You know that feeling when you finally find the landscaping idea with mulch and rocks that looks exactly right for your yard? That’s what this guide is for. We’re cutting through the endless scrolling to bring you the best, most inspiring designs we’ve seen all year. After filtering through hundreds of options from local nurseries, Home Depot, and specialty stone suppliers, we narrowed it down to 30 ideas that actually deliver. Inside, you’ll find curated inspiration for every style, from natural and serene to modern and structured, with options ranging from a few hundred dollars to more ambitious budgets. This isn’t just about what’s pretty; it’s about what works in 2026, as more of us embrace water-wise gardening and create true outdoor living rooms. And stay until the end — we break down the most common mistakes that can ruin these looks. 📌 Save this to Pinterest for later — you’ll want to revisit these ideas.
1. Lush Backyard with Winding River Rock Stream
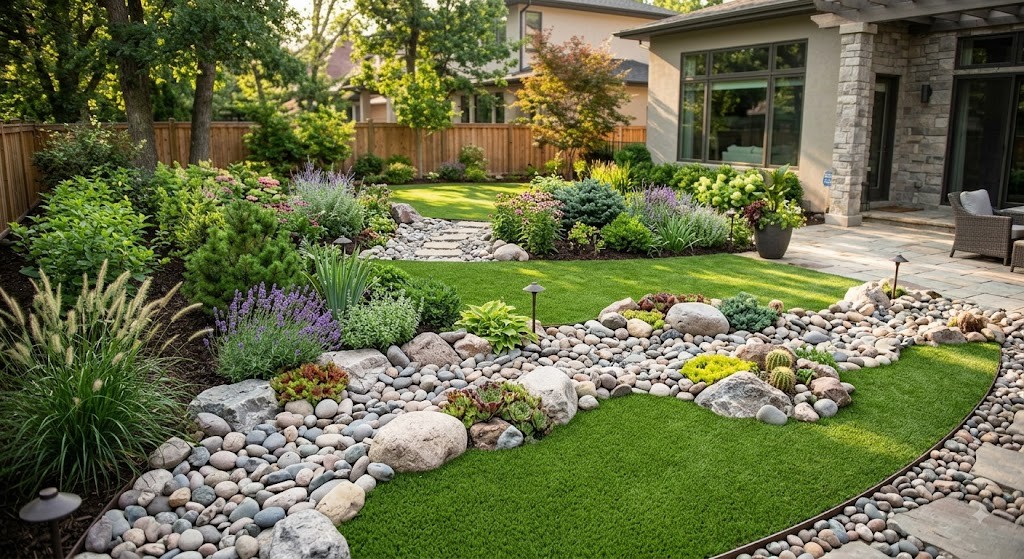
What makes this design so successful is the clever use of the dry river bed. It’s not just a decorative feature; it’s a brilliant device for creating zones in a larger space without building walls. The winding path of gray and brown river rocks creates a sense of movement and draws the eye through the landscape, making the yard feel more expansive. By separating the manicured lawn from the lushly planted beds, it adds visual interest and a naturalistic structure. The variation in rock size—from smaller pebbles to larger, smooth stones—mimics a real stream bed, adding to the serene, organic feel.
⚠️ Real Talk
Here’s a realistic look at what it might cost to bring this manicured, multi-textured backyard to life. Prices will vary based on your region and the quality of materials you select.
- River Rocks & Boulders: $800 – $2,500 (depending on size and volume)
- Plants & Greenery (shrubs, succulents, flowers): $1,000 – $3,000
- Paved Patio Stones & Installation: $2,000 – $5,000
- Mulch & Soil Amendments: $300 – $700
- Labor (for grading, installation): $3,000 – $7,000
- TOTAL: $7,100 – $18,200
Budget alternative: Source rocks locally (if possible), start with smaller, less mature plants, and handle the installation yourself over several weekends to cut costs by 50-60%.
2. Garden Bed with Dark Mulch and White Pebble Accents
When scattering decorative pebbles like this, the key is intentional randomness. Don’t just dump them. To get this look, place your larger plants first, then apply the dark brown mulch. After that, take a bucket of the white pebbles and place them by hand in small, meandering ‘drifts’ or clusters. Think about how water might naturally deposit stones. Create a few dense patches and then sprinkle a few ‘stragglers’ away from the main group. This technique makes the design feel more organic and less like polka dots on your garden bed. Avoid a perfectly even distribution, as it looks unnatural.
📐 Style Math
Let’s be honest: keeping those white pebbles looking bright and distinct from the dark mulch is the main challenge here. Over time, rain, wind, and garden maintenance can cause the mulch to bleed into the rocks and the rocks to sink into the mulch. You’ll likely need to spend an hour or two each season ‘tidying up’—rinsing the pebbles, pulling stray mulch bits out, and possibly topping up both materials to keep the lines crisp. If you have heavy leaf-fall in autumn, using a leaf blower can be tricky as it might blow the mulch and pebbles around. A gentle hand-rake or a blower on a very low setting is your best bet.
3. Suburban Front Yard with Low-Maintenance Pebble Groundcover
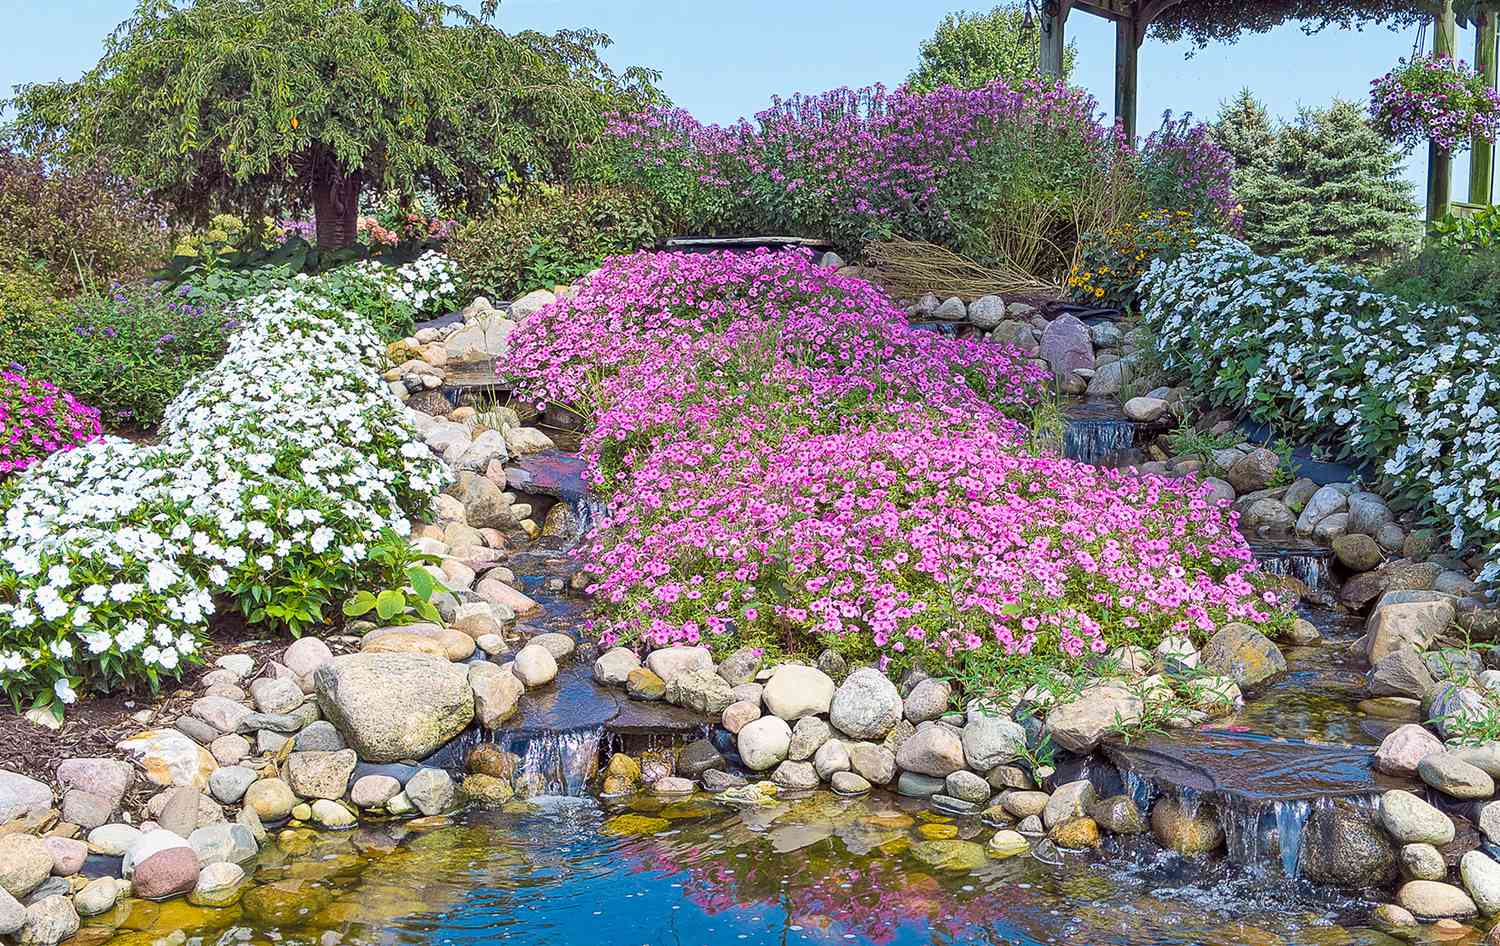
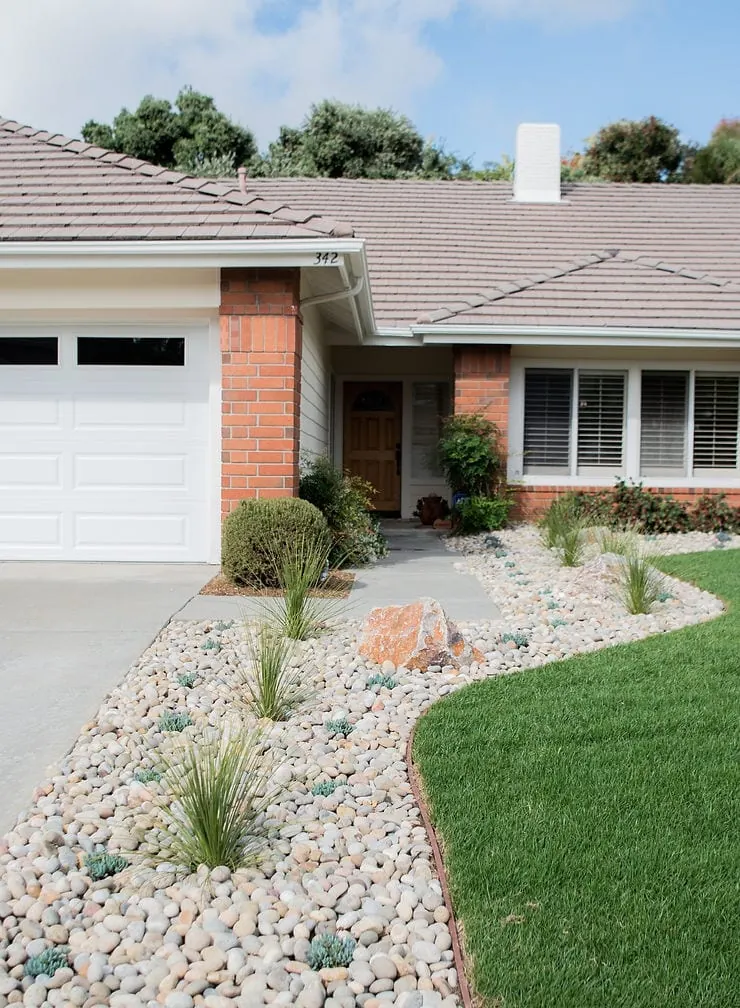
The single most important element in this design is the generous, sweeping curve of the pebble bed’s border. Without it, this would just be a patch of rocks next to a lawn. The clean, decisive arc creates a powerful visual line that guides the eye and feels incredibly intentional and polished. It elevates the simple materials—pebbles, grass, a few plants—into a cohesive, thoughtful landscape. This graceful separation between the soft texture of the green lawn and the hardscape of the light-colored river pebbles is what gives the whole front yard its curb appeal and modern, clean aesthetic.
|
📋 Copy HEX 🔗 Share |
💰 Budget Breakdown
You can absolutely achieve this clean, low-water look on a tighter budget. For the ground cover, skip the bags of pricey decorative pebbles from a big box store. Instead, search for ‘river rock,’ ‘pea gravel,’ or ‘drainage rock’ from a local landscape or quarry supplier. Buying in bulk (by the cubic yard) can be 70% cheaper, you’ll just need a truck and some shovels. For plants, focus on smaller, drought-tolerant varieties from a local nursery or even propagate succulents from a friend’s garden. Find a unique accent boulder on Facebook Marketplace or from a construction site (with permission!) instead of buying a perfect one from a garden center. The total cost could drop from $2,000+ to under $600 with some sweat equity.
4. Textured Beds of Red Mulch and Varied Boulders
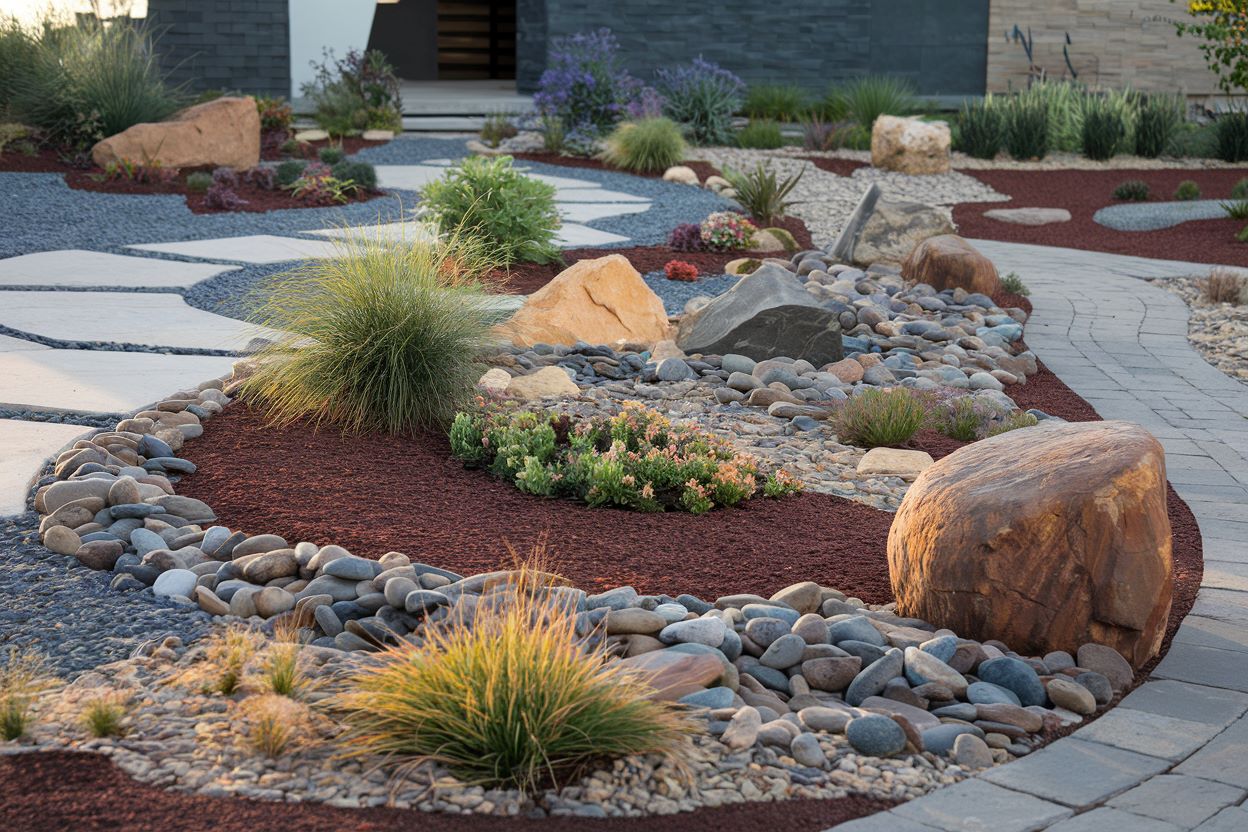
This landscape masters the art of texture through a simple but effective formula. Think of it as 50% Softscape + 40% Hardscape + 10% Greenery. The reddish-brown shredded mulch is the ‘soft’ foundation, providing a uniform color base and soft texture. The ‘hard’ 40% is a mix of multiple rock types—large natural boulders for anchoring, smooth river stones for flow, and gravel for fine detail. The final 10% is reserved for carefully chosen ornamental grasses and drought-tolerant plants. You could swap the red mulch for black or dark brown, and the formula would still work perfectly. The key is the high contrast in materials.
💡 Designer Tip
This style of intricate, multi-material landscaping works best in medium to large front yards, ideally with at least 400 square feet of available garden space. The curvilinear beds and pathways need room to ‘breathe’ and create a natural flow. In a space smaller than 20 feet by 20 feet, the variety of materials—red mulch, boulders, river stones, two types of pavers—could feel cluttered and chaotic rather than serene. The scale of the large boulders also requires a yard big enough to accommodate them without looking out of place. For smaller spaces, consider the more focused approach in Idea #2.
5. Irregular Stone Path Through a Colorful Mulch Bed
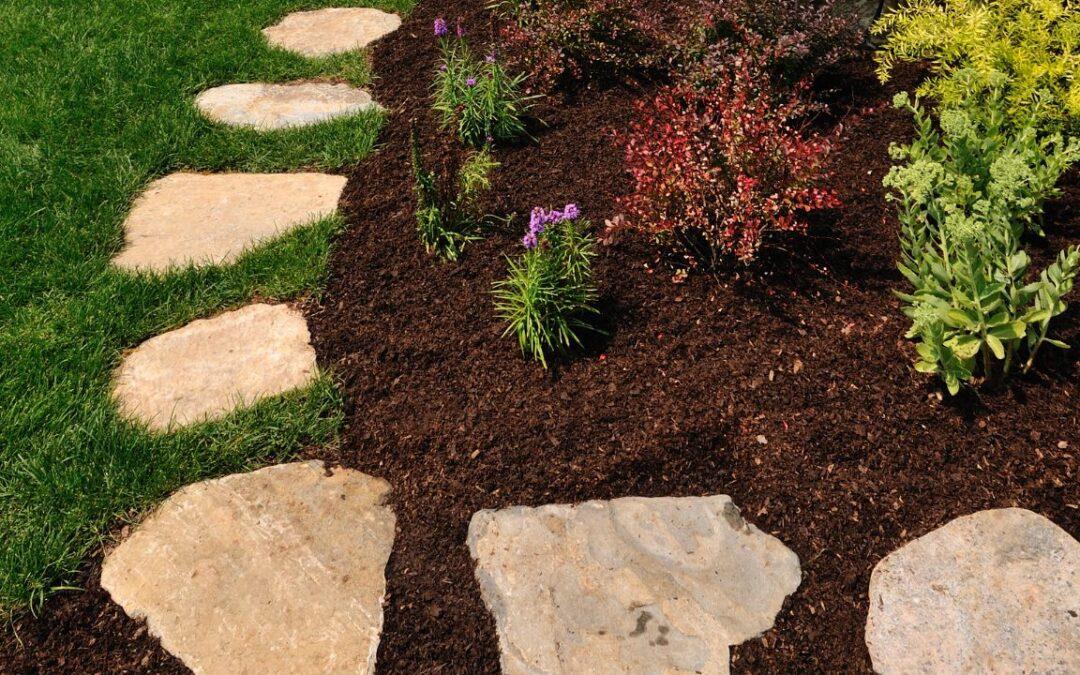
This pathway feels so natural and inviting because it follows a key principle of organic design: irregularity. The stepping stones are different shapes and sizes, and they’re laid in a gentle, meandering curve rather than a straight line. This mimics paths found in nature. Furthermore, the contrast between the cool, light-colored stone and the rich, dark brown mulch makes the path pop visually. The vibrant green grass growing between the stones softens the look, integrating the hardscape seamlessly into the surrounding softscape. It’s a journey, not a sidewalk.
📏 Scale Guide
While undeniably beautiful, a pathway with grass growing between the stones requires consistent upkeep. You’ll need to mow carefully around each stone and use a string trimmer for a clean edge, which adds time to your lawn care routine. The grass in the gaps can also get worn down with heavy foot traffic, creating bare patches. The adjacent dark brown mulch will need to be topped up every 1-2 years to maintain its rich color and weed-suppressing depth. The multi-colored foliage plants will also need seasonal pruning to keep their shape and prevent them from overwhelming the path.
6. Rustic Dry-Stacked Stone Wall with Brown Mulch
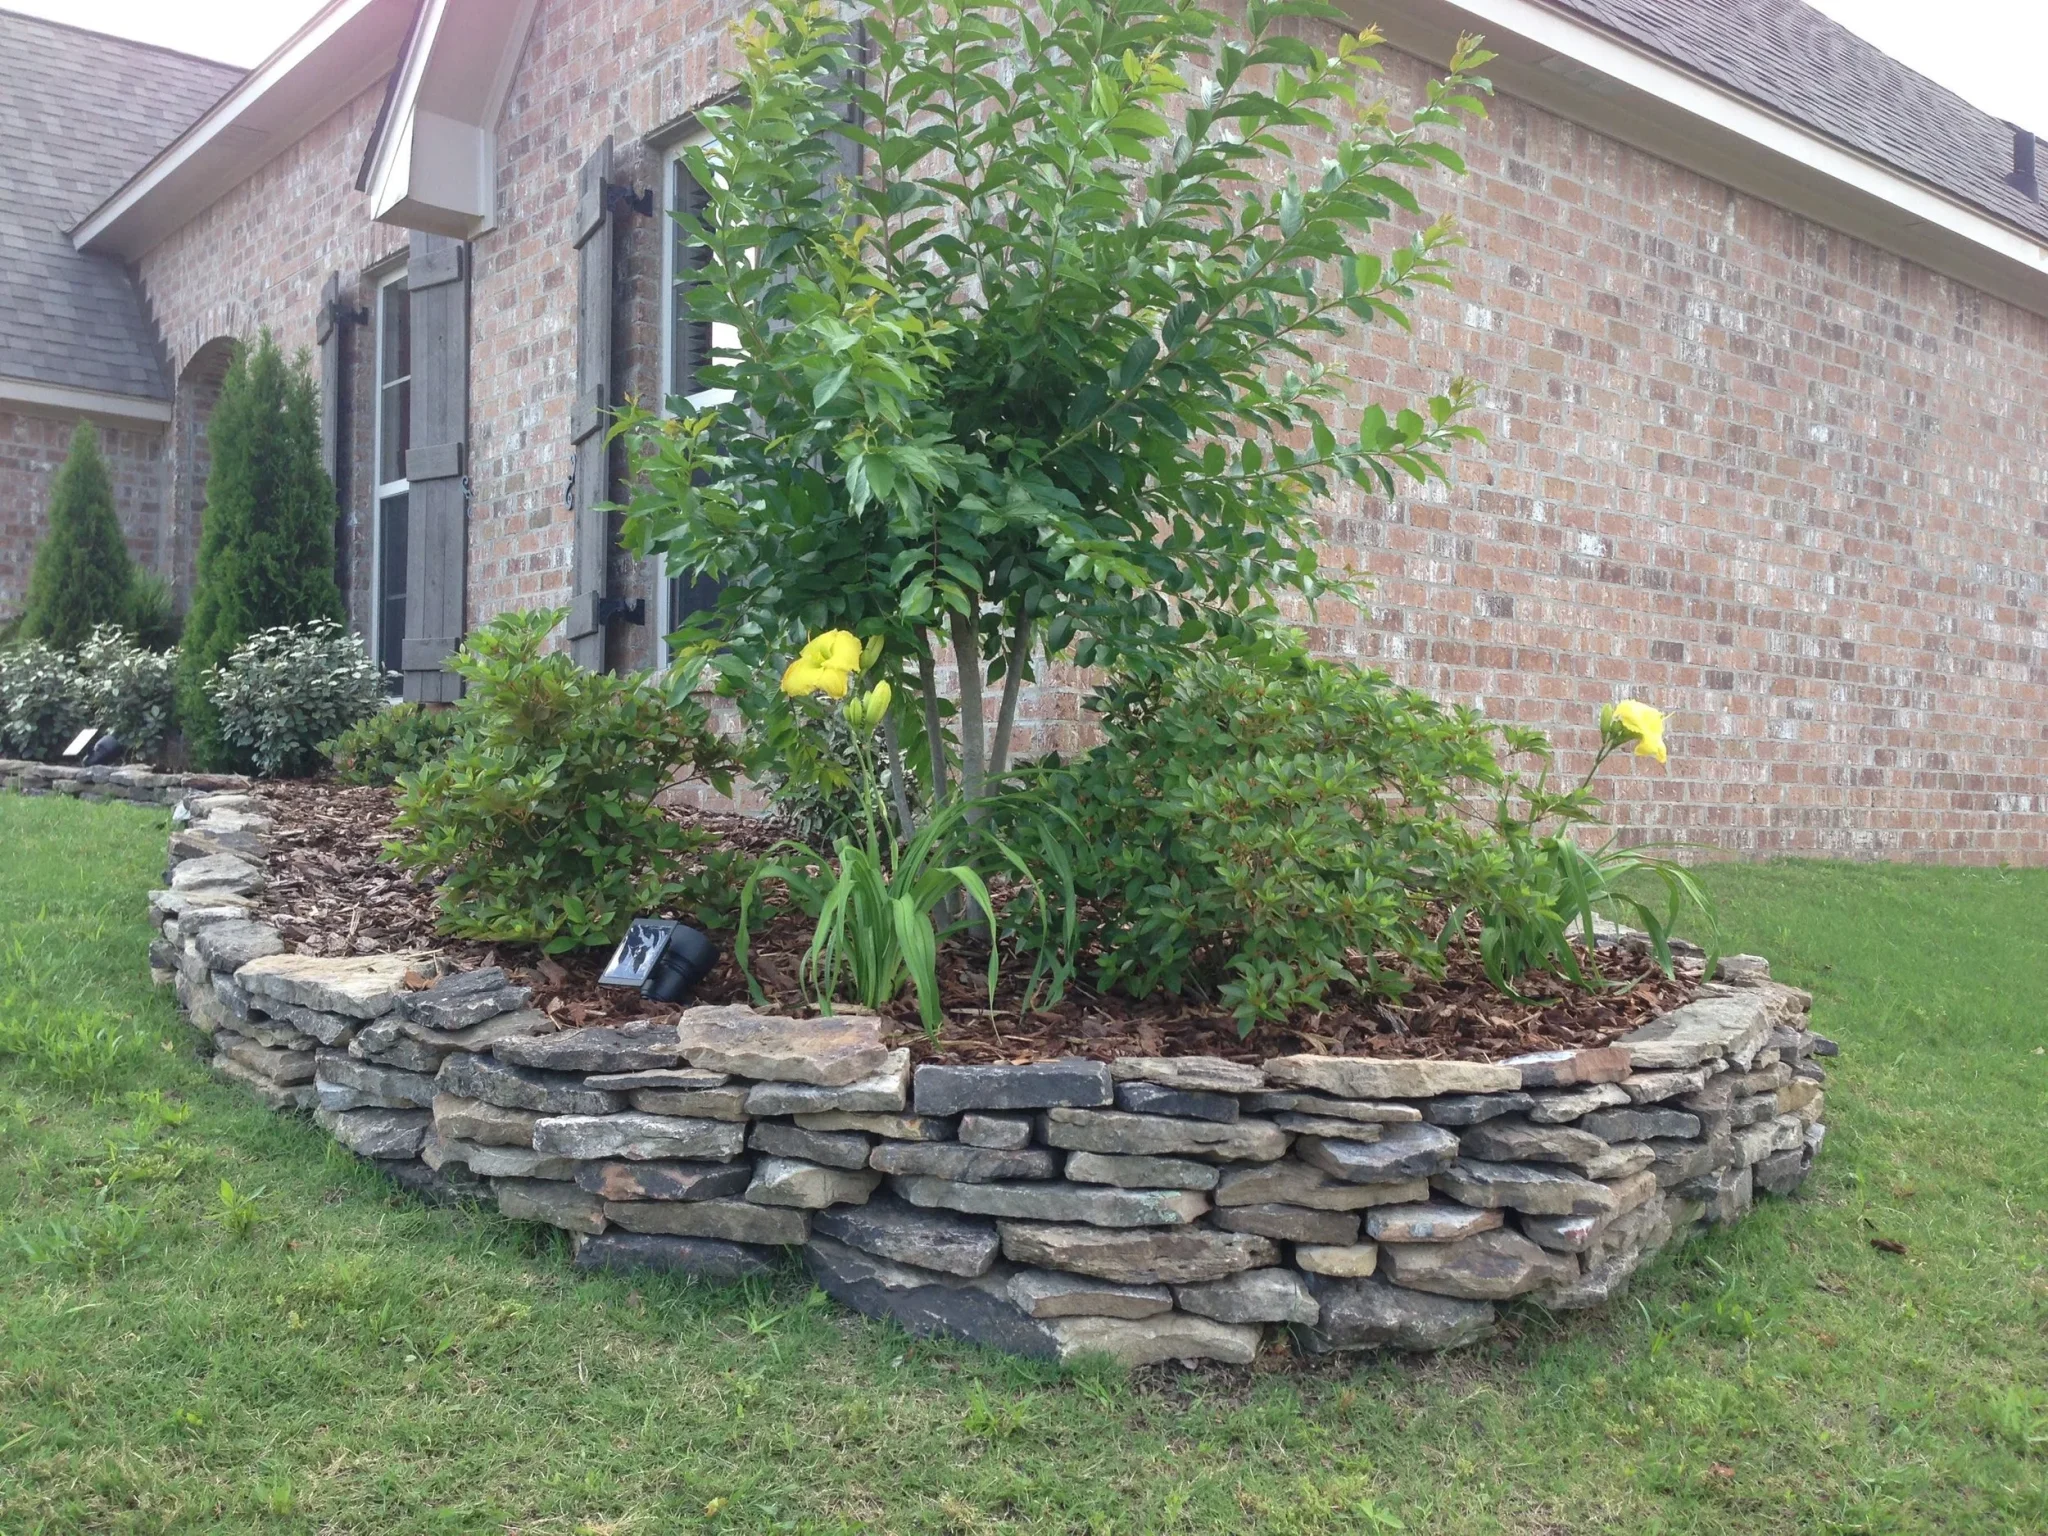
When building a dry-stacked wall like this, always remember the ‘2-over-1’ and ‘1-over-2’ rule. This means every stone you place should sit on top of two stones below it, and span the joint between them. This simple principle is what gives a wall without mortar its strength and stability. Also, make sure to slightly angle the wall back into the slope it’s retaining (this is called ‘battering’). A slight backward lean of about 1-2 inches for every foot of height uses gravity to its advantage and prevents the wall from pushing outward over time. This detail is crucial for longevity.
🔧 How-To Brief
This project has serious curb appeal, but it’s not a weekend whim. Check these boxes before you start hauling stone:
- Measure Your Slope: Is the area you want to retain on a gentle or steep slope? A wall over 3 feet high may require a professional engineer and permits.
- Source Your Stone: Have you located a supplier for the natural, irregular stone? Get quotes for delivery, as stone is incredibly heavy. You’ll need about 1.5 tons for a 10-foot long, 2-foot high wall.
- Plan for Drainage: A retaining wall must let water escape. Plan to backfill the first 12 inches behind the wall with gravel and a perforated drain pipe to prevent hydraulic pressure buildup.
- Check Local Utility Lines: Call 811 before you dig! Ensure you won’t be hitting any underground gas, water, or electrical lines when you excavate the foundation for your wall.
7. Garden Bed with Dark Mulch and Integrated River Rocks
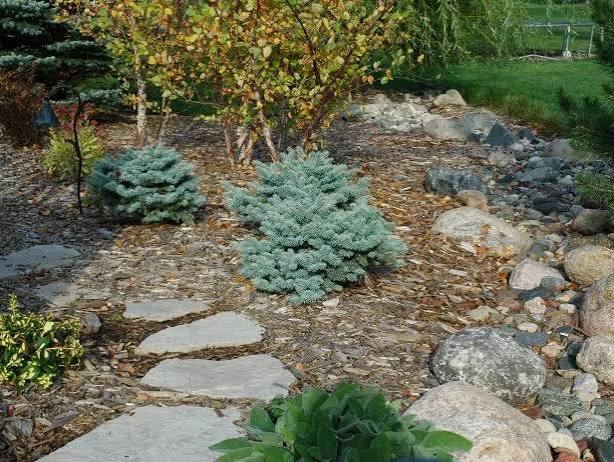
The magic of this design lies in the integration, not just placement, of the smooth grey river rocks. They aren’t just sitting on top of the mulch; they appear to be emerging from it. This suggests a natural process, as if the landscape has settled this way over time. By nestling the rocks down into the mulch and soil, and allowing plants like the ornamental grasses to grow right up against and even between them, the design avoids looking staged. This thoughtful blending of rock and mulch creates a cohesive, tranquil feel that a simple rock border could never achieve.
🎯 What Makes It Work
Want to recreate that natural ’emerging rock’ look? It’s all in the placement. Here’s a quick guide.
- Excavate: After laying down your base layer of soil, choose a spot for your rock. Dig a shallow depression, about 1/3 the height of the rock.
- Set the Rock: Place your rock in the depression. Wiggle it around until it feels stable and settled. The goal is for it to look like it has been there forever, not like it was just dropped on top.
- Add Mulch: Now, apply your dark brown mulch around the rock, bringing it right up to the edges. Don’t be afraid to get some on the rock itself; you can brush it off later.
- Plant Around It: Place your plants, like ornamental grasses, close to the rock’s base. This reinforces the illusion that the rock is a natural feature the plants have grown around.
Time: 10-15 minutes per rock. Cost: Just your materials.
8. Colorful Shrubbery Set in River Rock Ground Cover
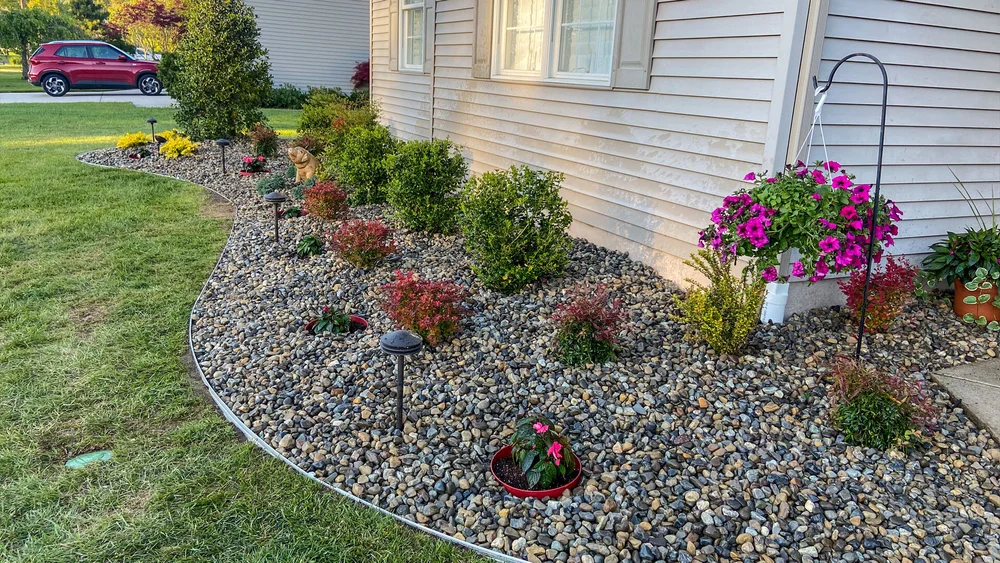
A yard full of river rocks looks like the ultimate low-maintenance dream, but there are a few realities to consider. First, rocks absorb and radiate heat. In a sunny climate, this can ‘bake’ the soil underneath, making it tough for some plants to thrive. You’ll need to choose heat-loving, drought-tolerant species. Second, while rocks do suppress weeds, they don’t eliminate them. You will still get determined weeds poking through, and they can be a pain to pull out of a rocky bed. Finally, leaf and debris cleanup can be a chore. You can’t rake rocks, so a leaf blower is often necessary, which can be noisy and might dislodge smaller stones.
🧹 Maintenance Reality
The cost of filling a large bed with mature, colorful shrubs can add up fast. To get this vibrant, filled-in look for less, buy the smallest available versions of the plants you want. A 1-gallon shrub is often a fraction of the cost of a 5-gallon one. It requires more patience, but they will grow. Also, check local nurseries at the end of the season for clearance sales. For the river rock ground cover, compare prices between bagged rock at big-box stores and buying it in bulk from a landscape supply yard. If you can transport it yourself, bulk is almost always dramatically cheaper. Compare with the pebble groundcover in Idea #2 for another cost-effective approach.
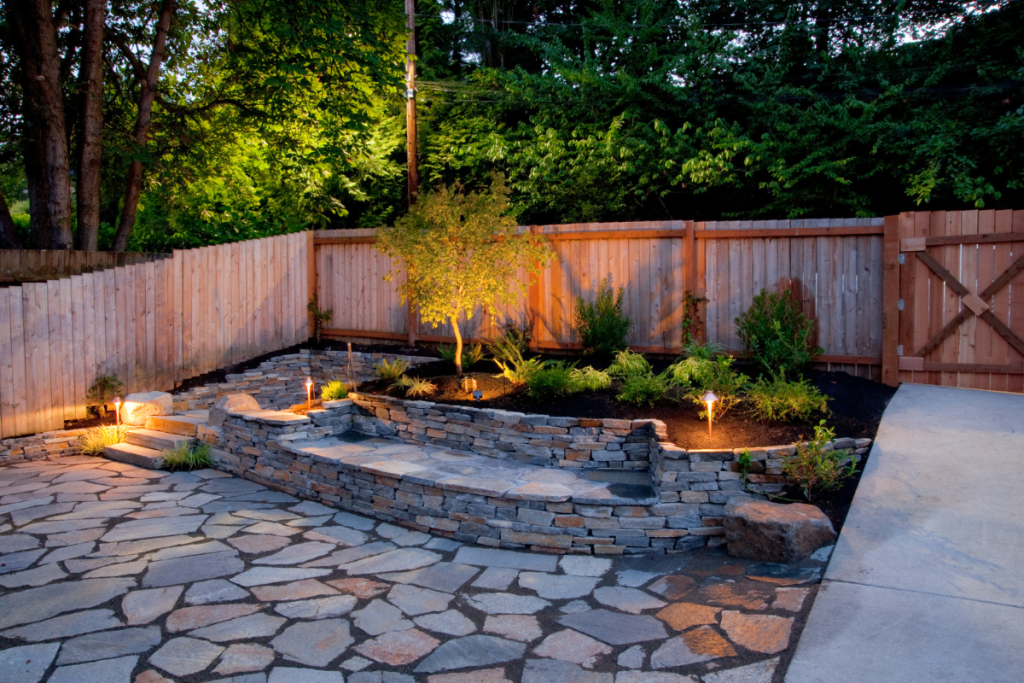
9. Illuminated Flagstone Patio with Curved Stacked Stone Walls
This outdoor space feels so inviting because it combines three key design principles: enclosure, texture, and light. The curved, stacked stone retaining walls create a sense of enclosure, making the patio feel like a distinct ‘room’ in the yard. This gentle separation from the rest of the garden provides a cozy, sheltered feeling. The mix of textures—smooth flagstone, rough-stacked stone, soft foliage, and dark mulch—adds depth and visual interest. Finally, the warm, low-voltage landscape lighting is the hero, highlighting the textures of the stone and plants and turning the space into a usable, magical retreat after dark.
🔥 Trending Context
We’re seeing spaces like this explode in popularity because they perfectly capture the ‘outdoor living room’ trend. For years, the backyard was just a yard. Now, homeowners want functional, beautiful extensions of their indoor living space. This design isn’t just a patio; it’s a destination. The inclusion of retaining walls for seating, raised beds for gardening, and sophisticated lighting for evening ambiance reflects a major cultural shift. We’re investing in creating experiences at home, and a well-designed patio like this offers a private escape for relaxing and entertaining.
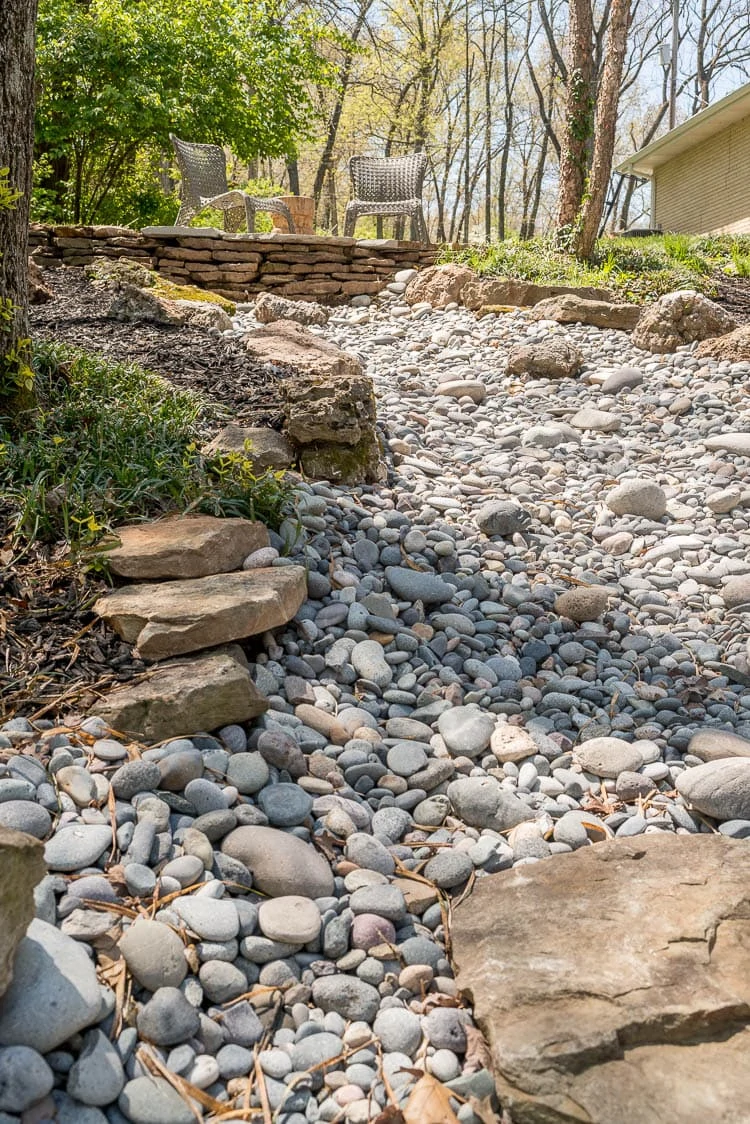
10. Naturalistic Dry Creek Bed with a Pebble Path
A dry creek bed is a brilliant solution for a sloped or awkwardly shaped yard. This feature works best in a space that has at least 15-20 feet of linear run, allowing the ‘creek’ to meander naturally. The width can vary from 2 feet for a small accent to 6+ feet for a major landscape feature. The key is proportion. A tiny creek in a huge yard will look lost, while a massive one will overwhelm a small space. For this look to be believable, you also need varying levels, like the raised patio shown, to justify the presence of a ‘creek’ and retaining walls.
💸 Get This Look For Less
To make a dry creek bed look authentic, you must use a variety of rock sizes. This is the number one secret. Start with a base of smaller, 1-2 inch grey and tan pebbles. Then, line the ‘banks’ with larger, 4-8 inch river stones. Finally, place a few even larger ‘accent boulders’ (12+ inches) at the curves or turns, as if they were deposited there by a strong current. This mix of sizes is what tricks the eye into seeing a real, natural feature instead of just a pile of rocks. Never use just one uniform size of stone.
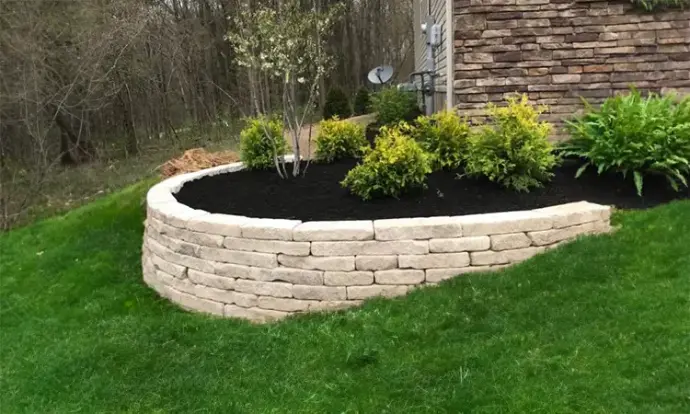
11. Curved Stone Wall with High-Contrast Black Mulch
This landscape’s striking look comes down to a simple, high-impact formula: 60% Dramatic Contrast + 30% Soft Curves + 10% Greenery. The heavy lifting is done by the stark contrast between the light beige of the curved stone retaining wall and the deep, rich black of the shredded mulch. This immediately grabs your attention. The gentle curves of the wall prevent the look from feeling too harsh or linear. The final 10% is the greenery, which acts as a necessary soft accent, with the chartreuse shrubs providing a secondary color pop against the black mulch.
✅ Before You Start
Black mulch offers incredible visual punch, but it comes with a couple of maintenance footnotes. Dyed black mulch is prone to fading in direct sunlight. To keep it looking this rich and dark, you may need to ‘refresh’ it by raking the top layer to expose the darker mulch underneath, or by adding a thin new top layer every year. Also, be aware that some cheaper black mulches can have their color wash off in heavy rain, potentially staining adjacent light-colored stone walls or concrete paths if not installed carefully. Always buy a high-quality, properly cured dyed mulch to minimize this risk.
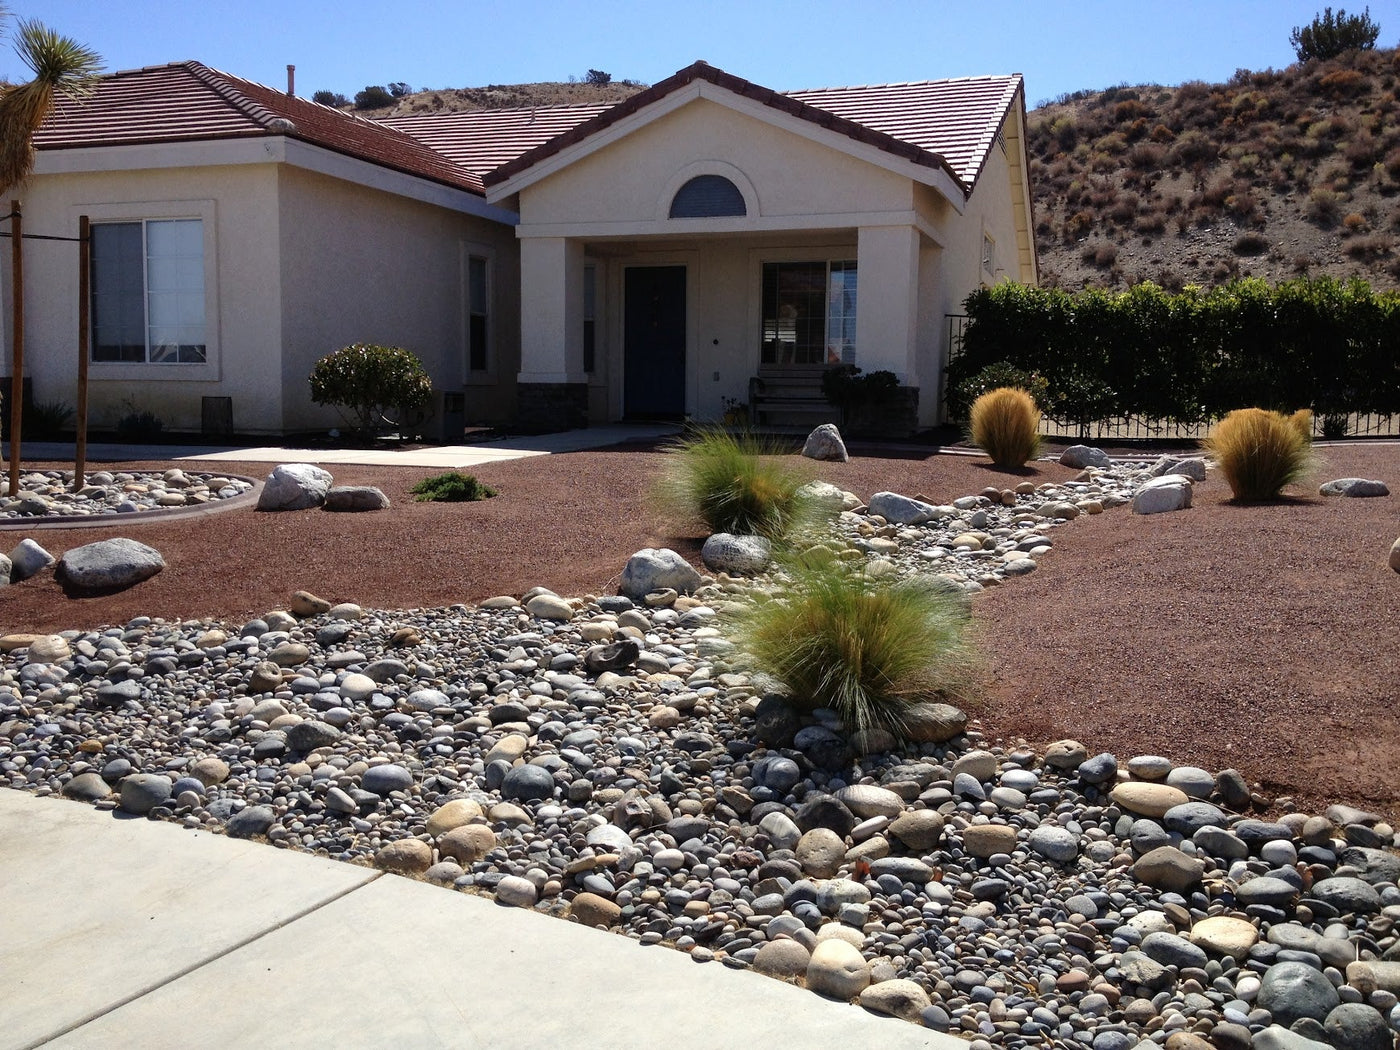
12. Xeriscape Design with Red Mulch and River Rocks
The single element that defines this xeriscape is the river rock ‘stream’ flowing through the center. It’s the design’s backbone. It’s not just a border or an accent; it’s a major feature that establishes the narrative of the entire landscape. It guides the eye from the street to the house, provides a clear path for drainage, and creates a naturalistic focal point. If you were to remove the river rock bed, you’d be left with disconnected islands of mulch and grass, and the whole composition would lose its purpose and flow.
⭐ The One Thing
This design is a masterclass in repetition and rhythm. Notice how the reddish-brown mulch is used in several distinct, separate sections. This repetition of color and texture ties the whole yard together. The rhythm is created by the placement of the mounded ornamental grasses. They aren’t in a straight line; they are placed in a staggered, organic pattern that feels natural and less rigid. This combination of repeating elements (mulch) and rhythmic placement (grasses) creates a landscape that is both cohesive and dynamic.
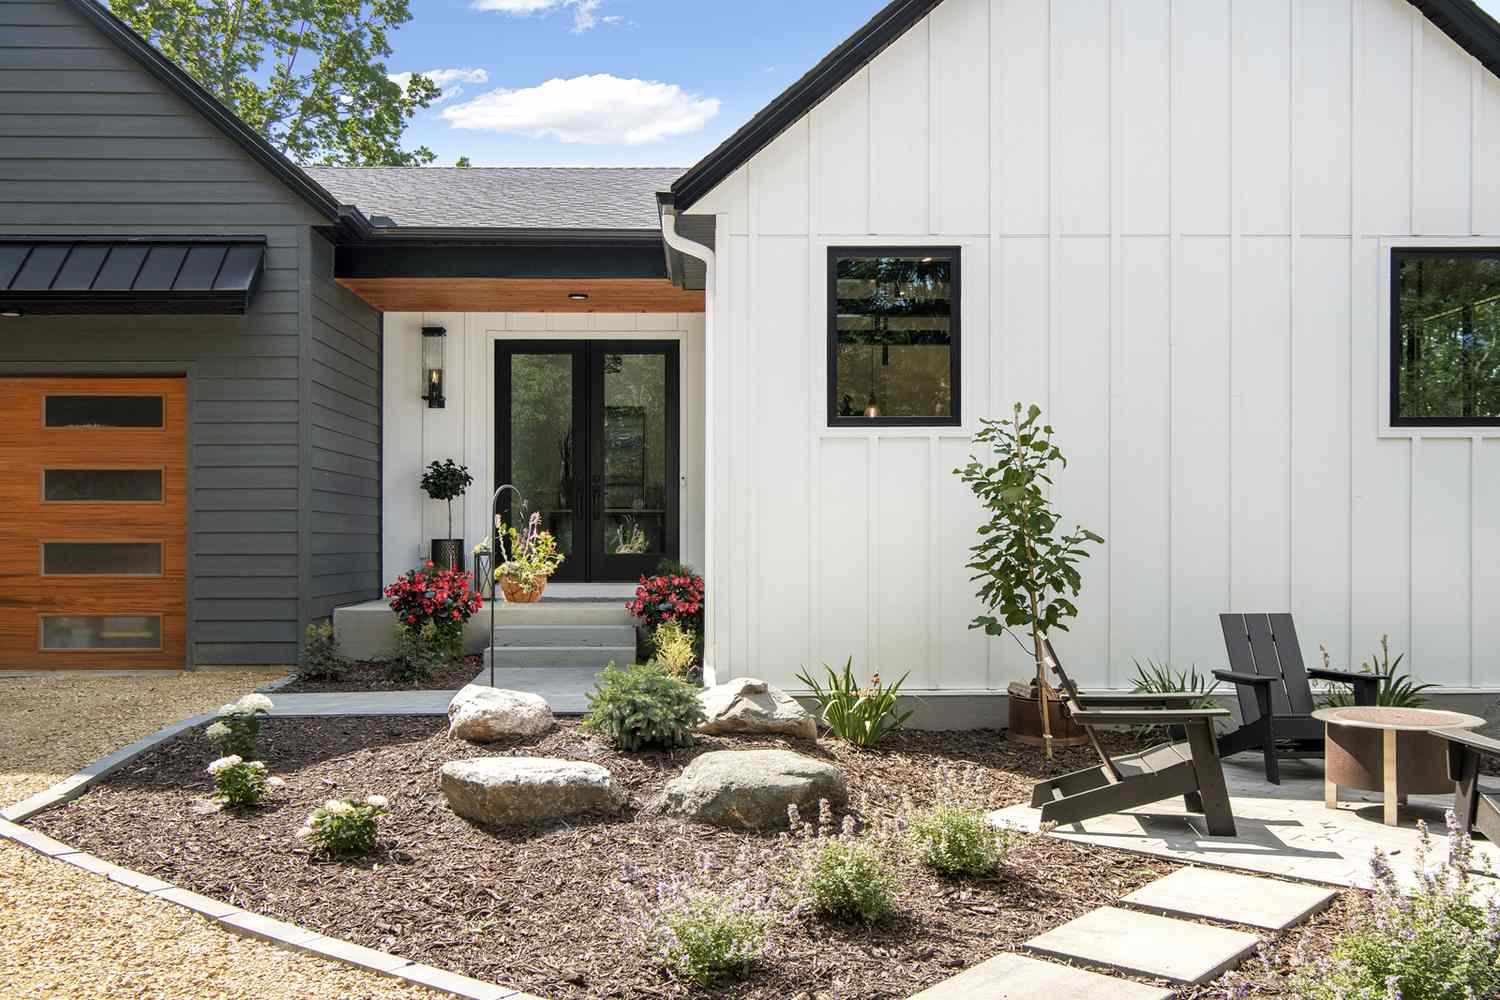
13. Winding Stone Path with Decorative Grey Boulders
When placing large decorative boulders, always ‘plant’ them. Never just set a boulder on top of the ground or mulch. Dig a shallow hole and bury the bottom third of the rock. This gives it a sense of permanence and makes it look like it’s a natural part of the landscape that has been there for years. It also makes the boulder much more stable. Group boulders in odd numbers (3 or 5) and vary their sizes and orientations to create a more natural-looking cluster. The largest boulder should be your anchor, with smaller ones supporting it visually.
⚠️ Real Talk
A design with this many large, heavy elements is not easy to change. Once those grey boulders are placed and the stone pathway is set, you are pretty much committed. Moving a 300-pound boulder is not a simple task. Before you install, be 100% sure on the placement of your path and major rocks. Lay out the path with a garden hose and use cardboard cutouts or spray paint to mark the locations for the boulders. Live with the layout for a few days to see how it feels before you start any heavy lifting or digging. Measure twice, place once.
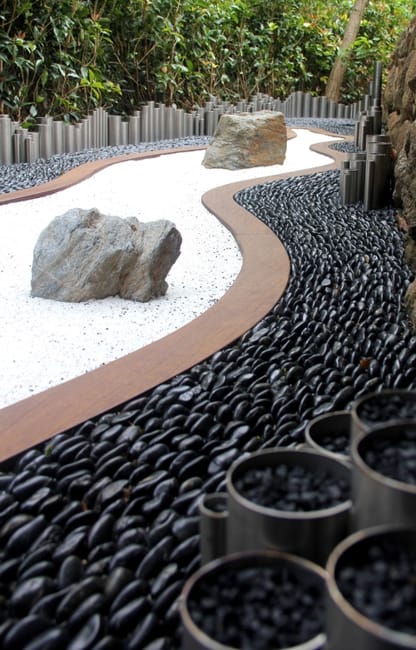
14. Modern Zen Path with Contrasting Gravel and Pebbles
Creating that crisp, winding line between the white gravel and black pebbles is the key to this look. Here’s how you do it:
📐 Style Math
- Outline the Path: Use a rope or garden hose to lay out the exact curves you want for your path.
- Install Edging: Purchase a flexible, heavy-duty landscape edging (like the reddish-brown one shown). Trench along your outline and install the edging according to the manufacturer’s instructions. This physical barrier is non-negotiable for keeping the stones separate.
- Lay Down Fabric: Cut and lay high-quality landscape fabric across the entire area to suppress weeds.
- Fill with Stone: Carefully pour or shovel the black river pebbles on one side of the edging and the white gravel on the other. Use a rake to smooth them out to a depth of about 2-3 inches.
Time: 4-6 hours for a 20-foot path. Cost: $200-$500 for edging and stone.
This striking Zen garden look is all about a finely tuned balance of materials. Let’s break down the formula: 45% Light Stone (white gravel) + 45% Dark Stone (black river pebbles) + 10% Natural Accent (large grey boulders). The stark contrast between the black and white creates the primary visual tension. The reddish-brown border acts as a ‘frame’, defining the shapes. The large, grey boulders are the sculptural elements that break the flat plane and add a sense of age and permanence. The minimal use of plants is intentional, putting the focus entirely on form, line, and texture.
15. Undulating Pattern of Mulch and Light River Rocks
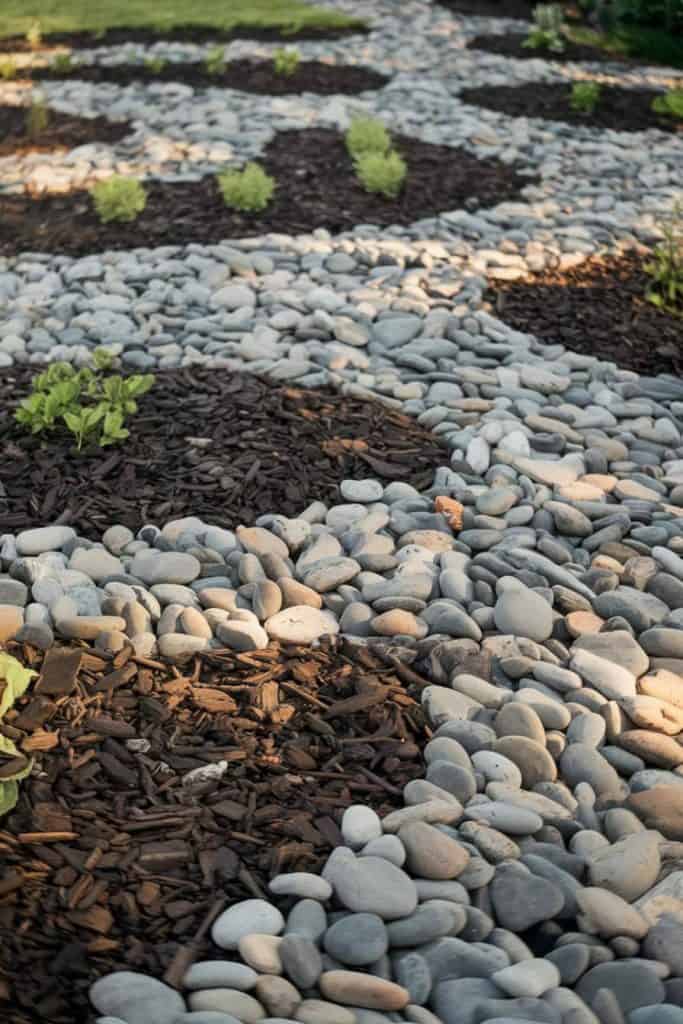
The defining feature here is the deliberate, wave-like pattern. This isn’t just a border or a mix; it’s an intentional graphic design element applied to the landscape. The alternating, undulating bands of dark brown mulch and light grey river rocks create a sense of rhythm and movement on the ground plane. It turns a simple garden bed into a piece of art. Without this distinct, flowing pattern, the area would be a standard, pleasant mix of materials. With it, it’s a bold, memorable statement that showcases a high level of design intent. It’s a more advanced look than the simple border in Idea #25.
💰 Budget Breakdown
This kind of graphic, patterned ground cover works beautifully in small, contained areas where it can be viewed from above, like a small courtyard, an atrium, or a dedicated feature bed near a patio or walkway. For this pattern to read clearly, you need a space of at least 8×8 feet, but it can become overwhelming in a very large, open yard. The ideal application is in a visually isolated zone where it doesn’t have to compete with a vast lawn or complicated plantings. Its strength is in its artistic quality, so treat it like a living carpet and give it a clear frame.
16. Winding Gravel Path with Tropical Palm Plantings
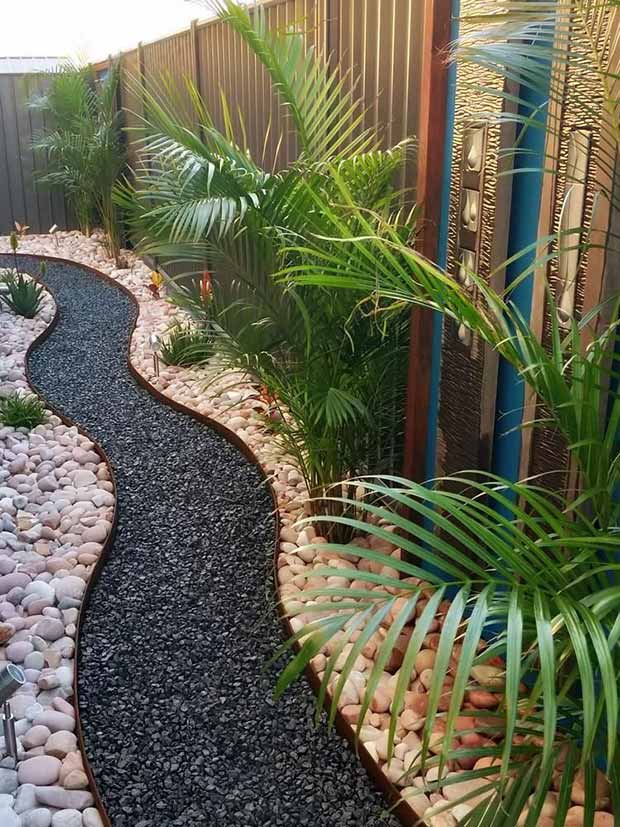
This design succeeds by masterfully blending the structured with the wild. The dark grey gravel path, cleanly defined by its rusted metal edging, provides a strong, modern, and man-made line. This clean geometry acts as a perfect foil to the surrounding beds. The beds themselves are a riot of lush, tropical-feeling textures with the palm fronds and other large-leafed plants, set in a sea of soft, rounded river rocks. It’s this contrast—the sharp, clean line of the path against the soft, full, and slightly untamed plantings—that creates such a dynamic and visually interesting space. This gives a very different energy than the more manicured tropical look in Idea #26.
💡 Designer Tip
You don’t need a trip to a specialty nursery to get this tropical vibe. For the lush greenery, look for hardy perennials that have a tropical look, like Hostas (for shade) or Cannas (for sun). They are affordable and come back every year. For the river rock, buy in bulk from a landscape supplier, not in bags from a home center, to save up to 70%. The rusted metal edging can be a splurge, so for a budget alternative, use a simple black plastic or metal edging. Finally, scour thrift stores or Facebook Marketplace for unique decorative panels like the blue and wood one shown to add a personal touch for cheap.
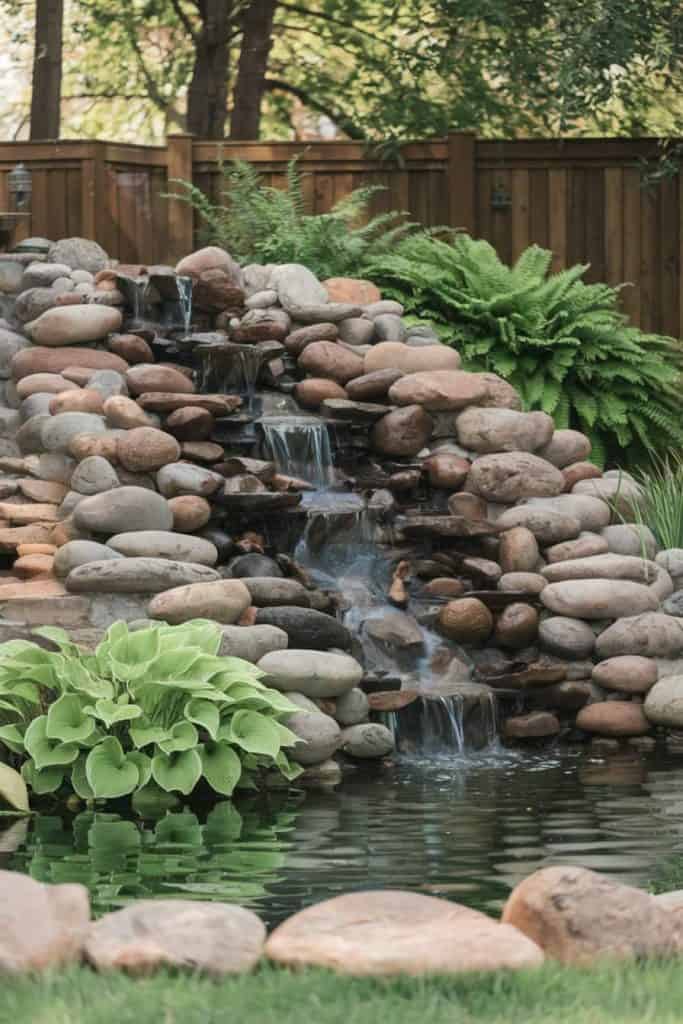
17. Tiered River Rock Waterfall and Garden Pond
A water feature of this scale is a significant investment, both in materials and labor. Here’s a general breakdown to help you plan. The final cost can vary widely based on the complexity and size.
📏 Scale Guide
- Excavation & Pond Liner: $500 – $1,500
- Pump, Filter & Tubing: $400 – $1,200
- River Rocks & Boulders (by the ton): $1,000 – $3,500
- Surrounding Plants (Hostas, Ferns): $300 – $800
- Professional Installation Labor: $3,000 – $8,000
- TOTAL: $5,200 – $15,000
Budget alternative: A smaller, pre-formed waterfall kit can give you the sound of water for under $1,000, but won’t have this naturalistic look. DIY installation will save you the most money, but be prepared for a labor-intensive project.
A pond and waterfall are beautiful, but they aren’t ‘set it and forget it’ features. You’re essentially taking on a new ecosystem. You’ll need to regularly clean out the pump filter, sometimes weekly during peak seasons. Algae will be a constant battle, requiring either manual removal or the use of algaecides. In the fall, you’ll need to net the pond to keep leaves from falling in and decaying, which can harm water quality. In colder climates, you’ll need to properly winterize your pump and potentially add a de-icer if you have fish. It’s a hobby, not just a landscape feature.
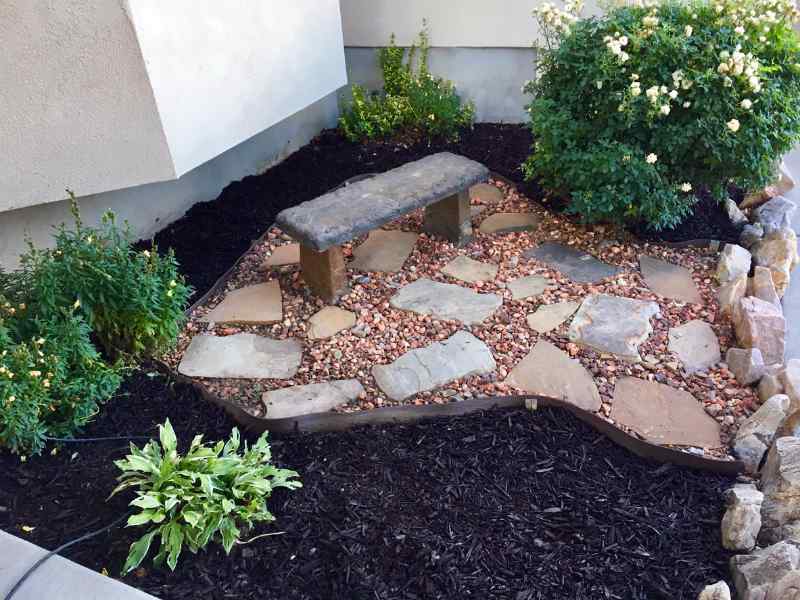
18. Stone Bench and Flagstone Path in a Black Mulch Bed
When combining multiple stone and rock elements like this, create a visual hierarchy. Here, the flagstone path is the primary feature, so it uses larger, flatter pieces. The reddish pebbles are a secondary texture, filling the gaps and providing color contrast. The stone bench is the functional ‘hero’ piece, and the stacked stone border is a tertiary, framing element. Don’t use four different types of stone that are all the same size and shape. By varying the size, shape, and function of your rock and stone, you create a landscape that is layered and interesting rather than chaotic and busy.
🔧 How-To Brief
This type of ‘vignette’ landscaping, featuring a bench and multiple materials, is perfect for creating a destination in a small to medium-sized yard. It works wonderfully in a corner, at the end of a path, or under a shade tree. You need a footprint of at least 8×10 feet to accommodate the bench, the path, and the surrounding beds without it feeling cramped. In a very large yard, a small vignette like this can get lost. If you have a huge space, consider expanding the concept with a larger patio or multiple seating areas to match the scale.
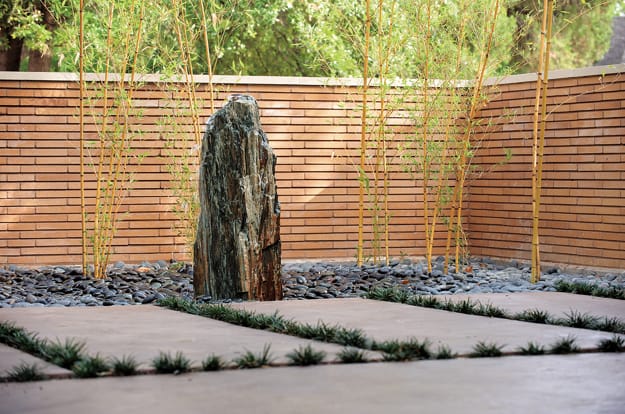
19. Modern Courtyard with Bamboo and a Stone Monolith
The tall, dark grey and green rock monolith is unequivocally the star of this show. It’s a powerful, sculptural element that serves as the entire courtyard’s focal point. Its verticality provides a stunning contrast to the horizontal lines of the slatted wood fence and concrete pavers. Everything else in the design—the bamboo, the river stones, the ground cover—is there to support and frame this single, dramatic stone. If you were to remove it, the space would still be pleasant, but it would lose its heart, its anchor, and its ‘wow’ factor. This is a testament to the power of a single, bold statement piece.
🎯 What Makes It Work
This design is a textbook example of using the ‘Rule of Three’ in texture and height. You have three distinct textures on the ground plane: smooth concrete, low green ground cover, and dark river stones. This creates interest without chaos. You also see a clear hierarchy of three heights: the low ground cover, the medium-height bamboo, and the tall stone monolith. This variation in height is crucial for creating a dynamic, three-dimensional composition and preventing the space from feeling flat and one-note. The horizontal slatted fence provides a fourth, unifying texture that ties it all together.
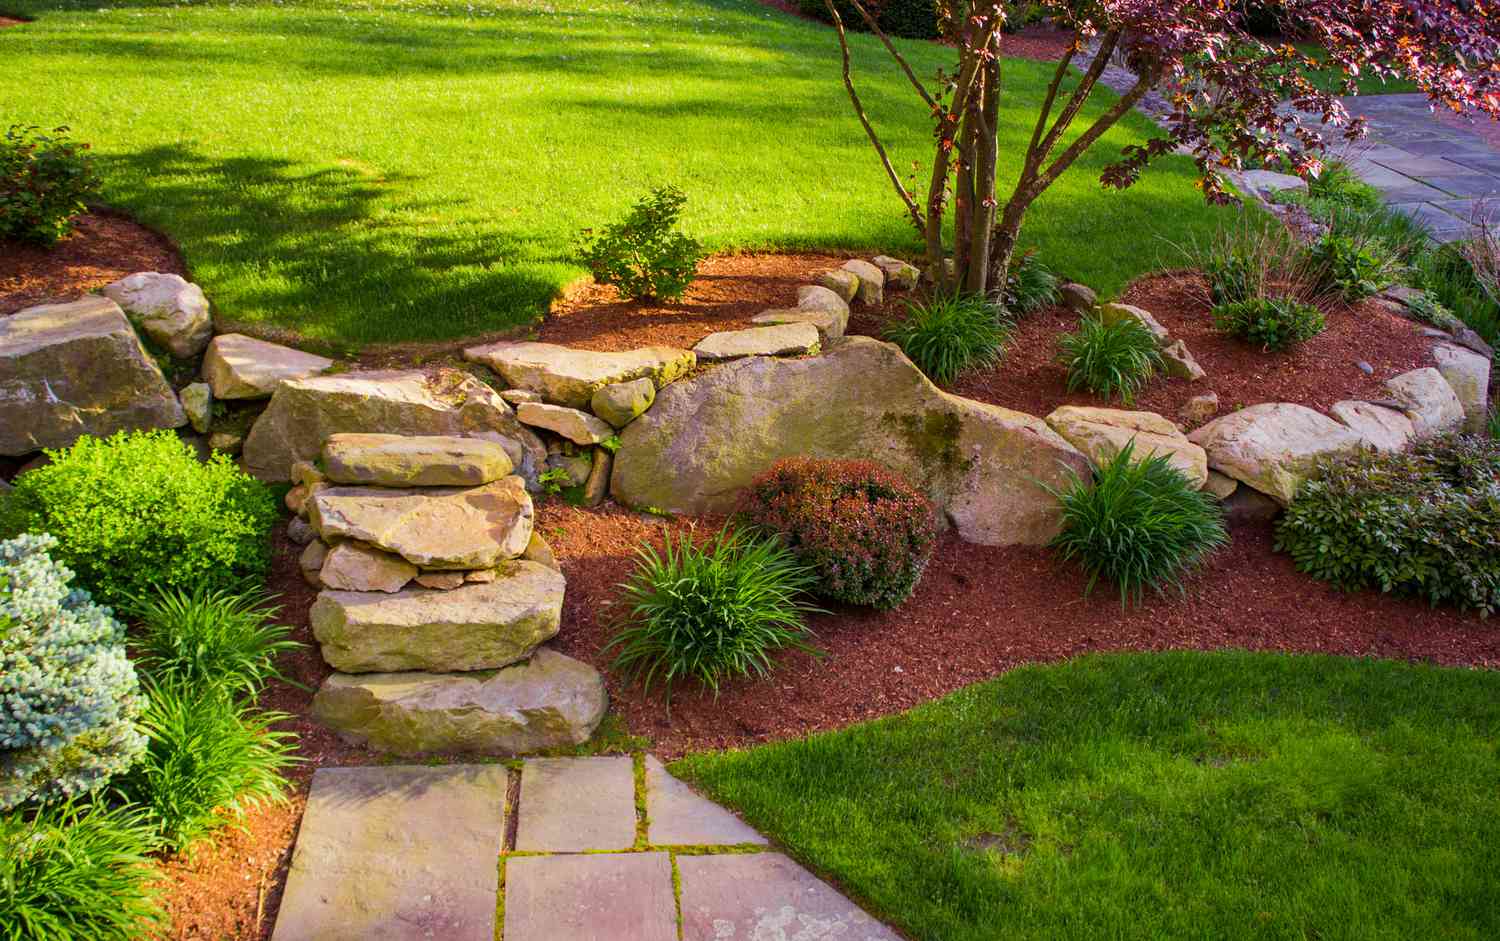
20. Gravel Path with Large Stepping Stones and Layered Beds
Creating a stable path with large stepping stones set in gravel is easier than it looks. Here’s the professional method:
🧹 Maintenance Reality
- Excavate and Compact: Dig out the path area to a depth of 4-5 inches. Use a hand tamper to compact the soil base.
- Install Edging: Securely install your desired edging along the sides of the path to contain the gravel.
- Add Base Layer: Put down a 2-inch layer of crushed rock or paver base and compact it firmly. This is crucial for stability.
- Place Stepping Stones: Set your large, flat flagstones in place, wiggling them into the base until they are level and don’t rock. Aim for a comfortable stride length between them (about 18-24 inches center-to-center).
- Fill with Gravel: Carefully pour the light-colored gravel around the stepping stones, filling the path up to just below the top of the stones. Rake it smooth.
Time: A full weekend for a 30-foot path. Cost: $5-$15 per square foot.
This style, often called ‘Soft Modern’ or ‘Naturalistic Modern,’ is gaining traction because it strikes a perfect balance. It’s more structured and intentional than a purely wild or cottage garden, but softer and more organic than stark, minimalist modernism. People are gravitating towards landscapes that feel both clean and serene. The combination of geometric elements (the path) with natural textures (gravel, stone, layered plants) and a relaxed planting style creates an outdoor space that feels both sophisticated and deeply calming. It’s the landscape equivalent of ‘quiet luxury.’ Compare this to the more rustic path in Idea #4.
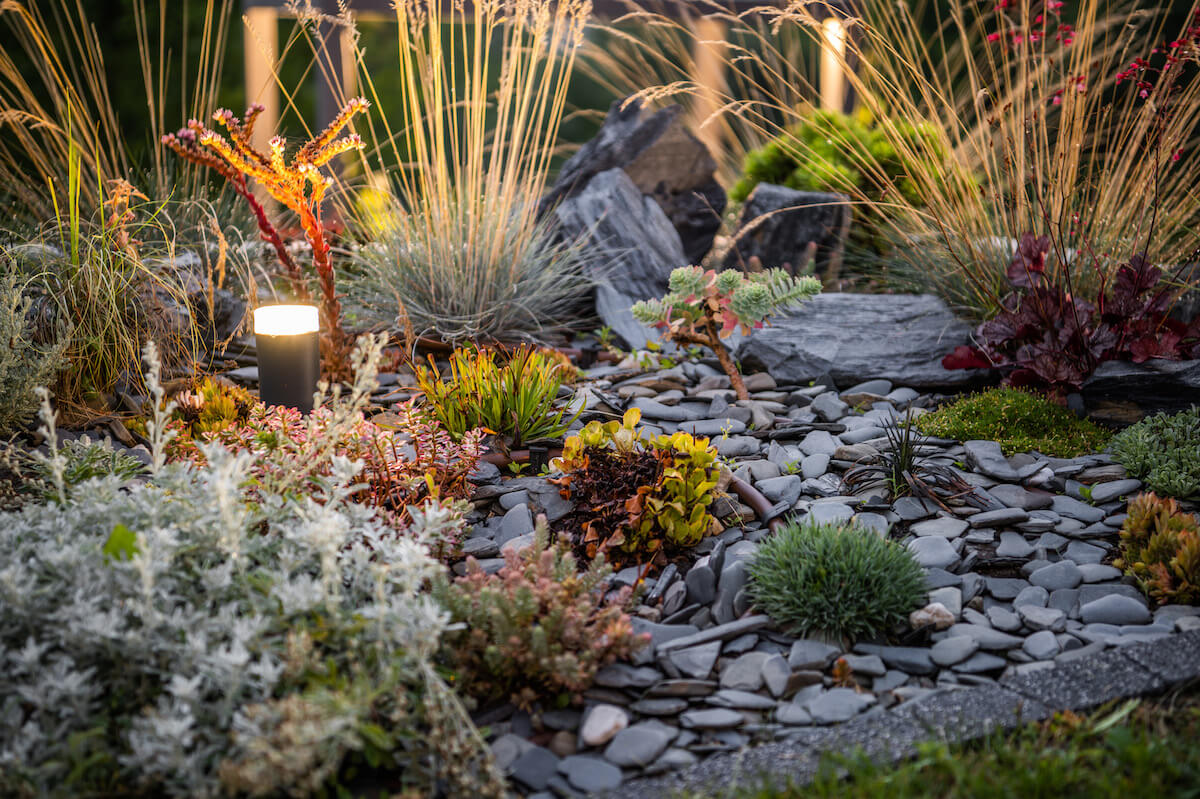
21. Illuminated Rock Garden with Diverse Plants and Stone
When lighting a garden like this, the key is to uplight for drama and downlight for function. Use adjustable, narrow-beam spotlights aimed upward at your most interesting plants, like the tall ornamental grasses or a specimen succulent. This highlights their texture and form against the dark night sky. For pathways or steps, use shielded downlights or bollard lights that cast pools of light on the ground, ensuring safe passage without creating glare. The goal is to create pockets of warm, inviting light, not to flood the entire area like a stadium. Use warm white (2700K-3000K) LED bulbs for the most natural, inviting glow.
|
📋 Copy HEX 🔗 Share |
🔥 Trending Context
A rock garden with this level of detail and variety is a plant collector’s dream, but it’s not ‘no maintenance.’ The slate chips and pebbles are great for drainage, which succulents love, but they also create a perfect environment for volunteer seeds to sprout. You’ll be doing a fair amount of hand-weeding. The diverse plants will have different water and sun needs, so you can’t just turn on a sprinkler; you’ll need to water specific plants individually. Also, cleaning fallen leaves and debris from between the plants and off the varied rock surfaces can be a meticulous, hands-and-knees job.
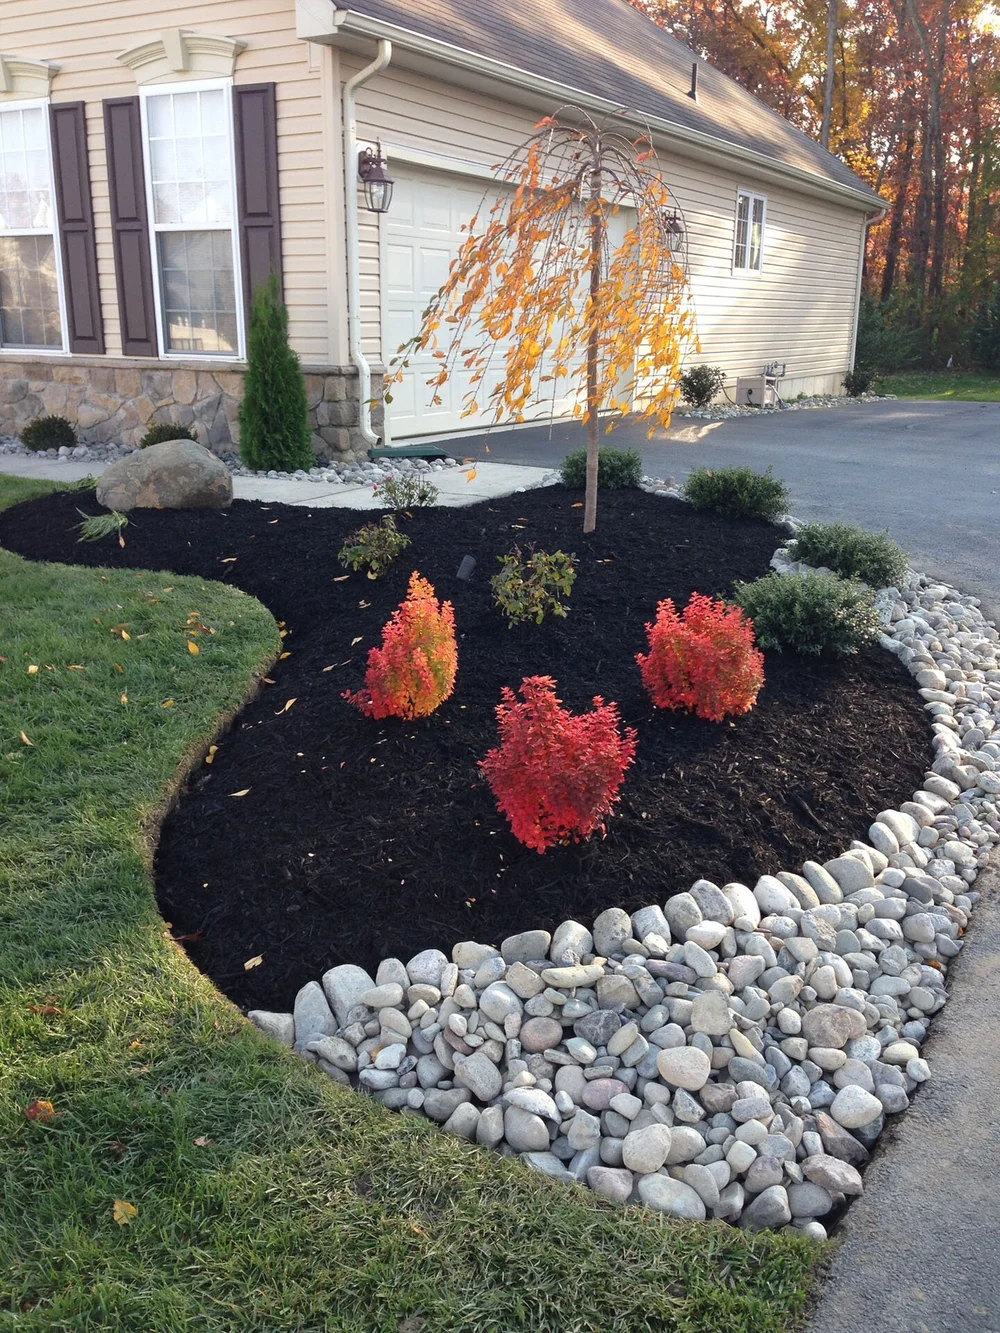
22. Curving Black Mulch Bed with River Rock Border
This is a classic recipe for curb appeal, and its formula is simple: 50% Black Mulch + 30% Green Lawn + 15% River Rock Border + 5% Color Pop. The black mulch provides a deep, rich canvas that makes everything else stand out. The vibrant green lawn creates a sharp, clean edge. The light gray river rocks form a bright, textured ribbon that separates the two and draws the eye along the curve. The final, crucial 5% is the burst of color from the autumn leaves on the weeping tree and the red shrubs. Without that pop of color, the scene would be handsome but could feel a bit sterile.
💸 Get This Look For Less
You can get this high-contrast look for a lot less. The biggest savings will be on the plants. Instead of a specimen weeping tree, start with a smaller, more common shrub that has great fall color, like a burning bush or a dwarf fothergilla. Buy small, 1-gallon versions of the green and red shrubs; they will fill in within a season or two. For the river rock border, check Facebook Marketplace or Craigslist for people getting rid of leftover landscaping stone. You can often get bags of rock for free if you’re willing to haul them. This is a much bolder use of black mulch than the subtle look in Idea #10, making a big impact.
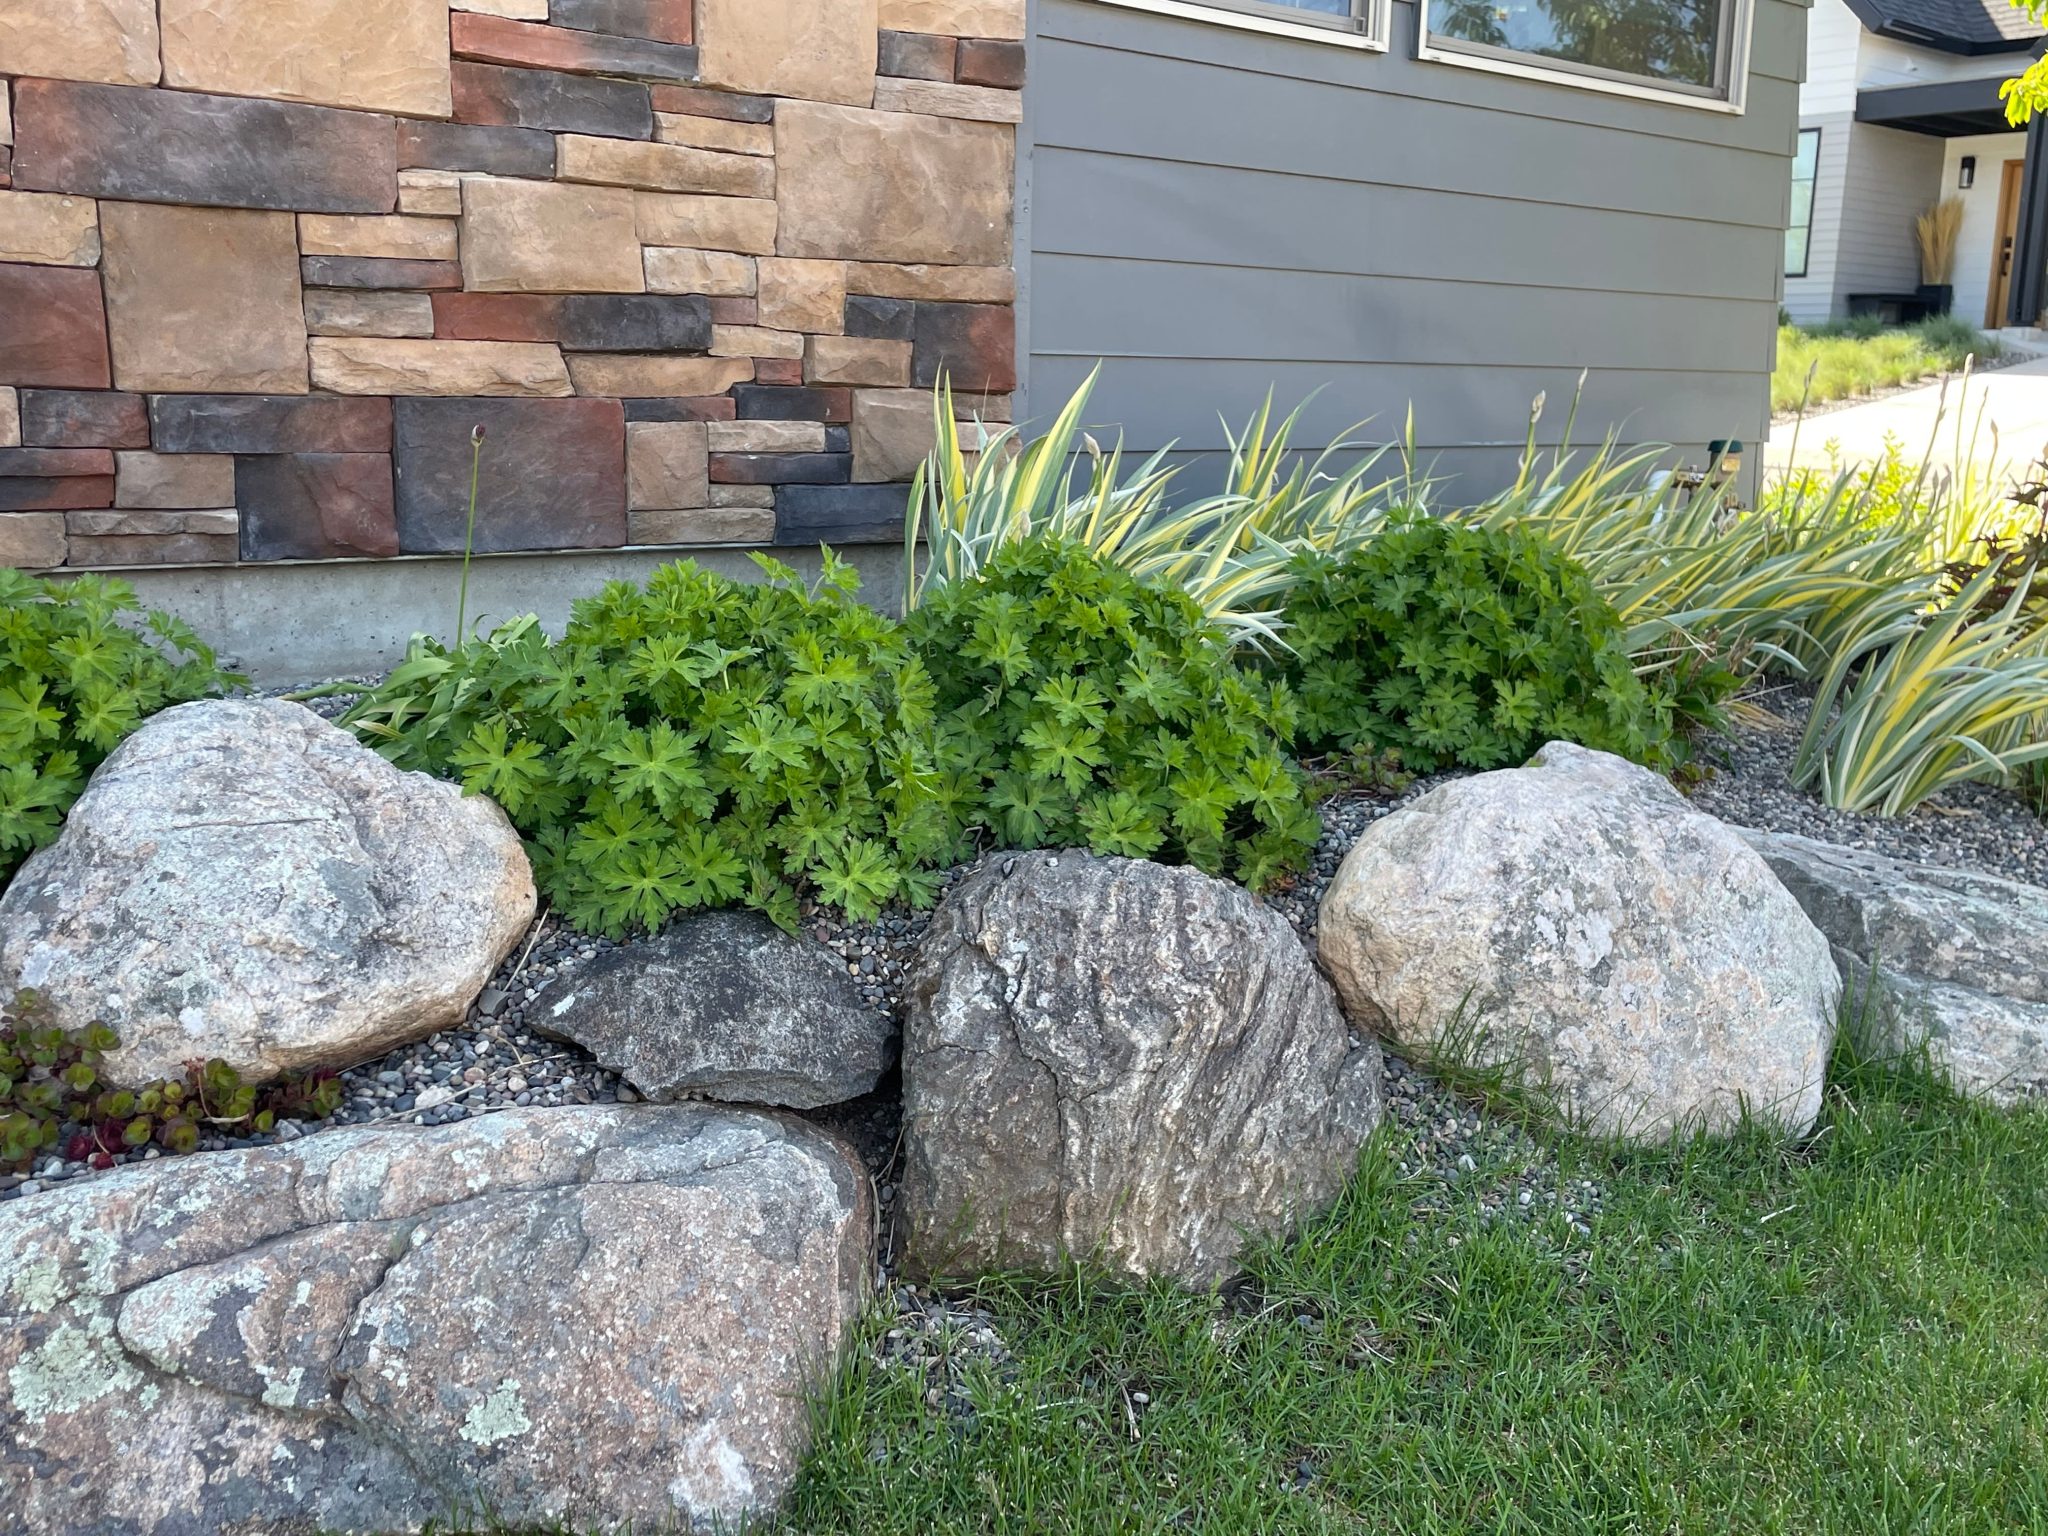
23. Layered Rock Garden with Varied Greenery and Pebble Mulch
This composition is so effective because it masterfully layers texture, color, and scale. In the foreground, you have the fine texture of the dark pebble mulch. Moving up, you have the vibrant green of the leafy groundcover, followed by the larger, bolder forms of the light-colored boulders. Behind that, the variegated yellow-and-green plants add another layer of color and texture. Finally, the house facade itself provides the backdrop, with the horizontal grey siding and the multi-colored stacked stone veneer. Each layer is distinct but complementary, creating a rich, complex, and deeply satisfying visual.
✅ Before You Start
A layered rock garden like this is incredibly versatile. It can be scaled down to fit a small foundation bed of just 4×8 feet, or expanded to cover an entire hillside. The key is to maintain the right proportions. For a smaller space, use fewer, smaller boulders (maybe three instead of five) and choose more compact plant varieties. For a large-scale application, you’ll need bigger boulders and more substantial plantings to ensure the design doesn’t look sparse. The principle of layering works at any scale, as long as the elements are in harmony with the overall size of the space.
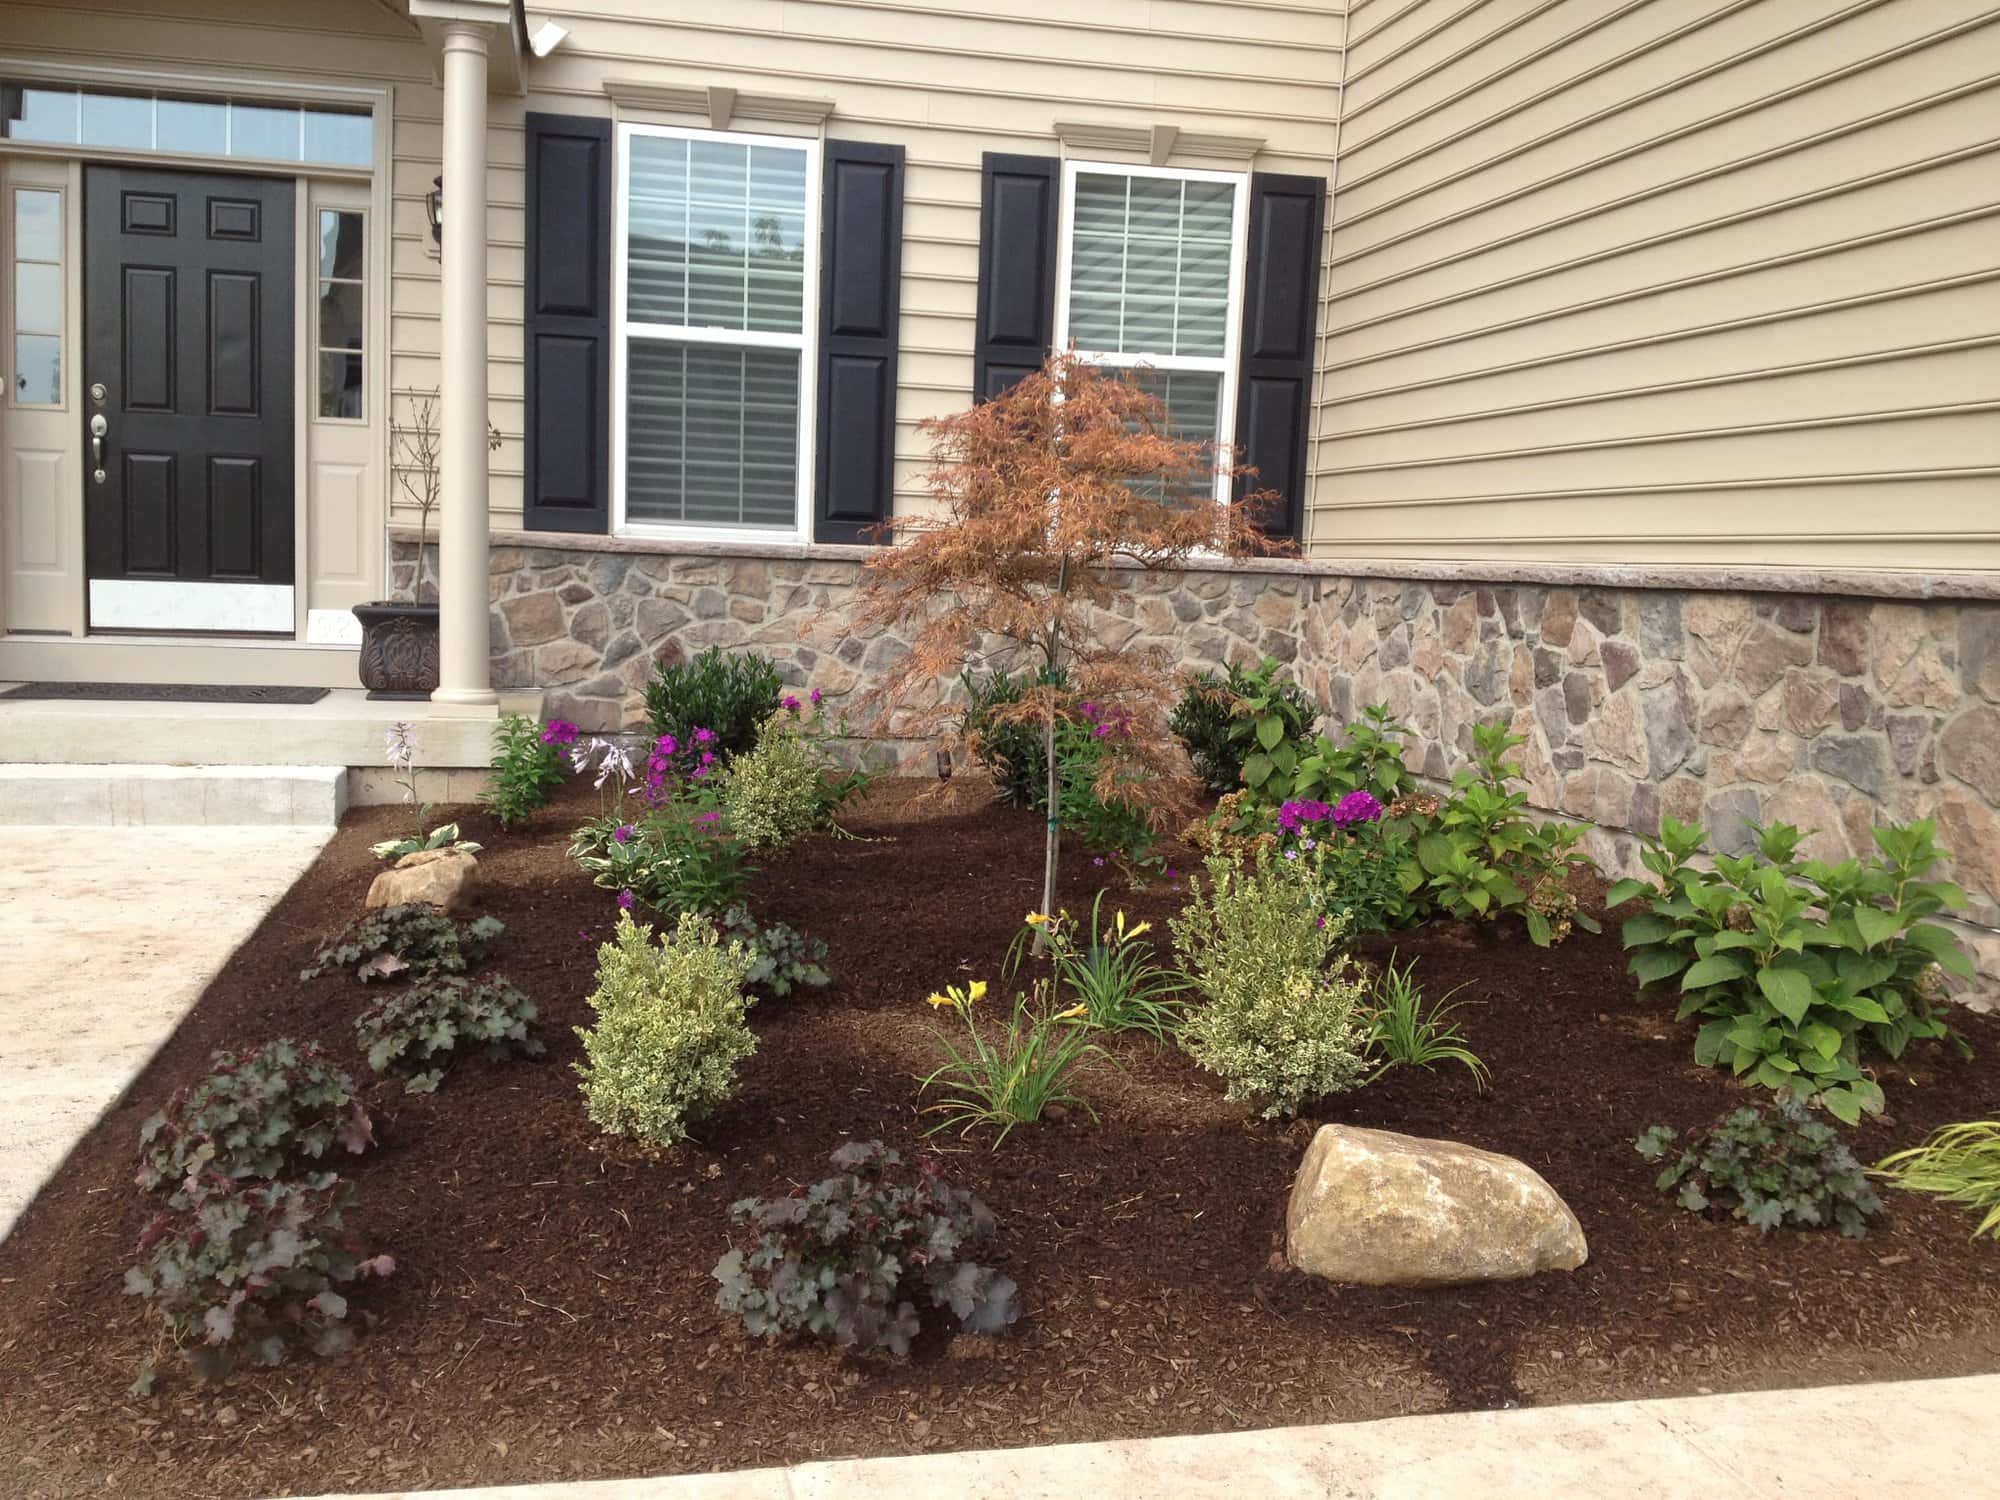
24. Classic Dark Mulch Bed with Flowering Shrubs and Rocks
When arranging plants and rocks in a bed like this, think in triangles. This is a classic floral design trick that works just as well in landscaping. Place your largest element (like the small tree or a large boulder) as the highest point of your triangle. Then, place two smaller elements (a shrub and another rock, for example) to form the base. This creates a composition that feels balanced but not rigidly symmetrical. Repeat this with other groups of plants and rocks throughout the bed, overlapping the triangles to create a sense of depth and flow.
⭐ The One Thing
Dark brown wood mulch is a fantastic, natural-looking ground cover, but it is an organic material that breaks down over time. To keep this bed looking fresh and providing good weed suppression, you’ll need to apply a new 1-2 inch layer of mulch every spring. This not only restores the rich, dark color but also replenishes the nutrients it adds to the soil as it decomposes. Budget for this as a small, annual landscaping cost. The flowering plants will also require deadheading and seasonal pruning to encourage blooms and maintain a tidy shape.
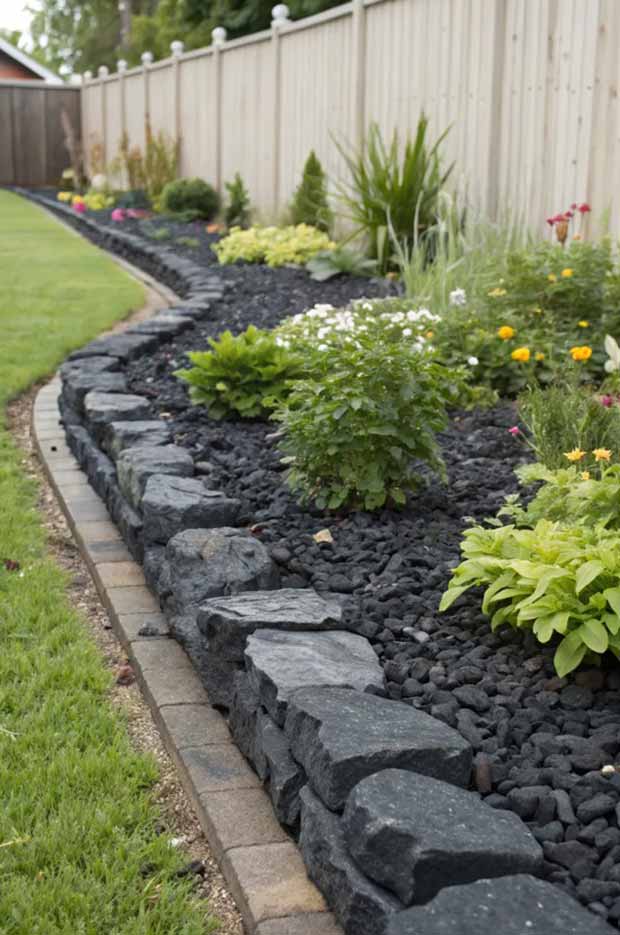
25. Curved Gravel Bed with a Low Dark Stone Wall
The single element that gives this design its polished, finished look is the double border. It’s not just a stone wall retaining the gravel; it’s the combination of the dark, irregular stone wall AND the neat row of rectangular brick pavers at its base. This paver edging creates a perfect, clean line between the garden bed and the lawn, making mowing easier and preventing grass from creeping into the wall. It’s a small detail that shows a high level of care and elevates the entire installation from ‘nice’ to ‘professional’.
⚠️ Real Talk
Building a low, informal stone retaining wall like this is a great DIY project. Here’s a simplified guide:
- Mark and Dig: Lay out the curve of your wall with a garden hose, then dig a trench about 6 inches deep and 12 inches wide.
- Create a Base: Fill the trench with 3-4 inches of paver base or gravel and compact it firmly with a hand tamper until it’s level. This is the most important step for a stable wall.
- Lay the First Course: Set the largest, flattest stones for your first course, wiggling them into the base until they are stable and level.
- Stack and Stagger: Continue adding courses, staggering the joints between stones like you would with bricks. For extra stability, you can use landscape block adhesive between the layers.
- Backfill: As you build, backfill behind the wall with gravel for drainage.
Time: One weekend for a 15-foot wall. Cost: $10-$20 per linear foot.
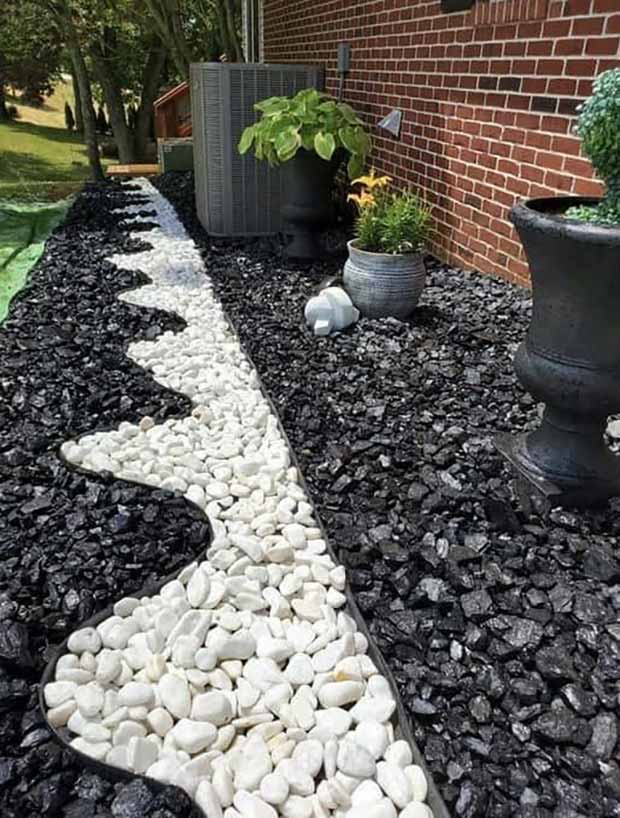
26. Contrasting Black Mulch and White Pebble Garden Border
This design’s power comes from its extreme contrast, which can be broken down into a simple formula: 70% Dark Base + 20% Light Accent + 10% Green Life. The chunky black mulch and the red brick wall create a dark, textured backdrop, making up the bulk of the visual weight. The winding path of polished white river rocks provides a stark, bright accent that your eye can’t help but follow. The final 10% is the potted green plants, which bring necessary life and a softer texture to the scene. This is a more graphic and less naturalistic use of contrast than the undulating pattern in Idea #14.
📐 Style Math
Let’s talk about those gorgeous, polished white river rocks. They are stunning when they’re clean. But keeping them that way is a job. They will show every bit of dirt, leaf stain, and algae growth. To keep them looking pristine, you’ll need to rinse them down regularly. A few times a year, you may even need to scoop them into a bucket with some water and a bit of vinegar or outdoor cleaner to give them a good wash. Also, the high polish can make them slippery when wet, so they are best used as a decorative accent rather than a primary walking surface.
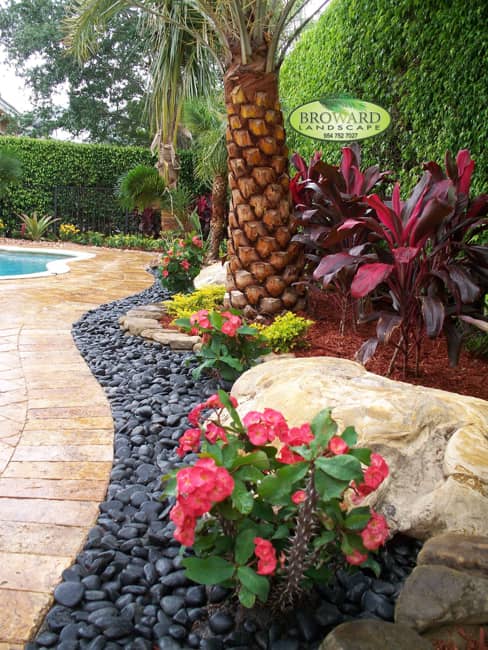
27. Tropical Path Bordered with Glossy Black River Rocks
This look is all about the power of a strong border. The glossy black river rocks create an incredibly sharp and defined edge for the stamped concrete path. This dark, wet-look line acts like eyeliner for the garden, making the colors of the tropical plants—the vibrant reds and pinks—pop with intensity. The contrast between the smooth, dark rocks and the lighter, textured concrete path also adds a layer of sophistication. It’s a deliberate, high-end detail that elevates the entire landscape from a simple garden to a luxurious, resort-style oasis. This creates a much more manicured feel than the wilder look of Idea #15.
💰 Budget Breakdown
Want this lush, tropical look without the five-star resort price tag? Focus on budget-friendly swaps. Instead of a stamped concrete path, consider using simple concrete pavers or even large stepping stones set in gravel. For the vibrant foliage, plants like Coleus can provide incredible red and burgundy color for a single season at a very low cost. Look for clearance tropical plants at the end of summer to overwinter indoors. The glossy black river rocks are a key part of the look, but you can achieve a similar effect with less expensive black lava rock, which also provides great contrast.
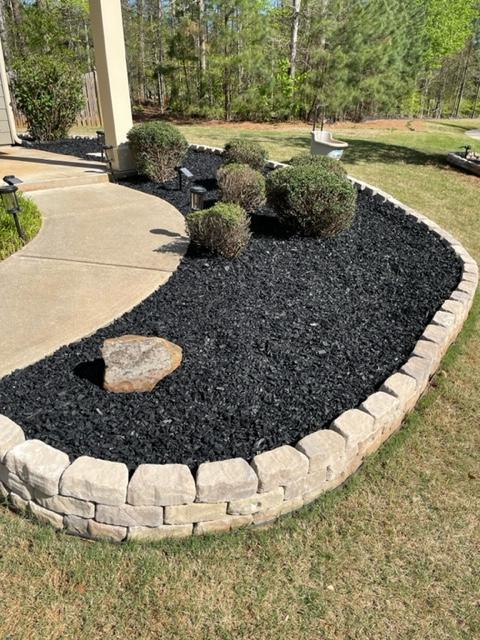
28. Tidy Curved Bed with Black Mulch and Stone Edging
When using a dark mulch like black, plant selection is key. The dark background can make dark green foliage disappear. To create visual pop, choose plants with contrasting foliage. The bright, almost lime green of these rounded shrubs is a perfect example. Chartreuse, silver, or variegated leaves will stand out beautifully against black mulch. For flowers, hot colors like yellow, orange, and bright pink create a stunning, high-energy contrast, while cool whites and blues offer a more serene, classic combination. Avoid plants with deep burgundy or dark purple leaves unless you are intentionally going for a subtle, moody look.
💡 Designer Tip
This clean, simple design of a single material bed with a stone border is endlessly scalable. It’s perfectly suited for small, tight spaces, like a narrow bed between a house and a walkway, where it can provide a tidy splash of green. In this context, using just a few identical shrubs creates a sense of calm and order. The same concept can be expanded to create a large, sweeping border along a driveway or the entire front of a house. For a larger application, you would simply increase the number of shrubs and add some larger accent plants to maintain proportion.
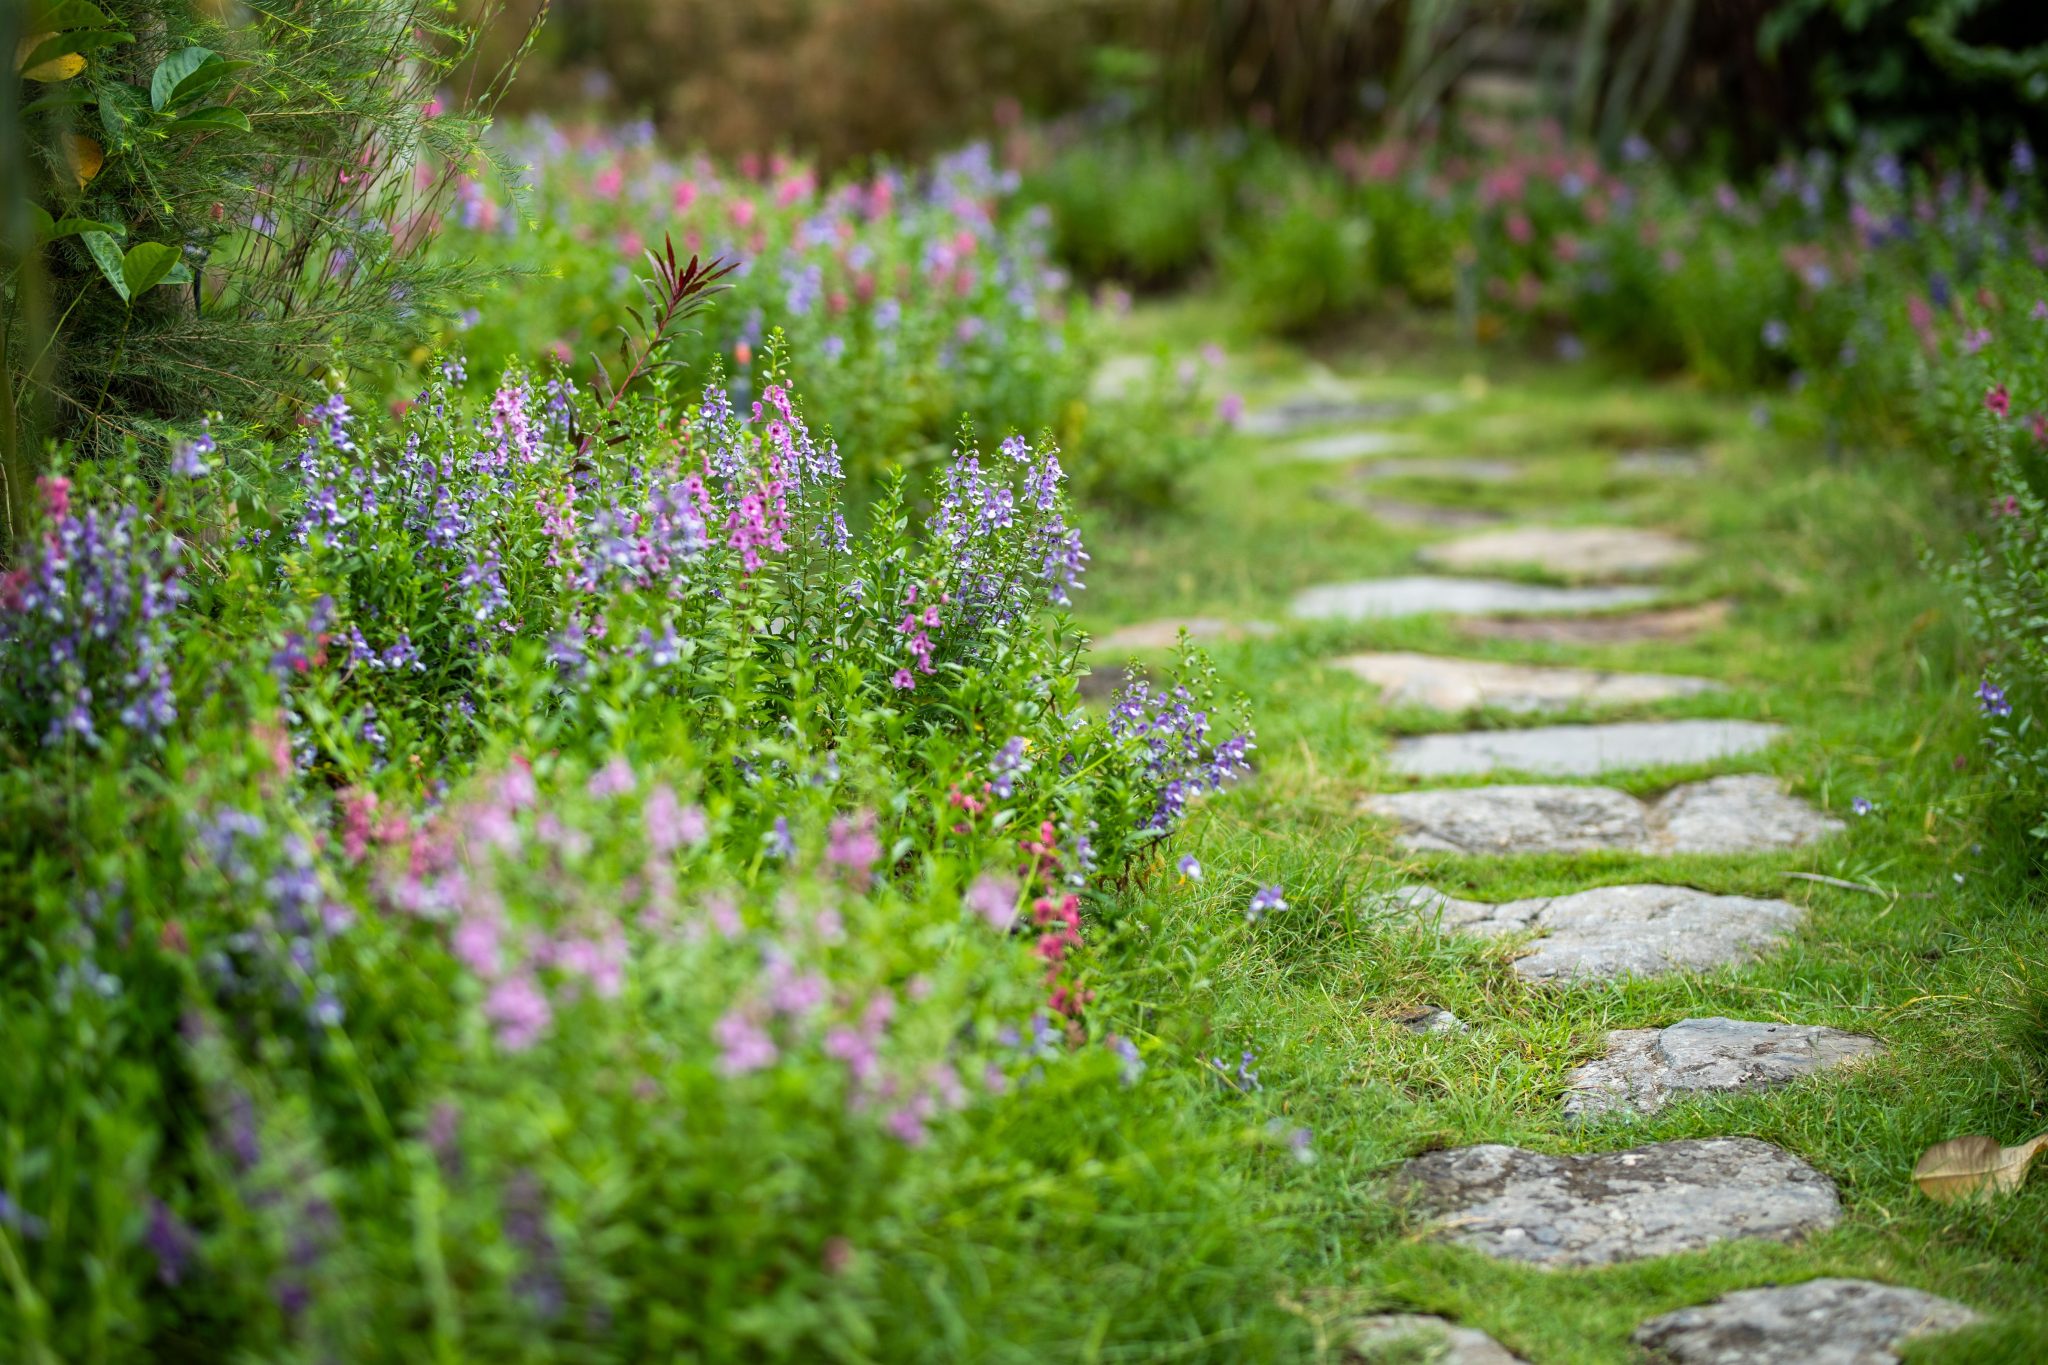
29. Stone Stepping Path Through a Lush Floral Garden
The single element that makes this garden feel so magical and alive is the way the flowering plants are allowed to spill over and soften the edges of the stone path. The irregular grey pavers provide a solid, functional route, but it’s the purple and pink blossoms creeping onto the stones and the vibrant green grass peeking through the cracks that truly define the space. This intentional ‘blurring of the lines’ between hardscape and softscape is what transforms a simple path into an immersive, romantic garden journey. It feels less like a construction and more like a discovery.
📏 Scale Guide
A lush, ‘spilling over’ garden like this is stunning, but it requires diligent editing to keep it from becoming an overgrown mess. The flowering plants that soften the path’s edge will need to be trimmed back every few weeks during the growing season to keep the walkway clear and safe. The grass growing between the pavers will need regular attention with a string trimmer. You’ll also need to be vigilant about weeding, as the dense plantings create a perfect environment for unwanted guests to hide. This is a garden for someone who genuinely enjoys the process of gardening, not someone looking for a low-maintenance solution.
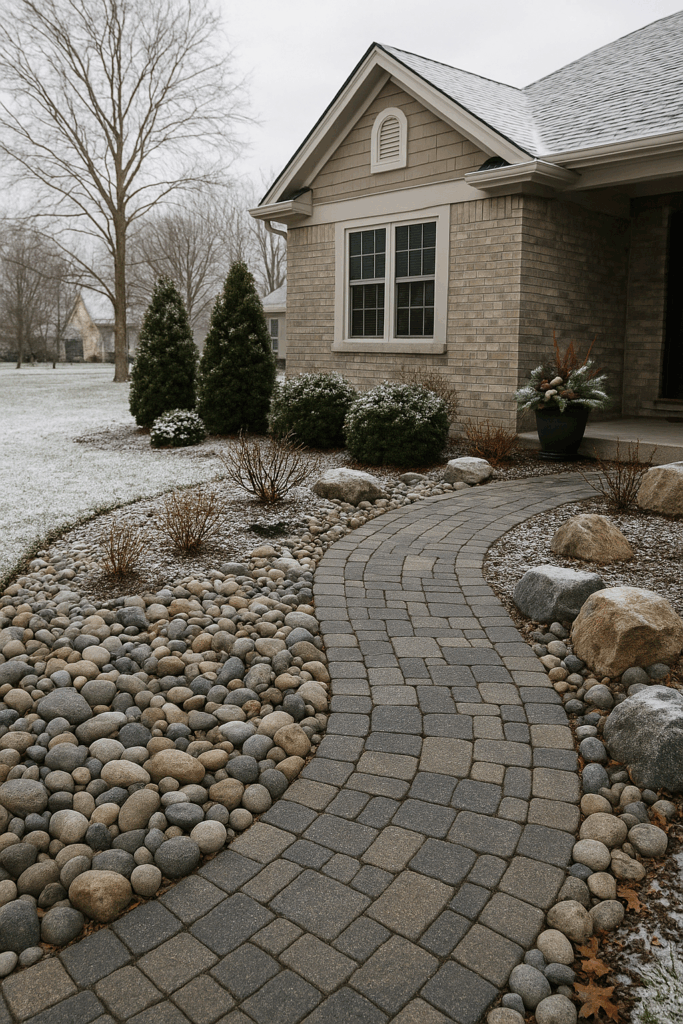
30. Winter-Ready Paver Path with River Rock Borders
This landscape is a brilliant example of designing for all four seasons. Even in winter, with a dusting of snow, the design holds its own because its beauty is based on ‘good bones’—strong lines and contrasting textures. The elegant curve of the paver pathway provides a powerful visual line. The varied sizes of the river rocks and boulders offer year-round texture and interest. The conical evergreens provide crucial green color and structure when everything else is dormant. This is a landscape that doesn’t rely on flowers to be beautiful; its underlying structure is strong enough to carry it through the bleakest months.
🔧 How-To Brief
Creating a durable paver path with rock borders involves several material costs. This is a project where investing in quality materials pays off in longevity. Here’s an estimated breakdown for a 50-foot long, 3-foot wide path:
- Interlocking Pavers: $600 – $1,500
- Paver Base & Sand: $200 – $400
- Mixed River Rocks & Boulders: $500 – $1,200
- Plants (Evergreens, Shrubs): $300 – $900
- Edging & Landscape Fabric: $100 – $250
- TOTAL: $1,700 – $4,250 (DIY)
Budget alternative: Using basic concrete pavers, sourcing free rocks locally, and buying smaller plants can reduce the cost by 40-50%. And be sure to check our advice in Mistake #2 about what goes under those rocks.
Your Yard’s Next Chapter Starts Here
With these 30 ideas, you’re not just looking at pictures anymore; you’re gathering the building blocks for your own outdoor sanctuary. Whether you’re starting small with a simple mulch bed or planning a full-on rock garden retreat, the perfect design is about reflecting your style. Take the inspiration that speaks to you, make it your own, and start creating a yard you can’t wait to come home to. Now, go make a new Pinterest board — it’s time to start planning.