You know that feeling when you find the one? That perfect fence idea that makes you stop scrolling and actually save the pin? Finding the right design for a sloped yard can feel like a unicorn hunt, but it doesn’t have to be. We’ve done the deep dive for you, sifting through countless projects from professional installers and landscape designers to find what actually works.
Inside, you’ll find 27 distinct fence ideas for every kind of slope, from gentle grades to steep hills. We’re covering everything from modern horizontal slat fences and classic white pickets to sturdy privacy designs and rustic wood-and-wire combos. For 2026, it’s all about embracing the landscape, not fighting it—a huge move away from clunky solutions and towards designs that feel integrated and intentional.
And stay until the end — we break down the most common mistakes that can ruin these looks. 📌 Save this to Pinterest for later — you’ll want to revisit these ideas.
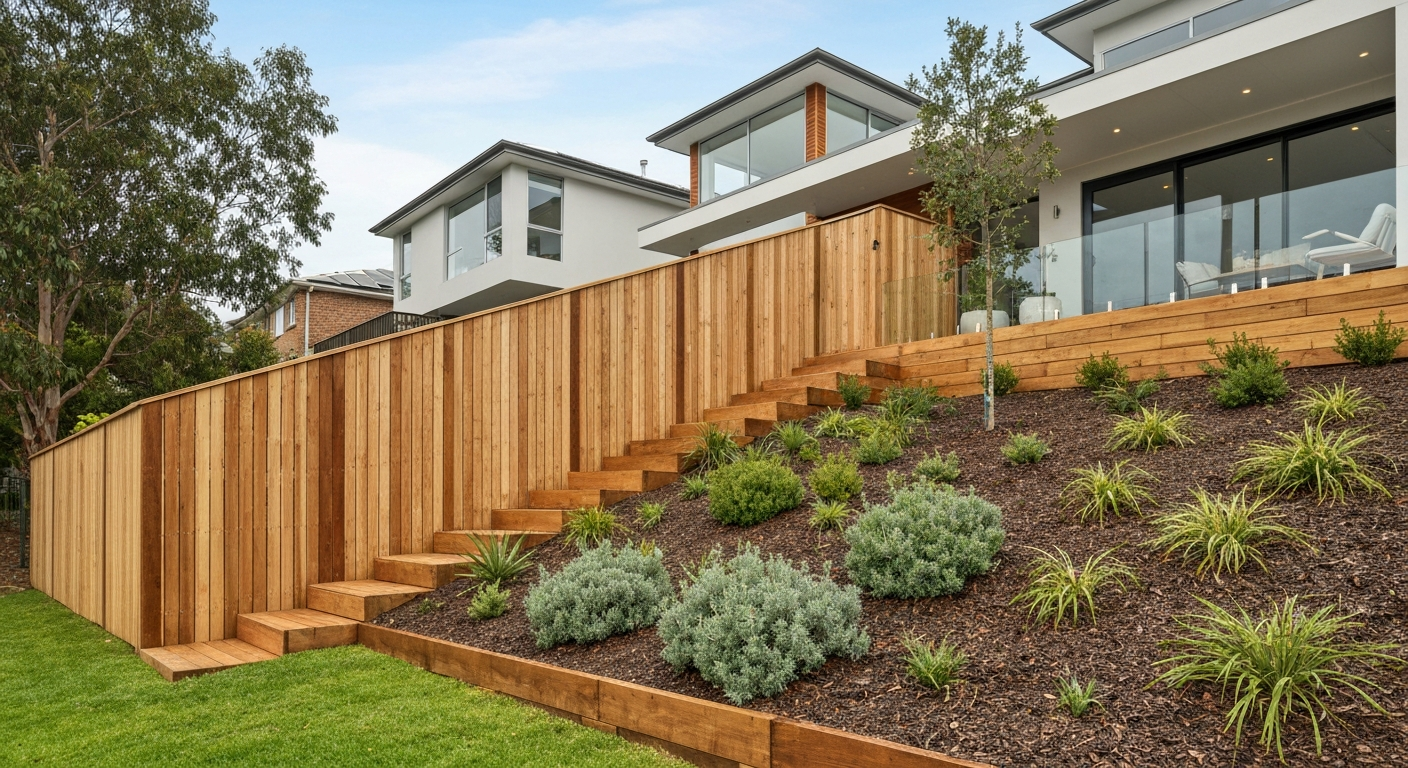
1. Integrate Timber Steps into a Slatted Fence on a Landscaped Slope
This design works because it treats the fence and stairs as a single, cohesive unit rather than two separate elements. The repetition of the natural timber in both the vertical fence slats and the stair treads creates a strong visual rhythm that guides the eye up the slope. This harmony is amplified by the contrast with the modern, cool-toned white and grey house, making the warm wood feel like a deliberate, stylish choice. The entire installation reads as a piece of landscape architecture, not just a barrier.
|
📋 Copy HEX 🔗 Share |
🔧 How-To Brief
When building steps into a garden slope, don’t use standard interior stair dimensions. For a more comfortable and leisurely climb outdoors, aim for a lower riser and a deeper tread. A good rule of thumb is a 6-inch riser (the vertical height) and a 14-inch tread (the horizontal depth). This is less steep than the typical 7.75-inch riser found on indoor stairs and makes carrying garden tools or simply strolling up the hill a much more pleasant experience.
2. A Simple Stepped Privacy Fence Solution for Even Grades
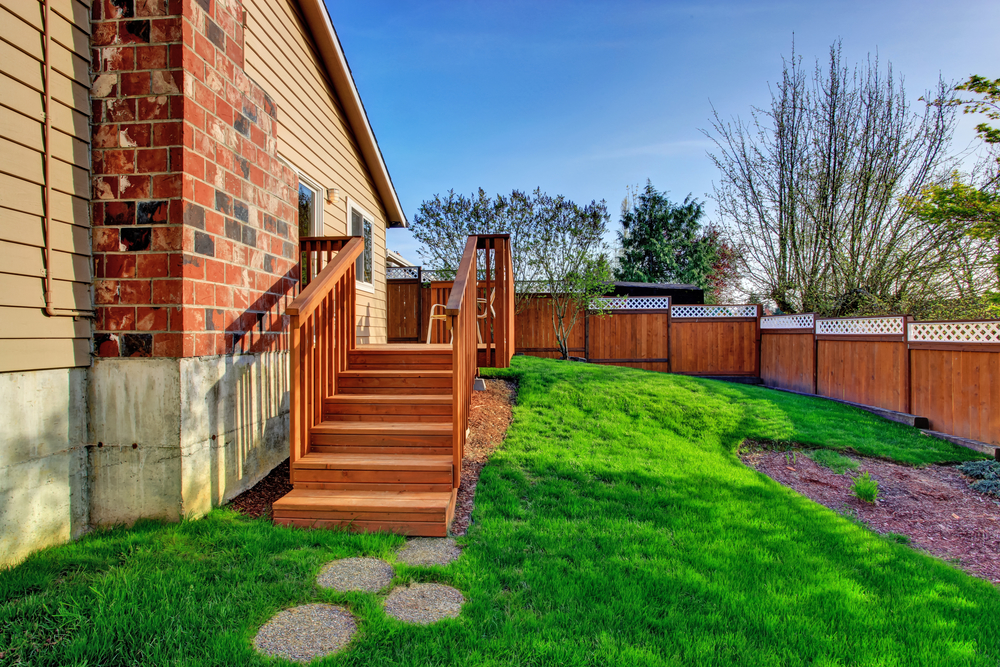
The big reality check with any standard stepped fence is the triangular gap that forms under each panel on a slope. If you have a small dog, need to keep critters out, or just want absolute privacy, this is a non-starter. This “out-of-the-box” solution looks clean, but it isn’t a true barrier. To fix it, you’ll need to add custom-cut boards or a continuous ‘kicker board’ along the bottom to follow the ground, which adds to the cost and complexity of the installation.
⚠️ Real Talk
A standard stepped-panel fence is a great DIY-friendly option, but only for certain types of slopes. It works best on a consistent, gentle to moderate grade of up to about 15 degrees. For anything steeper, or for a yard with rolling, irregular terrain, you’ll end up with massive, awkward gaps and a jagged, disjointed look. In those cases, you’ll need a ‘racked’ fence that follows the slope or a custom-built solution like the one in Idea #6.
3. Pair a Stepped Wood Fence with a Structural Stone Retaining Wall
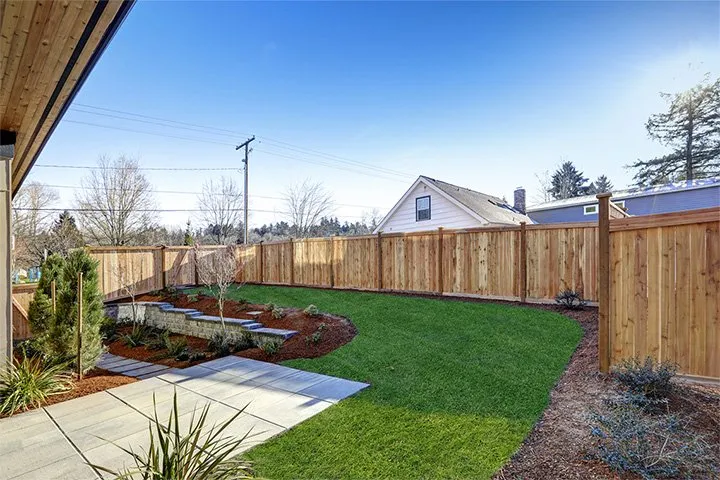
The single element that makes this entire backyard work is the grey stone retaining wall. Without it, the fence would just be floating on a messy, potentially eroding slope. The wall does the heavy lifting of taming the grade, creating a crisp, level line for the green lawn and paver patio to meet. It gives the simple wood fence a solid, intentional foundation and transforms a challenging, sloped space into a functional, multi-level outdoor living area. It’s the structure that enables the style.
✅ Before You Start
Here’s a realistic look at what a multi-level project like this can cost when professionally installed. The retaining wall is the biggest investment by far.
- Main Furniture (Fence Panels & Posts): $2,500 – $4,500
- Textiles (Lawn Sod): $500 – $1,200
- Decor/Accessories (Plants/Mulch): $400 – $900
- Wall Treatment (Stone Retaining Wall & Pavers): $8,000 – $15,000
- TOTAL: $11,400 – $21,600
Budget alternative: You can achieve a similar tiered effect for 40-60% less by using interlocking concrete blocks from a big-box store for the wall and a simple gravel patio instead of stone pavers.
4. Install a Contrasting Black Slatted Fence on a Grassy Roadside
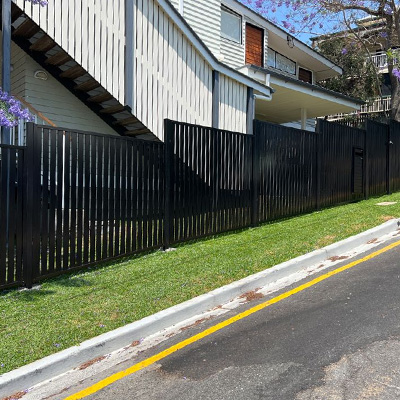
The visual formula here is all about high contrast and clean lines. Think of it as: 70% natural color + 30% bold graphic element. The vibrant green grass and the light-colored building in the background form the soft, natural base. The tall, black slatted fence acts as the strong, defining graphic element, drawing a crisp, dark line across the landscape. You could swap the black for a deep charcoal or even a dark navy and still get the same powerful, modern effect against the green.
🔥 Trending Context
A black fence looks incredibly sharp, but it comes with a few maintenance realities. First, it shows dust, pollen, and water spots more than lighter colors, so it will need a good rinse with a hose a few times a year to look its best. Second, if it’s wood, you’ll need to re-stain or repaint it every 3-5 years, as sun fading will be more obvious on a dark color. If you want the look without the work, powder-coated aluminum is a fantastic, albeit more expensive, alternative.
5. Build a Horizontal Wood Fence That Follows the Ground’s Contour
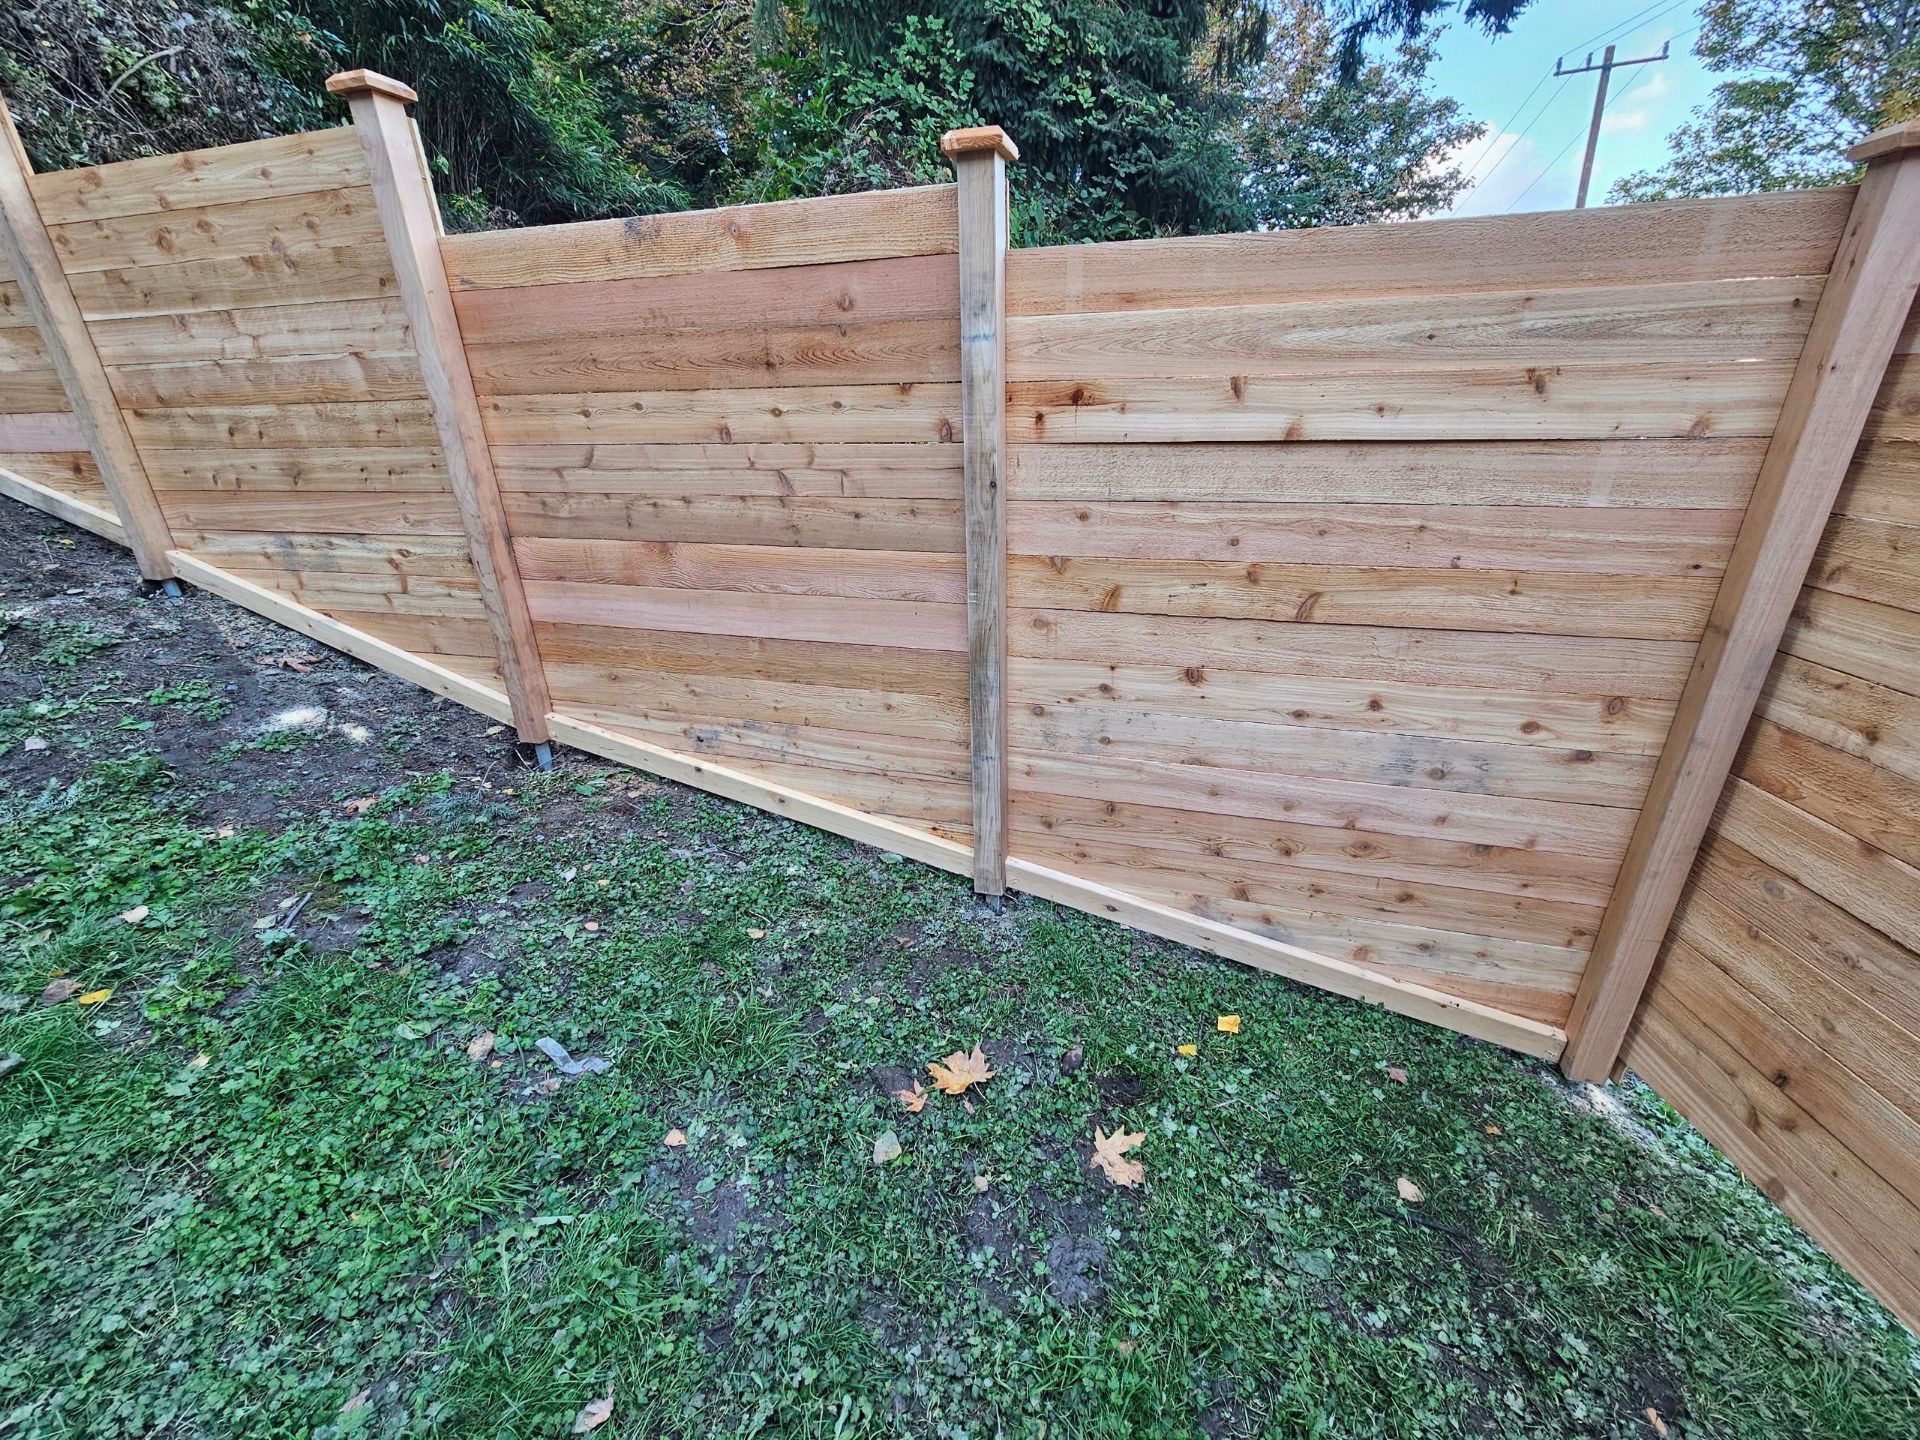
This is a great example of a ‘racked’ or ‘contoured’ fence, and it works because it embraces the slope instead of fighting it. Unlike a stepped fence, which creates a jagged line, this design allows the horizontal slats to run parallel to the ground. The key is the continuous wooden beam along the bottom. This single element provides a strong visual anchor, making the entire structure feel grounded and intentional, even as it moves down the incline. The consistent gap at the bottom looks much more professional than the triangular gaps of a stepped design.
🧹 Maintenance Reality
Want to create that continuous bottom rail that follows the slope? It’s a pro-level move that you can DIY.
- Set your vertical posts first, ensuring they are perfectly plumb.
- Run a string line along the ground where you want the bottom of the fence to be, following the exact contour of the slope.
- Measure the distance and angle between the posts along the string line.
- Cut your bottom rail (typically a 2×6 or 2×8) to match these measurements and angles.
- Attach the rail to the posts using sturdy wood screws or brackets. This rail now serves as your guide for installing the rest of the slats.
This one detail takes about 2-3 hours of careful measuring but makes all the difference.
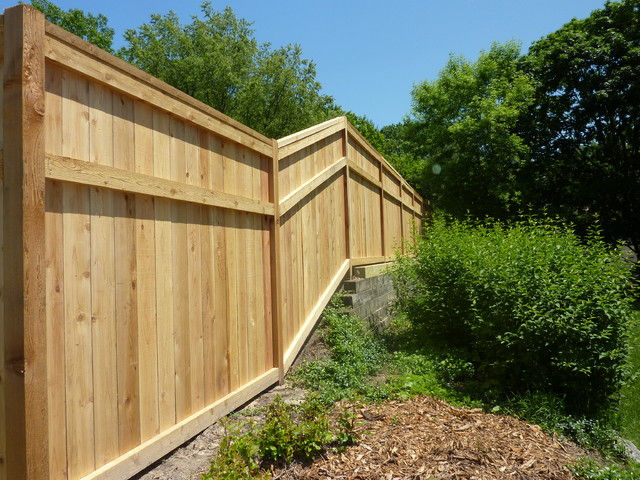
6. Use Stepped Panels and a Low Retaining Wall for a Steep Slope
This combination is ideal for steep slopes where a fence alone isn’t enough. It works best for grades between 20 and 40 degrees. The low concrete block retaining wall handles the most aggressive part of the slope at the bottom, creating a more manageable starting point for the fence. The stepped fence panels can then handle the rest of the incline. For very long or tall slopes, you may need to engineer a more substantial retaining wall, but for a typical residential yard, this is a robust solution.
💸 Get This Look For Less
Let’s be honest: tackling a slope this steep is not a beginner DIY project. The amount of force and water pressure moving downhill is significant. The low concrete retaining wall here isn’t just for looks; it’s structural. If it’s not built correctly with proper footings, drainage, and backfill, it can fail, causing the entire fence and a lot of earth to slide. If your slope is more than a few feet high, always consult a structural engineer or experienced landscaper before you start digging.
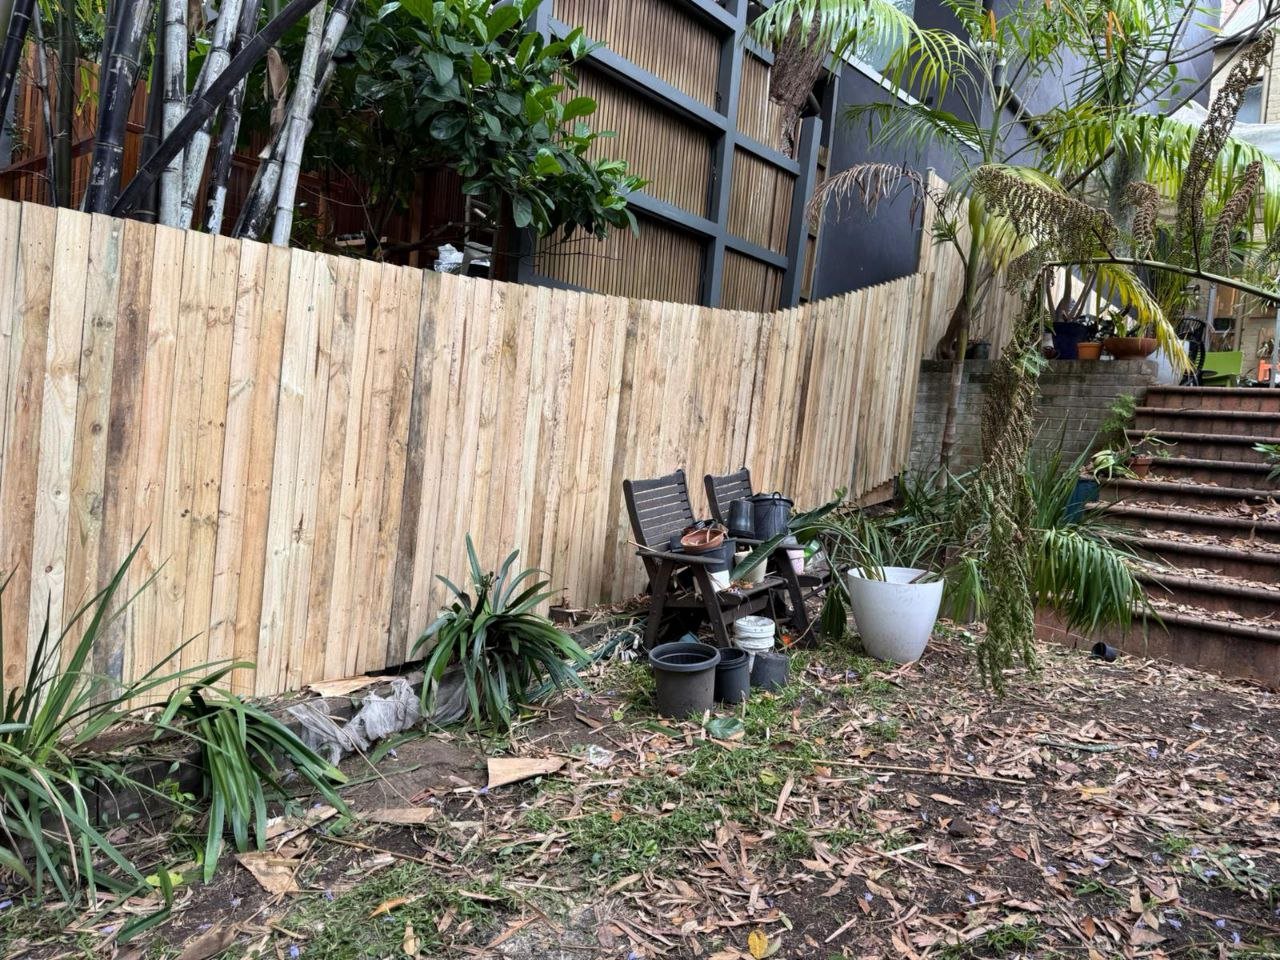
7. Install a Tall, Stepped Wooden Privacy Fence in a Natural Setting
When installing a tall privacy fence (6 feet or higher) on a slope, the visual weight of the fence can become overwhelming. To counter this, increase the ‘reveal’ on your fence posts. Instead of having the panels meet flush in the middle of the post, let 3-4 inches of the post show on either side of the panel section. This creates subtle vertical lines that break up the long horizontal mass of the fence, making it feel more structured and less like a giant wooden wall. It’s a small detail that adds a lot of architectural polish.
💡 Designer Tip
A professionally installed 150-foot wood privacy fence like this can easily run $9,000-$15,000. To get a similar look for less, consider using pre-made fence panels from a home improvement store. A standard 6’x8′ cedar panel costs around $100-$150. You’ll still need to buy posts and concrete, but by providing the labor yourself, you can bring the total project cost down to the $3,000-$5,000 range. This is a much more affordable approach than the custom terracing seen in Idea #18.
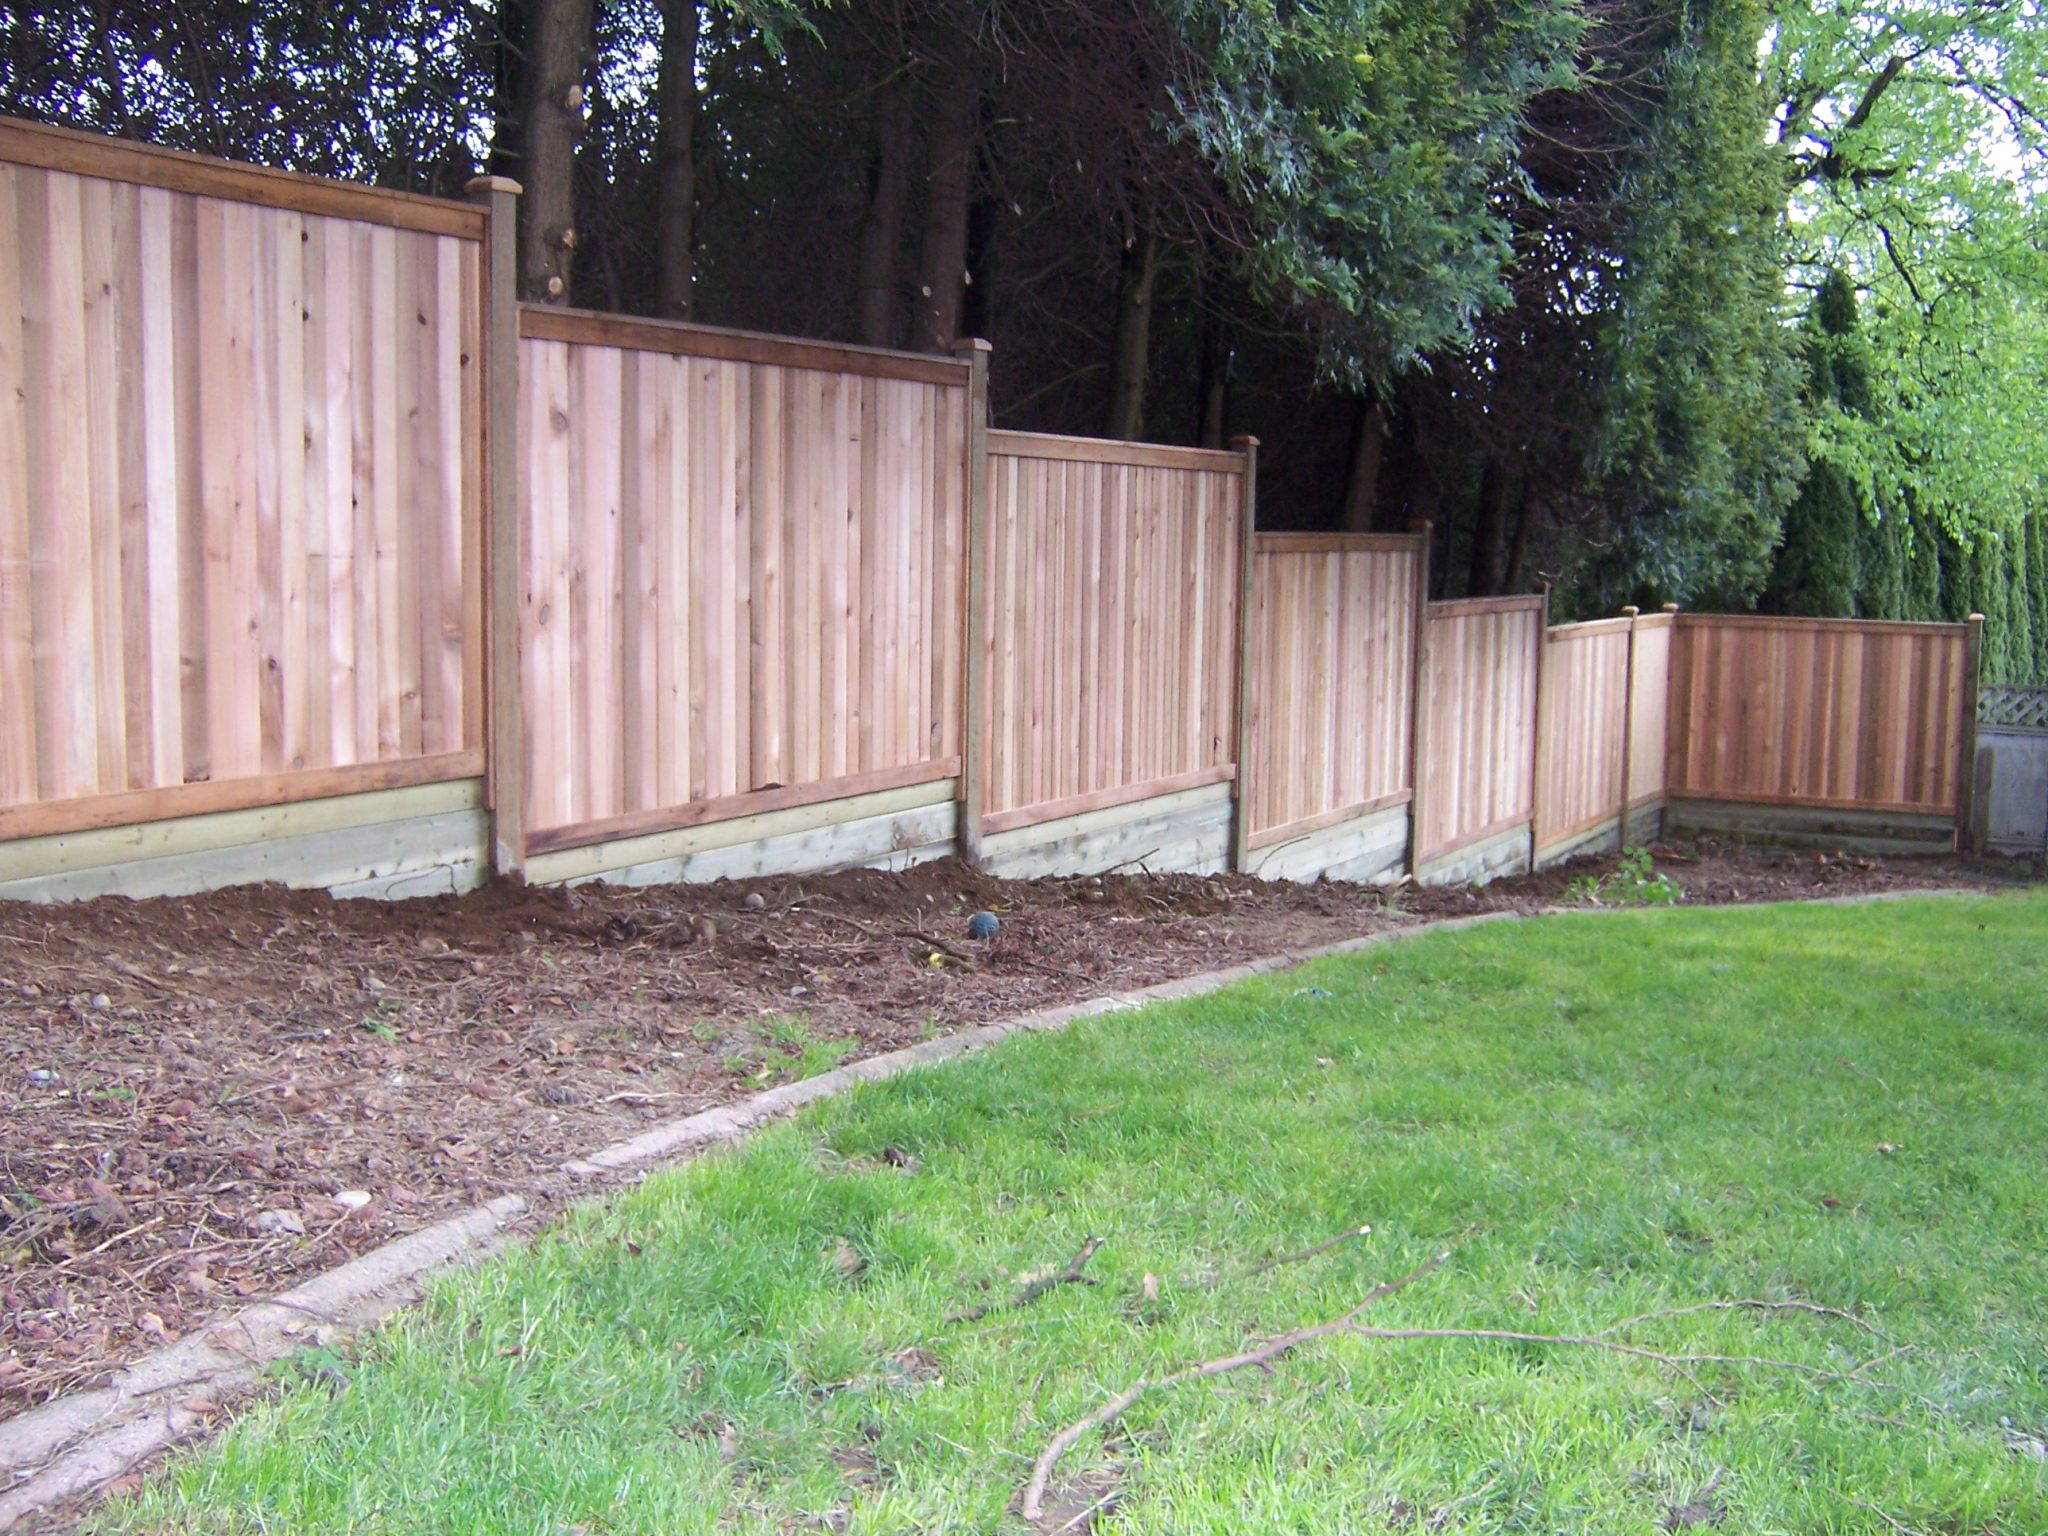
8. Contrast a Dark Horizontal Slat Fence Against a Lush Green Slope
The most important element here is the color contrast. It’s the dark, almost black, stain on the fence against the vibrant, uniform green of the manicured lawn. This high-contrast pairing is what gives the design its modern, graphic punch. If the fence were natural wood, it would blend in and feel more rustic. If the grass were patchy or brown, the effect would be lost. The bold color choice is everything; it turns a simple fence into a dramatic backdrop.
📏 Scale Guide
This design is a masterclass in using horizontal lines to visually widen a space. Even though the yard slopes up and away, the strong horizontal slats of the dark fence draw the eye from side to side, creating an illusion of more breadth. The stepped design works with the slope, but the dominant visual read is horizontal. This technique makes the backyard feel larger and more expansive than it actually is, while the dark color helps the fence recede into the background, letting the green lawn be the star.
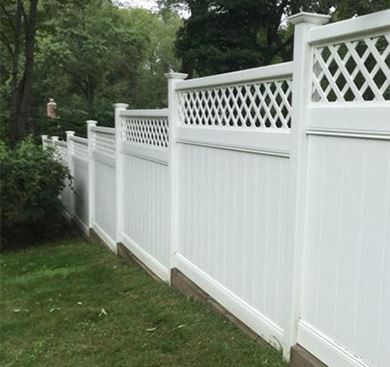
9. Choose a Stepped White Vinyl Fence with a Decorative Lattice Top
White vinyl is famously low-maintenance, but ‘low’ doesn’t mean ‘no’. In shady or damp areas, the north-facing side of the fence can develop a green or black film of algae and mildew over time. The decorative lattice at the top, with all its nooks and crannies, is particularly prone to this. Plan on a yearly cleaning with a hose and a soft brush, or a gentle pressure washing with a vinyl-safe cleaning solution, to keep it looking bright white and pristine.
⭐ The One Thing
The formula for this classic look is simple: 80% solid privacy + 20% decorative openness. The solid white lower portion provides the necessary screening and boundary, while the top 18-24 inches of diagonal lattice adds a touch of lightness and traditional charm. It keeps the fence from feeling like a monolithic white wall. You can apply this same math to a wooden fence, using a different lattice pattern or even cut-outs to achieve a similar, less imposing effect.
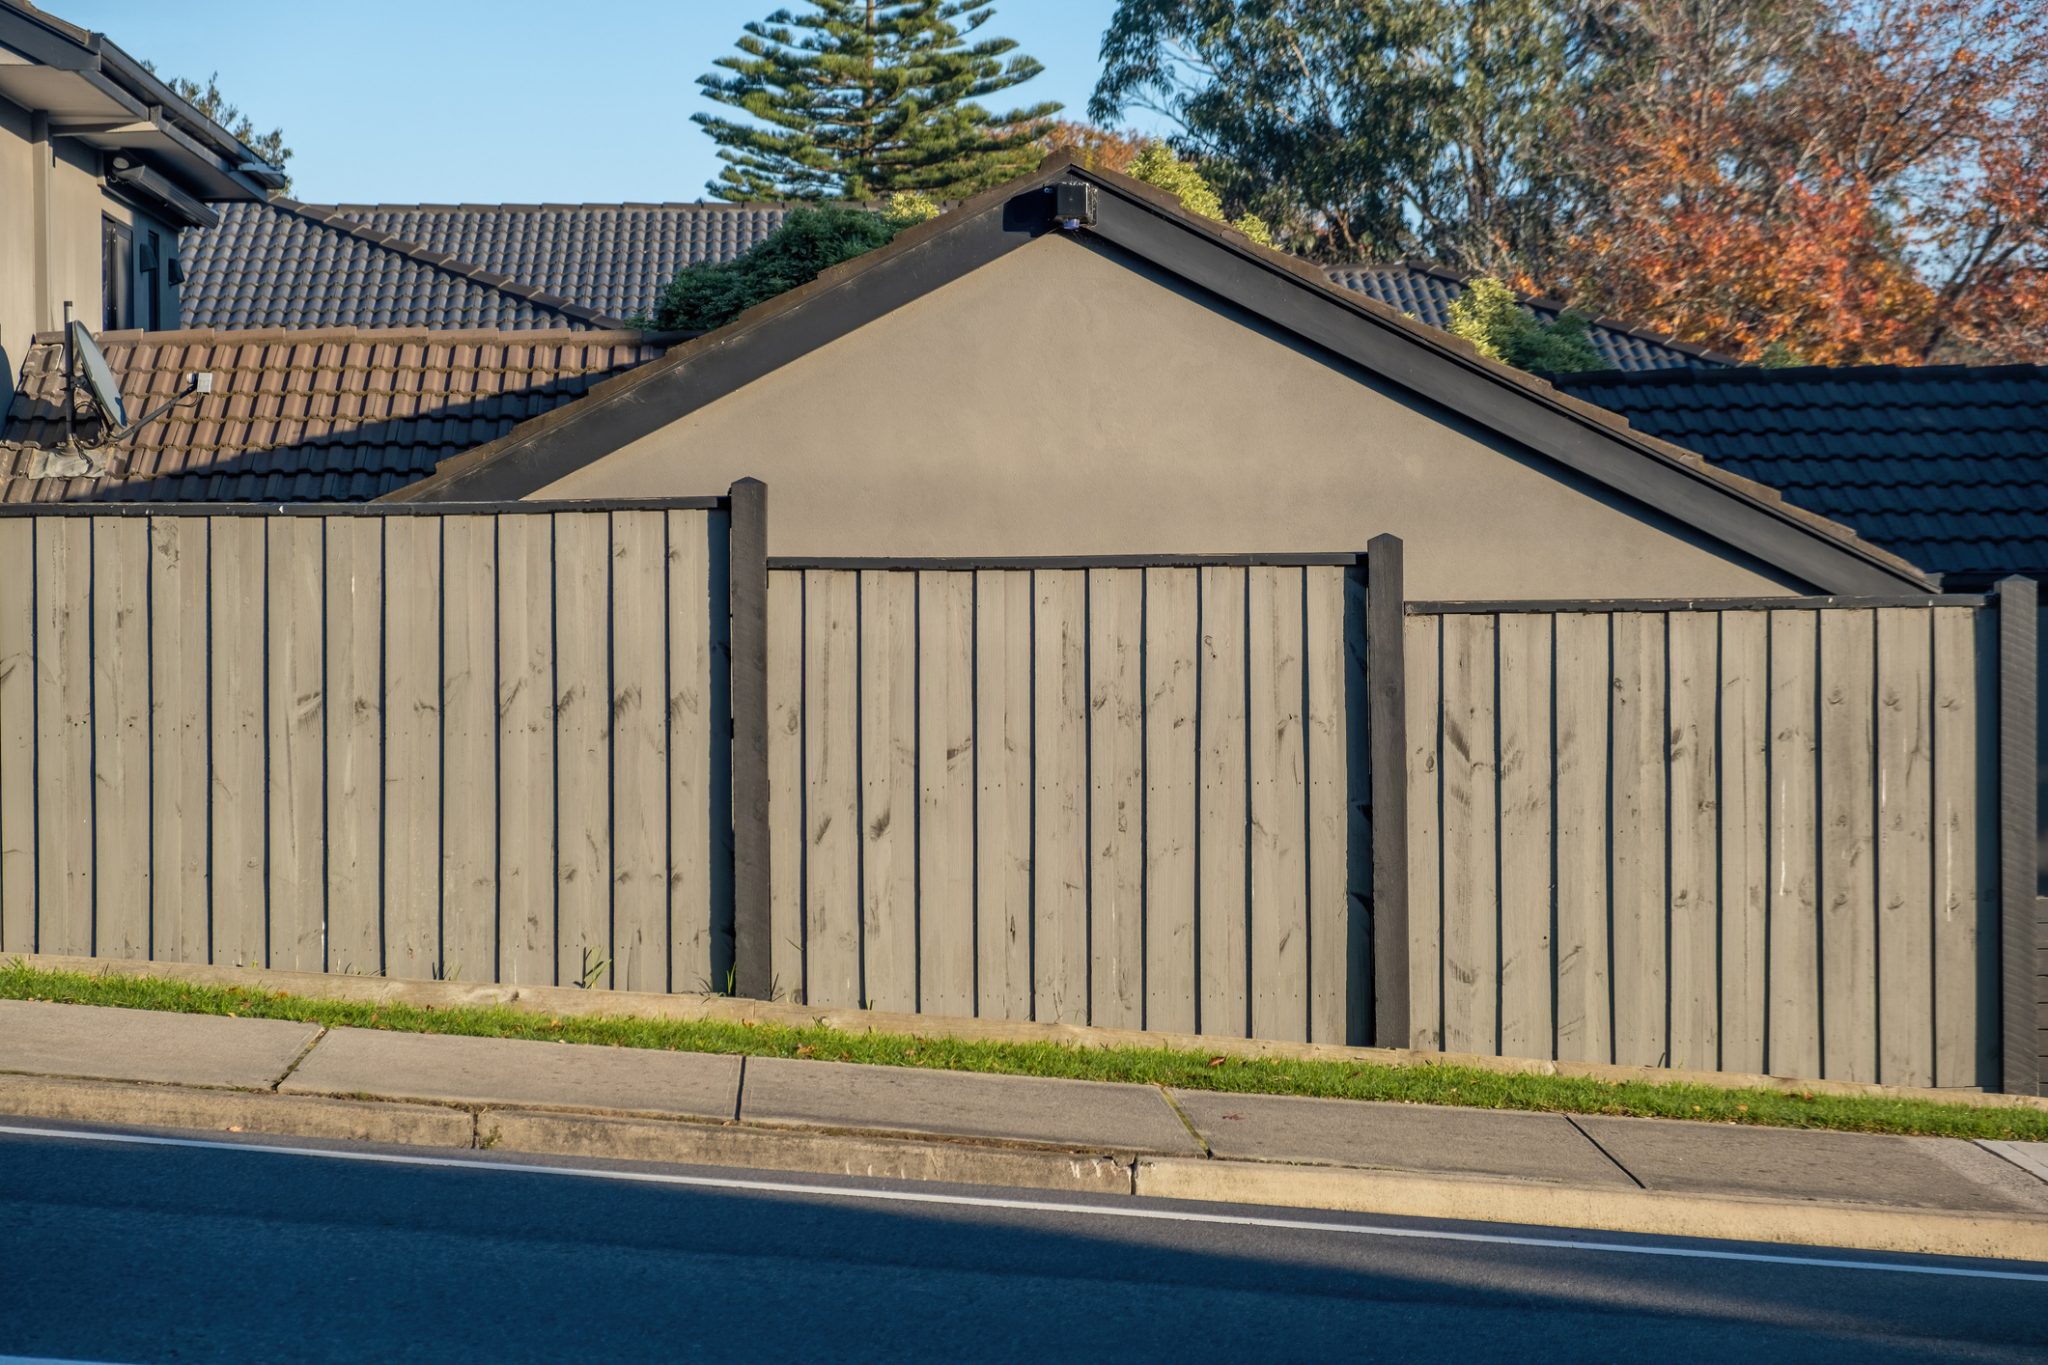
10. Run a Grey Wood Plank Fence Along a Sloping Urban Sidewalk
A custom-stained grey fence can be pricey. To get this muted, sophisticated look for much less, use standard pressure-treated pine planks and apply a semi-transparent grey stain yourself. A 5-gallon bucket of quality stain costs around $200 and will cover over 1,000 square feet. For the dark posts, simply use a solid black or charcoal exterior paint. You’ll achieve this exact high-end palette for the cost of materials and a weekend of work, saving thousands on custom fencing. If you prefer a lighter, more traditional look, check out the white picket version in Idea #15.
📐 Style Math
When a fence runs parallel to a sloped sidewalk, it’s crucial to maintain a consistent reveal at the bottom. Notice how there’s a uniform gap between the bottom of the fence planks and the ground. The easiest way to achieve this is to run a taut string line about 2-3 inches above the ground, parallel to the slope. Use this line as the guide for the bottom of your fence rail. This ensures a clean, professional line and prevents the fence from looking like it’s crashing into the ground at the low end.
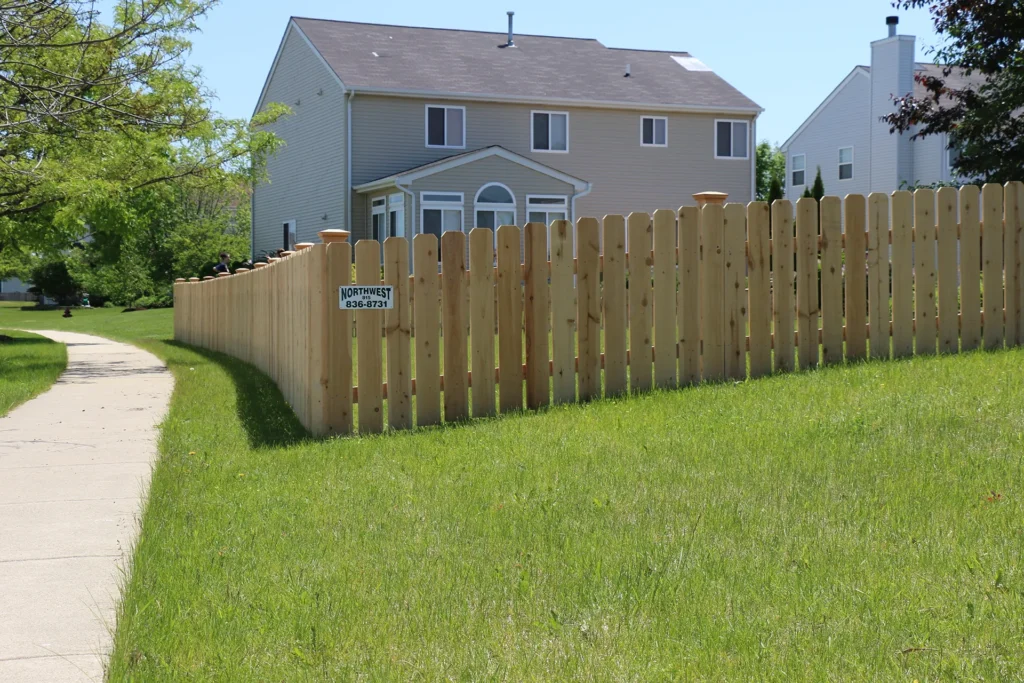
11. Install a Stepped Picket Fence on a Curving Green Lawn
This fence succeeds because it’s a ‘best of both worlds’ solution. The stepped panels cleanly handle the vertical change in elevation, while the fence itself is installed along a gentle curve, softening its presence in the landscape. The combination of the rigid, stepped geometry with the organic curve of the lawn creates a pleasing visual balance. The choice of natural wood with decorative post caps adds a layer of traditional charm that feels perfectly at home in a suburban setting.
🎯 What Makes It Work
Before you commit to a picket fence on a slope, run through this quick checklist:
- What is the primary purpose? If it’s keeping a small dog in, the gaps in a picket fence might be too large. You may need a privacy fence or one with mesh backing.
- Have you called 811? Before you dig any post holes, you absolutely must call the utility marking service to locate any underground lines. It’s free and it’s the law.
- Is your slope consistent? A stepped fence like this works great on a uniform grade. If your yard has lumps and bumps, you may need to do some light grading first to avoid an uneven look.
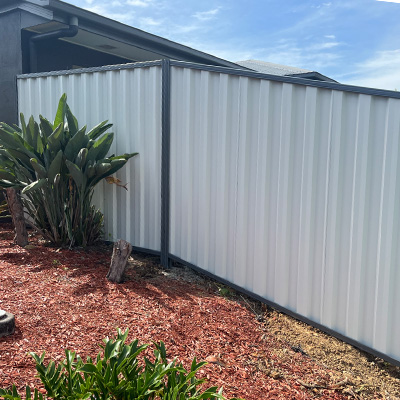
12. Use Stepped Corrugated Metal for a Modern, Industrial Fence
The single thing that makes this fence stand out is the material choice: corrugated metal. It’s unexpected in a residential garden setting, which is usually dominated by wood or vinyl. The light grey metal provides a cool, industrial texture that contrasts beautifully with the soft, organic shapes of the green foliage and the rich red-brown mulch. It’s a bold move that instantly signals a modern, design-forward aesthetic and sets the space apart from the ordinary.
💰 Budget Breakdown
Building a fence with corrugated metal can be surprisingly cost-effective, especially compared to cedar or vinyl, if you build the frame yourself.
- Main Furniture (Metal Panels & Framing): $1,500 – $3,000
- Lighting: N/A
- Textiles: N/A
- Decor/Accessories (Mulch & Plants): $300 – $700
- Wall Treatment: N/A
- TOTAL: $1,800 – $3,700
Budget alternative: Look for reclaimed or salvaged corrugated panels on Facebook Marketplace or at architectural salvage yards. You can often find them for a fraction of the price of new panels, and they come with a unique, weathered patina.
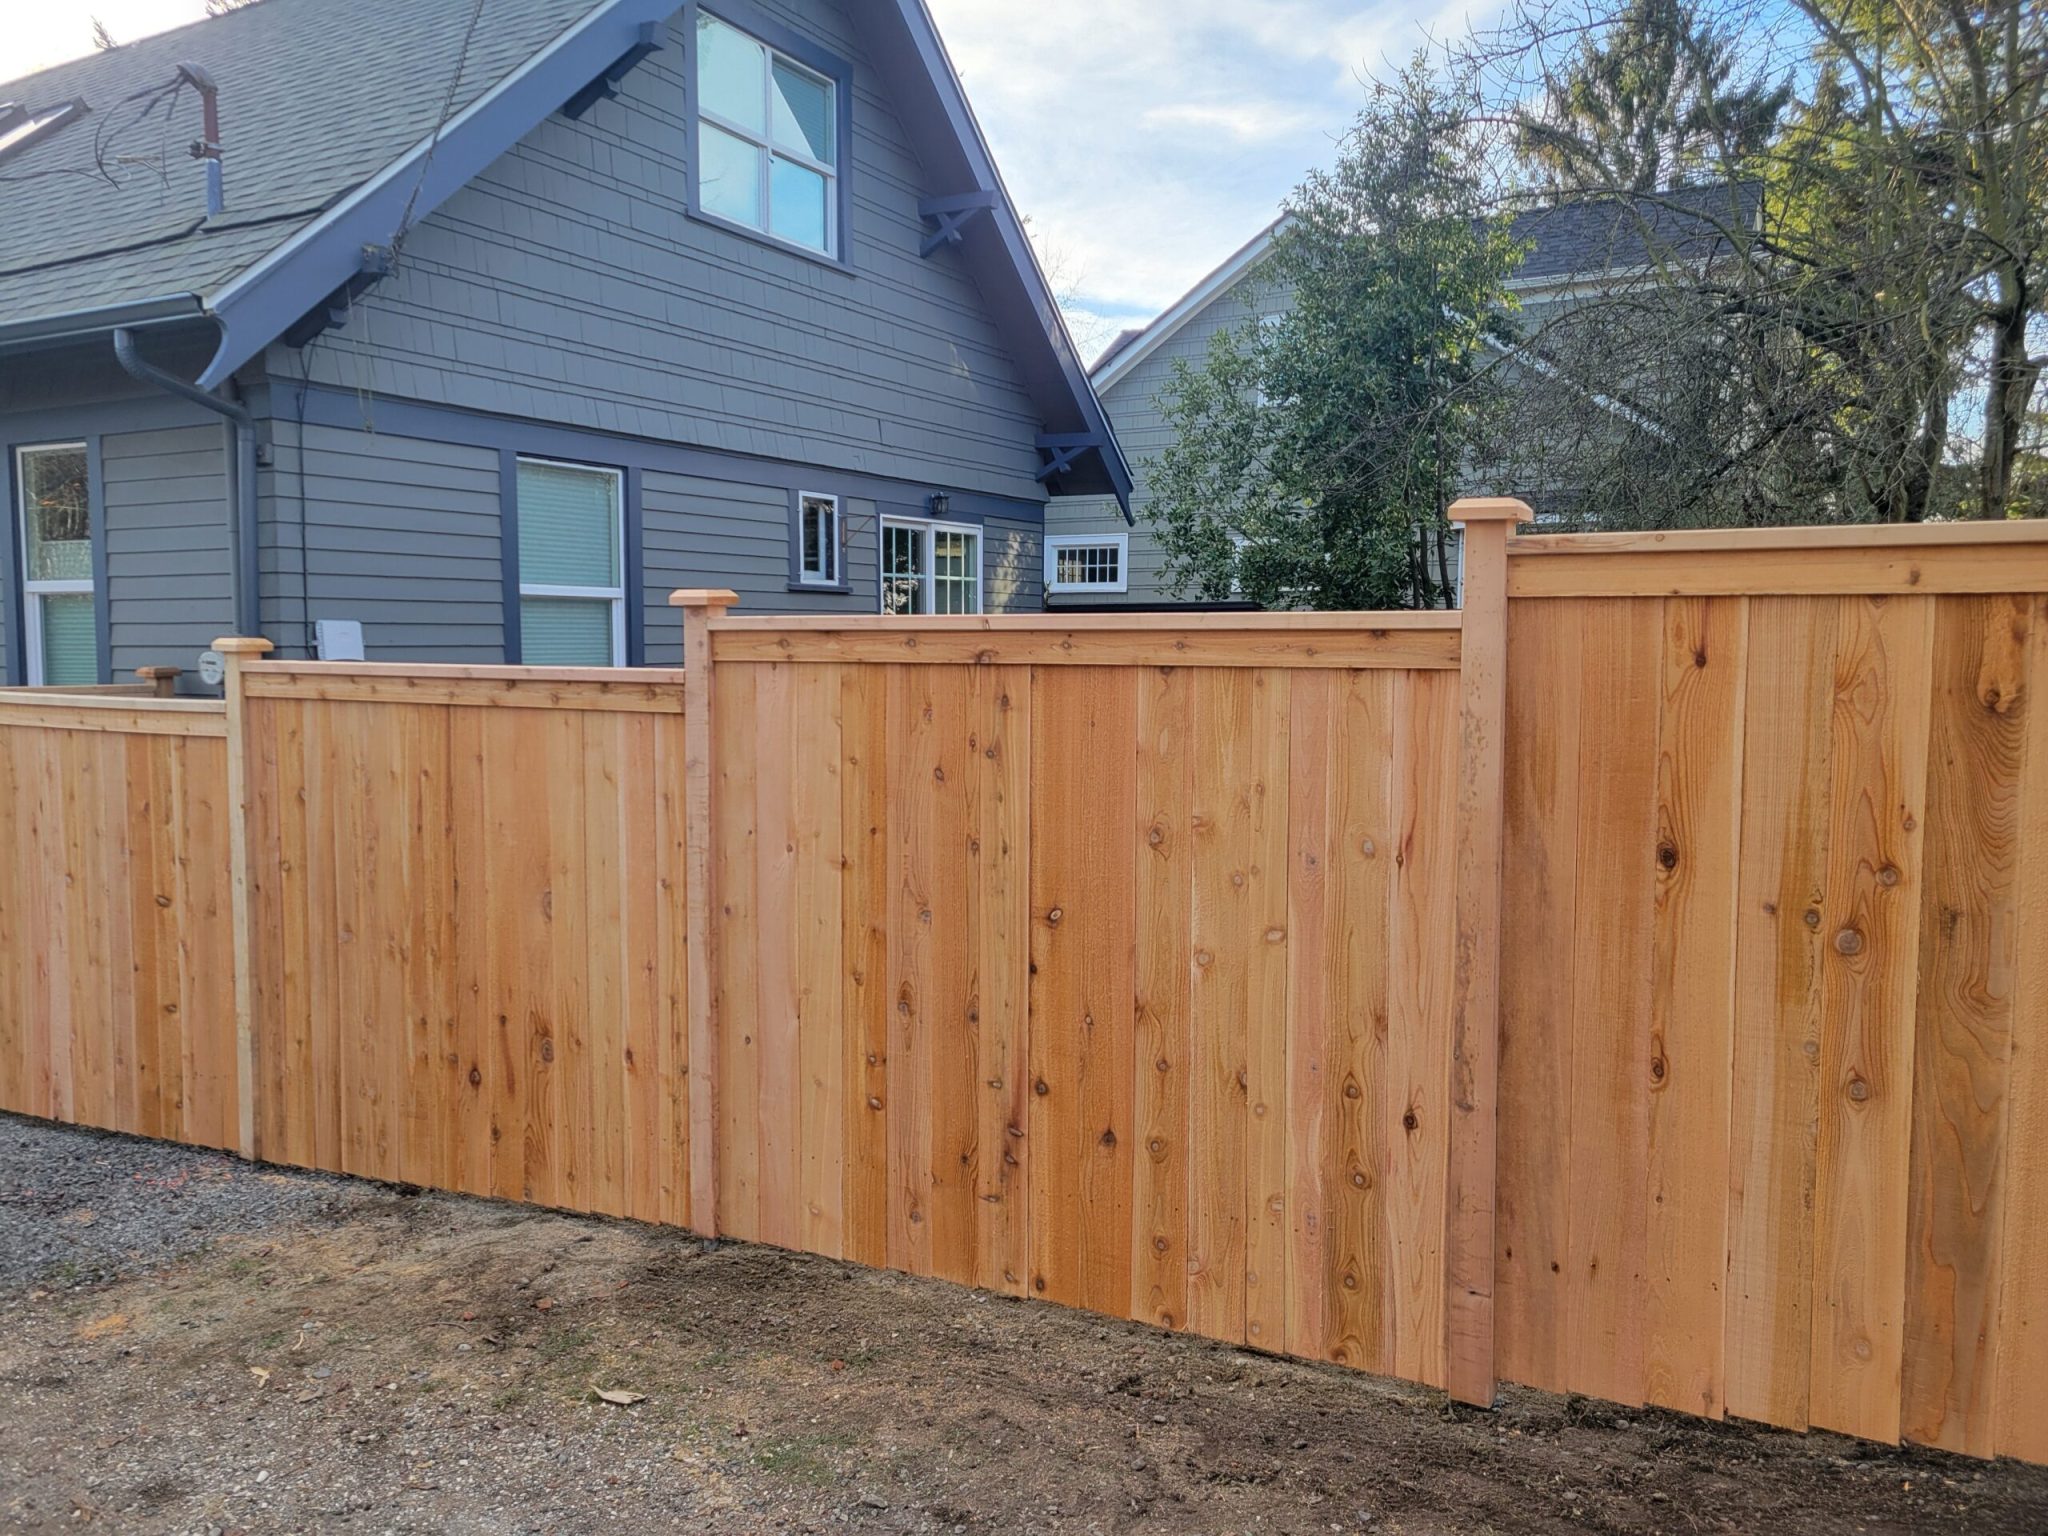
13. Assemble a New Stepped Wood Privacy Fence on a Gravel Lot
To get those perfectly stepped panels on a gentle slope, the key is setting your posts correctly. Here’s the condensed guide:
- Set your first and last posts in concrete and let them cure.
- Run a taut string line between the tops of these two posts. This line represents the top of your finished fence.
- Use a line level to ensure the string has a consistent, gentle slope.
- Measure for your intermediate post locations (typically every 8 feet).
- Dig your holes and set the remaining posts, making sure the top of each post just touches the string line.
This method ensures a perfectly straight top line that follows the slope, even if the ground underneath has minor variations. Total time: 4-6 hours, plus concrete curing time.
🔧 How-To Brief
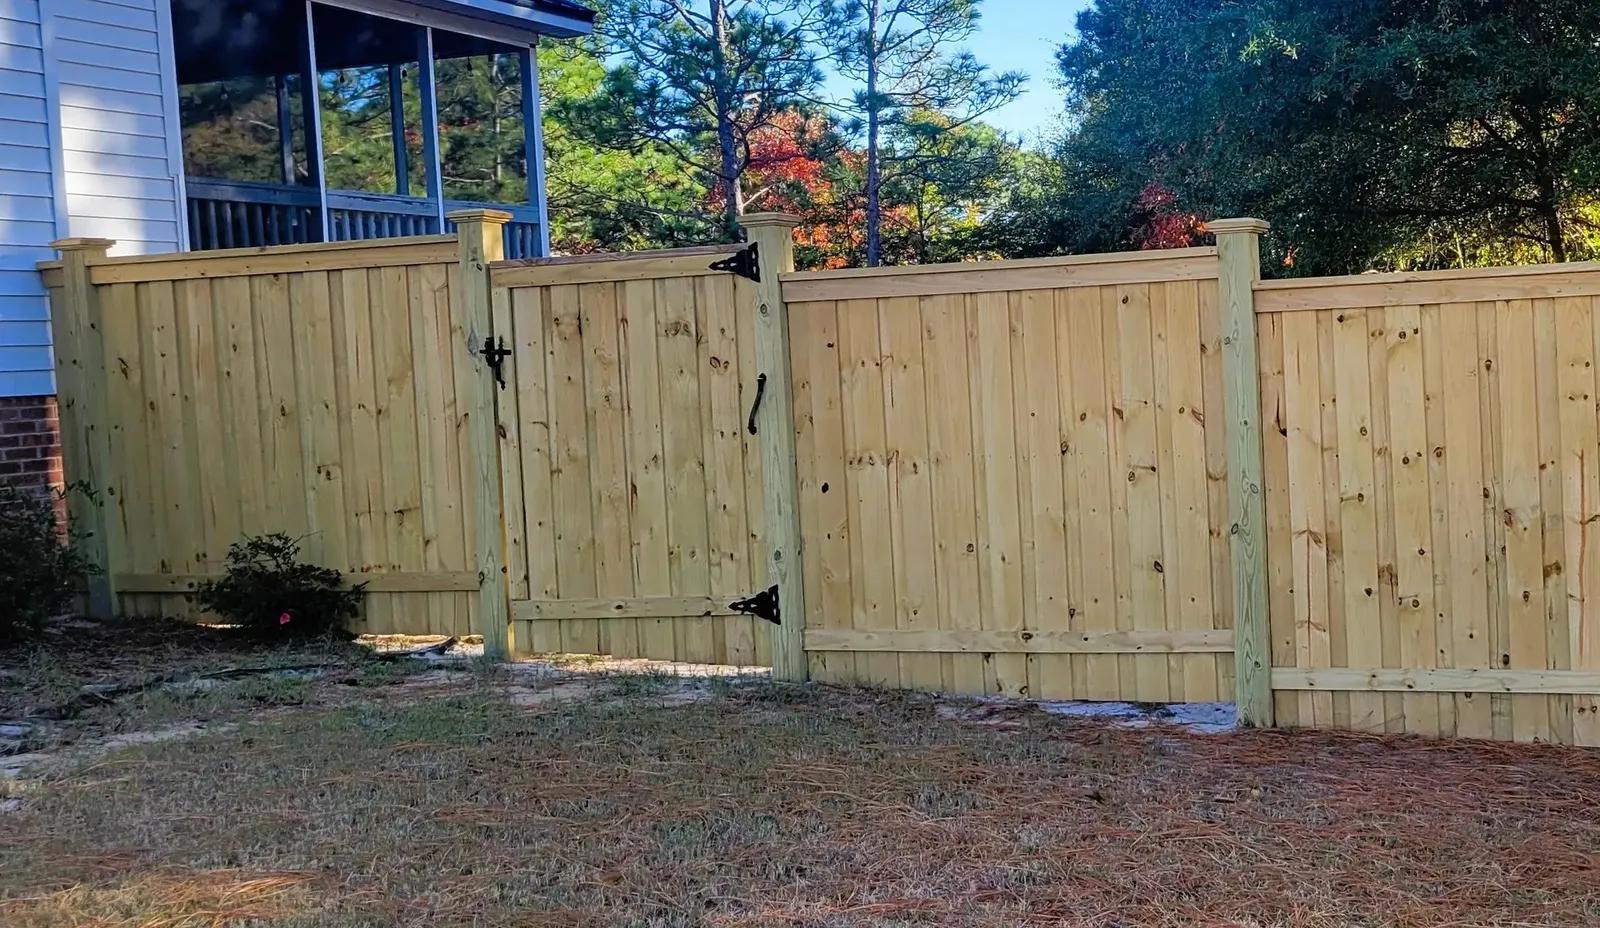
A brand new natural wood fence looks beautiful, but it won’t stay that way on its own. Untreated wood will turn a silvery-grey color within a year or two due to sun and rain. If you love this fresh, warm wood tone, you need to protect it. Plan on applying a good quality UV-blocking sealer or semi-transparent stain within a few weeks of installation. This is not a one-and-done job; you’ll need to reapply it every 2-3 years to maintain the color and protect the wood from moisture and decay.
14. Customize a Wood Fence with Bottom Boards Cut to Grade
The detail of cutting the bottom of the fence boards to follow the slope is a hallmark of a high-quality, custom installation. To do this, first install your fence panels with a straight bottom edge, leaving a few extra inches of length on the vertical boards. Then, take a small block of wood (e.g., a 2×4 scrap) and a pencil. Run the block along the ground while holding the pencil against it, tracing the contour of the slope onto the fence boards. This creates a perfect scribe line. Simply cut along the line with a circular saw for a flawless fit.
⚠️ Real Talk
This fence demonstrates a simple but effective principle: consistency in the details. The fence itself is a standard stepped-panel design, but the choice to scribe the bottom boards to the ground’s contour elevates the entire project. This one extra step eliminates the awkward triangular gaps you see on most stepped fences. It shows a commitment to craftsmanship and results in a solid, gap-free barrier that looks incredibly professional and tidy. Compare this to the potential gaps discussed in Mistake #2.
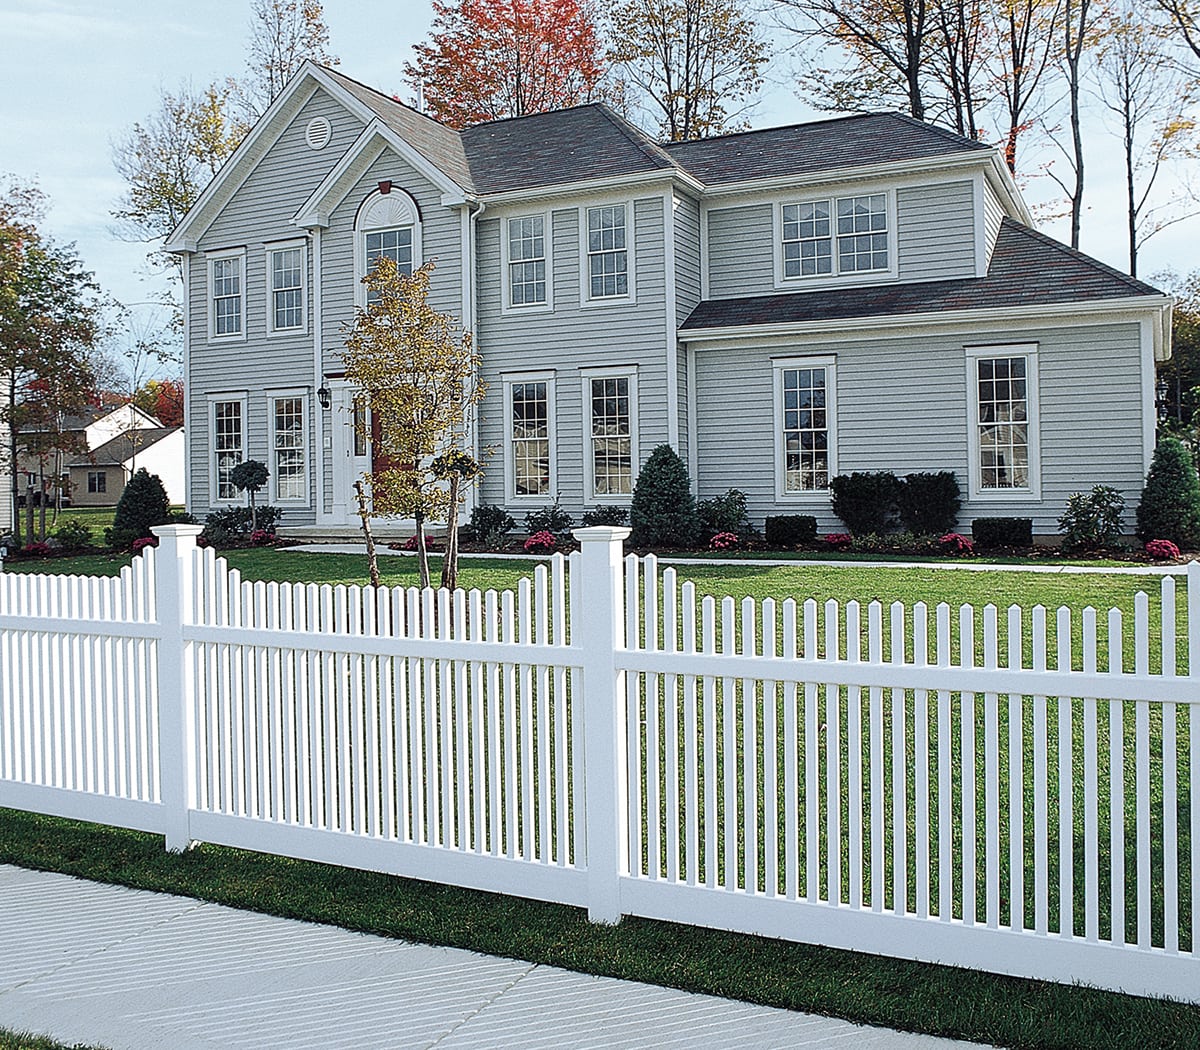
15. Frame a Blue House with a Classic Stepped White Picket Fence
The enduring appeal of this look comes down to a simple formula: 60% charming structure + 40% classic color theory. The white picket fence provides the timeless, welcoming structure. The color palette does the rest of the work. The crisp white of the fence and trim pops against the soft, light blue siding of the house—a classic complementary pairing. The vibrant green grass adds a fresh, natural element that ties it all together. It’s a formula that feels nostalgic and completely current at the same time.
✅ Before You Start
In an era of minimalist, dark-toned modern farmhouses, this classic combination is trending as a form of ‘soft nostalgia.’ It taps into a collective desire for homes that feel welcoming, established, and friendly. On Pinterest, this look is part of the ‘Grandmillennial’ and ‘Coastal Grandmother’ aesthetics, which favor timeless design over fleeting trends. It suggests permanence and a connection to traditional American architecture, which feels comforting and aspirational right now.
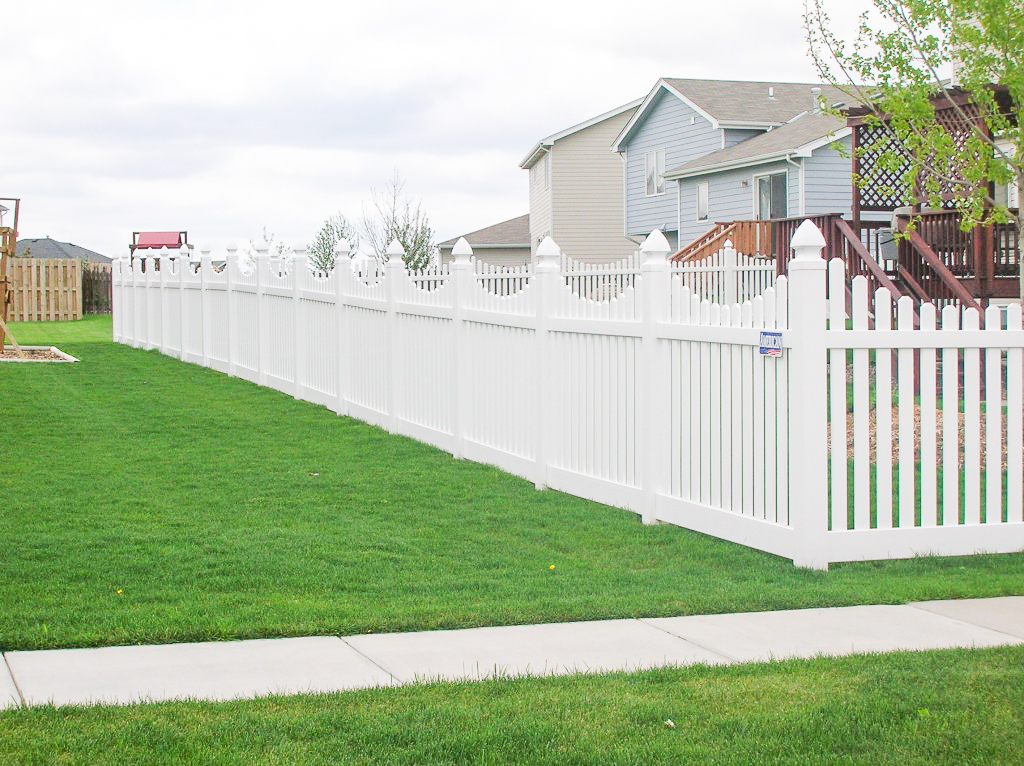
16. Install a Scalloped White Vinyl Picket Fence on a Grassy Slope
A professionally installed vinyl fence can cost upwards of $45 per linear foot. You can get this exact look for about half that price by going the DIY route. A standard 6-foot-wide scalloped vinyl picket panel from a big-box store like Lowe’s or Home Depot costs around $70-$90, with posts adding another $30 each. For a 100-foot fence, you’re looking at a total material cost of around $2,000-$2,500, a significant savings over professional installation.
🔥 Trending Context
While vinyl fences don’t require painting or staining, they are not invincible. The biggest enemy of a pristine white vinyl fence is the lawnmower and string trimmer. The bottom rail is highly susceptible to scuffs, scratches, and gouges from landscape maintenance. These marks can be difficult or impossible to remove. To prevent this, create a 6-inch-wide mulch or gravel border along the base of the fence so you never have to get machinery right up against it. This will keep it looking brand new for years.
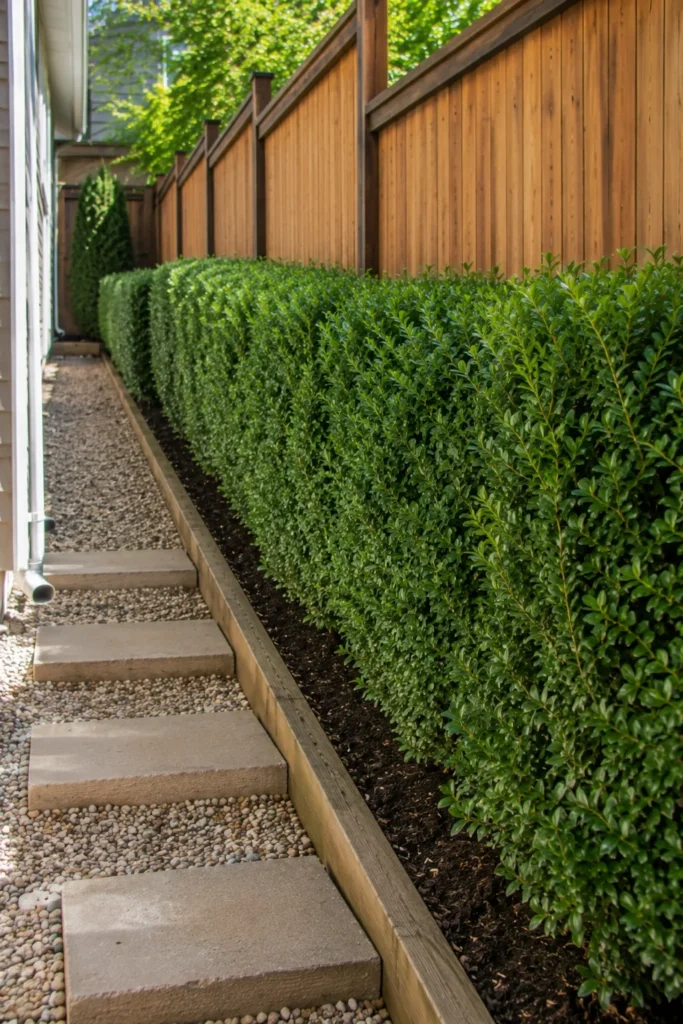
17. Combine a Stepped Wood Fence, Hedge, and Gravel Path on a Slope
The secret ingredient in this tranquil scene is the neatly trimmed green hedge. It acts as a soft, living transition between the hardscape of the gravel path and the tall wooden fence. Without the hedge, the two man-made elements would feel stark and disconnected. The hedge introduces a layer of natural texture and vibrant color, blurring the lines and making the whole composition feel like a cohesive, established garden space rather than just a fenced-in walkway.
🧹 Maintenance Reality
This layered approach—path, planting bed, fence—is perfect for narrow side yards with a gentle slope. You need a minimum width of about 5-6 feet to pull this off without it feeling cramped. The path itself should be at least 36 inches wide for comfortable passage. The planting bed for the hedge needs about 18-24 inches of width. This design is an excellent way to turn a purely functional, sloped utility space into a beautiful and intentional garden feature.
18. Top Tiered Retaining Walls with a Modern Black Slat Fence
This design is so successful because it masterfully blends materials and functions. The tiered retaining walls—one of rough, natural stone and one of smooth, light grey concrete blocks—do the hard work of taming the steep slope. The sleek, black vertical slat fence then provides a lightweight, graphic element on top. This combination of textures (rough vs. smooth) and forms (heavy mass vs. light lines) creates a sophisticated, high-end look that feels both natural and rigorously modern.
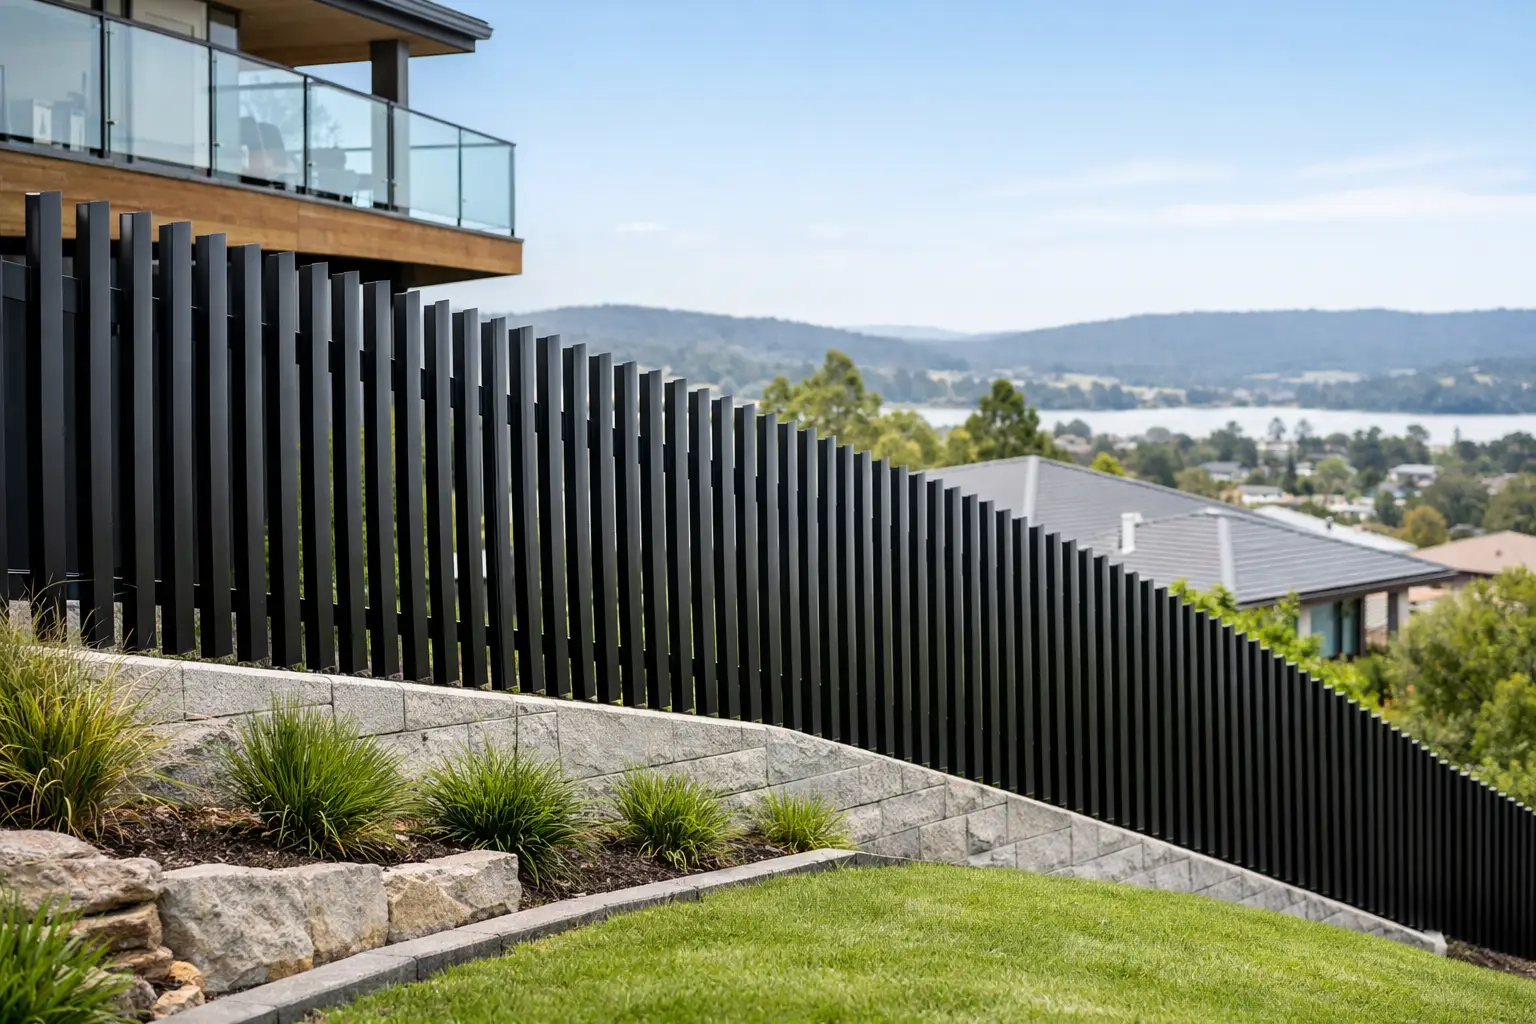
💸 Get This Look For Less
When installing a fence on top of a retaining wall, never set the fence posts directly inside the hollow cores of the concrete blocks. The blocks aren’t designed for that kind of lateral load and can crack. The correct method is to use metal post brackets that are anchored deep into the wall’s structure with epoxy and threaded rods during construction. Alternatively, set the posts in concrete directly behind the wall. This ensures the fence is stable and won’t compromise the integrity of your expensive retaining wall.
19. Let a Simple Light Wood Picket Fence Follow an Autumn Slope
A simple picket fence like this is great for defining a boundary, but let’s be real: it’s not a privacy fence and it’s not a security fence. The gaps between the pickets are wide enough for small pets to slip through and for anyone to see directly into your yard. This style is purely decorative and demarcation. If you need to contain a pet or block the view, you’ll need to consider adding wire mesh to the back or opting for a full privacy fence design instead.
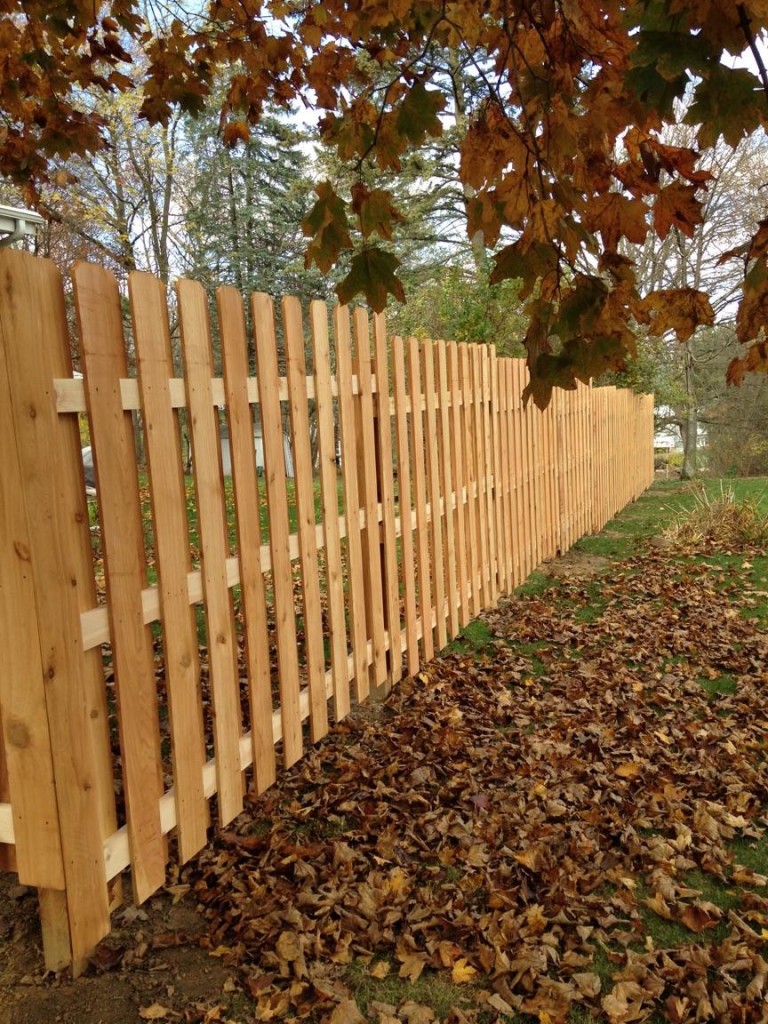
💡 Designer Tip
The beauty of this simple design is its elemental formula: 90% repetition + 10% natural variation. The repeating vertical lines of the light wood pickets create a strong, rhythmic pattern that is easy on the eyes. The 10% of natural variation comes from the gentle, uneven slope of the ground itself and the scattered autumn leaves. The rigid, man-made structure combined with the soft, organic setting creates a scene that feels both orderly and completely natural.
20. Use Stepped Horizontal Slats for a Long Sidewalk Fence
A long, continuous fence like this is perfect for defining property lines in suburban or urban lots with a noticeable but not-too-steep grade (think 5-15 degrees). For a long run, stepping the panels is more practical and cost-effective than trying to create a custom racked fence. The key is to keep the panel lengths consistent (usually 8 feet) so the steps are regular and rhythmic. This is a great real-world example of how to handle a common slope, offering more privacy than the picket style in Idea #11.
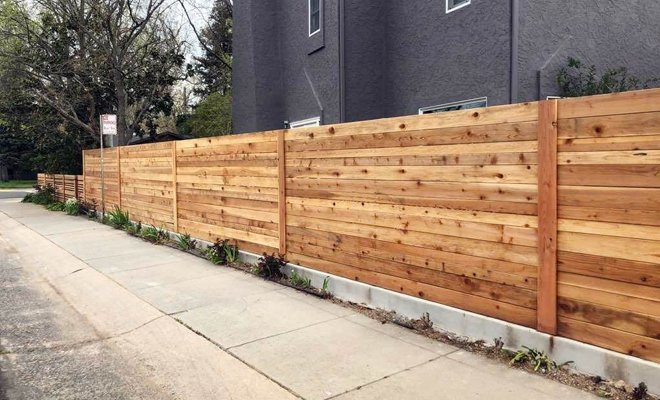
📏 Scale Guide
The cost of cedar or redwood for a long horizontal fence can be astronomical. A fantastic budget alternative is to use pressure-treated pine deck boards instead. They come in long, straight lengths perfect for this application and cost about a third of what cedar does. They won’t have the same reddish hue initially, but once you apply a warm-toned stain or sealer, you can get a very similar look and excellent durability for a fraction of the price. Check out the options at your local lumber yard.
21. Let a Natural Wood Picket Fence Line Follow the Grade
To build a ‘racked’ picket fence where the slats follow the ground, the trick is in the rails. You install them at an angle, parallel to the slope.
- Set your posts perfectly vertical.
- Cut the ends of your horizontal rails at an angle that matches the slope of your ground. You can find this angle using a sliding T-bevel.
- Attach the angled rails to your posts. Most builders ‘toe-screw’ them in place.
- Now you have a sturdy frame that follows the slope. Simply attach your vertical pickets, ensuring each one is perfectly plumb (straight up and down) using a level.
It’s more complex than a stepped fence, but it results in a gap-free bottom line.
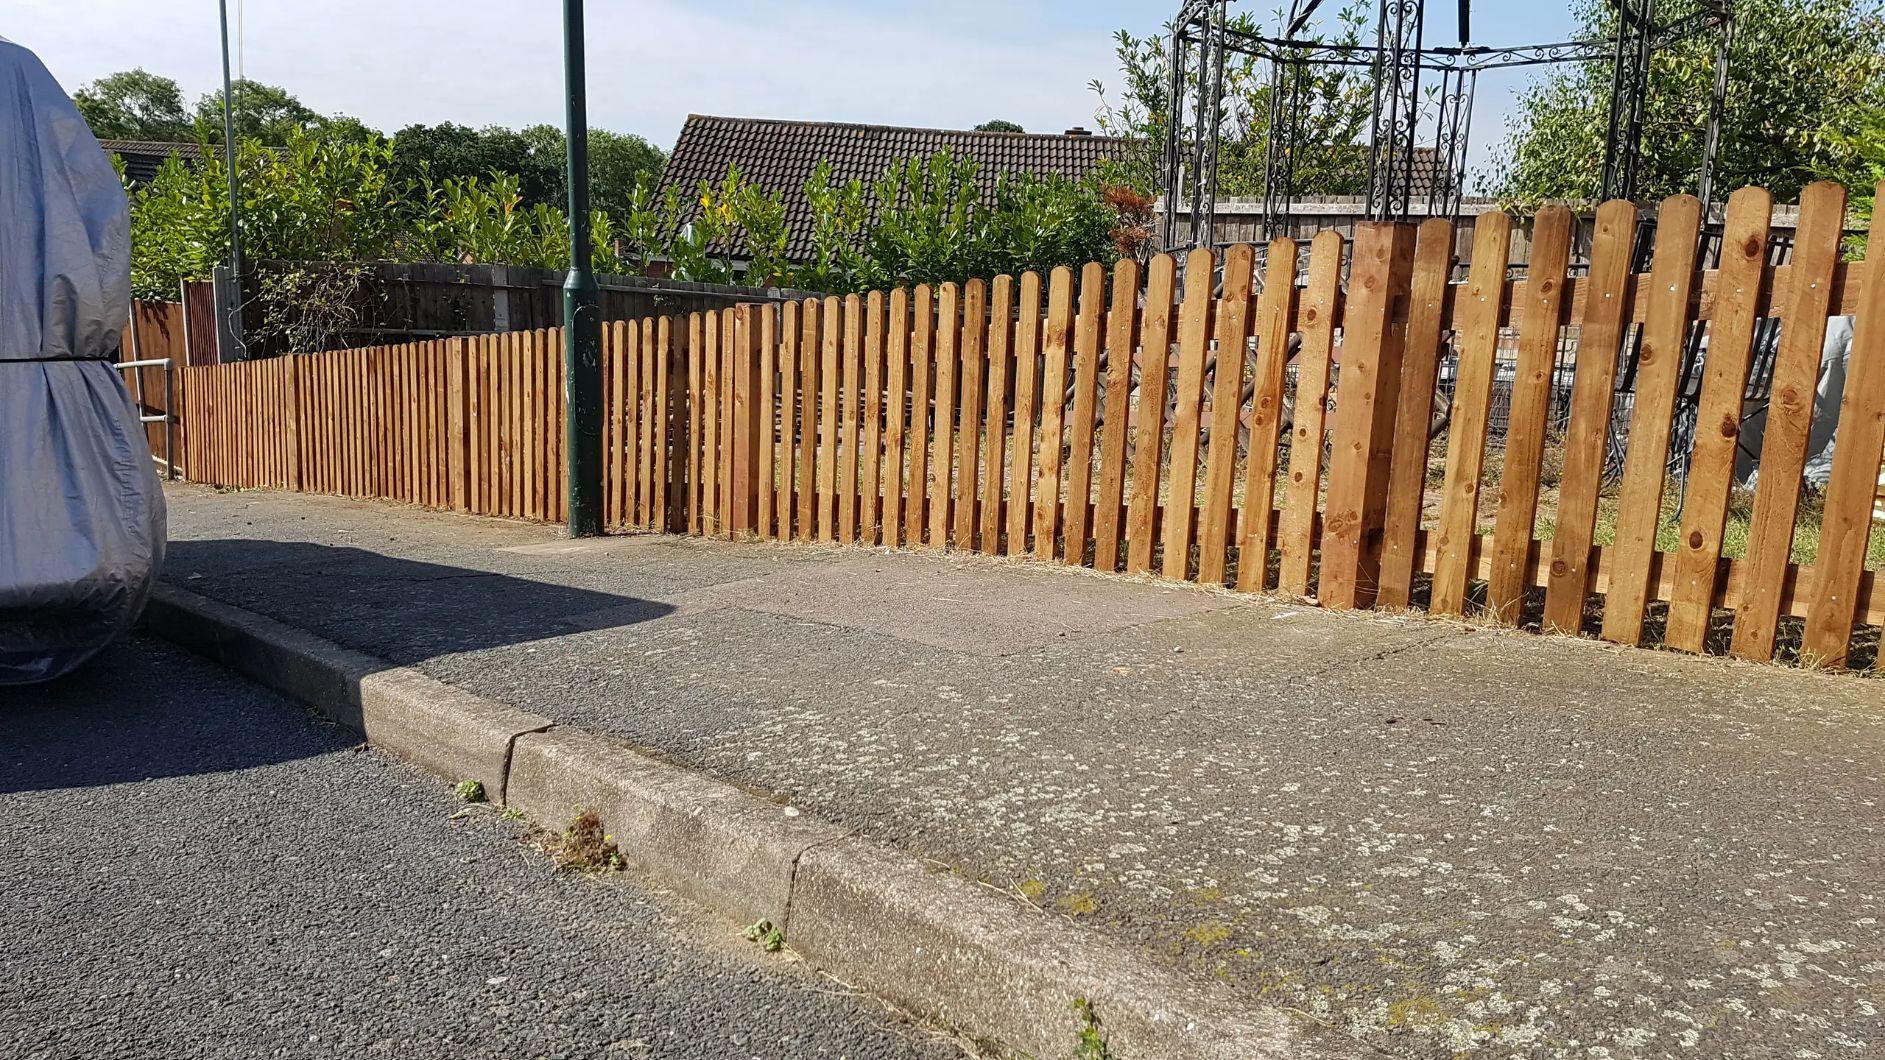
⭐ The One Thing
that makes this fence style work is that every single vertical picket is perfectly plumb, even as the rails beneath them follow the slope. This strict vertical repetition creates a sense of order and stability that contrasts with the angled ground. If the pickets were installed at a 90-degree angle to the rails (and thus leaning), the whole fence would look like it was about to fall over. The tension between the vertical pickets and the sloped rails is what creates the professional, finished look.
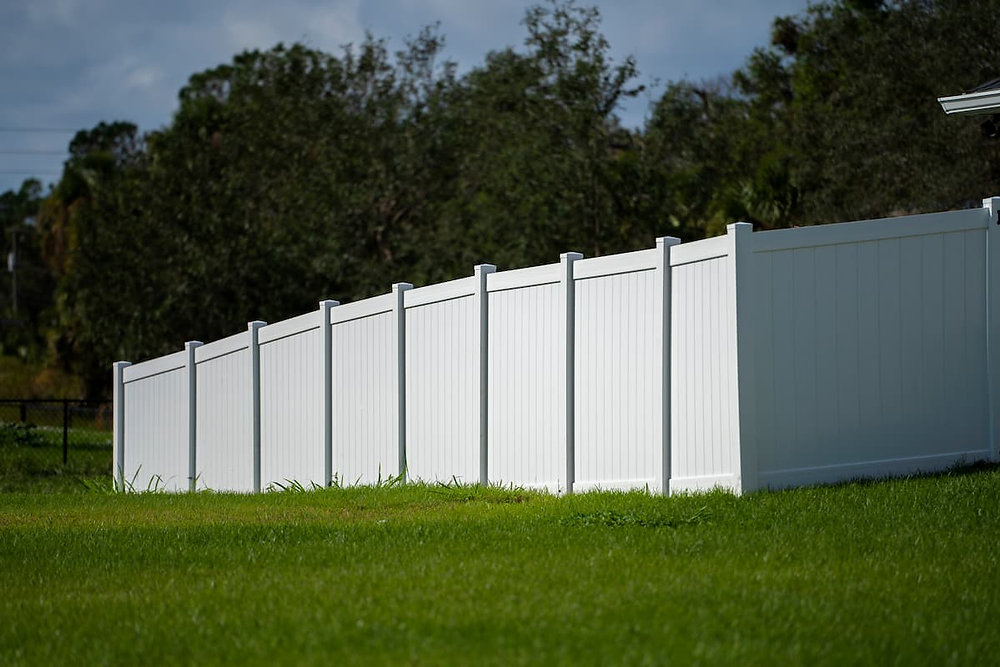
22. Install a Stepped White Vinyl Privacy Fence on a Gentle Slope
When installing a stepped vinyl fence, the transition at each post is critical. To get a clean, professional look, make sure to buy the correct ‘end post’ or ‘line post’ brackets for a sloped installation. These brackets are designed to hold rails at two different heights on the same post. Don’t try to screw the panels directly into the post; using the manufacturer-provided brackets ensures the fence has the necessary strength and flexibility to handle wind and ground movement over time.
📐 Style Math
Before you order hundreds of feet of vinyl fencing, double-check these key points:
- Confirm Property Lines: A fence is a permanent structure. Get a property survey to be 100% certain you are building on your land. Misplacing a fence by even a few inches can lead to costly legal disputes.
- Check Local Codes & HOA Rules: Most towns have rules about fence height, material, and setback from the street. Your Homeowners Association will likely have even stricter rules. Get written approval before you buy.
- Measure the Total Slope: Use a string line and a level to find the total drop in elevation from the highest point to the lowest. This will help you calculate how many ‘steps’ you’ll need and if this method is suitable for your grade.
23. Build a Terraced Wood Fence with Concrete Block Retaining Walls
Creating a terraced backyard is a major landscaping project. This look, using affordable concrete blocks and a simple wood fence, is one of the more budget-friendly ways to do it.
- Main Furniture (Wood Fence Materials): $1,000 – $2,500
- Lighting: N/A
- Textiles: N/A
- Decor/Accessories (Plants/Groundcover): $500 – $1,000
- Wall Treatment (Concrete Retaining Wall Blocks & Steps): $3,000 – $6,000
- TOTAL (DIY): $4,500 – $9,500
Budget alternative: This *is* the budget alternative! Having this professionally excavated and built with natural stone could easily cost $25,000 or more. Using segmental concrete blocks and providing your own labor is the key to affordability here.
🎯 What Makes It Work
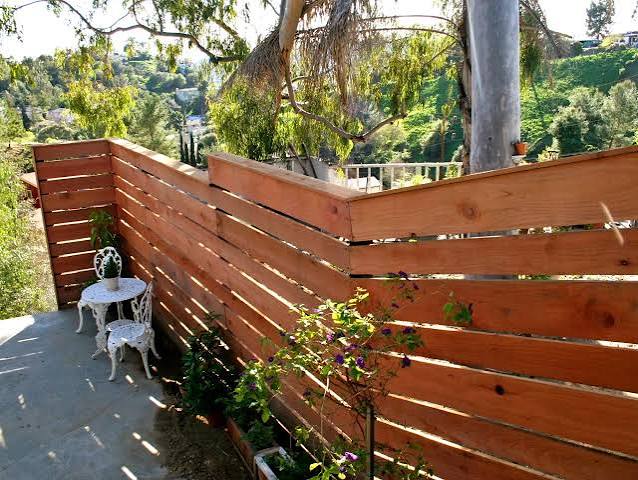
This design is effective because it breaks a single, unusable steep slope into multiple smaller, level, and functional tiers. Instead of one intimidating hill, you get a series of garden beds and landings. The wooden fence provides safety and definition at each level, while the integrated concrete steps make navigating the slope easy and intuitive. It’s a classic engineering solution to a landscape problem, executed with simple, accessible materials that work well together visually.
24. Set a Natural Picket Fence Atop a Rough Stone Retaining Wall
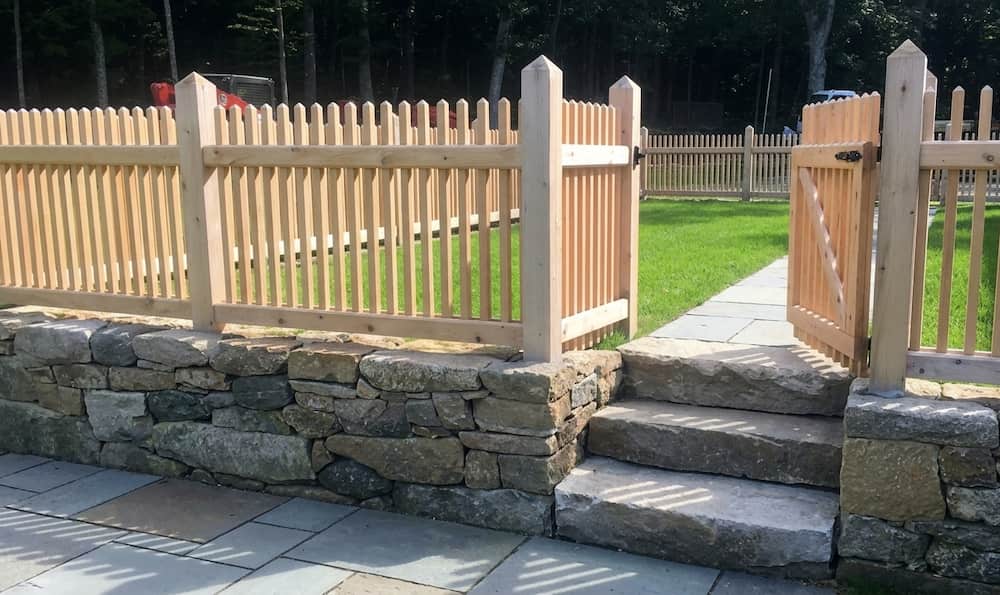
A fence on top of a stone wall looks amazing, but it can be a weak point. This is especially true for a dry-stacked or mortar-jointed natural stone wall, which doesn’t have the same internal structure as a concrete block wall. The force of wind against the fence acts like a lever, putting a lot of stress on the top of the wall. Unless the posts are deeply and securely anchored into a concrete core within the wall, this can lead to wobbling posts and eventual failure. This rustic look requires modern engineering to be safe and durable.
💰 Budget Breakdown
Building rough-cut stone steps like these is an art. Here’s the basic approach for a stable installation on a slope:
- Excavate a trench for your first step, digging down about 6 inches.
- Fill the trench with 4 inches of compacted gravel to create a stable, well-draining base.
- Select a large, flat-bottomed stone for your first tread and set it perfectly level on the gravel base.
- Backfill behind the first stone with soil, tamping it down firmly.
- Repeat the process for each subsequent step, ensuring each new stone slightly overlaps the one below it.
Material cost is highly variable, but the labor is intensive.
25. Combine a Gray Board Fence with a Natural Wood Lattice Topper
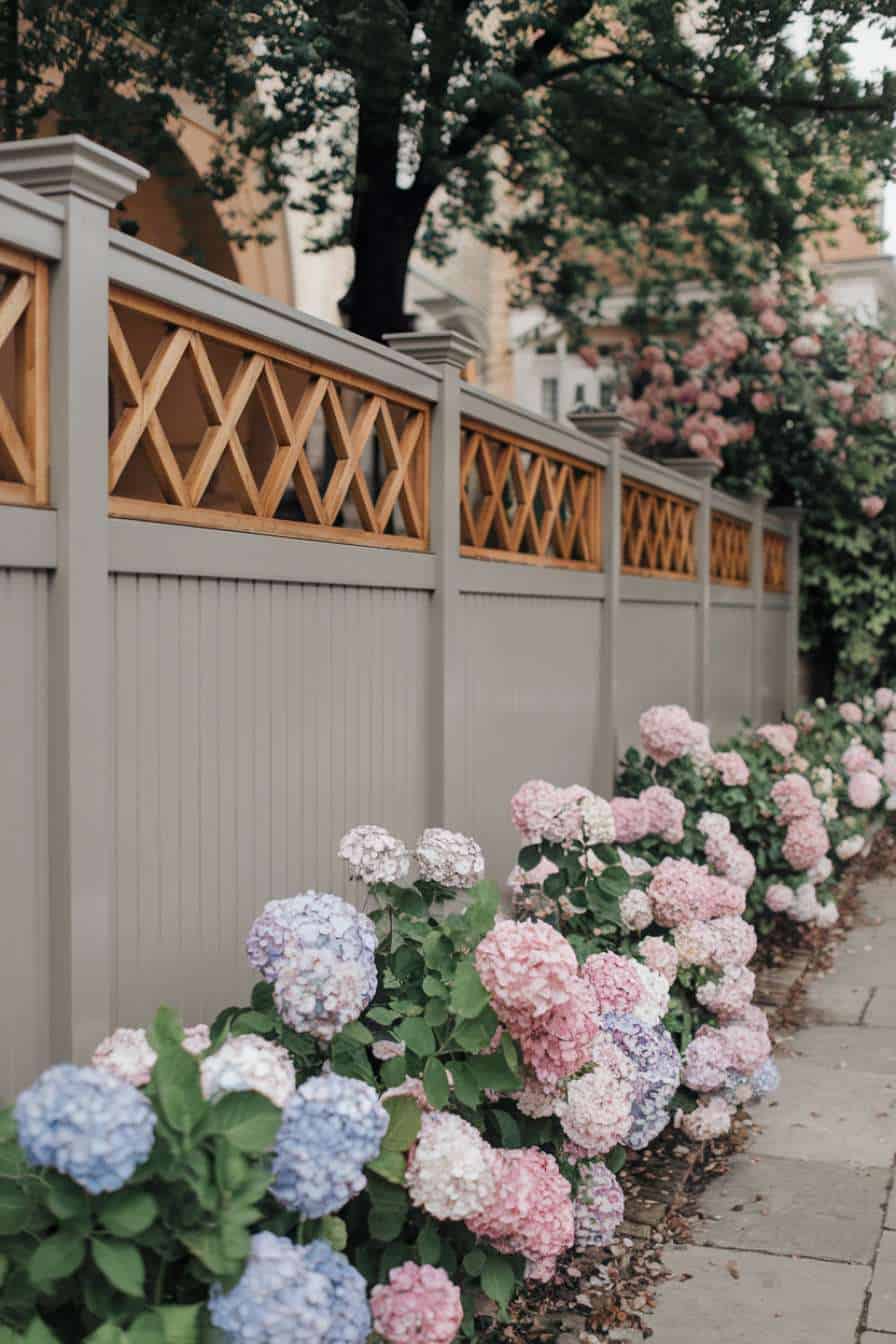
This elegant look is a lesson in sophisticated layering. The style math is: 70% solid modern base + 20% traditional texture + 10% vibrant life. The painted gray board-and-batten fence provides the solid, contemporary foundation. The natural wood lattice topper adds a layer of traditional, airy texture that prevents the gray from feeling too heavy. Finally, the explosion of pink and blue hydrangeas at the base brings the whole scene to life with color and organic form. Each layer plays a distinct and crucial role.
🔧 How-To Brief
The element that truly elevates this fence from nice to unforgettable is the natural wood lattice topper. It’s a deliberate, contrasting choice. By leaving the lattice in its natural, light wood tone against the painted gray fence, the designer created a focal point. It adds warmth, architectural detail, and a touch of craftsman-like quality. If the lattice were also painted gray, the effect would be flat and far less interesting. That single strip of contrasting material makes all the difference.
26. Step a Black Metal Fence Down to a White Brick Pillar
When combining a lightweight metal fence with a heavy masonry pillar, the connection point is everything. Don’t just butt the fence rail up against the brick. For a secure and clean installation, use a ‘flange plate’. This is a small metal plate with screw holes that attaches to the end of the fence rail. You then anchor the entire plate securely to the brick pillar using appropriate masonry screws (like Tapcons). This creates a much stronger connection and gives the transition a finished, professional look.
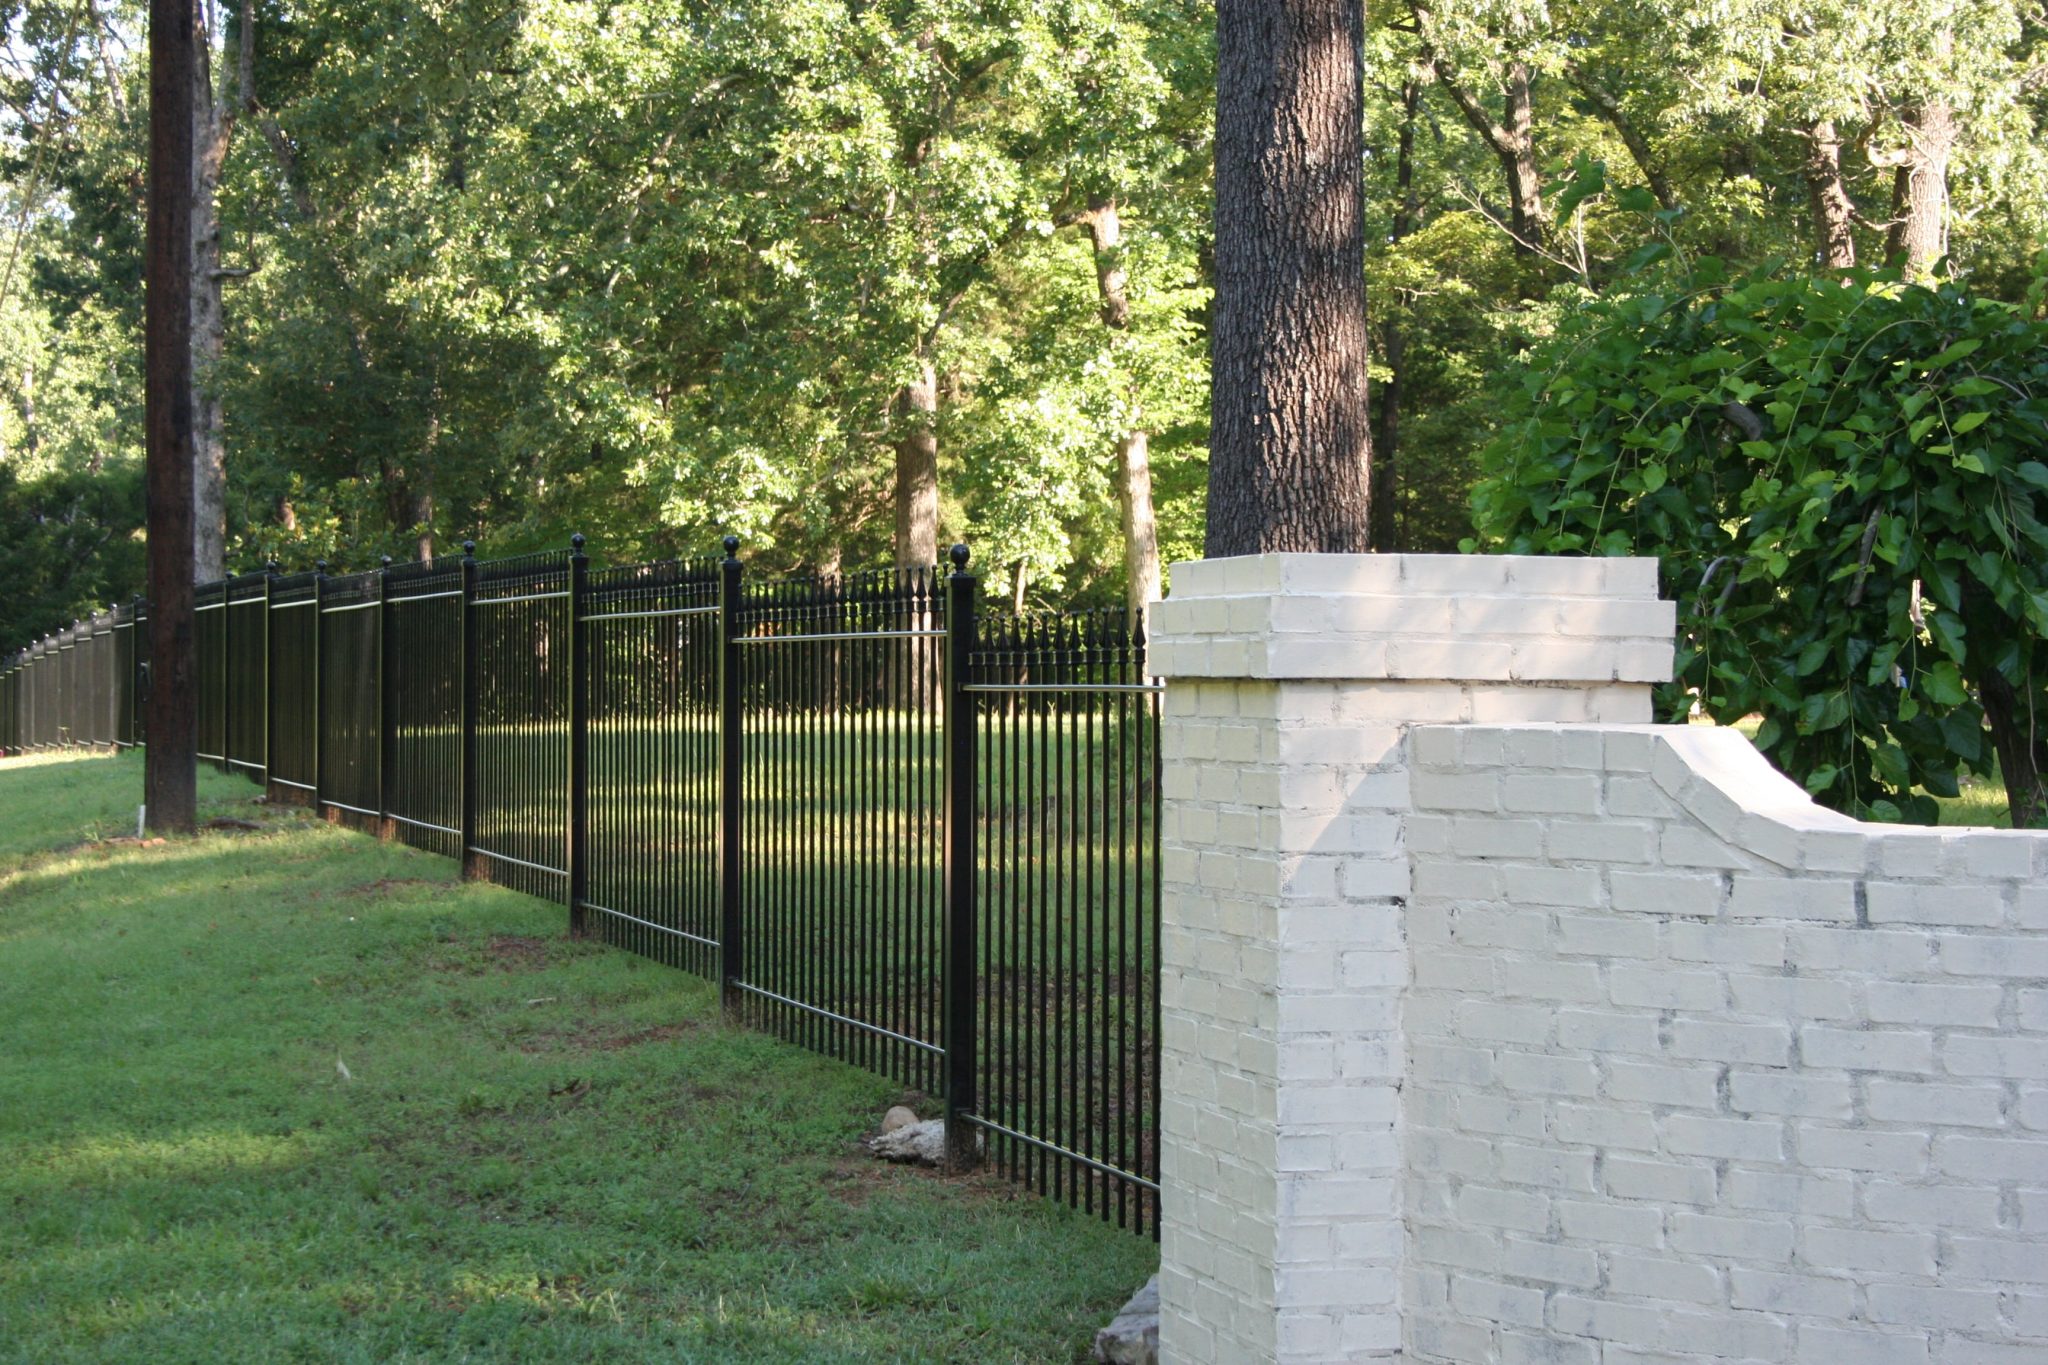
⚠️ Real Talk
While a powder-coated aluminum or steel fence is incredibly durable, the weak point can be the painted brick. Over time, moisture can get behind the paint, causing it to bubble, peel, and flake off, especially at the base near the damp lawn. To keep this looking crisp, you’ll likely need to do touch-ups every few years. When it’s time to repaint the whole pillar, be sure to scrape all loose paint and use a high-quality masonry primer before applying the top coat. The black metal offers a nice contrast to natural wood options, like the fence in Idea #13.
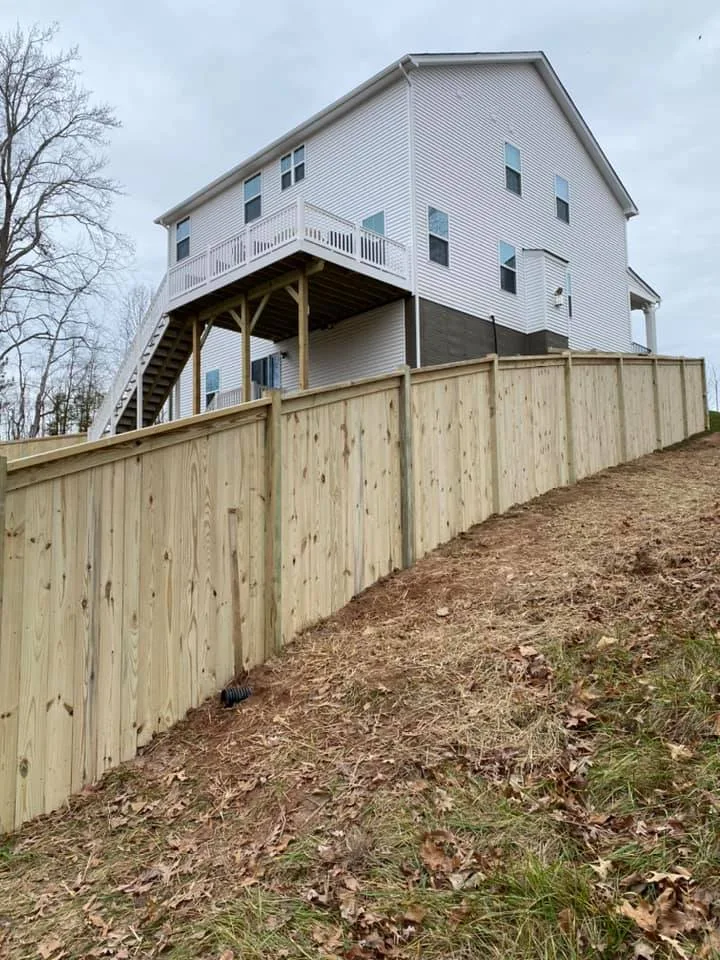
27. Install a Dark Slatted Fence on a Tiered Retaining Wall Slope
This modern design works because of its clean, parallel lines. Notice how the dark slats of the fence, the dark metal handrail, and the vertical lines of the concrete steps all run parallel to each other as they ascend the slope. This repetition of form and direction creates a strong sense of rhythm and order. The light grey of the retaining walls and gravel path acts as a neutral canvas, allowing the dark, linear elements to stand out as the primary design feature. This rustic combination of stone and wood feels more organic than the modern pairing in Idea #27.
✅ Before You Start
This is a large-scale solution for a significant change in elevation, best suited for slopes greater than 25 degrees where simple stepping isn’t practical. The minimum width for this entire assembly (path, wall, and stairs) is about 8-10 feet. The concrete steps should be a standard 36-42 inches wide to feel generous. This is a substantial hardscaping project, a far cry from the simple fence in Idea #19, and is best for connecting a main house level to a lower patio or garden area.
Your Property Line, Your Design Statement
That tricky slope in your yard isn’t a problem—it’s an opportunity. Whether you’re drawn to the clean lines of a modern horizontal fence or the classic charm of a white picket, the right design can turn an awkward grade into a standout feature of your home’s landscape. Don’t just build a barrier; create a beautiful boundary.
Ready to get started? Head over to your Pinterest board and start planning which of these looks will tell your home’s story.