Ever feel like you have a million terracotta pot ideas saved to your Pinterest board, but can’t quite figure out how to make them look that good in your own home? We get it. That’s why we’ve pulled together 27 truly inspiring, real-home examples of how to use terracotta, from simple succulent arrangements to statement-making planters. We’re talking about specific ways to add character, whether you’re decorating a sun-drenched patio or a cozy living room corner. And stay until the end — we break down the most common mistakes that can ruin these looks. 📌 Save this to Pinterest for later — you’ll want to revisit these ideas.
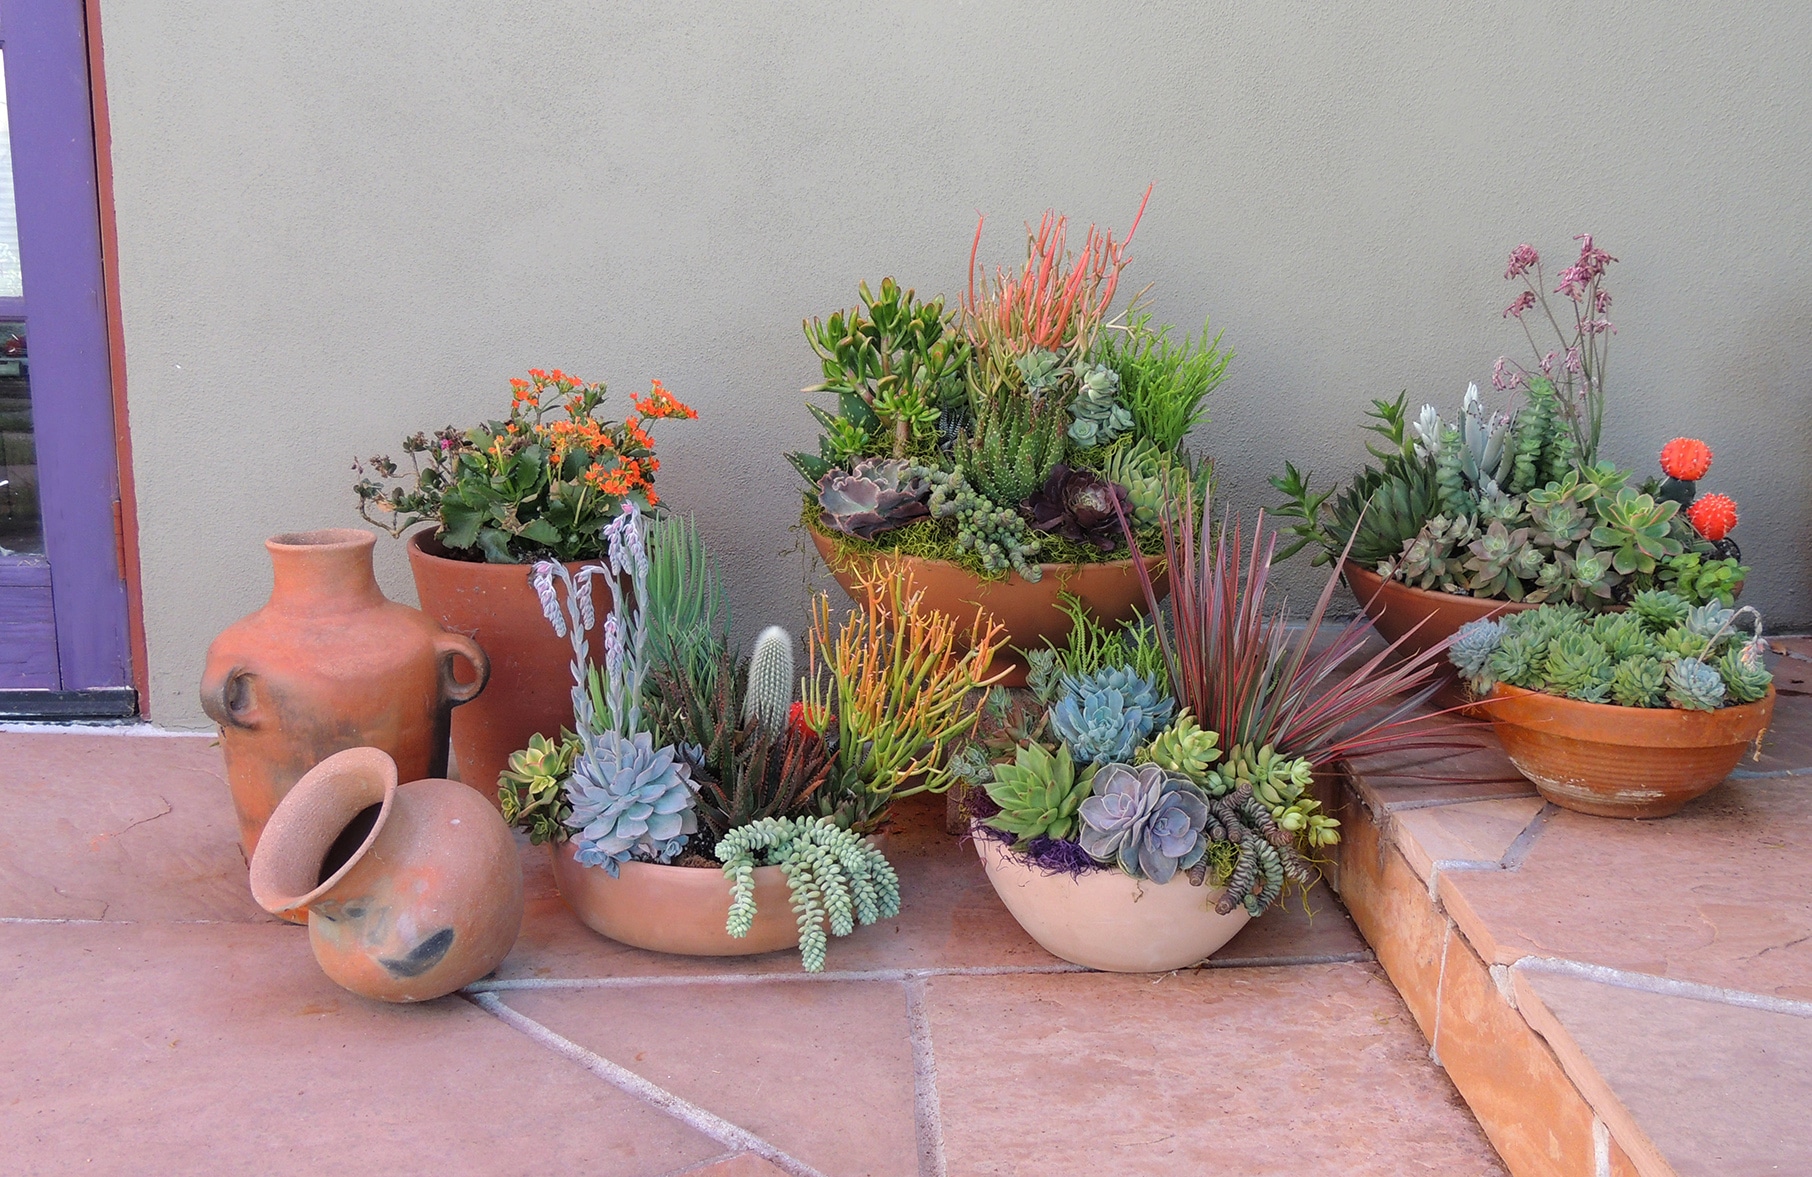
1. A Vibrant Patio Collection of Terracotta and Succulents
What Makes It Work: This arrangement feels curated, not cluttered, for a few key reasons. First, the variety in pot shape—from tall vases to shallow bowls—creates instant visual interest and rhythm. Second, the consistent material (terracotta) and plant type (succulents) act as a unifying thread that ties everything together. The warm terracotta beautifully complements the reddish-brown patio tiles and the diverse greens of the plants, while the cool gray wall provides a neutral backdrop that makes the colors pop.
⭐ The One Thing
Designer Tip: To create a dynamic plant grouping, think in triangles. Start with your tallest or most interesting pot as the peak of your first triangle. Then, place two smaller, complementary pots to form the base. From there, build out with more triangles of varying sizes and heights. This method ensures your collection has depth and looks balanced from every angle, preventing it from looking like a flat, boring lineup of pots on the ground.
2. A Grand Footed Terracotta Bowl with Spiring White Flowers
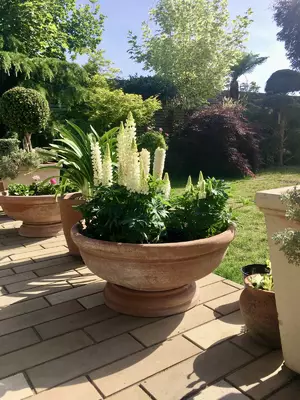
The One Thing: It’s all about the footed base. That simple pedestal elevates the entire arrangement from just a planter to a genuine garden feature. It adds a touch of classical elegance and height, making the bowl a focal point rather than just another pot on the patio. By lifting the lush greenery and white spires off the ground, it gives the entire composition a sense of importance and sculptural presence that it would completely lack if it were a simple bowl sitting on the brick.
⚠️ Real Talk
Scale Guide: A large statement planter like this one, likely 24-30 inches in diameter, is perfect for anchoring a space. Use it to define the corner of a patio (at least 10×10 feet) or to flank a grand entryway. To ensure it doesn’t feel cramped, allow for at least 3 feet of open space around it. This gives it breathing room and allows people to appreciate its form without it becoming a walkway obstruction. For smaller spaces, consider the more compact grouping shown in Idea #4.
3. A Rustic and Weathered Terracotta Pot with a Thorny Climber
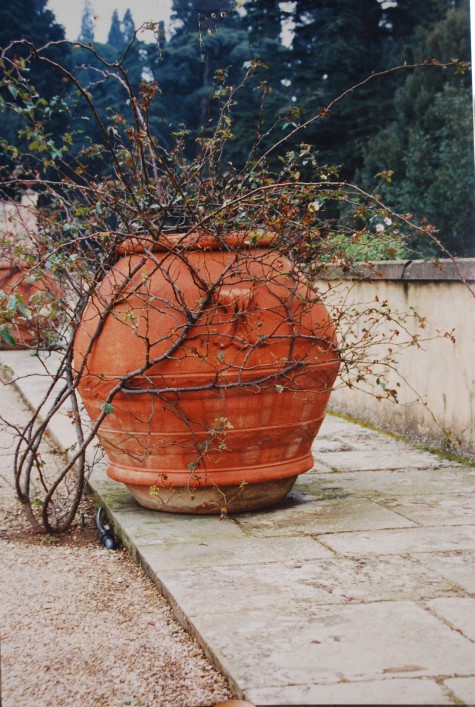
Maintenance Reality: That gorgeous, weathered patina with hints of moss is the result of time and moisture—it doesn’t happen overnight on a sunny, dry porch. If you want to encourage this look, place your unsealed terracotta pot in a shadier, damper part of your garden. The real work, however, is the thorny plant. A vigorous climber needs assertive pruning once or twice a year to keep it from grabbing passersby or overwhelming the pot. Neglect it, and your charming rustic feature could become a spiky, tangled mess.
📐 Style Math
Style Math: The formula here is simple: 70% Rustic Texture (the weathered pot, aged wall, stone pavers) + 20% Wild Greenery (the sparse climber and dense background foliage) + 10% Architectural Form (the pot’s classic shape). The magic is that texture does most of the work. You could swap the thorny plant for a sprawling rosemary bush or a fragrant lavender and the overall Italian-countryside vibe would remain perfectly intact, proving the power of a well-aged pot.
4. A Sunlit Countertop Display of Snake Plants in Terracotta
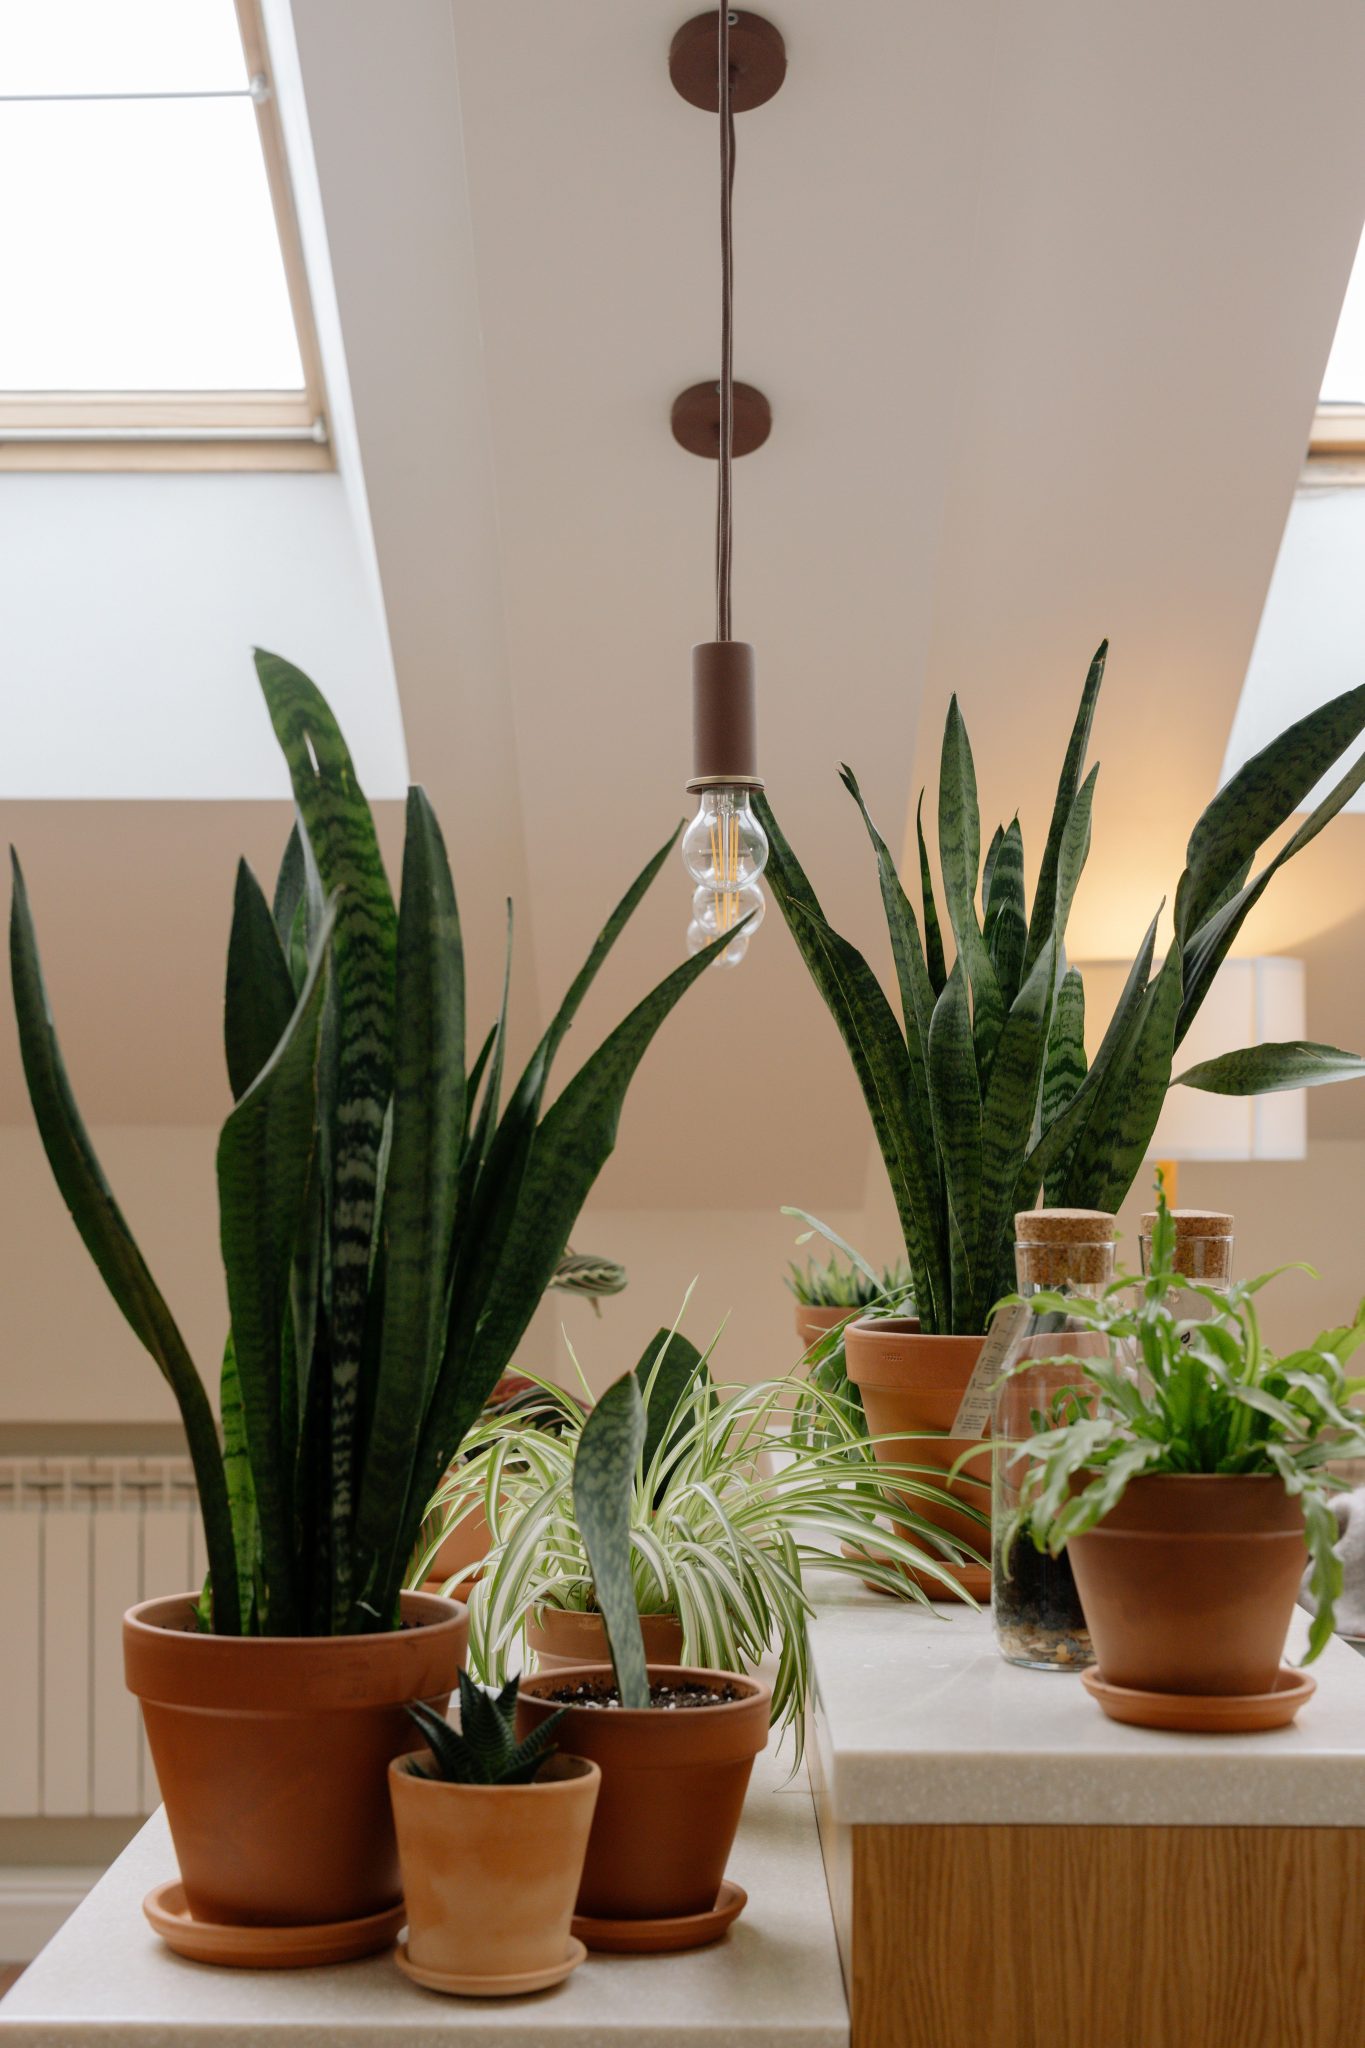
Real Talk: Let’s be honest: while this looks effortlessly chic, keeping plants on a kitchen countertop requires a bit of care. Terracotta is porous, and even with a saucer, condensation can form and leave a dreaded water ring on your counter. Always use a cork mat or a small decorative trivet underneath as a backup. Also, be mindful of placement. A spot near the sink might offer welcome humidity, but a counter right above a dishwasher can get surprisingly hot and dry for your plant friends.
📏 Scale Guide
Get This Look For Less: You absolutely do not need a big budget for this fresh, green look. Head to a big box store like Home Depot for a pack of three 6-inch terracotta pots and saucers for about $15. Snake plants are famously inexpensive and forgiving; you can find small ones at a local nursery or even Trader Joe’s for $10 a pop. The key is grouping them together to create impact. For less than $50, you can have a stylish, light-filled plant corner that looks a thousand bucks.
5. A Close-Up on a Weathered Terracotta Pot with Trailing Succulents
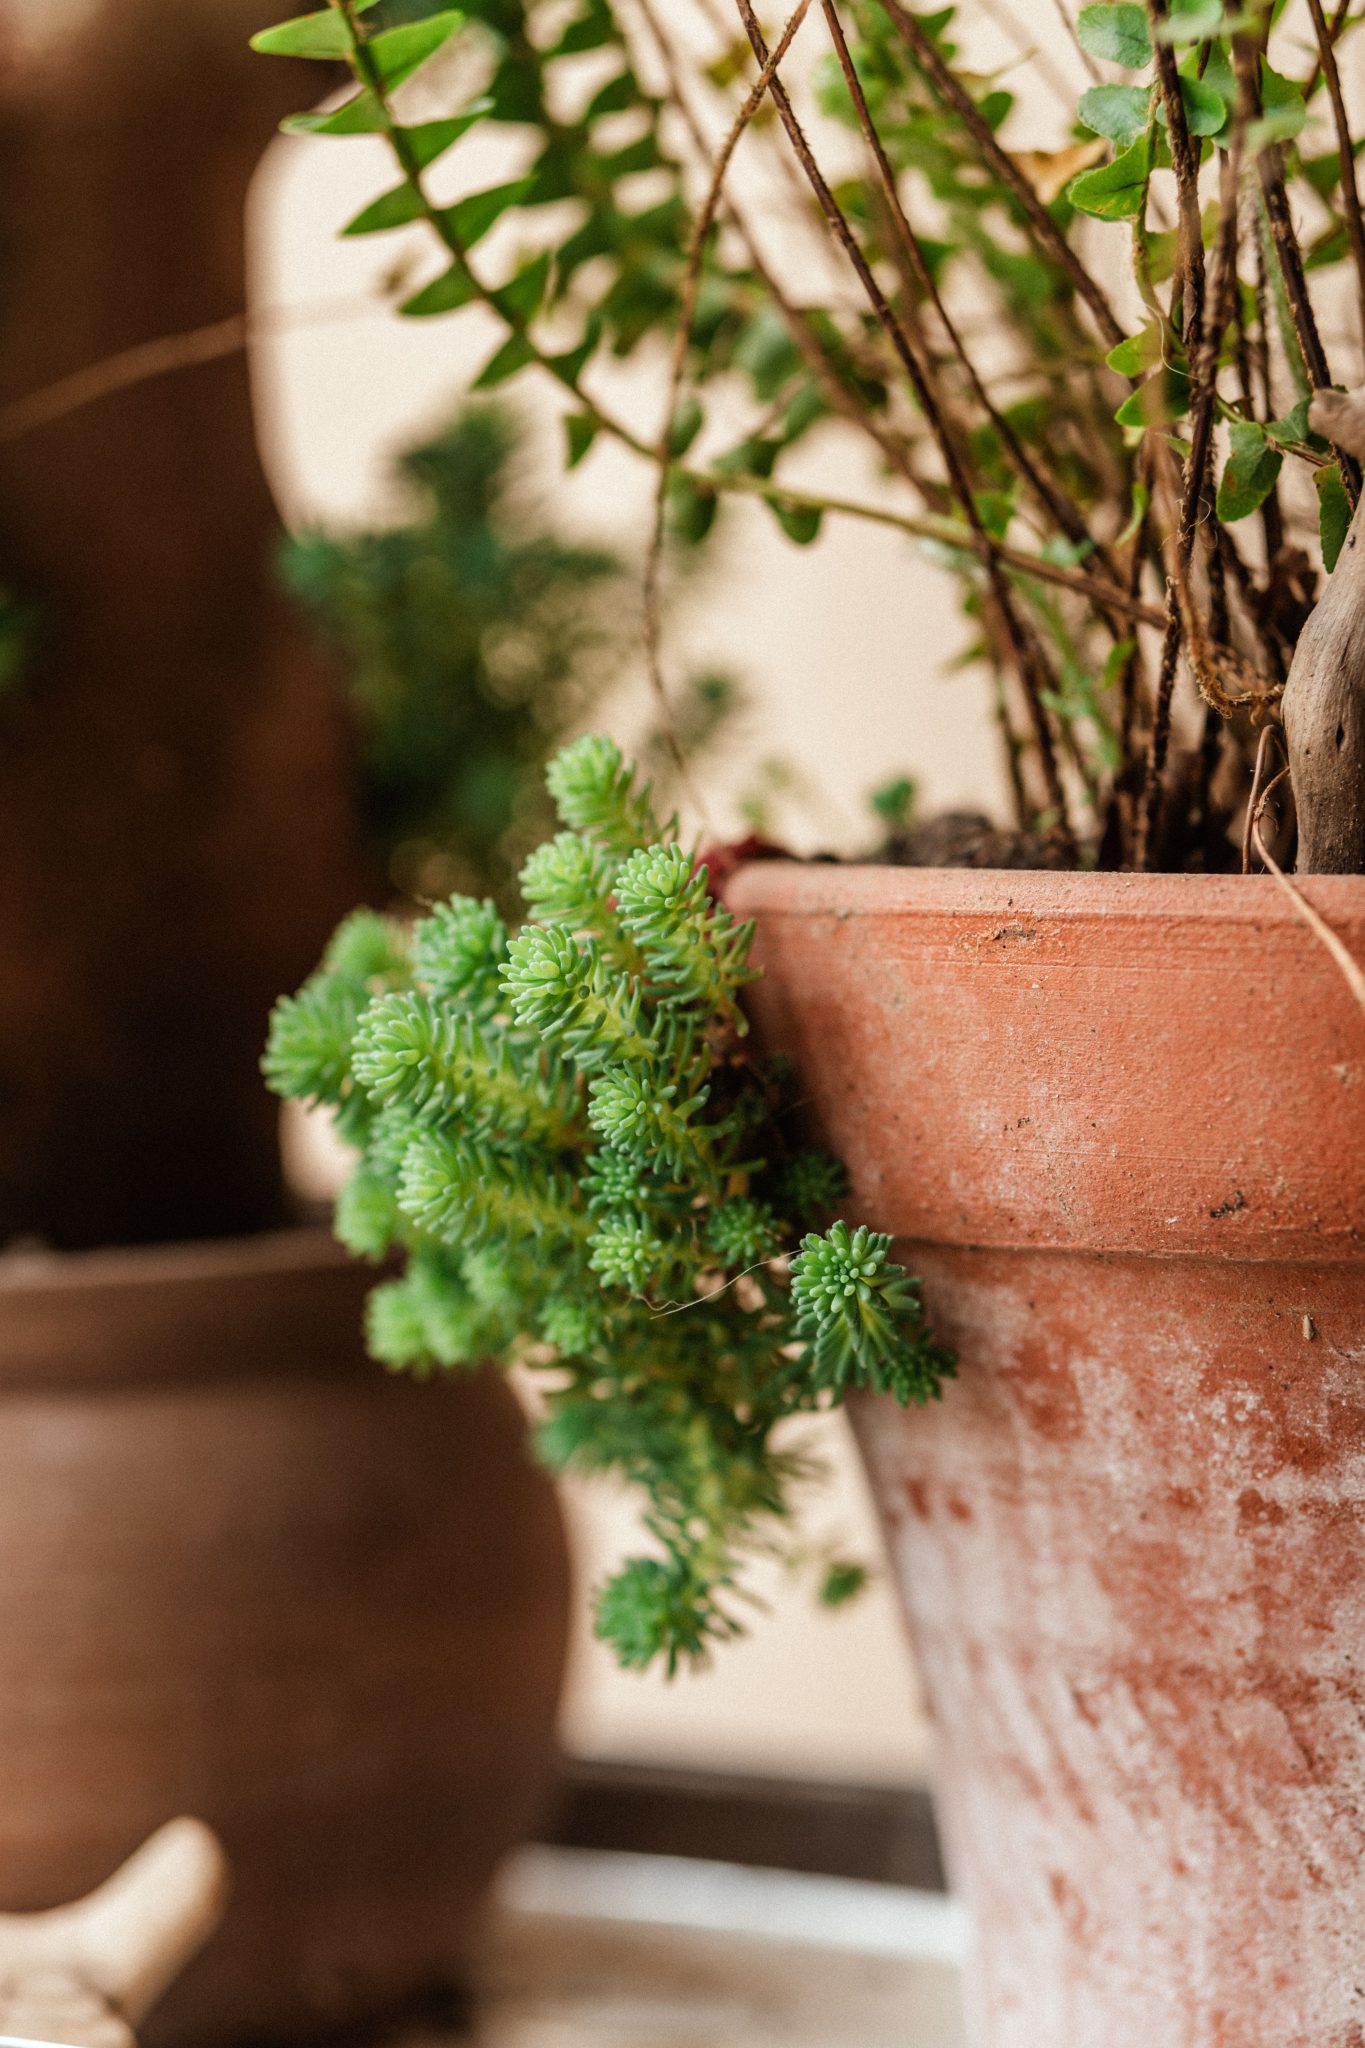
How-To Brief: Want to fast-track that aged, mossy patina on a new pot? Here’s a tried-and-true method. Time: 30 minutes prep, 1-2 weeks waiting. Cost: ~$5.
- In a bucket, mix equal parts plain yogurt (or buttermilk) and water.
- For more texture, crumble a handful of dried or live moss into the slurry.
- Using a cheap paintbrush, slather the mixture all over the outside of your clean, unsealed terracotta pot. Don’t be neat about it!
- Place the pot in a shady, cool, and damp spot in your garden.
- Mist it with a spray bottle of water every day for a week to keep the surface moist.
- Before you know it, you’ll see the beginnings of a beautiful, natural patina.
💰 Budget Breakdown
Before You Start Checklist: To get this beautifully organic, weathered look, you need the right setup. Run through this list before you begin:
- Is your pot genuine, unsealed terracotta? Glazed or sealed pots won’t absorb the moisture needed for patina to form.
- Have you chosen a location that’s mostly shady and stays damp? Constant, harsh sun will bake the pot dry and inhibit moss growth.
- Are you patient? A truly authentic patina takes months or even years. This method gives a great head start, but time does the best work.
- Is your chosen plant happy with the shadier, moister conditions that encourage this look?
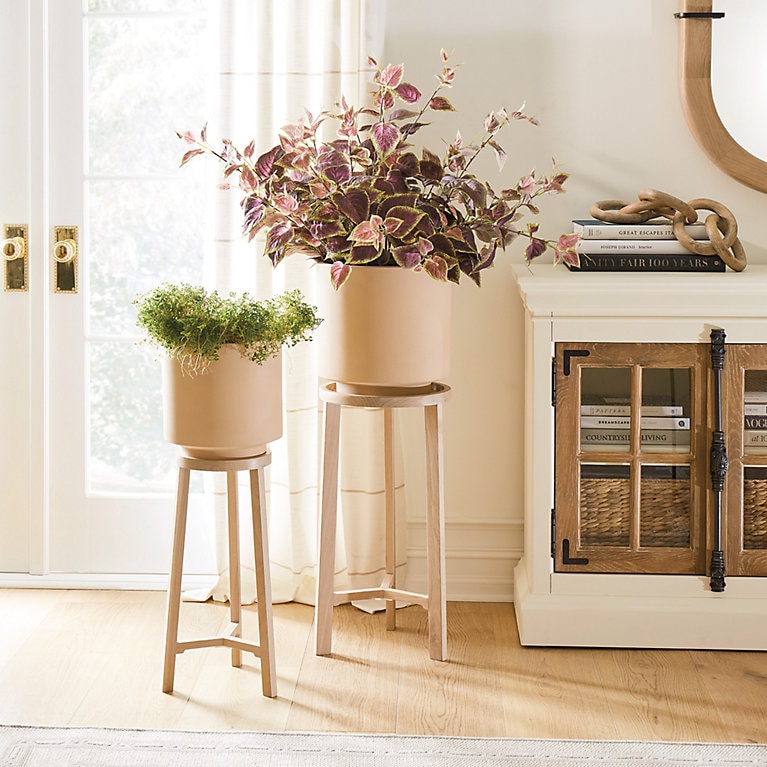
6. Pairing Light Beige Planters with Wooden Stands by a Window
What Makes It Work: This scene is a masterclass in quiet cohesion. The planters aren’t terracotta, but they embrace its earthy spirit with a modern twist. The light beige color of the pots creates a soft, low-contrast look against the cream curtains and light wood floors. Using two stands of different heights adds dynamic vertical interest, drawing the eye upward. The simple cylindrical shape of the planters feels modern and clean, letting the varied foliage of the plants be the star of the show.
✅ Before You Start
Designer Tip: When using plant stands, the rule of thirds is your best friend. The top of the plant’s foliage should hit at roughly two-thirds the height of the window frame it’s in front of. This creates a pleasing proportion and makes the plant look intentionally placed, rather than just randomly set there. Notice how the taller plant on the left perfectly aligns with the upper horizontal mullion of the French door. That’s no accident. If you’re struggling with plant placement, check our mistakes section for tips on scale.
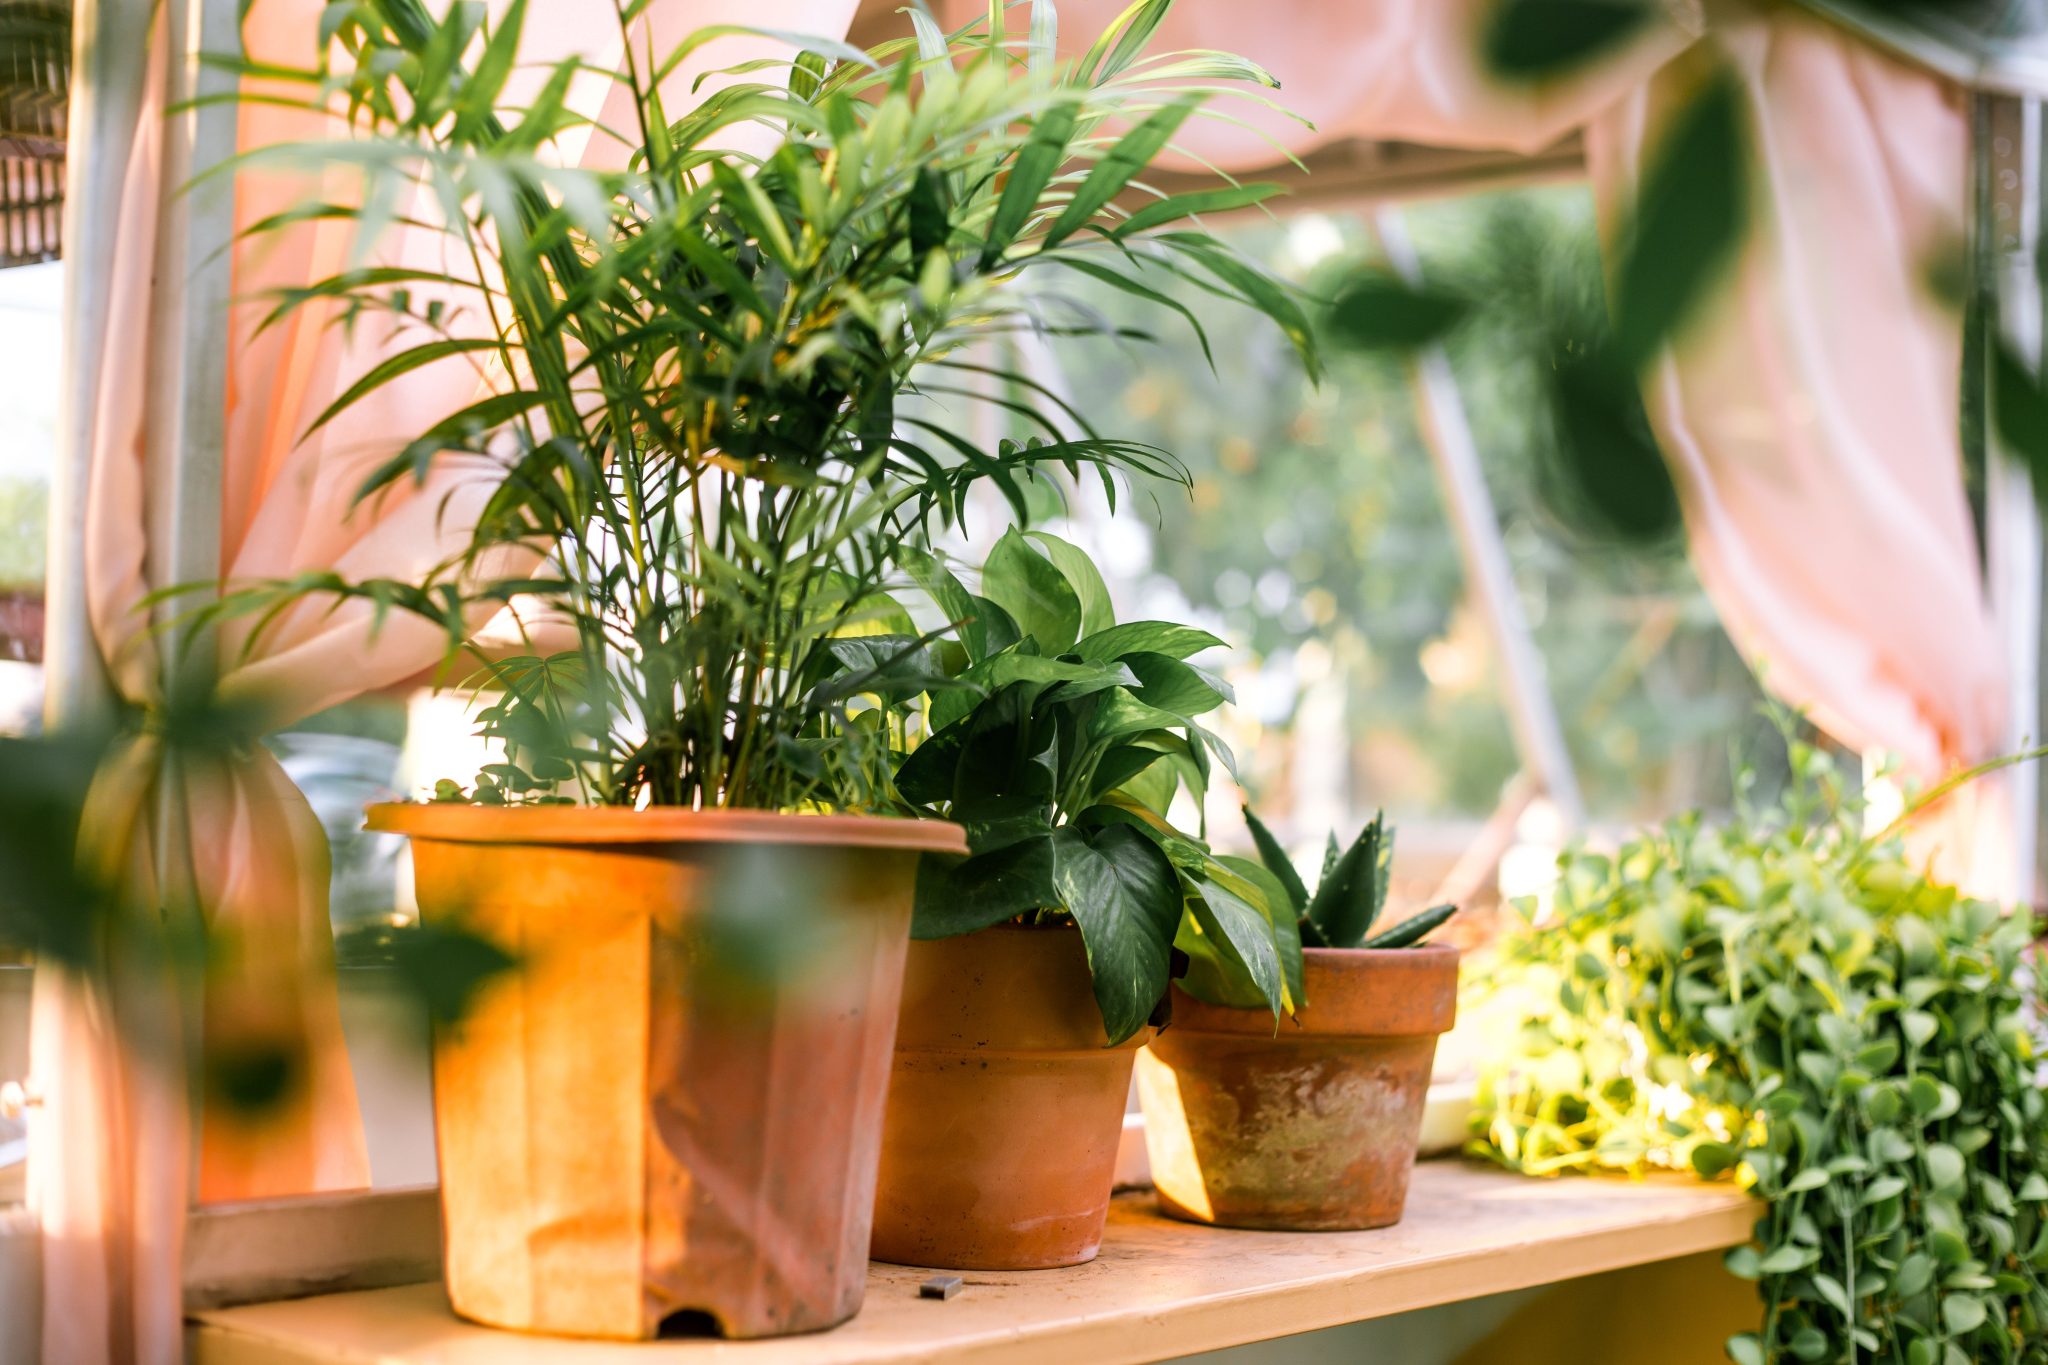
7. A Sun-Drenched Plant Shelf with a Sheer Pink Curtain
Trending Context: This look taps directly into the ‘romantic academia’ and ‘soft maximalism’ trends we’re seeing all over Pinterest. It’s about creating a personal, slightly nostalgic space filled with things you love. The combination of classic terracotta, lush plants, and that soft, sheer pink curtain feels curated and personal. The warm, hazy light gives it a dreamlike quality that’s a gentle rebellion against the stark, minimalist interiors that dominated the last decade. It feels lived-in and loved.
🔥 Trending Context
The One Thing: The sheer pink curtain is the secret ingredient. Without it, this would just be a nice shelf of plants. But the curtain diffuses the bright sunlight, casting a warm, rosy glow over the entire scene. It softens the edges, adds a pop of unexpected color, and transforms a simple plant display into a romantic, atmospheric moment. It proves that what’s *behind* your plants can be just as important as the plants themselves.
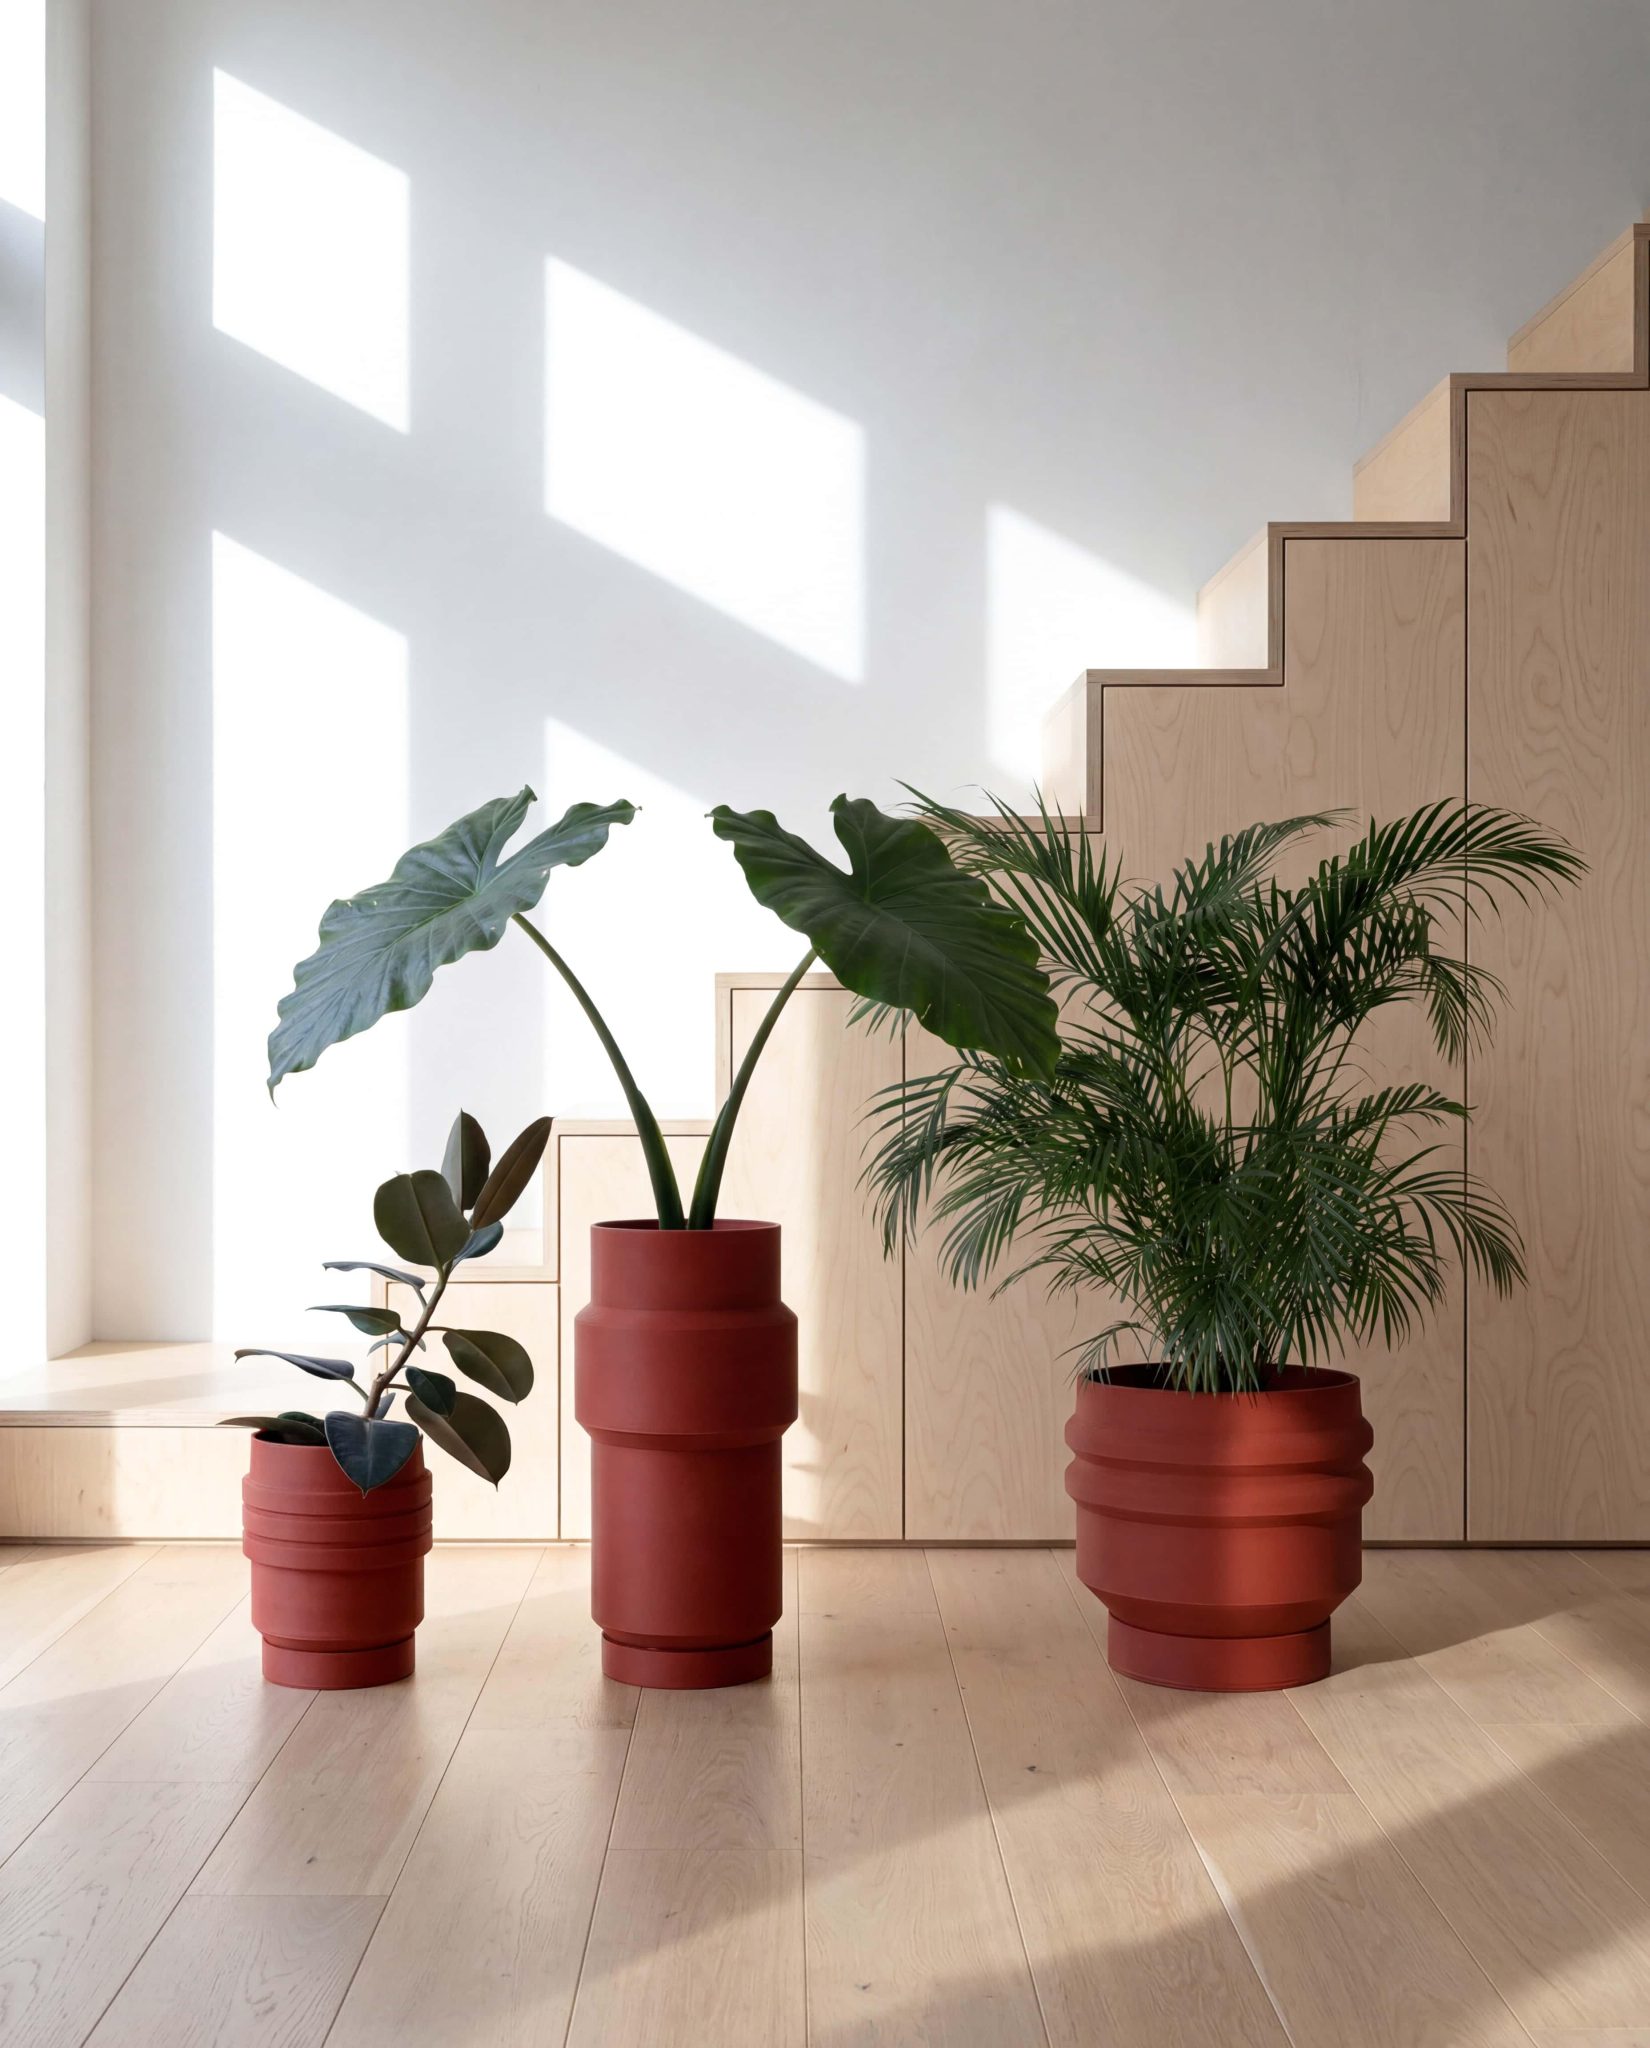
8. Modern Cylindrical Planters with Deep Terracotta Tones
Style Math: This look follows a clean, contemporary formula: 50% Natural Material (the terracotta-toned planters, light wood floors and cabinets) + 40% Vibrant Greenery (the lush tropical plants) + 10% Crisp Architecture (the white walls and sharp, geometric sunlight patterns). The balance between the warm, earthy planters and the cool, bright whites is what creates that serene yet modern feel. You could swap the reddish-brown planters for matte black ones and instantly shift the vibe to be more industrial and edgy.
🎯 What Makes It Work
Real Talk: Planters this large and stylish often come with a hidden challenge: drainage. Many modern cylindrical pots don’t have drainage holes to maintain their sleek look. This is an aesthetic choice that can be a death sentence for your plants if you’re not careful. Before you buy, check for a hole. If there isn’t one, you have two options: drill one yourself (carefully!), or use it as a cachepot by keeping your plant in its plastic nursery pot and placing that inside the decorative one. Just remember to tip out excess water after watering.
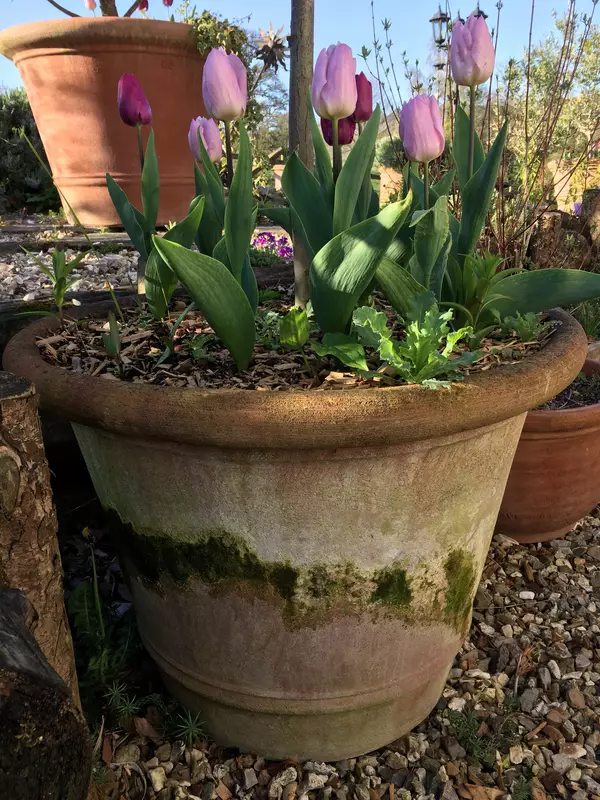
9. A Weathered Pot of Purple Tulips with Mossy Details
The One Thing: The texture of the pot itself is the hero here. The heavy weathering, the wide rolled rim, and especially the patches of bright green moss and lichen tell a story of time and seasons. A brand new, pristine terracotta pot simply wouldn’t have the same soul. This pot feels like it has been part of a garden for decades, and that history provides a stunning, rustic foundation for the delicate, vibrant purple tulips. It’s the contrast between the aged and the new that creates the magic.
💸 Get This Look For Less
What Makes It Work: This composition is a study in complementary colors and textures. The weathered, earthy orange of the terracotta is a natural complement to the deep purples and bright greens of the tulips. The rough, mossy texture of the pot contrasts beautifully with the smooth, soft petals of the flowers. This pairing of rough and smooth, aged and fresh, is a classic design principle that creates a look that is both visually interesting and emotionally resonant. Compare the patina here to the pot in Idea #2.
10. Spacious Interior with Large Matte Planters and Lush Greenery
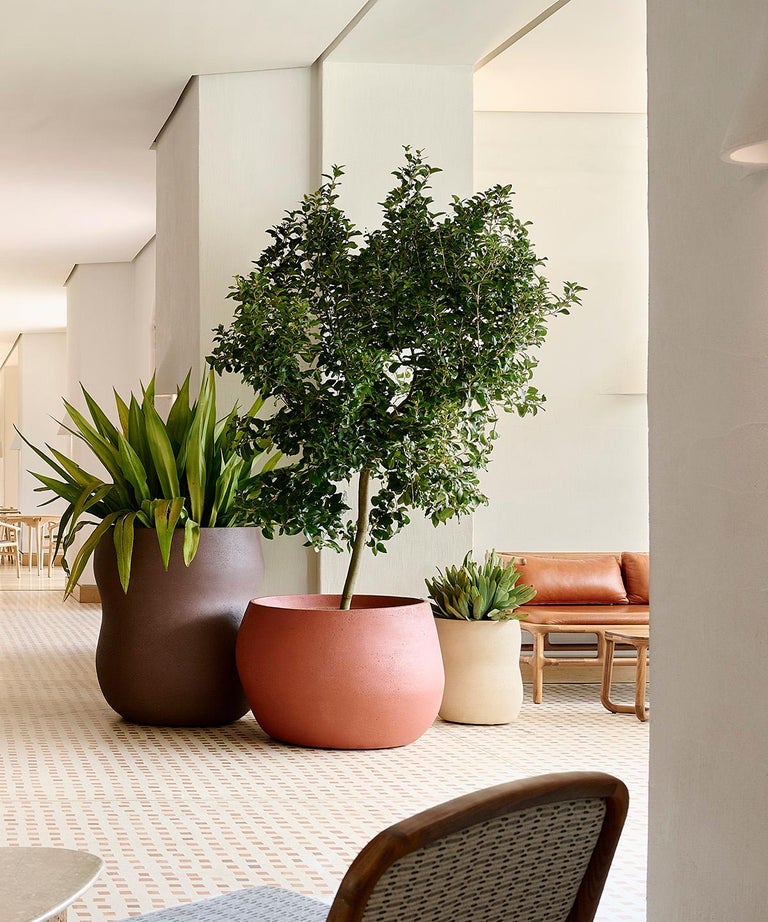
Scale Guide: This is how you use planters in a large, open-concept space. In a room with high ceilings and a generous footprint (at least 20×20 feet), small pots get lost. You need substantial pieces like these large-scale matte planters (30-36 inches tall) to make an impact. The key is to vary the heights and shapes to create a layered look rather than a static row. Notice how the tall tree draws the eye up, while the lower, spikier plant adds mid-level interest. This approach helps to ground the large room and make it feel more inviting.
🔧 How-To Brief
Budget Breakdown: Achieving this high-end look requires investment, primarily in the large-scale furniture and plants.
- Large Matte Planters (2): $300 – $800
- Mature Fiddle Leaf Fig Tree: $200 – $500
- Other Large Plants: $100 – $250
- Leather Sofa & Designer Chair: $5,000 – $15,000
- TOTAL: $5,600 – $16,550
- Budget alternative: Get the vibe for less with faux large plants from Target or World Market, and search Facebook Marketplace for a secondhand leather sofa. The large pots are the hardest part to fake, but you can find fiberglass versions for a fraction of the cost of ceramic.
11. A Weathered Bowl Planter with Fresh Herbs on a Wooden Table
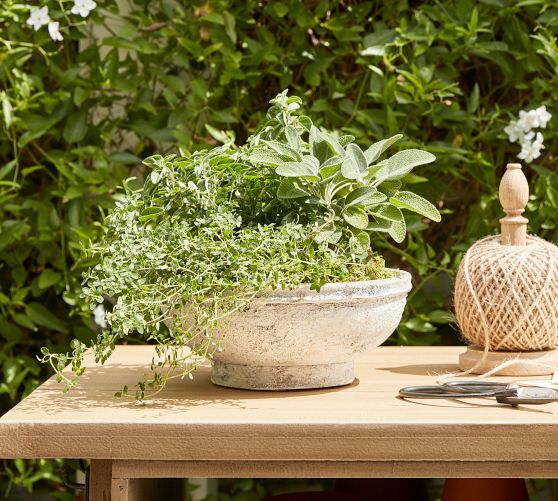
Designer Tip: When creating a container herb garden, always include a ‘spiller.’ In this arrangement, the trailing thyme serves that role perfectly. It softens the edge of the distressed bowl and connects it to the table surface, making the whole composition feel more natural and less stiff. Your formula should be ‘thriller, filler, spiller’: a tall, exciting plant (like the upright sage), a mounding plant to fill the middle (filler herbs), and something to trail over the side. It’s a foolproof recipe for a beautiful container garden.
🧹 Maintenance Reality
Trending Context: This image perfectly captures the ‘garden-to-table’ and ‘cottagecore’ aesthetics that continue to dominate home and lifestyle trends. The focus on fresh, usable herbs in a rustic, weathered planter speaks to a desire for self-sufficiency and a connection to nature. The accompanying twine and scissors suggest not just decoration, but active use. It’s not just a pretty object; it’s part of a lifestyle that values authenticity, natural materials, and the simple pleasure of growing your own food.
12. Verdigris Metal Planter with Trailing Greenery on Stone Steps
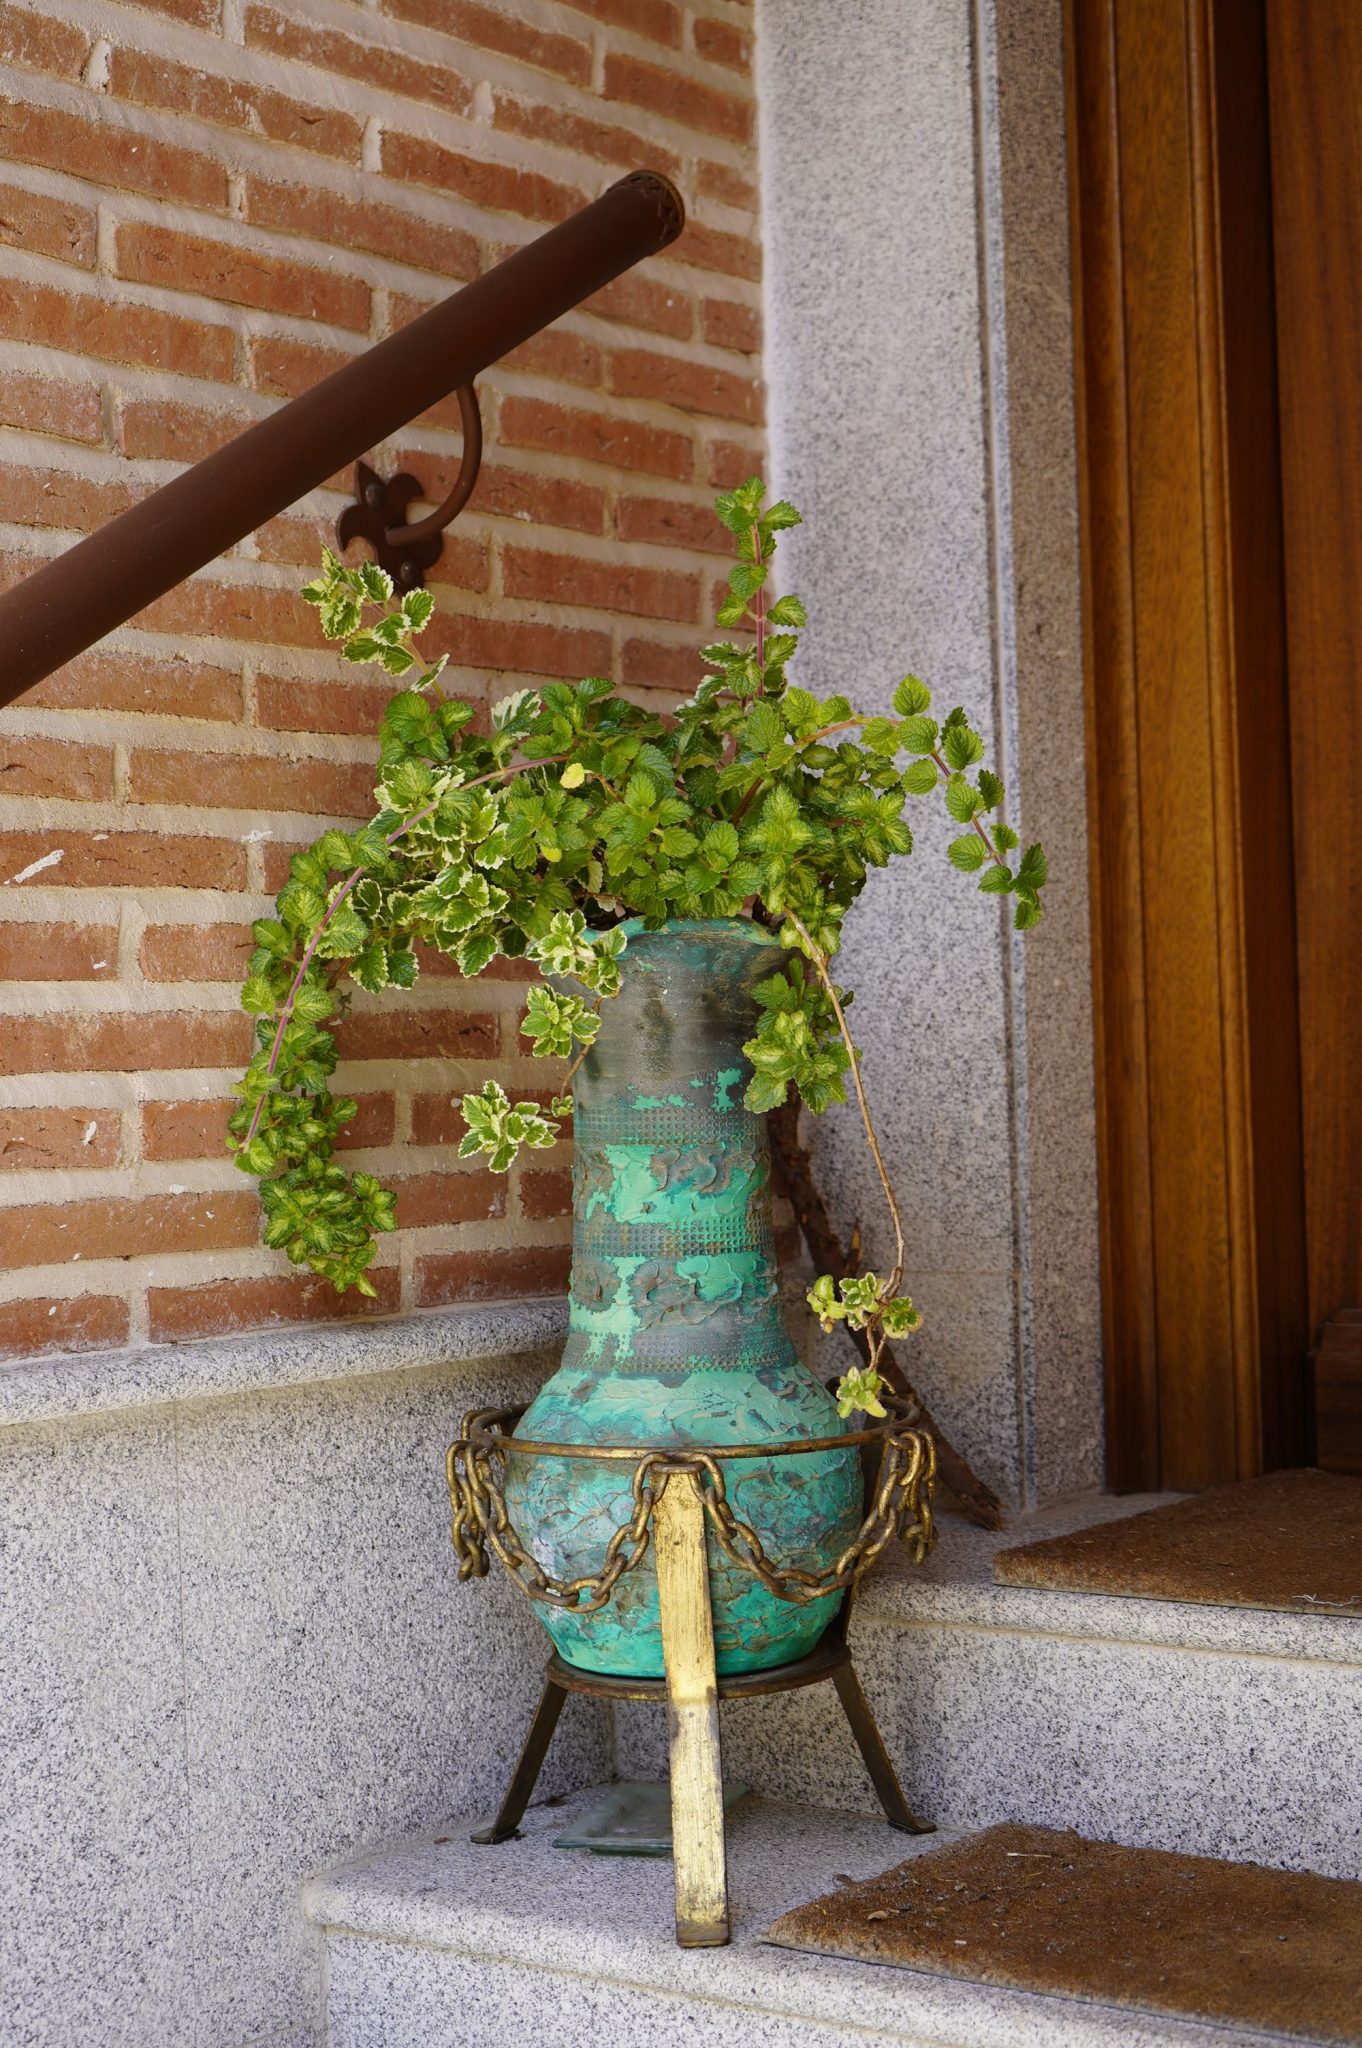
Style Math: This vignette is a lesson in textural harmony. It’s about 40% Aged Metal (the verdigris planter and stand) + 30% Rustic Masonry (the red brick wall and gray stone steps) + 20% Lush Greenery + 10% Antique Detail (the gold chain). The magic comes from layering multiple types of weathered materials. The cool green-blue of the patina is a stunning complement to the warm red of the brick, a classic color theory pairing that always works. Remove any one of these textures, and the whole story falls apart.
💡 Designer Tip
Real Talk: While a verdigris patina is beautiful, it’s a sign of oxidizing copper or brass. If this is a genuine antique, be gentle with it. Avoid harsh cleaners that could strip the patina. Also, be aware that metal planters heat up much more in direct sun than terracotta or ceramic pots do. This can stress the plant’s roots. This type of planter is best suited for a location that gets gentle morning sun or is in bright, open shade for most of the day, protecting both the planter and the plant within it.
13. A Light Speckled Pot Holding a Mixed Succulent Arrangement
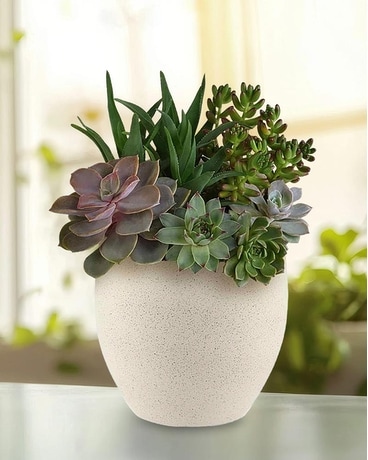
What Makes It Work: This arrangement is successful because of the expert use of repetition and variation. The ovoid shape of the pot is subtly echoed in the rosette shapes of the succulents. The pot’s light beige, speckled color provides a neutral, textured canvas that doesn’t compete with the plants. The variety in the succulents themselves—from spiky dark green to soft purple-grey—creates a ton of visual interest in a very small space. It’s a miniature landscape, and the pot is the perfect frame for it.
⭐ The One Thing
Get This Look For Less: Creating a stunning succulent arrangement is one of the most budget-friendly DIYs out there. A single speckled pot like this can be found at stores like HomeGoods or Target for $15-$25. The real savings come from the plants. Instead of buying several individual succulents, buy one or two larger, mixed ‘hen and chicks’ plants and carefully separate them. You’ll get multiple small plants for the price of one, allowing you to create a full, lush arrangement for under $40 total.
14. Terracotta Pots in a Warm, Plant-Filled Living Space
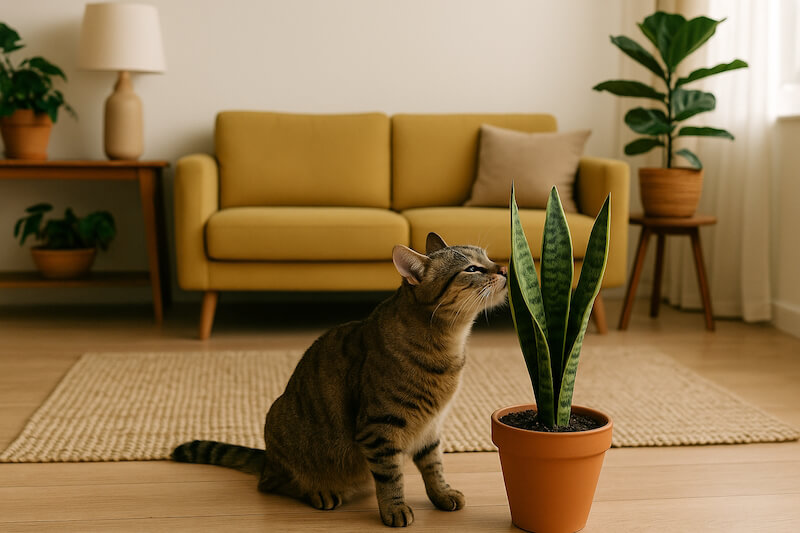
The One Thing: The unifying power of terracotta is the key to this entire room’s success. With a jute rug, light wood floors, a yellow sofa, and tons of different green plants, the space could easily feel busy or disjointed. But the repeated use of classic terracotta pots—on the floor, on the side table—acts as a consistent visual anchor. Their warm, earthy orange ties everything together, grounding the space and creating a cohesive, intentional ‘jungalow’ vibe. Without them, it would just be a collection of plants; with them, it’s a style.
⚠️ Real Talk
Designer Tip: Don’t be afraid to place a pot directly on the floor, as long as you do it right. The trick is scale. A small 6-inch pot on the floor will look lost and accidental. You need a pot that is at least 10-12 inches in diameter to have enough presence to feel intentional. Always, always, always use a saucer underneath to protect your flooring! Tucking a floor pot next to the leg of a sofa or a side table, as seen here, helps it feel connected to the rest of the furniture group.
15. A Scalloped Terracotta Pot and Tray with a Single Succulent
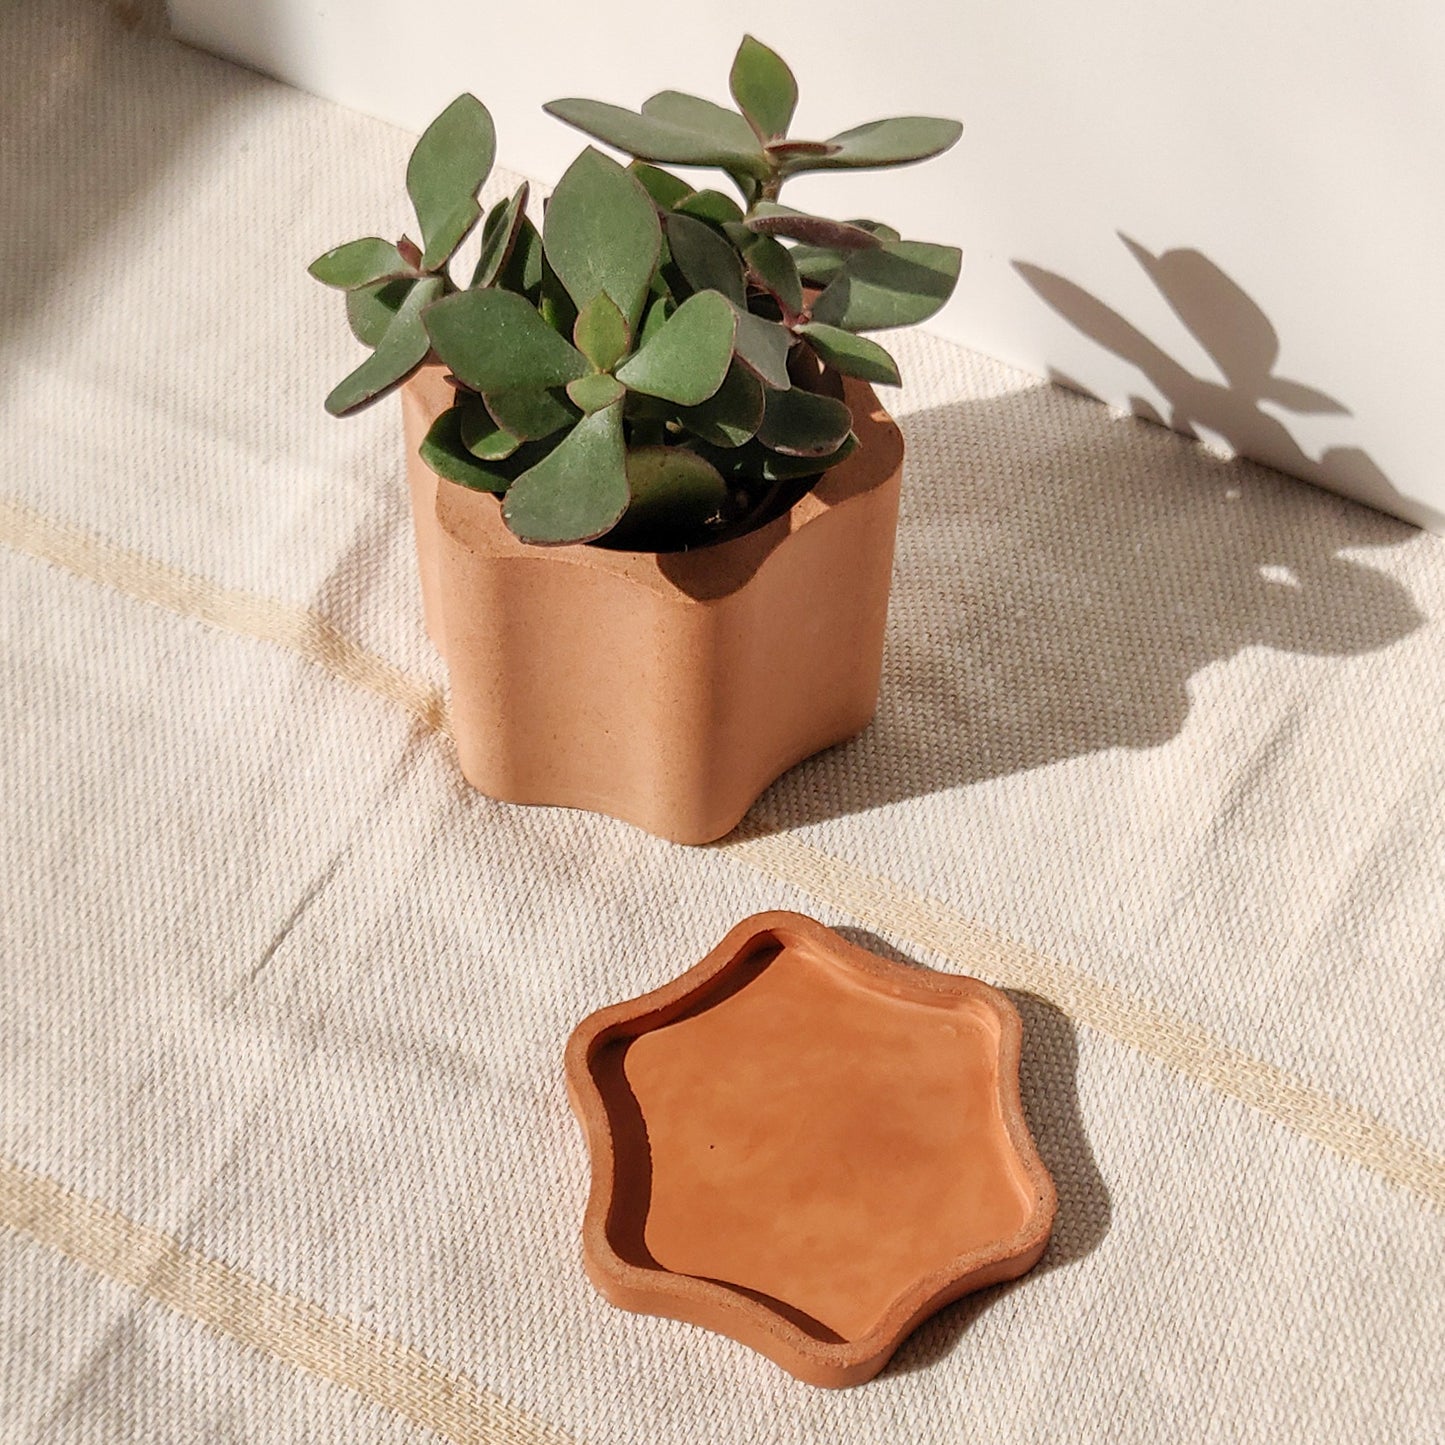
What Makes It Work: The beauty of this simple scene lies in its celebration of form. The repeating scalloped or ‘pie crust’ edge on both the pot and the tray creates a gentle, rhythmic pattern that feels special and considered. This isn’t just a standard pot and saucer; it’s a matching set. Placing a simple, structural succulent inside allows the unique shape of the pottery to shine. The bright, direct light casting sharp shadows further emphasizes these beautiful, organic forms, turning a simple plant into a piece of living sculpture.
📐 Style Math
Before You Start Checklist: To recreate this minimalist, high-impact look, check these points first.
- Do you have a spot with direct, bright light? The sharp shadows are a key part of this look, and you won’t get them in a dim corner.
- Can you find a matching pot and tray set? The coordination is what elevates it. Hunting on Etsy or at boutique garden shops for ‘scalloped terracotta’ is your best bet.
- Are you committed to a single, simple plant? Over-planting would hide the pot’s beautiful edge.
- Is the surrounding surface neutral? This look works best against a simple, textured fabric or a clean tabletop.
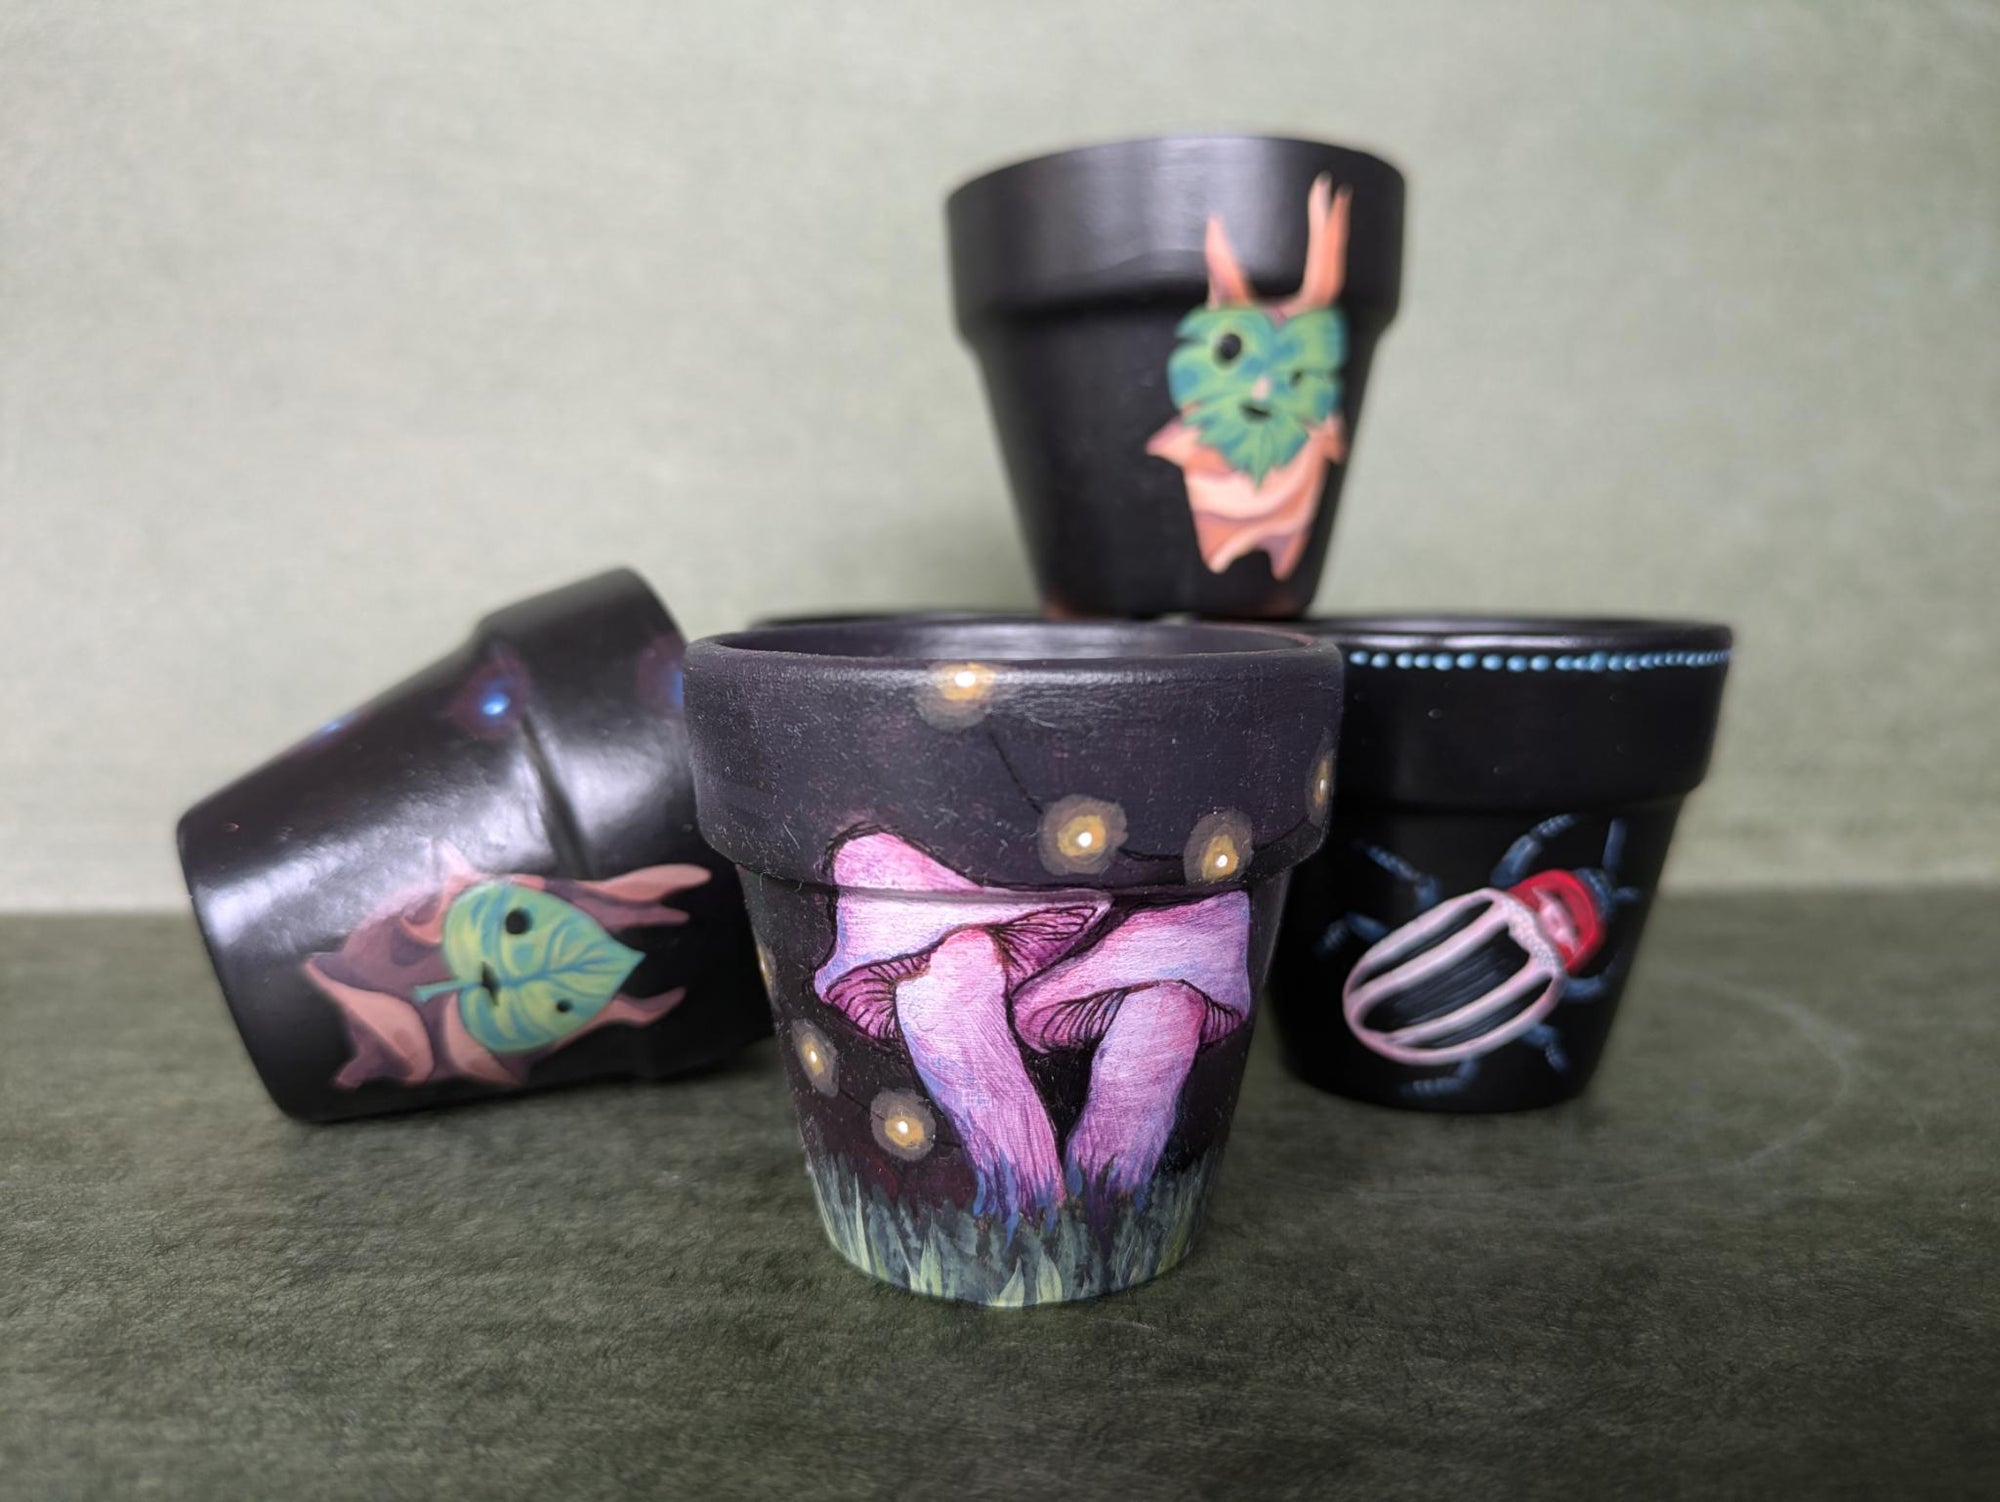
16. Whimsical Hand-Painted Black Pots with Magical Nature Motifs
How-To Brief: Create your own enchanted garden pots. Time: 2-3 hours + drying. Cost: ~$25.
- Clean your small terracotta pots and let them dry completely.
- Apply one to two coats of matte black acrylic or chalk paint to create a solid base. Let it dry fully.
- Use a white charcoal pencil to lightly sketch your whimsical designs—think glowing mushrooms, cute beetles, or stylized leaves.
- With fine-tipped paint brushes, fill in your designs using colorful acrylic paints. Vibrant purples, greens, and reds will pop beautifully against the black.
- Use a white paint pen or a tiny brush to add highlights and small details.
- Once everything is bone dry, spray with a clear matte sealant to protect your art.
📏 Scale Guide
Budget Breakdown: This is a wonderfully affordable craft project with a high-impact result.
- Small Terracotta Pots (set of 4): $8 – $15
- Matte Black & Assorted Color Acrylic Paints: $15 – $25
- Fine-Tipped Brushes: $5 – $10
- TOTAL: $28 – $50
- Budget alternative: Use craft paint you already own and look for cheap pots at a thrift store. If the pots are staying indoors and won’t get wet, you can even skip the sealant. The creative style here is a fun contrast to the more bohemian painting in Idea #19.
17. A Modern Terracotta Pot Paired with Natural Wood and Rattan Accents
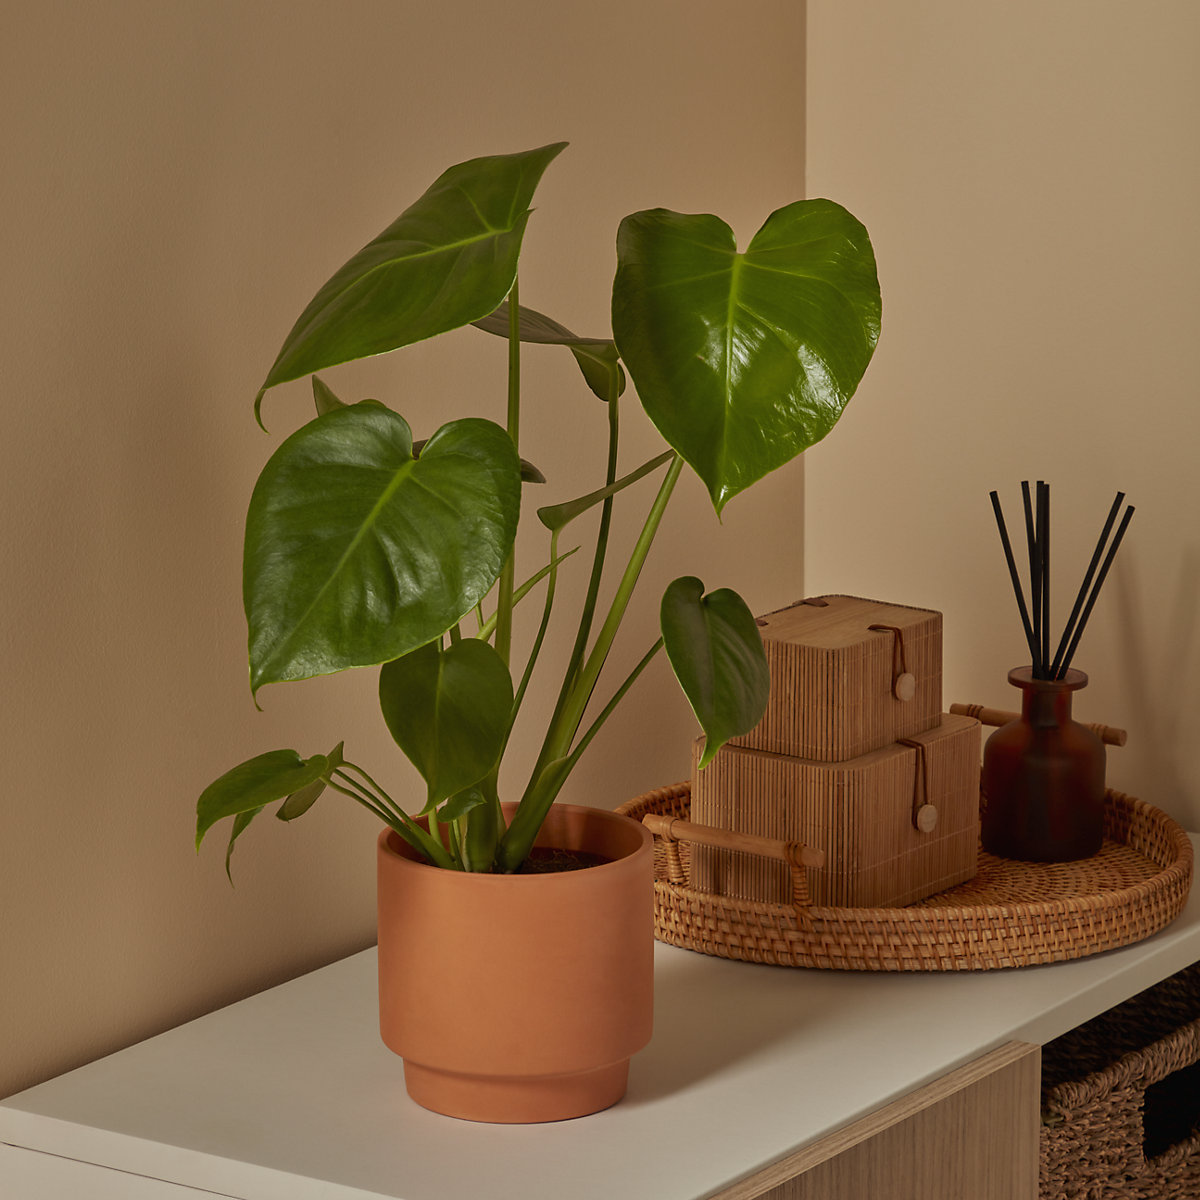
Style Math: This shelf styling is a perfect recipe for a warm, modern-organic look. It breaks down to: 40% Smooth Terracotta + 30% Woven/Textured Naturals (the rattan tray and ribbed wood boxes) + 20% Vibrant Greenery + 10% Sleek Glass (the amber diffuser). The key is the mix of smooth (pot), woven (tray), and ribbed (boxes) textures, all within the same warm, earthy color family. This creates a look that is rich and layered without being cluttered. It feels calm and collected.
|
📋 Copy HEX 🔗 Share |
💰 Budget Breakdown
The One Thing: The woven rattan tray is the crucial element that bridges the gap between all the other pieces. It connects the smooth terracotta pot to the wooden boxes and provides a defined ‘zone’ for the decor, making the arrangement feel intentional. Without the tray, the pot, boxes, and diffuser would just be three separate items sitting on a shelf. The tray groups them into a single, cohesive vignette. It’s a simple styling trick that makes a world of difference.
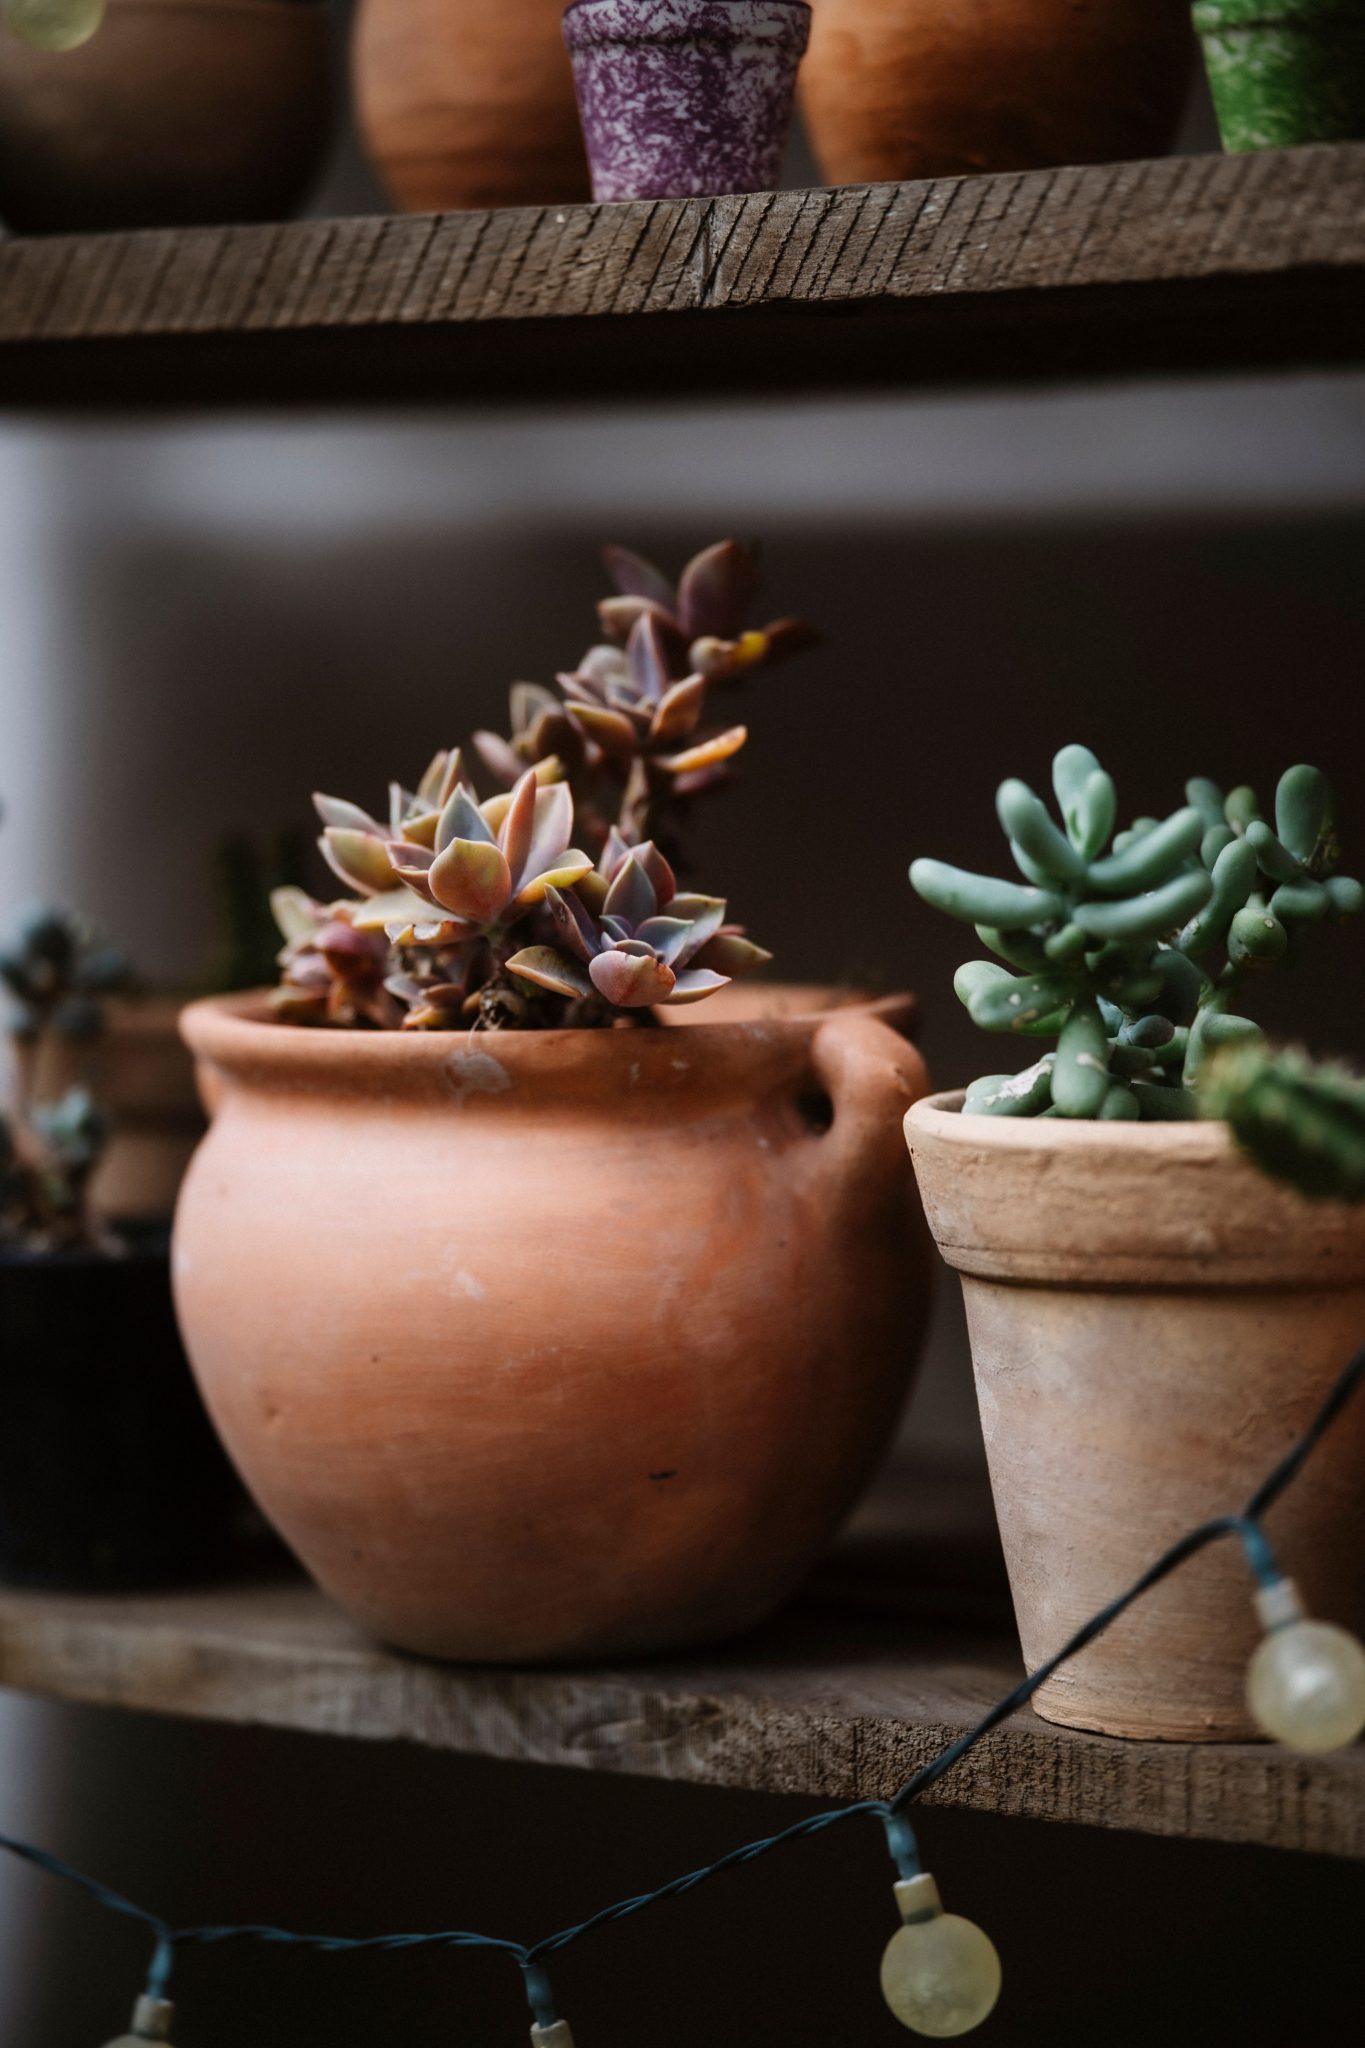
18. Rustic Wooden Shelves with an Eclectic Mix of Terracotta Pots
What Makes It Work: This display feels cozy and authentic because it embraces imperfection and variety. The mix of pot sizes, from the large one with handles to the tiny mottled purple one, creates a collected-over-time feel. The rustic, unfinished wood of the shelves adds warmth and texture that plain white shelves would lack. Finally, the string of soft white lights is a genius touch, adding a layer of warmth and a magical glow that transforms the simple shelf into a charming feature, day or night.
✅ Before You Start
Designer Tip: When styling shelves with plants, think about depth. Don’t just line everything up along the front edge. Notice how the larger pot is set back, while a smaller pot is pulled forward. This creates layers and makes the display feel much more dynamic and full. Tucking in non-plant items, like the string of lights, also adds to this layered effect. Overlap items slightly to make them feel connected to each other.
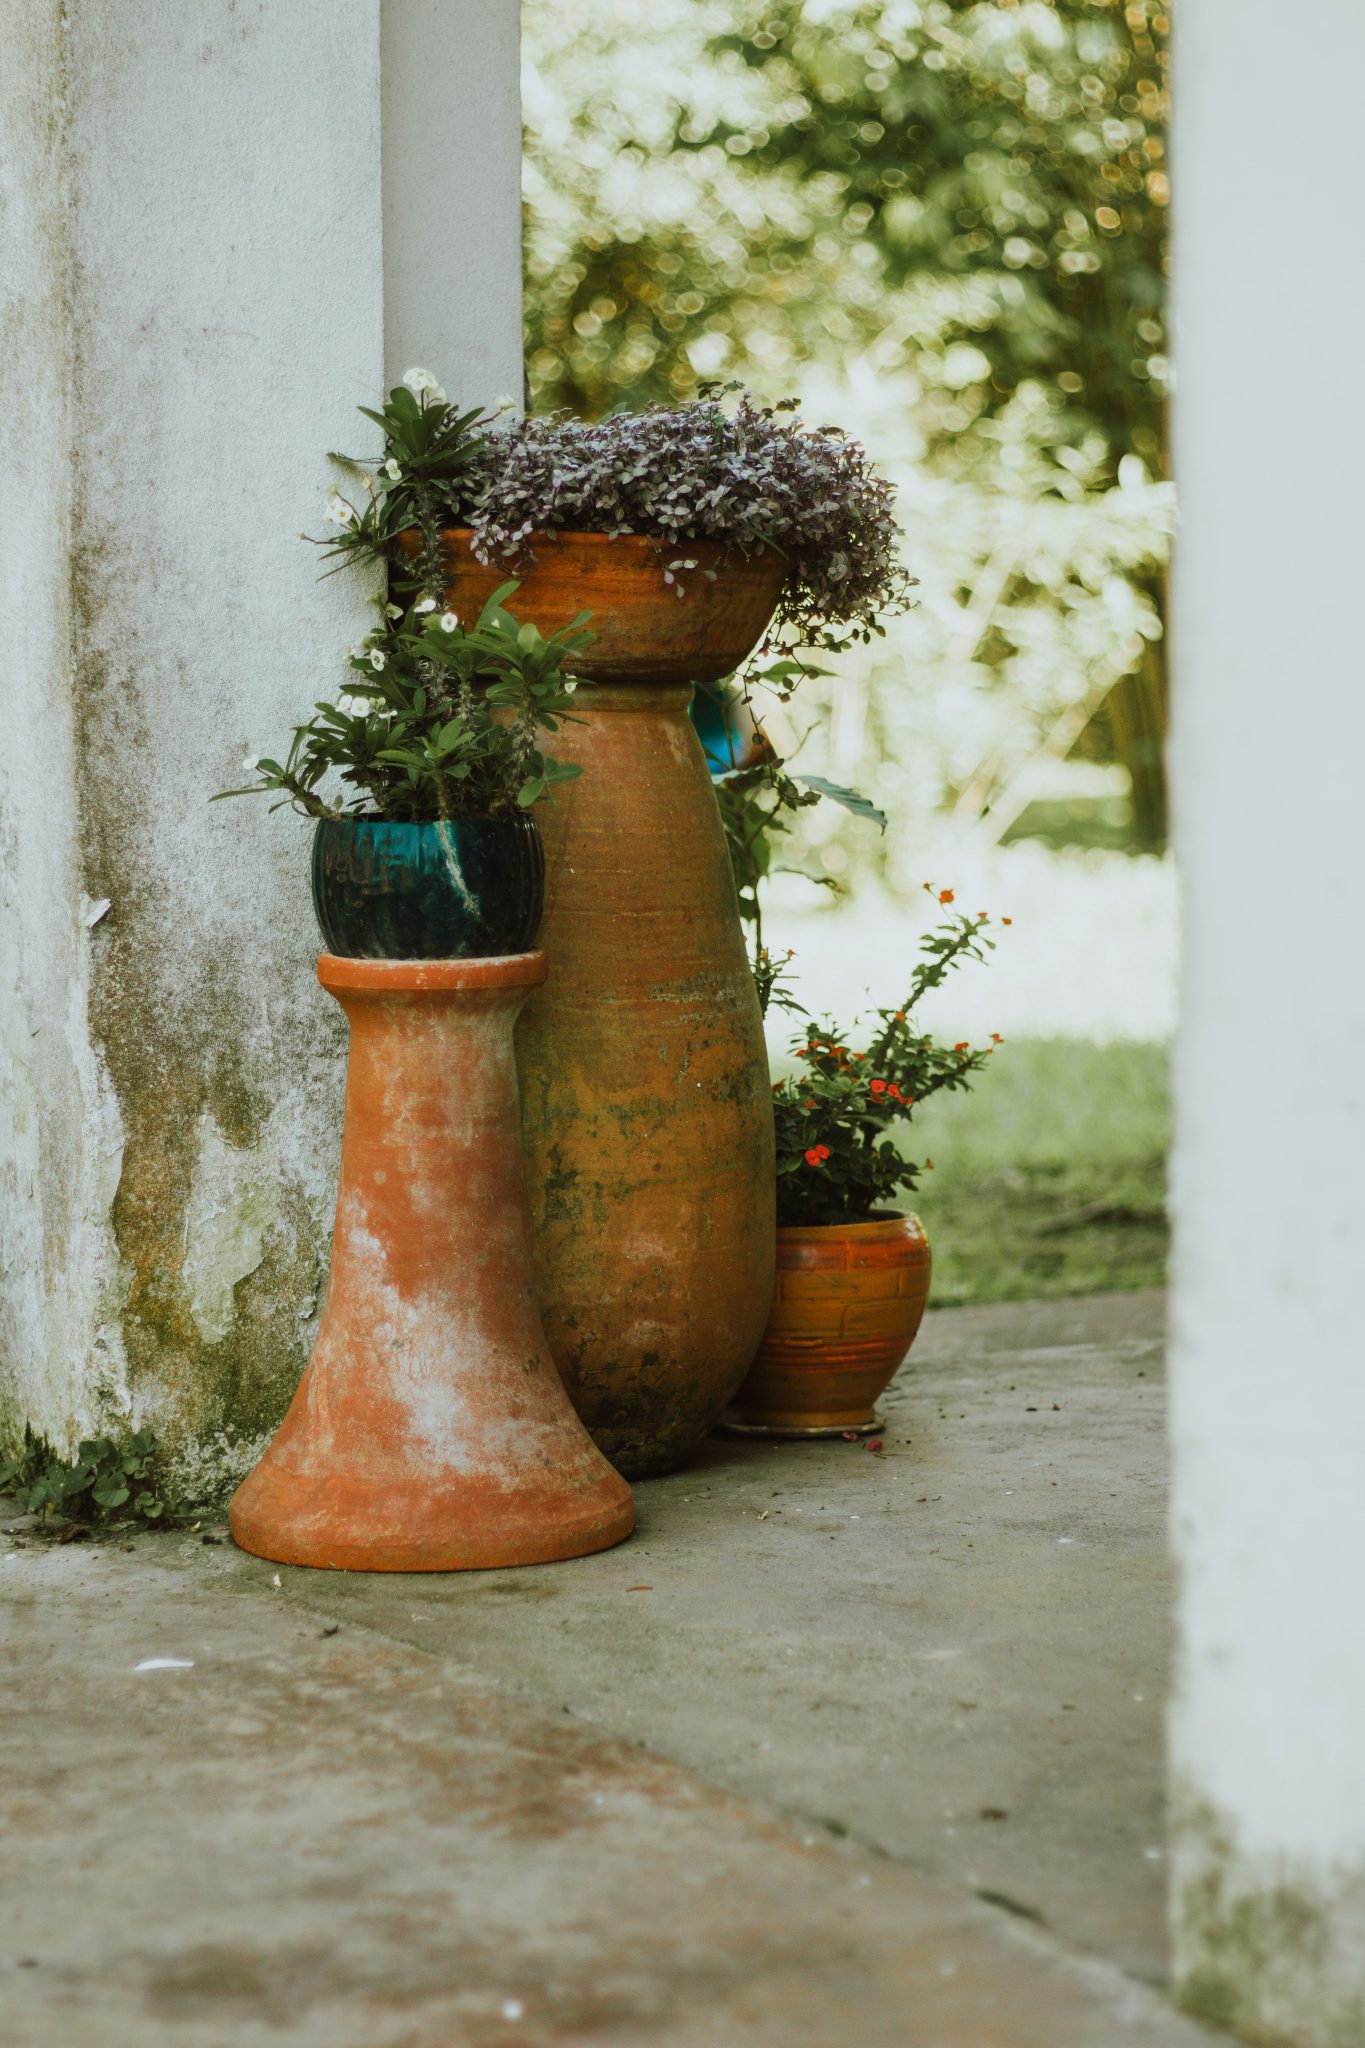
19. An Aged Collection of Terracotta and Glazed Pots on a Patio
Style Math: This beautiful, overgrown look is all about layering. Let’s break it down: 50% Classic Terracotta (in various states of aging) + 30% Lush and Varied Greenery (trailing, flowering, thorny) + 15% Unexpected Color Pop (that gorgeous teal glazed pot) + 5% Rustic Base (the weathered concrete). The teal pot is the secret weapon here; it breaks up the monotony of the terracotta and adds a focal point, making the whole collection feel more curated and thoughtfully assembled.
🔥 Trending Context
Real Talk: A dense grouping of pots like this looks amazing but can be a haven for pests like slugs and snails, who love the cool, damp, shady spots between the containers. Be sure to check periodically for any unwanted guests. Also, watering can be a bit of a chore. You’ll need to make sure you’re getting water to every plant, not just the ones in the front. A watering can with a long, thin spout is your best friend for reaching the pots in the back without making a huge mess.
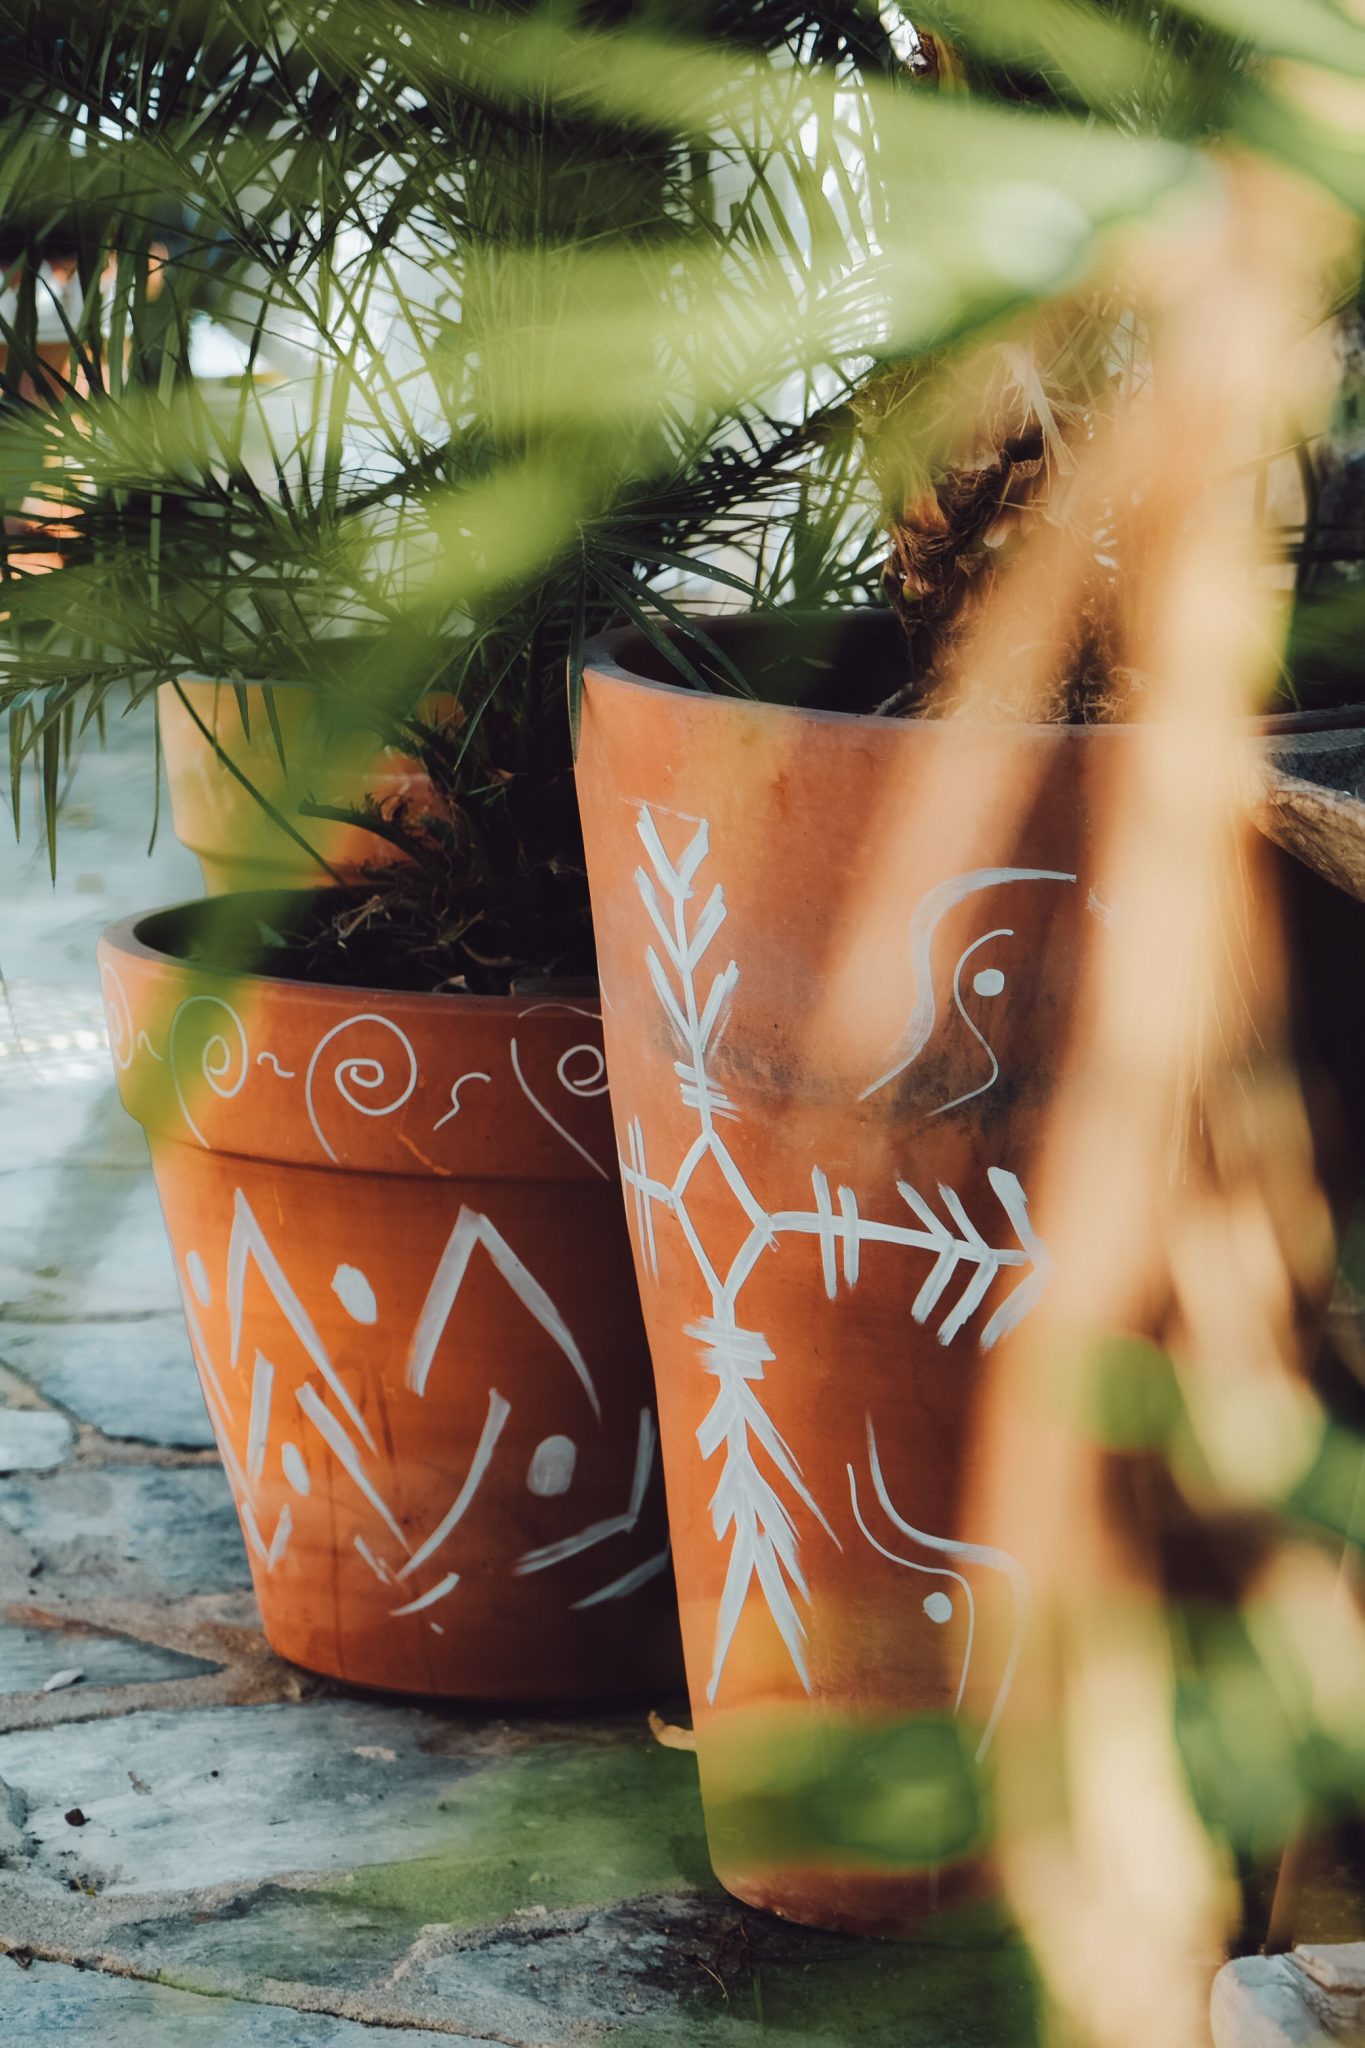
20. Hand-Painted Terracotta Pots with White Bohemian Patterns
How-To Brief: Get this breezy, boho look with a pot and a paint pen. Time: 1 hour. Cost: Under $15.
- Start with a clean, dry terracotta pot. No need to prime it; the natural color is the perfect backdrop.
- Using a white oil-based paint pen (they are more opaque and durable than acrylic), start drawing your design.
- For a bohemian feel, mix geometric shapes (lines, dots, zig-zags) with more organic, free-flowing swirls and leaf motifs. Don’t overthink it! The charm is in the hand-drawn quality.
- Fill one pot with a pattern, then try a different but complementary pattern on a second pot.
- Let the paint cure for 24 hours before planting. For outdoor use, a quick spray of clear sealant will help it last.
🎯 What Makes It Work
What Makes It Work: The success of this idea lies in its laid-back, artistic simplicity. The high-contrast pairing of graphic white on earthy terracotta is always a winner. By keeping the pattern to a single color (white), the look remains cohesive even with two different designs. The freehand nature of the patterns gives the pots a personal, one-of-a-kind feel that you just can’t get from a mass-produced item. It’s a perfect example of how a simple, inexpensive DIY can add a huge amount of personality. This is a much more free-spirited approach than the detailed illustrations in Idea #15.
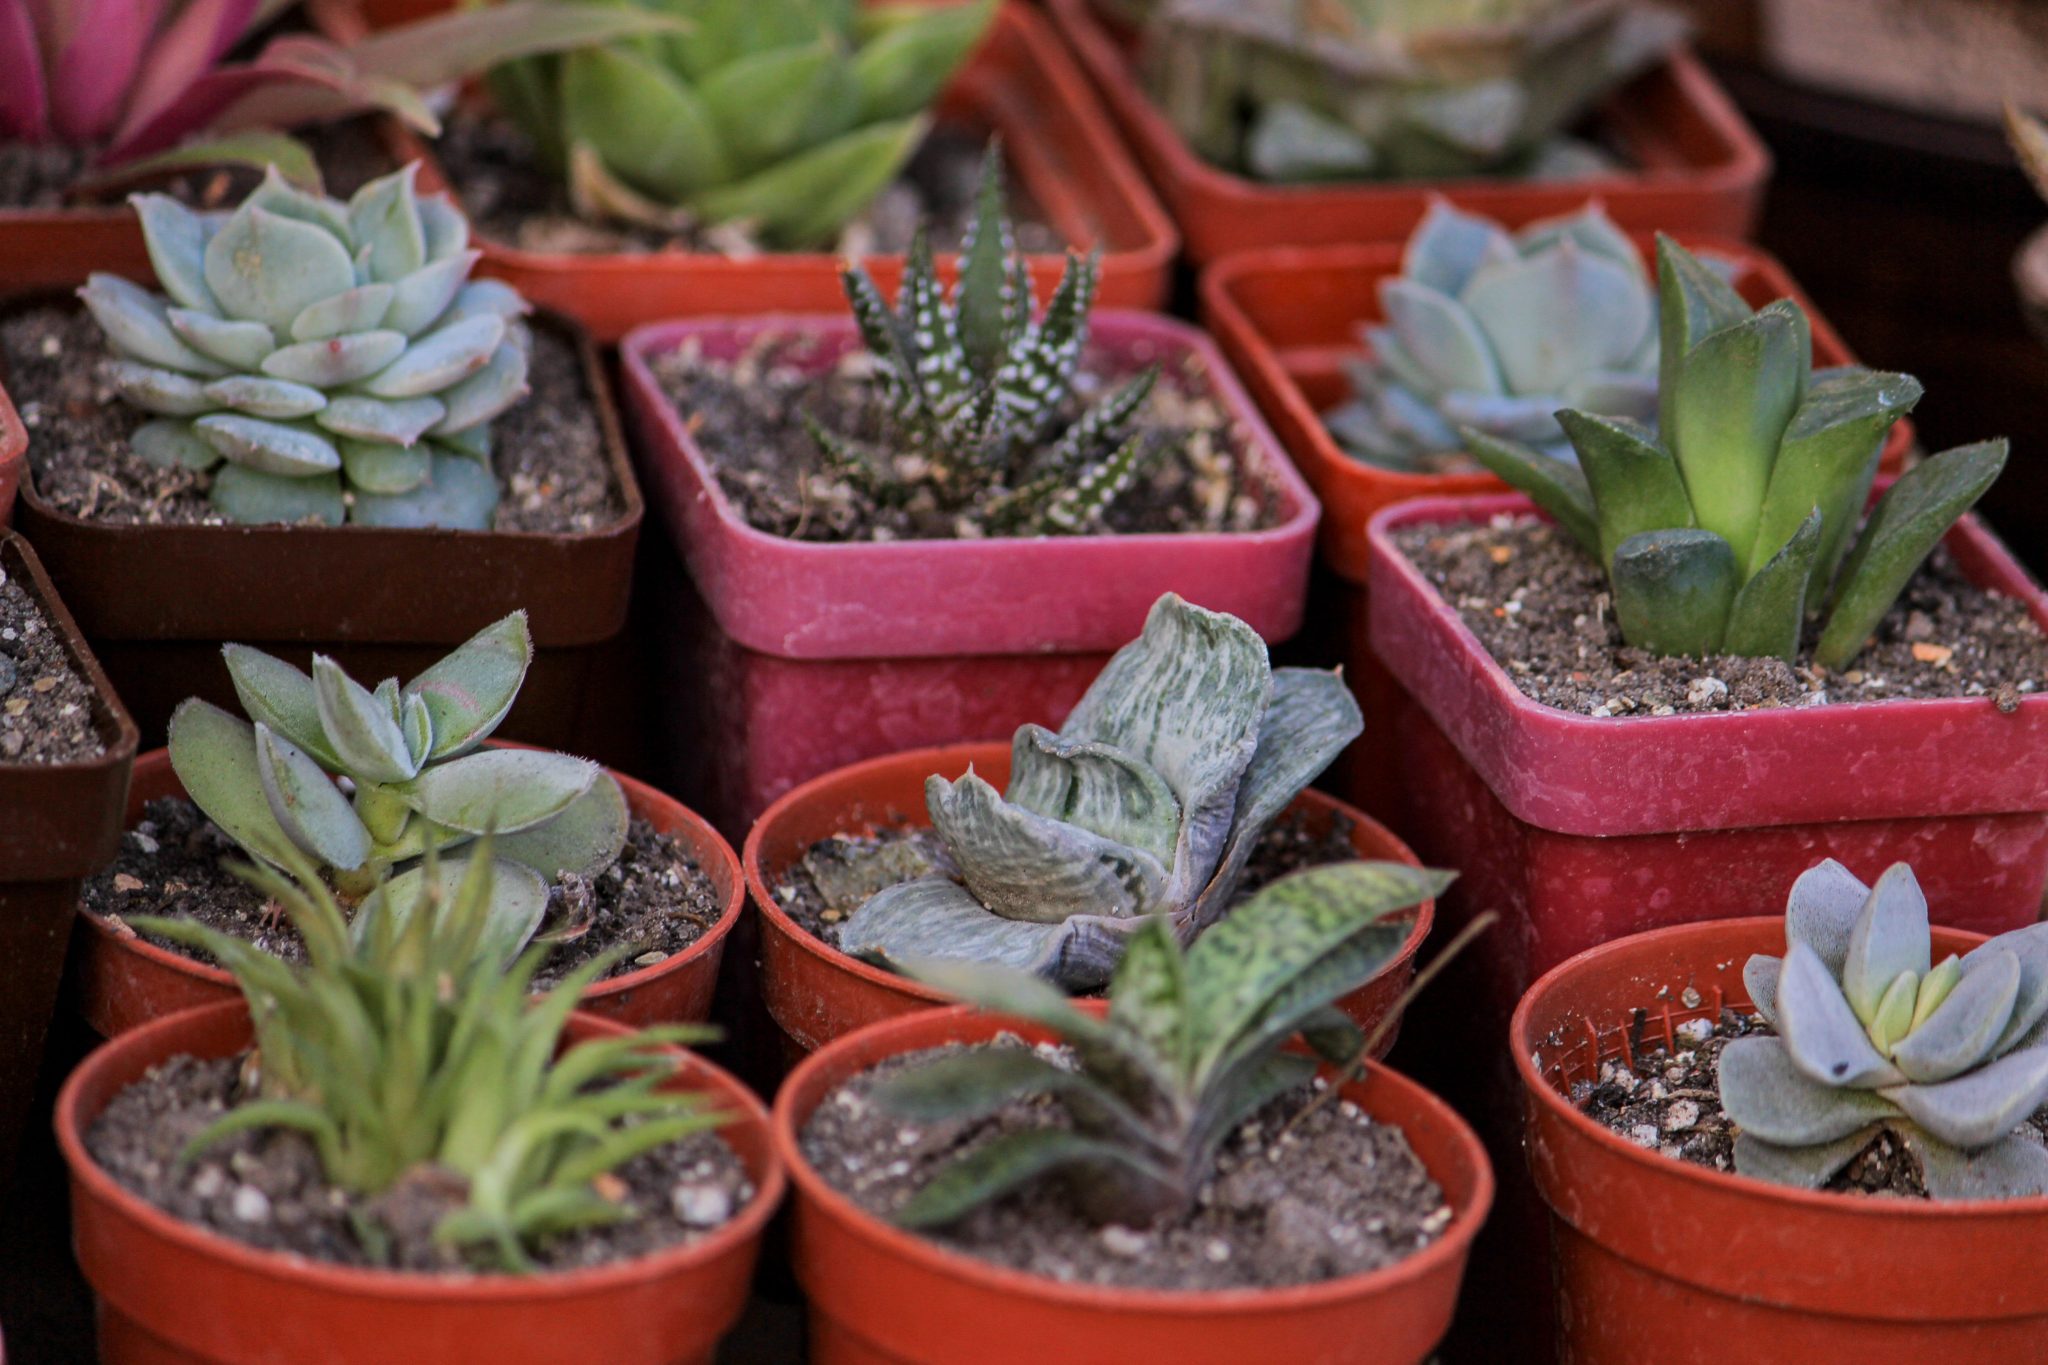
21. A Dense Display of Succulents in Terracotta and Red-Pink Pots
The One Thing: The key to this vibrant display is repetition with a twist. By grouping dozens of small succulents together, you create a powerful visual impact that a single plant could never achieve. The secret ingredient is the introduction of those square, reddish-pink pots. They break up the sea of round, orange terracotta, adding a jolt of modern color and a contrasting shape that makes the entire collection more dynamic and interesting to look at. It’s a controlled chaos that works beautifully.
💸 Get This Look For Less
Designer Tip: When creating a large collection of small plants, the trick is to treat them as a single mass. Pack them tightly together so their edges touch and the individual pots almost disappear. This creates a ‘carpet’ of texture and color. To ensure it looks cohesive, stick to a limited pot palette. Here, it’s just two main colors: terracotta and reddish-pink. This simple color rule provides the structure that allows the wild variety of the succulents to shine without looking messy. See a more rustic take on this concept in Idea #21.
22. A Rustic Tabletop Garden of Mixed Succulents and Cacti
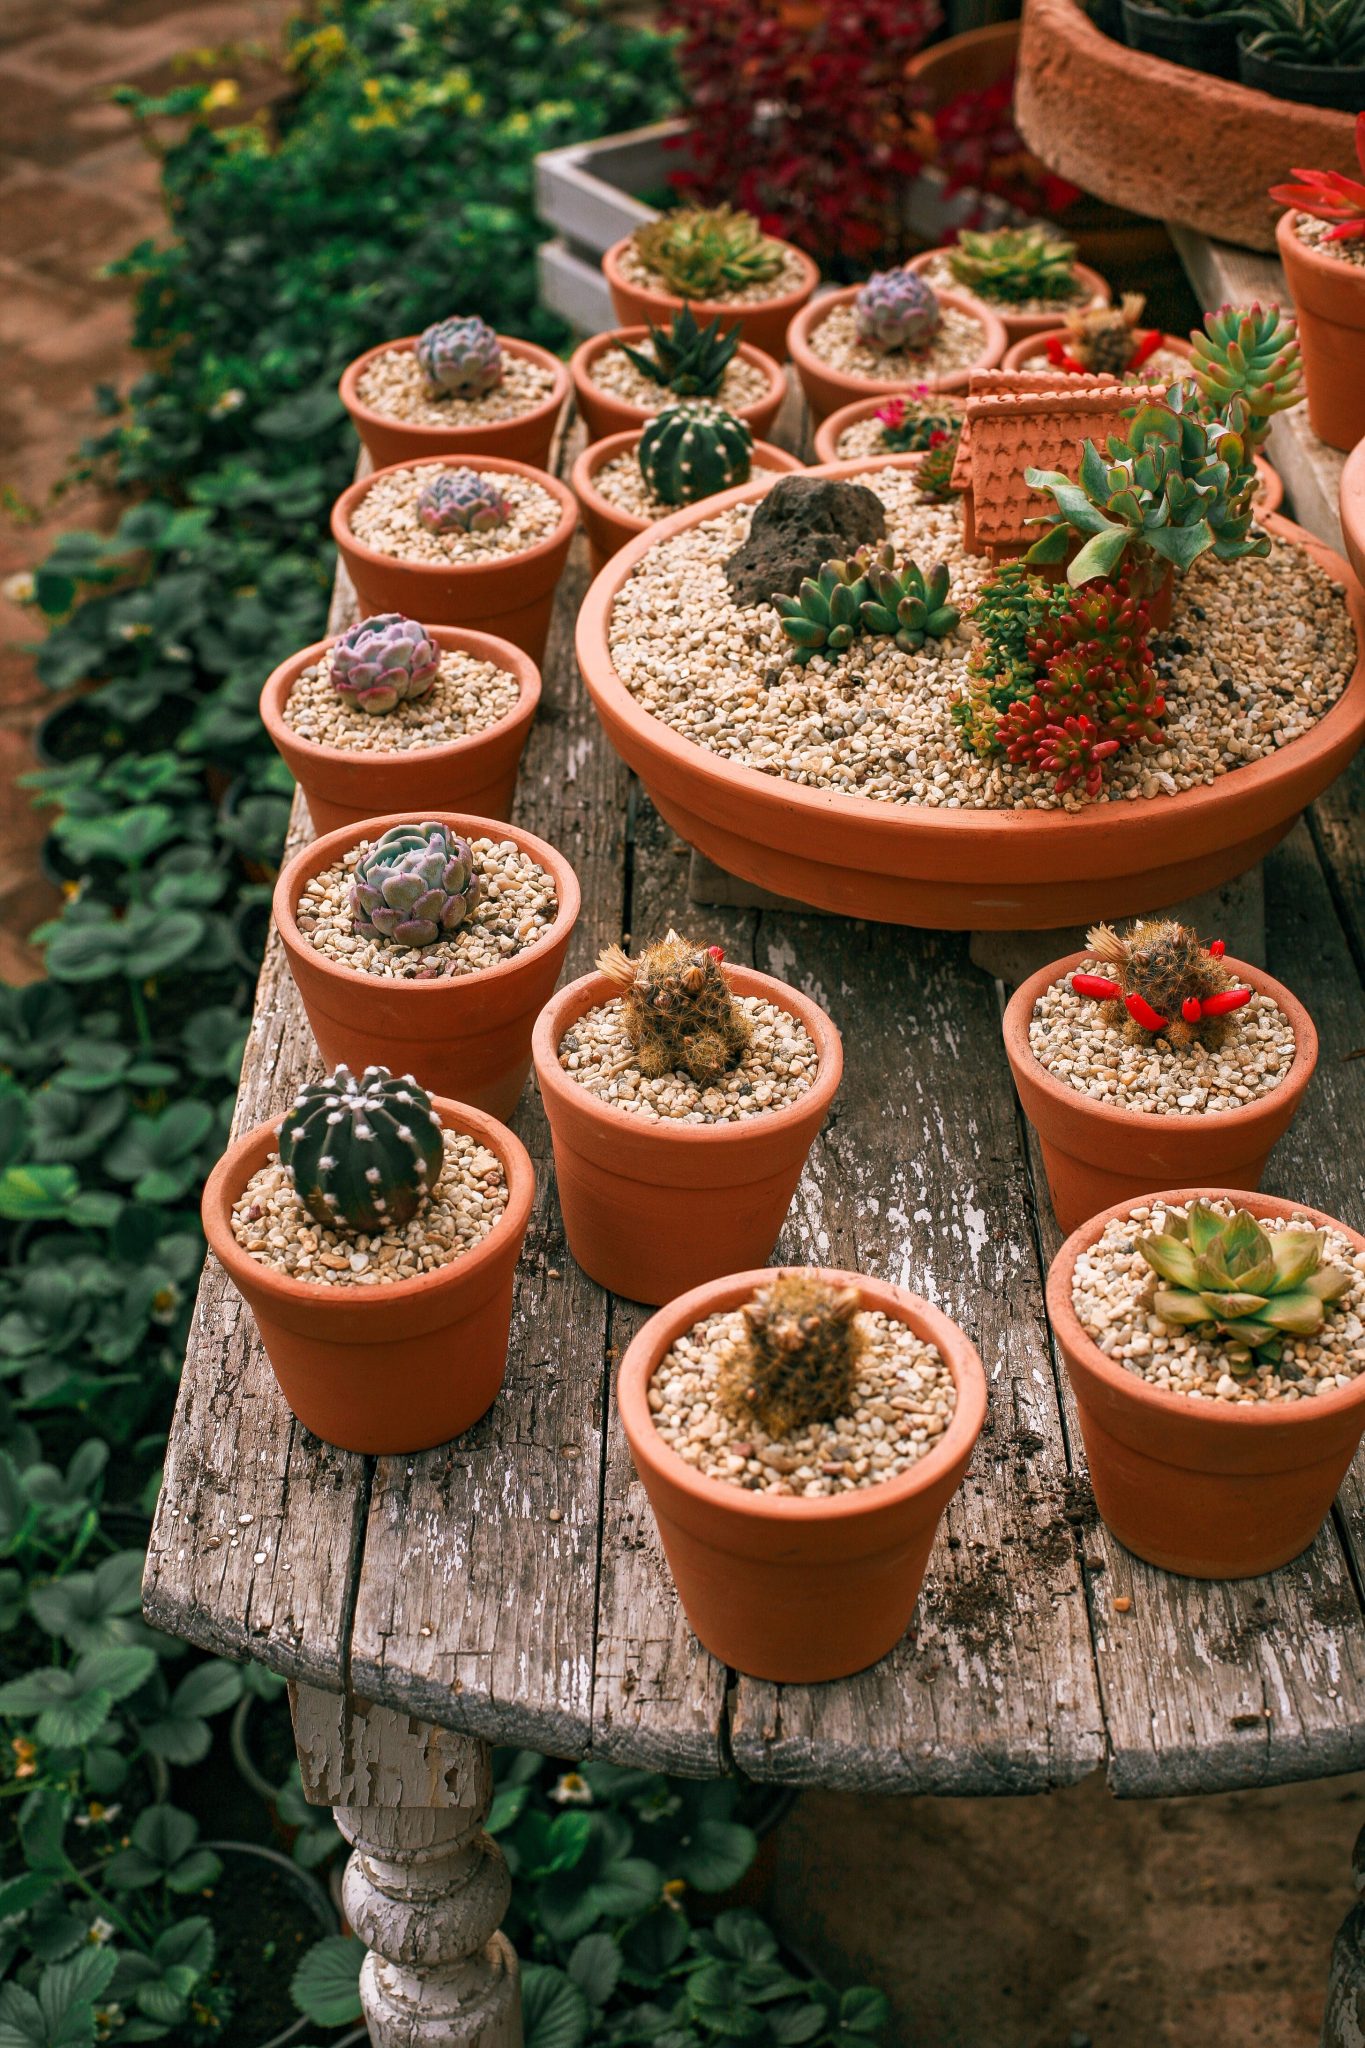
What Makes It Work: This is more than just a collection of pots; it’s a miniature world. The large, shallow bowl in the center, complete with a tiny terracotta house and gravel groundcover, acts as the charming centerpiece and anchor for the entire display. The surrounding individual pots of cacti and succulents serve as the supporting cast. The whole scene is unified by the consistent use of terracotta and the weathered, peeling paint of the wooden table, creating a rustic, cohesive, and utterly charming botanical story.
🔧 How-To Brief
Get This Look For Less: The beauty of a succulent collection is that it can grow over time. Start with a few small, inexpensive terracotta pots and a couple of interesting succulents from a local nursery. The ‘miniature garden’ bowl can be your main DIY project. Use a standard terracotta saucer or shallow bowl, add some soil, and then look for miniature or ‘fairy garden’ accessories online or at a craft store. The little house is the key piece, and they are often available for just a few dollars. The rest can be collected and added over months or years.
23. An Aged Terracotta Sun Face Planter with Moss and Pebbles
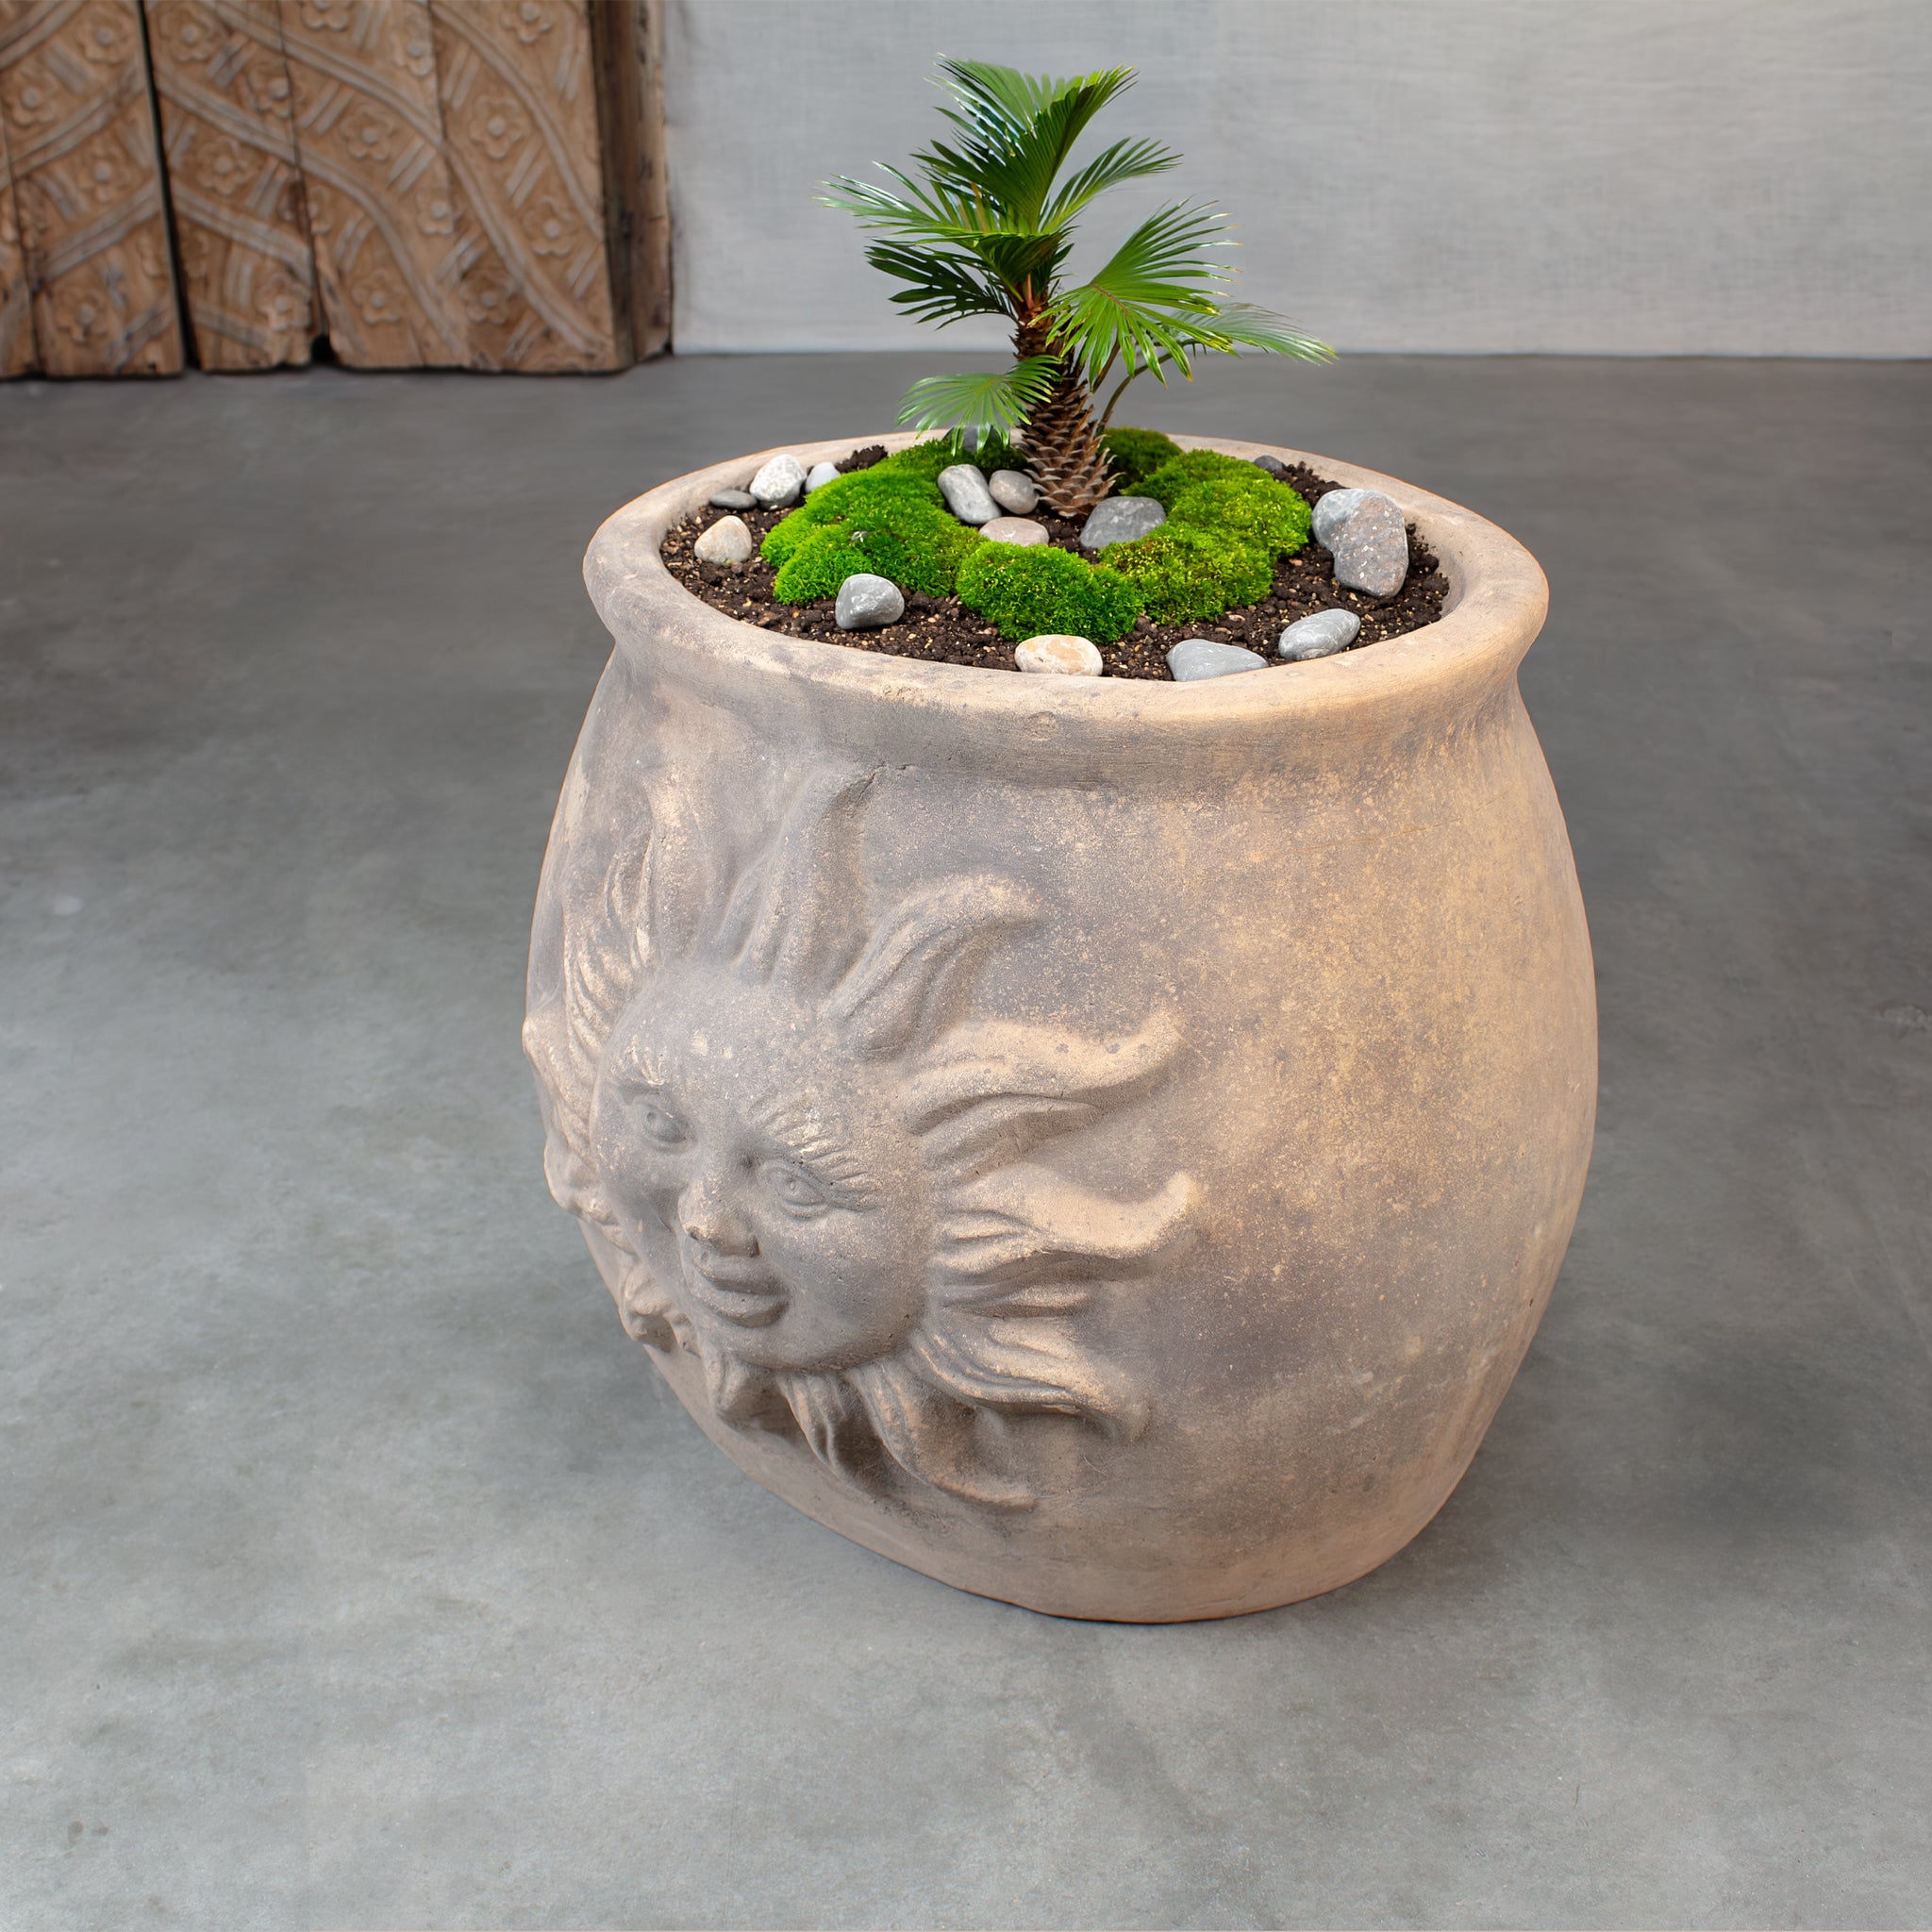
Maintenance Reality: A planter with a detailed relief like this sun face requires a little extra care to keep it looking its best. The crevices of the design are prime spots for dirt and debris to collect. A gentle scrub with a soft-bristled brush and water a few times a year will keep the details sharp. The moss and pebble topping, while beautiful, can make it hard to judge soil moisture. You’ll have to rely on the weight of the pot or gently push aside the pebbles to feel the soil, rather than just glancing at it.
🧹 Maintenance Reality
Style Math: This serene corner is a formula of balanced textures: 50% Aged Terracotta (the pot itself, with its weathered surface and sun relief) + 30% Soft Greenery (the bright moss and palm-like plant) + 20% Smooth Stone & Concrete (the gray pebbles and floor). The pot is the undeniable star, but the supporting elements are crucial. The soft moss contrasts with the hard pebbles, and the simple gray floor and wall provide a minimalist backdrop that lets the textured planter command all the attention.
24. A Festive Terracotta Pot and Candle Centerpiece
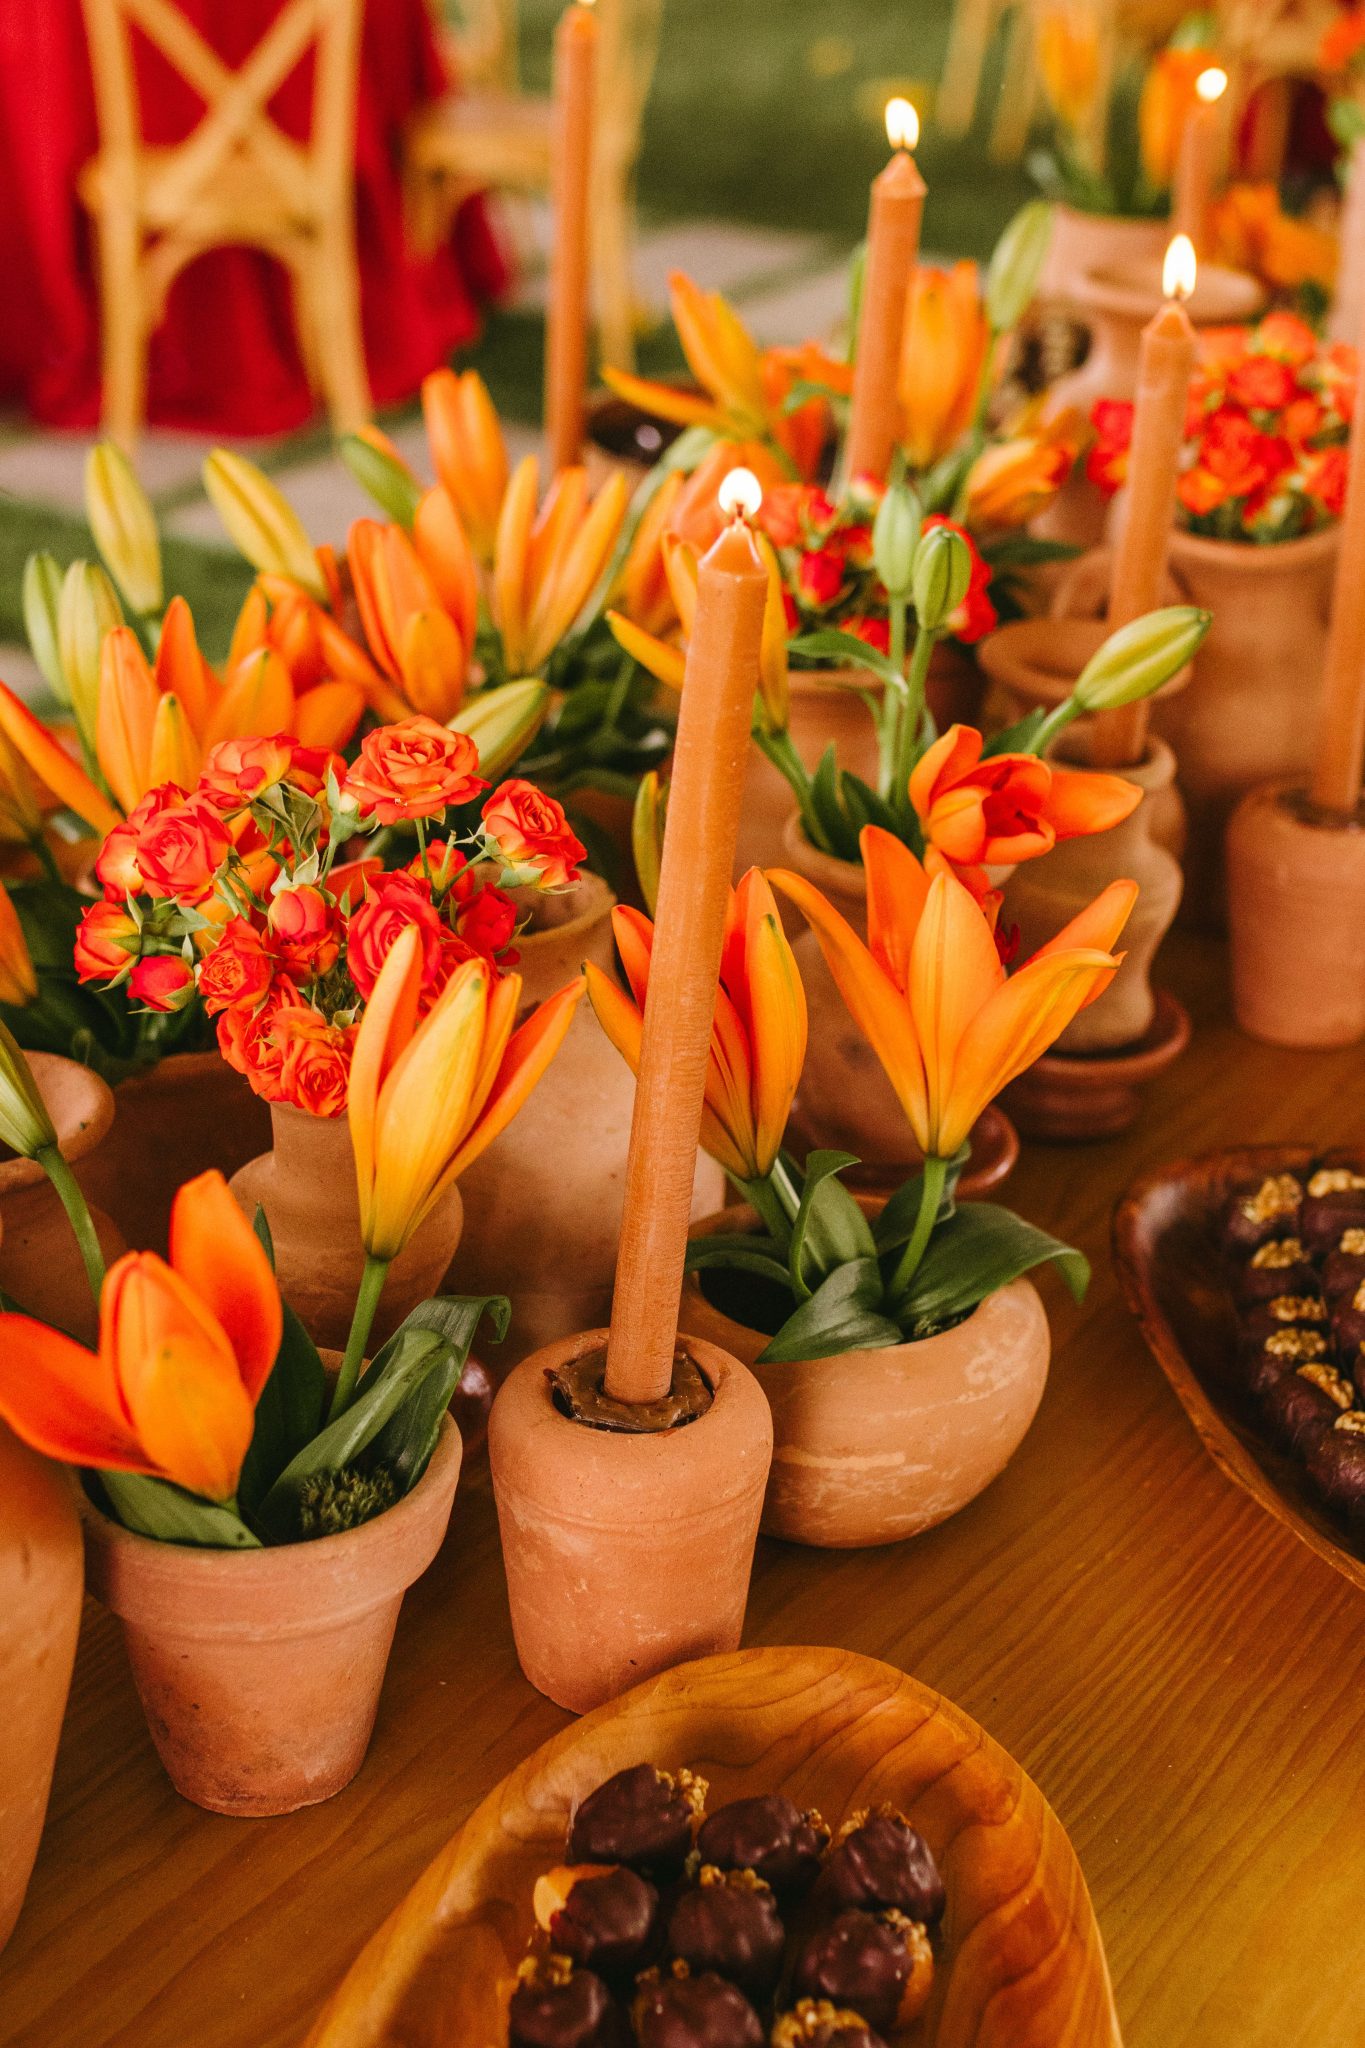
How-To Brief: Create this warm, glowing centerpiece for your next dinner party. Time: 30 minutes. Cost: $40-$60.
- Gather 5-7 small, matching terracotta pots (about 4 inches).
- Cut floral foam to fit snugly inside 3-4 of the pots and soak it in water.
- Arrange your flowers (like lilies and roses) in the foam-filled pots, cutting stems to varying heights for interest.
- For the candle pots, fill the bottom with sand or small pebbles to create a stable, non-flammable base.
- Securely nestle your tapered candles into the sand.
- Arrange the flower and candle pots in a cluster or line down the center of your table. Intersperse with a few empty pots for a layered look.
💡 Designer Tip
Real Talk: This is a stunning centerpiece, but it requires adult supervision. You have open flames directly next to flammable materials (flowers, foliage, and a wooden table). Never leave this centerpiece unattended while the candles are lit. Ensure the candles are securely fixed and won’t wobble or tip over. For a safer but equally beautiful alternative, use high-quality flameless LED tapered candles. You’ll get the same warm glow without any of the fire hazard, letting you and your guests relax and enjoy the meal.
25. A Large Ribbed Terracotta Pot with a Statement Fan Palm
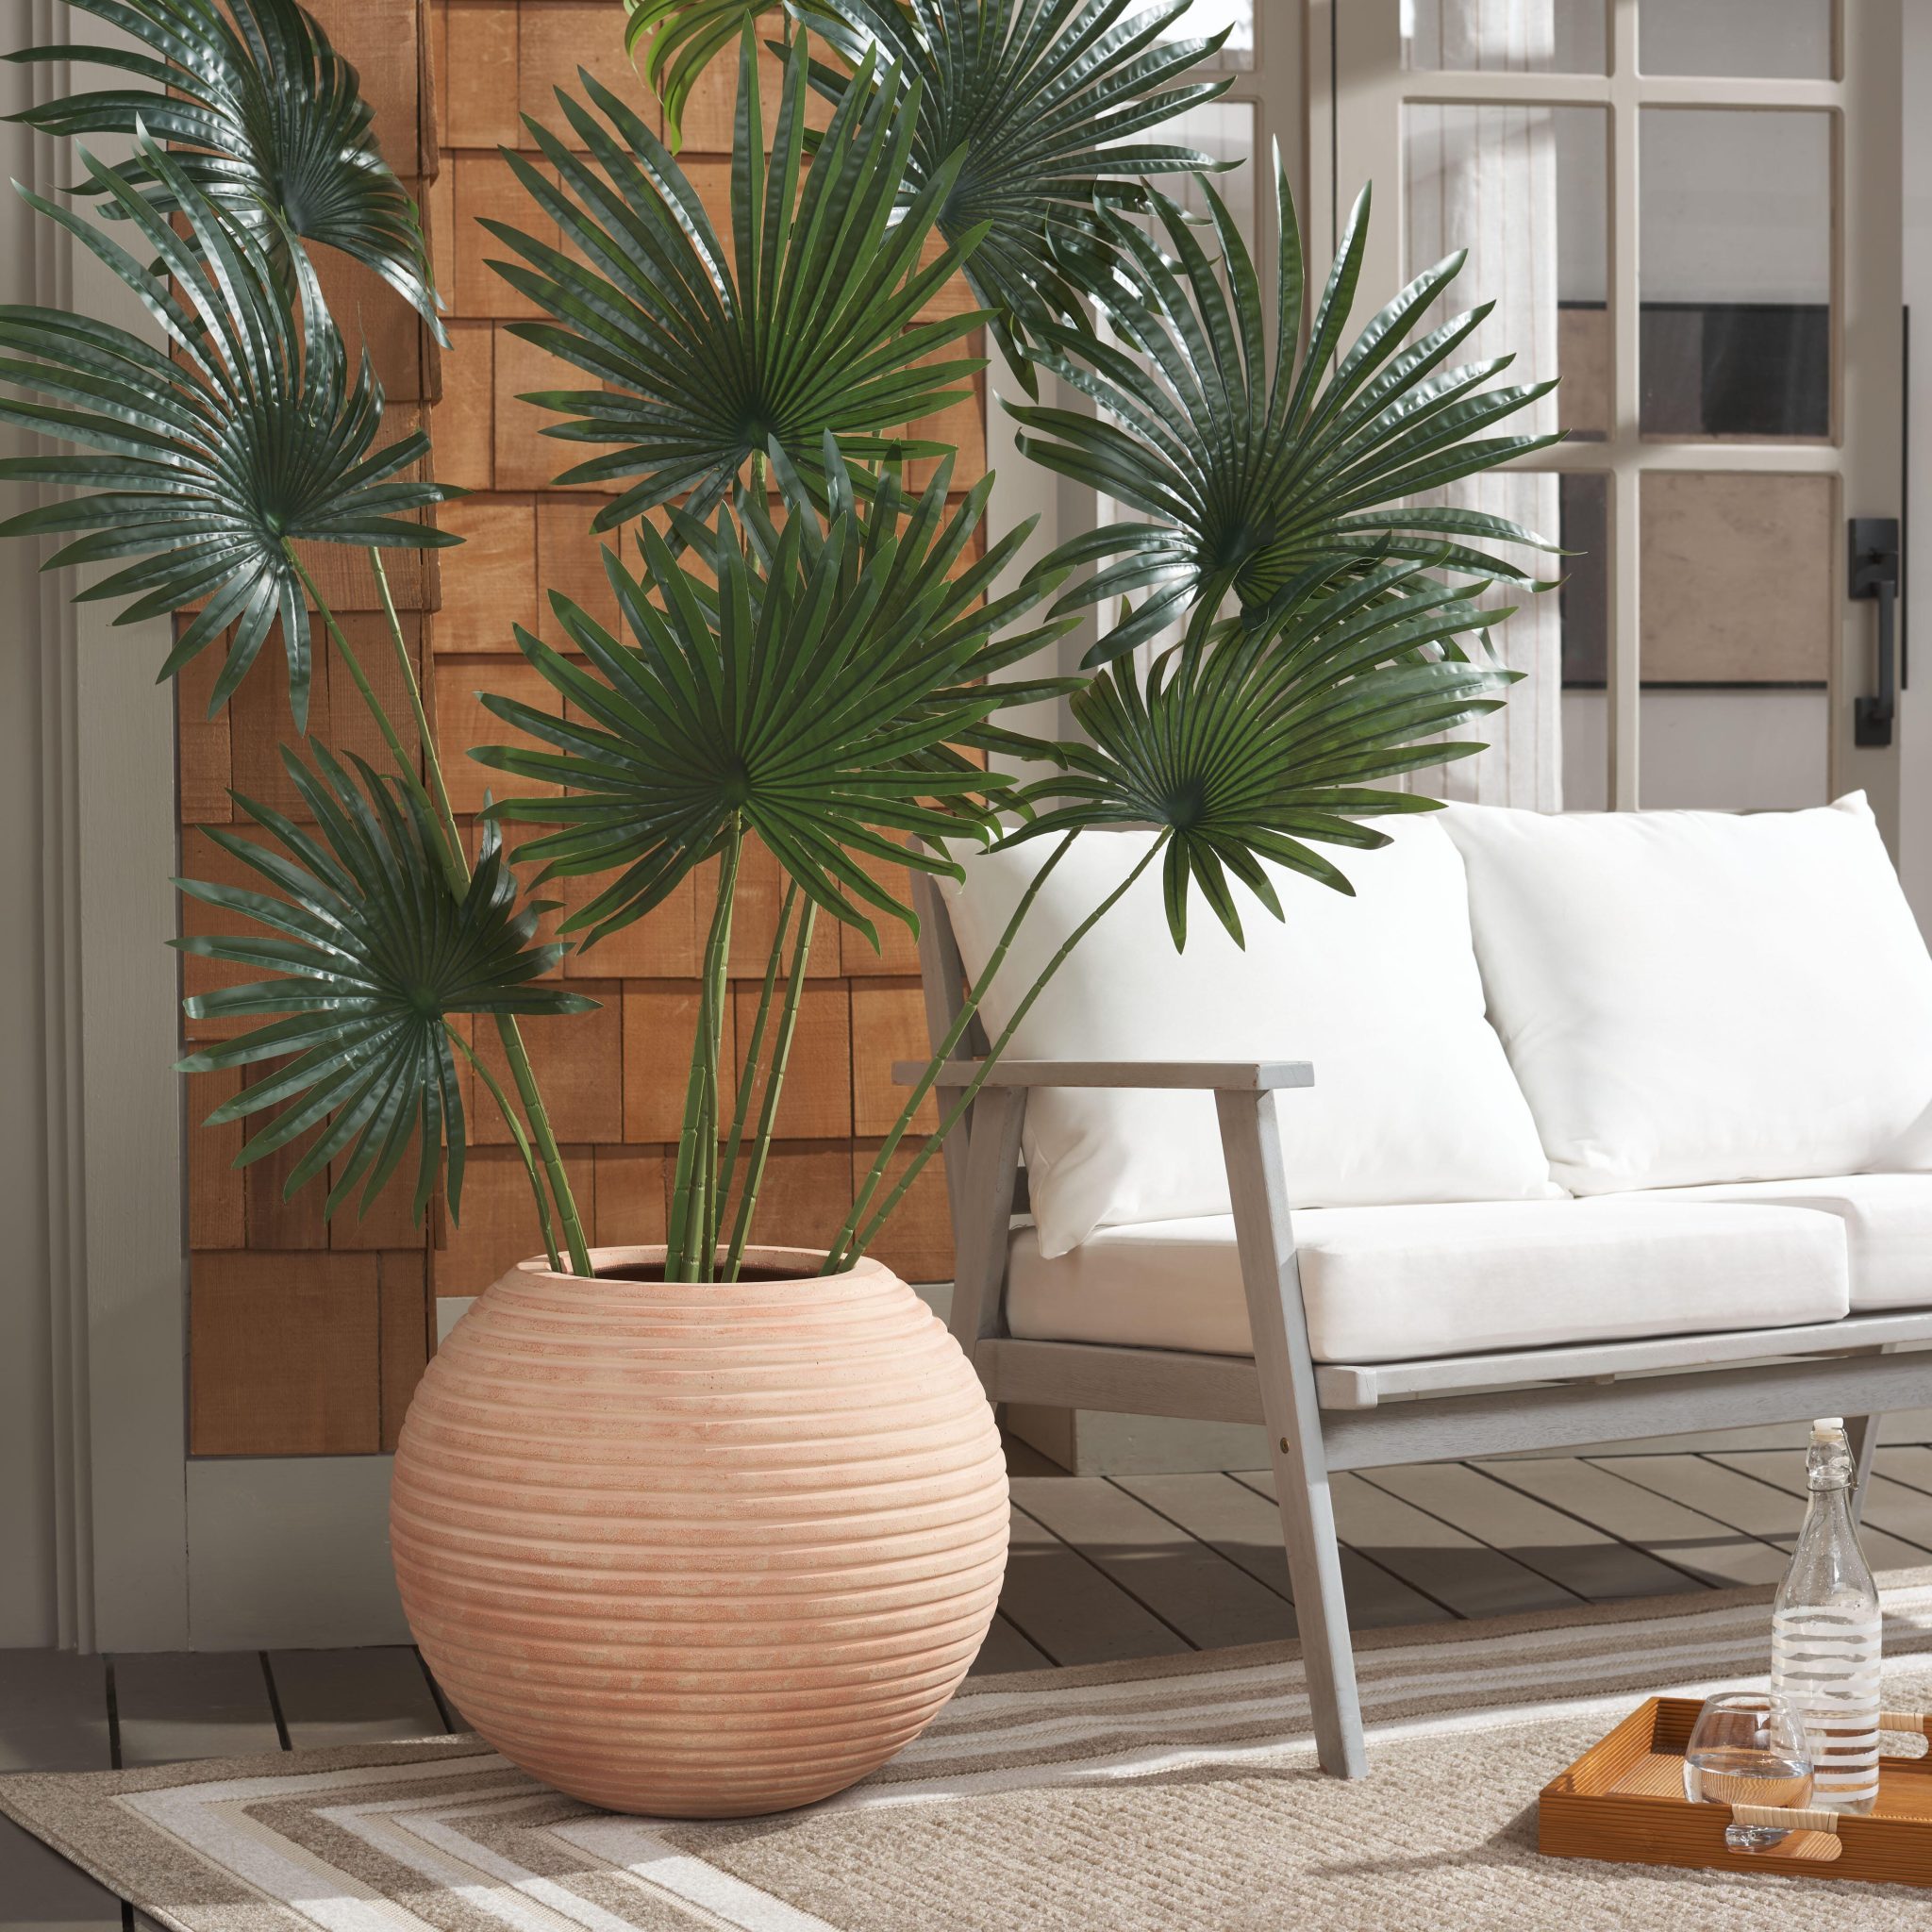
Designer Tip: When you’re working with a large-scale planter, the pot’s texture is just as important as the plant itself. The strong horizontal ribbing on this pot adds significant visual weight and surface interest. Without it, the large expanse of terracotta could look flat and less impactful. When you’re shopping for a big pot, don’t just look at the color and shape—run your hand over it. A subtle pattern, a ribbed texture, or a sand-blasted finish can elevate a simple container into a true design element.
⭐ The One Thing
Maintenance Reality: A big pot and a big plant come with a few care realities you need to know before you commit.
- A fan palm needs bright, indirect light. Placing it where it gets blasted by hot afternoon sun will scorch those beautiful green leaves.
- This planter is heavy on its own. Filled with soil, water, and a plant, it will be immovable. Decide on its permanent home BEFORE you plant it.
- Terracotta dries out quickly, especially outdoors. In the summer heat, a large, thirsty plant like this may need watering every other day. A self-watering insert could be your best friend.
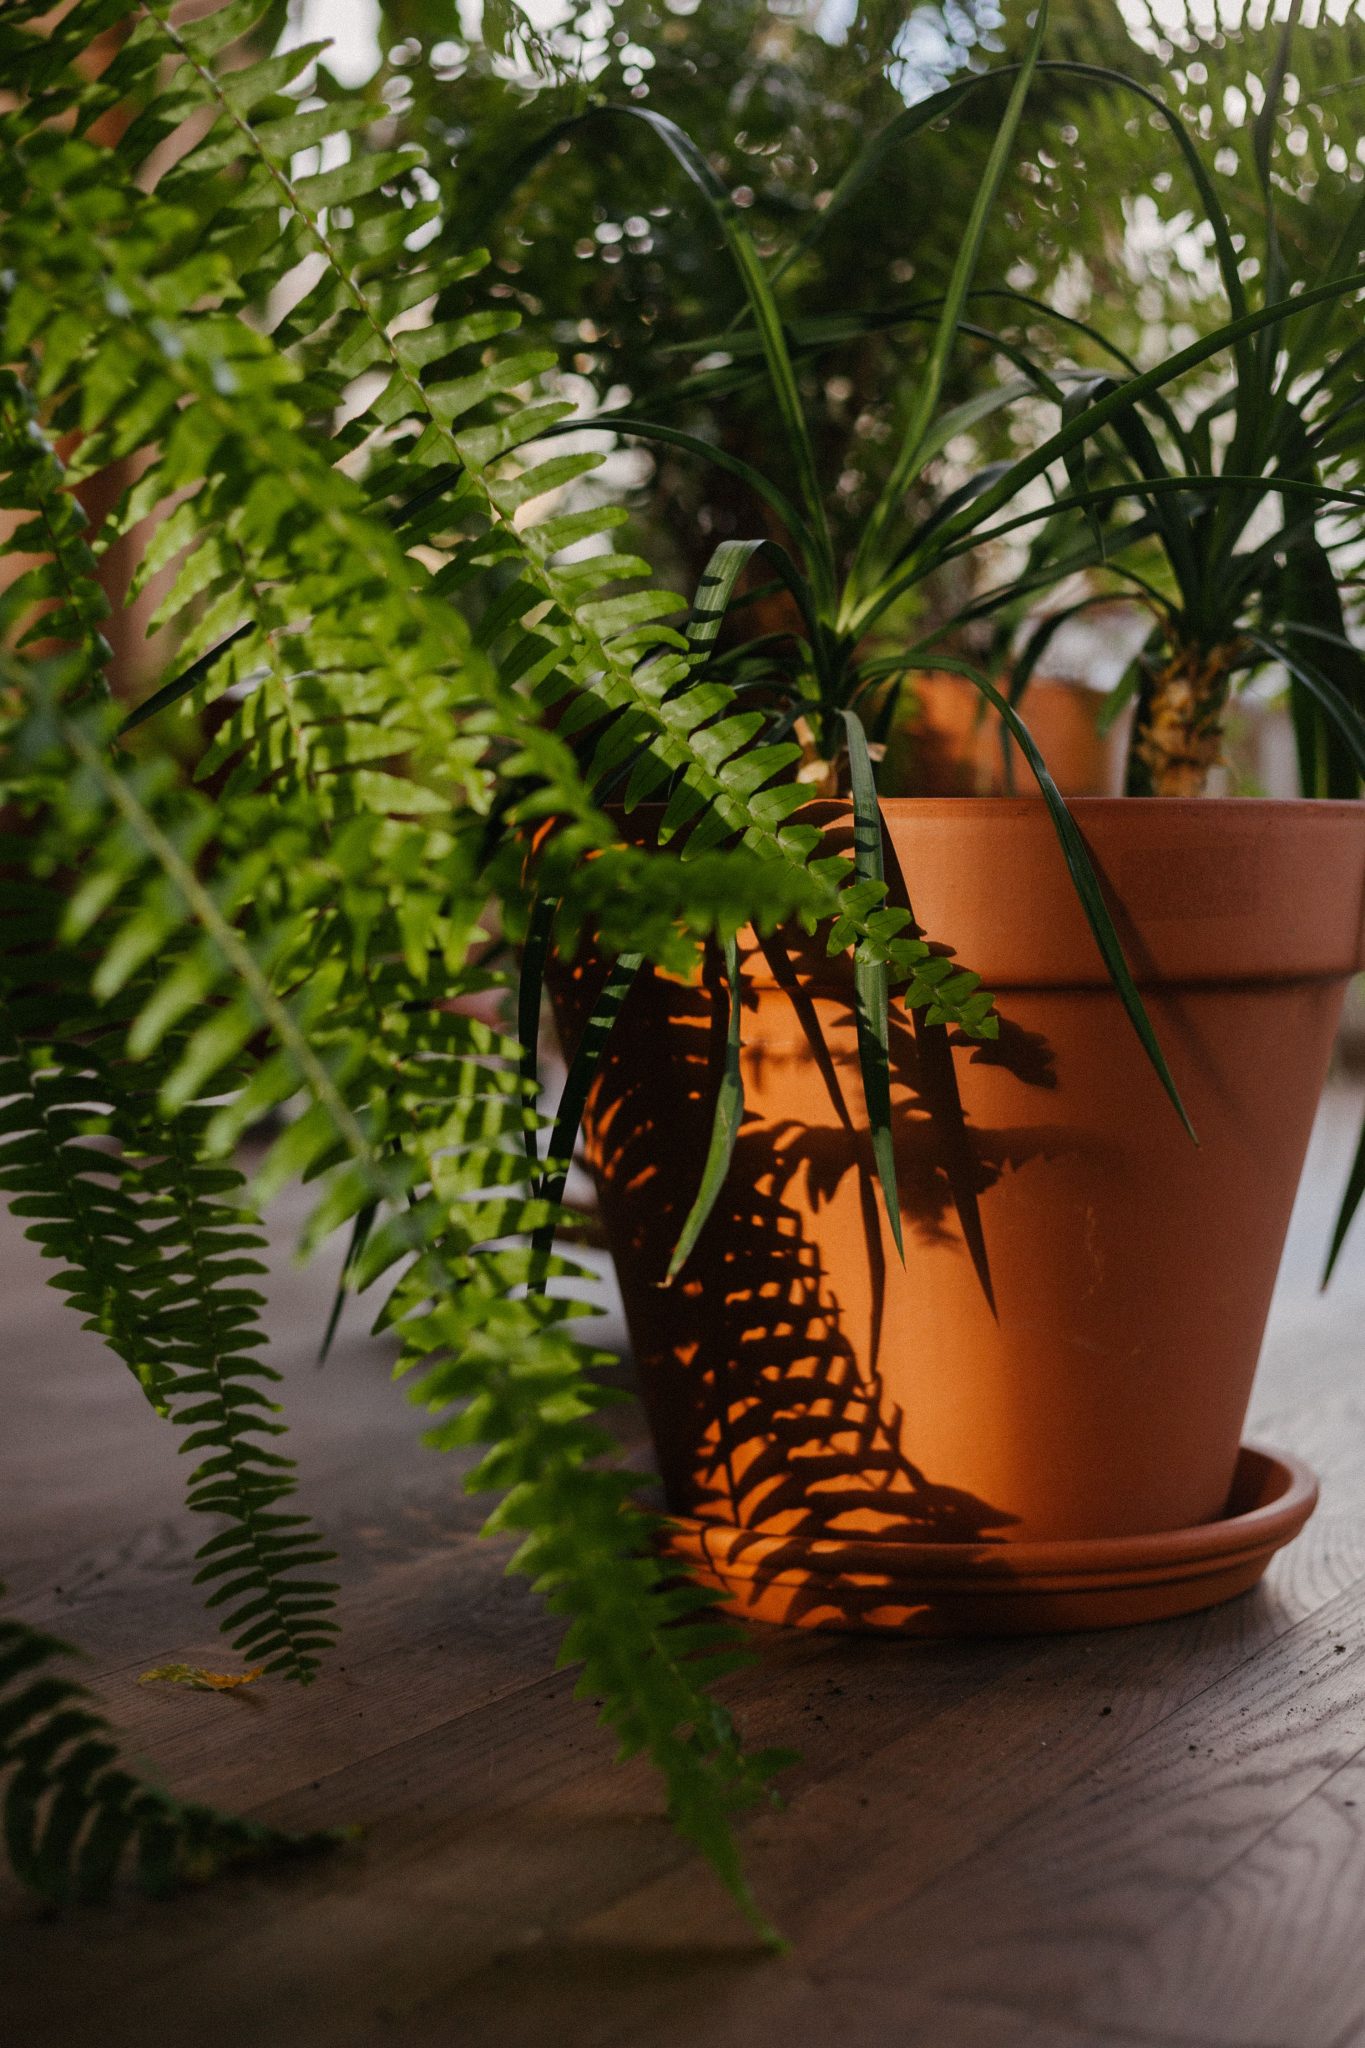
26. A Classic Terracotta Pot and Fern Casting Dramatic Shadows
The One Thing: The shadows. Absolutely, the shadows are the star of this show. Without the dramatic, intricate shadows cast by the fern leaves, this would be a simple, pleasant photo of a plant. But the strong directional light turns the scene into art. The shadows dapple across the earthy orange pot, the matching saucer, and the dark wood floor, adding a layer of pattern, depth, and movement. It highlights the delicate structure of the leaves in a way that looking directly at the plant cannot.
⚠️ Real Talk
What Makes It Work: This composition is a perfect example of using natural light as a design element. The high-contrast light creates a dynamic interplay between the solid forms (the pot, the floor) and the ephemeral patterns (the shadows). The simple, classic shapes of the pot and saucer provide a perfect canvas for the intricate shadows. The limited color palette of terracotta orange, lush green, and dark wood brown allows the textures and the light-and-shadow play to take center stage without distraction.
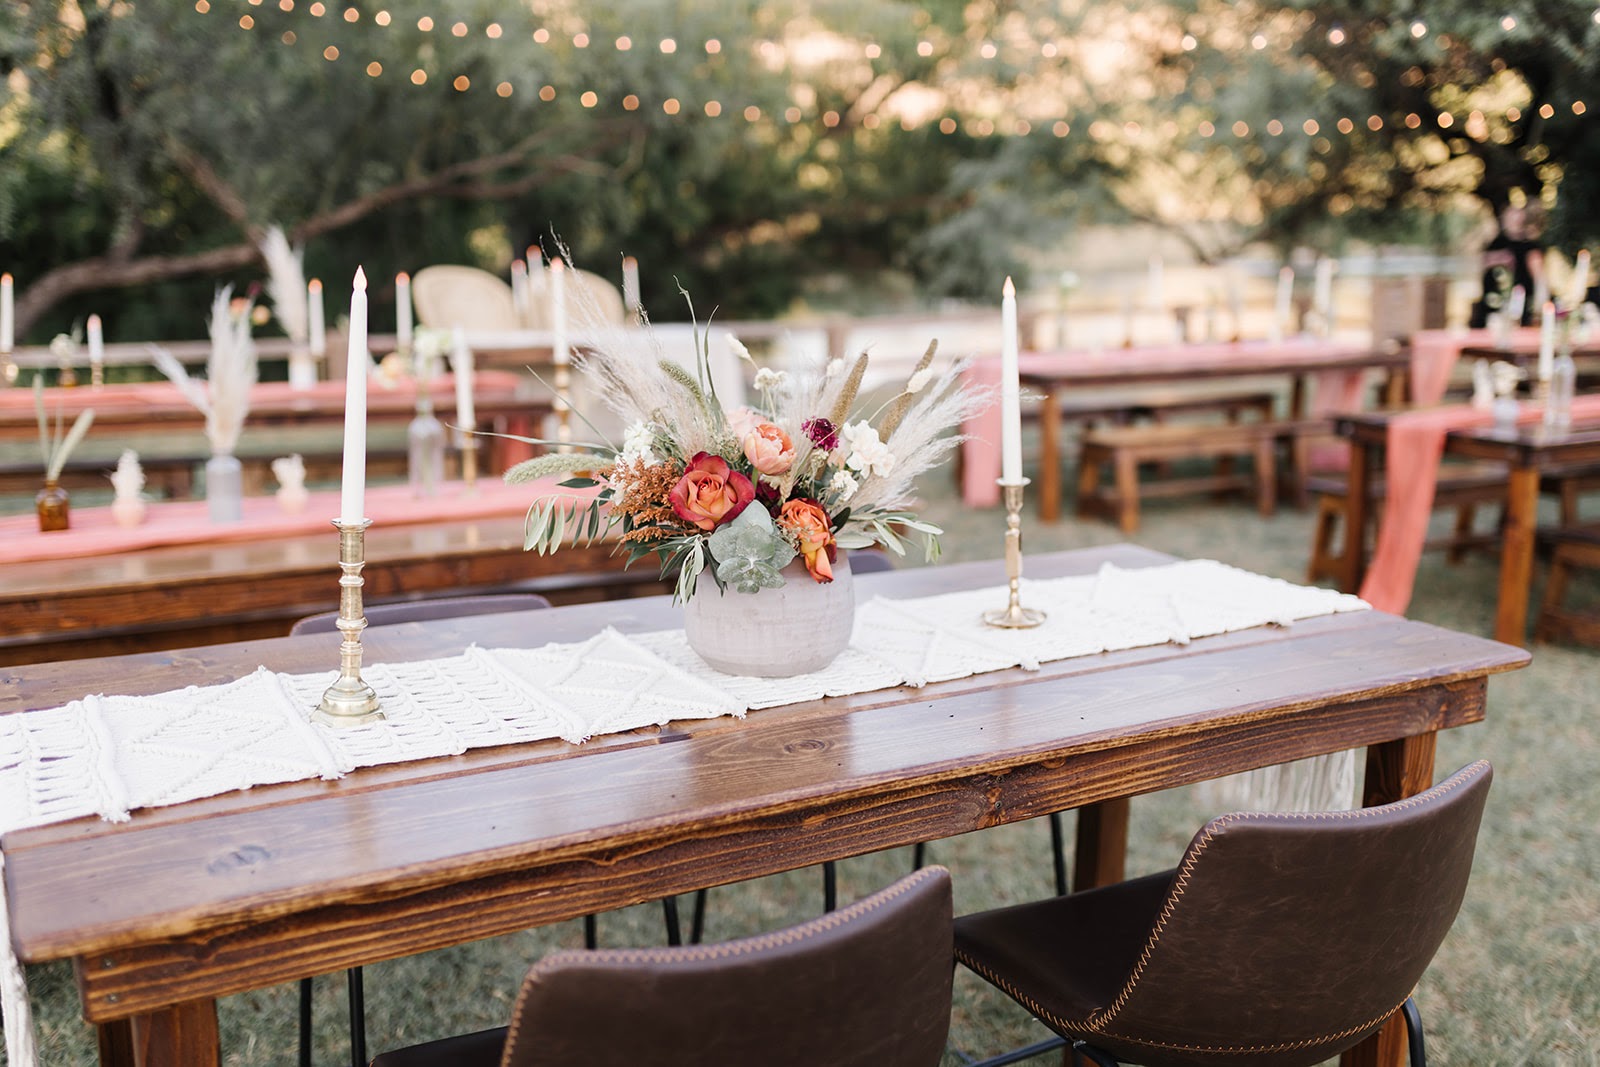
27. A Rustic Dining Table with a Pampas Grass Centerpiece
Style Math: This romantic, boho tablescape follows a specific formula: 40% Rustic Wood (the dark stained table) + 30% Soft Textiles (the macrame runner, feathery pampas) + 20% Warm Tones (peach/orange flowers, brown leather chairs) + 10% Metallic Accent (the brass candlesticks). The light gray pot is a clever choice—it provides a neutral, textural base that doesn’t compete with the warm tones of the flowers or the brass, allowing them to be the stars of the centerpiece.
|
📋 Copy HEX 🔗 Share |
📐 Style Math
Get This Look For Less: A high-end floral centerpiece can be pricey, but you can achieve this vibe on a budget. The key is the pampas grass, which you can buy dried online or at craft stores for around $20—and it lasts forever! Supplement with a few affordable grocery store flowers in peach and orange tones. Use a simple textured gray pot from a store like Target ($25) and find vintage brass candlesticks at a thrift store for a few dollars each. The macrame runner can be found on Amazon for under $30. You get the full romantic effect for a fraction of the cost.
Your Turn to Dig In
See? Terracotta is so much more than just a simple garden pot. It’s a texture, a color, and a vessel for bringing life and character into your home. You don’t have to do it all at once. Just pick one idea from this list that sparked something for you and start there. Now, head over to Pinterest and start creating your own board with these fresh looks!