You know that feeling when you finally find the low-budget DIY garden pot idea that looks exactly right for your space, but you’re not sure how to actually pull it off? We’ve all been there, endlessly pinning gorgeous gardens. That’s why we’ve put together this list of 30 incredible, budget-friendly planter ideas made from real, everyday items. Forget overpriced pots; these projects prove you can create a stunning garden with a little creativity and things you might already have. We’re showing you everything from upcycled tires to clever tin can displays. And stay until the end — we break down the most common mistakes that can ruin these looks. 📌 Save this to Pinterest for later — you’ll want to revisit these ideas.
1. Vibrant Stacked Painted Tire DIY Planters
There’s a reason this look is so satisfying: it’s a masterclass in contrast. The industrial, utilitarian form of old car tires is completely transformed by joyful, high-gloss paint in shades of blue, yellow, and pink. This bold color choice pops dramatically against the natural texture of the wooden fence and the green of the plants. Stacking them creates vertical height and repetition, turning what could be junk into a deliberate, sculptural statement. It’s the perfect blend of rugged and cheerful.
💡 Designer Tip
Want to make your own? It’s easier than you think. This quick guide will get you started.
- Clean the Tires (1 hour): This is the most important step! Scrub the tires inside and out with a strong degreasing soap and a stiff brush to remove all road grime and oils. Let them dry completely.
- Drill for Drainage (10 mins): Flip the tire over and use a power drill with a 1/2-inch bit to drill 5-7 drainage holes in what will be the bottom wall of the planter.
- Prime and Paint (2 hours + drying): Apply a coat of exterior-grade primer designed for rubber or plastic. Once dry, apply 2-3 thin coats of your chosen bright outdoor spray paint. Thin coats prevent drips and result in a more durable finish.
- Stack and Fill (15 mins): Arrange your painted tires, then fill with potting soil and your favorite plants.
2. Eclectic Garden of Upcycled Tire and Bottle Planters
This eclectic look is a beautiful jumble of textures and materials, but it follows a surprisingly simple formula. Think of it as: 50% painted tires + 30% repurposed plastic + 20% wood and found objects. The key is that the tires, painted in coordinating white and blue, create a cohesive base. The smaller items, like bottles and wooden boxes, are then scattered in to add detail and variety. You could easily swap the plastic bottles for old tin cans or the wooden box for a vintage crate and still achieve the same charming, resourceful vibe.
⚠️ Real Talk
Let’s be honest about using tires in the garden. While they make fantastic, durable planters, there’s a bit of debate about safety. If you plan to grow edible plants like herbs or vegetables, it’s wise to line the inside of the tire with heavy-duty landscape fabric or a large plastic grow bag. This creates a barrier between your soil and the rubber, preventing any potential chemicals from leaching into your food. For flowers and ornamental plants, it’s generally not a concern.
3. Sustainable Vertical Garden from Repurposed Plastic Bottles
The single element that makes this idea so brilliant is its use of vertical space. It’s not just about recycling bottles; it’s about transforming a flat, boring wall into a living, breathing garden column. By suspending the planters, you can grow a surprising number of plants in a tiny footprint, making it perfect for apartment balconies, small patios, or a narrow side yard. Without the vertical strings, you’d just have a pile of plastic bottles on the ground. With them, you have a clever piece of garden architecture. It’s a game-changer for small-space gardening.
|
📋 Copy HEX 🔗 Share |
📐 Style Math
When creating a hanging bottle garden, use a consistent type and size of bottle for a clean, intentional look. A mix of different shapes and sizes can quickly look messy. To make cutting easier and safer, use a very sharp craft knife to start the incision, then switch to a sturdy pair of scissors to cut around the bottle. For perfectly straight lines, wrap a piece of painter’s tape around the bottle as a cutting guide. This little bit of precision is what separates a DIY project from looking like a DIY project.
4. Rustic DIY Wooden Pallet Planter with an Integrated Trellis
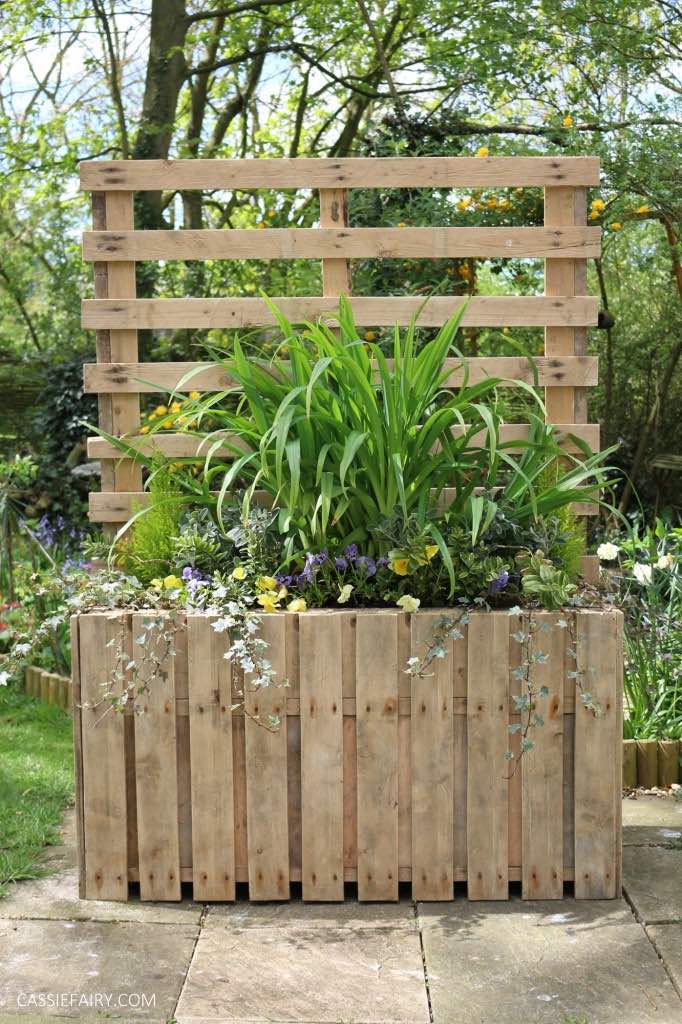
Building this rustic planter is an incredibly affordable way to get a large, impactful piece for your garden, especially if you can source the pallet for free.
🔧 How-To Brief
- Wood Pallets: $0 – $25 (often found for free from local businesses)
- Screws & Hardware: $10 – $20
- Landscape Fabric Liner (optional but recommended): $15 – $25
- Potting Soil & Plants: $50 – $150 (depending on plant size and variety)
- TOTAL: $75 – $220
Budget alternative: Skip the planter box build and simply lean a free pallet against a wall. You can then stuff the openings with soil (wrapped in landscape fabric pockets) or hang small pots from it for a similar vertical effect, costing under $50.
This is a substantial piece. For it to feel balanced and not overwhelm your space, you’ll need a good spot. It works best on a patio or deck area of at least 8×10 feet. The planter itself is about 4 feet wide, so you need enough clearance around it for it to breathe. It’s perfect for creating a privacy screen on a balcony or defining an ‘edge’ for an outdoor seating area. It might be too bulky for a very narrow walkway, where the bottle garden from Idea #3 would be a better fit.
5. Cheery Painted Tire and Pallet Planters Along a Stone Path
The ‘perfectly imperfect’ garden is a huge trend right now, moving away from rigid, formal landscaping and embracing a more personal, lived-in feel. This look captures that spirit perfectly. It’s part of the broader ‘cottagecore’ and upcycling movements we’re seeing all over Pinterest. People want their homes and gardens to tell a story, and using repurposed items like tires and pallets painted in cheerful, coordinating colors feels authentic and joyful. It’s a sustainable choice that also happens to be incredibly stylish and photogenic.

|
📋 Copy HEX 🔗 Share |
📏 Scale Guide
The success of this design lies in its controlled color palette. Despite using a variety of repurposed items (tires, pallets), the consistent use of white and light blue paint unifies the entire collection. This makes the arrangement feel curated, not chaotic. The pop of red from the flowering plants acts as a deliberate accent color, drawing the eye and adding energy. Stacking some of the tires also introduces varied heights, preventing the lineup from feeling flat and creating a more dynamic rhythm along the path.
6. Dramatic Clawfoot Bathtub Planter with a Copper Pipe Trellis
Take away the copper pipe trellis, and you have a lovely floral display in a tub. But with it, you have a piece of functional art. The intricate, almost sculptural form of the copper pipes provides a stunning industrial contrast to the vintage charm of the clawfoot tub and the organic shapes of the plants. It adds height, structure, and a warm metallic gleam that elevates the entire concept from a quirky planter into a sophisticated garden centerpiece. It’s the element that signals true design intent and creativity.

🔥 Trending Context
An old bathtub makes a statement, but it requires some real-world planning. First, drainage is non-negotiable. You MUST drill several large holes in the bottom of the tub, or your plants will rot. Second, that beautiful copper trellis will age. It will develop a greenish patina (verdigris) over time when exposed to the elements. Some people love this look! If you want to keep it shiny, you’ll need to polish it a couple of times a year and apply a clear sealant designed for metal.
7. Playful Pallet Bench with Rubber Boot and Bucket Planters
You don’t need fancy materials to create this burst of garden color. This entire look is built on found and forgotten items. Search Facebook Marketplace or local classifieds for a free wooden pallet to build the bench. The planters? Raid your own closet for old rain boots (or hit up a thrift store for a few dollars a pair). A simple plastic bucket from a hardware store costs less than $5. With a couple of sample pots of paint ($5-10 each) and some strawberry starts ($15), you can replicate this entire vibrant scene for well under $50.

✅ Before You Start
This charmingly rustic setup is all about a balanced formula of color and texture. It breaks down to roughly 40% painted wood + 30% quirky planters (boots, buckets) + 30% lush greenery. The key is the bold, saturated paint on the pallet bench; the magenta and teal create a strong foundation. The variety of colors and shapes in the rubber boot planters adds the playful, eclectic layer, while the strawberry plants tie it all together with a classic garden feel. The formula works because the bench provides a single, unifying stage for all the smaller, quirky elements.
8. Bright Turquoise Tiered Planter from Repurposed Drawers
This idea is so effective because it cleverly uses the existing structure of a piece of furniture to create instant landscaping. The staggered, open drawers form natural tiers, providing different levels and pockets for a variety of plants without any extra construction. The single, unifying coat of vibrant turquoise paint is crucial; it transforms the old dresser from ‘furniture’ into ‘planter’ and makes the whole thing feel intentional. The tiny pop of red on the knobs is the finishing touch, a classic complementary color choice that makes the turquoise feel even more electric.

🧹 Maintenance Reality
Before you drag grandma’s old dresser onto the lawn, a reality check: most indoor furniture is not built to withstand the elements. This is a fantastic, whimsical idea, but it will have a limited lifespan outdoors. The particleboard or cheap wood will likely swell, warp, and degrade after a season or two of rain and sun. To extend its life, coat the entire piece (especially the inside of the drawers) with several layers of marine-grade varnish or exterior paint. Also, don’t forget to drill plenty of drainage holes in the bottom of each drawer!
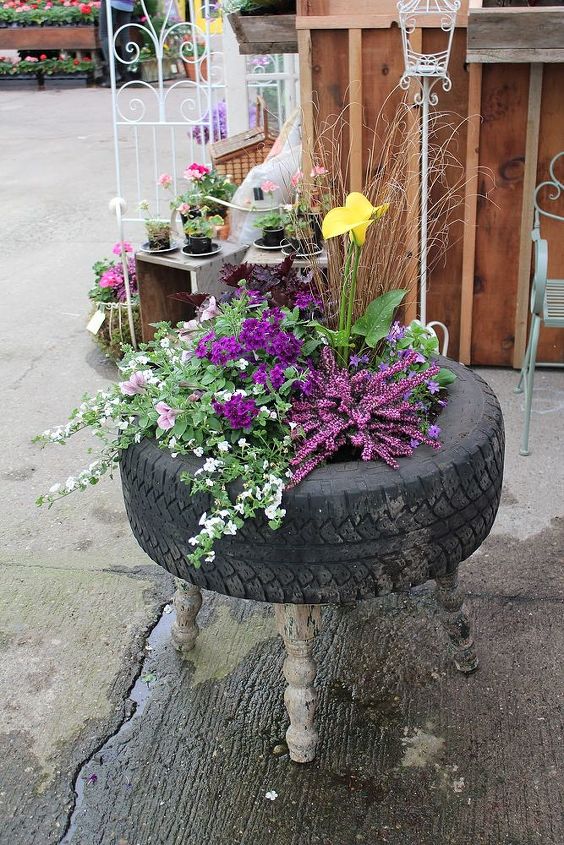
9. Creative Repurposed Tire Planter on Weathered Spindle Legs
The single most important element here is the spindle legs. Without them, it’s just a tire with flowers on the ground, similar to Idea #1. By elevating the tire, the entire piece is transformed. It gains a sense of lightness and personality, morphing from a simple planter into a quirky piece of ‘garden furniture’. The weathered, traditional style of the spindles provides a fantastic stylistic contrast with the industrial modernism of the rubber tire, creating a visual tension that is incredibly compelling and chic.
⭐ The One Thing
To securely attach legs to a tire, you can’t just screw them into the rubber. You’ll need to create a stable base inside. Cut a circular piece of plywood that fits snugly into the bottom of the tire cavity. Attach the spindle legs to this plywood base first, screwing them in from the top. Then, place the entire wood-and-leg assembly inside the tire. You can secure it further by drilling through the tire sidewall and into the edge of the plywood circle in a few spots. This ensures your planter is stable and won’t wobble.
10. Tiered Natural Log Planter with Mixed Greenery
This is the ultimate low-cost, high-impact project if you have access to the right materials. The cost can be next to nothing if you can source the logs for free.
💸 Get This Look For Less
- Logs: $0 – $75 (Check with local arborists, tree removal services, or on Facebook Marketplace for free firewood or logs)
- Potting Soil: $20 – $40
- Plants (Foliage & Flowers): $30 – $80
- Labor: Your own time!
- TOTAL: $50 – $195
Budget alternative: If you can’t find large logs, create a similar tiered look by stacking smaller firewood-sized pieces in a circle and filling the center with soil, like a rustic raised bed. The cost could be as low as $30 for soil and plants.
hauling logs, make sure you’ve covered the basics. A project like this is more permanent than a simple pot, so planning is key.
- Confirm your wood source is not treated with harmful chemicals, especially if growing edibles.
- Measure the intended space to ensure your log structure will fit with enough room to walk around it.
- Check the sun exposure. Does the spot get full sun, part shade, or full shade? This will dictate your plant choices.
- Decide on your base: Will it sit on soil, mulch, or pavers? This affects stability and drainage.
11. Serene White Washed Terracotta Pots with Green Foliage
Getting that perfect, gracefully aged whitewash finish is a simple DIY that instantly elevates cheap terracotta pots. It gives them a rustic, European-inspired feel.
🎯 What Makes It Work
- Gather materials: You’ll need a terracotta pot, white latex or acrylic craft paint, a small container for mixing, a paintbrush, and a lint-free rag or paper towels.
- Mix your wash: Pour some paint into your container and add an equal amount of water. Stir until it has a thin, milky consistency. Adjust with more water for a more transparent look or more paint for an opaque one.
- Apply the wash: Brush the mixture messily all over the outside of the pot. Don’t worry about perfect coverage.
- Wipe it back: Immediately, before the paint dries, use your rag to wipe off some of the paint. Let it catch in the texture of the pot and leave it thicker in some areas than others. The goal is an imperfect, layered finish.
- Let it cure: Allow the pot to dry completely for 24 hours before planting.
This design’s beauty is in its simplicity and texture. The rough, chalky finish of the whitewashed pots provides a soft, tactile contrast to the smooth, waxy leaves of the green plants. By using a monochromatic color scheme (white and green), the focus shifts entirely to form and texture. The larger pot’s ornate pattern adds a layer of detail, while the simpler pots provide a quiet supporting role. It’s a calm, cohesive look that feels both rustic and refined.
12. Purple Butterfly Embossed Pot in a Sunny Garden Scene
This simple but effective vignette relies on a clever use of color and distance. The formula is: 20% bold foreground color + 30% neutral texture + 50% soft background context. The vibrant purple pot is the undeniable star, immediately grabbing your attention. The rough concrete ledge provides a necessary neutral, textured stage. The background elements—the beige floral pot, blue gate, and chairs—are muted and slightly out of focus, adding depth and a sense of place without competing with the main subject. This layering creates a complete, story-rich scene from just a few elements.

💰 Budget Breakdown
You don’t need to hunt for an expensive embossed pot to get this look. Find any cheap plastic pot at a dollar store or Target for $3-$5. The magic comes from the color. Buy a can of spray paint specifically formulated for plastic (like Krylon Fusion) in a bold, saturated color like deep purple or cobalt blue for about $8. A plain pot in a stunning color will have just as much impact as a patterned one, giving you that focal point for a fraction of the cost. The total for this high-impact look could be under $15, plant included.
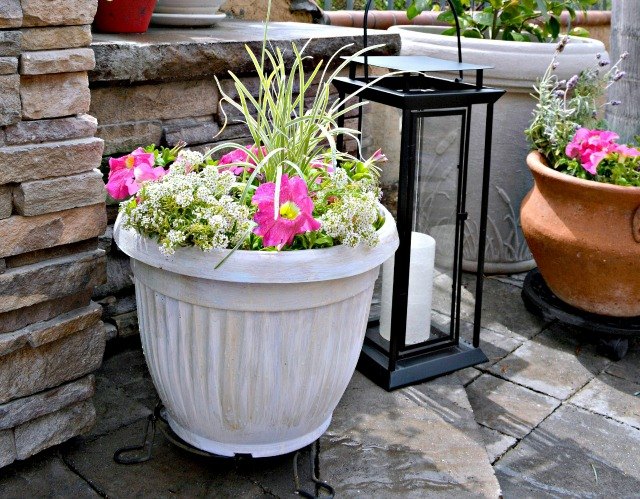
13. Charming Distressed White Planter with Pink Petunias
That beautiful distressed white finish is gorgeous, but it won’t stay pristine forever. White planters, especially those with a chalky or matte finish, are magnets for dirt, pollen, and water stains. Be prepared to give this planter a gentle wipe-down with a damp cloth a few times during the growing season to keep it looking fresh. Splashing from watering can leave muddy marks near the base. While the distressed nature hides some imperfections, it’s a higher-maintenance choice than a simple dark grey or terracotta pot.
💡 Designer Tip
A planter of this size—roughly 18-24 inches in diameter and height—is incredibly versatile. It’s substantial enough to serve as a standalone feature at the corner of a patio, flank an entryway, or anchor the end of a seating arrangement. However, it’s not so massive that it would overwhelm a smaller balcony or townhouse garden. For this scale to work, ensure you have at least a 3×3 foot area of floor space to dedicate to it, including the plant’s spillover. It provides significant visual weight without the commitment of the giant bathtub planter in Idea #6.
14. An Upcycled Garden of Repurposed Household Items
The secret to making a collection of junk-turned-planters look chic instead of chaotic is repetition. Notice how this display uses multiples: two bright yellow tires are stacked, and the vertical pallet has multiple ‘shelves.’ This repetition creates a visual rhythm. When you’re creating your own upcycled garden, try to use at least two or three of the same item (e.g., three painted tin cans, a stack of two tires). This signals that your choices are deliberate and turns a random assortment into a cohesive, intentional design statement.
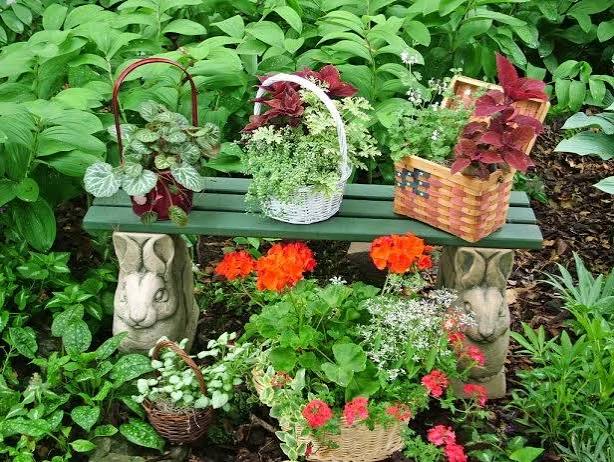
⚠️ Real Talk
This look is peak ‘Dopamine Decor’—a trend focused on using color, creativity, and personal expression to create spaces that make you happy. It rejects minimalist perfection in favor of joyful, unapologetic maximalism. Using a toilet as a planter isn’t about being subtle; it’s about having a sense of humor and finding beauty and utility in unexpected places. This resourceful, anti-consumerist approach to decorating resonates deeply with people looking to create sustainable and unique homes that reflect their personality.
15. Whimsical Mint Glitter Rain Boots as Flower Planters
The glitter. That’s it. That’s the magic. Using old rain boots as planters is a cute idea, as seen in Idea #7. But using *glittery* mint green boots elevates the concept from simply rustic to fabulously whimsical. The sparkle catches the light and adds an unexpected touch of glamor to the garden. It’s a playful, joyful detail that makes you smile. Without the glitter, they’re just boots; with it, they’re a conversation piece and a clear style statement. It proves that even in the garden, a little sparkle goes a long way.

📐 Style Math
This idea works so well because of its brilliant use of complementary colors. The bright, sunny yellow of the small flowers is positioned directly opposite the light mint green and blue tones on the color wheel. This high-contrast pairing makes both colors appear more vibrant and saturated. The neutral gray of the wooden planks acts as a calm backdrop, allowing the green, yellow, and blue to take center stage without competing for attention. It’s a simple, powerful color story that feels fresh and full of energy.
16. Delicate Hand-Painted Terracotta Pot with Floral Decal
You can achieve this delicate, hand-decorated look without being a professional artist by using floral decals or transfers. It’s a simple way to get intricate results.

🔧 How-To Brief
- Paint the Pot: Start by painting a clean terracotta pot with 2-3 coats of white acrylic or chalk paint. Let it dry completely.
- Choose Your Decal: Purchase waterslide decal paper (for inkjet or laser printers) or pre-made furniture transfers with a floral design you love.
- Apply the Decal: Follow the package instructions. For waterslide, this usually involves printing the design, cutting it out, soaking it in water, and sliding the thin film onto the pot’s surface. For transfers, you simply rub the design onto the pot.
- Seal the Design: This is crucial for longevity! Once the decal is fully dry and smooth, apply 2-3 coats of a clear, water-based polyurethane or an outdoor-rated sealant over the entire pot to protect the design from moisture and sun.
Hand-painted or decaled pots require a bit more care than a standard planter. To preserve the beautiful finish, it’s best to use this as a decorative cachepot—meaning you keep your plant in its simple plastic nursery pot and just place it inside the decorated one. This prevents constant contact with damp soil, which can cause the paint to peel or the decal to lift over time. When watering, remove the inner plastic pot, water it in the sink, let it drain completely, and then place it back inside your pretty pot.
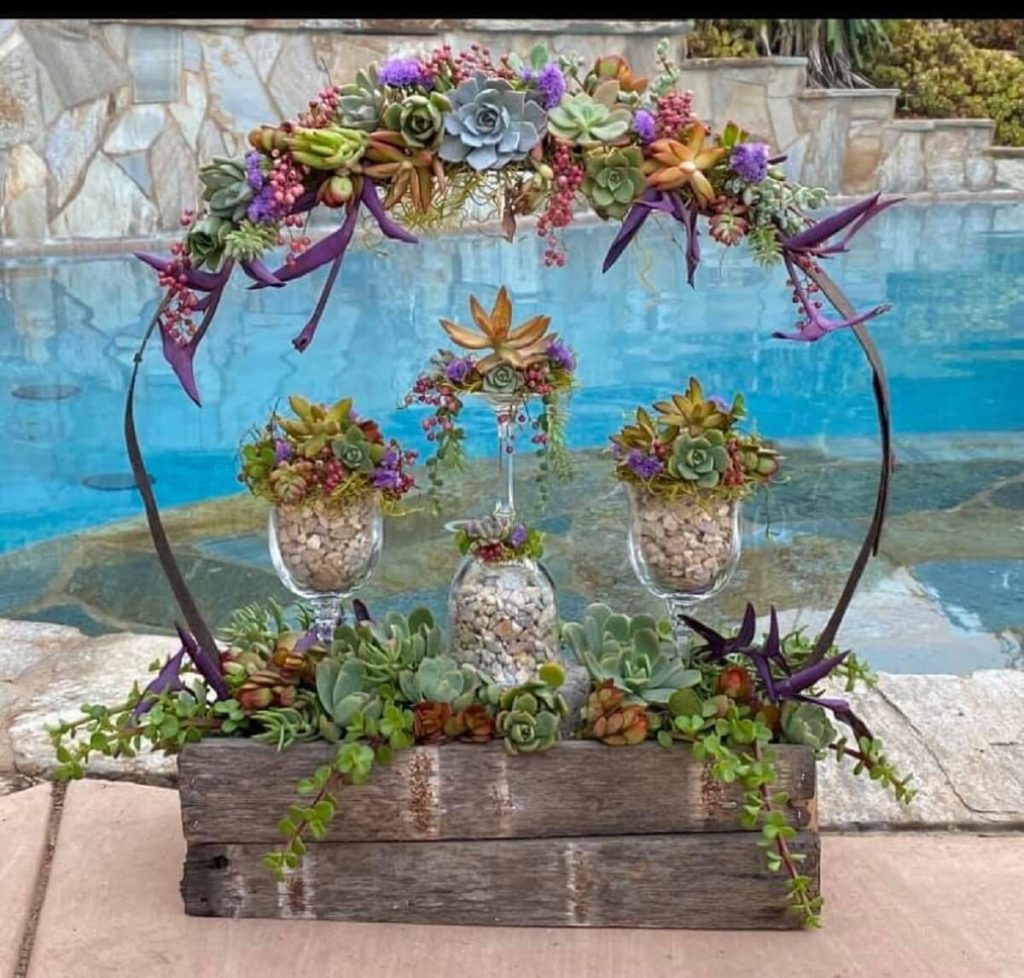
17. Lush Rustic Wood Box Succulent Display
Creating a dense, lush succulent arrangement like this is all about the plants themselves. The container can be very inexpensive, but the succulents add up.
📏 Scale Guide
- Wooden Box: $10 – $30 (or build one from scrap wood for less)
- Glassware (goblets, bottle): $5 – $15 (from a thrift store)
- Arch Frame: $15 – $25 (or use a natural branch for free)
- Succulents & Trailing Plants (the main cost): $60 – $180 for a dense arrangement
- Decorative Gravel/Soil: $10 – $20
- TOTAL: $100 – $270
Budget alternative: Start with a few ‘mother’ plants and propagate your own cuttings. It takes more time, but you can fill a large planter for the cost of just a few initial plants ($20-30).
This stunning display is a lesson in textural layering. The formula is approximately 60% diverse succulents + 20% weathered wood + 10% trailing foliage + 10% delicate accents (glass, gravel). The sheer variety of succulent shapes, colors, and sizes creates the core interest. The rustic wooden box and dark arch provide a grounding, earthy framework. Then, the trailing purple and green plants soften the edges and add a sense of movement, while the clear glass and light gravel offer a final, subtle layer of texture and refinement.
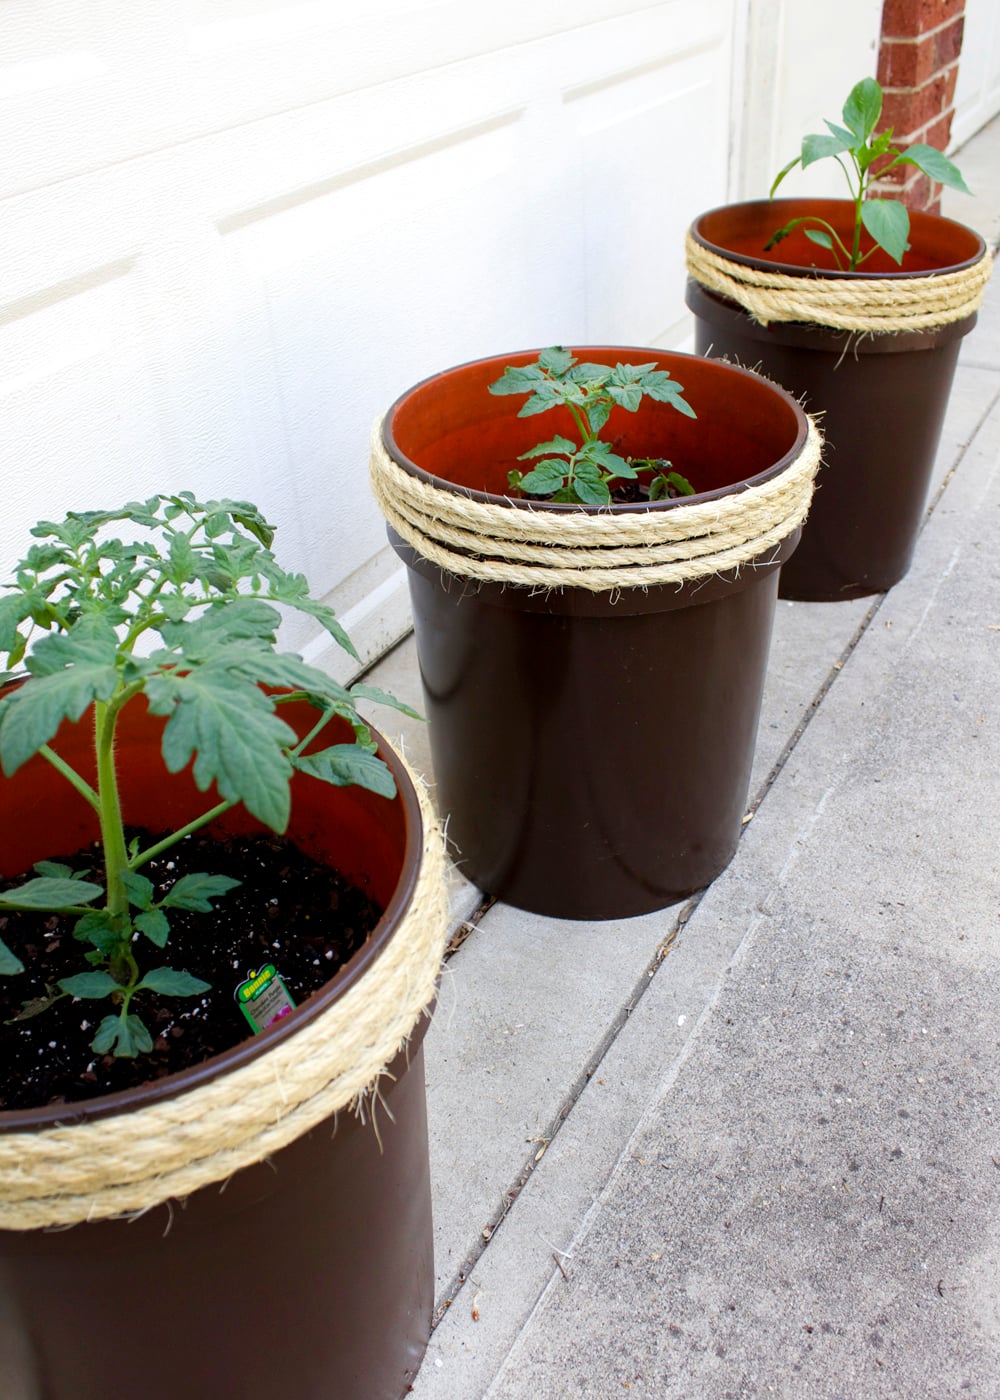
18. Simple Rope-Wrapped Brown Plastic Garden Pots
This is one of the cheapest and fastest ways to upgrade boring plastic nursery pots. A basic 1-gallon brown plastic pot costs about $2-$4. A 50-foot roll of natural jute or sisal rope from a hardware store is around $8 and can cover several pots. Using a hot glue gun (which you might already own), you can wrap the rim of a pot in less than 10 minutes. For under $15, you can create a set of three cohesive, textured planters that look far more expensive and intentional than the plain plastic pots they started as.
🔥 Trending Context
When wrapping pots with rope, the secret to a professional finish is to start at the top, not the bottom. Apply a line of hot glue under the pot’s top lip and press the end of the rope firmly into it. Then, apply glue in a thin, continuous line and wrap the rope tightly, making sure each new row is pressed snugly against the one above it. This ensures there are no gaps. Wrapping just the top 2-3 inches, as shown here, gives you the most visual impact for the least amount of rope and effort, and the pop of the orange interior rim adds a fun surprise.
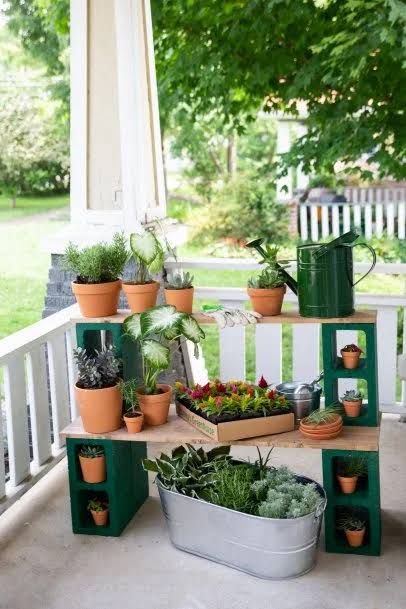
19. DIY Upcycled Plastic Bottle Self-Watering Planter
The genius of this design is its transparent functionality. By using a clear plastic bottle, the entire self-watering system is demystified. You can literally see how it works: the soil wicks moisture up from the reservoir, and the roots grow down towards the water source. This visual element is not only educational and fascinating, but it also serves a practical purpose—you can see exactly when the water level is low and needs a refill. It turns a simple scientific principle into a compelling visual feature.
✅ Before You Start
Creating this ultra-functional planter takes just a few minutes and is a perfect project for gardening beginners or kids.
- Clean the Bottle: Thoroughly wash and dry a standard plastic soda bottle.
- Cut the Bottle: About two-thirds of the way up from the bottom, carefully cut the bottle in half using a craft knife or sharp scissors.
- Create the Wick: Unscrew the cap and poke a small hole in it. Thread a piece of thick string or a strip of absorbent fabric (like from an old cotton t-shirt) through the hole, leaving a few inches dangling on either side. Screw the cap back on.
- Assemble: Invert the top section of the bottle and place it into the bottom section. The string should hang down into the reservoir.
- Plant: Fill the top section with potting soil and your chosen small plant or herb.
- Add Water: Lift the top section and add about an inch of water to the bottom reservoir. Place the top back on and let the wicking action begin!
20. Tiered Vertical Planters from Stacked Plastic Bottles
This is the ultimate solution for micro-gardening. The entire footprint of this tiered structure is no bigger than the base of a single plastic bottle, maybe 4×4 inches. This makes it ideal for the narrowest of spaces: a tiny apartment balcony railing, a kitchen windowsill, or even just a small corner of a desk near a sunny window. Its vertical design multiplies your growing space without taking up any additional surface area. It’s a more compact and modular alternative to the hanging bottle garden in Idea #3.

🧹 Maintenance Reality
While this stacking bottle planter is an ingenious use of space, be realistic about what you can grow in it. The soil volume in each segment is very small, meaning it will dry out extremely quickly, especially on a hot, sunny day. You will likely need to water it daily. This setup is best suited for small, shallow-rooted plants like succulents, small herbs (chives, thyme), or trailing plants that don’t require a lot of root space. Trying to grow a tomato plant or a large-leafed basil in this would be an exercise in frustration.
21. Clear Plastic Bottle Self-Watering Herb Planters
The single most important element that makes this idea work so well for a kitchen garden is the self-watering feature. Herbs can be notoriously thirsty, and forgetting to water for a day or two can lead to wilted, sad-looking plants. This system provides a consistent supply of moisture directly to the roots, taking the guesswork out of watering. It creates a more stable environment for the plants to thrive and makes indoor herb gardening significantly more foolproof for busy people. It’s practical science in its most elegant form, very similar to the single version seen in Idea #19.

⭐ The One Thing
Ready to start your own windowsill herb garden? A quick check before you begin will ensure success.
- Do you have a spot that gets at least 4-6 hours of direct sunlight per day? Most herbs need this to thrive.
- Have you chosen herbs that stay relatively small, like basil, oregano, thyme, or mint? Avoid rosemary which can get large.
- Do you have the right materials? You’ll need clear bottles, a wick material (cotton string works well), and good quality potting mix.
- Check that your bottle caps are all the same size for a uniform look.
22. Lush and Ornate Grey Urn with a Vibrant Floral Arrangement
This arrangement is a masterclass in the ‘Thriller, Filler, Spiller’ container design method. The tall, dark spiky foliage is the ‘thriller’—it provides height and dramatic structure. The bright red and pink-and-white flowering plants are the ‘filler’—they add mass, color, and fill out the body of the arrangement. The cascading green variegated vine is the ‘spiller’—it softens the edges of the pot and trails down, connecting the planter to the ground. This classic formula is a foolproof way to create a balanced, professional-looking container garden.

💸 Get This Look For Less
An arrangement this lush and packed with flowers requires consistent attention to stay beautiful all season. Deadheading—pinching or cutting off spent blooms—is essential. You should do this every few days to encourage the plants to produce new flowers instead of putting energy into making seeds. Because it’s so densely planted, it will also be very thirsty. On hot, sunny days, you will likely need to water it deeply every single day. Once a month, use a water-soluble bloom-boosting fertilizer to keep the flowers coming.
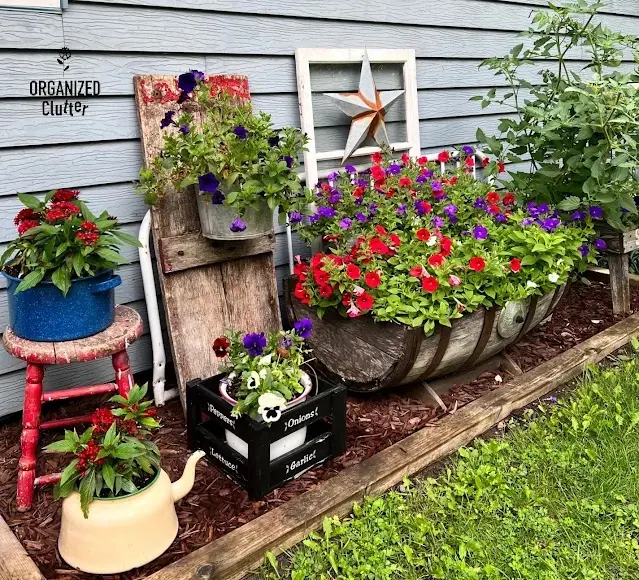
23. Rustic Garden Bed with Repurposed Barrel and Household Items
This charmingly maximalist look is a careful calibration of different rustic textures. The formula is roughly: 40% distressed wood (barrel, crate, plank) + 30% metal (galvanized bucket, enamel pots) + 30% vibrant flowers. The key is that the various wood tones and finishes create a warm, cohesive backdrop. The metal elements, in various colors and sheens, add a cooler, harder-edged layer of interest. The flowers, concentrated in bold red and purple, act as the unifying thread that ties all the disparate objects together into a single, joyful composition.
🎯 What Makes It Work
When creating a ‘curated clutter’ look like this, the secret is to create a backdrop. Notice how all these items are arranged against the light blue siding and the distressed white window frame. This defined zone tells your eye that this collection of objects is a deliberate vignette. Without a backdrop, the same items scattered in the middle of a lawn would just look like clutter. Use a fence, a wall, or even a large painted piece of plywood to give your collection a stage to perform on.
24. Vibrantly Hand-Painted Terracotta Pots with Graphic Patterns
that makes this idea so special is the unapologetic use of bold, graphic pattern. These aren’t just colored pots; they are canvases for artistic expression. The swirling, paisley, and abstract designs give each pot a distinct personality. This moves them beyond simple containers into the realm of decorative objects. The hand-painted quality adds a layer of charm and authenticity that you could never get from a mass-produced pot. It’s the artistry that elevates this from a simple garden display to a joyful, creative statement.

💰 Budget Breakdown
You don’t need to be an artist to get a similar graphic look. Use painter’s tape to create bold stripes, chevrons, or geometric blocks of color. Or, use round foam pouncers (found at any craft store for a few dollars) to create perfect polka dots. Another great trick is to use stencils. You can find intricate mandala or floral stencils for under $10. By using these simple tools, you can create complex, eye-catching patterns on cheap terracotta pots with minimal artistic skill, achieving a high-end look for the cost of some paint and a stencil.
25. Rustic Branch with Macrame Hanging Planters on a Wooden Fence
This design is so effective because it layers natural textures. You have the rough, organic bark of the tree branch, the woven, fibrous jute of the macrame hangers, the smooth ceramic of the pots, and the linear grain of the wooden fence. This rich combination of textures creates a scene that is visually complex and interesting, even with a relatively simple color palette of browns, grays, and greens. The repetition of the five hanging pots provides a sense of rhythm and order, making the rustic elements feel purposeful and composed.

💡 Designer Tip
Making your own macrame plant hangers is a classic DIY that’s making a huge comeback. A basic hanger can be made in under 30 minutes for just a few dollars.
- Cut Your Cord: For a small pot, cut eight pieces of jute or cotton cord, each about 6 feet long.
- Start the Hanger: Gather all eight cords together and tie a single large knot at one end, leaving a 6-inch tassel.
- Create the Net: About 2 inches above the main knot, take two adjacent cords and tie a simple square knot. Repeat this with the next two cords, and so on, until you have four knots in a circle.
- Stagger the Knots: For the next row, move down another 2-3 inches. This time, take one cord from one knot and one cord from the adjacent knot and tie them together. Repeat this all the way around. This creates the net pattern.
- Finish the Hanger: After 3-4 rows of knots, place your pot inside to check the fit. Gather all eight cords together above the pot and tie one final large knot to create the hanging loop. Trim any excess cord.
26. Playful Yellow Bicycle Planter with White and Yellow Pots
This cheerful display follows a strict but effective color formula: 60% neutral white + 30% accent yellow + 10% natural green. The collection of white pots and the white column create a clean, bright base that makes the space feel organized and fresh. The pops of vibrant yellow—on the large pot and the decorative bicycle—are used sparingly enough to feel special and draw the eye. The green from the snake plants provides the necessary organic element. You could swap the yellow for a bright pink or cobalt blue and achieve the same dynamic effect.

⚠️ Real Talk
Let’s be real: decorative planters like this bicycle are more about style than horticultural function. The ‘basket’ on this bike is likely very small and shallow, with poor drainage. It’s a cute novelty, but it’s not an ideal long-term home for a plant. To make it work, you’ll need to choose a plant that tolerates being root-bound and doesn’t mind drying out, like a succulent or a small snake plant. Think of the bicycle as a ‘pot holder’ rather than a true planter, and be prepared to water that small pot frequently.
27. Charming Painted Tin Can Planters with Twine Accents
This is DIY at its most affordable and cheerful. The cost to create a whole shelf of these is minimal, especially if you’re already buying canned goods.
📐 Style Math
- Repurposed Tin Cans: $0
- Sample Pots of Craft Paint (Pastels): $5 – $15
- Twine/Rope: $5
- Small Plants or Herbs: $15 – $30
- Scrap wood for shelf: $0 – $10
- TOTAL: $25 – $60
Budget alternative: Skip the paint and embrace the industrial look of the plain tin cans. Just add the twine wrap. You could create a dozen of these for the cost of plants and a single roll of twine, easily under $25 total. This look is much more budget-friendly than the hand-painted terracotta pots in Idea #24.
Tin cans make adorable planters, but they have one major enemy: rust. Even if you drill drainage holes (which you absolutely must do), moisture from the soil will eventually cause the can to rust from the inside out. The paint may also start to flake over time. Think of these as charming, but likely single-season, planters. To prolong their life, you can coat the inside with a rust-proof sealant before adding soil, but don’t expect them to last for years like a ceramic or plastic pot would.
28. Whimsical Aluminum Kettle Planter with Yellow Spotted Flowers
The single element that makes this idea so charming is the unexpectedness of the kettle. Our brains are wired to see a kettle in a kitchen, on a stove. Placing it in a garden, filled with soil and flowers, creates a moment of delightful surprise. It’s a bit of domestic whimsy brought out into the wild of the garden. The specific shape—the handle, the spout—is instantly recognizable and gives the planter so much more personality than a standard round pot. It tells a story of repurposing and creative thinking.

🔧 How-To Brief
When using a non-traditional metal container like a kettle, colander, or watering can as a planter, embrace its built-in features. The spout on this kettle, for instance, acts as an excellent overflow drain, preventing the soil from becoming waterlogged. When planting in a colander, the existing holes provide perfect, all-over drainage without any need for drilling. Always assess a found object for its inherent strengths and weaknesses as a planter before you start adding soil. This is much easier than trying to force it to be something it’s not.
29. Eclectic Vertical Garden on a Distressed White Wooden Wall
This eclectic collection works because the distressed white wooden wall acts as a unifying canvas. Like a gallery wall for plants, the consistent background allows the different shapes, colors, and textures of the repurposed containers to shine without creating chaos. The vertical arrangement draws the eye upward, making the most of a small space. The pops of bright yellow, blue, and red are distributed evenly, creating a balanced composition that feels energetic and joyful. It’s a perfect example of organized chaos.

📏 Scale Guide
Don’t have a wooden wall? You can get this look for almost zero cost using a single, free wooden pallet from a local hardware or grocery store. Just lean the pallet against a wall or fence. You can then either tuck small pots into the openings or use a staple gun to attach repurposed plastic bottles and tin cans directly to the wood slats. This gives you the same vertical structure and rustic vibe for a fraction of the effort and cost of building a full plank wall. Compare this to the more constructed pallet planter in Idea #4.
30. A Creative Collection of Repurposed DIY Plant Pots
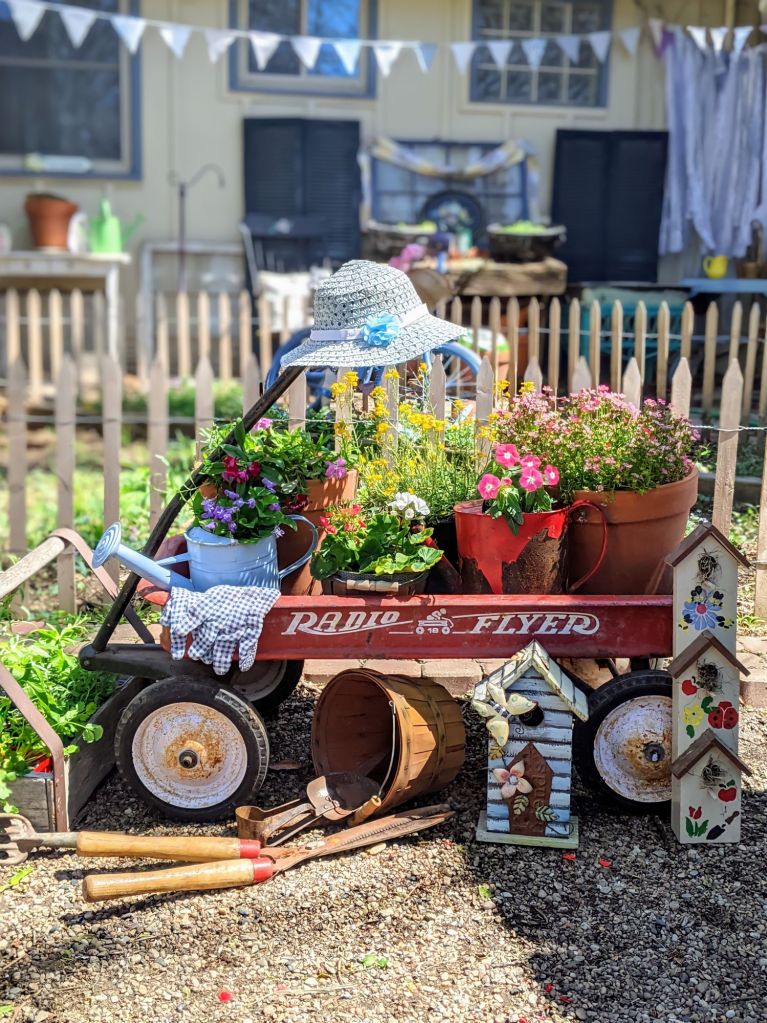
This image perfectly captures the spirit of the ‘low-buy’ and sustainability movement that’s dominating home and garden trends. Instead of buying new, there’s a huge cultural shift towards finding value and beauty in what we already have. This isn’t just about saving money; it’s a creative challenge. Can I turn this bottle into a self-watering system? Can this old tire become a home for flowers? This mindset transforms consumption into creation and results in gardens that are deeply personal, resourceful, and environmentally conscious.
🔥 Trending Context
raiding your recycling bin to create your own collection of planters, run through this quick checklist to ensure your projects are successful.
- Is it food-safe? If you’re planting edibles, stick to food-grade containers like glass jars and specific types of plastic (look for numbers 1, 2, 4, or 5).
- Can I add drainage? This is the most critical question. If you can’t drill or poke holes in the bottom, it’s not a good candidate for a planter.
- Is it durable enough? Will it withstand sun, rain, and temperature changes? A thin glass jar might crack in a frost, while a tin can will rust.
- Is it the right size? Make sure the container is large enough for the root system of the plant you want to grow.
Your Garden’s Next Chapter is Handmade
As you can see, a stunning garden doesn’t have to come from a big-box store. The most beautiful spaces are often the ones that show a little bit of heart and a lot of creativity. So next time you’re about to toss a tin can, an old tire, or a pair of leaky boots, take a second look. You might be holding your next favorite planter. Now go make something beautiful! Don’t forget to save your favorite ideas to your Pinterest board for when inspiration strikes.