You know that feeling when you finally find the wooden walkway that looks exactly right for your garden on Pinterest, but have no idea how to make it a reality? You’re not alone. After filtering through hundreds of options, we narrowed it down to 30 ideas that actually deliver. We’re covering everything from rustic boardwalks to sleek, modern paths. As we move into 2026, the biggest trend is blurring the line between your home and your garden, and a beautiful walkway is the perfect way to do it. And stay until the end — we break down the most common mistakes that can ruin these looks. 📌 Save this to Pinterest for later — you’ll want to revisit these ideas.
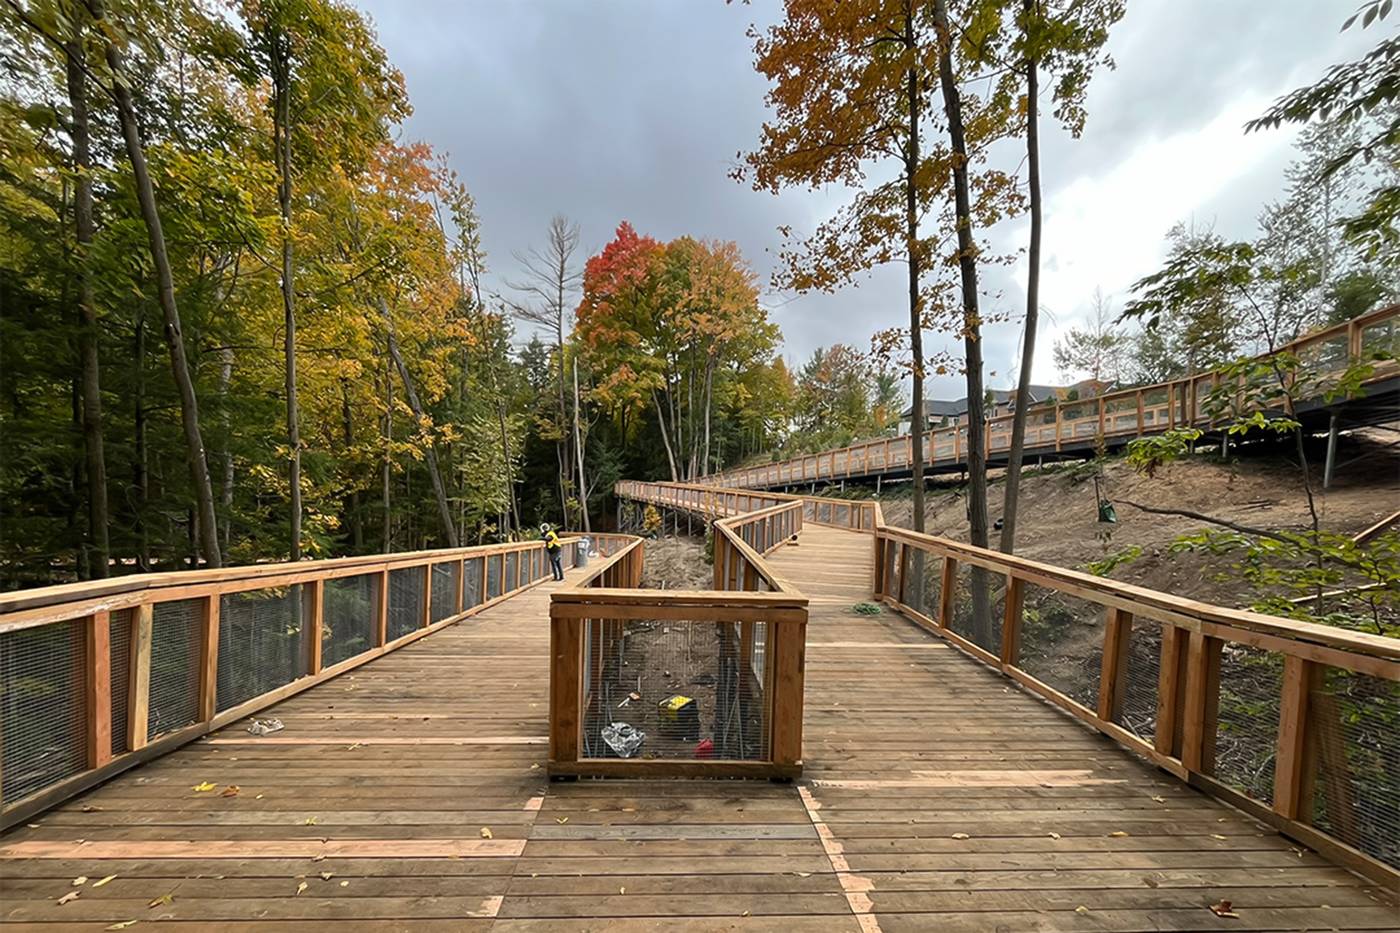
1. Elevated Forest Walkway with Wire Mesh Railings
This design succeeds by creating a sense of journey and immersion. The graceful curve of the walkway encourages a slower pace, inviting you to appreciate the surrounding autumn forest. The use of repeating vertical lines in the wooden posts of the railing provides a subtle rhythm that guides the eye forward. Finally, the contrast between the warm, light brown wood and the industrial feel of the wire mesh adds a layer of visual interest that keeps the design from feeling too rustic or one-note.
|
📋 Copy HEX 🔗 Share |
⭐ The One Thing
When installing a walkway through a wooded area, position the path to highlight specific natural features. Frame a particularly vibrant cluster of autumn trees or a unique rock formation at the apex of a curve. For maximum impact, ensure your railings are no higher than 42 inches. This height provides safety without obstructing the view, keeping the focus on the landscape itself. It maintains an open, airy feeling, making the walkway feel like a part of the environment, not an intrusion on it.
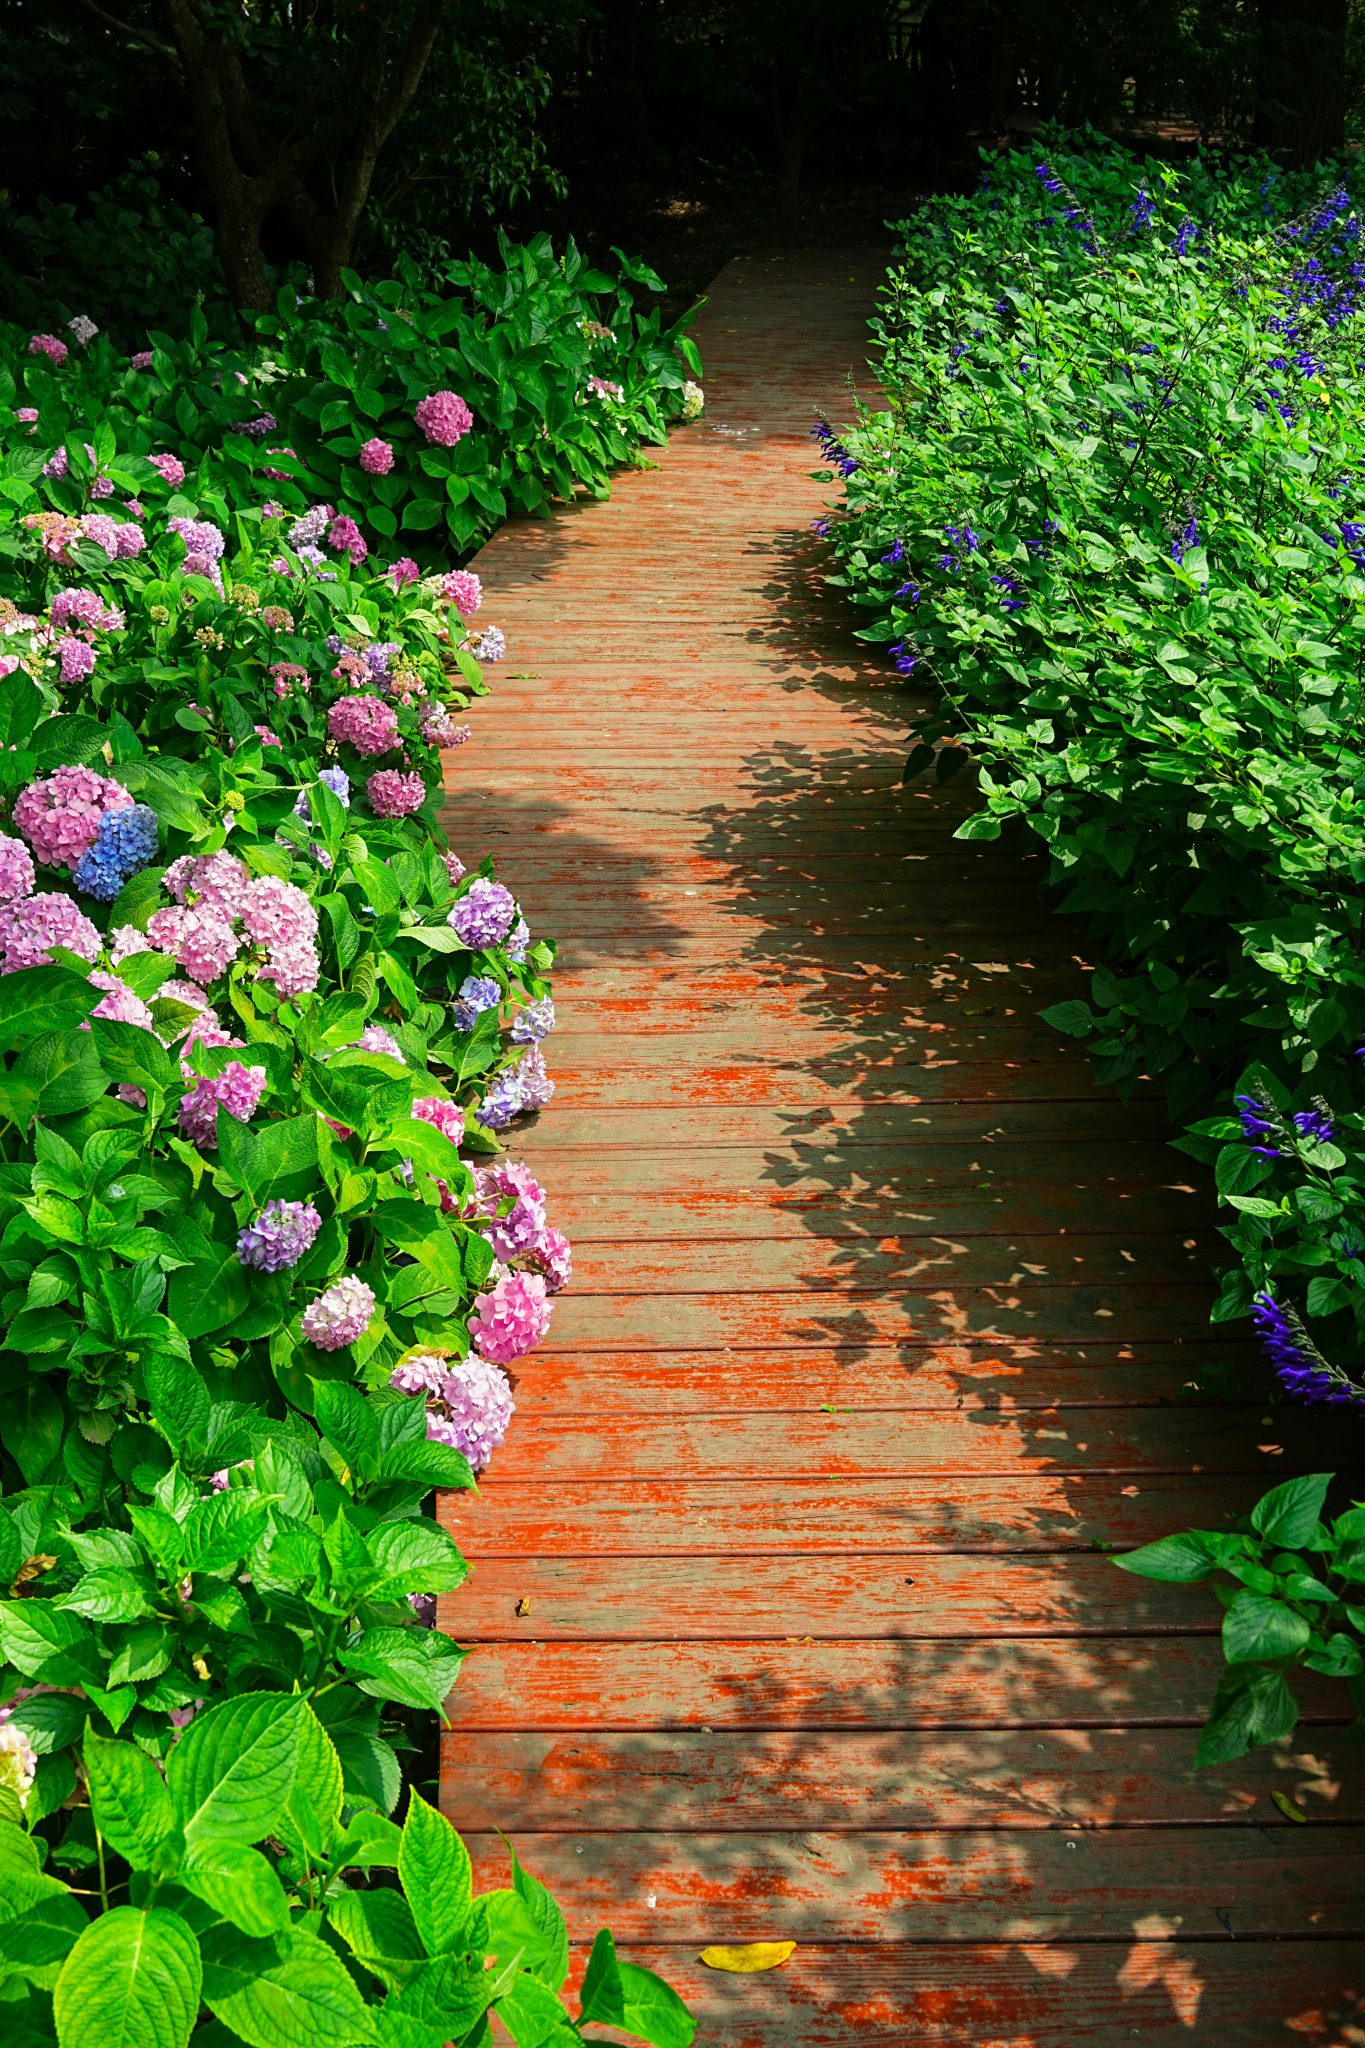
2. Rustic Plank Path Through a Hydrangea Garden
Think of this look as a simple garden formula: 50% lush, dominant foliage (like the green leaves), 40% colorful flowering plants (the vibrant pink and purple hydrangeas), and 10% rustic hardscaping (the weathered wooden planks). The key is the overwhelming abundance of plantings that soften and nearly swallow the pathway. You could swap the hydrangeas for peonies or rhododendrons, or change the wood to flagstone, but keeping that ratio of wild, colorful planting to a simple, narrow path is what maintains the magic.
|
📋 Copy HEX 🔗 Share |
💰 Budget Breakdown
A path this embedded in a garden requires a reality check. The dappled sunlight is beautiful, but it also means some parts of the wood may stay damp longer, encouraging moss or mildew. You’ll need to be comfortable with a slightly uneven, rustic look as the ground settles. This is not a perfectly level, manicured path. It’s also a haven for insects and spiders, so if you’re not a fan of brushing past a few webs on your morning stroll, this style might not be for you.
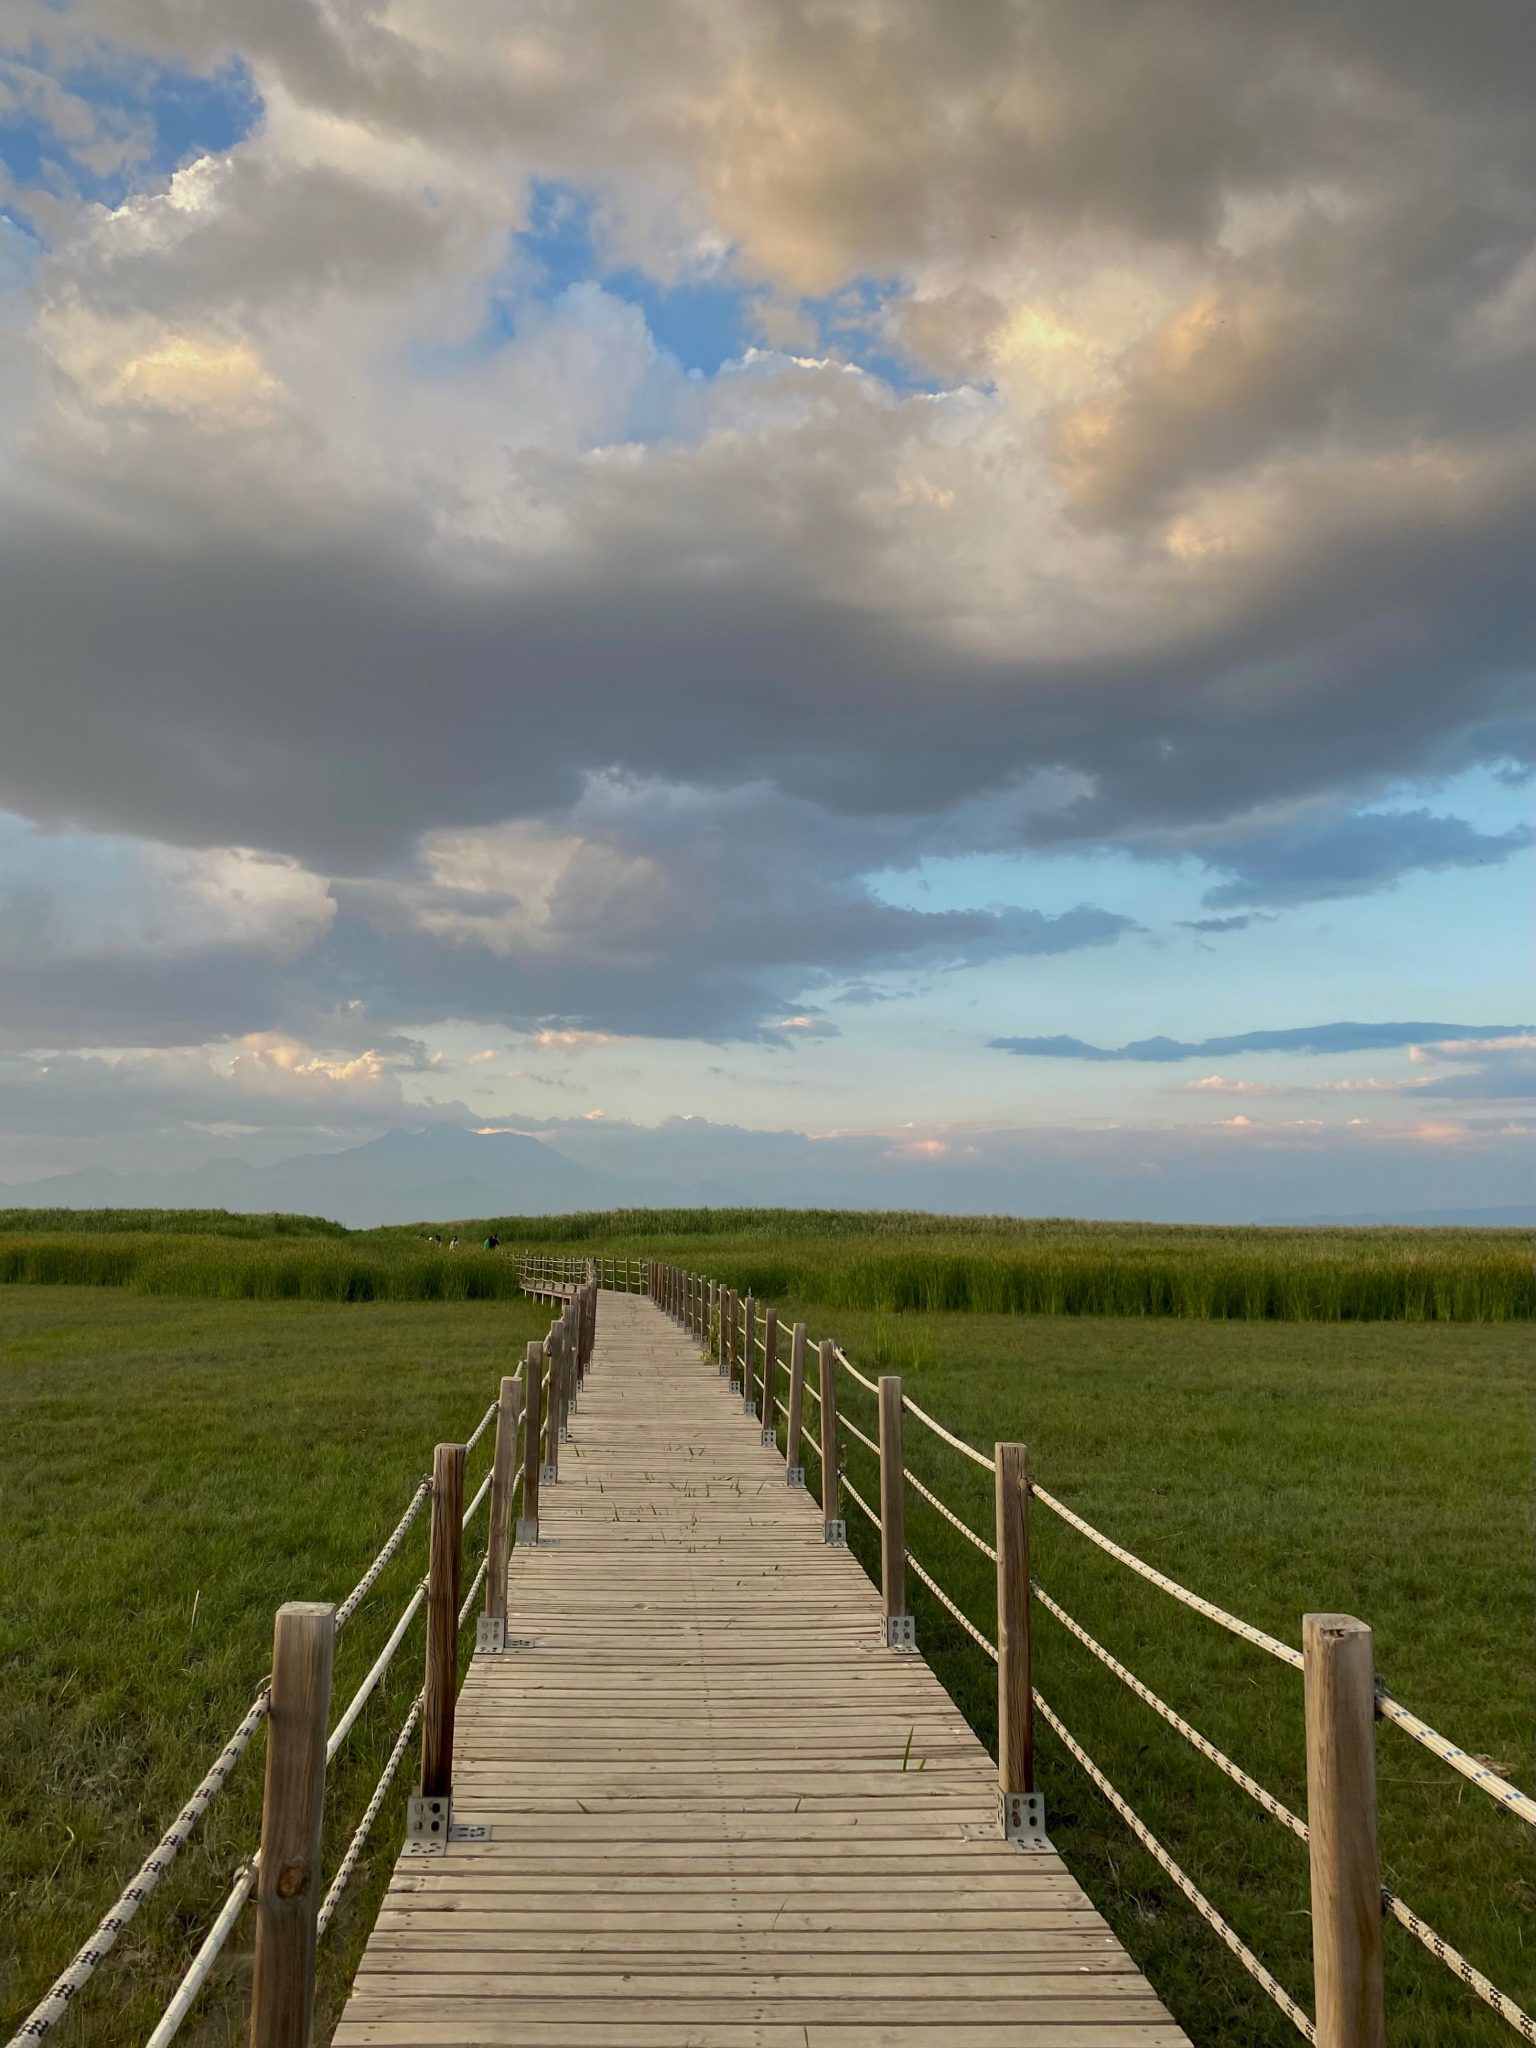
3. Winding Wetland Boardwalk with Simple Rope Railings
The single element that makes this walkway unforgettable is the rope railing. Remove it, and you just have a simple wooden path. But the thick, white rope, with its subtle blue flecks, injects a distinctly nautical and slightly rustic character. It’s a textural contrast to the smooth wood and the soft grasses. The rope is what tells the story here, suggesting a connection to water, coastlines, and a more rugged, natural setting than a standard wooden or metal railing ever could.
|
📋 Copy HEX 🔗 Share |
✅ Before You Start
- Main Structure (wood, posts, hardware): $4,500 – $7,000
- Rope & Fittings: $800 – $1,500
- Labor: $3,000 – $5,000
- TOTAL: $8,300 – $13,500
- Budget Alternative: Use reclaimed wood for the walkway and source simple agricultural rope from a farm supply store for a similar aesthetic at around 40-50% less.
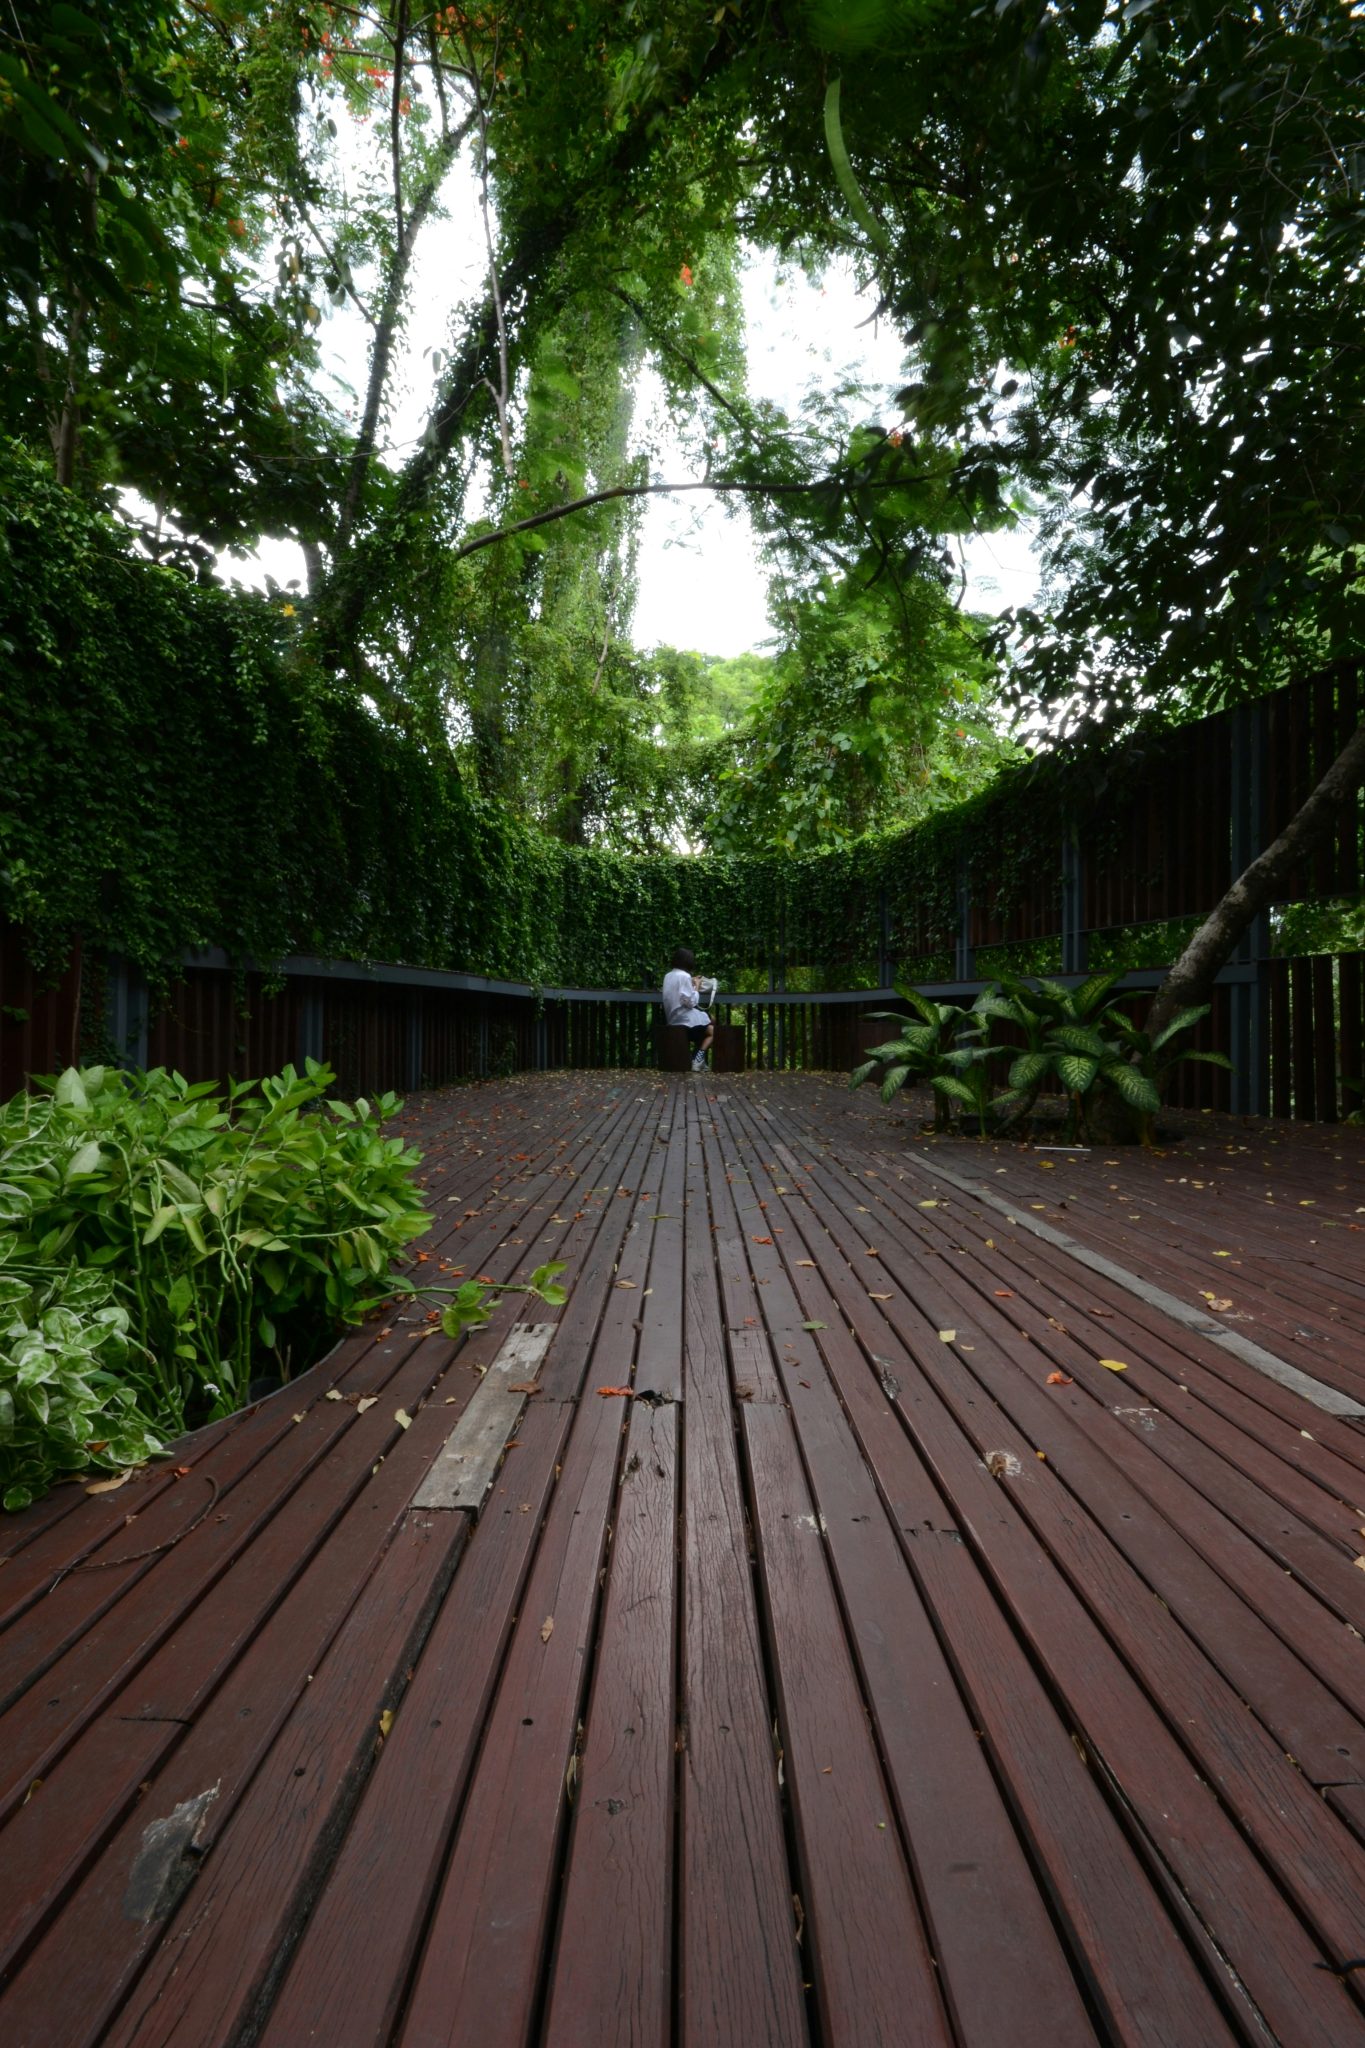
4. Shaded Walkway with Dark Wood Slats and an Ivy-Covered Fence
An ivy-covered fence is a stunning backdrop, but it requires commitment. Plan on trimming the ivy 2-3 times per year to keep it from overwhelming the fence and walkway. The dense canopy means the dark wood slats will need regular sweeping to clear fallen leaves and debris, which can hold moisture and make the surface slippery. Expect to re-stain the dark wood every 2-3 years, especially in shaded, damp areas, to prevent rot and maintain that rich, dark color. The annual cost is low, but the time investment is real.
|
📋 Copy HEX 🔗 Share |
🔥 Trending Context
This design creates a powerful sense of enclosure and tranquility. It works because of the harmony in its color palette—the dark red-brown of the wood, the deep green of the ivy, and the grey of the fence slats all feel cohesive and earthy. The gentle curve of the fence and walkway prevents the narrow space from feeling like a bowling alley, instead creating a sense of mystery about what’s around the bend. It’s a masterful use of texture, from the smooth walkway to the complex, leafy wall of ivy.
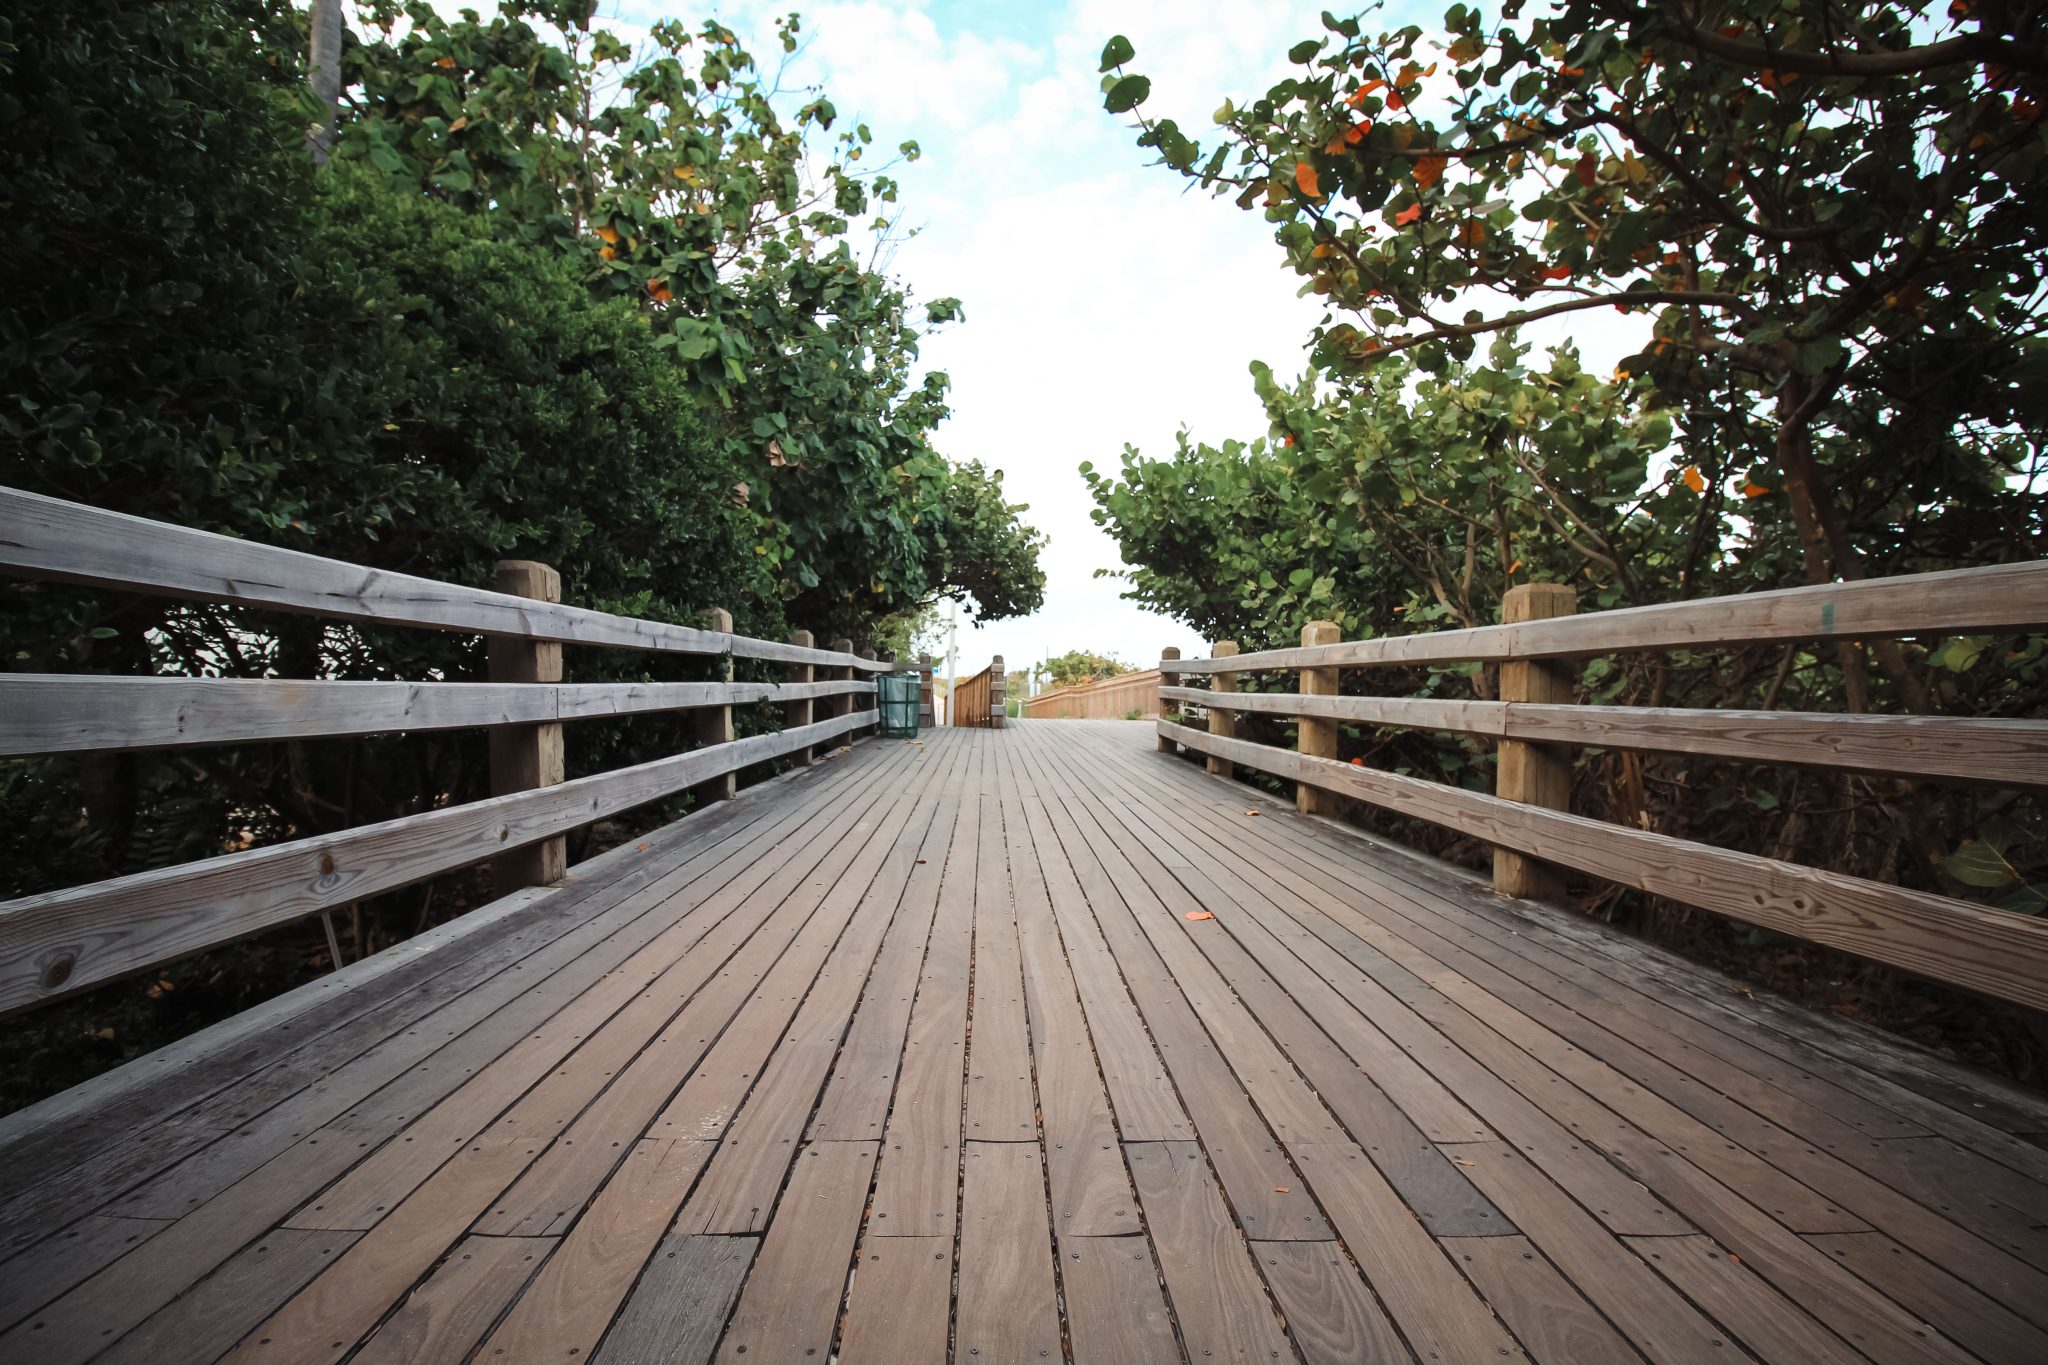
5. Straight Weathered Boardwalk Flanked by Dense Greenery
This style of long, straight boardwalk works best in larger, more expansive outdoor spaces where you need to create a clear, defined route. It’s ideal for connecting two points in a large yard, leading to a detached studio, or cutting through a wild, natural garden area. For the perspective to be effective, you need a minimum length of about 40-50 feet. Anything shorter, and the ‘receding into the distance’ effect is lost. It’s less suited for small, compact gardens where a winding path, like in Idea #13, would create the illusion of more space.
|
📋 Copy HEX 🔗 Share |
💡 Designer Tip
You don’t need a massive budget to create this classic boardwalk. Instead of expensive hardwoods, use standard pressure-treated pine decking from a big-box store like Home Depot or Lowe’s, which will weather to a silvery gray over time. For the railings, simple 4×4 posts and 2×4 rails will do the trick. You can often find discounted or reclaimed lumber on Facebook Marketplace. The key is the repetition and the straight lines, not the price of the materials. You could achieve this look for as little as $15-$20 per linear foot.
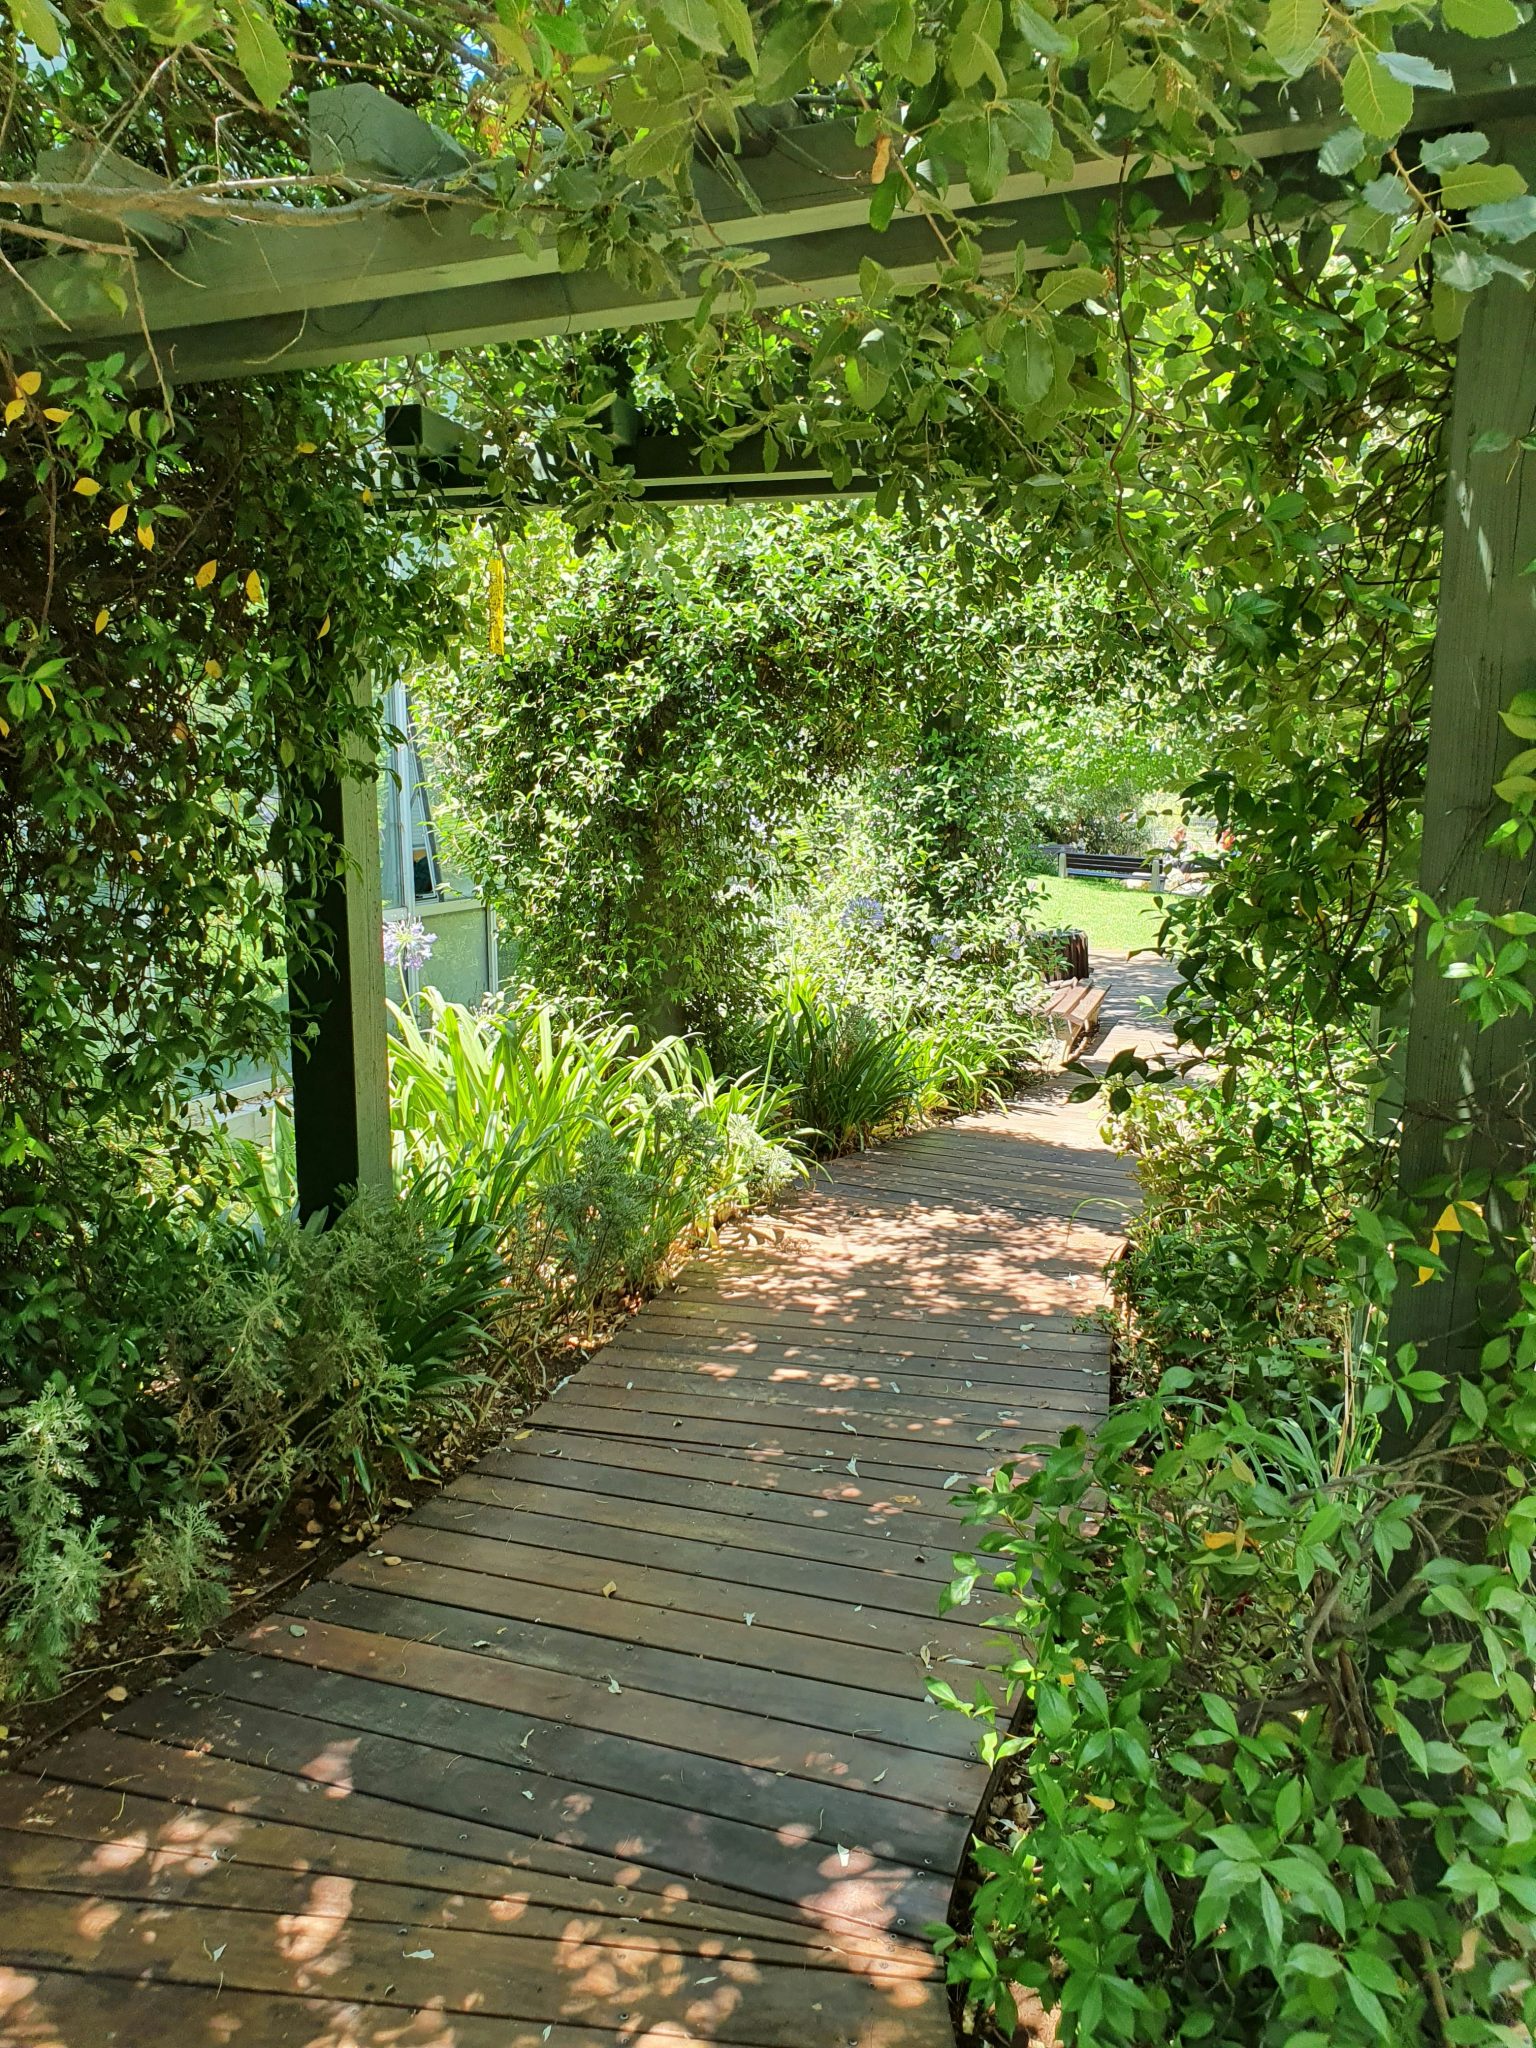
6. Curved Wooden Walkway Forming a Lush Green Archway
The experience of this walkway is entirely defined by the overhead foliage. It’s not just a path; it’s a tunnel, an immersive green room. Without the dense plant life climbing over the pergola structure, you’d have a simple, pleasant curved path. But with it, you get a sense of magic, enclosure, and transition. The dappled light filtering through the leaves is the crucial element that transforms a simple walk into a memorable, sensory experience. It’s the difference between walking alongside a garden and walking through it.
|
📋 Copy HEX 🔗 Share |
🔧 How-To Brief
Creating a living tunnel like this is a long-term project, not an overnight installation. You’re looking at a commitment of at least 3-5 years for climbing plants to fully cover the overhead pergola structure. Be prepared for regular pruning to keep the path clear and prevent it from becoming an overgrown mess. This much foliage also means more moisture, so choosing a rot-resistant wood like cedar or redwood for the walkway itself is crucial, even if it costs more upfront. Otherwise, you’ll be replacing planks sooner than you think.
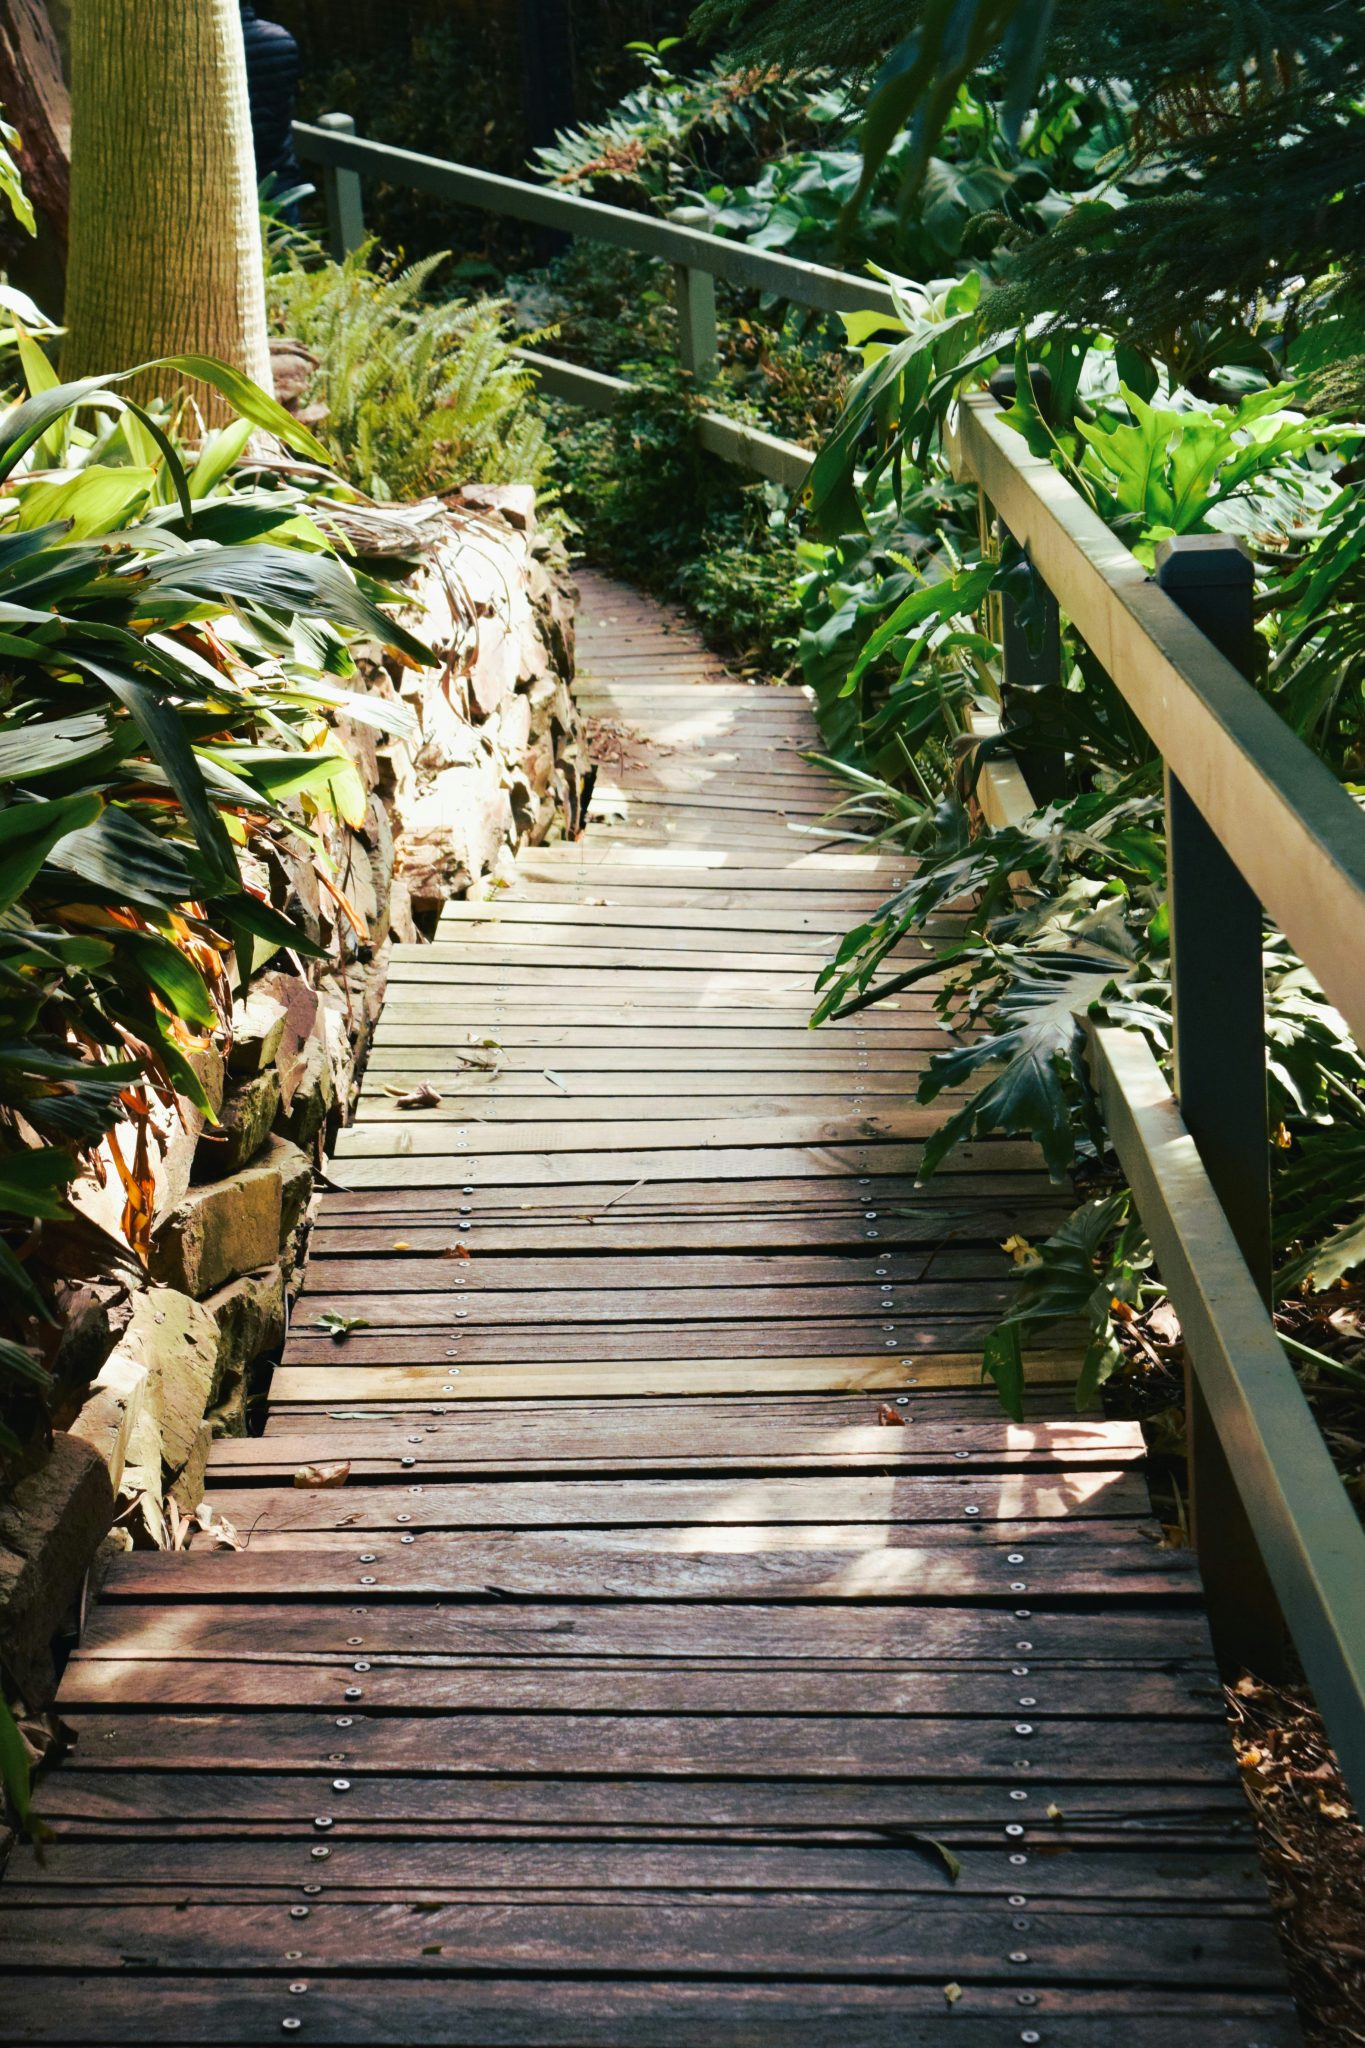
7. Weathered Plank Path with a Natural Stone Wall
When pairing a wooden walkway with a stone wall, the key is to leave a ‘breathing room’ gap of at least 6-8 inches between the two elements. Fill this gap with gravel or small river stones. This serves two purposes: first, it provides excellent drainage, preventing water from getting trapped against the wood and causing rot. Second, it creates a subtle visual separation that allows both the texture of the wood and the texture of the stone to be appreciated independently. It’s a small detail that makes a huge difference in longevity and professional finish.
|
📋 Copy HEX 🔗 Share |
🧹 Maintenance Reality
This look is a masterclass in textural harmony. The rough, organic surface of the stacked stone wall, the weathered grain of the wooden planks, and the soft, varied leaves of the tropical foliage all contribute to a rich, layered feel. Nothing is perfectly smooth or polished. The design works because it feels unearthed and natural. The pale green railing is a clever touch, acting as a bridge color that connects the brown of the wood and the grey of the stone with the vibrant greens of the plants.
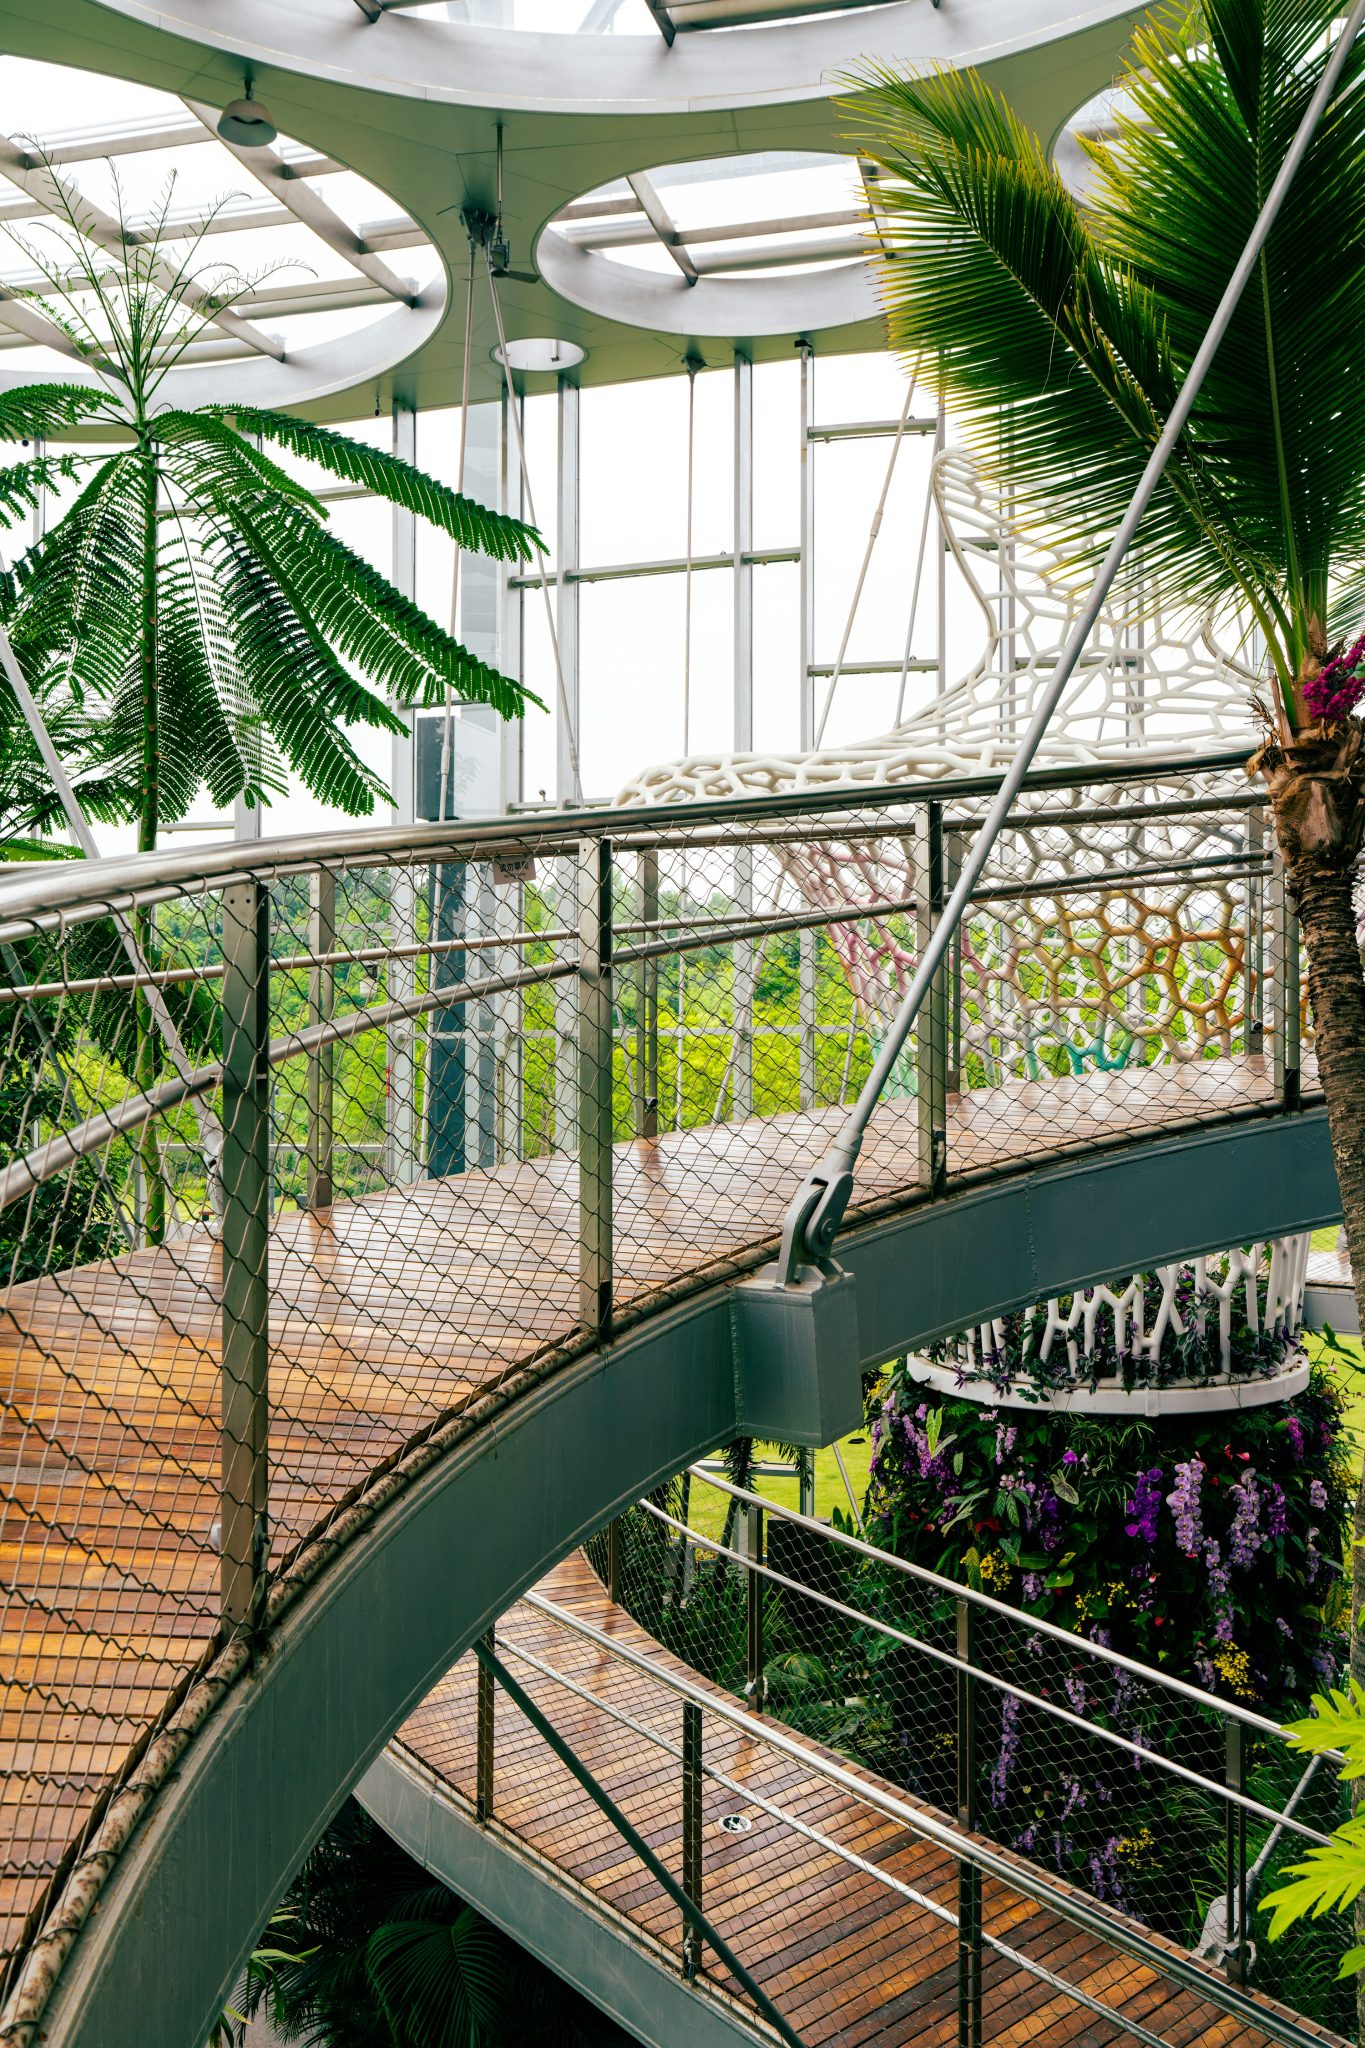
8. Curved Conservatory Walkway with Metal Mesh Railing
This look is gaining traction as part of the ‘biophilic design’ movement, which is all about connecting modern architecture with the natural world. People are craving more green in their lives, and bringing the outside in (or in this case, creating a structured ‘inside’ for the outside) is a huge trend. The combination of industrial materials like metal and glass with a very organic element like wood and plants is very 2026. It speaks to our desire for spaces that feel both engineered and wild simultaneously.
|
📋 Copy HEX 🔗 Share |
📐 Style Math
An elevated walkway like this is specifically designed for large, double-height spaces like a conservatory, a grand entryway, or a commercial atrium. You need a minimum ceiling height of at least 15-20 feet to pull this off without the space feeling cramped. The graceful curve requires a significant footprint, likely a room that is at least 30 feet long and 20 feet wide. This is not an idea for a standard backyard; its success is entirely dependent on having a grand, light-filled volume to move through.
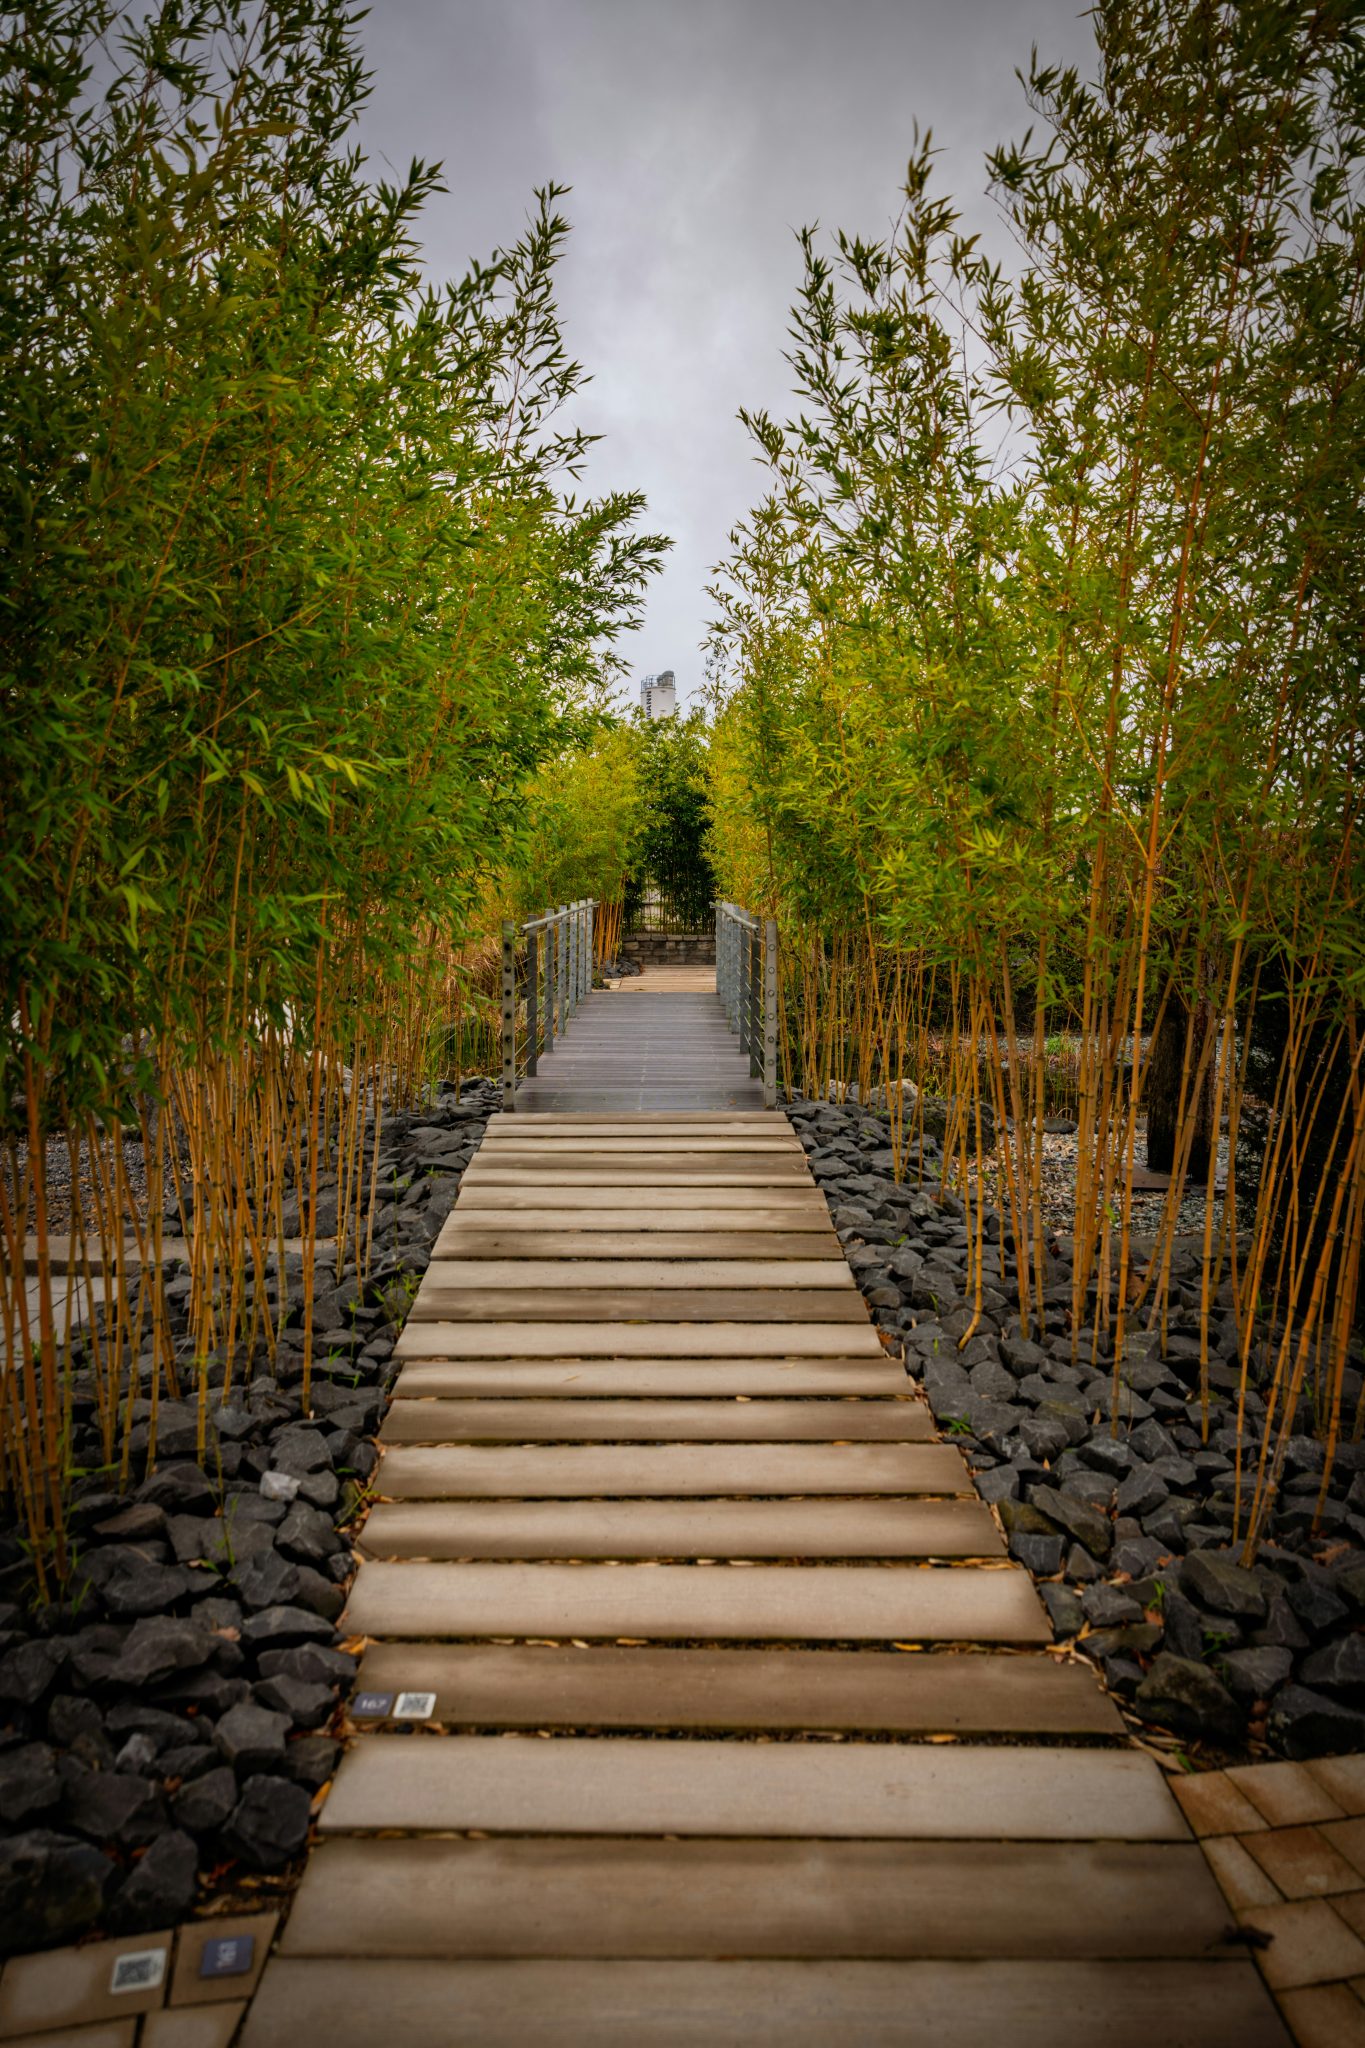
9. Bamboo-Lined Path with Stone Edging and a Metal Bridge
The formula here is a study in controlled nature: 40% linear hardscaping (the straight wooden walkway), 40% vertical organic screening (the tall bamboo), and 20% textural ground cover (the dark aggregate stone). The success of this Japanese-inspired look is in the clean lines and the limited palette. You can maintain the formula by swapping materials: replace the wood with smooth concrete pavers, or switch the bamboo for a different columnar plant like Italian Cypress, but you must maintain the crisp separation between the three elements.
|
📋 Copy HEX 🔗 Share |
🎯 What Makes It Work
Bamboo is beautiful, but it can be notoriously aggressive. To prevent it from taking over your entire yard, you absolutely must install a root barrier when planting. This is a non-negotiable step. The dark grey aggregate stones look fantastic, but they can be a magnet for leaves and debris, which will be very noticeable against the dark color. You’ll either need to commit to regular leaf blowing or accept a less-than-pristine look. Also, ensure the wooden planks are treated to handle the moisture that a densely planted area can hold.
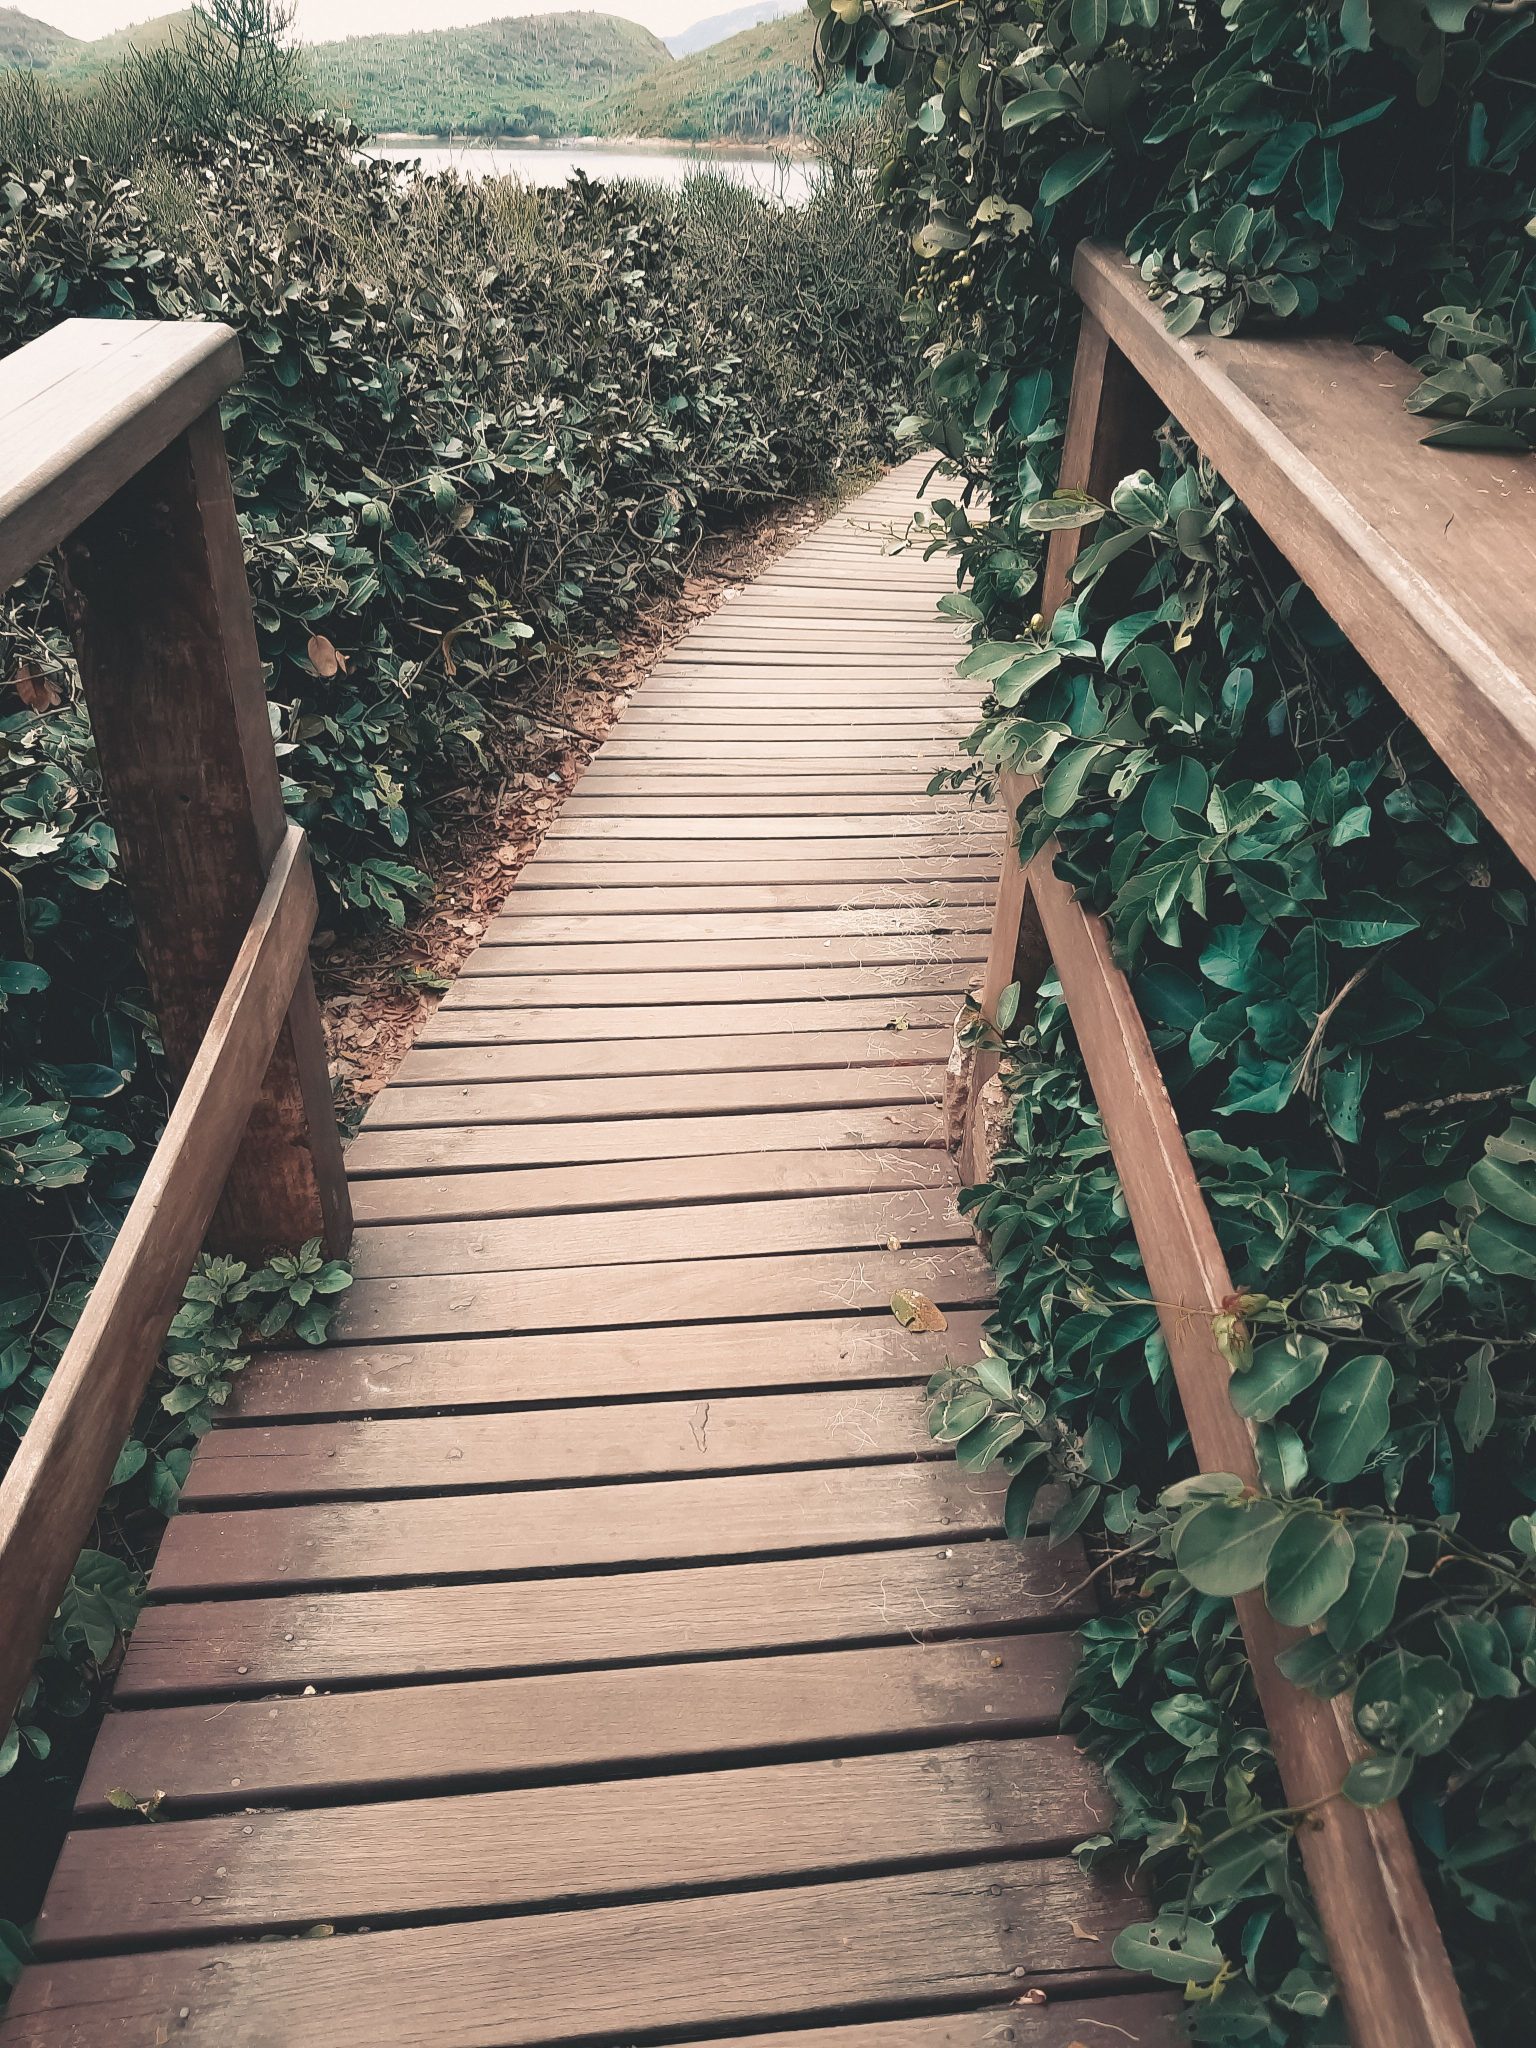
10. Curved Boardwalk Leading Through a Foliage Tunnel
This composition is effective because of its strong use of framing. The dense green foliage on both sides creates a natural frame, focusing the viewer’s attention down the curved path toward the hazy mountains in the distance. This creates a sense of depth and destination. The low, simple wooden handrails are key; they provide a sense of security without competing for attention with the impressive natural surroundings. The horizontal planks of the boardwalk also create leading lines that pull the eye along the curve.
|
📋 Copy HEX 🔗 Share |
📏 Scale Guide
To get this ‘natural tunnel’ effect on a budget, focus on fast-growing native shrubs and grasses instead of expensive, slow-growing specimen plants. Check with your local nursery for recommendations. The boardwalk itself can be built with affordable pressure-treated pine. Let it weather naturally to a silvery gray, which will blend beautifully with the foliage. The story here is the shape of the path and the volume of the plants, not the price of the materials. You can achieve this immersive feel for a fraction of the cost of a high-end hardwood installation. This is the budget cousin of the grander Idea #1.
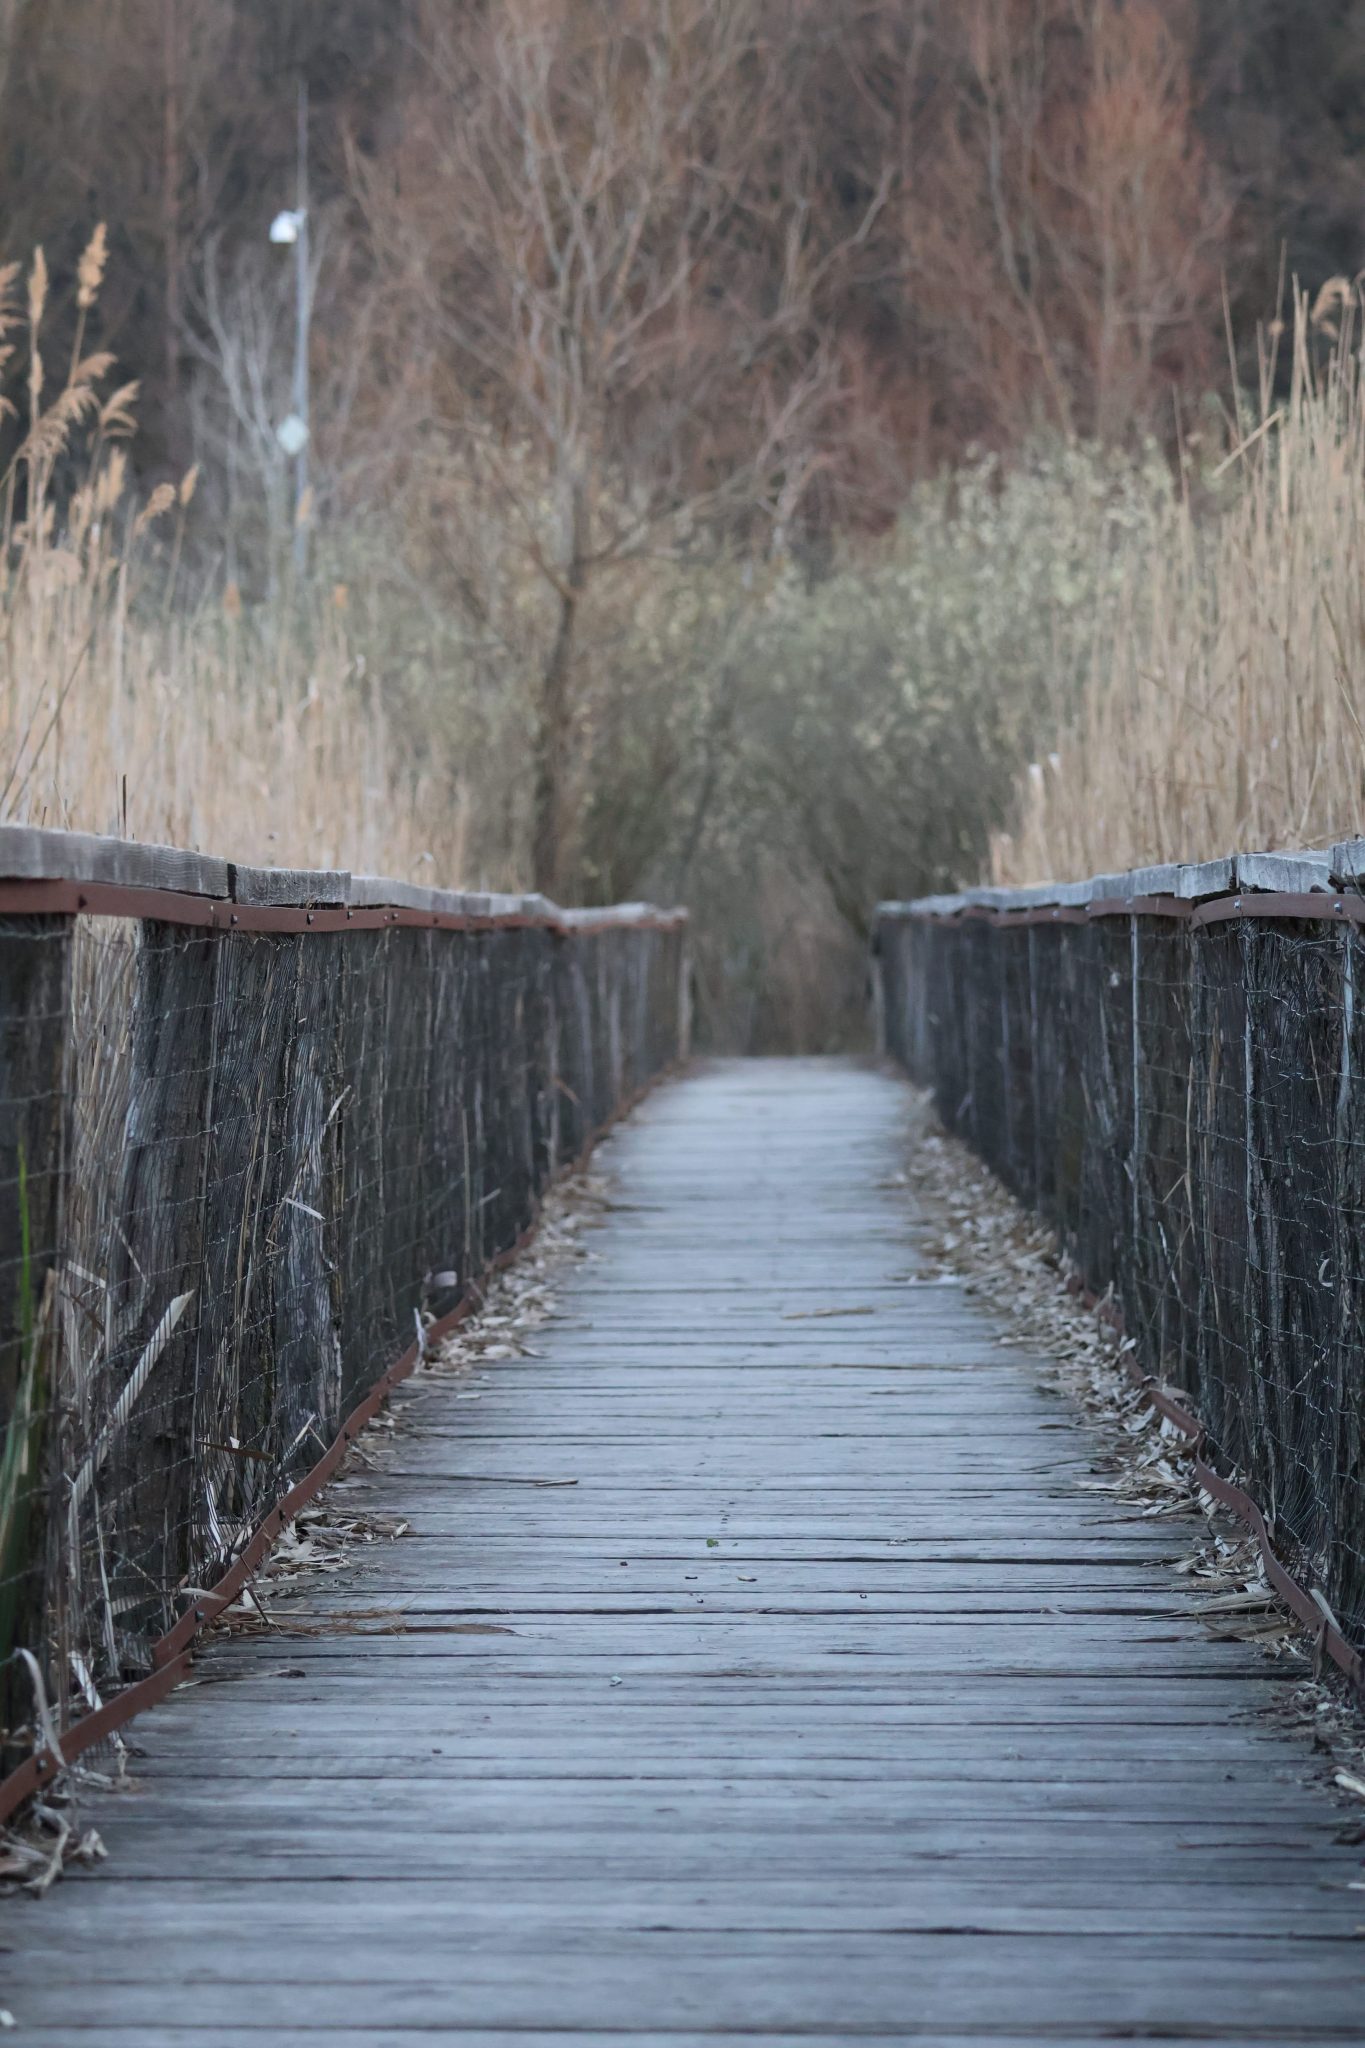
11. Weathered Gray Walkway with Wire Mesh and Rusted Metal Railings
This walkway celebrates a ‘Wabi-Sabi’ aesthetic—finding beauty in imperfection and age. The rusted metal band on the railing isn’t a flaw; it’s a feature. To maintain this look, you do… almost nothing. The goal is to let nature take its course. The wood is already weathered gray, the metal is developing a natural patina. Your only real task is to ensure the structural integrity remains sound, checking for loose posts or planks once a year. This is the perfect choice for someone who wants a beautiful, textural path without the endless cycle of sanding, staining, and sealing.
|
📋 Copy HEX 🔗 Share |
⚠️ Real Talk
The single element that elevates this design is the thin, rusted metal band along the top of the railing. It’s an unexpected touch of industrial decay amidst the natural setting. The wire mesh is practical and the weathered wood is rustic, but that specific line of rust adds a layer of history and texture that feels authentic and earned. It catches the light in a different way than the wood and provides a sharp, dark line that defines the edge of the path against the soft, dry reeds beyond.
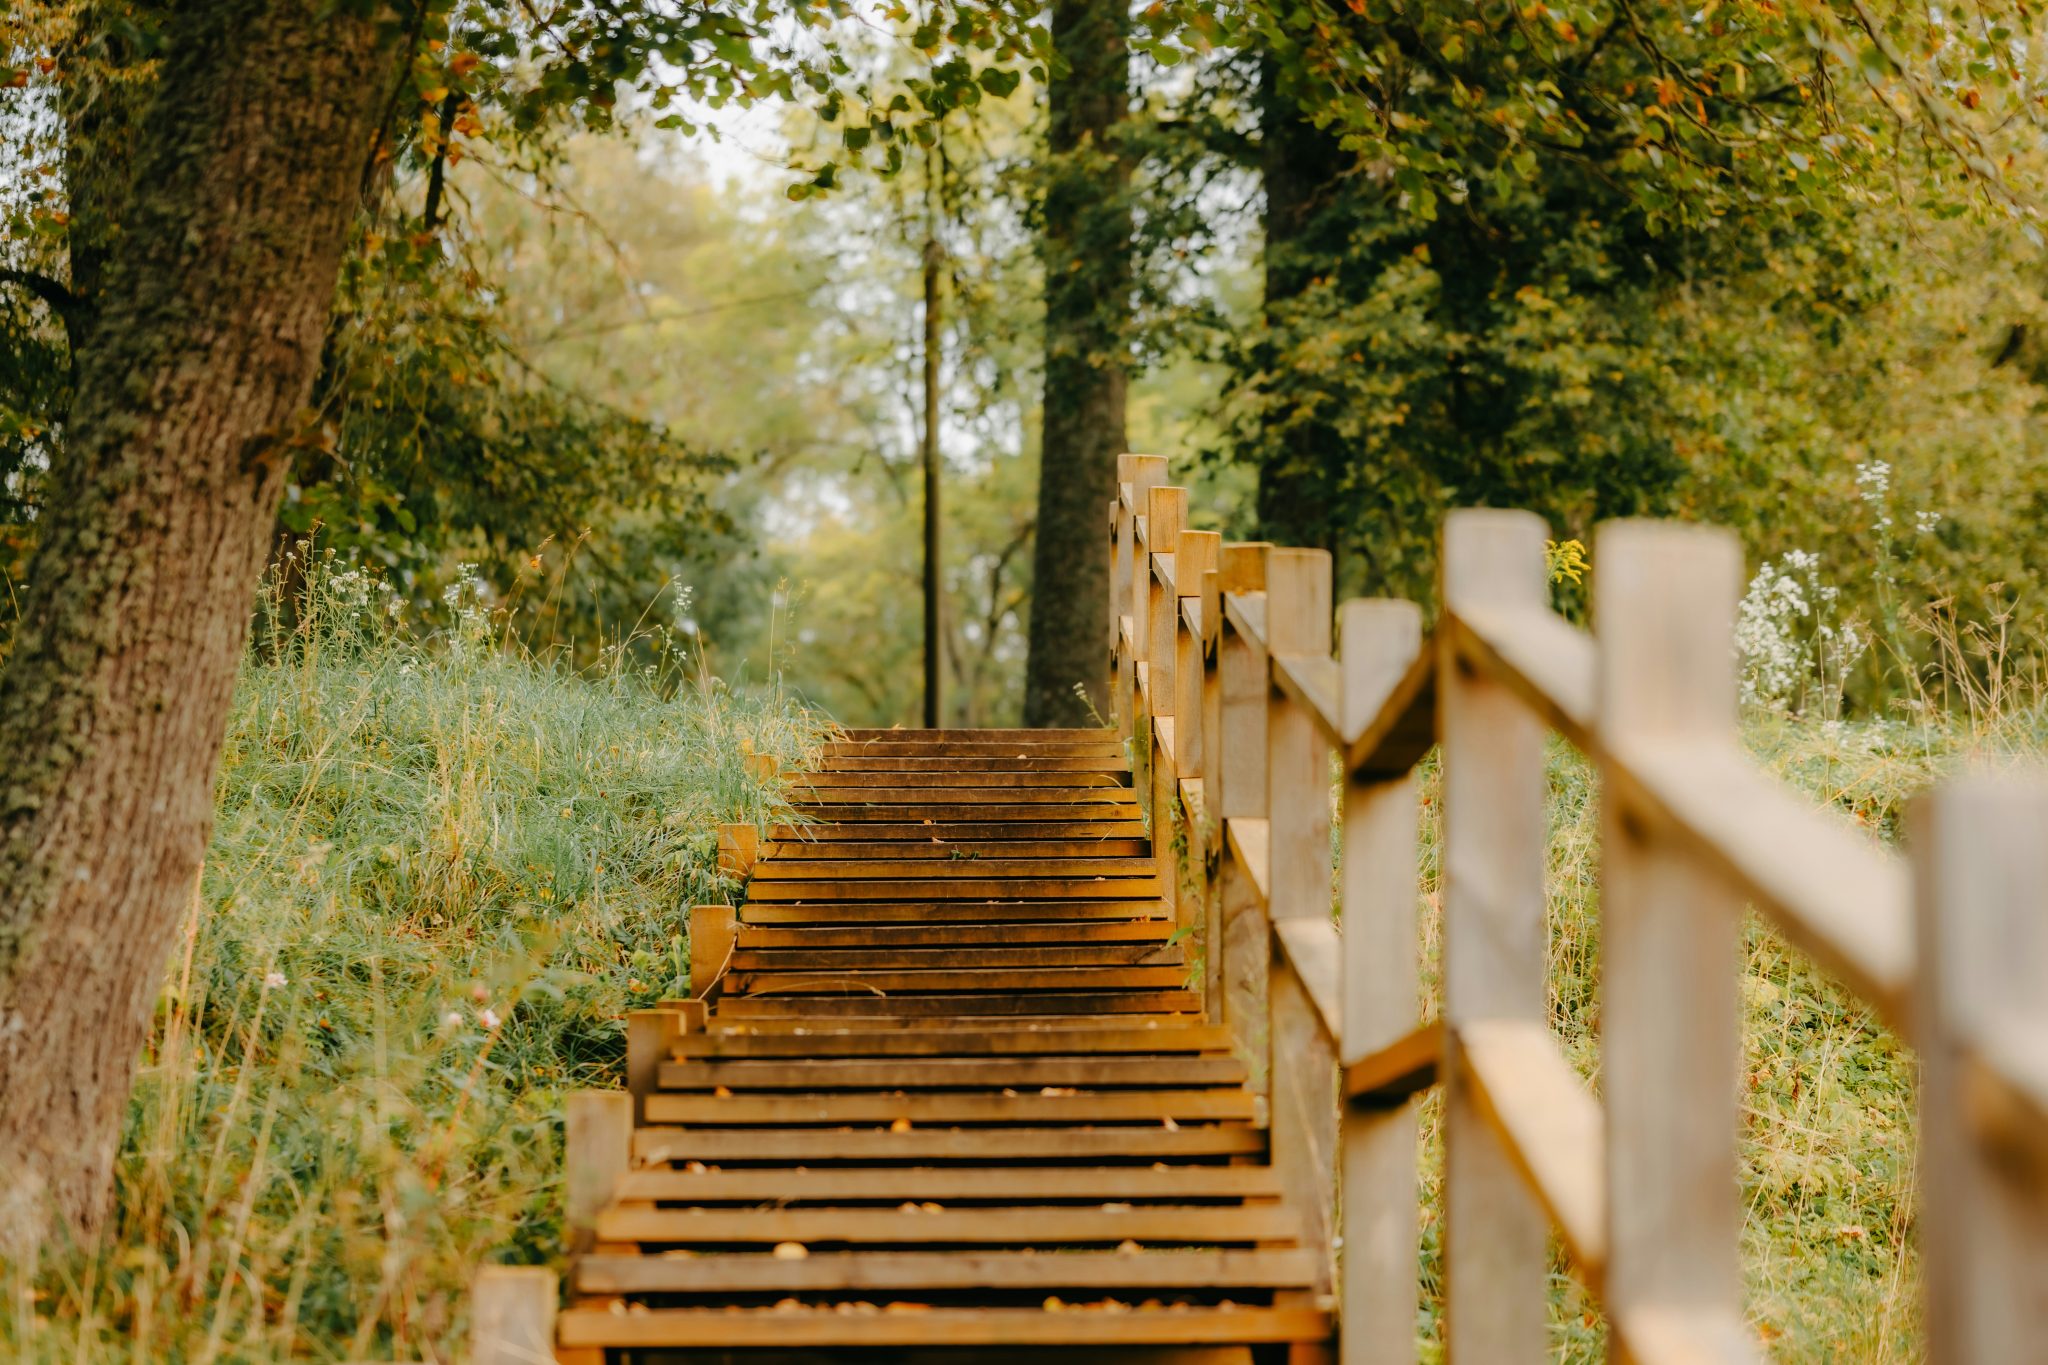
12. Slatted Wood Walkway with a Minimalist Vertical Rail
For a slatted walkway on an incline, the spacing of your slats is critical for both aesthetics and safety. Don’t go wider than a 1/2-inch gap between boards. This prevents most leaves and debris from getting stuck, making cleaning easier, but is narrow enough that it won’t catch a heel or look unfinished. This specific spacing also creates a pleasing visual rhythm as the path ascends, emphasizing the length and gentle slope of the walkway. It’s a small detail that makes the construction look deliberate and professional.
|
📋 Copy HEX 🔗 Share |
💸 Get This Look For Less
Want to recreate that minimalist railing? It’s simpler than it looks.
- Set your 4×4 posts, spacing them no more than 6 feet apart for stability.
- Run a 2×4 along the ground between the posts to serve as your bottom rail.
- Cut your 2×2 vertical balusters to size. Attach them to the inside of the top and bottom rails, spacing them 4 inches apart.
- Cap the entire structure with another 2×4 for the top handrail.
- Estimate Time: 1 day for a 20-foot section.
- Material Cost: Approximately $15-25 per linear foot, depending on wood choice.
13. Rustic Curved Path of Rough-Sawn Planks
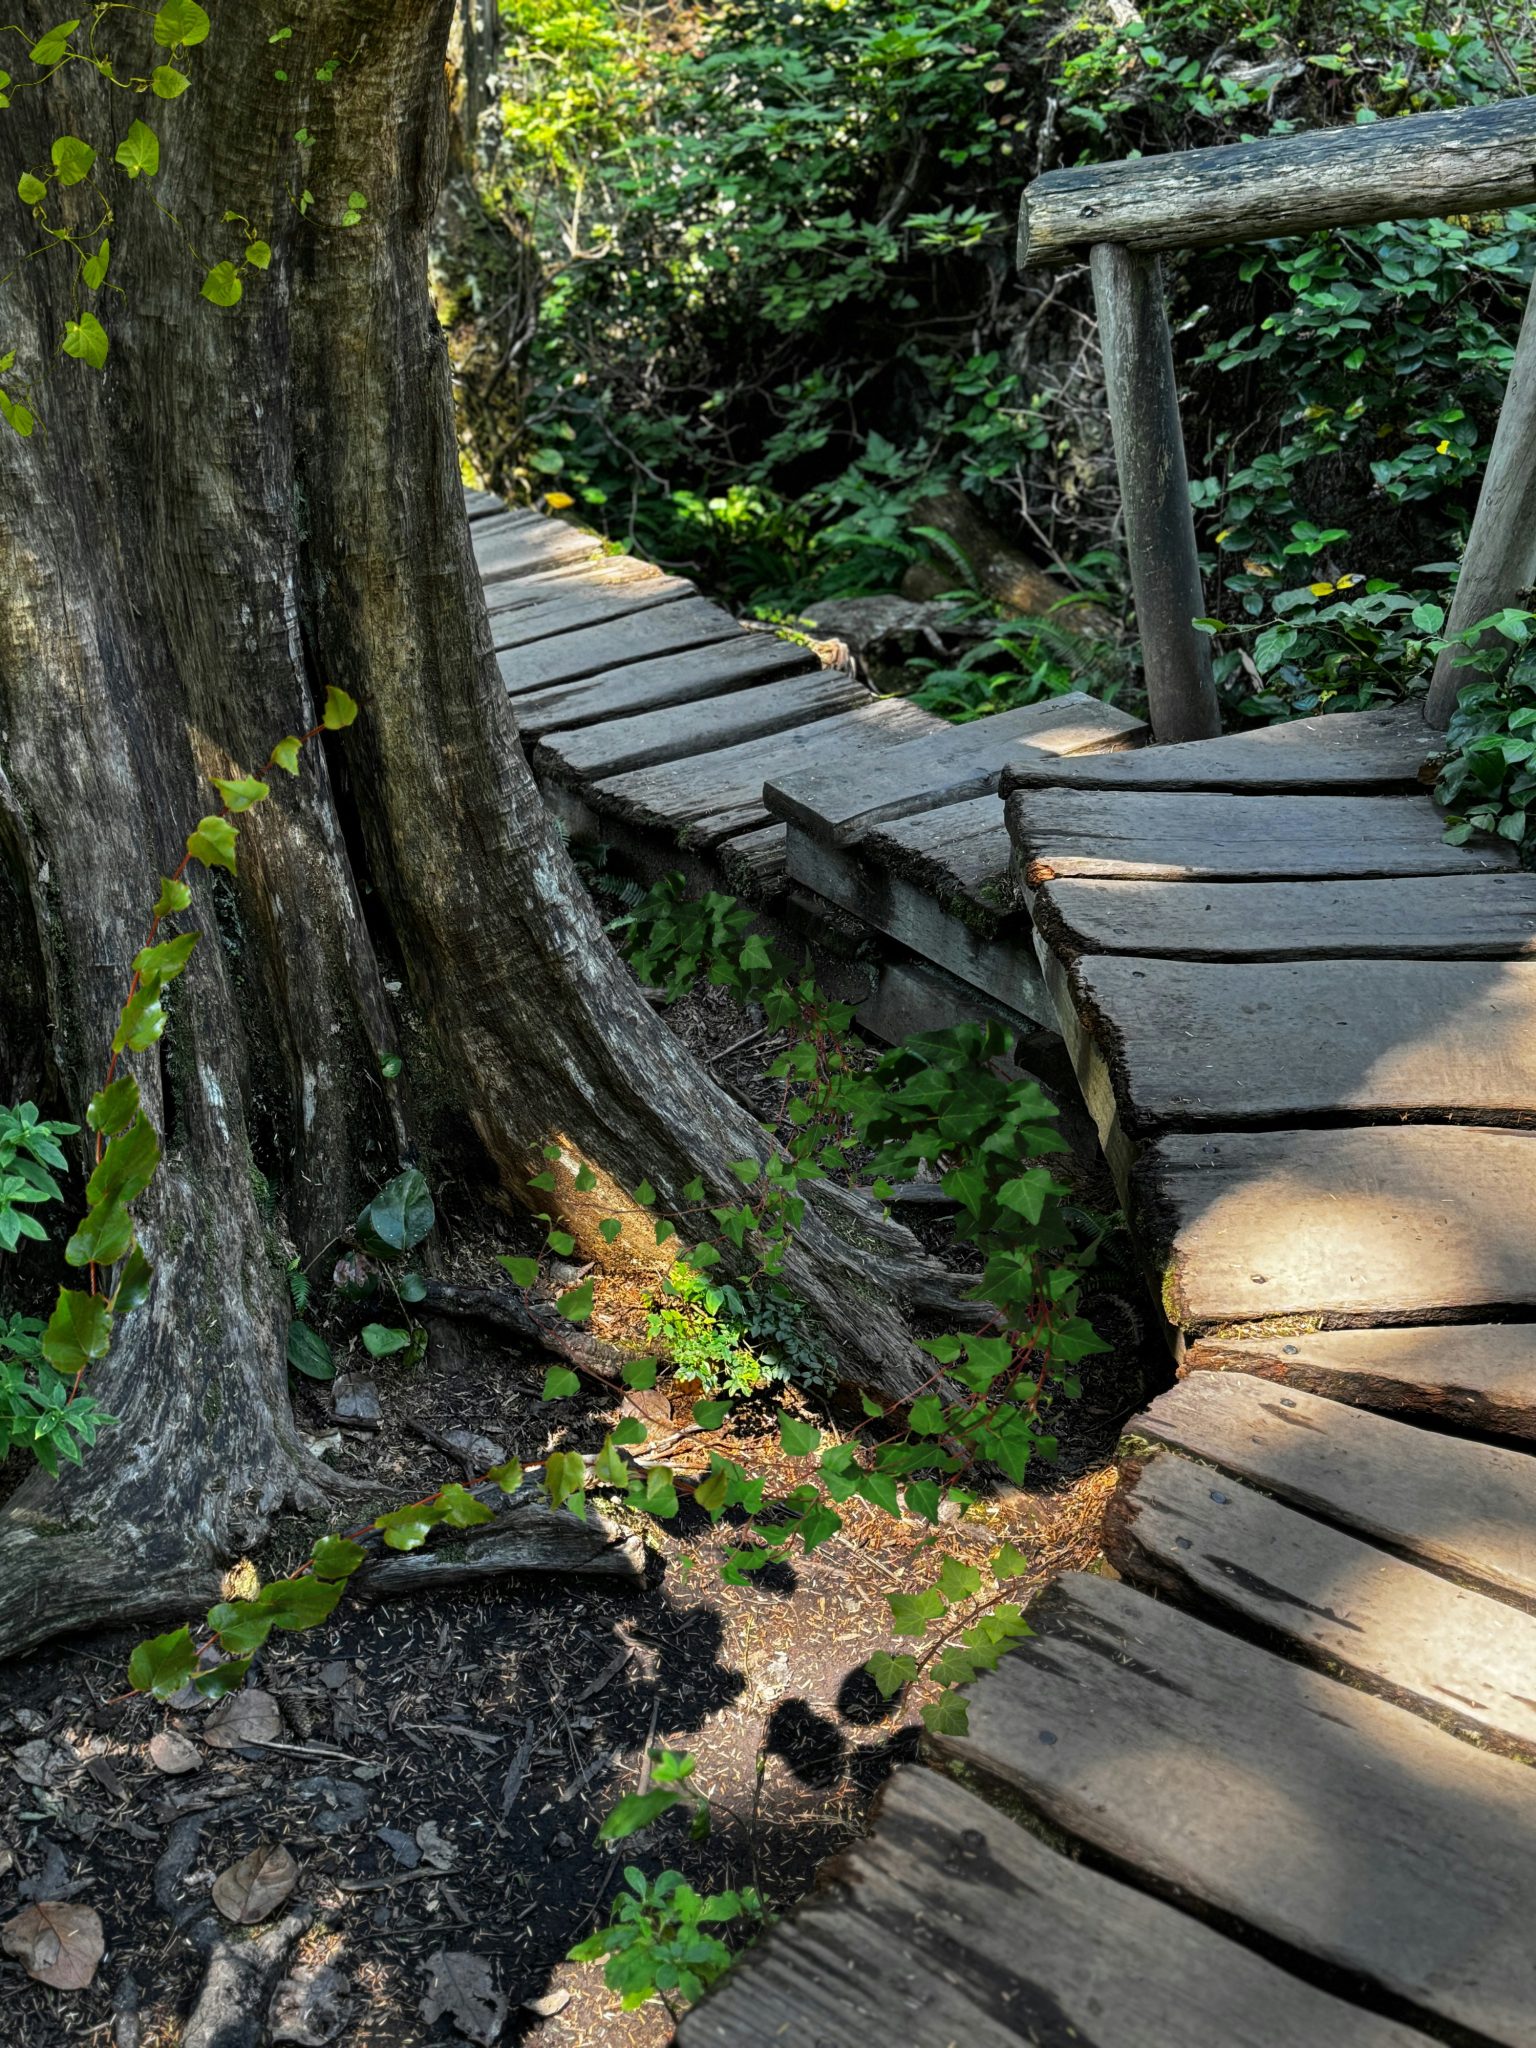
The magic here comes from its complete surrender to the environment. The walkway doesn’t try to impose order; it follows the natural contours of the land. The use of rough, uneven planks makes it feel as though it was built from materials found on-site. The large tree with its exposed roots isn’t an obstacle to be removed; it’s the anchor point for the entire scene. This design works because it feels discovered rather than constructed, blending seamlessly into the wildness of the surrounding greenery.
|
📋 Copy HEX 🔗 Share |
⭐ The One Thing
A truly rustic path like this is beautiful but comes with functional trade-offs. The uneven surface of the rough-sawn planks can be a tripping hazard, especially for young children or anyone with mobility issues. It’s not the place for fancy footwear. In wet or icy conditions, the wood can become extremely slippery without a non-slip finish, which would compromise the raw aesthetic. This is a path for ambling and enjoying the view, not for rushing from point A to point B. Compare its ruggedness with the more uniform surface of Idea #5.
14. Aged Wood Deck Path with a Rough Stone Bench
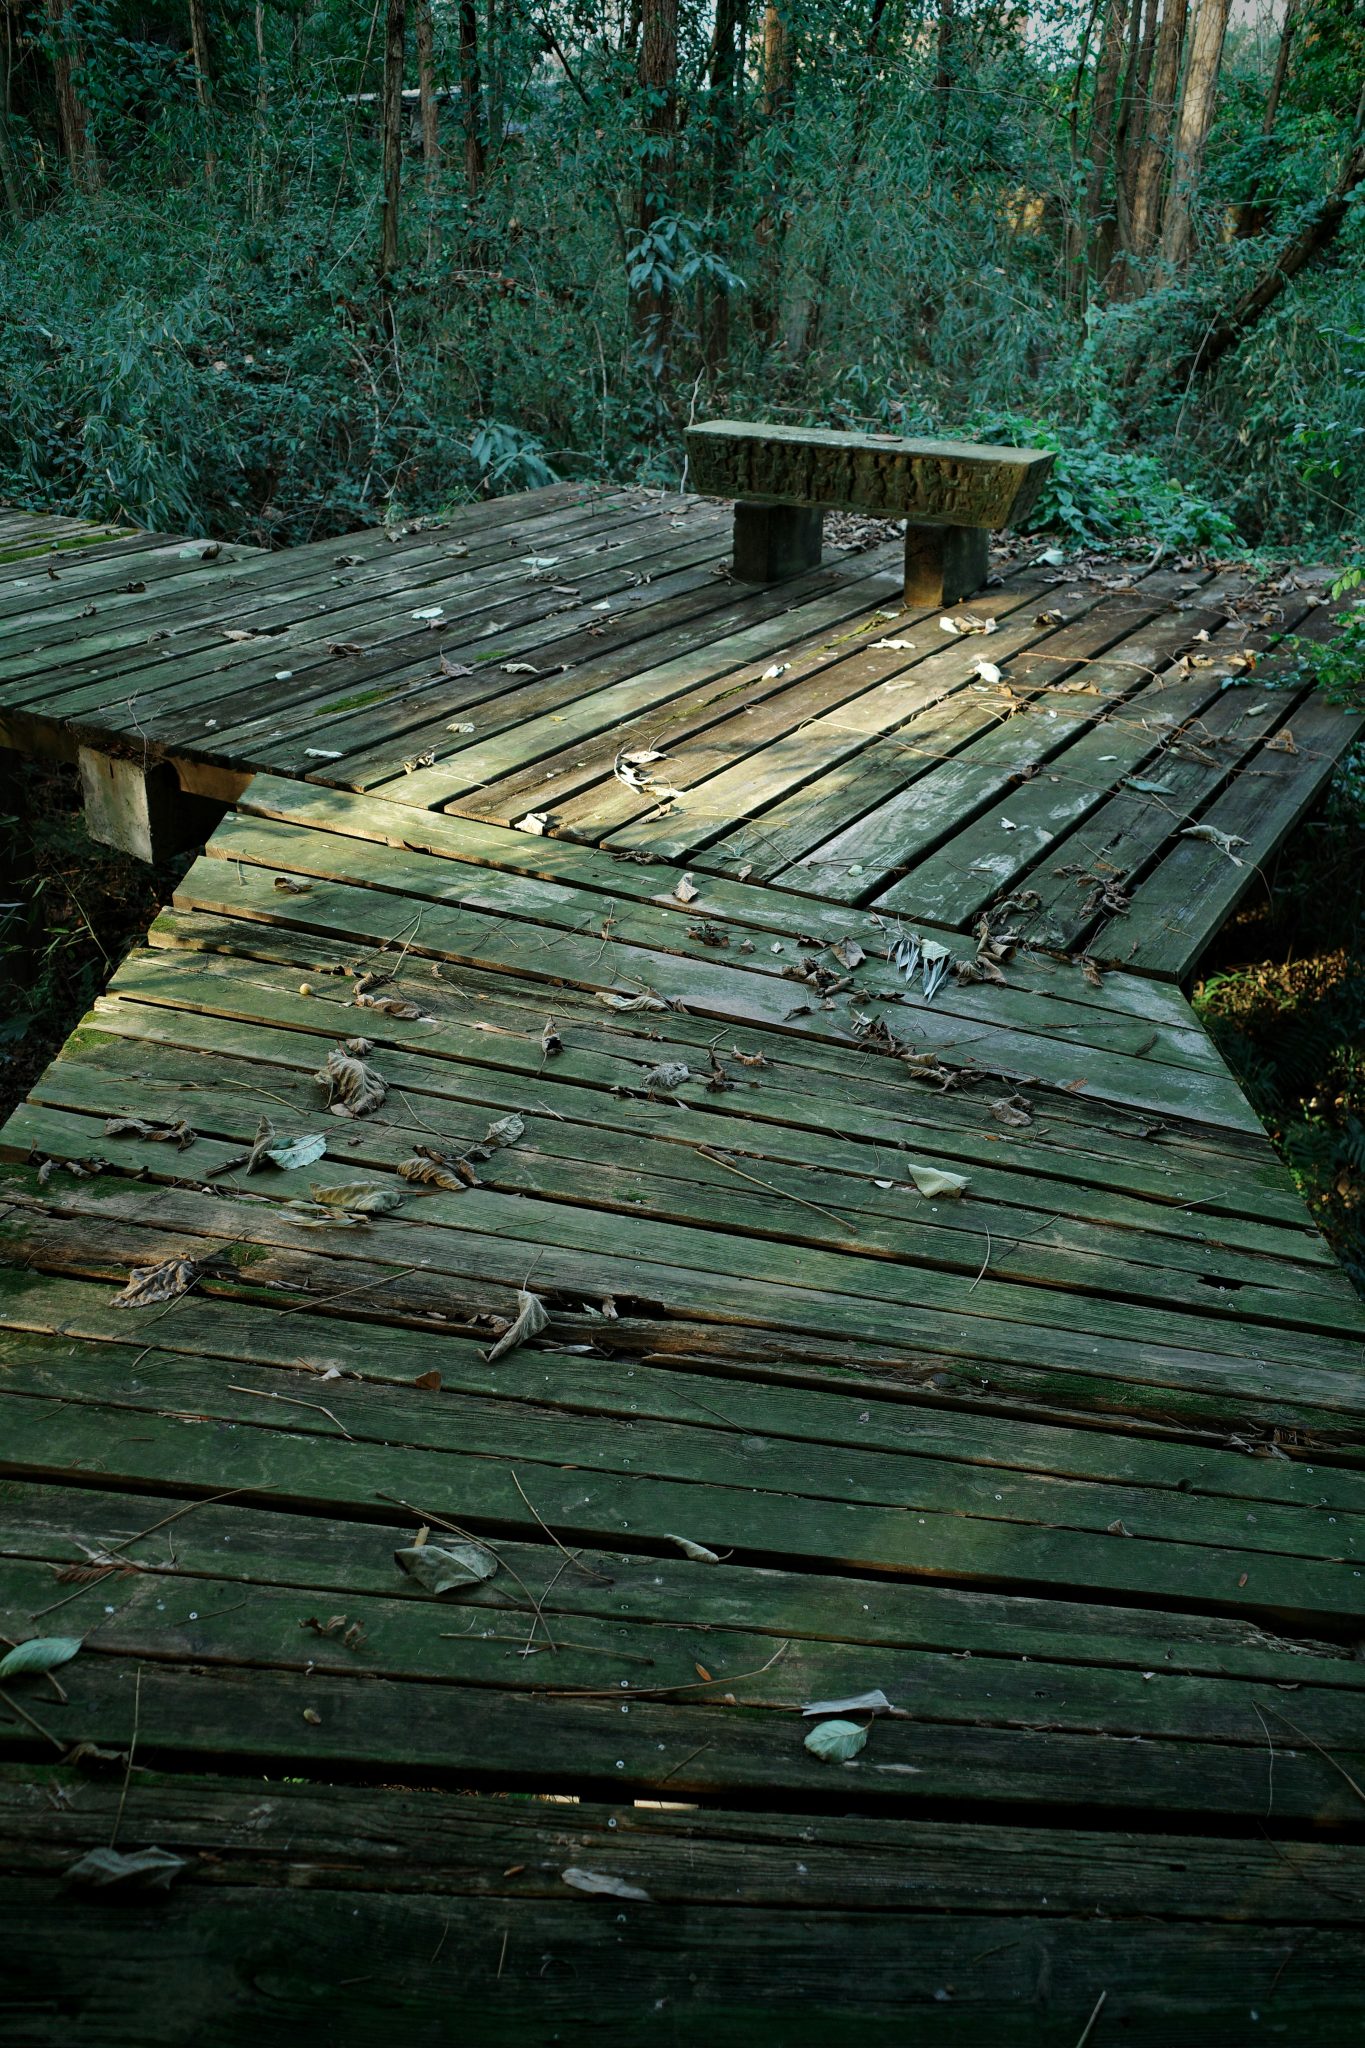
The rough stone bench is the heart of this scene. Take it away, and you have a simple, albeit beautiful, wooden path in a forest. But the bench adds a sense of purpose and humanity. It’s an invitation to pause, to sit, to be still within the environment rather than just pass through it. Its heavy, permanent quality provides a powerful anchor, contrasting with the lighter, linear nature of the wooden walkway and the ephemeral quality of the fallen leaves. It transforms the path from a corridor into a destination.
|
📋 Copy HEX 🔗 Share |
💰 Budget Breakdown
A solid stone bench can be incredibly expensive. To get this look for less, you can create a similar feature using much more affordable materials. Consider using concrete form tubes to cast two simple pedestals, then lay a thick, reclaimed wooden beam or a large, flat-topped boulder across them. Another option is to hunt for a simple, weathered concrete bench at a garden salvage yard or on Facebook Marketplace. The goal is to get that sense of weight and permanence, which you can achieve without a four-figure price tag.
15. Wood Deck and Stairs Extending into a Pine Forest
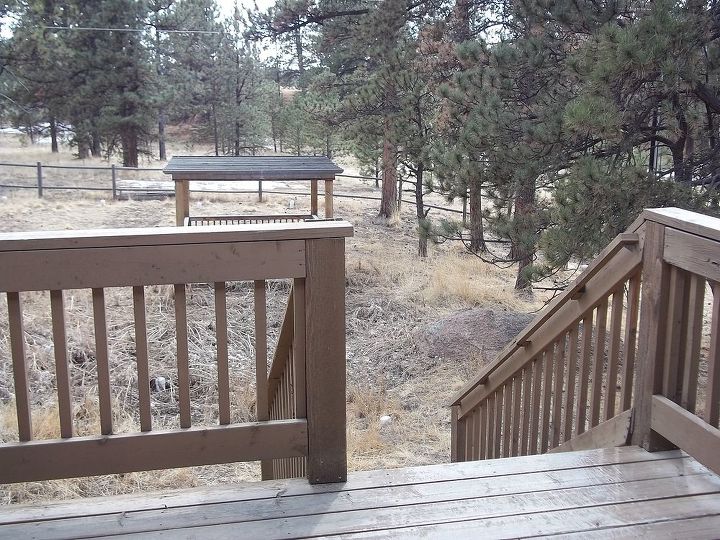
This design is perfect for properties that have a slight to moderate slope. It acts as a transitional element, gracefully connecting a house or patio area to a lower or higher section of the yard. The deck area provides a stable, level platform, while the stairs manage the change in elevation. This solution is ideal for lot sizes of a quarter-acre or more, where you have a distinct ‘upper’ and ‘lower’ zone. It wouldn’t make sense on a completely flat lot, where a ground-level path would be more appropriate.
|
📋 Copy HEX 🔗 Share |
✅ Before You Start
Before you commit to building a deck that extends into a natural area, run through this quick checklist:
- Have you checked your local building codes for setback requirements from property lines and rules for deck construction?
- Is the area well-drained? Building a deck over boggy ground can lead to premature rot and instability.
- Have you identified the ‘desire line’—the natural path people already take? Build your deck to follow this path for the most intuitive flow.
- What’s your plan for managing the transition between the deck and the natural ground to prevent a ‘dead end’ feeling?
16. Curved Slat Walkway on Gravel with a Coastal Vibe
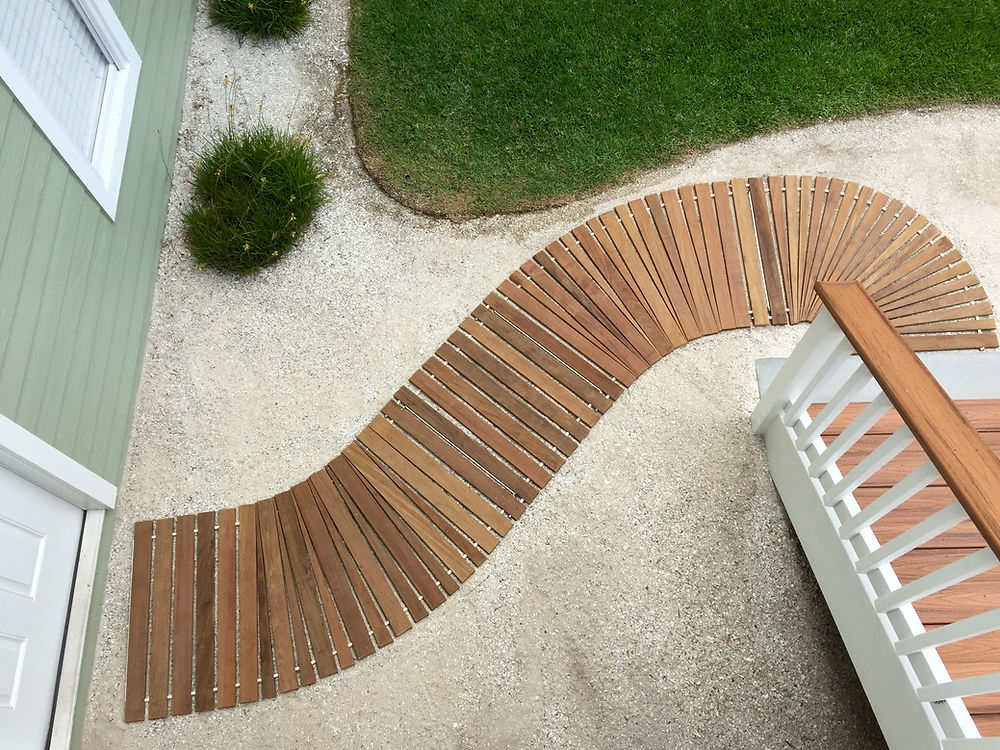
This design feels so fresh and inviting because of the smart interplay of color and texture. The warm brown of the wooden slats, the pale green of the house siding, and the clean white trim create a classic, coastal-inspired palette. The texture of the light-colored gravel provides a satisfying crunch underfoot and creates a beautiful, bright ground plane that makes both the wood and the surrounding green grass pop. The gentle curves of the path feel organic and welcoming, a stark contrast to a rigid, straight concrete sidewalk.
|
📋 Copy HEX 🔗 Share |
🔥 Trending Context
Creating that fanned-out curve with wooden slats is a great DIY project. Here’s how:
- Lay out your curved shape on the ground using a garden hose or marking paint.
- Place a temporary stake or pipe at the center point of your curve’s radius.
- Lay your first slat pointing directly at the center stake.
- Lay subsequent slats, ensuring the inside edge is slightly closer to the previous slat than the outside edge. This will create the fan effect naturally.
- Use a consistent spacer (like a small piece of 1/4″ plywood) on the outer edge to keep the gaps even.
- Once you’re happy with the layout, secure the slats to underlying support beams.
Time: 4-6 hours. Cost: ~$10-15 per sq. ft.
17. Wooden Slat Path with Fan-Shaped Turns
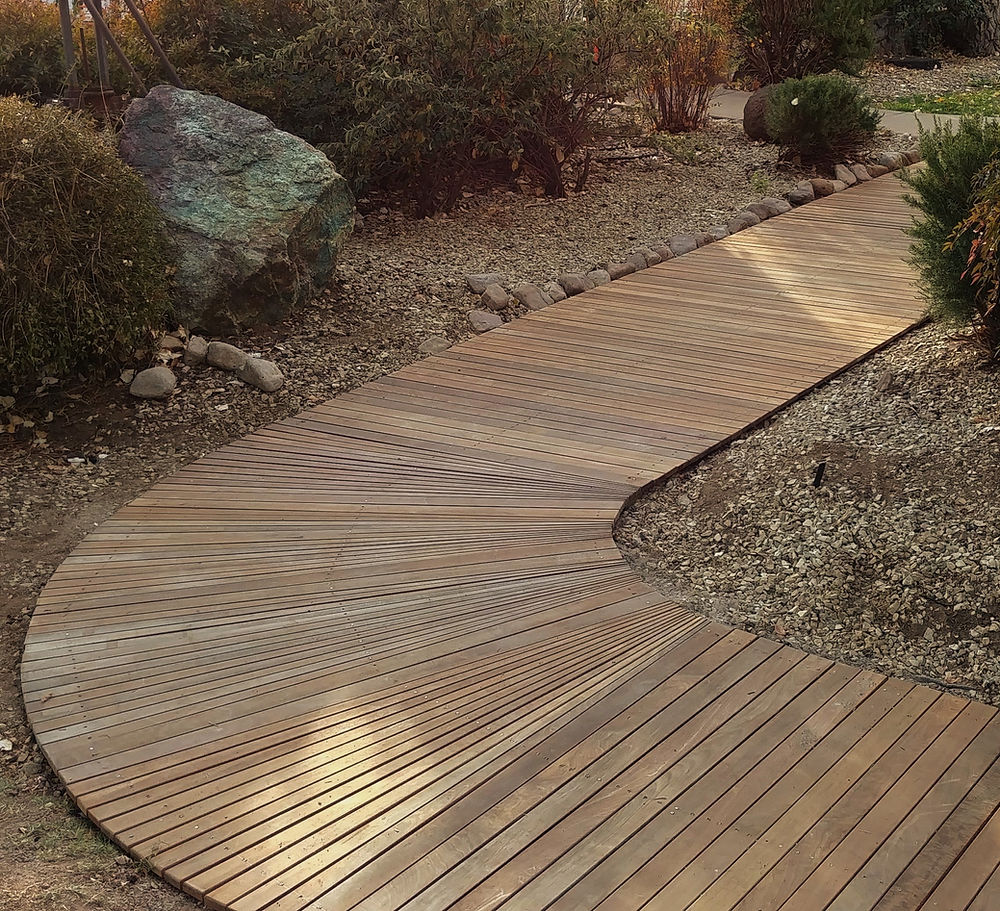
The distinctive, fan-shaped arrangement of the wooden slats at the turns is what makes this path a standout design. It’s a simple yet brilliant way to handle a change in direction without awkward cuts or angles. This radial pattern transforms the functional need for a curve into a deliberate, decorative moment. It elevates the walkway from a simple path to a piece of landscape art, drawing attention to the craftsmanship and thoughtful design. It’s a detail that shows care and intention. For a similar concept with a different material palette, see Idea #16.
|
📋 Copy HEX 🔗 Share |
💡 Designer Tip
When building a slatted wood pathway over a gravel or rubble base, the foundation is everything. To prevent the slats from shifting or becoming uneven over time, you must install hidden support runners. These are typically two parallel pressure-treated 2x4s laid flat and anchored into the ground along the length of your path. The visible slats are then screwed into these hidden runners. This provides a stable, level base and ensures the gaps between your beautiful slats remain perfectly even for years to come.
18. Zigzag Wood Inlay Within a Red Brick Path
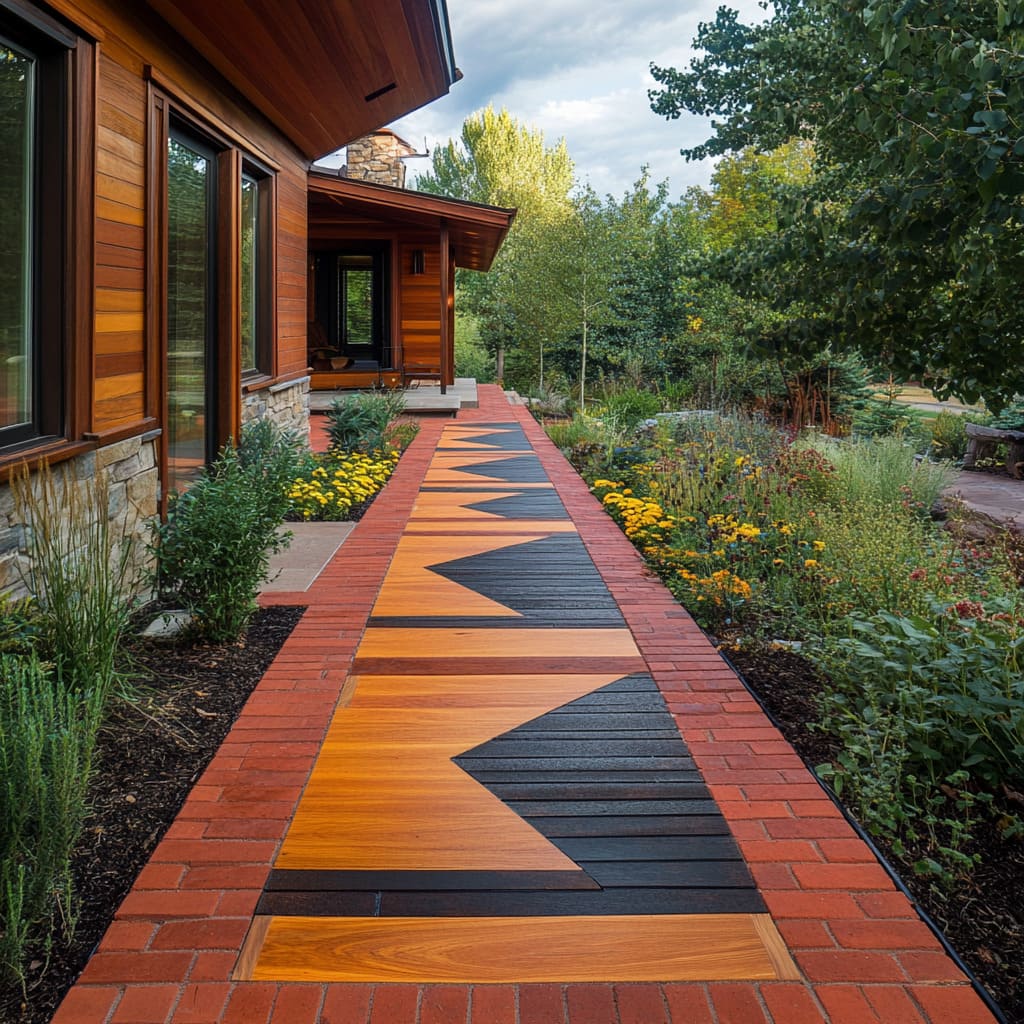
The visual recipe for this dynamic walkway is all about contrast: 70% classic, traditional material (the red brick pavers in a running bond pattern) + 30% modern, geometric accent (the zigzag wooden planks). The key is allowing the traditional material to dominate the frame, which makes the modern inlay feel like a special, intentional detail rather than a chaotic mix. You could change the formula by using bluestone instead of brick, but you must maintain that strong contrast between the static frame and the dynamic inlay for it to work.
|
📋 Copy HEX 🔗 Share |
🔧 How-To Brief
Combining wood and brick in a walkway requires careful planning. Wood and brick expand and contract at different rates with changes in temperature and moisture. Without a proper expansion gap between the two materials, you risk the wood buckling or the bricks cracking. A flexible, sandable sealant in the gap is essential. Also, be aware that the wood, being softer than brick, will likely show wear and tear more quickly. This look is stunning but it’s a higher-maintenance choice than a path made from a single material.
19. Weathered Plank Walkway Bordered by Wildflowers
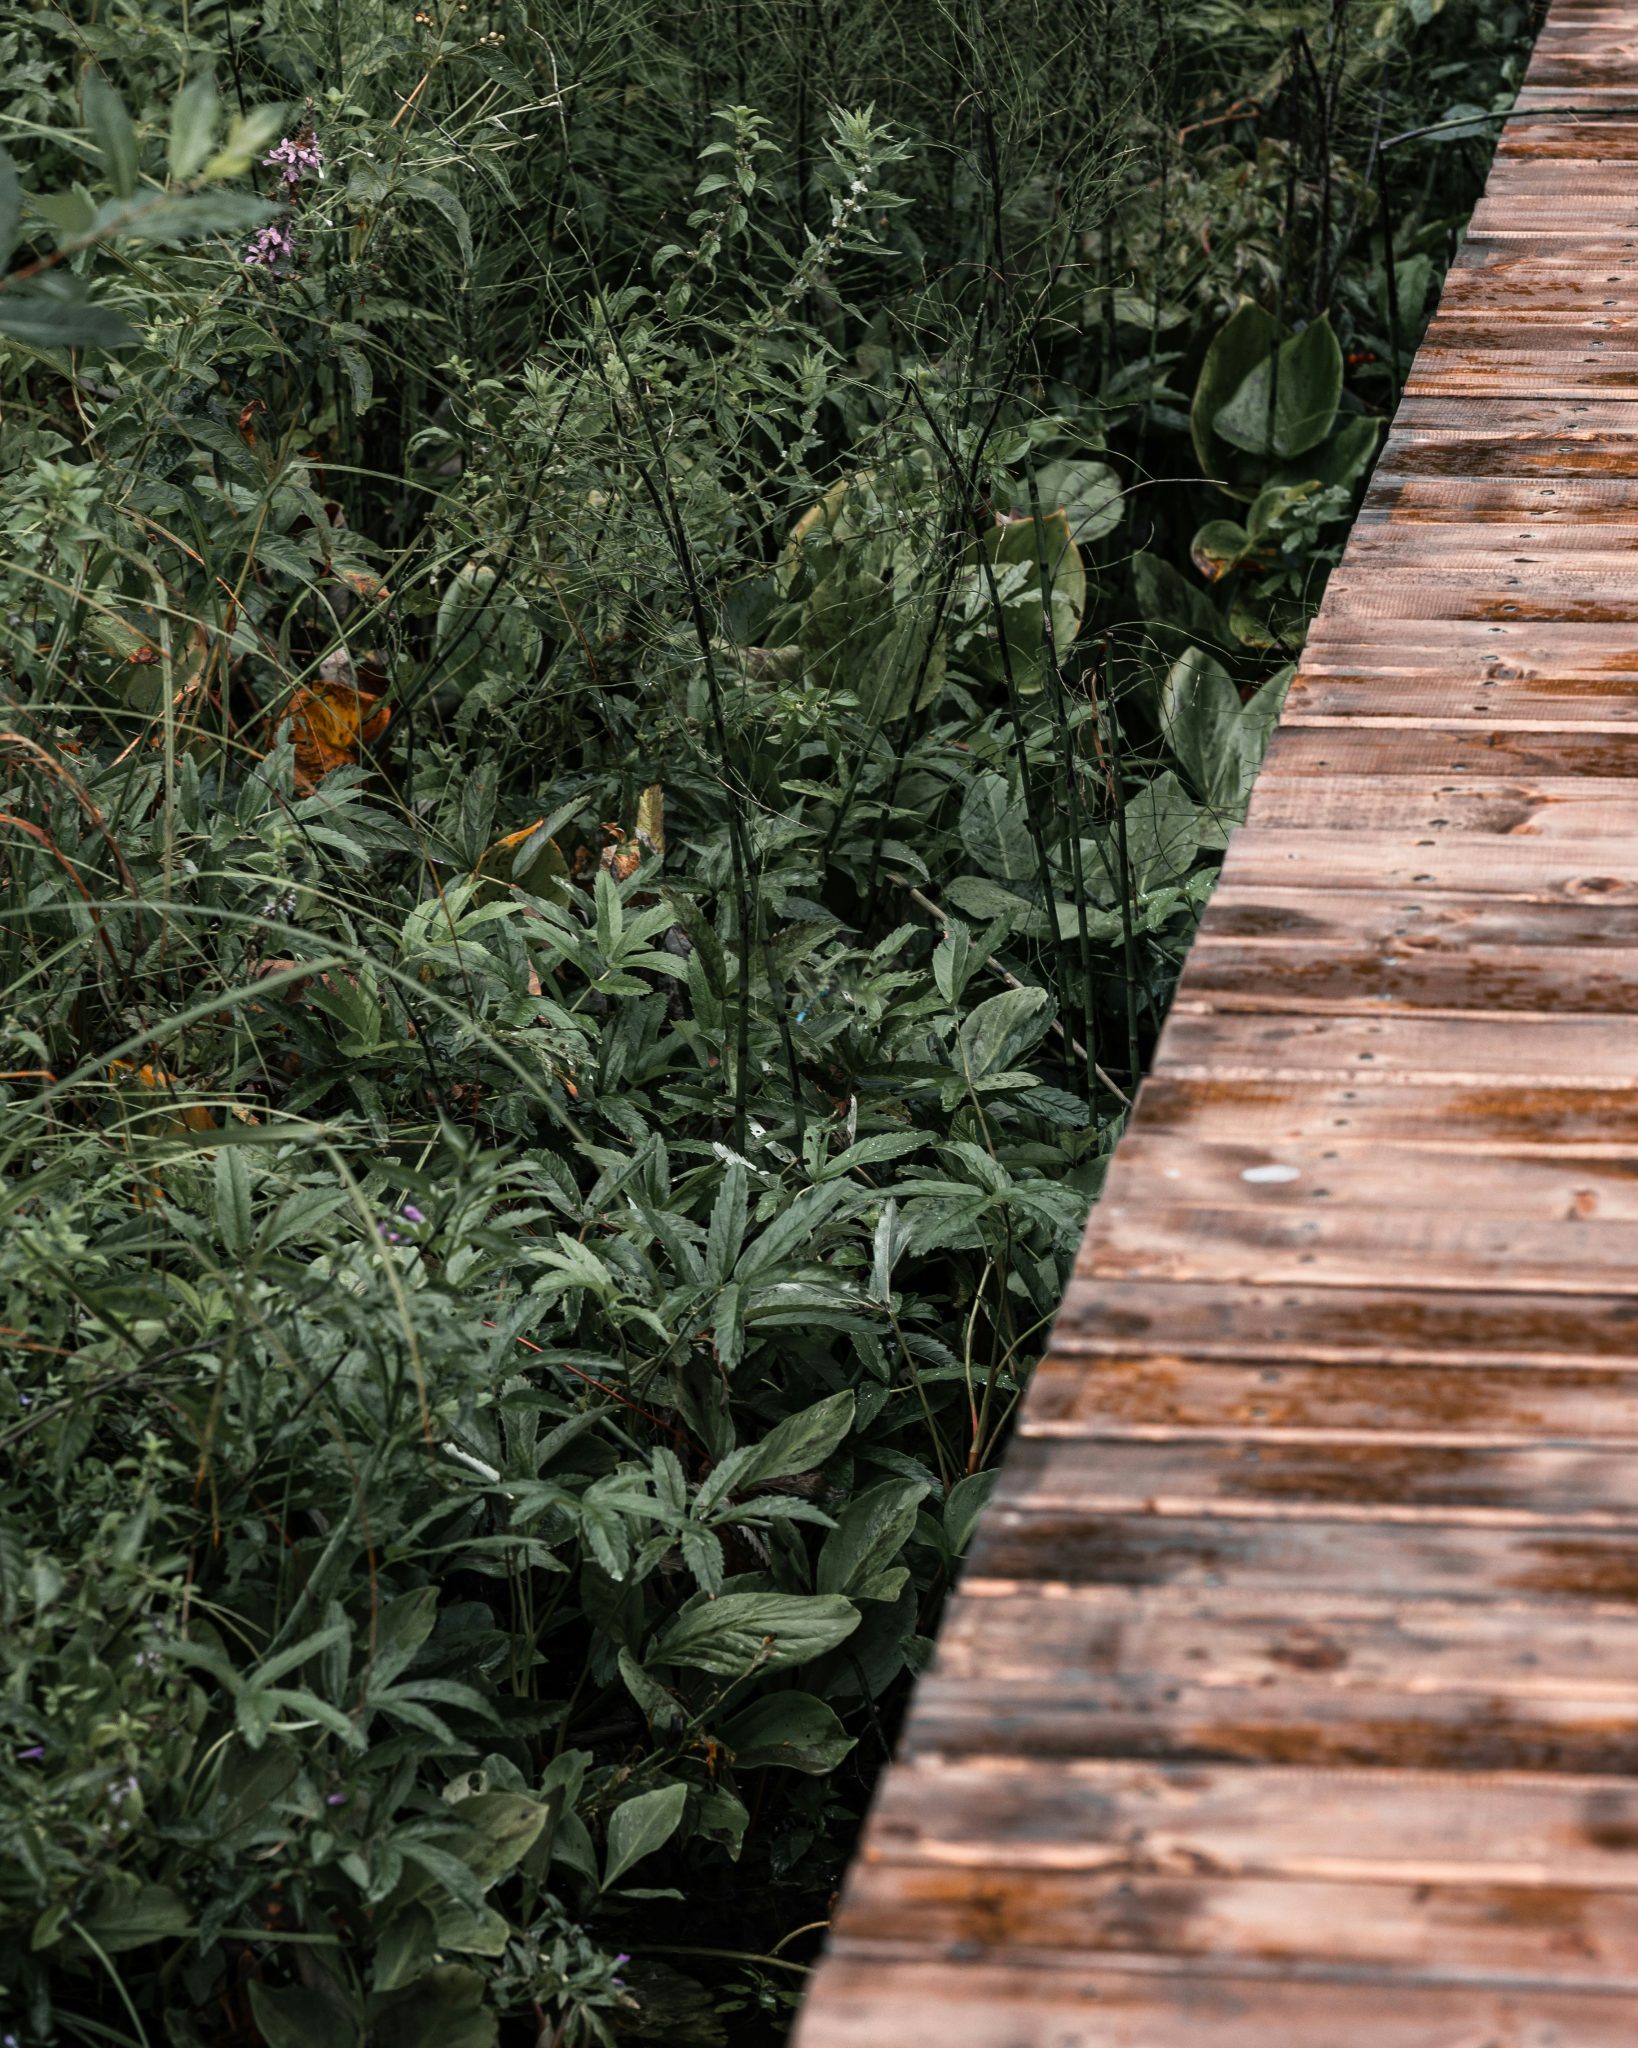
This close-up view reveals why a simple plank walkway can be so compelling. It’s the texture! The weathered grain and visible nail heads on the wood provide a rustic, tactile quality that contrasts beautifully with the soft, delicate textures of the surrounding foliage and tiny wildflowers. The diagonal line of the walkway creates a strong sense of movement and energy, leading the eye through the frame. The limited, earthy color palette of greens and browns, punctuated by tiny dots of purple and white, feels cohesive and natural.
|
📋 Copy HEX 🔗 Share |
🧹 Maintenance Reality
You can get this untamed, rustic look for very little money. The key is to embrace imperfection. Use reclaimed wood from old pallets (ensure they are heat-treated, not chemically treated), or check for leftover decking on Craigslist. Lay the planks directly on a leveled dirt path. Then, simply sow a ‘wildflower mix’ from your local nursery along the edges. The whole point is that it shouldn’t look perfect or expensive. It’s about creating a feeling of nature reclaiming a man-made path. Total cost could be under $100 for a short path.
20. Garden Path Made of Round Wood Slices
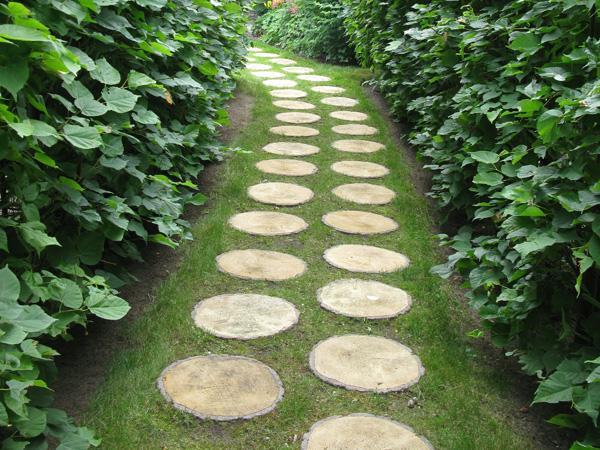
Creating this charming path is a perfect weekend project. Here’s a quick guide:
- Source your wood slices, or ‘tree cookies.’ They should be 2-3 inches thick. Use a rot-resistant wood like cedar or black locust.
- Dig a shallow trench, about 3 inches deep, where you want your path. Level the bottom.
- Add a 1-inch layer of sand or fine gravel for drainage and easier leveling.
- Arrange your wood slices in the trench, leaving small gaps between them. Tap them with a rubber mallet to set them in place.
- Fill the gaps with soil and sow grass seed or a hardy ground cover like creeping thyme.
Time: One afternoon for a 15-foot path. Cost: ~$5-10 per linear foot if you buy the slices.
|
📋 Copy HEX 🔗 Share |
📐 Style Math
While whimsical and beautiful, wood slice paths have a limited lifespan. Even with rot-resistant wood, direct contact with soil means they will eventually begin to decay. Expect to replace some or all of the slices every 5-7 years. They can also become very slippery when wet or frosty. This type of path is best for low-traffic, decorative areas of a garden rather than a main thoroughfare to your front door. It’s more about charm than hardcore durability. For a more permanent solution, consider the stone and wood path in Idea #18.
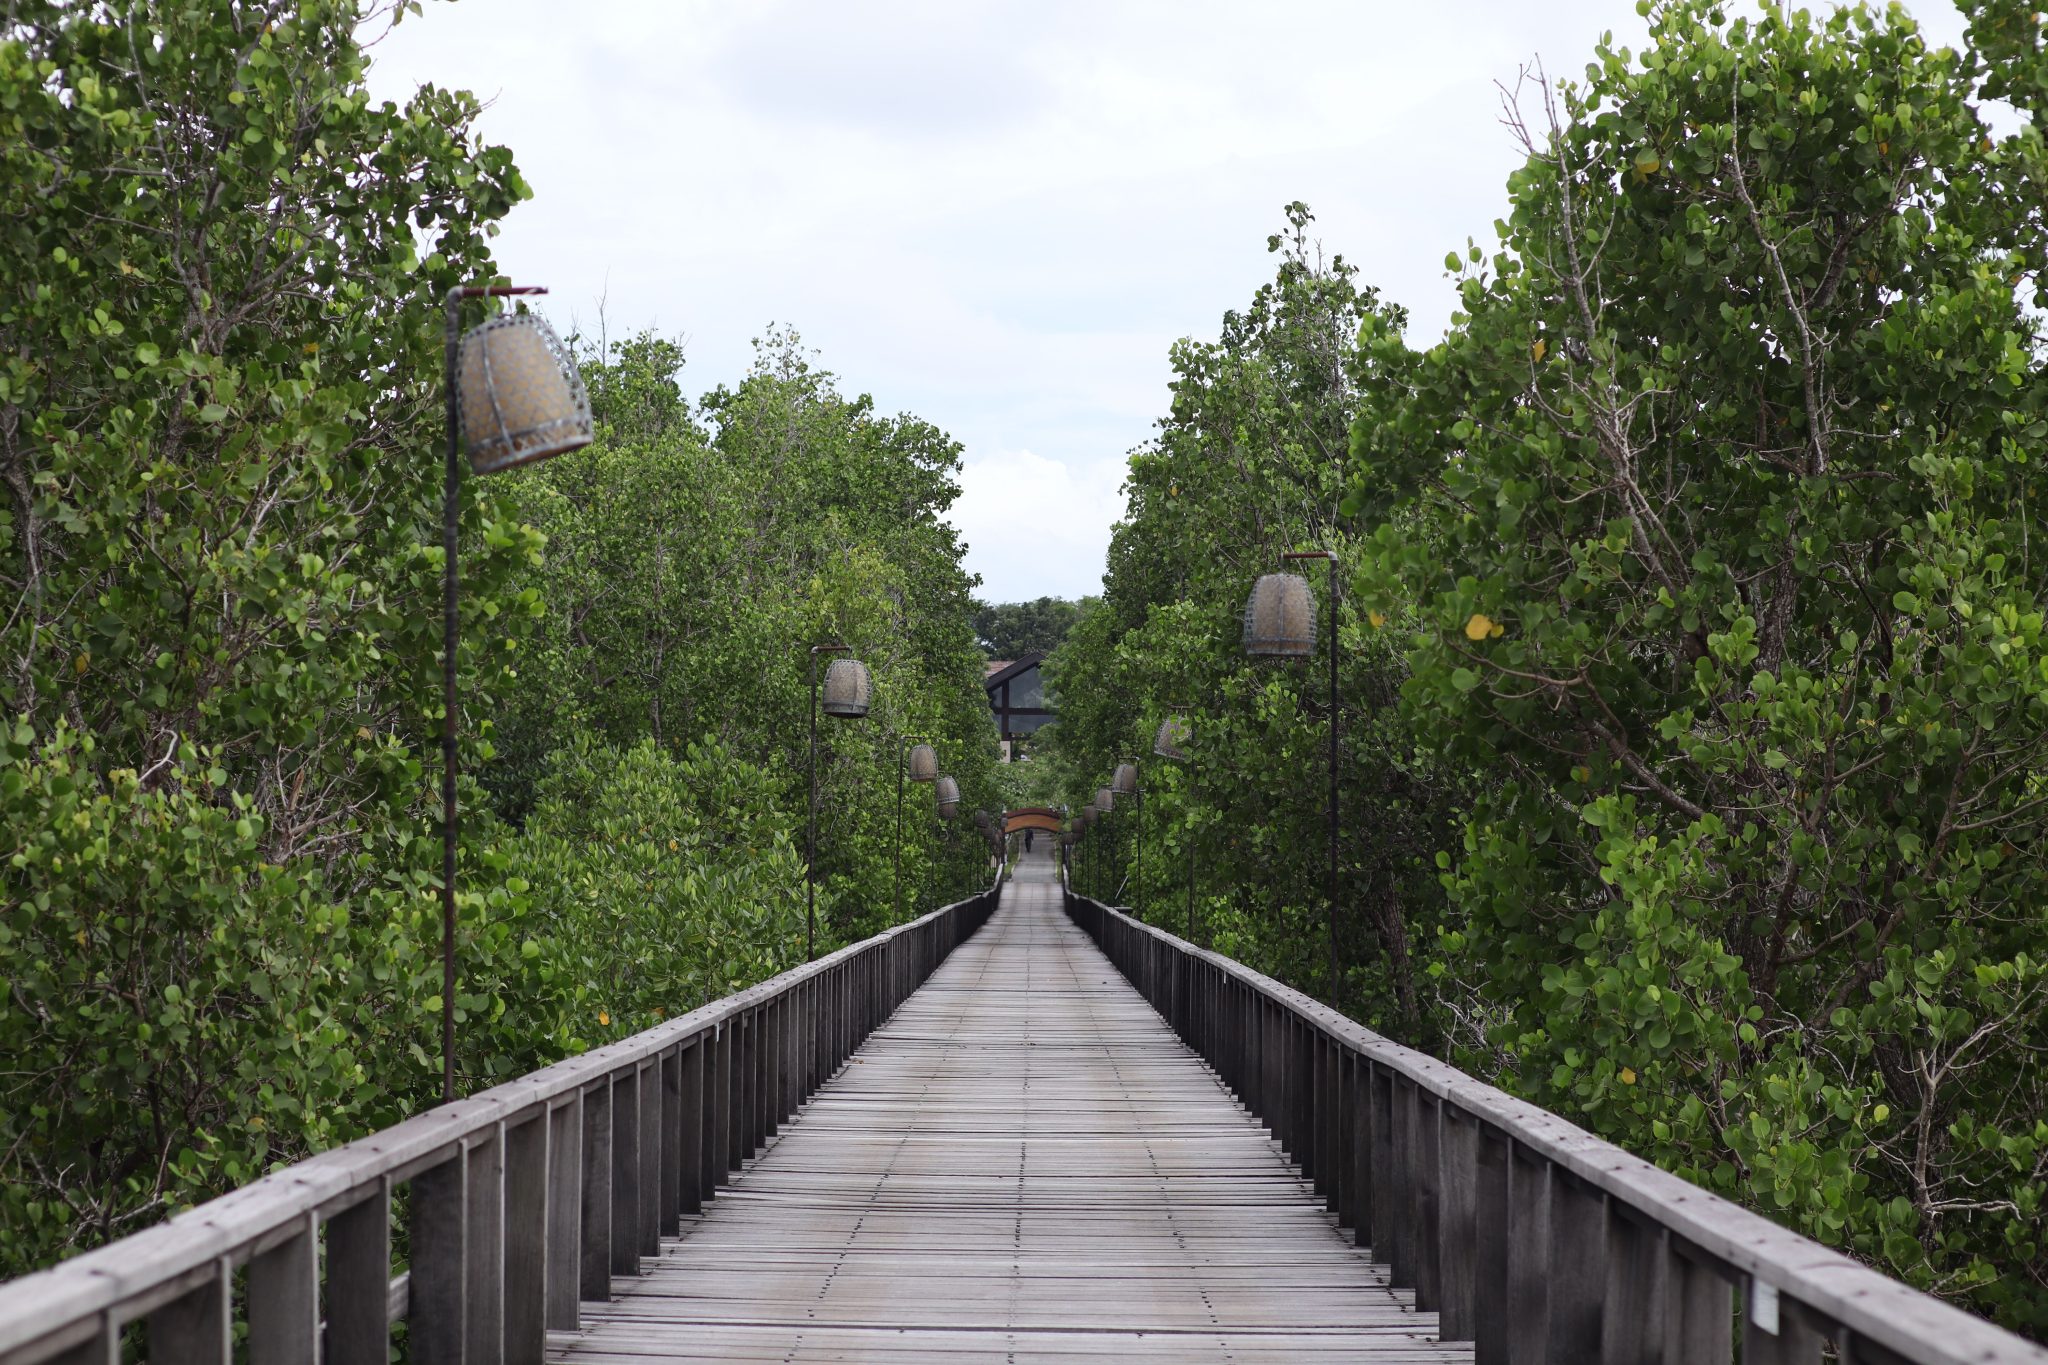
21. Boardwalk with Ornate Woven Lanterns
The ornate, basket-like lanterns are what elevate this walkway from a simple boardwalk to a magical, atmospheric journey. They introduce a decorative, almost whimsical element that contrasts with the rustic, weathered wood. They suggest an event, a destination, or a story waiting at the end of the path. Without them, it’s a nice walk through the woods. With them, it becomes an experience, especially at dusk when they would be lit, casting intricate shadows and a warm glow.
|
📋 Copy HEX 🔗 Share |
🎯 What Makes It Work
- Weathered Boardwalk (materials & labor): $6,000 – $11,000
- Decorative Lanterns (6-8): $600 – $1,200
- Low-Voltage Wiring & Installation: $700 – $1,500
- TOTAL: $7,300 – $13,700
- Budget Alternative: Build a simpler boardwalk from pressure-treated pine. Instead of expensive hard-wired lanterns, use solar-powered woven lanterns from Target or World Market. You’ll get a very similar vibe for about half the cost.
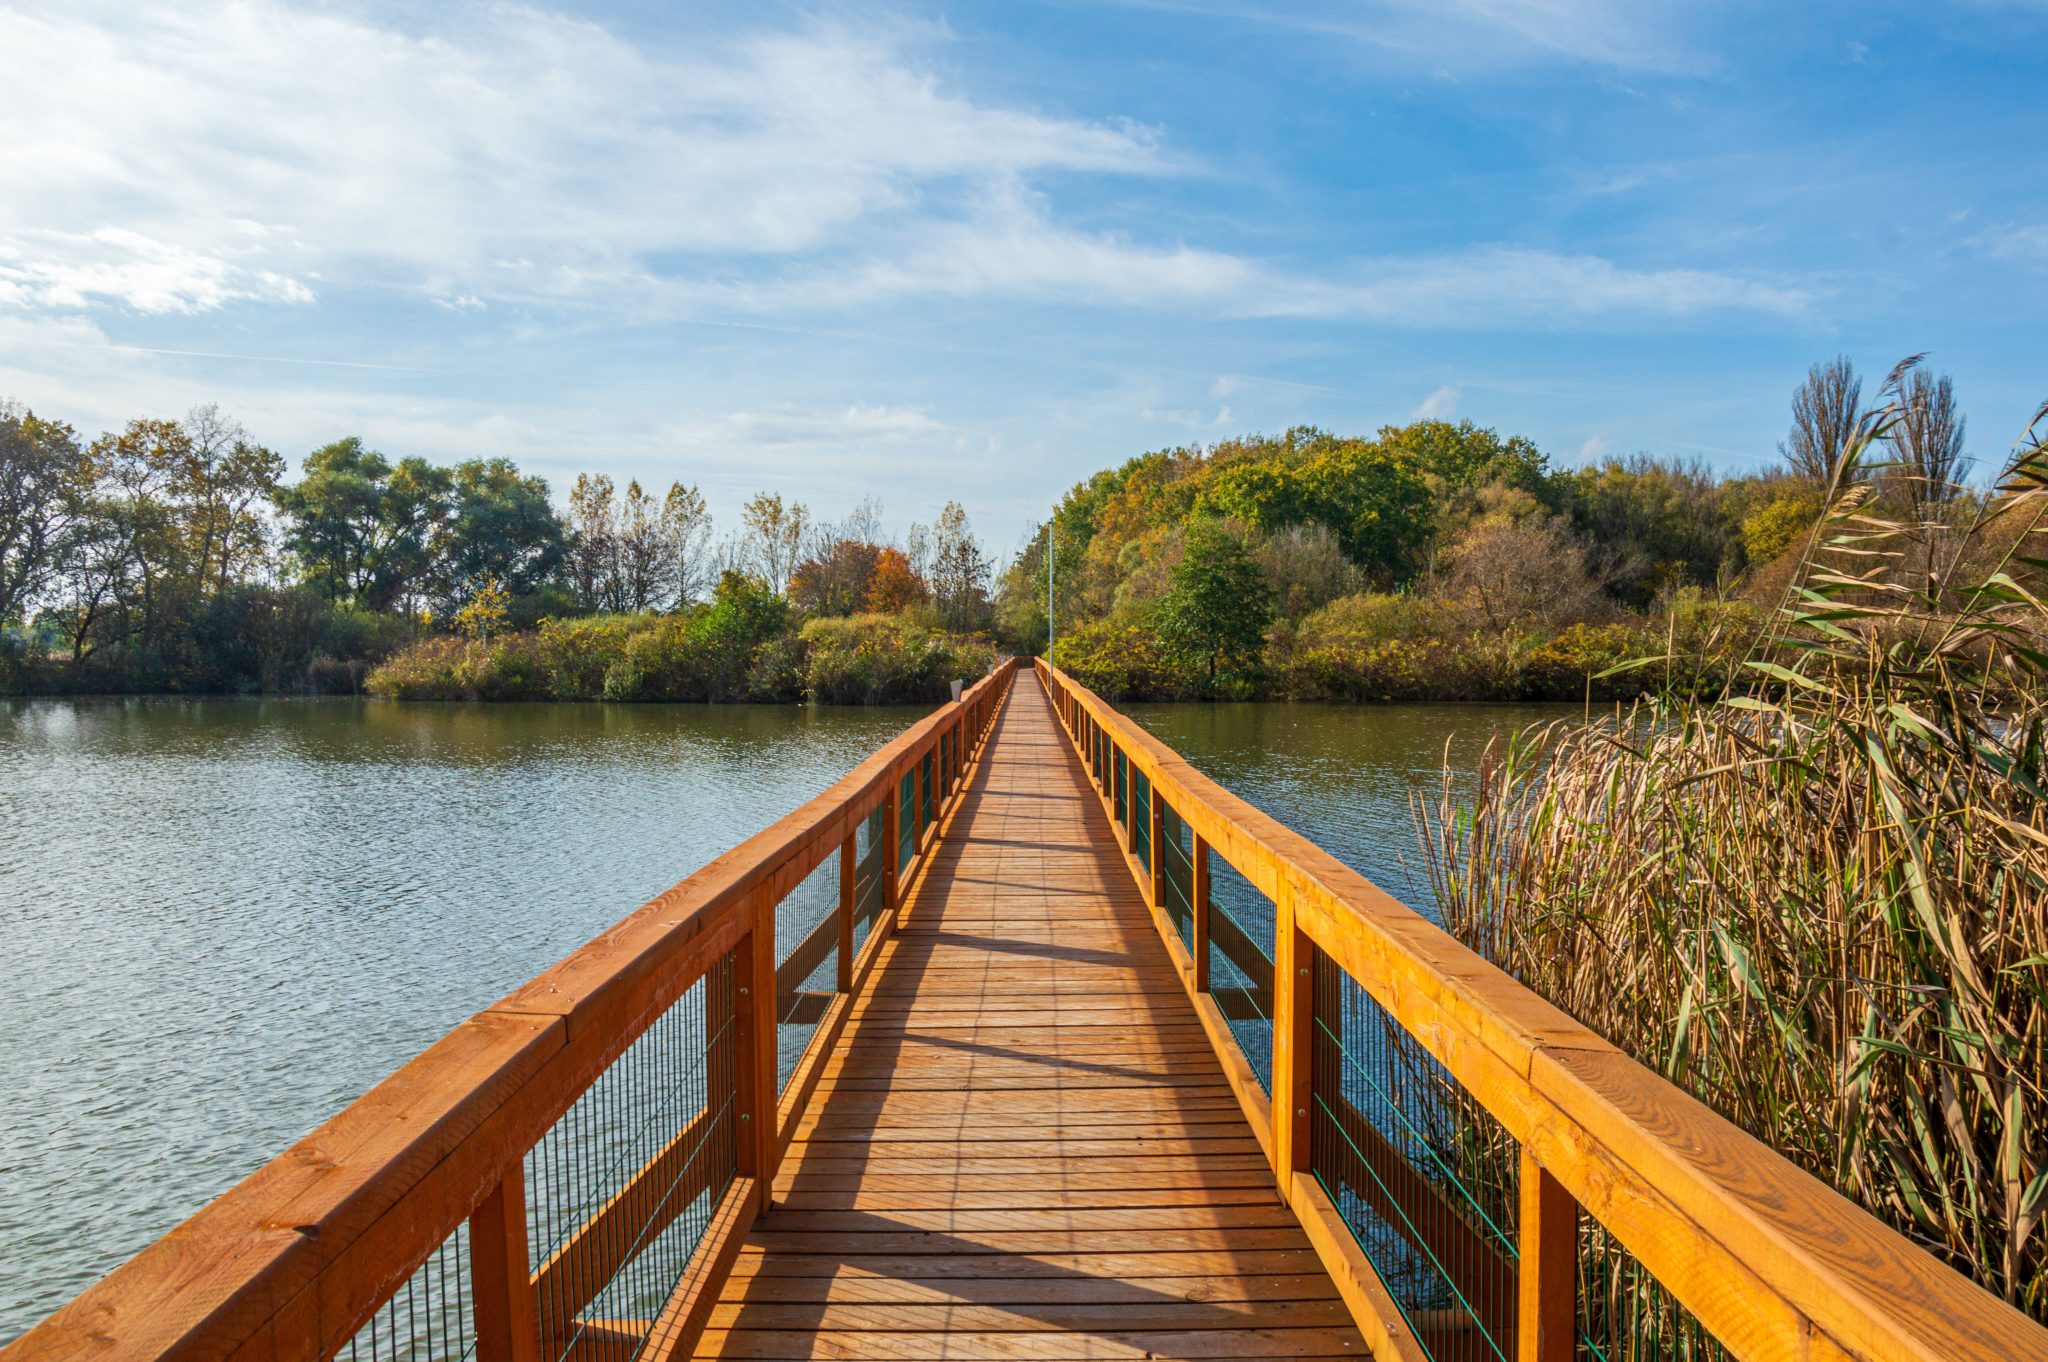
22. Long Wooden Footbridge Over Water with Green Mesh Railing
This bridge design works through its smart use of color and transparency. The light brown, almost orange-toned wood stands out beautifully against the blue sky and the dark green water and reeds. The choice of dark green mesh for the railing infill is brilliant; it provides safety while being visually permeable, allowing your eye to see through to the water and reeds beyond. This transparency prevents the long bridge from feeling like a heavy, solid barrier, instead keeping the structure light and integrated into the scenery.
|
📋 Copy HEX 🔗 Share |
📏 Scale Guide
A long, straight footbridge like this is a solution for a very specific problem: crossing a body of water or a significant dip in the landscape. It’s not a decorative garden path, but a piece of functional infrastructure. This scale is appropriate for large, rural properties, parks, or nature preserves. The minimum span that justifies this kind of construction would be around 30 feet. For shorter gaps, a simpler, less engineered-looking bridge like the one in Idea #23 might be more visually appropriate.
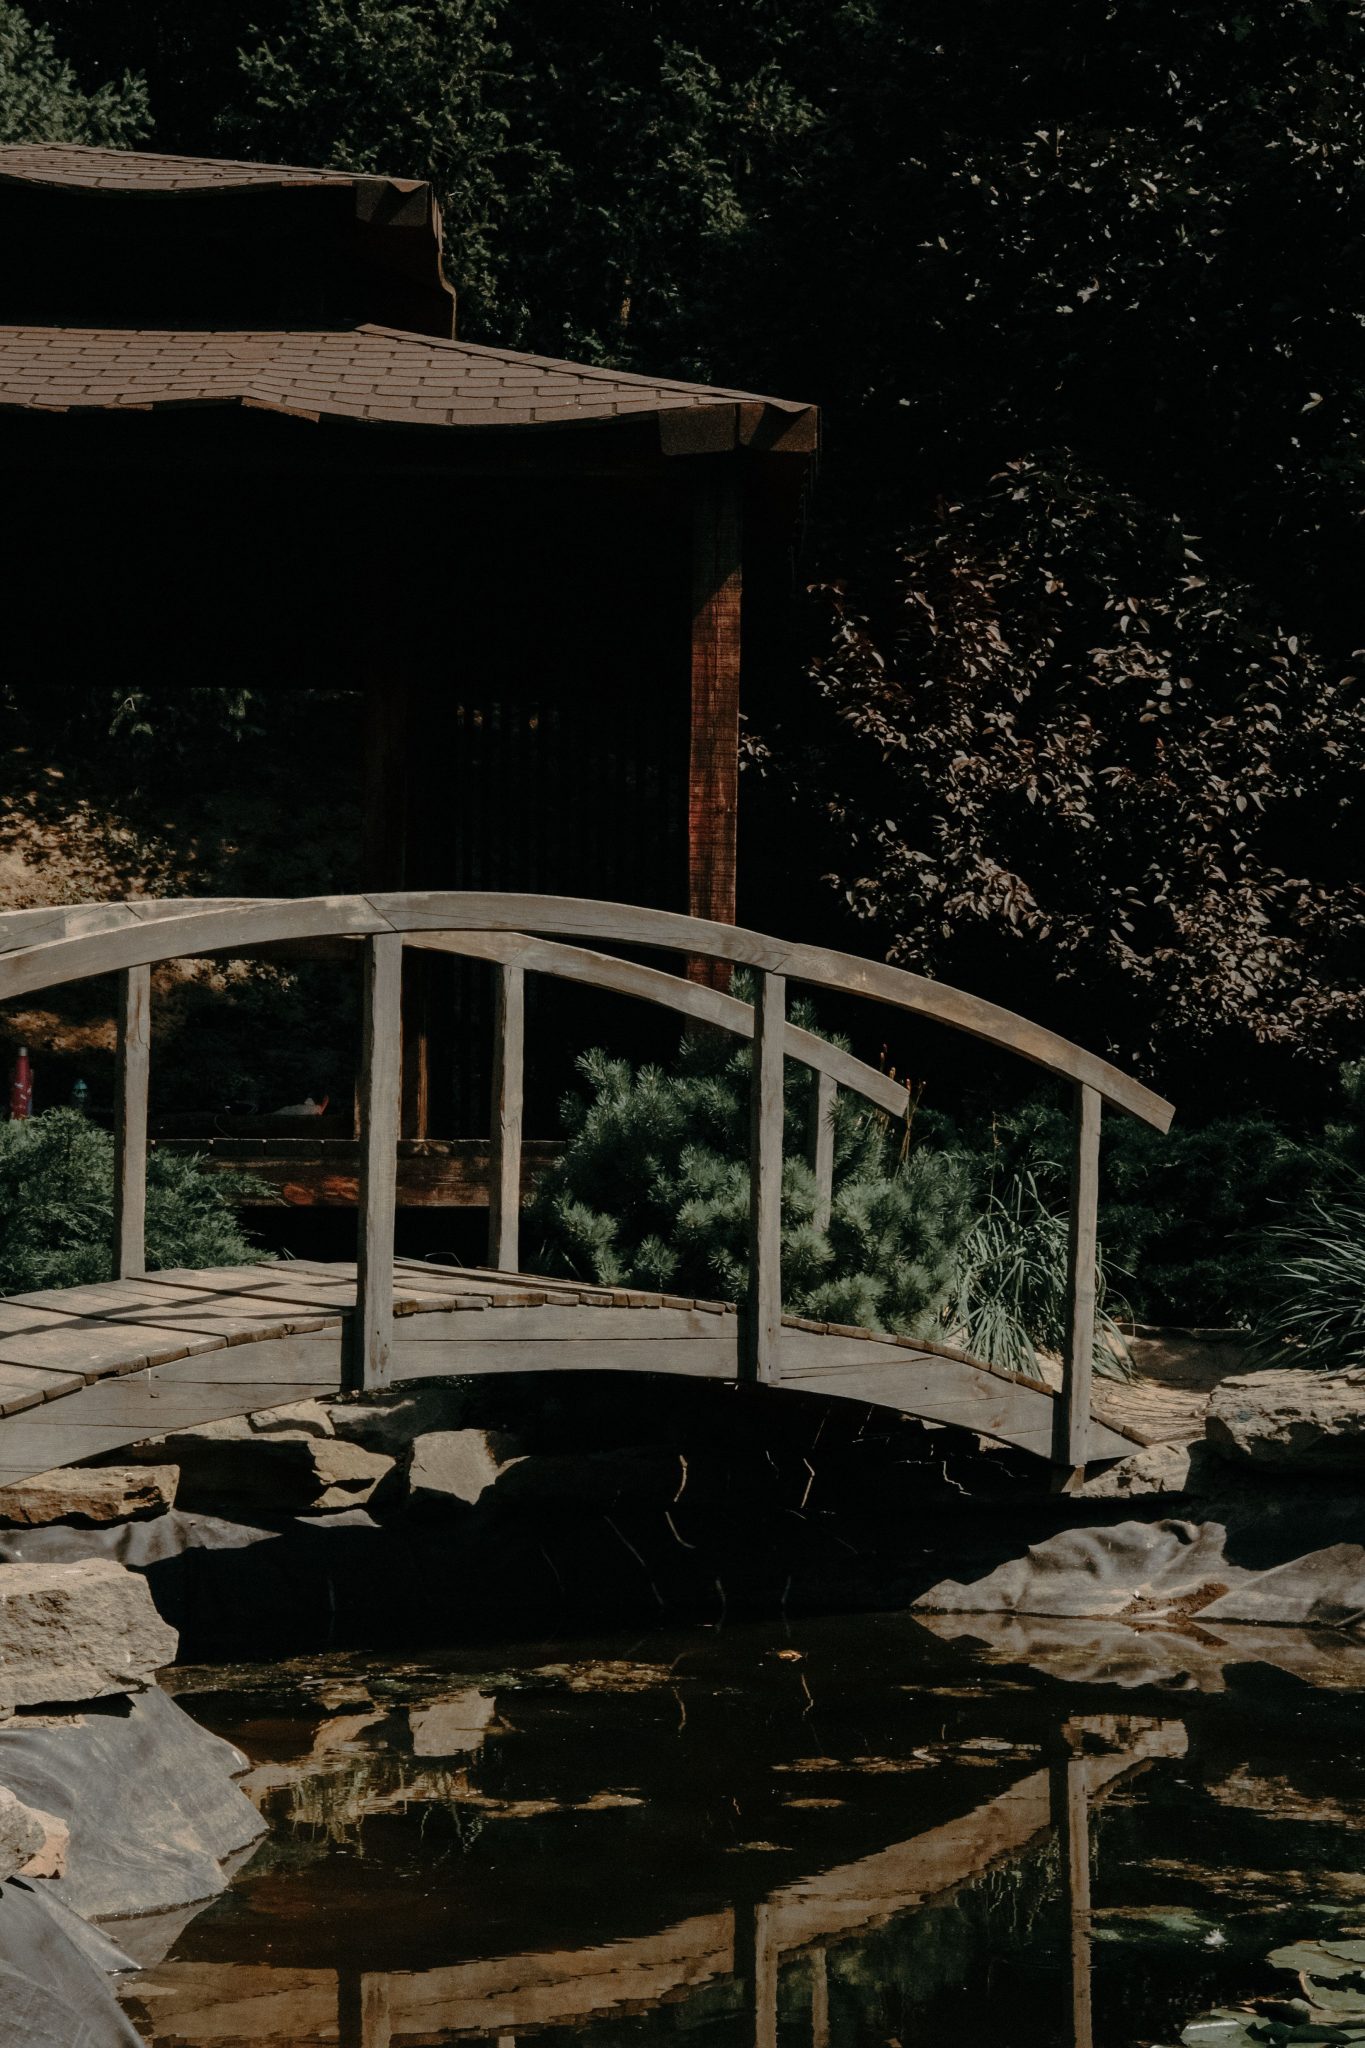
23. Rustic Wooden Arch Bridge Over a Dark Pond
When placing an arch bridge in your garden, the reflection is just as important as the bridge itself. Position it over the darkest, stillest part of your pond to get the most dramatic and complete reflection. The goal is to create a perfect visual circle formed by the bridge and its mirror image in the water. To enhance this effect, consider adding a dark pond liner, as seen here, which deepens the color of the water and makes for a crisper, more glass-like reflection.
|
📋 Copy HEX 🔗 Share |
⚠️ Real Talk
An arched bridge can be unexpectedly steep, and the wooden slats can become very slippery, especially in a shady, damp spot next to a pond. This makes it potentially tricky for those with mobility challenges. While beautiful, it’s not the most practical design for everyday, high-traffic use. If this will be your primary path, consider adding non-slip strips or opting for a flatter design. Also, the lush foliage is lovely, but it will drop leaves into the pond, requiring regular skimming to keep the water clear.
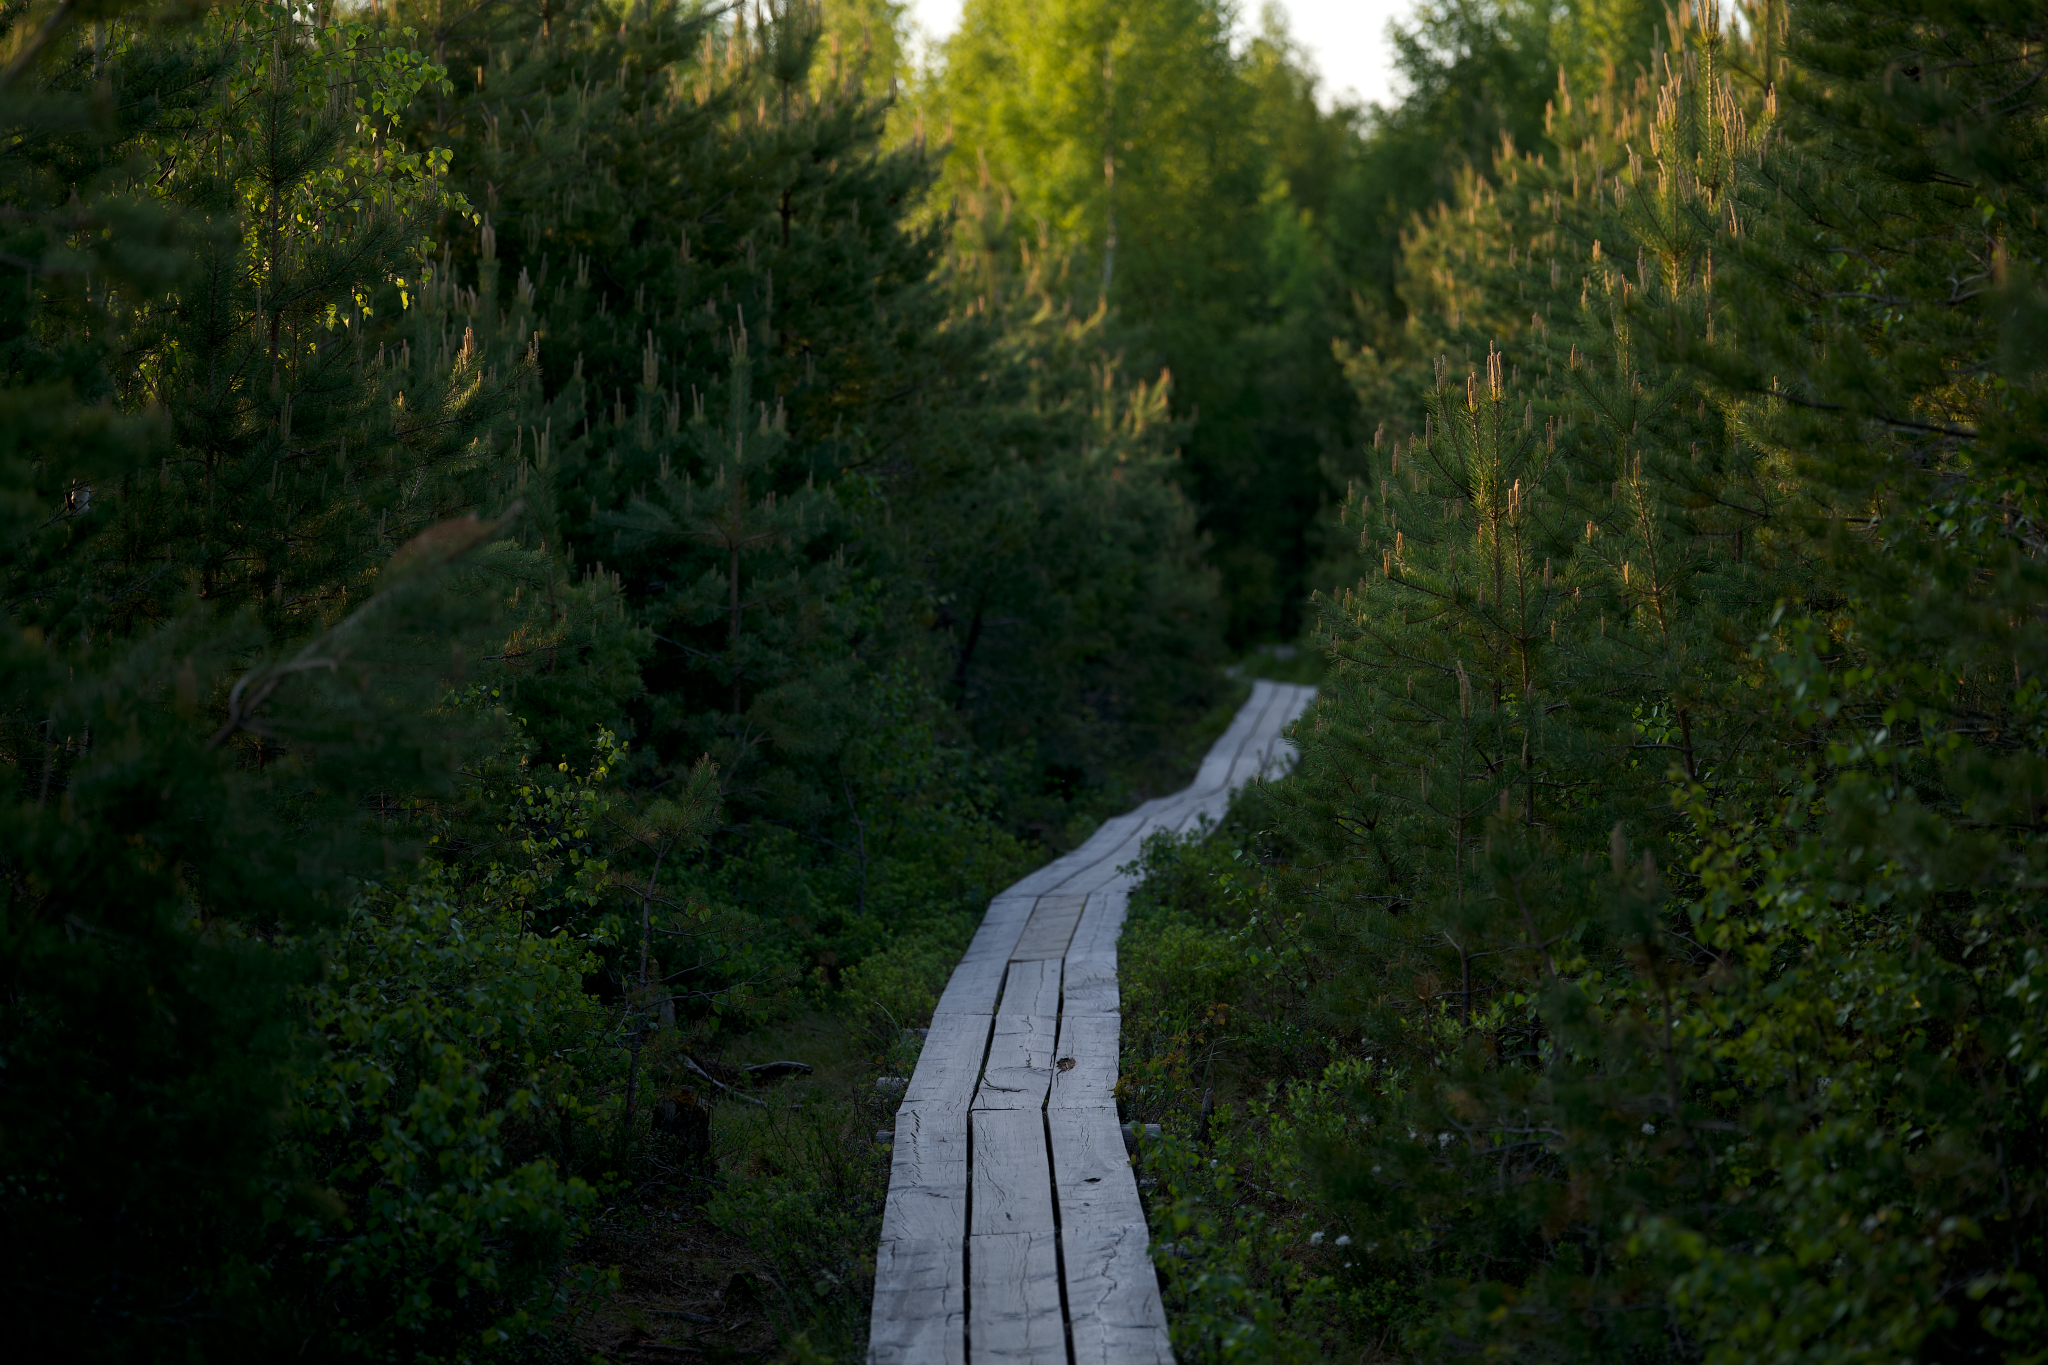
24. Tranquil Boardwalk Winding Through an Evergreen Forest
The key to this walkway’s success is its winding nature. A straight path would feel like an imposition on this dense evergreen forest, a human-made scar. But the gentle curves make the boardwalk feel like it belongs, as if it’s following a natural contour of the land or a path worn by animals. It encourages a slower, more contemplative walk, with the view changing with every turn. The winding design creates a sense of discovery, making you wonder what’s around the next bend.
|
📋 Copy HEX 🔗 Share |
💸 Get This Look For Less
This design masterfully balances human access with natural beauty. It works by elevating you slightly above the forest floor, preserving the delicate ecosystem underneath while giving you an intimate, eye-level view of the ferns and undergrowth. The choice of simple, unadorned wood ensures the structure doesn’t compete with the majesty of the surrounding evergreen trees. The repetition of the planks creates a pleasing rhythm that leads you deeper into the serene, sun-dappled environment.
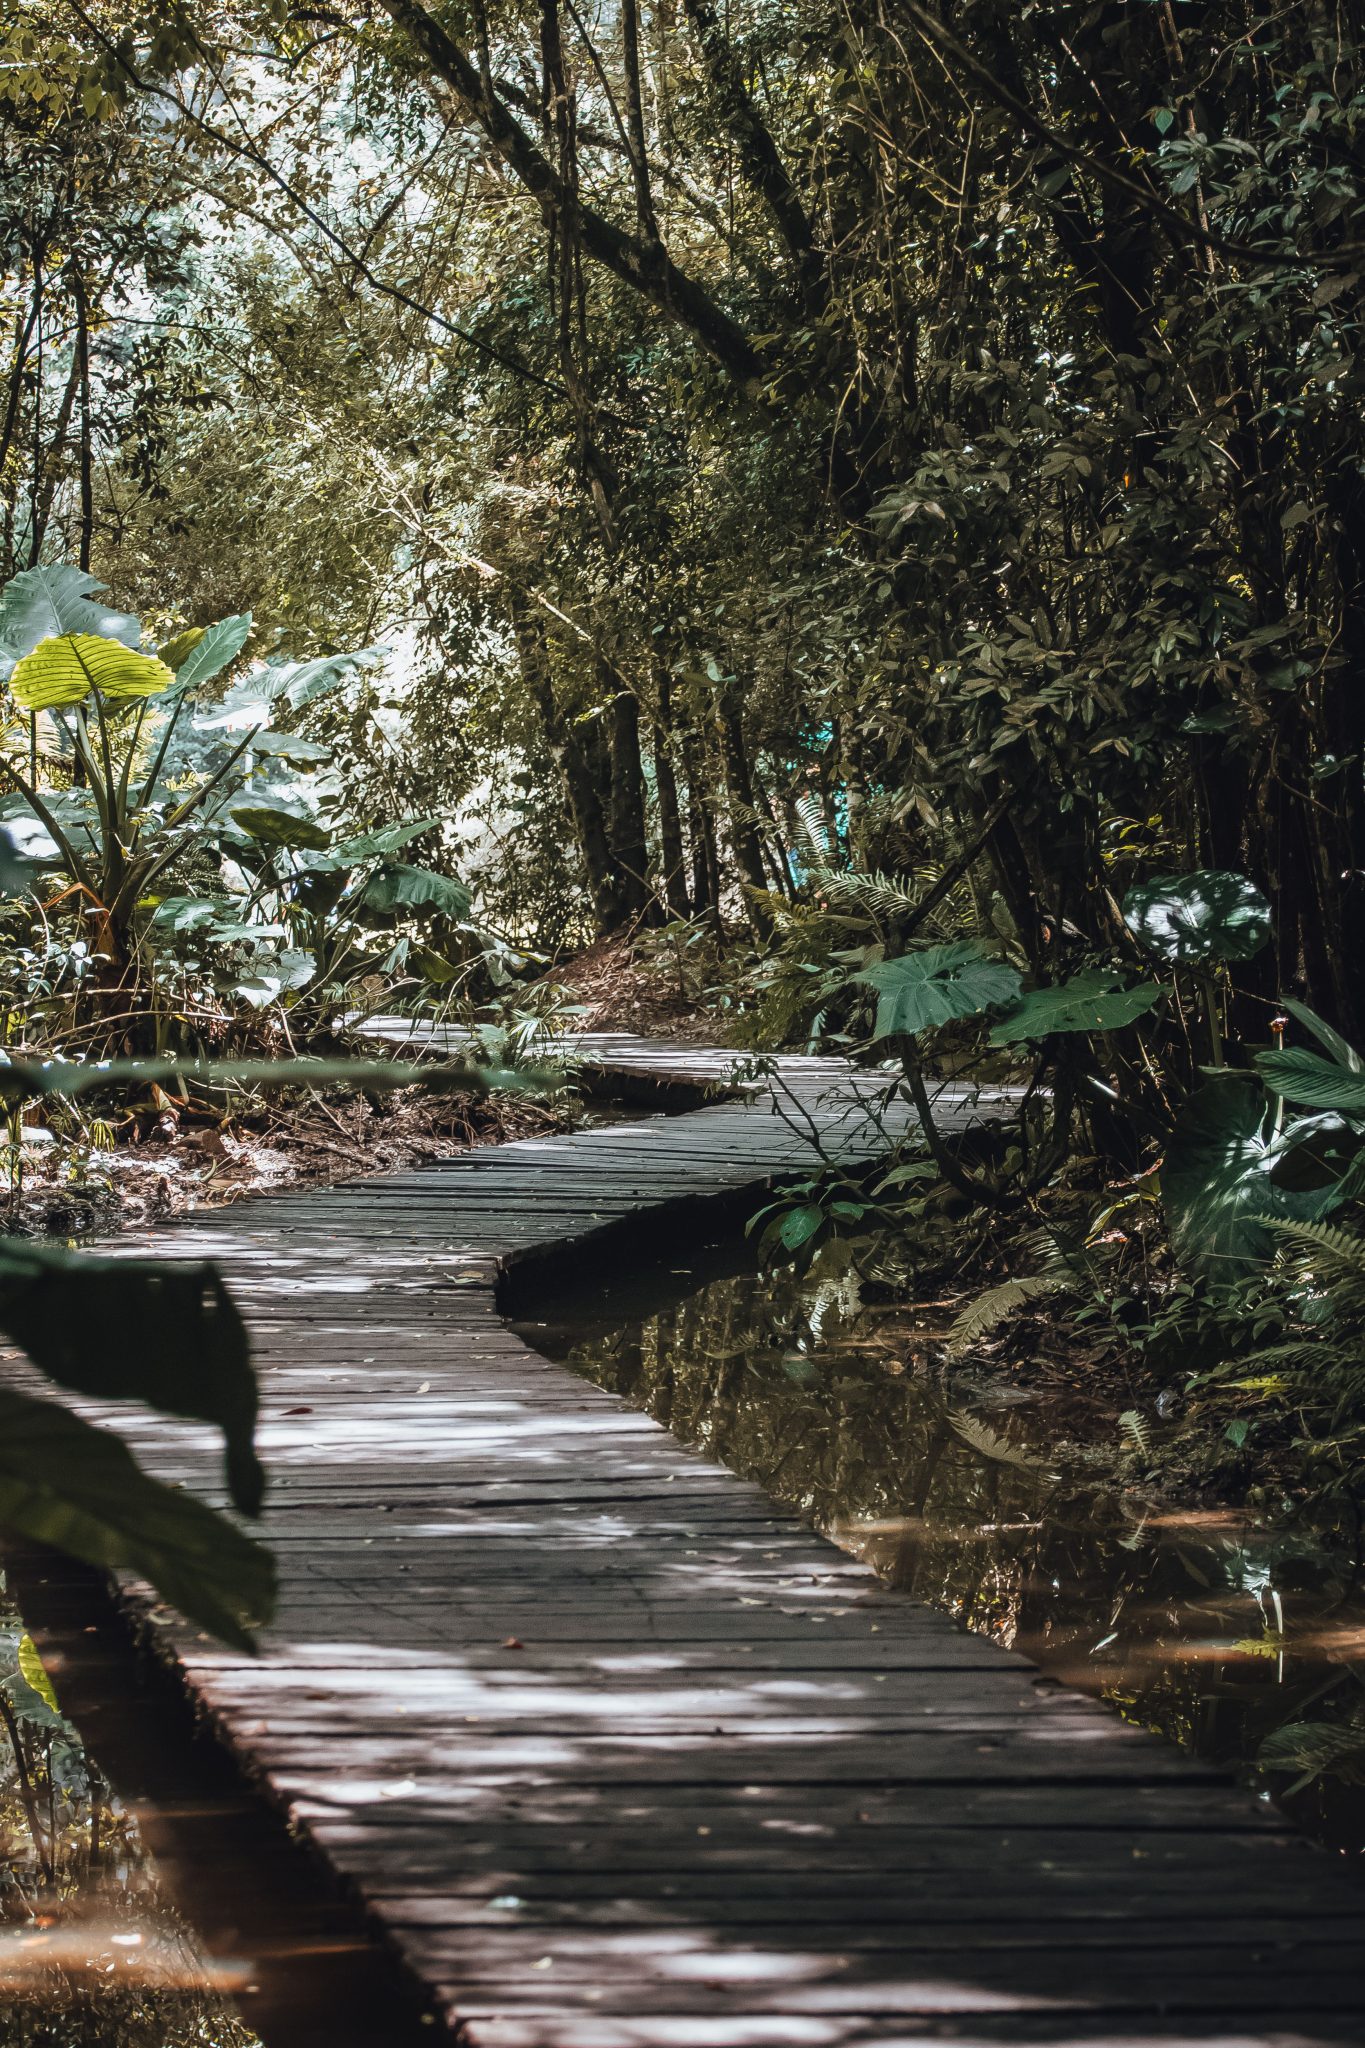
25. Dark Wood Boardwalk Curving Through a Lush Jungle
A walkway in a jungle-like setting with still water nearby is a beautiful but high-maintenance feature. The dark wood will be prone to algae and mildew growth due to the constant dampness and shade, requiring a cleaning with a deck brush and specialized cleaner at least twice a year to prevent it from becoming dangerously slippery. The still water is a breeding ground for mosquitos, so you’ll need a mitigation plan. And the lush foliage will constantly be dropping leaves and fronds onto the path, necessitating frequent sweeping or blowing.
|
📋 Copy HEX 🔗 Share |
⭐ The One Thing
This exotic look follows a simple visual recipe: 60% dense, large-leafed green foliage + 30% dark, moody surfaces (the walkway and the still water) + 10% dramatic lighting (the shafts of sunlight filtering through the canopy). The magic is in the contrast between the vibrant life of the plants and the dark, almost mysterious quality of the path and water. You could swap the dark wood for dark composite decking for less upkeep, but you must maintain the high-contrast lighting and the overwhelming sense of green to keep the jungle vibe.
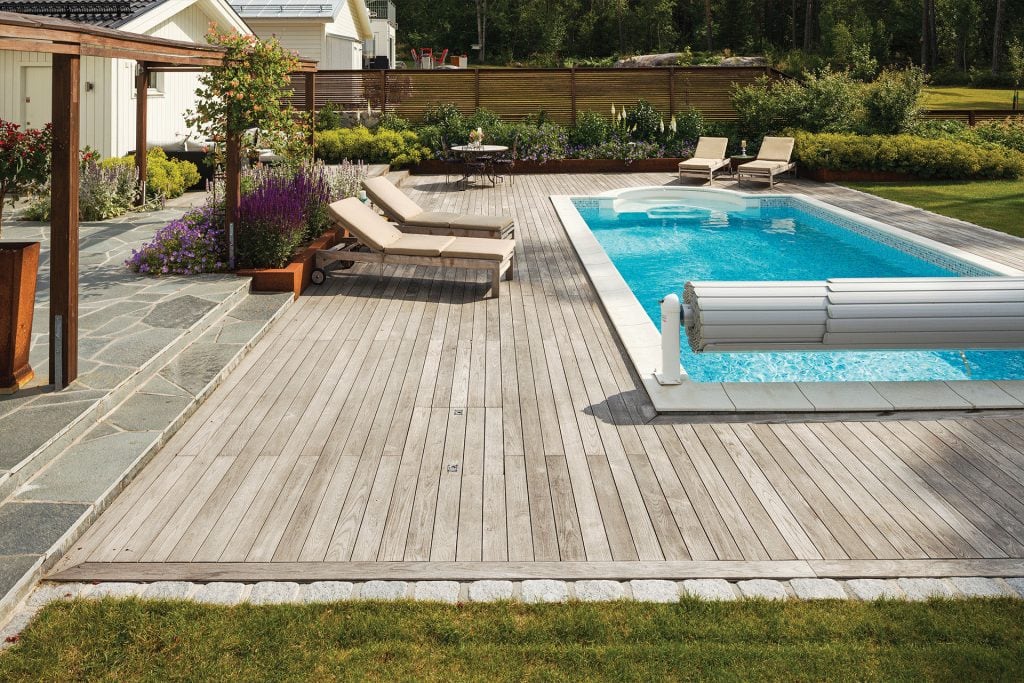
26. Light Greyish Wood Deck Around a Rectangular Pool
This look is right on trend for 2026, tapping into the desire for a ‘resort at home’ feeling. The specific color of the decking—a light, greyish wood or ‘greige’—is incredibly popular. It offers a softer, more organic feel than traditional brown decking and a warmer look than stark grey stone. It pairs beautifully with the cool blue of the water and the natural green of the lawn, creating a sophisticated and relaxing palette that feels both modern and timeless. Homeowners are moving away from high-contrast materials and embracing these subtle, earthy mid-tones.
|
📋 Copy HEX 🔗 Share |
💰 Budget Breakdown
A poolside deck requires careful planning. Here’s a quick checklist before you start:
- Have you chosen a material that is slip-resistant and stays relatively cool in direct sun? Wood-plastic composites are often a good choice here.
- What is the chemical resistance of your chosen decking material? It must be able to withstand splashes of chlorinated or saltwater.
- How will you handle drainage? The deck should be sloped almost imperceptibly away from the pool to prevent water from pooling.
- Does your plan comply with local safety regulations regarding pool fencing and access?
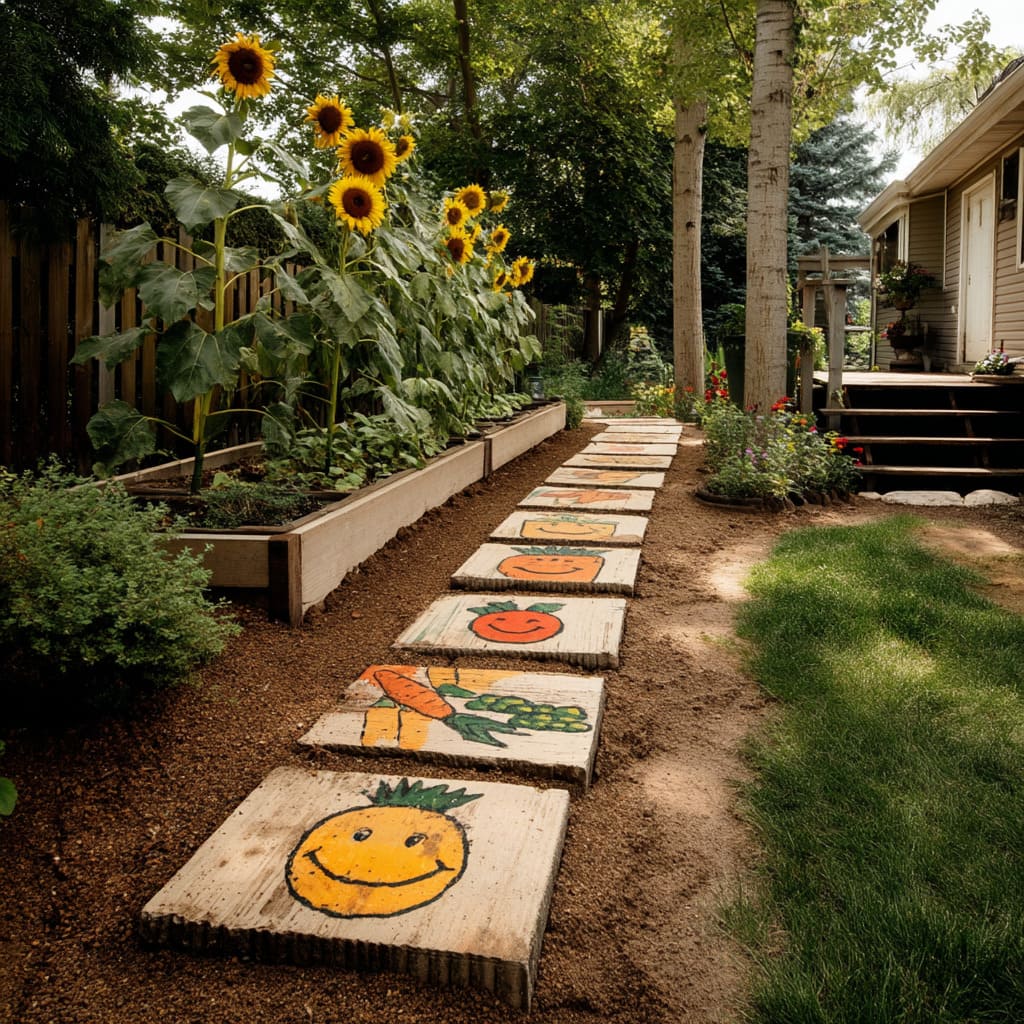
27. Whimsical Garden Path with Painted Stepping Stones
This is the ultimate budget-friendly walkway idea. You can buy basic rectangular concrete pavers from any home improvement store for just a few dollars each. A set of acrylic paints and some clear outdoor sealant will cost less than $30. The raised wooden planter can be made from untreated pine boards, which are very affordable. The biggest investment here is your own time and creativity. It’s a fantastic project to do with kids and proves that a joyful, personalized garden path doesn’t require a big budget, just a little imagination and a weekend afternoon.
|
📋 Copy HEX 🔗 Share |
✅ Before You Start
While incredibly charming, a path with painted stones requires a certain mindset. The paint will inevitably chip and fade over time with foot traffic and weather. You’ll need to be okay with touching them up every year or two, or embracing the weathered, worn-in look. The spaced-out stepping stones set in loose soil can be a bit wobbly and aren’t ideal for anyone with an unsteady gait. This is a whimsical, fun path for a secondary area, not a highly practical, all-weather thoroughfare.
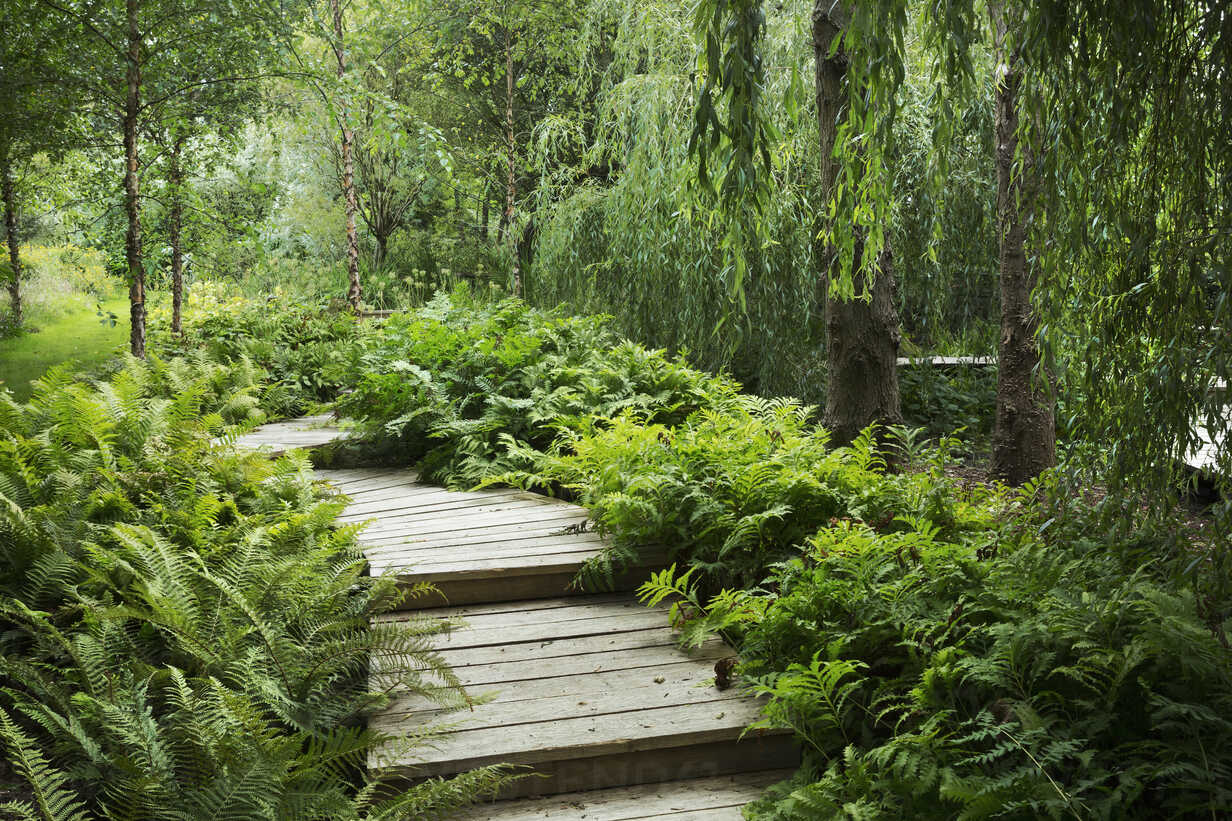
28. Curved Weathered Wood Walkway Through a Fern Garden
This path feels so harmonious because it mimics the organic forms of the nature surrounding it. The gentle curve of the weathered walkway perfectly complements the soft, arching fronds of the ferns and the weeping branches of the willow trees. There are no hard angles or straight lines to be found. The design works by embracing a single, consistent design language of soft curves and abundant, layered greenery. It creates an atmosphere that is serene, gentle, and feels completely natural, as if the path grew there itself.
|
📋 Copy HEX 🔗 Share |
🔥 Trending Context
To create a truly integrated look where a walkway winds through a dense garden, install the walkway first, then plant around it. This seems counter-intuitive, but it allows you to bring in larger plants and soil amendments without damaging your new path. Once the walkway is in place, you can arrange your plants, like these ferns, so their foliage just spills over the edges of the wood. This slight overlap is the key to making the path and garden feel like a single, cohesive entity rather than two separate elements.
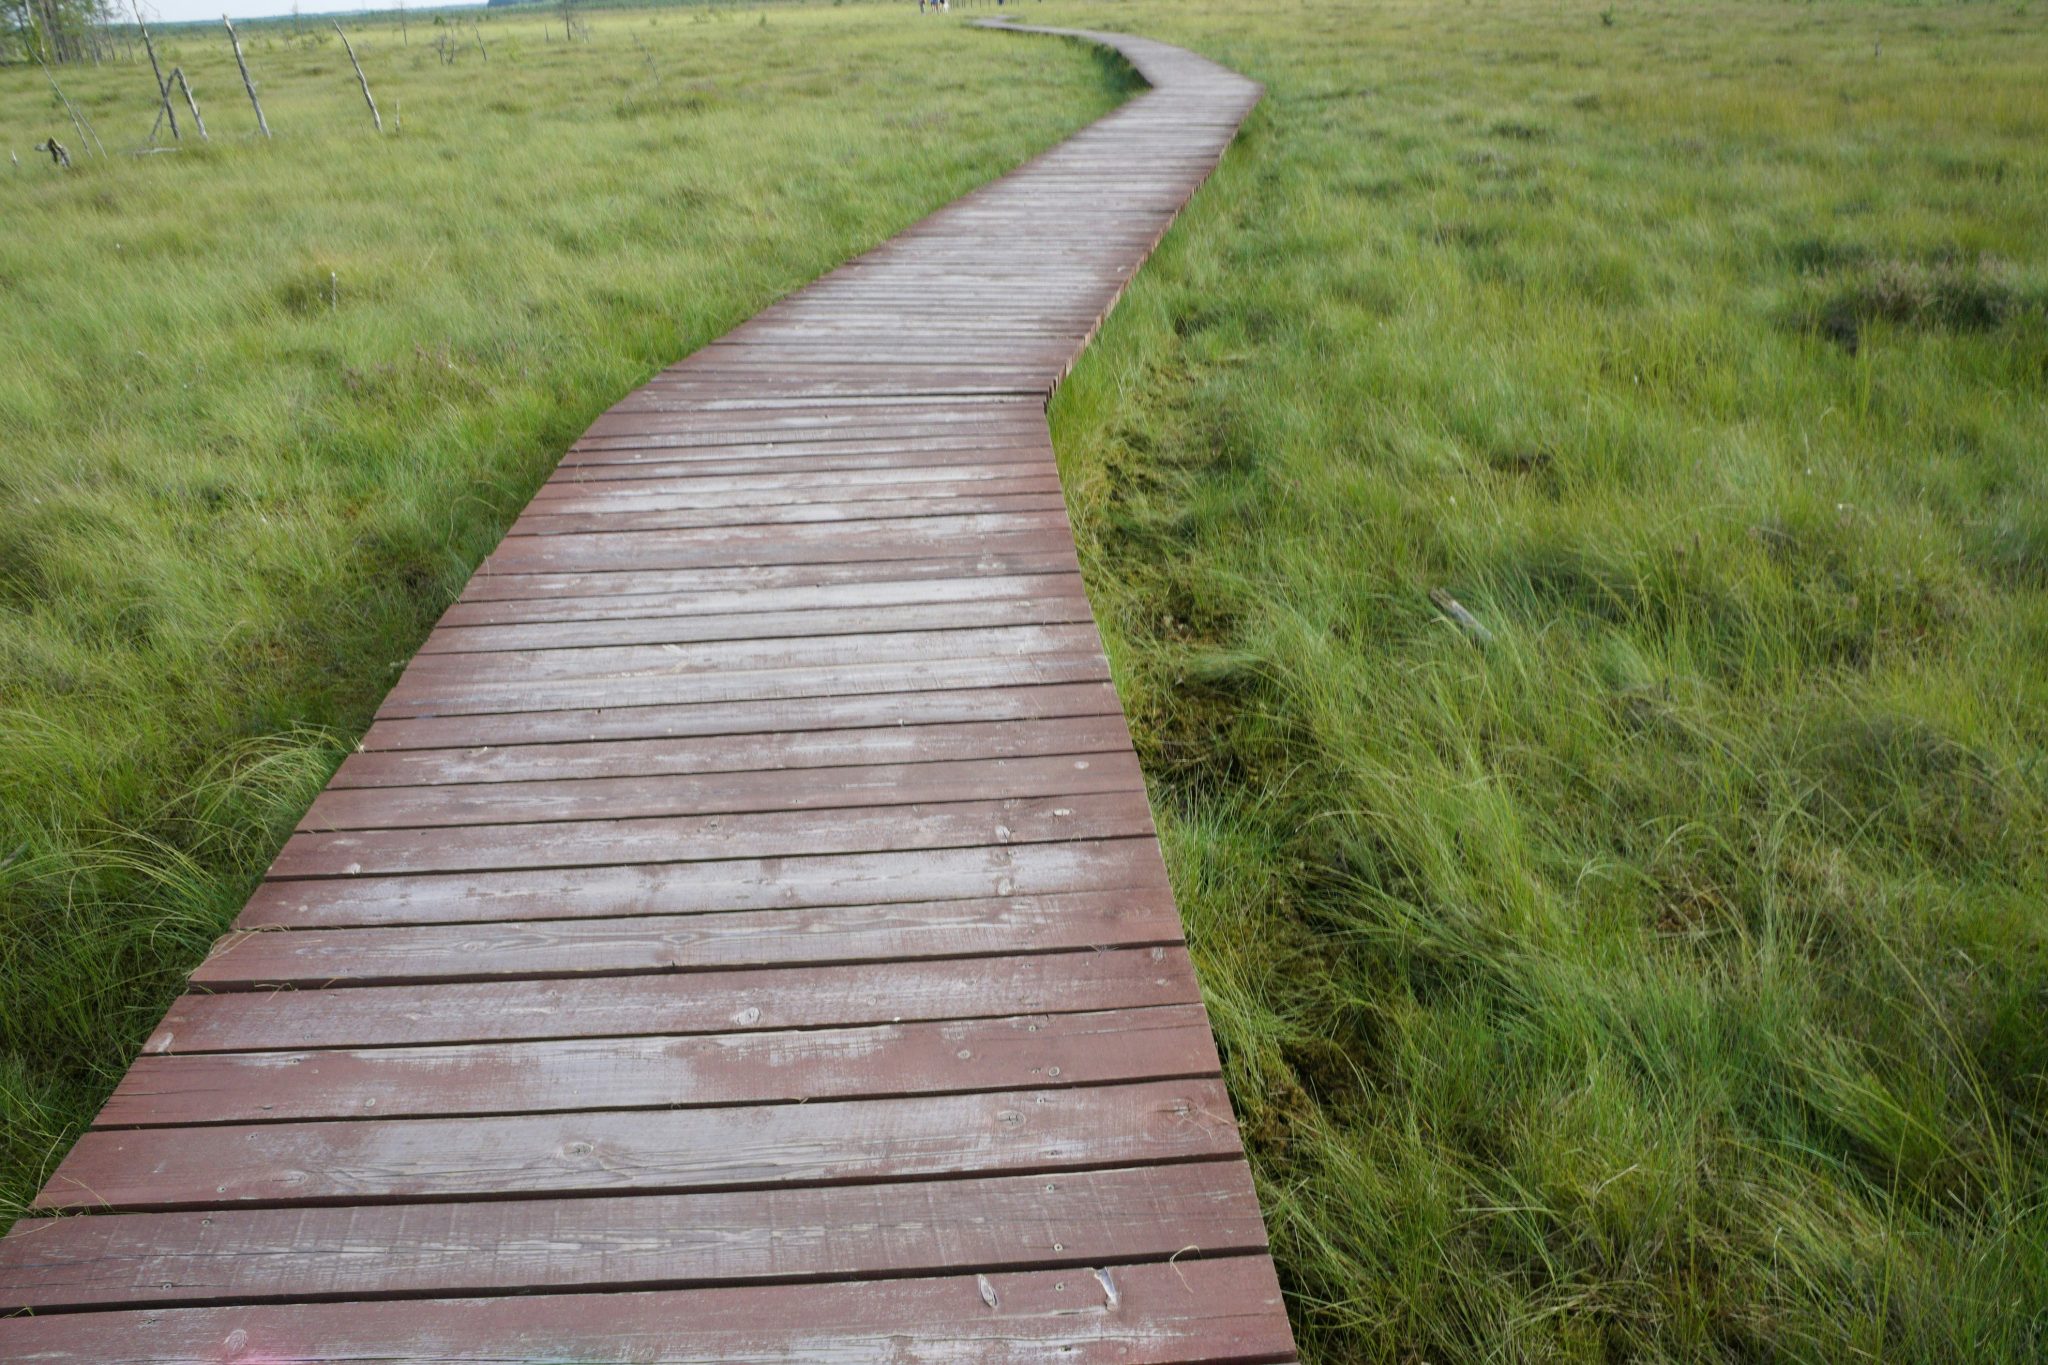
29. Winding Boardwalk of Weathered Reddish-Brown Planks in a Meadow
The sinuous, meandering curve is the single most important feature of this walkway. In a vast, open space like this green meadow, a straight path would feel severe and rigid. The winding design, however, feels playful and natural. It slows the journey down, forcing you to look from side to side and appreciate the expanse of the landscape. It turns a simple walk into a more engaging exploration. The path itself becomes a graphic, river-like element snaking through the vibrant green grass.
|
📋 Copy HEX 🔗 Share |
💡 Designer Tip
This rustic meadow look is very achievable on a budget. Use standard, inexpensive pressure-treated pine lumber for the planks. Instead of staining it, let it weather naturally. Over a couple of seasons, it will develop its own unique patina, with some areas graying out and others retaining a reddish-brown hue, just like in the photo. The key is the shape and the setting, not the type of wood. The ‘meadow’ can be created simply by letting a section of your lawn grow wild and overseeding it with native tall grasses.
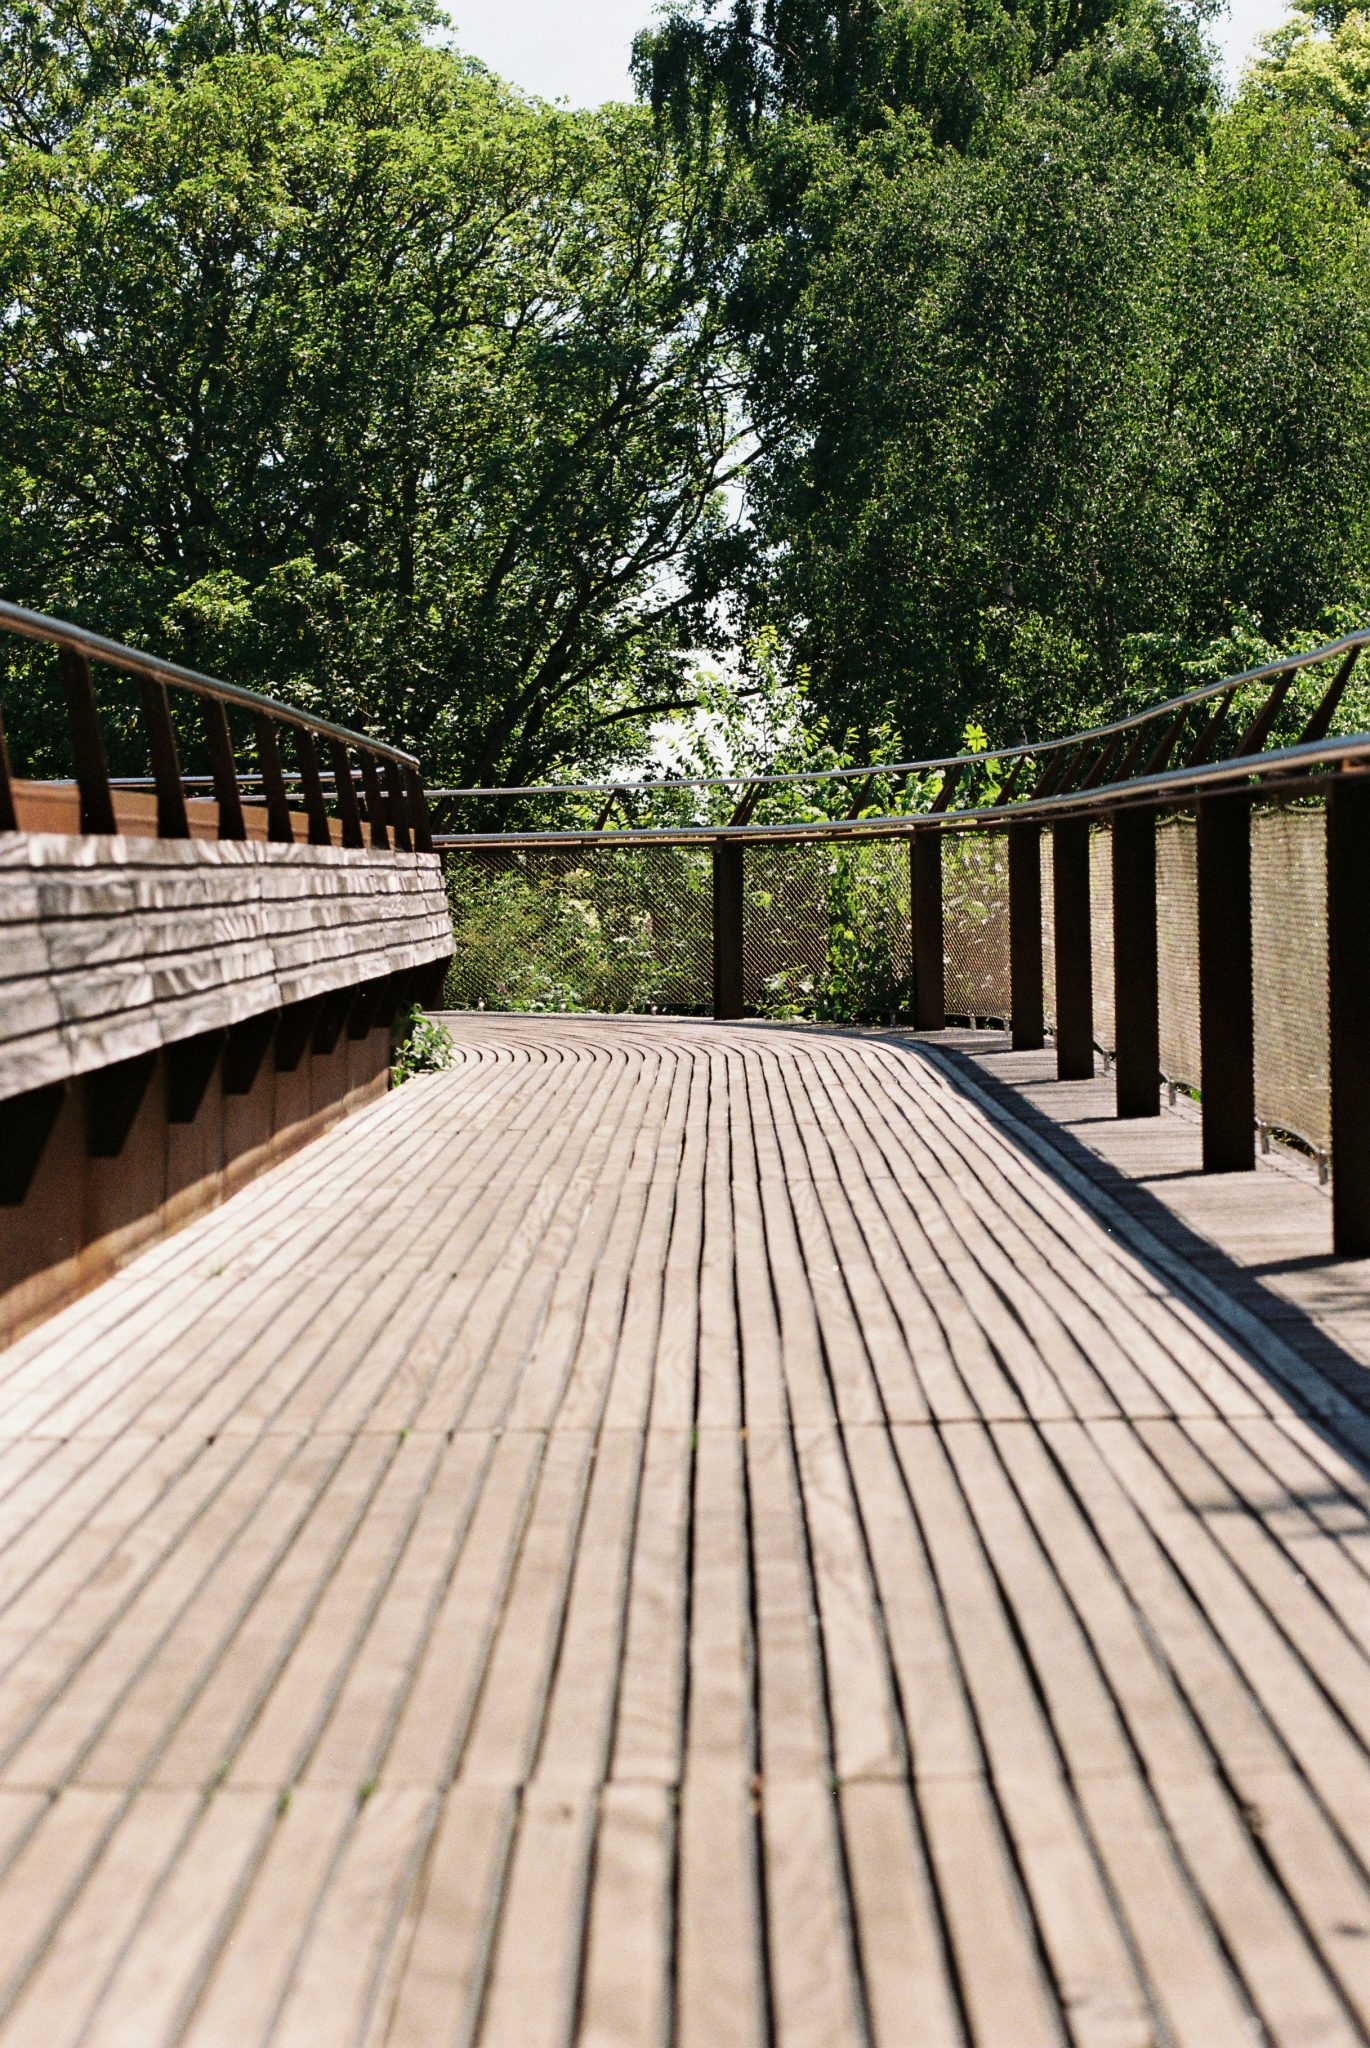
30. Curved Wood Slat Walkway with an Integrated Bench
This design is a brilliant example of multi-functional hardscaping. The walkway and bench are not two separate things; they are one continuous, flowing element. This integration is what makes the design feel so sleek and clever. The curve of the path is mirrored in the curve of the bench, creating a harmonious and unified form. The contrast between the warm, light wood slats and the cooler, industrial dark metal of the railing adds a sophisticated, modern edge. It’s practical, beautiful, and space-efficient.
|
📋 Copy HEX 🔗 Share |
🔧 How-To Brief
- Wood Slats & Substructure (Cedar or similar): $3,500 – $6,000
- Custom Bench Fabrication: $1,500 – $2,500
- Metal Railing with Mesh Infill: $2,000 – $4,000
- Labor & Installation: $4,000 – $7,000
- TOTAL: $11,000 – $19,500
- Budget Alternative: For a similar feel, build a straight path and a separate, straight bench from more affordable pressure-treated wood. Use pre-made fence panels for the railing. You’d lose the elegant curve, but capture the wood-and-metal concept for 40% less.
Your Perfect Path Awaits
A thoughtful wooden walkway does more than just get you from here to there; it shapes the way you experience your outdoor space. Whether you’re drawn to a rustic boardwalk or a sleek modern path, the right design can completely change the story of your garden. Let these ideas be the starting point for creating a path that’s uniquely yours.
Feeling inspired? Pin your favorite looks to your board and start planning your project. Happy walking!