You know that feeling when you scroll through Pinterest and finally find the outdoor kitchen that looks *exactly* right for your space? That’s what this guide is all about. After filtering through hundreds of options across places like Home Depot, Wayfair, and specialty outdoor living stores, we narrowed it down to 30 ideas that actually deliver. Inside, you’ll find everything from sprawling rustic pavilions to sleek, modern cooking stations. With more of us treating our backyards as a true extension of our homes, the demand for functional, beautiful outdoor kitchens is peaking, and these designs show why. And stay until the end — we break down the most common mistakes that can ruin these looks. 📌 Save this to Pinterest for later — you’ll want to revisit these ideas.
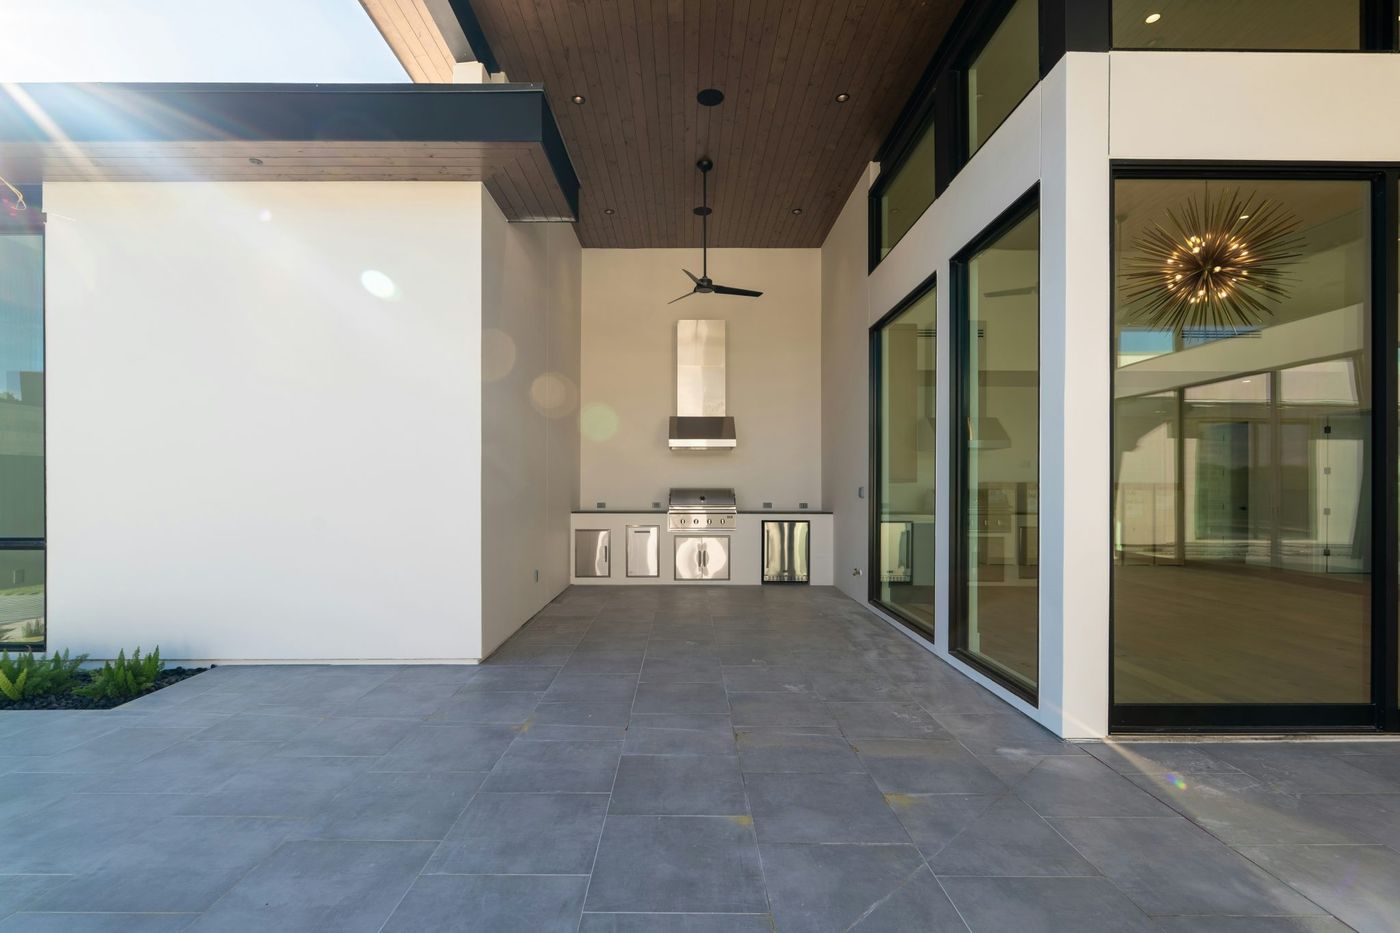
1. Sleek Modern Patio Kitchen with a Dark Wood Plank Ceiling
The power of this design lies in its bold, clean contrasts. The dark wood plank ceiling and black-framed glass doors create a strong graphic frame, which makes the space feel intentionally designed, not just like an afterthought on a patio. The sleek, handle-free stainless steel cabinetry reinforces this modern aesthetic, reflecting the light and preventing the dark elements from feeling too heavy. It’s a balanced composition where every material has a clear purpose: wood for warmth, steel for function, and glass for connection to the indoors.
📐 Style Math
Stainless steel looks fantastic, but outdoors it’s a magnet for fingerprints, water spots, and pollen. Plan on wiping it down weekly with a microfiber cloth and a stainless-steel-specific cleaner to keep it looking sharp. The dark wood plank ceiling will need to be resealed every 2-3 years, especially in a climate with harsh sun or heavy rain, to prevent fading and water damage. An alternative for the ceiling could be a composite material that mimics wood but requires virtually no upkeep.
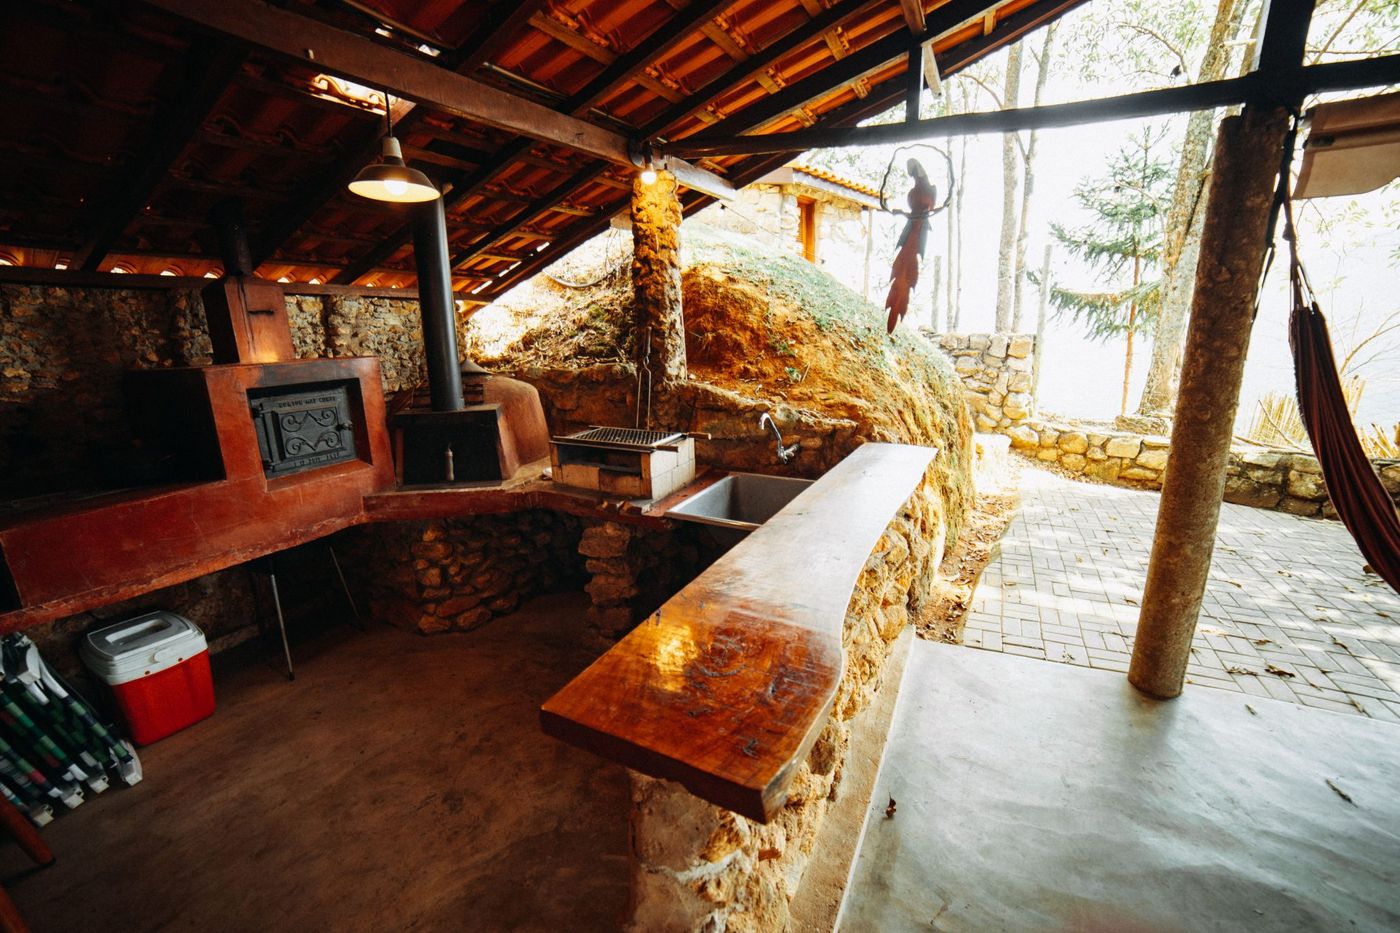
2. Rustic Outdoor Kitchen with a Wood-Fired Oven and Live-Edge Counter
The single element that defines this entire space is the live-edge wooden counter. While the stacked stone and wood-fired oven are beautiful, they are familiar rustic components. The counter, with its organic, un-sanded edge and polished surface, introduces a touch of natural sculpture. It transforms the kitchen from a purely functional cooking area into a social hub where guests will instinctively gather. Without it, the space would still be a nice rustic kitchen; with it, it becomes a memorable, one-of-a-kind destination.
💡 Designer Tip
When incorporating a heavy element like a wood-fired oven, ensure your patio foundation is properly engineered to handle the weight. A standard 4-inch concrete slab might not be sufficient. For an oven of this size, you should pour a dedicated reinforced concrete footing that’s at least 6-8 inches thick and extends below the frost line for your climate. This prevents cracking and shifting of the patio and the kitchen structure over time. Always consult a structural engineer for heavy additions.
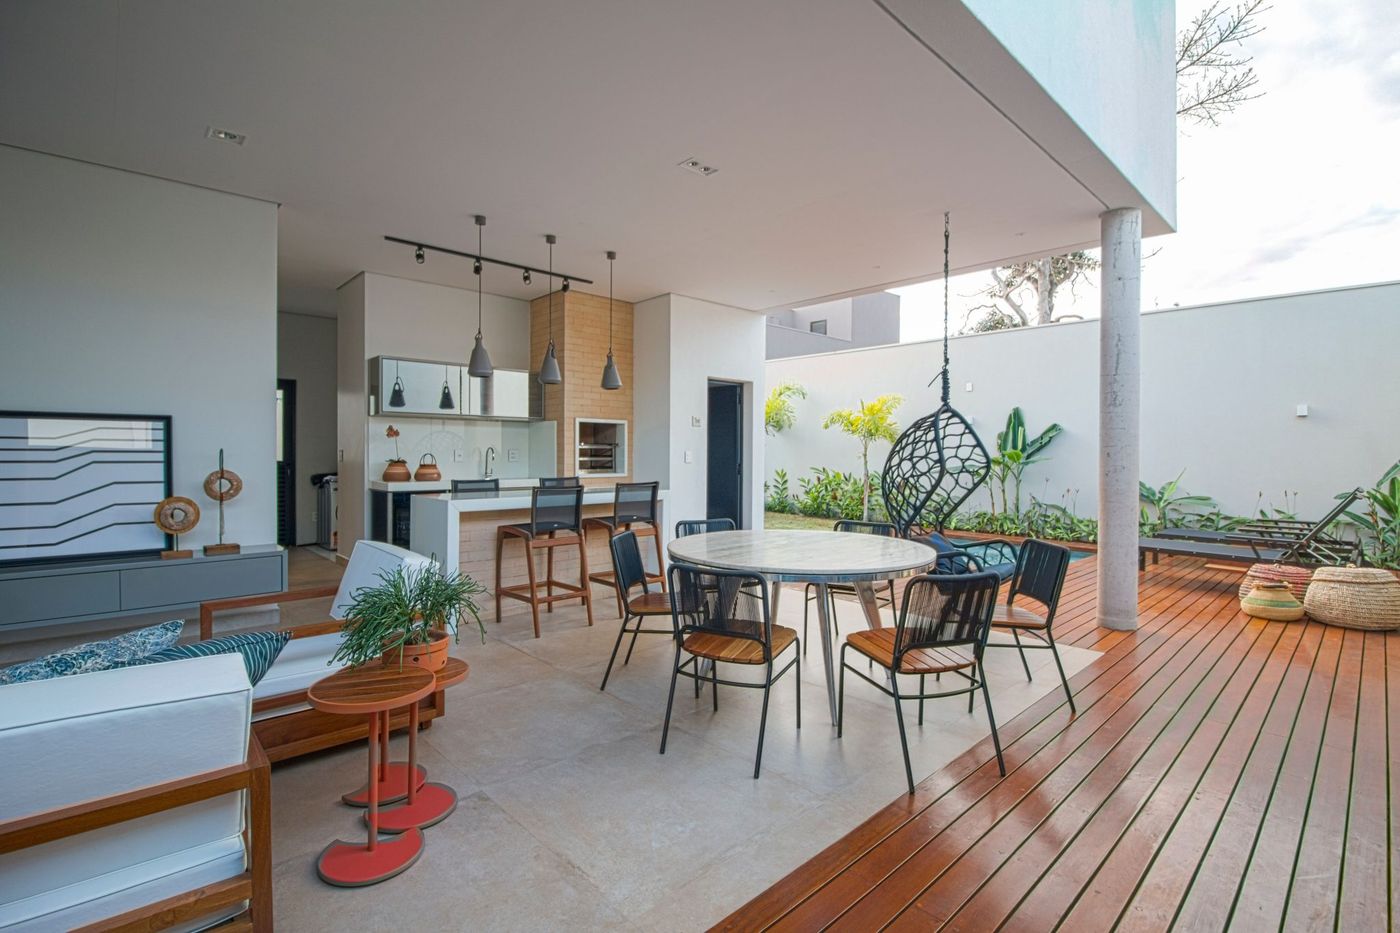
3. The Minimalist Approach to a Contemporary Open-Air Kitchen
A lean, contemporary design excels in spaces where a full-blown kitchen would feel overwhelming. This approach is ideal for smaller patios, urban backyards, or even large balconies, roughly 80 to 150 square feet. Because it relies on clean lines and negative space, it doesn’t visually clutter the area. The key is to have at least one solid wall to anchor a simple floating countertop, preserving the remaining floor space for seating and circulation. Compare this with the expansive layout in Idea #16, which requires a much larger footprint.
💰 Budget Breakdown
Let’s be honest: a truly minimalist outdoor kitchen often sacrifices storage and some functionality. With an open design featuring just a countertop and maybe a small grill, you have nowhere to hide the clutter. Propane tanks, bags of charcoal, grilling tools, and cleaning supplies will need a separate, dedicated storage solution (like a nearby deck box or indoor closet) to maintain that clean, uncluttered look. This style is best for tidy homeowners who don’t mind a bit of back-and-forth.
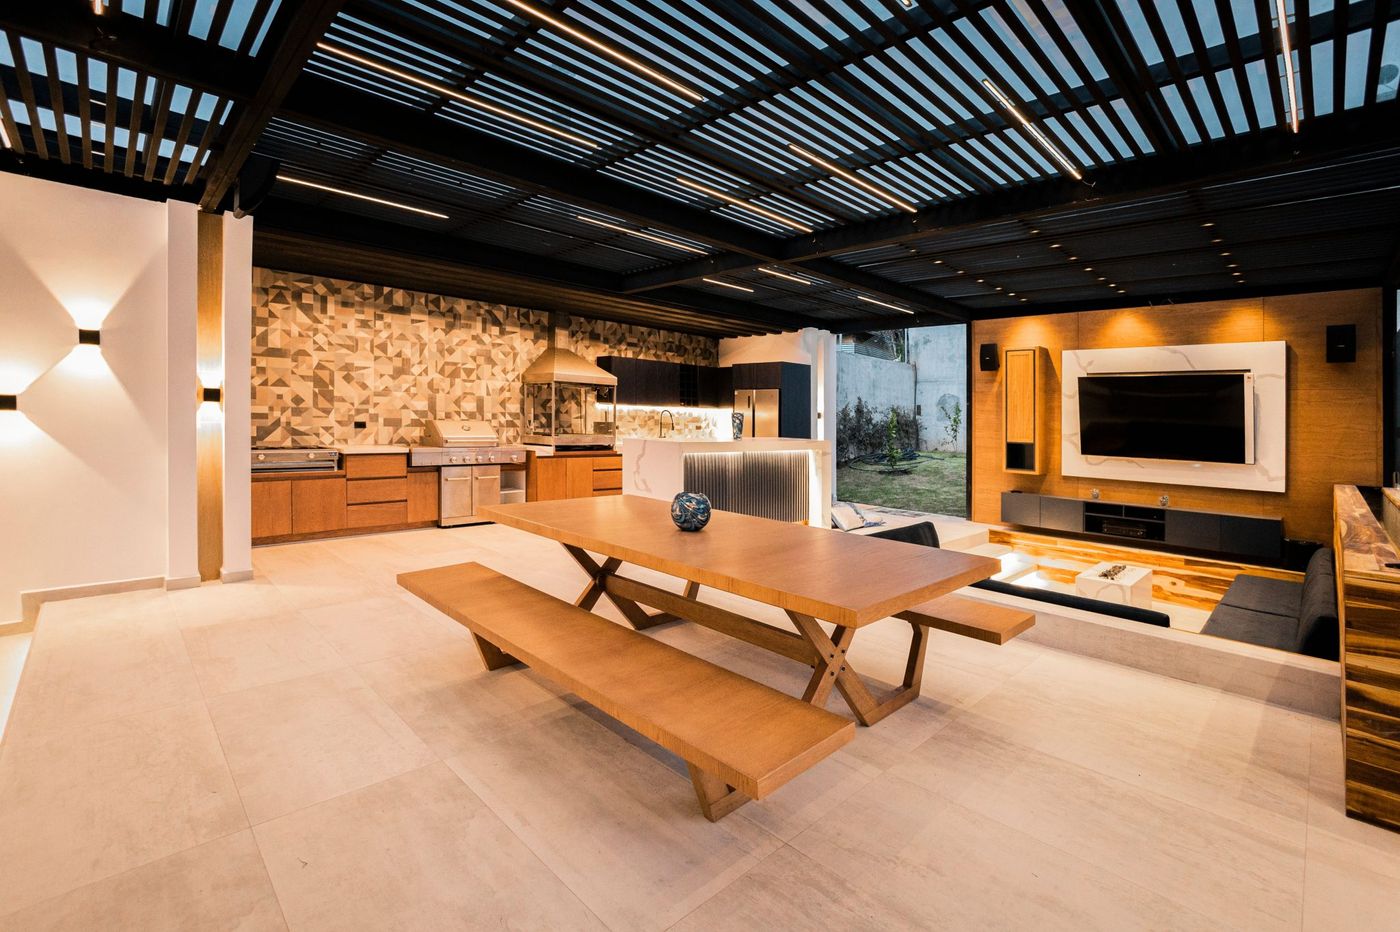
4. Modern Outdoor Lounge with a Wood-Paneled TV Wall and Pergola
- Main Furniture (Dining Table/Benches, Lounge Seating): $4,000 – $9,000
- Kitchen Cabinetry & Countertops: $8,000 – $15,000
- Appliances (Grill, TV): $3,000 – $7,000
- Pergola & Lighting: $10,000 – $25,000+
- Tile & Wall Paneling: $2,500 – $6,000
- TOTAL: $27,500 – $62,000
- Budget alternative: Use a pre-fabricated pergola kit, source a dining set from Facebook Marketplace, and opt for a simpler backsplash tile to bring the total cost down to the $12,000 – $20,000 range.
⚠️ Real Talk
This design is a masterclass in creating ‘zones’ without walls. The slatted black pergola defines the entire space from above, creating a cohesive ‘room.’ Below, the sunken lounge area physically separates relaxation from the dining and cooking areas, making the patio feel larger and more organized. The repetition of material—the light wood of the dining table echoing the cabinets and the lounge’s accent wall—ties all three zones together seamlessly, creating a harmonious and sophisticated outdoor living room.
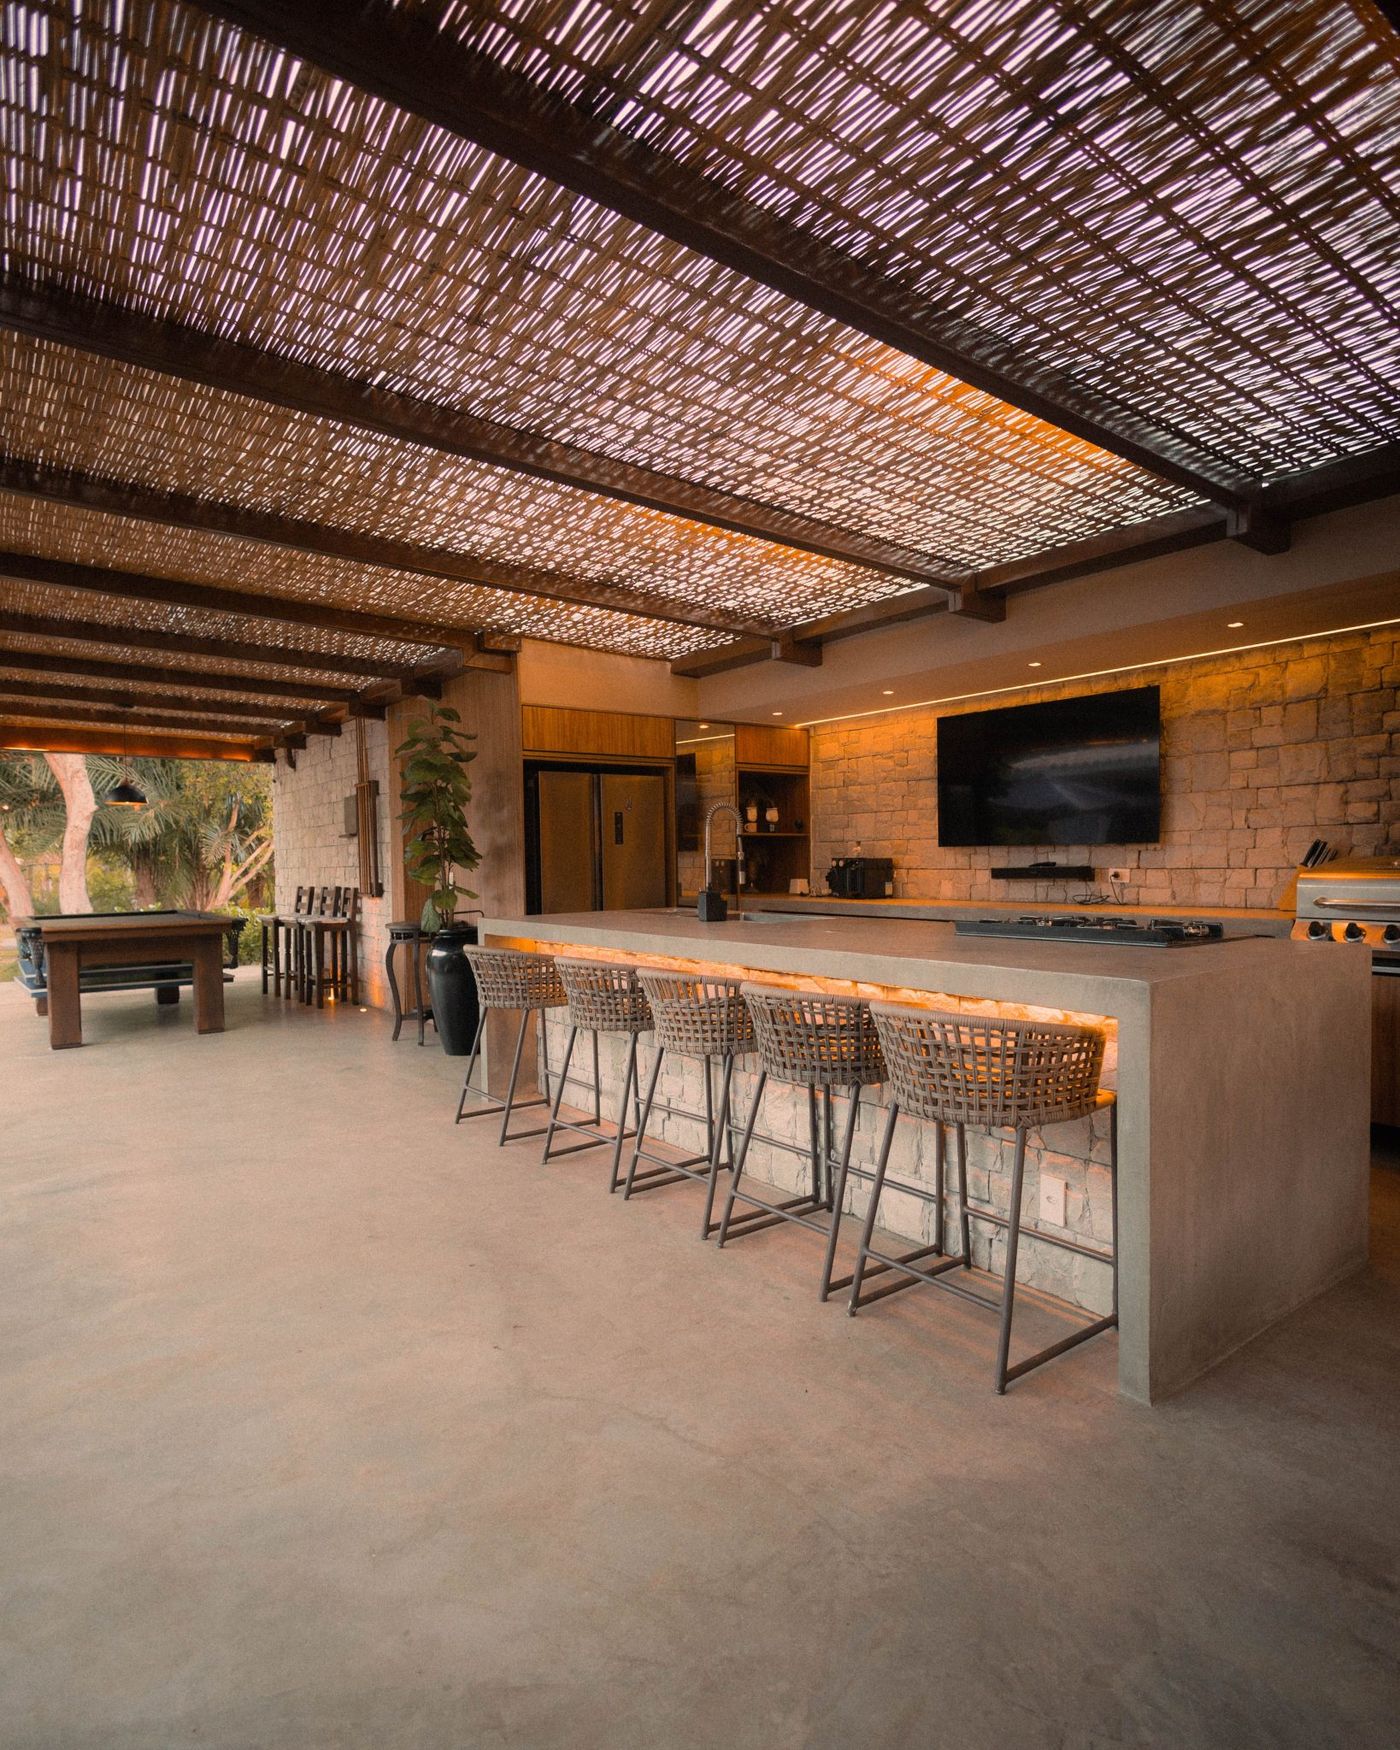
5. Luxury Patio Featuring a Woven Canopy and Concrete Island
The woven rattan canopy ceiling is the undeniable star of this show. It’s the element that transports you from a nice backyard patio to a five-star resort in Bali. It provides dappled, textured light that feels much more organic and high-end than a standard canvas awning or solid roof. The canopy’s natural texture softens the hard edges of the concrete island and stone wall, adding warmth and an incredible layer of visual interest that makes the entire space feel luxurious and thoughtfully curated.
🎯 What Makes It Work
A natural rattan or woven canopy is stunning, but it’s not a ‘set it and forget it’ feature. In most climates, it will be susceptible to moisture, mildew, and sun degradation. It needs to be cleaned at least twice a year and treated with a UV-protectant sealant. Be prepared for a potential replacement every 5-7 years. For a similar look with less work, consider a synthetic all-weather wicker or a laser-cut metal screen in a woven pattern, which will stand up to the elements with minimal cleaning.
6. Modern Poolside Kitchen for Seamless Indoor-Outdoor Flow
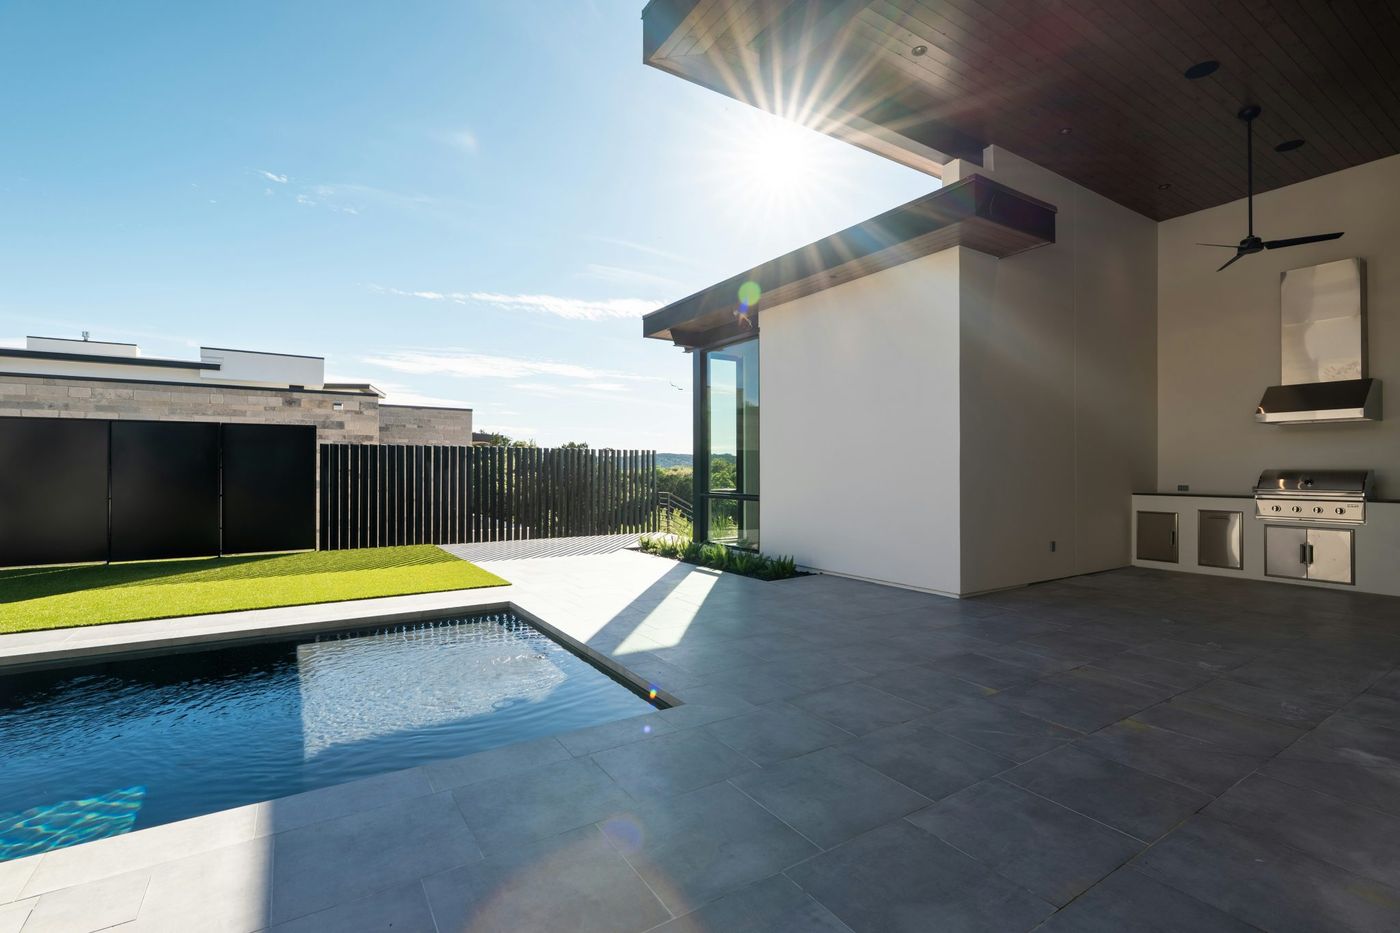
The formula here is all about clean, resort-style living: 50% hardscaping (sleek concrete or pavers), 30% water element (the pool), 15% functional kitchen block, and 5% greenery. The key is keeping the kitchen unit compact and linear, acting as a functional backdrop rather than the main event. You can swap the material palette easily: replace concrete with light wood decking, or a stainless steel kitchen with one clad in dark tile, and the chic, modern poolside vibe remains as long as you maintain those proportions.
🧹 Maintenance Reality
When placing an outdoor kitchen near a pool, a non-slip patio surface is non-negotiable for safety. Look for pavers or tiles with a high coefficient of friction (COF) rating, ideally 0.60 or higher. Brushed concrete is a great option. Avoid highly polished stone or smooth ceramic tiles, which become dangerously slick when wet from pool splashes. Also, ensure all electrical outlets are GFCI-protected and located a safe distance from the water’s edge as required by local codes.
7. A Compact and Sleek Backyard BBQ Station
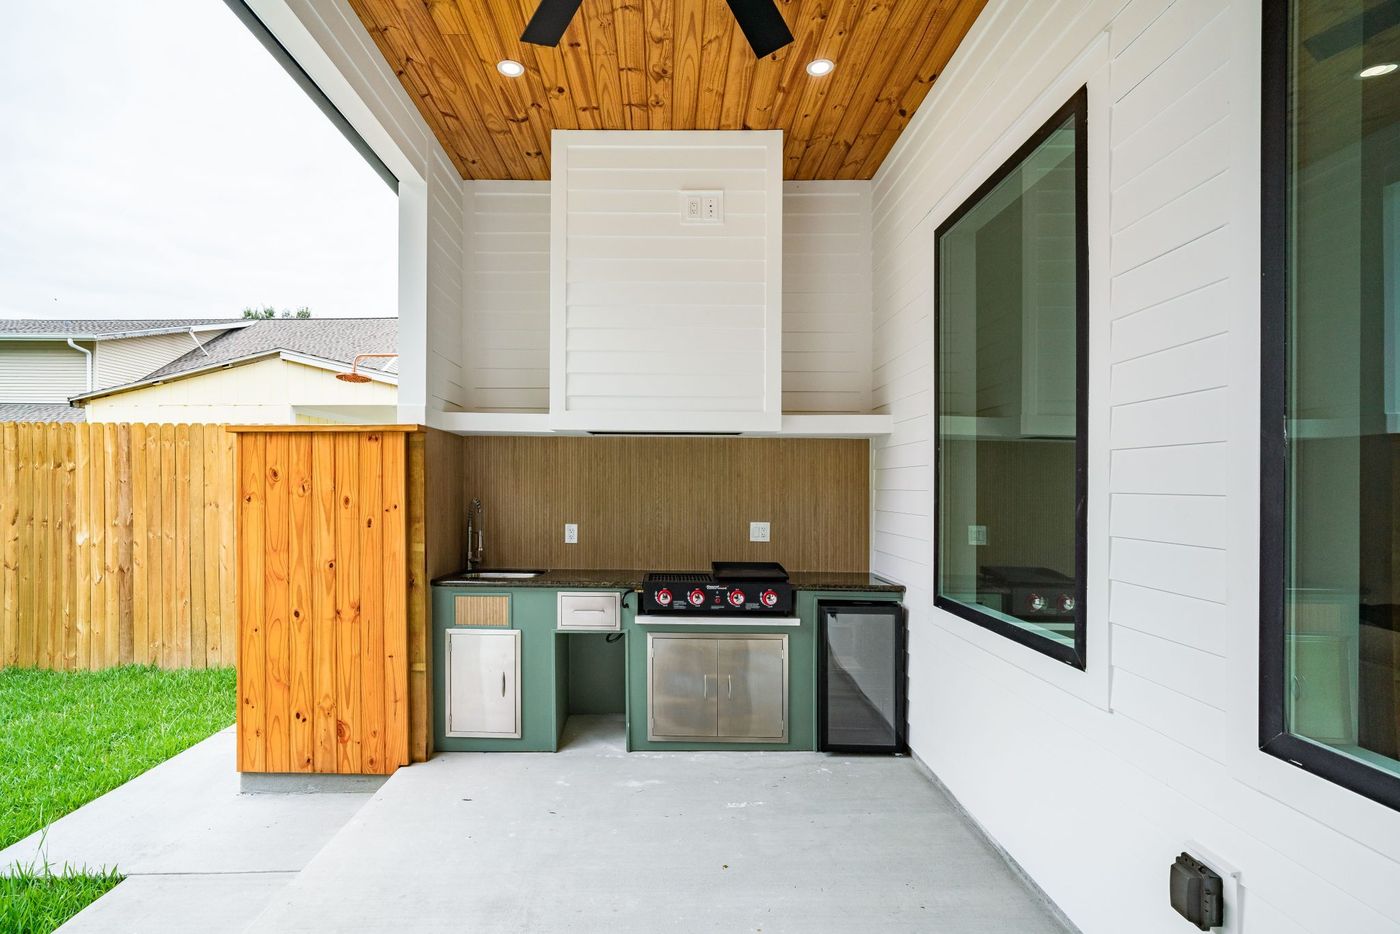
You don’t need a massive built-in island to have a functional outdoor kitchen. You can achieve this sleek, compact look for under $2,000. Start with a high-quality freestanding grill ($500-$1,200). Instead of custom cabinetry, flank it with two stainless steel outdoor work tables from a restaurant supply store ($150 each). Add a quality outdoor-rated mini-fridge ($300-$500). This modular approach gives you the prep space and cold storage you need without the cost and permanence of a custom build-out.
📏 Scale Guide
This tiny-but-mighty setup is perfect for backyards where space is at a premium, from a city townhouse garden to a suburban patio corner. It works best in a footprint of about 8-10 feet long by 3 feet deep. This gives you enough room for a standard grill, a small fridge, and a bit of counter space without eating up your whole yard. It’s the ideal solution for spaces under 200 square feet where a larger island, like the one in Idea #18, would simply not fit.
8. Elegant Poolside Kitchen with a Sunset Glow
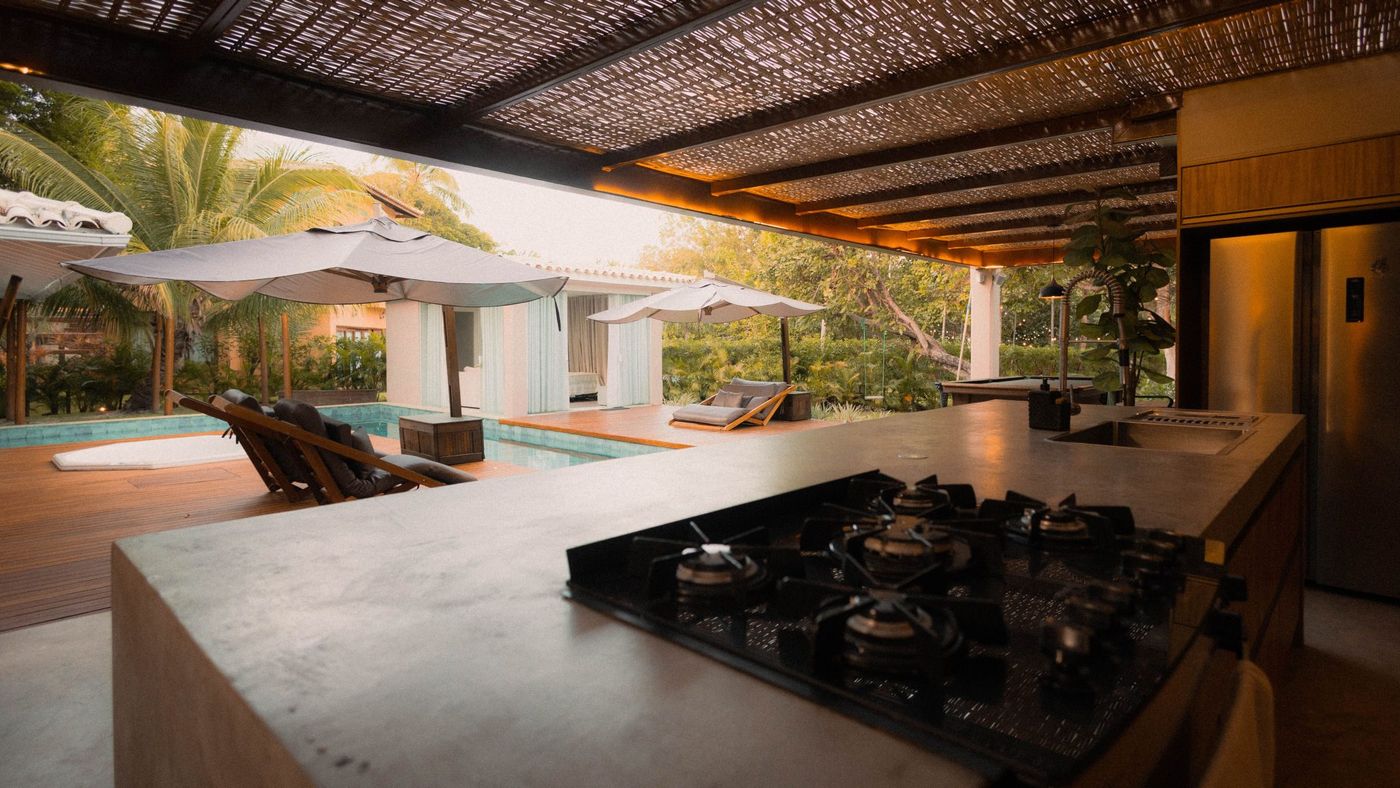
The magic here is created by the strategic use of lighting against a simple, elegant design. The clean lines of the kitchen itself are understated, allowing the ambient light to be the main feature. Warm, low-level lighting washes over the surfaces, highlighting textures and creating a soft glow that reflects beautifully in the adjacent pool. This technique, known as ‘light-washing,’ turns a functional space into a romantic, atmospheric feature as dusk falls. The focus is less on the kitchen itself and more on the mood it helps create.
💸 Get This Look For Less
An open, poolside kitchen looks incredible, but it offers zero protection from the elements. A sudden rain shower can ruin your dinner party, and intense afternoon sun can make the cooking area uncomfortably hot and cause food to spoil faster. This setup is best suited for climates with predictable, mild weather. If you live somewhere with frequent rain or extreme heat, you’ll be much happier with a covered design like the one in Idea #9.
9. Inviting Covered Patio with a Vaulted Wood Ceiling
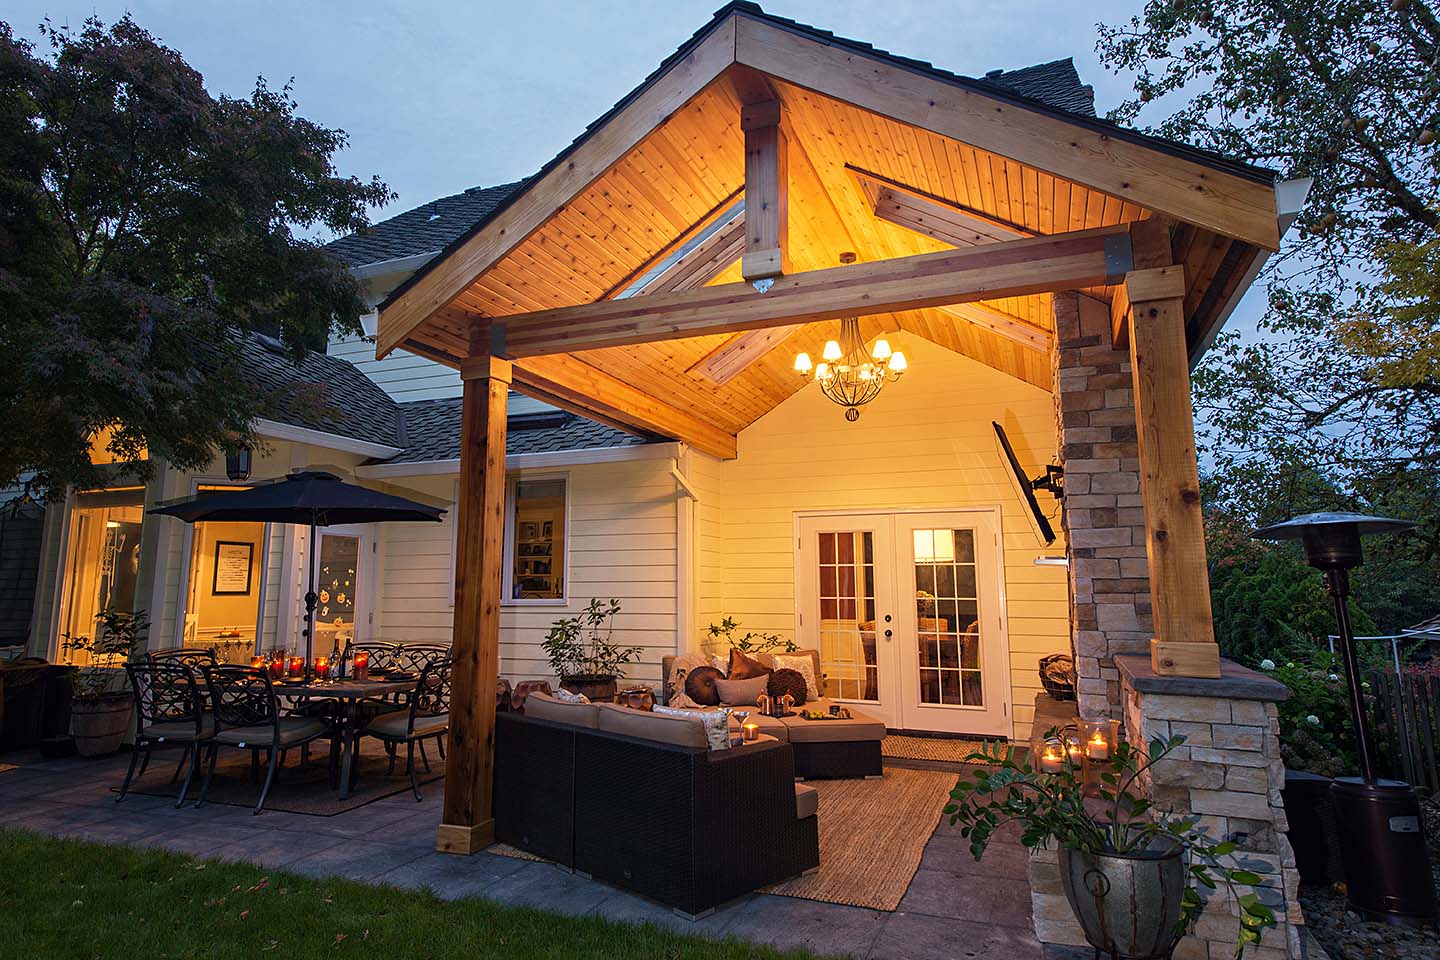
This cozy, rustic look follows a simple recipe: 50% warm wood (ceiling, beams), 25% neutral stone (columns, pavers), 20% dark, grounding furniture (dining set, sectional), and 5% classic lighting (chandelier, sconces). The high percentage of wood is what creates the overwhelming feeling of warmth and enclosure. You could switch the stone for brick and the dark furniture for light, and the space would still feel inviting as long as that dominant, vaulted wood ceiling remains the centerpiece of the design.
🔥 Trending Context
- Confirm your house’s existing roofline can support a vaulted extension like this. You’ll likely need an architect or structural engineer.
- Get multiple quotes for the stone veneer work. The labor can often cost more than the materials.
- Map out your electrical plan. Decide on locations for a chandelier, fan, outlets, and accent lights before any construction begins.
- Check your local setback requirements to ensure the structure is a permissible distance from your property lines.
10. Modern Stone Kitchen with a Dark Metal Pergola
To install recessed lighting in a slatted pergola, follow these steps:
⭐ The One Thing
- Plan your layout: Determine the number and spacing of lights for even coverage. Mark the locations on the pergola beams.
- Select the right lights: Choose low-profile, outdoor-rated (wet-rated) LED puck lights or small recessed cans designed for shallow mounting.
- Run the wiring: Use outdoor-rated electrical cable. Run it along the tops of the beams or route a channel to conceal it. All connections must be in waterproof junction boxes.
- Drill the openings: Use a hole saw bit that matches the specific size required for your light fixtures. Drill clean holes at your marked locations.
- Install and connect: Wire the lights according to the manufacturer’s instructions, connecting them to the main power cable. Ensure all connections are secure and watertight.
- Connect to power: Have a licensed electrician connect the entire system to a GFCI-protected circuit with a switch or dimmer.
Time estimate: 4-6 hours. Material cost: $300-$800.
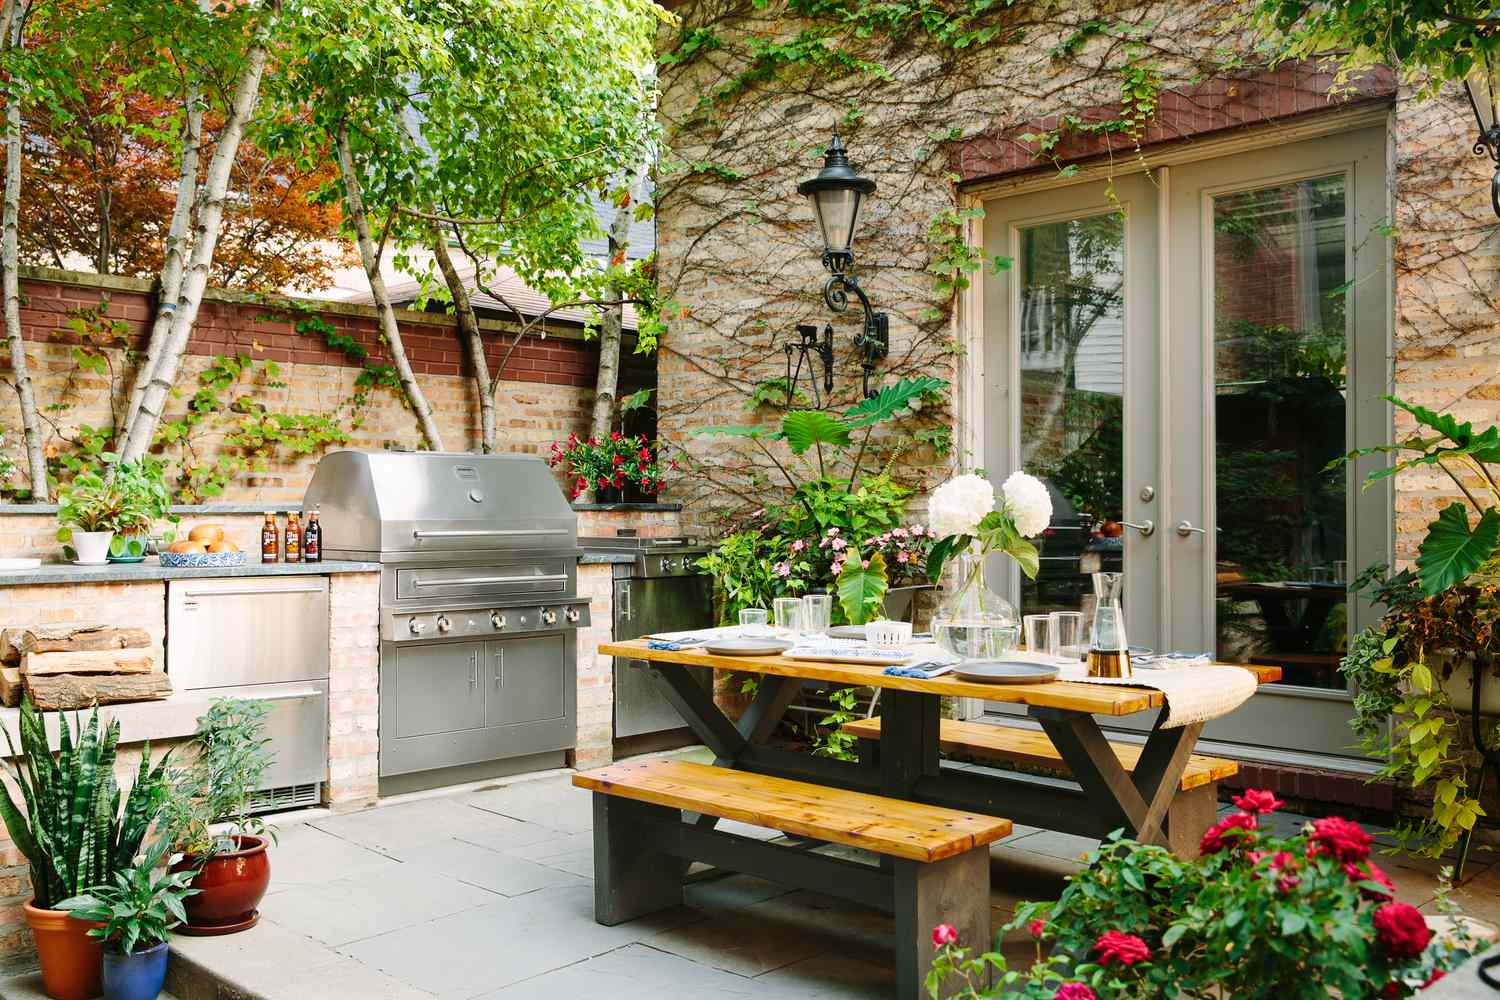
For a clean, modern look, the countertop overhang on an outdoor kitchen island should be minimal. On the working side (the grill side), aim for a standard 1.5-inch overhang. For a bar seating area, you need more legroom; a 10 to 12-inch overhang is comfortable for counter-height stools. Anything less feels cramped, and anything more can risk the stability of the stone countertop unless properly supported with steel brackets.
11. Spanish-Style Outdoor Kitchen with Arched Accents
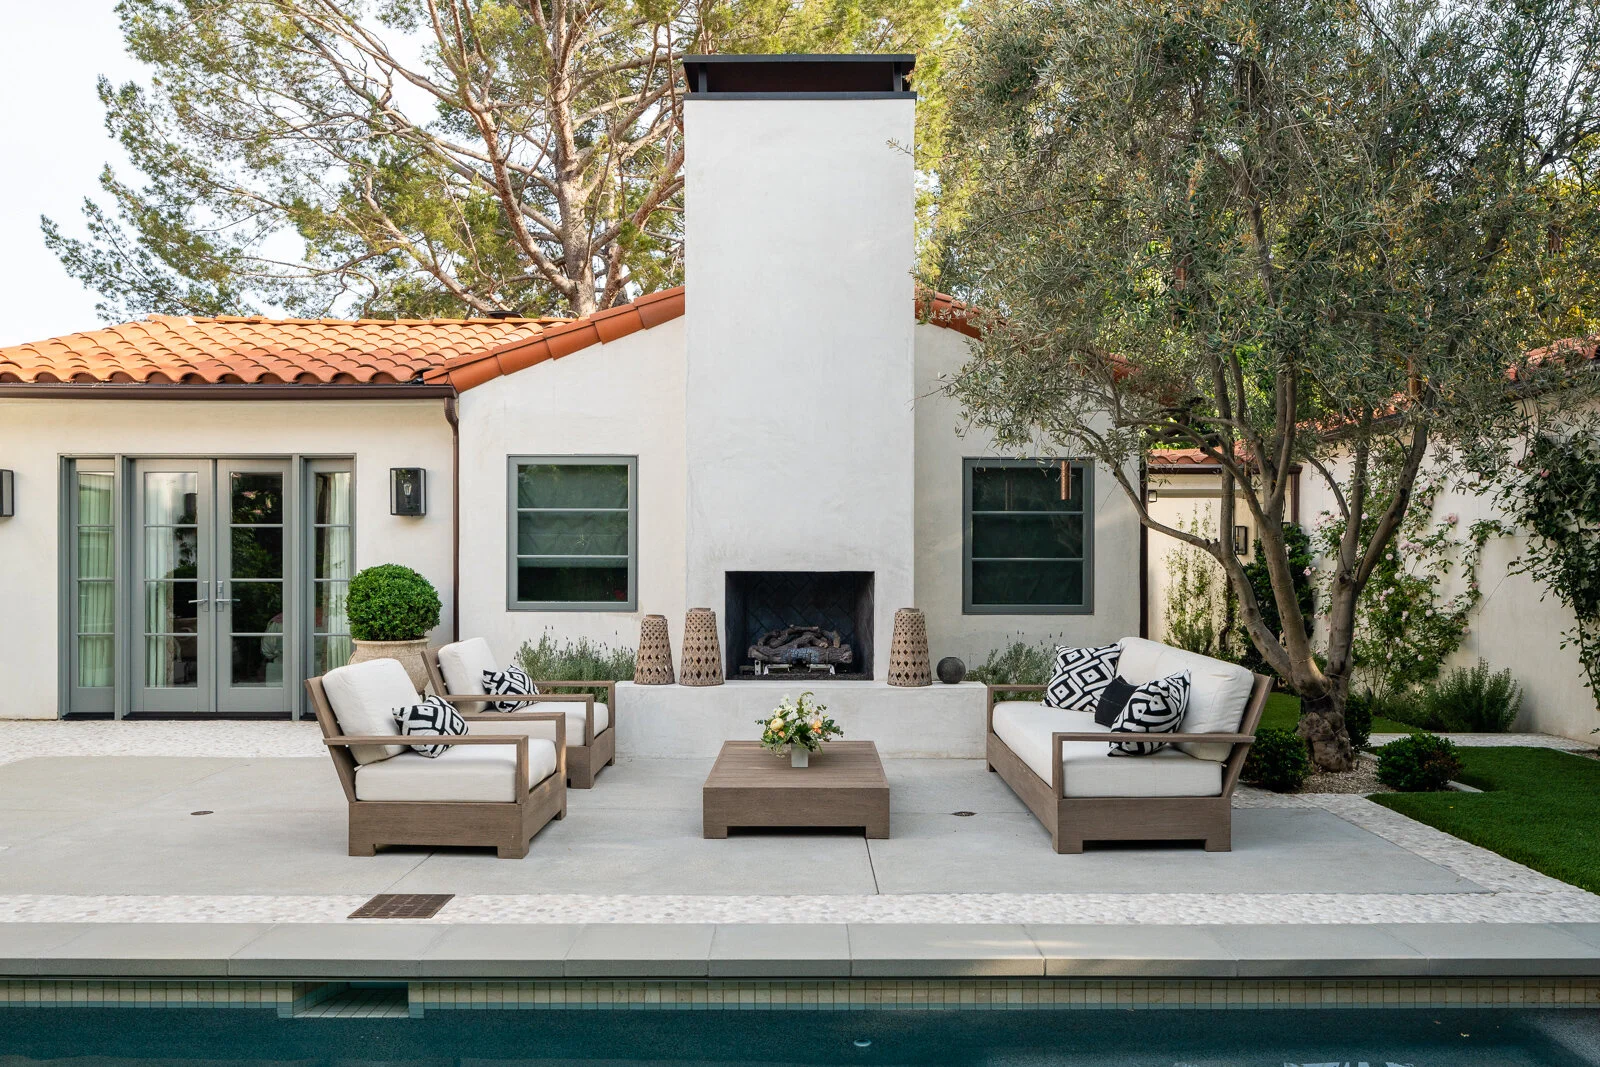
There’s a major trend right now towards creating highly personal, character-rich spaces, moving away from the minimalist gray-and-white aesthetic that dominated for years. Spanish and Mediterranean influences, with their warm terracotta tones, intricate tilework, and textured stucco, are surging on Pinterest because they feel authentic, vibrant, and joyful. Homeowners are craving spaces that feel like a vacation, and this style instantly evokes a sense of sun-drenched, old-world charm that has timeless appeal.
🔧 How-To Brief
You can capture this Spanish villa vibe without a full custom build. Focus on the finishes. Use standard concrete blocks for the kitchen base, then cover it with an affordable stucco finish ($3-$6 per sq. ft.). The magic is in the tile. Instead of tiling a whole wall, create a smaller, high-impact backsplash behind the grill using just 15-20 beautiful, patterned cement tiles from a specialty store or even Wayfair ($10-$20 per tile). Add a few large terracotta pots from Home Depot, and you’ve got the look for a fraction of the cost. This is a much more achievable approach than the ornate build in Idea #24.
12. A Robust Outdoor Kitchen with a Granite-Topped Stone Island
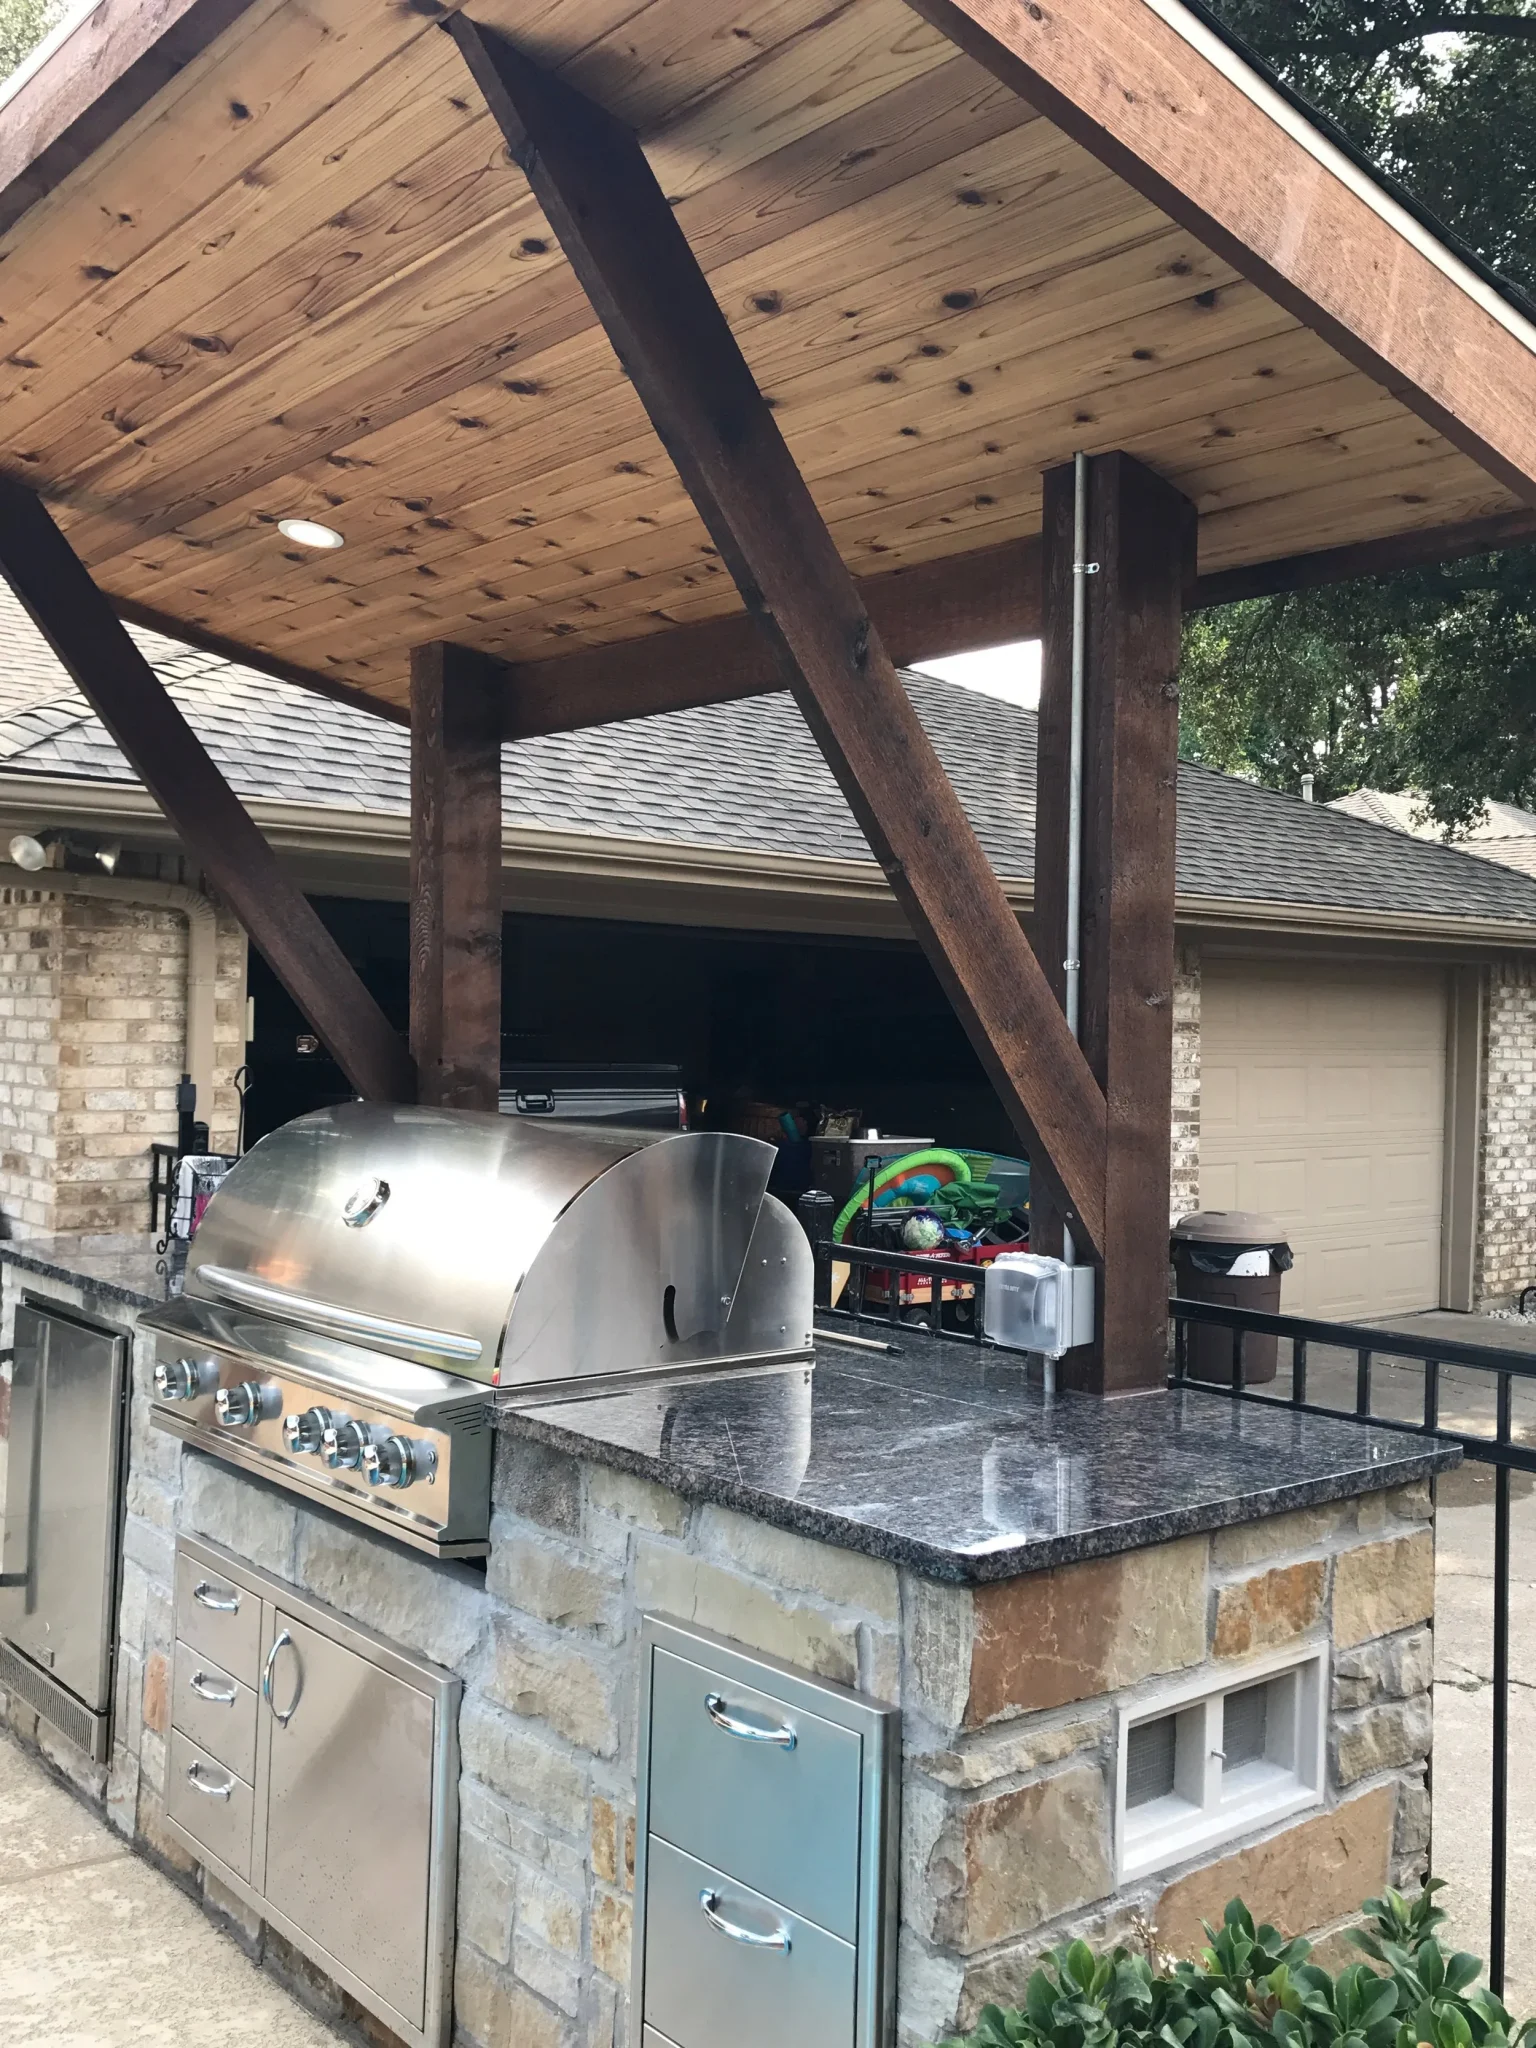
This design feels so solid and permanent because of the smart pairing of textures and weights. The rough, varied texture of the stacked stone veneer base provides a strong, earthy foundation. This is topped with a thick slab of dark, polished granite, which adds a sense of sleekness and durability. The final layer, a natural wood slatted ceiling, brings warmth and prevents the stone and steel from feeling too cold or industrial. It’s a trio of materials that balances rustic, modern, and natural elements perfectly.
✅ Before You Start
An L-shaped island of this substance needs significant room to breathe. This layout is best for patios that are at least 15 feet wide and 20 feet long. You need a minimum of 42-48 inches of clear walkway space around the entire island for comfortable circulation, especially when the grill is in use and cabinet doors are open. Trying to squeeze a design this bulky into a smaller space will result in a cramped, awkward cooking and entertaining experience. For tight spots, a linear kitchen like Idea #7 is a better choice.
13. A Small but Mighty Transitional Outdoor Kitchen
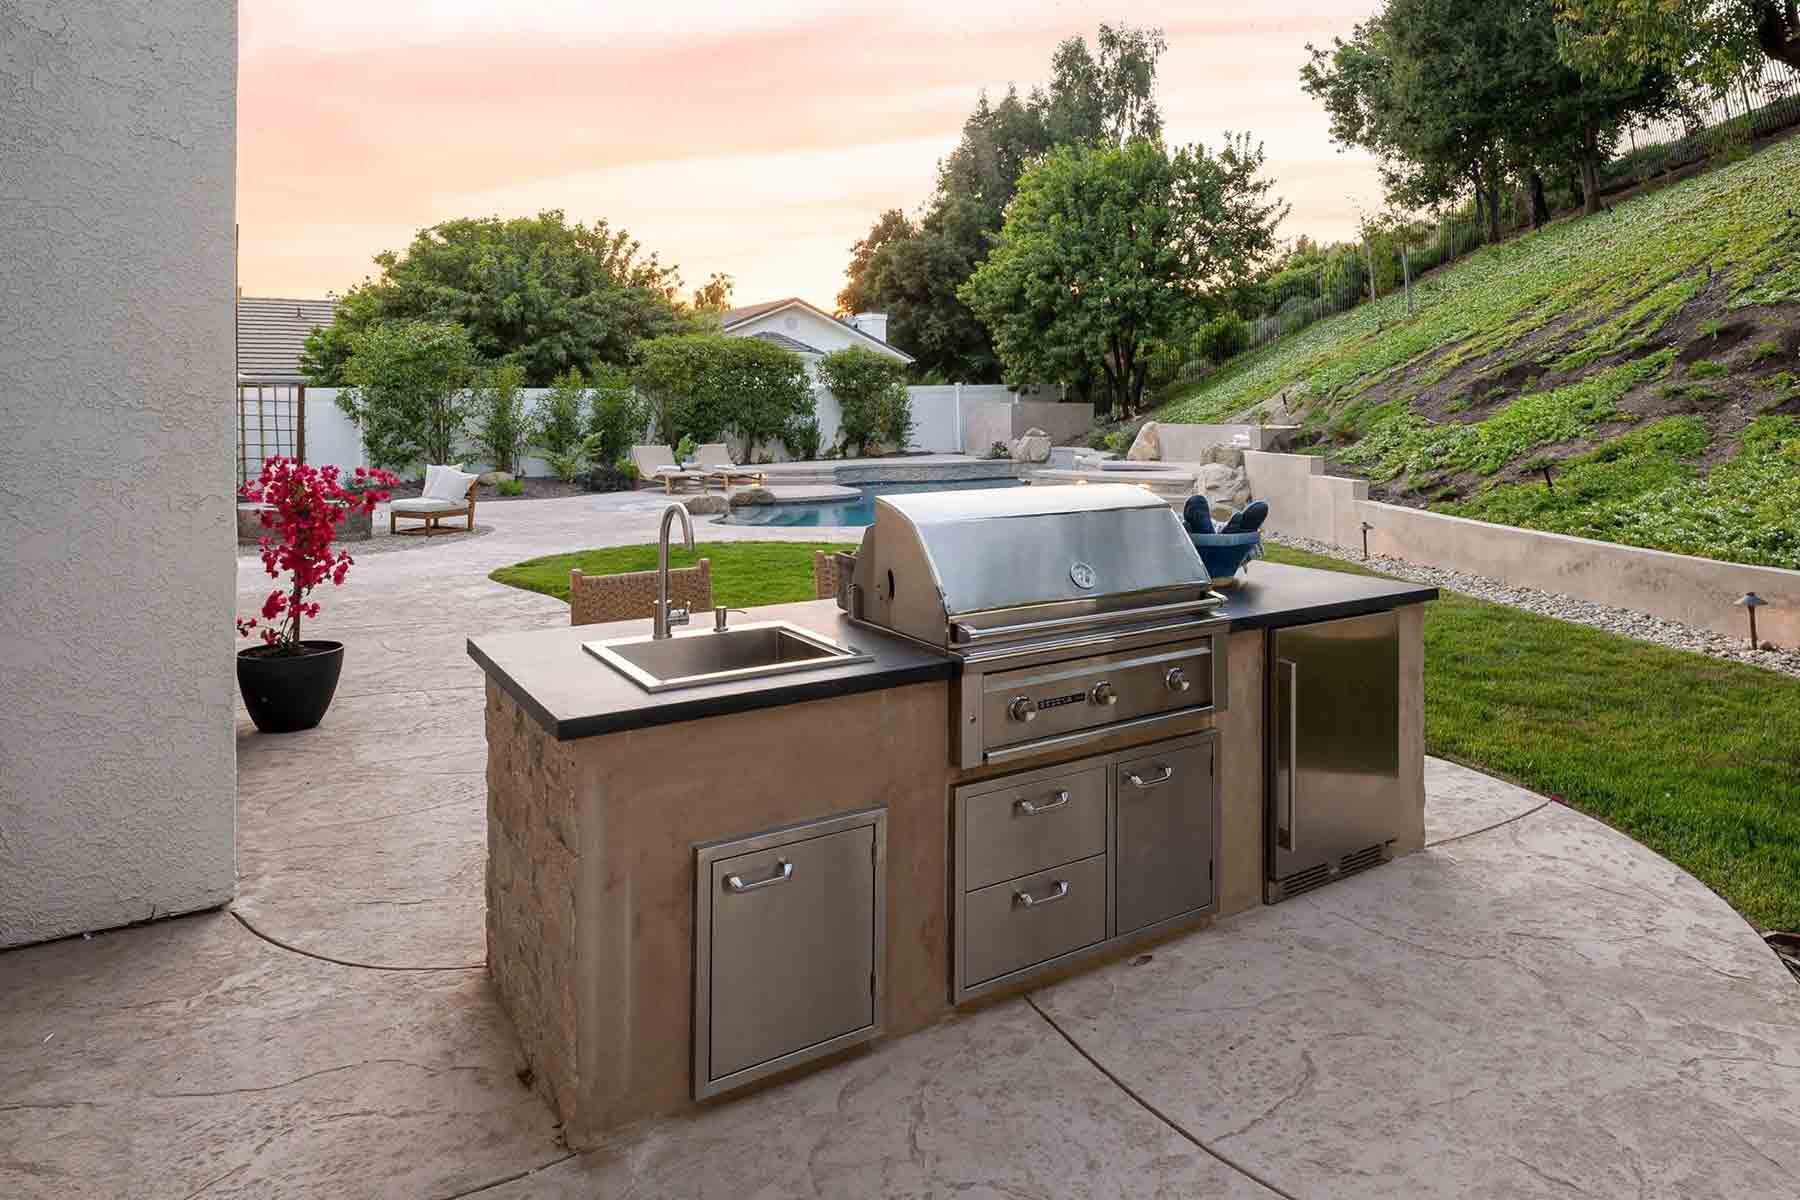
The biggest challenge with a small outdoor kitchen is planning for plumbing and electrical. Adding a sink isn’t as simple as just dropping it in; you’ll need to run hot and cold water lines from your house and, more complicatedly, a drain line that ties into your home’s sanitary system. This can involve trenching and significant plumbing work. Similarly, refrigerators and outlets require running buried, GFCI-protected electrical lines. These utility hookups can easily double the cost of a small project, so budget accordingly.
📐 Style Math
The inclusion of a sink is what elevates this from a simple ‘grill station’ to a true ‘outdoor kitchen.’ Having running water right where you’re cooking is a total game-changer. It means you can wash hands, rinse vegetables, and clean up messes without constantly running back and forth to the house. It’s the single feature that delivers the most functional convenience and makes the entire space feel self-sufficient and thoughtfully planned.
14. Covered Outdoor Kitchen with Flagstone Floors and a Wood Ceiling
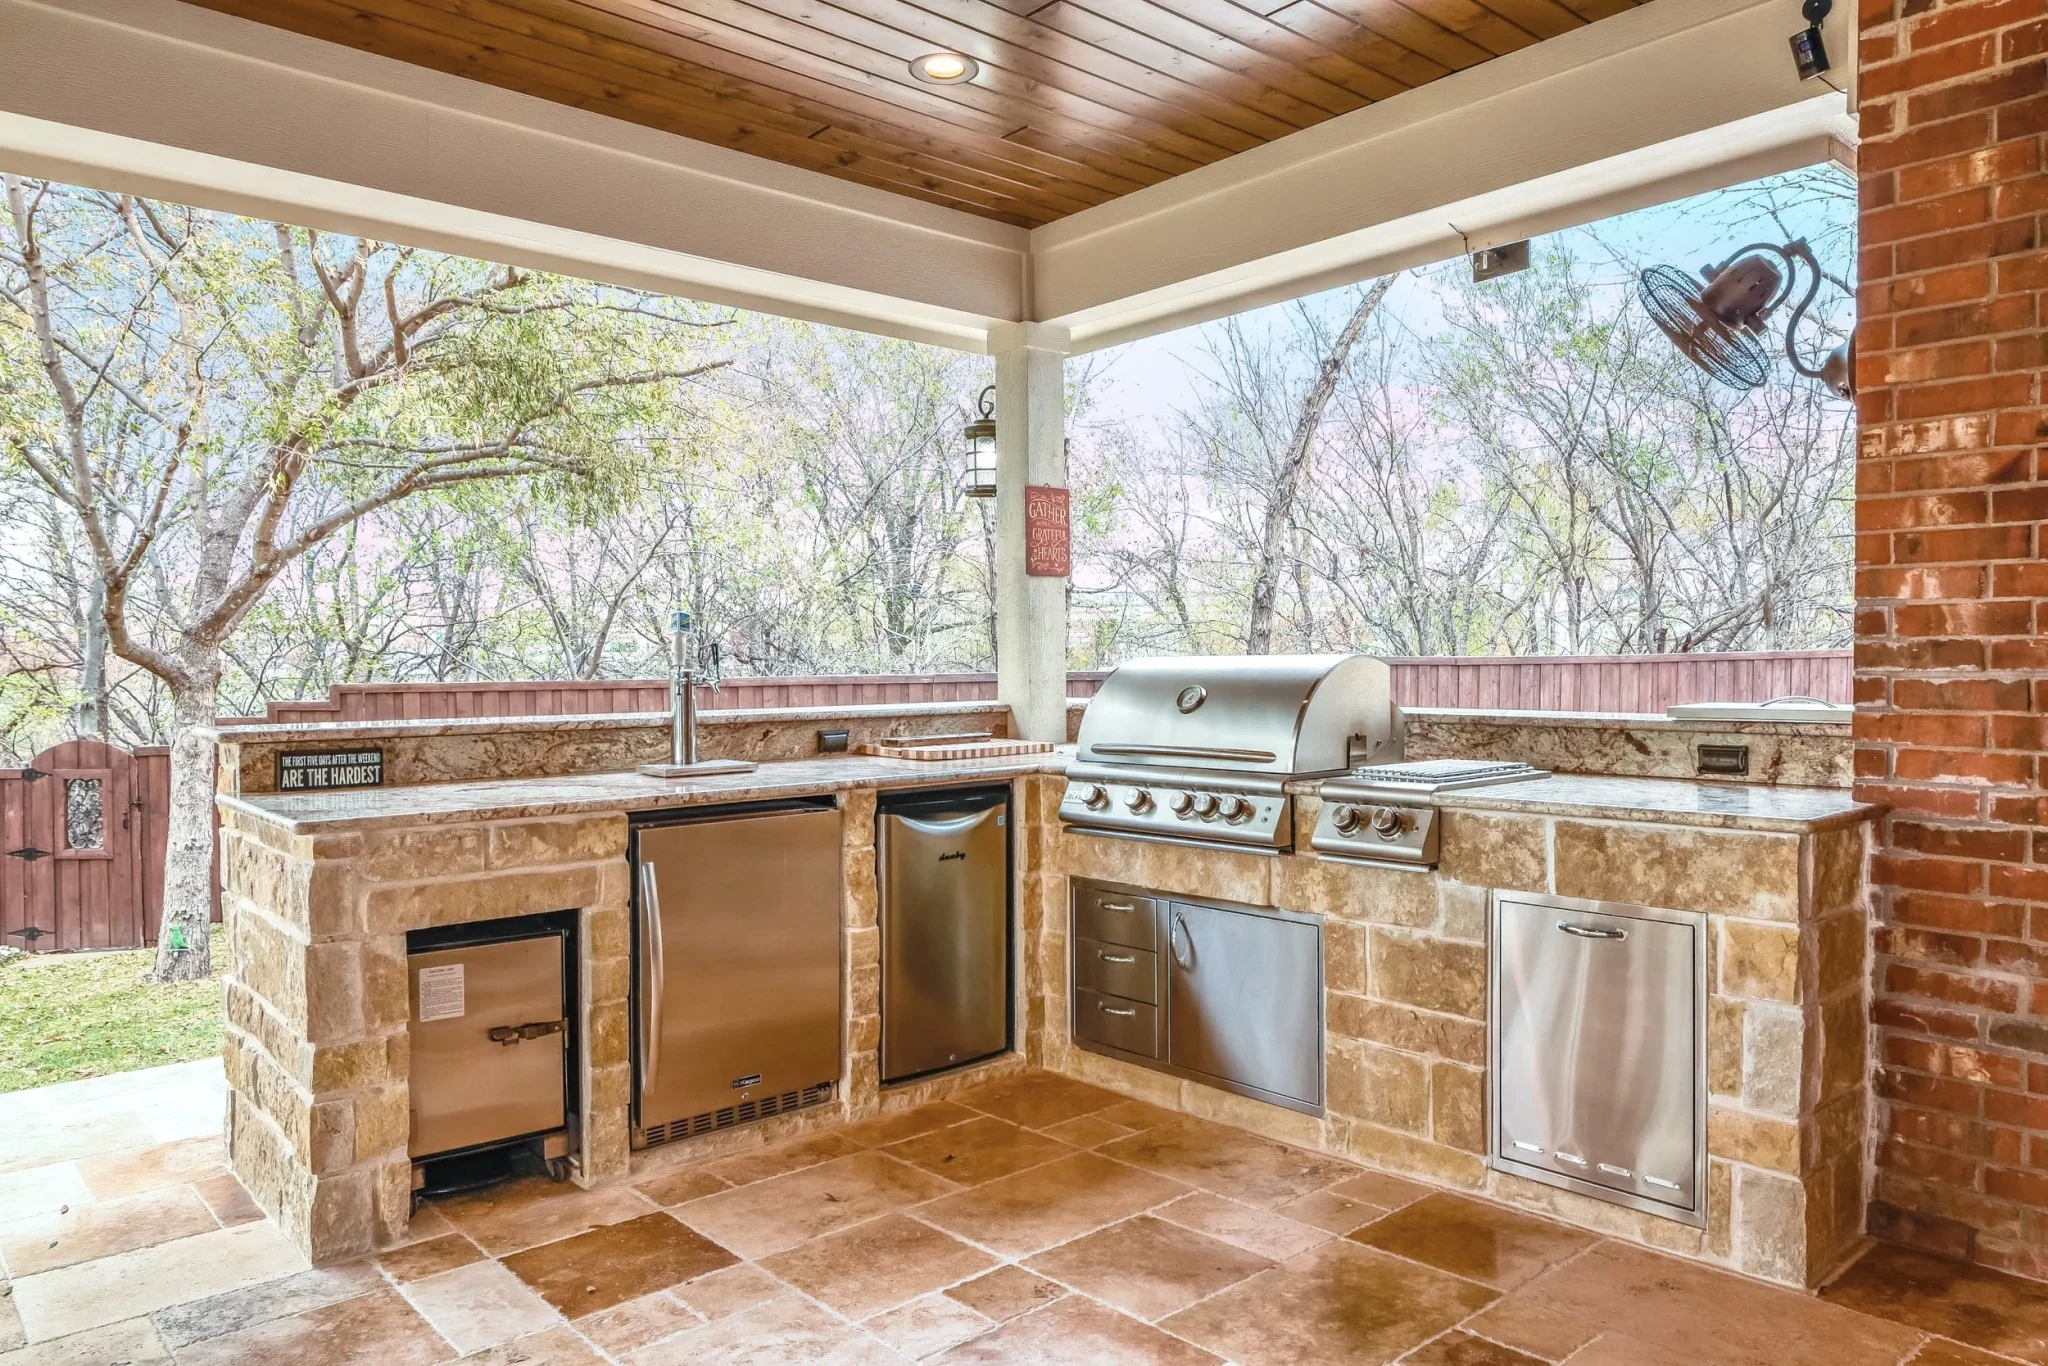
When choosing a countertop for an outdoor kitchen that is covered but still exposed to humidity and temperature swings, prioritize non-porous materials. While beautiful, materials like marble and some lighter granites can stain easily from leaves, pollen, and spills. Dekton, Neolith, and other ultra-compact surfaces are fantastic, as they are virtually indestructible and non-porous. If you opt for natural stone like granite, choose a darker, denser variety and be prepared to seal it annually to prevent staining and weathering.
💡 Designer Tip
This look is a masterclass in texture mixing: 40% rugged stone (kitchen base and floor), 30% smooth metal (stainless steel appliances), 20% warm wood (ceiling planks), and 10% classic brick (support column). The beauty is in the balance. No single texture overwhelms the others. The smooth, cool steel provides a modern counterpoint to the rustic, warm stone and wood, creating a sophisticated yet comfortable environment that feels both timeless and current.
15. Contemporary Kitchen with a Slatted Wood Privacy Fence
- Check local zoning laws for fence height restrictions before you build. Many municipalities limit privacy fences to 6 or 8 feet.
- Determine the direction of your prevailing winds. A slatted fence offers some permeability, but a strong wind can still put significant stress on the structure.
- Plan your utilities. Will you need to run a gas line for the grill? Map out the route before you lay your patio pavers.
- Verify the sun’s path throughout the day to ensure your dining area will have adequate shade when you’re most likely to use it.
💰 Budget Breakdown
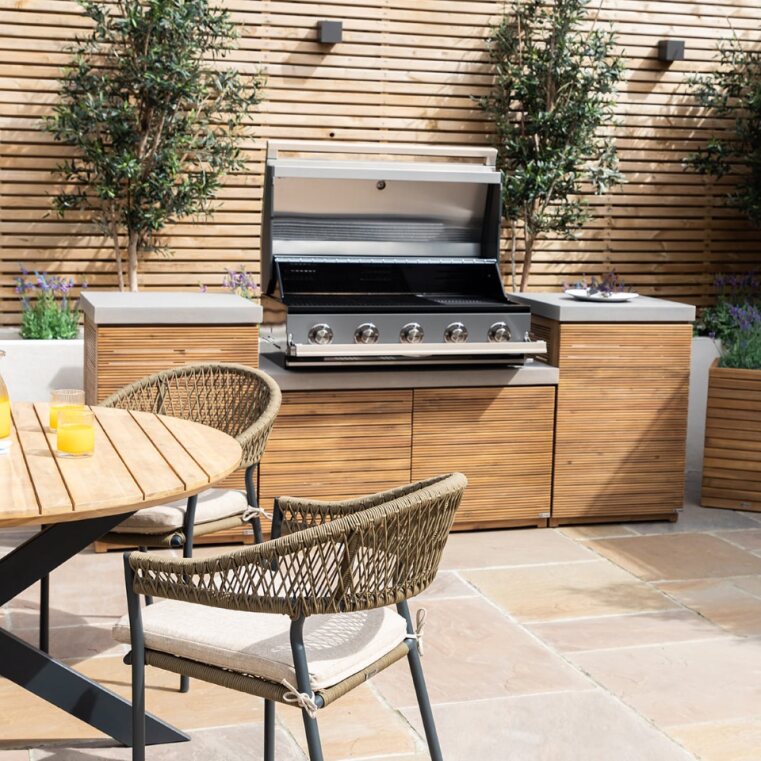
This design brilliantly uses vertical lines to create a sense of height and cohesion. The slatted wood on the kitchen cabinetry is perfectly matched to the tall privacy fence behind it. This repetition makes the kitchen feel fully integrated into the landscape, rather than just an object placed on a patio. The consistent vertical pattern draws the eye upward, making the entire space feel more expansive and creating a serene, unified backdrop that conceals whatever is on the other side of the fence.
16. Lush Garden Kitchen with a Wisteria-Covered Pergola and Pizza Oven
- Main Structure (Pergola, Stone Kitchen Base): $15,000 – $30,000
- Appliances (Grill, Pizza Oven, Fridge): $7,000 – $18,000
- Furniture (Dining Set, Adirondack Chairs, Bar Stools): $4,000 – $8,000
- Hardscaping (Patio, Fire Pit): $10,000 – $25,000
- Landscaping & Lighting: $5,000 – $15,000
- TOTAL: $41,000 – $96,000
- Budget alternative: Build a simpler pressure-treated wood pergola, use a portable pizza oven, and build the fire pit yourself with a kit to get a similar feel for $15,000 – $25,000.
⚠️ Real Talk
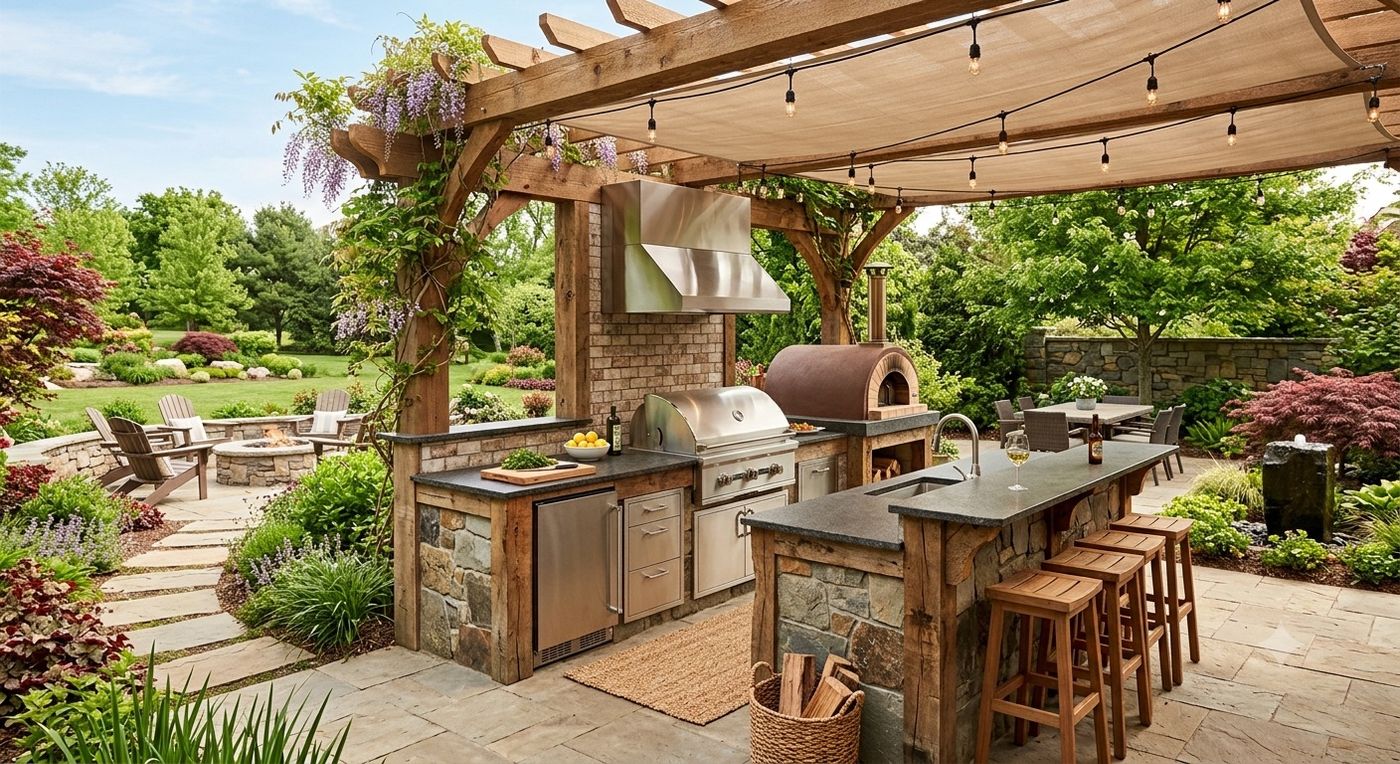
While the kitchen is incredible, the one thing that makes this space truly magical is the abundance of mature greenery. The climbing wisteria on the pergola, the lush plants framing the patio, and the established trees in the background are what truly define this outdoor room. They provide natural privacy, dappled shade, and a sense of permanence and tranquility that no amount of expensive hardscaping can replicate. Removing the plants would leave a beautiful but sterile patio; the landscape is its soul.
17. Compact Poolside Kitchen with Stacked Stone and a Sloped Canopy
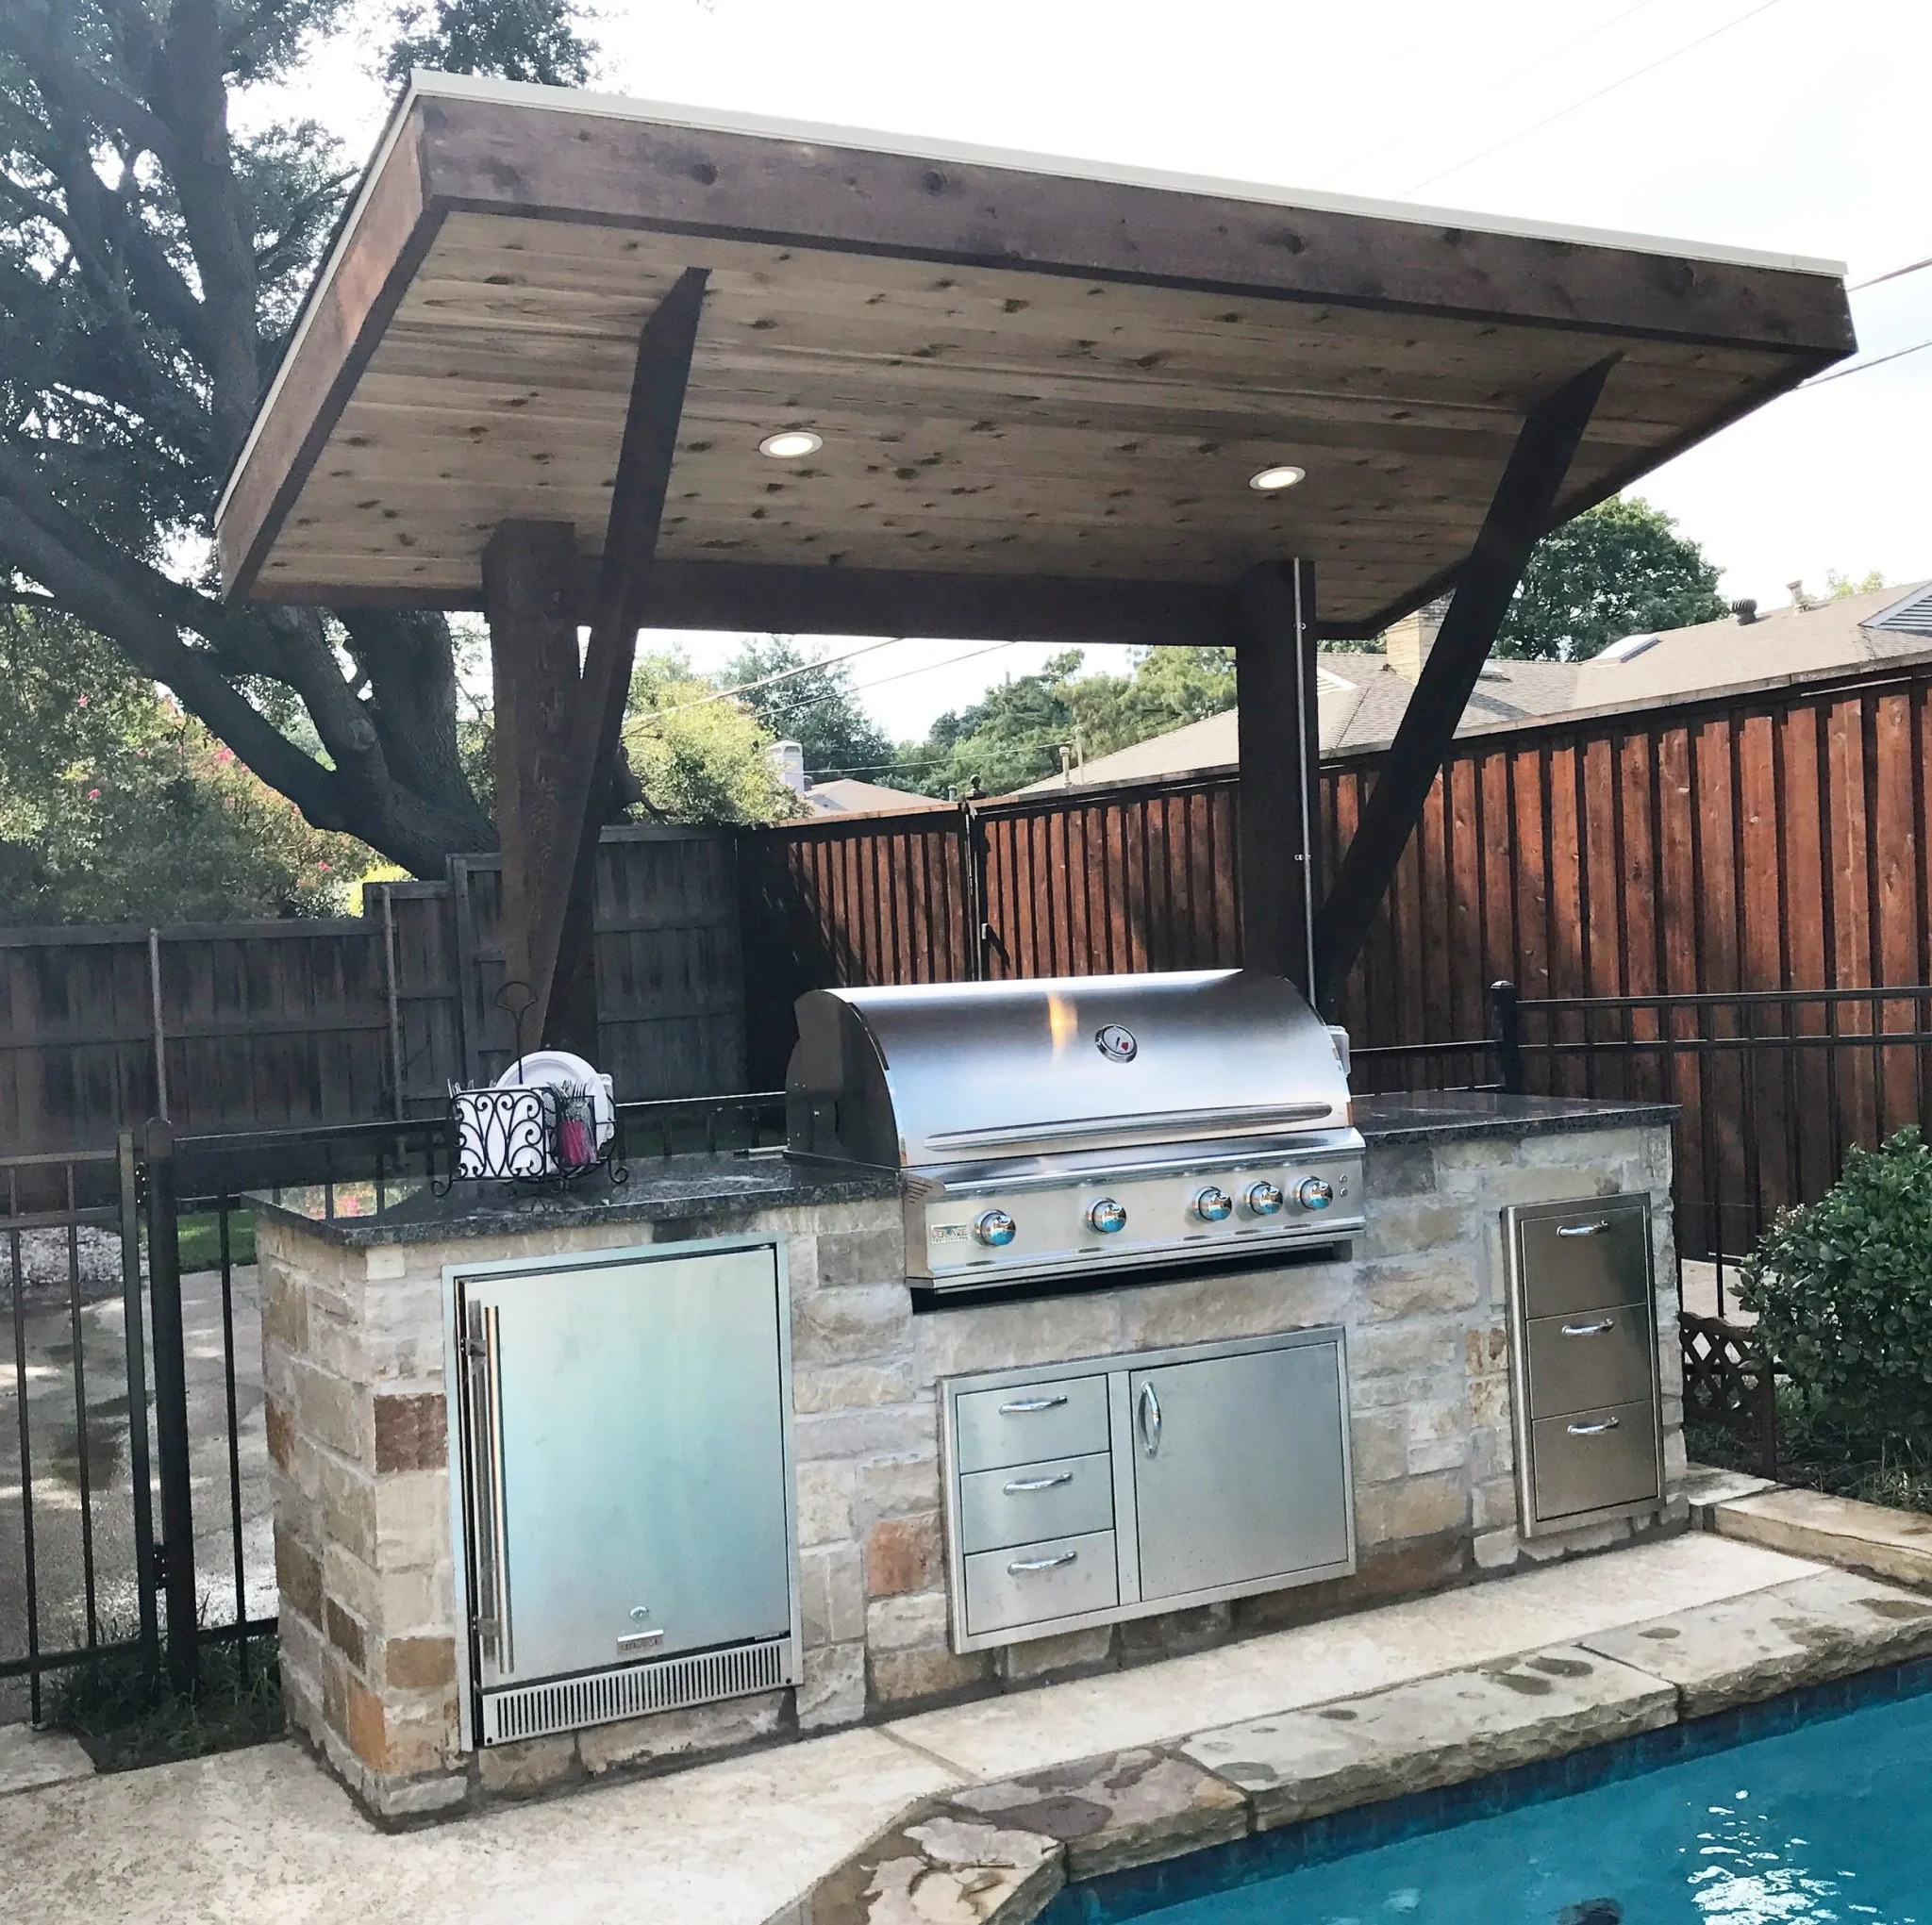
This is a fantastic layout for a long, narrow side yard or the edge of a pool deck. The linear design requires a footprint of about 10-14 feet in length but only 3-4 feet in depth (plus clearance). This makes it highly efficient, packing a grill, fridge, and storage into a small area without projecting too far into the usable patio space. The sloped canopy works well under existing house eaves or when you need to manage rainwater runoff in a specific direction, away from the pool or seating areas.
🎯 What Makes It Work
A mini-fridge is a great addition to an outdoor kitchen, but be realistic about its capacity and performance. Outdoor-rated models are more expensive because they’re built to handle wider temperature swings, but in extreme heat (95°F+), even the best ones can struggle to keep drinks ice-cold. They’re also small. Don’t expect to store food for a huge party. They are perfect for a six-pack of drinks and some condiments, but you’ll still be running to your main refrigerator inside for anything more.
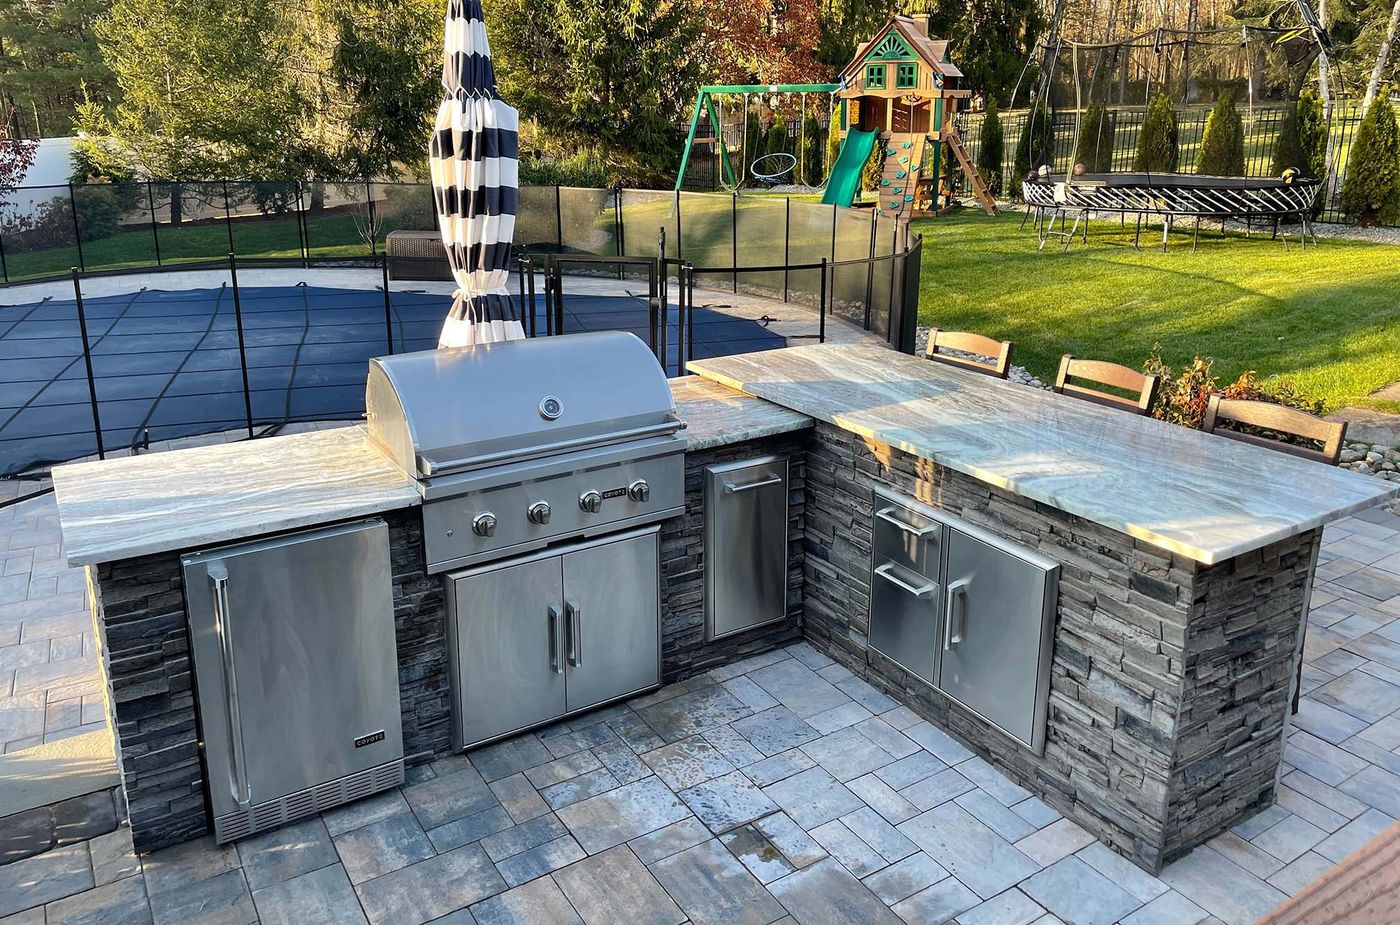
18. L-Shaped Outdoor Kitchen with Dark Stacked Stone and Veined Granite
Installing a stone veneer base for a kitchen island is a popular DIY project. Here’s a simplified guide:
🧹 Maintenance Reality
- Build your frame: Construct the island’s structure using pressure-treated wood or steel studs. Cover it with cement backer board, screwing it in every 6-8 inches.
- Apply a scratch coat: Trowel a 1/2-inch layer of mortar over the backer board, then score it with a notched trowel to create grooves for adhesion. Let it cure for 24-48 hours.
- Plan your layout: Lay out your stone panels or individual stones on the ground to arrange a pleasing pattern, mixing colors and sizes.
- Apply the stone: ‘Butter’ the back of each stone with mortar and press it firmly onto the scratch coat with a slight twisting motion. Use shims for even spacing if needed. Start at the bottom and work your way up.
- Grout (if applicable): If your stone style requires it, pipe grout into the joints after the stone has set for 24 hours.
Time estimate: 2-3 weekends. Material cost: $15-$40 per square foot.
Light-colored granite is beautiful, but it can be prone to staining outdoors. Spills like red wine, grease from the grill, or even wet leaves left for too long can penetrate the stone’s surface. You absolutely must seal light-colored granite countertops annually with a high-quality impregnating sealer. This creates a protective barrier. Also, wipe up spills immediately. For a lower-maintenance alternative that provides a similar light look, consider quartz (in a shaded area, as some can yellow in direct sun) or an ultra-compact surface like porcelain.
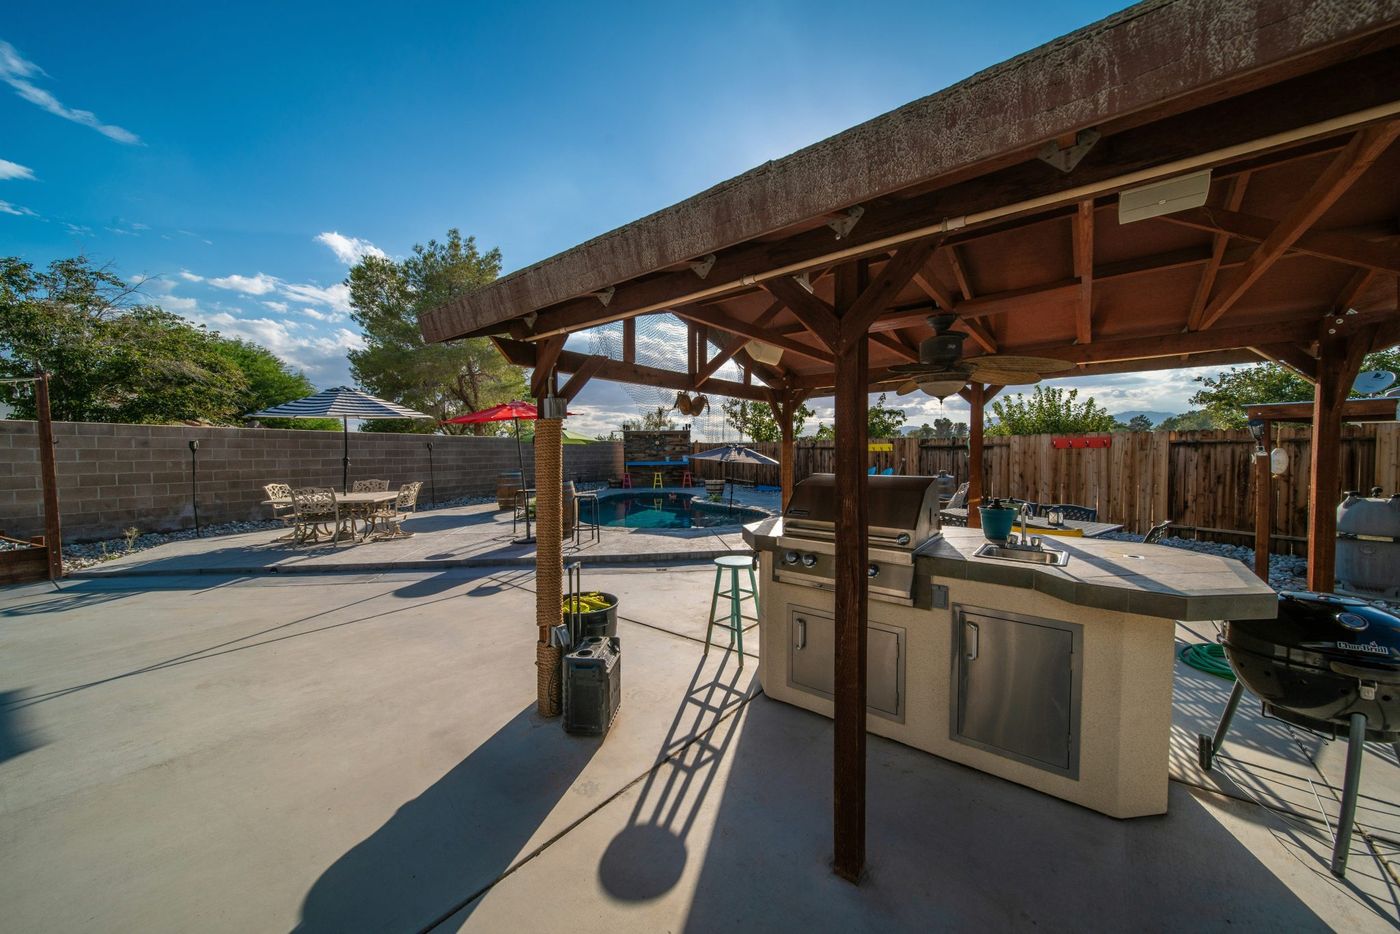
19. Simple Covered Grill Patio for Casual Gatherings
You can create this simple, functional covered grill space on a tight budget. The core is a freestanding grill from a big-box store like Lowe’s or Home Depot ($300 – $800). Pair it with an all-weather prep cart from IKEA or Wayfair ($150 – $300) for workspace. For the dining area, a simple metal and glass table set from Walmart or Target can be found for under $400. The key is focusing on functional pieces rather than a fully integrated, custom-built kitchen. It provides the same utility—grilling and dining—for a fraction of the cost.
📏 Scale Guide
The single most important element here is the roof. It’s not fancy, but having a solid cover over the grill and table is what makes this patio usable in more than just perfect weather. It provides essential shade on a hot, sunny day and keeps you dry during a light summer rain. This simple addition dramatically extends the number of days you can comfortably use your outdoor space, transforming it from a spot for grilling into a reliable outdoor room.
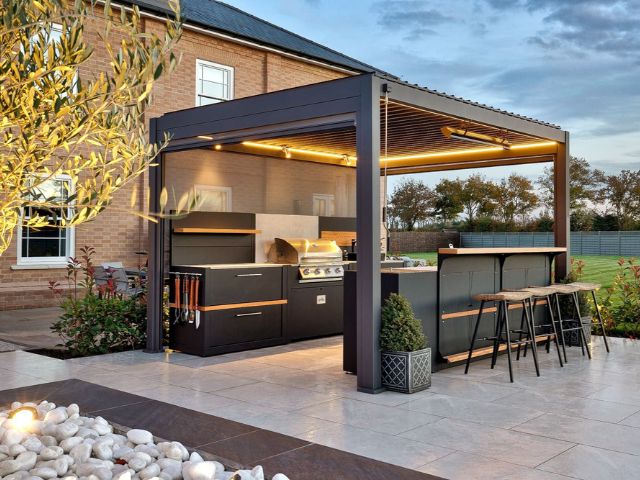
20. Modern Bar and Kitchen Under an Illuminated Metal Pergola
Integrated lighting is what makes a modern design feel truly high-end. When planning a pergola, ask your contractor to incorporate channels for running low-voltage wiring for LED strip lights. Use warm white (2700K-3000K) LEDs for an inviting glow, not a sterile blue-white light. Place the strips on the underside of major beams, pointing downward to illuminate the space below, or pointing upward to create a soft, ambient uplighting effect that highlights the structure itself. Always use waterproof strips and connectors rated for outdoor use.
💸 Get This Look For Less
This design works because of its sophisticated, monochromatic palette. The dark grey of the pergola, kitchen cabinets, and stool frames creates a unified, seamless look. This allows the accent materials—the warm wood of the bar top and the glow of the strip lighting—to truly pop. By keeping the base color consistent, the design avoids looking busy and instead feels sleek, intentional, and very contemporary. It’s a chic and moody take on outdoor entertaining.
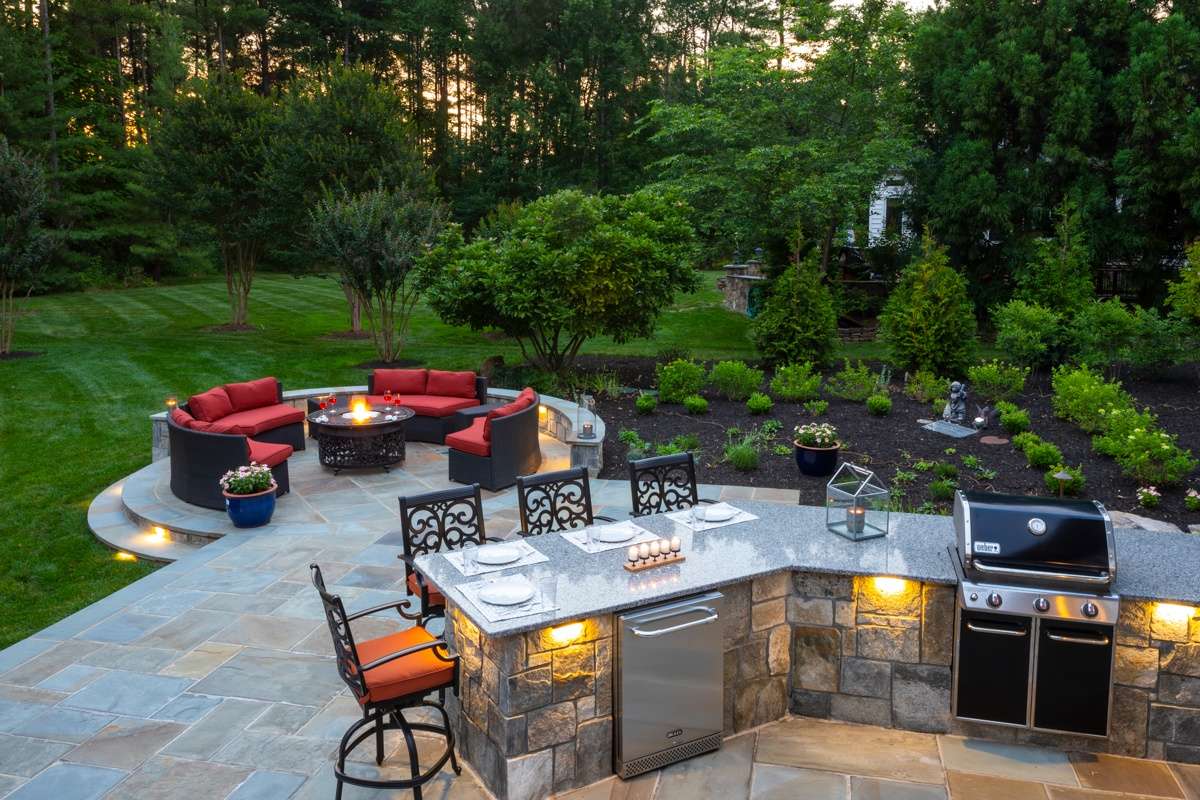
21. Multi-Level Stone Patio with a Fire Pit Lounge
This inviting scene is all about creating distinct moods through color and form. The formula: 60% neutral, textured hardscaping (the multi-toned stone pavers and kitchen island), 30% deep, grounding furniture (the black curved sofas), and a crucial 10% high-energy accent color (the bold red cushions). The red is what brings the whole space to life. You could swap it for cobalt blue or bright orange, and the inviting energy would remain, proving the power of a small, strategic pop of color.
🔥 Trending Context
Those gorgeous, deep-cushioned outdoor sofas are incredibly comfortable, but they come with a major maintenance commitment. The cushions are thick and will absorb a ton of water in a rainstorm, taking days to dry out and becoming prone to mildew. You either need to invest in custom-fit waterproof covers and be diligent about using them, or have a convenient, dry place to store them indoors. Leaving them exposed to the elements is a recipe for faded, stained, and moldy cushions within a season or two.
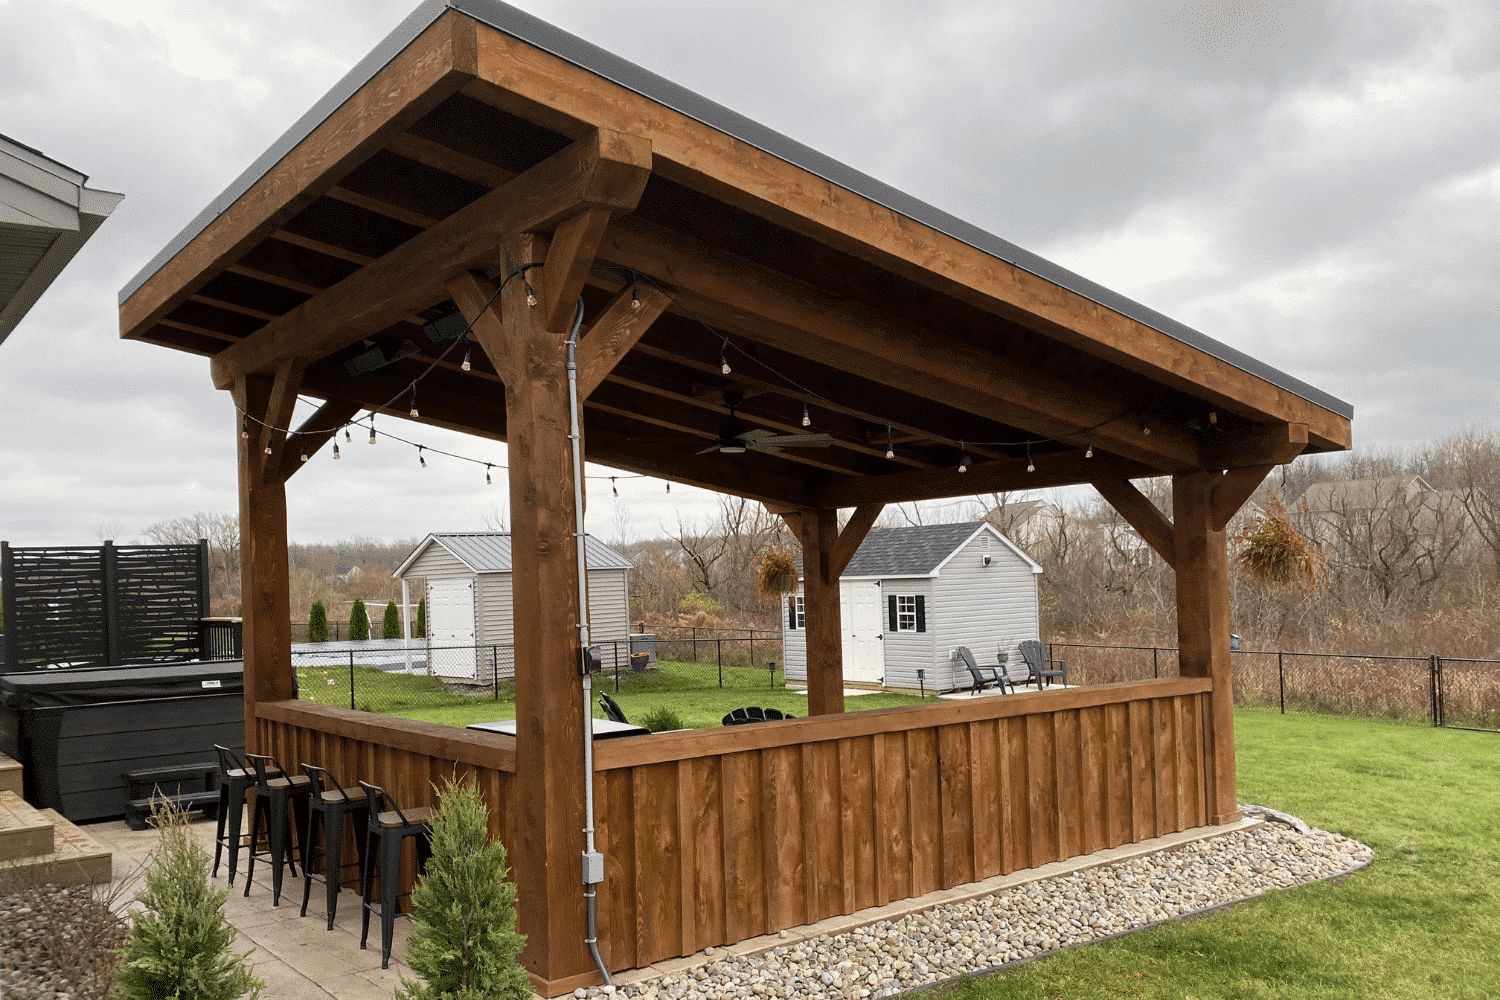
22. Casual Backyard Pavilion with an Integrated Wooden Bar
- Pavilion Kit or Lumber: $4,000 – $12,000
- Patio Pavers or Concrete Slab: $2,500 – $7,000
- Bar Stools: $400 – $1,200 (for 4)
- Lighting (String lights, fan): $300 – $800
- Labor (if not DIY): $5,000 – $15,000
- TOTAL: $12,200 – $36,000
- Budget alternative: A DIY approach using a pre-cut pavilion kit from Costco or a home improvement store and using gravel instead of pavers can bring the total cost down to the $6,000 – $10,000 range.
|
📋 Copy HEX 🔗 Share |
⭐ The One Thing
The freestanding pavilion or ‘backyard pub’ is trending because it creates a true destination within your own property. It’s a psychological shift from simply being on the ‘patio’ to ‘going to’ a special spot. This idea appeals to our desire for separate zones for different activities, especially as we continue to use our homes for both work and play. It feels like a mini-getaway, a dedicated space for relaxing and socializing that’s distinct from the house itself, which is a powerful draw.
23. A Simple Deck with a Charcoal Grill and a View
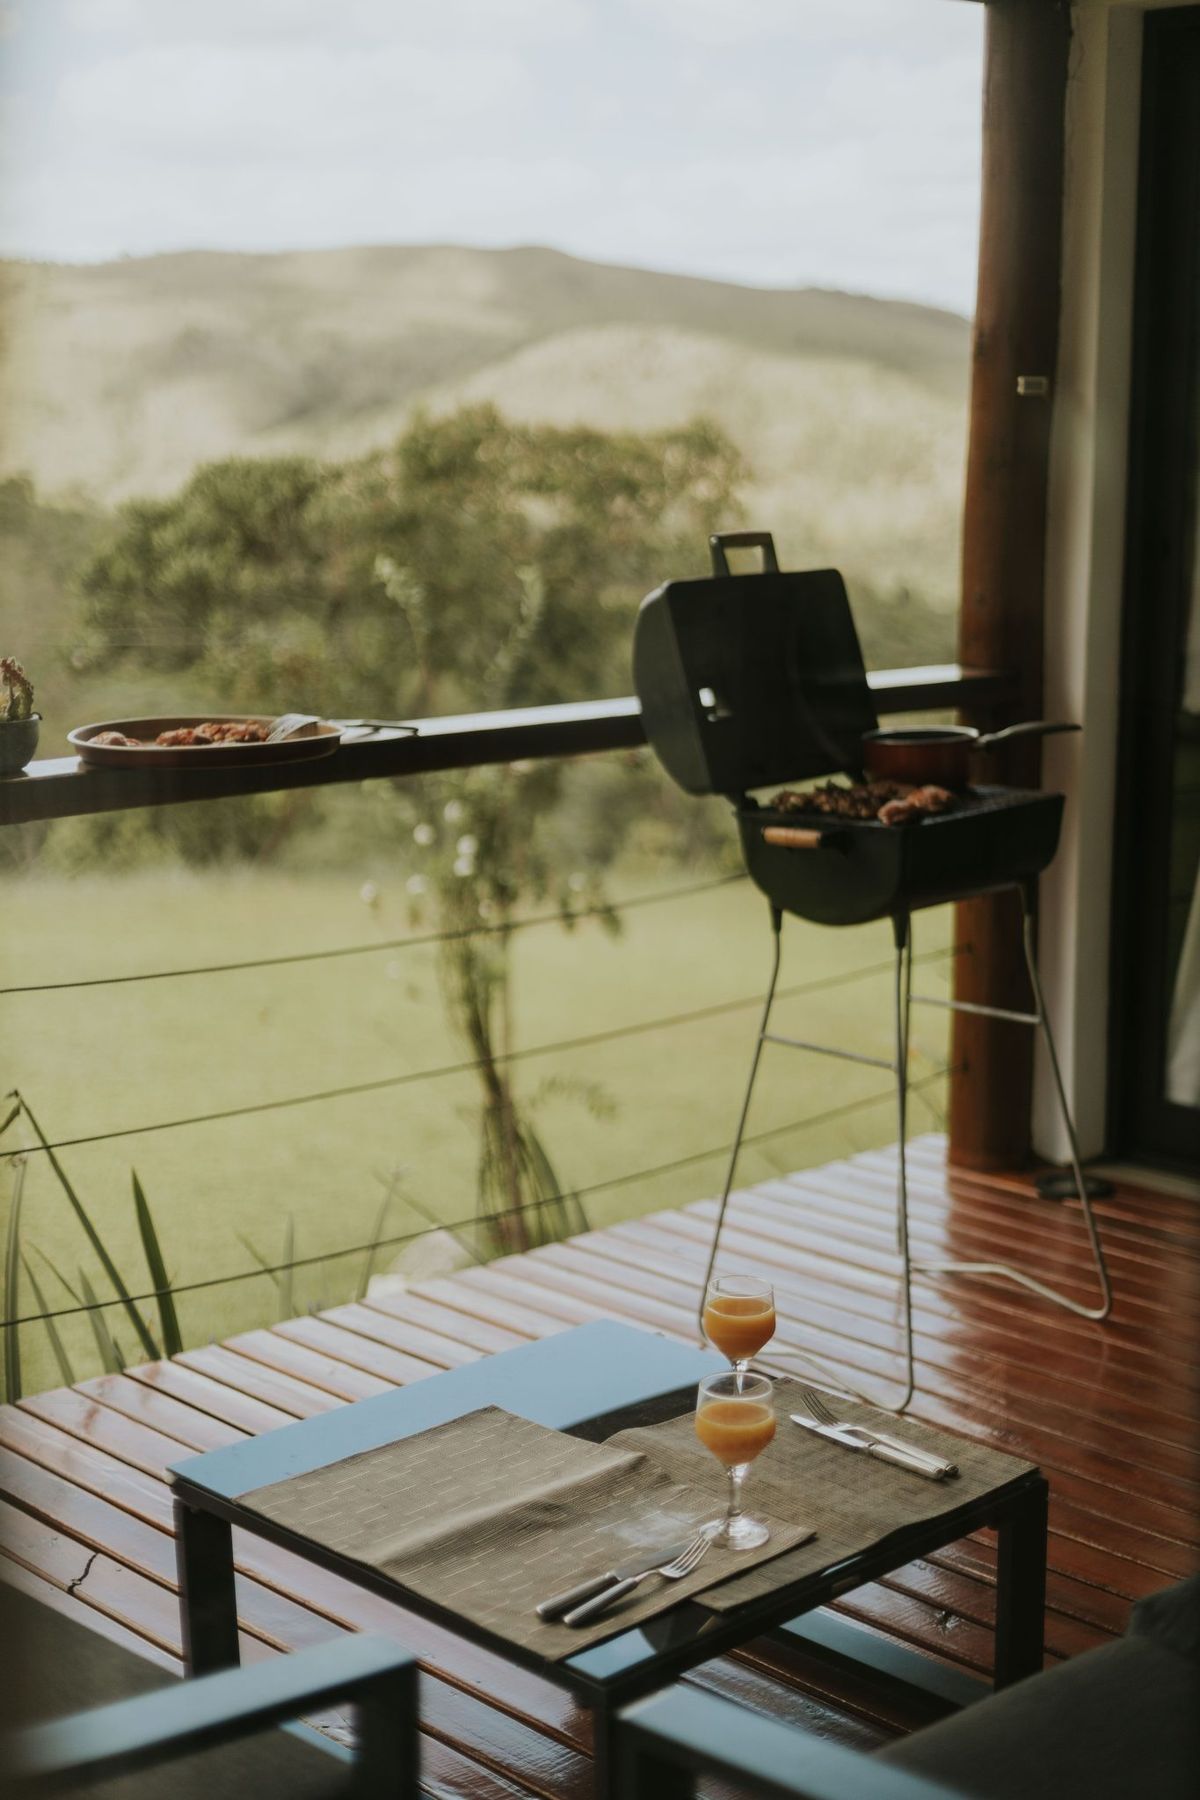
This is outdoor entertaining at its most elemental and achievable. You don’t need a $30,000 kitchen to enjoy a meal outside. This entire setup can be had for under $500. A classic Weber charcoal grill costs about $150-$250. A small bistro or dining set from IKEA or Facebook Marketplace can be found for $100-$200. The focus isn’t on fancy appliances; it’s on the simple, joyful act of cooking and eating in the fresh air. It’s a powerful reminder that a great outdoor space is more about the experience than the expense. Compare this to the high-end setup in Idea #4.
🔧 How-To Brief
that truly makes this space special is the view. The simple furniture and classic grill are just facilitators for the main event: the connection to the lush, green landscape beyond. The low-profile cable railing is a brilliant choice because it provides safety without obstructing the scenery. This setup proves that if you are lucky enough to have a beautiful natural backdrop, the best design decision you can make is to keep everything else simple and let the view be the star.
24. Ornate Mediterranean Kitchen with Spanish Tile and a Wood Pergola
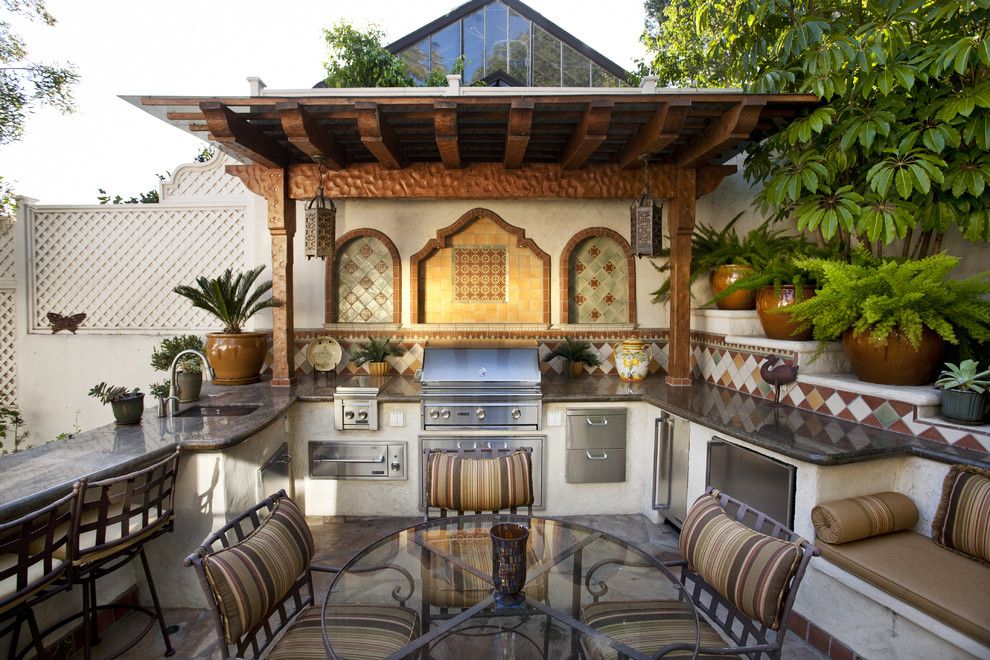
This design is so successful because it fully commits to its theme. It doesn’t just hint at a Mediterranean vibe; it embraces it wholeheartedly. The key is layering authentic materials: the rough stucco walls, the dark-stained wood of the pergola, the intricate patterns of the Spanish tile, and the heavy wrought iron of the furniture. The arched alcoves for the grill and tile create architectural interest and depth. It feels less like a decorated patio and more like a genuine piece of a Spanish villa, transported to a backyard.
✅ Before You Start
A dark-stained wood pergola requires consistent upkeep to look its best, especially in a sunny climate. The dark stain will absorb more UV radiation, leading it to fade and break down faster than a lighter finish. Plan to clean and apply a fresh coat of sealant or stain every 1-2 years. Also, the abundance of potted plants is gorgeous, but it means daily watering in the summer and a plan for where to overwinter them if you live in a climate with frost.
25. A Traditional Whitewashed Bar in the Ibizan Style
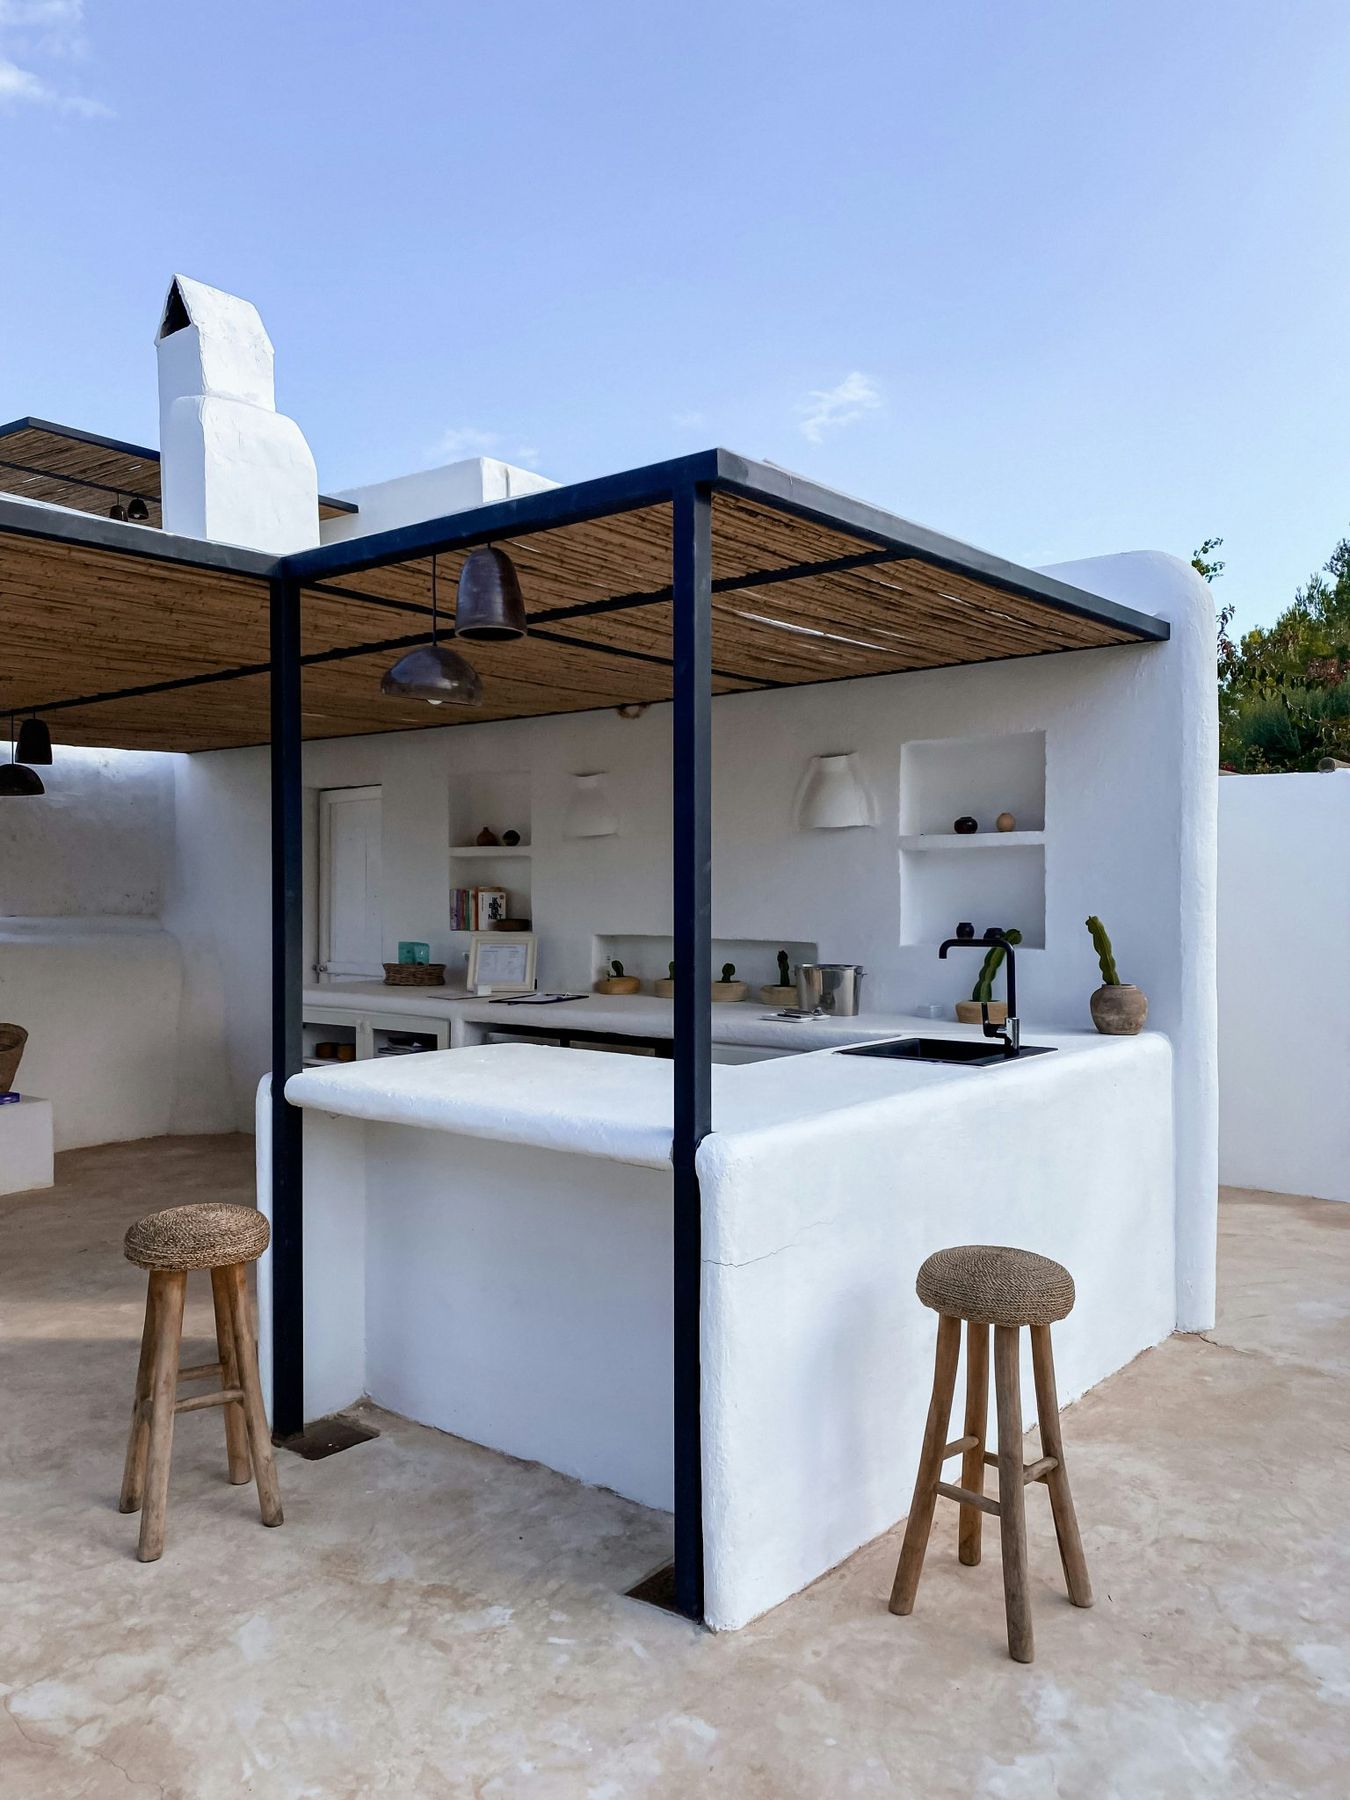
The classic Ibiza look is a study in rustic simplicity. The formula is approximately: 70% textured white walls (stucco or limewash), 20% natural wood (weathered beams, rough-hewn shelves), and 10% organic decor (woven baskets, clay pots, greenery). The overwhelming use of whitewash creates a bright, light-reflecting canvas that feels cool and serene, while the wood and natural elements prevent it from feeling sterile. It’s a palette built for sunshine, and it’s incredibly timeless.
📐 Style Math
To get that authentic, chalky, slightly uneven finish of a traditional Ibizan building, don’t use standard exterior paint. Use a limewash or a Roman clay finish instead. These materials are applied with a brush in a cross-hatch pattern, creating subtle variations in texture and color that give the surface a soft, velvety depth. It’s a more labor-intensive application than rolling on paint, but the beautiful, authentically rustic result is well worth the effort.
26. Elemental Cooking: Grilling in a Natural Setting
The single most compelling element here isn’t an object, it’s the context. The act of cooking is taken out of the kitchen and placed directly in nature. This isn’t about a fancy setup; it’s about the sensory experience—the smell of the grill mixing with the fresh air, the sounds of the outdoors, the simplicity of preparing food in a beautiful, natural environment. It’s a reminder that sometimes the best design feature is no design at all, just a thoughtful placement within the landscape.

💡 Designer Tip
Cooking in a more ‘wild’ or natural setting means paying extra attention to fire safety. Never place a grill directly on dry grass or leaves. You need a clear, non-combustible zone of at least 10 feet around your cooking area. A simple patch of gravel, a small paver pad, or even just cleared dirt is essential. Also, be mindful of wildlife. The smell of cooking can attract curious animals, so be sure to clean your grill thoroughly and store all food and trash securely after you’re done.
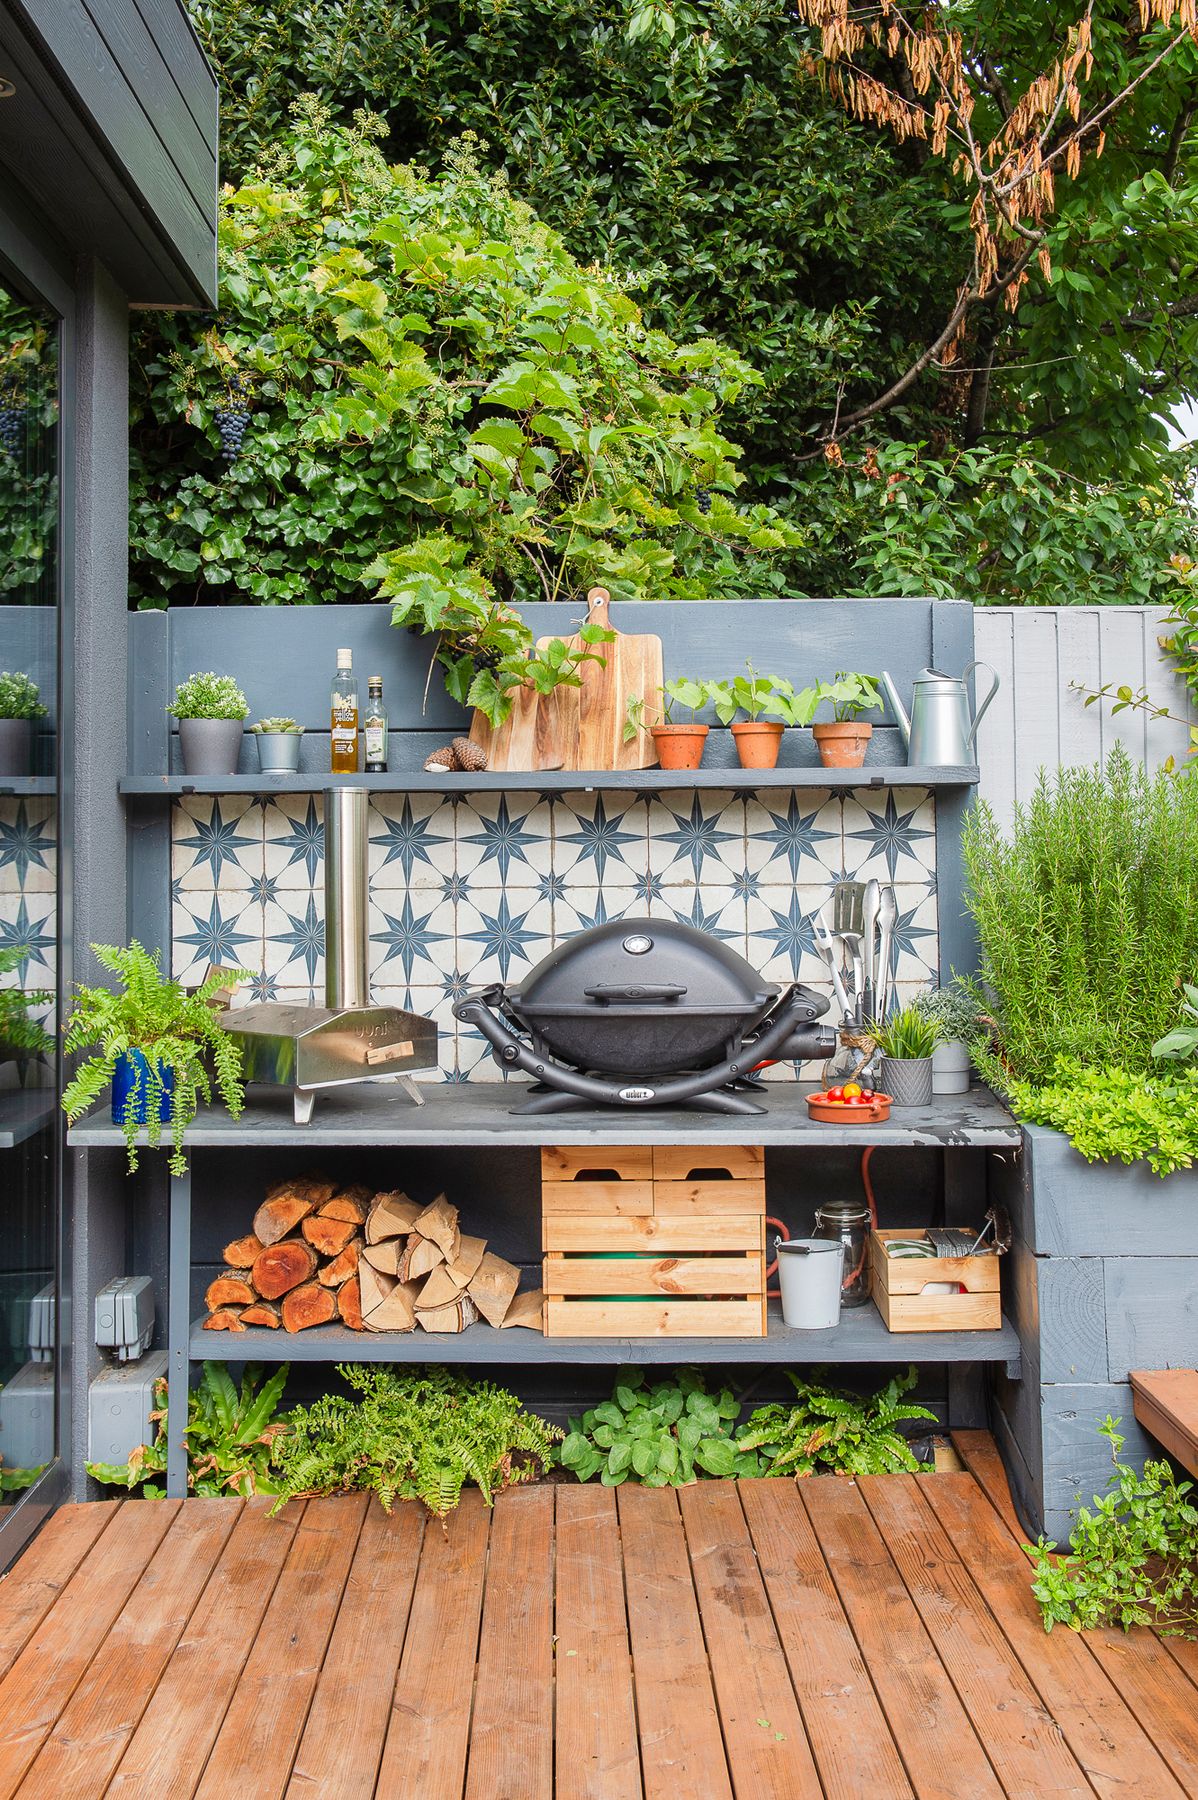
27. A Charming and Compact Kitchen for a Small Patio
This style of compact, all-in-one kitchen is a lifesaver for small patios and decks, especially those in the 100-200 square foot range. A linear island that is no more than 6-8 feet long can pack in a grill, a small countertop prep area, and maybe an access door for a propane tank. By keeping it pushed against a wall or railing, you preserve the maximum amount of floor space for a small bistro table or a couple of lounge chairs, making the small patio feel surprisingly functional.
💰 Budget Breakdown
Want an incredible outdoor kitchen without the custom build? Look for ‘BBQ Island Kits’ online from retailers like BBQGuys or The Home Depot. These kits come with a pre-fabricated steel frame and the cutouts for specific grills and components. You simply assemble the frame, attach cement board, and then apply your own finish, whether it’s stucco, tile, or stone veneer. It gives you a custom look for about 40-60% of the cost of hiring a contractor from scratch.
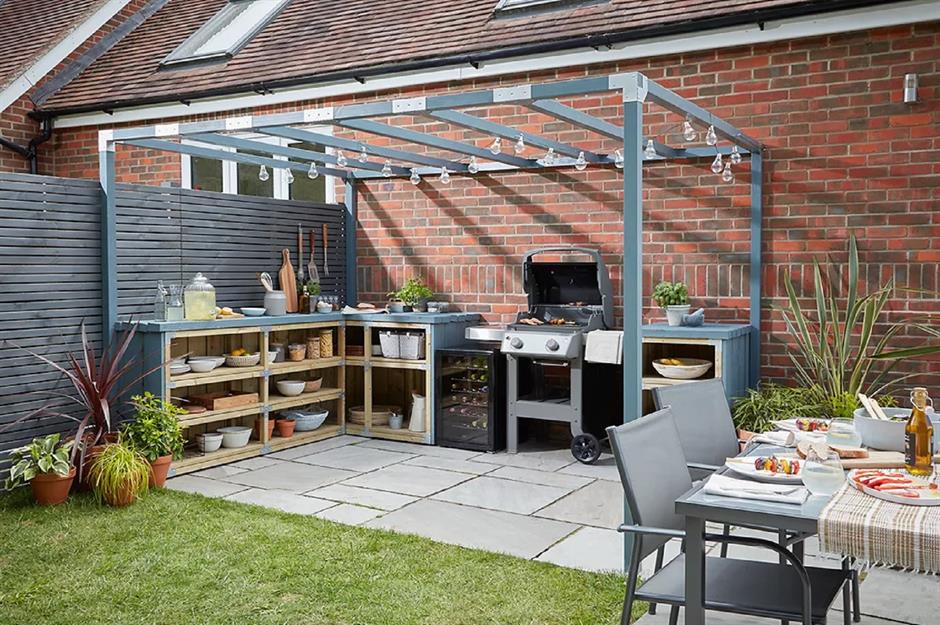
28. Rustic Deck Kitchen with a Budget-Friendly BBQ Area
This design feels so approachable and charming because it embraces simple, readily available materials. It’s not trying to be a high-end, sleek modern kitchen. The use of standard pressure-treated deck boards, a simple wooden frame for the BBQ area, and a classic freestanding grill makes it feel like an authentic, achievable DIY project. Its rustic appeal comes from its honesty and functionality, proving that you can create a warm and inviting outdoor cooking space without exotic materials or a massive budget.
⚠️ Real Talk
- Check the condition of your existing deck. Can the structure support the added weight of a kitchen unit and foot traffic? Reinforce it if necessary.
- Plan for your propane tank. Does your design have a ventilated, easily accessible cabinet to hide it? Or will it sit next to the grill?
- Use materials rated for ground contact for any part of the kitchen structure that touches the deck to prevent rot.
- Consider a grill mat. Placing a fire-resistant mat under your grill will protect your wooden deck from grease stains and stray embers.
29. A Cozy Patio Corner with an Outdoor Fireplace
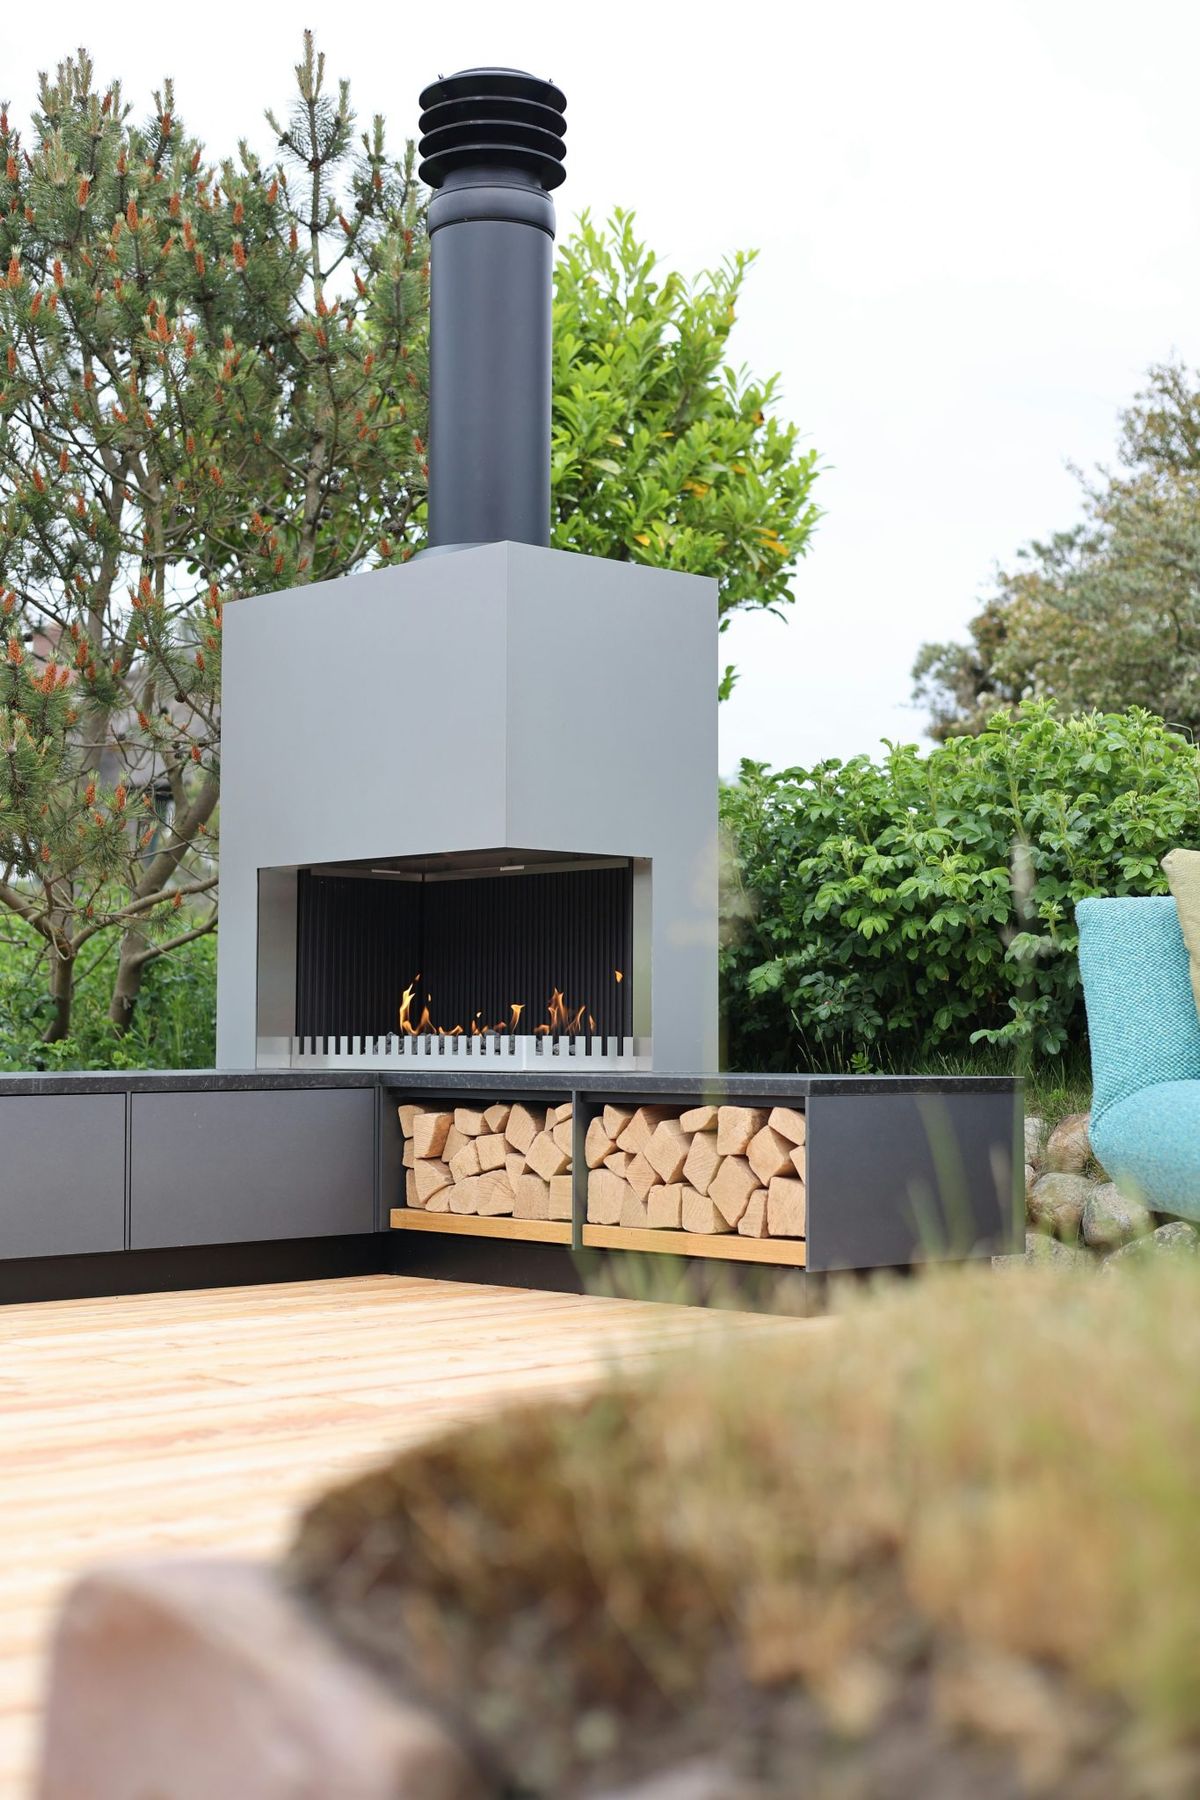
When incorporating a fireplace or fire feature, the seating arrangement is everything. Don’t just place chairs facing the fire. Create a conversational grouping *around* it. A curved sectional or two small loveseats facing each other with the fireplace at one end encourages interaction. The goal is for the fire to be the focal point of a social hub, not just a heater that everyone stares at. Keep seating within 6-8 feet of the fire for optimal warmth and coziness.
🎯 What Makes It Work
A wood-burning outdoor fireplace seems incredibly romantic, but it comes with real responsibilities. You need a place to store firewood and keep it dry. You’ll have to manage the smoke, which can be an issue for neighbors depending on wind direction. And there’s cleanup: you have to regularly sweep out the ash. For many people, a gas fireplace insert or a gas fire pit table offers 90% of the ambiance with 10% of the work, and is a much more practical choice for frequent use.
30. Lush Miami Villa Kitchen with Spanish-Modern Flair
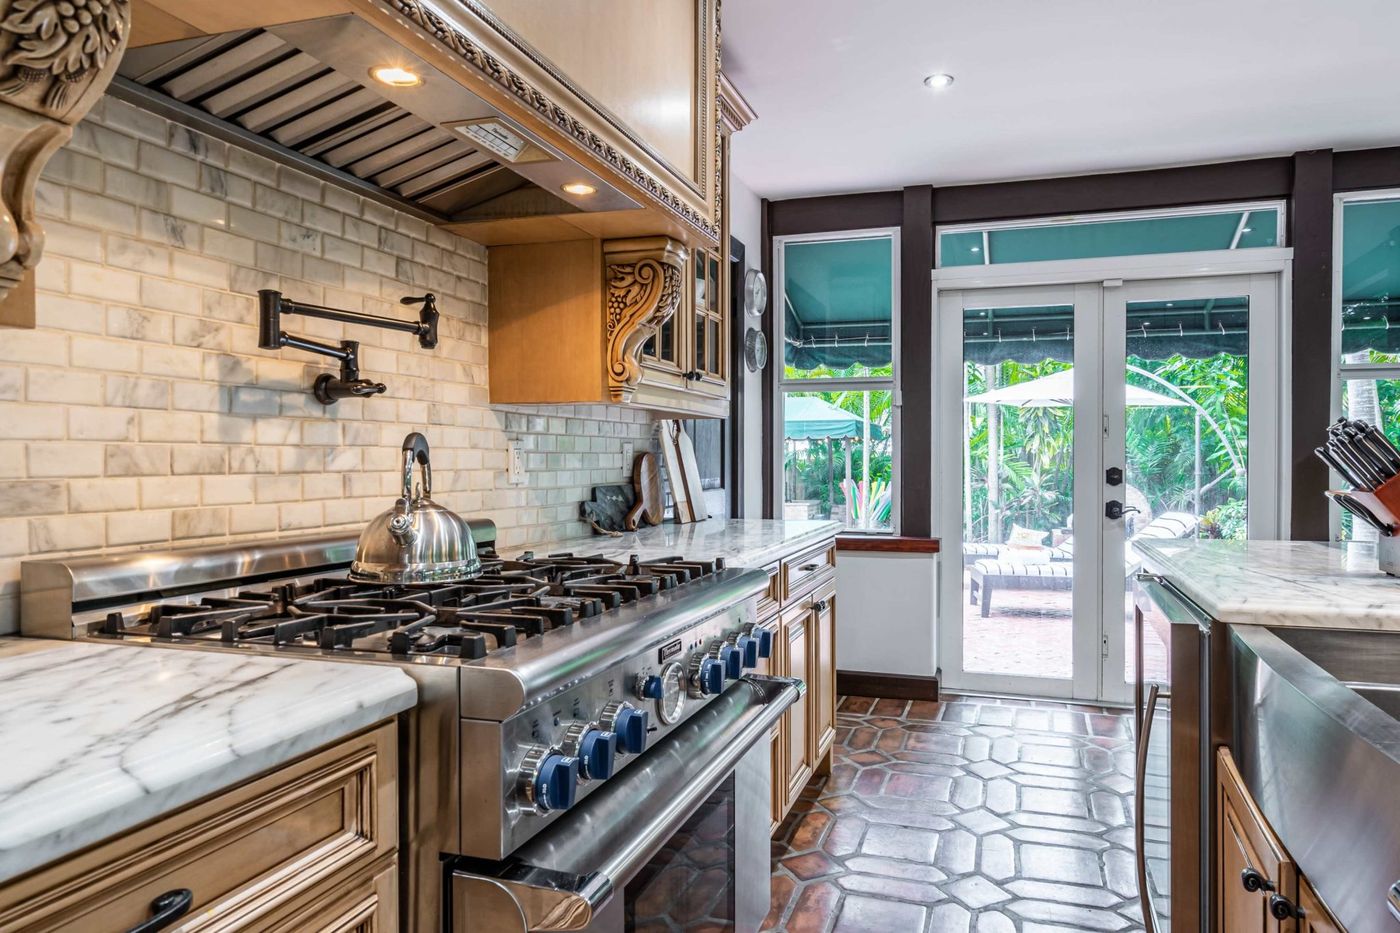
This look is a beautiful fusion of styles. It’s about 50% traditional Spanish (stucco walls, terracotta roof tiles), 30% tropical modern (clean lines, open-air design, lush foliage), and 20% luxury resort (sleek appliances, comfortable bar seating). This blend works so well because the crisp modern elements prevent the traditional Spanish architecture from feeling too heavy or dated, while the lush greenery softens the hard lines and makes the whole space feel like a private oasis.
🧹 Maintenance Reality
We’re seeing a big movement towards ‘resimercial’ design—bringing the high-end, comfortable feel of commercial hospitality (like hotels and restaurants) into residential spaces. People want their homes, and especially their backyards, to feel like a vacation. This kind of beautifully designed outdoor bar and kitchen, which feels like it could be at a boutique hotel in Miami or Spain, is a direct result of that trend. It’s about creating an escape in your own backyard.
Your Alfresco Era Awaits
An outdoor kitchen is more than just a place to grill; it’s a hub for making memories. Whether you were drawn to a simple grill deck or a full-service rustic pavilion, the right design can completely change how you use your outdoor space. Pick the idea that sparked something for you, and start planning. Don’t forget to save your favorites to your Pinterest board to keep the inspiration flowing!