You know that feeling when you finally find the Halloween room decor that looks exactly right for your space? It’s a specific kind of magic, but sifting through thousands of ideas can feel more like a trick than a treat. After filtering through hundreds of options across Grandin Road, Etsy, and Target, we narrowed it down to the looks that actually deliver for 2026. Inside, you’ll find 29 curated ideas covering everything from rustic charm and gothic elegance to playful whimsy. This year, it’s all about creating a personal, layered look that feels collected, not just purchased. And stay until the end—we break down the most common mistakes that can ruin these looks. Pin this guide for later—your future self will thank you when it’s time to decorate.
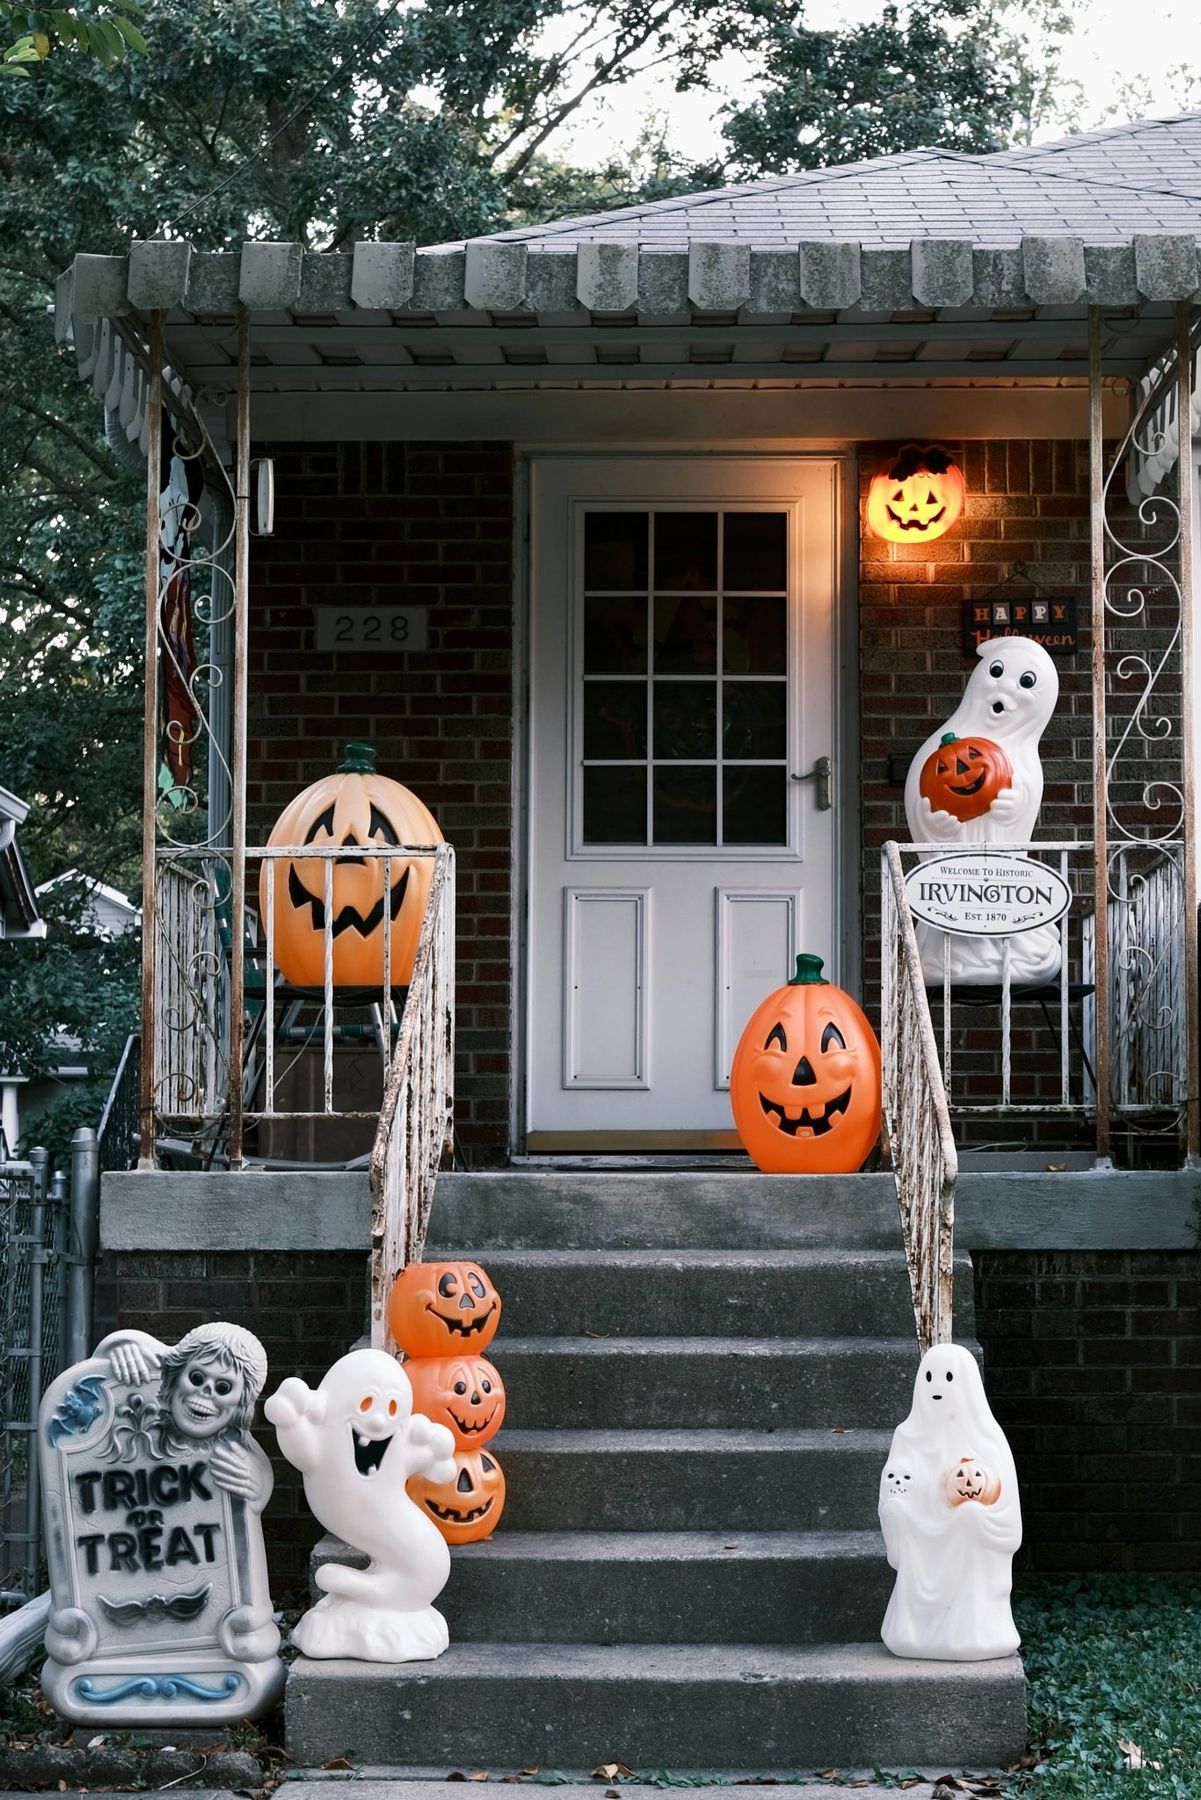
1. Nostalgic Charm with Light-Up Blow Mold Figures
This look is pure, unfiltered nostalgia, and that’s precisely its power. The combination of classic light-up blow molds—the friendly ghosts and bright orange pumpkins—creates an immediate sense of familiarity and fun. It works because of repetition and scale. By clustering multiple similar items together on the brick porch and concrete steps, the display feels intentional and impactful, not random. The warm glow against the cool red brick and gray concrete creates a beautiful color temperature contrast that’s inviting and festive without being overly scary.
💡 Designer Tip
While blow molds are wonderfully durable, their biggest enemy is the sun. To keep those oranges and whites vibrant for years to come, store them in a dark, cool place like a basement or an opaque storage bin during the off-season. UV rays will cause the plastic to fade and become brittle over time. Before you set them up each year, give them a quick wipe-down with a damp cloth and mild soap to remove any dust or grime. Check the cords and bulbs annually for any fraying or damage before plugging them in for safety.
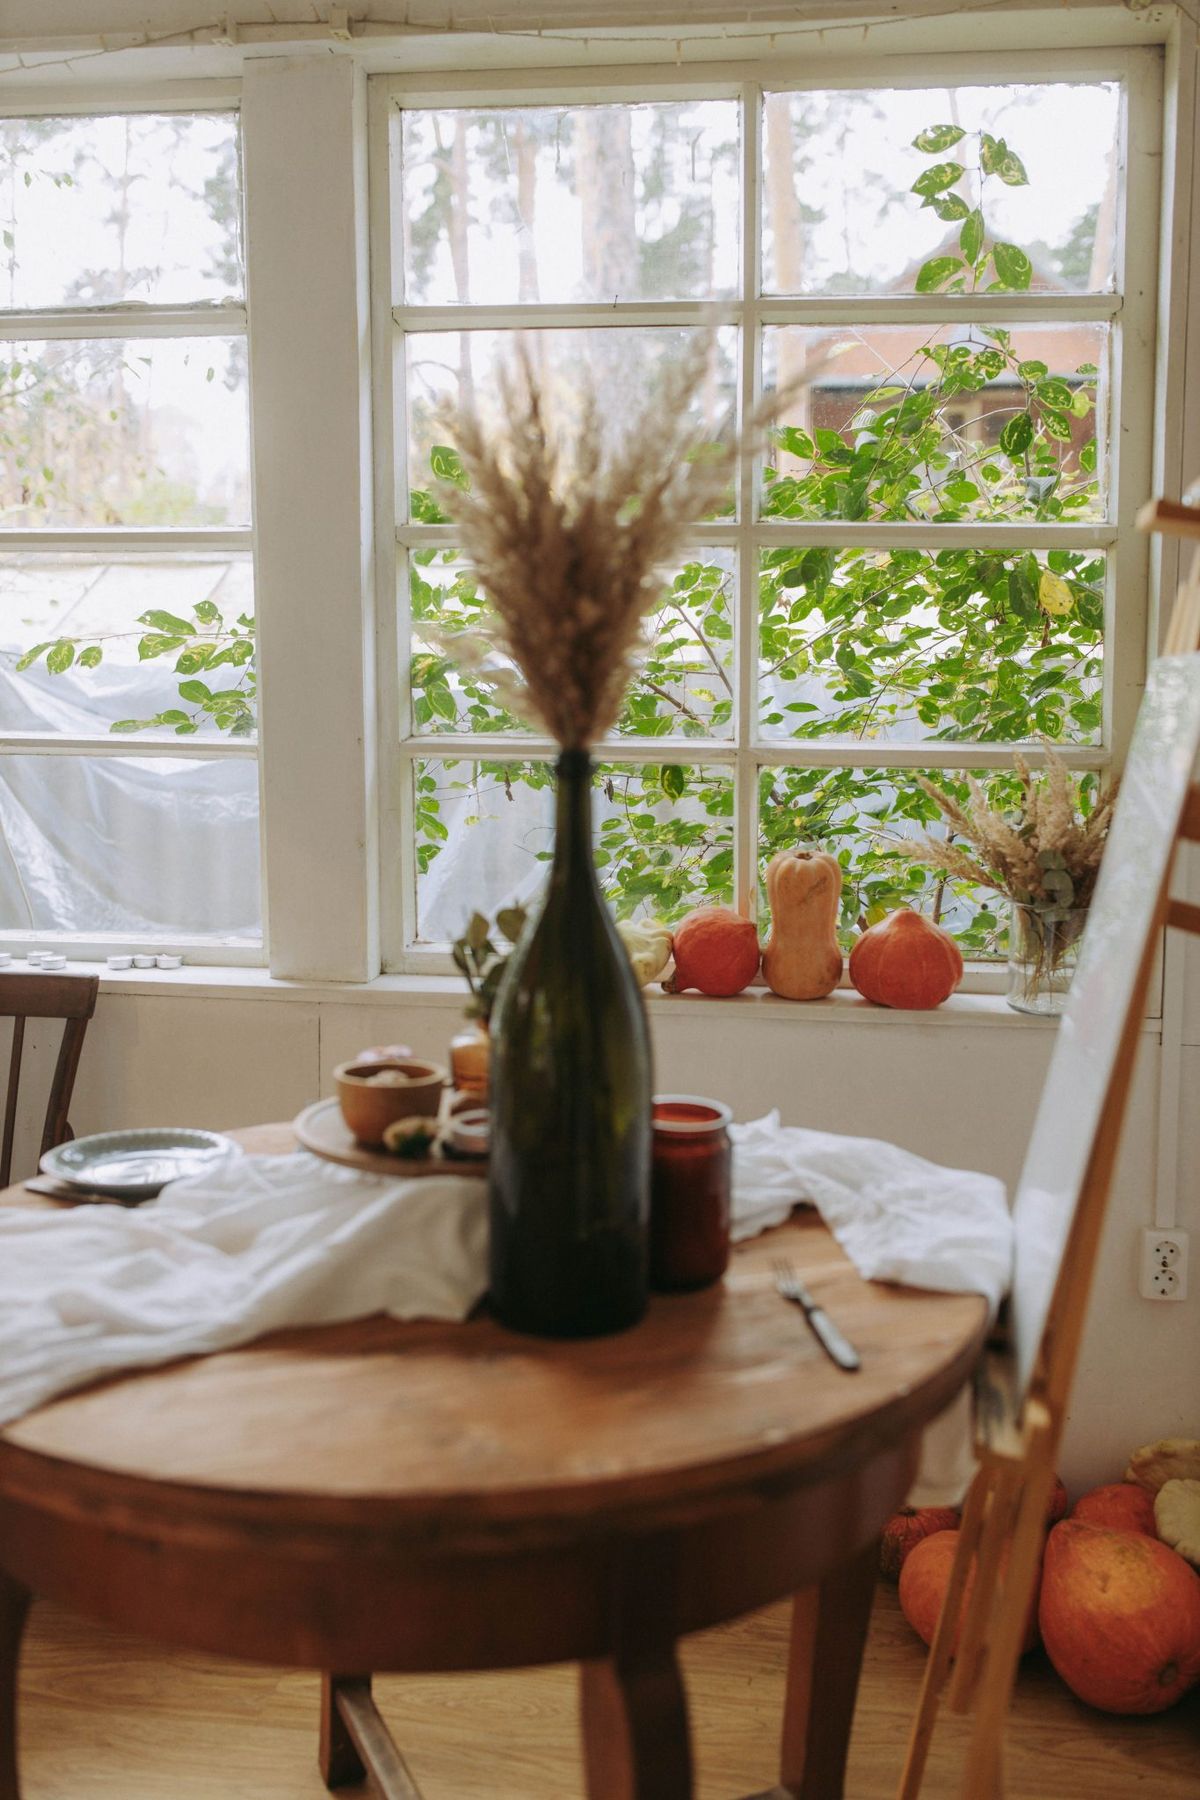
2. Natural Autumn Windowscape with Gourds and Pampas Grass
When arranging natural elements like these gourds and dried grasses, think in triangles. Place your tallest element (here, the pampas grass arrangement) slightly off-center. Then, create a visual triangle by placing your next largest items (the bigger gourds) to form the other two points of the triangle. Fill in the gaps with smaller items. This creates a composition that feels balanced and natural to the eye, rather than a stiff, straight line of objects. It guides the viewer’s gaze across the entire display effortlessly.
⚠️ Real Talk
The formula here is simple and endlessly adaptable: 60% natural textures + 30% autumnal color + 10% soft light. The natural textures come from the wooden table, the gourds’ skin, and the feathery pampas grass. The autumnal color is carried by the classic orange pumpkins, while the white gourds and linen runner provide a neutral base. The final 10% is the soft, ambient glow from the tealights, which brings it all to life. You could swap the orange for deep reds or muted greens and still achieve the same cozy, rustic balance.
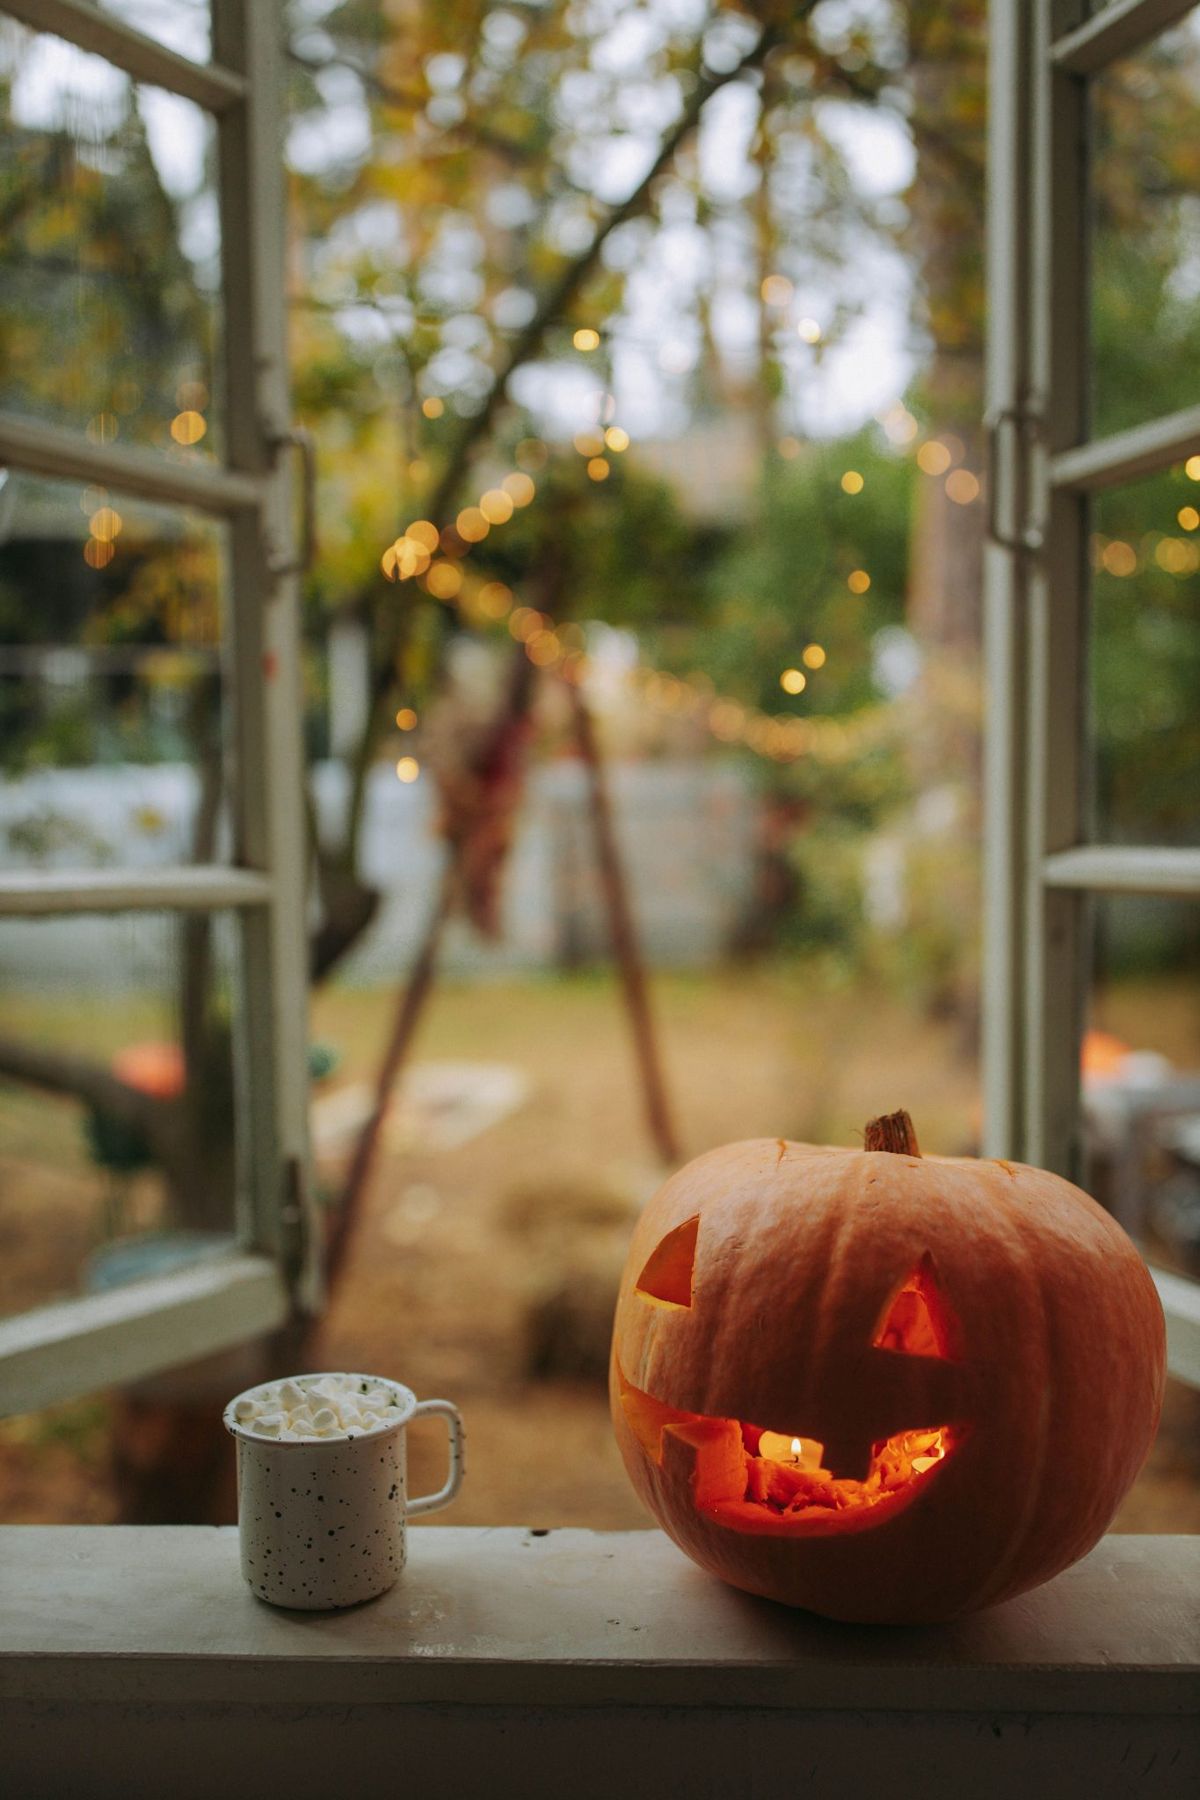
3. A Cozy Window Nook with a Glowing Pumpkin and Hot Cocoa
The single element that makes this entire scene work is the lit jack-o’-lantern. It’s not just a decoration; it’s the heart of the moment. It provides the warm, flickering light that creates the cozy atmosphere, its glow reflecting softly on the window pane and the white mug. Without it, you’d just have a mug of marshmallows by a window. The pumpkin transforms it into a story—a quiet, solitary celebration of the season. It’s proof that sometimes one perfectly placed, thoughtfully executed item is more powerful than a dozen scattered ones. Compare this simple moment with the grander display in Idea #5.
🎯 What Makes It Work
Let’s be honest: an open window in the fall is lovely, but it’s not always practical. This cozy vibe depends on the weather cooperating. A sudden gust of wind can blow out your candle (a serious fire hazard) or send a chill through the room. If you have pets or small children, an open flame on an accessible windowsill is a definite no-go. For a safer, more reliable version of this look, opt for a high-quality, flickering battery-operated candle inside your pumpkin. You’ll get all the ambiance without any of the risk.
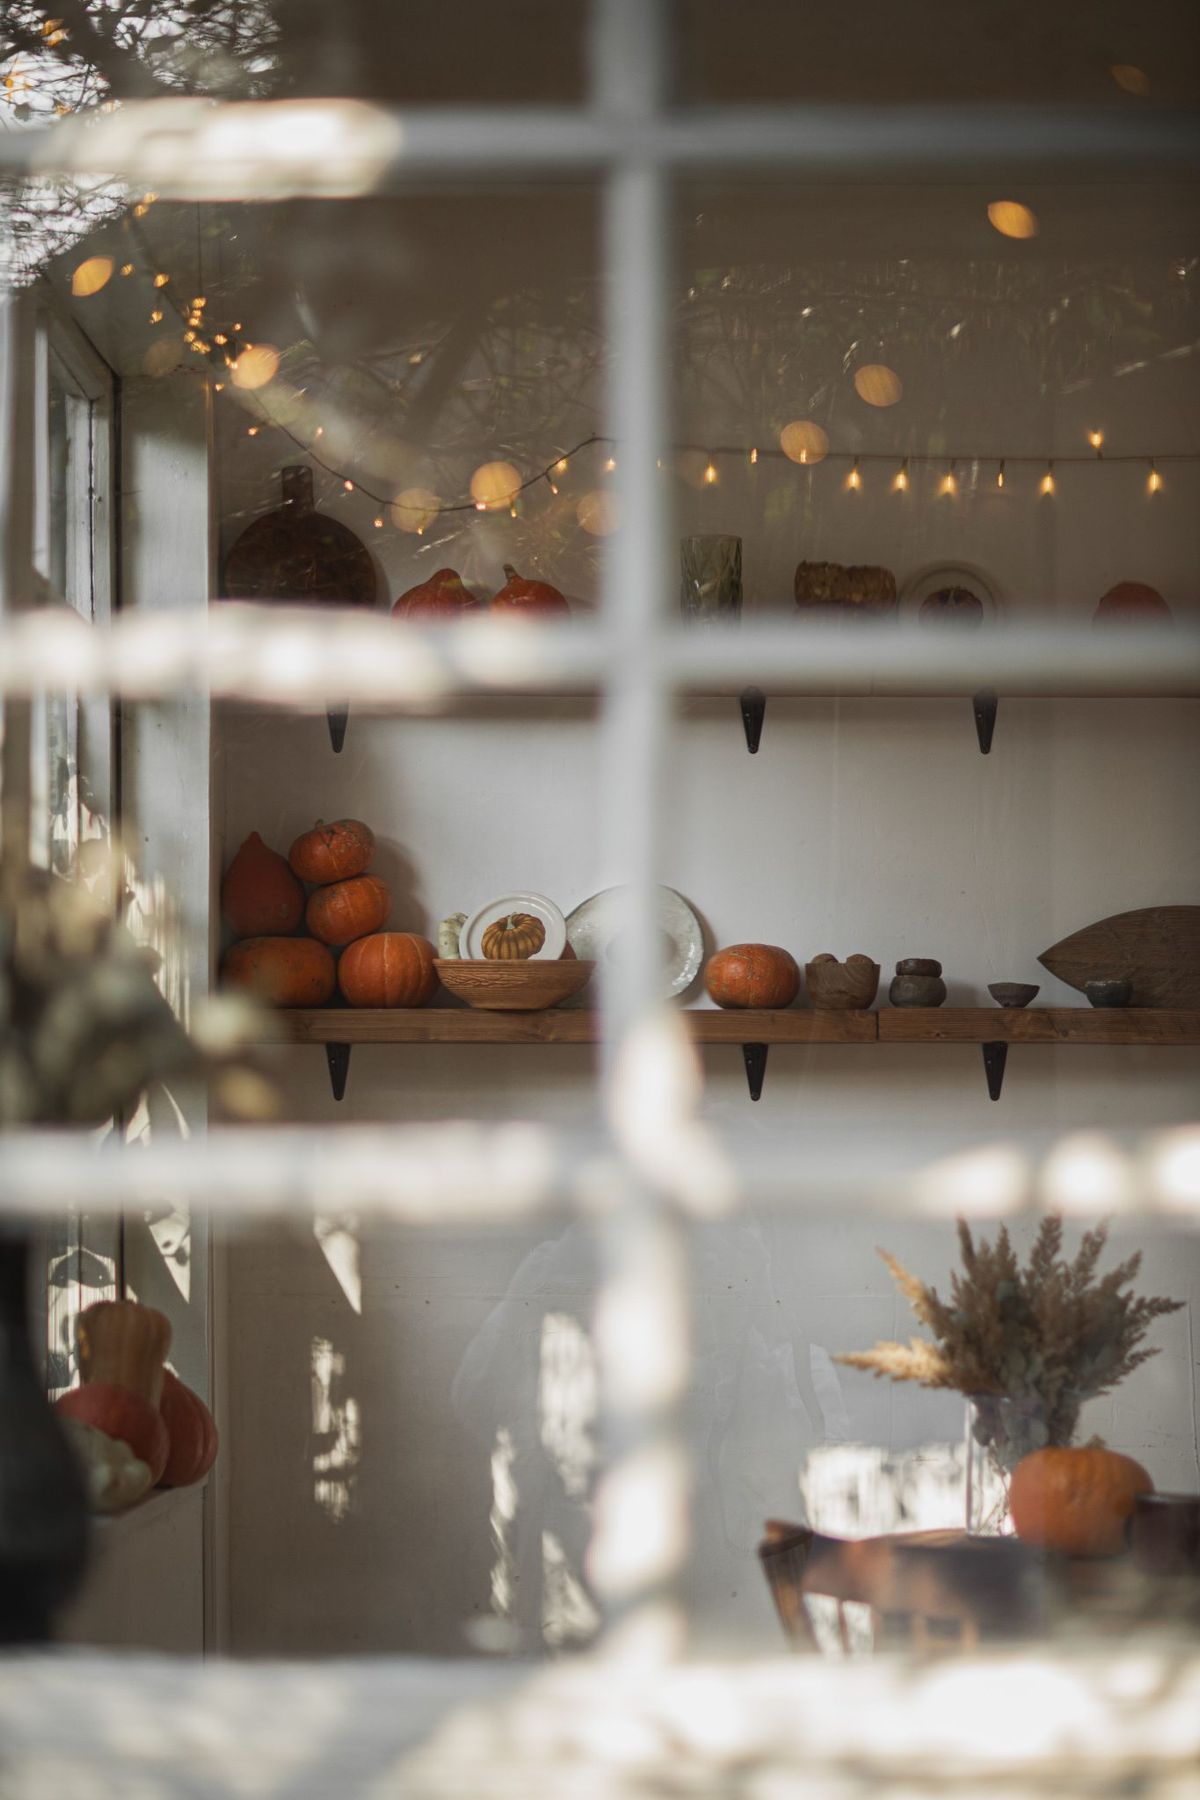
4. Layering Rustic Shelves with Pumpkins and Fairy Lights
Want to recreate this perfectly layered shelf look? It’s easier than it seems. This project should take about 30 minutes with a material cost of around $25-$50, depending on the pumpkins you choose. Here’s how to do it:
- Start with a clean slate. Remove everything from your shelves. This is key to seeing the space fresh.
- Place your largest items first. Arrange the biggest pumpkins on different shelves, avoiding perfect symmetry.
- Layer in medium-sized decor. Add the ceramic plates and smaller bowls, tucking them slightly behind or next to the pumpkins.
- Add small-scale texture. Place the smallest pumpkins and the vase with dried grasses to fill in any visual gaps.
- Drape the fairy lights. Start at one end of the top shelf, loosely weaving the strand between and behind your objects for a soft, diffused glow.
💸 Get This Look For Less
You don’t need expensive rustic shelves to get this look. A simple set of floating shelves from IKEA (like the LACK or BERGSHULT) for under $30 will do the trick perfectly. Instead of ceramic pumpkins, hit up Target’s dollar spot or even a local grocery store for a variety of real mini pumpkins and gourds for just a few dollars. The charming pumpkin-illustrated plate can be a DIY project using a plain white plate from a thrift store and a porcelain paint pen. The final look will be just as warm and inviting for a fraction of the cost.
5. A Gothic-Glam Dining Table with Skulls and Crows
This dramatic look feels expensive, but it’s surprisingly achievable. The key is committing to the dark, moody theme. Here’s a potential cost breakdown:
- Main Furniture (Table/Chairs): $700 – $2500+
- Lighting (Candlesticks/Candles): $100 – $300
- Textiles (Tablecloth/Napkins): $80 – $200
- Decor/Accessories (Skulls, Crows, Spiderwebs): $150 – $400
- TOTAL: $1030 – $3400
Budget alternative: Get this look for under $500 by using a simple black flat sheet as a tablecloth, sourcing candlesticks and dinnerware from thrift stores, and focusing your budget on a few high-quality decorative skulls to anchor the scene.
✅ Before You Start
A tablescape this dramatic needs room to breathe. This idea is best suited for a dedicated dining room or a dining area that is at least 10 ft x 12 ft. In a smaller space, the dark colors and abundance of decor can feel overwhelming and cluttered. The height of the candlesticks and the spread of the spiderwebs require a bit of visual clearance. If your dining area is part of an open-plan living space, make sure the gothic theme is contained to the table itself to prevent it from clashing with your everyday decor.
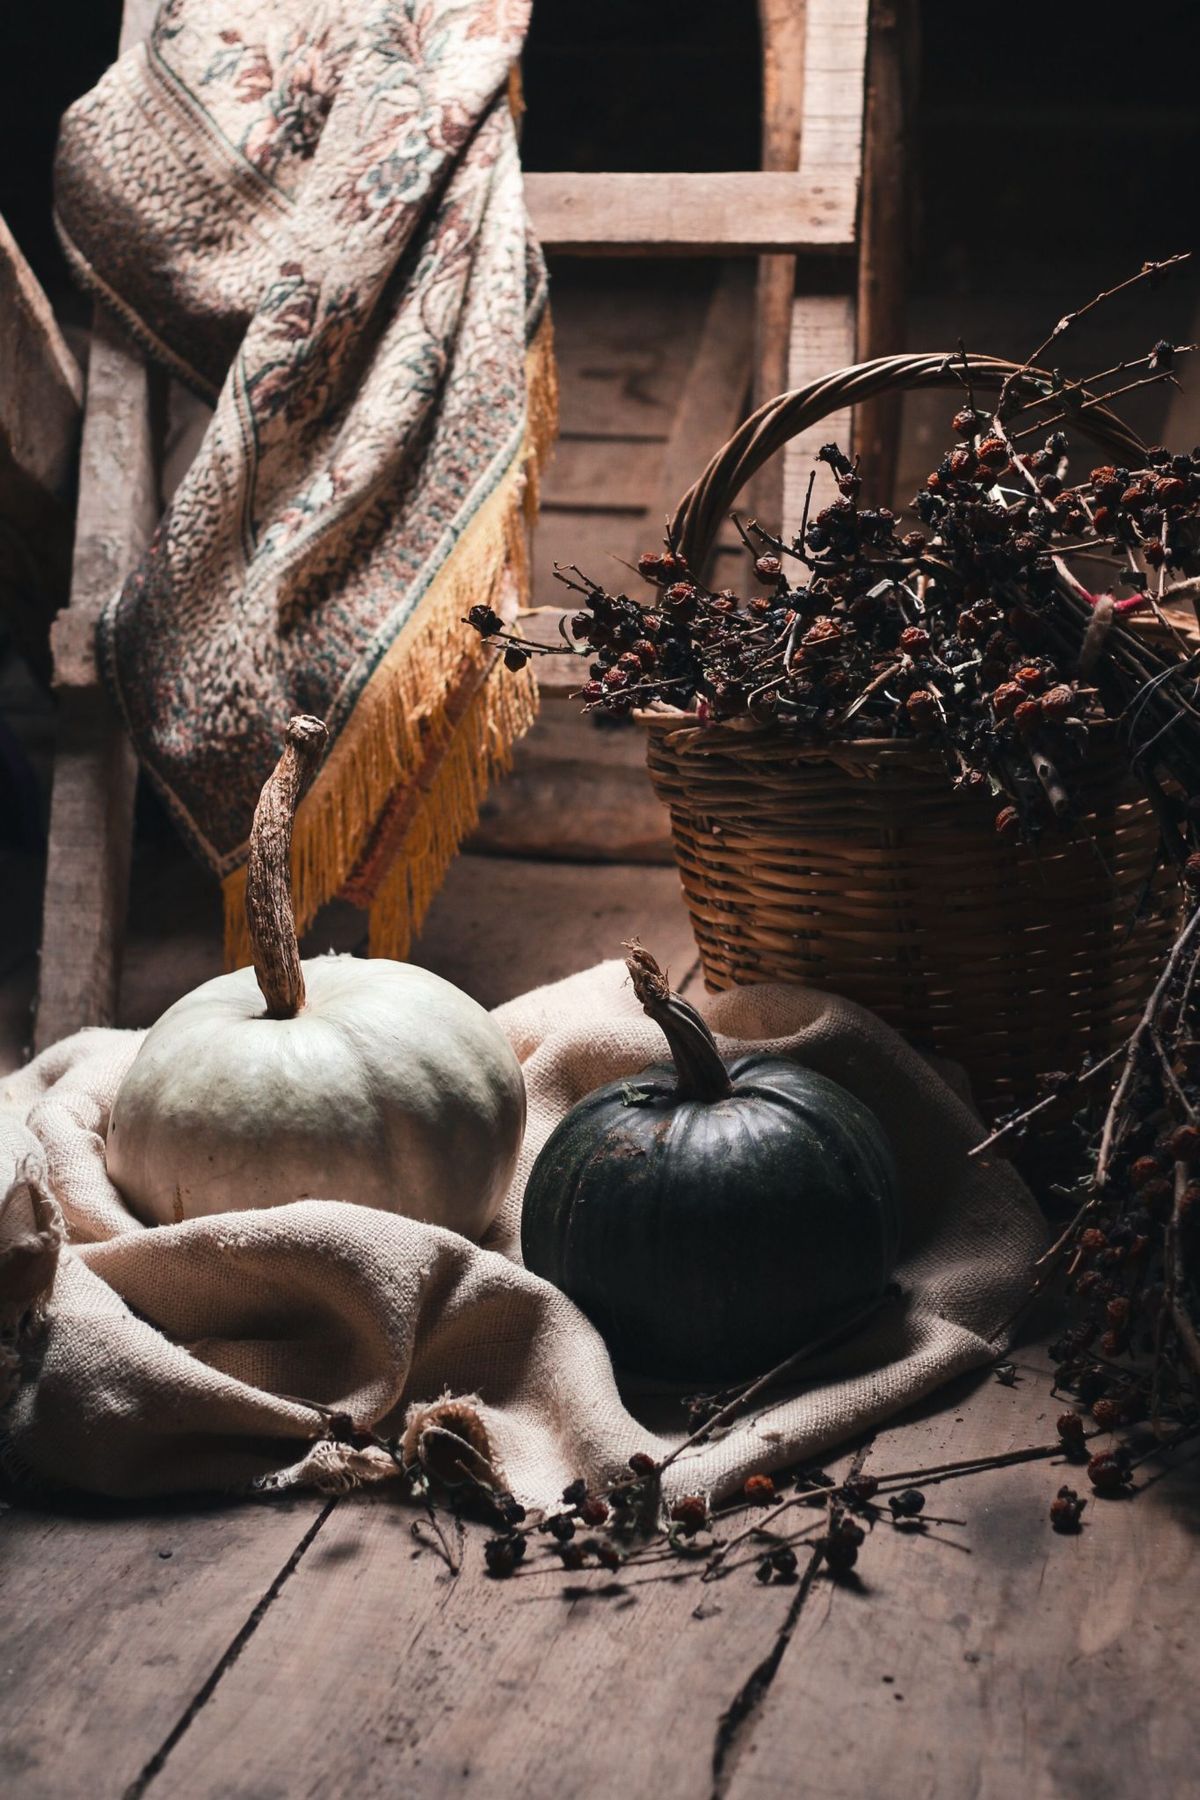
6. An Earthy Still Life with Heirloom Pumpkins and Botanicals
This composition is a masterclass in texture and subtle color. It works because it avoids the typical bright orange of Halloween, opting for a more sophisticated, earthy palette. The contrast between the smooth skin of the pale green pumpkin and the rough, warty texture of the dark green one creates immediate interest. The softness of the draped beige fabric and the rustic quality of the woven basket and wooden planks add layers of tactile depth. Nothing is shiny or new; everything feels foraged, found, and thoughtfully placed.
🧹 Maintenance Reality
There’s a growing movement away from disposable, plastic-heavy holiday decor and toward natural, sustainable options. This look taps directly into that ‘cottagecore’ and ‘dark academia’ aesthetic that celebrates nature, texture, and a sense of history. Using real heirloom pumpkins, dried branches from the yard, and timeless textiles like burlap means your decor is not only beautiful but also biodegradable or reusable. This style has staying power because it’s rooted in the authentic beauty of the season, not just commercial trends.
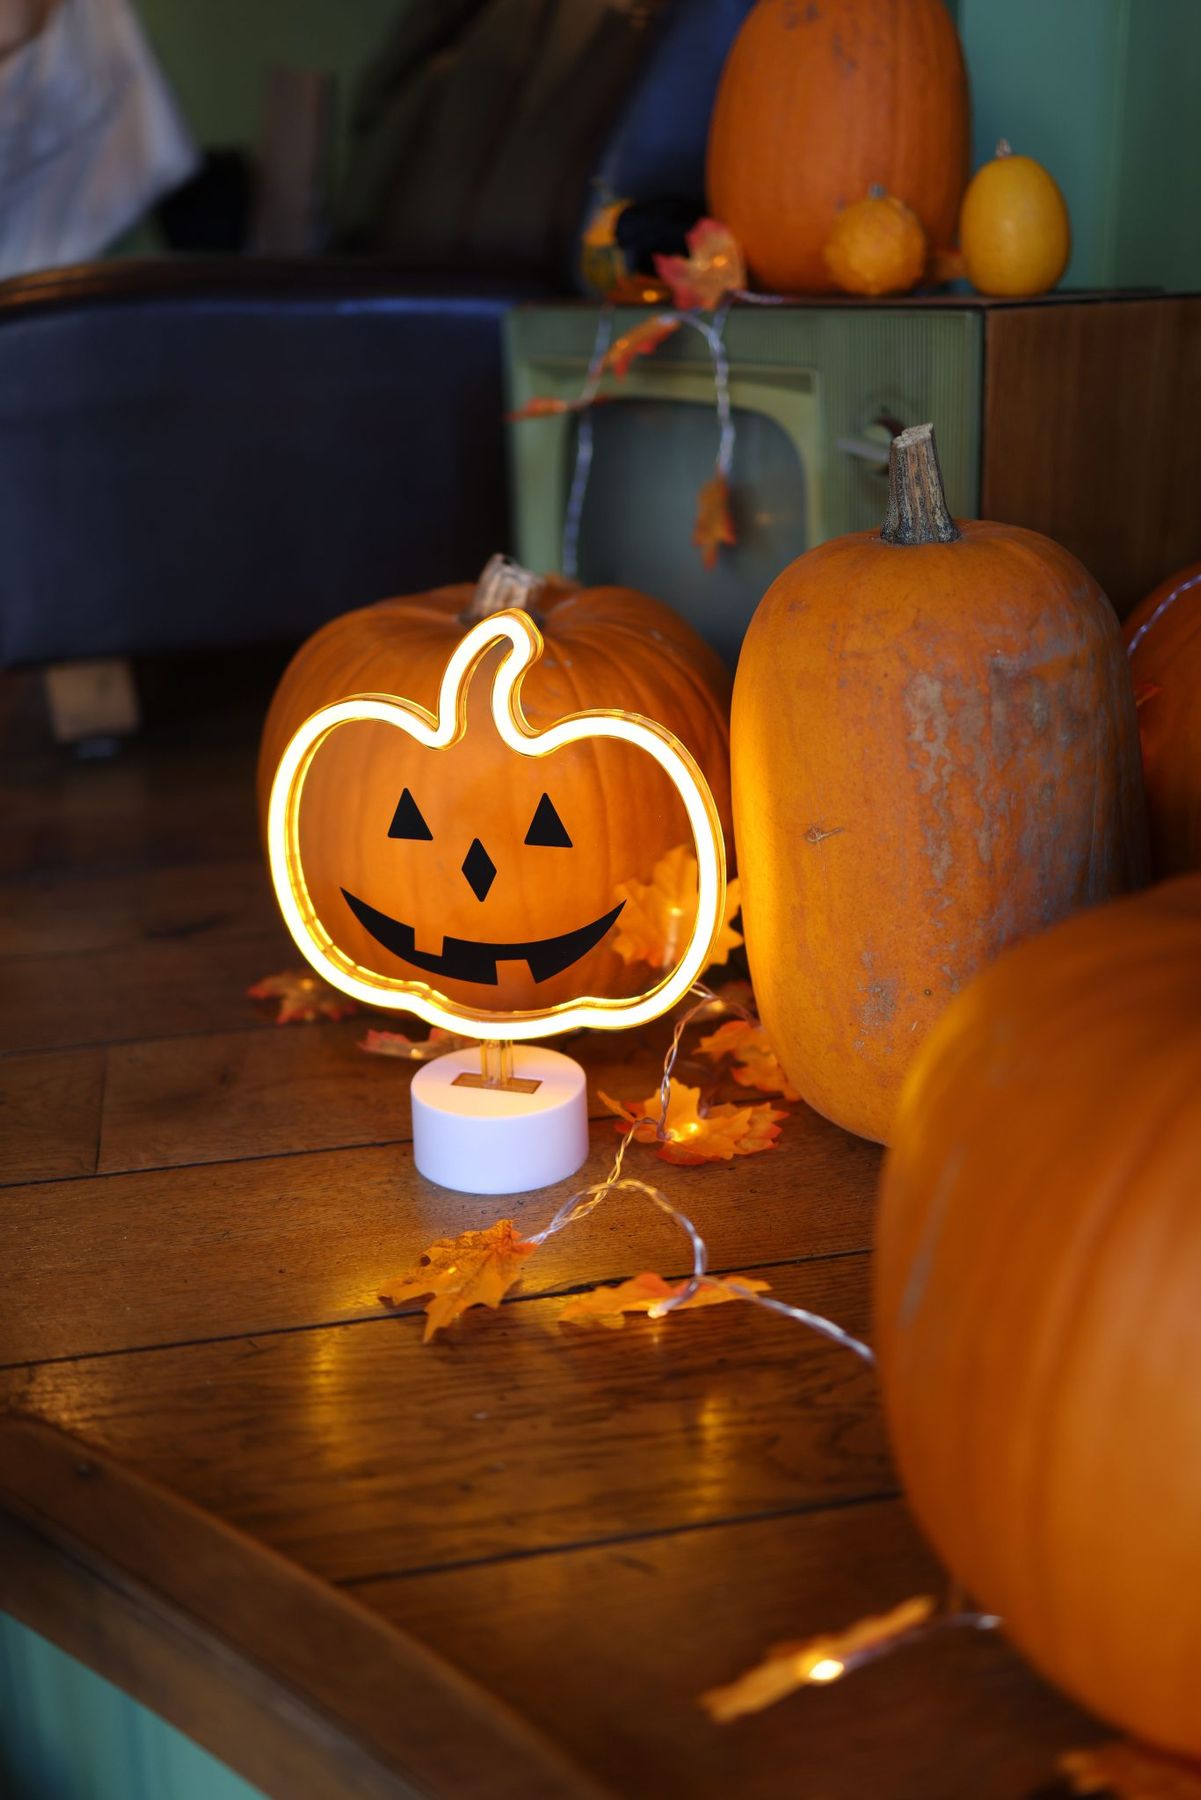
7. Creating a Neon Glow with a Jack-O-Lantern Sign
When using a single, bright focal point like a neon sign, the key is to build a softer, supporting scene around it. Don’t try to compete with its intensity. Place the sign as your anchor, then use pumpkins and leaves with matte, non-reflective surfaces around its base. This allows the neon to be the undisputed star while the other elements add texture and seasonal context. To amplify the glow, place it against a medium-to-dark colored wall, which will make the light pop even more than a plain white wall would.
📏 Scale Guide
The Jack O’ Lantern neon light is everything here. Without it, this is just a pile of pumpkins and leaves—a classic, but common, fall arrangement. The neon sign injects a modern, slightly edgy personality into the scene. It changes the entire mood from purely rustic to something more contemporary and fun. The vibrant orange light it casts over the whole display is what creates the drama and warmth, unifying all the separate elements into one cohesive, glowing statement. It’s the piece that makes you stop and look twice.
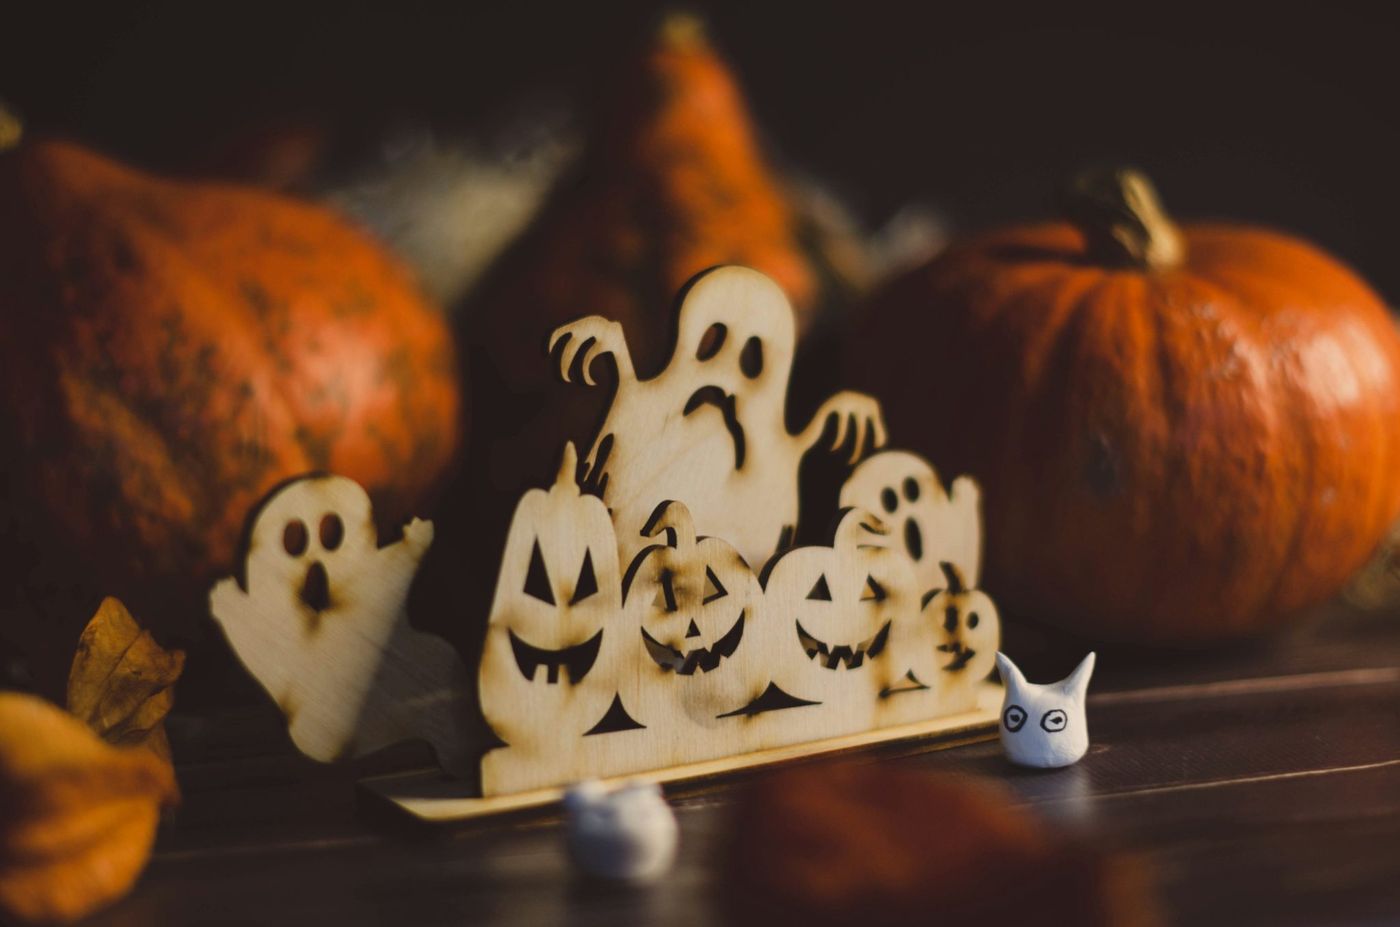
8. Rustic Charm with Wooden Ghost and Pumpkin Cutouts
This cozy, rustic look follows a simple formula: 50% rustic wood + 40% classic Halloween motif + 10% soft focus. The wooden ghost and jack-o’-lantern cutouts provide the primary material and theme. The blurred orange pumpkins in the background add depth and reinforce the Halloween color palette without demanding attention. The final 10% comes from the shallow depth of field, which creates a dreamy, soft-focus effect, making the scene feel intimate and professionally styled. You can apply this formula to any holiday by swapping the motifs!
📐 Style Math
While charming, unfinished wood decor like this has its vulnerabilities. If you plan to use these on a covered porch or near a window, be aware that moisture can cause the wood to swell, warp, or even grow mildew. They are strictly for indoor use in dry areas. Also, the light-colored, raw wood is prone to staining. A spilled drink or a child’s sticky fingers could leave a permanent mark. If you love the look but need more durability, consider giving them a quick coat of clear matte sealant before displaying them.
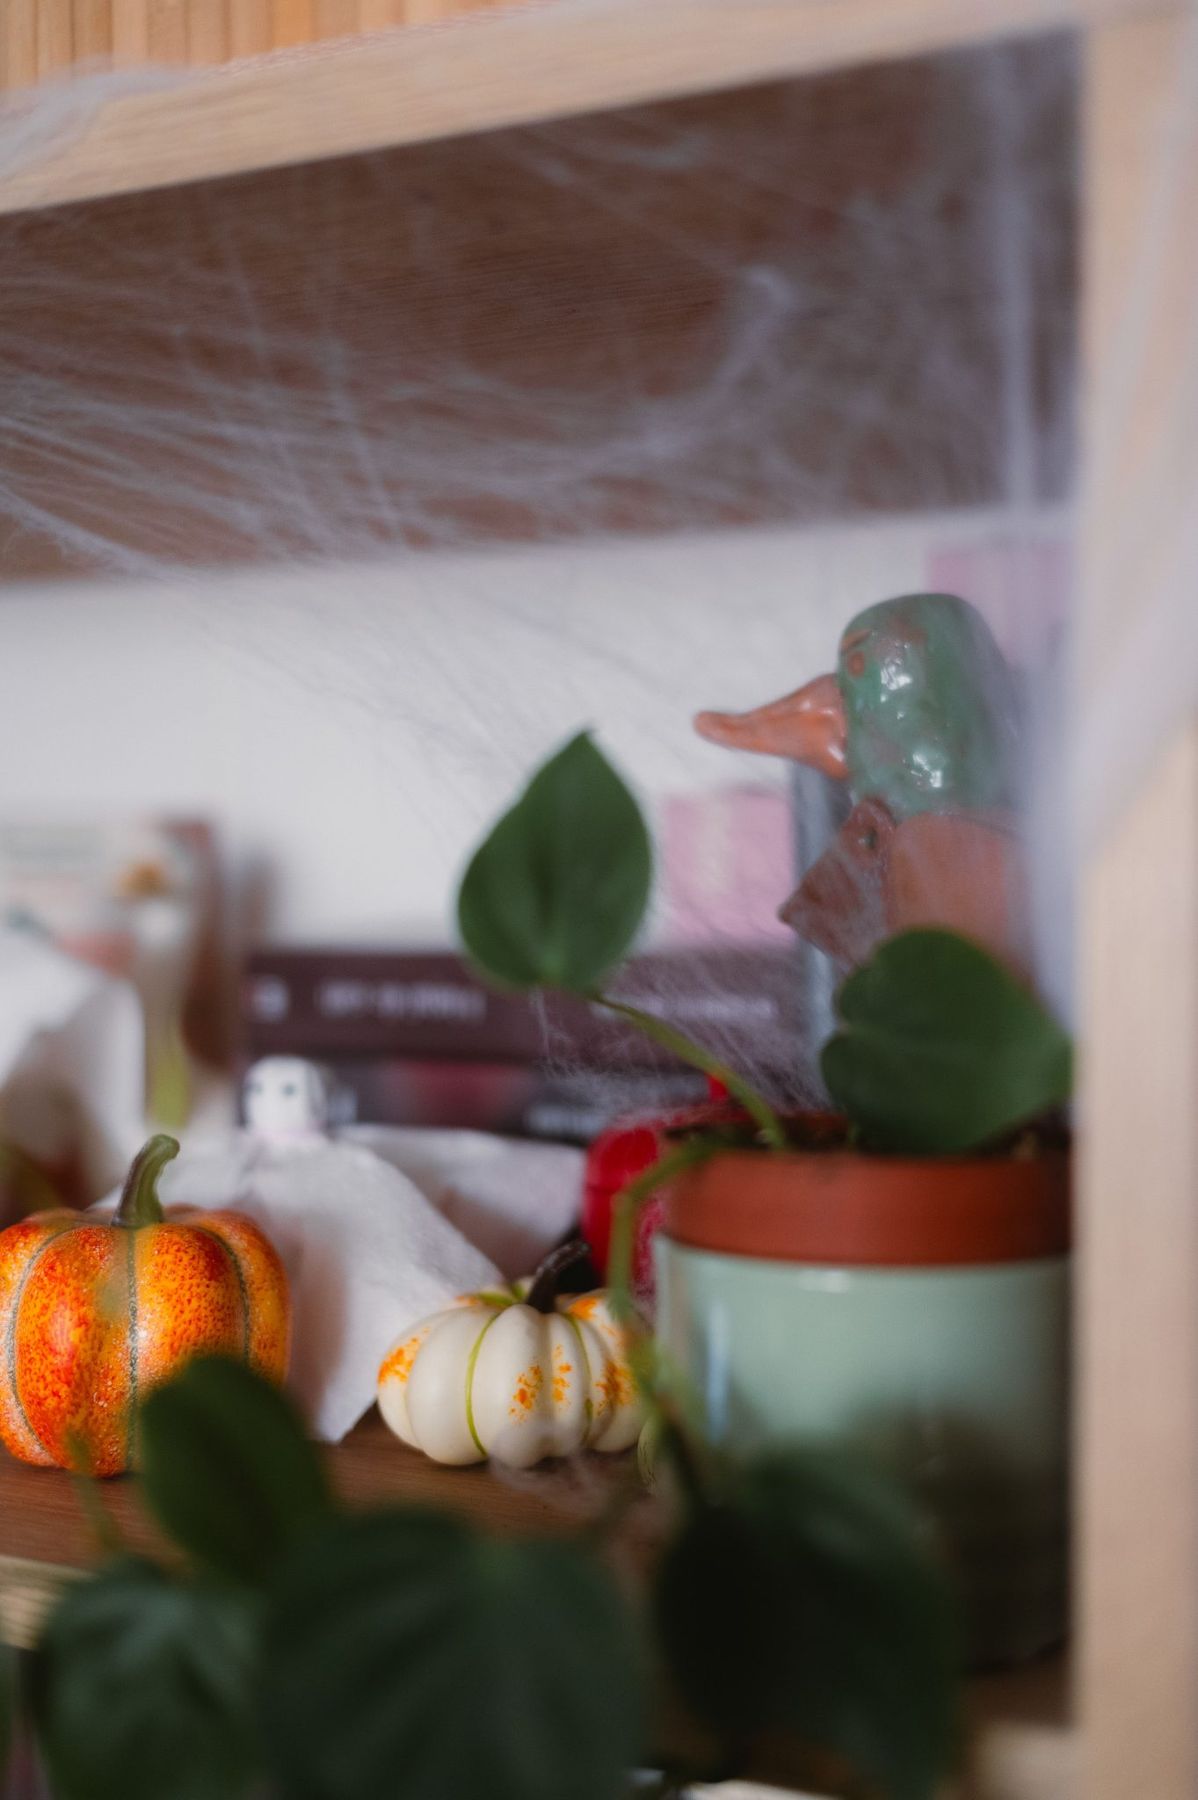
9. A Playful Halloween Shelf with Cobwebs and Ceramic Accents
This look is incredibly budget-friendly and perfect for a small space or even a kid’s room. The star of the show, the stretchy spiderweb, can be found at any dollar store for a buck or two. The small decorative pumpkins are common finds at Target or Walmart for under $5 each. The most expensive part might be the potted plant, but a small succulent or an artificial one from IKEA would work just as well. You could recreate this entire shelf for less than $20, proving that festive decor doesn’t need a big budget. For a more layered shelf look, check out Idea #4.
⭐ The One Thing
Let’s talk about those stretchy cobwebs. They look fantastic for the first few days, but they are absolute magnets for dust, pet hair, and any other airborne particles in your home. By the end of October, that pristine white web can look a bit dingy. Worse, they can be a real pain to remove completely, often leaving tiny, stubborn strands behind on surfaces and decor. My advice? Use them for a shorter period, perhaps just for a Halloween party weekend, or be prepared for a meticulous cleanup job with a vacuum hose and a damp cloth.
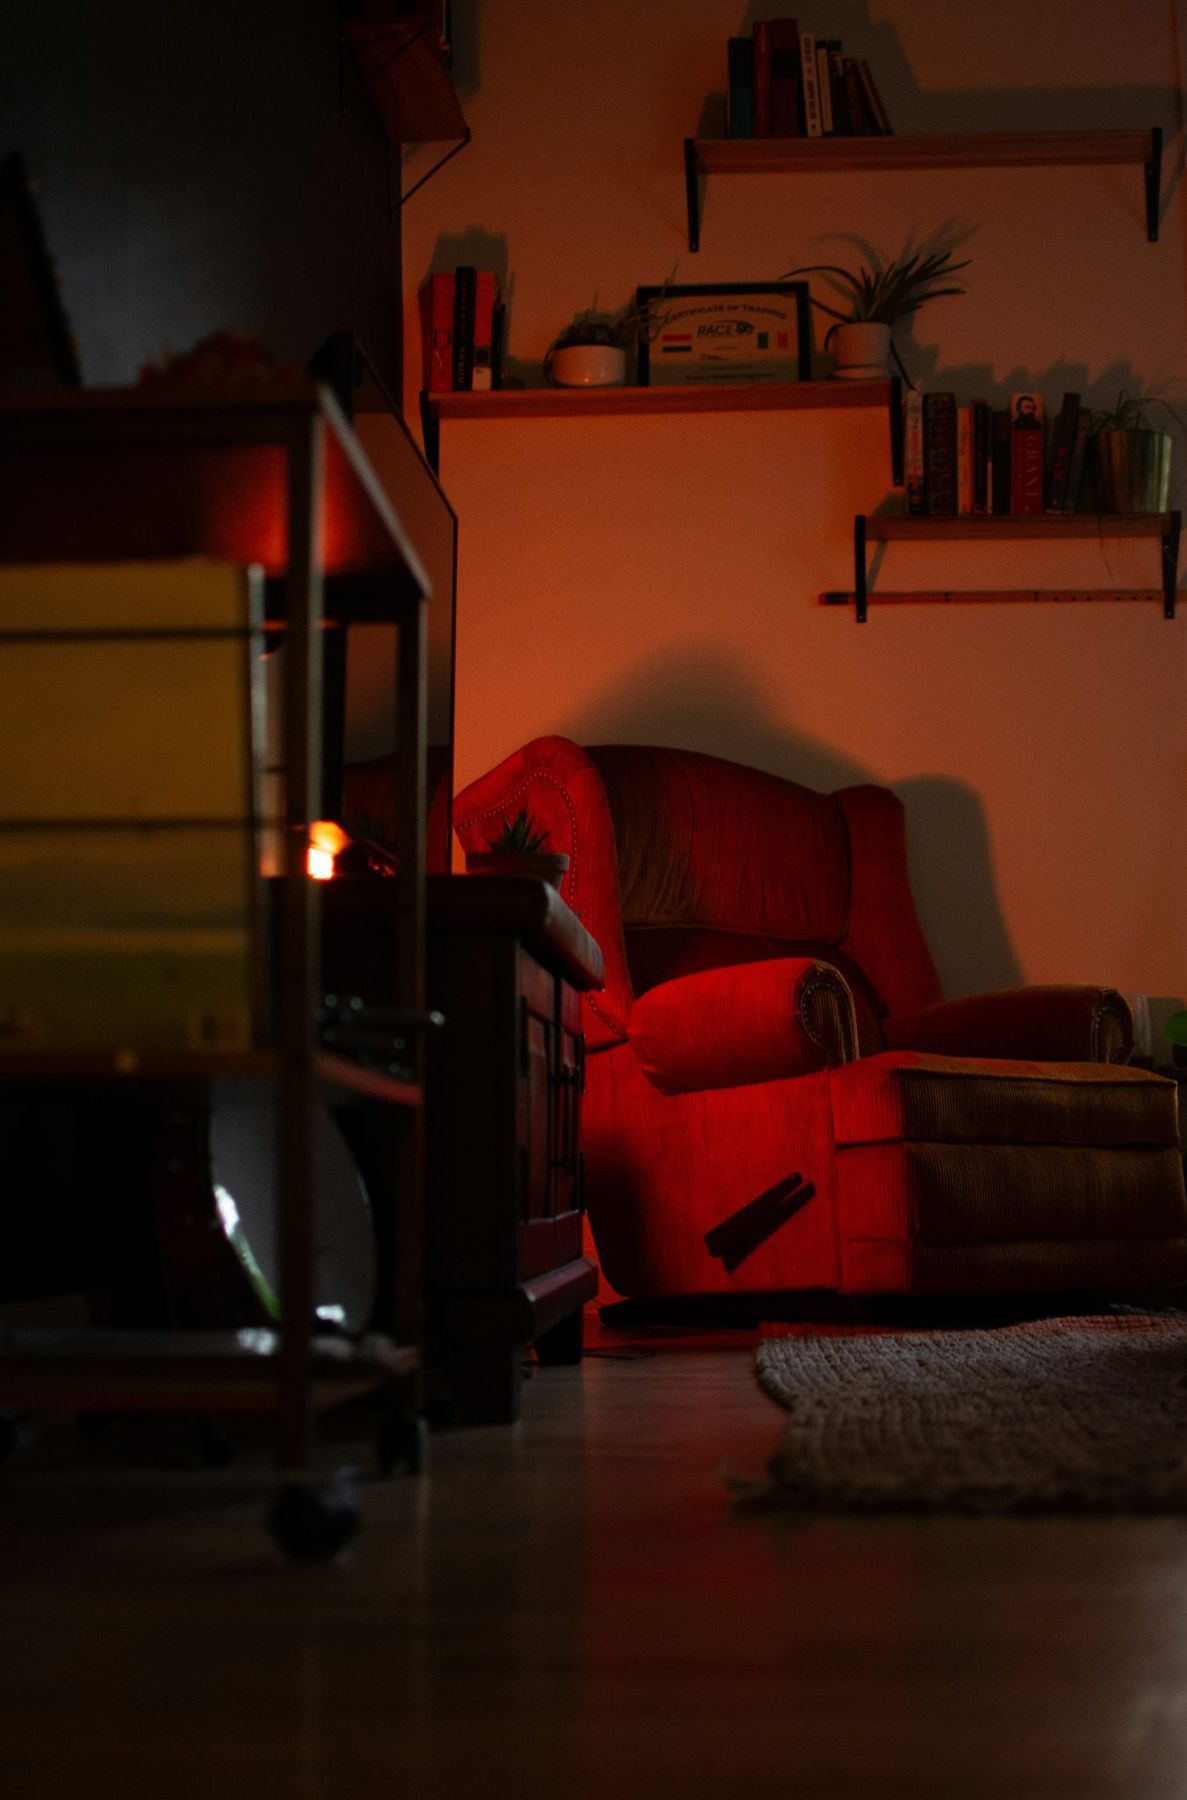
10. A Moody Reading Nook with a Red Recliner and Warm Lighting
This corner exudes coziness because of its masterful use of light and color. Instead of decorating with overt Halloween items, the mood is set entirely by the deep red corduroy of the chair and the intense, warm orange-red lighting. This is a technique called color washing. The light floods the area, saturating the textures of the recliner and the rug, creating a monochromatic and immersive feeling. The dark wood of the shelves and the green of the plants provide just enough contrast to keep the scene from feeling flat. It’s spooky-adjacent, relying on feeling rather than figures.
💰 Budget Breakdown
This look is perfect for smaller, defined spaces. It’s an ideal setup for an unused corner of a bedroom or living room, roughly 6 ft x 6 ft. The key is containment. The intense colored lighting works best when it has clear boundaries; in a large, open-concept space, the effect would be diluted and lost. This is not about lighting a whole room, but creating an intimate, glowing zone. A ceiling height of 8 feet is perfectly adequate, as the focus is on the lower half of the room, anchored by the chair.
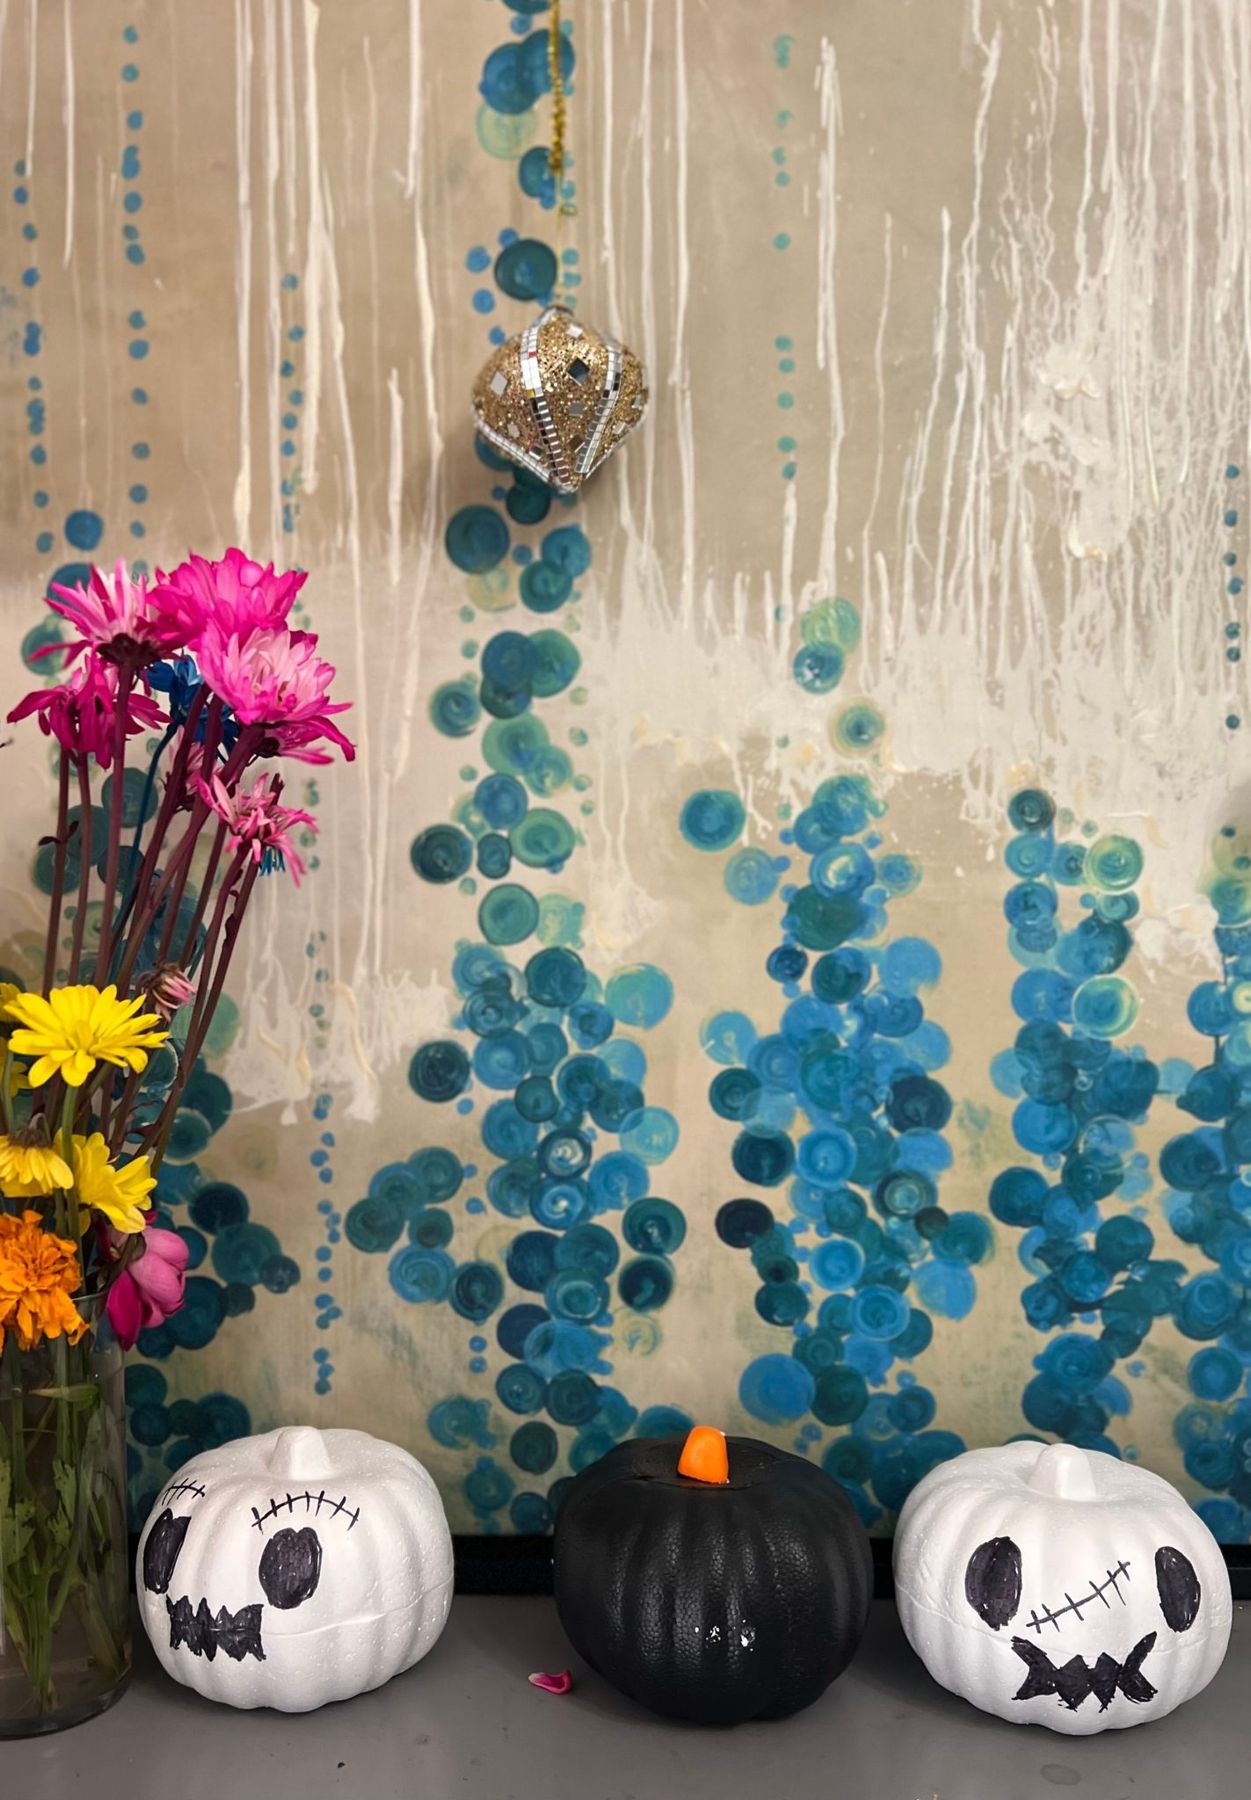
11. Artistic Halloween Decor Against a Bold, Abstract Backdrop
The abstract painting in the background is the undeniable hero of this arrangement. It elevates the simple, cute pumpkin figures from craft-store decor to a curated artistic statement. The painting provides the entire color palette—the teal, blue, white, and even hints of yellow that are picked up by the fresh flowers. Without that backdrop, the pumpkins and vase would feel random and disconnected. The artwork gives them a home and a reason for being, turning a simple Halloween display into a vibrant, gallery-worthy vignette.
🔧 How-To Brief
Don’t have a large abstract painting? You can create a similar backdrop yourself for under $50. Get a large canvas from a craft store, a few sample pots of paint in a color family you love (like the teals and blues here), and one contrasting color. Create the circle motifs using the rims of cups or bowls dipped in paint. The white drips can be made by thinning white acrylic paint with a bit of water and letting it run down the canvas. The goal isn’t perfection; it’s to create a dynamic, personal backdrop for your decor.
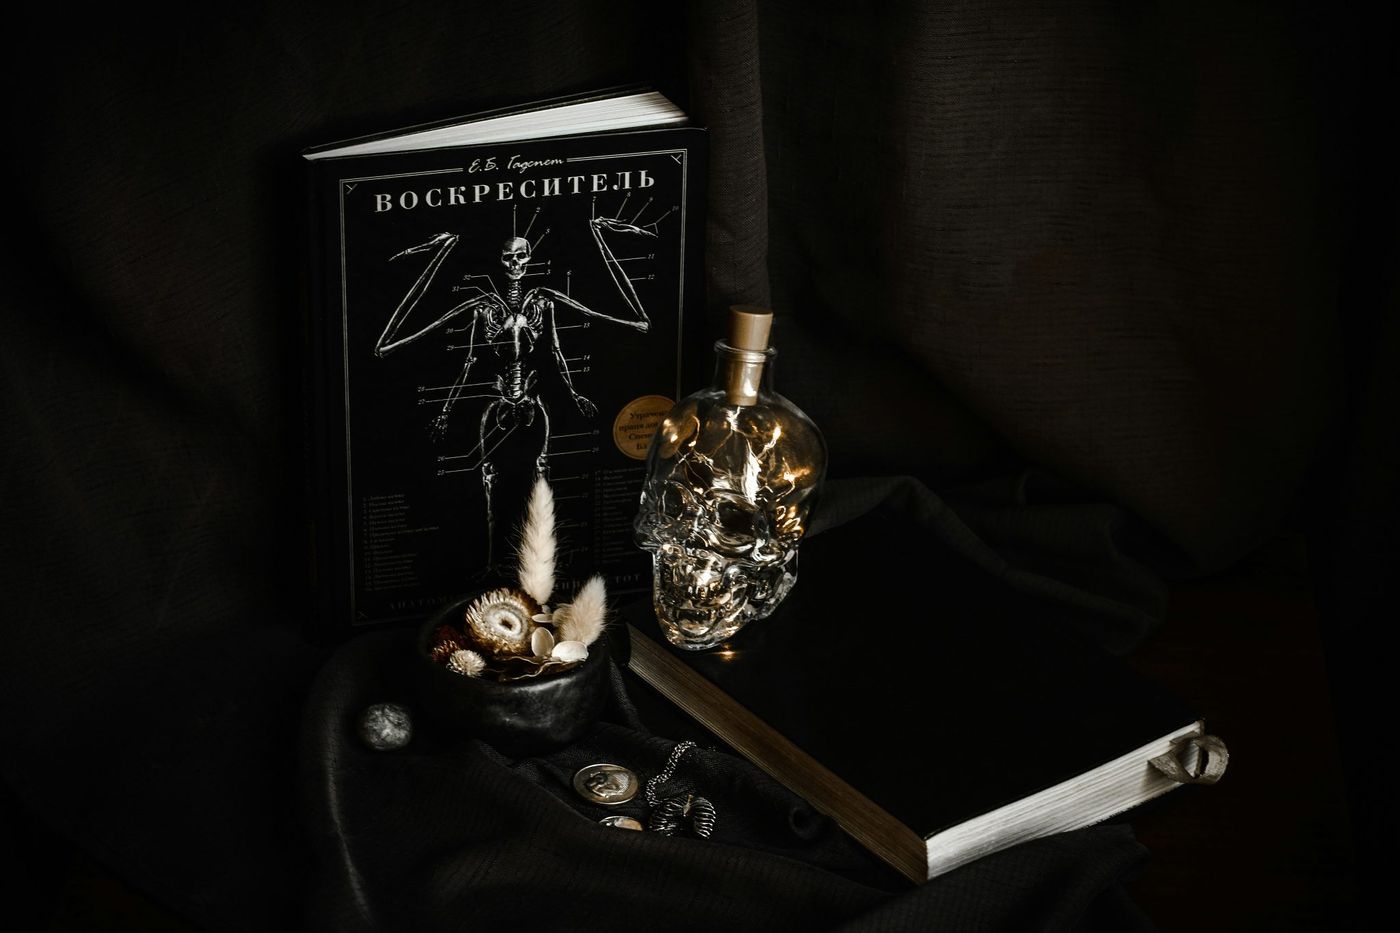
12. Crafting a Gothic Vibe with a Skull Bottle and Antique Books
Before you commit to this moody, academic look, run through this quick checklist to make sure you have the right foundation:
- Do you have a suitable surface? A dark wood bookshelf, mantel, or side table works best to enhance the gothic feel.
- What is your light source? This style thrives in low, directional light, like a single table lamp or nearby candlelight. Bright overhead lighting will wash it out.
- Do your books fit the theme? Look for books with aged-looking spines in dark colors like black, burgundy, or deep green. Avoid bright, modern book jackets.
This look is a more contained version of the full tablescape in Idea #5.
🔥 Trending Context
Creating an aged-book look for your vignette is a simple project that takes less than an hour. The material cost is minimal, especially if you use old books you already own.
- Gather your materials: A few hardcover books, dark-colored craft paper (black, brown), a printer, and a glue stick.
- Measure the existing book covers (height and full wrap-around width).
- Find and print vintage-style book titles or anatomical illustrations online. Make sure they are sized to fit your book spines and covers.
- Cut the craft paper to size and fold it to create new dust jackets for your books.
- Use the glue stick to attach your printed titles and illustrations onto the new jackets.
- Stack them artfully with your skull bottle and other gothic curiosities.
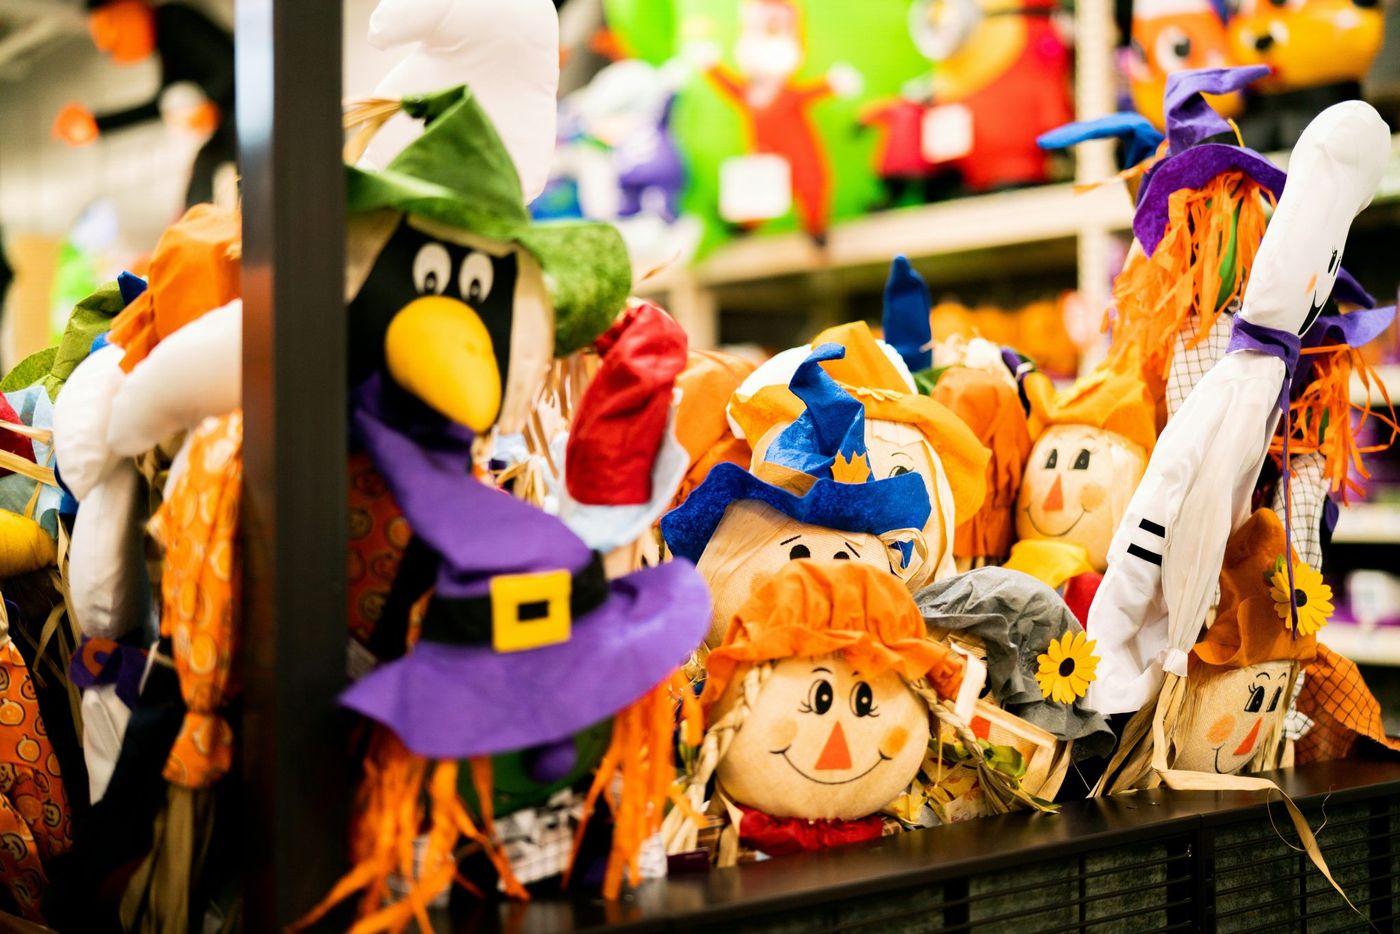
13. A Cheerful Display of Colorful Plush Scarecrows and Ghosts
A large collection of plush decor like this can be a dust nightmare. Fabric and straw are notorious for collecting dust, and the nooks and crannies of the clothing and hats make them difficult to clean thoroughly. If anyone in your home has allergies, this type of display can be a real trigger. To keep them looking fresh, you’ll need to commit to regular dusting with a soft brush attachment on your vacuum. Spot cleaning is your only option for stains, as most of these figures are not machine washable due to their mixed materials and delicate details.
💡 Designer Tip
You don’t need to buy two dozen of these to make an impact. The key to this look is density. You can achieve a similar cheerful, abundant feel on a budget by focusing on one small area. Try filling a single large wicker basket or a wooden crate with just 5-7 of these plush figures. Bunch them together tightly so they are spilling over the edge. This creates the illusion of plenty without the expense of filling an entire shelf. Check places like TJ Maxx or HomeGoods in early September for good deals on individual figures.
14. Simple & Sweet: A Minimalist ‘Happy Halloween’ Display
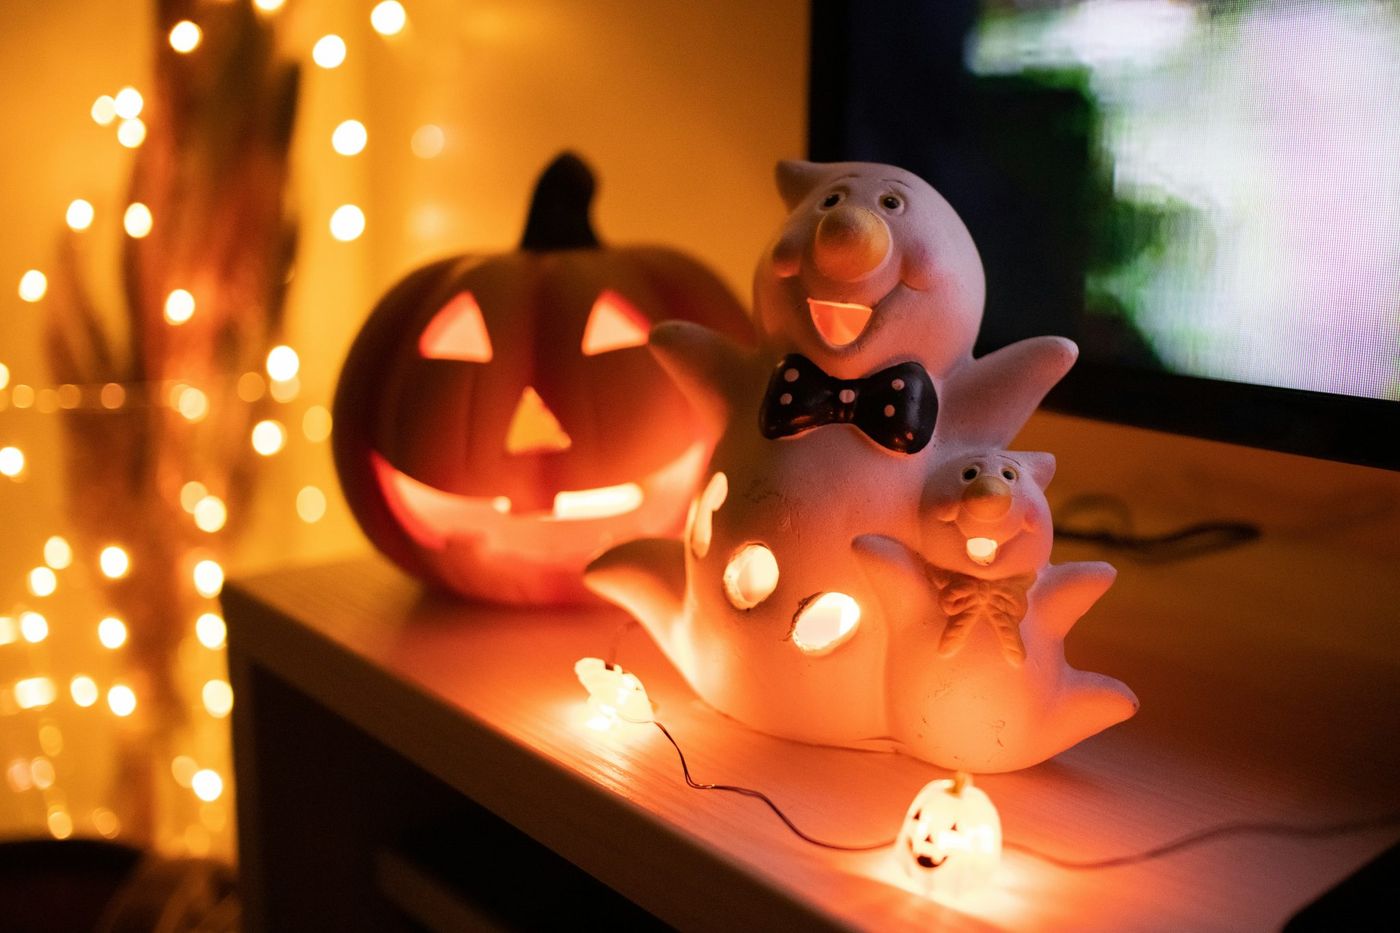
This look succeeds through its sheer simplicity and directness. In a world of over-the-top Halloween displays, a simple, friendly message like “Happy Halloween” paired with universally understood symbols (a pumpkin and a ghost) feels refreshingly clear and uncluttered. It doesn’t require complex styling or a dozen coordinating pieces. The charm lies in its restraint. The visual hierarchy is obvious: the message is the hero. This approach is perfect for smaller spaces, minimalist aesthetics, or as a cheerful accent in a larger decorative scheme.
⚠️ Real Talk
As people continue to embrace a more minimalist and intentional approach to home decor, this type of simple, graphic-led decoration is gaining popularity. It’s the holiday equivalent of a witty graphic tee. It communicates the festive spirit instantly without adding visual clutter. This trend is also fueled by the rise of small-space living, where every decorative item needs to make a clear impact without overwhelming the room. It’s a low-effort, high-reward way to celebrate the season that feels very current.
15. A Tranquil Autumn Scene with Candles, Pumpkins, and a Good Book
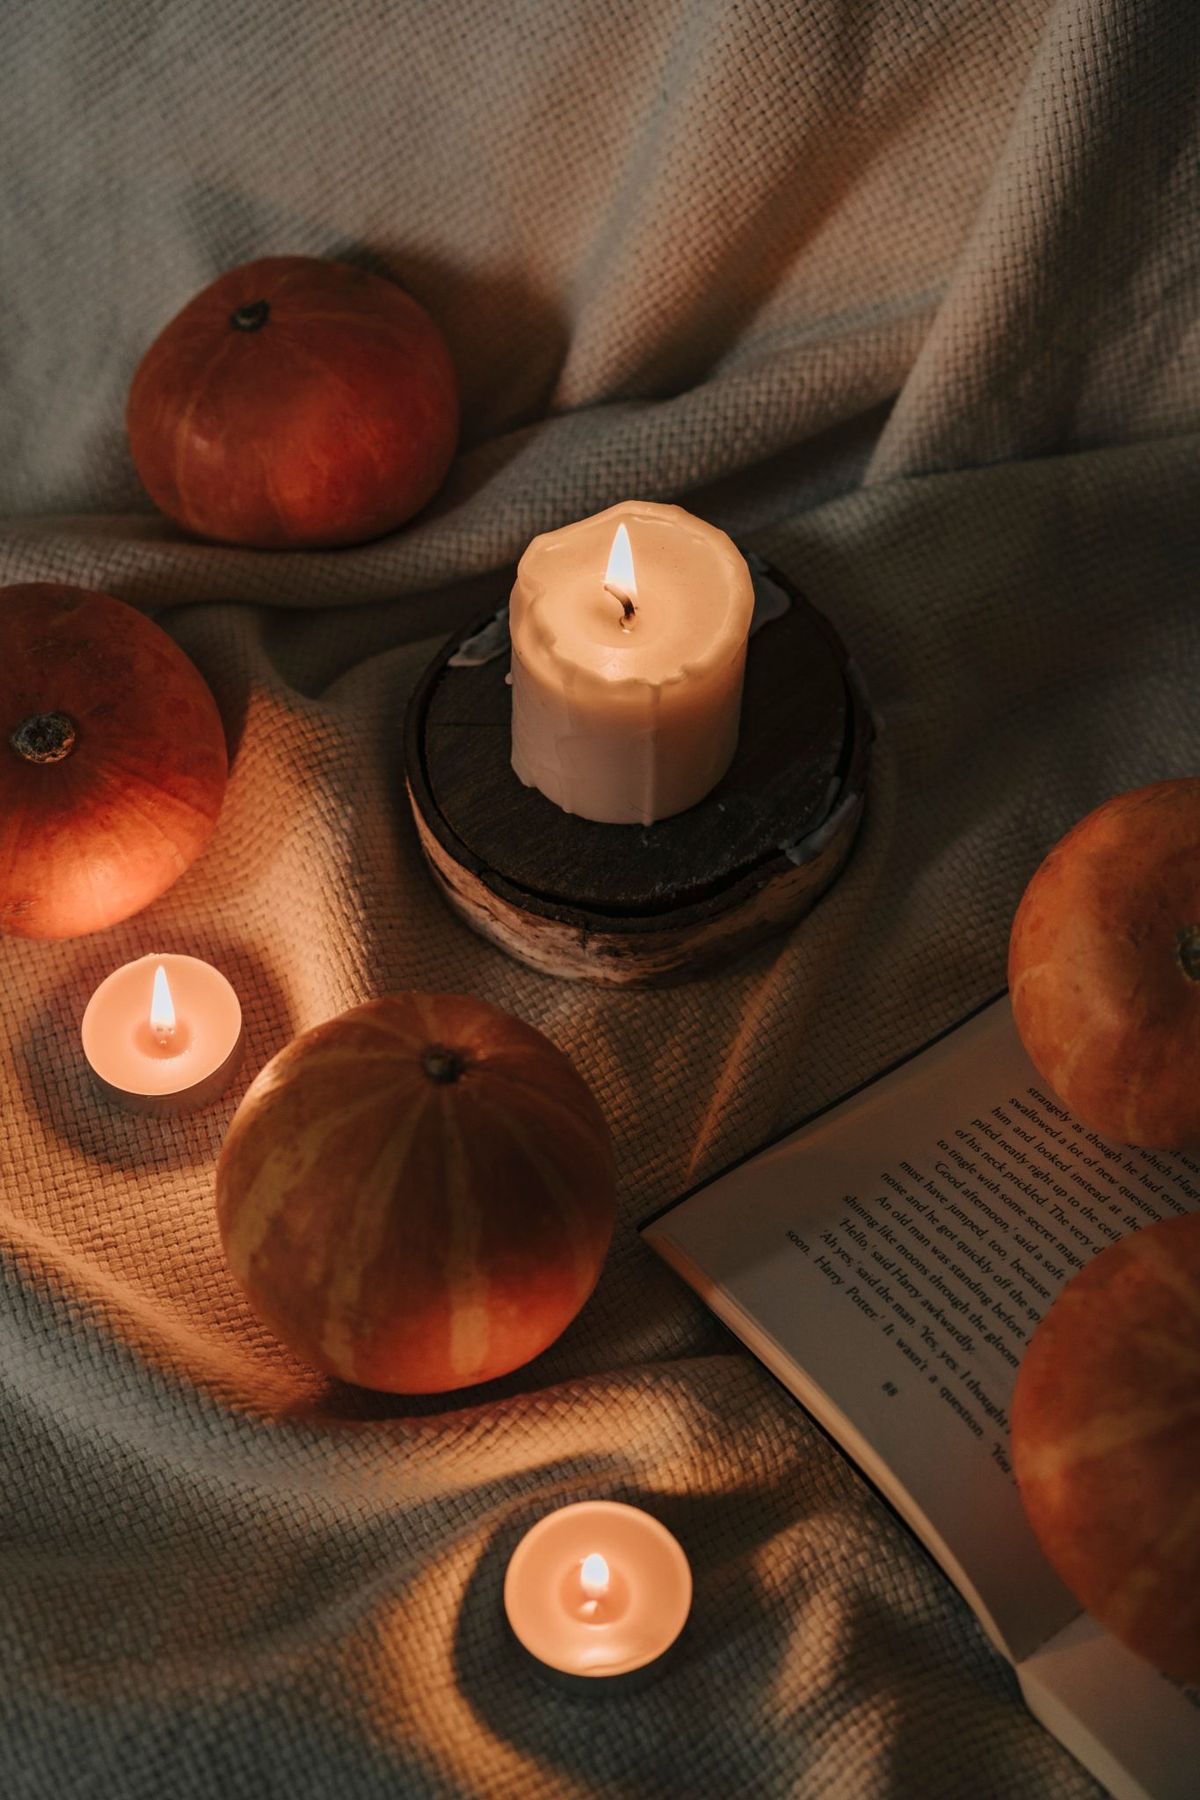
The formula for this ultra-cozy scene is all about warmth and texture: 60% soft textiles + 30% natural elements + 10% ambient light. The chunky, woven blanket provides the vast majority of the visual softness. The small pumpkins and the wooden candle base bring in the necessary natural, rustic touch. The final, crucial 10% is the flickering light from the candles, which activates the entire scene and makes it feel alive. You could swap the pumpkins for pinecones and the blanket for a faux fur throw and the cozy math would still work.
🎯 What Makes It Work
When styling a ‘flat lay’ scene like this on a textured surface like a blanket, create visual depth by varying the height of your objects. Notice how the pillar candle on its wooden base is the tallest point, followed by the medium-sized pumpkins, and finally the low-profile tea lights and open book. This subtle variation in height prevents the arrangement from looking flat and uninteresting. It guides the eye around the composition, creating a more dynamic and engaging little world.
16. A Mysterious Window Silhouette with a Glowing Jack-o’-Lantern
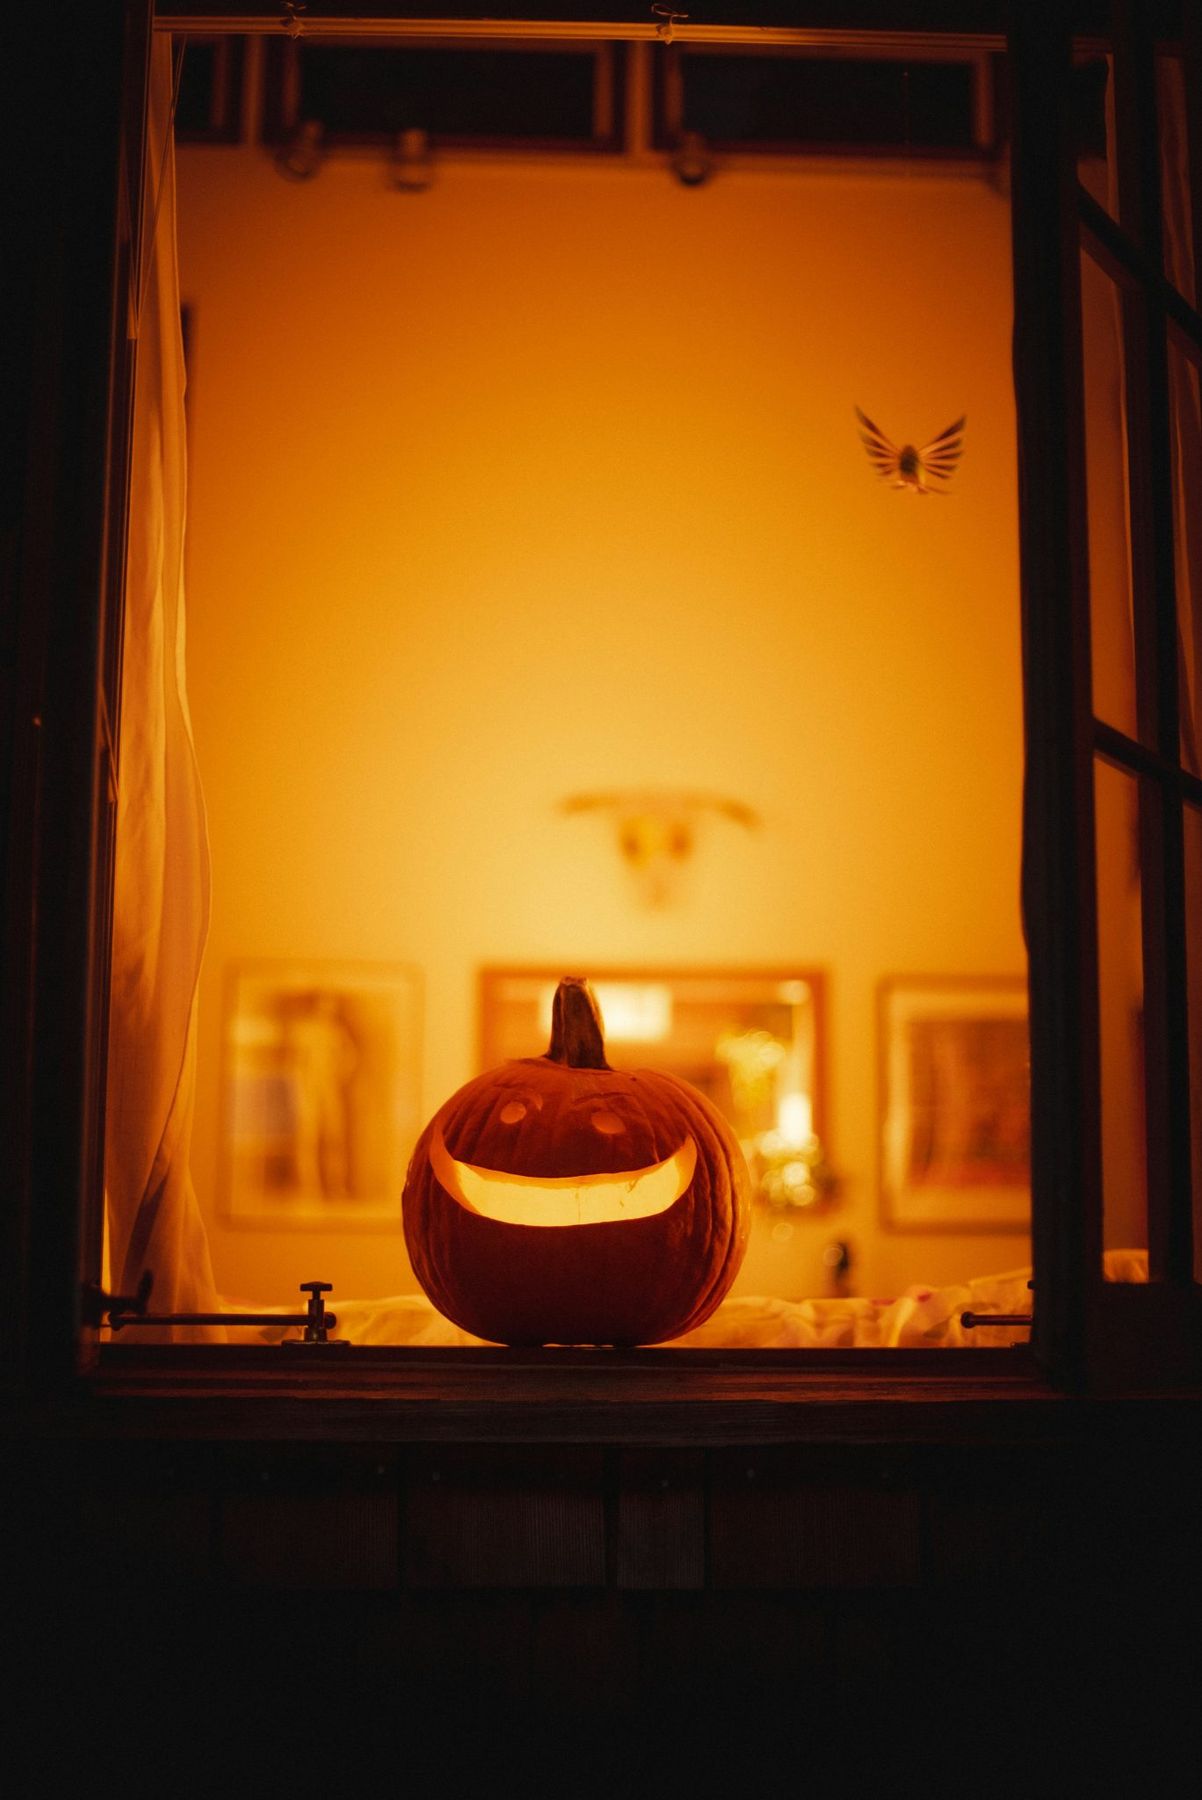
The power of this image lies entirely in its use of silhouette. The jack-o’-lantern isn’t just a decoration in a room; it’s a character seen from the outside, creating a sense of mystery and narrative. What’s happening in that warm, glowing room? The dark wood of the window frame acts like a picture frame, focusing all attention on the bright, smiling pumpkin. Removing the ‘from the outside looking in’ perspective would lose all the drama. It’s a reminder that how you frame your decor is just as important as the decor itself.
💸 Get This Look For Less
This look is designed to be viewed from the exterior of your home, which means your interior lighting is doing all the work. To get that rich, warm orange glow filling the room, you can’t rely on just the candle in the pumpkin. You’ll need to supplement with other warm light sources inside the room, like lamps with orange or warm-white bulbs. Also, be mindful of what’s visible in the background. The blurred art and decor add to the mystery here, but a pile of laundry or a stack of mail on a table would quickly ruin the effect.
17. A Dramatic Gothic Display with a Golden Skull and Bloody Candles
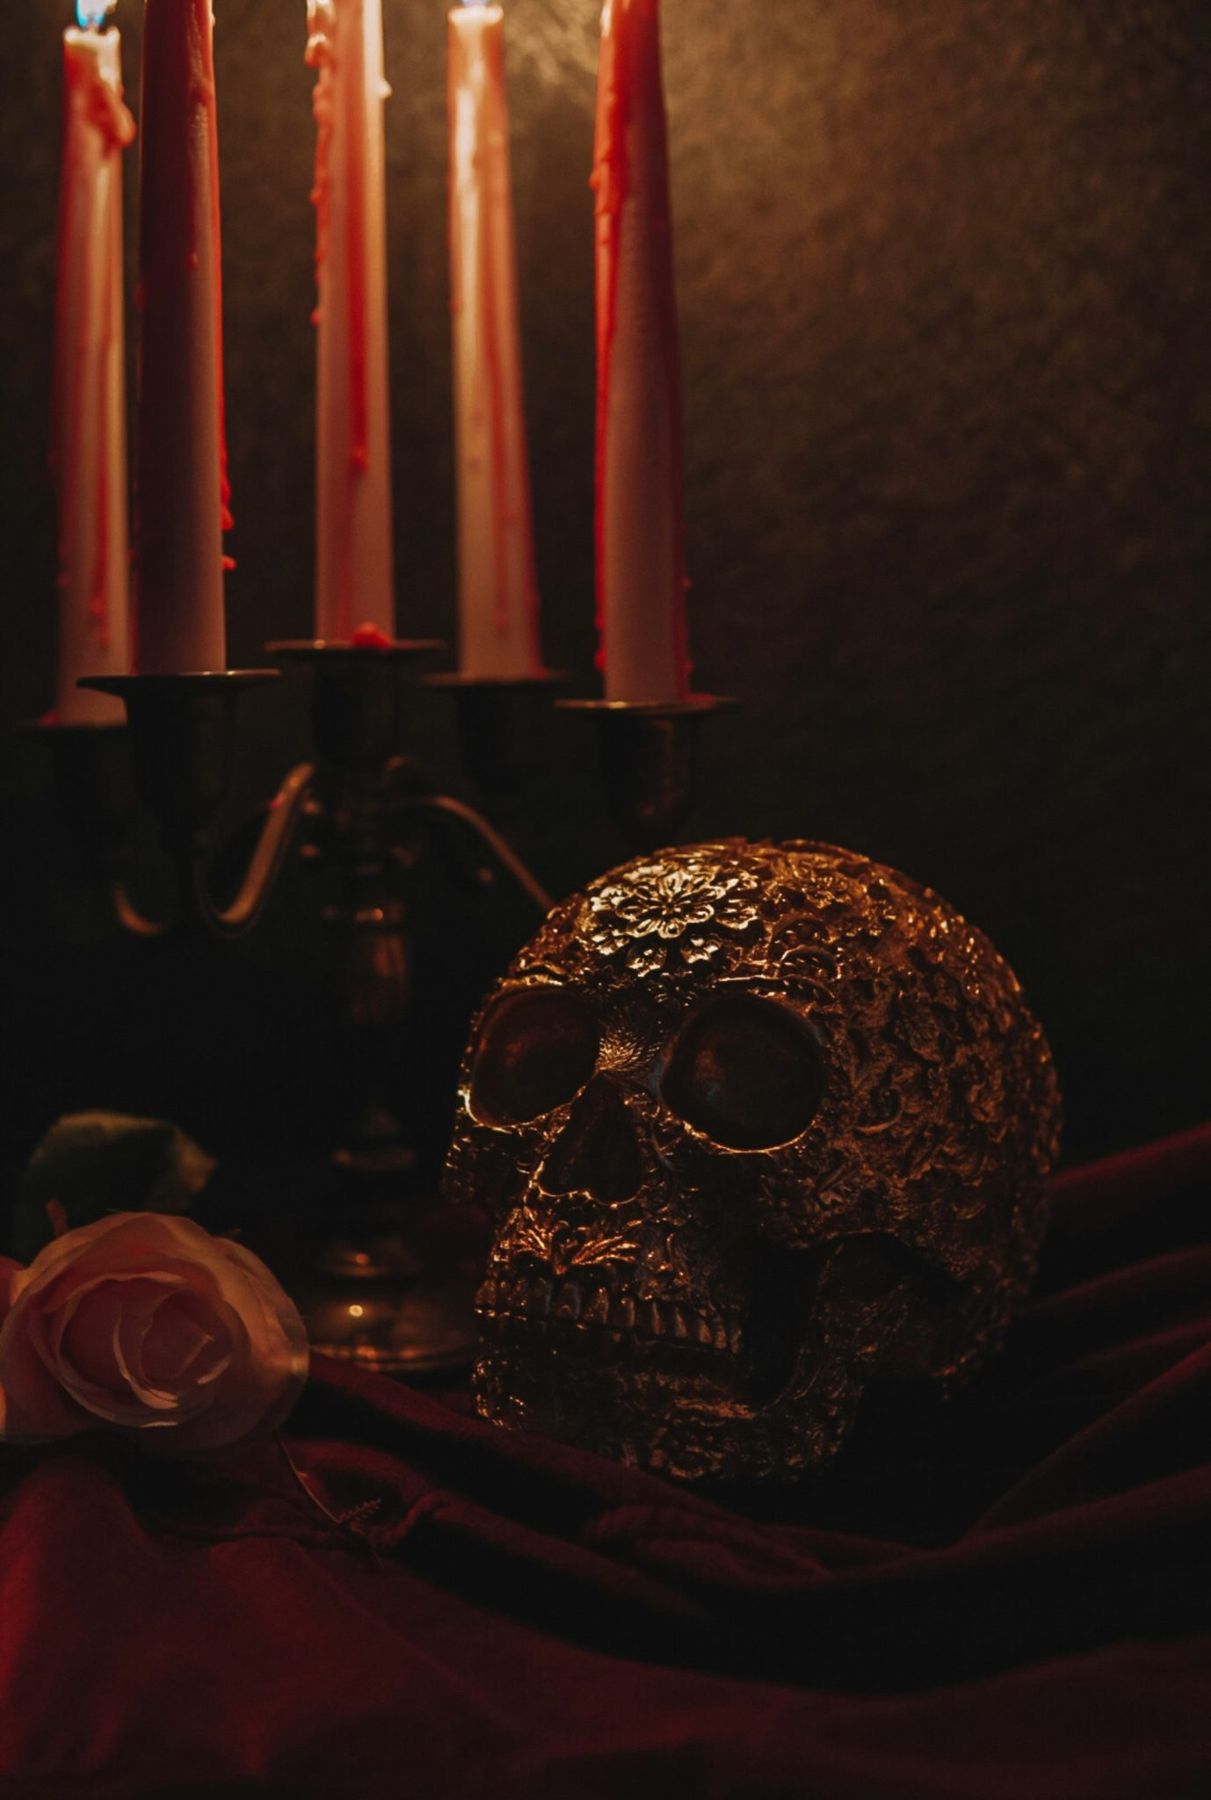
This opulent, gothic look is all about a few high-impact pieces. The key is to invest in items that have texture and a sense of drama.
- Main Feature (Golden Skull): $40 – $150
- Lighting (Candelabra & Drippy Candles): $50 – $200
- Textiles (Draped Fabric): $20 – $60
- Decor/Accessories (Rose): $5 – $15
- TOTAL: $115 – $425
Budget alternative: Create the bloody candles yourself by dripping red crayon or candle wax over plain white pillar candles. Swap the velvet fabric for a cheaper dark red fleece or an old bridesmaid dress from a thrift store. The skull is where you should focus your spending for maximum impact.
✅ Before You Start
This is a perfect idea for a small, dedicated surface like an entryway console, a fireplace mantel, or a specific corner of a bookshelf. It doesn’t need a lot of square footage, but it does demand to be the star of its zone. A space of about 3 feet wide by 2 feet deep is plenty. The vertical height of the candelabra is important, so ensure you have at least 2-3 feet of clearance above the surface to avoid a cramped look. This type of dramatic vignette gets lost in a cluttered room; it needs negative space around it to feel truly special.
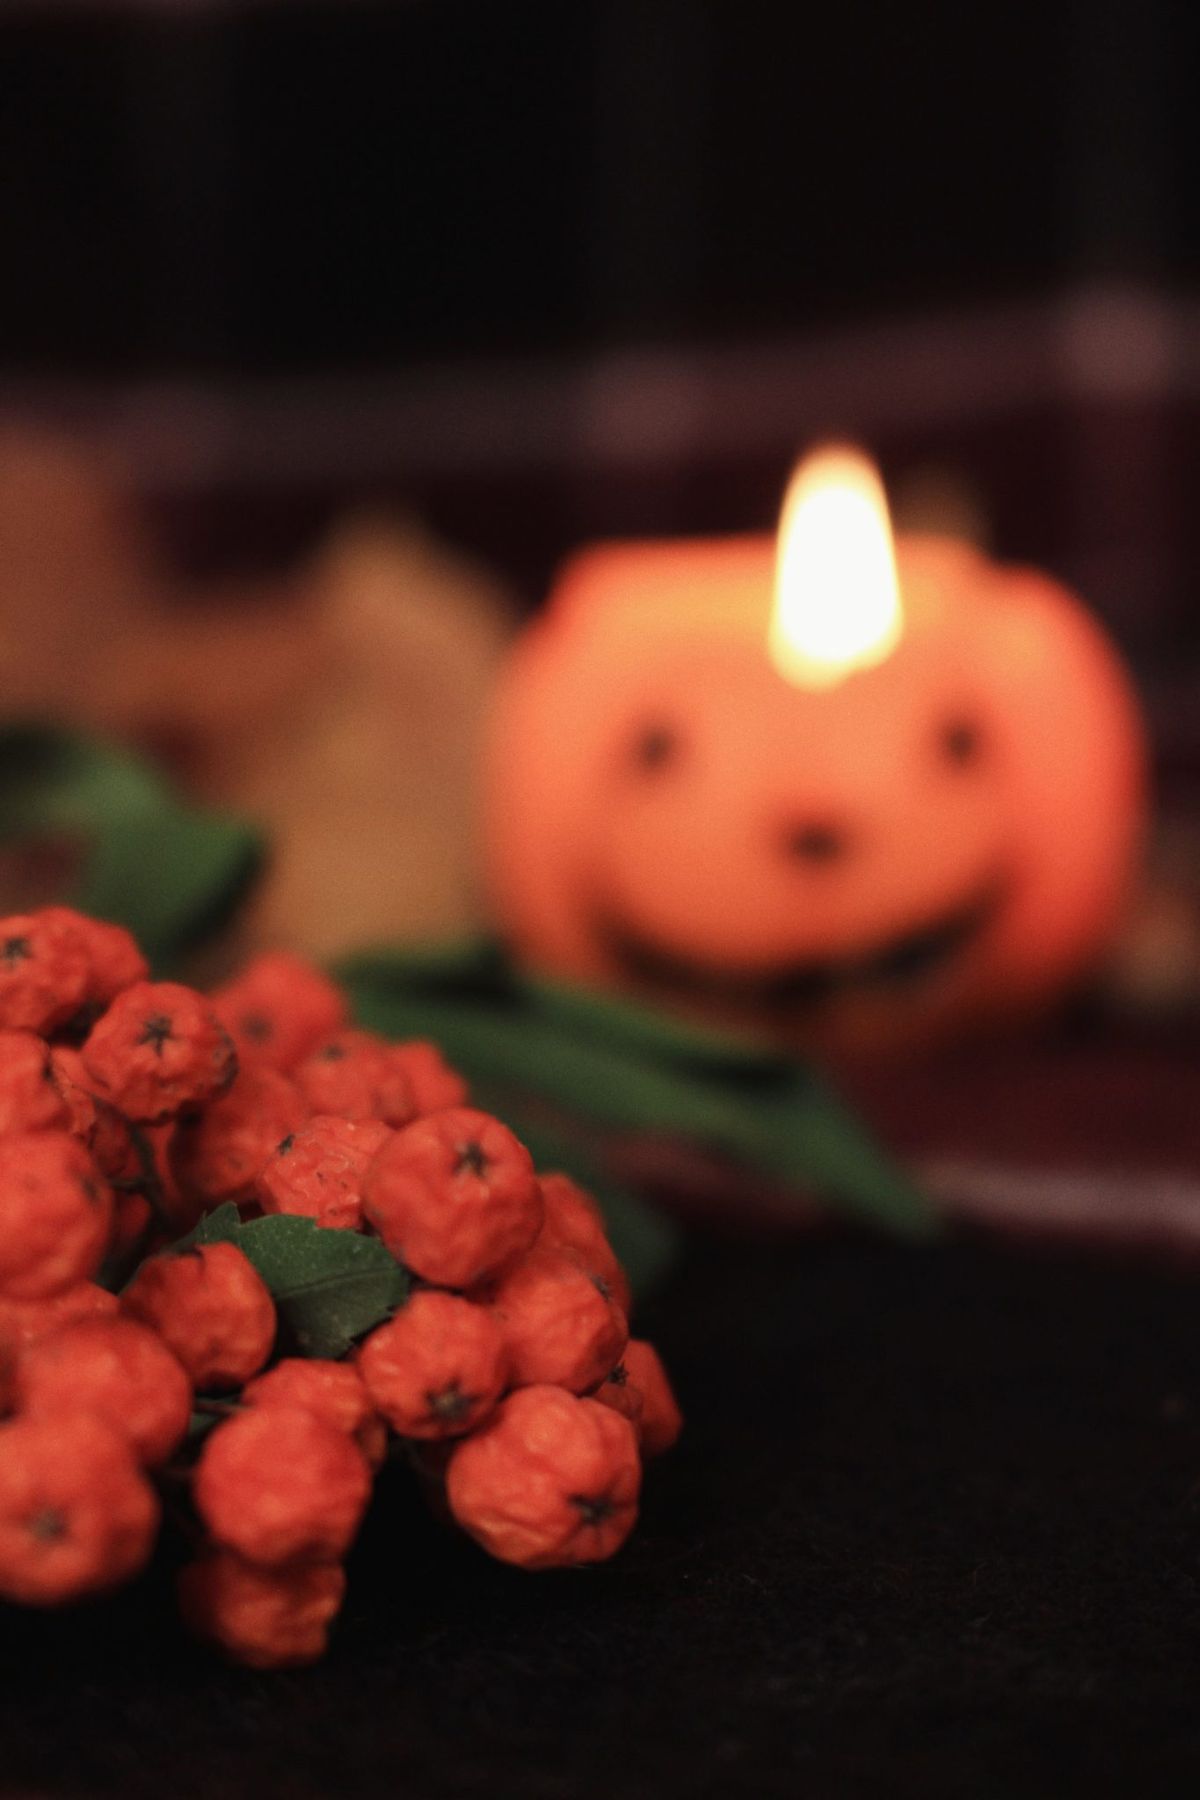
18. A Cozy Close-Up: Orange Berries and a Flickering Jack-o’-lantern
This image is captivating because it uses a classic photography technique: a shallow depth of field. The sharp focus is intentionally placed on the orange-red berries and green leaves in the foreground, making them the primary subject. The glowing jack-o’-lantern in the background is blurred, turning it from a specific object into a beautiful, soft source of light and color. This contrast between sharp and soft focus creates a sense of depth and intimacy, drawing the viewer into the small, warm world of the scene.
🧹 Maintenance Reality
You can create a similar layered light effect with any small lantern or candle. It’s a quick styling trick that adds instant atmosphere. This will take about 5 minutes with minimal cost.
- Choose your light source: a small jack-o’-lantern candle, a tea light in a colored glass holder, or even a string of fairy lights in a jar.
- Place the light source on a table or shelf, about 1-2 feet back from the edge.
- Find your foreground element. A small branch of fall leaves, a sprig of berries (real or faux), or even a single, interestingly shaped gourd will work.
- Position the foreground element a few inches from the front edge of the surface, directly in line with your light source.
- Turn on the light and dim any other competing lights in the room to let your little vignette shine.
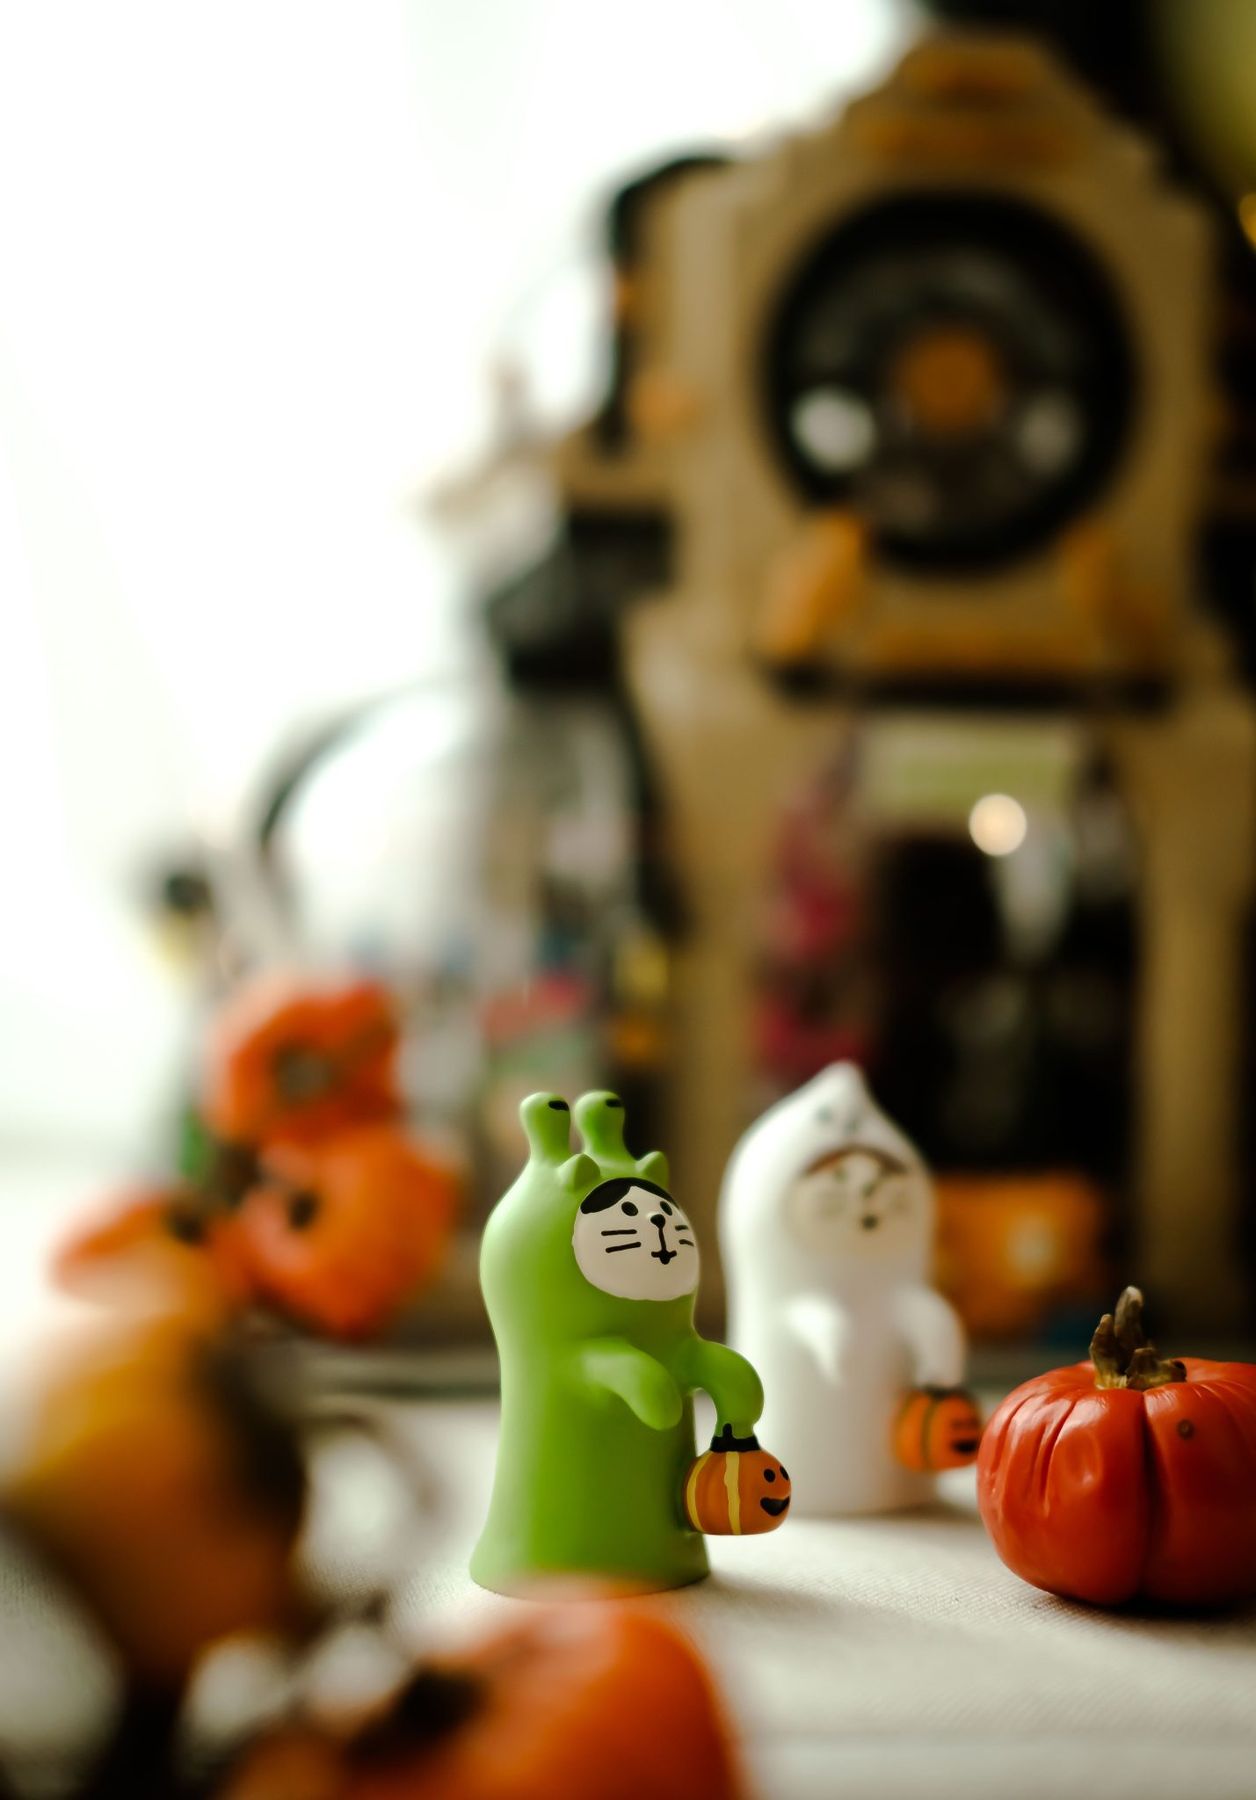
19. Whimsical Charm with Miniature Ceramic Ghost Figurines
When working with miniature decor, the secret is to create a ‘micro-landscape.’ Don’t just place the items on a surface; build a tiny world for them. Use other small-scale items, like the miniature pumpkins here, to create a sense of environment. A sprinkle of black glitter could become ‘dark soil,’ a small piece of green felt could be ‘grass.’ By giving your figurines a context to live in, no matter how simple, you make the entire display more engaging and intentional. It transforms them from static objects into characters in a story. These tiny figures have the same playful energy as the plush scarecrows in Idea #13.
📏 Scale Guide
Adorable ceramic figurines like these can sometimes be pricey, especially from independent artists on Etsy. For a much cheaper alternative, buy a block of white and green air-dry clay from a craft store for about $10-$15. Sculpting these simple ghost shapes is a perfect beginner’s project (and a fun one to do with kids!). Let them dry completely, then use a black fine-tip permanent marker to draw on the faces. You can make a whole family of ghosts for the price of one store-bought figure, and they’ll be completely unique to you.
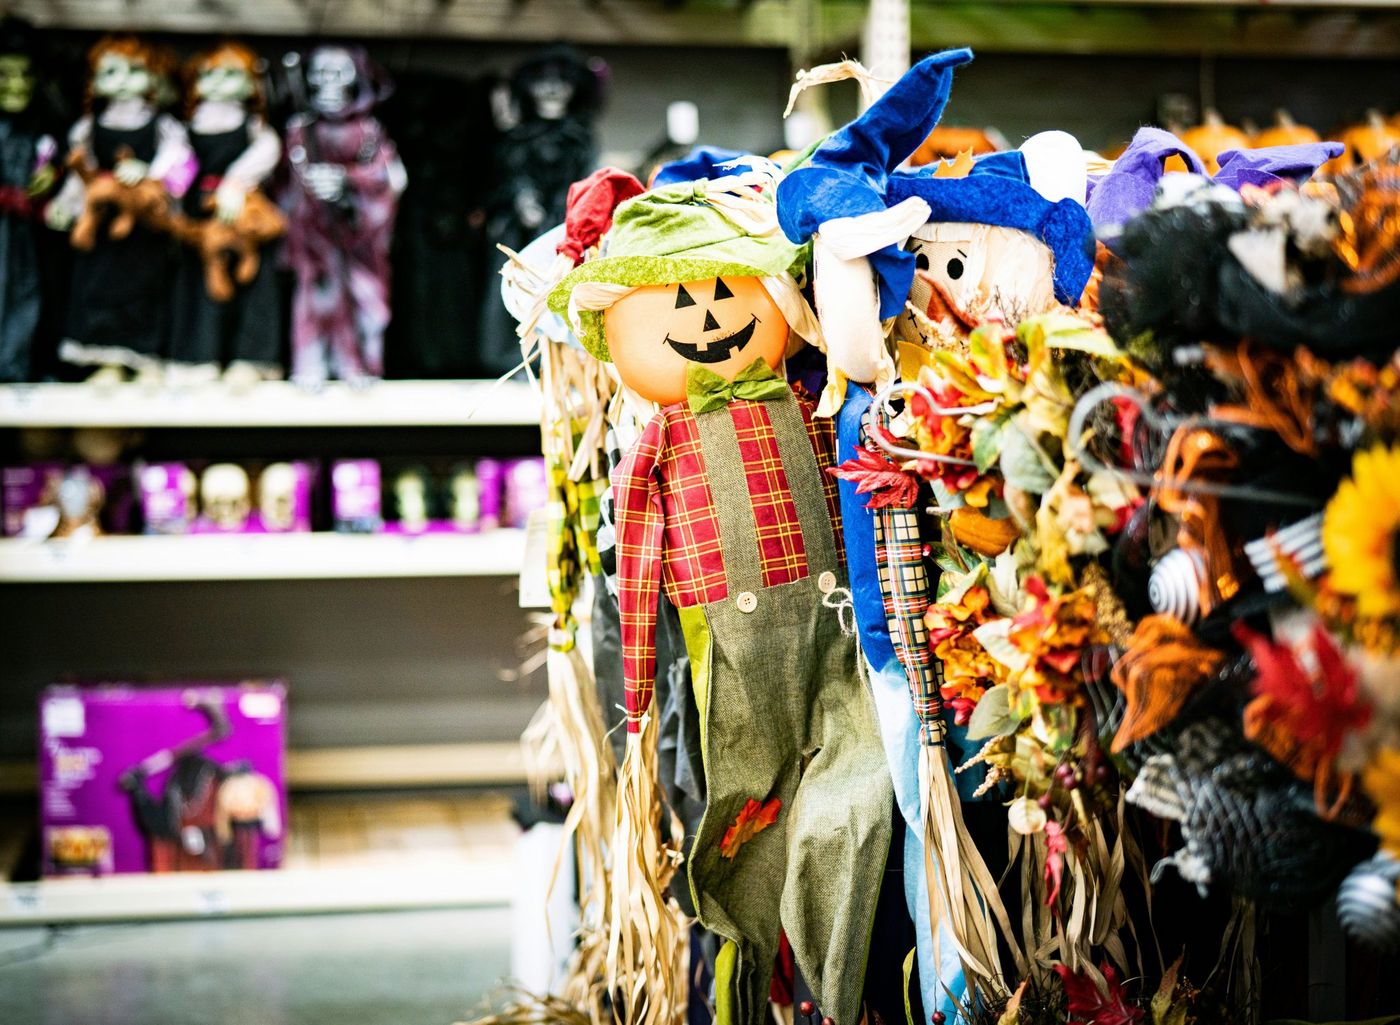
20. Nostalgic Harvest Decor with Plaid Scarecrows and Sunflowers
This classic harvest look, heavy on plaid, burlap, and straw, can quickly date your decor if you’re not careful. While charming, it can lean more ‘craft fair in 1998’ than ‘stylish home in 2026.’ To keep it feeling fresh, be selective. Instead of using every element at once, pick one or two to focus on. Perhaps use just the scarecrow figures but pair them with more modern, solid-colored pumpkins instead of the faux autumn leaves. Or, use the plaid and sunflower motifs but in a more restrained color palette. It’s all about editing.
📐 Style Math
This style taps into the ‘Grandmillennial’ trend, which finds comfort and charm in decor that our grandparents might have had. It’s a rebellion against years of stark, gray-and-white minimalism. People are craving warmth, nostalgia, and a sense of history in their homes, and this harvest-themed decor delivers that in spades. The key to its current popularity is a sense of curation—it feels collected and loved, not just bought off a big-box store shelf. It’s about celebrating tradition with a knowing, stylish wink.
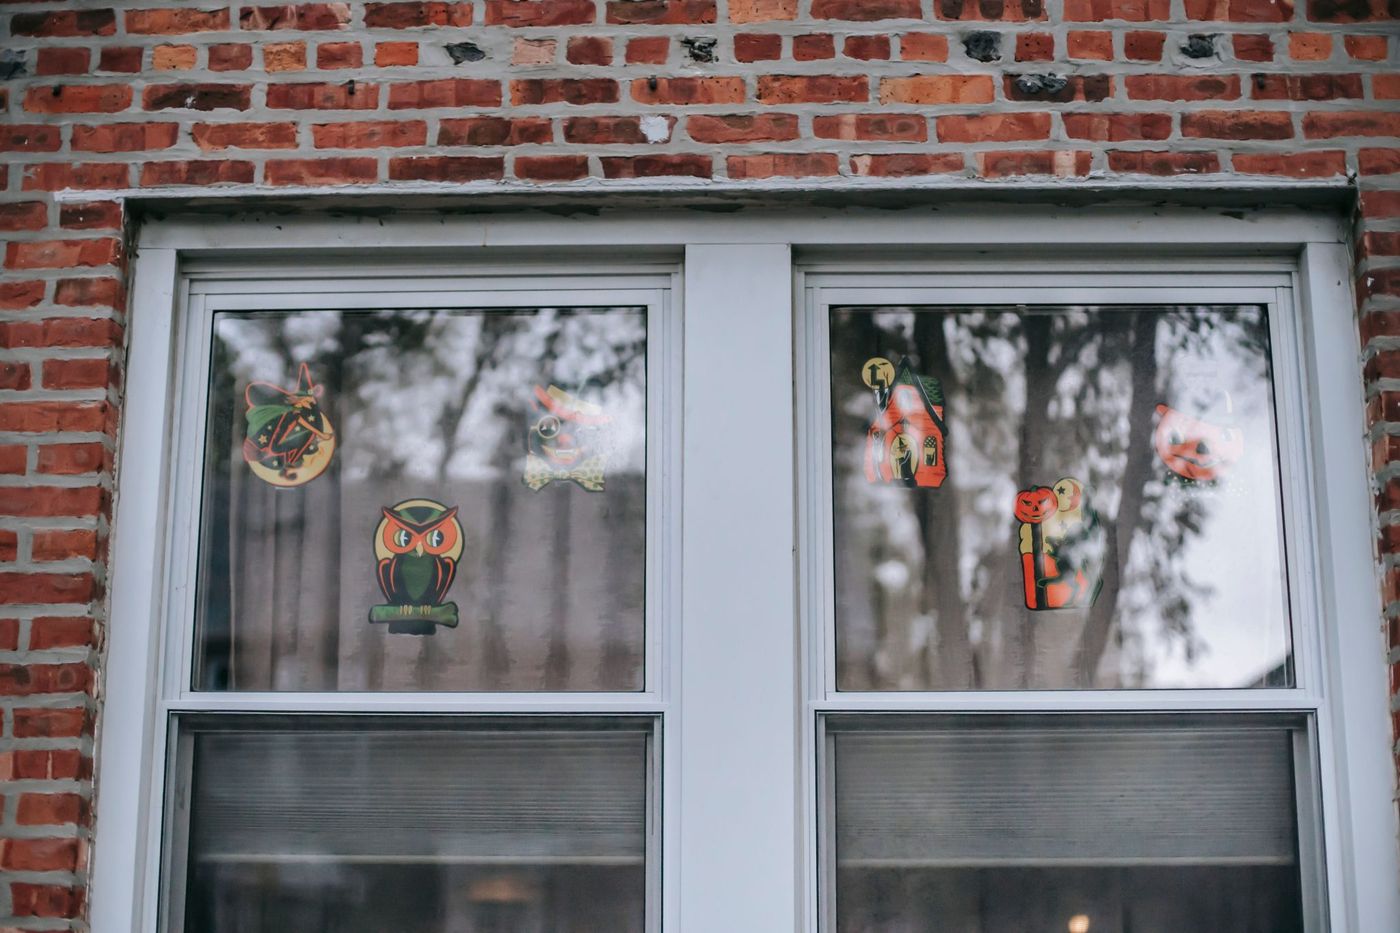
21. Throwback Fun with Vintage-Style Halloween Window Clings
The single element that makes this work is the specific, vintage art style of the window clings. These aren’t just any Halloween stickers; they evoke a very particular brand of 1970s and 80s nostalgia. The slightly goofy witch, the classic haunted house silhouette, and the simple jack-o’-lantern faces are instantly recognizable to anyone who grew up during that era. If you were to swap these out for modern, hyper-realistic, or CGI-style clings, the entire feeling of charming, innocent fun would be lost. The artwork *is* the idea.
⭐ The One Thing
Window clings are fun and easy, but they can leave a stubborn, filmy residue on your glass, especially if they are left on for a long time or baked in the sun. To remove it, first peel off the cling. Then, spray the area with a glass cleaner and let it sit for a minute. Use a plastic scraper or an old credit card to gently scrape away the film. For really stubborn residue, a little bit of rubbing alcohol on a cloth can help break it down. Always clean your windows thoroughly after removing clings to prevent a foggy appearance.
22. A Dramatic Focal Point: One Glowing Pumpkin in a Sea of Darkness
The power of this scene comes from extreme contrast. You have one single, bright source of warm light—the carved jack-o’-lantern—set against a backdrop of complete darkness and a mass of unlit, shadowy pumpkins. This creates a powerful focal point that the eye is immediately drawn to. It’s dramatic and theatrical. The composition also plays with the idea of ‘the one versus the many,’ making the lit pumpkin feel special and singular. This technique creates a mood that is far more mysterious and atmospheric than a dozen lit pumpkins all competing for attention.

💰 Budget Breakdown
This idea is incredibly scalable and works in almost any outdoor or indoor setting, as long as you can control the lighting. You could recreate this on a small apartment balcony with just 5-6 pumpkins, or on a grand front porch with 50. The key isn’t the total number of pumpkins, but the ratio of lit to unlit. You need a critical mass of dark pumpkins to make the single lit one feel significant. For maximum impact, place this display in an area that is naturally dark at night, away from streetlights or bright porch lights.
23. A Rustic Porch Scene with a Skeleton in a Spindle Rocker
The visual recipe for this charmingly eerie scene is: 40% rustic texture + 40% classic spooky element + 20% modern comfort. The rustic texture is provided by the unfinished wood slat wall, the burlap pillow, and the dried corn stalks. The full-sized skeleton is the undeniable spooky star. The final 20% comes from the clean, white spindle rocking chair, which adds a touch of modern farmhouse style and prevents the look from becoming too much like a haunted barn. It’s the crisp white paint that keeps it feeling stylish. This is a great outdoor idea, similar to the classic blow molds in Idea #1 but with a more rustic feel.

🔧 How-To Brief
To make your skeleton look more naturally posed and less like a stiff prop, use clear fishing line. Tie a short length of line to a wrist and inconspicuously tack it to the arm of the chair to make it look like the skeleton is resting its hand. You can do the same with an ankle, tying it to the rocker’s leg to create a crossed-leg pose. These tiny, invisible adjustments make a huge difference in creating a more dynamic and believable posture, adding a layer of wit and personality to the display.
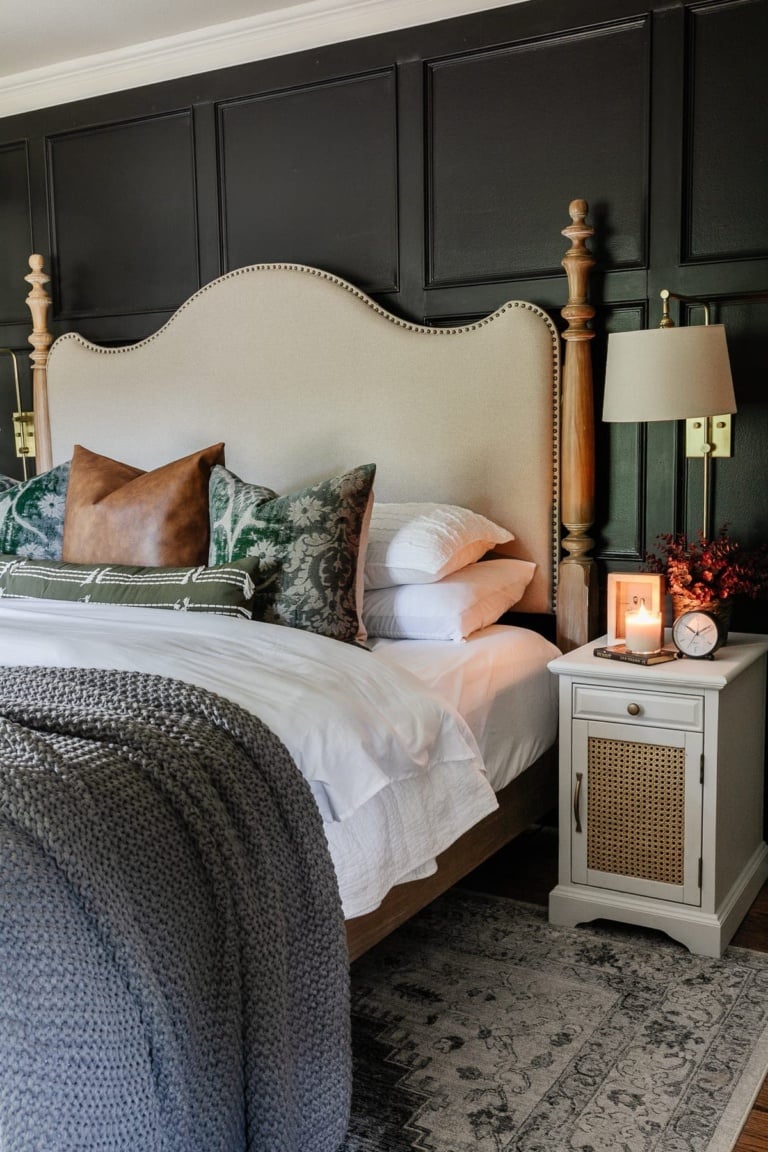
24. Sophisticated Spooky: A Moody Bedroom with a Black Accent Wall
This moody, high-end look is about investment pieces and a dramatic paint choice. The accent wall is the most affordable part of the equation.
- Wall Treatment (Paint & Paneling): $200 – $600
- Main Furniture (Spindle Bed & Nightstands): $1500 – $4000
- Lighting (Brass Wall Sconces): $300 – $800
- Textiles (Bedding, Pillows, Chunky Knit): $400 – $1000
- TOTAL: $2400 – $6400
Budget alternative: Get a similar vibe by painting a simple black rectangle behind your existing headboard. Focus on textiles: find a charcoal chunky knit throw from Target or HomeGoods, and a cognac-colored faux leather pillow from Amazon.
🔥 Trending Context
A black accent wall is a major commitment. While it looks incredibly chic and sophisticated, it can make a room feel significantly smaller and darker, especially if the room doesn’t get a lot of natural light. It also shows every speck of dust and every scuff mark. Touching up black paint is notoriously difficult to get right without repainting the whole section. Before you commit, try painting a large foam board black and placing it against the wall for a few days to see how you feel about the change in light and mood throughout the day.
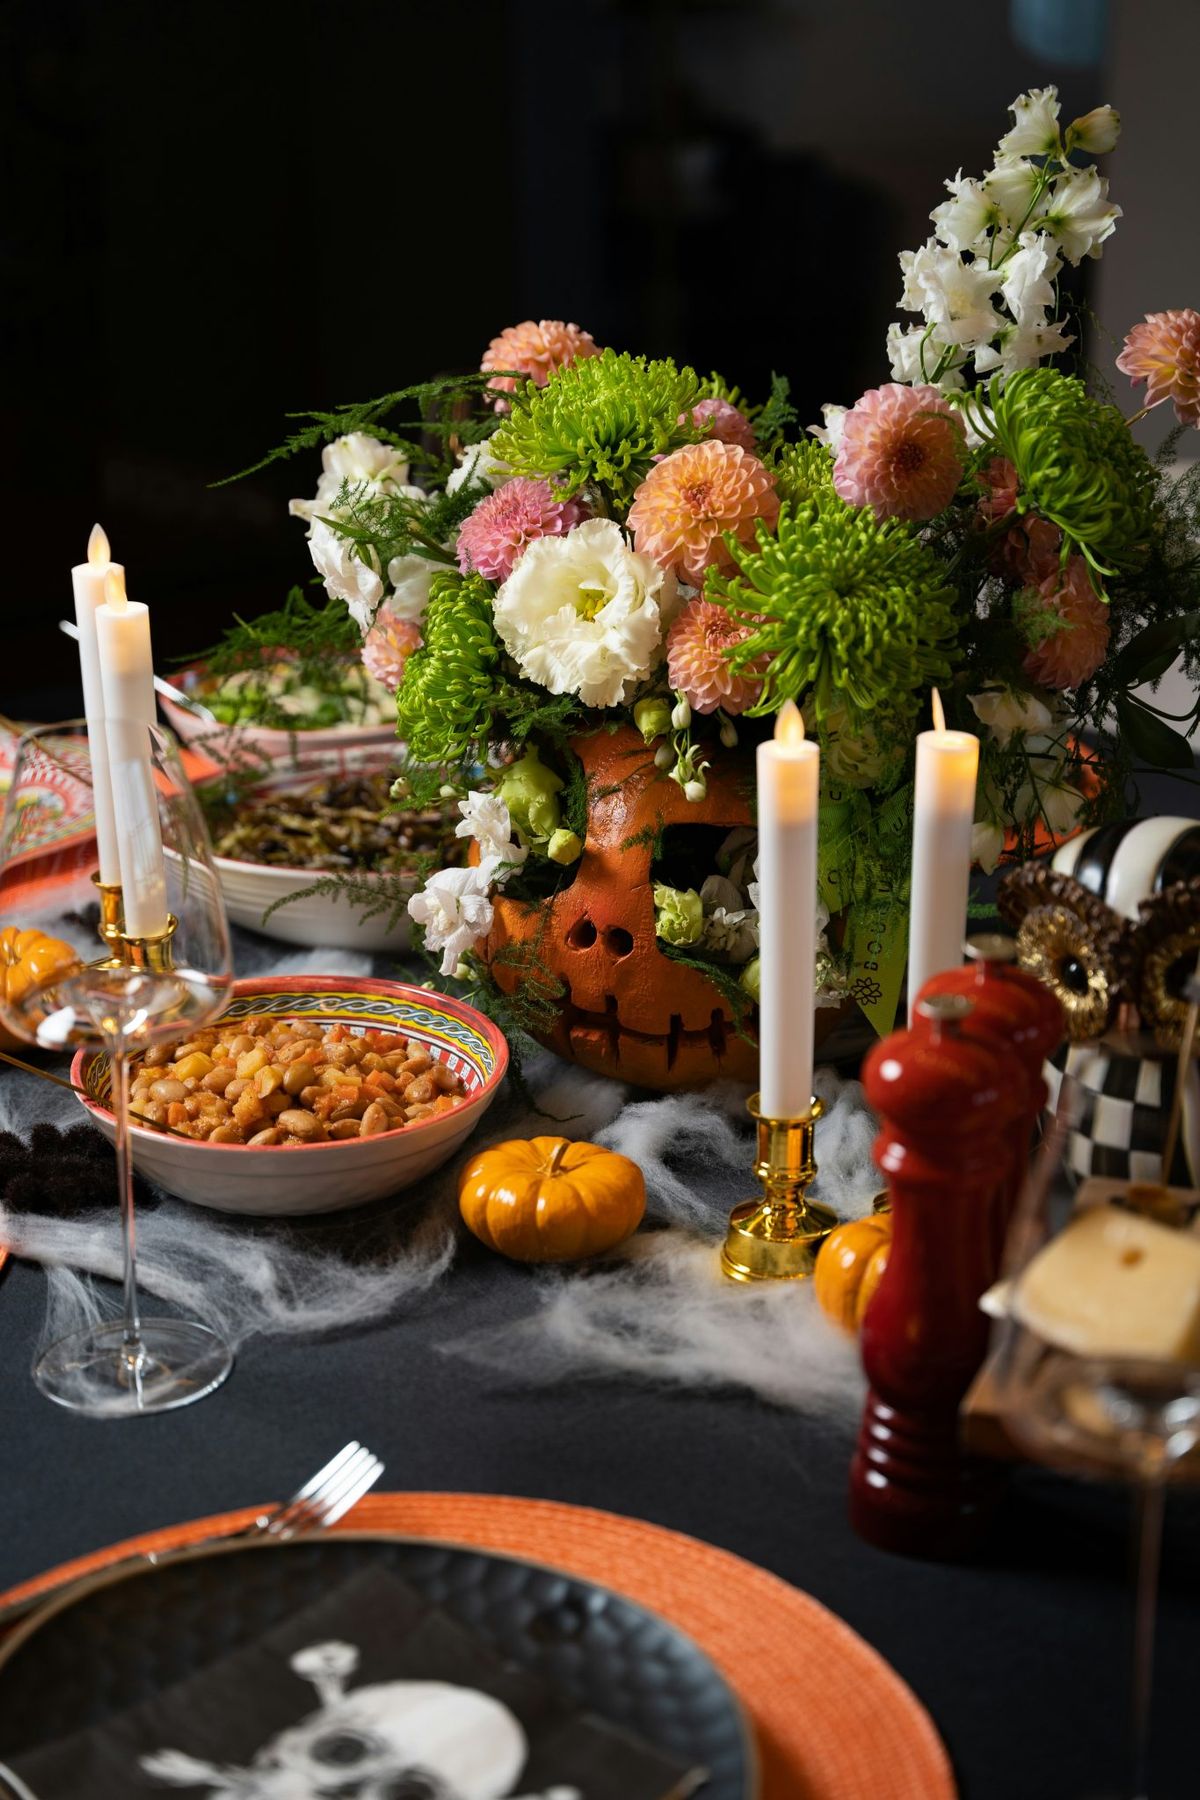
25. A Whimsical Halloween Table Spread with Florals and Treats
This tablescape feels special because it masterfully blends spooky with sweet. Instead of leaning into dark, gothic themes, it pairs classic Halloween motifs with fresh flowers and delicious-looking food. This juxtaposition creates a mood that is whimsical and celebratory, not scary. The use of multiple heights—from the tall floral arrangements to the flat platters of food—creates a dynamic, interesting landscape for the eye to explore. The color palette is controlled but festive, focusing on traditional orange and black but softening it with the natural greens and pinks of the flowers.
|
📋 Copy HEX 🔗 Share |
💡 Designer Tip
A beautiful floral arrangement can be one of the most expensive parts of a tablescape. To get this look for less, focus on affordable filler flowers and seasonal greenery. Instead of roses, opt for carnations in shades of deep red or orange. Forage for interesting branches or colorful autumn leaves in your backyard. A few statement blooms from the grocery store can be supplemented with lots of cheaper greenery from a place like Trader Joe’s to create a large, lush arrangement for under $25. The key is abundance and texture, not necessarily expensive flower types.
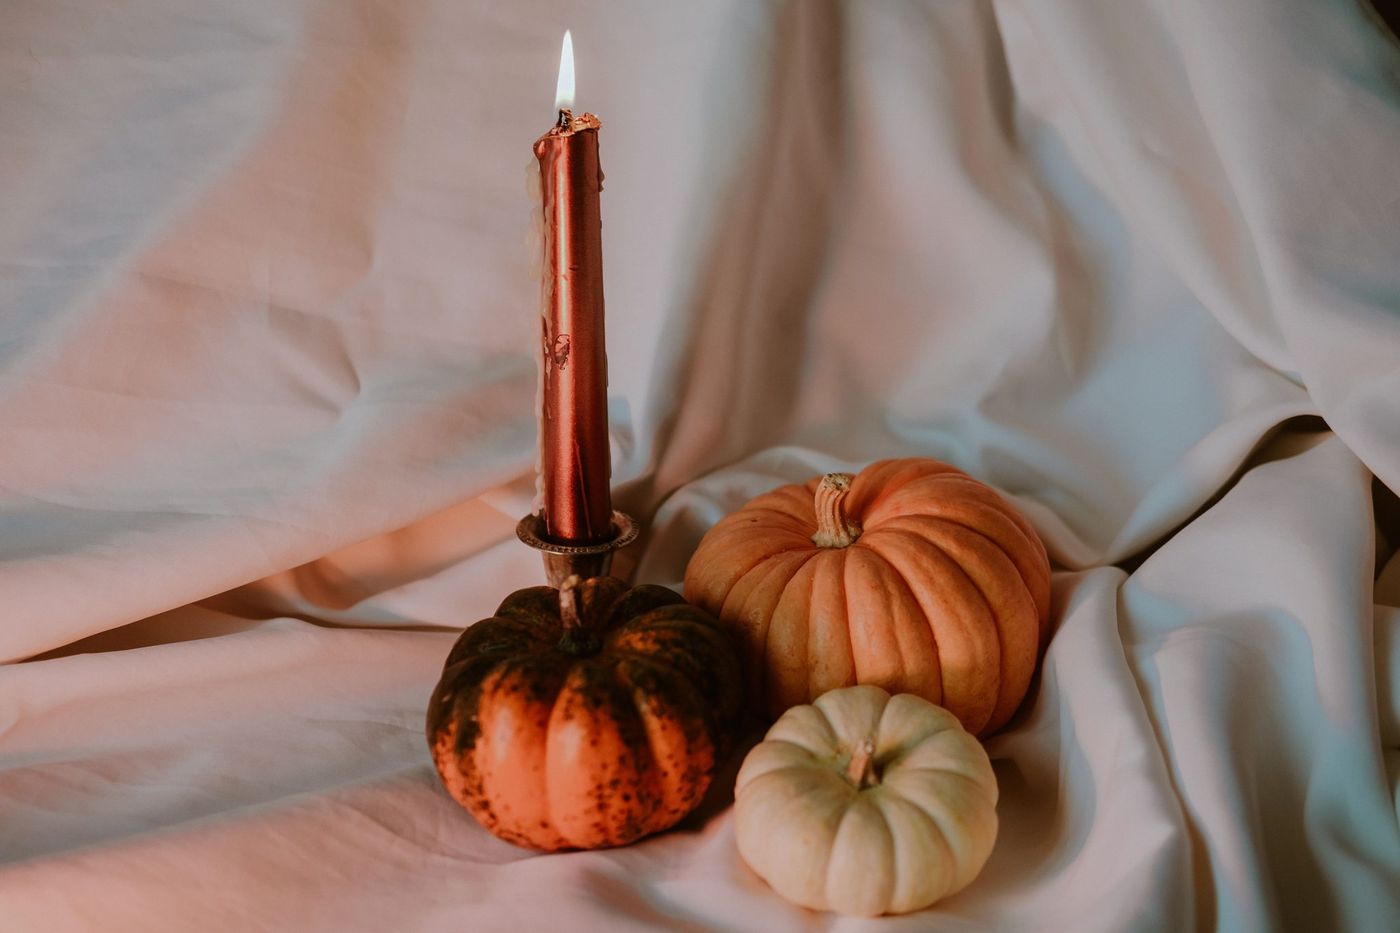
26. A Vintage-Inspired Still Life with Pumpkins and Candlelight
The single element that defines this scene is the soft, warm candlelight. It’s not just illuminating the objects; it’s creating the entire vintage, cozy atmosphere. The flickering flame casts a gentle glow on the pumpkins and creates long, soft shadows, blurring the background and making the scene feel intimate and timeless. If you were to switch the candle for a bright, modern LED light, the entire mood would be shattered. The look would become harsh and sterile. The flame’s organic, warm quality is absolutely essential to achieving this nostalgic feeling.
⚠️ Real Talk
Creating a cozy vignette like this is all about layering textures. It’s a simple process that takes only a few minutes to style.
- Start with a soft base. Lay down a textured, neutral-colored fabric like a chunky knit sweater, a fleece blanket, or a piece of faux fur.
- Add your main characters. Place a few small pumpkins of varying sizes onto the fabric. Don’t line them up; cluster them in an organic way.
- Introduce the light. Carefully place a lit pillar candle or a few tea lights among the pumpkins. Ensure they are on a stable, fire-safe surface.
- Add one more element. An open book, a sprig of dried leaves, or a mug of tea can complete the story and make it feel more personal.
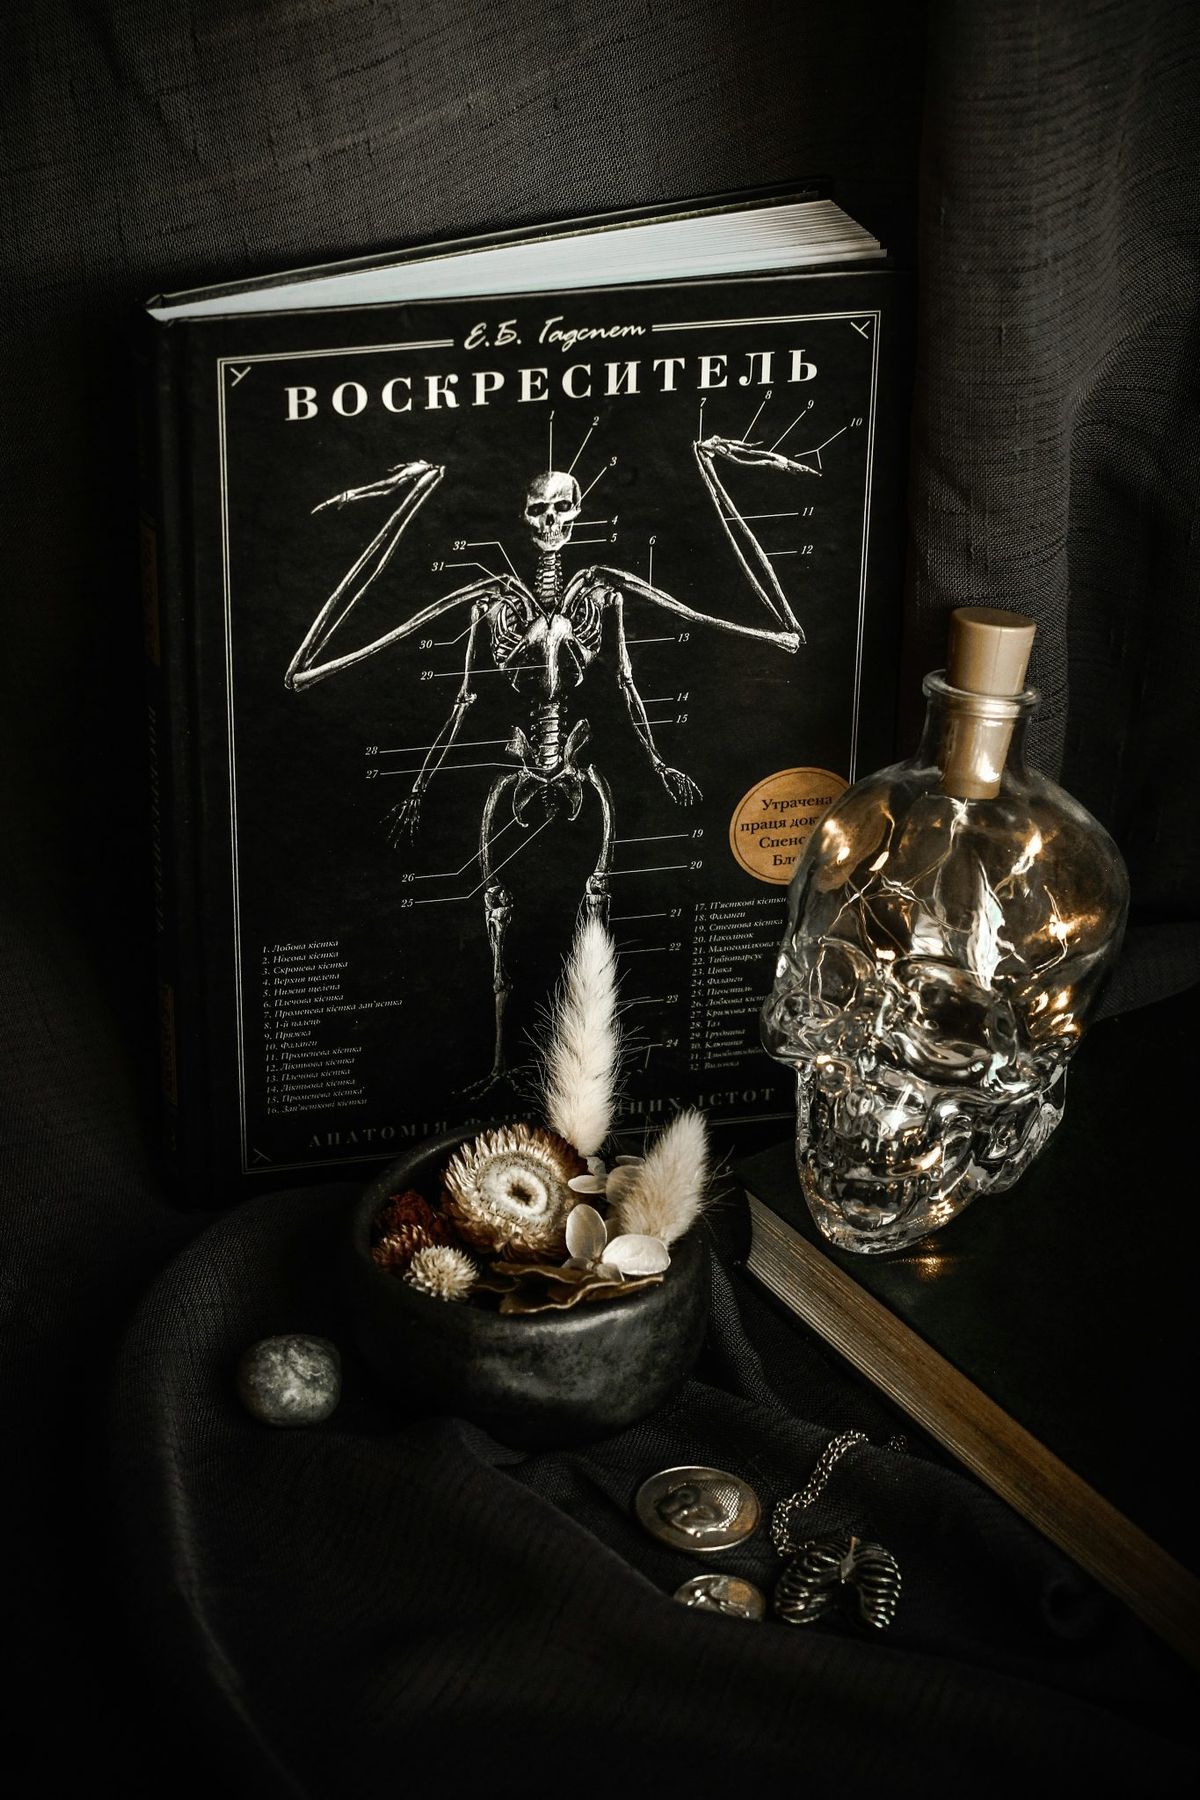
27. An Academic Gothic Vibe with a Skull Lantern and Anatomy Book
To nail the ‘academic’ part of this gothic look, your choice of book is critical. Don’t just grab any old hardcover. Look for a book with some visual weight and thematic relevance. An old medical textbook, a book of anatomical drawings, a leather-bound classic novel, or even a book on botany or astronomy works perfectly. The cover or a key illustration should connect to the theme of knowledge, history, or the macabre. The book isn’t just a prop; it’s a storytelling device that gives your skull and lantern intellectual context.
🎯 What Makes It Work
This look follows a clear formula for a ‘cabinet of curiosities’ feel: 50% macabre object + 30% academic element + 20% functional lighting. The skull lantern is the hero piece. The book of anatomical skeletons provides the intellectual, historical layer. The lantern’s practical function of providing light brings it all together, making it feel less like a random collection of props and more like a scholar’s desk. You could swap the skull for a collection of bones and the anatomy book for a map, and the formula would still hold true.
28. Creating a Cozy Fall Vibe in the Living Room
The ‘cozy fall’ aesthetic often seen on Pinterest relies heavily on layering lots of textiles—throw blankets, pillows, soft rugs. While this looks incredibly inviting, it can be impractical for daily life, especially with kids or pets. A mountain of pillows on the sofa has to be moved every time someone wants to sit down, and light-colored chunky knit blankets can easily get snagged, stained, or covered in pet hair. Be honest with yourself about how you actually live in your space before committing to a high-maintenance, multi-layered look.
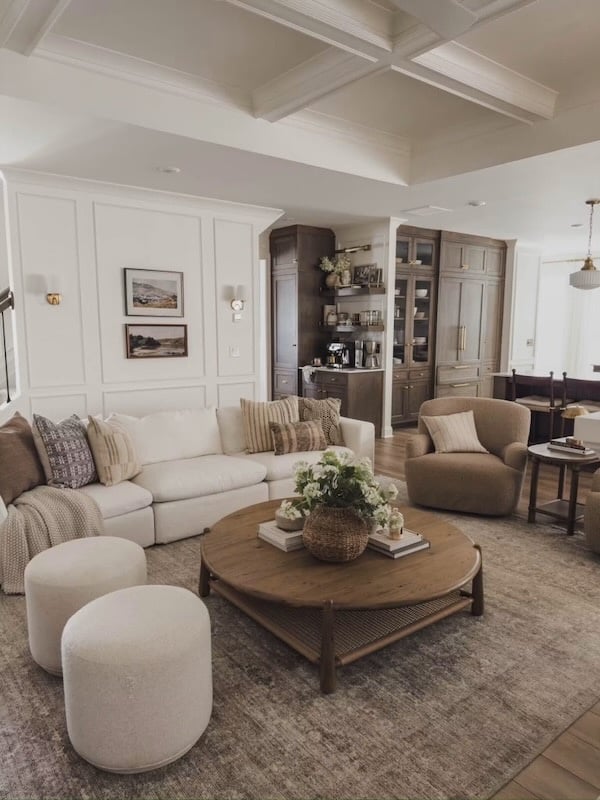
💸 Get This Look For Less
This cozy, layered look works best in a living room that has a clearly defined seating area. A room size of at least 12 ft x 15 ft is ideal to accommodate a sofa, coffee table, and potentially an accent chair without feeling cramped by the extra decor. The key is to have enough floor space so the layered rugs don’t feel like a tripping hazard and enough surface area on the sofa for the pillows to feel abundant, not overwhelming. In a very small living room, focus the ‘cozy’ on just one area, like a single chair, to avoid clutter.
29. Adorable and Festive with Ceramic Ghost Decorations
The charm of these ceramic ghosts lies in their simplicity and friendly expressions. They tap into a ‘cute’ Halloween aesthetic that feels playful and sweet rather than spooky. The smooth, matte texture of the ceramic gives them a modern, handcrafted feel, elevating them beyond typical plastic decorations. By creating them in a group, they form a little ‘family,’ which adds a layer of narrative and personality. The consistency in their design, paired with slight variations in pose, makes the collection feel cohesive and thoughtfully curated.

✅ Before You Start
If you love the look of these artisan ceramic ghosts but not the price tag, salt dough is your best friend. It’s an incredibly cheap and easy DIY project. Just mix 2 cups of all-purpose flour, 1 cup of salt, and 1 cup of water to form a dough. Sculpt your ghost shapes, use a toothpick to create eyes, and bake at 250°F (120°C) for about 2-3 hours until completely hard. Once cool, you can leave them natural or paint them. You can make dozens of these for just a few dollars in pantry staples. It’s a fantastic way to get a custom, handcrafted look for virtually no cost.
Your Coziest, Spookiest Season Starts Now
With a little inspiration, you can move beyond the plastic skeletons and create a Halloween atmosphere that feels personal, stylish, and genuinely you. Whether you go for gothic glam or rustic charm, the best looks tell a story. So pick an idea that speaks to you, make it your own, and have fun with it! Don’t forget to save your favorite ideas to your Pinterest board to get started.