You know that feeling when you finally find the side yard idea that looks *exactly* right for your space? That forgotten, awkward strip of land suddenly has potential. After filtering through hundreds of options across Wayfair, Home Depot, and Lowe’s, we narrowed it down to 24 ideas that actually deliver. Inside, you’ll find everything from lush cottage gardens to sleek modern walkways, designed to inspire your own transformation. In 2026, it’s all about ‘destination side yards’—turning that pass-through into a place you actually want to be. And stay until the end — we break down the most common mistakes that can ruin these looks. 📌 Pin this guide for later—your future self will thank you when it’s time to actually do this.
1. Arched Trellis with a Pink Rose Canopy and Bistro Seating
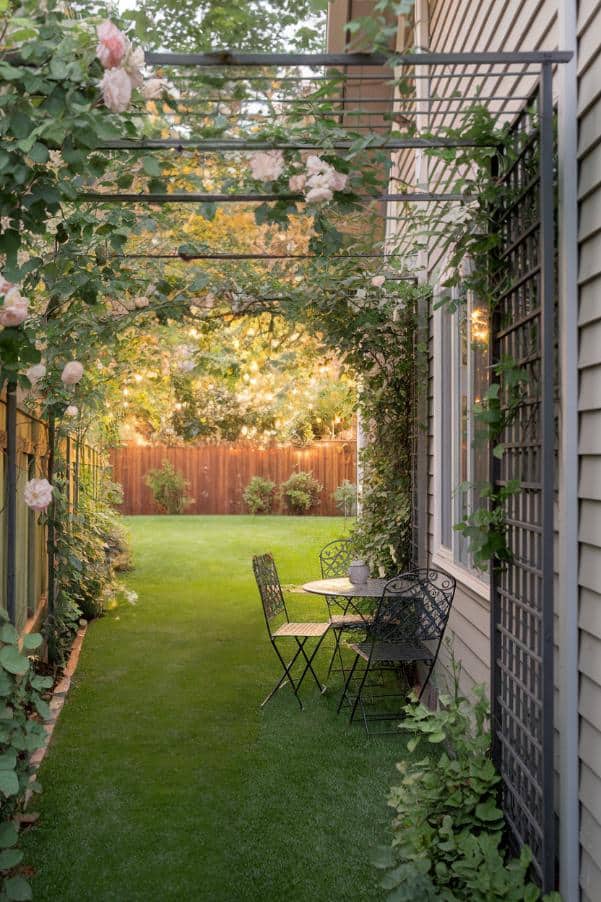
The arched metal trellis is the hero here. Without it, you just have a table on a patch of grass next to a house. With it, you have a destination. It creates a vertical ‘ceiling’ that defines the seating area, making the narrow yard feel like a deliberate, cozy room. The climbing roses add that magical, secret-garden quality that completely transforms the feeling of the space from a simple walkway to a romantic escape.
💰 Budget Breakdown
To get this lush look, choose a ‘climbing’ rose variety, not a ‘rambling’ one. Climbers have stiffer canes that are easier to train onto a trellis. Secure the main canes to the arch with soft plant ties, aiming for a 45-degree angle to encourage more blooms along the entire stem. For a dense canopy like this, you’ll need at least two plants, one on each side of the arch, and about 2-3 years of growth to achieve full coverage.
2. Modern Walkway with Linear Pavers and Grass Inlays
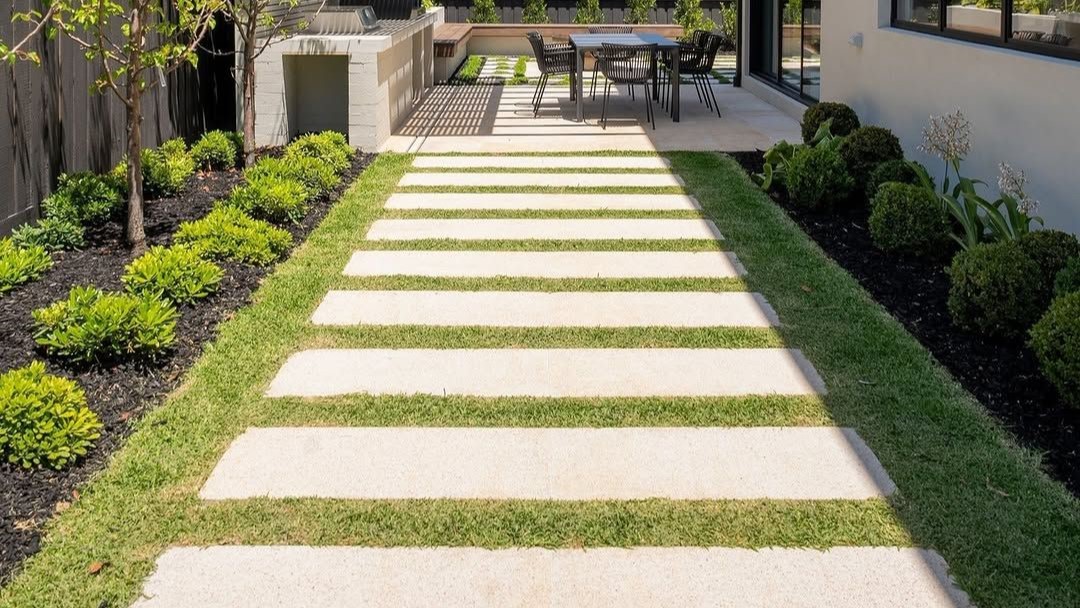
This design is a masterclass in using lines to create a sense of order and length. The rectangular pavers and the green grass strips between them create strong parallel lines that draw your eye forward, making the narrow space feel longer and more intentional. The contrast between the hard, light-colored concrete and the soft, green grass adds visual interest without feeling busy. It’s clean, structured, and incredibly effective in a tight space.
🔧 How-To Brief
This look is ideal for side yards that are 5 to 8 feet wide. The key is the paver-to-grass ratio. For stability and a comfortable walking surface, each paver should be at least 24 inches wide. The grass strips should be kept narrow, around 2-4 inches, to maintain the crisp linear look and make mowing easier. If your side yard is wider, you could add a second row of pavers. For something cozier, check out the bistro setup in Idea #1.
3. Lush Garden Entry with a Vine-Covered Arch and Stepping Stones
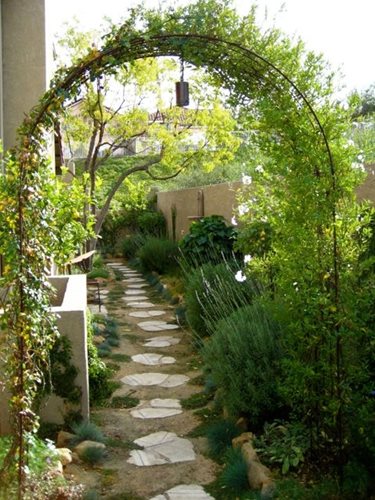
A path made of irregular stepping stones looks wonderfully rustic, but be honest about who will be using it. The uneven surfaces can be a tripping hazard, especially for kids, older adults, or anyone carrying groceries. In wet or icy conditions, natural stone can become slippery. If accessibility and safety are top priorities, a more uniform path like the one in Idea #2 might be a better fit. This is a look for sure-footed people who love a wild garden vibe.
📐 Style Math
This magical, overgrown feel comes from a specific formula: 70% lush, dense foliage + 20% hardscape (the stepping stones and low wall) + 10% architectural element (the vined archway). The key is letting the plants be the star. Choose a variety of textures and shades of green. The hardscape should feel like it was placed within the garden, not the other way around. The arch acts as a focal point and a gateway, inviting you into the secluded space.
4. Modern Gravel Path with Bamboo Privacy Screening
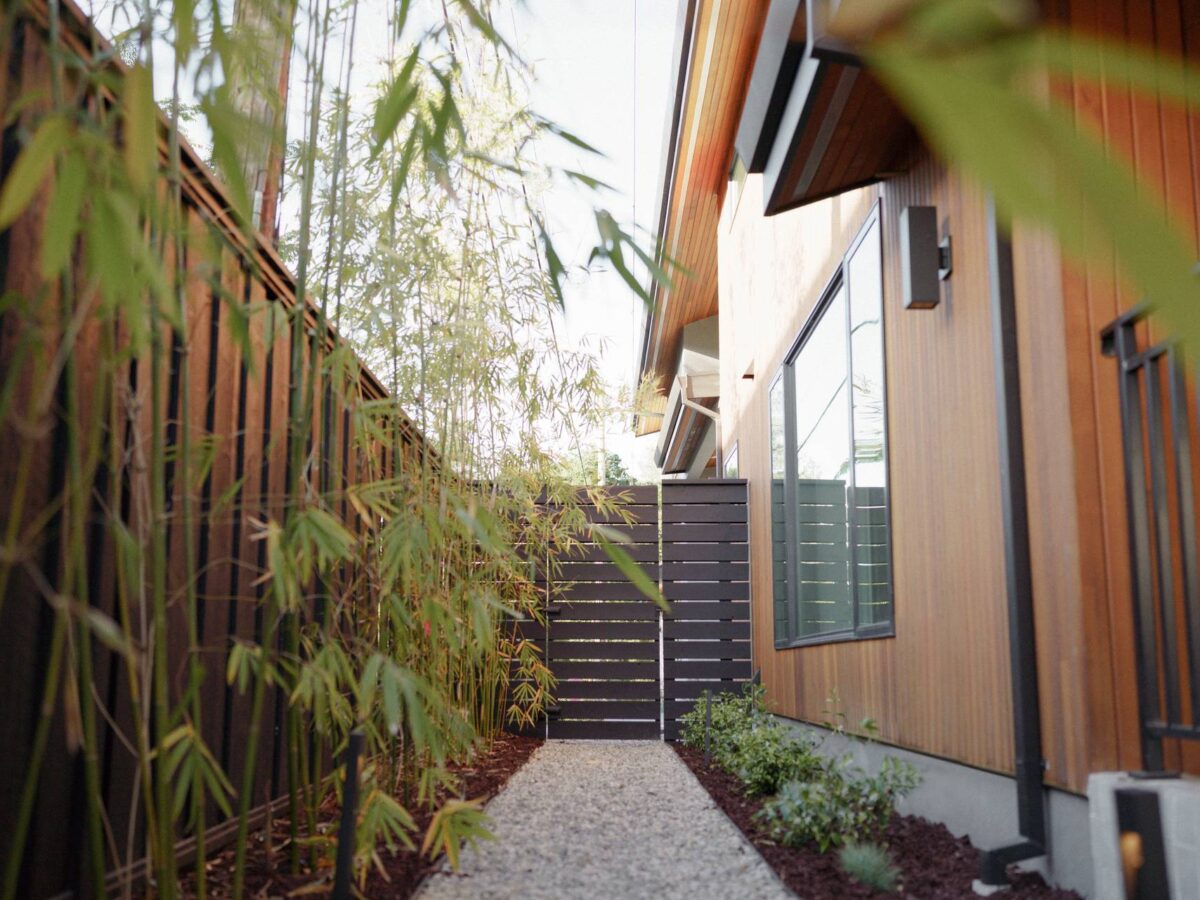
Bamboo is a fantastic natural screen, but you absolutely must use the right kind. Opt for ‘clumping’ bamboo (like Fargesia varieties), not ‘running’ bamboo. Running bamboo sends out aggressive underground rhizomes that will take over your yard, your neighbor’s yard, and possibly challenge your house’s foundation. Even with clumping varieties, it’s wise to install a root barrier 24-30 inches deep during planting to keep it perfectly contained.
📏 Scale Guide
For a gravel path that feels stable and neat, the secret is in the layers. First, lay down a high-quality landscape fabric to prevent weeds. Then, add a 2-3 inch base layer of crushed rock and tamp it down firmly. Your top layer of decorative gravel (like the light gray pebbles here) only needs to be 1-2 inches deep. The firm base prevents that mushy, sinking feeling and keeps the gravel from migrating into your mulch beds.
5. Clean Concrete Paver Path with Low Hedges and Bollard Lights
The power of repetition is on full display here. The rhythmic placement of the bollard lights creates a guide for the eye and a sense of calm order. This repetition turns a simple path into a deliberate design feature. The low, neatly trimmed hedge reinforces this linear feel, acting as a soft, living wall that defines the edge of the walkway. The combination of clean lines in the pavers, hedge, and lights gives the space a sophisticated, almost commercial-grade polish.
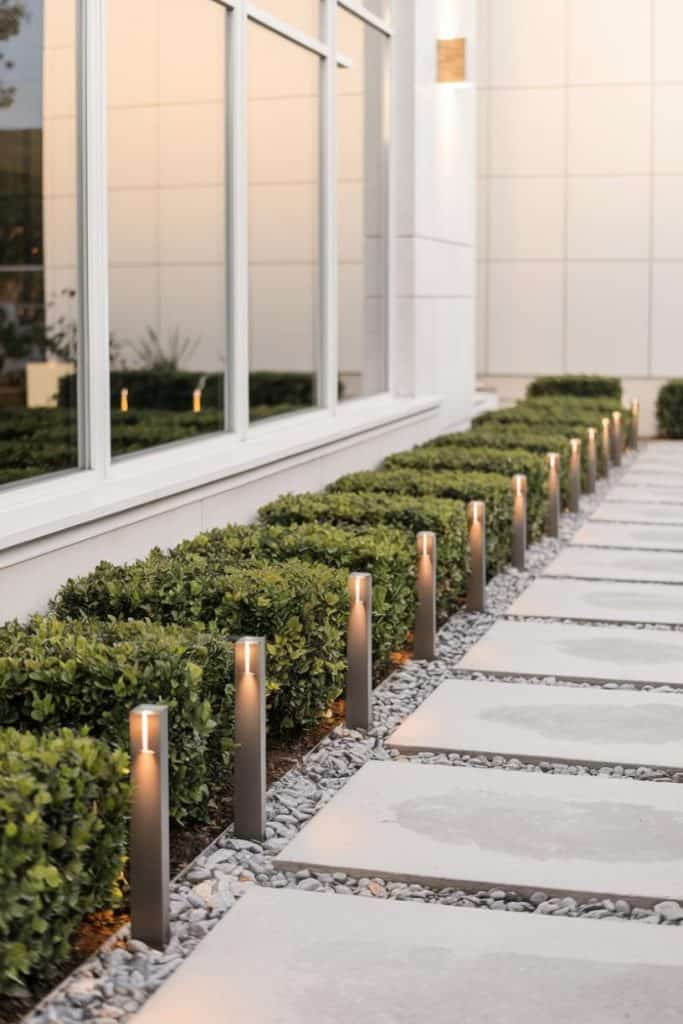
🧹 Maintenance Reality
Hardwired bollard lights like these can be expensive to purchase and install ($100-$300+ per light plus electrician fees). You can get a very similar effect for a fraction of the cost with solar-powered LED pathway lights. Look for models with a simple, dark grey or black finish and a modern, cylindrical shape. A set of 6-8 good quality solar lights from Target or Amazon can run you $60-$120 total, and you can install them yourself in an afternoon.
6. Tropical Side Path with a Rustic Stone Retaining Wall
The rustic stone retaining wall is what gives this side yard its soul. It provides a massive dose of texture and natural, earthy color that beautifully contrasts with the smooth white siding of the house. It feels ancient and established. Take away the wall, and you’d have a simple planting bed. With the wall, you have a layered, dynamic landscape with depth and character. The trailing vines softening its edges are the perfect finishing touch.
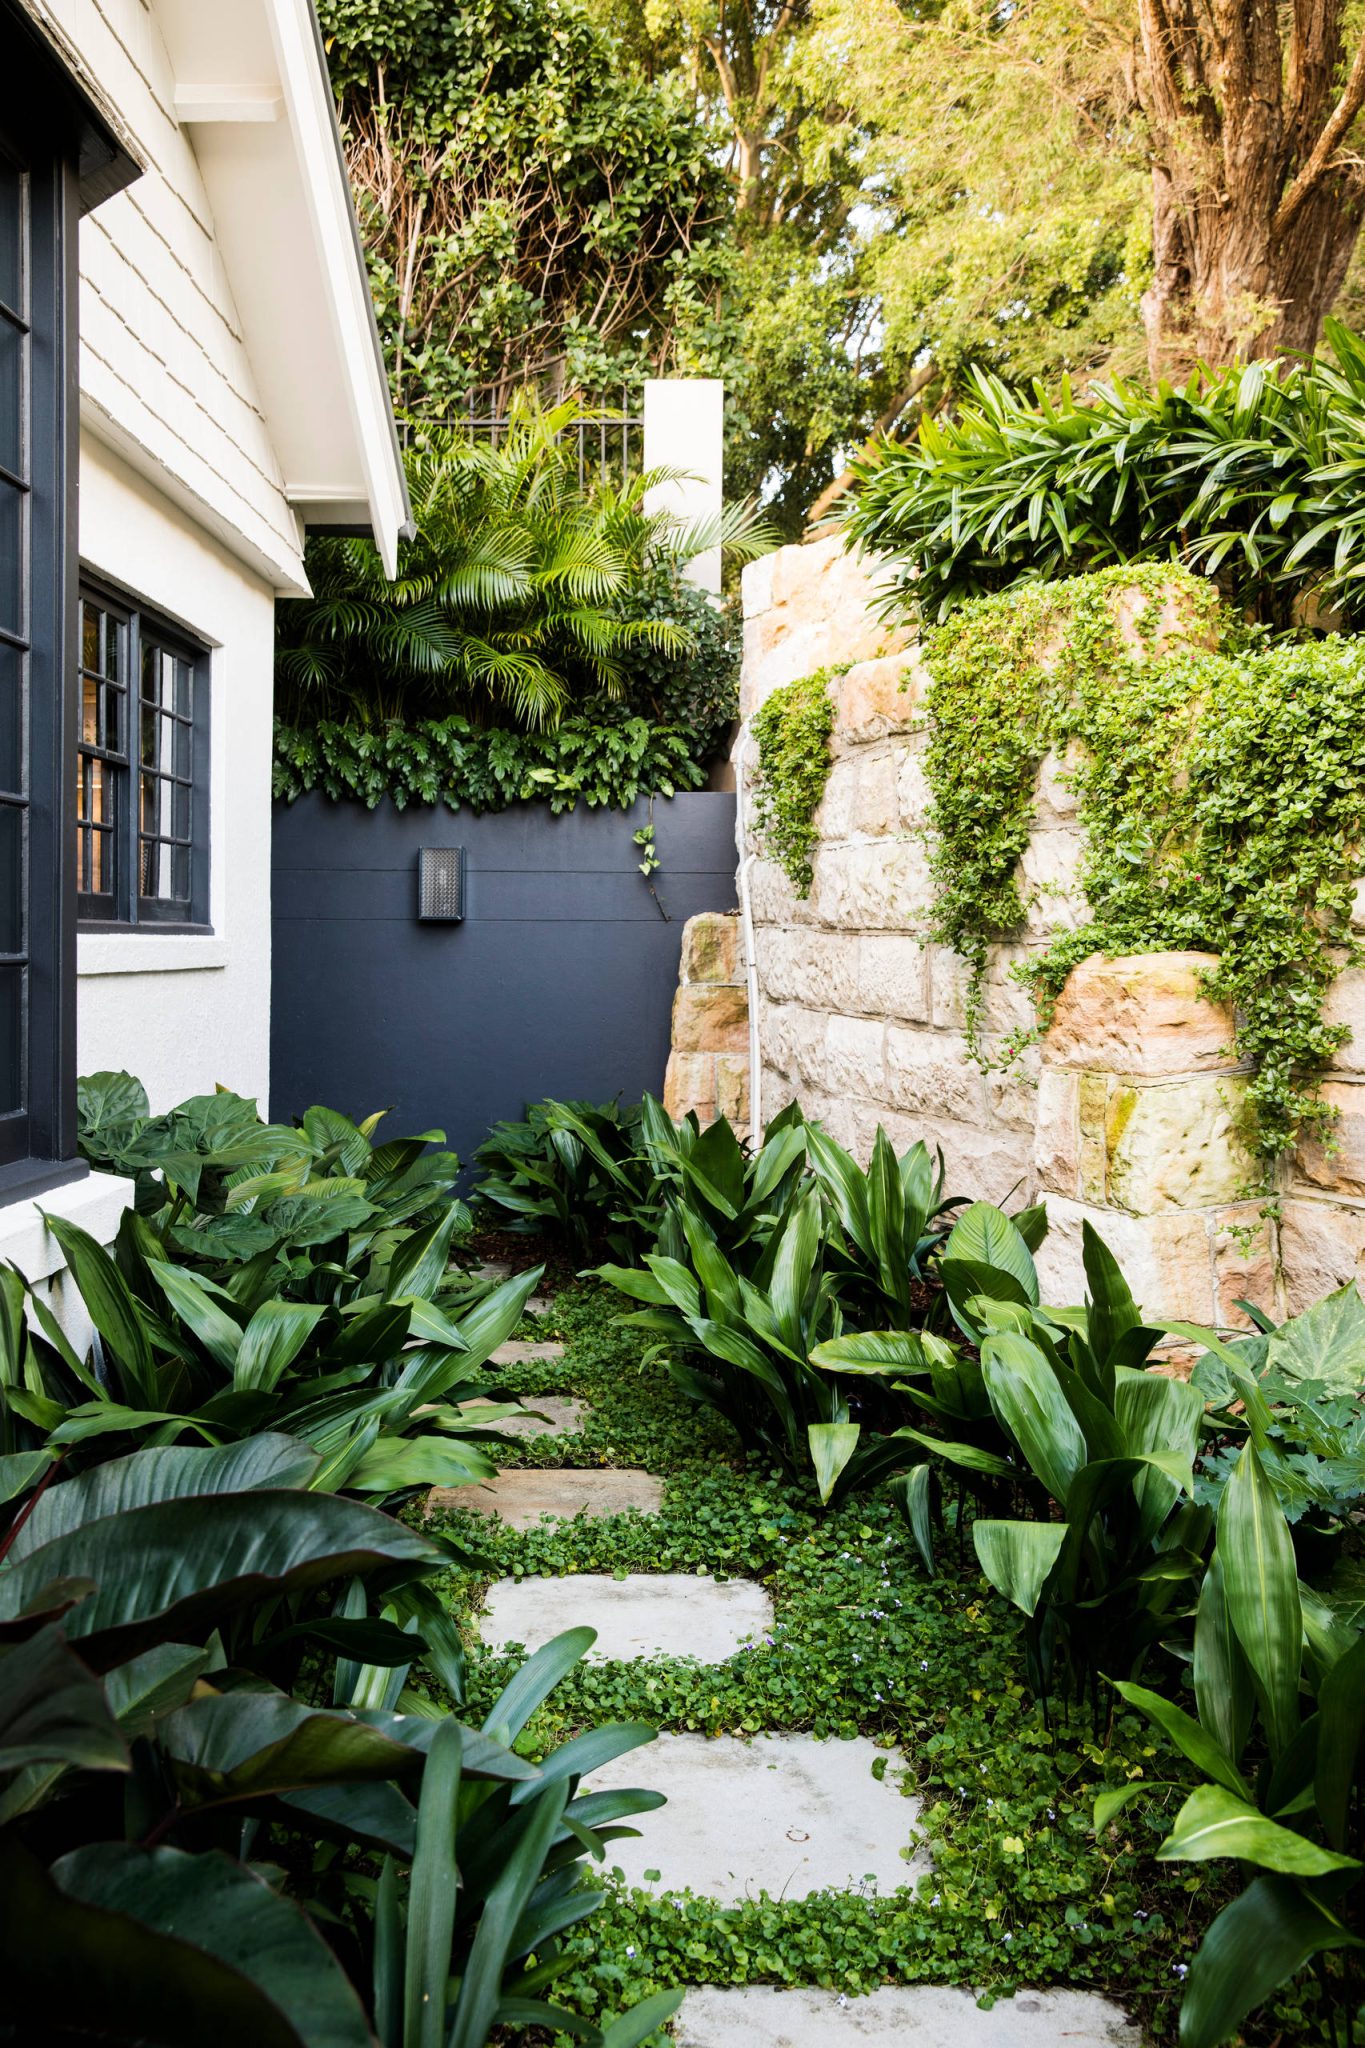
🔥 Trending Context
This look achieves a beautiful balance of textures. It’s roughly 50% lush, soft foliage (the tropical plants and ground cover) + 30% rough, natural texture (the stone wall) + 20% smooth, modern surfaces (the white siding and dark grey panel). This blend is what makes it feel both serene and visually interesting. If you switched the stone wall for a smooth stucco one, the whole vibe would shift from textured and rustic to sleek and modern.
7. Narrow Side Yard with Raised Concrete Planters and a Metal Fence
This design is a lifesaver for extremely narrow side yards, even those as tight as 3-4 feet wide. By lifting the garden up into raised planters, you keep the walkway clear and defined. The planters should be at least 18 inches tall to have a real presence, but keep their width to 12-18 inches to maximize path space. Using tall, slender plants, rather than wide, bushy ones, also helps maintain that verticality and prevent the space from feeling choked. Compare this to the wider, meandering path in Idea #3.
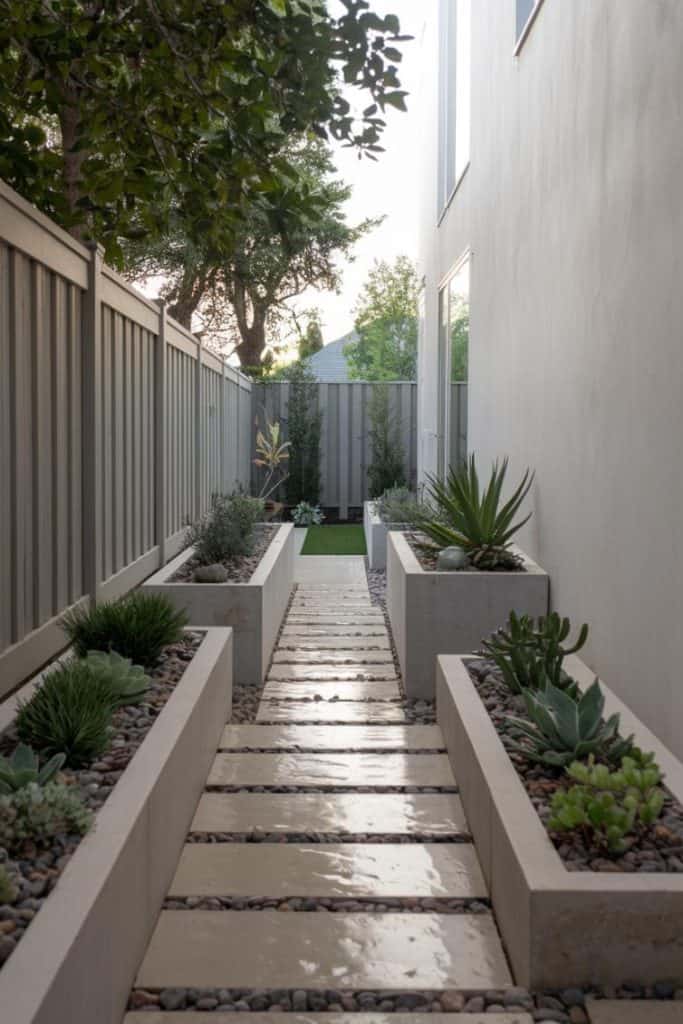
✅ Before You Start
Install a Corrugated Metal Fence (DIY). Estimated time: 1 day. Cost: $15-$25 per linear foot.
- Set your posts (wood or metal) in concrete, ensuring they are plumb and spaced no more than 8 feet apart.
- Install horizontal stringers (wood 2x4s or metal rails) at the top, middle, and bottom between the posts.
- Stand your first corrugated metal panel against the frame, ensuring it’s level.
- Secure the panel to the stringers using self-tapping roofing screws with neoprene washers. The washers are key to preventing leaks and rust streaks.
- Overlap the next panel by one corrugation ‘rib’ and continue screwing them into place.
8. Cottage Garden with a Brick Path and a Flowering Pergola
This is the ‘Cottagecore’ dream, and it’s a trend with serious staying power. It’s a reaction against minimalist, sterile spaces, leaning into nostalgia, romance, and a connection to nature. People are craving spaces that feel personal, a little wild, and full of life. A brick path, a wooden pergola dripping with flowers—these elements feel handmade and timeless. This isn’t about perfection; it’s about creating a charming, slightly magical escape right outside your door.
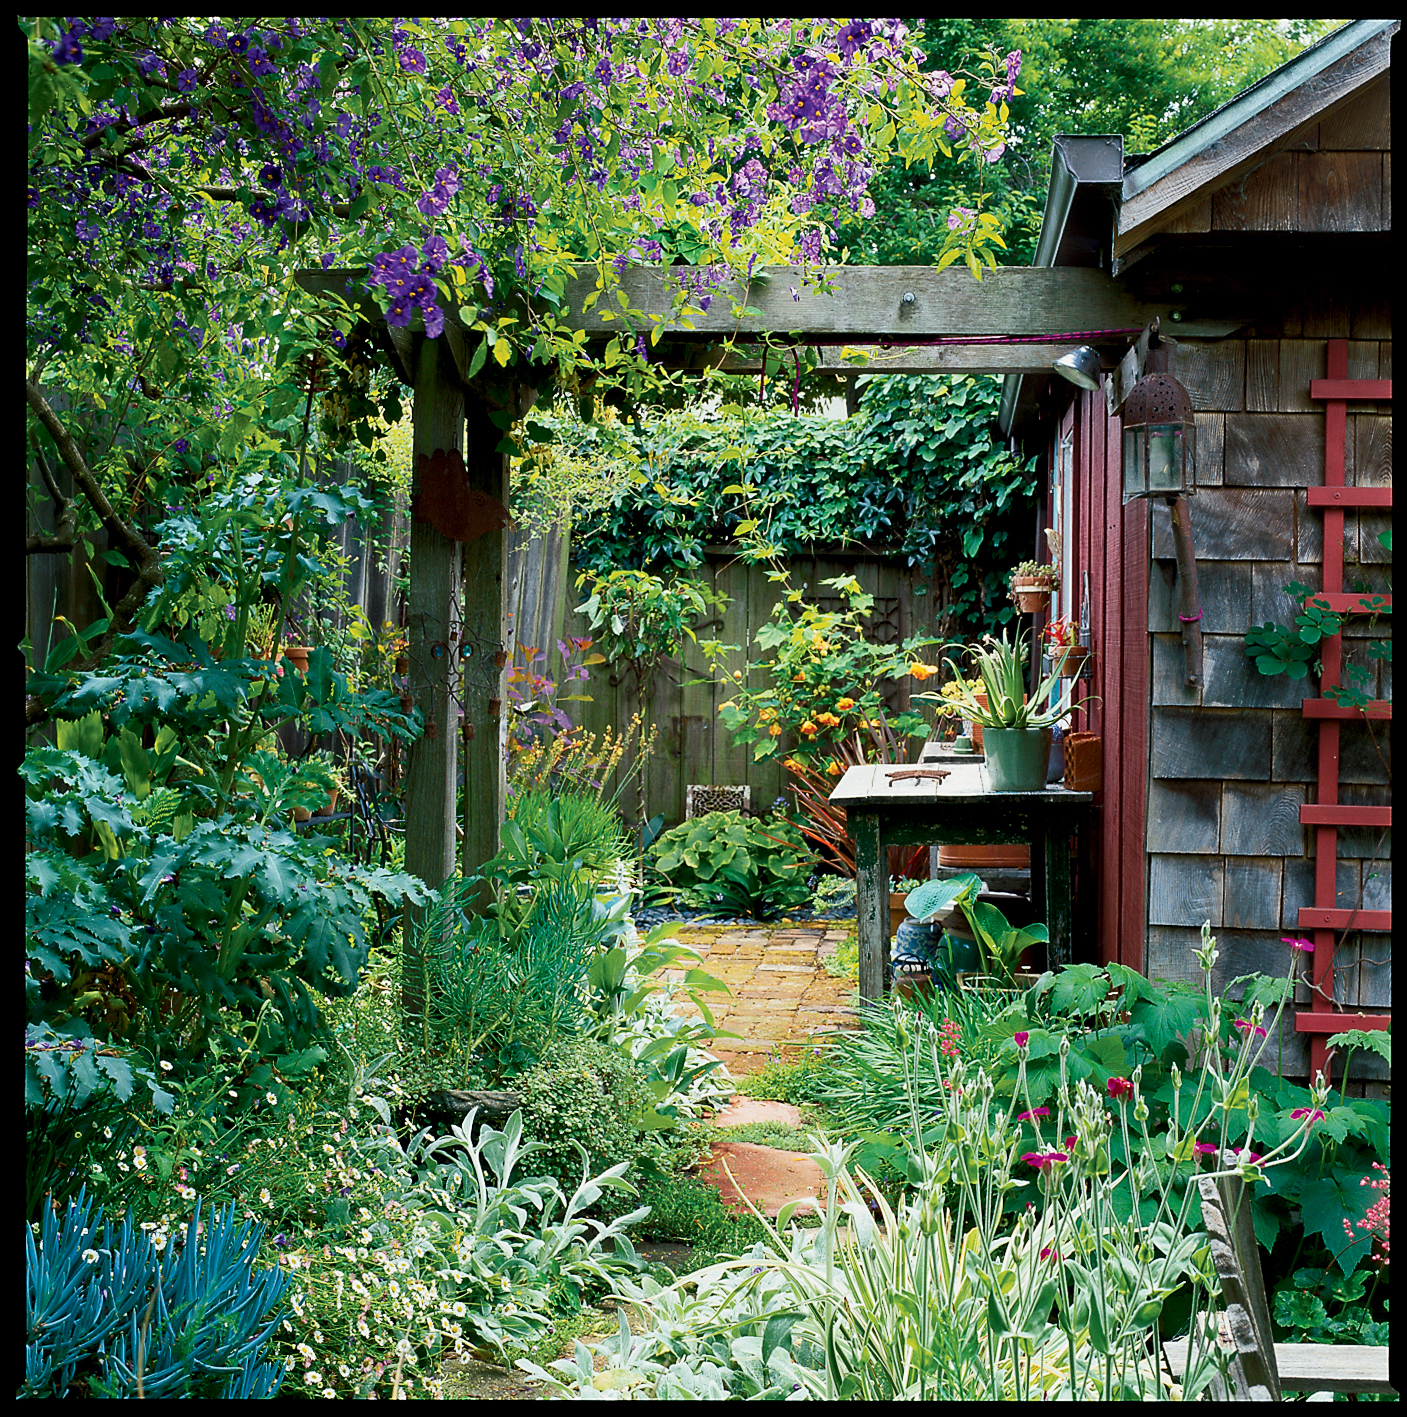
🎯 What Makes It Work
A gorgeous wooden pergola requires upkeep. To keep it from rotting or weathering unattractively, you’ll need to clean it and apply a fresh coat of sealant or stain every 2-3 years, depending on your climate. And those beautiful flowering vines? They need regular pruning to keep them from getting too heavy, pulling on the structure, or blocking the path entirely. It’s a commitment, but for a look this enchanting, many gardeners find it’s well worth the effort.
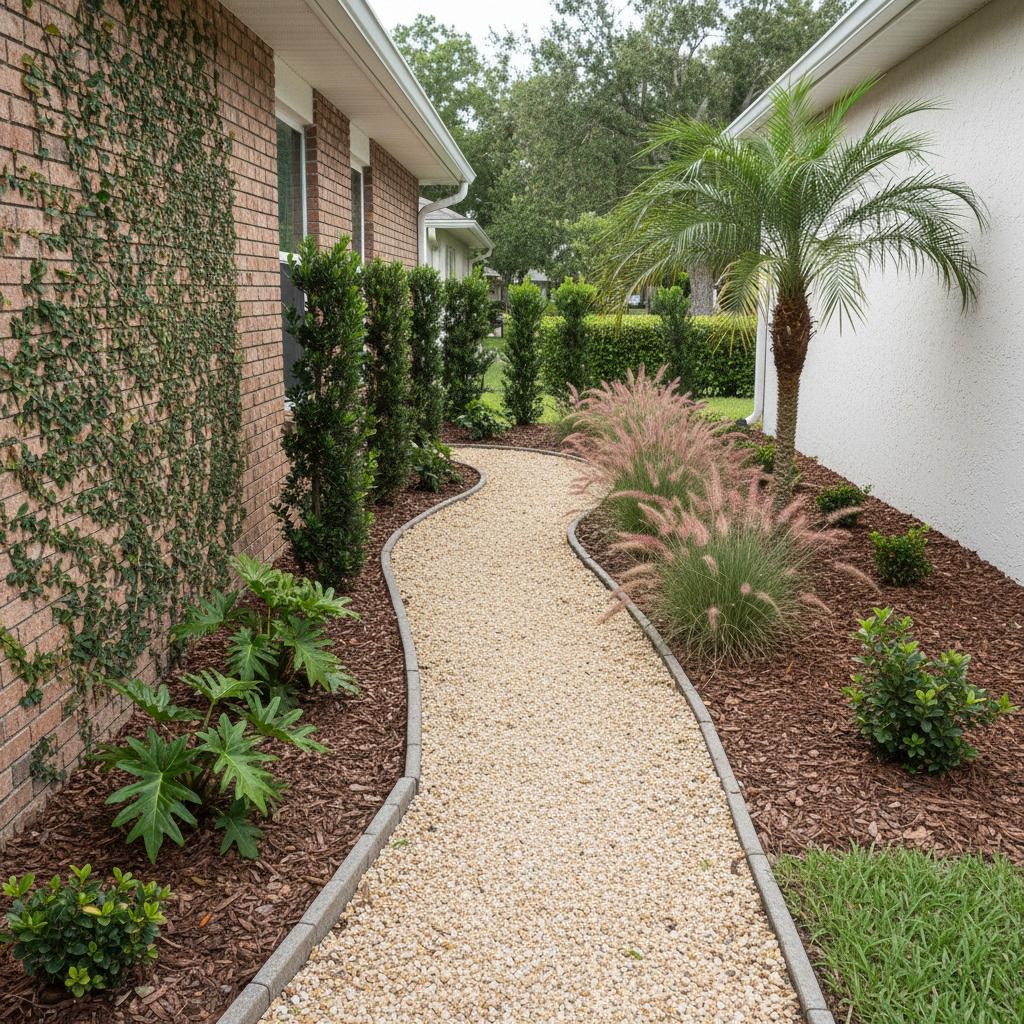
9. Winding Gravel Path Flanked by Brick and Stucco Walls
Creating a gentle, natural-looking curve in a path is an art. Avoid abrupt, jerky turns. A good trick is to lay out two garden hoses on the ground to define the edges of your path. You can easily adjust the hoses to create smooth, sweeping curves until you find a shape you love. Once you’re happy with the layout, you can use spray paint to mark the lines on the ground before you start digging. This ensures the final result feels intentional and graceful, not accidental.
💸 Get This Look For Less
A gravel path is a fantastic, permeable solution, but it isn’t ‘set it and forget it’. To keep it looking crisp, you’ll need to rake it a few times a year to smooth out divots and redistribute the stones. Leaves and debris need to be removed with a leaf blower (on a low setting) or a rake. Weeds can still occasionally pop through, even with landscape fabric, so some minor hand-weeding will be necessary. Topping it up with a fresh layer of gravel every 4-5 years keeps it looking fresh.
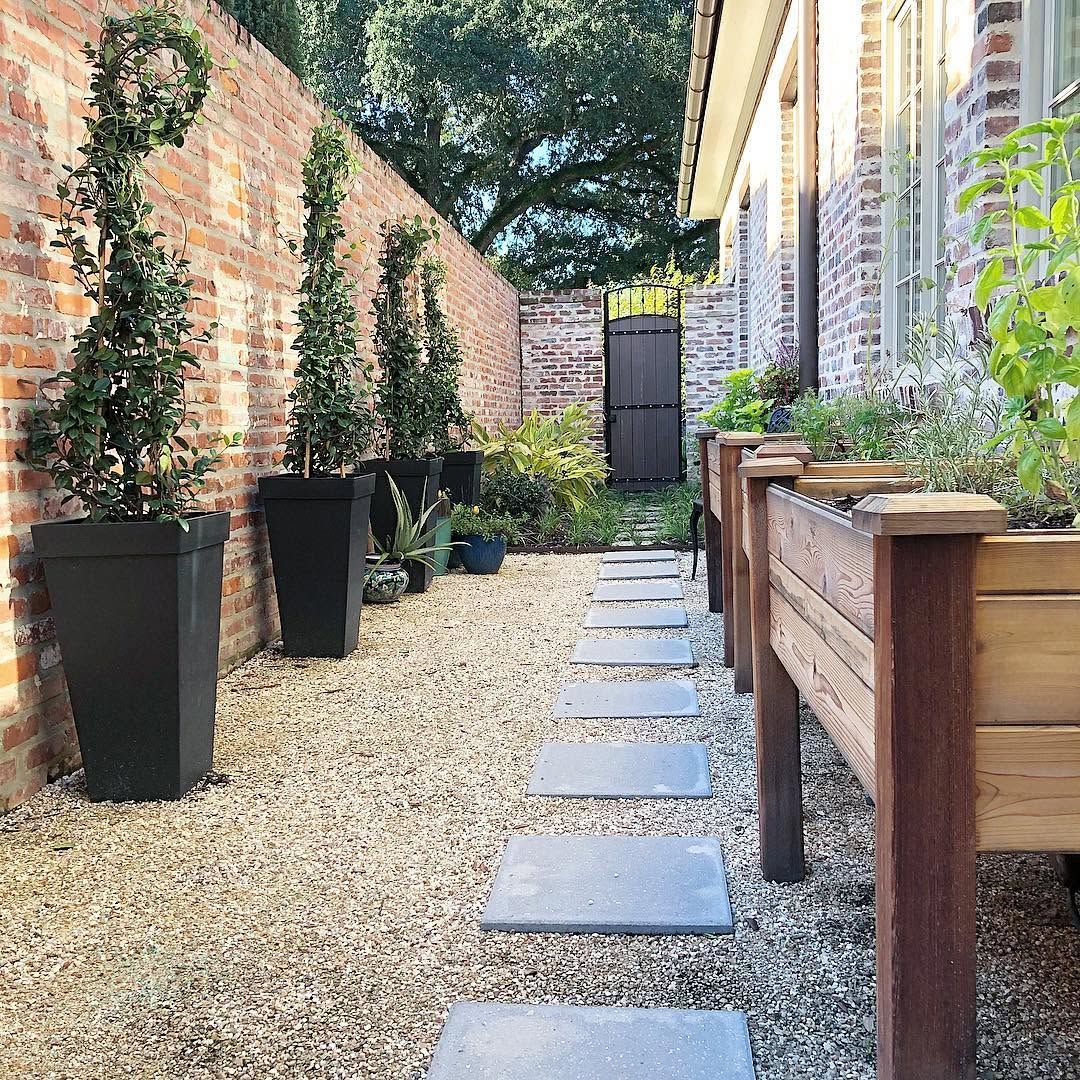
10. Functional Side Yard with Raised Garden Beds and a Gravel Path
- Main Furniture: Raised light wood garden beds (2) – $300-$600
- Ground Cover: Gravel & stepping stones for 150 sq ft – $250-$500
- Decor/Accessories: Tall dark square planters (2) & trellises – $200-$400
- Plants: Assorted greenery & climbers – $150-$350
- TOTAL: $900 – $1,850
- Budget alternative: Build your own raised beds from cedar fence pickets, use pea gravel from a landscape supply yard, and shop end-of-season plant sales to get this look for around $400-$750.
⭐ The One Thing
- What kind of sun does this spot get? Track the light for a full day. Most vegetables and many flowers need 6+ hours of direct sun to thrive in raised beds.
- Is there a water source nearby? Dragging a hose from the front of the house gets old fast. Plan for irrigation or a convenient spigot.
- How will you get soil and compost to the beds? Make sure your path is wide enough for a wheelbarrow.
- Have you tested your soil? Even for raised beds, it’s good to know what you’re working with for any in-ground plantings.
11. Cozy Side Yard Nook with Bamboo Planters and String Lights
The overhead string lights are the single most transformative element in this space. During the day, it’s a pleasant path. At night, those lights create a magical, festive canopy that turns a narrow corridor into an inviting outdoor room. They provide a soft, warm glow that makes the space feel intimate and usable after dark. Without them, the bench and planters would just be sitting in the dark; with them, it’s a destination.
⚠️ Real Talk
Those tall, modern planters can be pricey. You can achieve a similar look by building your own planter boxes out of pressure-treated lumber or even weather-resistant composite decking boards. For the seating, skip the new outdoor bench and search Facebook Marketplace or thrift stores for a simple wooden bench you can paint or seal. A little sanding and a coat of exterior paint can work wonders. The whole vibe can be recreated for under $300 with some savvy shopping and DIY spirit.
12. Weathered Garden Gate Framed by Lush Hydrangeas
The formula for this enchanting entrance is simple: 60% dense, untamed greenery + 20% statement blooms (the white hydrangeas) + 10% rustic structure (the weathered gate) + 10% traditional hardscape (the paver path). The key is the abundance of foliage that feels like it’s spilling onto the path and framing the gate. The pop of white from the hydrangeas provides a bright, cheerful contrast against all the deep green, drawing your eye right to the entrance.
💡 Designer Tip
This composition uses a classic design trick: framing. The dense foliage on either side of the gate acts as a natural frame, creating a ‘vignette’ that draws your focus to the gate and the path beyond. The curved pathway adds to the charm, creating a sense of mystery and discovery—you can’t see what’s around the bend, which makes you want to explore. It’s a much more engaging experience than a straight, predictable path. For another take on a garden entrance, see the archway in Idea #3.
13. Serene Side Yard with a Modern Water Feature and Spotlight
When using an uplight on a feature like this fountain, placement is everything. Position the in-ground spotlight about 12-18 inches away from the base and angle it slightly upwards. This ‘grazing’ technique highlights the texture of the material—in this case, the dark, rough stone—creating dramatic shadows and depth. If you place the light too close, you’ll get a ‘hot spot’; too far, and you’ll just wash the whole thing out. It’s all about accentuating the form and texture.
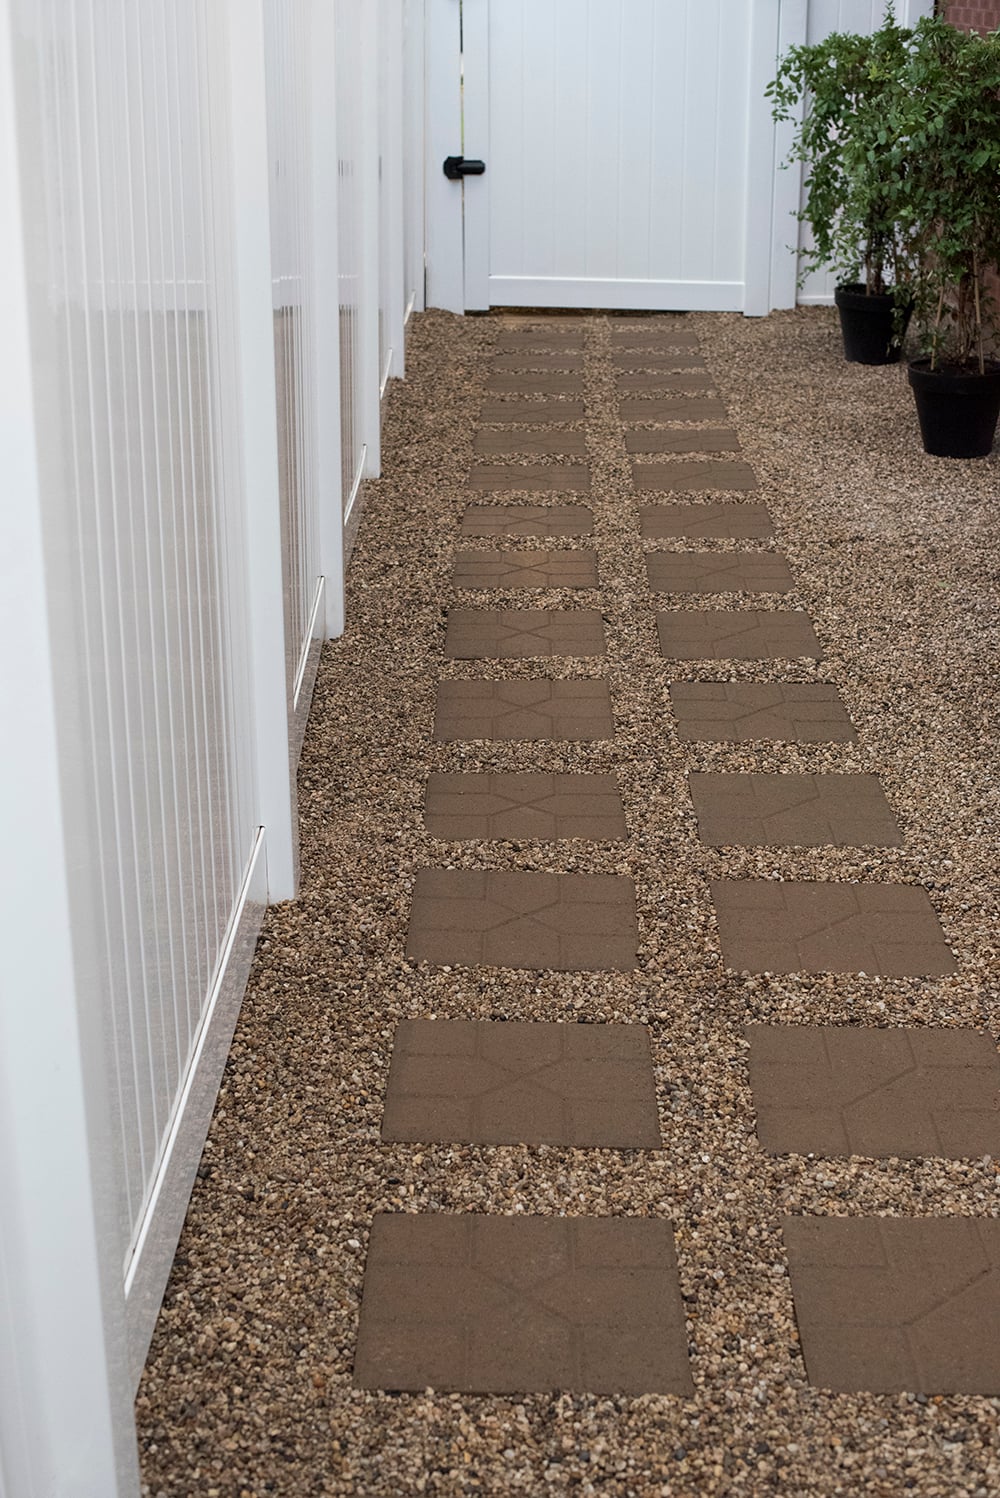
💰 Budget Breakdown
A water feature adds incredible tranquility, but it’s not a zero-maintenance element. The pump will need to be cleaned of debris every few months to prevent clogs. You’ll also need to periodically add water to compensate for evaporation, especially in sunny or windy weather. And consider the sound: a loud, splashing fountain might be annoying if it’s right outside a bedroom window. Look for models with adjustable flow rates so you can control the volume.
14. Sleek Side Path with Gravel, Stepping Stones, and a Slatted Fence
This clean, modern aesthetic is exceptionally well-suited for very narrow side yards, from 4 to 6 feet wide. The light colors of the gravel and wood fence help the space feel brighter and wider than it is. Using large rectangular pavers (at least 2×3 feet) creates an uncluttered look and makes the path feel more substantial. The key is to keep the planting palette simple and vertical, using slender plants that won’t encroach on the walkway. This is a very different approach from the dense planting in Idea #19.
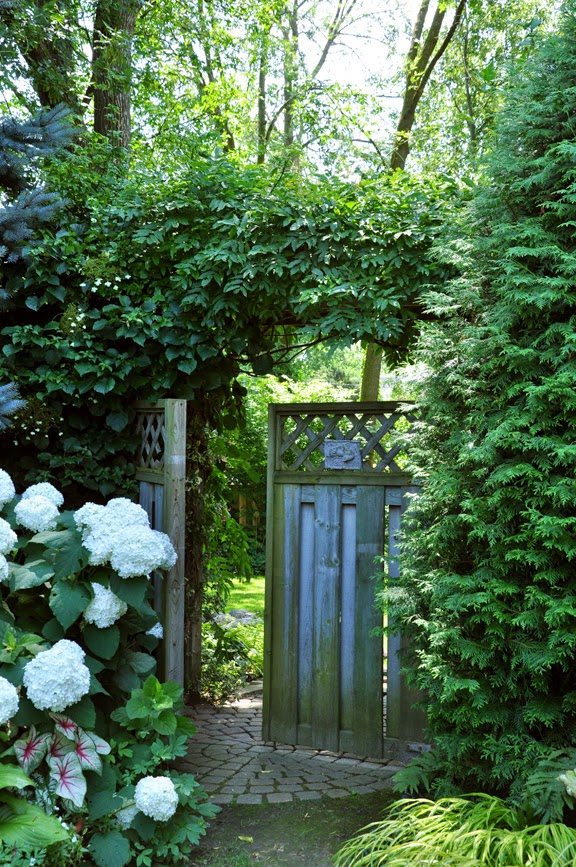
🔧 How-To Brief
A light-colored wood fence like this is stunning, but it requires the most maintenance to keep it looking pristine. It will need to be cleaned annually to remove mildew and dirt, especially in shaded or damp climates. Expect to re-apply a clear or lightly tinted sealant every 1-2 years. Any delay can lead to graying or dark water stains that are difficult to remove. If you love the look but hate the work, consider composite fencing in a similar light wood tone.
15. Tidy Gravel Walkway with Trellised Climbing Plants
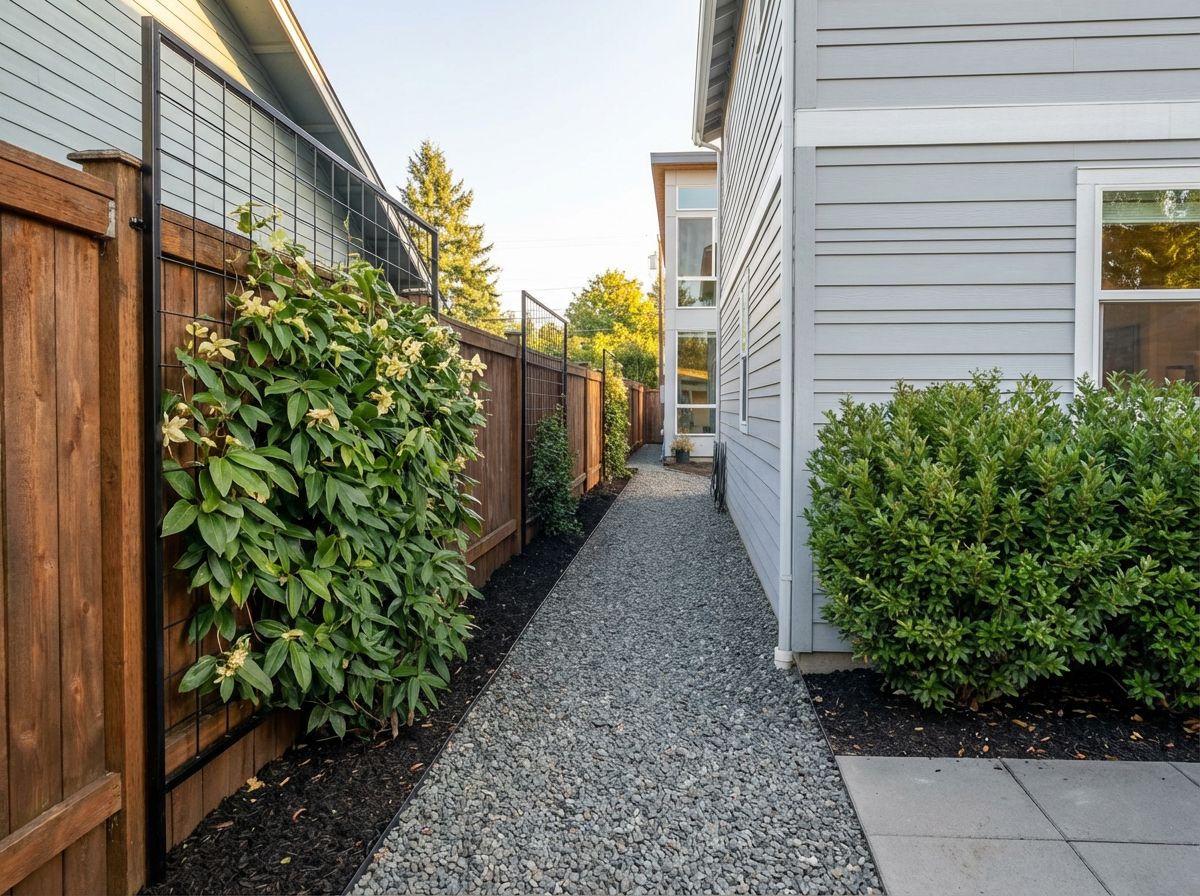
Mount a Trellis on a Wooden Fence. Estimated Time: 1 hour. Cost: $30-$80 per trellis.
- Choose your trellis. A simple black metal grid like this one offers a great modern contrast to the wood.
- You need a gap between the fence and the trellis for air circulation and for the vines to wrap. Use 1-2 inch wood blocks as spacers.
- Hold the trellis against the fence where you want it, mark the mounting points, and pre-drill holes through the trellis and into the wood spacers and fence posts/planks.
- Use exterior-grade screws long enough to go through the trellis, the spacer block, and securely into the fence.
- Gently start weaving your climbing plant onto the bottom of the trellis to encourage it to grow upwards.
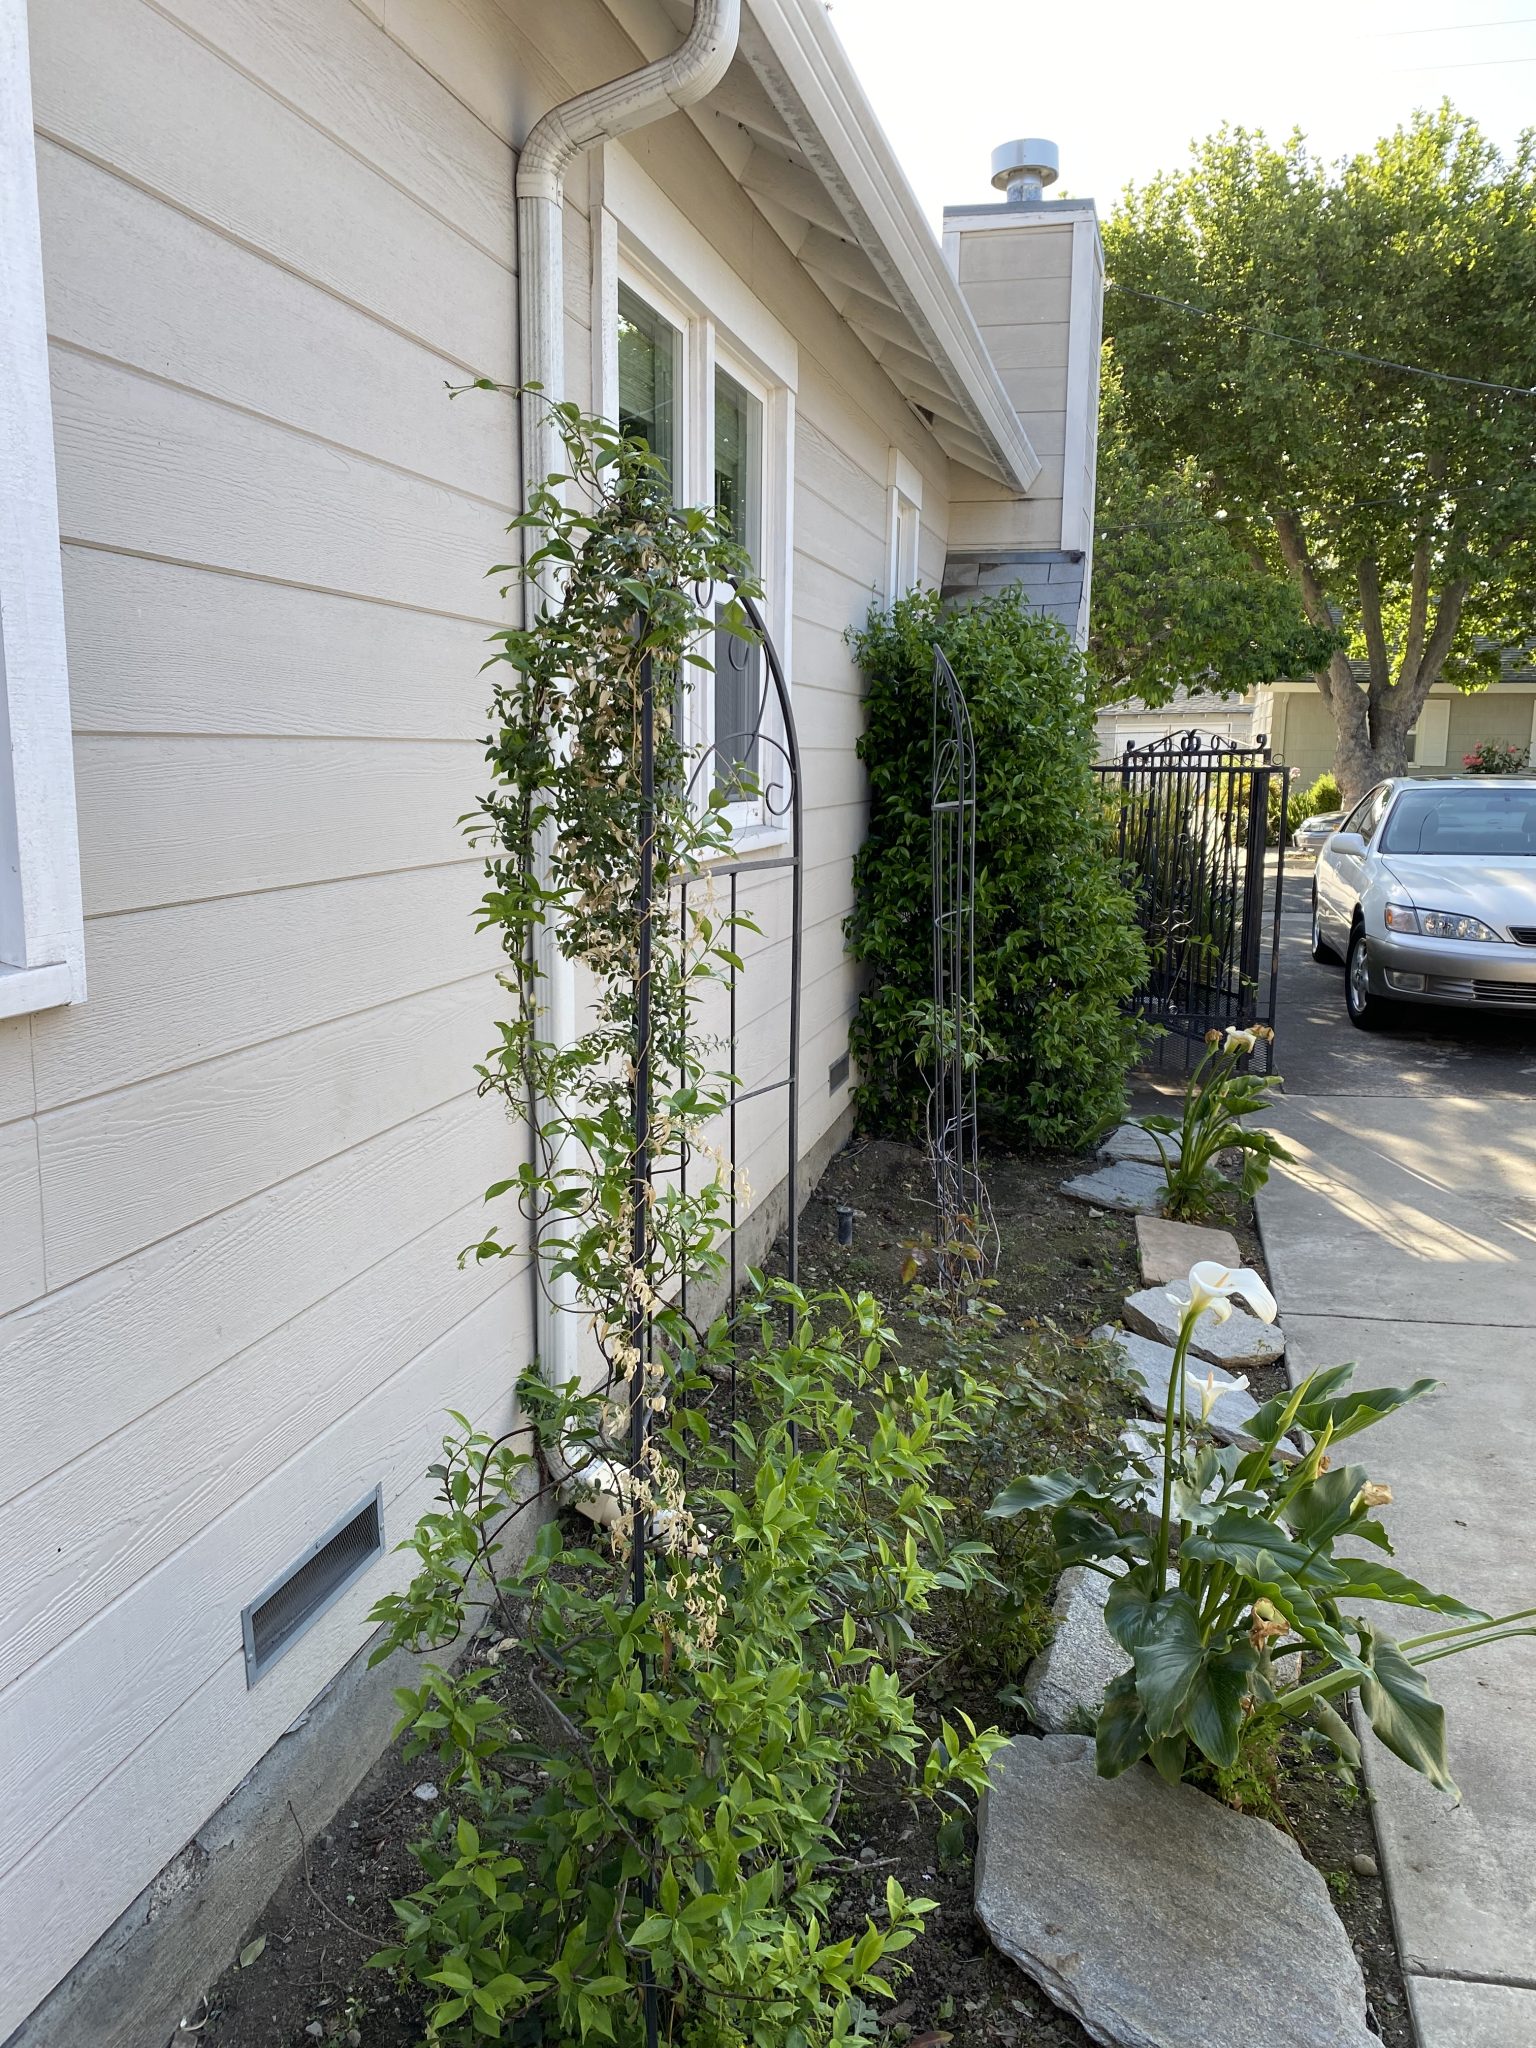
📐 Style Math
This design cleverly uses vertical space. In a narrow side yard, you don’t have much room to spread out horizontally. By adding trellises to the fence, the garden grows *up*, drawing the eye upward and making the space feel taller and more expansive. It turns a plain, functional boundary fence into a beautiful living wall, adding greenery and color without sacrificing a single inch of precious path width. It’s an incredibly efficient use of space.
16. Shaded Flagstone Path Through a Lush, Overgrown Garden
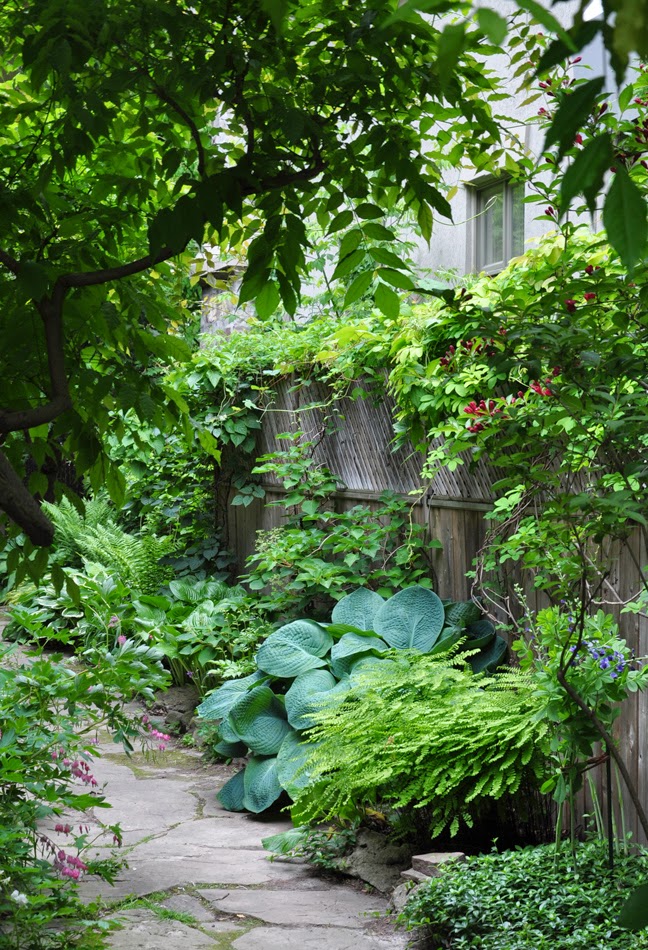
The shade is what makes this garden possible. The dense tree canopy creates the perfect microclimate for a woodland garden aesthetic, allowing shade-loving plants like hostas, ferns, and climbing vines to thrive. Without the shade, these plants would scorch, and the vibe would be completely different. The dappled light filtering through the leaves creates a tranquil, cooling effect that makes this narrow space feel like a secluded forest path. This look simply wouldn’t work in a hot, sunny side yard.
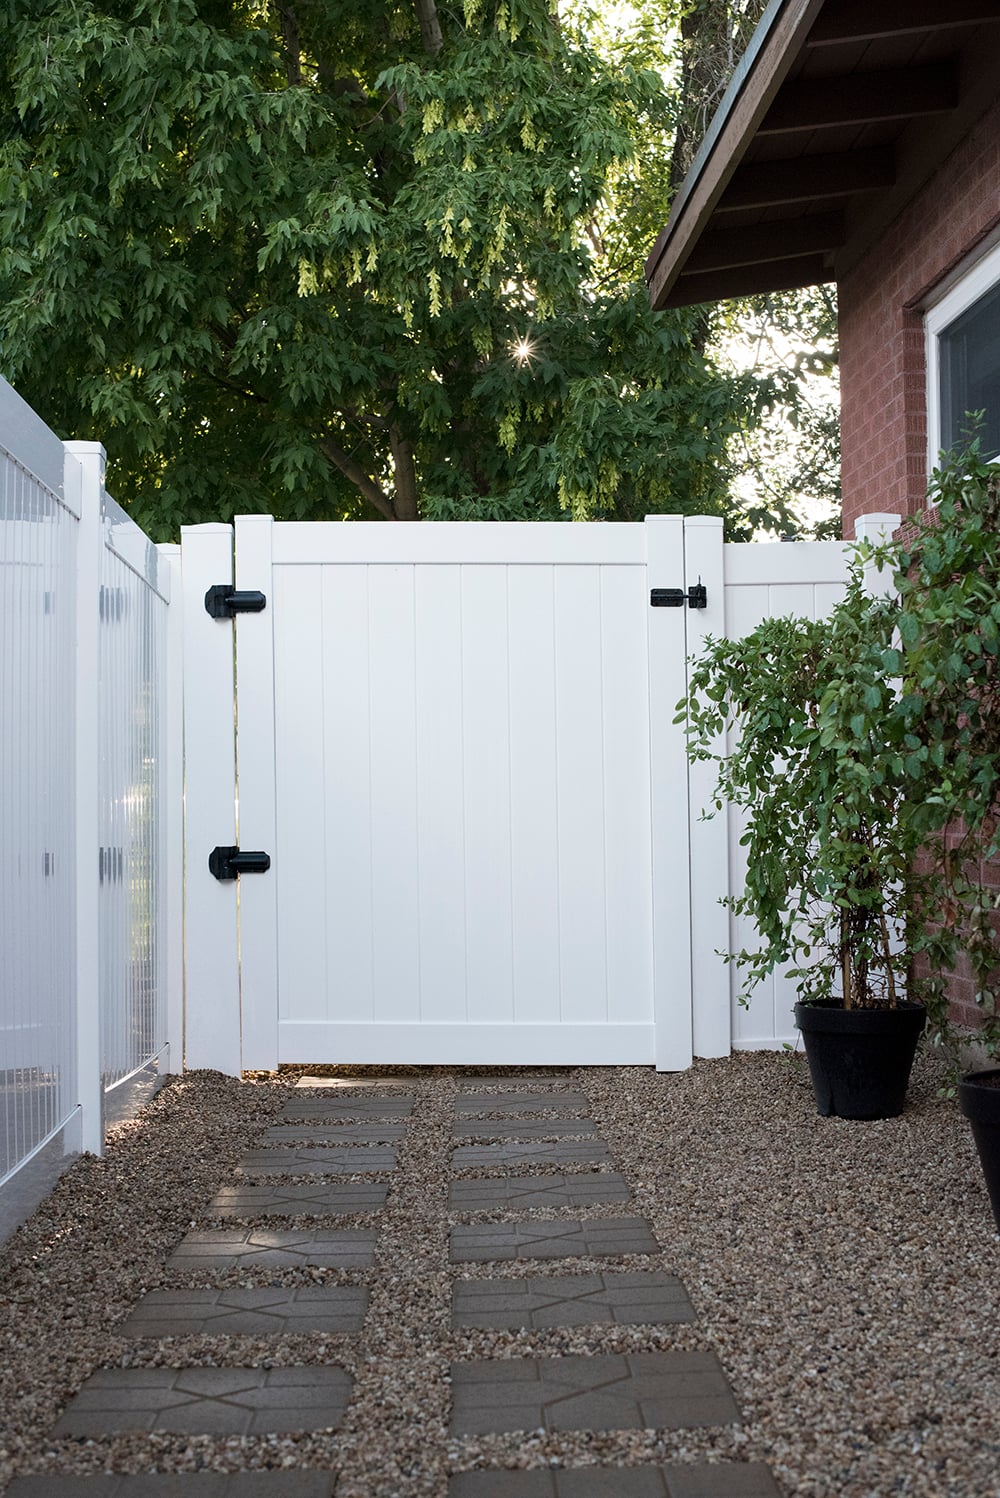
📏 Scale Guide
A path with lush, overhanging plants and natural flagstones can get very slippery, especially in the shade where moisture lingers. Moss and algae can grow on the stones, increasing the slip factor. You’ll need to scrub the path with a stiff brush and water (or a specialized cleaner) at least once a year to keep it safe. Also, be prepared for some serious pruning to keep the path from becoming completely impassable as the hostas and ferns reach their mature size.
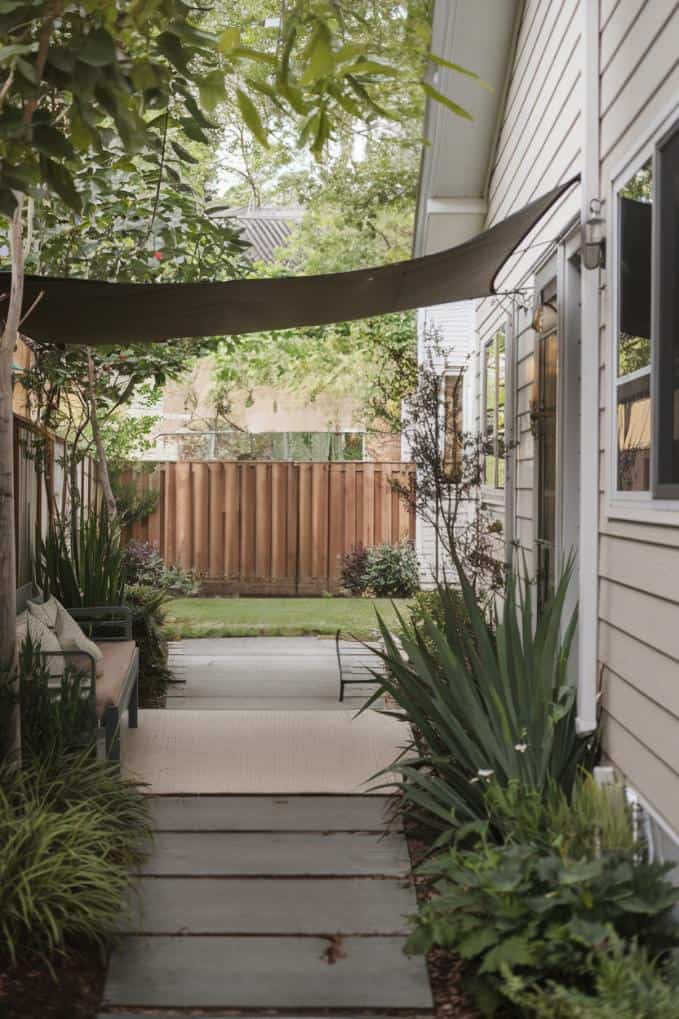
17. Shaded Side Yard Patio with a Fabric Sun Shade
- Main Furniture: Dark metal outdoor bench with cushions – $250-$600
- Lighting/Shade: Large fabric sun shade sail & hardware – $100-$300
- Hardscape: Rectangular concrete pavers for 100 sq ft – $400-$800
- Plants: Assorted landscaping shrubs and groundcover – $200-$500
- TOTAL: $950 – $2,200
- Budget alternative: Find a used bench on Facebook Marketplace, use more affordable pre-cast pavers from a big-box store, and buy smaller plants that will grow over time to get this look for around $500-$900.
🧹 Maintenance Reality
To get a taut, professional-looking installation for a sun shade sail, tension is everything. Install your anchor points (on the house fascia and fence posts) at slightly different heights. This slight twist in the fabric not only looks more dynamic but also helps it shed rainwater and resist flapping in the wind. Use heavy-duty turnbuckles at each corner; they allow you to crank up the tension after the initial installation for a perfectly smooth, tight canopy.
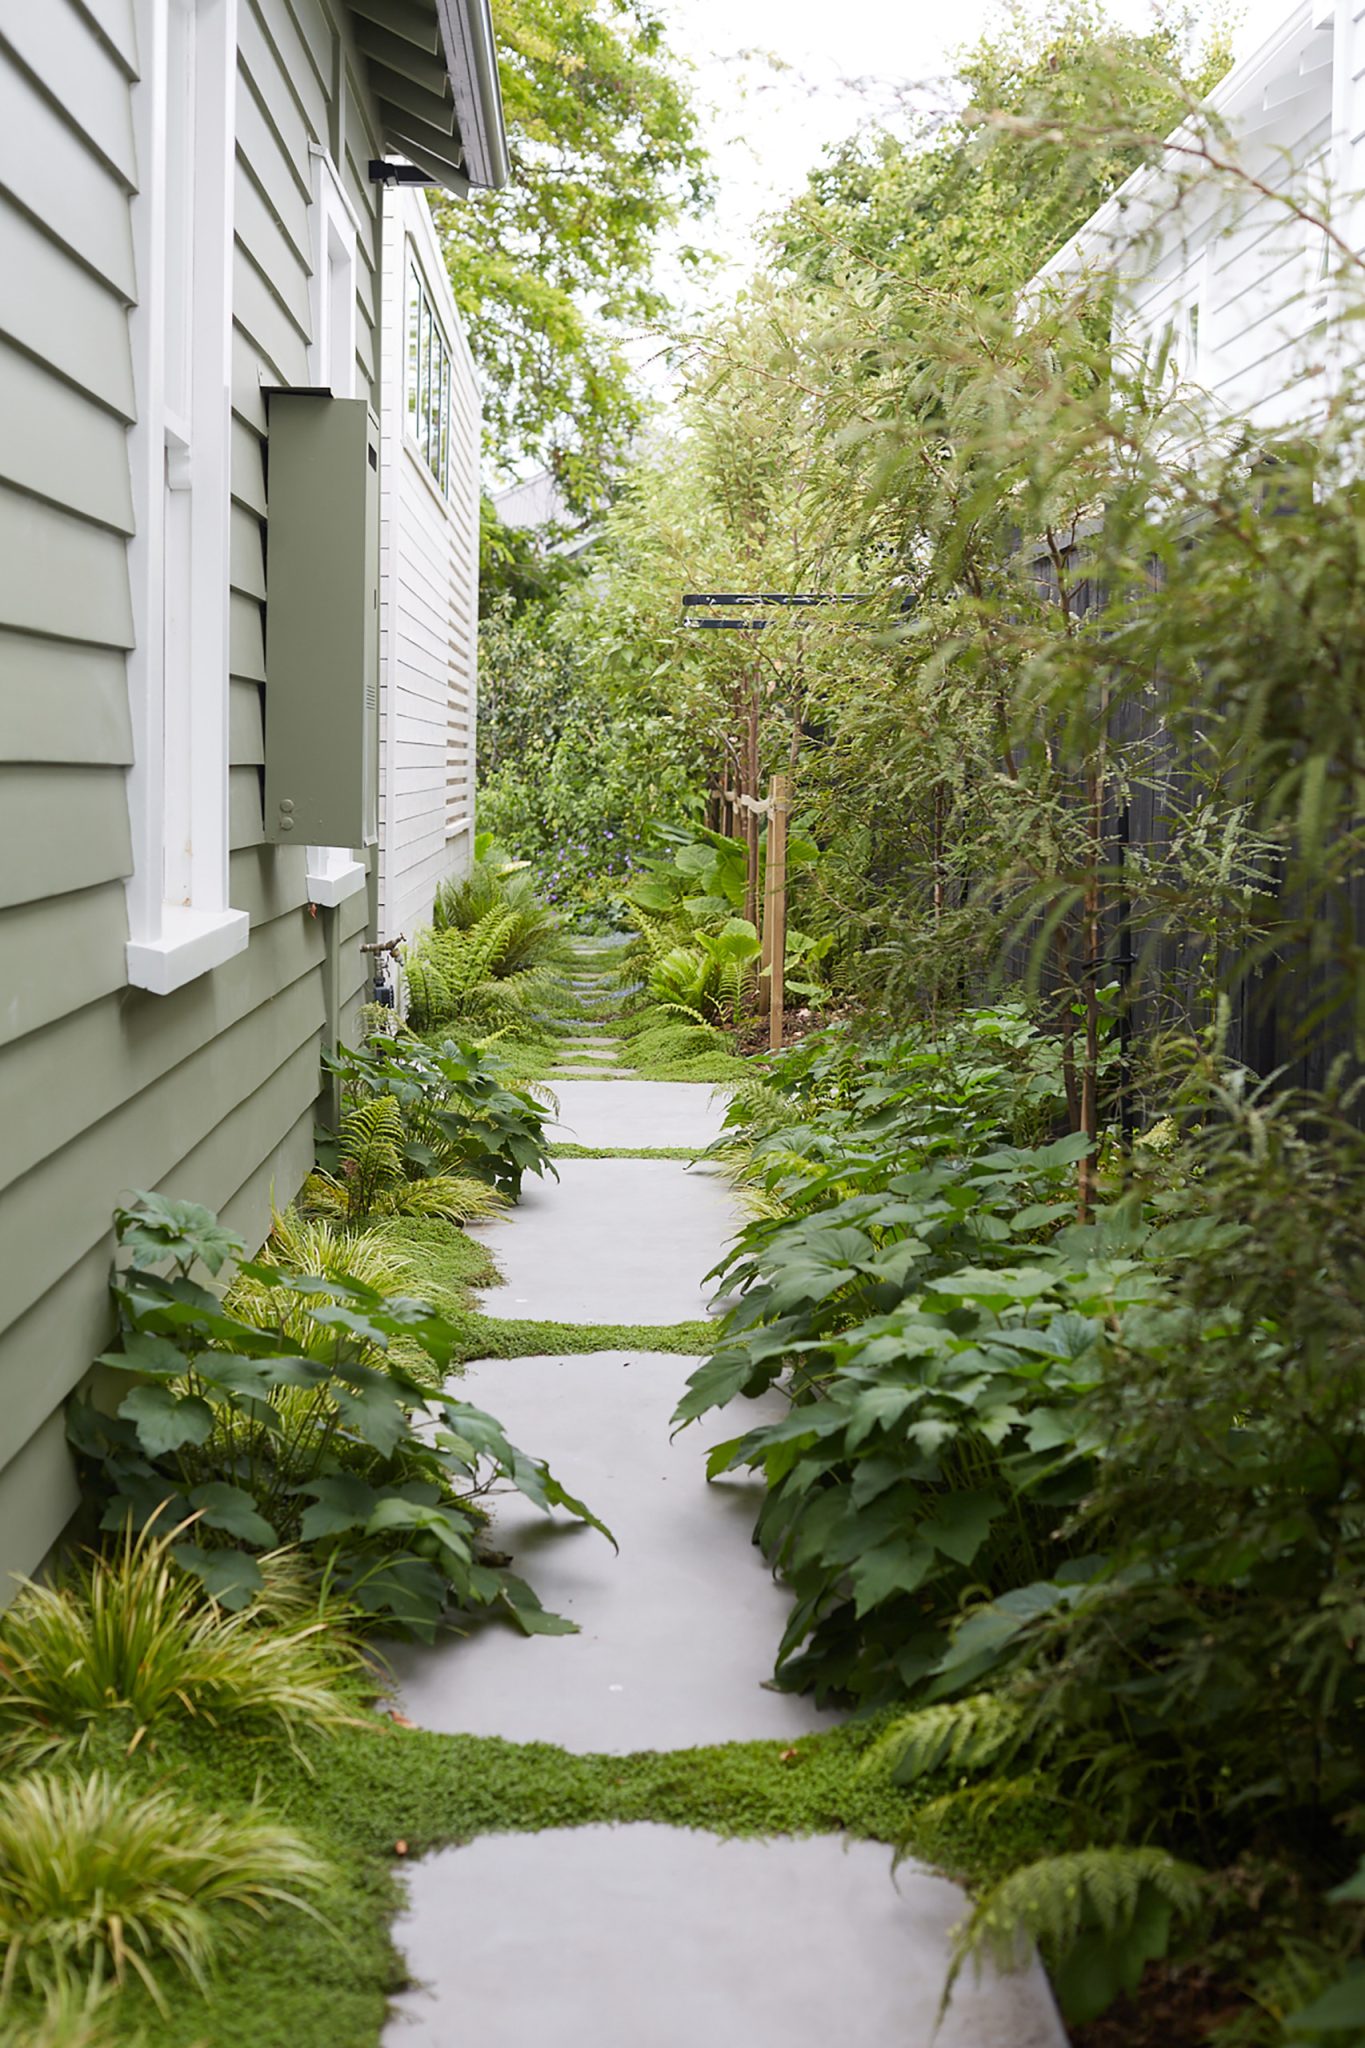
18. Walkway with Segmented Concrete Slabs and Green Groundcover
The visual recipe here is a perfect 50/50 split between hardscape and softscape. 50% structured, man-made material (the light grey concrete slabs) and 50% living, green texture (the groundcover and side plantings). This balance prevents the walkway from feeling too sterile or too overgrown. The pale sage green of the house siding acts as a neutral backdrop, allowing the vibrant greens of the foliage to really pop. The success of this look hinges on keeping that balance in check.
🔥 Trending Context
Breaking up a long, continuous concrete path with segments of green groundcover is a brilliant design move. It prevents the ‘bowling alley’ effect that a solid path can create in a long, narrow space. The gaps introduce a pleasing rhythm and pattern, forcing your eye to slow down and appreciate the journey. It also improves permeability, allowing rainwater to soak into the ground rather than running off. It’s both aesthetically pleasing and environmentally smart.
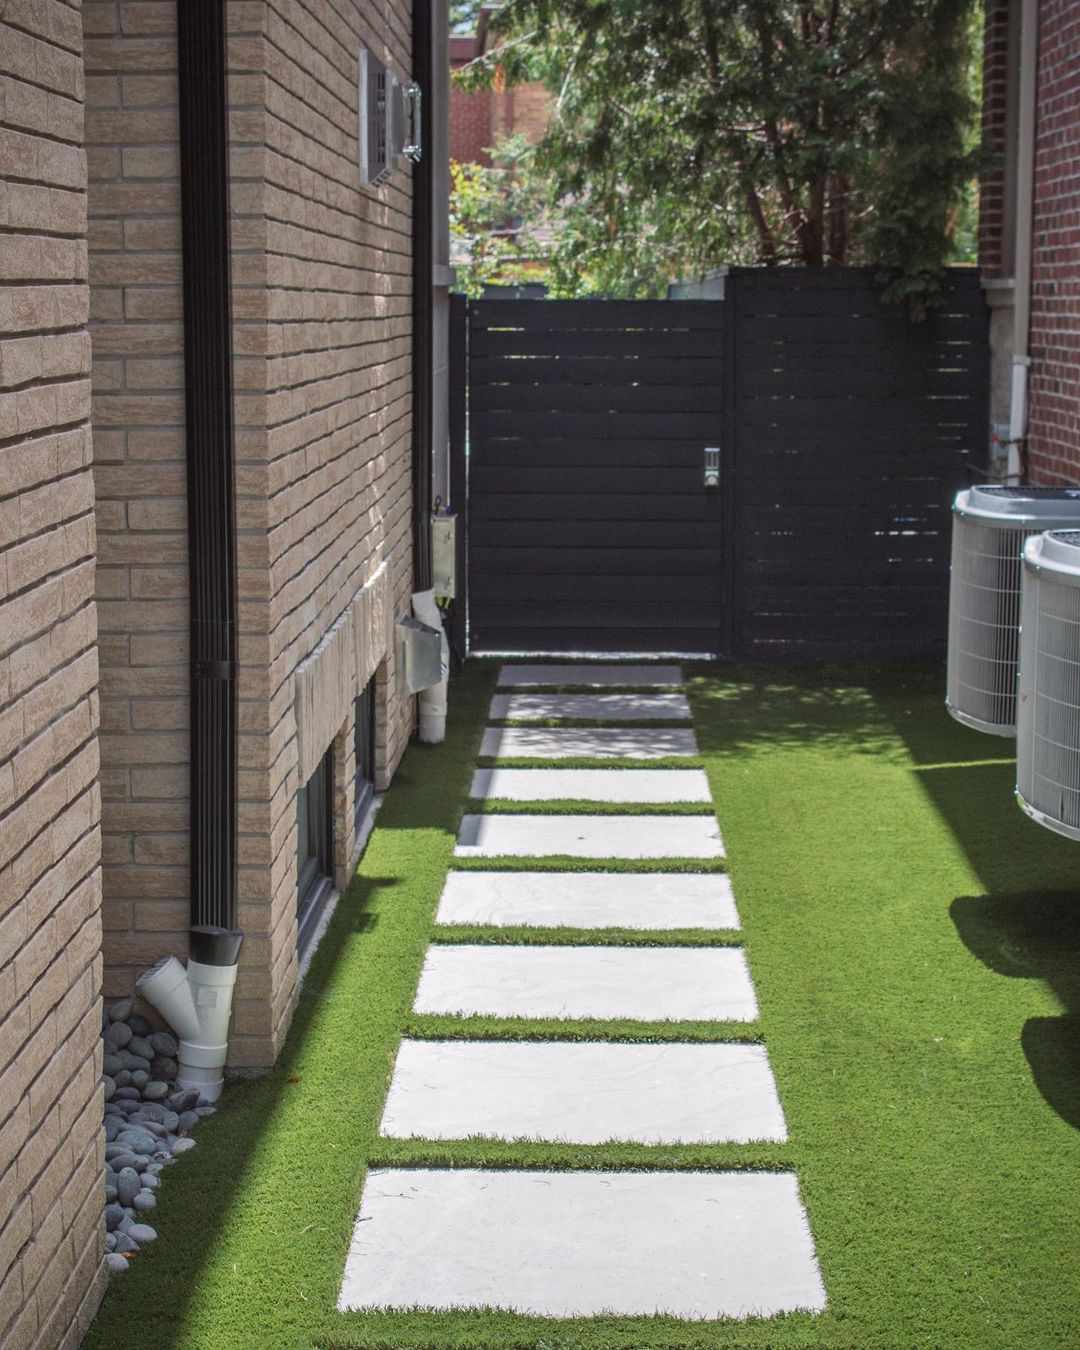
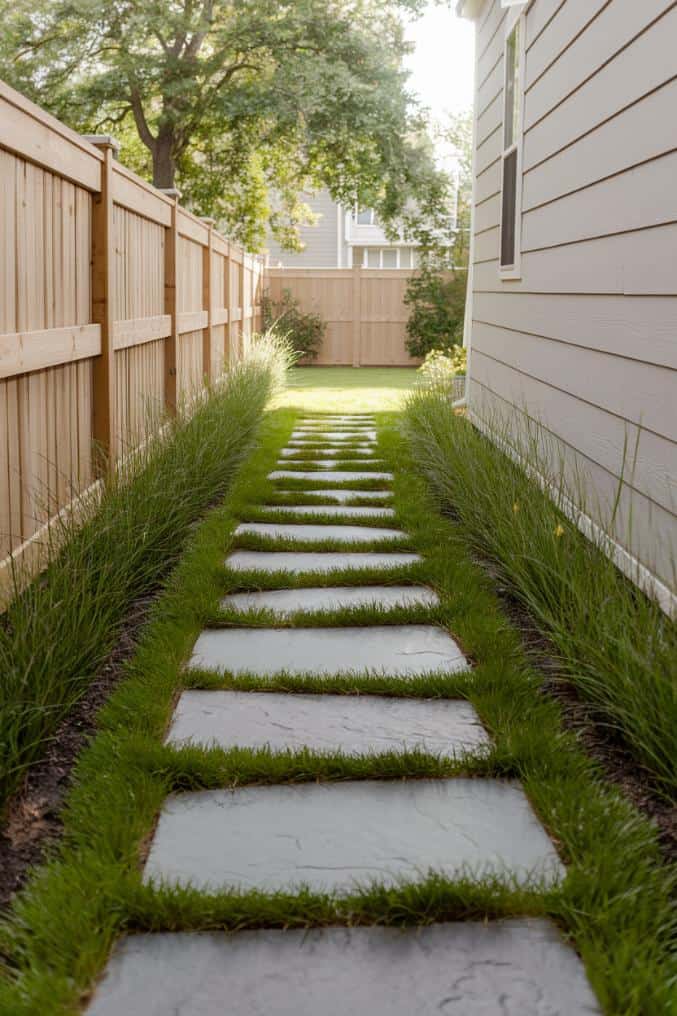
19. Simple Stepping Stone Path Through a Grassy Lawn
This is one of the most budget-friendly pathway ideas out there. A simple lawn is far cheaper to install than extensive hardscaping. The key is the stepping stones. Instead of custom-poured concrete, you can buy affordable pre-cast concrete pavers from Home Depot or Lowe’s for $5-$15 each. Just measure a comfortable stride (around 24 inches center-to-center), cut out the sod, level the dirt, add a thin layer of sand, and set your paver. It’s a weekend DIY project that delivers a clean, functional path.
✅ Before You Start
Mowing around stepping stones set in grass can be a bit of a pain. To make it easier, make sure the stones are set flush with the soil level, or even slightly below it. This allows the lawnmower wheels to roll right over them without hitting the blade. You’ll also need to use a string trimmer or edger around each stone to get a clean, crisp look, which adds a few extra minutes to your lawn care routine. This is less work than weeding gravel, but more work than a solid path like in Idea #24.
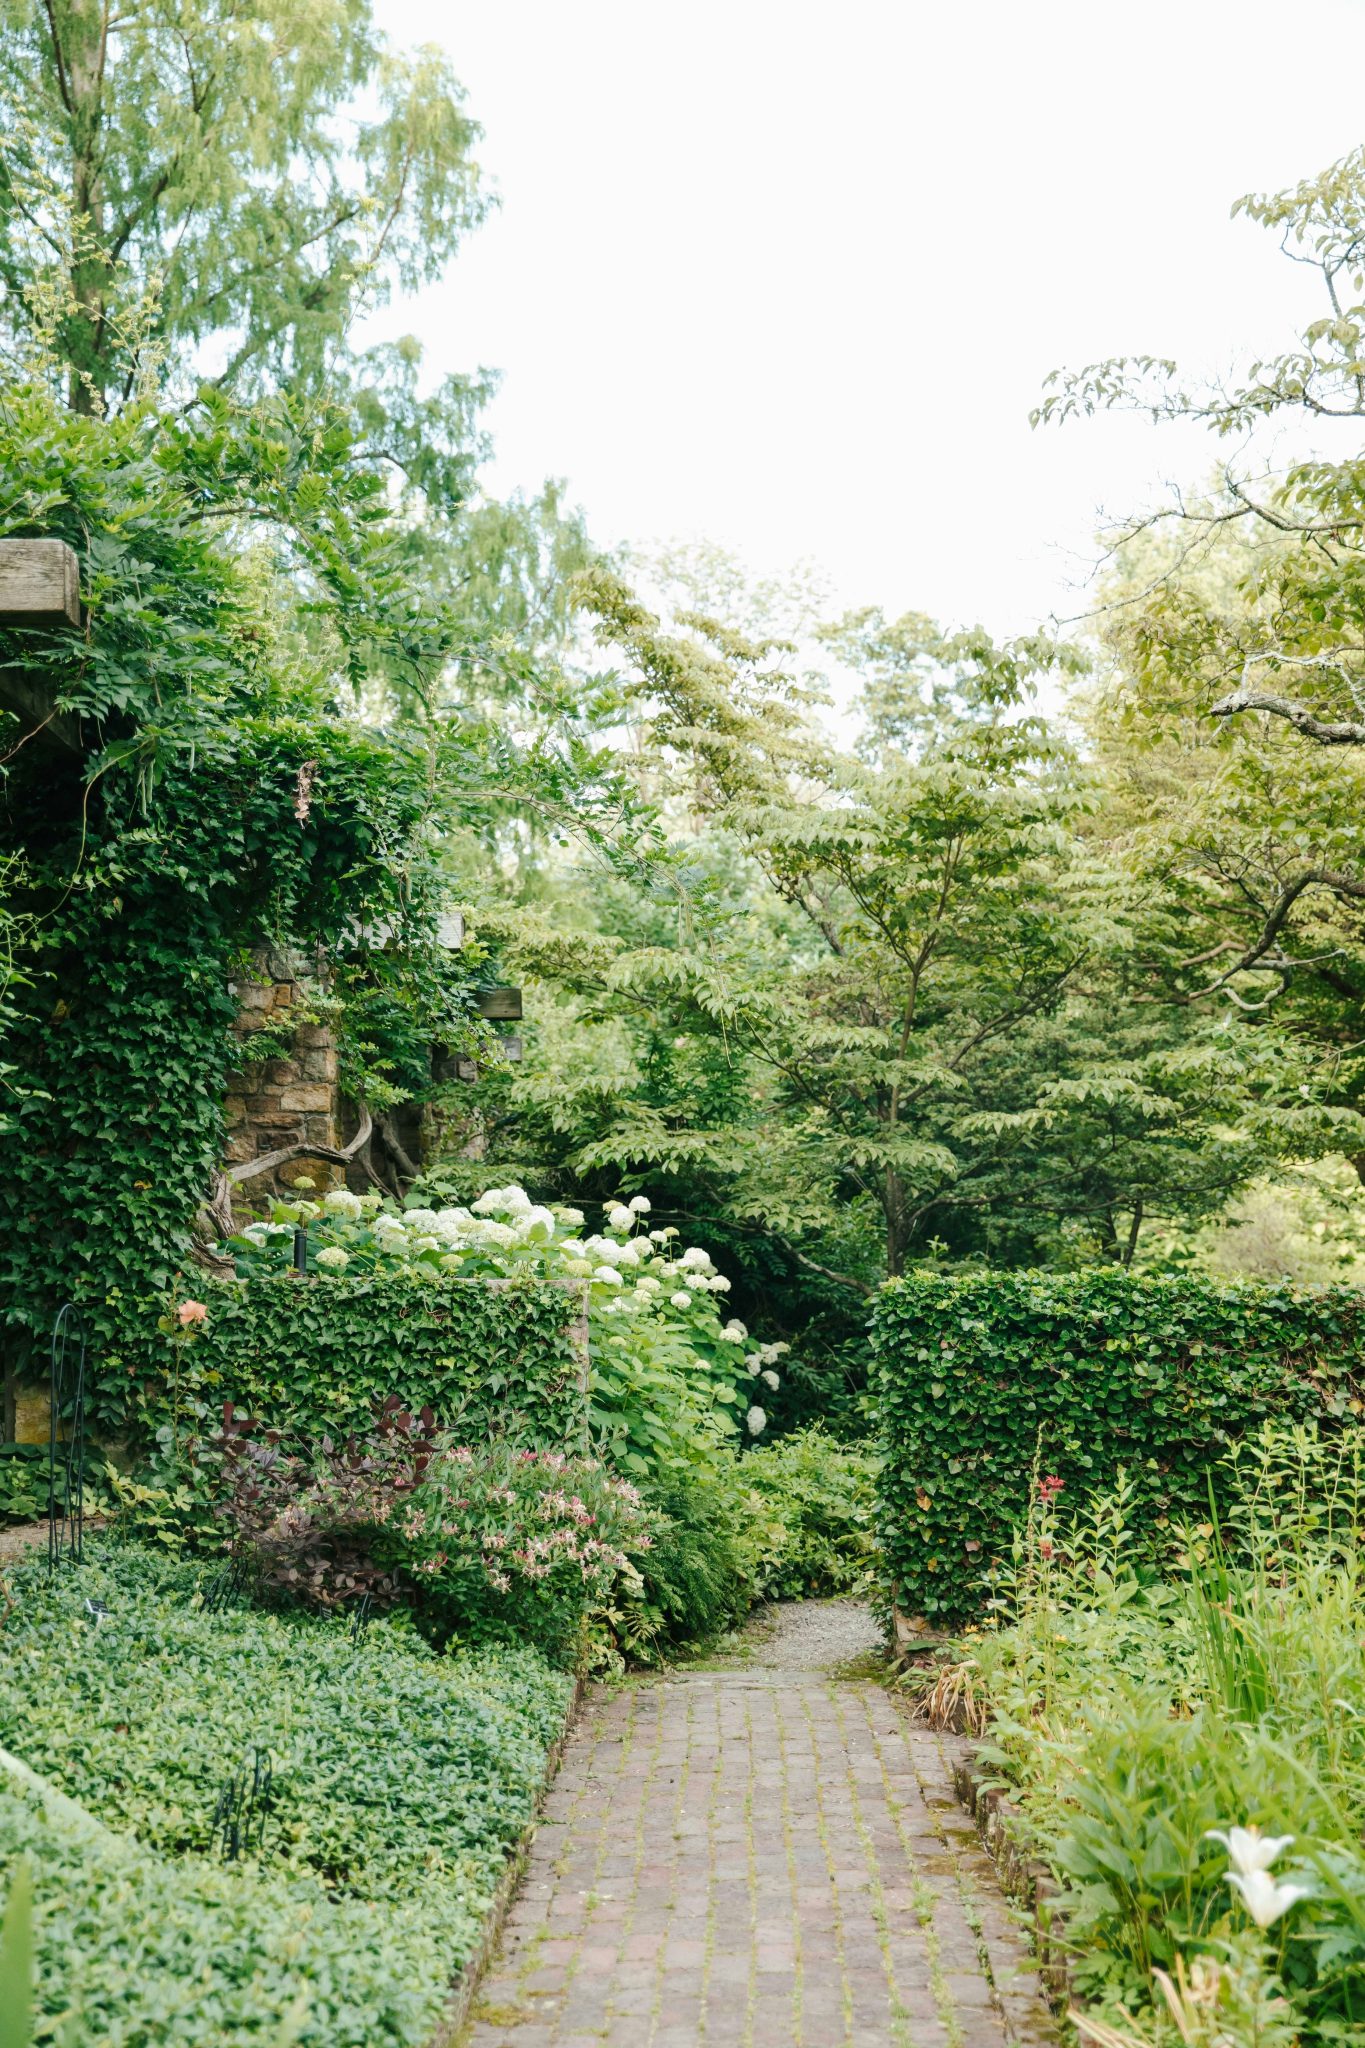
20. Lush Brick Walkway Bordered by an Ivy-Covered Stone Wall
This look taps directly into the ‘English Garden’ and ‘Old Money’ aesthetics that are all over Pinterest. It’s about creating a space that feels like it has history and has been lovingly tended for generations. The combination of weathered brick, old stone, and classic plants like ivy and hydrangeas feels timeless and established. It’s a move away from hyper-modern, minimalist designs toward something more romantic, textured, and soulful.
🎯 What Makes It Work
English Ivy is beautiful, but it can be incredibly destructive. Its aerial roots can work their way into mortar joints, damaging old stone or brick walls over time. It can also harbor pests and moisture against the wall. If you love the look but are worried about damage, consider a less aggressive climbing vine like Climbing Hydrangea or Boston Ivy (which is actually in the grape family and less damaging). Regular, aggressive pruning is non-negotiable to keep it in check.
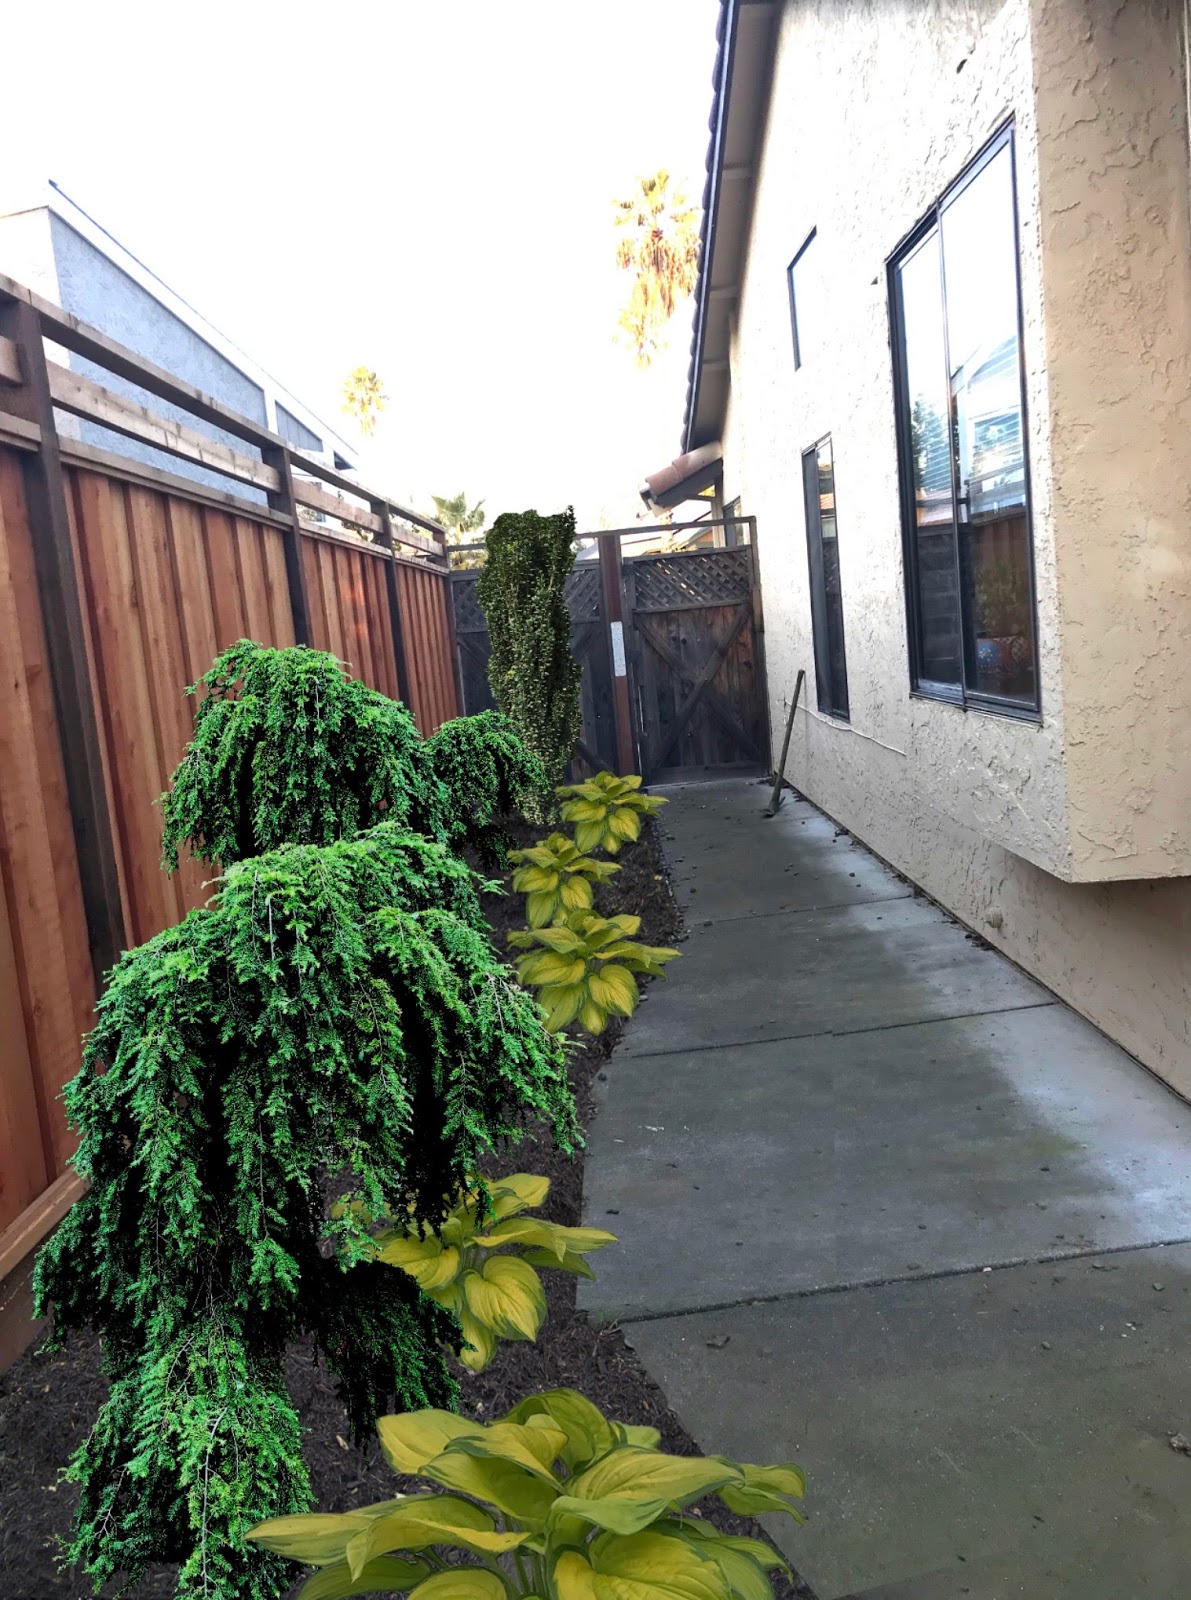
21. Concrete Path with a Colorful Mix of Conifers and Hostas
Before You Start Checklist:
- Check the mature size of your plants! That ‘weeping’ conifer might look small now, but will it block the path in 5 years? Read the plant tags carefully.
- Is the path wide enough for its purpose? If you need to move a lawnmower or garbage cans through here, ensure you have at least 36-48 inches of clear width.
- What is the sun exposure? Hostas thrive in shade, while many conifers need more sun. Make sure your plant choices match the light conditions of your specific spot.
- Does the fence need to be stained or sealed? It’s much easier to do it now before the plants are in and getting large.
💸 Get This Look For Less
This design works well in a medium-width side yard of about 6-10 feet. The concrete path itself should be a comfortable 3-4 feet wide. This leaves a 3-6 foot planting bed, which is enough room to layer plants as shown. You can place taller, slender plants like the dark green shrubs against the fence, and lower, wider plants like the chartreuse hostas in front. This layering creates depth and interest that a single row of plants would lack.
22. Illuminated Side Yard Nook with Raised Planters and Bistro Seating
The bistro set is what changes everything. Without it, this is a nicely lit pathway. With the small table and two chairs, it becomes a destination—a place for morning coffee or a glass of wine at night. It signals that this space is meant for lingering, not just passing through. Placing it at the end of the path creates a focal point and a reason to walk down it. This is a great alternative to the grassy seating area in Idea #1 if you prefer hardscaping.
⭐ The One Thing
The cozy, cafe-like atmosphere is a calculated effect. It’s about 40% hardscape (pavers, block planters), 30% warm ambience (the string lights), 20% greenery (the plants), and 10% purposeful furniture (the bistro set). The lights are critical for setting the mood, while the planters and fence create a sense of enclosure and privacy. The furniture itself is lightweight and visually unobtrusive, which is key in such a narrow space.
23. Modernist Side Yard with a Floating Wooden Bench
This design feels incredibly serene because of its ‘integrated’ nature. The bench isn’t just placed in the yard; it’s built *into* the wall. This makes the design feel cohesive and intentional. The use of a limited material palette—white walls, light grey pavers, natural wood—creates a calm, uncluttered look. The path of white pebbles with inset stepping stones adds texture without adding visual noise, reinforcing the minimalist, tranquil vibe.
⚠️ Real Talk
For a built-in bench like this to be comfortable, ergonomics are key. Aim for a seat depth of 16-20 inches and a seat height of 16-18 inches off the ground. For a slatted bench, the gap between the wood slats should be no more than 1/2 inch. Any wider and it can become uncomfortable to sit on. A slight backward slope of about 5 degrees on the seat can also make it more comfortable for lounging.
24. Minimalist Paved Courtyard with Dark Planters and a Bench
- Main Furniture: Modern wooden bench – $300-$700
- Hardscape: Light stone pavers for 120 sq ft – $900-$2,000
- Decor/Accessories: Dark rectangular planters (2) & dark gravel – $250-$500
- Plants: Assorted foliage plants – $100-$300
- TOTAL: $1,550 – $3,500
- Budget alternative: Use larger-format concrete pavers instead of stone, build a simple bench from cedar 2x4s, and use fewer, smaller plants to achieve a similar minimalist feel for $700-$1,200.
💡 Designer Tip
When you pave almost an entire area, you have to think seriously about drainage. Where will rainwater go? A slight, almost imperceptible slope (1/4 inch per foot) away from the house foundation is essential. The dark gravel strip seen here isn’t just for looks; it’s likely a French drain—a perforated pipe in a gravel-filled trench that collects and directs water away. Without proper drainage planning, you could end up with a flooded side yard and water issues in your basement.
That Neglected Space? It’s Your Next Favorite Place.
That awkward strip of land doesn’t have to be an afterthought. As you can see, whether you’re dreaming of a lush garden escape, a functional herb garden, or a modern, minimalist path, there’s a solution that fits your space and style. Take the leap and turn that pass-through into a place you love. Don’t forget to save your favorite ideas to your Pinterest board to get started!