You know that feeling when you finally find the garage makeover idea that looks exactly right for your space? It’s a mix of excitement and “Aha!” that gets the project rolling. But where do you find the *one*? After filtering through hundreds of options across The Home Depot, IKEA, and Target, we narrowed it down to these 30 ideas that actually deliver. We’ve covered everything from modern minimalist workshops to cozy home office conversions and full-blown entertainment hubs. In 2026, the trend is all about reclaiming this square footage as a true extension of your home, not just a place for boxes. And stay until the end — we break down the most common mistakes that can ruin these looks. 📌 Save this to Pinterest for later — you’ll want to revisit these ideas.
1. The Foundational Upgrade: A Simple Garage Floor Coating
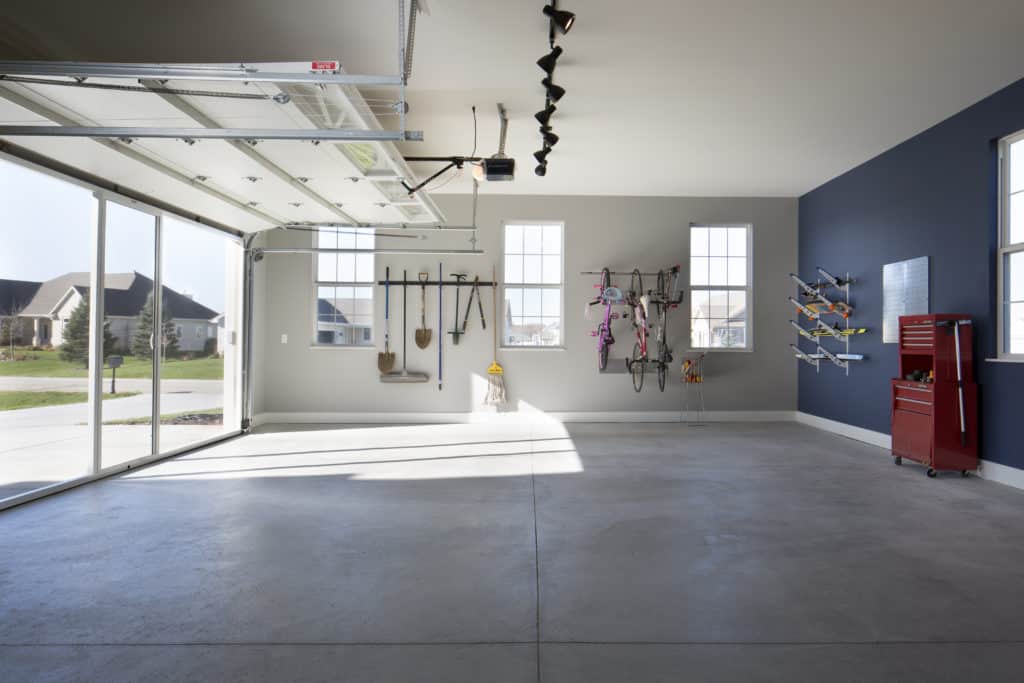
Sometimes the most impactful change is the one you walk all over. Before you even think about cabinets or wall paint, look down. A clean, sealed floor sets the stage for everything else. It instantly makes the garage feel less like a forgotten utility space and more like a deliberate part of your home. This simple upgrade reduces dust, makes cleaning up spills a breeze, and provides a neutral, finished canvas that works with any style you decide to layer on top, from a functional workshop to a full-on living space.
⭐ The One Thing
Getting this foundational look is more affordable than you might think. Here’s a general idea for a standard two-car garage (around 400 sq. ft.).
- DIY Epoxy Floor Kit: $200 – $500
- Floor Prep Supplies (cleaner, degreaser, crack filler): $50 – $100
- Application Tools (rollers, squeegee): $30 – $60
- TOTAL: $280 – $660
- Budget alternative: A high-quality concrete paint or sealer can give a fresh look for about 40% less, though it may require more frequent touch-ups.
2. Add Warmth with a Vertical Wood Slat Accent Wall
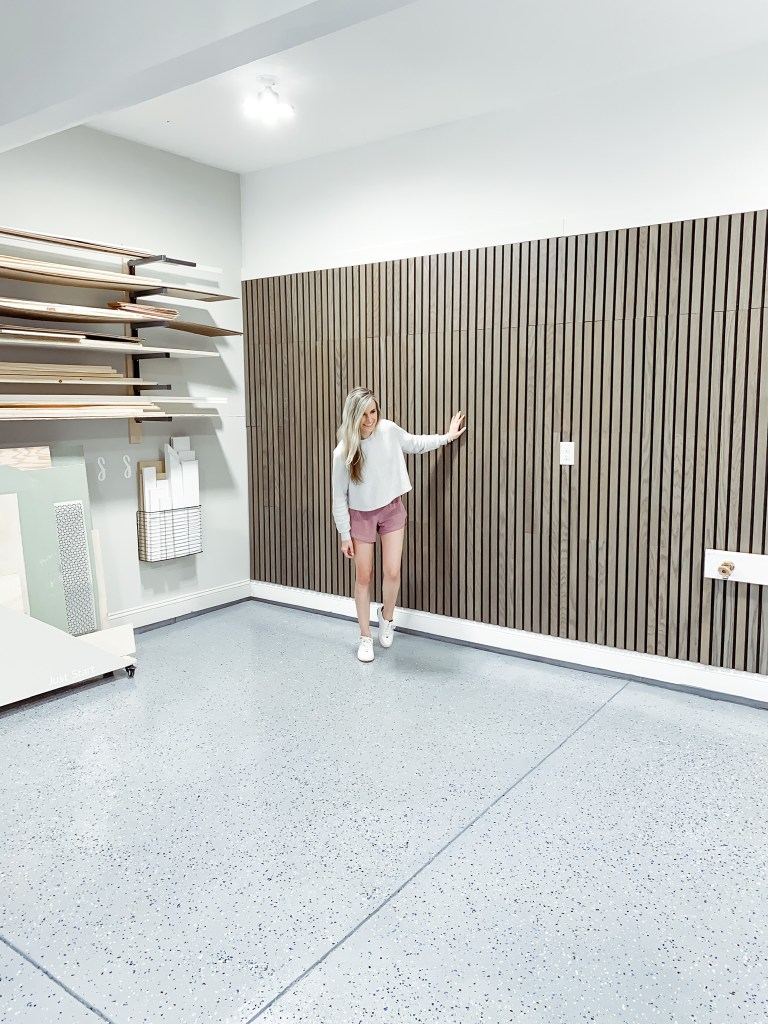
When installing a vertical wood slat wall, the secret to a high-end look is in the spacing. Aim for a gap that is 50-75% of the width of the slats themselves. For example, if you use 1.5-inch wide slats, a gap between 0.75 and 1 inch will look deliberate and sophisticated. Anything wider can look sparse, and anything tighter can lose the dramatic line effect. Always use a level and consistent spacers (scrap wood works perfectly) to ensure every slat is perfectly parallel.
📐 Style Math
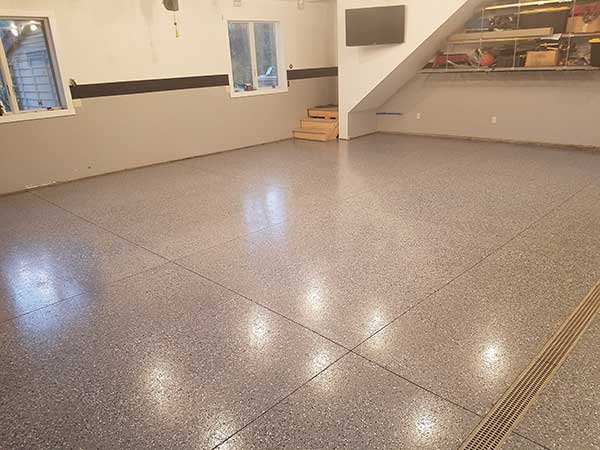
This look achieves its polished feel with a simple formula: 60% Neutral Base + 30% Wood Texture + 10% Clean Lines. The light gray epoxy floor and white walls create a bright, neutral canvas. The vertical wood slat paneling provides the crucial 30% of warmth and texture, making the space feel designed. The final 10% comes from the clean lines of the baseboards and shelving. You could swap the wood for painted V-groove paneling to change the vibe while keeping the same successful ratio.
3. Keep It Clean with Speckled Gray Epoxy and White Walls
The single most important element here is the speckled gray epoxy floor. It’s the visual anchor that makes everything else work. Take it away, and you just have plain walls and a fridge. The floor does three things perfectly: it hides dust and minor debris thanks to its pattern, it provides a durable and easy-to-clean surface ideal for a high-traffic area, and it adds a touch of visual interest without overwhelming the clean, utilitarian aesthetic. It’s the practical choice that also happens to look sharp and intentional.

🎯 What Makes It Work
An epoxy floor is incredibly durable, but it’s not invincible. To keep it looking its best, sweep or dust mop weekly to remove grit that can scratch the surface over time. For spills, a simple solution of water and a pH-neutral cleaner like Simple Green is best; avoid acidic cleaners. While resistant to most chemicals, you should wipe up oil or solvent spills immediately. Expect to potentially need a fresh topcoat every 5-7 years, especially in high-traffic zones, to maintain that perfect sheen. The cost for a professional recoat is typically around $2-$4 per square foot.
4. A Classic Look: Beige and Black Flecked Floor Coating
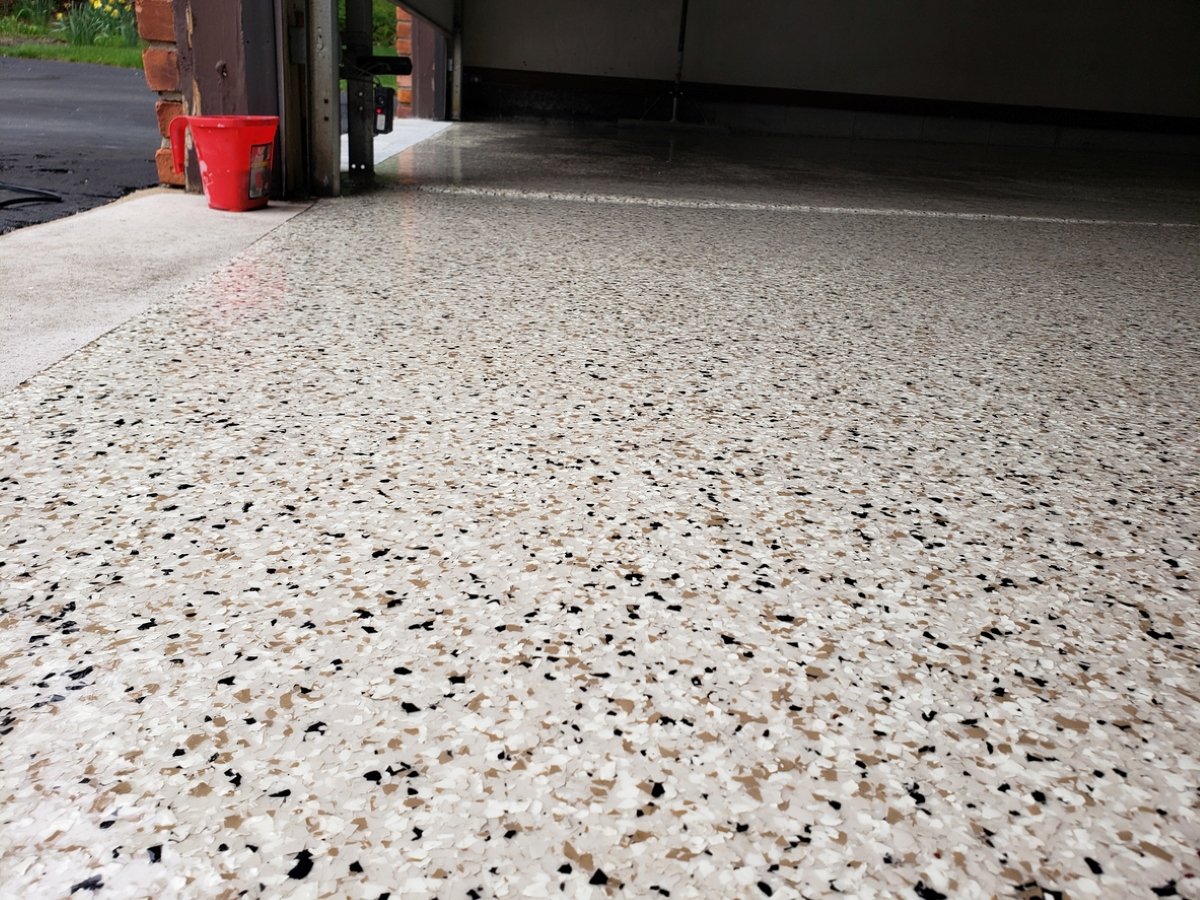
A glossy, reflective floor looks amazing, but let’s have some real talk: it can be incredibly slippery when wet. If you live in a snowy or rainy climate, melting snow or water dripping from your car can turn this surface into a skating rink. Consider adding a non-slip additive to your final topcoat; it will slightly dull the sheen but could save you from a nasty fall. Also, that beautiful reflection will highlight every single leak or drip from your car, so be prepared for regular cleanup if your vehicle is prone to spots.
🔥 Trending Context
Applying a DIY epoxy flake floor coating is a weekend project that pays off big. Here’s a quick guide:
- Prep is Key (4-6 hours): Thoroughly sweep and degrease the concrete. Etch the floor with the included solution to open up the pores for better adhesion. Let it dry completely for 24 hours.
- Mix & Roll (2-3 hours): Mix the two-part epoxy according to the instructions. Working in 4×4 foot sections, roll a thin, even coat.
- Broadcast the Flakes: Immediately after rolling a section, toss the decorative flakes up into the air, letting them fall naturally onto the wet epoxy.
- Scrape & Seal: After the epoxy cures (check instructions, usually 12-24 hours), scrape off any loose, vertical flakes. Then, apply the clear topcoat to seal everything in.
Time Estimate: 2 days. Material Cost: $200-$500 for a standard kit.
5. Choosing Your Finish: Polyurea vs. Epoxy Coatings
The choice of flooring is the hero of any garage renovation, and understanding the material is key. While many people default to epoxy, polyurea is another fantastic option. It works because it offers rapid curing times (you can often drive on it in 24 hours) and is more flexible, making it more resistant to impact and temperature-induced cracks. Both finishes create a seamless, non-porous surface that transforms dusty concrete into a polished, intentional floor, making the garage feel like a true room in the house.
🔧 How-To Brief
Want that sealed, polished look without committing to a full two-part coating system? You have options! A high-quality concrete stain followed by a clear sealer can give you a similar vibe for significantly less. This approach allows the natural texture of the concrete to show through while providing color and protection. It’s a great project for a DIYer on a strict budget.
- Concrete Stain (1 gallon): $40 – $70
- Concrete Sealer (1 gallon): $50 – $80
- Total Cost for 400 sq.ft.: ~$150 – $250
6. Go Bold with Blue Cabinets and Hexagonal Lighting
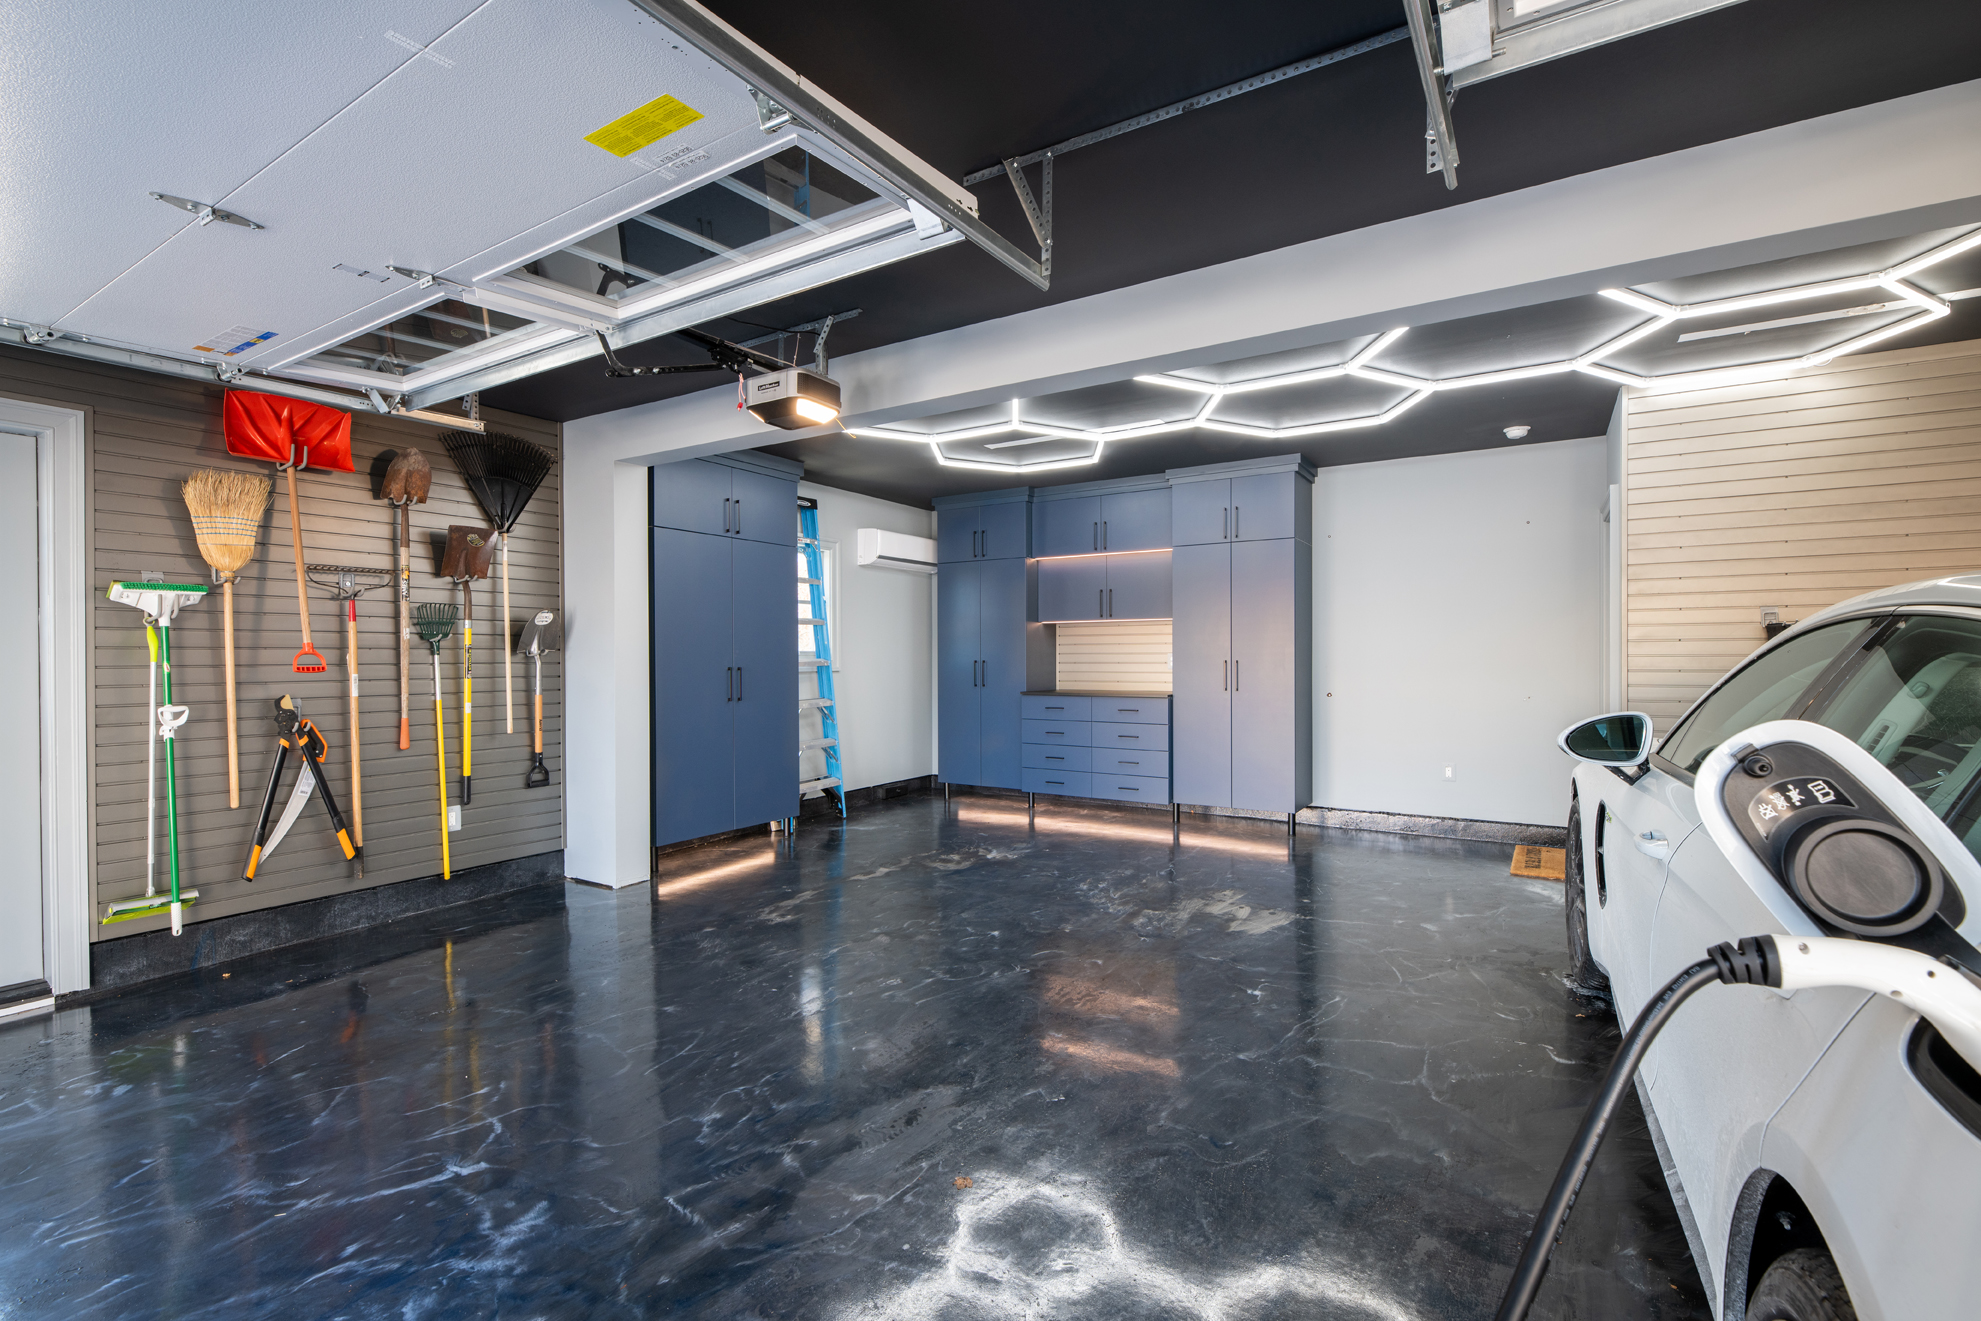
The clear star of this show is the hexagonal LED lighting. Without it, you’d have a nice, but fairly standard, modern garage. The geometric light fixture turns the ceiling into a design feature, echoing the sleek, contemporary lines of the cabinets and creating a futuristic, almost sci-fi ambiance. It proves that utility lighting doesn’t have to be boring. This single choice elevates the entire space from merely functional to genuinely stylish and memorable. Compare this to the simple strip lighting in Idea #8 to see the difference a fixture can make.
🧹 Maintenance Reality
This look is hot right now because it perfectly taps into the “resimercial” design trend — blending residential comfort with commercial-grade durability and aesthetics. Homeowners are increasingly viewing the garage as a showpiece, not just a storage closet for their car. The bold color choice, high-gloss finishes, and statement lighting are tricks borrowed from high-end retail and modern office design. This trend has staying power because it’s rooted in quality and a desire to make every inch of a home feel thoughtfully designed.
7. Create a Minimalist Studio with a Fold-Down Bed
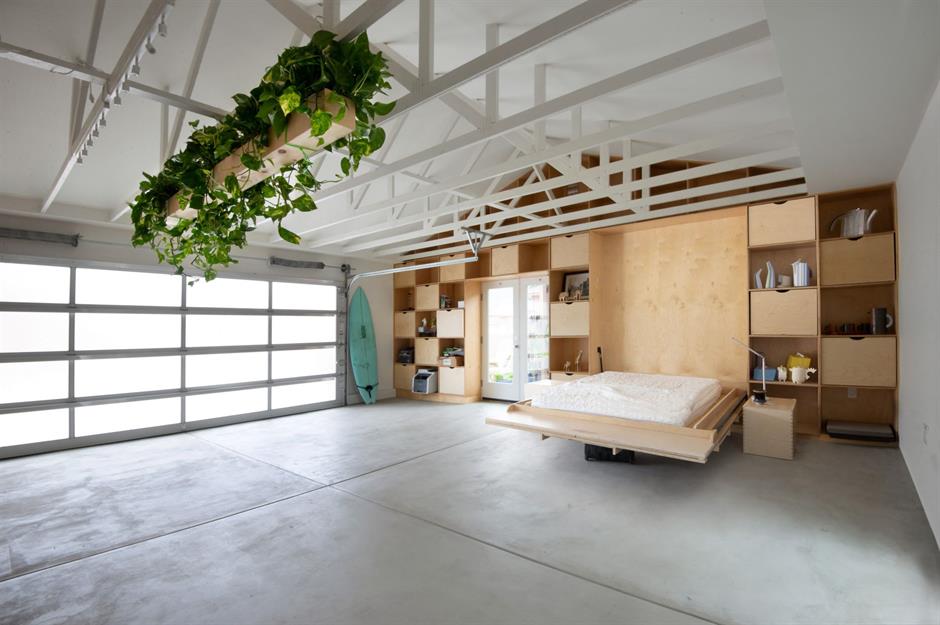
This kind of multi-functional garage conversion works best in a standard two-car garage, roughly 20×20 feet or 400 square feet. This provides enough room for the custom cabinetry and fold-down bed along one wall without making the remaining floor space feel cramped. You need a minimum ceiling height of 8 feet to accommodate the exposed rafters and overhead planter, but 9-10 feet is ideal to enhance the airy, spacious feeling. For smaller, single-car garages, consider a more compact setup like the office in Idea #13.
💡 Designer Tip
When using a translucent garage door for natural light, managing privacy and harsh sun is key. Instead of flimsy curtains, opt for a professional-grade window film. You can get films that are frosted for privacy, mirrored for security, or UV-blocking to protect your interiors from fading. A 99% UV-blocking film will cost around $6-$10 per square foot but will save your floors, furniture, and art from sun damage, and it gives the door a sleek, uniform appearance from the outside.
8. Energize Your Space with Bold Red Graphic Accents
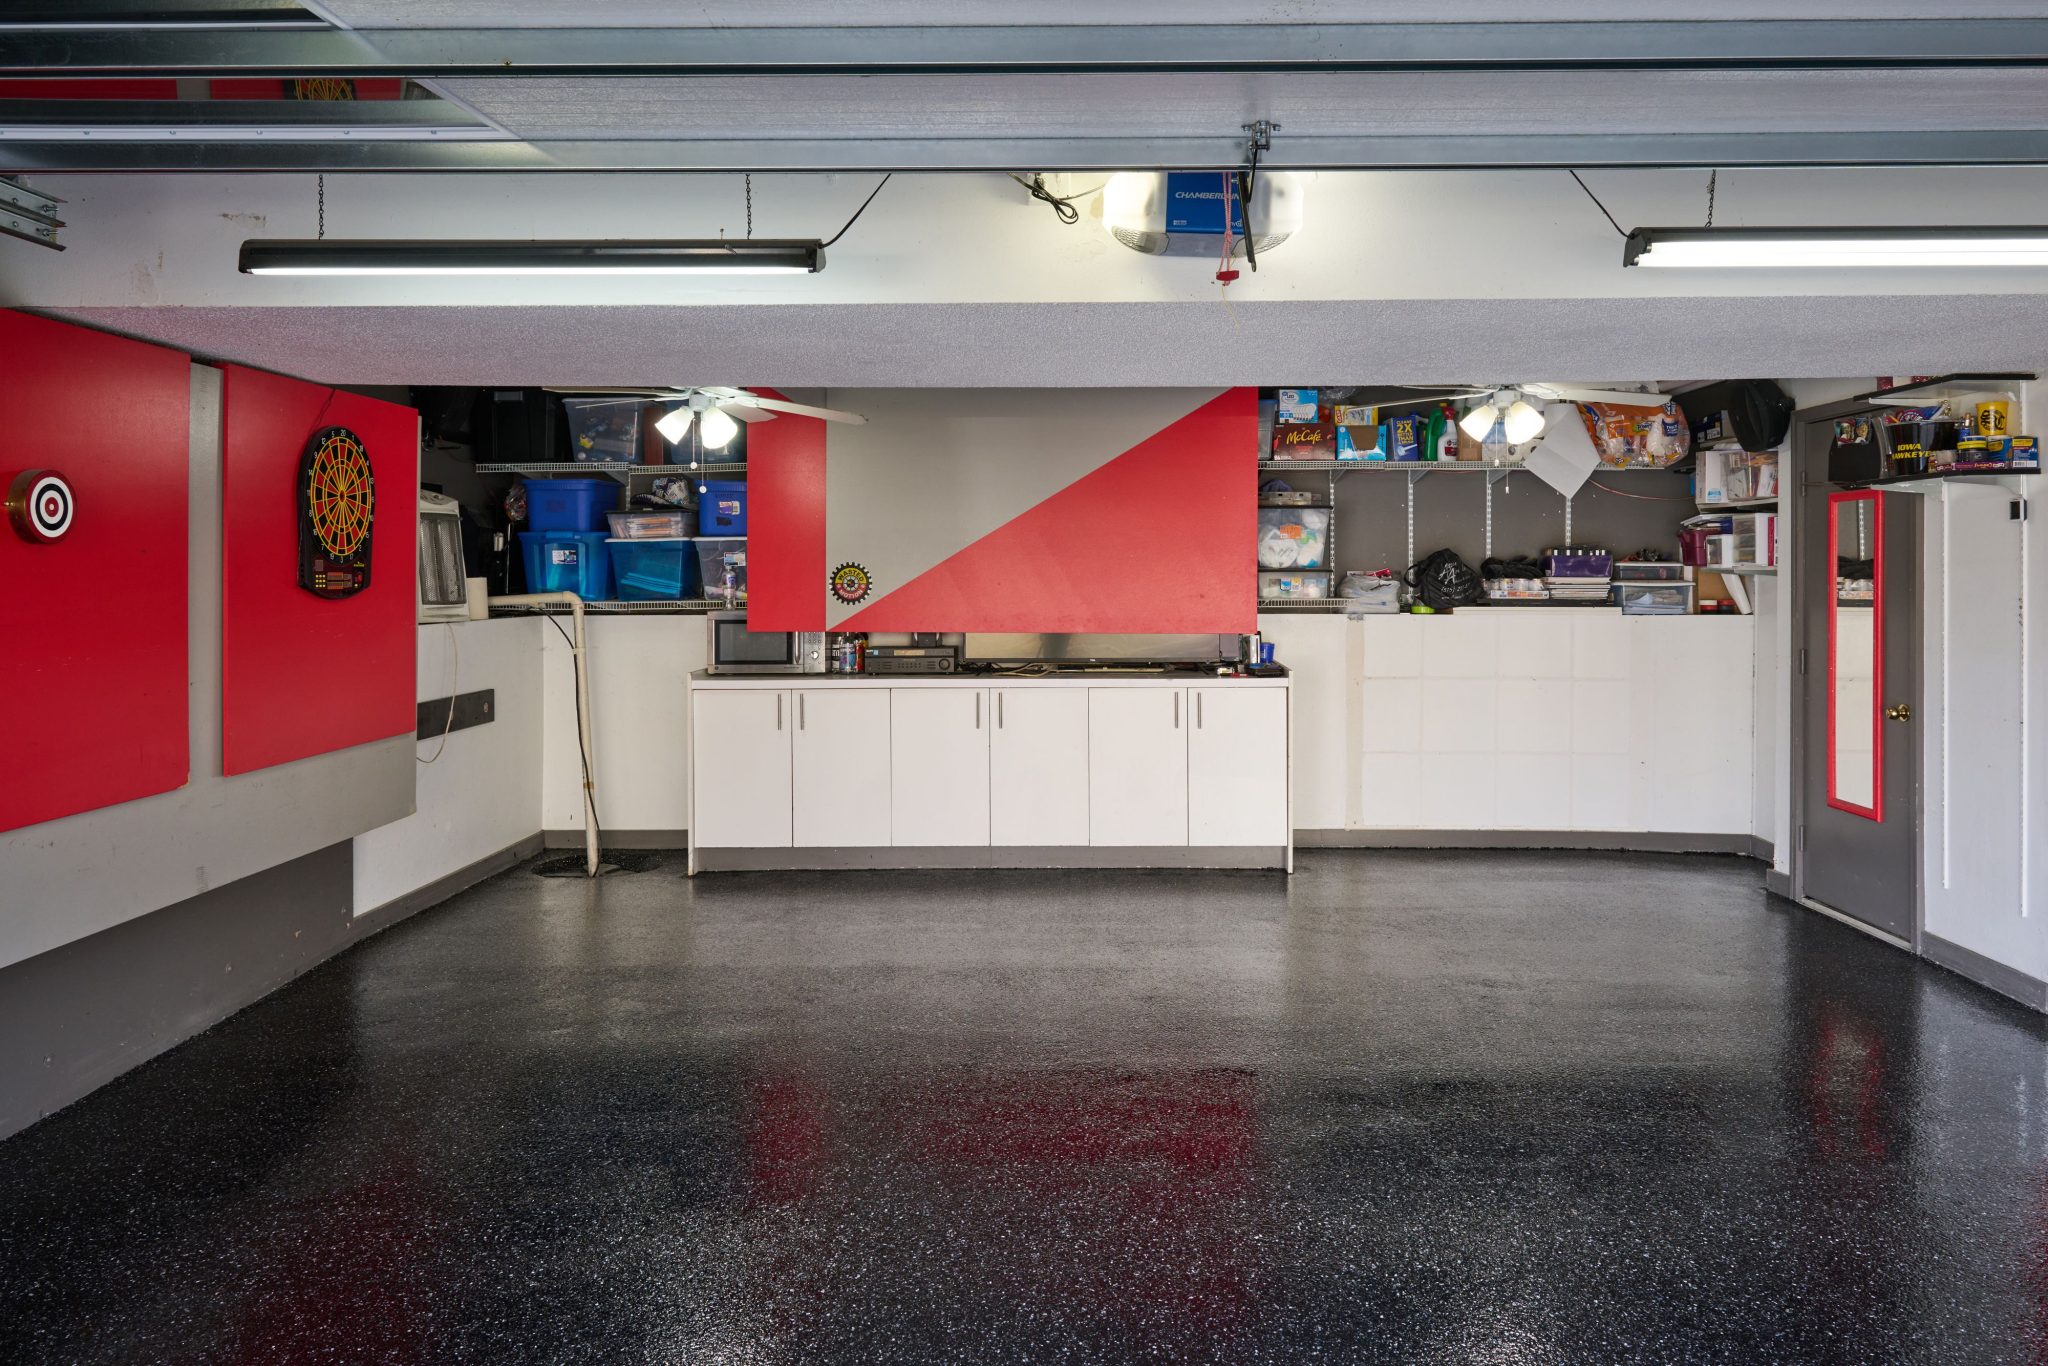
The formula for this energetic space is 70% Neutral + 30% Bold Color. The speckled black floor and white walls/cabinets create a clean, neutral backdrop that comprises the majority of the visual space. This allows the vibrant red accents—the wall panels and the large geometric shape—to truly pop without overwhelming the room. If red isn’t your color, you could easily swap it for a bold royal blue, a zesty orange, or a deep kelly green and the design would still work perfectly because the ratio is correct.
💰 Budget Breakdown
A pristine white-and-red garage looks fantastic… when it’s empty. Let’s be honest: this is a highly curated look that requires discipline to maintain. If your garage is a true workhorse space with bikes, lawn equipment, and overflowing bins, a design this crisp can quickly look cluttered and chaotic. The key to making this work is having ample closed storage (like the white cabinets shown) to hide the necessary mess of daily life. If you can’t commit to putting things away every single time, a more rustic look like Idea #21 might be a better fit.
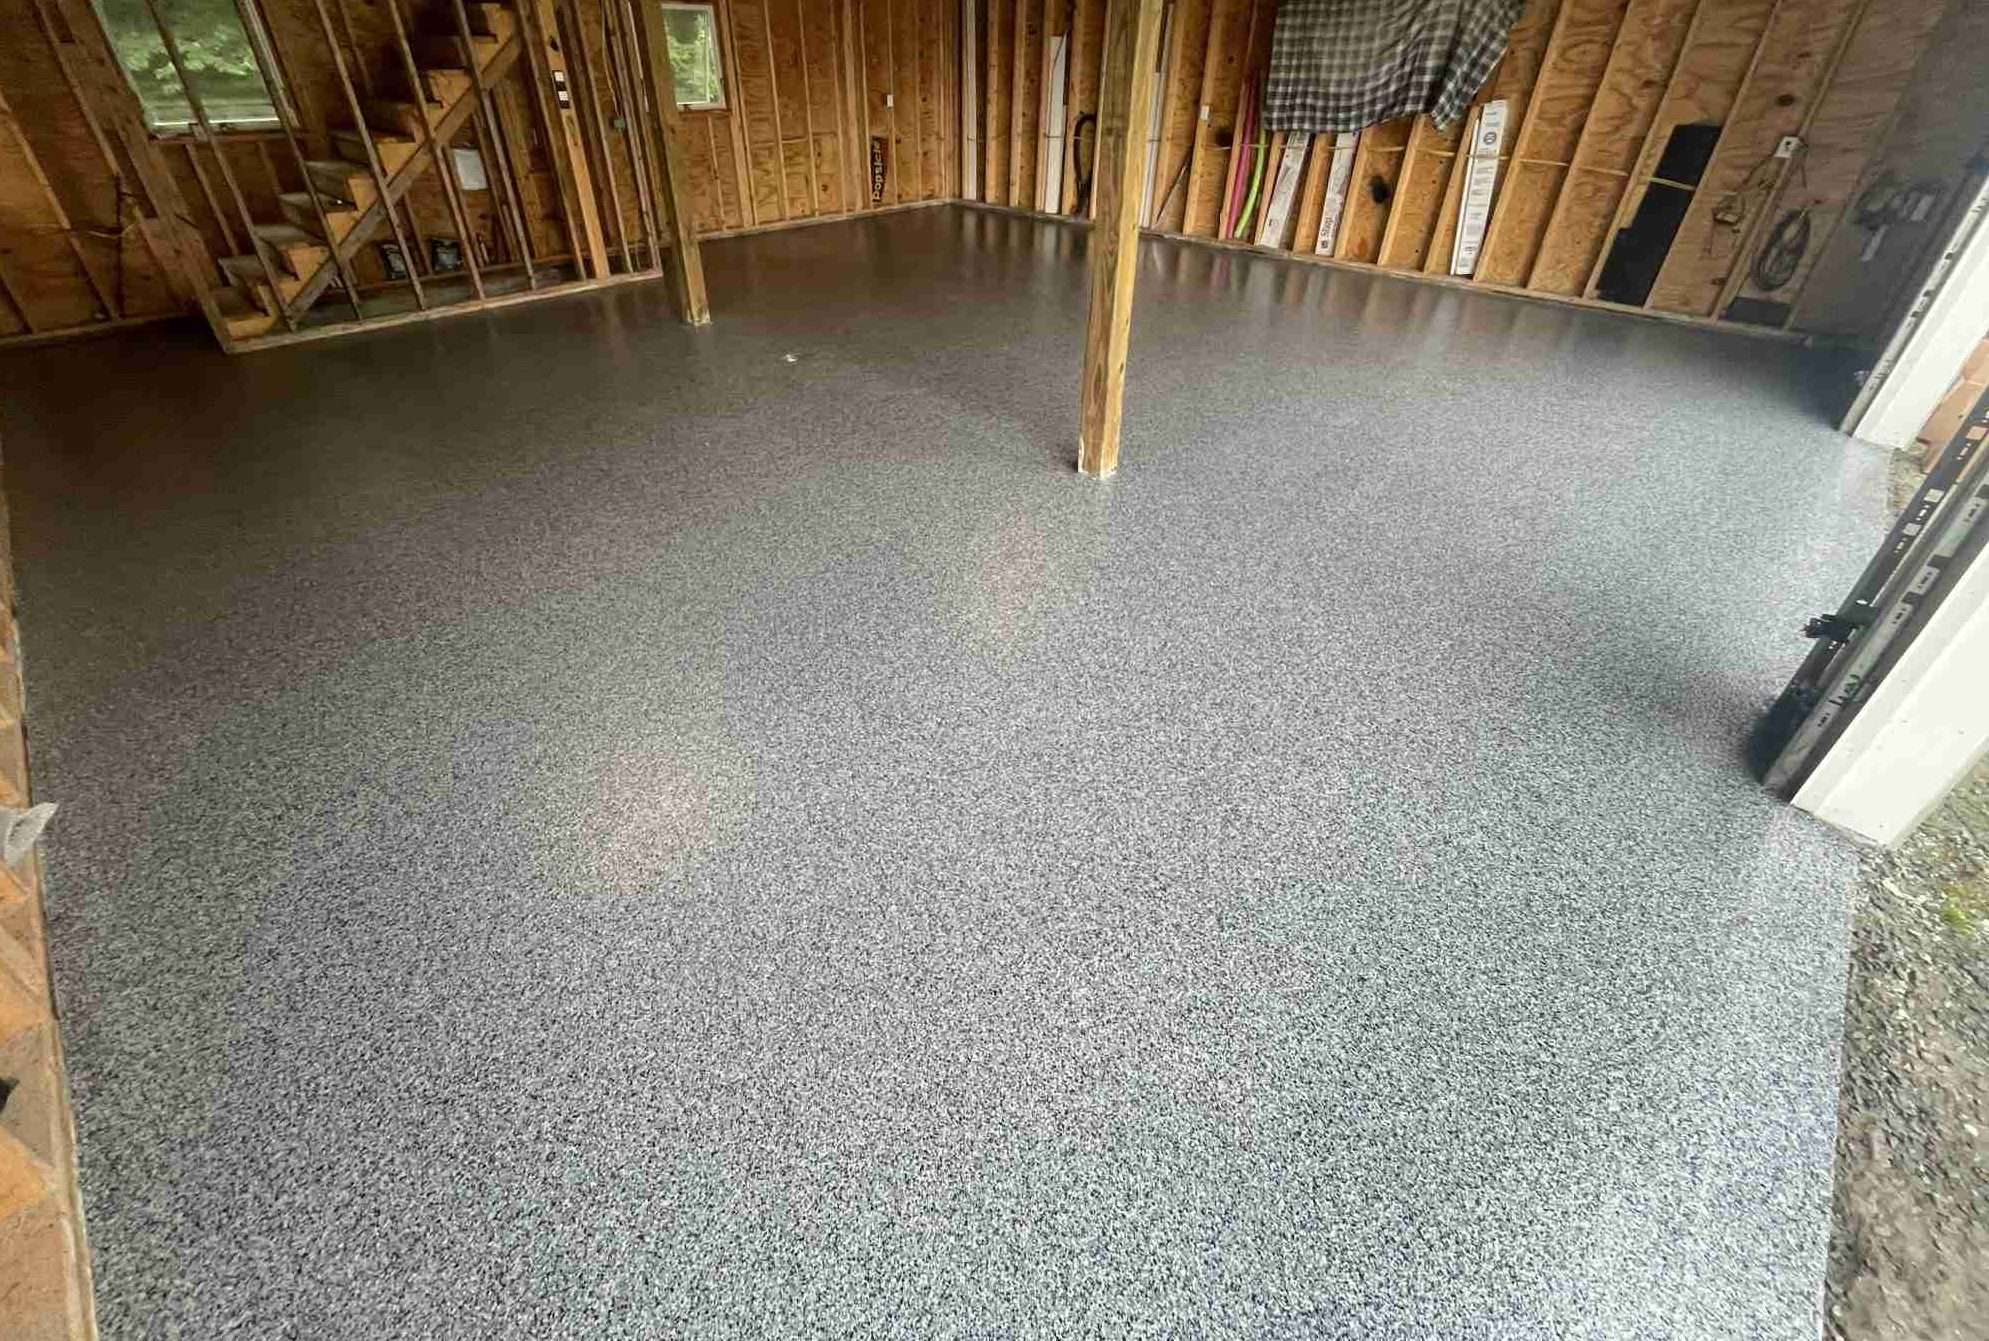
9. The Great Debate: Epoxy vs. Polished Concrete Floors
Deciding between an epoxy coating and polished concrete is a classic garage dilemma. Epoxy works by applying a resinous coating *on top* of the concrete, creating a uniform, durable, and often colorful layer. Polished concrete, on the other hand, involves grinding down the existing concrete slab with progressively finer diamond grits to achieve a smooth, lustrous finish. The choice depends on your goal: epoxy is great for covering imperfections and adding color, while polished concrete offers a more natural, industrial look that’s nearly indestructible.
⚠️ Real Talk
Before you commit to a new garage floor, run through this quick checklist:
- Moisture Test: Tape a plastic square to the floor for 24 hours. If condensation forms, you have a moisture issue that must be addressed before applying any coating.
- Check for Sealant: Sprinkle some water on the concrete. If it beads up, you have an old sealer that needs to be removed before a new one can be applied.
- Assess Cracks: Are the cracks hairline or significant? Large cracks need to be filled and stabilized before you can cover the floor.
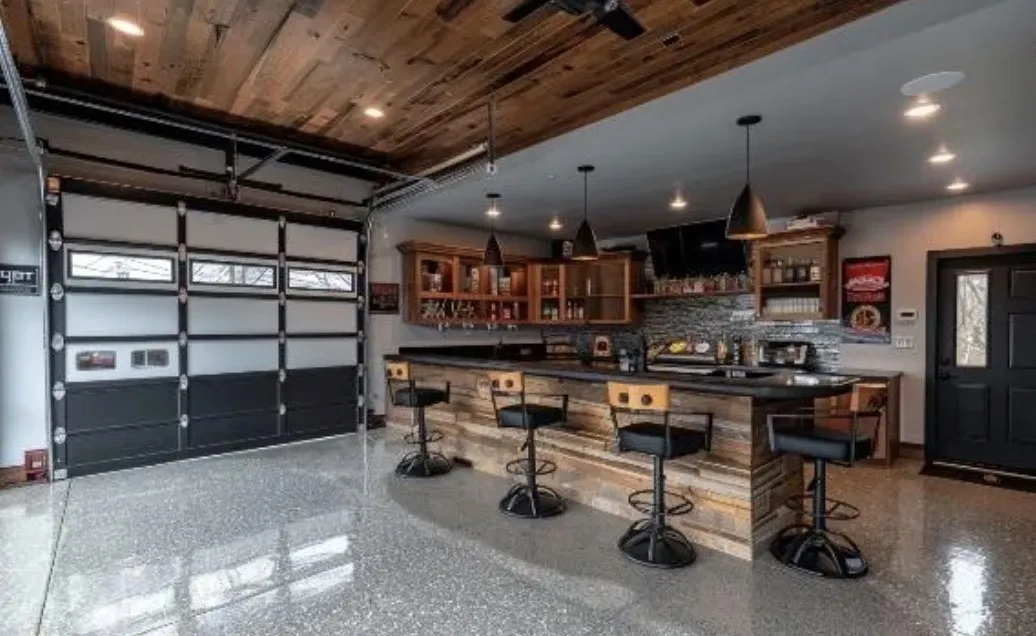
10. Design a Garage That’s an Entertainment Hub
As homes have become our primary spaces for both work and play, the garage has emerged as the final frontier for expansion. This trend of converting garages into entertainment zones—be it a home theater, a bar, or a game room—is a direct result of wanting to maximize every square foot. It’s a move toward seeing the garage not as a separate, utilitarian shed, but as integrated, flexible living space that can adapt to a family’s changing needs. This idea has real staying power because it adds significant functional value to a home.
✅ Before You Start
When turning a garage into a living space, managing the garage door is a huge challenge. Instead of removing it, which is expensive and permanent, insulate the existing door. For about $100-$200, you can buy foam board or reflective insulation kits that fit directly onto the door panels. This dramatically improves climate control and soundproofing. Then, you can hide the door with heavy, floor-to-ceiling blackout curtains on a ceiling-mounted track to complete the transformation without a major renovation.
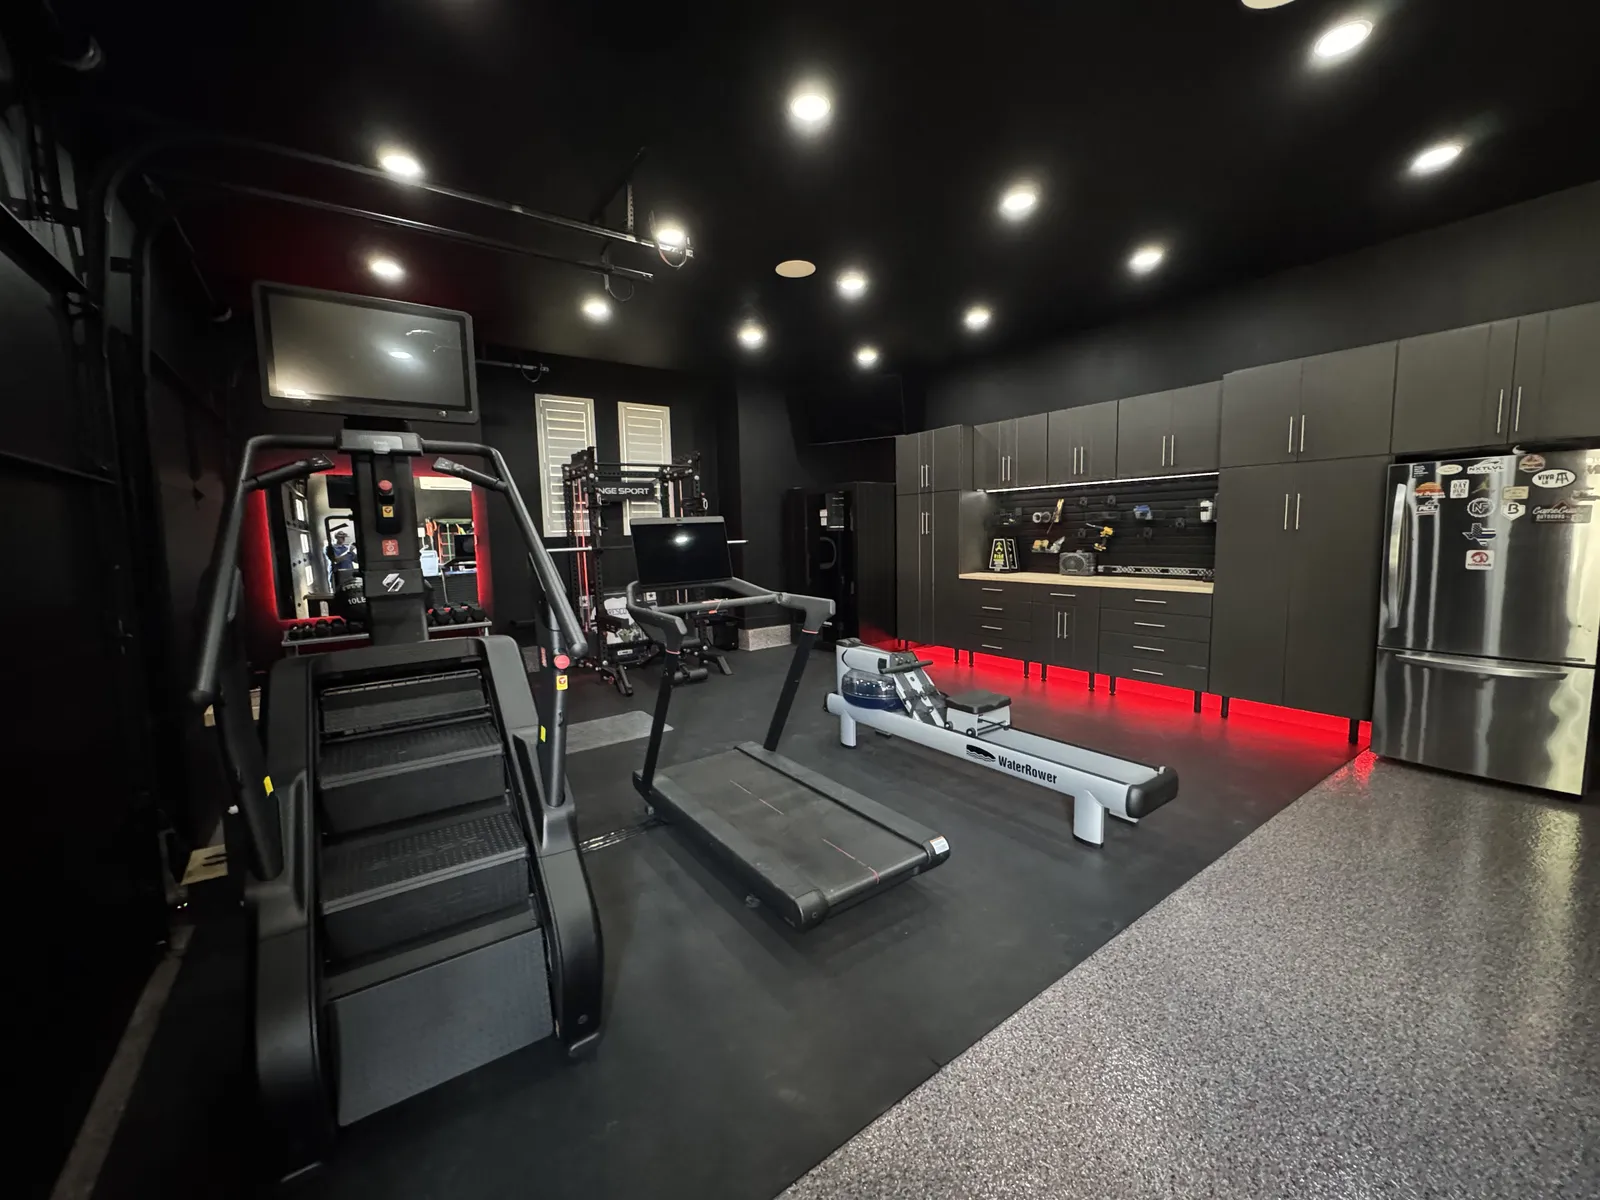
11. Create a Budget-Friendly Garage Man Cave
You absolutely do not need a five-figure budget to create a great hangout spot. The key is to be savvy. Scour Facebook Marketplace and thrift stores for a comfy old sofa and a coffee table—a few hundred dollars at most. Instead of expensive flooring, get large, interlocking rubber gym mats. They’re comfortable, durable, and cover ugly concrete in minutes. For the ‘bar,’ a sturdy secondhand workbench or kitchen island works perfectly. Add a mini-fridge and a dartboard, and you’ve got a functional man cave for well under $1,000.
💸 Get This Look For Less
A word of warning: comfort is king, but garages are not naturally comfortable. Before you spend a dime on a big-screen TV, think about climate control. A garage in Texas will be an oven in August, and one in Minnesota will be a freezer in January. You’ll need to budget for insulation (especially for the garage door) and either a portable AC unit/heater or a more permanent mini-split system. Without this, your cool man cave will be unusable for half the year, no matter how great it looks.
12. The Industrial Workshop: A Blue Workbench and Tiled Floor
This look is pure, unapologetic function, and that’s precisely why it works. The industrial aesthetic is communicated through honest, hard-wearing materials. The blue steel of the workbench, the tiled floor with a practical yellow safety line, the gray roller shutter—none of it is trying to be pretty. It’s all about purpose. This creates an authentic, no-fuss environment that feels both professional and inspiring for getting work done. The pops of primary color (blue and yellow) against the neutral gray and white backdrop add visual energy without feeling overly decorated.

📏 Scale Guide
That white tiled floor with white grout looks incredibly sharp and professional, but it’s a high-maintenance choice for a workshop. Grout is porous and will stain easily from oil, grease, or dirt. To keep it looking clean, you’ll need to apply a high-quality grout sealer annually. For cleaning, you’ll have to use a stiff brush and a dedicated grout cleaner. A darker grout (gray or black) would provide the same industrial feel with a fraction of the cleaning hassle. The workbench itself will likely show scratches, but for a workshop, that just adds character.
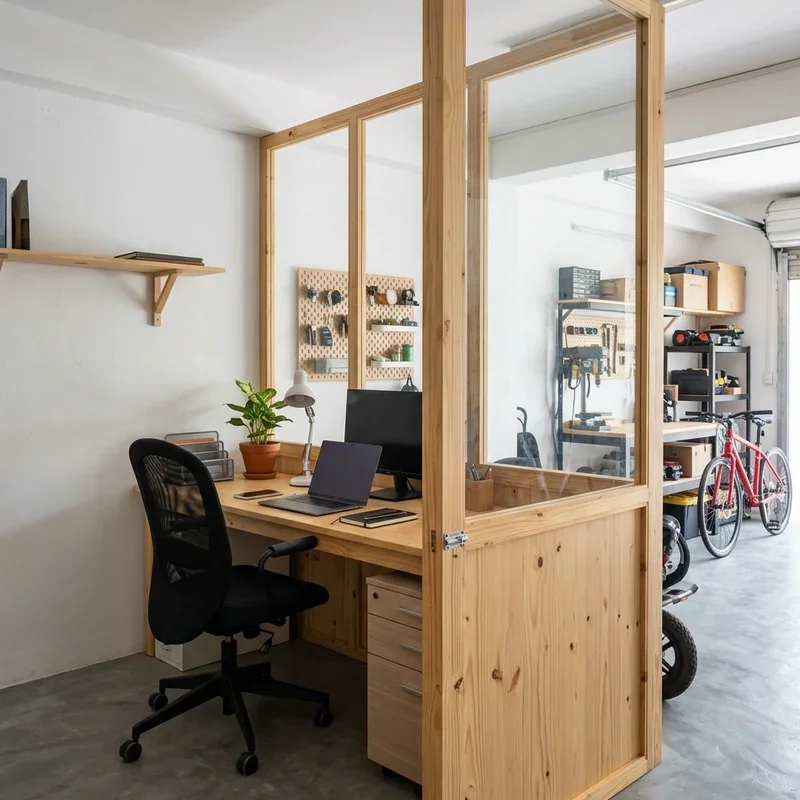
13. Divide and Conquer with a Plywood and Glass Office Partition
The plywood and glass partition is the single element that makes this entire concept possible. It brilliantly separates the clean, quiet office from the potentially messy and noisy workshop area without sacrificing light or a sense of openness. By creating this ‘room within a room,’ you get the best of both worlds: a dedicated, climate-controlled workspace and a functional garage. Without the partition, it would just be a desk at the edge of a garage. It’s a game-changing architectural feature that defines the two zones.
⭐ The One Thing
This partition idea is perfect for a standard two-car garage (at least 20 feet wide) where you can afford to dedicate a 10×10 or 10×12 foot section to the office. You need enough remaining space for the ‘garage’ functions, whether that’s parking a car or, as shown here, tool storage and a workshop. The minimum ceiling height should be 8 feet to avoid the partitioned space feeling claustrophobic. This wouldn’t be as effective in a single-car garage, as the remaining utility area would likely be too narrow to be useful. Compare with the open-plan office in Idea #14, which suits a space you can fully dedicate.
14. Set Up a Modern Home Office with an L-Shaped Desk
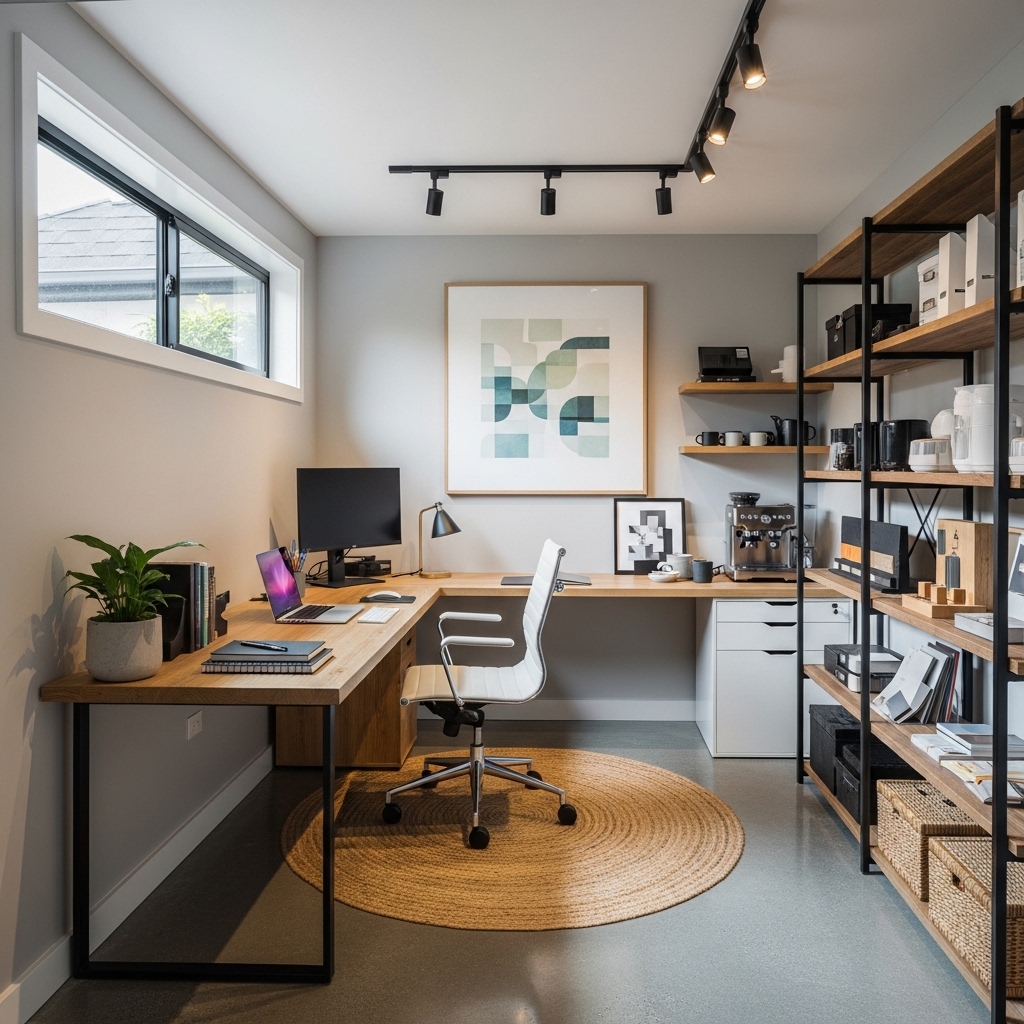
The stylish equilibrium of this room comes from a clear formula: 50% Modern Industrial + 30% Natural/Organic + 20% Soft Neutrals. The industrial half is represented by the black metal of the shelving unit and track lighting. The natural elements are the light wood desk and the round jute rug, which add essential warmth and texture. The remaining 20% is the soft neutral palette of the light gray walls and white chair. This balance prevents the space from feeling too cold and sterile or too rustic.
📐 Style Math
This design is successful because it masterfully mixes hard and soft textures. The hardness of the concrete floor, metal shelving, and desk frame is balanced by the softness and warmth of the wooden surfaces, the natural fiber rug, and the light filtering through the window. This contrast is key. It creates a space that feels both organized and productive, yet comfortable and inviting. The L-shaped desk is also a smart move, maximizing usable workspace in the corner without dominating the entire room.
15. Embrace Raw Materials: A Concrete Block and Wood Studio
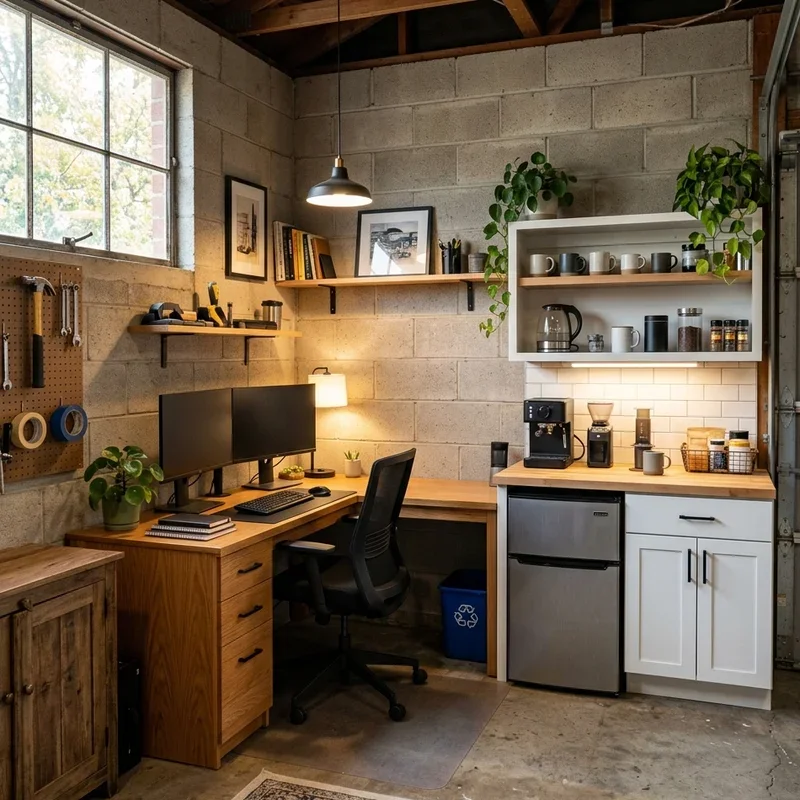
When working with raw, industrial materials like exposed concrete blocks, lighting is your most powerful tool to add warmth. Don’t rely on a single overhead light. Instead, layer it. Here, the under-shelf LED strip lighting is crucial. It washes the wooden desktop in a warm glow, making it an inviting place to work. The directional pendant light adds another layer, creating a focused pool of light. This technique, called ‘task lighting,’ makes a huge difference and prevents the space from feeling like a cold, unfinished basement.
🎯 What Makes It Work
The single element holding this entire look together is the consistent use of warm-toned wood. Imagine the room with white or metal desks and shelves—it would instantly feel cold, bleak, and unwelcoming. The wood provides a necessary organic contrast to the gray concrete blocks and stark white cabinets. It’s the material that introduces a sense of coziness and humanity into an otherwise industrial shell. Everything else could be changed, but remove the wood, and the soul of the design is lost. This is a more industrial take on the wood accents seen in Idea #2.
16. Bright and Personal: A Yellow Home Office with a Long Desk
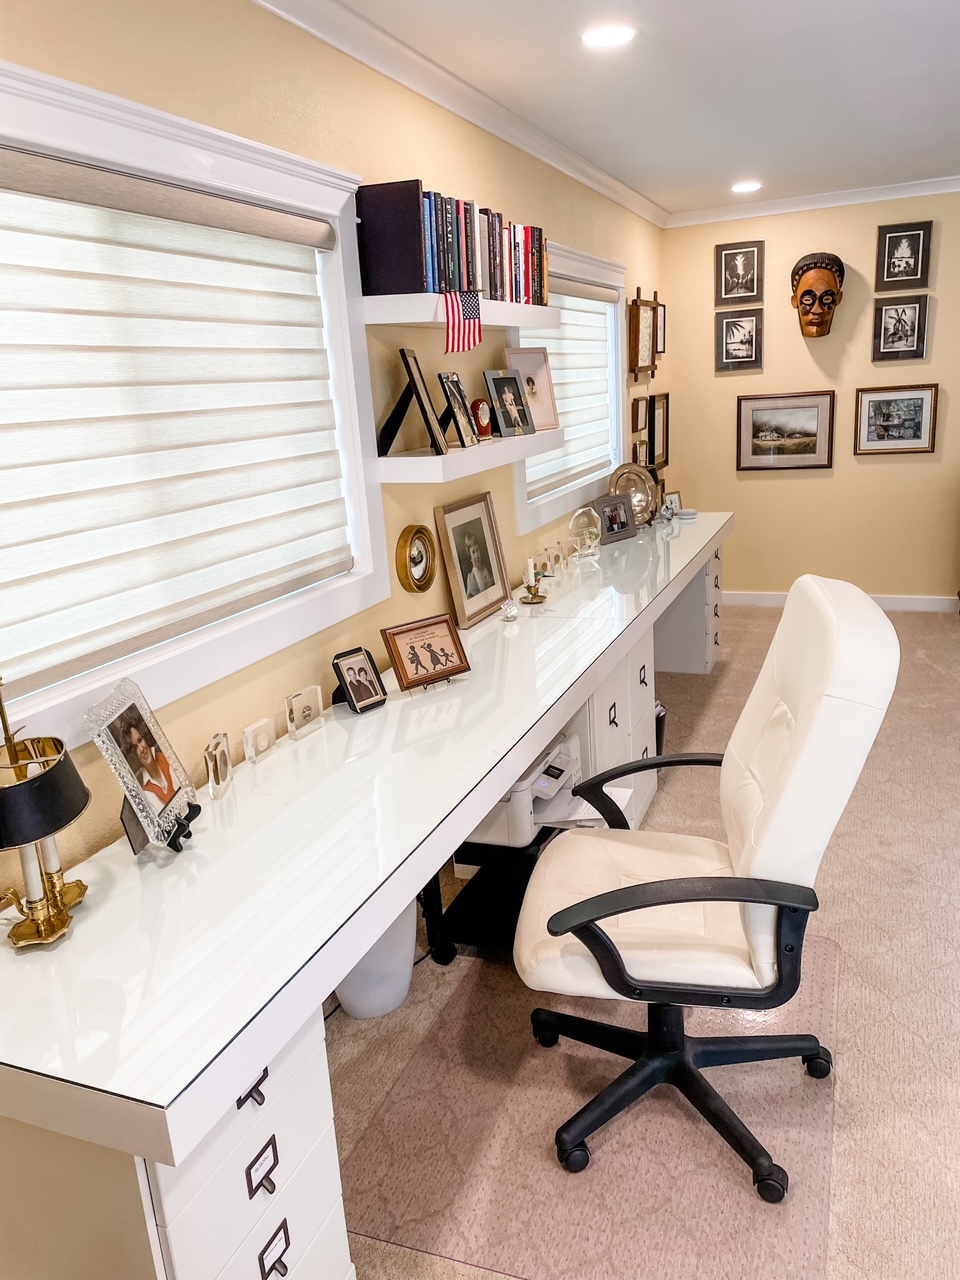
A gallon of paint is the cheapest, most impactful renovation tool you have, but be careful with a strong color like this warm yellow. A color this saturated can look very different depending on the light. Test your paint sample on a large poster board and move it around the room at different times of day. A yellow that looks cheerful and sunny in the morning might feel aggressive and overwhelming in the afternoon sun. Also, be mindful of how it reflects on your computer screens, as it can cause a slight color cast.
🔥 Trending Context
This office feels so personal and inviting due to the successful use of asymmetry and layering. The gallery wall isn’t perfectly gridded; it’s a casual, collected mix of sizes and frames, which feels authentic. The floating shelves are also styled asymmetrically, avoiding a stiff, mirrored look. This intentional imbalance makes the space feel lived-in and dynamic. The layering of art, books, and decor on the shelves and wall adds depth and tells a story about the person who works there, elevating it from a simple desk-and-chair setup to a true personal office.
17. The Ultimate Sports Fan Zone with Stadium Seating
that absolutely makes this room is the green turf flooring. It’s a bold, unexpected choice that instantly communicates “sports” and “stadium” before you even notice the multiple screens or themed decor. Swap it out for regular carpet or wood, and you lose 80% of the immersive effect. It’s a sensory experience—you can almost smell the grass. The turf commits to the theme so completely that it gives permission for all the other elements, like the raised seating platform and wall mural, to work.

🔧 How-To Brief
A full-blown home theater like this requires significant space, ideally a long and wide two-car or even three-car garage. You’ll need a minimum length of 18-20 feet to allow for proper viewing distance from the projection screen. The width needs to accommodate the tiered seating platform, which can easily be 10-12 feet across. Ceiling height should be at least 9 feet to allow for the platform rise without making the back row feel cramped. This is a high-investment, high-space idea; for a more casual media room, consider the layout in Idea #23.
18. An Open-Plan Conversion with Bi-Fold Doors to the Garden
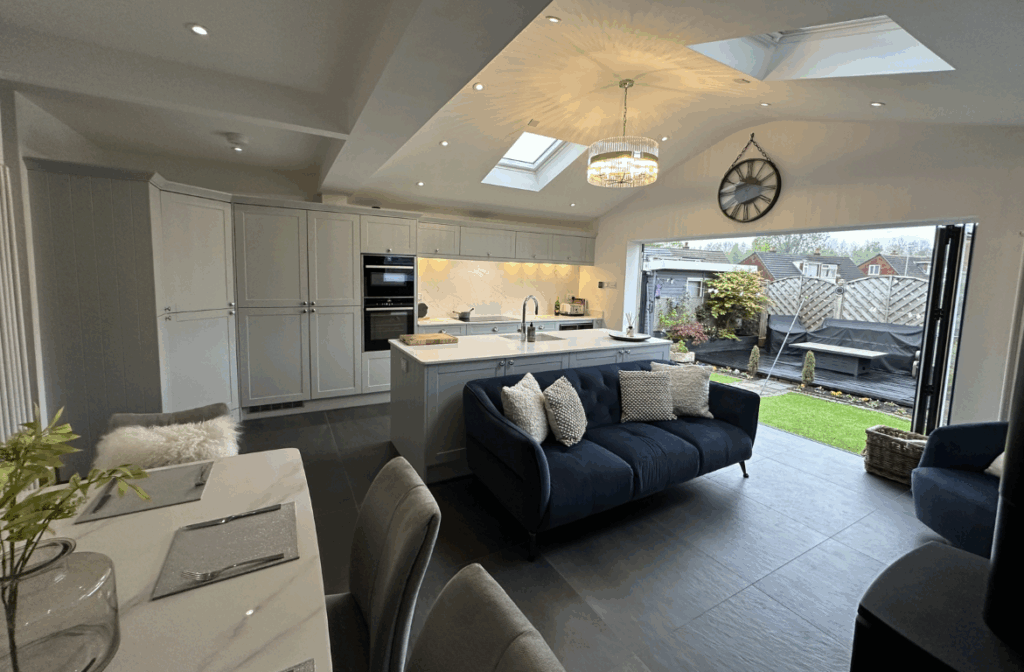
The genius of this conversion lies in its seamless indoor-outdoor connection. The bi-fold doors are the key. When fully opened, they effectively remove an entire wall, merging the interior living space with the garden patio. The use of a consistent, dark charcoal floor tile across both the kitchen and the (unseen but implied) patio would further blur this line. The vaulted ceiling with skylights enhances the sense of openness, making the entire area feel like one large, airy pavilion rather than a converted garage.
🧹 Maintenance Reality
Before you knock down walls and install massive bi-fold doors, check these items off your list:
- Structural Engineer Consult: Any time you remove a large portion of an exterior wall, you need to know what’s required to support the roof. This is not a DIY guess.
- Sun Direction: Which way does this wall face? A south-facing wall of glass can create a greenhouse effect, making the room uncomfortably hot without proper UV-coated glass or an overhang.
- Budget for Landscaping: Opening up the room to the garden means the garden is now part of your interior decor. You need to budget for making the immediate outdoor view look just as good as the inside.
19. A Cozy Workshop with Plywood Walls and a Green Accent
When using raw plywood for walls, the finishing details make the difference between looking like a construction site and a finished, intentional space. Pay extra attention to the seams between panels. Instead of just butting them up against each other, consider using a reveal gap of about 1/4 inch. This creates a clean, deliberate shadow line that looks much more professional. Also, ensure you use a high-quality polyurethane sealer (a matte finish is very contemporary) to protect the wood from moisture and stains, and to bring out its natural warmth.
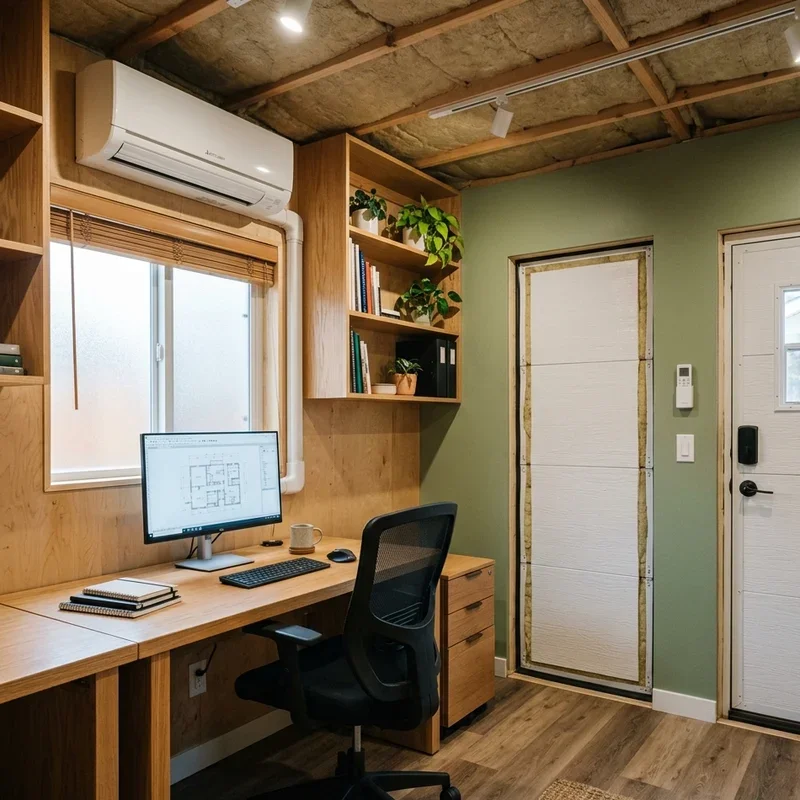
💡 Designer Tip
This design’s cozy, modern vibe comes from a balanced equation: 70% Natural Wood + 20% Muted Color + 10% Industrial Elements. The plywood-paneled walls and desk create a warm, enveloping base. The muted green accent wall provides just enough color to add personality without overpowering the natural materials. The final 10% of industrial touches—the exposed ceiling, track lighting, and black metal chair legs—keep the look feeling modern and grounded, preventing it from becoming an all-out rustic cabin.
20. Upgrade Your Curb Appeal with a Modern Wood Garage Door
A high-end garage door replacement is one of the best home improvement projects for return on investment. This isn’t a budget-friendly update, but it makes a massive impact on curb appeal. The combination of natural wood with modern, dark trim is a timeless look.
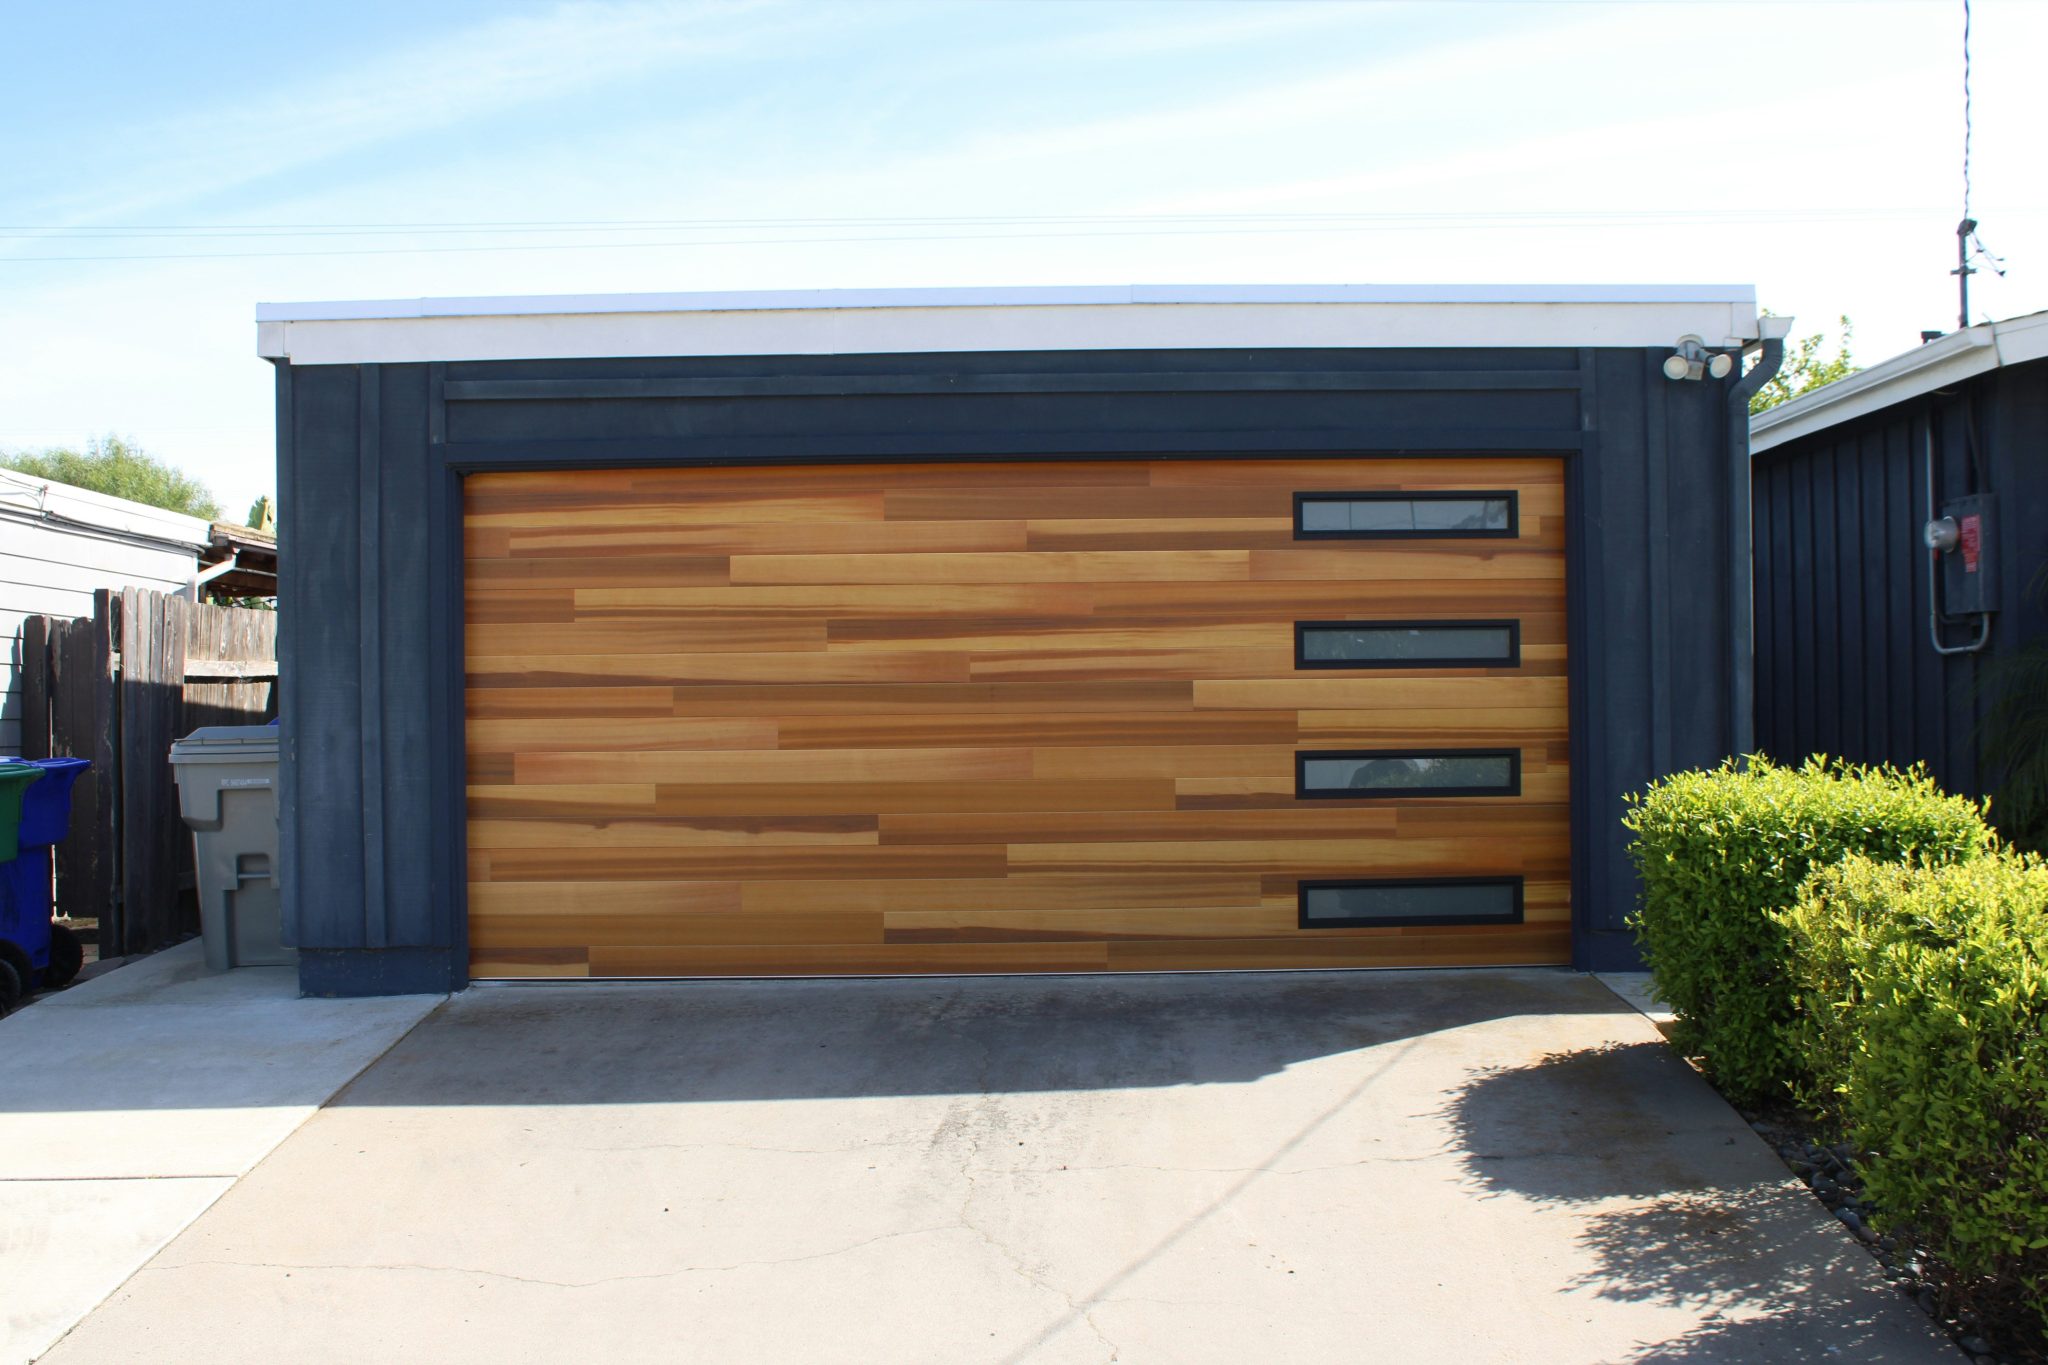
💰 Budget Breakdown
- Custom Wood Garage Door (Double): $4,000 – $10,000+
- Professional Installation: $500 – $1,200
- New Opener & Hardware: $400 – $800
- Exterior Paint/Trim Work: $300 – $1,000
- TOTAL: $5,200 – $13,000+
- Budget alternative: You can achieve a similar look with a steel door that has a highly realistic wood-grain composite overlay for about 40-50% less.
21. The Ultimate Woodworker’s Garage with Rolling Workbench
The key to this entire workshop’s functionality is the large wooden workbench on casters. It’s more than just a table; it’s a mobile command center. Its size provides a generous surface for large projects, and its mobility allows the entire layout of the workshop to be reconfigured in seconds. You can roll it to the center of the room for assembly, push it against a wall to free up floor space, or move it closer to a specific tool. This flexibility is what transforms a static room into a dynamic and efficient workspace.
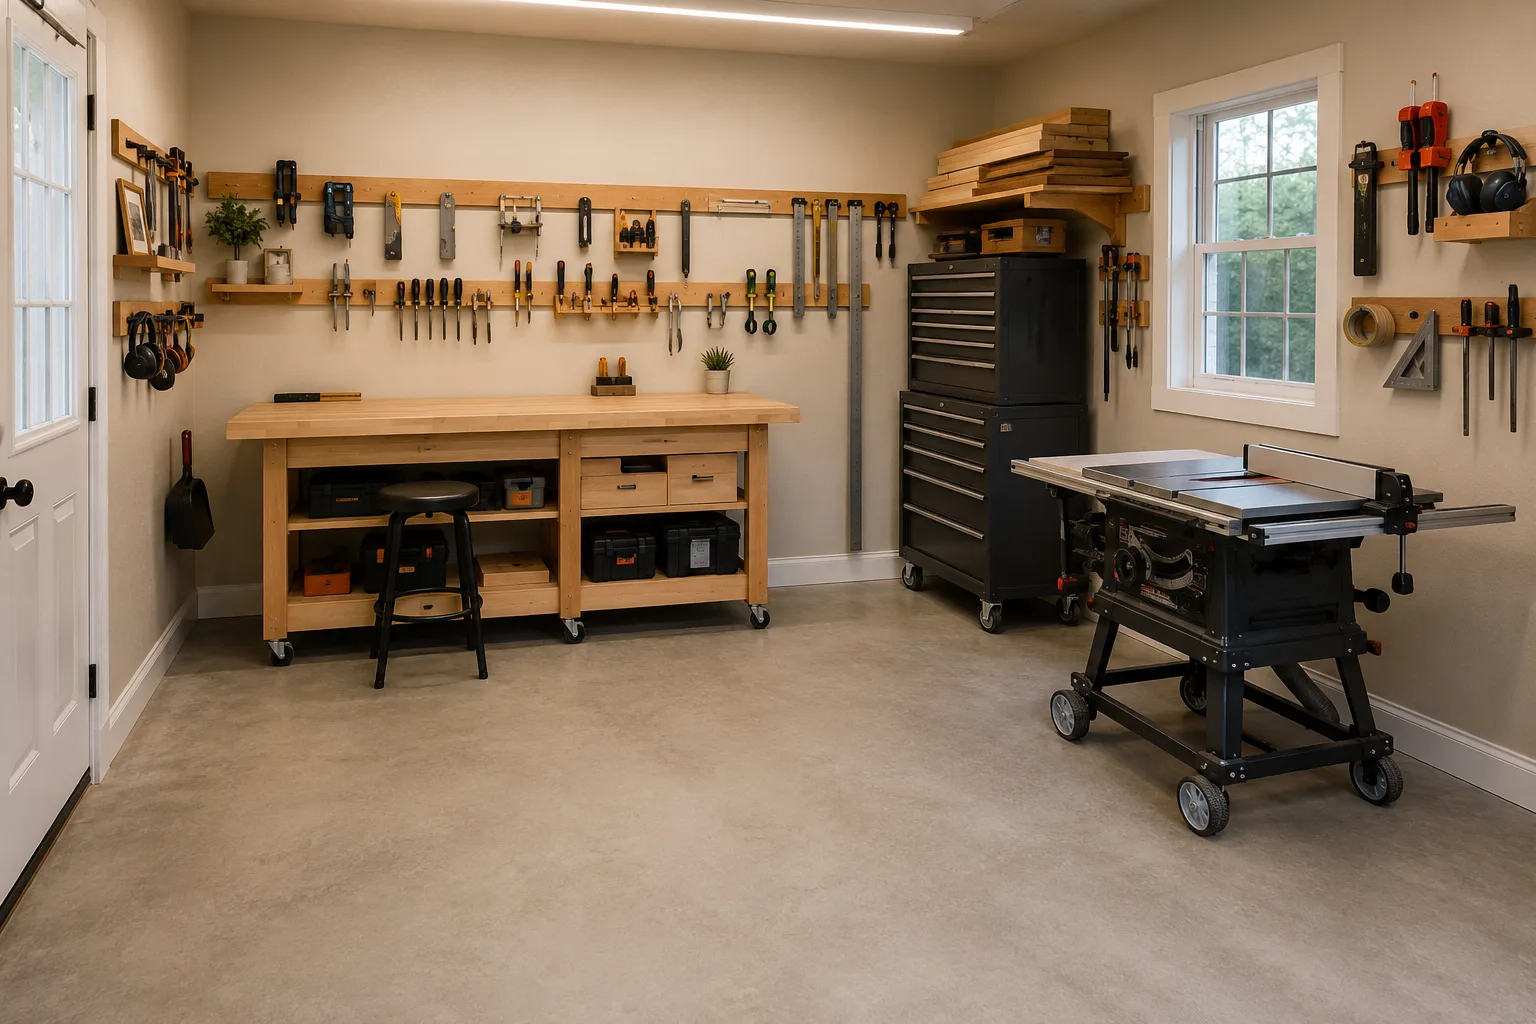
⚠️ Real Talk
This space is a masterclass in the design principle of ‘a place for everything, and everything in its place.’ The wall-mounted wooden organizers aren’t just storage; they’re a visual inventory system. Every tool is visible and easily accessible, which is critical for an efficient workflow. The combination of open, wall-hung storage for frequently used items and closed, drawer storage (in the tool chests) for less-used or smaller items is a classic workshop strategy that reduces clutter and time spent searching for tools.
22. An Airy Conversion with a Glass Garage Door and Kitchenette
This bright, functional space is a perfect example of the ADU (Accessory Dwelling Unit) trend that’s sweeping the nation. As cities ease zoning restrictions, homeowners are converting their garages into small, stylish living spaces for rental income, multi-generational living, or a dedicated home office away from the main house. The use of inexpensive but stylish materials like plywood cabinetry, paired with a high-impact feature like the full-view glass garage door, defines this popular and pragmatic movement.
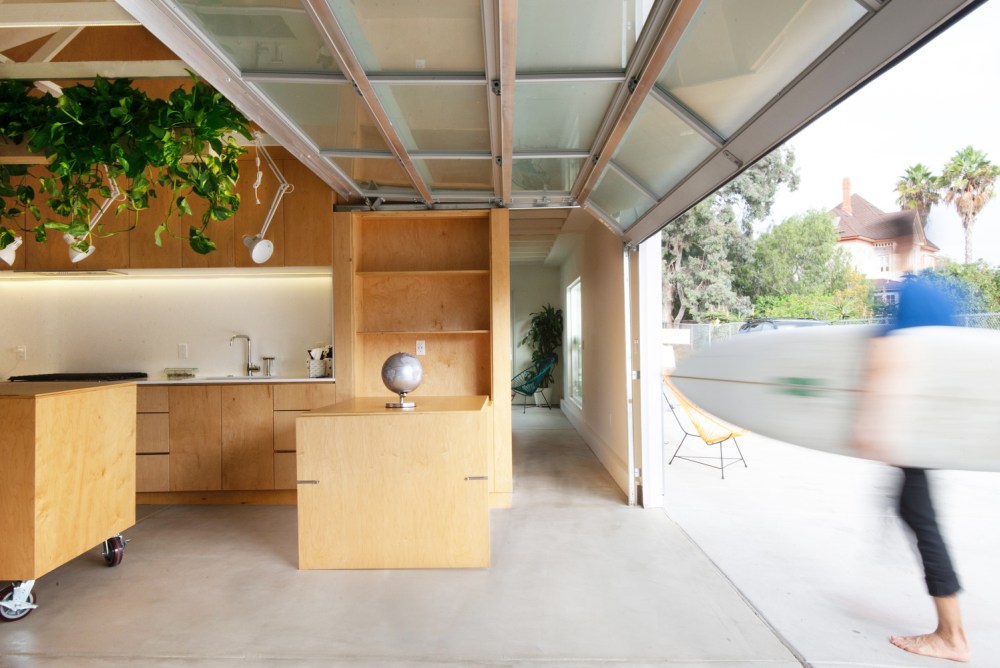
✅ Before You Start
When using plywood for cabinetry, the edge is everything. Instead of trying to hide the layers with edge banding, embrace them! A high-quality ‘Baltic Birch’ or ‘ApplePly’ plywood has beautiful, clean layers that look fantastic when left exposed. Just make sure to sand them perfectly smooth (up to 220-grit) and finish them with multiple coats of a clear, non-yellowing polyurethane. This detail turns an inexpensive material into a high-end, contemporary design statement. It celebrates the material’s honesty, much like the plywood walls in Idea #19.
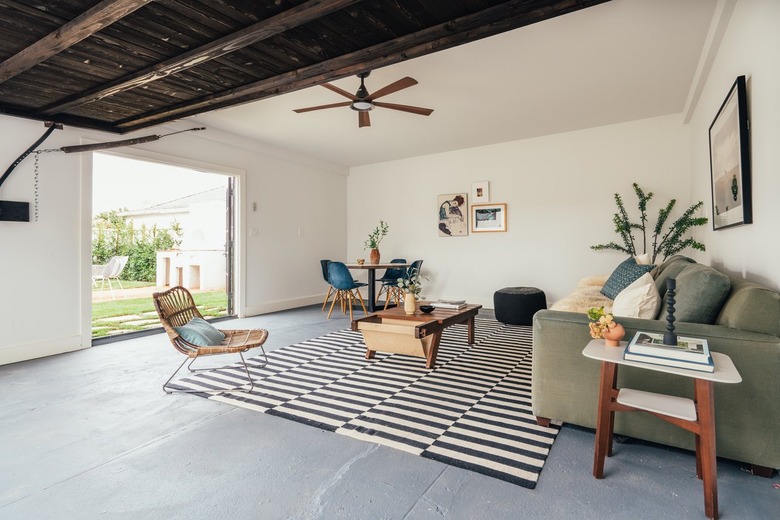
23. A Casual Living Space with a Dark Wood Slat Ceiling
This room’s relaxed yet chic vibe comes from a well-executed formula: 60% Light & Airy + 30% Dark & Grounding + 10% Color Pop. The white walls and light concrete floor create the expansive, airy base. The dark wood ceiling and striped rug provide the necessary grounding elements, adding weight and intimacy. The final 10% comes from the pops of color in the pale green sofa and blue dining chairs, which inject personality and keep the space from feeling too monochrome. The result is perfectly balanced and effortlessly cool.
💸 Get This Look For Less
This open-plan living concept works best in a larger-than-average garage, ideally a deep two-car or a three-car space (at least 500-600 sq. feet). You need enough square footage to clearly define both a living zone and a dining zone without them feeling cramped. A minimum ceiling height of 9 feet is recommended to accommodate a statement ceiling like the dark wood slats without making the room feel heavy or oppressive. In a smaller space, a light-colored wood or simply painting the ceiling white would be more effective.
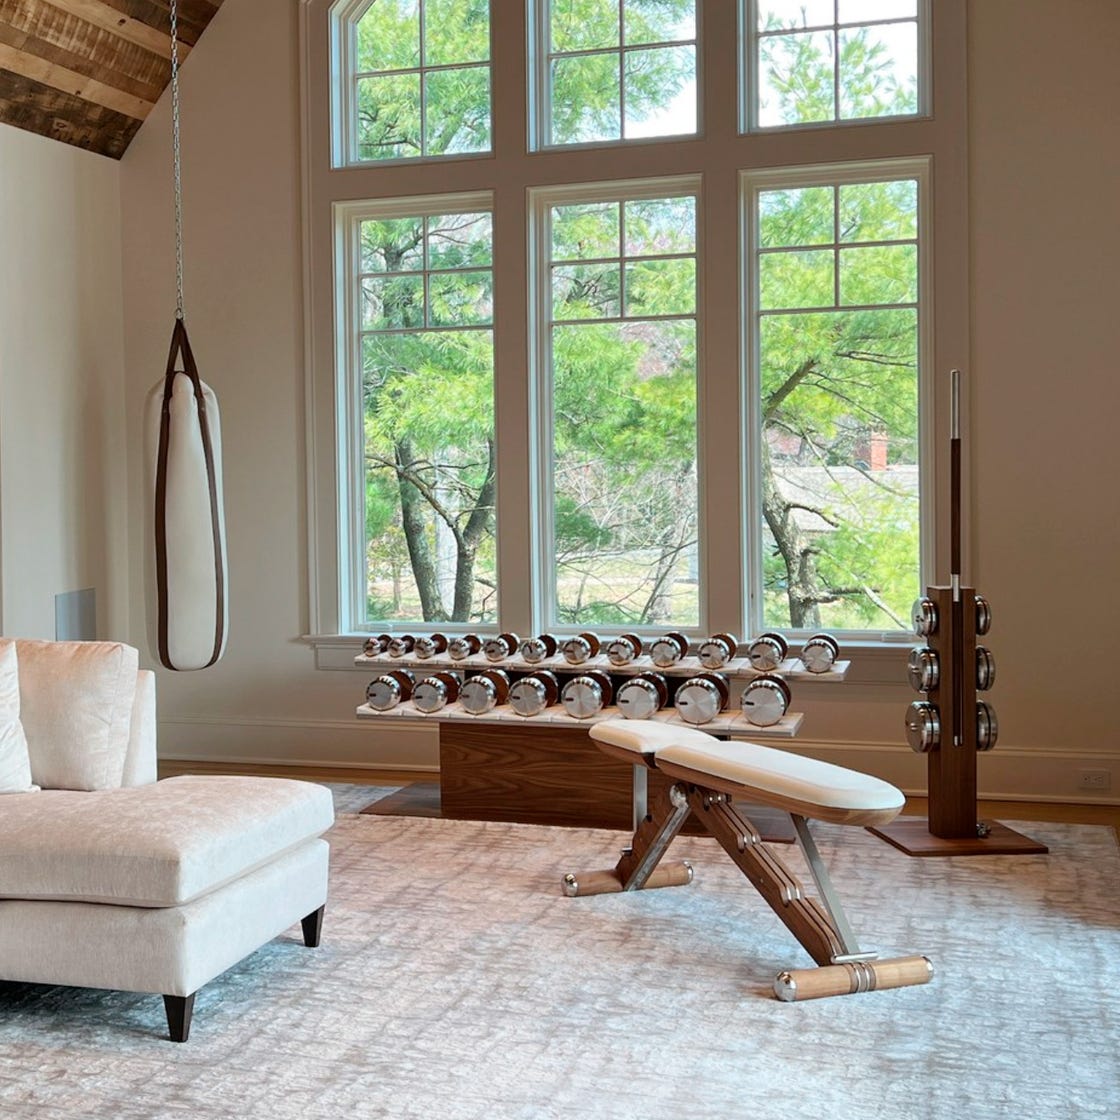
24. A Serene Home Gym with Views of the Outdoors
This home gym feels so luxurious because it borrows from high-end spa design, not traditional gym aesthetics. The key is the use of natural materials and a connection to the outdoors. The warm wood of the dumbbell rack and bench, paired with the large windows looking out onto lush greenery, creates a calming, serene environment. This focuses on the wellness aspect of exercise, rather than the purely utilitarian. It turns a workout into a restorative experience, which is a powerful psychological shift.
📏 Scale Guide
You don’t need a fortune to create a serene workout space. Find a spot near a window for natural light. Instead of bespoke wooden equipment, look for well-designed basics from brands like IKEA or Target. A simple wooden bench, a nice yoga mat, and a set of adjustable dumbbells can be stored attractively in a woven basket. The key is the ‘less is more’ approach. For a similar feel to the upscale setup for under $500, focus on a neutral color palette, a good quality area rug, and add a few real plants to connect with nature.
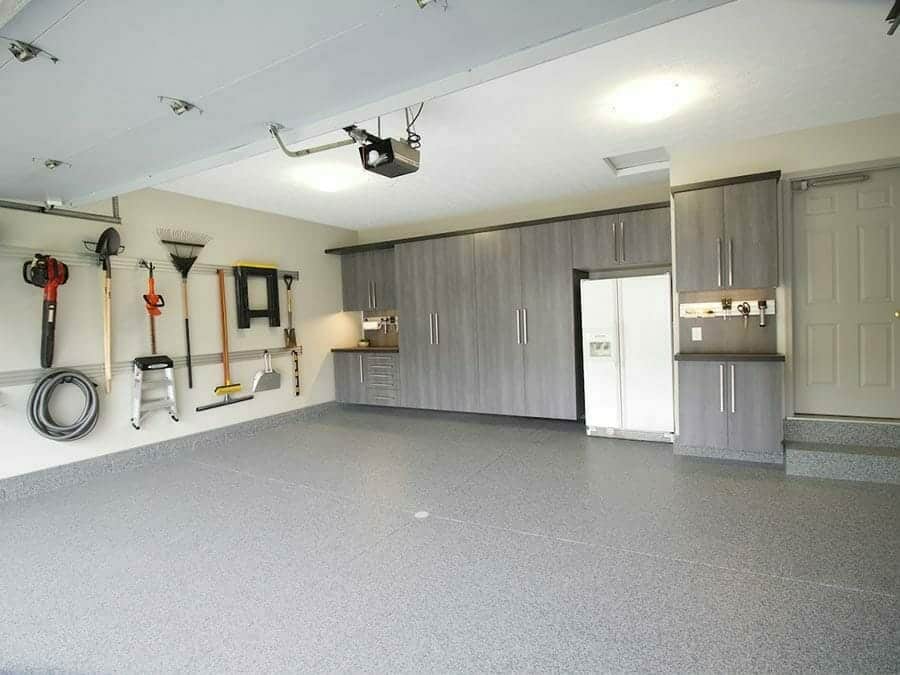
25. Get Hyper-Organized with Wall-to-Wall Grey Cabinets
The single element that defines this garage is the wall of seamless, light grey cabinetry. It is the ultimate commitment to organization. By providing a massive amount of closed storage, it allows the rest of the garage to remain clean, open, and uncluttered. It transforms the space from a place where things are ‘kept’ to a place where things are ‘stored.’ The uniform color and hardware create a calm, monolithic backdrop that is both highly functional and visually restful. Without these cabinets, it would just be another garage; with them, it’s an organizational masterpiece.
⭐ The One Thing
While a wall of cabinets hides a multitude of sins, the cabinets themselves still need care. The textured, wood-look finish is great at hiding fingerprints, but it can trap dust and grease. Wipe them down a few times a year with a mild cleaner. The biggest maintenance reality of a system this large is what’s inside. A system this organized only *stays* organized with discipline. If you tend to just shove things in and close the door, you may find yourself with beautiful cabinet doors that hide complete chaos, defeating the purpose of the investment.
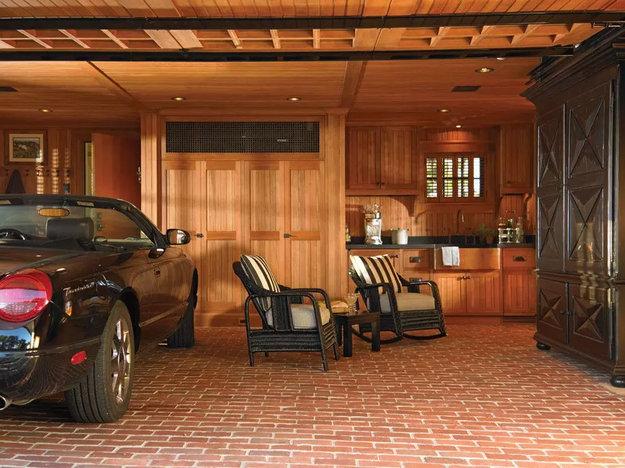
26. A Cozy Retreat with Warm Wood Paneling and Brick Floors
When using extensive wood paneling on both walls and ceilings, vary the direction of the planks to create subtle visual interest. For instance, run the wall panels vertically and the ceiling panels horizontally, perpendicular to the roof line. This small detail helps to differentiate the planes and prevents the room from feeling like a monotonous wooden box. It adds a layer of architectural detail that feels custom and thoughtful, elevating the overall design of the space.
📐 Style Math
This garage conversion feels exceptionally warm and inviting because it fully embraces a single design concept: the cozy cabin. The designer didn’t hold back. The combination of warm wood paneling, red brick flooring, and classic furniture like rocking chairs creates a powerful, unified atmosphere. The key is the commitment to texture. The roughness of the brick, the grain of the wood, the weave of the chair cushions—all these elements work together to create a rich, tactile experience that makes you want to settle in and stay awhile.
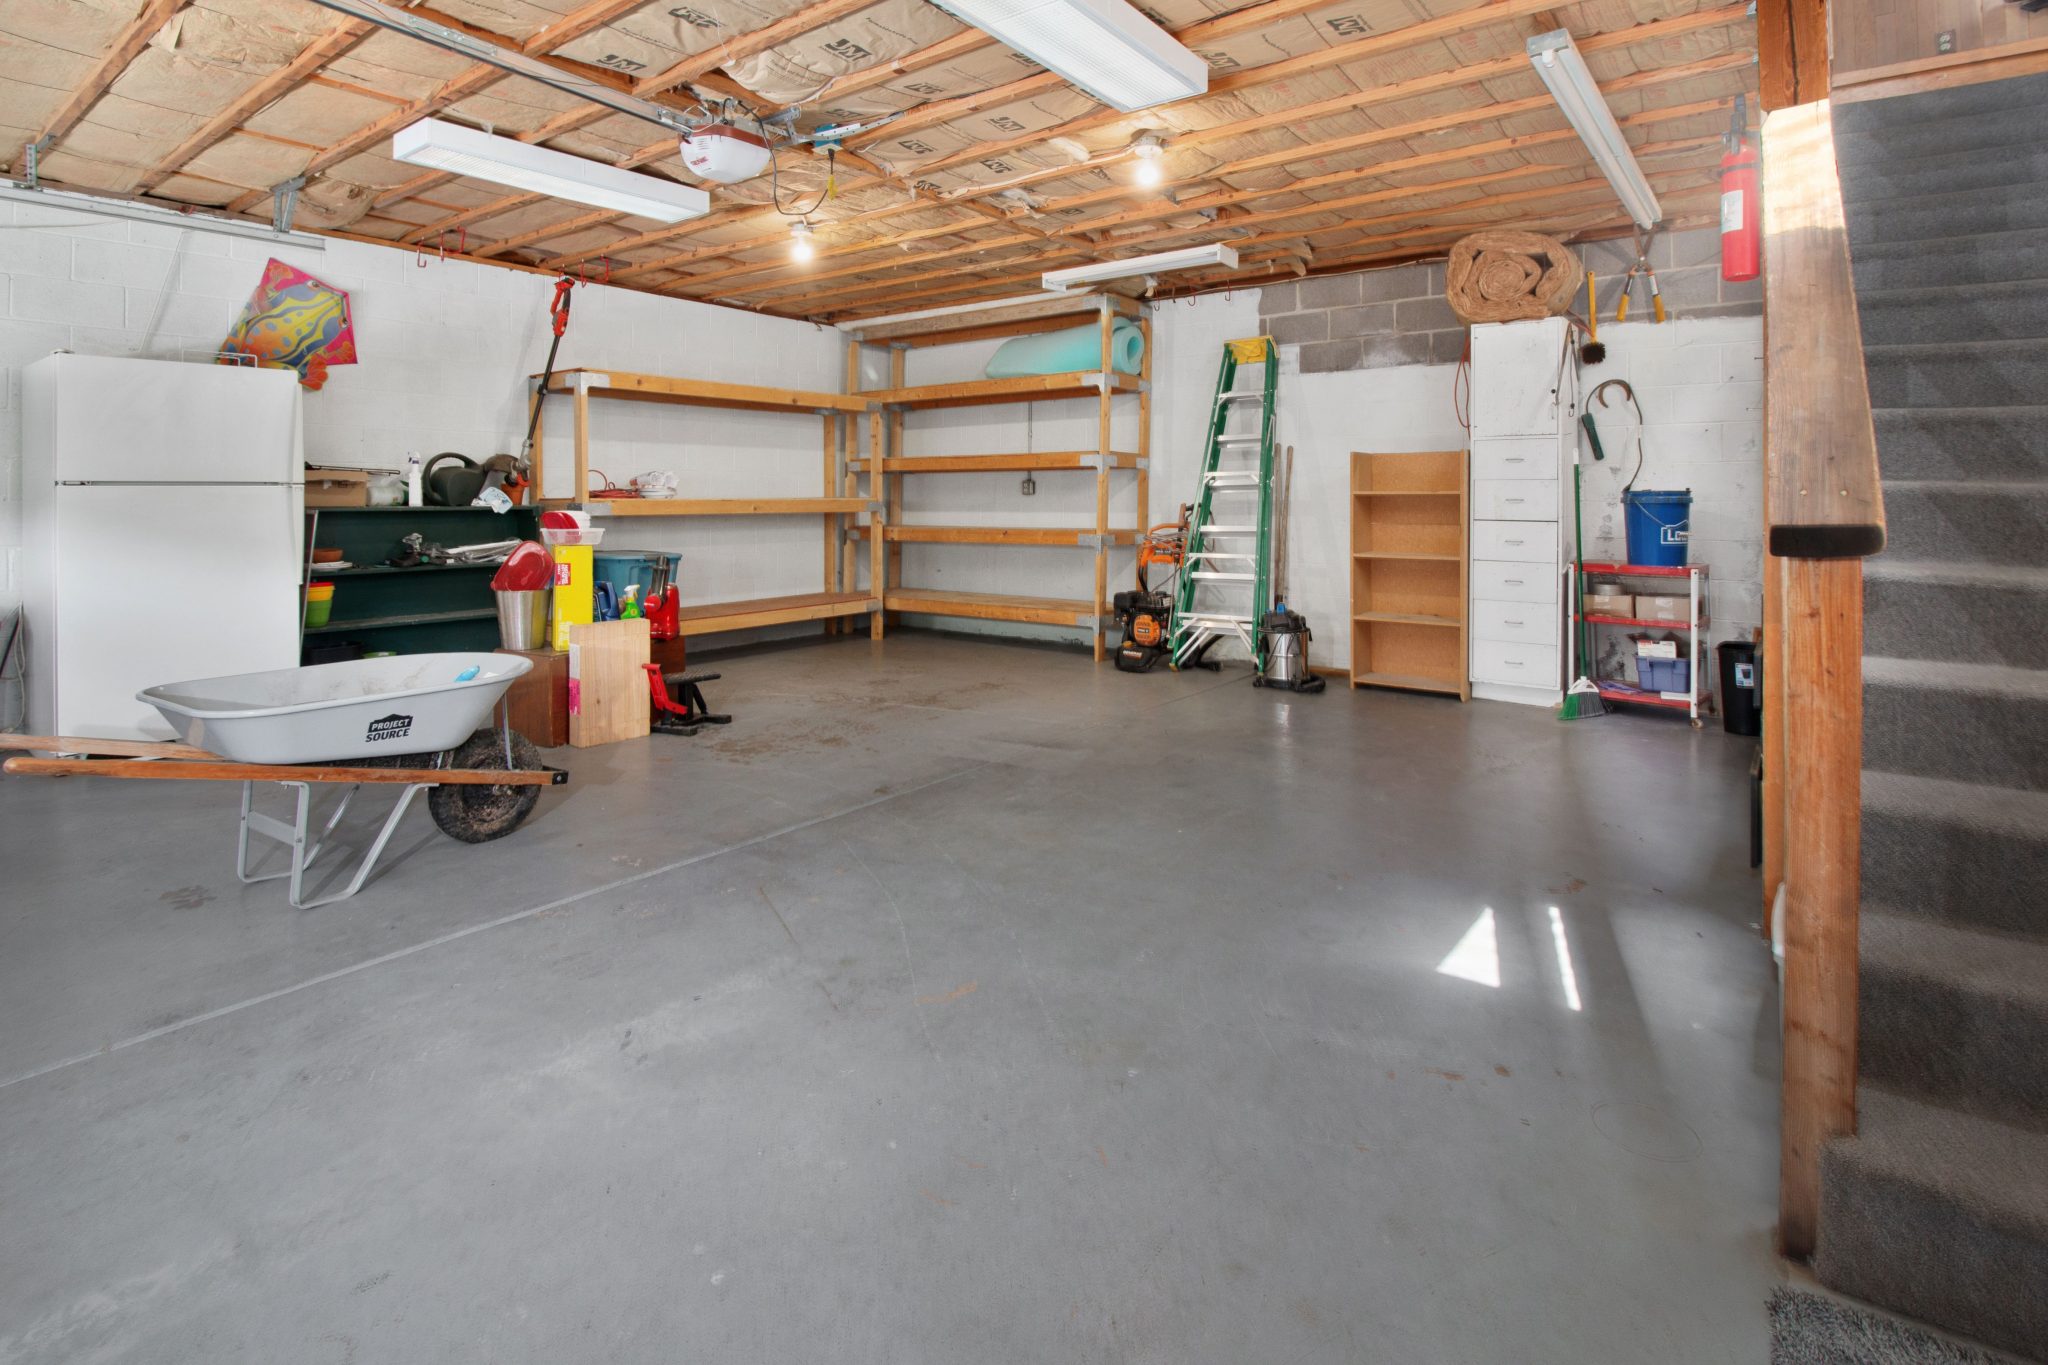
27. The No-Frills Functional Garage with Exposed Ceilings
This is the reality of a functional, hardworking garage, and there’s nothing wrong with it! The exposed ceiling beams and insulation, the concrete block walls, the basic shelving—it’s all about utility over aesthetics. While this look might not win any design awards, it’s practical and inexpensive. The one thing to watch out for is dust and debris from exposed insulation. Over time, it can degrade and shed particles, so it’s wise to eventually cover it with drywall or plywood, even if it’s a project for a later date.
🎯 What Makes It Work
This look is already budget-friendly, but you can make it even more so by leaning into secondhand and salvage. Check Facebook Marketplace or Craigslist for people giving away free lumber or old kitchen cabinets they’ve torn out. These can be repurposed into sturdy, free shelving and storage. A mis-tint can of ‘oops’ paint from the hardware store is the cheapest way to get those walls coated in a fresh layer of white or grey. The goal here isn’t perfection; it’s improved function on a shoestring budget.
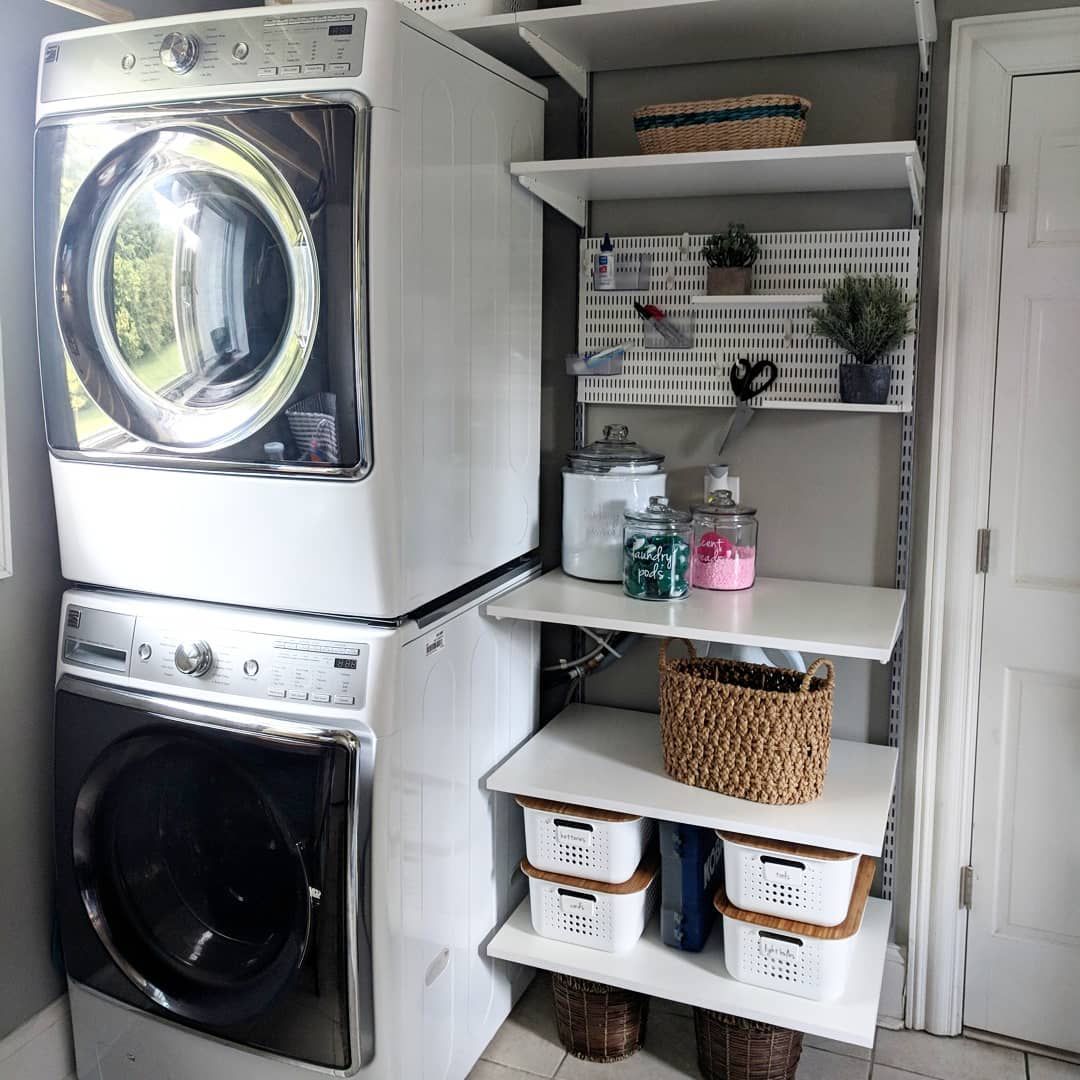
28. Carve Out a Compact Laundry Nook with Vertical Storage
You can build a custom vertical laundry shelf like this in an afternoon. Here’s how:
🔥 Trending Context
- Measure Your Space: Measure the width, depth, and height available next to your washer/dryer.
- Get Your Shelves Cut: Go to a hardware store and have them cut simple white laminate shelves to your desired depth and width.
- Install Vertical Tracks: Screw two vertical metal tracks (like the Rubbermaid FastTrack system) to the wall. Use a level to ensure they are perfectly parallel. Cost: $20-$30 per track.
- Attach Brackets and Shelves: Snap the shelf brackets into the tracks at your desired heights. Place the shelves on top. For added stability, you can screw the shelves to the brackets from below.
Time Estimate: 2 hours. Material Cost: $80-$150.
This compact laundry solution is perfect for a small nook in a garage or closet. You only need a space about 28-30 inches wide to accommodate a standard stacked washer/dryer unit. The key is the vertical space. To make a setup like this work, you need a ceiling height of at least 8 feet to comfortably fit the machines and have usable shelving above. This is an incredibly efficient use of a small footprint, proving you don’t need a dedicated room for a fully functional laundry area.
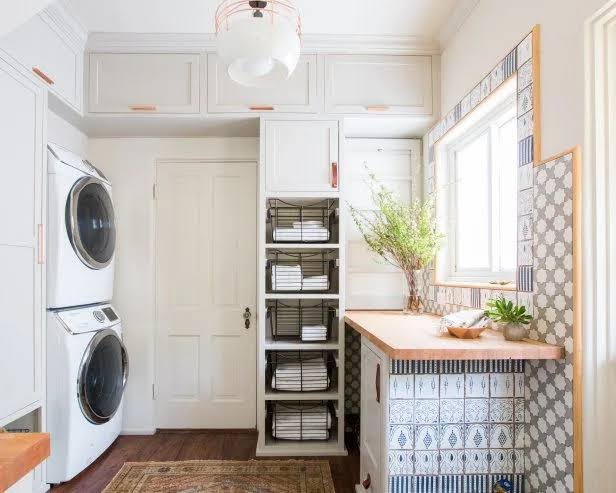
29. A Simple and Cheap Garage Laundry Station Makeover
Creating a functional laundry space in the garage doesn’t have to be expensive. The key is to focus on simple, impactful changes. Instead of custom cabinetry, use a simple wire shelving unit from Target or Walmart for around $50-$80. A fresh coat of white paint on the walls will instantly make the space feel cleaner and brighter. Use simple, matching plastic baskets from the dollar store to conceal clutter. The goal is to create a sense of order and cleanliness without a major renovation, costing you less than $200 total.
🔧 How-To Brief
When your laundry is in a utility area like a garage, lighting is often an afterthought. Replace that single bare bulb with a bright, 4-foot LED shop light. For about $30, you can get a fixture that floods the area with clean, daylight-balanced light. This not only makes the space feel less like a dungeon but is also incredibly practical for sorting clothes and spotting stains. Good lighting is one of the cheapest upgrades you can make with the biggest psychological impact.
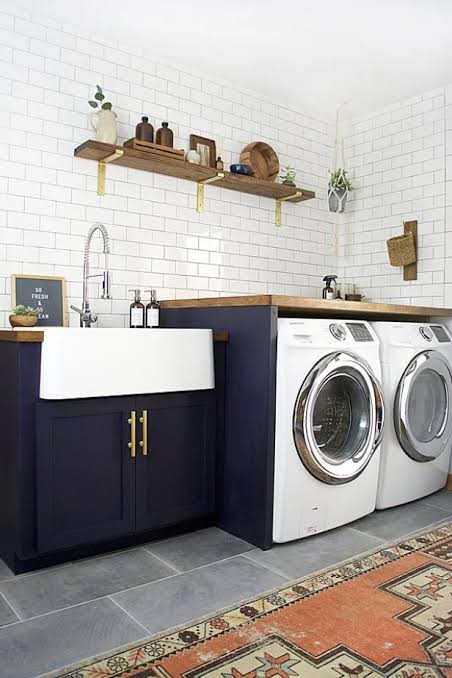
30. Define Your Laundry Zone with a Rug and Shelving
Even in an unfinished garage, you can create a designated ‘laundry room’ feel with two simple design tricks. First, adding a durable, outdoor-rated rug visually separates the space from the rest of the garage. It creates a ‘room’ where there isn’t one. Second, installing shelving *directly* above the machines concentrates all the laundry-related items into one zone. This combination of a visual floor anchor and vertical organization tricks the eye into seeing a purposeful, self-contained area.
🧹 Maintenance Reality
Let’s be real: putting a standard indoor rug in a garage is a bad idea. It will get stained by dirt, oil, and moisture very quickly. The key is to use an indoor/outdoor rug made from polypropylene or another synthetic material. These are designed to be weather-resistant, mold-resistant, and can be easily cleaned with a hose. They provide the color and softness you want without the maintenance nightmare of a traditional rug in a utility space.
Your Garage’s Next Chapter Awaits
That dusty, cluttered space at the edge of your house holds so much potential. Whether you’re dreaming of a hyper-organized workshop, a quiet home office, or a full-blown entertainment zone, the right plan can turn your garage into one of the most valuable rooms in your home. We hope these ideas have sparked your imagination and given you the confidence to start your own project. Ready to get started? Pin your favorite ideas and let the transformation begin!