You know that feeling when you finally find the DIY insulated cat house that looks exactly right for your space, but the instructions seem like they’re written in another language? We’ve all been there, endlessly scrolling Pinterest for the perfect project. That’s why we did the heavy lifting for you. After filtering through hundreds of options and ideas, we narrowed it down to the 30 best DIY insulated cat house plans for 2026. Inside, you’ll find everything from ultra-simple bin shelters to complex multi-level wooden catios, covering styles like rustic, modern, and minimalist. These aren’t just pretty pictures; they are real, buildable projects for every skill level. As we all look for more ways to care for our furry friends, both domestic and feral, creating safe and warm outdoor shelters has become a top priority for pet lovers everywhere. And stay until the end — we break down the most common mistakes that can ruin these looks. 📌 Save this to Pinterest for later — you’ll want to revisit these ideas.
1. Cozy Cat in a Blue and Beige House
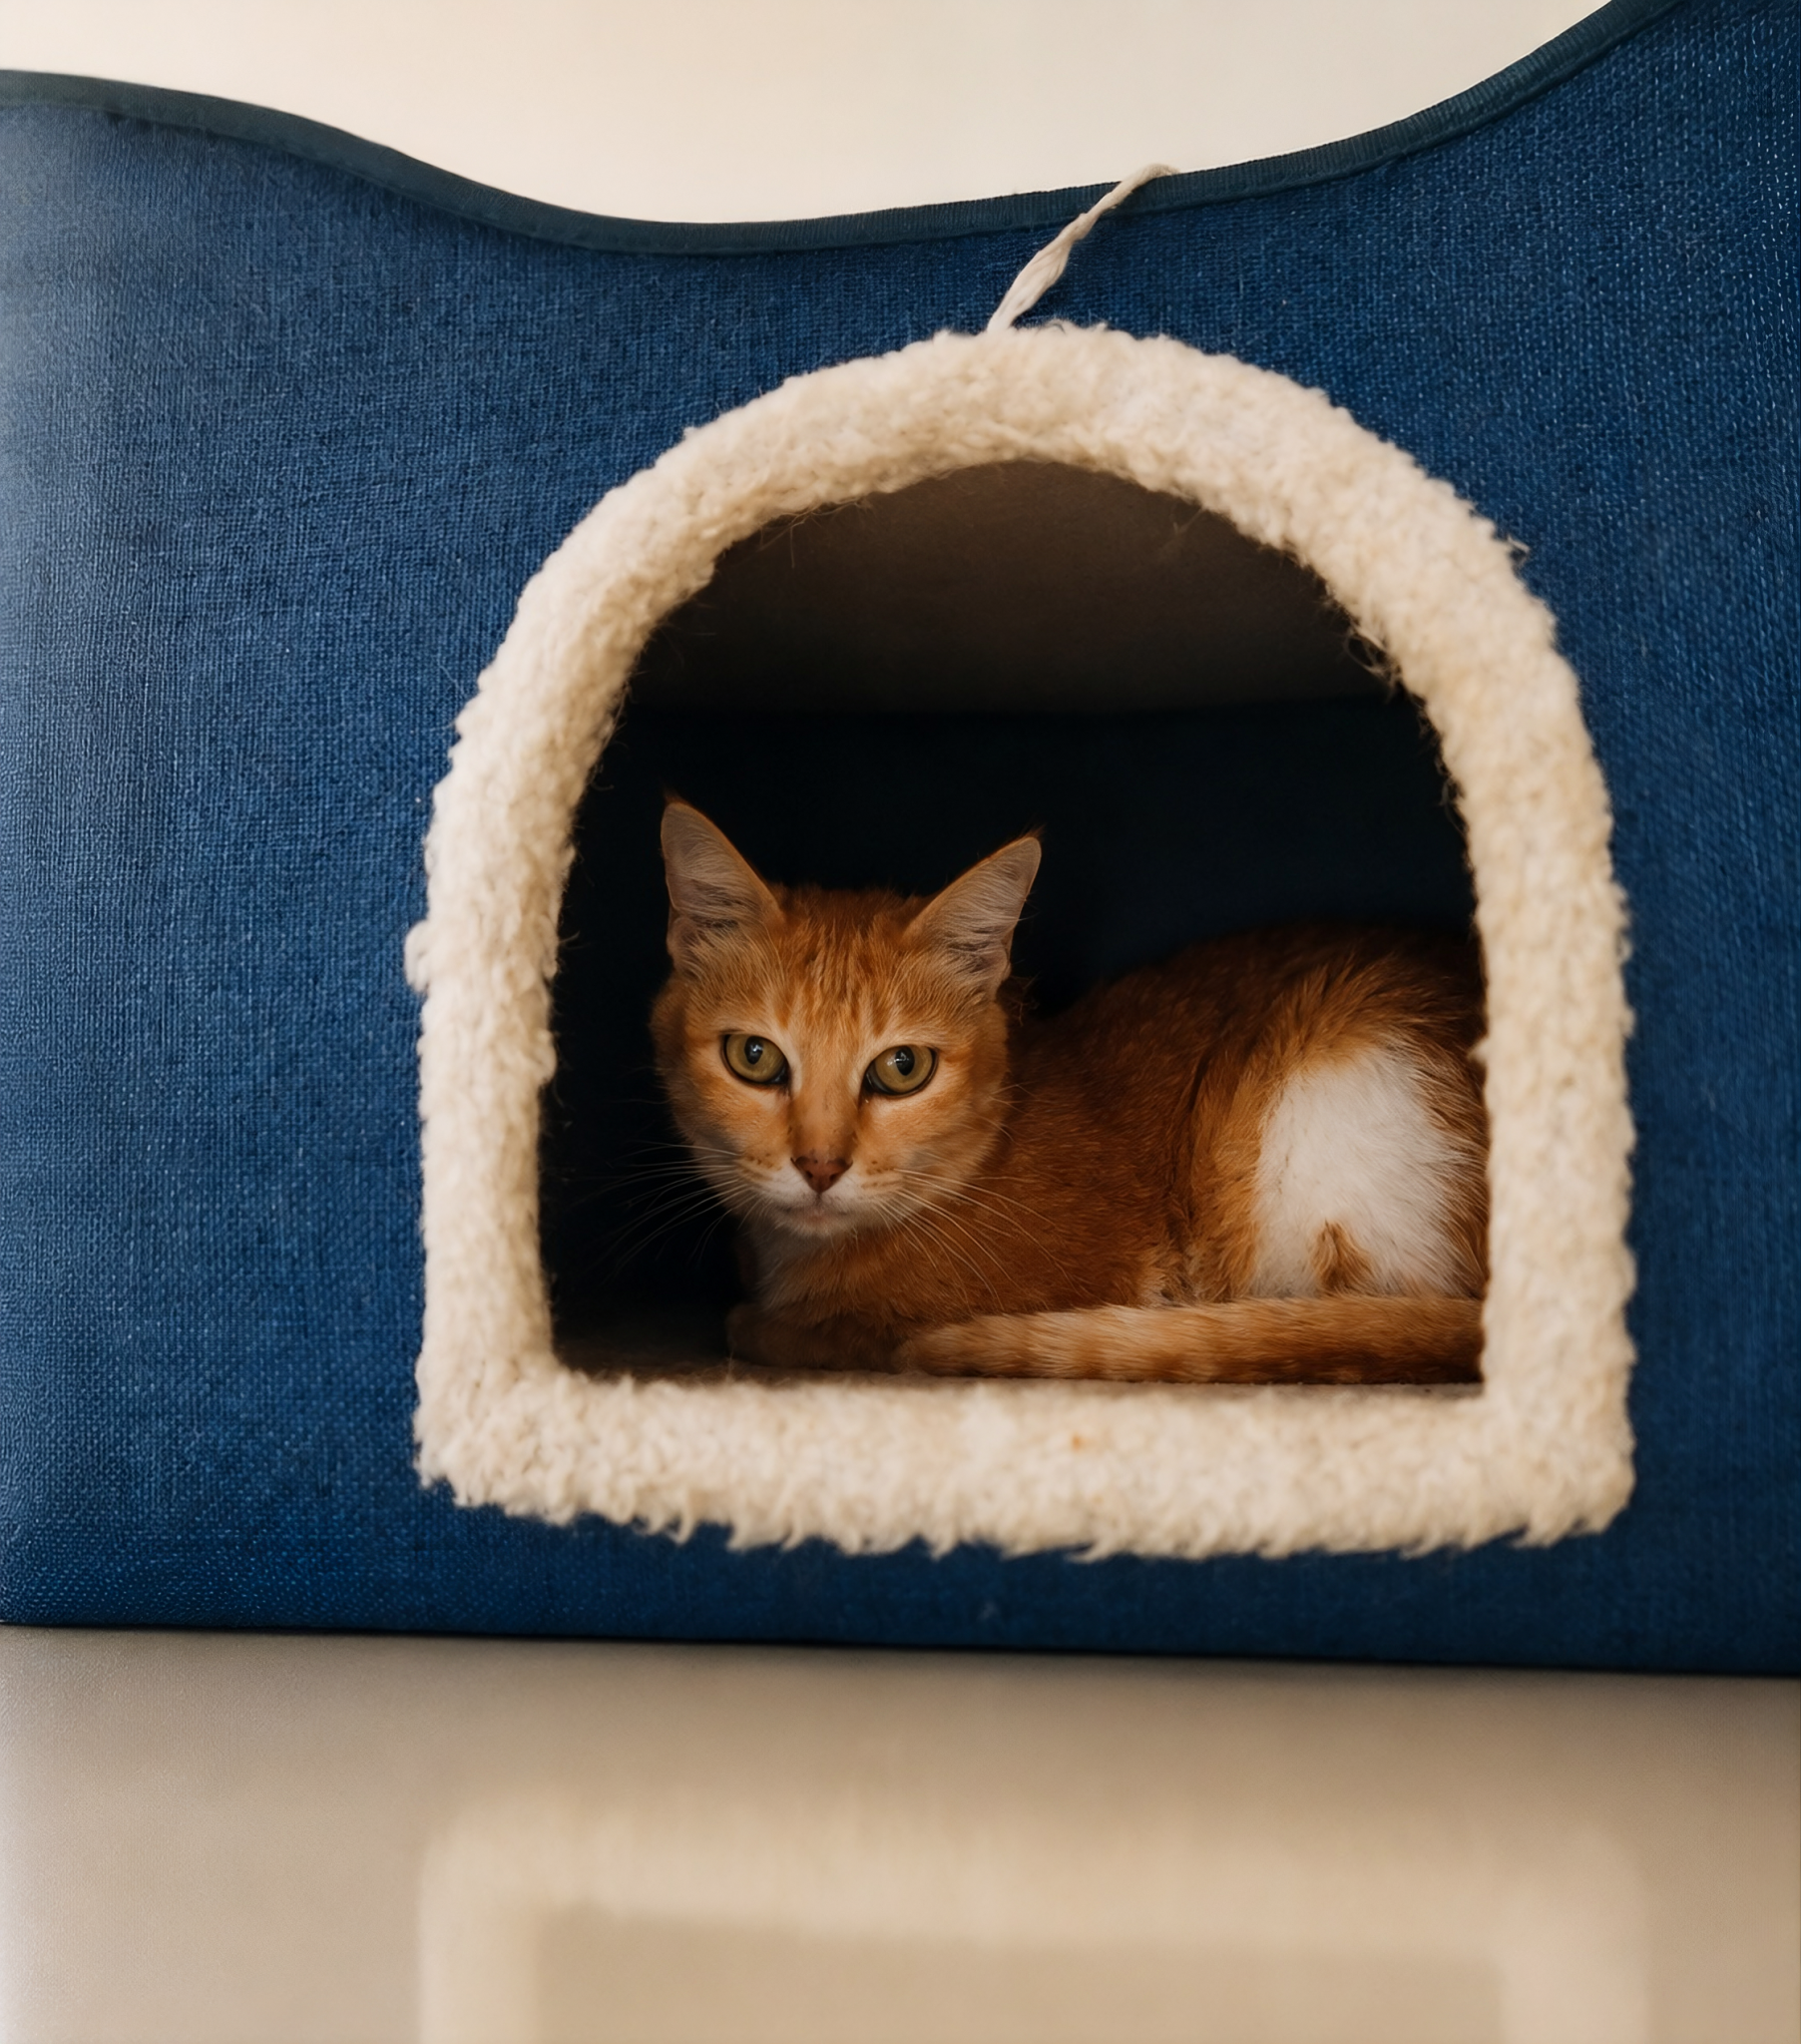
The simple color combination of calming blue and neutral beige creates a welcoming little haven. The design focuses on comfort over complexity, with the rounded entryway being just large enough for a cat to feel secure but not exposed. It’s the visual equivalent of a warm hug. The slightly recessed entrance also offers a bit of protection from wind and rain, making the interior feel that much safer for a nervous cat getting used to a new space.
|
📋 Copy HEX 🔗 Share |
⭐ The One Thing
While this house looks adorable, its simple construction might not be enough for harsh winters. The materials appear to be basic, so without significant added insulation (like foam board inserts and straw bedding), it’s best suited for milder climates or as a sheltered spot on a covered porch. Also, consider the size—this is a single-cat situation. If you’re caring for a colony, you’ll need multiple houses or a much larger design like the multi-cat structures seen in Idea #5.
2. The Ultimate Upcycled DIY Cat Shelter: A Black Plastic Bin
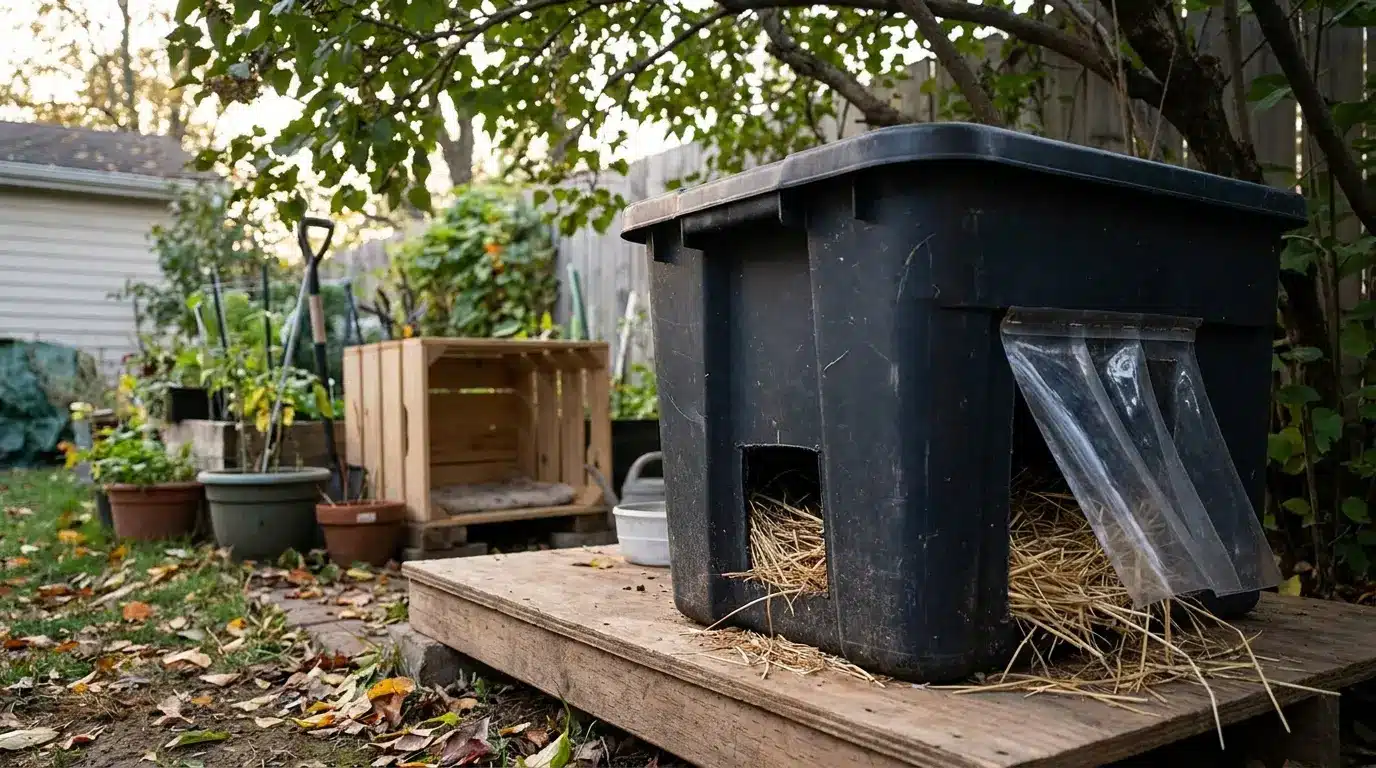
This is one of the easiest and most effective DIY shelters you can make, perfect for helping local community cats. Here’s a quick guide:
|
📋 Copy HEX 🔗 Share |
🔧 How-To Brief
- Source Your Bin: Find a large (at least 35-gallon) plastic storage bin with a secure lid. Darker colors absorb more heat from the sun.
- Cut the Entry: Using a box cutter or jigsaw, carefully cut a 5-6 inch square or circular opening about 2-3 inches up from the bottom to prevent water from getting in.
- Add Flaps (Optional): Cut a piece of heavy-duty clear plastic or a mud flap into strips and screw or glue it over the opening to block wind.
- Insulate: Line the bottom and sides with a 1-inch thick foam insulation board.
- Add Bedding: Fill the bin loosely with straw (not hay!) as it repels moisture and allows cats to burrow in for warmth.
- Secure the Lid: Place the lid on top and seal it with duct tape or caulk to make it waterproof.
Time estimate: 1 hour. Material cost: $30-$50.
- Plastic Storage Bin: $15 – $25
- Insulation Foam Board: $10 – $20
- Straw Bale (small): $5 – $10
- Clear Plastic/Flaps: $3 – $7
- TOTAL: $33 – $62
- Budget alternative: Ask neighbors for old storage bins they’re not using or check Facebook Marketplace. Many home improvement stores have scrap foam board for a few dollars. This can easily be a sub-$20 project.
3. Modern Dark Gray Wooden Cat House with a Sloped Roof
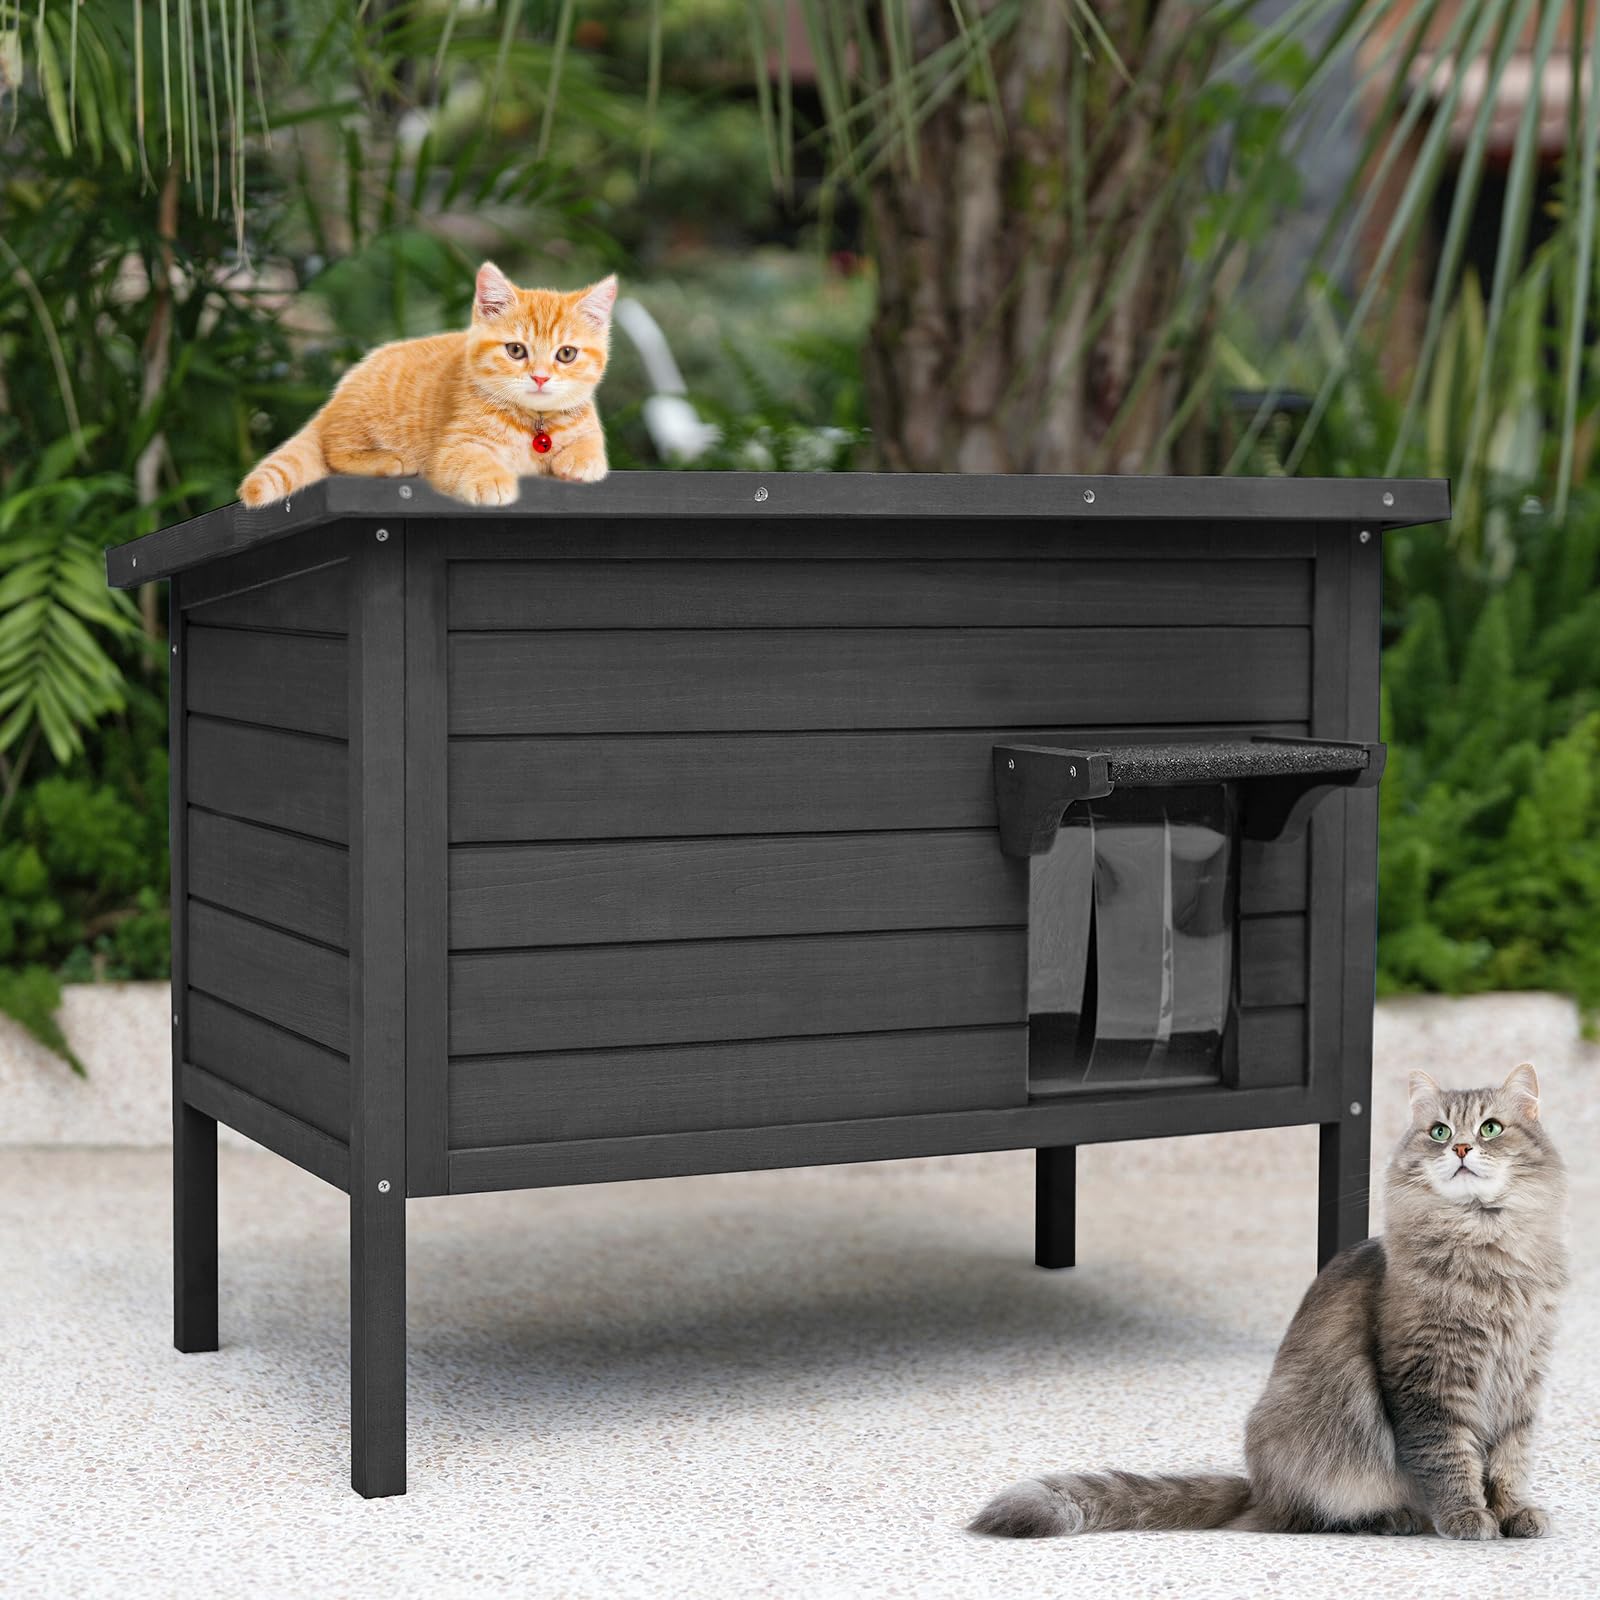
To make a wooden cat house last for years, proper sealing is non-negotiable. After assembling the house, apply at least two coats of an outdoor-rated, pet-safe sealant or paint, like you see with this handsome dark gray finish. Pay extra attention to the end grains of the wood and the roof edges, as these are the first places water will try to seep in. For the legs, consider adding small furniture glides or rubber feet. This elevates the wood just enough to keep it from wicking moisture directly from the damp ground, preventing rot over time.
|
📋 Copy HEX 🔗 Share |
⚠️ Real Talk
that makes this design so successful is the clear flap door. While many DIY designs leave the entrance open, a flap door is a game-changer for insulation. It dramatically reduces heat loss, keeps wind and rain out, and gives a timid cat a much greater sense of security. It turns a simple box into a truly protected and warm den, making it far more likely to be used in bad weather. Without it, the house would be little more than a windbreak.
4. Elevated Natural Wood Shelter with a Shingled Roof
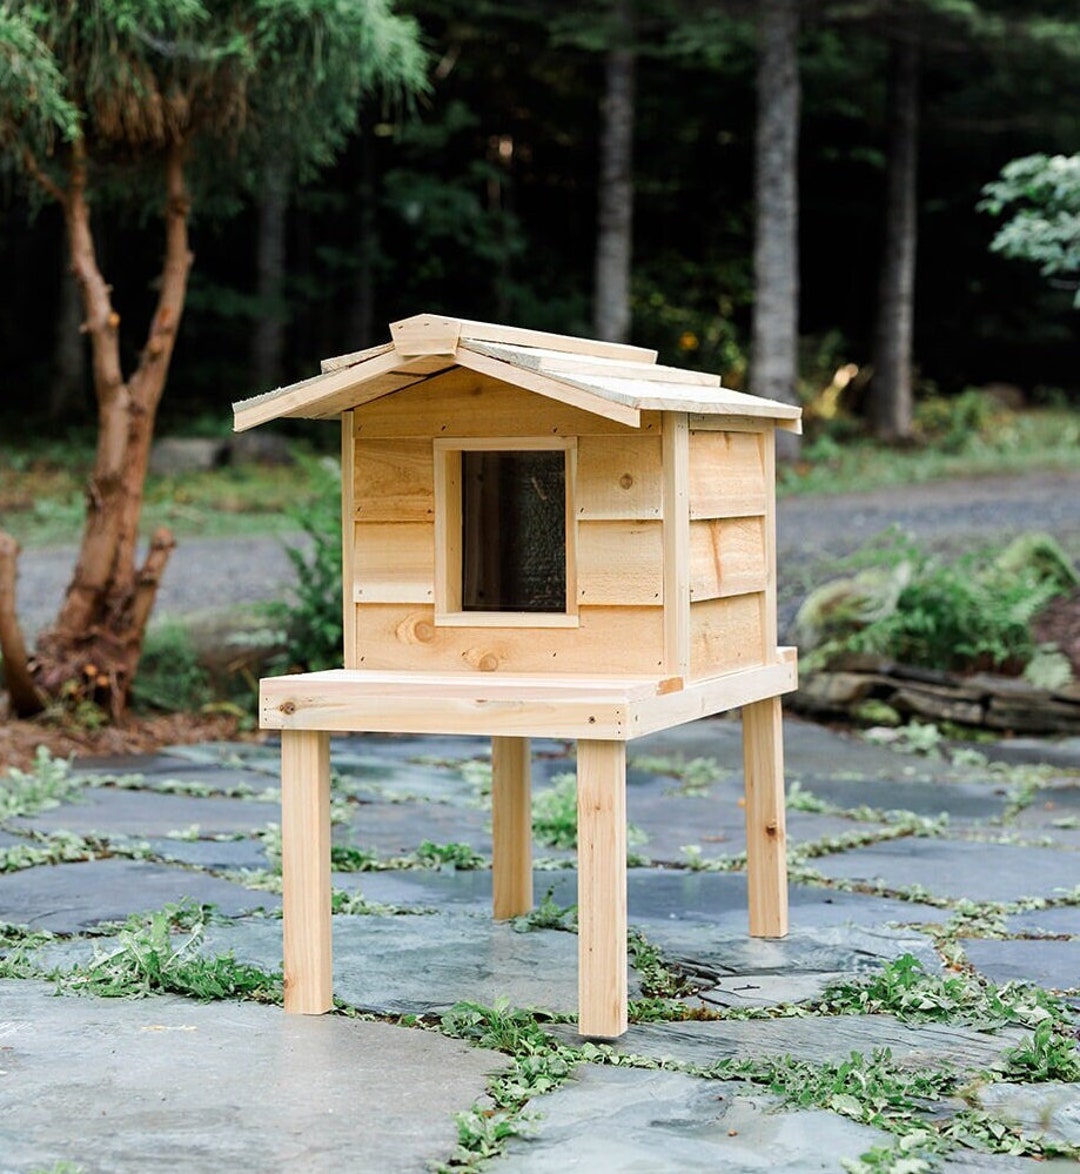
This design works because it mimics a traditional house structure, which we subconsciously register as sturdy and protective. The gabled, shingled roof isn’t just for looks; it effectively sheds rain and snow, preventing moisture from pooling and seeping in. Elevating the structure on sturdy legs is also crucial—it keeps the base dry, deters pests, and provides a cat with a better vantage point, which helps them feel safe. The simple, square opening is just big enough, adding to that sense of a secure, den-like space.
|
📋 Copy HEX 🔗 Share |
📐 Style Math
Natural wood looks beautiful but requires upkeep. To keep this house from turning a sad, splintery gray, you’ll need to re-apply a clear, pet-safe waterproof sealant every 1-2 years, depending on your climate. The shingled roof is very durable, but check for any cracked or missing shingles after major storms. The biggest maintenance task will be clearing out old bedding and cleaning the interior at least twice a year (spring and fall) to prevent mold and parasites. A quick scrub with a mild soap and water is all it takes.
5. A Collection of Cat Shelters for a Community Colony
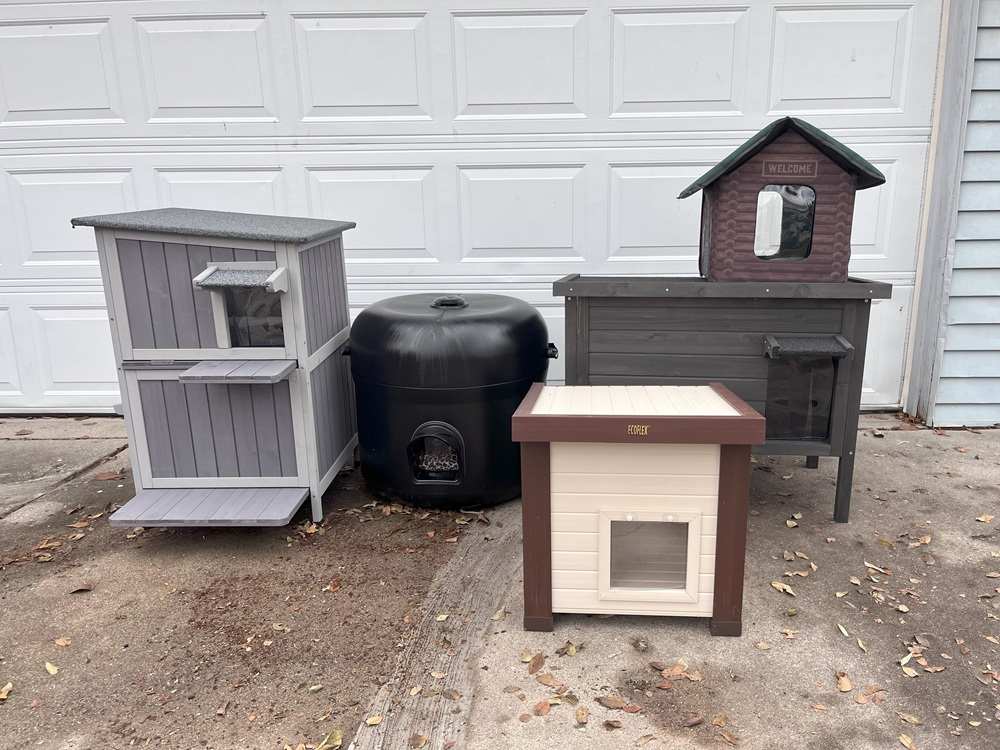
When providing for a colony of cats, variety is your best friend. Cats have preferences, just like people! Some may prefer a raised house with an escape route, while others want a low-to-the-ground, burrow-like shelter. Offering different styles, materials, and entry types increases the chances that every cat will find a spot they feel safe in. Notice the mix here: wood, plastic, multi-level, and single-level. Don’t be afraid to mix a DIY project like the bin shelter from Idea #2 with a pre-made wooden one.
|
📋 Copy HEX 🔗 Share |
✅ Before You Start
This setup is ideal for a space where you’re caring for 4-8 cats. To avoid territorial disputes, place shelters at least 5-10 feet apart. This gives the cats enough personal space. The area shown, likely a driveway or patio, is about 10×15 feet. You need a solid, relatively flat surface to keep the houses stable. This approach wouldn’t work on a small balcony or a narrow side yard; it requires a dedicated zone that won’t be blocked by cars or heavy foot traffic.
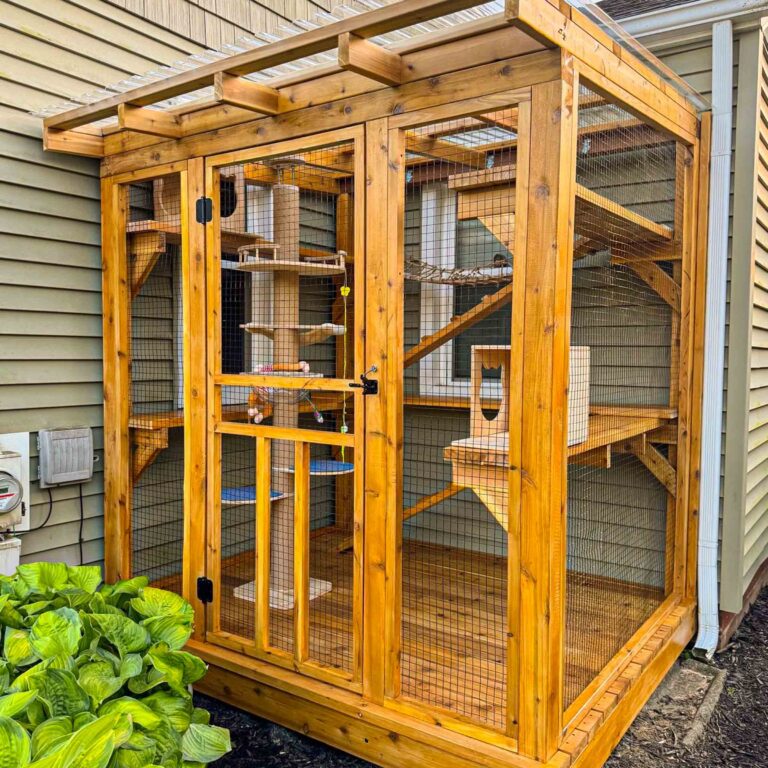
6. The Ultimate Catio: A Cedar-Framed Outdoor Play Pen
- Cedar Wood & Framing: $500 – $900
- Wire Mesh Enclosure: $200 – $400
- Corrugated Plastic Roofing: $100 – $180
- Cat Tree & Perches: $150 – $300
- Decor/Accessories (bridge, small house): $80 – $150
- TOTAL: $1,030 – $1,930
- Budget alternative: Use pressure-treated pine instead of cedar to save 30-40% on wood costs (ensure it’s fully dry and cured before cats use it). Build your own perches from sanded 2x4s and use reclaimed materials for climbing structures. A similar-sized build could be done for $600-$900 with savvy sourcing.
|
📋 Copy HEX 🔗 Share |
🎯 What Makes It Work
A catio is an amazing enrichment for indoor cats, but it’s a serious project. Be honest about your DIY skills. This isn’t a weekend project for a beginner; it involves precise cuts, creating a stable structure, and securely attaching heavy wire mesh. If your skills are more at the level of the bin shelter in Idea #2, consider hiring a local handy person to help build the frame. Also, be aware that this is a permanent structure. Check with your HOA or local ordinances before you start building, especially if it’s visible from the street.
7. Two-Story Wooden Cat House with Covered Porch
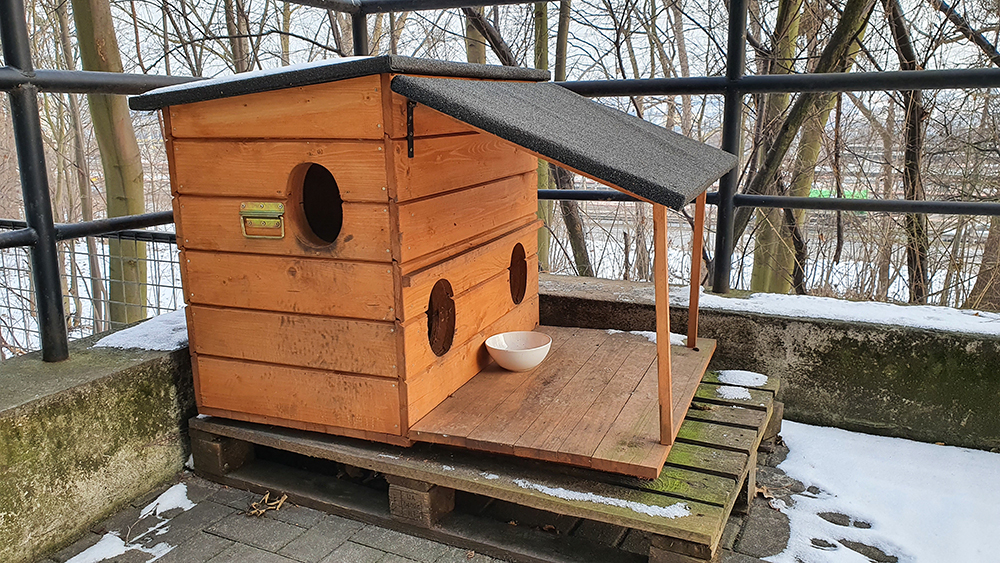
The multi-level design is brilliant for a few reasons. First, it doubles the available shelter space without increasing the footprint. Second, it caters to different cat personalities: the lower level offers a dark, secure den, while the covered porch provides a semi-enclosed space for a cat to lounge and observe. The use of oval doorways is a nice touch, softening the otherwise boxy structure. Placing it on pallets is a practical move in a snowy climate, keeping the entire structure elevated above the damp and cold ground.
|
📋 Copy HEX 🔗 Share |
💰 Budget Breakdown
This is a medium-to-large scale project best suited for a yard or a very large patio. The base dimensions are likely around 4 feet wide by 3 feet deep, and it stands about 4-5 feet tall. You need a level spot that can accommodate the pallet base. This would be too overwhelming for a small balcony. However, it’s a great solution for someone with a bit of yard space who wants to house 2-4 friendly cats together. The separate but connected spaces can help reduce minor squabbles.
8. Plywood Shelter with Built-In Feeding Station
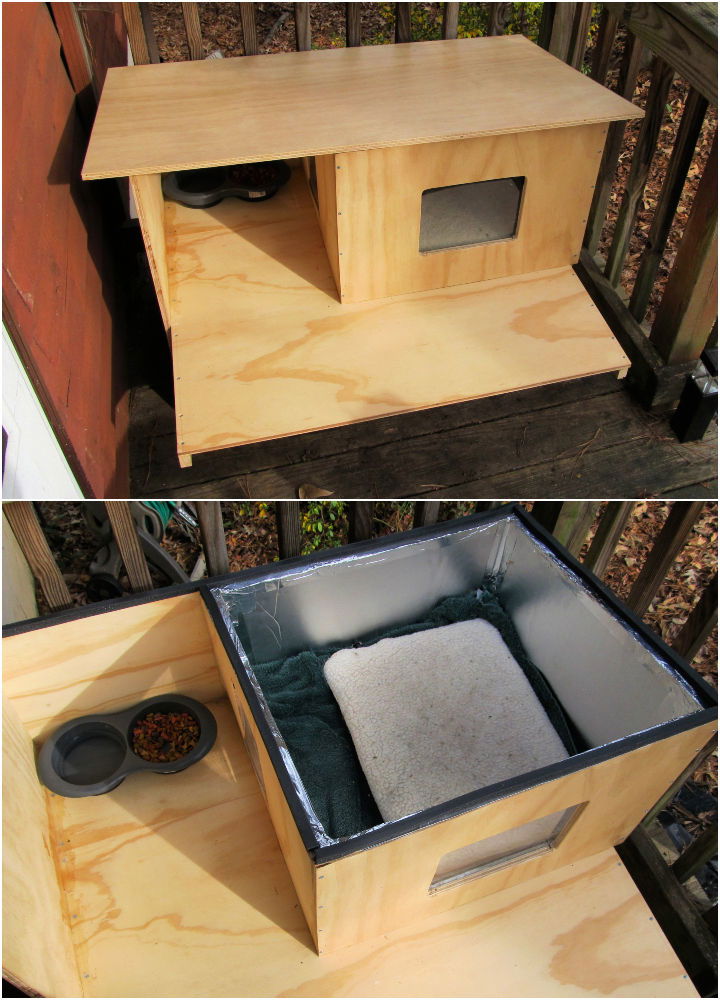
The single most important feature here is the silver reflective insulation (like Reflectix). This material is lightweight, easy to cut, and dramatically increases the thermal performance of a simple wooden box. It works by reflecting the cat’s own body heat back at them, creating a pocket of warmth. Without this lining, the plywood box would offer minimal protection from the cold. It’s an inexpensive addition that makes a massive difference in how well the shelter actually keeps a cat warm.
|
📋 Copy HEX 🔗 Share |
🔥 Trending Context
This design is a masterclass in functional minimalism. The formula is simple: 70% raw structure + 30% cozy insulation. The bare plywood provides the form and function, creating the separate sleeping and eating zones. The insulation and soft bedding make up the other 30%, turning the box into a home. You could change the formula by painting the exterior (adding 10% ‘finish’ and reducing the ‘raw structure’ to 60%), but the core balance of a simple shell enhanced by effective insulation remains the key to its success.
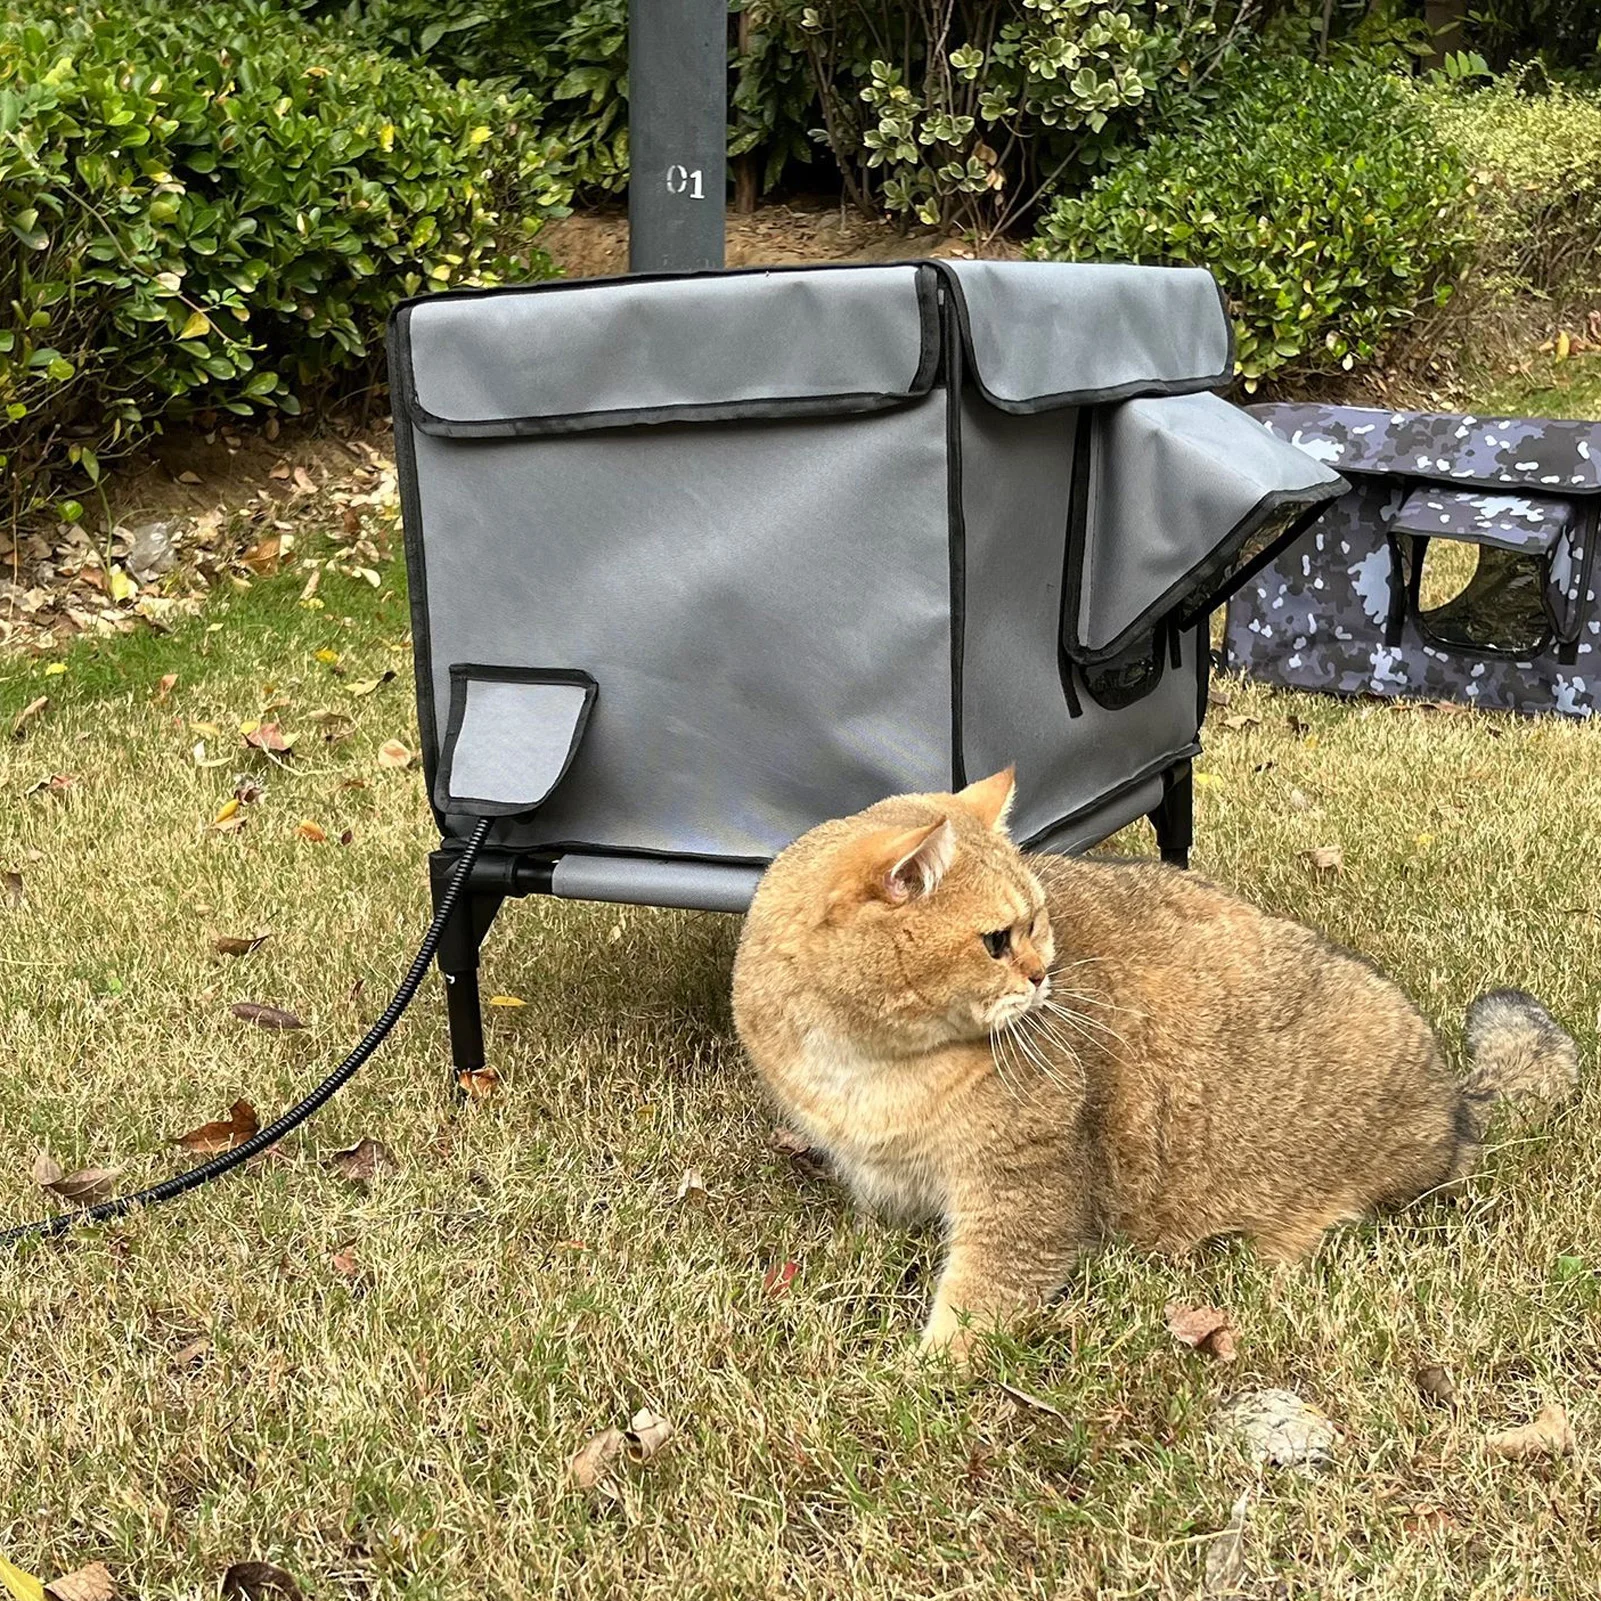
9. Elevated, Heated Gray Fabric Pet House for Outdoors
Heated outdoor beds can be lifesavers, but that power cord is the weak link. You must ensure you’re using an outlet protected by a Ground Fault Circuit Interrupter (GFCI) and a weatherproof extension cord designed for outdoor use. The cord should be secured to the leg of the house and run in a way that prevents it from becoming a trip hazard or getting tangled. Also, inspect the cord regularly for any signs of chewing from squirrels or other wildlife. Safety is paramount when mixing electricity and outdoor elements.
|
📋 Copy HEX 🔗 Share |
🧹 Maintenance Reality
These types of fabric houses are fantastic for covered porches or decks, but if you place them in a completely exposed area, they can get waterlogged in heavy rain. To maximize weather resistance, spray the entire fabric exterior with a heavy-duty waterproofing spray for outdoor gear, like Scotchgard Outdoor Water Shield. Apply two coats, letting it dry completely in between. This won’t make it 100% waterproof, but it will help it shed moisture and dry out much faster.
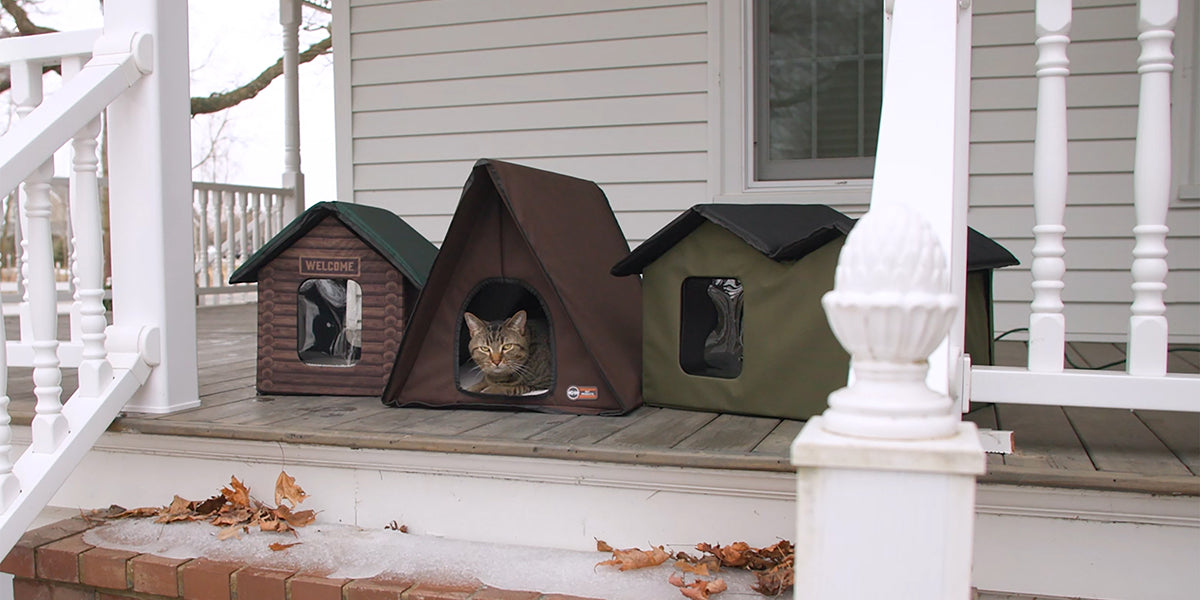
10. A Trio of Insulated Fabric Shelters on a Porch
The popularity of these “pop-up” insulated cat houses has exploded on Pinterest and in feral cat support groups over the past couple of years. Why now? They represent the perfect intersection of convenience, affordability, and effectiveness. As more people become aware of the needs of community cats, they’re looking for solutions that don’t require advanced carpentry skills or a big budget. These shelters offer an instant, out-of-the-box way to provide life-saving warmth, making proactive animal welfare accessible to everyone.
|
📋 Copy HEX 🔗 Share |
📏 Scale Guide
This arrangement works so well because it offers choice with zero intimidation. For a timid cat, a large wooden structure can seem imposing. These small, soft-sided shelters are low to the ground and have snug openings, which appeals to a cat’s natural instinct to seek out small, den-like spaces. The variety in shapes (tent, cabin, house) allows different cats to pick their favorite, and grouping them together on a covered porch creates a safe, communal feeling while still giving each cat its own territory.
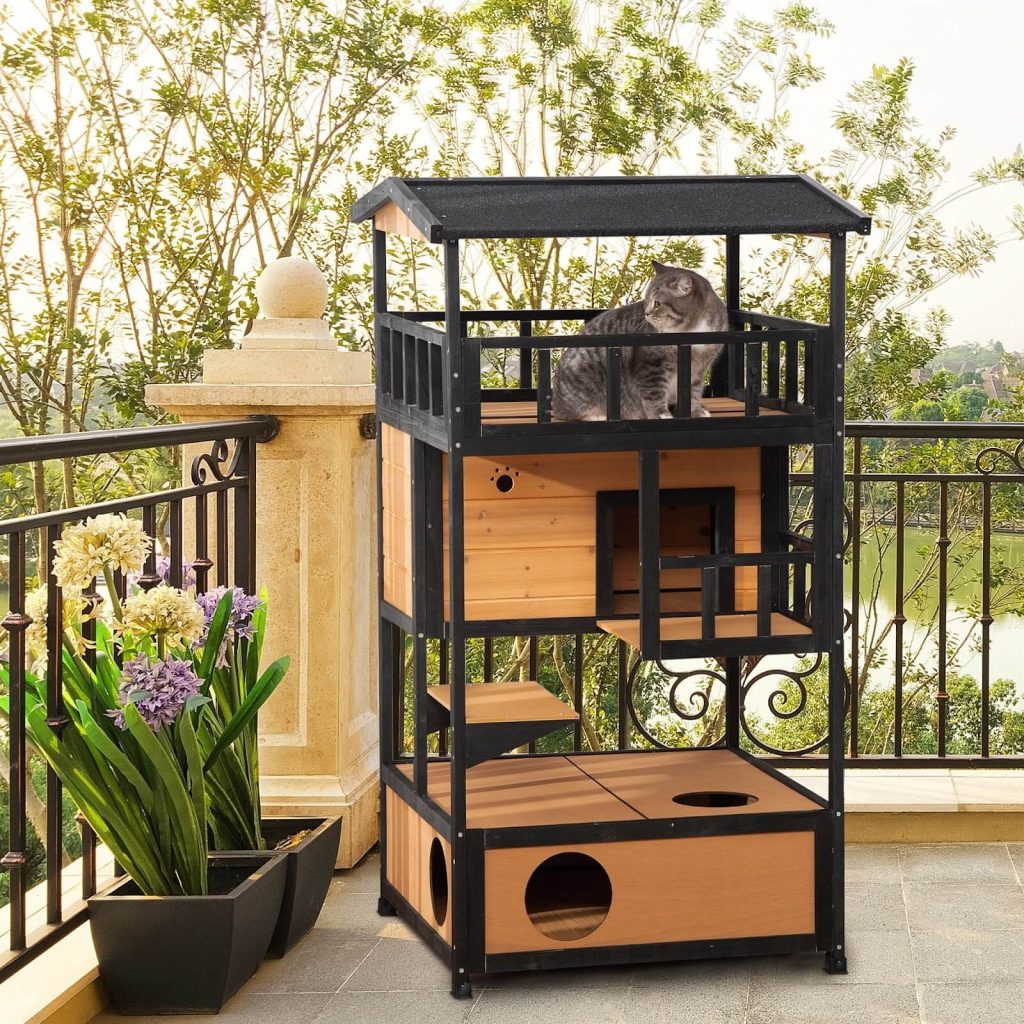
11. Modern Multi-Level Cat Condo with Black Metal Frame
This is a sophisticated design equation: 50% natural wood + 40% black metal + 10% open air. The light wood provides warmth and a natural feel, while the crisp black metal frame gives it a modern, industrial edge. The final 10% is the negative space—the gaps between levels and the open-air balcony—which prevents the structure from looking like a heavy, solid block. You could swap the materials—for example, use a dark stained wood with a silver metal frame—and the core architectural balance would still hold.
|
📋 Copy HEX 🔗 Share |
💡 Designer Tip
This is a vertical, space-saving design perfect for a patio, balcony, or a small backyard. It likely has a footprint of about 3×3 feet but reaches a height of 5-6 feet. This verticality is key: it provides multiple zones for climbing and resting without eating up valuable ground space. It’s an excellent choice for urban environments. For a more expansive feel in a larger yard, you might consider a horizontal catio like the one in Idea #14.
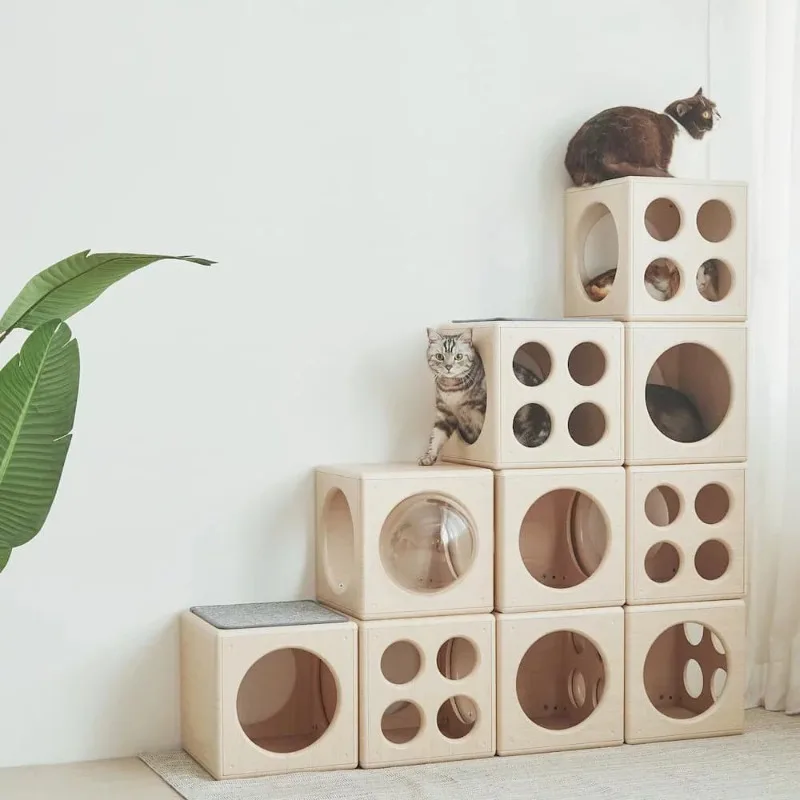
12. Playful Modular Cat Cubes in Light Plywood
The clear dome window is the single element that elevates this from a simple set of boxes to a truly special piece of cat furniture. It adds a quirky, space-capsule vibe and, more importantly, provides a unique sensory experience for the cat. They can peek out with a 180-degree view while feeling completely safe inside their little pod. It’s a focal point that adds personality and an interactive element that both cats and humans love.
|
📋 Copy HEX 🔗 Share |
💸 Get This Look For Less
When building with plywood, the finish of the edges makes all the difference between looking like a cheap DIY project and a piece of custom furniture. After cutting your pieces, take the time to thoroughly sand every single edge, moving from a medium grit sandpaper (like 120) to a fine grit (220). This will make the edges smooth to the touch and give them a professional, polished look. For the cutout openings, you can use a router with a roundover bit to create a soft, curved edge that’s both safe and aesthetically pleasing.
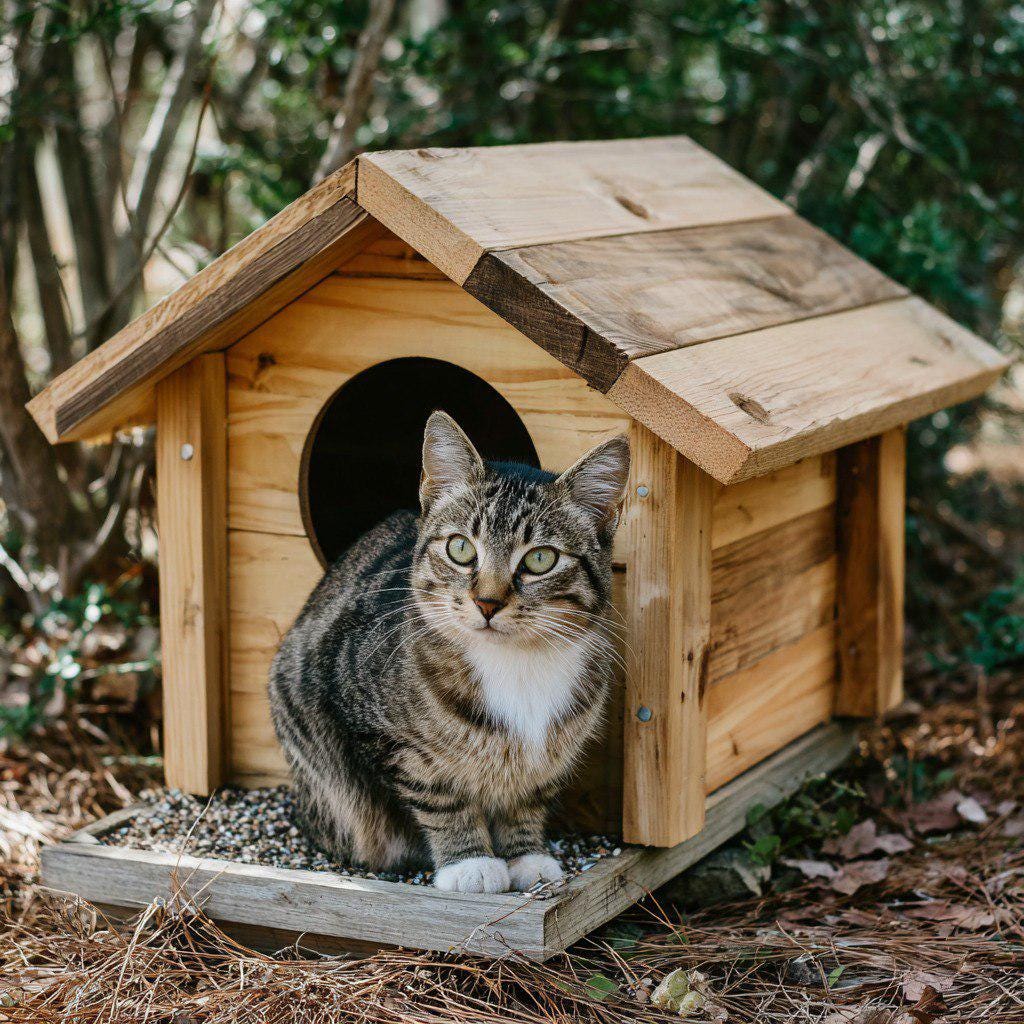
13. Rustic Wooden Cat Shelter with a Sloped Roof
Building a simple, rustic shelter like this is a great beginner woodworking project. Here’s a simplified plan:
|
📋 Copy HEX 🔗 Share |
⭐ The One Thing
- Build the Box: Cut five pieces of 3/4″ exterior-grade plywood for the floor, two sides, front, and back. A good size is 18″ deep x 22″ wide. Make the front and back pieces high enough for a sloped roof (e.g., 16″ high in back, 18″ in front).
- Cut the Entry: Use a jigsaw to cut a 6-inch diameter circular hole in the front panel.
- Assemble the Box: Use wood glue and exterior screws to assemble the four walls and the floor.
- Create the Roof: Cut a piece of plywood for the roof that overhangs all sides by at least 2 inches. Attach it with screws. For extra weatherproofing, you can add roofing felt or shingles.
- Build the Base: Construct a simple frame from 2x4s to lift the house off the ground.
- Insulate: Line the inside walls and floor with 1″ rigid foam insulation before filling with straw.
Time estimate: 3-4 hours. Material cost: $60-$90.
You can build this for under $40. Look for scrap plywood at Home Depot or on Facebook Marketplace—you only need a small amount. Use reclaimed 2x4s from a pallet for the base (check that they are heat-treated ‘HT’, not chemically treated ‘MB’). A can of ‘oops’ paint from the hardware store can be had for a few dollars and will provide excellent weather protection. The most expensive part might be the insulation, but it is the most critical for warmth.
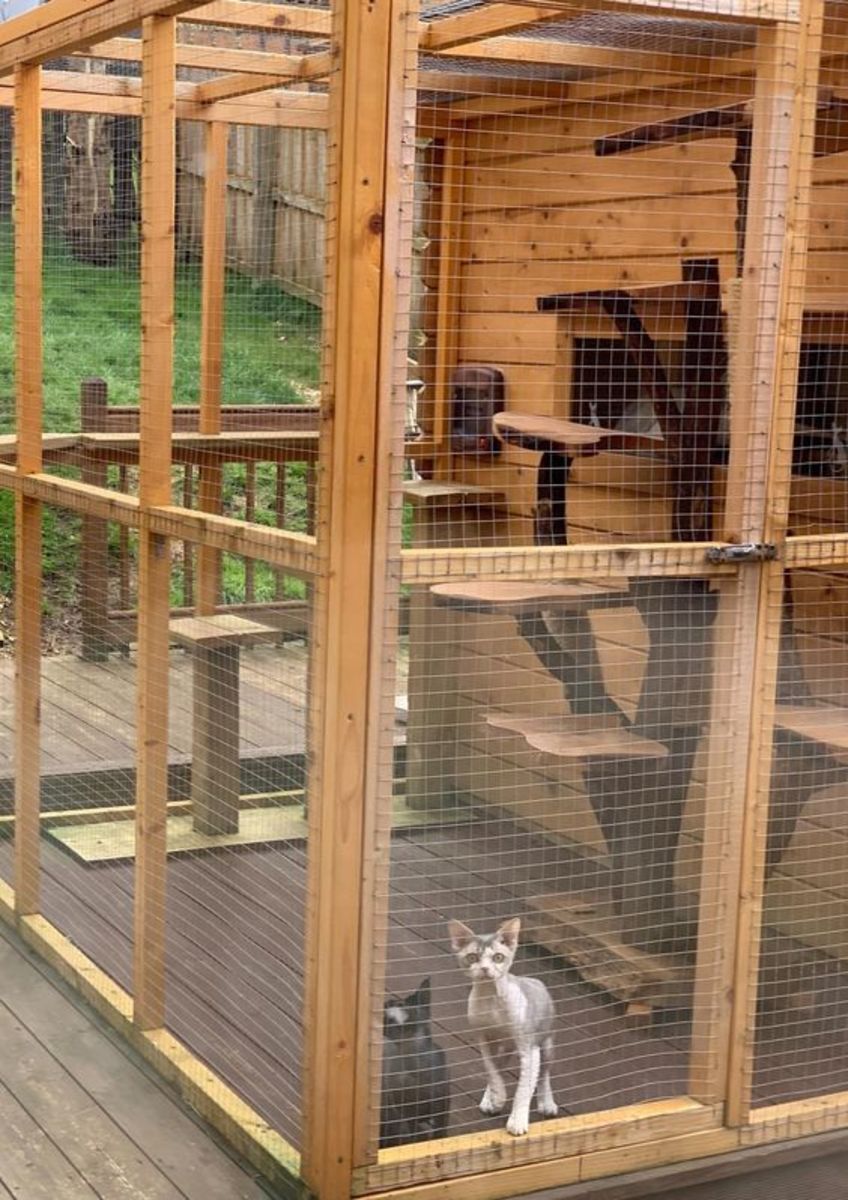
14. Spacious Natural Wood Catio with Integrated Shelving
This catio excels by blending natural and man-made elements to create a stimulating environment. The inclusion of real tree branches alongside milled wood perches provides varied textures for climbing and scratching. The design offers a clever mix of spaces: a fully enclosed, house-like section for sleeping and security, and a more open, wire-mesh area for sunbathing and observing the yard. This variety allows cats to choose their level of exposure and comfort, which is crucial for their well-being.
|
📋 Copy HEX 🔗 Share |
🔧 How-To Brief
A structure this large is a magnet for other critters. Raccoons and squirrels may try to get in, either for the cat food or just out of curiosity. Your wire mesh needs to be a heavy gauge (14 or 16 gauge is best) and securely attached to the frame with staples every few inches. Don’t leave gaps, especially at the roofline and near the ground. Also, be prepared for spiders to set up shop in every corner. Regular ‘de-webbing’ will be a part of your maintenance routine with a large outdoor structure like this.
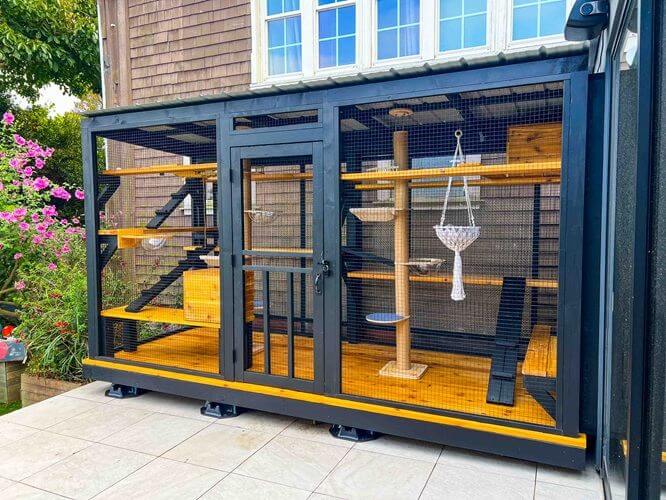
15. Multi-Level Cat Enclosure with Ramps and a Scratching Post
- Black Metal Frame/Mesh Panels (Kit): $300 – $600
- Wood for Platforms/Ramps: $80 – $150
- Sisal Scratching Post: $40 – $70
- Macrame Cat Bed: $30 – $50
- Labor/Assembly Time: 4-8 hours
- TOTAL: $450 – $870
- Budget alternative: Instead of a pre-fab kit, build the frame yourself from wood 2x4s and attach hardware cloth (wire mesh). Use scrap wood or pallet wood for the platforms and make your own scratching post by wrapping a sturdy log or 4×4 post with sisal rope. You could achieve a similar result for $200-$350.
|
📋 Copy HEX 🔗 Share |
⚠️ Real Talk
The single element that makes this design so engaging for a cat is the variety of paths and textures. It’s not just a box with shelves; it’s a dynamic playground. The ramps encourage movement between levels, the tall sisal post satisfies the instinct to scratch and climb, and the soft, swaying macrame bed offers a unique resting spot. This thoughtful combination of elements provides critical mental and physical stimulation, preventing boredom for cats who live primarily indoors.
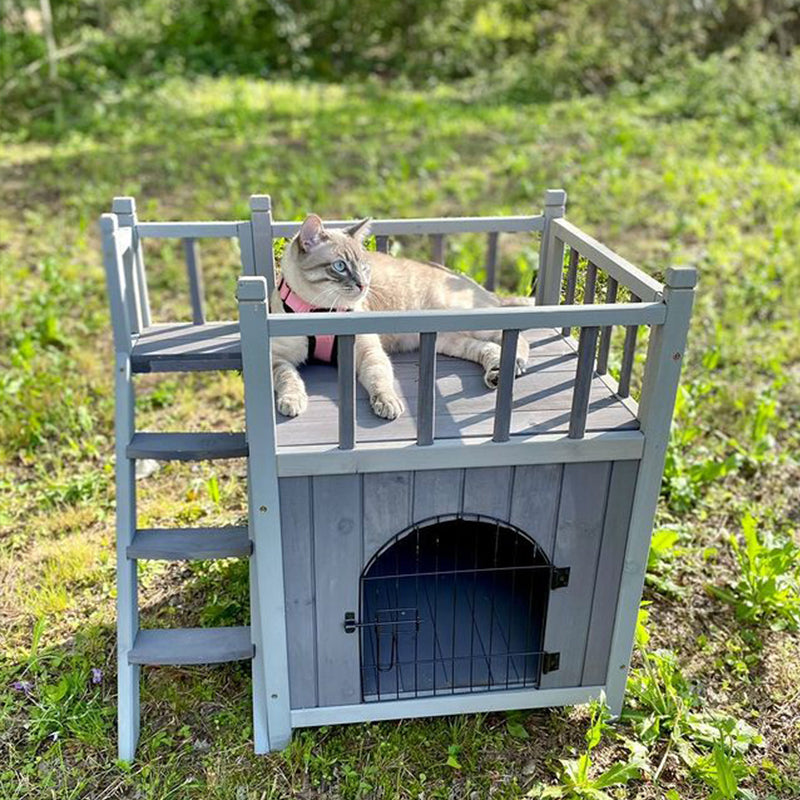
16. Two-Story Gray Cat House with an Open Sun Deck
This design is a winner because it offers the best of both worlds: a dark, secure shelter and an elevated, open-air lounge. The cat can choose to be hidden and protected from the elements in the lower compartment or climb up to the ‘sun deck’ to supervise their territory. The ladder is a key feature, providing an engaging way to move between the two zones. The contrasting dark gray panels on the lower level visually ground the piece and make the arched entrance pop.
|
📋 Copy HEX 🔗 Share |
📐 Style Math
- Check Your Space: Do you have a level patch of grass or patio at least 3×3 feet? This house needs a stable base.
- Consider the User: Is your cat a climber? An older or less agile cat might ignore the upper deck entirely, making a single-story design a better choice.
- Plan for Placement: The open deck is for sunbathing. Observe your yard to find a spot that gets reliable morning or afternoon sun.
- Material Prep: Are you prepared to paint or seal all the wooden pieces *before* assembly? This is crucial for long-term weather resistance.
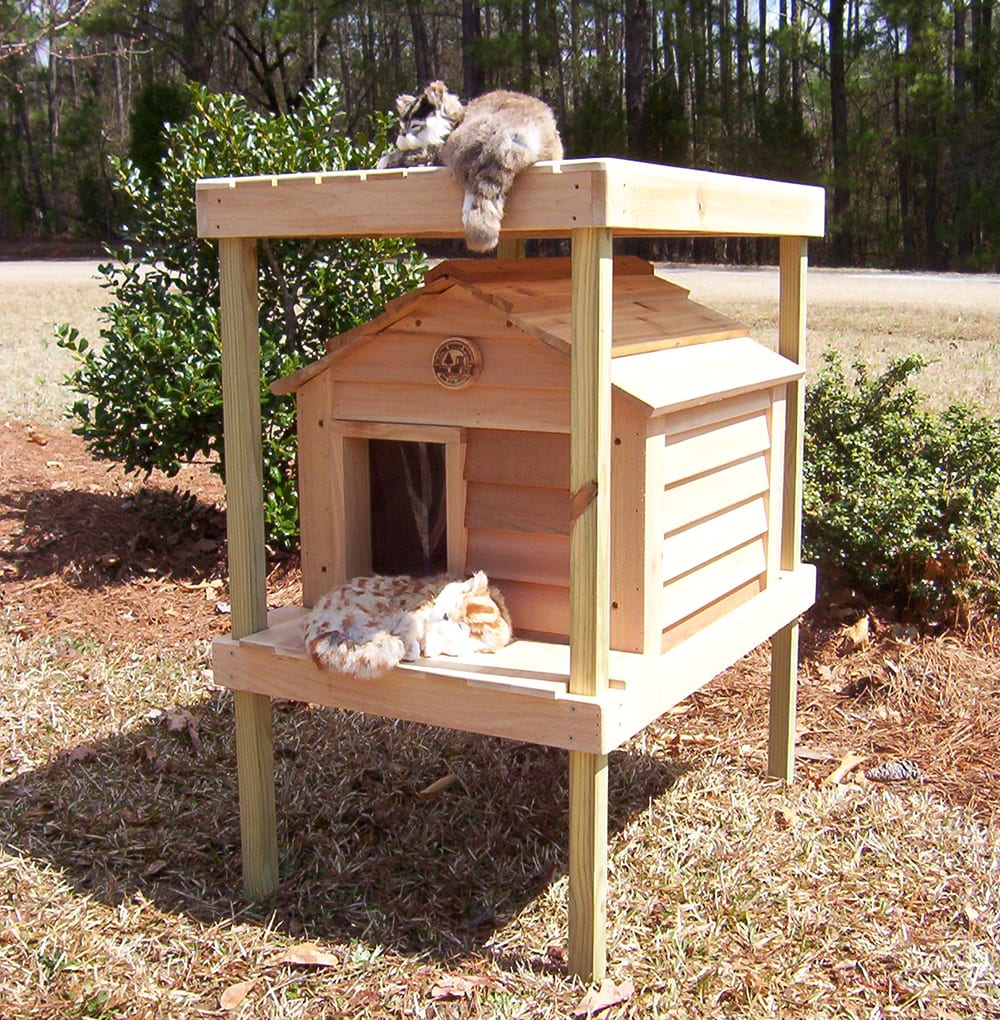
17. Insulated Wooden Cat Loft with Platform
When building a cat house with a loft or upper level, ensure the opening between floors is at least 8×8 inches and located in a back corner. This allows a cat to easily jump up and down without feeling cramped. More importantly, it creates a ‘safe corner’ on the lower level that is not directly under the opening, so a napping cat won’t be disturbed by another cat entering from above. This simple placement detail can prevent territorial spats in a multi-cat household.
|
📋 Copy HEX 🔗 Share |
✅ Before You Start
A design with a platform and loft like this one can be quite heavy, especially if made from solid wood and insulated. Think carefully about where you’re going to place it, because you won’t want to move it often. It needs a firm, level base. Placing a large, heavy wooden structure directly on grass will kill the lawn underneath and the base will be constantly exposed to moisture, leading to rot. It’s much better to place it on a patio, a deck, or a simple base of gravel or paving stones.
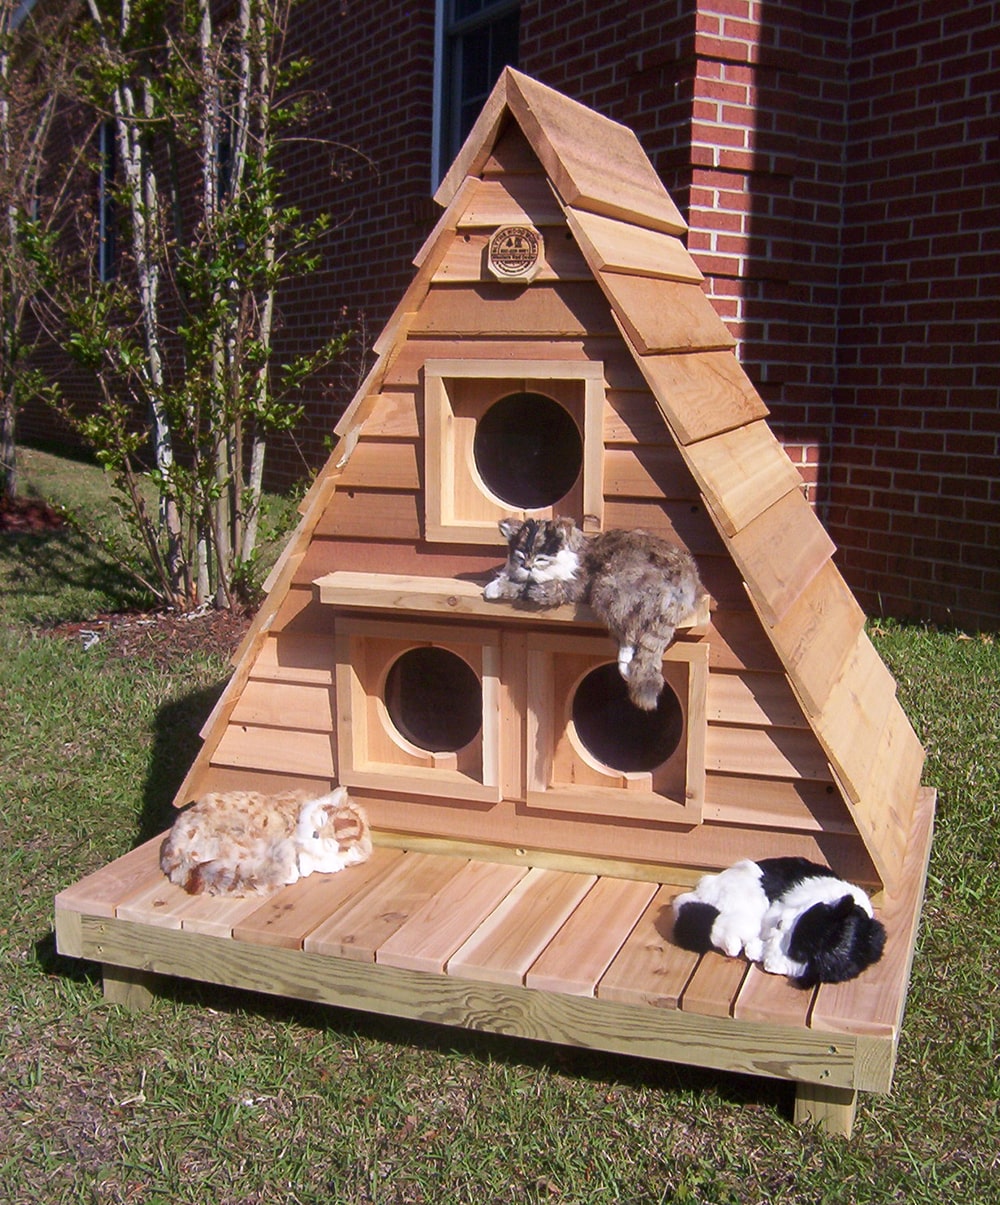
18. Weatherproof Insulated Wood Shelter for Outdoor Cats
This shelter’s effectiveness lies in its straightforward, no-frills functional design. The compact footprint helps to trap a cat’s body heat efficiently. The offset entrance, though not visible here, is a common feature in such designs and acts as a windbreak, preventing drafts from blowing directly onto a resting cat. The elevation on short legs is critical, as it keeps the insulated floor from direct contact with the cold, wet ground, which would otherwise sap warmth away. It’s a design perfected by feral cat caretakers over many years.
|
📋 Copy HEX 🔗 Share |
🎯 What Makes It Work
With any wooden outdoor structure, moisture is the enemy. While described as ‘weatherproof,’ this typically means weather-resistant. To maintain that resistance, you should plan to inspect the seals and paint annually. Pay close attention to the roof seams and the base of the legs. If you see cracking paint or exposed wood, a quick sanding and touch-up will prevent bigger problems down the line. The interior straw or bedding should be completely replaced at least twice a year to prevent mold and mildew from growing in the enclosed space.
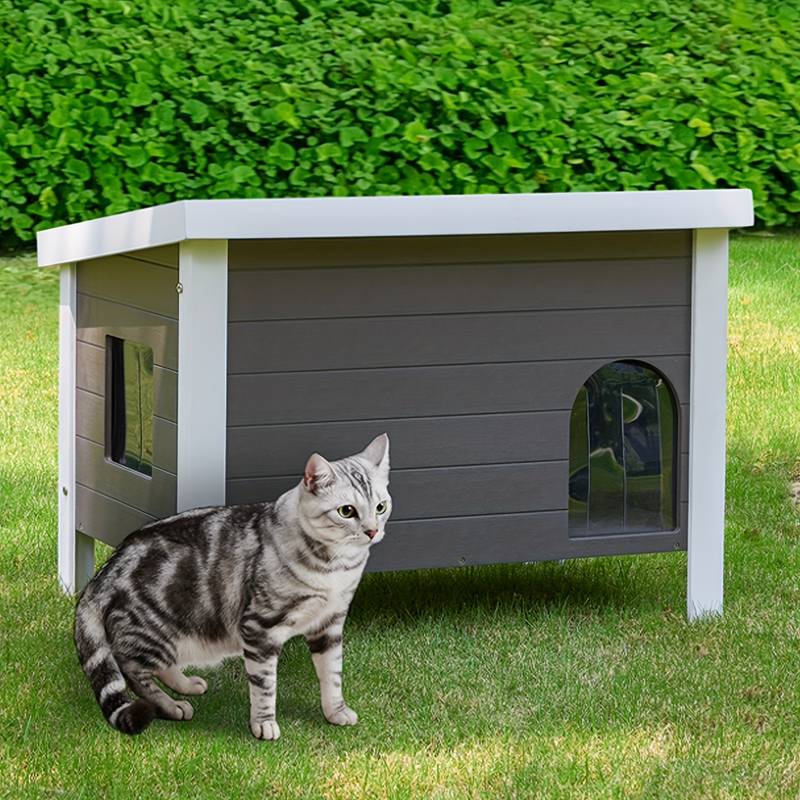
19. Modern Cat House with Dark Gray Paneling and White Trim
This look is achieved with a simple but effective formula: 70% dark, moody siding + 25% crisp white trim + 5% clear accents. The dark gray horizontal paneling gives it substance and a modern feel, while the bright white trim on the roof and openings provides a sharp, clean contrast that makes the whole structure pop. The small, clear flaps are the finishing touch, adding function without disrupting the clean color palette. You could easily adapt this, for example using navy blue siding with natural wood trim for a more coastal vibe.
|
📋 Copy HEX 🔗 Share |
💰 Budget Breakdown
The white trim is the key element that makes this design feel architectural and intentional, rather than just a basic box. It outlines the shape of the house, defines the openings, and creates a visual connection between the roof and the base. If you were to paint the entire house a single color, it would lose all of its personality and look much more generic. That crisp, contrasting trim is doing all the heavy lifting, style-wise.
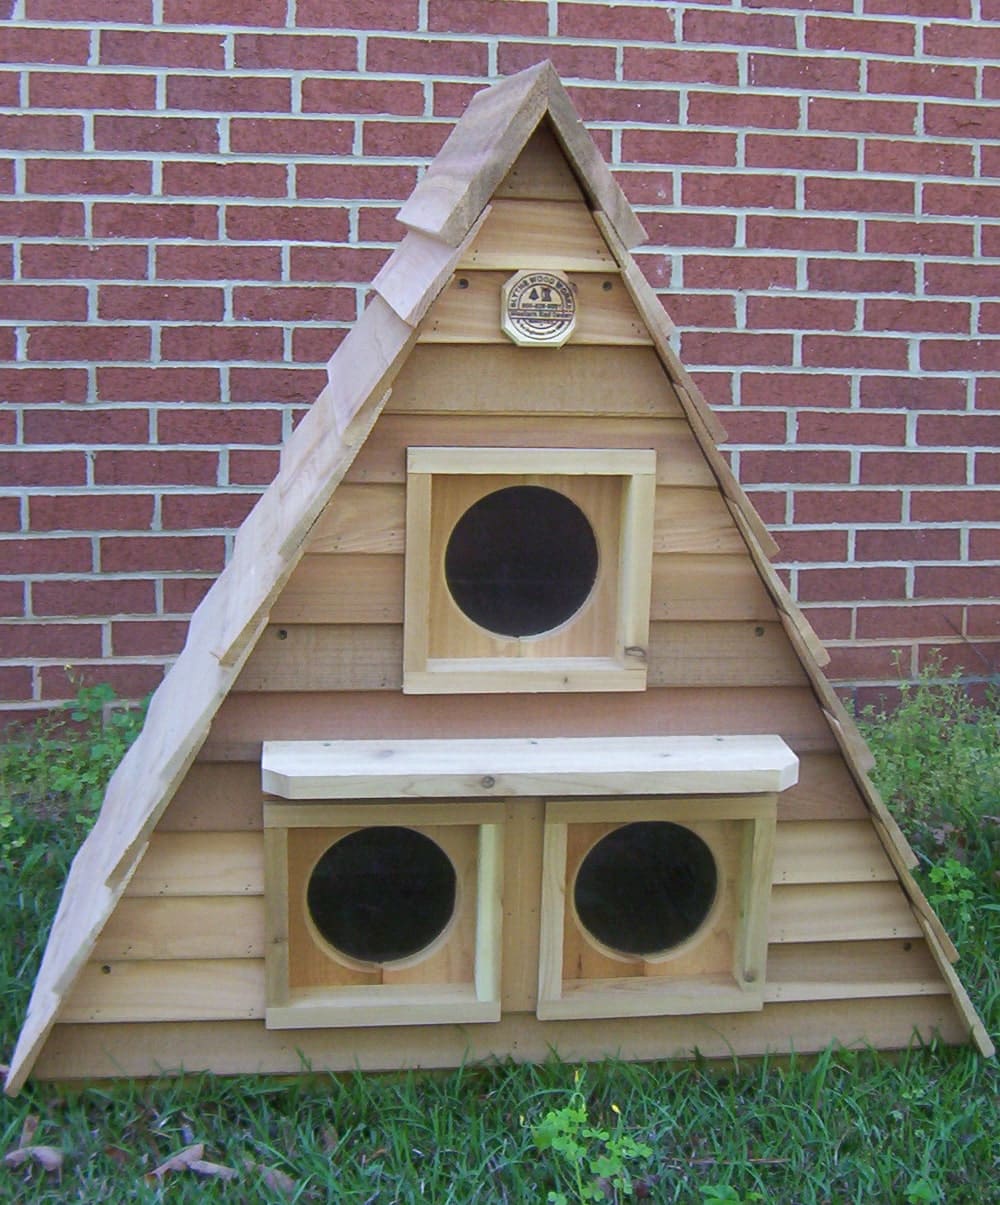
20. Customizable Outdoor Wooden Kennel for Multiple Cats
A large, multi-cat kennel like this is designed for a spacious yard and a committed caretaker. A structure advertised to hold 3-6 cats needs a significant footprint, likely in the range of 6 feet wide by 4 feet deep. This isn’t something for a small patio. It’s best placed in a quiet corner of a backyard with a good vantage point, where the cats can see their surroundings but aren’t disturbed by constant foot traffic. Ensure the ground is level and consider a gravel or paver base for stability and drainage.
|
📋 Copy HEX 🔗 Share |
🔥 Trending Context
If you’re housing multiple cats that aren’t part of a bonded family, providing multiple entry/exit points is crucial. This is a key feature of ‘customizable’ designs. Having at least two doorways (e.g., one on the front, one on the side) prevents a more dominant cat from ‘trapping’ another cat inside. It gives everyone a clear escape route, which significantly reduces stress and conflict within the shared space. Even adding a simple second opening to a basic design can make it much more successful for a small colony.
21. Rugged, Insulated House for Feral or Domestic Cats
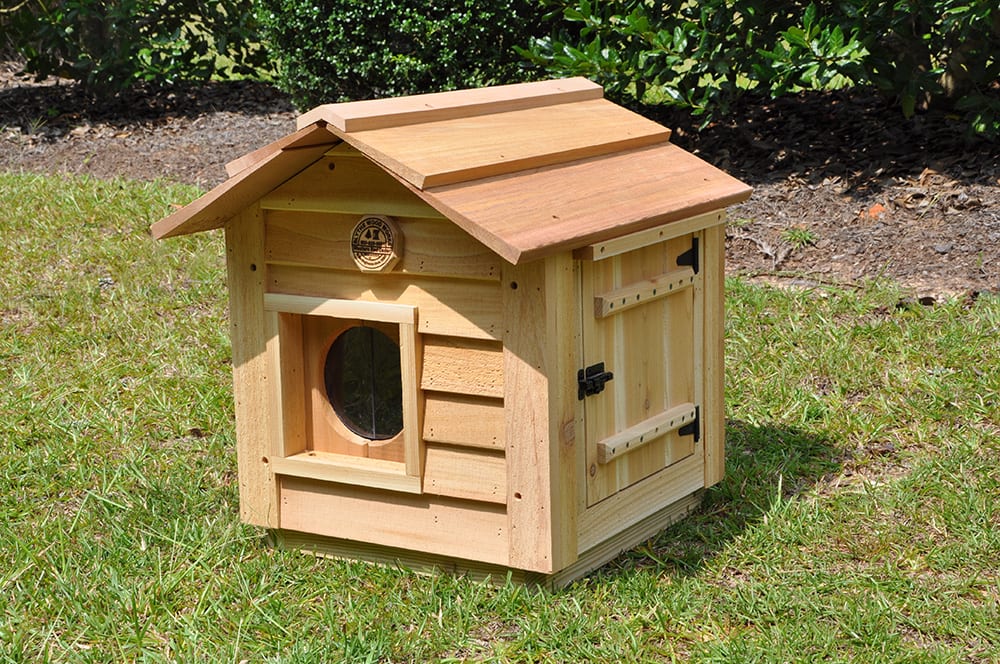
The word ‘feral’ is important here. A truly feral cat (one that is not socialized to humans) will not use a shelter that is placed too close to your house or in a high-traffic area. For this type of rugged house to be successful, it needs to be placed at the edge of your property, near a natural line of cover like a hedge or fence. The cat needs to be able to approach and leave without feeling exposed. Don’t be discouraged if it takes weeks or even months for a feral cat to start using a new shelter.
|
📋 Copy HEX 🔗 Share |
🧹 Maintenance Reality
This design’s success hinges on its rugged, unobtrusive appearance. It’s not trying to be a cute accessory for your yard; it’s designed to blend in and provide serious protection. The sturdy, no-nonsense construction inspires confidence. Features common to these designs, like an extended roofline to protect the entrance and an offset doorway, are all about function over form. A feral cat’s survival depends on security and warmth, and this type of house prioritizes both above all else.
22. Vibrant Orange Wooden Cat House on a Stone Patio
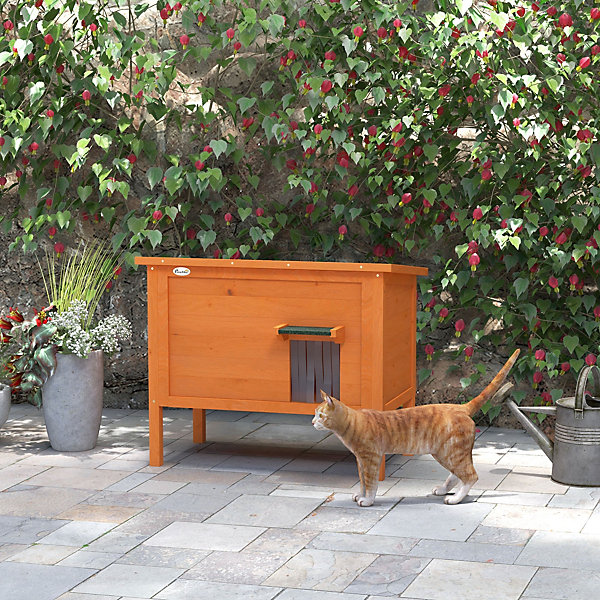
The bold, unapologetic orange color is what makes this little house a star. In a sea of natural wood and neutral grays, this vibrant hue is an instant mood-lifter. It turns a simple, functional object into a joyful piece of garden art. It proves that a cat house doesn’t have to be boring or try to disappear into the background. It can be a deliberate and fun design choice, adding a pop of personality to the outdoor space. Compared to the more subdued shelter in Idea #3, this one is all about making a statement.
|
📋 Copy HEX 🔗 Share |
📏 Scale Guide
We’re seeing a big trend in landscape design toward using pops of bright, saturated color in outdoor structures and accessories. After years of minimalist neutrals, people are ready to have more fun with their outdoor spaces. A brightly painted cat house, birdhouse, or even just a planter can be an easy, low-commitment way to participate in this trend. It adds a touch of whimsy and personal flair to a garden or patio.
23. Another Look at a Rugged Insulated Cat Shelter
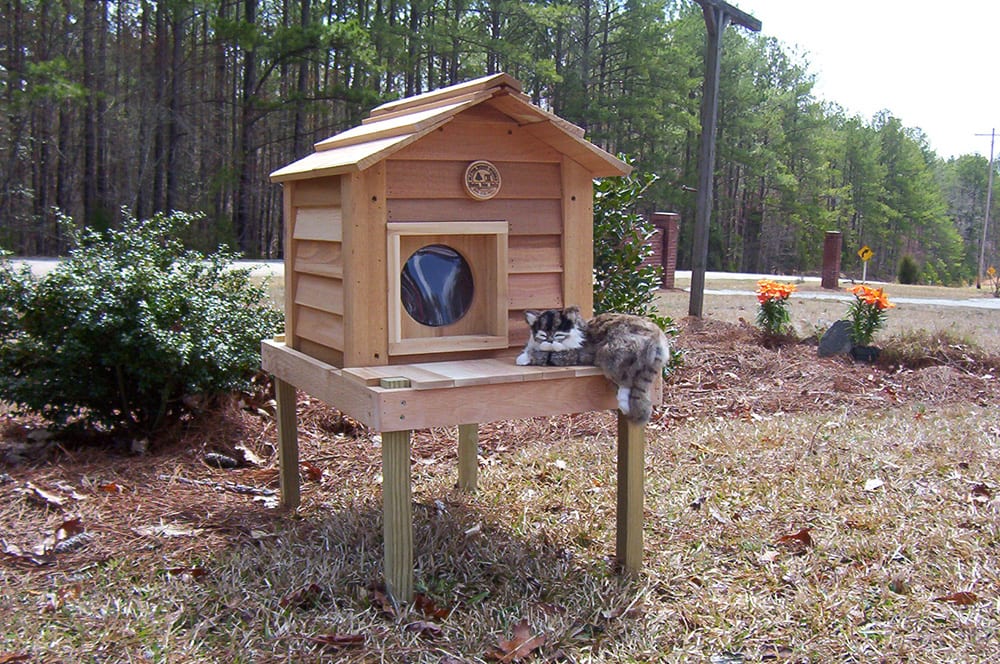
When choosing insulation for a DIY cat house, straw is the gold standard for bedding. However, for lining the actual walls and ceiling, rigid foam board (like the kind used for house sheathing) is superior. It provides a higher R-value (a measure of thermal resistance) and doesn’t hold moisture. A great combination is to line the walls and ceiling with 1-inch foam board, caulking the seams, and then fill the house one-third full with loose straw that the cat can burrow into.
|
📋 Copy HEX 🔗 Share |
💡 Designer Tip
While built to be ‘rugged,’ the number one maintenance task for these houses is keeping the inside clean and dry. At least twice a year, you must remove all the old straw, which can harbor fleas, mold, or other unpleasant things. Once empty, wipe down the interior with a mild bleach solution (1 part bleach to 30 parts water) or a veterinary-grade disinfectant, let it air out completely, and then add fresh, clean straw. This is non-negotiable for the health of the cats using the shelter.
24. Durable Insulated Shelter for Outdoor Use
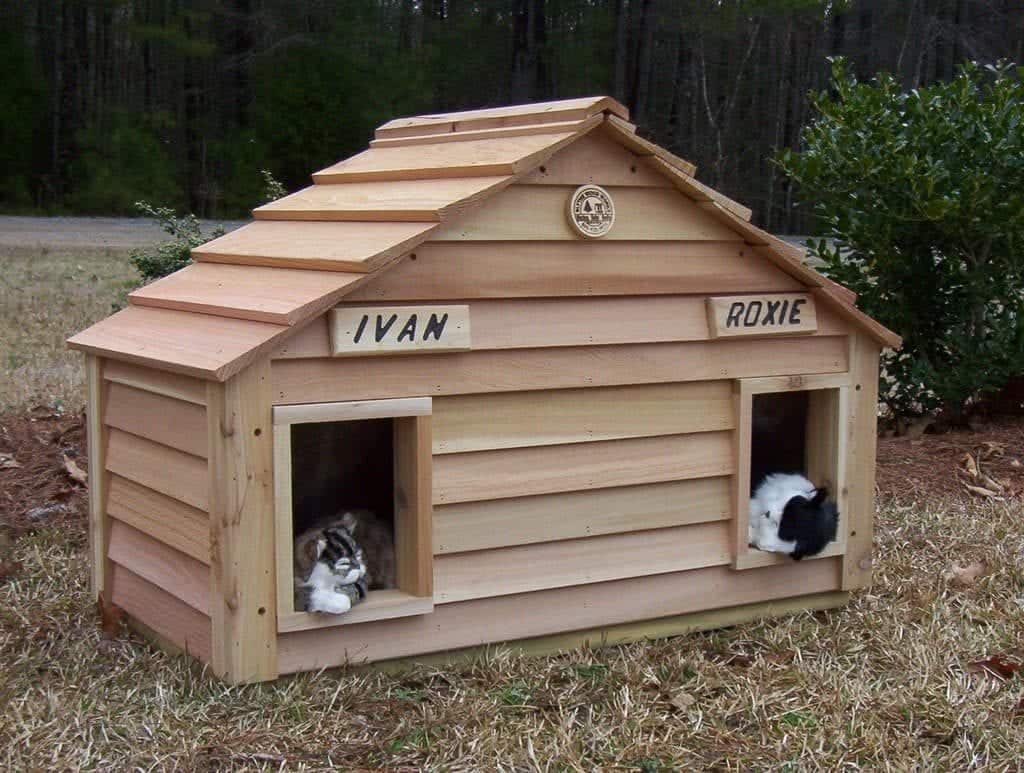
- Identify the User: Is this for your friendly indoor/outdoor cat, or for a shy neighborhood stray? Your placement strategy will be completely different. A friendly cat will be happy on the porch; a shy cat needs more distance.
- Measure the Insulation: The term ‘insulated’ can mean anything from a thin layer of foam to thick, high-R-value panels. Check the specs. For freezing climates, you want a minimum of 1-inch thick rigid foam insulation.
- Plan for Bedding: The house itself is only half the equation. You need a budget and a plan for providing and replacing straw bedding. Remember: never use hay or blankets, as they absorb moisture and can make a cat colder.
|
📋 Copy HEX 🔗 Share |
💸 Get This Look For Less
Don’t assume a cat will automatically use the house you provide. Cats, especially cautious strays, can be very wary of new objects in their territory. It can help to place the house and leave it for a week before you add the bedding. Then, add the bedding and maybe a sprinkle of catnip or a few high-value treats near the entrance to encourage investigation. Be patient. It can take a long time for a cat to trust a new shelter.
25. Wooden Pet Shelter with a Sloped Metal Roof
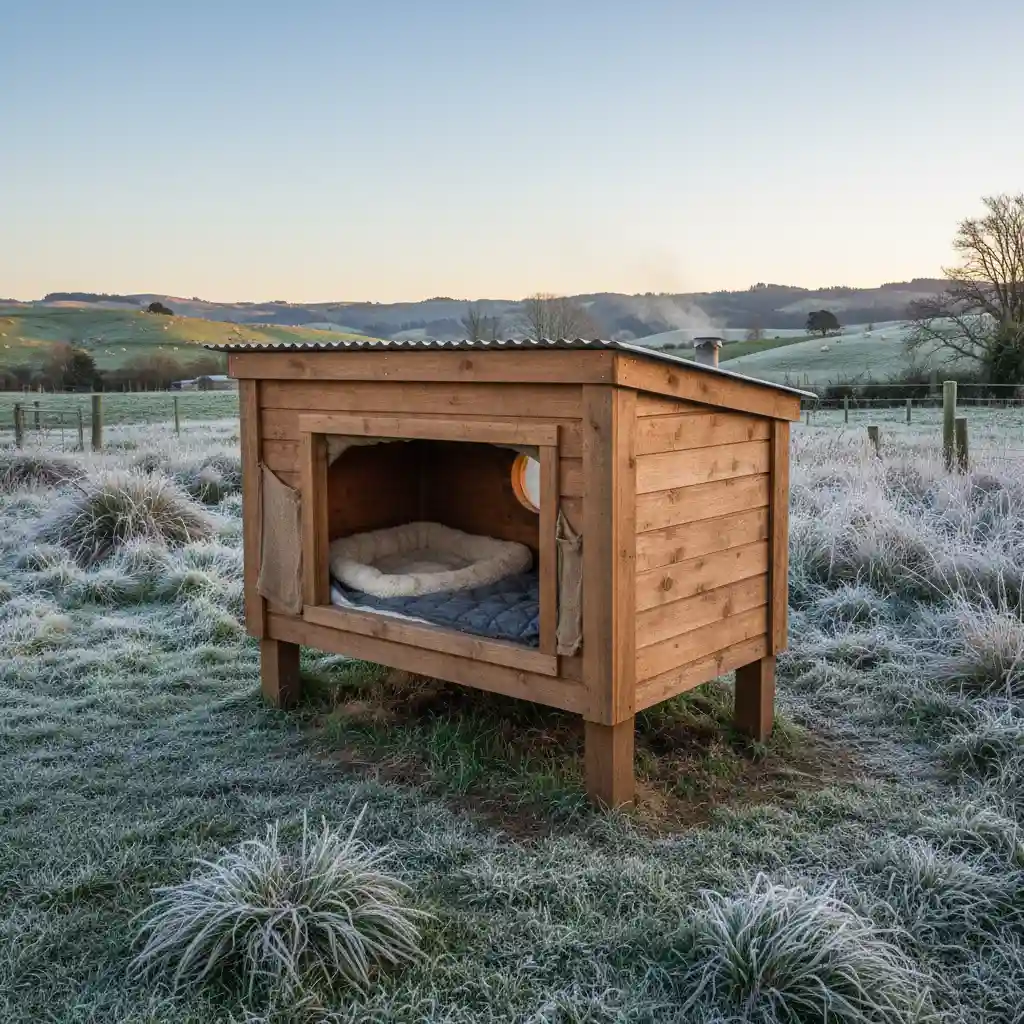
This design is effective because of its material honesty and simplicity. The corrugated metal roof is incredibly durable and practical, shedding snow and rain with ease and lasting for decades with no maintenance. The open front is welcoming and non-threatening, making it more approachable for a timid animal than a small opening or a flapped door might be. Elevating the structure on sturdy wooden legs keeps the cozy bed inside off the cold, frosty ground, which is essential for warmth.
|
📋 Copy HEX 🔗 Share |
⭐ The One Thing
You can create a similar shelter very inexpensively. The frame can be built from reclaimed pallet wood. Corrugated metal roofing is often available for cheap or free on Facebook Marketplace or Craigslist from people re-doing a shed or garage. The key is the elevated floor and the waterproof roof. Even a simple platform with a sloped roof, built from scrap materials, can provide a life-saving dry spot for an outdoor animal to rest.
26. Stained Wood and Wire Mesh Catio
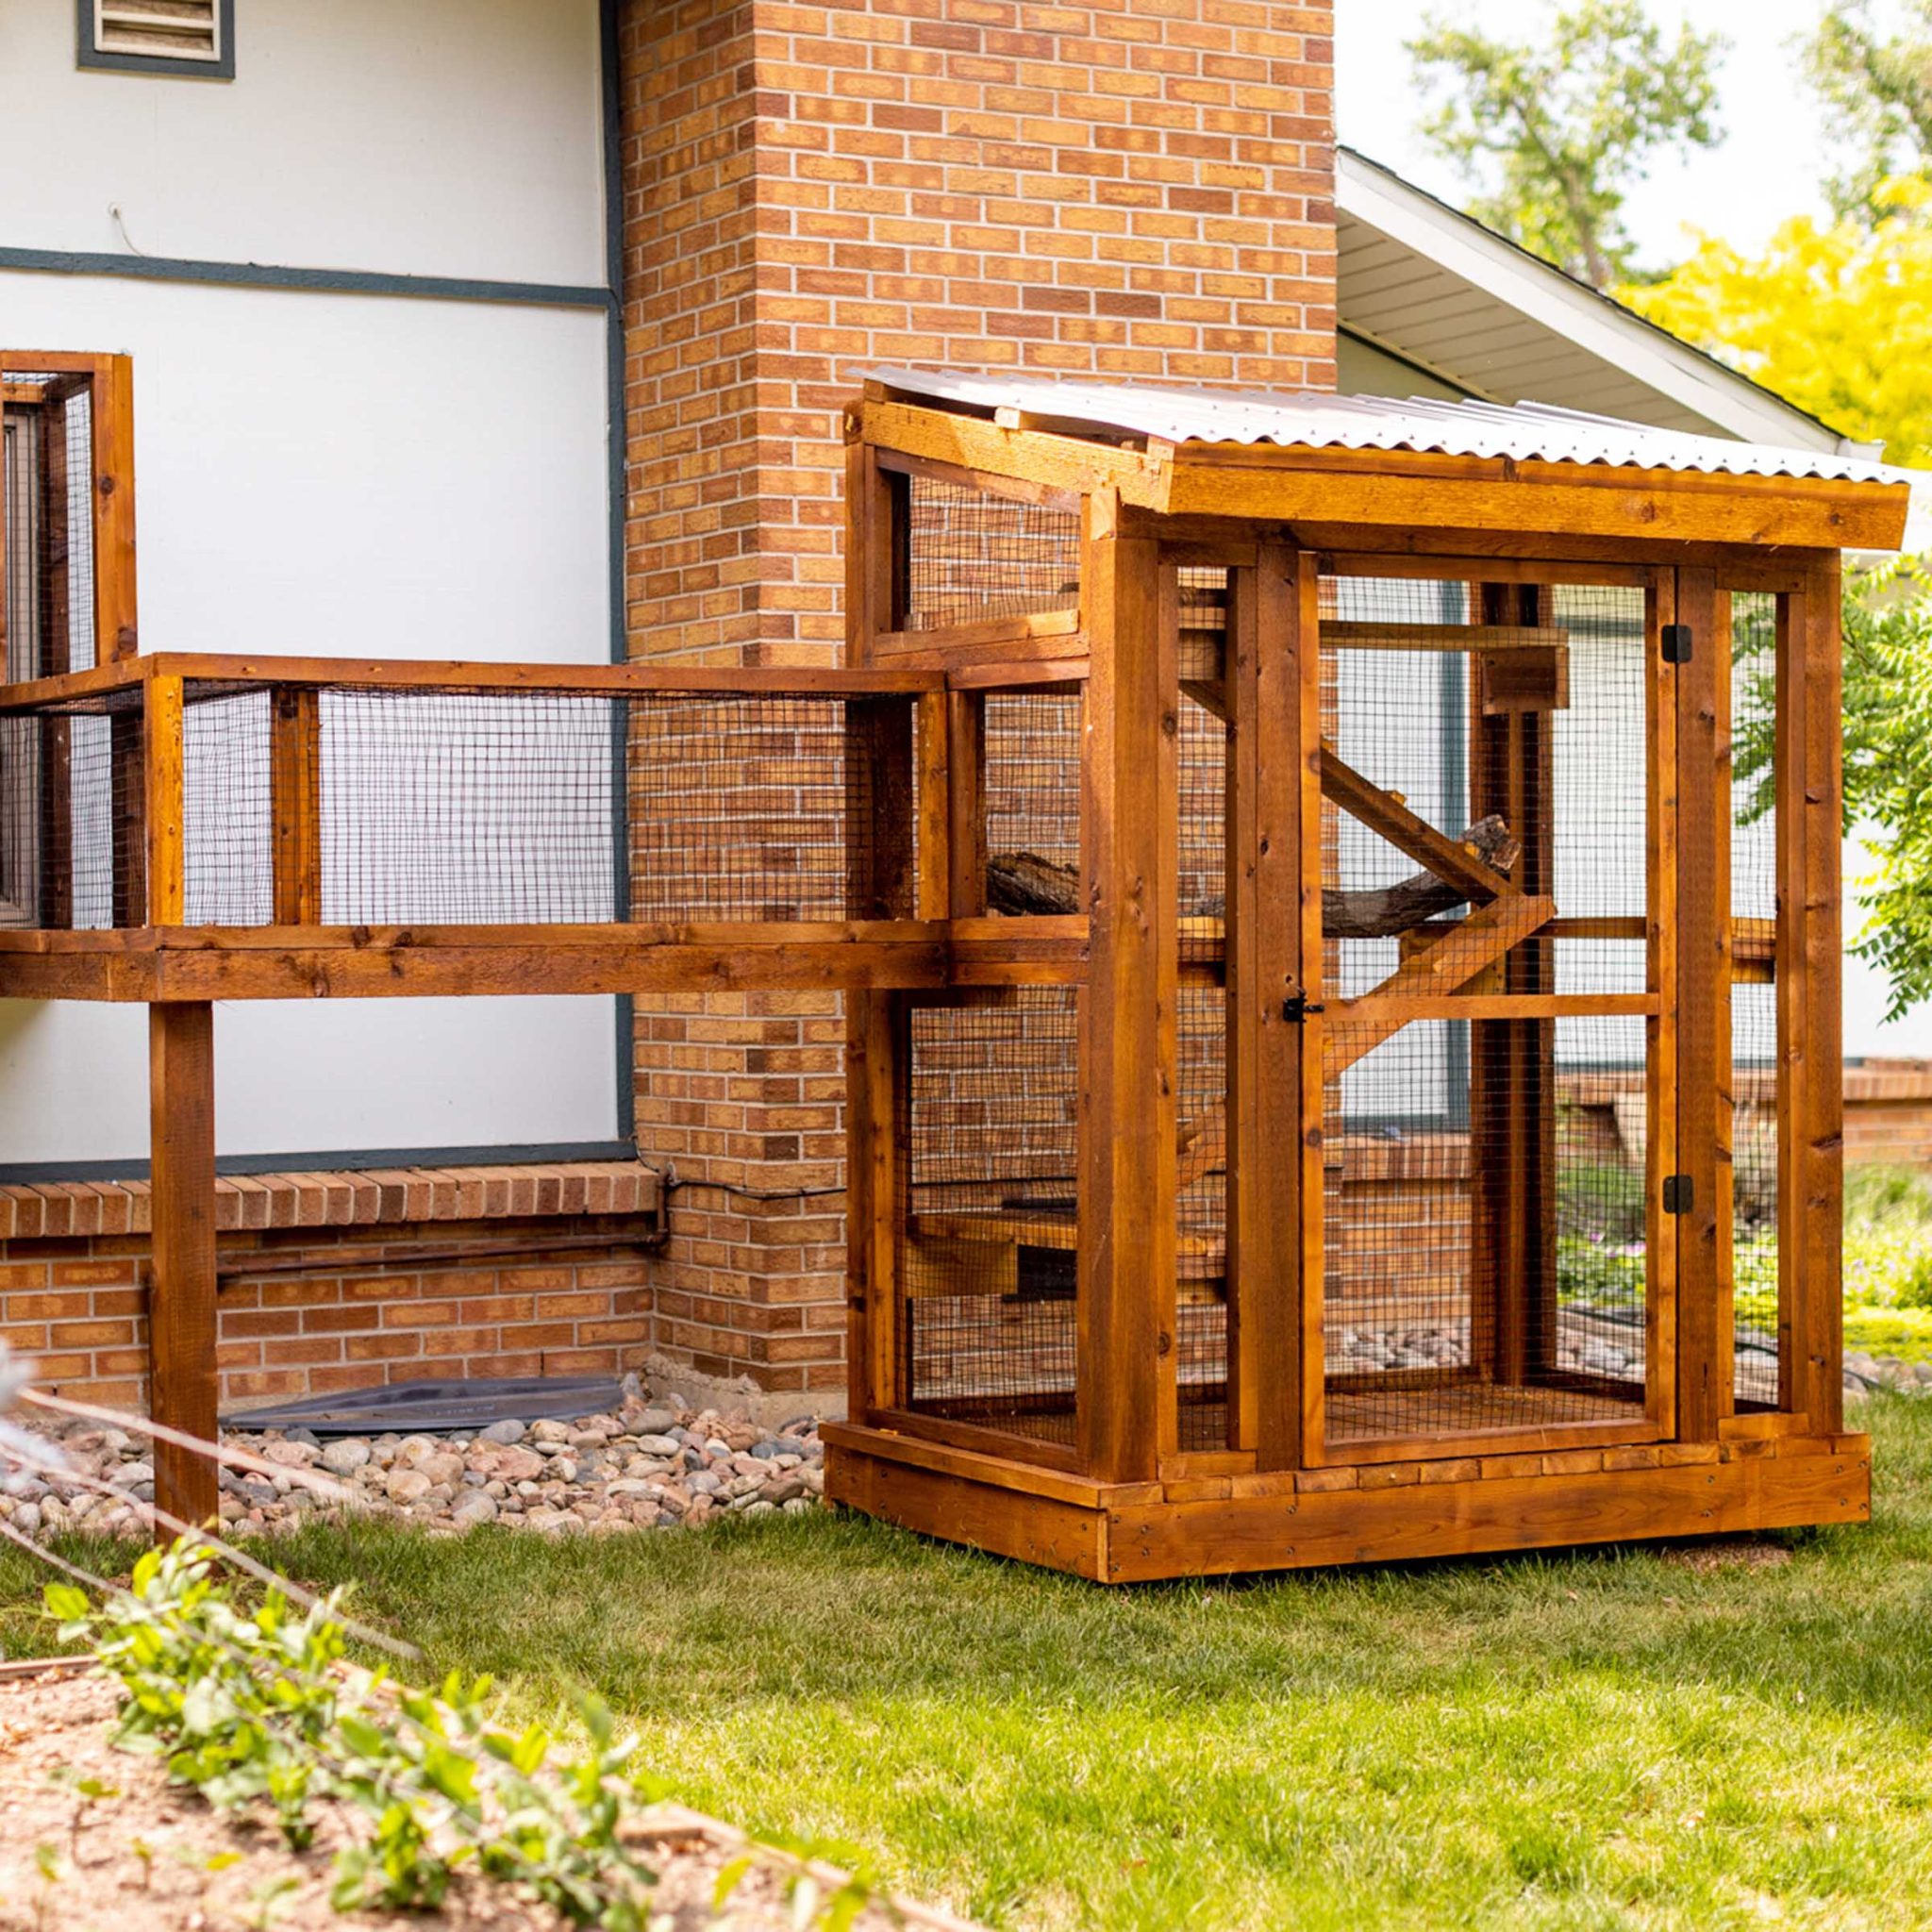
The visual formula here is about balancing man-made structure with the natural environment. It’s roughly 50% warm wood structure + 30% industrial mesh + 20% natural backdrop. The stained wood frame and wire mesh are clearly man-made, but their colors are chosen to complement the brick and siding of the house. The corrugated metal roof adds another layer of texture. The success of the design comes from how it frames the view of the yard, allowing the cat to be ‘in’ nature while remaining safely contained.
|
📋 Copy HEX 🔗 Share |
🔧 How-To Brief
The stained wood finish looks fantastic, but it will need to be re-applied every 2-3 years to protect the wood from sun and rain damage. A wire mesh enclosure, especially one this large, can be difficult to clean. Leaves, cobwebs, and cat fur will inevitably collect in the corners. A leaf blower can be your best friend for quick cleanups. Also, check the base of the structure regularly for signs of rot or insect damage where the wood meets the ground.
27. Insulated Cat Shelter for a Covered Porch
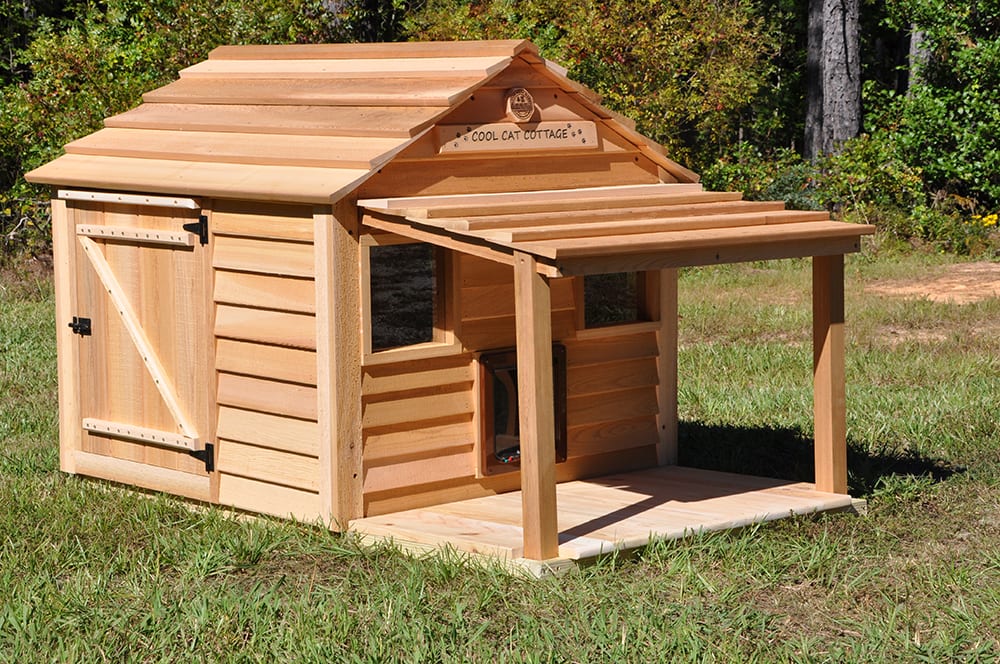
If you’re placing a cat house on a porch or deck, add a ‘welcome mat’ of sorts. A small piece of astroturf, a rough coir mat, or even just a flat piece of scrap wood right outside the entrance will help clean a cat’s paws before they go inside. This small addition helps keep the interior bedding cleaner and drier, especially during muddy or snowy weather. It’s a simple detail that makes a big difference in the overall hygiene of the shelter.
|
📋 Copy HEX 🔗 Share |
⚠️ Real Talk
A compact, insulated house like this is perfectly scaled for a covered porch, a small deck, or even a larger, sheltered balcony. The typical dimensions are around 24 inches wide by 20 inches deep. This size provides a snug, easily-warmed space for a single cat without dominating your outdoor living area. It’s too small to be placed in the middle of an open yard, where it would look lost and offer little sense of security. Its natural habitat is near the reassuring structure of the main house.
28. Peaceful Cats Resting in a Red Wooden House
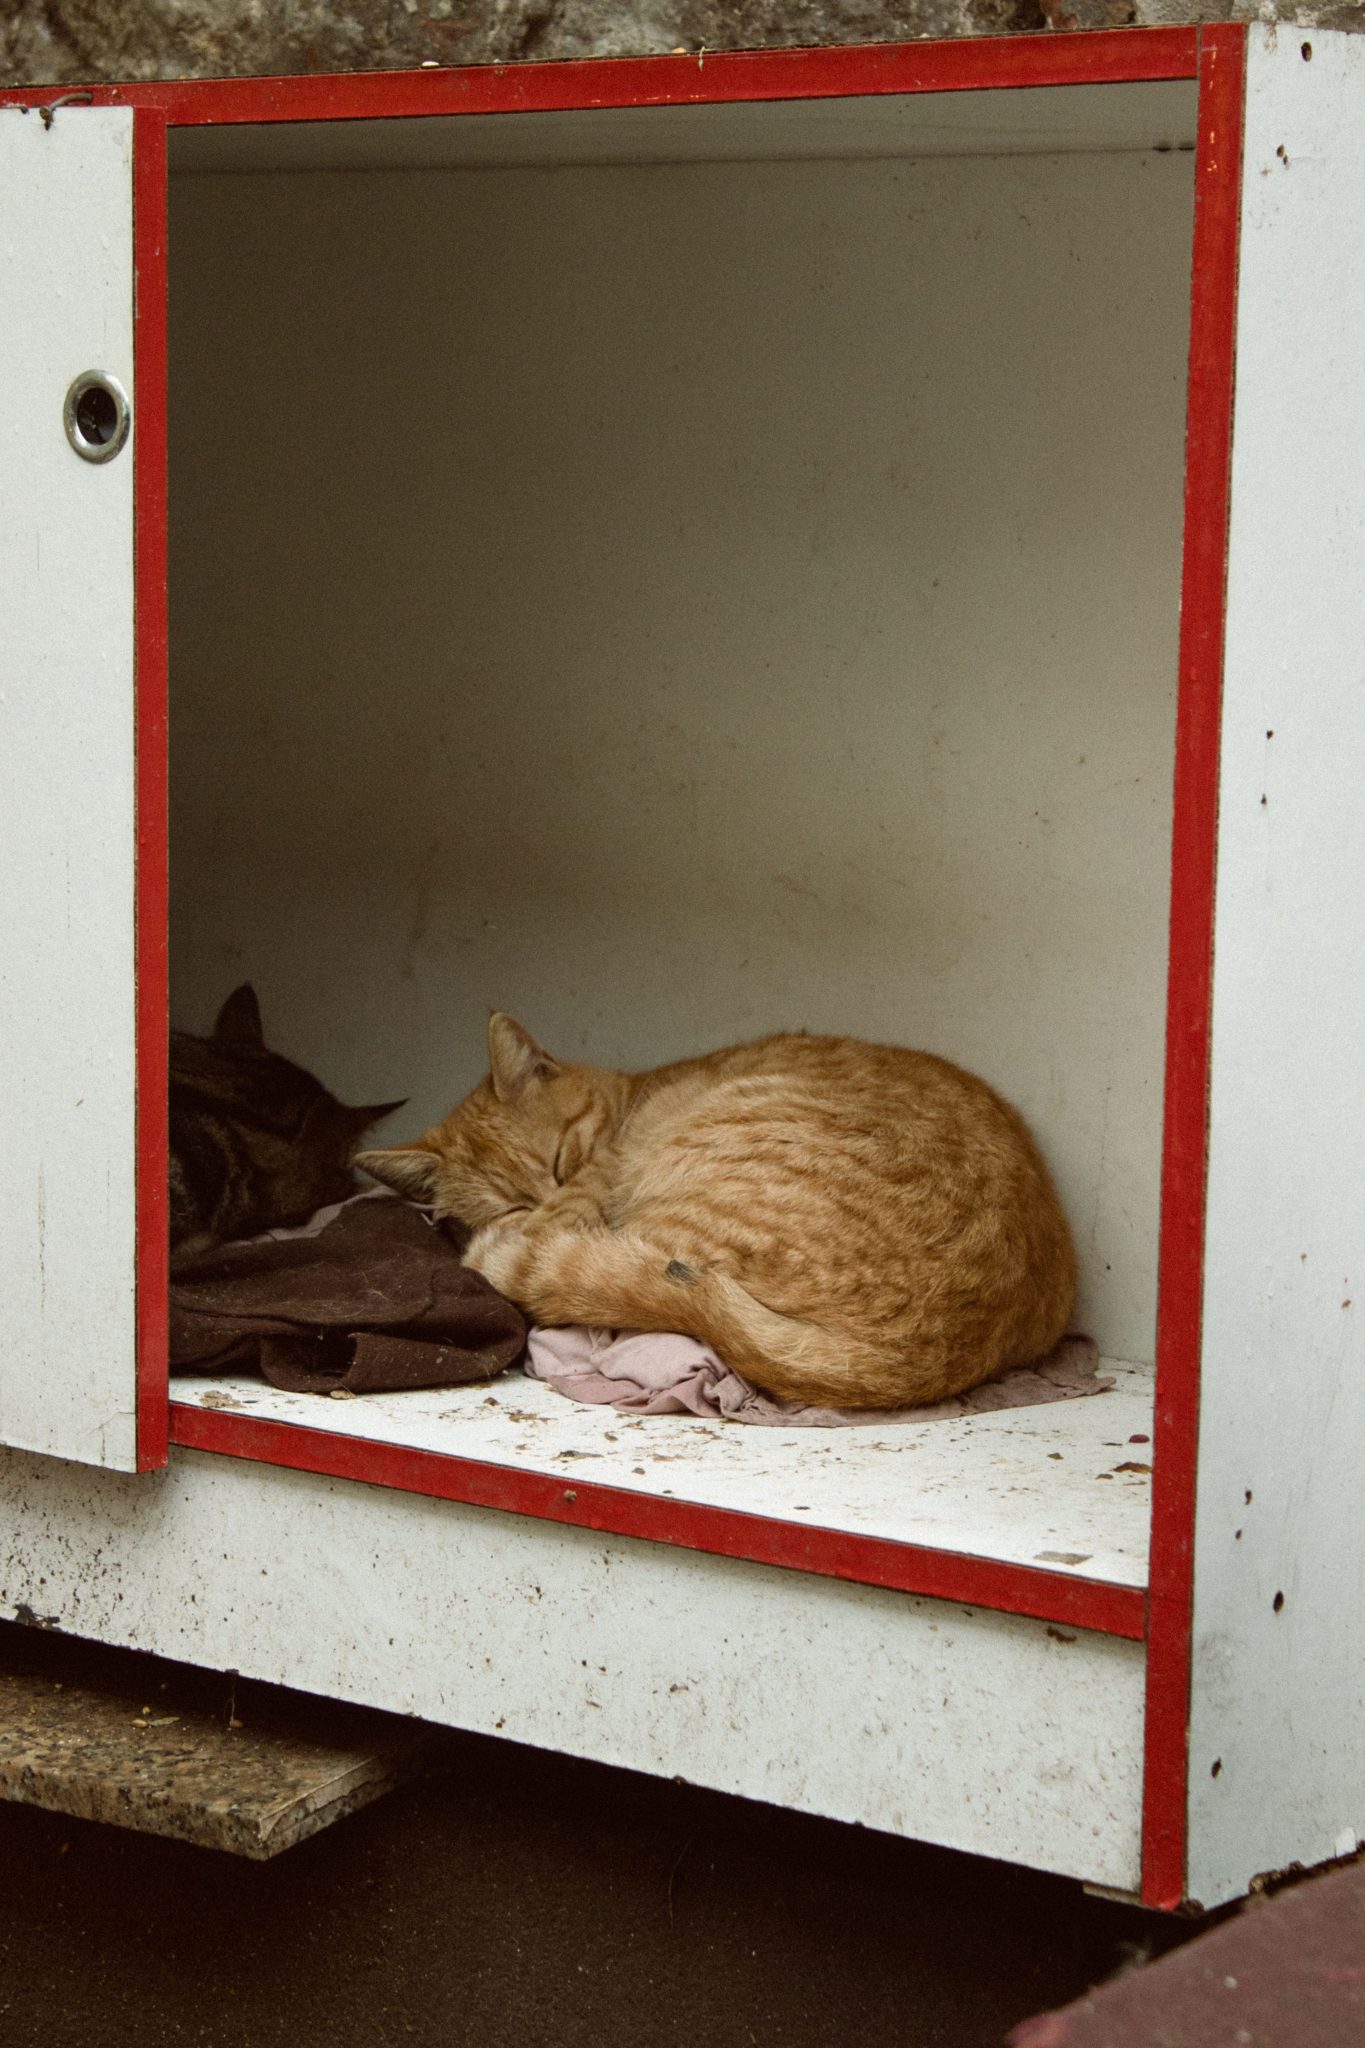
Seeing two cats sharing a house so peacefully is lovely, but don’t assume it’s always the case. Not all cats enjoy co-sleeping. Unless you know for a fact that two cats are strongly bonded and like to cuddle, it’s always better to provide one shelter per cat. Forcing unrelated or unfriendly cats to share a small space can lead to stress, fights, and one cat being denied access to shelter altogether. When in doubt, provide more houses than you think you need.
|
📋 Copy HEX 🔗 Share |
📐 Style Math
that makes this scene so heartwarming is the visible sense of security. The cats aren’t just in the house; they are deeply relaxed, with one even sleeping soundly. This is the ultimate sign of a successful shelter. It means the house is placed in a location where the cats feel safe from threats, it’s protected from the elements, and the interior is comfortable enough for them to let their guard down completely. Achieving this level of trust is the true goal of any DIY cat house project.
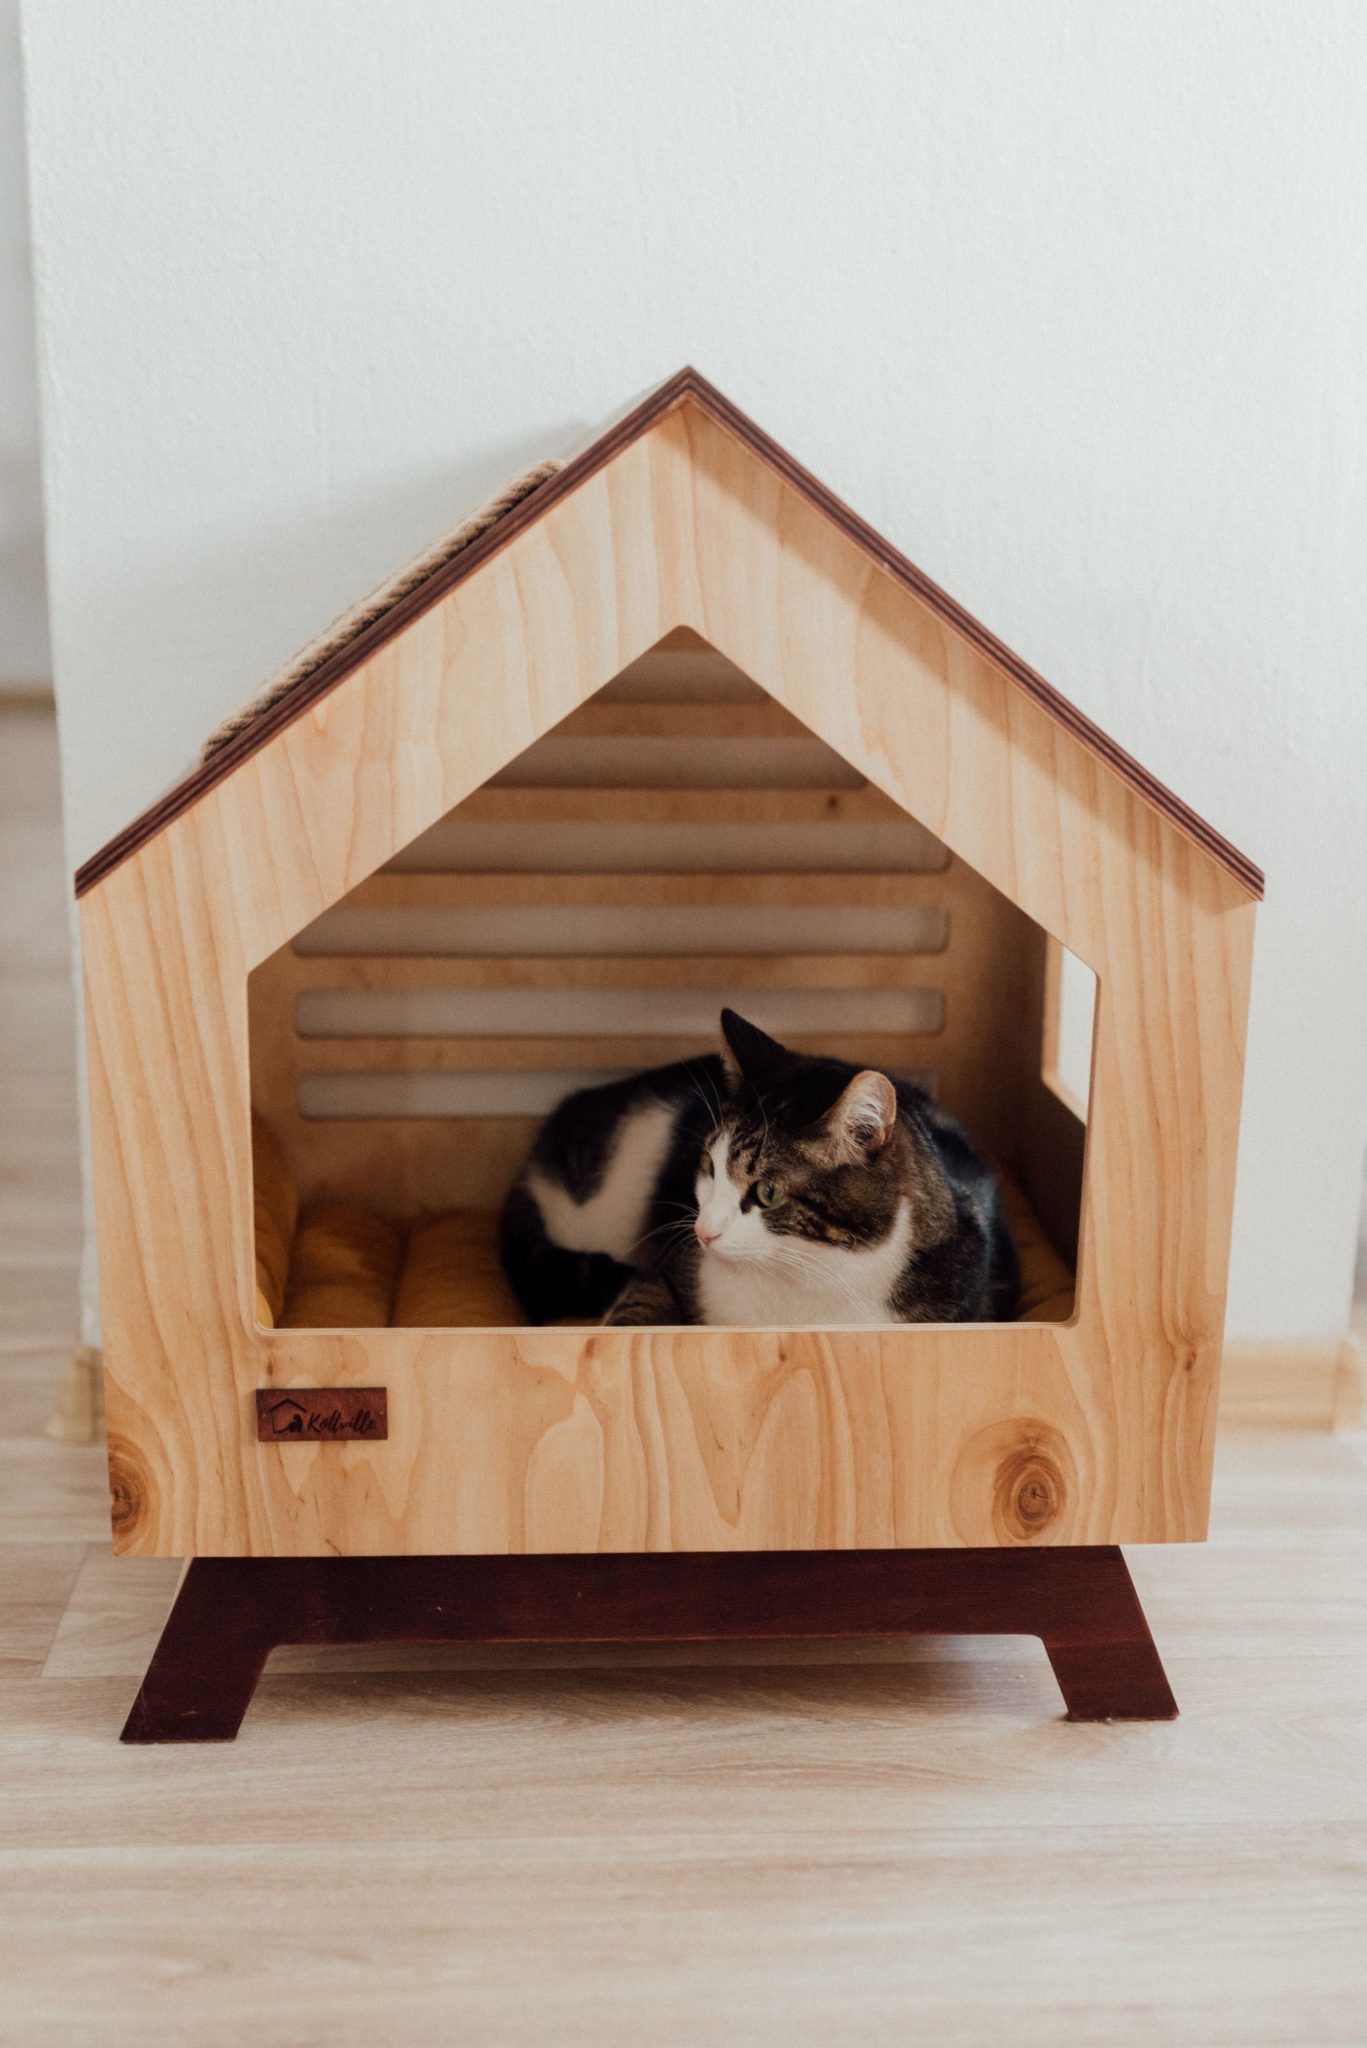
29. Plywood Cat House with Peaked Roof and Rope Accent
For an indoor cat house like this, aesthetics are just as important as function. The braided rope accent along the roof ridge is a perfect example of a small detail with a big impact. It adds a touch of nautical or rustic charm and breaks up the flat planes of the plywood. To attach it, simply run a thin bead of hot glue or clear construction adhesive along the peak of the roof and press the rope firmly into place. It’s a five-minute addition that adds a ton of personality.
|
📋 Copy HEX 🔗 Share |
✅ Before You Start
This design proves that simple geometry and natural materials are a winning combination. The formula is: 60% light plywood + 20% dark base + 15% soft cushion + 5% textural accent. The light plywood creates a bright and airy feel, while the dark base provides a strong visual anchor. The plush cushion inside signals comfort and coziness. The final touch is the rope, which adds a handmade, textural detail. This is a calm, minimalist equation that would fit into any modern home.
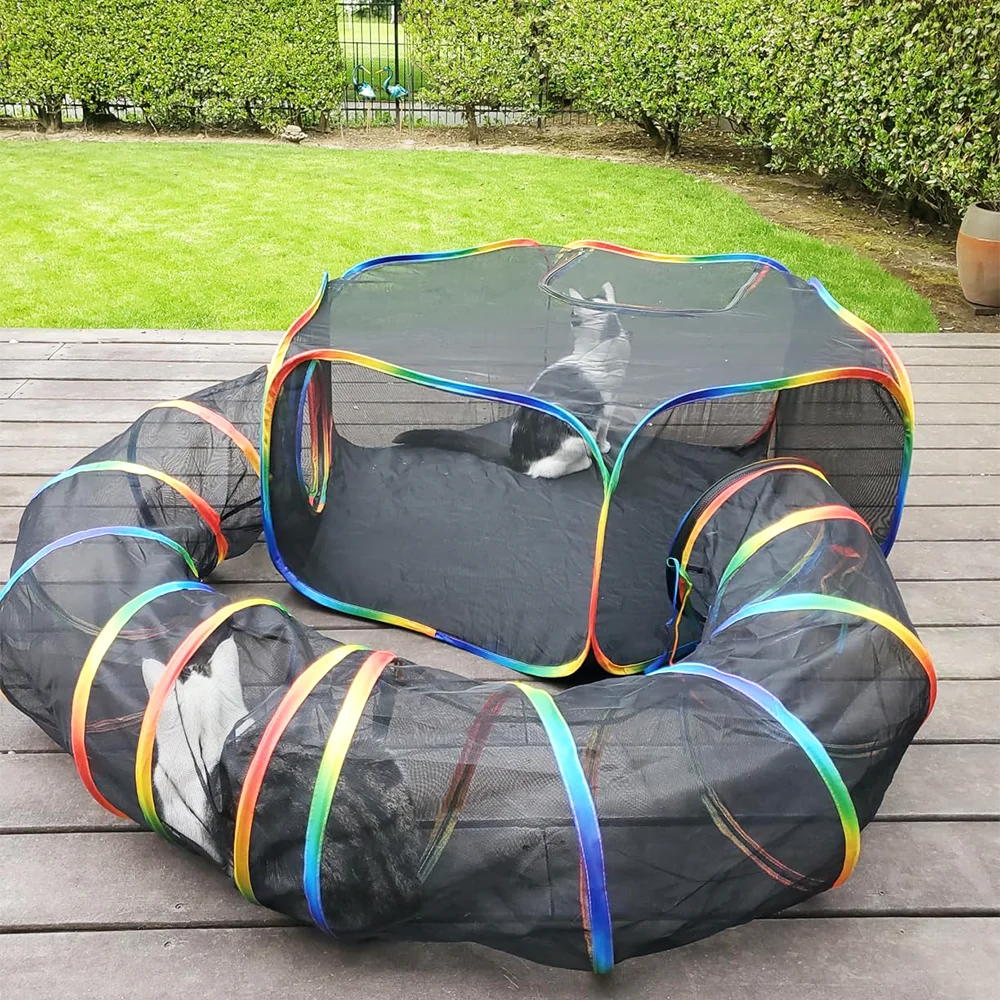
30. Rainbow Trim Pop-Up Cat Tunnel and Enclosure
Portable, pop-up play tunnels and cubes are having a moment, especially for people in apartments or homes without safe outdoor access for their cats. They offer a quick and easy way to provide enrichment and a change of scenery. This trend is driven by a desire for flexible, non-permanent solutions that can be used on a balcony, a deck, or even just in a larger room indoors. The rainbow trim adds a dose of pure joy, tapping into the broader design trend of incorporating playful, vibrant colors into our lives.
|
📋 Copy HEX 🔗 Share |
🎯 What Makes It Work
These mesh tunnels are fantastic for supervised play, but they are not built to be permanent outdoor structures. The mesh is lightweight and can be easily torn by a determined squirrel or snagged on a branch. The fabric will fade and become brittle if left in the sun for weeks on end. The best way to maintain it is to treat it as a toy: bring it out for playtime, and fold it up and store it indoors when you’re done. A quick wipe with a damp cloth is all it takes to clean it.
Your Guide to a Warmer, Safer Winter for Cats
With 30 distinct ideas, from the simplest bin shelter to an elaborate catio, there’s a project here for every skill level and budget. Taking the time to build a safe, warm space for a feline friend is one of the most rewarding things you can do. Now go pick your favorite, and get ready to build! Don’t forget to share your finished projects with the rest of us on Pinterest.