You know that feeling when you finally stumble upon a cleaning hack that actually works? The kind that makes you say, “Where has this been all my life?” It feels like unlocking a secret level of home mastery. We’ve waded through countless tips and tricks to find the ones that are genuinely game-changing in 2026, from products you’ll find at Target and Walmart to DIY solutions using household staples.
We’ve compiled 30 of the most effective, no-nonsense cleaning ideas for everything from your bathroom tiles to your kitchen baseboards. Get ready for step-by-step guides, honest reality checks about what could go wrong, and even a few budget breakdowns. And stay until the end — we break down the most common mistakes that can ruin these looks.
📌 Save this to Pinterest for later — you’ll want to revisit these ideas.
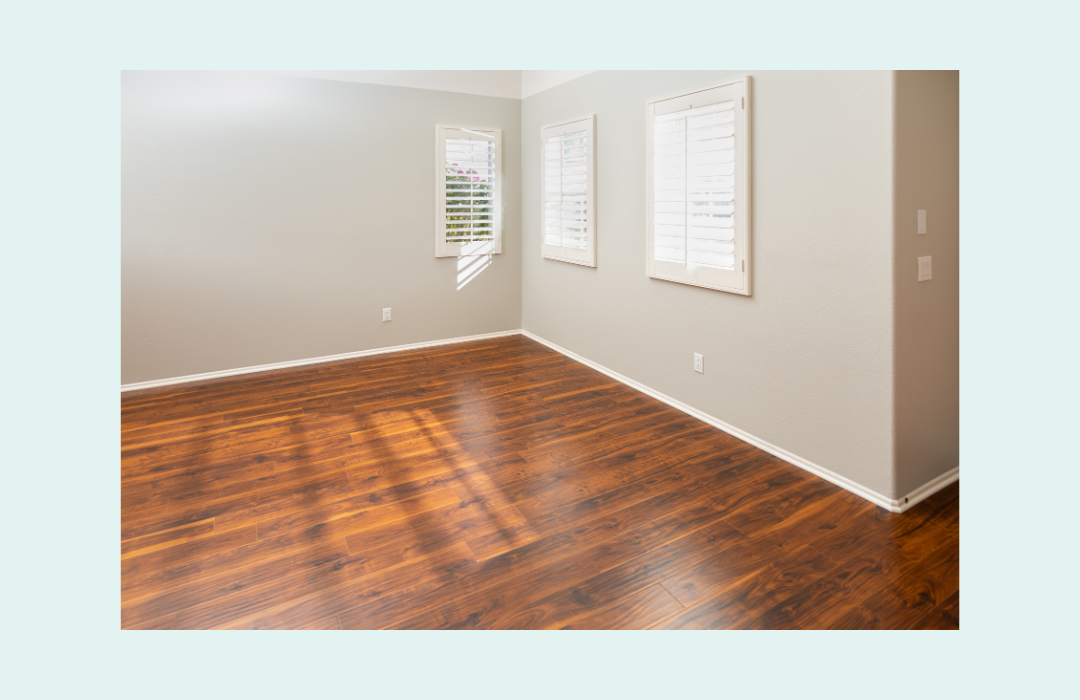
1. The Blank Slate: A Pre-Move-In Deep Clean
There is no better time to achieve a true deep clean than when a room is completely empty. Without furniture or decor in the way, you can access every single inch of the space, from the corners of the hardwood floors to the tops of the window shutters. This allows for a level of thoroughness that’s nearly impossible in a furnished room. The unimpeded natural light streaming in also reveals dust and smudges you might otherwise miss, ensuring your new beginning is as fresh as it looks.
|
📋 Copy HEX 🔗 Share |
💰 Budget Breakdown
Before you even think about cleaning an empty room, make a plan. Start from the top and work your way down. This means dusting ceiling fixtures and the tops of window frames first, then wiping down walls and shutters, followed by baseboards, and finally, vacuuming and mopping the floor. This gravity-friendly approach ensures you aren’t knocking dust onto surfaces you’ve just cleaned. Also, check that the power is on; you might need it for a vacuum or better lighting in dim corners.
2. Assemble Your Essential Cleaning Toolkit
Having the right tools is half the battle. A curated kit means you’re always prepared for spills, scuffs, or a full weekend cleaning marathon. This setup focuses on versatile workhorses: a lightweight handheld vacuum for quick pickups, a duster for surfaces high and low, a multi-purpose spray bottle for your favorite DIY solution, and a sturdy bucket. Paired with microfiber cloths and good-quality sponges, you have a system ready for nearly any task.

|
📋 Copy HEX 🔗 Share |
📐 Style Math
- Main Tools (Handheld vacuum, bucket, duster): $75 – $150
- Consumables (Spray bottle, cloths, sponges): $20 – $40
- Your Choice of Cleaners: $15 – $30
- TOTAL: $110 – $220
- Budget Alternative: Skip the handheld vac for now and focus on quality cloths and a good all-purpose cleaner for about $30 total.
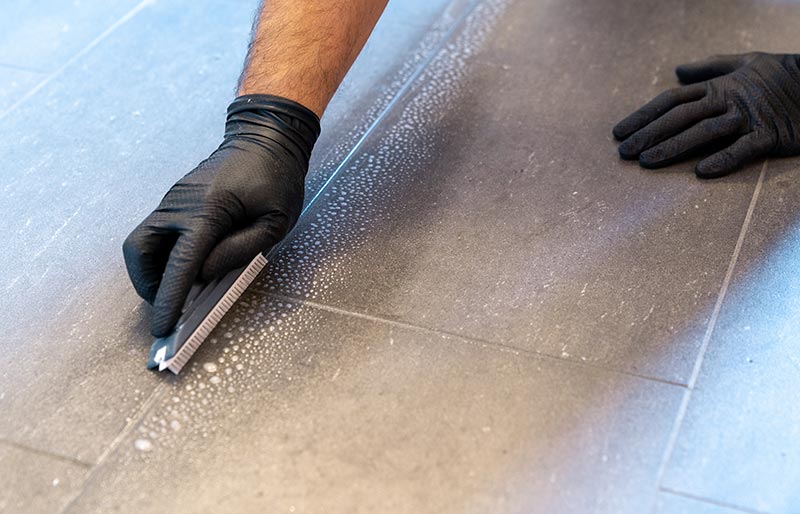
3. Bring Grout Back to Life with a Stiff Brush
Dingy grout can make even the cleanest tiles look drab. The most effective way to restore it is with targeted, manual scrubbing. A small, stiff-bristled brush allows you to concentrate pressure directly on the grout lines, lifting away embedded grime that a mop or sponge just skims over. The visible suds show the cleaning agent is at work, breaking down dirt and mildew. For this task, good old-fashioned elbow grease is truly the secret ingredient.
|
📋 Copy HEX 🔗 Share |
📏 Scale Guide
- Time: 20-30 minutes per 10 sq. ft. | Cost: $5-$10 (brush + cleaner)
- Start by applying a grout cleaner or a paste of baking soda and water to the grout lines.
- Let it sit for 5-10 minutes to penetrate the grime.
- Using a small, stiff brush, scrub the grout lines in a circular motion.
- Wipe away the dirty suds with a damp cloth.
- Rinse the entire area with clean water to remove any remaining residue.
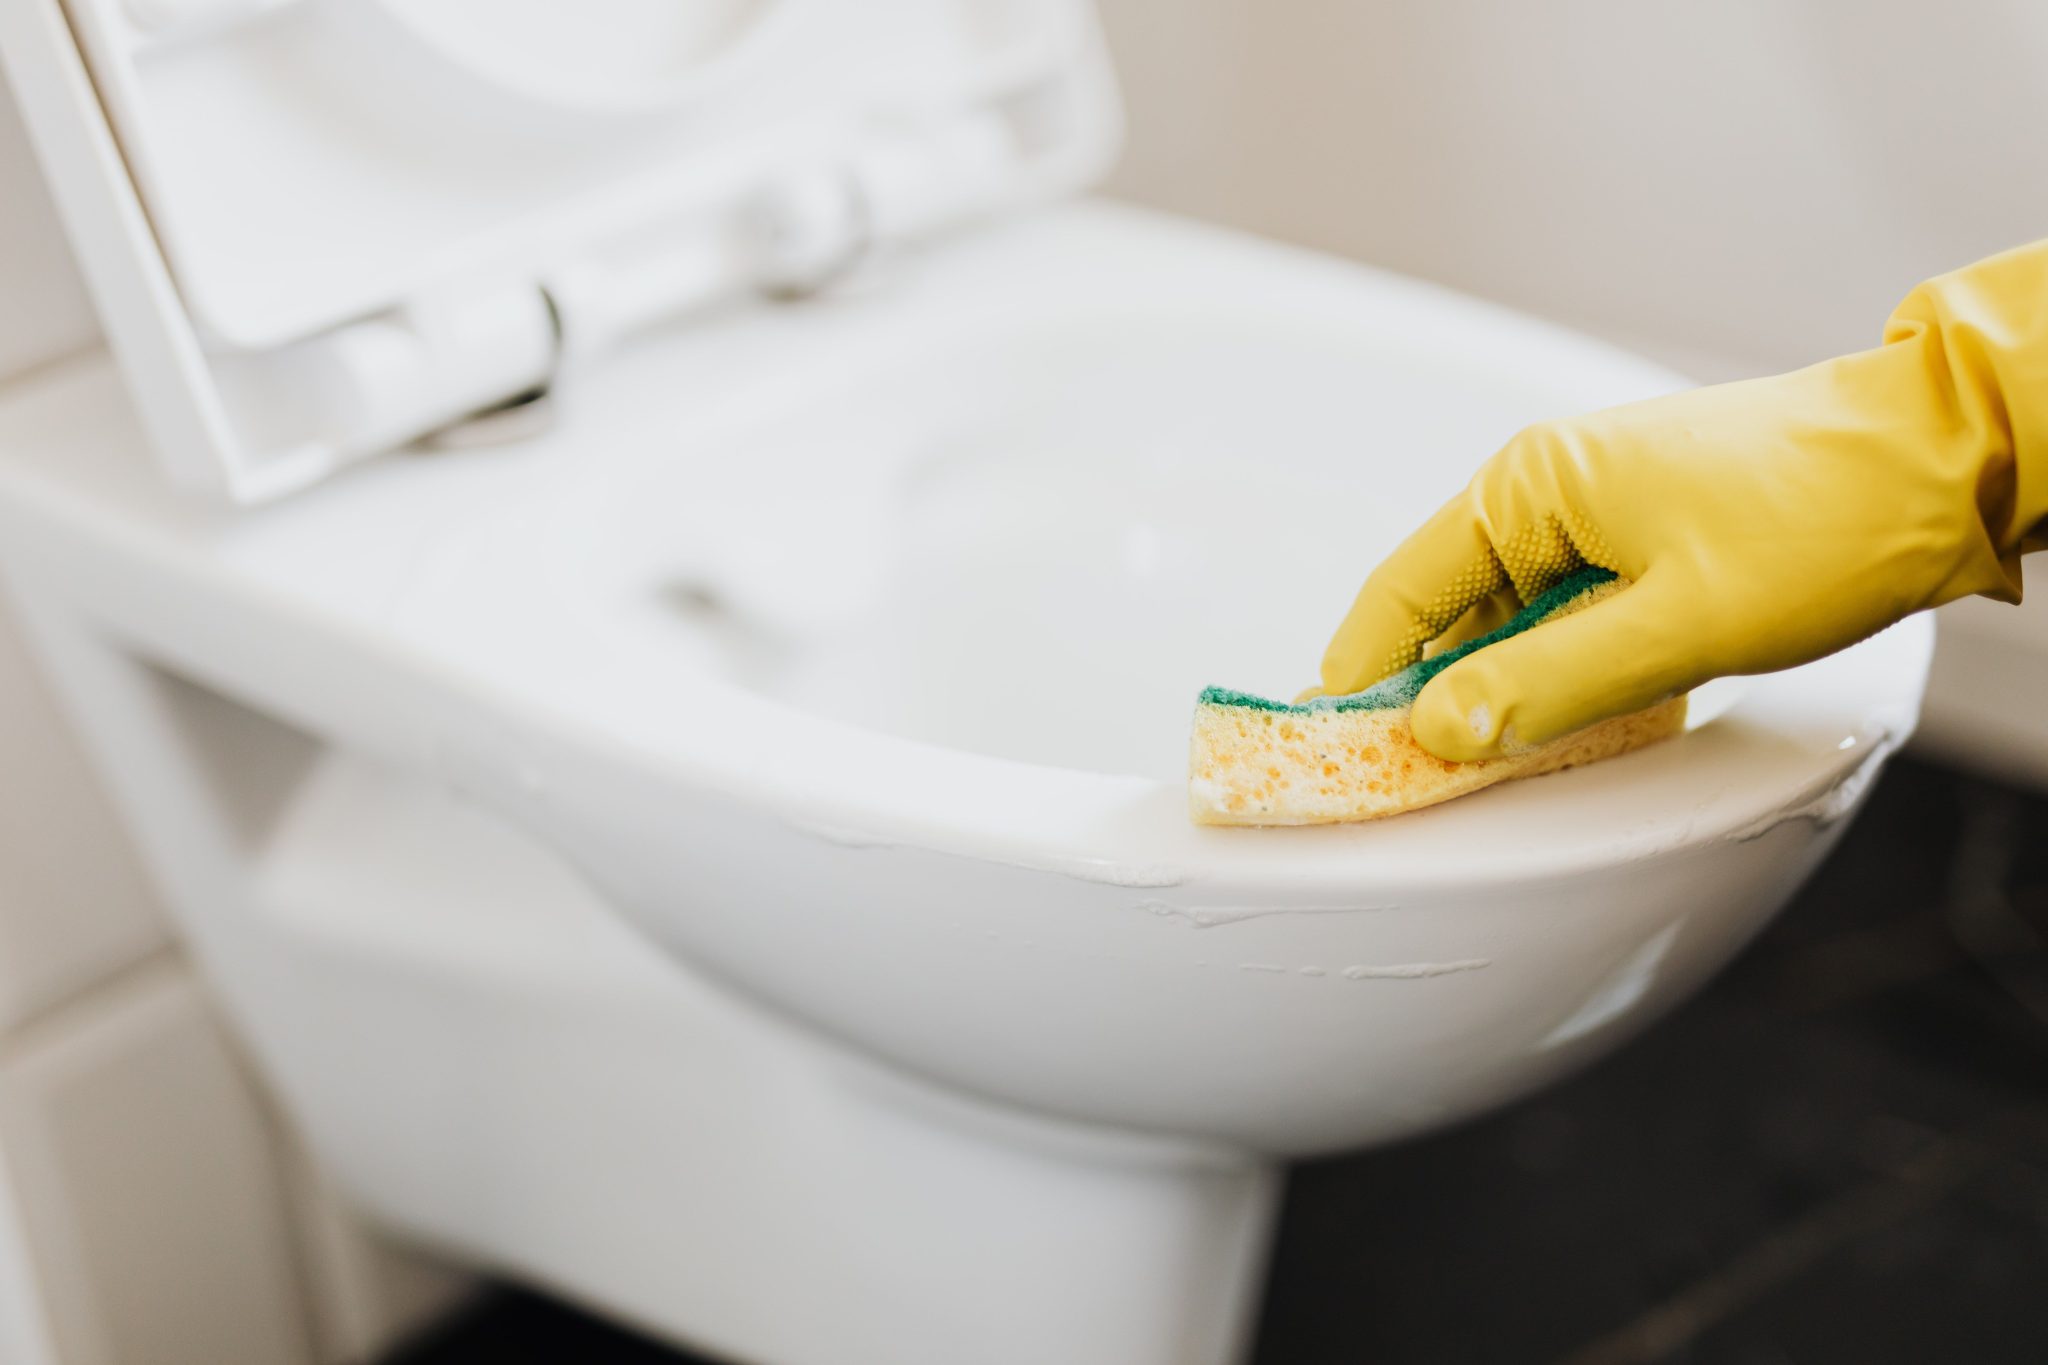
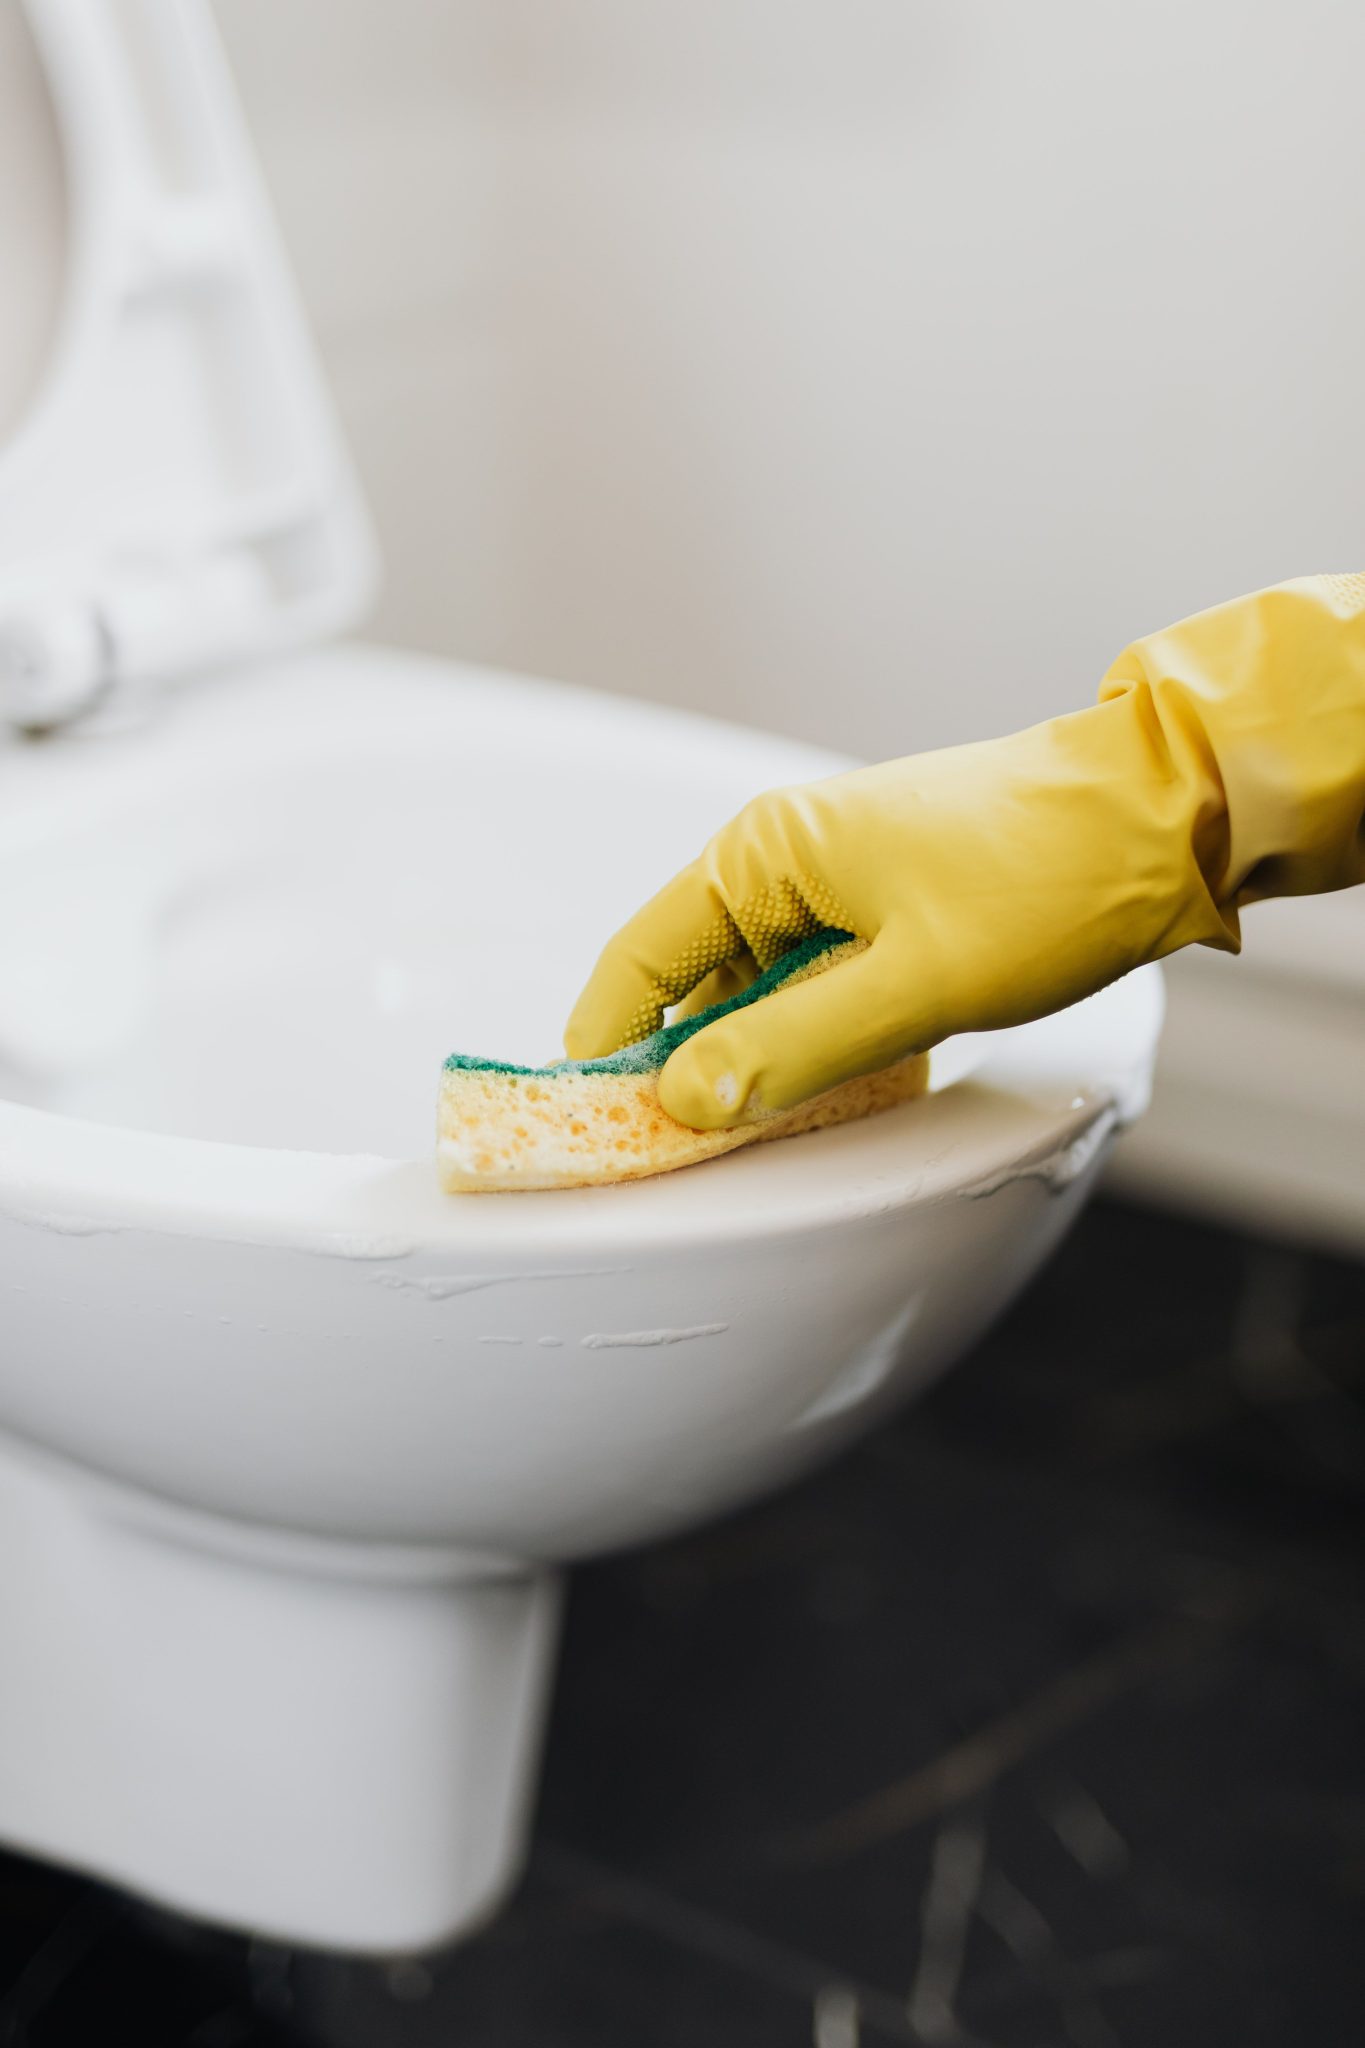
4. The Right Way to Sanitize the Toilet Rim
that makes this clean effective is the tool. While many people reach for a toilet brush, a dedicated sponge is the key to thoroughly cleaning the rim, the underside of the seat, and the hinges. A brush is designed for the bowl, but a sponge can be maneuvered into all the nooks and crannies where germs hide. Just be sure this sponge is *only* for the toilet and is stored separately and disinfected after each use. The yellow glove is non-negotiable, of course.
|
📋 Copy HEX 🔗 Share |
🎯 What Makes It Work
Let’s be honest: this is nobody’s favorite job. But it’s non-negotiable for a hygienic bathroom. The most common mistake is using the same sponge to wipe down other bathroom surfaces—don’t do it! To avoid cross-contamination, assign a specific color sponge solely for this task. After you’re done, soak the sponge in a bleach solution or run it through the dishwasher on a sanitize cycle to kill any lingering bacteria before its next use.
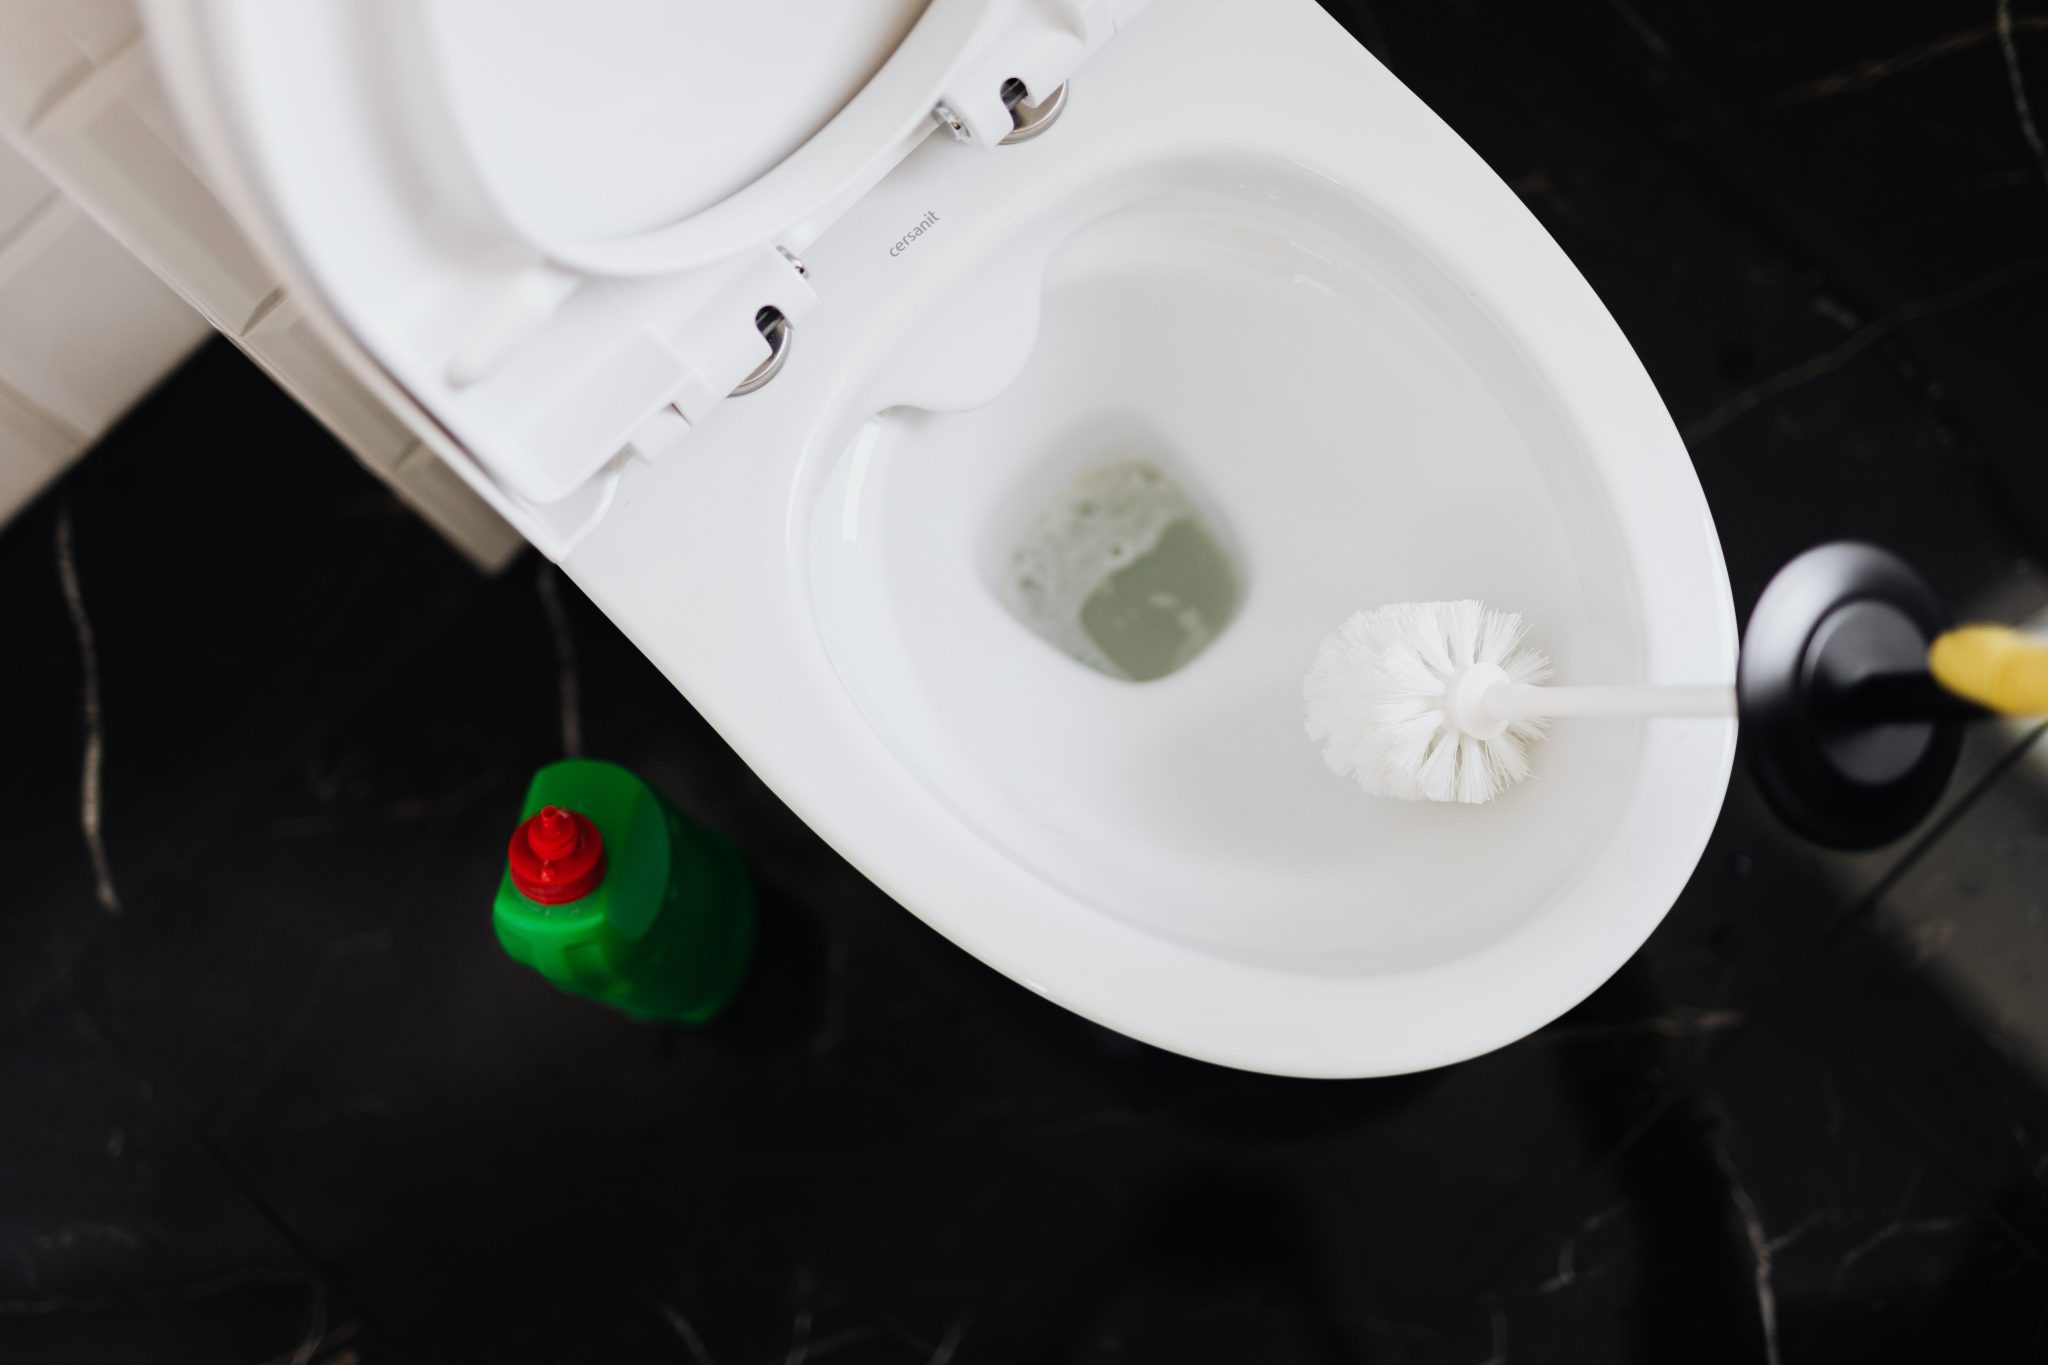
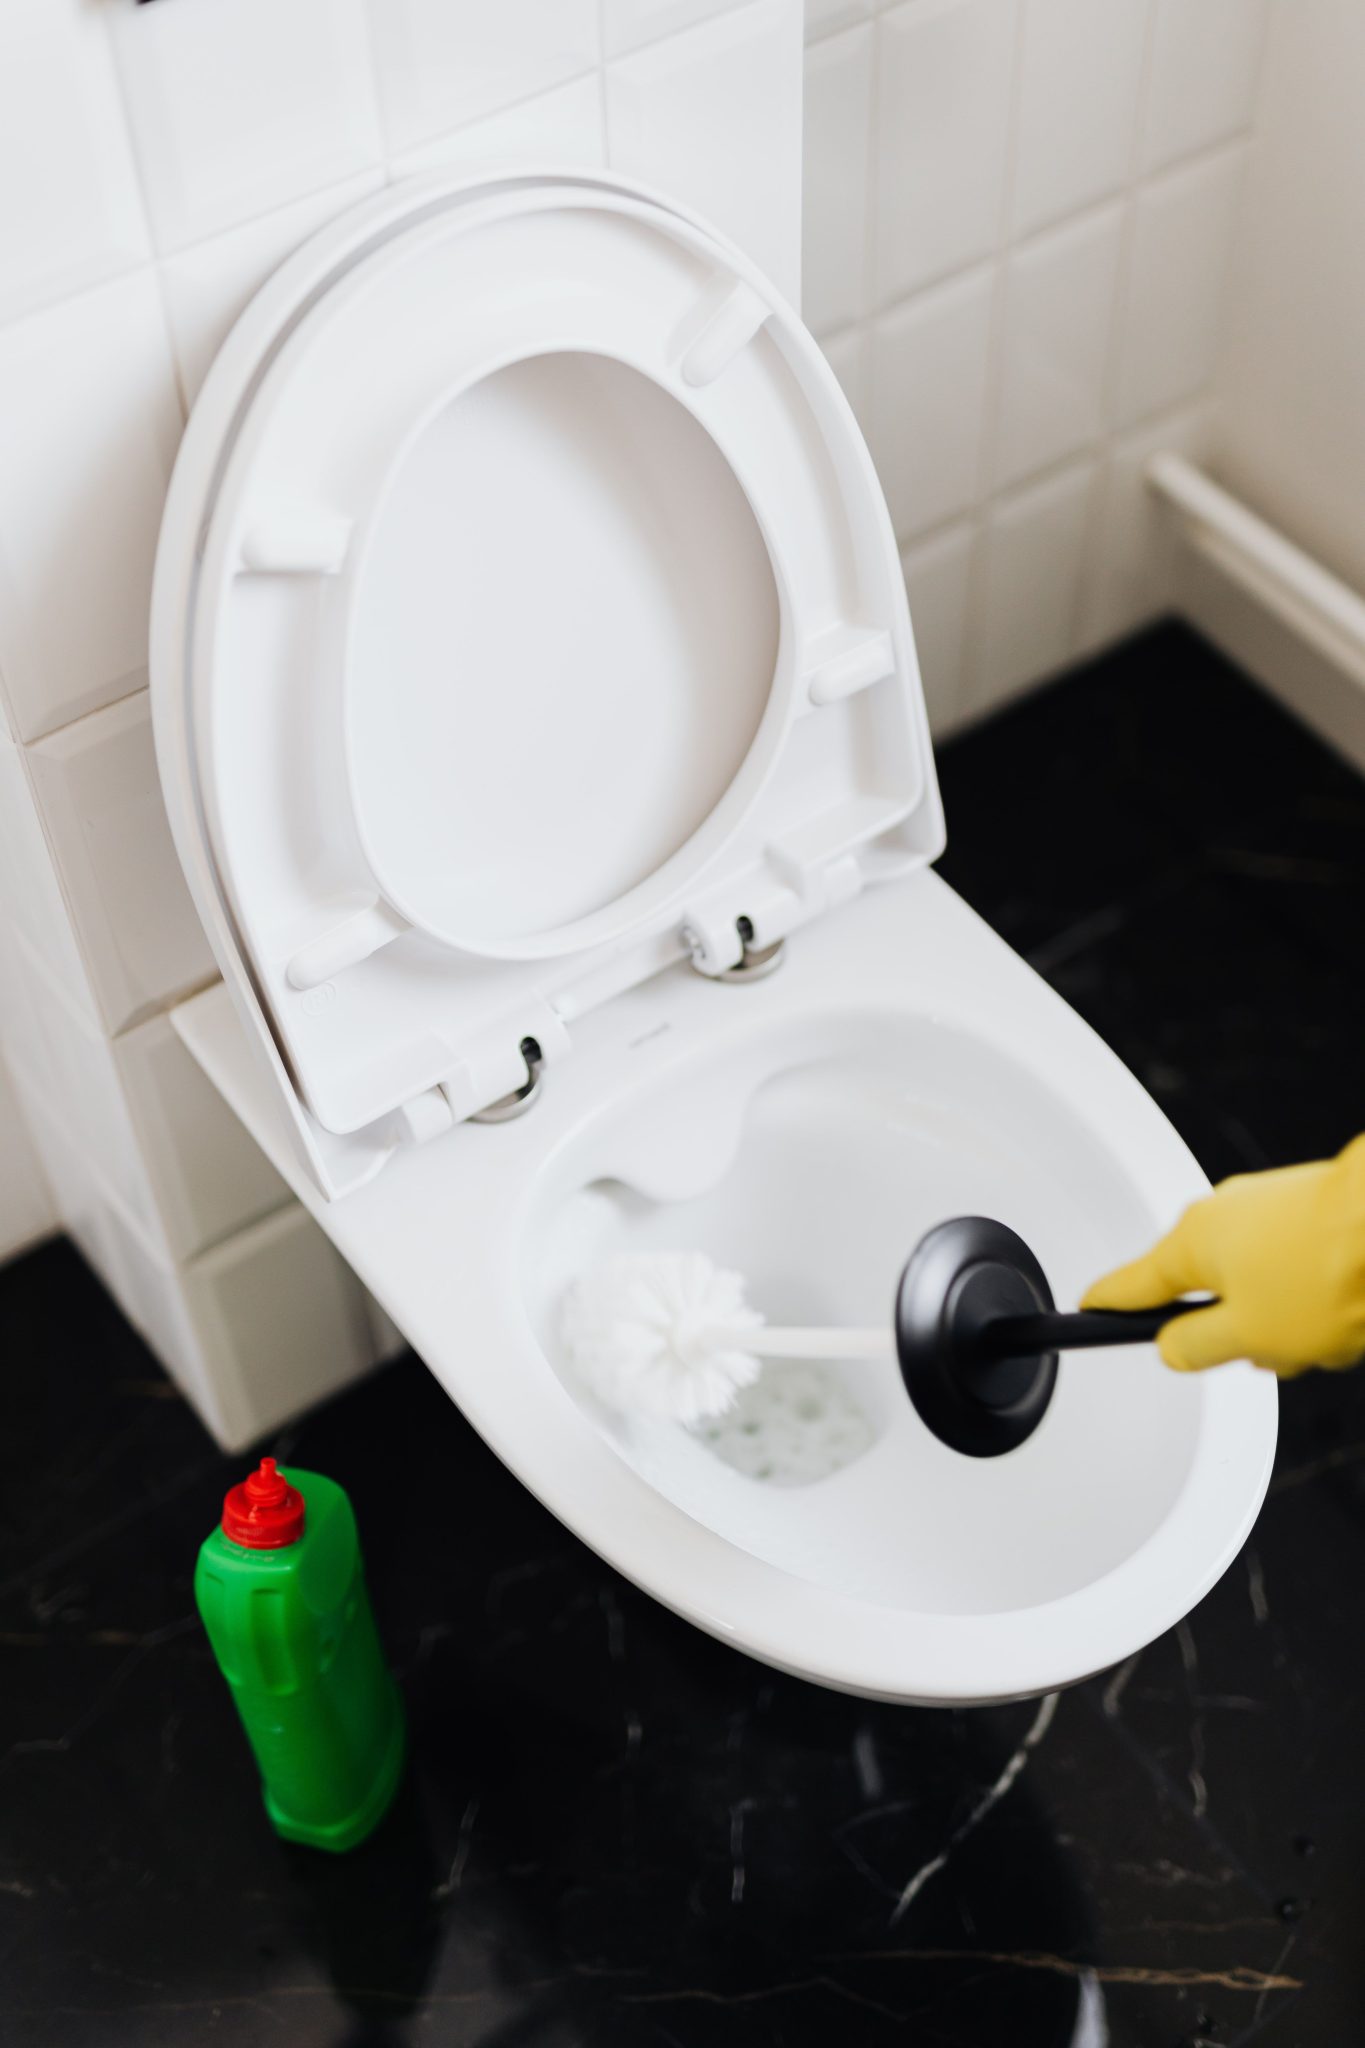
5. The Top-Down Toilet Cleaning Technique
This cleaning angle works because it follows the path of flushing. Starting with a good scrub under the rim and working your way down the bowl ensures that you are pushing debris and germs downwards, where they can be easily flushed away. The brush gets into the siphon jet and beneath the rim where water and bacteria accumulate. Paired with a potent cleaning solution, this methodical approach ensures a comprehensive clean rather than just swishing water around.
|
📋 Copy HEX 🔗 Share |
🧹 Maintenance Reality
Designate a specific toilet brush for each bathroom to prevent cross-contamination. After cleaning, let the brush drip-dry by clamping it between the seat and the bowl for a few minutes before placing it back in its holder. A wet brush sitting in a closed caddy is a breeding ground for bacteria. This simple air-drying step keeps your tools more sanitary. For a similar refresh, compare this with the sponge method in Idea #4.
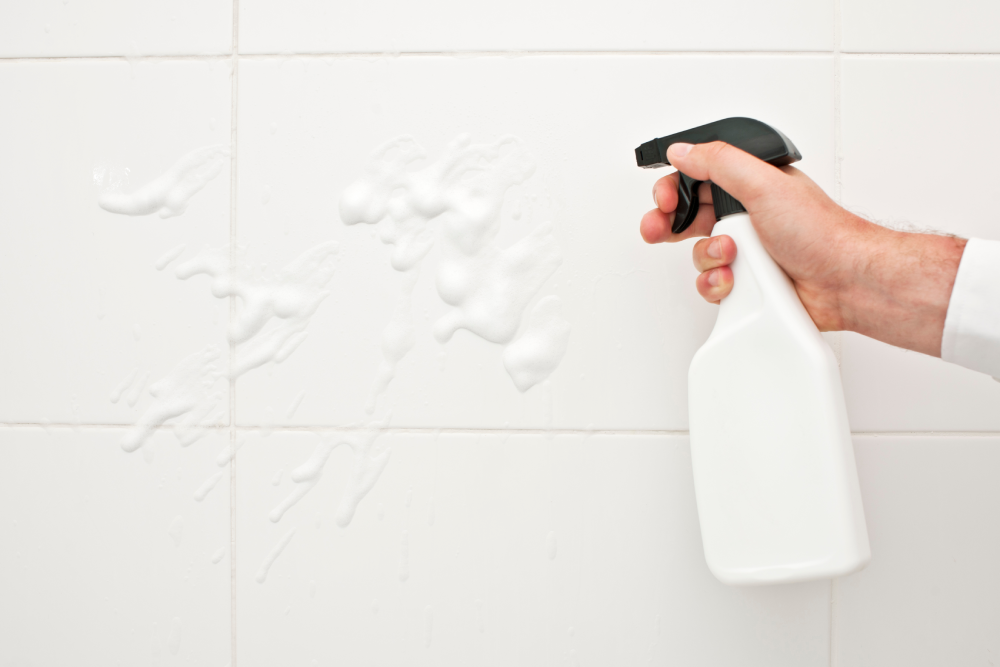
6. Using Foaming Cleaner for Stubborn Tile Grime
Sometimes you need a cleaner that defies gravity. Foaming sprays are brilliant for vertical surfaces like shower walls because they cling to the tiles and grout instead of immediately running down. This extended contact time allows the active ingredients to penetrate and break down soap scum and mildew more effectively. You use less product and get a better result with less scrubbing. It’s a win-win for tough bathroom jobs.
|
📋 Copy HEX 🔗 Share |
💡 Designer Tip
The formula here is simple but effective: 70% Product Power + 30% Dwell Time. The foam’s job is to stick around, but you have to give it time to work. Spray an even coat on the dry tile wall, making sure to cover the grout lines. Then, walk away for at least 10-15 minutes. Let the foam do the heavy lifting. When you come back, most of the grime should wipe away with a damp cloth or a light scrub, rather than requiring intense effort.
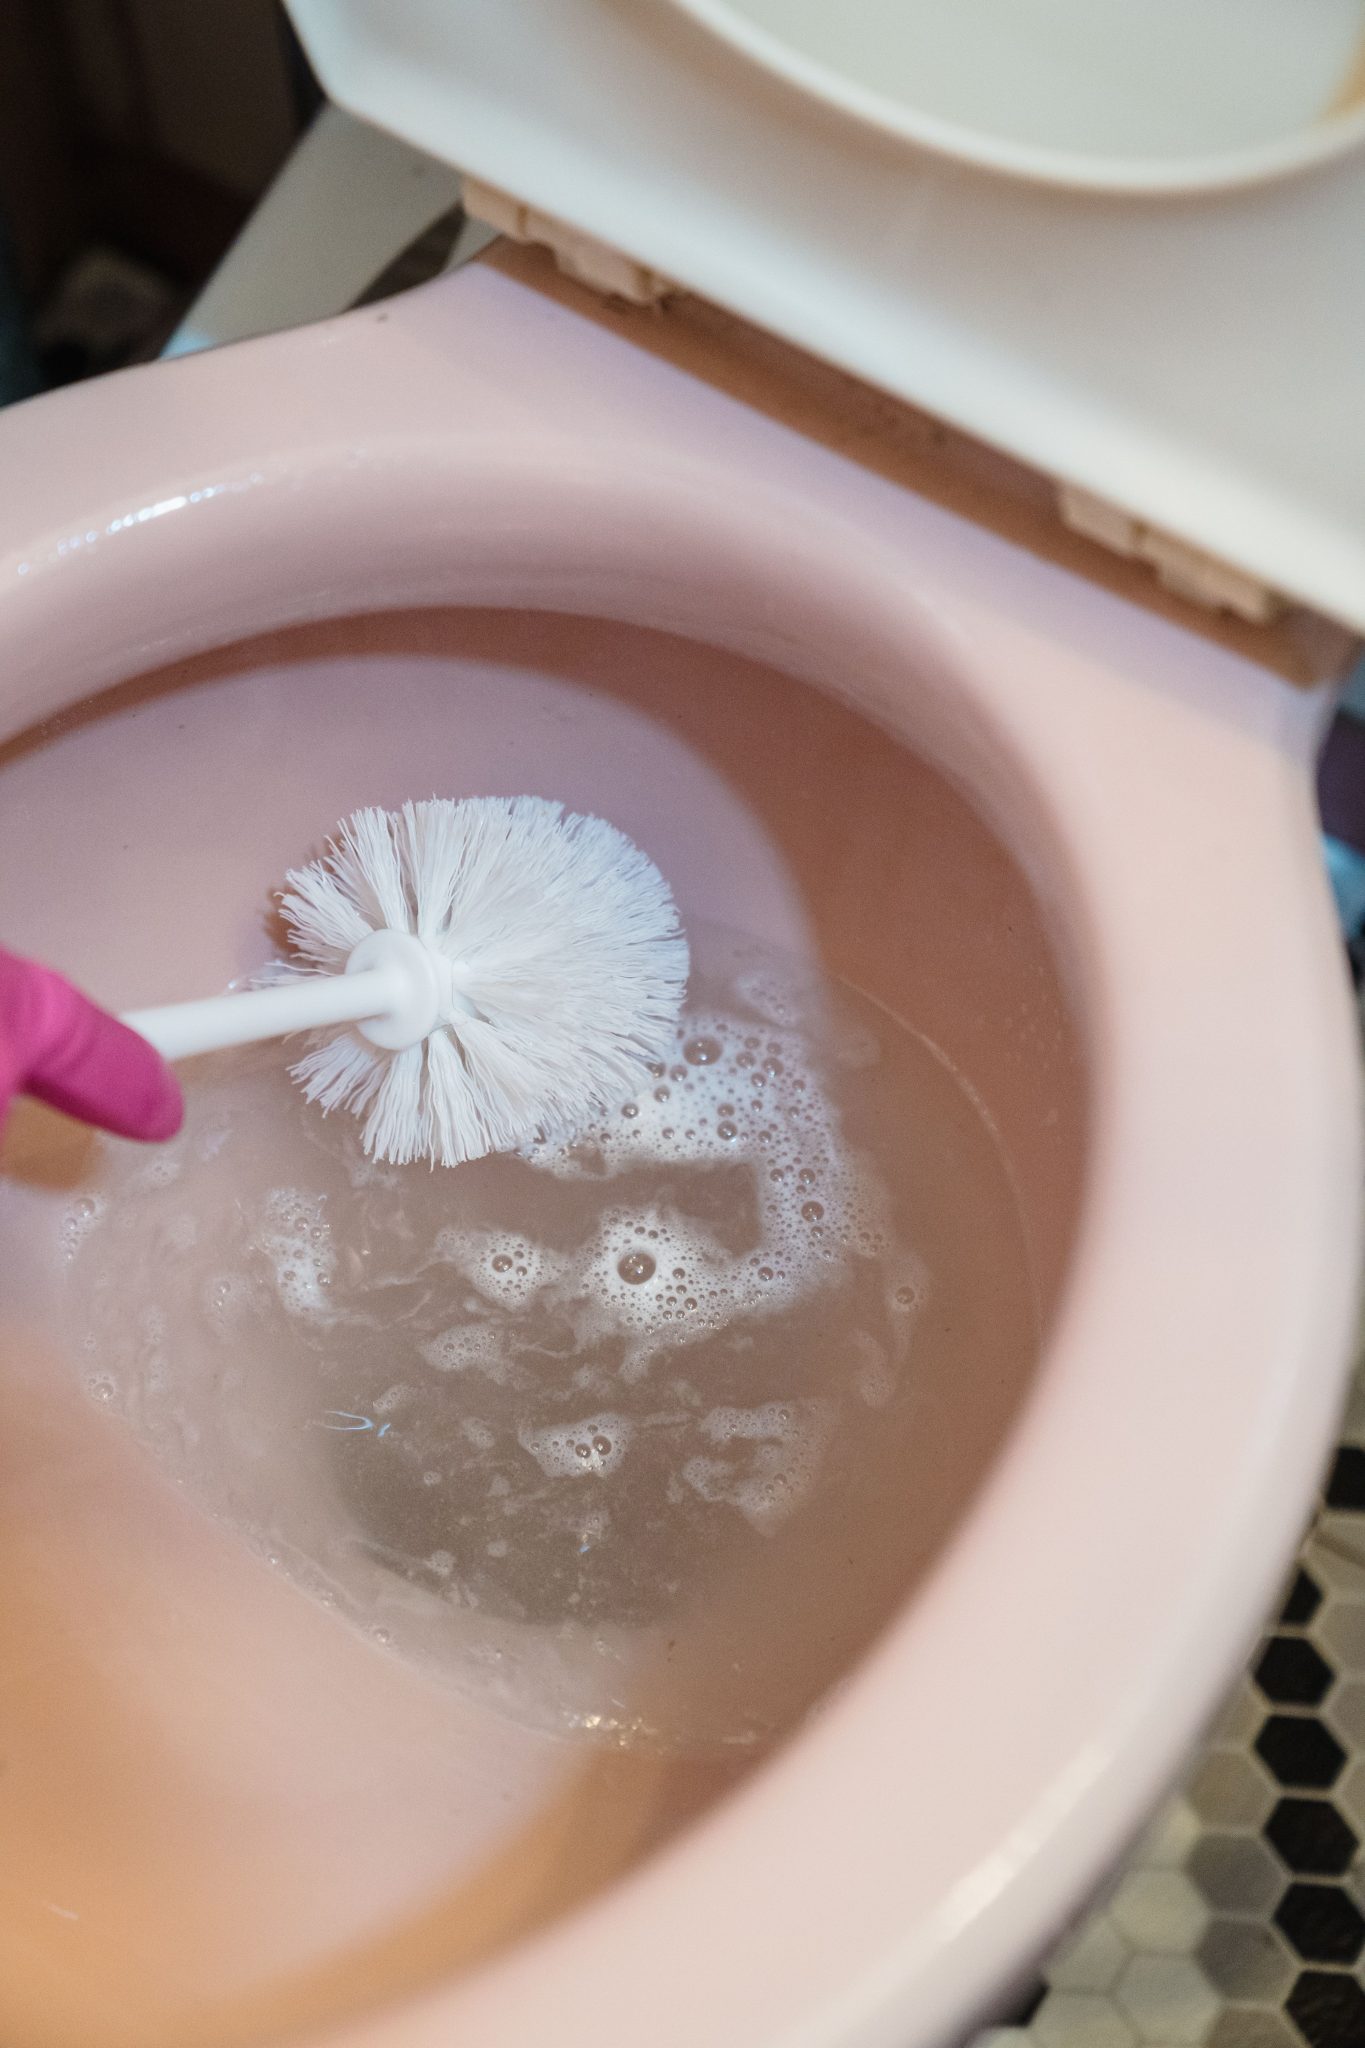
7. Safely Cleaning a Vintage Pink Toilet
Vintage fixtures, especially colored ones from the mid-century, can be more delicate than modern porcelain. Their glazes can be susceptible to harsh abrasives and strong acids. To clean this pink toilet without damaging the finish, avoid abrasive powders or heavy-duty scouring pads. Instead, use a non-scratch toilet brush and a gentle, pH-neutral cleaner. The soap bubbles indicate a mild solution is being used, which is perfect for lifting dirt without stripping the color or shine.
|
📋 Copy HEX 🔗 Share |
🔥 Trending Context
Finding replacement parts for a vintage pink toilet is a nightmare, so preservation is key. Do not use bleach tablets in the tank. The caustic chemicals can degrade the rubber flapper and other internal mechanisms, leading to leaks. More importantly, they can slowly eat away at the porcelain glaze from the inside out, causing discoloration and roughness over time. Stick to cleaning the bowl directly.
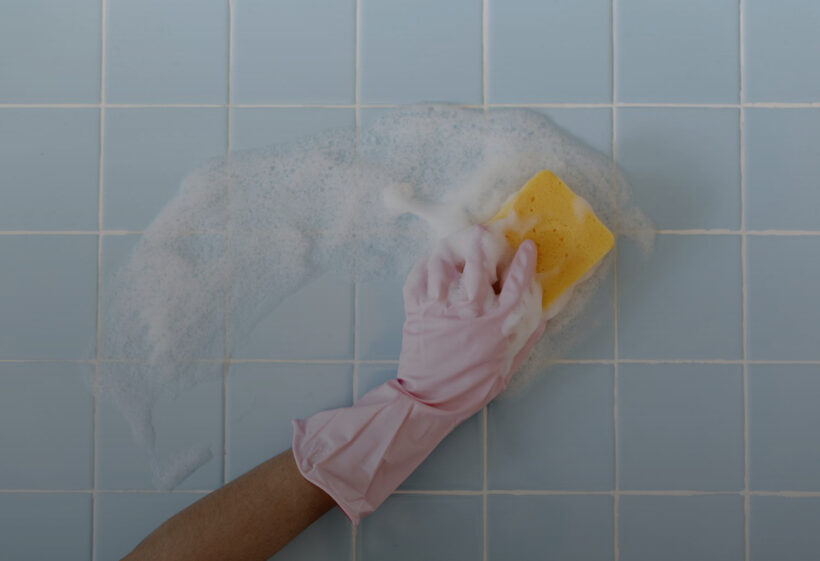
8. Tackling Soap Scum on Colorful Bathroom Tiles
The single element that makes this clean so satisfying is the visible contrast. The white foam against the light blue tiles instantly shows you where you’ve cleaned and where the product is actively working. Using a bright yellow sponge against the blue also helps you track your progress. This visual feedback is incredibly motivating and ensures you don’t miss a spot, which is easy to do on a monochromatic surface. The suds are proof that the soap scum is breaking down.
|
📋 Copy HEX 🔗 Share |
⚠️ Real Talk
You don’t need expensive specialty cleaners to get this result. A simple mixture of equal parts white vinegar and water in a spray bottle is a fantastic soap scum cutter. For a bit more power, add a few drops of dish soap. Spray it on the tile, let it sit for about 15 minutes, and then scrub with a basic sponge from Target or Walmart for under $5. The key is the vinegar, which costs just a few dollars for a large bottle and works wonders on mineral deposits.
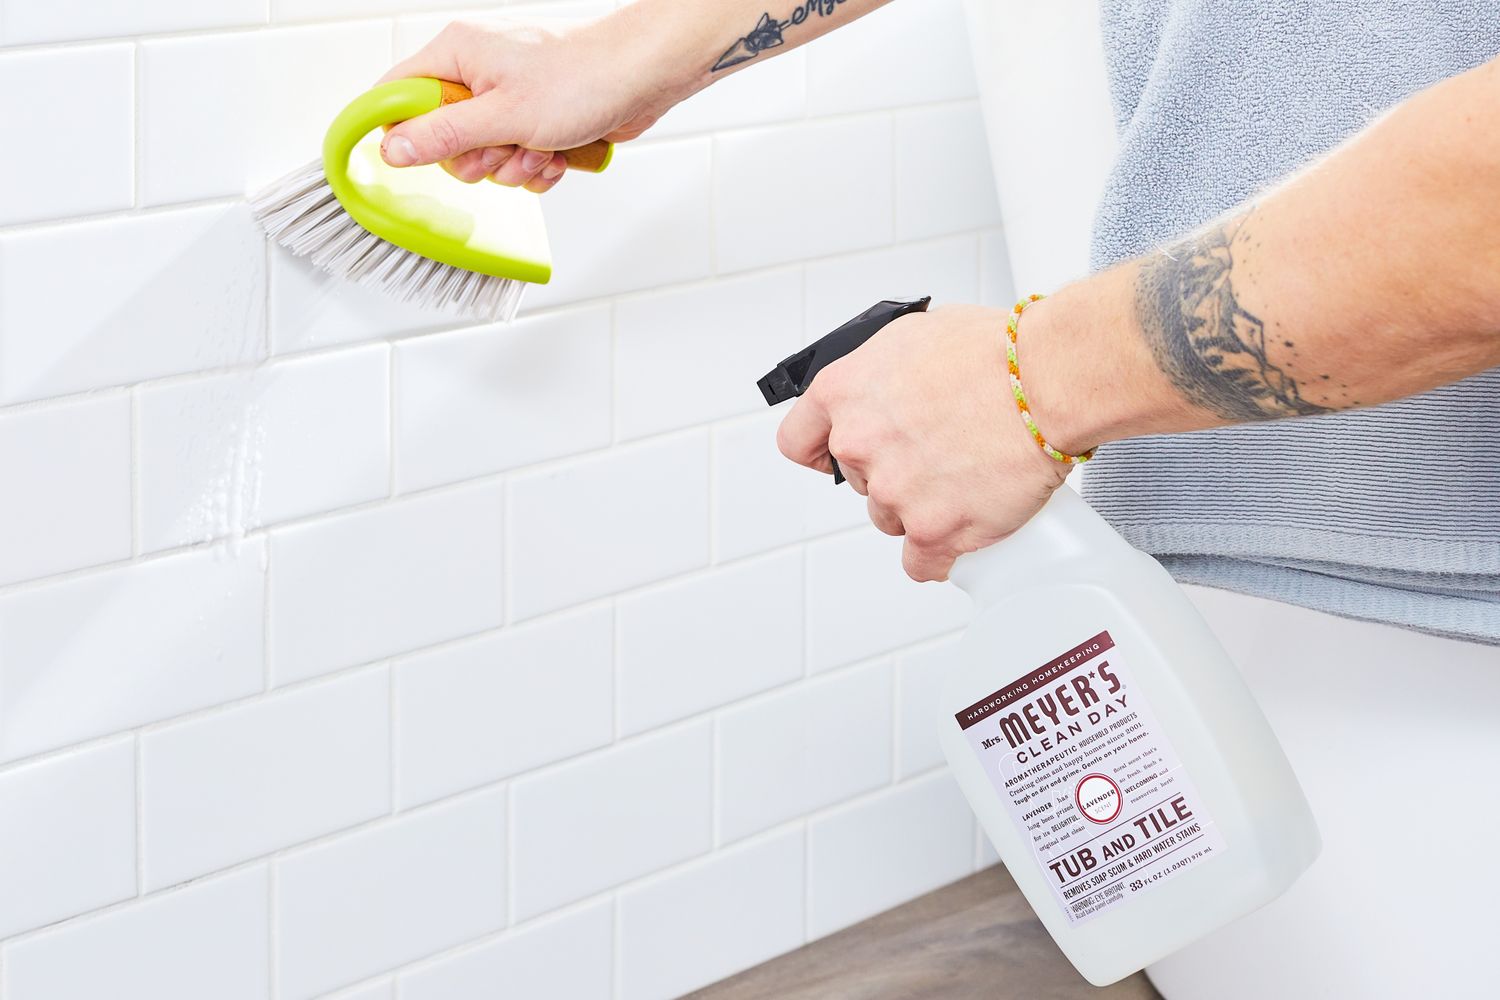
9. Keeping White Subway Tile Perfectly Bright
White subway tile is timeless for a reason, but keeping it pristine requires the right approach. This method works by combining a targeted spray cleaner (like the Mrs. Meyer’s shown) with the mechanical action of a stiff-bristled brush. The spray dissolves soap scum and hard water spots, while the brush gets deep into the grout lines—the place where dinginess really shows. This dual-action attack lifts stains from both the tile surface and the porous grout, restoring that clean, uniform look. Just like we saw in Idea #3, targeted scrubbing is key.
|
📋 Copy HEX 🔗 Share |
💸 Get This Look For Less
White grout is beautiful but high-maintenance. To keep it looking good, it needs to be sealed annually, especially in a shower. A grout sealer creates a barrier that repels water and prevents mildew and stains from penetrating. The process takes a couple of hours and costs about $20 for a bottle of sealer, but it will save you hours of deep scrubbing in the long run. Without a sealant, you’ll be performing this deep clean far more often.
10. The Full Monty: An All-Around Toilet Bowl Scrub
This is a familiar scene, but doing it right makes all the difference. Before you start, make sure you have everything you need within arm’s reach to avoid dripping dirty water on your clean floor. Also, check that your cleaning product is compatible with your plumbing system, especially if you have a septic tank. This is about more than just the bowl; it’s a full system clean.
|
📋 Copy HEX 🔗 Share |
⭐ The One Thing
- Always start by flushing the toilet to lower the water level. This allows you to apply cleaner directly to the sides of the bowl for better contact.
- Make sure you have proper ventilation in the bathroom; turn on the fan or open a window, especially when using strong cleaners.
- Put on your gloves *before* you handle any cleaning products or the brush.
- Have a cloth or paper towels ready on the floor to rest the wet brush on if you get interrupted.
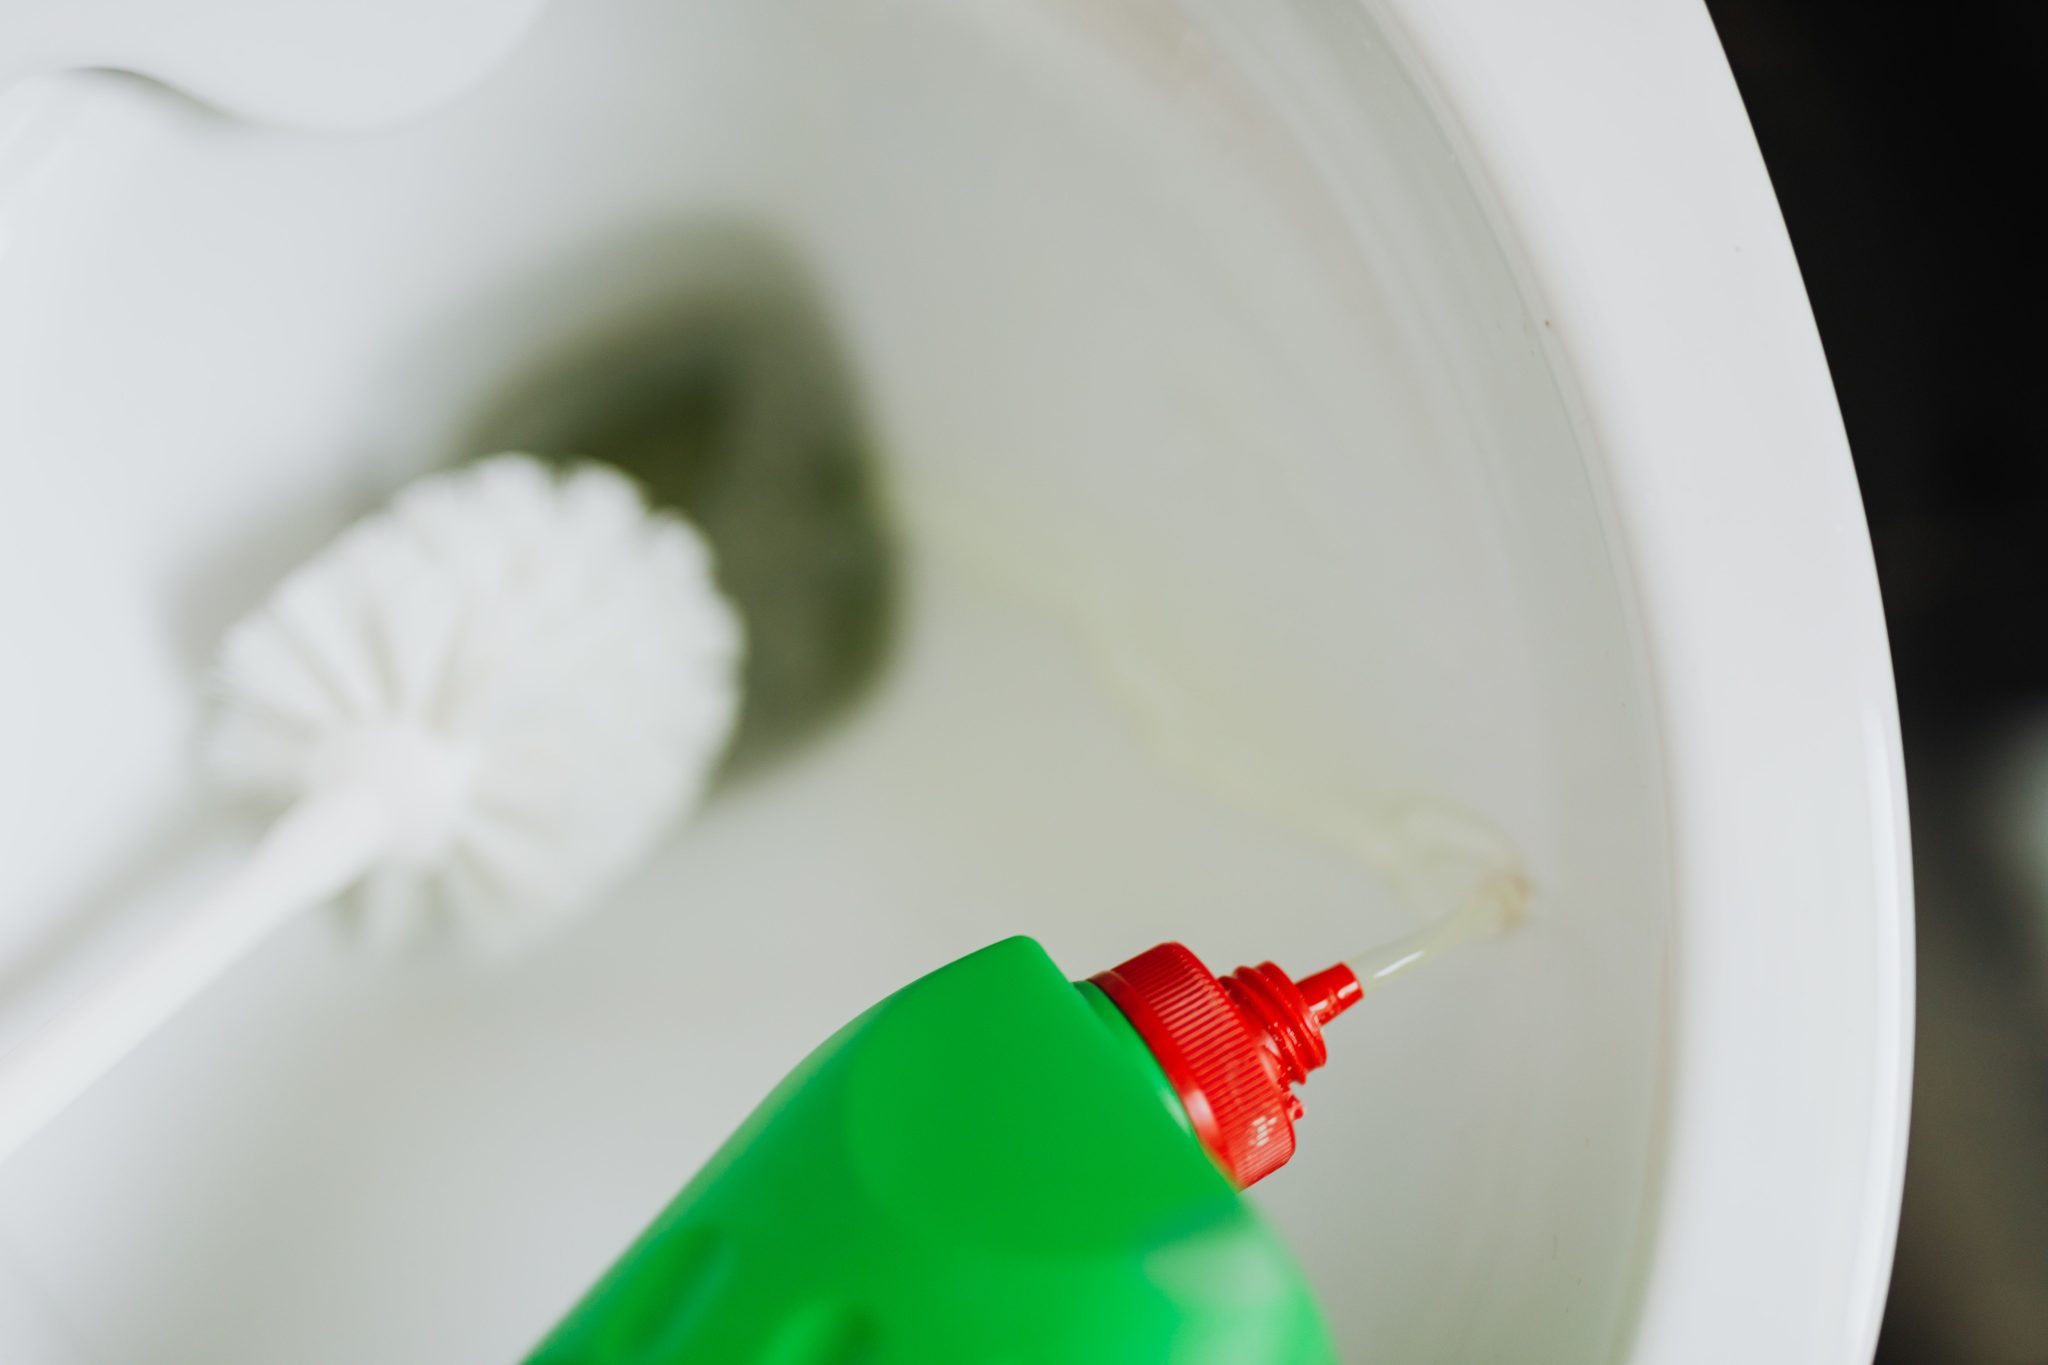
11. The Perfect Pour for a Deep Clean
Let’s have a real talk about toilet cleaners. More is not always better. Drowning the bowl in cleaning liquid is wasteful and doesn’t make it any cleaner. Most modern toilet bowl cleaners are designed with angled necks for a reason: to dispense a concentrated stream directly under the rim. A single, steady pass around the circumference of the bowl is all you need. The thick formula is designed to cling and slide down, coating the entire surface.
|
📋 Copy HEX 🔗 Share |
✅ Before You Start
that matters here is the placement of the cleaner. The goal isn’t to just dump it in the water. **The power of the clean comes from applying the solution directly to the porcelain bowl itself, especially under the rim.** This is where water stains and bacteria build-up are worst. By applying the gel or liquid there and giving it 5-10 minutes to work before you start scrubbing, you let the chemicals do the hard work for you, dissolving grime so the brush can simply wipe it away.
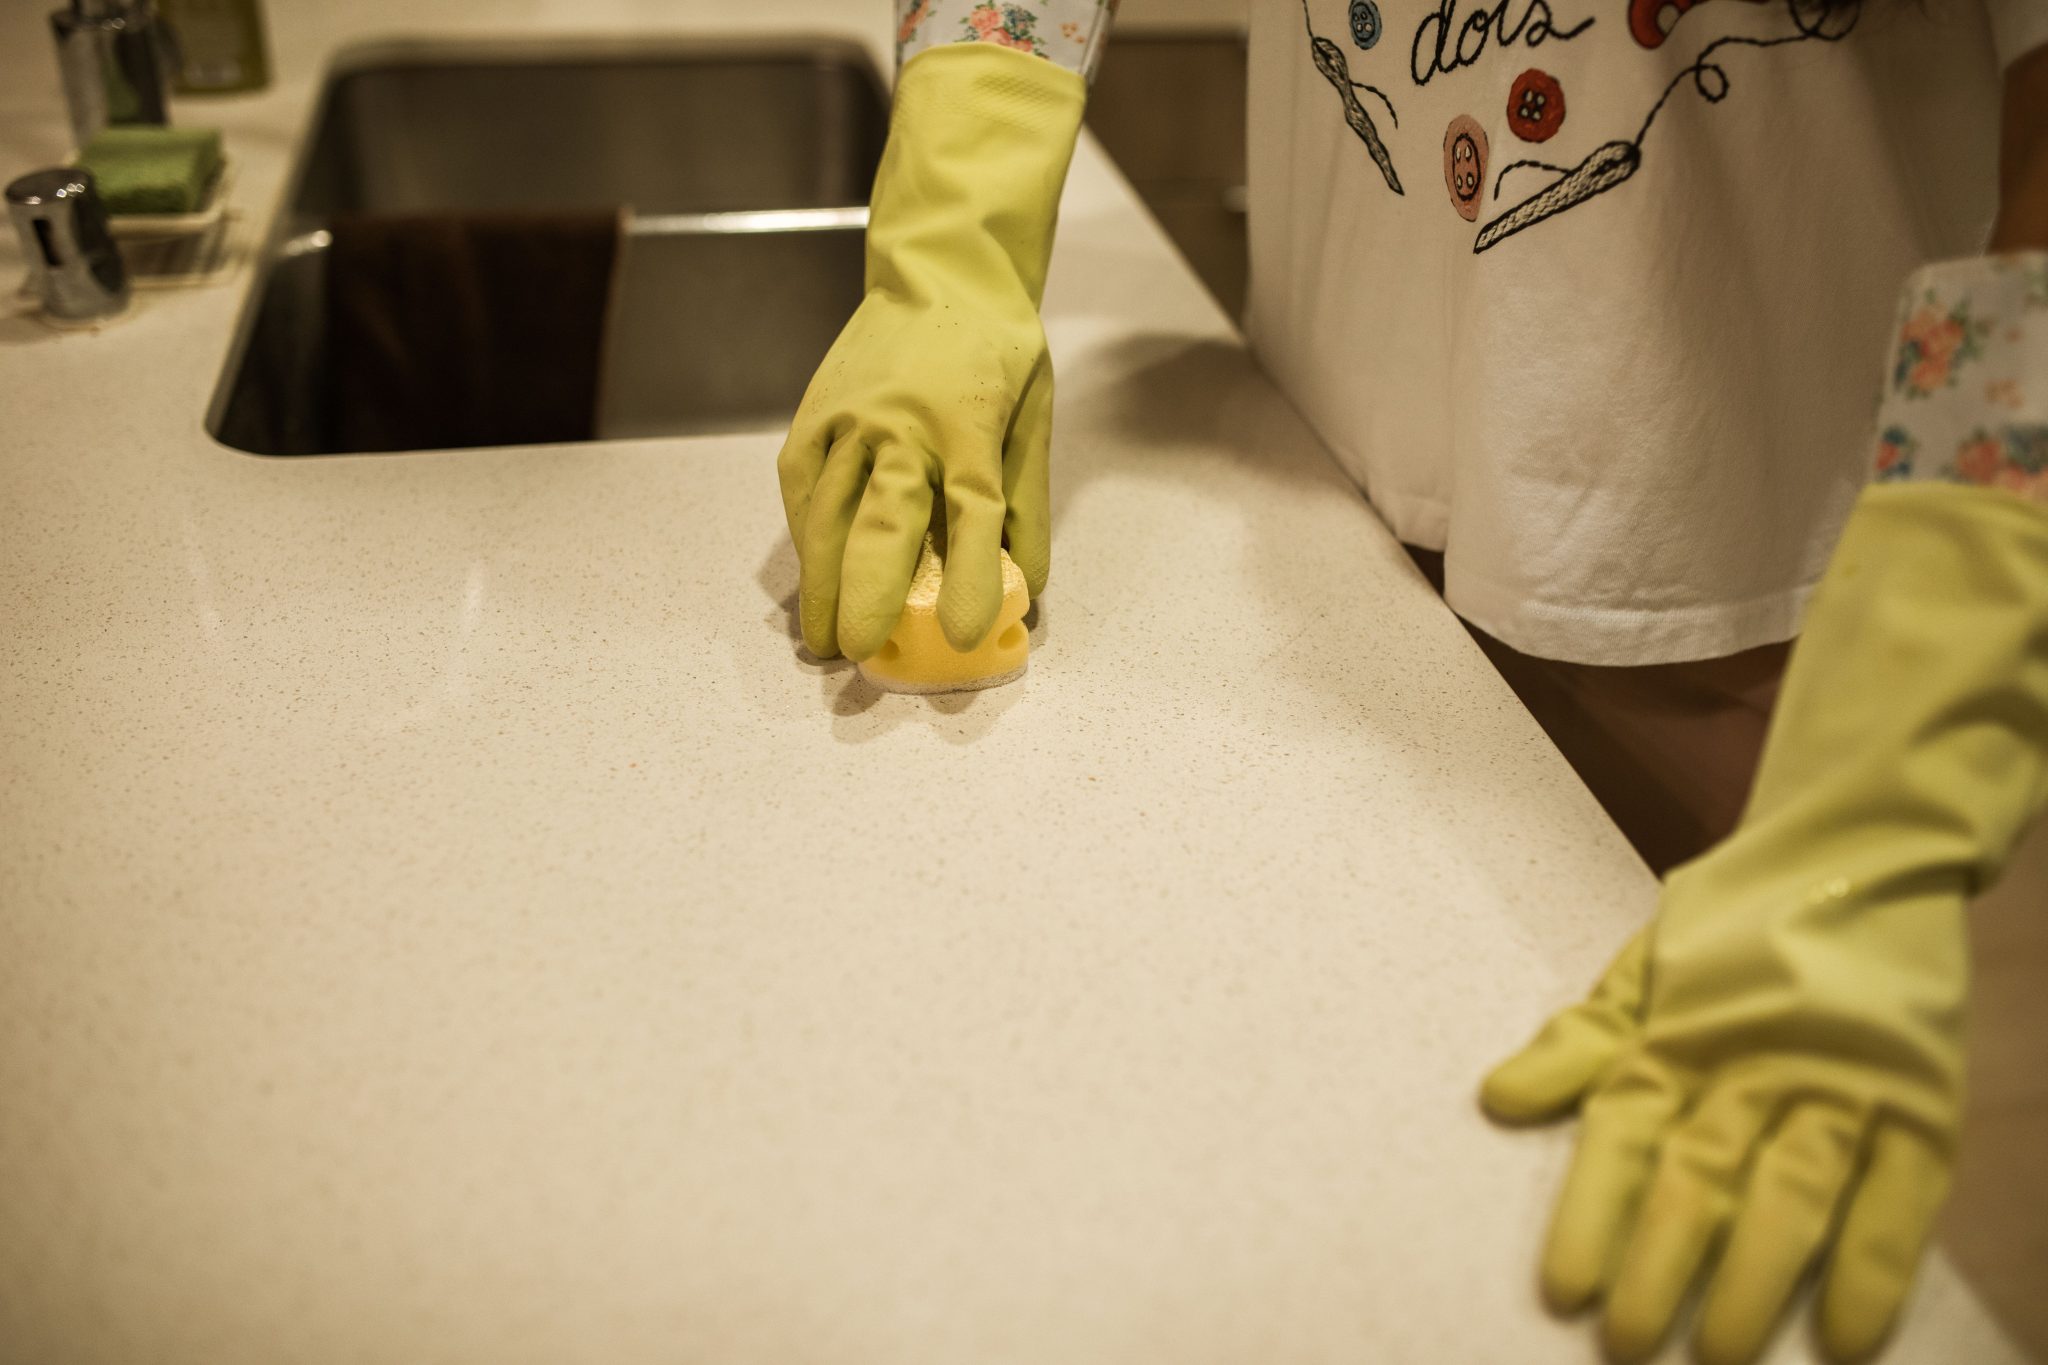
12. Cleaning Speckled Kitchen Counters Without Streaks
The formula for a streak-free finish on a composite or laminate countertop like this is simple math: 50% Right Cleaner + 40% Right Tool + 10% Right Motion. The cleaner should be gentle and non-abrasive. The tool is a non-scratch sponge or microfiber cloth. The motion is key: work in small, circular motions to lift grime, then wipe clean with a straight, slightly overlapping pass to prevent streaks. The yellow gloves aren’t just for show; they let you use hotter water, which helps dissolve grease.
|
📋 Copy HEX 🔗 Share |
🔧 How-To Brief
This is a quick, two-minute job. First, clear the counter of any items. Second, spray your preferred cleaner lightly across the surface. Third, use your damp sponge to gently scrub any stuck-on spots. Fourth, rinse the sponge thoroughly and wipe down the entire counter to remove the cleaning solution. Finally, for a perfect shine, use a dry microfiber cloth to buff the surface. This last step is the pro secret to a truly streak-free finish.
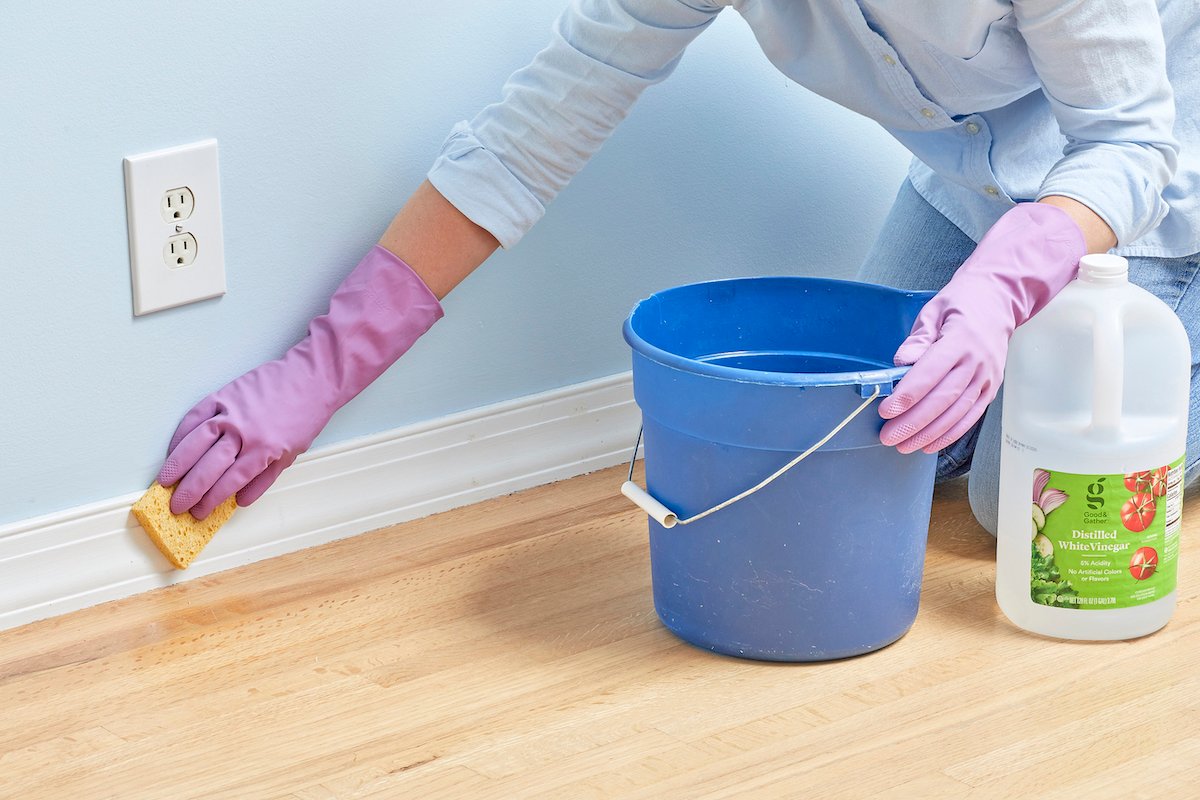
13. A DIY Vinegar Solution for Floors and Baseboards
This is the ultimate budget-friendly deep clean. With just a few basic items, you can tackle both hardwood floors and painted baseboards effectively. The acidic nature of white vinegar is fantastic at cutting through grime and residue without the harsh chemicals of many commercial cleaners. It’s a classic for a reason. Here, the pink gloves protect hands while the simple sponge and bucket are all you need for application.
|
📋 Copy HEX 🔗 Share |
💰 Budget Breakdown
- Main Supplies (Bucket, Gloves, Sponge): $10 – $20
- Cleaning Agent (Large bottle of white distilled vinegar): $3 – $5
- TOTAL: $13 – $25
- Budget Alternative: Honestly, this IS the budget alternative! It’s one of the cheapest and most effective ways to get a deep clean. You likely already have most of these items at home.
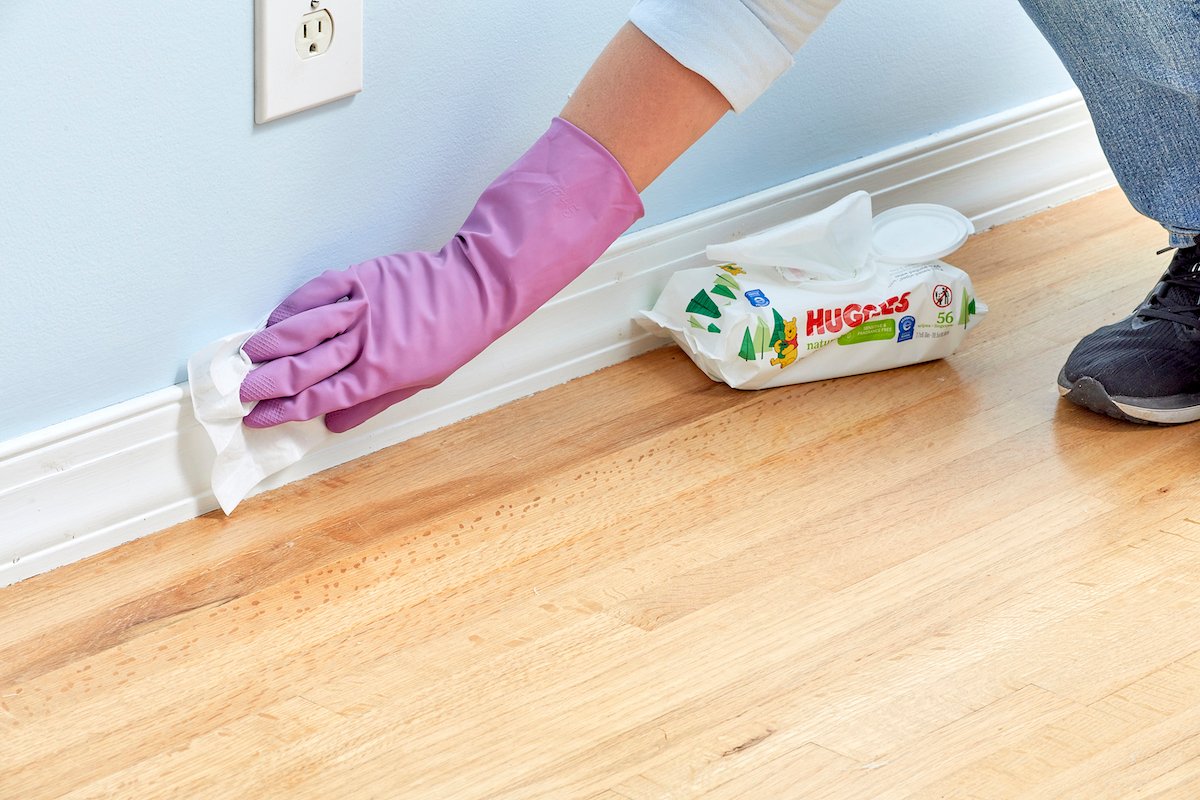
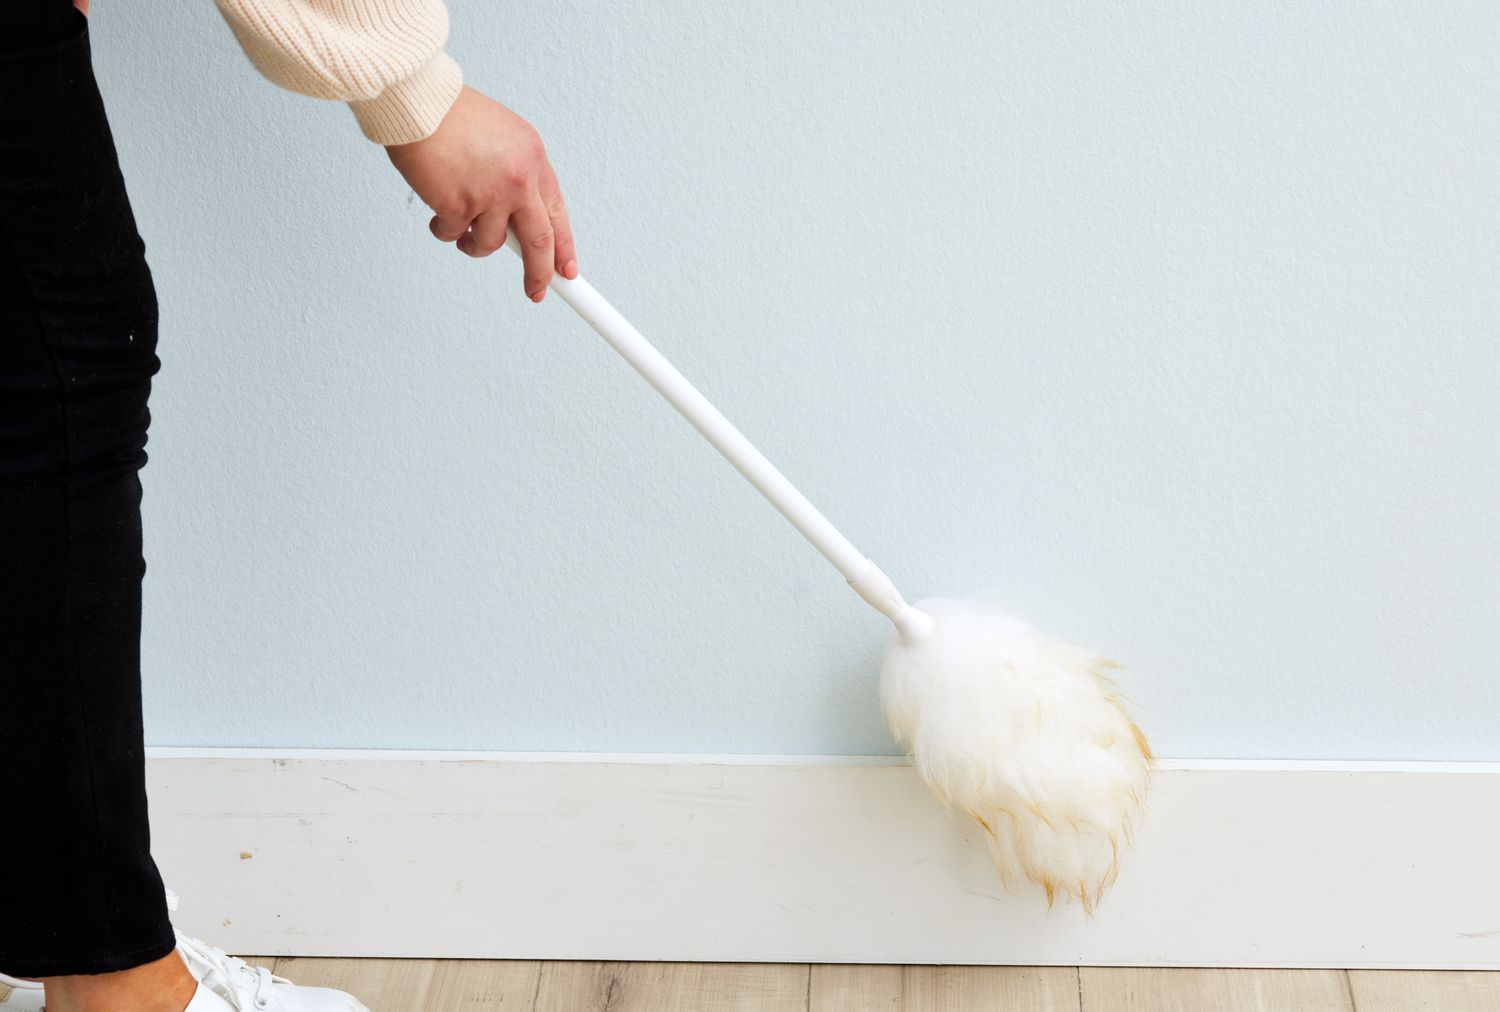
14. The Quick Wipe-Down for Dusty Baseboards
You don’t need a bucket and mop for a quick baseboard refresh. A simple pack of disposable cleaning wipes, like the Huggies Natural Care shown here, can do the trick surprisingly well. While meant for babies, these wipes are gentle, low-sudsing, and perfect for trapping dust and scuffs on painted wood. For less than $5, you can get a large pack that will last you through months of touch-ups. It’s a lifesaver for quick cleaning before guests arrive.
|
📋 Copy HEX 🔗 Share |
📐 Style Math
For a super-fast dusting that prevents future buildup, grab a dryer sheet. Gently wipe it along the top of your baseboards. The anti-static properties of the dryer sheet not only pick up existing dust but also leave behind a residue that repels new dust from settling. It’s a two-for-one hack that takes seconds and keeps your baseboards cleaner for longer. Compare this quick method with the vacuuming technique in Idea #15.
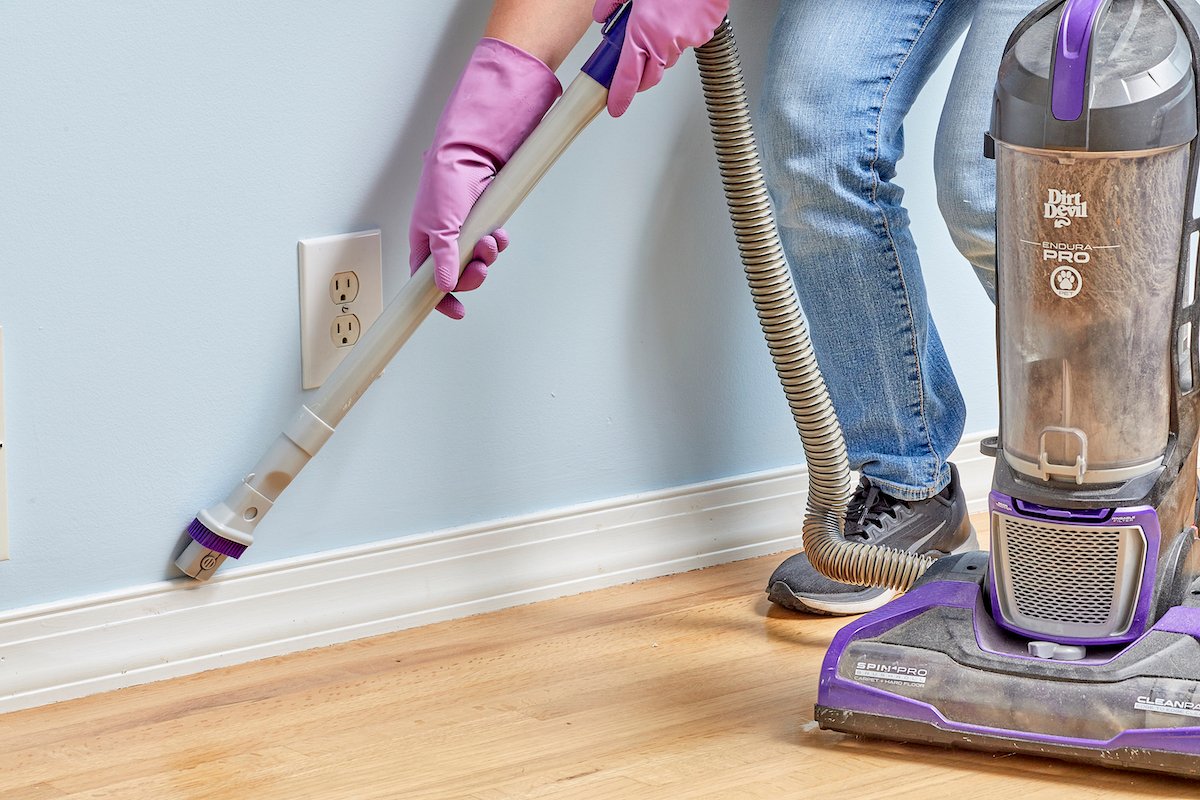
15. Why Vacuuming Your Baseboards is a Game-Changer
This hack is a must for any home with pets, kids, or just a lot of foot traffic. While wiping baseboards (as seen in Idea #14) is great for scuffs and sticky spots, vacuuming is far more efficient for removing dust, pet hair, and debris. Use a brush attachment to avoid scratching the paint. This method works best as part of a weekly or bi-weekly floor cleaning routine. It’s especially effective in large rooms where wiping every inch by hand would be a tedious chore.
|
📋 Copy HEX 🔗 Share |
📏 Scale Guide
that makes this technique superior is the brush attachment. Don’t just use the open end of the hose! The soft bristles of the dusting attachment are crucial. They gently dislodge fine, clinging dust from the curved molding and the top edge of the baseboard, allowing the vacuum’s suction to pull it all away cleanly. Without the bristles, you’re just sucking up the loose stuff and leaving the stubborn film of dust behind.
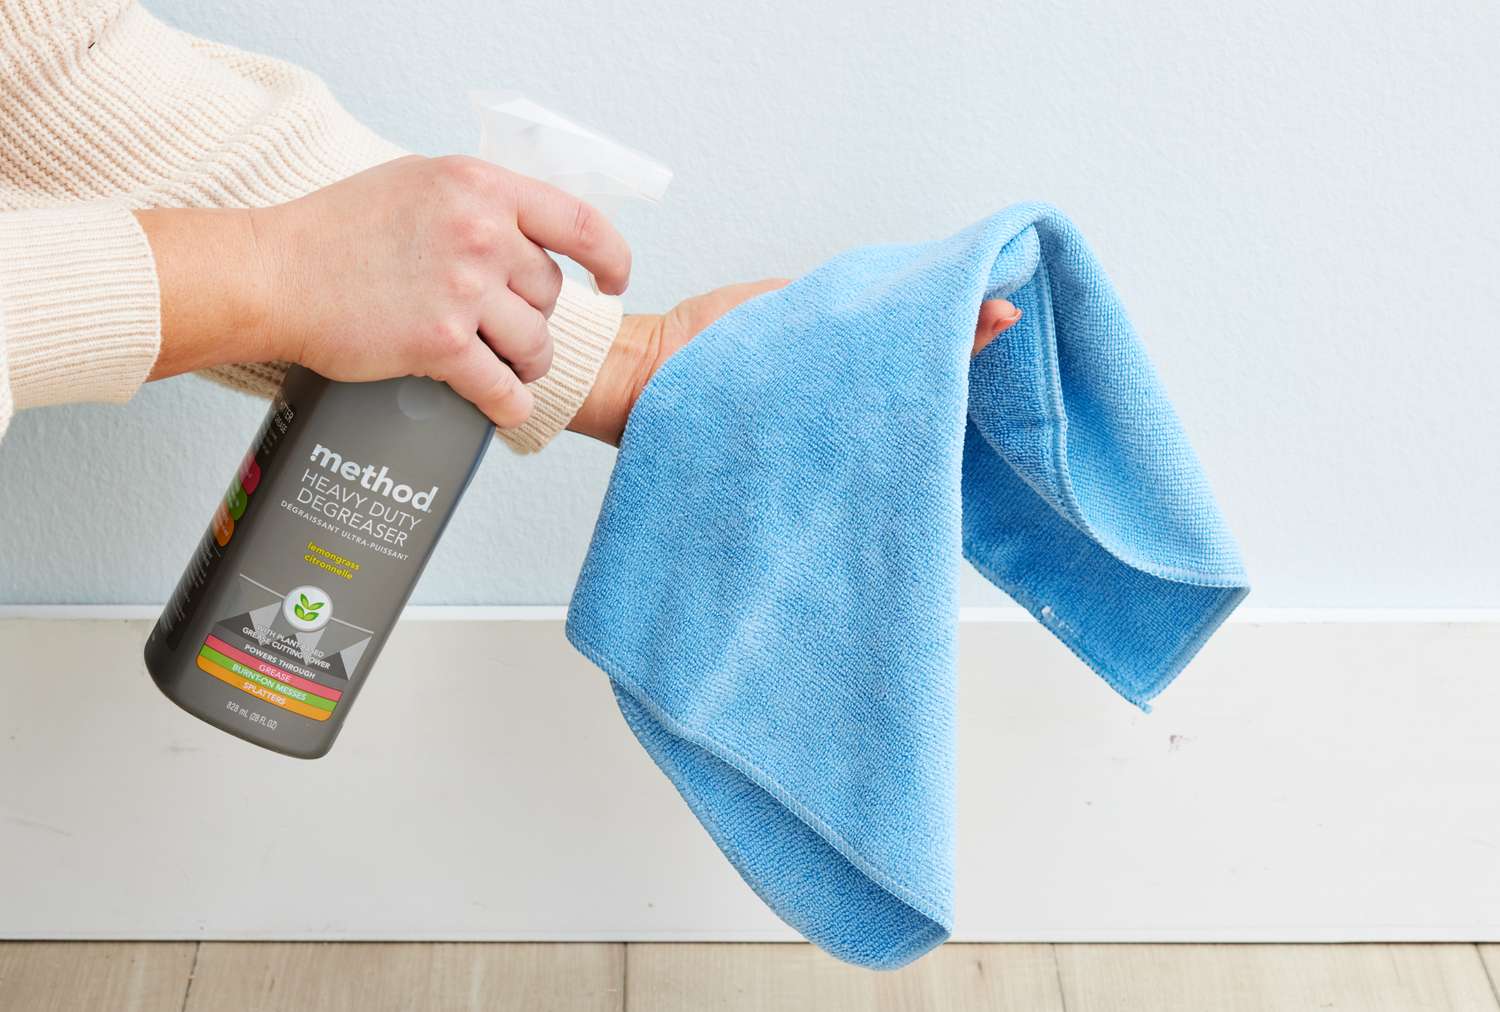
16. Spray the Cloth, Not the Surface
This simple switch in technique is a professional cleaner’s secret. Spraying your cleaning cloth, rather than the surface itself, gives you complete control over the amount of product you use. It prevents overspray from getting on adjacent surfaces (like the floor or upholstery), eliminates drippy messes on vertical areas, and ensures an even, thin application. This reduces product waste and prevents the kind of heavy buildup that can leave surfaces looking dull and streaky over time.
|
📋 Copy HEX 🔗 Share |
🎯 What Makes It Work
- Time: 5 seconds | Cost: $0
- Fold your microfiber cloth into quarters. This gives you eight clean surfaces to work with.
- Hold the spray bottle about 6-8 inches from the cloth.
- Give the cloth a light spritz of cleaner—just enough to make it damp, not saturated.
- Wipe down your surface (wall, counter, furniture).
- When the cloth section gets dirty, flip to a clean section and continue.
17. The Gentle Power of a Feather Duster
Let’s be real: feather dusters have a bit of a reputation for just pushing dust around. And if you use them incorrectly, that’s exactly what they do. A high-quality duster with genuine ostrich feathers will actually trap and hold dust thanks to its natural oils and intricate fibers. However, for this to work, you need to use a light, rolling motion, not a frantic whipping one. It’s best for light, routine dusting on delicate surfaces, not heavy-duty grime.
|
📋 Copy HEX 🔗 Share |
🧹 Maintenance Reality
In an era of high-tech microfiber and robotic vacuums, the feather duster feels charmingly analog. But there’s a reason it’s still around: sustainability. A well-made feather duster can last for decades with proper care, unlike disposable wipes or microfiber cloths that need frequent washing. As people look for more eco-friendly cleaning solutions, classic tools like this are seeing a quiet resurgence. It’s a simple, effective tool for what it does best: light, regular upkeep.
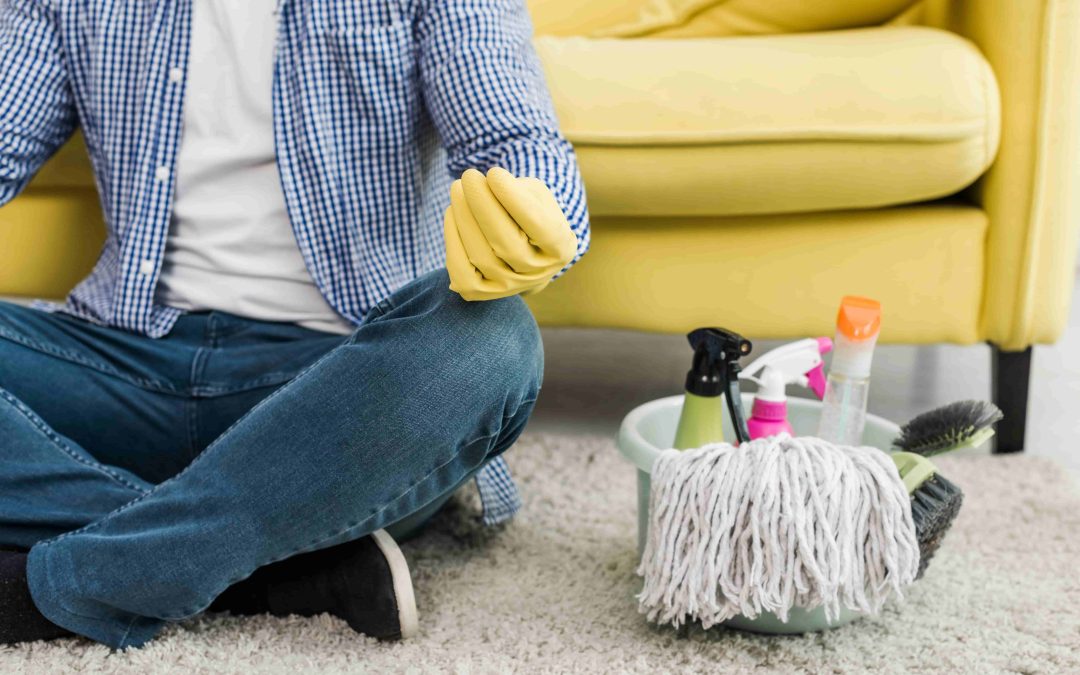
18. Assemble Your Carpet-Cleaning Go-Kit
Staring down a carpet stain? Don’t just grab the first thing you see. Taking a moment to assemble a dedicated kit prevents panic and ensures you have everything you need to treat a spot effectively without making it worse. This setup on a beige shag rug is a perfect example of being prepared. The bucket contains the mess, while the variety of sprays and brushes allows you to tailor your approach to the specific type of stain you’re dealing with.
|
📋 Copy HEX 🔗 Share |
💡 Designer Tip
- Main Supplies (Bucket, Brushes, Mop): $25 – $40
- Cleaning Sprays (Spot treatment, deodorizer, etc.): $20 – $50
- Protective Gear (Gloves): $5 – $10
- TOTAL: $50 – $100
- Budget Alternative: Start with a good all-purpose carpet spot cleaner, a white microfiber cloth, and a small scrub brush. You can build a solid starting kit for under $20 from Target or Walmart.
19. Focus on the Toilet Rim with a Sponge
When cleaning a toilet, the area under the rim is ground zero for germs and limescale, but it’s often missed by a quick swish of a brush. Use a dedicated, gloved hand and a sponge to physically wipe this area. The tactile feedback of the sponge lets you feel for any rough, built-up areas that need extra attention. Apply your cleaner directly to the sponge for better control and scrub the entire circumference for a truly hygienic finish.
|
📋 Copy HEX 🔗 Share |
🔥 Trending Context
You absolutely cannot use this sponge for any other task. Once it has touched the inside of a toilet bowl, it is a dedicated toilet-only tool until you throw it away. To avoid any mix-ups, buy a specific color or type of sponge that you will only use for this job. After cleaning, douse it in disinfectant or a bleach solution before storing it separately from all other cleaning supplies. When in doubt, throw it out—sponges are cheap, but cross-contamination is a serious health risk.
20. Deep Clean the Exterior of the Toilet Bowl
most people forget is that the outside of the toilet needs just as much attention as the inside. Dust, drips, and aerosols from flushing settle on the exterior surfaces, including the tank, the lid, and the base. Using a sponge gives you the flexibility to clean these curved and vertical surfaces thoroughly, which a brush can’t do. A dedicated sponge ensures you’re sanitizing every part of the fixture, not just the bowl. Compare this to the interior-focused methods in Idea #4.

|
📋 Copy HEX 🔗 Share |
⚠️ Real Talk
This systematic approach works because it treats the toilet like any other fixture in the bathroom. The white-on-white scene—white toilet, white tiled wall—can camouflage dust and grime, but a thorough wipe-down with a contrasting sponge reveals all. By working from the top of the tank down to the base where it meets the floor, you ensure gravity works with you, moving dirt downwards and leaving the entire unit sparkling clean.
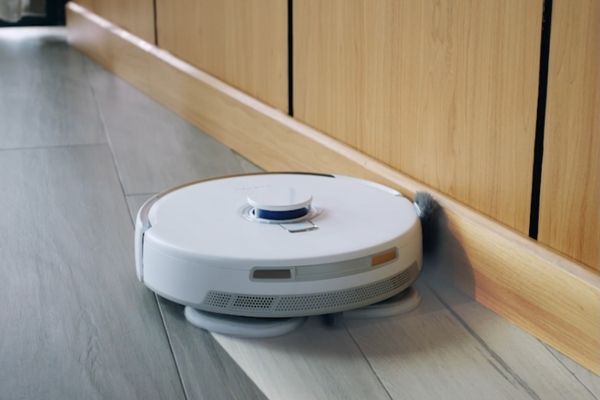
21. Let a Robot Do the Daily Floor Sweep
A robotic vacuum is not for deep cleaning; it’s for maintenance. The reality of owning one is that you still need to do a full, manual vacuum regularly. What this little gadget excels at is the daily upkeep. It’s brilliant at picking up crumbs, pet hair, and dust before it accumulates. However, you must empty its small dustbin after almost every run and regularly clean its brushes and sensors to keep it functioning properly. It’s a time-saver, but not a no-maintenance miracle.
|
📋 Copy HEX 🔗 Share |
💸 Get This Look For Less
Robotic vacuums are ideal for homes with primarily hard flooring and low-pile rugs. They work best in open-plan spaces without a lot of clutter or complex furniture legs to navigate. While newer models are better at avoiding obstacles, they can still get stuck on high-pile shag rugs, stray socks, or power cords. This white robotic vacuum on a grey wood-look floor is in its perfect environment: a spacious, uncluttered room where it can roam freely.
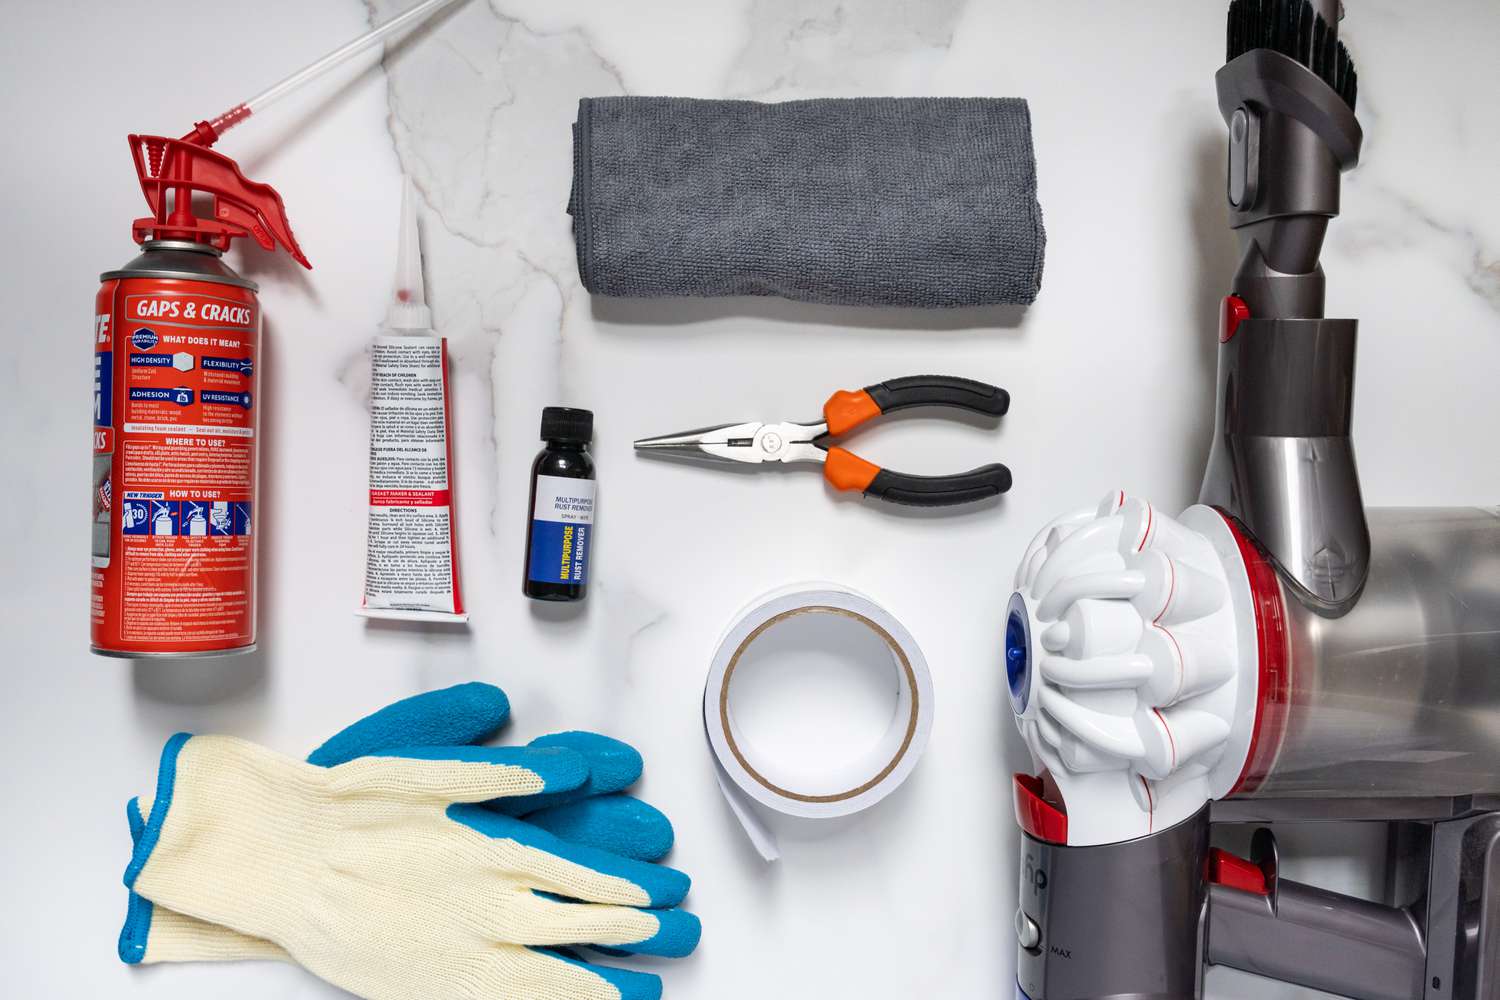
22. Your Home Repair & Deep-Clean Arsenal
A truly clean home often involves more than just wiping surfaces. This collection represents the next level: the intersection of cleaning and maintenance. Having items like sealant, rust remover, and basic tools on hand means you can tackle the root cause of a problem—like a leaky seal causing mildew—instead of just cleaning the symptom. This proactive approach saves you from bigger headaches down the road. The neatly organized layout on the marble surface isn’t just for a photo; it’s a principle of being prepared.
|
📋 Copy HEX 🔗 Share |
⭐ The One Thing
- Tools & Repair (Pliers, Sealant, Rust Remover): $40 – $75
- Cleaning Supplies (Microfiber cloth, gloves): $15 – $25
- Vacuum Attachments (if purchased separately): $20 – $40
- TOTAL: $75 – $140
- Budget Alternative: Start with the basics. A good pair of pliers, a tube of all-purpose caulk, and a quality microfiber cloth will run you about $30 and handle a wide range of minor repairs and cleaning tasks.
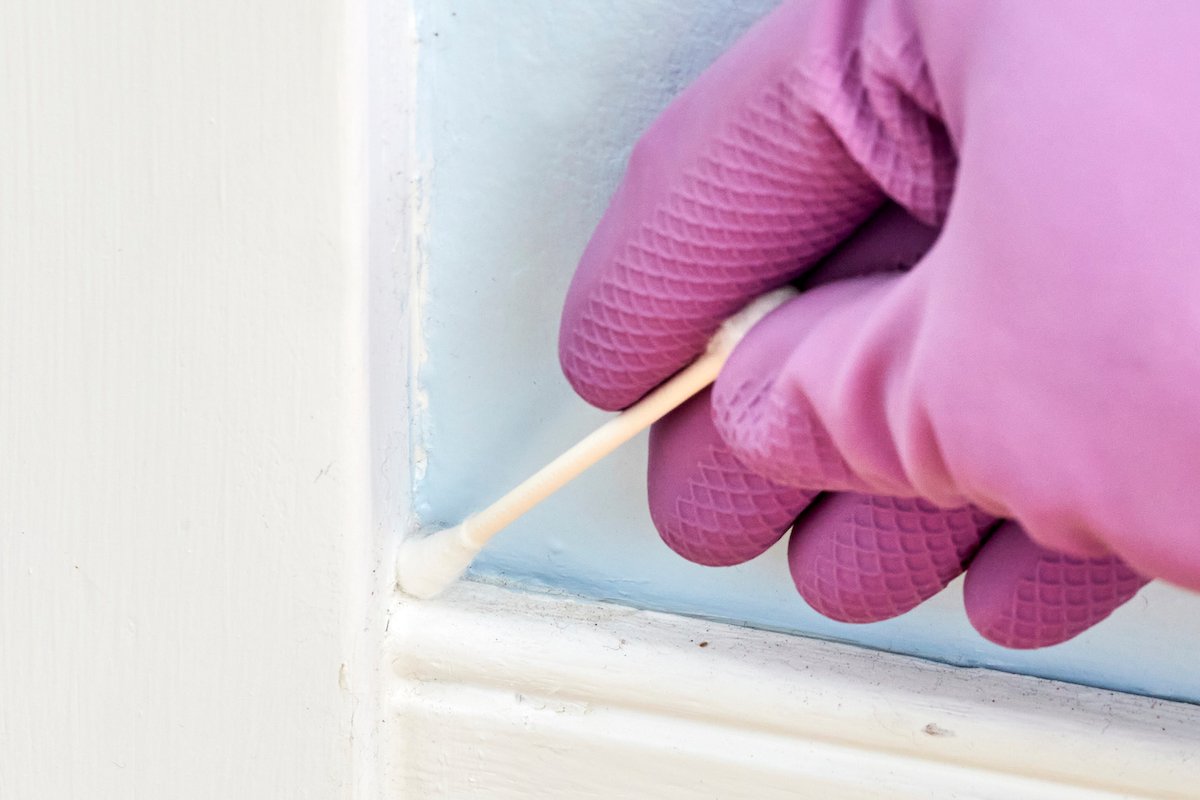
23. Use a Cotton Swab for Detailing Tight Corners
For the truly obsessed, this is the final touch. A cotton swab is the perfect tool for getting into the tightest crevices where dust and grime love to hide. Think the seam where baseboards meet the wall, the corners of window tracks, or the details on cabinet doors. The absorbent cotton tip grabs onto dirt in a way that the edge of a cloth or the bristles of a brush simply can’t. It’s meticulous, yes, but deeply satisfying.
|
📋 Copy HEX 🔗 Share |
✅ Before You Start
The single most important element here is precision. This isn’t for cleaning a whole room; it’s for the tiny spots that, left undone, make a space feel not-quite-clean. The pink glove highlights the delicacy of the operation. By focusing on these minute details, like the crevice along this white baseboard, you elevate the entire look of the room. It’s the difference between a clean room and a *spotless* room. This is what professional cleaners do to get that picture-perfect finish.
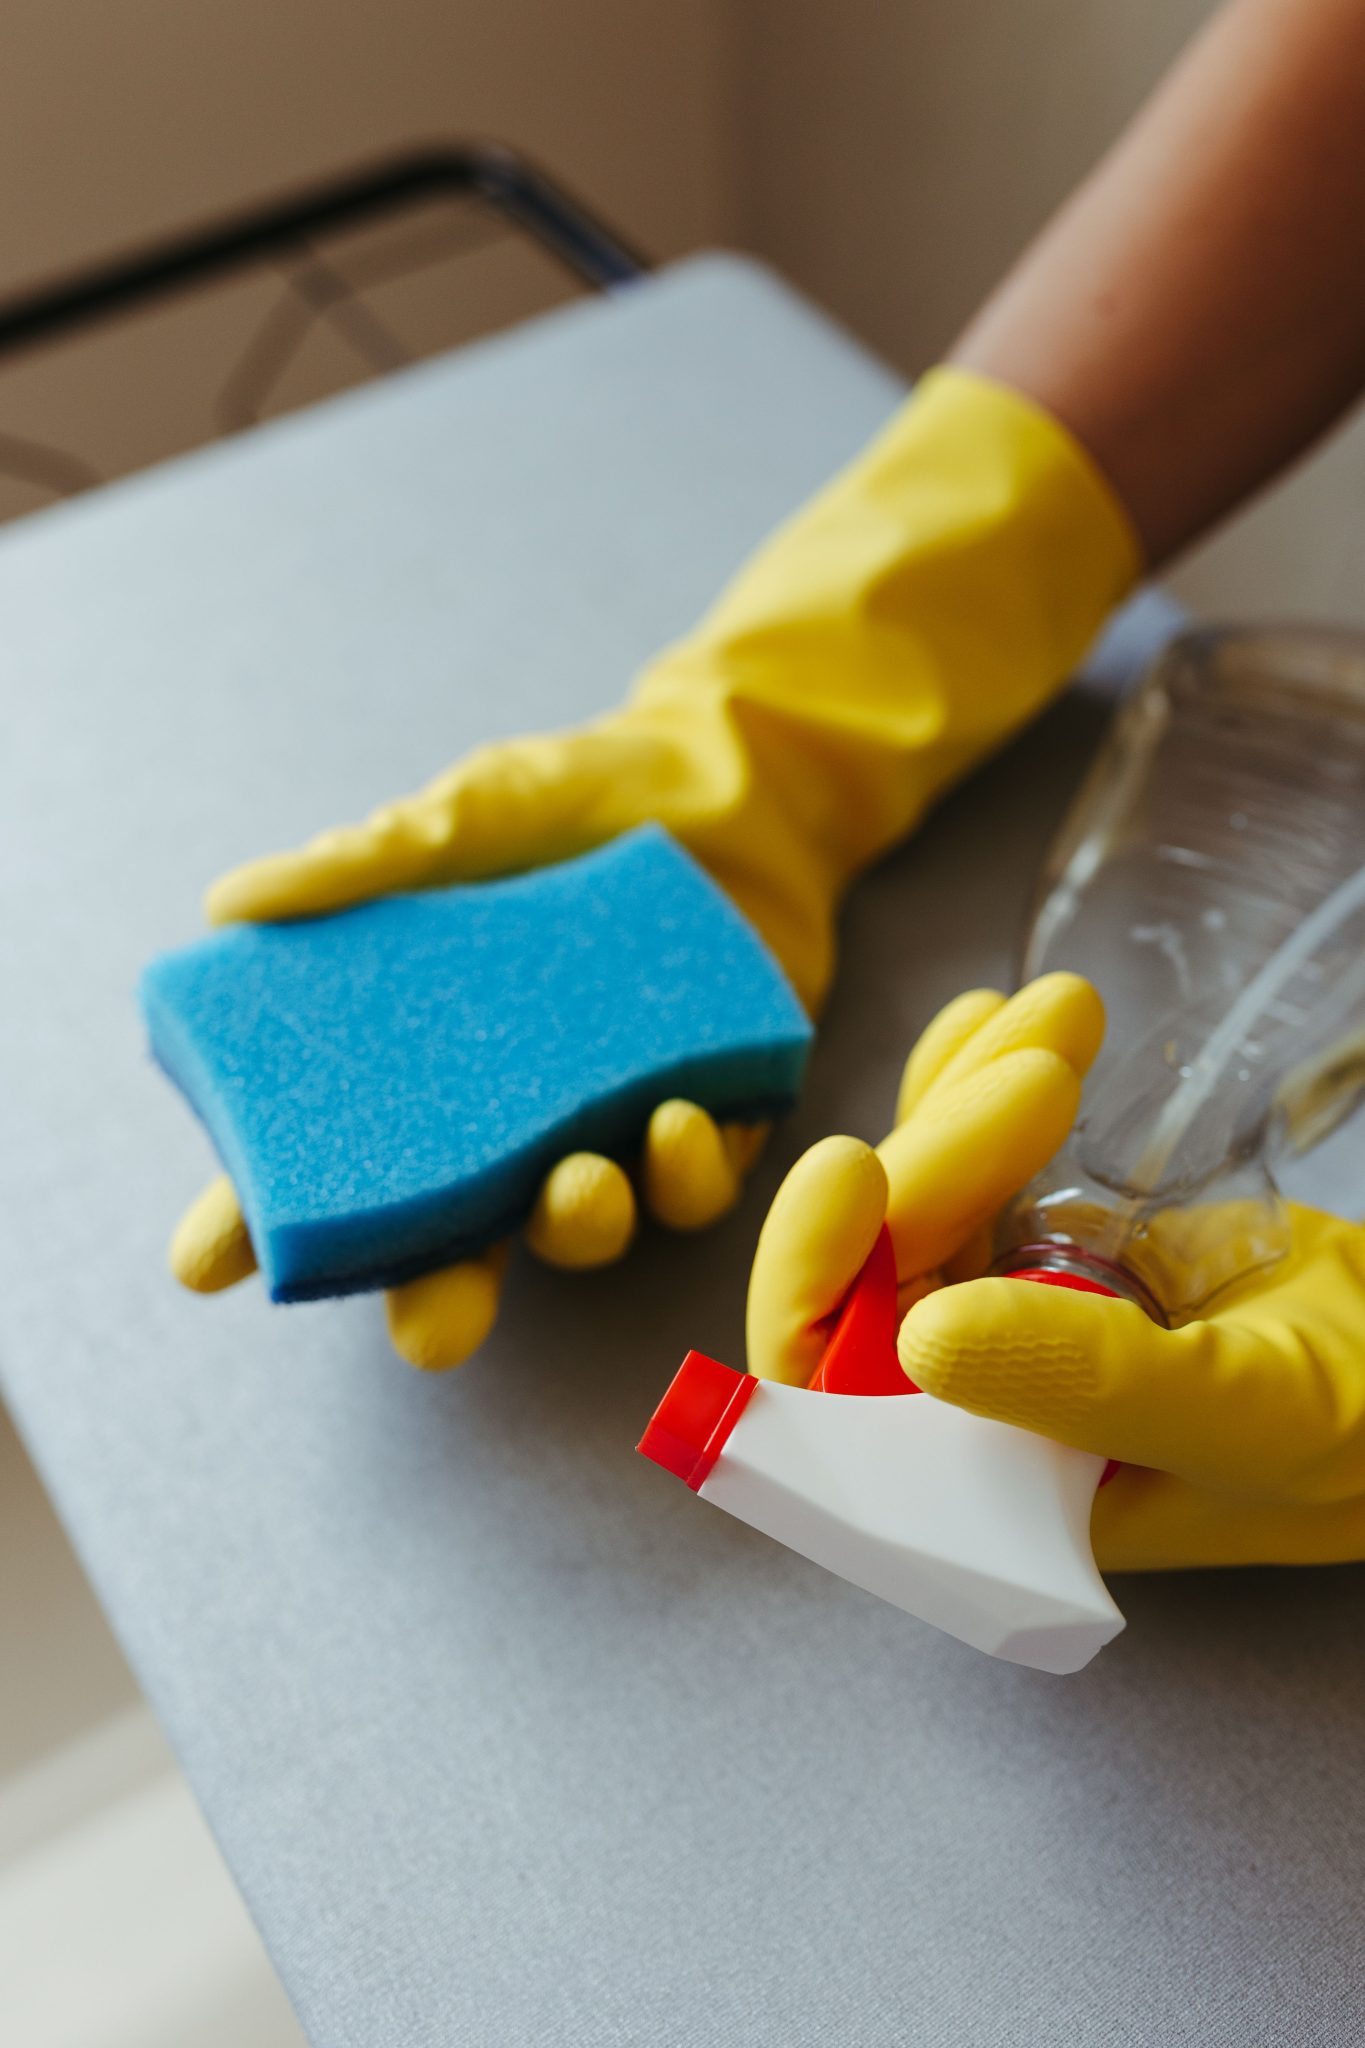
24. Your Three Essentials for Any Spill or Wipe-Down
Keep this trio under your kitchen sink, and you’ll be ready for 90% of daily messes. The yellow rubber gloves protect your hands. The blue sponge offers a slightly abrasive side for stuck-on gunk and a soft side for general wiping. The spray bottle can be filled with your go-to all-purpose cleaner. Having them grouped together means you can grab and go, tackling a spill or a dirty counter in seconds without having to hunt for supplies.
|
📋 Copy HEX 🔗 Share |
🔧 How-To Brief
Think of this as a cleaning equation: Protective Gear + Abrasive Tool + Cleaning Agent = Universal Clean. The yellow gloves are your non-negotiable base. You can swap the blue sponge for a microfiber cloth for more delicate surfaces. And the cleaning agent can be anything from a heavy-duty degreaser to simple soap and water. By keeping these three categories of tools together, you create a versatile cleaning station that adapts to almost any task.
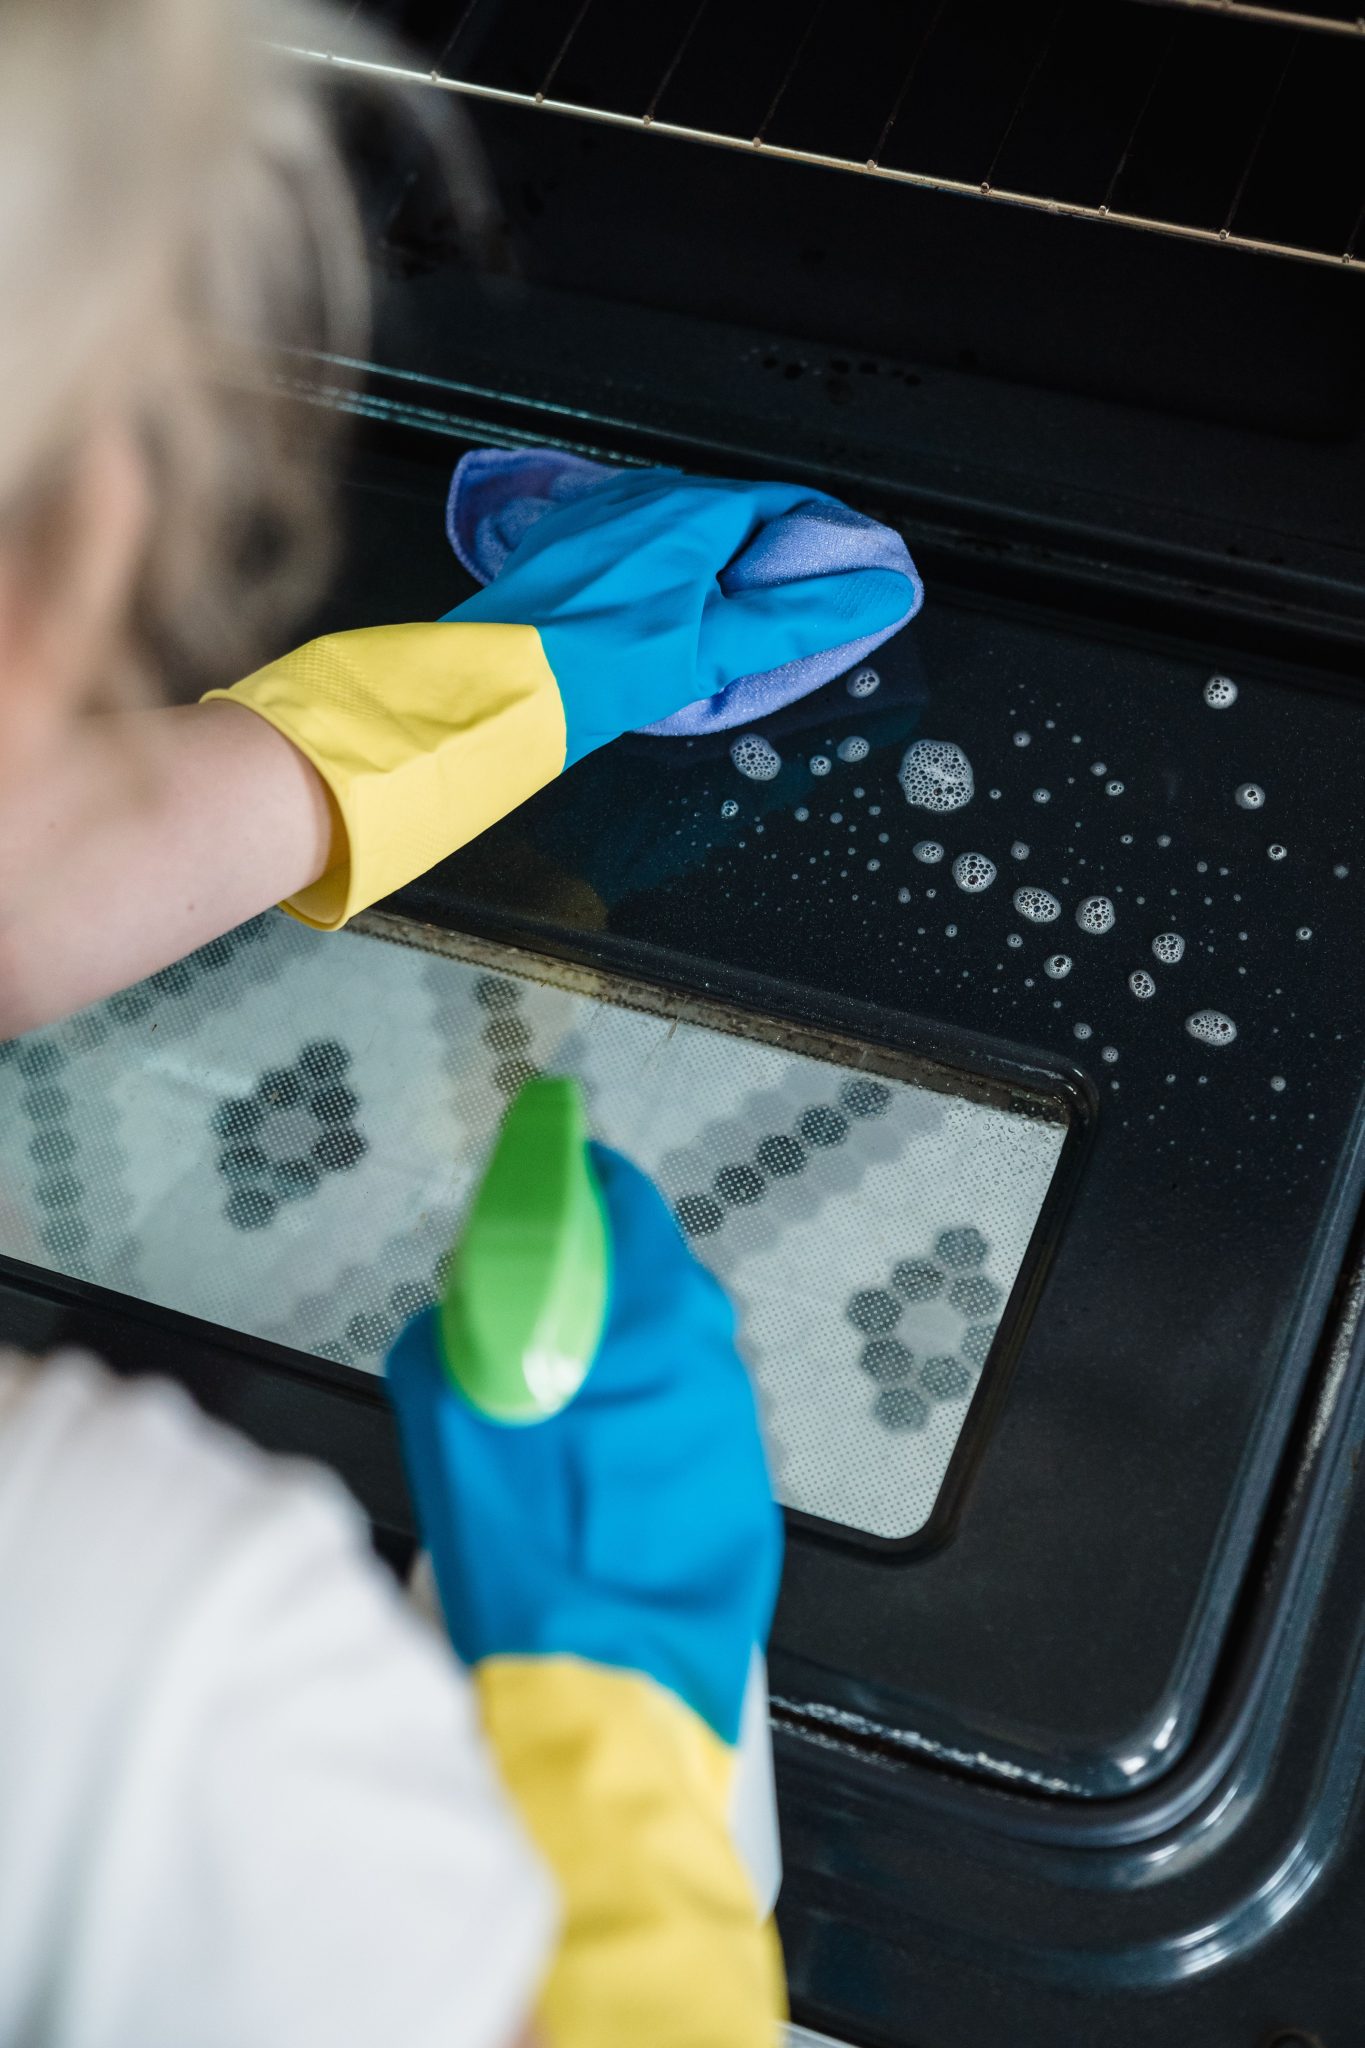
25. The Secret to a Spotless Oven Door
Cleaning the inside of an oven door is a notoriously tough job. The key is using a degreaser that’s strong enough to break down baked-on grease without toxic fumes. The purple microfiber cloth provides a gentle abrasive action to scrub away the residue loosened by the spray, while the gloves are essential for protecting your skin from the potent cleaning solution. The foam and bubbles are a good sign that the degreaser is actively working to lift the grime from the glass.
|
📋 Copy HEX 🔗 Share |
💰 Budget Breakdown
Many people are tempted to use the self-clean feature, but this can be risky. The extremely high temperatures can blow a thermal fuse, damage electronic control panels, or even warp the oven racks. For the glass door, a targeted manual cleaning is always safer and often more effective. It requires some elbow grease and about 30 minutes of your time, but you avoid the risk of a very expensive appliance repair call. Plus, you won’t fill your house with smoke.
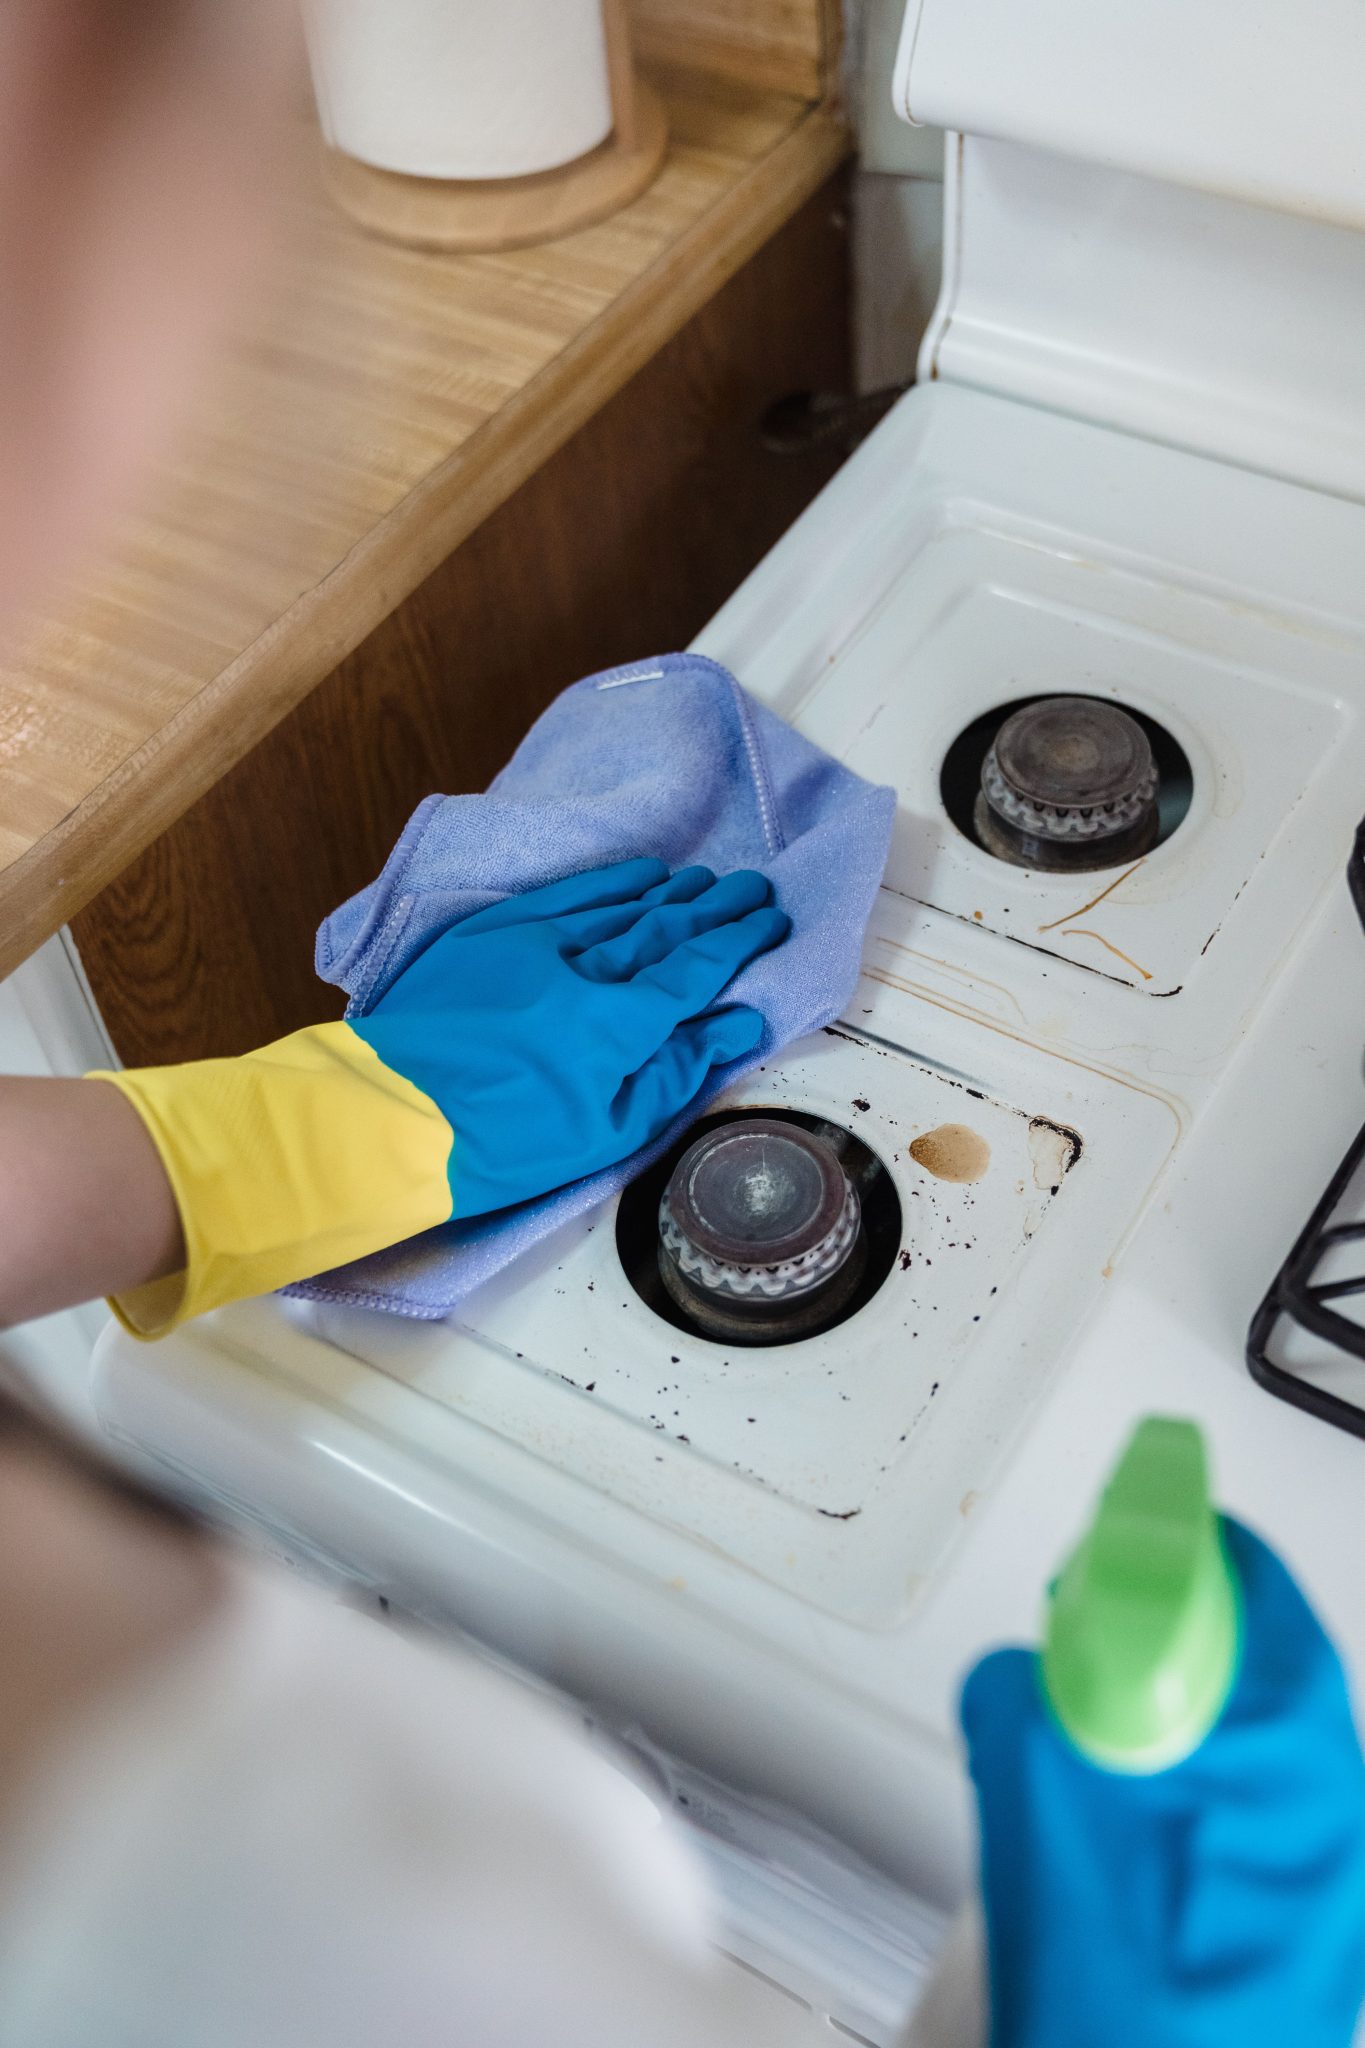
26. Restoring a Greasy, Stained Stovetop
A white stovetop shows every single splatter, making frequent cleaning a must. The reality is that if you let grease and food debris sit and get cooked on, the cleaning job becomes exponentially harder. The key to maintaining a white stovetop is to wipe up spills as soon as the surface is cool enough to touch. For a deeper clean like this one, a good degreaser spray and a microfiber cloth are your best defense against stains that can become permanent over time.
|
📋 Copy HEX 🔗 Share |
📐 Style Math
This method works because it combines three key elements: a chemical solvent (the green degreaser spray), a gentle abrasive (the lavender microfiber cloth), and manual force. The degreaser breaks the bonds of the cooked-on food, lifting it from the enamel surface. The texture of the microfiber cloth grabs the loosened debris without scratching the stovetop. The final piece is the applied pressure, which physically removes the grime. It’s a classic, effective combination.
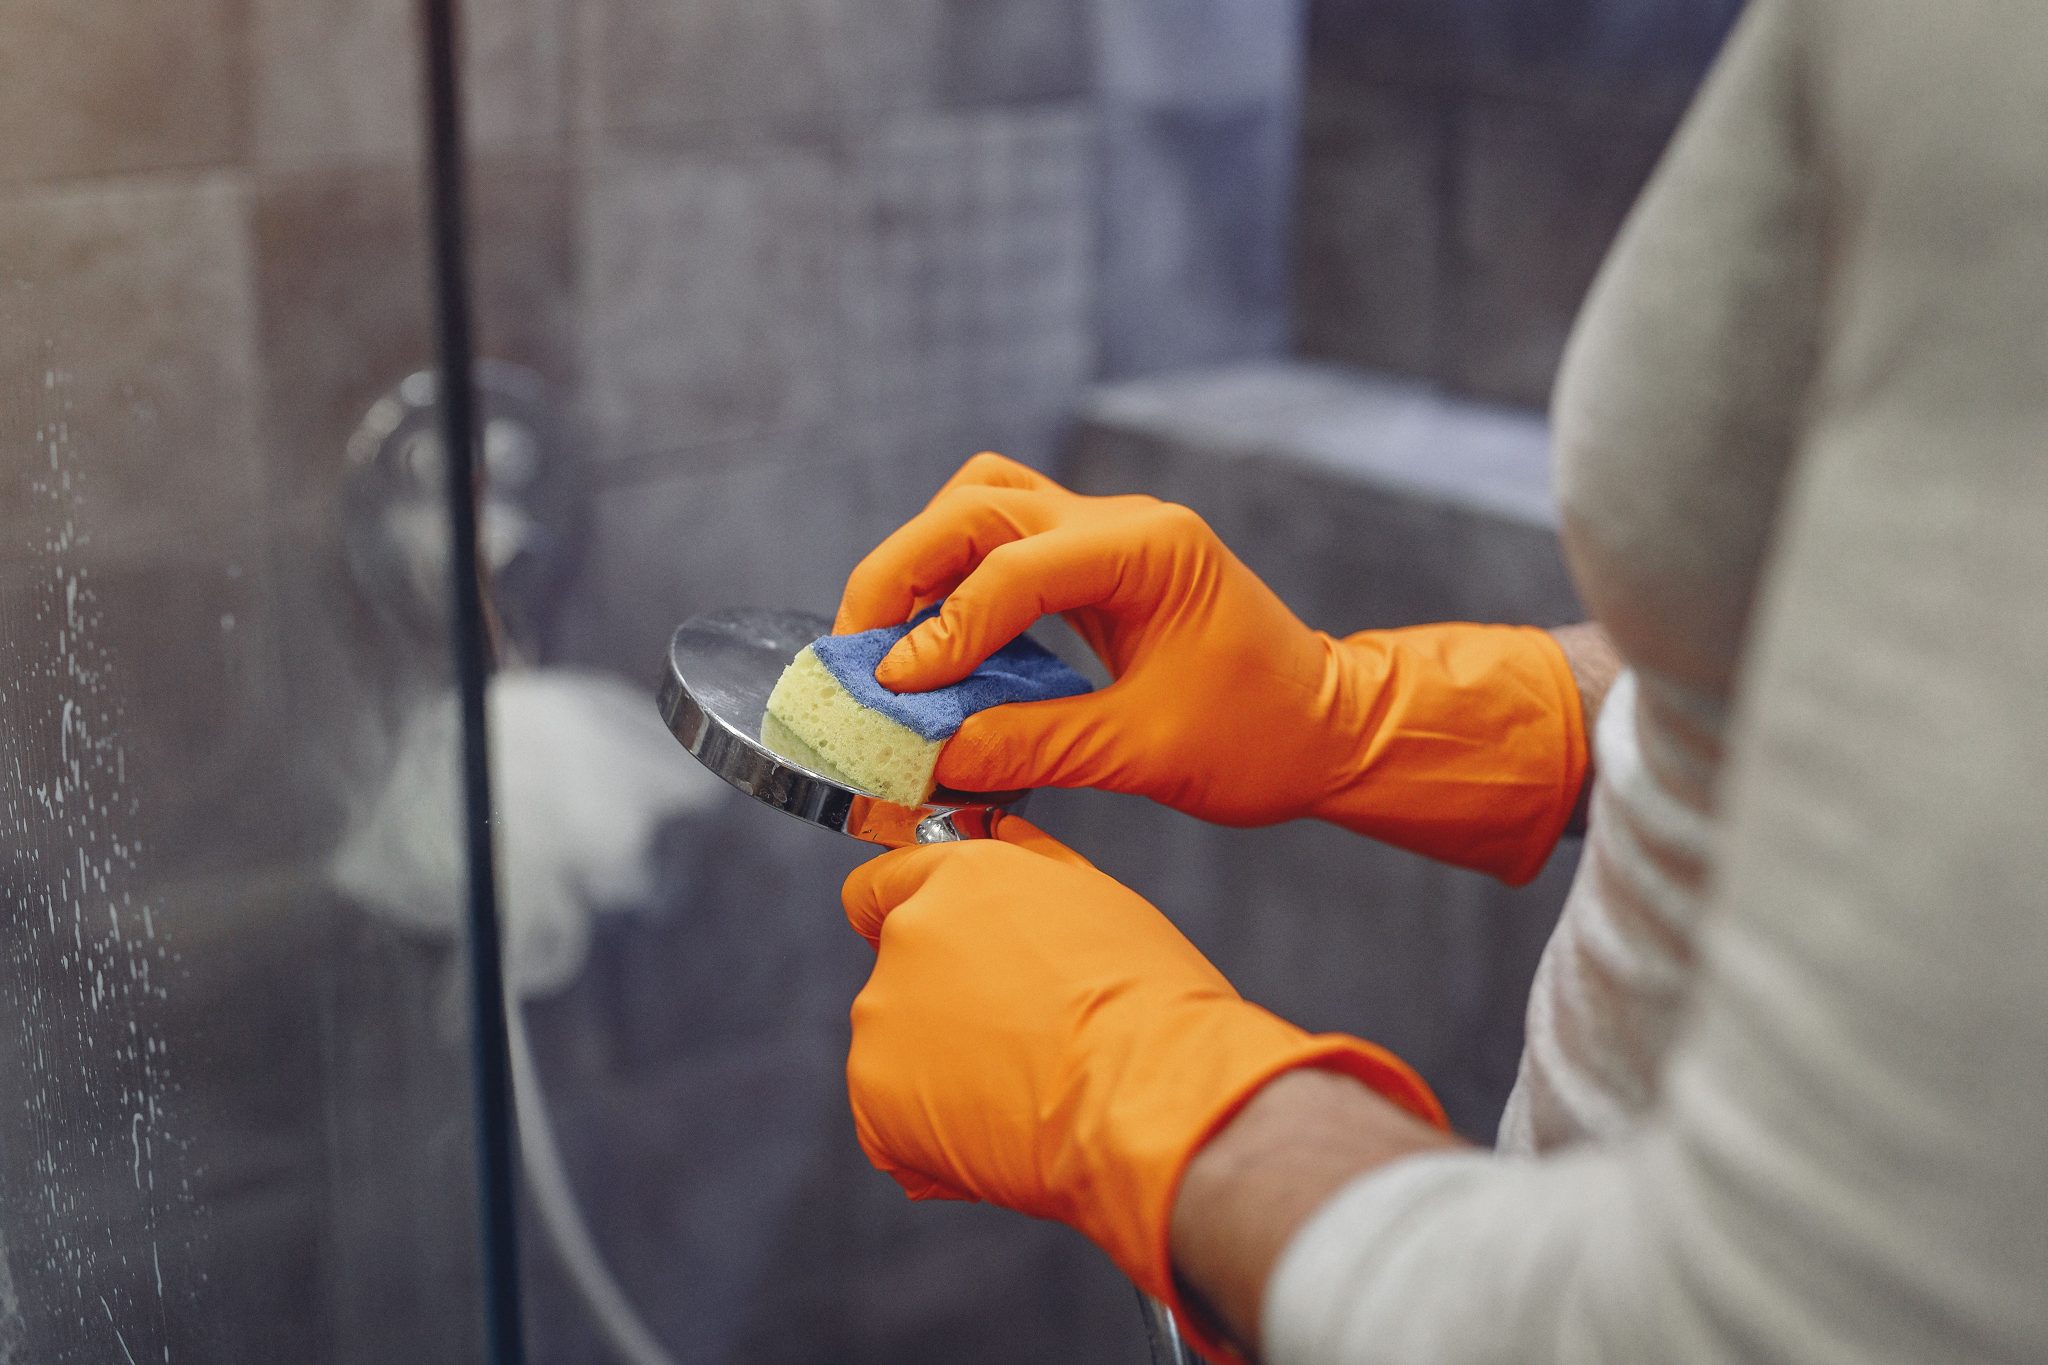
27. Making Chrome Fixtures Shine Without Scratches
The trick to getting chrome fixtures brilliantly clean without causing damage is to use a non-scratch tool. The blue and yellow sponge shown here is perfect; the softer yellow side is for general cleaning, while the blue scouring side is designed to be tough on grime but gentle on finishes. Always test a new sponge on an inconspicuous area first. For a flawless, streak-free shine, dry and buff the chrome with a clean microfiber cloth after you’ve cleaned it.
|
📋 Copy HEX 🔗 Share |
📏 Scale Guide
Forget expensive chrome cleaners. A 50/50 solution of white vinegar and water in a spray bottle works just as well, if not better. The vinegar effortlessly dissolves hard water spots and soap scum. Spray the fixture, let it sit for a minute (don’t let it dry), then wipe with the soft side of a sponge. The cost is pennies compared to a specialty product. This is a perfect example of a cheap, effective, and readily available cleaning hack.
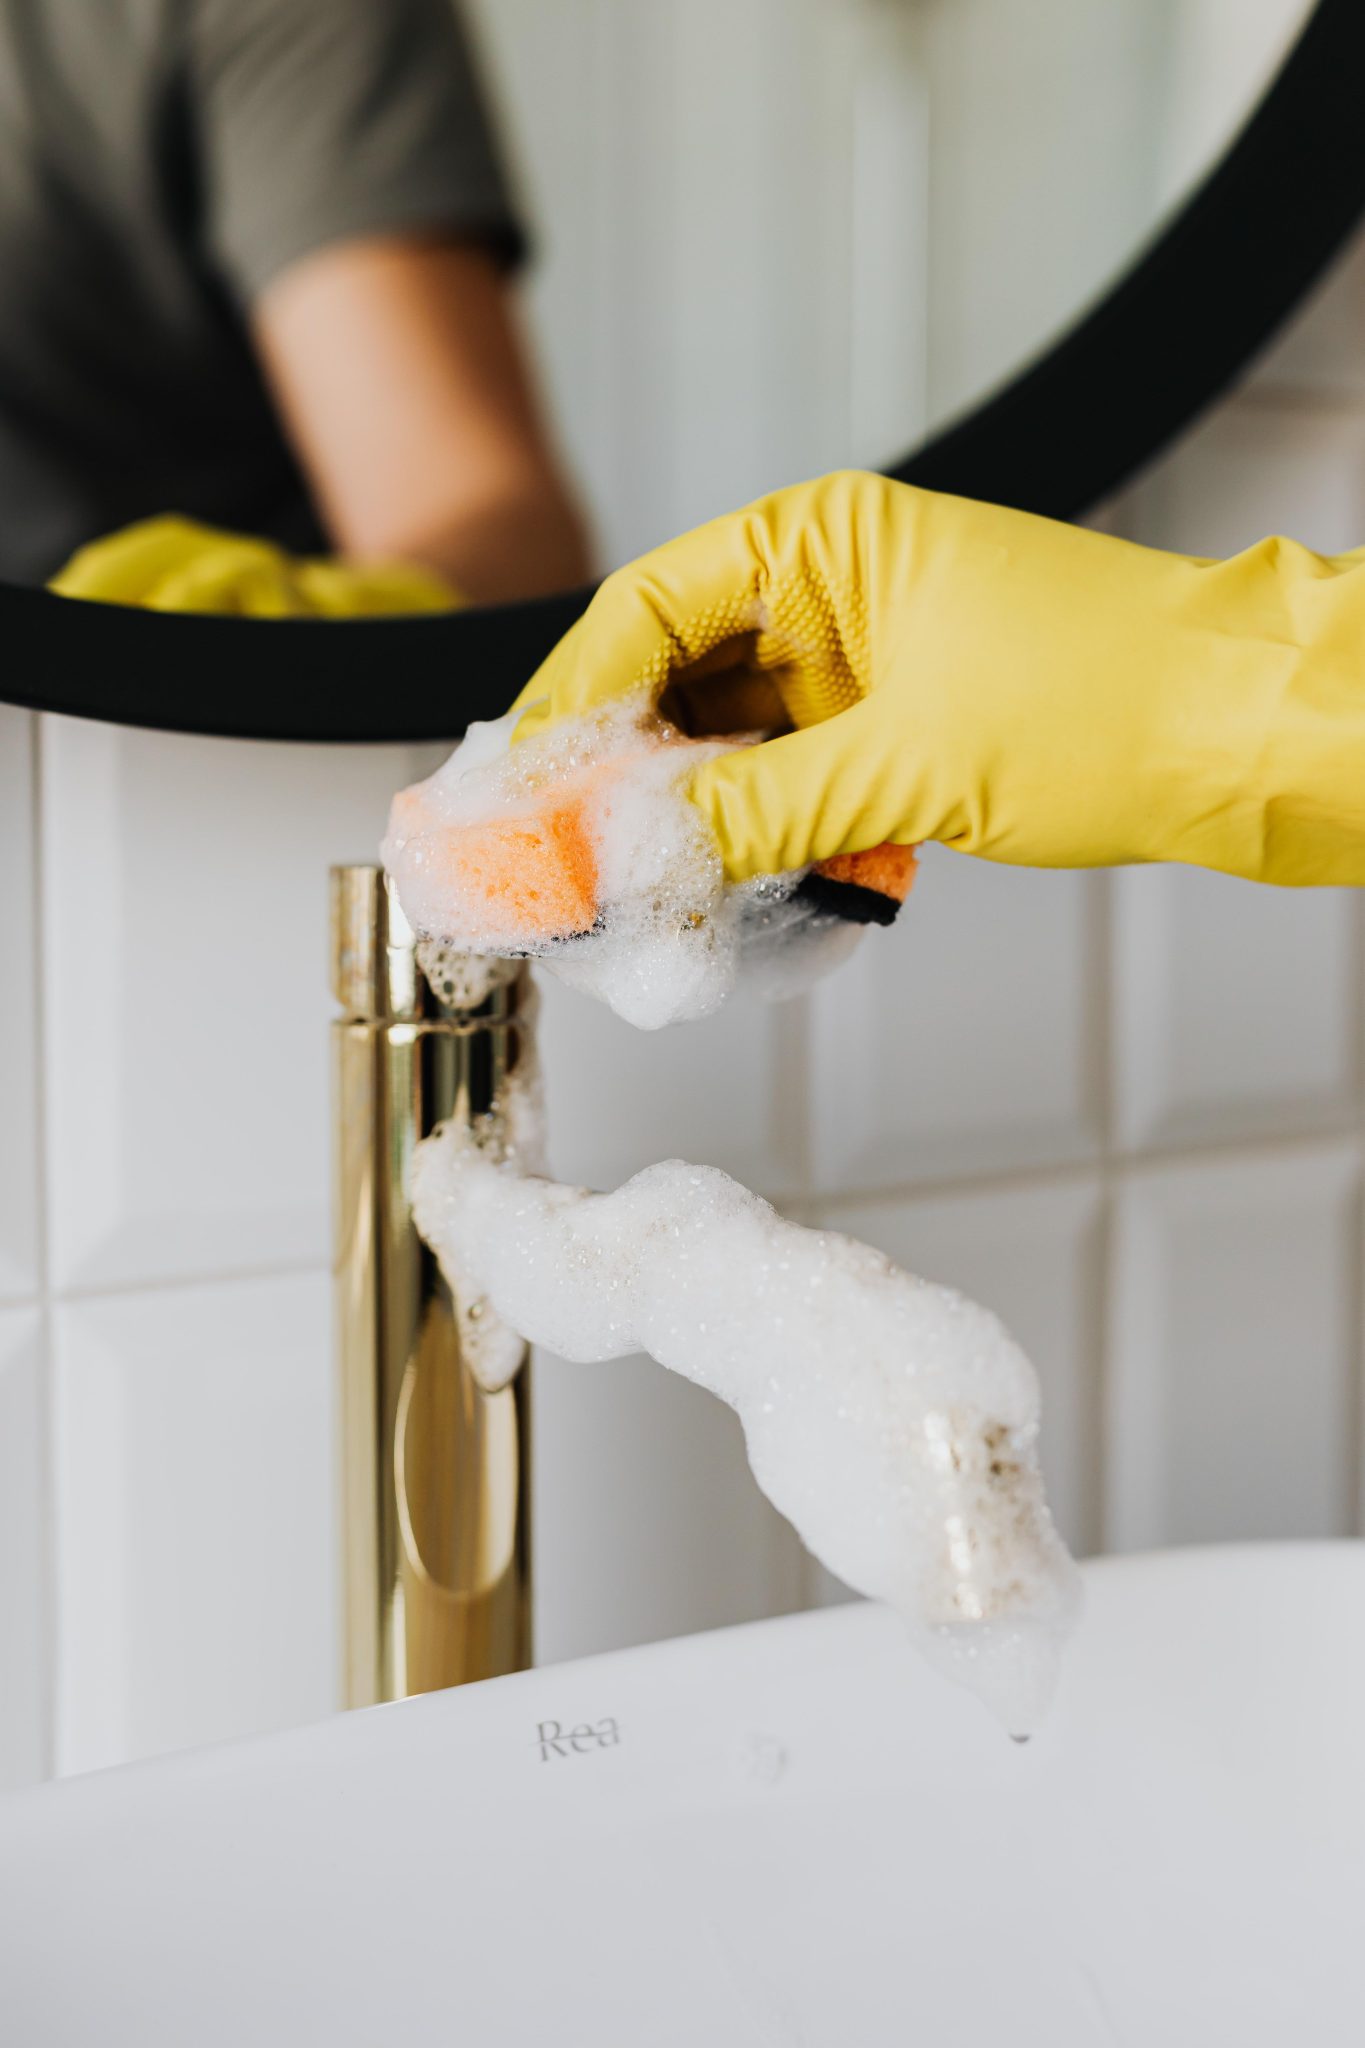
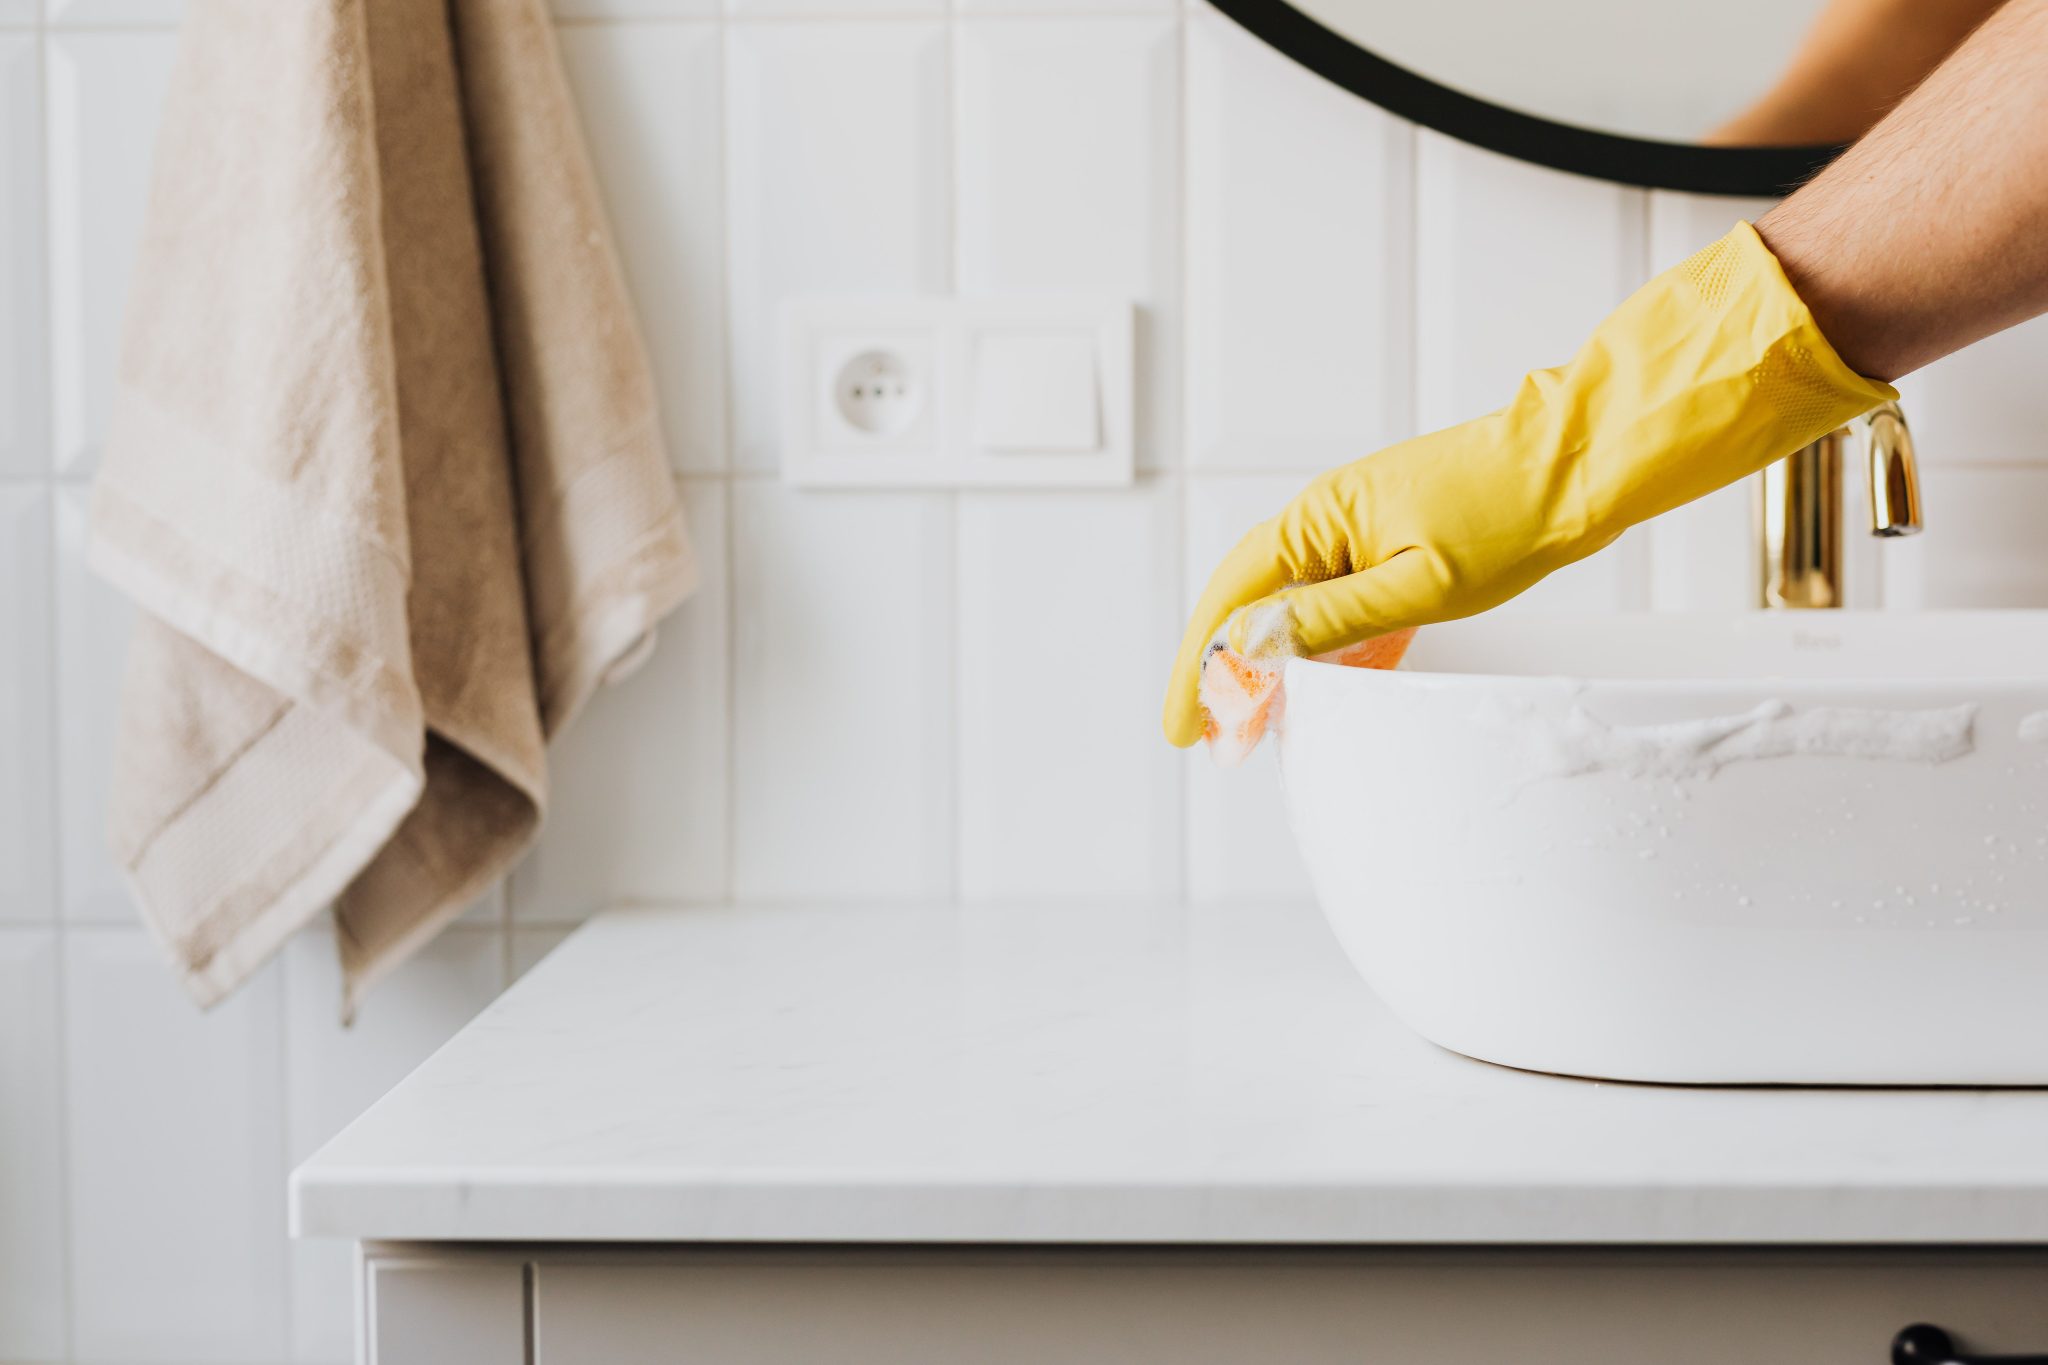
28. Safely Cleaning Gold and Brass Faucets
Be very careful here. Unlike the durable chrome in Idea #27, many modern gold and brass-toned faucets have a PVD coating or a lacquer finish that is easily damaged by harsh chemicals or abrasive sponges. Using the wrong cleaner or a scratchy sponge can strip the finish or create fine scratches, ruining the fixture. The ‘Rea’ brand sink and black-rimmed mirror suggest a modern bathroom where finishes are key. Protect your investment by being gentle.
|
📋 Copy HEX 🔗 Share |
🎯 What Makes It Work
you must do before cleaning a gold or brass faucet is to use the mildest cleaner possible. Start with just warm water and a drop of dish soap on a soft cloth. The suds seen here are fine, as long as the sponge being used is non-abrasive (this orange and black one looks soft). Absolutely no vinegar, ammonia-based cleaners, or abrasive powders. These can permanently damage the finish. When in doubt, just use soap and water.
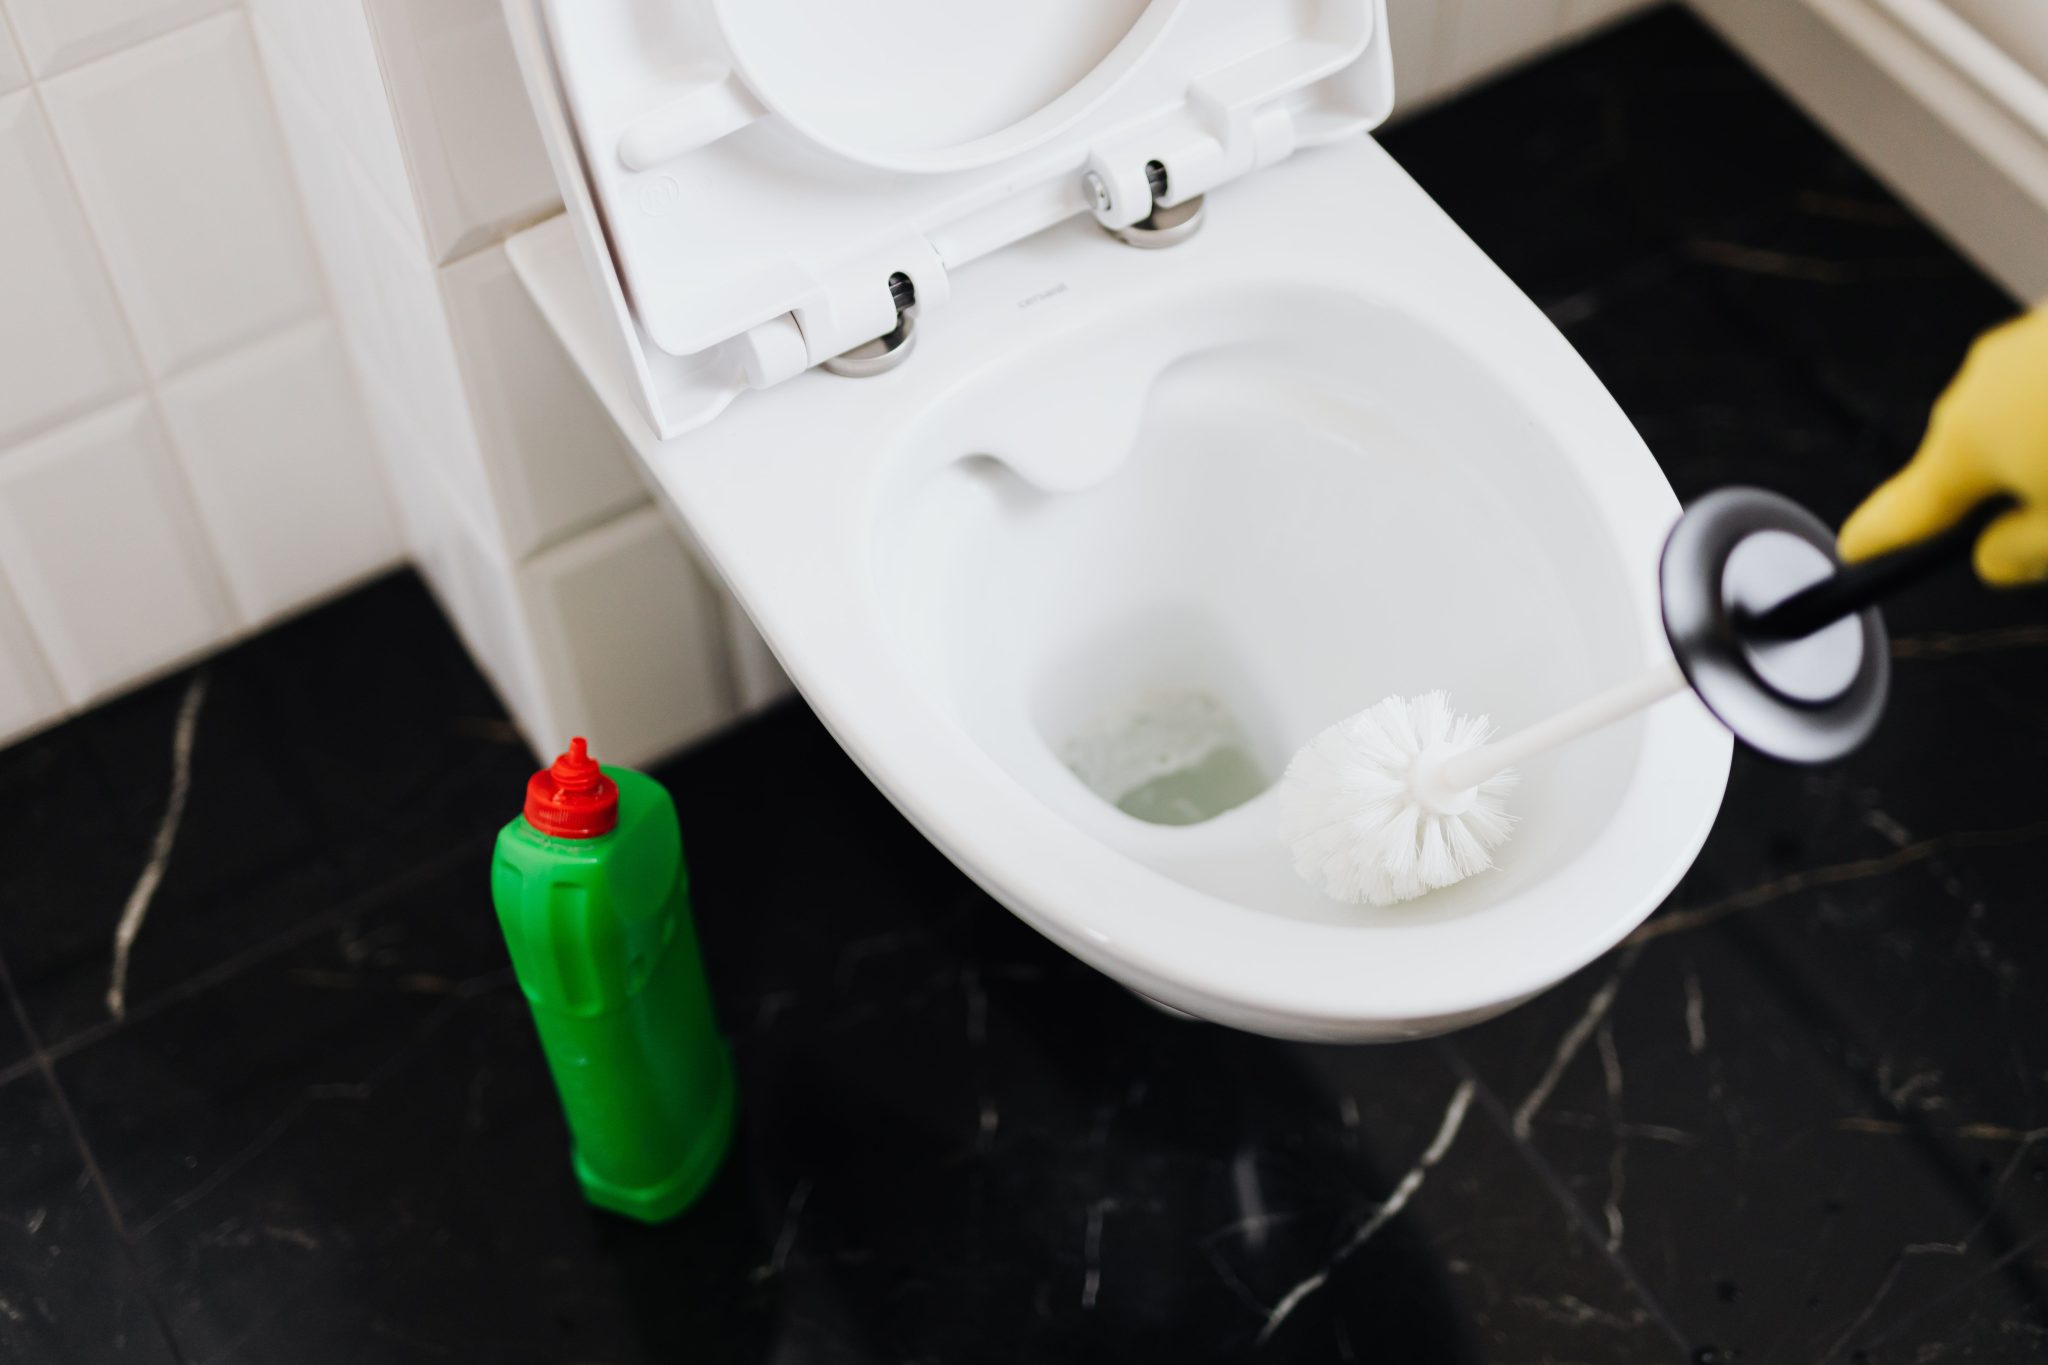
29. Cleaning Around a Toilet on Delicate Marble Floors
This cleaning hack is specifically for bathrooms with natural stone flooring like this black marble. While the toilet itself is hardy porcelain, any cleaner that drips, leaks, or gets splashed onto the floor can cause catastrophic damage. Acidic toilet bowl cleaners (which includes most of them) will etch marble, leaving a dull, permanent mark. This rule applies to any acid-sensitive material, including travertine and limestone. Be extremely cautious.
|
📋 Copy HEX 🔗 Share |
🧹 Maintenance Reality
Before you even bring a cleaner into a bathroom with marble floors, do this: First, place an old, thick towel around the base of the toilet to catch any and all drips. Second, double-check that your chosen toilet cleaner is non-acidic and safe for septic systems (these are generally milder). Third, consider cleaning the floor separately with a pH-neutral stone cleaner *after* you’ve finished with the toilet to neutralize any accidental splashes.
30. The Gentle Clean for Vessel Sinks and Gold Fixtures
This cleaning approach works because it’s gentle and controlled. A vessel sink has more exposed surface area than a standard undermount, so a careful wipe-down is essential. The foam indicates a mild, soapy cleaner is being used, not a harsh chemical. Using a soft sponge allows the user to clean the curve of the bowl and the counter around it without scratching the ceramic or the countertop. The white subway tiles and gold faucet create a chic backdrop that deserves a delicate touch. A similar approach is needed for the faucet in Idea #28.
|
📋 Copy HEX 🔗 Share |
💡 Designer Tip
When cleaning around a high-end fixture like this gold faucet, the ‘less is more’ rule is your best friend. Don’t spray cleaner directly on the faucet. Instead, apply a small amount of gentle cleaner (even just warm, soapy water) to your soft sponge or microfiber cloth and then wipe the fixture. This prevents the cleaner from getting into the internal mechanisms and causing corrosion. To finish, buff it dry with a separate, clean cloth to prevent water spots and enhance the shine.
Your Clean Home Awaits
Armed with these 30 hacks, you’re ready to tackle any cleaning challenge your home throws at you. It’s not about having a perfect home, but about enjoying the peace of mind that comes with a clean, cared-for space. Pick one to try this weekend and see the difference for yourself.
Feeling inspired? Pin your favorite ideas to your cleaning board on Pinterest and start building a routine that actually works for you.