Let’s be honest, scrolling through carport ideas can feel a little… uninspired. You know the potential is there, but most of what you see is a sea of basic metal roofs. If your current carport situation has been bothering you for longer than you’d like to admit, this is for you. We’re here to show you that a carport can be a genuinely beautiful, statement-making extension of your home.
We did the deep dive, filtering through hundreds of designs to bring you these 30 incredible examples that prove “stylish carport” isn’t an oxymoron. We’re covering everything from sleek modern structures and rustic timber frames to brilliant multi-purpose patio conversions. These aren’t just pretty pictures; we’re breaking down why they work. In 2026, maximizing every square foot of your property for both function and style is the biggest trend, and a thoughtfully designed carport is a perfect example of this shift. And stay until the end — we break down the most common mistakes that can ruin these looks. 📌 Save this to Pinterest for later — you’ll want to revisit these ideas.
1. Modern Integration with a Black Slat Screen
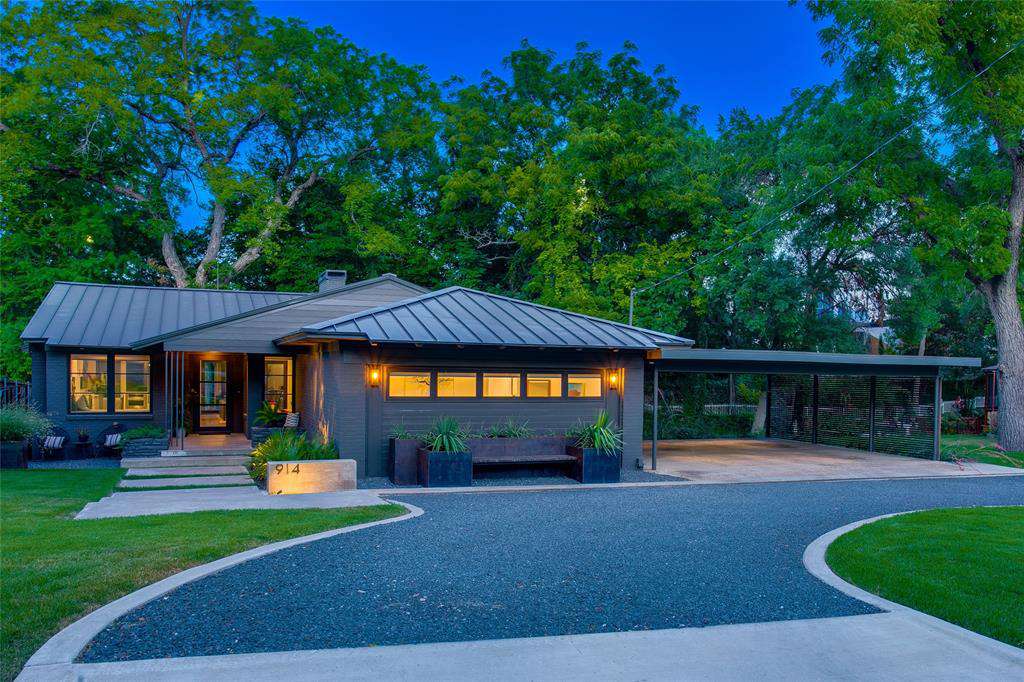
This design succeeds by treating the carport not as an addition, but as an integral part of the home’s architecture. The key is repetition of materials and color. The carport’s dark roofline and slatted screen perfectly mirror the home’s dark blue metal roof and modern aesthetic, creating a cohesive and intentional look. The horizontal lines of the house siding are echoed in the carport screen, making the entire facade feel unified rather than disjointed. It’s a masterclass in visual harmony.
|
📋 Copy HEX 🔗 Share |
⚠️ Real Talk
Thinking about a slatted screen? For optimal privacy without completely blocking light, specify a 1-inch gap between 3-inch-wide slats. This ratio—approximately 3:1 for the slat width to gap size—provides substantial visual screening from a distance but still allows for airflow and ambient light to filter through. If you opt for wider slats, say 5 or 6 inches, you can increase the gap to 1.5 or 2 inches to maintain that sense of openness while still ensuring privacy.
2. Power Up with an Integrated Solar Panel Canopy
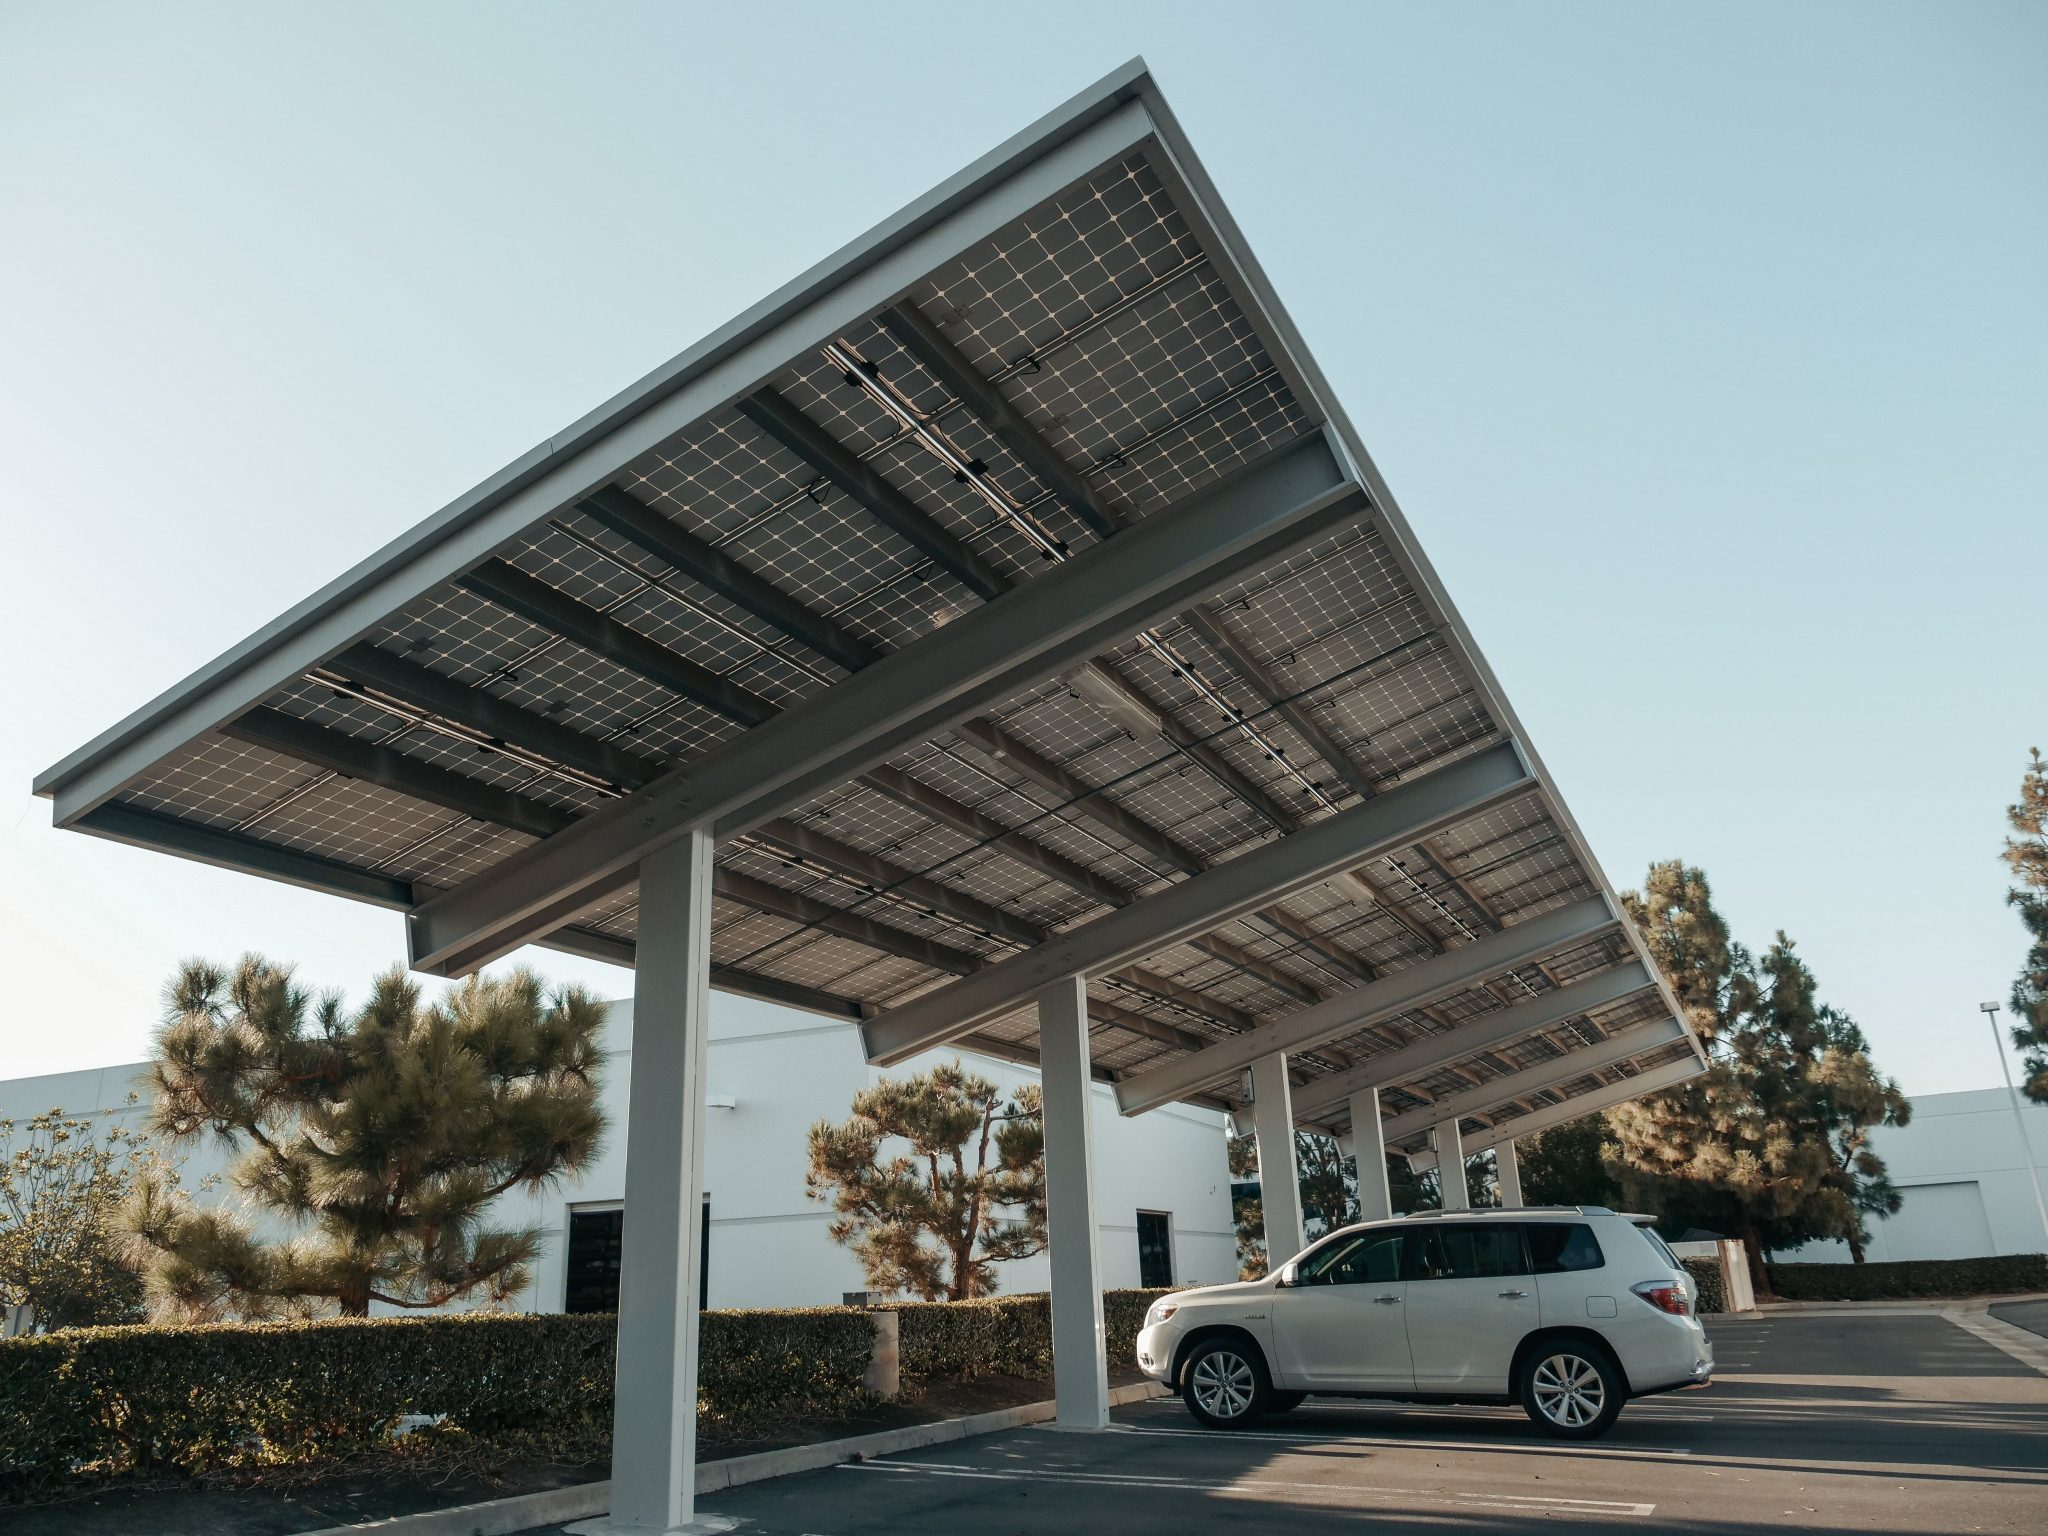
With the rise of electric vehicles and a bigger focus on sustainable home features, solar carports are moving from a niche market to a mainstream power move. In 2026, it’s not just about offsetting your energy bill; it’s about future-proofing your property. A solar carport essentially turns a simple parking structure into a power plant for your home and car. This trend has serious staying power because it combines two things homeowners crave: smart, eco-friendly technology and enhanced property value.
|
📋 Copy HEX 🔗 Share |
✅ Before You Start
This is a significant investment, but one that pays for itself over time.
- Solar Panel Canopy & Inverter: $15,000 – $25,000
- Structural Columns & Beams (Steel/Aluminum): $5,000 – $10,000
- Installation & Electrical Work: $4,000 – $8,000
- Permitting & Inspection: $500 – $1,500
- TOTAL: $24,500 – $44,500
- Budget alternative: Start with a standard carport structure ($5,000) and add panels later. This breaks up the cost but may require retrofitting.
3. A Grand Entrance with an Integrated Drive-Through Design
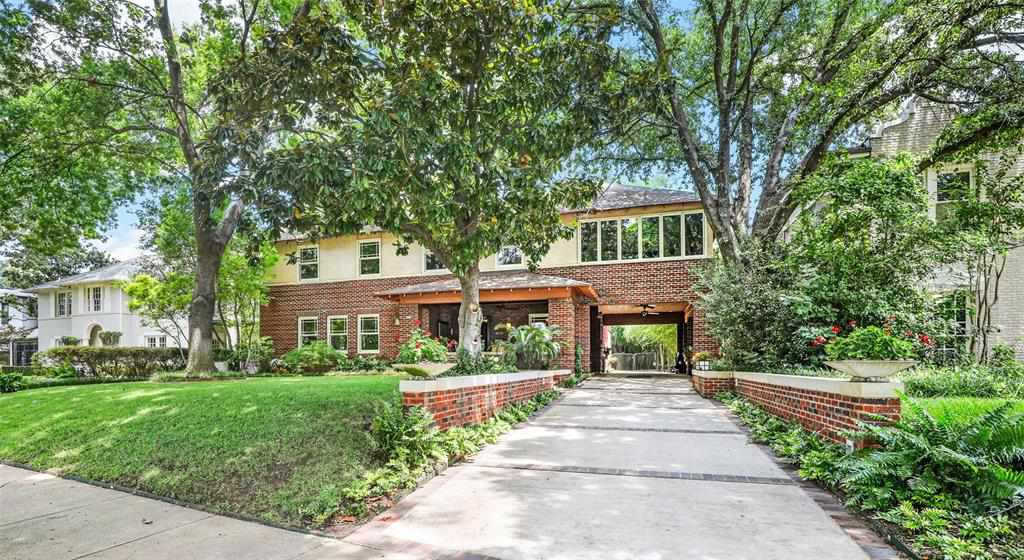
that makes this design feel so grand and established is its complete architectural integration. This isn’t a carport that was added on; the house was clearly designed around it. The drive-through portico, flanked by substantial brick walls that match the home’s facade, creates a powerful sense of arrival and permanence. Removing it would fundamentally change the character of the house from stately and impressive to something far more ordinary. It’s a feature that defines the home’s entire front elevation.
|
📋 Copy HEX 🔗 Share |
🎯 What Makes It Work
A design this integrated is beautiful, but it’s not a weekend project. This is a feature that needs to be part of the home’s original blueprint or a major renovation involving architects and structural engineers. The roofline, foundation, and facade materials all have to be seamlessly connected. Trying to tack a structure like this onto an existing home without professional guidance can lead to serious structural issues, water intrusion problems, and an awkward, ‘stuck-on’ look that devalues your property.
4. Sustainable Power Meets Rustic Timber Frame
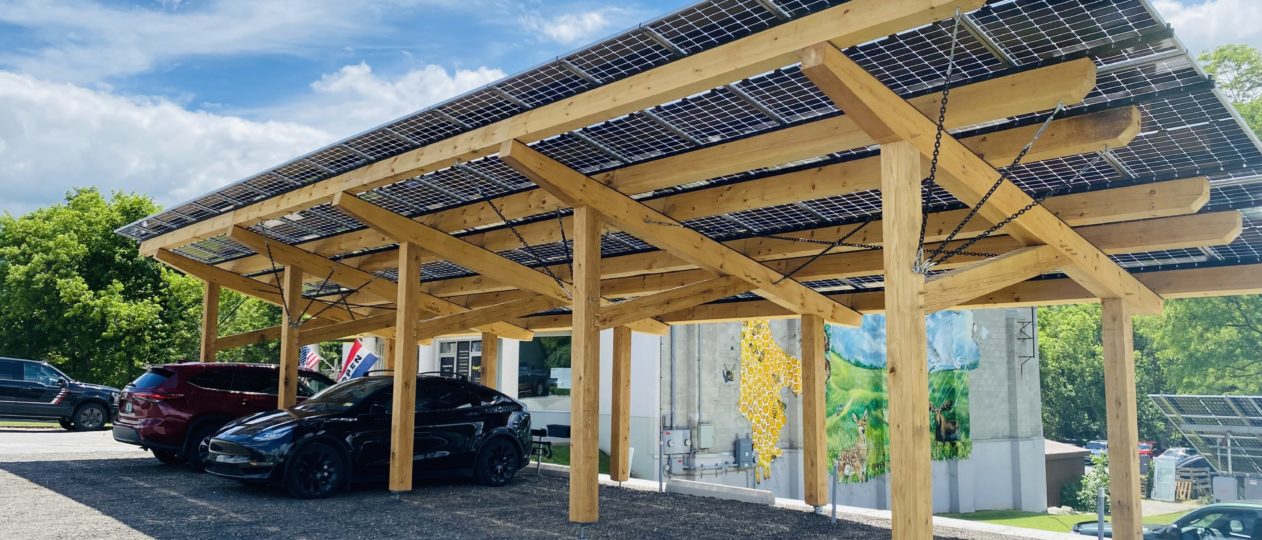
This look is a beautiful equation of natural and industrial elements. Think of it as 60% rustic timber + 40% tech. The warm, substantial wood beams provide a classic, sturdy base, while the sleek, black solar panels offer a sharp, modern contrast. The metal support chains add a subtle industrial detail. You could swap the timber for reclaimed wood for a more weathered look or use painted glulam beams for a more contemporary feel, but the core formula of ‘warm structure + cool tech’ remains the same. Compared to Idea #2, this approach feels much more grounded and organic.
|
📋 Copy HEX 🔗 Share |
📏 Scale Guide
An exposed timber frame is gorgeous, but it requires commitment. To keep the wood from weathering to a dull grey, you’ll need to re-stain or reseal it every 2-4 years, depending on your climate’s sun and moisture exposure. The annual cost is minimal if you DIY (around $100-200 for stain and supplies), but professional work can run $500-$1,000. For a lower-maintenance alternative, consider composite or stained glulam beams, which offer a similar look with significantly less upkeep.
5. Craftsman Charm with Sage Green Siding and a Stone Base
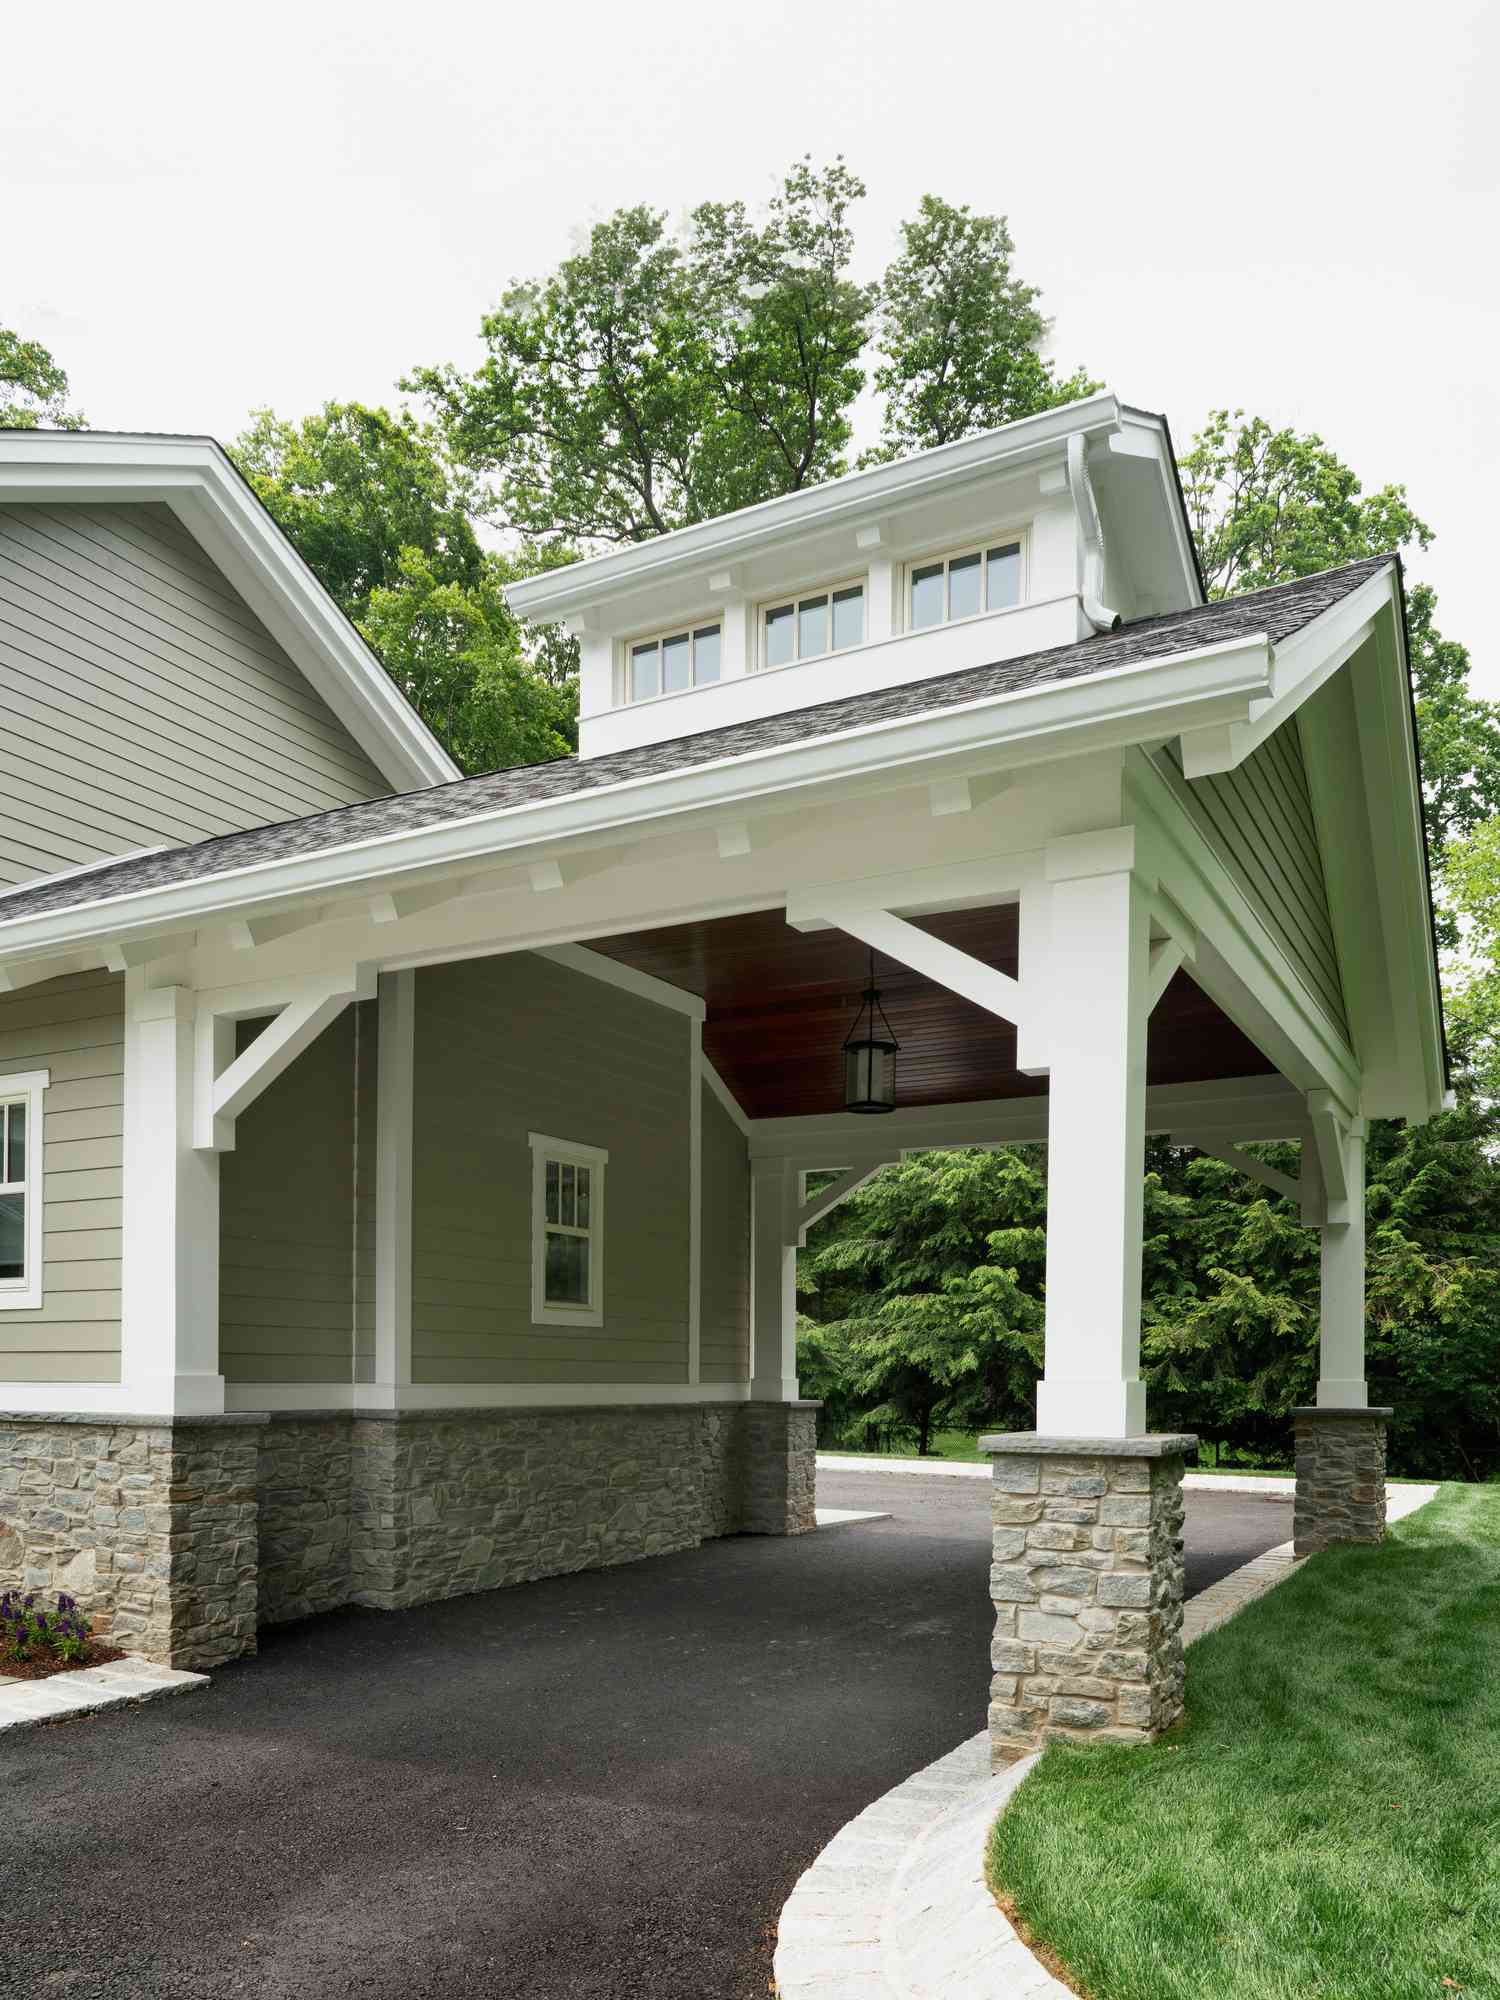
When combining multiple materials like siding, stone, and wood, the key to a high-end look is a ‘material hierarchy’. Use the most textured, visually heavy material (the stacked stone) at the bottom to ground the structure. The siding should be the mid-tone, dominant field color, and the ceiling should be the ‘surprise’—in this case, the rich, dark wood planking. This layered approach creates depth and feels custom. Keeping the support columns a clean, simple white prevents the design from becoming too busy.
|
📋 Copy HEX 🔗 Share |
🔥 Trending Context
This design works because of its skillful use of texture and color. The rough, variegated surface of the stacked stone base provides a sturdy, tactile anchor. This contrasts beautifully with the smooth, uniform sage green siding. The final touch is the dark wood plank ceiling, which adds unexpected warmth and richness, drawing the eye upward and making the space feel more like an outdoor room than just a place to park. The black lantern serves as a perfect focal point, tying all the elements together.
6. Build a Rustic Timber Shelter with Slatted Half-Walls
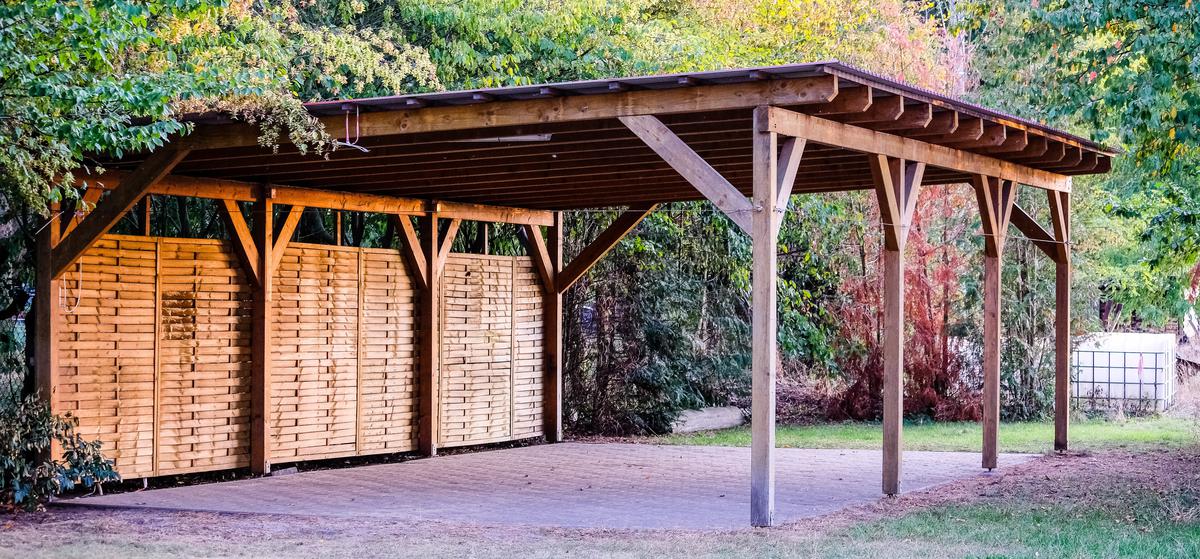
Building a slatted half-wall is a great way to add privacy and style. Here’s a quick guide:
- Set Your Posts: Measure and install your main vertical support posts for the carport frame.
- Install Support Rails: Attach horizontal 2x4s at the top and bottom between the posts where you want your wall. Add a middle rail for walls over 4 feet tall.
- Cut & Attach Slats: Cut your 1×6 slats to height. Starting from one end, attach the first slat, making sure it’s perfectly plumb (vertical).
- Use a Spacer: Use a scrap piece of wood (e.g., a 1-inch block) as a spacer to ensure even gaps. Place it against your attached slat, press the next slat against it, and fasten. Repeat across the length of the wall.
Time estimate: 4-6 hours. Material cost: $200-$400.
|
📋 Copy HEX 🔗 Share |
🔧 How-To Brief
This style is incredibly versatile and works well for a standard one or two-car space, roughly 12×20 feet or 20×20 feet. The open, airy design with a simple gabled roof works best with a ceiling height of at least 9 feet at the eaves, rising to 12-14 feet at the peak. This ensures it doesn’t feel cramped. Because of its rustic simplicity, it’s a great fit for properties with more land or a backyard setting, where it can blend with the natural environment. It’s less suited for tight urban lots where a more modern, integrated design like Idea #1 might be better.
7. Define Your Space with a Modern Decorative Screen
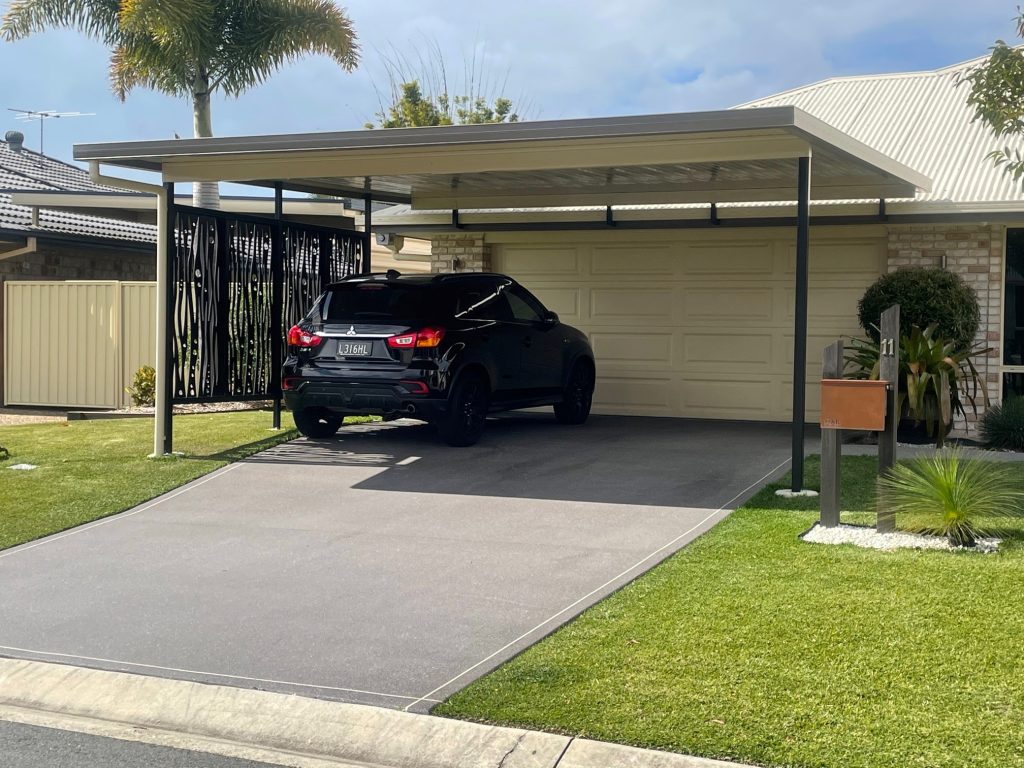
The single element that elevates this entire design is the decorative black metal screen. Without it, you’d have a very simple, functional carport. With it, you have a piece of architectural art. The organic, wavy pattern provides a beautiful contrast to the rigid, straight lines of the carport roof and the paved driveway. It serves a practical purpose—creating a sense of separation and enclosure—but its primary job is to inject style and personality. It proves that even a small detail can have a massive impact.
|
📋 Copy HEX 🔗 Share |
💸 Get This Look For Less
A custom laser-cut metal screen like this can be pricey, often running $1,000-$3,000 or more. But you can get this look for much less! Search for ‘decorative composite screen panels’ at stores like Home Depot or on Wayfair. They come in dozens of patterns (geometric, leafy, wavy) and typically cost between $80 and $150 per 2×4 foot panel. You can frame them with simple pressure-treated lumber painted black and achieve 90% of this custom look for a fraction of the price.
8. Embrace Natural Wood with a Classic Gabled Roof
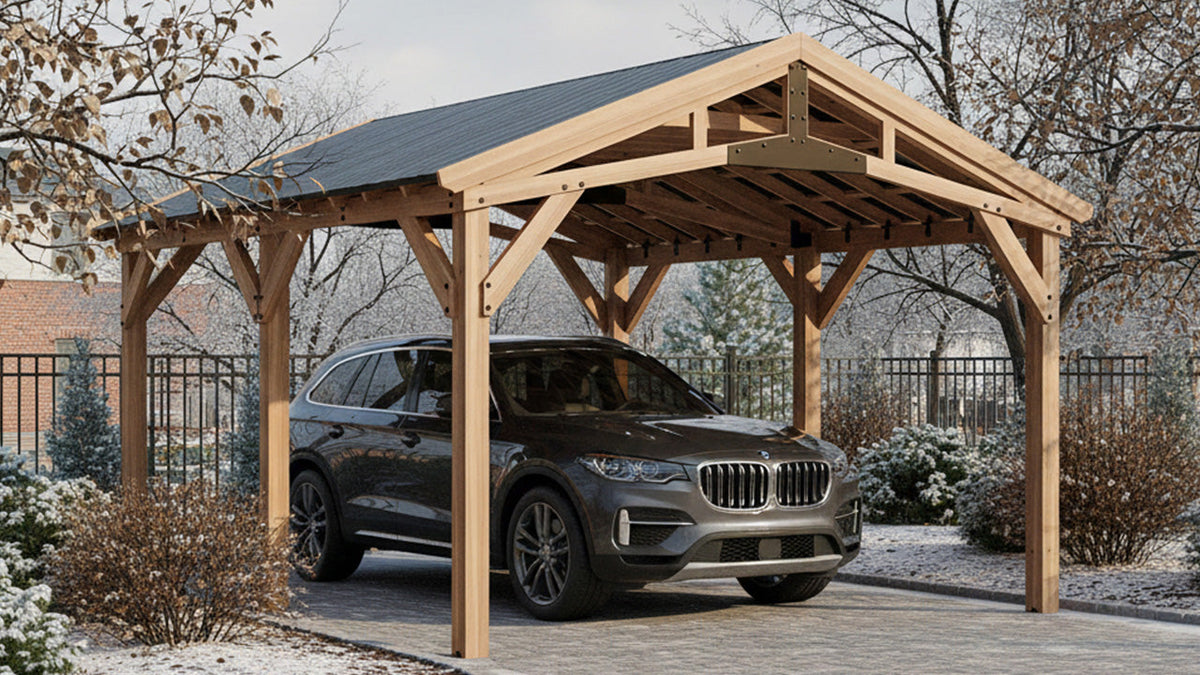
The beauty of this design lies in its honest construction. The exposed light wood beams and dark metal connector plates aren’t hidden; they’re celebrated as part of the aesthetic. This creates a sense of sturdiness and craftsmanship. The simple, classic gabled roof is a timeless shape that sheds snow and rain effectively, making it highly practical. By keeping the materials simple—natural wood, dark metal, and a standard shingle roof—the structure feels both handsome and completely at home in its natural, snowy surroundings.
|
📋 Copy HEX 🔗 Share |
🧹 Maintenance Reality
While the natural wood is lovely, be aware of what ‘natural’ means in an exterior setting. Unprotected wood, especially a light variety like pine or cedar, will inevitably weather and turn a silvery gray over time when exposed to sun and rain. If you love that weathered, rustic look, great! But if you want to maintain the warm, light brown tone seen here, you will need to apply a UV-blocking sealer or stain every couple of years. It’s a maintenance trade-off for the aesthetic.
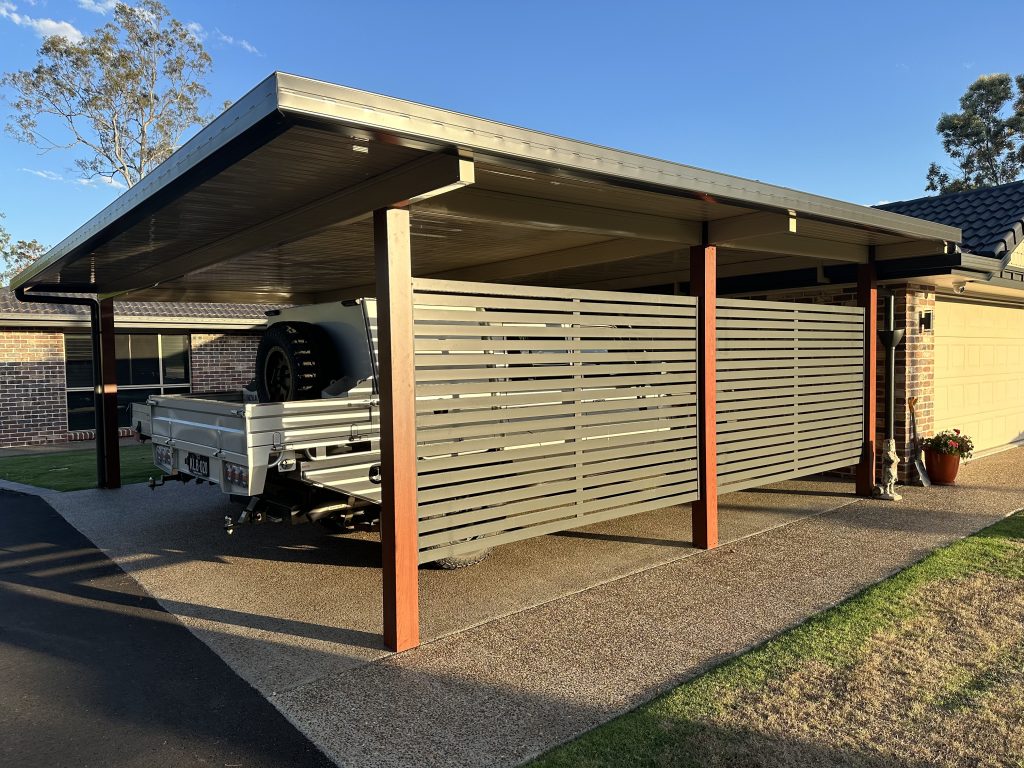
9. Achieve Privacy with a Horizontal Slat Screen
For a modern look that feels both private and airy, a horizontal slat screen is perfect. The key is in the finishing. Don’t just nail up raw lumber. For a polished result, use a high-quality exterior paint or solid stain in a contemporary color like the warm grey shown here. Paint the support posts a contrasting color, like this reddish-brown, to add warmth and definition. Also, orienting the slats horizontally makes a space feel wider and more expansive, which is a great trick for a narrow or small carport area.
|
📋 Copy HEX 🔗 Share |
💰 Budget Breakdown
This design’s formula is all about balancing textures and lines. It’s roughly 50% clean lines + 30% natural texture + 20% warm color. The flat metal roof and crisp horizontal slats provide the clean, modern lines. The exposed aggregate driveway brings in a wonderful, pebbly texture that grounds the space. Finally, the reddish-brown tone of the wooden posts injects just enough warmth to keep the greys and browns of the brick from feeling too flat. It’s a simple but incredibly effective combination.
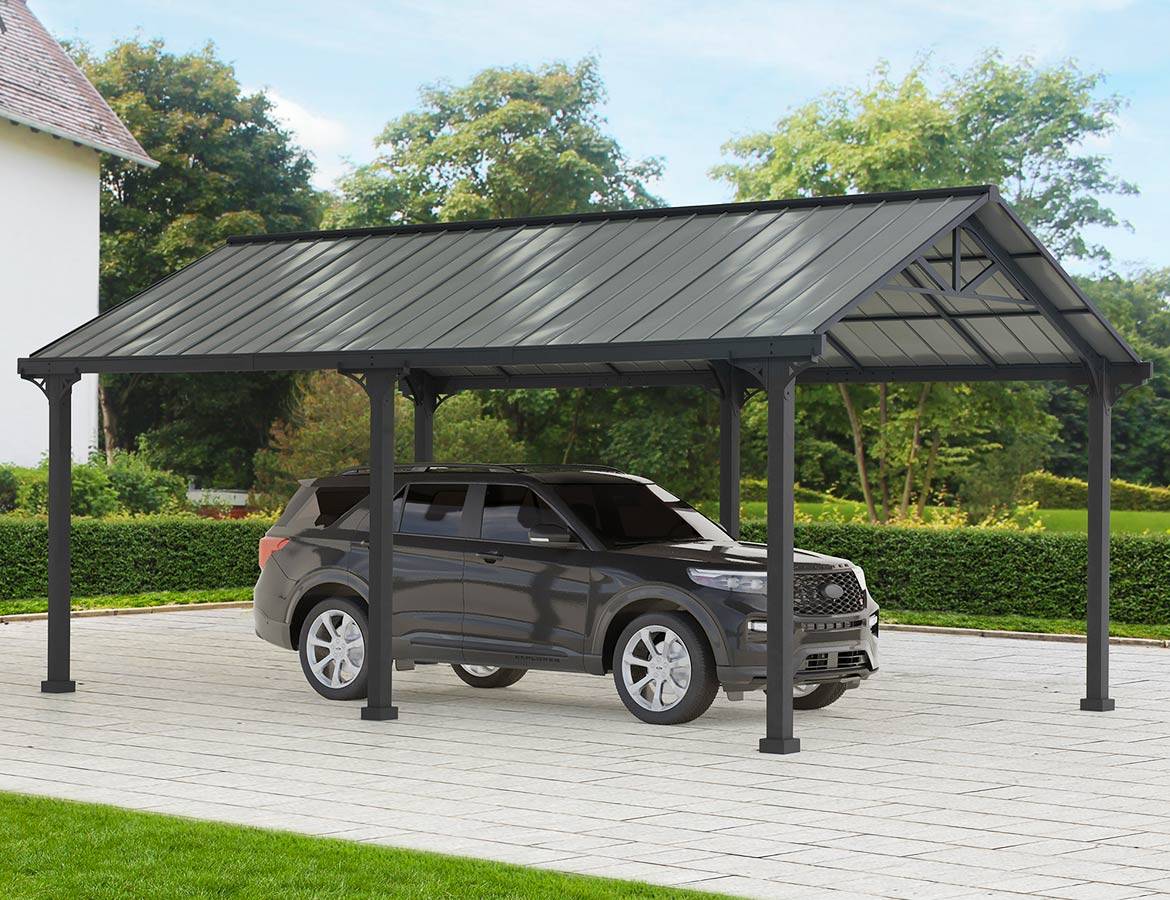
10. Mix Shade and Light with Clear Roof Panels
This carport is a smart solution for anyone who wants protection from the elements without plunging their driveway into darkness. The design works by combining opaque metal roofing over the main parking area with clear polycarbonate panels at the peak of the gable. This allows rain and snow to be shed effectively while letting a significant amount of natural light filter through. This is especially important if the carport is located in front of windows, as a solid roof can make the interior of your home feel much darker.
|
📋 Copy HEX 🔗 Share |
💡 Designer Tip
The clear panels in the gable are, without a doubt, the defining feature here. They are the ‘one thing’ that transforms a standard metal carport kit into a much more thoughtful and pleasant design. By placing them at the highest point, they catch the most light throughout the day and create a bright, airy feeling underneath, preventing the ‘dark cave’ effect that many carports suffer from. It’s a simple, inexpensive addition that completely changes the experience of the space.
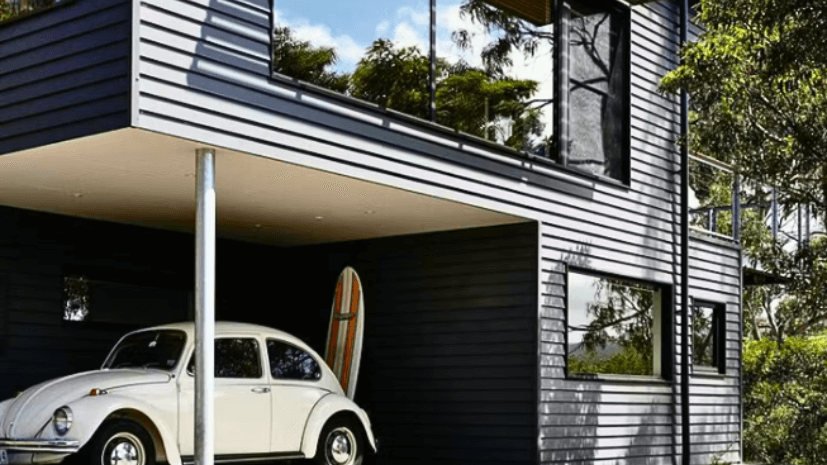
11. Go Minimalist with Contrasting Grey Slatted Siding
This is modern minimalism executed perfectly. The style math is simple: 70% monochromatic slats + 20% clean structure + 10% natural accent. The key is the subtle variation in the grey tones of the horizontal siding; the dark and light grey slats create a rhythmic, textured pattern that’s visually interesting without being busy. The single, clean-lined metal support beam is all the structure you see, keeping it incredibly uncluttered. The final 10%? A natural wood element like the surfboard, which adds a touch of warmth and personality.
|
📋 Copy HEX 🔗 Share |
📐 Style Math
A minimalist design like this lives or dies by its execution. Because there are so few elements, any imperfection will stand out. The gaps in the slatted siding must be perfectly uniform, the paint finish has to be flawless, and the single support beam needs to be installed with absolute precision. This isn’t a style that’s forgiving of ‘close enough’. Also, consider that the very open nature of this design offers less protection from wind-blown rain and snow compared to a more enclosed structure.
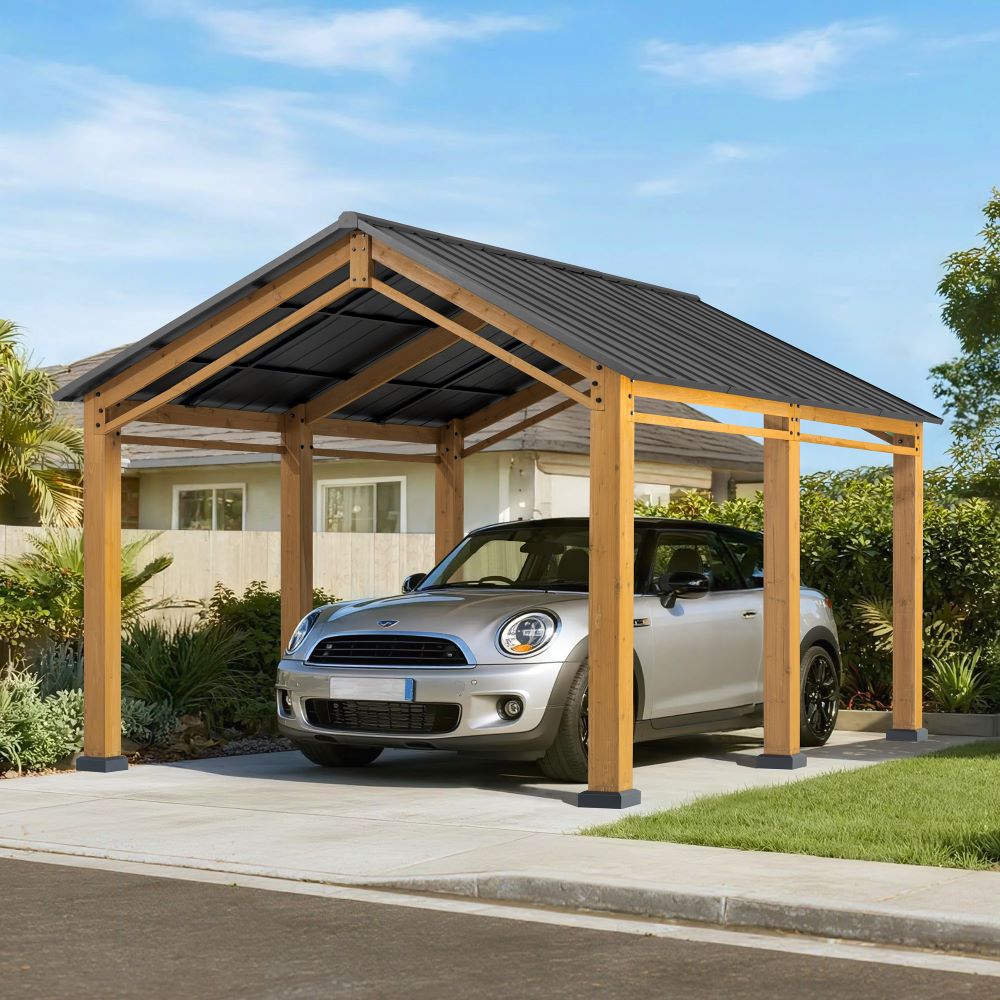
12. A Simple, Modern Structure of Wood and Metal
A custom wood-and-metal carport can be a significant investment. For a more budget-friendly approach that captures this clean, modern aesthetic, look into pre-fabricated kits from companies like TOJA GRID or local metal suppliers. You can often buy the metal brackets and connectors separately and source the wood (like standard 4×4 or 6×6 pressure-treated posts) from a big-box store like Lowe’s or Home Depot. This allows you to get the custom look and sturdy feel for about 40-60% less than a fully custom build. Compare with Idea #14, which uses a full metal frame.
|
📋 Copy HEX 🔗 Share |
⭐ The One Thing
Before you commit to a detached carport, check these boxes:
- Check Setbacks: Verify your local zoning laws. There are rules about how close any structure can be to your property lines, and a detached carport is no exception.
- Confirm Surface Level: Is your driveway or proposed foundation area perfectly level? A slight slope may require extra work like pouring a concrete slab or using adjustable post bases.
- Plan for Runoff: Where will water from that sloped metal roof go? Ensure it will drain away from your home’s foundation and won’t pool on your property or your neighbor’s.
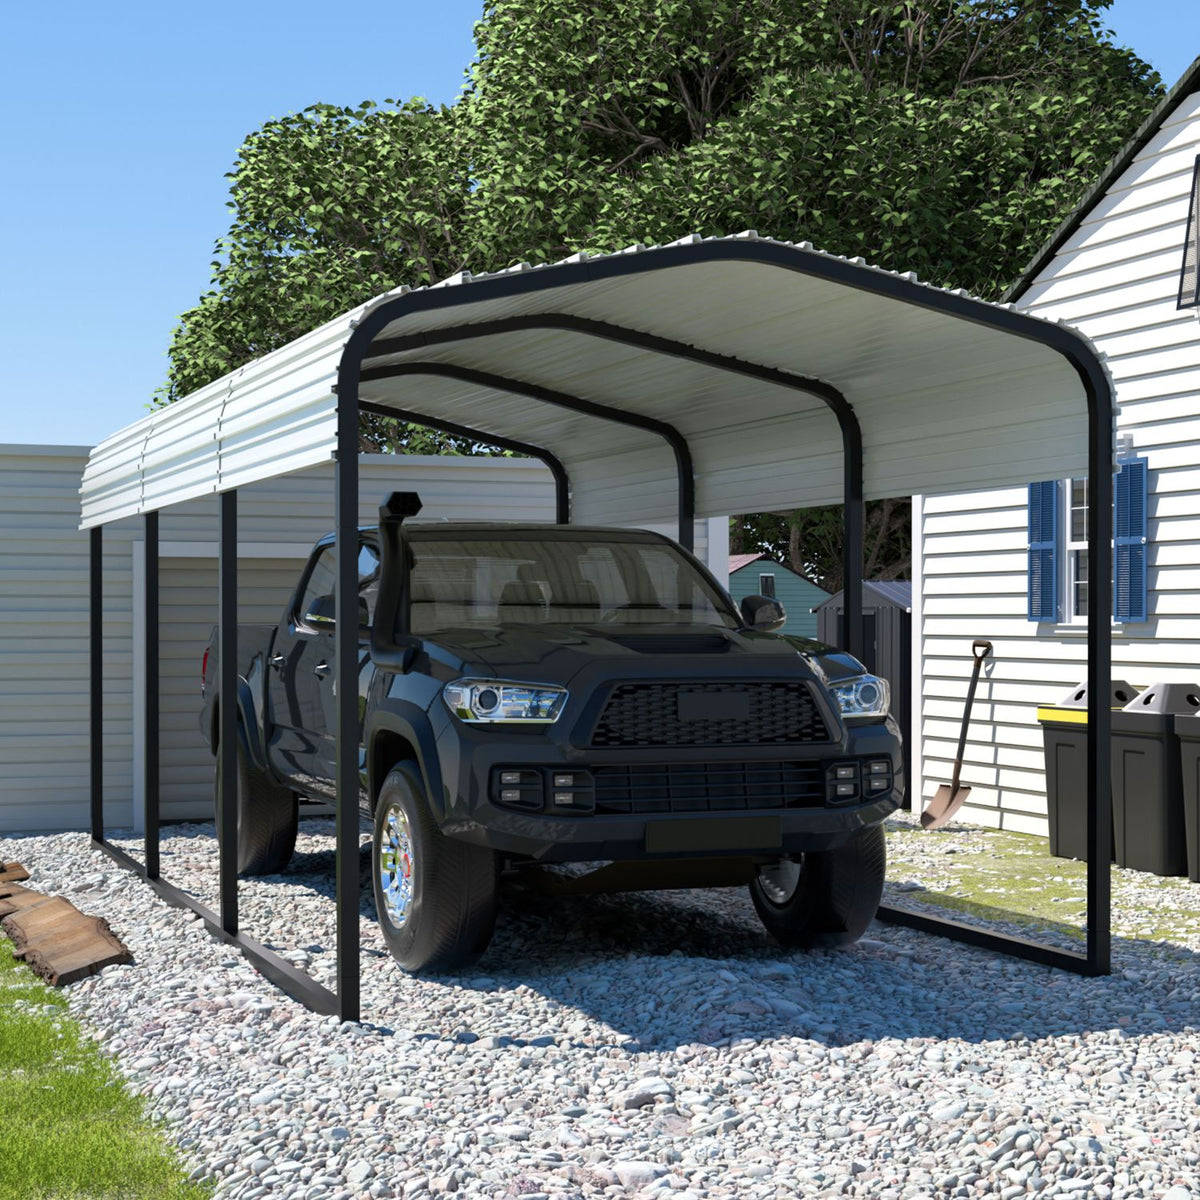
13. The Utilitarian Pick: A Simple Metal Frame on Gravel
This is the go-to option for purely functional, budget-friendly coverage. It’s affordable and fast to install.
- Metal Carport Kit (frame and roof): $700 – $1,500
- Gravel (for a 12×20 area, 4-inch depth): $300 – $600
- Delivery & Professional Installation (optional): $400 – $800
- TOTAL: $1,000 – $2,900
- Budget alternative: You’re already looking at it! Assembly can often be a DIY project for two people, saving you the installation cost. Sourcing gravel from a local landscape supplier is usually cheaper than big-box stores.
|
📋 Copy HEX 🔗 Share |
⚠️ Real Talk
Let’s be honest: while incredibly practical and affordable, this type of basic metal carport rarely adds aesthetic value to a property. It’s a purely functional choice. If your home has a distinct architectural style (like Craftsman, Mid-Century Modern, etc.), a generic structure like this can actually detract from its curb appeal. It’s a great solution for a work area or outbuilding, but think carefully before placing it front-and-center if home value is a top priority.
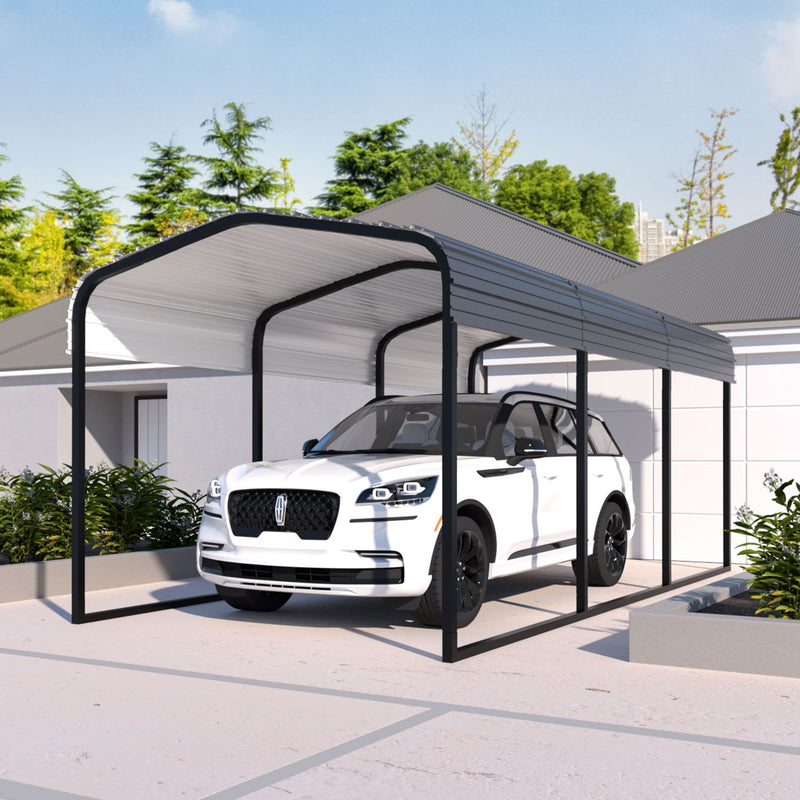
14. Shelter in Style with a Grey Corrugated Metal Roof
This design’s success comes from its smart use of color and shape. The dark grey corrugated roof has a modern, industrial feel that pairs nicely with the stark black U-shaped frames. This dark structure creates a bold contrast against the light grey concrete and the white SUV, making everything look crisp and clean. The simplicity of the frame’s shape is key; it’s functional without being fussy, which allows the clean lines and color contrast to take center stage. It looks much more designed than the basic carport seen in Idea #13.
|
📋 Copy HEX 🔗 Share |
✅ Before You Start
When installing a carport on a concrete slab, you want to ensure it’s anchored securely. Don’t just drill and use standard bolts. For the best and safest installation, use concrete wedge anchors that are at least 1/2-inch in diameter and 4-5 inches long. This ensures the anchor goes deep into the slab and expands for a tight grip, which is critical for resisting wind uplift. It’s a small detail that makes a huge difference in the structure’s long-term stability.
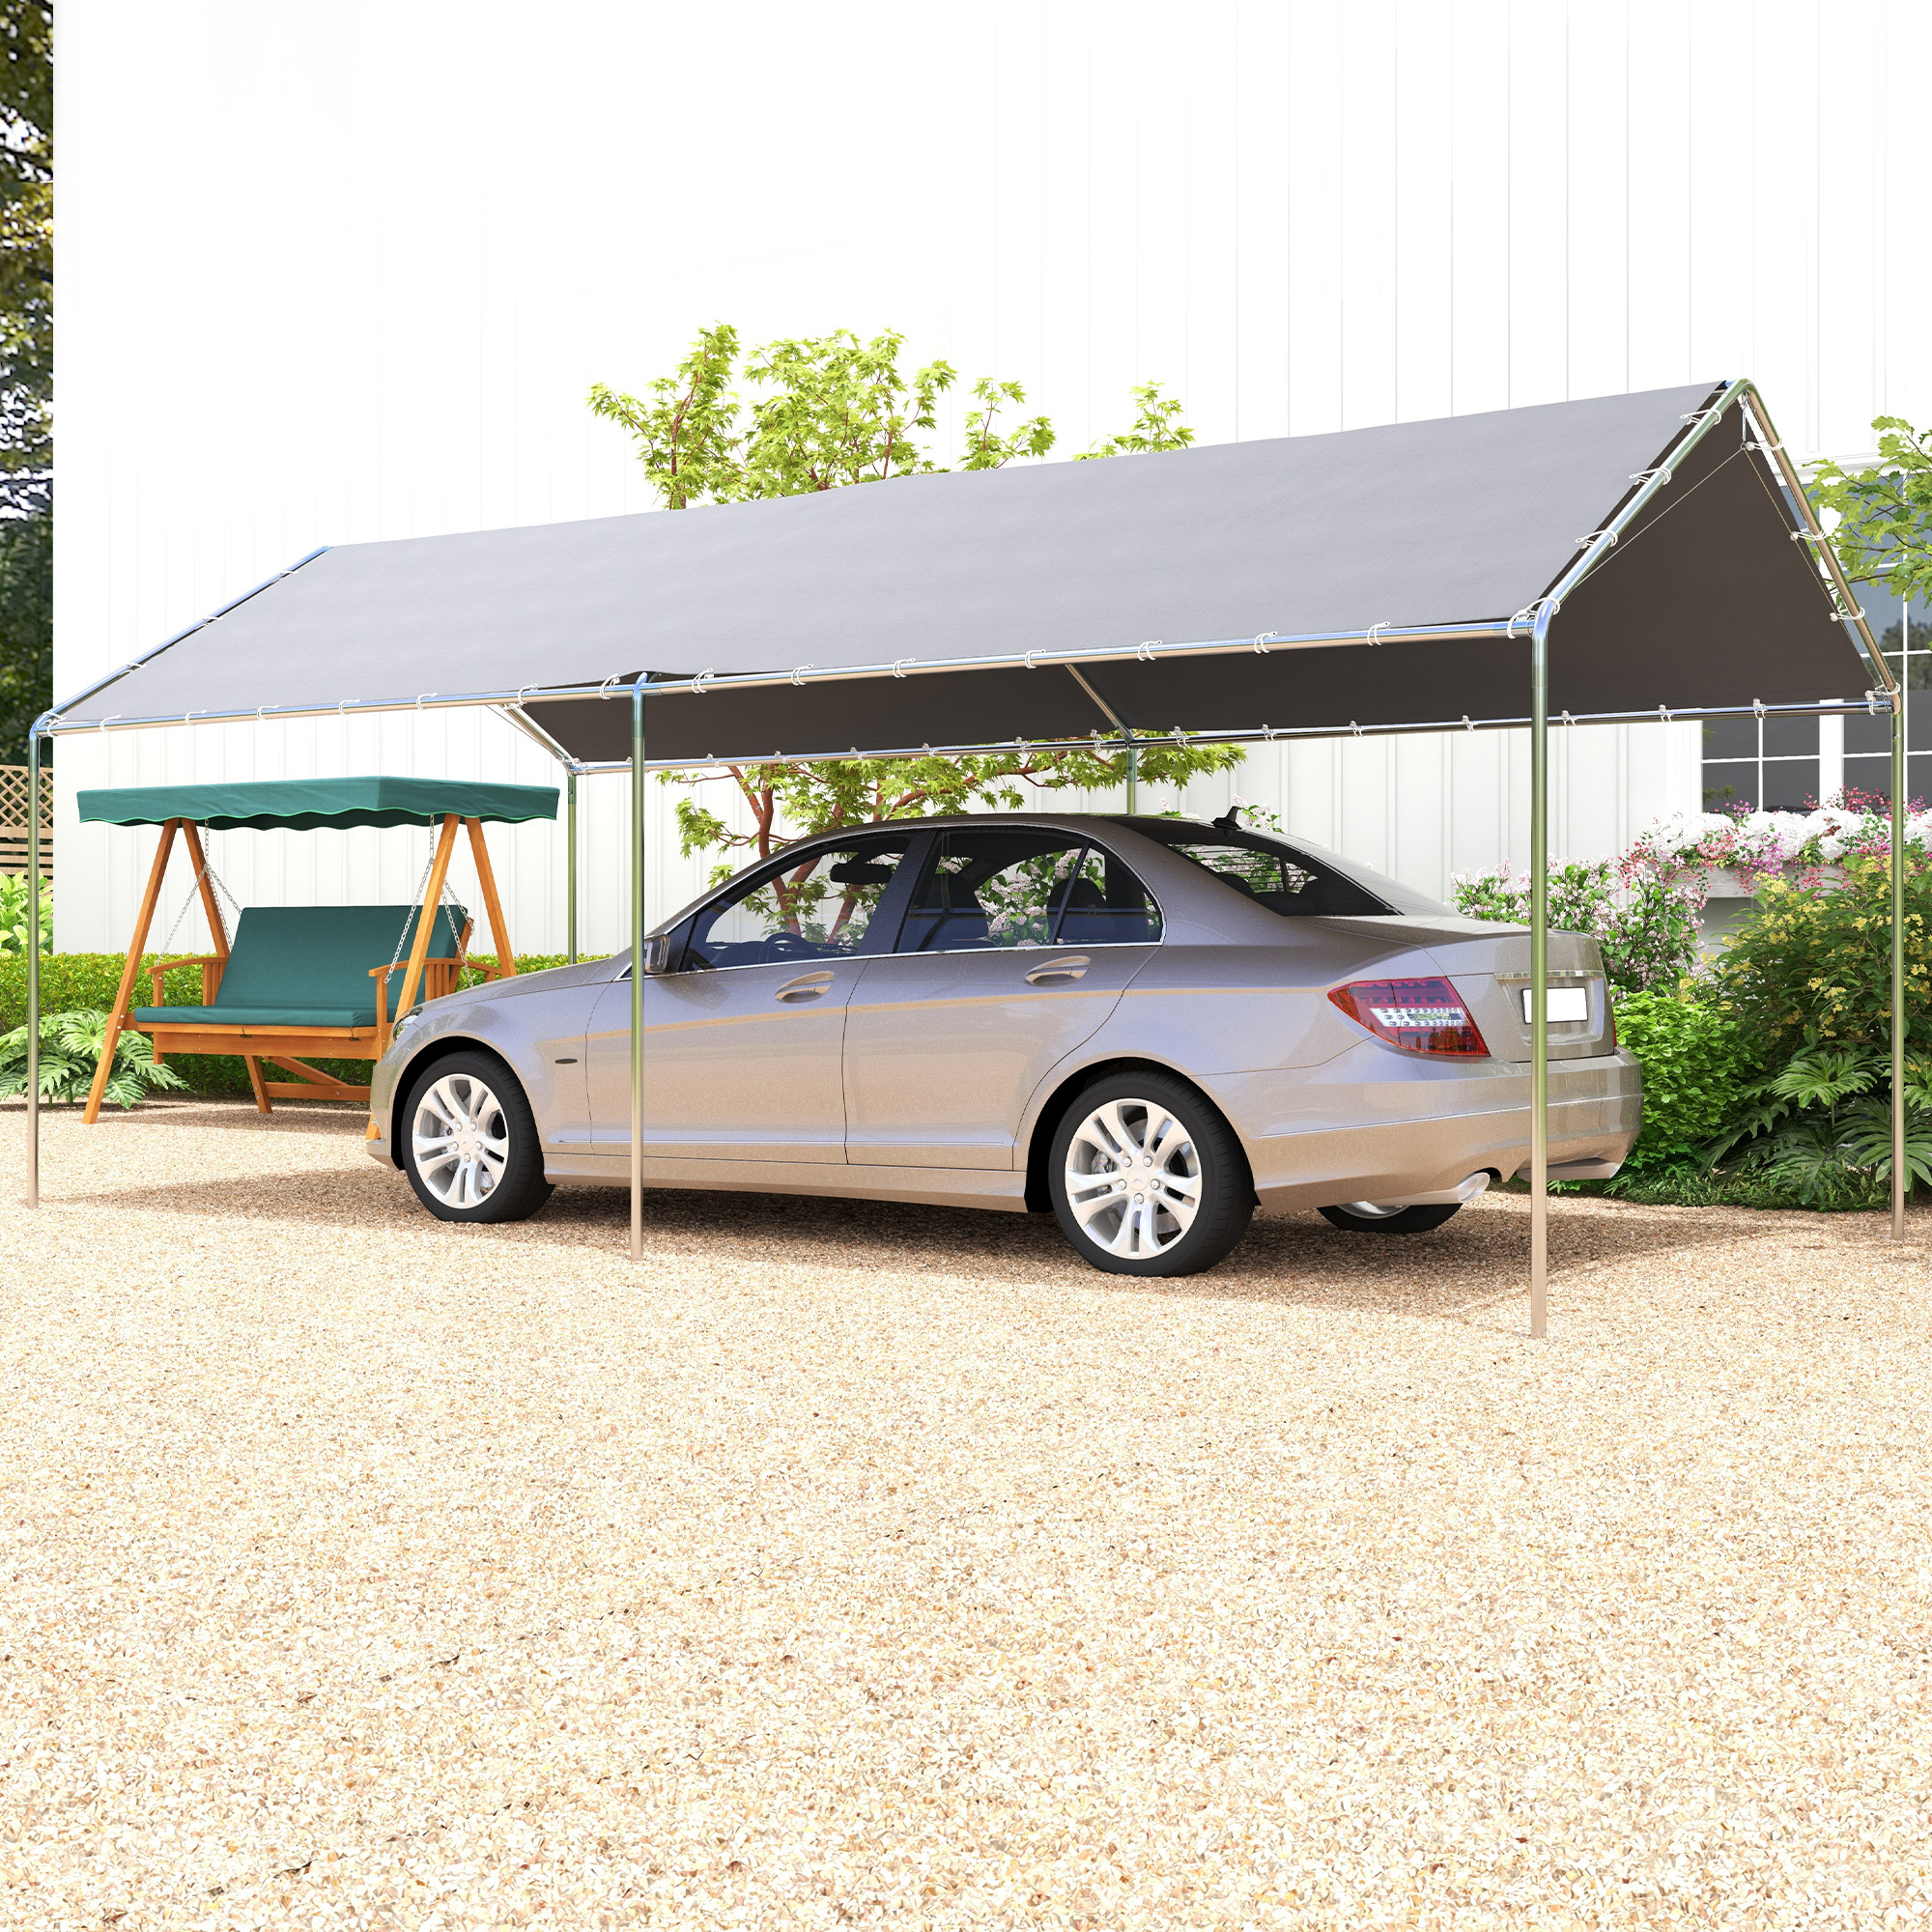
15. An Easy, Breezy Option with a Fabric Roof
If you’re looking for a non-permanent, budget-conscious shade solution, a fabric-roof carport is the answer. These are widely available at home improvement stores, warehouse clubs like Costco, and online for anywhere from $300 to $800. They offer excellent protection from the sun and light rain without the cost and commitment of a permanent structure. This is a perfect choice for renters or for homeowners who want to try out a carport in a specific location before investing in a more durable build. Plus, installation is a straightforward DIY project.
|
📋 Copy HEX 🔗 Share |
🎯 What Makes It Work
The main trade-off for the low cost of a fabric carport is durability. The fabric roof, even if UV-treated, will eventually degrade from sun exposure and will likely need to be replaced every 3-5 years. Replacement canopies typically cost $150-$300. These structures are also not designed to handle heavy snow loads, so the canopy may need to be removed in the winter in colder climates to prevent the frame from collapsing. Think of it as a seasonal or semi-permanent solution rather than a lifetime one.
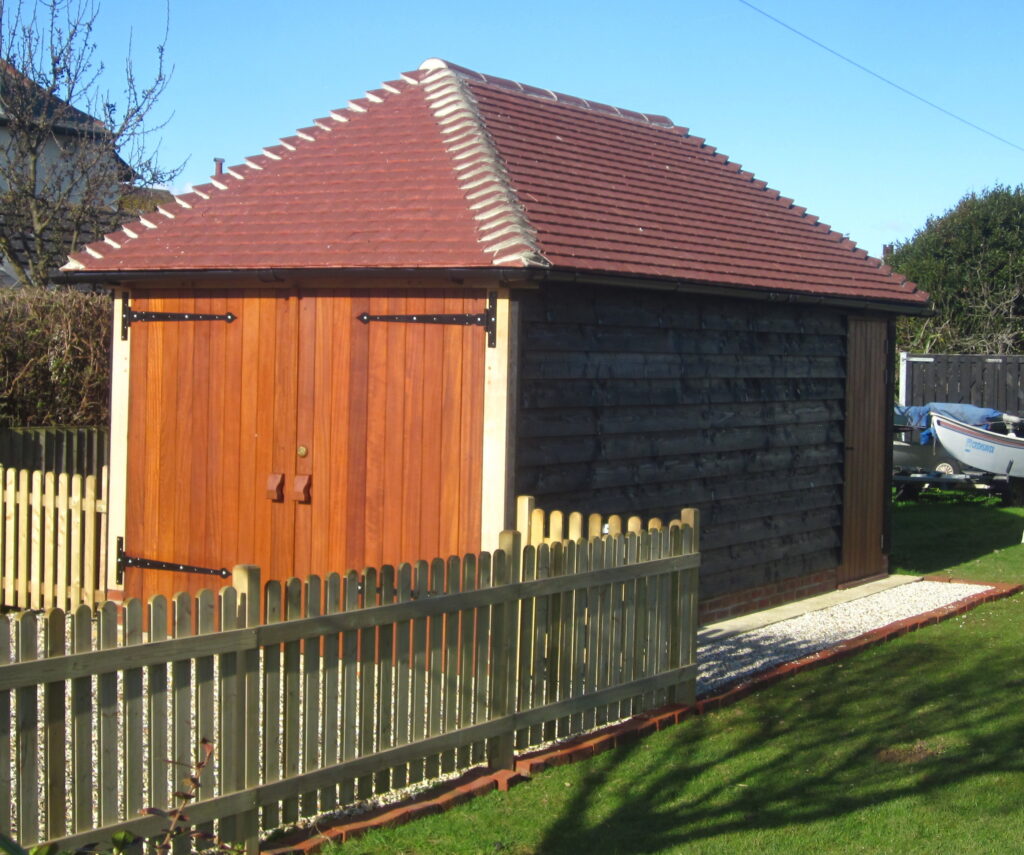
16. Create a Rustic Outbuilding with Bi-Fold Wood Doors
The bi-fold light wood doors with their prominent black strap hinges are what make this structure truly special. They transform it from a simple carport into a handsome, carriage house-style outbuilding. While it can be left open to function as a carport, the ability to close it off provides security, better weather protection, and a much more finished, building-like appearance. The contrast between the light wood of the doors and the dark wood of the siding is a classic, can’t-miss design choice.
|
📋 Copy HEX 🔗 Share |
📏 Scale Guide
This design achieves its rustic, traditional feel with a simple formula: 40% dark siding + 30% light doors + 20% terracotta roof + 10% black hardware. The dark horizontal plank siding provides a solid, grounding backdrop. The light wood bi-fold doors create a bright, inviting focal point. The terracotta roof adds a touch of warm, earthy color, and the bold black strap hinges provide the perfect rustic, forged-metal accent. It’s a balanced palette that feels timeless and welcoming.
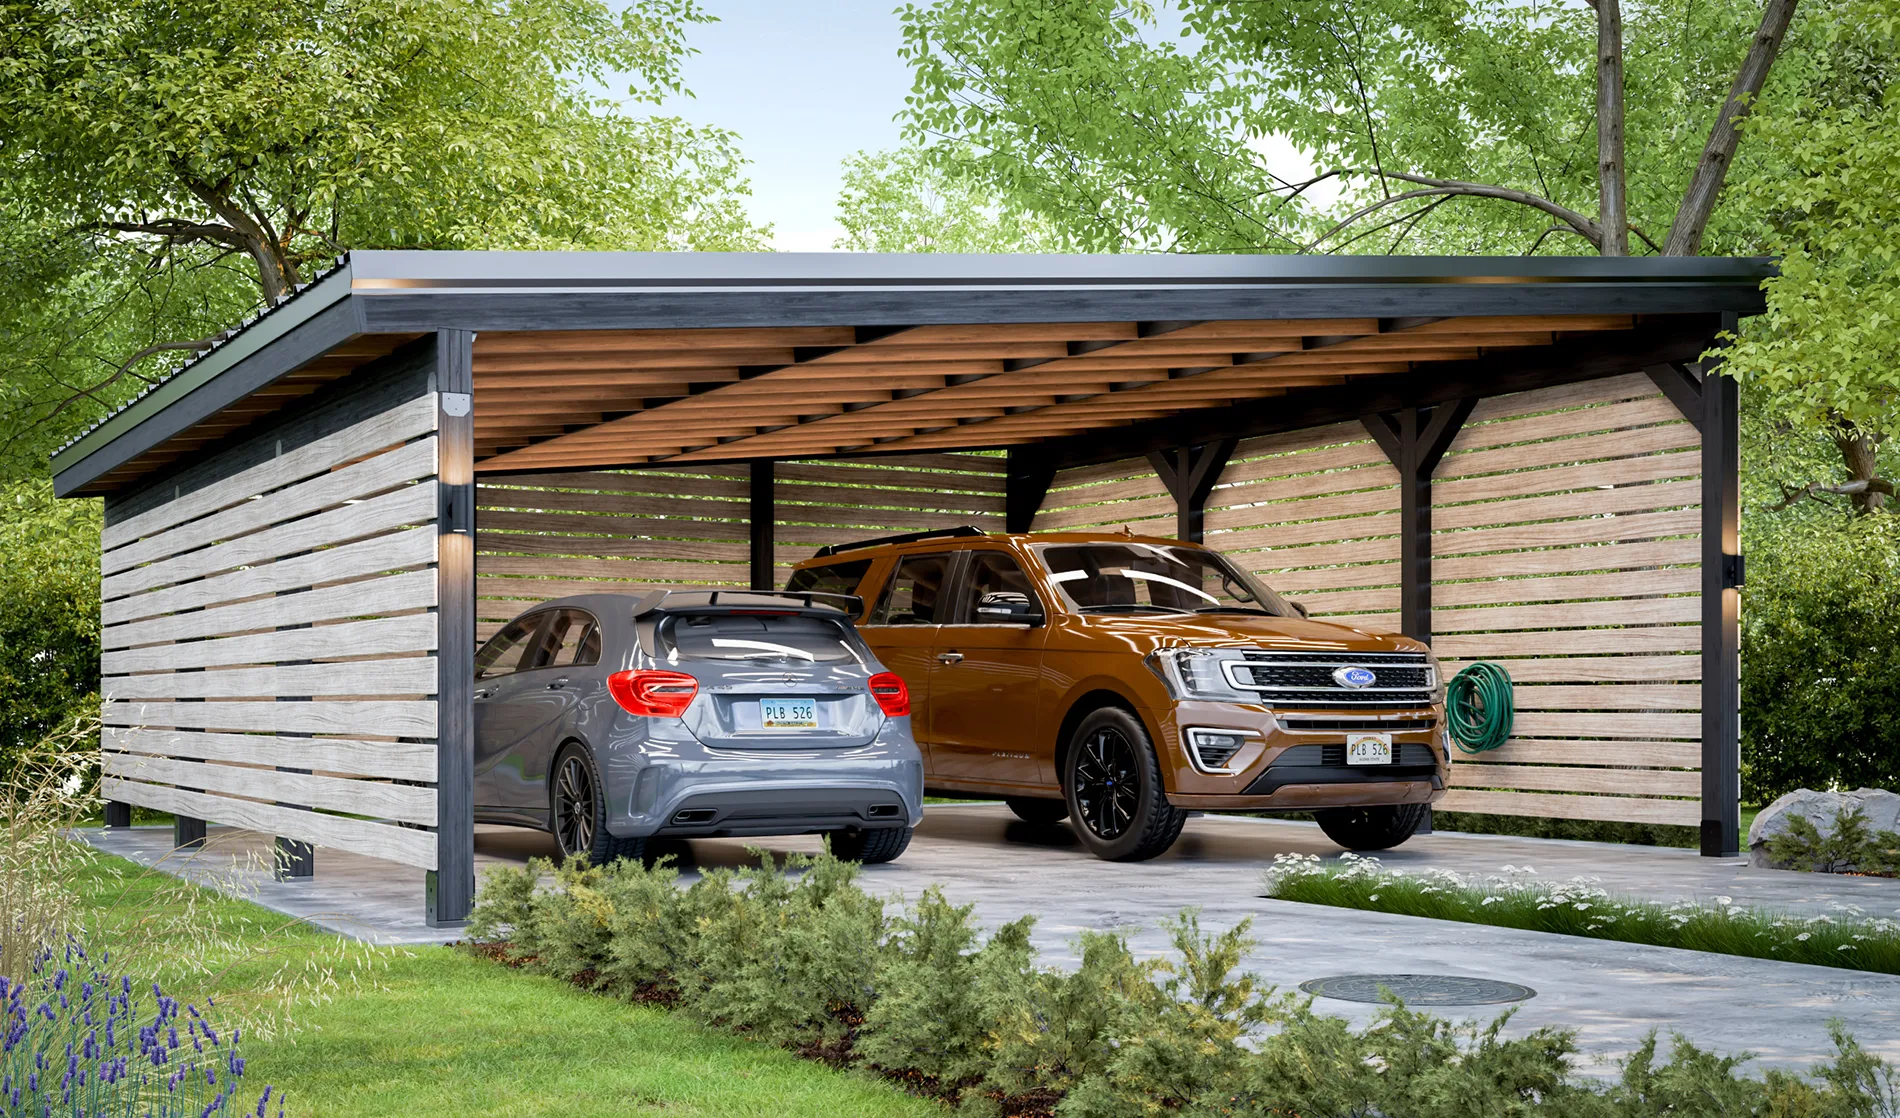
17. Modern Warmth with a Slatted Timber Ceiling and Frame
This carport feels so luxurious because it flawlessly blends modern structure with natural materials, blurring the line between inside and outside. The dark metal frame provides a sleek, contemporary skeleton, but the slatted timber on the ceiling and side wall brings immense warmth and texture. The integrated lighting is crucial; by washing the wood in a soft glow, it highlights the natural grain and turns the carport into a design feature that’s beautiful to look at, especially at night. It feels more like an outdoor living room than a parking spot.
|
📋 Copy HEX 🔗 Share |
🔥 Trending Context
To get this high-end, integrated lighting look, use weatherproof LED channel systems. These are aluminum channels with a diffuser cover that you can recess between the slats or mount on the beams. A color temperature of 2700K to 3000K will give you a warm, inviting glow that beautifully complements the wood tones. Avoid cooler, blue-toned lights (4000K or higher), as they can make the space feel sterile and harsh. Plan the wiring before you build for the cleanest installation.
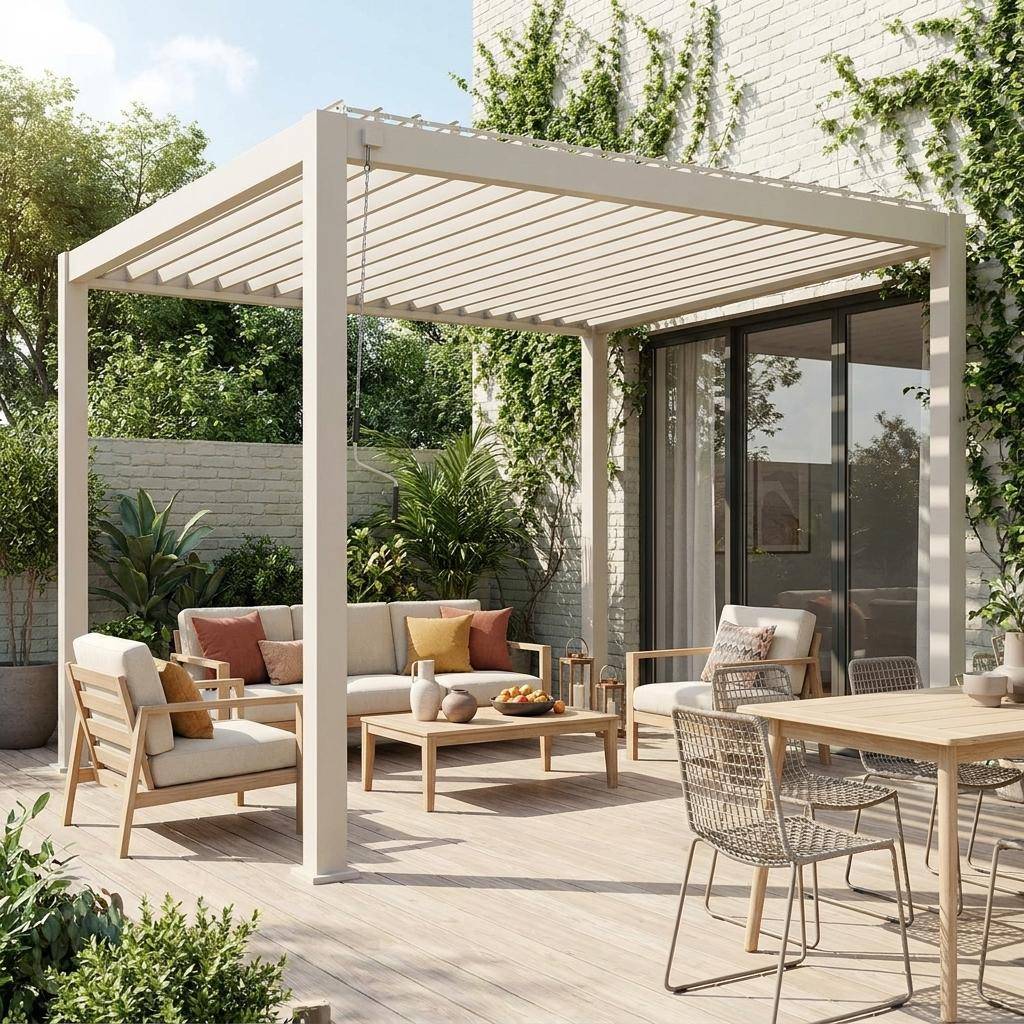
18. Create an Airy Outdoor Room with a Slat Pergola
The trend of creating true ‘outdoor rooms’ is stronger than ever for 2026, and this is a perfect example. Homeowners want functional, comfortable, and stylish spaces to extend their living area, and a pergola-covered patio checks all the boxes. It defines the space, provides dappled shade without blocking all the light, and creates a framework for adding elements like lighting and plants. It signals a shift from seeing the backyard as just a yard to seeing it as valuable, livable square footage. This idea is less carport, more ‘car-optional’ patio.
|
📋 Copy HEX 🔗 Share |
🔧 How-To Brief
A custom-built wood deck and pergola can cost a pretty penny. To achieve this vibe for less, start with a simple paver patio (which you can often DIY). Then, instead of a full wood pergola, consider a more affordable aluminum or vinyl pergola kit from a store like Target or Wayfair, which can cost $600-$1,500. For furniture, keep an eye on end-of-season sales or browse Facebook Marketplace for secondhand outdoor sets that you can refresh with new cushions.
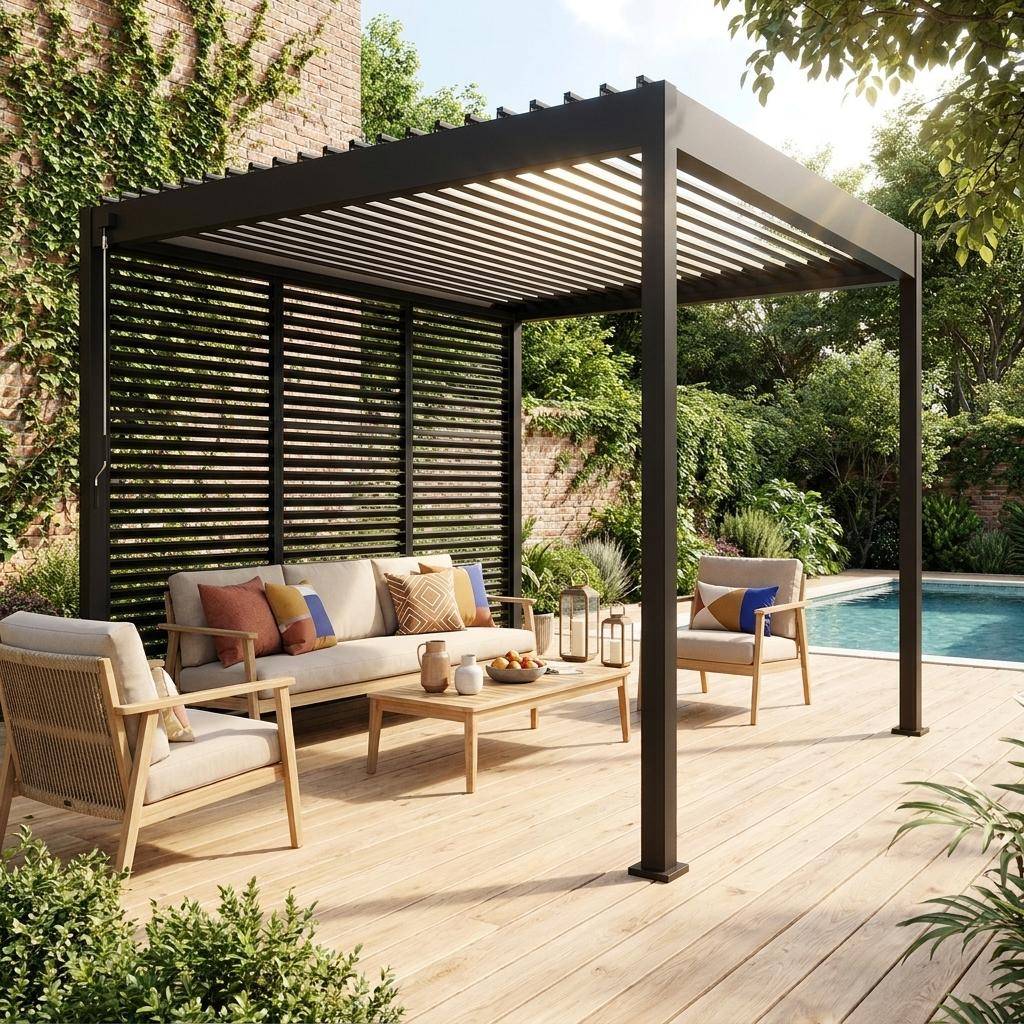
19. Modern Privacy with a Louvered Black Metal Pergola
The success of this space lies in its masterful control of light and privacy. The black metal pergola provides a strong, modern visual anchor, and its dark color recedes into the background, allowing the lush greenery and light wood tones to pop. The adjustable louvered roof and side screens are the key functional elements, allowing the user to dial in the perfect amount of sun, shade, or privacy at any given moment. This adaptability is what makes the design feel so luxurious and responsive. Compare this to the more open pergola in Idea #20.
|
📋 Copy HEX 🔗 Share |
💸 Get This Look For Less
The louvered privacy screens are the game-changer here. While the adjustable roof is fantastic for sun and rain control, the matching side screens are what truly transform this from a pergola into a private outdoor room. They provide a feeling of enclosure and seclusion from neighbors without creating a solid, imposing wall. They also add another layer of architectural interest and texture, reinforcing the clean, linear look of the entire structure. It’s the feature that delivers the ultimate sense of a private retreat.
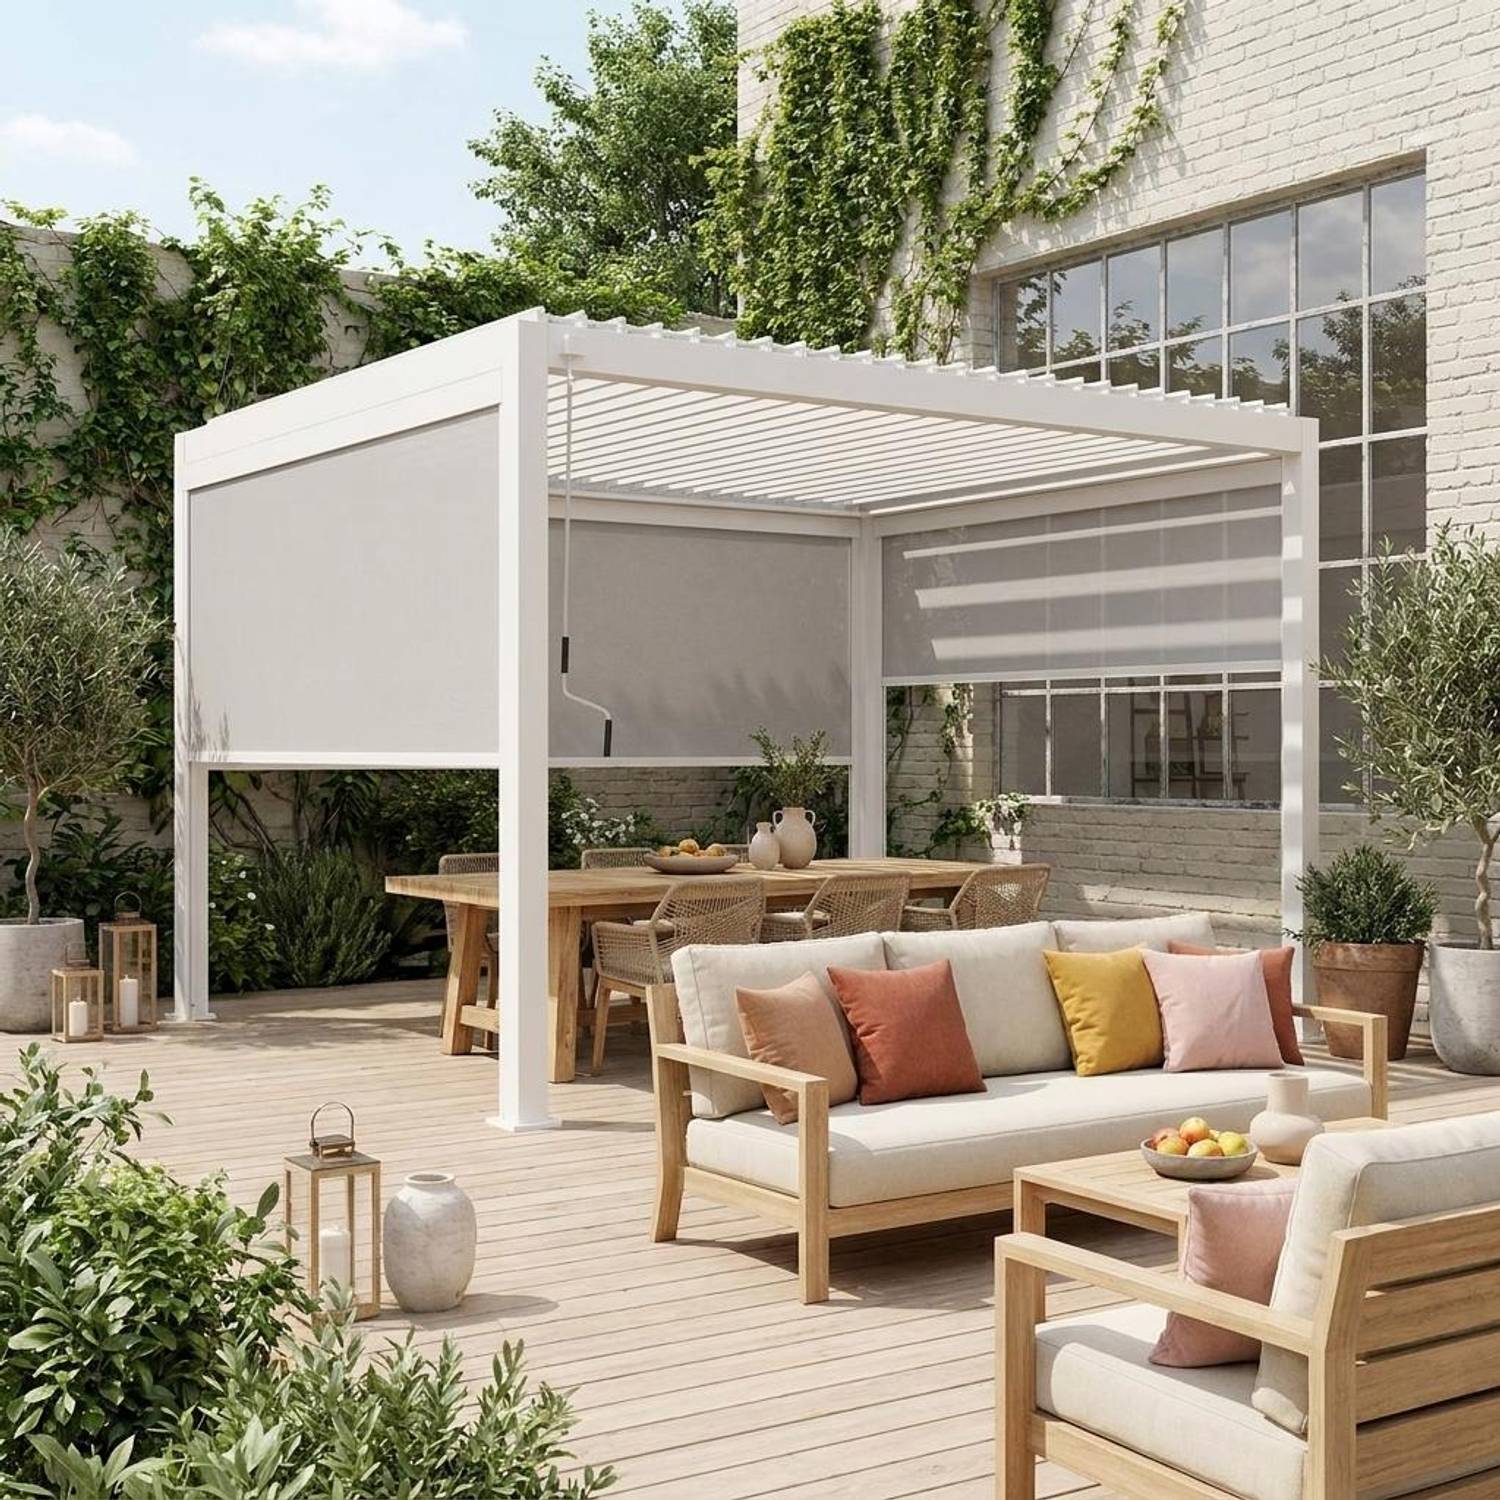
20. Dine and Lounge Under a White Pergola with Retractable Shades
Here’s the visual recipe for this relaxed, inviting space: 50% airy structure + 30% natural textures + 20% soft comfort. The white slatted pergola and light wood deck create the airy, open base. Natural textures come in through the wicker dining chairs and the slatted wood furniture. The final layer is all about comfort—plush cream cushions and a variety of colorful and patterned pillows that invite you to sit down and stay awhile. The retractable gray shades are a functional bonus, adding another layer of texture and control.
|
📋 Copy HEX 🔗 Share |
🧹 Maintenance Reality
A white pergola looks stunningly crisp and clean… when it’s new. Be prepared for regular maintenance to keep it looking that way. White surfaces, especially horizontal ones, show dirt, pollen, and mildew much more readily than darker colors or natural wood. Plan on giving it a thorough cleaning with a soft brush and a mild detergent solution at least once or twice a year, depending on how much tree cover is overhead. If you’re in a very damp or wooded area, a darker color might be a more practical long-term choice.
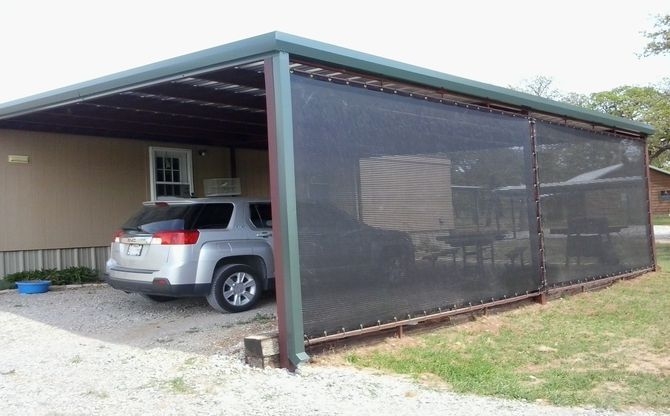
21. Add Inexpensive Privacy with Black Mesh Screens
This is a brilliant, low-cost solution for adding privacy and wind protection to a basic carport. Instead of building expensive solid walls, using heavy-duty mesh screens (also known as ‘privacy fence screen’ or ‘windscreen’) is a fantastic hack. You can buy these in standard-height rolls online or from fencing suppliers for as little as $1-$2 per linear foot. They attach easily to any metal or wood frame using zip ties or grommets, providing instant screening without the cost or permanence of a real wall.
|
📋 Copy HEX 🔗 Share |
💰 Budget Breakdown
Installing a mesh screen with grommets is a simple DIY project. Here’s how:
- Measure Your Frame: Measure the height and length of the carport bay you want to cover. Order a screen that matches these dimensions.
- Start at a Corner: Unroll the screen and use a heavy-duty zip tie or a short piece of rope to secure the top corner grommet to the carport frame.
- Attach Top Grommets: Move along the top of the frame, securing each grommet. Pull the screen taut as you go, but not so tight that it stretches or tears.
- Attach Side & Bottom: Go back and attach the side grommets, and finally the bottom ones, ensuring the screen is smooth and even.
Time estimate: 1 hour. Material cost: $80-$200.
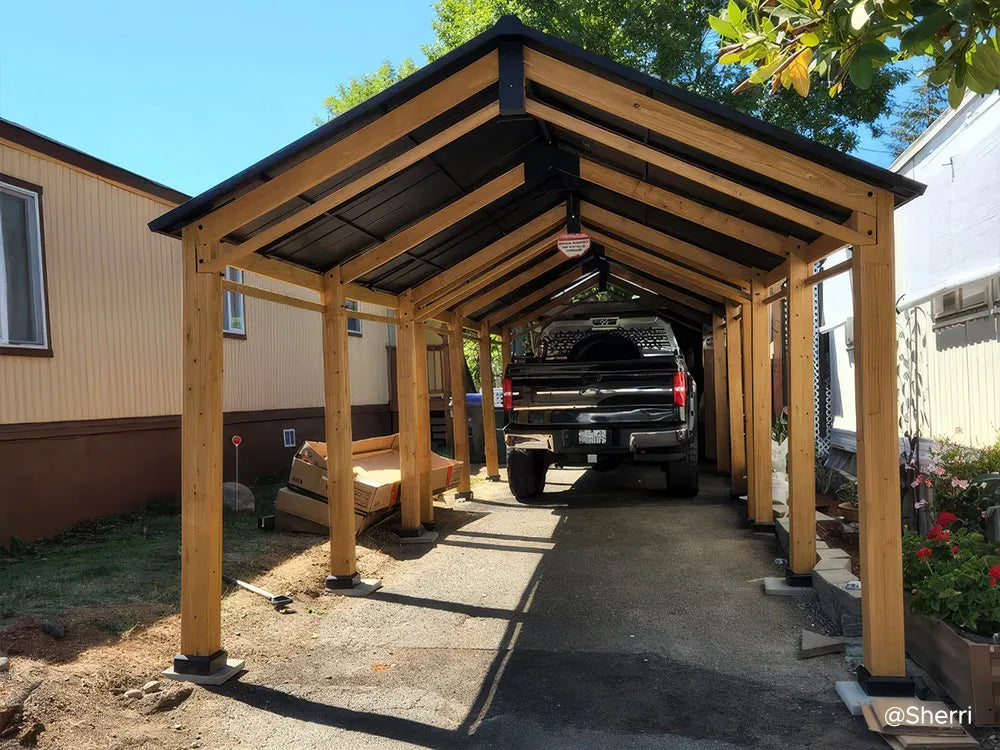
22. A Sturdy, Open-Air Shelter with a Black Metal Roof
This carport’s appeal is in its robust simplicity. By using tall, substantial natural wood posts and exposed roof beams, the structure feels incredibly sturdy and well-built, like a modern barn. Topping it with a crisp, black metal roof adds a clean, graphic contrast that keeps the design from looking too rustic. Leaving the sides open maintains an airy feel and makes parking easy, while the dark square post bases are a small detail that provides a clean transition from the wood posts to the paved driveway. It feels both strong and stylish.
|
📋 Copy HEX 🔗 Share |
💡 Designer Tip
A new structure this substantial needs a solid plan. Before you even buy the materials, check these items off your list:
- Permit Requirements: A permanent, anchored structure of this size almost always requires a building permit. Check with your local planning department about what drawings and documents you’ll need to submit.
- Underground Utilities: Before you dig holes for those post footings, call 811. It’s a free service that will mark the location of any buried utility lines (gas, water, electric) on your property to prevent a dangerous and costly accident.
- Material Lead Times: Specialty items like metal roofing or large-dimension timbers may not be in stock. Check lead times with your suppliers early in the process to avoid delays.
23. Festive Flair: Decorating Your Carport for the Holidays
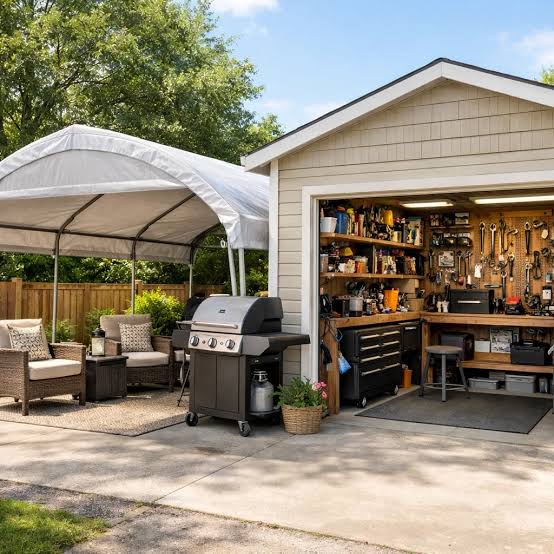
When decorating a carport for Christmas, focus on creating a dramatic, welcoming entrance. Use outdoor-rated LED string lights with a warm white color (2700K) for the most inviting glow. Wrap the main support posts tightly with lights, like candy cane stripes. Then, swag weatherproof garland along the roofline, securing it with zip ties or floral wire. The key is to use items in a larger scale than you would indoors—thicker garlands and bigger bows—so they don’t get lost in the open space.
|
📋 Copy HEX 🔗 Share |
📐 Style Math
A little holiday cheer is great, but safety first! Only use lights and extension cords that are explicitly rated for outdoor use. Check all wires for any cracks or damage before plugging them in. Secure all decorations thoroughly to withstand wind and winter weather; a loose garland or string of lights can become a hazard in a storm. And be mindful of where your cords are running. Avoid creating trip hazards across walkways or the driveway. A little planning prevents a holiday headache.
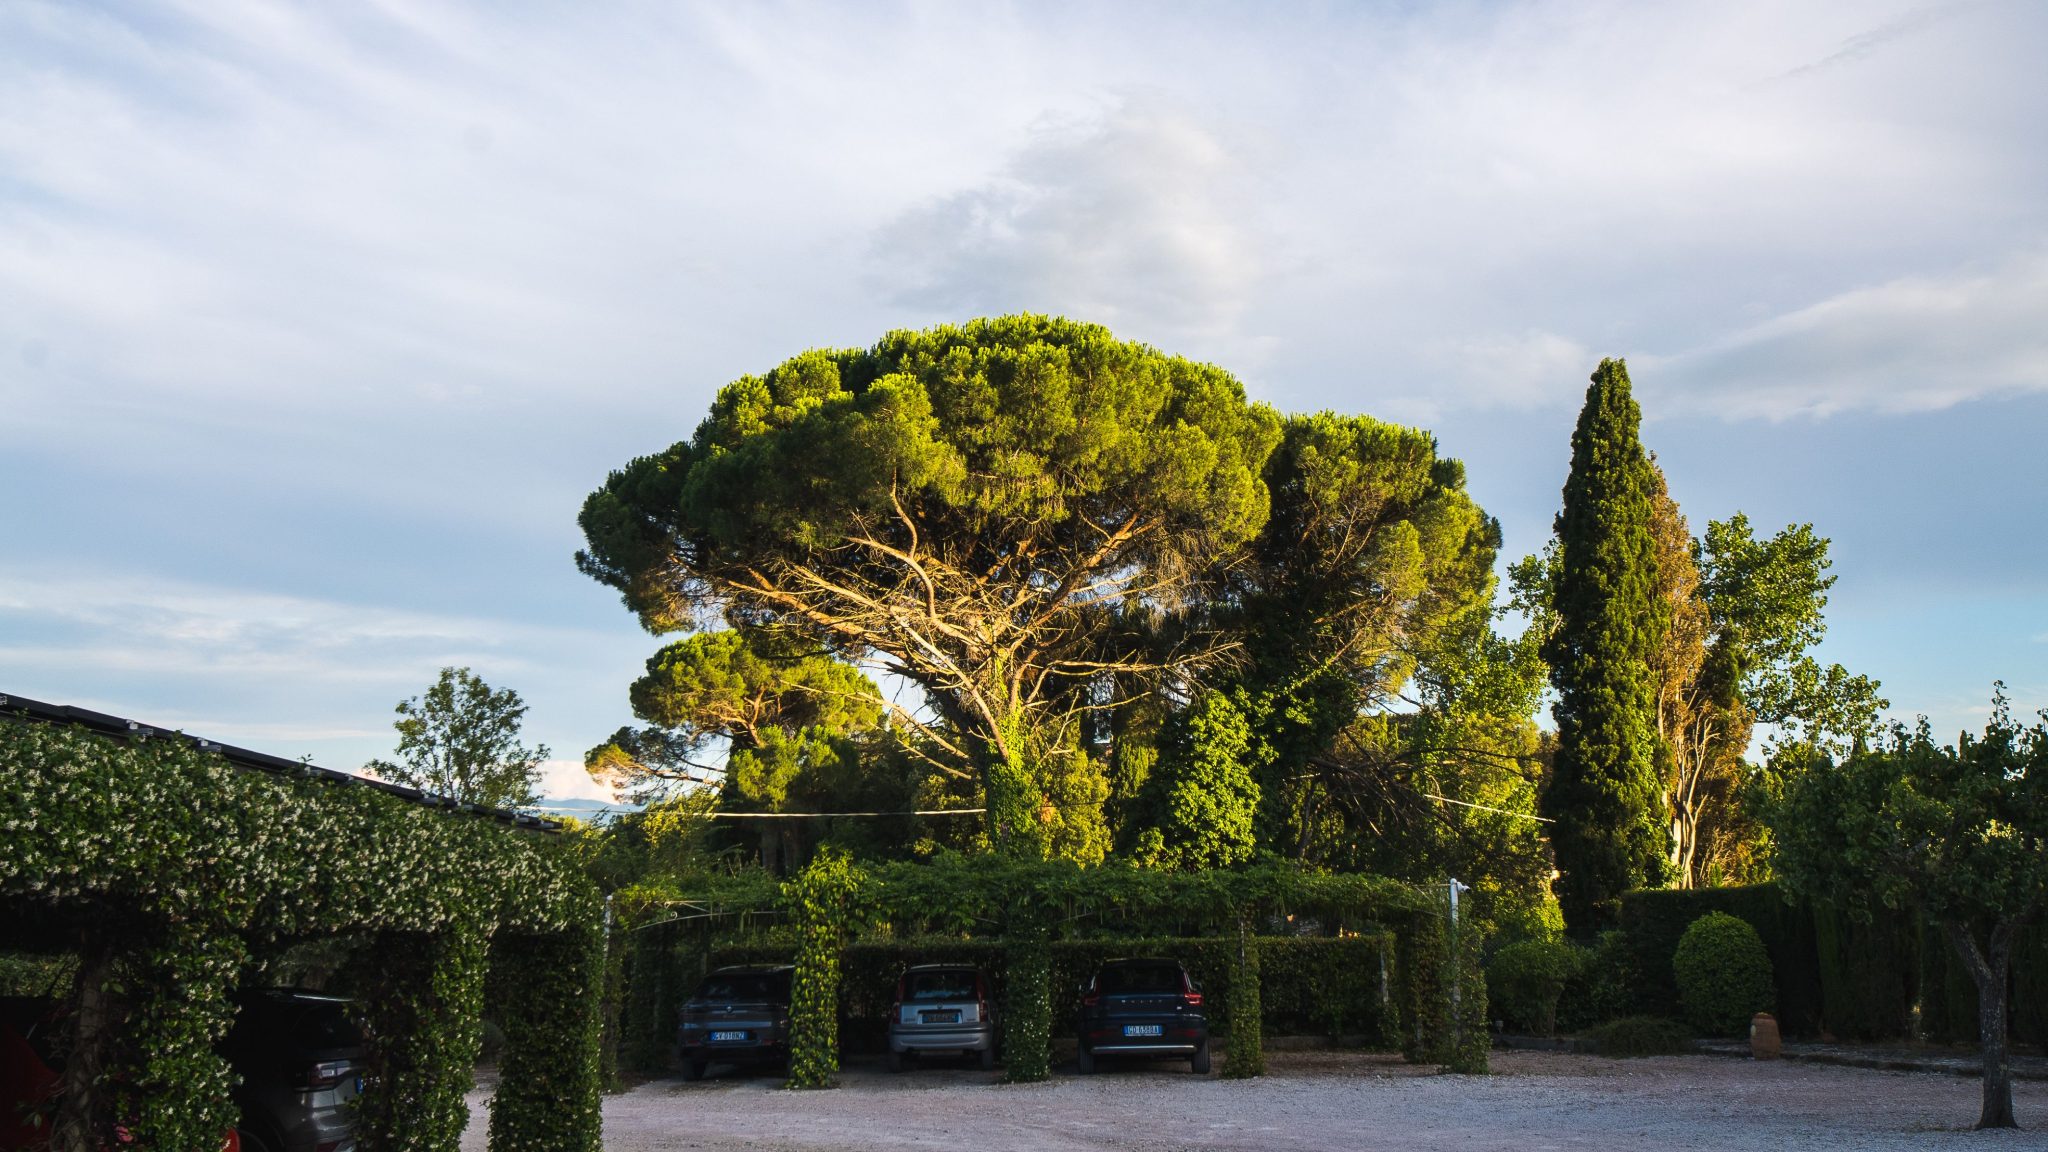
24. Blend into Nature with a Vine-Covered Canopy
that makes this carport so magical is that it has been completely surrendered to nature. The simple metal framework is just a skeleton for the lush, living canopy of green vines and flowers. This transforms a purely functional structure into a ‘green roof’ that blends seamlessly into the landscape. It provides dappled, natural shade that feels cooler and more pleasant than a solid roof, creating a serene, organic parking area that feels more like a part of the garden than a part of the driveway.
|
📋 Copy HEX 🔗 Share |
⭐ The One Thing
A living carport is a stunning and eco-friendly choice, but it’s not a ‘set it and forget it’ project. You’ll need to choose a fast-growing but manageable vine appropriate for your climate (like trumpet vine, clematis, or hops). For the first few years, you’ll need to ‘train’ the vines to grow up and over the structure. Annual pruning is essential to keep the growth from becoming too heavy, prevent it from growing onto the cars, and ensure the structure remains sound. It’s a beautiful commitment, but it is a commitment.
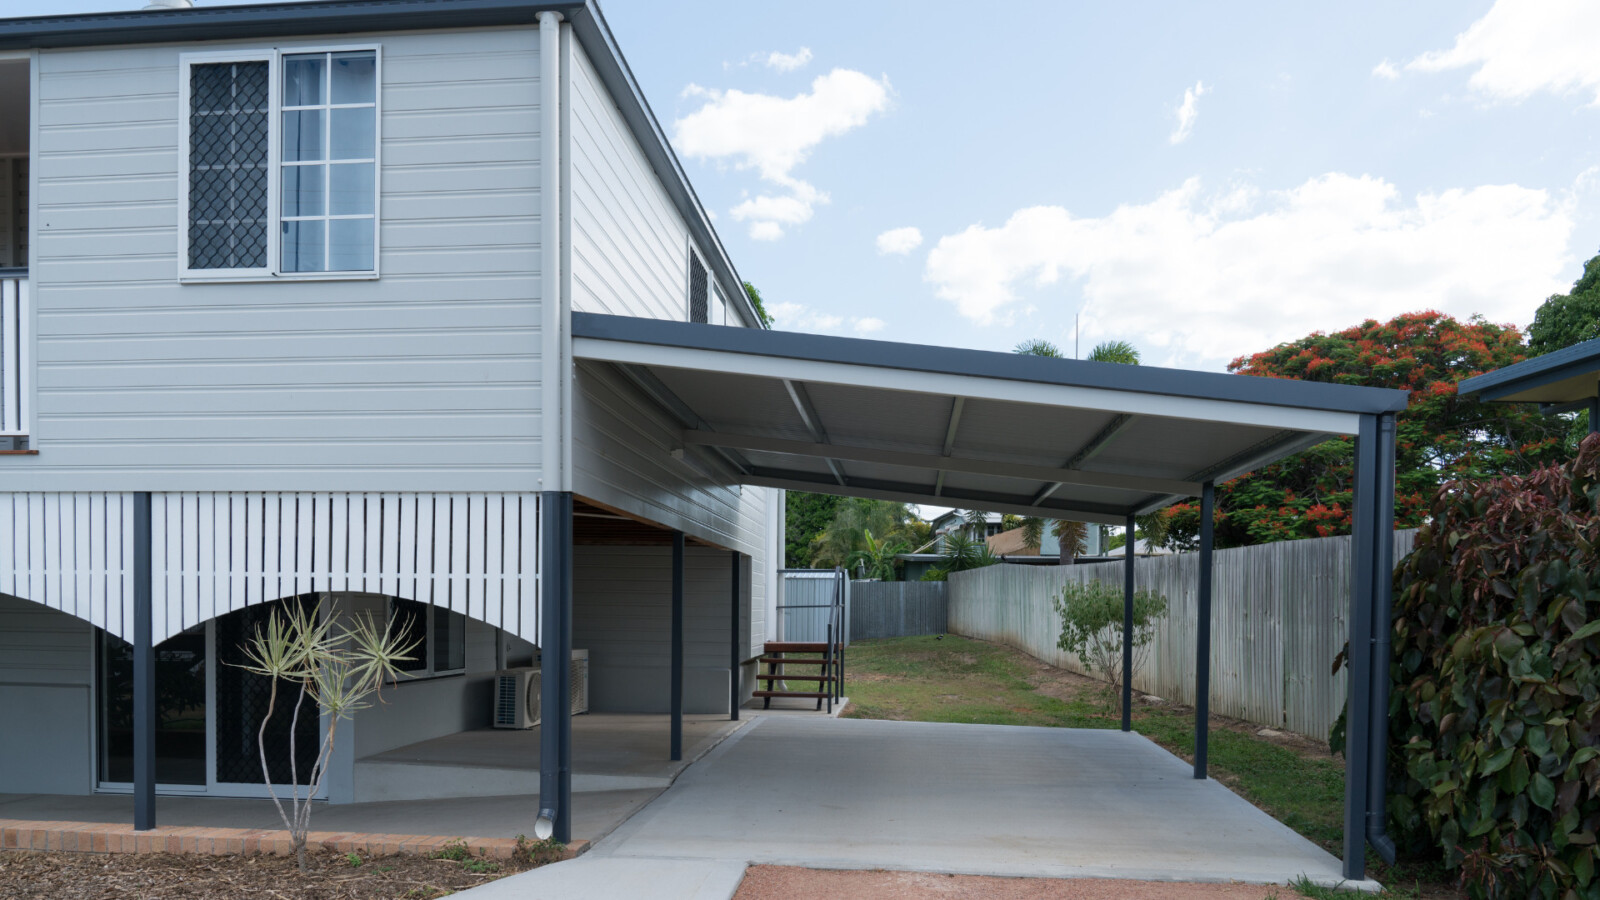
25. A Clean, Modern Extension with Contrasting Grey Tones
This design demonstrates the power of a simple, two-tone palette. By using a light grey for the main house siding and a darker charcoal grey for the carport posts and beams, the structure is clearly defined while still feeling connected to the home. The clean lines of the flat roof and the repetition of the horizontal siding onto the main house create a cohesive, modern look. The addition of the white vertical slats under the raised house adds another layer of texture and brightness, keeping the overall scheme from falling flat.
|
📋 Copy HEX 🔗 Share |
⚠️ Real Talk
A flat or low-slope roof carport like this is best suited for homes that already have modern or contemporary rooflines. This style works well for standard car spaces (10-12 feet wide per car) but can be extended lengthwise easily. The minimum ceiling height should be at least 8 feet to avoid feeling claustrophobic, but 9-10 feet is ideal. Because of its clean, unobtrusive lines, this is an excellent option for smaller properties or attached carports where a large, pitched roof might feel overwhelming.
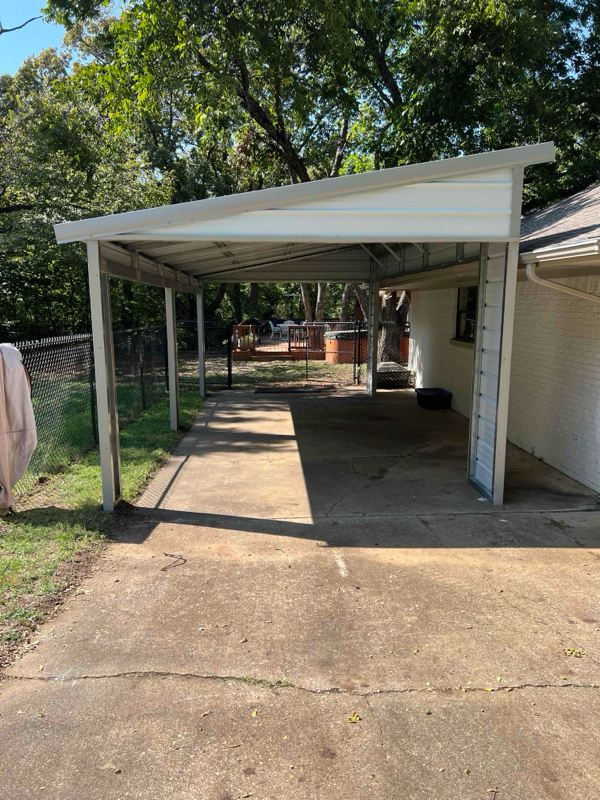
26. The No-Frills Lean-To for Simple, Effective Coverage
This is one of the most cost-effective ways to build a permanent carport, especially if you have a long wall to attach it to.
- Lumber & Metal Posts: $600 – $1,200
- Metal or Polycarbonate Roofing Panels: $400 – $900
- Hardware (screws, anchors, flashing): $100 – $200
- Concrete for Footings: $50 – $100
- TOTAL (DIY): $1,150 – $2,400
- Budget alternative: Look for lean-to carport kits online. While sometimes made with lighter-gauge metal, they include all necessary parts and can reduce guesswork, often falling in the lower end of this price range.
|
📋 Copy HEX 🔗 Share |
✅ Before You Start
Attaching a structure directly to your house requires careful attention to one key detail: flashing. This is a thin piece of metal that tucks under your home’s siding and goes over the top edge of the carport roof where it meets the wall. Without proper flashing, water will inevitably find its way into the wall, leading to rot, mold, and expensive structural damage. If you’re not 100% confident in how to install it correctly, this is one step where it’s worth hiring a professional for a few hours.
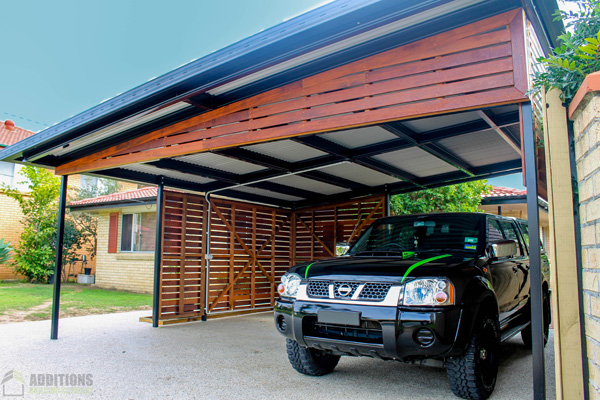
27. A Bold Statement with Dark Timber Slats and a Black Frame
This carport’s powerful, modern look comes from a bold and simple formula: 60% dark timber + 30% black metal + 10% light concrete. The dark stained timber slats, used for both the facade and side wall, create a strong, textured volume. The black metal frame and gutters provide a crisp, graphic outline. Finally, the light-colored concrete driveway acts as a neutral base, making the dark structure pop. The corrugated underside of the roof adds a subtle industrial texture to the mix.
|
📋 Copy HEX 🔗 Share |
🎯 What Makes It Work
When using dark, bold exterior colors like this, lighting is not optional—it’s essential. A structure this dark can disappear at night, creating an uninviting ‘black hole’ on your property. Plan for integrated lighting from the start. Consider uplighting the timber slat wall to highlight its texture, and install downlights under the roof to illuminate the parking area. This not only improves safety and usability but also transforms the carport into a dramatic architectural feature after the sun goes down.
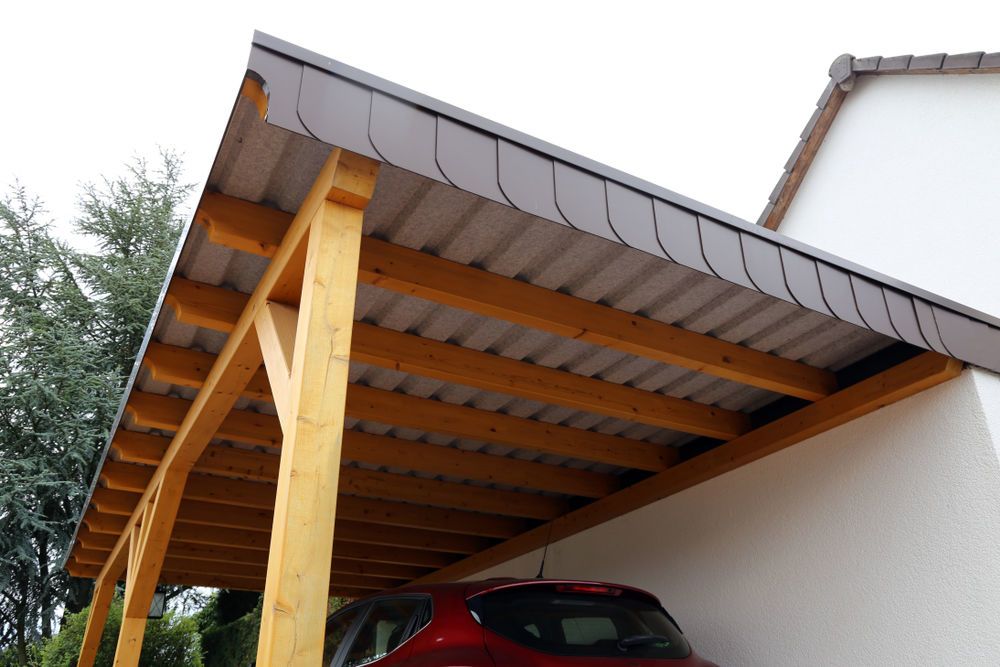
28. Classic Pitched Roof with Exposed Wooden Beams
The appeal of this design lies in its honest and visible construction. You can see exactly how it’s put together: sturdy wooden posts holding up substantial beams, which in turn support the rafters of the pitched roof. This exposure of the ‘bones’ of the structure gives it a timeless, rustic charm and a sense of enduring quality. The corrugated material on the underside is a practical choice, while the dark scalloped metal edging adds a subtle decorative touch that elevates it beyond a purely utilitarian shed.
|
📋 Copy HEX 🔗 Share |
📏 Scale Guide
The exposed wood is beautiful, but it requires regular maintenance to stay that way, as discussed in Idea #8. The other reality to consider here is pests and nests. The open rafters and beams create perfect, sheltered spots for birds and wasps to build nests. If you live in an area where this is common, you may need to install bird spikes or netting on the upper beams. Regular inspection and clearing of nests during the spring and summer will be part of your seasonal upkeep with a design this open.
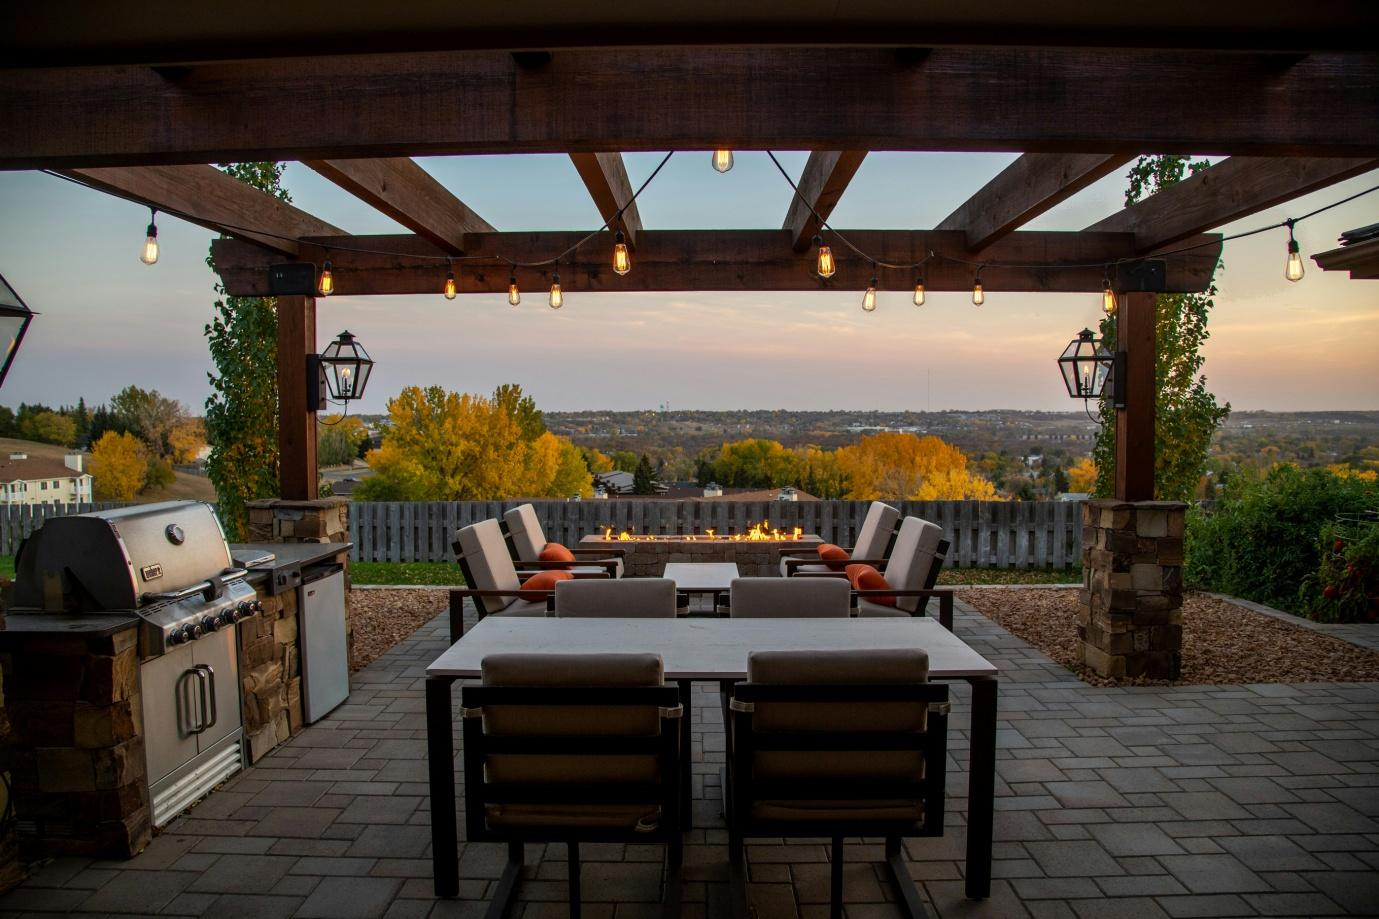
29. The Ultimate Entertainer’s Patio with a Pergola and Outdoor Kitchen
The single element that makes this space a true entertainer’s dream is the full-service outdoor kitchen. It’s more than just a standalone grill; it’s a built-in station with a grill, refrigerator, and counter space for prep and serving. This transforms the patio from a place to sit into a place to *host*. It consolidates all the cooking and serving activities in one zone, allowing the host to be part of the party instead of running back and forth to the indoor kitchen. This is the feature that elevates the space into a true extension of the home.
|
📋 Copy HEX 🔗 Share |
🔥 Trending Context
Hanging outdoor string lights is an easy way to add major ambiance. Here’s a 4-step guide:
- Choose Outdoor-Rated Lights: Buy commercial-grade, weatherproof string lights. Look for shatterproof bulbs if possible.
- Install Guide Wires: For spans longer than 15 feet, run a galvanized steel guide wire and secure it with eye hooks. This prevents sagging and protects the light cord from strain.
- Attach Lights to Wire: Use zip ties or carabiner clips to attach the string light cord to the guide wire every 1-2 feet. Don’t wrap the cord around the wire.
- Create a Gentle ‘Scallop’: Let the lights hang with a gentle, even droop between attachment points for a classic, relaxed look.
Time estimate: 2 hours. Material cost: $100-$300.
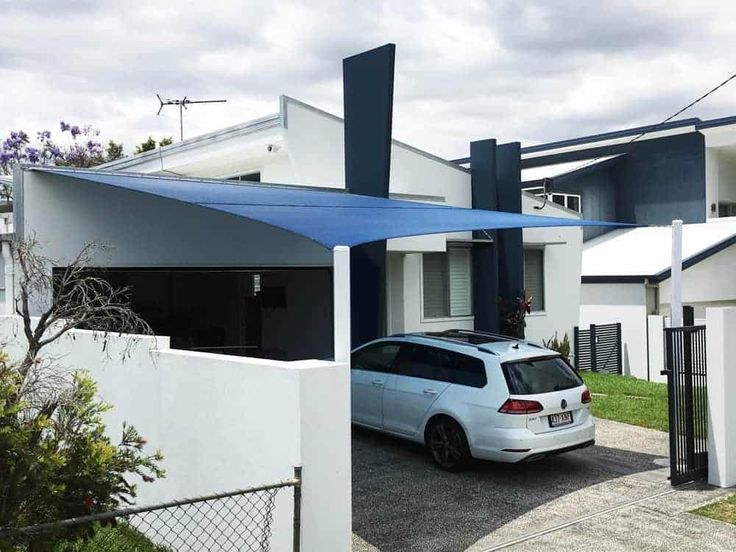
30. Modern and Minimal with a Blue Sail Shade
This is a fantastic example of achieving a high-impact look with minimal elements. The design works because of bold, geometric contrast. The crisp white facade of the house acts as a clean canvas. The dark blue sail shade provides a striking pop of color and a dynamic, angular shape that contrasts beautifully with the right angles of the house. The dark paving stones ground the space, and the single white support column acts as a simple, effective anchor point. It’s clean, functional, and visually sharp.
|
📋 Copy HEX 🔗 Share |
🔧 How-To Brief
A custom-tensioned sail shade from a specialized company can be expensive. For a much more affordable option, you can buy pre-made triangular or square sail shades from hardware stores or online for $50 to $200. The key is getting it taut. You’ll need to install heavy-duty mounting hardware (like eye bolts) into solid structures—the side of your house, a sturdy tree, or a 4×4 or 6×6 post securely concreted into the ground. Use turnbuckles to get that final bit of tension for a crisp, professional look.
More Than Just a Parking Spot
We hope these 30 ideas have opened your eyes to what a carport can be. It’s not just a place to park your car—it’s an opportunity to extend your home’s style, add major curb appeal, and create a truly functional space that works for you. Whether you go for a rustic timber frame or a sleek solar-powered structure, the right design can make a world of difference.
Ready to start planning? Get to pinning, save your favorites, and begin imagining the next chapter for your home’s exterior.