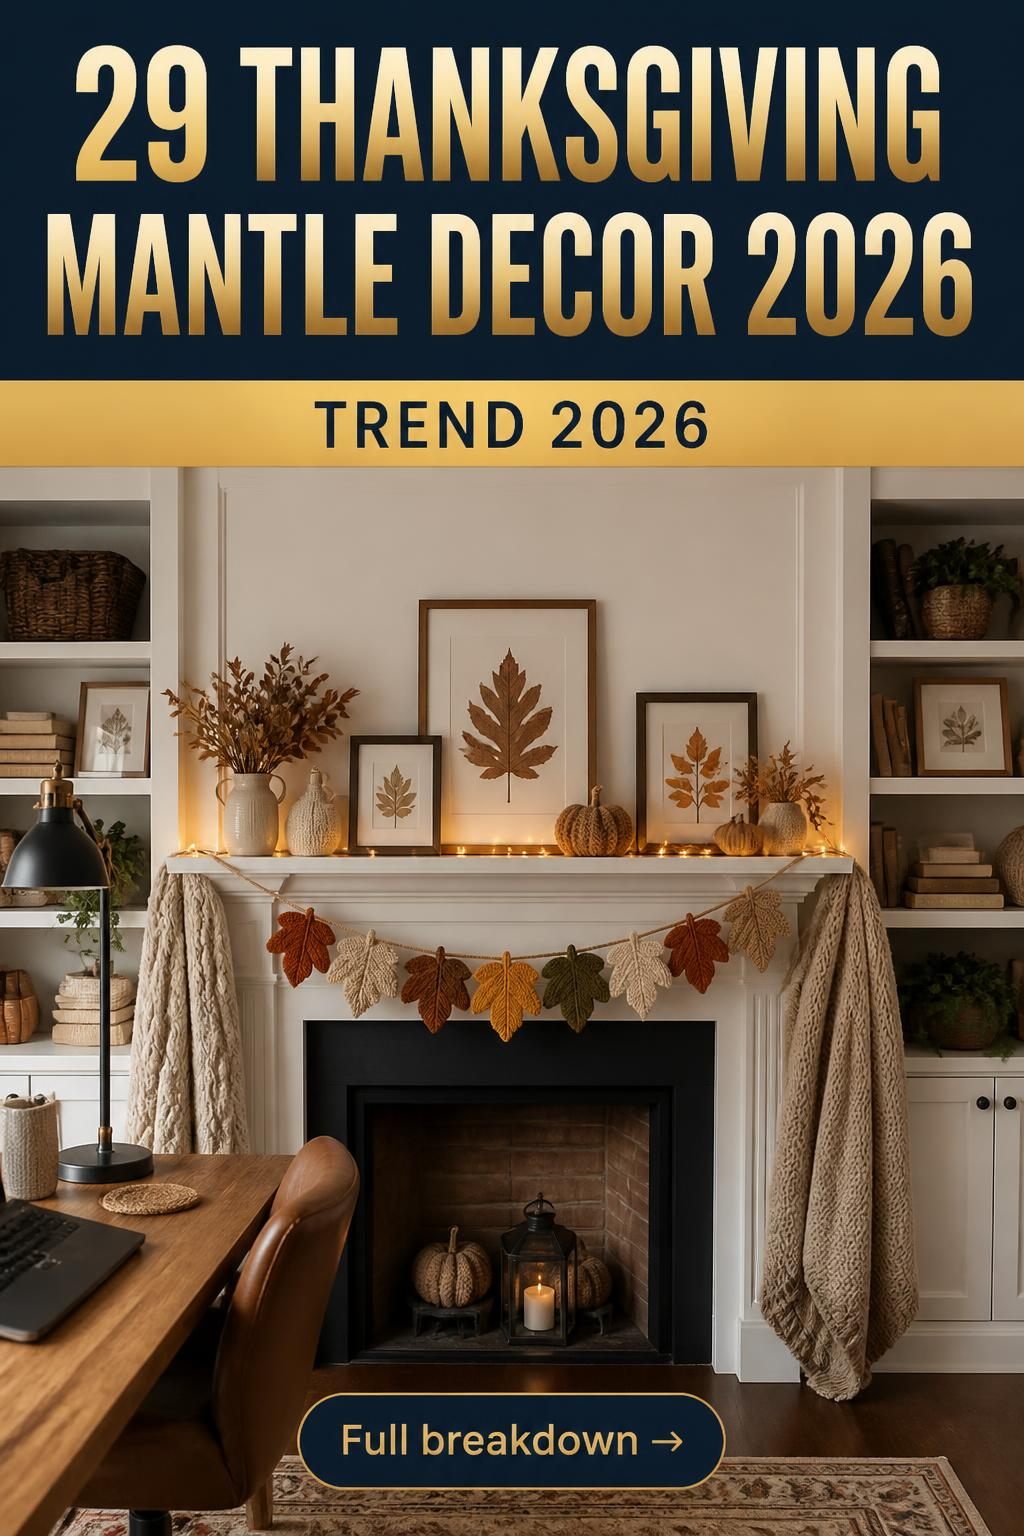
You know that feeling when you finally find the fall craft that looks exactly right for your home? That perfect project that’s fun to make and looks genuinely beautiful, not like a preschool art class. We spent serious time browsing Target, Walmart, and even Facebook Marketplace to bring you only what’s worth your attention this year. After filtering through hundreds of options, we narrowed it down to 29 ideas that actually deliver.
Inside, you’ll find curated ideas covering every autumn vibe, from cozy rustic centerpieces to elegant, natural displays, with projects ranging from practically free to around $150. For 2026, it’s all about hyper-personalization and sustainability—using what you have or can easily find to create something beautiful, a trend we’re seeing all over Pinterest. And stay until the end — we break down the most common mistakes that can ruin these looks.
📌 Save this to Pinterest for later — you’ll want to revisit these ideas.
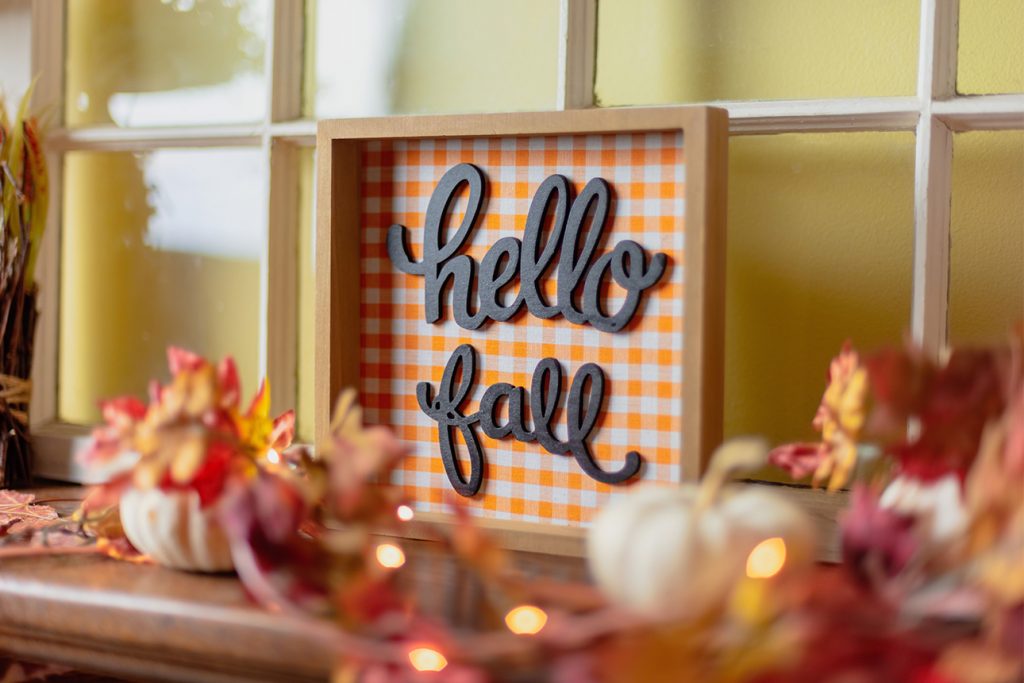
1. Frame a ‘Hello Fall’ Sign with Gingham and Garland
The charm here comes from layering different textures and patterns. The classic orange and white gingham provides a familiar, almost picnic-blanket warmth, but framing it in dark wood keeps it from feeling too country. The delicate, hand-drawn quality of the “Hello Fall” script softens the clean lines of the frame, and the addition of the garland with its soft lighting adds a touch of magic. It’s a study in balanced contrasts: rustic wood meets soft fabric, and clean typography meets organic leaves.
|
📋 Copy HEX 🔗 Share |
🔧 How-To Brief
Want to make your own version? It’s simpler than it looks. Here’s a quick guide for an 8×10″ frame:
- Prep your materials (Est. time: 20 mins): You’ll need a wooden frame, a piece of gingham fabric cut to size, cardstock, a black marker, and a mini LED light garland.
- Create the background: Remove the glass from the frame. Stretch the gingham fabric smoothly over the frame’s backing board and secure it with tape or a staple gun.
- Add the text: Write “Hello Fall” on a piece of white cardstock, then trim it to create a pleasing border. Use adhesive to mount it in the center of the gingham.
- Assemble and illuminate: Place the fabric-covered board back into the frame. Finally, loosely wrap the mini garland around the sign, tucking it into the leaves and pumpkins for a layered look.
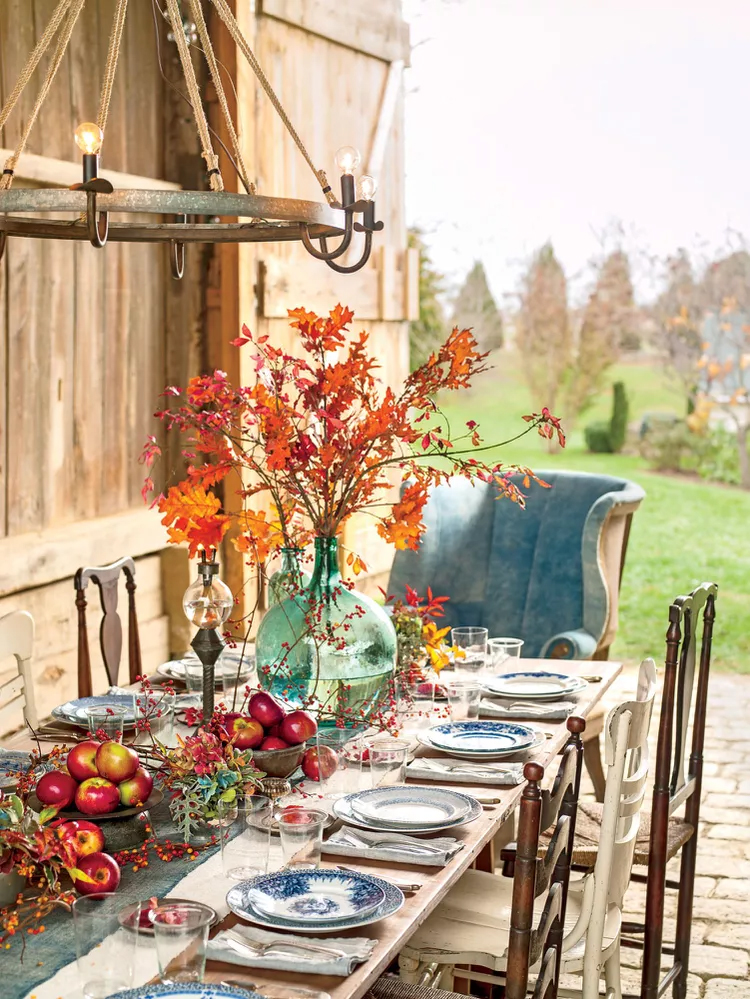
2. Set a Rustic Outdoor Table with Turquoise and Red Apple Accents
When setting an outdoor table, think about creating a distinct “room” within the natural space. The rope and metal chandelier hanging from a tree branch does exactly that. It defines the dining area and adds an unexpected touch of interior elegance to the rustic setting. You can achieve this with any large, non-electric lighting fixture. The key is to hang it low enough to feel connected to the table—about 30-36 inches above the surface is the sweet spot—to create a sense of intimacy and enclosure.
|
📋 Copy HEX 🔗 Share |
✅ Before You Start
Let’s be honest: an outdoor tablescape this beautiful is highly dependent on the weather. A sudden gust of wind can send leaves and napkins flying, and an unexpected shower can ruin the whole affair. This setup is best for a calm, clear day or a covered porch area. Also, remember that natural elements like fresh apples can attract insects. Consider using faux apples if you plan to have the table set for an extended period before guests arrive. It provides the same look without calling every bug in the neighborhood to dinner.
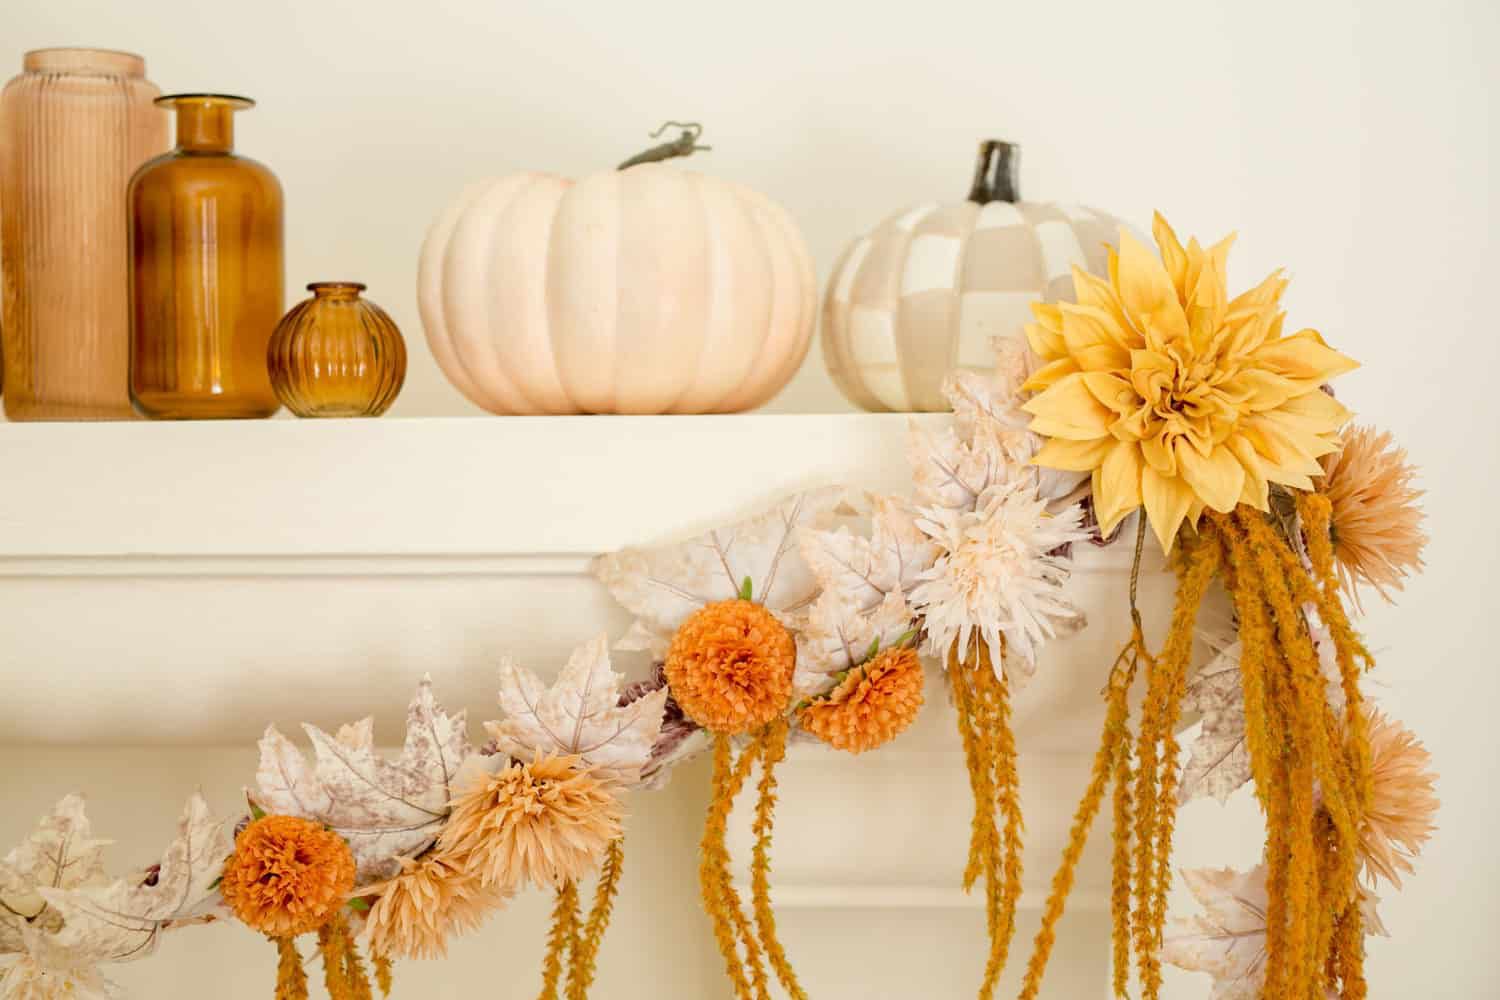
3. Style a Soft, Neutral Mantle with Amber Glass and Florals
This look is a perfect formula for subtle autumn decor. Think of it as 70% neutral base + 20% warm tones + 10% texture. The white mantel and pale pumpkins make up the neutral majority, creating a calm, clean canvas. The amber glass bottles bring in that essential 20% of fall warmth without screaming “orange!” The final 10% comes from the varied textures in the floral garland—the soft petals, muted leaves, and fuzzy pom-poms. You could swap the amber for smoked grey glass or the yellow dahlias for cream-colored roses, and the sophisticated formula would still work perfectly.
|
📋 Copy HEX 🔗 Share |
📐 Style Math
You don’t need to buy expensive, brand-new amber bottles to get this look. In fact, the vintage vibe is what makes it feel authentic. Spend an afternoon at your local thrift store or flea market; you can often find beautiful, uniquely shaped glass bottles for just a few dollars each. Look for old medicine bottles, beer growlers, or even interesting vinegar bottles. A good cleaning is all they need to become the star of your mantelpiece. The subtle imperfections of second-hand finds add character that new items just can’t replicate.
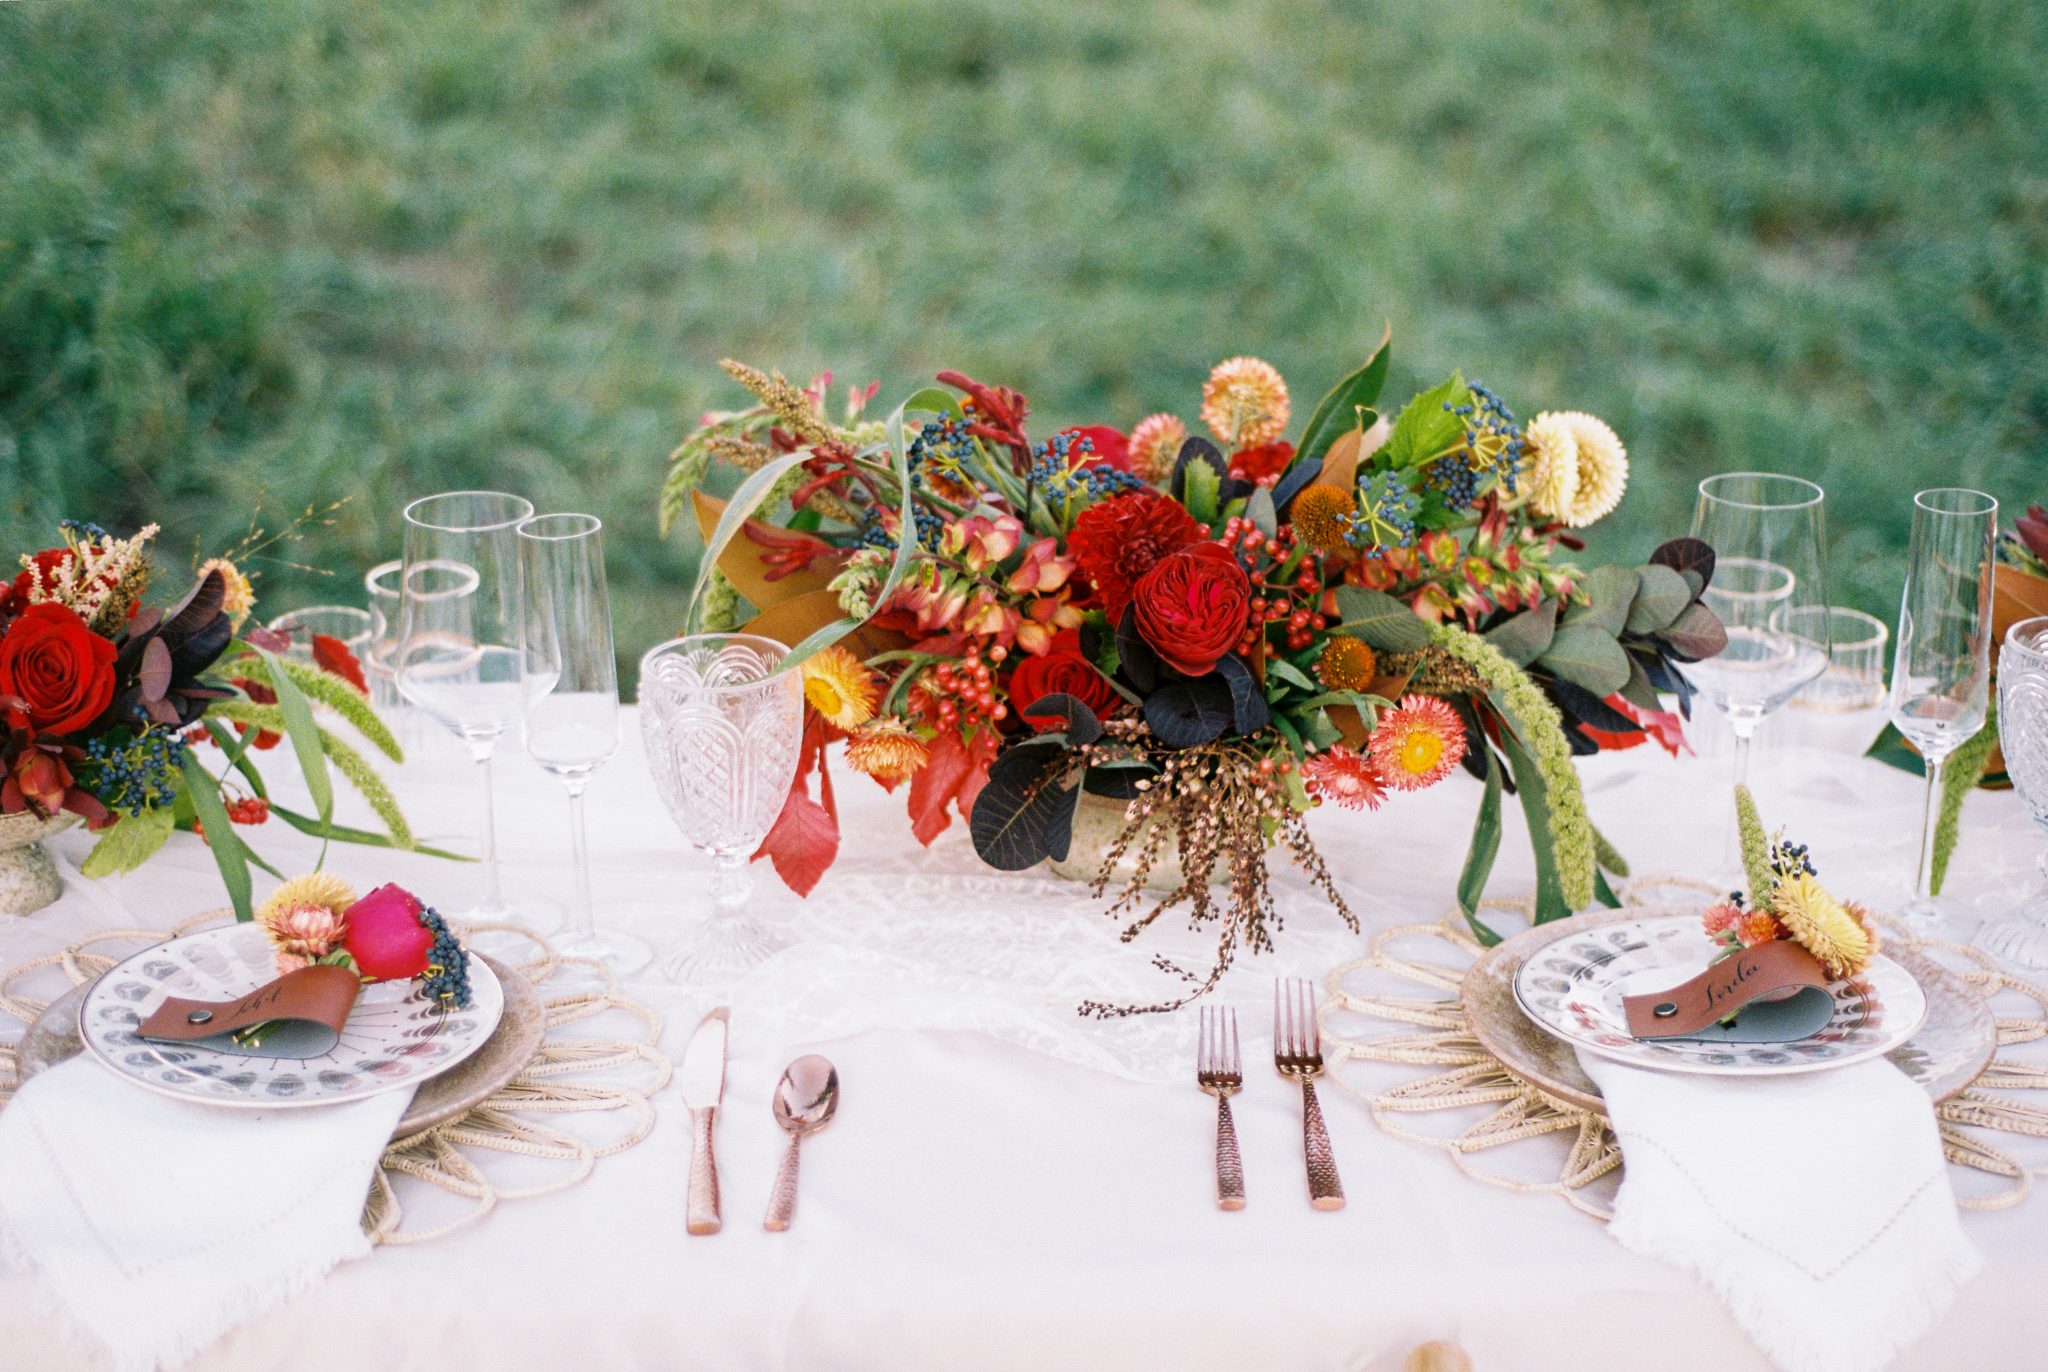
4. Layer a Festive Table with Woven Placemats and Rose Gold Flatware
Recreating this lush, multi-layered tablescape for six involves a mix of high and low elements. The floral centerpiece is the biggest investment, especially if using fresh flowers from a florist. Here’s a general breakdown:
- Main floral centerpiece: $150 – $300
- Woven placemats (set of 6): $40 – $80
- Patterned plates & napkins: $90 – $200
- Rose gold flatware (set for 6): $60 – $150
- Glassware & name tags: $50 – $100
- TOTAL: $390 – $830
Budget alternative: Use high-quality faux flowers for the centerpiece, source plates from Target or HomeGoods, and find vintage flatware on Etsy for a similar feel at about 40-50% less.
|
📋 Copy HEX 🔗 Share |
⭐ The One Thing
The single element holding this entire design together is the set of woven circular placemats. Without them, the elegant plates, shimmering flatware, and elaborate floral centerpiece would feel a bit too formal, almost floating on the table. The placemats provide a crucial layer of natural, rustic texture that grounds each place setting. They act as a visual anchor, connecting the earthy, abundant vibe of the centerpiece to the refined details of the flatware and china. Remove them, and you lose the entire relaxed-yet-sophisticated aesthetic.
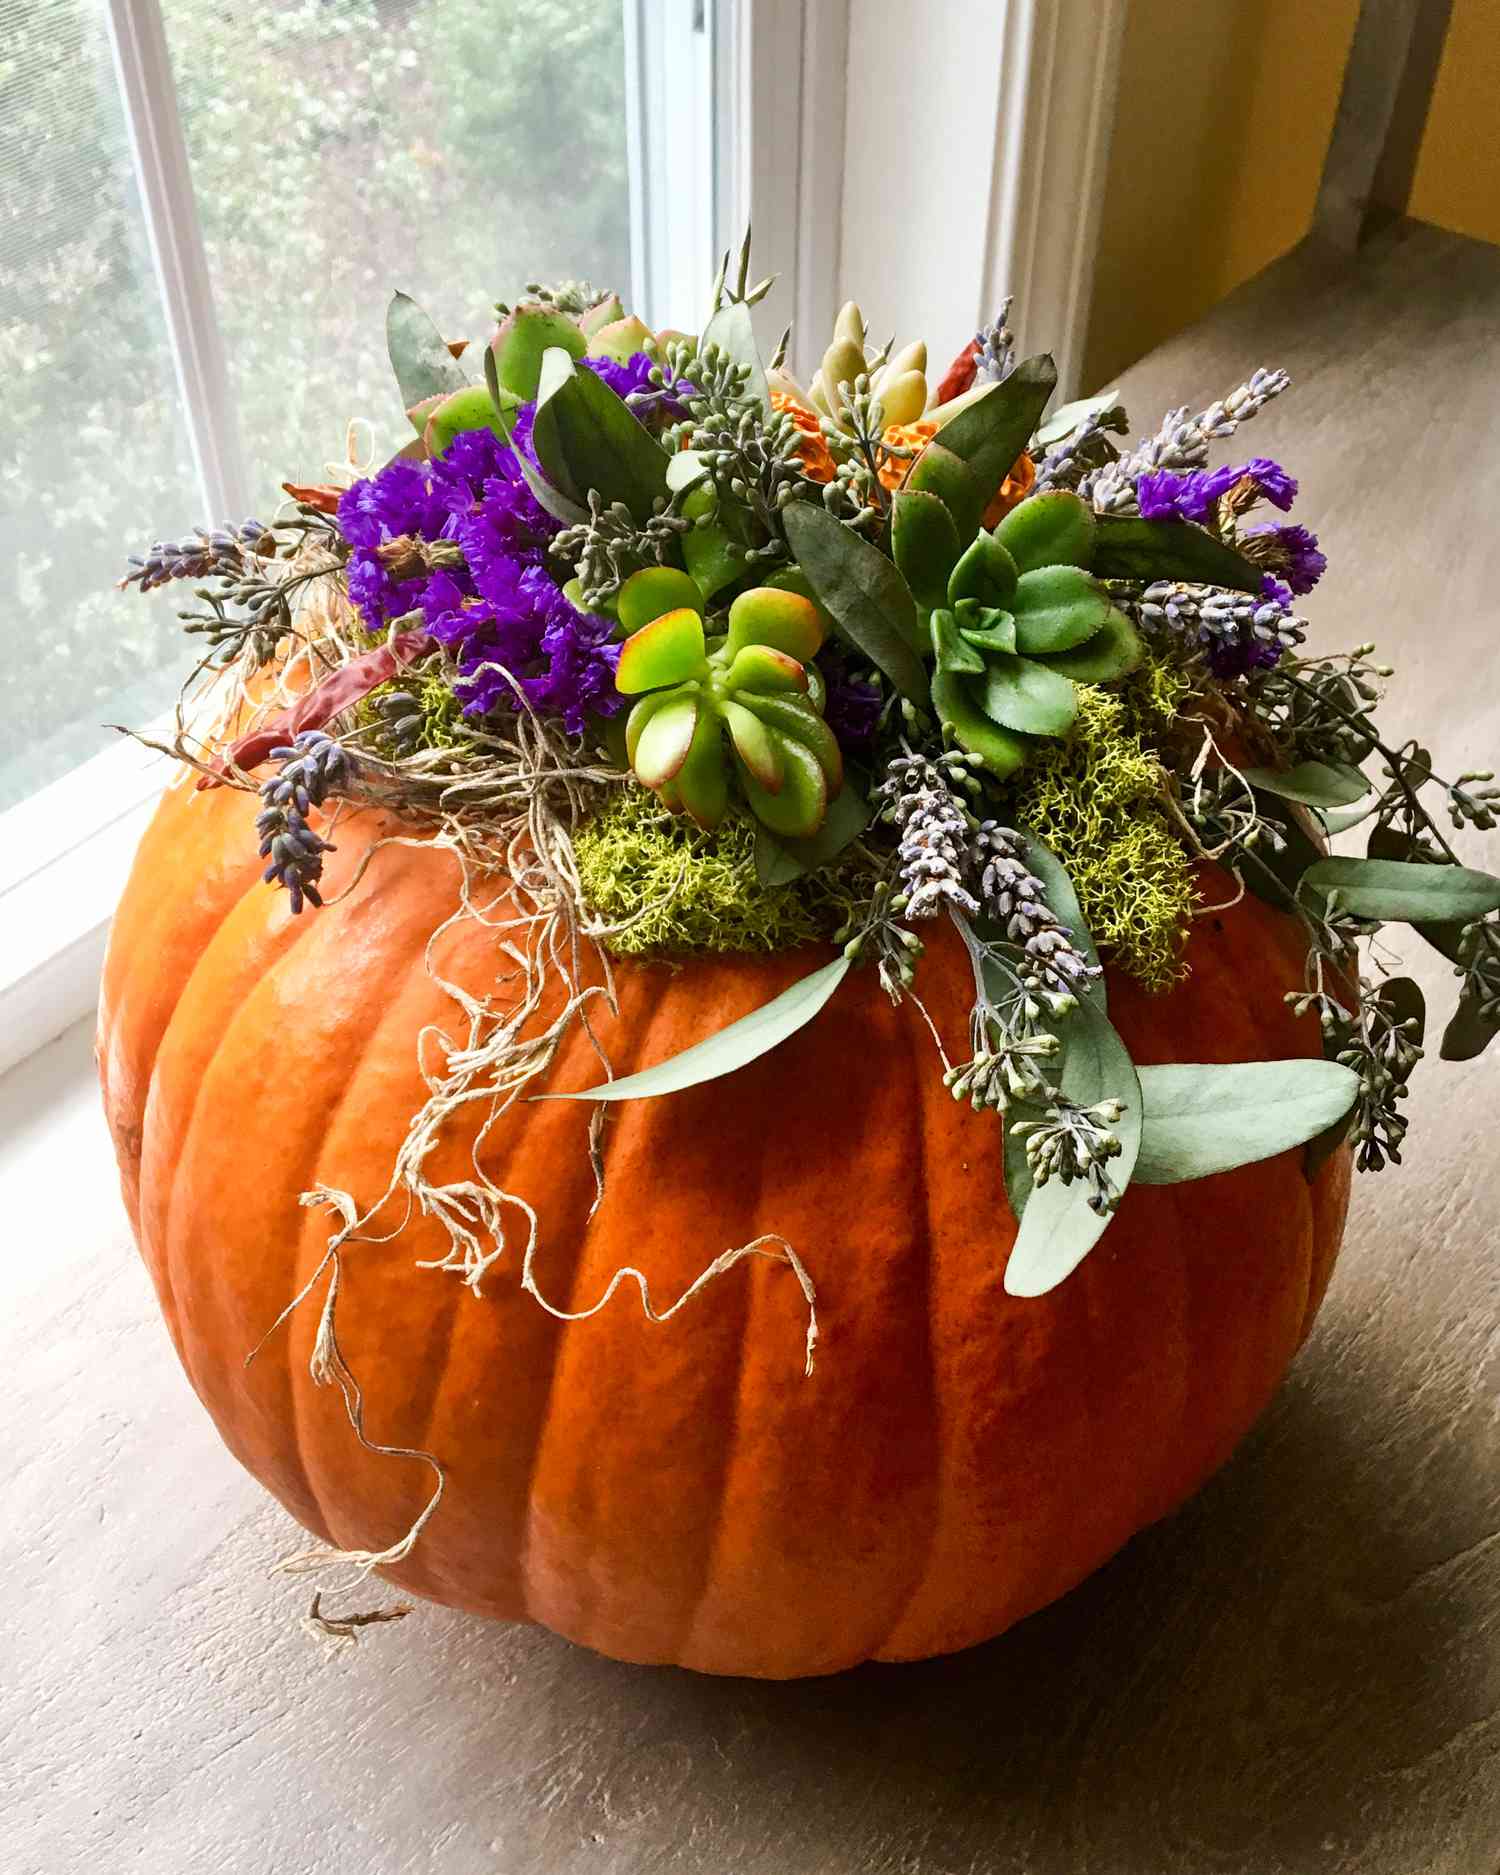
5. Create a Vibrant Centerpiece with a Succulent-Stuffed Pumpkin
This is a stunning centerpiece, but it has a limited lifespan. A hollowed-out pumpkin will start to soften and decompose within a week or two, especially once it’s holding moist soil for the succulents. To prolong its life, be sure to scoop the inside thoroughly and pat it dry before planting. You can also line the inside with plastic or a small bowl to prevent direct contact between the wet soil and the pumpkin flesh. As for the succulents, they require very little water, so just give them a light misting every few days. After the pumpkin has seen better days, you can repot the succulents to enjoy them long-term.
|
📋 Copy HEX 🔗 Share |
📏 Scale Guide
The visual magic of this arrangement lies in its use of complementary colors. The vibrant orange of the pumpkin sits directly opposite purple on the color wheel, creating a high-contrast, energetic pairing that instantly draws the eye. The bright purple flowers and lavender spikes pop against the orange backdrop. The various shades of green from the succulents act as a bridge between these two strong colors, adding a natural, earthy buffer that keeps the combination from feeling jarring. It’s a classic color theory trick that makes the whole piece feel balanced and dynamic.
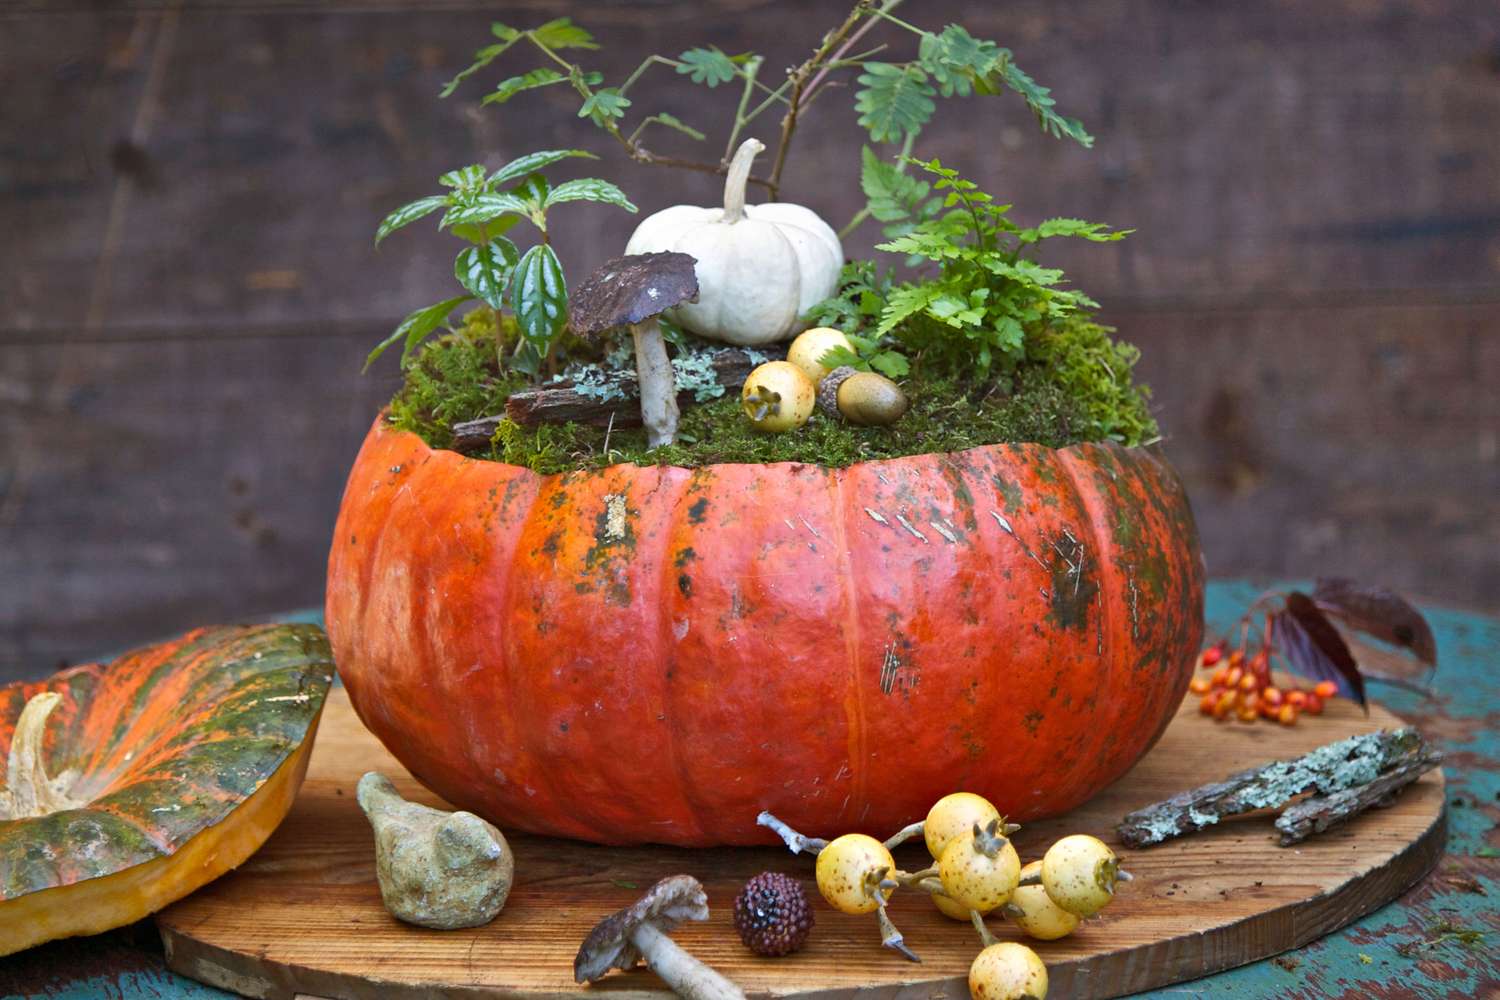
6. Design a Whimsical Pumpkin Planter with Miniatures
Creating this tiny, whimsical world inside a pumpkin is a fun afternoon project. It’s like a miniature autumn terrarium. Here’s the quick how-to:
- Hollow the pumpkin (Est. cost: $5-10): Cut a wide opening at the top and scoop out all the seeds and pulp. Make the opening large enough to work inside.
- Build your base: Fill the bottom two-thirds of the pumpkin with green moss, creating a lush, textured floor for your scene.
- Place the main elements: Nestle a small white pumpkin and a few small, leafy plants into the moss. Don’t overcrowd it.
- Add the details: This is the fun part. Carefully place your miniatures—like tiny mushrooms, acorns, and berries—to create a little scene. Use a dab of hot glue to secure them if needed.
- Final touch: Arrange it on a rustic wooden slice to complete the look and protect your furniture.
|
📋 Copy HEX 🔗 Share |
🔥 Trending Context
This idea works best with a medium-to-large pumpkin, at least 10-12 inches in diameter. You need enough interior space to create a scene with depth, rather than just a jumble of items. A pumpkin this size is perfect as a centerpiece for a round café table or as a welcoming accent on an entryway console. For a larger dining table, consider making a trio of them in varying sizes. This concept isn’t well-suited for a narrow mantelpiece, as the depth of the pumpkin can make it unstable. For a smaller space, try the mantel-friendly design in Idea #3.
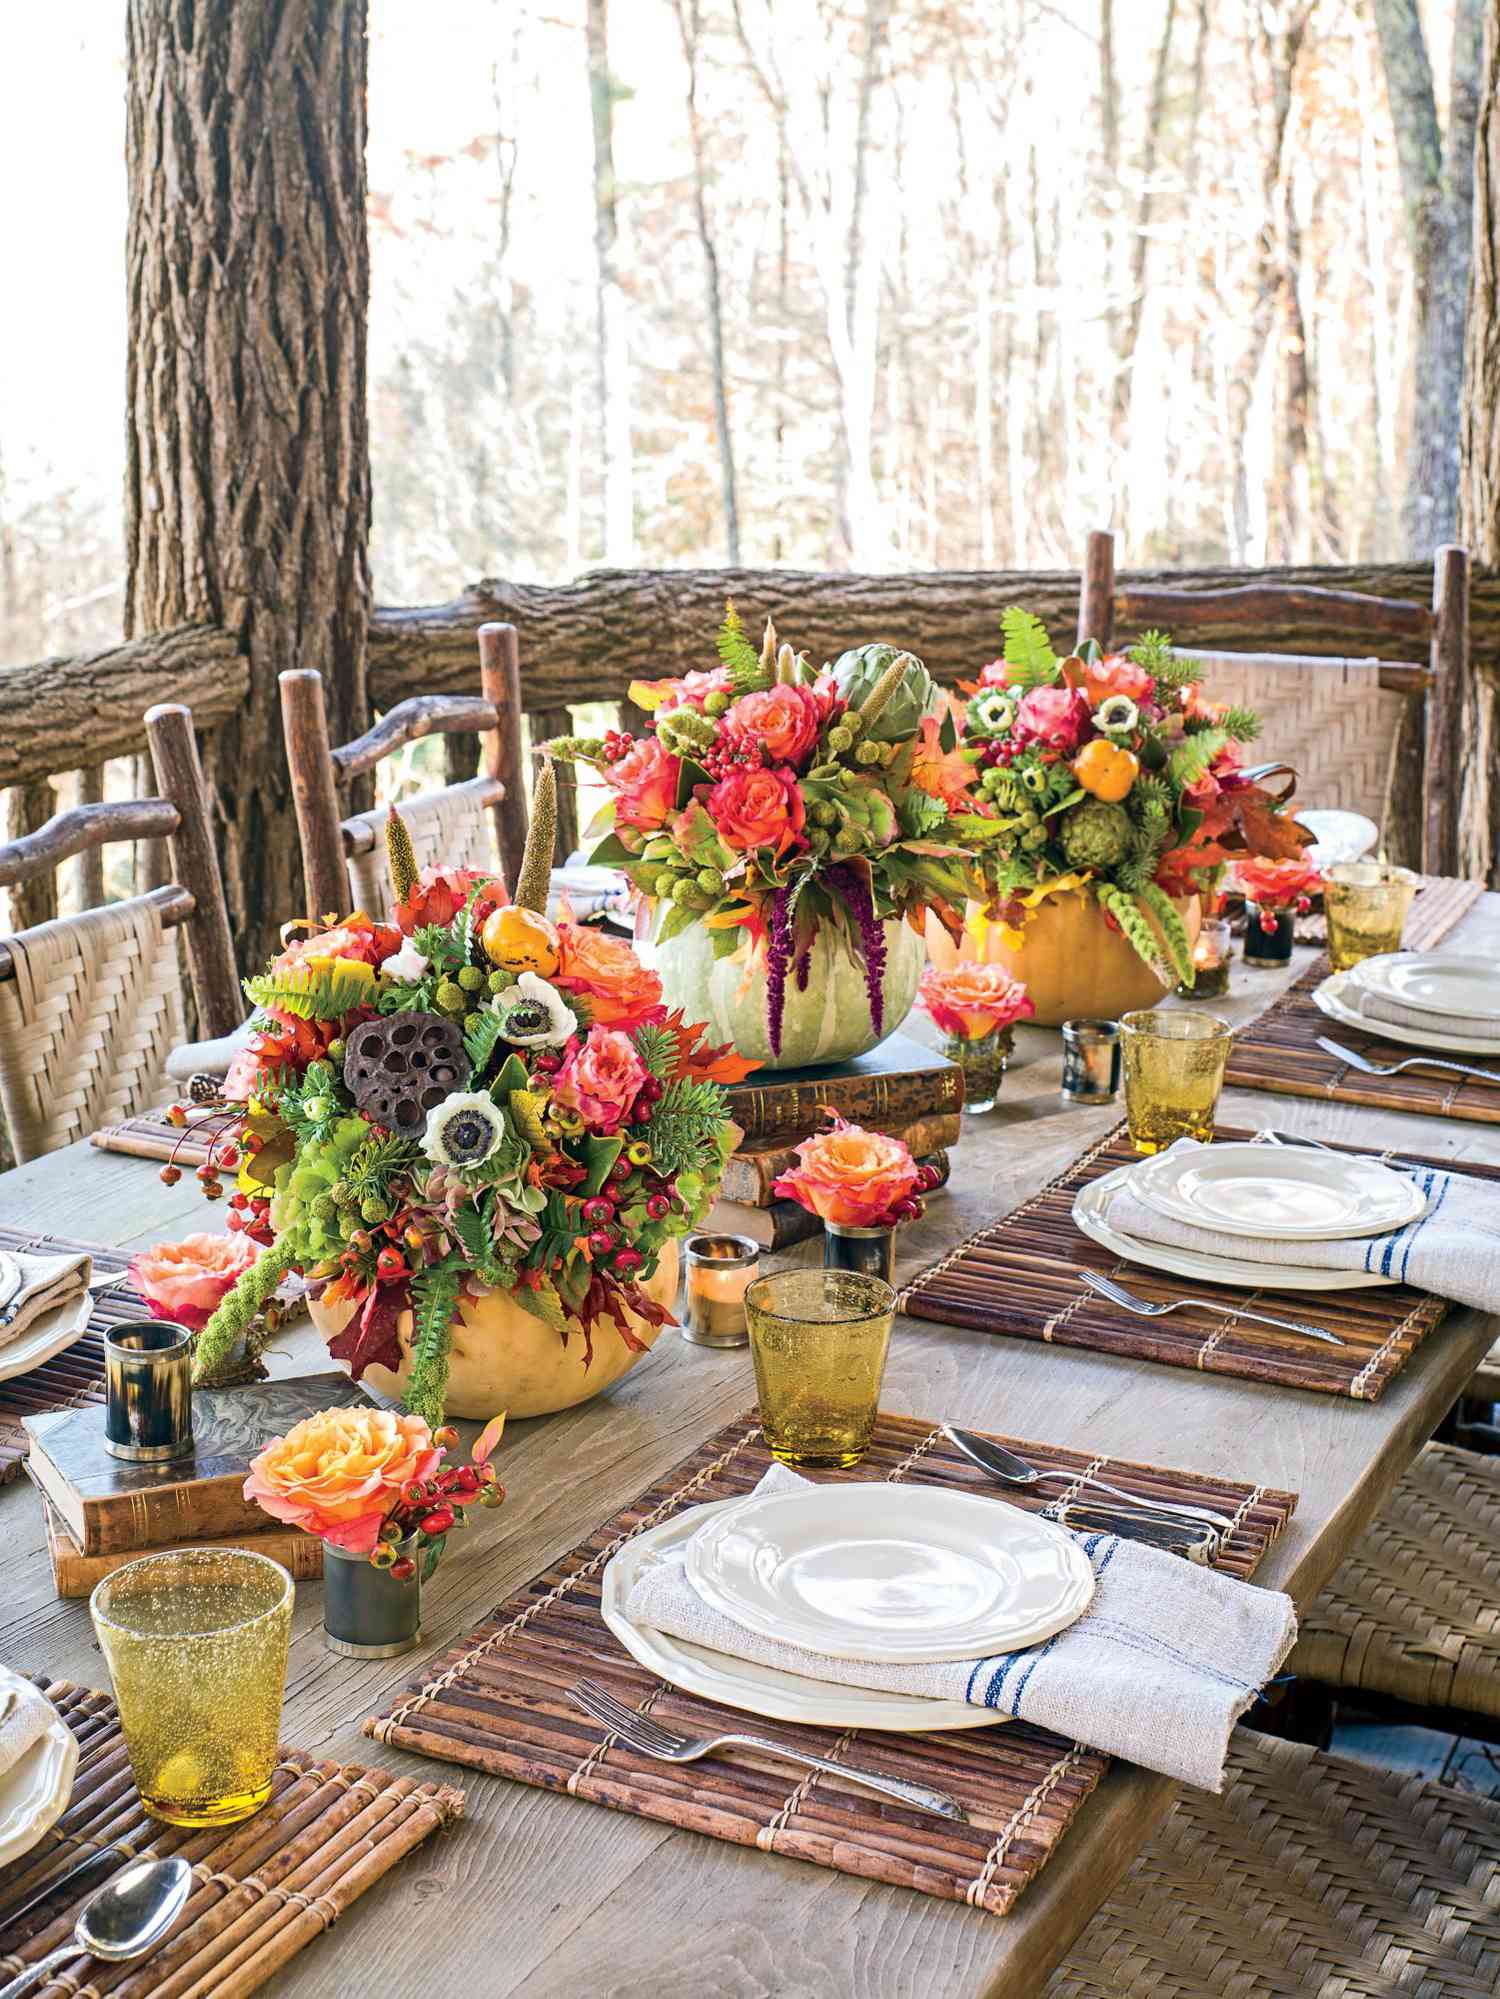
7. Arrange a Rustic Porch Dining Table with Gourd Centerpieces
This abundant, rustic look is all about layering natural elements. The formula is simple: 50% warm woods + 30% autumnal colors + 20% varied textures. The wooden table and woven chairs provide the foundational warm tones. The pumpkins, gourds, and yellow glassware deliver those classic fall hues. The final 20% comes from the rich textures of the bamboo placemats, linen napkins, and the lush foliage itself. The balance is what makes it feel cozy and inviting rather than cluttered and overwhelming.
|
📋 Copy HEX 🔗 Share |
💰 Budget Breakdown
Instead of one massive centerpiece that blocks conversation, scatter several smaller arrangements down the length of the table. This approach creates better visual rhythm and feels more intimate. Here, they used multiple pumpkin and gourd bouquets. This allows everyone at the table to have a beautiful view without having to peer around a giant floral display. It also makes the table feel more abundant and overflowing, enhancing that cozy, harvest-feast feeling. This is a great trick for any long, rectangular dining table.
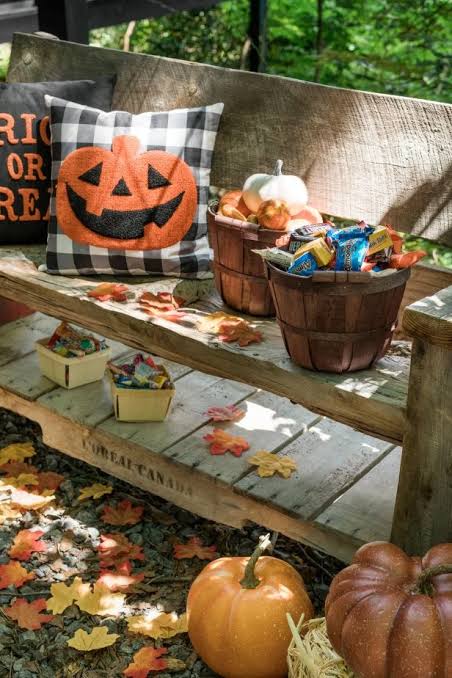
8. Create an Impactful Fall Display on a Dime
An expensive-looking fall display doesn’t have to break the bank. The key is to focus on volume and natural elements. Instead of one pricey decorative object, gather a large bowl or basket you already own and fill it with seasonal items from the grocery store or your own backyard. A big pile of apples, a collection of pinecones, or a bunch of small gourds can create a huge visual impact for under $20. The “abundant” look is naturally impressive. Mix in a few faux pumpkins from Target or Walmart for longevity, and you have a display that feels generous and stylish for a fraction of the cost of a single high-end decor piece.
|
📋 Copy HEX 🔗 Share |
🎯 What Makes It Work
There’s a major shift away from disposable, single-season decor and towards more sustainable, personal expressions of style. People are tired of buying plastic bins of stuff they only use for one month a year. The trend for 2026 is “found and foraged.” It’s about celebrating the beauty of real, natural items—branches, leaves, seasonal produce—and mixing them with a few well-made, reusable pieces. This approach is not only more affordable and eco-friendly, but it also results in a look that feels more authentic and connected to the actual season. Compare this approach to the more traditional decor in Idea #15.
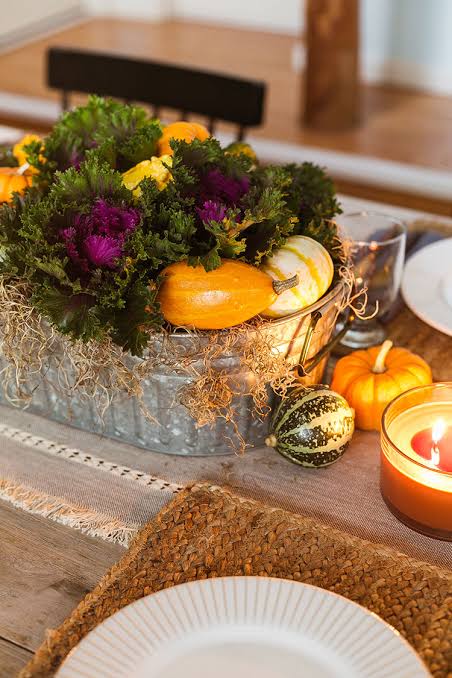
9. Use Kale and Gourds for an Unexpected DIY Centerpiece
The showstopper here is the ornamental kale. While pumpkins and gourds are beautiful fall staples, the deep purple and green ruffled leaves of the kale add an unexpected touch of drama and sophistication. It’s a vegetable, but used in this context, it functions like a lush, sculptural flower. It breaks up the smooth, rounded shapes of the gourds with its complex texture and rich color. Without the kale, this would be a pleasant but predictable fall centerpiece. With it, it becomes a memorable design moment.
|
📋 Copy HEX 🔗 Share |
🧹 Maintenance Reality
This striking centerpiece comes together in minutes. All you need is a trip to the grocery store’s produce section and a platter.
- Select your base (Est. cost: $15-25): Choose a large, flat platter or a shallow bowl. A rustic wood or simple ceramic style works best.
- Choose your stars: You’ll need one bunch of ornamental kale (purple or white), 2-3 small-to-medium pumpkins, and a handful of assorted small gourds.
- Anchor the arrangement: Place the kale slightly off-center on your platter. Don’t be afraid to let its leaves spill over the edge.
- Add the pumpkins: Cluster the pumpkins around the base of the kale, creating a focal point.
- Fill the gaps: Use the small gourds to fill in any empty spaces, tucking them between the larger items to create a full, abundant look. That’s it!
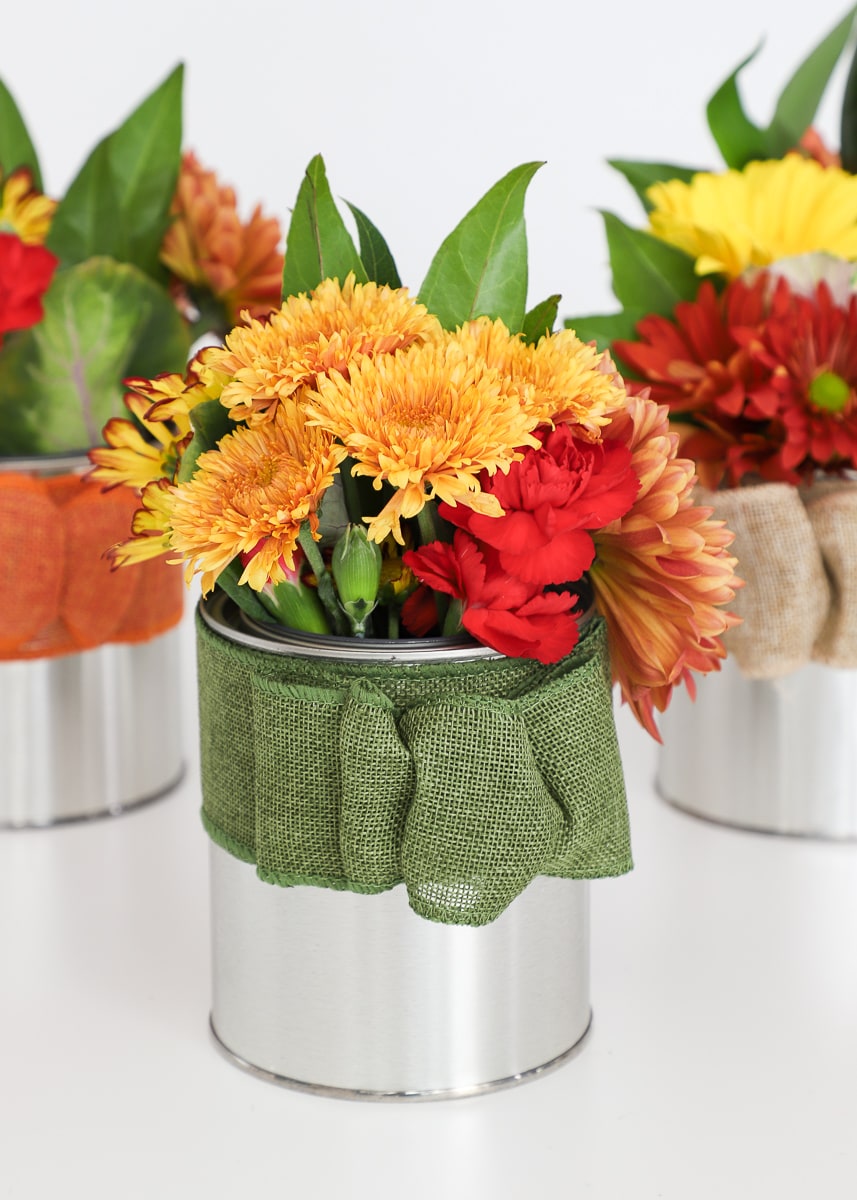
10. Craft Rustic Vases from Recycled Tin Cans and Burlap
This is a fantastic, low-cost craft, but a little prep makes all the difference. Before you begin, make sure you have these things covered:
- Clean your cans thoroughly: Wash the tin cans with soap and water, and make sure they are completely dry inside and out to prevent rust.
- Check for sharp edges: The inside rim of a tin can can be very sharp. Use a file or a bit of sandpaper to smooth down any jagged edges before you start decorating.
- Gather your supplies: You’ll need the clean cans, burlap ribbon in a few colors, a hot glue gun, and scissors. Having everything ready makes the process quick and fun.
- Protect your surfaces: Lay down newspaper or a craft mat before you start gluing.
|
📋 Copy HEX 🔗 Share |
💸 Get This Look For Less
While these tin can vases are adorable, remember they are not waterproof forever. Tin cans, especially if they have any scratches, will eventually rust when exposed to water. To make them last longer, you can place a small plastic cup or a trimmed water bottle inside the can to hold the water and flowers. This protects the metal from direct contact with moisture. Also, be mindful that these are very lightweight and can tip over easily, especially with top-heavy flowers. It’s best to place them somewhere they won’t be easily knocked over.
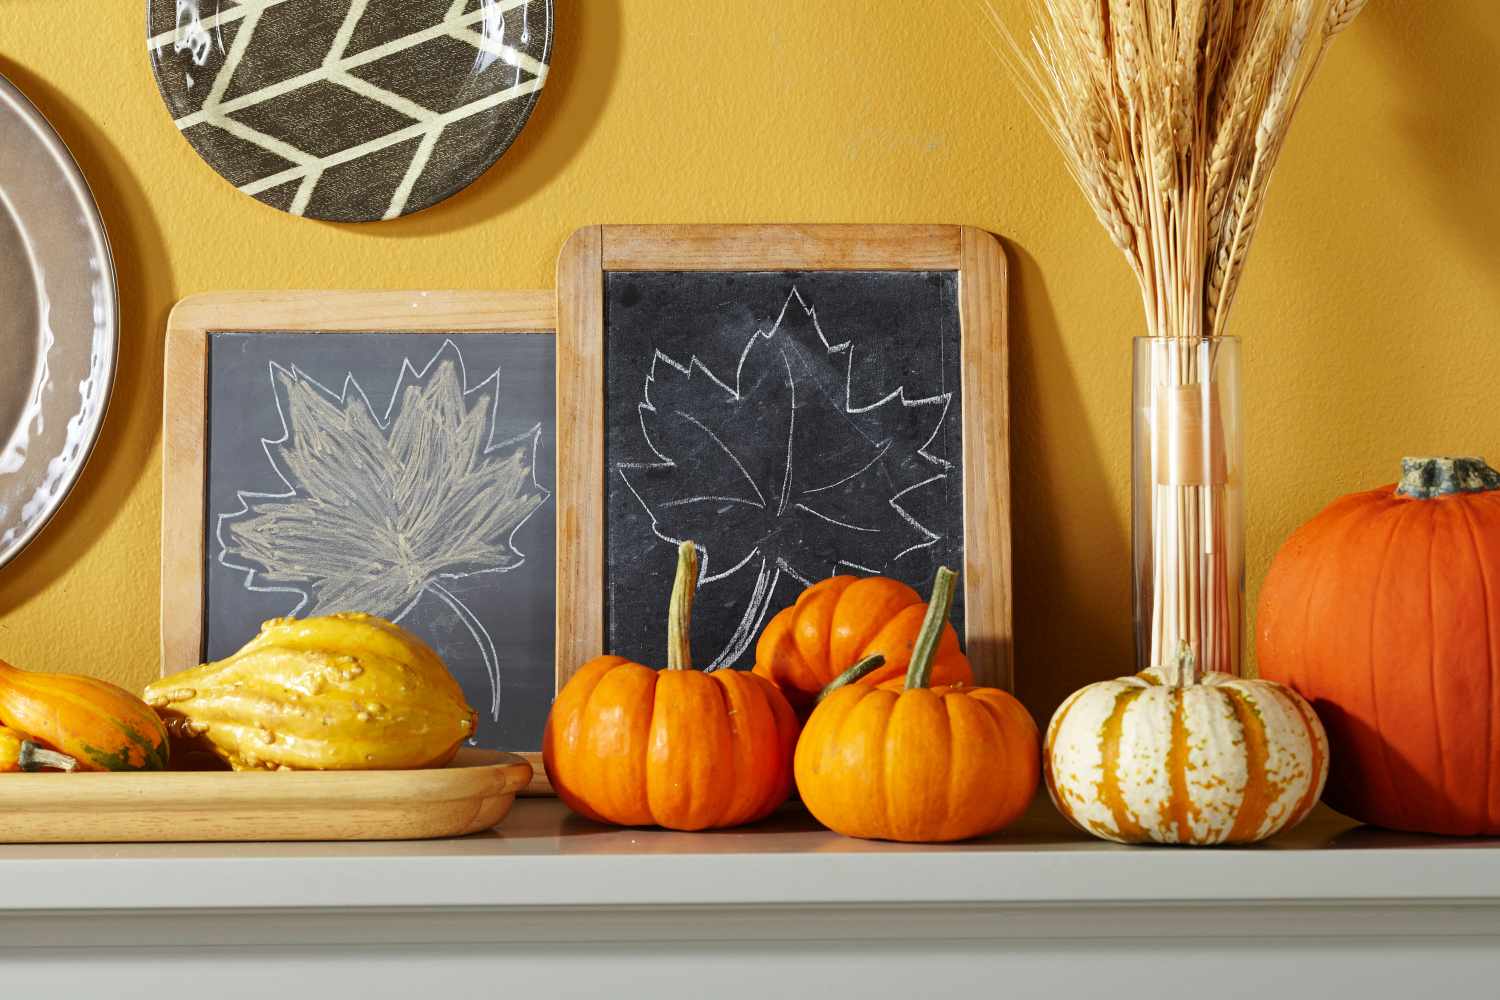
11. Style a Cheerful Shelf with Chalkboard Art and Wheat
The secret to great shelf styling—or “shelfies”—is layering in three dimensions: back, middle, and front. Place taller, flatter items like the chalkboards at the back, against the wall. In the middle ground, arrange medium-sized objects like the vase of wheat and the larger pumpkin. Finally, place the smallest items, like the gourds on the wooden tray, in the front. This creates visual depth and keeps the arrangement from looking like a flat lineup. Let items overlap slightly to make it feel natural and connected.
|
📋 Copy HEX 🔗 Share |
⚠️ Real Talk
This display feels so cohesive and warm because of the smart repetition of color. The warm yellow of the wall is picked up by the yellow gourds and the golden tones of the wheat stalks. The black of the chalkboards provides a grounding contrast that makes the yellows and oranges pop even more. The creamy white of the pumpkins connects to the white chalk drawings. This limited, repeated color palette ensures that even with a variety of objects, the whole scene reads as a single, harmonious composition.
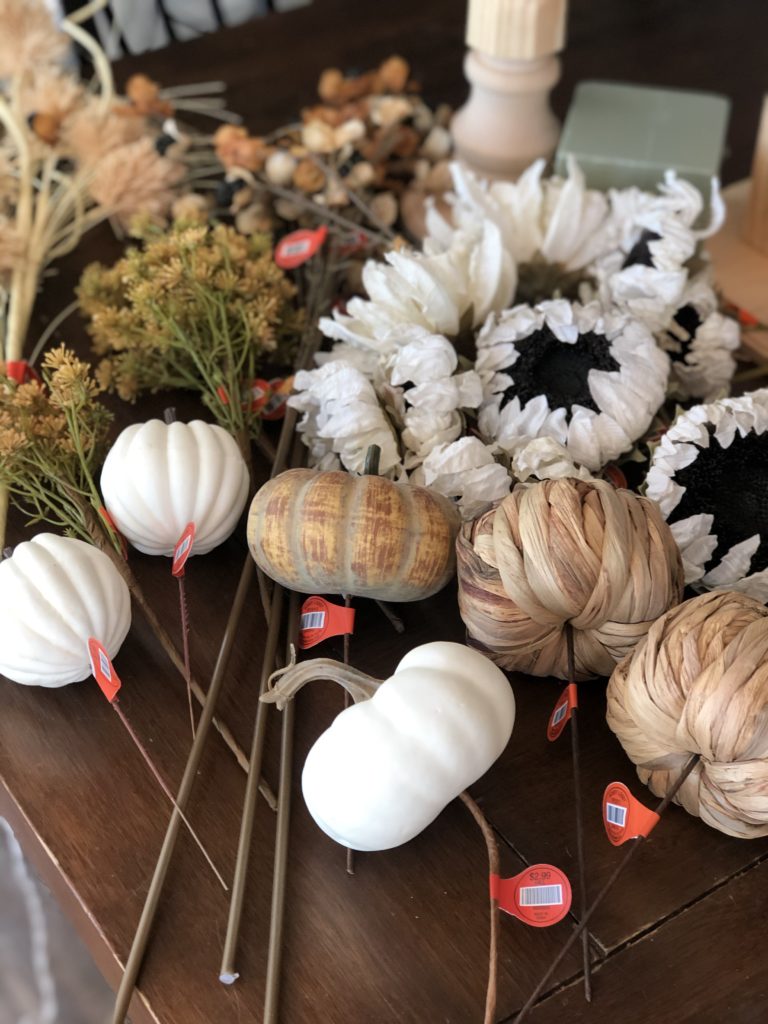
12. Stock Up on Versatile White and Neutral Craft Supplies
A successful crafting season starts with a well-stocked arsenal. Before you buy anything, take inventory of what you already have. Then, focus your shopping on versatile basics rather than project-specific items. Here’s a checklist for a great fall craft supply haul:
- Neutral pumpkins: A mix of white, cream, and natural-toned faux pumpkins can be adapted to any color scheme. You can always paint them later if you want a pop of color.
- Varied foliage: Get a few bunches of faux greenery like eucalyptus or olive branches, and some simple brown twigs. These work for fall, but can also be used in other seasons.
- Textural elements: Think about things like twine, burlap ribbon, or chunky yarn.
- A good glue gun: The essential tool that brings it all together.
|
📋 Copy HEX 🔗 Share |
💡 Designer Tip
It’s incredibly easy to go into a craft store in the fall and leave with a cart full of stuff you’ll never use. Those aisles are designed to make you feel like you need one of everything. The reality is, a few bags of high-quality, neutral-toned basics are far more useful than a dozen specialty items with glitter and garish colors. The orange price tags in the photo are a good reminder: just because it’s on sale doesn’t mean you need it. Buy with a general purpose in mind—like “mantel decor” or “centerpiece elements”—not just because it looks cute in the store.
13. Create a Cozy Corner with Mini Pumpkins and Candlelight
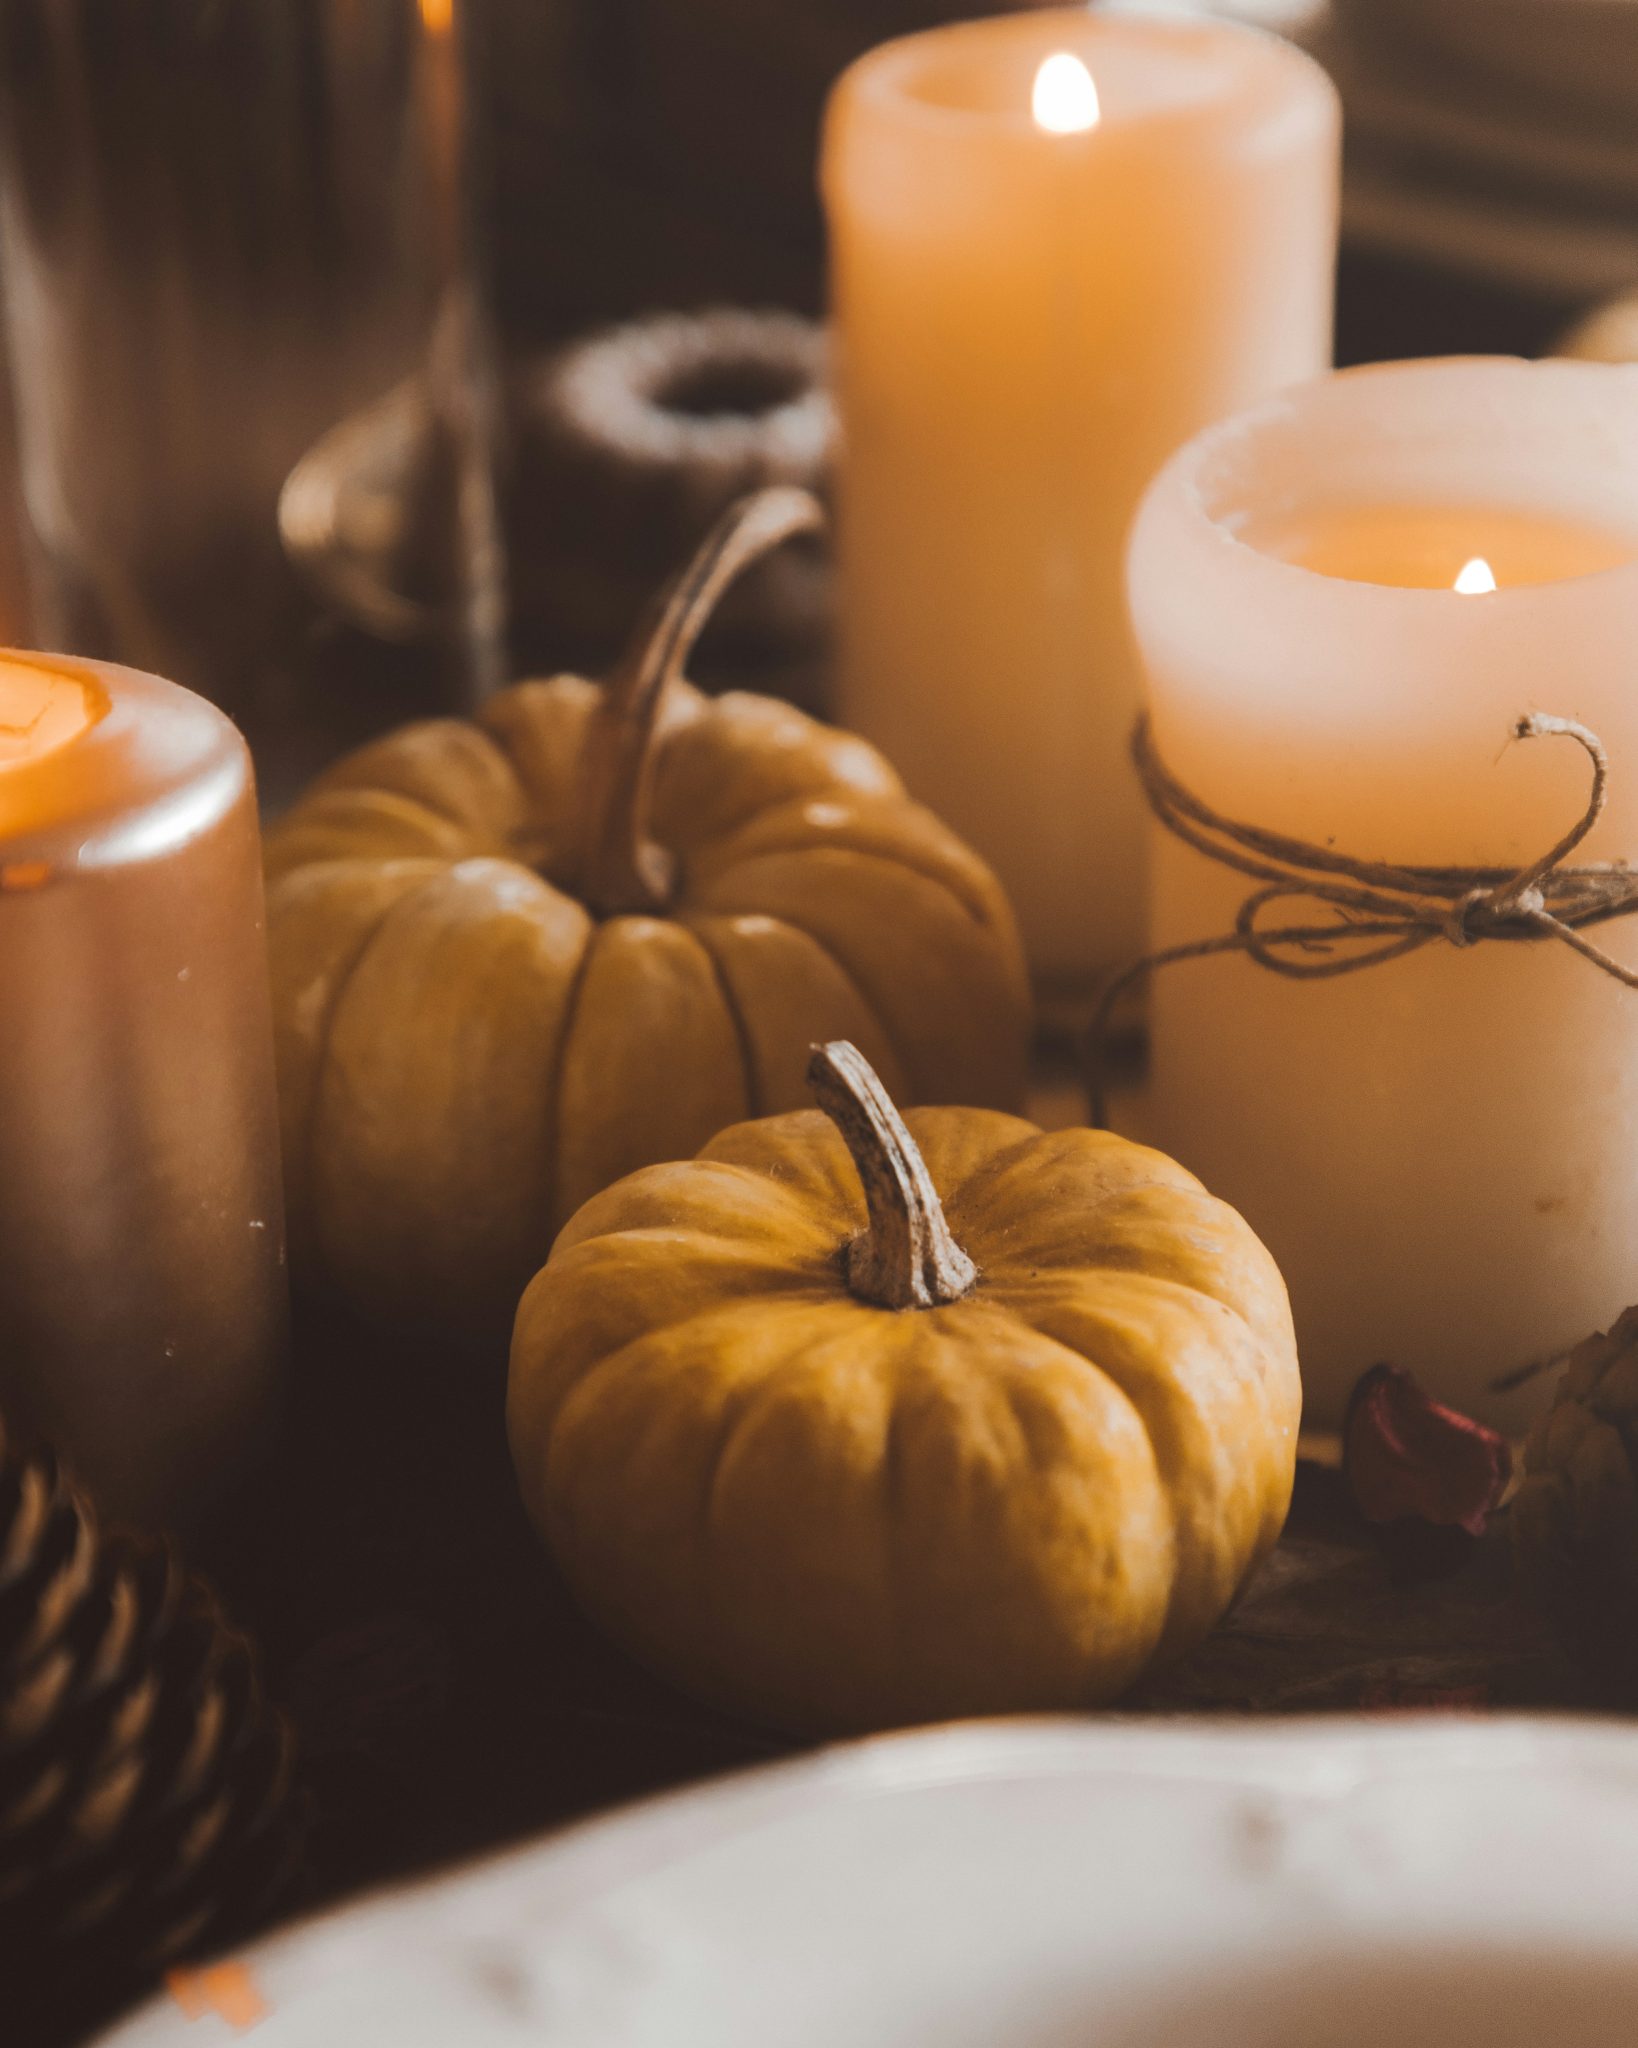
The single most important element in this cozy scene isn’t an object—it’s the candlelight. You could have the same pumpkins, the same twine-wrapped candle, and the same wooden surface, but without the flickering flame, you’d lose all the magic. The warm, moving light is what transforms a simple collection of items into an atmosphere. It softens edges, creates dancing shadows, and casts a golden glow that feels instantly warm and inviting. It’s a powerful reminder that sometimes the most impactful part of a design is intangible.
|
📋 Copy HEX 🔗 Share |
🔧 How-To Brief
This look is beautiful, but candle safety is non-negotiable. Never leave lit candles unattended, especially when they are surrounded by potentially flammable items like twine or pinecones. Keep the wicks trimmed to 1/4 inch to prevent high flames or smoking. Also, be prepared for wax drips. Place your candles on a heat-resistant tray or holder to protect your wooden surfaces. For a worry-free alternative that’s much safer for homes with kids or pets, use high-quality flameless LED candles. Many now have realistic flickering effects that can create a similar cozy ambiance without any of the risk.
14. Craft a Rustic Knitted Pumpkin with a Real Branch Stem
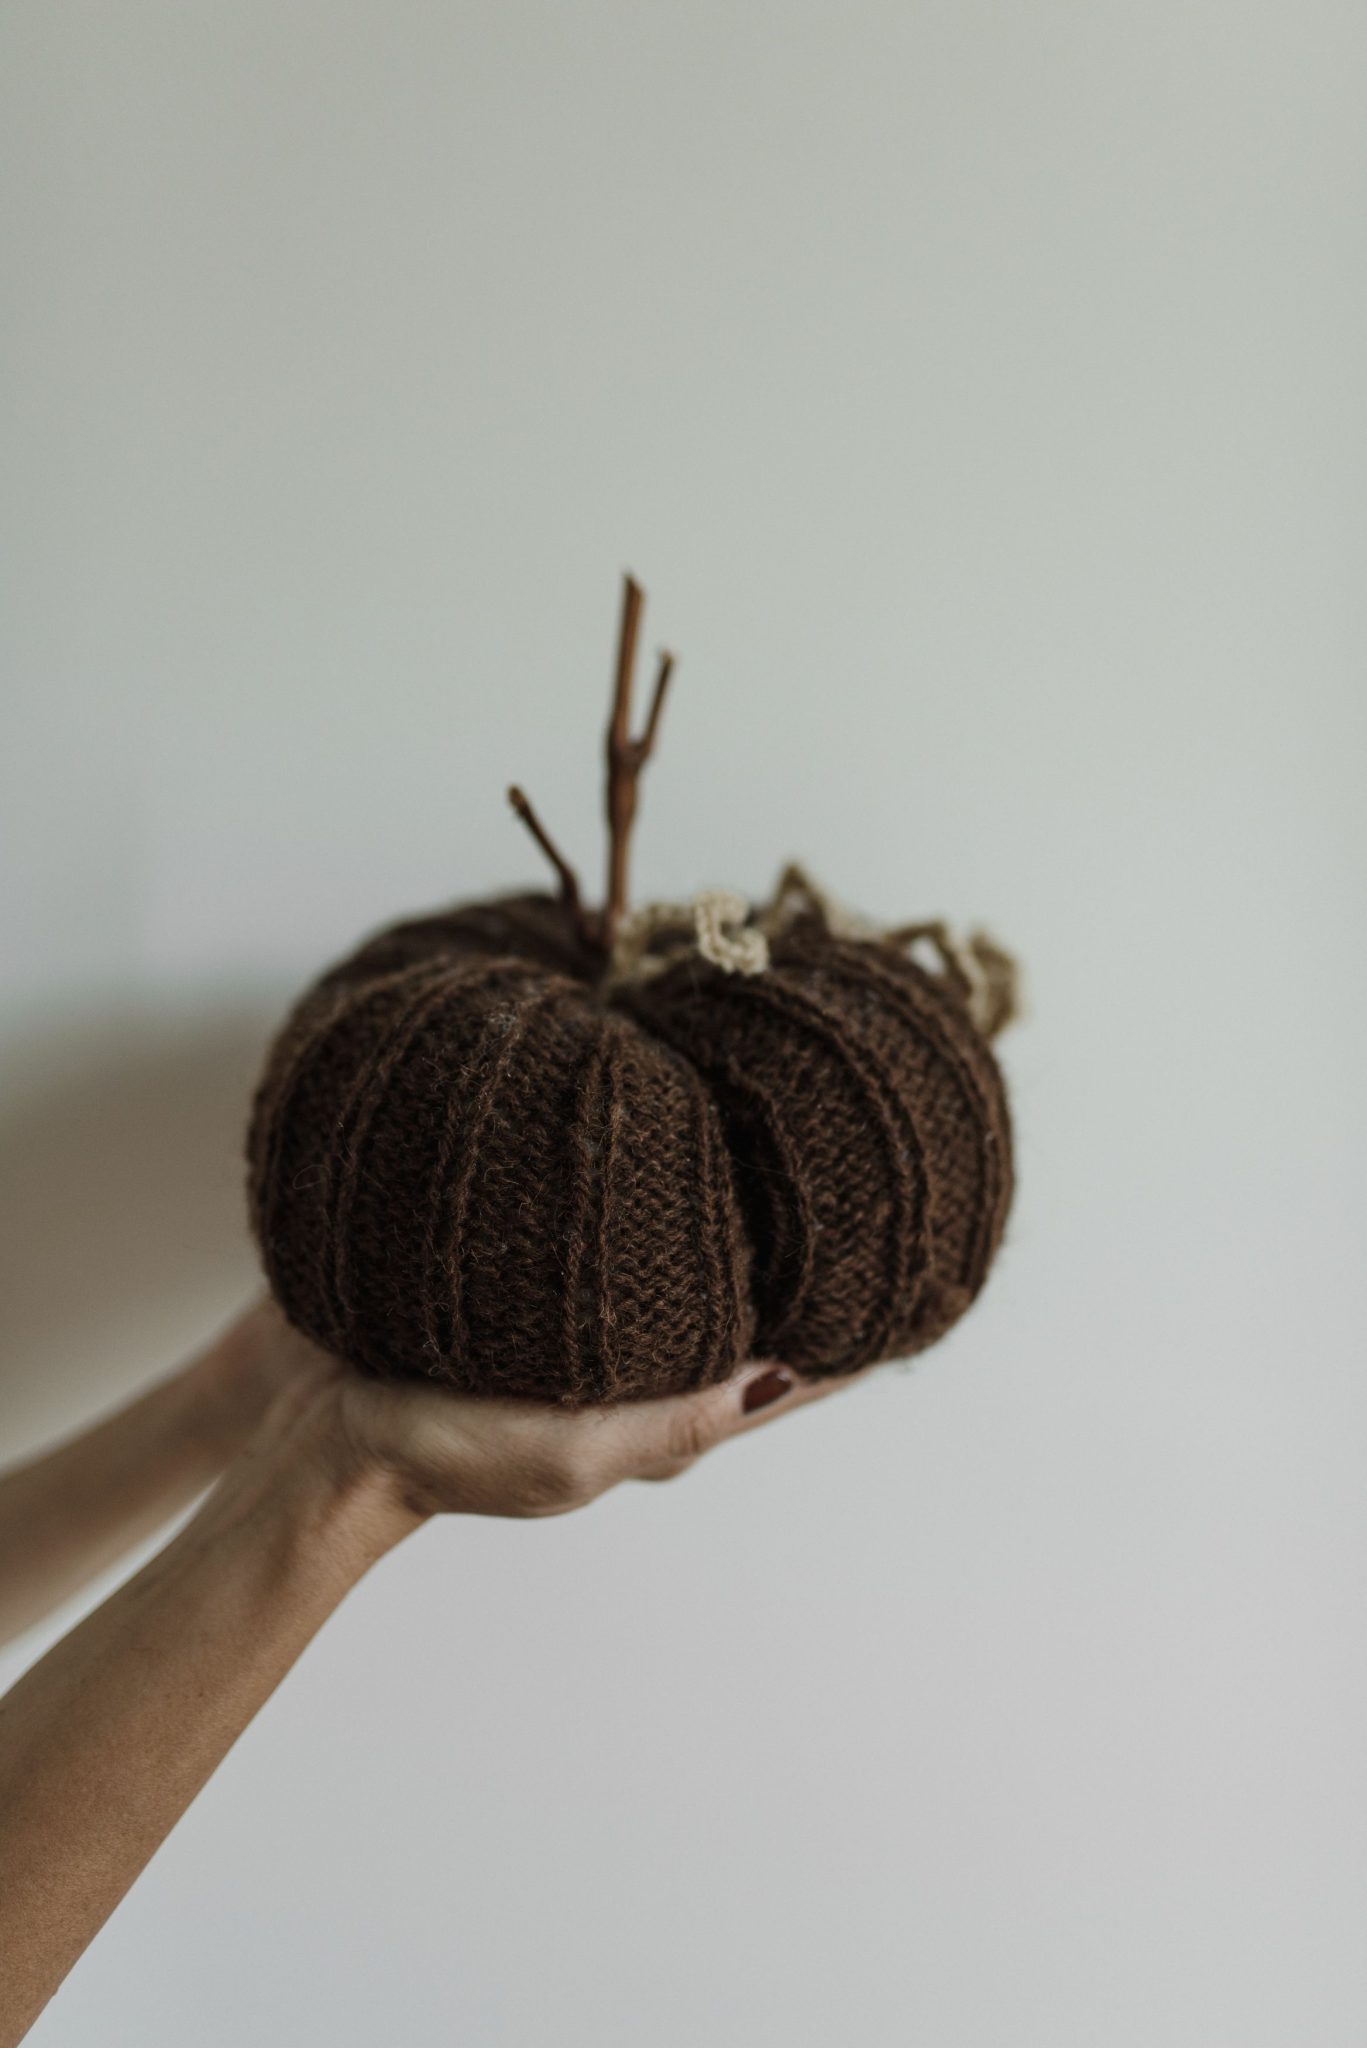
The appeal of this little pumpkin comes from its textural formula: 80% soft texture + 15% rustic texture + 5% delicate texture. The chunky, dark brown knit of the pumpkin itself provides the overwhelming feeling of softness and warmth. This is beautifully contrasted by the rough, natural bark of the real branch used as a stem. The final touch is the finely crocheted beige ribbon, which adds a small, delicate detail that keeps the overall piece from feeling too heavy or rustic. It’s this thoughtful mix of textures that makes it feel handmade and special.
|
📋 Copy HEX 🔗 Share |
✅ Before You Start
This simple craft works because it blends the artificial with the authentic. The pumpkin form is clearly a crafted object, made from yarn. But the use of a real, multi-branched piece of wood for the stem grounds it in reality. This juxtaposition is what catches the eye and makes the object interesting. It elevates a simple knit creation into something more sculptural and organic. It’s a celebration of handmade artistry and natural beauty all in one small, charming package. This is a much more modern take than a fully artificial pumpkin.
15. Assemble a Centerpiece with Amber Bottles and Faux Berries
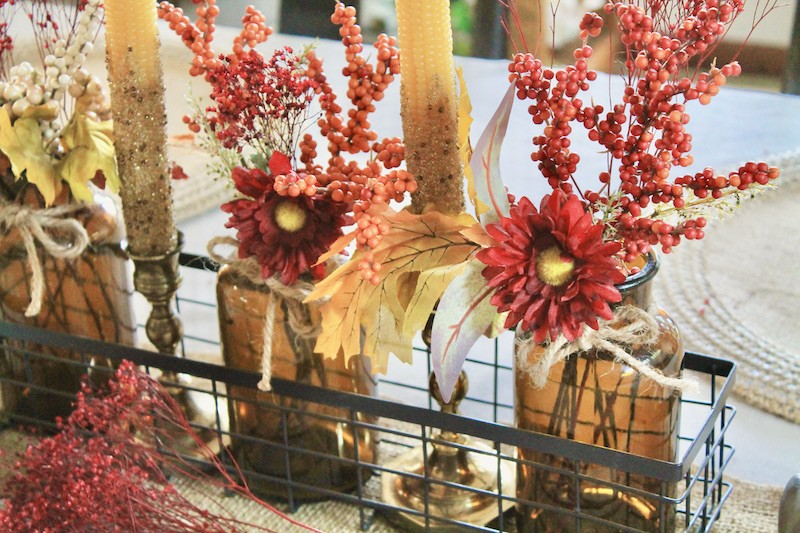
This rustic-chic centerpiece is a great DIY project that looks more expensive than it is. The key is sourcing affordable materials and assembling them with a designer’s eye.
- Amber glass bottles (assorted sizes): $15 – $40 (check thrift stores first!)
- Black wire basket: $10 – $25
- Faux berry/flower sprigs: $20 – $35
- Glitter candles & twine: $10 – $20
- Burlap runner: $10 – $15
- TOTAL: $65 – $135
Budget alternative: Forgo the basket and arrange the bottles directly on the runner. Use plain white candles and wrap them in twine yourself for a custom look at a lower cost. A similar concept with a more elegant feel can be seen in Idea #18.
|
📋 Copy HEX 🔗 Share |
📐 Style Math
To give your arrangement a professional, cohesive look, use repetition with variation. Notice how each bottle is decorated, but not identically. They all feature twine and a cluster of red/orange berries, but the placement and style vary slightly. One has a candle, another has a full bouquet. This creates a rhythm that guides the eye across the centerpiece. It feels intentionally designed, not just like a random collection of items. Apply this principle: pick 2-3 decorative elements and apply them in slightly different ways to each component of your arrangement.
16. Use Potted Hydrangeas and Apples for a Natural Table Setting
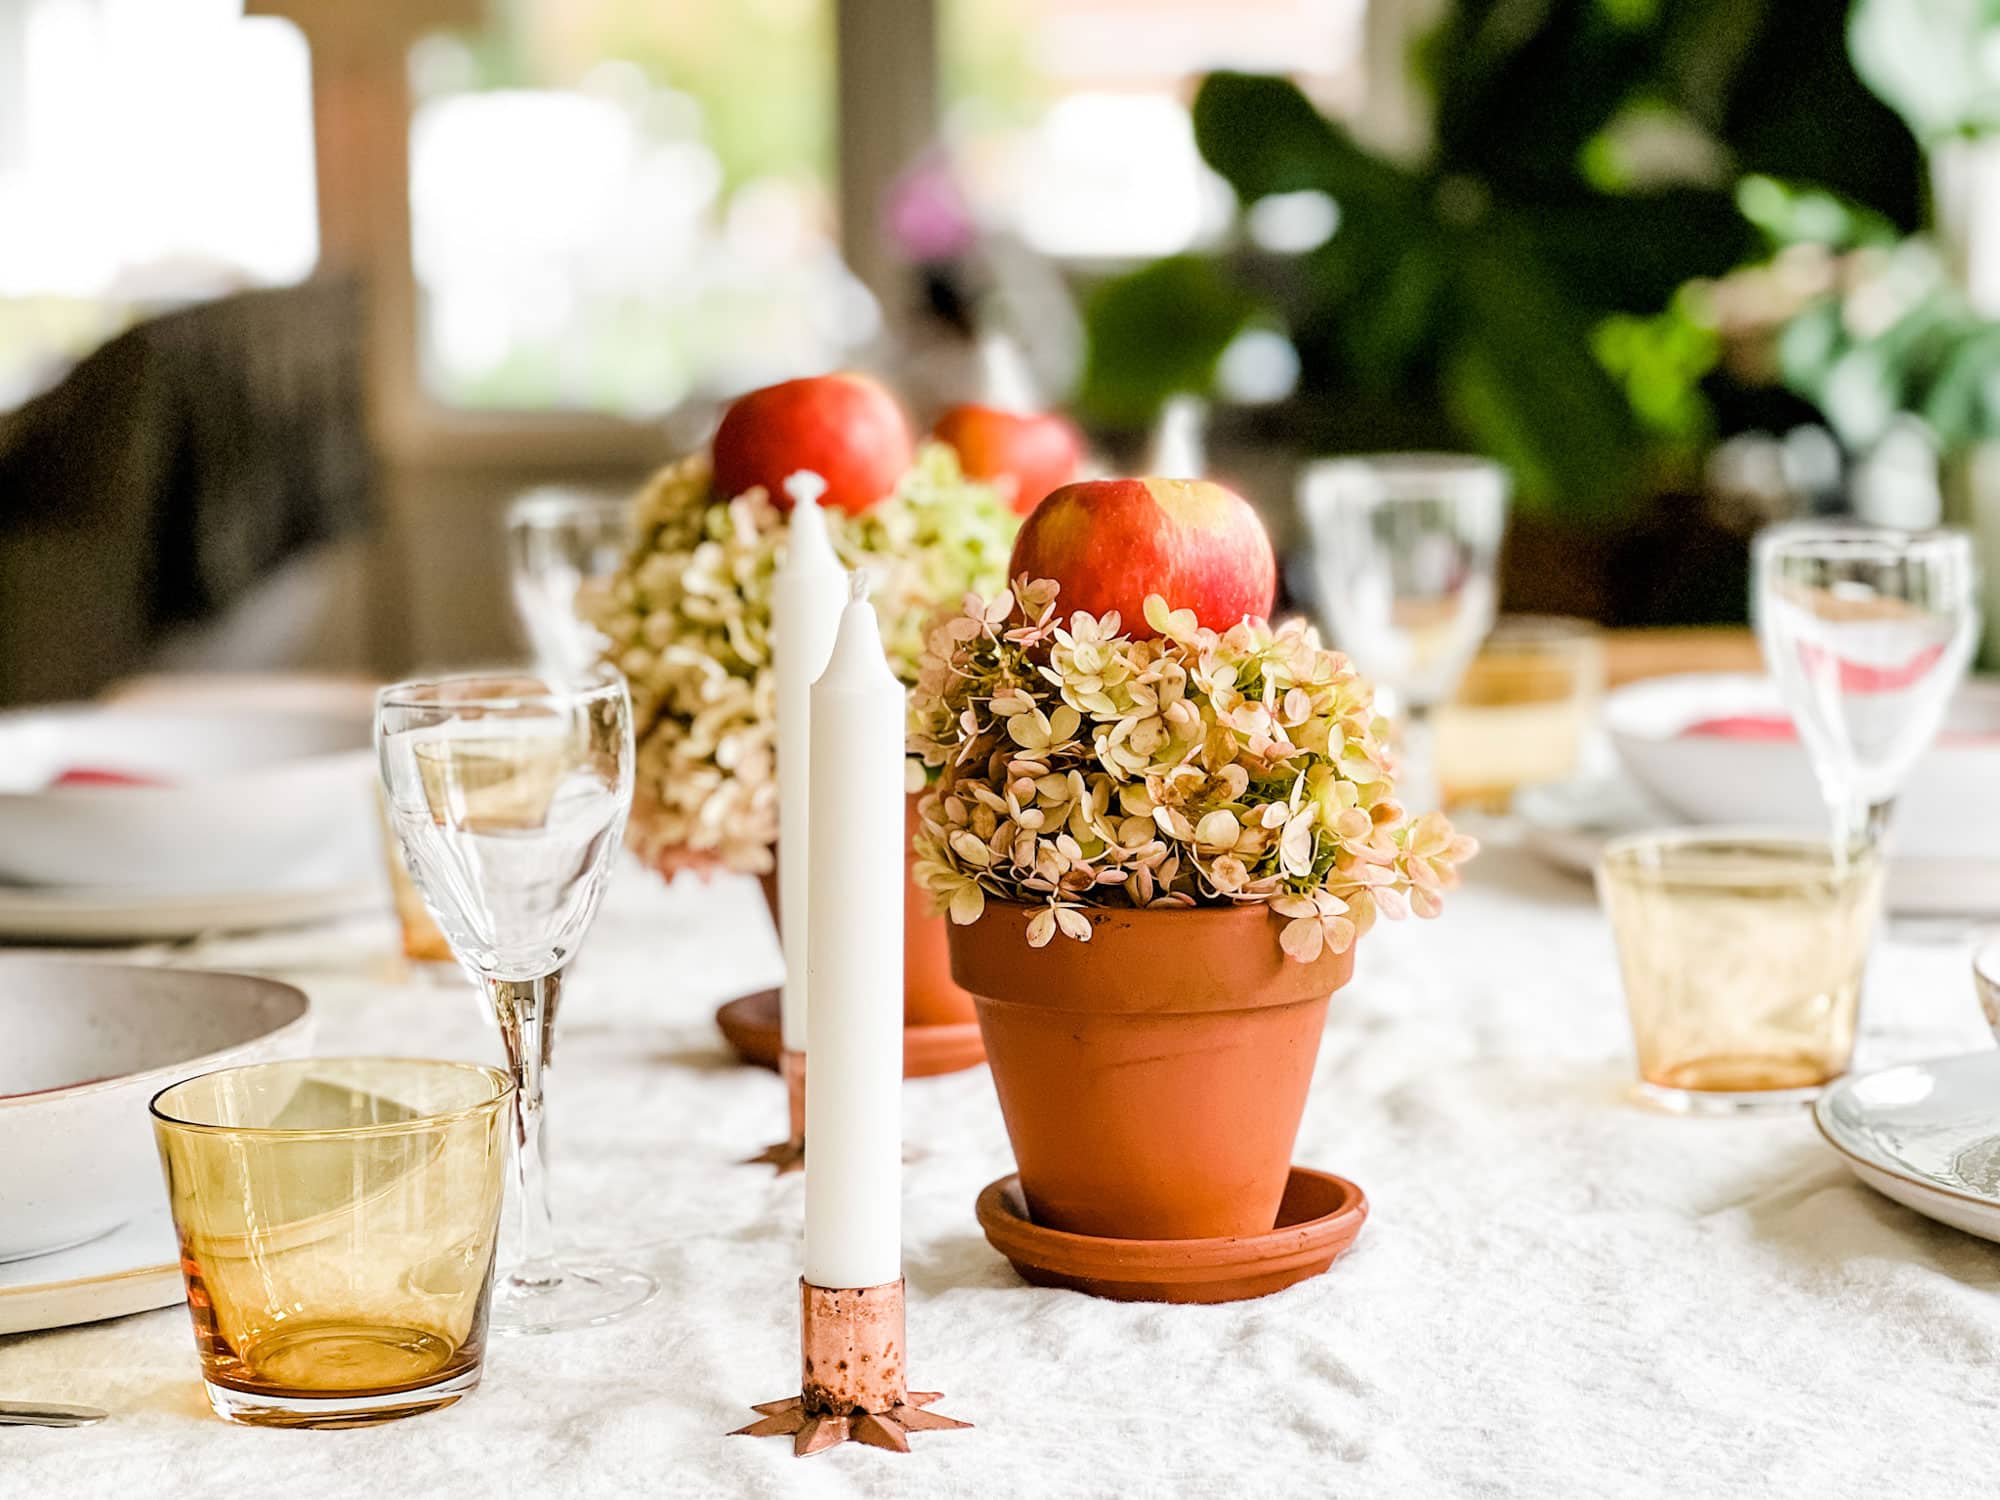
The simple, humble terracotta pot is the surprising hero of this tablescape. While the hydrangeas and apples are lovely, placing them in standard glass vases would have created a much more formal, generic look. The earthy, matte texture and warm color of the terracotta instantly signal a rustic, garden-inspired vibe. It feels unpretentious and natural, as if you just brought the pots in from your patio. This choice connects the entire tablescape to the outdoors and sets a relaxed, welcoming tone for the meal.
|
📋 Copy HEX 🔗 Share |
⭐ The One Thing
This design is a masterclass in using “in-between” colors. The hydrangeas aren’t a vibrant green or pink; they are a faded, muted tone that bridges the gap between summer and fall. This softness is a perfect backdrop for the crisp, bright red of the apples. The arrangement doesn’t scream “autumn” with typical oranges and browns. Instead, it whispers it, using the subtle, transitional colors of the late harvest season. The copper candle holders add a hint of metallic warmth that elevates the simple materials around them.
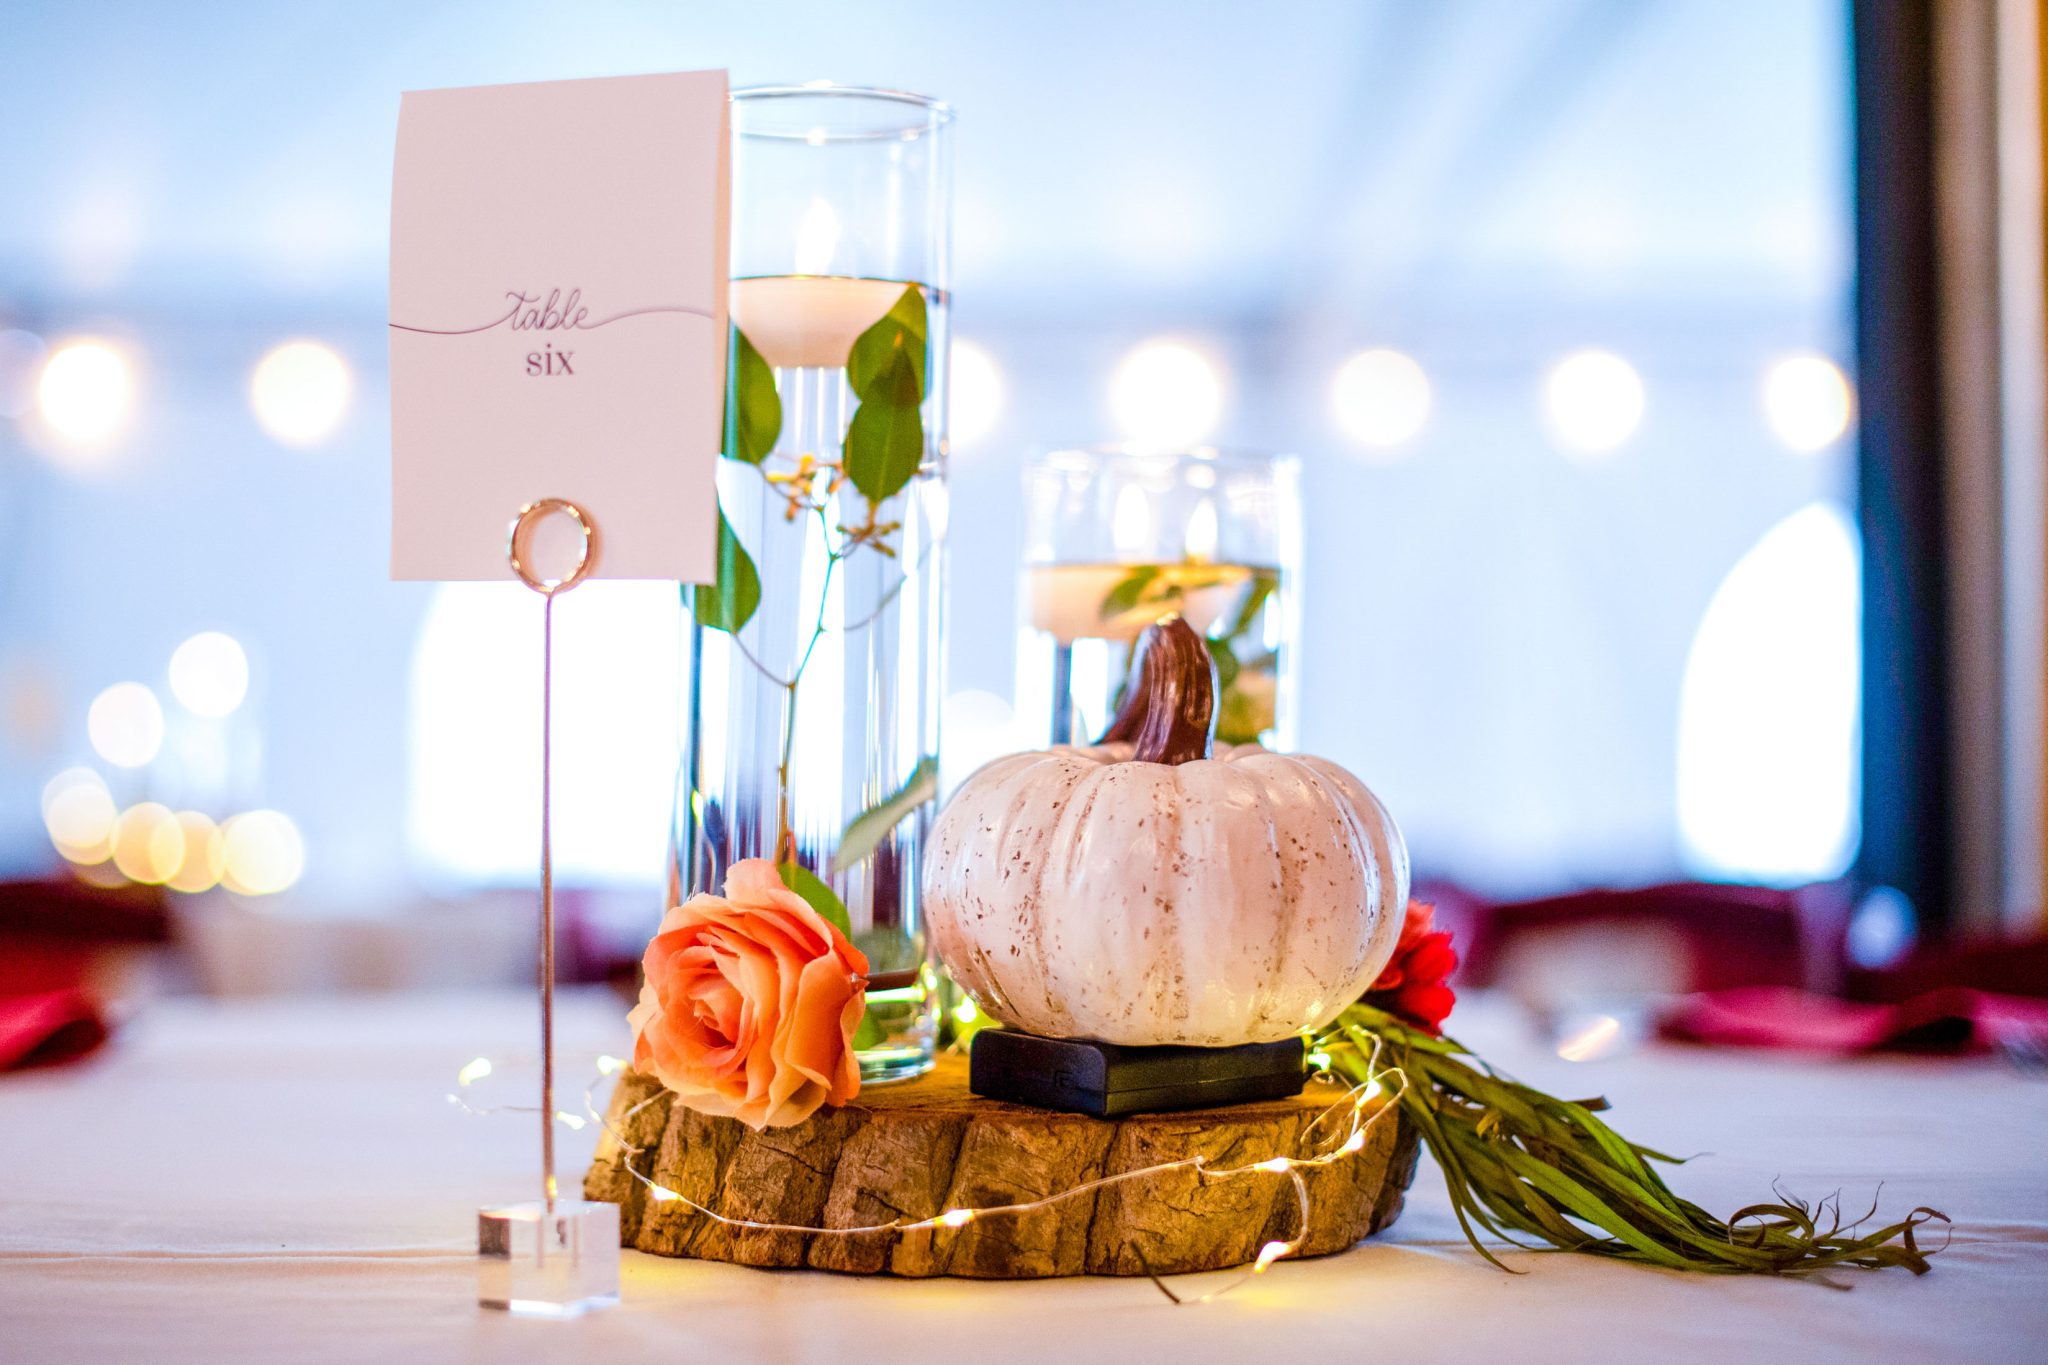
17. Combine a White Pumpkin and Floating Candles for an Elegant Display
This arrangement is perfectly scaled for a small, round table, like a bistro table for two or a wedding reception guest table (as hinted by the “Table Six” card). The key is the verticality of the cylinder vases, which draws the eye upward and makes the centerpiece feel larger without taking up too much table space. The entire display is contained on a wooden log slice about 12-14 inches in diameter. This idea is ideal for spaces where you need a festive touch that won’t overwhelm the surface or block sightlines across the table.
|
📋 Copy HEX 🔗 Share |
📏 Scale Guide
While beautiful, combining real candles with other decor requires vigilance. Floating candles are generally safer as the water contains the flame, but the glass vases can get hot. Keep them away from the faux greenery or any other flammable materials. The fairy lights are a lovely touch, but be mindful of the battery pack—you’ll need to strategically hide it behind the pumpkin or under the log slice. For a completely worry-free version, swap the real floating candles for submersible LED tea lights. You get the same warm, watery glow without any of the fire risk.
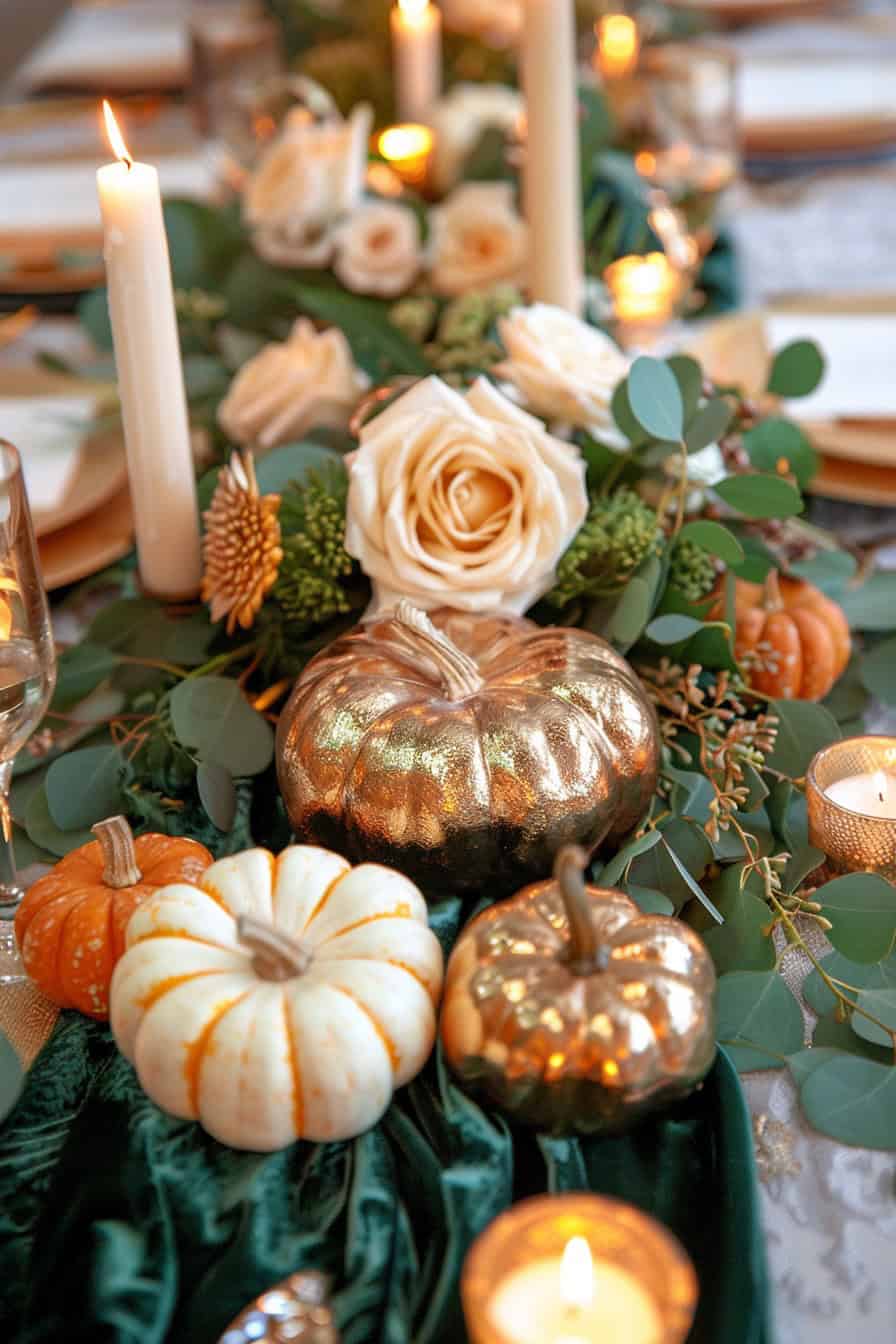
18. Drape a Green Velvet Runner with Pumpkins and Roses
The success of this design lies in its sophisticated mix of textures and sheens. The deep, matte softness of the green velvet runner absorbs light and creates a rich, luxurious base. This makes the other elements pop. The smooth, waxy skin of the real pumpkins contrasts with the high shine of the metallic gold ones. The delicate, papery petals of the cream roses add another layer of softness. This tactile variety is what makes the tablescape feel so decadent and inviting to the touch. It’s a feast for the eyes and the hands.
|
📋 Copy HEX 🔗 Share |
🔥 Trending Context
Deep, moody jewel tones like emerald green are having a major moment in interior design, and this trend is now finding its way into seasonal decor. People are moving away from the traditional, rustic orange-and-brown fall palette in favor of more dramatic, elegant color stories. Using a luxurious fabric like velvet as a base for pumpkins and foliage is a perfect example of this shift. It feels more “luxe” and less “farmhouse.” This trend has staying power because it’s about integrating seasonal decor into a sophisticated, year-round aesthetic rather than completely redecorating for fall.
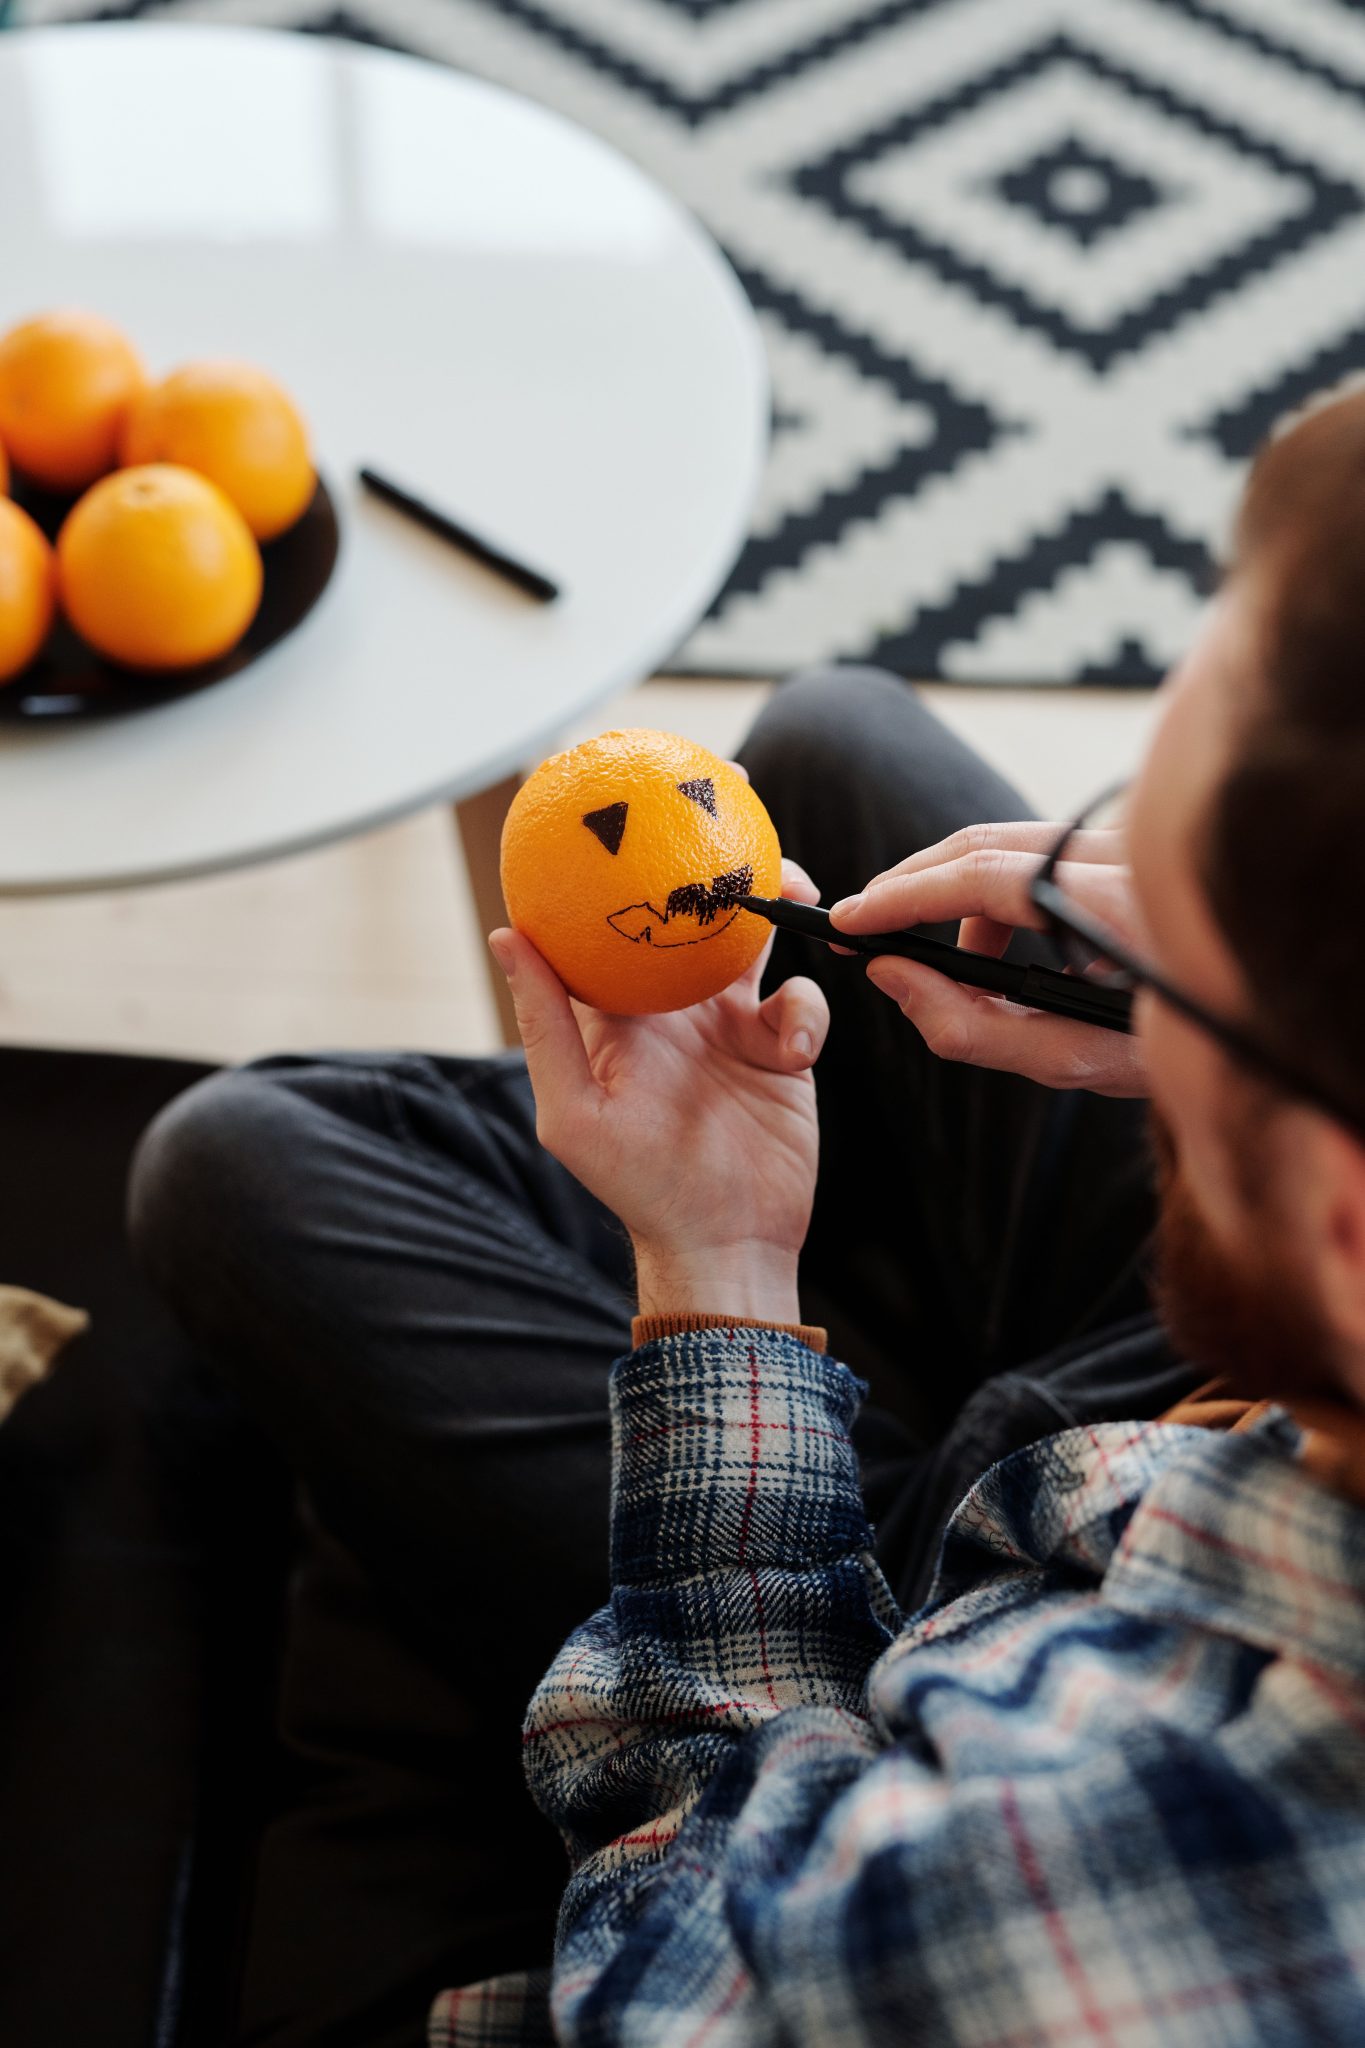
19. Draw a Jack-o’-Lantern Face on an Orange for a Quick Craft
Forget buying a whole pumpkin for carving, especially if you have limited space or time. This is the ultimate budget-friendly fall craft. A bag of oranges and a permanent marker will cost you less than $10 and provide an afternoon of fun. It’s a fantastic activity for kids and adults, and the result is a set of adorable, tiny “jack-o’-lanterns” that you can pile in a bowl for a festive centerpiece. When the season is over, there’s no waste—just peel and eat! This is a much more practical option than the pumpkin planters in Idea #5 if you want zero cleanup.
|
📋 Copy HEX 🔗 Share |
💰 Budget Breakdown
This is a super fun and easy craft, but a quick heads-up: use a non-toxic marker! While you’ll likely peel the orange before eating, it’s always best to use a food-safe or non-toxic pen when drawing on something you plan to consume, especially if kids are involved. Also, the marker can smudge a bit while it’s drying, so give your creations a few minutes to set before you handle them too much. And obviously, while they look like mini pumpkins, they are still oranges and will spoil if left out for too long. Plan to enjoy them for a few days, then eat them up.
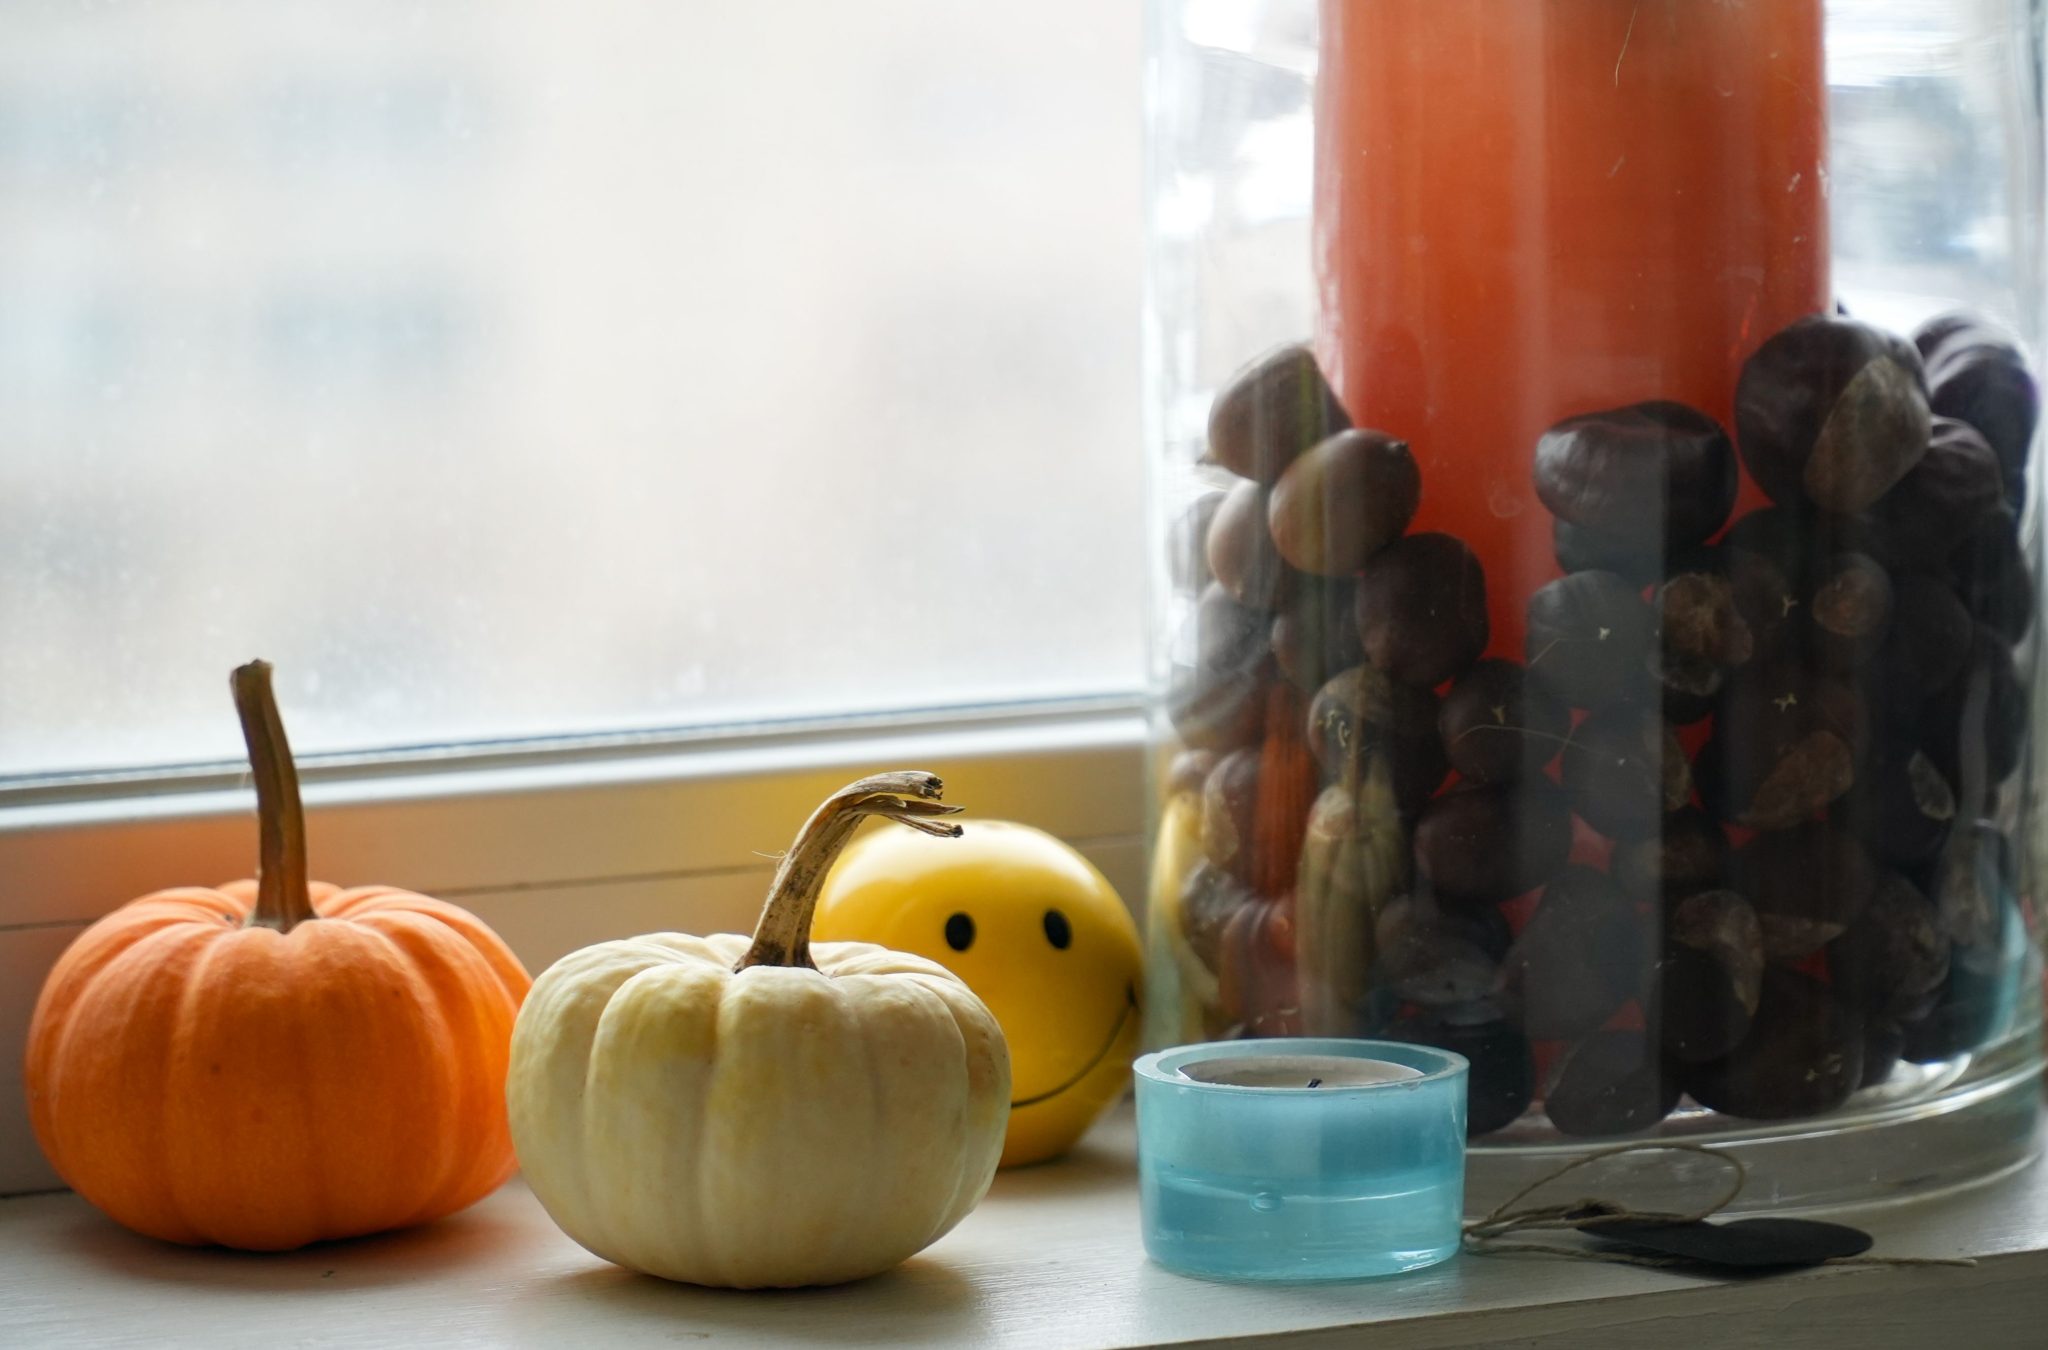
20. Create a Tiny Autumn Display on a Windowsill
This little vignette is a perfect example of how to bring fall charm to a very small space. The entire arrangement likely takes up a footprint of no more than 10 by 4 inches, making it ideal for a narrow windowsill, the corner of a bathroom vanity, or a small floating shelf in an entryway. The key to decorating small spaces is to think in miniatures. Using mini pumpkins and a small candle jar provides that autumnal feeling without cluttering the limited surface area. It proves you don’t need a grand mantelpiece to create a festive moment.
|
📋 Copy HEX 🔗 Share |
🎯 What Makes It Work
What makes this simple collection of items work so well is the careful balance of color and shape. The two pumpkins—one tall and orange, one squat and white—create a pleasing contrast in form. The color palette is a classic fall triad: warm orange, earthy brown (the acorns), and a surprising pop of cool light blue. This unexpected touch of blue keeps the arrangement from feeling too generic and adds a layer of personality. The transparent glass jar adds a modern touch and allows the color and texture of the candle and acorns to shine through.
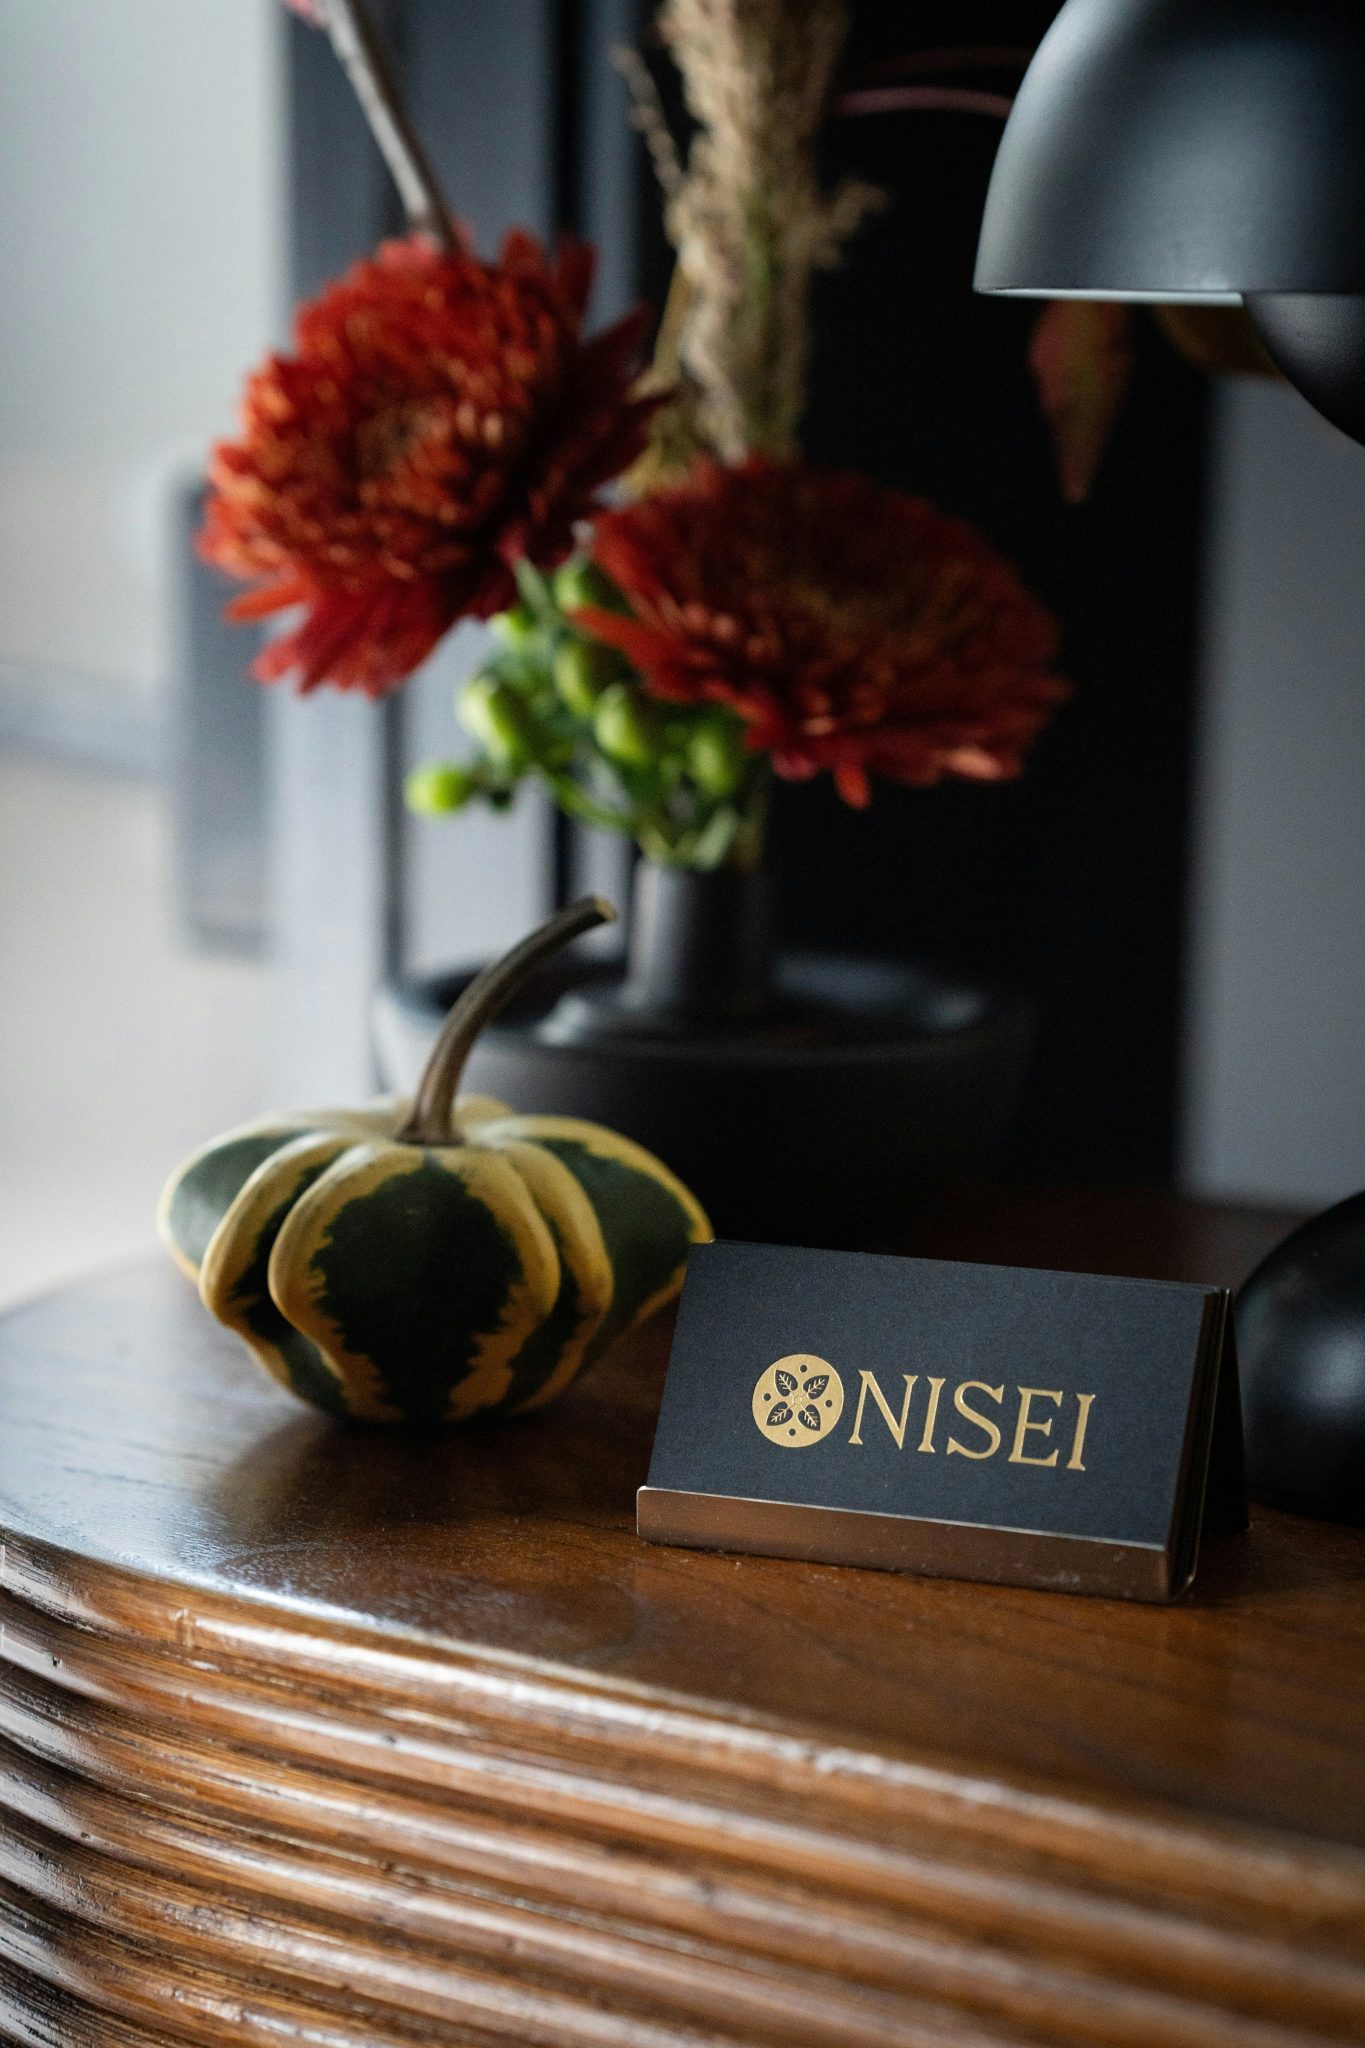
21. Accessorize Dark Wood Furniture with Gourds and Deep Red Florals
The single element that elevates this from a simple fall display to a refined, almost moody, composition is the dark wood surface itself. The polished finish and carved, ridged edges of the furniture piece add a sense of history and gravitas. The deep, rich wood tone makes the colors of the gourd and flowers appear more saturated and dramatic. On a plain white or light wood surface, this arrangement would look pretty; on the dark, detailed wood, it looks intentional and sophisticated. It’s a reminder that the surface you decorate on is just as important as the decorations themselves.
|
📋 Copy HEX 🔗 Share |
🧹 Maintenance Reality
When working with dark furniture, don’t be afraid to use equally dark decor. Notice how the black vase doesn’t disappear against the dark wood; instead, it creates a subtle, layered, monochromatic look that feels very chic. The key is to vary the sheens. The polished wood has a slight gloss, while the vase is a matte black. This difference in texture is enough to distinguish them. The gold lettering on the sign then adds a necessary touch of brightness and sparkle to lift the dark-on-dark pairing. Compare this with the light and airy feel of Idea #11.
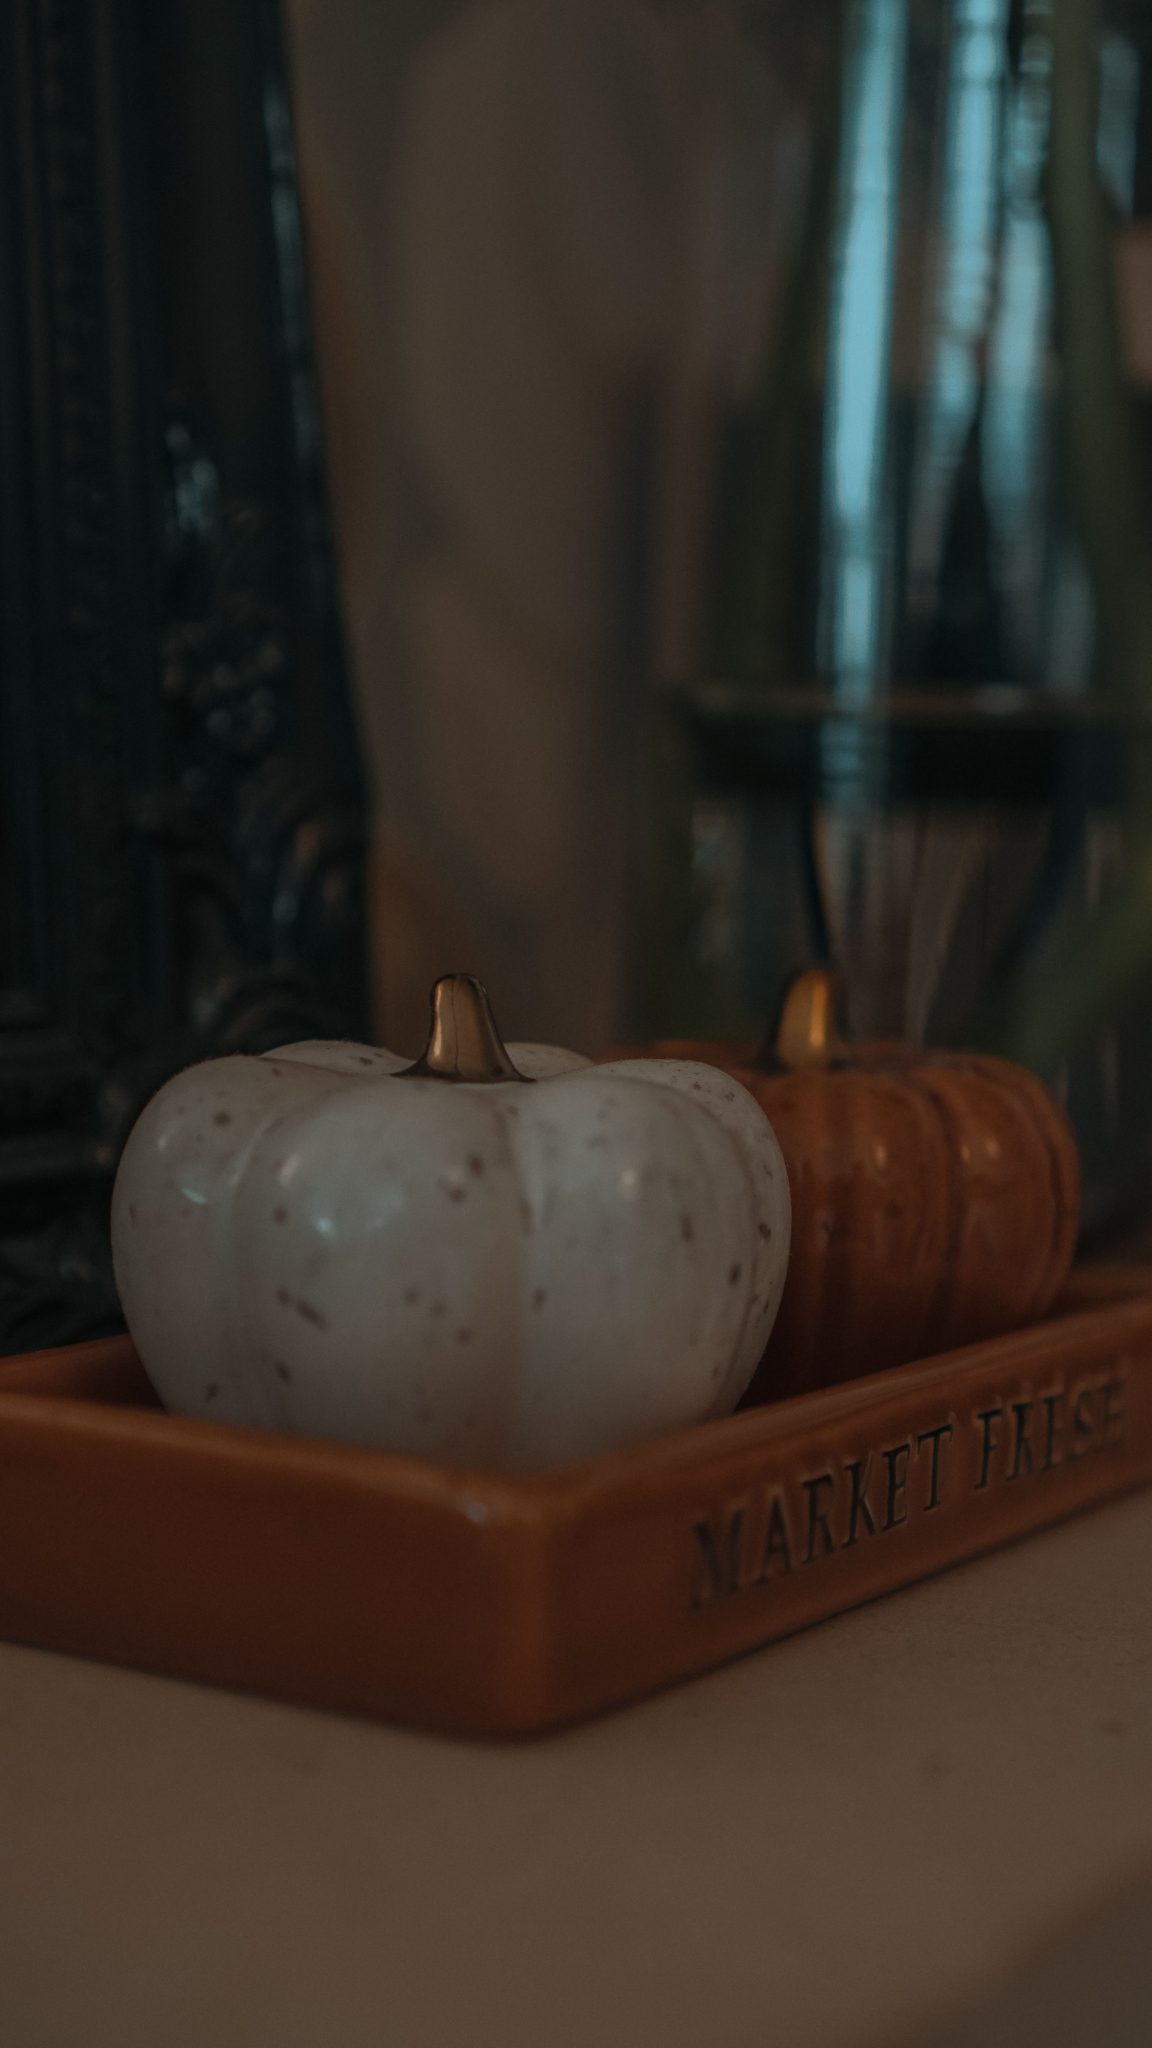
22. Display Mini Pumpkins on a Terracotta ‘Market Fresh’ Tray
This vignette is effective because of its simplicity and textural contrast. The smooth, painted surfaces of the white and orange pumpkins stand out beautifully against the matte, earthy texture of the terracotta tray. The tray itself, with its embossed “MARKET FRESH” text, adds a touch of rustic, farmhouse charm without being overly thematic. The gold stems on the pumpkins provide a small, elegant detail that elevates the whole look. It feels curated, not just thrown together. The limited number of items allows each one’s texture and color to be fully appreciated.
|
📋 Copy HEX 🔗 Share |
💸 Get This Look For Less
This look follows a simple visual recipe: 60% rustic base + 30% seasonal color + 10% metallic accent. The terracotta tray provides the rustic, foundational element. The white and orange pumpkins deliver the unmistakable colors of fall. And the small, shiny gold stems offer that final 10% of sparkle that makes the arrangement feel special and complete. You could easily swap the pumpkins for small gourds or the terracotta tray for a rustic wooden box, and the formula would still hold true, proving its versatility.
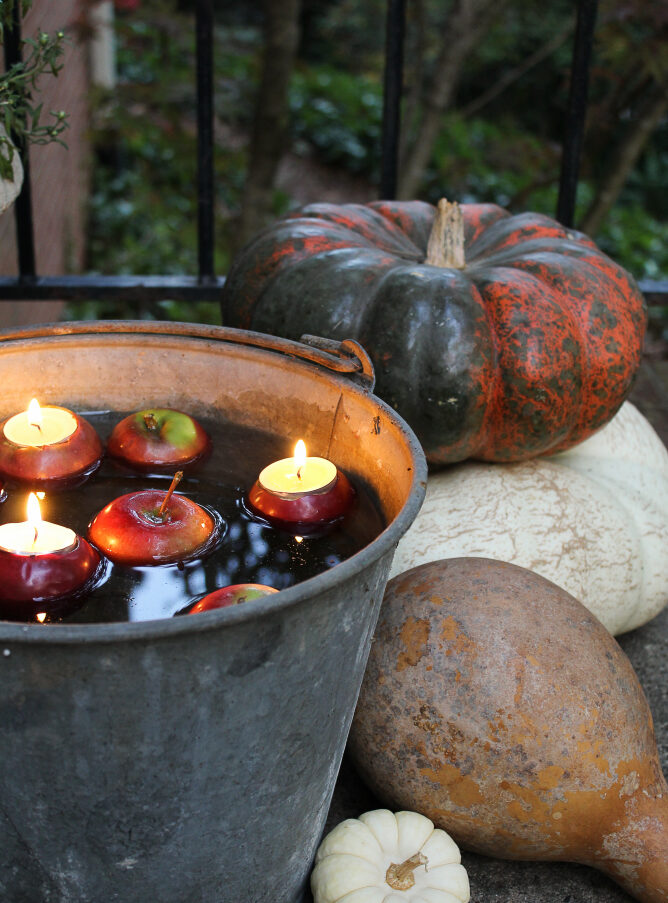
23. Float Apples and Candles in a Galvanized Bucket
This charmingly rustic feature is incredibly easy to assemble and makes a big impact for an outdoor gathering.
- Gather your materials (Est. cost: $25-40): You’ll need a galvanized metal bucket, a bag of red apples, and a package of tea light candles.
- Core the apples: Using an apple corer or a small knife, carefully hollow out the top center of each apple, creating a hole just wide and deep enough to securely hold a tea light.
- Fill the bucket: Place the bucket in its final location and fill it about two-thirds full with water.
- Float your candles: Gently place the apple “candle holders” into the water. Add a few whole apples as well to create a fuller look.
- Light and enjoy: Just before guests arrive, light the tea lights. The warm glow on the water is magical.
|
📋 Copy HEX 🔗 Share |
⚠️ Real Talk
This is a stunningly beautiful idea for an evening event, but it’s strictly for the outdoors. Open flames in floating, bobbing apples are not safe for an indoor setting. Even outdoors, place it on a stable, level surface like a stone patio or lawn, away from foot traffic where it could be knocked over. The tea lights will only burn for a few hours, so this is a temporary display, not an all-day decor piece. Also, the apples will start to brown once they’re cut, so it’s best to core them no more than an hour or two before you plan to light them.
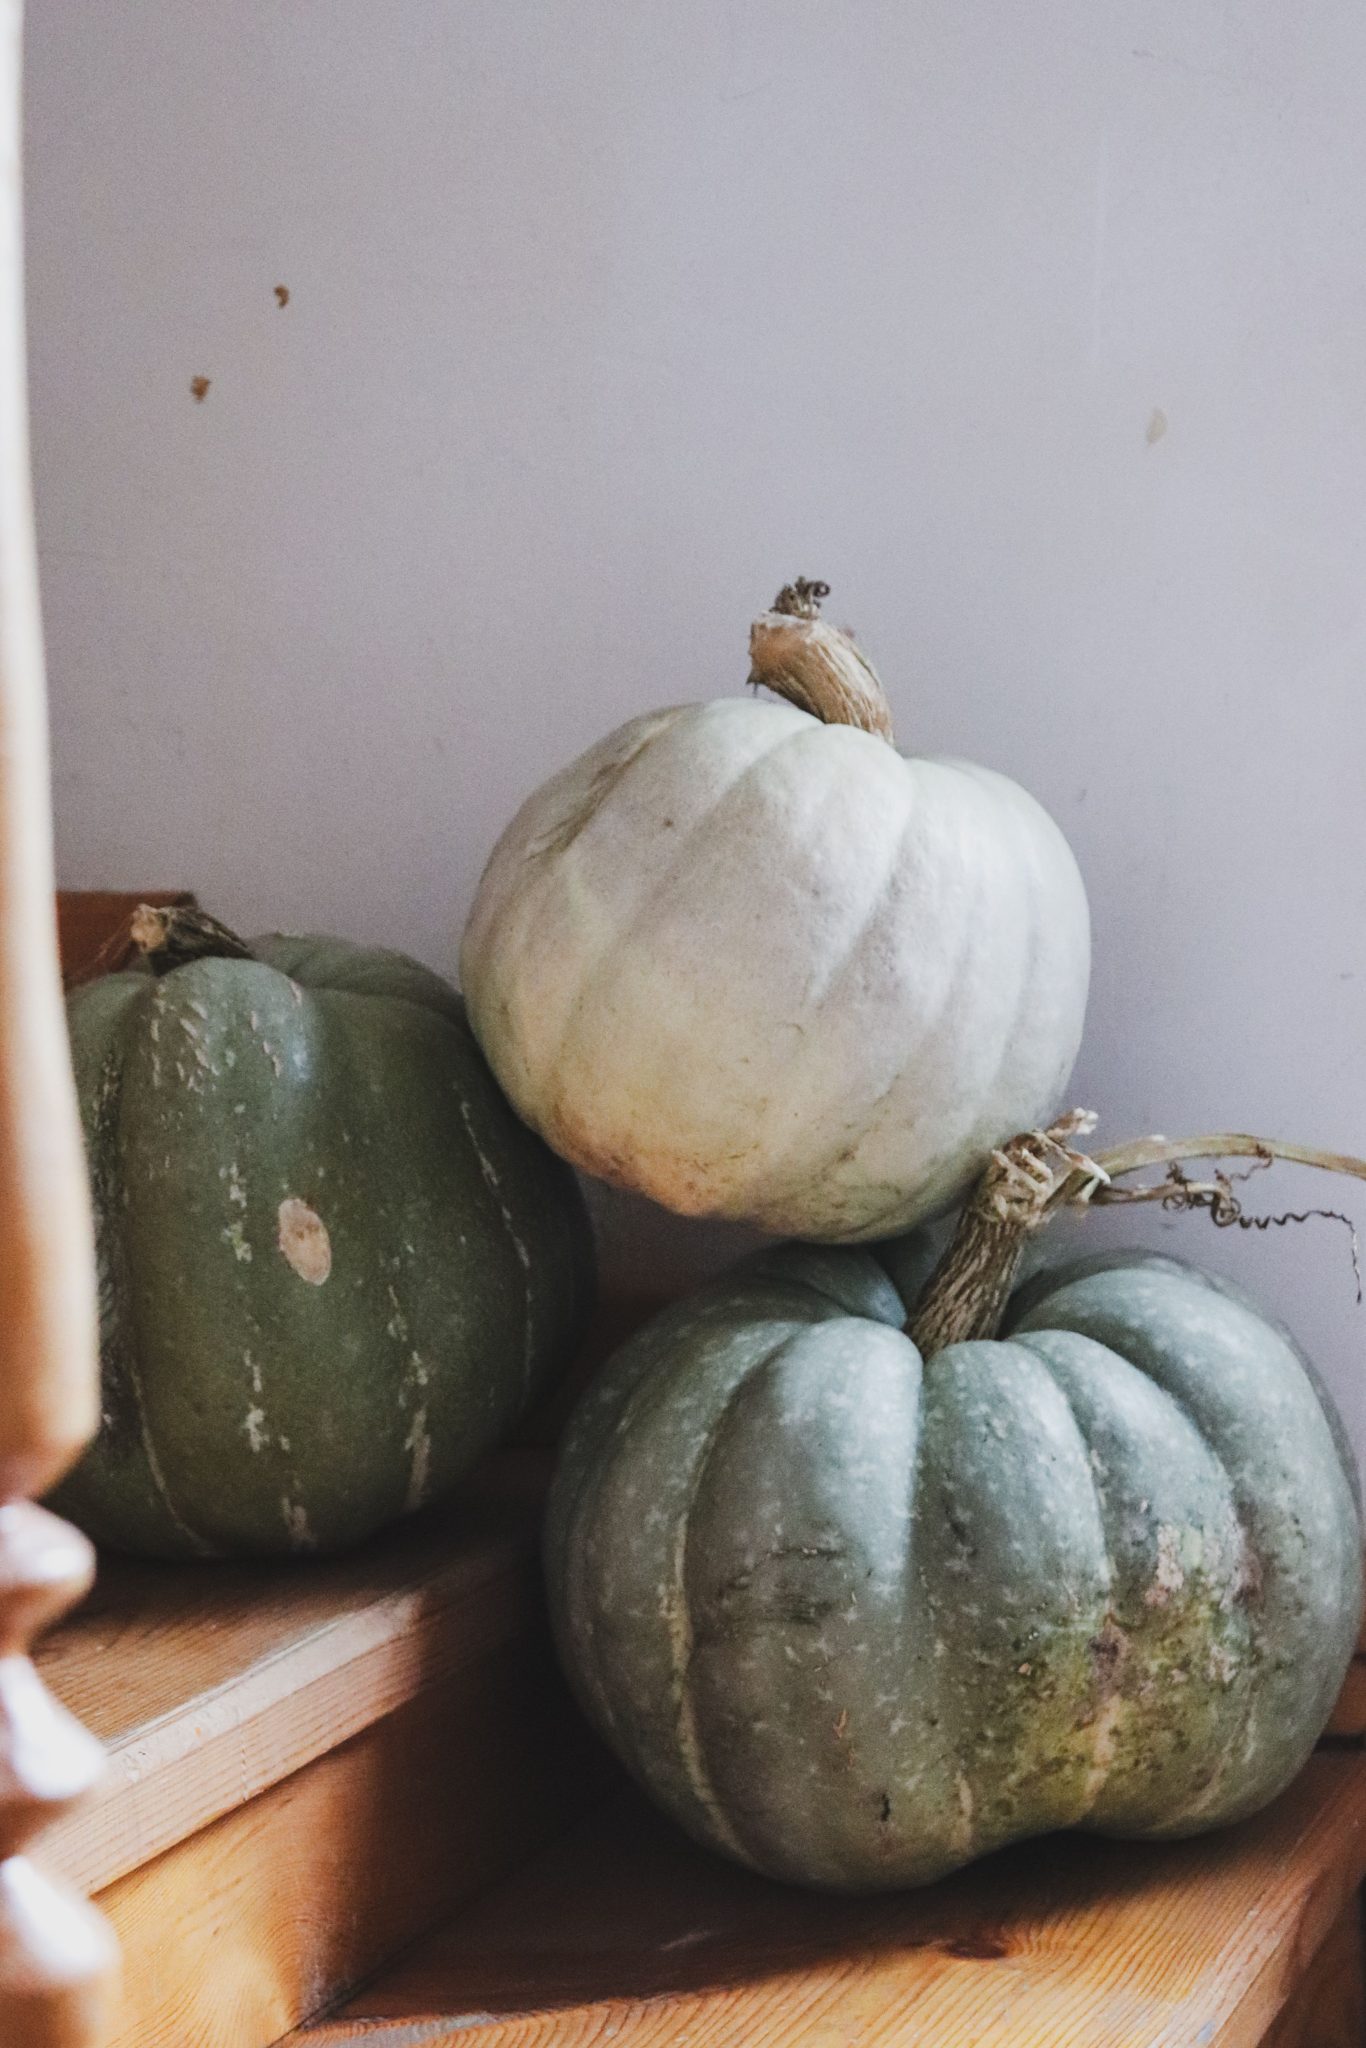
24. Arrange Heirloom Pumpkins on Simple Wooden Stairs
This design is a perfect lesson in “less is more.” The simplicity is what makes it so striking. By limiting the decor to just three pumpkins and placing them on clean, light-colored wooden stairs, the focus remains entirely on the unique beauty of the pumpkins themselves. The plain white wall acts as a blank canvas, and the diagonal line of the staircase creates a strong sense of movement. There are no distracting garlands, lights, or other clutter. It’s a confident, minimalist approach to seasonal decor that feels both rustic and modern.
|
📋 Copy HEX 🔗 Share |
💡 Designer Tip
The key to this entire look is the choice of pumpkins. These aren’t your standard bright orange, perfectly round grocery store pumpkins. These are heirloom varieties, celebrated for their unique shapes, muted colors (like the gorgeous green-blue and creamy off-white), and natural imperfections like bumps and variations in tone. Using heirloom pumpkins instantly elevates your fall decor, giving it a more authentic, farm-to-porch feel that’s very on-trend. They are decor objects in their own right and don’t need much embellishment to shine.
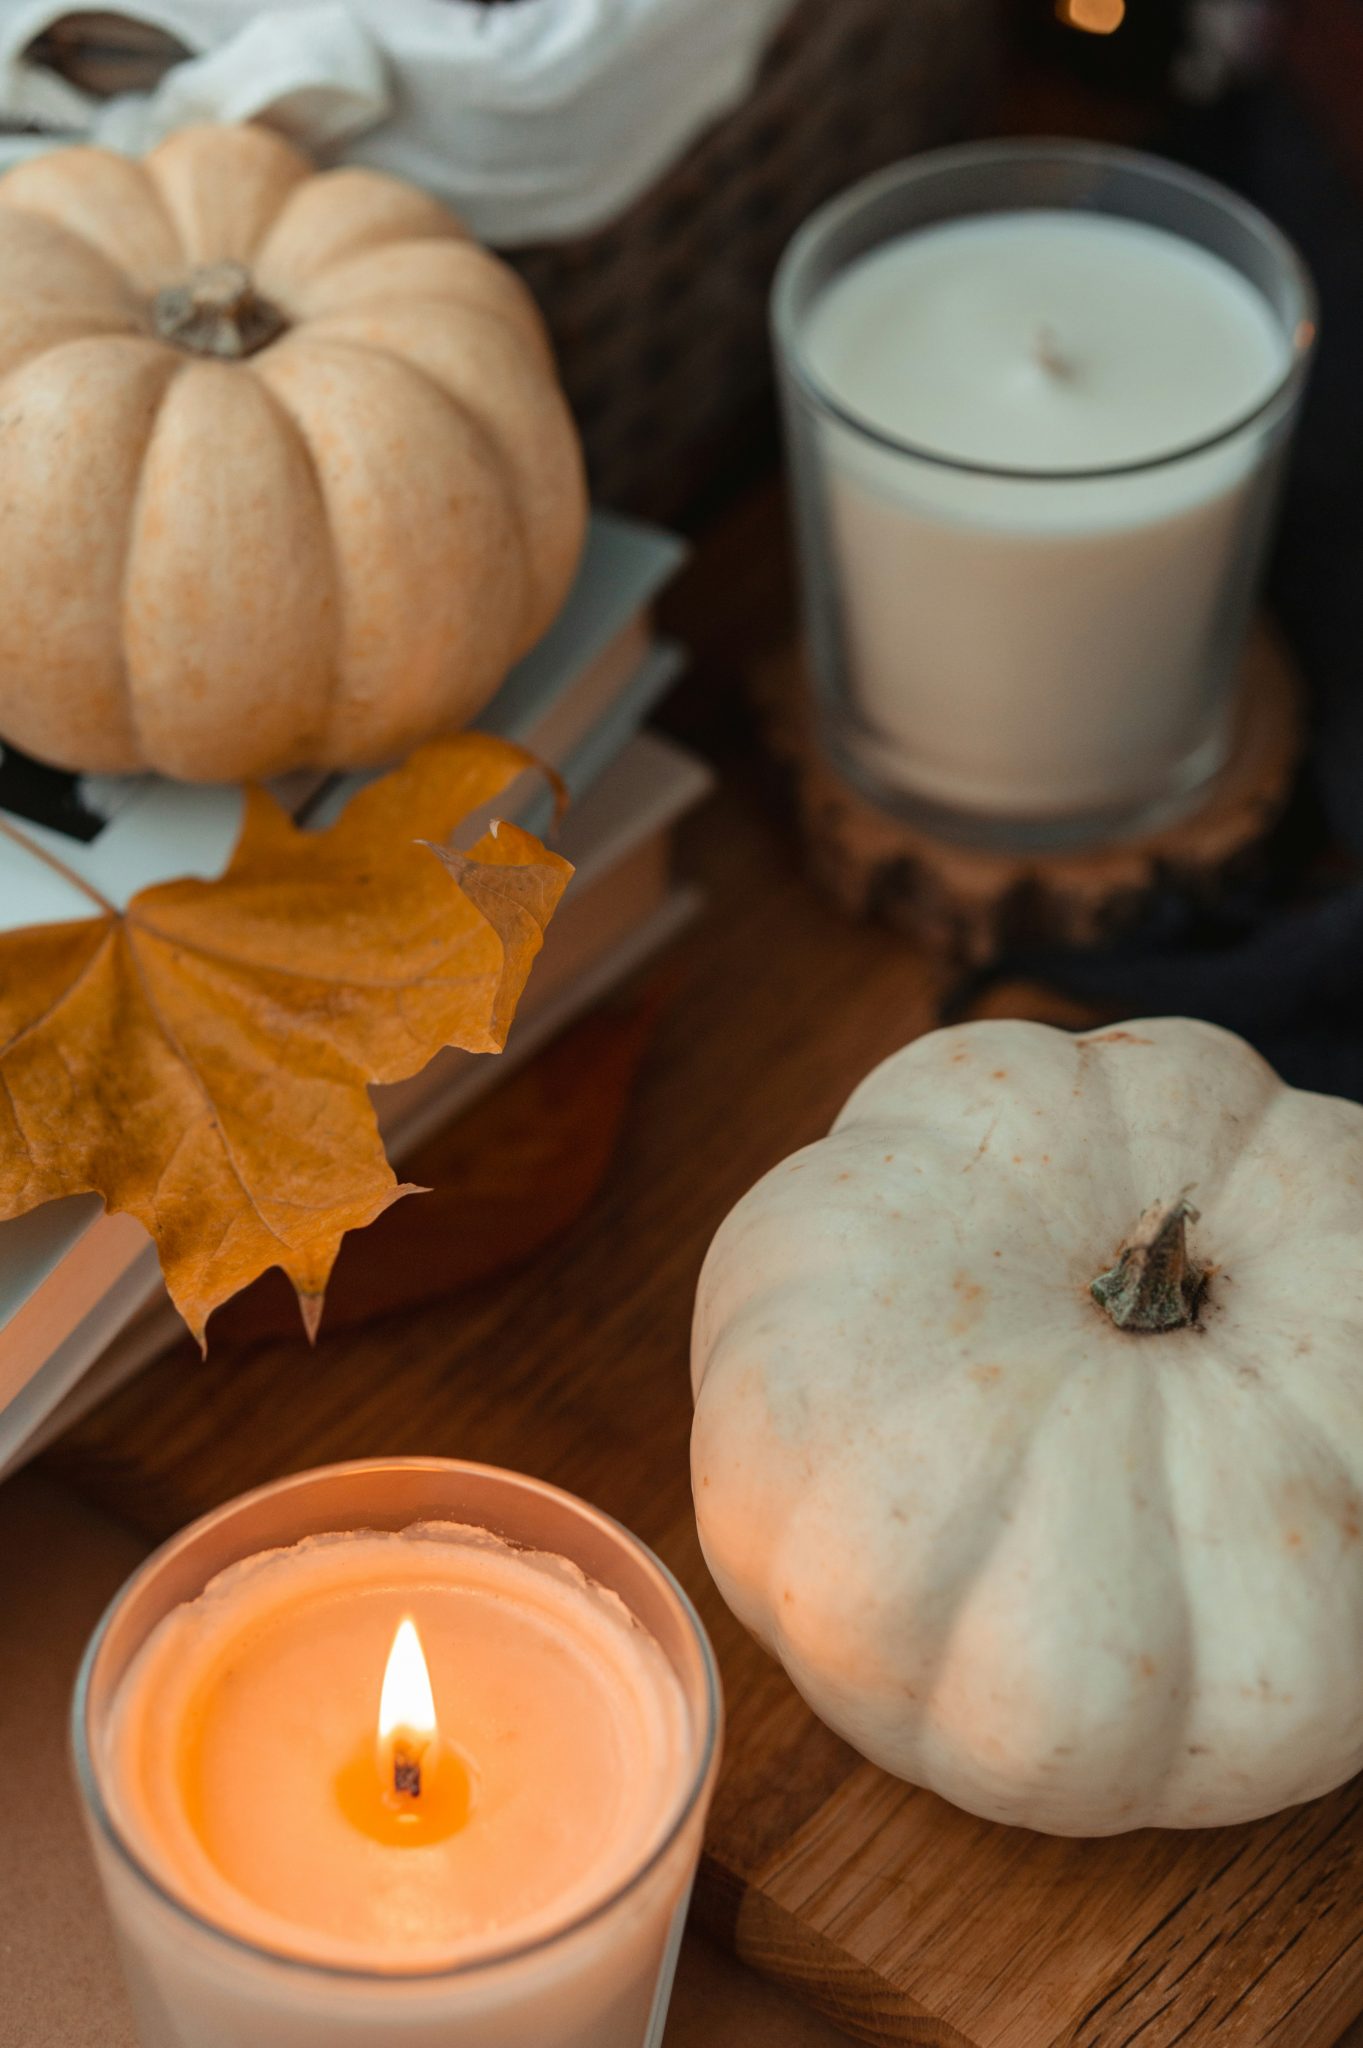
25. Style a Cozy Tabletop with Pumpkins, Books, and a Leaf
To create a cozy, layered look on any flat surface, think about varying the height of your objects. Here, the stack of books acts as a pedestal, lifting the single autumn leaf and making it a focal point. Without the books, the leaf would lie flat and get lost. The arrangement follows a simple visual triangle: the tall candle on one side, the shorter pumpkin and candle group on the other, and the books in the middle. This variation in height is what makes the composition dynamic and pleasing to the eye.
|
📋 Copy HEX 🔗 Share |
🔧 How-To Brief
This cozy, academic-inspired look is incredibly inexpensive to replicate. You already have the books! Raid your own shelves for a few hardcovers with neutral-colored spines (or remove the dust jackets to reveal the simple binding underneath). A walk around your neighborhood will likely yield a beautiful, vibrant leaf for free. The only things you might need to buy are two mini pumpkins and a couple of candles, which you can find at a grocery store or craft store for under $15 total. It’s a perfect example of creating a specific mood with things you already own.
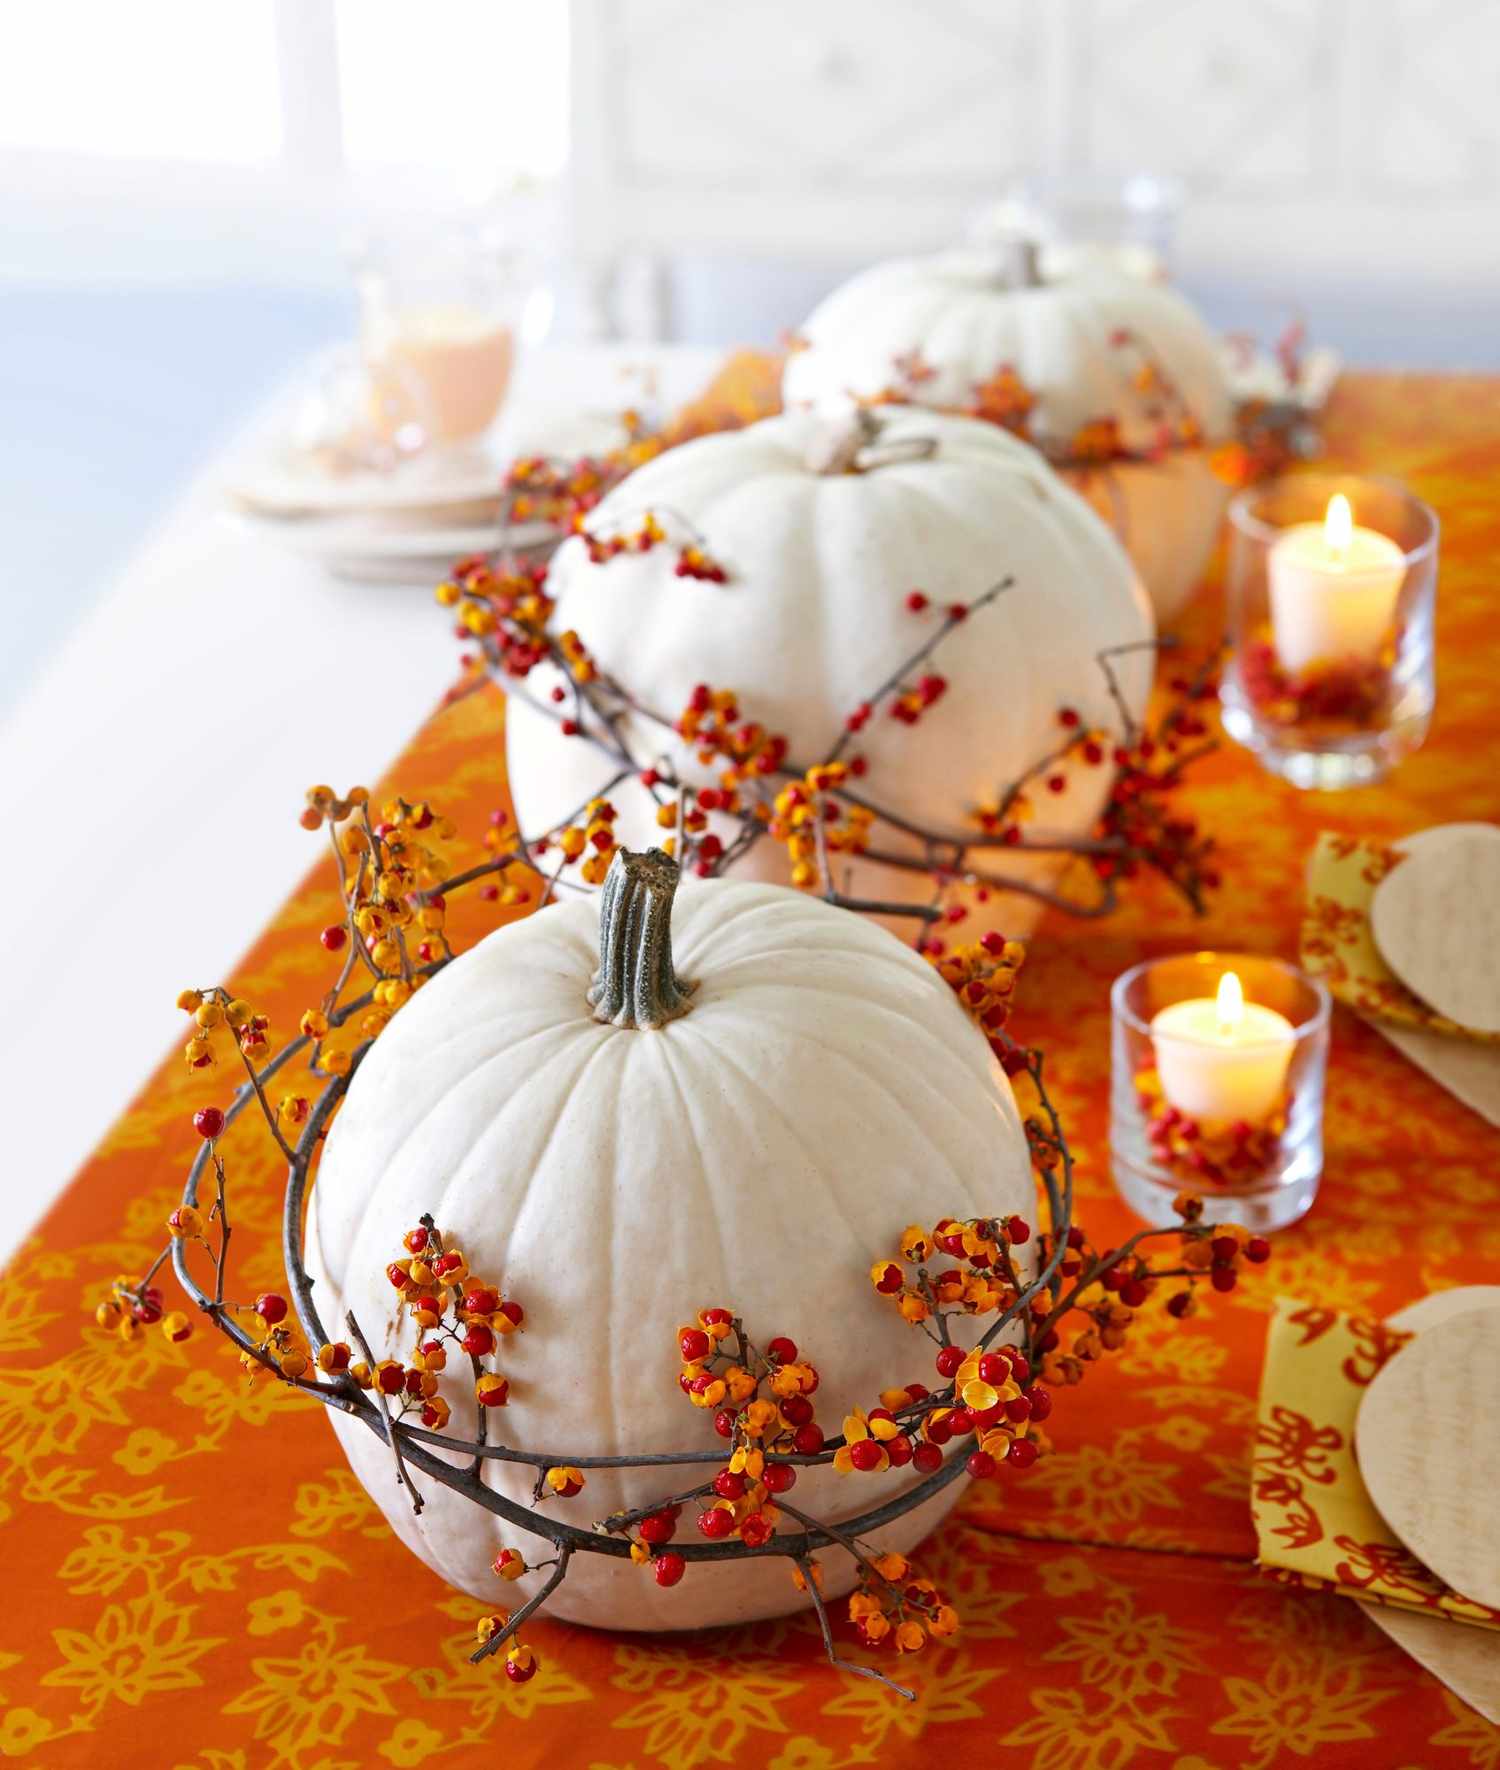
26. Use Bittersweet Garlands on White Pumpkins for a Pop of Color
The visual success here is all about contrast. The crisp, clean, neutral canvas of the white pumpkins makes the vibrant orange-red of the bittersweet berries pop dramatically. If you were to place the same garland on a traditional orange pumpkin, the effect would be far less noticeable. The white background isolates the color of the bittersweet, making it the star of the show. This is a great design lesson: if you want an accent color to have maximum impact, place it against a neutral backdrop.
|
📋 Copy HEX 🔗 Share |
✅ Before You Start
Real bittersweet is absolutely beautiful, but it can be a bit messy. As the berries dry, they can sometimes drop from the vine, so be prepared for a little cleanup, especially if you place this centerpiece on a dining table. Also, be aware that American Bittersweet berries are toxic to humans and pets if ingested, so this is not a great choice for households with curious toddlers or nibble-prone animals. For a worry-free alternative, high-quality faux bittersweet garlands are readily available at craft stores and will give you the same look without the mess or risk.
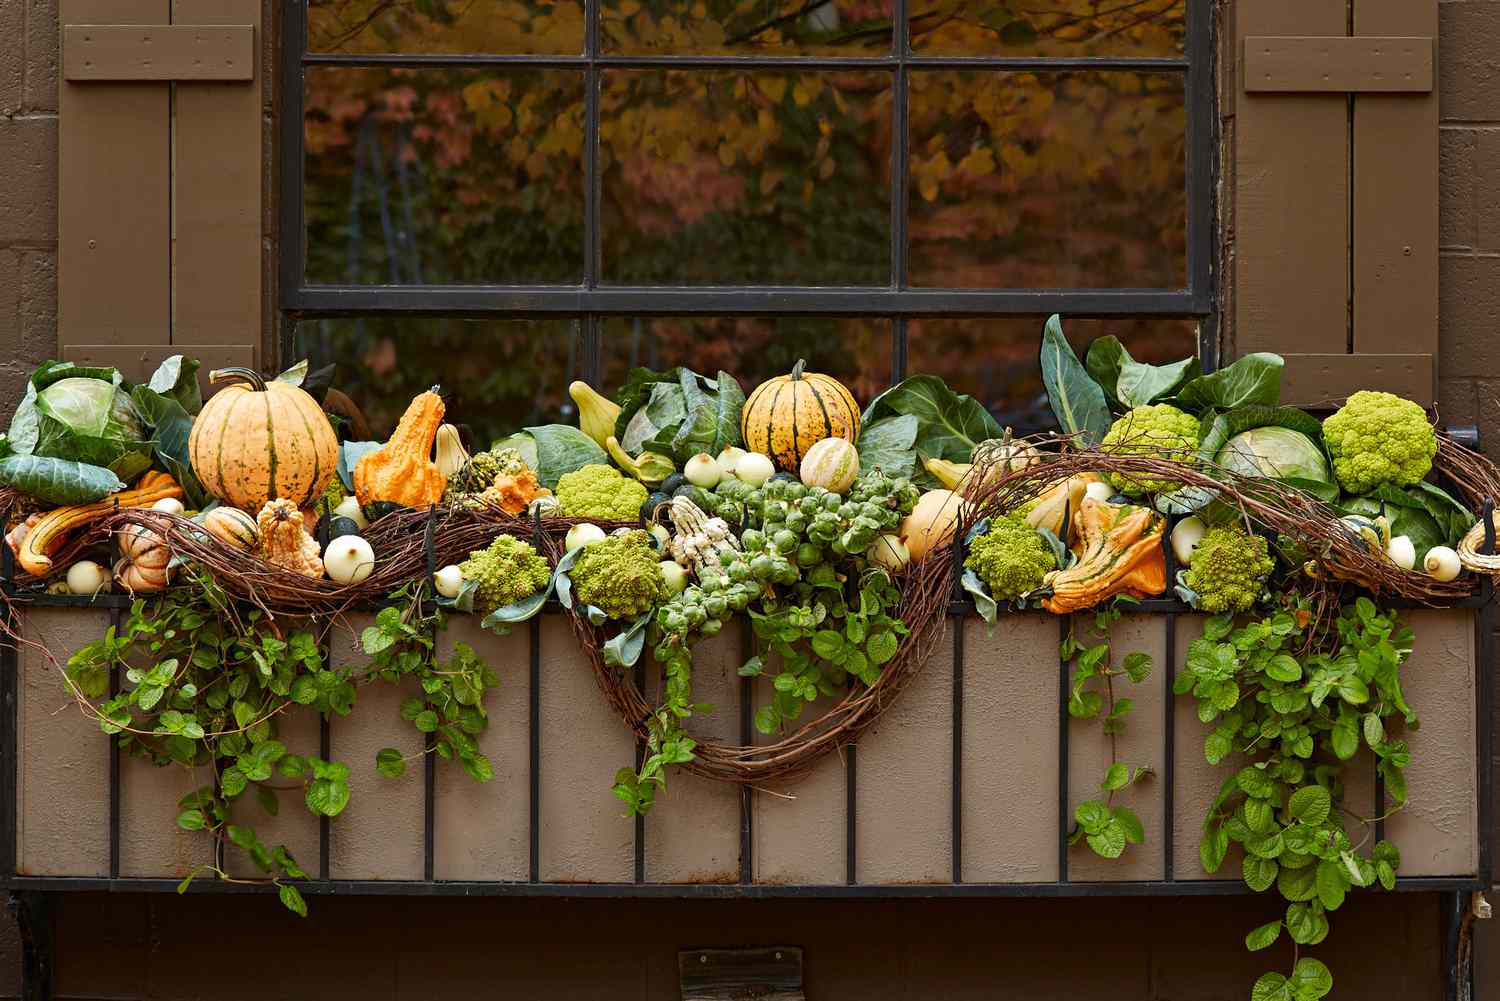
27. Fill a Window Box with an Abundant Mix of Gourds and Cabbages
The single element that makes this window box so spectacular is the sheer abundance. This isn’t about a few carefully placed gourds; it’s about creating a feeling of overflowing, unstoppable harvest. The arrangement is packed so tightly that it seems to be bursting out of the box. The trailing green vines, the interwoven twig wreaths, and the layers of cabbages and pumpkins all contribute to this sense of generosity and richness. If you were to remove half the items, you would lose the entire dramatic effect. Go big or go home!
|
📋 Copy HEX 🔗 Share |
📐 Style Math
This stunning display is a lesson in textural diversity. The formula is roughly: 40% smooth surfaces (pumpkins, gourds) + 30% leafy textures (cabbage, trailing vines) + 30% rustic elements (twig wreaths, Romanesco broccoli). The smooth gourds provide blocks of color, while the ruffled leaves of the cabbage and the intricate spirals of the broccoli add complexity. The twig wreaths bring in a rough, woody element that keeps the arrangement from feeling too polished. It’s this rich mix of textures that makes you want to look closer and discover all the different components.
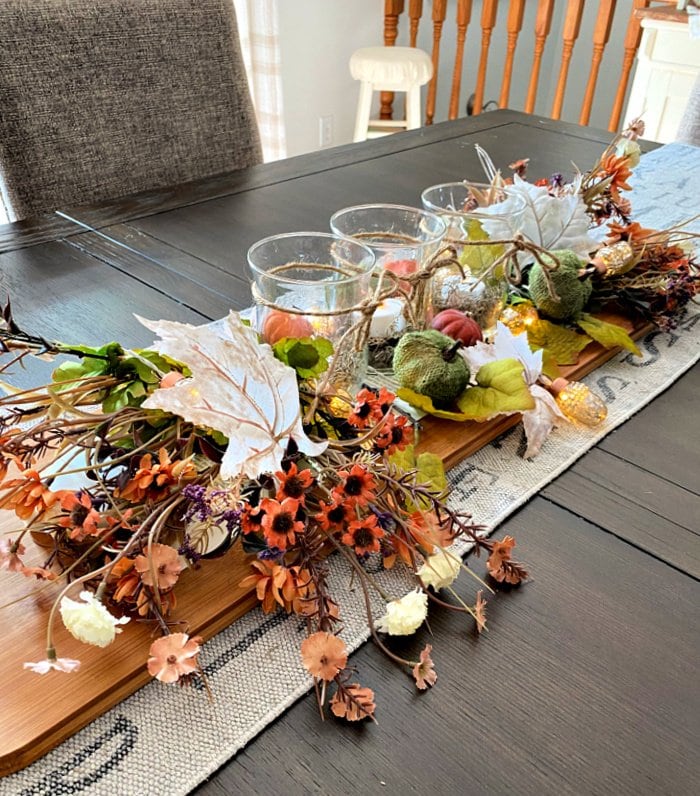
28. Create a Long Centerpiece with a Wooden Board and Faux Foliage
For a long dining table, a runner-style centerpiece is often more practical than a round one. Using a simple wooden board as the base for your arrangement is a brilliant trick. It contains all the decorative elements—candles, leaves, pumpkins—into one neat, cohesive unit. This not only looks organized and intentional, but it also makes cleanup a breeze. When it’s time to eat, you can simply pick up the entire board and move it aside, rather than having to gather up a dozen small, scattered items. Compare this linear approach to the clustered centerpiece in Idea #18.
|
📋 Copy HEX 🔗 Share |
⭐ The One Thing
This type of long, low centerpiece works best on a rectangular or oval dining table that seats six or more. The board itself should be about 10-12 inches wide and at least a third of the length of the table, but no more than half. This ensures it has presence without overwhelming the table or getting in the way of place settings. For a 6-foot table, a 2.5 to 3-foot board is ideal. The height should be kept low—generally under 10 inches—so that guests can easily see and talk to each other across the table.
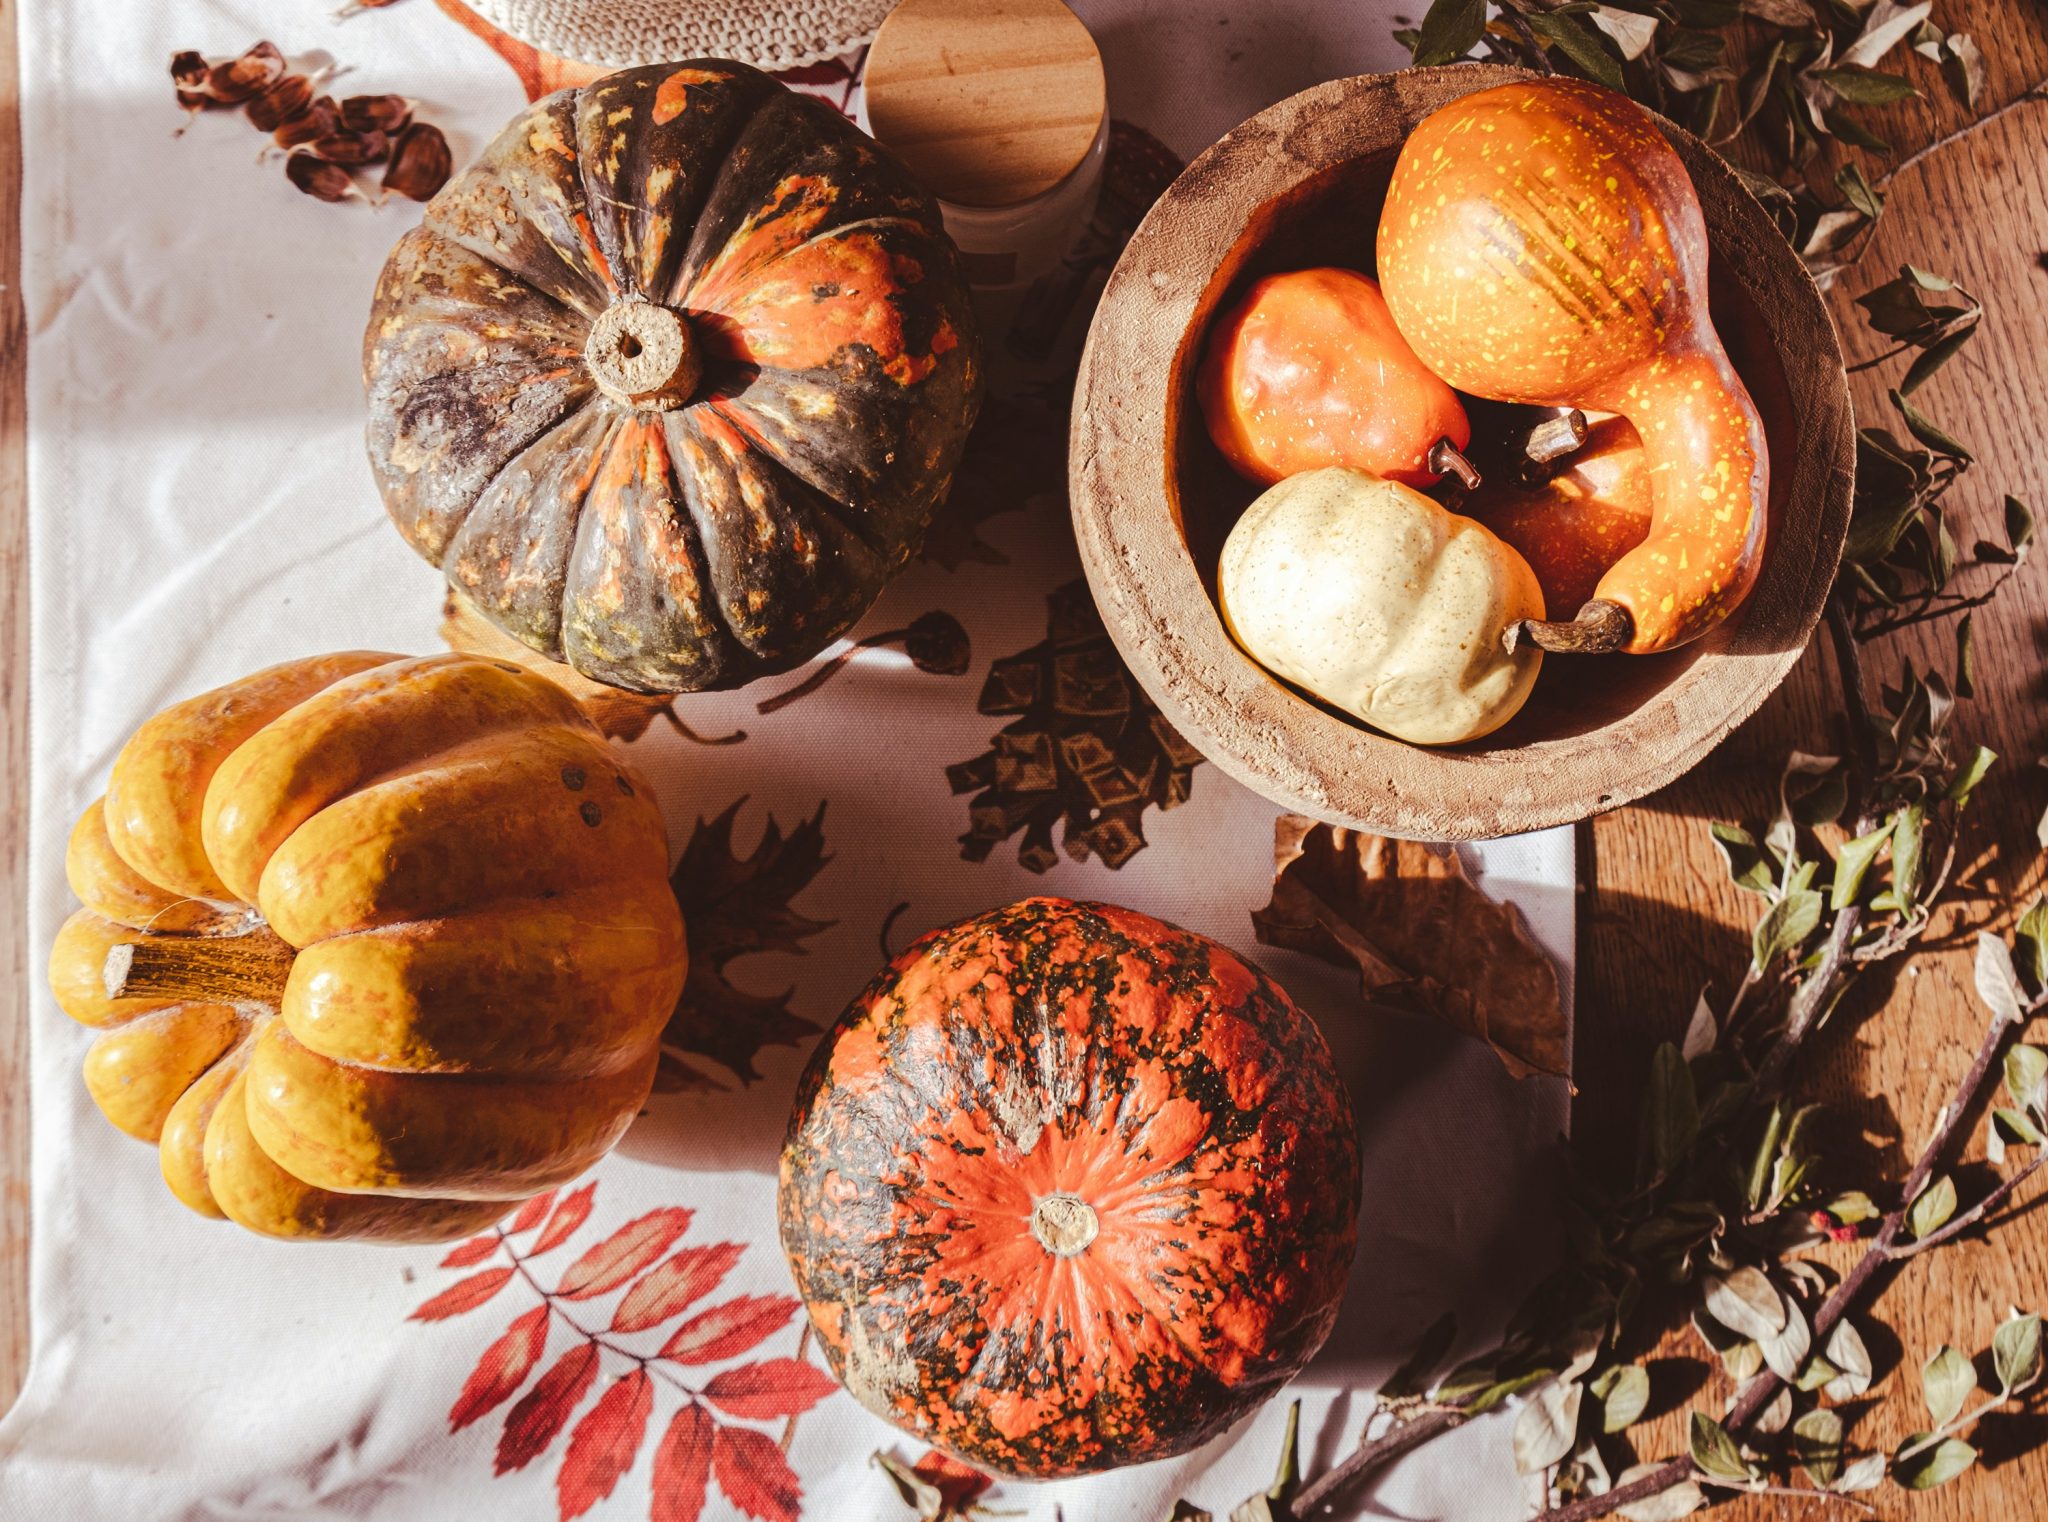
29. Layer a Rustic Tabletop with a Medley of Gourds and Pumpkins
This arrangement feels so cozy and authentic because it embraces natural imperfection. None of these gourds are perfectly symmetrical or uniformly colored. There are dark green ones with bumps, multi-toned ones with stripes, and classic orange pumpkins. The rough-hewn wooden bowl adds another layer of rustic texture. By celebrating the variety and “flaws” of natural objects, the display feels like it was gathered from a real harvest, not bought as a matching set from a big-box store. The scattered leaves and berries enhance this just-picked feeling.
|
📋 Copy HEX 🔗 Share |
📏 Scale Guide
You don’t need a big budget to create this look of natural abundance. The star of the show is variety. Instead of buying several large, expensive pumpkins, spend the same amount of money on a wide assortment of small, inexpensive gourds and mini pumpkins from a local farm stand or even the grocery store. Look for different shapes, colors, and textures. The wooden bowl can be a thrift store find—look for salad bowls with interesting grain or a handmade feel. The printed tablecloth could easily be swapped for a simple burlap runner or even a piece of flannel fabric.
Your Autumn Story Begins Here
Now you have a whole season’s worth of inspiration. Don’t feel pressured to do it all—the best approach is to pick one or two projects that genuinely spark joy and fit your home’s unique style. The goal is to have fun with the process and create something that makes you smile every time you see it.
Happy crafting, and don’t forget to save your favorite ideas to your Pinterest boards to share with friends!