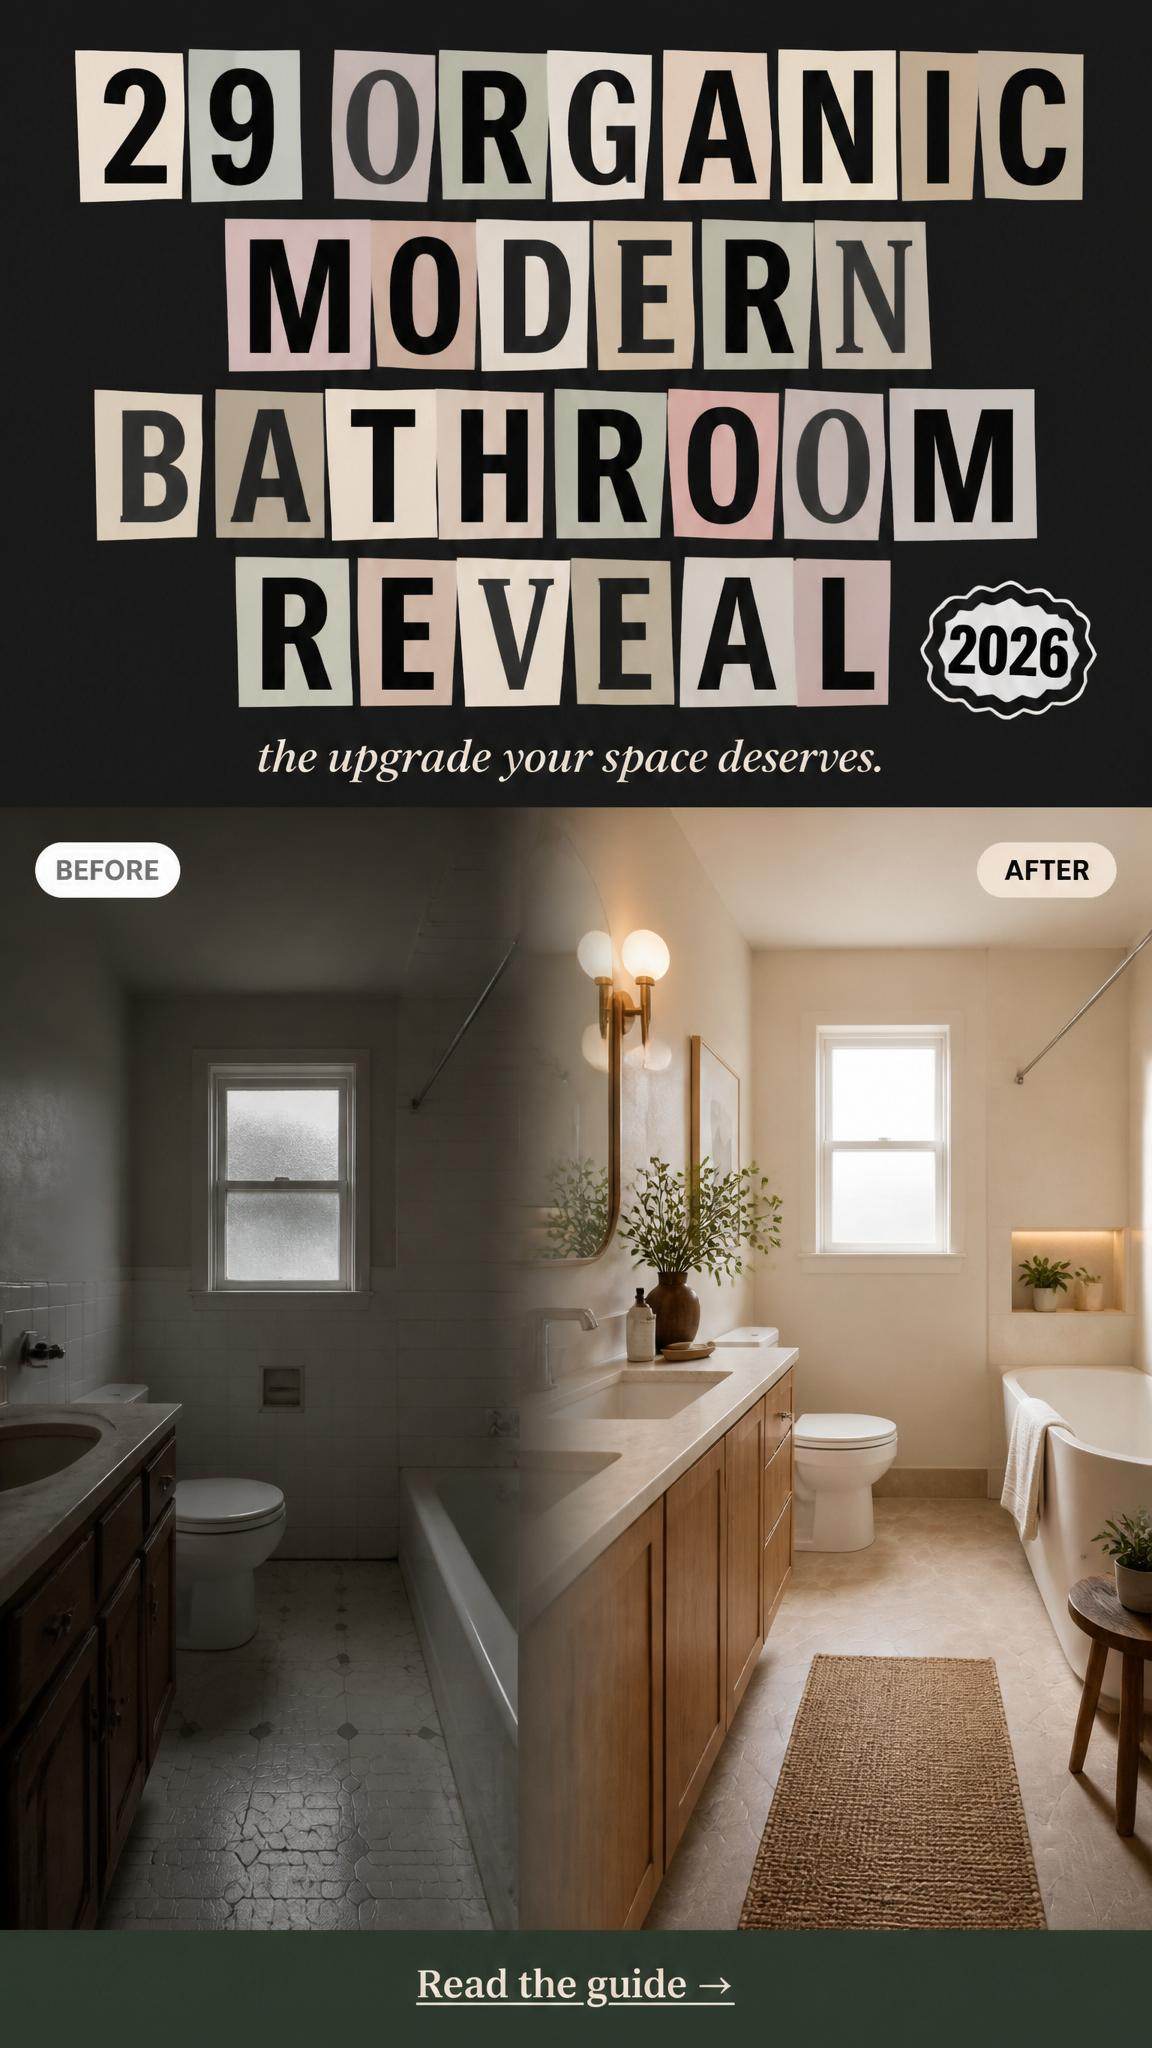
You know that feeling when a bathroom just feels *right*? It’s not an accident. The foundation of any great bathroom design is literally the foundation: the floor. After scrolling through hundreds of options on Pinterest, we’ve filtered it down to the 29 ideas that deliver on style, durability, and that “wow” factor for 2026. This isn’t just another list of pretty pictures; we’re showing you what works, from high-end marble to budget-friendly vinyl that looks surprisingly luxe.
We’re diving deep into the biggest trends—like the return of rich terracotta, bold checkerboard patterns, and sleek large-format tiles—and showing you how to make them work in a real home. And stay until the end — we break down the most common mistakes that can ruin these looks. 📌 Save this to Pinterest for later — you’ll want to revisit these ideas.
1. Embrace Texture with High-Quality Vinyl Planks
Let’s have some real talk about vinyl. The word can conjure images of peeling, 1970s floors, but modern Luxury Vinyl Plank (LVP) is a completely different animal. The key is in the quality. Cheaper versions can look flat and artificial, but a high-quality textured vinyl plank offers convincing wood-grain or stone-like finishes that are warm underfoot and 100% waterproof. Don’t cheap out on the wear layer—a thicker layer (20 mil or more) is essential for a bathroom to resist scratches, dents, and water damage for years to come.
|
📋 Copy HEX 🔗 Share |
💰 Budget Breakdown
To get this look for less, focus your search on end-of-stock sales at big-box stores like Floor & Decor or The Home Depot. You can often find high-end brands for 40-60% off if you’re flexible on the exact color. Also, check out local flooring liquidators. For a small bathroom, you might only need one or two boxes, and you can score incredible deals on leftover inventory from larger commercial projects. A $9/sq-ft look can quickly become a $3/sq-ft reality.
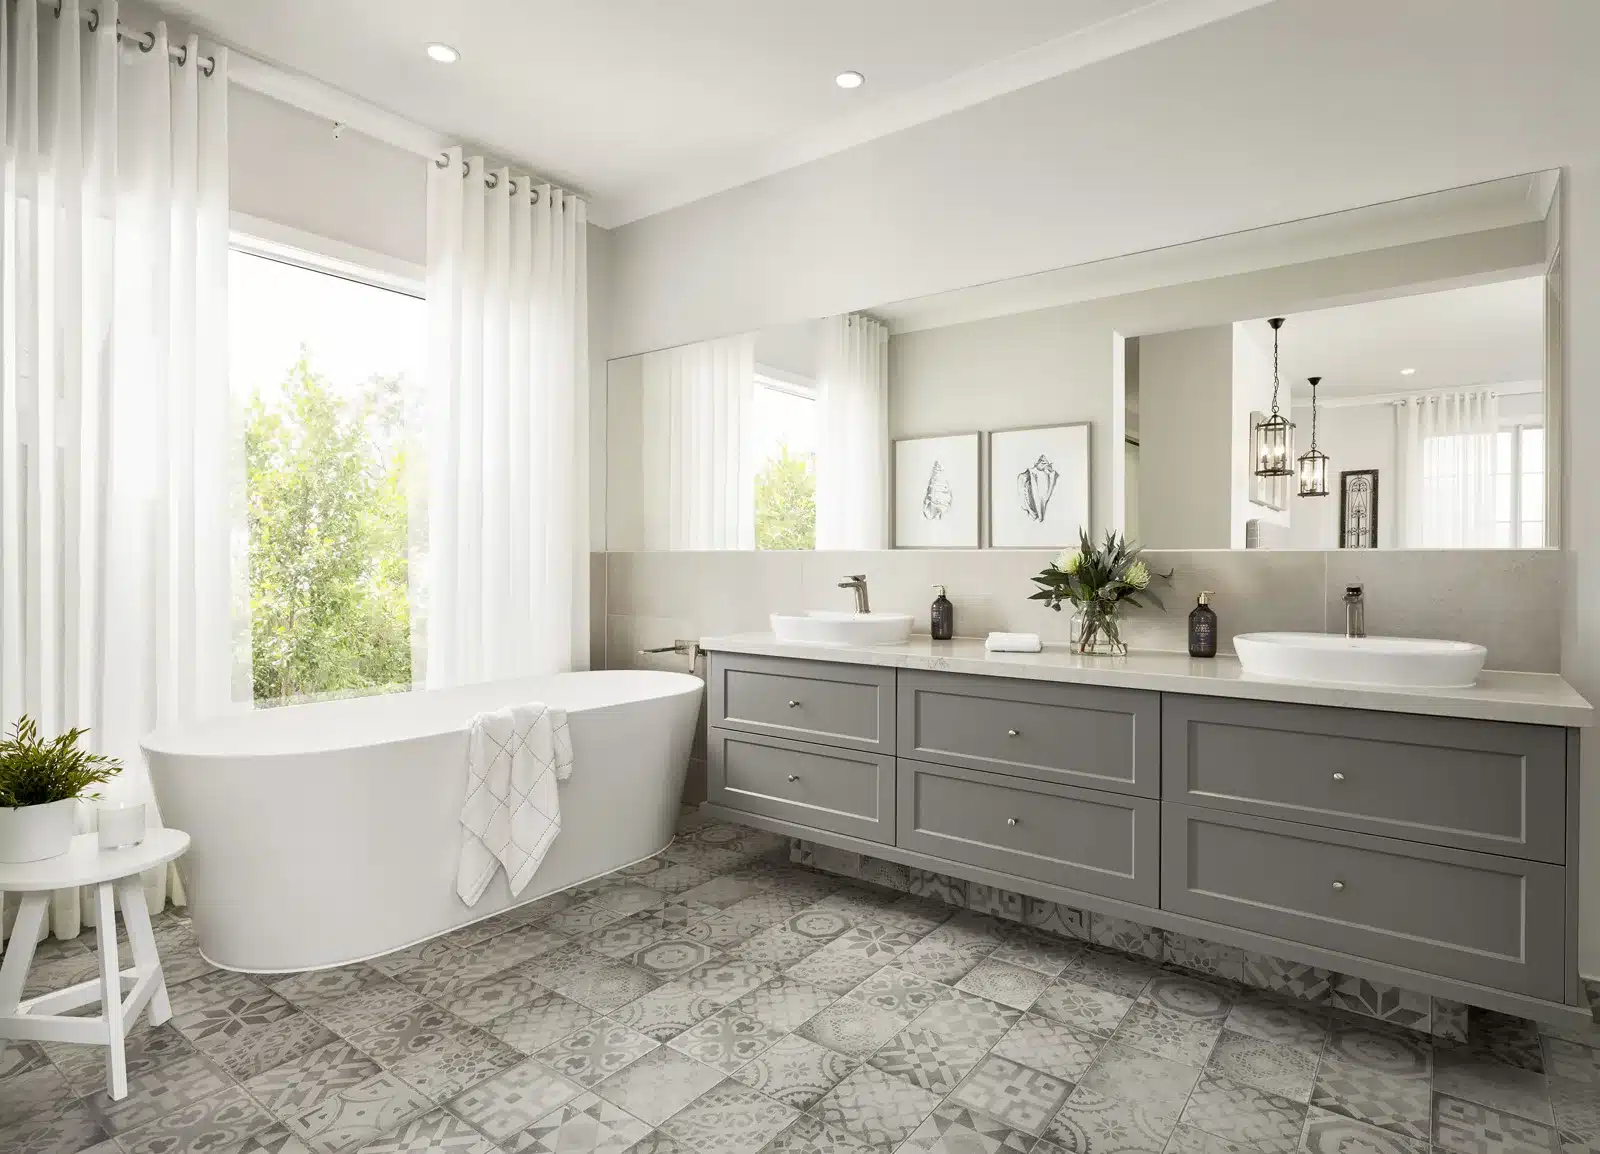
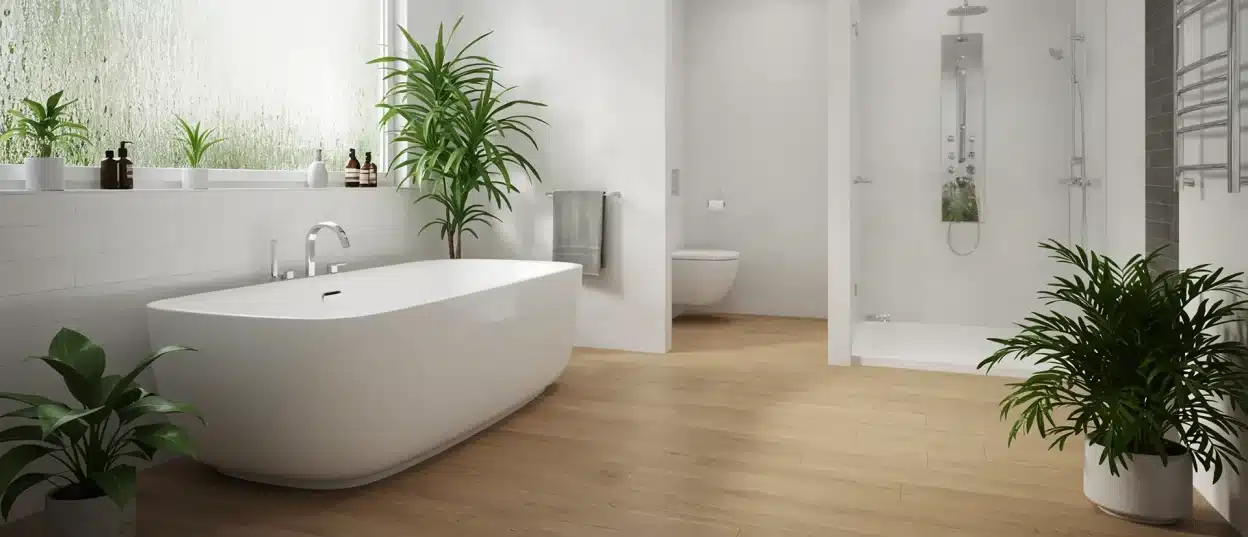
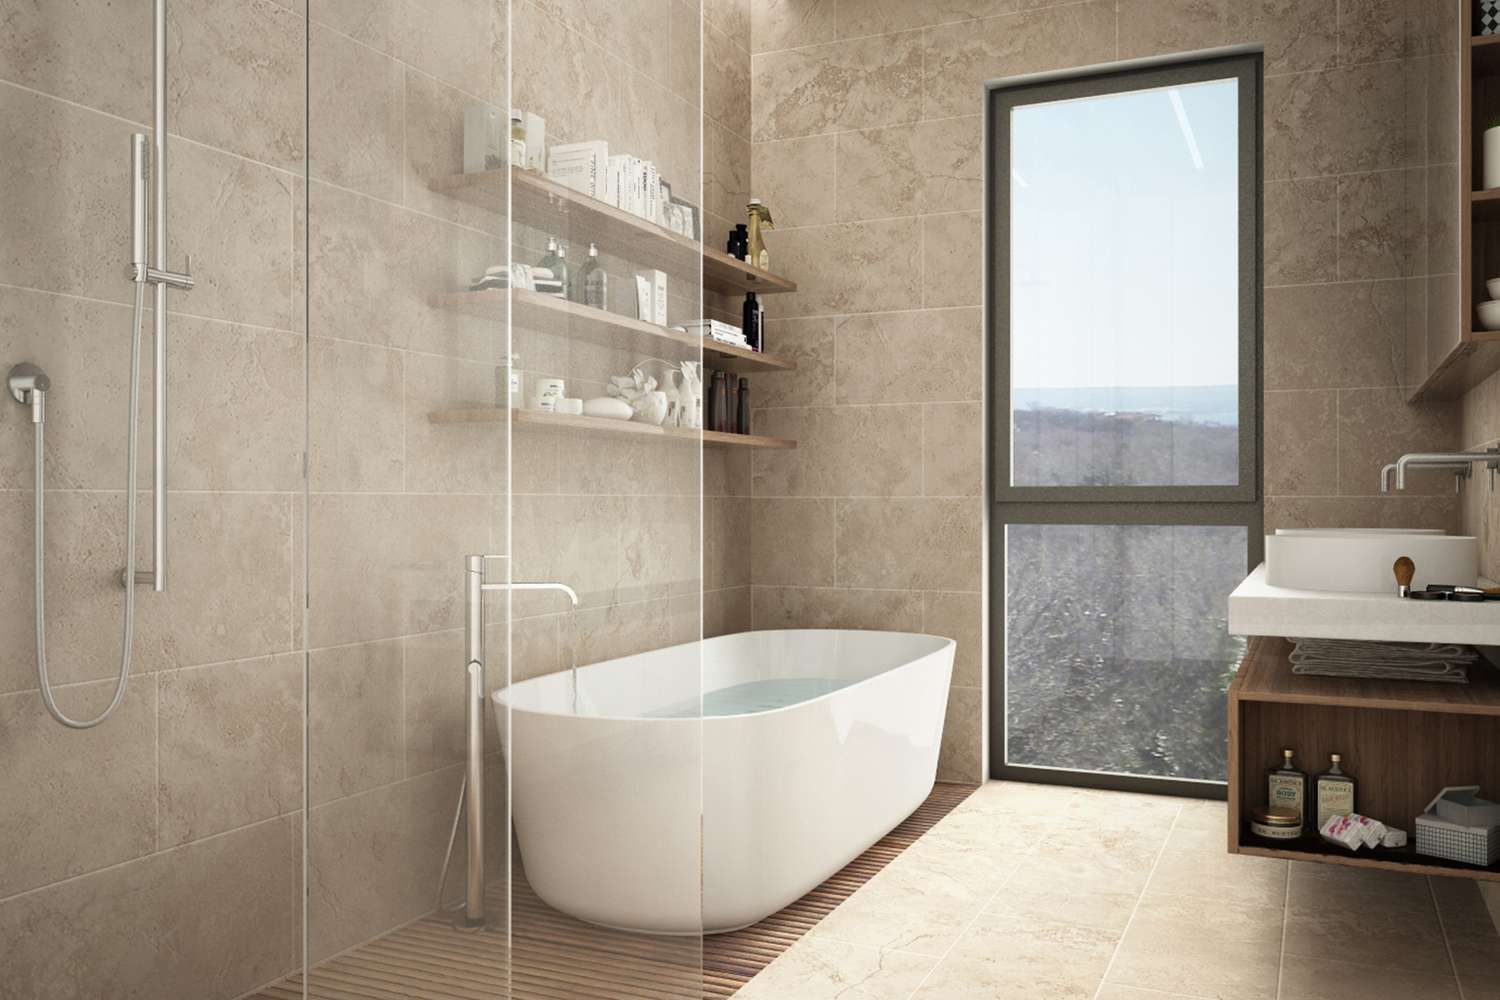
2. Create a Seamless Look with Large-Format Beige Tiles
What makes this space so calming and feel so expansive? It’s the seamless transition from floor to walls. Using the same large-format light beige tile throughout the room erases visual boundaries, making the ceiling feel higher and the walls wider. The sheer scale of the tiles—think 24×48 inches—means fewer grout lines, which contributes to a clean, uninterrupted surface. This technique turns the entire room into a cohesive, serene envelope, allowing statement pieces like the freestanding tub and matte black faucet to become focal points.
|
📋 Copy HEX 🔗 Share |
💡 Designer Tip
When using large-format tiles to create this seamless look, the grout color is more important than you think. You want the grout to disappear, not to create a grid. The trick is to choose a grout color that is an exact match to the tile, or even a half-shade lighter. Darker grout will outline each tile, breaking the monolithic effect. Test your grout color on a spare tile and let it dry completely before committing—it often darkens as it cures.
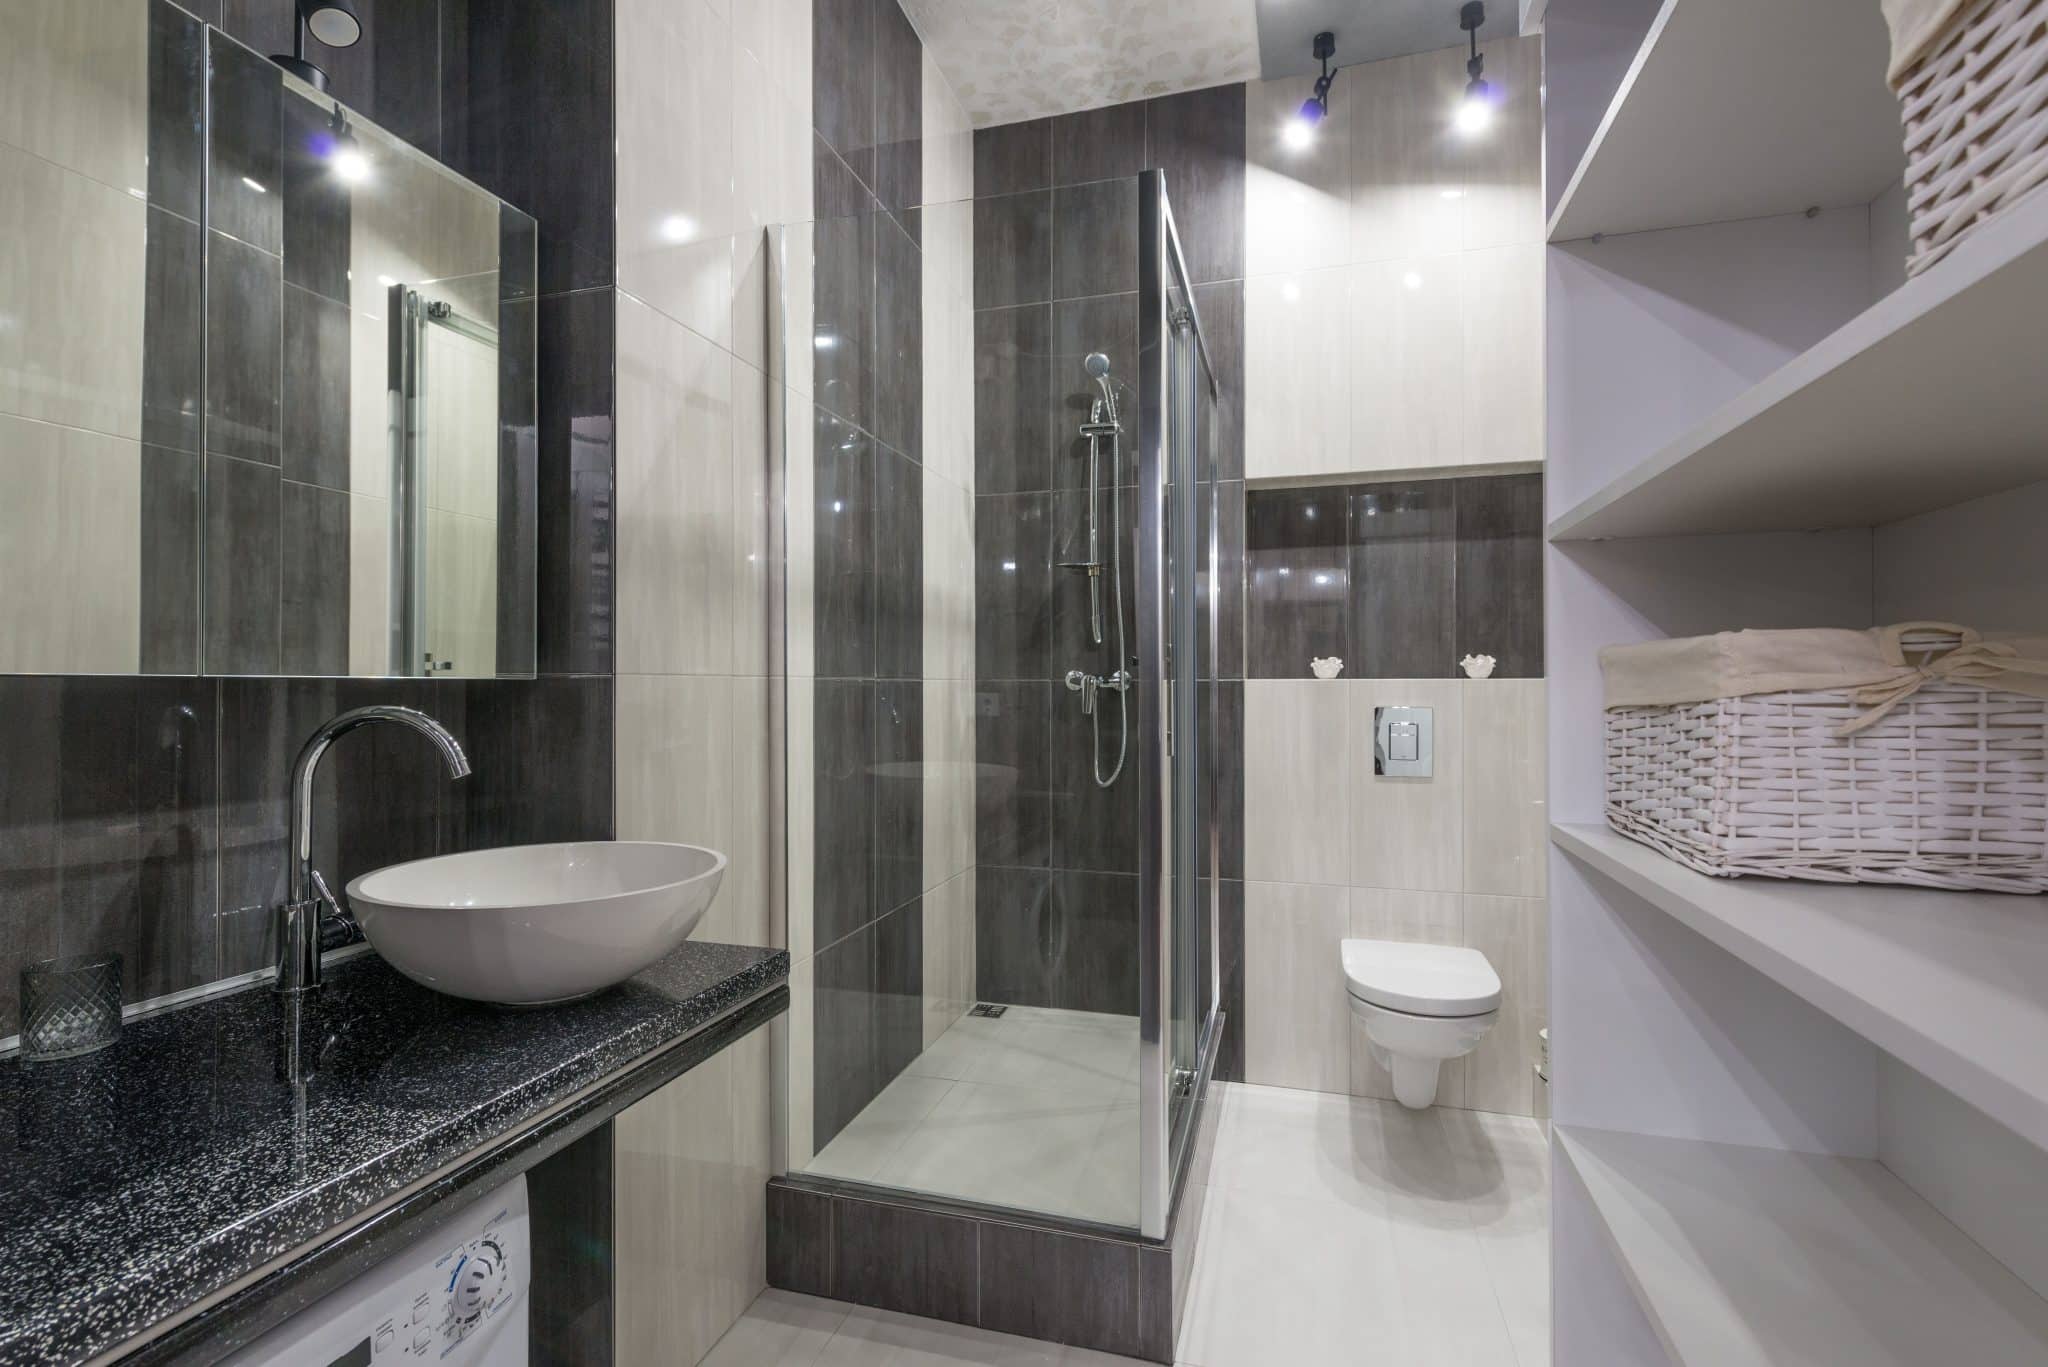
3. Add Visual Height with Two-Tone Vertical Wall Tiles
Think of this design as a simple but powerful formula: 50% light tile + 50% dark tile in a vertical application. The alternating stripes of light and dark grey glossy tiles draw the eye upward, creating an illusion of a much taller space. This is a brilliant strategy for bathrooms with standard or even low ceilings. The floor remains a simple, large-format light grey tile, which acts as a quiet base and prevents the striped walls from feeling overwhelming. The key is keeping the floor simple to let the walls do the talking.
|
📋 Copy HEX 🔗 Share |
✅ Before You Start
Want to recreate those vertical stripes? Here’s a quick guide for your tiler. Time: 1-2 days. Cost: $200-500 in extra labor.
- Start with a perfectly level and plumb base.
- Dry-fit the first two columns of alternating tile to ensure your pattern is centered on the wall.
- Use a high-quality polymer-modified thin-set mortar suitable for glossy tiles.
- Place tiles one by one, using a laser level to ensure every vertical line remains perfectly straight.
- Use tile spacers of at least 1/16” to maintain consistent grout lines.
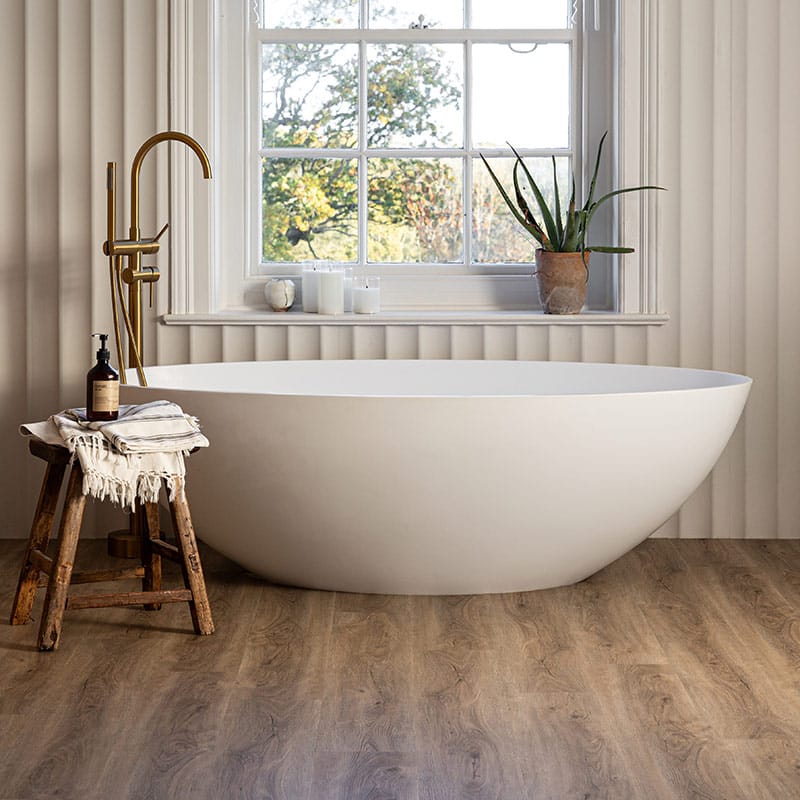
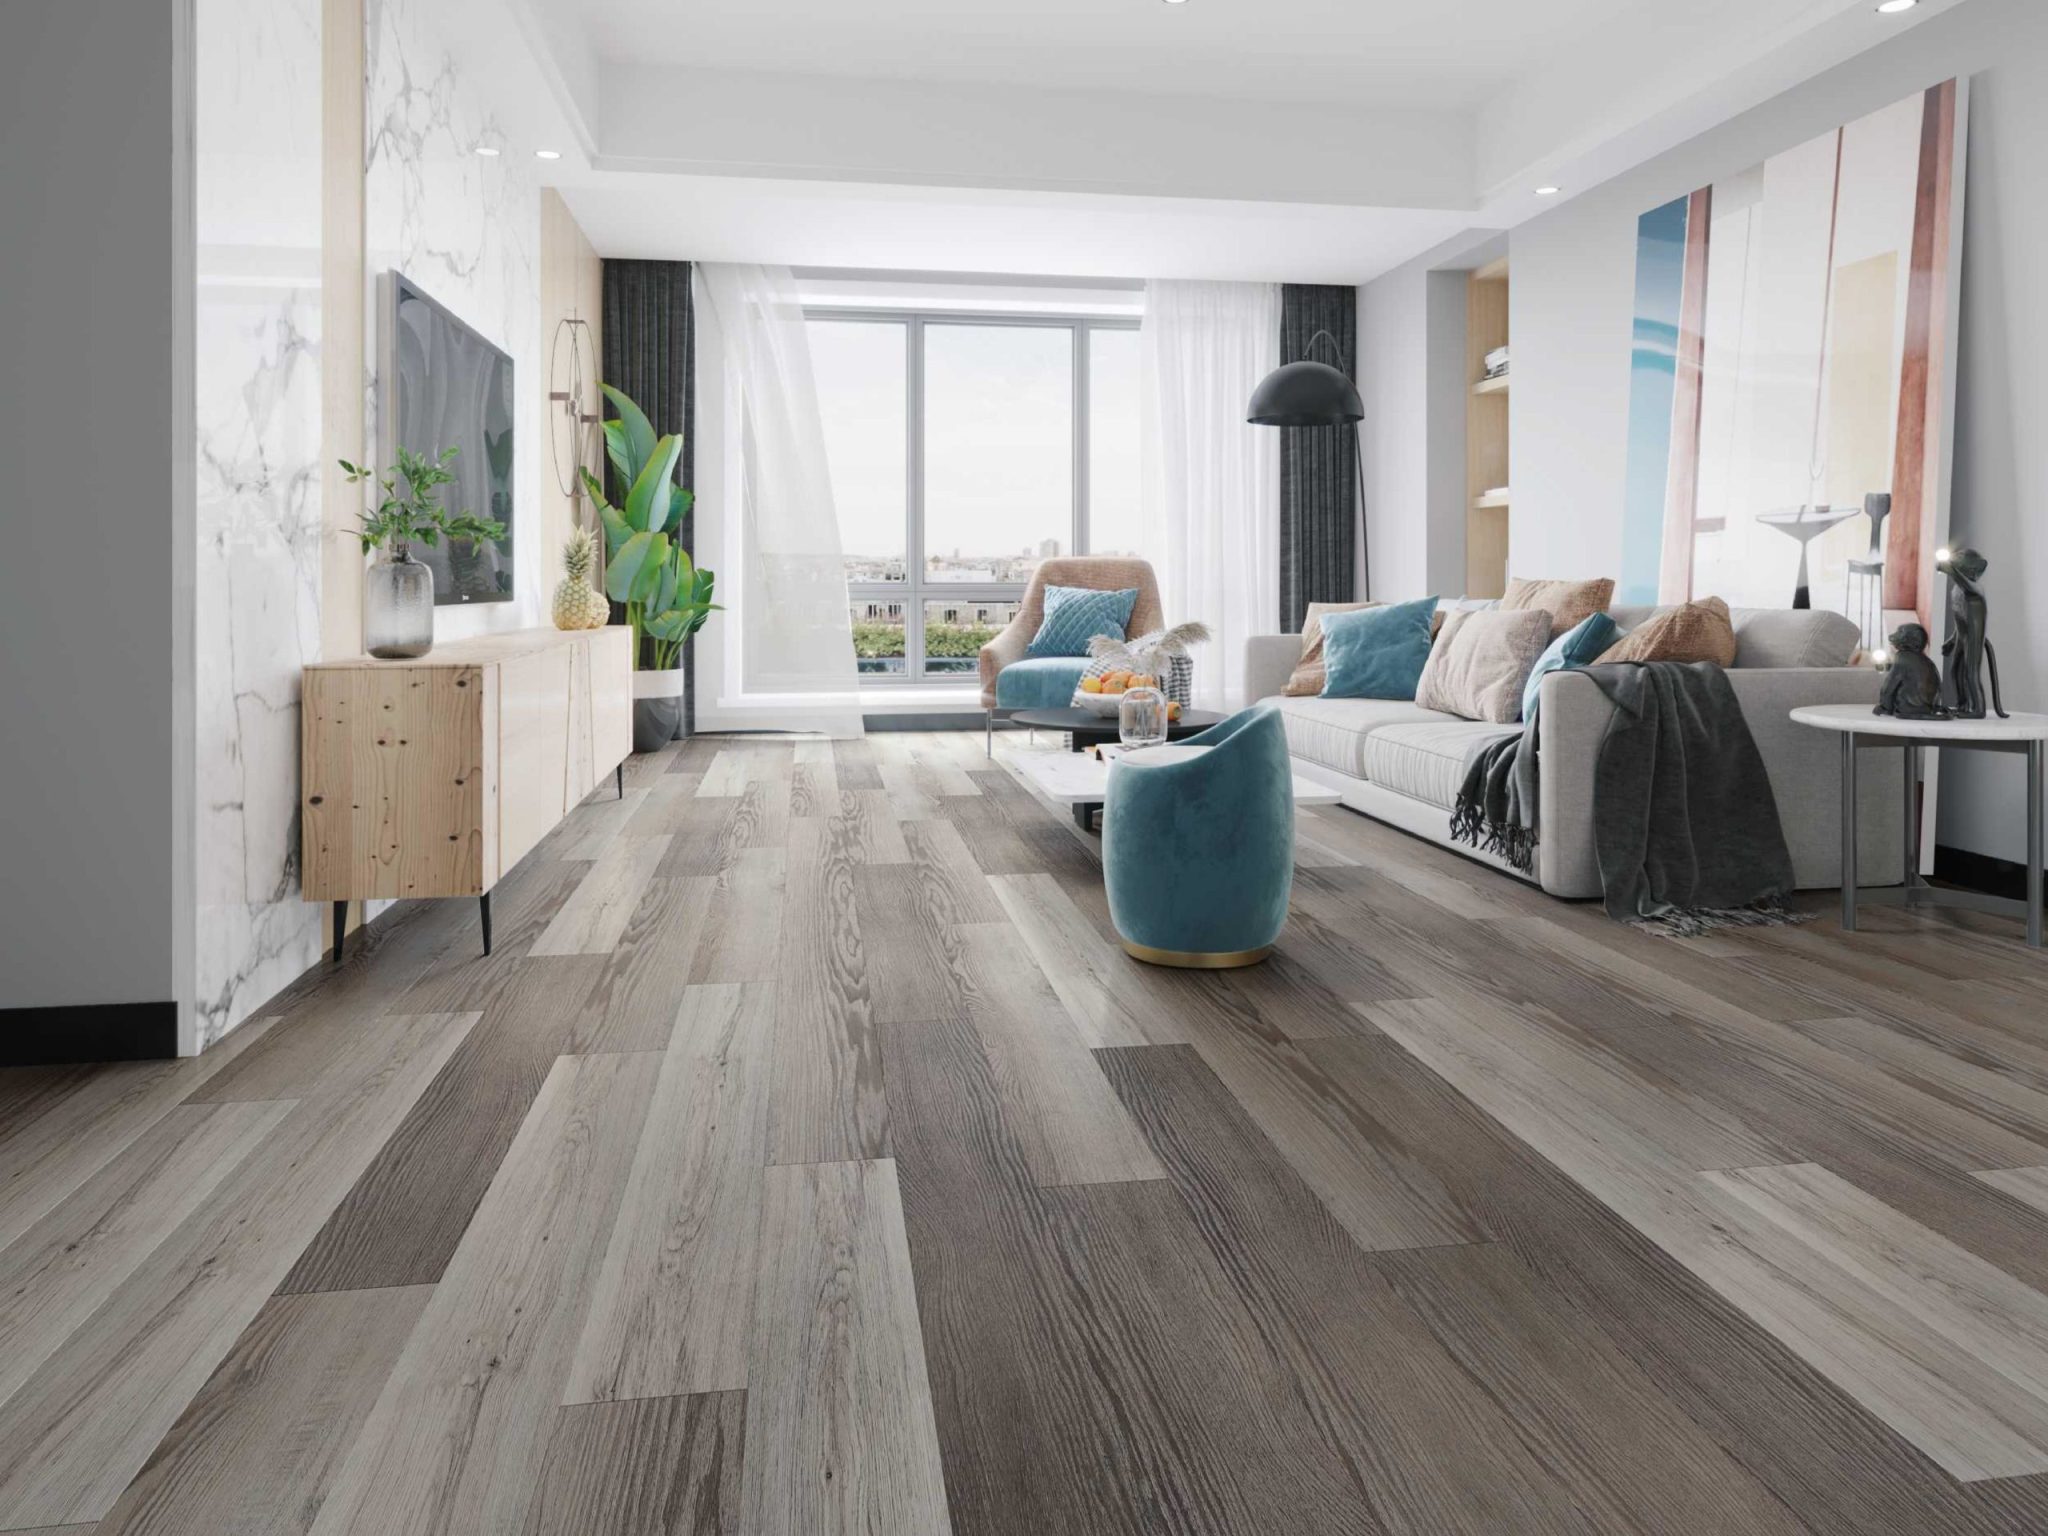
4. Warm Up a White Bathroom with Light Wood Plank Flooring
A light wood-look floor brings immediate warmth and a natural, organic feeling to an otherwise sterile white bathroom. While beautiful, be honest about keeping it pristine. This look works best with waterproof vinyl planks (LVP) or porcelain tile that mimics wood. Using real hardwood is a major risk in a full bath due to moisture, humidity, and potential water damage. Even with LVP, you must ensure seams are tight and professionally installed to prevent any water from seeping underneath to the subfloor, which can cause mold issues down the line.
|
📋 Copy HEX 🔗 Share |
⭐ The One Thing
This bright and airy aesthetic is incredibly versatile, but it shines in small to medium-sized bathrooms (roughly 50-90 sq. ft.). In a smaller space, the combination of light wood floors, white walls, and a large window amplifies natural light, making the room feel significantly larger. In a very large bathroom, this much white and light wood can start to feel a bit cold or bland without sufficient texture from plants, textiles, and varied lighting.
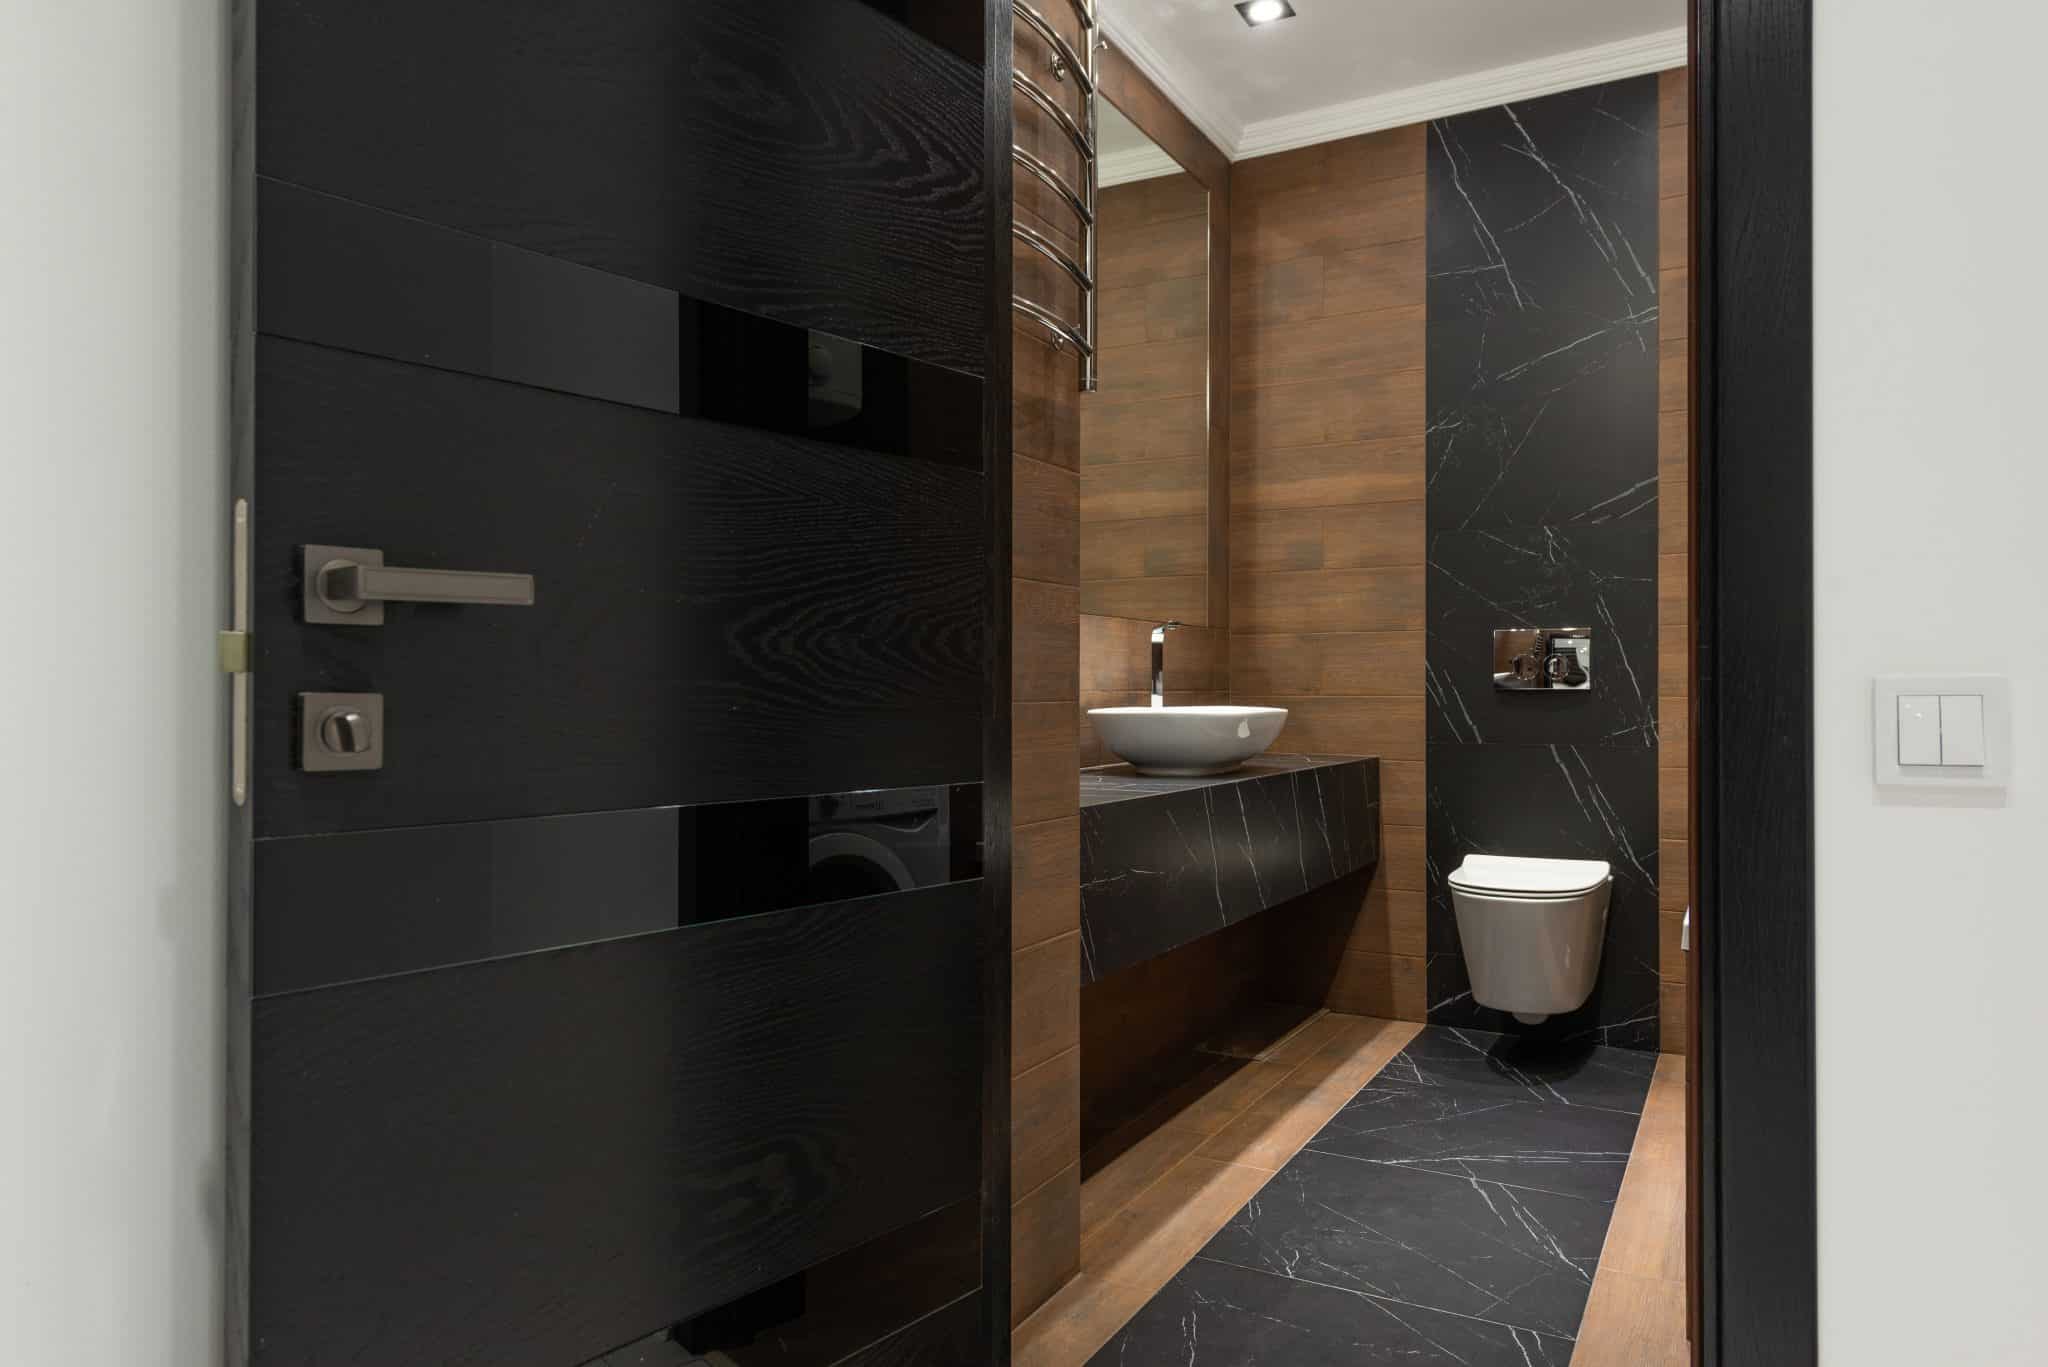
5. Juxtapose Dark Marble with Warm Wood Wall Paneling
This is a high-drama, high-investment look. The cost is driven by the quality of the materials and the floating elements which require structural work.
- Main Furniture (Floating Vanity, Wall-Hung Toilet): $2,500 – $6,000
- Lighting (Towel Warmer): $500 – $1,500
- Textiles (Towels): $100 – $300
- Decor/Accessories (Fixtures): $1,000 – $2,500
- Wall/Floor Treatment (Marble & Wood Paneling): $8,000 – $20,000
- TOTAL: $12,100 – $30,300
- Budget alternative: Use large-format porcelain tile that mimics dark marble and waterproof wood-look vinyl panels for a similar vibe at about 40% of the cost.
|
📋 Copy HEX 🔗 Share |
📏 Scale Guide
This bathroom is a masterclass in contrast. It’s not just about light vs. dark; it’s about texture and temperature. The cool, sleek, polished surface of the dark marble tile is balanced by the warm, natural, matte texture of the wood-look paneling. This creates a dynamic tension that is incredibly sophisticated. Without the wood, the marble could feel cold and intimidating. Without the marble, the wood might feel too rustic. Together, they create a perfect equilibrium.
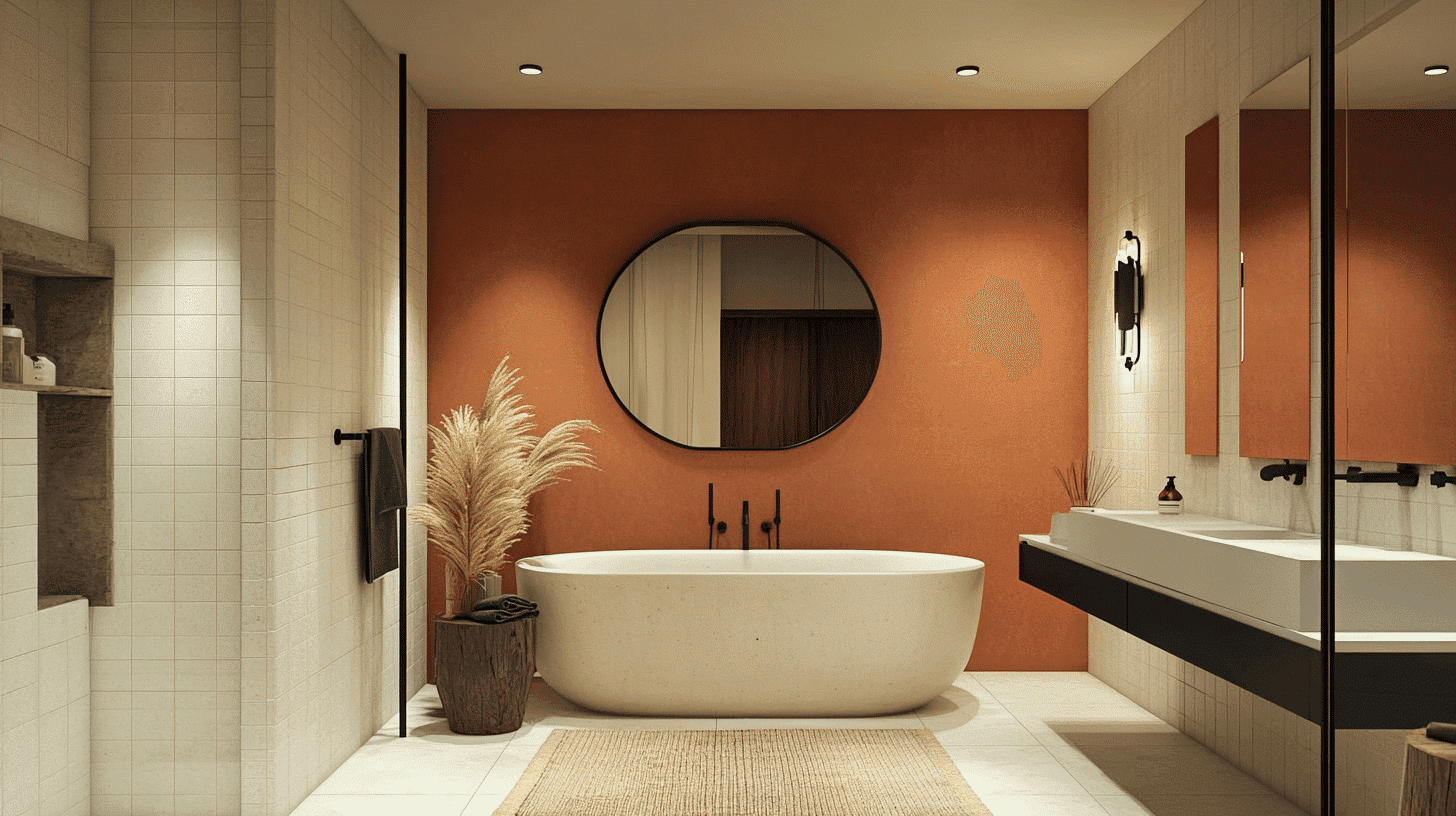
6. Frame a Tub with a Bold Terracotta Accent Wall
that makes this entire room work is the terracotta accent wall. Remove it, and you have a perfectly nice, but generic, modern bathroom. The rich, earthy orange hue provides a powerful dose of color and warmth that immediately draws you in. It serves as a backdrop, perfectly framing the sculptural white tub and making it pop. It’s a single design choice that injects immense personality and architectural interest into the space without requiring a massive budget or overhaul.
|
📋 Copy HEX 🔗 Share |
🔧 How-To Brief
The visual math here is all about balance. The formula is roughly: 60% neutral base + 30% bold accent color + 10% dark details. The light, off-white tiles on the floor and other walls provide a quiet, neutral canvas. The terracotta wall is the 30% star player. Then, the matte black fixtures, mirror frame, and vanity base are sprinkled in as the 10% that adds graphic punch and grounds the whole look. You could swap the terracotta for a deep forest green and it would still work beautifully.
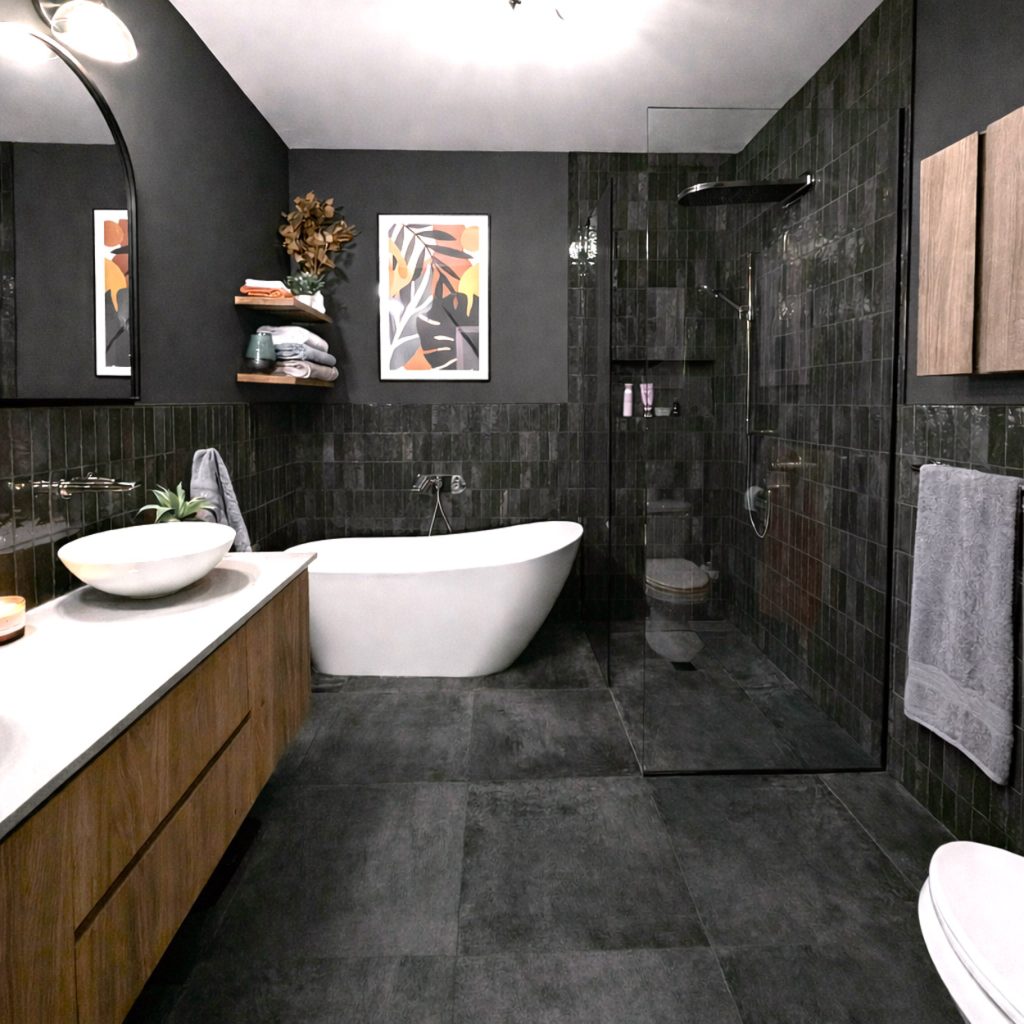
7. Embrace a Moody Vibe with Dark Gray Tile and Wood
A dark-on-dark palette like this is stunning, but you need to be realistic about lighting. A room flooded with dark gray matte tiles requires a robust lighting plan to avoid feeling like a cave. This look depends on multiple light sources: overhead recessed lights, task lighting at the vanity, and ideally, a source of natural light. If your bathroom is small or windowless, a floor-to-ceiling dark tile design like this can feel oppressive. In that case, consider using the dark tile on just the floor and one accent wall, as seen in Idea #5.
|
📋 Copy HEX 🔗 Share |
🔥 Trending Context
When you’re working with a monochromatic dark palette, introducing a natural texture is crucial to keep the space from feeling flat and lifeless. The wooden vanity here is the key. To get this right, choose a wood tone with warmth to it—like oak or walnut—to contrast with the cool gray of the tile. A gray-toned or ashy wood would get lost. This single element breaks up the sea of gray, adds organic warmth, and serves as a beautiful focal point.
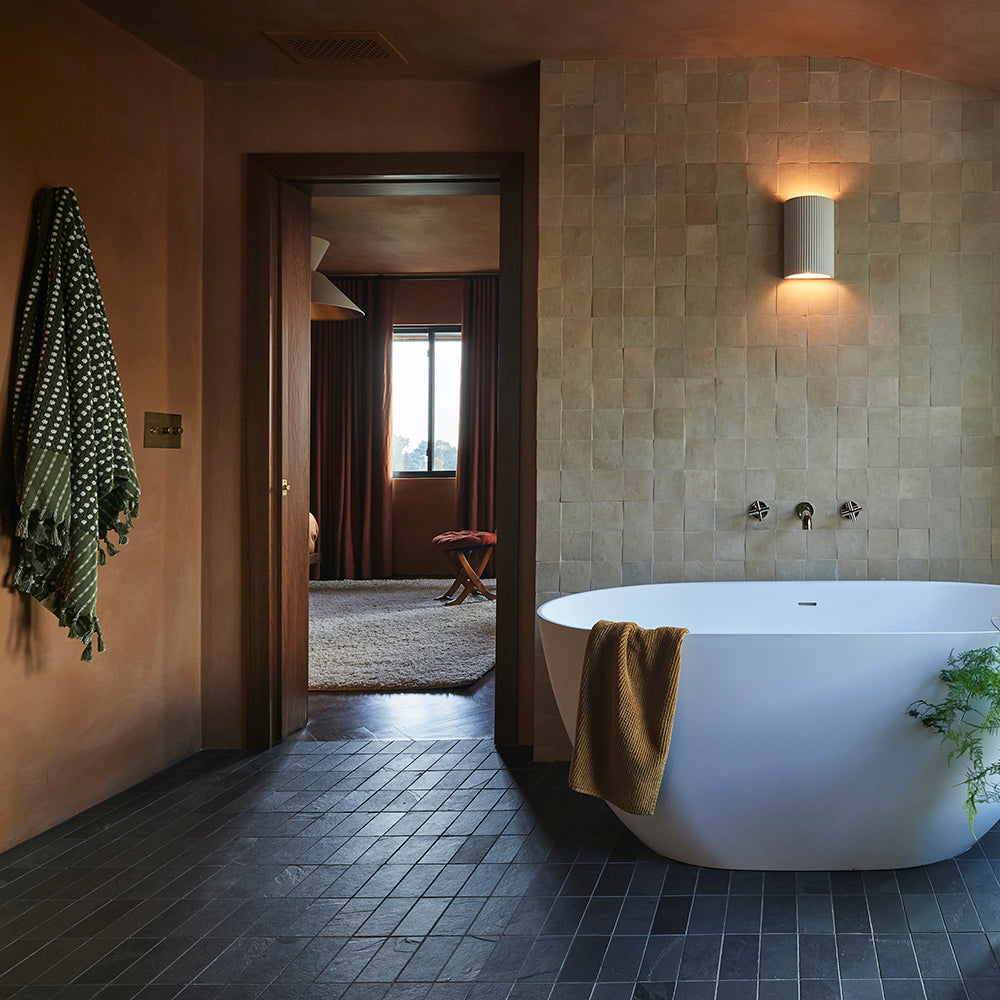
8. Pair Dark Slate with Warm Terracotta Walls
This design succeeds by balancing a trifecta of color, texture, and pattern. The dark charcoal slate floor, laid in a diagonal grid, provides a strong graphic foundation. This is softened by the smooth, warm terracotta-colored walls, which add a dose of earthy color. The final layer is the light beige square tiles on the tub surround, which introduce a subtle, textured grid. The brass fixtures act as jewelry, their warm metallic tone tying the terracotta and beige together. It feels curated and personal.
|
📋 Copy HEX 🔗 Share |
🎯 What Makes It Work
There’s a reason earthy, grounded palettes like this are resonating so strongly right now. After years of cool grays and all-white minimalism, we’re craving warmth, texture, and a connection to natural materials in our homes. This look taps directly into the ‘Modern Earth’ trend, which favors materials like slate, terracotta, and unpolished metals. It feels both contemporary and timeless and has significant staying power because it’s based on classic materials, not fleeting fads.
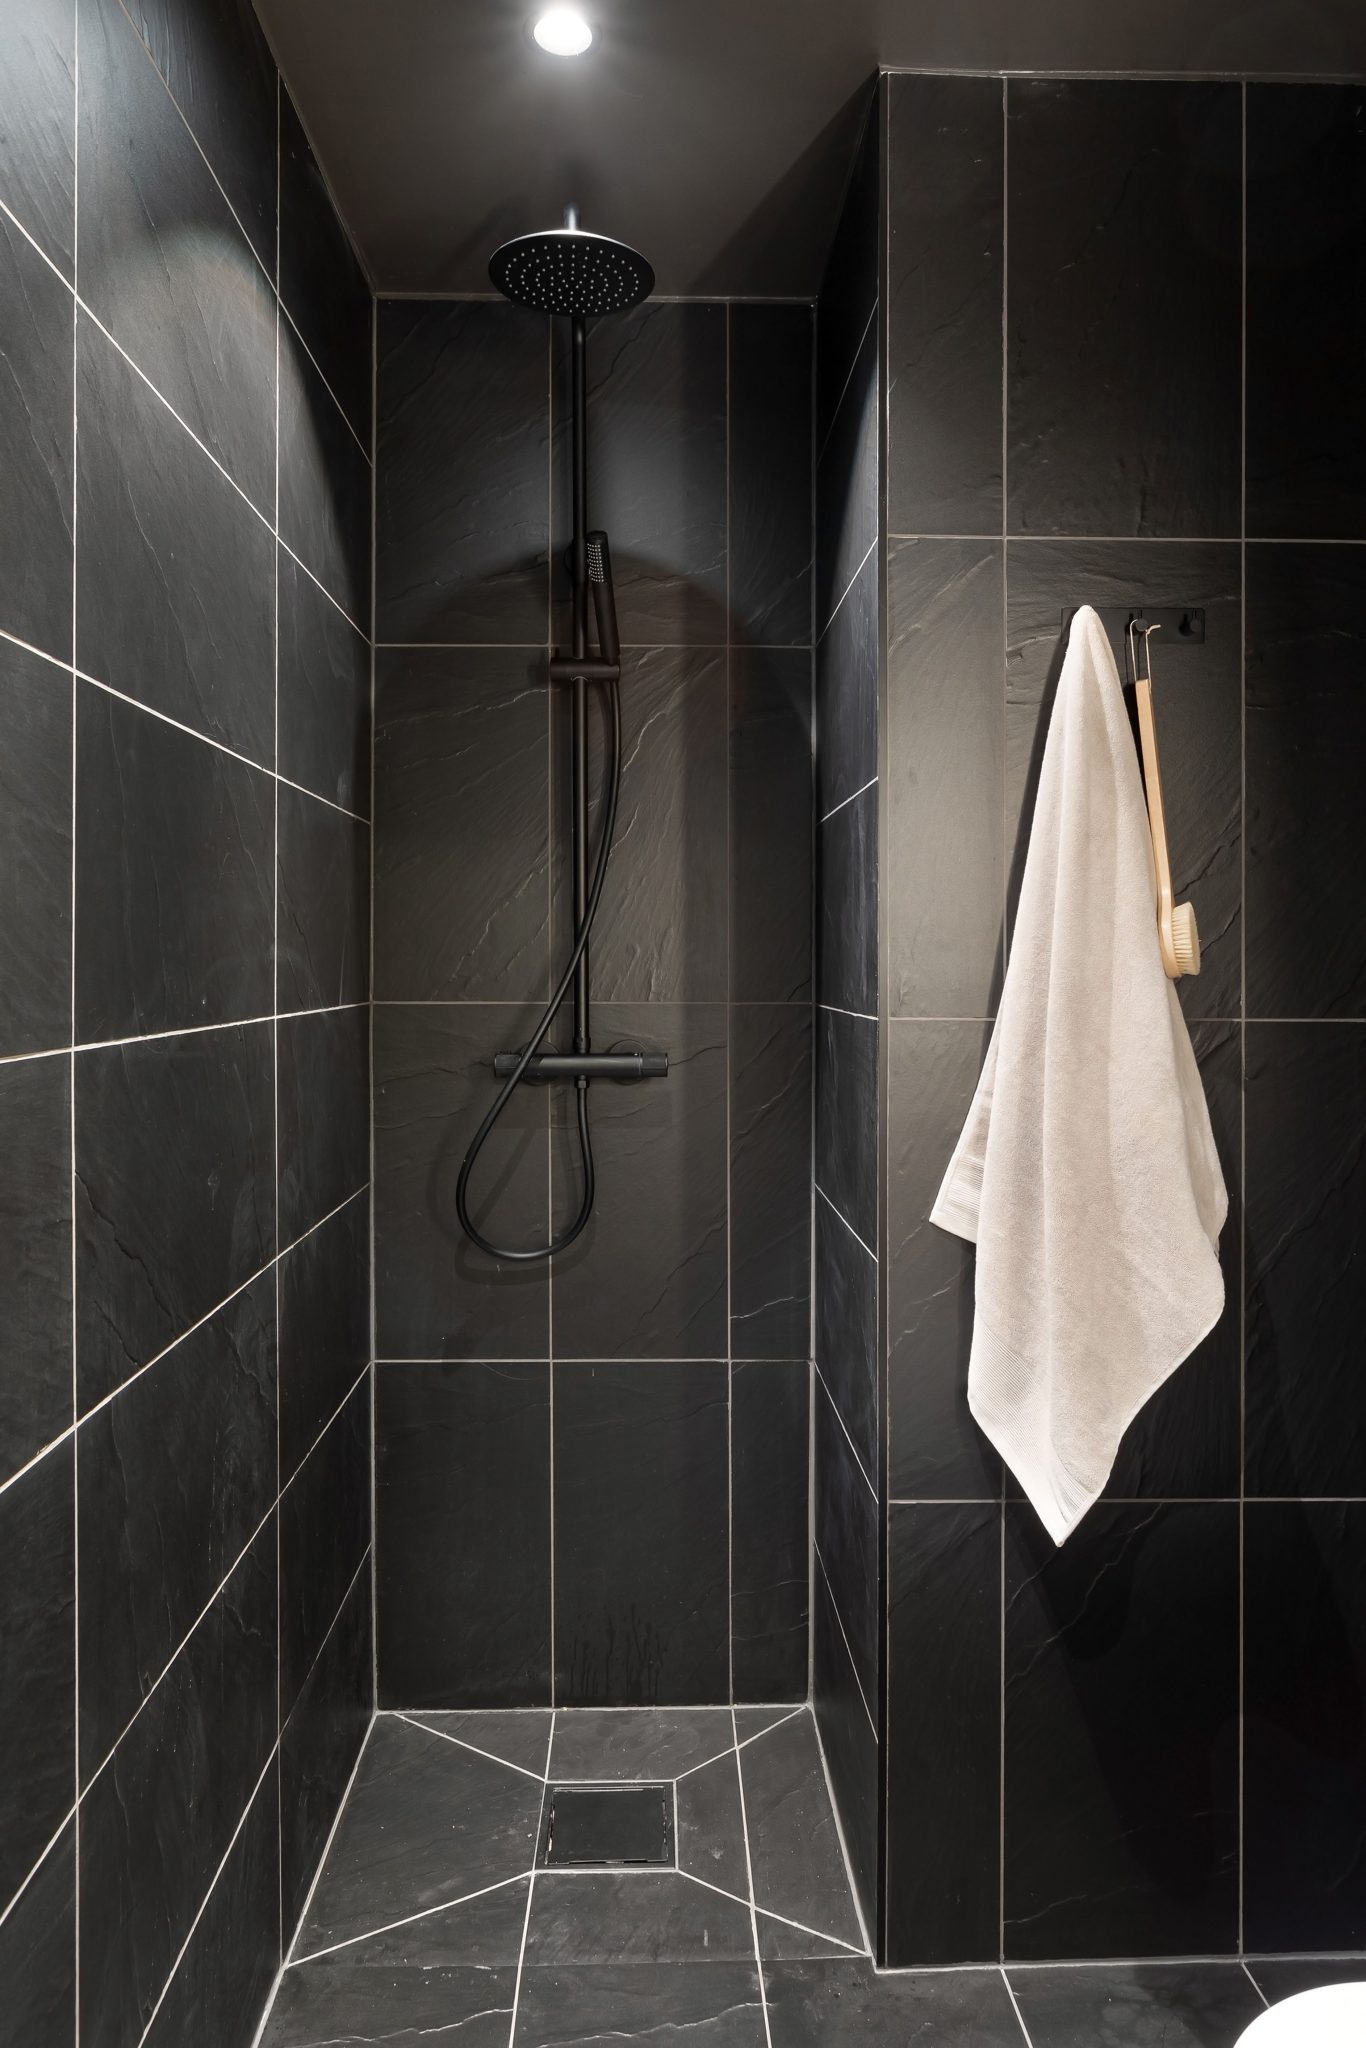
9. Go for Drama with Large, Dark Textured Shower Tiles
Installing matte black fixtures requires a gentle touch to avoid scratches. Here’s a quick guide: Time: 2-4 hours. Cost: $150-400 for a plumber.
- Shut off the water supply completely.
- When unpacking the new fixtures, keep them in their protective cloth bags until the moment of installation.
- Use a strap wrench with a rubber or cloth barrier instead of a standard metal pipe wrench, which will mar the finish.
- Apply plumber’s tape clockwise to all threaded connections.
- Hand-tighten first, then use the strap wrench for the final quarter-turn. Do not over-tighten.
|
📋 Copy HEX 🔗 Share |
🧹 Maintenance Reality
Dark tiles, especially in a shower, come with a specific maintenance routine. While they are great at hiding dirt, they are terrible at hiding hard water spots and soap scum, which appear as a chalky white film. To keep them looking sharp, you’ll need to squeegee the walls and door after every shower. A weekly cleaning with a pH-neutral cleaner is also a must. Avoid abrasive powders or harsh chemicals, which can etch the tile surface and dull the finish over time.
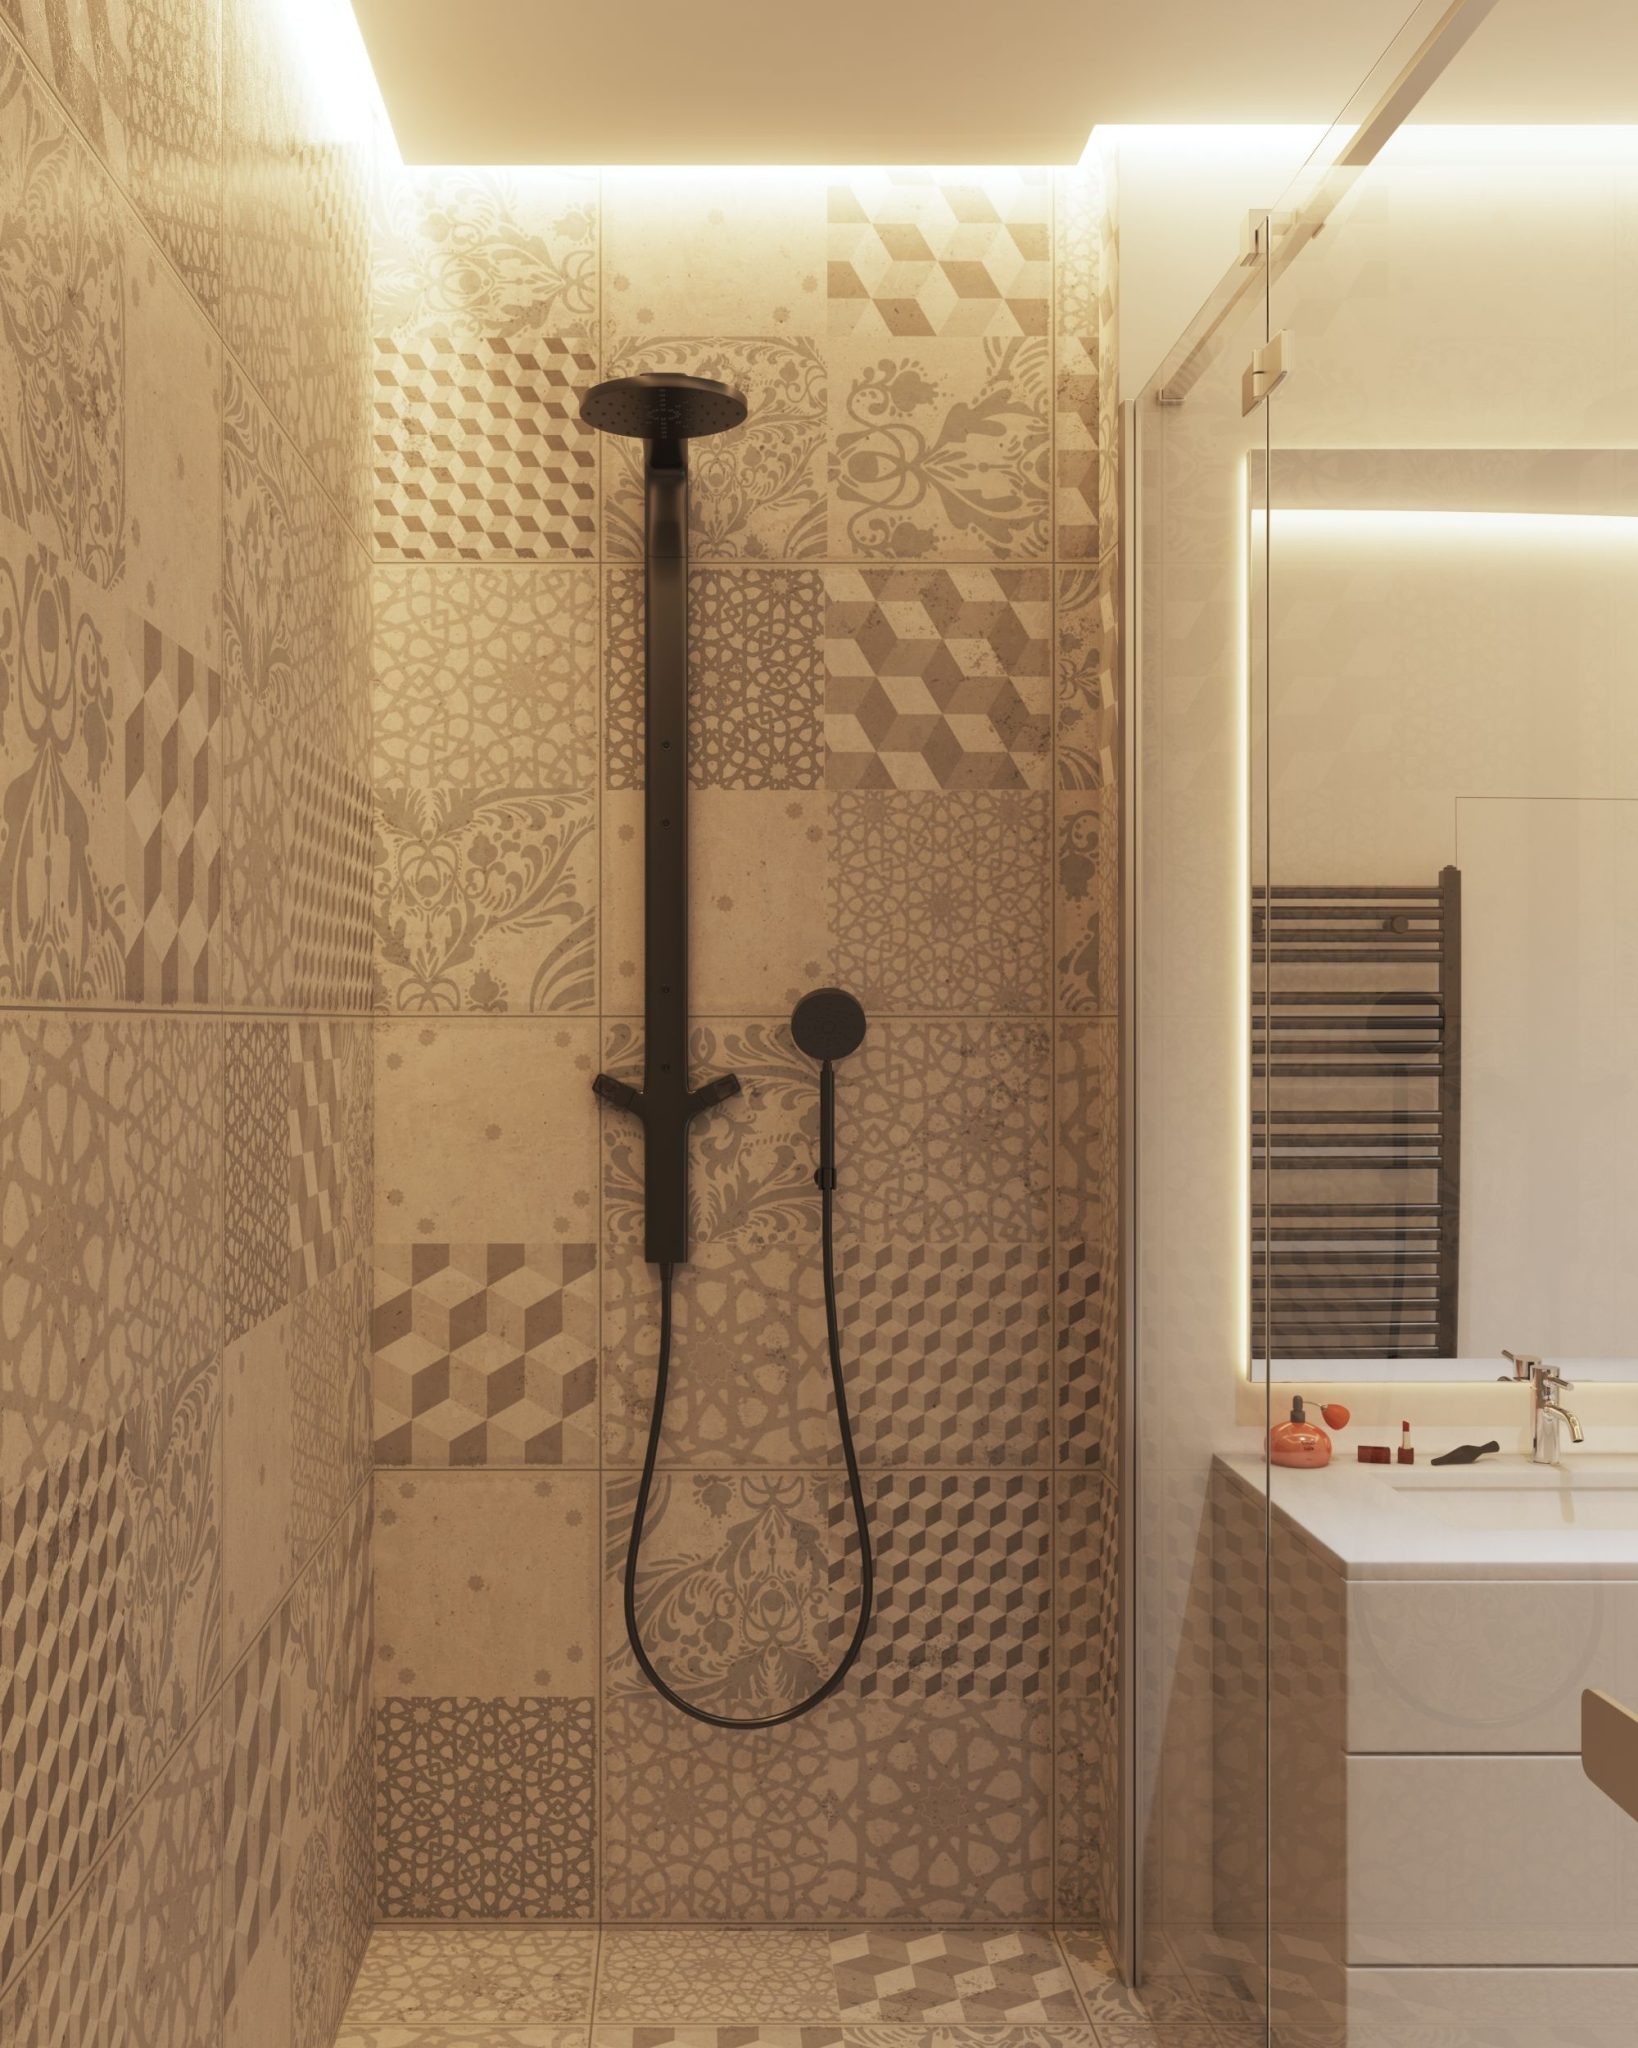
10. Unify a Space with Cohesive Beige Patterned Tiles
The single element that defines this bathroom is the fearless, all-over use of patterned tile. By using the same ‘patchwork’ tile on both the floor and the shower walls, the design achieves a bold, cohesive, and surprisingly calming effect. It turns the entire shower into a feature wall. This commitment to one pattern, rather than mixing and matching, is what elevates the look from potentially busy to intentionally designed. The matte black fixtures are the perfect quiet counterpoint.
|
📋 Copy HEX 🔗 Share |
💸 Get This Look For Less
Before you commit to a bold, all-over pattern like this, you need to be honest with yourself about ‘pattern fatigue.’ This is a strong look that you will see every single day. While it’s stunning, will you still love it in five years? If you’re hesitant, consider using the patterned tile in a smaller dose—perhaps just on the floor, or as a single feature wall behind the vanity. This gives you the personality punch without the long-term commitment of a full-room installation. Compare this to Idea #11 for a more restrained approach.
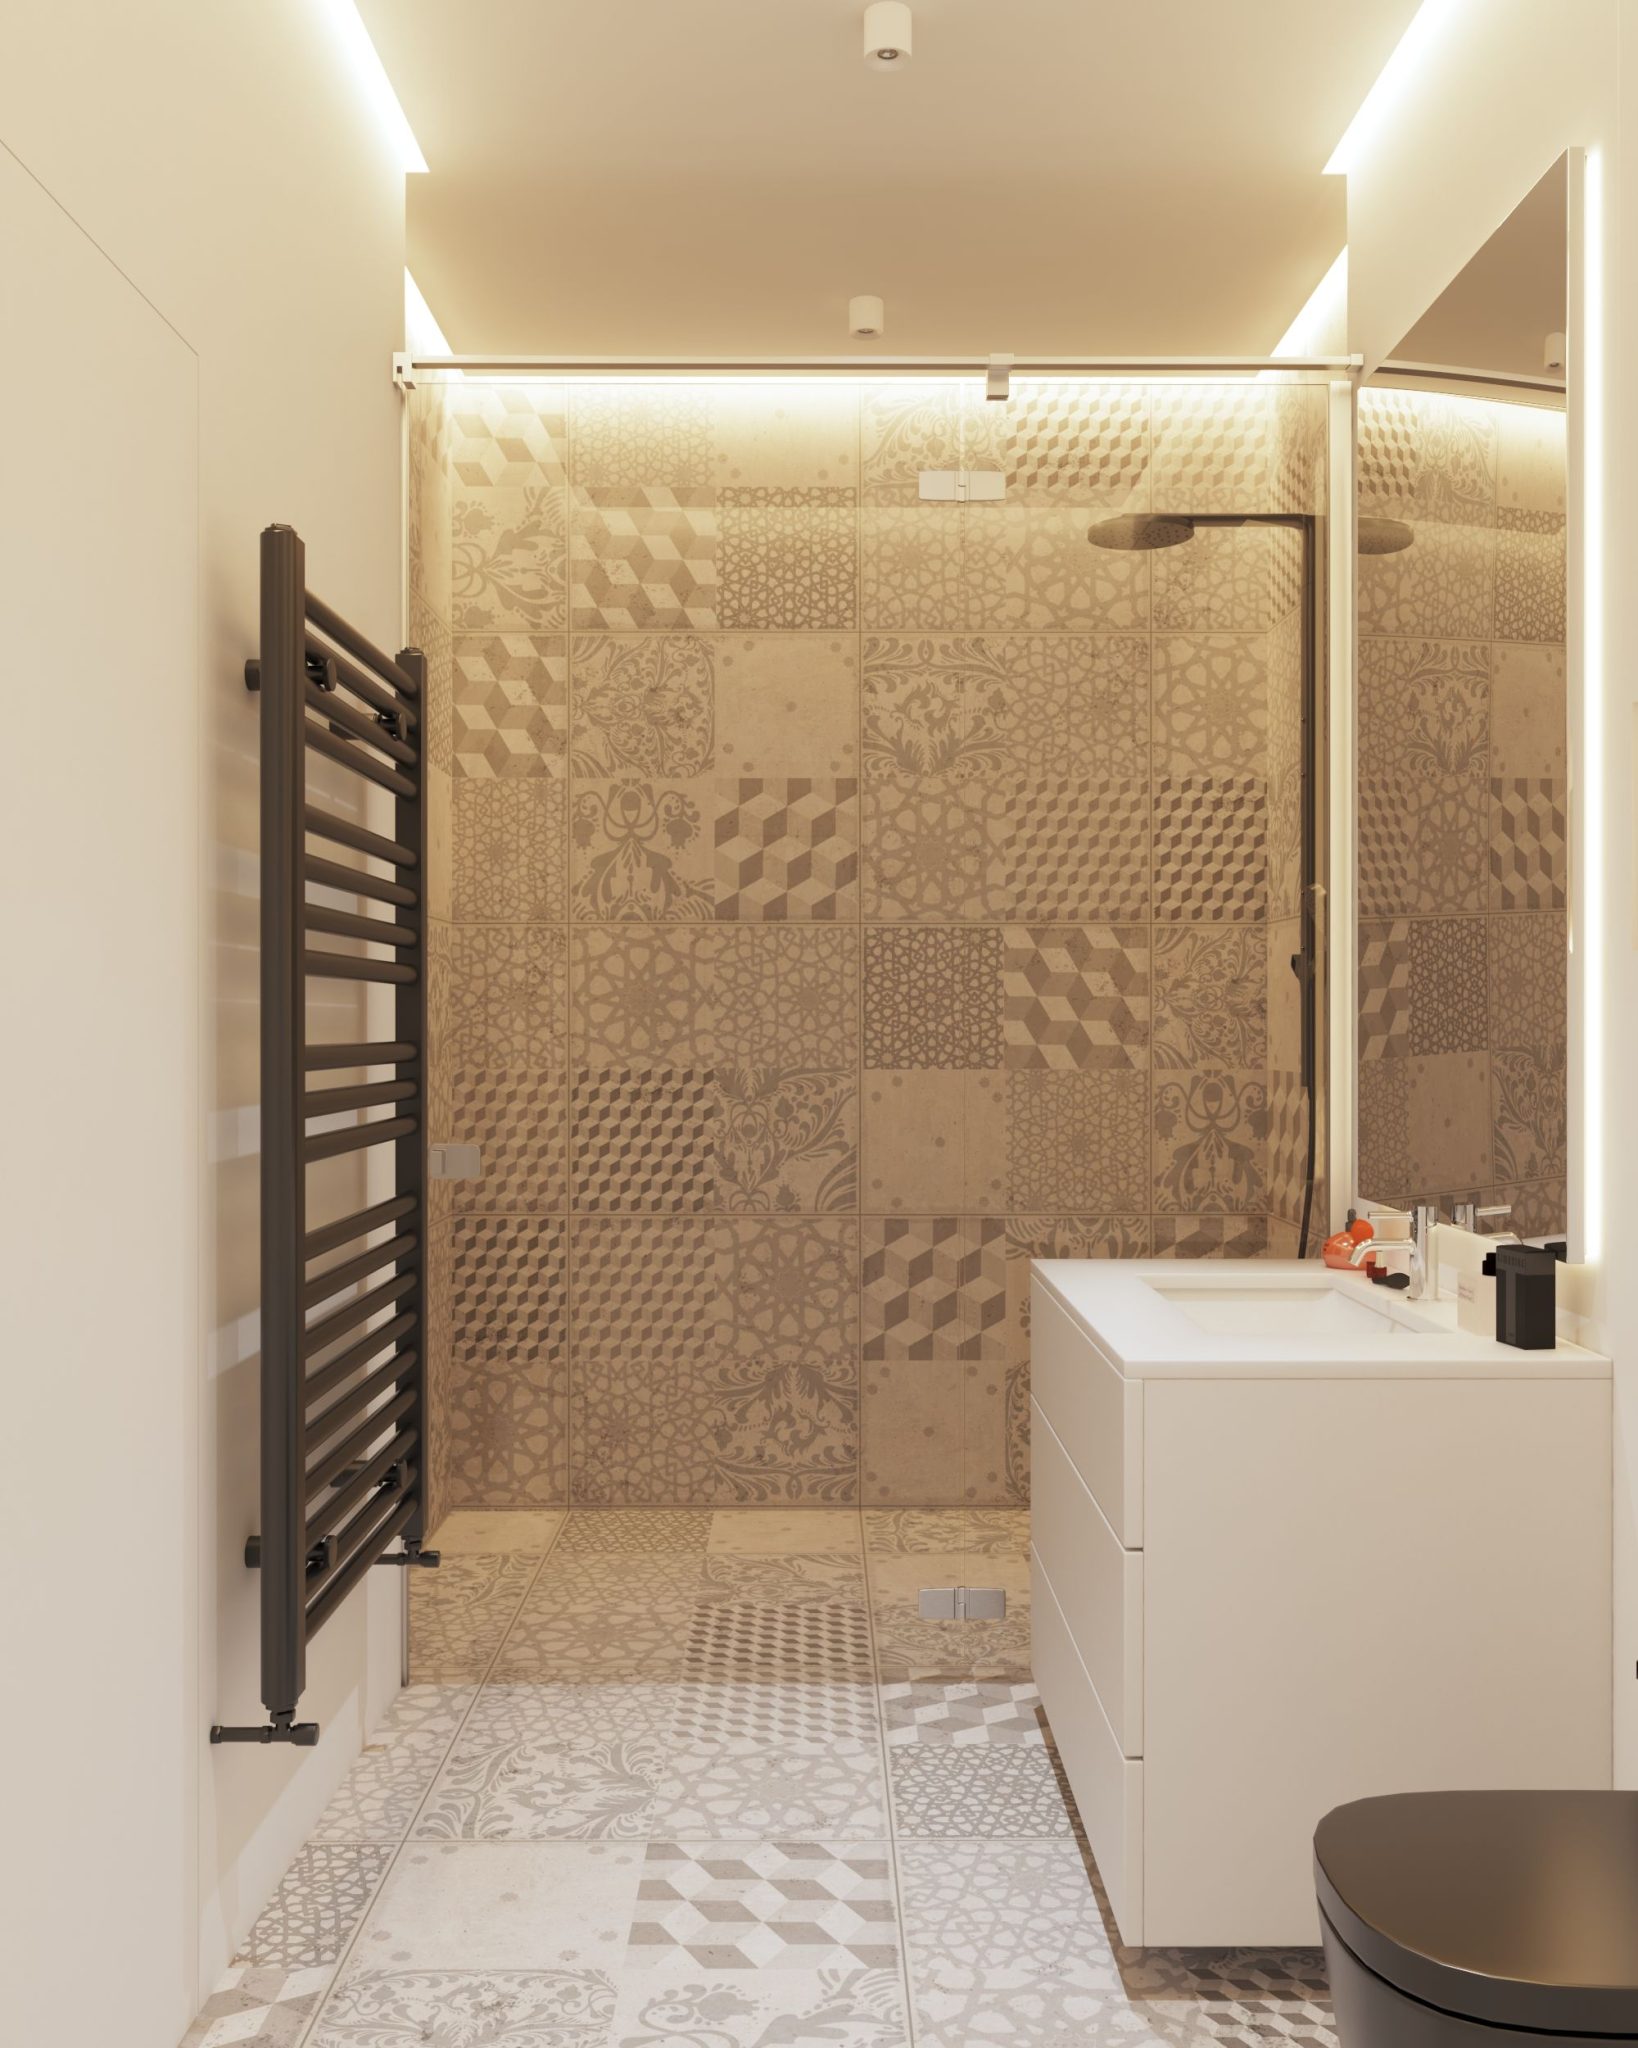
11. Highlight Patterned Tiles with Integrated Cove Lighting
Integrated lighting is a designer’s secret weapon for adding a high-end feel. For a backlit mirror, plan your electrical before the drywall goes up. You’ll need a recessed junction box centered exactly where the mirror will hang. For ceiling cove lighting, use flexible LED strips. To achieve a smooth, diffused glow like this, the strips should be installed inside an aluminum channel with a frosted diffuser cover. This prevents the ‘dotted’ look of individual LED bulbs and creates a seamless line of light.
|
📋 Copy HEX 🔗 Share |
📐 Style Math
This look is a direct reflection of the ‘hotel-ification’ of home bathrooms. We’re seeing a huge trend of homeowners wanting to replicate the luxurious, spa-like experience of a high-end hotel suite. Elements like integrated lighting, wall-hung vanities, and heated towel rails, once considered commercial-grade, are now becoming standard in residential design. It’s about creating a personal retreat, and thoughtful, layered lighting is one of the most effective ways to achieve that ambiance.
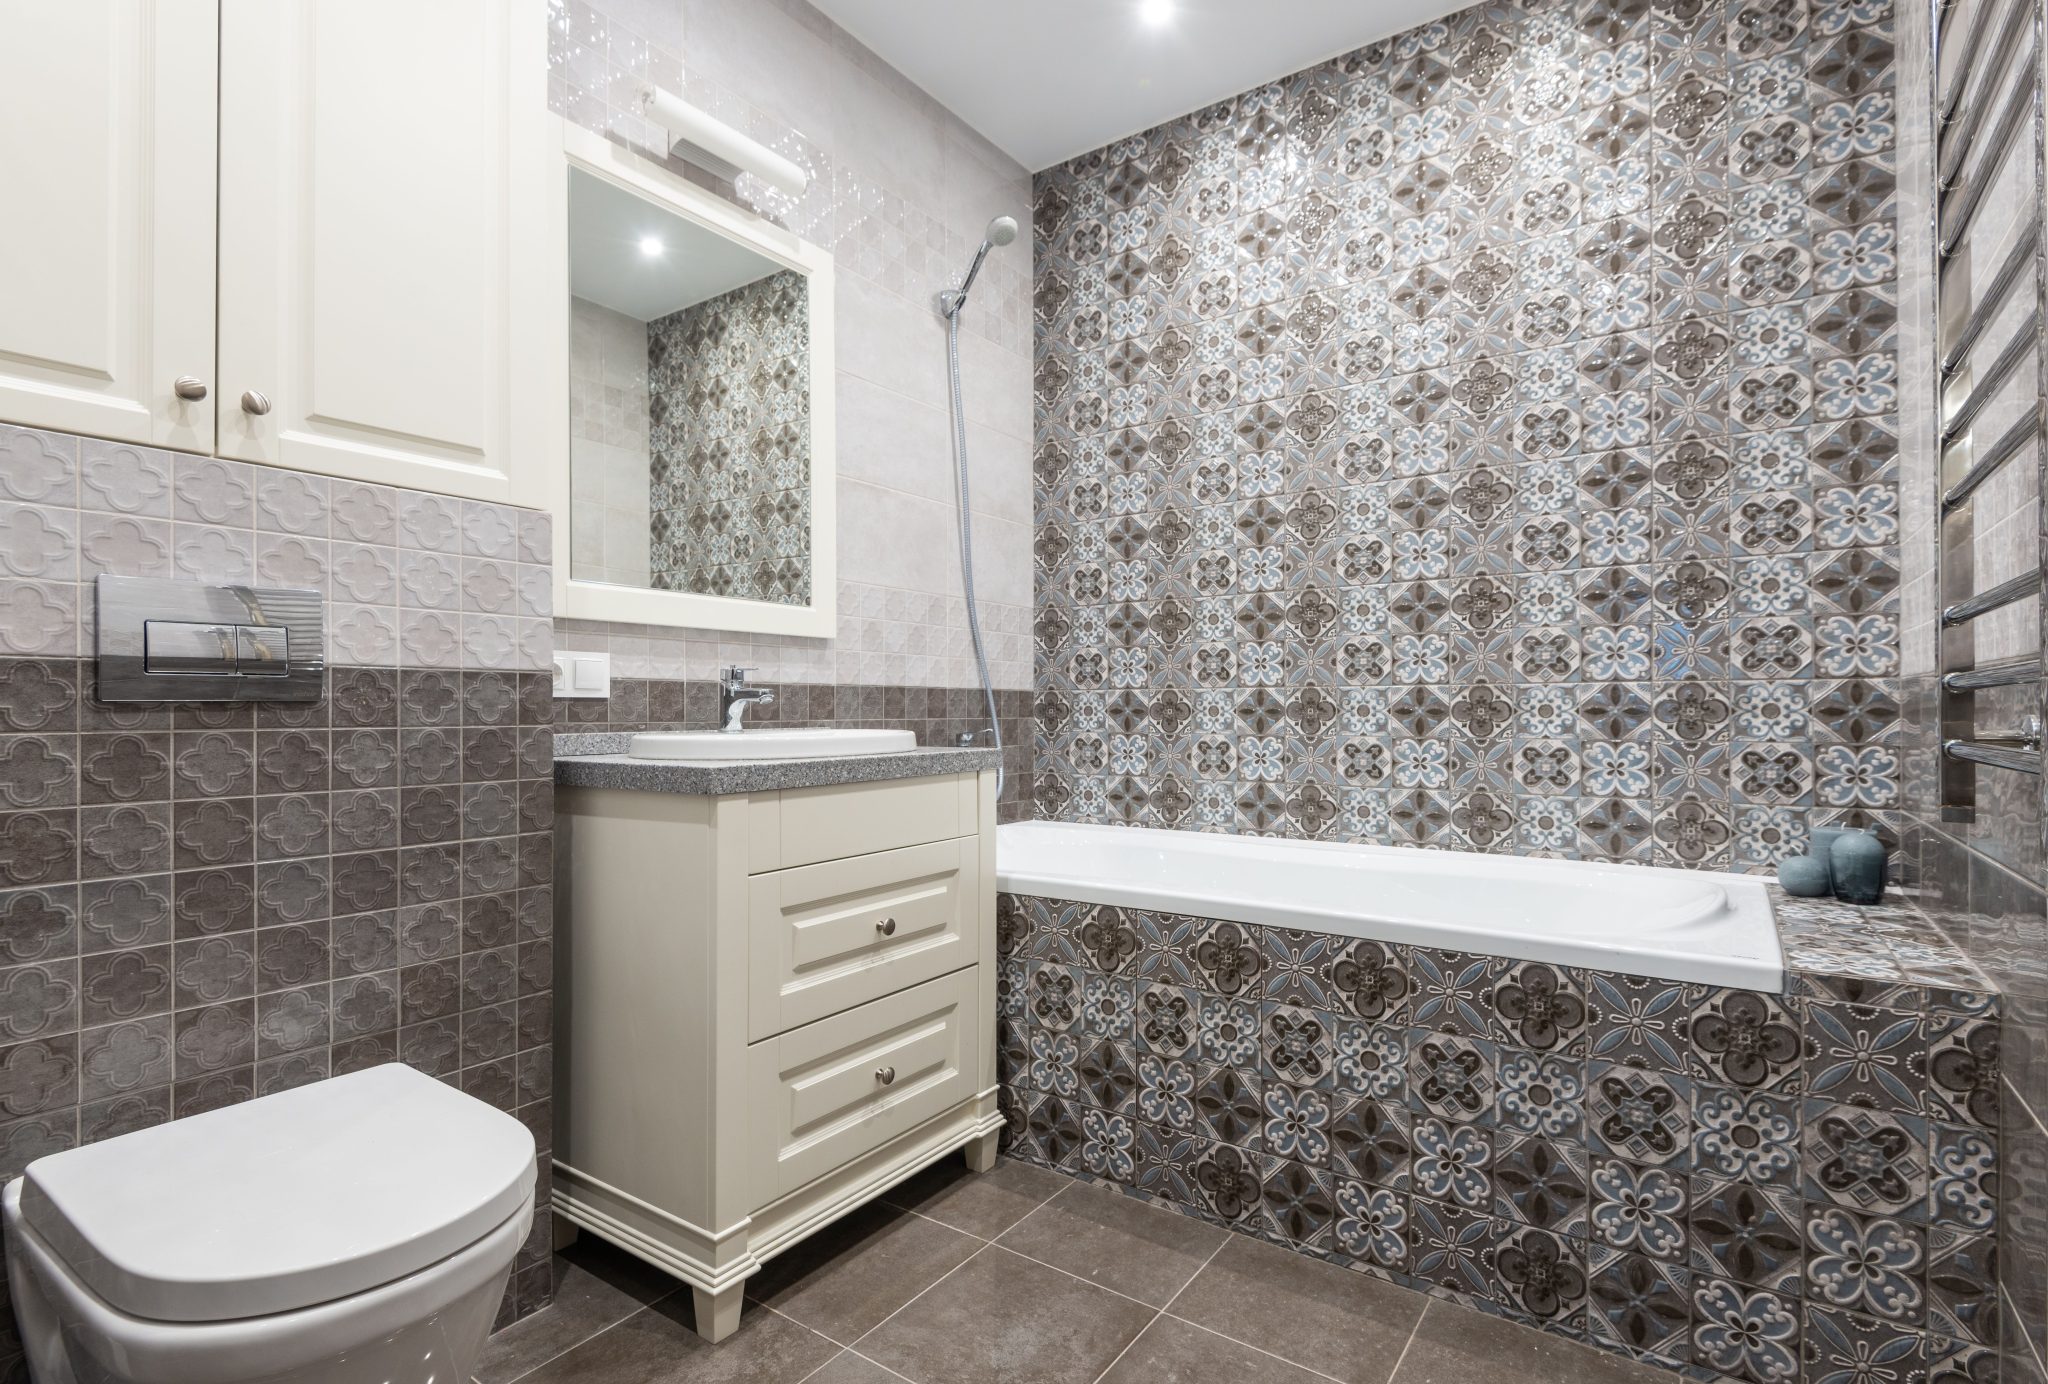
12. Create a Tiled Wainscoting with Two Coordinating Patterns
Mixing multiple tile patterns requires careful planning. Before you buy a single tile, get samples of everything—the floor tile, the light-patterned wall tile, the dark-patterned wainscoting tile, and the main feature wall tile. Lay them all out together in the actual bathroom to see how they interact in the room’s natural light. Ensure there’s a common color thread to tie them all together. Here, it’s the consistent use of gray and off-white that makes the mix feel cohesive rather than chaotic.
|
📋 Copy HEX 🔗 Share |
⚠️ Real Talk
The formula for successfully mixing patterns is about scale and color. Here’s the breakdown: 40% large-scale neutral floor + 30% small-scale light wall pattern + 20% small-scale dark wall pattern + 10% bold, multi-color feature pattern. The key is that the two wall patterns are the *same* pattern, just in different colorways. This creates repetition and rhythm. The feature tile is the ‘wild card’ but it works because its colors (blue, gray, brown) are echoed elsewhere in the room.
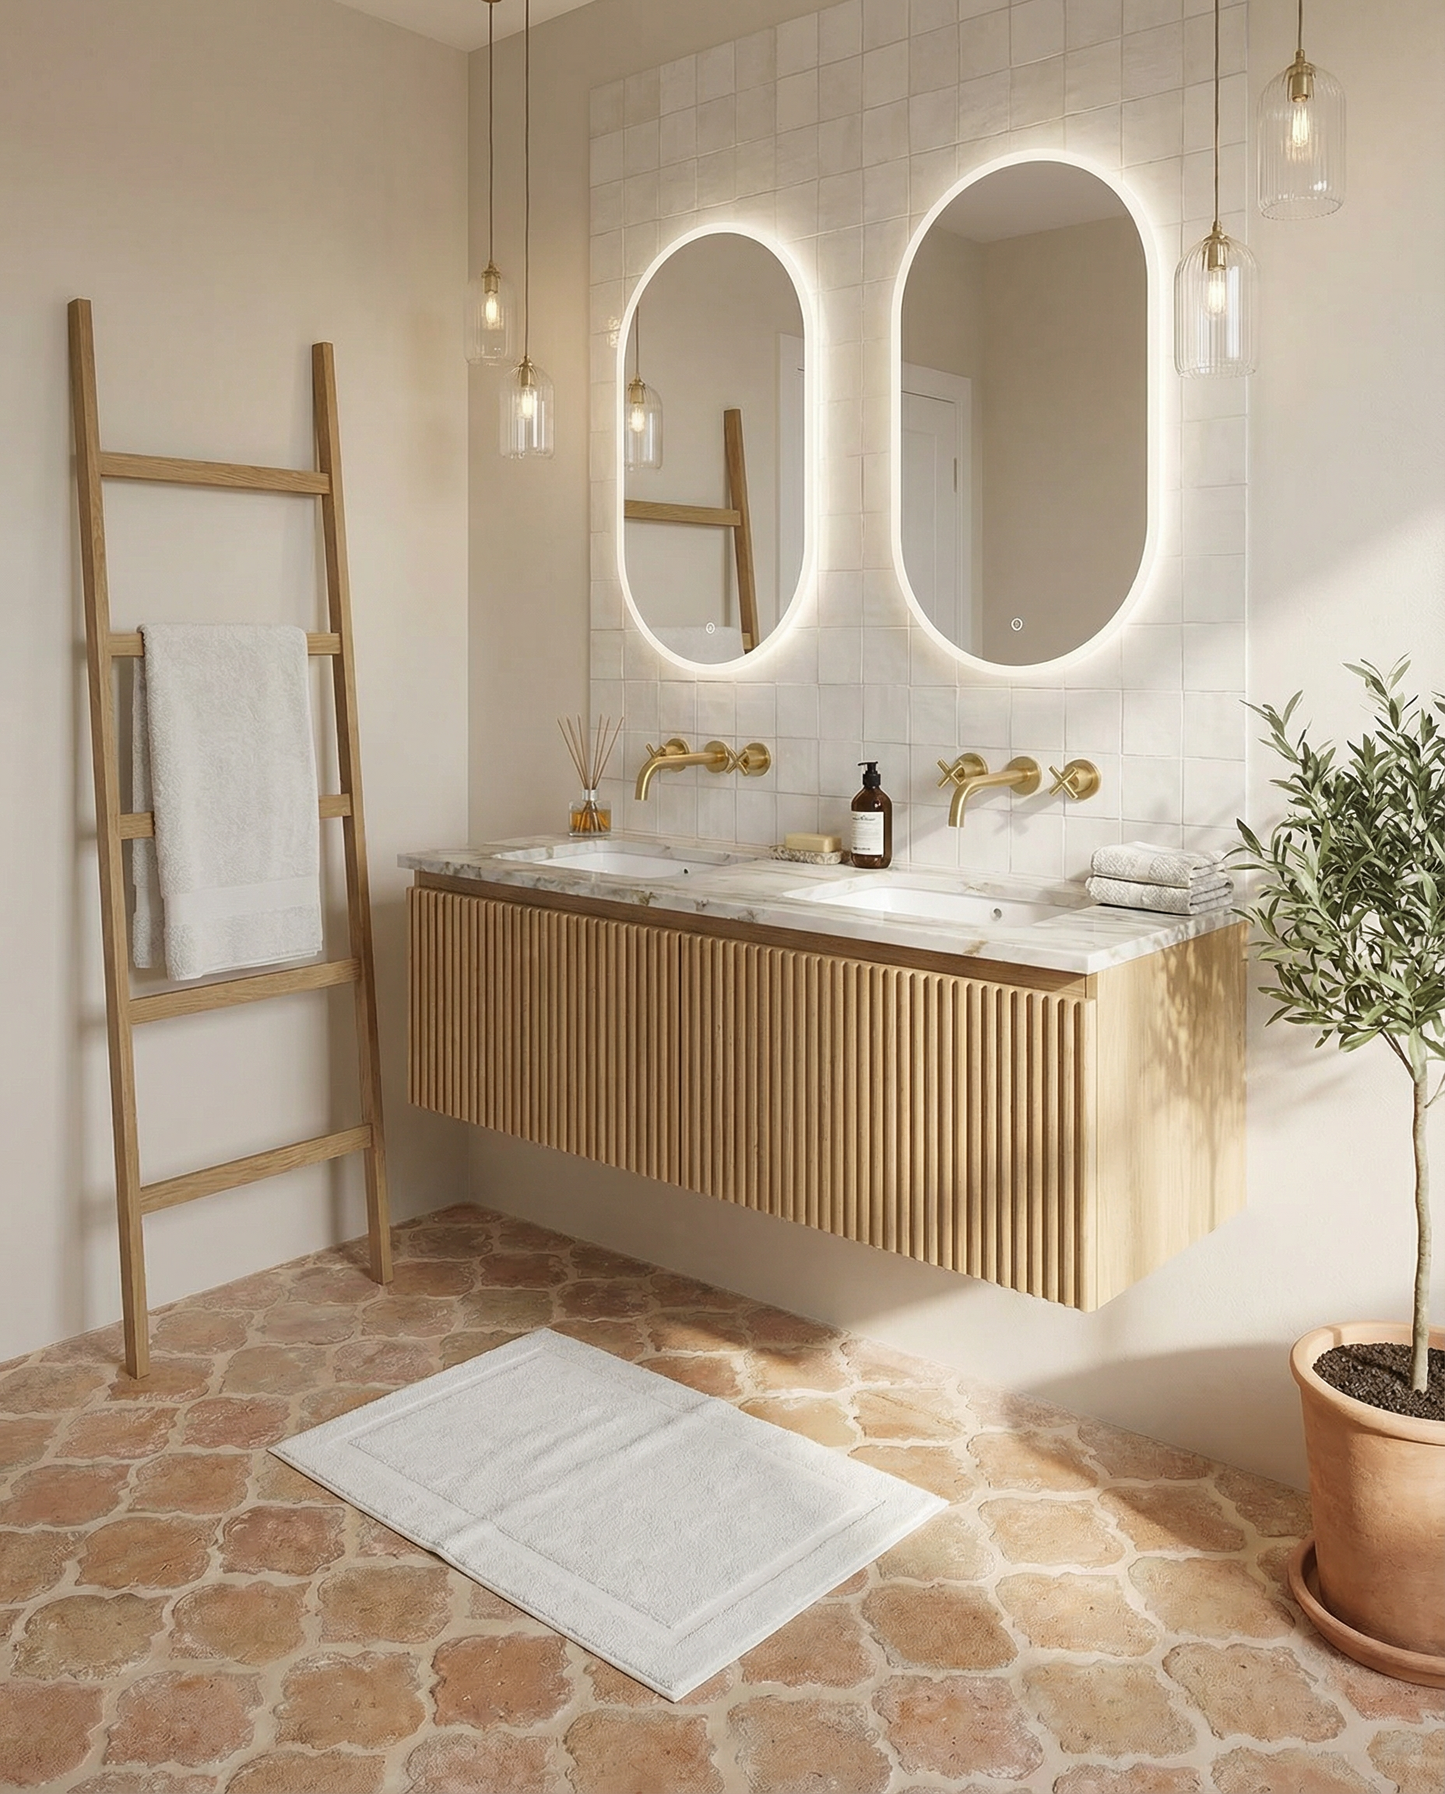
13. Get a Mediterranean Vibe with Irregular Terracotta-Look Tile
Real, handmade terracotta tile is stunningly beautiful but also porous, expensive, and requires regular sealing to prevent stains. You can capture 90% of this warm, Sardinian vibe for a fraction of the cost and maintenance by using a high-quality terracotta-look porcelain tile. Look for options labeled ‘color body’ or ‘through body,’ which means the color runs all the way through the tile, so a chip would be less noticeable. Brands like Marazzi and Daltile offer incredibly realistic options for $5-$10 per square foot, versus $20-$40 for authentic terracotta.
|
📋 Copy HEX 🔗 Share |
💰 Budget Breakdown
This room feels so serene and inviting because of its commitment to natural and natural-looking materials. The slightly irregular, aged appearance of the terracotta-look floor tiles provides a soft, rustic foundation. This is layered with the organic grain of the floating wood vanity, the subtle veining in the marble countertop, and the living olive tree. Even the lighting feels natural, with backlit mirrors providing a soft glow. The result is a space that feels earthy, warm, and deeply calming.
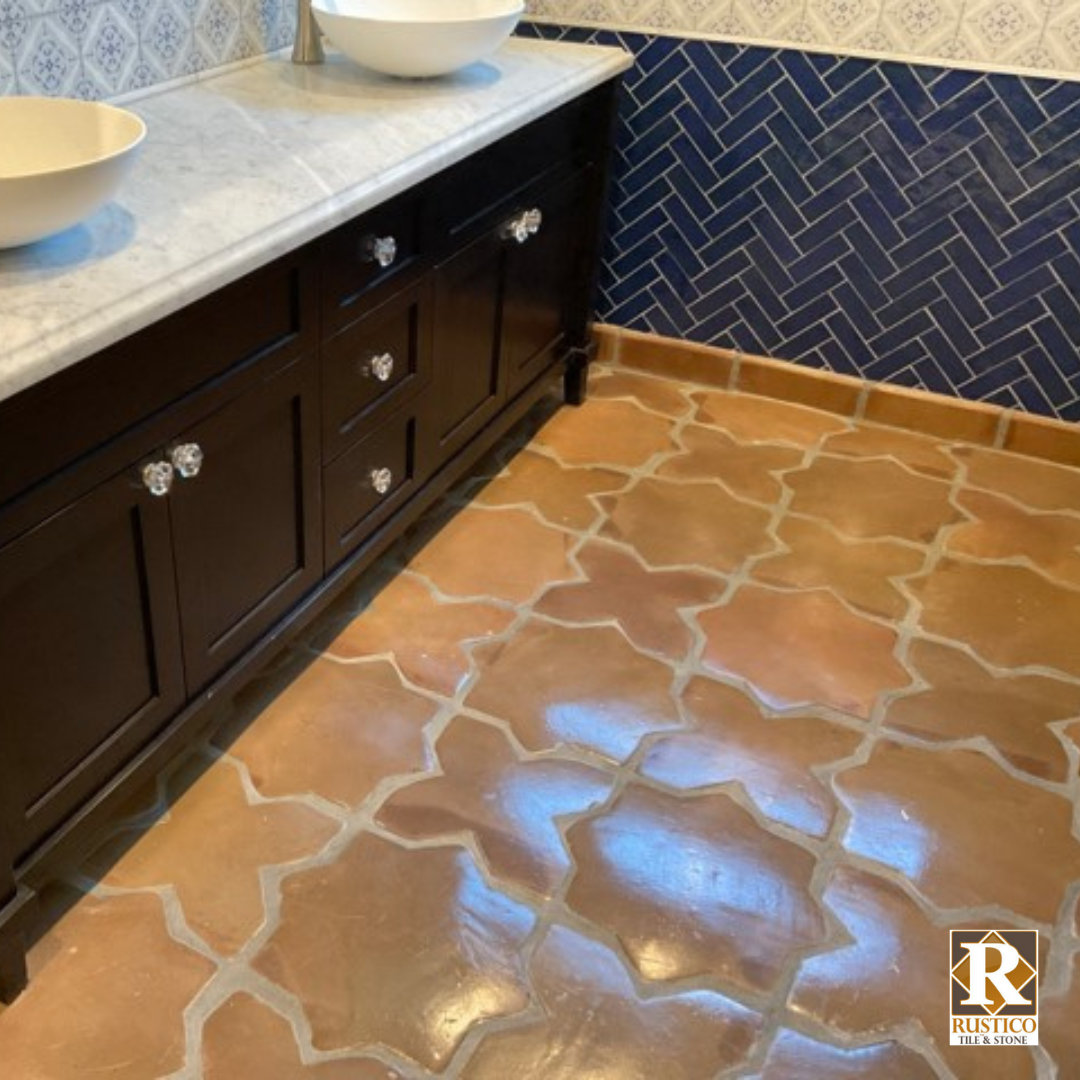
14. Ground a Room with Star-and-Cross Terracotta Floor Tile
The star-and-cross pattern is the undeniable soul of this bathroom. It’s a classic, historic pattern that brings an immediate sense of warmth, history, and craftsmanship to the floor. While the herringbone and patterned wall tiles are beautiful, the floor is what gives the room its foundational character. The deep, earthy red of the terracotta provides a rich base that makes the cooler blue tones on the wall feel intentional and balanced rather than cold.
|
📋 Copy HEX 🔗 Share |
💡 Designer Tip
An intricate tile pattern like this requires more planning than a simple grid. Before your project begins, make sure you’ve covered these points:
- Confirm your installer has experience with this specific pattern; it requires a different layout process.
- Order at least 15-20% extra tile for cuts and waste, as the pattern requires more intricate cuts around the room’s perimeter.
- Decide on the starting point. The layout should be centered on the main focal point of the room, like the vanity or the entrance.
- Choose your grout color carefully. A contrasting grout will highlight the pattern, while a matching color will make it more subtle.
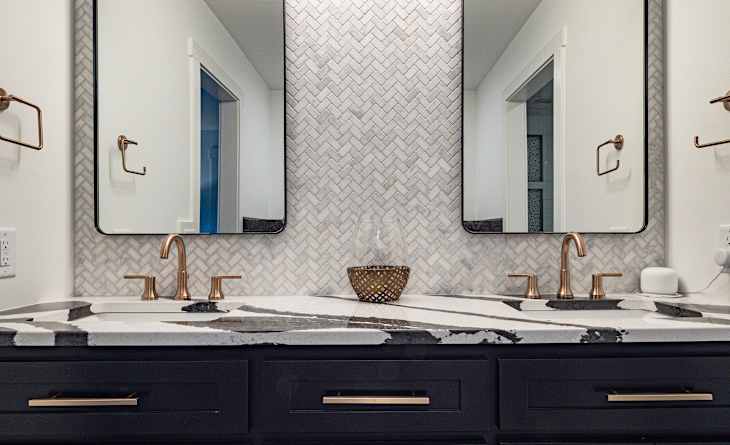
15. Elevate a Vanity with a Marble Herringbone Backsplash
This sophisticated vanity look carries a price tag to match its visual weight. The combination of a custom-colored vanity, real marble tile, and higher-end bronze fixtures drives the cost.
- Main Furniture (Double Vanity Cabinet): $1,500 – $4,000
- Lighting (Sconces): $400 – $1,000
- Textiles (Towels, Rug): $150 – $400
- Decor/Accessories (Mirrors, Faucets, Hardware): $1,200 – $3,000
- Wall Treatment (Marble Herringbone Tile): $1,000 – $2,500 (Installed)
- TOTAL: $4,250 – $10,900
- Budget alternative: Use a stock vanity, ceramic herringbone tile, and brushed nickel fixtures to achieve a similar feel for around $2,000.
|
📋 Copy HEX 🔗 Share |
✅ Before You Start
When installing a herringbone tile pattern, the direction matters. For a classic, elegant feel like the one shown, orient the points of the ‘arrows’ vertically, either pointing up or down. This draws the eye upward and creates a sense of height. A horizontal orientation, where the arrows point left or right, can make a wall feel wider but can also create a slightly more modern or even ‘busier’ look. Always do a dry layout on the floor first to confirm which direction you prefer.
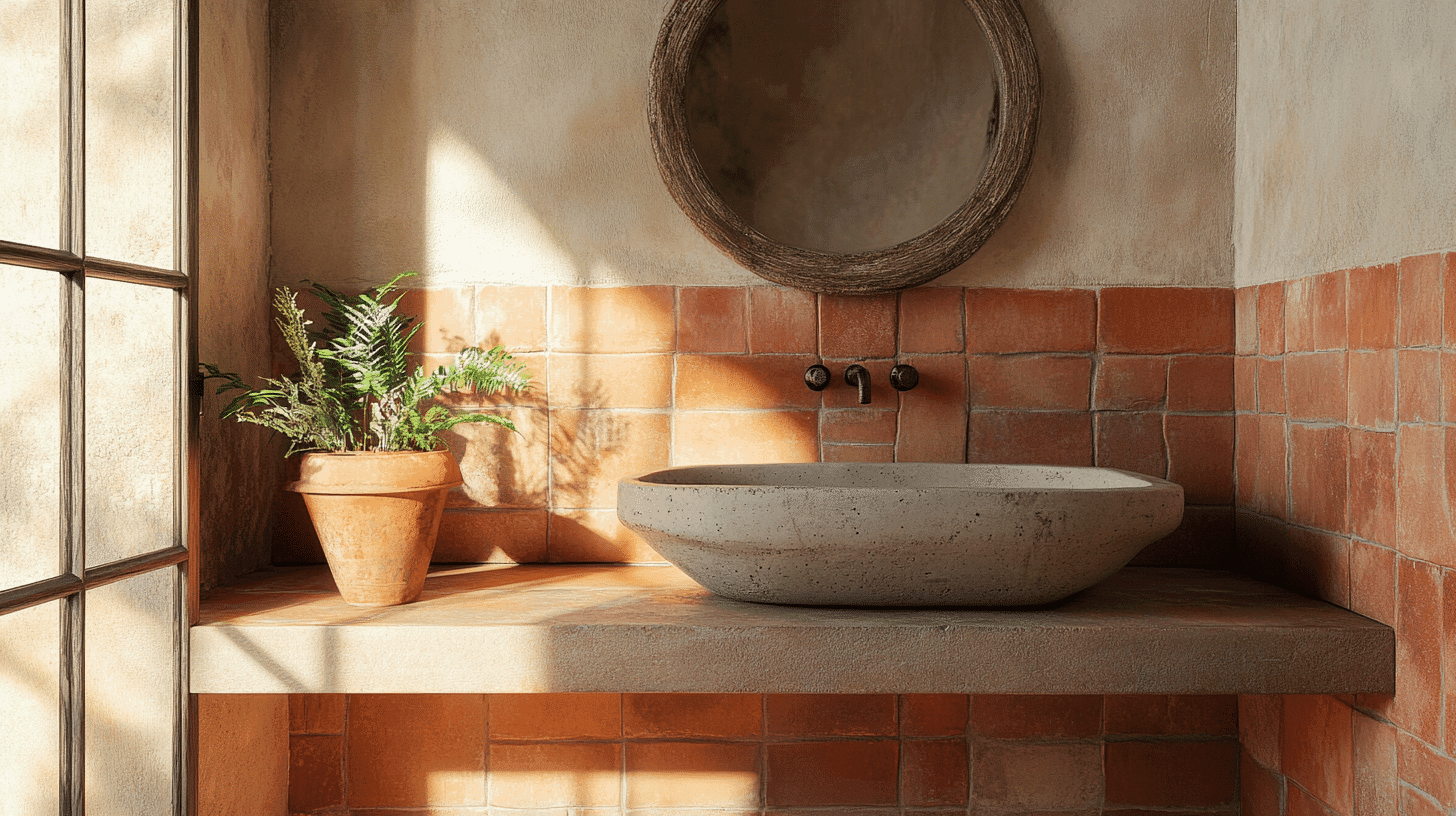
16. Mix Textures with Terracotta Tile and Venetian Plaster
This bathroom is a masterclass in tactile design. The success of the look lies in the pairing of two distinct but complementary textures. The lower half of the wall features the slightly rustic, matte finish of the reddish-brown terracotta tiles with their defined grout lines. Above it, the light beige plaster wall has a smooth, slightly varied, hand-troweled texture. This combination of a grid pattern below and an organic texture above creates a rich, layered effect that feels both rustic and incredibly sophisticated.
|
📋 Copy HEX 🔗 Share |
⭐ The One Thing
A half-wall or wainscoting treatment like this works exceptionally well in bathrooms with high ceilings (9 feet or more). The horizontal line created by the top of the tile helps to bring the scale of the room down to a more human level, making it feel cozier and less cavernous. In a room with a standard 8-foot ceiling, you’ll want to cap the tile wainscoting at around 36-42 inches high to avoid visually shortening the wall too much.
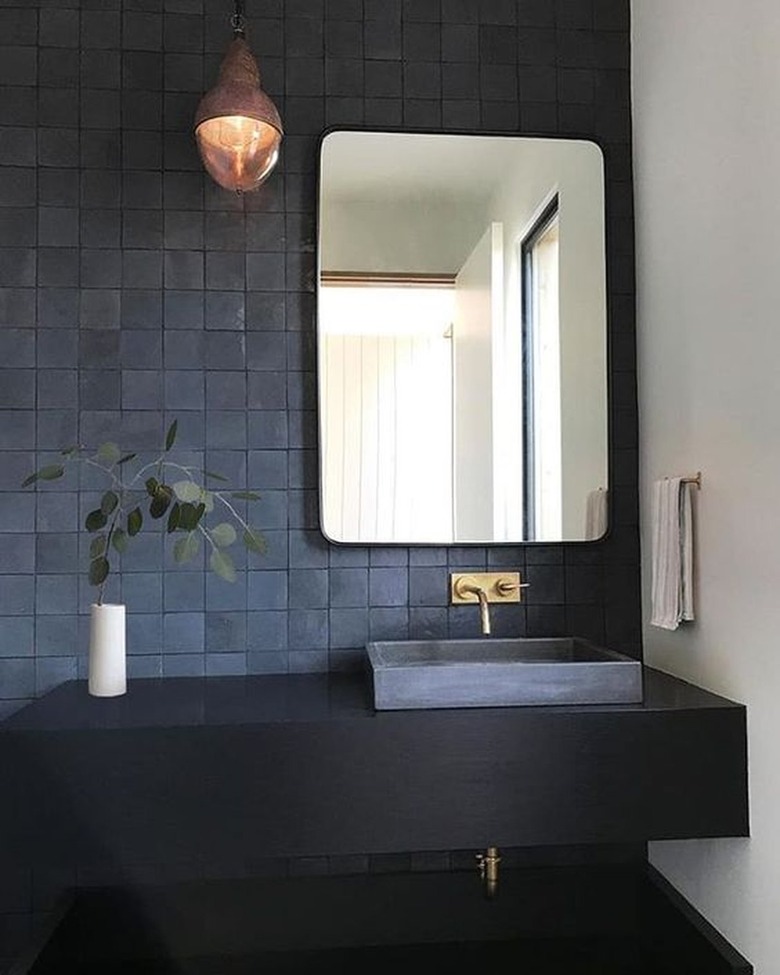
17. Create a Bold Contrast with a Dark Blue Tile Wall
A wall of saturated, dark blue tile is a bold commitment. While stunning, be aware that a dark color like this will absorb a lot of light. This isn’t a good choice for a small, windowless powder room unless you are intentionally going for a dramatic, jewel-box effect. To pull it off in an average-sized bathroom, you need to compensate with excellent lighting—both natural and artificial—and balance it with a lighter color on the adjacent walls and ceiling to keep it from feeling claustrophobic.
|
📋 Copy HEX 🔗 Share |
📏 Scale Guide
The visual equation for this modern, industrial look is surprisingly simple: 50% bold color block + 40% neutral white + 10% metallic warmth. The dark blue square tile wall provides the dramatic color. The adjacent white wall and white ceiling act as a neutral canvas, preventing the blue from overwhelming the space. Finally, the brass faucet and copper pendant light add that crucial 10% of warmth and shine, which keeps the cool-toned palette from feeling too sterile or cold.
18. Add Depth with Multi-Tonal Gray Wood-Look Planks
When installing wood-look planks—whether vinyl, porcelain, or laminate—always open and mix planks from at least three different boxes at a time. This is the single most important step to achieving a natural, varied look. Manufacturers print the patterns in repeats, and pulling from a single box will likely lead to noticeable duplicate planks placed too close together, which immediately screams ‘fake.’ By mixing them up, you ensure a random distribution of tones and grain patterns, just like real wood.
|
📋 Copy HEX 🔗 Share |
🔧 How-To Brief
You can find this multi-tonal wood-look flooring at every price point. At the high end, you have engineered hardwood with a gray-stained finish ($12-$20/sq-ft). The sweet spot for bathrooms is Luxury Vinyl Plank (LVP), which offers a waterproof solution with highly realistic textures for $4-$9/sq-ft. For the most budget-conscious approach, look at laminate flooring from places like IKEA or Lumber Liquidators ($1.50-$3/sq-ft), but be absolutely sure to get a version rated for wet areas and seal the perimeter meticulously.
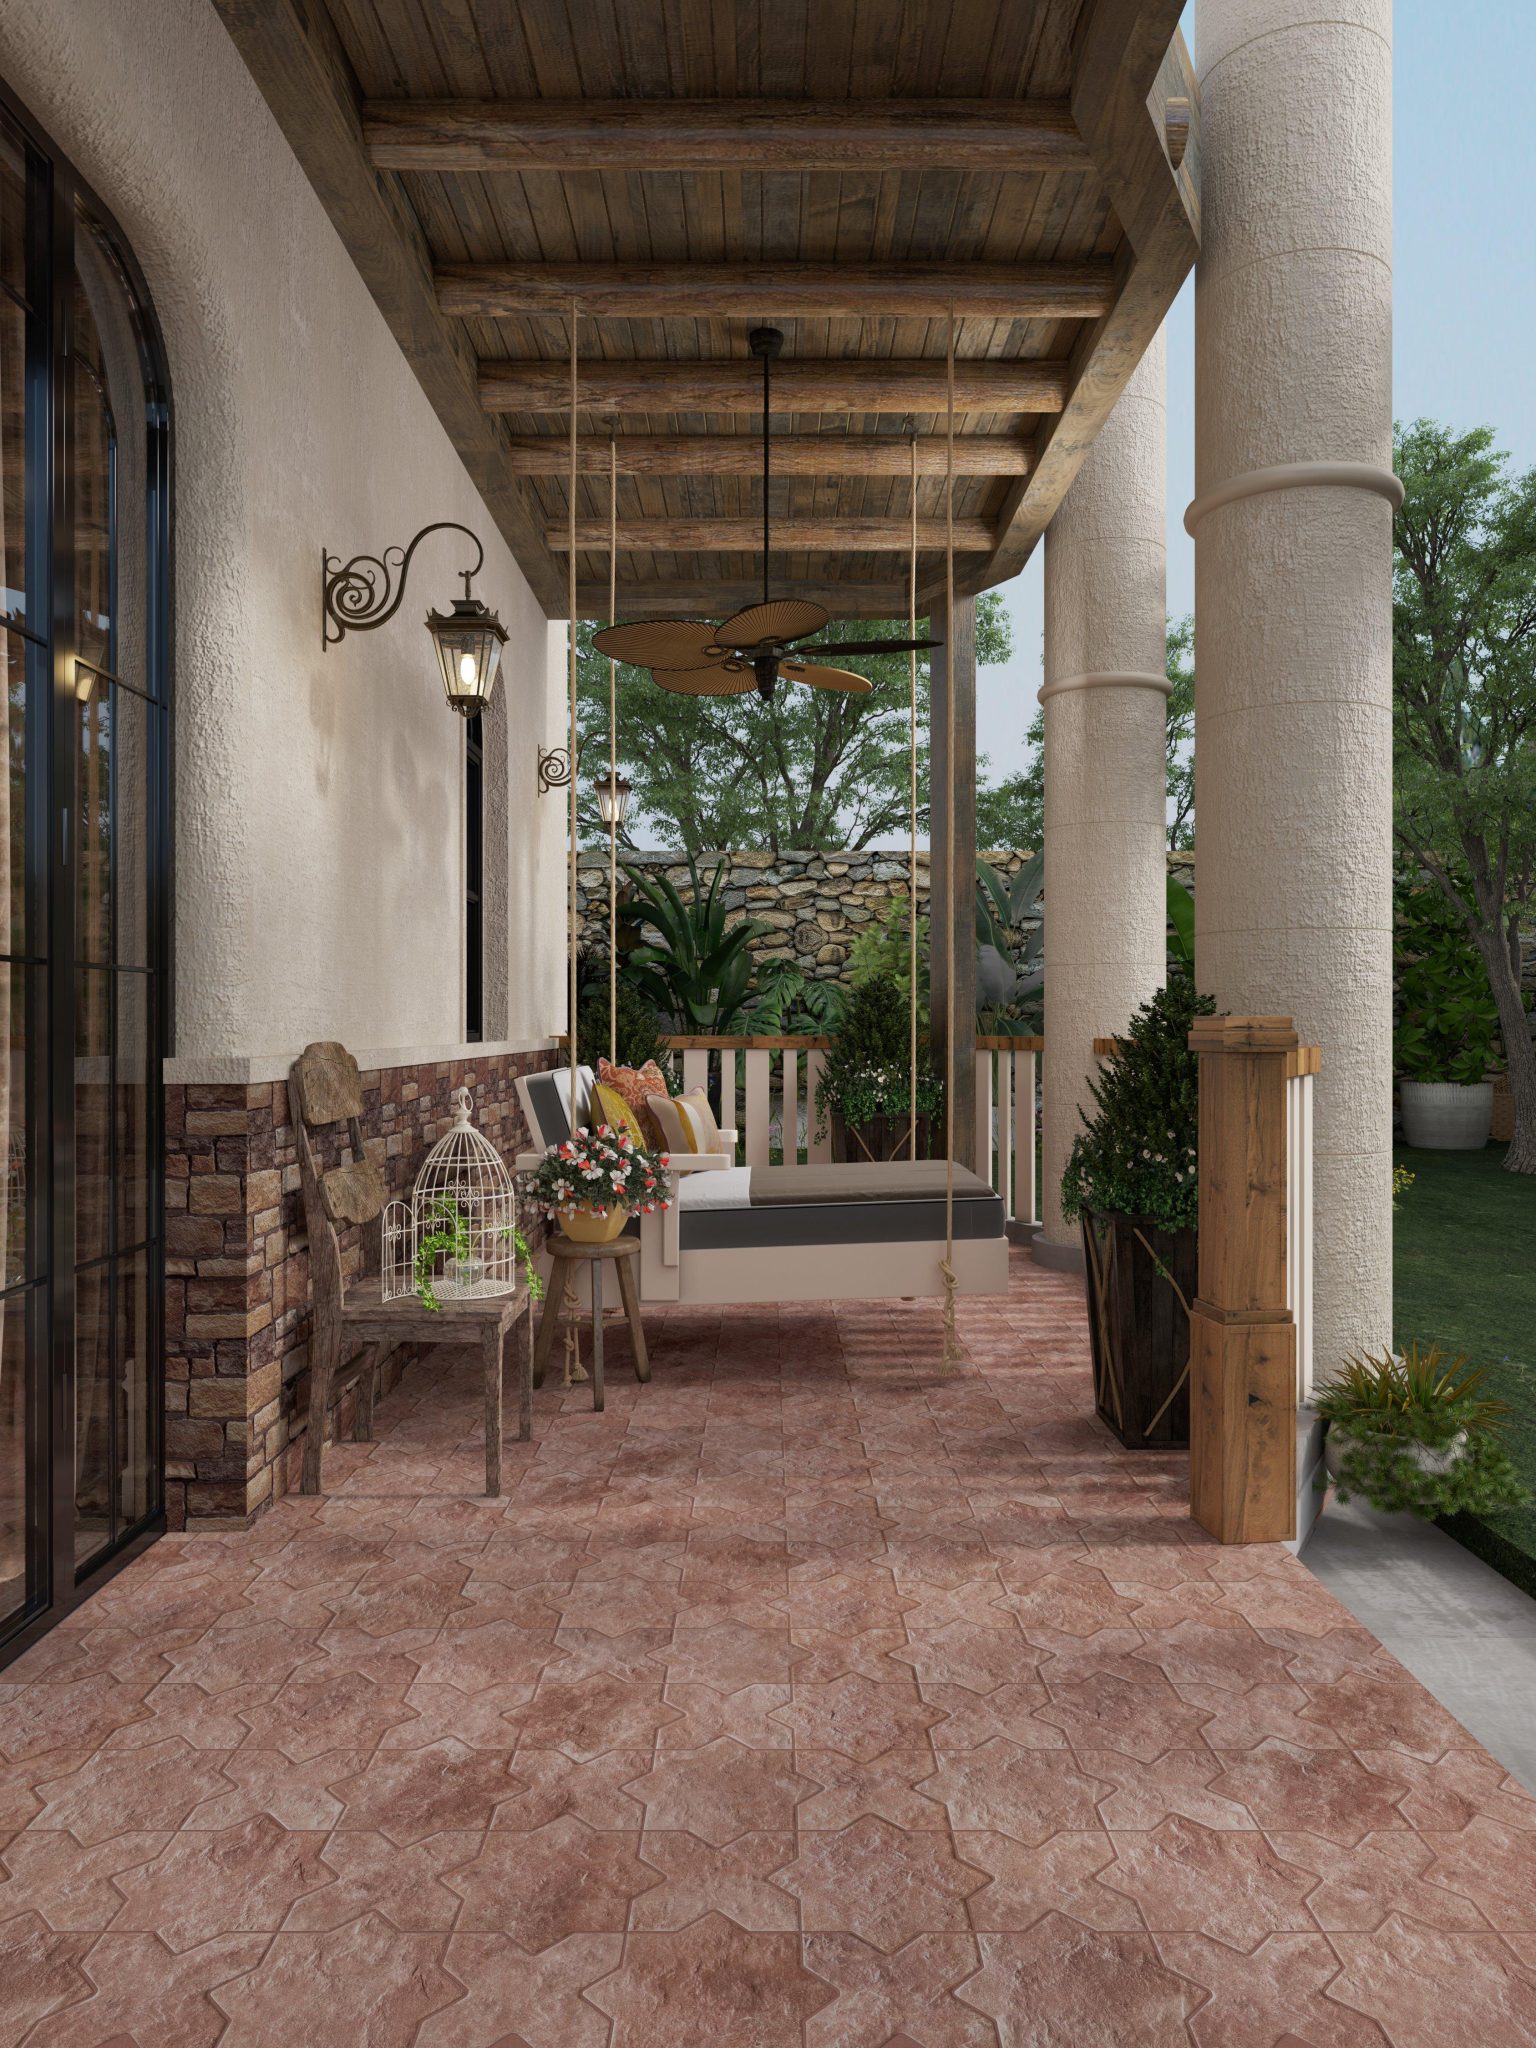
19. Bring in Rustic Warmth with Star-Patterned Terracotta Pavers
While these pavers are often used for outdoor patios, bringing them inside makes a huge style statement. However, there are practicalities to consider. These are thick, heavy tiles, so your subfloor must be strong enough to support the weight. They are also naturally porous and must be sealed properly (and repeatedly over the years) to prevent staining. The surface can be uneven, which is part of its rustic charm but might not be ideal for everyone. It’s a high-character, high-maintenance choice.
|
📋 Copy HEX 🔗 Share |
🔥 Trending Context
The beauty of this floor comes from its perfect imperfections. The repeating star-like geometric pattern provides a strong, organizing structure to the floor. However, this structure is softened by the inherent qualities of the material itself. The slight variations in the terracotta color from paver to paver, the textured matte finish, and the visible grout lines all contribute to a rustic, handmade aesthetic. It feels authentic and grounded, not mass-produced.
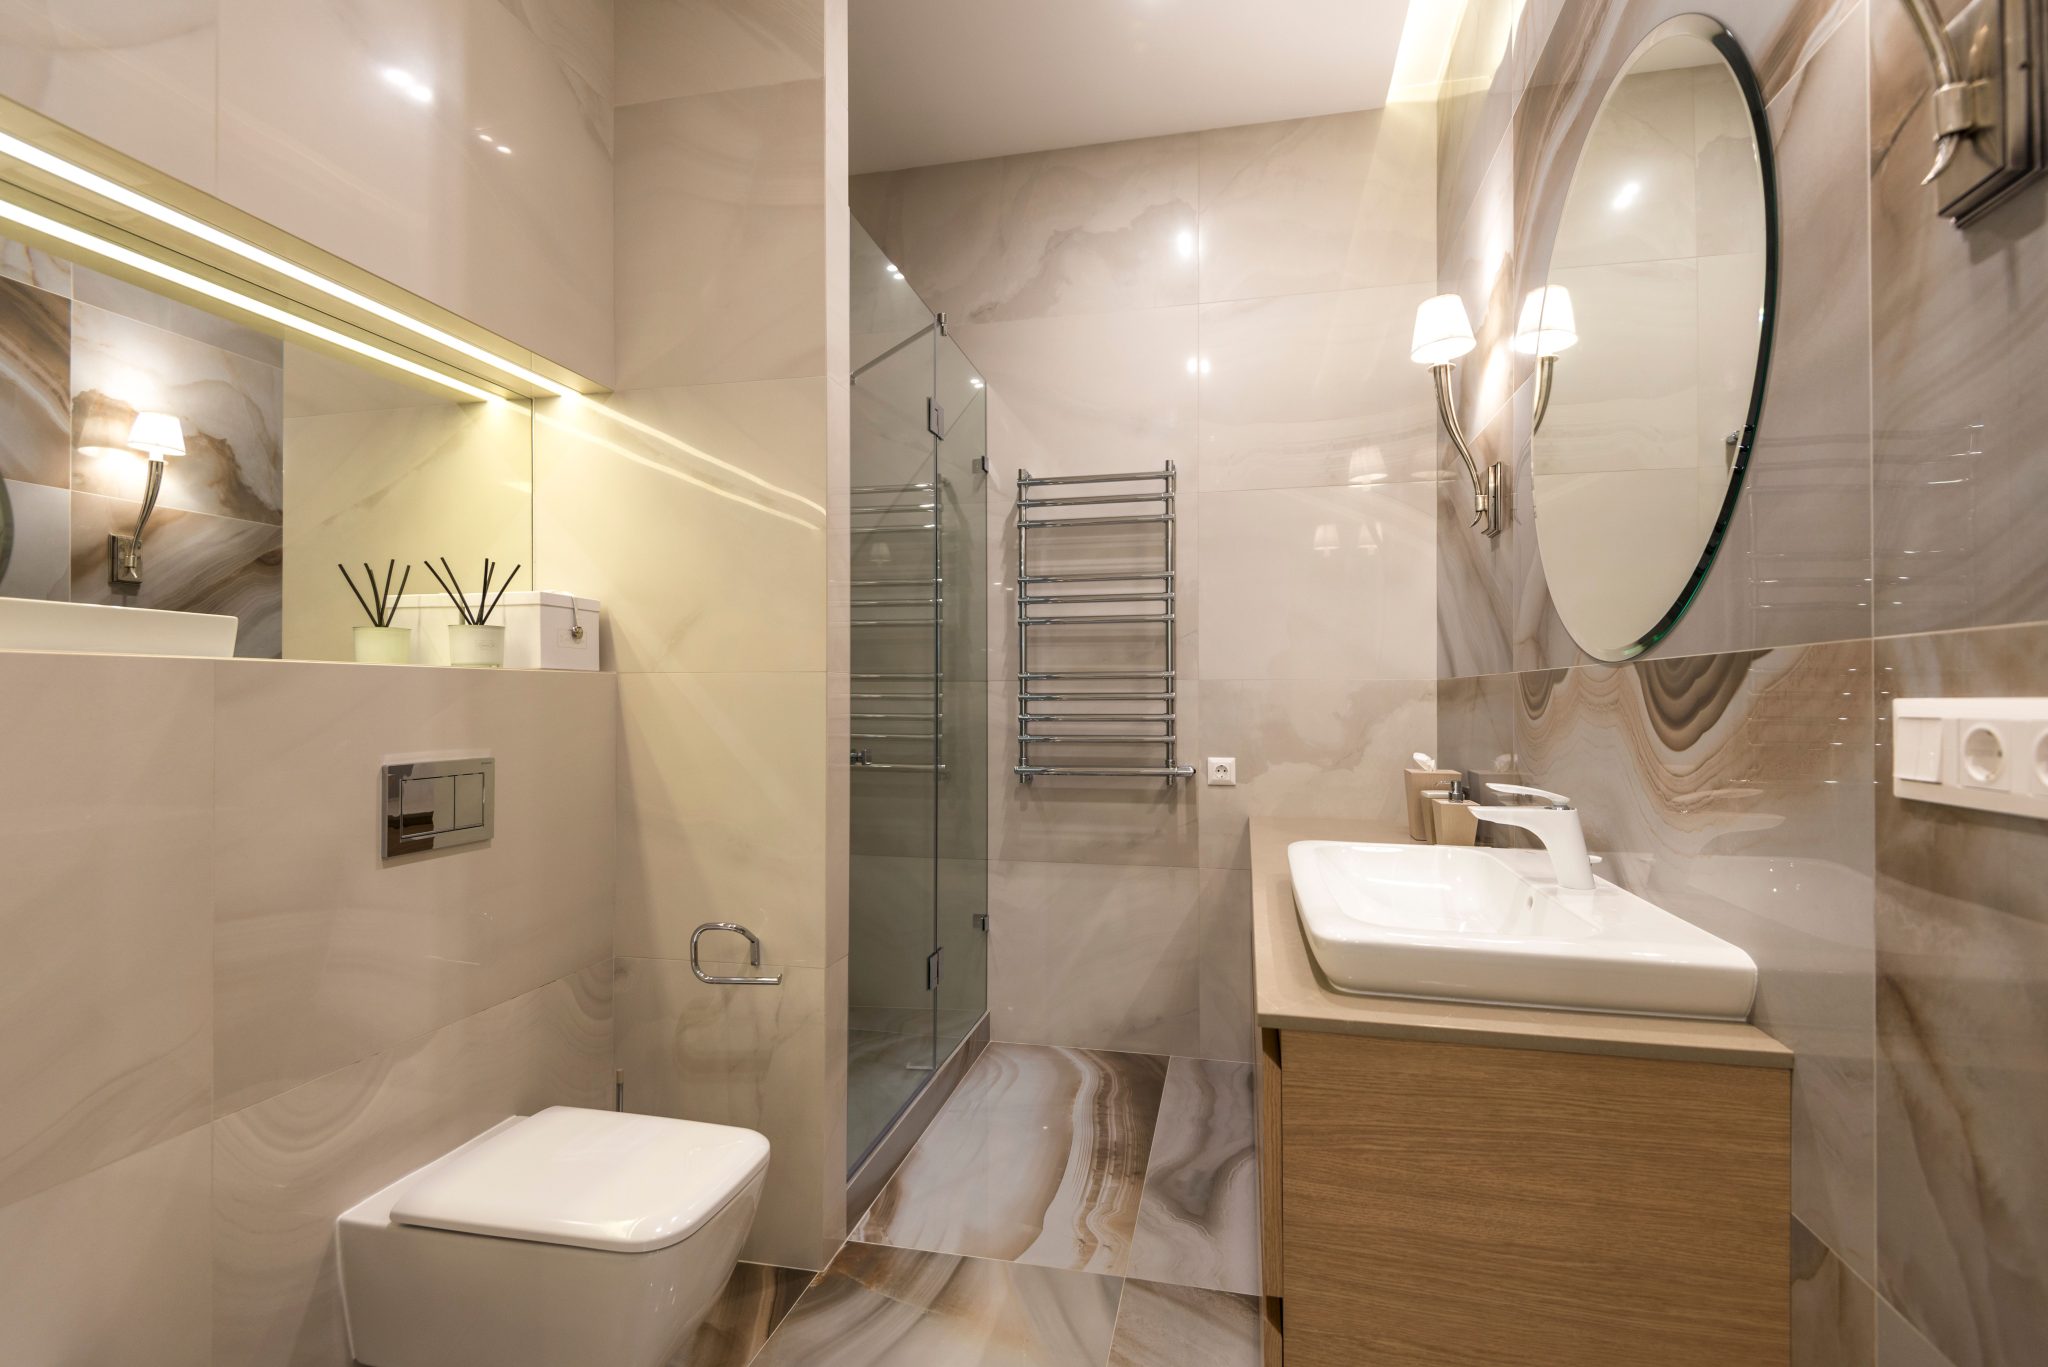
20. Choose High-Gloss, Large-Format Marble-Look Tiles
The look of floor-to-ceiling polished marble is the height of luxury, but it comes with a stratospheric price tag. Thankfully, modern porcelain tile offers an incredibly convincing alternative. Look for large-format (24×48″ or bigger) rectified porcelain tiles with a polished finish. ‘Rectified’ means the edges are perfectly straight, allowing for tiny 1/16″ grout lines that help create a seamless look. You can get a high-end Calacatta or Statuario marble look for $8-$15 per square foot, versus $50-$150 for the real stone.
|
📋 Copy HEX 🔗 Share |
🎯 What Makes It Work
A high-gloss floor is stunning when it’s clean, but it’s a magnet for showing every single drop of water, footprint, and speck of dust. If you’re a perfectionist, this floor might make you crazy. The glossy finish is also slippery when wet. To keep it looking its best, you’ll need to dry it after showers and clean it frequently with a microfiber mop. While beautiful, it’s not the most practical choice for a high-traffic family bathroom or for anyone who dislikes constant cleaning.
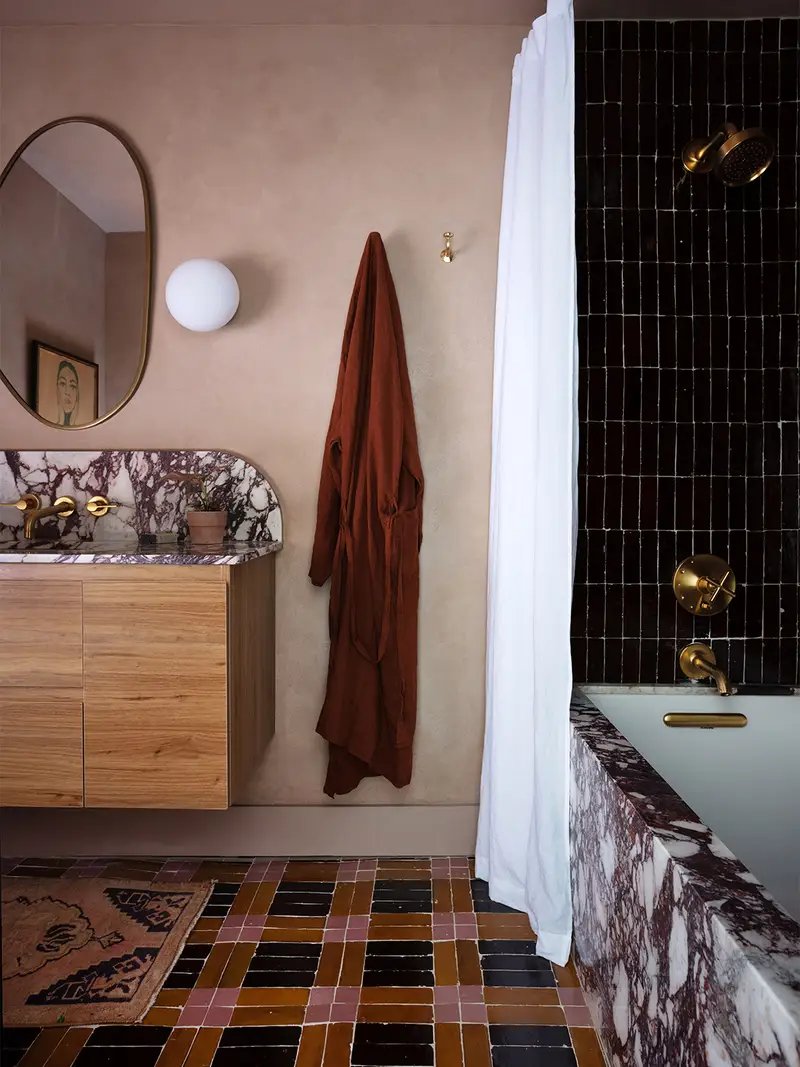
21. Mix Checkerboard Floors with Deep Earth Tones
In a room this rich with color and texture, the patterned floor tile is the element that ties it all together. It’s not a simple checkerboard; it’s a more complex pattern of black, deep brown, and a dusty pink that acts as the room’s color palette map. It establishes the sophisticated, earthy-meets-eclectic mood instantly. Every other color in the room—the black shower tile, the brown wood vanity, the pinkish-beige walls—can be found in the floor, which is why it feels so cohesive despite the bold choices.
|
📋 Copy HEX 🔗 Share |
🧹 Maintenance Reality
This bathroom’s success is a lesson in confident color mixing. The formula is: 40% deep neutrals (black and brown) + 30% warm mid-tones (the beige-pink walls and wood vanity) + 20% statement material (the purple-veined marble) + 10% metallic accent (the gold fixtures). The key is the warm undertone that runs through everything, from the pink in the floor to the gold in the mirror. It’s a sophisticated and deeply personal color story.
22. Embrace Minimalism with Neutral Toned Stone Tiles
This look, similar to the serene space in Idea #1, is perfectly suited for medium-to-large bathrooms where you want to create a calm, spa-like atmosphere. The large rectangular beige tiles on both the floor and walls create a continuous, unbroken plane that maximizes the sense of space. In a very small powder room (under 40 sq. ft.), using such large tiles can sometimes backfire, ironically making the space feel smaller because you see so few individual tiles and grout lines.
|
📋 Copy HEX 🔗 Share |
💸 Get This Look For Less
The power of this design lies in its monochromatic simplicity. By using the same light beige stone tile on every surface, the room becomes a neutral, textural shell. This lack of color variation creates a deeply calming and restful environment. The eye isn’t jumping around to different colors or patterns. Instead, it can appreciate the subtle details: the sculptural form of the tub, the dark lines of the window frame, and the warmth of the dark wood shelves. It is intentionally quiet.
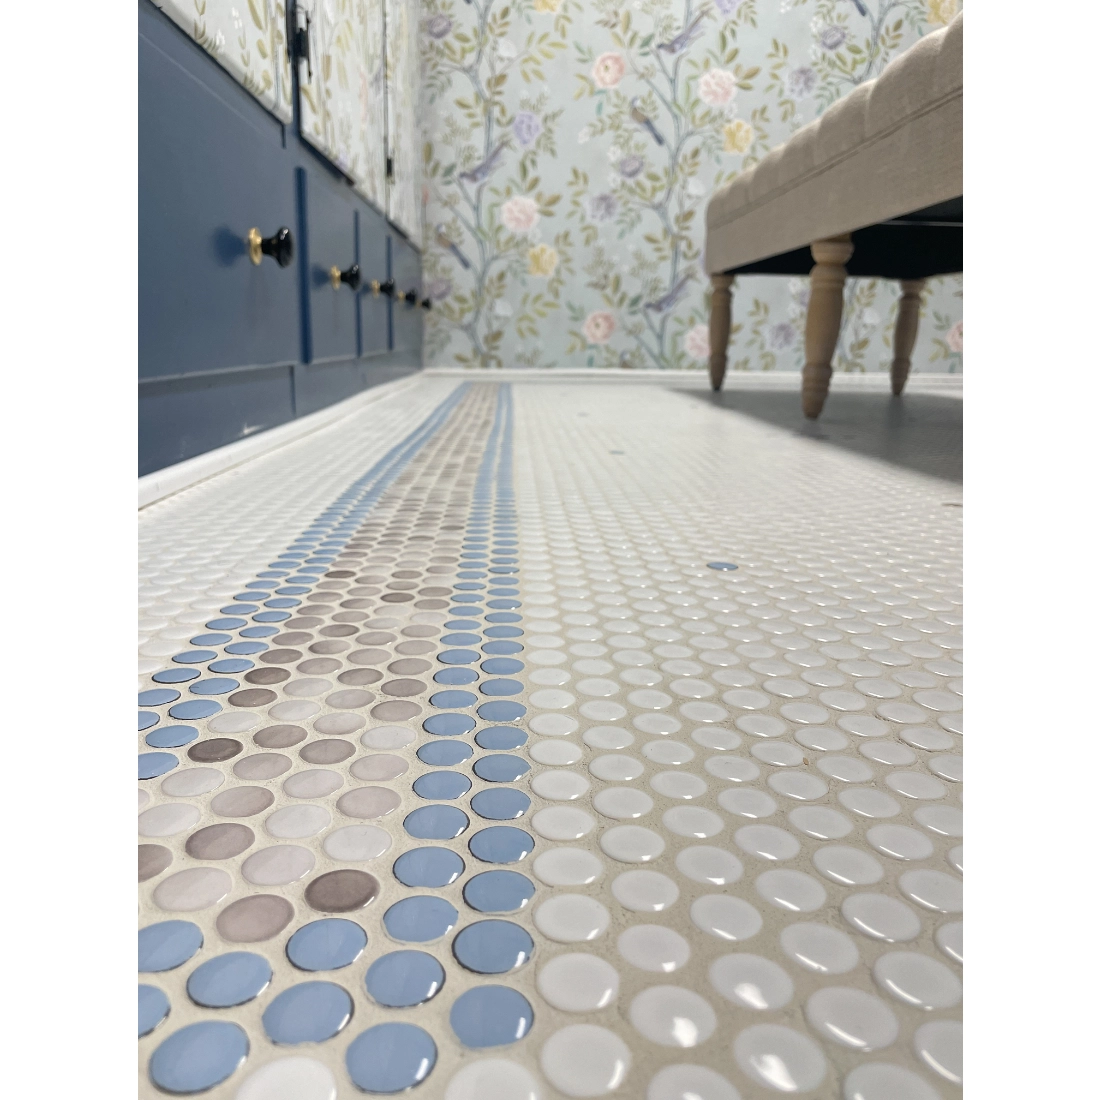
23. Customize a Floor with a Penny Tile Stripe
Creating a custom penny tile pattern is easier than it looks, as the tiles come on mesh-backed sheets. Time: 4-6 hours for a decorative stripe. Cost: $50-150 for extra tile colors.
- Lay out your main color sheets on the floor to determine placement.
- Use a utility knife to cut out the section of the mesh where you want your stripe to be.
- Pop individual penny tiles of different colors off their sheets.
- Individually place your colored tiles into the empty spaces, using a bit of thin-set on the back of each to hold it.
- Allow it to set before grouting the entire floor at once.
|
📋 Copy HEX 🔗 Share |
📐 Style Math
After a decade dominated by minimalist, large-format tiles, we’re seeing a huge resurgence of vintage and handmade-style tile. Penny rounds, along with hexagons and subway tiles, are making a major comeback. Homeowners are craving personality, character, and a touch of nostalgia. A custom detail like this penny tile stripe feels personal and unique—a welcome departure from the cookie-cutter looks that have been popular for so long. It signals a shift toward more playful and individualized design.
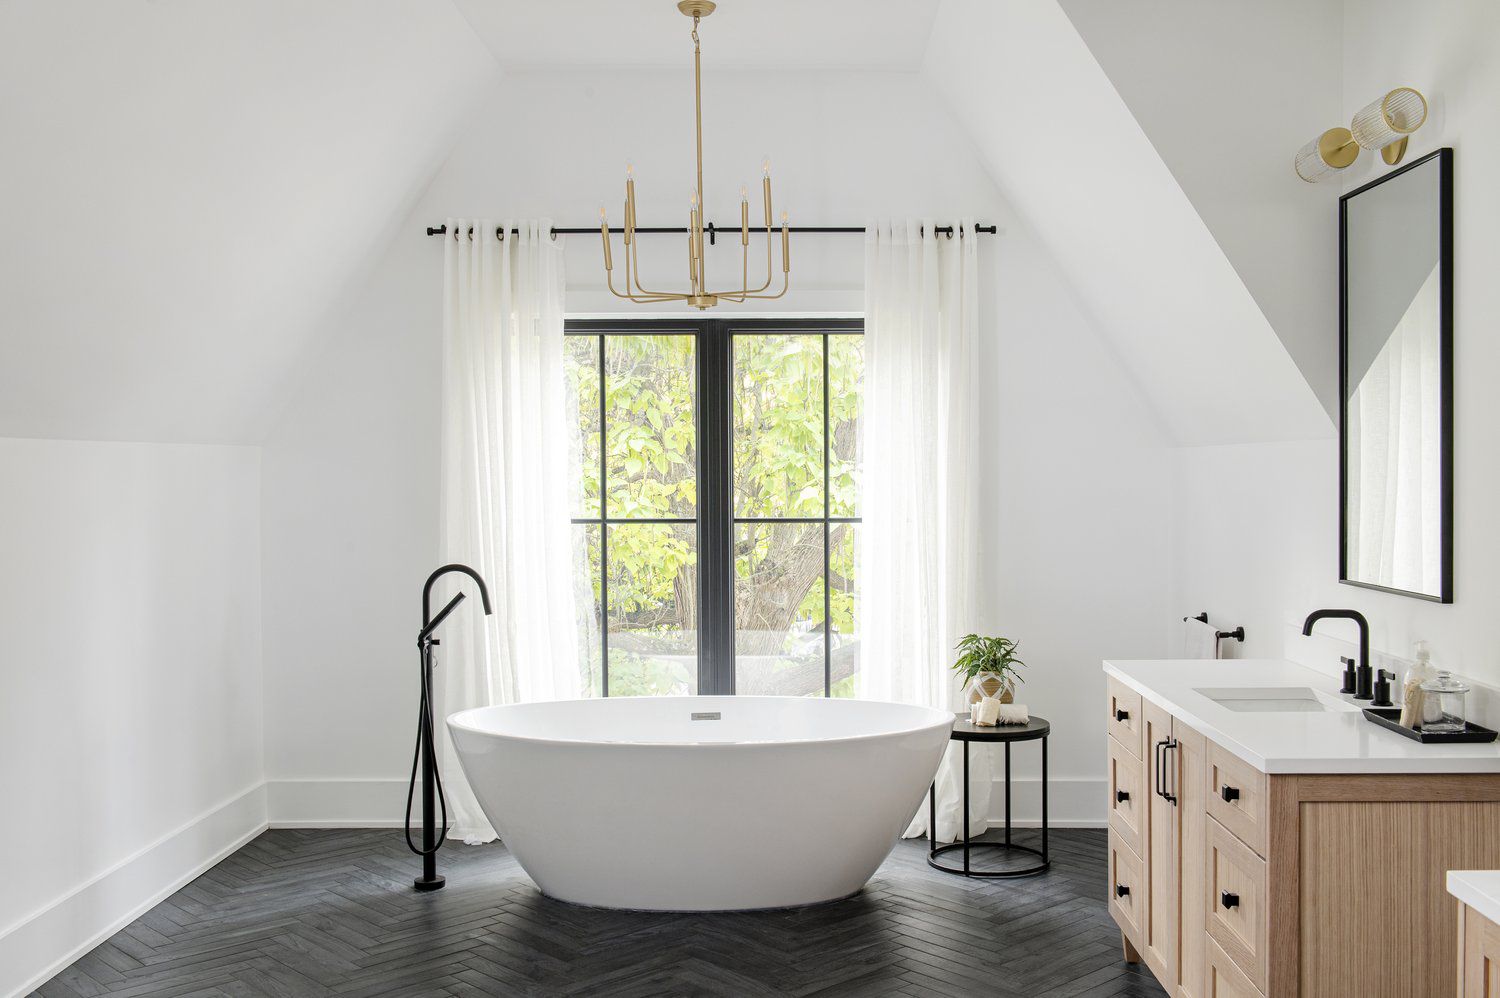
24. Contrast a Dark Herringbone Floor with Bright White Walls
This high-contrast, modern farmhouse look balances splurge-worthy tile with more common finishes. The floor is the star and the biggest investment.
- Main Furniture (Freestanding Tub, Wood Vanity): $2,500 – $6,000
- Lighting (Chandelier, Vanity Lights): $600 – $1,800
- Textiles (Curtains, Rug): $200 – $500
- Floor Treatment (Dark Herringbone Tile): $2,000 – $5,000 (Installed)
- Fixtures (Faucets, etc.): $800 – $2,000
- TOTAL: $6,100 – $15,300
- Budget alternative: Get a similar look using dark gray LVP in a herringbone pattern and more affordable fixtures to bring the total closer to $4,000.
|
📋 Copy HEX 🔗 Share |
⚠️ Real Talk
The choice of grout for a dark herringbone floor will dramatically change the final look. If you want the intricate zig-zag pattern to be the main focal point, use a contrasting light gray or white grout. This will make every single tile pop. If you want a more subtle, textural effect where the pattern is less pronounced, choose a dark charcoal or black grout that closely matches the tile color. This will create a floor that reads more as a single, textured surface from a distance.
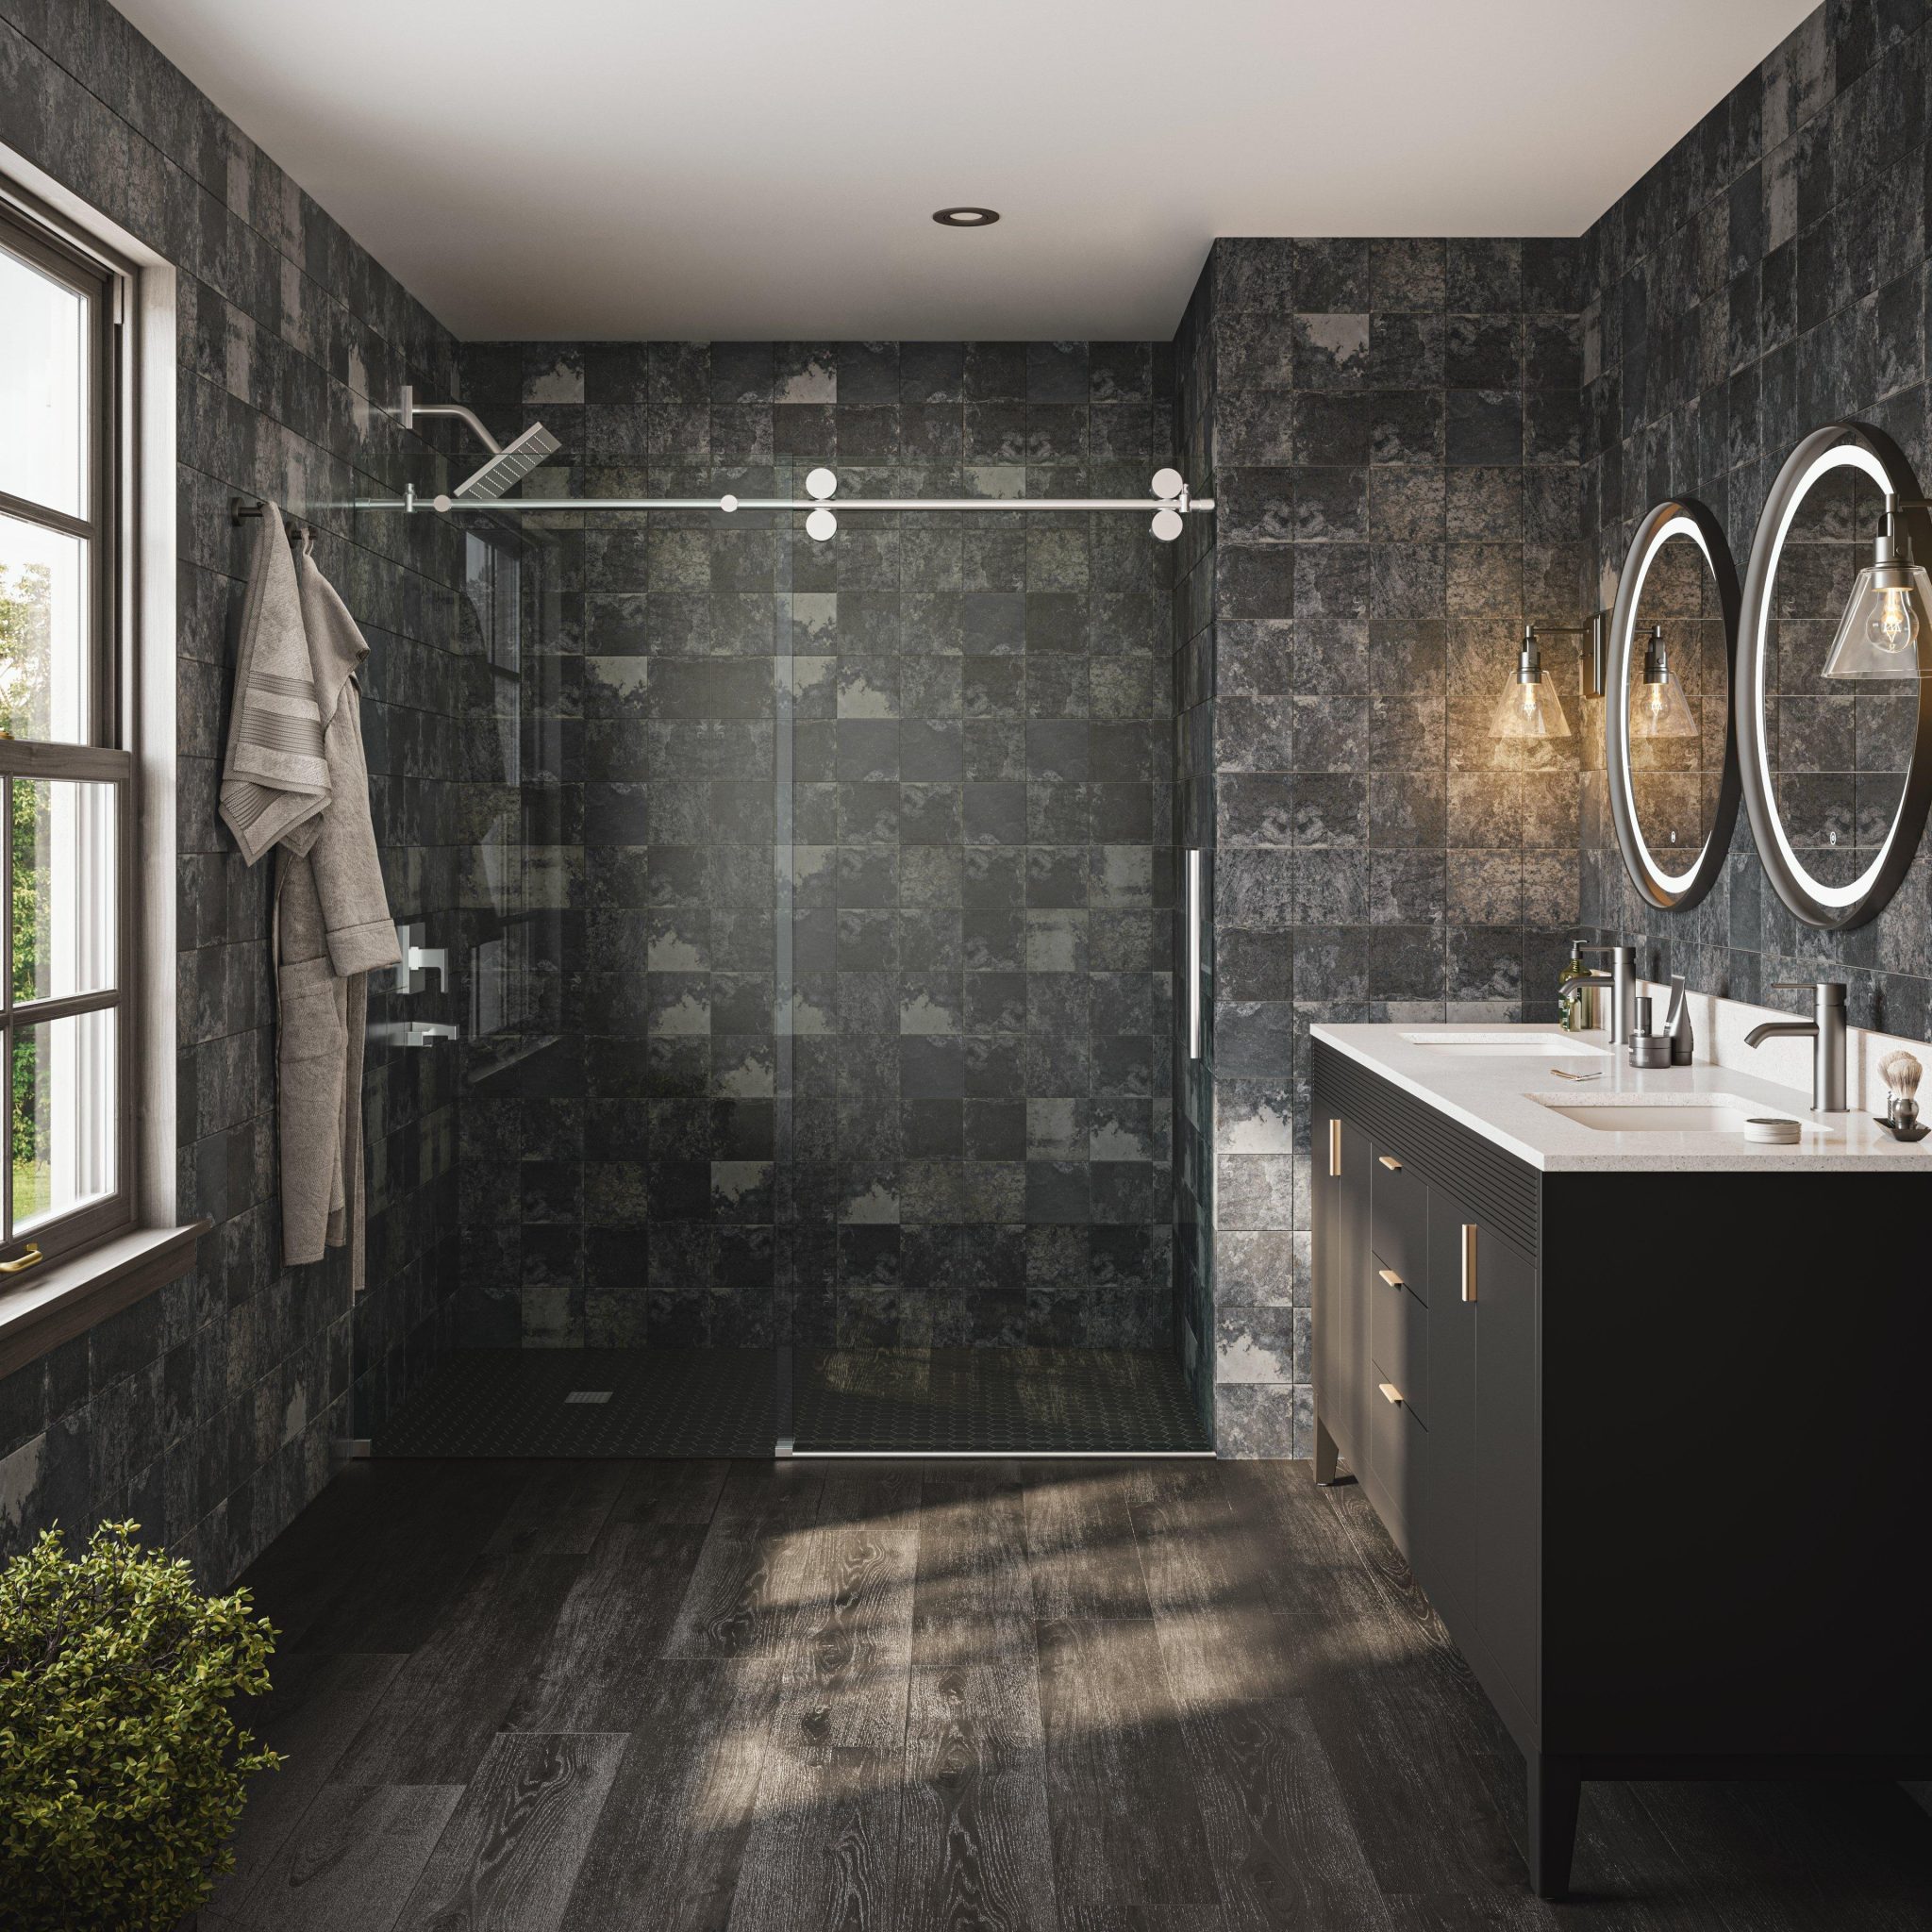
25. Go Moody with Dark Wood Floors and Charcoal Walls
A dark floor paired with dark walls is a stunningly dramatic choice, but it’s a look that absolutely requires excellent lighting to succeed. The key here is the use of large, backlit mirrors and supplemental overhead lights. Without this layered, bright lighting, the room would feel gloomy and cave-like. You must also incorporate lighter elements, like the off-white countertop, to provide visual relief. Don’t attempt this in a windowless bathroom unless you’re prepared to invest heavily in a professional lighting plan. A similar moody feel with more light is in Idea #6.
|
📋 Copy HEX 🔗 Share |
💰 Budget Breakdown
This dramatic, sophisticated aesthetic is best reserved for primary suites or larger guest bathrooms (100 sq. ft. or more). In a small powder room, the combination of dark wood floors and dark gray tiled walls would feel overwhelming and visually shrink the space. The look relies on having enough square footage to handle the visual weight of the dark surfaces without feeling cramped. The glass-enclosed shower also helps, as it doesn’t break up the sightlines.
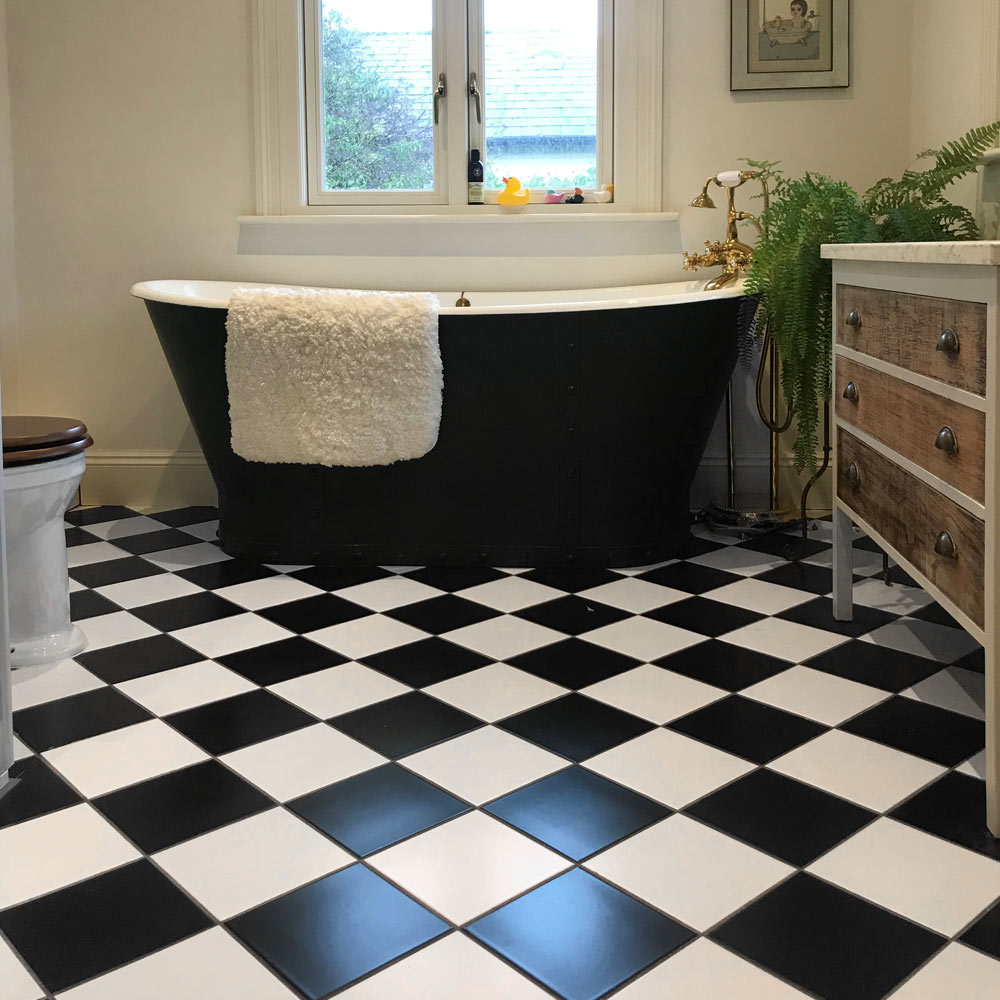
26. Make a Timeless Statement with a Checkerboard Floor
The single element that makes this bathroom unforgettable is the classic black-and-white checkerboard floor. It’s a design choice that is simultaneously bold and timeless, graphic and elegant. It has been in style for centuries for a reason. Everything else in the room—the clawfoot tub, the rustic vanity, the simple white walls—is chosen to support and complement the floor. Without it, the room would be pleasant but forgettable. With it, the room has an instant identity and a strong point of view.
|
📋 Copy HEX 🔗 Share |
💡 Designer Tip
This design is a perfect example of the power of high contrast. The sharp juxtaposition of pure black and clean white tiles creates a dynamic energy that immediately activates the space. The floor isn’t just a surface to walk on; it’s the primary design feature. Setting the square tiles on a diagonal (in a harlequin pattern) is a clever trick that makes the room feel wider and even more dynamic than a standard grid layout. Compare this classic take with the more modern version in Idea #28.
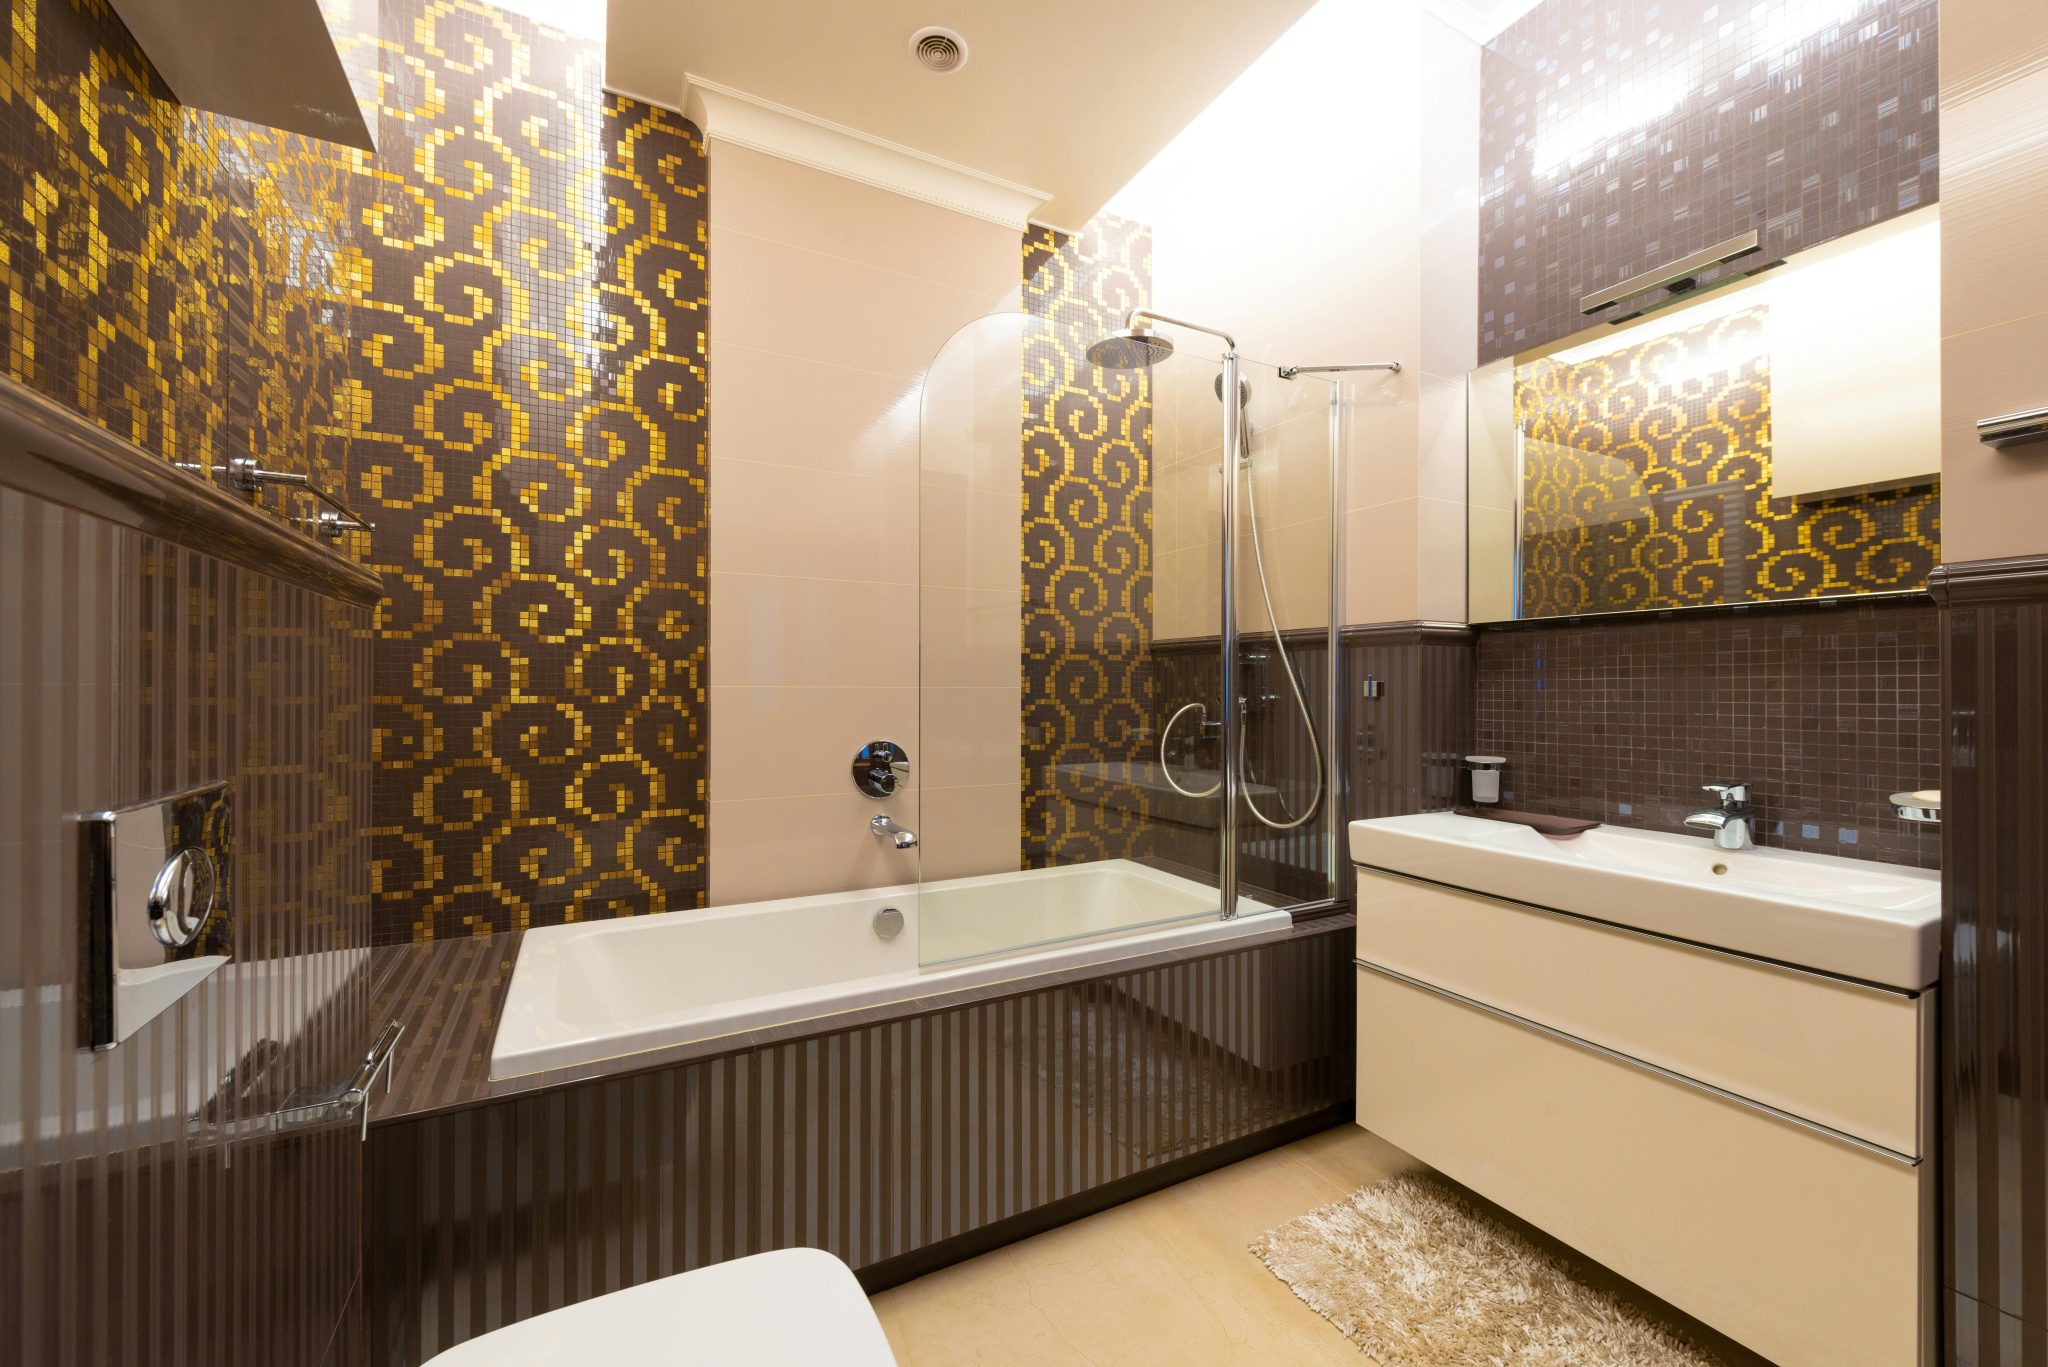
27. Embrace Luxury with Brown and Gold Mosaic Tiles
Glass mosaic tile is beautiful but labor-intensive to install, driving up the price. For a similar opulent feel on a budget, consider wall panels or stencil kits. Companies now offer large, waterproof wall panels printed with high-resolution mosaic patterns that can be installed over existing tile for a fraction of the cost. Alternatively, for a smaller area like a backsplash, you can use metallic gold and brown paints with a Moroccan or swirling pattern stencil to mimic the look for under $100.
|
📋 Copy HEX 🔗 Share |
✅ Before You Start
The weak point of any mosaic tile installation is the grout. With thousands of tiny tiles, you have a huge surface area of grout lines that can attract dirt, soap scum, and mildew. To keep a mosaic wall or floor looking new, sealing the grout immediately after installation is non-negotiable. It should then be deep cleaned and resealed annually. Using an epoxy grout from the start is a more expensive but far more durable and stain-resistant option that is worth considering for a shower area.
28. Try a Modern Classic with Hexagon Mosaic and Navy
A detailed mosaic floor like this requires precision. Before you commit, check these items off your list:
- Is your subfloor perfectly level? Mosaic sheets will highlight any dips or bumps in the floor, so self-leveling compound may be needed.
- Have you ordered enough tile? Patterned mosaics often require 15-20% overage for cuts and mistakes.
- Have you planned your layout? The pattern should be centered in the room, often starting from the doorway or the main focal wall.
- Will the pattern repeat be obvious? Ask the supplier for photos of a large installation to see how it looks at scale.

|
📋 Copy HEX 🔗 Share |
⭐ The One Thing
This look is a beautiful exercise in the 60-30-10 rule of color. The floor, walls, and tub provide the 60% neutral base (mostly white with black accents). The handsome navy blue vanity and trim are the 30% secondary color, adding weight and sophistication. Finally, the brass and gold fixtures and hardware serve as the 10% accent, bringing in warmth and a touch of glamour that ties the whole scheme together. It’s a formula that feels balanced, timeless, and completely intentional.
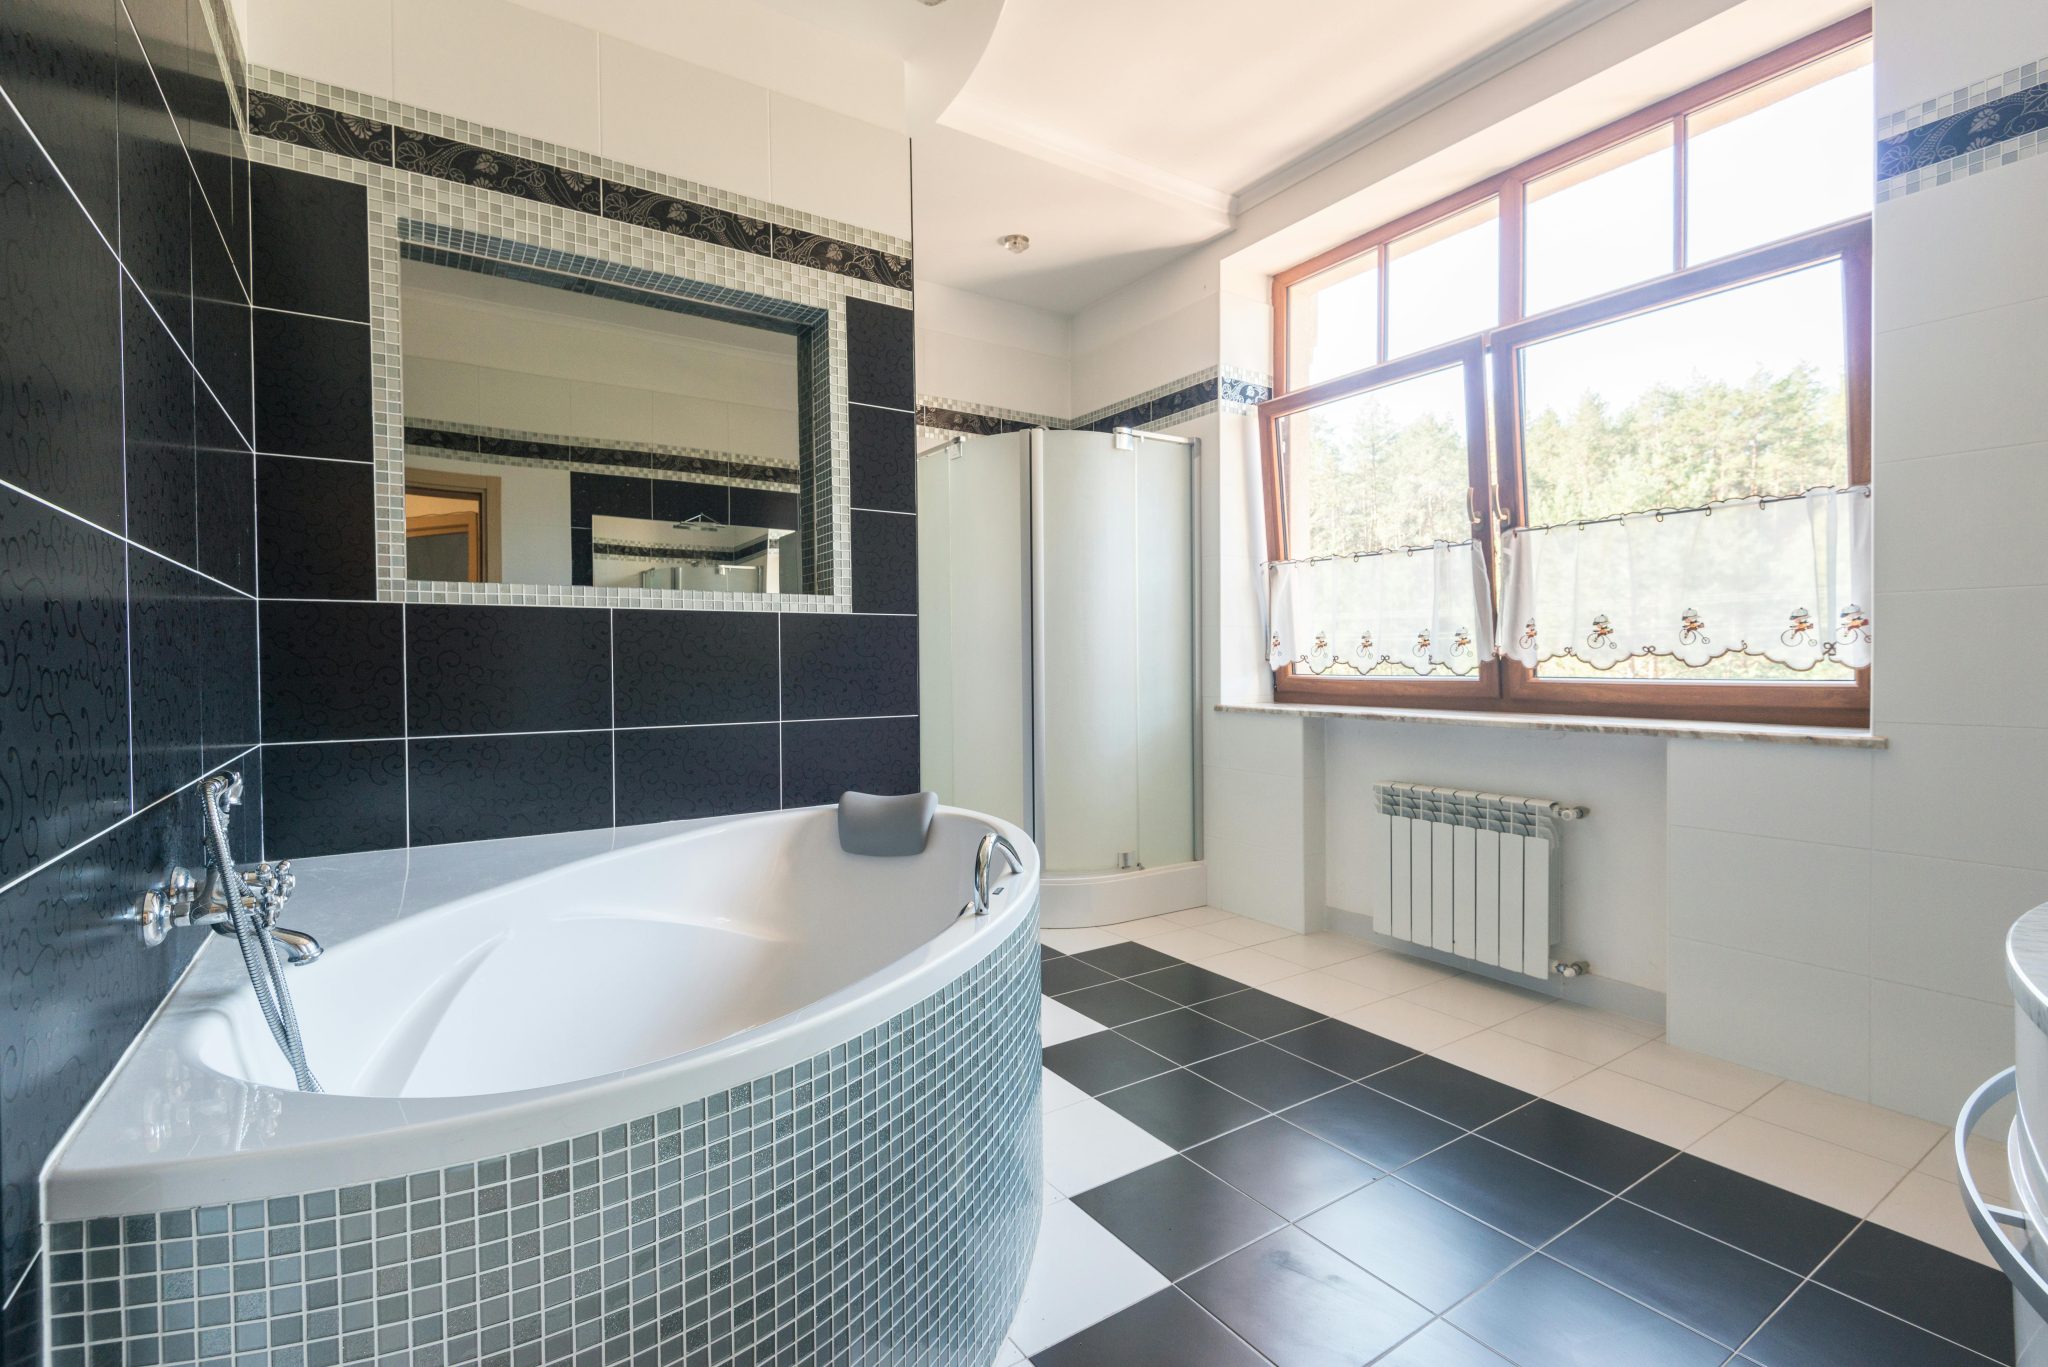
29. A Modern Take on the Black and White Checkerboard Floor
The size of the tile in a checkerboard pattern has a huge impact on the final look. For a more modern, graphic feel like this, use larger tiles (12×12 inches or bigger). This results in fewer grout lines and a bolder, less busy pattern. For a more classic, vintage, or
|
📋 Copy HEX 🔗 Share |
Your Floor Is the Foundation. Now, Build Your Story.
That perfect bathroom you’ve been pinning is closer than you think. As you’ve seen through these 29 ideas, the floor is the single most impactful surface in the room. It sets the tone, defines the style, and serves as the foundation for every other choice you’ll make. Pick the idea that speaks to you, start gathering samples, and get ready to build your own beautiful space from the ground up.
Ready for more daily inspiration? Follow us on Pinterest for the best in home design, delivered right to your feed.