34+ Jaw-Dropping DIY Ornament Ideas You Need to Try This Season to Elevate Your Holiday Decor

You know that feeling when you finally find the DIY ornament idea that looks exactly right for your tree—and then you realize it took three afternoons and a glue gun injury? Most roundups for 2026 skip the satisfying craft part and just show glossy finished trees.
We spent serious time browsing Michaels, Joann, and Etsy to bring you only what’s worth your attention this year. You’ll find 34 curated ideas spanning handcrafted felt, painted glass, natural rustic, and playful kawaii—with budget and luxury versions compared side by side, from $3 to $45. Ornament personalization exploded after nostalgia core hit Pinterest in late 2025, and 2026 is all about pieces that feel like they were made by a beloved aunt, not mass-produced. Pin this guide for later—your future self will thank you when it’s time to actually do this.
1. Handcrafted Quilted House Ornaments with Festive Colors
The beaded roofline is the secret here—those tiny colorful beads turn a simple quilt block from flat fabric art into a dimensional house silhouette. Without them, these squares would just read as mini quilts. The log cabin pattern already gives structure, but the beads define the roofline and add the kind of imperfect charm that makes a handmade ornament feel alive. It’s the difference between a craft project and a keepsake.
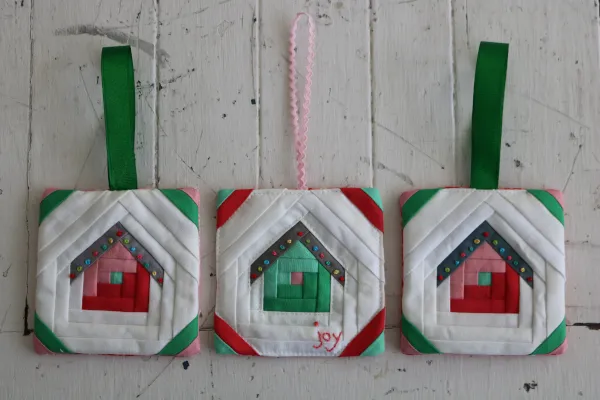
Use a 1/4-inch seam allowance when piecing the log cabin strips, but don’t obsess over perfect corners. Slightly wonky angles feel more folk-art and forgiving. For the beads, thread them onto embroidery floss before attaching to the roof edge—this keeps them evenly spaced and prevents glue blobs. If you want the ‘joy’ text look, use a tiny backstitch with two strands of floss, not a pen.
2. Collection of Handmade Felt Christmas Holiday Ornaments
- Felt sheets (wool blend): $8–$15
- Embroidery floss and beads: $5–$10
- Stuffing and sewing needles: $3–$6
- Total materials for 7 ornaments: $16–$31
- Budget alternative: acrylic craft felt at $0.50/sheet brings total under $12
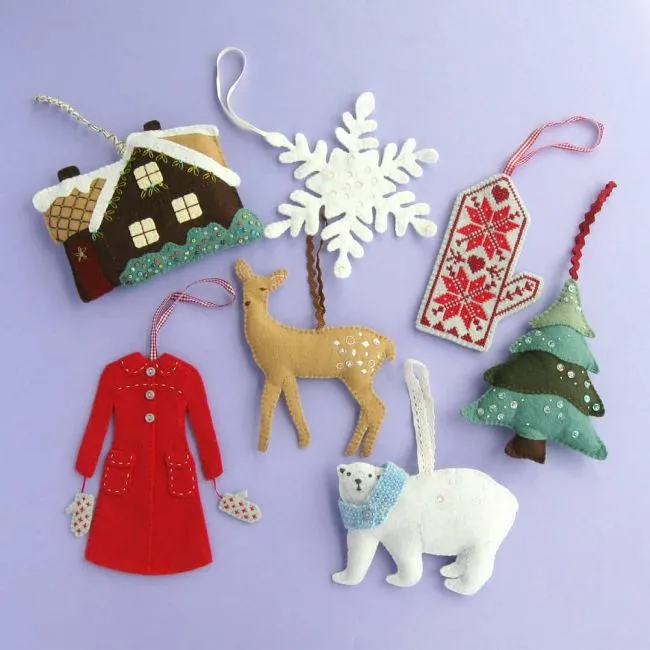
These felt ornaments are forgiving for beginners, but don’t expect them to survive a toddler tug-of-war. Small beads can pop off if not knotted tightly—use a double knot and a dot of fabric glue for security. Also, light purple surfaces in photos can trick you: the actual felt colors are more muted in person, so buy one sheet more than you think you need if you’re matching a tree palette.
3. Blue Craft Stick Star Ornament with Colorful Embellishments
- Paint 5 jumbo craft sticks deep blue and let dry (30 min).
- Arrange into a five-point star, overlapping tips, and secure with hot glue or wire.
- Layer acrylic flower gems, snowflake cutouts, and beads onto the center area.
- Wrap twisted wire around the center to hold everything and create a hanging loop.
- Add a glittery gold star on top for contrast. Time: 45–60 min. Cost: $6–$10.
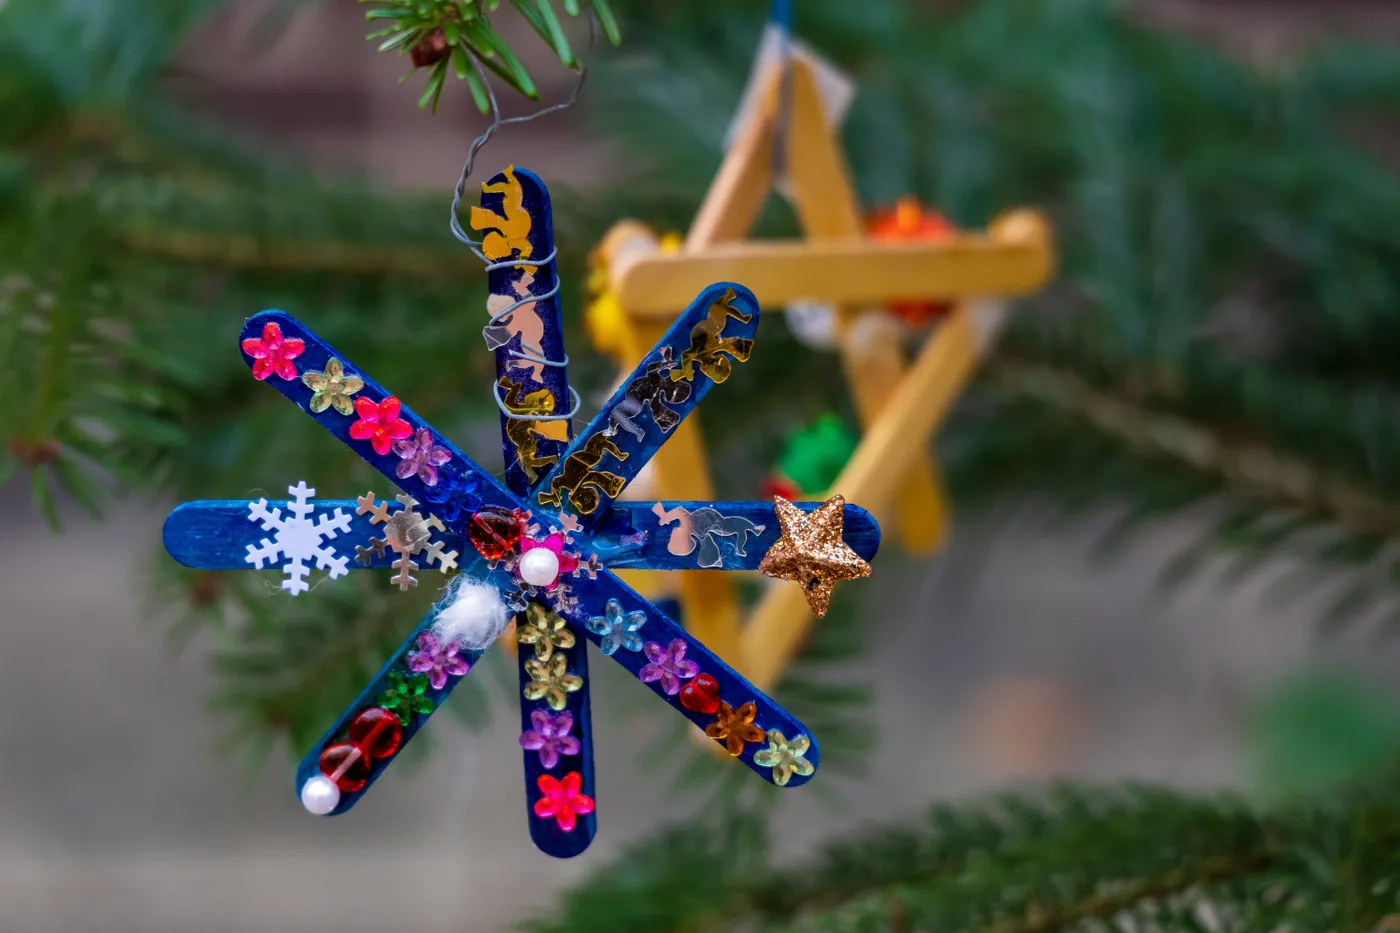
The genius here is restraint through chaos—the deep blue base anchors a riot of translucent color, so nothing fights for attention. The twisted wire isn’t just functional; it adds a mechanical, vintage-science-fair texture that balances the precious gems. If you swap the blue for black or silver, the whole mood shifts, but the layered center remains the star’s heartbeat.
4. Textured Reindeer Ornament with Red Nose on Frosted Tree
For that textured light-brown surface, use a dense wool roving or a coarse felted wool sheet, not smooth felt. The roughness is what makes the reindeer read as cozy woodland rather than cookie-cutter. Attach the red bead nose with a strong fabric glue, but position it slightly off-center—perfect symmetry can look factory-made, while a tiny offset feels hand-carved.
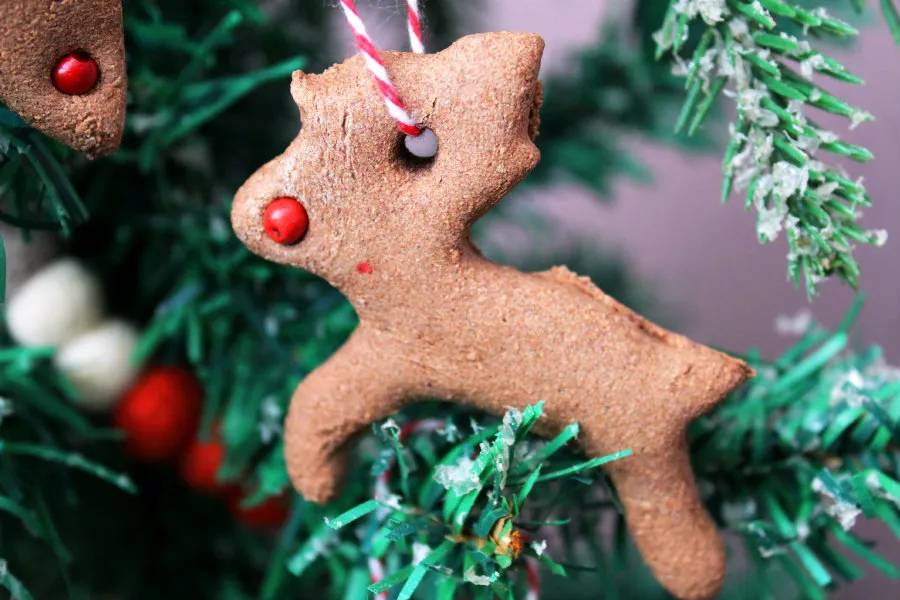
This one fits squarely into 2026’s ‘craft-core’ trend that’s taken over holiday decorating. After years of minimalist metallics, people are craving ornaments that show the maker’s fingerprints—literally. The red-and-white striped string is a nod to retro candy canes and adds a playful contrast against frosted pine. Compare its handmade charm with the more polished Idea #7 to see the spectrum of DIY finishes.
5. Handmade Beaded Felt Star and Pastel Rainbow Ornament
This design is 70% soft pastel felt, 20% silver beadwork, 10% white negative space. The star’s white base lets the silver beads act like jewelry, while the pastel rainbow keeps the palette from going saccharine. Swap the rainbow for a single arch in ecru and you get a more minimalist Scandinavian look; swap the star for a heart and it instantly becomes Valentine’s adjacent.
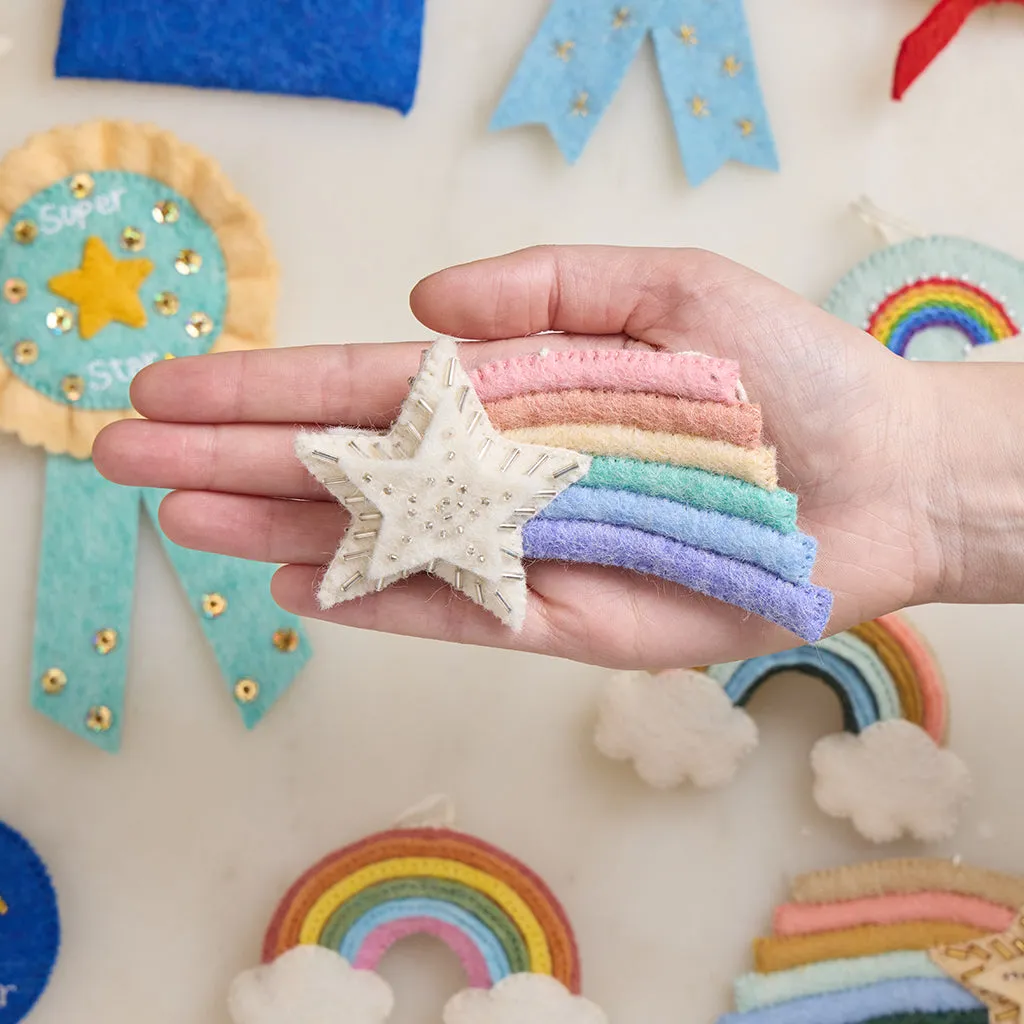
holding this together is the hand holding it—not literally, but the scale. The ornament is small enough to feel dainty but large enough that the beads register from across the room. If you scaled it up 30%, the bead-to-felt ratio would tip too sweet. Keep the star’s silver beads clustered, not scattered, so they read as intentional shimmer rather than glitter fallout.
6. Hand-held Felt Rainbow and Beaded Star Ornament
You don’t need a full craft store run for this one. Grab felt sheets from Walmart at $0.50 each, a bag of gold cylindrical beads from Amazon for $6, and clear round beads from a dollar store pack. The entire ornament can come together for under $10. Even cheaper: use aluminum foil cut into tiny tubes for the gold beads—it’s surprisingly convincing from a foot away.
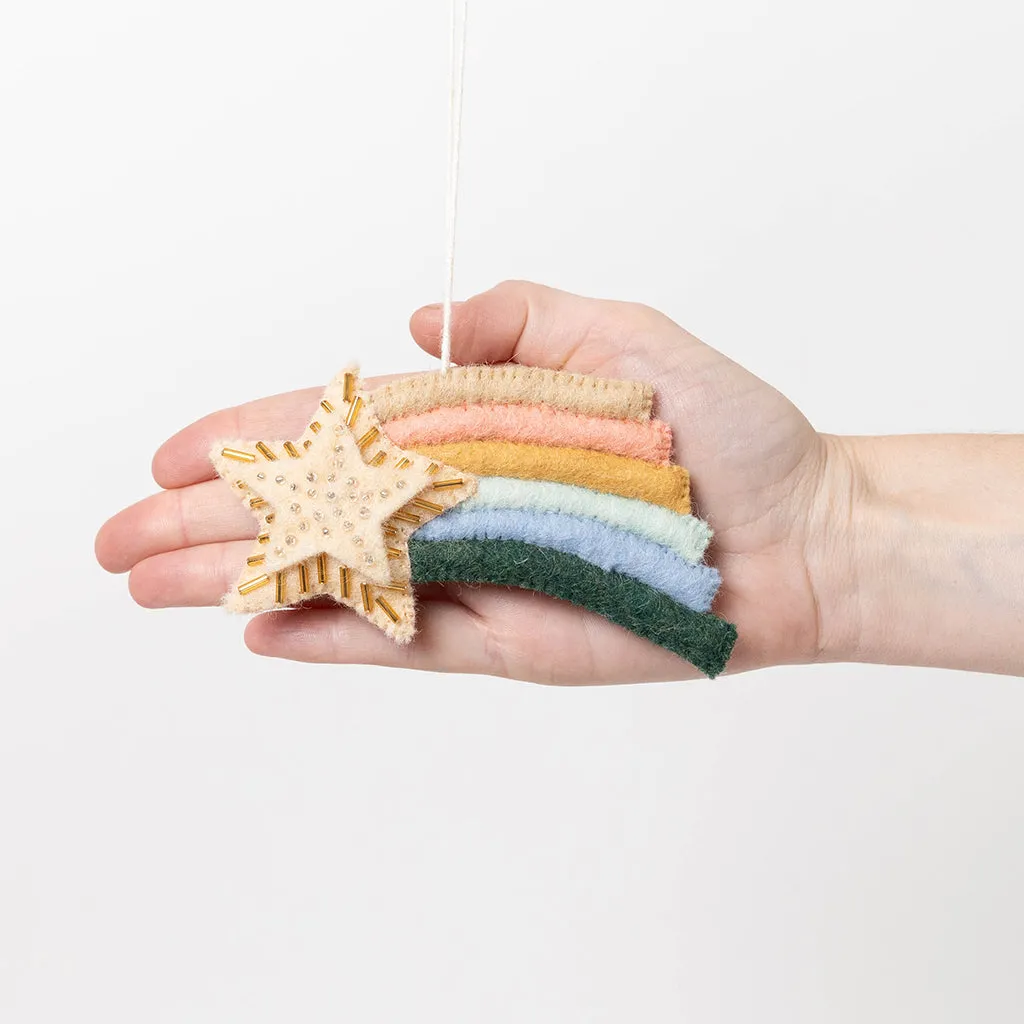
What makes this work is the tension between curved rainbow stripes and the rigid star. The rainbow’s five bands create a gentle, optimistic arc, while the beaded star adds contrast in both texture and direction. The gold cylindrical beads are the unsung heroes—they catch light in a way flat embroidery never could, giving the star a dimensional, almost mosaicked surface.
7. Hand-painted Floral Ornament with Gold Accents on Evergreen Branches
When painting on glass, use enamel acrylic paint and a fine liner brush for the gold outlines. Let the pink flowers dry completely before adding gold details—rushing this step leads to muddy edges. A tiny drop of flow medium will help the paint glide without streaks. Seal with a clear glossy varnish meant for glass; it’s what keeps the gold from tarnishing by next year.
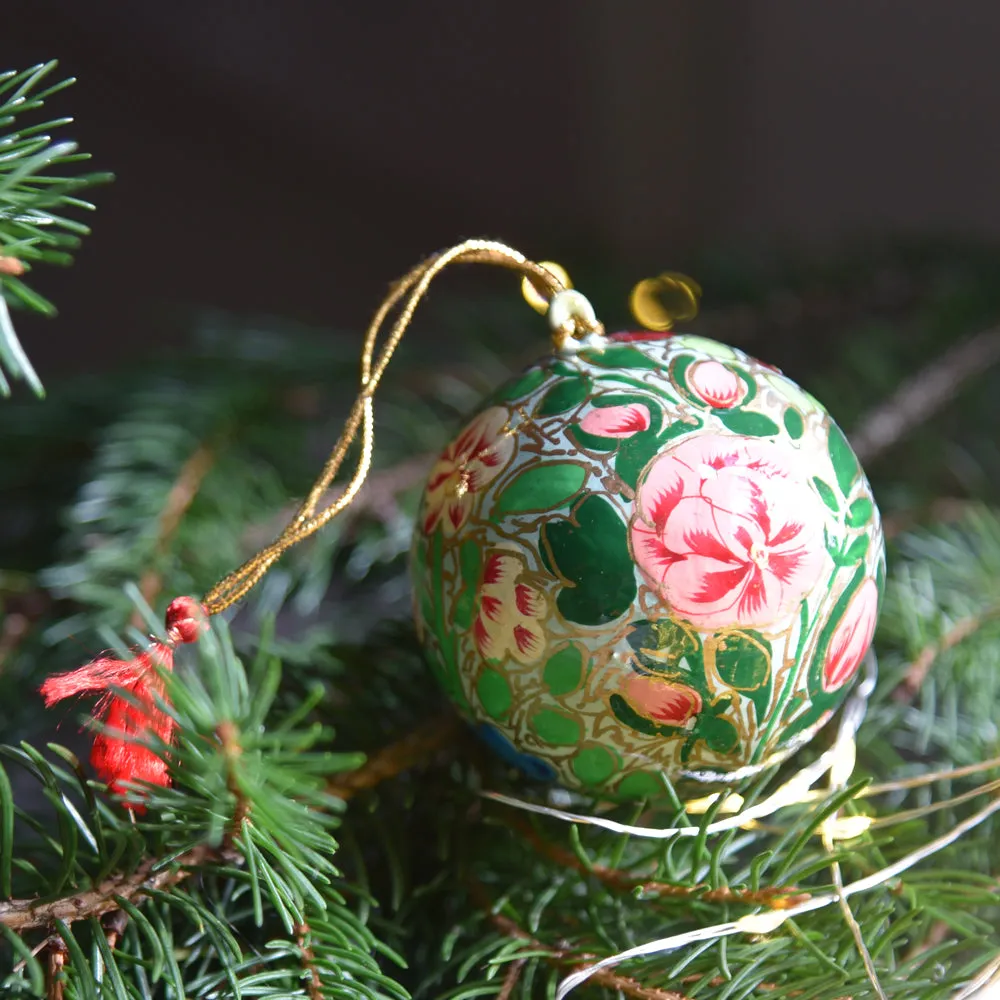
Glass ornaments with painted details need careful storage. Wrap each in acid-free tissue and store in a hard box, not a soft bin—pressure from other ornaments can scratch the paint. The gold cord with red tassel will fade slightly if exposed to direct sunlight, so keep this one away from a south-facing window on the tree. A quick wipe with a dry microfiber cloth is all it needs before hanging.
8. Handmade Light Beige Star Ornament on Green Fir Branch
This star works beautifully on a tree 6–8 feet tall, but on a tabletop tree it will look oversized and lumpy. Aim for a branch with some space around it—too dense a cluster and the beige star disappears. The six-pointed shape needs at least 4–5 inches of clear branch to hang gracefully, so place it on an outer limb, not tucked near the trunk.
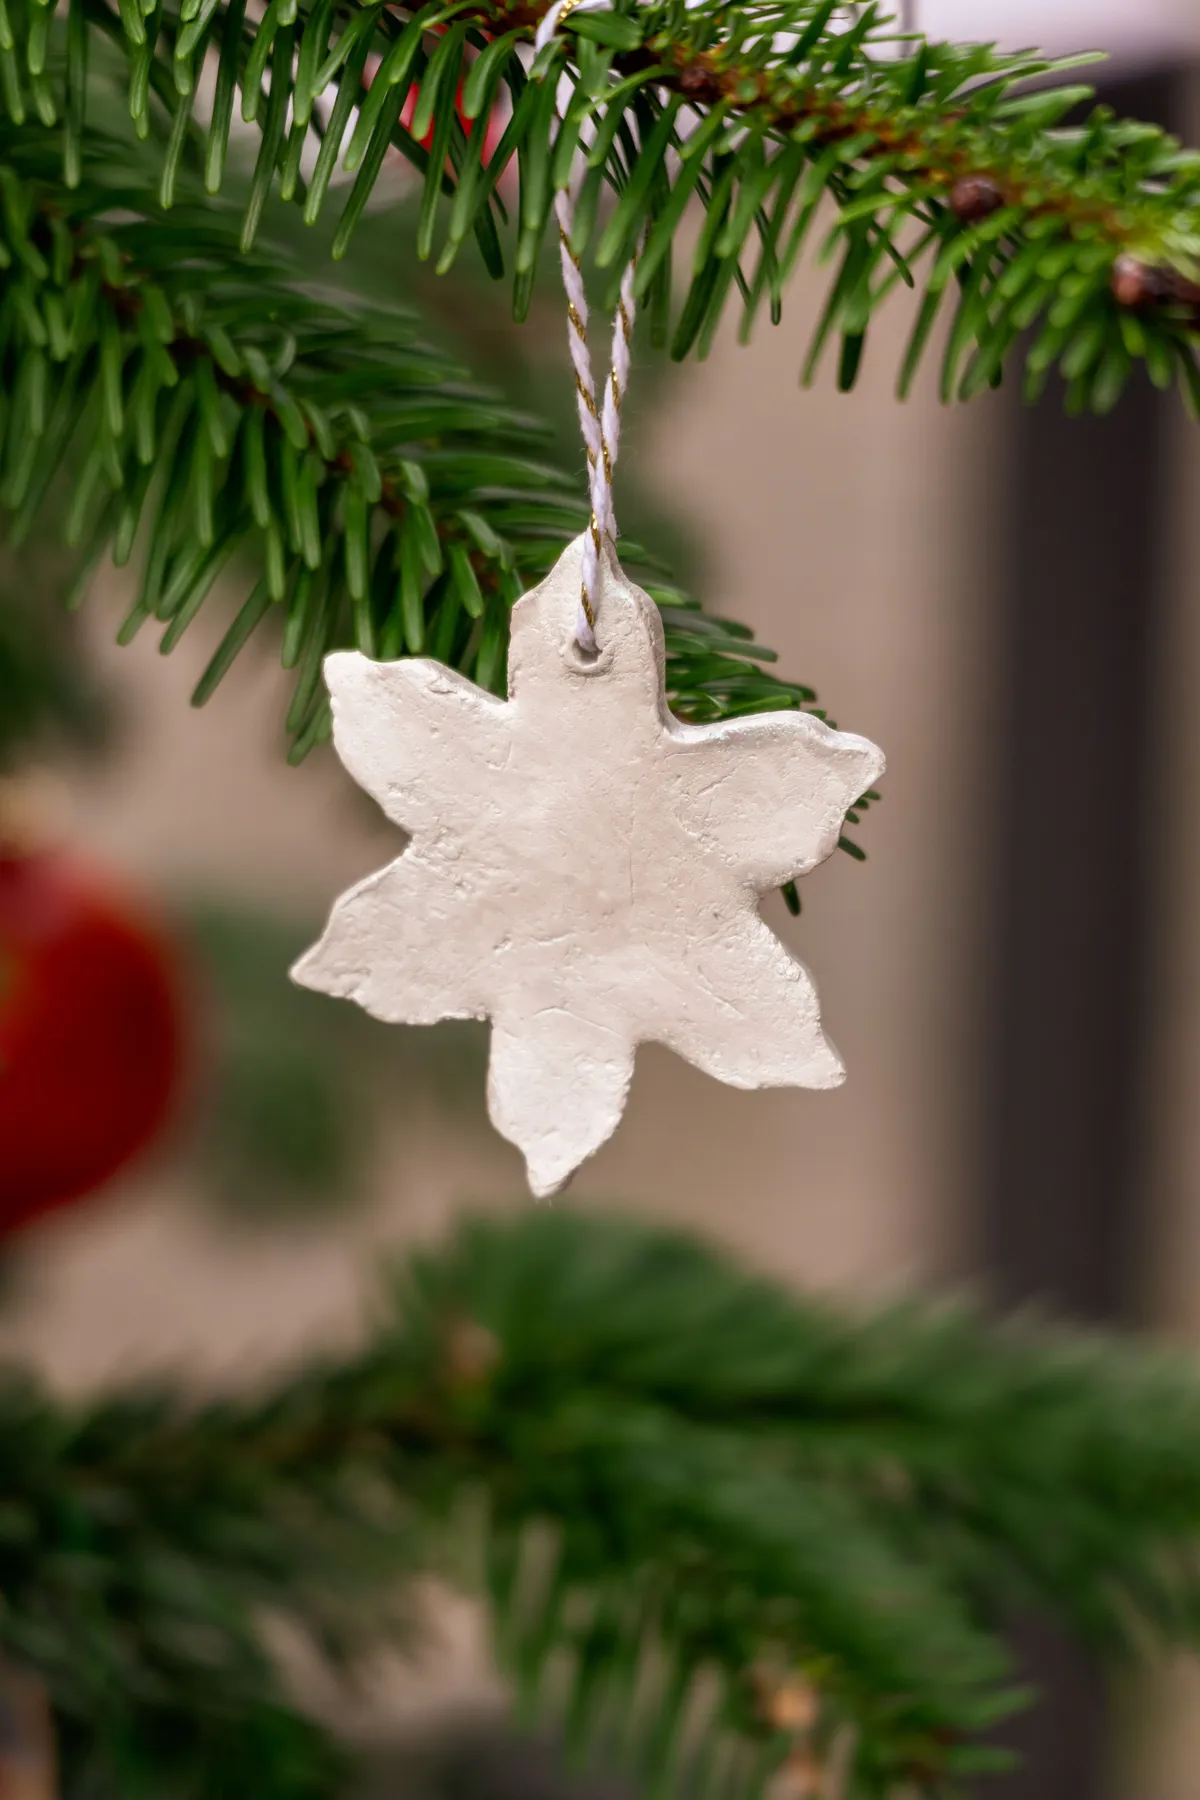
The matte, slightly porous texture of the clay or dough is the whole story here. It absorbs light rather than reflecting it, which makes it feel ancient and handmade—like something pulled from a Scandinavian winter market. The white-and-gold twine hanger is a masterstroke: it introduces a hint of festivity without stealing attention from the star’s rustic surface.
9. Hand-painted Ornament with Girl in Blue Dress and Large Bow
Narrative ornaments are having a huge moment in 2026 because people want their trees to tell a story, not just sparkle. This hand-painted scene of a girl walking toward a brick archway feels like a page from a vintage storybook. It’s the antidote to mass-produced baubles that all look alike. Collectors are specifically hunting for pieces with a single focal character and a strong sense of place.
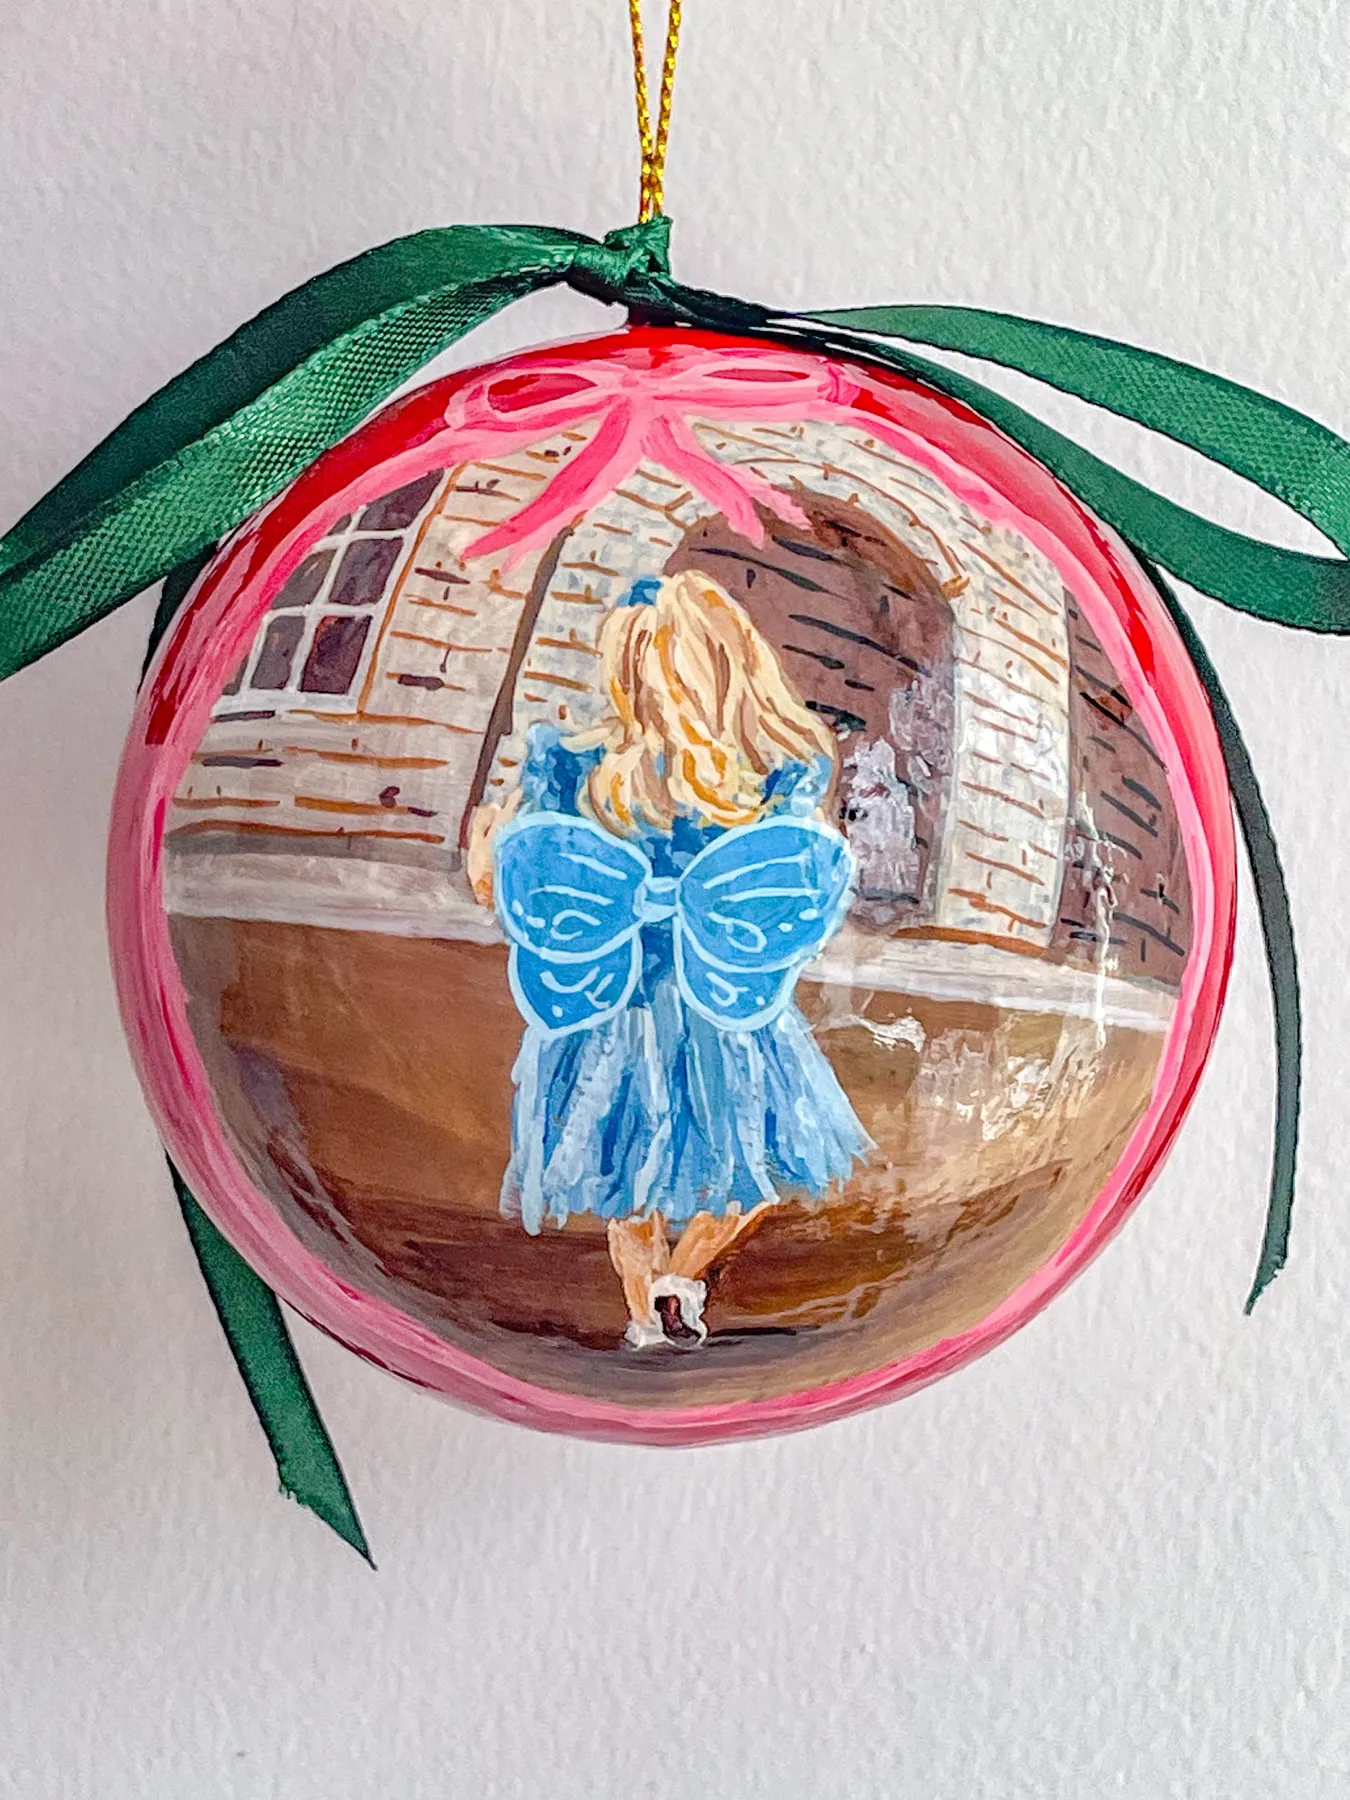
A word of caution: the dark green ribbon and gold string hanger are delicate. Don’t hang this ornament on a branch that gets brushed against often, or the bow will fray. The red painted border is lovely but can chip if knocked, so add a thin coat of clear nail polish over the rim for extra protection. Also, clear ornaments show every fingerprint—handle by the hanger only.
10. Felt Kawaii Pizza Slice Ornaments on a Green Christmas Tree
This recipe is 60% cream felt base, 20% red pepperoni spots, 15% brown crust edge, 5% tiny black eyes. The kawaii faces do the heavy lifting—two dots and a tiny mouth instantly anthropomorphize a triangle. Swap pizza for cookies, tacos, or strawberries using the same face formula and you have a whole food-themed tree. Add a tiny blush dot under each eye with pink fabric paint for maximum charm.
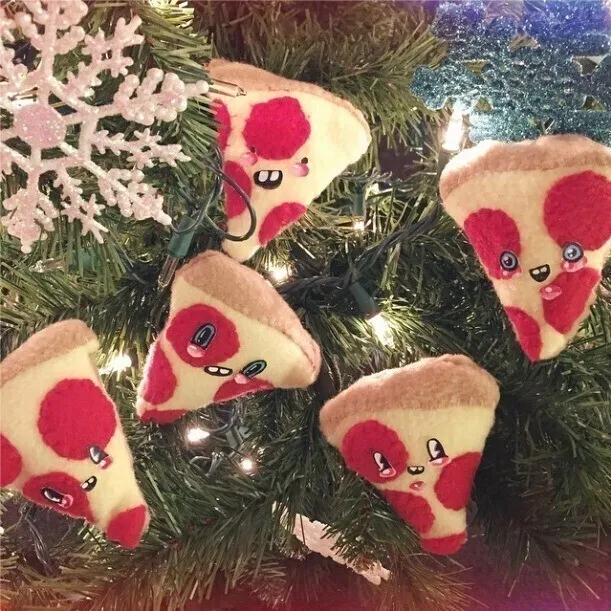
You can replicate this vibe for under $8. Use stiffened craft felt from Dollar Tree, cut triangles with pinking shears for a zigzag crust edge, and glue on red felt circles. For the faces, grab a pack of adhesive googly eyes and a fine-tip fabric marker. No sewing required—hot glue works fine for ornaments that hang, not play. Compare with Idea #11 for another playful glitter alternative.
11. DIY Glitter Paw Print Ornaments with Festive Ribbons
- Roll out air-dry clay 1/4 inch thick and cut circles with a cookie cutter.
- Press a dog or cat paw firmly into the center to create the print.
- Let dry 24 hours, then paint the ornament white or light blue.
- Fill the paw print with glitter glue or paint the print with glue and sprinkle glitter.
- Thread a coordinating ribbon through the pre-made hole and tie a small bow. Time: 30 min active + drying. Cost: $5–$9.
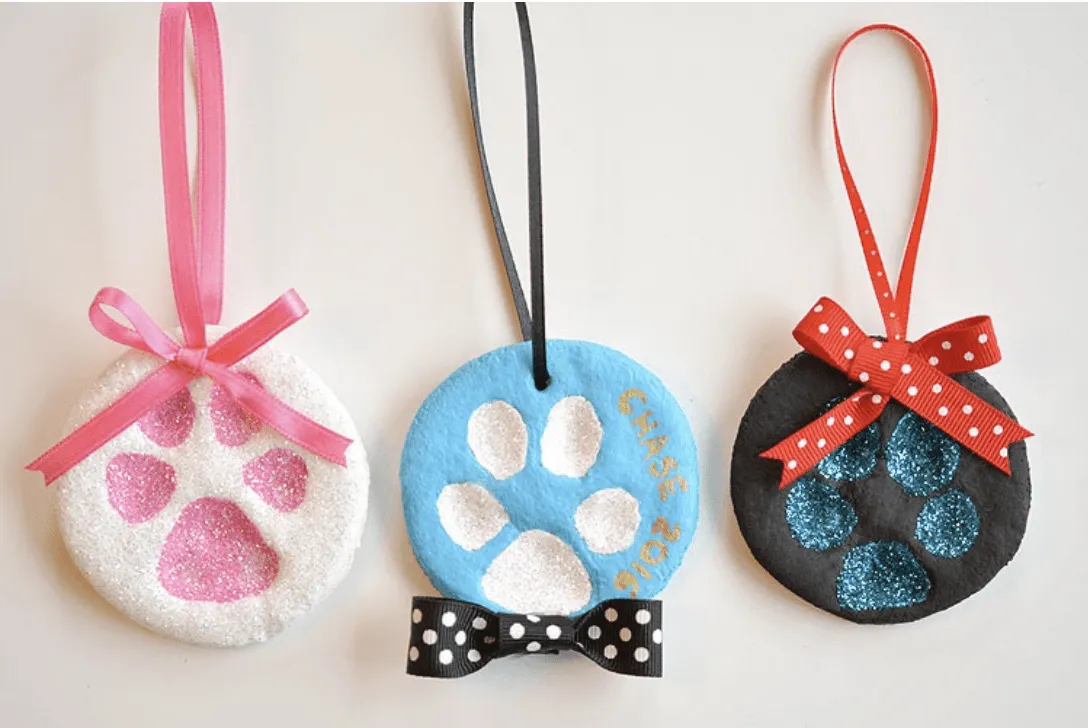
The success of this design is the contrast between the matte clay surface and the concentrated glitter inside the print. The glitter becomes a jewel-like focal point rather than sparkly noise. The ribbon hanger and bow add softness, which keeps the ornament from feeling like a plastic tag. Choose glitter colors that echo the ribbon for a pulled-together look—pink glitter with pink polka dot ribbon is perfection.
12. Handmade Felt Car Ornament with Peach Flowers and Rose Petals
For the peach felt flowers, cut five small circles per flower, fold each in half twice, and glue the points together to form a little rosette. This gives a dimensional, soft petal effect that flat felt can’t match. Add a tiny white bead in the center of each flower with a dab of tacky glue. The grey window stitching should be done with a single strand of embroidery floss using a running stitch—don’t backstitch too tightly or the felt will pucker.
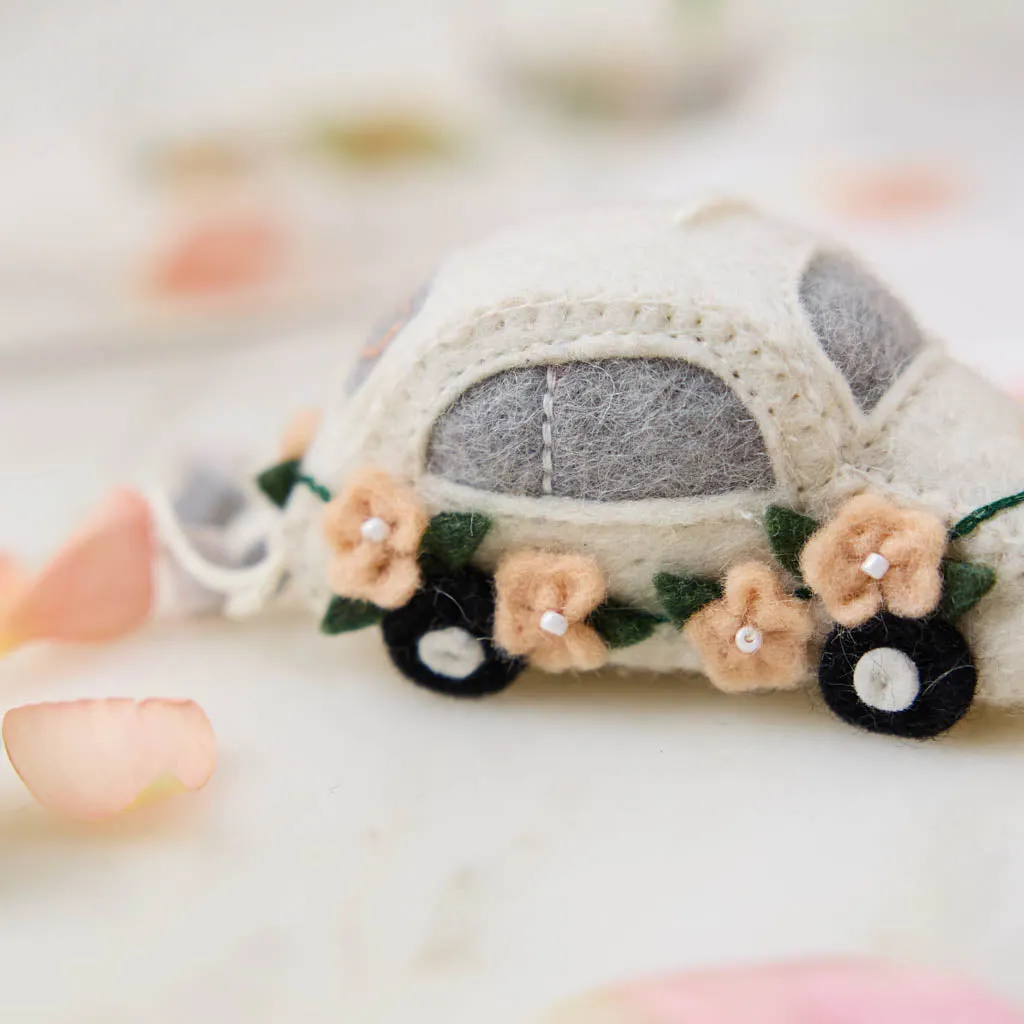
Felt ornaments are surprisingly sturdy, but the delicate peach flowers can crush if stored under weight. Give this one its own little box or hang it on the tree in a spot where it won’t get bumped. The scattered rose petals in the photo are a styling choice; you don’t need to recreate them on the tree. A lint roller is your friend for removing dust without pulling off beads.
13. Gold Wire Star Ornament with Assorted Beads
This design is 80% gold wire structure, 15% clear and white beads, 5% light blue accents. The wire is the architecture; the beads are the jewelry. If you swap gold for copper, the whole piece warms up into a more rustic, desert palette. Swap the light blue beads for deep burgundy and it becomes a moody winter star. The integrated hanging loop is a clever touch—no separate finding needed.
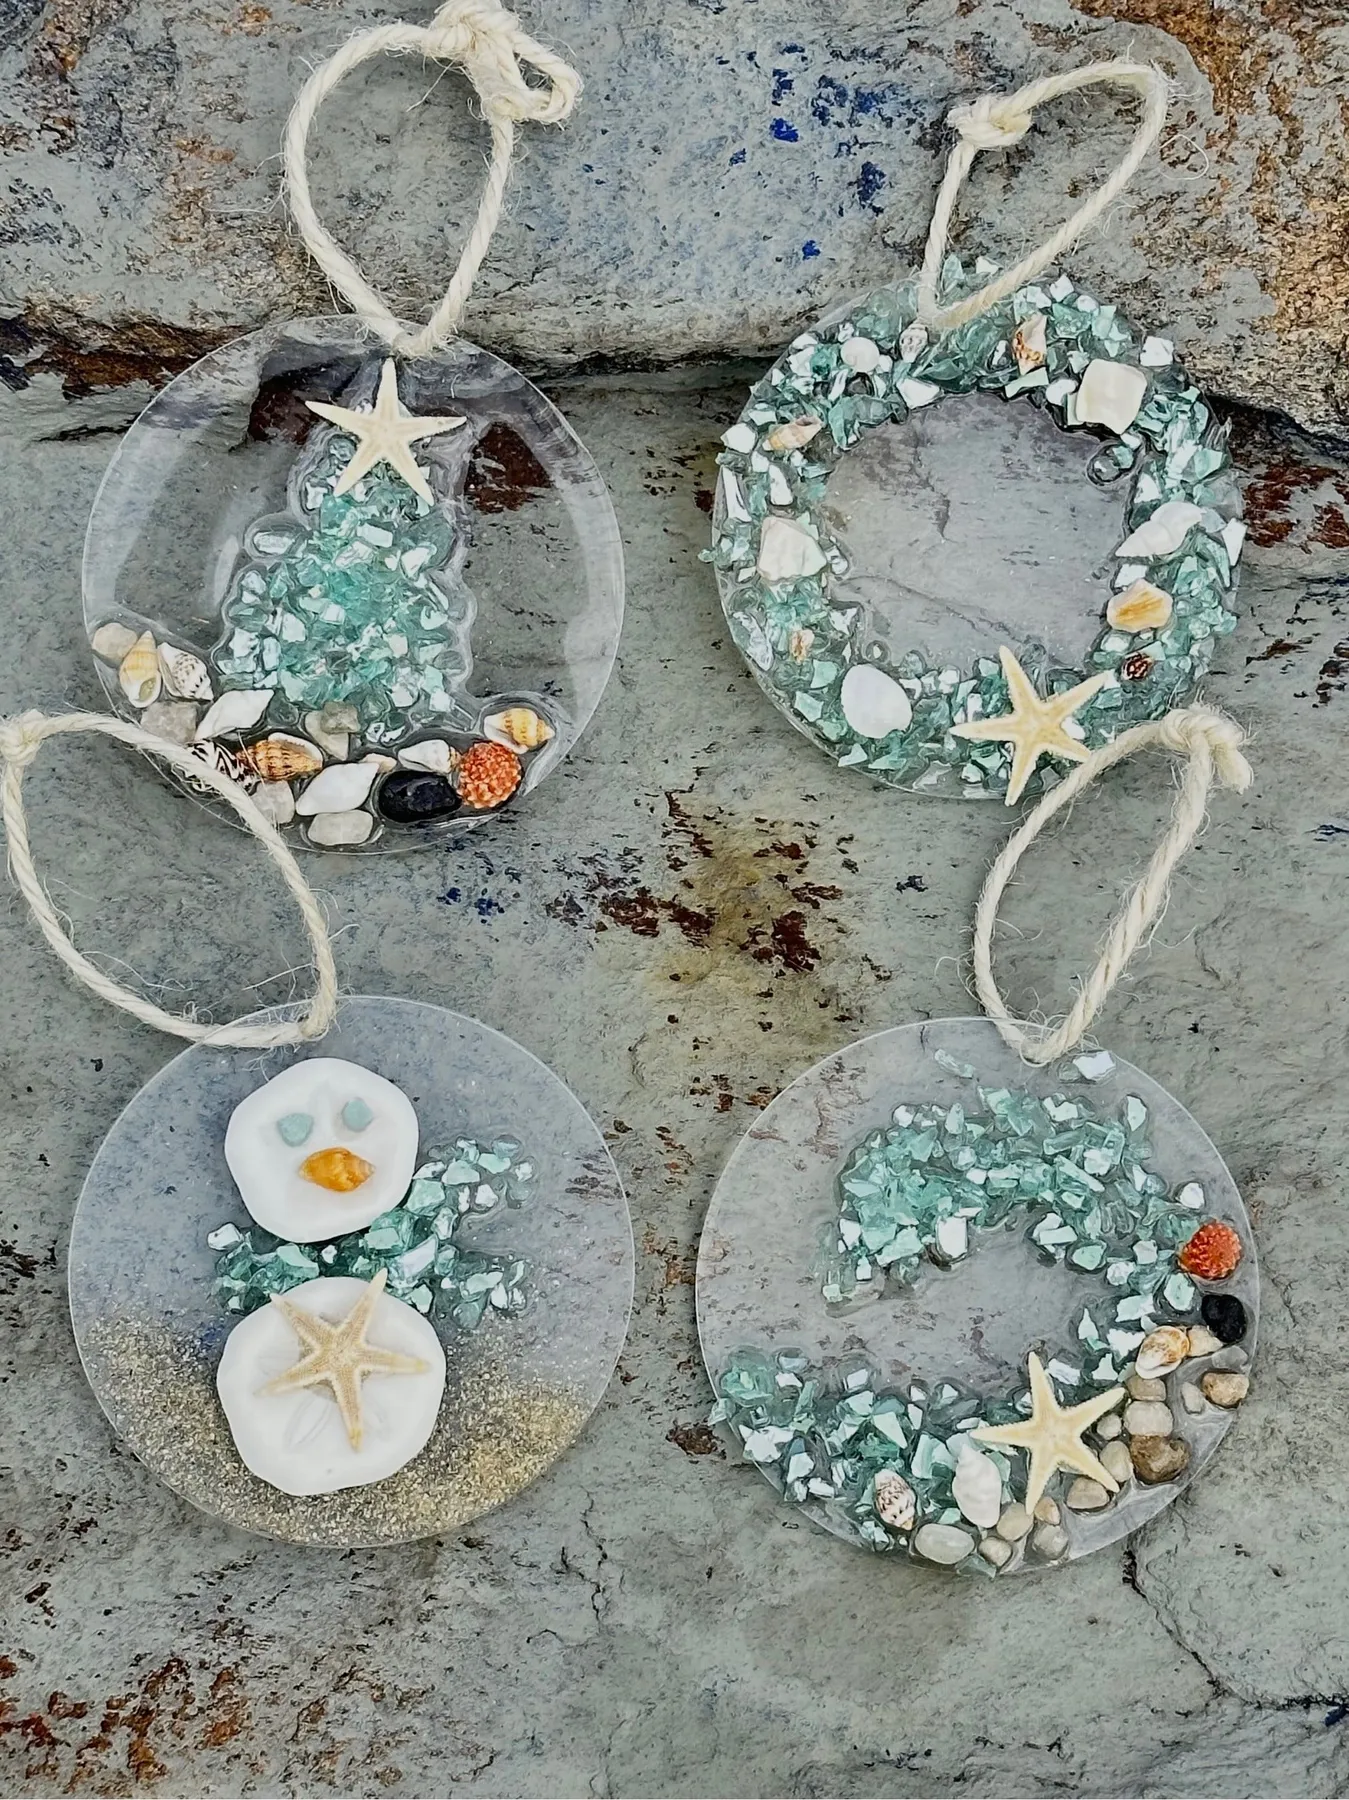
The thin gold wire is the one thing that makes or breaks this. Too thick and it looks like a child’s craft; too thin and it won’t hold the bead weight. Aim for 20-gauge gold-colored wire. It’s stiff enough to hold a star shape but malleable enough to bend with pliers. The clear faceted beads catch light like tiny prisms, giving the ornament a delicate sparkle without any glitter.
14. Ribbon-covered Glitter Ornament with Purple and Gold Design
You don’t need pricey ribbon for this. Hit the Walmart seasonal aisle for spools of glitter ribbon at $3 each and deep purple satin at $2. Fold and glue the ribbon onto a plastic ball ornament from a dollar store—total cost under $8. The key is to cut ribbon strips with a pinking shear to prevent fraying. Use a low-temp glue gun to avoid melting the satin.
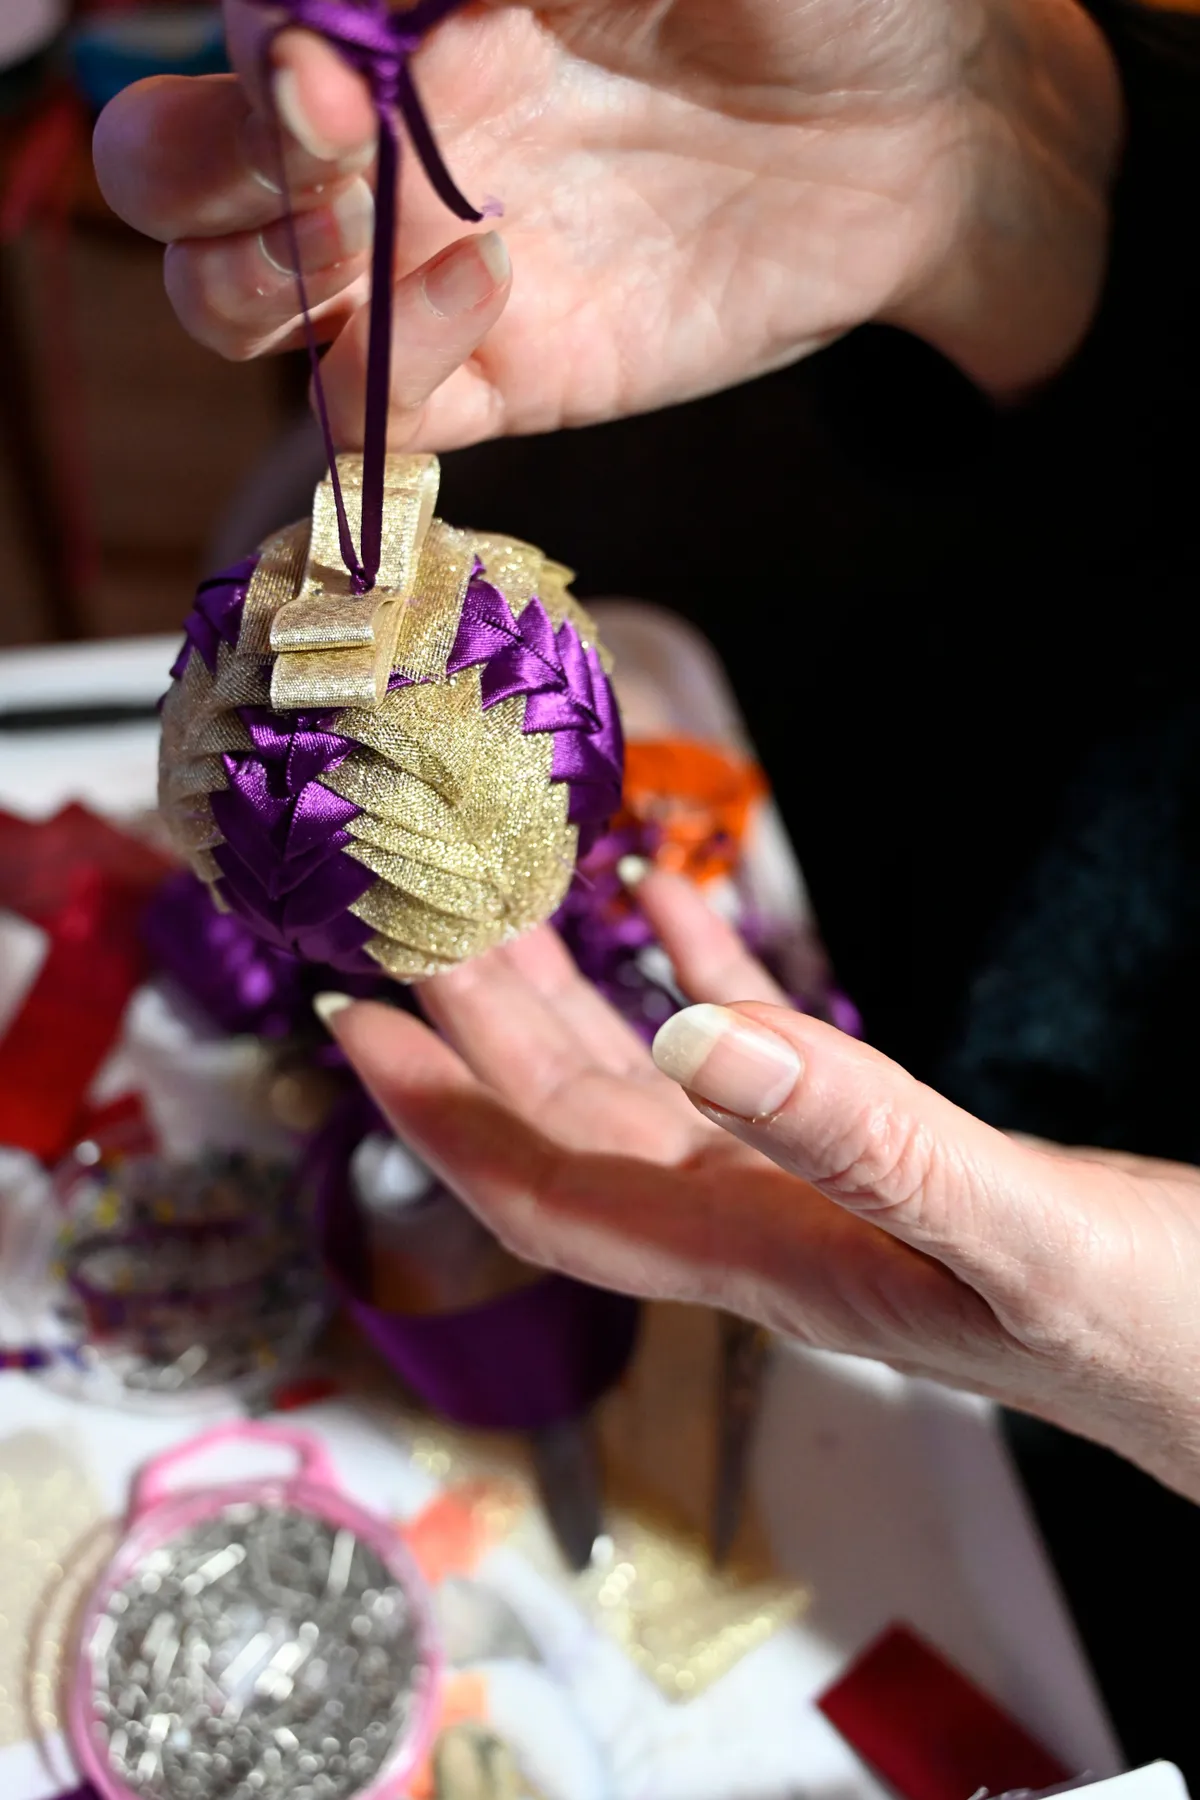
This ornament is heavy on the hands—literally. The folded ribbon adds weight, so if you hang it on a weak branch, it will sag. Use a branch near the trunk or a sturdier artificial limb. The purple satin will show fingerprints and glue smudges if you’re not careful; work with clean dry hands. Also, the deep purple plus gold is gorgeous but can look Halloween-ish if your tree is mostly orange; pair it with silver and white ornaments for balance.
15. Red Letter Z Christmas Ornament with Santa Hat and Holiday Accents
Initial ornaments are back in a big way for 2026, but they’re no longer just painted wooden letters. This red ‘Z’ with a Santa hat, pinecone, candy cane, and holly cluster is a mini storytelling diorama. People are customizing with family initials and meaningful trinkets. It’s a low-effort, high-personality project that photographs beautifully on a green tree.

When attaching the pinecone and candy cane, use a two-part epoxy instead of hot glue. Epoxy holds heavier 3D items on a flat surface through temperature changes. Drill a tiny hole in the top of the letter for the golden string rather than gluing the loop on—it will last for decades. Balance the cluster at the bottom third of the letter; too many elements at the top will make it top-heavy and swing.
16. Whimsical Glass Golf Cart Ornament with Floral Details
- Glass golf cart shape ornament (vintage or new): $12–$25
- Acrylic paints for florals: $4–$8
- Silver glitter and tiny golf club embellishments: $3–$6
- Clear sealer: $5
- Total: $24–$44
- Budget alternative: paint a $1 glass ball ornament with the same floral pattern and glitter details
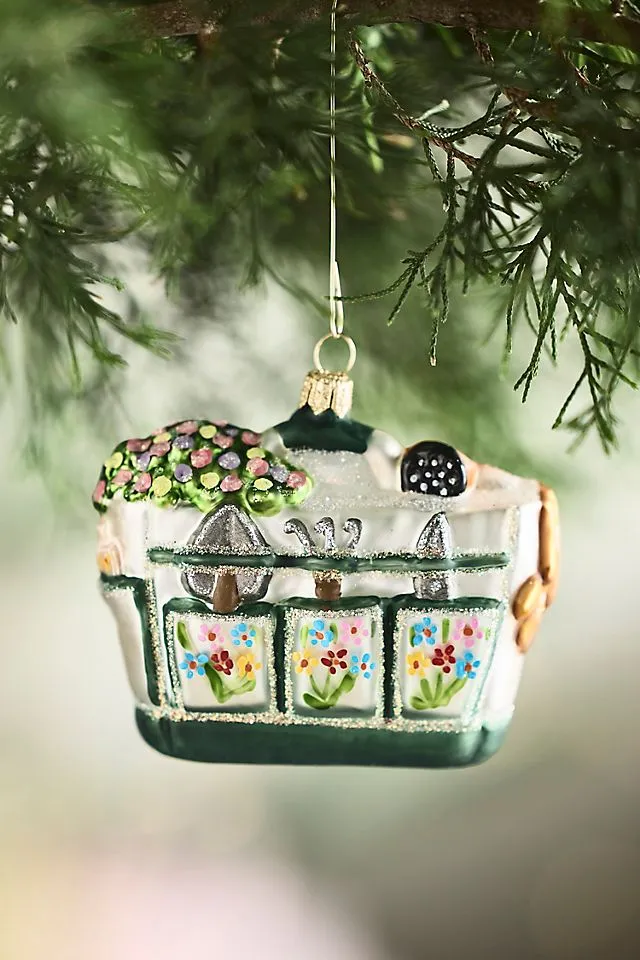
The whimsy here comes from the unexpected pairing of a golf cart with delicate hand-painted florals. It’s a conversation starter because it combines a masculine sport symbol with feminine garden motifs—something for everyone. The silver glitter on the clubs and window frames adds sparkle and definition, making the white body pop against the dark evergreen. The textured green shrub on the roof is a brilliant final touch that grounds the piece.
17. Whimsical Paper Plate Bird Ornament
- Cut a paper plate or cone into a curved bird body shape.
- Paint or color the body cream/white.
- Cut an orange triangle beak and two small black eyes from paper; glue in place.
- Layer pink and purple paper strips at the back for the tail feathers, fanning them out.
- Punch a small hole at the top and thread a thin gold string for hanging. Time: 25 min. Cost: $2.
This is a kid-friendly project, but be realistic: paper plate ornaments won’t survive humid basements or attic storage. The layers can curl. If you want it to last more than one season, swap the paper plate for a thin craft foam base. Also, the gold hanging string is delicate—if the bird is handled a lot, reinforce the hole with a tiny piece of tape on the back before threading.
18. Yellow Pom-Pom Chick Hatching from a White Eggshell Ornament
Use a 2-inch pom-pom maker with bright yellow yarn for the chick body; the denser the pom-pom, the better it fills the eggshell. For the cracked eggshell, cut a real eggshell in half after blowing out the egg, or use a plastic egg half painted matte white. Attach the red felt feet so they peek over the rim—that tiny detail sells the ‘hatching’ illusion. The googly eye should sit off-center for a curious, alive look.
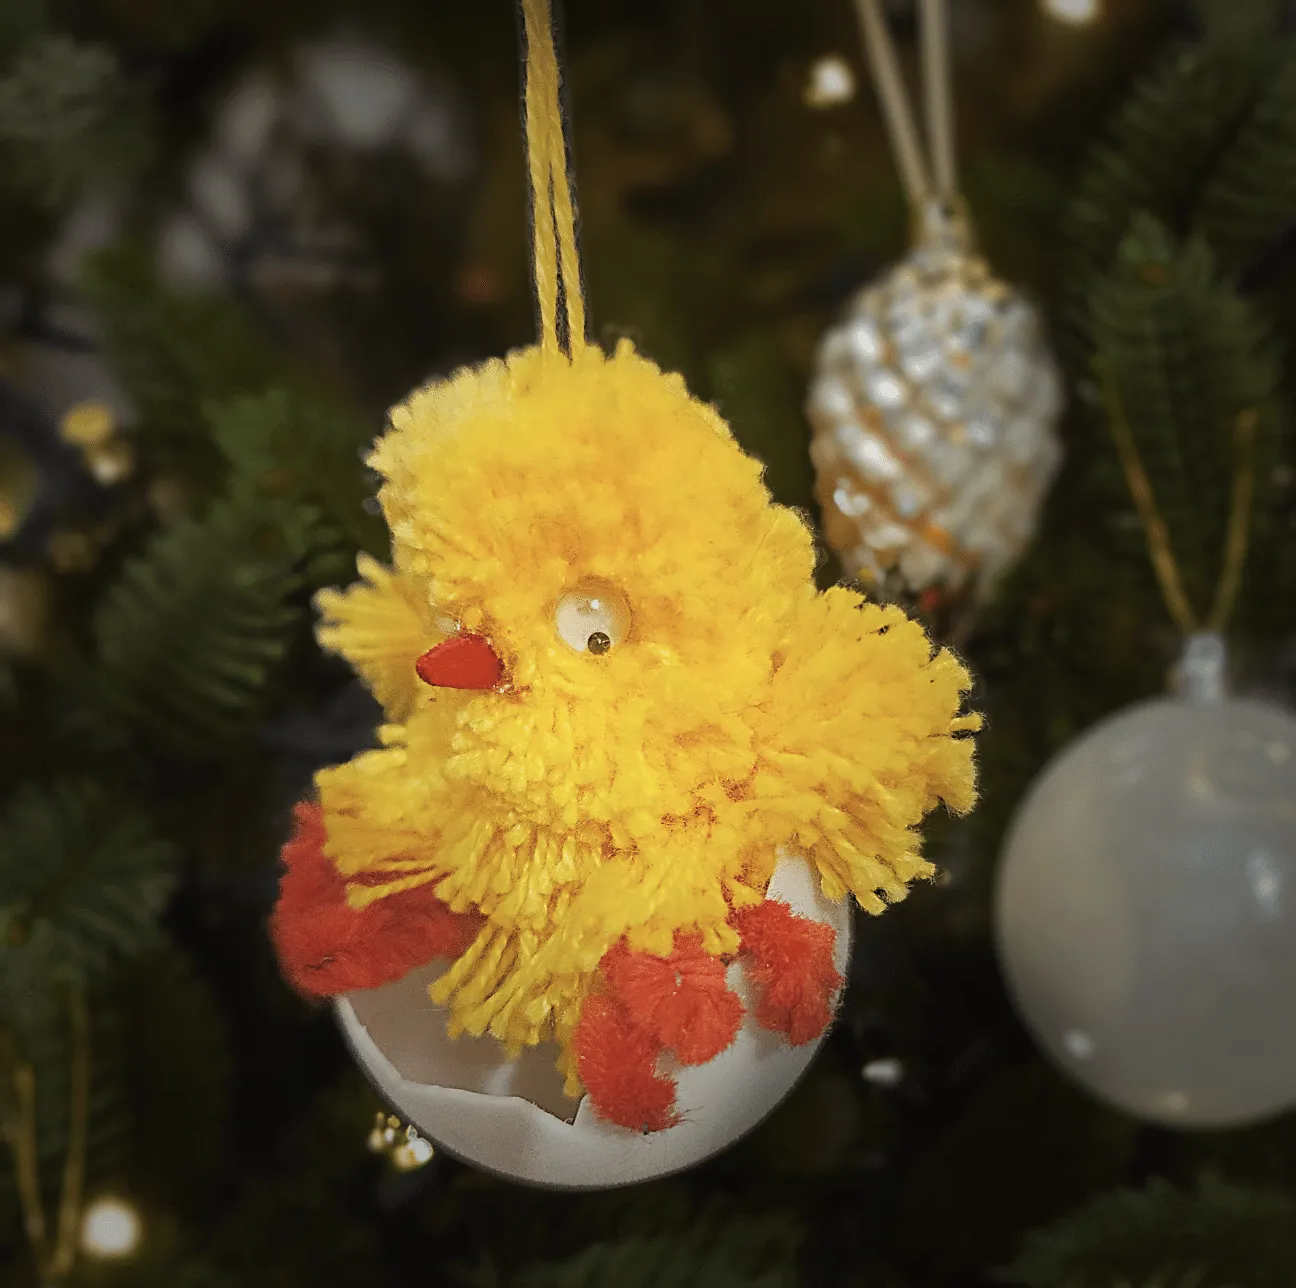
This hatching chick taps into the 2026 ‘cottagecore animals’ trend that’s been all over Pinterest. It’s sentimental, slightly silly, and undeniably cute. The yellow yarn against the dark green pine is a classic complementary color pairing. Compare with the more refined Idea #19 felt collection—both are whimsical but on opposite ends of the precious spectrum.
19. Collection of Traditional Handcrafted Felt Christmas Ornaments with Beadwork
This set is 50% red and forest green, 25% cream and light blue, 15% intricate embroidery, 10% tiny beads. The golden metallic hangers and square tags unify the whole batch. Swap the red for dusty rose and the green for sage, and you get a modern cottage look. The key is to keep each ornament small—no larger than 3 inches—so the intricate details stay delicate rather than clunky.
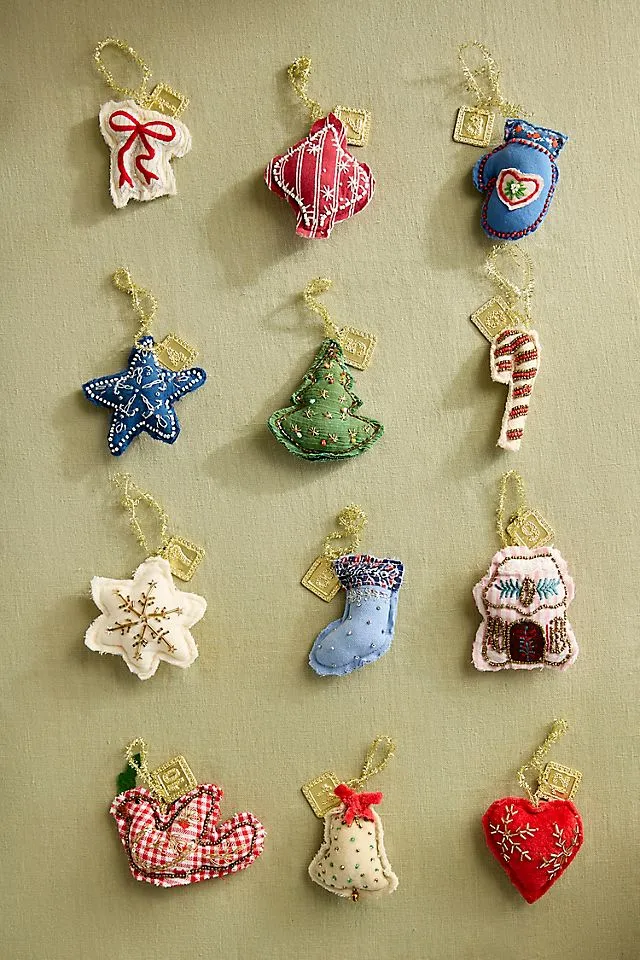
The tiny square golden tags are the one thing that elevates this from a craft fair to a boutique collection. They add a sense of finish and intentionality, like each piece was cataloged. Without them, the ornaments would still be pretty, but they’d lack that jewelry-like polish. The embroidered patterns are impressive, but it’s the metallic hanger and tag that make them feel heirloom-worthy.
20. DIY Light-up Character Ornaments on Frosted Tree
Battery-powered LED tealights are the safest option for these ornaments. Change batteries before the season starts; they typically last 40–60 hours of continuous use. The googly eyes and pom-pom ear muffs can shift if glued too loosely, so reapply with E6000 for a permanent hold. The white fuzzy ear muffs will collect dust—store in a zip bag and gently spot clean with a lint roller.
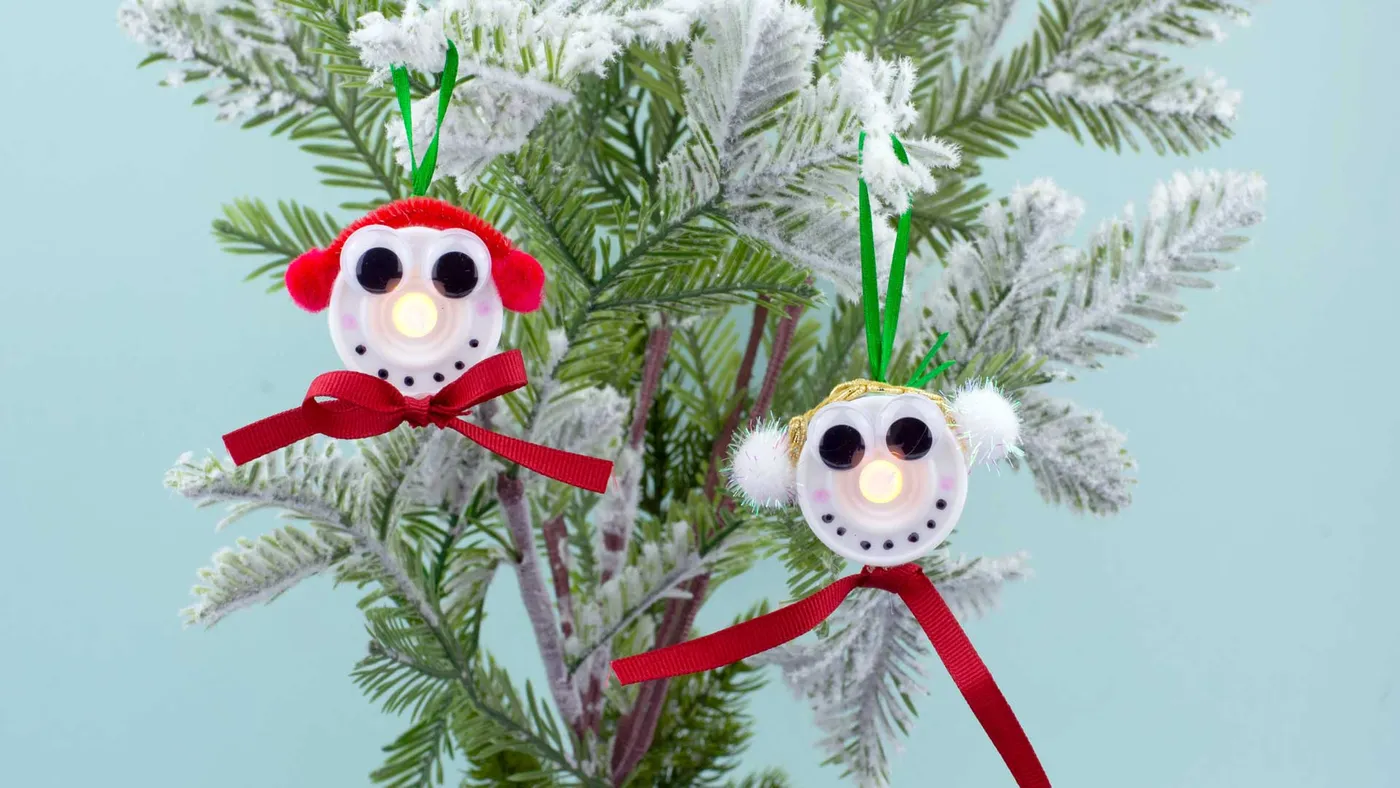
These light-up characters work best on a tree 5–8 feet tall. On a tabletop tree, the round white orbs will dominate visually. Place them at eye level for maximum effect, not buried deep in the branches. The warm yellow glow needs darkness to read properly, so if your tree sits in a bright living room, consider hanging these on the side away from the window. See Idea #25 for a non-light-up alternative with similar cozy energy.
21. Assorted Teal, White, and Silver Glitter Christmas Ornaments
Teal is having a quiet resurgence in 2026 after years of blush and emerald dominance. Paired with silver and white, it feels fresh but not icy. This mix of textures—ribbed, lace-patterned, faceted, glitter—creates depth without adding many colors. It’s the easy way to make a store-bought tree look curated. The white carved tray in the photo is a styling trick: arranging ornaments in a shallow dish on a side table brings the tree’s palette into the room.
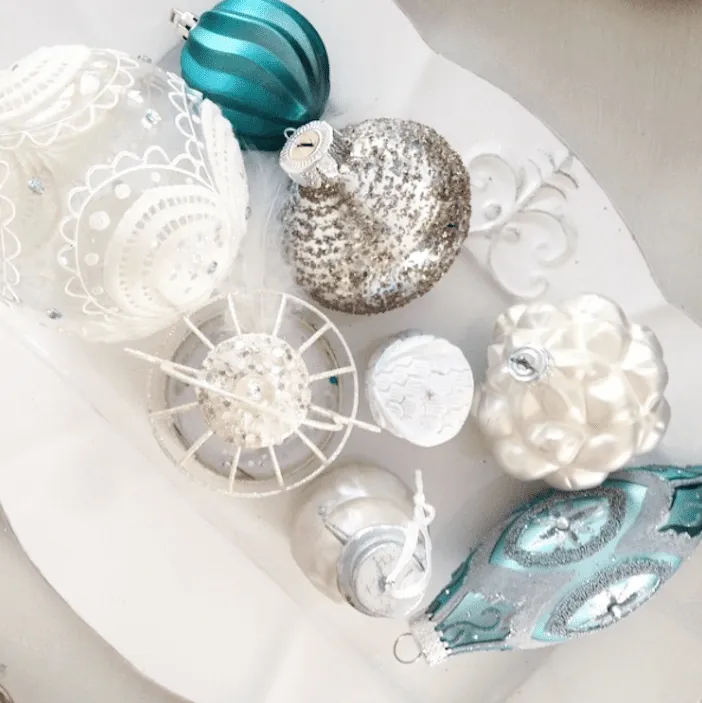
When mixing ornament textures, follow the rule of three: one shiny, one matte, one glitter. In this set, the faceted round is shiny, the ribbed teardrop is matte, and the silver glittered round is the sparkle. Repeat that trio across the tree in clusters of three at different heights for a designer look. Don’t hang them evenly spaced—organic grouping feels more collected over time.
22. Clear Bauble with Wood Beads and Greenery
This is the easiest budget project in the entire list. Grab a pack of clear plastic ornaments from Dollar Tree ($2), a bag of small wood beads from Walmart ($4), and a few sprigs of faux greenery from an old garland. Fill the ornament halfway, tie a twine bow, and you’re done for under $7 total. For a luxe upgrade, use real dried eucalyptus and gold-leafed beads.
The contrast between the transparency of the glass and the opacity of the wood beads is what makes this so satisfying. The greenery adds an organic, irregular shape that breaks the sphere’s perfect geometry. The twine bow and tiny white tag give it a market-stall charm. It’s proof that minimal materials can still feel intentional when the color story is this restrained—natural wood, deep green, bright white.
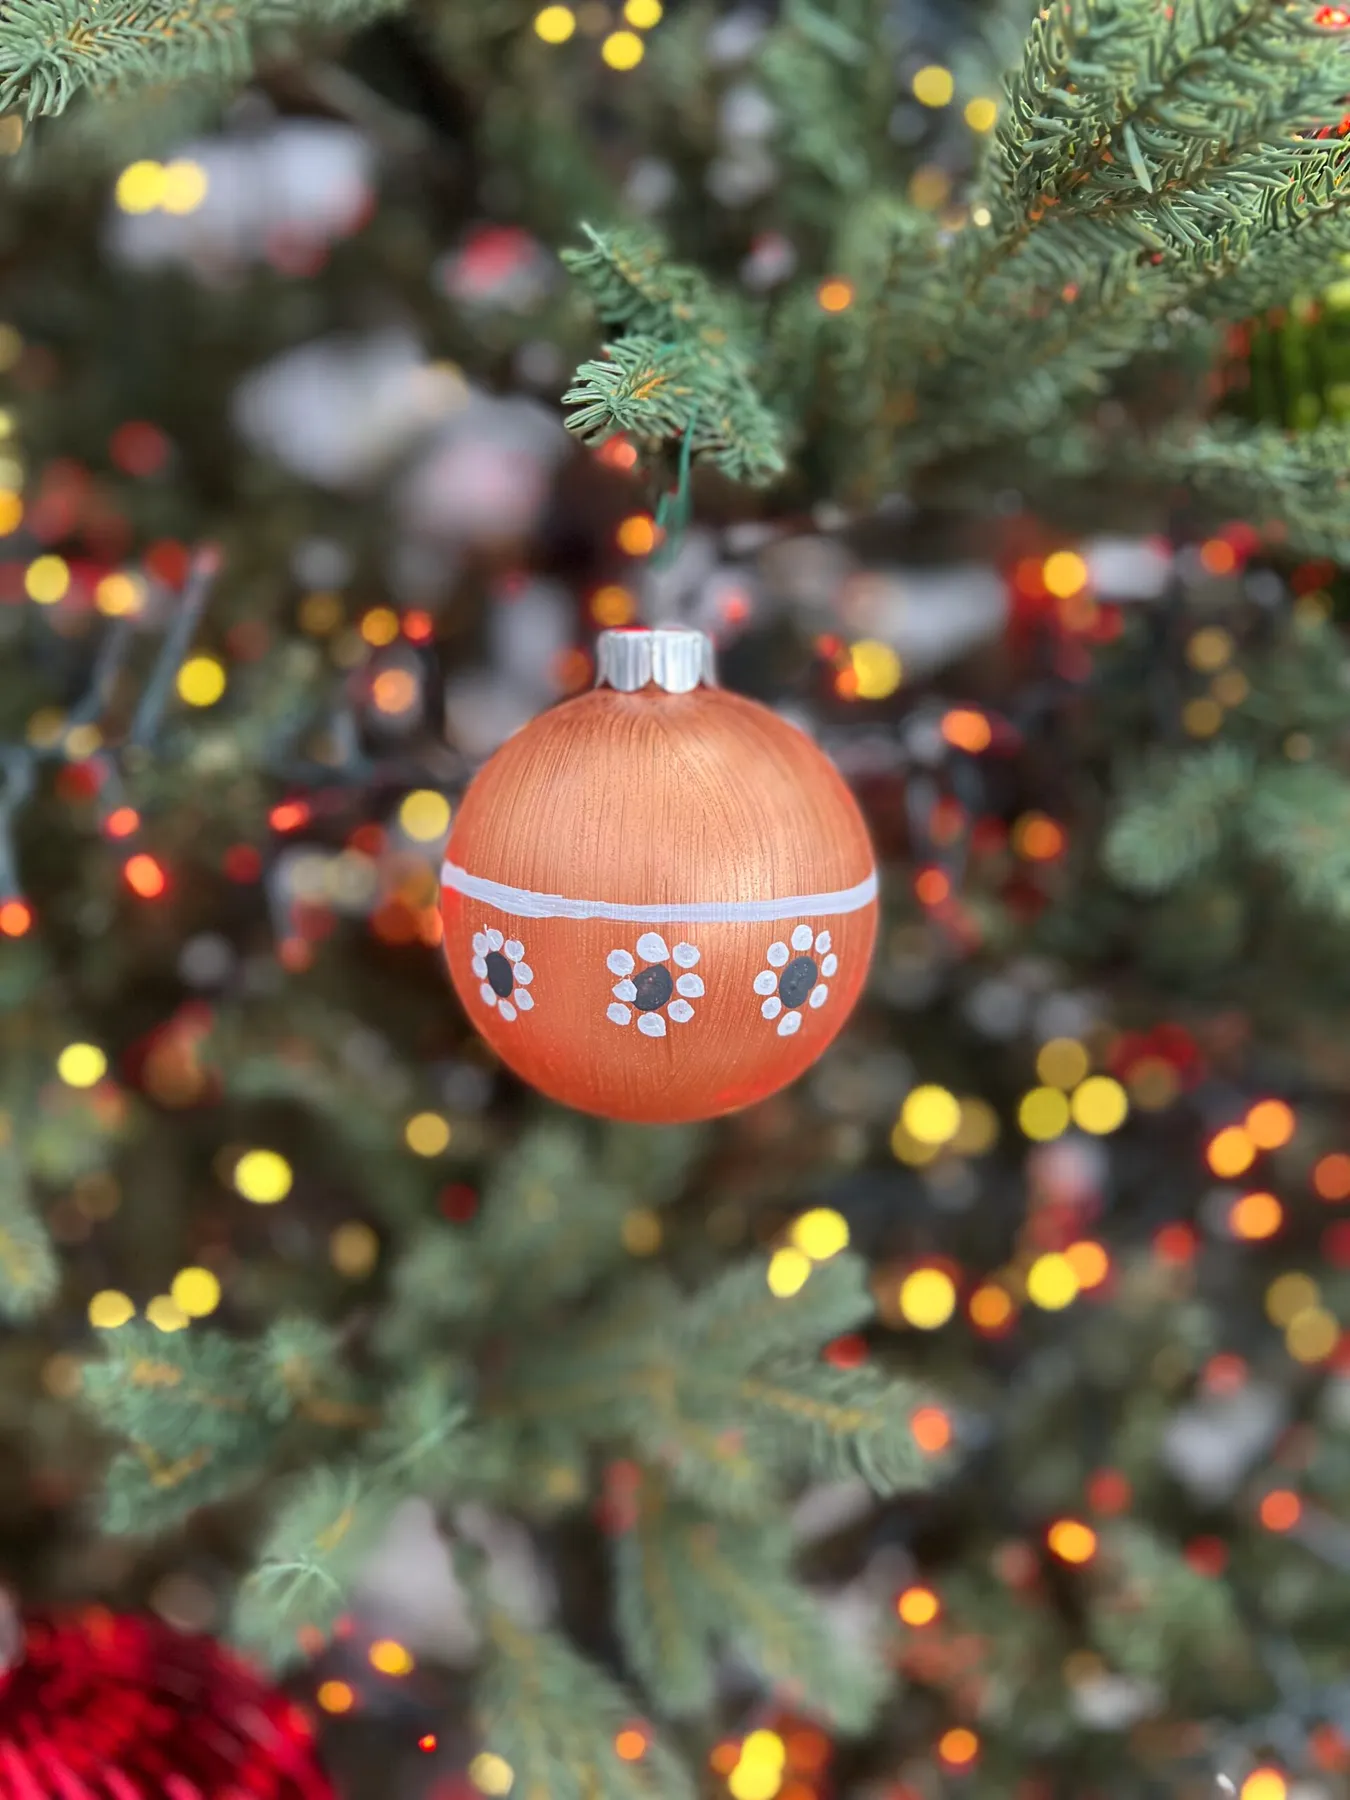
23. Metallic Orange Ornament with White Floral Pattern on Christmas Tree
This design is 80% metallic orange-copper, 10% white painted band, 5% black floral or paw motifs, 5% silver cap. The orange-copper is a bold choice but the white band gives the eye a resting place. Swap the orange for deep teal and the white band for gold, and the ceremony changes completely. The black motifs keep it from being too sweet—they add a graphic, almost tribal edge.
|
📋 Copy HEX 🔗 Share |
Metallic finishes can scratch easily during storage. Wrap this ornament individually in tissue and avoid plastic bags, which can trap moisture and cause the paint to lift. The silver ribbed cap is decorative but not load-bearing—always hang by the cap’s loop, not the ornament body. Also, that orange-copper shade will pull warm tones from other ornaments; if your tree is mostly cool silver, it may clash. Use it as an accent on a tree with gold and cream ornaments.
24. Textured Punch Needle Ornaments on Colorful Artificial Trees
These circular punch needle ornaments measure about 3–4 inches across and need a tree with some visual space around them. On a dense green tree they’d get lost among the needles. The bright blue and pink artificial trees in the photo provide a solid color backdrop that makes the wavy stripes pop. If you have a standard green tree, place these on the outermost branches facing the room.
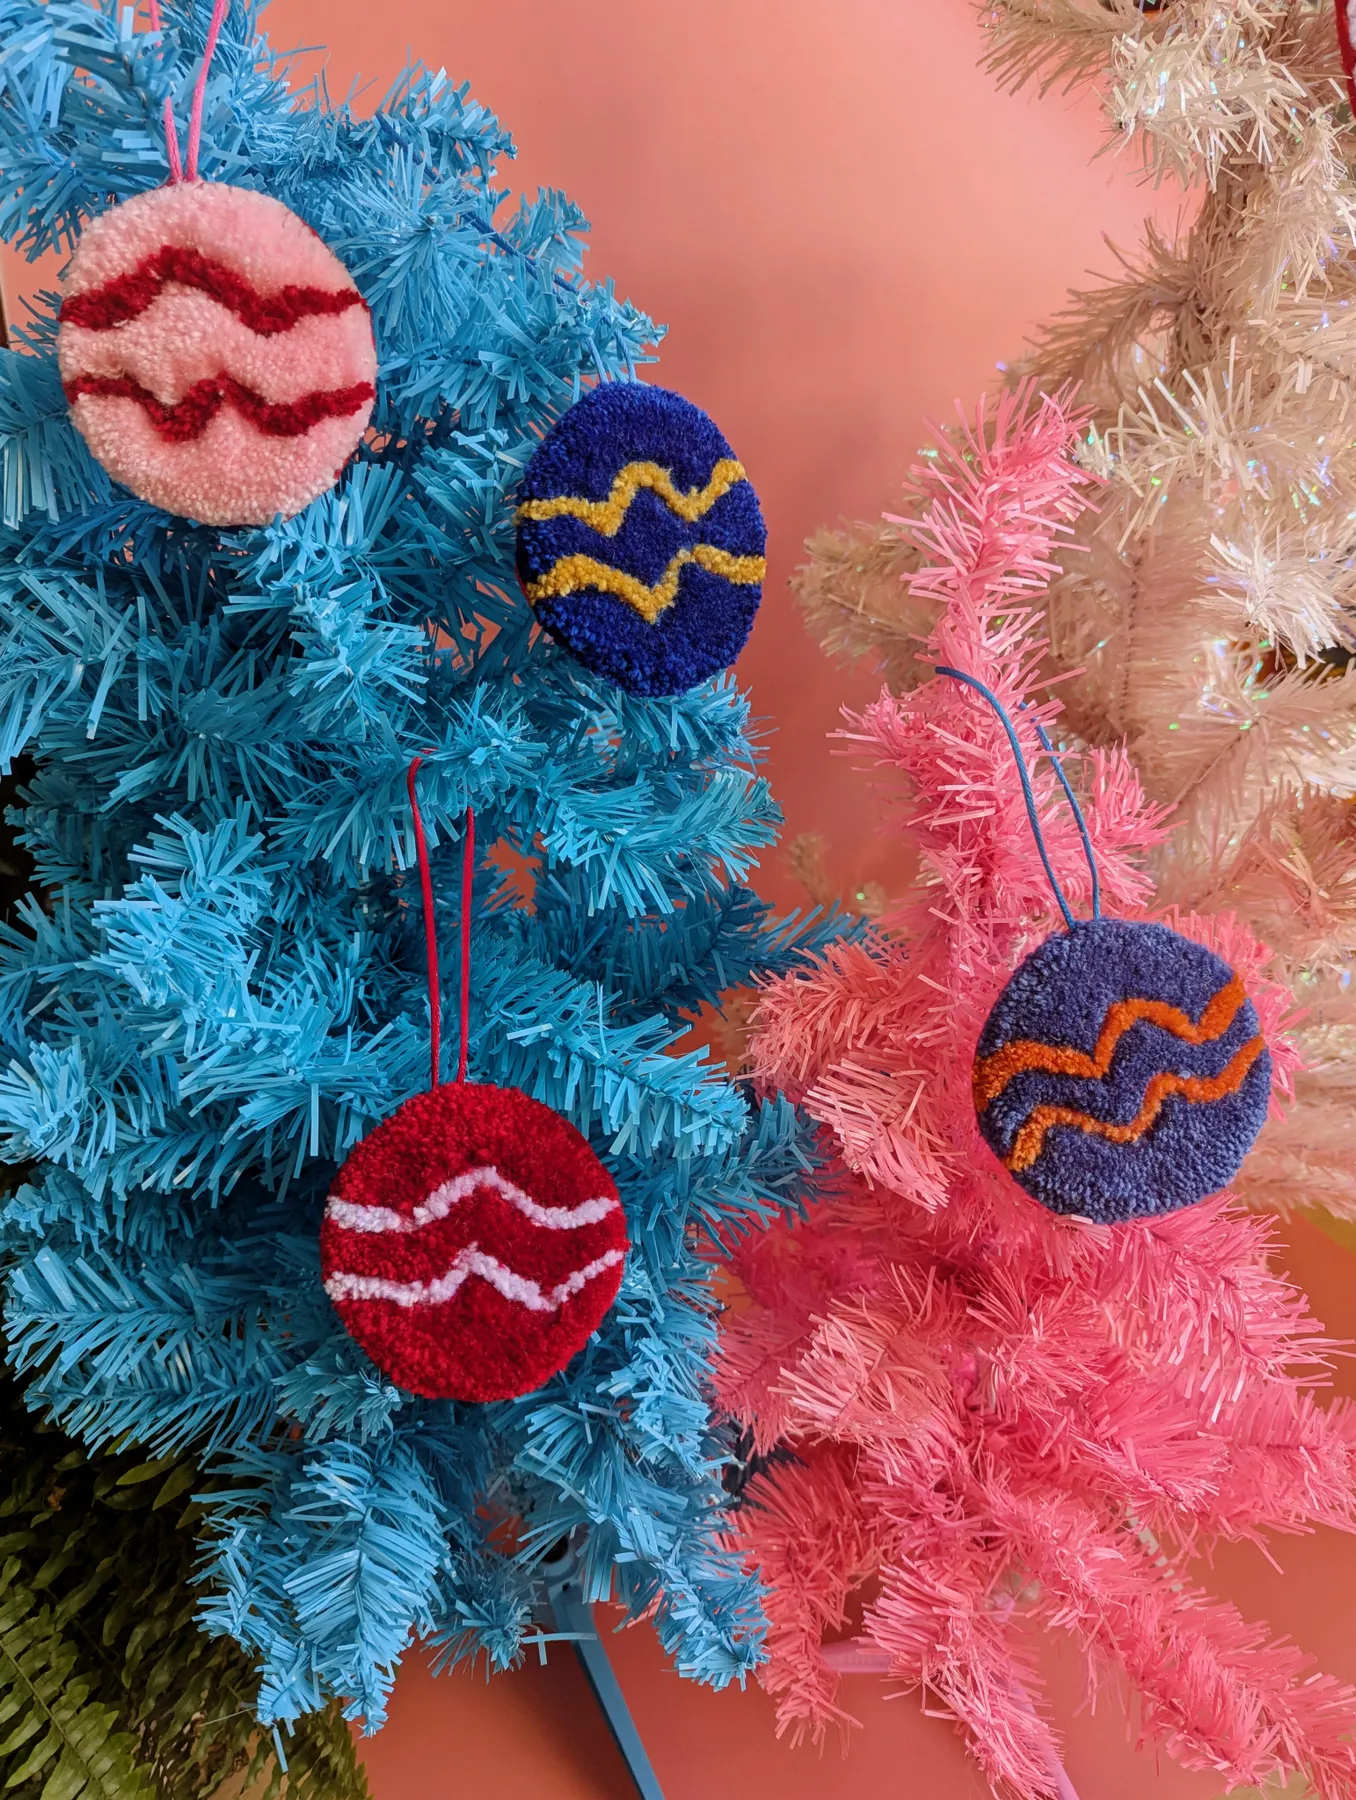
The wavy stripe pattern is the one thing that makes these feel modern rather than grandma’s yarn project. The curved lines create movement and a sense of play, especially in unexpected color combos like dark blue and orange. The peach wall in the background further warms the scene. If you’re making these, pay attention to the wavy shape—straight stripes would read as a woven placemat, not a festive ornament.
25. Silver Snowflake Ornaments with Red Ribbons on Green Garland
Silver finishes tarnish over time, especially in humid climates. A quick wipe with a silver polishing cloth before hanging will restore shine. The red ribbons will fade if exposed to direct sunlight, so keep this garland out of a south-facing window. The textured snowflake surfaces collect dust in the grooves—use a soft-bristle toothbrush to gently clean. Natural pinecones are stable but can drop sap if newly collected; bake them at 200°F for 30 minutes to set the sap.
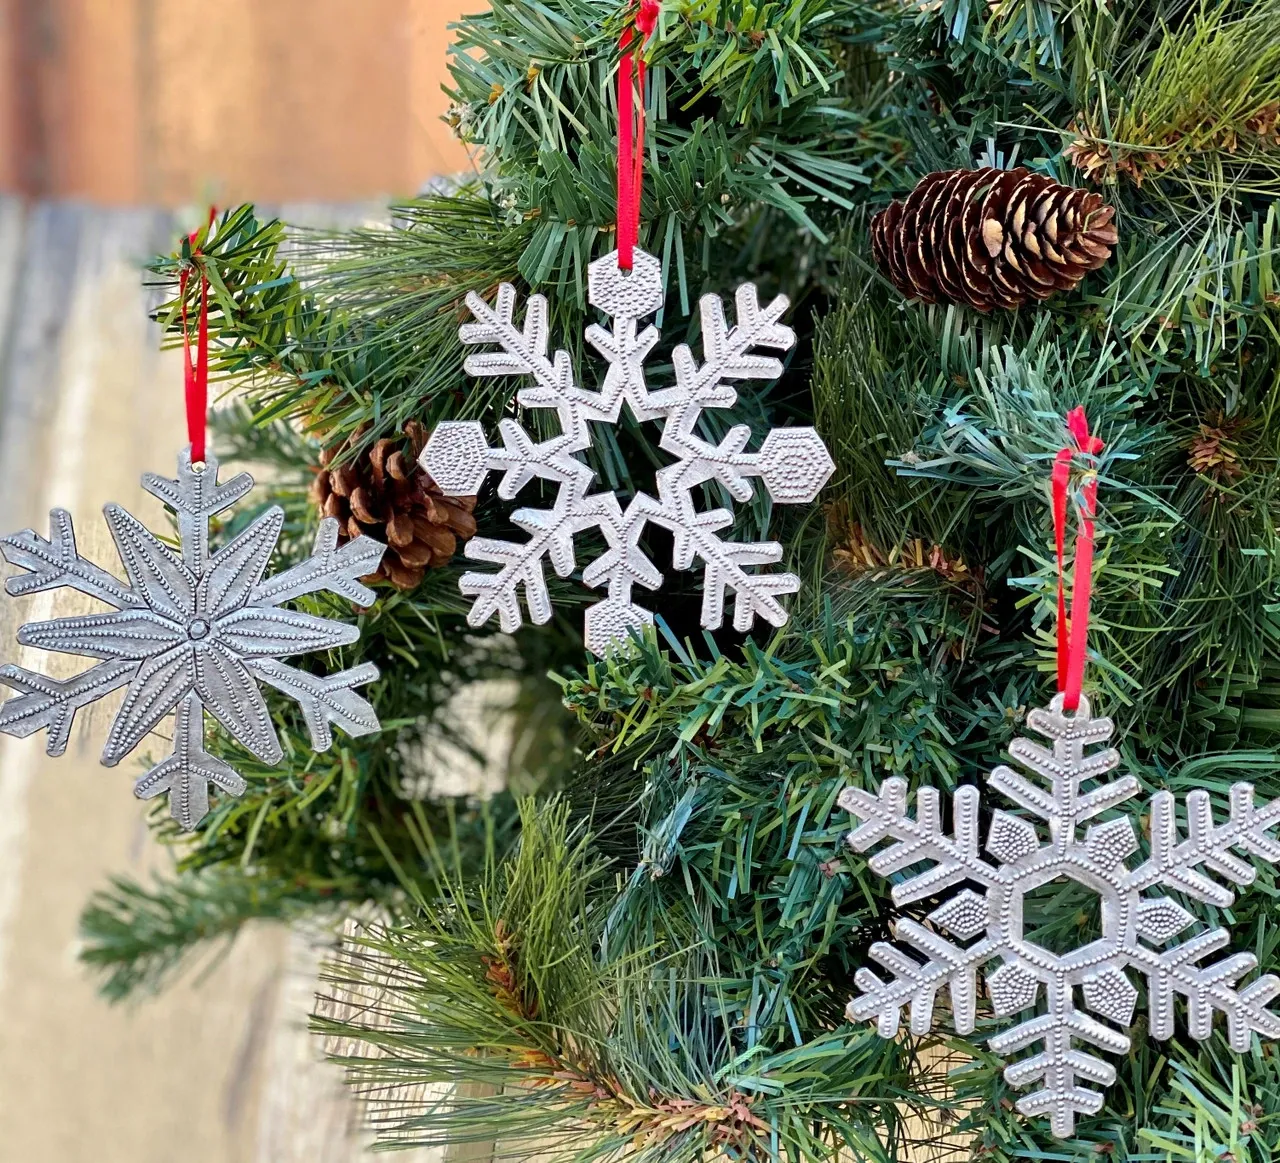
When arranging ornaments on a garland, cluster them in odd numbers—three silver snowflakes grouped together reads more intentional than spread evenly. The red ribbon hangers should be cut at slightly different lengths to create a rhythm. If mixing with natural pinecones, place the pinecones first to anchor the garland, then weave the snowflakes around them. The contrast of shiny silver against matte brown pinecones is pure winter magic.
26. Paper-mache Animal Ornament with Holly and Berries Pattern
- Start with a small paper-mache animal shape from a craft store.
- Paint the entire body white and let dry.
- Using a fine brush, paint tiny green leaves, red berries, and black branches in a scattered pattern.
- Glue a small red felt Santa hat with a white pom-pom to the head.
- Attach a red string through the pre-existing hole. Time: 45 min + drying. Cost: $6–$10.
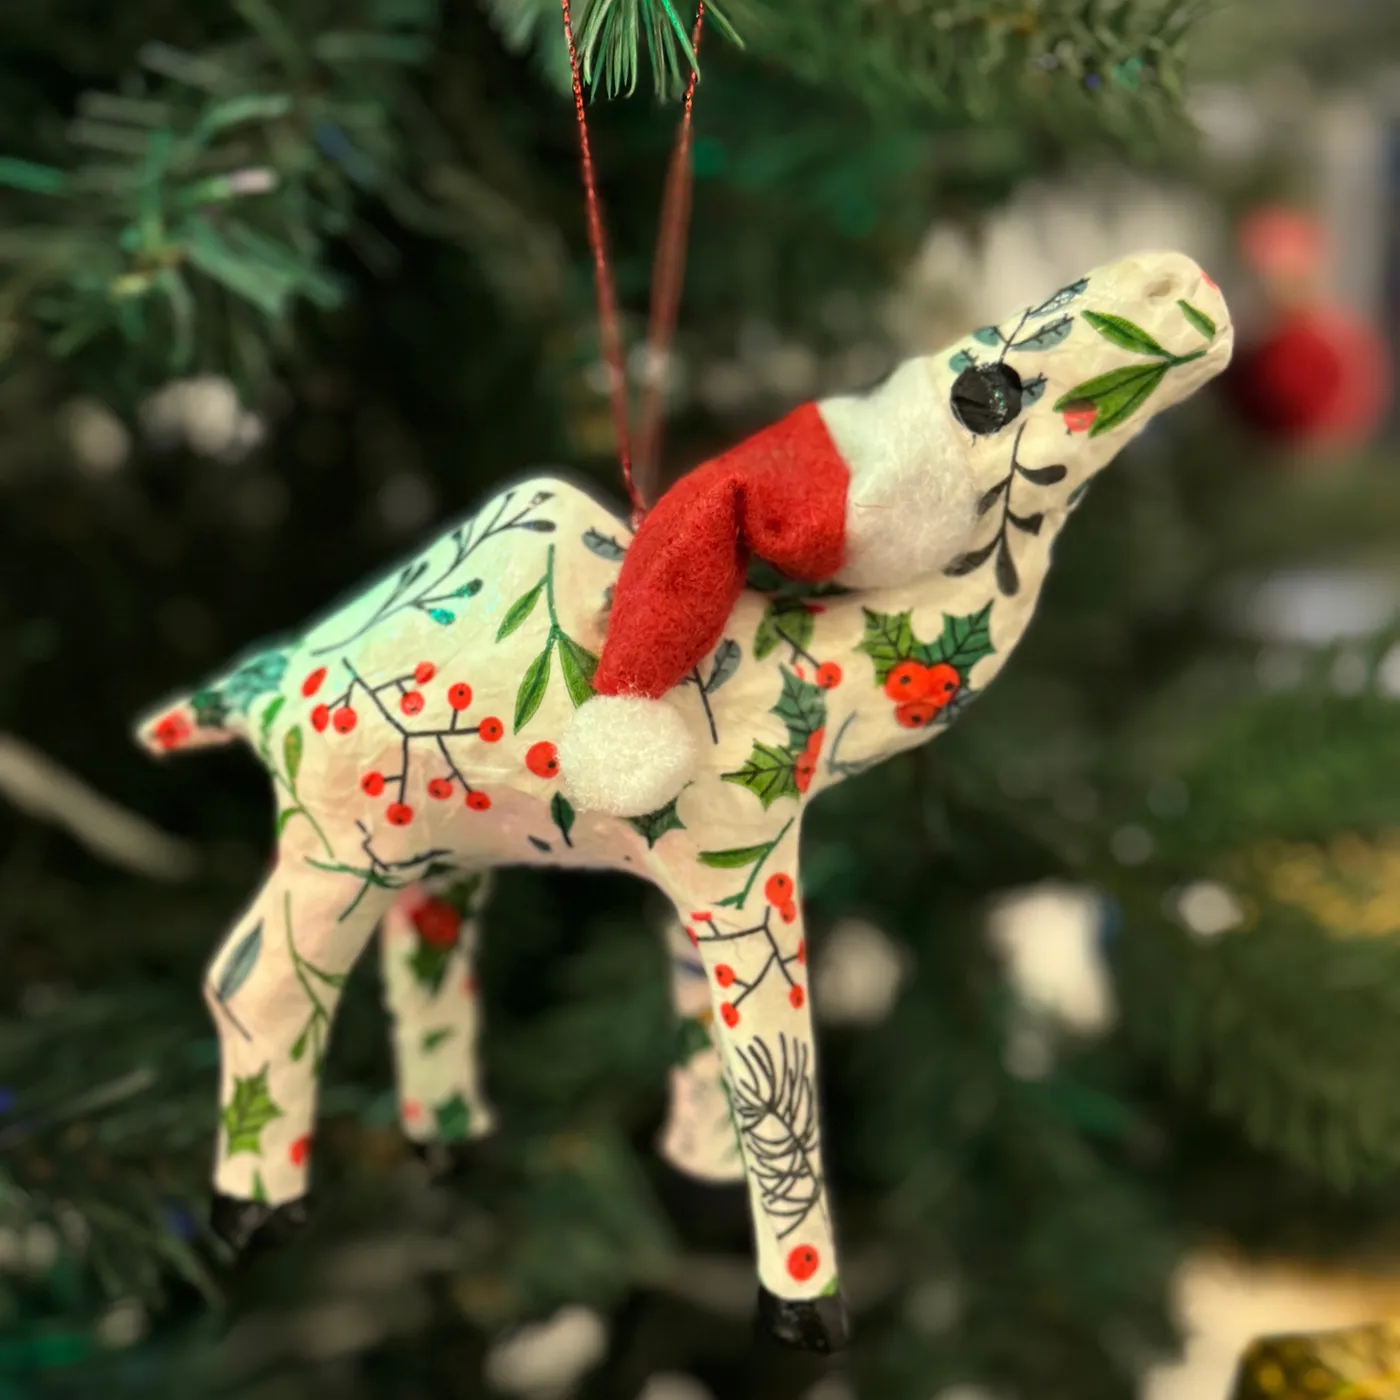
This project is already budget-friendly, but you can go even lower by making your own paper-mache form from a balloon and newspaper strips. Thrift stores are gold mines for old paper-mache or ceramic animal figures that can be repainted. The holly and berries pattern is classic and forgiving—imperfect dots of red still read as berries. This ornament pairs well with Idea #18 for a mixed handmade tree.
27. Clear Globe Ornament with Mini Pinecones and White Flocking
The white flocking on the outside of the clear globe does double duty: it frames the miniature pinecones inside and suggests snow without covering the view entirely. It’s the balance between transparent and opaque that makes this feel like a tiny snow globe. The metallic cap adds a finished edge. Inside, the small dried pinecones are the perfect scale—large enough to identify, small enough to leave breathing room.
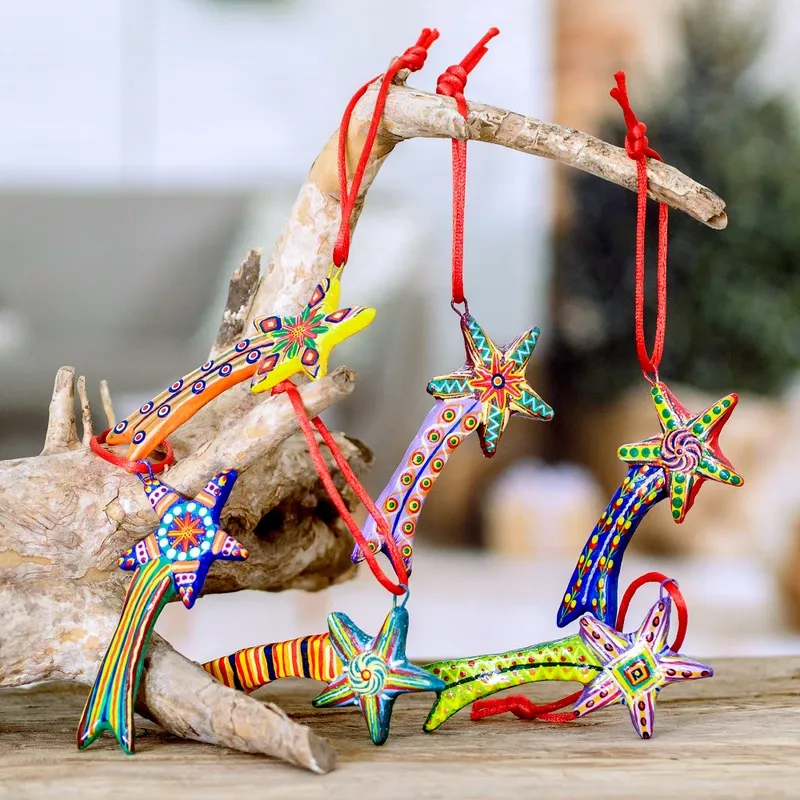
Miniature landscape ornaments are trending hard in 2026 as people seek ‘portable calm’ in their holiday decor. There’s something deeply soothing about a contained winter scene you can hold. This one echoes the popularity of fairy gardens and terrariums. Compare with the more whimsical Idea #28 miniature car scene—both use a clear globe as a tiny stage.
28. Miniature Red Car and Gifts Inside a Clear Snow Ornament
Be careful when filling the ornament—the artificial snow will stick to the inside of the glass and obscure the scene if you tilt it too much. Use a small spoon and let the snow settle before sealing. The red car is the focal point; make sure it’s positioned facing outward and not buried. Avoid hanging this ornament near heat vents, as temperature changes can cause condensation inside the globe.
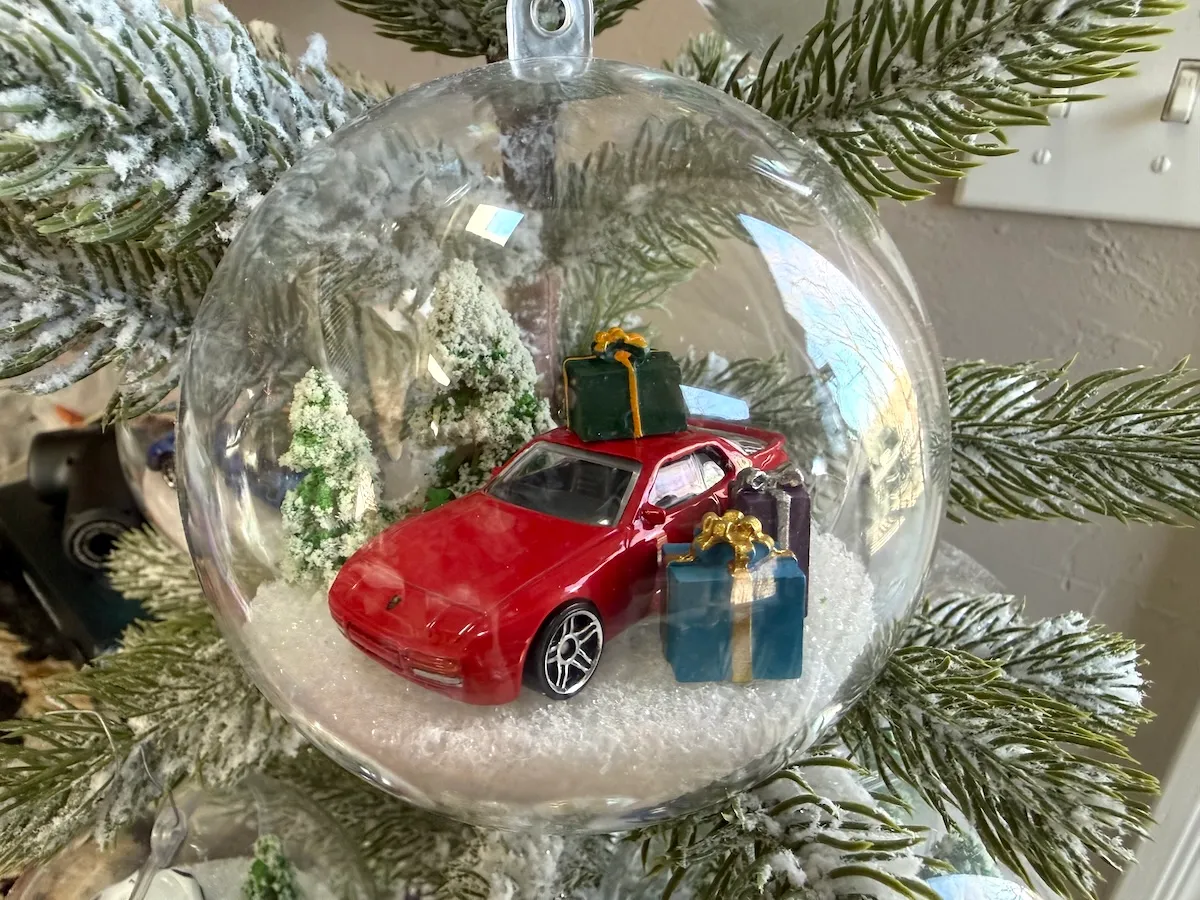
This ornament shines on a tree 6–9 feet tall where viewers can get close enough to peek inside. On a tabletop tree, the miniature car and gifts will be almost invisible from normal viewing distance. Place it at eye level on an outer branch. The flocked pine branches in the photo add to the snowy aesthetic—if your tree isn’t flocked, a dusting of faux snow spray on surrounding branches will enhance the effect.
29. Embroidered Woodland Mice Heart Ornament with Berries and Acorns
Use a dark green cotton or linen fabric as the base; it hides stitching imperfections and gives the embroidery a rich ground. For the mice, use split stitch for outlines and satin stitch for tiny bodies. Keep the red berries as French knots—they add dimension without bulk. The small white hanging loop should be sewn into the seam before turning the heart right side out, not glued on after.
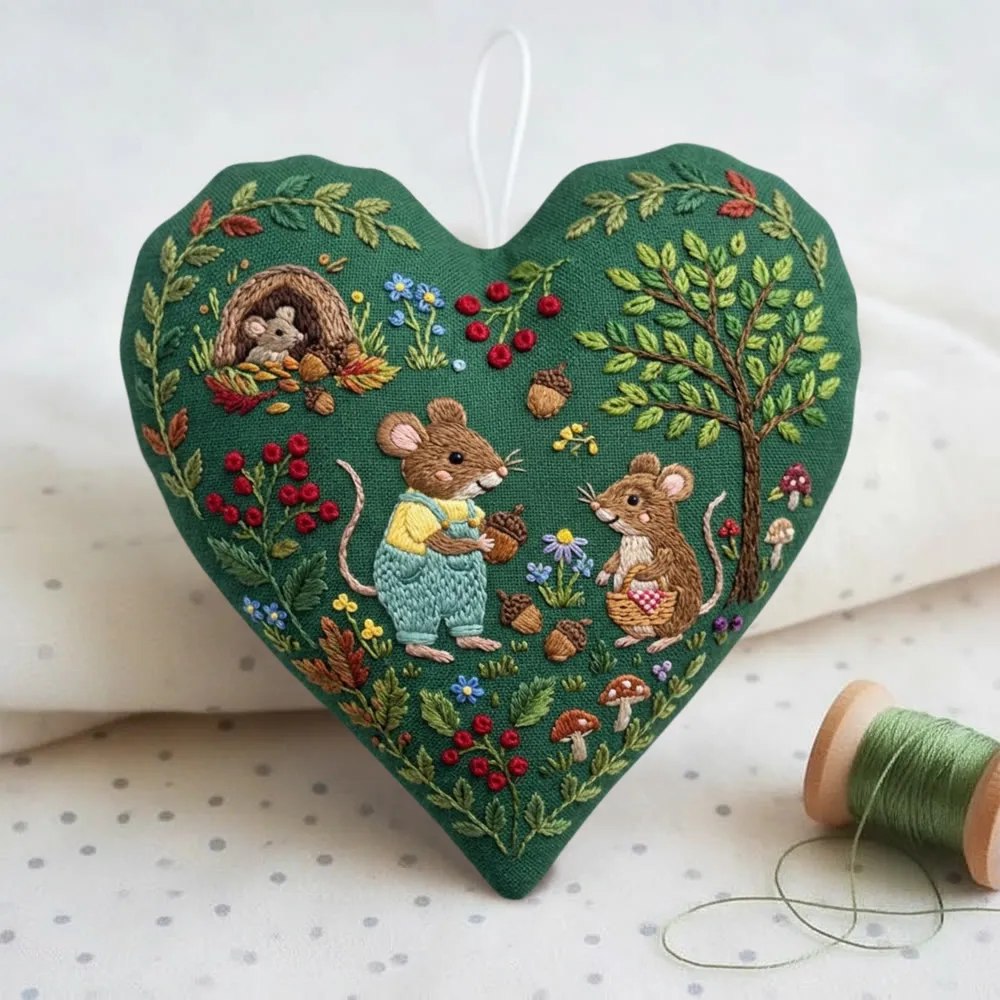
The burrow detail—one mouse peeking from a hole—is the one thing that transforms this from a pretty embroidery into a story. It creates a focal point and invites the viewer to look closer. The heart shape softens the woodland scene, making it romantic rather than rustic. This is a labor of love, but the charm is in the imperfections, so don’t strive for perfection.
30. Clear Bauble Ornament with Colorful Confetti Filling
This design is 70% transparent glass, 20% multicolored confetti, 10% silver cap and white ribbon. The clear sphere is the canvas; the confetti is the paint. The key is to not overfill—leave about one-third empty so the pieces can shift and catch light. Swap the bright confetti for pastel paper shapes and you get a softer, Easter-egg vibe. Add a few metallic confetti pieces for sparkle.
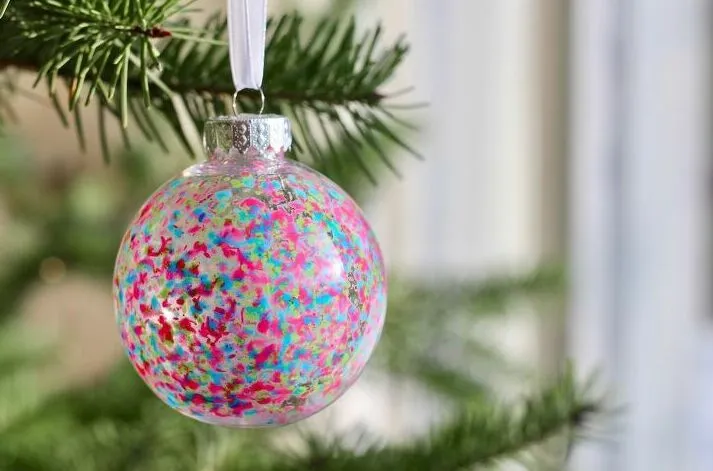
Confetti-filled ornaments are zero-maintenance until they break. Plastic ornaments are safer than glass if you have kids or pets. The confetti colors won’t fade, but the silver cap can tarnish—polish with a soft cloth. Store upright in a divided box to prevent the confetti from settling into a clump. If the white ribbon gets dirty, hand wash with mild soap and lay flat to dry.
31. Sparkling Glass Santa Ornament with Owl, Green Sack, and Golden Accents
- Measure your branch strength: this glass ornament is heavier than a standard bauble.
- Check your ornament storage: a glass Santa with protruding owl and sack needs a dedicated slot.
- Decide placement: keep away from high-traffic walkways where it might get bumped.
- Budget minimum: expect to spend $18–$35 for a quality version, or $8 for a DIY ceramic paint kit.
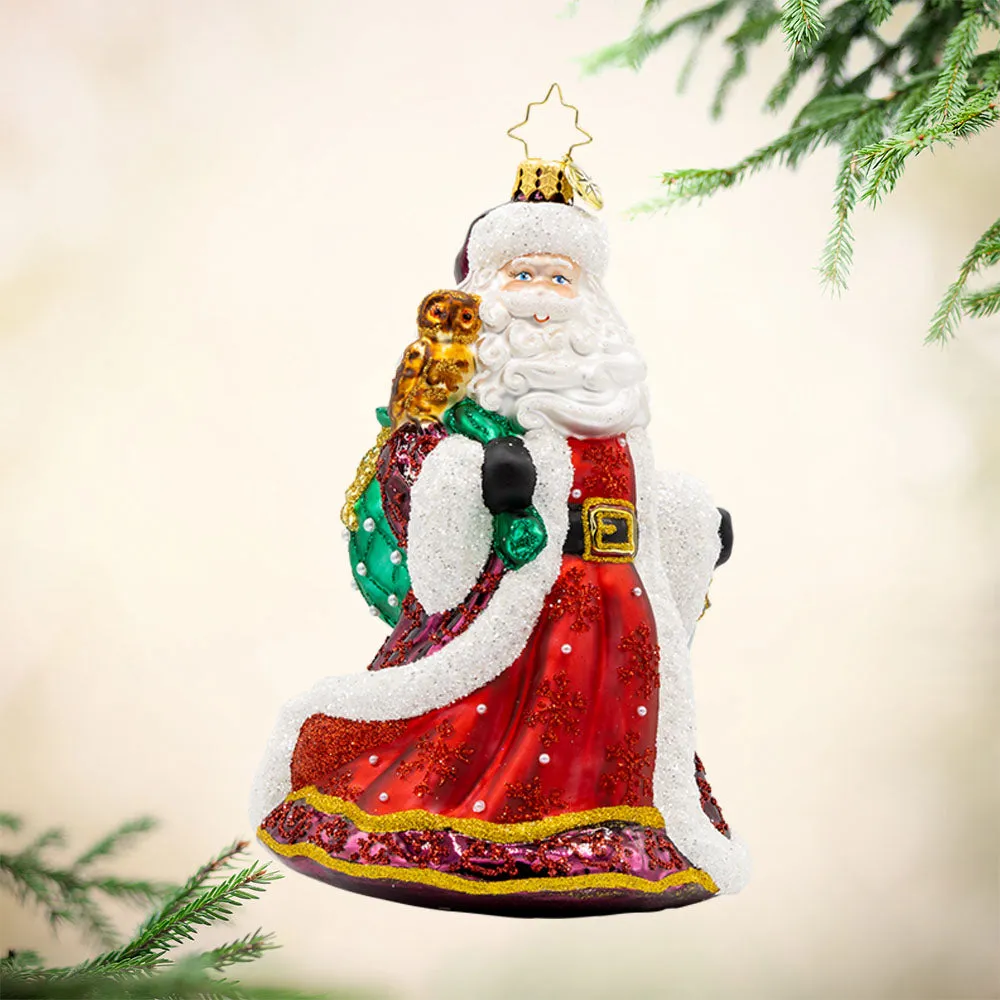
The genius of this ornament is the unexpected pairing of Santa with an owl on his sack—it’s traditional and quirky at once. The red glittered robe and white textured trim create a classic Santa silhouette, while the small brown owl adds a woodland storybook element. The golden star hanger ties it all together with a regal finish. This is an ornament that starts conversations.
32. Translucent Pale Green Glass Ornaments with Gold Detailing
When working with translucent glass ornaments, always paint details from the inside if possible—it gives a softer, more luminous effect than exterior paint. For gold line work, use a gold leaf pen instead of paint; it’s more precise and dries without brush marks. The faceted geometric shape will reflect light differently depending on placement, so hang one and rotate it before deciding where the rest go.
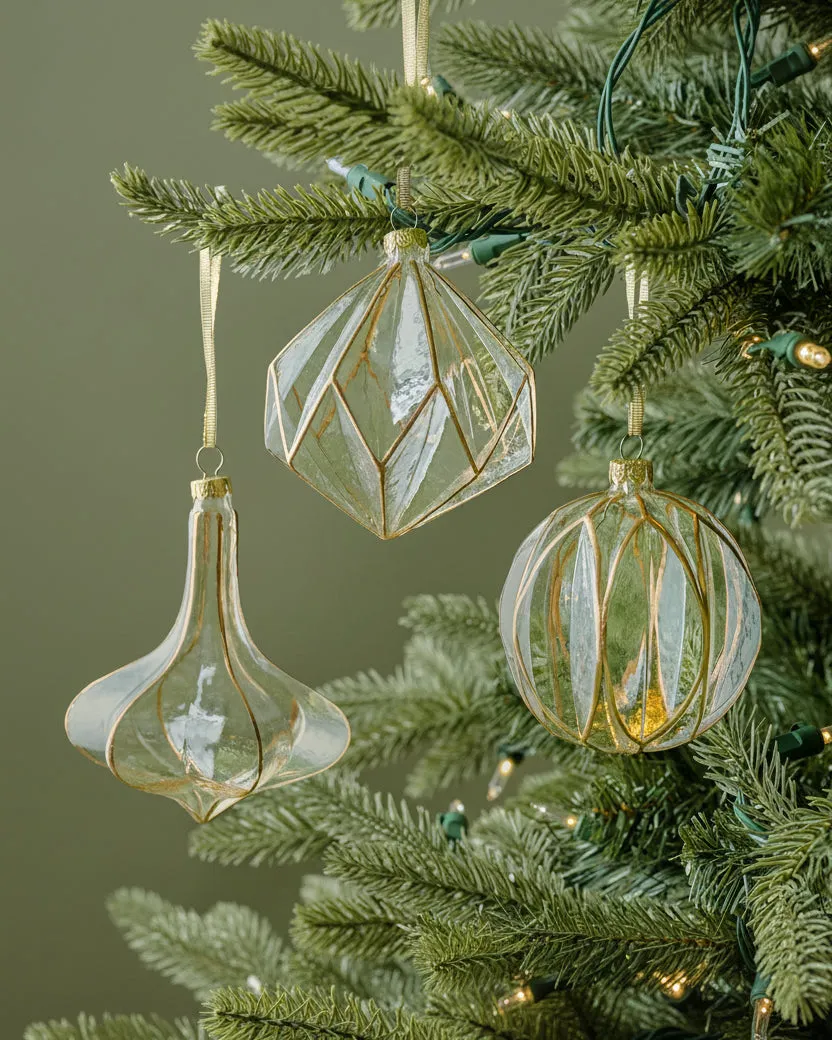
Pale green glass paired with gold is timeless, but it can read as too ‘spring’ if your tree is heavy with red and burgundy. Stick to a palette of cream, gold, and deep green for a cohesive look. The thin gold ribbons are elegant but can slip off the branch; tie a tiny knot at the end to prevent sliding. These ornaments are delicate—wrap individually in tissue for storage.
33. Handmade Natural Twine Star Ornament with Beads
This is the most affordable project on the list. A roll of jute twine costs $3 at Walmart, a bag of natural wooden beads $4, and you already have the time. The entire star can be made for under $8. For the coiling technique, start with a small circle and wrap the twine around itself, adding beads every few wraps. Use a dab of hot glue to keep the coils in place.
The formula here is 80% natural twine, 15% wooden beads, 5% open star shape. The monochromatic light brown palette feels warm and Scandinavian. Swap the twine for white cotton rope and add silver beads for a coastal winter look. Or use dark brown jute with red beads for a more rustic farmhouse holiday. The star shape keeps it festive no matter the materials.
34. Ornate Golden Egg Ornament with Roman Numerals
The Roman numerals on the white band are the one thing that makes this egg ornament memorable. Without them, it would be just another gold glitter bauble. The numerals give it a clock-face, old-world feel—like a treasure from an ancient holiday. They also make it a great keepsake for celebrating a specific year or anniversary. The black vertical lines with silver dots add a subtle celestial map quality.
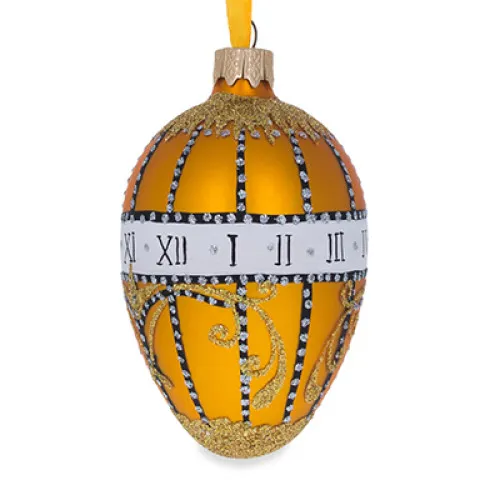
Opulent, maximalist ornaments are back in 2026 as a reaction to years of minimalism. People want their trees to feel abundant and storied. This golden egg with ivory and Roman numerals fits the ‘old money holiday’ aesthetic that’s trending on social media. It’s a statement piece that works on a tree with deep burgundy, forest green, and antique gold—no bright colors needed.
Your Tree’s Story Starts With a Single Handmade Ornament
You don’t need all 34 ideas—just pick one that makes you smile and start there. The best trees are built slowly, ornament by ornament, with pieces that mean something. So save this to Pinterest for later, grab your glue gun or felt, and let your tree tell a story only you can tell.