25 Jaw-Dropping Homemade Christmas Ornaments You Must Craft This Holiday Season

Still scrolling through homemade Christmas ornament photos without knowing which ones are actually worth making? You’re not alone—and most guides feel too generic. We spent serious time browsing Michaels, Etsy, Hobby Lobby, Target, and Amazon to bring you only what’s worth your attention this year, from $3 twine projects to $45 heirloom kits. This guide gathers 25 curated ideas spanning rustic natural, playful clay, embroidered folk, and keepsake styles. And stay until the end—we break down the most common mistakes that can ruin these looks. In 2026, slower, hands-on holiday rituals are everywhere on Pinterest, and ornament-making is the easiest way to start. 📌 Save this to Pinterest for later—you’ll want to revisit these ideas.
1. Glitter-Crusted Tree, Snowflake, Star and Stocking Set
With a 1/4-inch thick salt dough or air-dry clay base, get the glitter to stay by brushing on a 50/50 mix of decoupage medium and water with a flat foam brush. Dust the glitter over a paper plate, then tap the back twice—seriously, tap harder than feels necessary. Do two thin layers rather than one thick shell, or the red ribbon will start flaking the edges as the ornament turns on the tree.
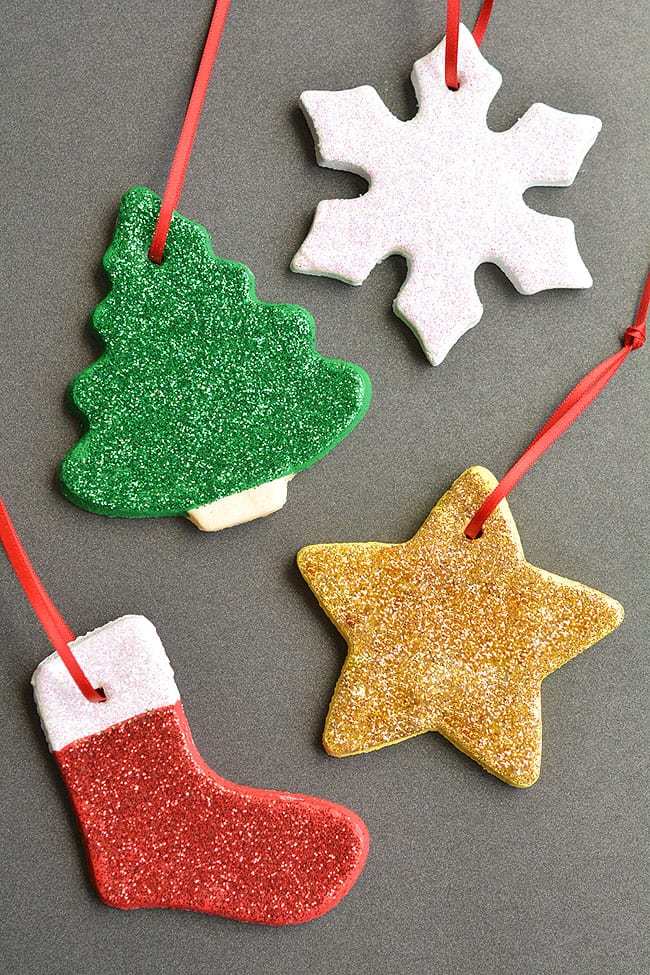
What makes this set work is the thick, all-over glitter crust on every silhouette. Take that away and you have four flat dough shapes. Leave it, and the tree, snowflake, star, and stocking instantly read as a collected set even though the forms are simple. The red ribbon loops are the quiet hero—they give each piece a clean top line and keep the sparkle from feeling chaotic.
2. Off-White Felt Tree and Heart Ornaments with Blanket Stitch
- Off-white wool blend felt (three sheets): $8–$12
- Red embroidery floss and satin ribbon: $5–$8
- Blanket stitch template and polyfill: $4–$6
- Mini branch or artificial tree placement: $0 if using existing
- Total: $17–$26
- Budget alternative: Use craft felt from Michael’s at $1 per sheet and red baker’s twine from Walmart ($4) to get the same look for under $10.
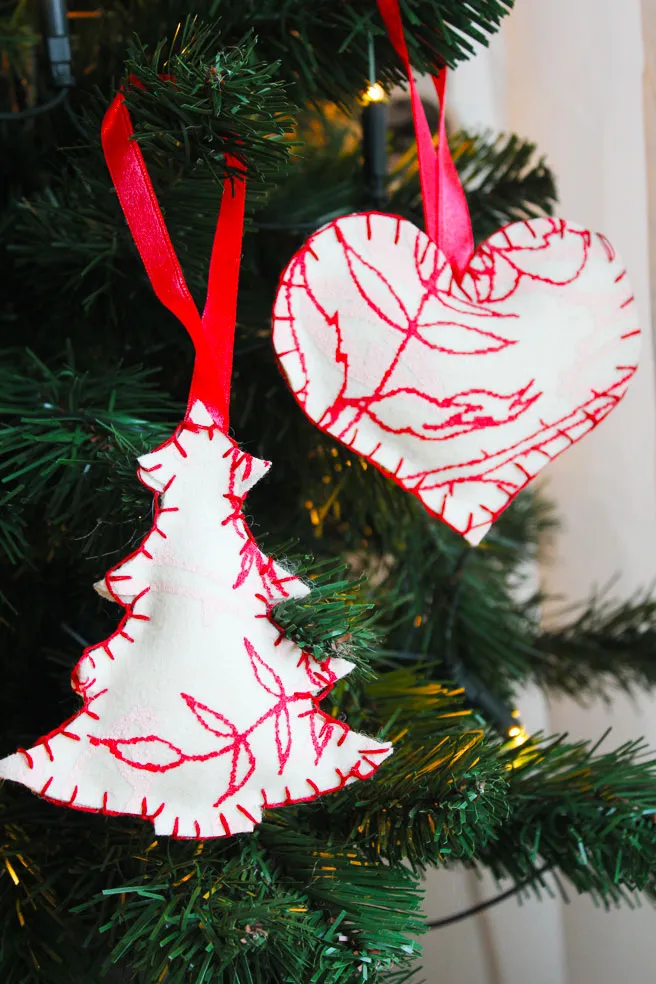
The off-white felt reads almost like a blank canvas against the dark green needles, so the red blanket stitch does all the talking. The warm white fairy lights hit the raw edges just enough to create shadow lines, which makes the simple tree and heart feel dimensional. The satin ribbon hangers add a slightly dressy note that keeps the handwork from turning too country.
3. Thick Gold Glitter Star Ornament on a Red Ribbon
This thick glitter star is stunning, but it will shed—especially in a warm room with kids or pets walking past the tree. Seal it with two light coats of clear matte spray, letting each coat dry 30 minutes. The red satin ribbon will want to slide through that small hole, so add a tiny dot of hot glue behind the top point after threading. And honestly, this ornament shines best alone or in pairs; place it on a branch with breathing room so the blurred warm lights behind it can do their job.

The formula here is 70% single-impact gold, 20% red ribbon, and 10% blurred warm bokeh. If you want a different mood, swap the gold for silver or copper and keep the red ribbon. If you go burgundy ribbon instead, the star turns a bit more traditional. The point is not to add a third strong color—let the glitter be the whole personality.
4. Felt Gingerbread, Reindeer and Candy Cane Ornaments with Pine Cones
The pine cones are the one element that makes this arrangement work. Without them, the felt gingerbread man, mitten, reindeer, and candy cane might read as a craft table spread. With them, the whole thing turns into a warm, woodland holiday scene. The dark brown wood surface also does a lot of work—don’t swap it for a white plate unless you want a completely different energy.
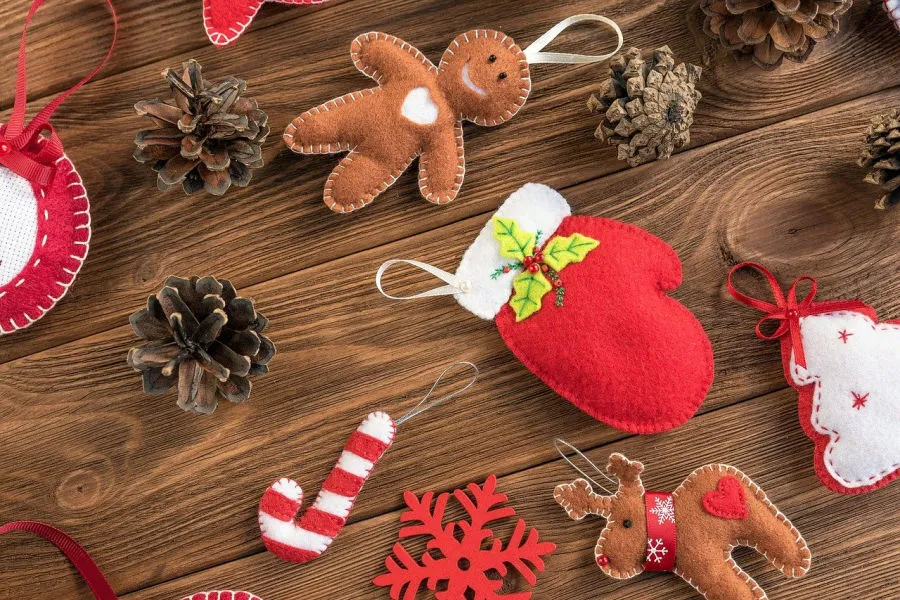
This mix of soft felt and natural pine cones taps straight into the folk-art revival that’s been building on Pinterest for two years. In 2026, the trend is less about perfect stitches and more about texture you want to touch. Felt ornaments are also a practical choice in homes with little kids or pets, which keeps their popularity steady.
5. Whimsical Handcrafted Ornaments on a Wooden Cutting Board
You don’t need a fancy kit to recreate this. Grab an unfinished wood cutting board at Target or a thrift store for $5–$12, rustle up last year’s ribbon scraps, and hit Michael’s for a bag of unfinished wood shapes for $6. A few paint pens at $8 and a strand of red-and-white striped twine from Walmart for $4 pull it together. The entire tray setup lands around $25–$35, and the board can live in your kitchen all year.
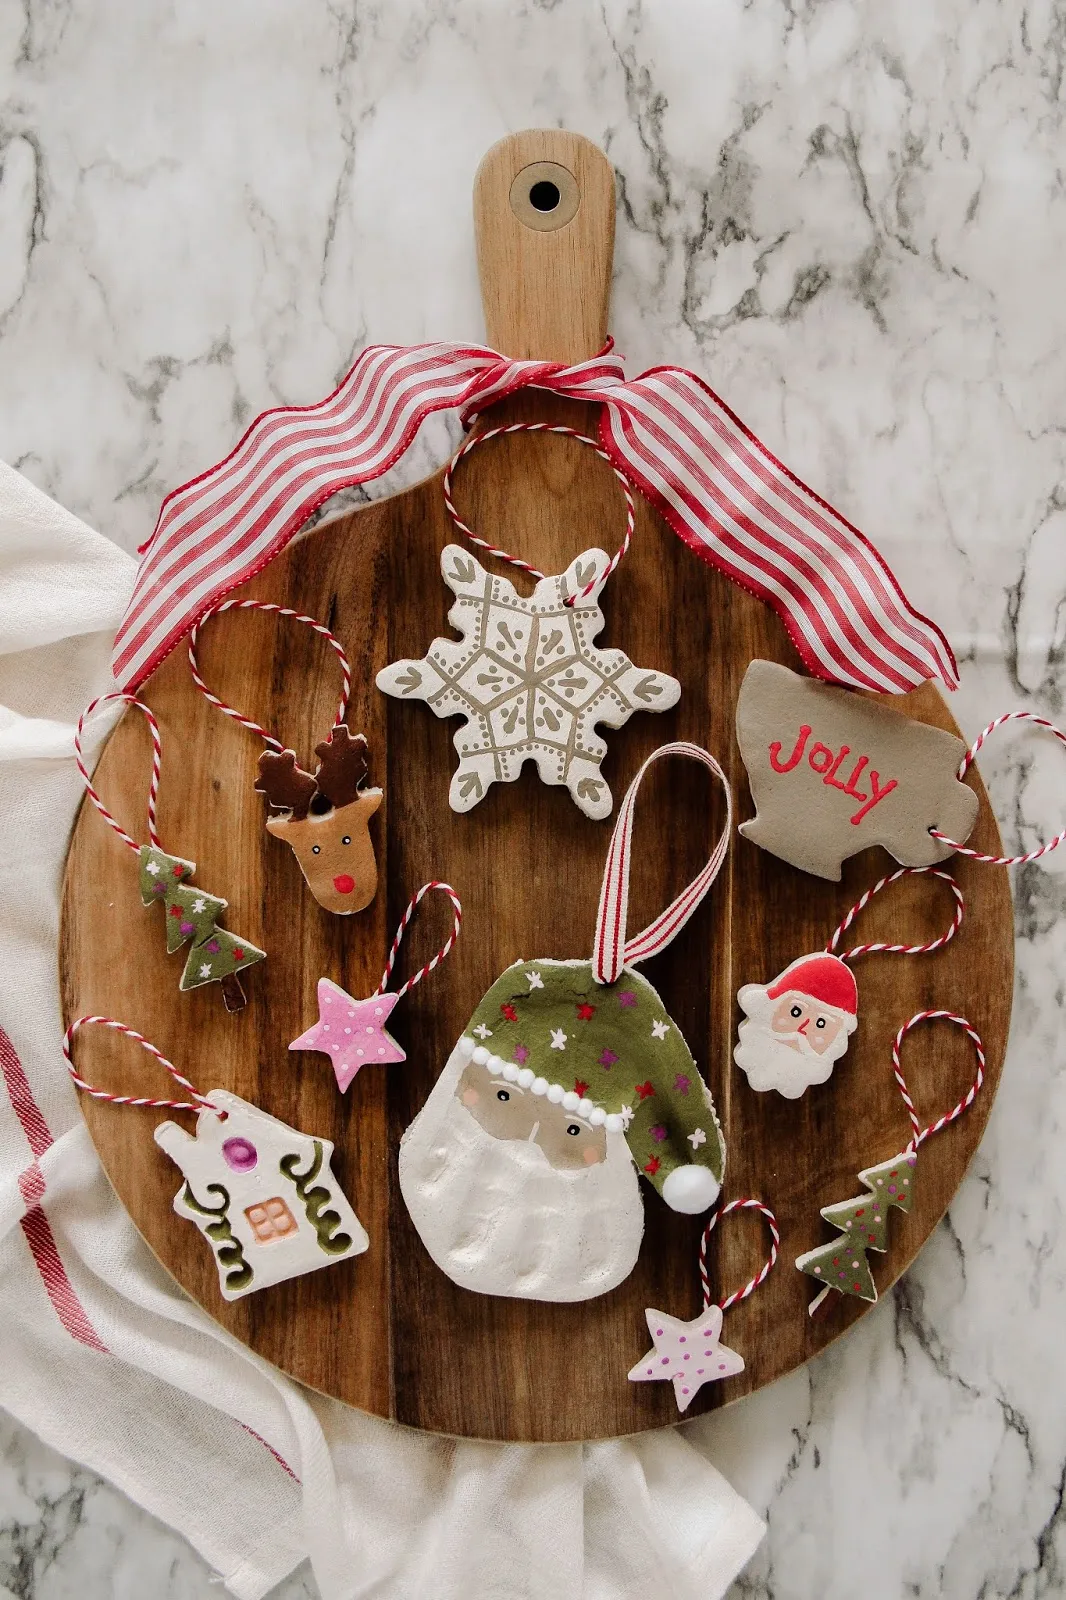
This vignette needs about an 18-by-18-inch patch of countertop or console to feel intentional. On a smaller apartment sideboard, use a 12-inch round board and limit yourself to five ornaments. If you have a wide marble island, go bigger, but keep the ornaments clustered, not lined up like a yard sale. Compare the restraint here with the fuller pile in Idea #12—same neutral ground, different level of edit.
6. White Bird with Red Belly and Clear Bauble on a Lit Tree
The clear glass bauble and the white bird with red belly work because they separate into two layers of interest: the bauble reflects light, while the bird absorbs it. The gold glitter on the bird gives you one metallic pop per cluster, which is enough. Warm white string lights are the unsung hero here—they keep the greens from going flat and make the delicate red ribbon on the bauble visible without a flash.
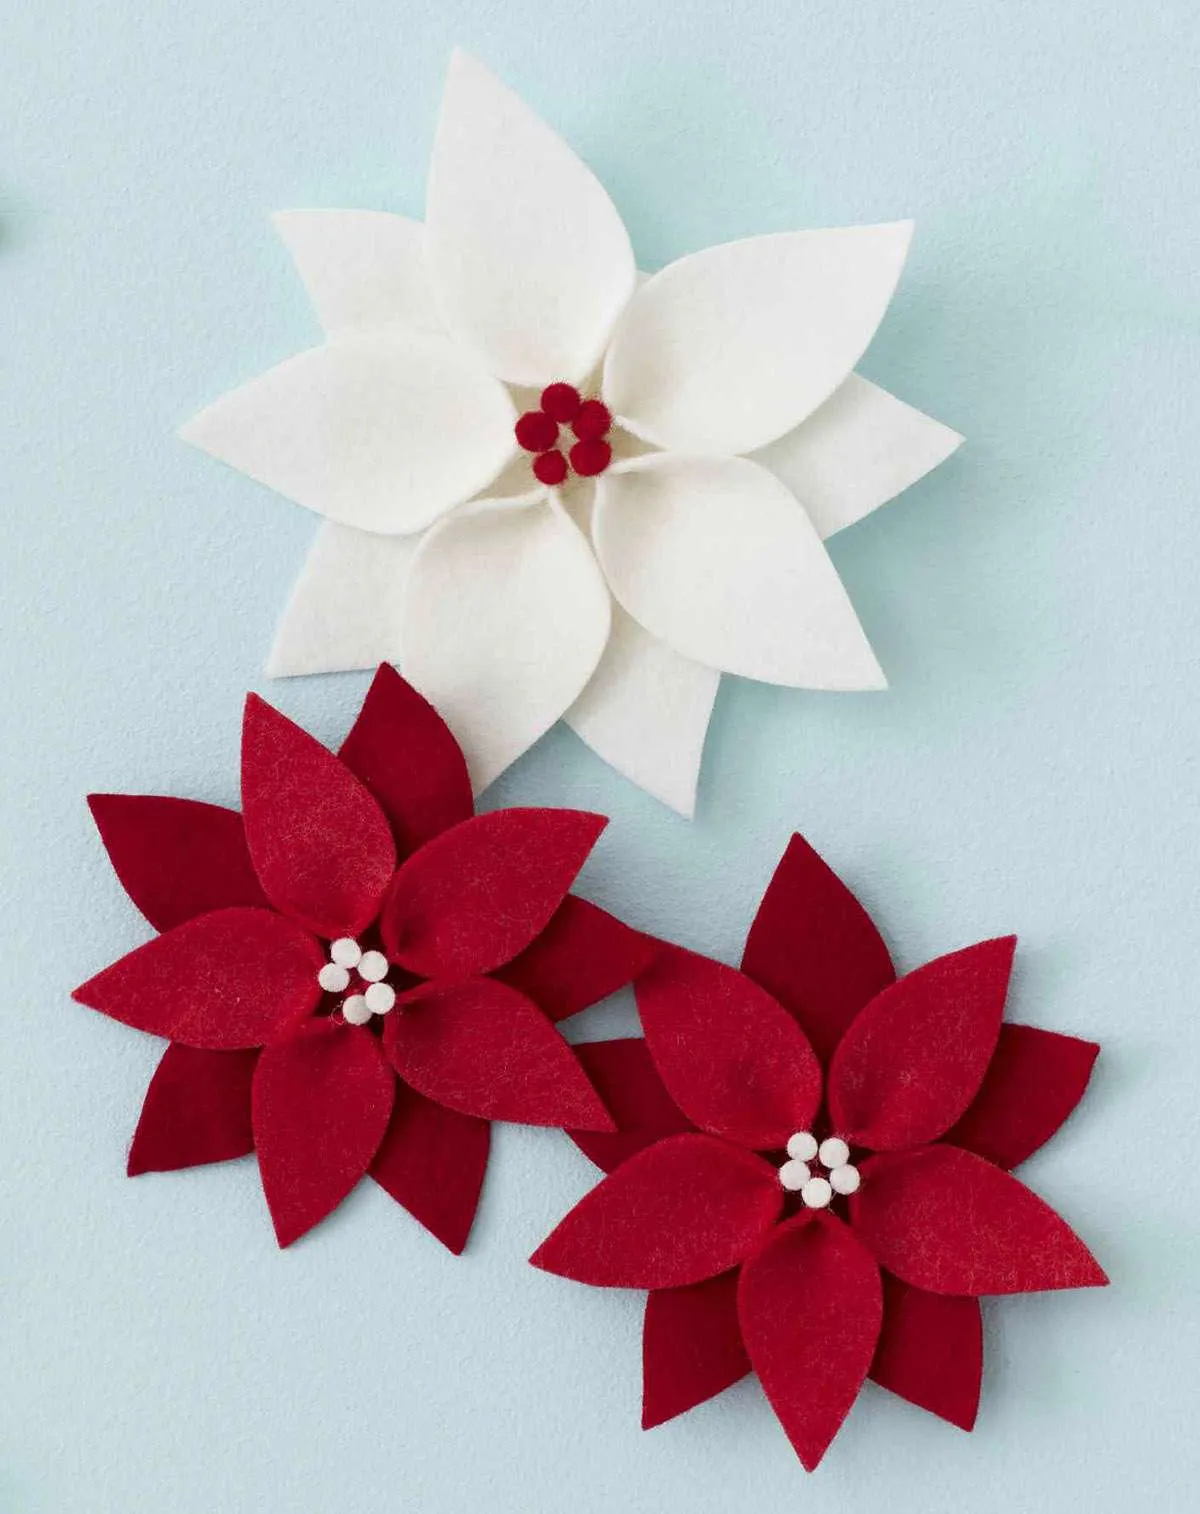
When you hang delicate ornaments like this, place them at eye level on outer branch tips so the string lights can glow behind them. Use a 2-inch red satin ribbon, fold it in half, and knot the tails instead of the loop—the ornament will hang straighter. If it spins too much, wrap a tiny clear rubber band around the branch and the ribbon knot to freeze the angle.
7. Easy Salt Dough Baby Handprint Ornament Keepsakes
- Stir 2 cups flour, 1 cup salt, and 3/4 cup warm water until a dough forms.
- Knead 10 minutes, then roll to a 1/4-inch thickness on parchment.
- Press a clean baby hand firmly into the dough once, then cut a 3-inch circle around the print with a cookie cutter or knife.
- Use a straw to poke a hanging hole near the top, then transfer to a parchment-lined sheet.
- Bake at 200°F for 2–3 hours, flipping halfway until hard.
- Let cool, then seal both sides with Mod Podge or polyurethane.
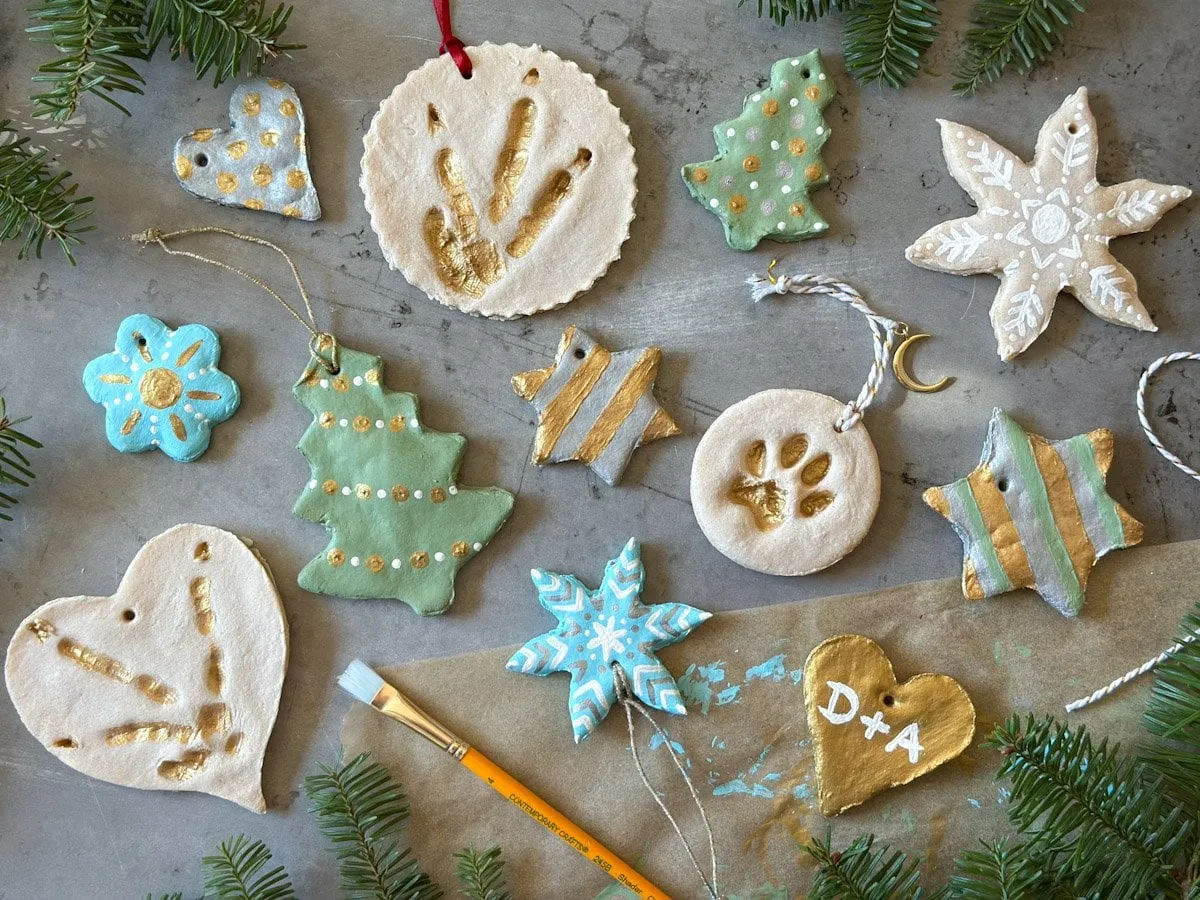
Time: about 30 minutes prep plus bake. Materials: under $5.
Salt dough is wonderfully cheap but it can absorb humidity and soften if you skip the seal. Store these in an airtight container with a silica packet, and check them every November before you hang them. If a handprint ever feels tacky or smells musty, bake it again at 200°F for an hour, then reseal. It’s not bulletproof, but with care it’ll last many Christmases.
8. Hand-Painted White House Ornament with Yellow Door
Custom-painted house ornaments surge every December because people want a tiny version of their own front door, and 2026’s take leans hand-painted rather than vinyl-perfect. The wobbly white base, black roof, and yellow door here feel like a small painting, not a product. That’s exactly why it stands out against the blurred greenery and warm bokeh—it reads as a memory, not a mass-produced shape.
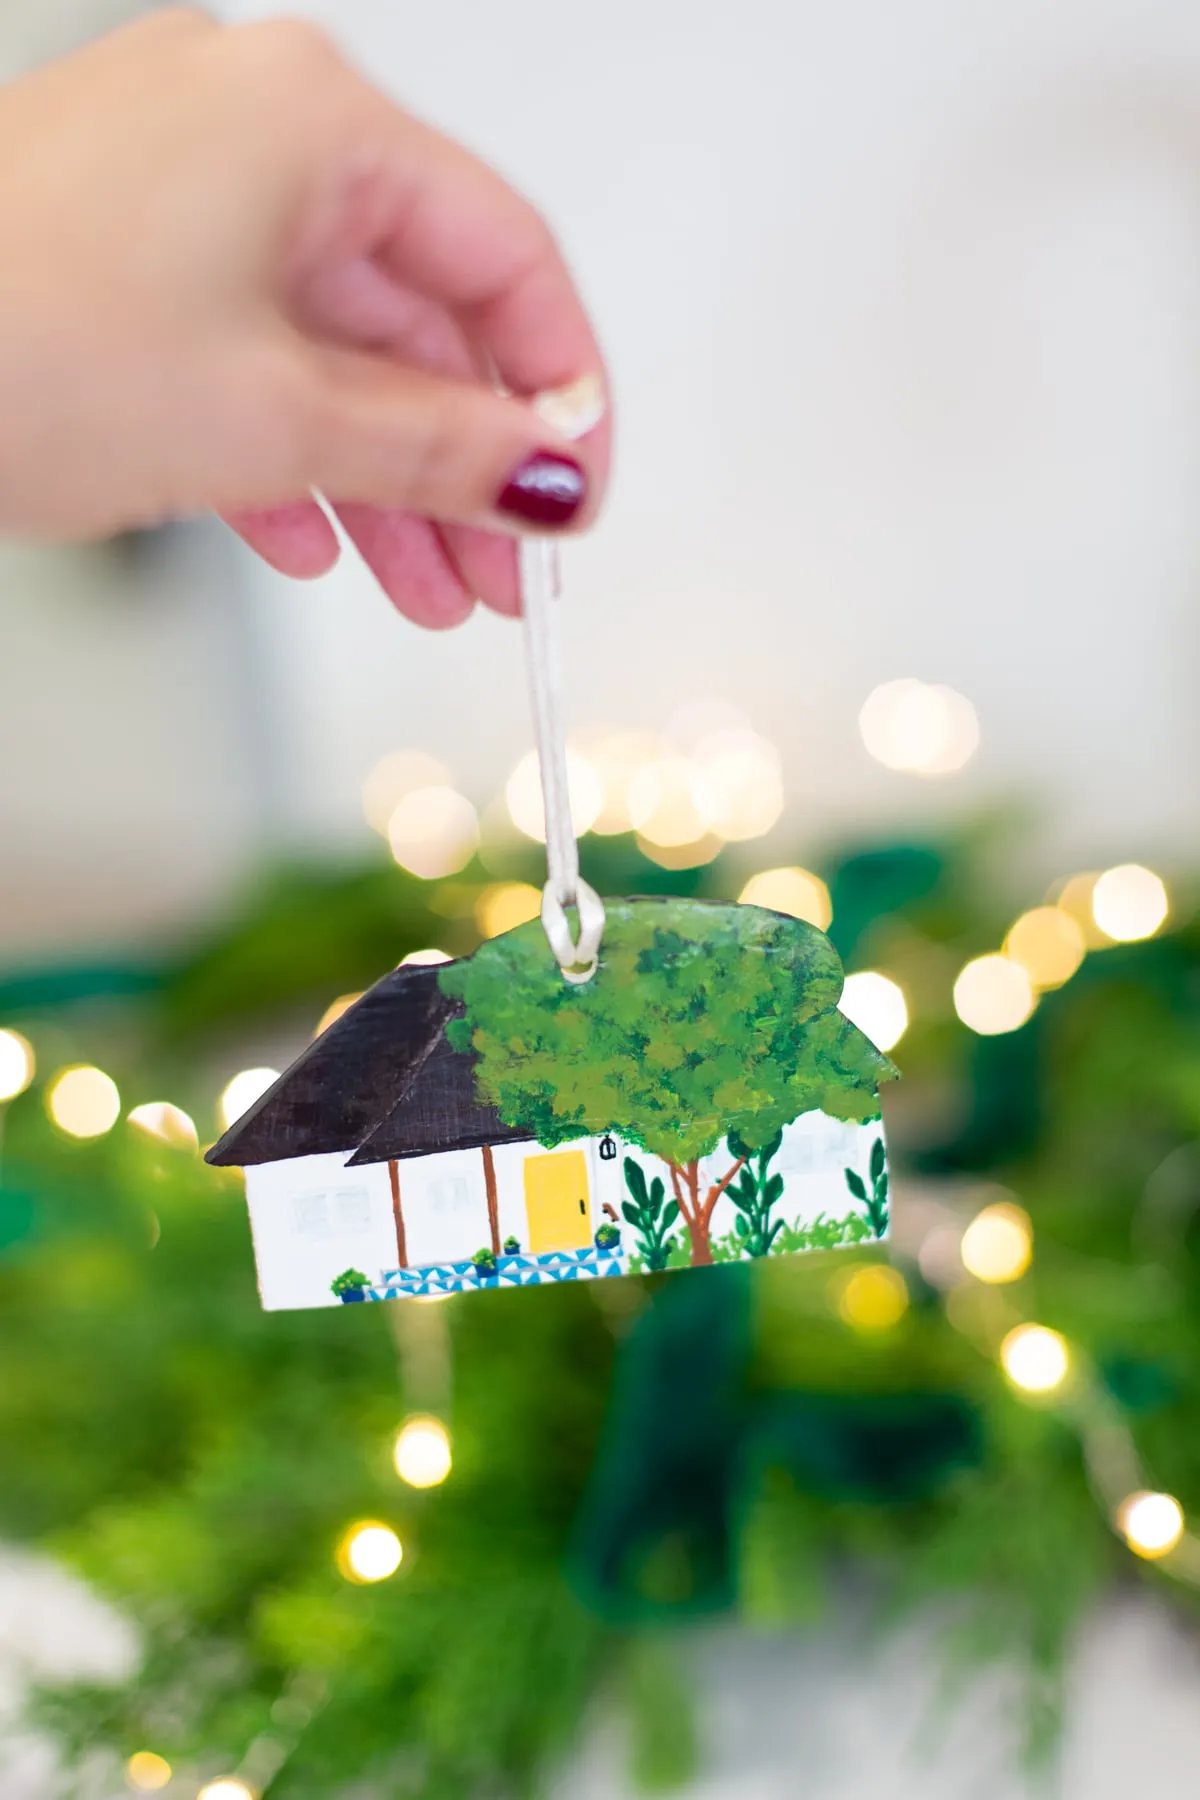
Think 60% white base, 20% green trees and shrubs, 10% yellow door, 10% black roof. The blue-and-white porch detail is the secret ingredient; it breaks up the white and gives the eye a place to rest. If you swap the yellow door for red or navy, keep the foliage green and the roof black so the structure still reads as a house from across the room.
9. Hand-Painted Gingerbread, Tree and Star Ornaments with Assorted Hangers
Here’s the thing: assorted yarn and ribbon hangers look wonderful, but they tangle the moment two ornaments touch in storage. Wrap each one in a small square of tissue or slide a toilet paper tube over the hanger. Hand-painted dough ornaments also chip along edges if you toss them into a bin, so lay them flat in a shallow box with parchment between layers.
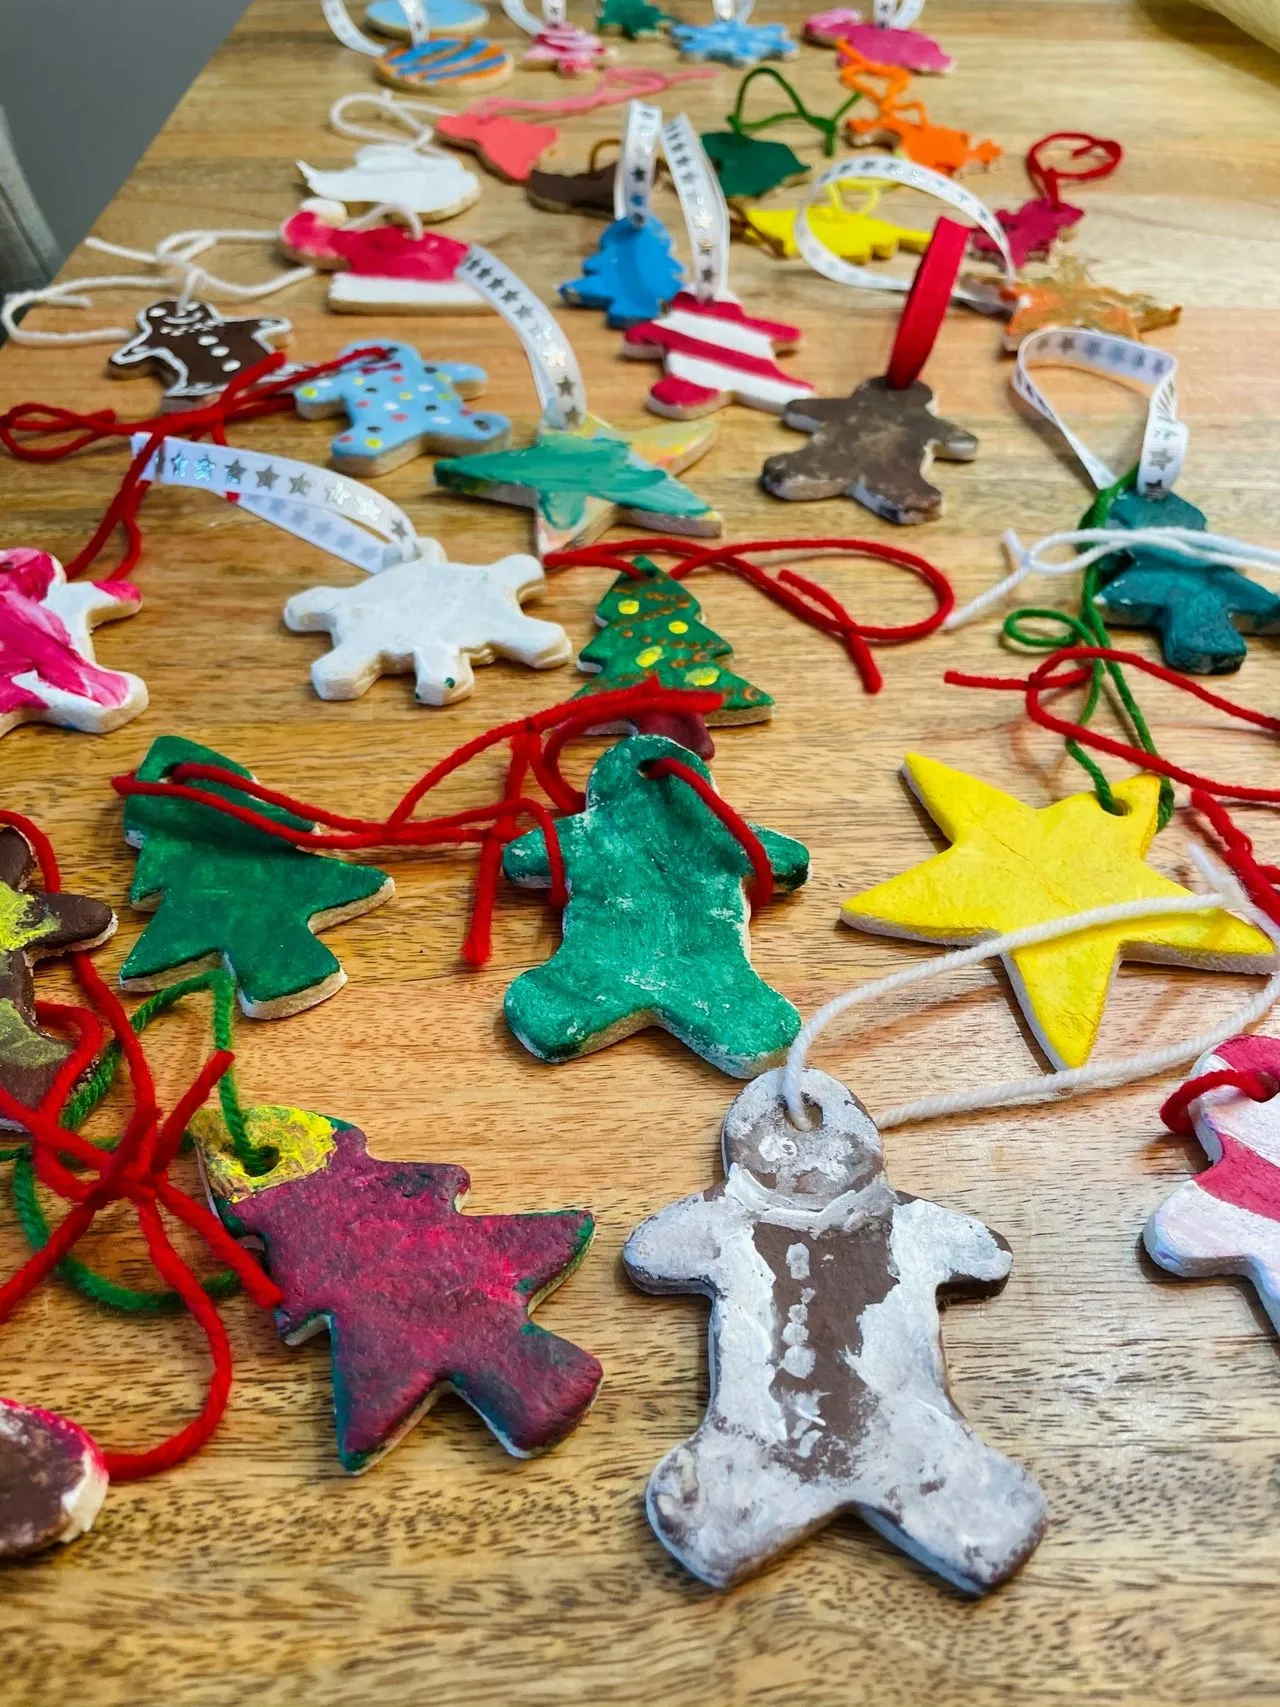
The mismatched hangers are the single most important detail. Red yarn, a star-patterned white ribbon, whatever else you have—they make the set feel collected over decades rather than made in one afternoon. If you replace them all with one uniform string, you’ll lose the homemade, playful energy. Protect that variety.
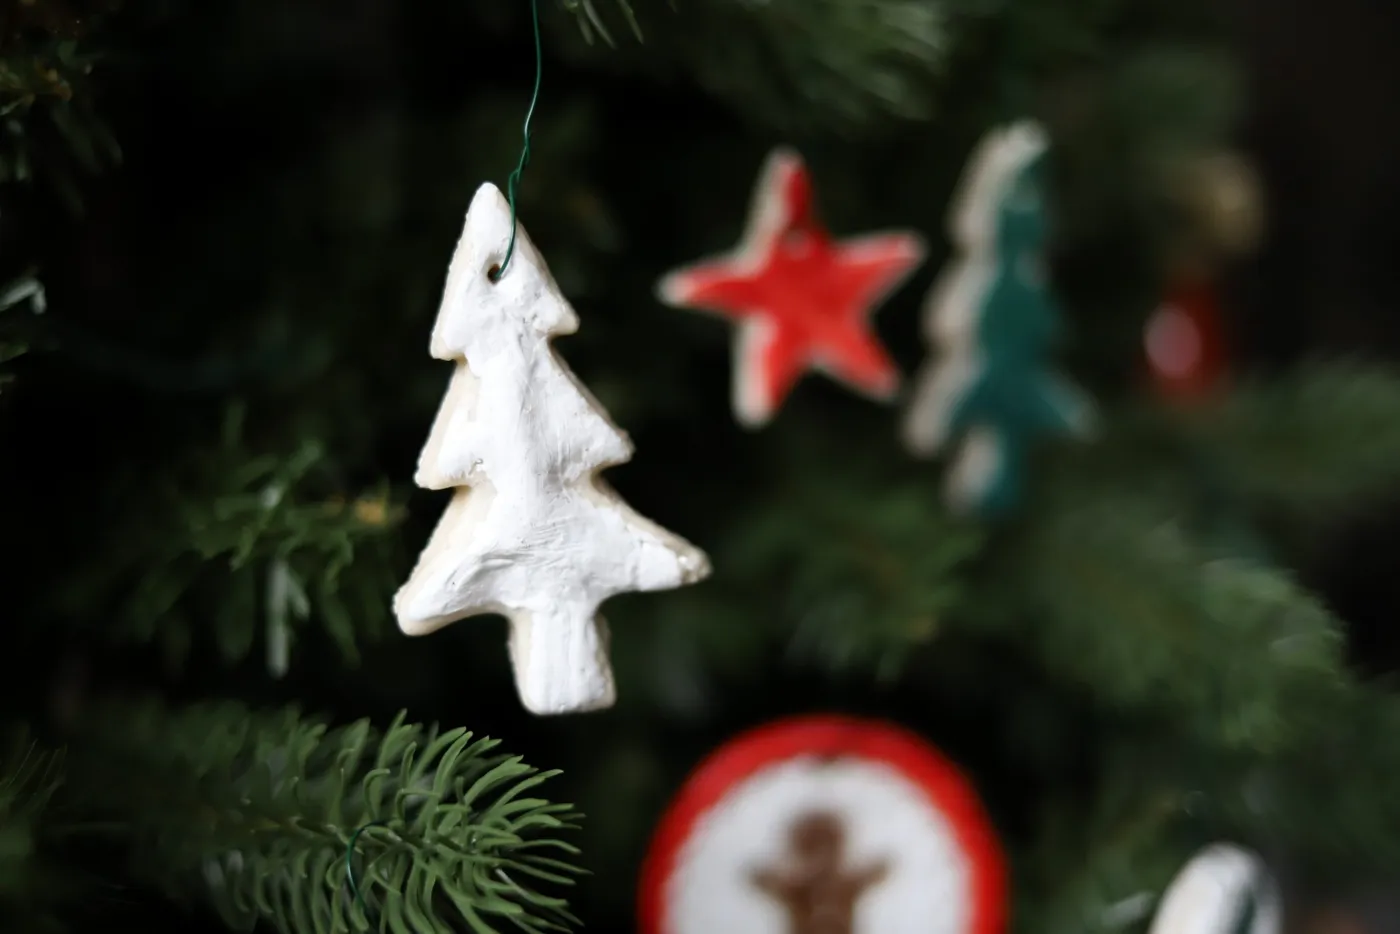
10. Rough-Textured White Tree Ornament on Evergreen Branches
The rough white tree ornament and its teal and red companions need a full-size tree or a thick evergreen garland to hang from. On a little tabletop tree, the white tree would look like a clenched fist among the needles. A 7-foot tree or a 6-foot garland across a mantel gives the chunky homemade finish proper room. If your space is petite, use one ornament per branch cluster, not three.
|
📋 Copy HEX 🔗 Share |
You can get this snowy, rough-textured look cheaply: buy plain ceramic or plaster tree blanks from a dollar store or Target for $1–$3 each. Mix white acrylic paint with fine play sand or baking soda to create the rough texture, then paint two coats. Thread green floral wire or jute for the hanger. A set of four comes in under $15, and no one will guess they aren’t high-end clay.
11. Playful Clay Snowman, Stocking and Candy Cane Ornaments
When you’re painting playful clay shapes with tiny features, get a toothpick and lightly scratch your placement lines into the wet surface before filling. Wait a full 24 hours after painting before you seal, or the red and gold will smear. For twig arms, drill pilot holes with a 1/16-inch bit before baking or drying, then dip the twig ends in hot glue and press in. Googly eyes should go on last, after the topcoat, so they don’t get cloudy.
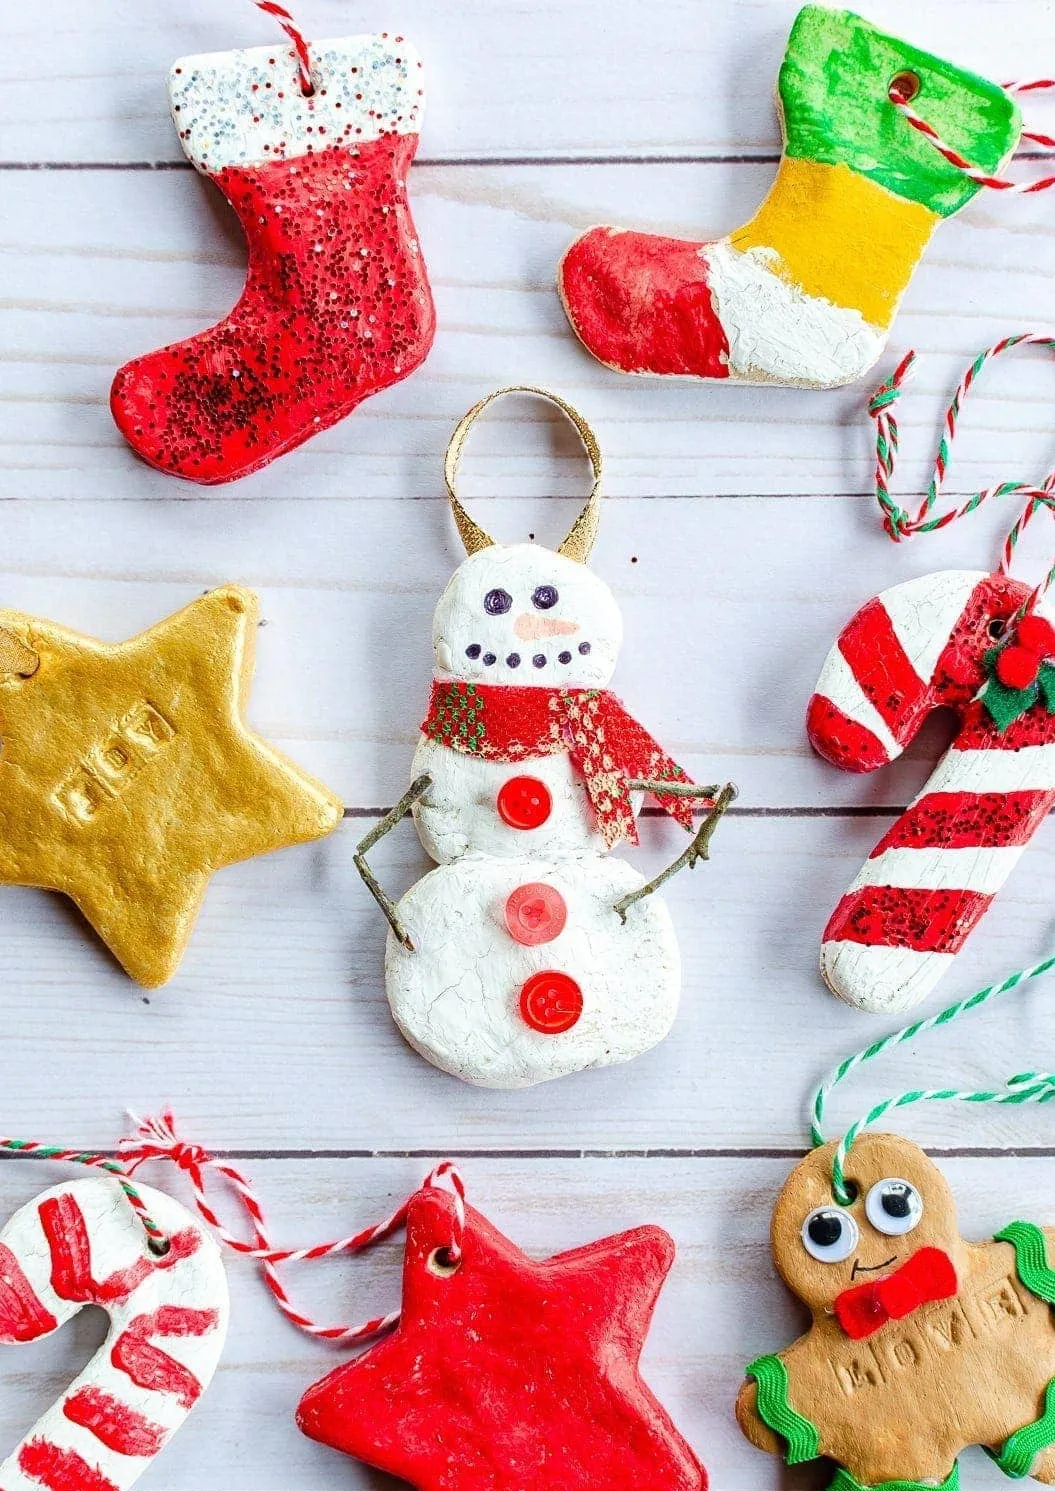
The repetition of red, green, gold, and white across different shapes is what unifies this busy collection. A snowman, stockings, candy canes, stars, and a gingerbread man can coexist because the palette stays tight. The braided red-and-green twine reinforces the color story and gives every ornament a rustic finish. That repeated twine is doing more work than it looks like.
12. Light Beige Cookie-Style Trees and Snowflakes with Twine
Unglazed cookie-style ornaments can absorb hand oils and develop yellowish fingerprints over time. Seal with a matte water-based varnish on both sides once they’re fully dry, and dust only with a dry microfiber cloth. If you hang them in a humid kitchen or bathroom, the twine may darken—so keep them on a tree in the main living space instead.
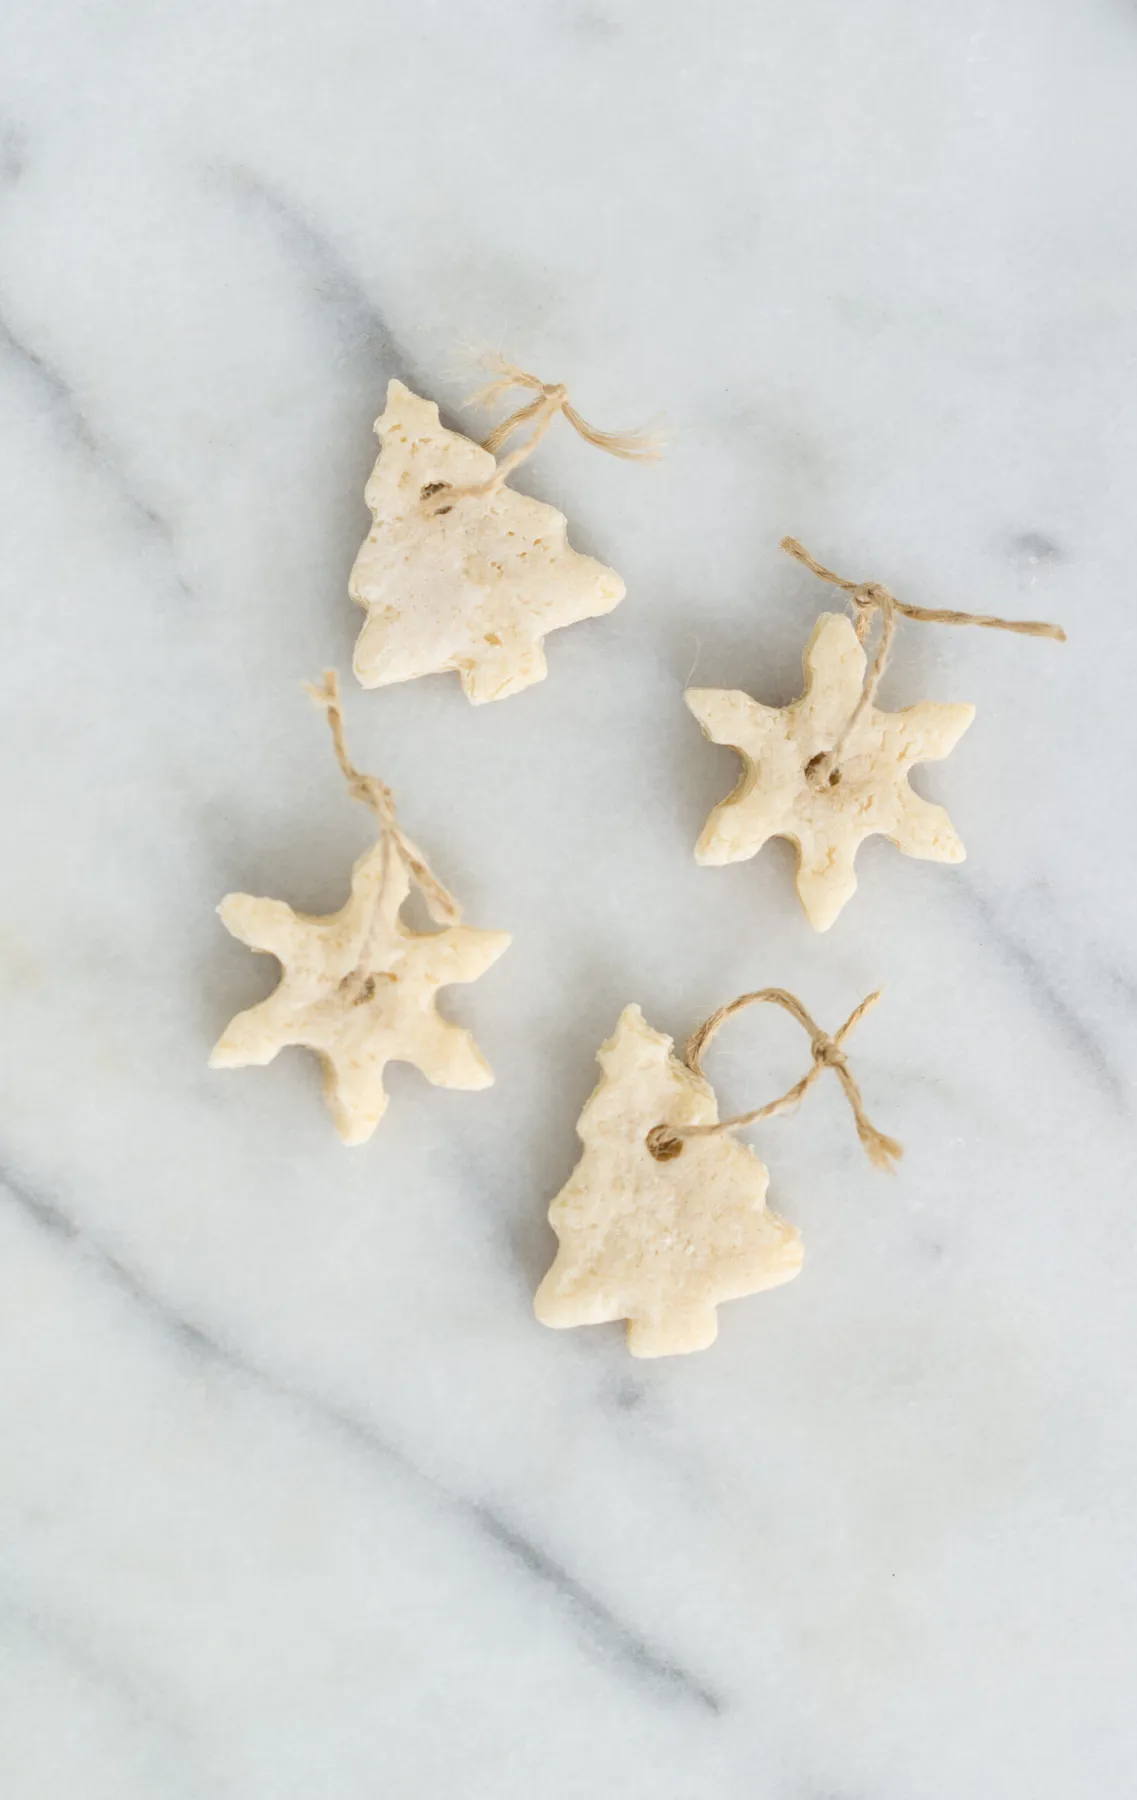
To make clean hanging holes without cracking, cut them while the dough is still soft with a drinking straw. Twist the straw, blow out the plug, and smooth the back side. After baking or drying, sand the edges with a fine nail file. Thread natural twine through with a darning needle rather than poking it with your finger. Budget 20 minutes, cost about $2 for twine.
13. Cross-Stitch Hoops, Felt Lion and Upcycled Coffee Pod Bells
The visual formula works because it’s 40% dark stone neutral, 30% red and green tradition, 20% blue and orange surprise, and 10% gold string. The wooden embroidery hoops and circular cross-stitch pieces add softness, while the denim tree and felt lion bring unexpected textures. To make it your own, keep the hoops and cross-stitch ‘HO’ lettering, then swap the lion for a red fox or a tiny raccoon.
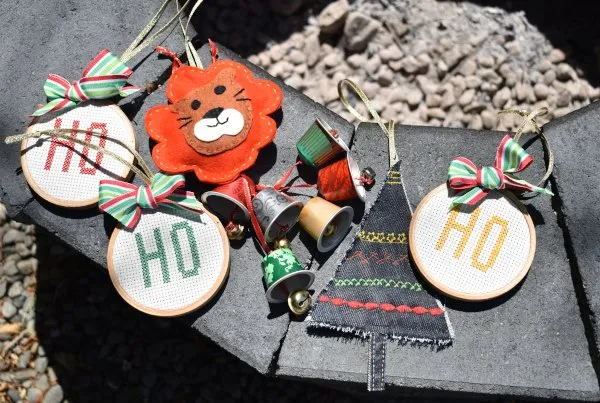
The repurposed coffee pod bells are the one thing that makes this whole collection memorable. They add a metallic gleam and a clever eco-story, and people always ask about them. Without them, this is a lovely but predictable embroidery set. With them, it reads as a personal, thrifty, anyone-can-do-this project.
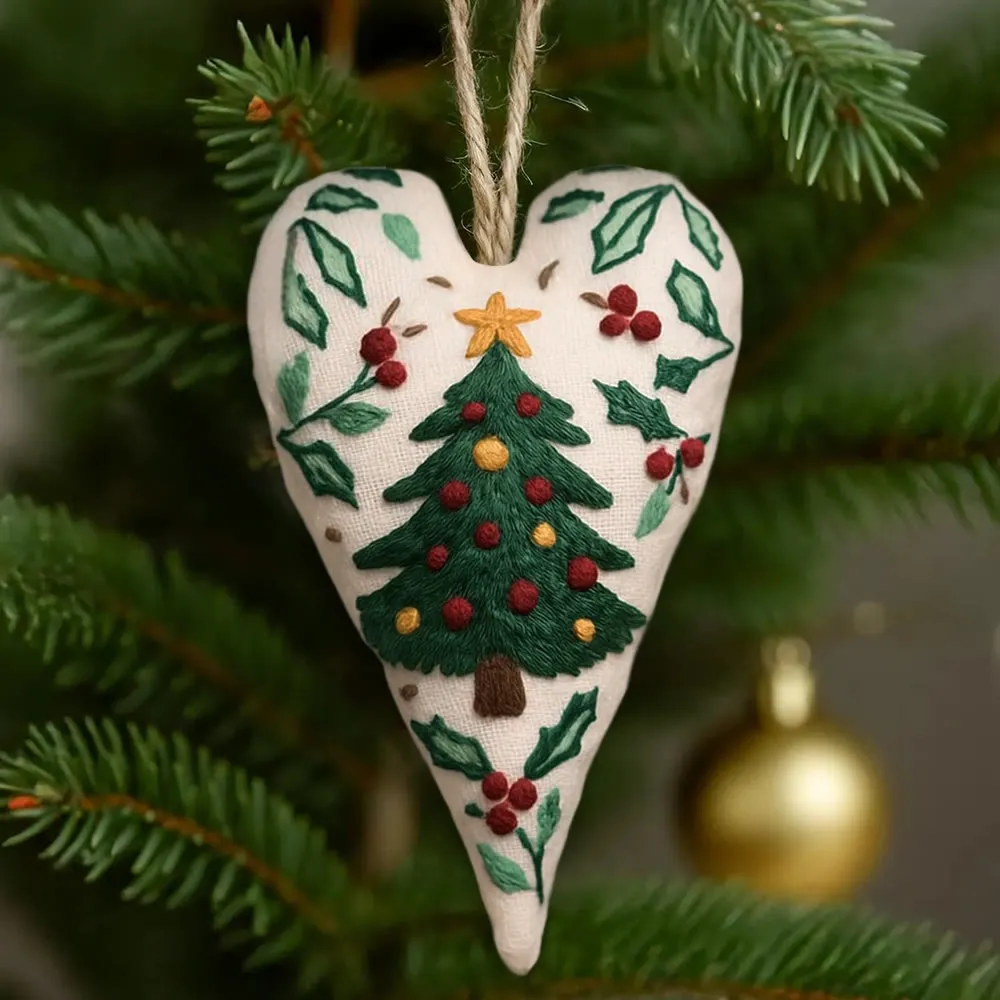
14. Cream Heart Ornament with Embroidered Tree and Berries
Embroidered heart ornaments are part of a growing “heirloom holiday” movement on Pinterest—people want small, portable stitching projects that feel traditional but not fussy. A heart with a central Christmas tree, red berries, and a yellow star is exactly the kind of piece you can finish in a single weekend, then pass down. In 2026, that slow-craft energy is the antidote to plastic bauble overload.
|
📋 Copy HEX 🔗 Share |
A cream fabric heart on a real tree will pick up sap and tiny needle oils, especially near the trunk. Spray it with a light fabric protector and hang it on an artificial tree or at the outer tips. The red embroidery and berries can bleed if you ever try to wash it by hand, so spot clean only with a damp cotton swab.
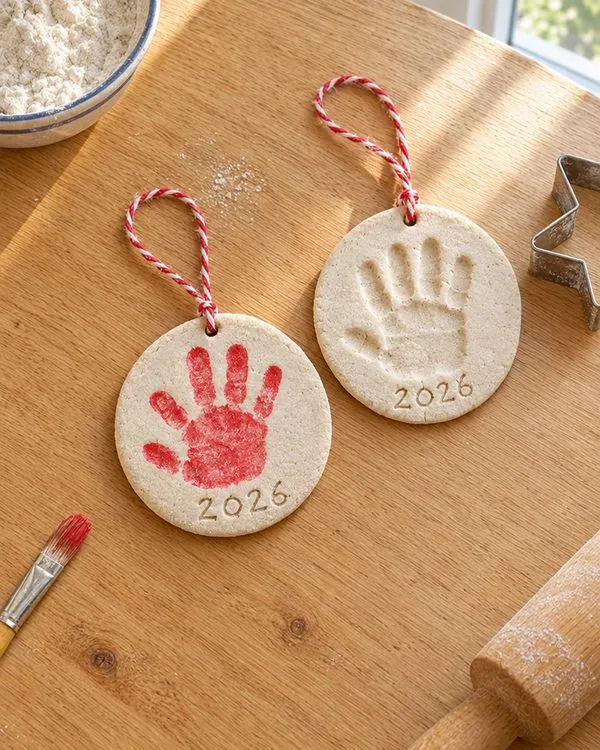
15. Handprint Keepsake Ornaments with 2026 Date Imprint
- Air-dry clay or salt dough (enough for 6–8 handprints): $8–$15
- Non-toxic red paint and brush set: $10–$14
- Red-and-white striped baker’s twine: $5–$7
- Clear matte sealer: $8–$12
- Rolling pin and circle cutter: $0 if already in kitchen
- Total: $31–$48
- Budget alternative: Use flour, salt, and water for under $4, plus dollar-store twine, to create the same keepsakes for less than $8 total.
|
📋 Copy HEX 🔗 Share |
These 3–4 inch handprint ornaments fit a full-size tree easily, but if you have a slim 4-foot tree, use no more than five so they don’t bunch. The light wood surface in the photo makes a great drying rack, but don’t stack them until fully cured. Compare with the simpler salt dough project in Idea #7 for a same-day version.
16. Punch Needle Christmas Tree Art in a Wooden Hoop
The red background is the strongest move here—it makes the green tree jump forward because they’re complementary colors. The wooden hoop frames the round composition and echoes the natural wood table underneath, creating a nesting effect. Yarn loops in red, green, white, and yellow add actual physical dimension, so the piece shifts subtly as you walk past it. The metal hanger gives it one crisp line at the top.
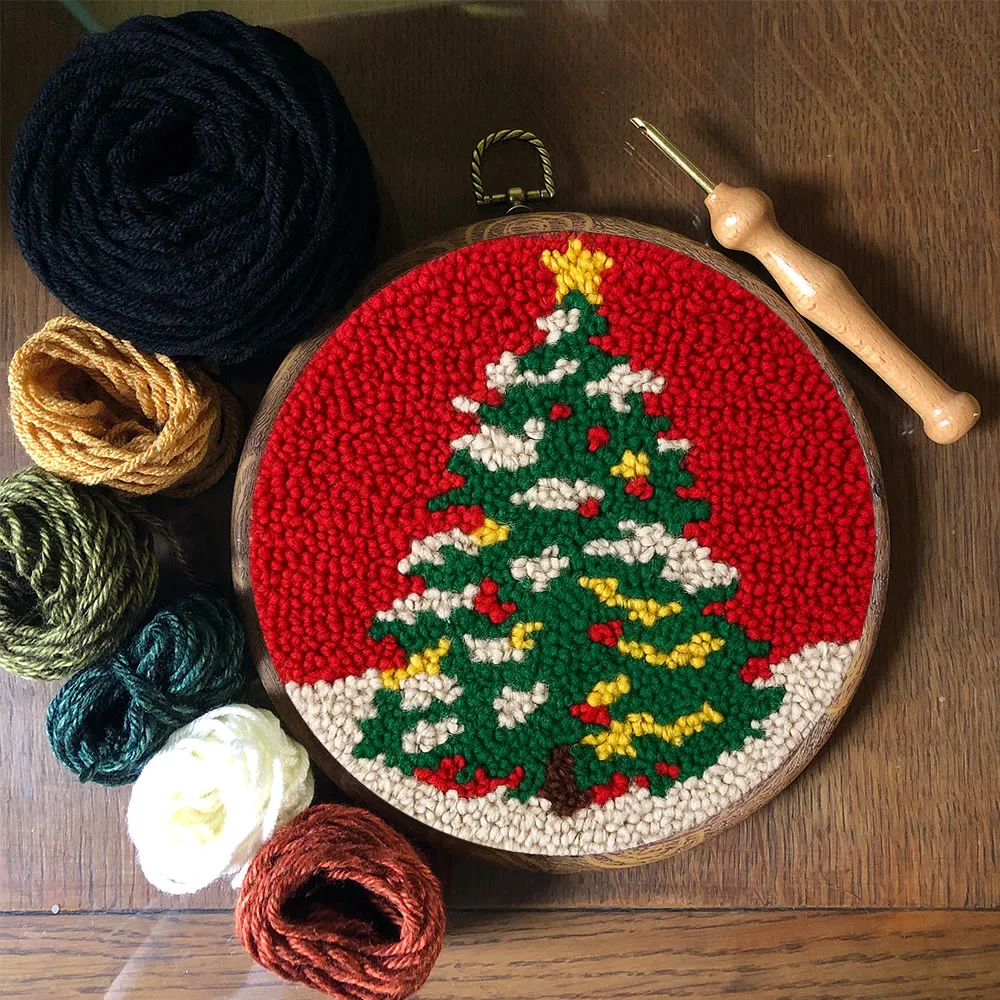
You can make this with a hoop you already have, leftover yarn from any knitting basket, and a scrap of monk’s cloth. A basic punch needle tool runs $8–$10 at Michael’s or Amazon. That puts the entire project under $20 if you skip new yarn and use what’s in the house. Check thrift stores for embroidery hoops—they almost always have a few.
17. Sugared Green Tree Ornaments on a Plaid Towel
For that sugared look, mix fine glass glitter into clear-drying craft glue and dab it only on the raised areas of a green ceramic ornament. Let it cure 48 hours before hanging, or you’ll have glitter snow on every branch below. Use 1/4-inch white satin ribbon and tie a loose loop, not a tight knot, so the ornament hangs straight. If you’re doing a set, keep the glitter concentrated at the top third of each tree.
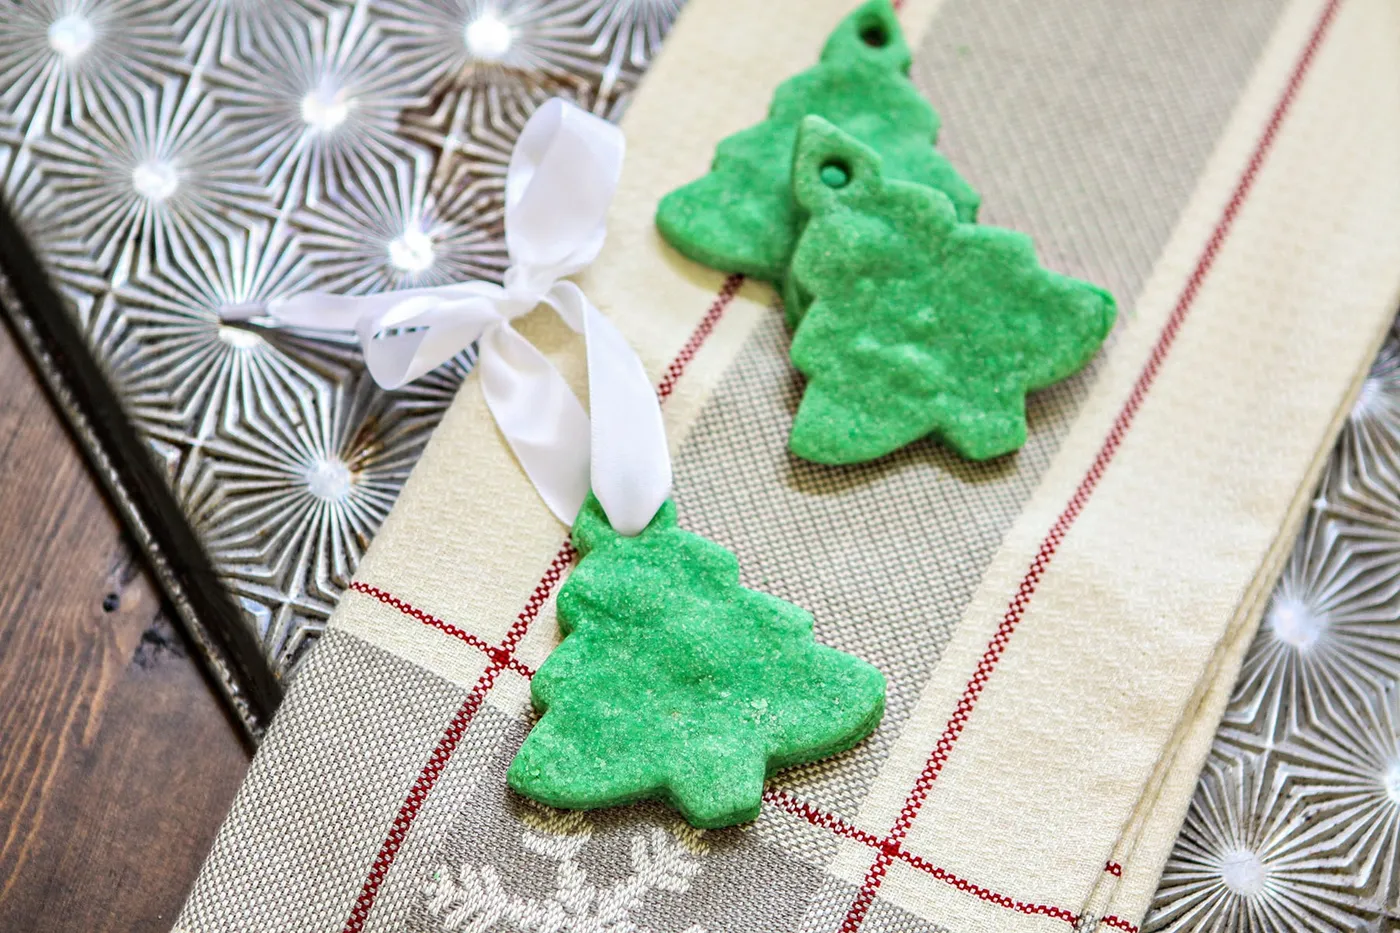
The glitter will shed a little every year, especially when you’re packing and unpacking the box. Put a towel under the tree when decorating, and store these in a shoe box with tissue between them. The satin ribbon will flatten in storage, but a low iron with a cloth will smooth it out. For a lower-maintenance cousin with similar gleam, see Idea #3—one chunky glitter star instead of three sugared trees.
18. Cream Fabric Star Ornament with Red Button Accents
The three small red buttons placed symmetrically on the cream fabric are what make this star feel intentional. Take them off and it’s just a soft stuffed shape; keep them and it reads like a vintage toy or a piece of country Americana. The dark visible hand-stitching adds outline, but the buttons are the color anchor. They also give the eye something to land on before moving to the twine loop.
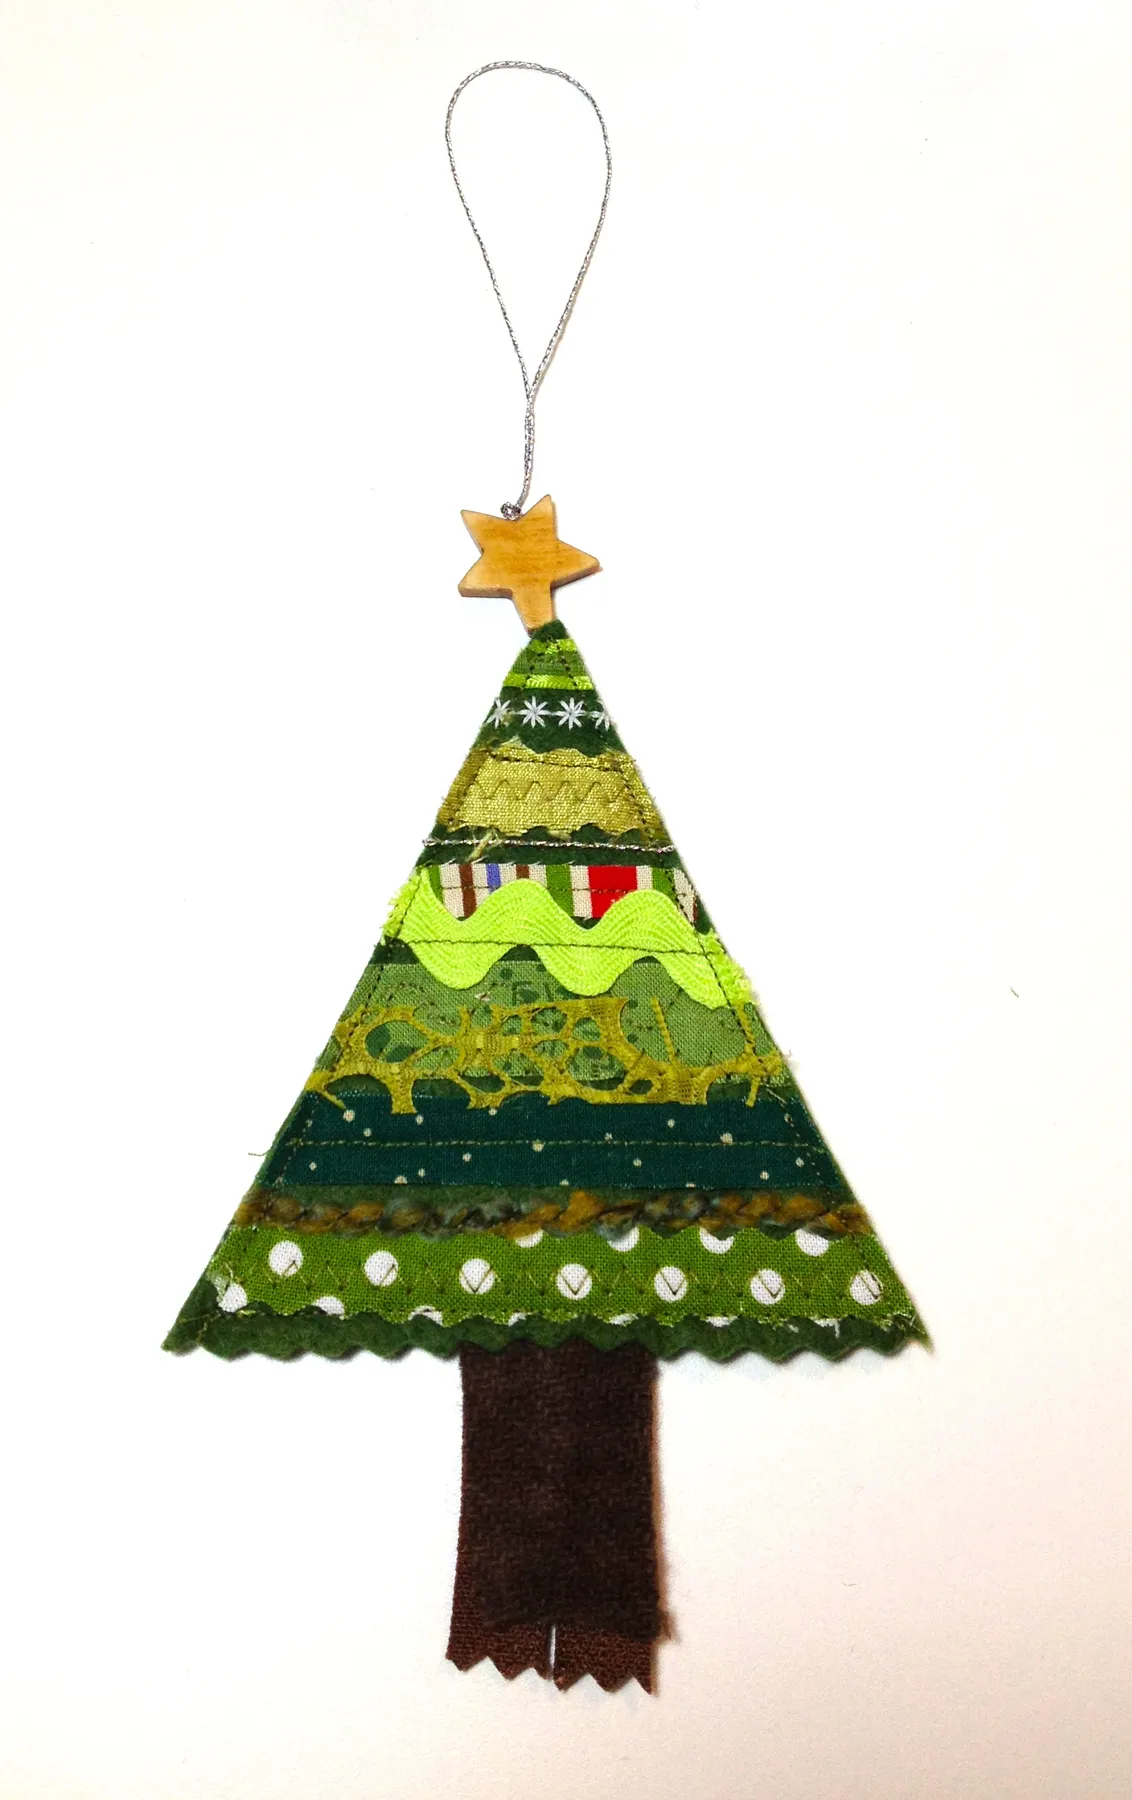
The ratio here is roughly 80% cream fabric, 15% red button accents, and 5% dark stitching. If you swap the cream for oatmeal linen or light chambray, keep the red buttons the same for that same pop. If you want it quieter, use wooden buttons instead—but you’ll lose the holiday punch.
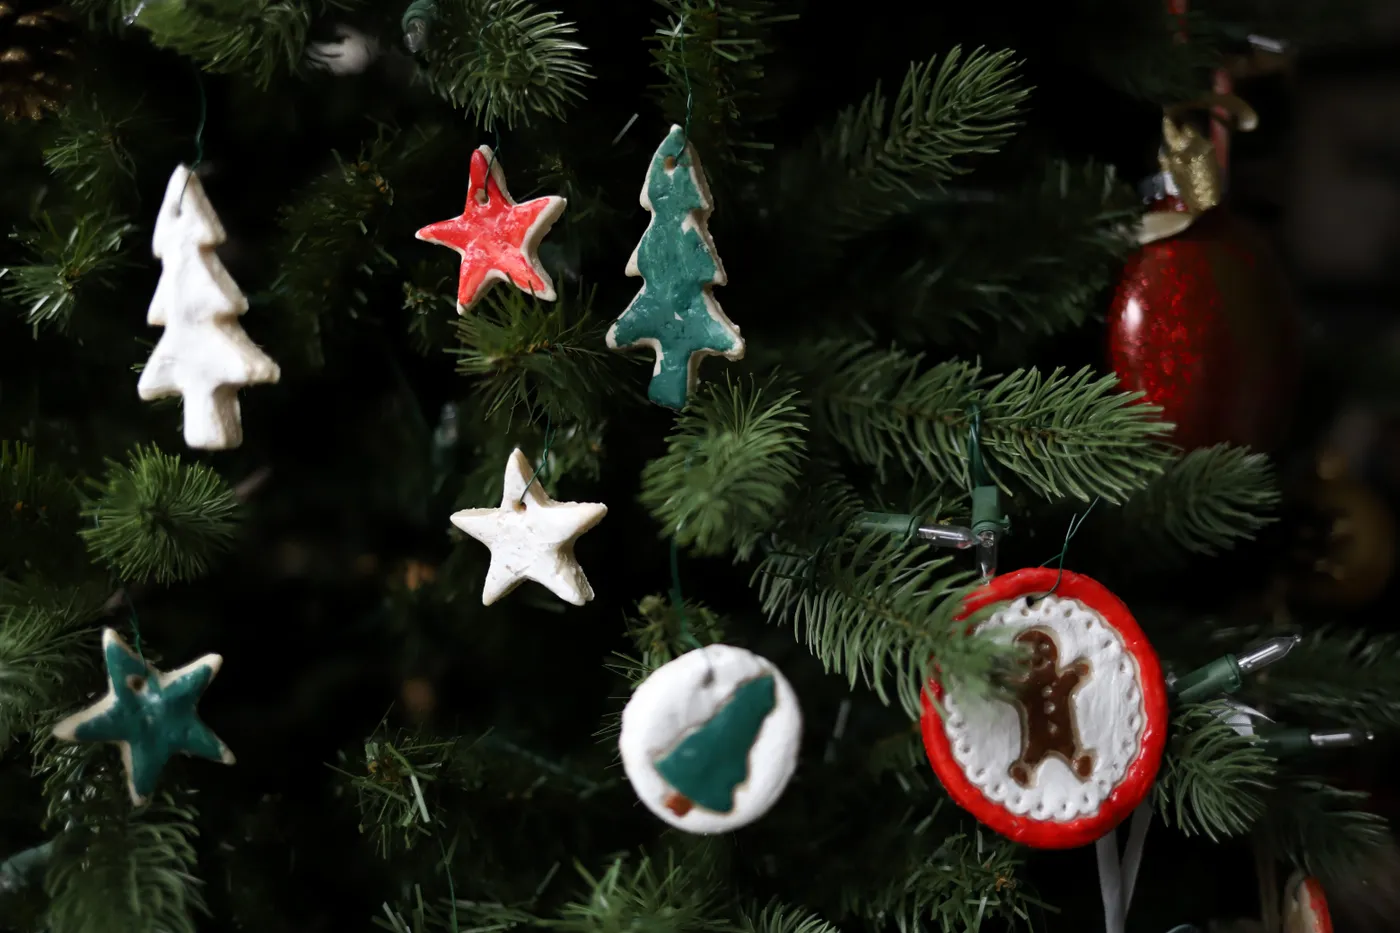
19. Hand-Painted Clay Stars and Gingerbread Man on Dark Green Tree
Hand-painted clay ornaments on a dark green tree channel the 1970s homemade-Christmas nostalgia, but the 2026 version is lighter and more refined. The white clay bases in these photos keep things from looking muddy, while the clear string lights give it a clean, modern glow. Pinterest trends show more people rejecting shiny plastic in favor of matte, hand-painted texture, and this tree is exactly that.
|
📋 Copy HEX 🔗 Share |
To get even color on clay stars, mix acrylic paint with a little water—about two parts paint to one part water—and apply three thin coats with a flat brush. Let each coat dry 30 minutes. For a gingerbread man face, use a toothpick dipped in dark brown paint, touching the surface lightly. Finish with a matte acrylic sealer and air dry 24 hours before hanging.
20. Kraft Paper Gifts with Gingerbread Tags Under the Tree
Wrapped gifts under a tree look magical until a dog noses a corner or a toddler uses a tag as a handle. Keep gingerbread gift tags flat and small, and use kraft paper with crisp folds instead of floppy corners. Also, if you’re using string lights, don’t let the paper touch warm bulbs—leave at least an inch of air. The brown paper and red-and-white baker’s twine can stay, but plan for a little movement.
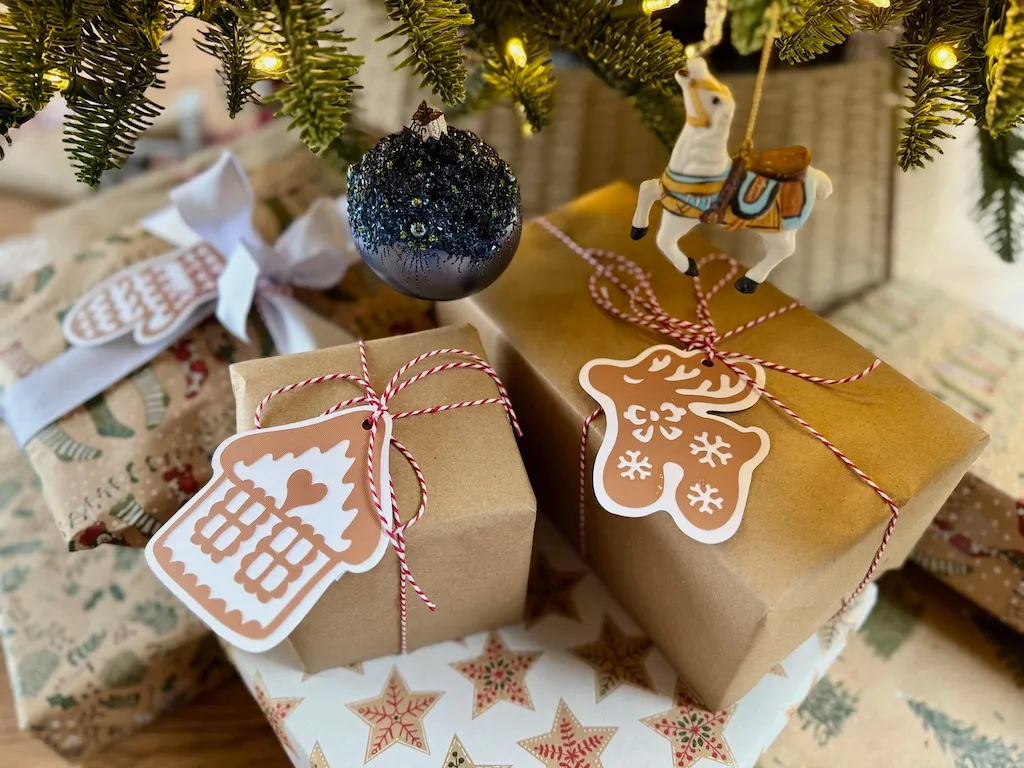
This under-tree scene needs at least a 3-foot clear run from the tree skirt to the floor. If your tree is slim and wall-tucked, stack gifts in a tight L-shape and let two tags peek out at eye level. The glittery dark blue ornament deep in the branches is a nice counterpoint, but one is enough.
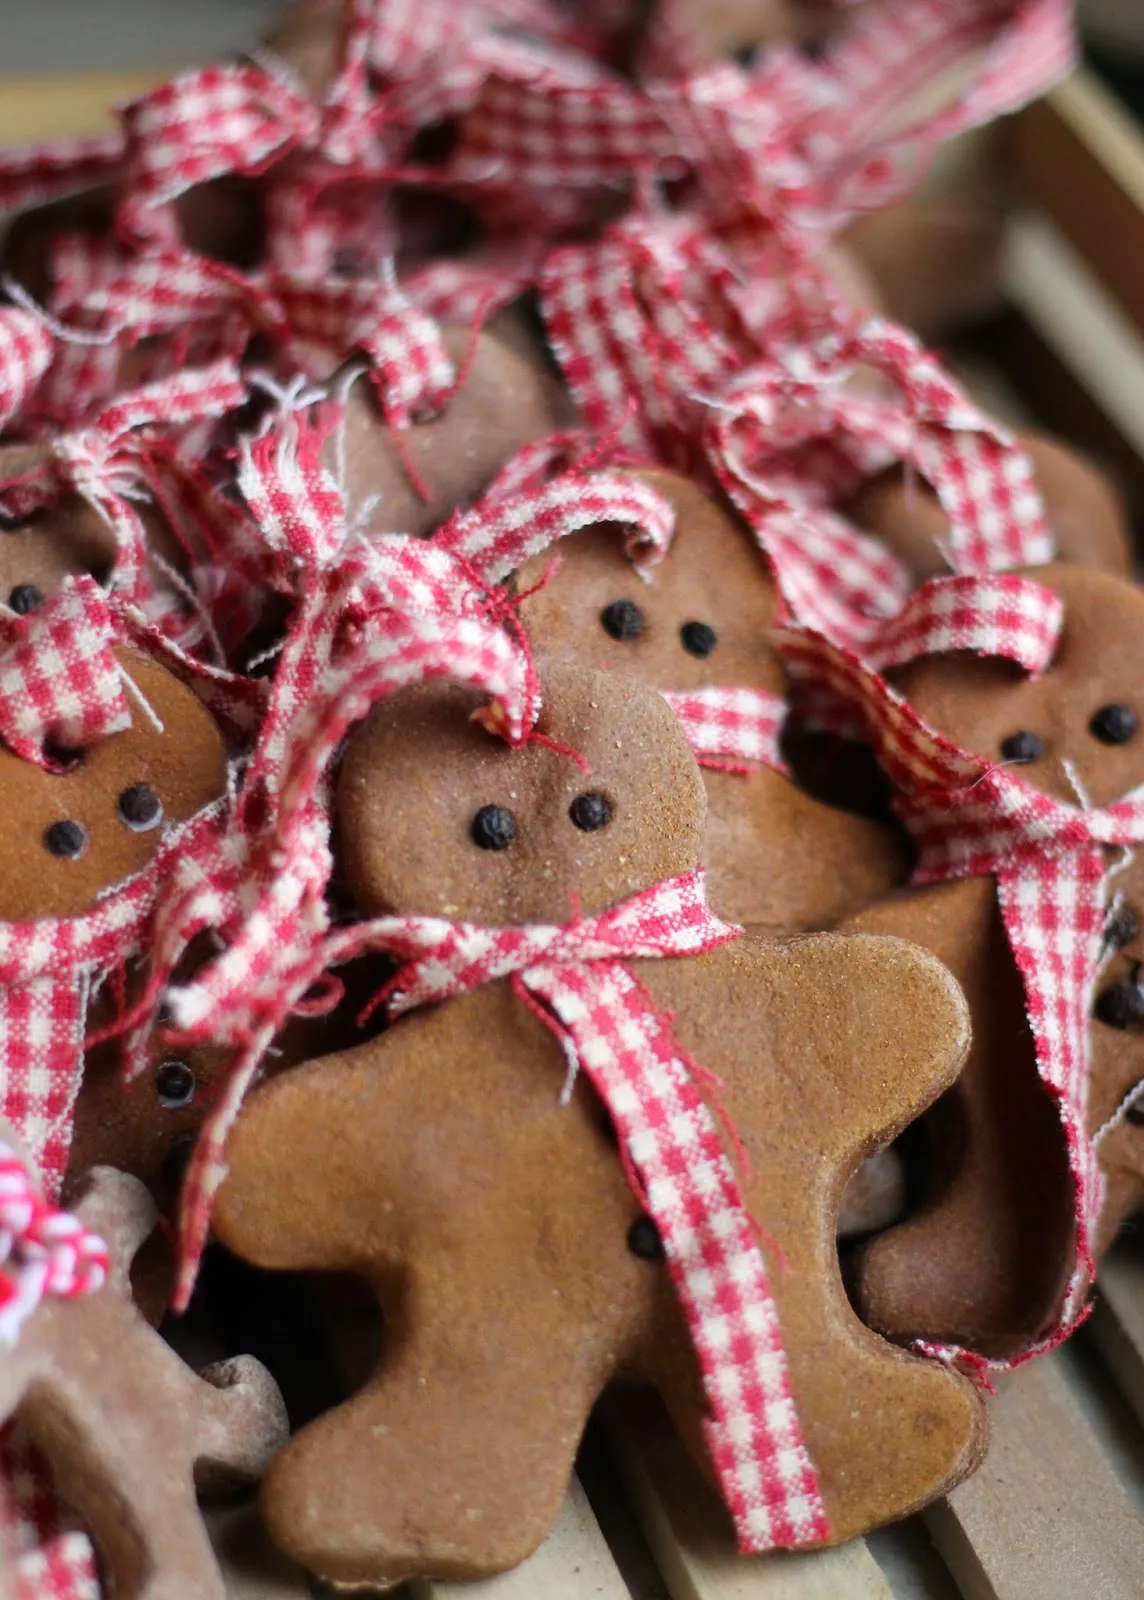
21. Matte Brown Gingerbread Men with Plaid Ribbon Scarves
If you don’t want to bake or sculpt, buy plain brown gingerbread man ornaments in bulk from Michael’s or Amazon for $10–$15. Add peppercorn eyes with a dab of super glue, then tie a $4 spool of red-and-white plaid ribbon from Walmart around each neck. Let the ribbon edges fray naturally by pulling a thread. Twelve ornaments land under $20 and look like they came from a holiday market.
The all-over repetition of identical gingerbread men is what creates the visual rhythm; it’s calm and rhythmic rather than busy. The frayed plaid scarves add a homespun, rustic note that softens the matte brown. Compared to the single gingerbread look in Idea #24, this pile is more about abundance and handing one to every person who comes to dinner.
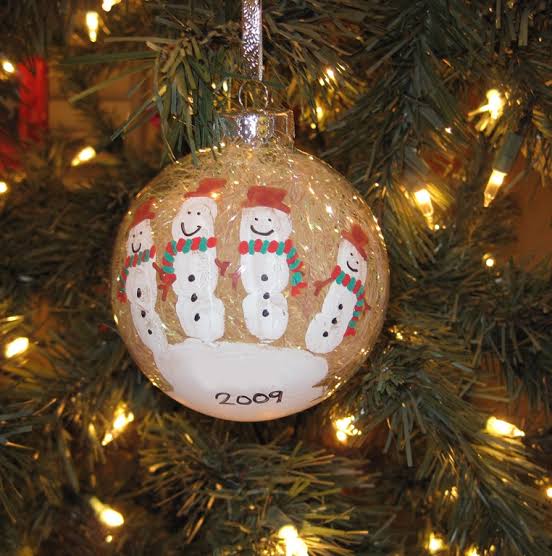
22. Handprint Snowman Family Painted on a Glass Ornament
- Measure your glass ornament diameter and the child’s hand width before choosing paint.
- Use non-toxic white acrylic paint if kids are painting.
- Clean the glass surface with rubbing alcohol and let dry fully.
- Keep cotton swabs and a fine liner brush nearby for snowman faces.
- Allow 24 hours between white handprints and colored scarves.
For a snowman family on a round glass ornament, paint the white handprints first with fingers pointing toward the hook. Once dry, use a fine liner brush for red hats, green-and-red striped scarves, and black button eyes. Paint the year on the bottom last so it’s easy to correct. A small lazy Susan helps you rotate the sphere smoothly without smudging tiny smiles.
23. Twig Christmas Tree and Star Ornaments with Button Details
This set is about 70% natural twig texture, 20% small button color, and 10% jute string. The Christmas tree shapes can be deliberately imperfect—branches can fork a little—but the star shape benefits from symmetry. The buttons aren’t oversized; they read as tiny ornaments for the twig trees. Keep the cardboard bases hidden from the front so the jute loops remain the only visible hardware.
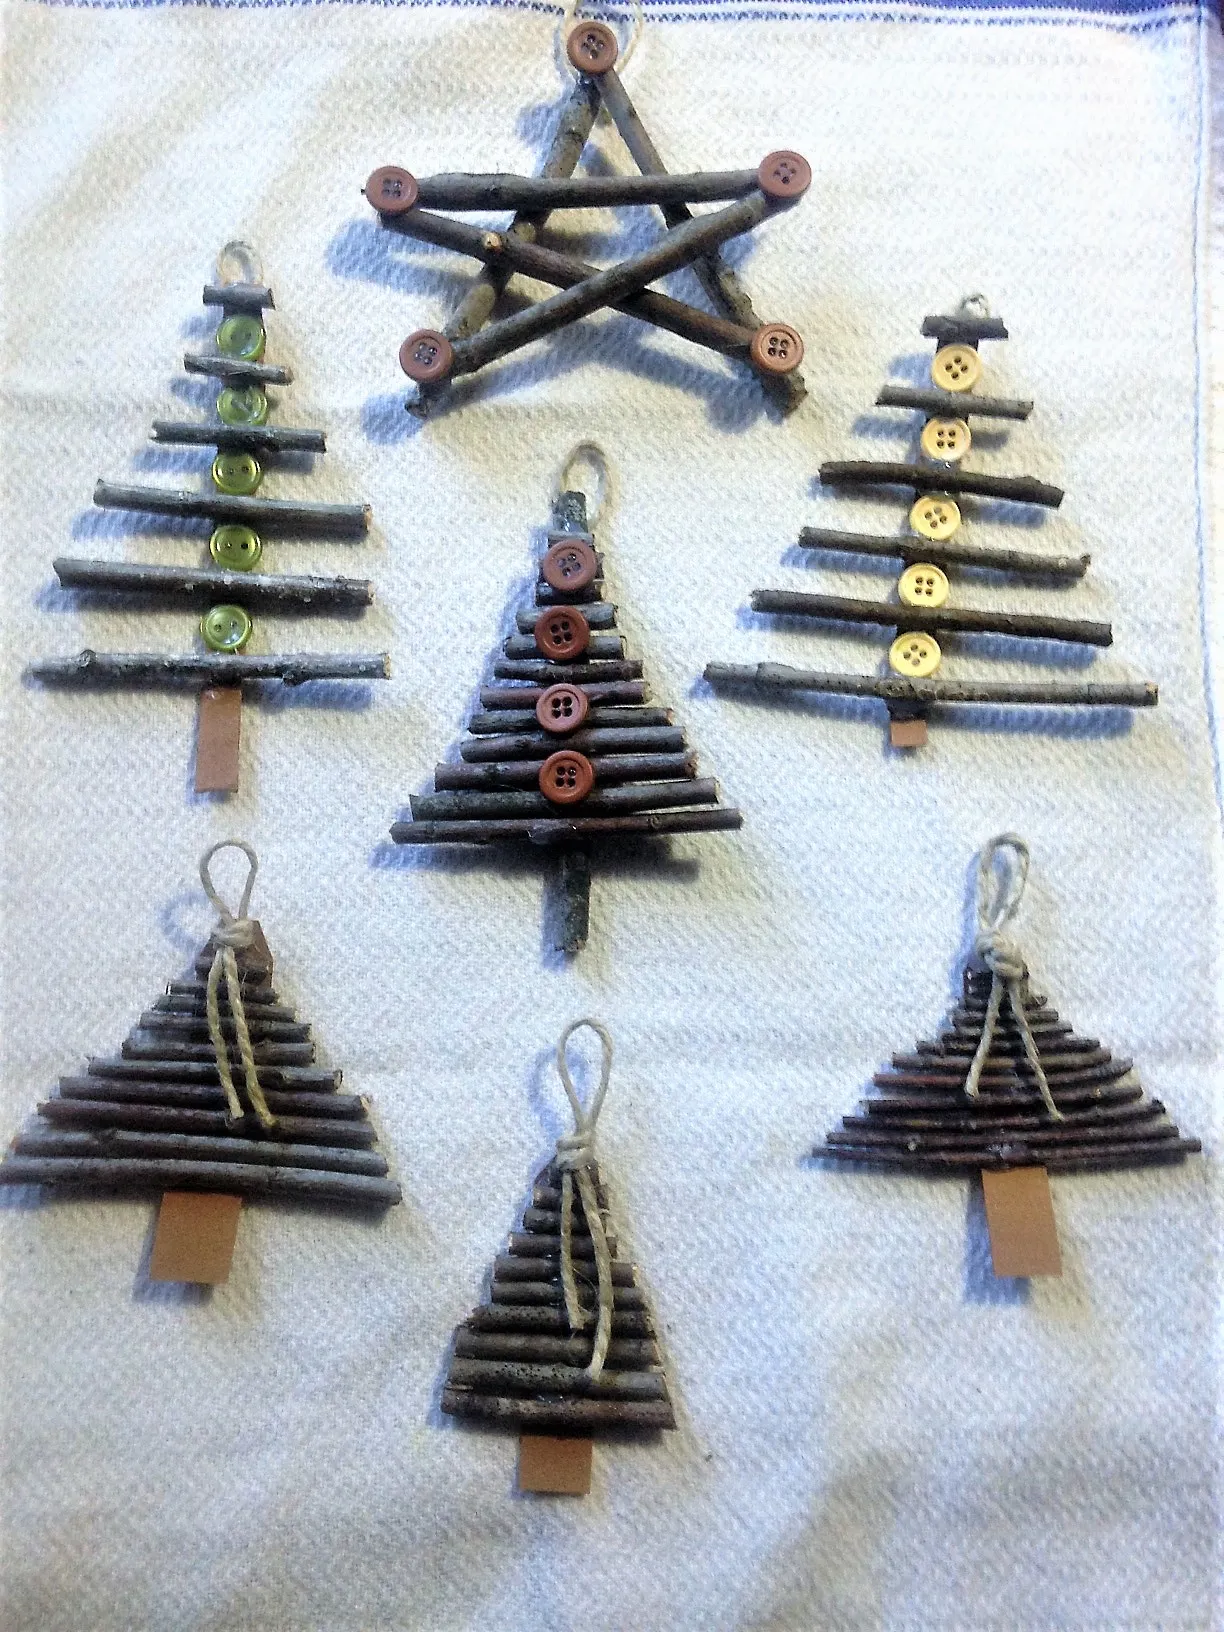
The tiny cardboard bases under each twig ornament are doing more than they appear. They hold the twigs in alignment and keep the jute hanger from pulling the whole shape sideways. Without them, these fragile little sculptures would twist and collapse in storage. They’re the unglamorous, non-negotiable detail.
24. Rustic Gingerbread Man with Peppercorn Eyes and Gingham Scarf
- Lay the gingerbread man flat and mark where the eyes and buttons should go with a light pencil dot.
- Put a tiny amount of fabric glue on a toothpick.
- Press each peppercorn or bead onto a glue dot and hold for 20 seconds.
- Let the glue dry for one hour before tying the gingham ribbon.
- Tie a small scarf at the neck, then form a hanging loop from the same ribbon.

Time: 10 minutes per ornament. Materials: under $5 if you already have glue.
The frayed gingham ribbon is charming but it will keep fraying year after year. After each holiday season, trim the loose threads and, once it looks too thin, replace the scarf entirely. Also keep this ornament away from cats—the combination of a dangling ribbon and a biteable gingerbread shape is basically a cat toy.
25. Colorful Hand-Painted Ornaments with Metallic Cookie Cutters
Use metallic cookie cutters as risers or shallow trays for your hand-painted ornaments, but don’t hang them on the tree—they’ll compete with the bright paint and tend to look chaotic. Keep the arrangement on a natural wood surface and let about 30% of that wood show through, so the eye has a place to rest between the stars, trees, and gingerbread man. The white ribbon with black stars is a great unifier if you have a few hanging loops that need consistency.
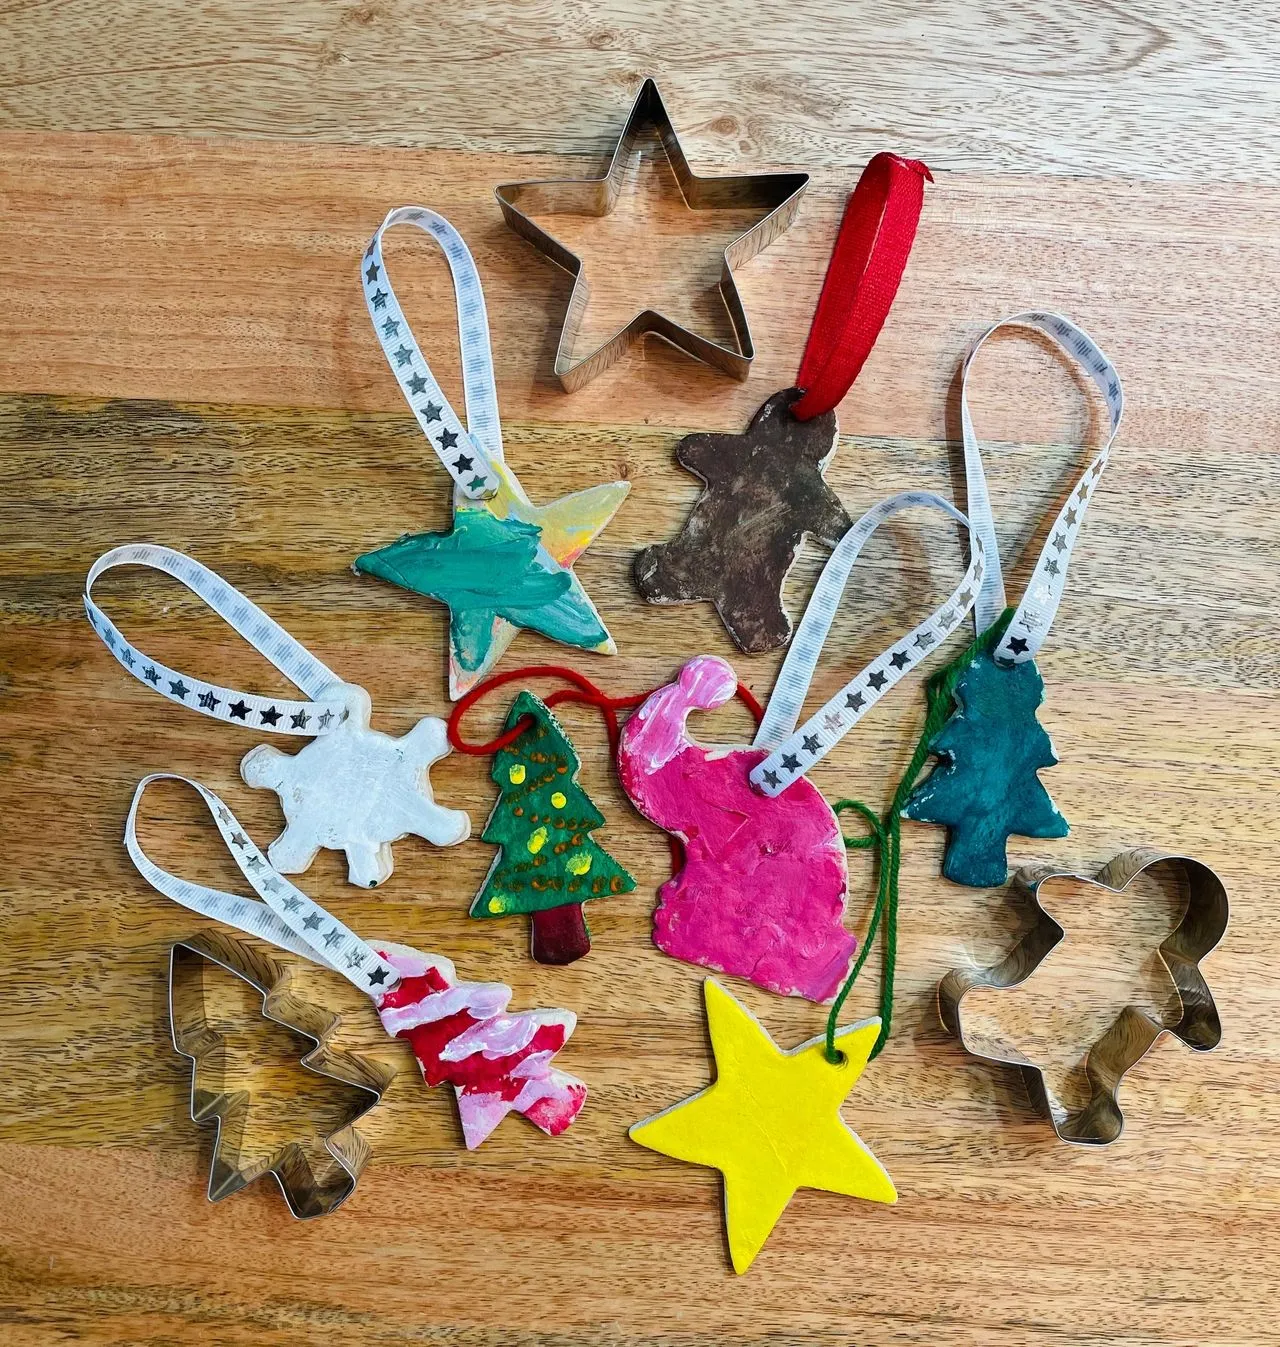
The “art room” aesthetic is having a moment in 2026: visible brushstrokes, uneven edges, and mismatched yarn loops are considered proof of time spent, not mistakes. Hand-painted ornaments with metallic cookie cutters tap directly into that handmade-is-better mood. This is not a trend that will look dated in two years; it’s more of a values shift in how people decorate.
Hang Your 2026 Story on the Tree
Start with one ornament that made your hands itch, make three of them, and let the tree fill up over time. Save your favorite ideas to your Christmas Pinterest board now, and by December you’ll have a tree full of stories instead of just decorations.