You know that feeling when you finally have a weekend for that project, but you spend the first hour just trying to find the right screw? If your workshop or garage has been a source of low-key frustration for longer than you’d like to admit, this is the guide for you. We spent serious time browsing The Home Depot, Target, and IKEA to bring you only what’s worth your attention this year. After filtering through hundreds of options, we narrowed it down to 32 ideas that actually deliver on organization. From modular industrial systems to clever DIY plywood racks, these are the best screw storage ideas for 2026. This isn’t just about tidiness; it’s about reclaiming your time and making your creative space work for you, not against you. And stay until the end — we break down the most common mistakes that can ruin these setups. 📌 Save this to Pinterest for later — you’ll want to revisit these ideas.
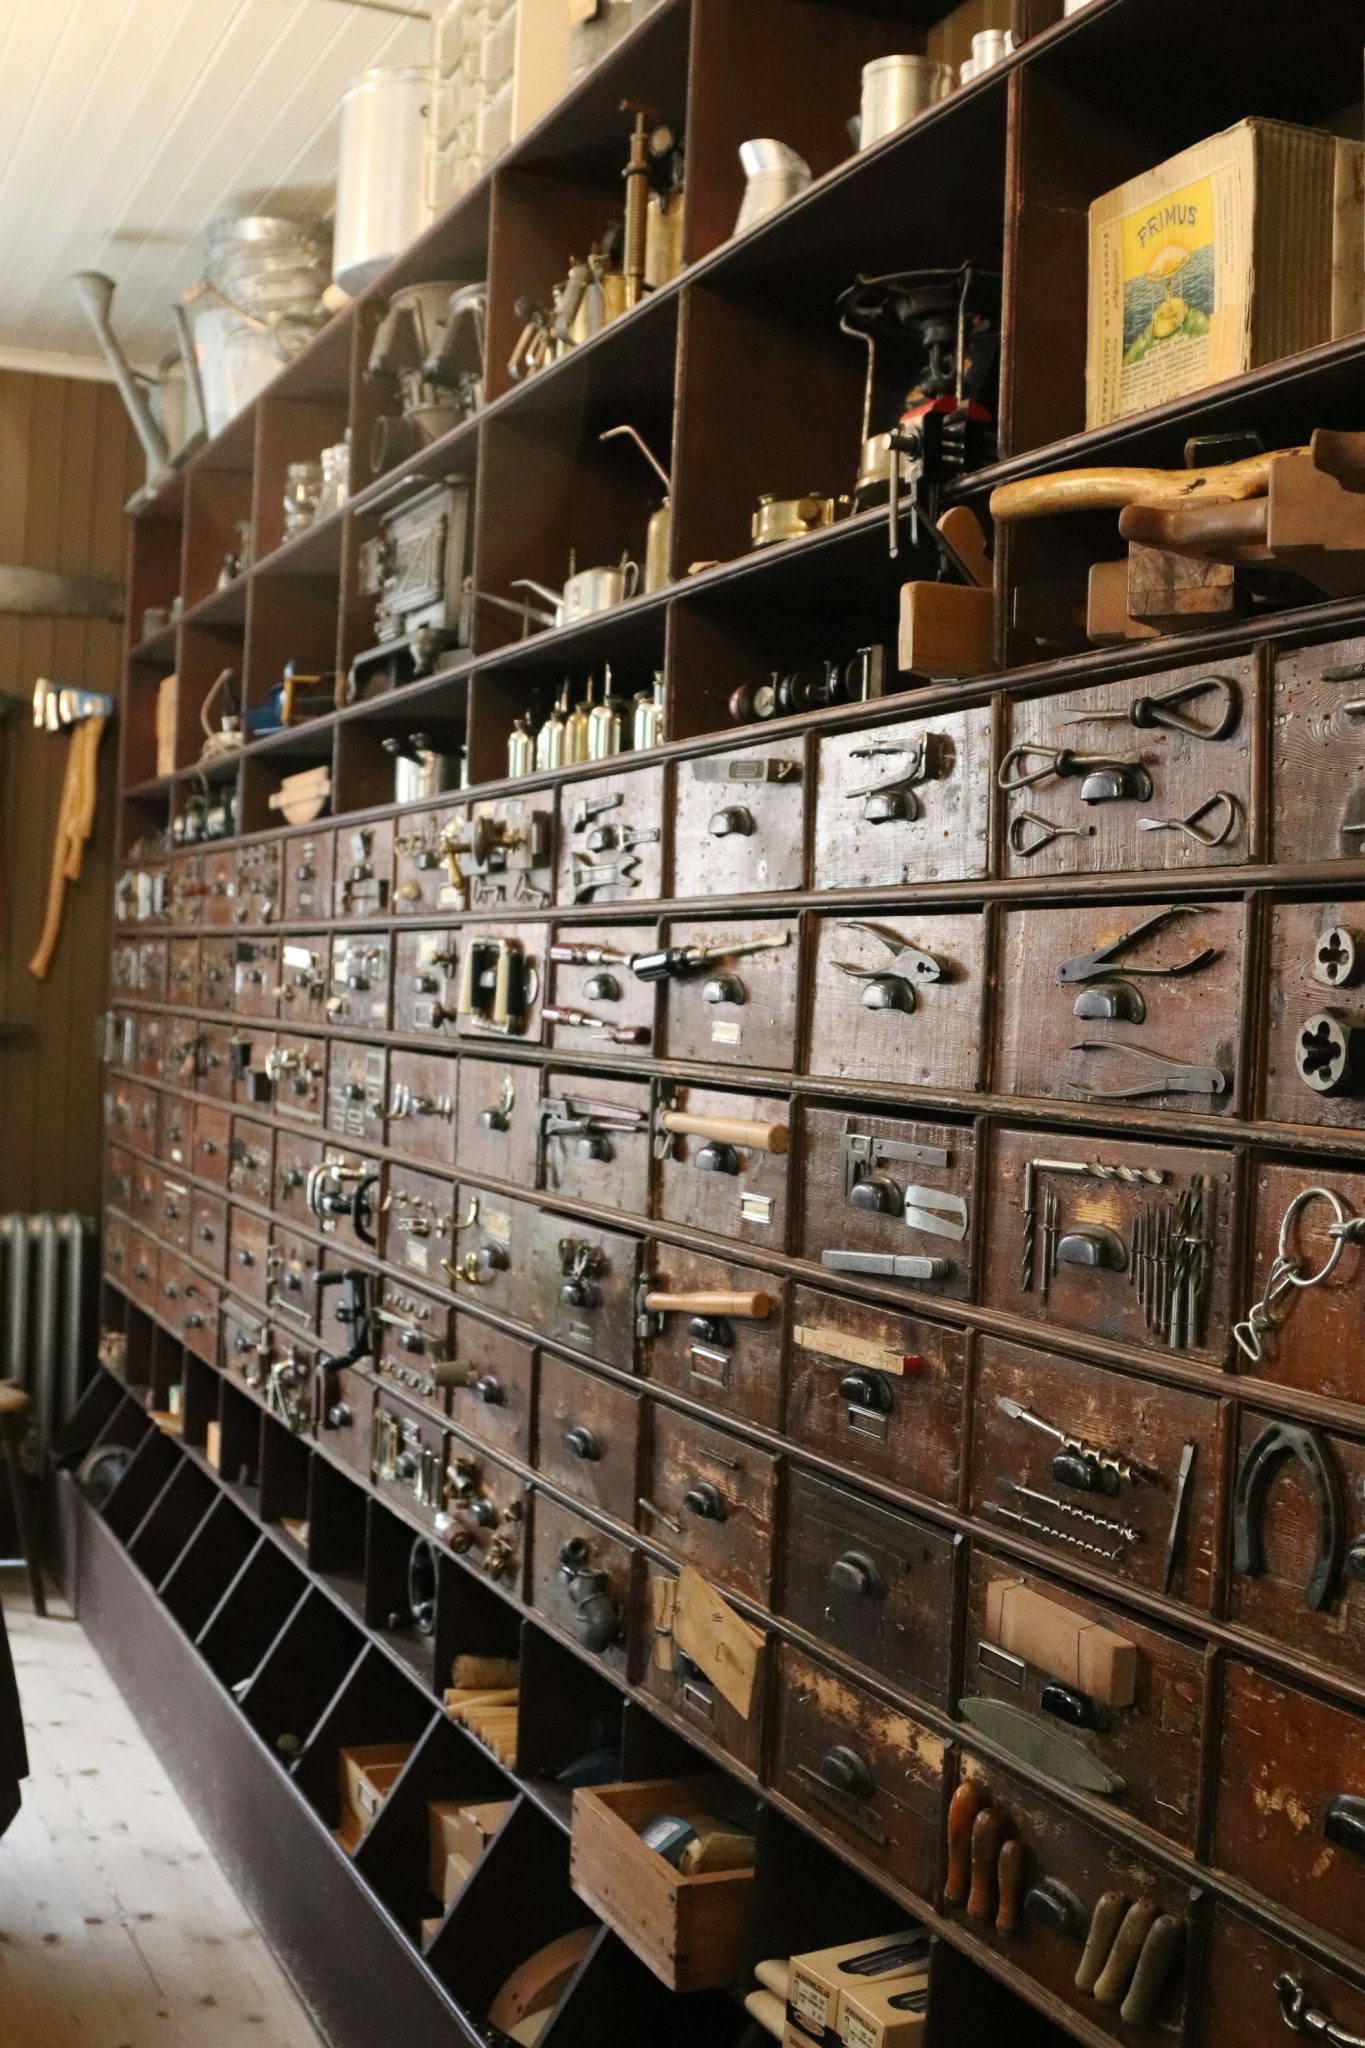
1. Build a Floor-to-Ceiling Apothecary-Style Cabinet
This is organization as architecture. The sheer scale of this dark wood, multi-drawer cabinet turns storage into the primary feature of the room. It works because it embraces the principle of repetition; the grid of small drawers creates a powerful visual rhythm that feels both orderly and impressive. The contrast between the dark, aged wood and the shiny metal tools adds a layer of industrial history and character. It’s not just a place to put things; it’s a statement piece that tells a story of craftsmanship.
💡 Designer Tip
Let’s be honest: a custom piece of this magnitude is a major commitment in both space and budget. Dusting the open shelves and the individual tool-fronts will be a frequent chore to keep it looking sharp. This system is also relatively inflexible; once it’s built and installed, you can’t easily reconfigure it for larger tools or different needs. It’s perfect for someone with a consistent set of small parts and tools, but less ideal if your hobby requires you to constantly adapt your storage.
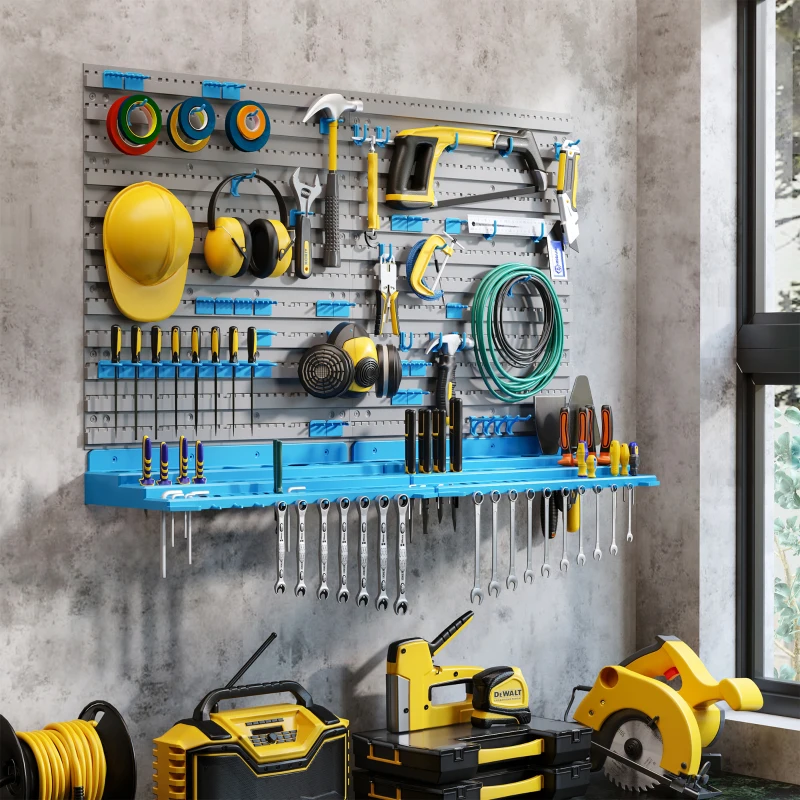
2. Install a Modular Pegboard with Bright Blue Accents
When installing a slatted pegboard system like this, don’t just fill it randomly. Create functional zones. Dedicate a specific panel or a vertical section to one type of task. For instance, group all your screwdrivers and wrenches together above a hanging shelf, as seen here. Keep a 3-4 inch perimeter of empty space around power tools to make them easy to grab and put back without knocking other items off their hooks. This intentional grouping saves you precious seconds every single time.
|
📋 Copy HEX 🔗 Share |
📐 Style Math
The visual formula here is a lesson in balanced industrial style. Think of it as 60% neutral industrial base (the grey pegboard and concrete wall) + 30% bold accent color (that vibrant blue on the shelf and holders) + 10% functional chaos (the yellow and black tools). You could easily swap the blue for a fiery red or a safety orange to change the mood entirely without losing the organized, high-energy feel. The key is to commit to one strong accent color for all your modular add-ons.
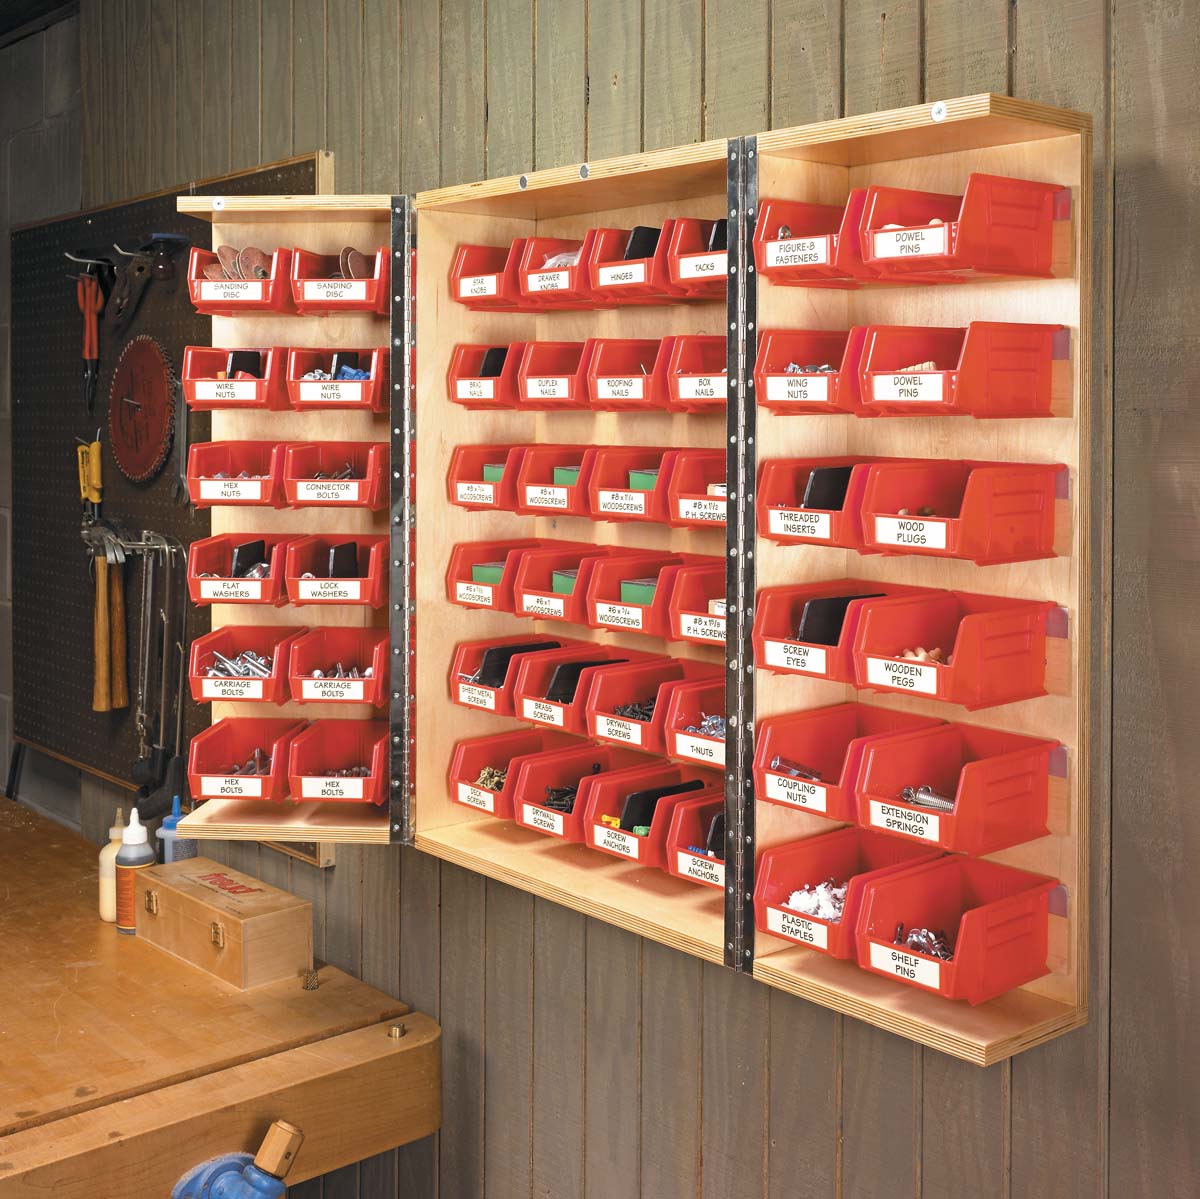
3. Conceal Red Parts Bins Inside a Plywood Cabinet
You don’t need a custom cabinetmaker to get this look. A simple plywood box cabinet can be a weekend DIY project for under $100. Build a basic carcass from one sheet of 3/4″ plywood. Instead of expensive drawer slides, just make the red plastic bins a snug fit so they slide on the shelves themselves. You can get a 24-pack of these bins from places like Uline or Harbor Freight for about $30-$40. The ability to close the doors gives you a clean, unified look, a trick that feels much more expensive than it is. Compare this with the grand apothecary unit in Idea #0 for a more accessible take on cabinet storage.
⚠️ Real Talk
The doors. Without the two simple plywood doors, this would just be another open rack of red plastic bins. But by adding the ability to conceal the contents, the entire setup is elevated. It transforms a potentially cluttered-looking wall of hardware into a clean, serene wooden element in the workshop. When open, it’s all business. When closed, it’s calm. That dual-state functionality is what makes this simple build so incredibly smart and effective.
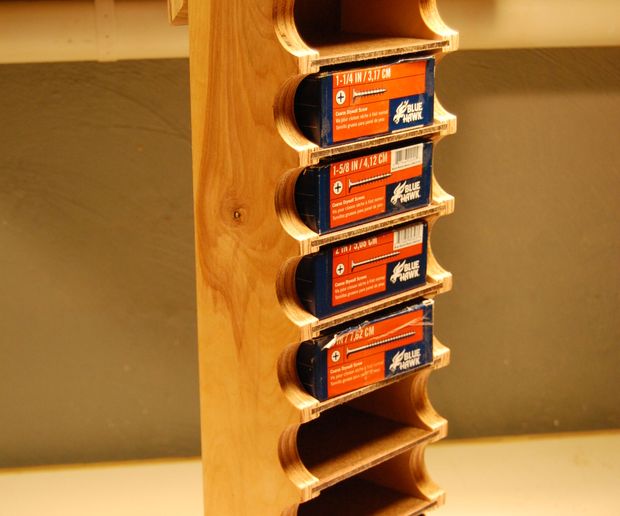
4. Create a Vertical Plywood Rack for Boxed Screws
This is a brilliant solution for narrow spaces. The unit itself only needs to be about 5-6 inches deep, making it perfect for the wall space behind a door or at the end of a workbench. To be effective, you’ll want a vertical height of at least 3 feet to store a meaningful number of boxes. It’s ideal for a wall area around 18 inches wide and 4 feet tall. Because it keeps boxes in their original packaging, it’s a great companion to more granular systems like the bins in Idea #6, which are better for loose screws.
💰 Budget Breakdown
We’re seeing a huge trend towards ‘Plywood Modern’ in workshop and utility spaces. Designers and DIYers are embracing the honest, raw beauty of construction-grade materials. This rack isn’t trying to be fine furniture; it’s celebrating its own utility. This move away from hiding everything in black-and-yellow plastic tubs and toward building custom, material-forward solutions is about making our functional spaces just as aesthetically pleasing as the rest of our homes.
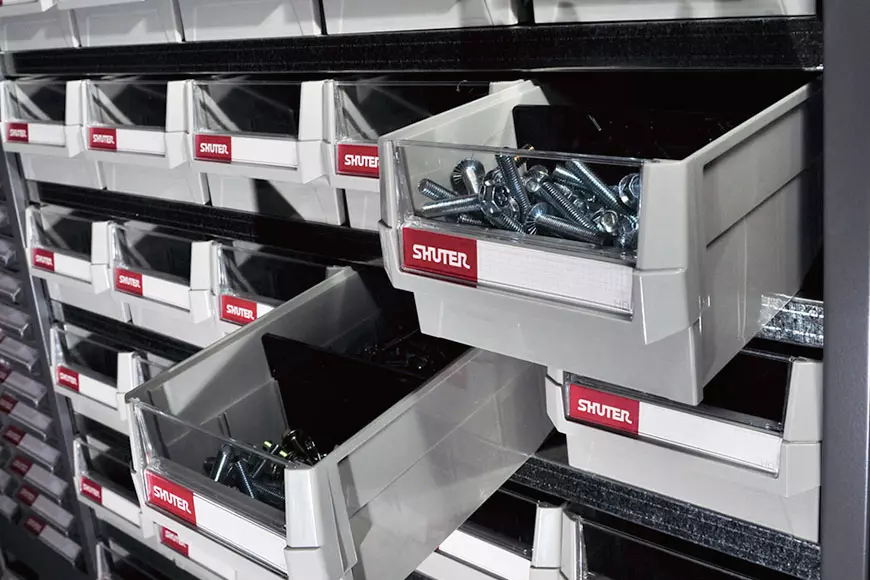
5. Use Modular Pull-Out Bins with Clear Fronts
This system prioritizes visibility and access above all else. What makes it work is the perfect balance of uniformity and information. The identical light gray bins create a calm, orderly grid, which prevents the wall from looking chaotic. However, the clear fronts and red labels mean you can identify the exact fastener you need in seconds without opening a single drawer. It’s the ‘at-a-glance’ principle in action. The ability to pull each bin out completely also makes it easy to take a whole category of screws over to your project.
⭐ The One Thing
- Main Shelving/Track System: $80 – $200
- Pull-Out Bins (40 count): $150 – $300
- Labels & Dividers: $20 – $40
- TOTAL: $250 – $540
- Budget alternative: Look for similar, smaller-scale desktop organizers from brands like Akro-Mils. You can get a 24-drawer unit for around $40 and stack them as needed, bringing the total cost down to about $120 for a similar capacity.
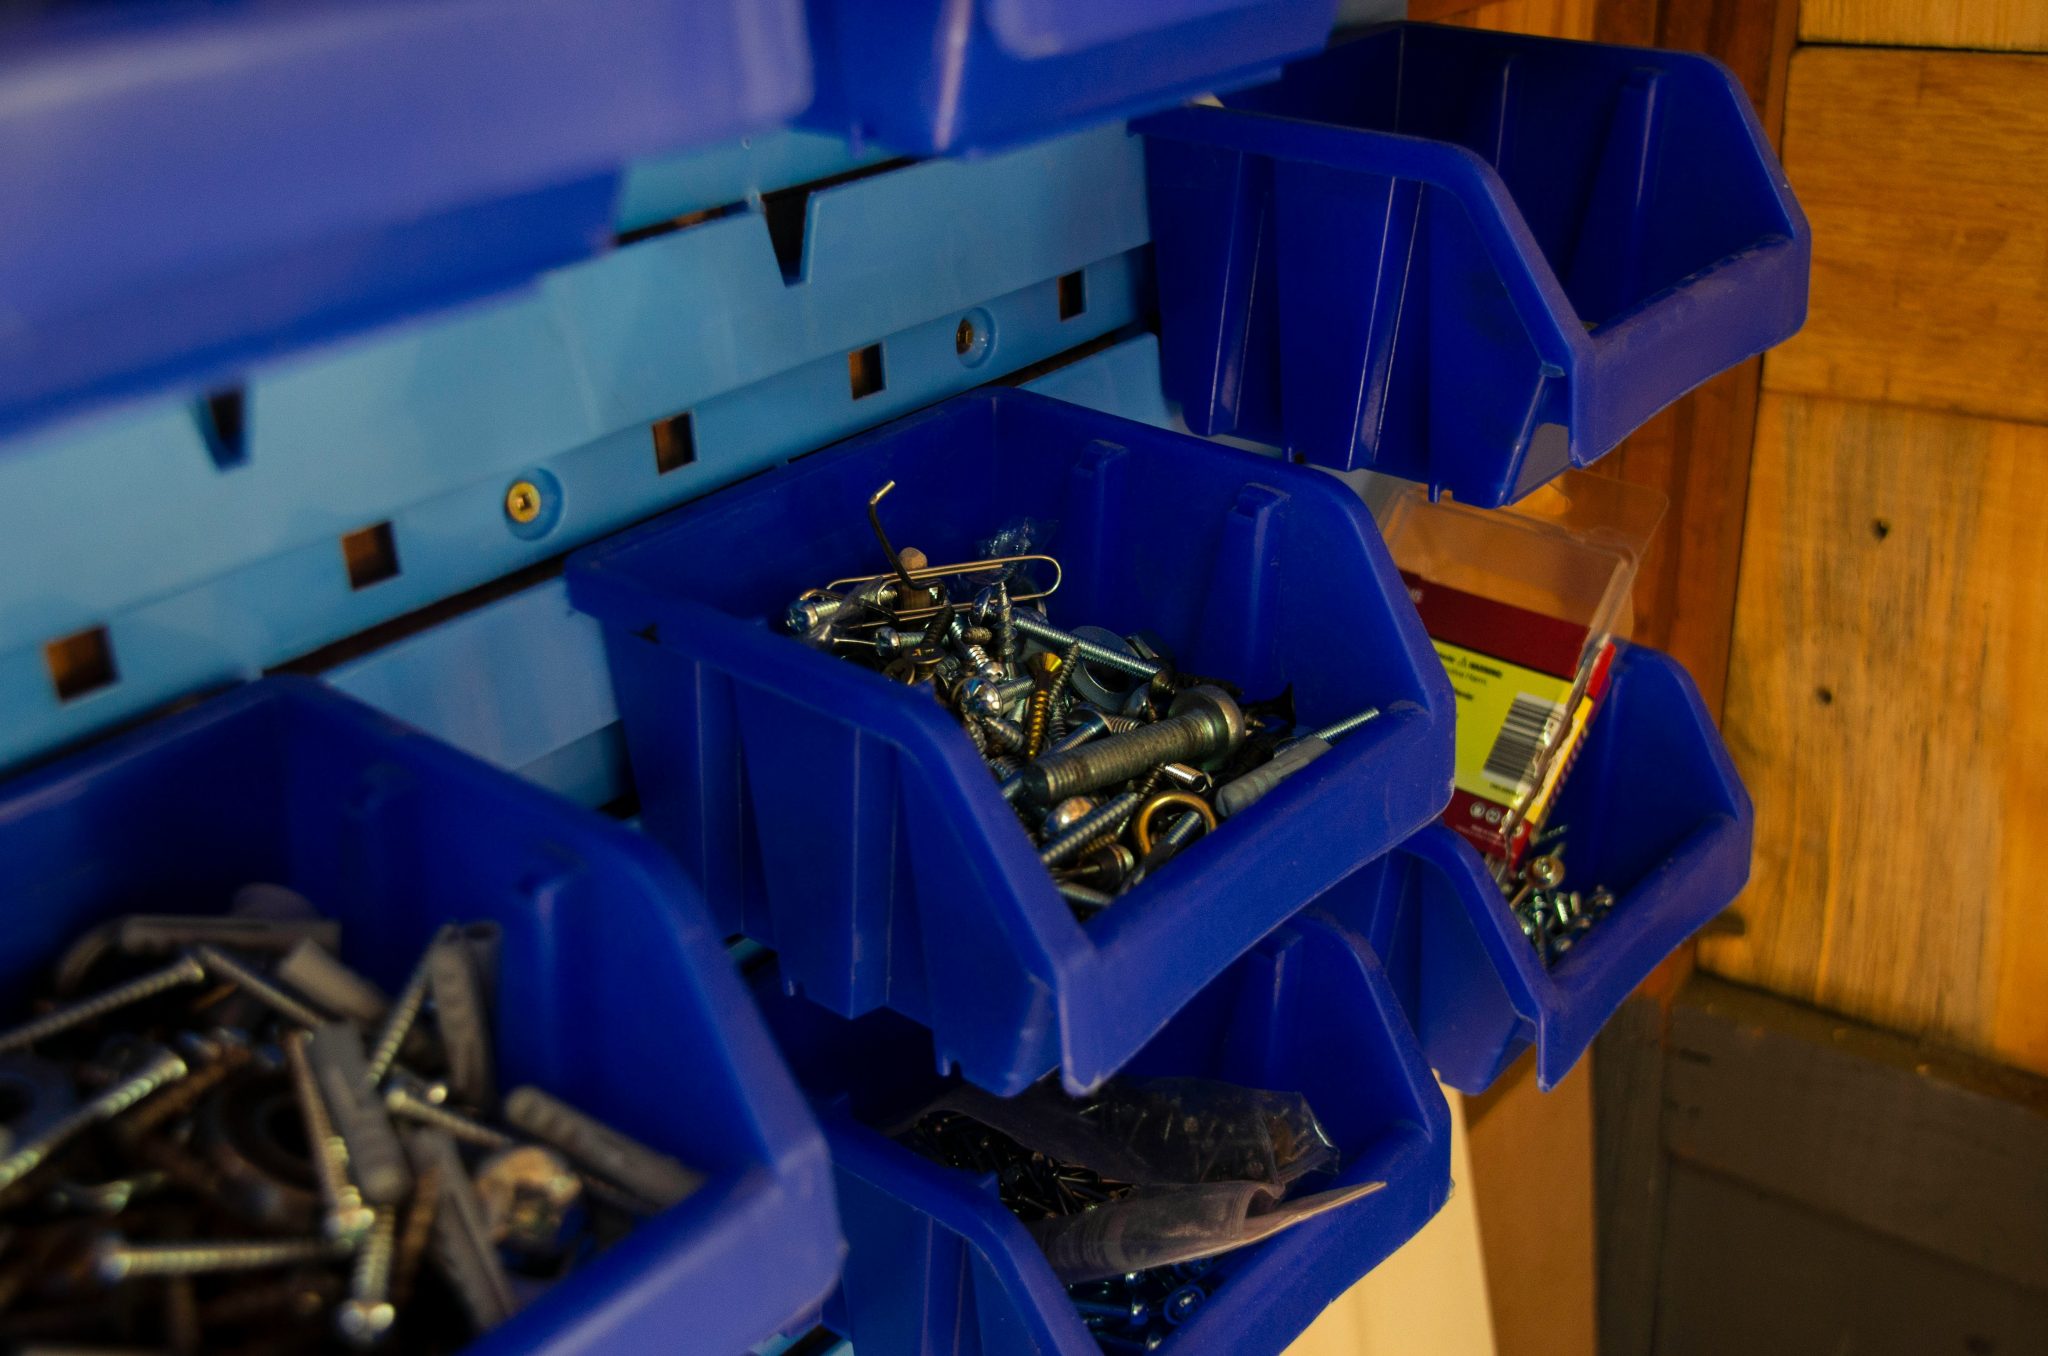
6. Mount Blue Bins on a Matching Wall Panel
Plastic bin systems like this are incredibly practical, but they are magnets for fine sawdust. The open-top design means you’ll need to periodically empty them out and wipe them down, or just accept a bit of dust mixed in with your hardware. The plastic itself can become brittle over many years, especially if exposed to UV light from a window or harsh temperature swings in a garage. For a longer-lasting alternative with less maintenance, consider a system with metal drawers, though it comes at a higher price point.
|
📋 Copy HEX 🔗 Share |
🔥 Trending Context
When you’re organizing small parts in these bins, think like a grocery store stocker. Place the most frequently used items—like 1-5/8″ drywall screws or common machine bolts—in the bins located between your waist and shoulder height. This is your ergonomic ‘golden zone’. Less-used specialty hardware can go on the higher and lower rows. This simple bit of planning will save your back and make your workflow feel noticeably smoother. It’s a small detail that has a huge impact on daily use.
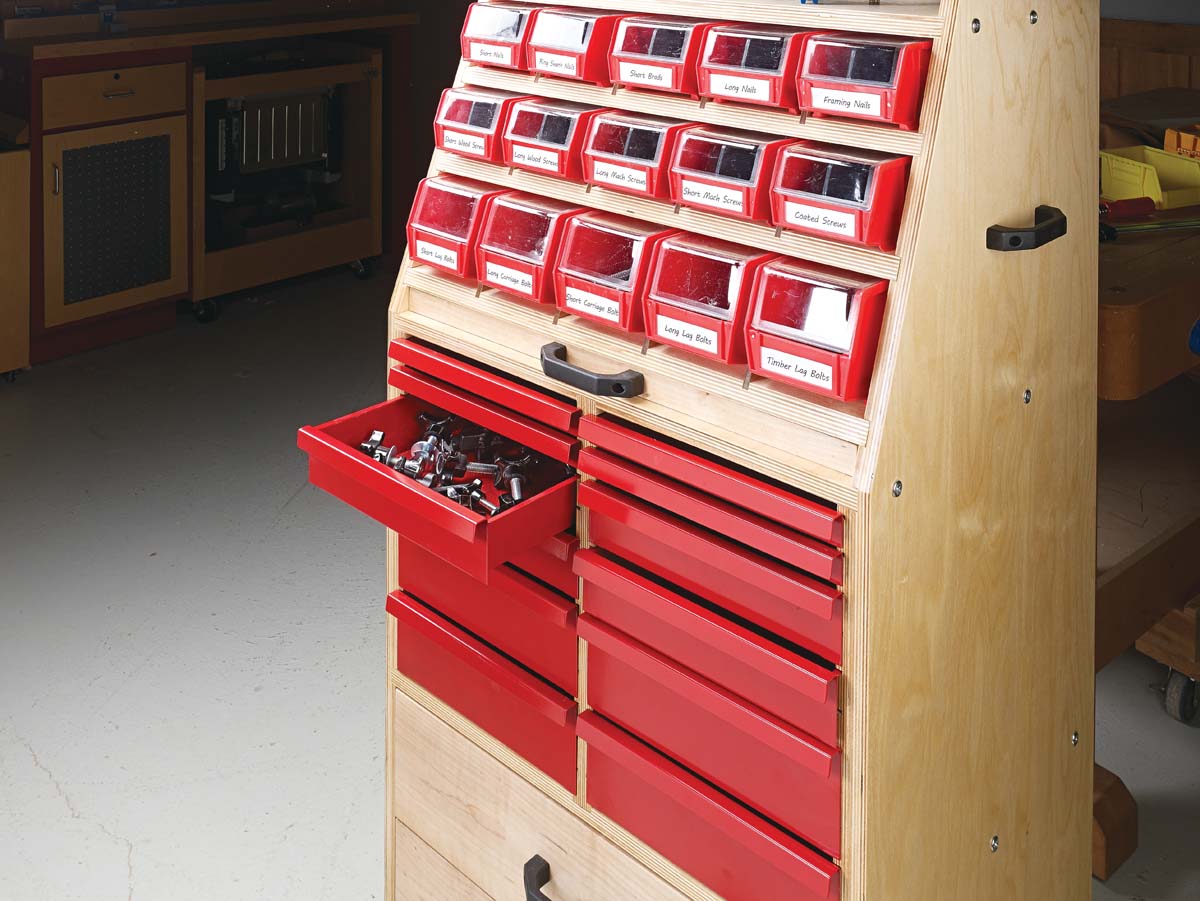
7. Build a Mobile Plywood Cart with Red Bins and Drawers
This mobile cart is a masterclass in functional color-blocking. The formula is simple: 80% raw material + 20% signal color. Here, the unfinished light plywood makes up the bulk of the visual, keeping it bright and workshop-appropriate. The vibrant red is used exclusively on the interactive elements—the bin fronts and drawer faces. This tells your brain exactly where to look and what to pull. You could swap the red for a deep blue or a bright yellow to get a completely different feel while maintaining the same intuitive functionality. The black handles are a neutral accent that adds a touch of graphic punch.
🔧 How-To Brief
Want to recreate those clean, labeled bin fronts? Here’s a quick guide to making them look professional. Time: 1 hour. Cost: ~$5 for labels.
- Measure the label area on your bins.
- Use a word processor or spreadsheet to create uniform text boxes matching those dimensions. Choose a clean, sans-serif font like Helvetica or Arial.
- Print your labels on a full sheet of adhesive sticker paper.
- Use a paper cutter or a straight edge and craft knife for perfectly straight cuts.
- Apply the labels carefully, using the top edge of the label area as your guide for perfect alignment every time.
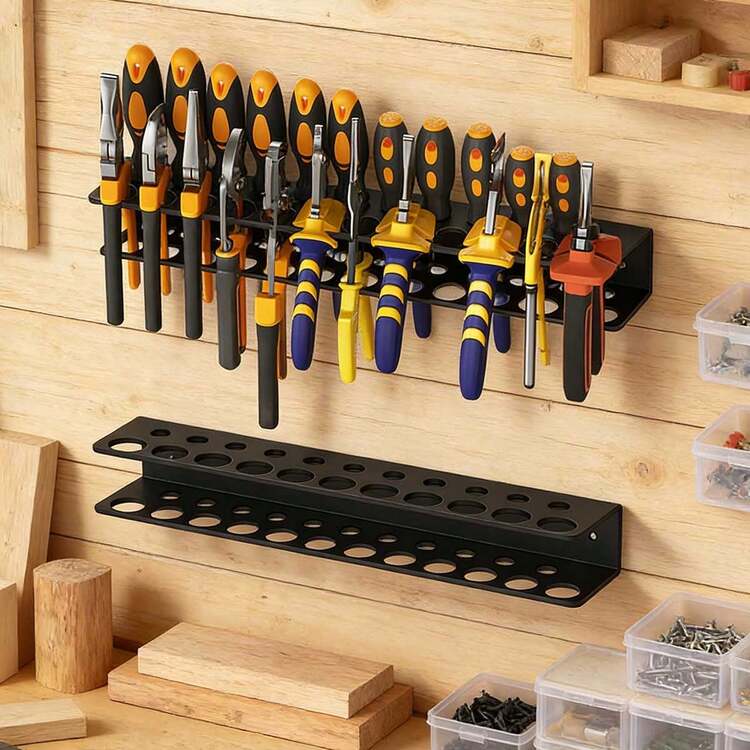
8. Use Black Metal Wall Racks for Hand Tool Organization
The single element that makes this work is storing the tools by their handles. It’s such a simple idea, but it’s brilliant. Instead of hiding the business end of the tool away in a drawer or a pouch, this rack system presents the handles, which are often color-coded and ergonomically shaped. This provides an immediate visual cue for what each tool is. It’s not just storage; it’s a display that makes grabbing the right screwdriver or pliers an instinctive, one-step process. This is far more efficient than rummaging through a box.
💸 Get This Look For Less
This type of wall-mounted rack is perfect for compact spaces. You only need a clear patch of wall about 24 inches wide by 18 inches high to install a two-tiered system like this. It’s an ideal solution for the wall space directly above a workbench or next to a primary work zone. Because it has virtually zero depth, it won’t impede your movement in a narrow garage or a small basement workshop. It’s about maximizing vertical space without creating any horizontal clutter.
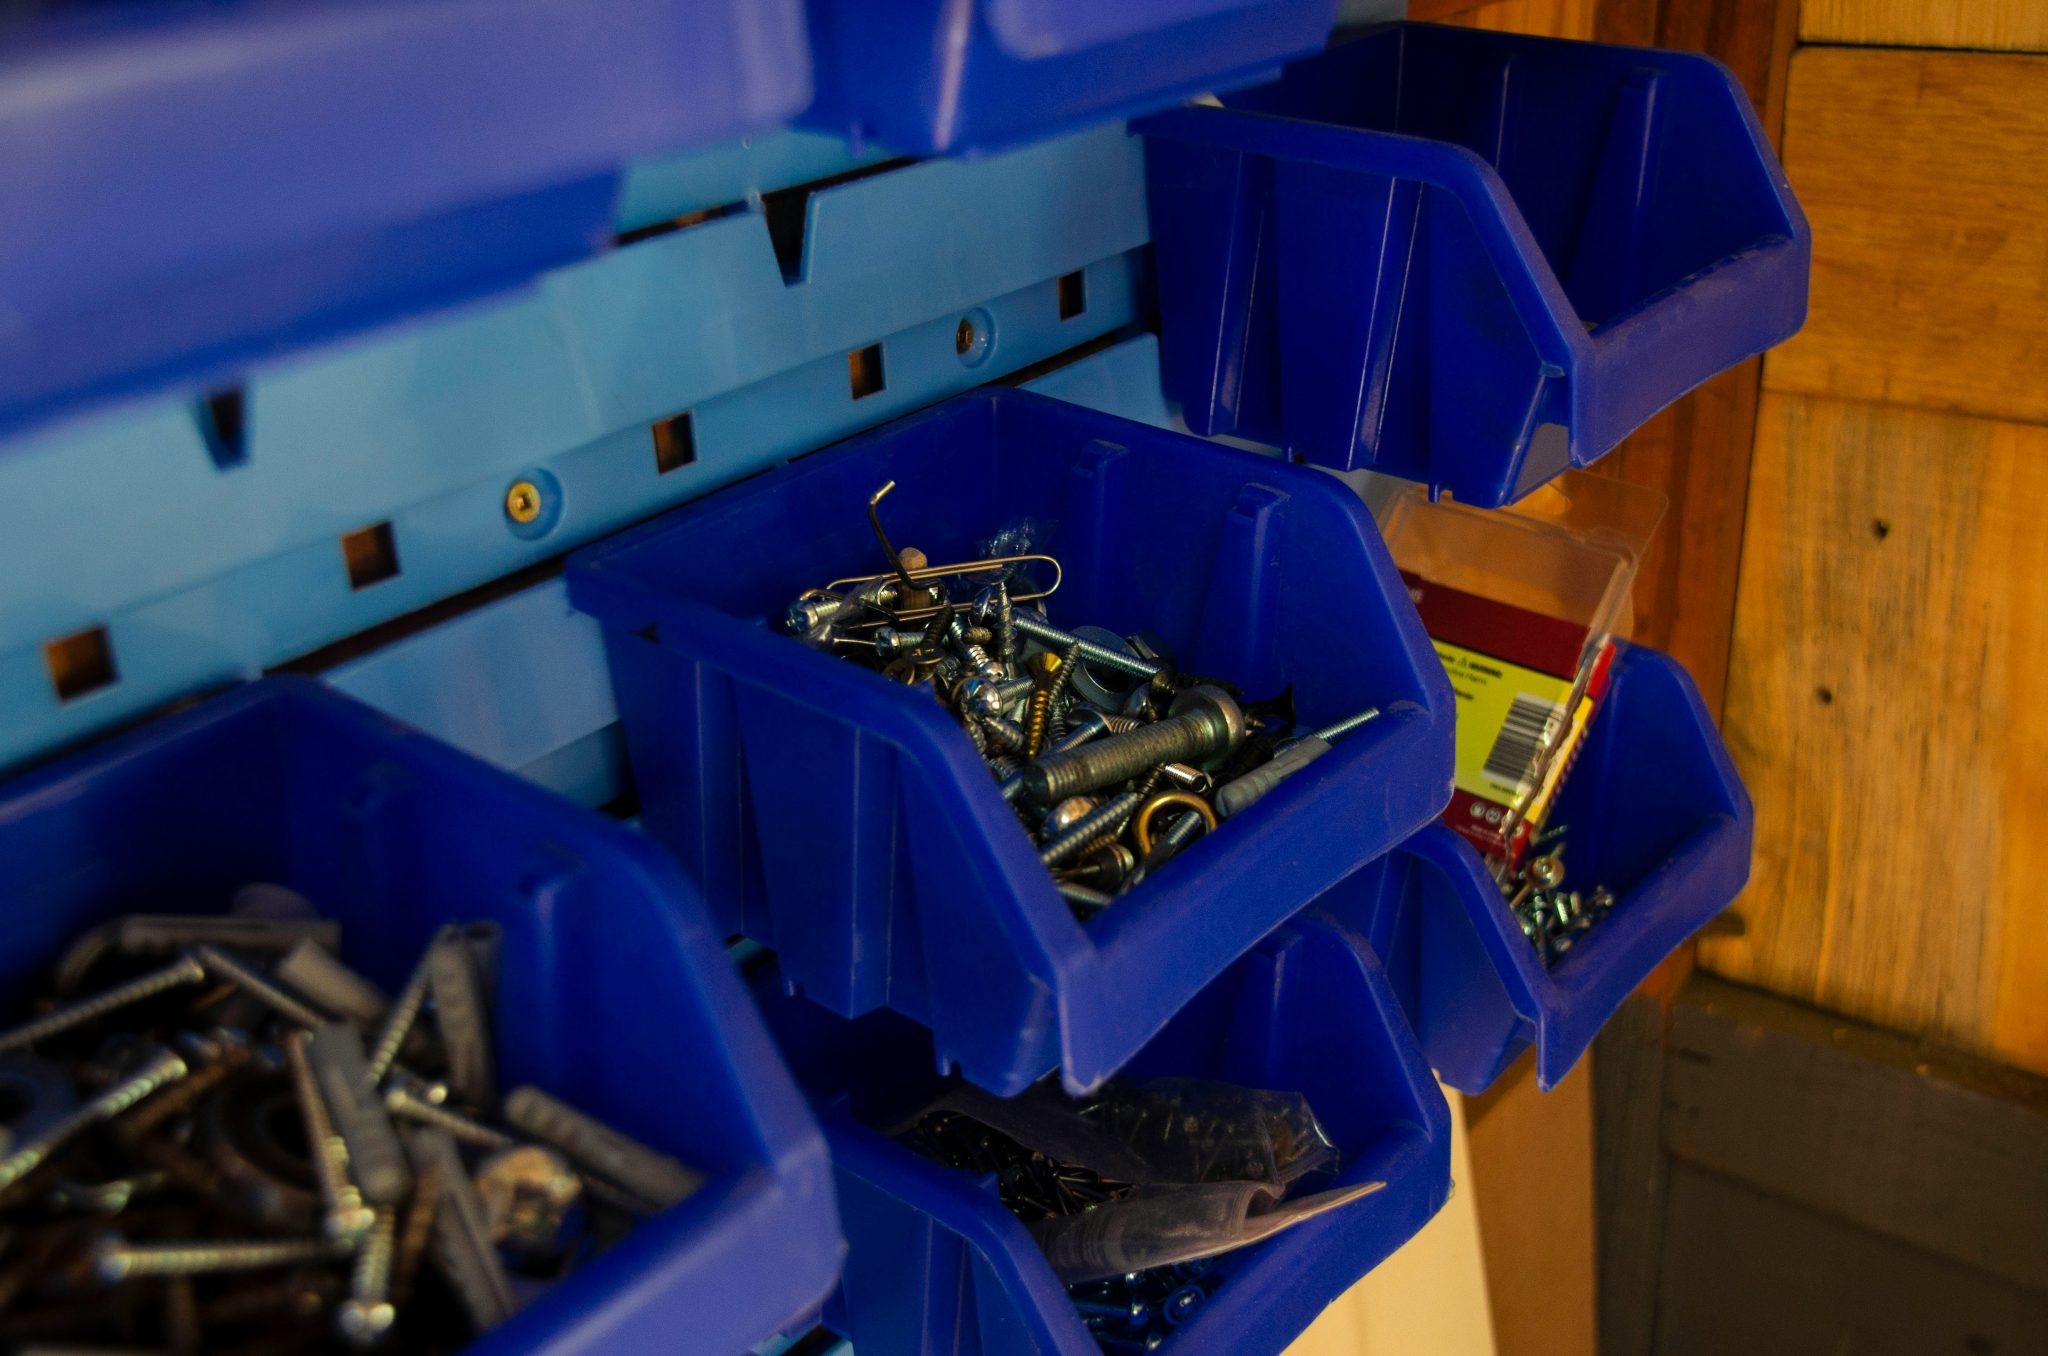
9. Layer Blue Plastic Bins on a Slat Wall
A slat wall system offers amazing flexibility, but it has its limits. Be very mindful of the weight capacity, not just of the wall panel itself, but of the individual bins. It’s easy to overload a bin with heavy bolts and washers, which can cause the plastic hook on the back to fatigue and fail over time. For very heavy items, it’s always better to use a sturdy shelf or cabinet. Think of slat walls as ideal for light-to-medium-duty storage, not for your entire collection of 3/4-inch lag bolts. For a similar but more robust setup, check out the pull-out system in Idea #4.
🎯 What Makes It Work
You can get the look of this versatile system on a shoestring budget. Instead of a commercial plastic slat wall panel (which can cost $50-$100+), make your own French cleat wall from a single sheet of plywood. Cut the plywood into 4-6 inch strips, then rip each strip at a 45-degree angle. Mount one half to the wall and the other to the back of homemade wooden bins or even directly to store-bought plastic ones. You get the same modular functionality for the cost of plywood and a little bit of time.
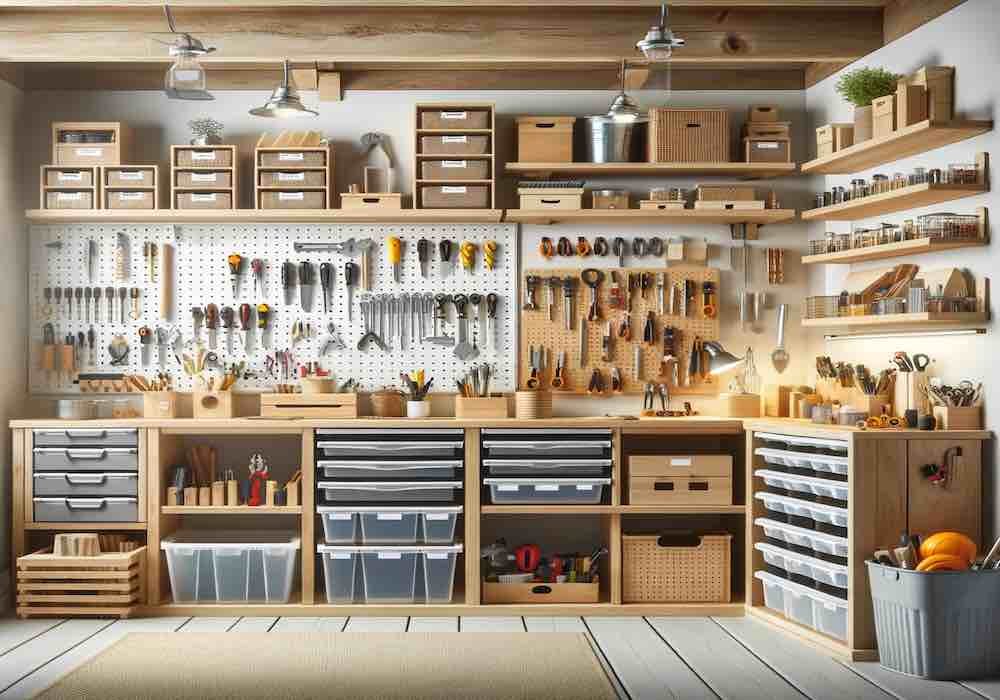
10. Combine Pegboards, Shelves, and Drawers for Max Storage
This setup is a perfect example of ‘a place for everything, and everything in its place.’ It works because it employs a variety of storage types tailored to different needs. The pegboard offers quick-access, high-visibility storage for frequently used tools. The shelves are for bulkier items and jars. The under-counter drawers provide concealed, high-density storage for thousands of small parts. This multi-layered approach avoids the pitfall of a one-size-fits-all solution, creating a truly efficient and ergonomic workspace.
✅ Before You Start
When planning a comprehensive workbench area like this, map out your workflow first. Where do you do your cutting? Your assembly? Your finishing? Place the tools and supplies for each task closest to that zone. For example, all your measuring and marking tools should be on the pegboard right where you start a project. All your fasteners should be in drawers underneath your main assembly area. Thinking in zones will make your final layout incredibly intuitive to use.
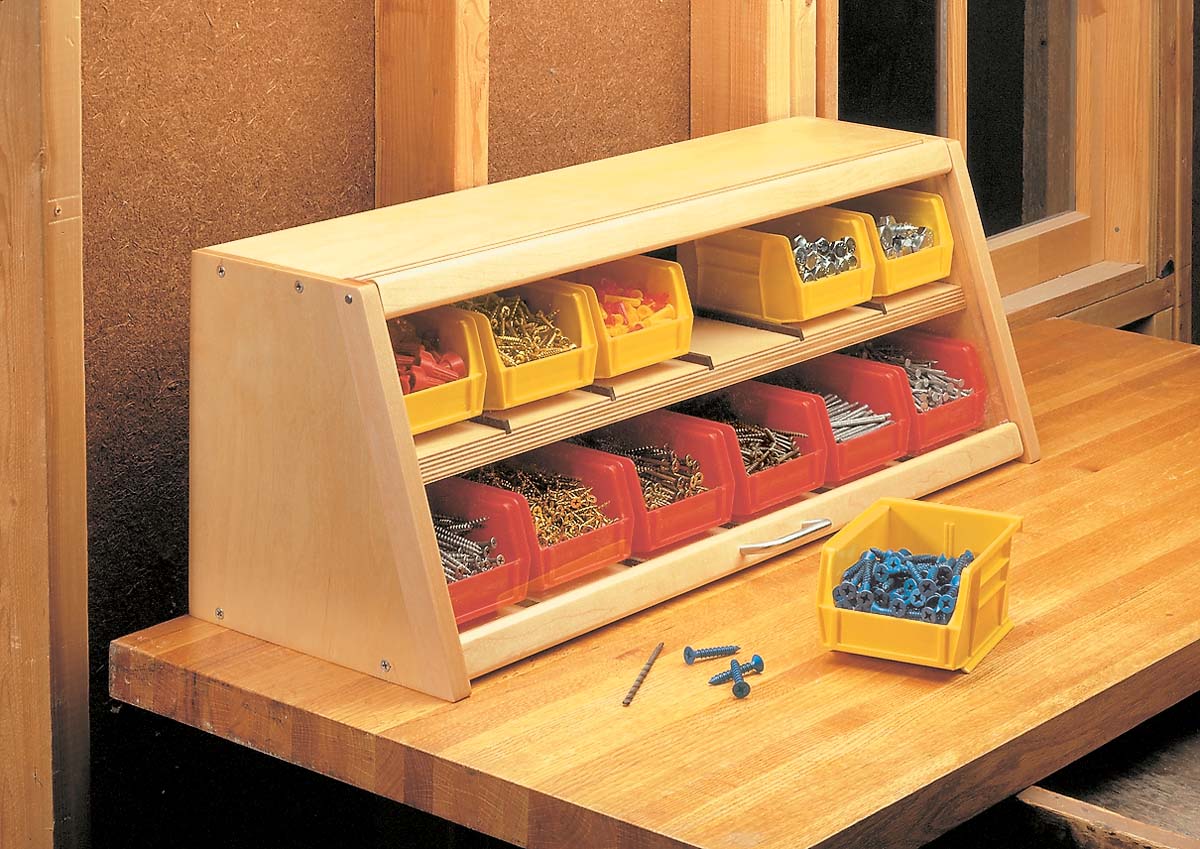
11. Build a Tiered Desktop Caddy for Plastic Bins
This is a fantastic scrap wood project. You can build this little caddy for practically nothing if you have some leftover 1×4 boards or 3/4″ plywood from another project. The angled design is easy to achieve with a few simple cuts on a miter saw. The yellow and red bins are inexpensive and widely available at hardware stores or online, often for less than $2 each. For a total cost of around $20 and a single afternoon, you can create a highly functional desktop organizer that keeps your most-used screws right at your fingertips.
🧹 Maintenance Reality
The formula here is all about primary colors and raw materials, creating a playful, almost retro workshop vibe. It’s about 50% light natural wood + 25% bright yellow + 25% bright red. The key is the balance. The wood acts as a neutral canvas that stops the primary colors from feeling overwhelming. You could introduce another primary, like blue, but you’d want to keep the total percentage of color around 50% to maintain that clean, organized look.
12. Use a French Cleat System with Plywood Boxes
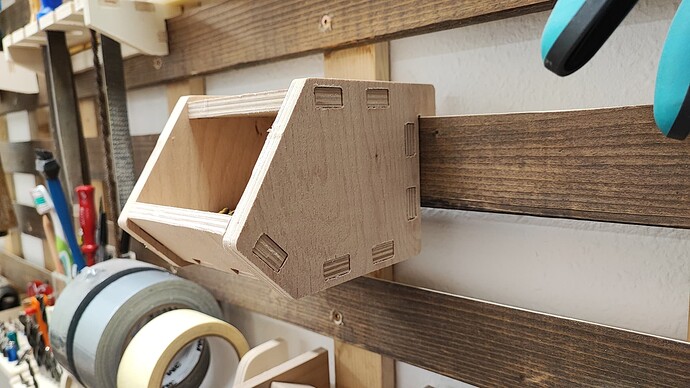
The French cleat is the hero of this design. It’s an incredibly simple and strong mounting system that offers infinite modularity. Unlike a fixed shelf, you can slide the plywood box anywhere along the dark-stained rail, or remove it entirely to take to your workbench. This flexibility is what makes the system so powerful. You’re not locked into one configuration. As your needs change, you can build new boxes, shelves, or holders and easily add them to the wall. It’s a storage system that grows with you.
📏 Scale Guide
Before you commit to a French cleat system, make sure you’re ready for the build. It’s a fantastic DIY project, but it requires a few key things:
- A table saw or track saw to safely and accurately cut the 45-degree angles on your cleats.
- Enough clear wall space to make the system worthwhile—at least a 4×4 foot section.
- Studs to anchor the wall cleats to. You cannot safely mount a loaded French cleat system on drywall alone.
- A plan for what you want to hang, so you can build your boxes and holders to the right size from the start.
13. Embrace the Grit with a Distressed Metal Toolbox
While there’s a certain romantic appeal to this gritty, industrial look, let’s be real about what it means to live with it. That ‘distressed’ toolbox and ‘worn’ workbench are covered in actual dirt, grime, and possibly rust. It’s not a ‘look’ you can easily recreate with paint; it’s earned. Spilling your fasteners out like this is also the fastest way to lose the one specific nut you need. This aesthetic is more about capturing a mood than creating a functional, everyday storage solution.

💡 Designer Tip
The beauty of this setup is that there is basically zero maintenance, because the aesthetic is one of decay and use. A new scratch or a bit of rust only adds to the character. However, that rust can transfer to your tools and fasteners if you’re not careful. The biggest maintenance issue is finding things. Wiping down the greasy surfaces will be a chore, and preventing the spread of rust might require occasional treatment with a rust converter or a clear coat, which ironically detracts from the raw look.
14. Mount a Custom Wooden Screwdriver Rack to the Wall
Create your own perfect-fit screwdriver rack from a scrap block of wood. It’s a satisfying 30-minute project. Cost: essentially free.
- Select a block of wood at least 1.5 inches thick. A piece of a 2×4 works perfectly.
- Lay out your screwdrivers on the block to determine spacing. Mark the center for each hole.
- Use a drill bit that is slightly larger than the shaft of each screwdriver, but smaller than the handle. Drill holes at your marked spots, about 3/4 of the way through the block.
- For a cleaner look, use a larger Forstner bit to drill about 1/4″ deep at each hole location first. This creates a neat countersink for the handle to rest in.
- Sand the block smooth and mount it to the wall with a couple of long screws into studs.

📐 Style Math
Don’t just drill random holes in your wooden rack. Take a moment to measure the diameter of your screwdriver shafts. Most fall into two or three common sizes. Use a separate, corresponding drill bit for each size group (e.g., a 1/4″ bit for small screwdrivers, a 3/8″ bit for larger ones). This ensures a snug, secure fit for every tool, preventing them from wobbling around. It’s a small detail that makes the finished rack feel much more custom and professional.
15. Use a Translucent Multi-Drawer Organizer for Small Nails
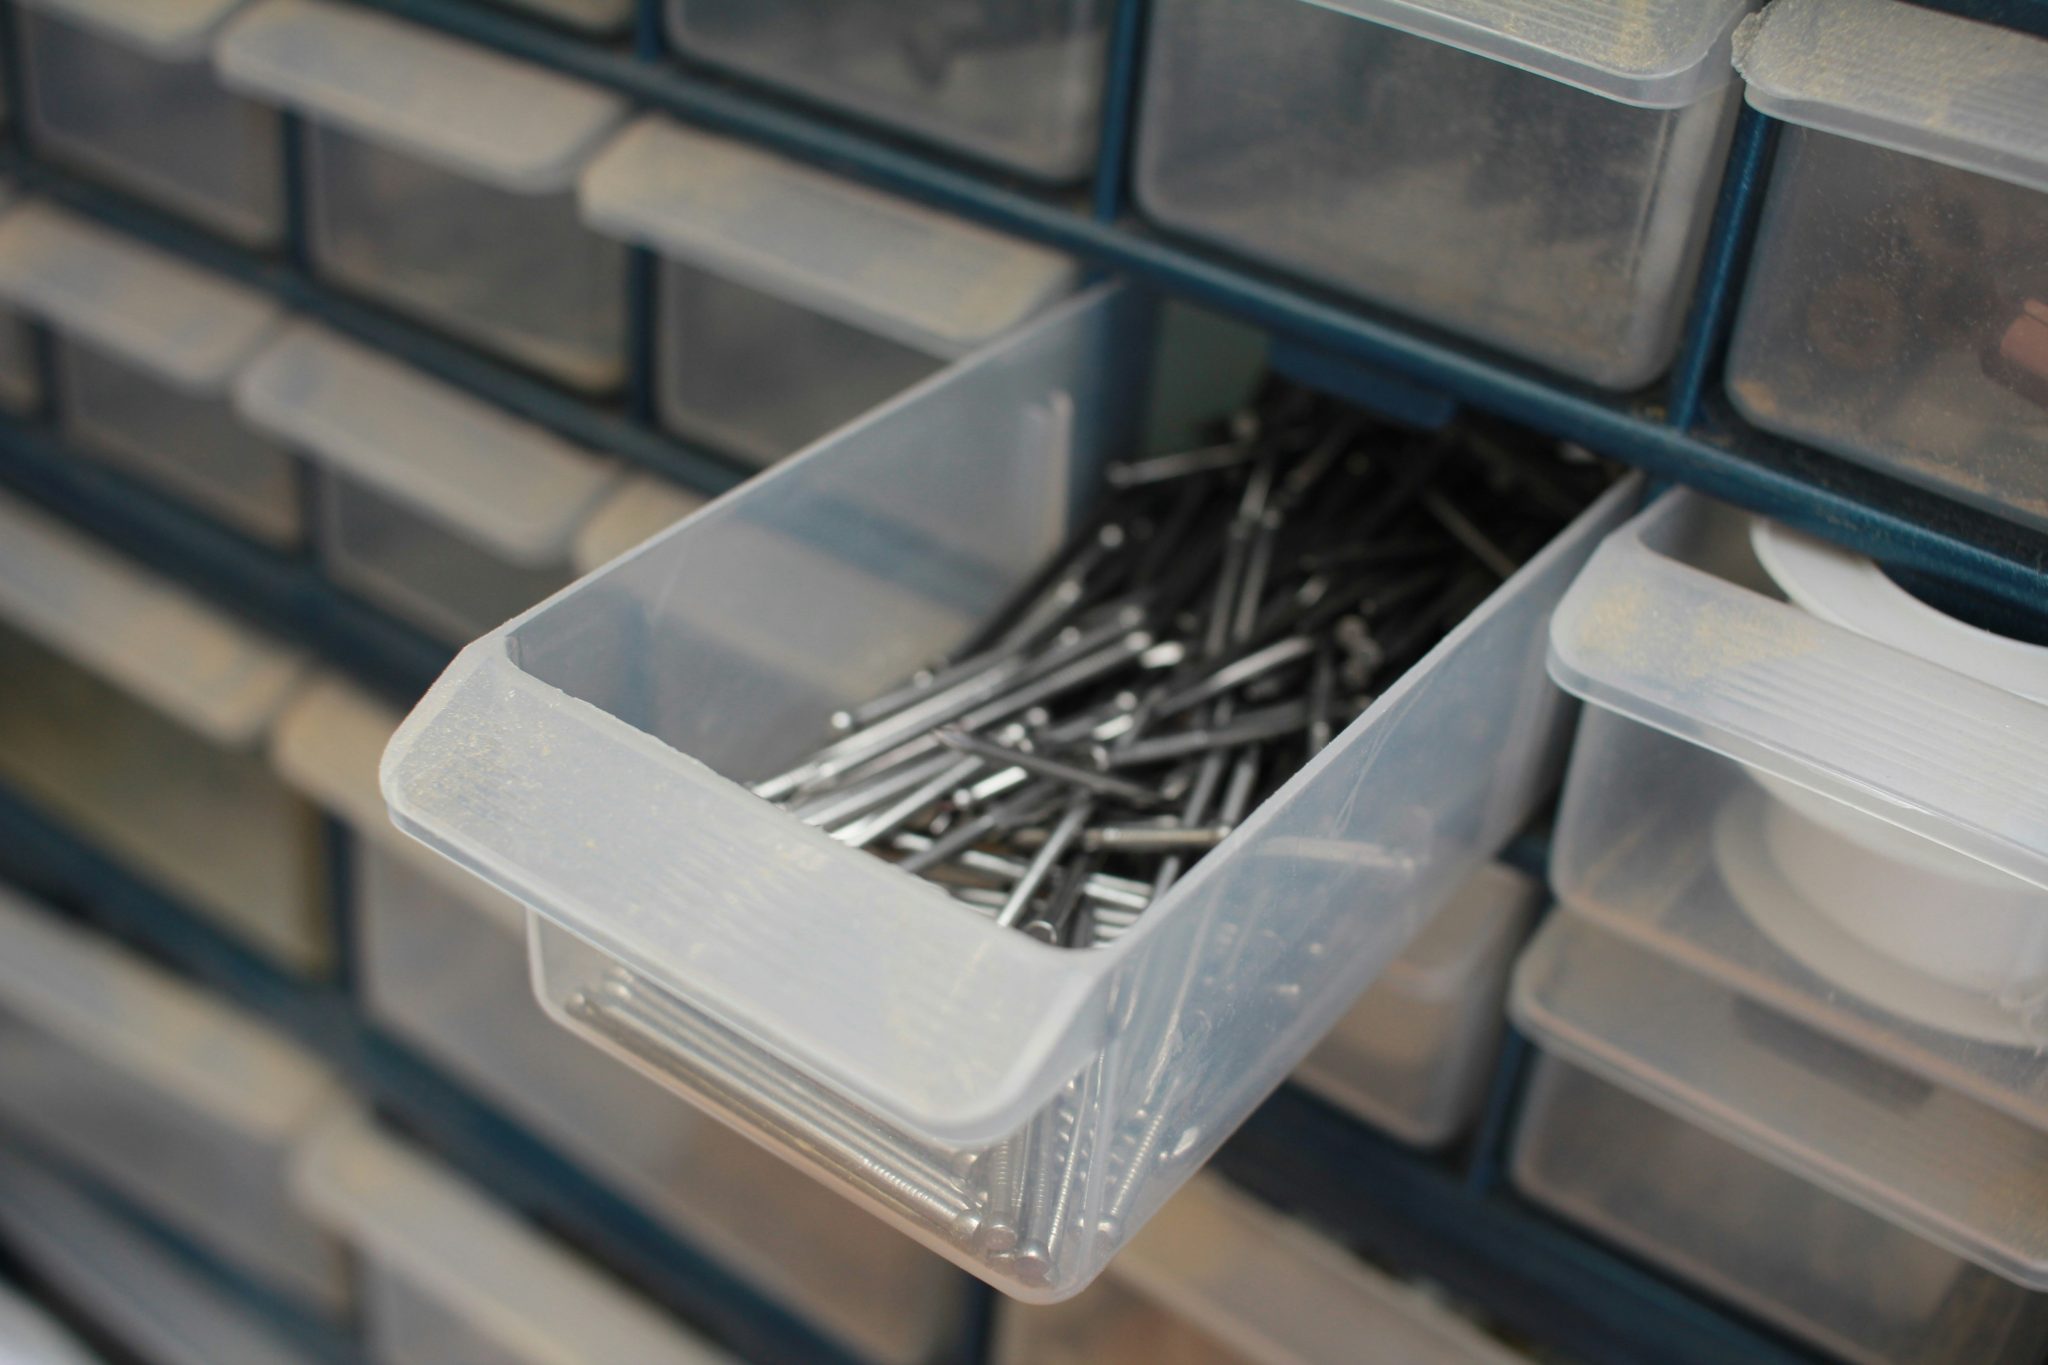
This is the classic, no-nonsense solution for a reason. It works because it solves the two biggest problems of small part storage: identification and containment. The translucent plastic drawers let you see the general shape and size of the contents without having to open anything. The small, individual compartments prevent tiny items like brad nails and small screws from getting hopelessly jumbled together. The dark frame provides a visual grid, making it easy for your eye to scan and find the right drawer quickly.
⚠️ Real Talk
These cabinet-style organizers are incredibly space-efficient. A standard 24-drawer unit might only be 20 inches wide by 10 inches tall, but it can hold thousands of individual items. They are perfect for sitting on a workbench, a shelf, or even mounted directly to the wall. For this to be effective, you need a critical mass of small parts. If you only have a few types of screws, this is overkill. But if you have dozens of different fasteners, this is one of the densest storage solutions available.
16. Keep Assorted Hardware in a Clear Plastic Tackle Box
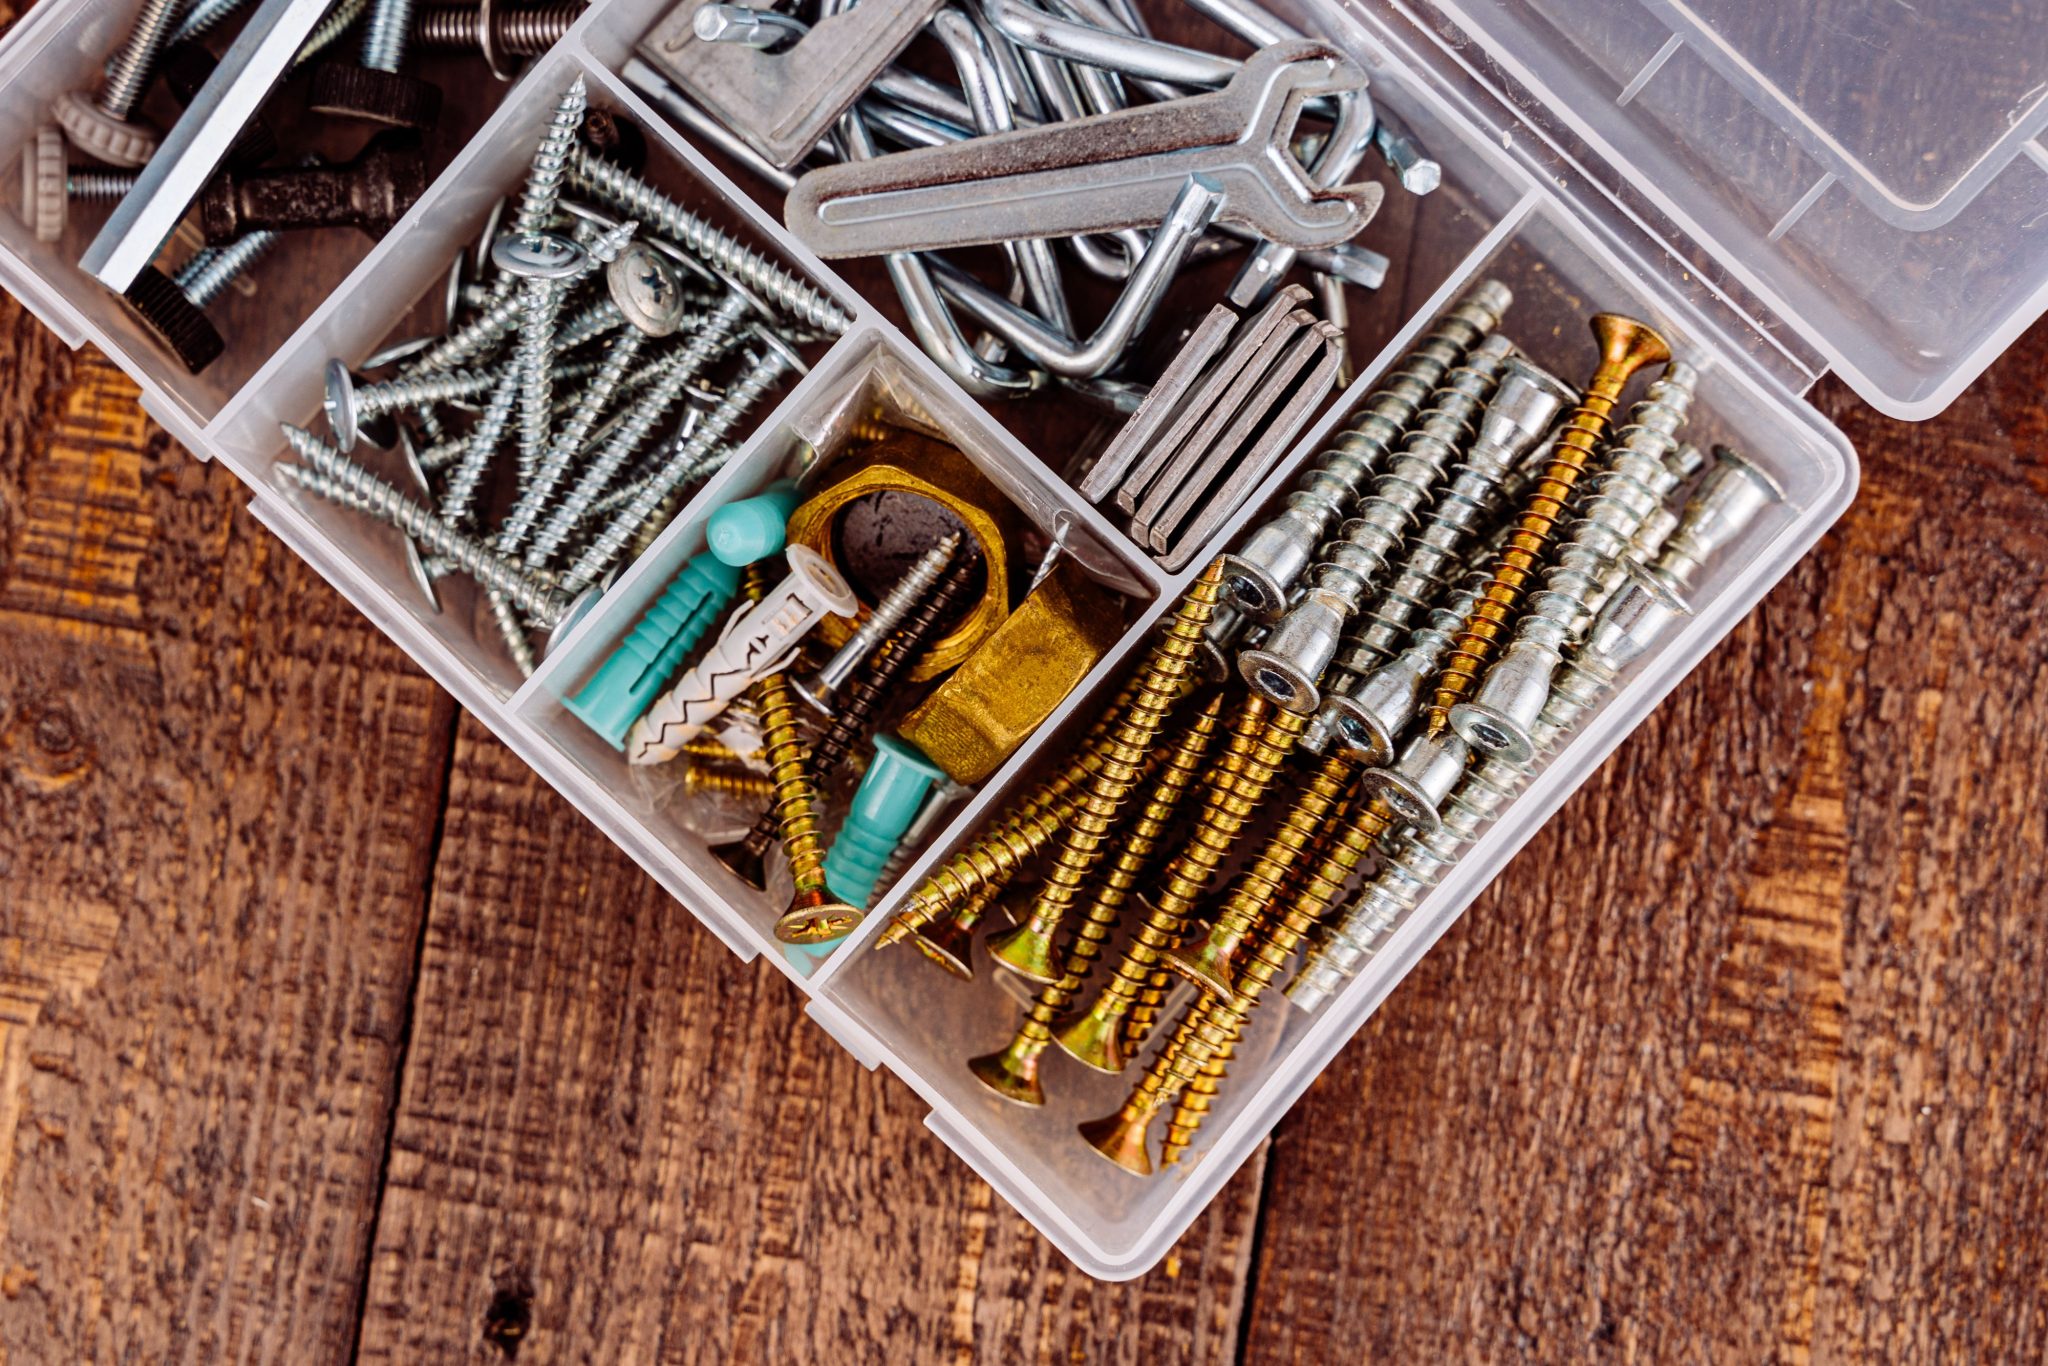
This is the undisputed king of budget-friendly, portable organization. Forget expensive, workshop-specific systems. A basic clear plastic organizer—often sold as a tackle box or bead organizer—can be had for $5-$15 at Walmart, Target, or any craft store. The adjustable dividers give you the flexibility to create larger compartments for bolts and smaller ones for screws. You can have a dedicated box for electrical connectors, another for plumbing fittings, and another for picture-hanging hardware, all for less than $50 total.
💰 Budget Breakdown
Portability. That’s the magic here. Unlike wall-mounted bins or heavy cabinets, you can grab this entire box and take it to your project, whether it’s in another room, in the attic, or at a friend’s house. You have your entire curated collection of fasteners right where you need it, instead of running back and forth to the garage for a different size screw. This one feature makes it an essential part of any organization system.
17. Opt for Clear Pull-Out Bins with a Bright Blue Handle
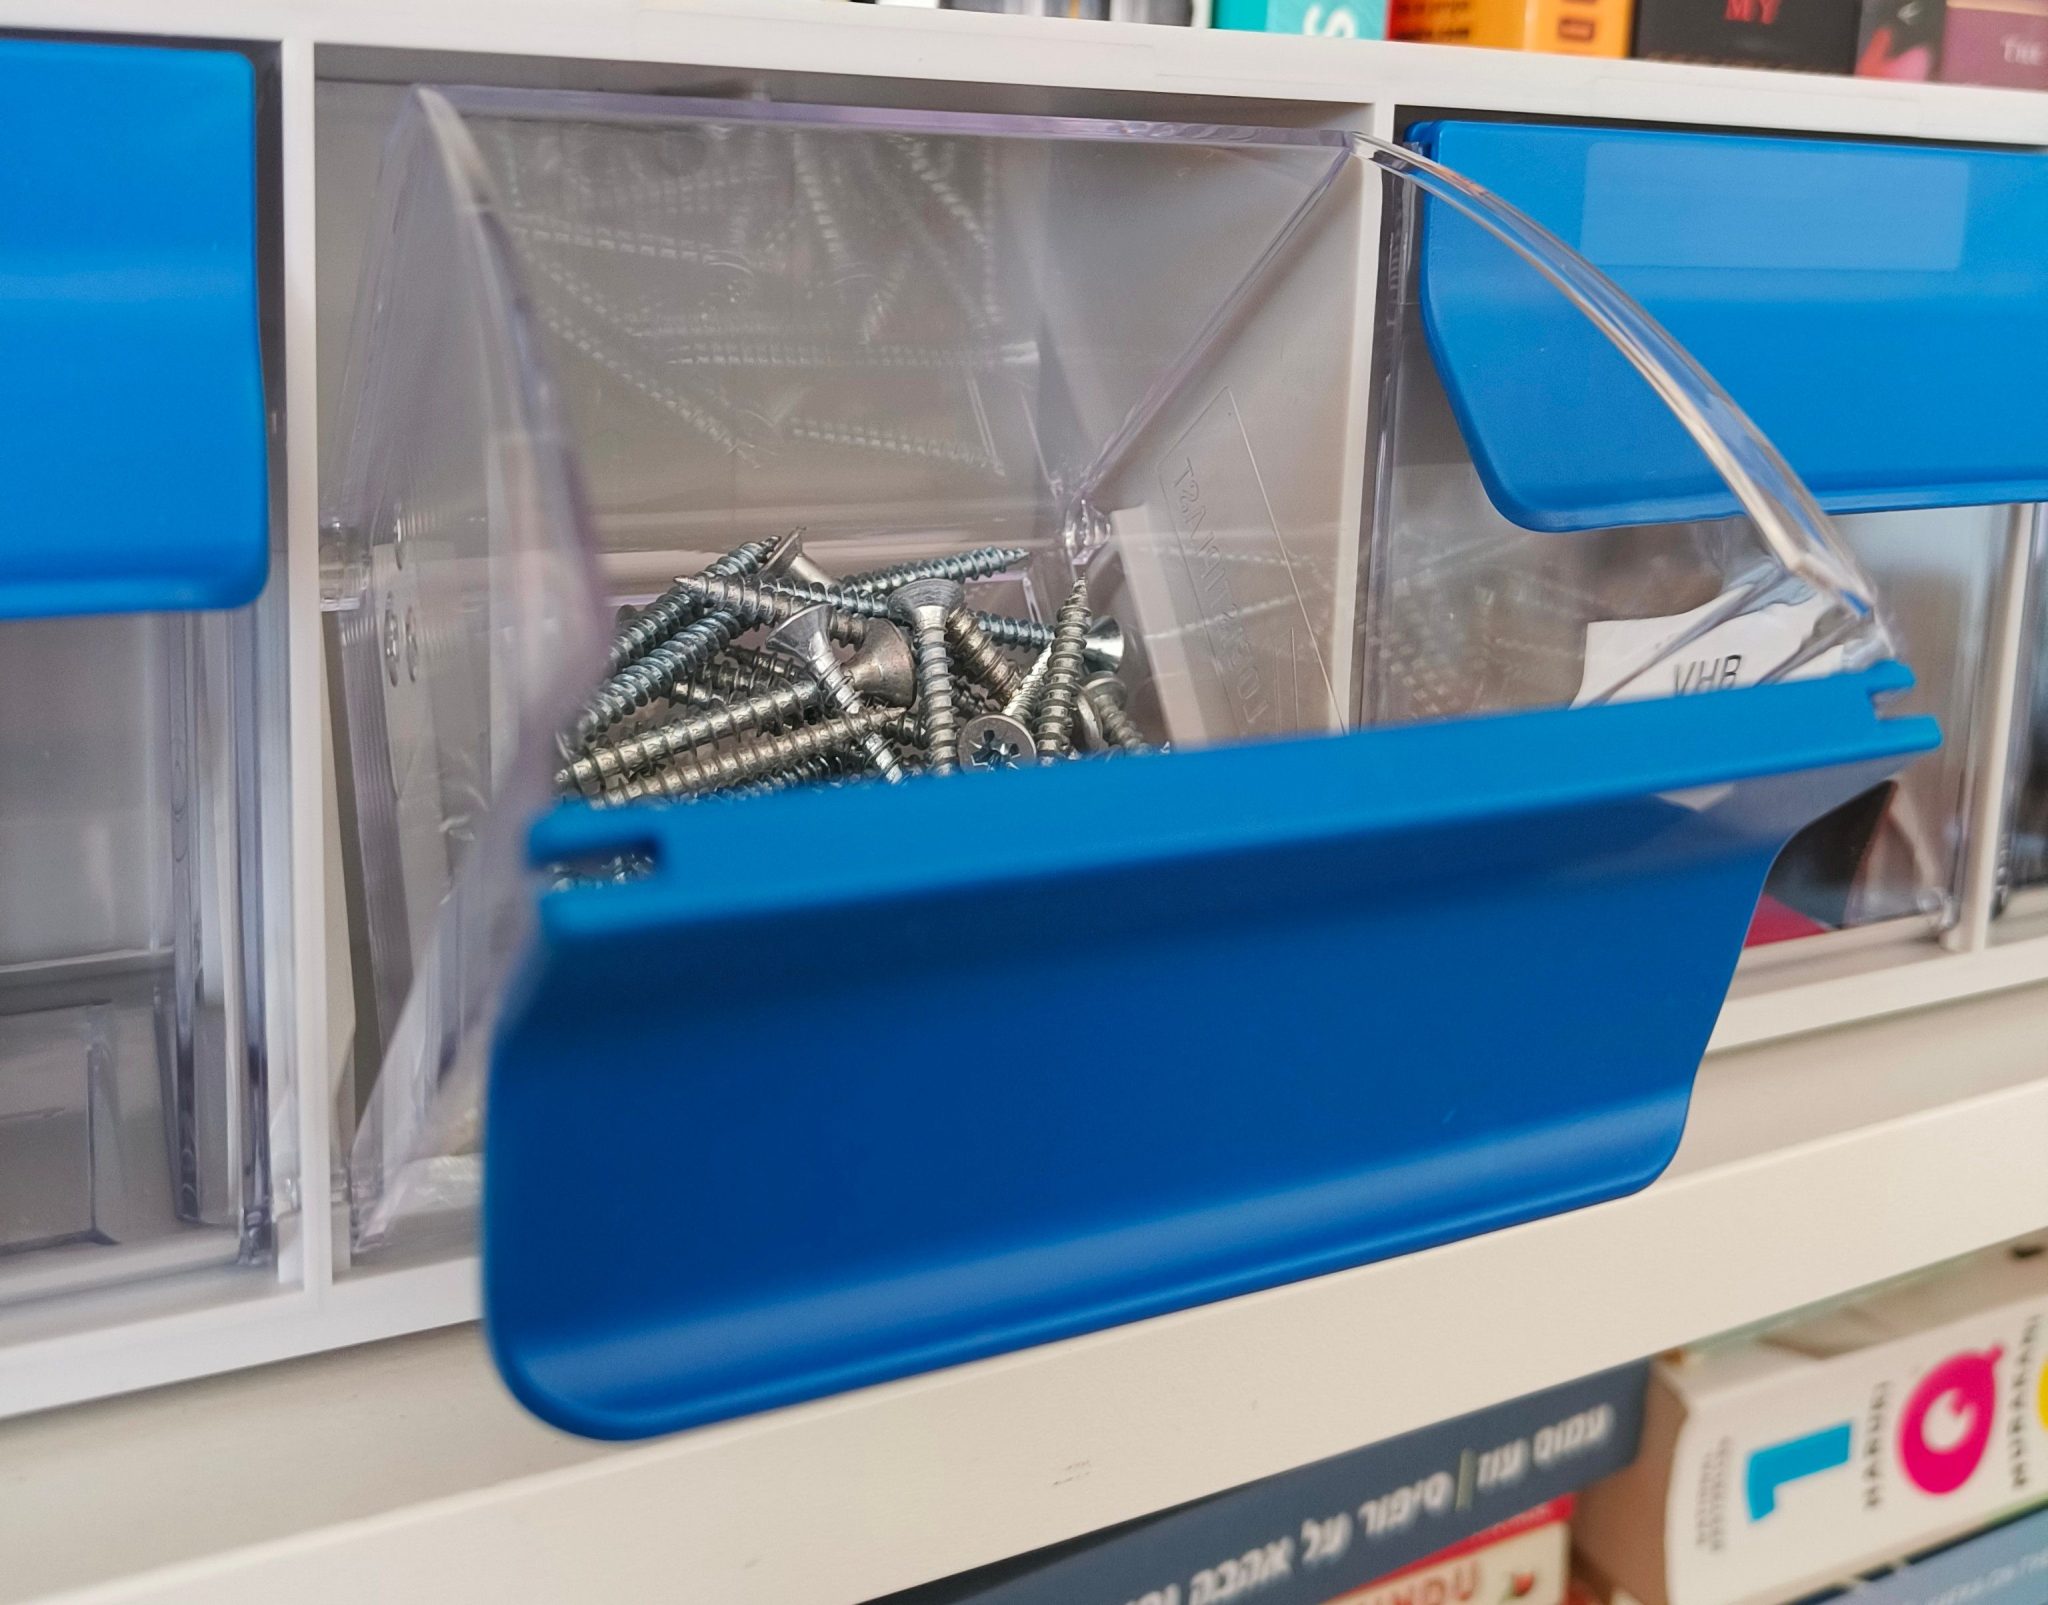
This design cleverly combines the best features of different systems. You get the at-a-glance visibility of a fully transparent container, which lets you instantly assess the contents and quantity. But you also get the clean, uniform look of the bright blue front panels, which serve as both a handle and a spot for a label. This mix of transparency and solid color gives you clarity without creating visual chaos, a problem that fully clear systems can sometimes have. Compare this to the similar, but flip-top style shown in Idea #17.
⭐ The One Thing
A system of individual bins like this can get surprisingly expensive once you scale it up. A single bin might be $5-$8, which sounds reasonable. But if you need 30 of them to get organized, you’re suddenly looking at a $150-$240 investment just for the bins, not including any shelving. Also, be aware that not all ‘clear’ plastic is created equal. Cheaper versions can yellow and become brittle over time, especially when exposed to sunlight in a garage.
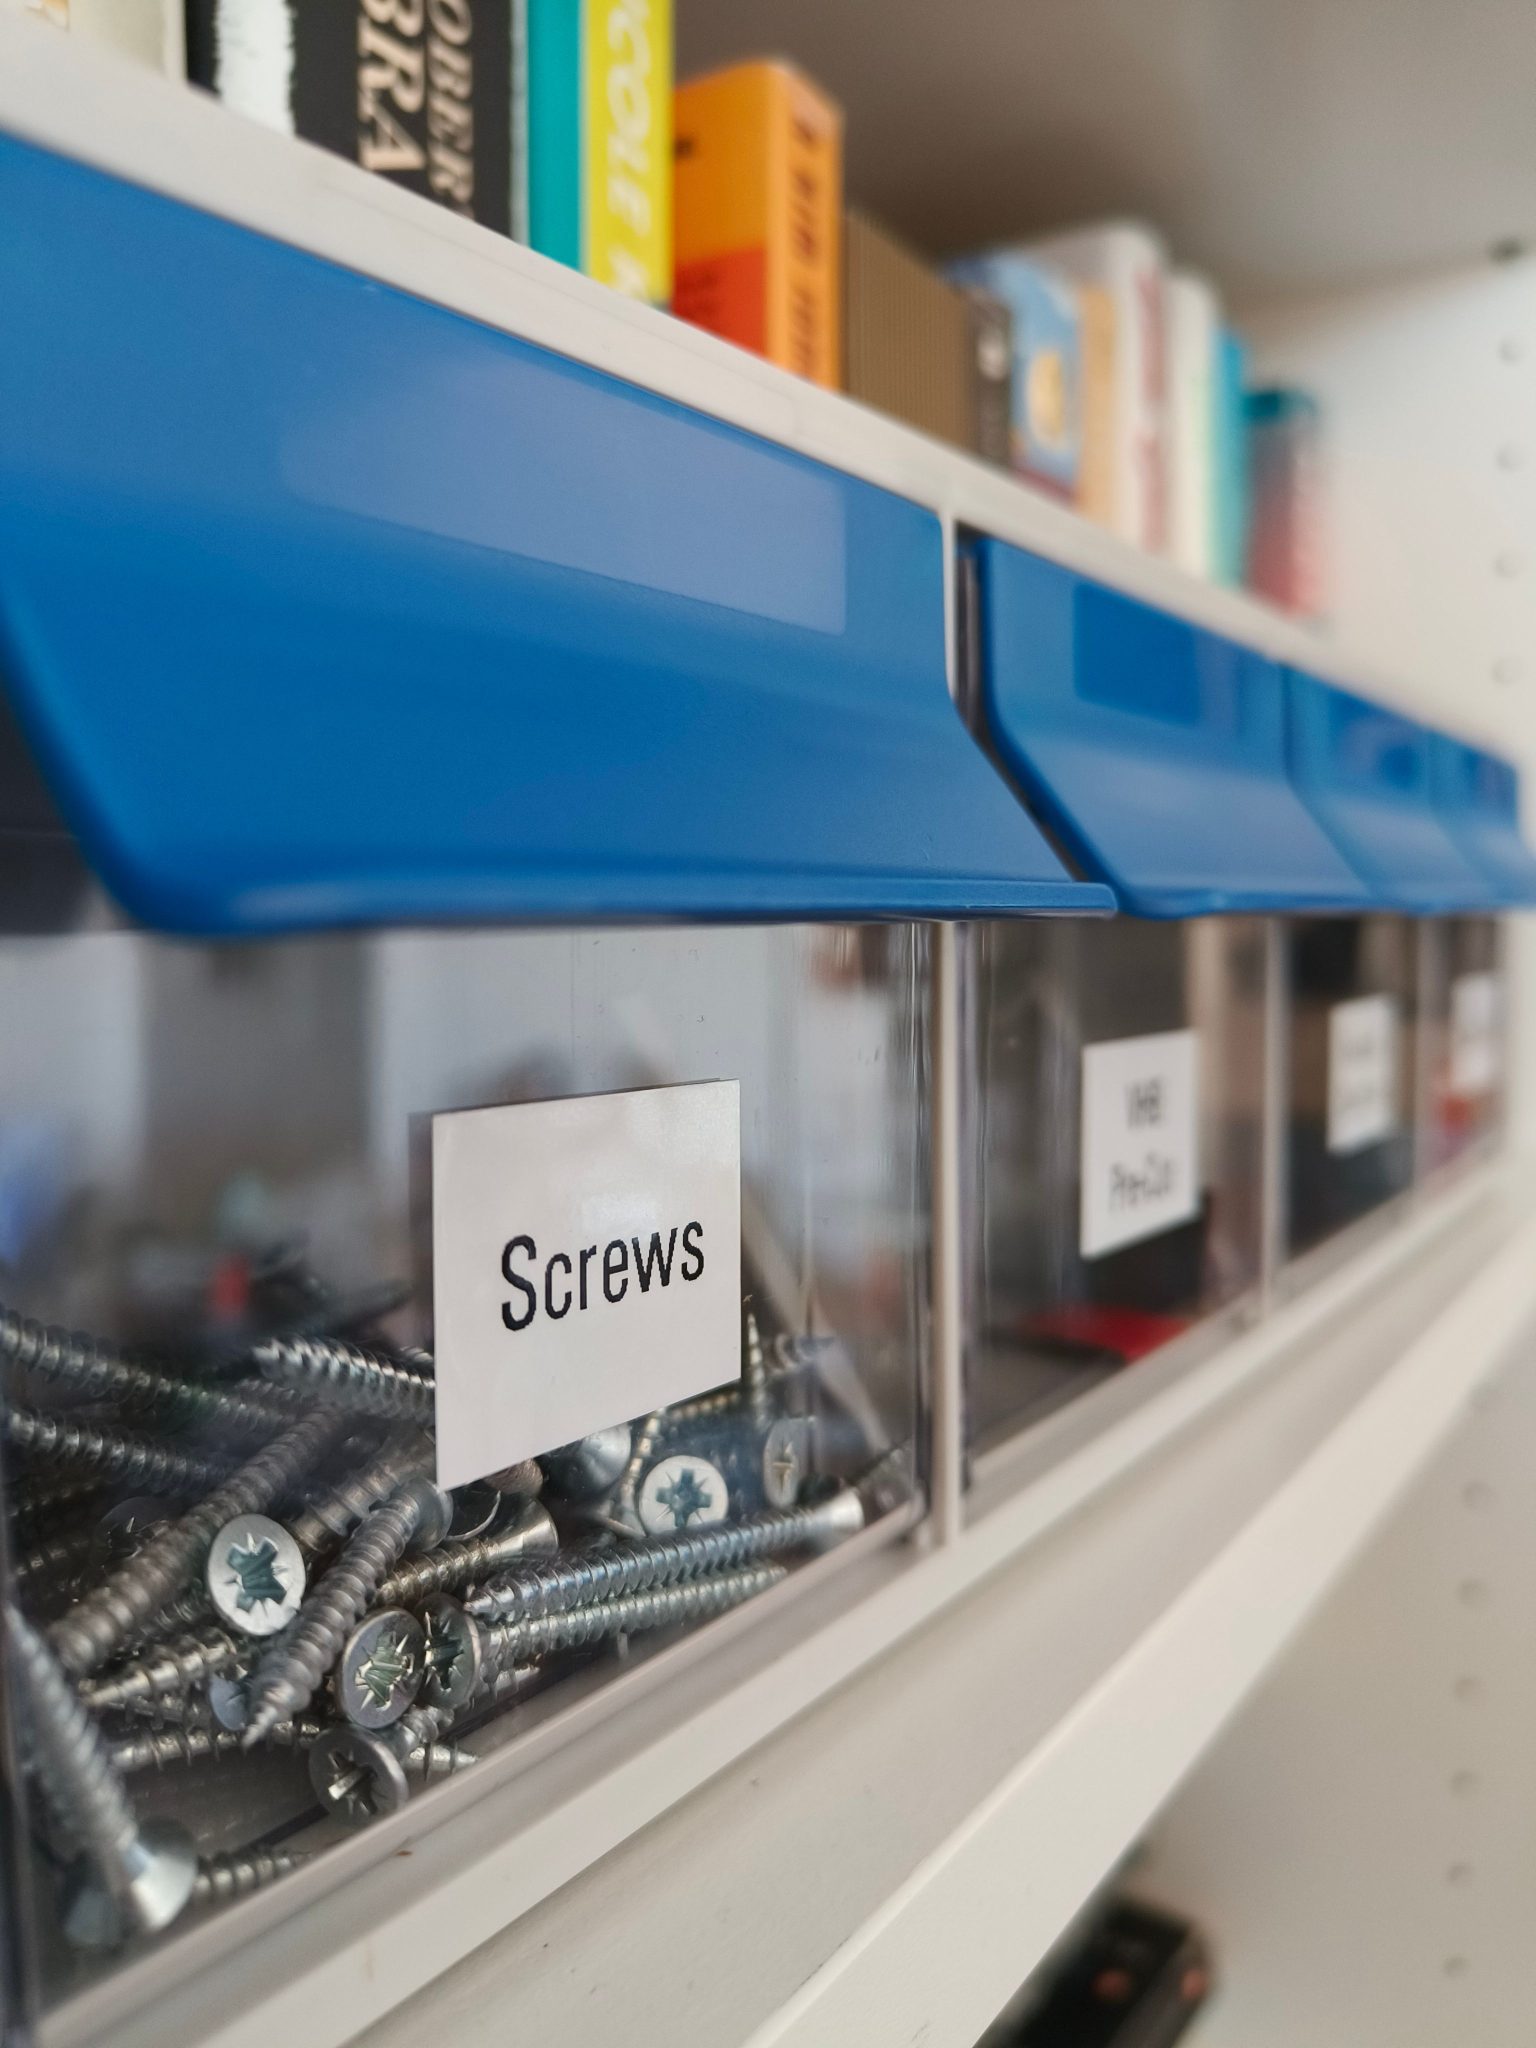
18. Use Labeled, Clear Bins with Blue Flip-Up Fronts
When labeling bins, be specific but concise. Instead of a generic label like ‘Screws’, get more granular: ‘Drywall Screws’, ‘Wood Screws < 2″‘, or ‘Machine Screws’. Use a bold, sans-serif font for maximum readability from a distance. A label maker is your best friend here. For bonus points, add a small sample screw to the outside of the bin with a dab of hot glue. It provides an instant visual confirmation that you’re grabbing the right container, no reading required.
🔥 Trending Context
There’s a reason you’re seeing these clear bin systems all over Pinterest and home organization blogs. It’s part of a larger ‘Clear Clutter’ trend, influenced by home organizing gurus like The Home Edit. The idea is to make everything visible so you know what you have and can find it easily. By decanting screws from their original messy cardboard boxes into uniform, clear containers, you get a hit of serotonin from creating order out of chaos. It’s functional, but it’s also deeply satisfying.
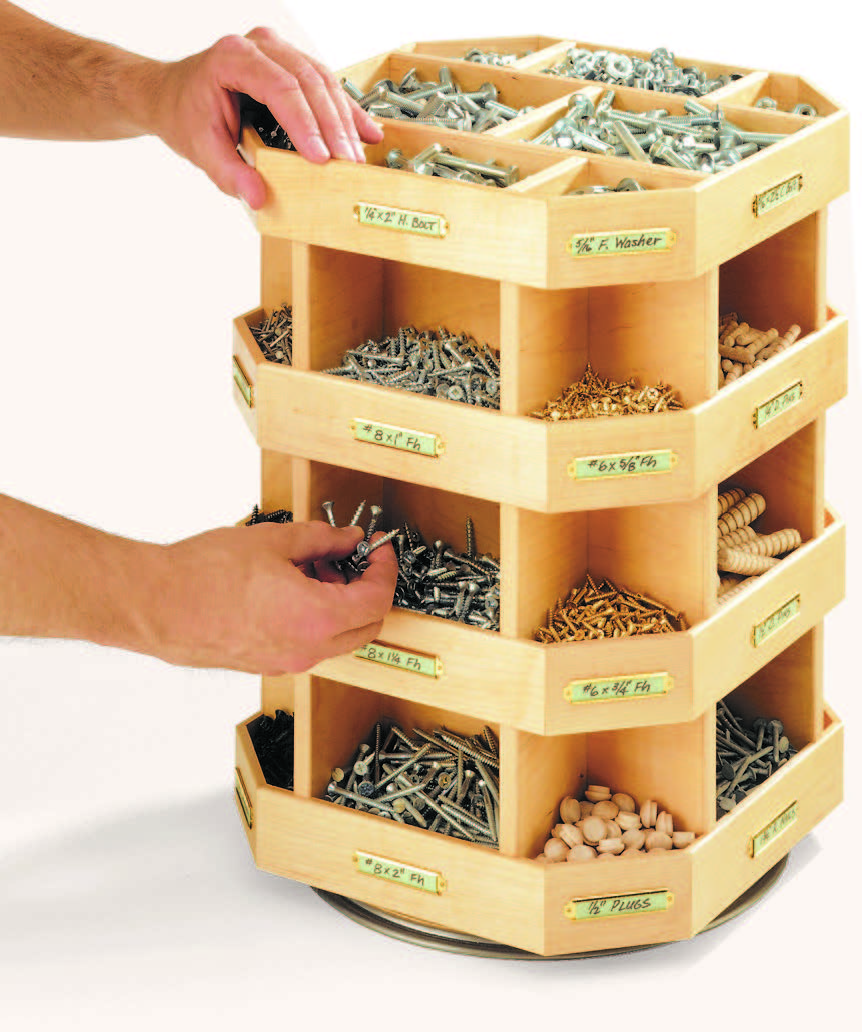
19. Craft a Multi-Tiered Rotating Hardware Organizer
The rotation is everything. This organizer could have been a simple stacked set of boxes, but adding the rotating base (a simple lazy Susan mechanism) transforms it from a static object into an interactive tool. It allows you to store a massive density of small parts in a very small footprint—likely less than one square foot of bench space. With a flick of the wrist, you can bring dozens of different fasteners into view. This is a level of access and efficiency that a flat wall of drawers can’t match.
🔧 How-To Brief
- Lazy Susan Hardware (12-inch): $15 – $30
- 3/4″ Plywood or Solid Wood: $30 – $60
- Brass Label Holders (24 pack): $15 – $25
- Fasteners and Wood Glue: $10
- TOTAL: $70 – $125
- Budget alternative: Skip the custom build and look for a multi-level spice rack carousel at a thrift store or on Facebook Marketplace. For $10-$20, you can get a similar rotating function, though with smaller compartments.
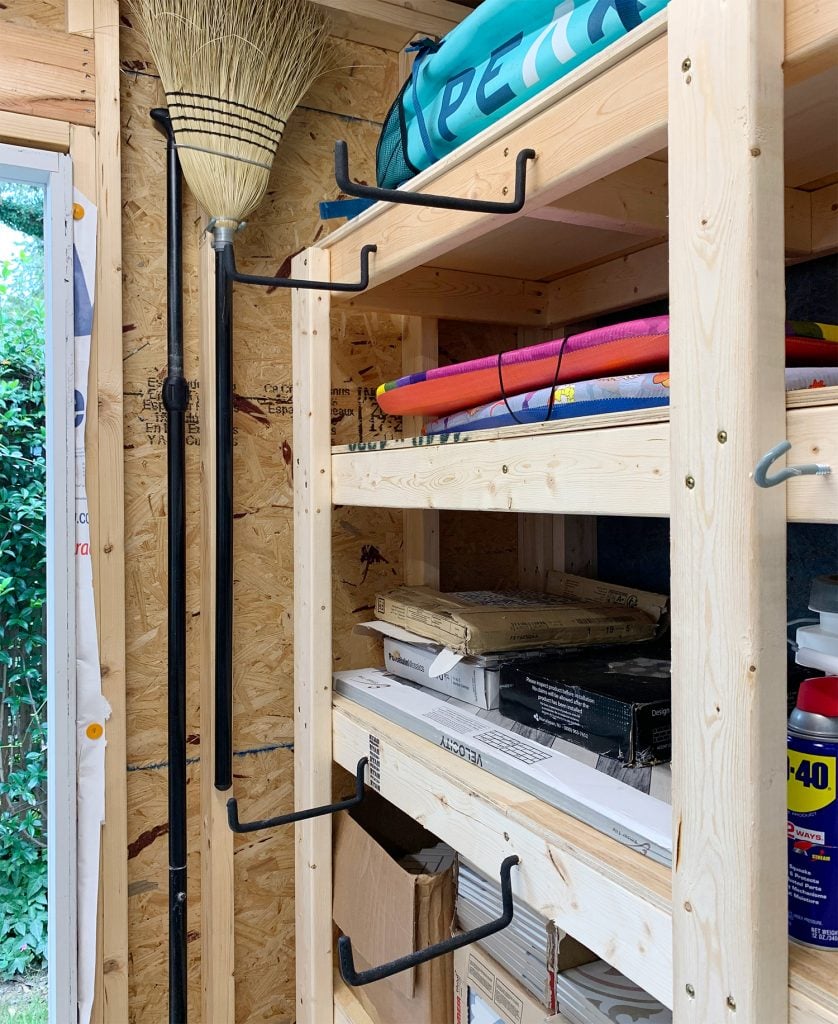
20. Use Unfinished Wood Shelving and Utility Hooks in a Shed
This is pure, unadulterated utility, and it works because it’s completely honest. There’s no pretense here. The unfinished 2x4s and plywood shelves are chosen for strength and cost-effectiveness, and the design follows suit. It’s a clear demonstration of ‘form follows function.’ The deep shelves are perfect for bulky boxes, while the sturdy uprights and plywood walls provide ample surface for mounting heavy-duty hooks. It’s a robust, adaptable system that prioritizes capacity over aesthetics.
💸 Get This Look For Less
Want this level of heavy-duty storage for next to nothing? Keep an eye out for reclaimed lumber. Construction sites, pallet recycling centers, or even your local Facebook Marketplace are great sources for free or cheap 2x4s and plywood. The look will be even more rustic and utilitarian, but the function is identical. A box of construction screws and a circular saw are all you need to turn a pile of scrap into a super-sturdy shelving unit like this one. For a more finished plywood look, see the cubbies in Idea #20.
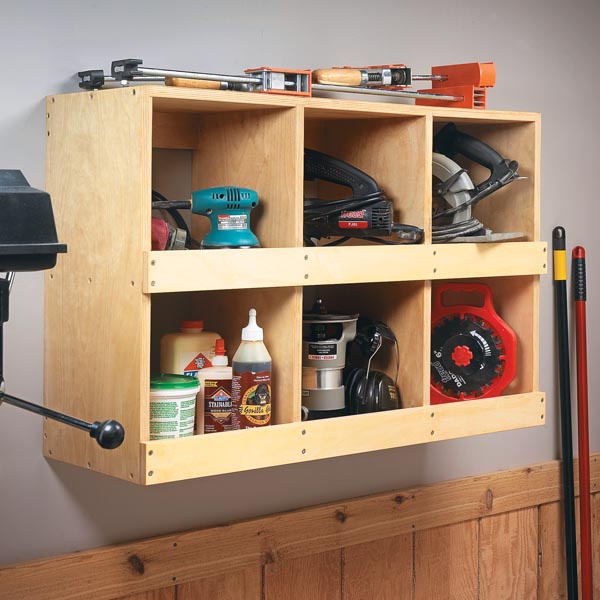
21. Build Wall-Mounted Plywood Cubbies for Power Tools
Building a simple plywood cubby unit like this is a great beginner woodworking project. Total time: 3 hours. Cost: ~$40.
- Cut a sheet of 3/4″ plywood into a top, bottom, two sides, and two vertical dividers. For a unit that is 36″ wide and 24″ tall, your main pieces will be 36″ long and your sides/dividers will be 22.5″ tall.
- Use a pocket hole jig to drill holes along the top and bottom edges of your side pieces and dividers. This hides the screws for a cleaner look.
- Assemble the outer box first using wood glue and pocket hole screws.
- Measure and mark the placement for your two vertical dividers for three equal cubbies. Secure them with glue and screws.
- Sand everything smooth, and you’re ready to mount it to the wall. Always screw directly into studs.
🎯 What Makes It Work
This is a perfect solution for the space directly above a workbench. A single unit, typically 3 to 4 feet wide and 2 feet tall, provides a significant amount of storage without encroaching on your workspace. The key dimension is the depth. A depth of 12-16 inches is ideal; it’s deep enough to hold most power tools, routers, and sanders, but not so deep that things get lost at the back. You can stack them vertically or run them side-by-side to fill a larger wall.
22. Use a Clear Box to Organize Gold and Silver Screws
Even the most utilitarian items can have a compelling aesthetic. The formula here is about texture and color contrast. It’s 50% rustic texture (the dark, distressed wood surface) + 40% metallic shine (the mix of gold and silver screws) + 10% modern utility (the clean lines of the clear plastic box and the pop of teal from the wall anchors). The warmth of the gold screws against the cool silver and teal creates a subtle but pleasing color palette, all framed by the crisp, transparent container.
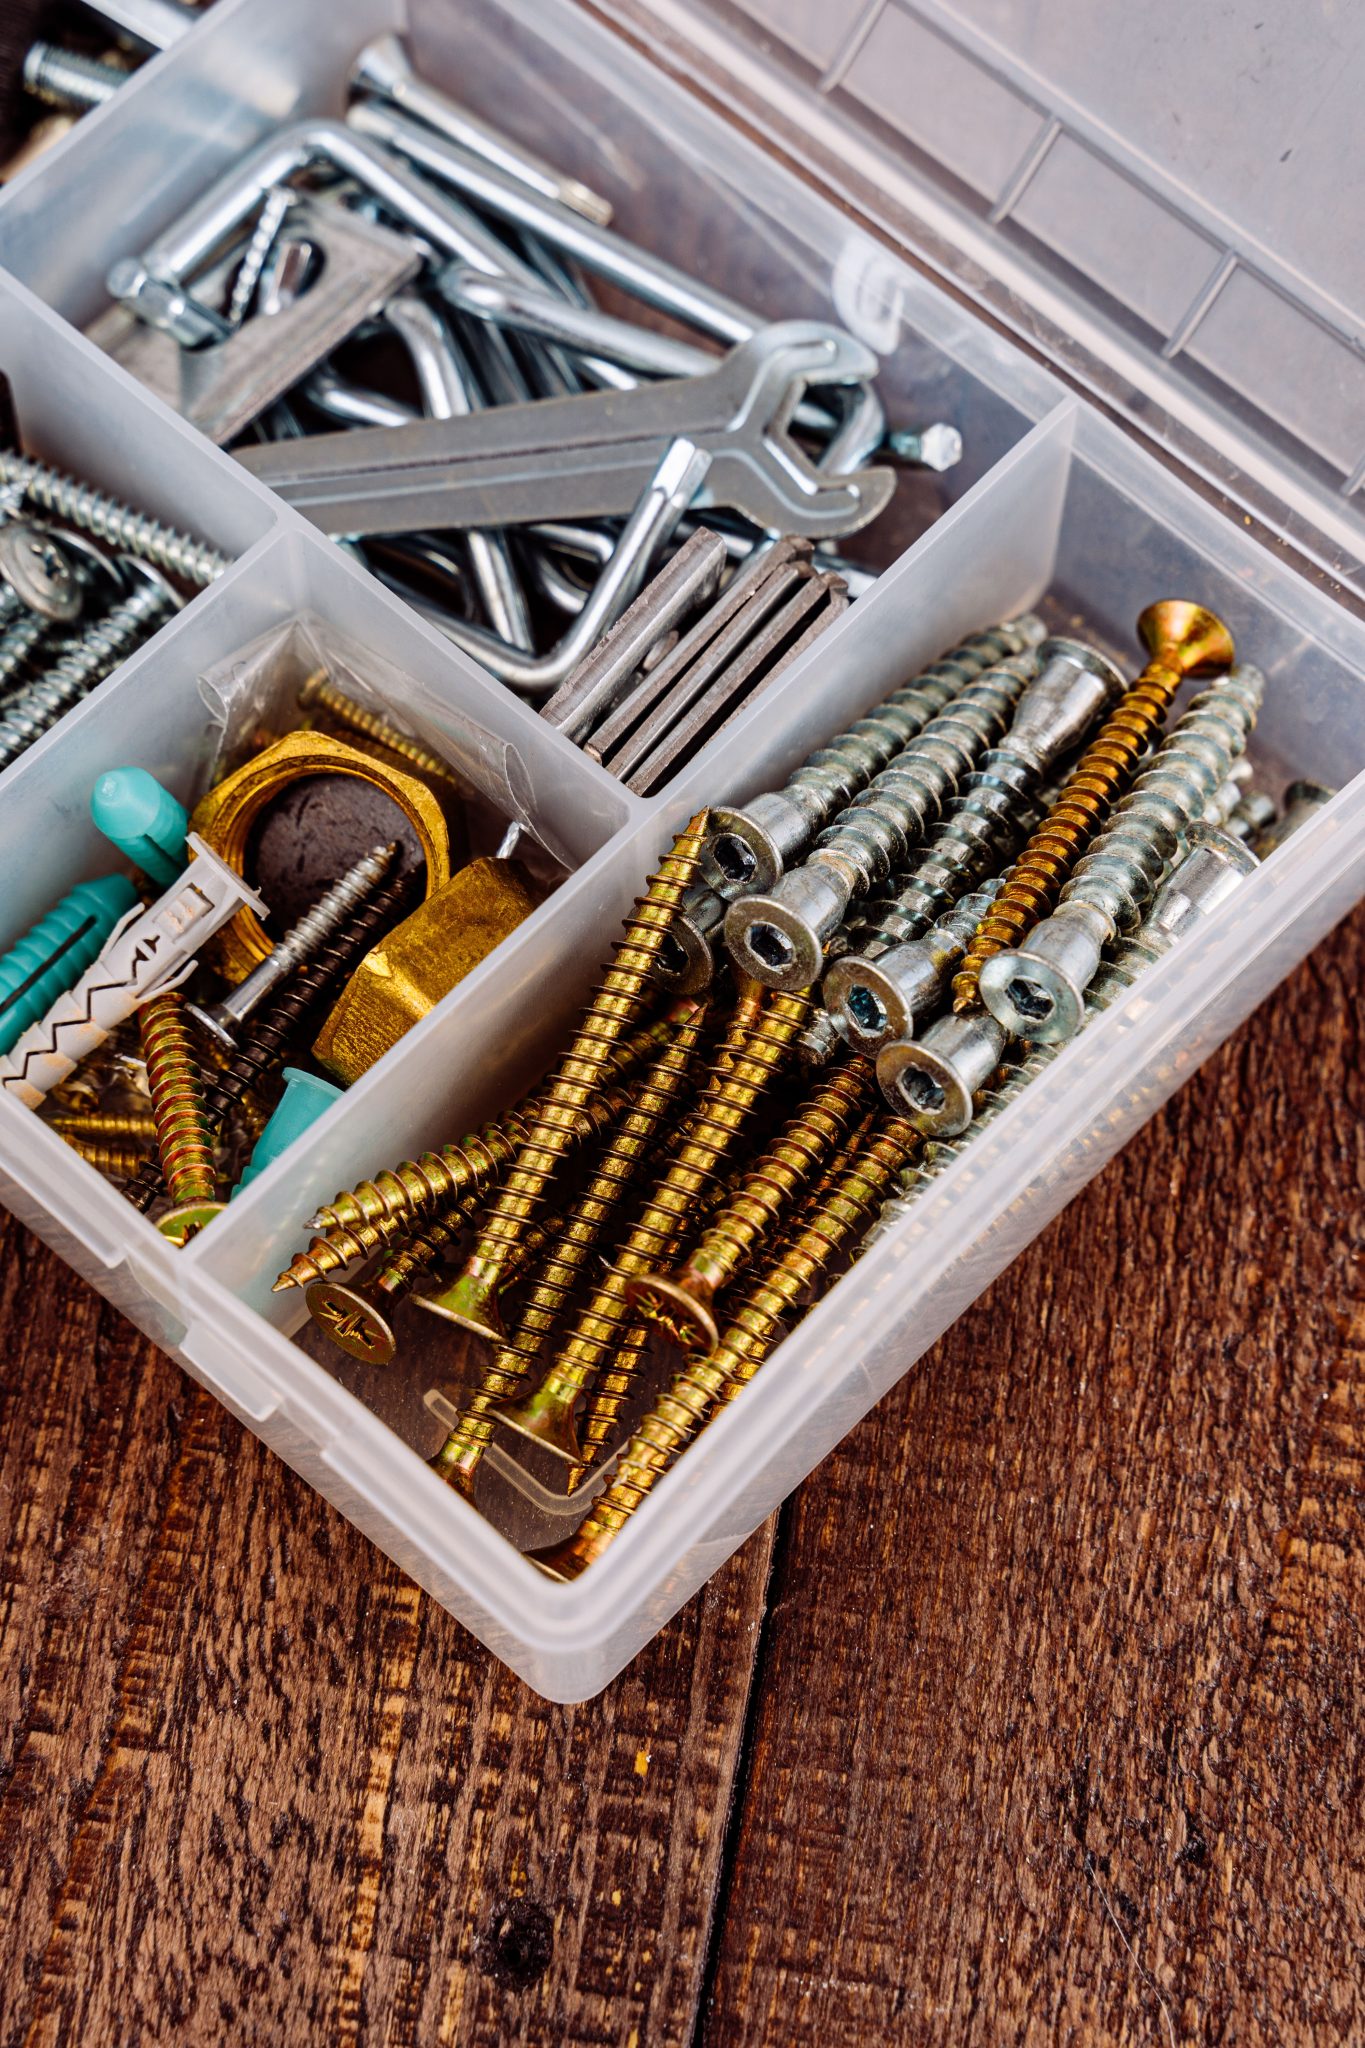
✅ Before You Start
The dividers are the key. Without the small plastic walls separating each type of fastener, this would be a useless, jumbled mess. It’s the act of compartmentalization that unlocks the value. By separating the gold wood screws from the silver hex-head screws and the plastic anchors, you transform a pile of hardware into a searchable, usable inventory. The clear box is just a container; the dividers are the organization system itself. It’s a small detail that makes all the difference.
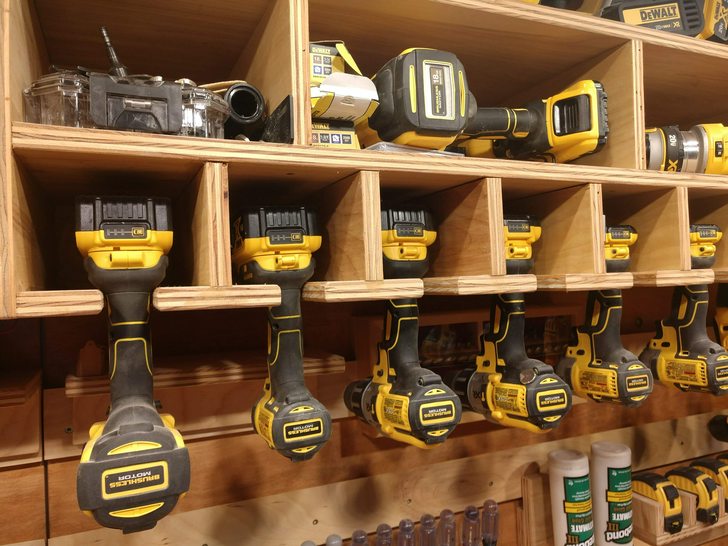
23. Use a Clear Plastic Organizer as a Drawer Insert
This is the concept of ‘secondary organization’ in action. The drawer itself provides the primary, macro-level storage (e.g., this is the ‘fasteners’ drawer). But the clear plastic insert provides the crucial secondary, micro-level organization that separates nuts from bolts and washers. This layering is what creates a truly functional system. It allows you to keep your workbench clear while still having perfectly sorted hardware just a pull away. The clear plastic is key, as it lets you see everything at once when you open the drawer.
|
📋 Copy HEX 🔗 Share |
🧹 Maintenance Reality
Before you buy a bunch of drawer inserts, take a minute to empty out your hardware drawer and group all the like items together. This will give you a clear idea of how many compartments you actually need and what sizes they should be. You might realize you need lots of small sections for screws, but a few larger, open sections for bulky items like toggle bolts or assorted washers. This little bit of prep work will ensure you buy the right organizer for your specific collection.
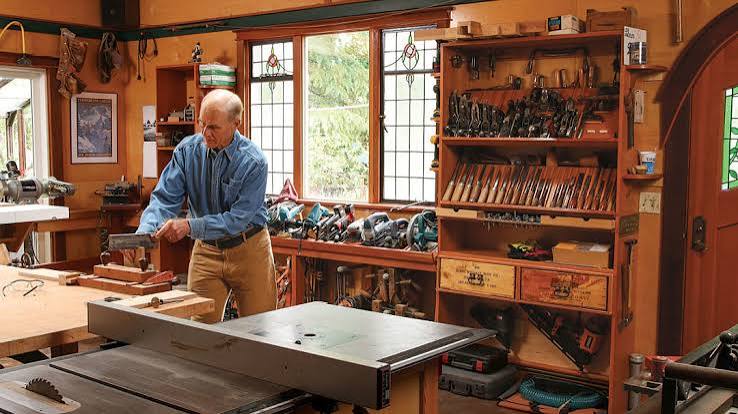
24. Hold a Clear Multi-Compartment Organizer for Easy Viewing
This style of organizer is having a moment because of its supreme practicality, a trend we’re seeing across home goods in 2026. People are tired of beautiful things that don’t work. This container isn’t trying to be an aesthetic object on its own; its design is entirely in service of its function. The total transparency, the secure latch, the small compartments—every element is optimized for the user’s goal: finding the right small part quickly. It’s a rejection of over-designed solutions in favor of honest, effective utility.
📏 Scale Guide
Be warned: the latches on these affordable plastic cases are almost always the first point of failure. After a year of being opened and closed, especially in a cold garage, the plastic hinges can become brittle and snap. When you’re shopping for one, pay close attention to the latch design. Look for ones with more robust, thicker plastic, or even better, a separate hinged mechanism rather than just a flap of bent plastic. Spending a few extra dollars on a better latch will save you from the inevitable ‘all my screws just spilled on the floor’ disaster.
25. Assemble a Basic Light Wood Plywood Utility Shelf
This is as simple and cost-effective as it gets. You’re looking at a true bare-bones build that delivers maximum storage for minimum cost. It’s a perfect first project for anyone setting up a workshop, garage, or utility closet.
- 2×4 Lumber (8-foot length, 4 count): $20 – $35
- Plywood Sheet (4×8 foot, 1 count): $40 – $60
- Wood Screws: $10
- TOTAL: $70 – $105
- Budget alternative: This IS the budget alternative! To make it even cheaper, look for scrap lumber or disassembled pallets. You can often find usable materials for free if you’re willing to do a little extra prep work like pulling nails.
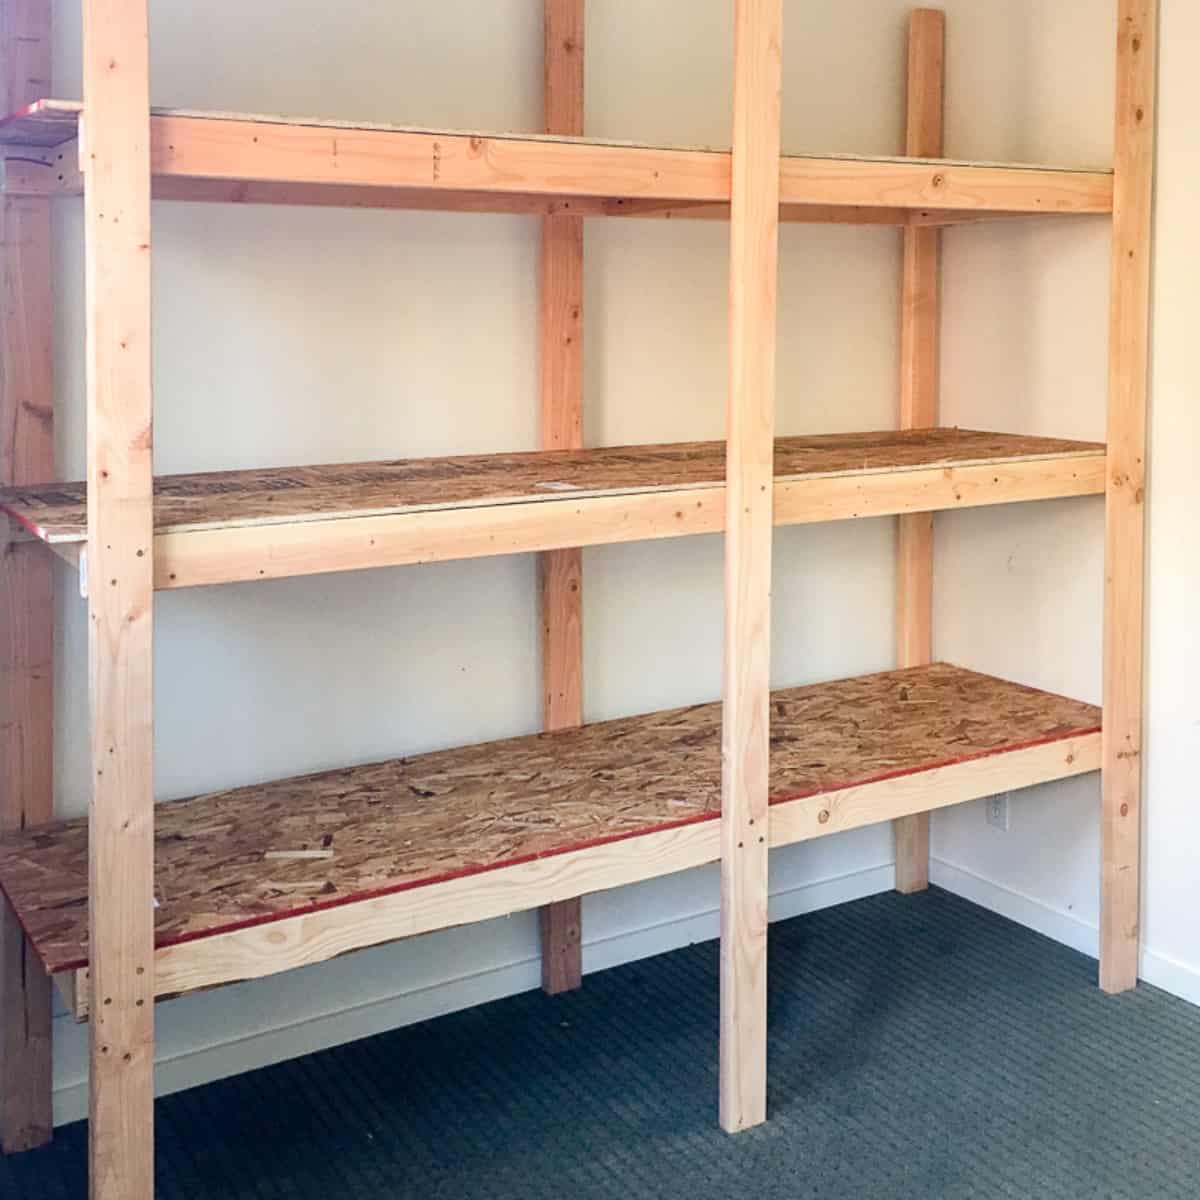
💡 Designer Tip
building a simple shelving unit like this, get your measurements right. Don’t just guess.
- Measure the total height, width, and depth of the space where the unit will live.
- Decide what you want to store on it. Measure the height of the tallest box or tool you plan to put on the shelves to determine the spacing between them.
- Confirm the floor is relatively level. If not, you may need to shim one of the legs to prevent wobbling.
- Locate the studs in the wall behind the unit if you plan to anchor it for safety, which is always a good idea.
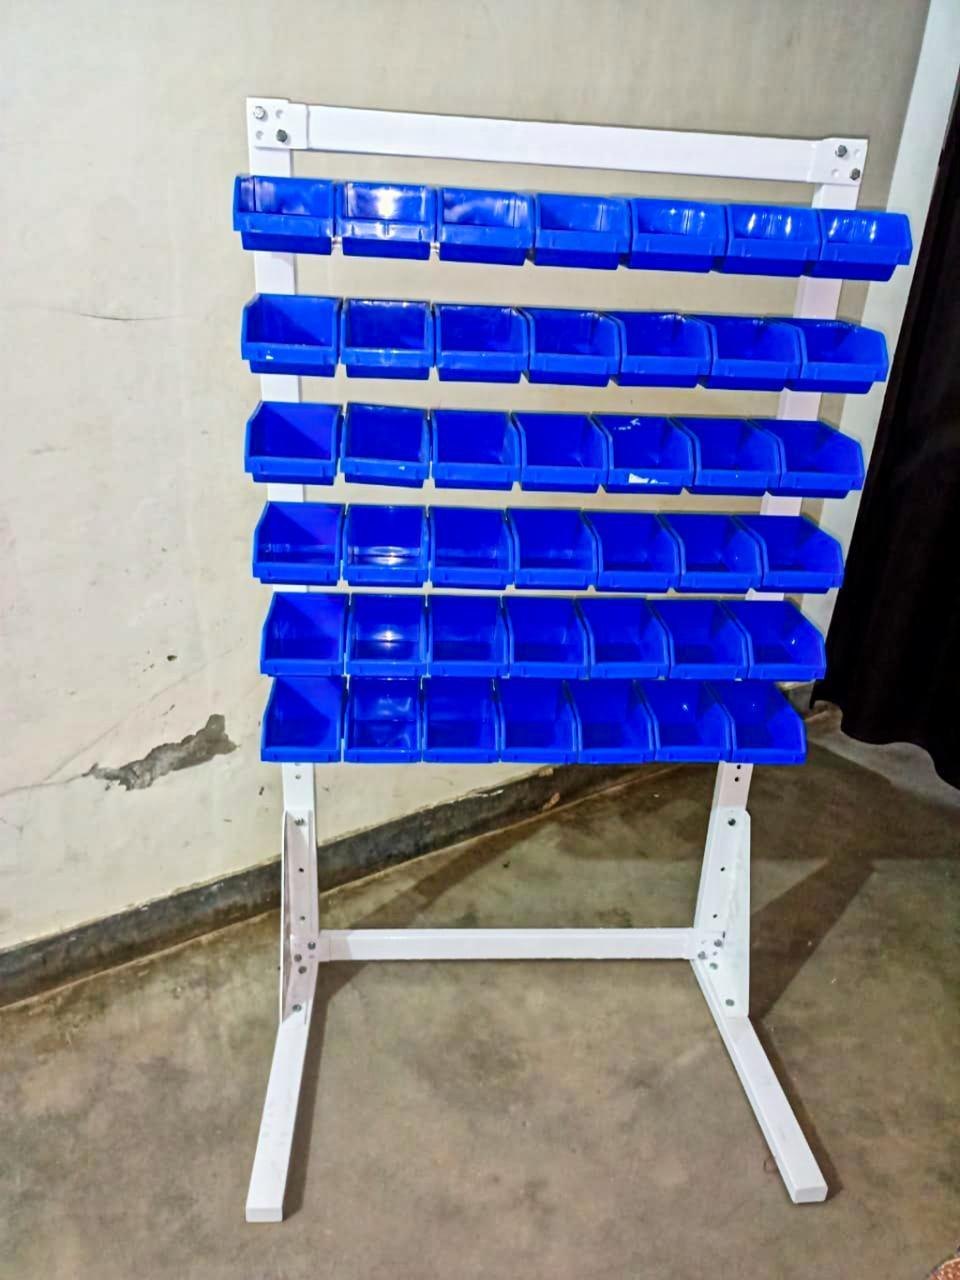
26. Set Up a Freestanding Rack with Royal Blue Parts Bins
A freestanding rack like this is an excellent choice for renters or anyone who doesn’t want to drill into their walls. A typical unit is about 36 inches wide, 12-16 inches deep, and can range from 3 to 6 feet tall. It’s a high-density solution that works well against a clear wall in a garage, basement, or workshop. Because the bins are angled, you need slightly more vertical clearance than the rack height itself to easily access the top row, so ensure you have at least 6-8 inches of space above it.
📐 Style Math
This system works because it provides an incredible amount of sorted storage in a compact footprint. The vertical design takes advantage of unused air space, while the angled bins present their contents for easy picking. The uniformity of the royal blue bins creates a strong visual statement that reads as ‘organized’ even when the bins are full of mismatched items. It’s an industrial-grade solution that’s accessible for home use, bringing a sense of professional order to a personal space.
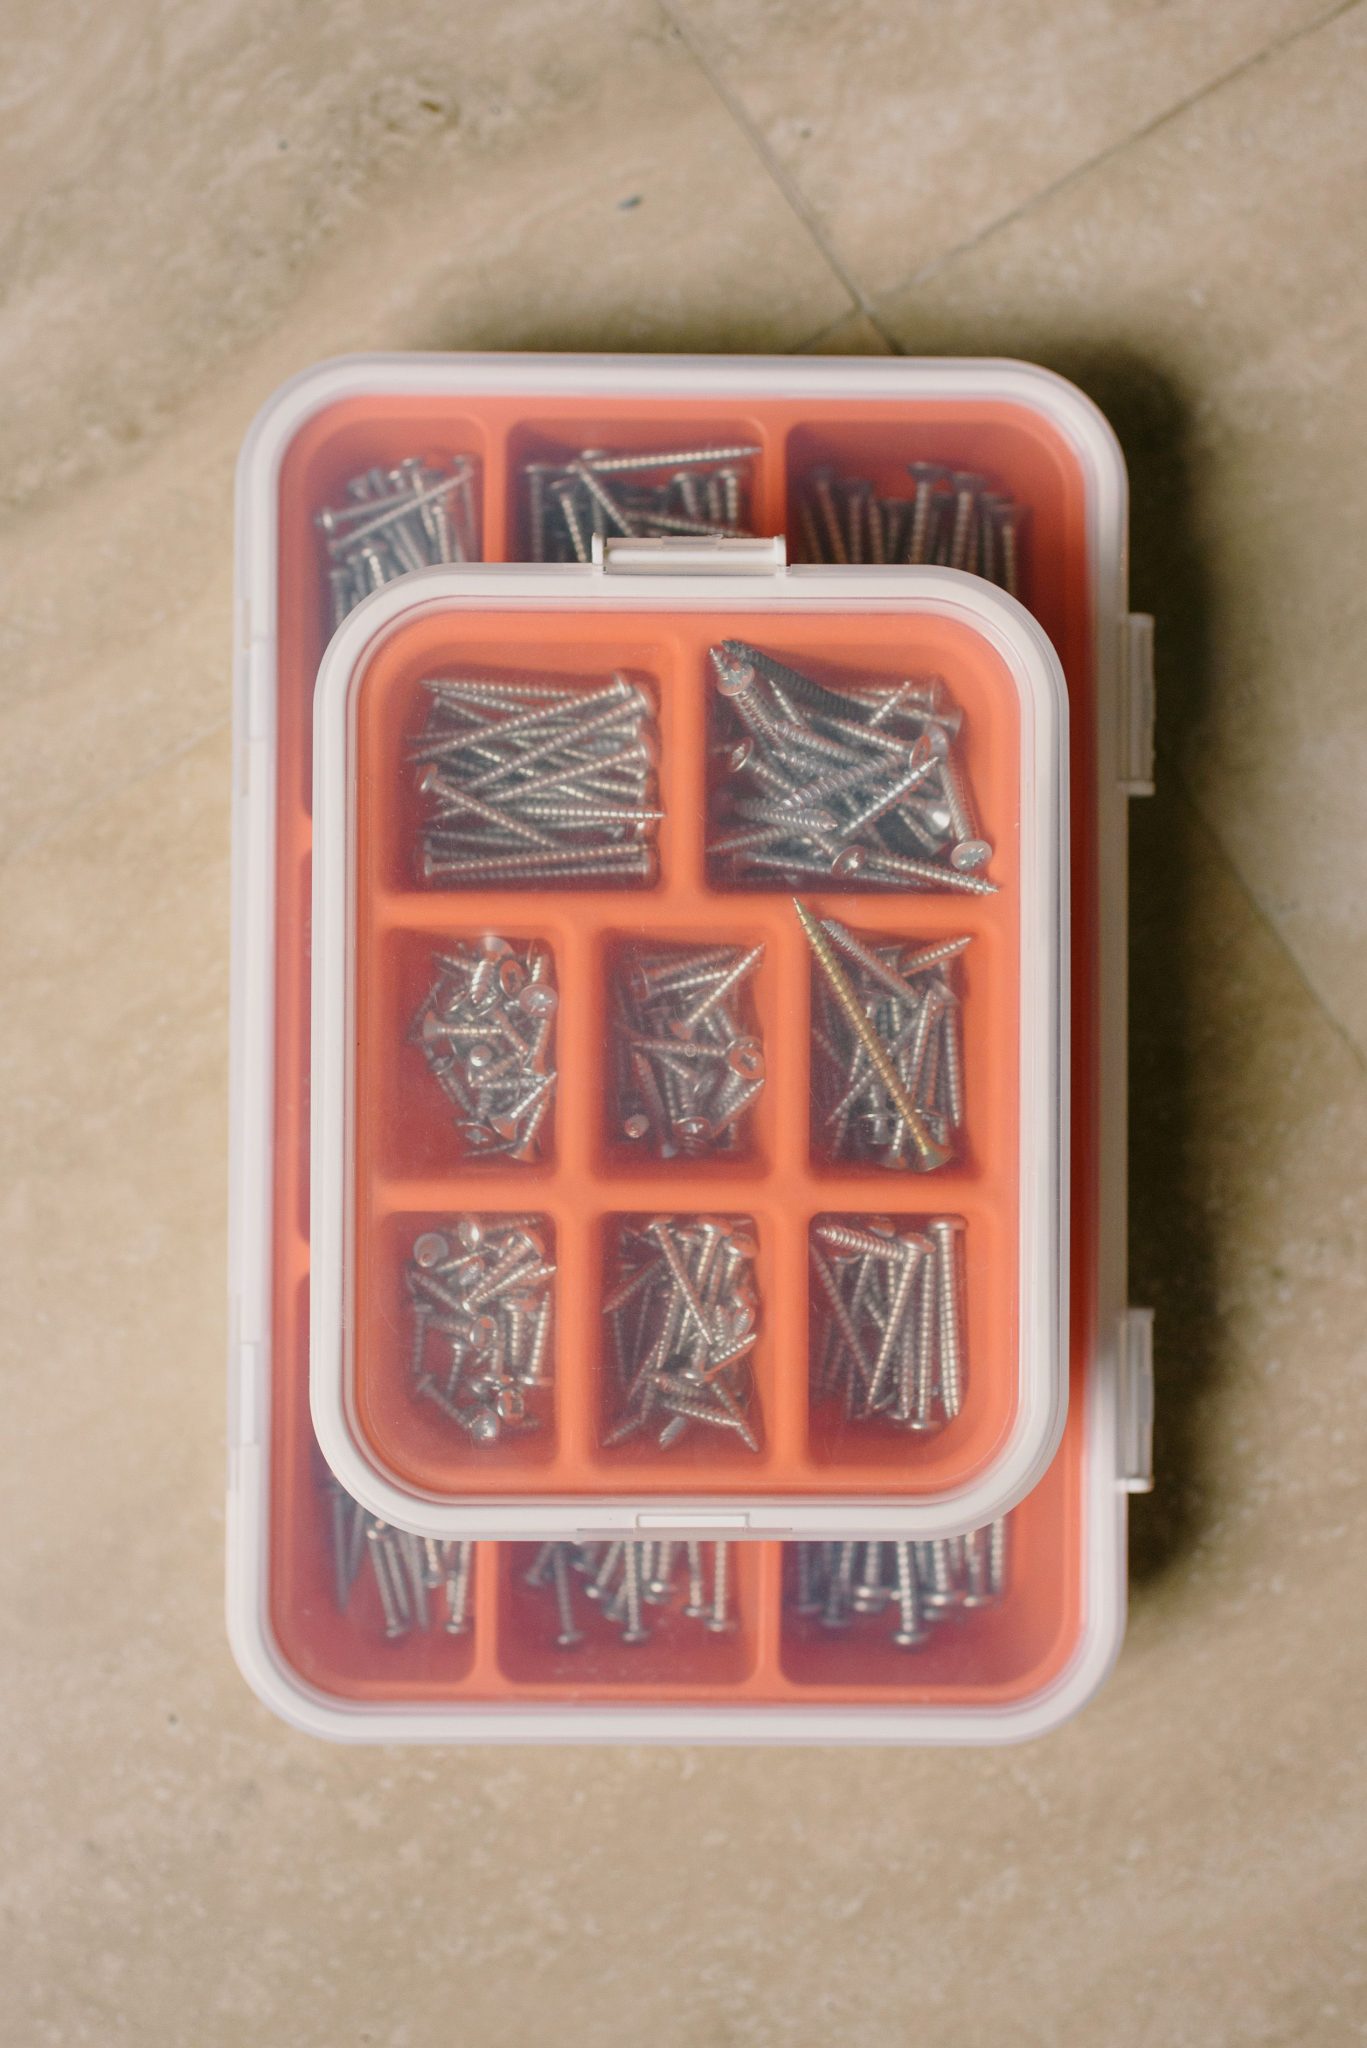
27. Stack Clear Containers with Orange Screw Inserts
When using stackable organizers, create a logical hierarchy. Put your most frequently used fasteners—like common wood screws or drywall screws—in the top container for the easiest access. The bottom container can be used for less common specialty hardware, like metric bolts or concrete anchors. This simple bit of planning means you’ll only have to move the top box half the time, making your workflow that much more efficient. It’s a small habit that makes a big difference.
⚠️ Real Talk
The biggest challenge with these clear plastic organizers is keeping them looking clear. The plastic surfaces are magnets for fine workshop dust, which clings via static electricity. The inside compartments will also collect dust and wood shavings over time. Wiping the exterior with a damp or anti-static cloth helps, but a full cleaning requires you to empty all the screws, which is a major hassle. Just accept that they will develop a light ‘workshop patina’ over time and it’s not a big deal.
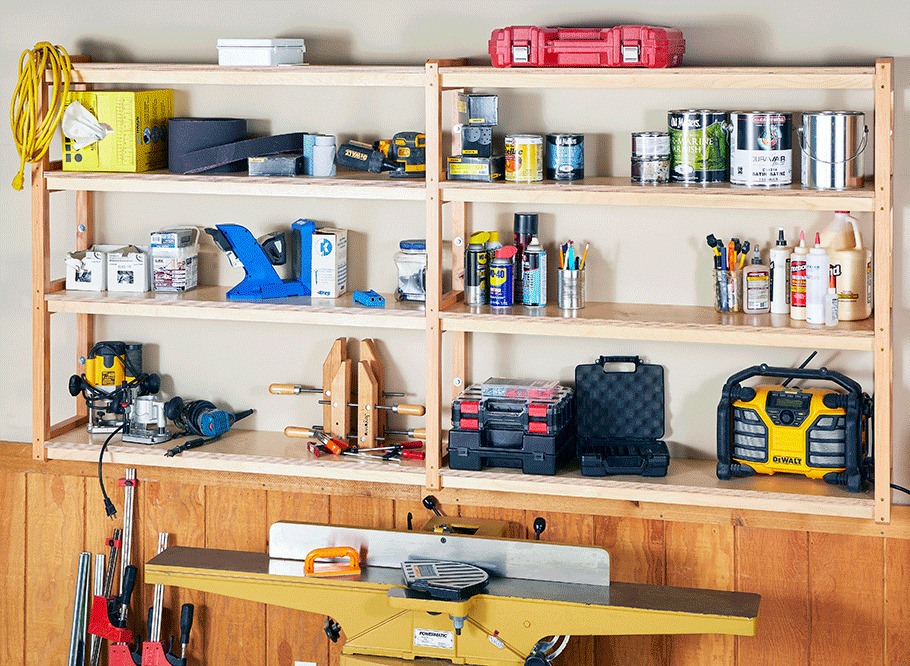
28. Organize Compartmented Cases on Wooden Workshop Shelves
The key to this entire setup is the use of portable, compartmented cases—often called ‘organizers’ or ‘sortainers’. Instead of decanting every screw into a permanent bin, this system keeps related hardware together in a portable format. You can grab the black case full of electrical connectors and the red case of assorted screws and take them both to your project. It combines the mass storage of shelving with the grab-and-go convenience of a toolbox, offering the best of both worlds.
💰 Budget Breakdown
While these cases are fantastic, they can lead to a ‘Russian doll’ problem of organization. You have boxes within boxes on shelves within your workshop. It’s easy to forget which black case holds the plumbing fittings and which one has the picture hangers. This system ONLY works if you are disciplined about labeling. Without clear, bold labels on the spine of each and every case, you’ll spend just as much time opening and closing boxes as you would have spent rummaging through a junk drawer.
29. Mount Tools and Labeled Bins on an OSB Panel
This is a fantastic example of material honesty and smart zoning. Using raw OSB as the backdrop is a design choice that’s both incredibly cheap and visually interesting, adding texture and a utilitarian vibe. The system works by creating distinct zones: the left side is a ‘tool board’ for quick-grab items, while the right side is a ‘parts library’ with its stacked, labeled bins. This clear separation makes the wall highly functional and intuitive to use. You’re never hunting for a tool in the bin section or a screw on the tool board.
![Workshop Infrastructure Updates [splitbrain.org]](https://nimorix.com/wp-content/uploads/2026/09/workshop-infrastructure-updates-splitbra-29.jpg)
⭐ The One Thing
You can get this look for pocket change. A 4×8 sheet of OSB is one of the cheapest wood products you can buy, often under $20. The white bins are simple, inexpensive plastic containers that you can find at the dollar store or Target’s Bullseye’s Playground. The simple wooden shelving for the bins can be made from scrap 1x2s. For under $50, you can create a huge, highly customized organization wall that’s perfectly tailored to your tools and parts.
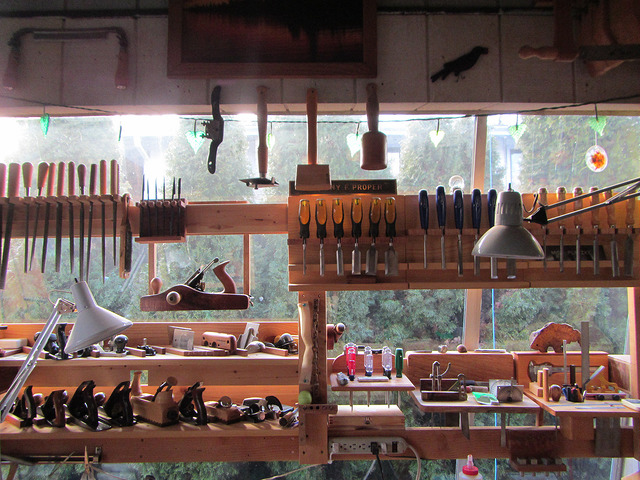
30. Organize Hand Tools and Planes on a Wooden Workbench
For your most-used hand tools like chisels, files, and marking gauges, create a ‘cockpit’ of organization right on your benchtop. A simple wooden block with drilled holes or a small tiered rack keeps them upright and ready to grab. The key is to keep this zone small and curated—only your top 5-10 tools belong here. This isn’t for long-term storage; it’s for active project work. It keeps your immediate work surface clear while ensuring your most important tools are always within arm’s reach.
🔥 Trending Context
This kind of benchtop, multi-tiered organization is best suited for a larger, dedicated workbench, ideally one that is at least 6 feet long and 30 inches deep. This provides enough surface area to have these organizational racks at the back of the bench without sacrificing your primary workspace in the front. For smaller workbenches (4 feet or less), this approach can feel cluttered. In that case, you’re better off using wall-mounted storage like in Idea #13 to keep your bench surface completely clear.
31. Use a Red Bin and Paper Cup for In-Progress Projects
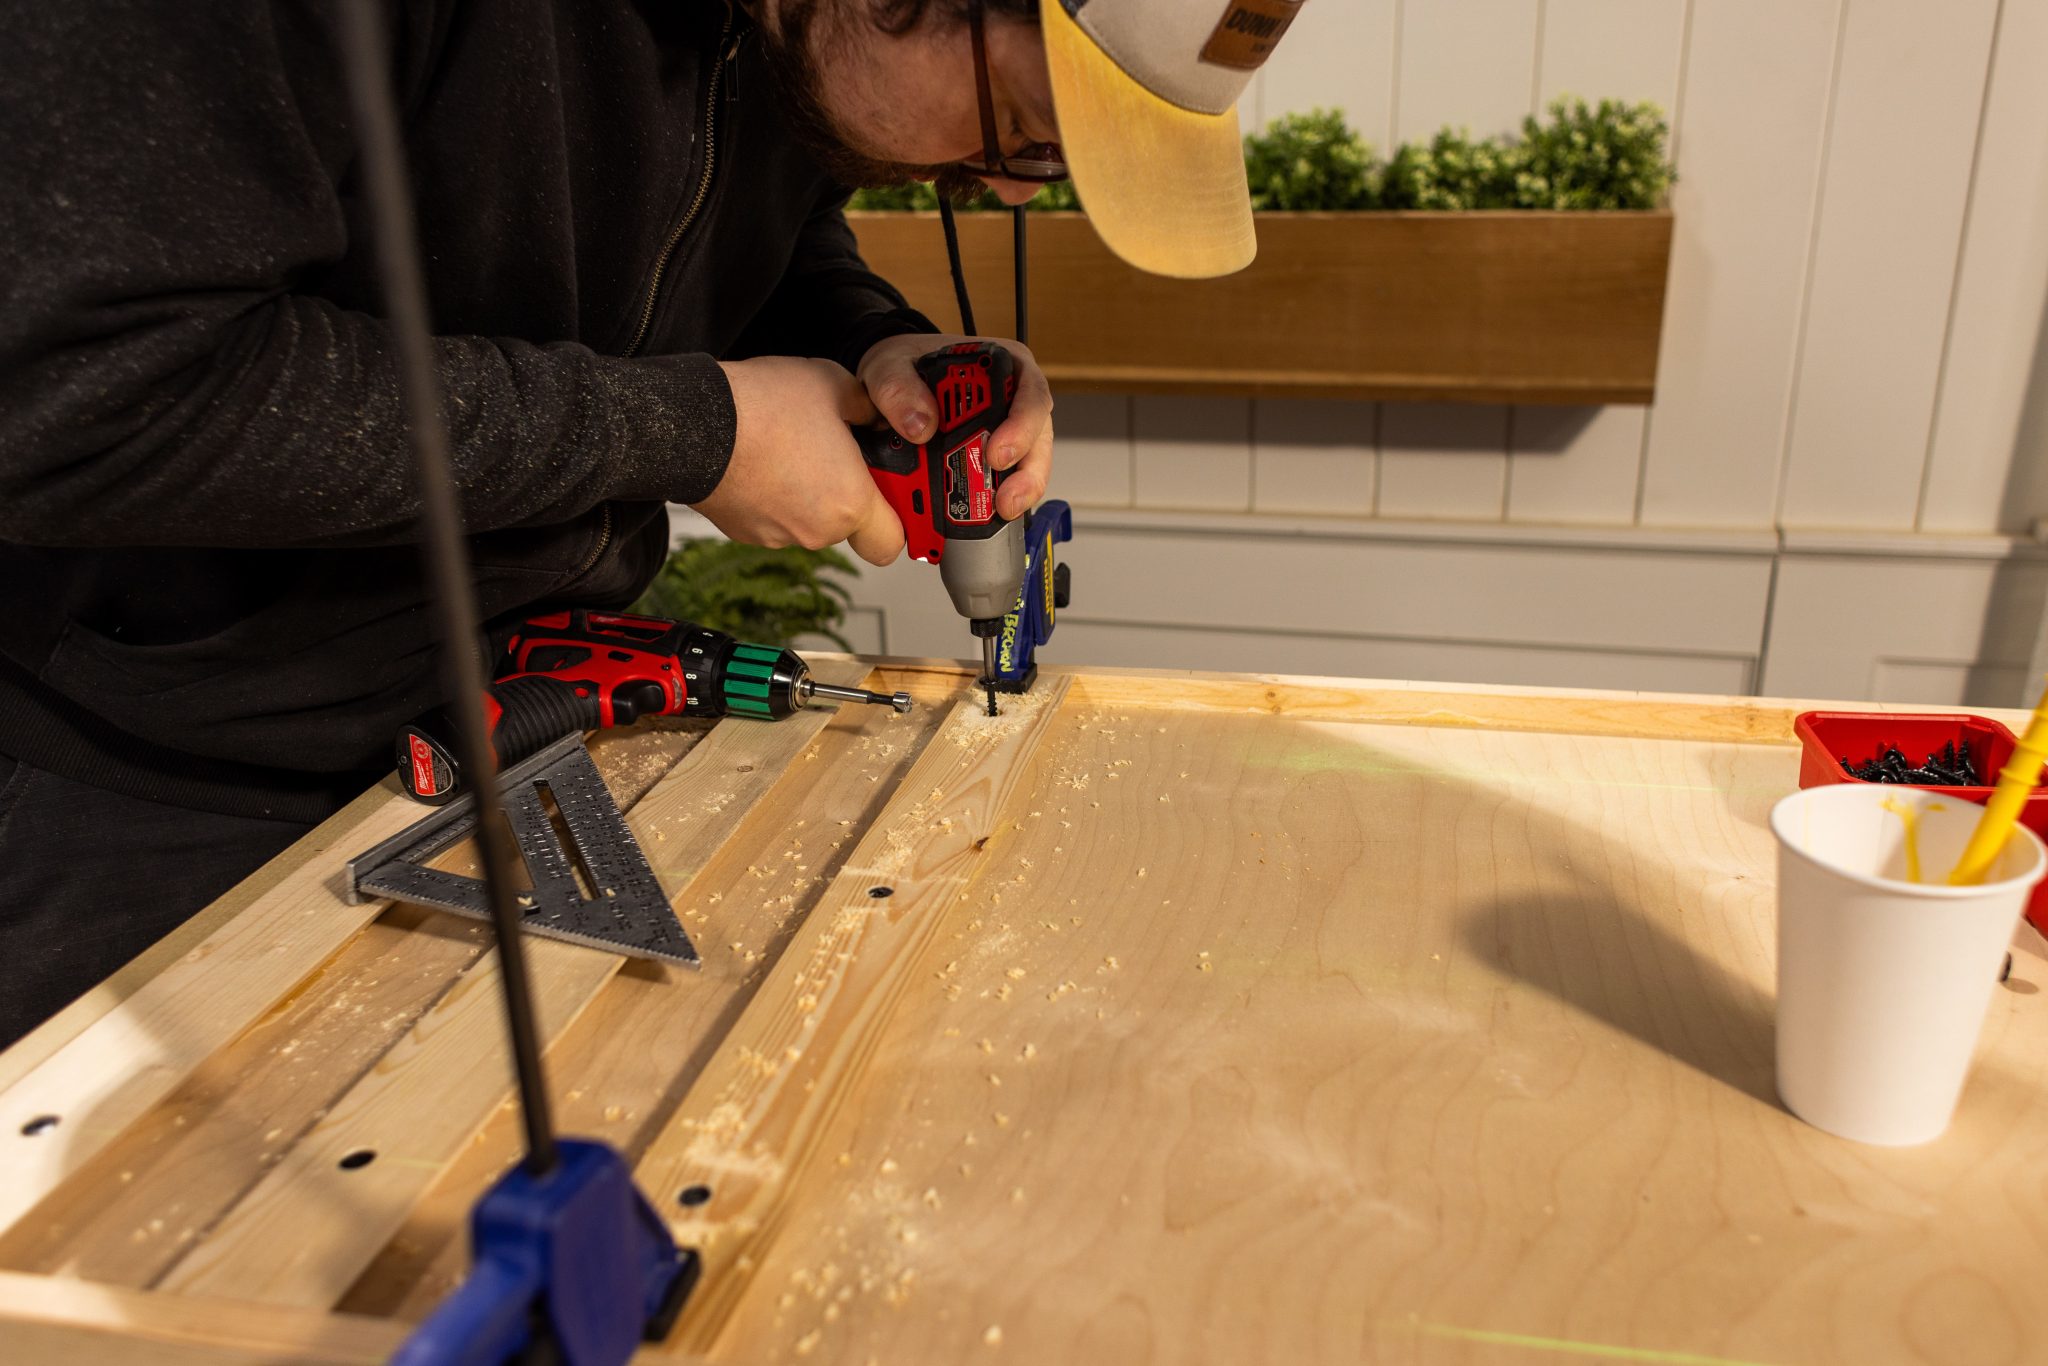
This image captures the reality of a project in motion, and it works because of its unpretentious, temporary nature. This isn’t a permanent storage system; it’s a workflow solution. The red bin holds the main supply of screws, while the paper cup likely holds the few you need for the immediate task, or perhaps a drill bit. This ‘macro-to-micro’ sorting on the fly prevents the entire box from getting knocked over and keeps your immediate workspace focused. It’s organization in its most practical, disposable form.
🔧 How-To Brief
This ‘system’ is for the moment, not for the long haul. Leaving screws in an open bin or paper cup on a busy workbench is asking for a spill. It’s also a terrible way to keep hardware sorted long-term. This setup is perfect for the 2 hours you’re actively assembling something, but at the end of the day, those screws need to go back into a labeled container with a secure lid. Don’t let your temporary workflow become your permanent, messy reality.
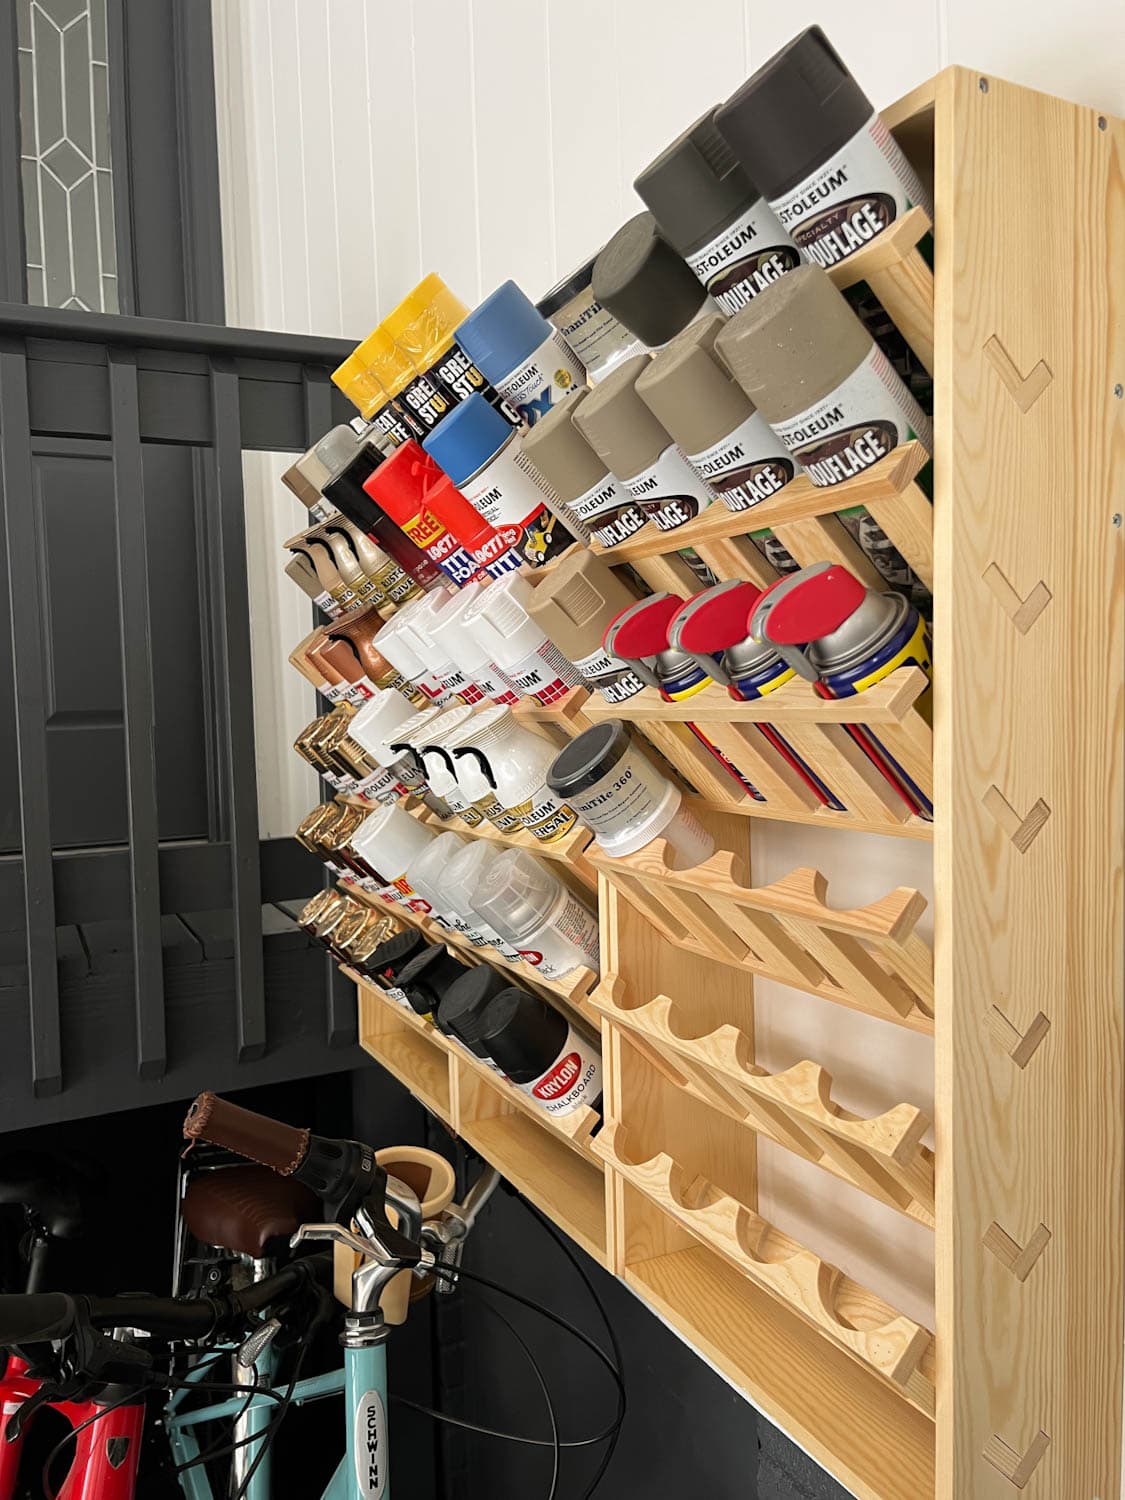
32. Build a Light Wood Angled Rack for Spray Cans
An angled can rack is a simple and brilliant storage solution. Here’s the quick version. Time: 2 hours. Cost: ~$30.
- Start with two tall side panels cut from 1×12 pine or plywood. Mark the locations for your shelves.
- Cut your shelf pieces. The key is to install them at a slight angle, around 10-15 degrees.
- Attach a thin strip of wood (a 1×2 works well) to the front edge of each shelf to act as a lip, preventing the cans from sliding off.
- Assemble the unit using wood glue and screws, attaching the shelves between the two side panels.
- The V-shaped carvings on the side are decorative, but they also lighten the look of the piece. You can add them with a jigsaw before assembly.
💸 Get This Look For Less
Spray paint cans have a shelf life, and improper storage can shorten it. Keep this rack in a climate-controlled space, not a garage that experiences extreme heat or cold, which can affect the paint and propellant. The nozzles are prone to clogging. After each use, turn the can upside down and spray for a few seconds until only clear gas comes out. This clears the nozzle and makes it much more likely to work next time. Periodically, you’ll want to take all the cans off and wipe down the shelves, as they can get sticky from overspray and leaky caps.
Your Most Organized Workshop Awaits
Whew, that was a lot of inspiration! But remember, the perfect screw storage system isn’t about having the most expensive cabinet or the trendiest bins. It’s about finding the solution that fits your space, your budget, and the way you actually work. Start small, label everything, and enjoy the simple, profound satisfaction of knowing exactly where that 3-inch deck screw is when you need it. Now go make something amazing!