29 Stunning Garage Storage Ideas That Will Transform Your Space and Declutter Your Life

You know that feeling when you finally find the garage storage idea that looks exactly right for your space, only to realize you have no idea how to actually pull it off? We’ve all been there, endlessly scrolling through Pinterest. After filtering through hundreds of options across places like IKEA, The Home Depot, and Lowe’s, we narrowed it down to the looks that actually deliver. Inside, you’ll find 29 curated ideas covering everything from sleek modular cabinetry and heavy-duty industrial shelving to clever DIY solutions that maximize every inch. In 2026, the garage is officially an extension of the home—not just a dumping ground. The focus is on creating functional, organized spaces that can double as workshops, gyms, or just really, really tidy storage zones. And stay until the end — we break down the most common mistakes that can ruin these looks. 📌 Pin this guide for later—your future self will thank you when it’s time to actually do this.
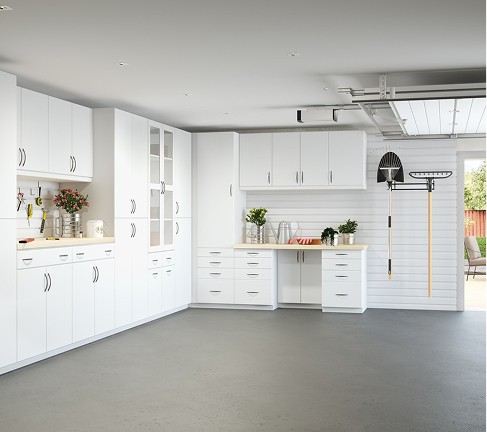
1. Install Wall-to-Wall White Cabinets with a Light Wood Countertop
Creating this clean, built-in look is a significant upgrade that pays off in functionality and home value. Here’s a realistic cost estimate for a standard two-car garage wall (approx. 20 linear feet).
📐 Style Math
- Stock Cabinetry (Base & Upper): $2,000 – $4,500
- Laminate or Butcher Block Countertop: $600 – $1,500
- Pegboard & Hooks: $150 – $300
- Hardware (Pulls & Handles): $100 – $250
- Professional Installation: $1,000 – $2,500
- TOTAL: $3,850 – $9,050
Budget alternative: Use IKEA SEKTION kitchen cabinets with a LAGKAPTEN countertop and SKÅDIS pegboard for a similar aesthetic, potentially bringing the total material cost down to $2,000 – $3,500.
This design is so successful because it borrows principles from modern kitchen design. The combination of clean, flat-panel white cabinets with the warmth of a light wood countertop creates a high-contrast, yet inviting, look. It feels less like a dingy garage and more like a functional extension of the home. The continuous countertop provides a massive, uninterrupted worksurface, while the closed cabinetry hides clutter completely. This instantly makes the entire space feel brighter, larger, and unbelievably organized, even if the inside of the cabinets are a mess.
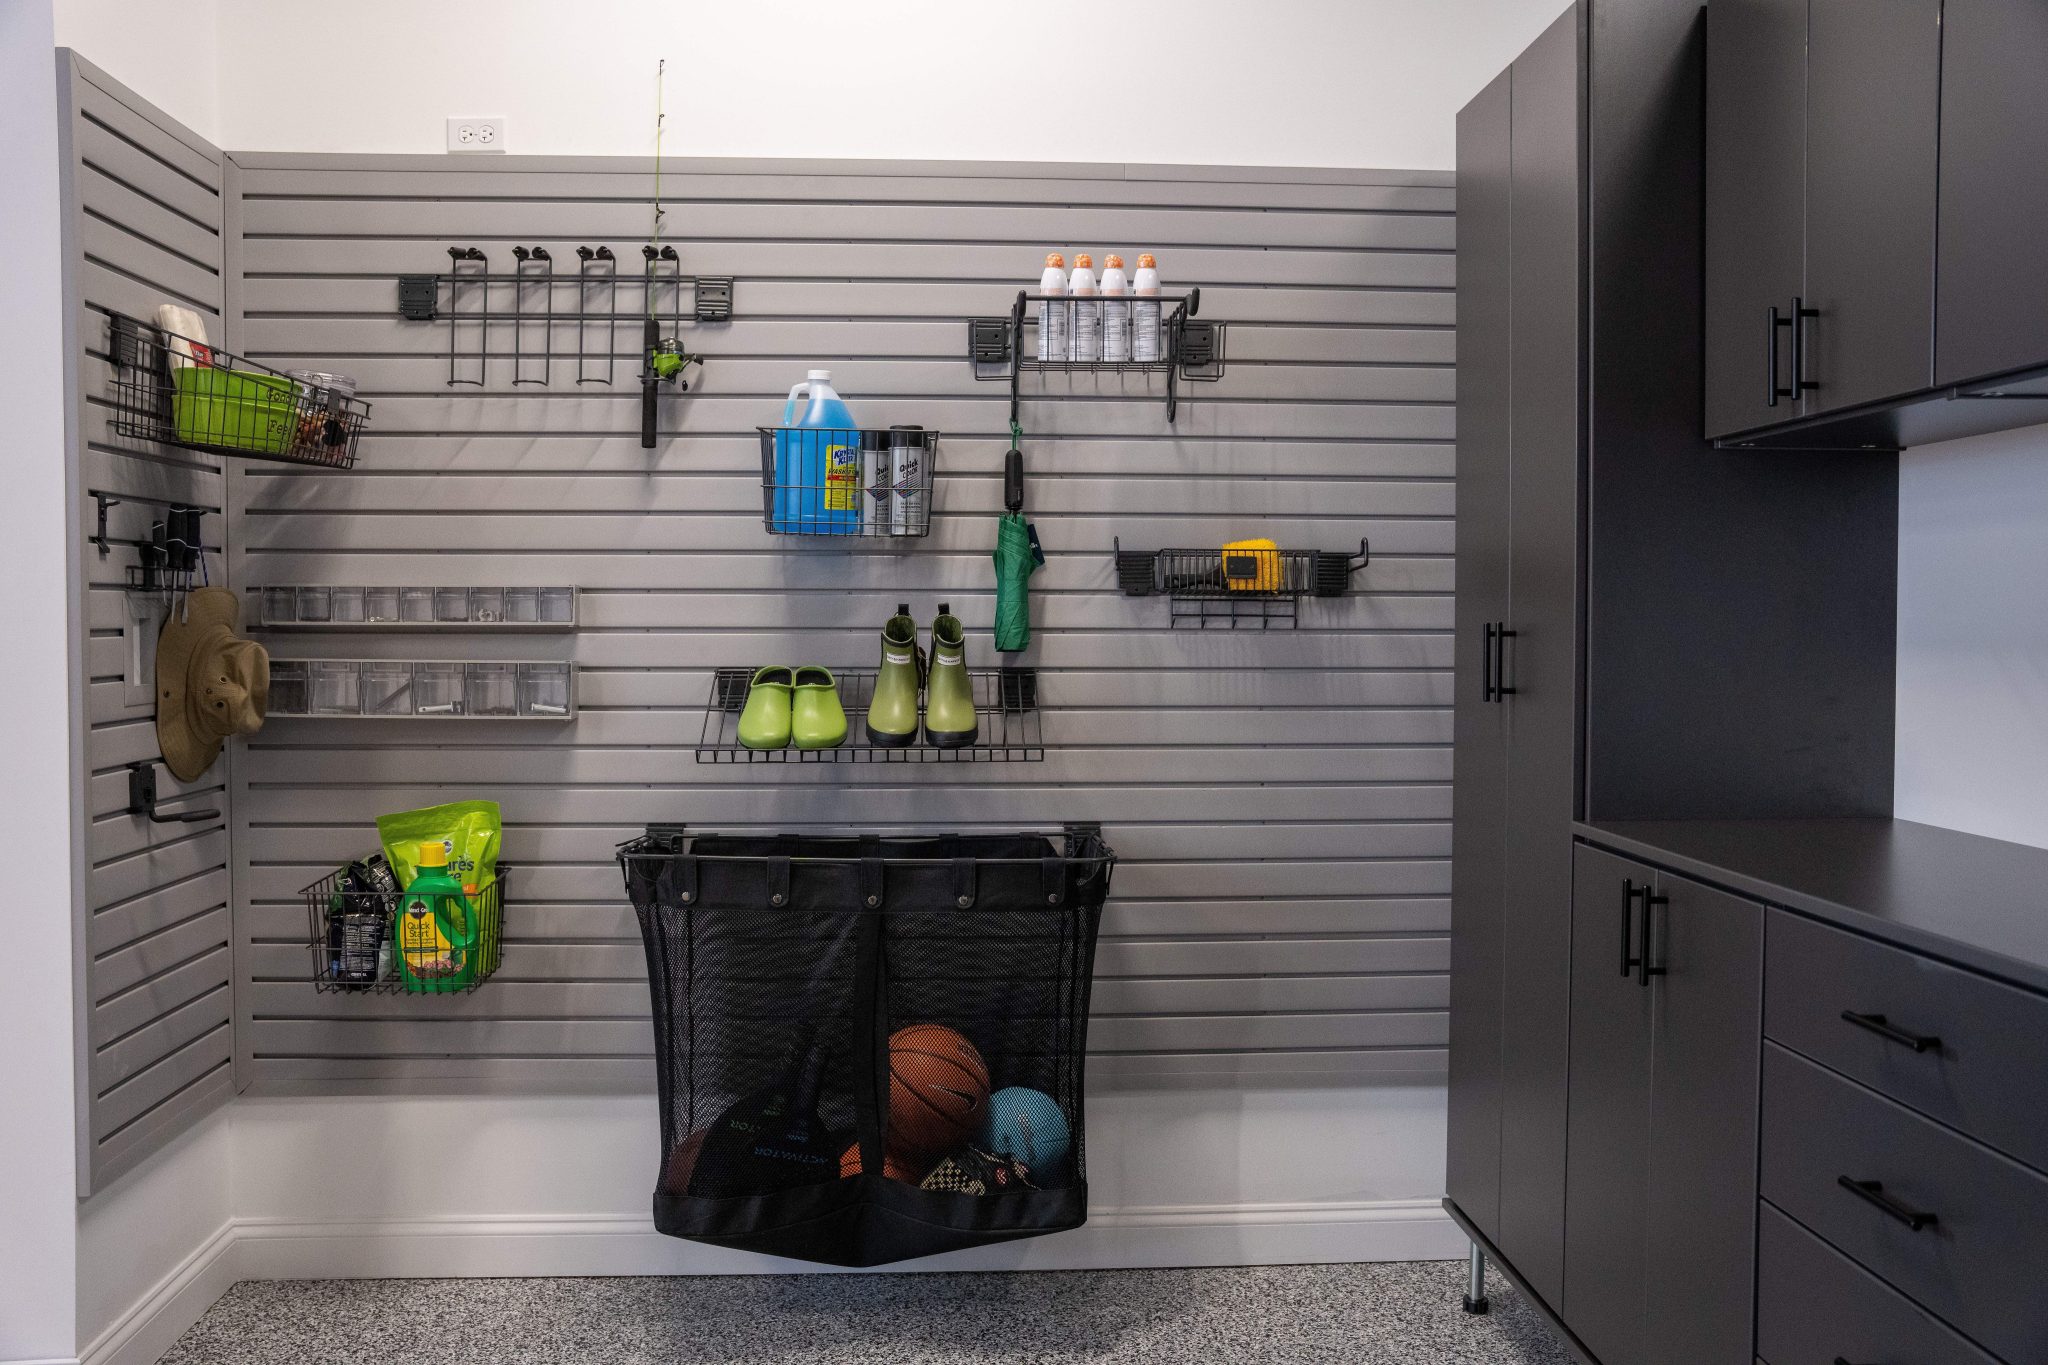
2. Cover Your Walls in a Light Grey Slatwall System
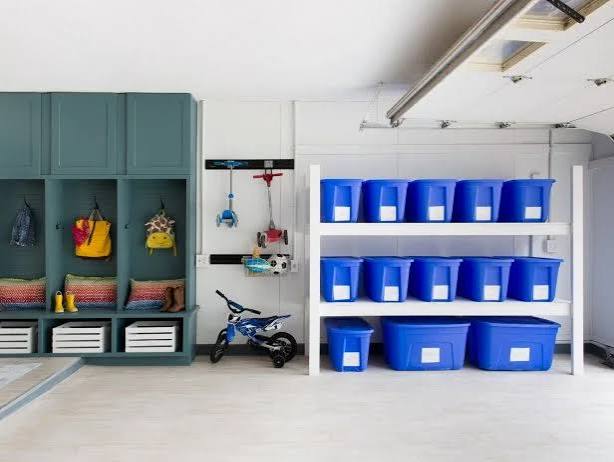
Before you install a single slatwall panel, lay them out on the garage floor and arrange your largest items first. Place your bicycles, ladders, and large garden tools on the panels to determine the ideal spacing and height. Use a pencil to mark the hook locations. This prevents you from installing the panels only to find your bike handlebars hit the wall or a rake handle is too long for its spot. It’s much easier to adjust things on the floor than once they’re drilled into the studs. Remember to plan for future purchases, too—leave some empty space for that new leaf blower or kayak.
💡 Designer Tip
Slatwall is incredibly durable, but it isn’t maintenance-free. The grooves are notorious for collecting dust and sawdust. Plan on a quarterly cleaning with a shop vacuum using a brush attachment to clear out the channels. For scuffs and grease, a magic eraser or a cloth with mild soap and water works wonders on most PVC slatwall systems. Be mindful of weight limits; while the wall itself is strong, the individual hooks have specific ratings. Overloading a hook can cause it to fail or even damage the slatwall panel itself. Always distribute weight evenly across multiple hooks for very heavy items.
3. Assemble Industrial-Style Shelving with Dark Metal and Wood
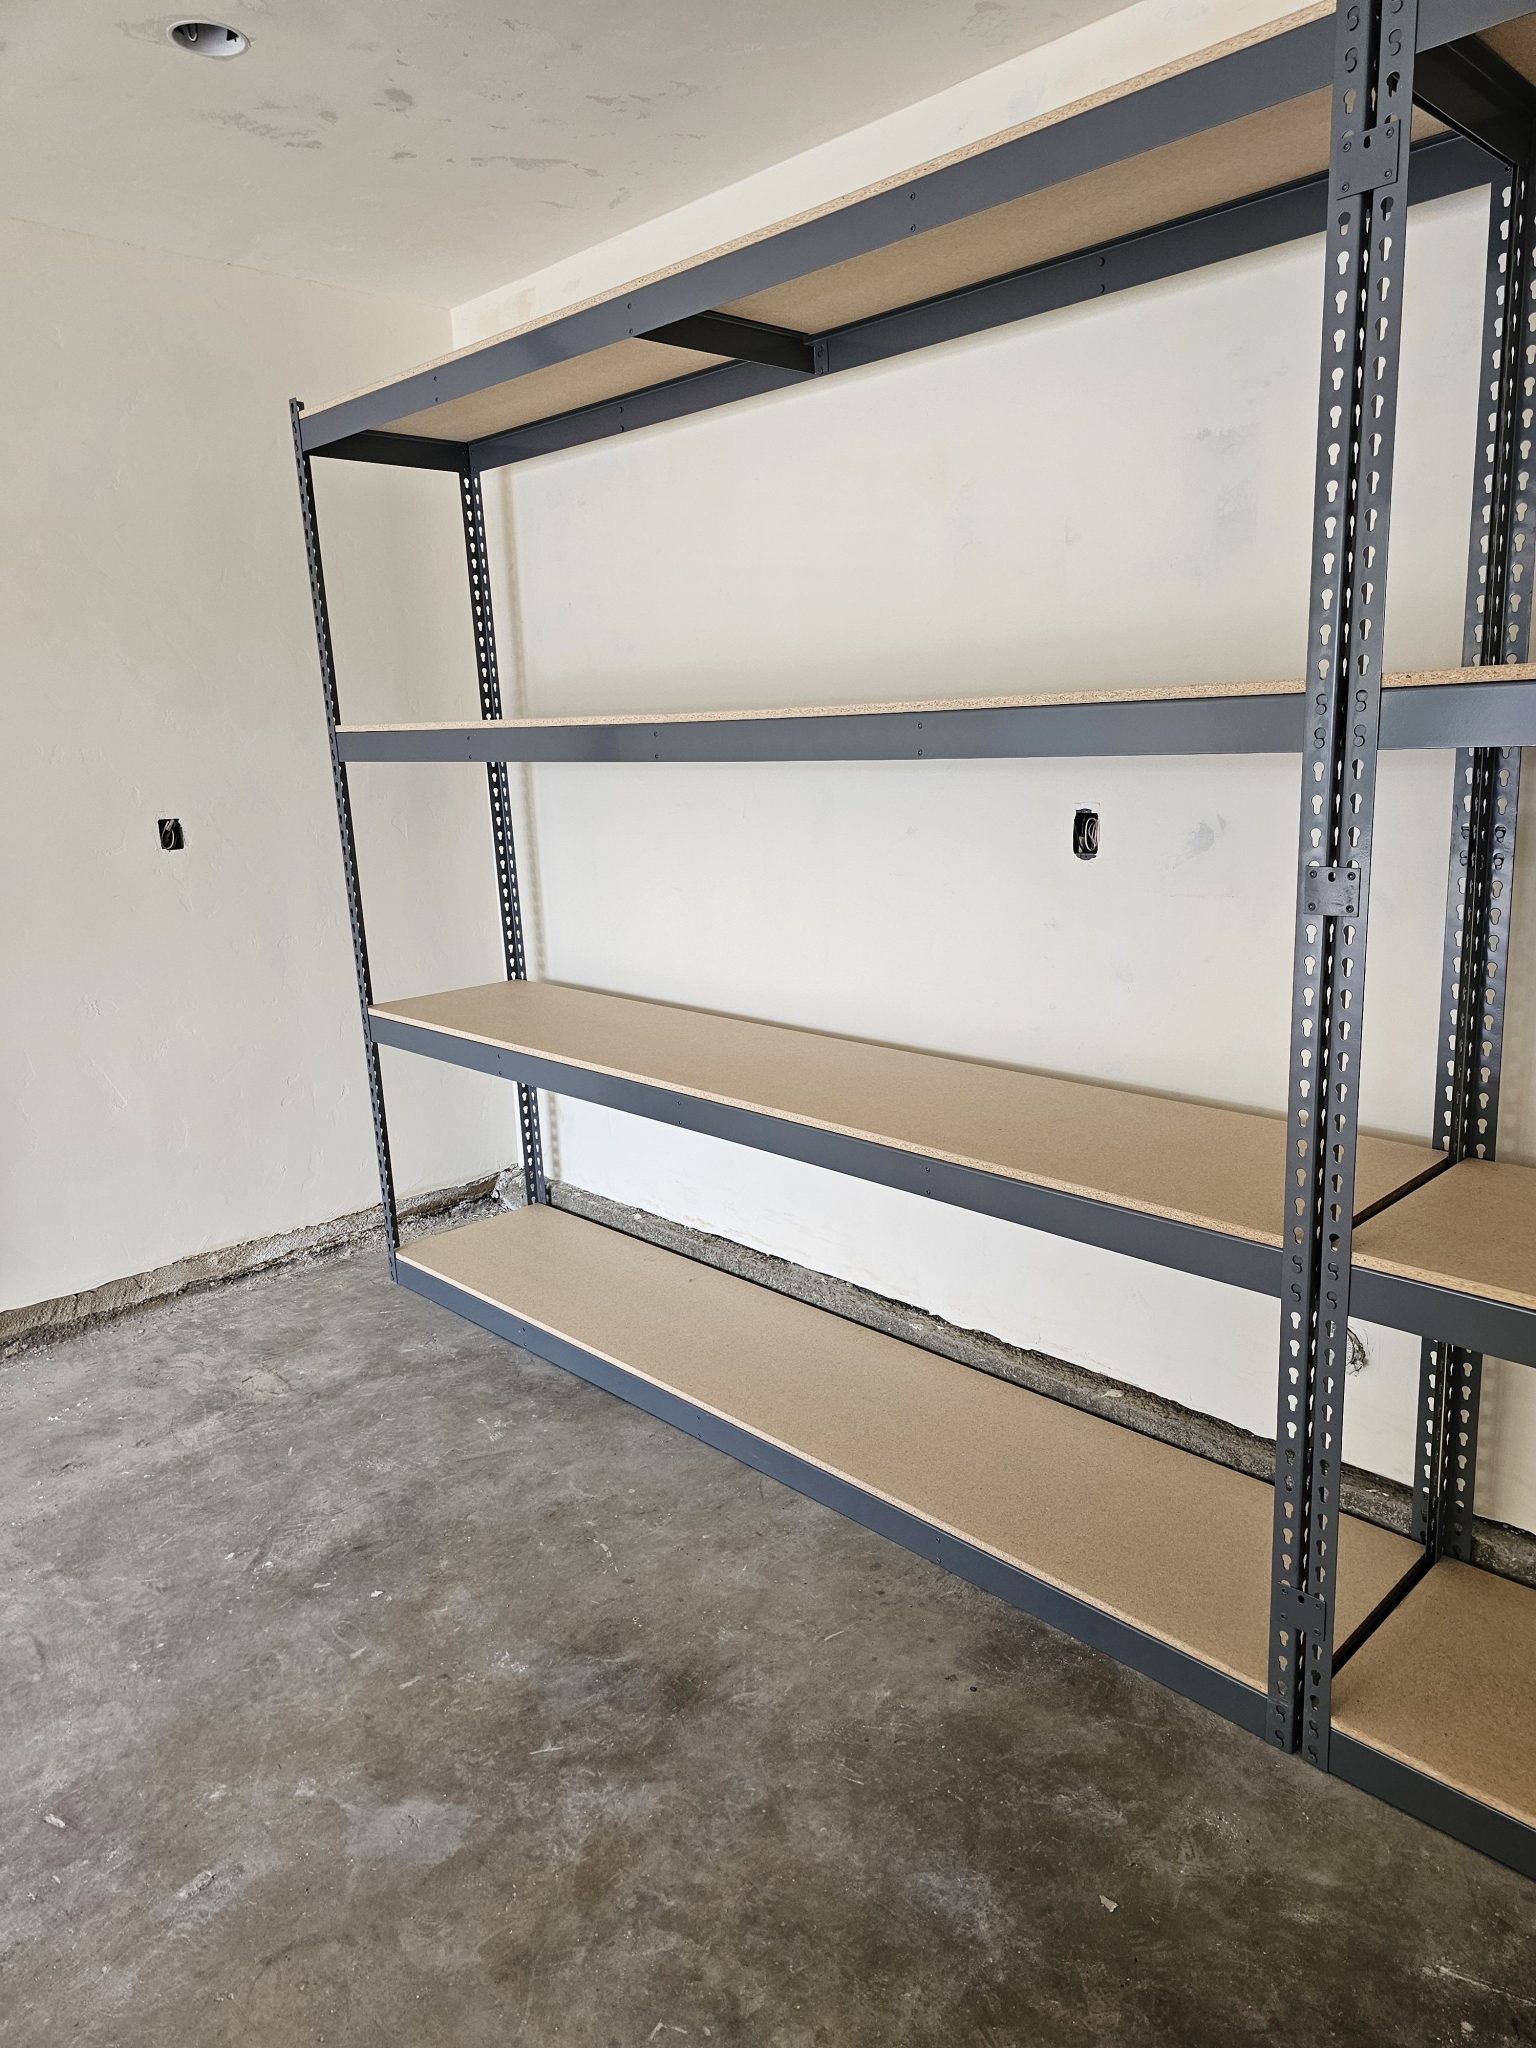
The single most important element here is the light brown engineered wood shelving. Without it, this is just another cold, generic metal rack you’d find in a warehouse. The wood introduces warmth, texture, and a touch of organic softness that balances the harsh, industrial feel of the dark gray metal frame. It makes the unit feel more considered and designed, rather than purely utilitarian. If you took the wood away and replaced it with wire mesh, the entire character would shift from ‘workshop chic’ to ‘storage locker’. It’s the key ingredient that makes this style feel at home in a residential setting.
📏 Scale Guide
This type of substantial, freestanding shelving works best along a long, uninterrupted wall. You’ll need a minimum of 8-10 feet of clear wall space to make a single unit feel impactful without being cramped. For the specific model shown, which appears to be about 72-84 inches tall, you’ll need a standard ceiling height of at least 8 feet. The depth is usually 18-24 inches, so ensure you have enough clearance to walk past comfortably, even with a car parked nearby. This is a great solution for single or two-car garages, but might feel overwhelming in a very small, tight space. Compare its open nature with the closed cabinets in Idea #1.
4. Organize with Color-Coded Bins on a Silver Metal Shelving Unit
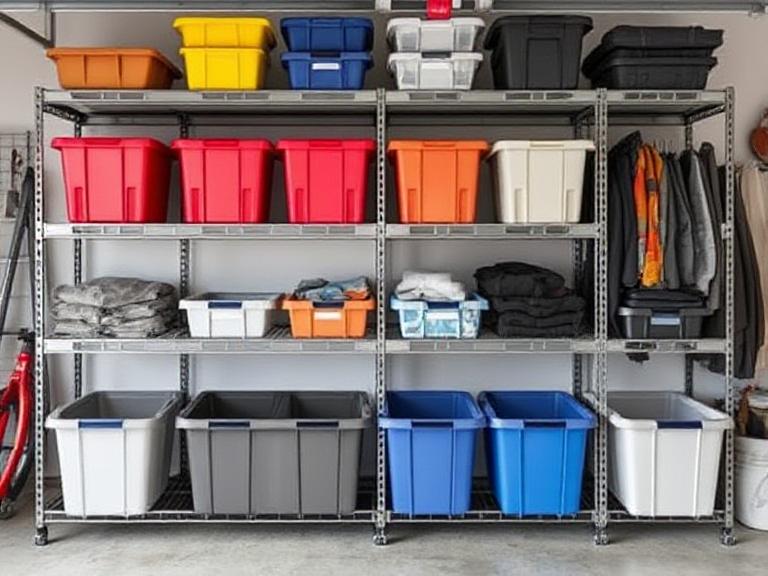
This look is pure functional fun, and the formula is simple: 70% Neutral Structure + 30% Functional Color. The silver metal shelving unit is the neutral workhorse, providing a clean, industrial grid that fades into the background. The storage bins are the ‘functional color’—they bring the personality and, more importantly, the organization. The mix of red, yellow, blue, and orange isn’t just for looks; it’s a visual coding system. You can swap the primary colors for a more muted palette (e.g., olive, navy, terracotta) and it will still work, as long as you maintain that 70/30 balance of neutral shelving to colorful containers.
⚠️ Real Talk
You absolutely do not need to spend a fortune to get this hyper-organized, color-coded look. This is the budget version of more robust systems like in Idea #3. Start with an IKEA HYLLIS shelving unit for about $25. It gives you the same silver metal vibe. Then, head to Target’s Brightroom line or Walmart’s Mainstays collection for plastic storage bins. You can often find them for $4-$8 apiece. A full setup with 20 bins could easily come in under $200. Keep an eye on Facebook Marketplace for people offloading entire sets of bins for even less.
5. Add a Pop of Color with a Vibrant Blue Metal Shelf
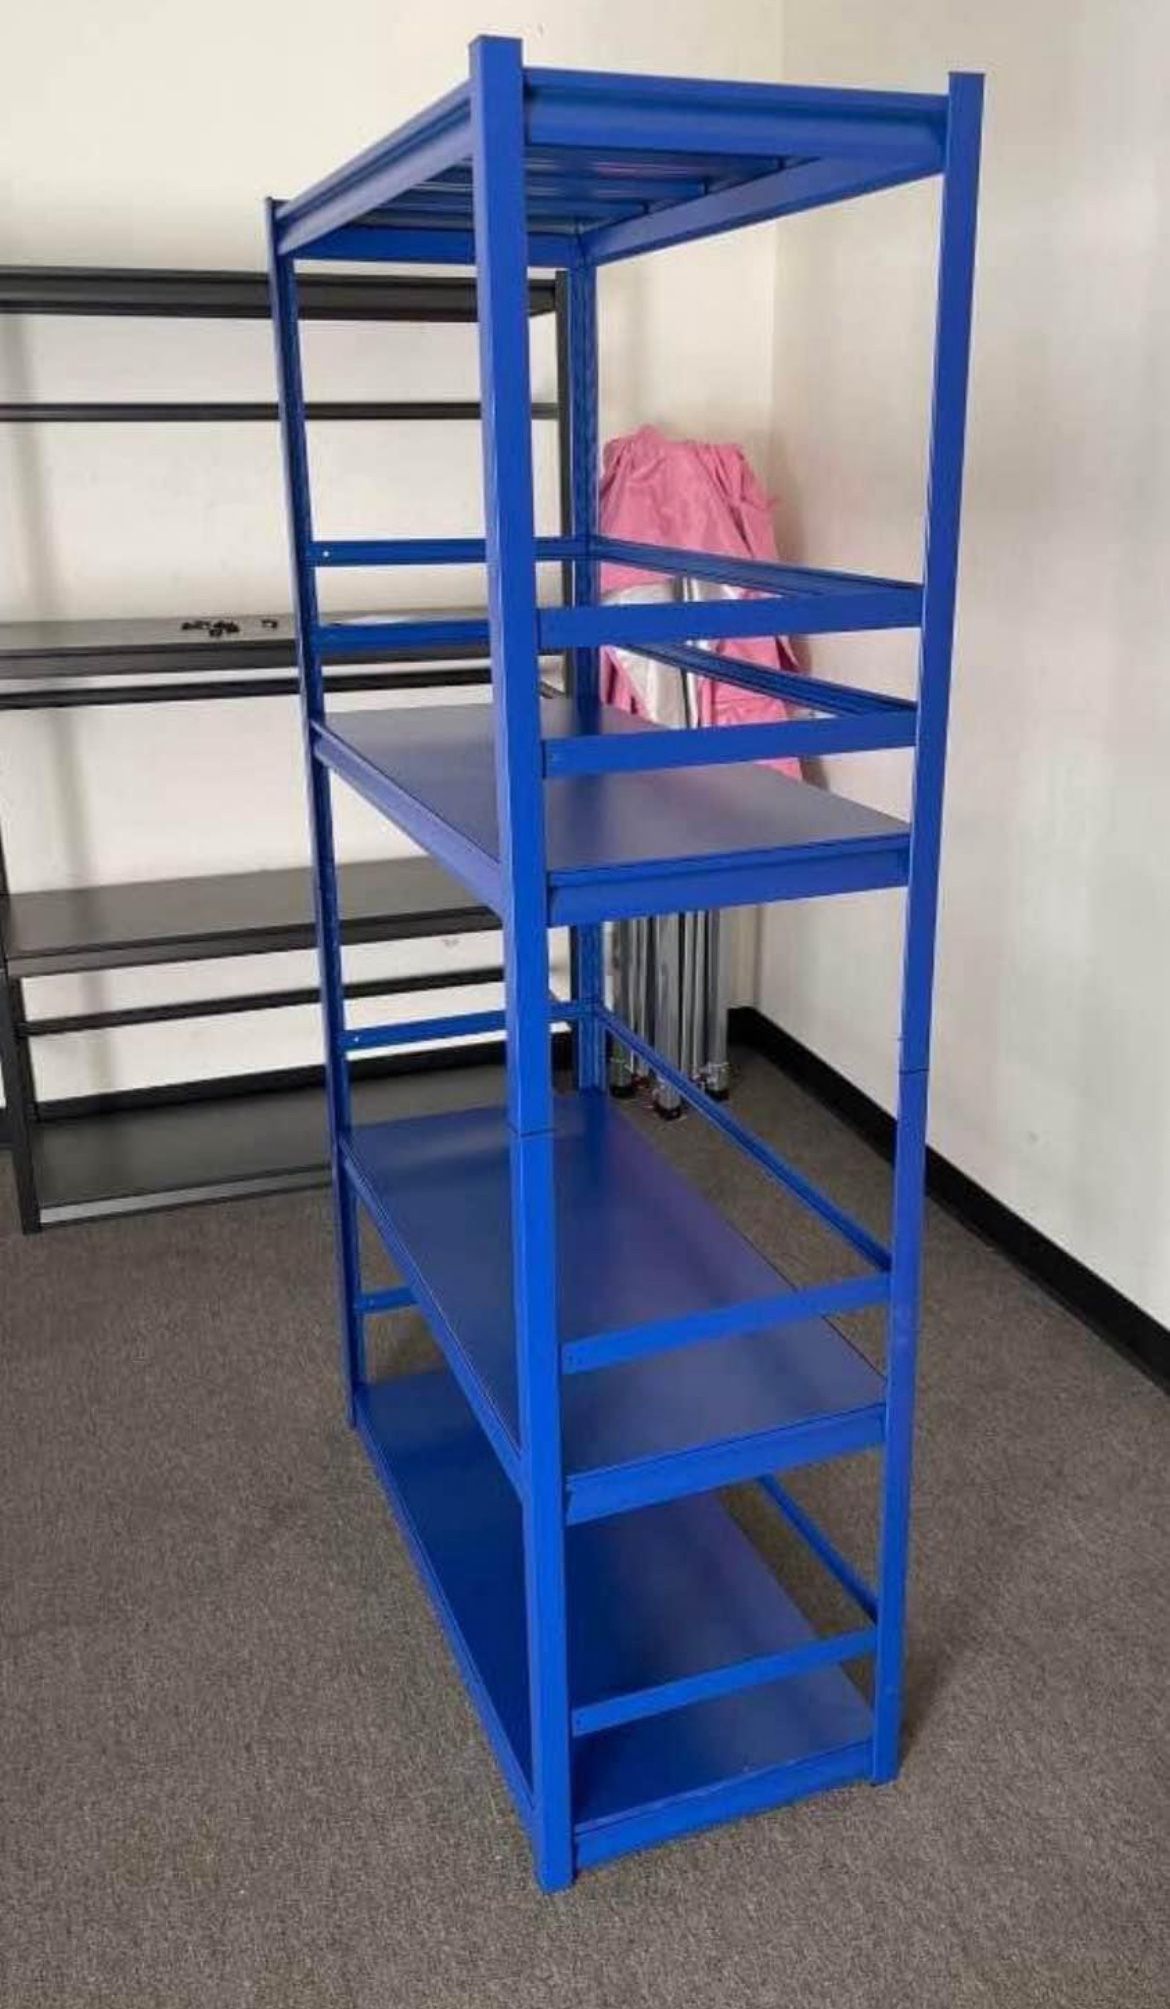
This works because of its confident simplicity. In a space that’s often a sea of grey concrete and neutral walls, a single, saturated piece of color acts as a powerful focal point. The vibrant blue immediately draws the eye and injects a dose of personality and energy. It transforms a purely utilitarian object—a metal shelf—into a deliberate design choice. The effect is amplified by the contrast with the dark grey carpet and plain white wall, which allows the blue to truly pop without competing for attention. It’s a lesson in how one bold move can define a small space.
🔥 Trending Context
Let’s be honest: a color this bold is a commitment. While it looks fantastic here, that vibrant blue might feel dated in five years, or you might just get tired of it. Unlike paint, you can’t easily change the color of a powder-coated metal shelf. Before you buy, ask yourself if you love *this specific color* or if you just love the idea of a colorful shelf. If you’re hesitant, consider achieving a similar effect with colorful storage bins on a neutral shelf, like in Idea #4, which is a much less permanent choice.
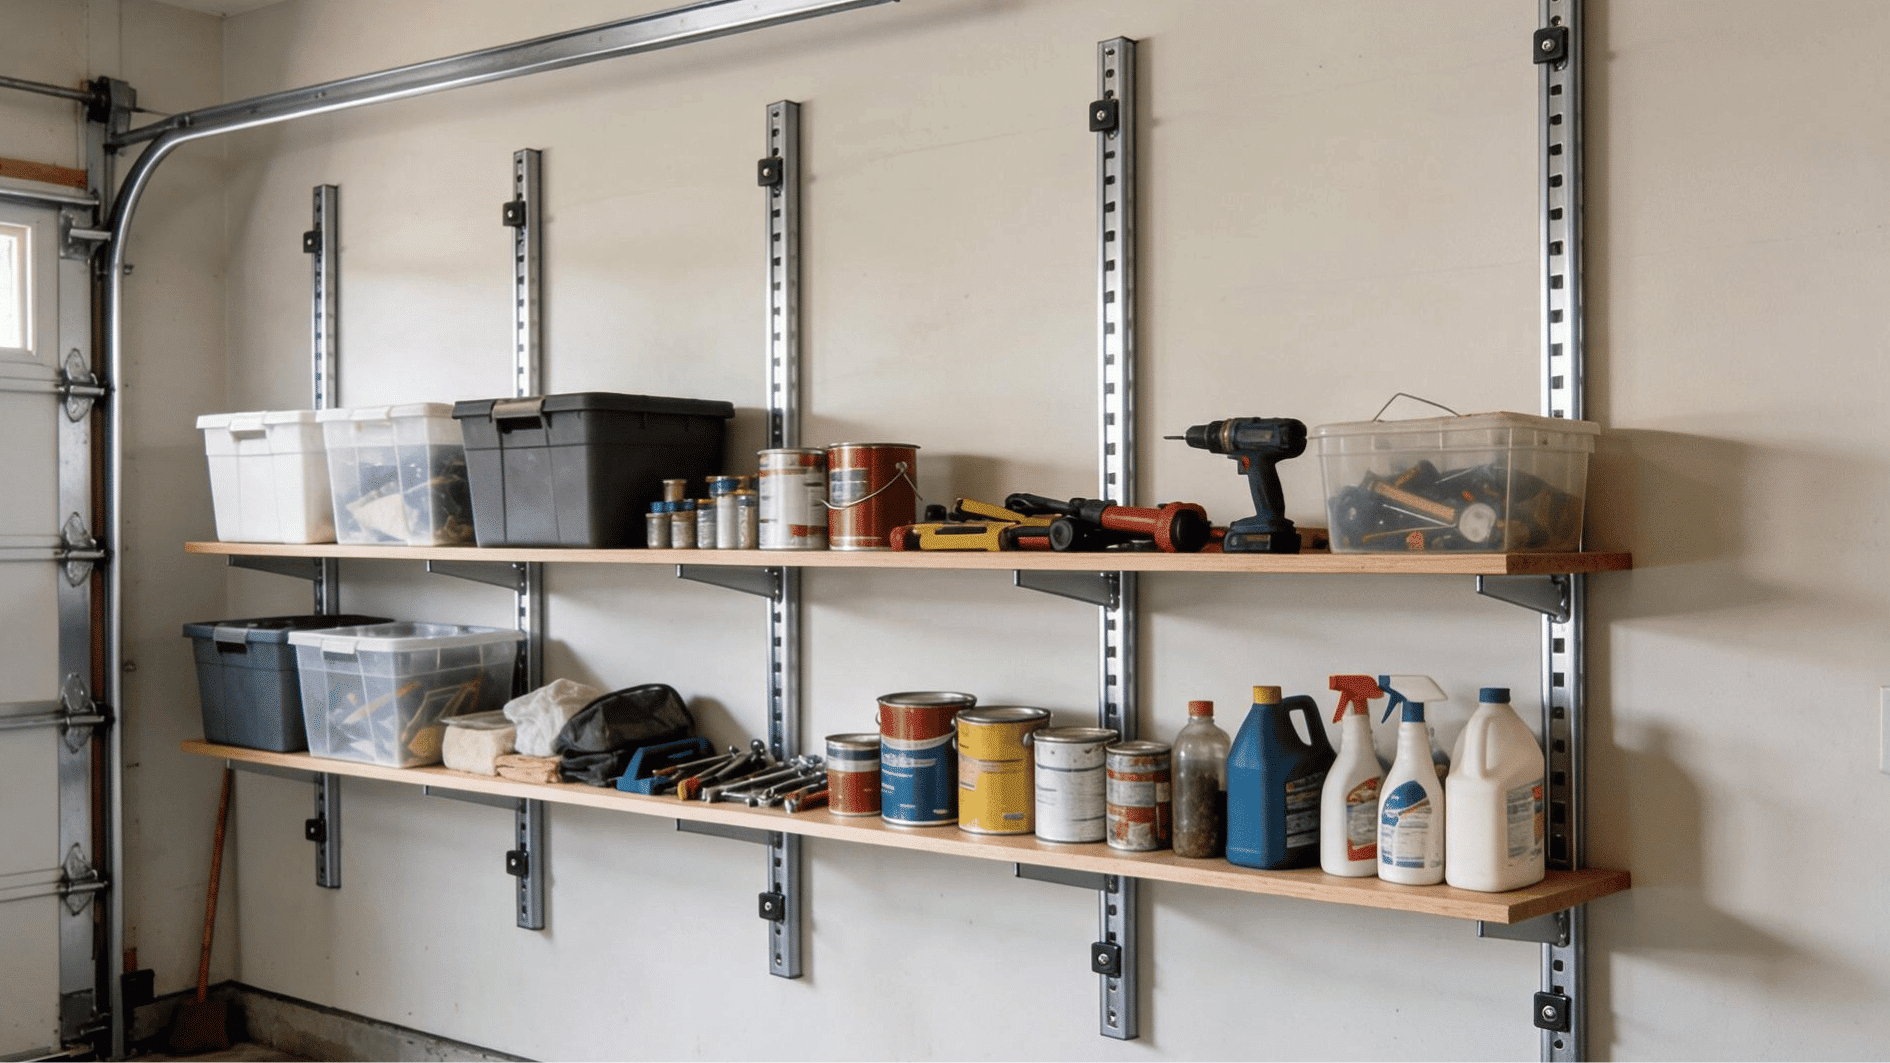
6. Install Adjustable Wall-Mounted Shelving with Wooden Planks
For adjustable track shelving, the biggest mistake is improper spacing of the vertical standards. They MUST be screwed directly into wall studs. Use a stud finder and mark every stud location along the wall. For heavy-duty garage storage, place a vertical track on every stud, typically 16 inches on center. Do not go wider than 32 inches between tracks, even for light loads, as the shelves will sag over time. This density might seem like overkill, but it ensures you can load up the shelves with heavy paint cans and tools without worrying about a catastrophic failure.
💸 Get This Look For Less
Here’s how to install the wooden plank shelves onto the brackets for a secure, custom fit. Time: 1 Hour. Cost: $50-$150 (for wood).
- Measure the distance between the center of your installed brackets. Cut your wood planks (common pine or poplar boards work well) to this exact length.
- Sand all cut edges and surfaces of the planks until smooth. Wipe away all dust.
- Apply a coat of polyurethane or clear sealer to all sides of the wood. This is crucial in a garage to protect against moisture and stains. Let it dry completely.
- Place the finished planks onto the shelf brackets.
- From underneath, use 1/2-inch wood screws to secure the plank to the holes in the shelf brackets. This prevents the shelves from shifting or tipping.
7. Choose Sleek Black Cabinetry with a Wall-Mounted Track System
Matte black is having a major moment everywhere from kitchens to bathrooms, and it was only a matter of time before it took over the garage. This trend is driven by a desire to make every part of the home feel cohesive and intentionally designed. The garage is no longer an afterthought. Using sophisticated finishes like matte black cabinetry elevates the space from a mere storage area to a proper ‘room.’ This look has staying power because black is timeless, and the focus on high-function, integrated storage systems (like the wall track) aligns with the broader cultural shift toward organization and efficiency.
💰 Budget Breakdown
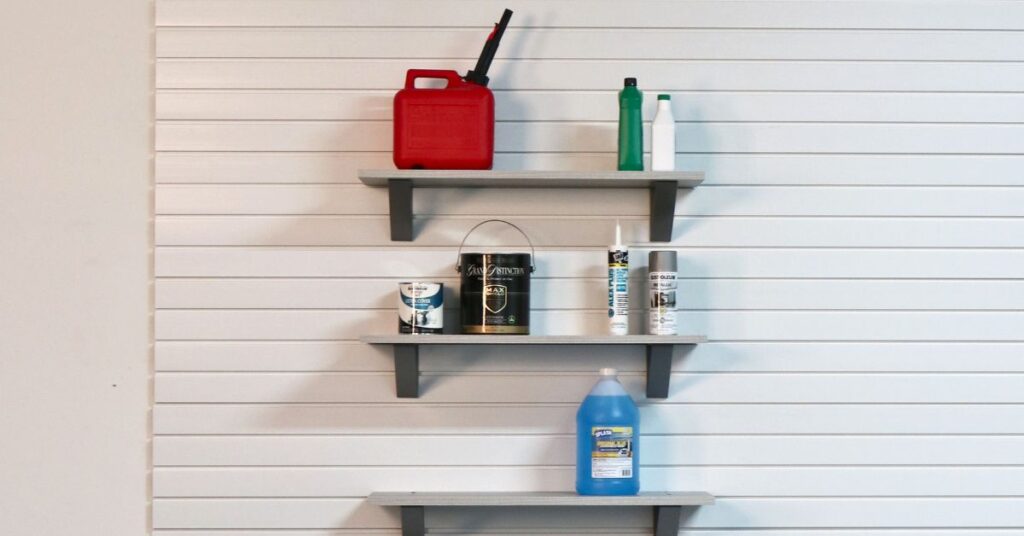
This design succeeds by creating distinct ‘zones’ for different types of storage. The tall, matte black cabinets provide a clean, monolithic backdrop for concealing bulk items and visual clutter. This is your ‘deep storage’ zone. Above the workbench, the silver track system creates a highly accessible ‘active storage’ zone for frequently used tools. The contrast in color and material (matte black vs. silver metal) visually separates these areas while the shared modern aesthetic keeps it cohesive. Compare this dark, moody approach to the bright and airy feel of the white cabinets in Idea #1—same concept, totally different vibe.
8. Combine Gray Wire Shelving with Clear Bins and a Pegboard Workbench
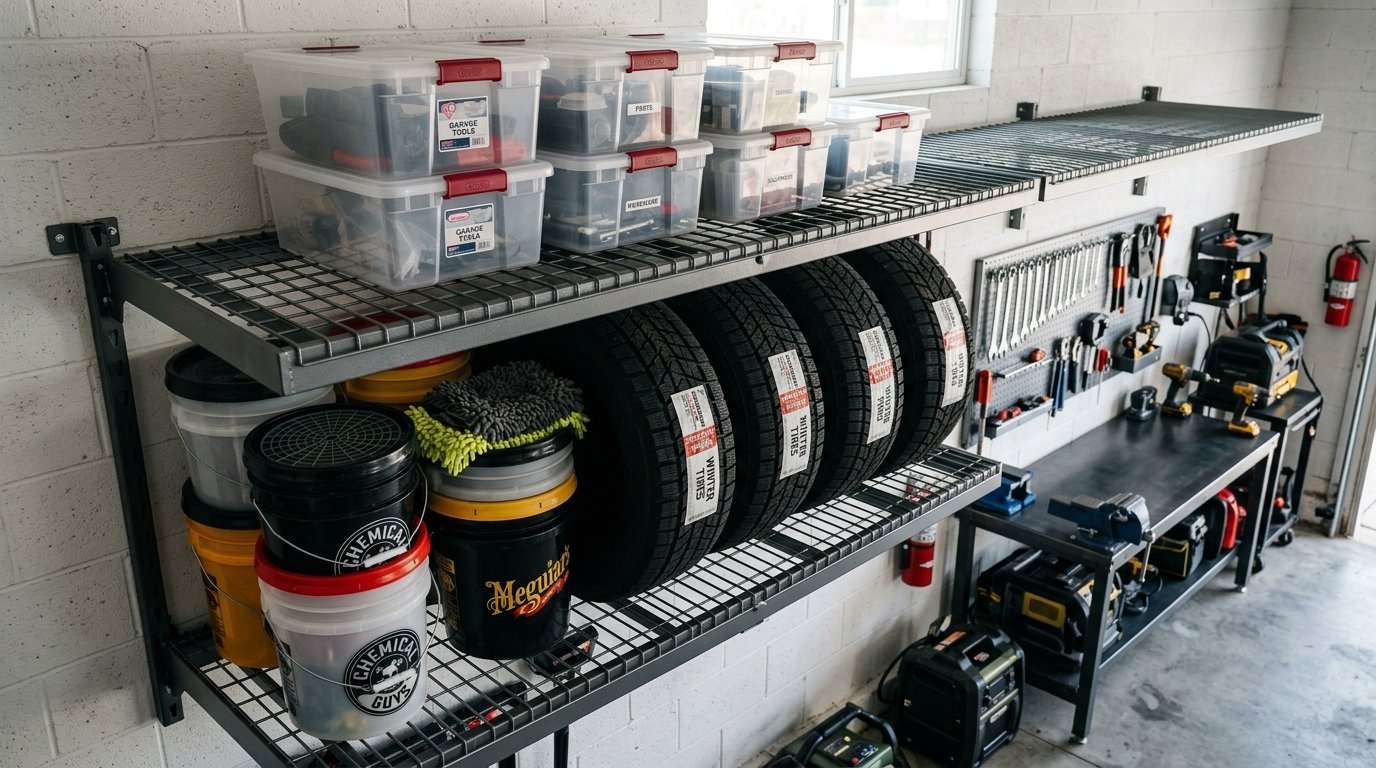
The game-changer here isn’t the shelving or the workbench—it’s the disciplined use of clear plastic storage bins with those bright red latches. By committing to a single type of container, the entire wall feels instantly unified and intentional. More importantly, they solve the biggest problem of garage storage: finding things. You can see the contents of every single box without pulling it down, which saves an incredible amount of time and frustration. The red latches add a subtle, repeating pop of color that breaks up the monotony of the gray and black, adding a bit of visual rhythm to the wall.
🧹 Maintenance Reality
Wire shelving is affordable and versatile, but it has its downsides. Small items can fall through the gaps, and liquids that spill will drip down onto everything below. It’s also a pain to dust. For storing smaller hardware, you absolutely need to use bins as shown. Also, be aware that cheaper wire shelving can bow under heavy weight. For items like tire stacks or full paint cans, make sure you buy a heavy-duty system with a high weight rating per shelf (look for 500+ lbs) and ensure it’s properly anchored to the wall studs.
9. Create a High-Density Tool Wall with a Full Pegboard System
Planning a high-density pegboard layout can feel like a game of Tetris. Here’s a quick process to get it right. Time: 2 hours. Cost: $10-$30 (for hooks).
- Gather ALL the tools you want to hang. Don’t forget the ones in your toolbox.
- Sort the tools by type (wrenches, screwdrivers, pliers) and then by size. This is key.
- Lay your empty pegboard sheet on the floor.
- Start placing your largest and longest tools first, as they have the biggest footprint.
- Arrange the sorted groups of tools around the large items. Keep tools you use together, close together.
- Once you have a layout you like, take a photo with your phone for reference.
- Install the pegboard on the wall and replicate the layout using the photo.

⭐ The One Thing
Don’t just hang tools directly on the pegboard. For small, loose items like sockets, screws, and drill bits, incorporate small, wall-mounted bins or magnetic strips directly onto the pegboard. Many pegboard systems have compatible clip-on bins and shelves. For wrenches and screwdrivers, buy dedicated holders that mount to the pegboard and keep them perfectly aligned and easy to grab. This creates a much cleaner, more professional look than a random assortment of individual hooks and prevents small, crucial pieces from getting lost in the shuffle.
10. Hang a Bicycle from a Ceiling-Mounted Metal Storage Rack
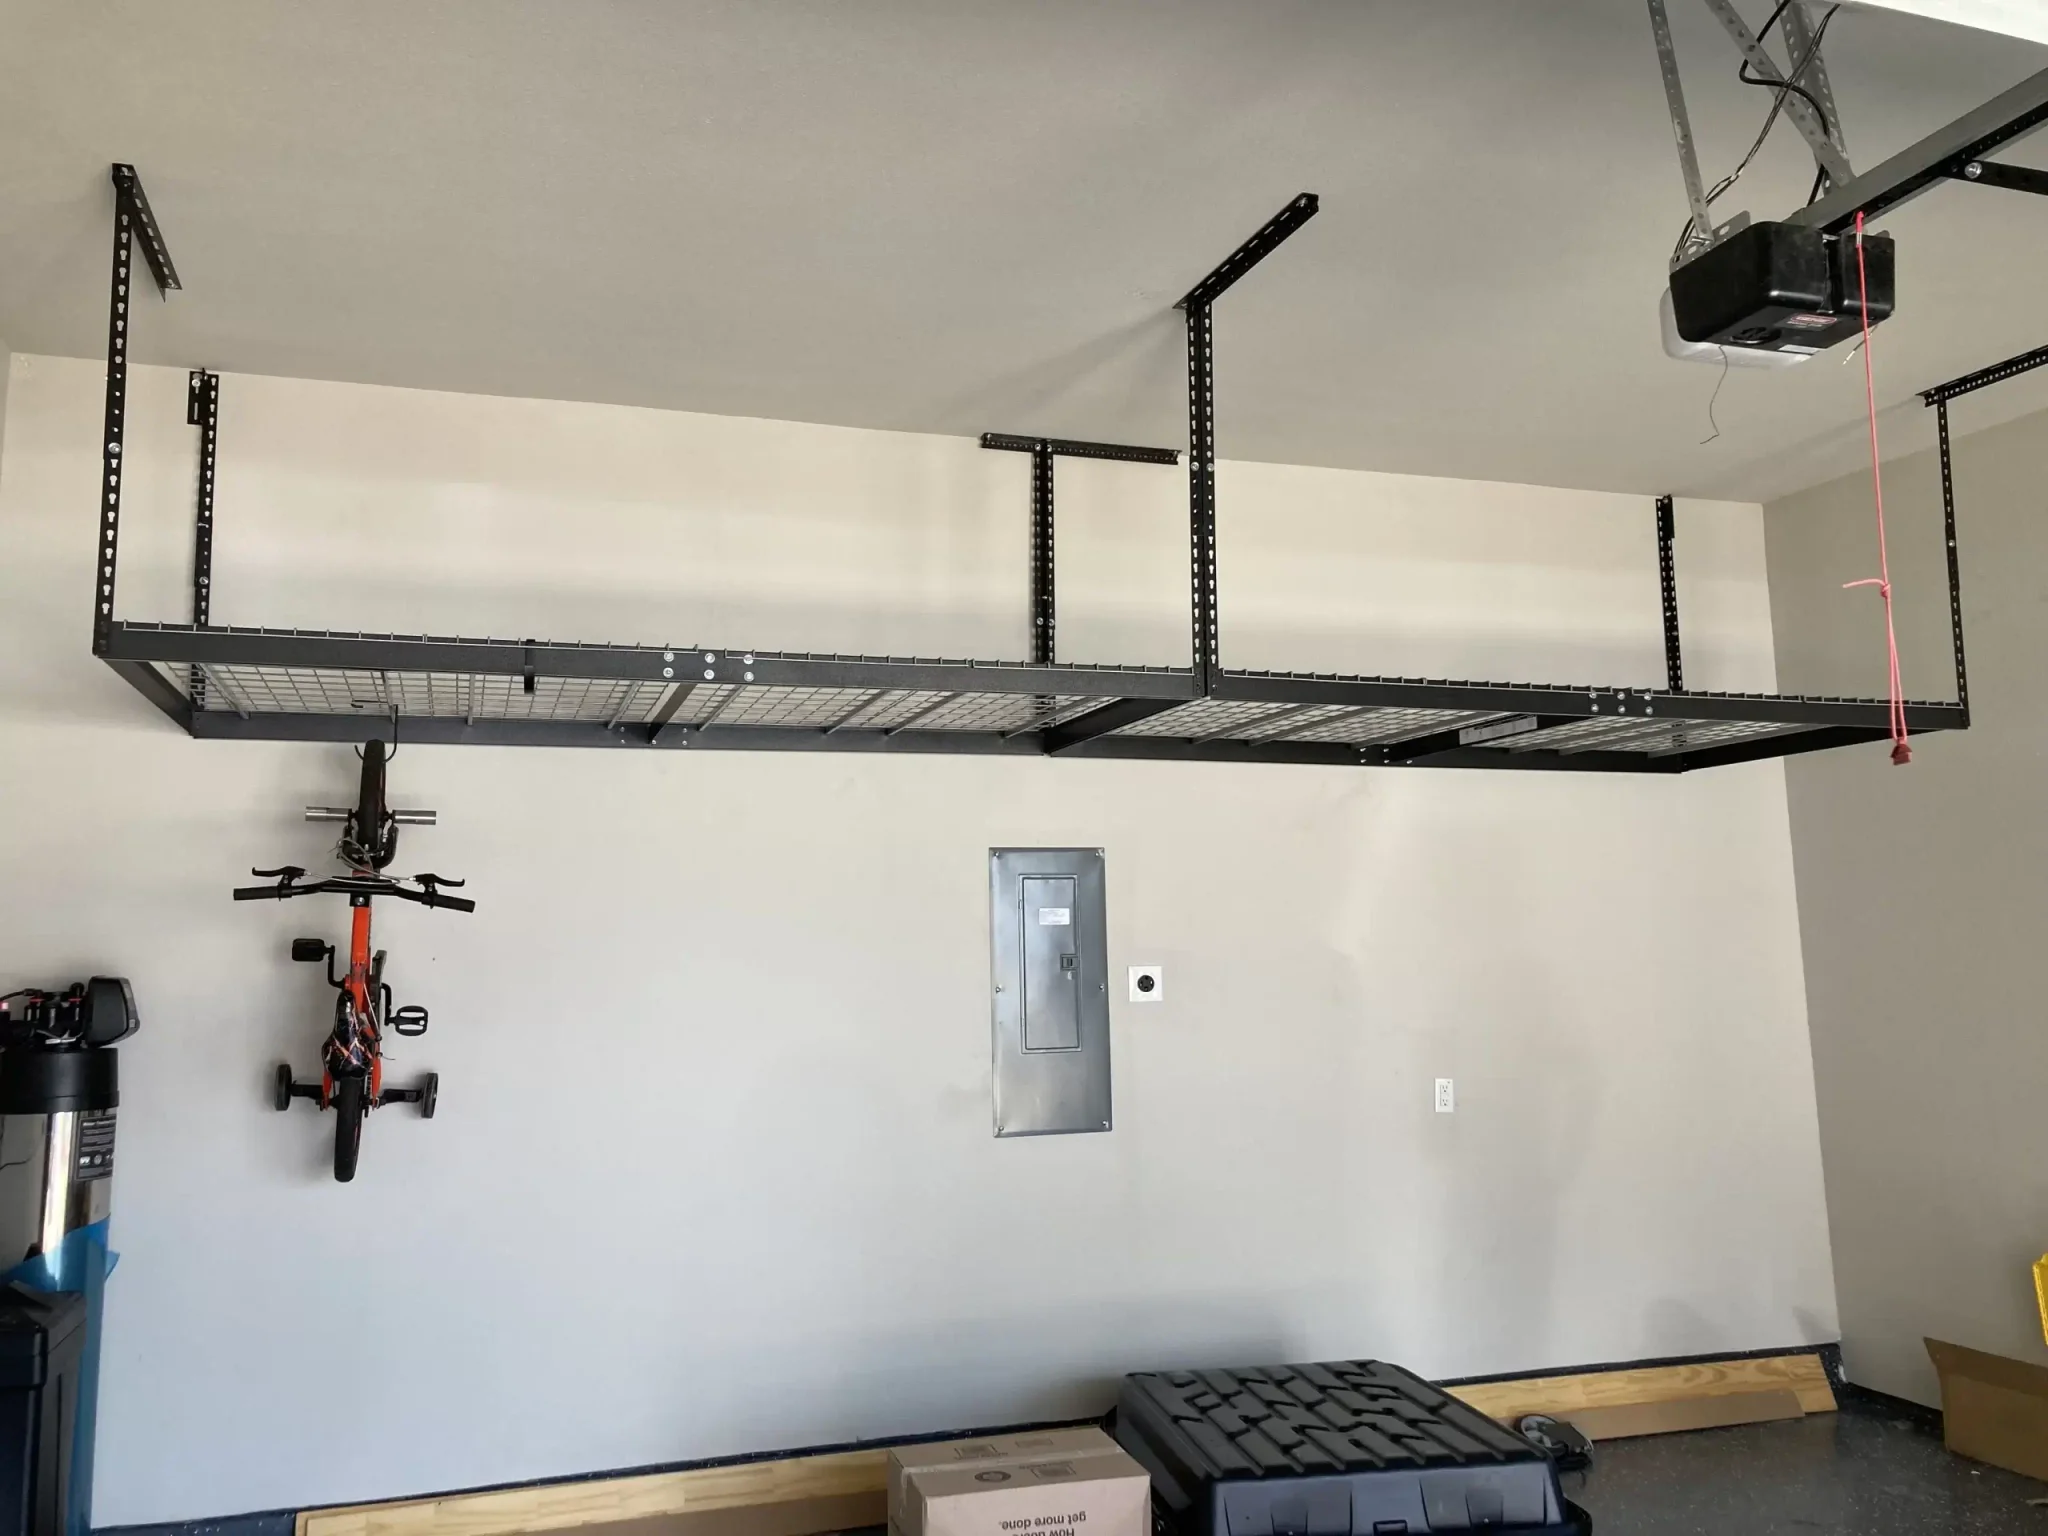
Overhead racks are fantastic space-savers, but they require adequate ceiling height. To comfortably hang a child’s bike as shown, you’ll need a minimum ceiling height of 9 feet. For an adult bike, aim for 10 feet or more, especially if you plan to park a taller vehicle like an SUV underneath. The rack itself will hang down about 18-24 inches (many are adjustable), and the bike will hang below that. Always measure the height of your car (plus any roof racks!) before installing to ensure you have enough clearance. This solution is ideal for two-car garages where you can dedicate the space above the hood of the car.
🔧 How-To Brief
A full overhead storage rack can cost several hundred dollars. If your main goal is just to get the bikes off the floor, you can achieve that for under $50. Home improvement stores sell simple, heavy-duty bicycle hoist pulley systems for about $25 each. These mount directly to the ceiling joists and let you easily lift and lower a single bike. Alternatively, for about $15, you can get a set of two heavy-duty, rubber-coated screw-in hooks. Just screw them into a ceiling joist at the right width and hang your bike upside down by its wheels. It’s less fancy, but just as effective.
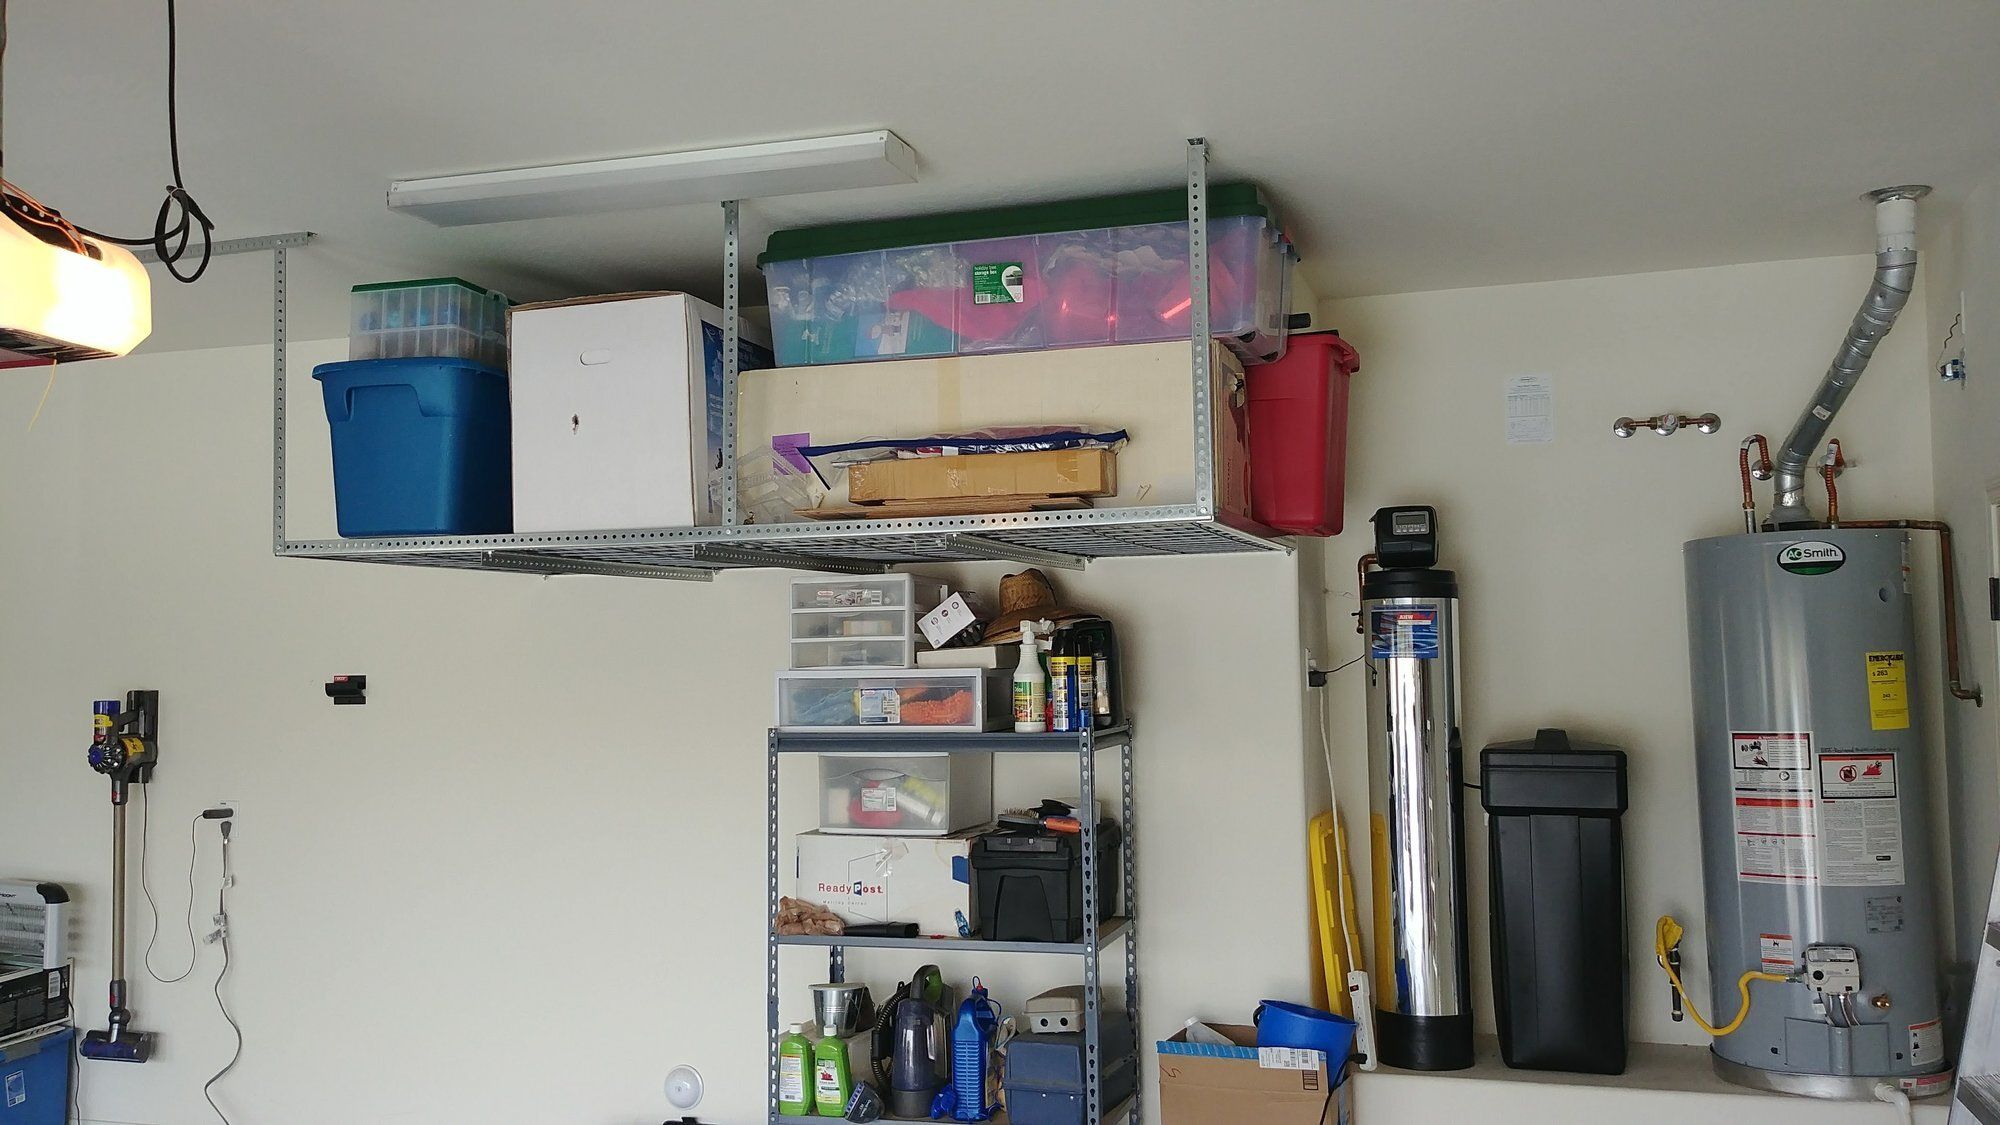
11. Combine an Overhead Grid Rack with a Tall Metal Shelving Unit
This is a masterclass in storage zoning. The design intelligently separates long-term, less-accessed items from everyday supplies. The overhead rack is perfect for seasonal decorations, camping gear, and archival boxes—things you only need a few times a year. This frees up the more accessible vertical shelving unit for items you need to grab more frequently. By assigning different ‘access frequencies’ to different storage zones, the entire system becomes more efficient. You aren’t climbing a ladder to get a bottle of cleaner, and your Christmas lights aren’t taking up prime real estate on the ground level.
🎯 What Makes It Work
Before installing an overhead grid rack, run through this quick checklist to avoid major headaches:
- Ceiling Joist Location: Have you used a stud finder to locate and mark all ceiling joists? The rack MUST be anchored into these for safety.
- Garage Door Clearance: Have you opened your garage door fully to measure the exact clearance between the door (in its open position) and the ceiling? The bottom of your rack must be below this line.
- Total Weight Calculation: Have you estimated the total weight of the items you plan to store? Ensure this is well below the manufacturer’s maximum weight capacity for the rack.
- Lighting Obstruction: Will the rack block any existing light fixtures? If so, you may need to plan for additional lighting.
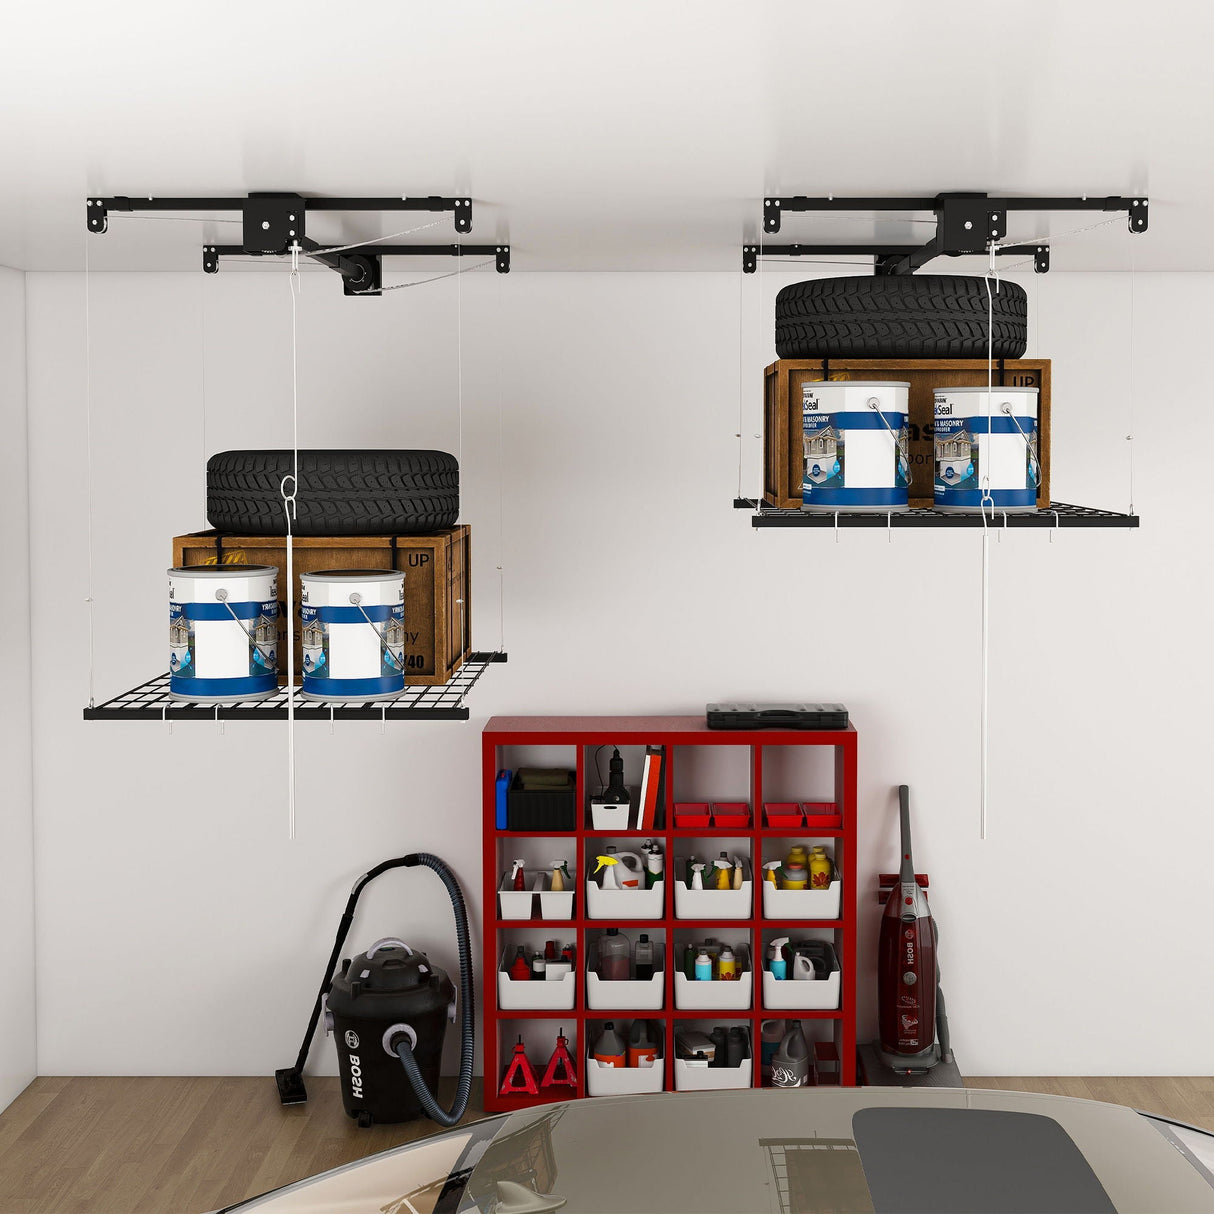
12. Use Retractable Ceiling Racks for Tires and Seasonal Items
The key element that makes this system special is its retractability. Unlike the fixed overhead racks in Idea #10, these platforms can be lowered for easy loading and unloading. This completely eliminates the dangerous and awkward process of climbing a wobbly ladder while trying to lift a heavy stack of tires or a bulky storage crate. It makes the highest, most inaccessible part of the garage genuinely usable for people of all physical abilities. The convenience of being able to bring the shelf down to you is a total game-changer for utilizing ceiling space safely and effectively.
✅ Before You Start
While motorized or pulley-operated ceiling racks are incredibly convenient, they introduce moving parts that require occasional checks. Once a year, inspect the ropes or cables for any signs of fraying or wear, especially at the connection points and pulley wheels. If it’s a motorized system, listen for any unusual straining or grinding sounds, which could indicate a problem with the motor or gears. Keep the remote in a designated spot so it doesn’t get lost. Also, remember that these systems have a strict maximum weight capacity that should never be exceeded—the motor is not designed to lift more than its rating.
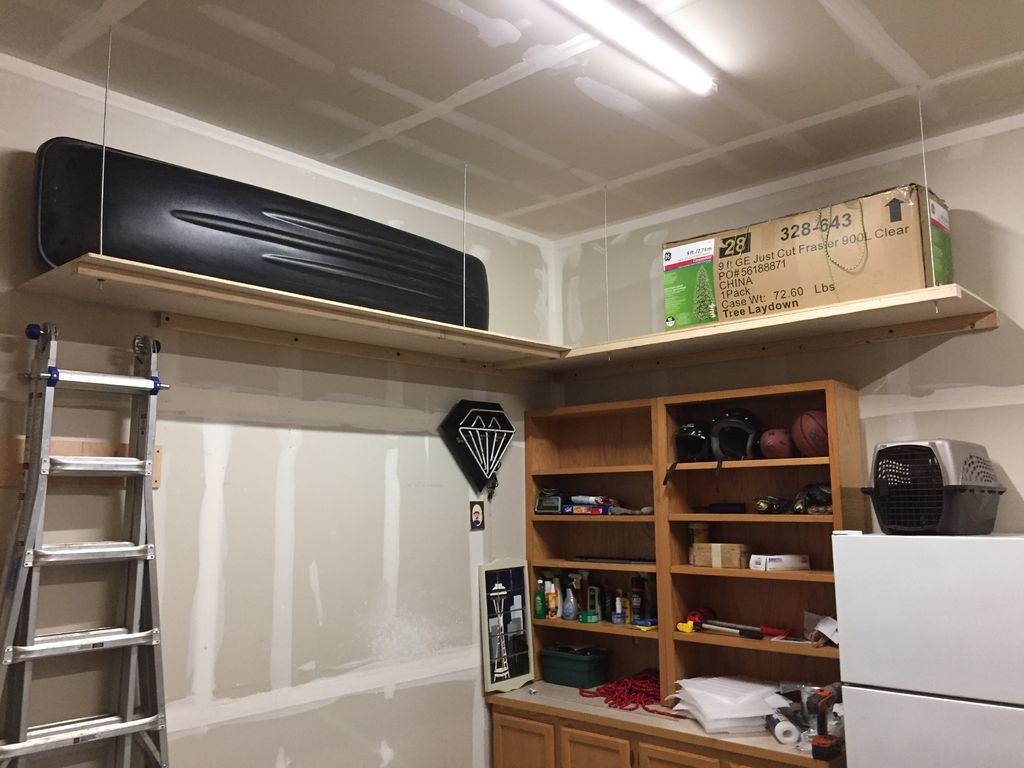
13. Build L-Shaped Overhead Shelving in an Unfinished Garage
This DIY wooden overhead shelf is the ultimate budget-friendly solution for reclaiming ceiling space. Forget expensive metal rack systems. You can build a sturdy shelf like this for under $100 in materials from any home improvement store. All you need are some 2×4 lumber for the frame and supports, and a sheet or two of 3/4-inch plywood or OSB for the shelf surface. With a saw, a drill, and some lag screws, you can create a custom-sized storage loft in a single weekend. It’s a fantastic way to get a ton of storage for a fraction of the cost of pre-made systems.
📐 Style Math
When building a DIY overhead shelf, don’t just attach it to the ceiling joists. For maximum strength and stability, you must also tie it into the wall studs. Build a 2×4 ‘ledger board’ that screws horizontally into the wall studs along the back of the shelf. Then, build the shelf frame so it rests on this ledger board. The vertical supports from the ceiling will then bear the rest of the load. This technique distributes the weight between the wall and the ceiling, making the entire structure significantly stronger and safer than a shelf that is only suspended from above.
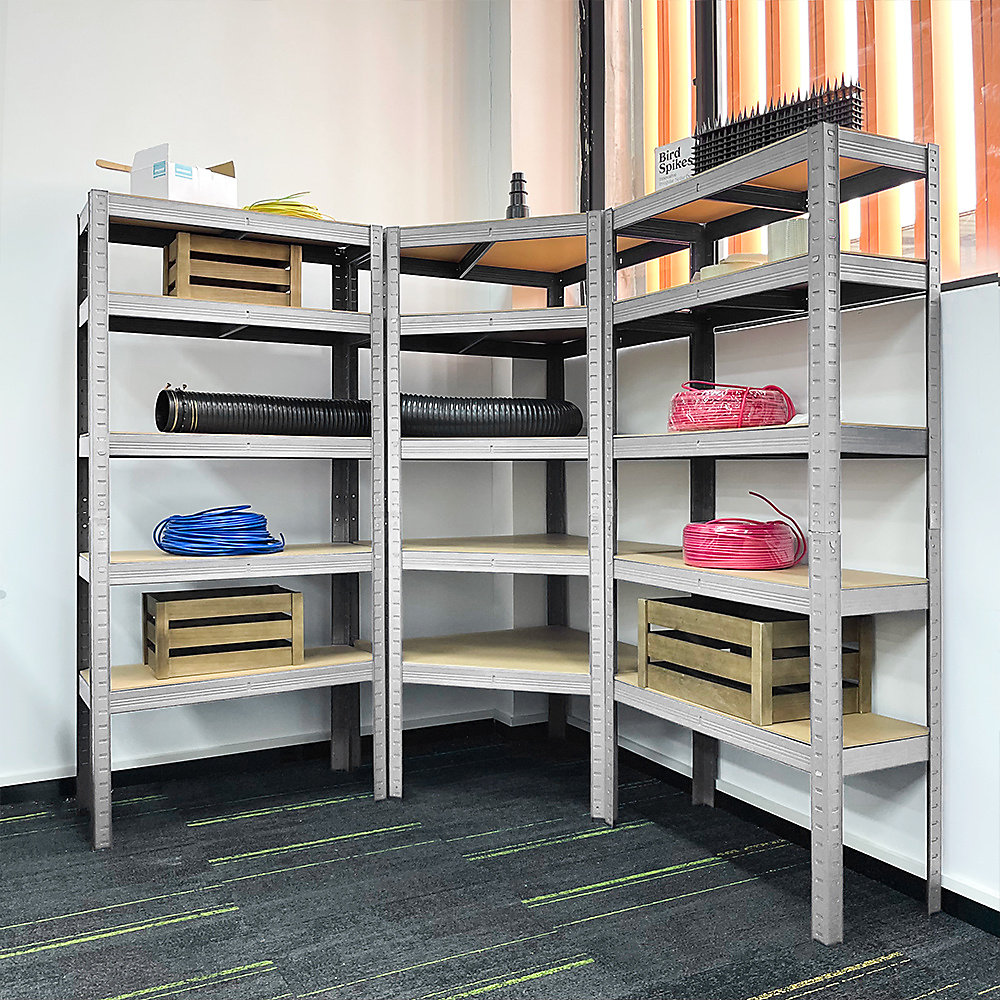
14. Arrange Light Grey Metal Shelves with Wooden Inserts in an L-Shape
The L-shaped configuration is a brilliant use of space, turning a typically underutilized corner into a high-capacity storage hub. It creates a sense of an intentional, built-in ‘storage zone’ rather than just having shelves pushed against walls. The continuity of the shelving around the corner draws the eye and makes the setup feel more integrated and substantial. Aesthetically, the combination of the cool, light grey metal and the warm, light brown wood shelves strikes a perfect balance between industrial utility and a more refined, contemporary look. It’s functional without feeling cold.
💡 Designer Tip
This L-shaped arrangement is perfect for a standard two-car garage corner. To replicate this look, you’ll need at least 6-8 feet of clear wall space on one side of the corner and 4-6 feet on the other. The shelves themselves are typically 18-24 inches deep, so you will be using a significant chunk of floor space in that corner. This is an excellent trade-off for the amount of vertical storage you gain. It’s less ideal for a narrow, single-car garage where the corner footprint might impede your ability to open car doors fully. Always measure your corner and map out the footprint on the floor with painter’s tape first.
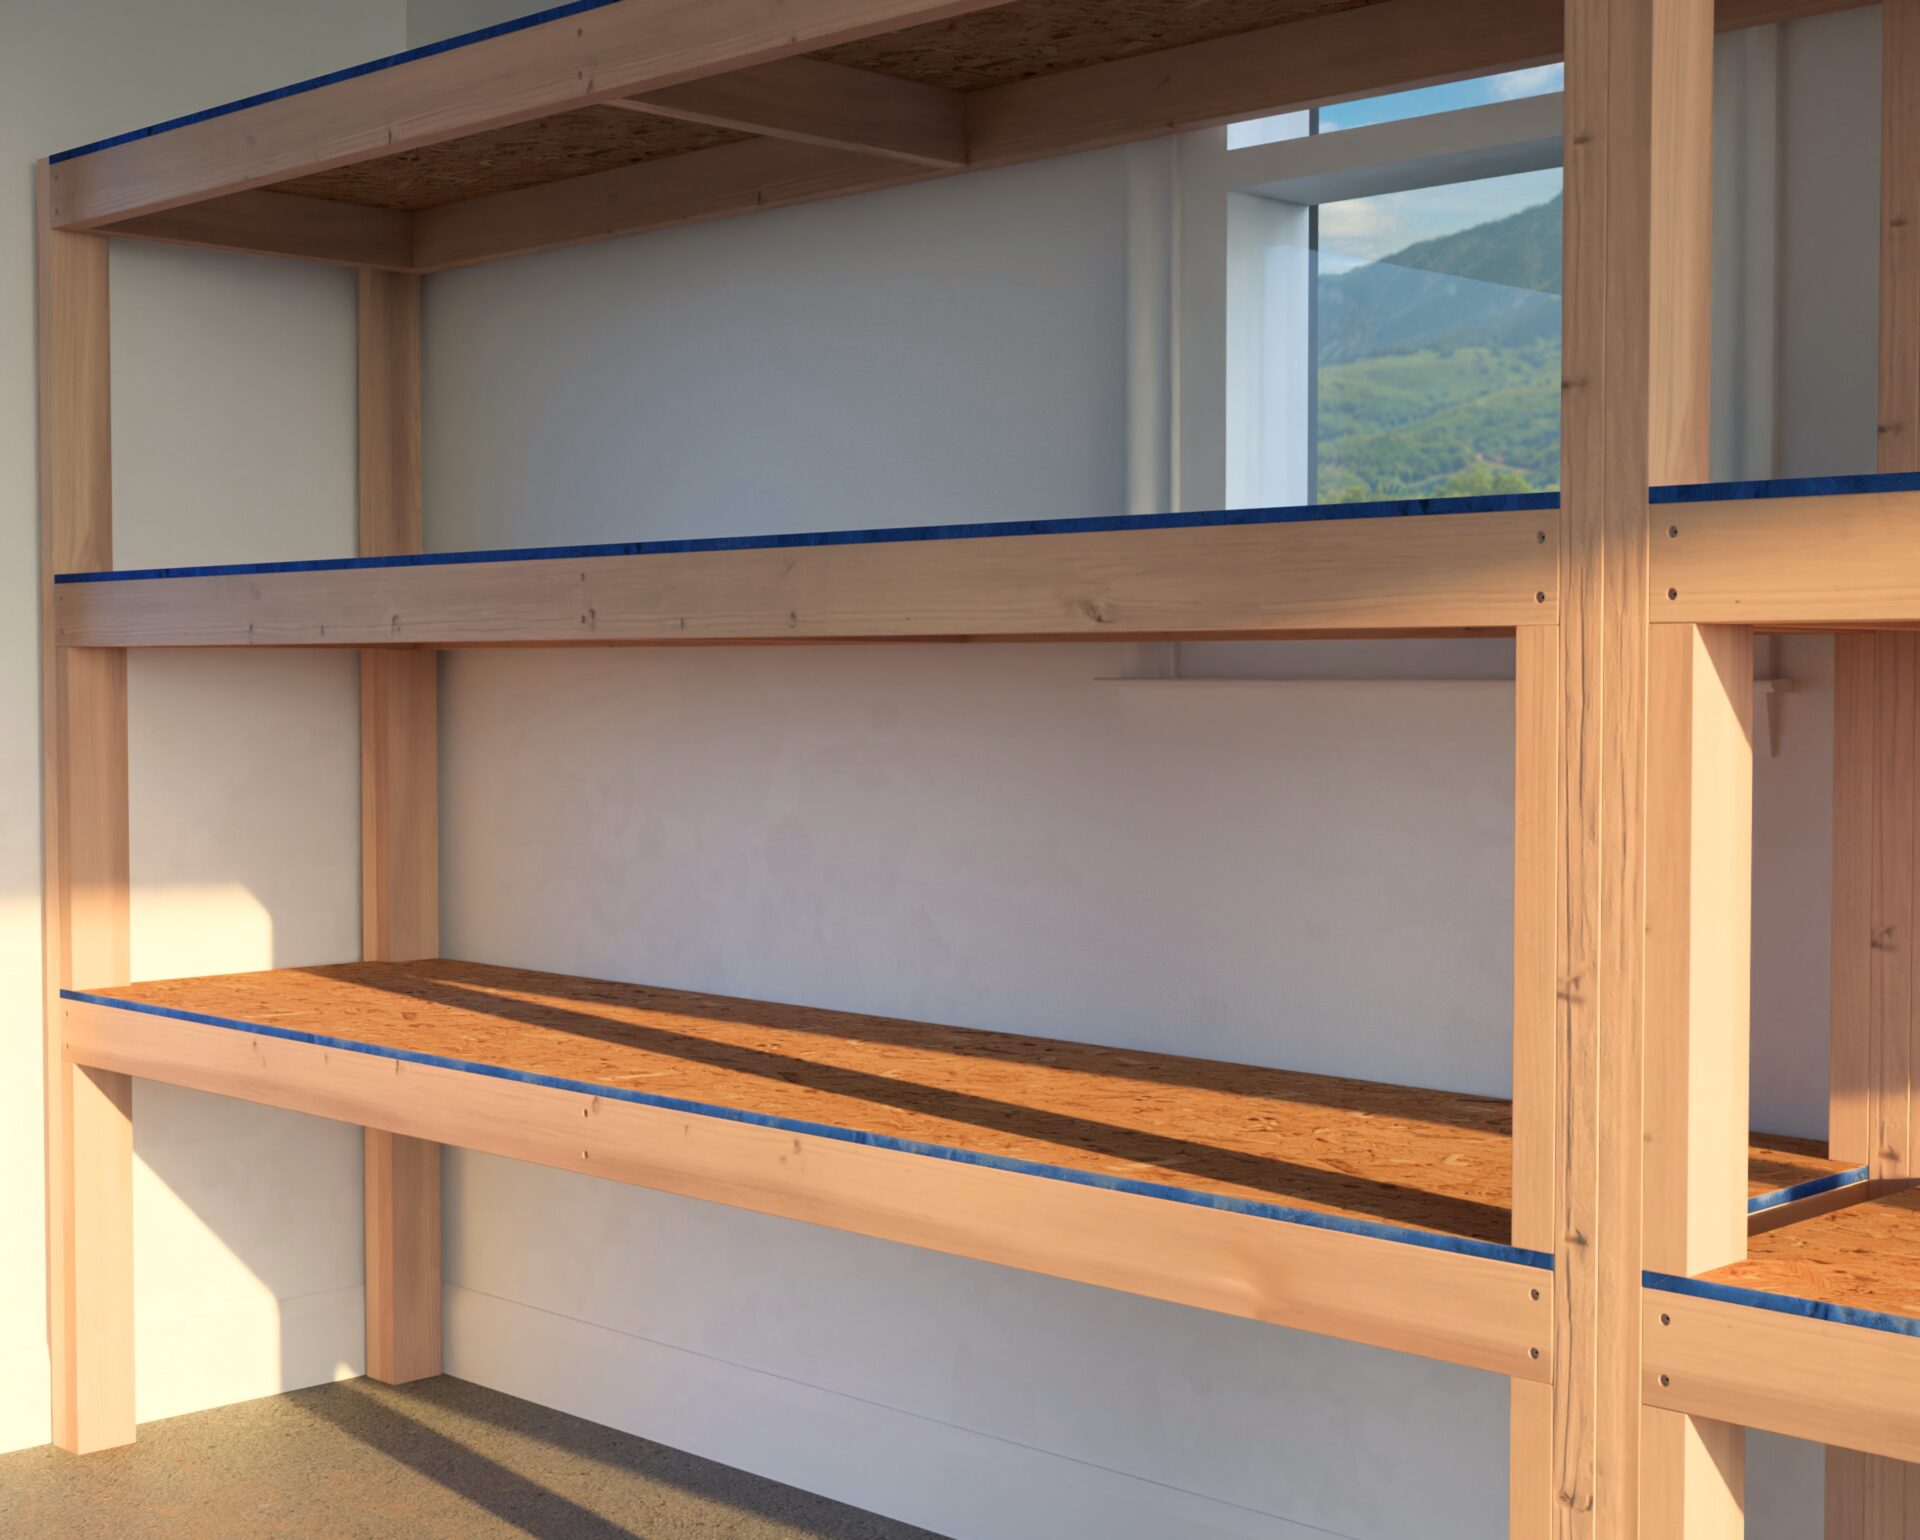
15. Construct DIY Plywood Shelves with Bright Blue Edging
The bright blue painted edging is the detail that elevates this from a simple DIY shelf to a piece of thoughtful design. It’s a tiny, inexpensive touch that has a huge visual impact. The blue edge defines the shape of each shelf, creating crisp horizontal lines that guide the eye and add a sense of rhythm and order. It also injects a playful, custom personality into what could otherwise be a very plain, utilitarian structure made of basic lumber and OSB. It proves that you don’t need expensive materials to create something with style; sometimes all it takes is a sample pot of paint.
📏 Scale Guide
Oriented Strand Board (OSB) is a fantastic, cost-effective material for shelving, but it has one major weakness: moisture. An unsealed OSB shelf in a damp garage can swell, warp, and even grow mold over time. If you use OSB for your shelving, you MUST seal all surfaces and edges with at least two coats of a high-quality polyurethane or oil-based primer and paint. This is especially critical for the cut edges, which are the most absorbent. Skipping this step to save time will result in shelves that sag and degrade within a few years.
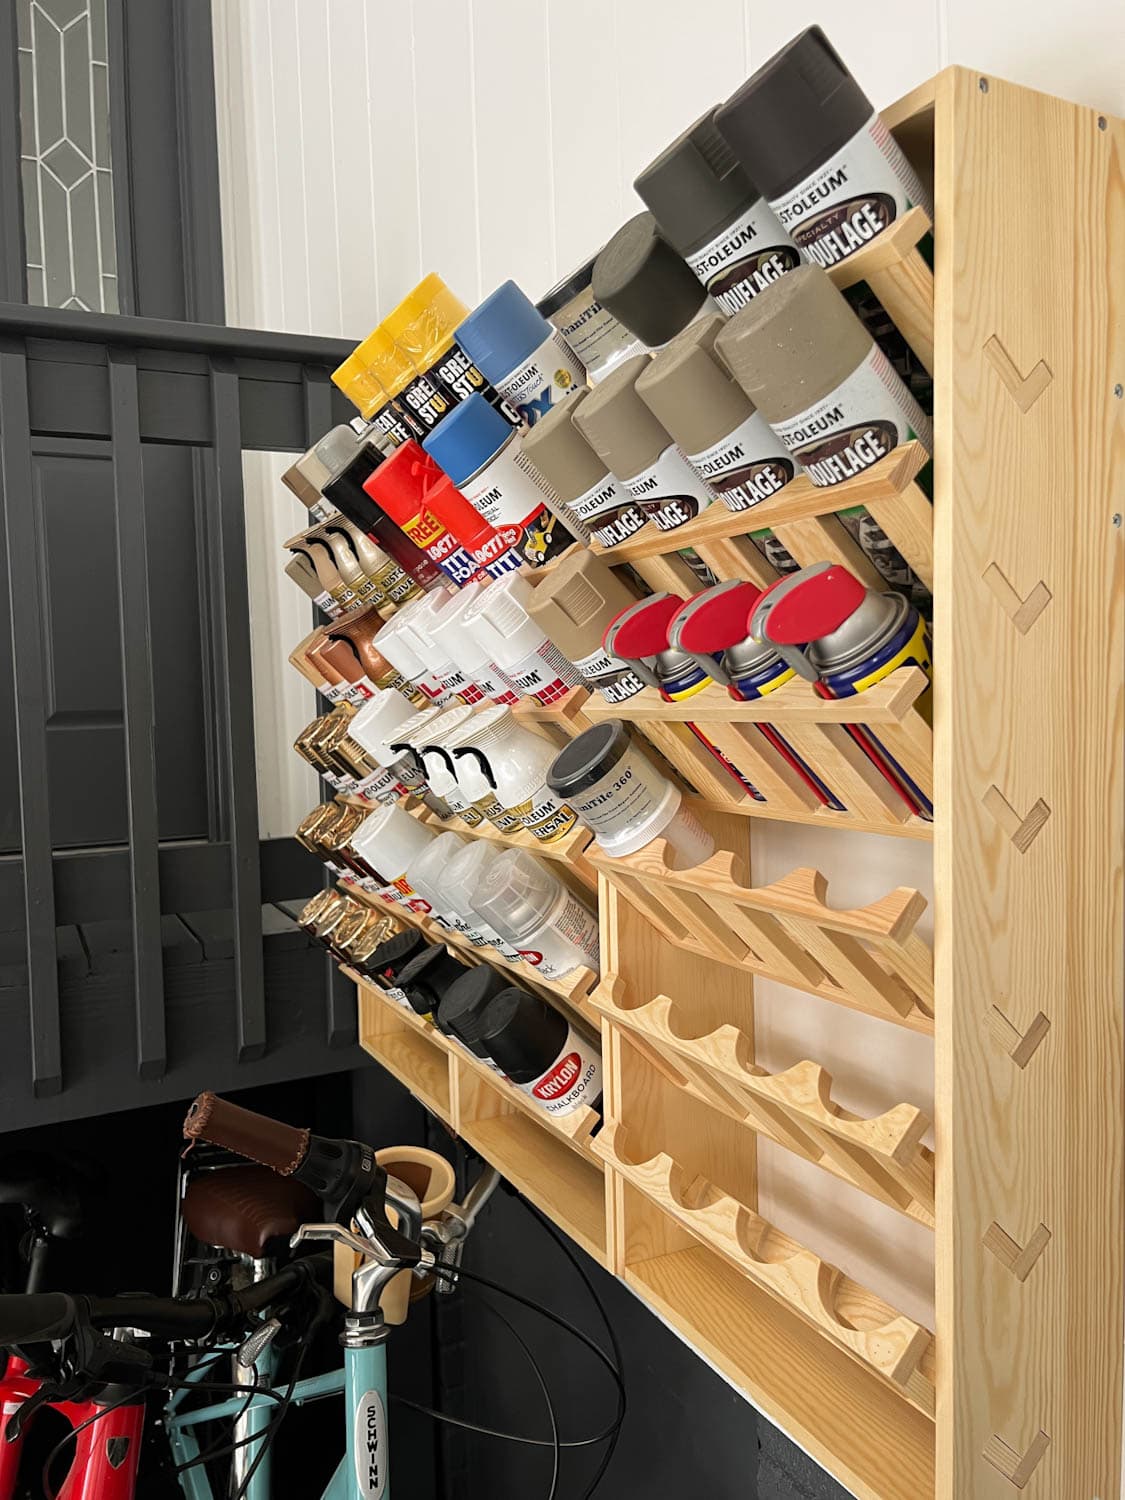
16. Build a Custom Wooden Rack for Spray Paint Can Storage
This design is genius because it solves two problems at once: storage and visibility. The angled slots not only keep the cans securely in place, but they also tilt them slightly downwards, making it easy to see the color of the cap at a glance. It turns a jumbled mess of cans into a tidy, color-coded library. The use of light, natural wood against the white wall gives it a clean, almost ‘craft room’ feel, which is a refreshing change from typical dark and grimy garage aesthetics. It’s a perfect example of how a custom-built solution can be far superior to any generic bin or shelf for a specific need.
|
📋 Copy HEX 🔗 Share |
⚠️ Real Talk
Don’t have the time or tools to build a custom wooden rack like this? You can get a similar ‘at-a-glance’ organization system for your spray paint for about $20. Look for an over-the-door shoe organizer with clear plastic pockets. A standard 24-pocket organizer can hold 24 cans of spray paint, keeping them visible and off your workbench. Just hang it on the back of the door leading into your house or screw it directly to an open patch of wall. It’s a quick, no-build hack that achieves the same goal of organized, visible storage.
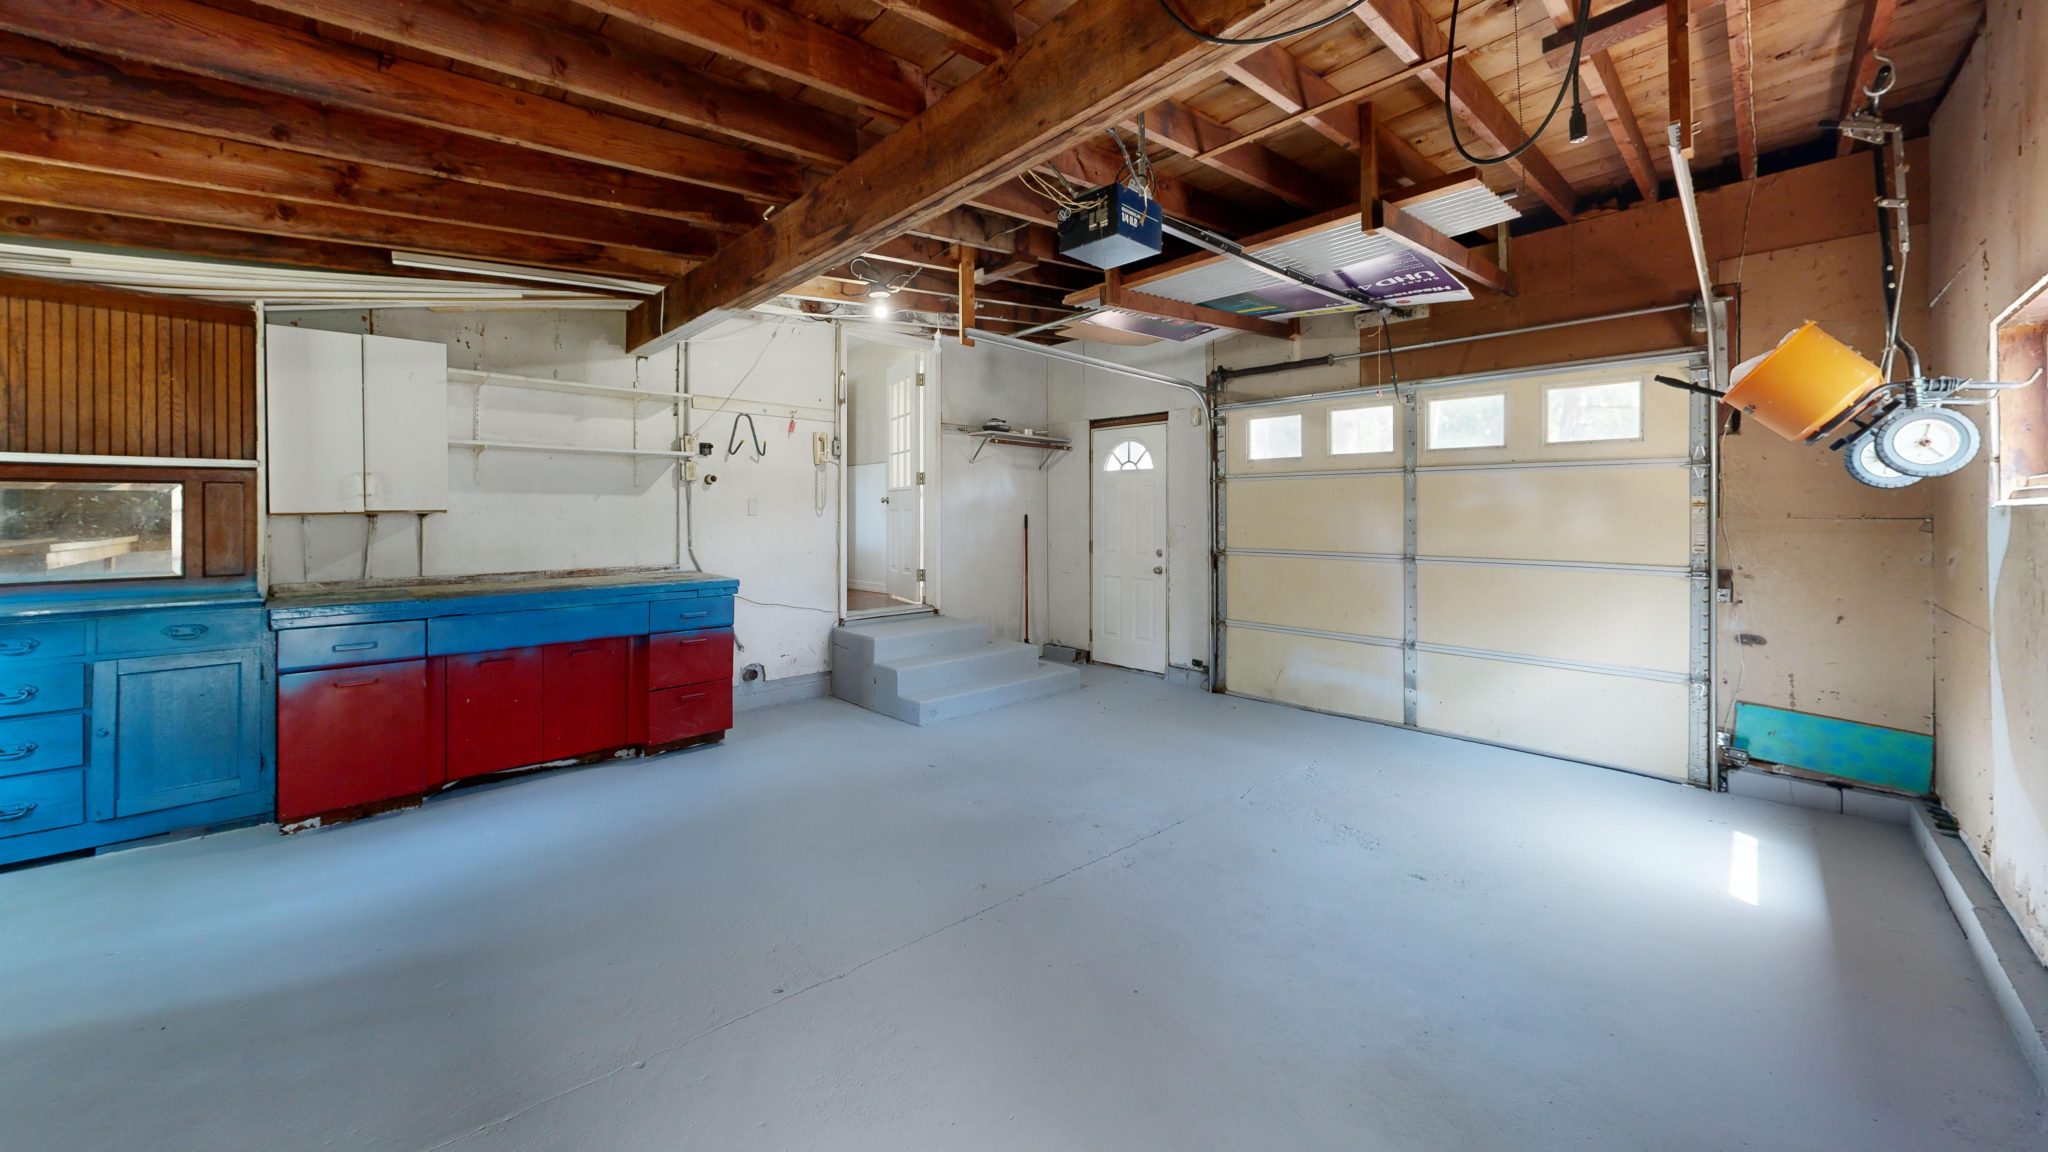
17. Embrace a Rustic Look with Exposed Beams and Painted Cabinets
This look achieves its charming, rustic character through a specific formula: 40% Raw Structure + 40% Painted Utility + 20% Neutral Backdrop. The ‘Raw Structure’ is the beautiful exposed wooden ceiling beams and concrete floor. The ‘Painted Utility’ comes from the brightly colored, distressed workbench and cabinets, which show a history of use. The ‘Neutral Backdrop’ is the plain white walls and simple shelving, which keep the space from feeling too chaotic. By balancing the raw architectural elements with pops of functional color, the space feels authentic and lived-in, not staged.
🔥 Trending Context
An exposed beam ceiling looks incredible, but it’s a magnet for dust, cobwebs, and pests. Plan on a deep clean at least twice a year, which will involve a tall ladder and a vacuum with a long extension wand. The distressed, painted finish on the cabinets is charming because of its imperfections, but it can also be prone to further chipping and flaking. To preserve the look without it getting worse, you may need to apply a clear matte sealant over the top, which will protect the existing paint layers from moisture and further wear and tear.
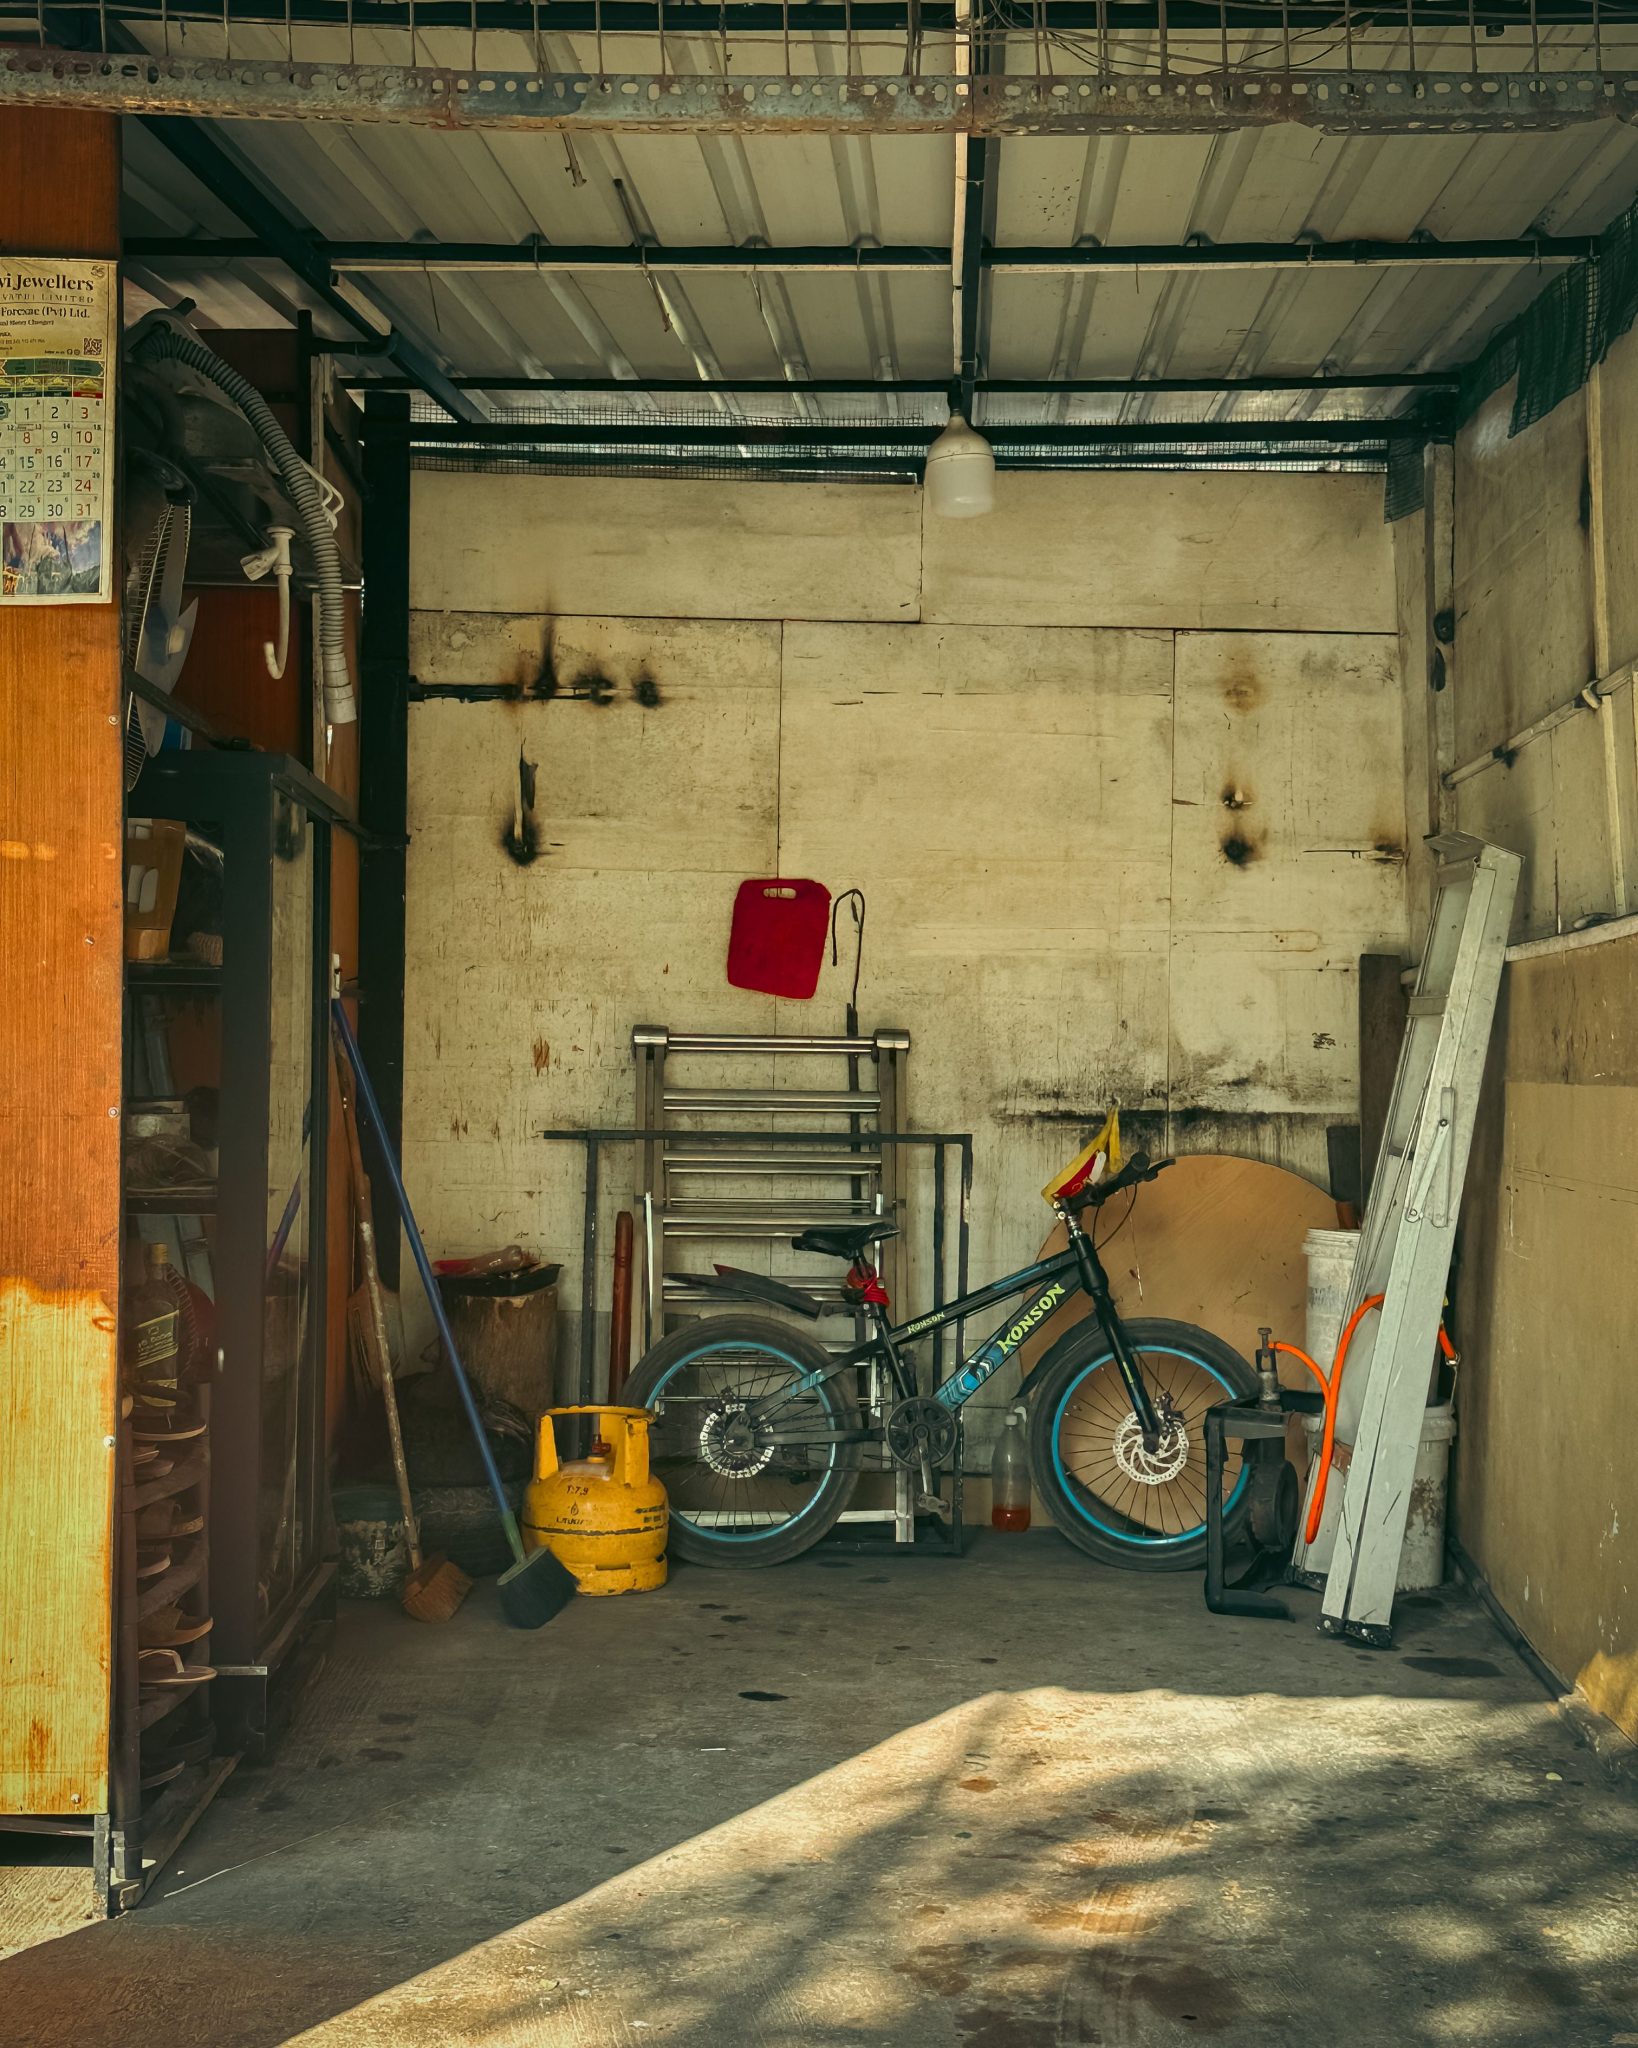
18. Utilize a Narrow Garage Space with Vertical Storage
In a narrow space like this, every inch of floor is precious. The key is to think vertically and get everything possible off the ground. Use wall-mounted hooks for ladders and bikes, and choose the tallest, skinniest shelving unit you can find. A shelf that is 36 inches wide but 84 inches tall is far more effective here than one that is 48 inches wide and 60 inches tall. Also, use the ‘dead space’ at the very back of the garage for your shelving unit. This keeps the sides clearer, making it easier to get in and out of car doors without bumping into things.
💸 Get This Look For Less
This photo shows the reality of a functional, but not ‘Pinterest-perfect,’ garage. It’s a bit grimy, the storage isn’t perfectly curated, and the lighting is utilitarian. And that’s okay. The goal of garage organization isn’t always to create a showroom; it’s to create a system that works for you. Don’t feel pressured to have a perfectly pristine space. A functional, safe, and reasonably tidy garage where you can find your tools and park your car is a huge win. Embrace the rustic, well-used character if that’s your reality.
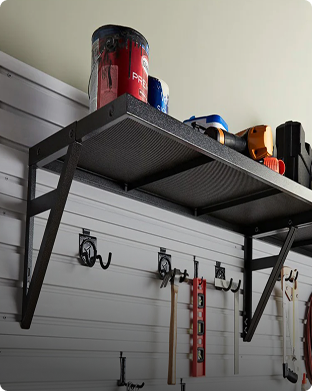
19. Mount a Heavy-Duty Shelf Above a Slatwall Tool Organizer
This is an incredibly efficient use of wall space because it layers two different types of storage in one footprint. The white slatwall panel provides flexible, accessible storage for everyday hand tools that you need to grab quickly. The heavy-duty overhead shelf, mounted just above it, is reserved for bulkier, heavier items that are used less frequently, like paint cans and power tools in their cases. This layering approach doubles the storage capacity of that wall section without taking up any additional floor space. The visual separation—white slatwall below, dark shelf above—also helps the area feel organized and intentional.
💰 Budget Breakdown
Before you commit to this layered setup, check these key points:
- Stud Alignment: Have you confirmed that there are solid wall studs where you need to mount BOTH the slatwall and the heavy-duty shelf brackets? You cannot safely mount a heavy shelf using drywall anchors alone.
- Ergonomic Height: Position the slatwall first. Will you be able to comfortably reach the tools hanging on it without the overhead shelf getting in your way?
- Shelf Clearance: Once you determine the top of the slatwall, is there enough vertical space left for the shelf and the items you plan to store on it without hitting the ceiling?
- Weight Capacity: Does the wall shelf’s weight rating far exceed the combined weight of the items you plan to put on it?
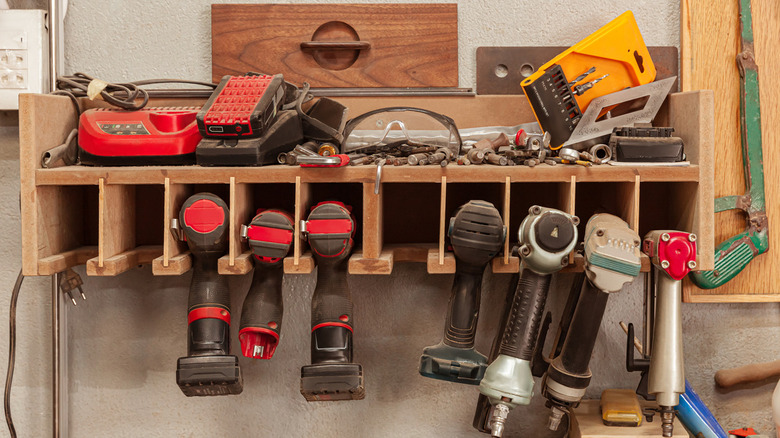
20. Build a Custom Wall-Mounted Organizer for Cordless Power Tools
The brilliance of this organizer is the integrated lower section with custom-sized slots for hanging cordless drills and drivers. This is something you simply cannot get from an off-the-shelf storage product. It uses the unique shape of the tools themselves as a storage mechanism, holding them securely and making them incredibly easy to grab and put back. By building a solution tailored to your specific tool collection, you create a perfect, ‘gravity-fit’ home for each item. This is so much more efficient than just lining them up on a flat shelf. Plus, linking to the idea of a spray paint rack like Idea #16 shows how custom solutions are often the best.
🧹 Maintenance Reality
You can build a simple version of this power tool holder with one piece of plywood. Time: 1.5 Hours. Cost: $20.
- Measure the width of the ‘neck’ of your drills (the part between the motor and the battery). Most are around 1.5 inches.
- On a piece of 3/4-inch plywood (at least 6 inches deep), draw a series of T-shaped slots. The narrow part of the ‘T’ should be slightly wider than your drill’s neck, and the wider part should be large enough for the tool body to pass through. Space them about 4-5 inches apart.
- Use a jigsaw to carefully cut out the T-shaped slots.
- Sand all the cut edges smooth to prevent splintering.
- Mount this slotted board under an existing shelf or build a simple box shelf above it as shown.
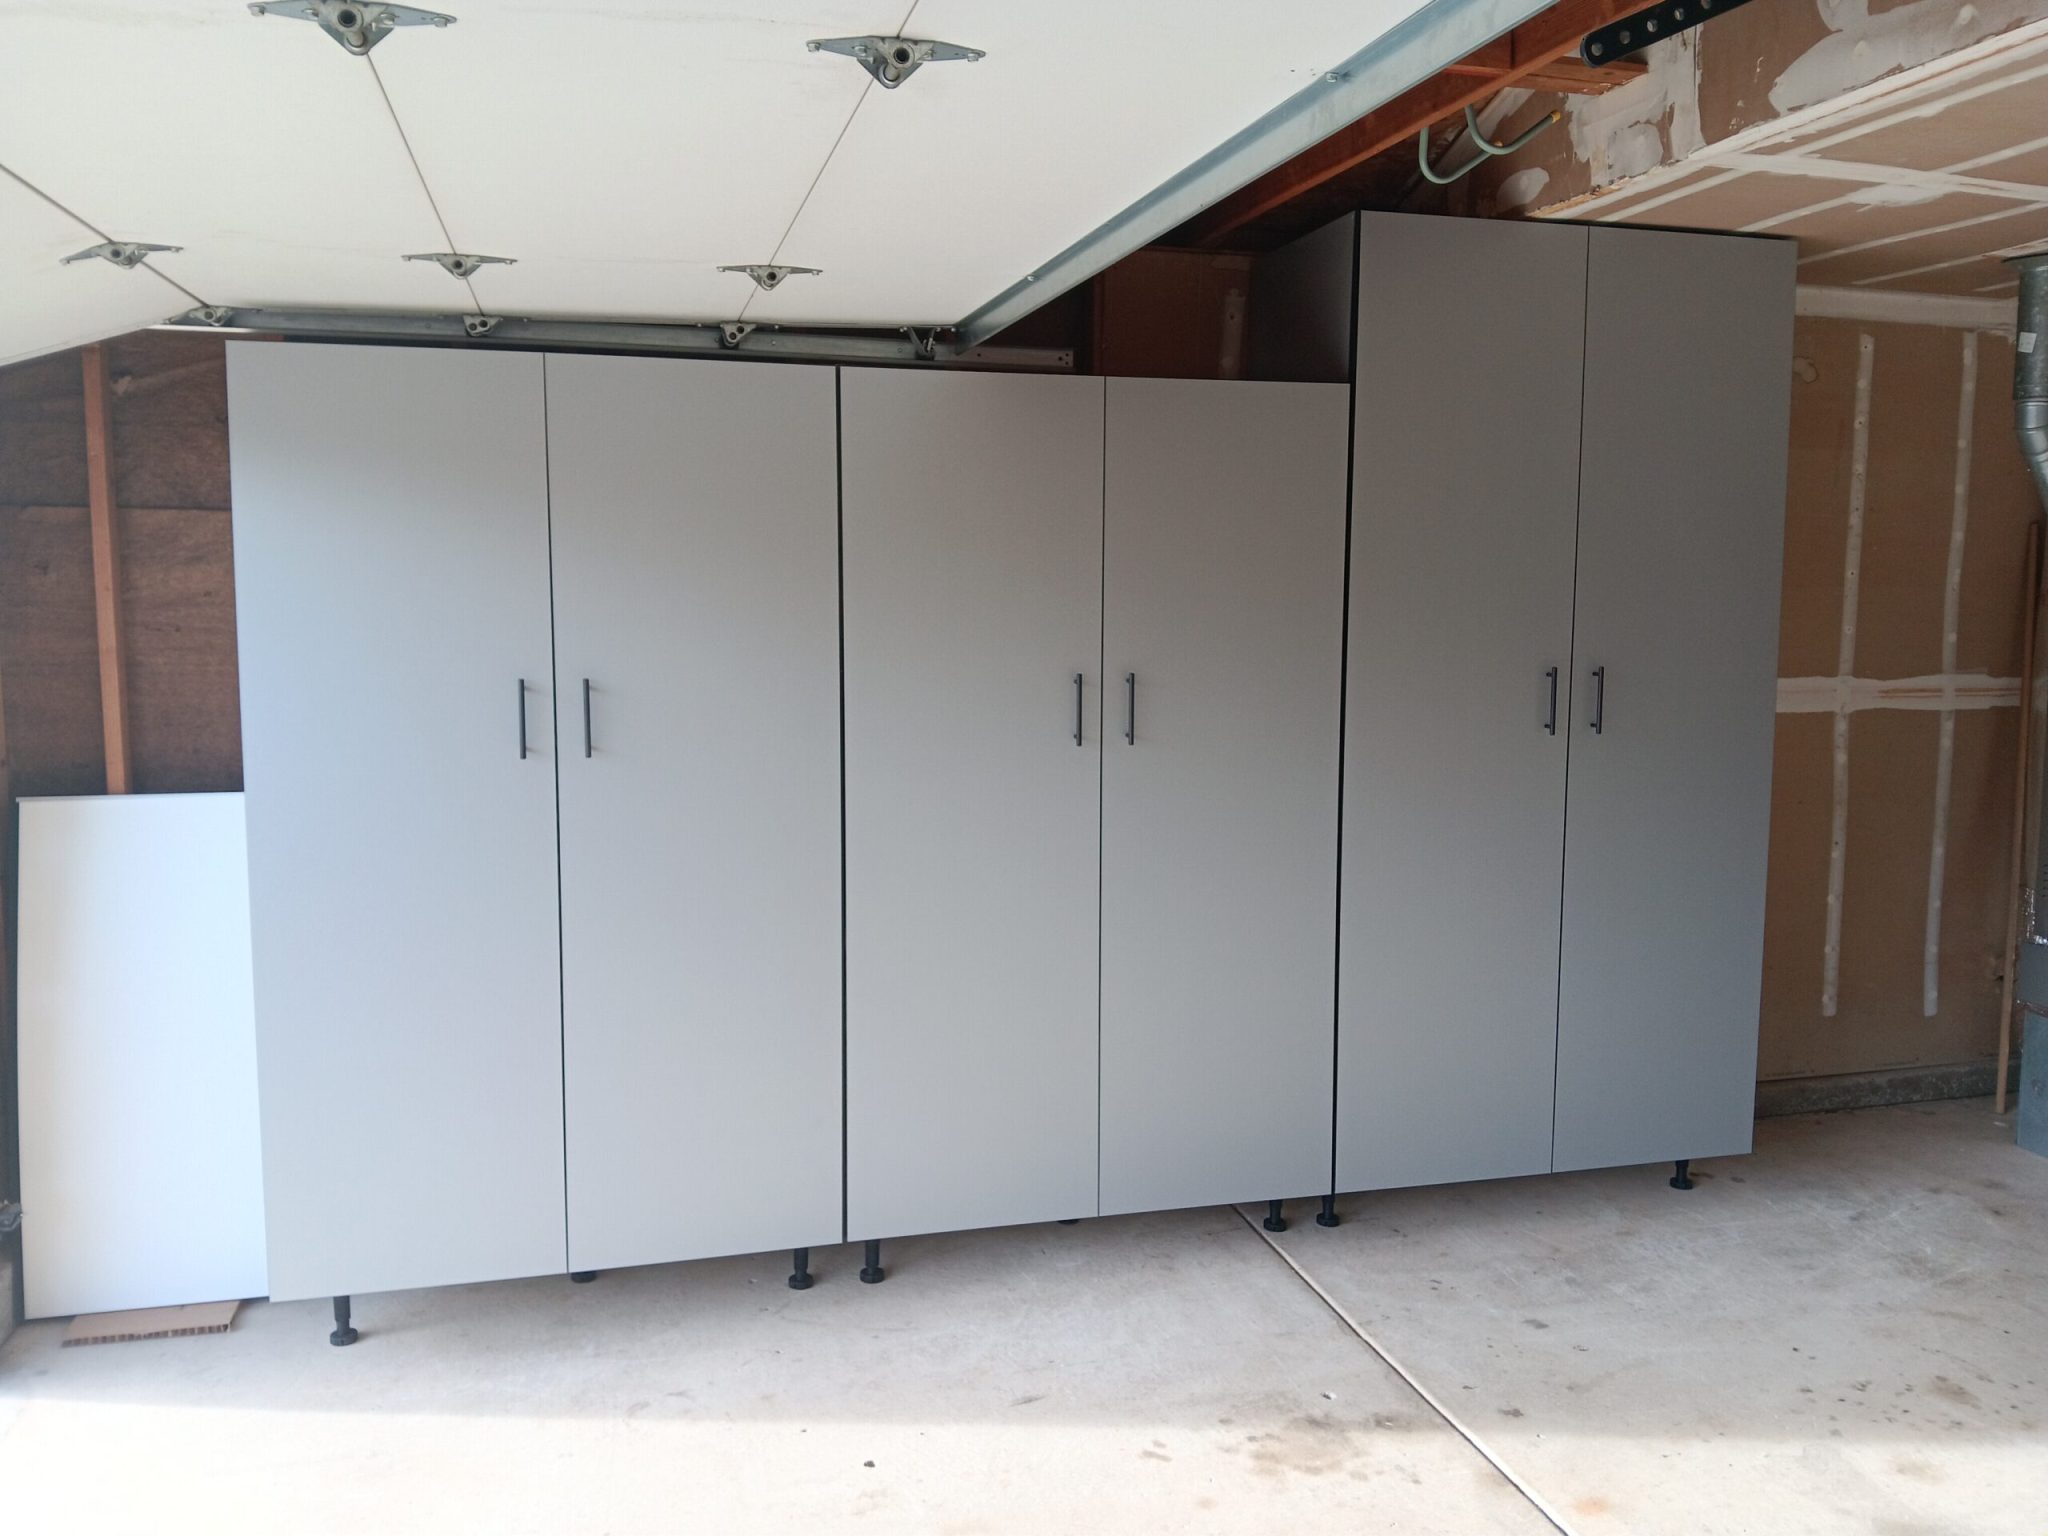
21. Install Modern Light Gray Modular Cabinets with Adjustable Feet
The adjustable feet are a small detail with a massive functional benefit. Raising the cabinets off the concrete floor protects them from potential water damage from melted snow, spills, or minor flooding. It also makes it infinitely easier to clean the garage floor, as you can sweep or hose it down without worrying about water wicking up into the cabinet material. From a design perspective, the space underneath creates a ‘floating’ effect, making the large cabinet bank feel lighter and less bulky than a traditional cabinet with a built-in toe-kick.
⭐ The One Thing
Modular cabinet systems are fantastic, but require precise installation to look their best. Here are some key upkeep points:
- Leveling is Key: Uneven garage floors mean you MUST take the time to adjust each individual foot so that all the cabinets are perfectly level and plumb. If not, the doors will not hang straight or close properly.
- Door Adjustments: Expect to re-adjust the cabinet door hinges a month after installation, and then annually. Temperature and humidity swings in a garage can cause slight shifts that make doors misaligned.
- Cleaning: The space under the cabinets is great, but it will collect dust and debris. Plan to sweep or blow it out regularly to keep it from becoming a haven for spiders and lost screws.
22. Use Clear, Labeled Pull-Out Bins on White Shelving
The single most effective element here is the combination of transparency and labeling. The clear plastic bins let you see the contents instantly, which is a huge advantage. But the crisp, white labels with bold black text take it to the next level. This dual system of identification means you can find what you need from twenty feet away by reading the label, or from two feet away by looking inside. It’s a foolproof system that eliminates guesswork entirely. The bright blue fronts add a nice pop of color, but the functional core of this idea is seeing and reading. This simple principle is often overlooked in the quest for aesthetics.

🔧 How-To Brief
When using a system of small bins for hardware like screws, nails, and bolts, resist the urge to mix different types in one bin to save space. It is always better to have more, smaller bins with highly specific contents. Instead of a general ‘Screws’ bin, create separate, labeled bins for ‘1-inch Drywall Screws,’ ‘3-inch Deck Screws,’ and ‘Sheet Metal Screws.’ This will save you countless minutes of frustratingly digging through a mess of assorted hardware to find the one specific fastener you need for a project. A label maker is your best friend for this task.
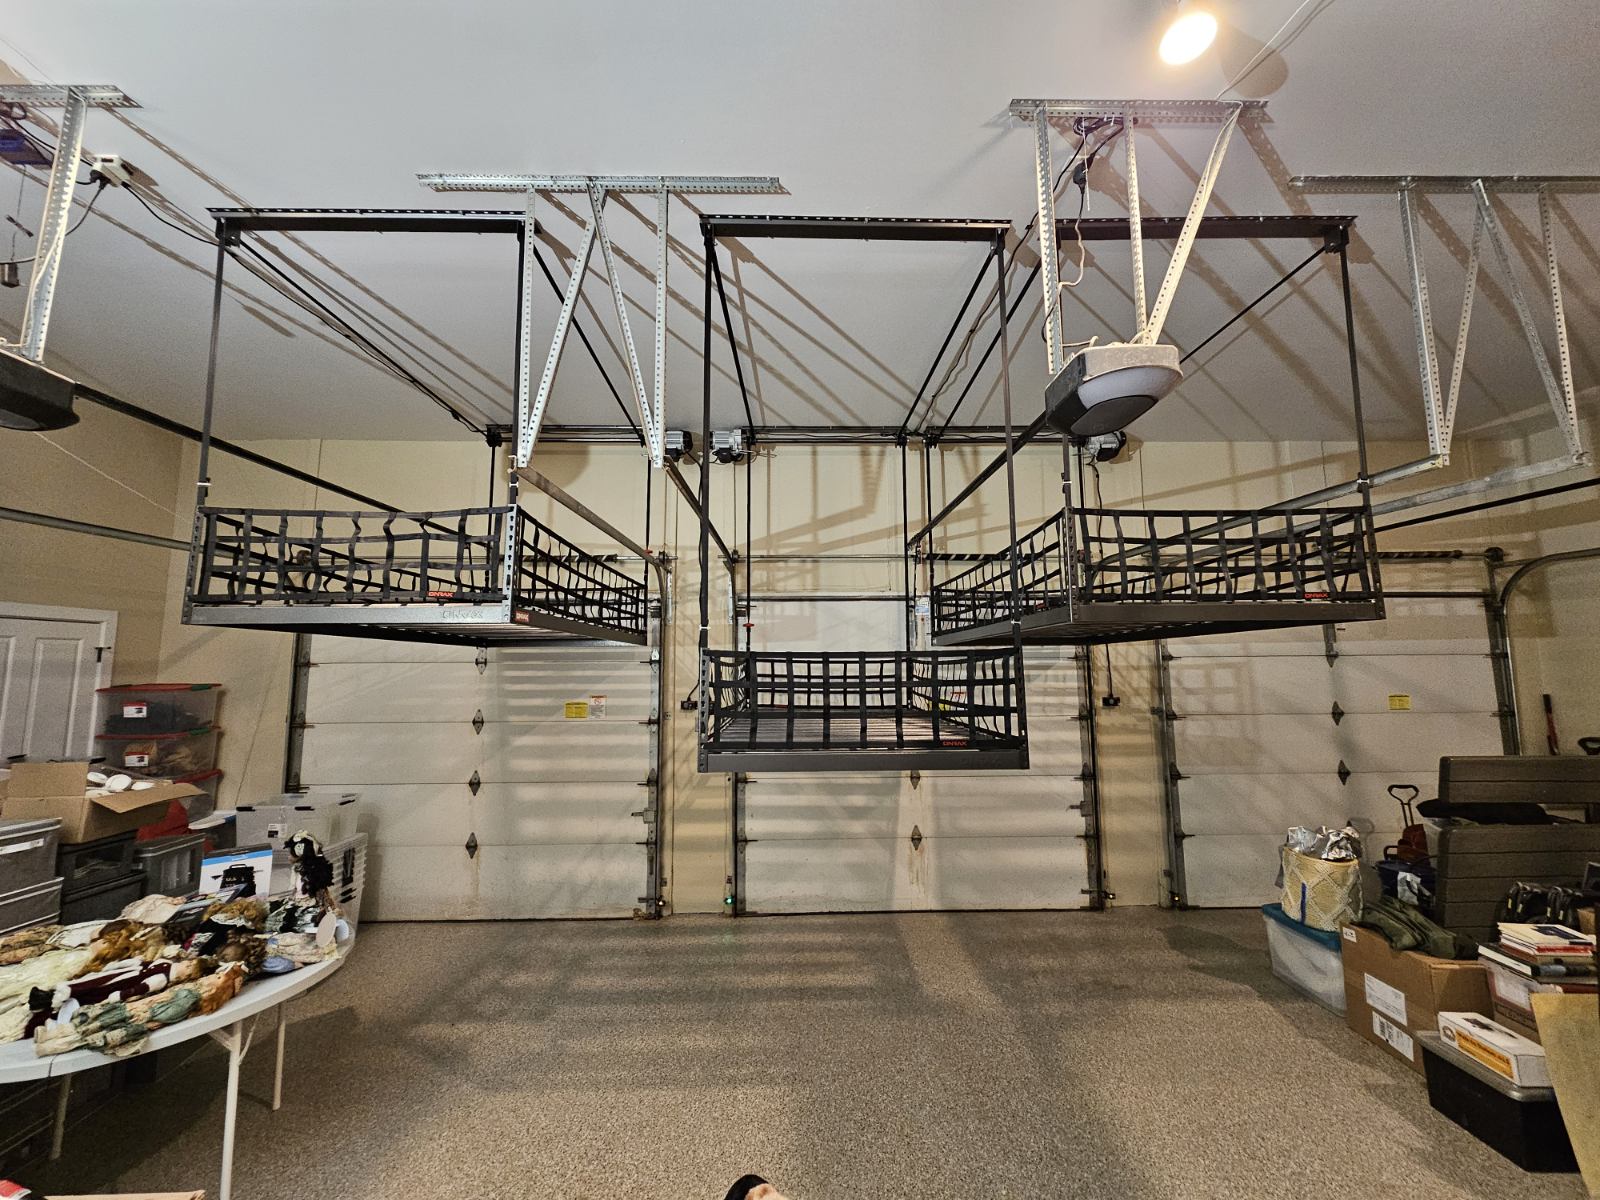
23. Install a Motorized Overhead Garage Storage System
Motorized storage is the next evolution of garage organization, moving beyond static shelves into smart, dynamic solutions. This trend is gaining traction as homeowners look for ways to maximize every cubic foot of their homes, and as technology becomes more accessible and affordable. It’s a direct response to the frustration and safety concerns of using ladders to access high storage. As our homes get ‘smarter’ with connected thermostats and lighting, it’s a natural progression to see that technology applied to the physical act of storage. This is a high-tech alternative to the more manual Idea #12.
🎯 What Makes It Work
A motorized lift is a serious piece of equipment. Before you buy, go through this critical checklist:
- Electrical Access: Do you have a GFCI-protected outlet on the ceiling or high on a wall near your desired installation point? If not, you will need to hire an electrician to install one.
- Joist Structure: Have you confirmed your ceiling joists run in the correct direction for the system’s mounting hardware and are they standard lumber (not engineered I-joists, which may require special hardware)?
- Headroom and Obstructions: Have you measured for all possible obstructions, including the garage door opener, tracks, and any plumbing or ductwork?
- Professional Installation: Are you comfortable with the mechanical and electrical installation, or should you budget for a professional installer? For safety, we highly recommend the latter.
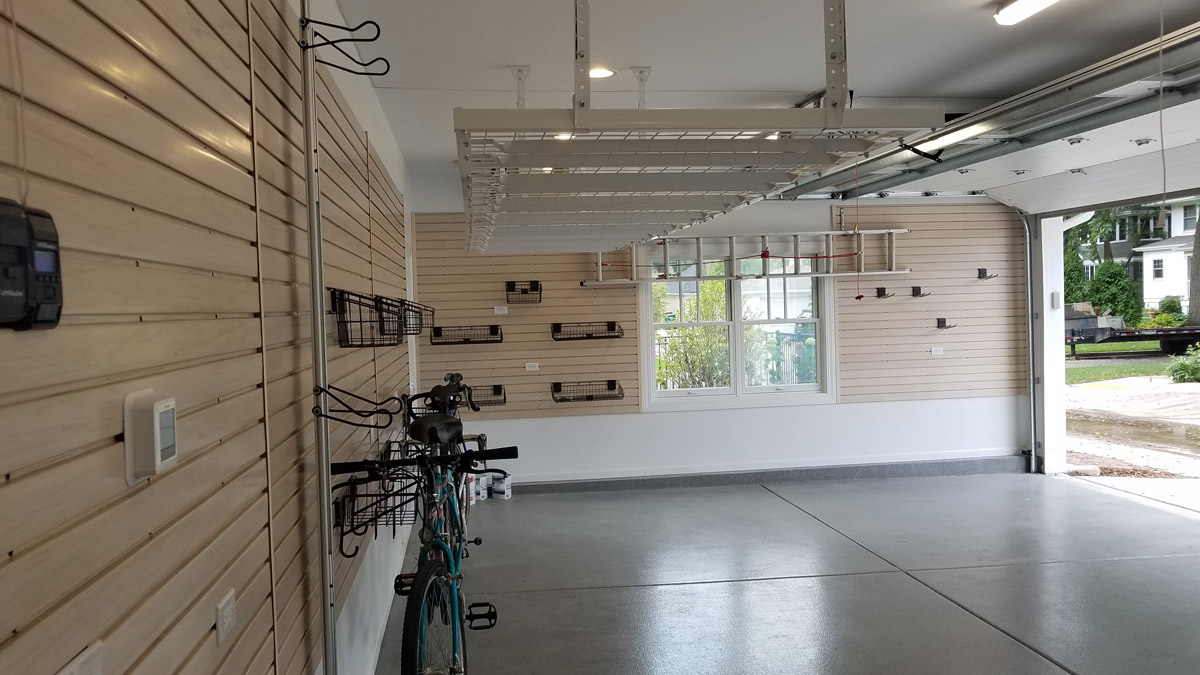
24. Combine Beige Slat Wall Panels with an Overhead Storage Rack
This bright and clean look follows a simple tonal formula: 60% Warm Neutral + 30% White + 10% Black Accents. The light beige slat wall provides the warm neutral base, covering a large visual area without being overpowering. The white ceiling, lower wall section, and overhead rack add brightness and reflect light, making the space feel larger. The black wire baskets and hooks are the 10% accent, providing necessary contrast and definition against the lighter surfaces. You could easily swap the beige for a light grey and it would still work perfectly, as the core principle is the balance of light tones with sharp, dark accents.
✅ Before You Start
This dual-system approach is perfect for garages with high ceilings (10 feet or more). The slatwall is most effective on the top half of the wall, from about 4 feet off the ground up to 8 or 9 feet. This keeps your hanging items at an accessible height. The overhead rack can then occupy the highest level of the garage, typically 1-2 feet down from the ceiling, perfect for storing items above the sweep of the garage door. This setup excels in a standard two- or three-car garage, as it provides immense storage capacity without encroaching on the floor space needed for cars.
25. Create a Workshop Corner with a Wooden Workbench and Tool Chest
The soul of this space is the well-used wooden workbench. It’s not a pristine, store-bought cabinet; it’s a surface with history. The nicks, stains, and worn finish tell a story of countless projects completed. It provides a warmth and authenticity that a sterile metal cabinet never could. Every other element—the red tool chest, the drill press, the shelves of fluids—revolves around this central hub of activity. It’s the anchor that makes this corner feel like a true, functional workshop rather than just a storage area. It has a character that can only be earned over time.

📐 Style Math
This look is the antithesis of the clean, minimalist garage. It’s busy, it’s visually dense, and it’s not for everyone. While it’s incredibly functional for someone who is actively working in the space, this level of ‘organized chaos’ can feel stressful and cluttered to others. Achieving this authentic workshop vibe requires accepting a certain amount of grime and imperfection. Wood paneled walls and open shelves are also much harder to keep clean than the smooth, sealed surfaces you see in more modern setups like Idea #28.
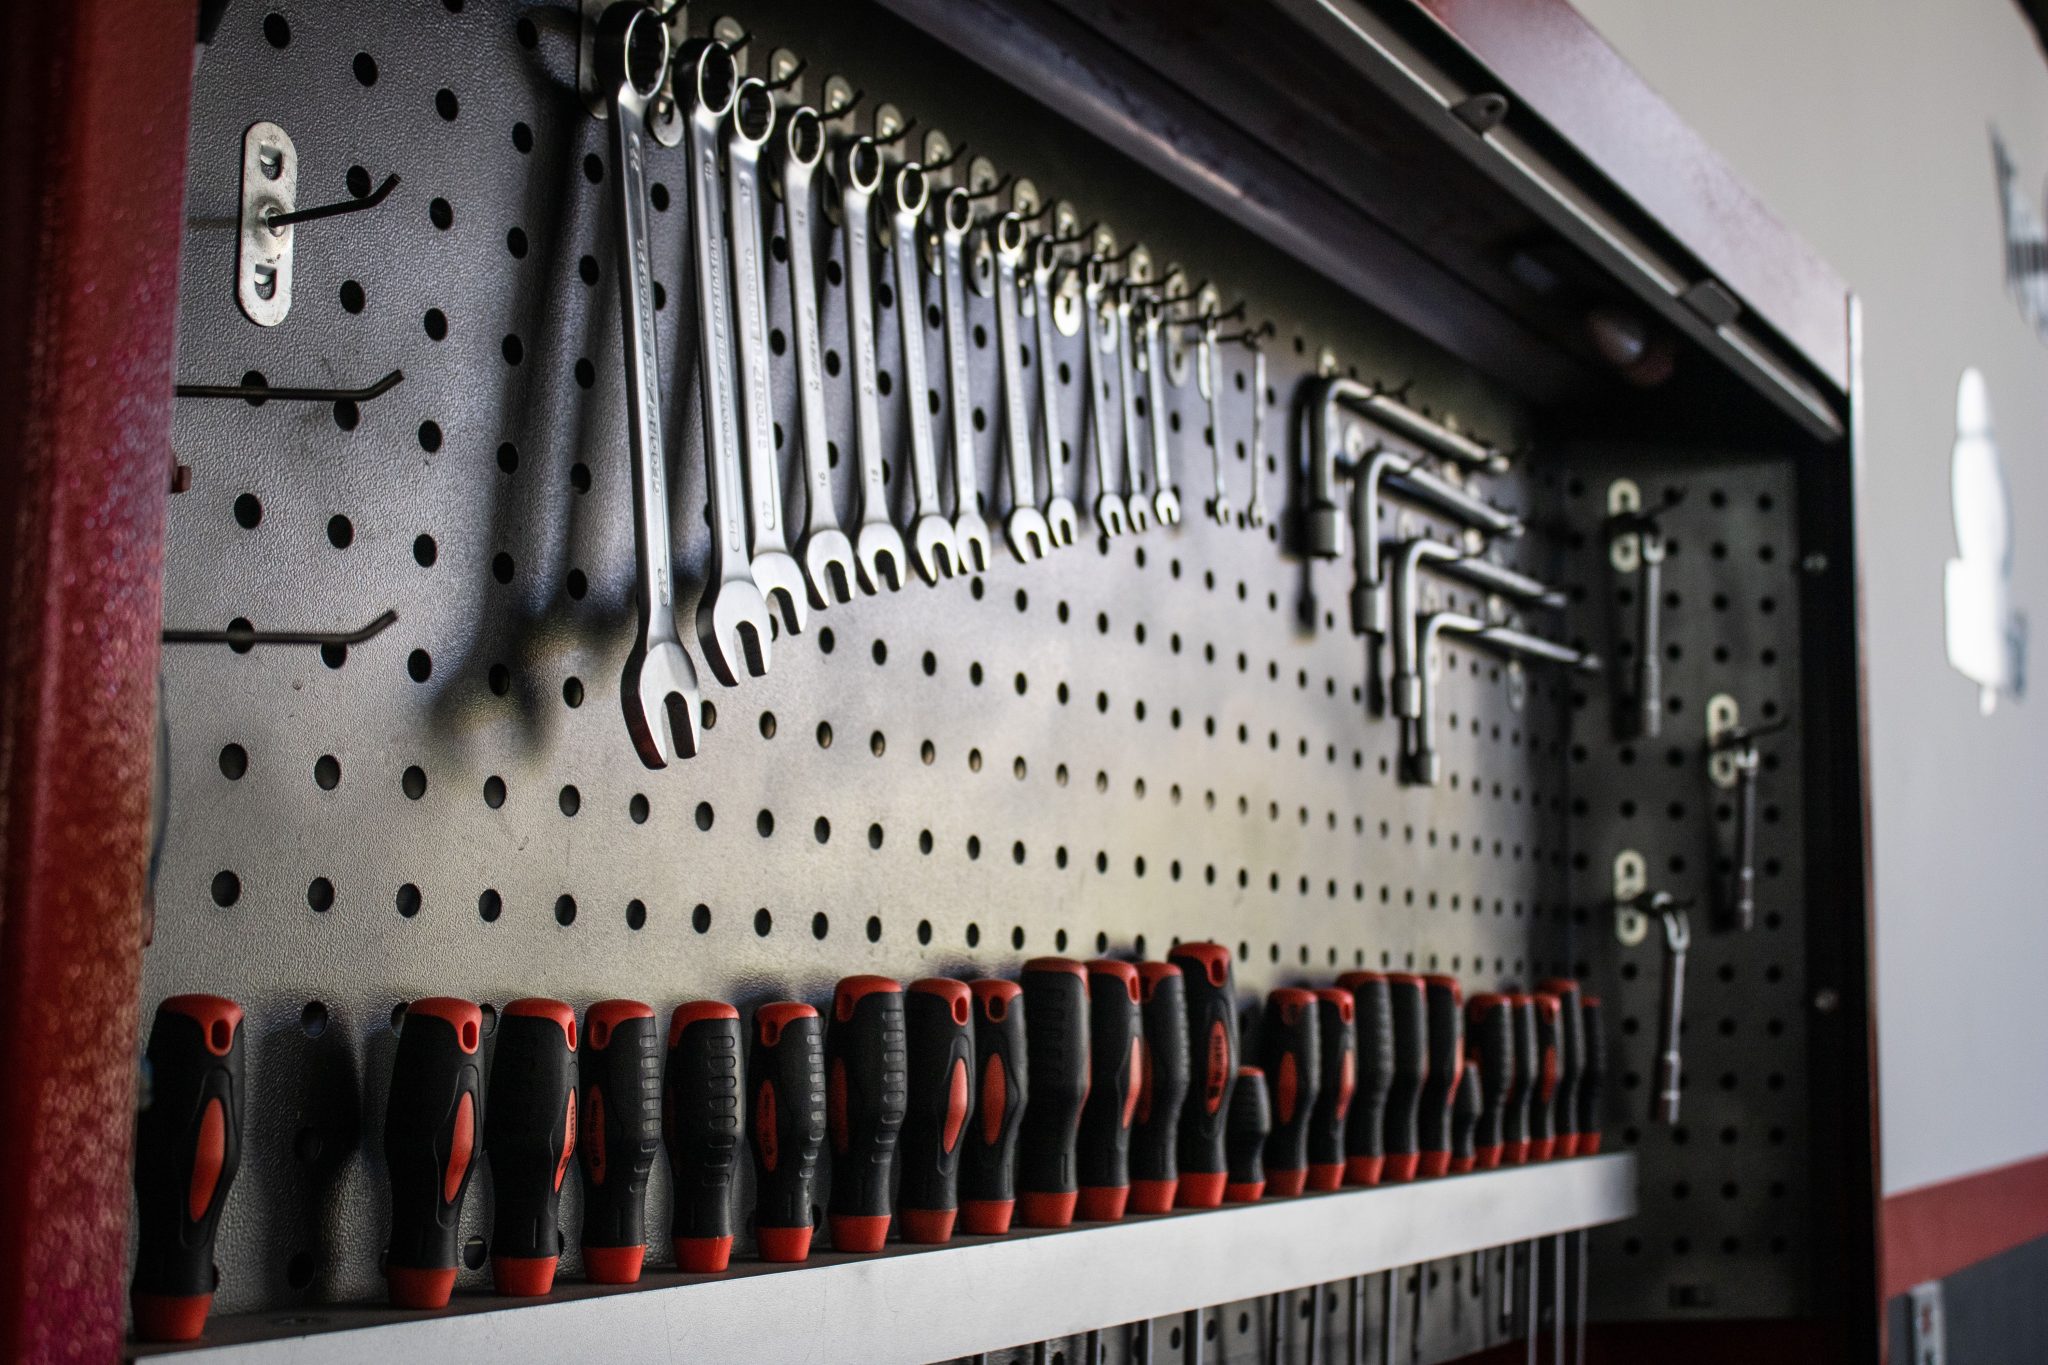
26. Organize a Tool Cabinet with a Black Pegboard Interior
Using black pegboard instead of the traditional brown or white is a brilliant design choice. The dark background makes the metallic silver of the wrenches and other tools pop, creating a high-contrast display that is both visually striking and easy to read. It feels more like a high-end retail display than a simple toolbox. The black also helps to visually absorb the visual clutter of the holes and hooks, making the tools themselves the undisputed heroes. It’s a simple swap that dramatically elevates the interior of any tool cabinet or storage closet, giving it a sleek, professional-grade appearance.
💡 Designer Tip
To make your pegboard organization even more effective, use a silver or white paint marker to trace the outline of each tool directly onto the pegboard. This serves two purposes: first, it shows you instantly where each tool belongs, making cleanup incredibly fast and satisfying. Second, it shows you at a glance if a tool is missing. This small, 15-minute task can save you hours of searching for a misplaced 10mm wrench down the line. It’s a classic trick used in professional workshops for a reason—it works.
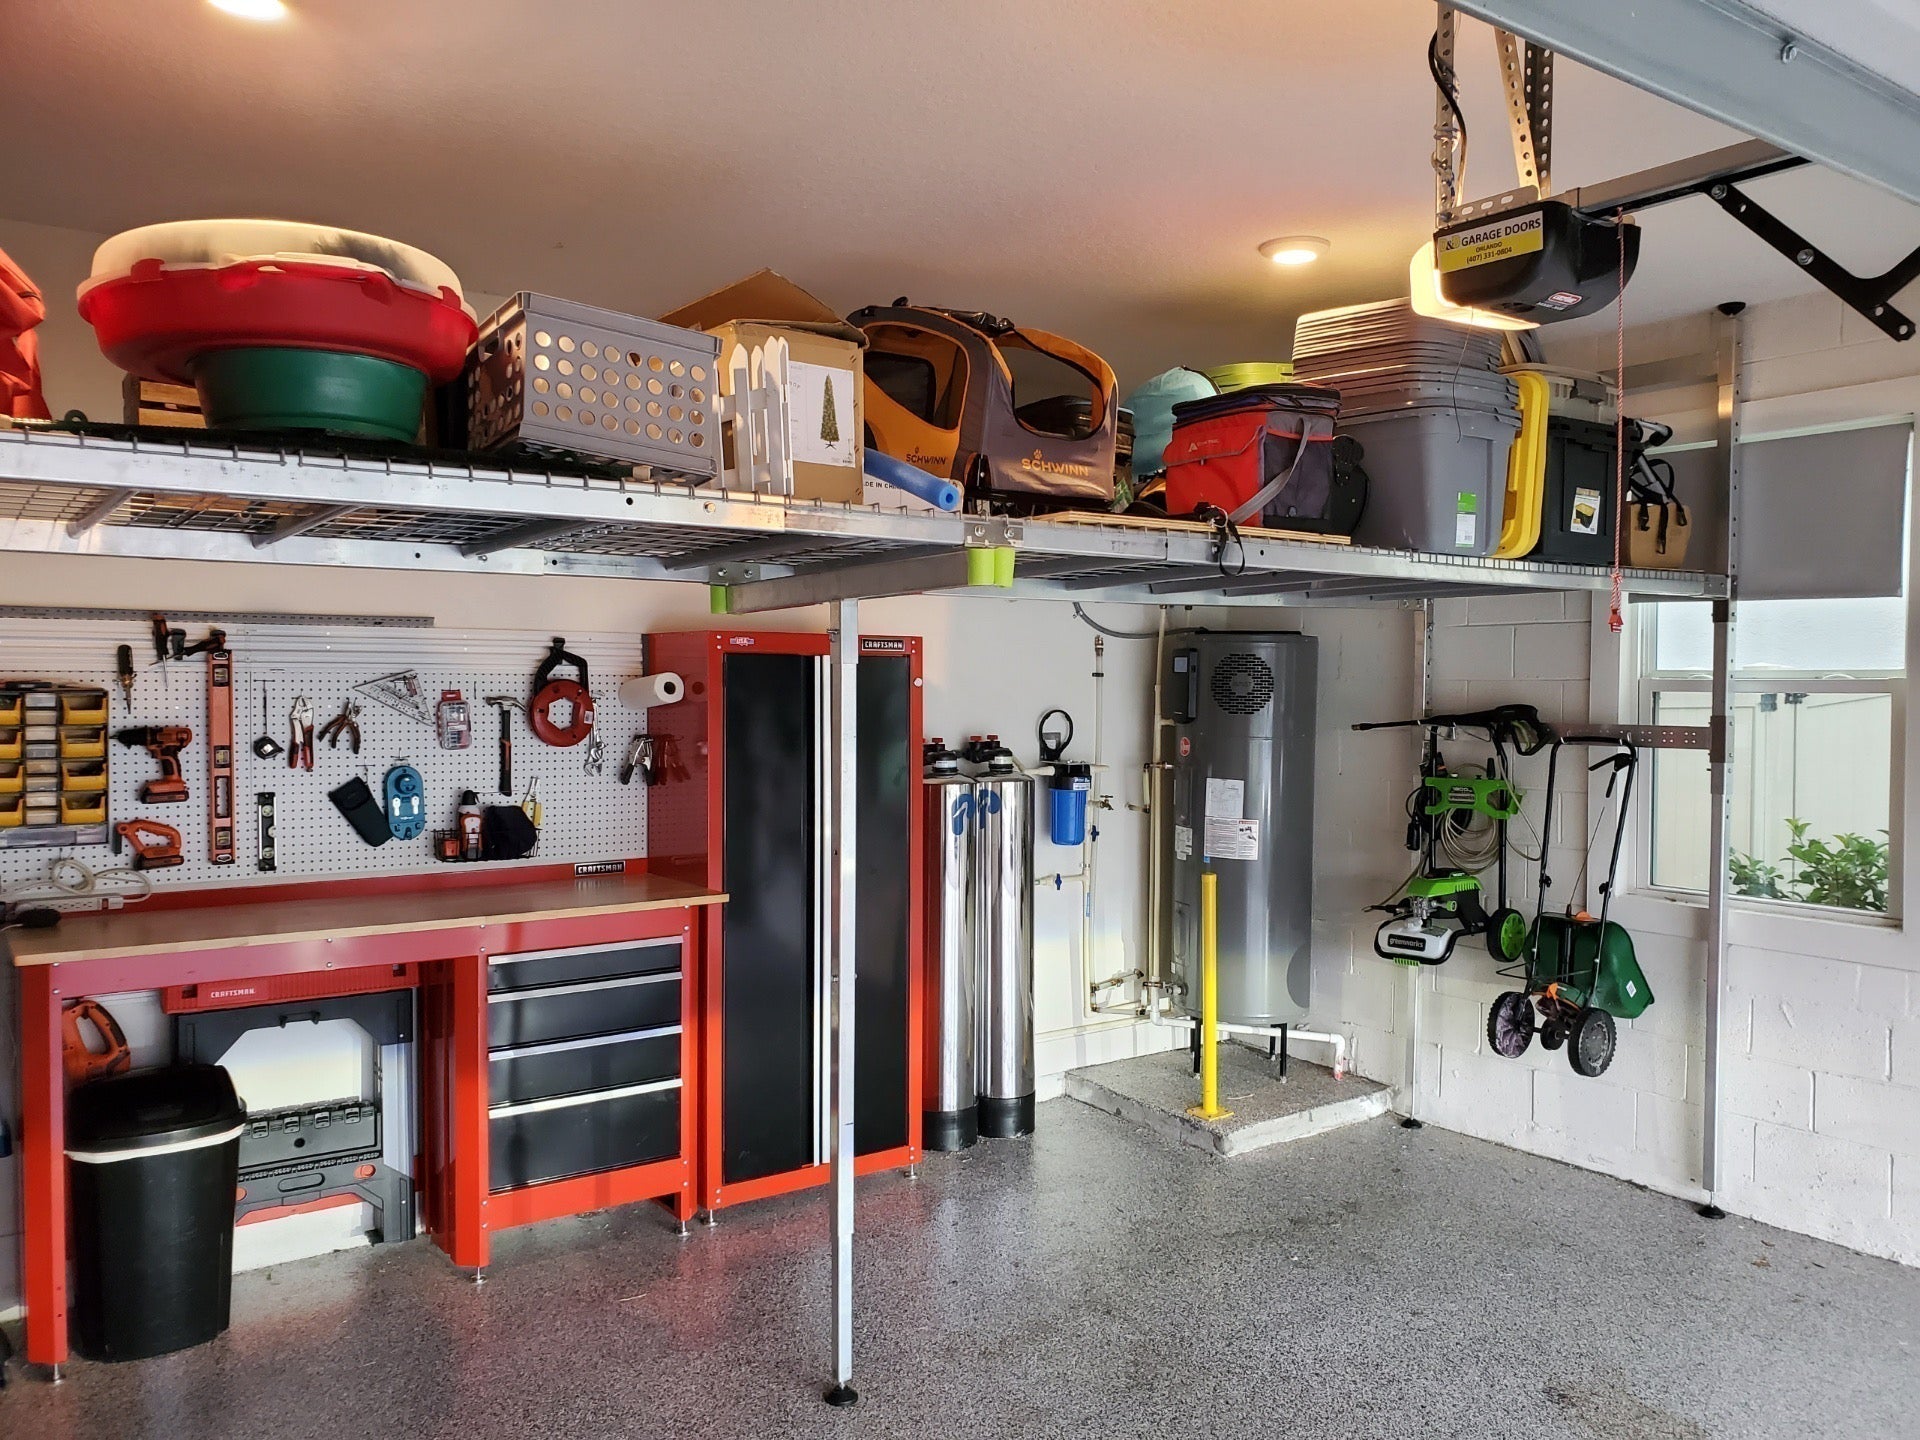
27. Combine Overhead Racks, a Red Workbench, and Tall Cabinets
This highly organized space is a masterclass in balancing color and texture. The formula is: 50% Neutral Infrastructure + 30% Bold Color + 20% Utilitarian Texture. The ‘Neutral Infrastructure’ is the white cinder block walls and gray speckled floor. The ‘Bold Color’ is the vibrant red workbench and cabinets, which act as the focal point. The ‘Utilitarian Texture’ comes from the overhead wire shelving, the pegboard, and the various tools and equipment. This combination creates a space that is visually exciting but not chaotic, functional but not boring. The red provides the energy, while the neutral base keeps it grounded.
|
📋 Copy HEX 🔗 Share |
📏 Scale Guide
Recreating this comprehensive, multi-zone system is a significant investment, but you can phase it in over time. Here’s a rough estimate:
- Epoxy Floor Coating (Professional): $2,000 – $5,000
- Overhead Wire Shelving (4×8 ft sections): $200 – $400 per section
- Workbench & Cabinet Combo: $800 – $2,500
- Tall Metal Storage Cabinets: $300 – $700 each
- Wall-Mounted Lawn Tool Racks: $50 – $150
- TOTAL (for a similar density): $3,500 – $9,500+
Budget alternative: Get the epoxy floor done first, then add components from brands like Husky or Gladiator piece by piece as sales come up.
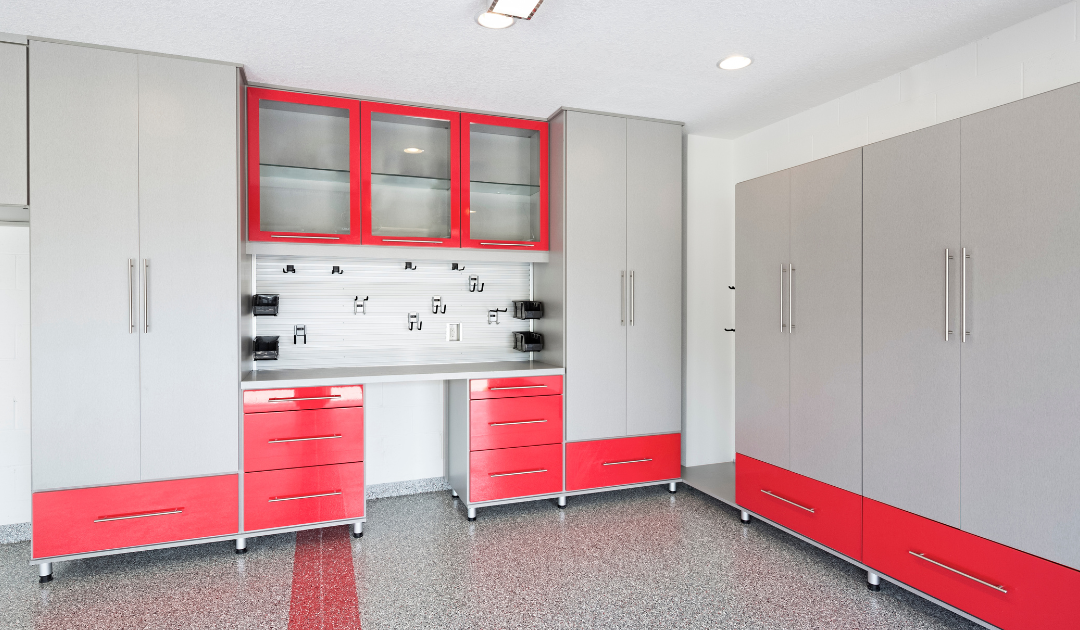
28. Design a Modern Garage with Gray and Red Modular Cabinets
This sleek, modular look reflects a major trend in home design: treating the garage as a finished ‘bonus room’ with the same level of polish as the rest of the house. Gone are the days of bare studs and concrete. Homeowners in 2026 are investing in complete systems that offer a clean, integrated aesthetic. The use of bold accent colors like this vibrant red, paired with sophisticated metallics and glass, is borrowed directly from contemporary kitchen and entertainment room design. This is less about ‘storage’ and more about creating a ‘garage suite’—a space that looks as good as it functions.
⚠️ Real Talk
The single element that makes this entire design pop is the vibrant red accent color. Without it, you’d have a very nice, but very neutral and safe, wall of gray cabinets. The red drawer fronts and cabinet frames inject energy, confidence, and a high-performance feel, almost like a luxury sports car or a professional tool chest. It breaks up the monotony of the gray and guides your eye around the space. It’s a deliberate, bold choice that transforms the room from simply ‘organized’ to ‘designed’. Removing the red would completely flatten the room’s personality. This is a great example of how to go beyond the safe choices mentioned in the mistakes to avoid section.
29. Maximize Awkward Corners with Strategic Shelving
Garage corners are notorious for becoming black holes of clutter. To make them functional, you must use purpose-built corner shelving. Standard rectangular shelves leave a huge, inaccessible dead space in the corner. Look for shelving units specifically designed with a 90-degree corner piece that connects two straight runs. When installing, make sure the corner unit is assembled and placed first, then build the adjacent straight sections off of it. This ensures a tight, seamless fit. For DIY solutions, a custom-cut triangular or pentagonal shelf can bridge the gap between two perpendicular shelves perfectly.
🔥 Trending Context
Corner shelving solutions are incredibly versatile and can work in almost any garage with a standard 90-degree internal corner. They are particularly effective in smaller one or two-car garages where you need to maximize every square inch. To implement a system like this, you’ll need at least 3-4 feet of clear wall space extending out from the corner in both directions. The shelves themselves are usually 18-24 inches deep, so be sure that this footprint won’t interfere with car doors or walkways. This is one of the best ways to add significant storage capacity to a space that is otherwise completely wasted.
Your Garage’s Next Chapter Starts Now
Whew, that was a lot of inspiration! But hopefully, you’ve found a few ideas that feel right for your space and your budget. The goal isn’t a perfect showroom, but a functional, organized space that makes your life easier. So pick a corner, start small, and reclaim your garage one shelf at a time. Now, go save your favorites to that ‘Dream Garage’ Pinterest board—we know you have one.