You know that feeling when you finally find the pumpkin decorating idea that looks exactly right for your space? It can feel like searching for a needle in a haystack. That’s why we’ve done the hard work for you. After filtering through hundreds of options from high-end decor stores to local craft markets, we’ve narrowed it down to the 30 ideas that truly deliver for 2026. This guide contains a huge range of styles, from classic carved jack-o’-lanterns and lush floral arrangements to modern, minimalist designs. For 2026, the trend is all about personalization—making these seasonal staples feel like a true extension of your home’s style. And stay until the end — we break down the most common mistakes that can ruin these looks. 📌 Pin this guide for later — your future self will thank you when it’s time to actually do this.
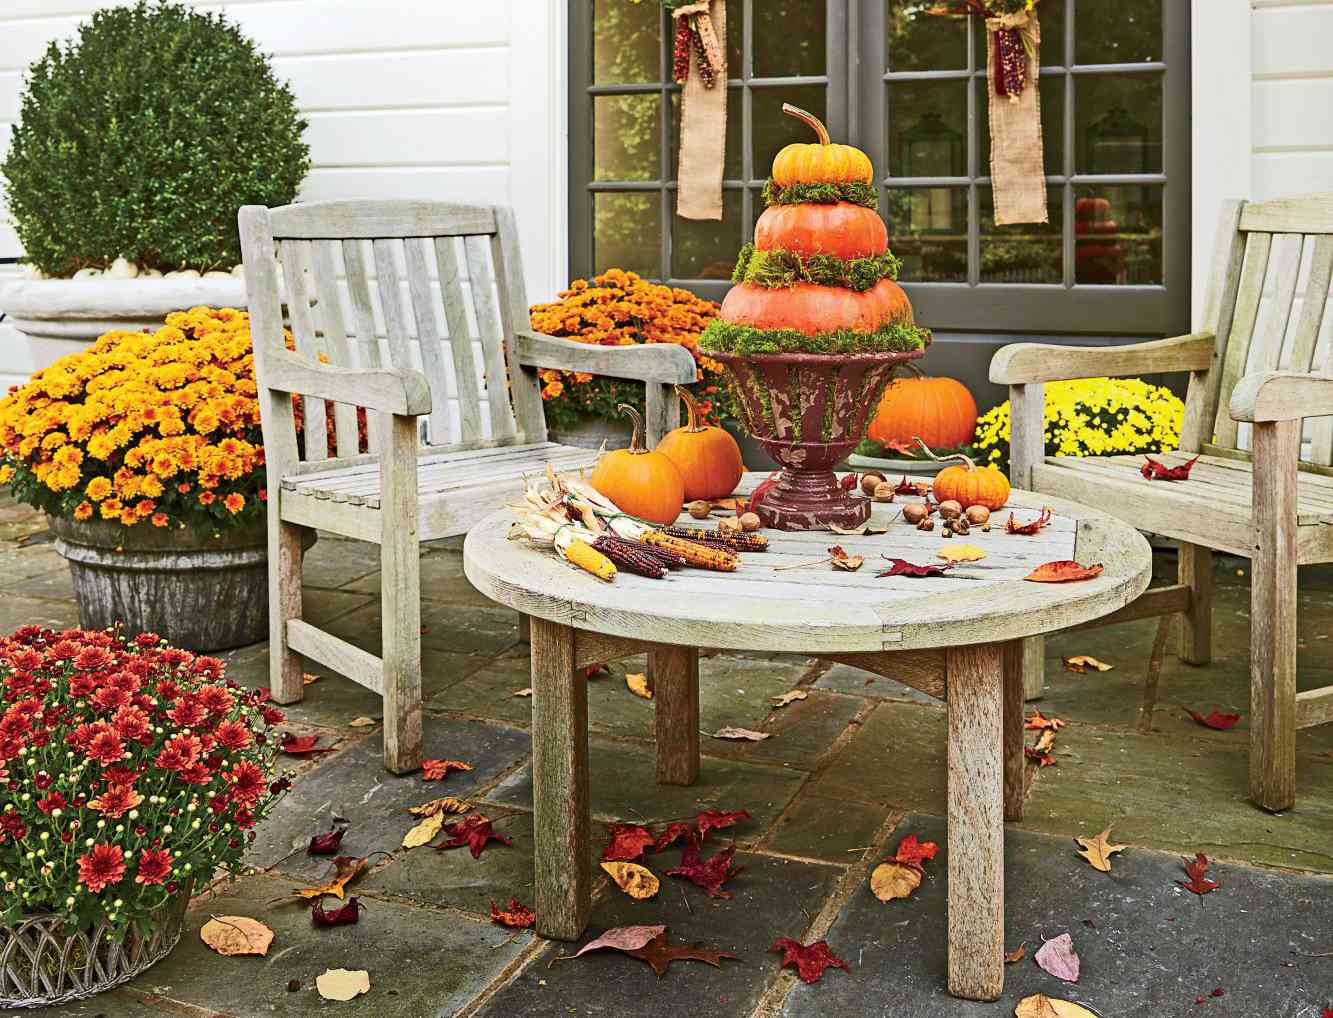
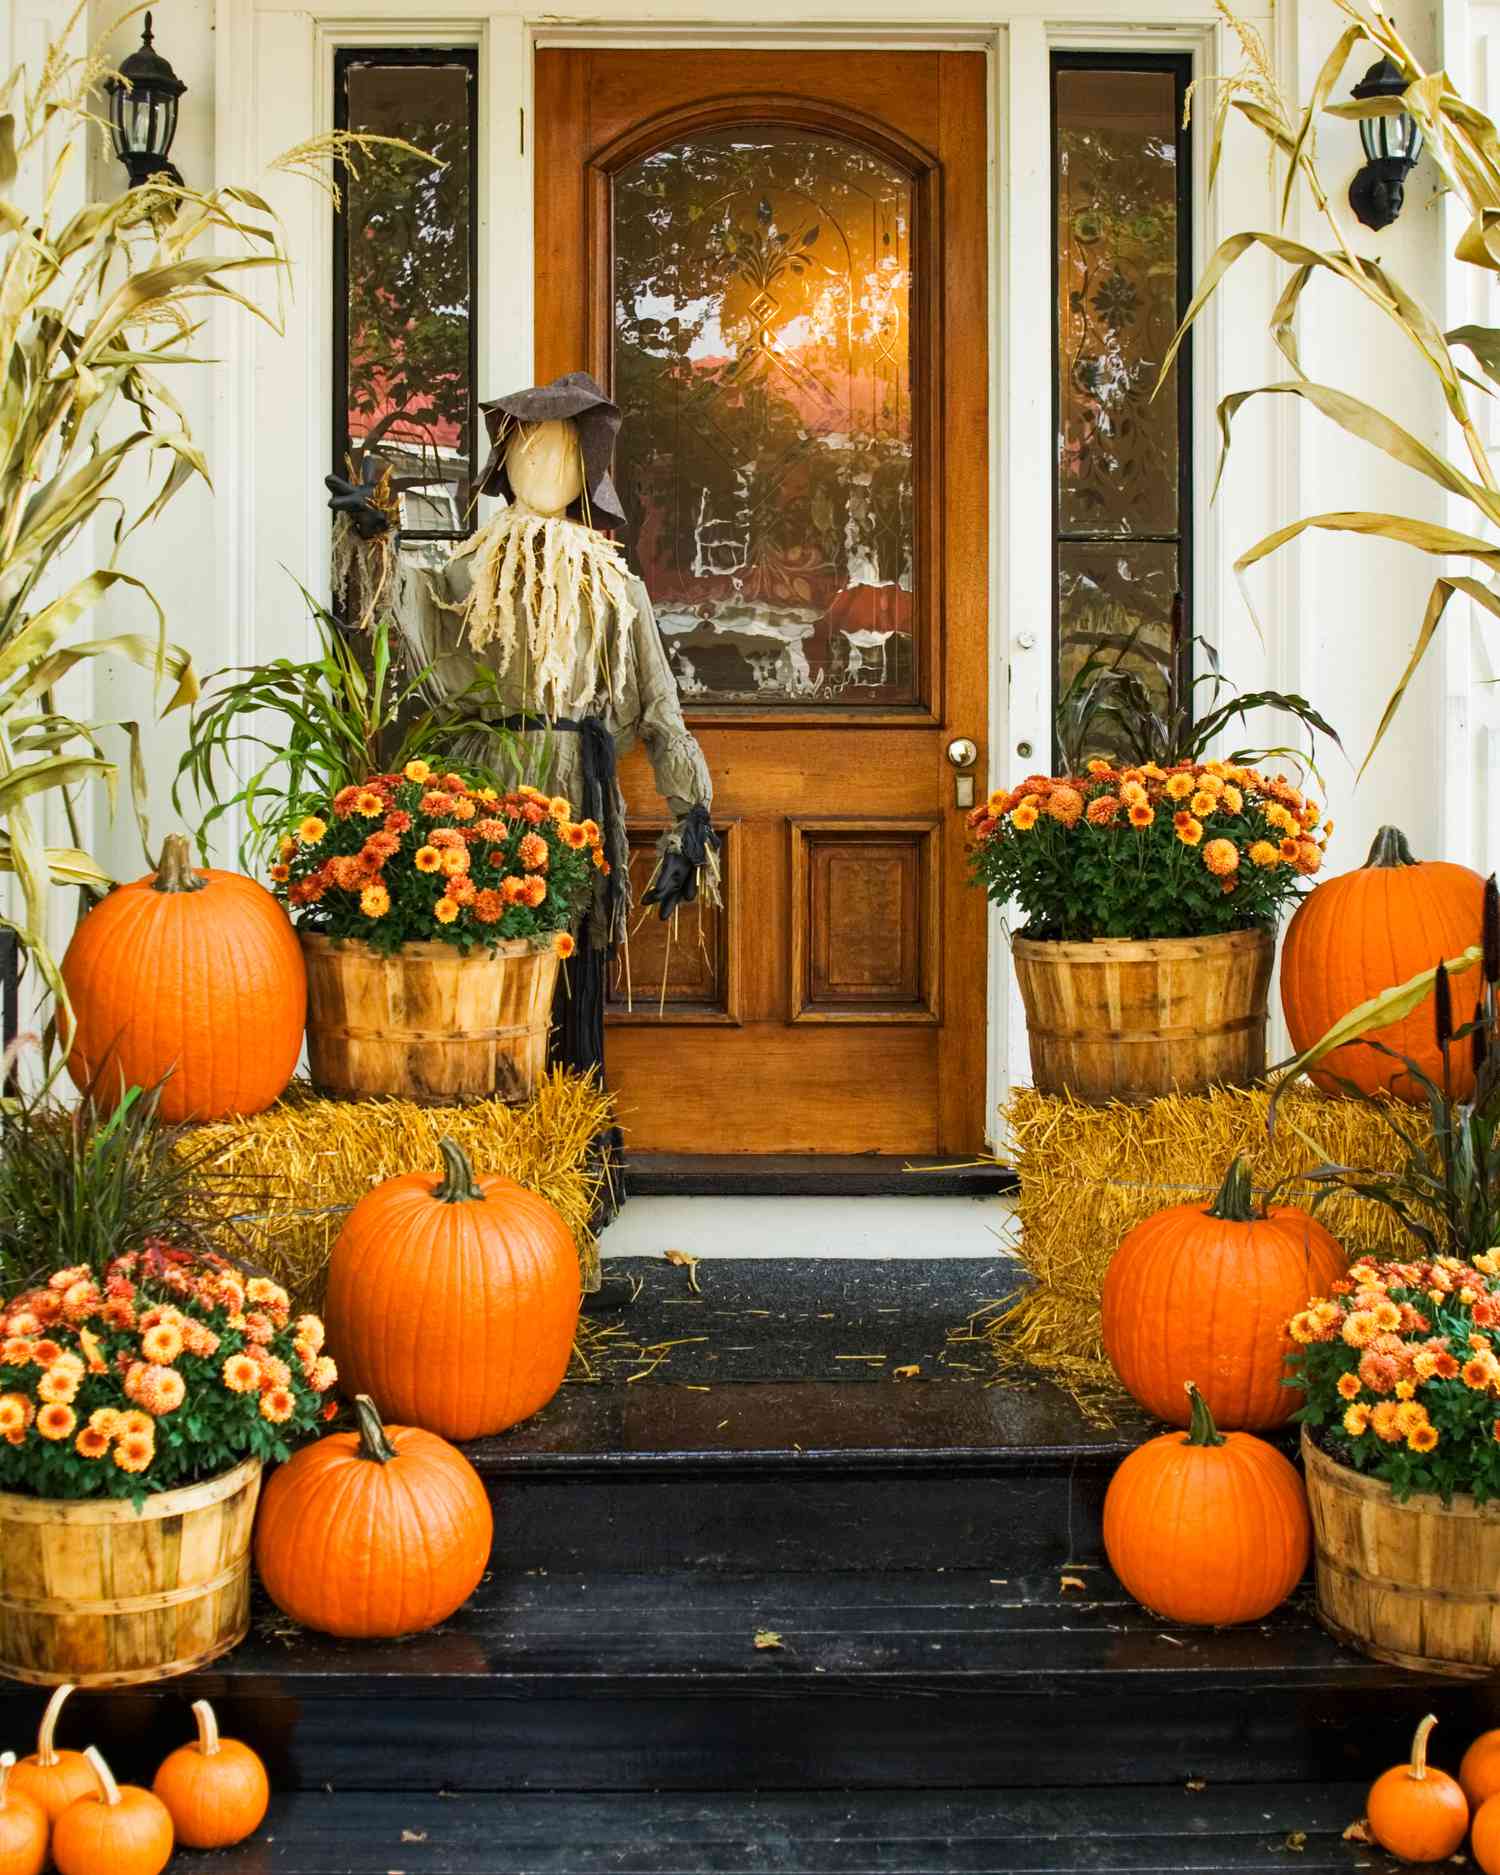
1. Layered Autumn Porch with Pumpkins and Mums
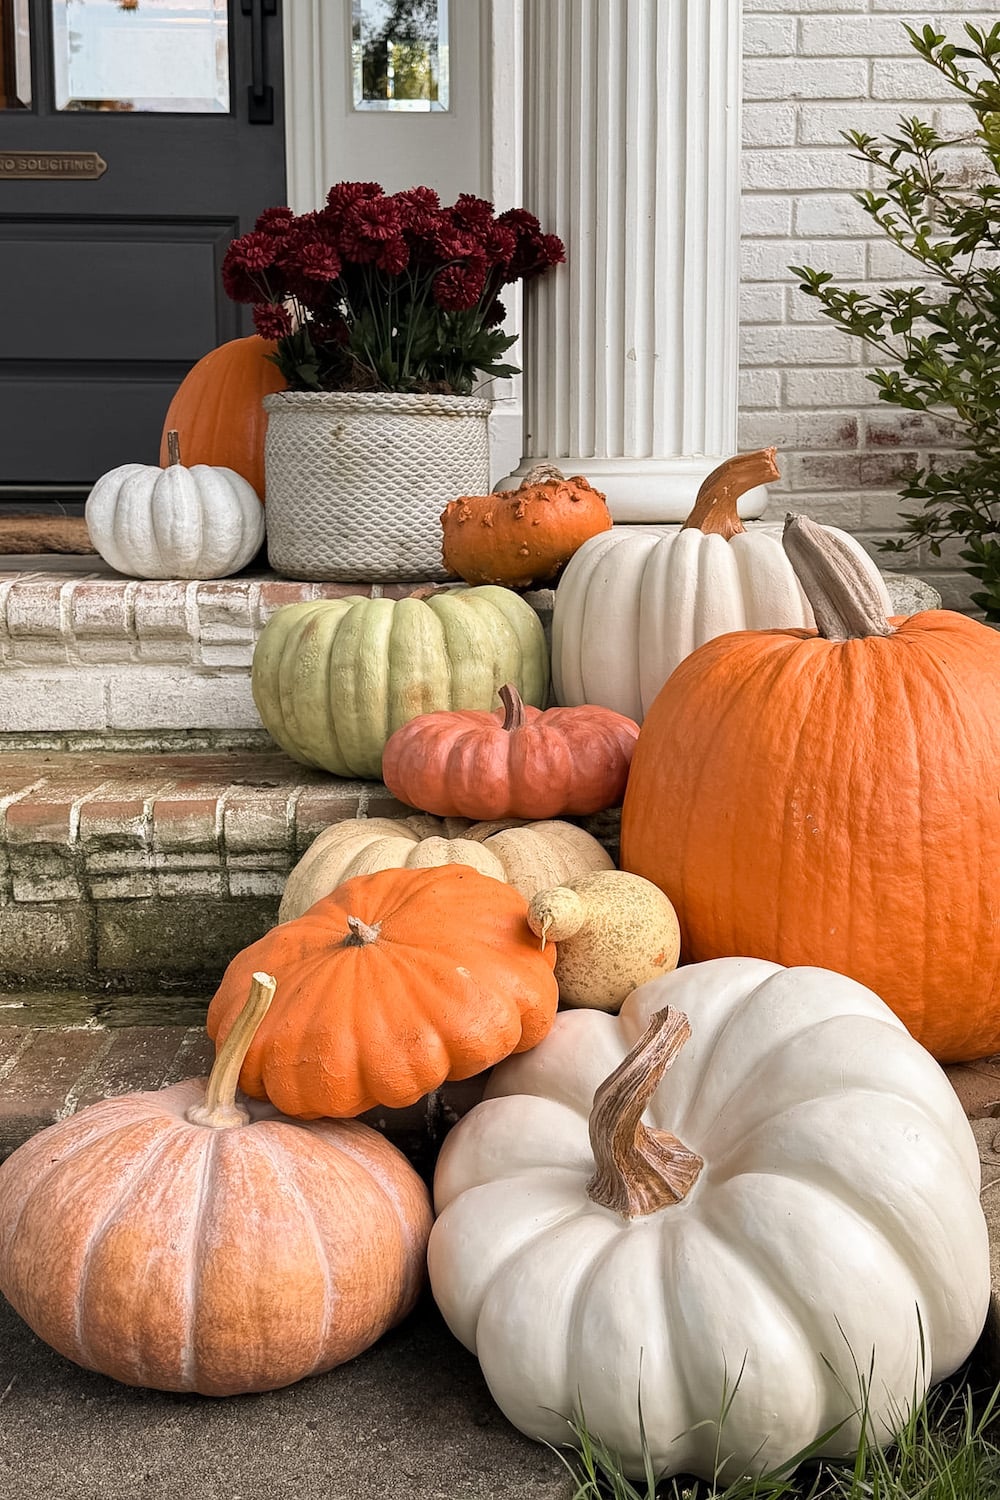
This beautiful porch display is a masterclass in layering. The success comes from a mix of textures and a tight color story. The rough, woven planter plays perfectly against the smooth skin of the pumpkins, while the weathered red brick provides a warm, historic base. By sticking to a palette of orange, cream, green, and deep red, the look feels abundant and curated, not chaotic. The varied heights—from the ground-level gourds to the tall planter of mums—keep the eye moving and create a lush, full effect.
💡 Designer Tip
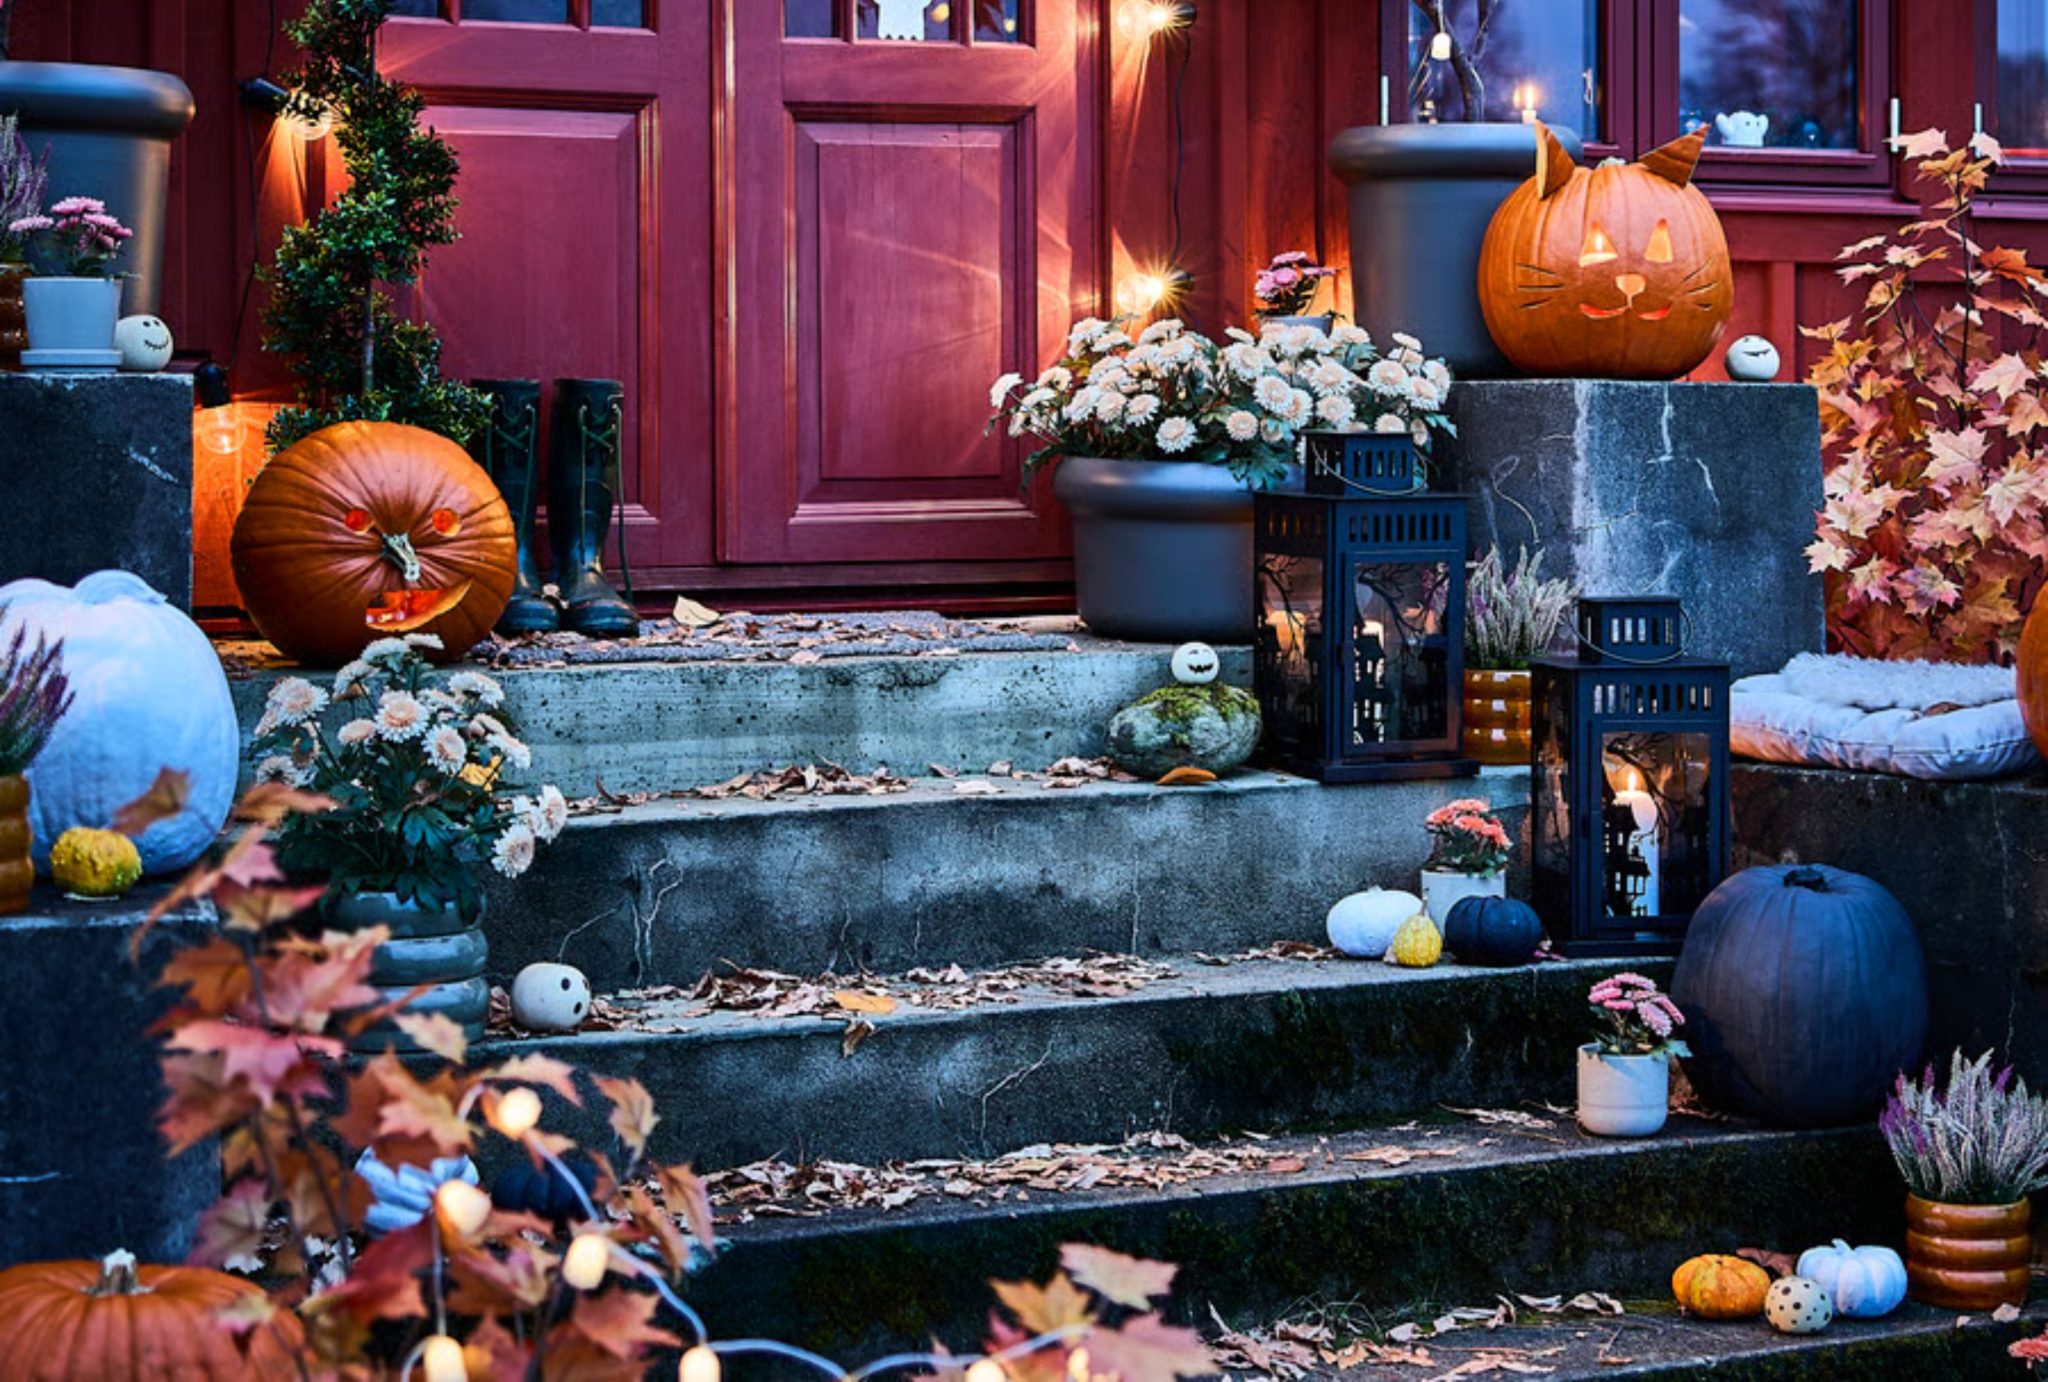
Creating a similar look involves investing in a few key pieces that you can reuse year after year, supplemented by seasonal naturals.
- Large Woven Planter: $70 – $150
- Chrysanthemum Plant: $20 – $40
- Assorted Pumpkins & Gourds: $50 – $100 (market prices vary)
- TOTAL: $140 – $290
- Budget alternative: Use a planter you already own and fill it with foraged branches instead of mums. Shop for pumpkins at a local farm stand for the best prices, often getting more for around $30-$50.
2. Elegant White Pumpkin and Greenery Tablescape
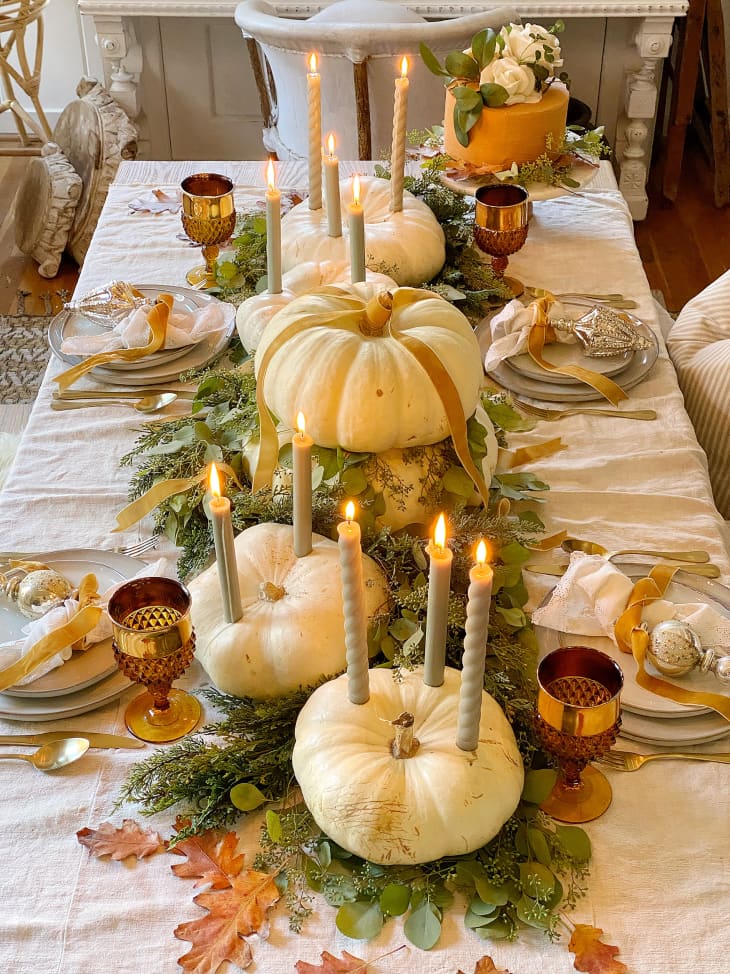
When creating a tablescape with candles, vary the heights to create visual interest, but ensure none are so tall they block conversations across the table. A good rule of thumb is to keep the flame below eye level for seated guests. For these ribbed taper candles, using cream-colored pumpkins as holders is a brilliant move that adds organic texture and height without introducing bulky, traditional candlesticks. This keeps the centerpiece feeling integrated and natural.
⚠️ Real Talk
It’s the gold velvet ribbon. Without it, you have a lovely, rustic tablescape. With it, you have pure elegance. The ribbon introduces a luxe texture and a touch of warm metallic color that elevates the entire design. It’s an inexpensive addition that makes the arrangement feel intentional, sophisticated, and deeply festive. It proves that sometimes, a single, thoughtful detail is all you need to transform a look from simple to stunning.
3. Enchanting Jack-o’-Lanterns Along a Grassy Path
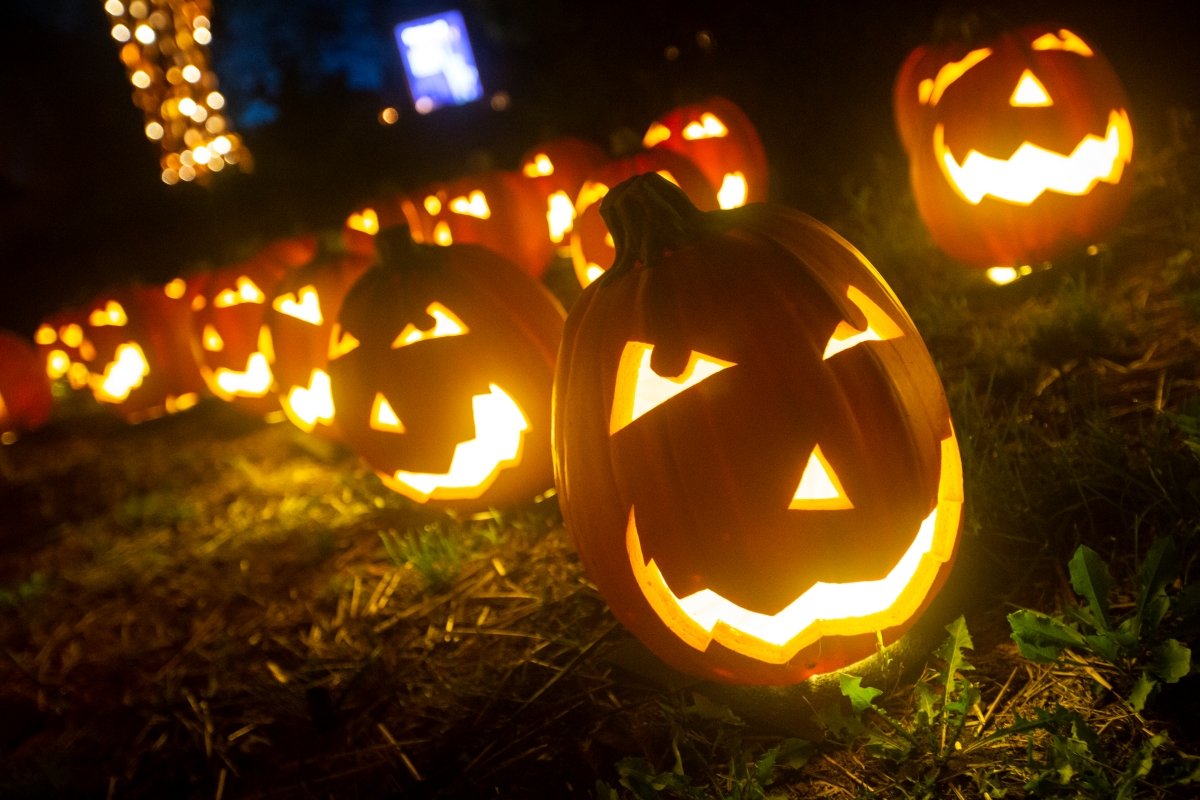
An enchanting path of glowing jacks is a classic for a reason, but it requires some practical planning. If you’re using real candles, never leave them unattended, and be mindful of wind. For a safer, more reliable glow, opt for battery-powered LED puck lights or flicker-effect candles. You’ll also need to consider your power source if you’re using string lights to illuminate them. And remember, squirrels and other critters find carved pumpkins to be a delicious snack, so this kind of display may only last a few nights.
🎯 What Makes It Work
This look is all about the power of contrast, creating a magical atmosphere through a simple formula. It breaks down to about 70% darkness + 20% concentrated warm light + 10% natural texture. The darkness of the night and deep green grass is essential for making the glowing pumpkins pop. The warm, fiery light from the carvings provides the focal point and festive mood. The subtle texture of the grass and pumpkin skin adds the final organic touch. You could swap the grass for a stone path and get the same powerful effect.
4. A Trio of Spooky Carved Pumpkins on the Steps
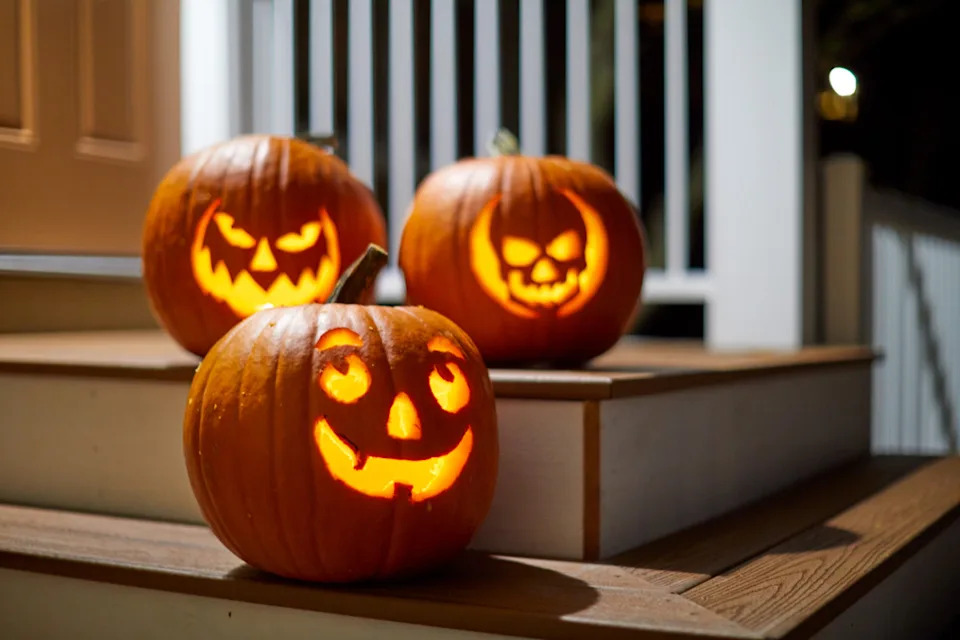
This trio of pumpkins works because it tells a mini-story. Each carving has a distinct personality—friendly, spooky, and artistic—creating a dynamic and engaging display rather than a repetitive one. The arrangement on different steps adds vertical interest, leading the eye up toward the door. Placing the most detailed carving (the skull) in the middle creates a clear focal point. This is a great example of how asymmetry and variation can make a simple setup feel much more thoughtful and designer-inspired.
📐 Style Math
You don’t need to spend a fortune on giant pumpkins to get this look. Craft stores like Michaels or Joann sell carvable foam pumpkins for $15-$30 each, which you can reuse every single year. A basic carving kit costs about $10, and a set of battery-powered LED lights is another $15. For under $75, you can create a permanent version of this display that you can bring out every October without the mess of carving a real pumpkin. Plus, they’re much lighter and easier to arrange on steps!
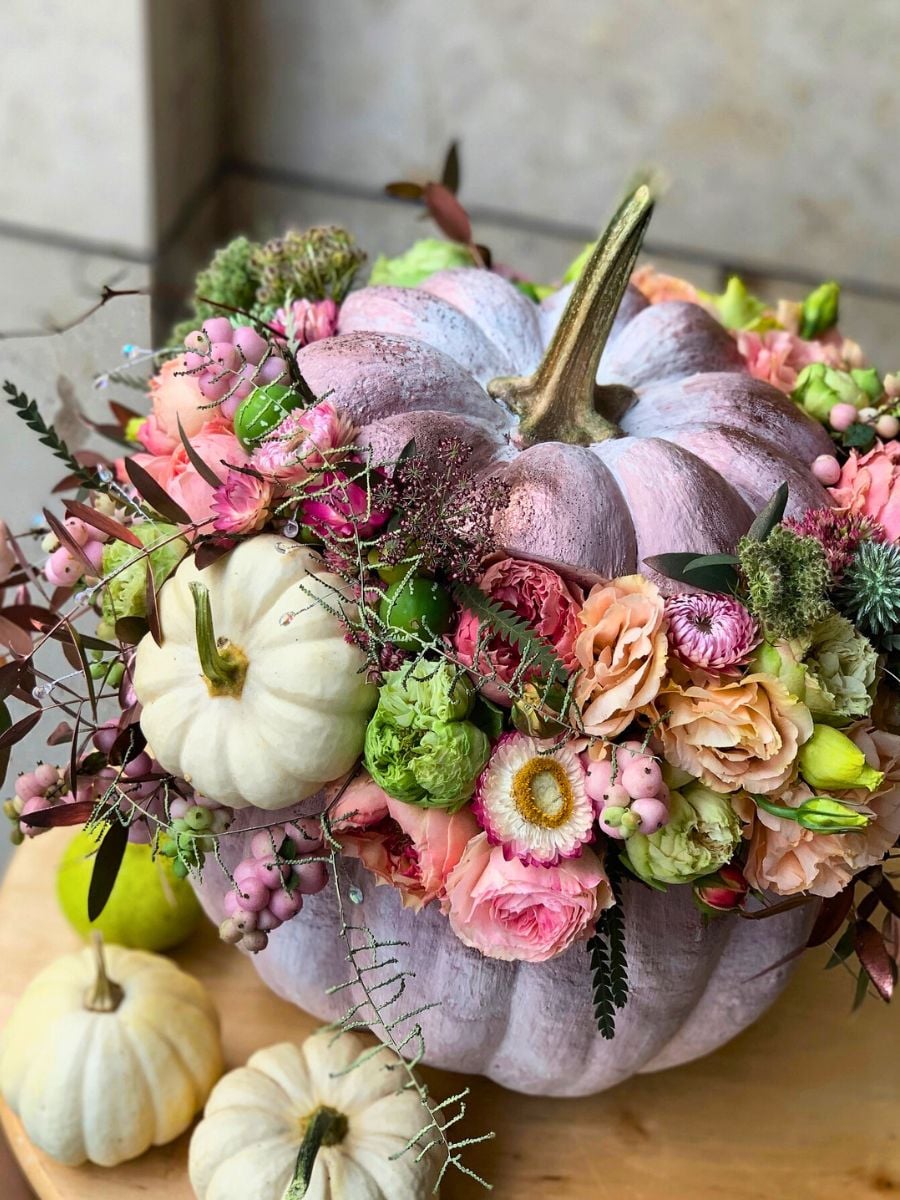
5. Lavender Pumpkin as a Lush Floral Vase
Transforming a pumpkin into a floral vase is easier than it looks and makes for a stunning, temporary centerpiece.
📏 Scale Guide
- Select a pumpkin with a relatively flat bottom for stability. Cut a wide opening around the stem.
- Scoop out all the seeds and pulp until the inside is clean and smooth. Pat the inside dry with a paper towel.
- Place a plastic container or glass vase inside the pumpkin. This is the secret to preventing the pumpkin from getting waterlogged and rotting quickly.
- Fill the container with water and a flower food packet, or place a block of soaked floral foam inside.
- Arrange your flowers, starting with greenery to build a base and then adding your larger blooms.
This entire process should take about 30-45 minutes, and the main cost is the flowers themselves.
When you’re creating a floral arrangement in a pumpkin, don’t just use water. Use a block of wet floral foam—the kind designed for fresh flowers. It holds stems exactly where you place them, giving you much more control over the final shape of your arrangement. It also ensures every single stem has constant access to water, which can extend the life of your flowers by several days compared to a simple vase of water. Just be sure to soak the foam thoroughly before you begin arranging.
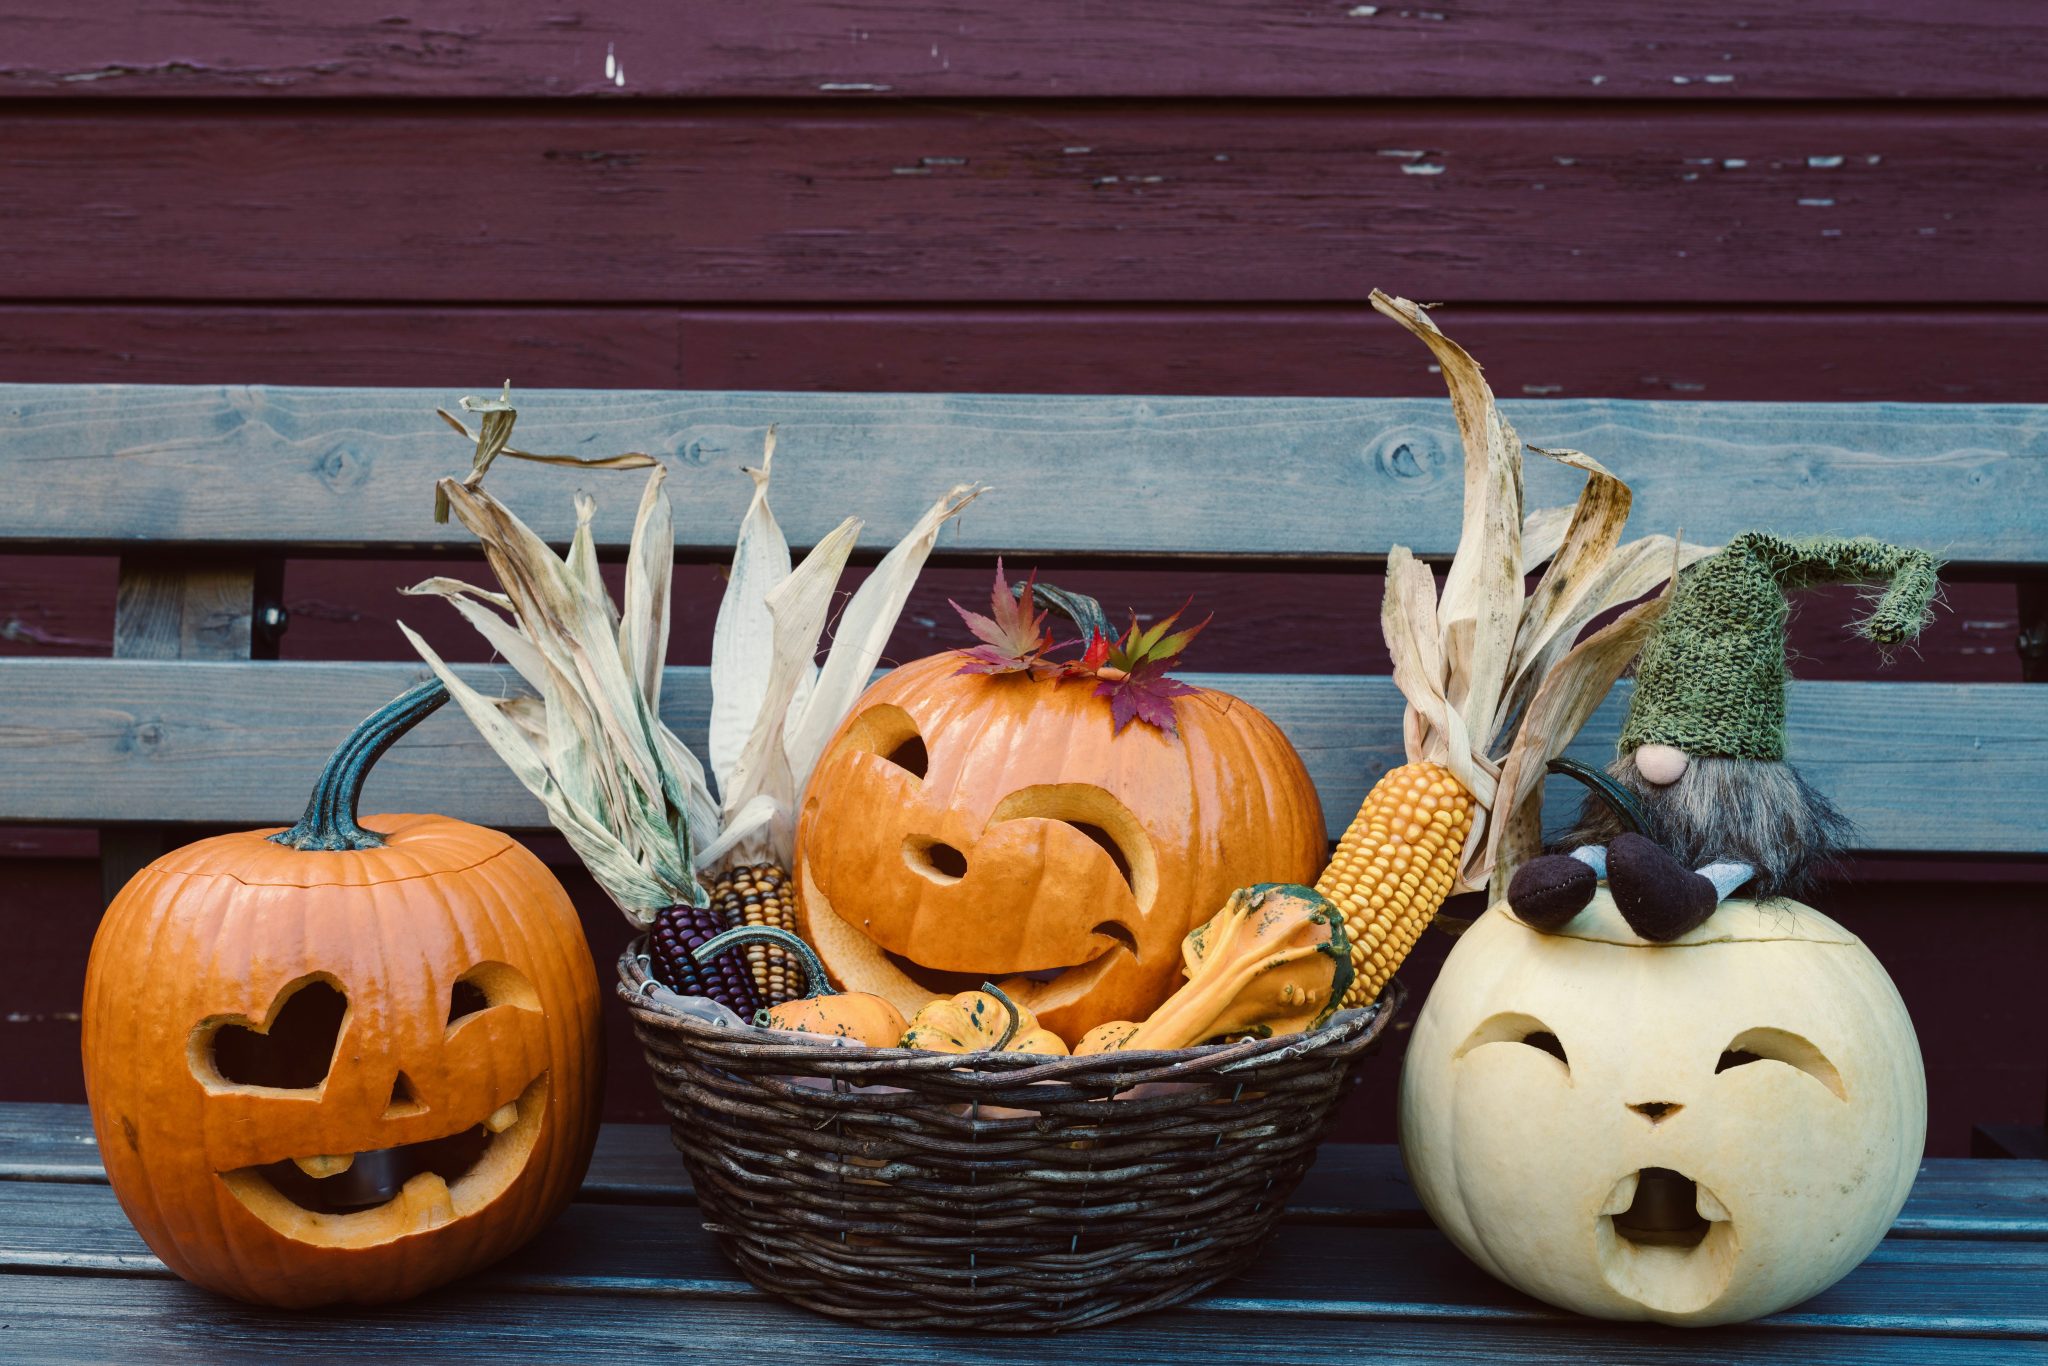
6. Cozy Pumpkin and Corn Display on a Rustic Bench
The rustic, cozy vibe is a direct descendant of the ‘Cottagecore’ and ‘Modern Farmhouse’ trends that continue to dominate platforms like Pinterest and Instagram. This look celebrates natural materials, simple pleasures, and a connection to the harvest season. It’s less about spooky Halloween and more about a warm, welcoming autumn feeling. In 2026, as people continue to seek comfort and authenticity in their homes, this style’s staying power comes from its genuine, unpretentious charm. It feels collected and personal, not store-bought.
🧹 Maintenance Reality
This idea is incredibly versatile but works best in transitional spaces like covered porches, entryways, or mudrooms. It’s perfect for a standard 4-6 foot bench. The key is having enough horizontal space to let the arrangement breathe. You need about 18-24 inches of depth to comfortably layer the pumpkins, corn, and other decor without it feeling crammed. This look is a fantastic solution for smaller spaces where a grander display, like the one in Idea #1, isn’t feasible.
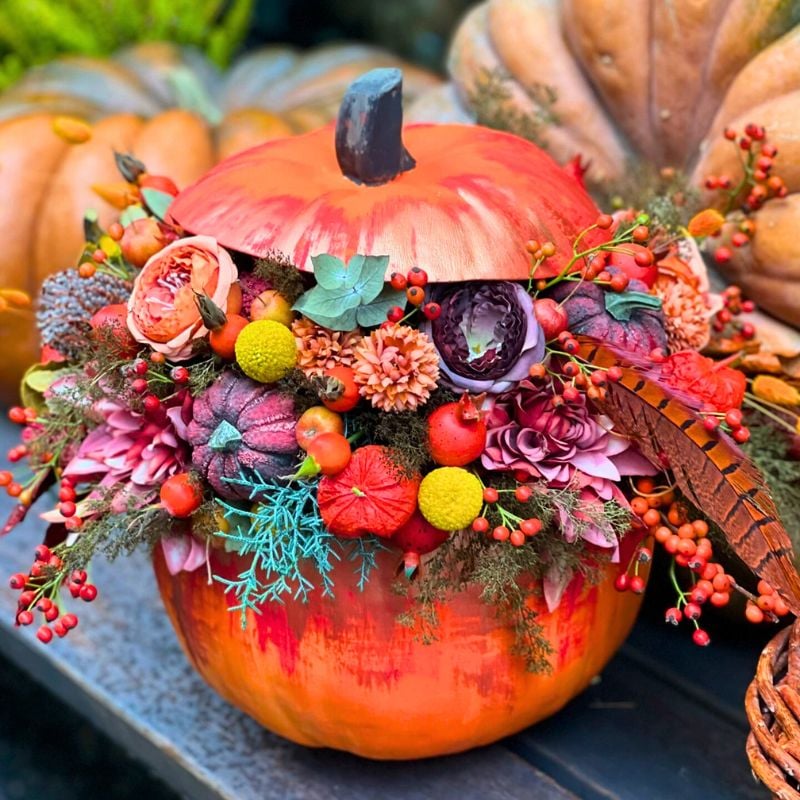
7. Pumpkin Centerpiece Bursting with Autumn Florals
The single most important element here is the askew pumpkin top. It’s a small, clever detail that transforms the arrangement from “flowers in a pumpkin” to a whimsical, overflowing treasure chest of florals. This playful touch gives the piece personality and a sense of effortless abundance, as if the flowers are literally bursting out. Without it, the centerpiece would still be pretty, but it would lose that unique, magical quality that makes it so memorable. It’s a lesson in how a simple gesture can define a design.
🔧 How-To Brief
A fresh floral centerpiece like this is a showstopper, but it’s a short-lived one. Expect your arrangement to look its best for about 4-7 days, depending on the types of flowers used and the temperature of your home. The pumpkin itself will start to soften after about a week once it’s been cut. To maximize its life, keep it out of direct sunlight and top it off with fresh water daily. This isn’t a ‘set it and forget it’ decoration; it’s a beautiful, high-maintenance piece for a special occasion.
8. A Classic Lineup of Glowing Jack-o’-Lanterns
The power of this classic display lies in repetition and rhythm. Lining up the four jack-o’-lanterns creates a strong visual path that is incredibly satisfying to the eye. While each face is unique, their similar size, color, and warm glow create a sense of unity. The rustic wooden surface adds a layer of texture that keeps the arrangement from feeling too sterile, and the bare branches in the background reinforce the spooky, late-autumn theme. It’s a simple formula that delivers maximum festive impact.

💸 Get This Look For Less
If you’re using real candles inside your pumpkins, fire safety is paramount. Never place them on an unstable surface or near flammable materials like hay, dried leaves, or curtains. Make sure the pumpkin is well-ventilated by carving a small chimney hole in the back or near the lid to allow heat to escape. Better yet, skip the open flame entirely. Modern LED pillar candles with a flicker effect are incredibly realistic and eliminate all fire risk, making them a much safer choice, especially if you have kids or pets.
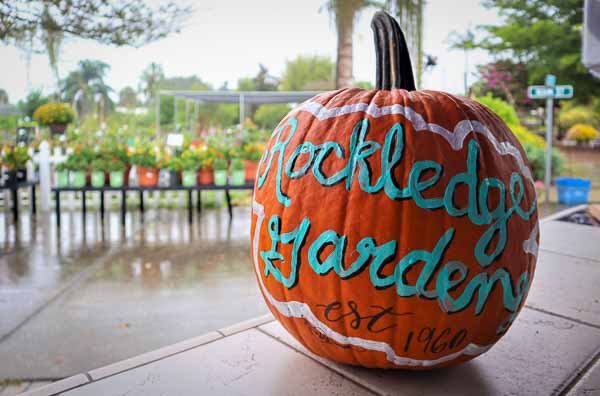
9. Branded Pumpkin with Custom Teal Script
Want to paint a custom script on a pumpkin? Here’s a simple way to transfer your design for perfect results.
✅ Before You Start
- Choose your font and print out your text to the desired size.
- Rub the back of the paper with a soft graphite pencil, completely covering the area behind the letters.
- Position the paper on your pumpkin, graphite-side down, and tape it securely in place.
- Carefully trace the outline of your letters with a ballpoint pen. This will transfer a faint graphite outline onto the pumpkin’s surface.
- Remove the paper and use your favorite paint pen or brush to fill in the outline.
This method, which takes about 20 minutes, is far more precise than trying to freehand complex lettering.
For painting on pumpkins, the type of paint you choose makes all the difference. Avoid standard washable craft paints, as they will flake off the waxy pumpkin skin. Your best bet is acrylic paint. For crisp lines and lettering, as seen here, use acrylic paint pens (Posca pens are a fantastic choice). They offer excellent control and opacity. For covering larger areas, standard bottled acrylic paint works well. Always start with a clean, dry pumpkin for the best adhesion.
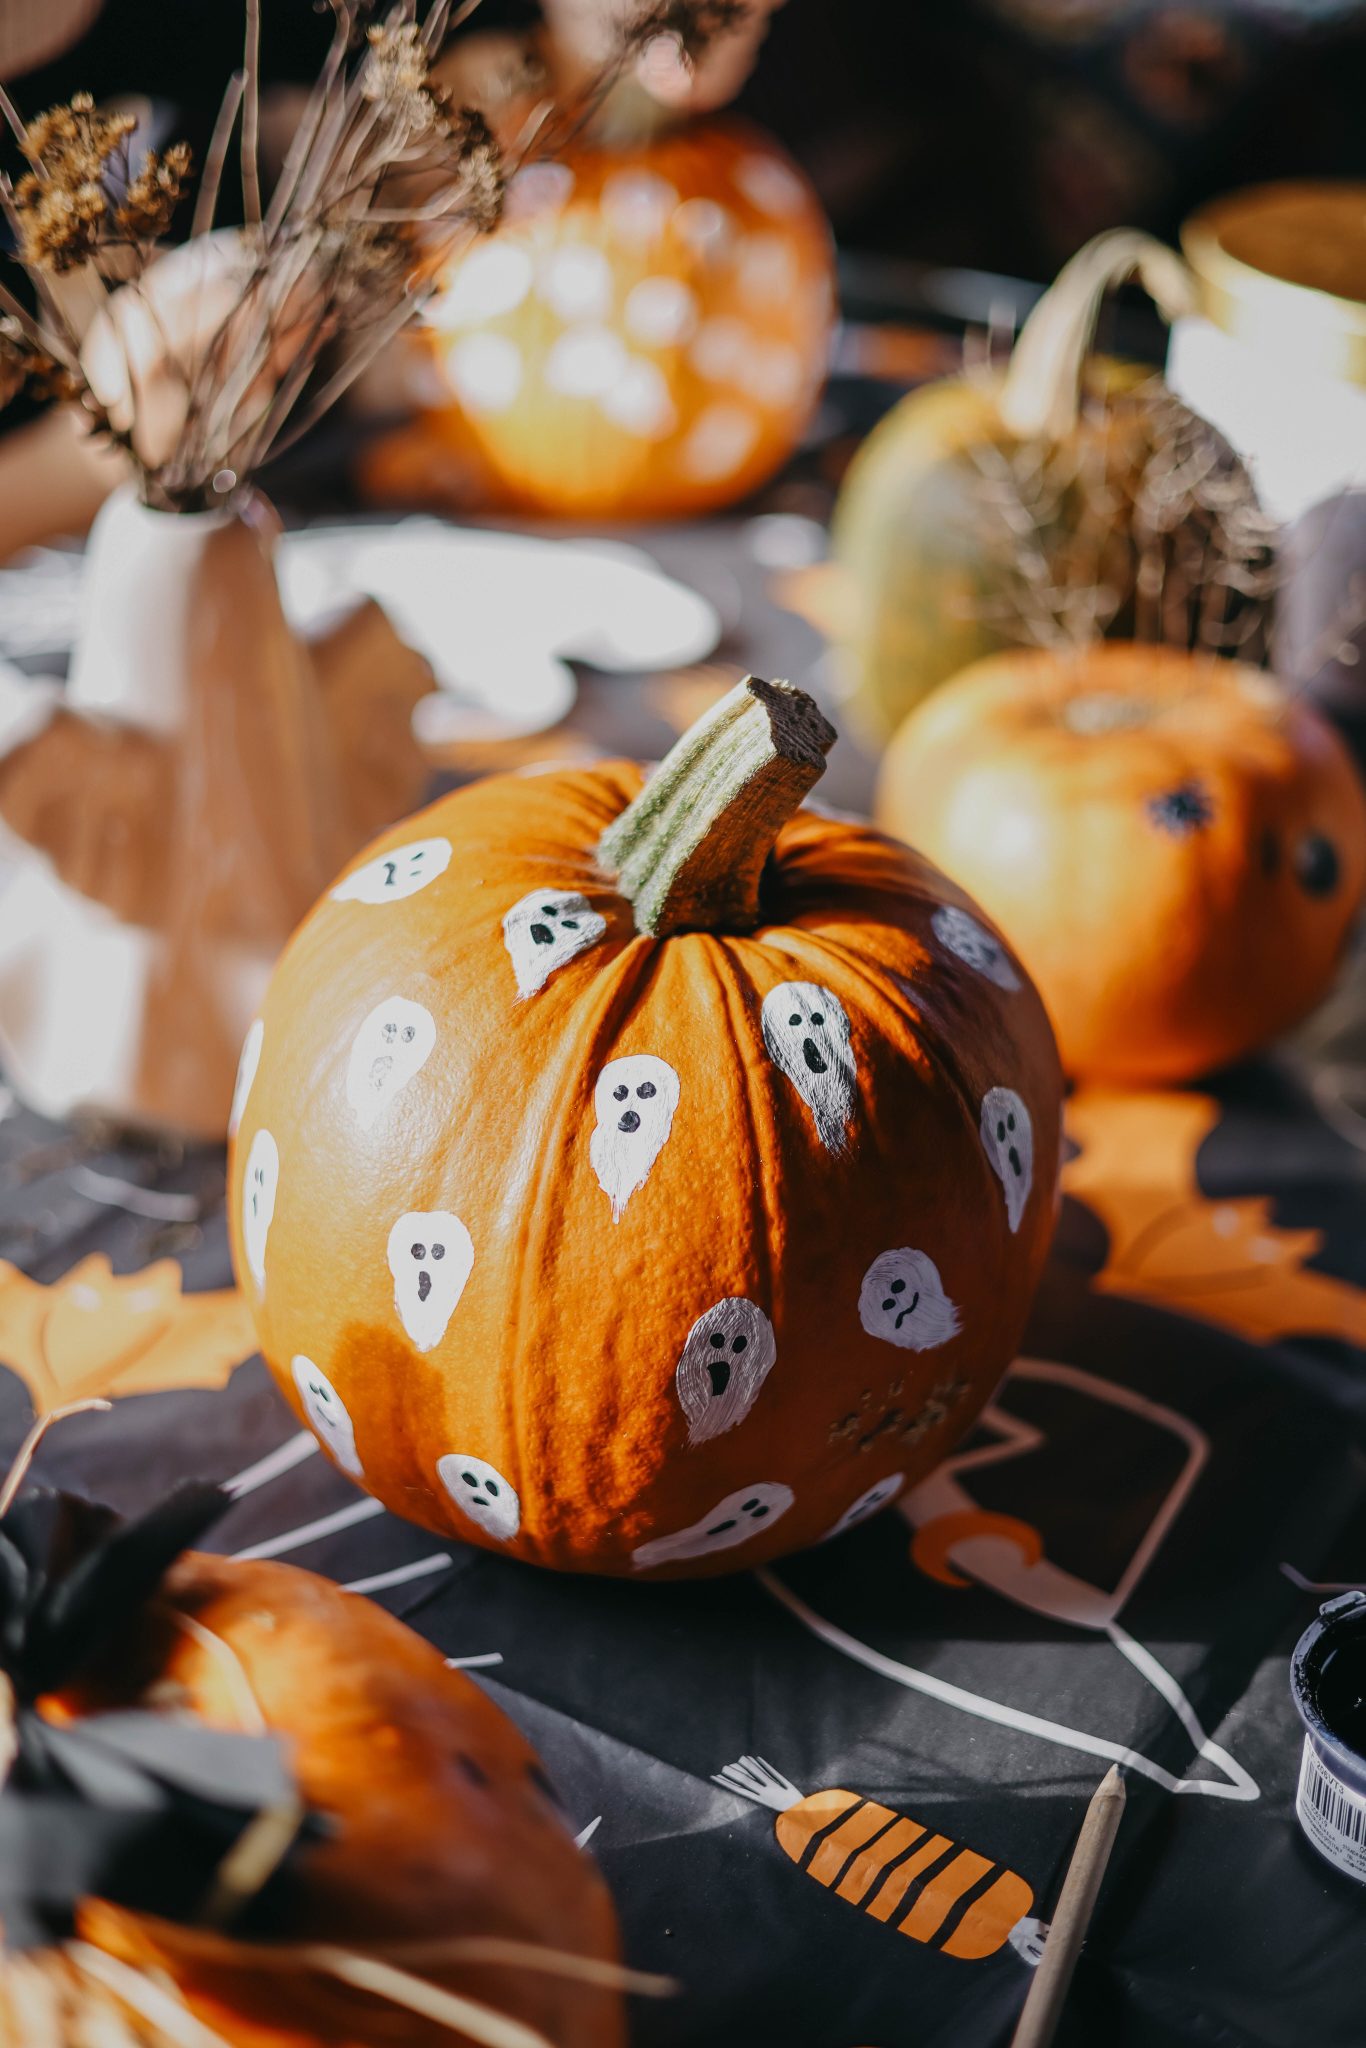
10. Playful Hand-Painted Ghost-Face Pumpkins
This playful, hand-painted look is a fantastic DIY project that costs next to nothing. A medium pumpkin might cost $5-$8 at a grocery store. A couple of acrylic paint pens (one white, one black) will run you about $10, and you’ll have them for many more projects. For under $20, you can create a whole family of these ghost-faced pumpkins. Compare that to pre-decorated pumpkins from a home decor store, which can easily cost $25-$50 for a single one. This is a perfect example of how a little creativity saves a lot of money.
💰 Budget Breakdown
painting your ghoulish friends, run through this quick checklist to ensure a smooth process.
- Is the pumpkin clean and completely dry? Wipe it down with a damp cloth and let it air dry to remove any dirt or residue.
- Do you have the right paint? Acrylic paint pens or craft acrylics are best. Test your pens on a hidden spot on the bottom to check for opacity and flow.
- Have you sketched your design? It’s helpful to lightly sketch the ghost shapes with a pencil first before committing with paint.
- Is your work area protected? Lay down some newspaper or a craft mat to catch any drips or smudges.
11. A Handful of Autumn’s Best Colors
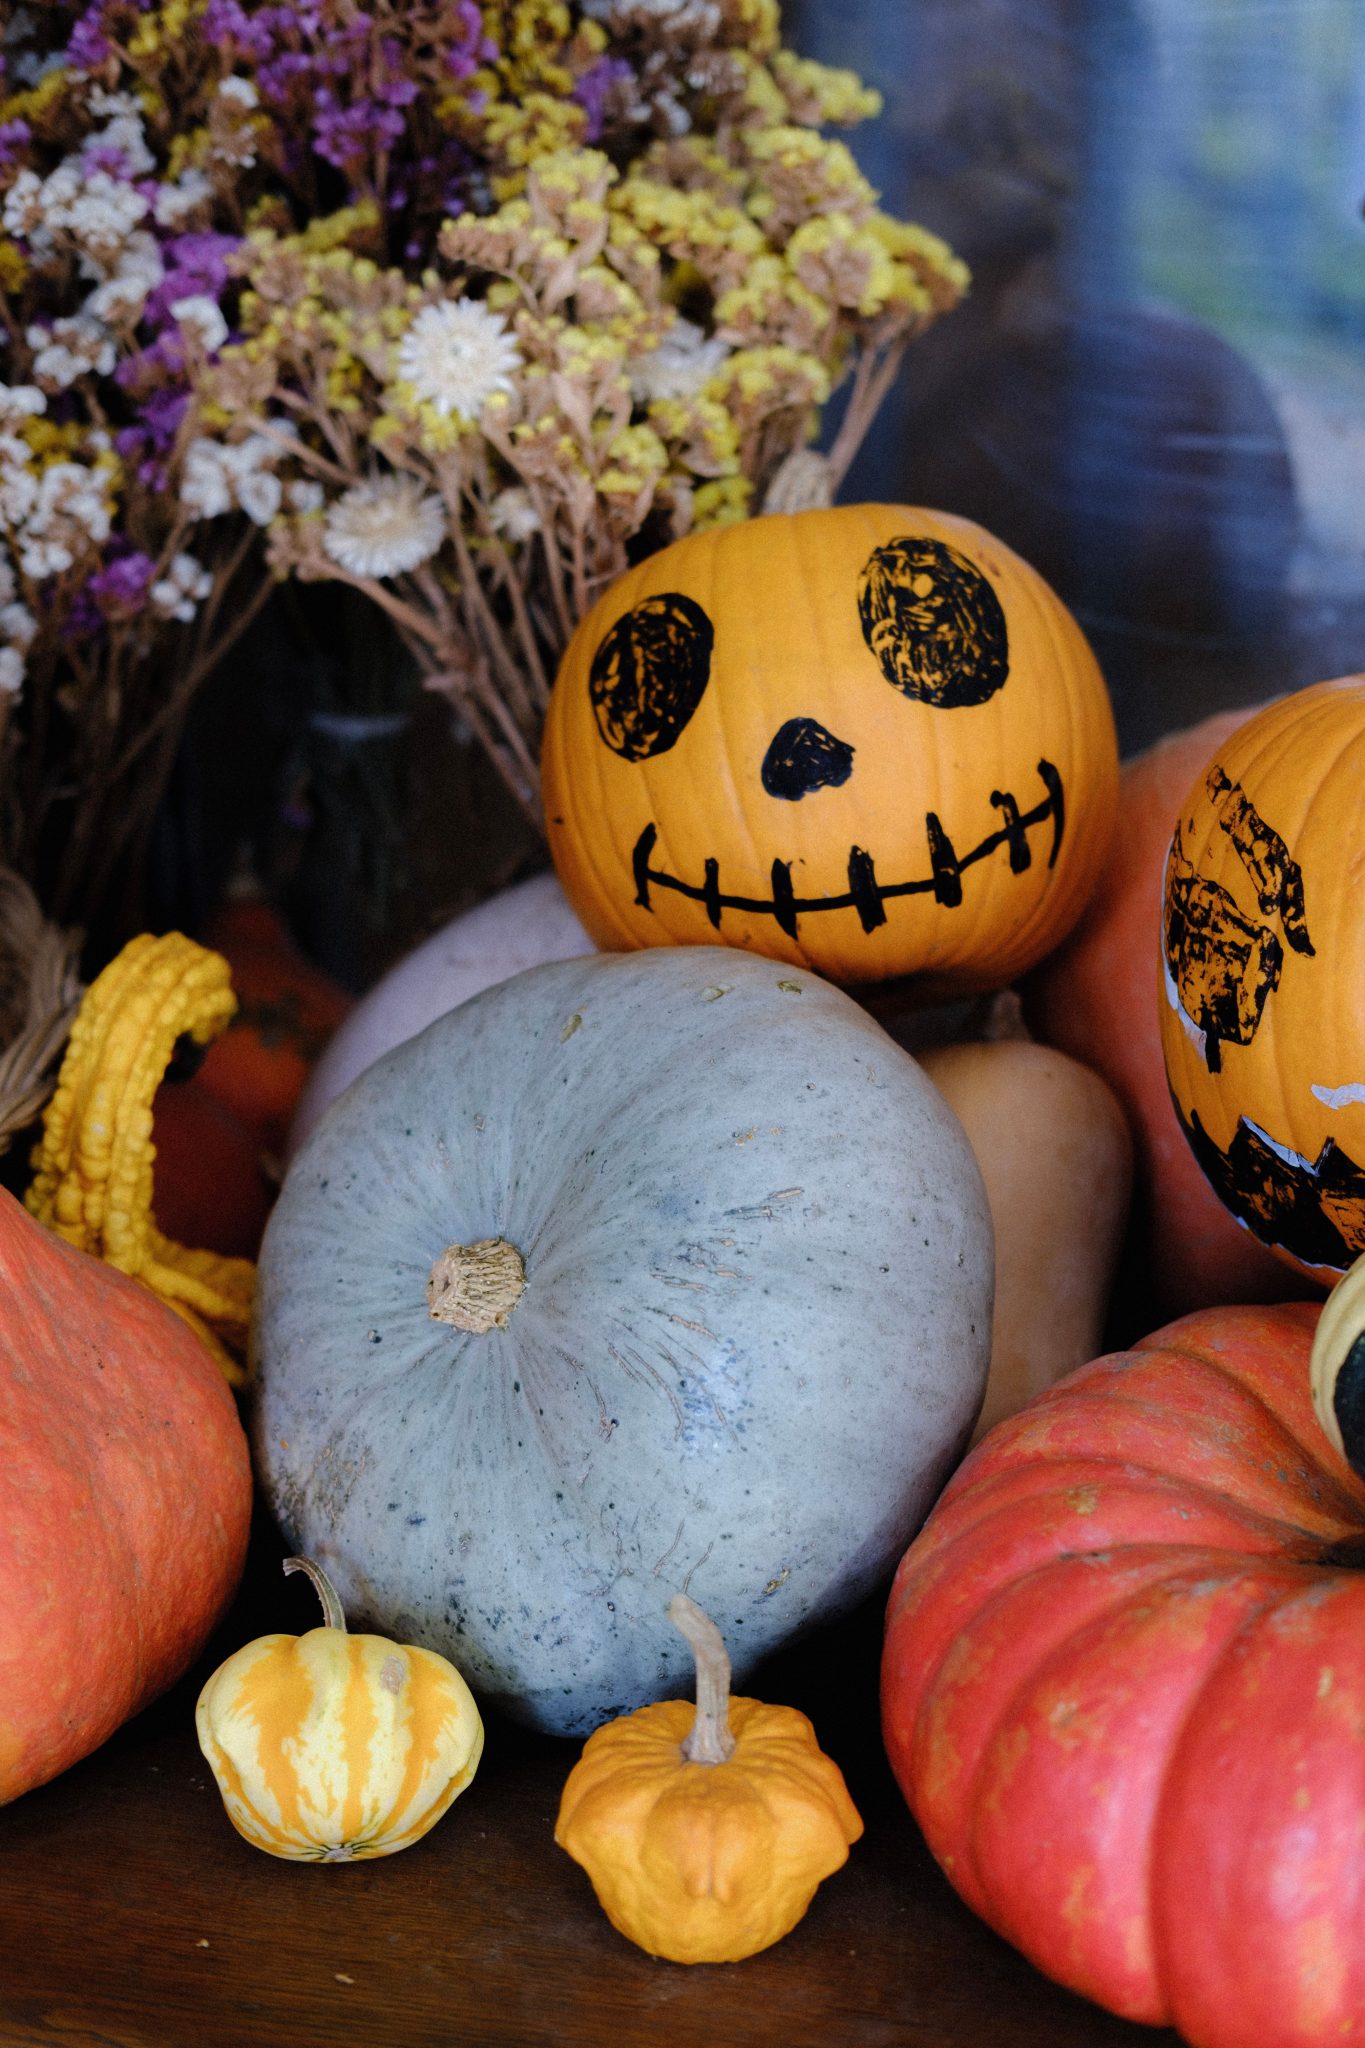
Creating a vibrant autumn display is like painting with a color formula. This look follows a classic 60% primary color + 30% secondary color + 10% accent. Here, the dominant color is the warm, saturated orange of the pumpkins. The secondary element is the rich brown of the dried foliage, providing an earthy, rustic base. The final 10% accent comes from the crisp white of the vase, which adds a point of contrast that makes the other colors feel even richer. You could swap the white vase for a black one for a moodier, more dramatic feel.
⭐ The One Thing
that makes this look feel curated and special is the hand-painted element. It’s the personal touch that separates it from a generic store-bought display. Knowing that someone took the time to paint each little ghost face adds a layer of charm and personality. It’s a celebration of creativity and the fun of the season, reminding us that the most memorable decorations are often the ones we make ourselves. Without the hand-painted details, it’s just a pile of pumpkins; with them, it’s a story.
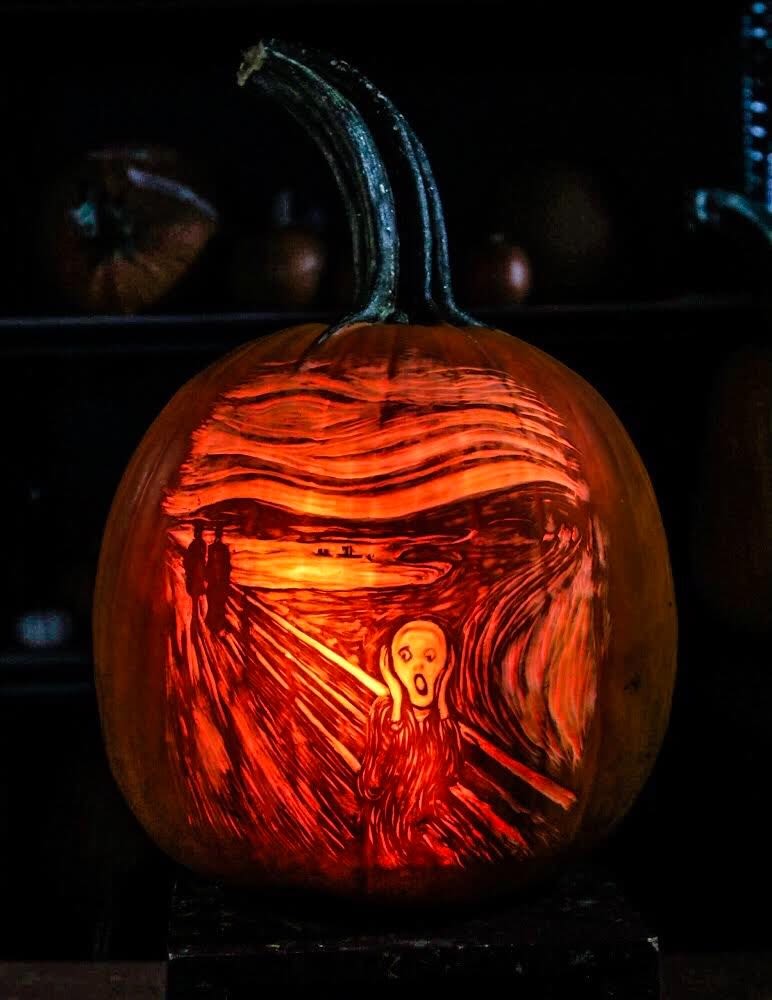
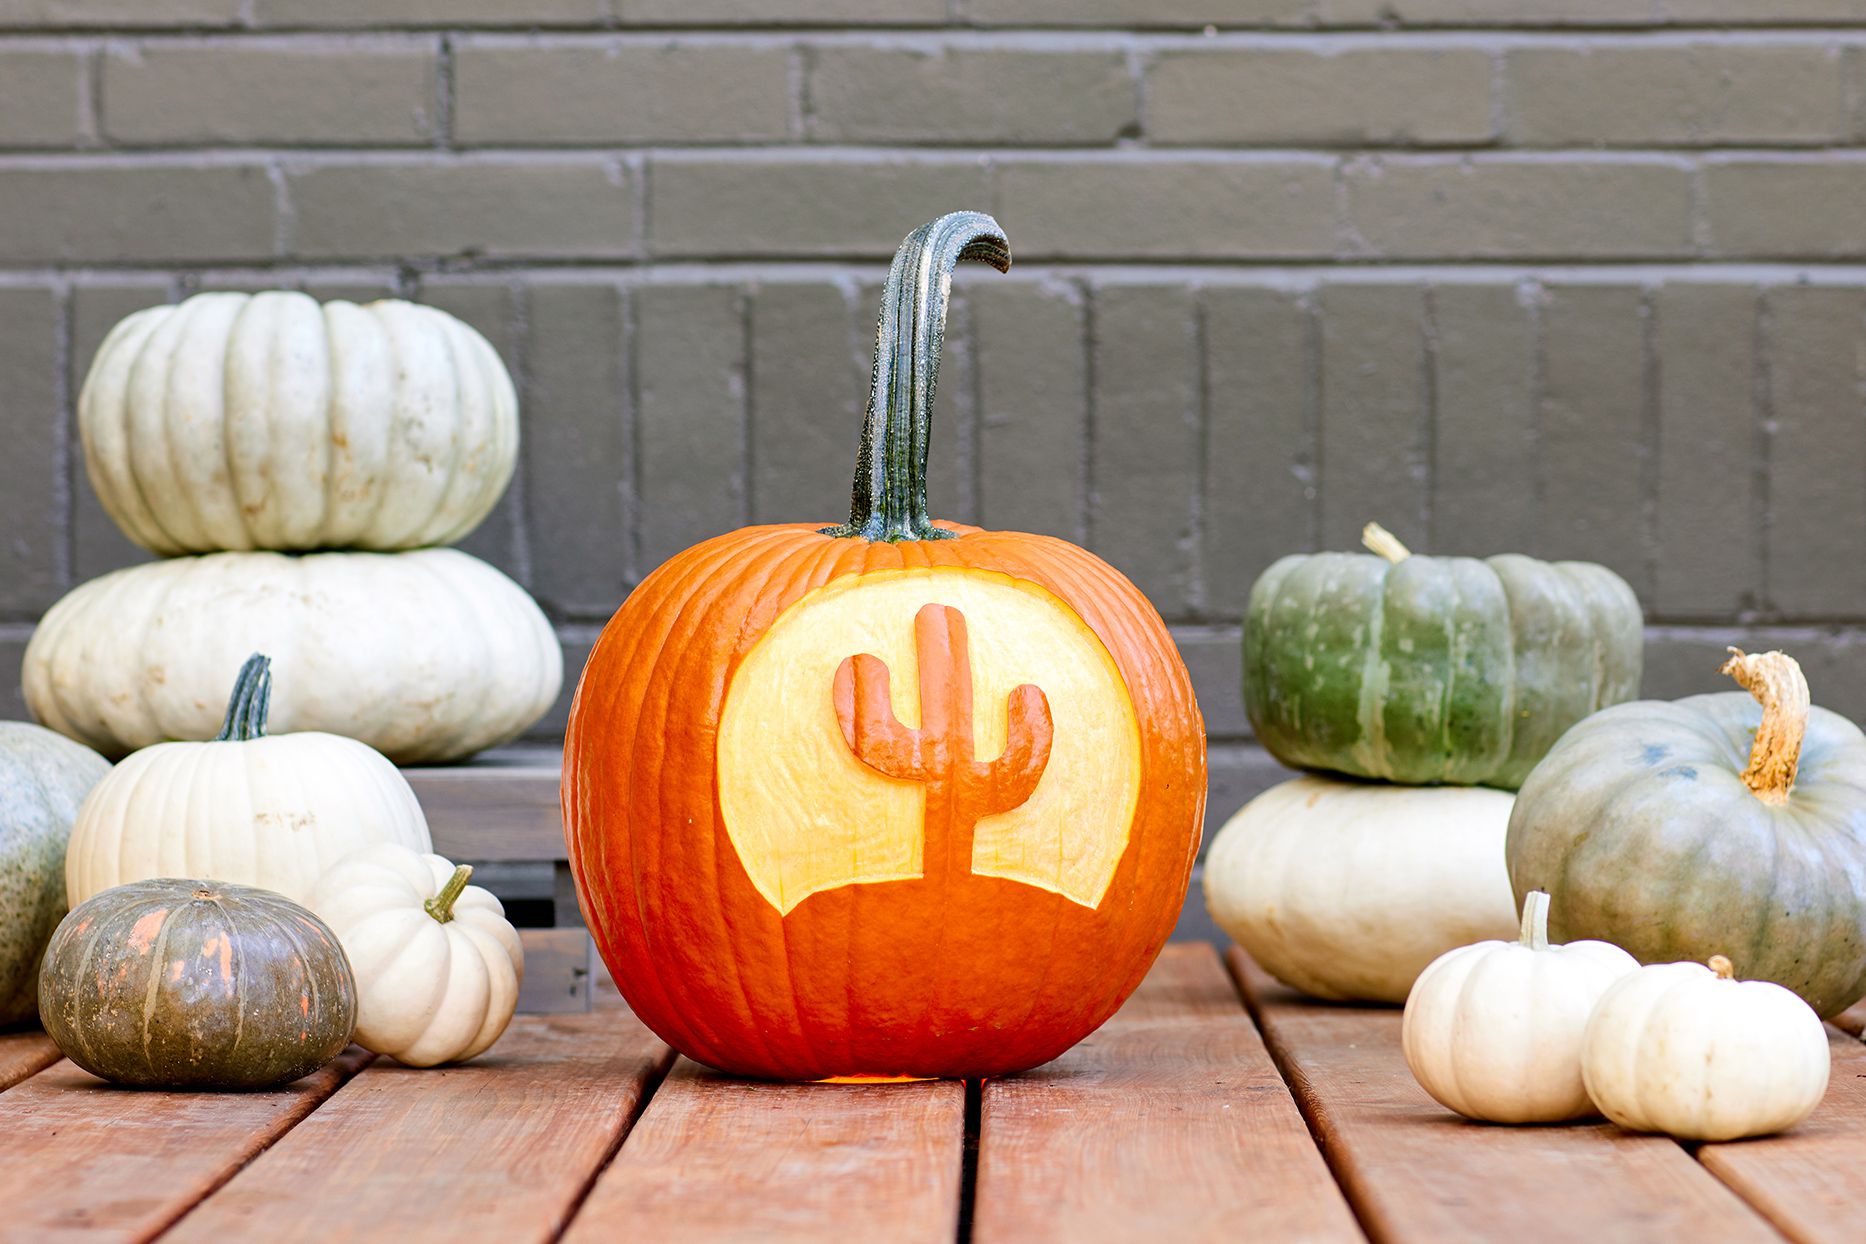
12. Masterpiece Carving: ‘The Scream’ on a Pumpkin
Let’s be honest: a carving this intricate is not a casual afternoon project. This is expert-level work that likely requires specialized tools (like linoleum cutters or clay loops), a pre-printed stencil, and hours of patient, detailed work. If you’re a beginner, attempting something this complex will probably lead to frustration and a broken pumpkin. Appreciate this for the work of art that it is, and perhaps start with a simpler design to build your skills. There’s no shame in a classic triangle-eyed jack-o’-lantern!
🔥 Trending Context
In an age of social media, pumpkin carving has evolved from a simple craft into a competitive art form. This ‘The Scream’ pumpkin is part of a larger trend of carving hyper-detailed, pop-culture-savvy, or art-historical designs that are made to be photographed and shared. It’s about showcasing skill and creativity, turning a humble gourd into a temporary, and therefore precious, piece of high-effort art. This trend reflects a broader cultural appreciation for craftsmanship and unique, personalized expressions in home decor.
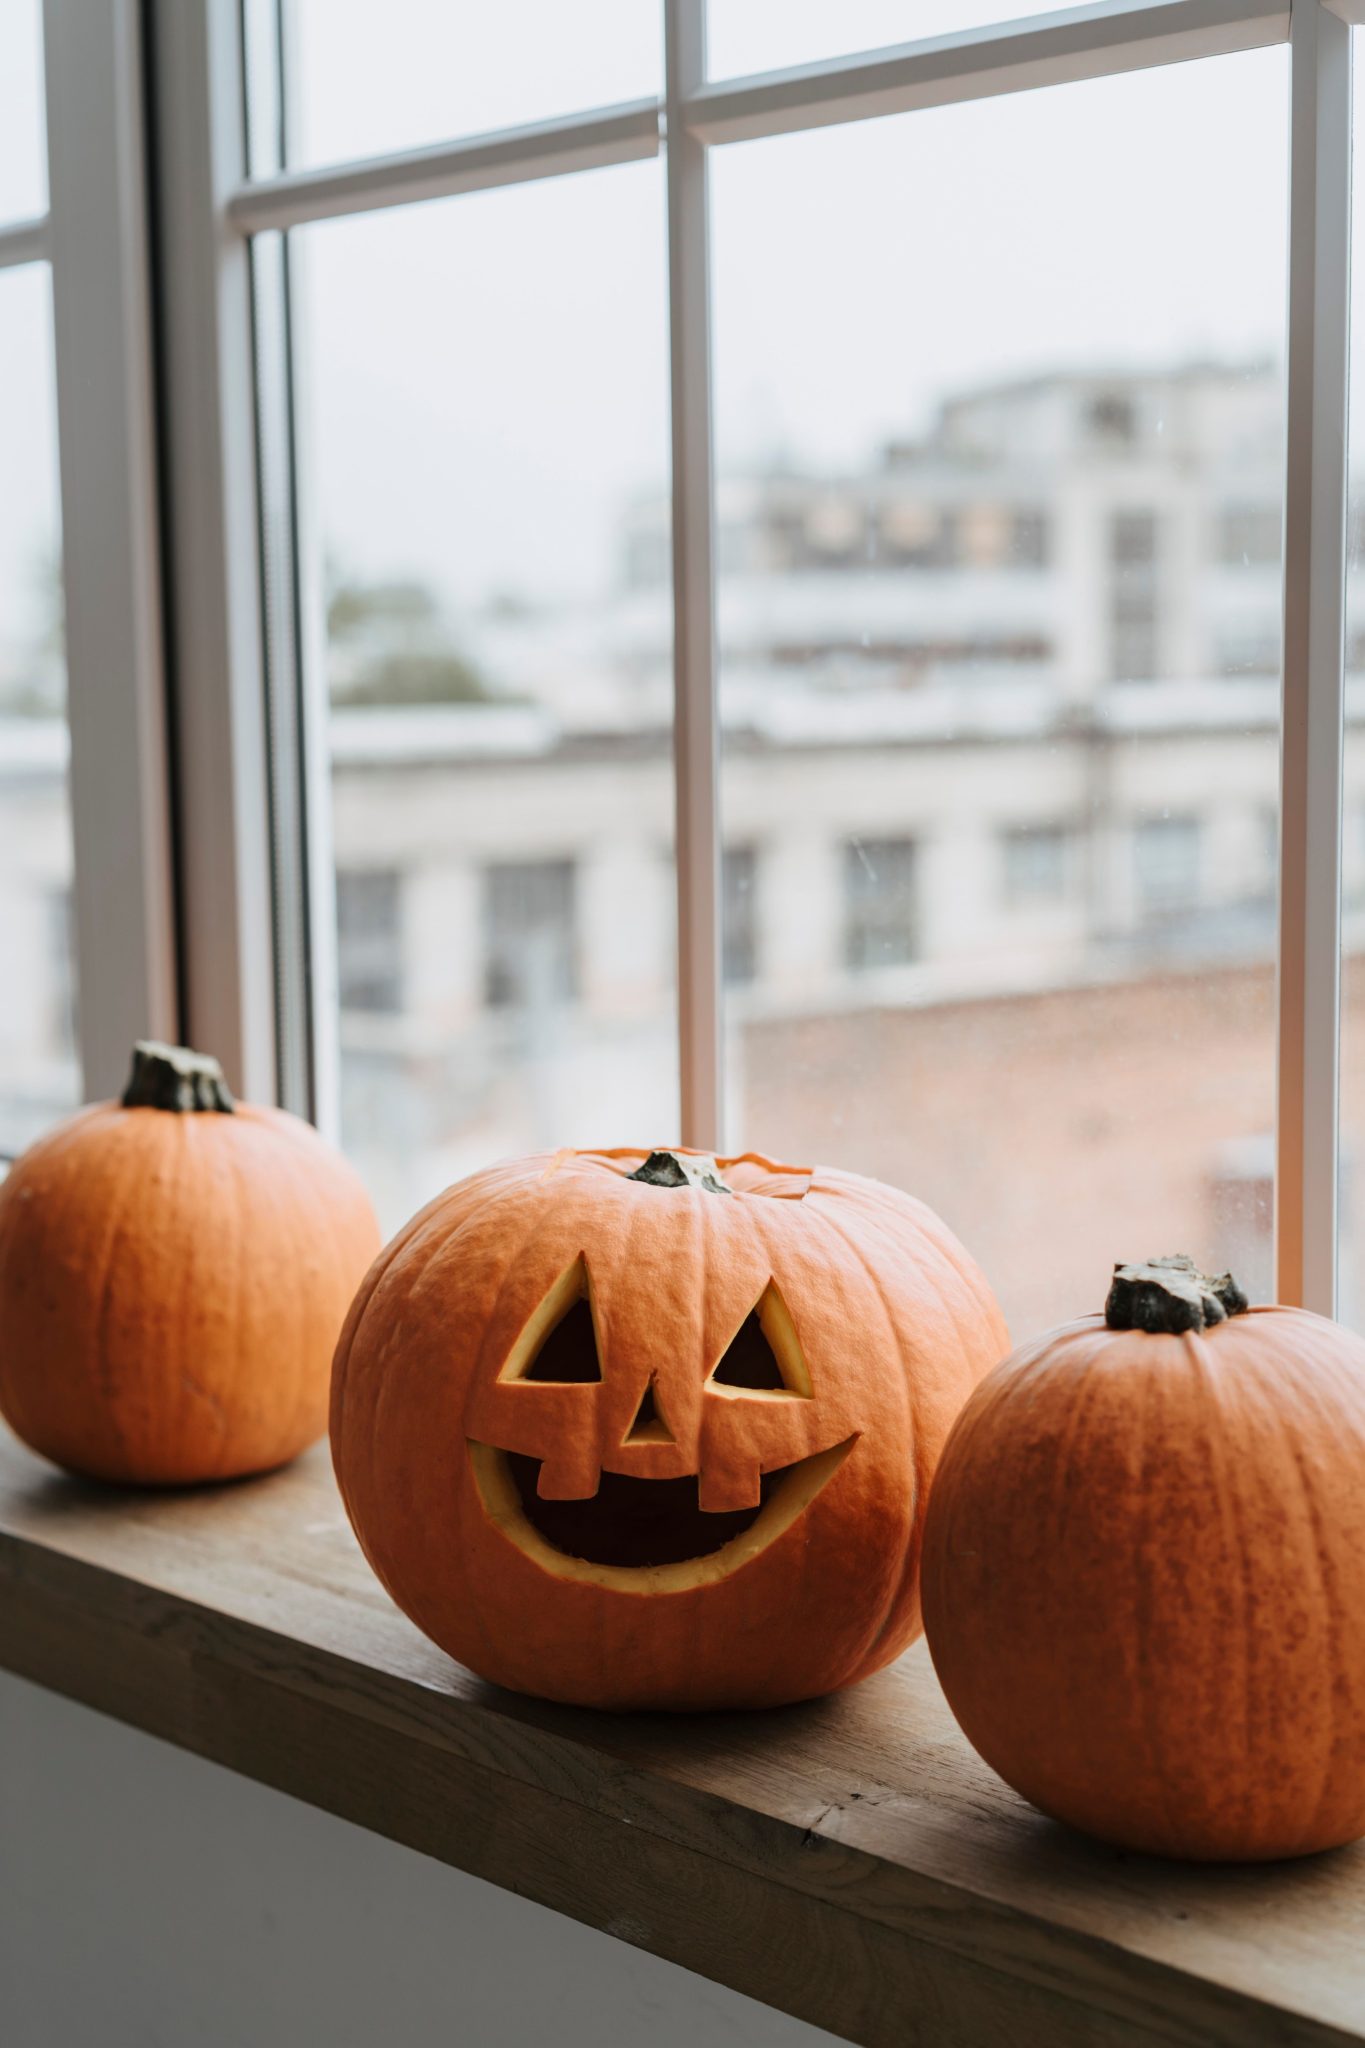
13. Simple Jack-o’-Lantern on a Sunlit Windowsill
This simple arrangement is perfect for small-space dwellers. It proves you don’t need a sprawling porch or a grand dining table to get into the festive spirit. A windowsill, a small side table, or even a bookshelf is all you need. The key is to match the scale of the pumpkins to the space. This trio of medium-to-small gourds feels right at home on this standard-sized windowsill. For a smaller apartment window, you might use mini pumpkins. Compare this to the much larger scale of the porch display in Idea #4.
💡 Designer Tip
This composition is beautiful in its simplicity because it leverages natural light. Placing the pumpkins in a window allows the sunlight to stream across them, highlighting their vibrant orange color and creating soft, interesting shadows. The uncarved pumpkins on either side act as visual bookends, grounding the carved jack-o’-lantern and making it the undeniable star of the show. The blurred urban background provides a modern contrast to the rustic, natural feel of the pumpkins.
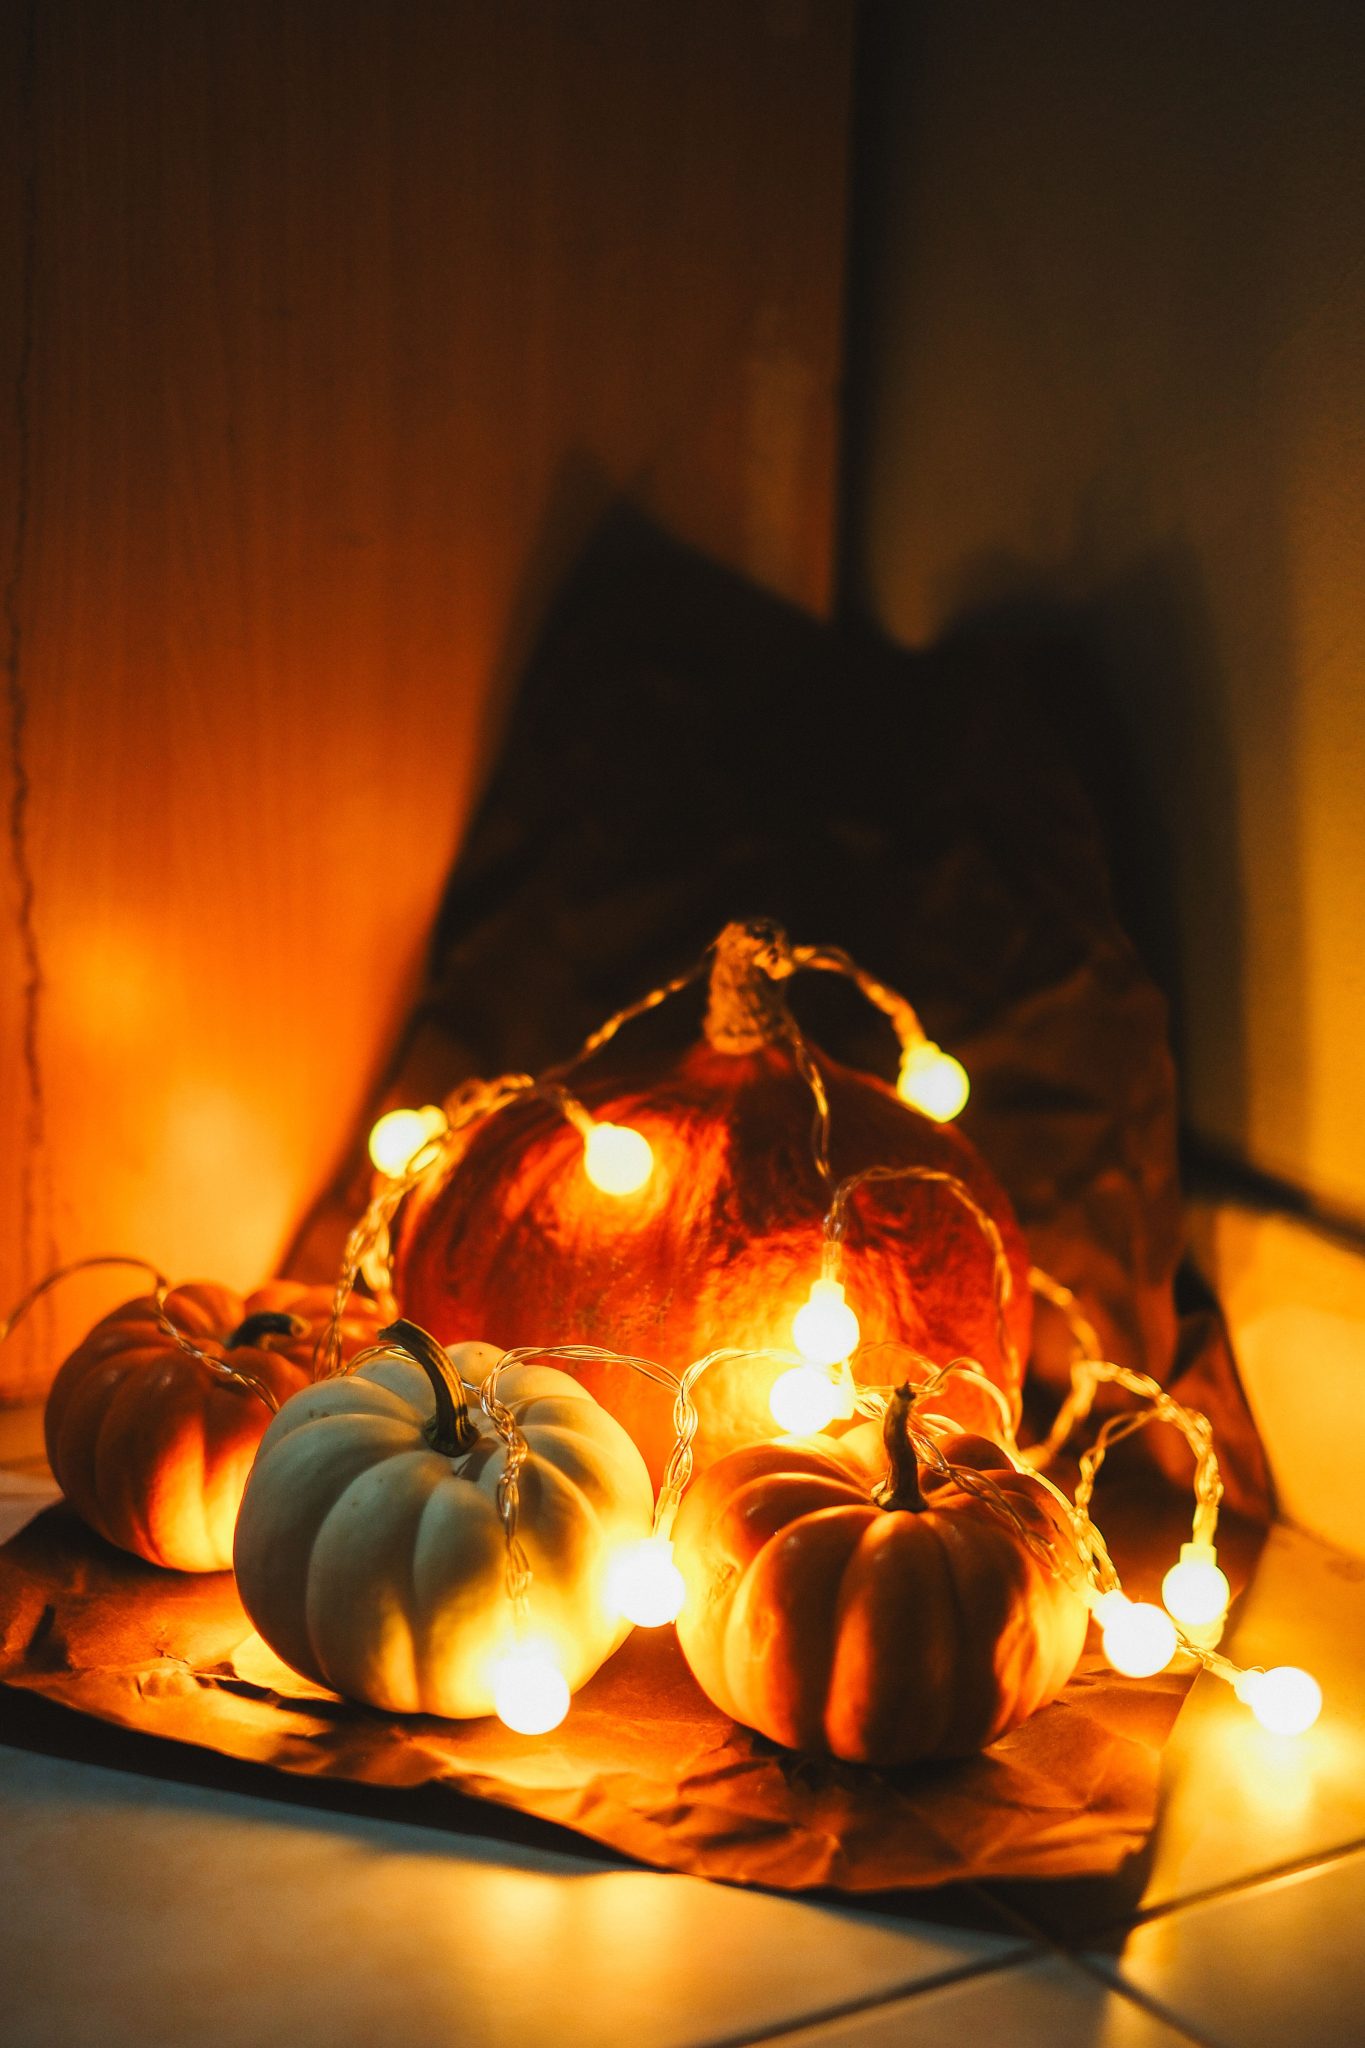
14. Cozy Glow: Pumpkins Wrapped in Globe Lights
When decorating with string lights, pay attention to the color temperature, measured in Kelvins (K). For a cozy, warm, candle-like glow like the one seen here, choose lights rated between 2200K and 2700K. Anything higher (like 3000K-4000K) will start to look more neutral or even cool-white, which can feel harsh and less inviting for an autumnal display. The warm globe lights used here are perfect because they mimic the warmth of a flickering fire, enhancing the orange of the pumpkins.
⚠️ Real Talk
Battery-powered string lights are incredibly convenient, but they come with the recurring cost and hassle of replacing batteries. A typical set of LED string lights will last for about 18-24 hours of continuous use on a set of standard AA batteries. If you plan to have them on for several hours each evening, you could be changing batteries every week. For a more sustainable and long-term solution, consider rechargeable batteries or opt for a plug-in version if your display is near an outlet.
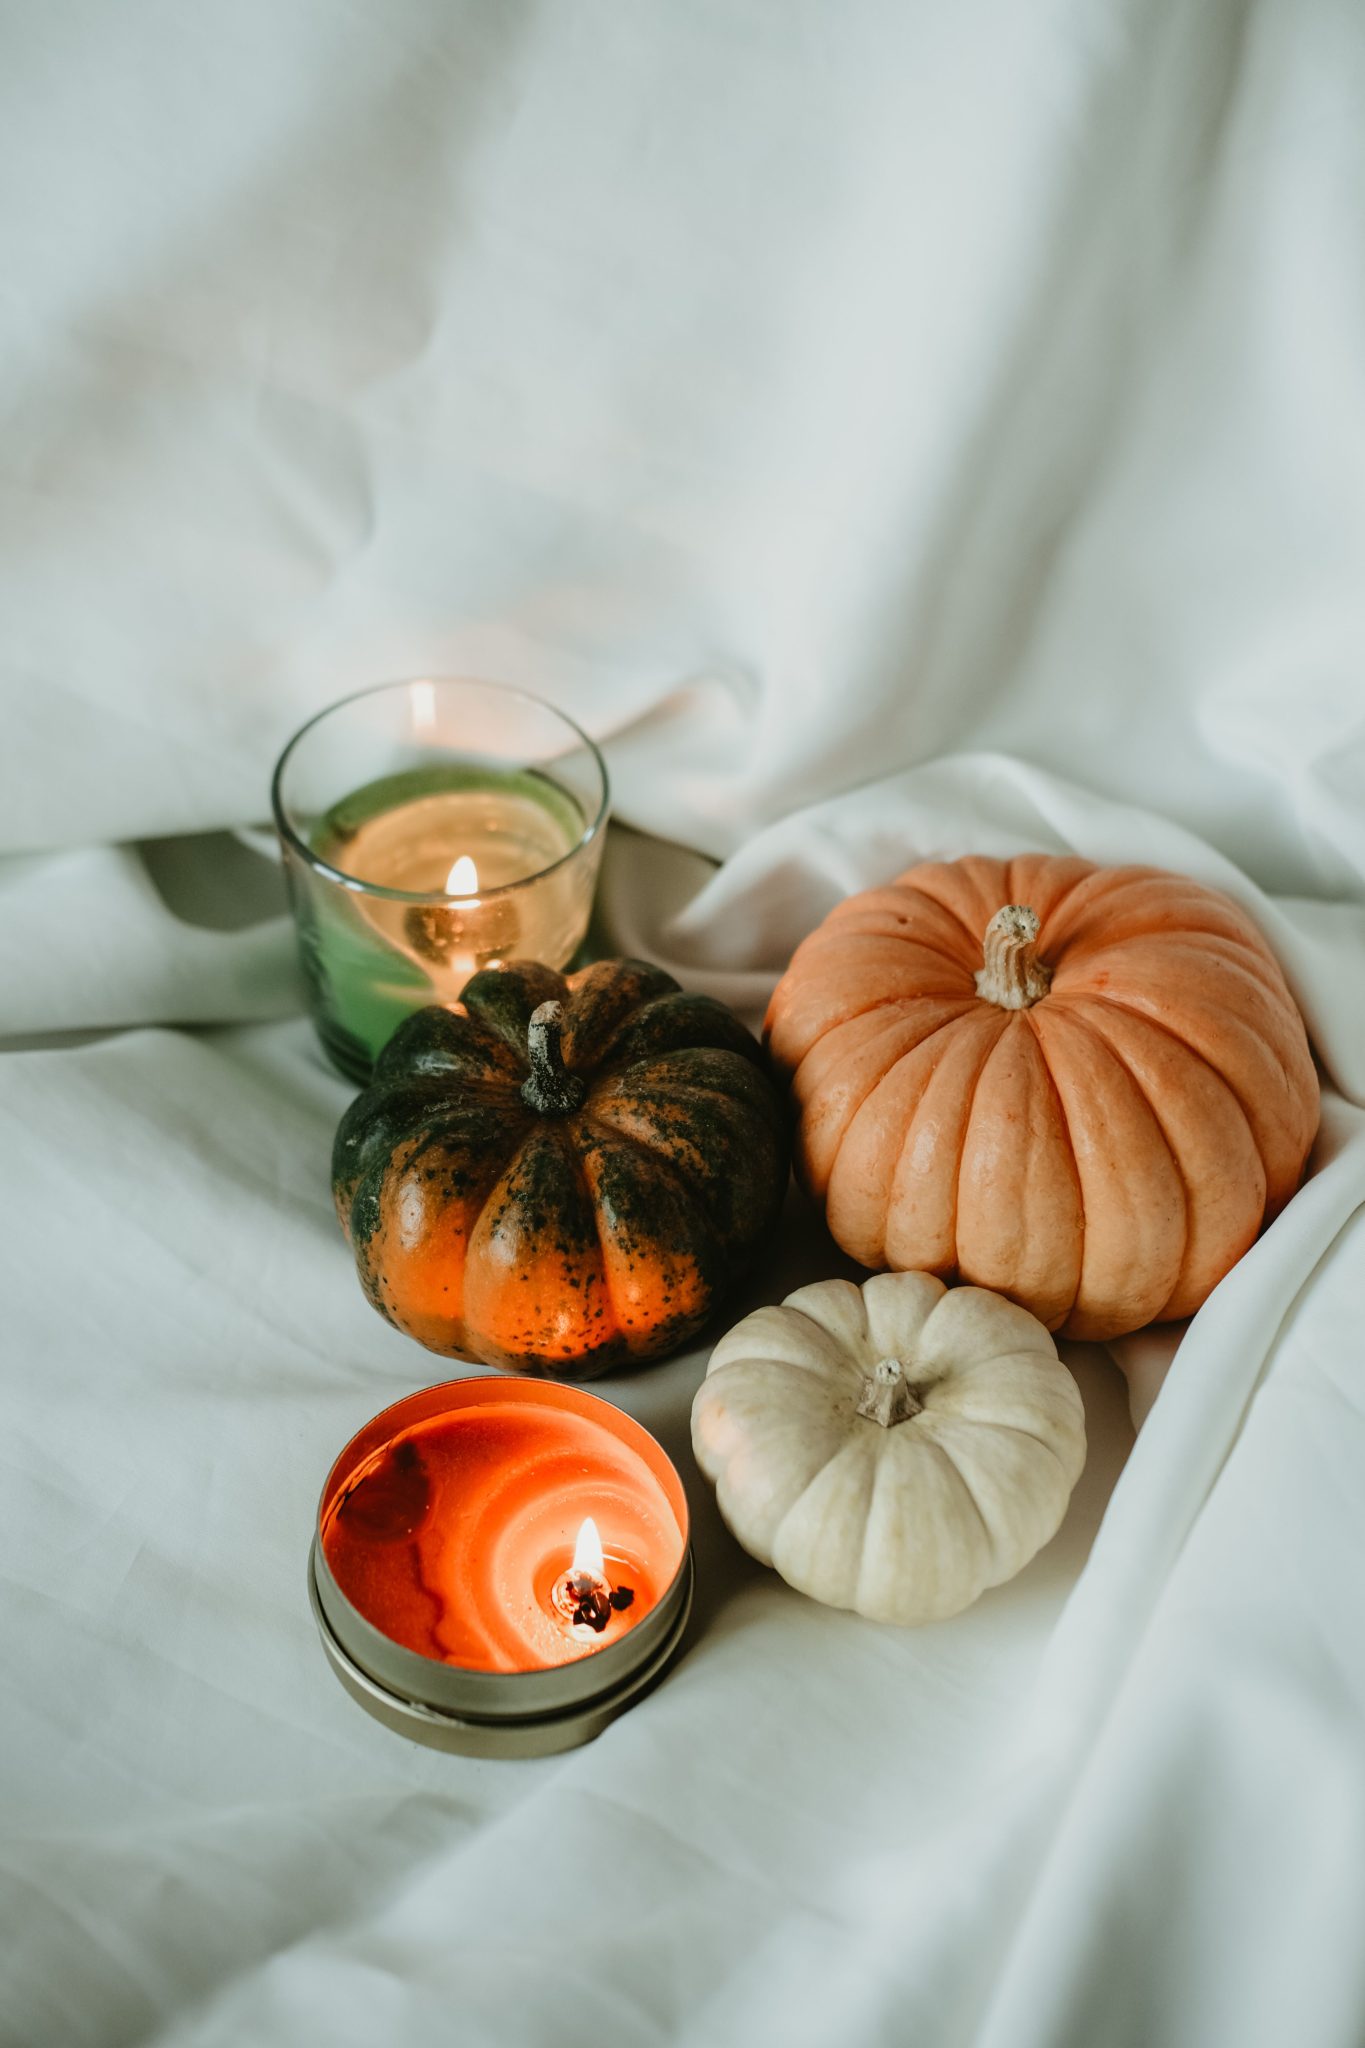
15. Serene Vignette with Pumpkins and Candlelight
This serene look is achieved through a careful balance of textures. The formula is approximately 50% soft texture (the draped fabric), 30% smooth texture (the pumpkin skins and glass votive), and 20% waxy/matte texture (the candles). The soft, draped fabric base is the key; it diffuses light and creates gentle folds and shadows, which is much more visually interesting than a hard, flat surface. The varying textures create a tactile quality that makes you want to reach out and touch them, enhancing the overall feeling of coziness.
🎯 What Makes It Work
The crucial element in this vignette is the softly draped white fabric. It serves as the canvas for the entire composition. It catches the candlelight beautifully, creating a gentle, diffused glow and soft shadows that a hard tabletop never could. The fabric introduces a layer of softness and movement that contrasts with the firm, static nature of the pumpkins and candles. Remove the fabric, and you just have a few objects sitting on a table; with it, you have a thoughtfully styled, almost romantic, scene.
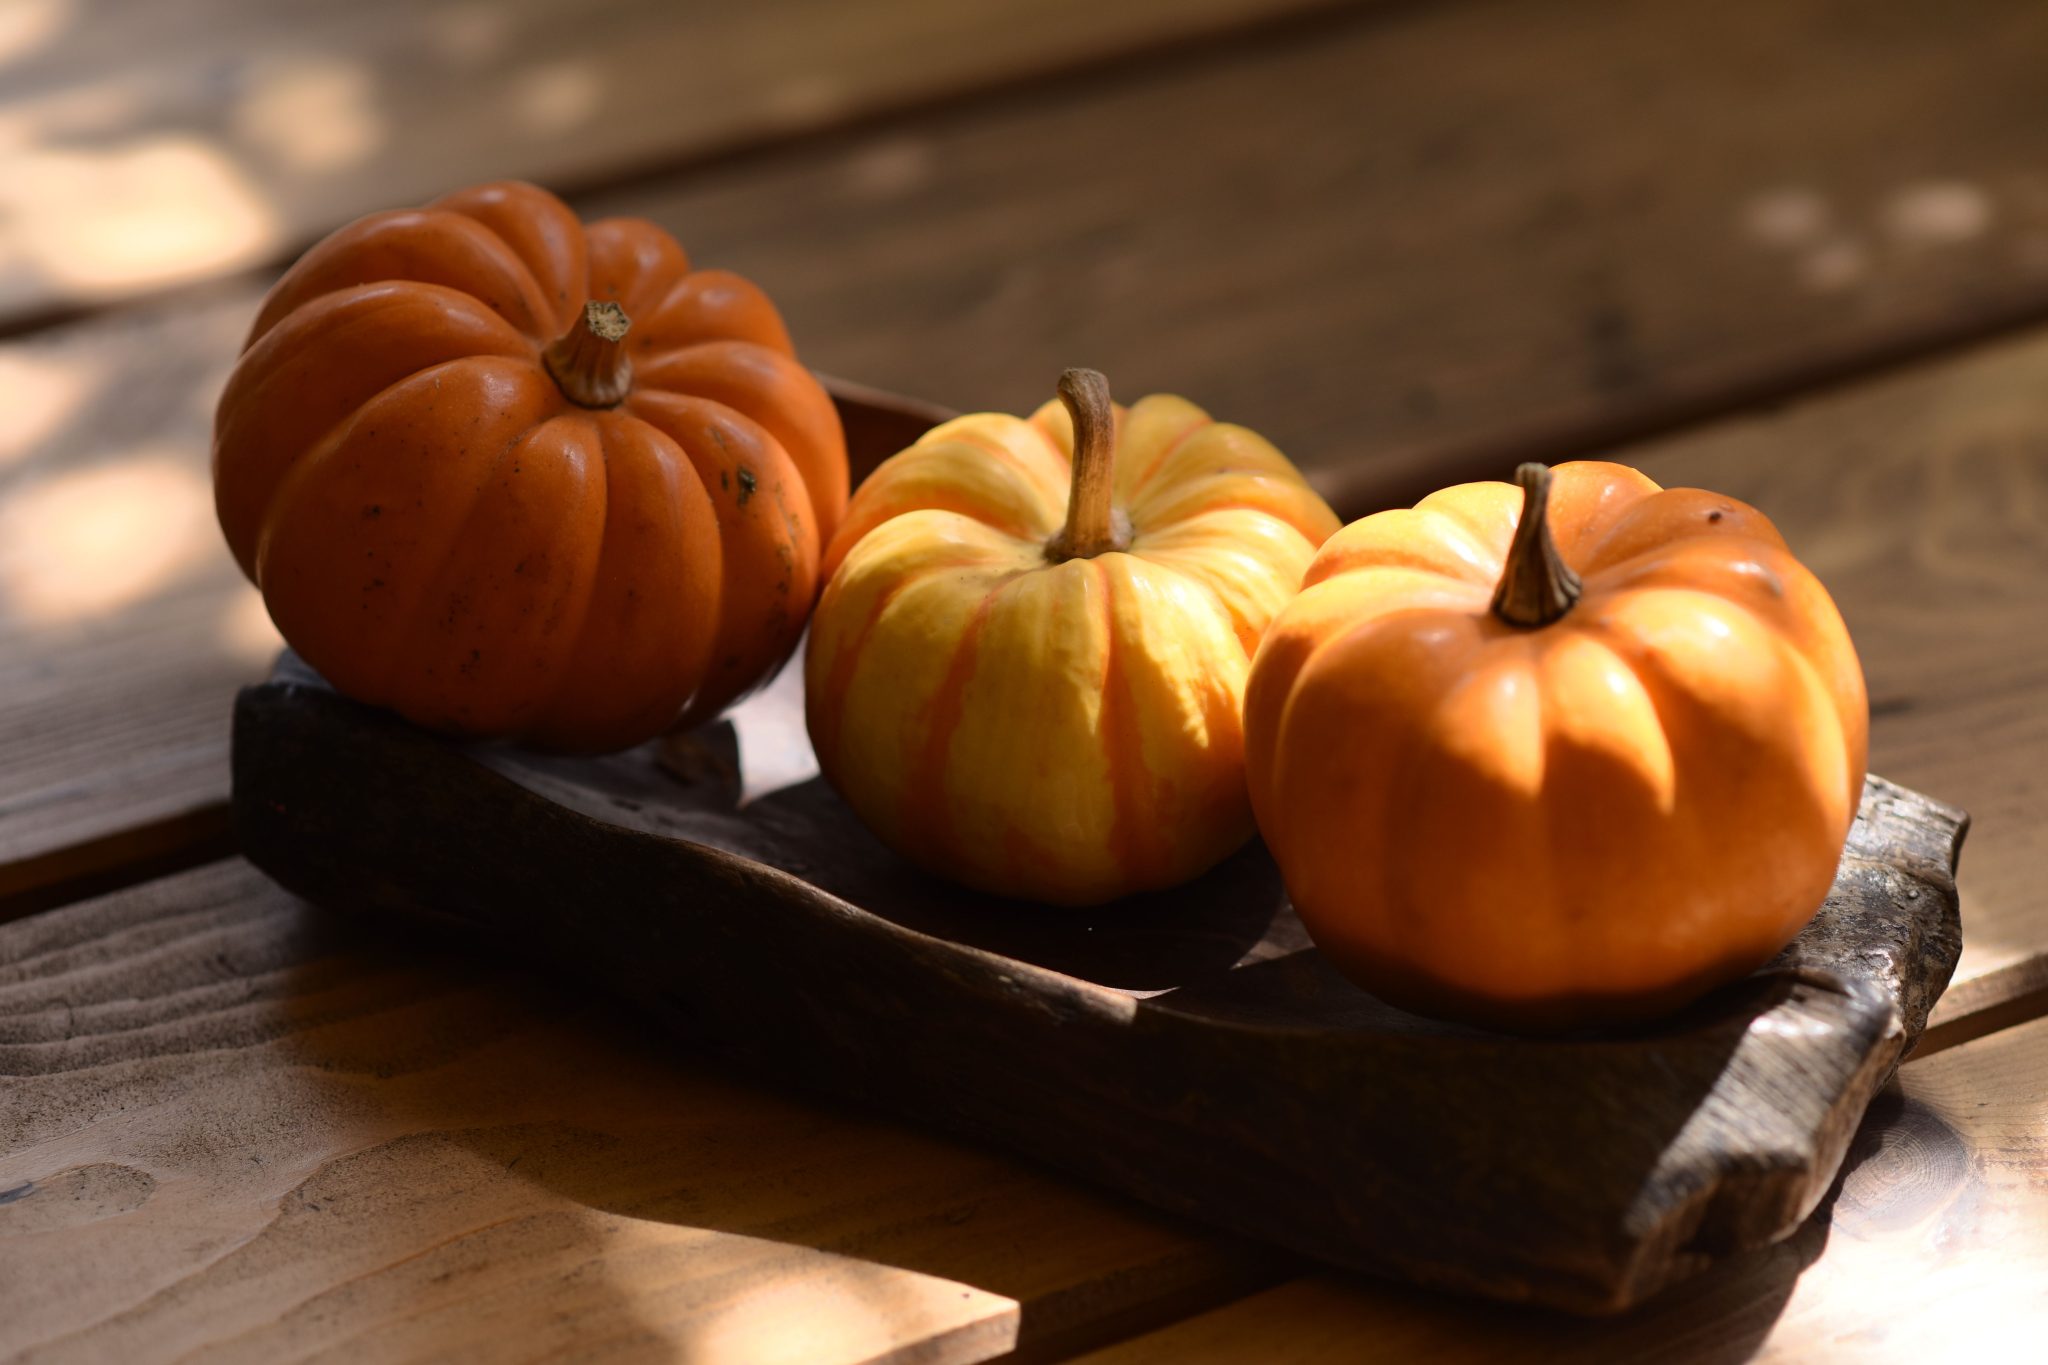
16. Rustic Mini Pumpkins in a Dark Wood Tray
This simple arrangement feels so warm and satisfying because of its use of natural materials and light. The dark, rustic wood of the tray provides a beautiful contrast to the bright orange and yellow of the mini pumpkins, making their colors pop. The light wood plank surface acts as a neutral backdrop. Most importantly, the dappled sunlight streaming across the scene adds a dynamic quality, creating highlights and shadows that bring the still life to life. It feels authentic and unforced.
📐 Style Math
You can capture this rustic vibe for just a few dollars. Mini pumpkins and gourds are often sold for as little as $1 each at grocery stores or farm stands in the fall. The “rustic wooden tray” doesn’t have to be a special purchase; check thrift stores for wooden bowls or cutting boards with interesting shapes. You can often find one for under $5. Facebook Marketplace is also a great place to find unique, inexpensive wooden decor. The dappled sunlight is free! It’s a great reminder that impactful decor isn’t about price.
17. Traditional Carved Jack-o’-Lanterns with Gothic Accessories
A display this theatrical, with multiple lit candles and carved pumpkins, is best suited for a party or special event rather than everyday decor. With open flames in the candelabra and inside the pumpkins, this setup should never be left unattended. It’s also not ideal for households with curious pets or small children. For a similar but safer vibe, swap all the real candles for high-quality, flickering LED versions. You’ll get all the spooky ambiance without any of the fire hazard, allowing you to enjoy the look with peace of mind.

📏 Scale Guide
To make your jack-o’-lantern carvings look extra spooky and dramatic, use a simple photography trick: place the main light source *behind* and *below* the subject. Here, the internal lighting from the pumpkins provides the primary glow, but the candles in the background add depth and context. By keeping the ambient room light low, the carved faces become the undeniable focal point. The contrast between the bright orange light and the deep shadows is what creates that classic, eerie Halloween atmosphere.
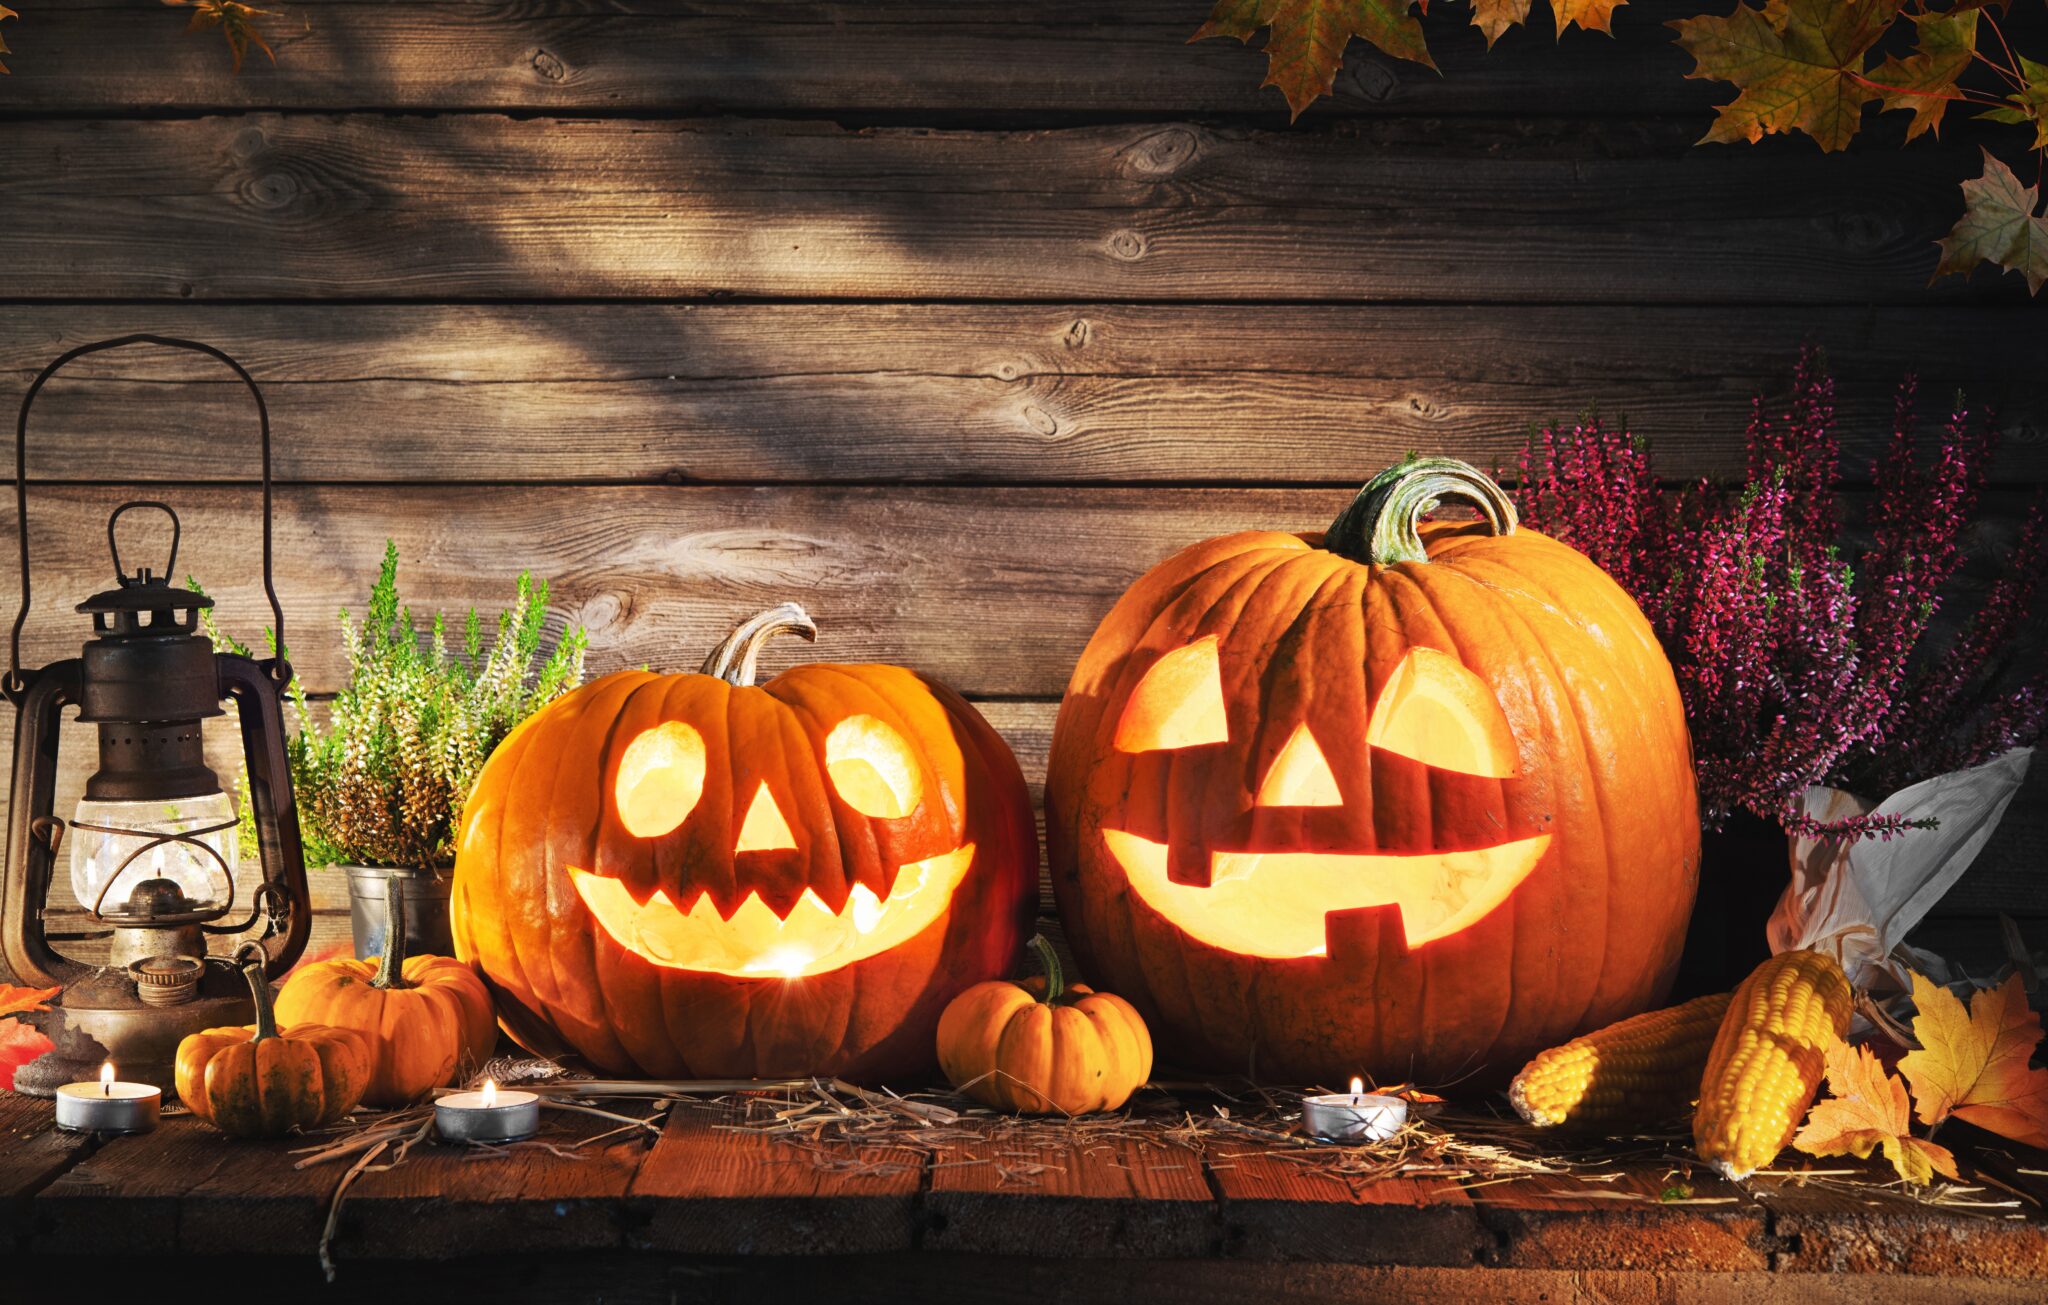
18. Rustic Halloween Display with Glowing Jack-o’-Lanterns
This rustic scene is a masterclass in texture layering. You have the smooth skin of the pumpkins, the rough texture of the dried corn husks, the fine wisps of hay, the cool metal of the lantern, and the rough-hewn wood of the wall. This rich combination of different surfaces creates a display that is incredibly deep and visually interesting. The warm, focused light from the pumpkins and lantern further enhances these textures by creating dramatic highlights and shadows, making the whole scene feel alive and immersive.
🧹 Maintenance Reality
This look taps directly into the ‘Modern Farmhouse’ aesthetic, which has been popular for years and shows no signs of slowing down. It’s a style that romanticizes rural life and values authenticity, craftsmanship, and natural materials. This display, with its vintage lantern, dried corn, and rustic wood, feels like it was gathered straight from a farm. In 2026, as our lives become more digital, this connection to a simpler, more tangible past feels especially comforting and desirable, making this style a perennial favorite.
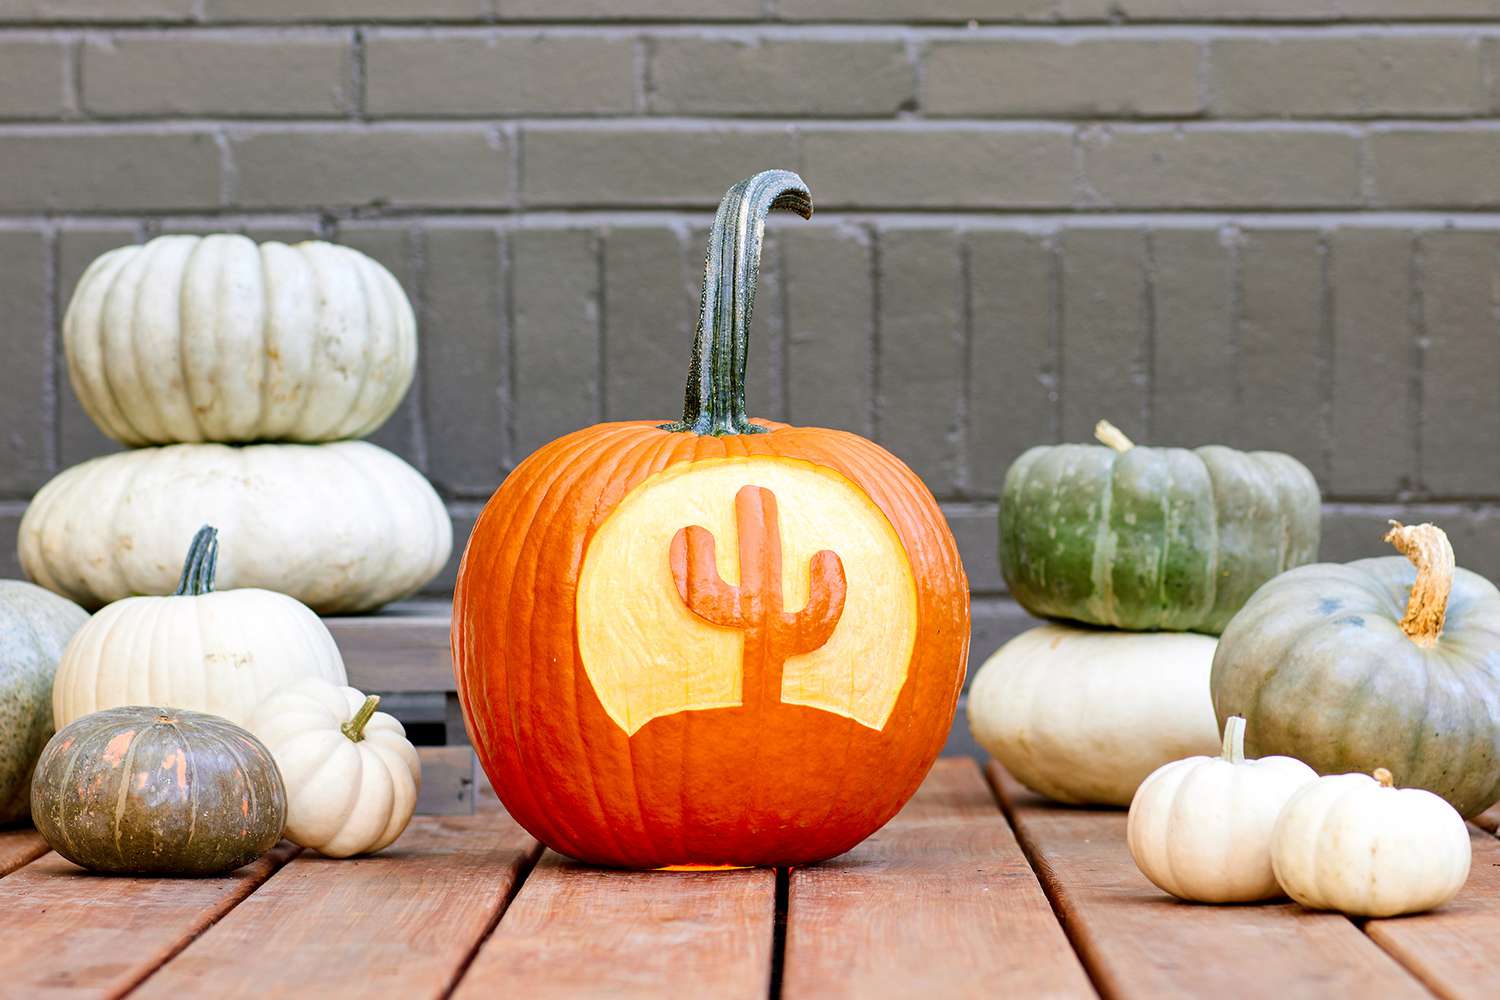
19. Subtle White and Gold Pumpkins on a Dark Mantel
This chic, minimalist approach is perfectly suited for a fireplace mantel, a console table, or a set of floating shelves. The key is a shallow depth. The arrangement likely only takes up about 8-10 inches of depth, making it ideal for narrow surfaces where larger, rounder pumpkins would feel overwhelming. Because the elements are small and the color palette is restrained, it adds a touch of seasonal spirit without creating visual clutter, making it a great choice for smaller rooms or more modern, uncluttered homes. Compare the subtlety here to the modern but bolder look of Idea #29.
🔧 How-To Brief
The single element that makes this work is the restraint in color. By sticking to a strict palette of white, charcoal grey, and a tiny hint of gold, the arrangement feels incredibly sophisticated and intentional. The temptation with fall decor is to lean into bright oranges and reds, but this proves that a quiet, neutral approach can be just as impactful. The gold accents are just enough to add a touch of warmth and luxury without breaking the minimalist spell.
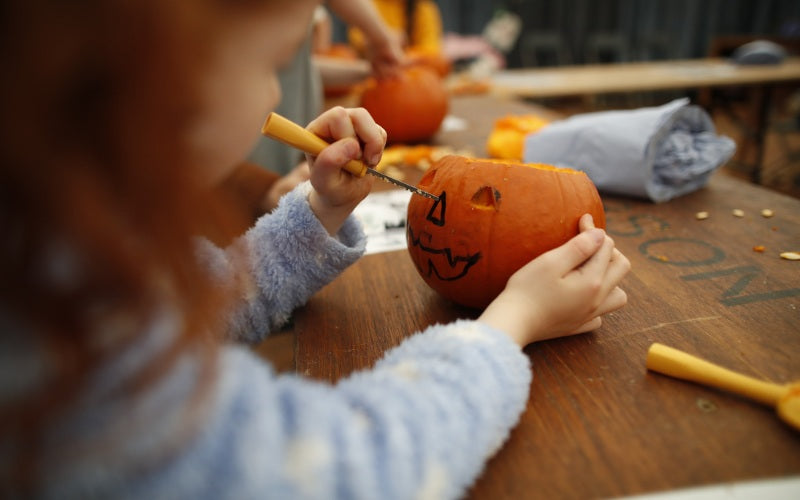
20. Child Carving a Jack-o’-Lantern on a Rustic Table
Pumpkin carving is a beloved family tradition, but it requires adult supervision, especially when sharp tools are involved. The specialized serrated saws in carving kits are designed to be safer than kitchen knives, but they can still cause injuries. Make sure an adult is always present to help with the tougher parts of the carving. Also, remember that the inside of a pumpkin can be surprisingly tough. An adult should always do the initial cutout for the lid, as that’s often the most difficult and risky step.
💸 Get This Look For Less
Want to preserve your carved masterpiece for more than a few days? Here’s a quick brief on how to make it last.
- After carving, clean the inside and outside thoroughly to remove all debris.
- Create a bleach solution by mixing 1 tablespoon of bleach with a quart of water.
- Spray the entire pumpkin with the solution, inside and out. This will kill bacteria and mold spores that cause decay.
- Let it air dry completely.
- To keep it from drying out, rub a thin layer of petroleum jelly on all the cut edges.
- Re-spray with the bleach solution every day or two to keep it fresh.
This process can help your jack-o’-lantern last for up to two weeks!
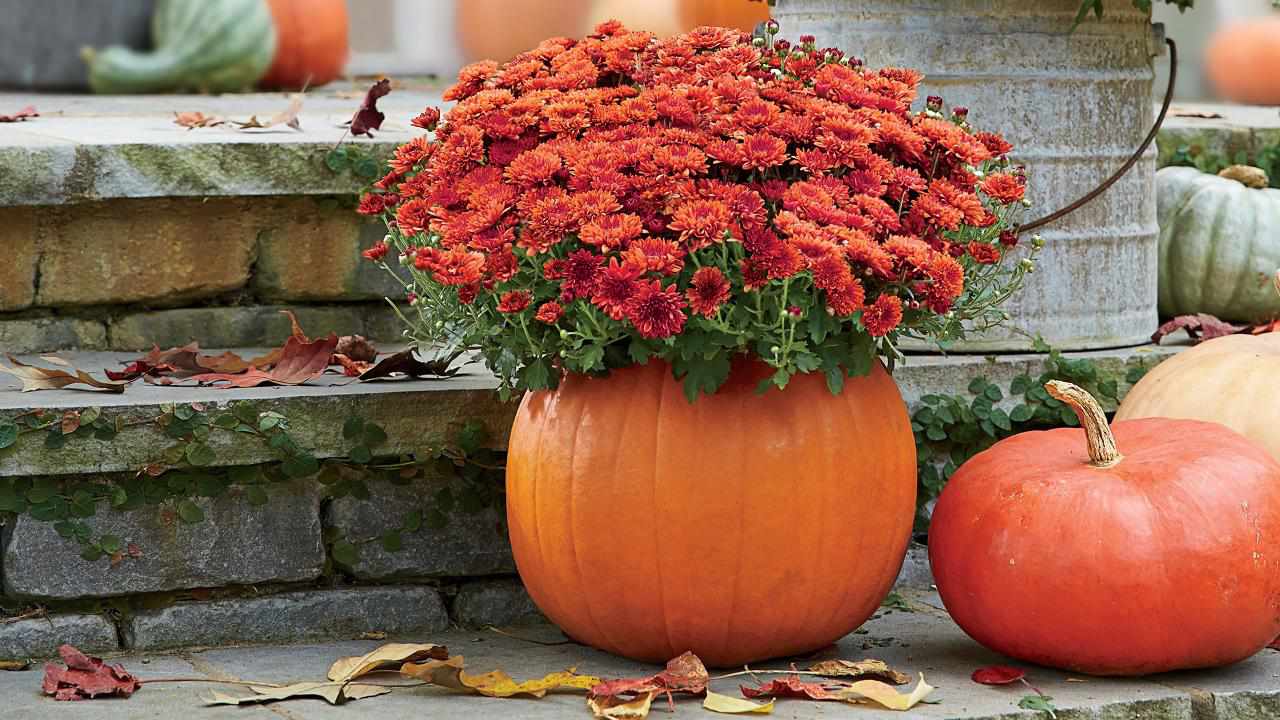
21. White Calligraphy Thankful and Grateful Pumpkin Decor
When applying calligraphy or any detailed design to a round object, your first instinct might be to center it perfectly. Don’t. Instead, place the main word, like ‘Thankful’ here, slightly above the visual center of the pumpkin. This little bit of asymmetry feels more natural and visually pleasing. Placing it dead-center can make the design feel static and less organic. The off-center placement here gives the script a little room to breathe and makes the overall composition feel more artful and less like a computer-generated label.
✅ Before You Start
This design is so effective because of its high contrast and elegant simplicity. The crisp, black, flowing script stands out dramatically against the smooth, matte white surface of the pumpkin. There are no other colors or distracting elements, which forces your eye to focus on the beautiful lettering and the positive message. It’s a confident, minimalist statement that feels both modern and timeless. It fits perfectly into a neutral home decor scheme while still feeling distinctly autumnal.
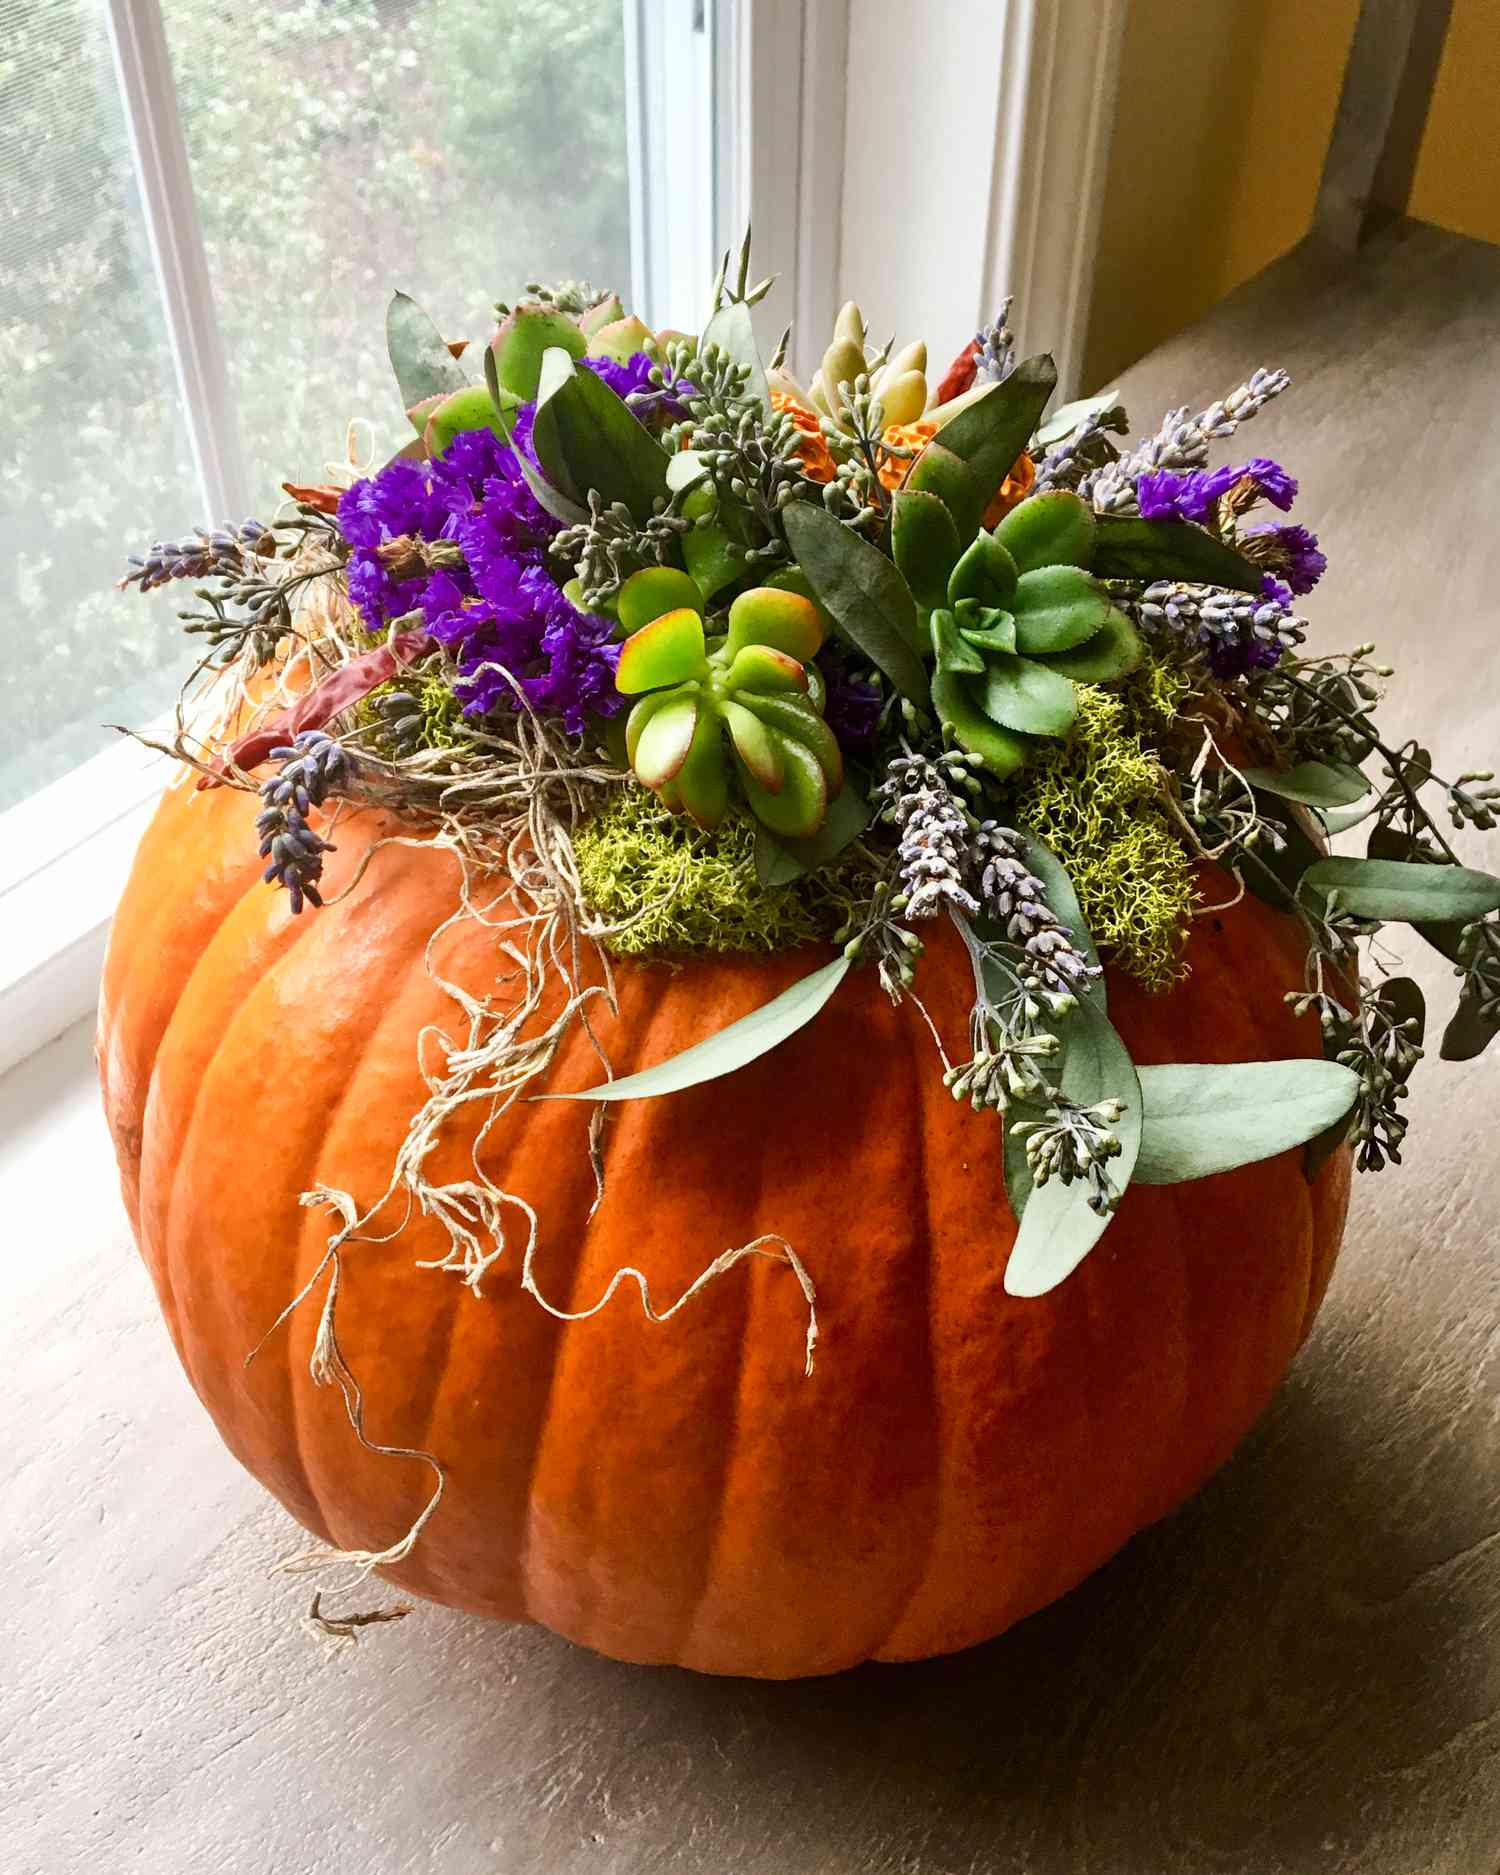
22. White Pumpkin with Pressed Dried Flowers and Twine
This style is part of the growing “cottagecore” and “nature-inspired craft” movements. It’s a gentle, whimsical approach to seasonal decor that moves away from bold, traditional colors in favor of softer, more organic elements. Using pressed flowers connects the decoration directly to the garden and the changing seasons in a very personal way. This trend has staying power because it’s sustainable (using natural elements you can forage yourself) and allows for endless personalization. It’s less about a specific holiday and more about celebrating nature’s beauty. For another crafty take, check out the doodle pumpkins in Idea #27.
💰 Budget Breakdown
This delicate look is incredibly budget-friendly. A small white pumpkin costs just a few dollars. The main decorative element—the pressed flowers—can be completely free if you press them yourself from your garden or wildflowers. If you don’t have a flower press, you can simply press them between the pages of a heavy book for a week or two. A roll of twine is only a couple of dollars. This is a perfect example of creating something beautiful and high-end looking with minimal expense, just a little time and creativity.
23. Whimsical Pumpkin Latte Decor with Rope Legs
This design is charming because it uses the visual language of a completely different object—a pumpkin spice latte—and applies it to a pumpkin. The “whipped cream” top, striped “straws,” and sprinkles are instantly recognizable cues that create a sense of playful surprise. The anthropomorphic face with its sweet smile and rosy cheeks gives it a friendly personality, making it feel like a character rather than just a decoration. It’s a clever fusion of two beloved fall icons.
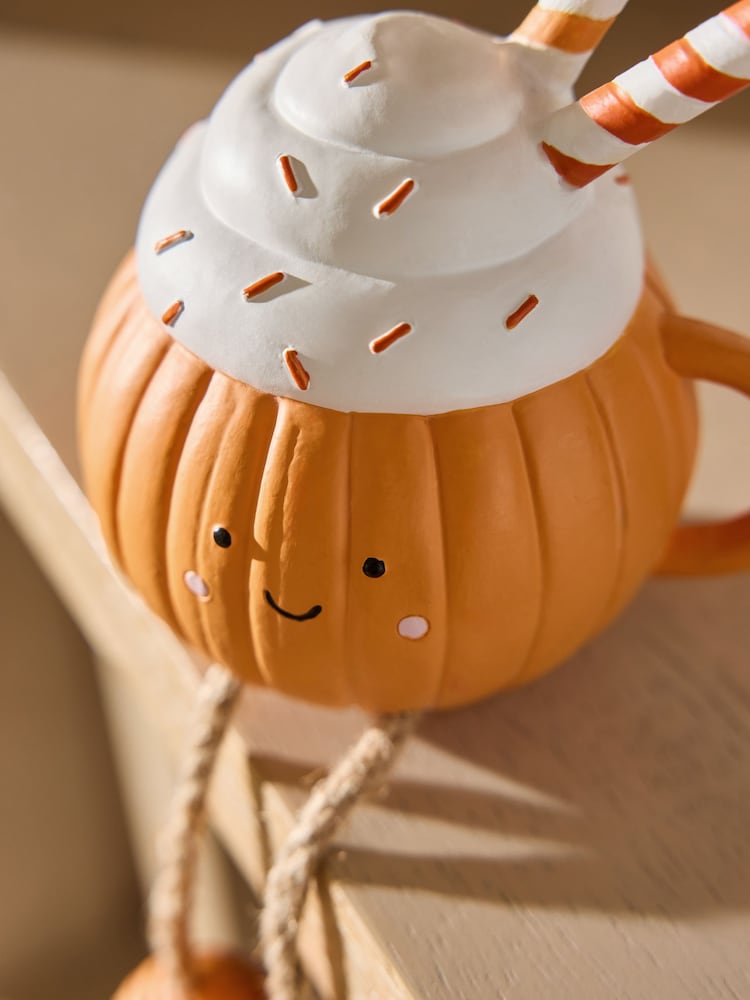
⭐ The One Thing
It’s all about the rope legs. They are the single detail that elevates this from a cute pumpkin decoration into a whimsical, laugh-out-loud piece of decor. The dangling legs give it a sense of character and life, transforming it into a little creature perched on the edge of the table. It’s an unexpected, slightly silly addition that is utterly charming and memorable. Without the legs, it’s cute; with them, it has a personality that makes you smile.
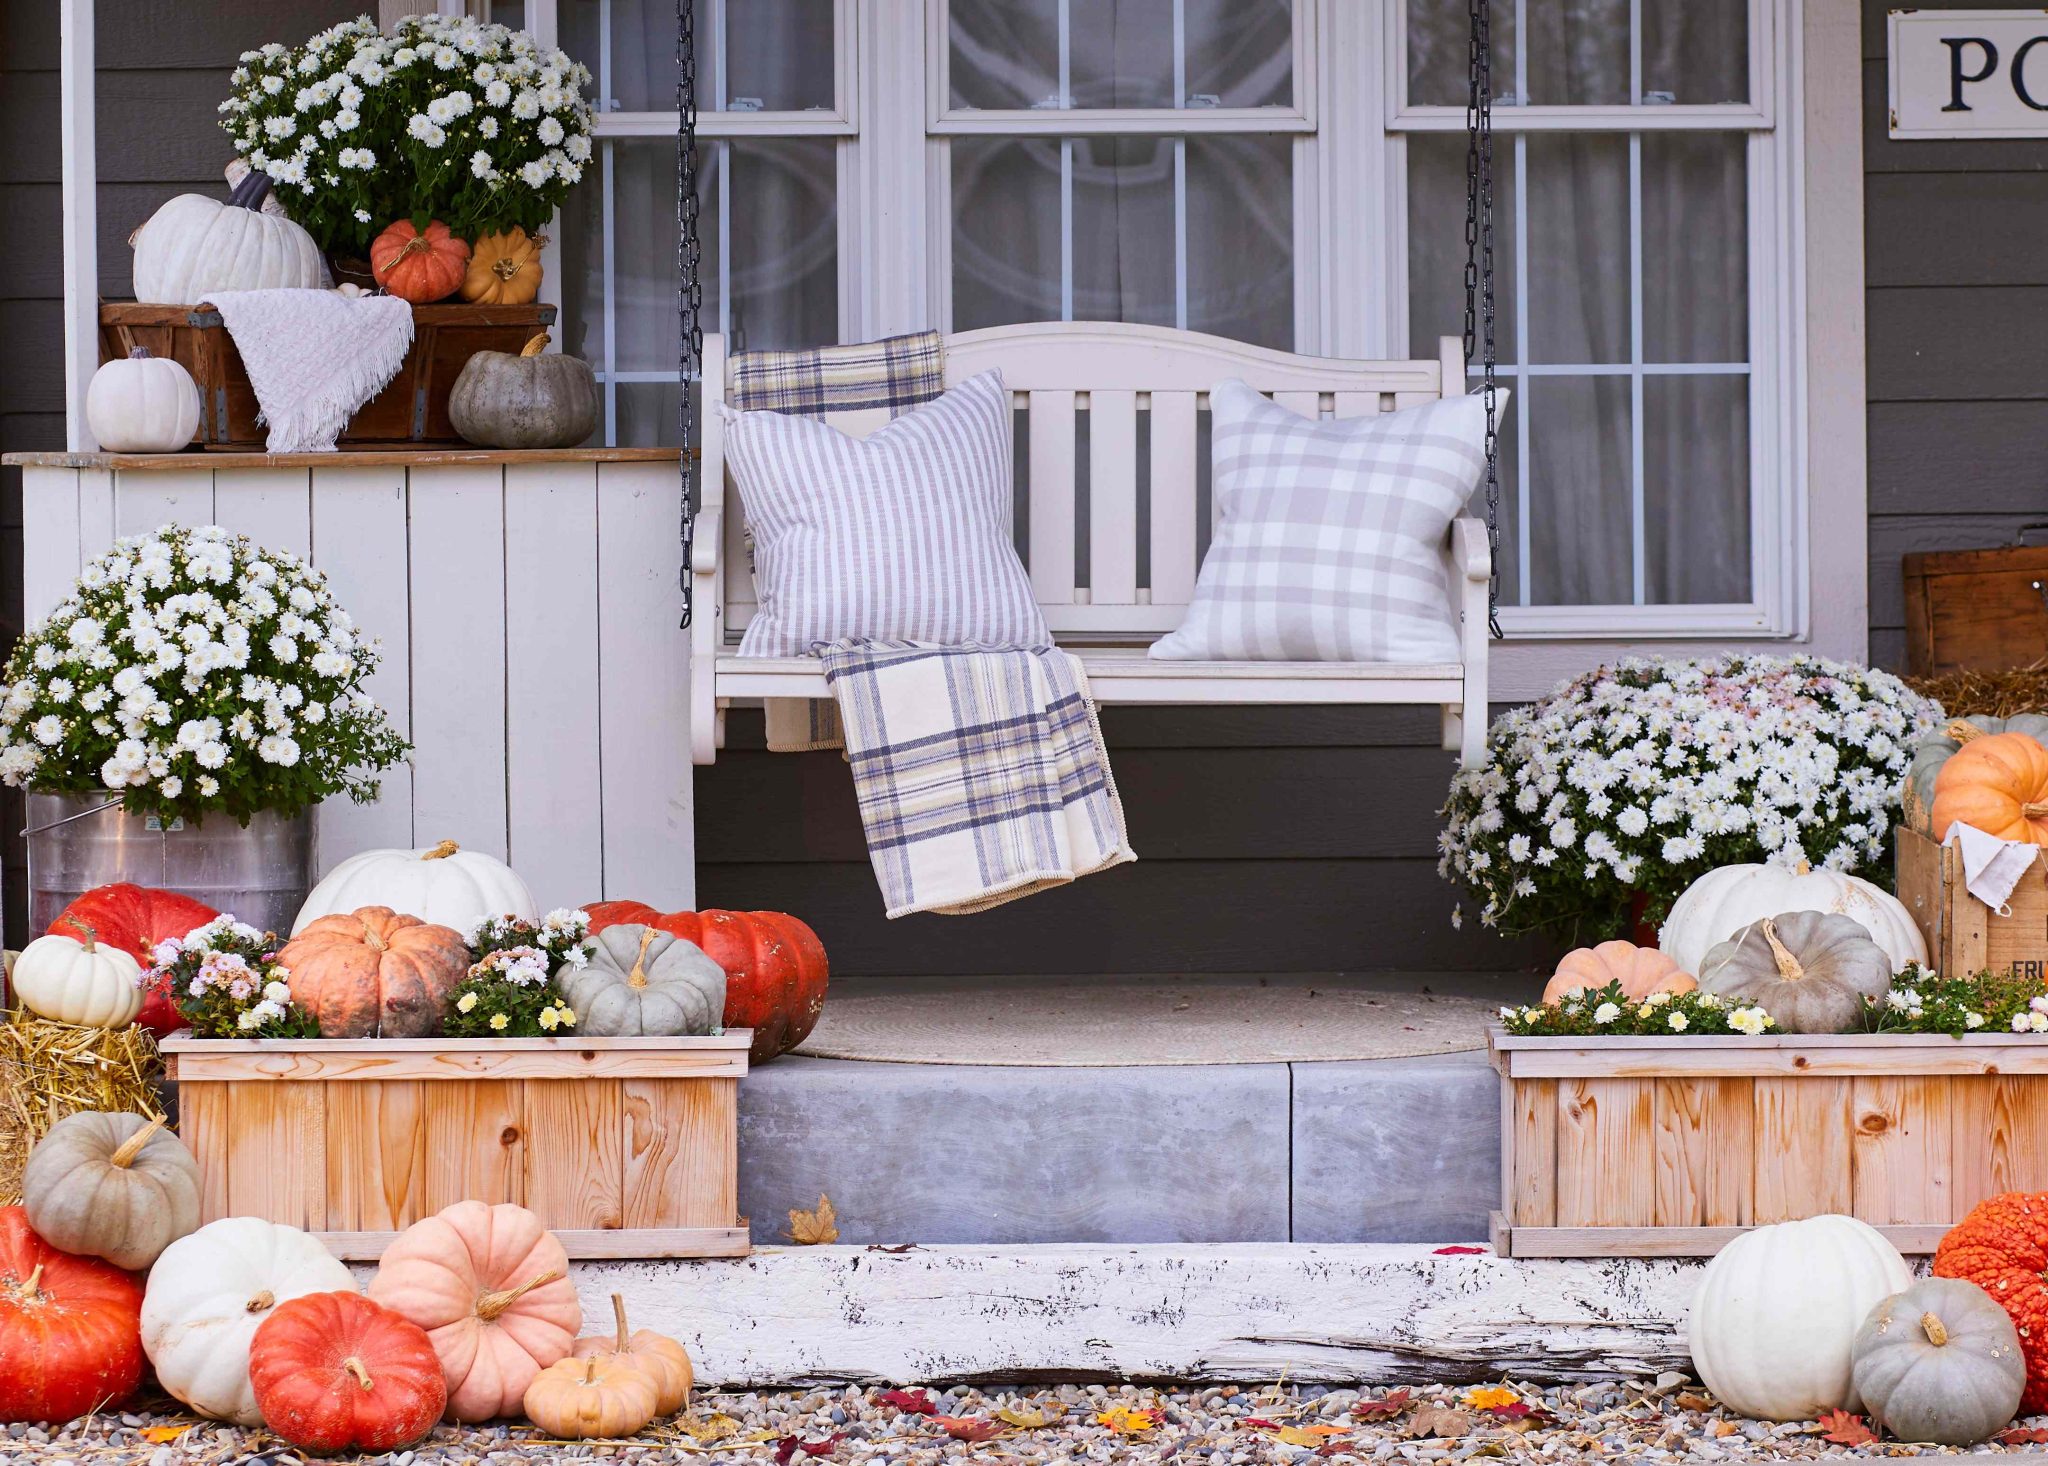
24. Cozy Porch Swing with Plaid and Pumpkins
A successful fall decor scheme often relies on a simple mathematical principle: repetition with variation. In this cozy setup, the formula is roughly 50% pumpkins + 30% cozy textiles + 20% natural accents. The pumpkins are the main theme, but notice the variation in size, shape, and color. The textiles (pillows and blankets) add softness and pattern. The natural accents, like corn stalks or hay, provide rustic texture. You can change the colors of the pumpkins or the patterns on the pillows, but keeping this ratio will always result in a balanced, inviting look.
🔥 Trending Context
When decorating an outdoor space like a porch, don’t be afraid to use indoor textiles like pillows and blankets, but be strategic. Use pillow inserts and covers designed for outdoor use, as they are resistant to moisture and mildew. For throw blankets, choose materials that are easily washable, like cotton or a synthetic blend. On days with good weather, bring them out to create a cozy, inviting look, and simply bring them back inside at night or when it rains. It’s a small step that makes a porch feel like a true outdoor living room.
25. Rustic Neutral Pumpkin Arrangement with Dried Grasses
This arrangement feels so calming and put-together because it adheres to the ‘Rule of Threes’. Grouping objects in odd numbers—especially three—is a classic design trick that creates a sense of harmony and visual balance that’s more engaging than an even-numbered group. The variation in size (large, medium, small) and color (cream, orange) within the trio adds further interest. The bundle of dried grasses acts as a fourth element that breaks the symmetry just enough to keep it from feeling too staged. It feels natural and effortlessly stylish.
💡 Designer Tip
Before you commit to a neutral, rustic fall decor scheme, take a quick inventory of your existing space.
- What are your wall colors? This look is stunning against off-white, beige, or warm gray walls, but might get lost against a darker color.
- What are your wood tones? The light wood stool works beautifully with other light-to-medium wood tones, like oak or maple.
- Where will it be placed? This arrangement needs good natural light to highlight the subtle textures of the cream pumpkin and dried grasses.
- What’s your goal? This is a quiet, calming look. If you’re hoping for a bold, high-energy statement, consider a more colorful idea like the one seen in Idea #1.
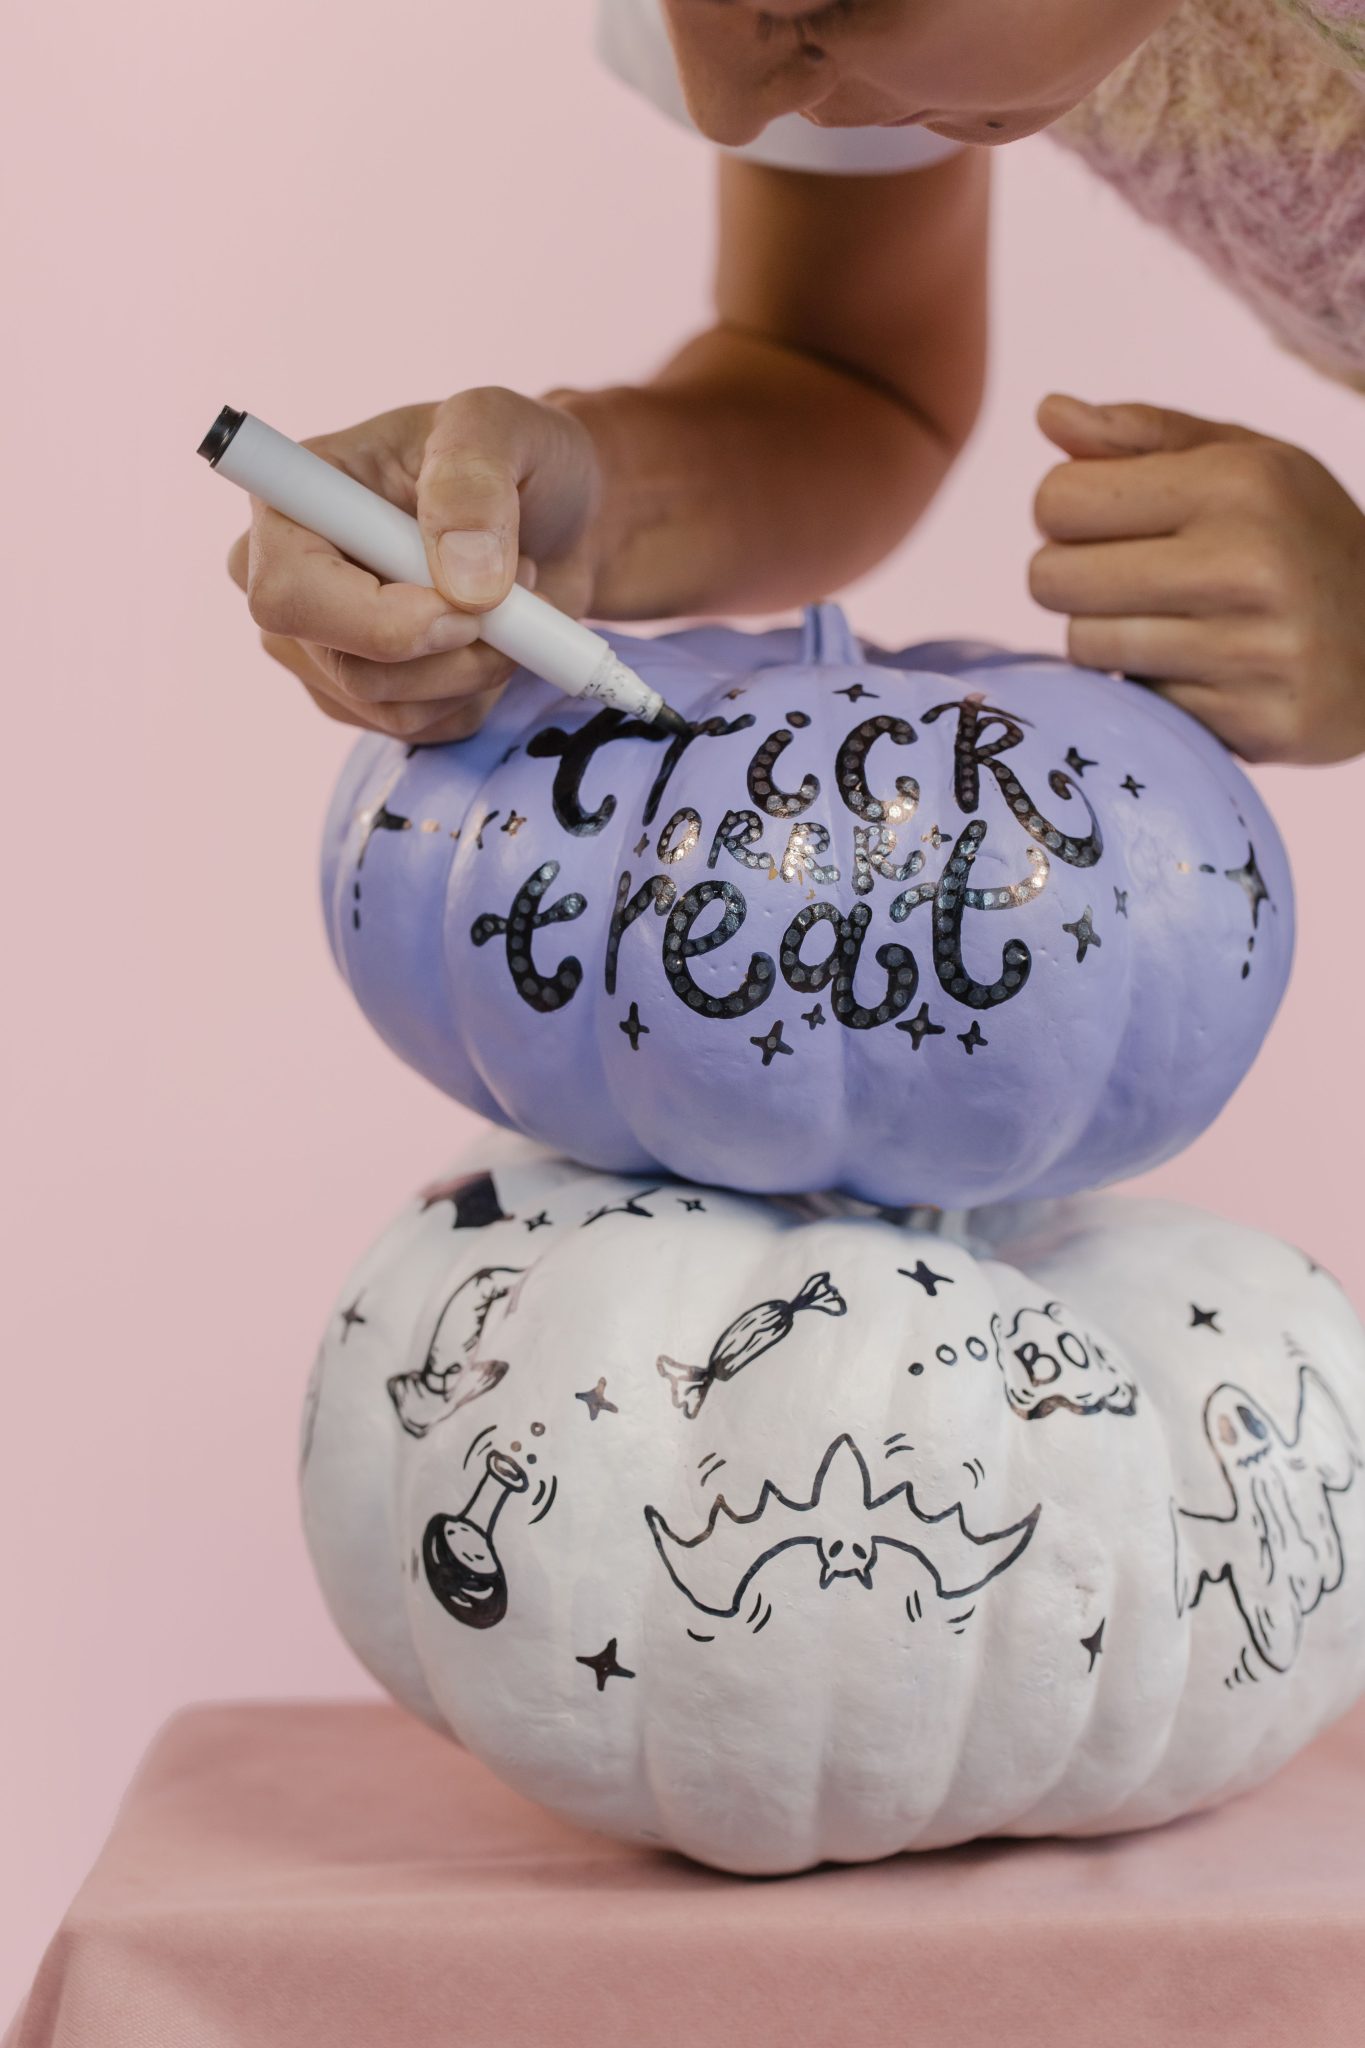
26. DIY Pastel Painted Pumpkins with Halloween Doodles
Creating your own doodle-art pumpkins is a fun afternoon project. Here’s how to get the look:
⚠️ Real Talk
- Start with faux craft pumpkins (or real ones) and give them a coat of matte acrylic paint in your desired pastel colors. Let them dry completely for at least 2-3 hours.
- Use a black permanent marker with a fine tip for the doodles. For the white pumpkin, start drawing whimsical Halloween shapes like ghosts, bats, and candy. Don’t overthink it; the charm is in the hand-drawn look.
- For the text, lightly pencil in your words first to get the spacing right. Then, trace over them with your marker. Create the dotted effect by simply drawing dashed lines.
- Add small star or dot accents to fill in any empty spaces and tie the designs together.
- Optional: Seal with a coat of clear matte spray sealer to protect your artwork.
This is a low-cost project, primarily needing just paint and markers, and takes about 2 hours plus drying time.
This playful, pastel approach to Halloween is a huge trend, driven largely by a younger, Pinterest- and Instagram-savvy audience. It moves away from the traditional, spooky orange-and-black palette and embraces a lighter, more modern aesthetic. It’s less about horror and more about a whimsical, stylized celebration of the season. This “Pastel-oween” trend has serious staying power because it allows Halloween decor to integrate more seamlessly with existing, light-and-bright home decor styles, making it feel more chic and less kitschy.
27. Stacked White Pumpkins and Fall Foliage in a Crate
This display works so well because of the clever use of a container to frame the arrangement. The rustic wooden crate acts like a shadow box, creating a defined space for the decor and making the simple act of stacking pumpkins feel more intentional and complete. The contrast between the crisp, smooth white pumpkins and the rough, weathered wood of the crate is also key. Finally, the warm tones of the amber bottles and red-orange leaves provide a perfect color complement to the neutral pumpkins and wood. For another take on rustic charm, see the mistakes to avoid in creating a cluttered look.
🎯 What Makes It Work
While this look is incredibly charming, be aware that stacking real pumpkins can lead to premature rotting. Moisture can get trapped between the pumpkins, and the weight of the top ones can bruise the bottom ones, creating soft spots. If you want this display to last more than a week or two, your best bet is to use faux pumpkins. They are lightweight, won’t rot, and can be stored and reused every year, making them a much more practical and long-lasting investment for a stacked arrangement.
28. Modern Matte Black Pumpkins on Floating Shelves
The key to making a minimalist display feel complete is to add a touch of organic life. Here, the eucalyptus branches are essential. They break up the hard, clean lines of the shelves and the round, static shapes of the pumpkins. The soft, silvery-green color adds a gentle, natural counterpoint to the stark matte black. A good rule is the 80/20 principle for minimalism: 80% clean lines and simple shapes, and 20% organic texture or shape to keep the space from feeling cold or sterile.
📐 Style Math
This minimalist approach is ideal for smaller spaces or areas where you want a hint of autumn without overwhelming the existing decor. It’s perfect for narrow hallways, small entryways, or even a bathroom. The floating shelves likely have a depth of only 6-8 inches. The key is verticality; it draws the eye upward, making a small wall feel taller. This is not a look for a large, empty wall, where it might feel lost. It’s a quiet statement, best used in an intimate or transitional space. Compare this to the similar palette but different scale of Idea #19.
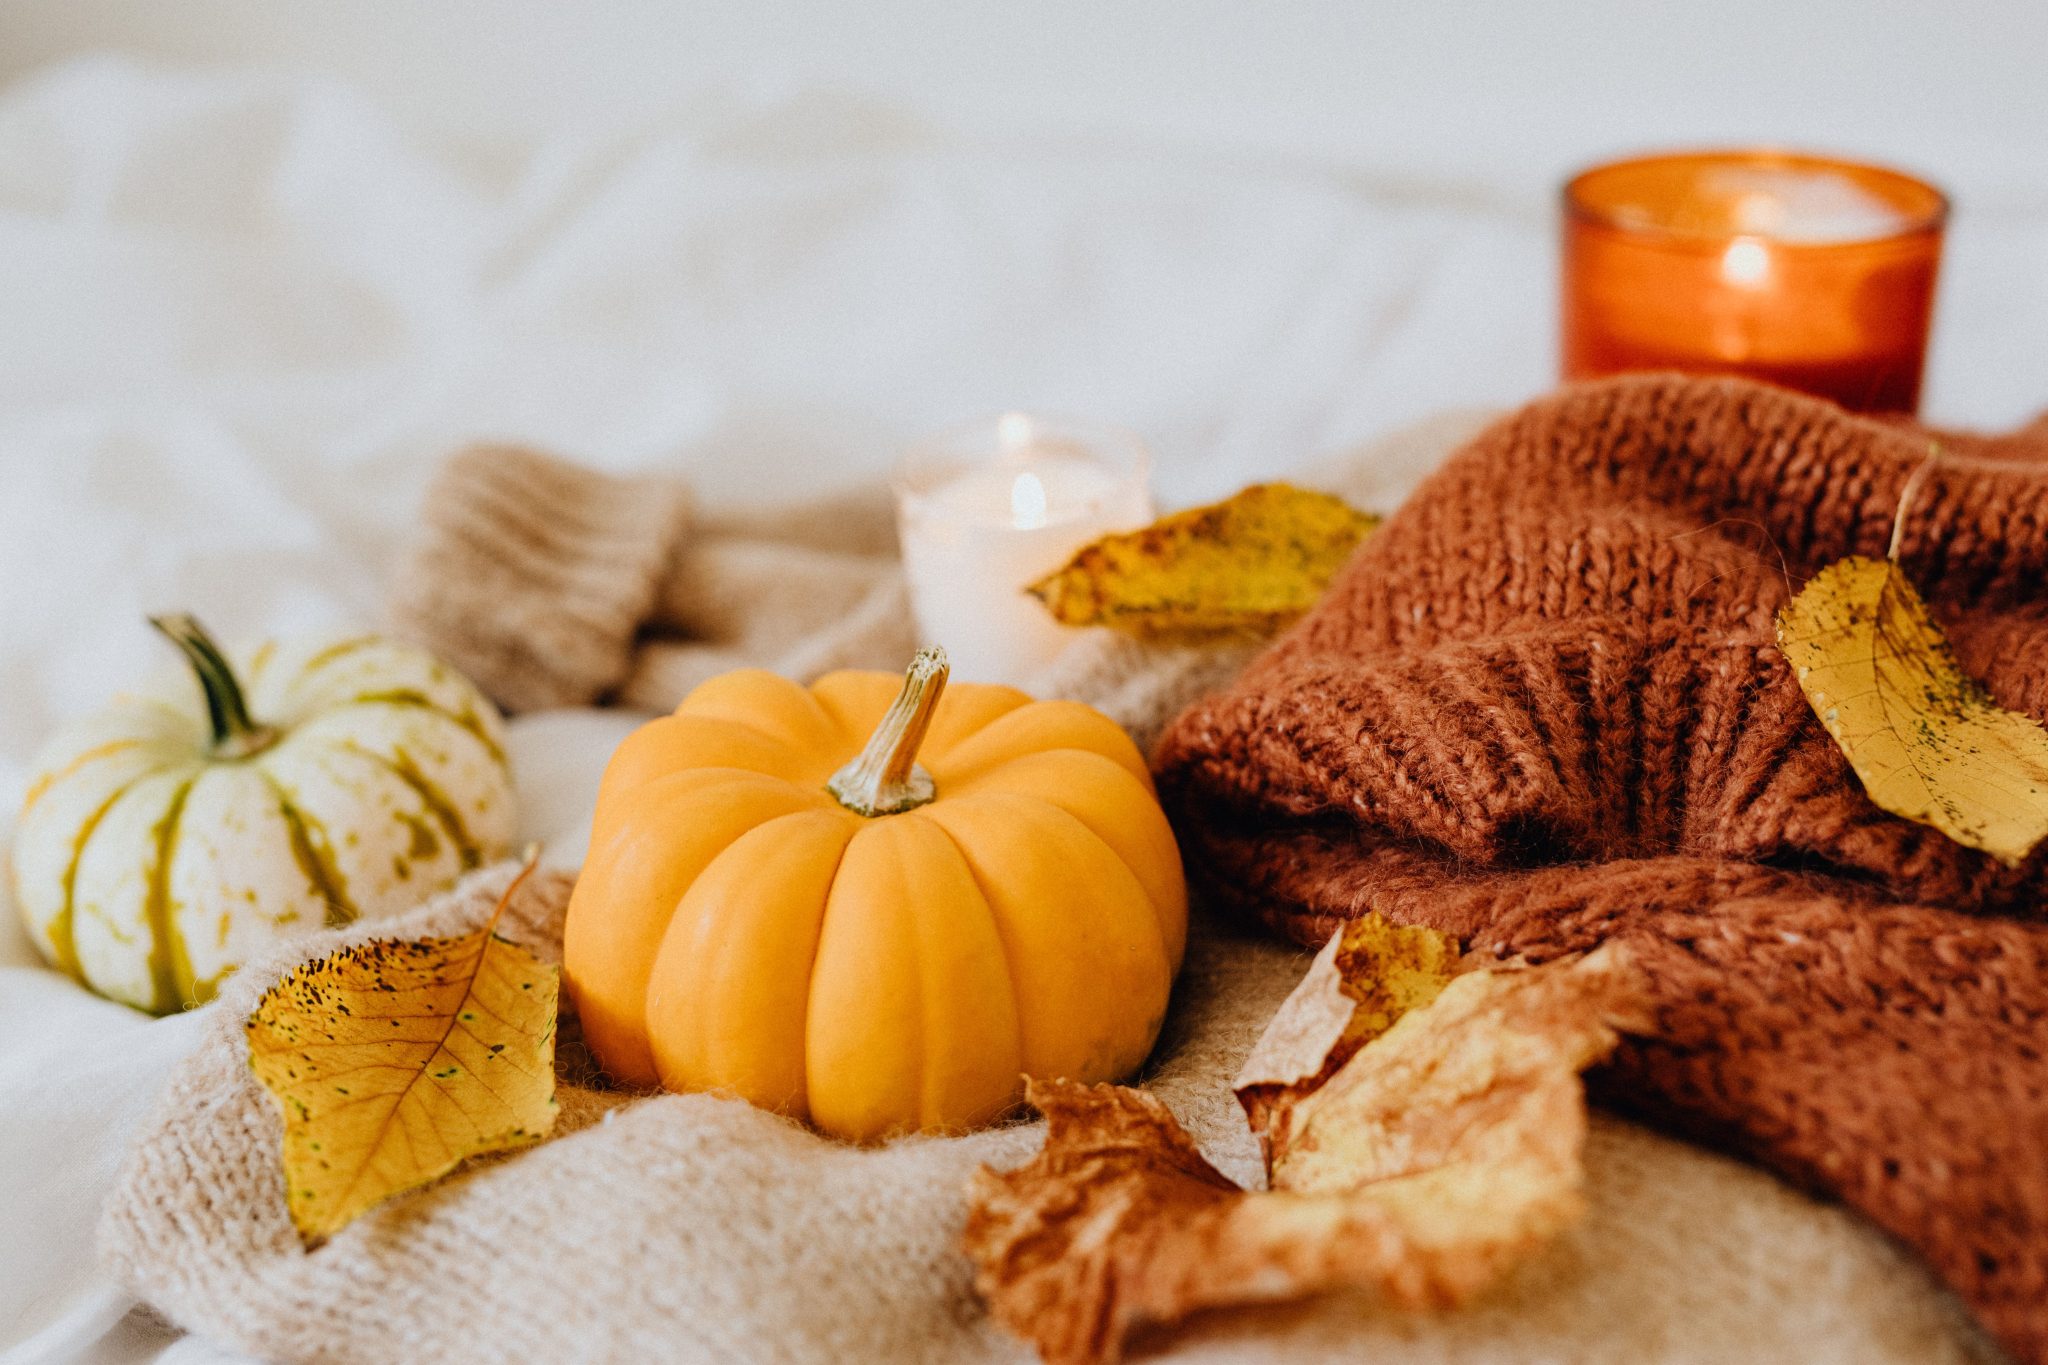
29. Cozy Knits and Warm-Toned Pumpkins
The feeling of ‘cozy’ is a design equation that you can replicate. This look is about 60% soft textures + 40% warm colors. The dominant element is the array of soft, touchable surfaces—the knitted blankets, the soft weave of a sweater, maybe even a fuzzy pillow. The other part of the formula is a color palette rooted in warmth: terracotta orange, mustard yellow, cream, and warm browns. By focusing on these two elements—texture and color—you can evoke that cozy autumn feeling in any corner of your home.
📏 Scale Guide
This warm, inviting scene works because it appeals to more than just our sense of sight; it appeals to our sense of touch. The visual prominence of knitted items immediately makes us think of warmth, softness, and comfort. It’s a sensory shortcut to feeling cozy. The pumpkins provide the seasonal context, but the textiles are what create the emotional response. The tight, close-up composition makes the scene feel intimate and immersive, as if you could just reach in and wrap yourself in one of those blankets.
30. Abundant Porch with Multi-Colored Pumpkins and Mums
Creating a large, impactful display like this can be an investment, but many of the core pieces can be used for years. The key is to splurge on reusable items and save on the seasonal specifics.
🧹 Maintenance Reality
- White Porch Swing: $200 – $500
- Outdoor Pillows: $40 – $80 (for two)
- Large Metal Buckets/Planters: $50 – $100 (for two)
- Wooden Crates/Planters: $30 – $60
- Assorted Pumpkins (White, Orange, Gray): $80 – $150
- White Chrysanthemum Plants: $40 – $80
- TOTAL: $440 – $970
- Budget alternative: Build a simple bench instead of a swing, use thrifted baskets for planters, and focus on fewer, more impactful pumpkins from a local farm.
A beautiful porch display like this requires a covered area to protect it from the elements. The white wooden swing, decorative pillows, and even the hay bales will not hold up well to rain. The pumpkins will also rot much faster if they are constantly wet. This stunning look is best suited for a covered front porch or a protected entryway. If your porch is exposed to the elements, you’ll need to opt for weather-resistant furniture and be prepared for your natural decor to have a much shorter lifespan.
Ready to Carve Out Your Autumn Style?
Fall is your chance to create that warm, welcoming vibe you’ve been dreaming of, and now you have a playbook of 30 distinct ideas to get you started. Don’t be afraid to mix, match, and put your own spin on these concepts. After all, the best design is the one that tells your story.
For a daily dose of home decor inspiration, be sure to follow us on Pinterest!