You know that feeling when you finally find the DIY Halloween decor that looks exactly right for your space, but the instructions are confusing or the result looks nothing like the picture? We’ve all been there. It’s easy to get lost in a sea of inspiration photos that feel totally unachievable for a real home and a real budget.
That’s why we’ve done the hard work for you. After filtering through hundreds of options from craft havens like Dollar Tree, Michaels, and JOANN, we curated this list of 30 genuinely doable DIY Halloween decoration ideas. Inside, you’ll find everything from rustic and spooky outdoor displays to minimalist and whimsical indoor vignettes. We’re showing you how to bring these looks to life in your own home, for 2026 and beyond. Stay until the end, where we break down the most common mistakes that can ruin these looks. 📌 Save this to Pinterest for later — you’ll want to revisit these ideas.
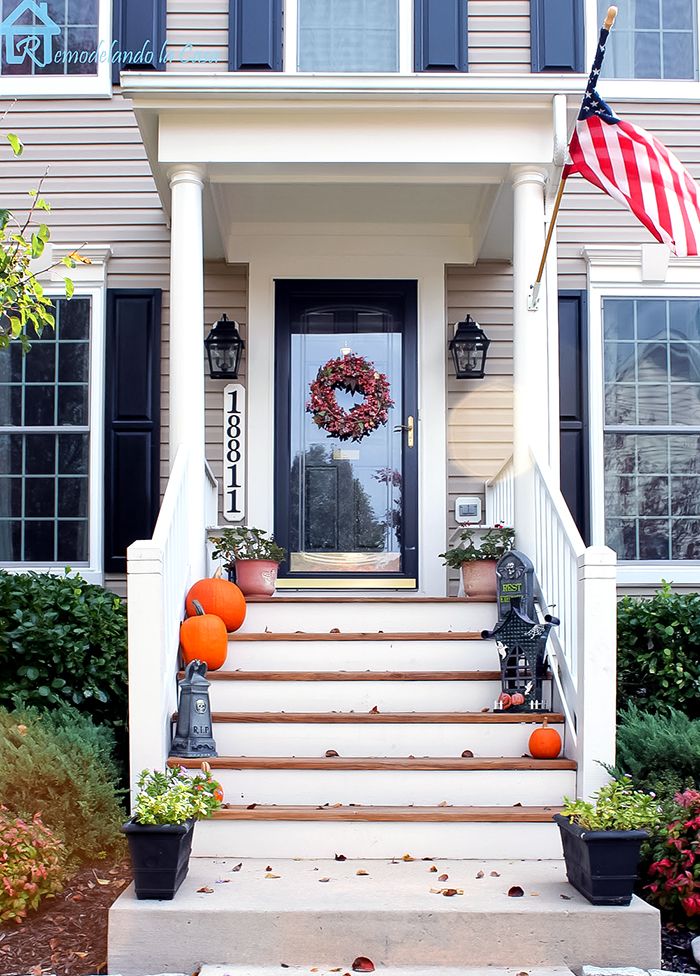
1. A Classic and Subtle Welcome with Pumpkins and Gravestones
This porch design succeeds because it leans into an autumnal palette rather than screaming Halloween. The harmony between the warm orange pumpkins and the cool gray of the gravestone figurines creates a gentle, pleasing contrast. The key is restraint; by limiting the ‘spooky’ elements to just a few small items and focusing on seasonal staples like a fall berry wreath, the overall look feels welcoming and festive, not kitschy. The repetition of black in the door frame, shutters, and gravestone text provides a subtle anchor that ties the whole composition together.
|
📋 Copy HEX 🔗 Share |
⚠️ Real Talk
When styling your front steps, always work in odd numbers. A group of three or five pumpkins will always look more natural and artfully arranged than an even-numbered group. For this look, aim for one large pumpkin (about 18 inches tall), two medium ones (12-14 inches), and two small gourds. This variation in scale creates visual interest and depth. Arrange them in an asymmetrical cluster, with the largest pumpkin set back and the smaller ones spilling forward onto the next step down. This simple trick makes any arrangement feel more professionally styled.
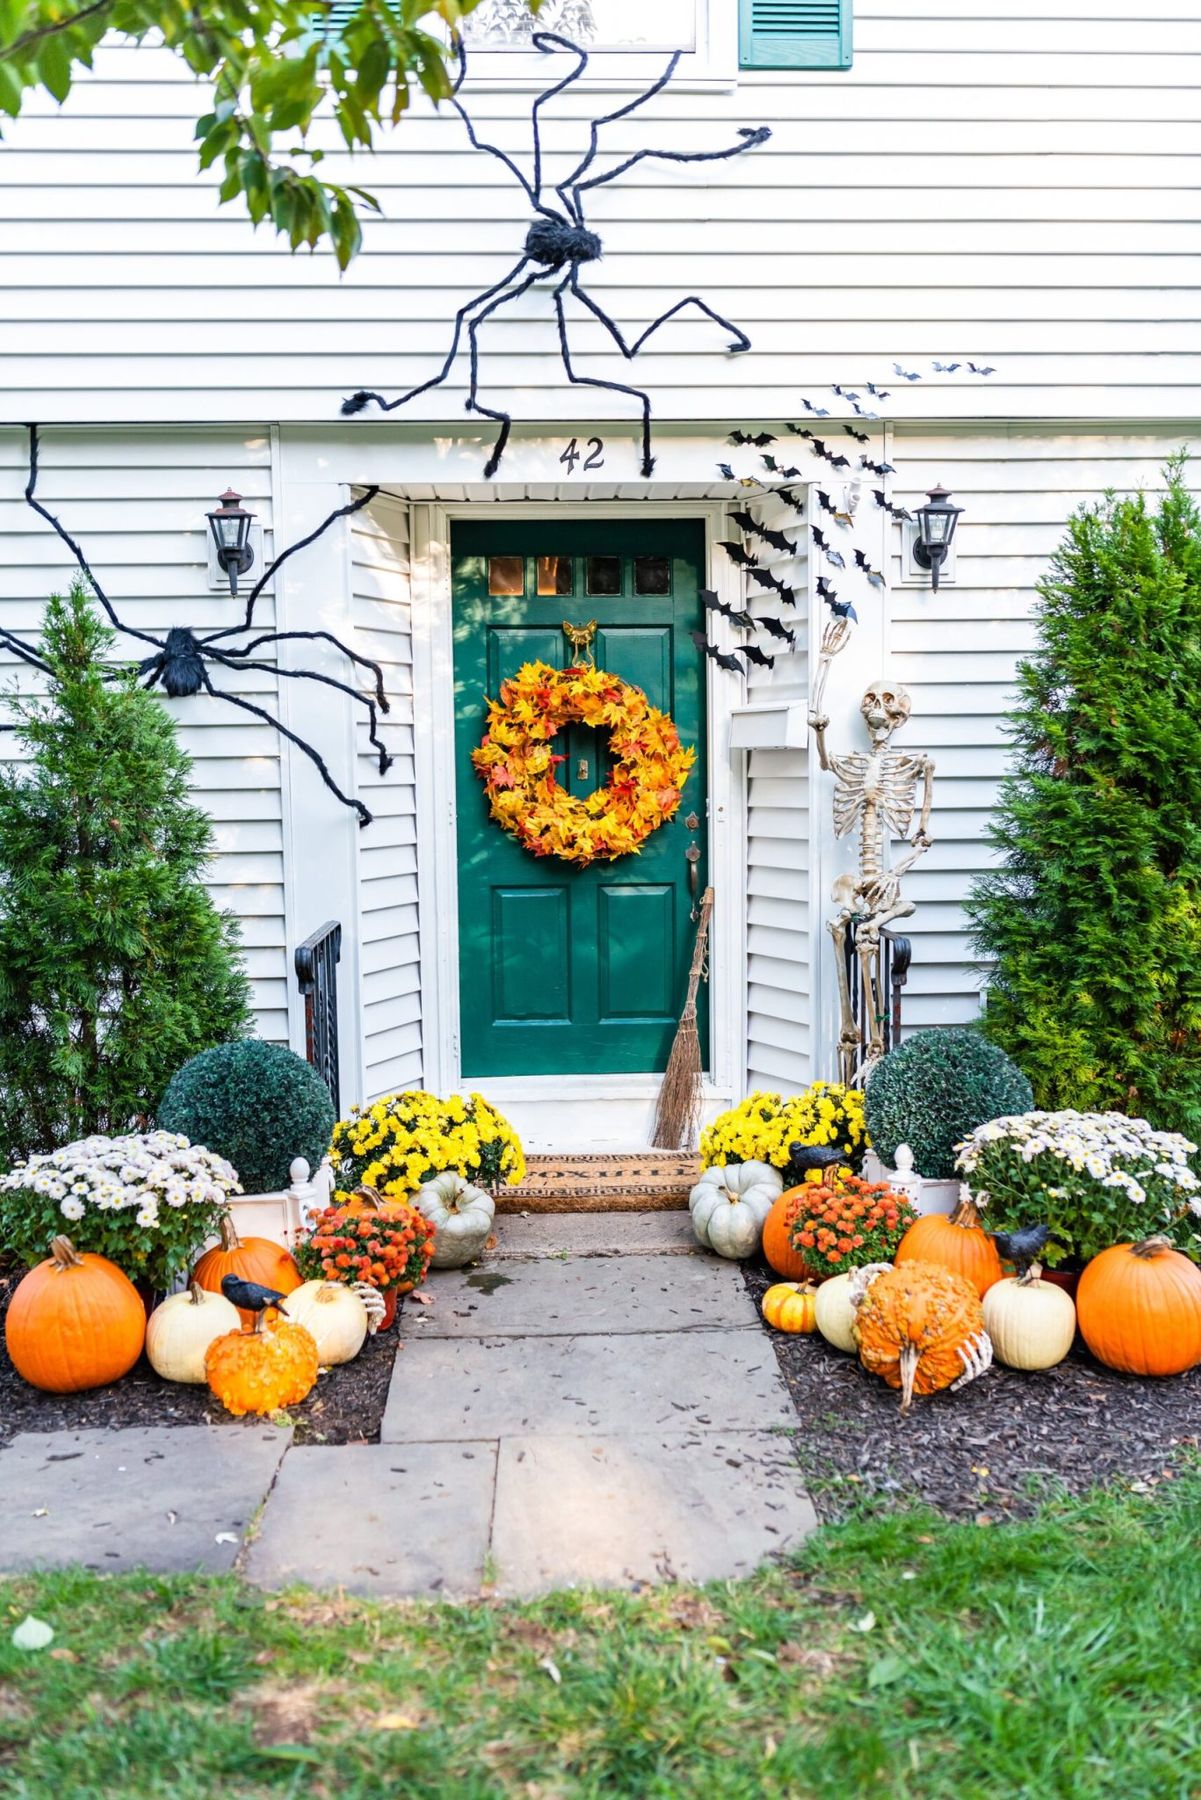
2. Festive Porch Takeover with Climbing Spiders and a Friendly Skeleton
The single element that makes this design so effective is the dynamic posing. The skeleton isn’t just standing there; it’s casually leaning, creating a sense of personality and story. Likewise, the spiders aren’t in a neat grid—they’re crawling up the siding in a chaotic, organic swarm. Without this sense of movement and character, you’d just have a pile of Halloween props. The posing is what turns static decorations into a lively, engaging scene that tells a fun, spooky story to anyone who walks by.
|
📋 Copy HEX 🔗 Share |
🔥 Trending Context
A word of caution about attaching things to your house siding. Those large faux spiders and bat swarms are fantastic, but you need a plan for mounting them that won’t cause permanent damage. Avoid any kind of strong adhesive or nails. Instead, look for vinyl siding hooks that slip under the edge of a panel without any drilling. For brick, use specialty brick clips. It takes a little extra effort up front, but you’ll be glad you did it when you’re not facing a costly repair job come November 1st.
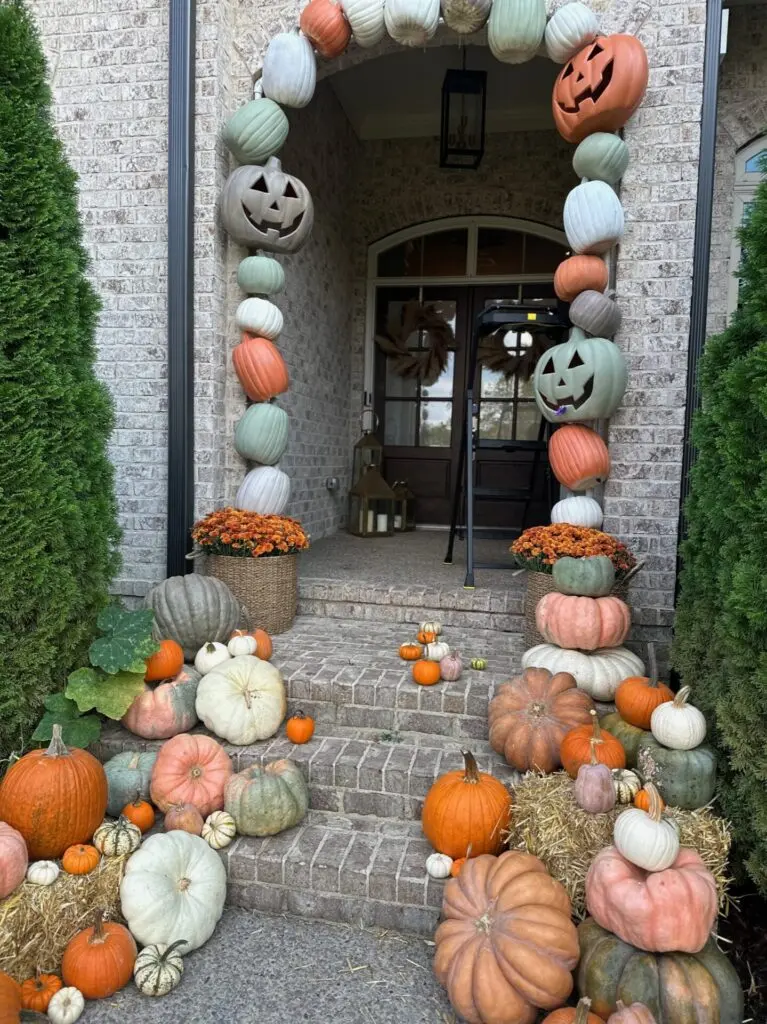
3. Whimsical Pastel Pumpkin Archway Entrance
This stunning archway follows a simple but effective visual formula: 50% pastel pumpkins (sage, cream, dusty pink) + 30% traditional orange pumpkins + 20% natural texture (hay, woven baskets, dried florals). The pastels soften the look and make it feel more whimsical and modern, while the traditional orange anchors it firmly in the autumn season. The natural textures provide depth and prevent the foam and plastic elements from looking too artificial. You could swap the pastels for shades of blue and gray for a moodier coastal vibe and still have it work beautifully.
|
📋 Copy HEX 🔗 Share |
🎯 What Makes It Work
That gorgeous stacked pumpkin archway is likely a custom or high-end retail piece that can cost hundreds. To get this look for less, buy craft foam pumpkins from a dollar store or craft store during a sale. You’ll need about 20-30 in various sizes. Paint them in your chosen pastel palette using chalk paint for a matte finish. Then, build a simple PVC pipe arch frame (under $30 in materials from a hardware store). Drill holes through the centers of the pumpkins and thread them onto the frame. It’s a weekend project that delivers a high-impact look for a fraction of the cost.
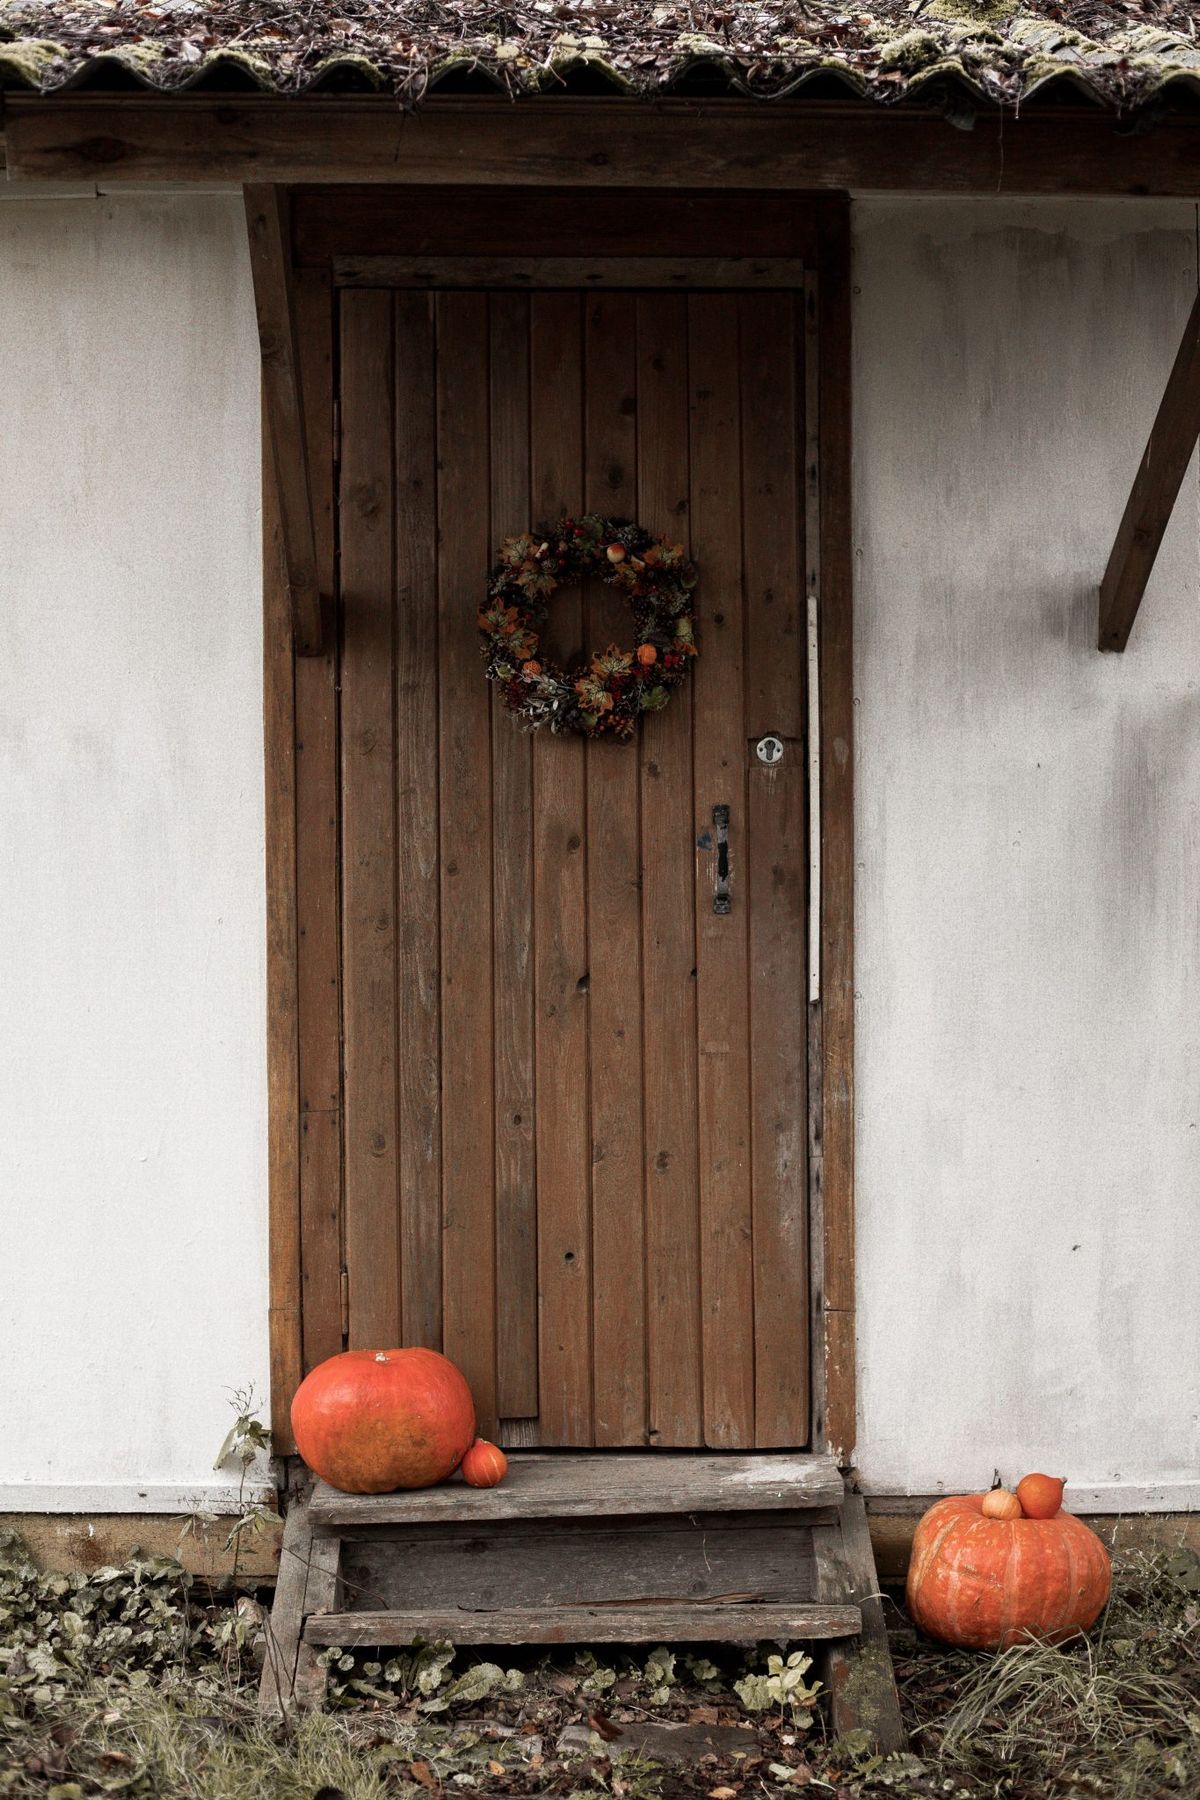
4. Rustic Wooden Door with an Autumn Wreath and Pumpkins
There’s a growing movement towards more natural, less commercially-driven seasonal decor, and this look taps right into it. Instead of plastic skeletons or inflatable ghosts, the focus is on organic elements that celebrate the harvest season itself. A simple wreath made of real or high-quality faux foliage, paired with natural pumpkins, feels authentic and timeless. This ‘modern rustic’ approach has serious staying power because it’s less about a specific holiday and more about embracing the feeling of the season, which allows the decor to stay up from September through Thanksgiving.
|
📋 Copy HEX 🔗 Share |
⭐ The One Thing
You can create a similar lush autumn wreath in about an hour for under $40. Here’s how:
- Start with a basic grapevine wreath form (around $8).
- Buy 3-4 ‘bushels’ of assorted faux autumn leaves, berries, and mini pumpkins from a craft store. Look for varied colors and textures.
- Use wire cutters to snip the bushels into smaller, individual stems.
- Begin by inserting the larger leaf stems into the grapevine base, working in one direction around the circle to create a base layer.
- Layer in the berry stems, tucking them among the leaves.
- Use a hot glue gun to secure 3 to 5 mini pumpkins or gourds at key points for emphasis.
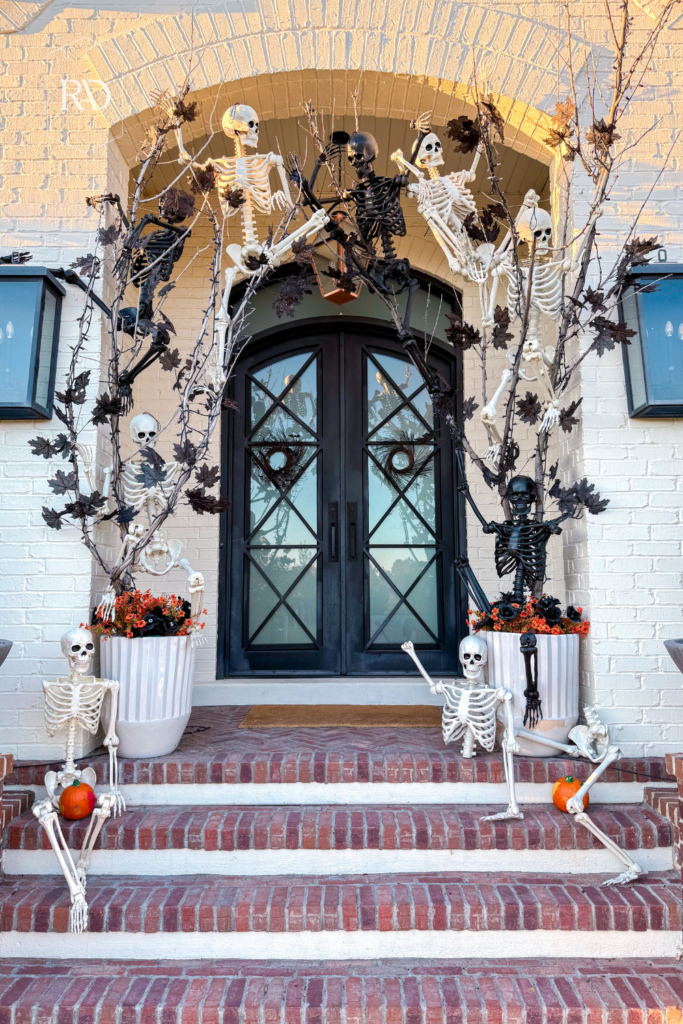
5. Dramatic Skeletons Climbing an Arched Entryway
Recreating this playful yet dramatic scene requires a few key purchases. The skeletons are the stars, but the planters and branches provide the necessary structure and scale for a high-end look.
- Life-Sized Skeletons (2-3): $120 – $250
- Large Fluted Planters (2): $150 – $400
- Decorative Branches & Florals: $80 – $150
- Small Accent Pumpkins: $20 – $40
- TOTAL: $370 – $840
Budget alternative: Find posable skeletons on Facebook Marketplace after Halloween for a deep discount. Use existing planters and spray paint them white. Forage for interesting bare branches in your yard or a park instead of buying them.
|
📋 Copy HEX 🔗 Share |
🔧 How-To Brief
This idea works best for entryways with some vertical height and symmetry, ideally a porch with at least a 9-foot ceiling. The double doors create a beautiful frame, but it would also work with a single door as long as you have at least 3-4 feet of space on either side to place the large planters. If your entrance is smaller, you might try a scaled-down version with just one climbing skeleton, as seen in Idea #9. The key is ensuring the skeletons have enough room to be posed dynamically without looking cramped.
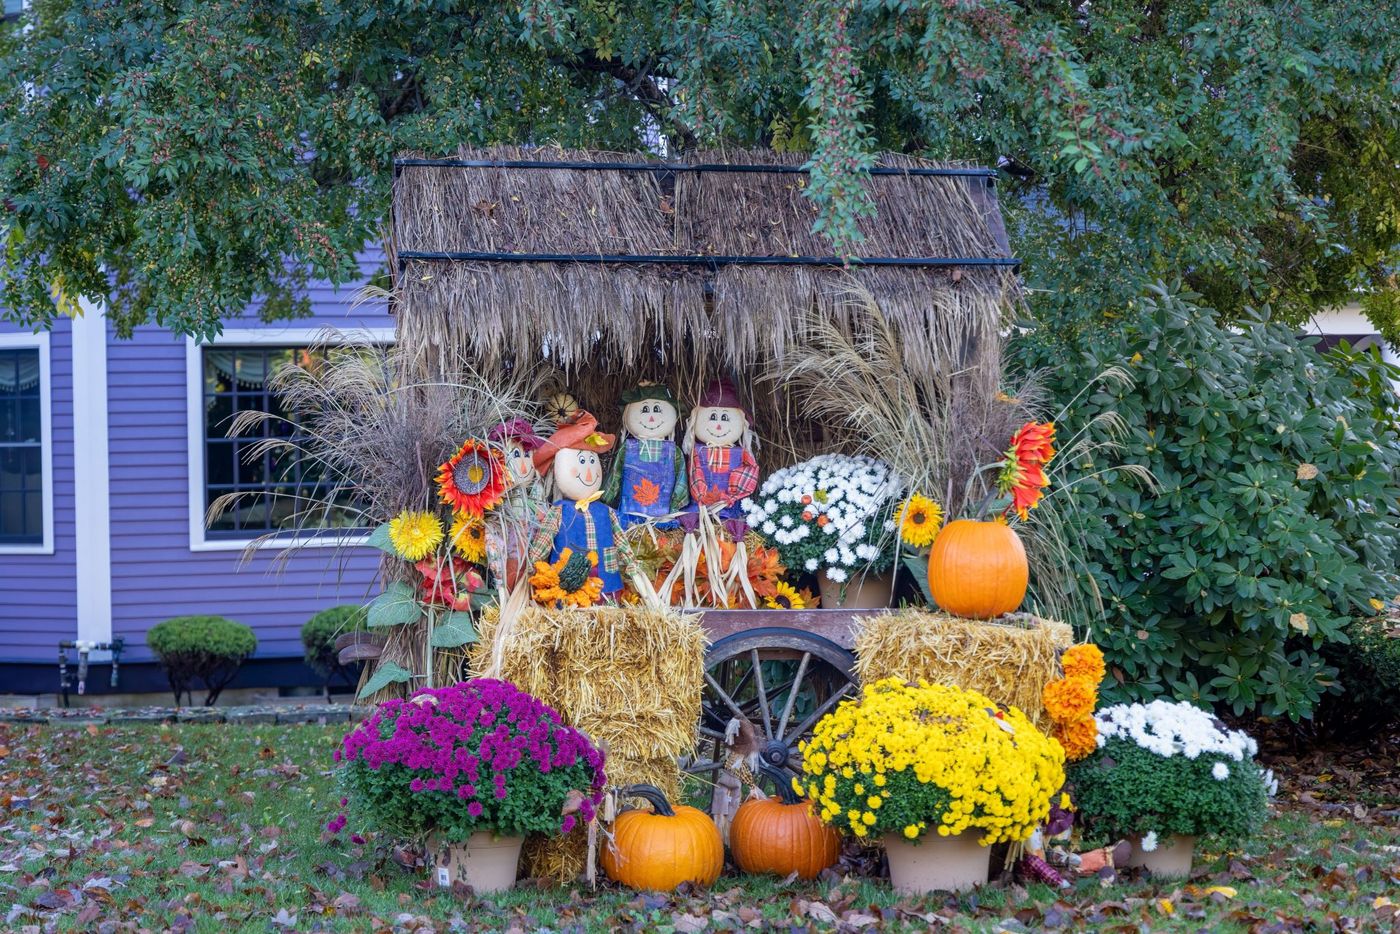
6. A Rustic Scarecrow Cart for a Harvest Festival Vibe
The charm of this display is all about layering and texture. It’s not just a few items placed on the ground; it’s a multi-level composition. The wooden cart creates a focal point and adds height, the hay bales provide a rustic base, and the potted mums inject pops of vibrant color. The mix of materials—thatched roof, rough wood, soft plush scarecrows, and spiky dried grasses—makes the scene visually rich and interesting to look at from any angle. It’s a masterclass in combining different elements into a cohesive, celebratory whole.
|
📋 Copy HEX 🔗 Share |
📐 Style Math
While this setup is incredibly charming, be prepared for some upkeep. Hay bales, especially in damp or rainy weather, can start to mold or become a haven for critters. The plush scarecrows will absorb water and may need to be brought inside or covered during heavy rain to prevent mildew. The chrysanthemums will need regular watering to stay vibrant. For a lower-maintenance alternative, consider using faux hay bales (available at craft stores) and swapping the plush figures for more weather-resistant wooden or metal scarecrow signs.
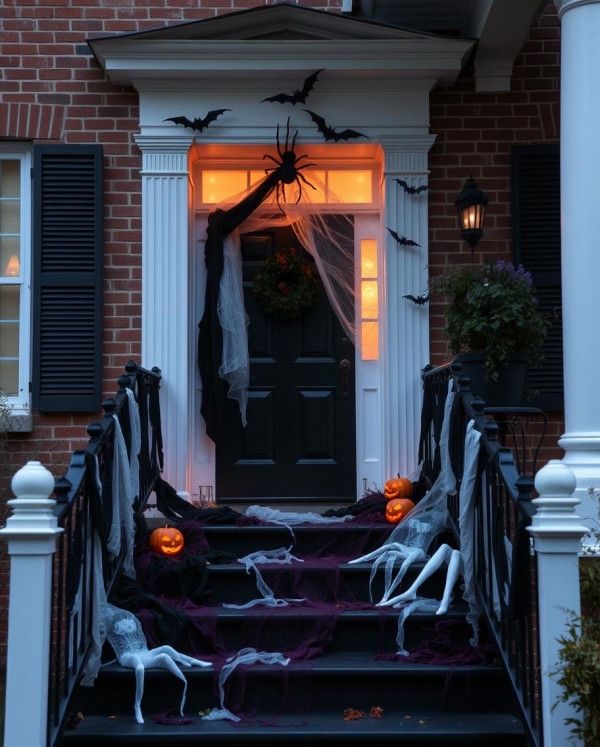
7. Ethereal Haunted House Look with Draped Gauze
To get that perfectly spooky, aged look with draped fabric, don’t just hang it—shred it. Before you drape the white gauze, take a pair of scissors and make several vertical snips along the bottom edge. Then, use your hands to rip upwards, creating tattered, uneven strands of varying lengths. You can also use a cheese grater to rough up sections for a more weathered texture. This extra 15 minutes of distressing is what separates a professional-looking haunted display from a sheet thrown over a railing. For extra spookiness, steep the fabric in weak tea for an hour to give it a grimy, aged color.
|
📋 Copy HEX 🔗 Share |
💸 Get This Look For Less
Before you commit to this ghostly draped look, run through this quick checklist:
- Do you have enough attachment points? Identify where you can safely secure the fabric (railings, columns, door frames, existing hooks) without causing damage.
- Is your entryway covered? Gauze fabric will get heavy, waterlogged, and sad-looking after a rainstorm. This works best on a covered porch.
- Check your lighting. Do you have an outlet for the illuminated pumpkins or will you need battery-operated versions? Does your porch light cast interesting shadows?
- Safety first! Ensure the draped fabric, especially near the steps, doesn’t create a trip hazard for guests or trick-or-treaters. And keep it far from any open flames, as we warn in our list of common mistakes.
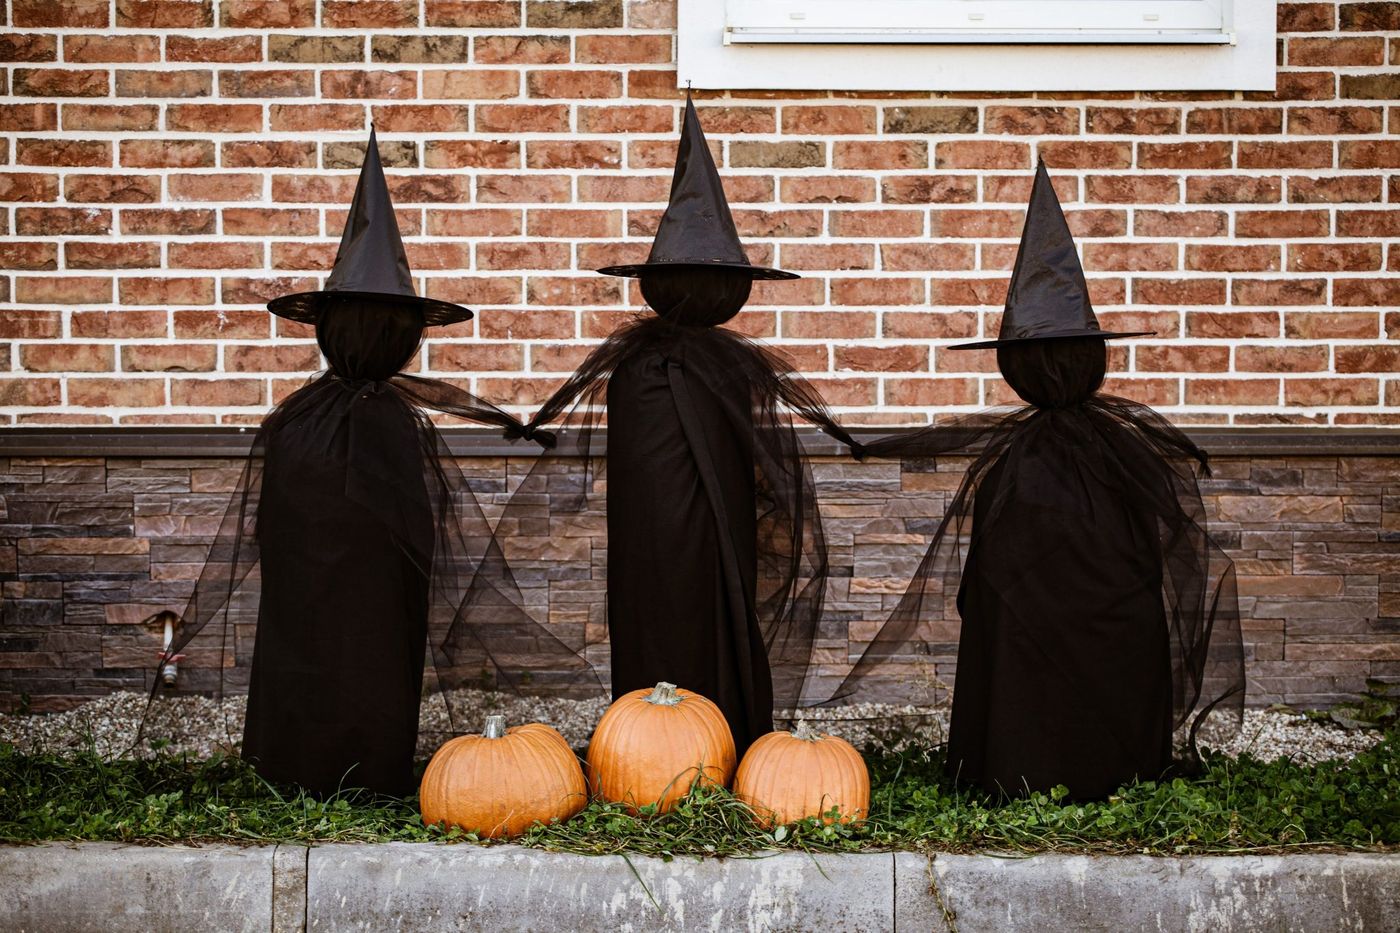
8. Holding Hands Witch Trio with Pumpkin Accents
You can DIY these spooky witches for about $50 in materials in under two hours. It’s a simple project with a huge impact.
- Start with three garden stakes or tall tomato cages (about 4-5 feet tall) and push them into the ground a couple of feet apart.
- For the ‘head’ of each witch, crumple up newspaper into a ball and tape it to the top of the stake.
- Drape a length of sheer black fabric (about 3-4 yards per witch) over each stake, letting it pool at the bottom. Secure it around the ‘neck’ with a zip tie.
- Place a basic black witch hat on top of each head. A little hot glue will keep it secure in the wind.
- Arrange the fabric ‘arms’ of the witches so they appear to be holding hands, using safety pins to connect them subtly.
- Place three pumpkins at their feet to complete the scene.
|
📋 Copy HEX 🔗 Share |
📏 Scale Guide
that makes this idea so memorable is the implied narrative. It’s not just three witch decorations; it’s a coven. The simple act of having them hold hands creates a story—they are gathering, casting a spell, or waiting for something. This bit of storytelling transforms them from static props into characters, which is infinitely more compelling and spooky. Removing that connection would just leave you with three separate, less interesting figures. The power is in their unity.
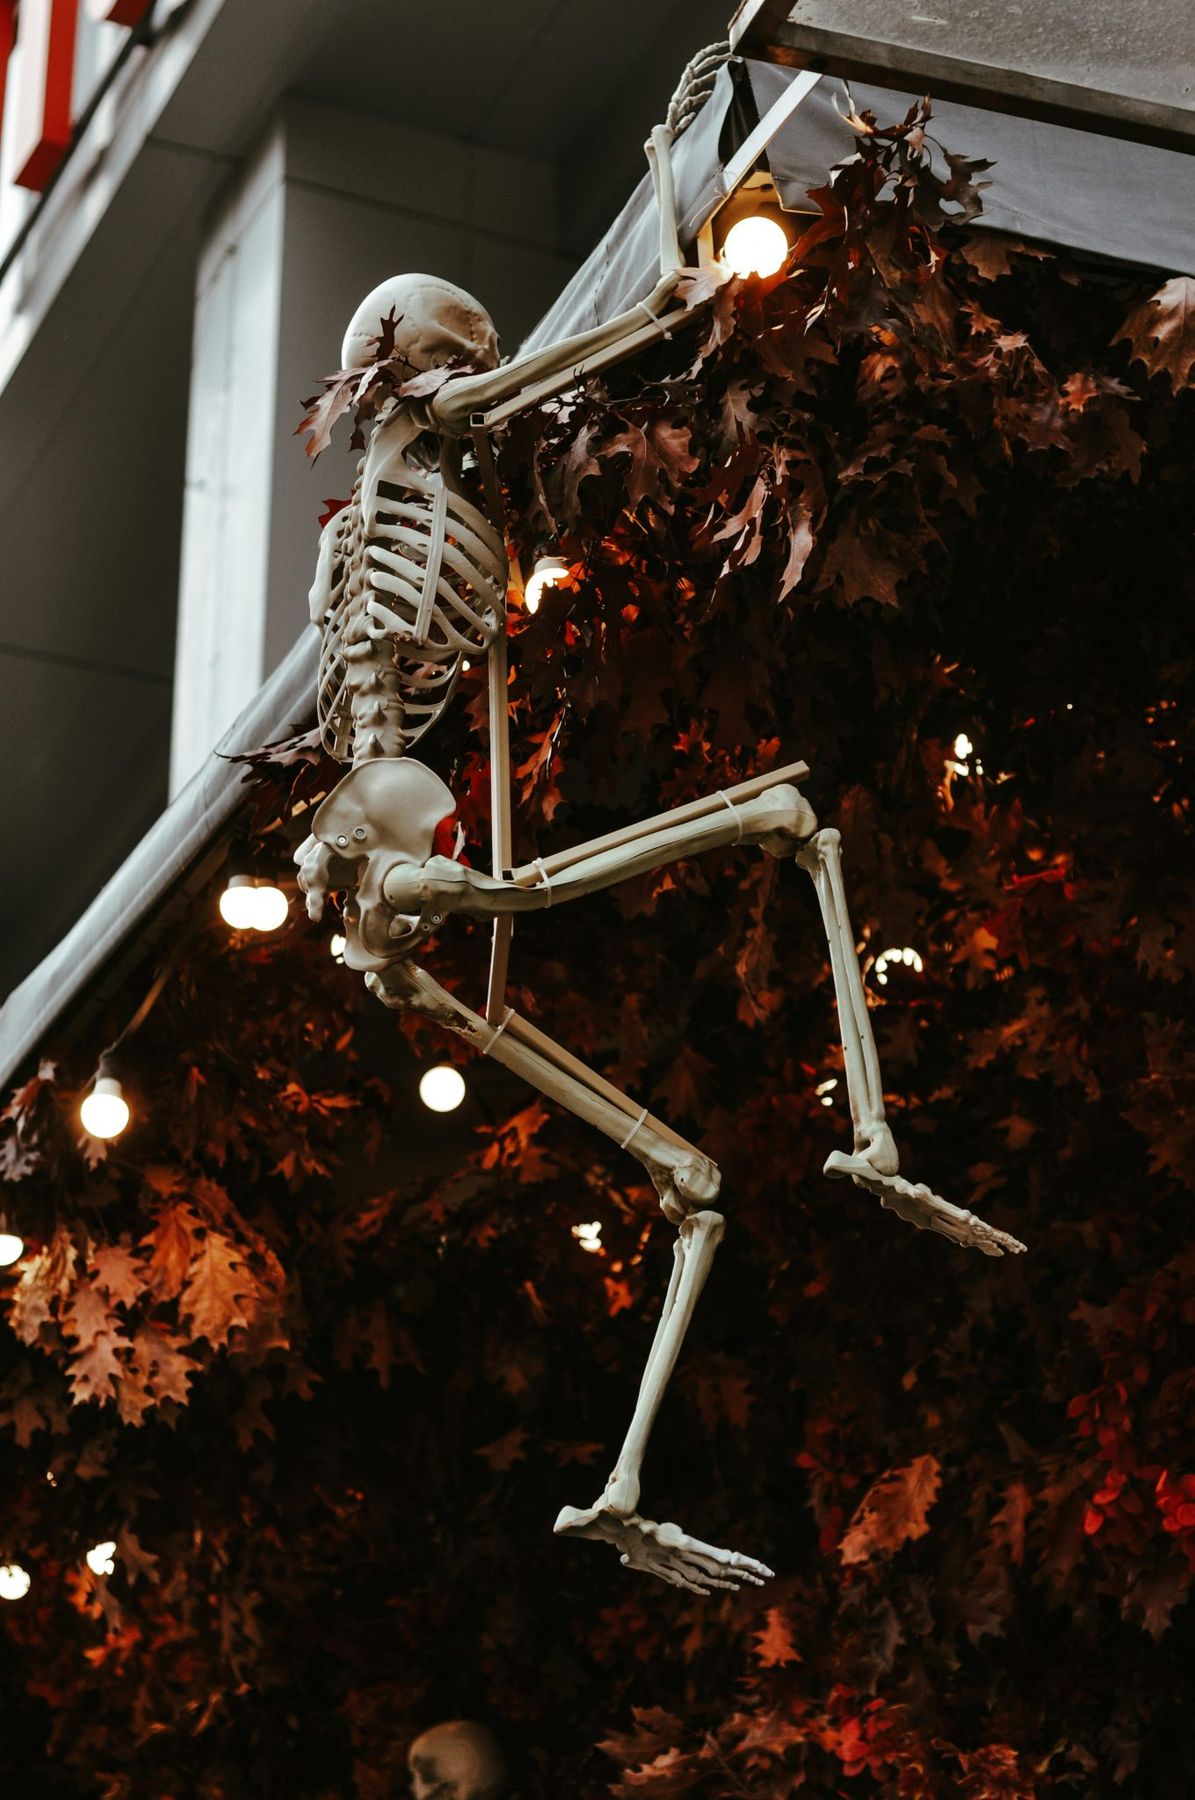
9. A Skeleton Lounging in an Autumn Leaf Canopy
The formula for this moody, playful look is surprisingly simple: 70% dense, dark foliage + 20% warm, ambient light + 10% a single, unexpected character. The overwhelming majority of the visual is the rich, textured canopy of rust-red and brown leaves. This creates the atmosphere. The string lights are woven in to add warmth and highlight the textures after dark. The skeleton is the punchline—a small but crucial element that introduces humor and a clear Halloween theme. You could swap the skeleton for a large crow or a cluster of bats and the formula would still work.
|
📋 Copy HEX 🔗 Share |
✅ Before You Start
Let’s be honest: creating that lush, dense foliage canopy is the hardest part of this DIY. Using real leaves is not practical. You’ll need to buy multiple garlands of high-quality faux autumn leaves—and they aren’t always cheap. To get this level of density, you’re likely looking at 8-10 garlands, which can add up. Also, consider the weight. All that plastic foliage can get heavy, so make sure your awning or pergola is strong enough to support it, and use heavy-duty zip ties to secure everything tightly against the wind.
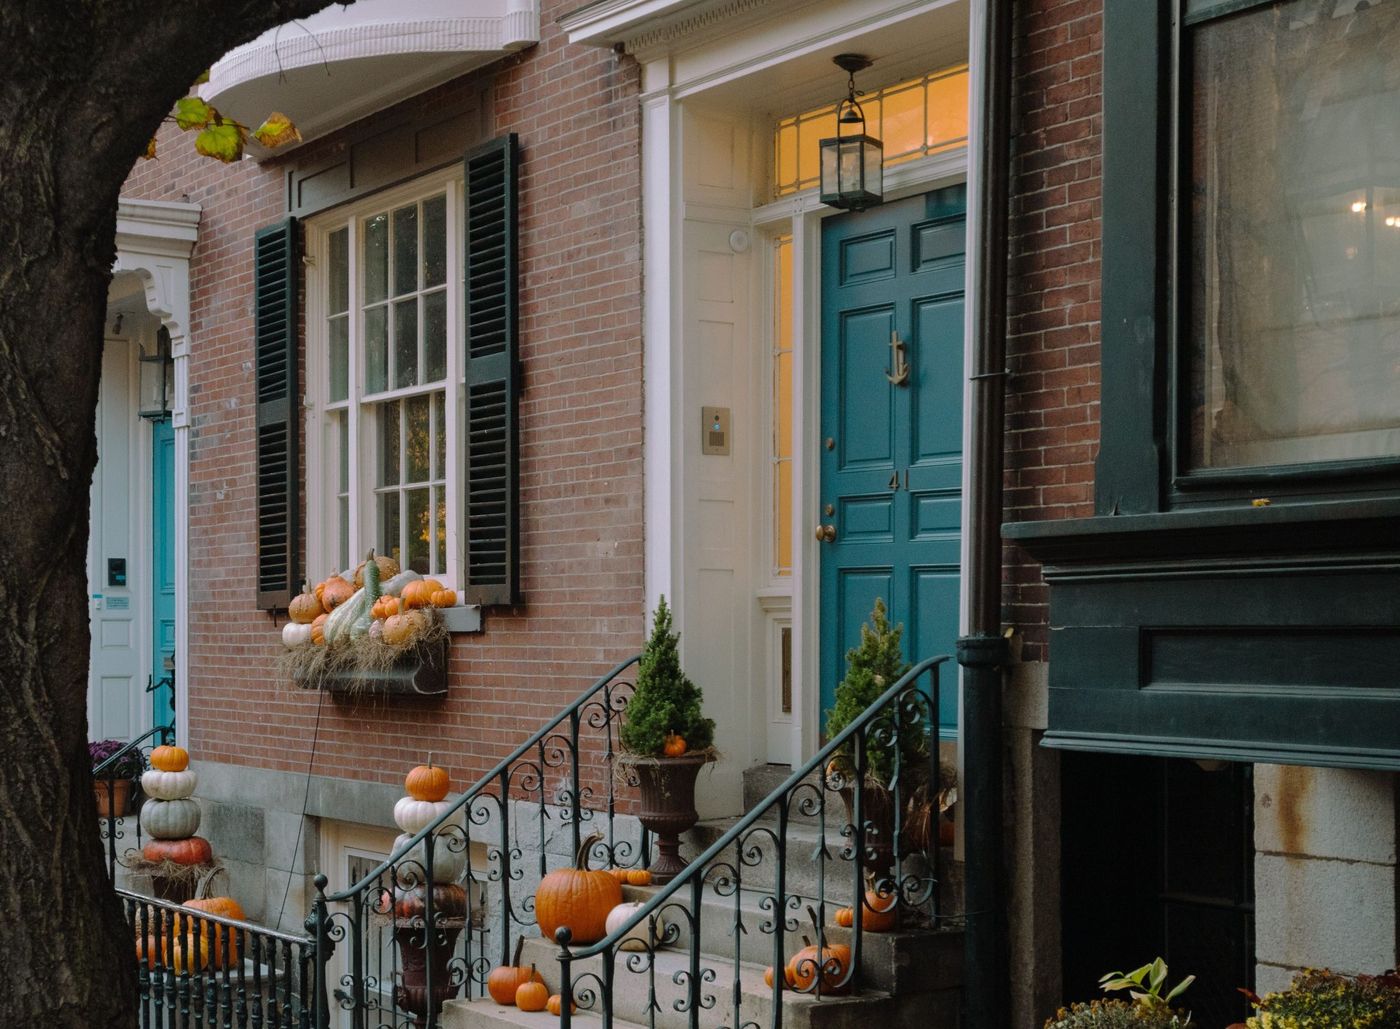
10. Abundant Pumpkin Display on a Classic Brick Townhouse
When you’re creating a large pumpkin arrangement, the secret to a high-end look is variety. Don’t just buy a dozen identical orange pumpkins. Mix it up! Aim for at least four different types: classic orange for color, a warty or ‘heirloom’ variety for texture, a pale white or green one for contrast, and a few small gourds to fill in the gaps. This mix of colors, sizes, and textures is what makes a display look curated and abundant, rather than like you just emptied a bin from the grocery store. This is a much more sophisticated approach than the simpler setup in Idea #1.
💰 Budget Breakdown
This design is a masterclass in color theory. The deep, rich teal of the front door is a complementary color to the bright orange of the pumpkins. Placing these two colors directly in the same line of sight makes both of them appear more vibrant and saturated. The red brick and dark green shrubs act as grounding, earthy neutrals that keep the bold color combination from feeling overwhelming. It’s a balanced, energetic palette that feels perfectly seasonal and incredibly stylish.
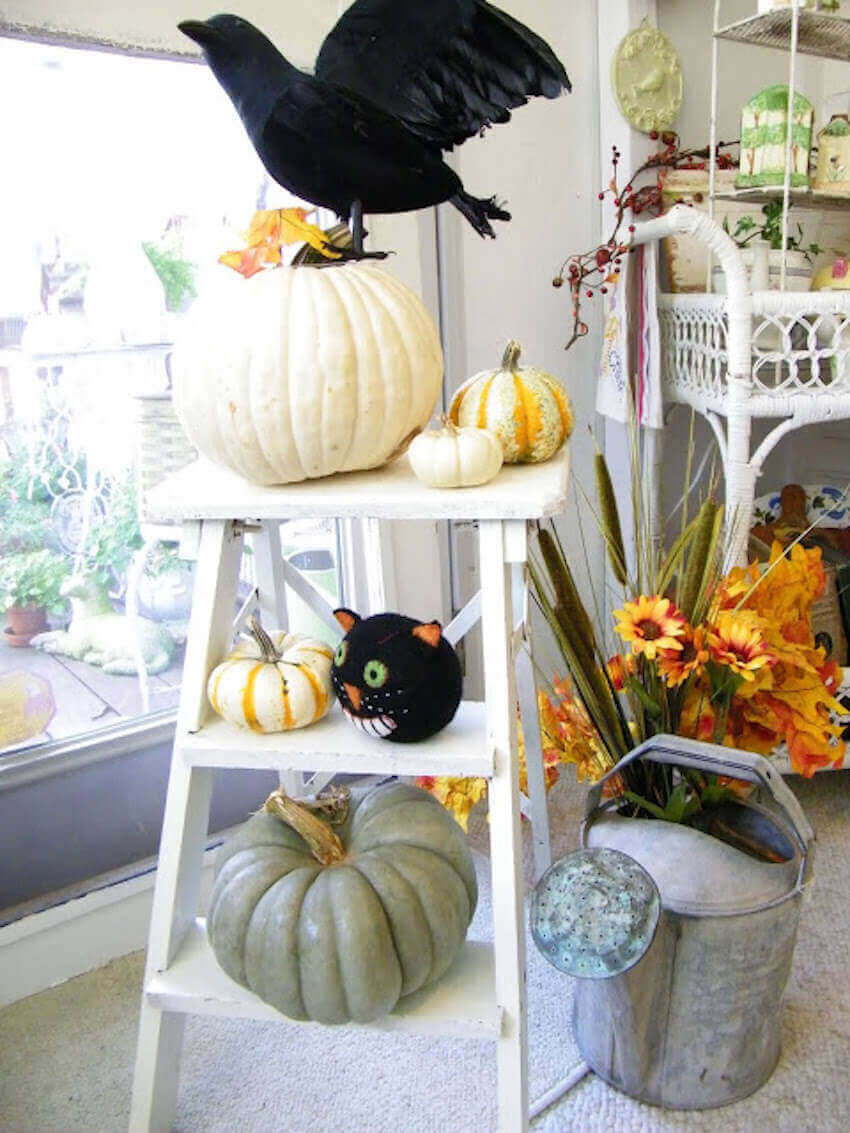
11. Vintage Ladder as a Tiered Pumpkin & Crow Stand
Forget expensive tiered plant stands. A vintage-style step ladder is one of the most versatile and affordable pieces of decor you can own. You can find old wooden ladders at thrift stores or flea markets for as little as $10-$20. A quick coat of white or black chalk paint, a little light sanding on the edges for a distressed look, and you have the perfect multi-level display for pumpkins, plants, lanterns, or any seasonal decor. It adds height and character to a porch corner for a fraction of the cost of new outdoor furniture. This is a great alternative to the cart display in Idea #6.
|
📋 Copy HEX 🔗 Share |
💡 Designer Tip
The ‘cottagecore’ and ‘modern farmhouse’ aesthetics are still dominating Pinterest, and this idea fits right in. It’s all about finding beauty in simple, utilitarian objects and celebrating a connection to a more rustic, pastoral lifestyle. Using a worn wooden ladder as a plant stand feels authentic and resourceful. The addition of the faux crow and felted cat add a touch of whimsical, storybook charm that is central to this trend’s appeal. It feels collected and personal, not store-bought and generic.
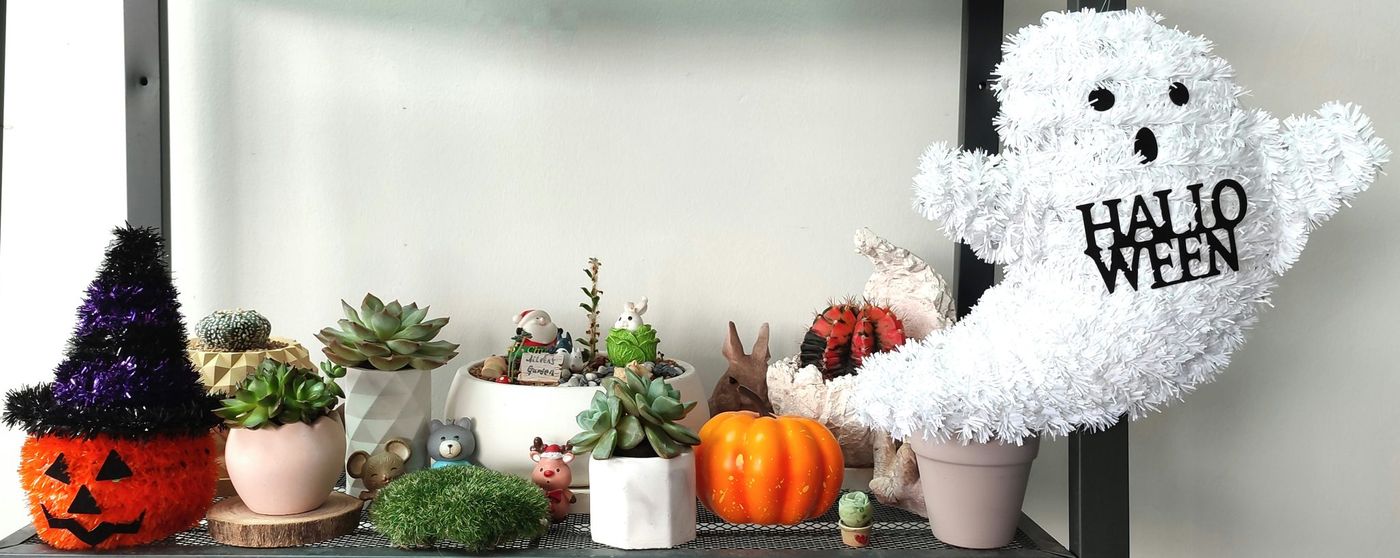
12. Miniature Succulent Shelf with Quirky Halloween Ornaments
This idea is perfect for those with limited space: apartment dwellers, dorm residents, or anyone who just wants a festive touch on their desk or kitchen counter. The entire display can fit on a surface as small as 12×6 inches. The key is to keep all the elements in a miniature scale. Use 2-inch potted succulents and decor items no taller than 4-5 inches. The tiered wire shelf is crucial, as it allows you to create a lush, layered look in a tiny footprint by taking advantage of vertical space. It’s proof that you don’t need a sprawling front yard to have fun with seasonal decorating.
|
📋 Copy HEX 🔗 Share |
🧹 Maintenance Reality
that makes this work is the unexpected combination of living plants and kitschy holiday decor. We’re used to seeing succulents in minimalist, boho, or desert-style settings. Placing a tinsel ghost and a plush jack-o’-lantern next to them is a delightful surprise. This playful clash of styles is what gives the arrangement its personality and charm. It’s a reminder not to take decorating too seriously and that combining your everyday decor with seasonal items can lead to fun, unique results.
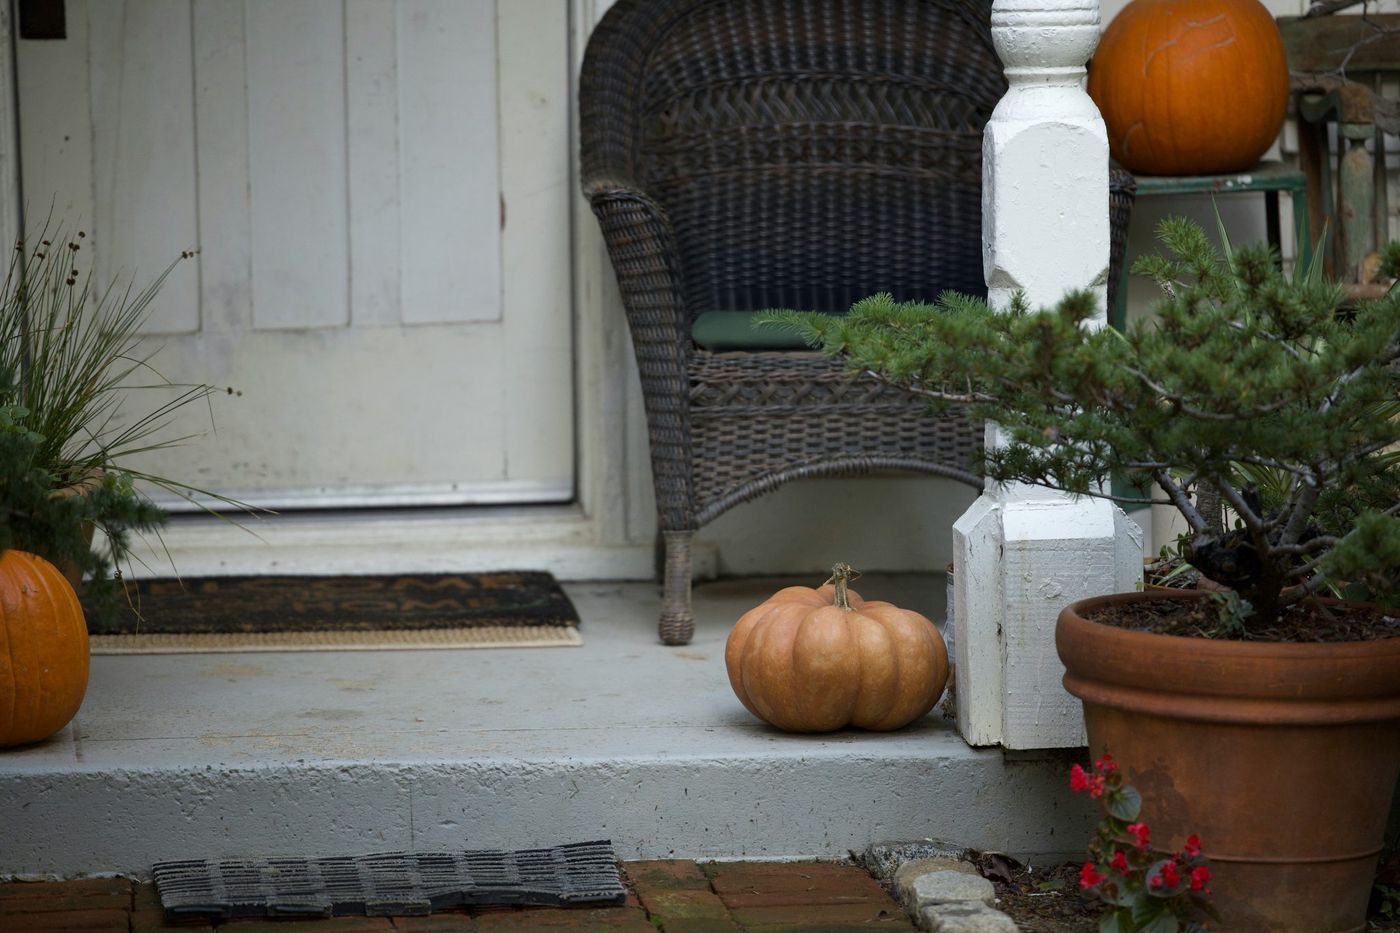
13. Cozy Porch Corner with a Wicker Chair and Pumpkins
This porch feels so inviting because it creates what designers call a ‘vignette’—a small, curated scene that tells a story. The wicker chair isn’t just furniture; it’s an invitation to sit and enjoy the autumn air. The pumpkins aren’t just lined up; they’re scattered naturally on the steps as if they just rolled out of a harvest basket. The layered doormats add a touch of personality and pattern. It’s these thoughtful details that transform a simple entryway into a ‘moment’ and make a house feel like a home.
⚠️ Real Talk
Natural wicker furniture looks beautiful, but it doesn’t always hold up well to the elements. If your porch is exposed to rain and morning dew, a natural rattan or wicker chair can start to fray, mold, or unravel. To get this look with less worry, opt for an all-weather wicker chair made from synthetic resin. They have come a long way and often look indistinguishable from the real thing, but they can be left outside year-round without fear of deterioration. Just be sure to bring any fabric cushions inside during wet weather.
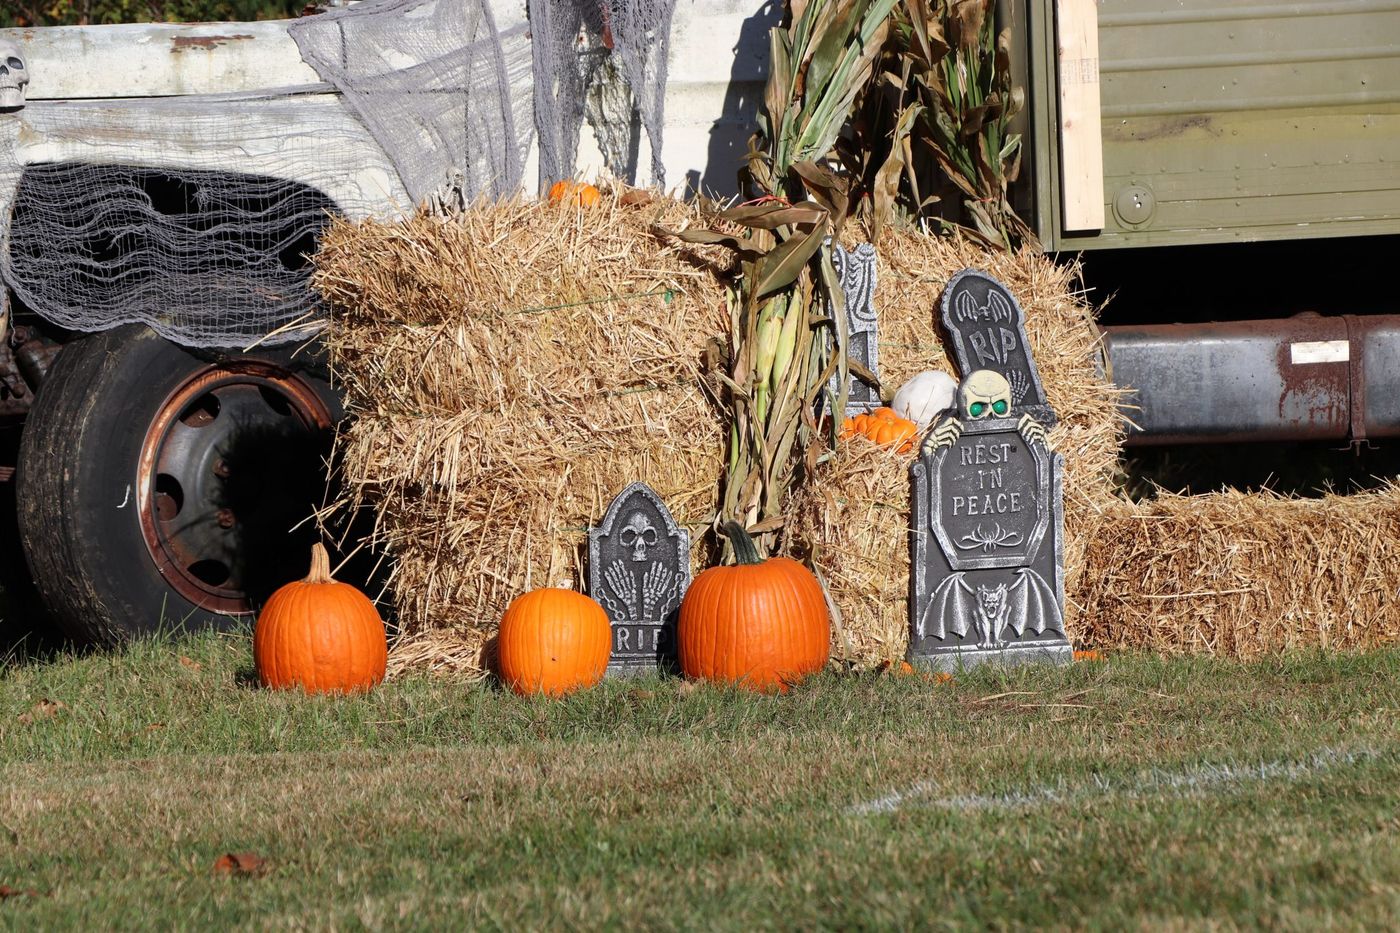
14. Playful Graveyard Scene on Rustic Hay Bales
Creating this fun, rustic graveyard is surprisingly affordable, as the most impactful elements are quite cheap. The hay bales provide incredible volume and texture for a low cost.
- Hay Bales (2-3): $20 – $35
- Plastic Tombstone Props (3-5 pack): $15 – $30
- Assorted Pumpkins & Gourds: $25 – $50
- Dried Corn Stalks (bundle): $10 – $20
- Stretchy Spider Webbing: $5 – $10
- TOTAL: $75 – $145
Budget alternative: Ask a local farm if you can get hay or straw bales for cheaper, especially older ones they’re clearing out. Dollar stores are your best friend for tombstones and webbing. You can also make your own tombstones from styrofoam sheets and gray paint.
|
📋 Copy HEX 🔗 Share |
🔥 Trending Context
Two words: Critters and Mess. Hay bales are notorious for harboring insects and even small rodents, which might not be welcome guests on your front porch or in your yard. As the bales break down, they also create a significant amount of dusty, straw-like debris that will get tracked into your house and can be a pain to clean up, especially from lawns. If you have severe allergies, setting this up might be a miserable experience. It’s a fantastic look, but be prepared for the organic reality of it.
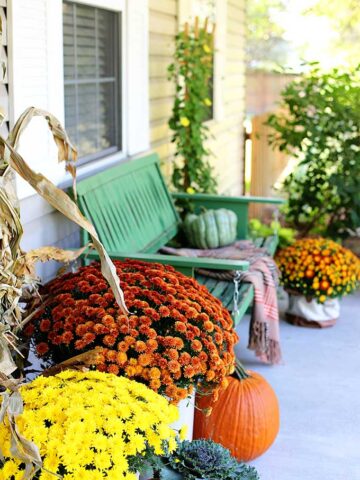
15. A Vibrant Green Bench Surrounded by Fall Mums
This porch’s vibrant energy comes from a bold color formula: 40% dominant cool color (the green bench) + 50% assorted warm accent colors (orange and yellow mums, pumpkins) + 10% neutral texture (dried corn stalks, woven blanket). The unexpected pop of forest green against the traditional autumn palette is what makes the whole scene feel fresh and unique. It breaks the ‘rules’ of fall color schemes in the best way. You could achieve a similar effect by painting the bench a deep navy blue or even a moody aubergine.
|
📋 Copy HEX 🔗 Share |
🎯 What Makes It Work
When buying potted chrysanthemums, look for plants where most of the buds are still tightly closed, with only a few flowers open. It’s tempting to grab the one that’s already in full, glorious bloom, but it’s also nearing the end of its life cycle. Choosing a plant that is mostly buds ensures you’ll get a much longer display—often 4-6 weeks of continuous color as the new flowers open. Remember to deadhead the spent blooms to encourage even more to open up.
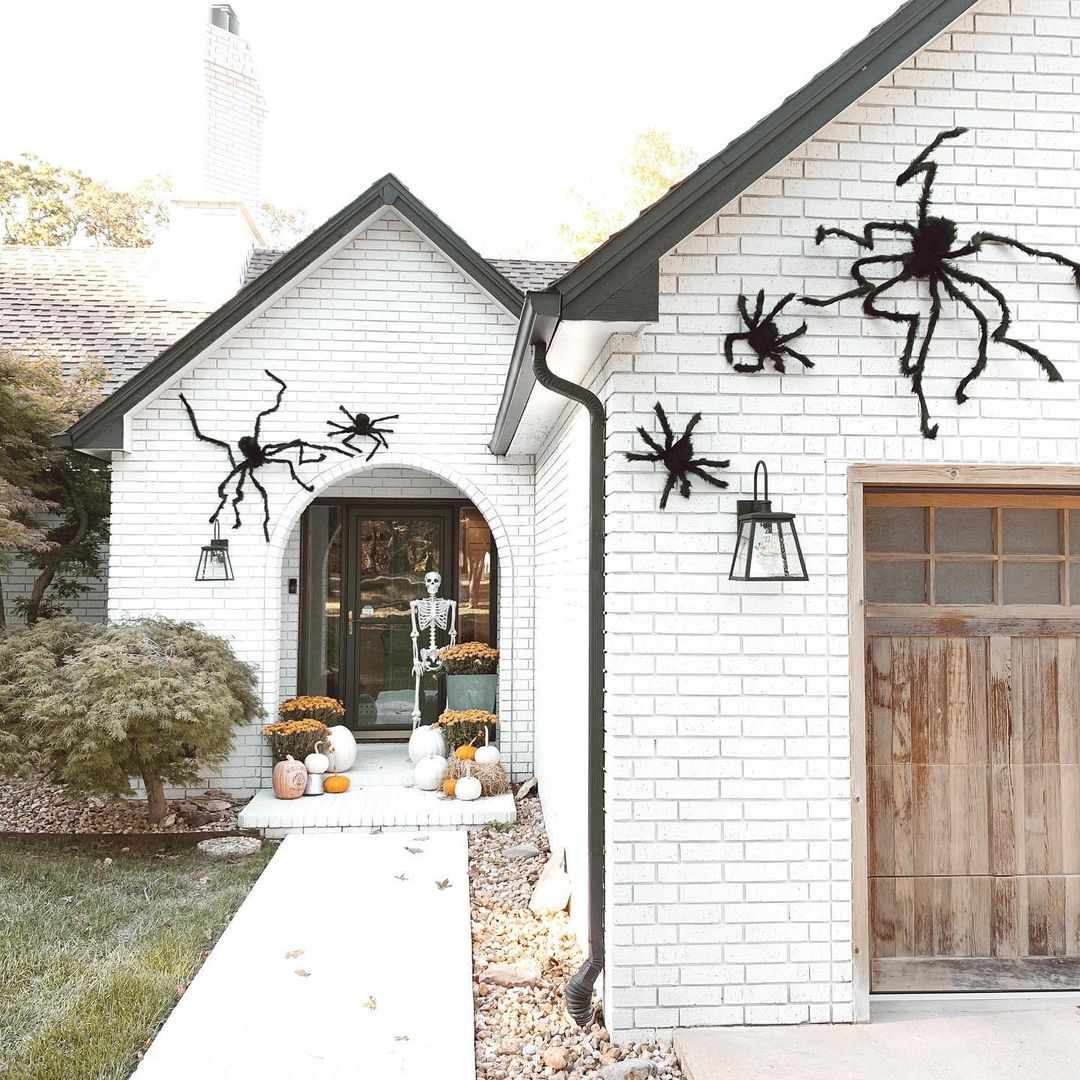
16. A Spooky and Inviting Front Entry Display
The single most important element in creating a spooky porch is layering. It’s not about having one big scary thing; it’s about building up an atmosphere through multiple textured elements. Think about a base layer (like stacked pumpkins or hay), a middle layer (draped fabric, corn stalks, taller figures), and a high layer (bats on the wall, spiders on the ceiling, wreaths on the door). This depth is what makes an entryway feel immersive and thoughtfully designed, drawing the eye to different points and creating a complete, spooky world for visitors to step into.
|
📋 Copy HEX 🔗 Share |
⭐ The One Thing
Before you go all-out on a spooky porch, take a moment for a quick reality check.
- What’s your neighborhood’s vibe? If you’re in a community with lots of very young children, an ultra-gory or terrifying display might not be the most neighborly choice.
- Where is your power source? Many of the best spooky effects involve lighting. Plan your extension cords now to avoid a tangled, hazardous mess later.
- Check the forecast. Are you in for a windy or rainy October? Make sure your props are securely fastened and can withstand a bit of weather. Heavy-duty zip ties and fishing line are your best friends.
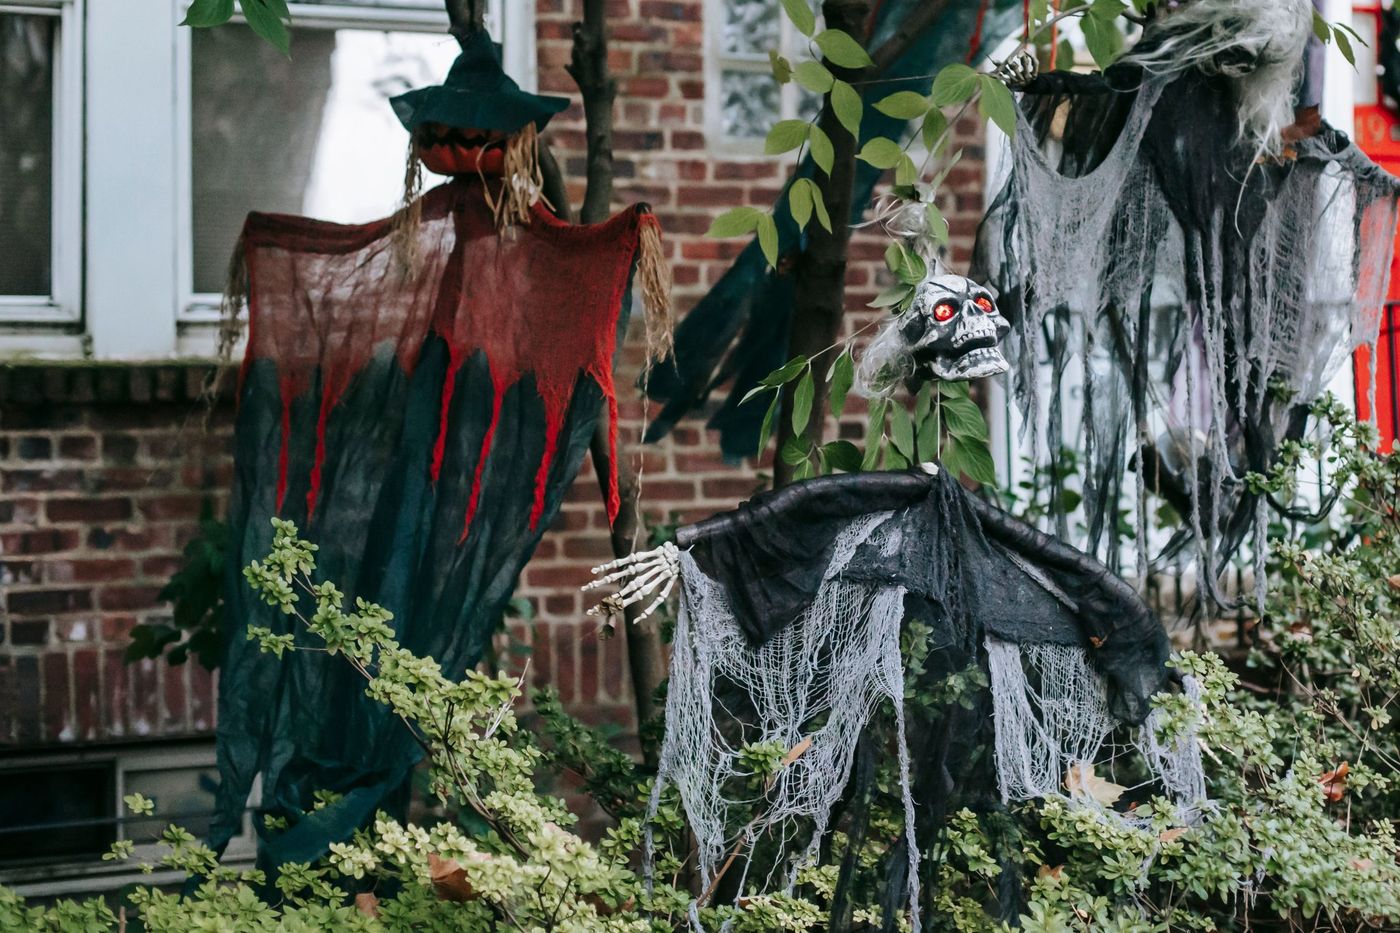
17. Hanging Ghouls with Glowing Red Eyes and Shredded Fabric
Create these terrifying hanging ghouls with a few simple items. The trick is the cheesecloth layering. This should take about 45 minutes per ghoul.
- Start with a styrofoam mannequin head or a simple ball for the head.
- Drape a piece of black fabric over it as a base layer.
- Cut cheesecloth into various lengths and widths. Soak them in a mixture of water and a small amount of gray or brown craft paint.
- Wring out the cheesecloth and drape it in layers over the head, letting it hang down. The more uneven layers, the better.
- While wet, shred and pull at the cheesecloth to create holes and tatters. Let it dry completely.
- Poke small, battery-operated red LED lights through the fabric for the eyes to complete the terrifying effect.
|
📋 Copy HEX 🔗 Share |
🔧 How-To Brief
These are genuinely spooky, which is great for a haunted house vibe, but maybe not so great if you have lots of little trick-or-treaters in your neighborhood. The combination of the shredded, ghostly appearance and the glowing red eyes can be truly frightening for young children. If your goal is a fun, family-friendly Halloween, you might want to opt for a more playful decoration, like the witch trio in Idea #8, or at least hang these ghouls high up in a tree where they are less imposing.
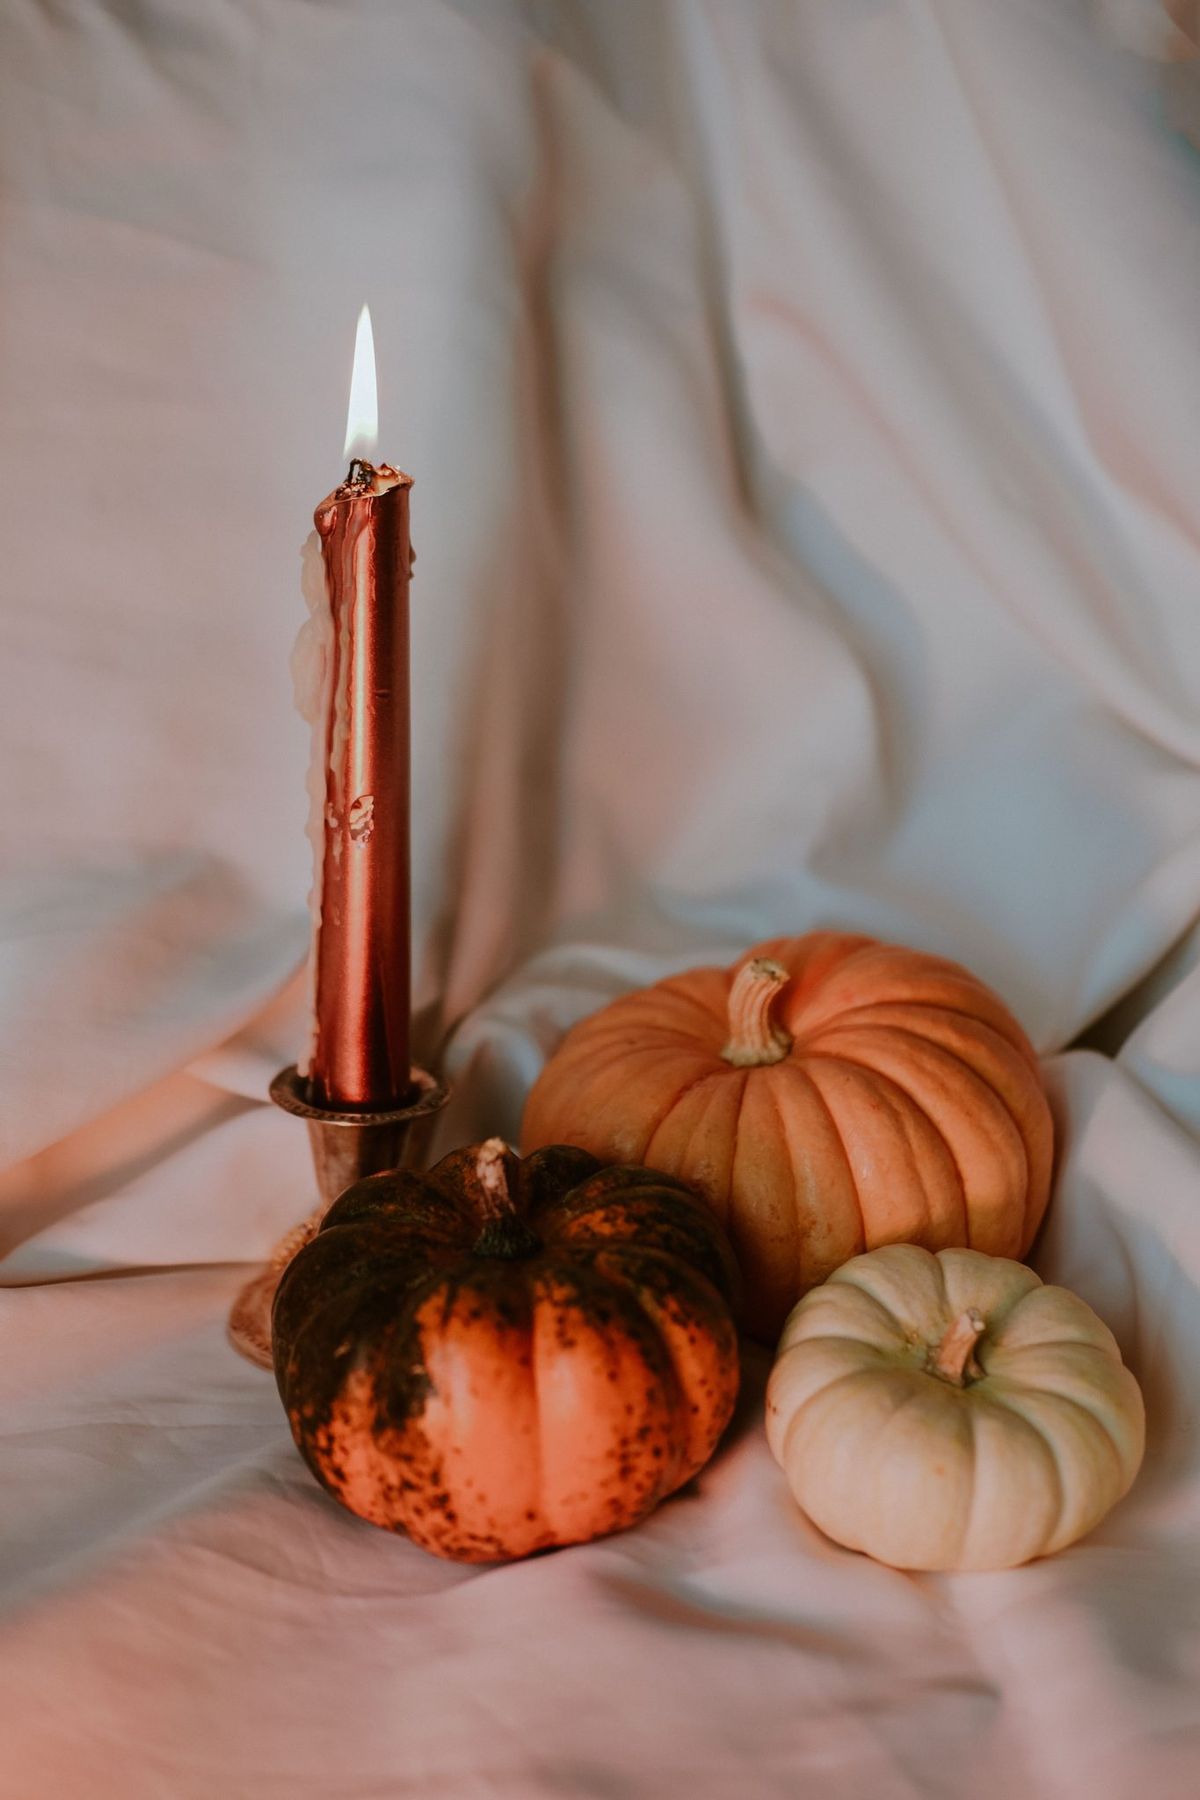
18. An Intimate Centerpiece with Pumpkins and a Copper Candle
This cozy vignette is perfect for small-space decorating. It works beautifully on a coffee table, a small side table, or even a nightstand. The entire footprint is no more than 18 inches wide. The key to its success in a small area is the tight clustering of the objects. Nothing is spread out. The pumpkins are touching, and the candle is nestled right against them. This creates a single, unified composition that feels intentional and impactful, rather than like a few random items scattered on a surface. It proves you don’t need a grand mantel to create a beautiful seasonal moment.
|
📋 Copy HEX 🔗 Share |
📐 Style Math
This composition feels so warm and inviting due to the masterful mix of color temperatures. The flame of the candle and the metallic copper finish of the candle itself provide a source of intense warmth. This is balanced by the cool, creamy white of the draped fabric and the more neutral tones of the mottled brown pumpkin. This blend of warm, cool, and neutral tones creates a dynamic yet harmonious palette that is sophisticated and visually pleasing. It’s a simple arrangement that packs a serious design punch.
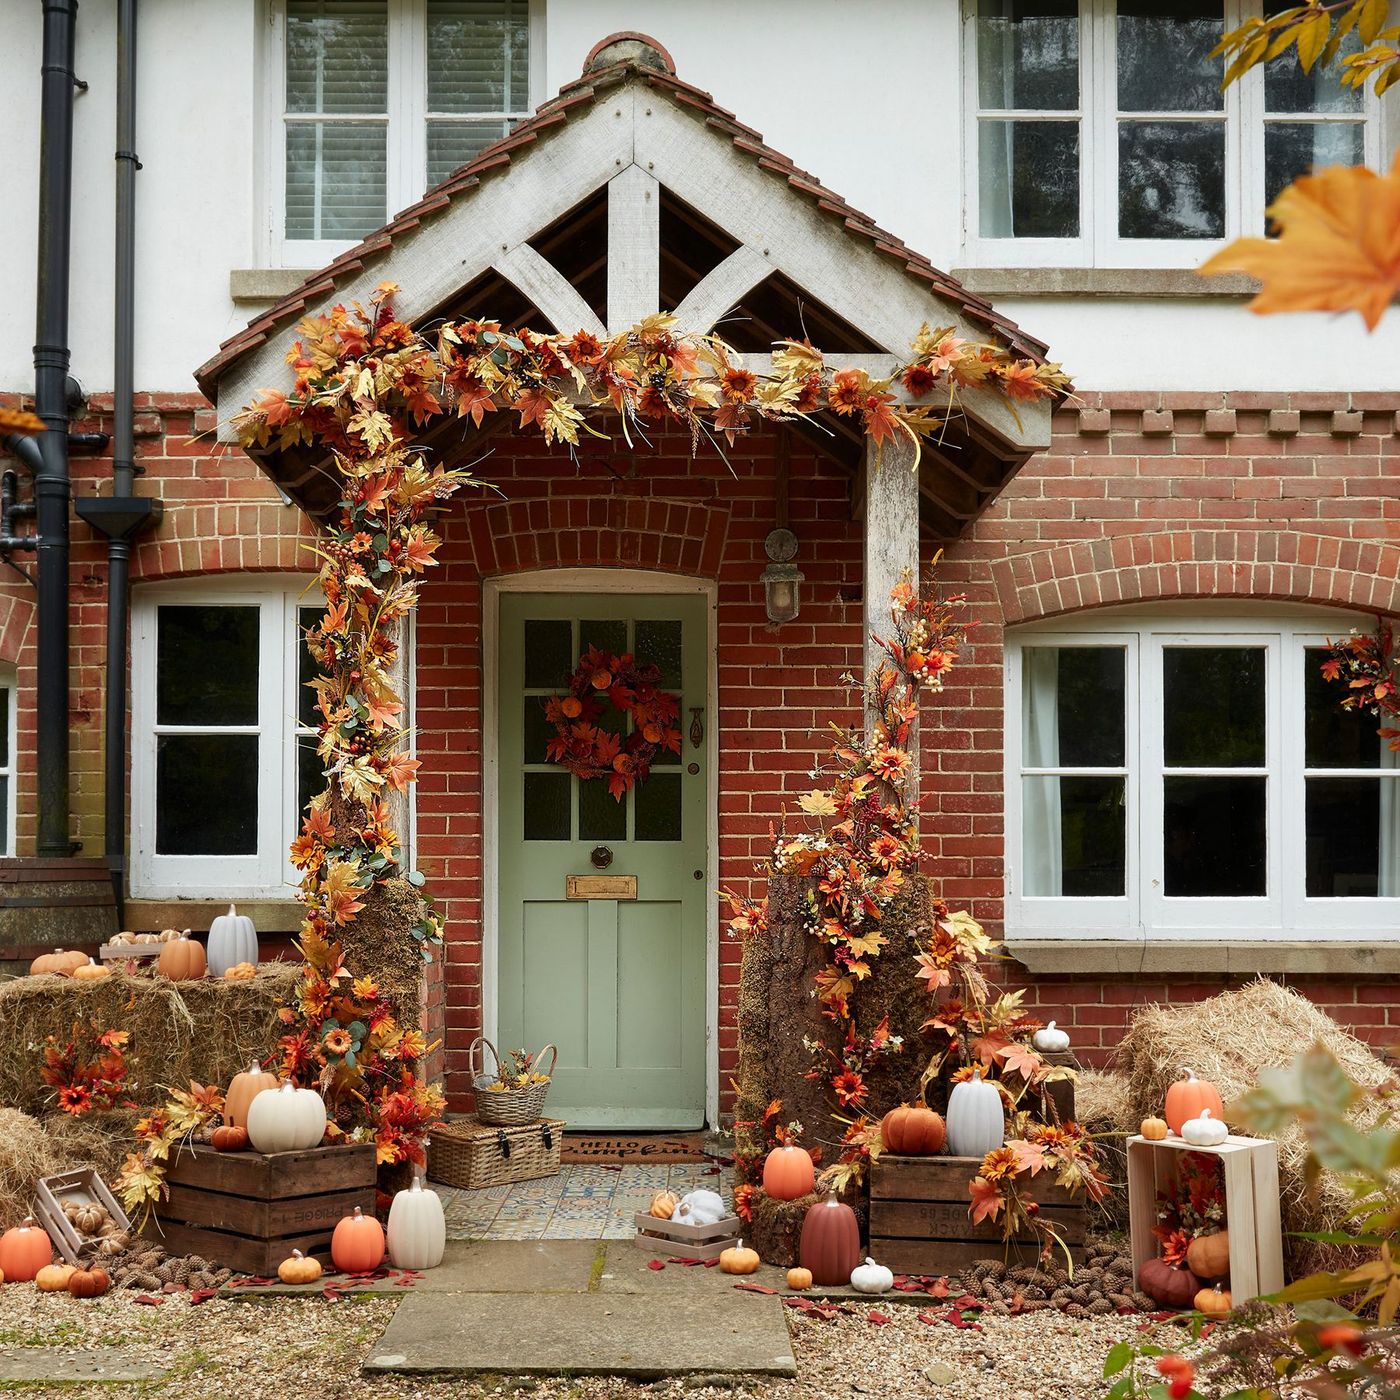
19. Mossy Wooden Posts and a Rainbow of Painted Pumpkins
To achieve that authentic, aged mossy look on your wooden porch posts, don’t rely on a flat coat of green paint. The secret is a multi-step texturing process. First, mix some sand or fine grit into a dark green or brownish paint. Apply this mixture unevenly to the posts, focusing on areas where moss would naturally grow. While it’s still tacky, press real or faux sheet moss (from a craft store) into the paint in patches. Once dry, go over it with a light dry-brushing of a brighter green to add highlights. This creates a realistic, layered texture that looks like it’s been there for decades.
|
📋 Copy HEX 🔗 Share |
💸 Get This Look For Less
A porch full of colorful heirloom pumpkins can get expensive fast, with some varieties costing $10-$20 each. Get this vibrant, multi-colored look on a dime by visiting a pumpkin patch right after a rainy day. They often sell the muddy, less-than-perfect pumpkins for a huge discount. Take them home, give them a good scrub, and then get creative with craft paint. A few sample pots of paint are all you need to turn bargain pumpkins into the colorful stars of your porch display, just like the pastel arch in Idea #3.
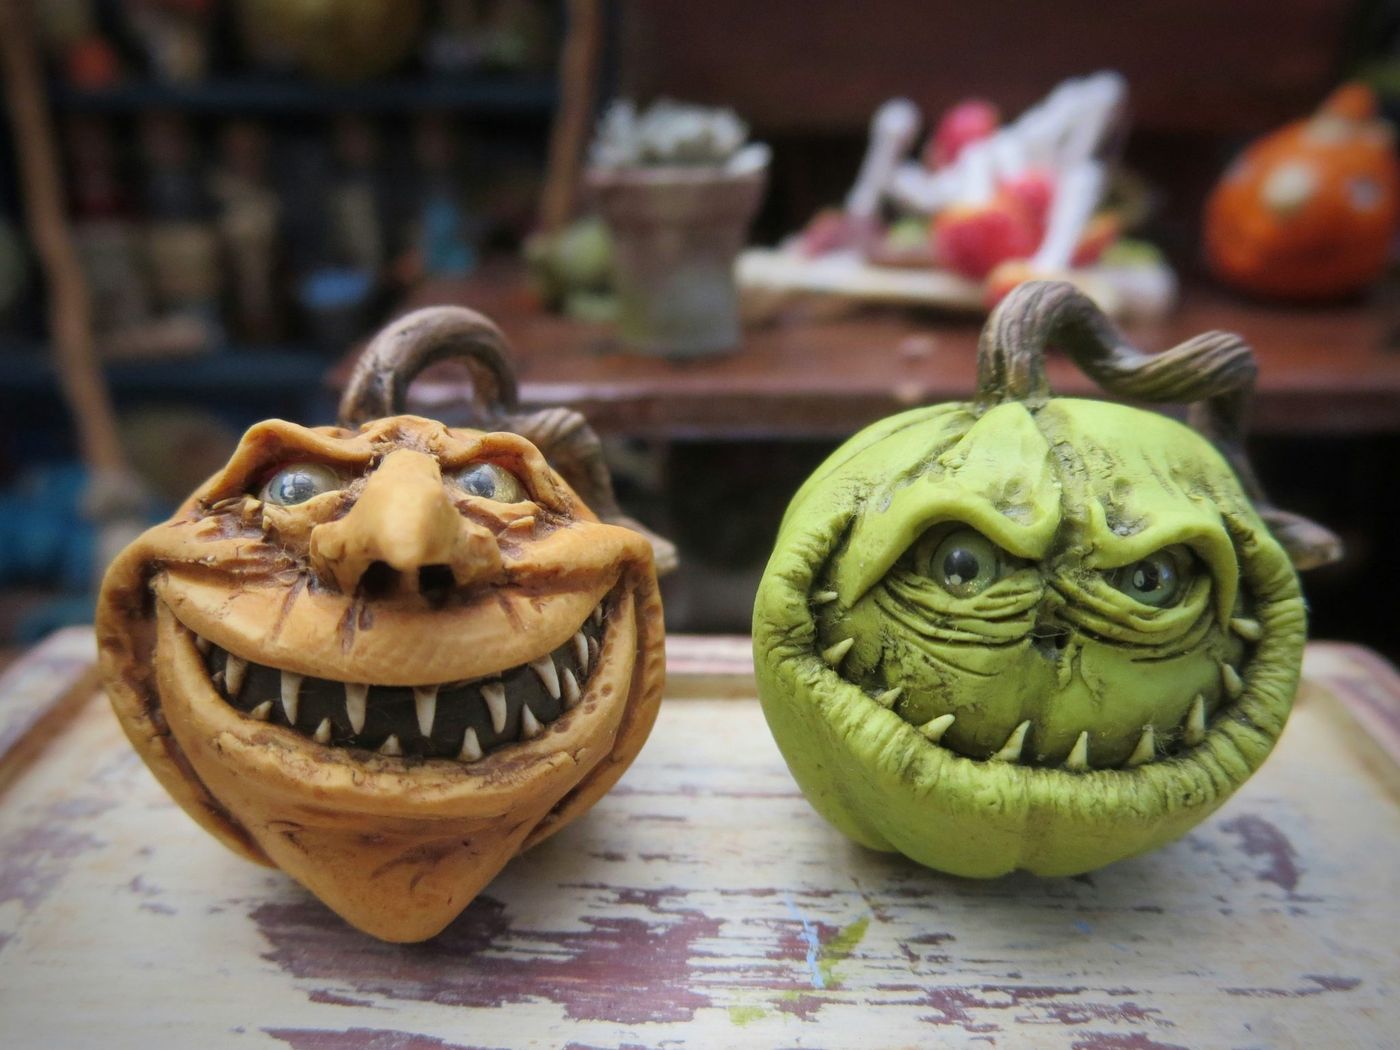
20. Grotesque and Playful Carved Pumpkin Figurines
The defining feature of these figurines is their exaggerated, grotesque expressions. In a world of cute, smiling jack-o’-lanterns, these stand out because they embrace a more traditional, folkloric version of Halloween creatures. The deep wrinkles, unsettling grins, and detailed teeth are what give them so much personality and make them memorable. They are a celebration of masterful carving and a departure from the generic, proving that ‘spooky’ can also be incredibly artful and humorous.
|
📋 Copy HEX 🔗 Share |
📏 Scale Guide
The visual success of this simple pairing comes down to a clear formula: 60% complex texture + 30% bold color contrast + 10% simple staging. The majority of the visual interest is in the detailed, wrinkled, and deeply carved textures of the pumpkins themselves. The lime green and classic orange provide a striking, almost jarring color contrast that immediately grabs your attention. The distressed white surface is the perfect neutral, simple stage that allows the complex figures to take center stage without any distraction.
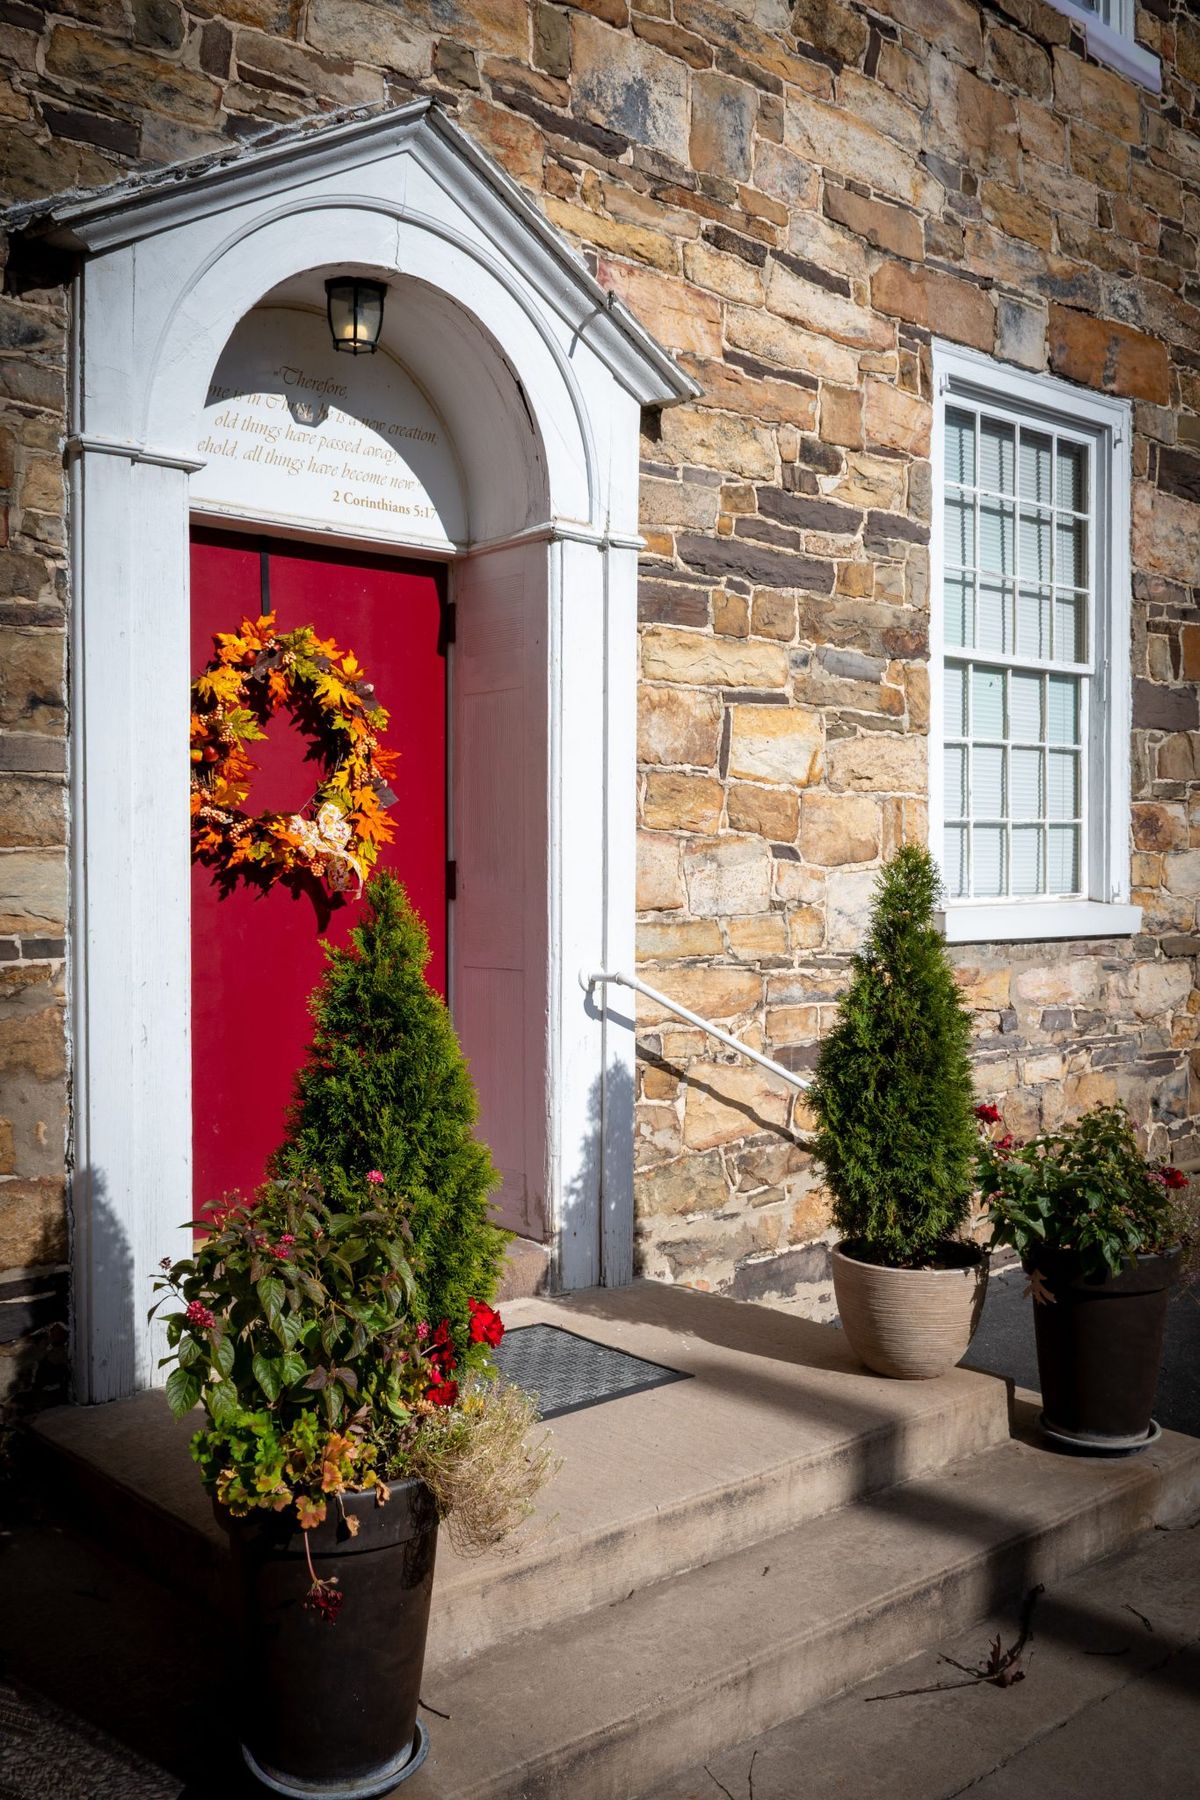
21. A Bold Red Front Door Against a Natural Stone Wall
The power of this entryway comes from the high contrast between texture and color. The natural fieldstone wall is rustic, textured, and has a muted, earthy palette. The front door, in contrast, is smooth, sleek, and painted a single, bold, vibrant crimson red. This juxtaposition is visually exciting. The simple autumn wreath works perfectly because it incorporates both the natural textures of the stone and a hint of the red from the door, acting as a bridge that ties the two dominant elements together. Compare this to the teal door against brick in Idea #10—both use color to make a statement.
|
📋 Copy HEX 🔗 Share |
✅ Before You Start
In an era of endless gray and white farmhouse everything, a boldly colored front door feels like a confident and joyful act of rebellion. Homeowners are increasingly using their front door as a place for personal expression, and this brilliant red is a perfect example. It signals personality and warmth from the moment you arrive. This trend has real longevity because it’s a relatively easy and low-cost way to make a huge impact on your home’s curb appeal, and it’s completely reversible if your tastes change.
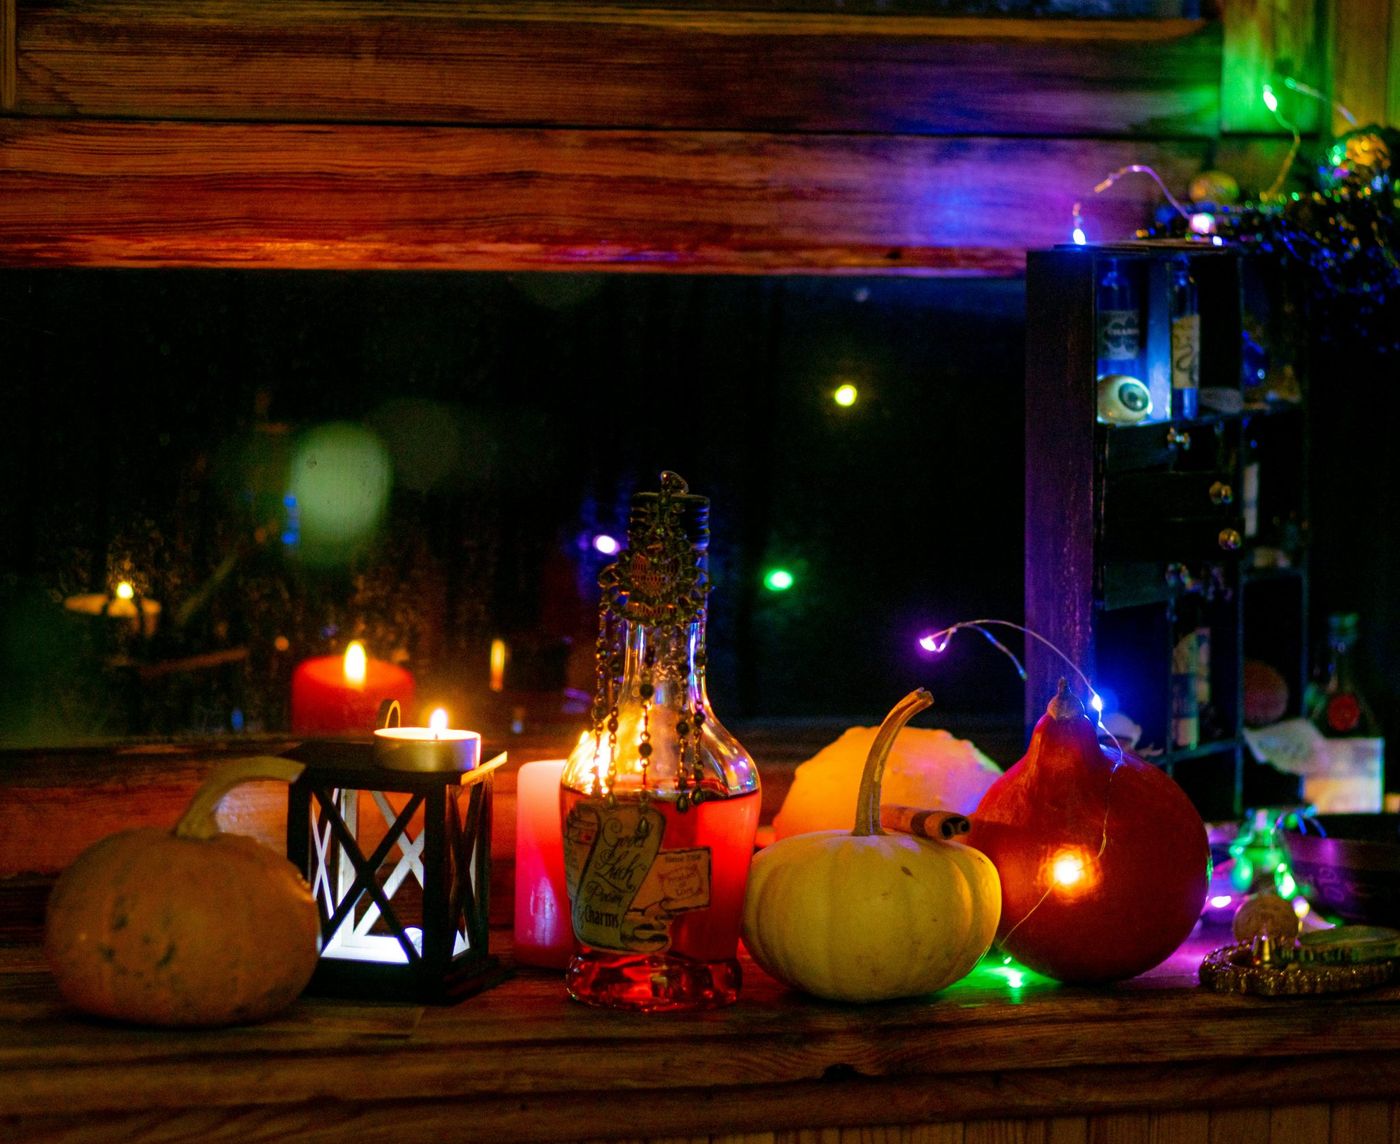
22. Atmospheric Mantel Display with Potion Bottles and String Lights
This magical mantel look is all about layering affordable elements to create a rich, atmospheric scene. Most of these items can be found at a craft store or dollar store.
- Multicolor String Lights (1-2 strands): $10 – $25
- Assorted Faux Mini Pumpkins: $15 – $30
- Black Lantern (battery-operated): $15 – $25
- Glass Potion Bottles & Labels (DIY): $10 – $20
- Assorted Candles (LED recommended): $15 – $30
- TOTAL: $65 – $130
Budget alternative: Save interesting glass bottles (olive oil, vinegar, etc.) and use them for your potion display. You can print vintage-style labels online for free. Use existing books to add height and dimension to your display.
|
📋 Copy HEX 🔗 Share |
💰 Budget Breakdown
When decorating with string lights, always choose a strand with dark-colored wire (black, brown, or green) for Halloween or fall displays. The multi-colored lights are festive, but a bright white or clear wire would stand out against the dark background and rustic elements, looking distracting and cheap. A dark wire melts into the background, allowing the focus to remain on the glowing bulbs and the objects they are illuminating. This is a small detail that makes a huge difference in the overall professionalism of the look.
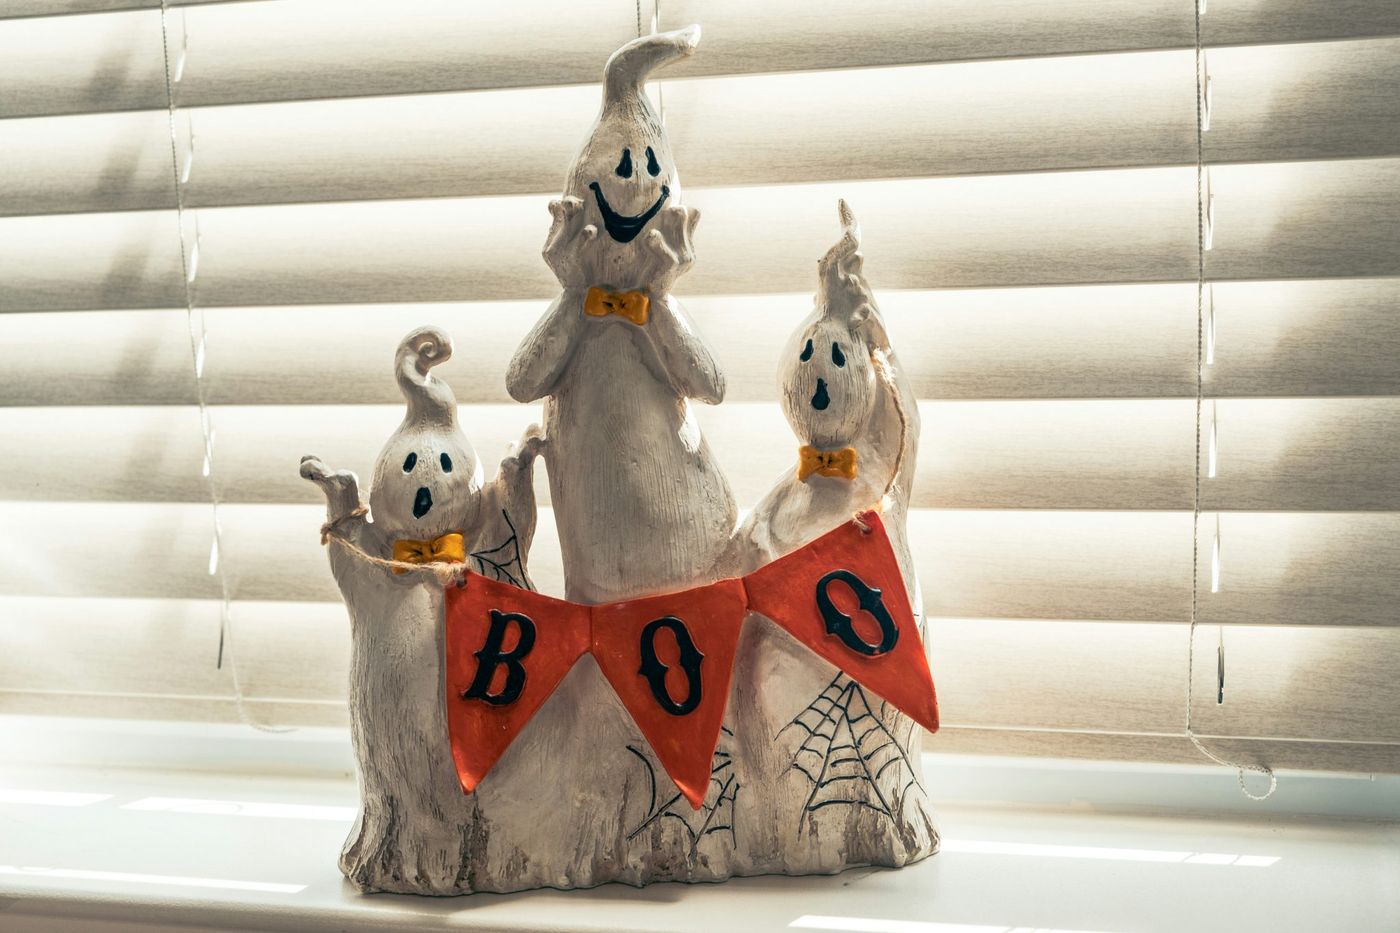
23. Cheerful ‘BOO’ Ghosts with Yellow Bow Ties
This charming figurine is ideal for tabletop or shelf styling. Due to its contained, circular design, it works best as a centerpiece on a round dining or entryway table, or on a floating shelf where it can be seen from all sides. Its dimensions are likely around 8-10 inches in diameter and 6-8 inches tall, making it a substantial piece without being overwhelming. It’s a great choice for adding a concentrated pop of festive cheer to a specific zone, like a coffee bar, a child’s dresser, or a fireplace hearth.
|
📋 Copy HEX 🔗 Share |
💡 Designer Tip
Want to give a plain ceramic Halloween decoration a bit more personality? It’s a simple 15-minute craft.
- Find some plain ghost, pumpkin, or cat figurines from a dollar or craft store.
- Get some small pre-made ribbon bows from the gift-wrapping or sewing section. Bright yellow, purple, or lime green work well.
- If you’re feeling extra crafty, add some detail with a fine-tipped black permanent marker. You can draw simple spiderwebs, dots, or crosshatch patterns.
- Use a small dot of hot glue to attach a bow to each figure—on the ‘neck’ of a ghost, the stem of a pumpkin, or as a bow tie on a cat. It’s an instant upgrade!
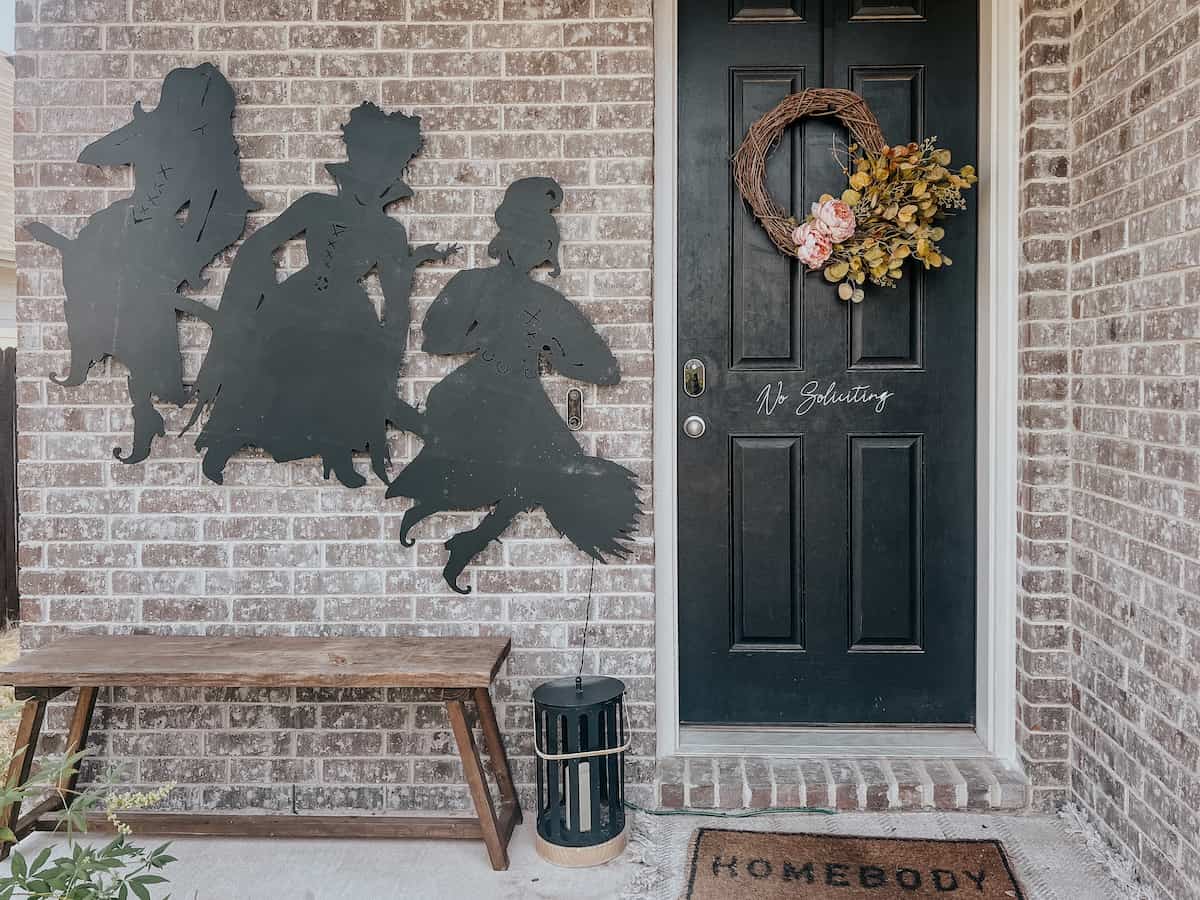
24. Witch Silhouettes and a Dried Floral Door Wreath
Those black metal witch silhouettes look fantastic, but they can be a challenge to hang on a brick wall without drilling. Adhesive hooks often fail on textured surfaces, especially with changing temperatures and humidity outdoors. Your best bet is to use brick clips, which are metal fasteners that grip onto the top and bottom of a single brick without any adhesive or drilling. Make sure you buy clips that match the size of your brick and that the silhouette has a point you can hang from. Otherwise, you’ll be picking them up off the porch after the first windy day.
|
📋 Copy HEX 🔗 Share |
🧹 Maintenance Reality
This design works because it expertly balances playful kitsch with sophisticated style. The witch silhouettes are pure Halloween fun—whimsical and a little spooky. However, they are paired with a very chic, modern grapevine wreath featuring dried, muted botanicals. The ‘Homebody’ doormat adds another layer of cozy, contemporary personality. This mix of high and low, silly and stylish, is what makes the whole entryway feel personal, curated, and not like it came straight out of a box from a big-box store.
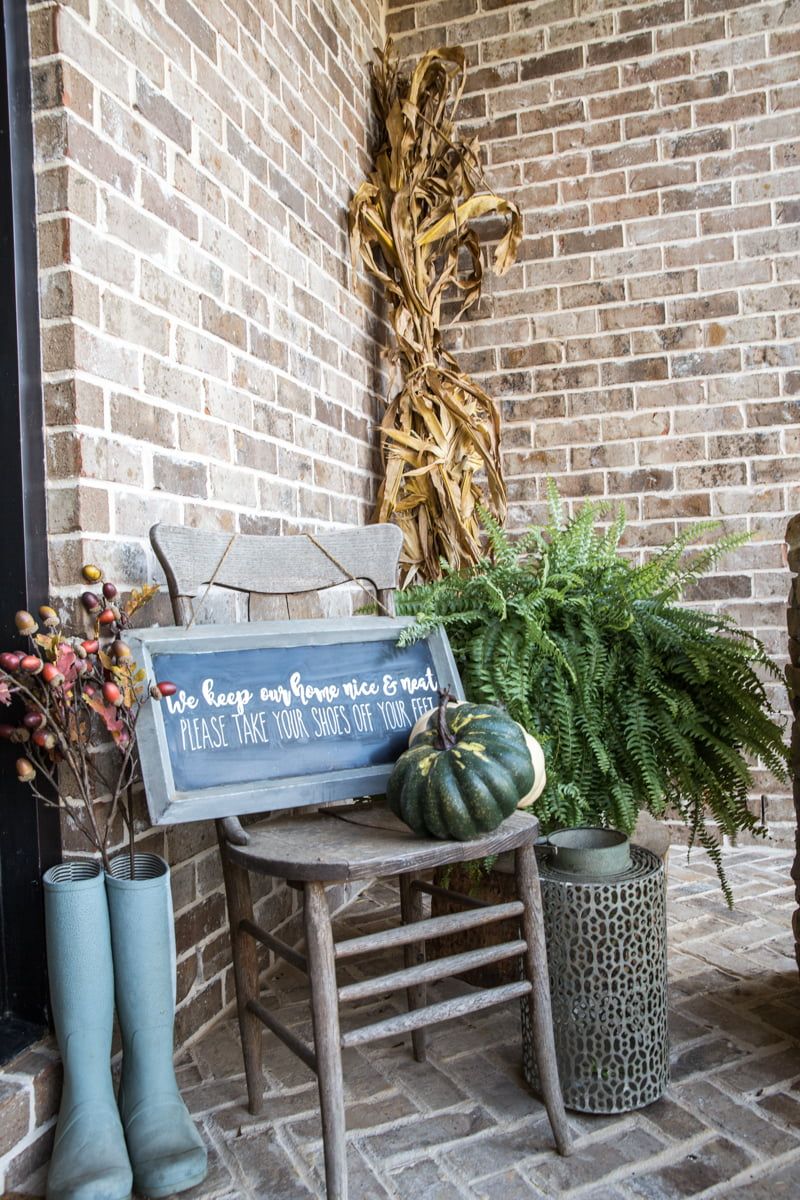
25. A Vintage Chair Display with a Green Pumpkin and Corn Stalks
The single element that elevates this entire vignette is the chalkboard sign. Without it, you would have a perfectly nice arrangement of fall items. With it, you have a story. It adds a layer of personality, a human touch, and a specific message. It can be changed to say ‘Welcome,’ ‘Happy Fall,’ or a spooky greeting. This ability to customize and communicate is what transforms the display from merely decorative to genuinely welcoming and personal. It’s the piece that makes the collection feel like a curated thought rather than a random assembly. Much like the vintage ladder in Idea #11, it uses a functional item for pure style.
|
📋 Copy HEX 🔗 Share |
⚠️ Real Talk
A vintage wooden chair with that perfect weathered patina can be a pricey find at an antique store. To get this look for less, hit up Facebook Marketplace or a garage sale for any old wooden chair, regardless of its finish, for $5-$15. The shape is more important than the color. Then, grab a can of gray or beige chalk paint. Apply one coat, let it dry, then use a medium-grit sanding block to distress the edges and high-traffic areas where wear would naturally occur. You’ll get that rustic, time-worn character for a fraction of the cost.
26. Moody Metallic Centerpiece with Copper and Black Ornaments
This dramatic look is a perfect example of a sophisticated, non-traditional Halloween palette. The formula is: 50% metallic copper + 40% matte and glitter black + 10% dark orange accent. The copper provides warmth and a touch of luxury, while the black brings the moodiness and drama. The small pops of orange in the pumpkin-shaped bauble are just enough to connect the arrangement to the holiday without overwhelming the chic metallic and black theme. You could easily swap the copper for gold or silver to match your existing home decor.

|
📋 Copy HEX 🔗 Share |
🔥 Trending Context
Glitter is the herpes of the craft world. It looks amazing, but it will get everywhere. A centerpiece with this much glitter-textured surface area will shed constantly. Every time you move it, adjust it, or even walk by it too quickly, you’ll be finding specks of black glitter on your table, your floor, and yourself for weeks. If you love the look but hate the mess, give the glittery ornaments a quick coat of clear matte spray sealant before you arrange them. This will help lock in most of the particles and minimize the sparkly fallout.
27. A Ceramic Ring of Friendly Ghosts Holding Hands
Give plain ghost decorations a charming, vintage-inspired makeover with paint pens. It’s a quick DIY that adds tons of personality. This project will take less than 30 minutes.
- Start with a plain white ceramic or plastic ghost figurine. Make sure it’s clean and dry.
- Use a black oil-based paint pen (they work best on slick surfaces) to draw on simple faces. Two ovals for eyes and a bigger oval for a mouth is classic and cute.
- Take a fine-tipped blue or red paint pen to add a small, subtle detail, like tiny stars on their bodies or a thin line around the base. This touch of color makes it feel more special.
- Let the paint dry completely according to the pen’s instructions before displaying.

|
📋 Copy HEX 🔗 Share |
🎯 What Makes It Work
When styling a circular object like this ring of ghosts, don’t just place it in the middle of a large, empty table. It will look lost. Instead, create a ‘base’ for it to anchor it in the space. Use a stack of two or three vintage books, a round woven placemat, or a small wooden cutting board underneath it. This adds a layer of texture and defines the space, making the entire vignette feel more intentional and complete. It’s a simple trick to make any centerpiece look more professionally styled.
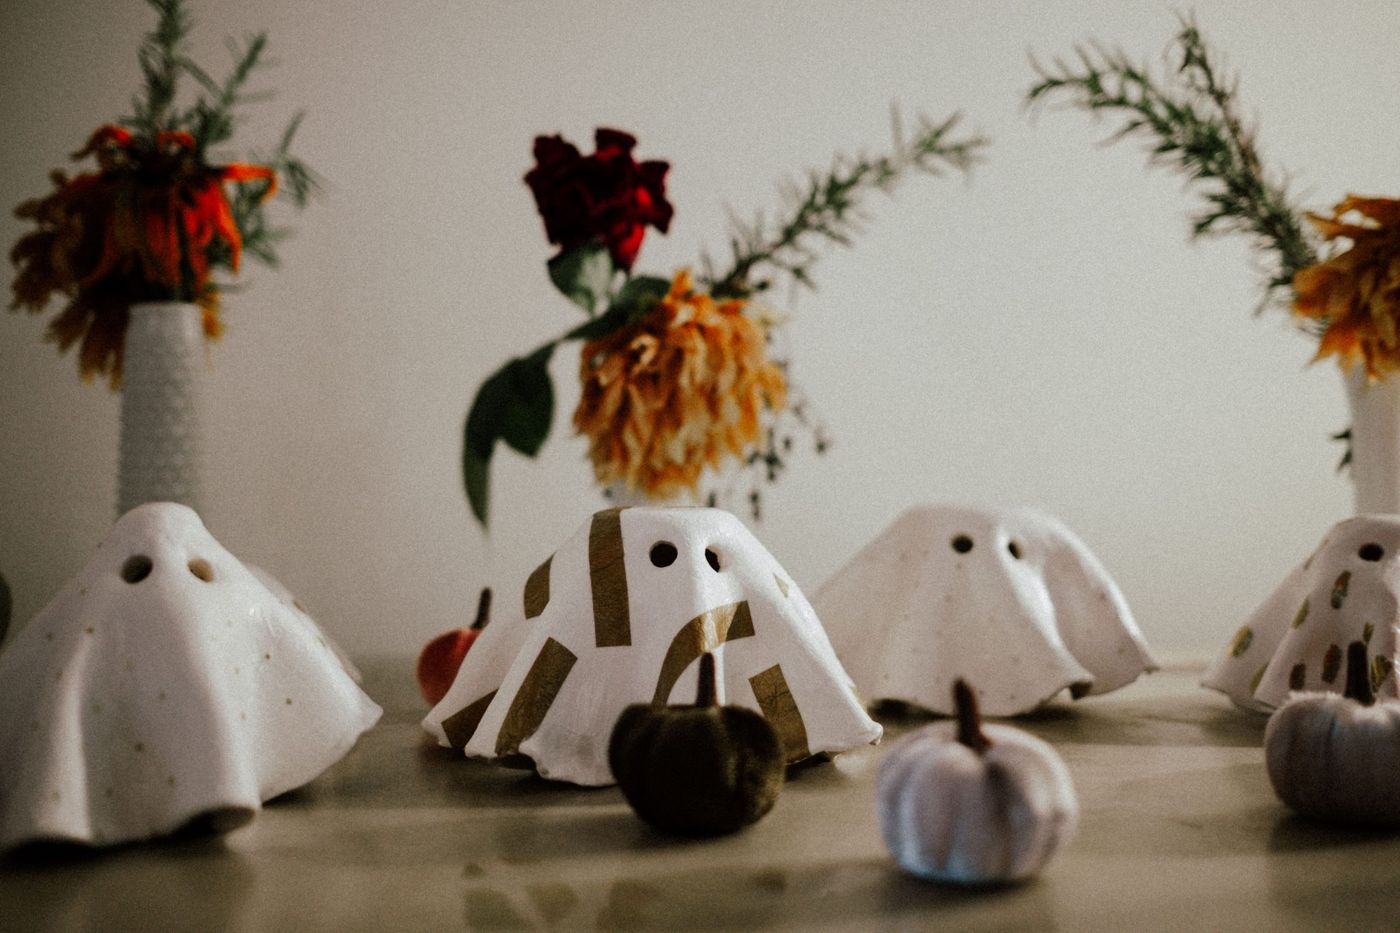
28. Minimalist Ceramic Ghosts with Gold Accents
This minimalist arrangement is perfectly suited for narrow spaces where traditional, bulky Halloween decor won’t fit. Think fireplace mantels, floating wall shelves, console tables in an entryway, or the top of a bookshelf. The entire look is built from small, individual components, so you can expand or contract it to fit your surface perfectly. The tallest element (the dried floral arrangement) is likely no more than 12-15 inches, keeping the vertical scale manageable and ideal for spaces with standard ceiling heights.
|
📋 Copy HEX 🔗 Share |
⭐ The One Thing
The reason this decor feels so chic and modern is its sophisticated use of restraint. The color palette is tightly controlled: off-white, gold, and deep, muted autumn tones. There are no bright, cartoonish colors. The shapes are simple and organic. The gold accents are geometric and applied sparingly, providing just a hint of glamour without being gaudy. By focusing on quality materials and a limited palette, the result is seasonal decor that feels more like art and less like a party supply.
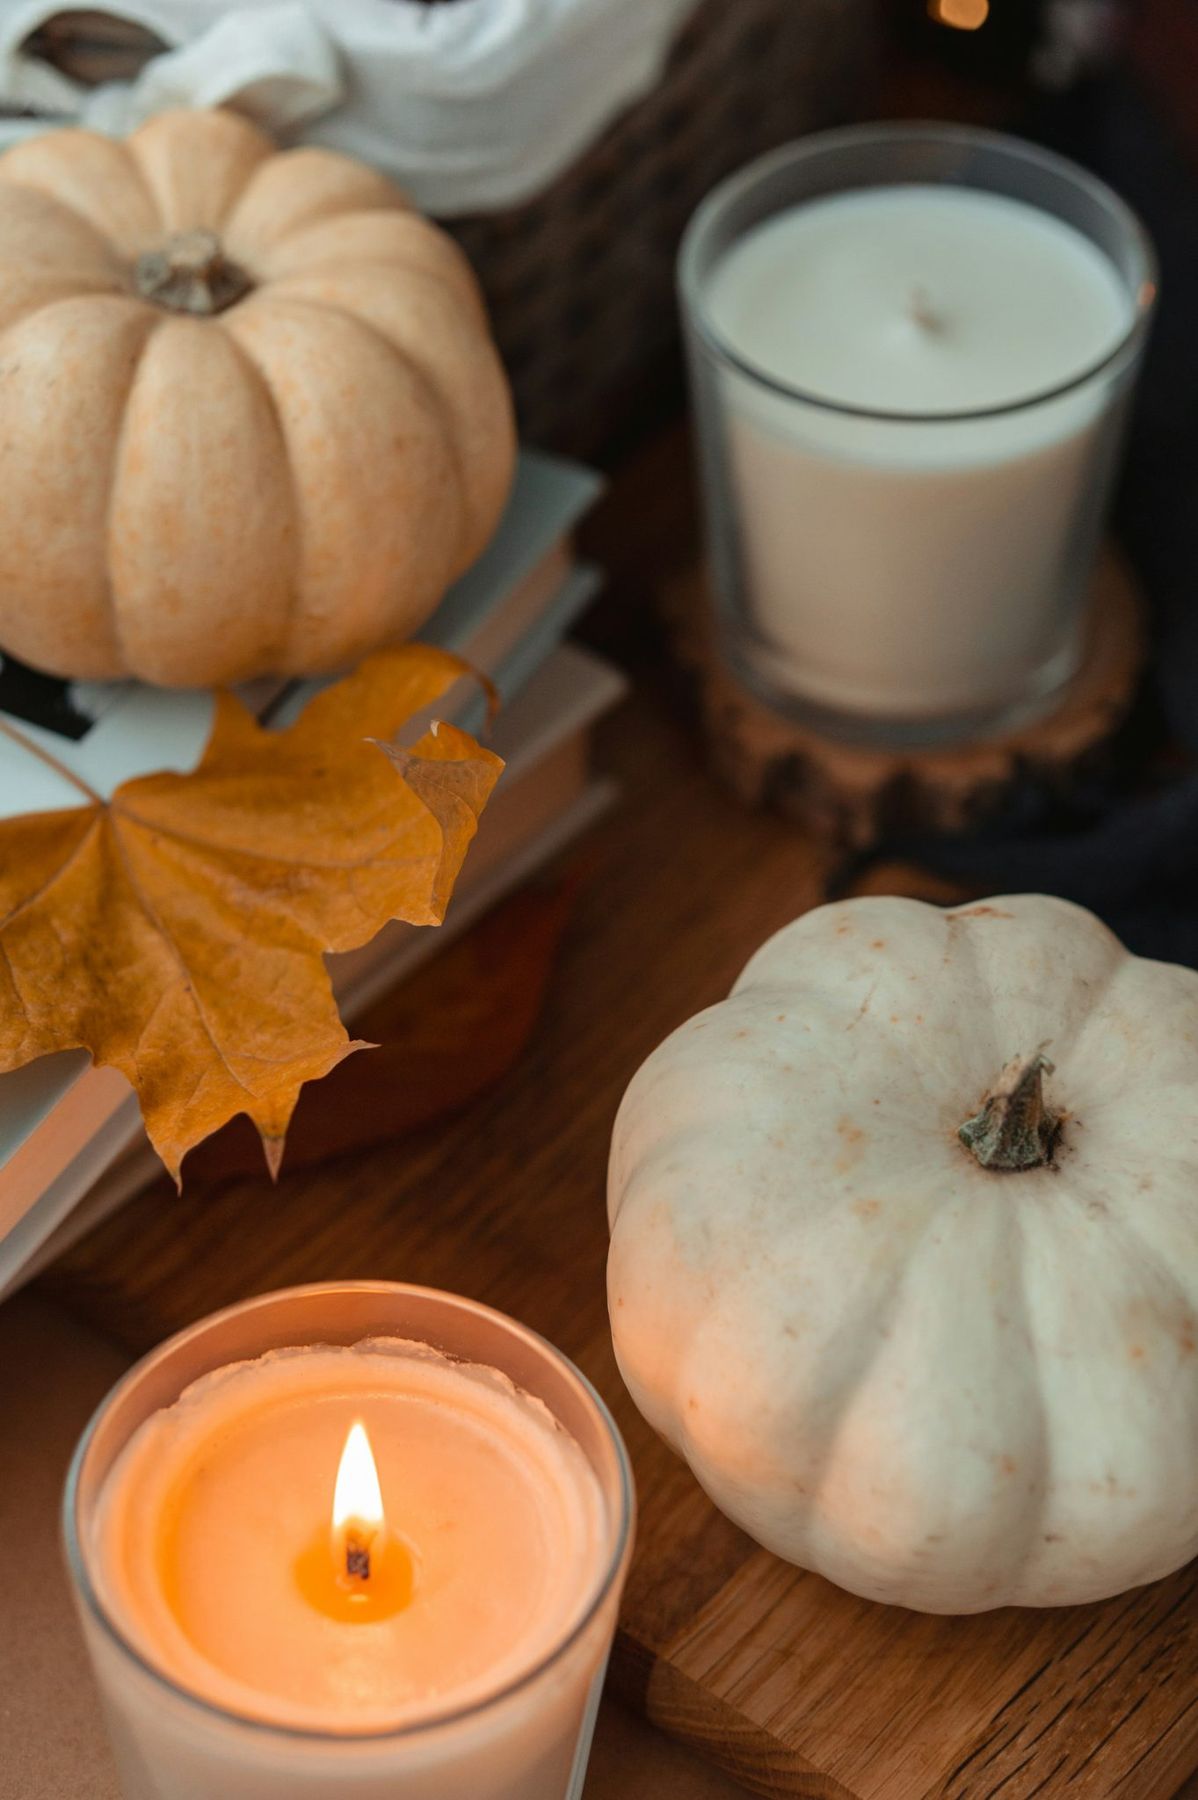
29. A Simple, Cozy Vignette with Mini Pumpkins and Candles
This scene is beautiful, but mixing paper and fire is always a risk. The stacked books and dried maple leaf are highly flammable. If you want to recreate this cozy look, please use battery-operated, flickering LED candles instead of real flames. Modern LED candles can look incredibly realistic and provide that same warm, amber glow without any of the fire hazard. It gives you the exact same atmospheric vibe with zero risk, so you can set it up and enjoy it without worry. This is non-negotiable for home safety.
|
📋 Copy HEX 🔗 Share |
🔧 How-To Brief
The single element that makes this simple arrangement feel special is the stack of books. It’s completely unexpected in a seasonal display. The books add height, texture, and a sense of story and intellect. They elevate the pumpkins and candles from just ‘stuff on a table’ to a thoughtful, curated moment. It suggests a quiet afternoon spent reading by candlelight as autumn sets in. Removing the books would leave you with a much flatter, less interesting composition. They are the narrative heart of the vignette.
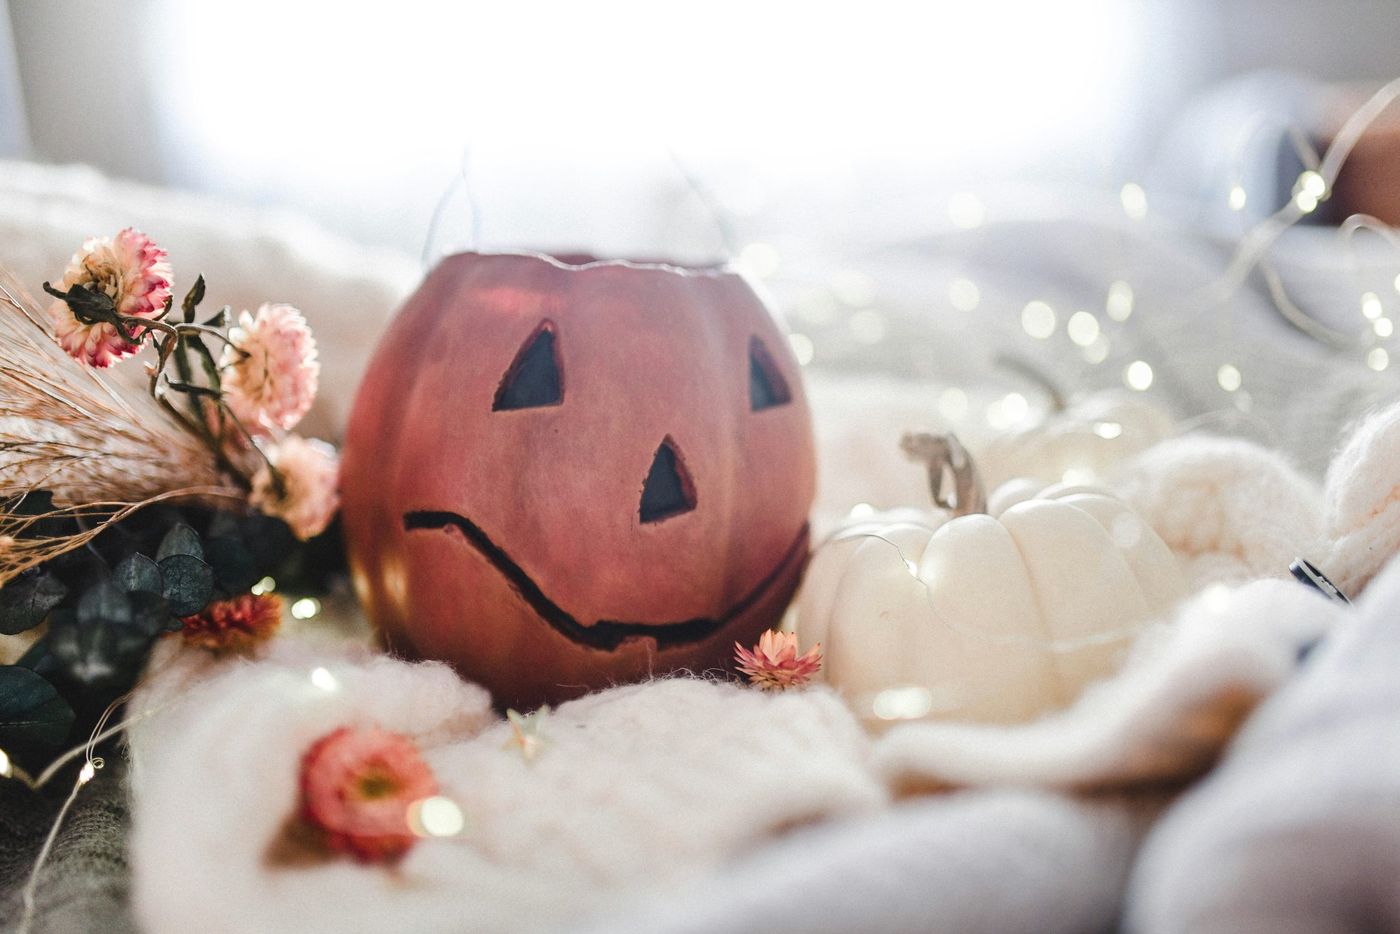
30. A Soft and Whimsical Jack-O-Lantern on a Knit Blanket
This cozy, magical look is incredibly affordable to put together, relying on texture and light rather than expensive props. You might already have some of these items at home.
- Carved Craft Pumpkin: $10 – $20
- Cream-Colored Knit Throw Blanket: $25 – $50
- Battery-Operated Fairy Lights (warm white): $5 – $15
- Dried Floral Sprigs: $10 – $20
- Small Decorative Gourd: $3 – $8
- TOTAL: $53 – $113
Budget alternative: Use a real pumpkin that you carve yourself. Check thrift stores for cozy blankets—you can often find beautiful ones for under $10. Forage for your own dried flowers or grasses for a truly personal touch.
|
📋 Copy HEX 🔗 Share |
📐 Style Math
This look is all about texture and softness, a departure from typical spooky decor. The formula is: 50% soft texture (the chunky knit blanket) + 30% warm light (the fairy lights and pumpkin glow) + 20% delicate natural elements (dried pink florals, gourds). The blanket creates a pillowy, inviting base that immediately sets a cozy tone. The warm light adds a magical, whimsical quality, while the dried flowers bring in a touch of fragile, organic beauty. The combination feels nostalgic and gentle, perfect for a less spooky take on Halloween.
Ready to Craft Your Hauntingly Good Home?
Now you have 30 distinct ideas to get you started, from grand porch statements to tiny, cozy vignettes. Remember that the best Halloween decor reflects your own personality, whether that’s spooky, playful, or stylishly subtle. Don’t be afraid to mix and match concepts or put your own spin on things. The goal is to create a space that feels festive and fun for you.
Go ahead and pick a favorite to try this weekend. And don’t forget to save this article to your favorite Pinterest board—inspiration is best when it’s easy to find again!