You know that feeling when you find the *perfect* Halloween decor idea on Pinterest, but it feels too complicated or expensive to actually pull off in your own home? We’ve all been there. This year, we’re cutting through the noise. We spent serious time browsing Etsy, Target, and even thrift store flips to bring you only what’s worth your attention for 2026. We found amazing inspiration with pieces ranging from under $10 to full-on statement props around $400.
Inside, you’ll find 30 curated ideas that move beyond the basic plastic skeletons. We’re focusing on styles that are atmospheric, whimsical, and genuinely spooky, with a big emphasis on personal, handmade touches over mass-produced jump scares. And stay until the end—we break down the most common mistakes that can ruin these looks. 📌 Save this to Pinterest for later — you’ll want to revisit these ideas.
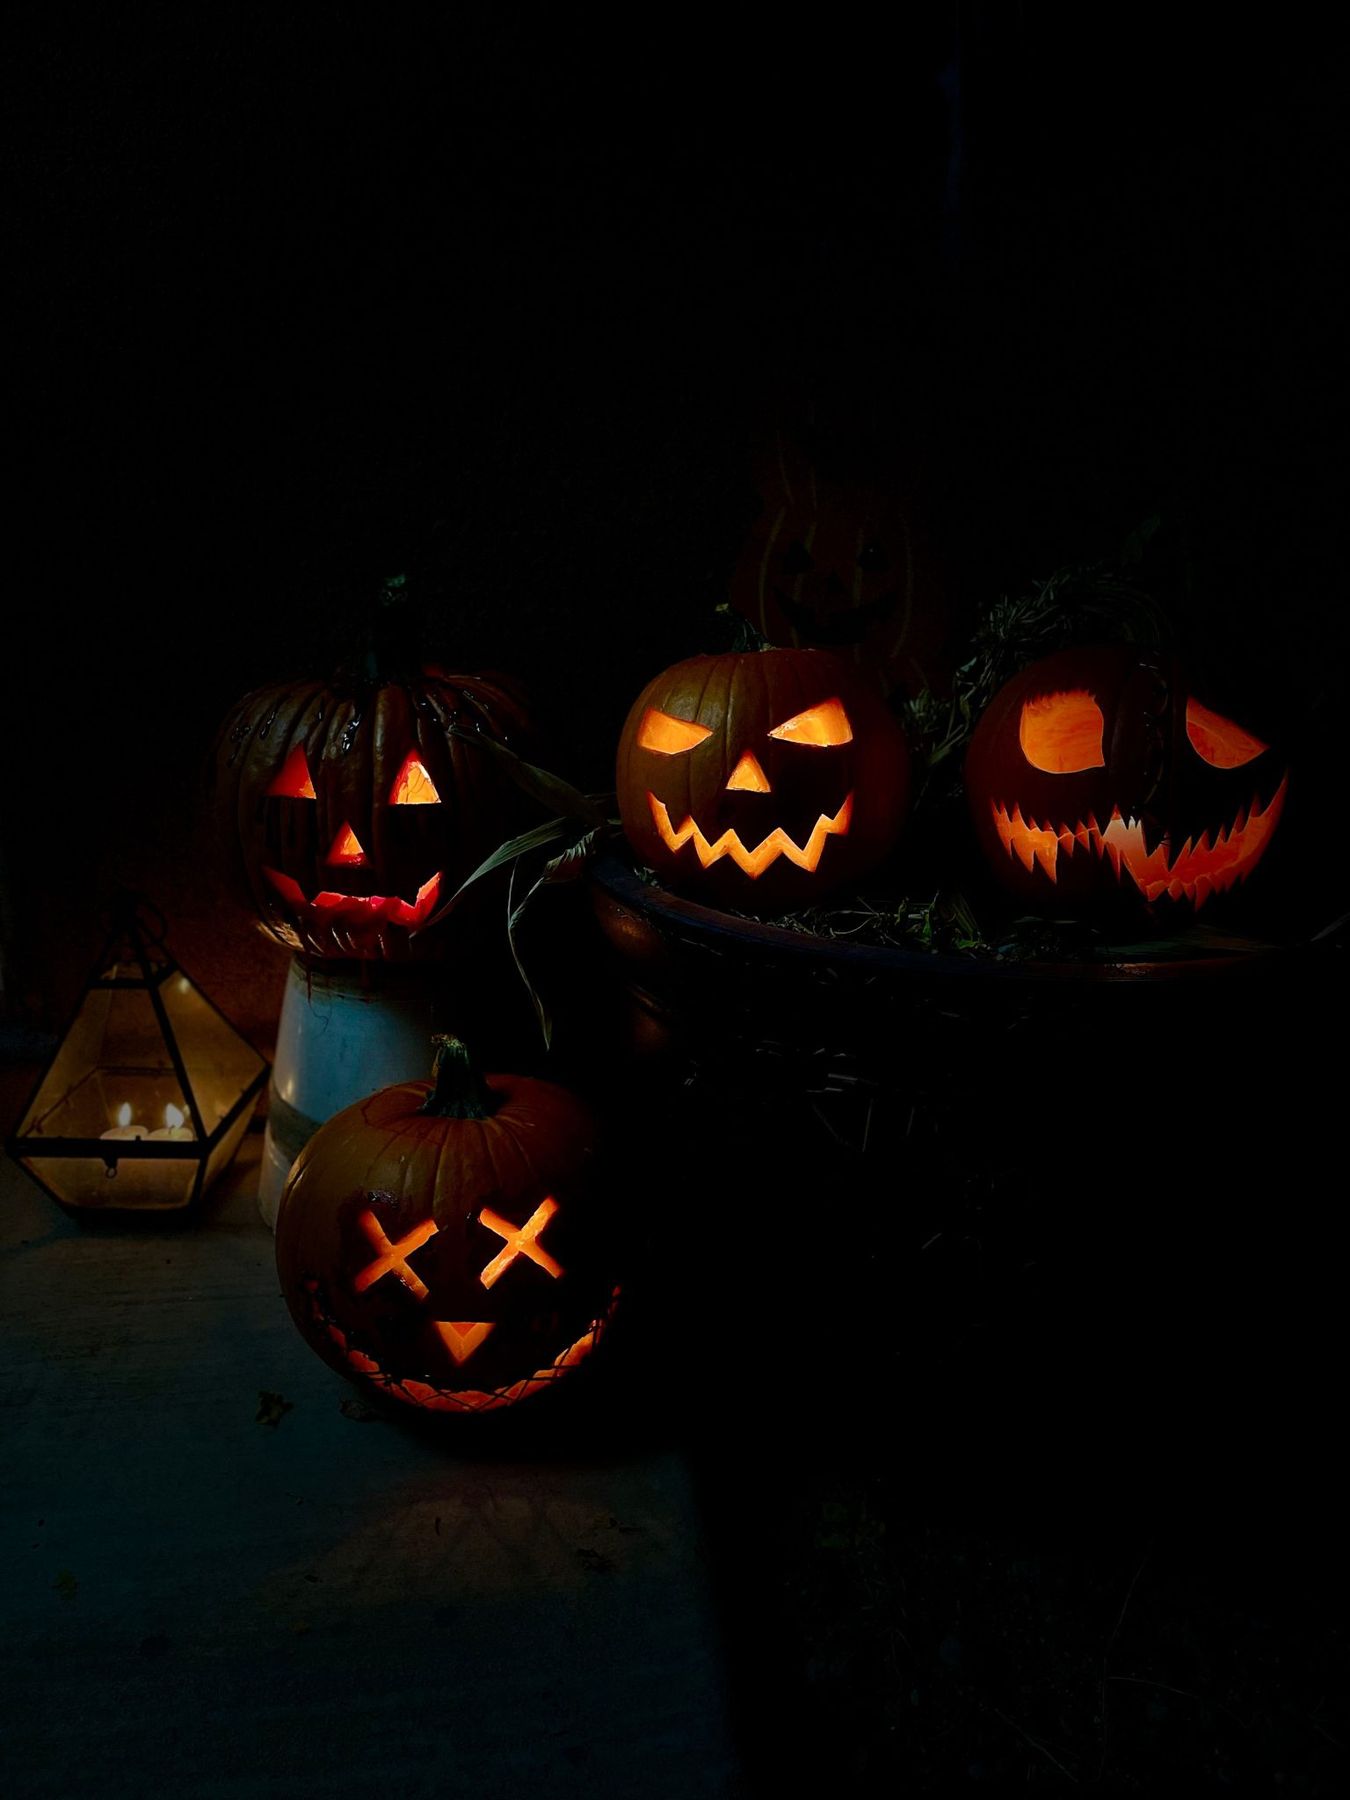
1. Create an Eerie Pumpkin Cluster with Varied Expressions
This look is all about creating a focal point through repetition and elevation. By grouping several jack-o’-lanterns together, you create a much stronger visual impact than a single pumpkin could alone. The varied heights—some on a pedestal, others in a container—force the eye to move around the display, taking in each unique carved face. The choice of a dark, non-reflective pedestal and container makes the glowing pumpkins pop, turning them into the undisputed stars of the show.
|
📋 Copy HEX 🔗 Share |
⚠️ Real Talk
You can absolutely get this dramatic look without splurging on high-end decor. Find a large, simple planter or bucket at a home improvement store or even a thrift shop—a coat of matte black spray paint works wonders. For the pedestal, look for a sturdy wooden stool or a stack of old books painted black. The key is creating different levels. A mix of real and high-quality foam pumpkins from a craft store will also help keep costs down while letting you build a collection over time.
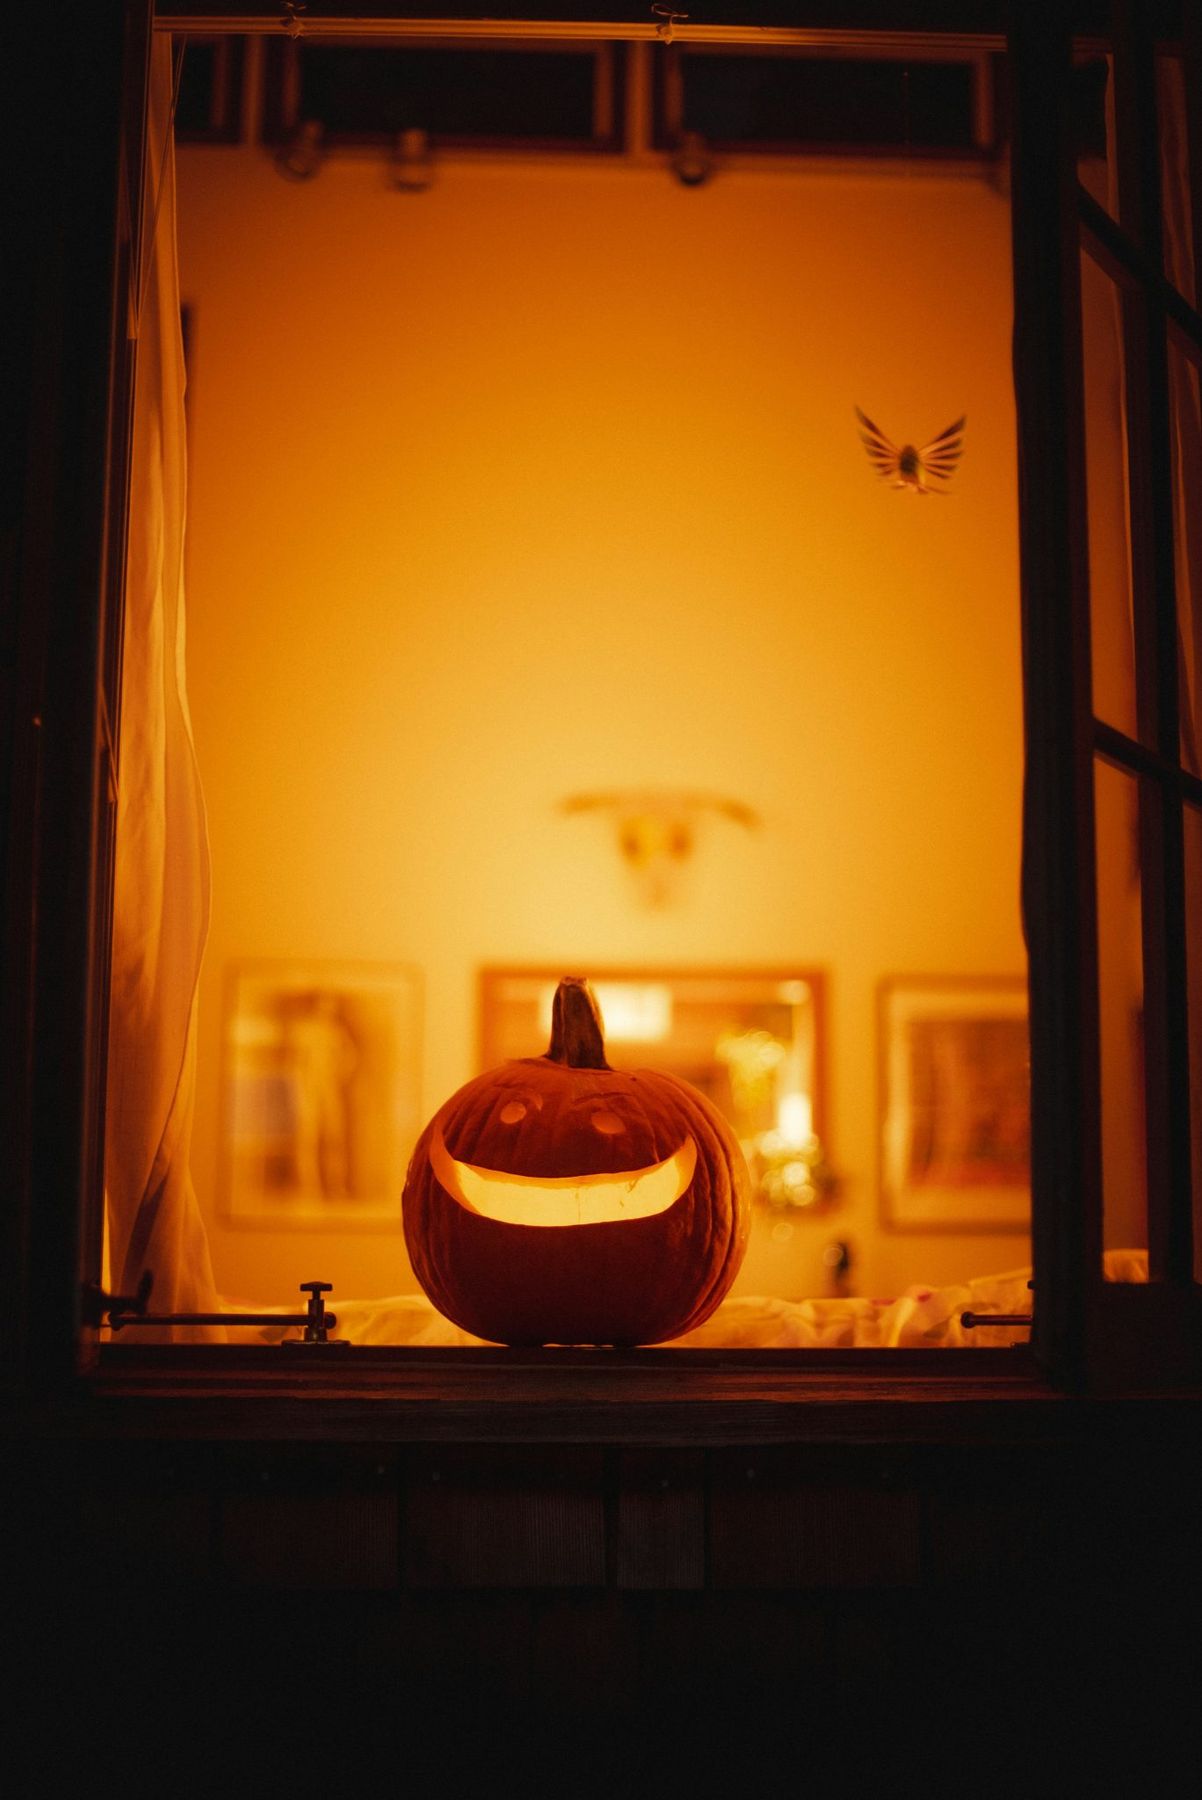
2. Frame a Single Glowing Pumpkin in a Window for a Moody Silhouette
that makes this idea so powerful is its restraint. It’s not about a yard full of decorations; it’s about a single, perfectly placed object creating a sense of mystery. The jack-o’-lantern acts like a piece of living art, framed by the dark window. From the outside, it’s an intriguing, warm welcome. From the inside, it casts a beautiful, amber glow that makes the whole room feel cozier. Removing it would just leave you with a dark window, completely losing that atmospheric, story-like quality.
|
📋 Copy HEX 🔗 Share |
💰 Budget Breakdown
To achieve this specific moody glow, ditch the real flame. A high-quality, battery-operated flickering LED candle is your best friend here. Specifically, look for one with a warm color temperature—around 2200K to 2700K—to get that rich, amber hue instead of a cold, sterile white light. Place the light source low and centered inside the pumpkin to ensure the entire carved face is evenly illuminated, which is the secret to a great silhouette from any distance.
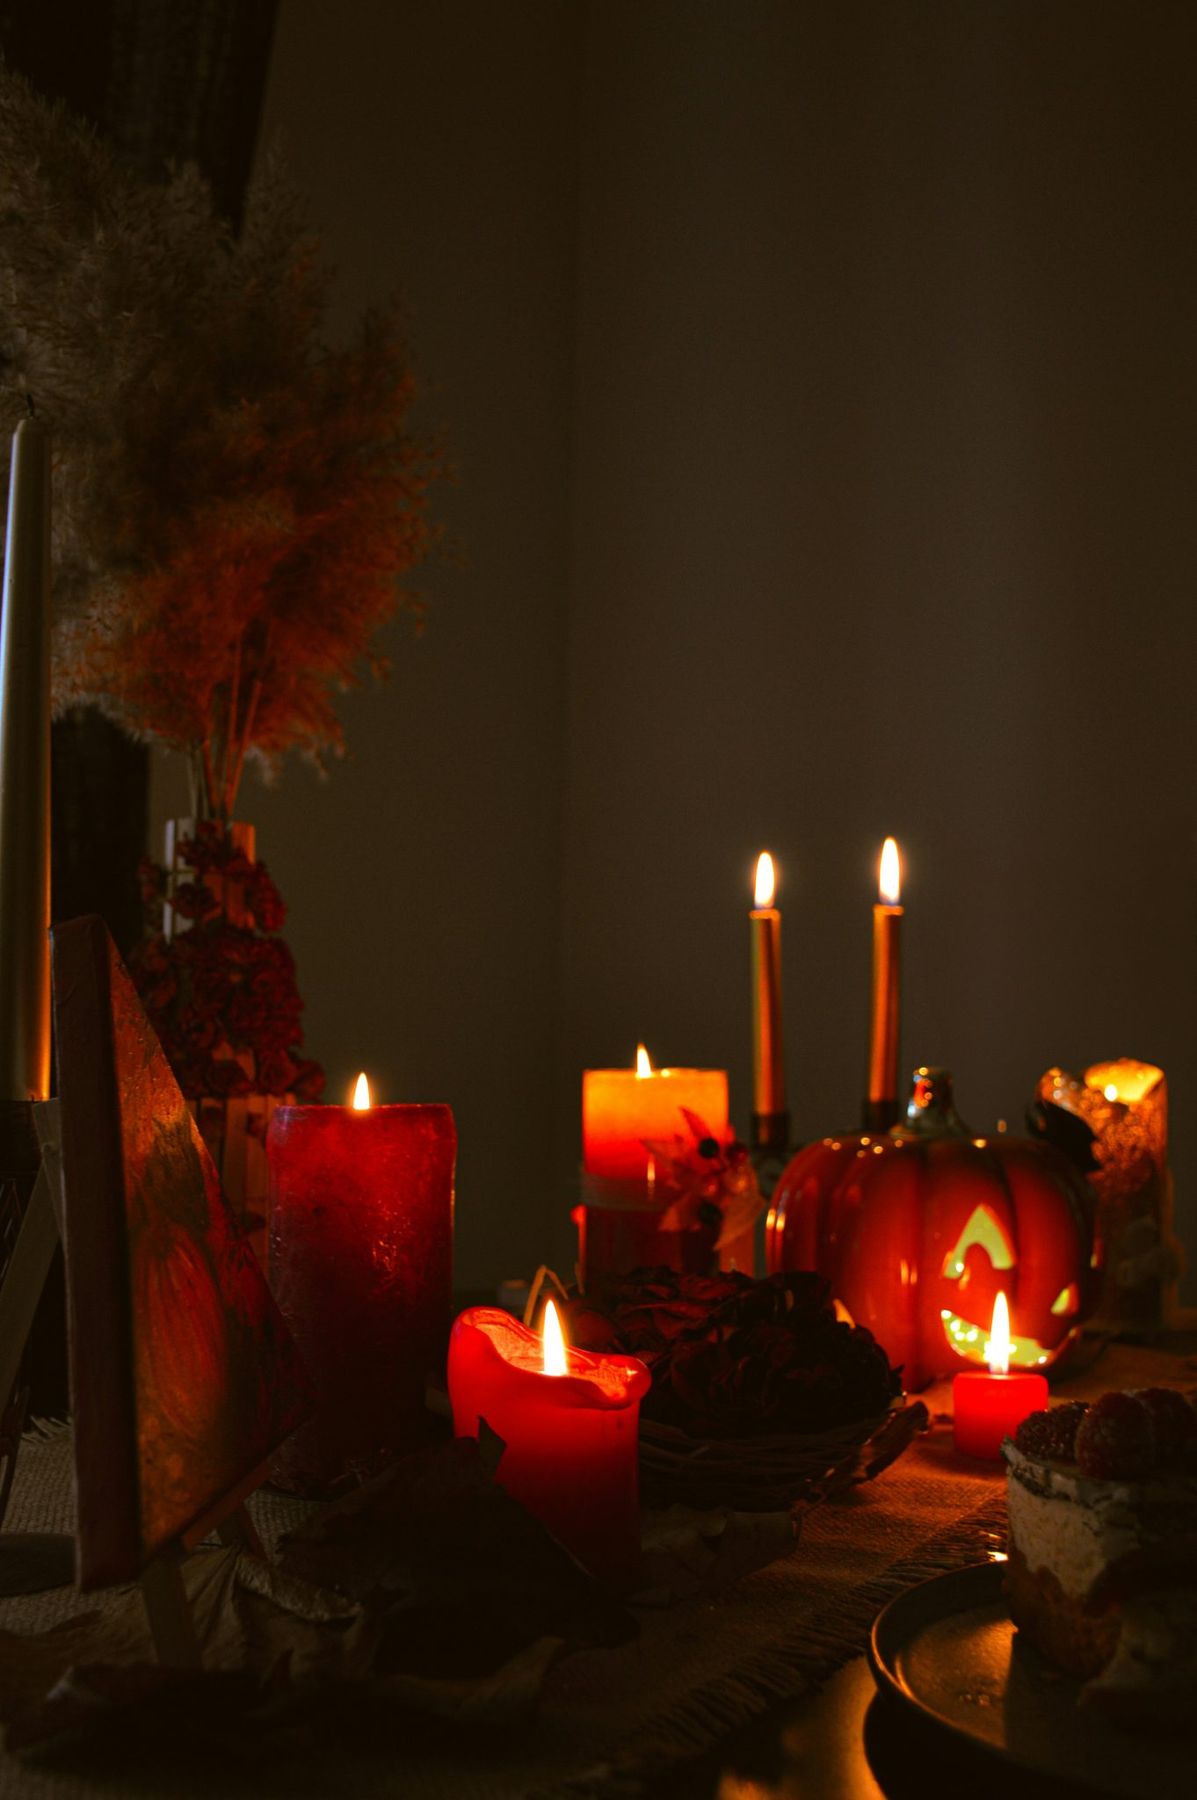
3. Layer a Table with a Jack-o’-Lantern and Crimson Candles
This dramatic centerpiece follows a simple but effective formula: 50% warm glow + 30% rich color + 20% rustic texture. The warm glow comes from the central jack-o’-lantern and the surrounding candles. The rich color is introduced through the deep crimson and burnt orange pillar candles, which add a sophisticated, almost vampiric touch. The final 20% is all about texture: the rough burlap runner, the scattered dried leaves, and the feathery pampas grass provide a natural, tactile element that keeps the look from feeling too polished.
|
📋 Copy HEX 🔗 Share |
🎯 What Makes It Work
Let’s be honest: an arrangement with this many open flames requires constant supervision. This is not a ‘set it and forget it’ centerpiece. Make sure all candles are on stable, heat-proof surfaces and are nowhere near the flammable pampas grass or dried leaves. For a safer, more practical version, use high-quality flameless LED candles. You can get a remarkably similar effect without the fire hazard, which is especially important if you have kids, pets, or a particularly lively Halloween party planned.
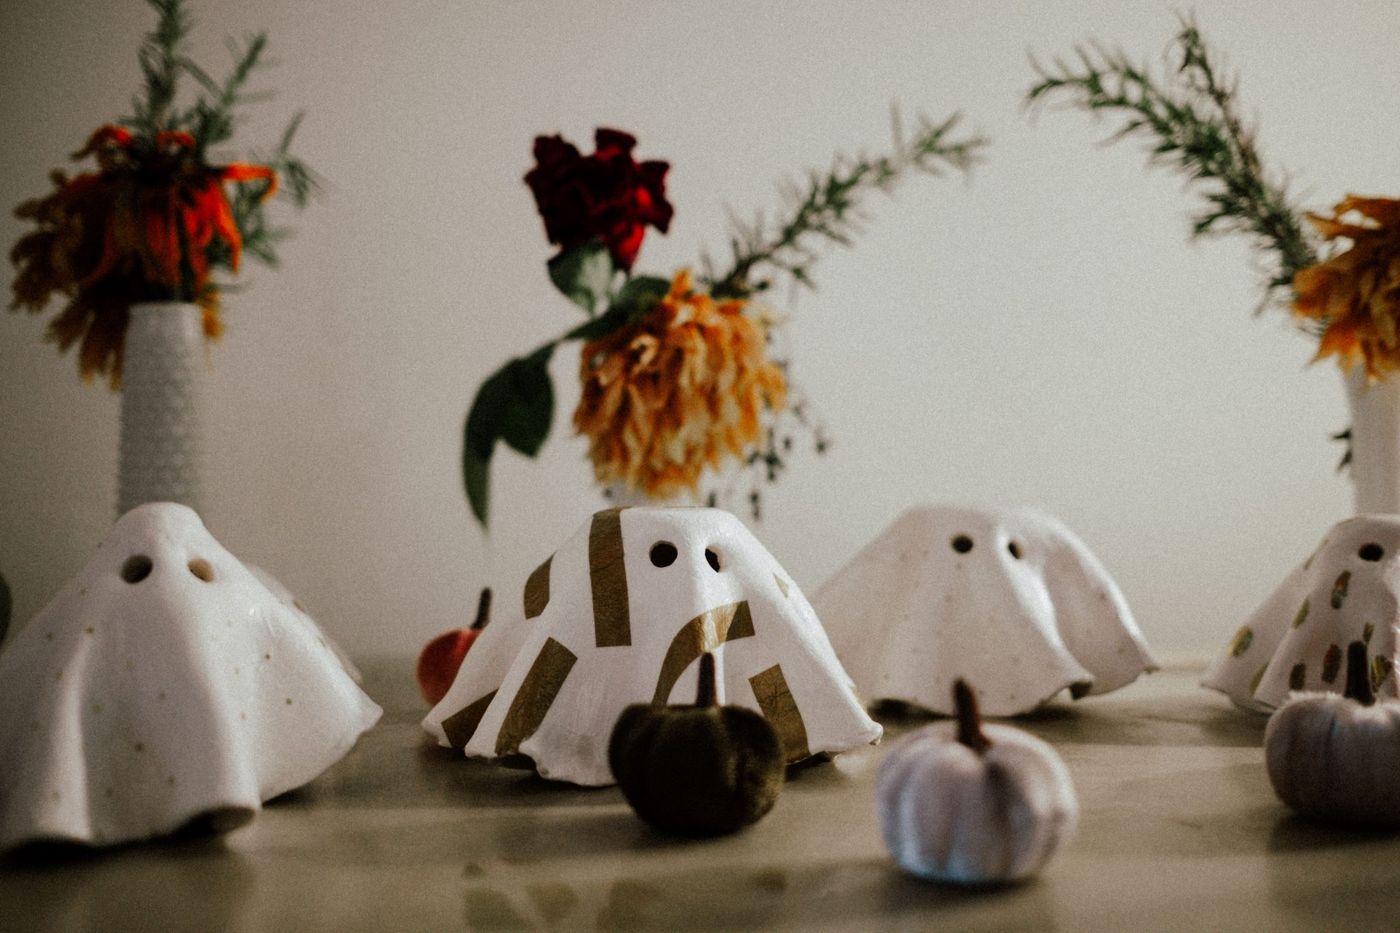
4. Arrange Minimalist Ceramic Ghosts with Autumnal Florals
This display works because it masters the art of contrast. You have the smooth, cool, minimalist white ceramic of the ghosts set against the rich, warm, and complex textures of the dried florals and velvet pumpkins. It’s a sophisticated take on Halloween that feels more like seasonal decor than a spooky gimmick. The subtle gold pattern on the surface below adds a touch of glam without overwhelming the simple charm of the ghost figures. It’s playful, not frightening, which makes it incredibly versatile.
|
📋 Copy HEX 🔗 Share |
📏 Scale Guide
This kind of vignette is perfect for smaller spaces where a big display would be overwhelming. It works beautifully on a console table, a bookshelf, or a mantel with at least 24 inches of width and 12 inches of depth to allow for layering. The tallest floral element should be no more than 18 inches high to keep the arrangement feeling balanced and intentional. It’s a great solution for apartments or bedrooms where you want a festive touch without sacrificing style. Compare with the grander scale of Idea #15.
5. Carve Whimsical Faces into Butternut Squash on a Tree Stump
The use of butternut squash instead of traditional pumpkins is what makes this idea so charming and unique. Their elongated shape and pale beige color offer a refreshing alternative to the sea of orange, and the simple, smiling faces give them an endearing, almost storybook quality. Placing them on a dark, weathered tree stump grounds the display in nature, making it feel rustic and authentic. It’s a whimsical twist that feels both creative and effortlessly seasonal.

|
📋 Copy HEX 🔗 Share |
🔧 How-To Brief
While fun, butternut squash has a higher moisture content and thinner skin than a pumpkin, which affects its longevity after carving. Expect your creations to last about 5-7 days before they start to soften and show signs of decay, especially in a humid environment. To prolong their life, make sure to thoroughly scoop out the insides and pat the interior dry. A light coat of petroleum jelly on the cut edges can also help slow down dehydration. This is a great weekend project, but don’t expect it to last the entire month.
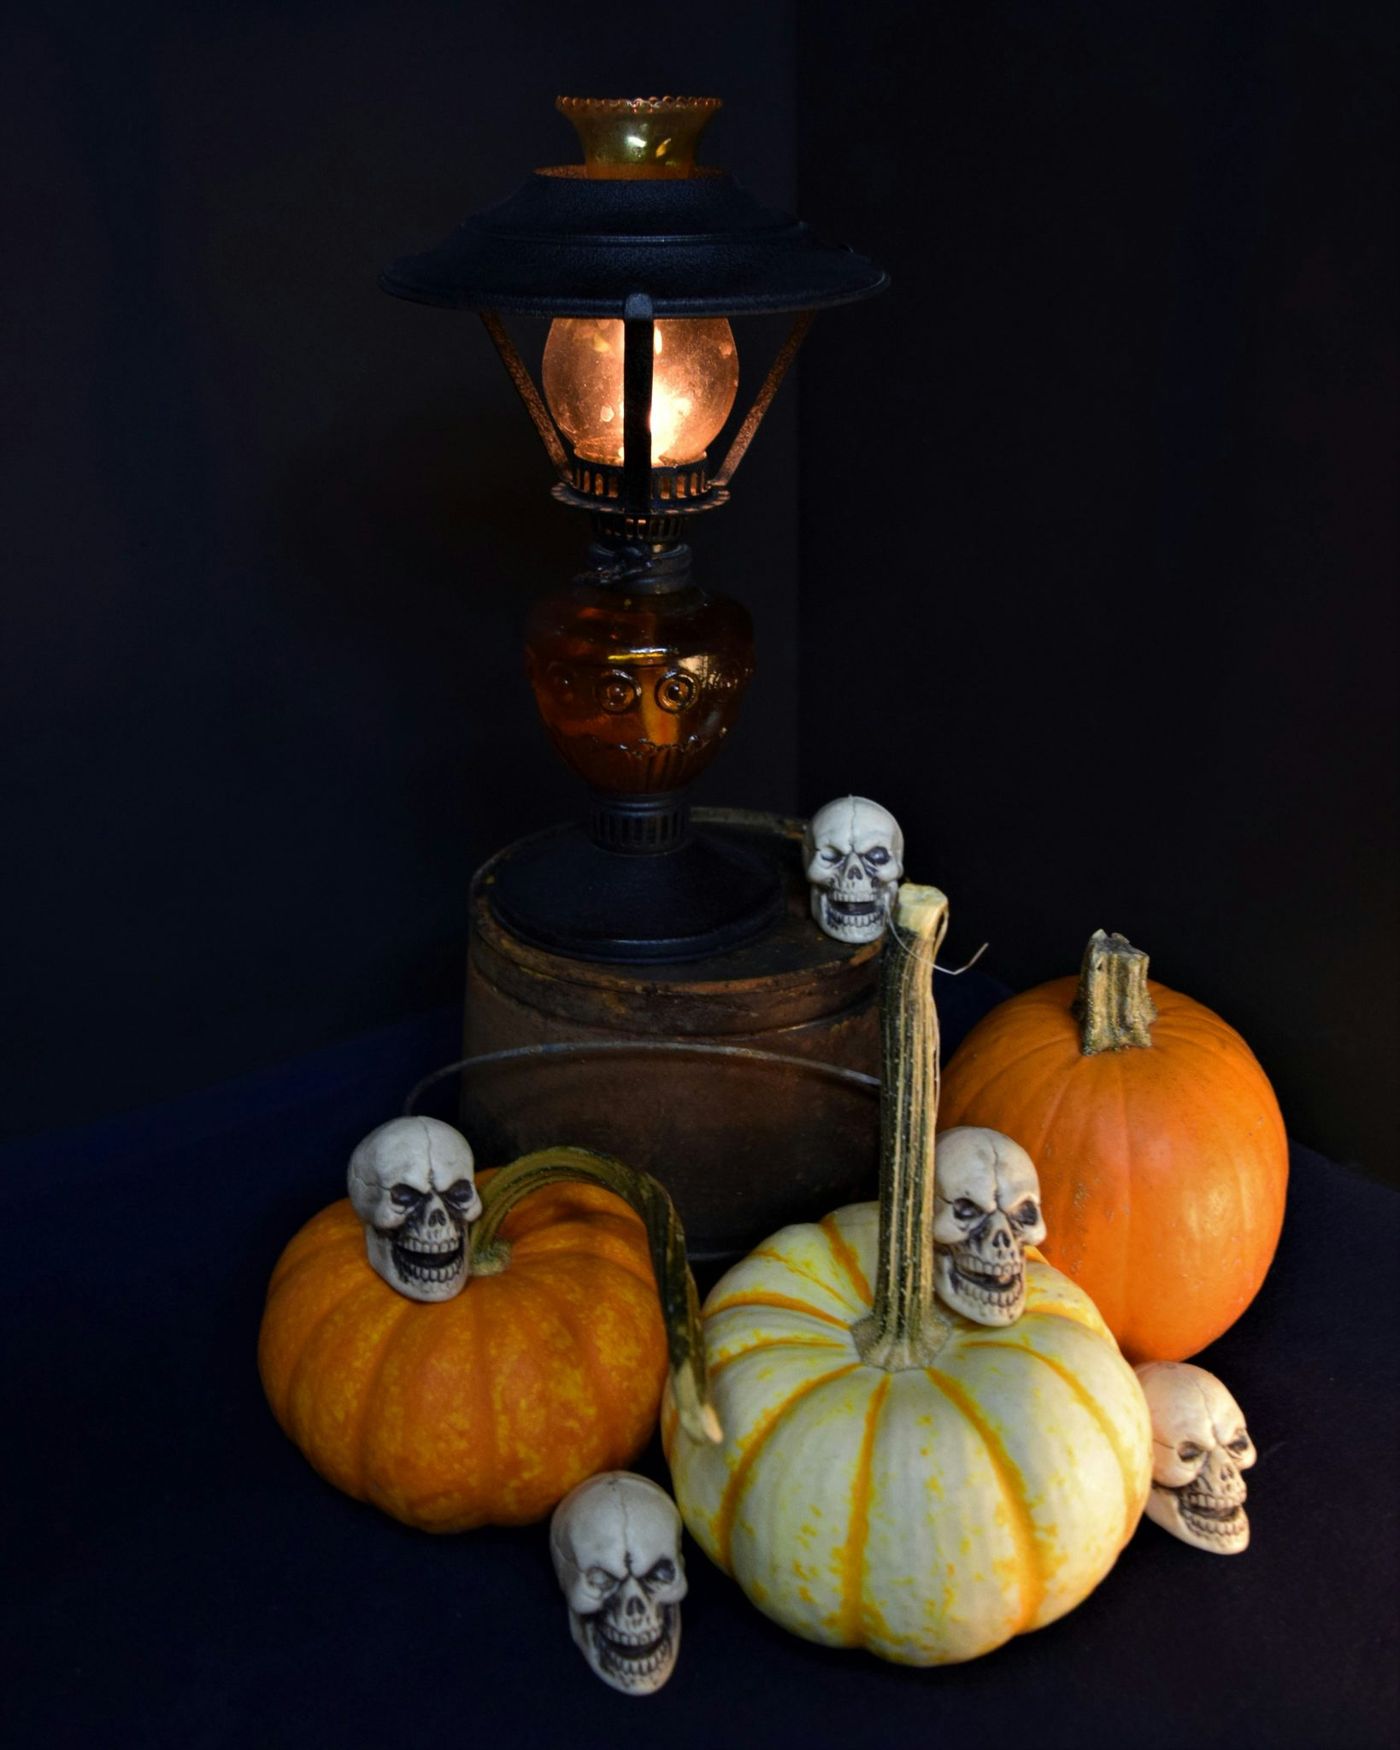
6. Style a Macabre Still Life with a Vintage Lantern and Mini Skulls
When creating a still life, the key is to ‘anchor’ your arrangement. Here, the vintage oil lantern serves as the visual anchor due to its height and warm amber light. The other elements—pumpkins and skulls—should be clustered around its base, not spread out evenly. Place the largest pumpkin first, slightly off-center, then fill in the gaps with the smaller pumpkins and skulls, making sure some items slightly overlap. This creates a more natural, collected-over-time feel than a perfectly symmetrical layout.
|
📋 Copy HEX 🔗 Share |
💸 Get This Look For Less
Here’s a look at what this vintage-inspired setup might cost:
- Vintage-Style Oil Lamp: $40 – $100
- Decor & Accessories (mini pumpkins, skull replicas): $50 – $125
- Rusted Metal Tray/Base: $25 – $60
- TOTAL: $115 – $285
Budget alternative: Find an old lantern at a flea market ($15), use mini pumpkins from the grocery store ($10), and find bags of plastic skulls at a dollar store ($5). A round pizza pan spray-painted with a textured metallic finish can create the base ($10). Total cost: ~$40.
7. Juxtapose Carved Pumpkins Against a Natural Stone Wall
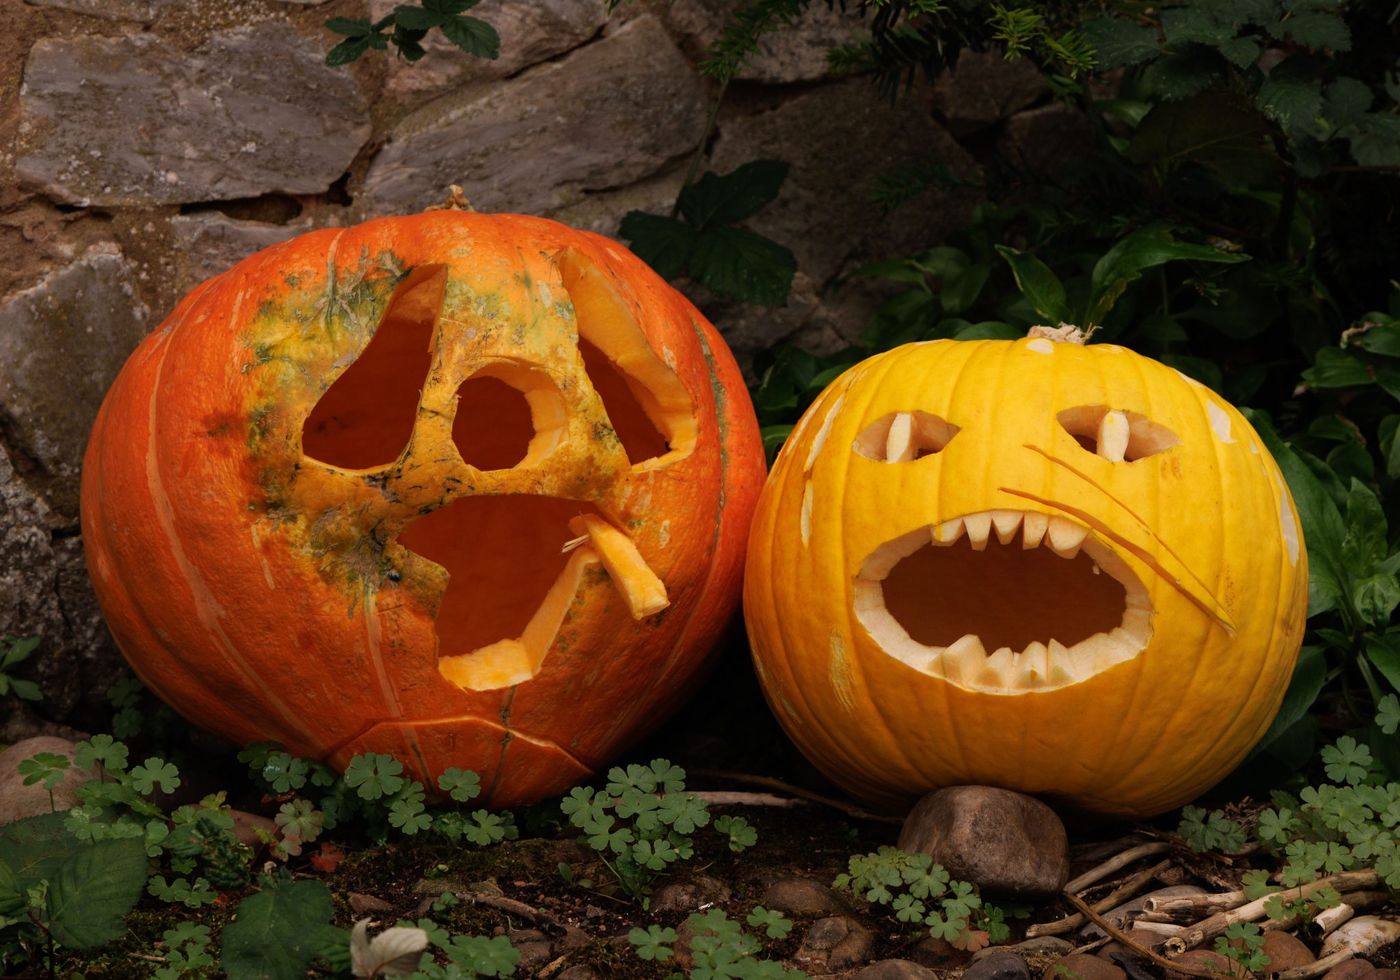
The magic here is in the texture play. The smooth, vibrant surfaces of the orange and yellow pumpkins create a stunning contrast against the rough, multi-toned texture of the natural stone wall. This juxtaposition highlights the organic forms of the pumpkins and the rugged beauty of the stonework. Placing them directly on the soil amidst clover and foliage further integrates them into the garden setting, making the decor feel like a natural extension of the landscape rather than something just placed on top of it.
|
📋 Copy HEX 🔗 Share |
⭐ The One Thing
We’re seeing a huge move towards ‘nature-first’ decorating, and this is a perfect example. Instead of plastic props on a perfect lawn, designers and homeowners on Pinterest are leaning into decor that complements and even celebrates imperfections in the natural environment. This look embraces the rustic, slightly untamed feel of a real garden. It has staying power because it’s not tied to a fleeting character or trend, but to the timeless beauty of natural materials.
8. Create a Cozy Spiderweb Tabletop with a Friendly Skeleton
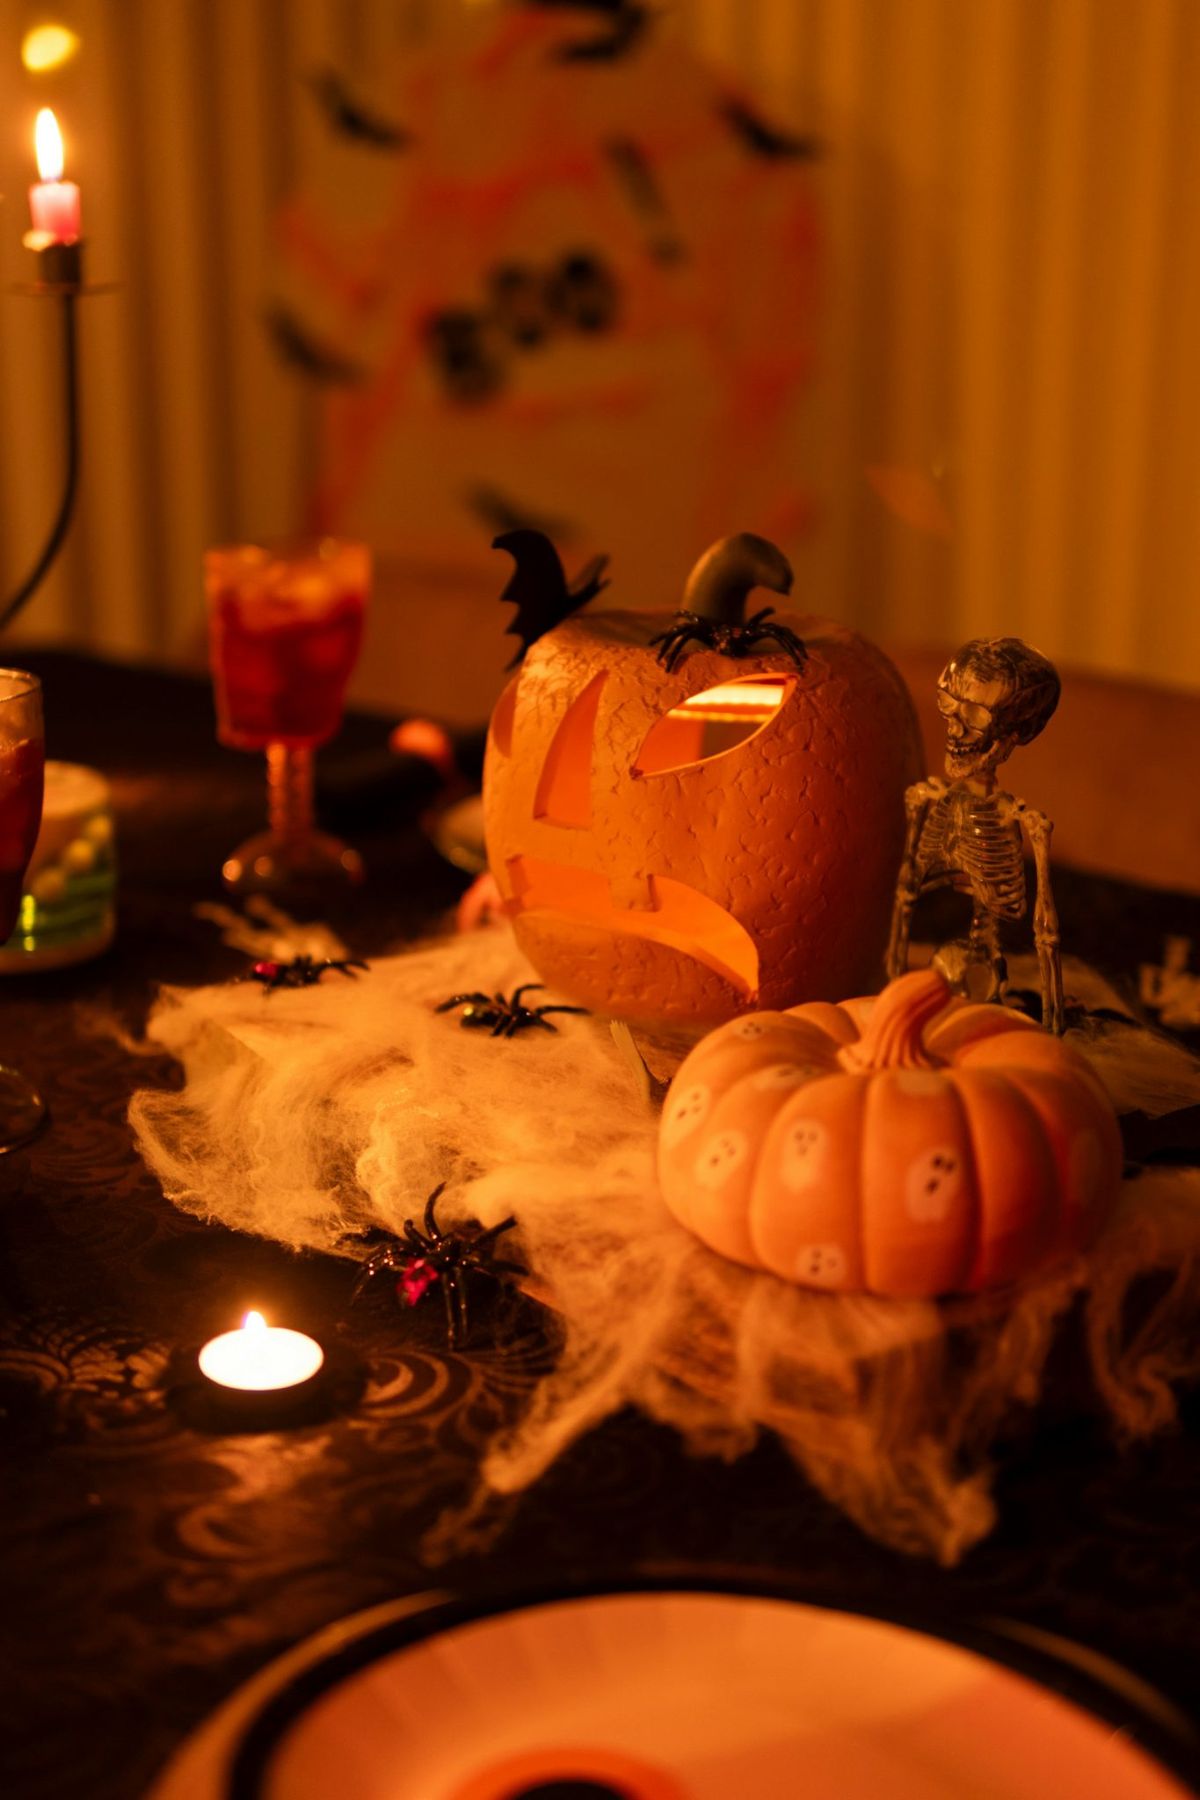
This playful setup has a clear formula: 60% spooky elements + 30% cozy lighting + 10% patterned base. The spooky factor comes from the cobwebs, plastic spiders, and miniature skeleton. The cozy element is crucial—it’s the warm, amber glow from the jack-o’-lantern and tealight that keeps the scene from feeling cheap or creepy, making it inviting instead. The final touch is the patterned black tablecloth, which adds a layer of visual interest and makes the orange and white elements stand out.
|
📋 Copy HEX 🔗 Share |
✅ Before You Start
A word of warning about those stretchy synthetic cobwebs: a little goes a long way. It’s incredibly easy to overdo it, resulting in a messy, dusty-looking clump rather than delicate, spooky strands. The trick is to stretch a small amount as thinly as possible until it becomes almost translucent. Also, be mindful that it can be a pain to remove from textured surfaces and plants, so plan your placement strategically if you don’t want to be picking out fluff for weeks.
9. Display Three Classic Jack-o’-Lanterns Against Pitch Black
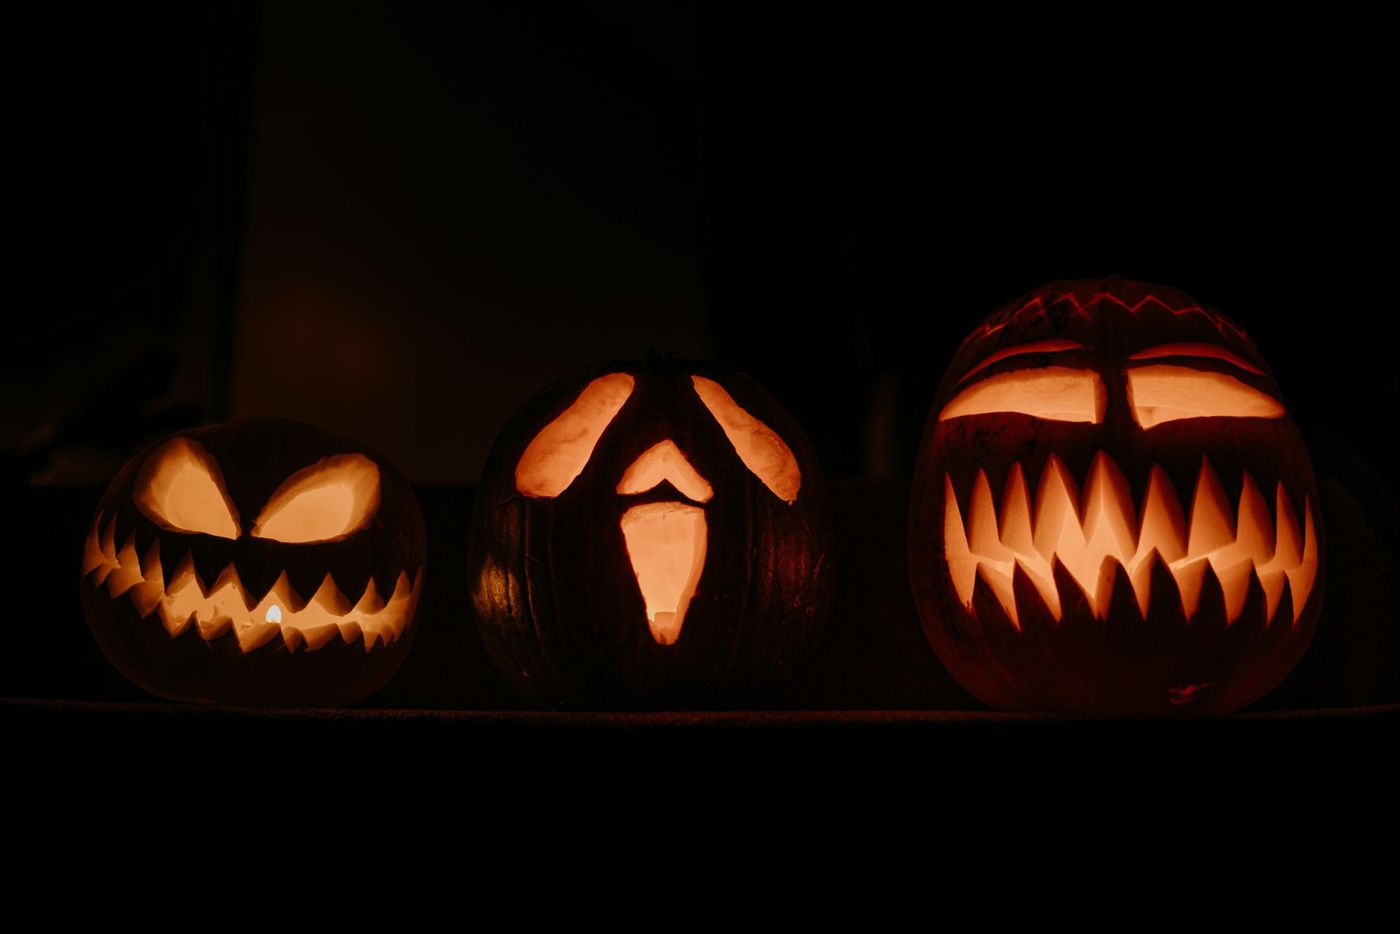
The single most important element here is the background. The pitch-black, shadowless backdrop is what gives this classic setup its sinister, floating quality. Without the deep, uninterrupted darkness, the pumpkins would lose their dramatic impact and just look like… well, pumpkins on a shelf. The darkness isolates them, forcing your eye to focus only on the menacing, glowing faces and the sharp, serrated carvings. It’s a masterclass in using negative space to create mood.
|
📋 Copy HEX 🔗 Share |
💡 Designer Tip
Before you commit to recreating this dramatic look, run through this checklist:
- Do you have a spot that can be made almost completely dark, even during the day? A fireplace cavity or a deep, shadowed bookshelf works well.
- Are your pumpkins appropriately sized for the space? They should be close enough to feel like a group, but not so crowded they lose their individual shapes.
- Will you use real candles or LEDs? If using real flames, ensure there is proper ventilation and nothing flammable is overhead.
10. Carve Pop Culture and Nature Themes into a Pumpkin Patch
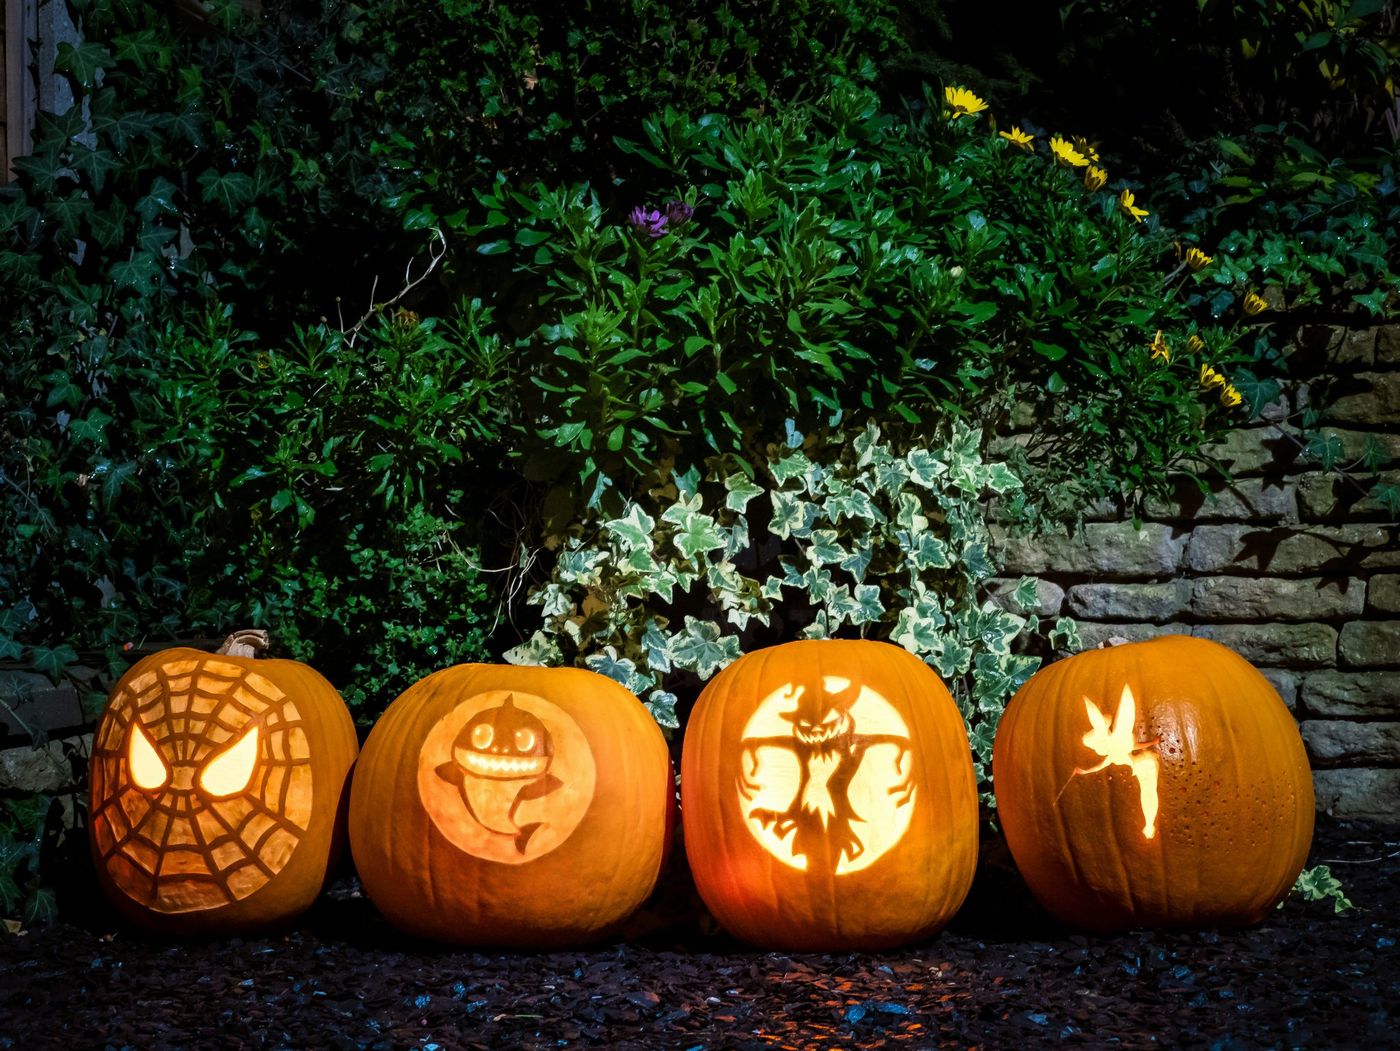
Want to carve a detailed silhouette like the fairy or shark? The key is surface-level carving, not cutting all the way through. Here’s a mini-guide:
- Print your design and tape it securely to the pumpkin.
- Use a pin or poking tool to transfer the design by making small perforations along all the lines.
- Remove the paper. Now, use a linoleum cutter or a clay ribbon tool to scrape away only the top layer of pumpkin skin inside your design.
- Don’t go deeper than about 1/4 inch. The light will shine through the thinned flesh, creating a beautiful glowing effect.
This technique takes about 45-60 minutes per pumpkin and the carving tools cost around $15-$25.
|
📋 Copy HEX 🔗 Share |
🧹 Maintenance Reality
For a row of narrative pumpkins like this, storytelling is key. Don’t just carve random images; create a theme. Whether it’s ‘under the sea,’ ‘a magical forest,’ or ‘scenes from your favorite movie,’ a cohesive theme makes the collection feel intentional and impressive. Arrange them in an order that makes sense. For instance, place the most detailed or ‘main character’ pumpkin in the center to create a clear focal point for your display.
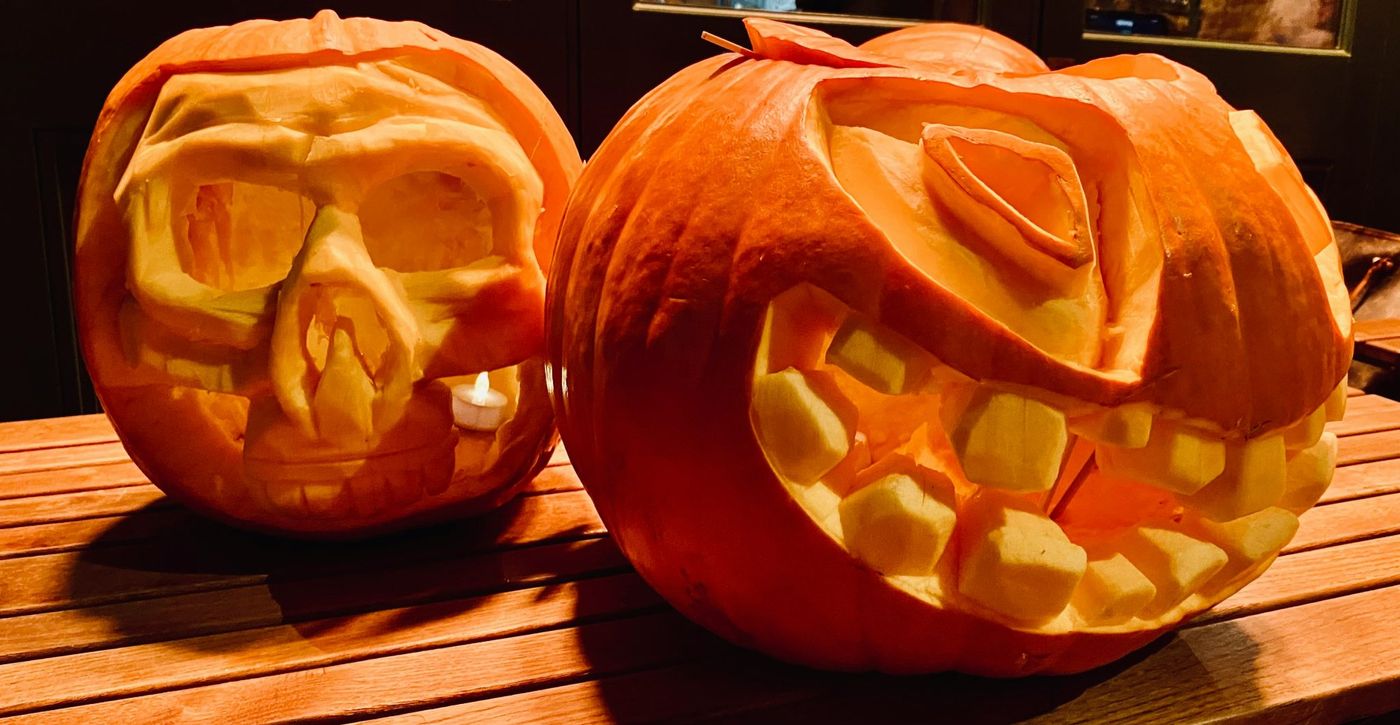
11. Showcase Intricate Skull and Monster Pumpkin Carvings
This display is effective because of its expert-level detail and contrast in expression. The pumpkin carved to look like a human skull has a more realistic, anatomical feel, which is genuinely eerie. Next to it, the grinning monster with its blocky teeth provides a classic, almost cartoonish spookiness. This pairing of ‘scary-realistic’ with ‘scary-fun’ creates a dynamic and engaging display. Placing them on a simple slatted wood surface keeps the focus entirely on the impressive craftsmanship of the carvings themselves.
|
📋 Copy HEX 🔗 Share |
🔥 Trending Context
Intimidated by the carving skills here? You can achieve a similar vibe with less effort. Look for pre-made, highly detailed foam pumpkins at craft or Halloween specialty stores. They often come in skull or monster designs and are reusable year after year. Alternatively, use stencils and a Dremel tool with a fine-point etching bit on a real pumpkin. This gives you more control than traditional carving knives and can help you achieve those intricate details with a bit of practice. This is a higher-effort version of the simpler faces in Idea #12.
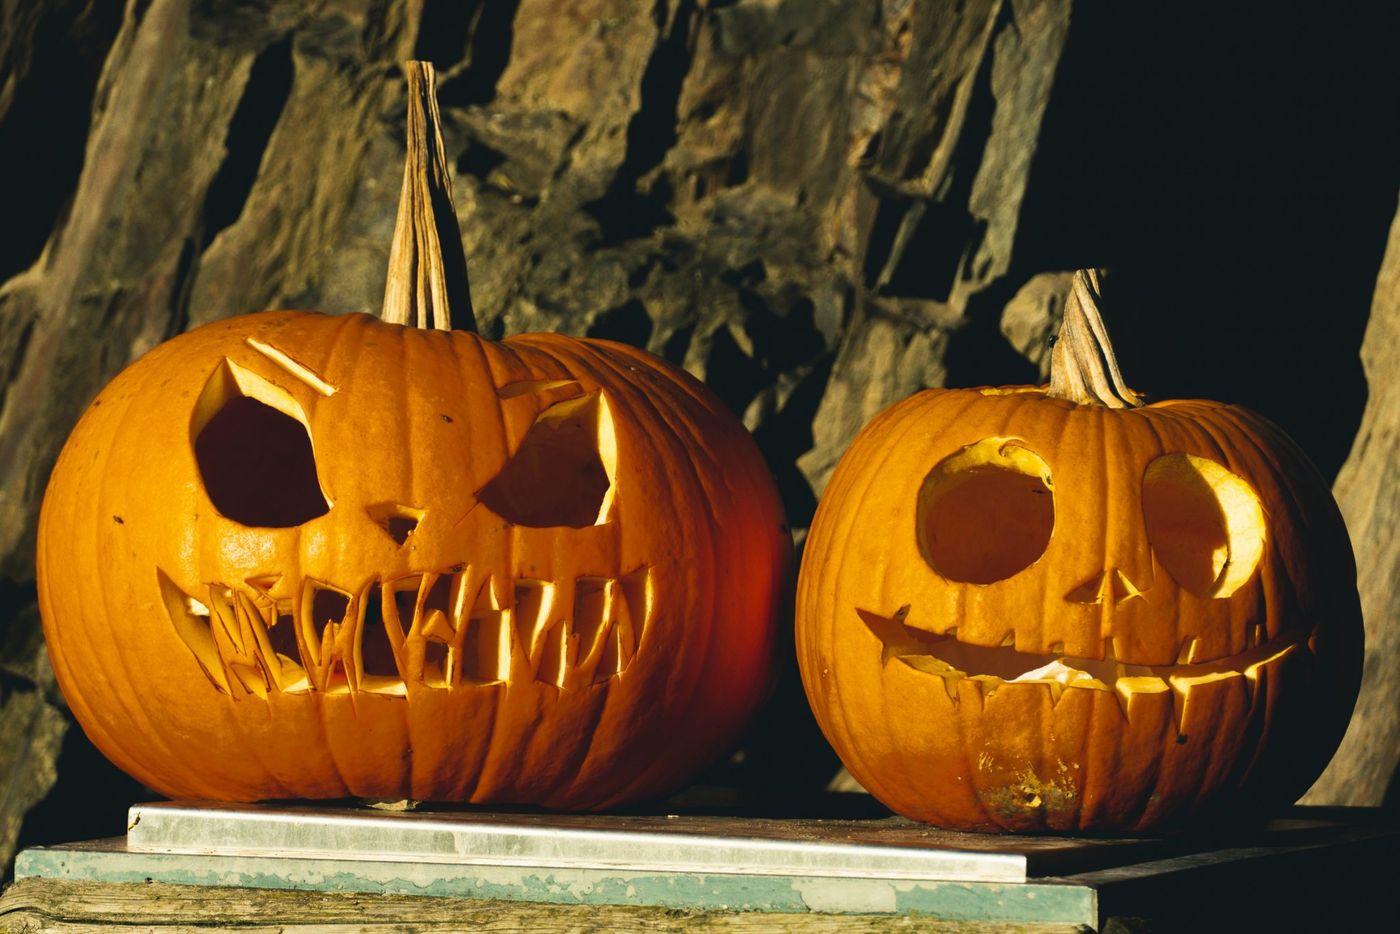
12. Position Aggressively Carved Pumpkins Against a Dark Bark Backdrop
The rough, dark texture of the tree bark background is the element that truly makes this display. It provides a raw, natural, and slightly menacing canvas that amplifies the spooky vibe of the carved pumpkins. The deep charcoal color of the bark makes the vibrant orange pop, and its organic texture complements the pumpkins’ natural form. If you were to place these same pumpkins against a plain wall, they would lose half of their rustic, ‘found in a haunted forest’ charm. The backdrop does the heavy lifting here.
|
📋 Copy HEX 🔗 Share |
📐 Style Math
This idea works best in a space that can handle its rustic, imposing nature. It’s ideal for an entryway, a covered porch, or against a large fireplace where the verticality of the bark can be appreciated. You’ll need a wall space of at least 4 feet wide by 5 feet high to make an impact. The pumpkins themselves should be large—at least 15 inches in diameter—to hold their own against the textured background. It’s a statement piece, not a subtle accent.
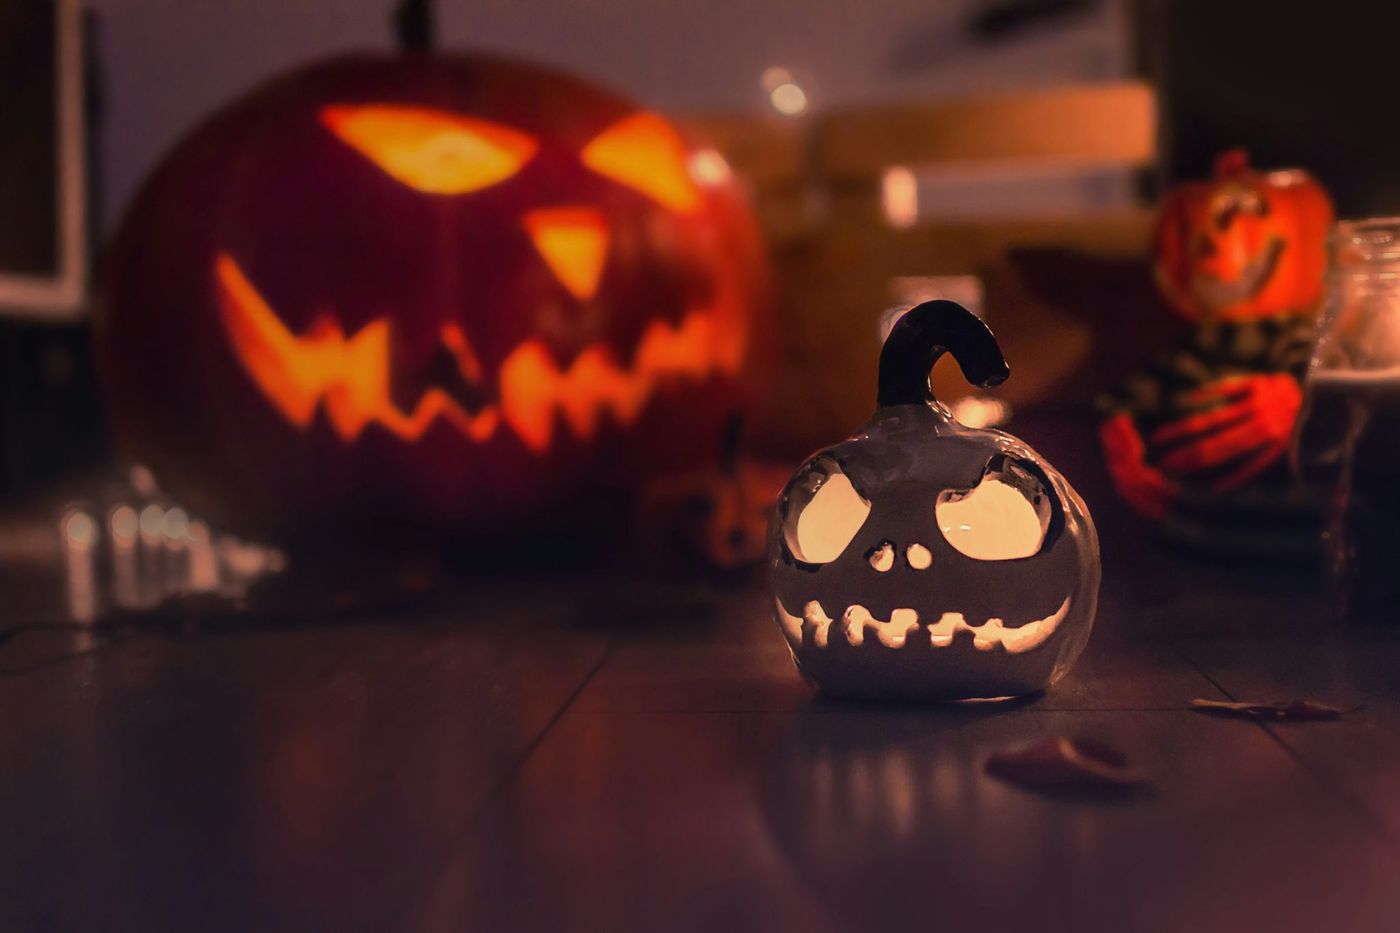
13. Layer Ceramic and Real Pumpkins for a Glowy Floor Display
When decorating on the floor, always think in terms of foreground, middle ground, and background. Here, the small white ceramic jack-o’-lantern is in the foreground, creating an immediate point of interest. The larger, glowing orange pumpkin sits in the middle ground, providing ambient light and a sense of depth. The dark background is implied. This layering technique makes a simple corner feel like a fully realized scene. Always place your smaller, more detailed items closest to the viewer.
|
📋 Copy HEX 🔗 Share |
⚠️ Real Talk
A glowing display on the floor can be beautiful, but it’s also a prime tripping hazard, especially in a dark room or a high-traffic area. Before setting this up, consider the typical footpaths in the room. Place it in a low-traffic corner, under a console table, or next to a fireplace where people aren’t likely to walk. If using a real pumpkin with a candle, place it on a sturdy, fire-proof plate and never leave it unattended. LED lights are a much safer option for any floor-level decor.
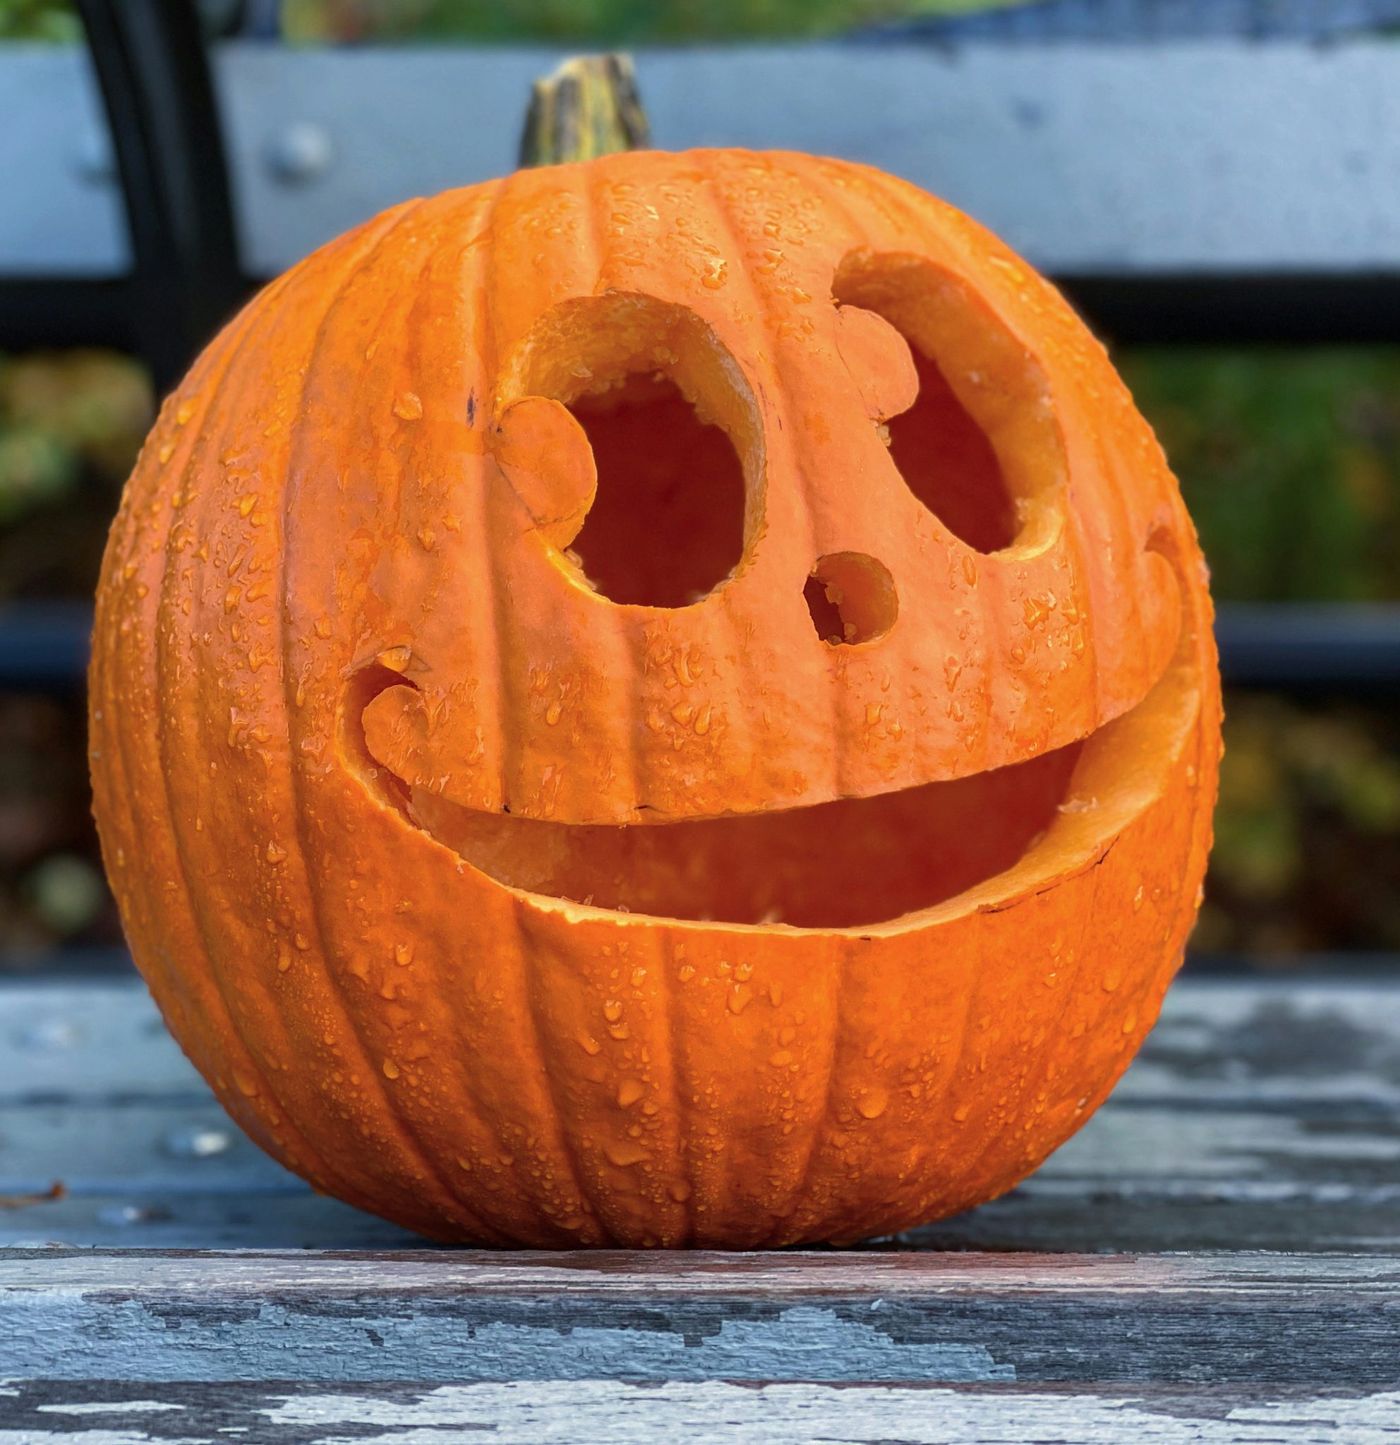
14. Place a Single Smiling Pumpkin on a Weathered Gray Bench
The charm of this idea lies in its simplicity and nostalgic feel. It’s a single object telling a quiet story. The contrast between the bright, cheerful orange pumpkin and the weathered, distressed gray of the bench creates a beautiful visual harmony. The simple, almost childlike smiling face adds a touch of sweetness rather than spookiness. The water droplets suggest a recent autumn rain, adding a layer of atmosphere and connecting the scene to the season. It feels authentic and unpretentious.
|
📋 Copy HEX 🔗 Share |
💰 Budget Breakdown
You don’t need a vintage park bench to get this look. Check Facebook Marketplace or a thrift store for a simple wooden bench or even a small coffee table. A can of chalk paint in a weathered gray or slate blue can instantly give it that distressed look. The key is the matte finish. The total cost could be under $50 if you find a secondhand bench, giving you a rustic photo-op spot for your seasonal decor year after year. This is a much simpler take on the rustic vibe seen in Idea #4.
15. Create a Looming Figure with a Pumpkin Head and Shredded Fabric
This theatrical prop gets its sinister presence from a formula of light and texture: 50% dramatic lighting + 40% distressed materials + 10% height. The lighting is the star—the menacing neon green glow from within the pumpkin head, accented by moody purple and blue. The shredded, tattered black fabric adds a ghostly, decaying texture that catches the light and creates movement. Finally, its height makes it loom over the viewer, giving it a truly intimidating presence. It’s pure Halloween theater.

|
📋 Copy HEX 🔗 Share |
🎯 What Makes It Work
Want to create that shredded, distressed fabric effect? It’s easier than it looks.
- Start with cheap, lightweight black fabric, like broadcloth.
- Use scissors to make small snips along one edge, about 1-2 inches apart.
- Now, rip the fabric by hand from each snip. This creates a much more natural, frayed edge than cutting.
- To add more texture, lightly spray the fabric with a bleach/water solution (1:10 ratio) and let it sit for a few minutes before rinsing. This will create faded, aged-looking spots.
- Finally, stretch, pull, and tie the fabric strips to your figure’s frame.
This takes about 30 minutes and the materials cost is under $20.
16. Arrange Expressive Jack-o’-Lanterns by a Rustic Wood Front Door
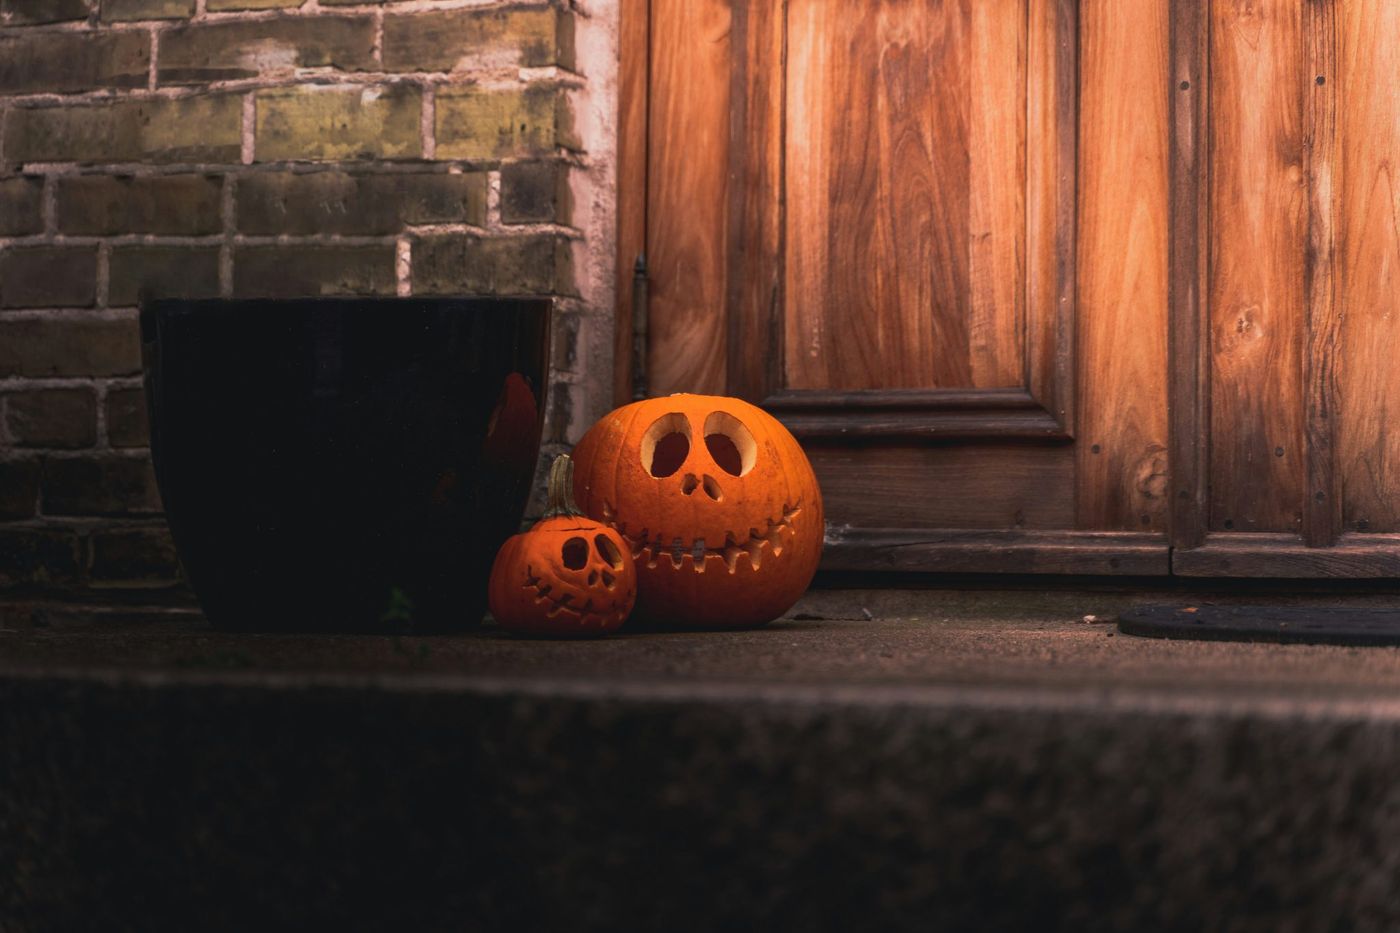
This welcoming stoop display works so well because it balances classic Halloween elements with strong architectural features. The bright orange pumpkins pop against the neutral gray brick and warm wood door. Using two pumpkins with different, highly expressive faces creates a sense of personality, as if they’re a pair of quirky greeters. The large black planter adds a modern touch and provides a strong, dark anchor point that balances the composition and prevents the pumpkins from looking like they are floating aimlessly.
|
📋 Copy HEX 🔗 Share |
📏 Scale Guide
Before you run out and buy pumpkins, take a look at your front door area:
- What are your dominant colors? Make sure your pumpkins and any other decor will complement, not clash with, your door, trim, and wall materials.
- How much space do you have? Measure your stoop to ensure there’s enough room for pumpkins, planters, and foot traffic without it feeling cramped.
- What is the scale of your entryway? A tiny pumpkin will get lost next to a grand entrance; choose a size that feels proportional.
17. Stack Three Menacing Jack-O-Lanterns in Total Darkness
The stacking is the single element that elevates this from a simple pumpkin display to something truly sinister. By arranging them vertically, you create a totem-like structure that feels more imposing and unnatural than a horizontal row. The top pumpkin, with its cross-shaped eyes, appears to be surveying the scene, while the jagged-toothed ones below seem to be snarling. This hierarchy creates a narrative and a sense of unease that is incredibly effective for a spooky theme. It’s a simple change that has a huge psychological impact.

|
📋 Copy HEX 🔗 Share |
🔧 How-To Brief
Stacking real pumpkins can be tricky and unstable. To do this safely, you need to create a secure structure. For a temporary display, you can slice off the top stem and a small, flat area on the bottom of the middle pumpkin. For a more stable, longer-lasting version, drill a hole through the center of all three pumpkins and slide them onto a wooden dowel or piece of rebar secured in a base. And remember, real pumpkins will start to soften in about a week, making the stack potentially hazardous. Check it daily for stability.
18. Line a Dark Wooden Table with a Trio of Glowing Pumpkins
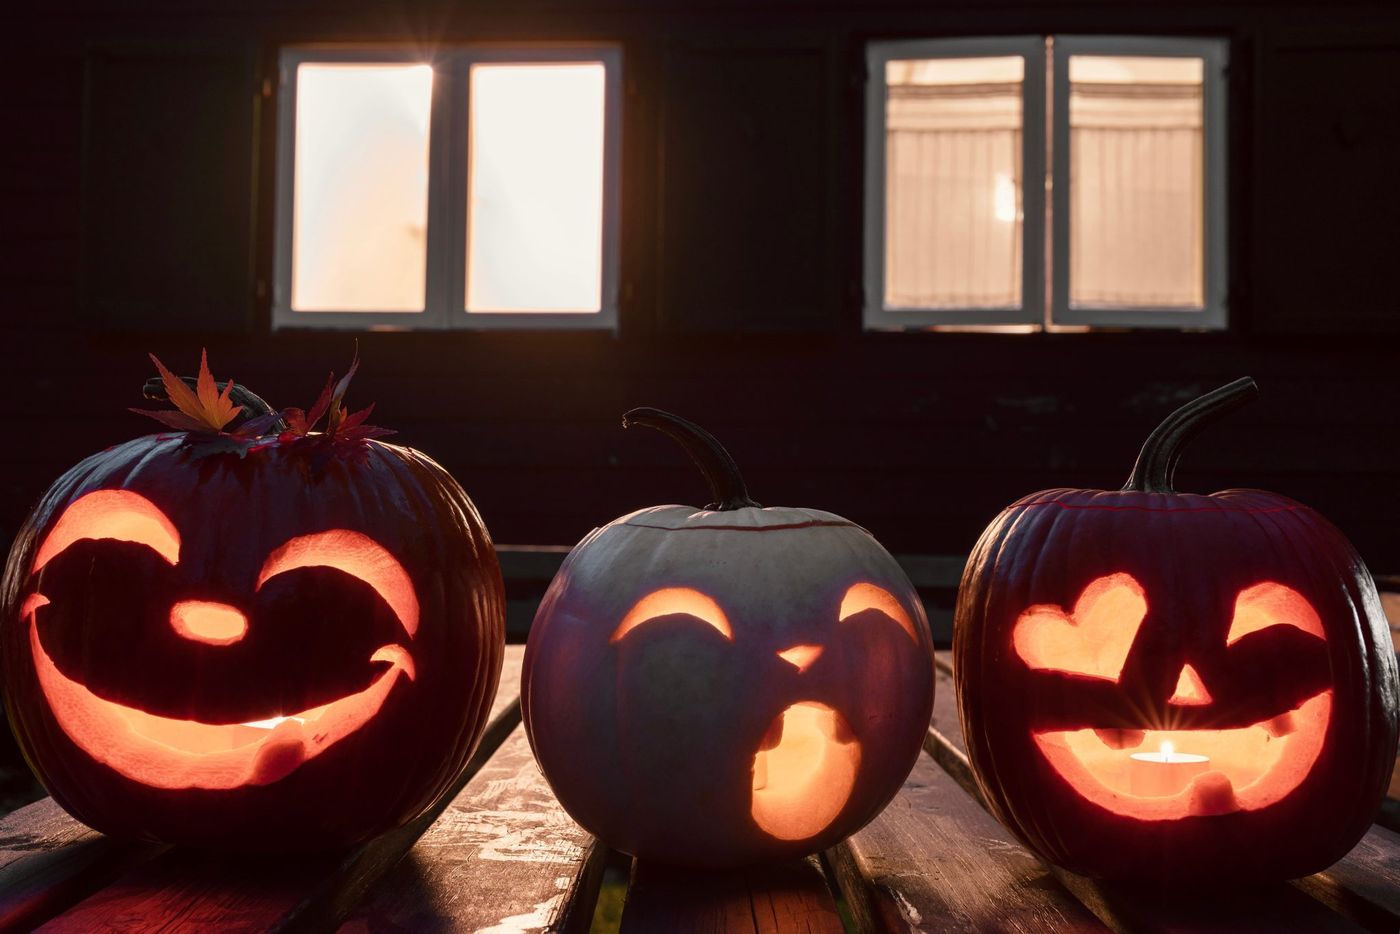
To get that beautiful, soft-focus background glow from the windows, you need to control your lighting. The key is to have the light inside your pumpkins be significantly brighter than the ambient light in the background. Use powerful LED puck lights inside the jack-o’-lanterns. Then, for the windows, use dimmable string lights or a lamp on a dimmer switch set to a very low level. This difference in intensity is what creates that dreamy, layered effect and makes your pumpkins the clear focal point of the scene.
|
📋 Copy HEX 🔗 Share |
💸 Get This Look For Less
This linear arrangement works best on a long, relatively narrow surface like a buffet, a sofa table, or an outdoor dining table. You’ll need a table that is at least 48 inches long to give the three pumpkins enough space to breathe without feeling cramped. The ideal table depth is between 18 and 24 inches, which allows for the pumpkins to be centered while leaving room for other small accents if desired. This setup is less suited for a small, round table where the linear effect would be lost.
19. Carve Tall, Cylindrical Gourds for a Whimsical Twist
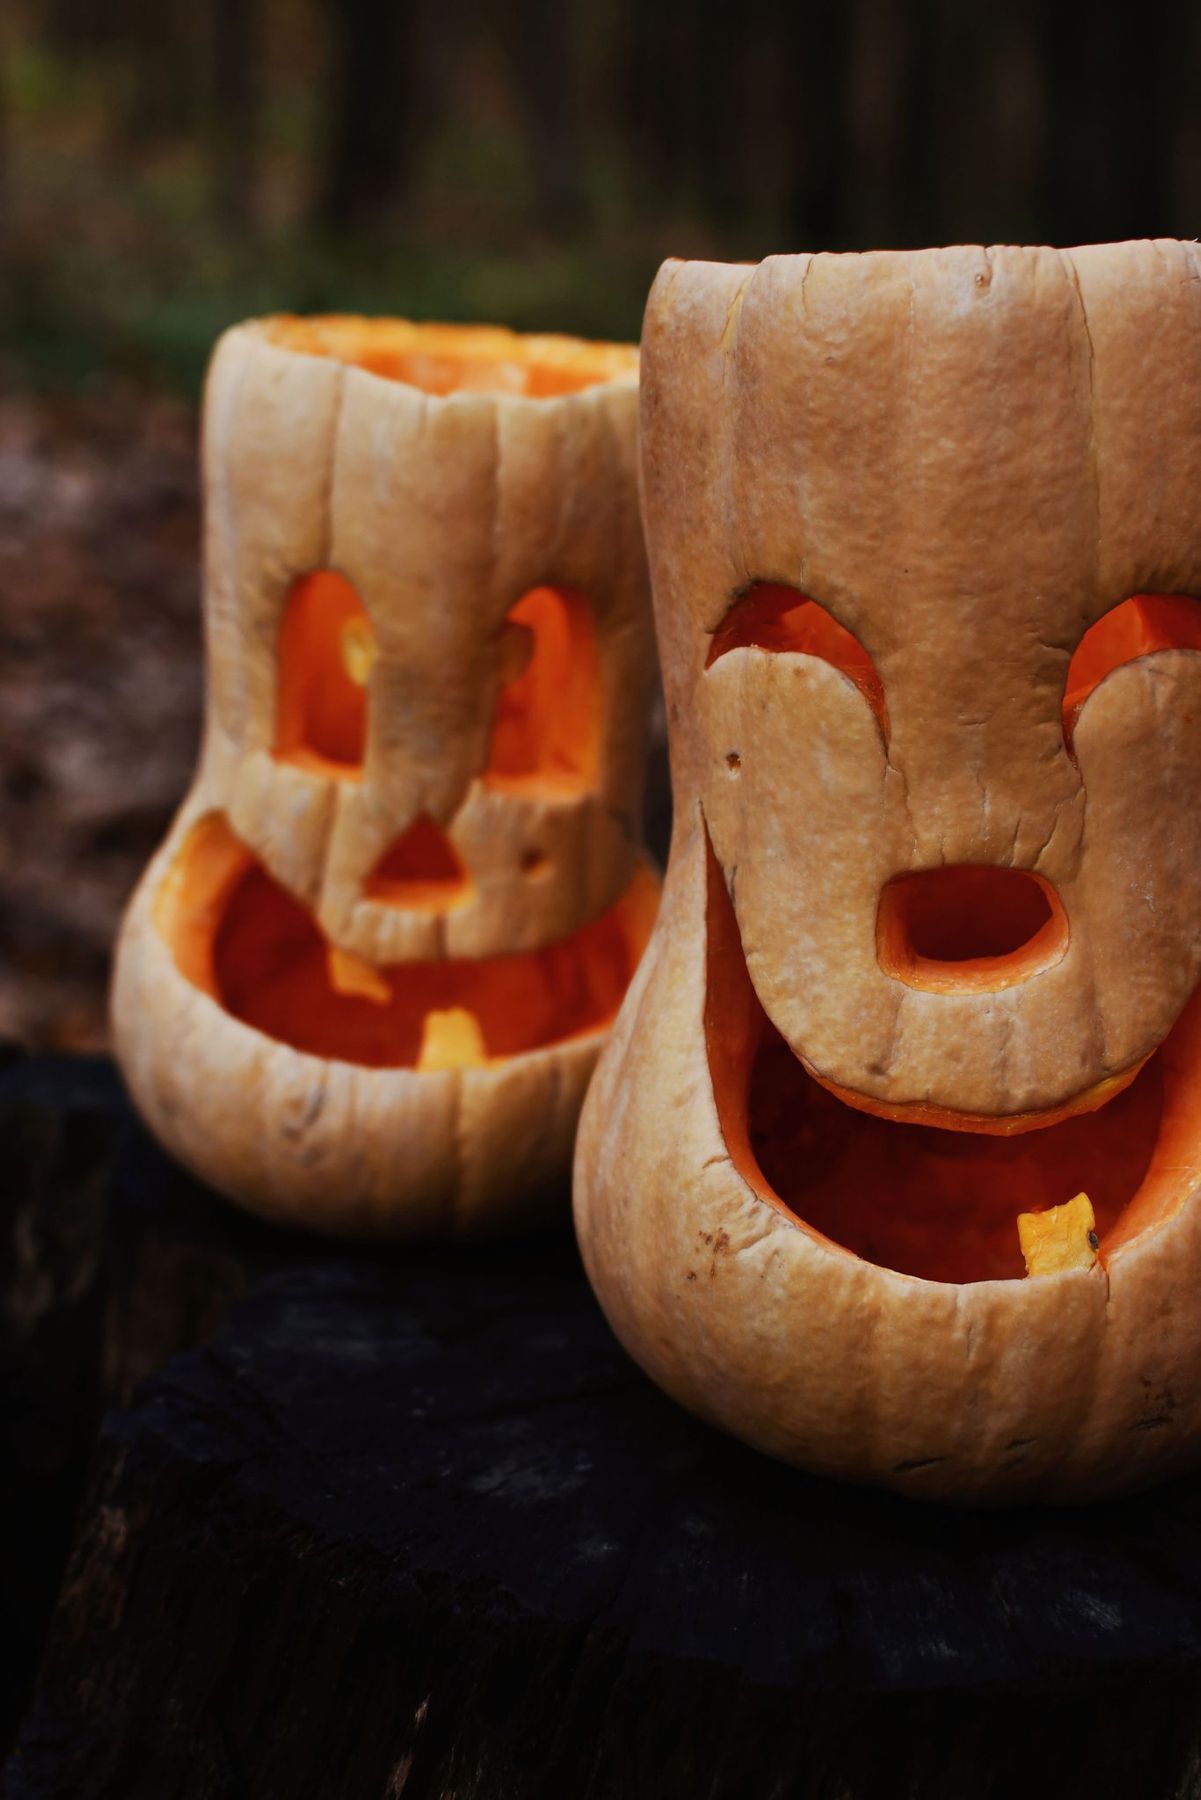
This is a fantastic example of playing with expectations. By using tall, cylindrical gourds instead of round pumpkins, the artist creates figures that feel more like quirky characters or friendly ghosts. The smiling faces, carved into the unusual shapes, are inherently whimsical and less intimidating than a classic jack-o’-lantern. Setting them on a charred, dark wood stump enhances their pale color and adds a rustic, fairy-tale element to the scene. It’s a look that prioritizes charm over chills. This is a great alternative to the butternut squash in Idea #4.
|
📋 Copy HEX 🔗 Share |
⭐ The One Thing
For 2026, we’re seeing a huge trend toward ‘farm-to-table’ decorating. This means moving beyond the standard pumpkin and embracing the full, weird, wonderful variety of the gourd family. People are seeking out unique shapes and colors at local farms and farmers’ markets to create one-of-a-kind displays. This look is popular because it feels personal, creative, and connected to the actual harvest season, rather than just pulling a plastic decoration out of a box.
20. Display Classic Jack-O-Lanterns on Red Brick Porch Steps
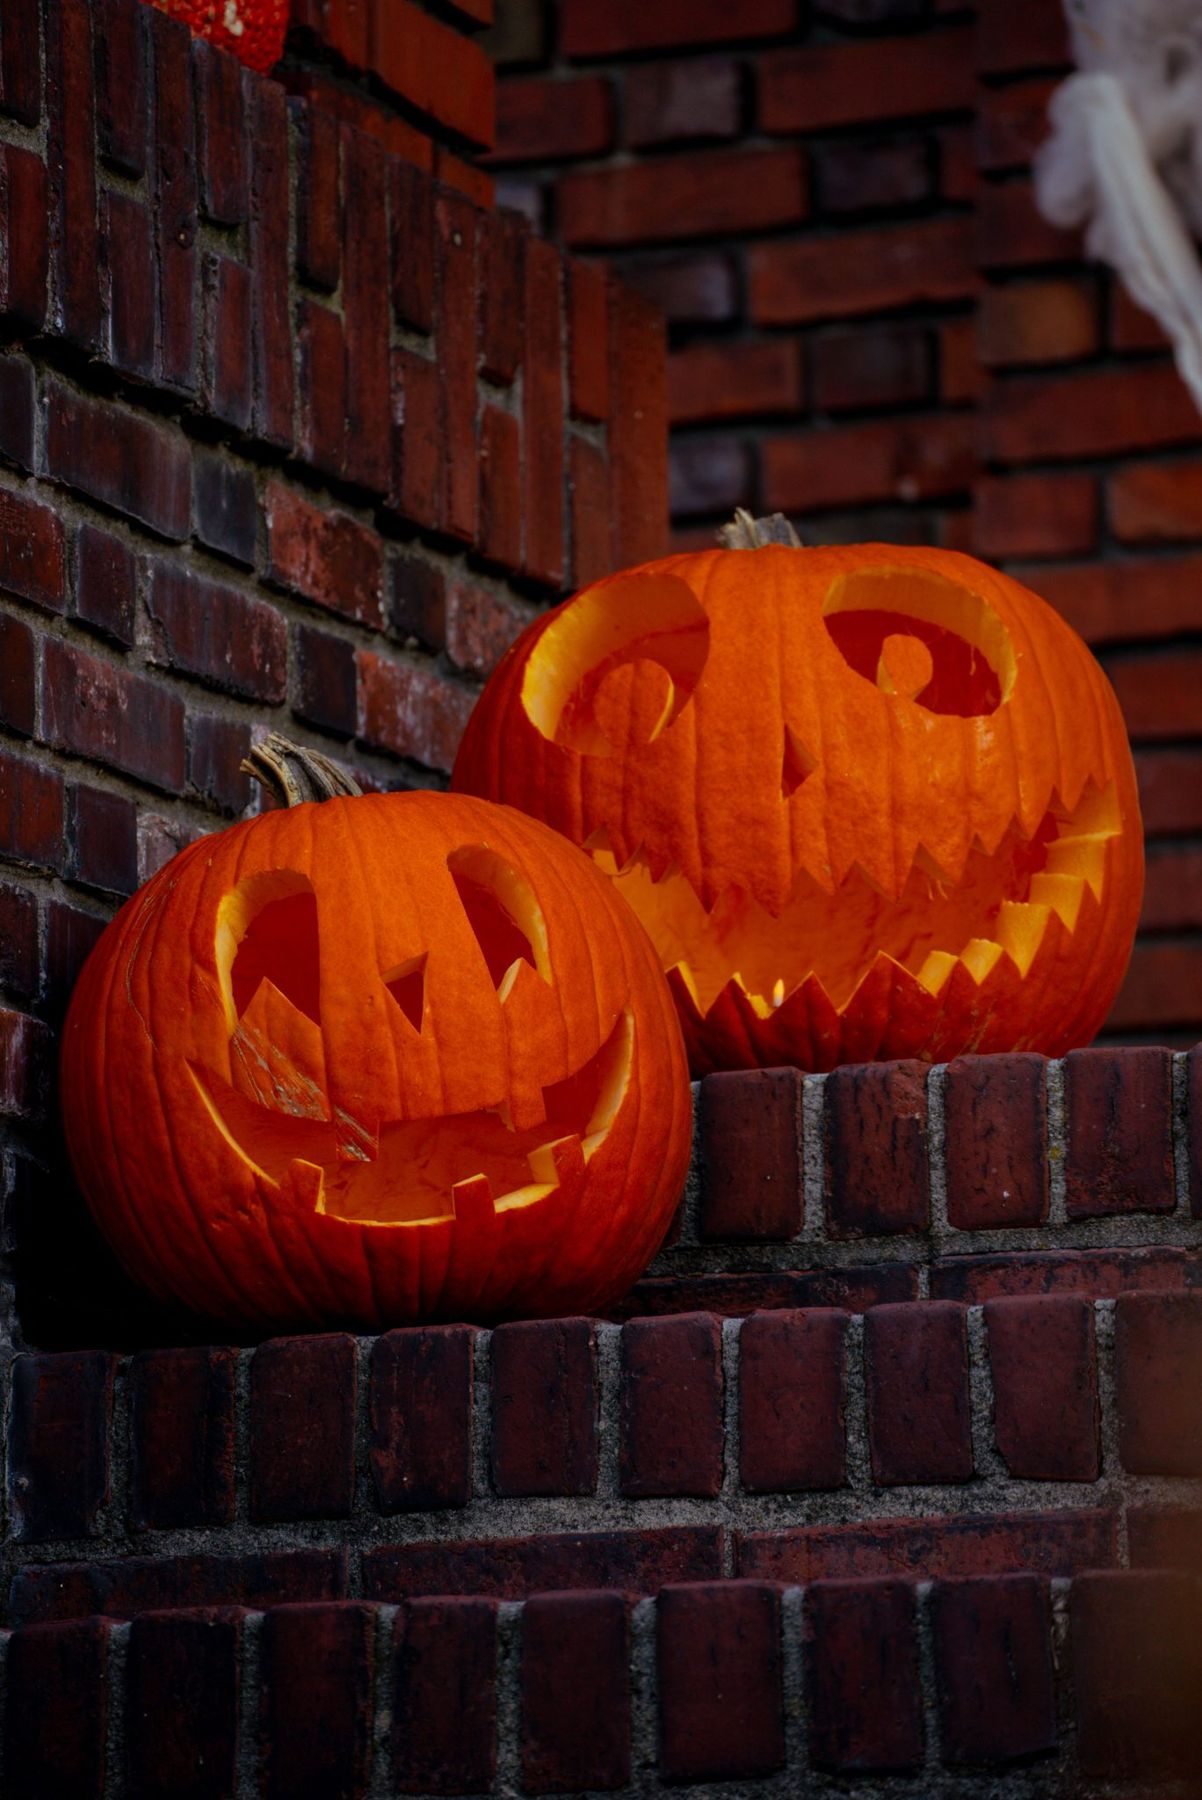
that makes this image so potent is nostalgia. This is the quintessential Halloween scene for many of us. The combination of classic, jagged-toothed jack-o’-lanterns, the warm glow of candlelight, and the timeless red brick steps taps into a collective memory of trick-or-treating and crisp autumn evenings. The wispy cobwebs are just the cherry on top. It’s not trying to be trendy or avant-garde; it’s leaning into the comfort and spooky joy of tradition, and that’s what makes it so powerful.
|
📋 Copy HEX 🔗 Share |
✅ Before You Start
If you’re using real candles in your pumpkins on a porch or walkway, be extra mindful of trick-or-treaters. The flowing costumes of excited kids can be a serious fire hazard. To be safe, either place the pumpkins far back from the main path where no one will brush against them, or, better yet, opt for realistic flickering LED candles. You’ll get all the nostalgic glow without any of the risk, giving you peace of mind on Halloween night. This is one area where safety absolutely trumps authenticity.
21. Assemble a Festive Group of Hand-Carved Pumpkins in the Dark
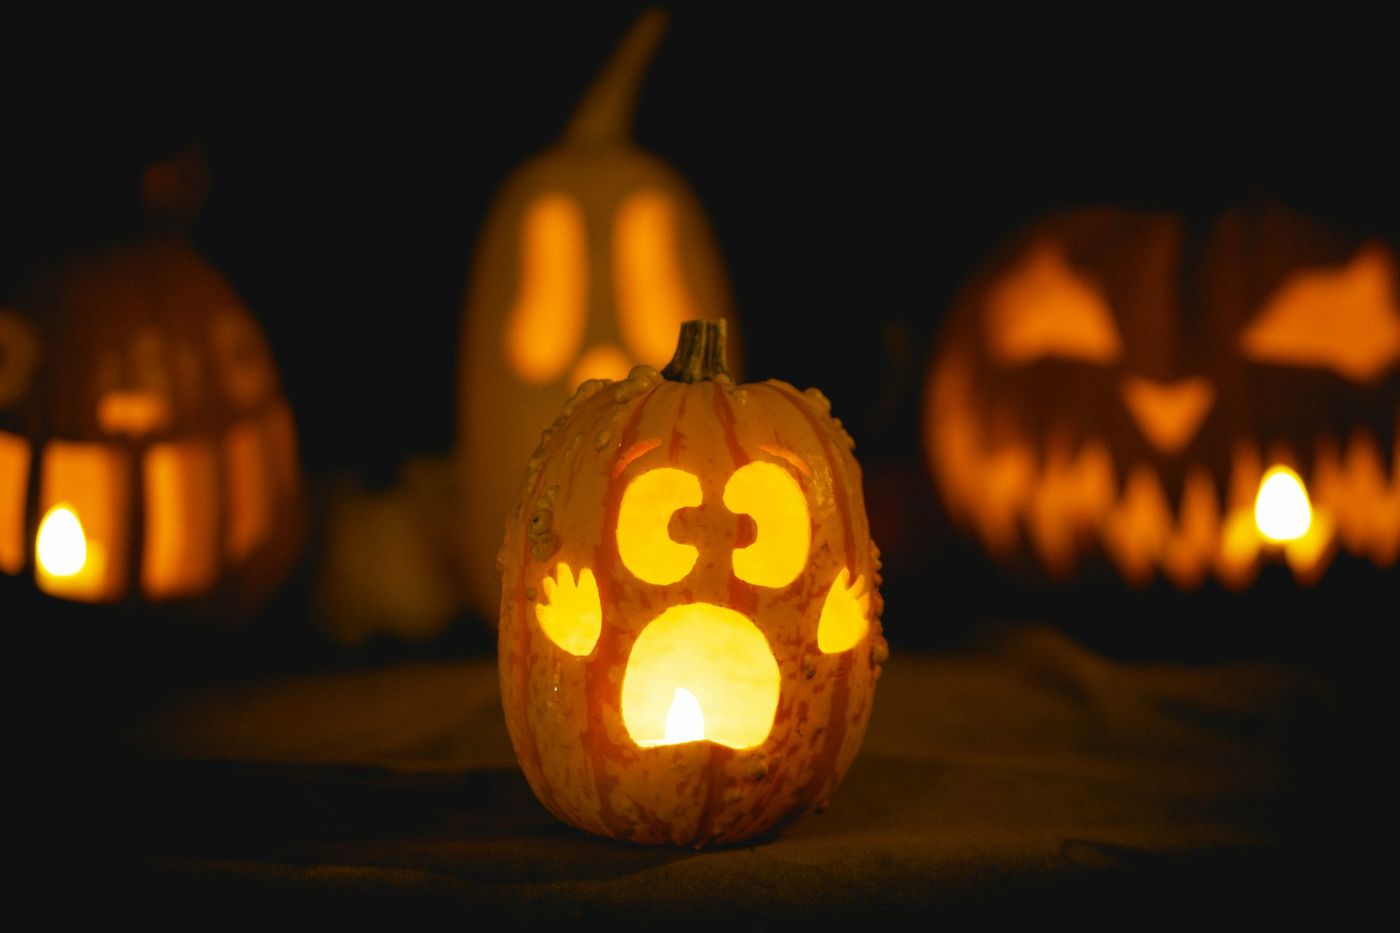
The formula for this vibrant scene is simple: 80% classic carving + 20% varied shapes. The vast majority of the visual interest comes from the distinct, hand-carved faces, each with its own personality. The remaining 20% of the magic comes from the subtle variation in the pumpkins’ shapes and sizes. A mix of tall, round, and squat pumpkins creates a more dynamic and interesting group than a set of perfectly uniform ones. It feels like a quirky little family has gathered.
|
📋 Copy HEX 🔗 Share |
💡 Designer Tip
When photographing your pumpkin creations, get the camera low. Shooting from a slightly upward angle, as seen here, makes the pumpkins feel more imposing and monumental. Placing the camera at or below the level of the pumpkins’ ‘chins’ gives them a sense of authority and personality. If you shoot from a high angle looking down, they can look small and less impressive. This simple change in perspective can make a huge difference in how spooky and grand your display feels.
22. Set Classic Jack-o’-Lanterns on a Burlap Base with String Lights
This traditional display works by layering different types of light and texture. You have the primary, warm glow coming from within the jack-o’-lanterns, which highlights their spooky faces. Then, you have the secondary, delicate sparkle from the black string lights scattered around the base. This adds another layer of visual interest and depth. The rough, natural texture of the burlap fabric provides a rustic foundation that complements the organic nature of the pumpkins and keeps the whole setup from feeling too slick or modern.

|
📋 Copy HEX 🔗 Share |
🧹 Maintenance Reality
Looking to recreate this classic spooky corner? It’s more affordable than you think.
- Main Furniture (2 large pumpkins): $20 – $40
- Lighting (internal LEDs + string lights): $25 – $50
- Textiles (large burlap sheet): $15 – $25
- TOTAL: $60 – $115
Budget alternative: Use one large pumpkin and several smaller gourds ($15), reuse Christmas string lights if you have them ($0), and buy a burlap sack from a hardware or garden store instead of a craft store roll ($5). Total cost: ~$20.
23. Create a Moody Centerpiece with a Red Ceramic Pumpkin and Candles
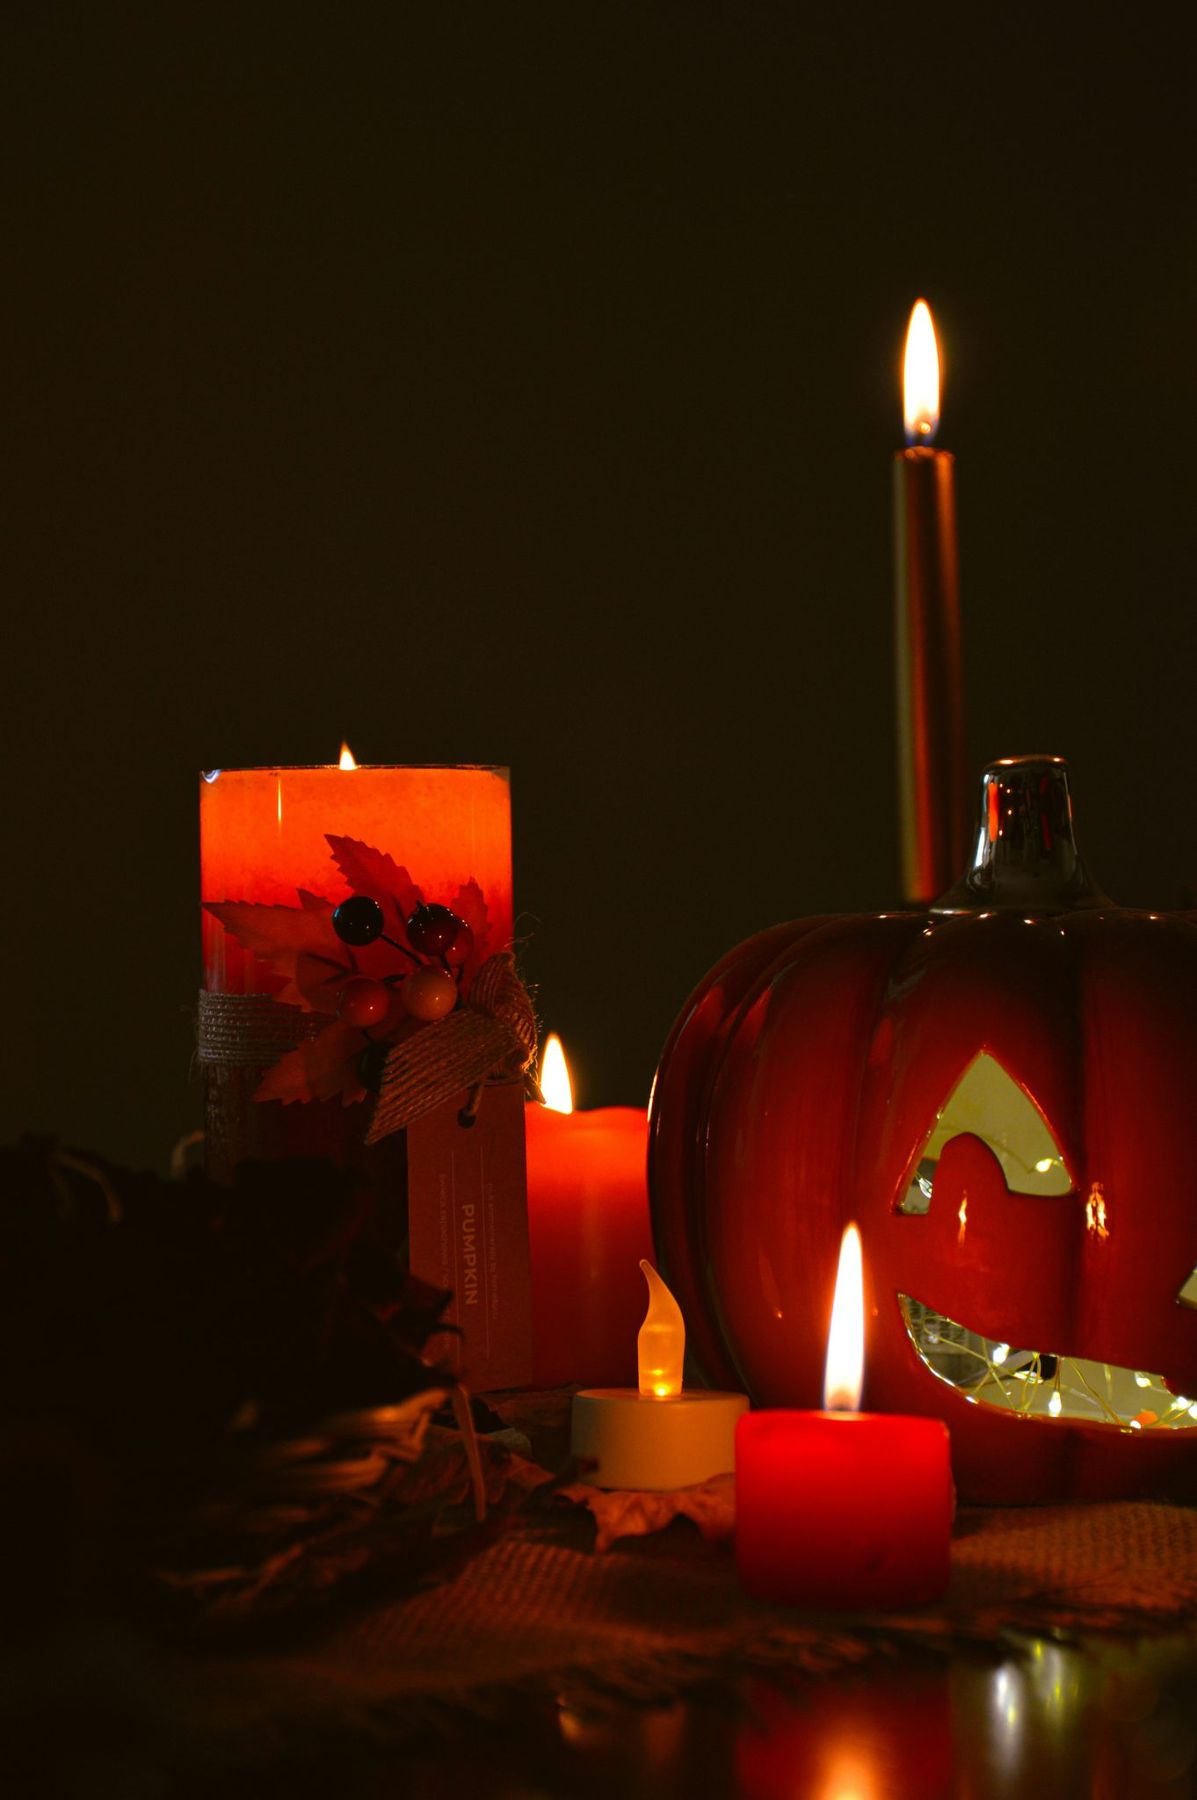
The single element that elevates this display from standard fall decor to something special is the bold, glossy red of the ceramic pumpkin. In a sea of orange and white, this deep crimson feels unexpected, sophisticated, and a little bit dangerous. It shifts the mood from ‘harvest festival’ to ‘vampire’s lair.’ The choice to fill it with delicate fairy lights rather than a single bulb adds a magical, twinkling quality that contrasts beautifully with its bold color. This is the centerpiece of a grown-up Halloween.
|
📋 Copy HEX 🔗 Share |
🔥 Trending Context
While this look is stunning, wax drips are a real concern. The heat from the pillar candles can cause them to drip onto your table runner and the faux leaves. To manage this, place each candle on its own small, heat-proof dish or holder. For the taper candles, make sure they are perfectly vertical and in a spot free from drafts to minimize drips. After the season, you’ll likely need to spend some time carefully scraping wax off surfaces, or just embrace the slightly messy, gothic look it creates.
24. Capture Dramatic Pumpkin Reflections on a Glossy Surface
That stunning reflection is easier to achieve than you might think. You don’t need a special table.
- Start with a piece of black acrylic or plexiglass, which you can get at a hardware store. It has a much clearer reflection than glass.
- Clean the surface thoroughly with a microfiber cloth to remove all dust and smudges. Any speck of dust will show up.
- Place your illuminated pumpkins directly on the acrylic sheet.
- Position your camera at a very low angle, almost level with the surface. This exaggerates the reflection.
- Make sure the room is completely dark. The only light source should be from within the pumpkins for maximum contrast.
This setup takes about 15 minutes to perfect.

|
📋 Copy HEX 🔗 Share |
📐 Style Math
A glossy, reflective surface looks incredible in photos, but it’s a magnet for dust, fingerprints, and smudges in real life. If you’re using this as a party display, be prepared for it to look less than perfect after the first few guests arrive. It requires constant wiping to maintain that flawless, mirror-like finish. For a lower-maintenance alternative that still provides some reflection, consider a semi-gloss or satin-finish black tray or a dark, polished stone countertop.
25. Illuminate Life-Sized Skeletons with Vibrant Pink and Orange Light
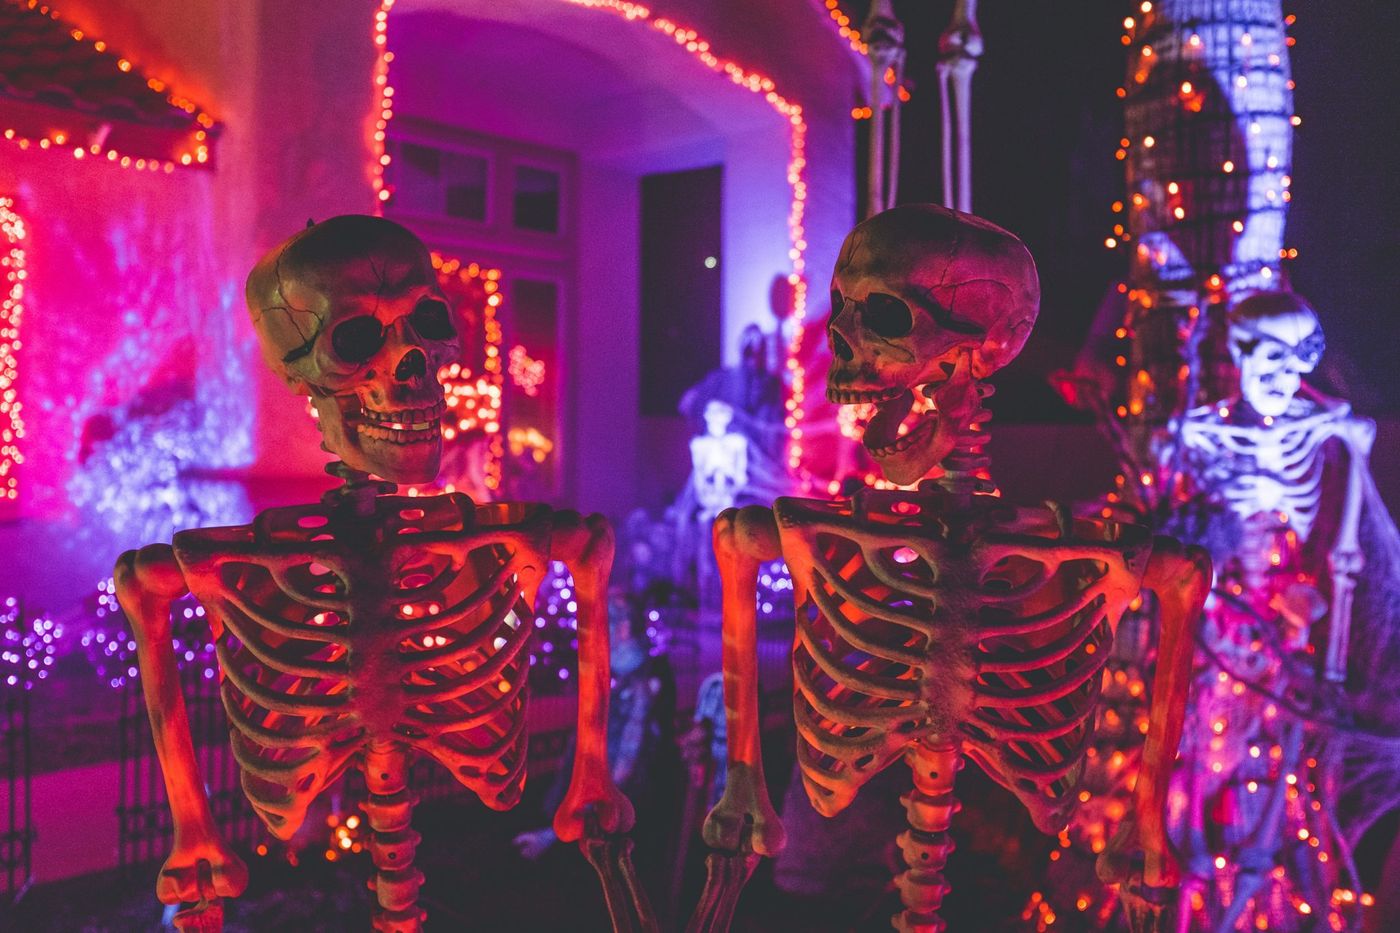
This electric, neon-soaked look is pure cinema. The formula is: 70% saturated color + 30% classic spooky shapes. The skeletons themselves are standard Halloween props, but they are completely transformed by the intense hot pink and electric orange lighting. The dense strings of fairy lights in the background add depth and create a club-like, otherworldly atmosphere. This isn’t about subtlety; it’s about overwhelming the senses with vibrant, unnatural color, turning a typical house into a spooky spectacle.
|
📋 Copy HEX 🔗 Share |
⚠️ Real Talk
A display this bold needs room to breathe. This is best suited for a front yard, a large porch, or an indoor space with high ceilings and a wide-open area, like a foyer or a great room with a minimum of 100 square feet of dedicated display space. The life-sized skeletons need to be seen from a distance to be fully appreciated. In a small apartment living room, they would feel cramped and overwhelming. This is a go-big-or-go-home idea that rewards having enough space to create a full scene.
26. Display a Detailed Row of Five Carved and Lit Pumpkins
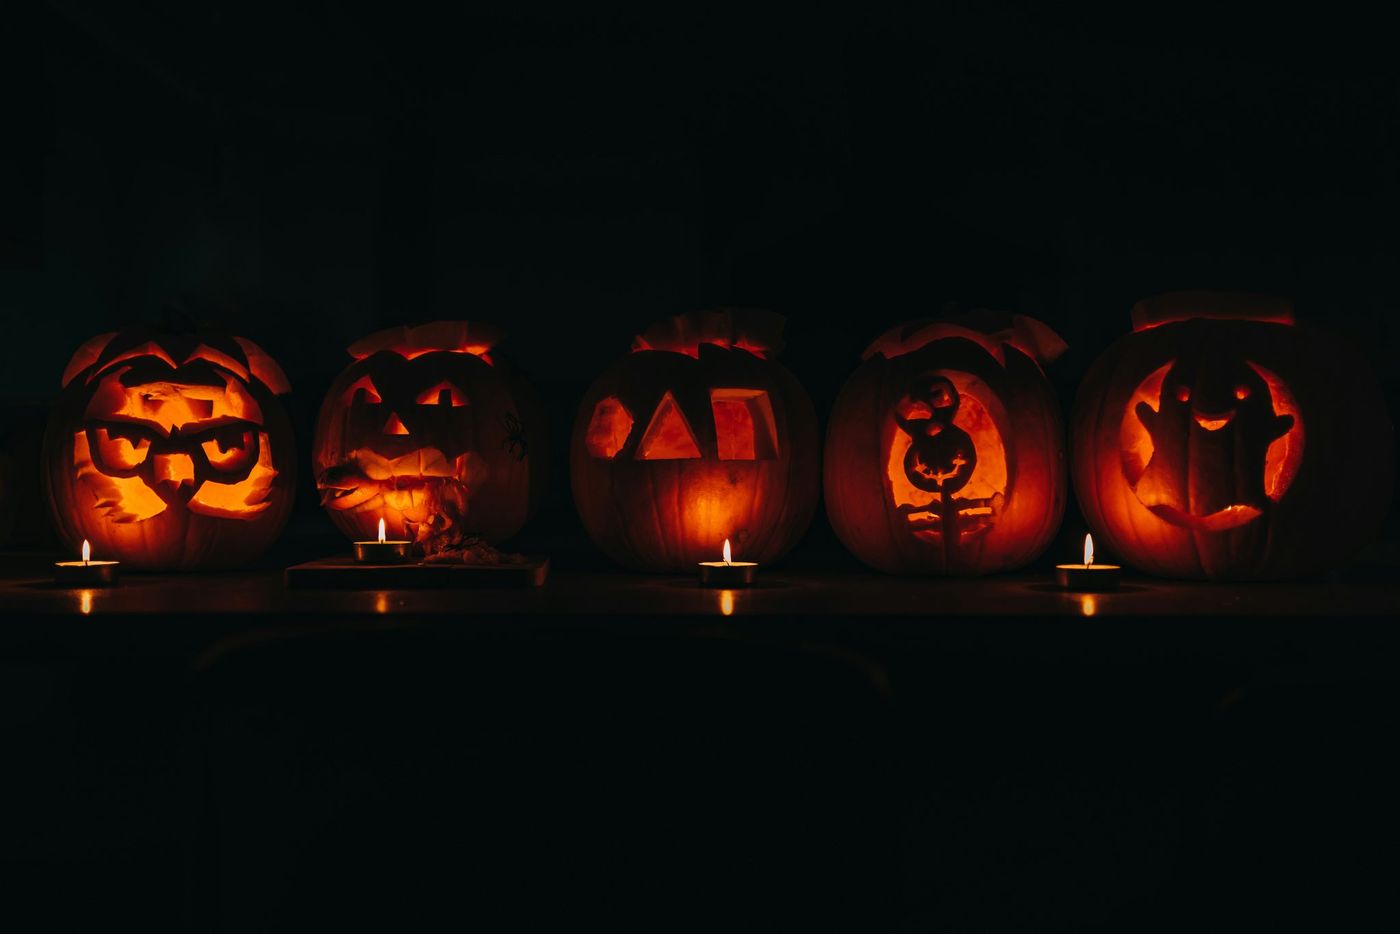
The strength of this display lies in its variety and detail. Instead of five pumpkins with similar jagged faces, each one features a unique, intricate design—a ghost, a skeleton, geometric patterns. This variety invites the viewer to look closer and appreciate the craftsmanship of each individual piece. Placing small tealight candles in front of the pumpkins adds another layer of light, illuminating the front surfaces of the pumpkins and creating a beautiful, multi-dimensional glow that a single internal light source couldn’t achieve alone.
|
📋 Copy HEX 🔗 Share |
💰 Budget Breakdown
Carving five detailed pumpkins can be time-consuming and expensive if you’re buying large ones. To get this look for less, use smaller, more affordable pie pumpkins. Their smaller size makes detailed carving much quicker. You can also mix in one or two intricately carved foam pumpkins from a craft store with three real ones. The foam pumpkins can be your most complex designs, and you can reuse them year after year, saving you time and money in the long run. The mix of real and artificial is often unnoticeable in a dark setting. See a different approach with fewer pumpkins in Idea #17.
27. Frame Thematic Halloween Cookies for a Charming Display
The rustic wooden frame is the game-changer here. Without it, you’d just have cookies on a table. By placing them inside the frame, you elevate them from simple treats to a piece of edible art. The frame creates a defined space, drawing the eye in and giving the arrangement a sense of purpose and intention. The dark wood provides a perfect, high-contrast backdrop for the bright orange and white icing, making the colors pop. It’s a brilliant way to turn your baking into decor.

|
📋 Copy HEX 🔗 Share |
🎯 What Makes It Work
Ready to turn your cookies into art? Here’s what to check first:
- Is your frame food-safe? If it’s a vintage or painted frame, place a sheet of parchment paper or a custom-cut piece of acrylic underneath the cookies to be safe.
- Are your cookies completely dry? The icing must be fully hardened, or it will smudge when you arrange them. This can take up to 24 hours for royal icing.
- Will the display be in direct sunlight? Bright sun can fade the food coloring in your icing over a few days.
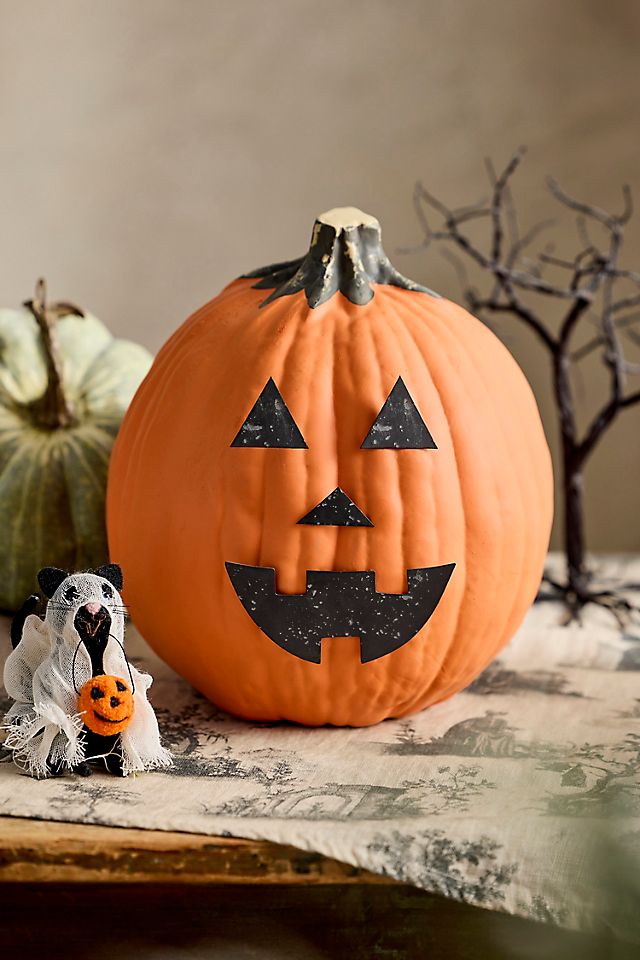
28. Style a Whimsical Vignette with a Ghost Cat and Patterned Runner
This charming scene works because it expertly blends playful and sophisticated elements. The jack-o’-lantern and ghost-costumed cat are undeniably cute and festive. But they are placed on a classic, almost formal, toile-style patterned runner and accented with a sculptural bare branch. This mix of high and low—of whimsical Halloween novelty and timeless design—is what makes the look feel curated and special, not childish. The limited color palette of orange, black, cream, and sage green ties everything together beautifully.
|
📋 Copy HEX 🔗 Share |
📏 Scale Guide
The secret to a great vignette is creating a ‘visual triangle.’ Here, the jack-o’-lantern is one point, the top of the bare branch structure is the highest point, and the ghost cat is the third point. This arrangement forces the eye to move up, across, and down, taking in the whole scene. When you’re arranging decor on a table, always think about creating peaks and valleys in a triangular shape, rather than lining everything up in a straight, boring row.
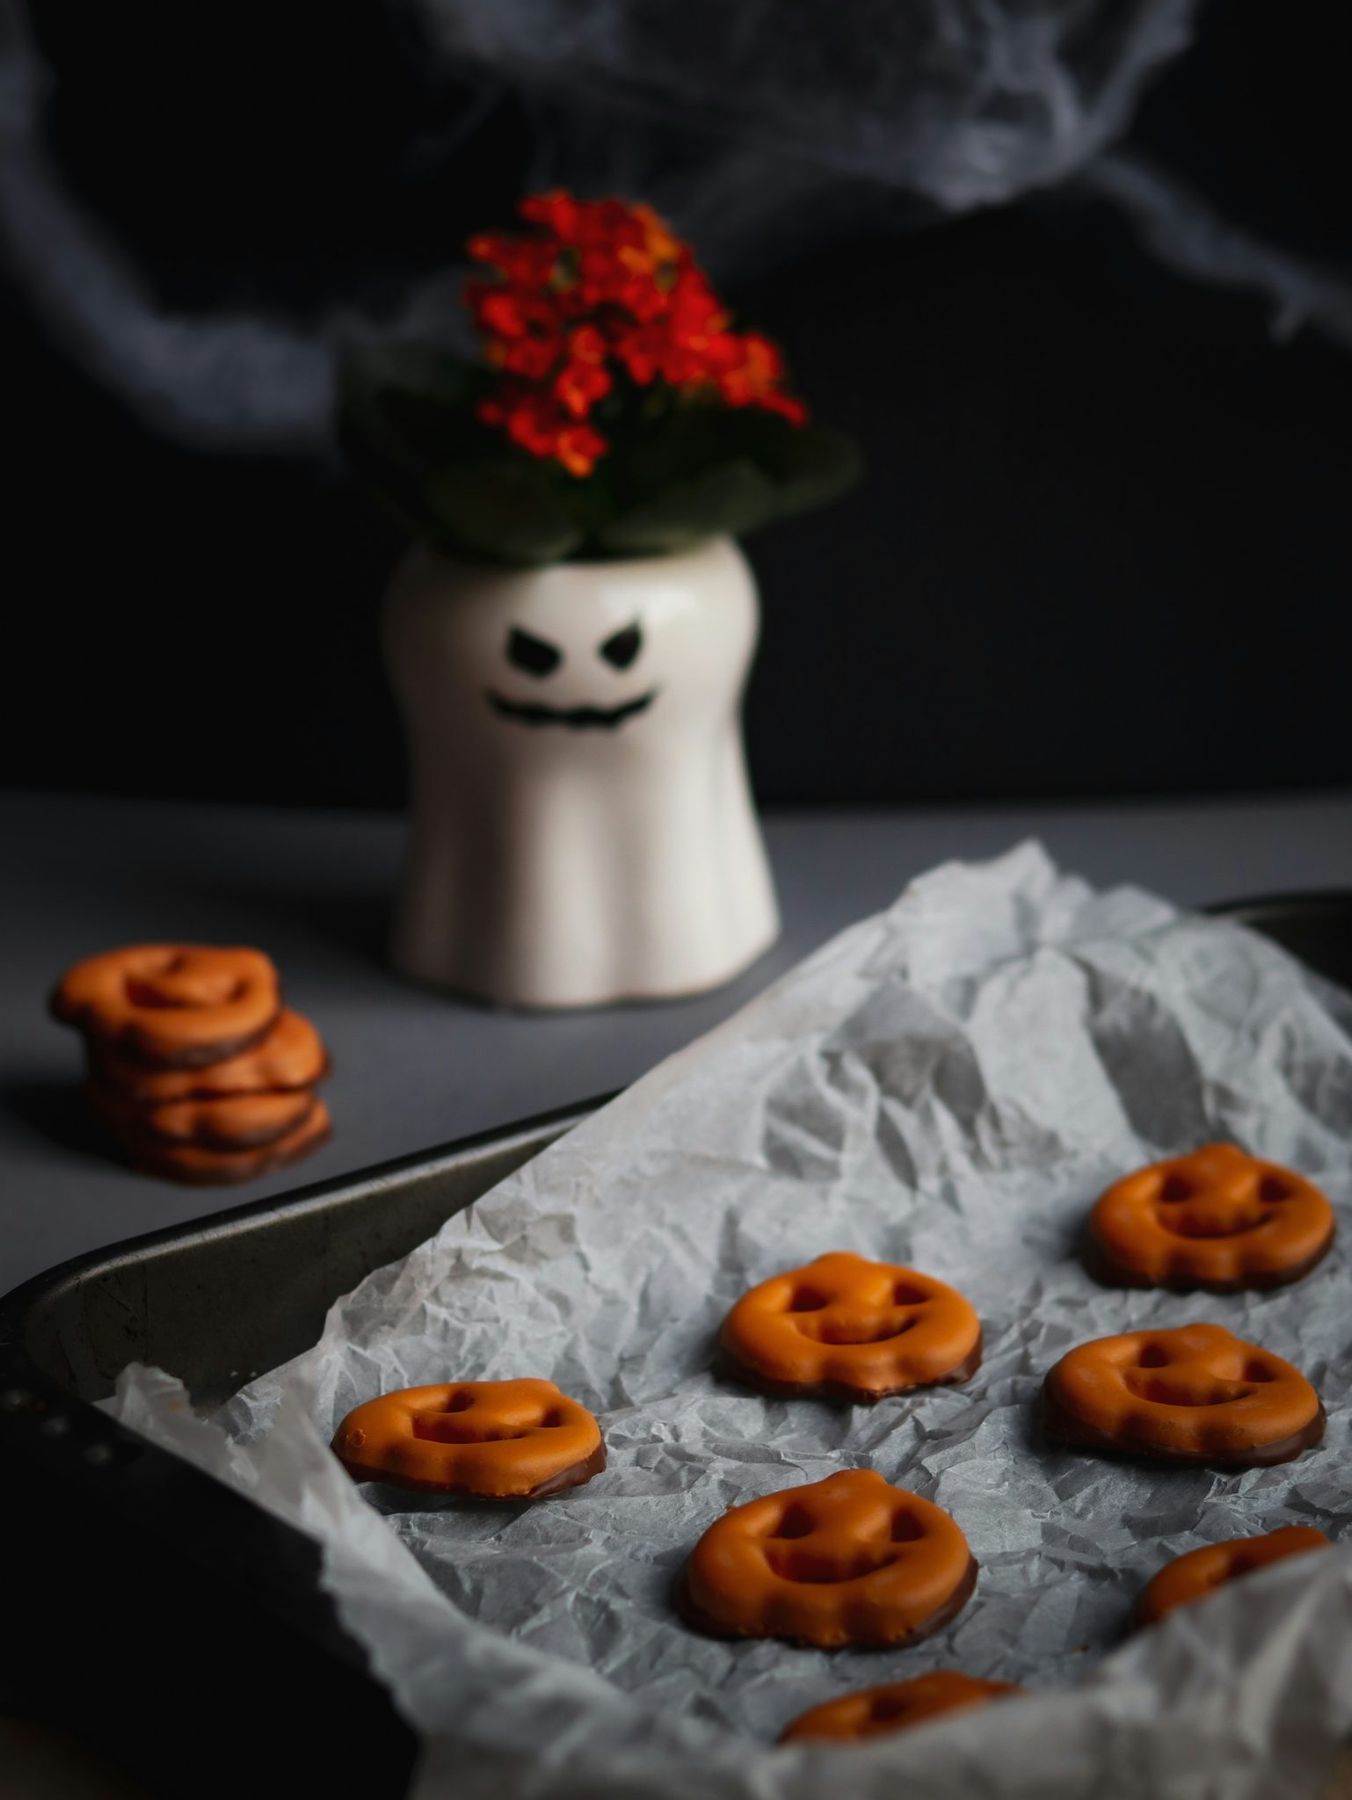
29. Pair a Ghost Planter with Pumpkin-Shaped Treats
This sweet and spooky setup follows a simple recipe for charm: 50% playful decor + 50% edible treats. The adorable ghost-shaped planter holding vibrant red flowers provides the festive, decorative anchor. The pumpkin-shaped cookies on the baking sheet are the edible, interactive element. The two parts work together to create a scene that feels both styled and lived-in. The color story is also key: the bright white, orange, and red create a cheerful and high-contrast palette against the dark background.
|
📋 Copy HEX 🔗 Share |
🔧 How-To Brief
You don’t need a specific ghost planter to get this look. Any simple white ceramic planter or vase will do. You can even find ghost-shaped ceramic mugs at stores like Target or HomeGoods during the season for under $10. For the treats, a simple pumpkin-shaped cookie cutter and some orange candy melts are all you need. This is a very budget-friendly idea that relies more on creativity and thoughtful arrangement than on expensive, single-purpose decor items.
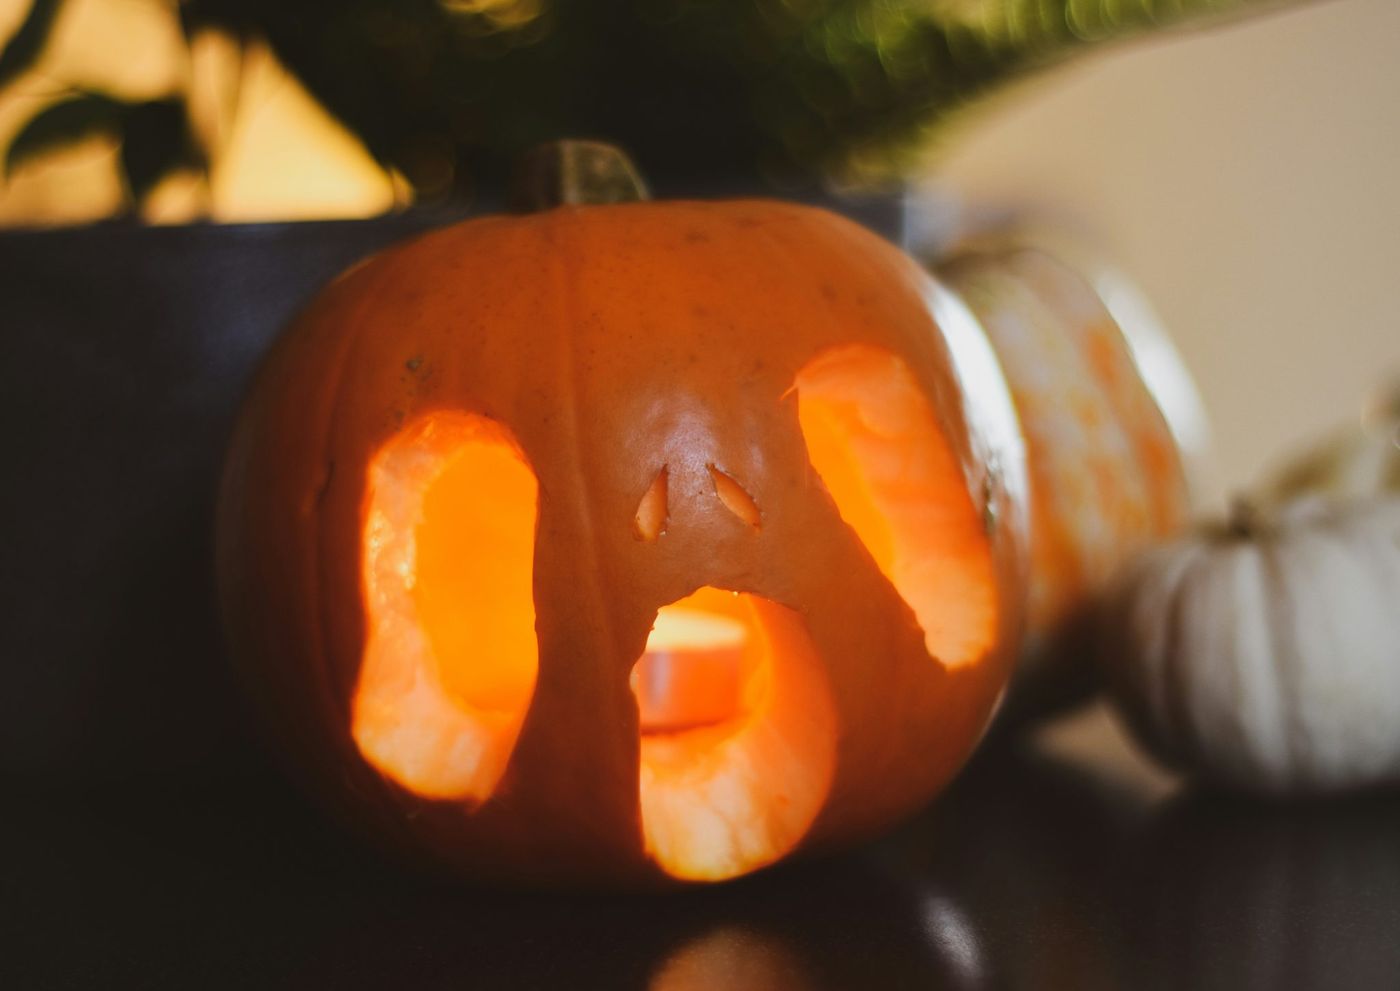
30. Create a Cozy Glow with a Single Carved Pumpkin and Tea Light
The most important part of this simple setup is the carving style. The soft, rounded edges of the ghost-like face create a look that is more cute than creepy. This isn’t a menacing jack-o’-lantern; it’s a friendly, glowing spirit. This choice of a gentle expression, combined with the warm, singular glow of the tea light, is what gives the scene its cozy, nostalgic, and approachable atmosphere. A sharper, more aggressive carving would completely change the mood from sweet to spooky. It proves that the details of the face are everything.
|
📋 Copy HEX 🔗 Share |
💸 Get This Look For Less
Using a real tea light creates that authentic, flickering glow we all love, but it comes with some realities. A standard tea light only burns for about 3-4 hours, so you’ll need to replace it frequently if you want it glowing all evening. More importantly, the flame can scorch the inside of the pumpkin’s ‘lid,’ creating a fire hazard. Always carve a small ‘chimney’ hole in the top of your pumpkin to allow heat to escape, and never leave a burning candle unattended. For peace of mind, a flickering LED tea light is the best choice.
Ready to Haunt Your Own House?
We hope these 30 ideas have sparked your imagination and shown you that creating a spooky, stylish home for Halloween is totally achievable. Whether you’re a fan of subtle, rustic touches or bold, theatrical displays, there’s something here for you. Pick your favorite, give it your own twist, and have fun creating a little magic this season. Don’t forget to save your top picks to your Pinterest boards so you can find them again later!