You know that feeling when you finally find the reception desk idea that looks exactly right for your space, only to realize you have no idea how to pull it off? It happens. After filtering through hundreds of options across high-end designers and accessible brands, we narrowed it down to 30 ideas that actually deliver. We’re covering everything from grand and luxurious to modern and minimal. In 2026, the reception area is becoming a statement of brand identity, moving beyond pure function to create a powerful first impression. And stay until the end — we break down the most common mistakes that can ruin these looks. 📌 Save this to Pinterest for later — you’ll want to revisit these ideas.
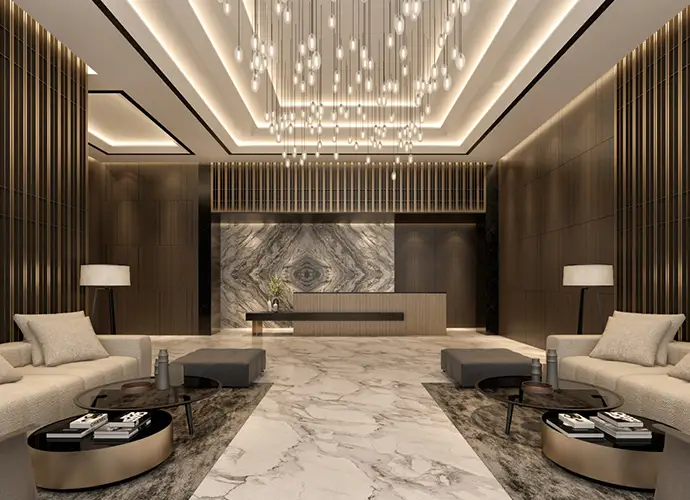
1. Grand Welcome with Book-Matched Marble and a Statement Chandelier
This design works because it masters the art of scale and balance. The massive, book-matched marble slab acts as a stunning piece of natural art, but it’s balanced by the warmth and texture of the dark wood paneling surrounding it. The grandeur of the multi-bulb chandelier is echoed in the reflective quality of the white marble floors, creating a cohesive and immersive sense of luxury. It’s not just about one impressive feature, but how all the large-scale elements—marble, wood, light, and space—speak to each other.
|
📋 Copy HEX 🔗 Share |
⭐ The One Thing
Recreating this level of luxury is an investment in premium materials and custom fabrication. Here’s a realistic look at the costs.
- Main Furniture (custom desk, sofas, tables): $18,000 – $35,000
- Lighting (chandelier, recessed): $8,000 – $20,000
- Wall & Floor Treatment (marble slab, wood paneling, marble flooring): $25,000 – $60,000+
- Decor/Accessories (rug, decor): $3,000 – $7,000
- TOTAL: $54,000 – $122,000+
- Budget alternative: Use a high-quality marble-effect porcelain slab, source a similar (smaller) chandelier from a restaurant supply store, and opt for luxury vinyl tile (LVT) flooring. This could bring the cost down by 40-60%.
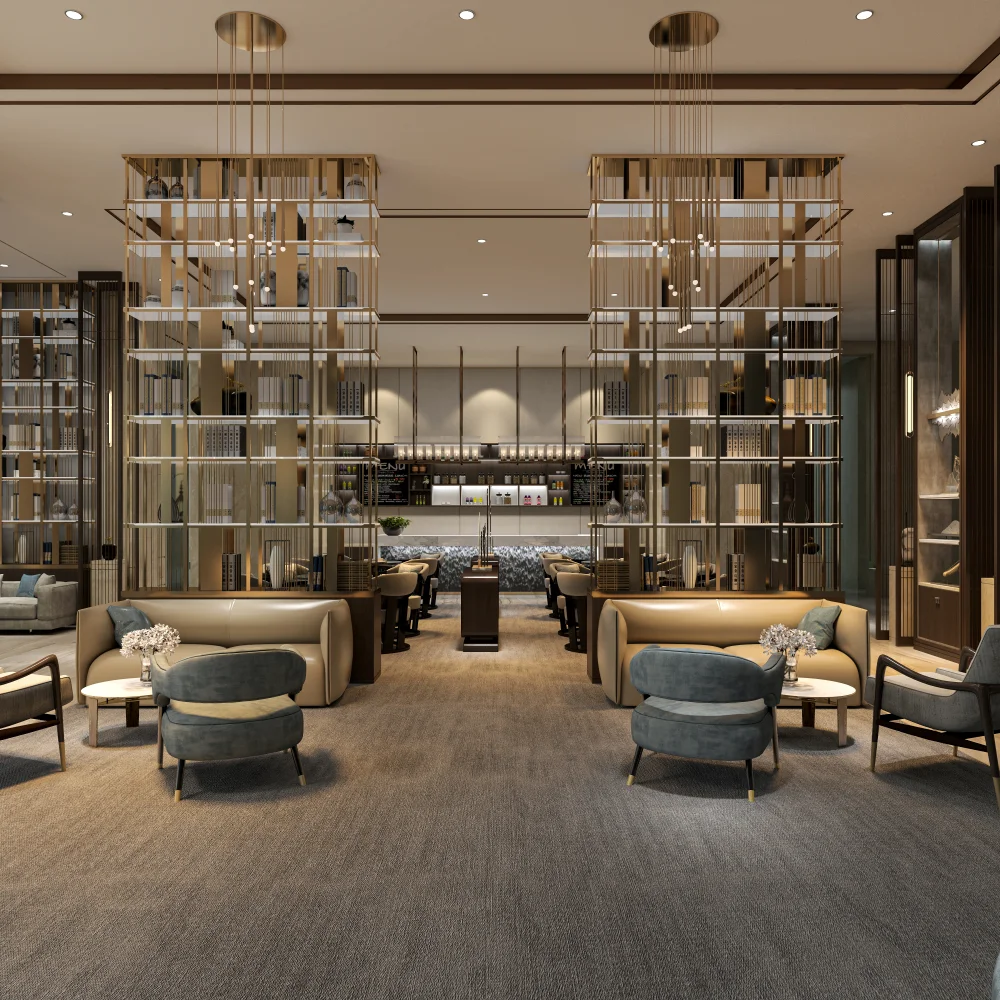
2. Frame a Lounge with Illuminated Gold Bookshelves
The single element that makes this space unforgettable is the pair of floor-to-ceiling gold metal bookshelves. They aren’t just for storage; they are architectural dividers that define the seating areas and create a grand, symmetrical pathway. Their open structure prevents them from feeling heavy, while the integrated lighting turns them into towering art pieces. Without these shelves, the lounge would just be a nice seating area. With them, it becomes a sophisticated and elegantly framed experience.
|
📋 Copy HEX 🔗 Share |
⚠️ Real Talk
This concept truly shines in a space with high ceilings and a generous footprint. You need a minimum ceiling height of 12 feet for the shelving to have the intended dramatic effect. For the layout shown, with two separate seating zones and a central walkway, plan for a width of at least 25-30 feet. Anything less will feel cramped and the powerful symmetry will be lost. This is a go-big-or-go-home idea that rewards larger spaces, unlike the more compact setup in Idea #7.
3. Pair a White Desk with a Textured Hexagonal Feature Wall
When installing a textured 3D wall panel like this hexagonal one, lighting is your secret weapon. Don’t just light the room; light the wall. Install a ceiling-mounted wall grazer or recessed linear lighting 12-18 inches from the wall. This will cast shadows that accentuate the geometric pattern, turning a flat surface into a dynamic feature. If the light source is too far away or too diffuse, the 3D effect will be completely lost. The goal is to create depth and shadow play.
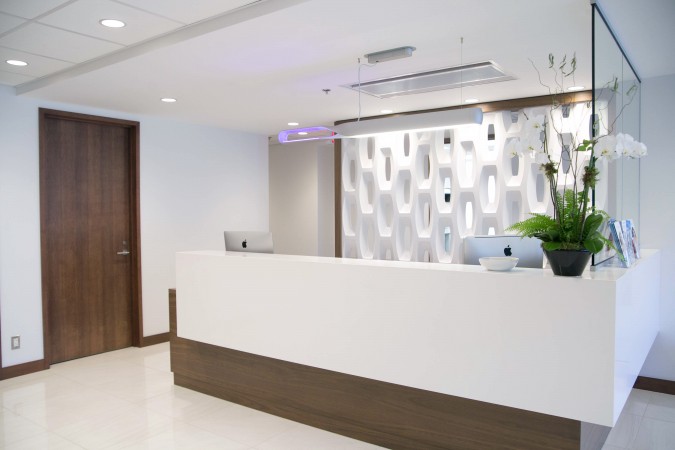
🎯 What Makes It Work
The visual formula here is a study in clean, modern balance. Think of it as: 60% crisp white (desk, feature wall, orchids) + 30% warm dark wood (desk base, door trim) + 10% natural green (plants). This high-contrast palette feels professional and fresh. You could easily swap the hexagonal pattern for vertical slats or a wave pattern, or change the dark wood to a deep charcoal gray, and the formula would still work perfectly. The key is the crisp ratio of white to a single dark, warm accent.
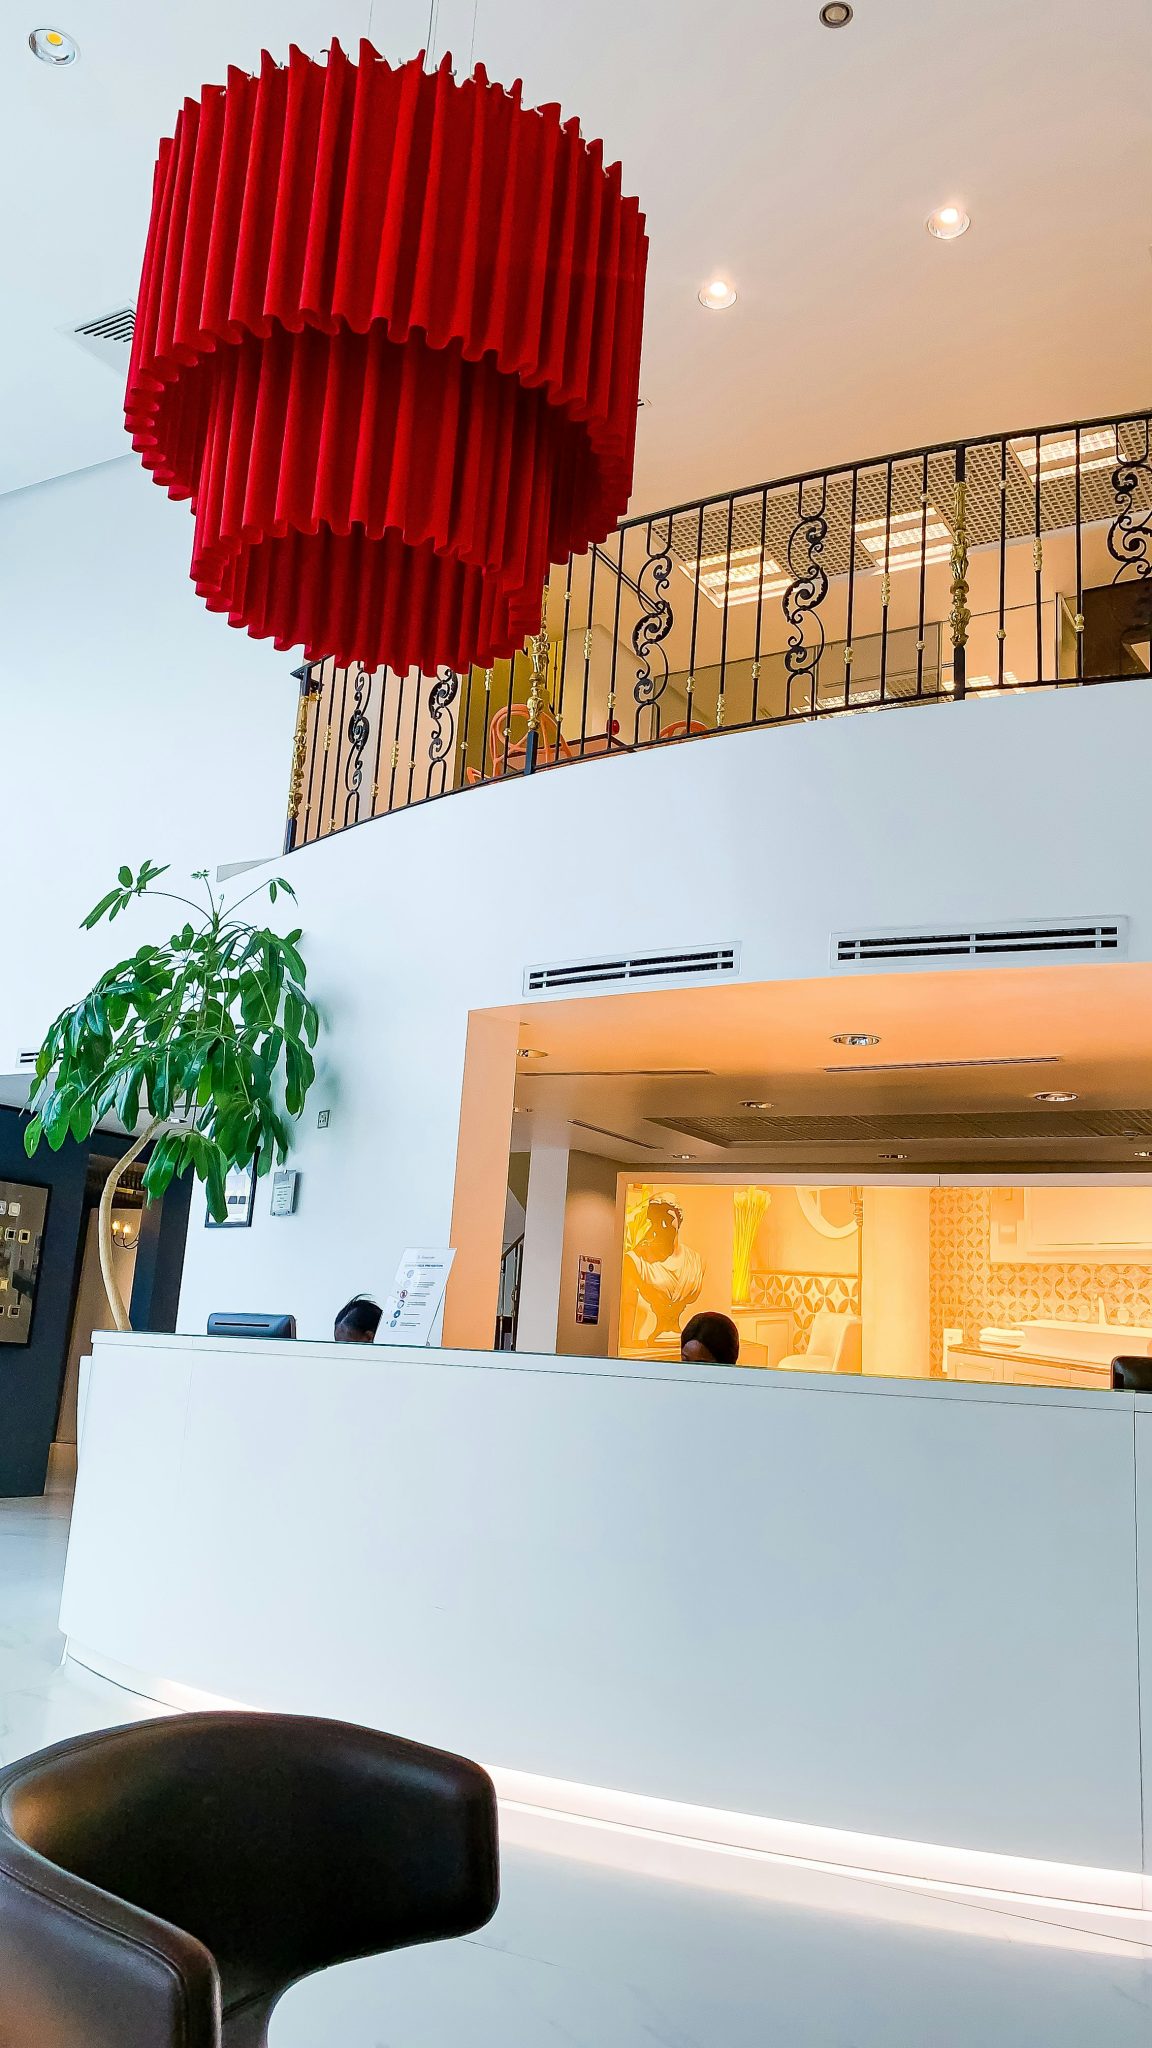
4. Anchor a Mezzanine Space with a Bold Red Chandelier
A statement piece like this massive red velvet chandelier is breathtaking, but it comes with a reality check: maintenance. A fixture this large and textured is a magnet for dust. Cleaning it won’t be a quick wipe-down; it will require scaffolding or a specialized tall ladder and careful vacuuming with a brush attachment at least twice a year. Before committing to a high-drama, high-maintenance piece, be honest about whether you have the resources and willingness to keep it looking its best.
|
📋 Copy HEX 🔗 Share |
📏 Scale Guide
This design’s success hinges on the principle of a single, audacious focal point. The room is almost entirely a monochrome white canvas, which allows the tiered red chandelier to read as a massive, sculptural art installation. The curvilinear shape of the desk subtly echoes the roundness of the chandelier, creating a subtle dialogue between the floor and the ceiling. The black and gold railing of the mezzanine adds just enough contrasting detail to frame the scene without competing with the main event.
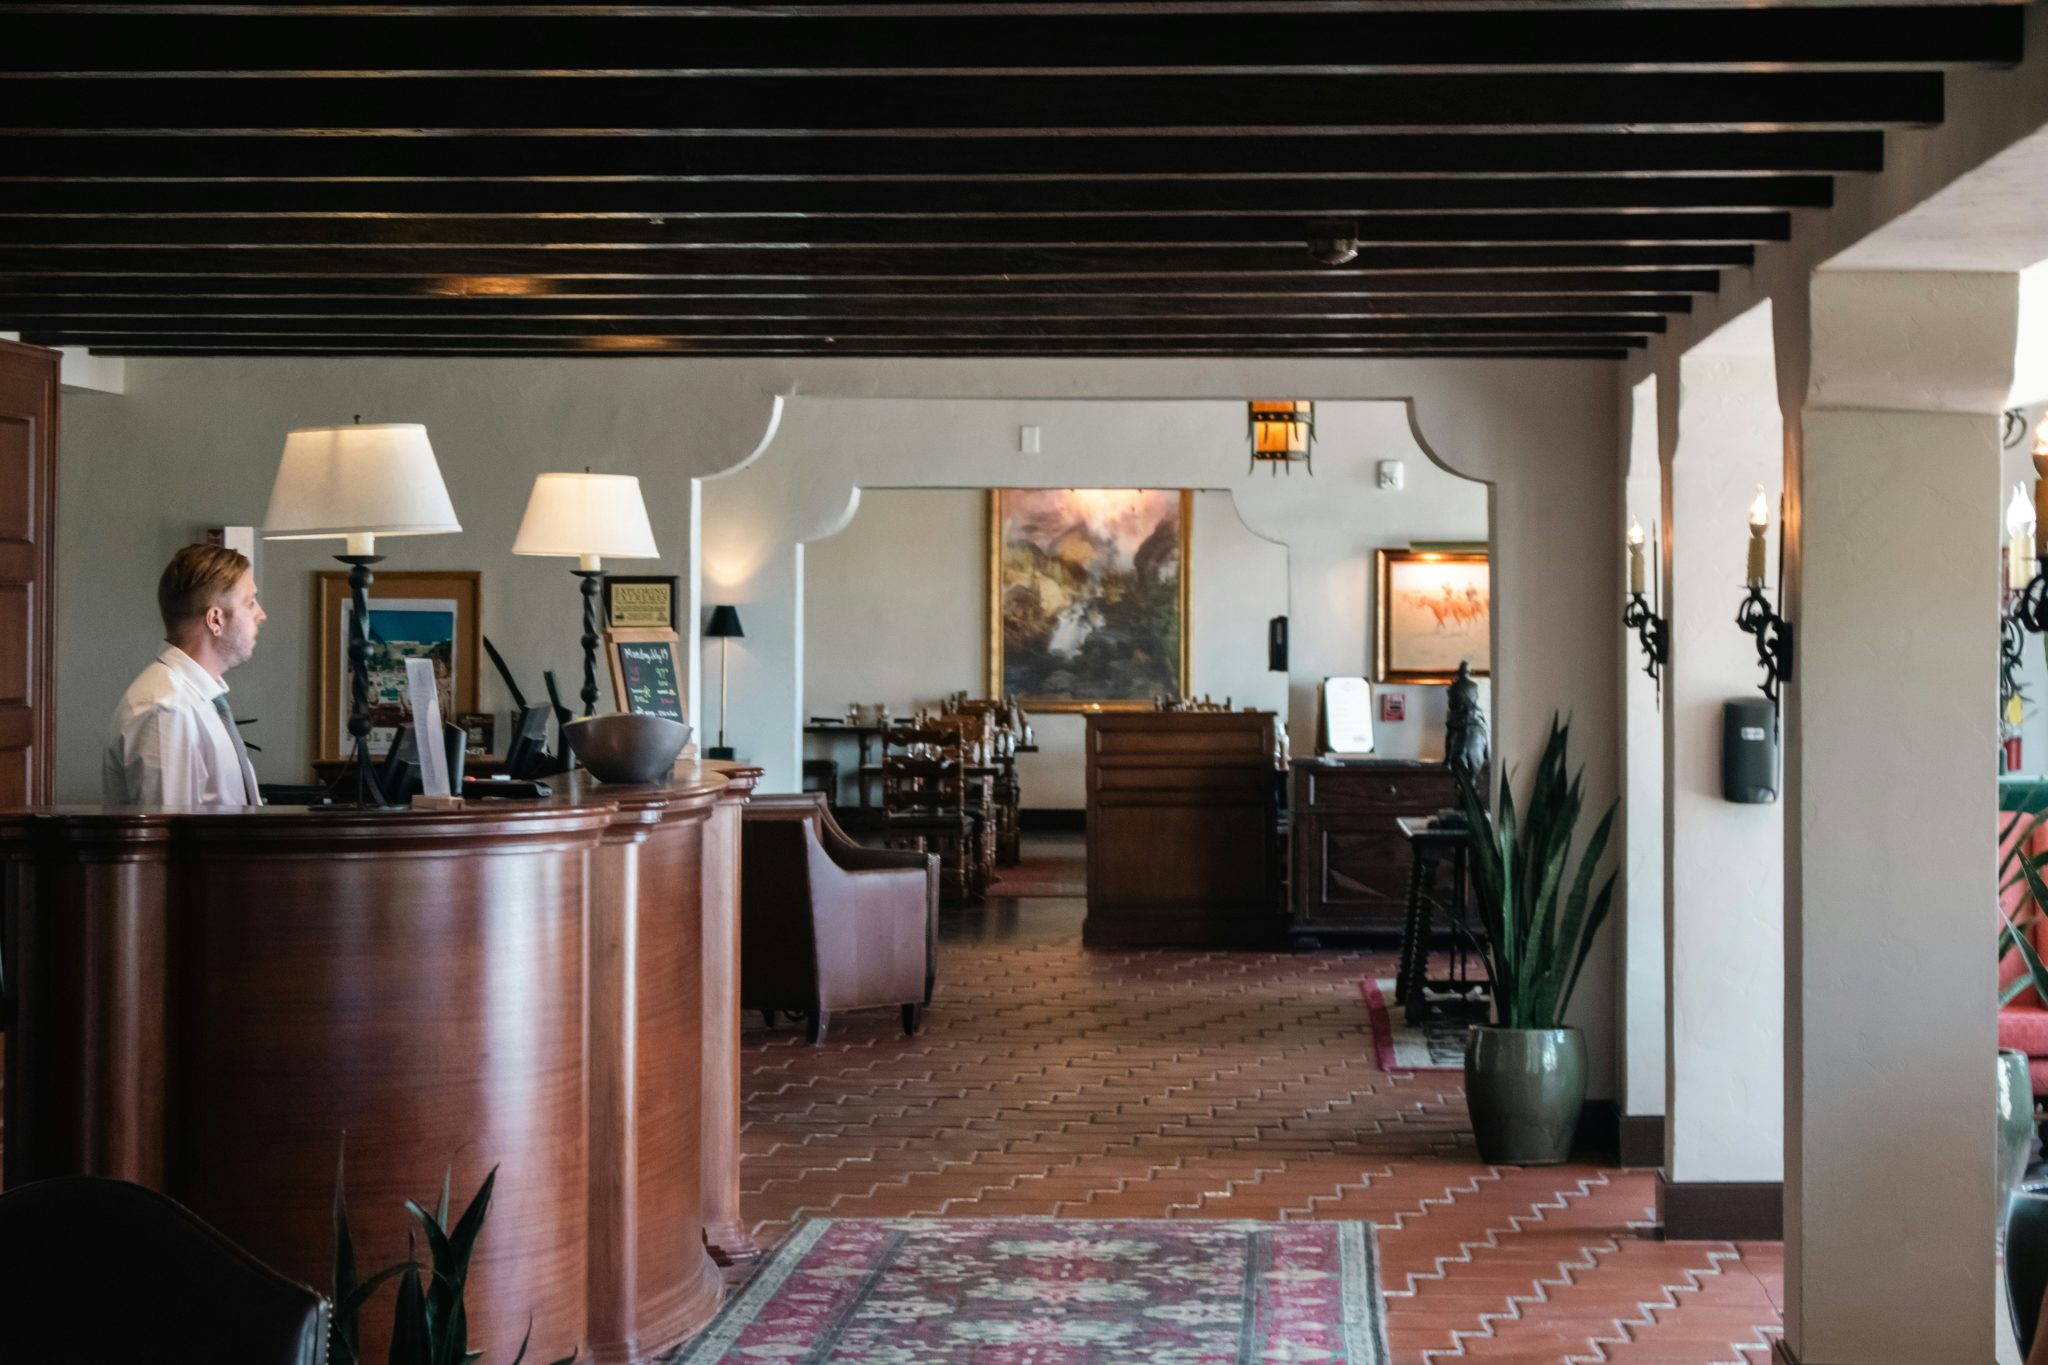
5. Embrace Spanish Colonial Warmth with a Curved Wood Desk and Terracotta Floors
That beautiful, rustic terracotta tile floor is a central part of this look’s charm, but it requires specific care. Terracotta is porous and can be prone to staining if not properly sealed. It should be sealed upon installation and then resealed every 3-4 years, especially in a high-traffic reception area. For cleaning, avoid harsh, acidic chemicals and opt for a pH-neutral cleaner. While more demanding than porcelain, the authentic, earthy patina it develops over time is something manufactured tiles just can’t replicate.
|
📋 Copy HEX 🔗 Share |
💰 Budget Breakdown
In a world of cool, minimalist design, there’s a growing appreciation for spaces that feel warm, grounded, and handcrafted. This reception area taps into the ‘Modern Hacienda’ trend, which celebrates natural materials and traditional architectural forms. The exposed wooden beams, arched doorways, and rich terracotta tones create an atmosphere that is instantly welcoming and feels rooted in history. It’s a move away from transient trends and toward a timeless, soulful aesthetic that feels both authentic and comforting.
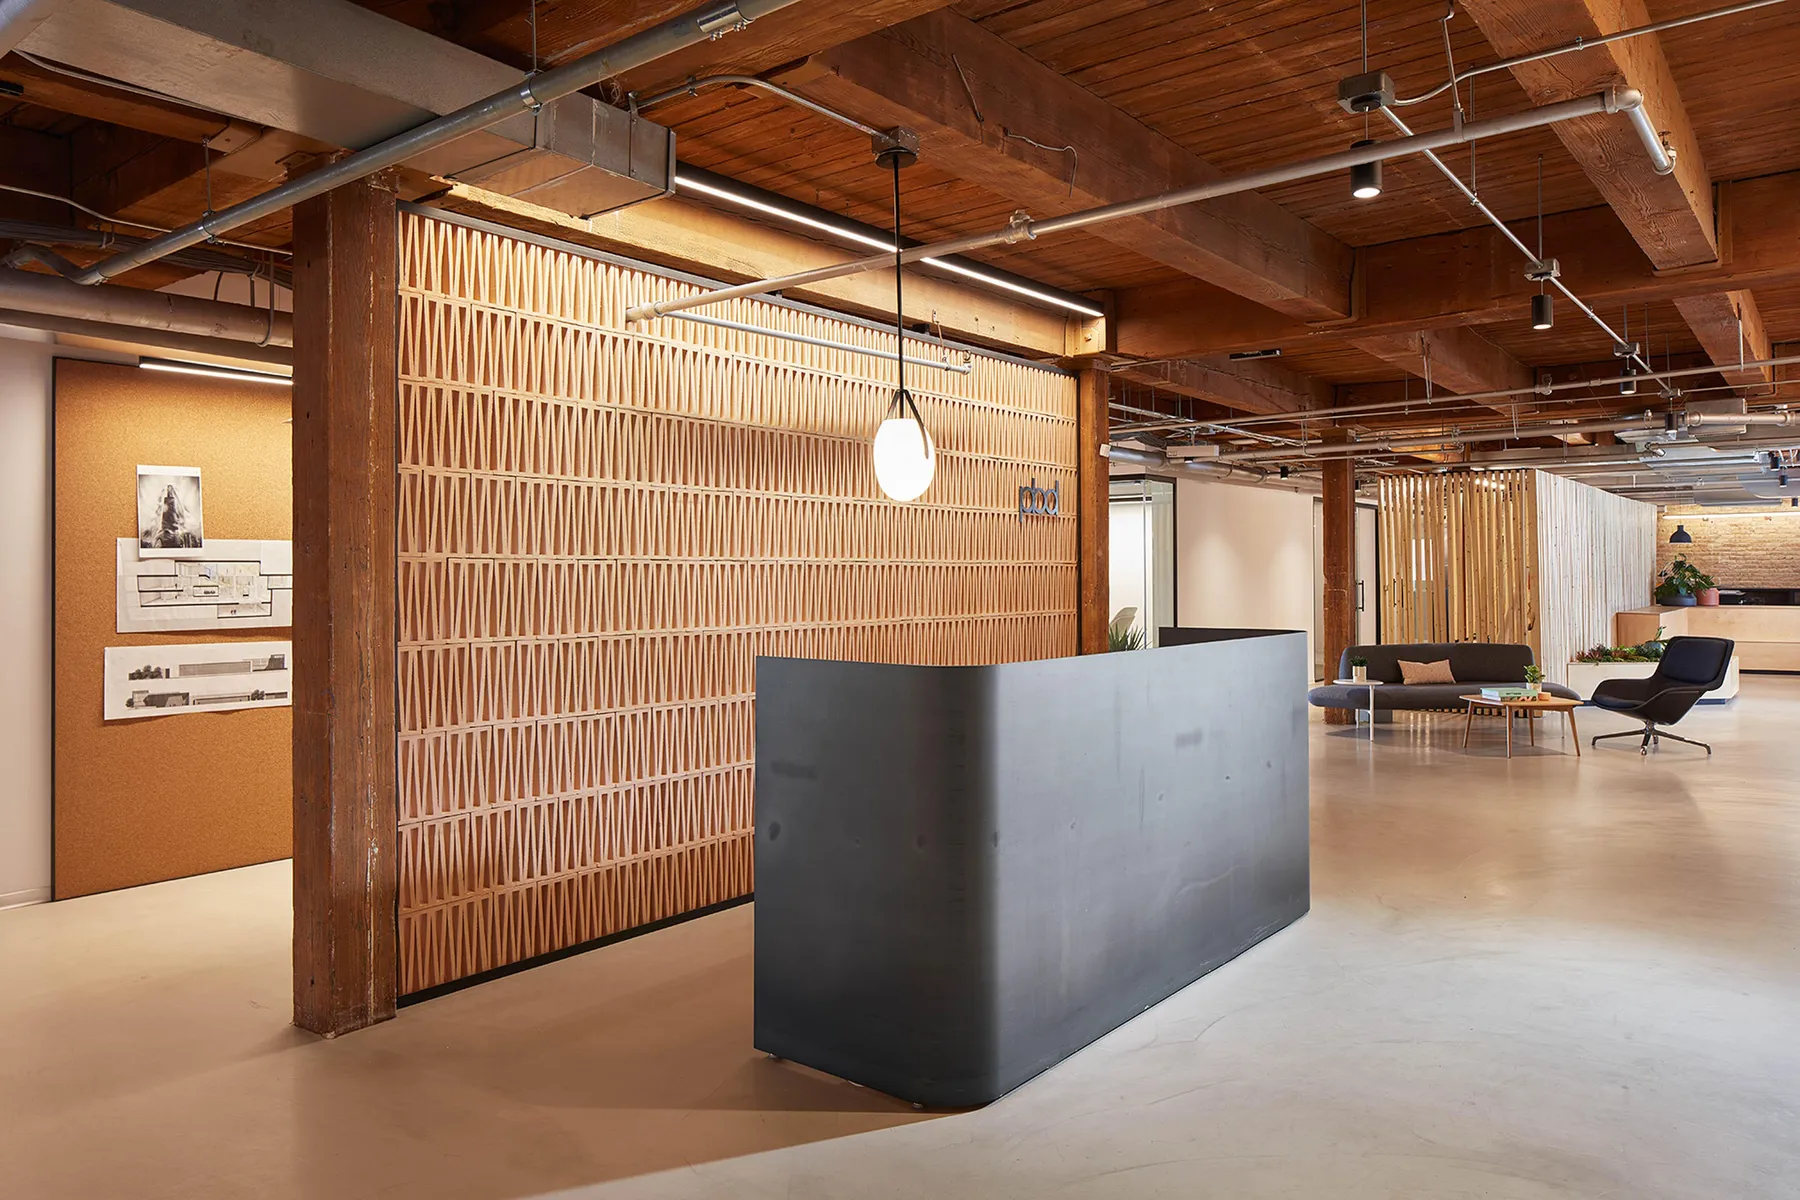
6. Contrast a Dark Gray Desk with a Natural Wood Screen
Here, the style is achieved through a careful blend of textures and finishes. The formula is approximately: 50% raw/natural elements (exposed wood ceiling, wood screen) + 40% sleek industrial materials (polished concrete floor, dark gray desk) + 10% refined lighting (modern pendants). This balance of rugged and smooth is what gives the space its unique character. You could swap the polished concrete for a dark slate tile and the feeling would hold. It’s a more raw take on industrial than the slick version in Idea #23.
|
📋 Copy HEX 🔗 Share |
✅ Before You Start
You don’t need custom millwork to get this vibe. A similar look can be achieved on a much smaller budget. Find a simple, dark gray desk from IKEA or a used office furniture store for $200-$400. The key element is the wood screen. You can create this yourself by purchasing pre-made slatted wood panels from a hardware store like Home Depot (around $100-$150 per panel). Mount them to the wall behind the desk. Finish the look with some simple globe pendants and you’ve captured the essence for under $800.
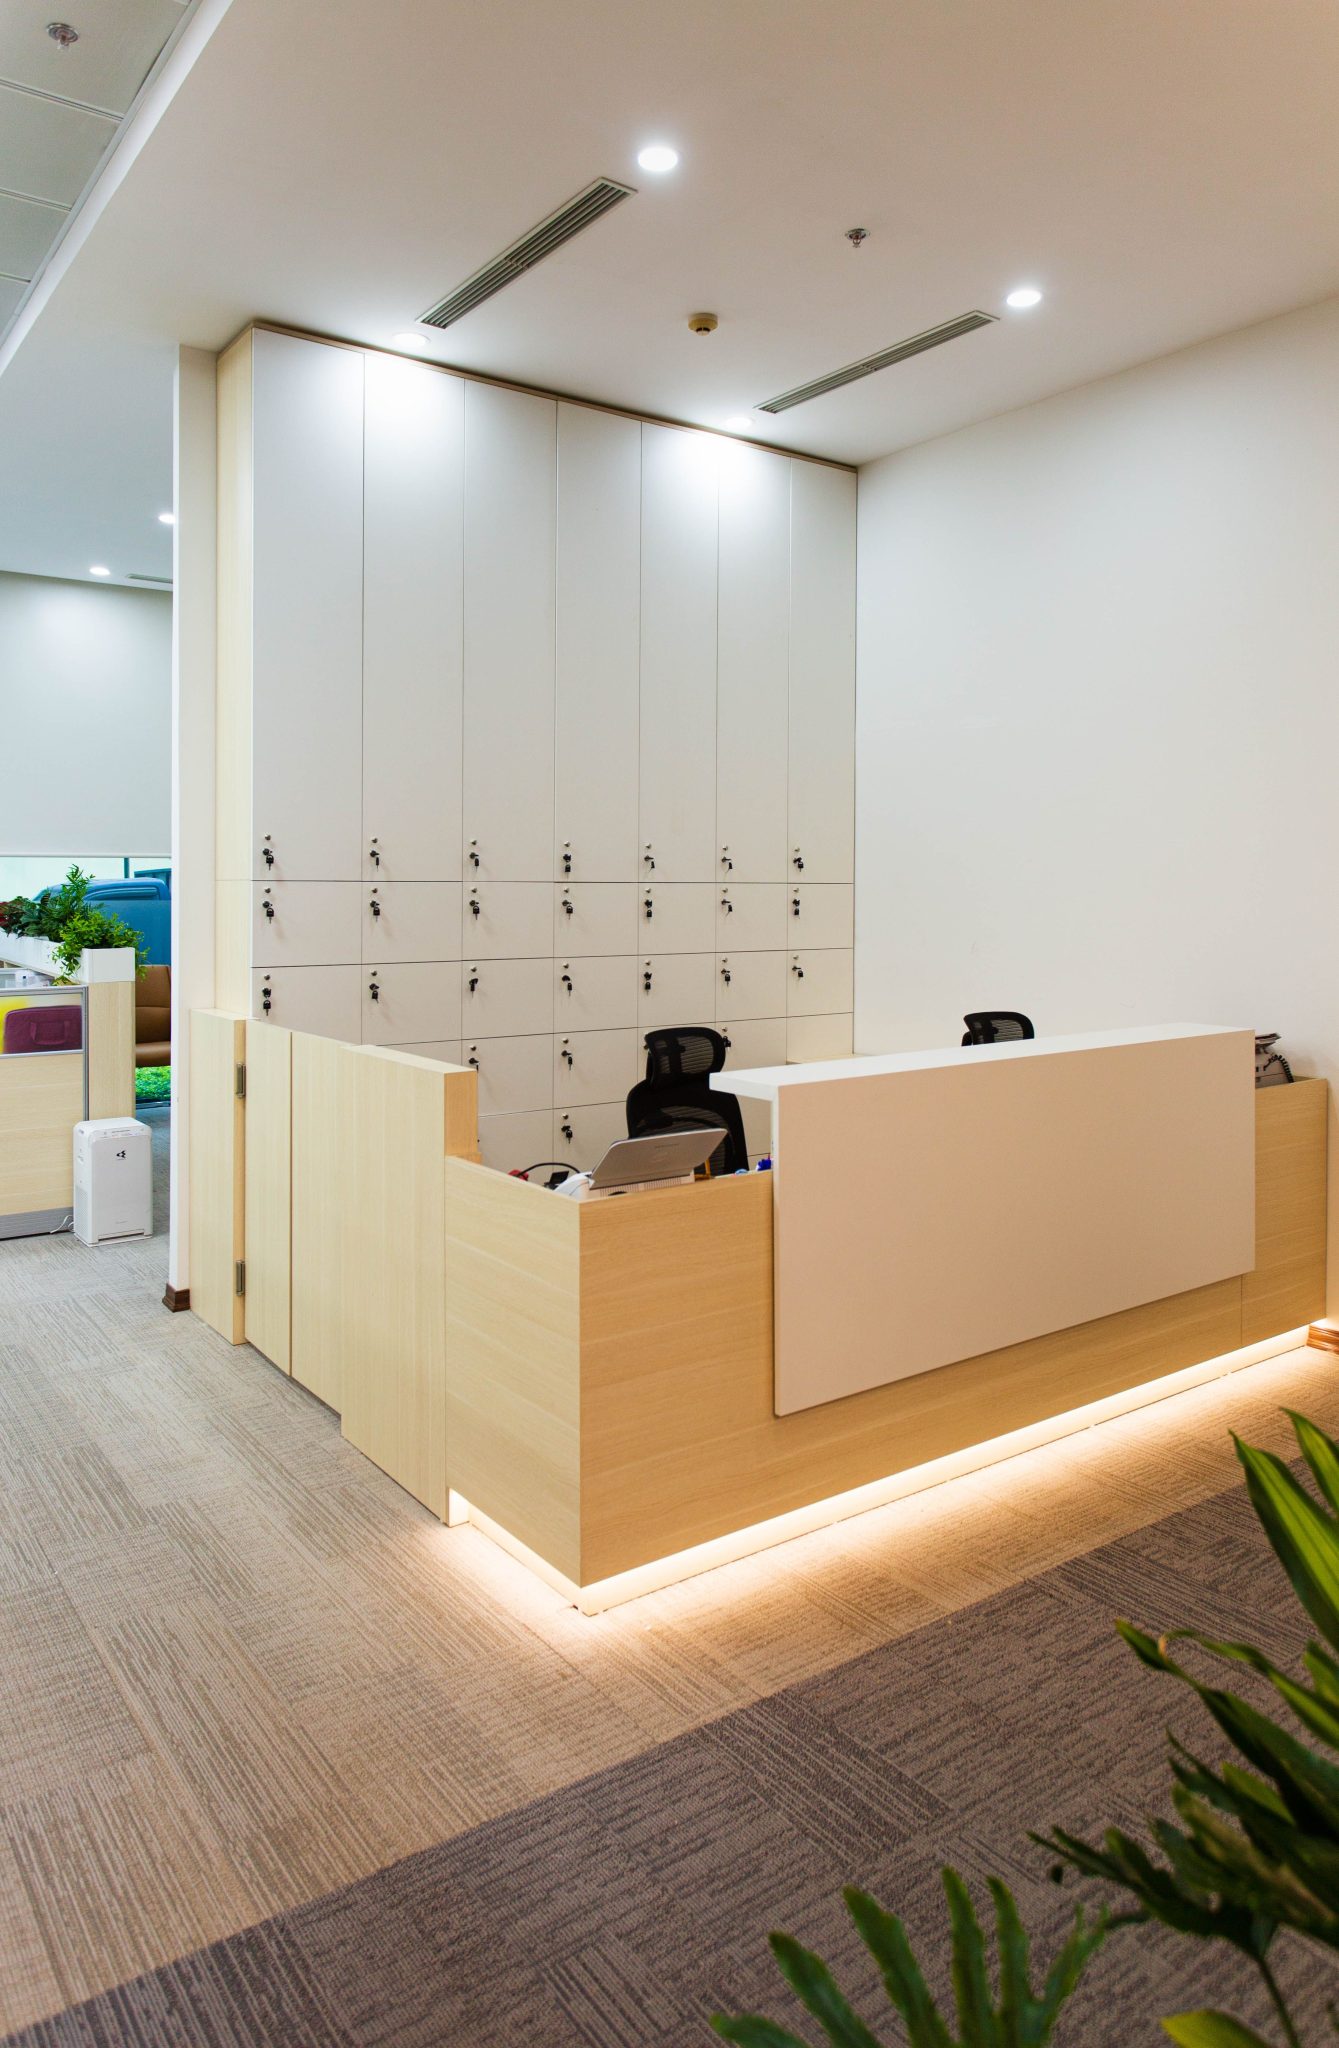
7. Combine a Light Wood Desk with a Wall of Lockable Storage
The defining feature here isn’t the desk itself, but the full-height wall of integrated, seamless storage behind it. This is the secret to maintaining a perpetually clean and organized reception area. By providing ample, concealed space for files, supplies, personal items, and IT equipment, the design ensures that the public-facing desk can remain pristine and uncluttered. It’s a brilliantly functional choice that elevates the entire space by prioritizing organization. Without it, the desk would inevitably become cluttered.
|
📋 Copy HEX 🔗 Share |
📐 Style Math
Before you commit to a full wall of built-in cabinetry, you need to do some prep work. Here’s a quick checklist to run through:
- Inventory Your Needs: What exactly will you be storing? Make a detailed list of files, equipment, and supplies to ensure your cabinet configuration (shelves vs. drawers) is correct.
- Measure Precisely: Measure the wall height and width in three different places to account for any variations. Don’t forget to account for baseboards and crown molding.
- Locate Utilities: Are there any outlets, light switches, or thermostats on the wall? These will need to be professionally moved or integrated into the cabinetry design.
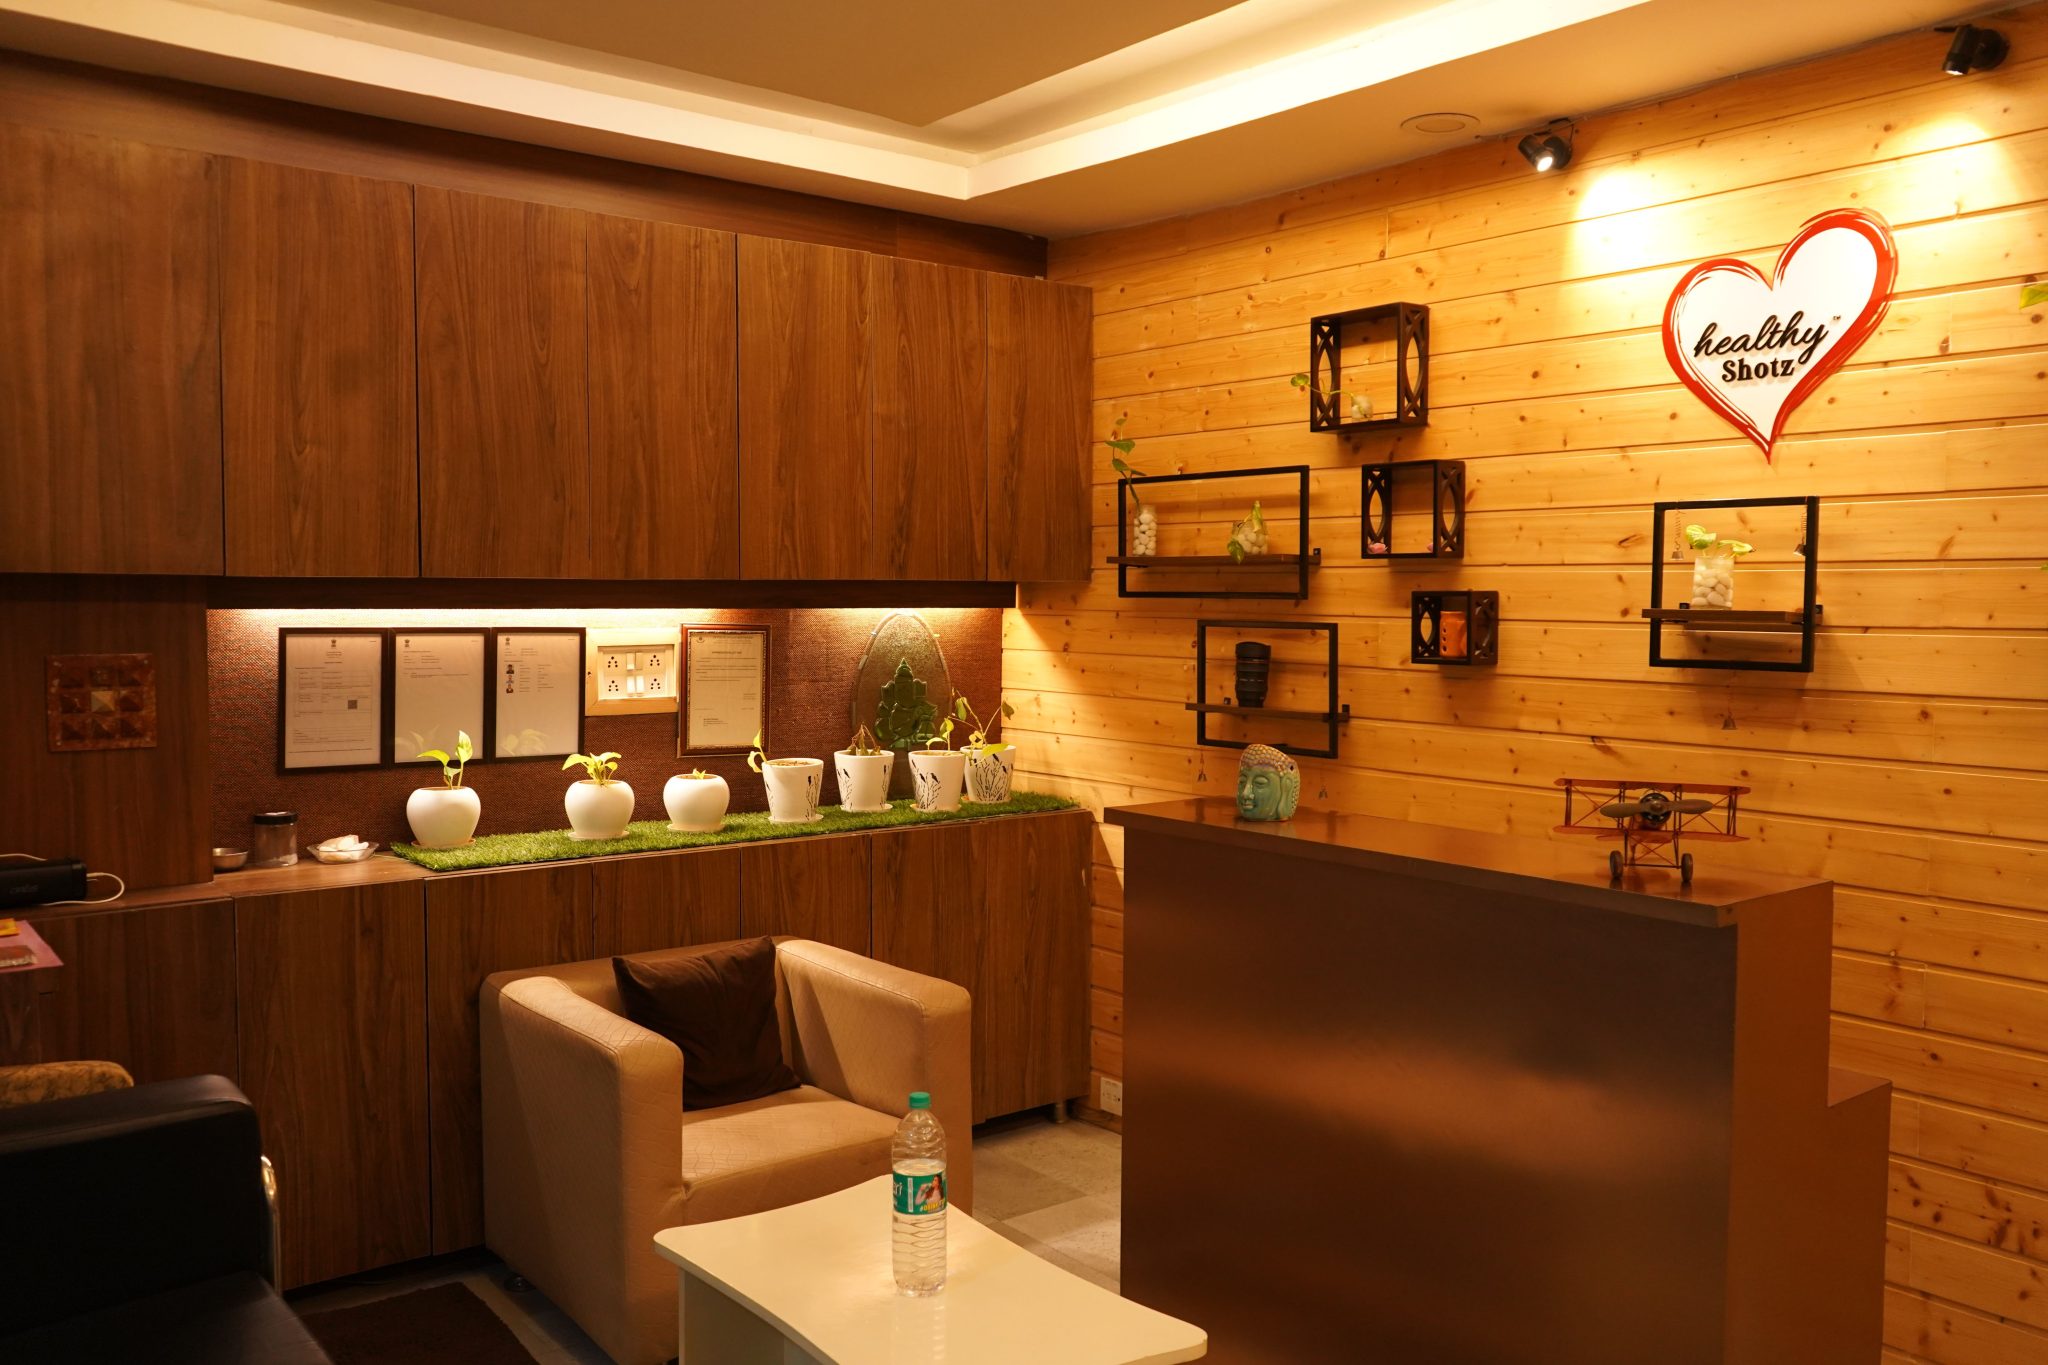
8. Create a Warm Welcome with Honey-Toned Wood Planks
When creating a wood plank wall, the details make all the difference. For a high-end look, use planks of slightly varying widths and tones to create subtle, natural variation. Most importantly, ensure the spacing between planks is perfectly consistent—even a 1/16-inch difference can be jarring. A trick is to use a few nickels as spacers while you install. And for the cleanest finish, run your wiring for any wall-mounted lights or shelves *before* you install the planks to avoid unsightly surface-mounted cords.
|
📋 Copy HEX 🔗 Share |
💸 Get This Look For Less
You can create those sleek, floating decorative shelves yourself to complement the wood wall. It’s a weekend project that makes a huge impact. (Estimated time: 3 hours, Cost: $50-$80)
- Purchase a 2×2 board and a 1×6 board (to your desired shelf length).
- Cut the 2×2 into a U-shaped bracket and mount it securely to the wall studs.
- Build a three-sided box out of the 1×6 board that will sleeve perfectly over the bracket.
- Glue and nail the box together.
- Slide the box over the bracket and secure it with a few finish nails from the top.
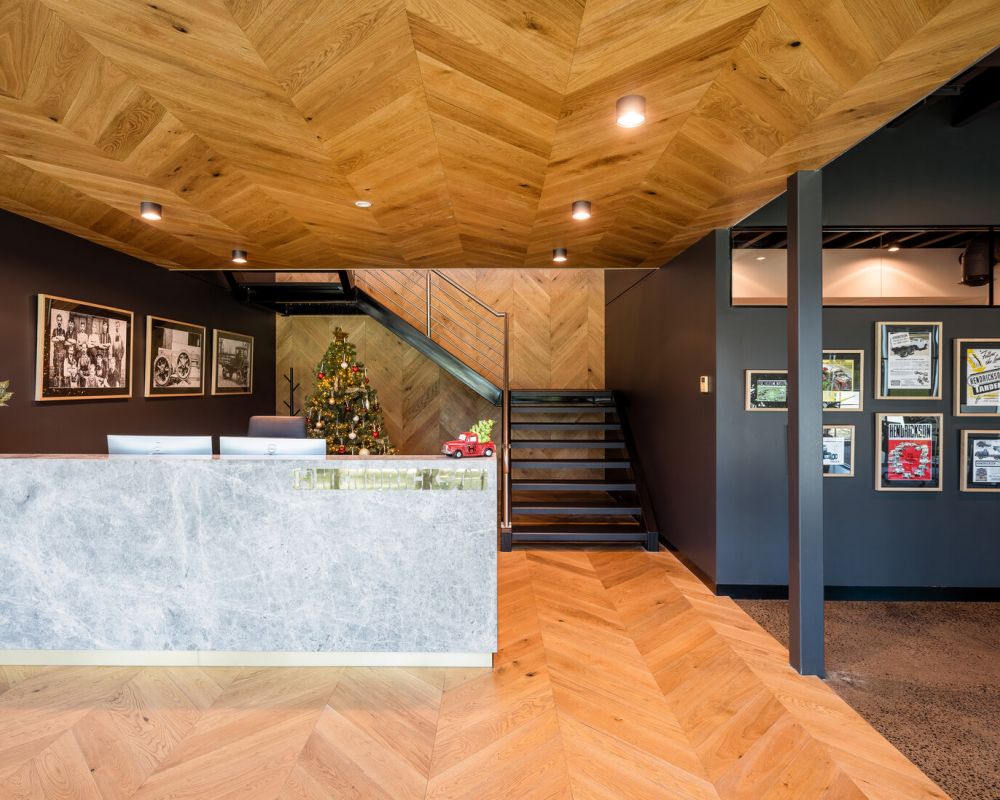
9. Marry Marble, Chevron Wood, and Gallery Walls
This space is a masterclass in mixing patterns and materials without creating chaos. The key is a tightly controlled color palette. The warm tones of the chevron wood floor and ceiling are the dominant feature, while the light gray of the marble desk and the dark charcoal of the walls act as grounding neutrals. The patterns work together because they are different in scale—the fine grain of the marble versus the larger geometric repeat of the wood. The simple black frames of the artwork provide a final, unifying element.
|
📋 Copy HEX 🔗 Share |
🧹 Maintenance Reality
A gallery wall of historical photos lends a wonderful sense of permanence and character, but it can be surprisingly difficult to get right. A common pitfall is inconsistent framing. For a cohesive look like this one, all the frames must be identical in color and style. Also, the matting should be consistent. The biggest challenge? The collection can easily start to feel cluttered or dated if the images aren’t curated with a strong editorial eye. What starts as charming can quickly become dusty and tired if not maintained.
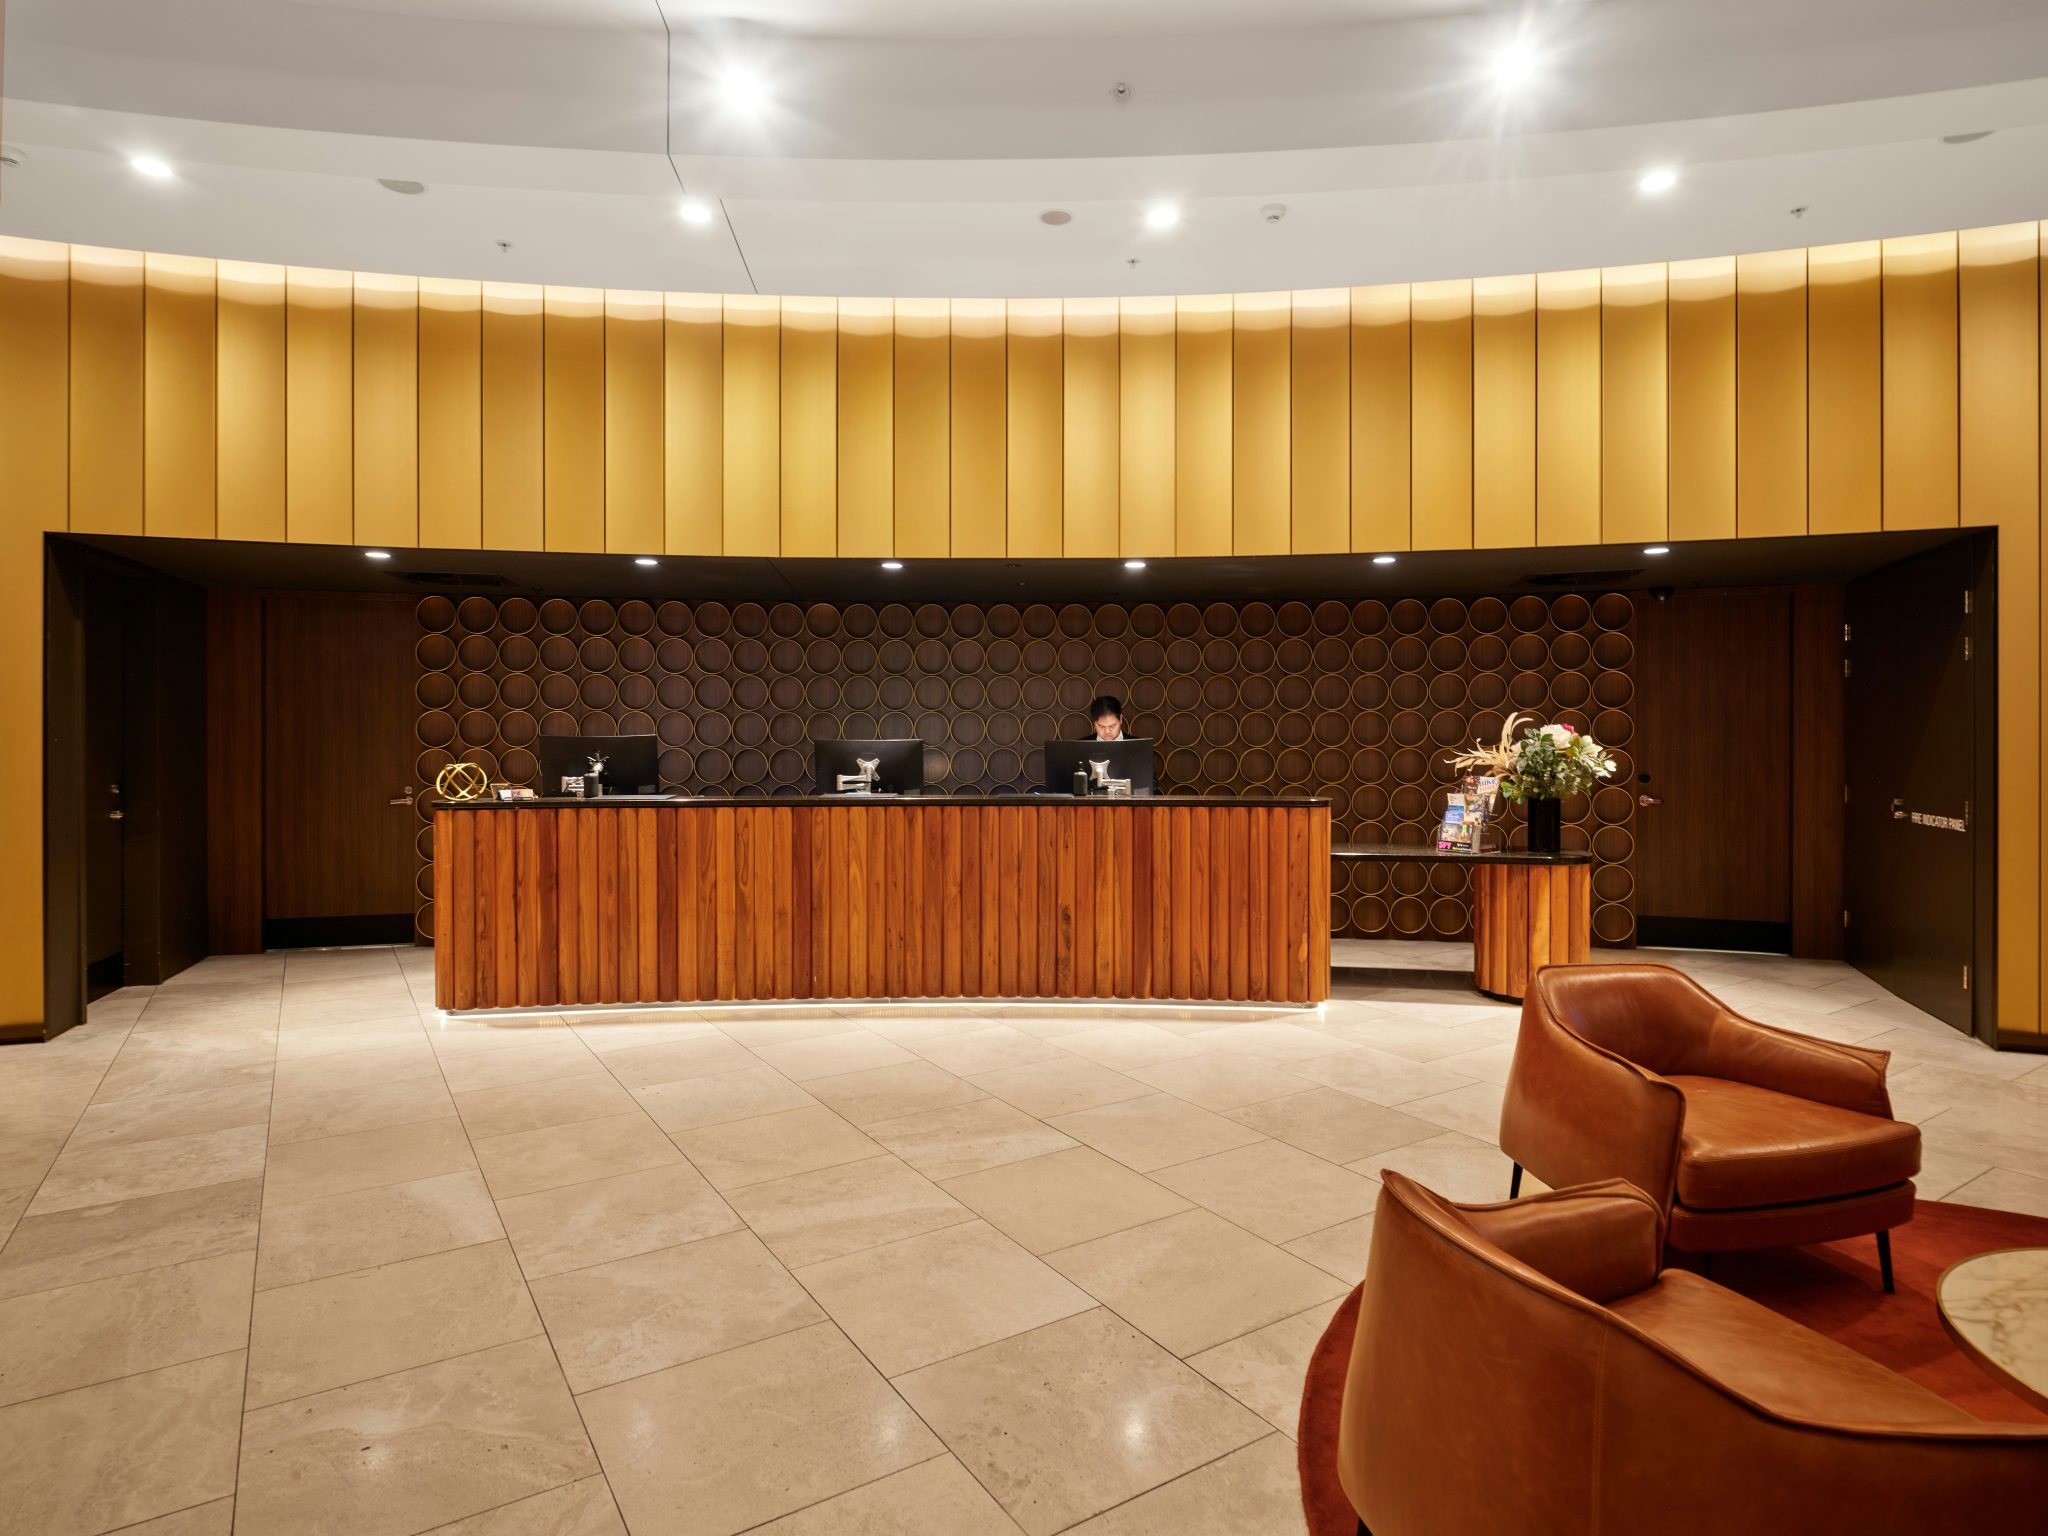
10. Feature a Backlit Desk of Vertical Wood Slats
The single most impactful element here is the custom reception desk itself. The use of vertical, half-round wooden slats is a stunning textural choice that feels both organic and meticulously crafted. It’s the back-lighting at the base that truly elevates it, making the substantial desk appear to float and casting a warm, inviting glow. This isn’t just a piece of furniture; it’s a functional sculpture that sets the tone for the entire space. The tactile quality of the wood invites you to touch it, making the welcome experience more personal.
|
📋 Copy HEX 🔗 Share |
🔧 How-To Brief
This design is perfect for a medium-sized reception area with a standard 8 to 10-foot ceiling. The desk’s long, curved form requires a decent amount of horizontal space—ideally a wall at least 15 feet long to allow the curve to feel graceful rather than cramped. The key is to have enough room for the desk to be the undisputed star. If your space is too small, the textured wall details and desk will compete and feel cluttered. This approach is more contained than the grand gesture of Idea #2.
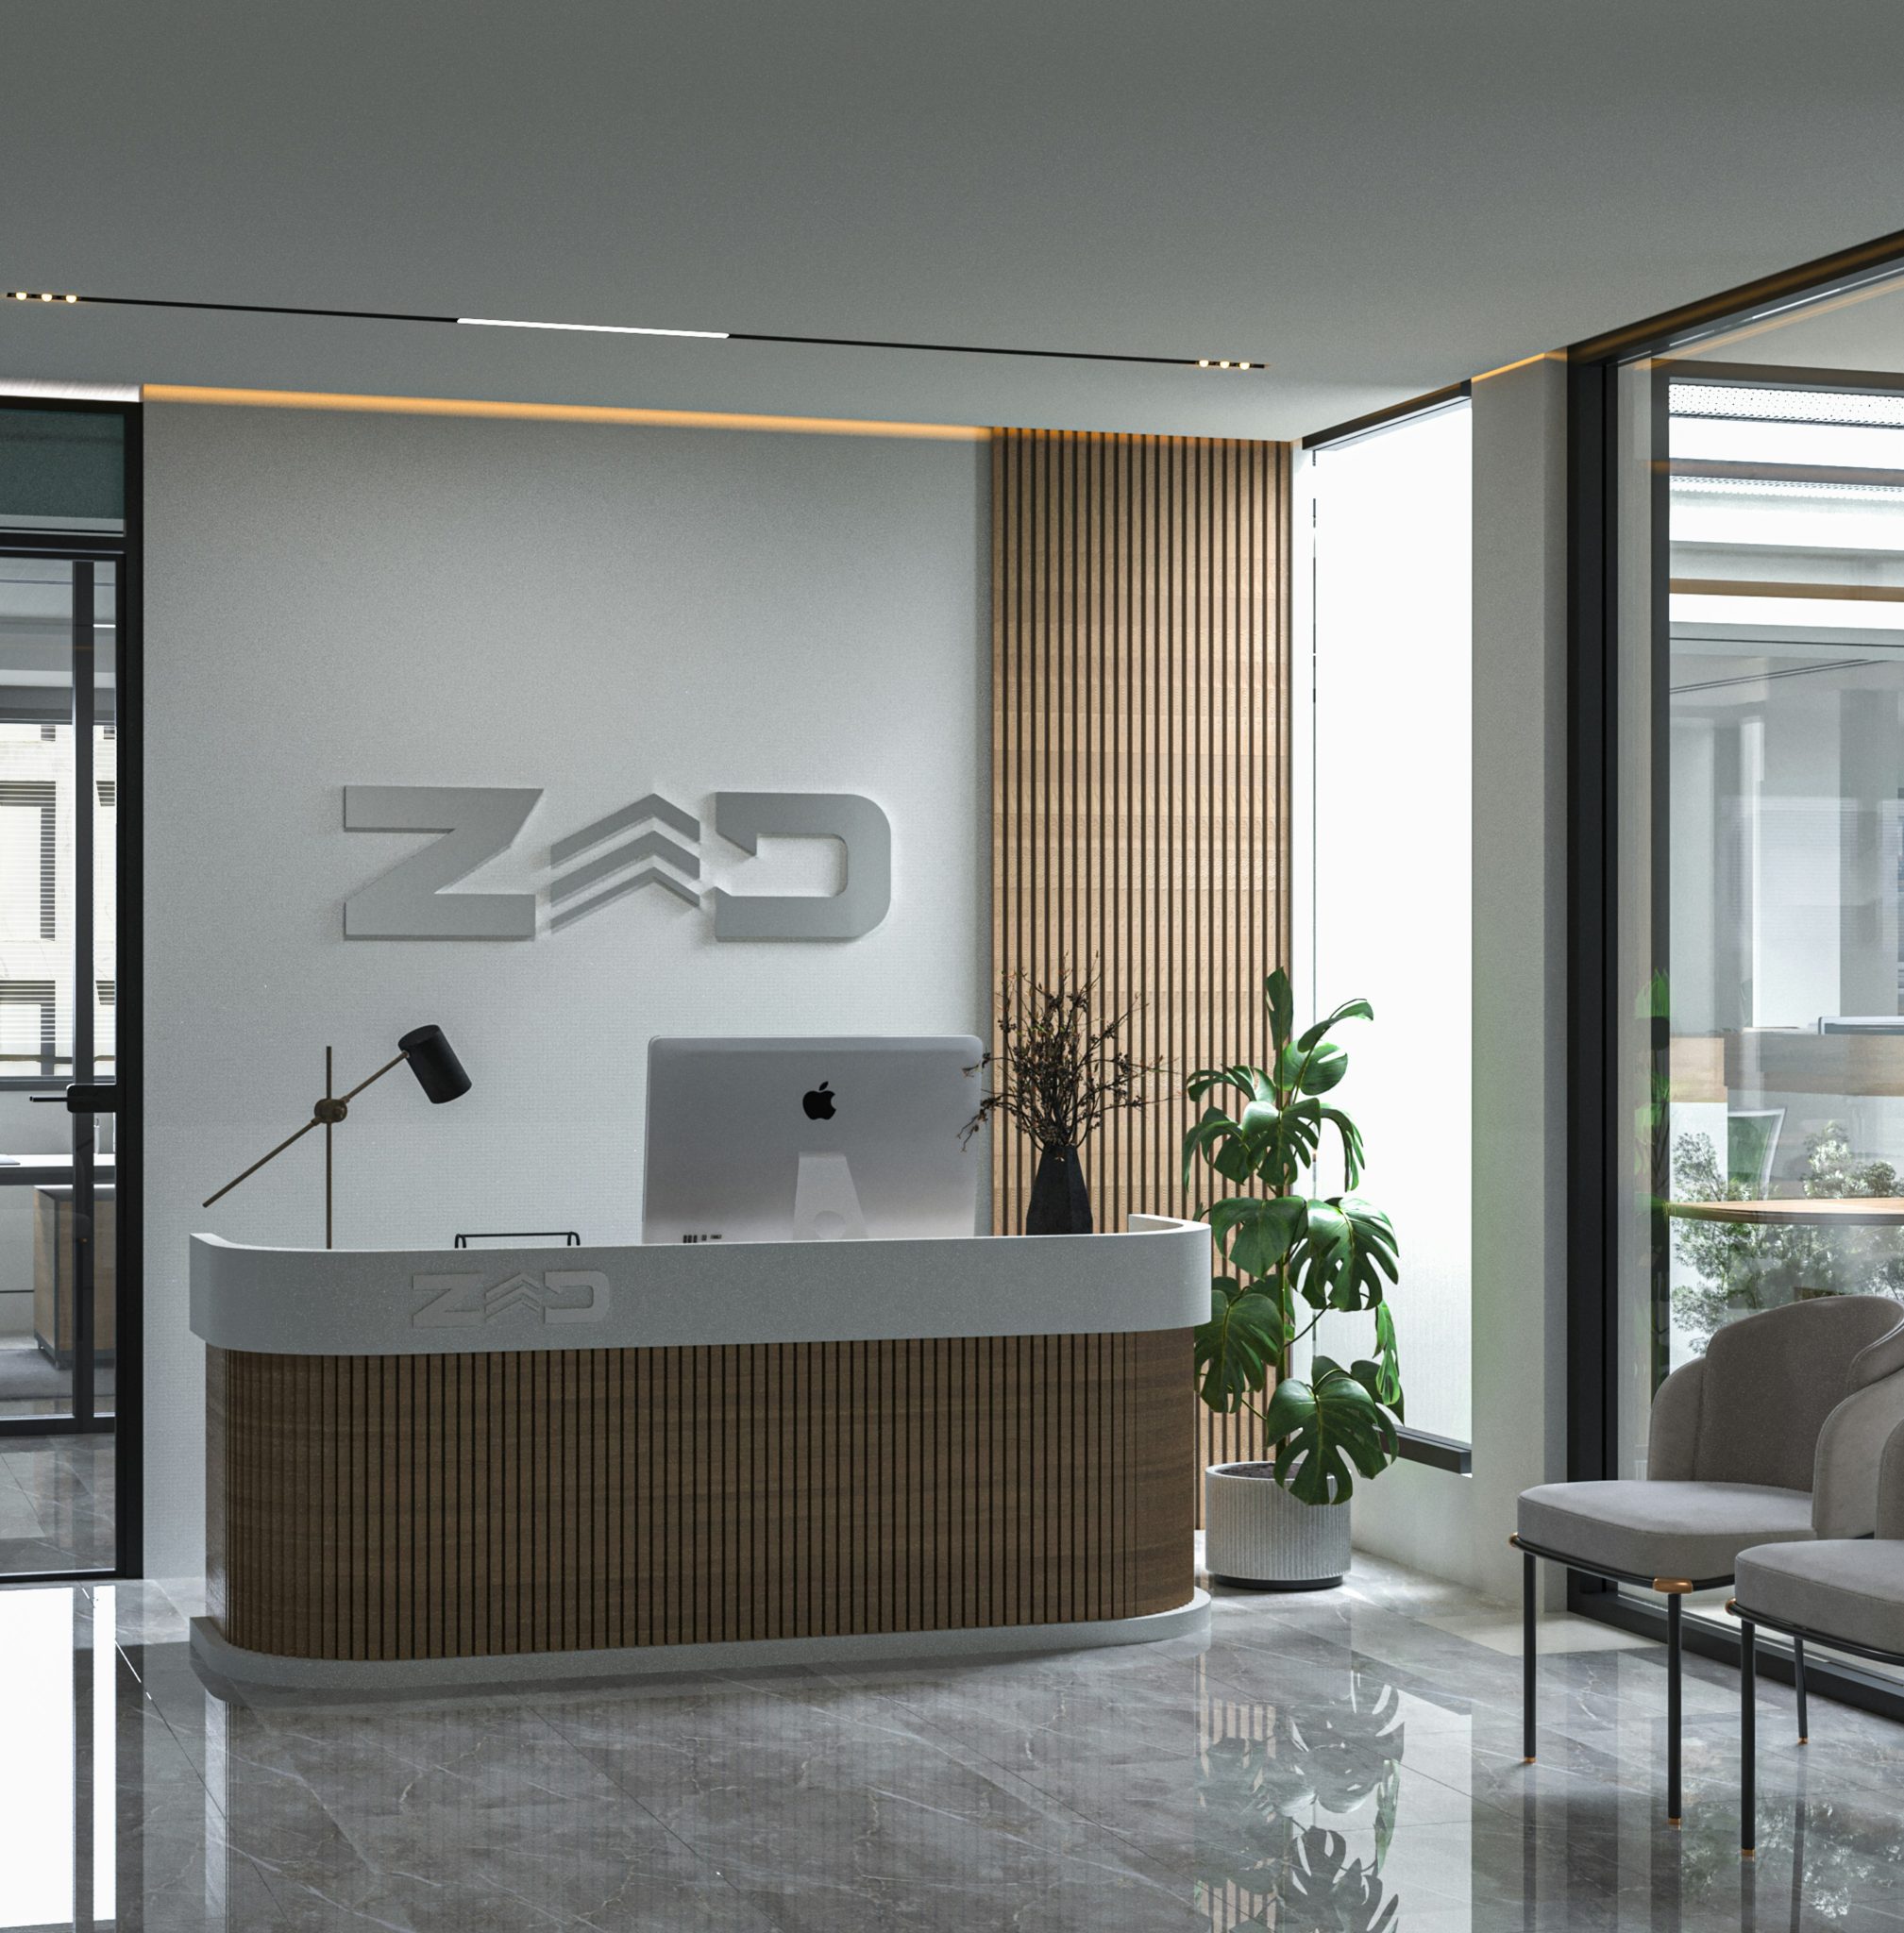
11. Set a Curved Wood-Slat Desk Against a Textured Grey Wall
This look is all about a sophisticated, low-contrast palette. The formula breaks down to about 50% cool light grey (textured wall, chairs), 30% natural wood tones (desk slats), and 20% deep charcoal/black (floor tiles, logo). The success of this design lies in its restraint. By keeping the colors within a narrow range of neutral tones, the focus shifts to the interplay of textures: the smooth desk top, the linear wood slats, the rough wall, and the glossy floor. This creates a rich, layered feel that is calming and professional.
|
📋 Copy HEX 🔗 Share |
🔥 Trending Context
Those dark, glossy marble-effect floor tiles are undeniably sleek, but they are not for the faint of heart in a high-traffic area. Their reflective surface will show every footprint, water spot, and speck of dust. Daily mopping will likely be necessary to keep them looking pristine. Furthermore, a high-gloss finish can become scratched over time from shoes and dragged furniture, which will dull the finish. A matte or honed version of a similar tile will be far more forgiving and offer a similar aesthetic with less daily stress.
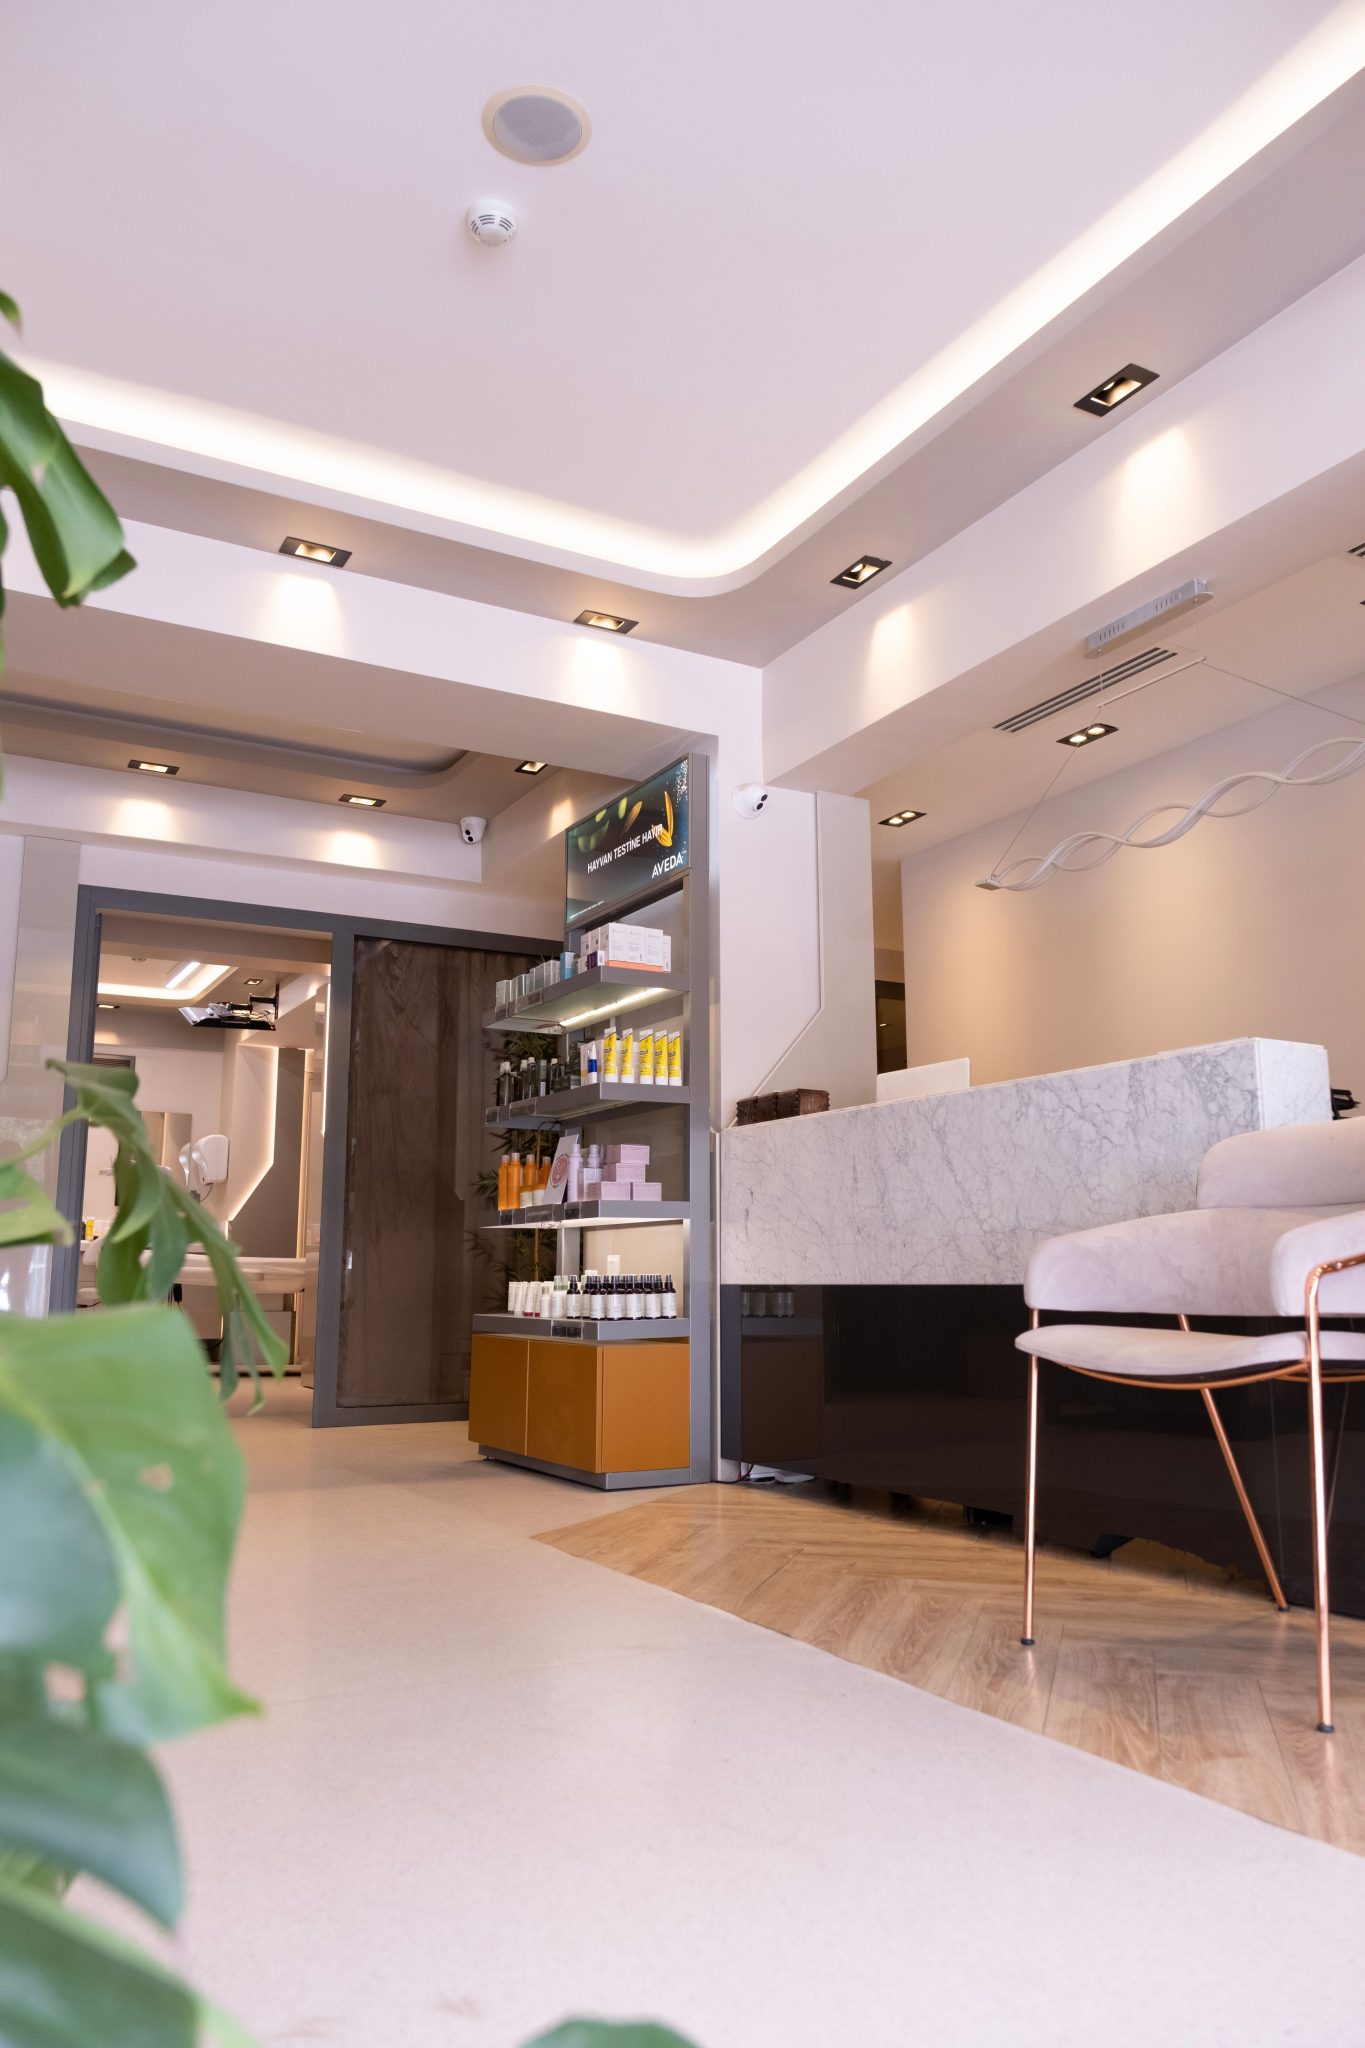
12. Integrate Product Shelving with a Marble and Black Desk
When integrating retail or product display into your reception, as seen with the multi-tiered shelving here, lighting is non-negotiable. Each shelf should have its own dedicated light source, like hidden LED strips along the front or back edge. This not only highlights the products, making them more appealing, but it also prevents the unit from looking like a dark, heavy block of storage. The light draws the eye and signals that these items are special and worth looking at. It transforms a storage unit into a showcase.
|
📋 Copy HEX 🔗 Share |
💡 Designer Tip
A custom marble-topped desk can be pricey, but you can achieve this polished, professional look for less. Start with a basic black or dark brown reception desk from a supplier like Wayfair or Overstock ($500-$900). Then, visit a local stone yard and ask for a remnant—a leftover piece of marble or quartz from a larger job. You can often get a desk-sized piece for a fraction of the per-square-foot cost. A fabricator can then cut and polish it to your exact dimensions for a few hundred dollars. This is a much more affordable path to luxury than the custom build in Idea #9.
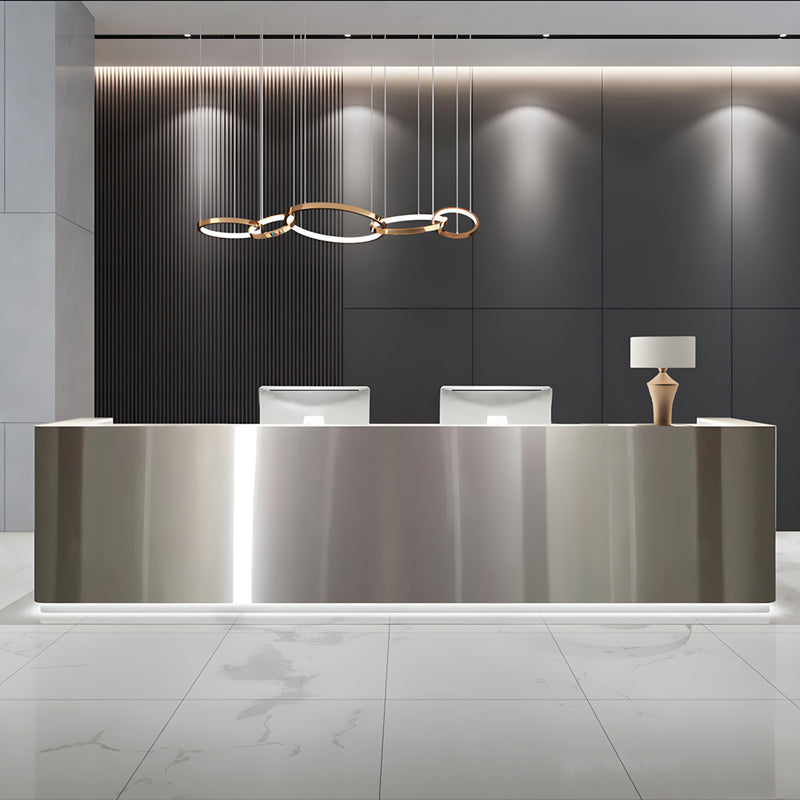
13. Juxtapose a Sleek Metallic Desk with Dark Wall Paneling
The power of this design comes from high-contrast textures. You have the super-smooth, reflective, light-grey metallic desk against a dark, matte, textured panel wall. This juxtaposition is what creates the visual excitement. The smoothness of the desk feels futuristic and clean, while the textured wall adds depth and architectural interest. The sculptural gold chandelier bridges the two, adding a touch of organic shape and warmth to an otherwise cool and linear space. It’s a beautifully balanced composition.
|
📋 Copy HEX 🔗 Share |
⭐ The One Thing
While a metallic desk looks incredibly chic and modern, it can be a magnet for fingerprints and smudges, especially a lustrous one like this. If it’s in a public area where clients might lean against it, be prepared for constant wipe-downs to maintain its sleek appearance. Additionally, while durable, a lacquered or powder-coated metal finish can be scratched by keys, bags, or other sharp objects, and repairs can be tricky to blend in. A brushed metal finish is often more forgiving for high-contact surfaces.
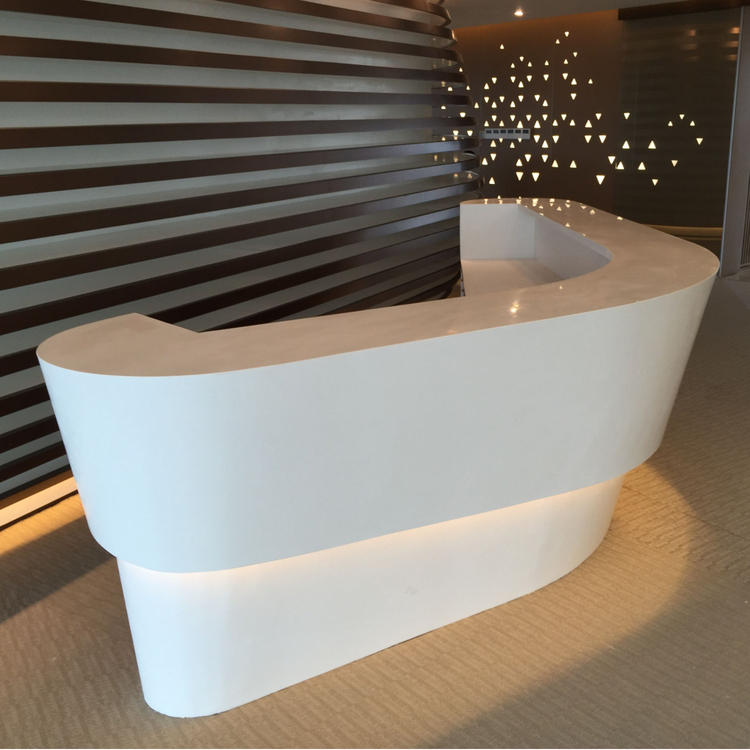
14. Light a Curved White Desk from Below and Behind
The single thing that elevates this design from simple to show-stopping is the masterful use of integrated lighting. The desk isn’t just a desk; it’s a light fixture. The strip lighting along the base makes it feel weightless, while the back-lit triangular cutouts on the wall provide a secondary layer of ambient glow. It’s a perfect example of how lighting can be part of the architecture itself. Without these glowing elements, the space would be perfectly nice, but with them, it becomes a memorable and sophisticated experience. The effect is similar to the desk in Idea #15, but with a different architectural backdrop.
|
📋 Copy HEX 🔗 Share |
⚠️ Real Talk
Creating a horizontal slatted wall treatment is a manageable DIY project that adds incredible texture. (Estimated time: 4-6 hours for a 10ft wall, Cost: $150-$250)
- Choose your wood slats (1×2 pine or poplar boards work great) and sand them smooth.
- Paint the wall behind the slats a dark color (like charcoal or black) to create depth.
- Start from the top. Use a level to ensure your first slat is perfectly horizontal. Nail it in place with a brad nailer.
- Use a spacer block (a scrap piece of wood of your desired gap width) to position the next slat.
- Continue this process down the wall, checking for level every few rows.
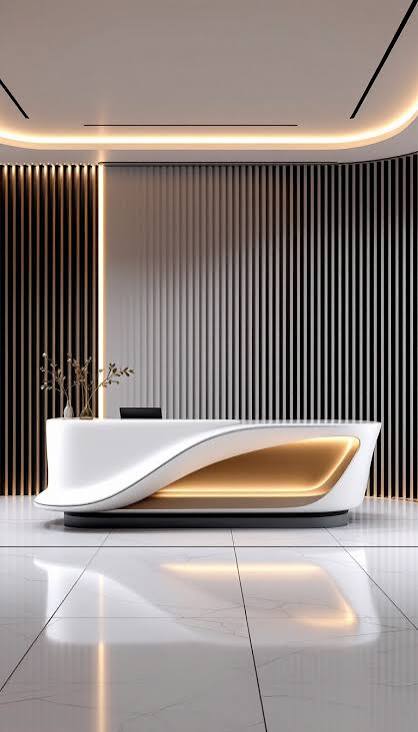
15. Highlight a Futurist White Desk with Ribbed Wall Panels
For a desk with such a strong, organic shape, the surrounding elements should be simple but complementary. The vertical ribbed panels on the wall are a brilliant choice because they add texture and linear direction without competing with the desk’s curves. To get this right, use an odd number of contrasting panels to create a focal point—here, three dark panels anchor the design. A single vertical light strip placed asymmetrically is the designer touch that prevents the arrangement from feeling too static and predictable. It adds just the right amount of edginess.
|
📋 Copy HEX 🔗 Share |
🎯 What Makes It Work
An organically shaped, sculptural desk like this needs room to breathe. This idea is best suited for a spacious lobby or entryway with a footprint of at least 150-200 square feet. The desk itself is the art, so you want to avoid cluttering the area around it. This look relies on negative space to feel impactful. It works beautifully with a ceiling height of 10 feet or more, which allows the cove lighting to wash the space in a soft glow. The visual effect is similar to its cousin, Idea #14, but requires a bit more open floor space to appreciate its unique shape.
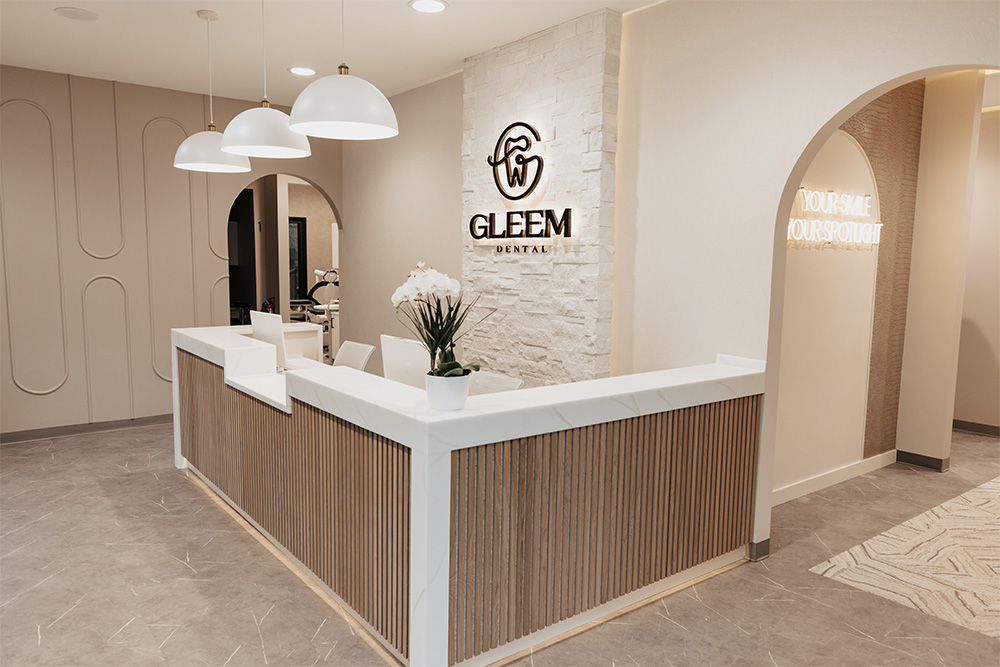
16. Ground a Minimalist Space with Wood Slats and Stacked Stone
This reception area feels so serene and welcoming because it perfectly balances clean, modern lines with natural, tactile materials. The verticality of the light wood slats on the desk is echoed in the linear pattern of the stacked stone accent wall, creating a pleasing sense of repetition. However, the textures are different enough—smooth wood versus rough stone—to keep things interesting. The arched doorways add a soft, classic counterpoint to the otherwise straight lines, preventing the space from feeling too rigid or sterile. This thoughtful blend of hard and soft, straight and curved, is the key to its success.
|
📋 Copy HEX 🔗 Share |
📏 Scale Guide
Before you commit to this beautifully layered look, run through this quick checklist:
- Confirm Your Lighting Plan: Do you have junction boxes in the right spots for the three pendant lights over the desk? Is there power available for the backlit logo on the stone wall? Plan your electrical before the wall goes up.
- Check Wall Support: Stacked stone veneer is heavy. Confirm with a contractor that the chosen wall has the structural integrity to support the additional weight.
- Finalize Your Palette: This look depends on a tight, neutral palette. Gather samples of your wood, stone, paint, and flooring to see them together in your space’s natural light before ordering anything.
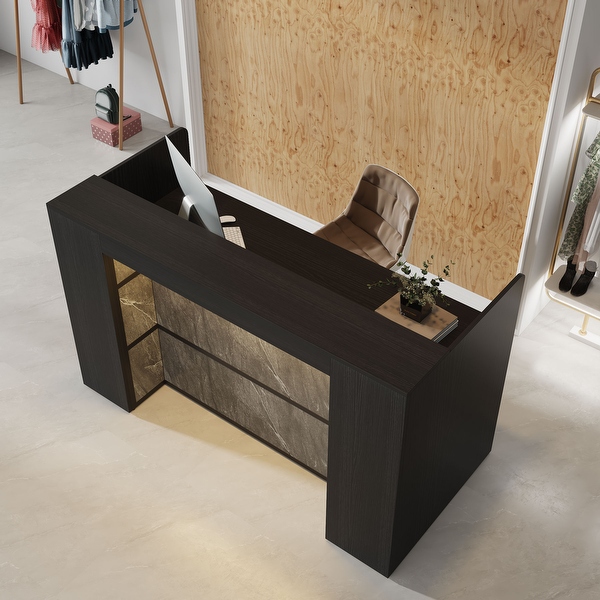
17. Accent a Dark Wood Desk with an Illuminated Stone Panel
The formula here is one of sophisticated, masculine minimalism. It breaks down as: 70% dark, structured wood + 20% textural, light stone + 10% soft ambient light. The desk’s sharp, trapezoidal lines give it a strong architectural presence, while the dark wood finish feels grounded and serious. The stone panel is the crucial element that provides visual relief and a touch of organic texture. The soft lighting is the final ingredient that prevents the dark desk from feeling too heavy or imposing. It’s a very controlled and confident material palette.
|
📋 Copy HEX 🔗 Share |
💰 Budget Breakdown
The single element that makes this desk design work is the illuminated stone accent panel. Without it, you would simply have a very nice, but somewhat generic, dark wood desk. The recessed panel, clad in a richly veined stone and lit from a hidden source, creates a focal point, adds a layer of texture, and introduces a sense of quiet luxury. It breaks up the large, dark surface and gives the piece a custom, high-end feel. It’s a small detail that does all the heavy lifting for the design.
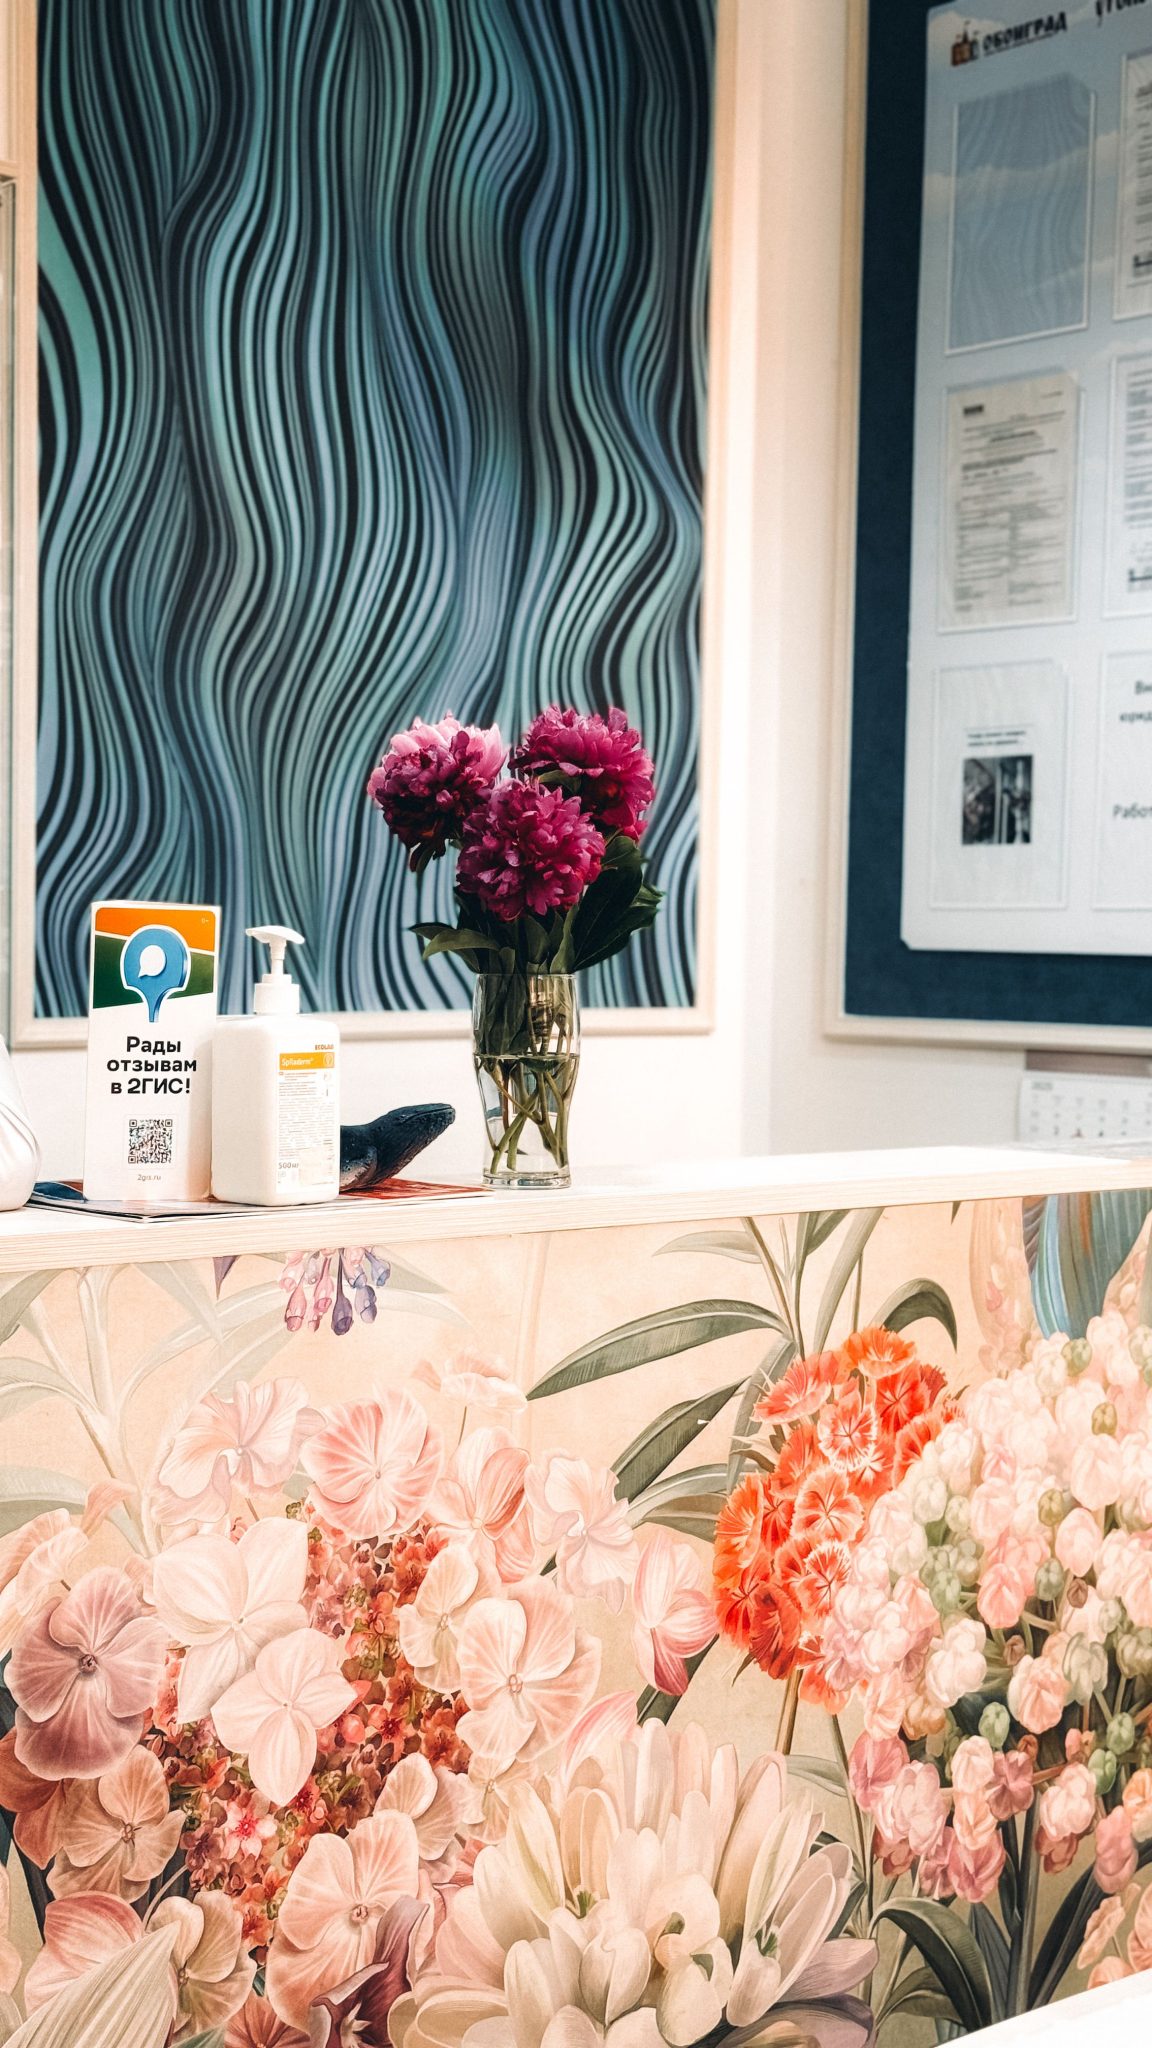
18. Design a Statement Desk with Bold Floral Wallpaper
After years of minimalism, maximalism is making a joyful return, and this desk is a perfect example. This look is part of the ‘Grandmillennial’ trend, which blends traditional design elements (like floral patterns) with a fresh, modern sensibility. It’s about embracing personality, color, and pattern in a way that feels curated, not chaotic. Covering a simple piece of furniture in a bold, beautiful wallpaper is a way to create a huge design impact and express individuality in a space that is often purely functional.
|
📋 Copy HEX 🔗 Share |
✅ Before You Start
You don’t need a custom-built desk to get this vibrant look. Find a simple, clean-lined reception desk on Facebook Marketplace or from a budget-friendly store (often under $300). The magic comes from wallpaper. Choose a high-quality, high-impact peel-and-stick floral wallpaper (a roll costs about $40-$60). Carefully apply it to the front face of the desk. The total cost can easily be under $400, but the result is a completely custom, personality-filled piece that looks far more expensive than it is.
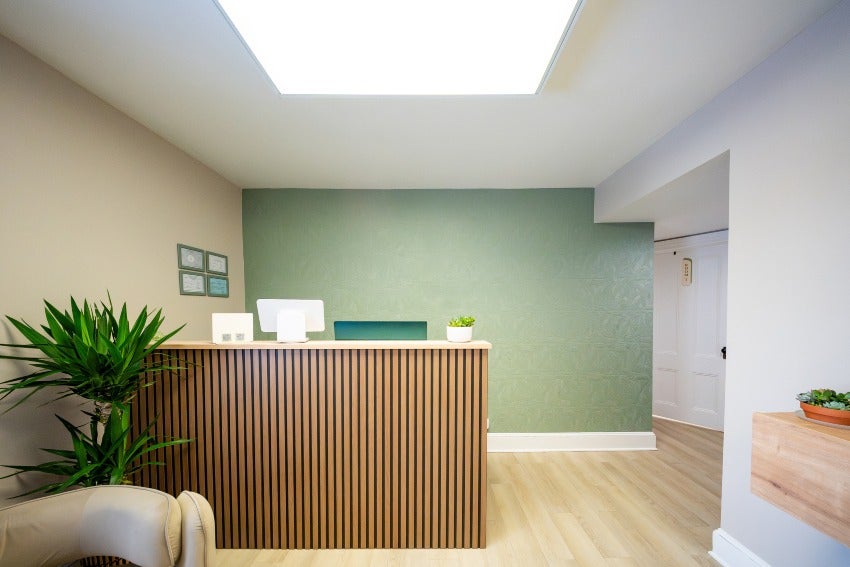
19. Pair a Slatted Wood Desk with a Textured Sage Green Wall
When pairing a textured wall with a textured desk, it’s crucial to choose textures that complement, not compete. Here, the fine, linear vertical slats of the desk work beautifully with the more random, organic texture of the sage green wall. A good rule of thumb is to vary the scale and direction of your textures. If your desk has a strong vertical pattern, choose a wall finish that is either non-directional (like plaster) or horizontal. This creates a balanced visual hierarchy. The calming color palette here is also a great companion to the sage green and terrazzo in Idea #22.
|
📋 Copy HEX 🔗 Share |
📐 Style Math
A light wood desk and light wood flooring can be a beautiful, seamless look, but it can also go wrong. The risk is that the space can feel washed out or monotonous if the wood tones are too similar. To avoid this, ensure there’s enough contrast in either the tone (e.g., a warm oak desk on a cool ash floor) or the grain pattern. Alternatively, use a rug to create a clear visual break between the desk and the floor, which will help define the reception zone.
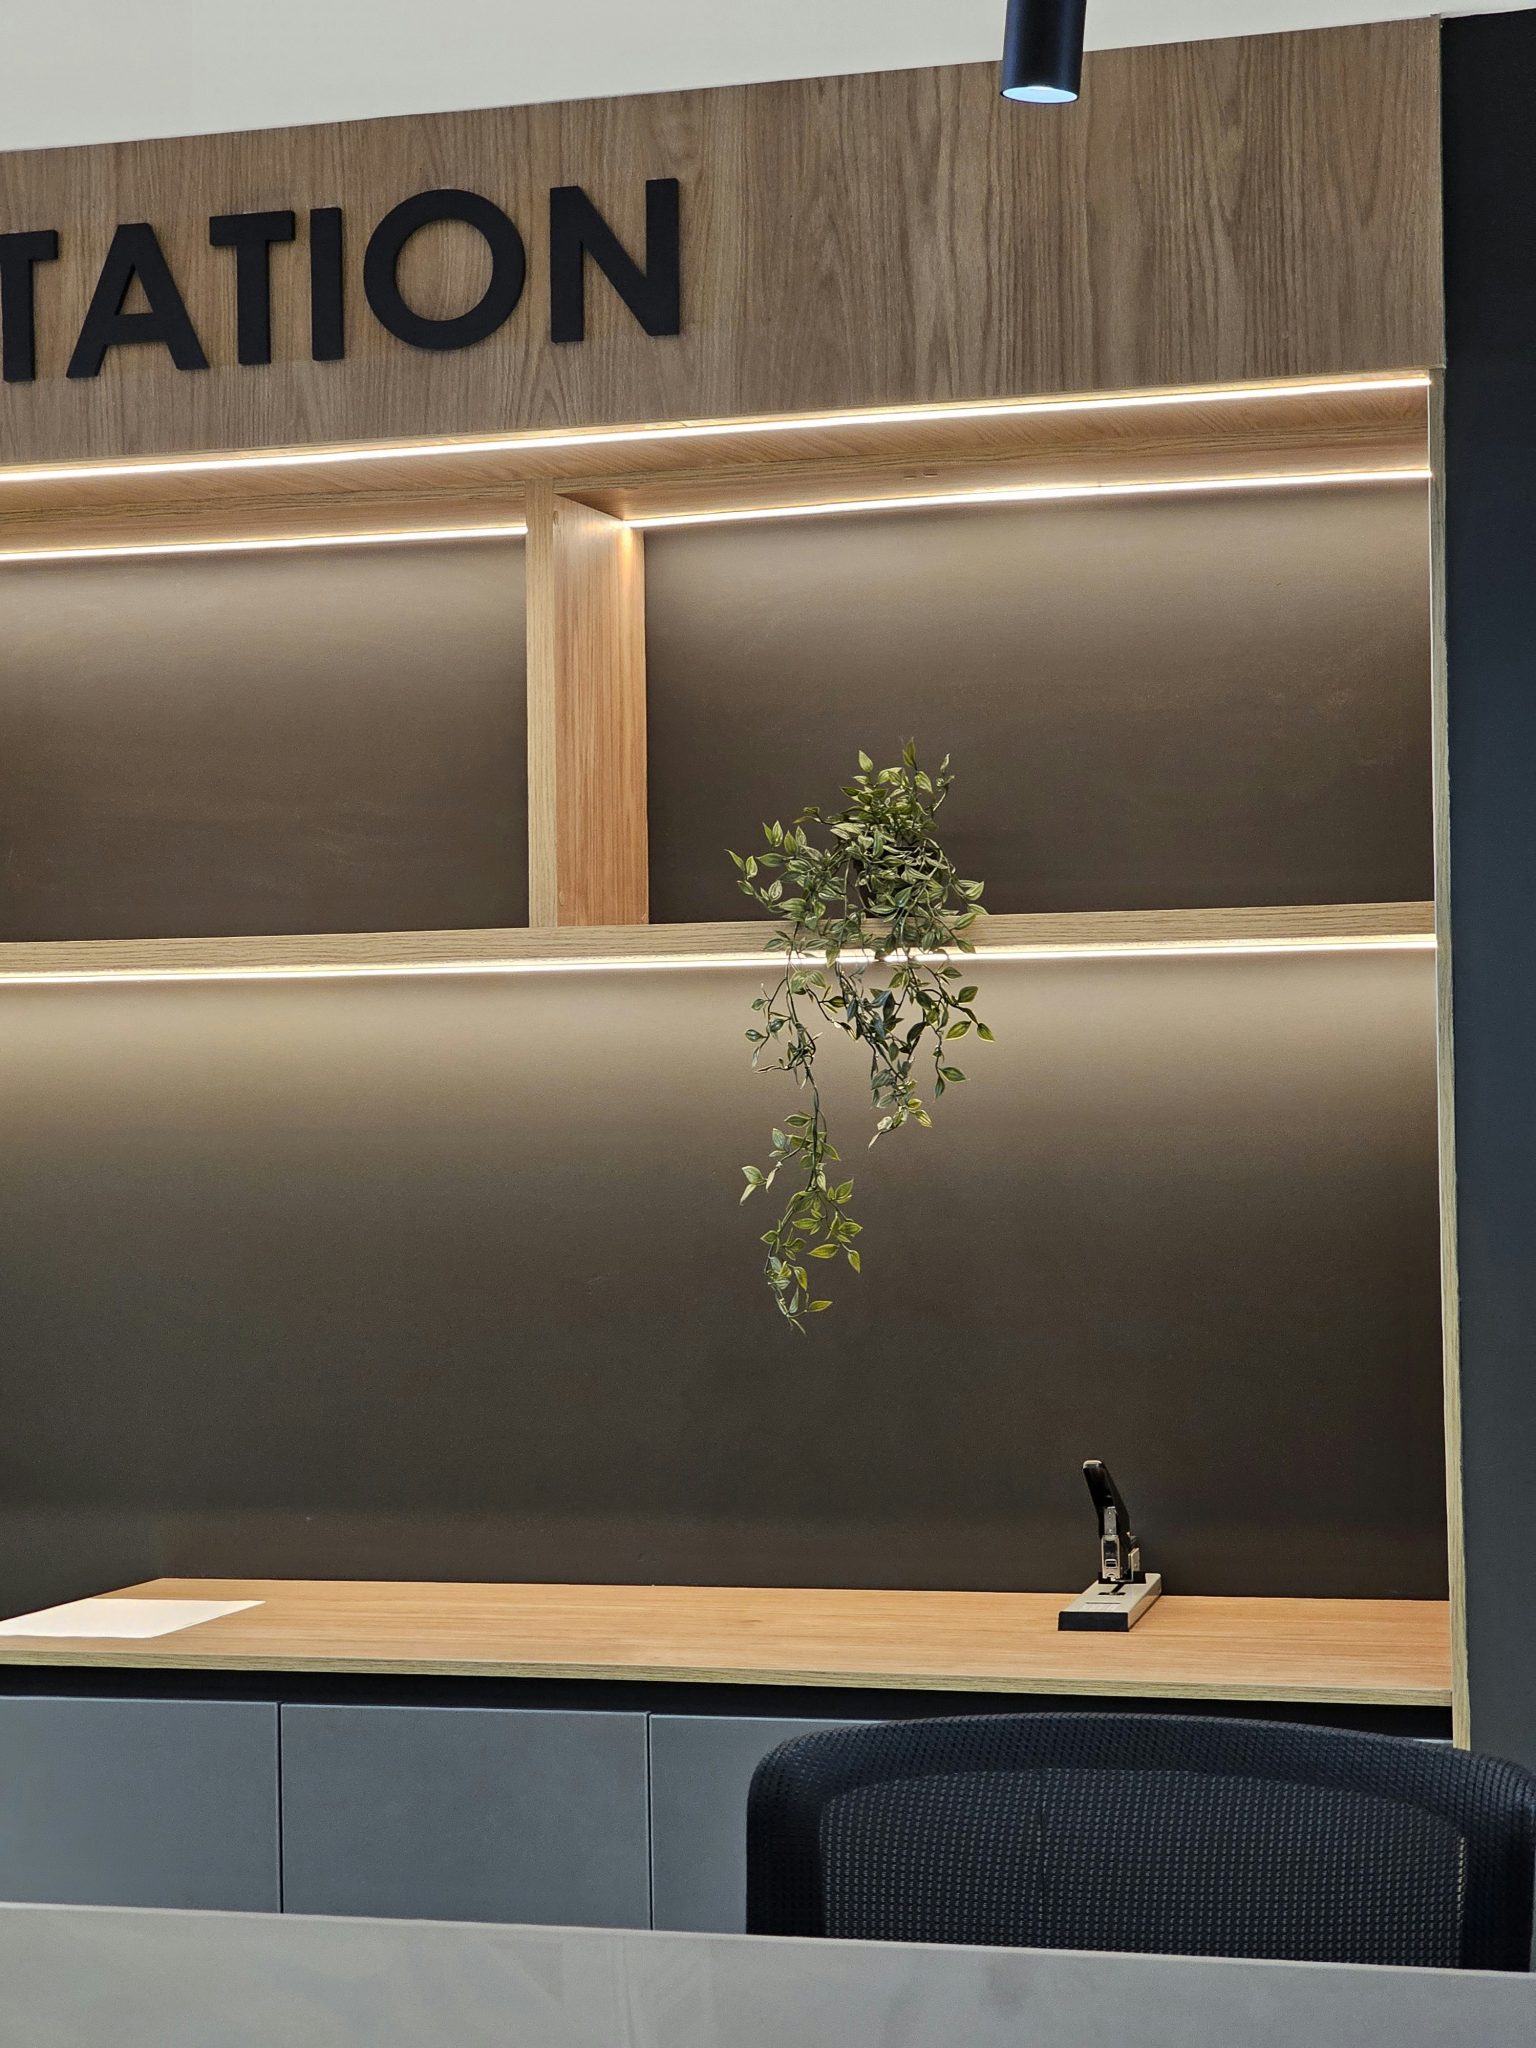
20. Combine Light Wood and Dark Gray for a Modern Service Counter
Integrating LED strip lighting can elevate a simple desk into a professional-looking feature. Here’s a quick guide to adding it to a recessed nook. (Estimated time: 1 hour, Cost: $30-$60)
|
📋 Copy HEX 🔗 Share |
💸 Get This Look For Less
- Purchase a reel of LED strip lighting, a power supply, and an aluminum channel with a diffuser cover.
- Cut the aluminum channel to the desired length and mount it to the top inside edge of the recessed area, so it’s hidden from view.
- Cut the LED strip to length along the designated cut lines.
- Peel the adhesive backing off the LED strip and press it firmly into the aluminum channel.
- Snap the diffuser cover onto the channel. This is crucial for creating a smooth, dot-free line of light.
- Connect the strip to the power supply and manage your cables for a clean finish.
This design works because of its clear visual logic and material contrast. The light wood acts as a frame, defining the primary surfaces that people interact with—the desktop and the decorative upper panel. The dark gray is used for the functional, recessed elements—the cabinet fronts and the back wall. This color blocking isn’t random; it visually separates the “working” parts of the desk from the “design” parts. The integrated lighting further highlights this separation, making the whole composition feel intentional and well-designed.
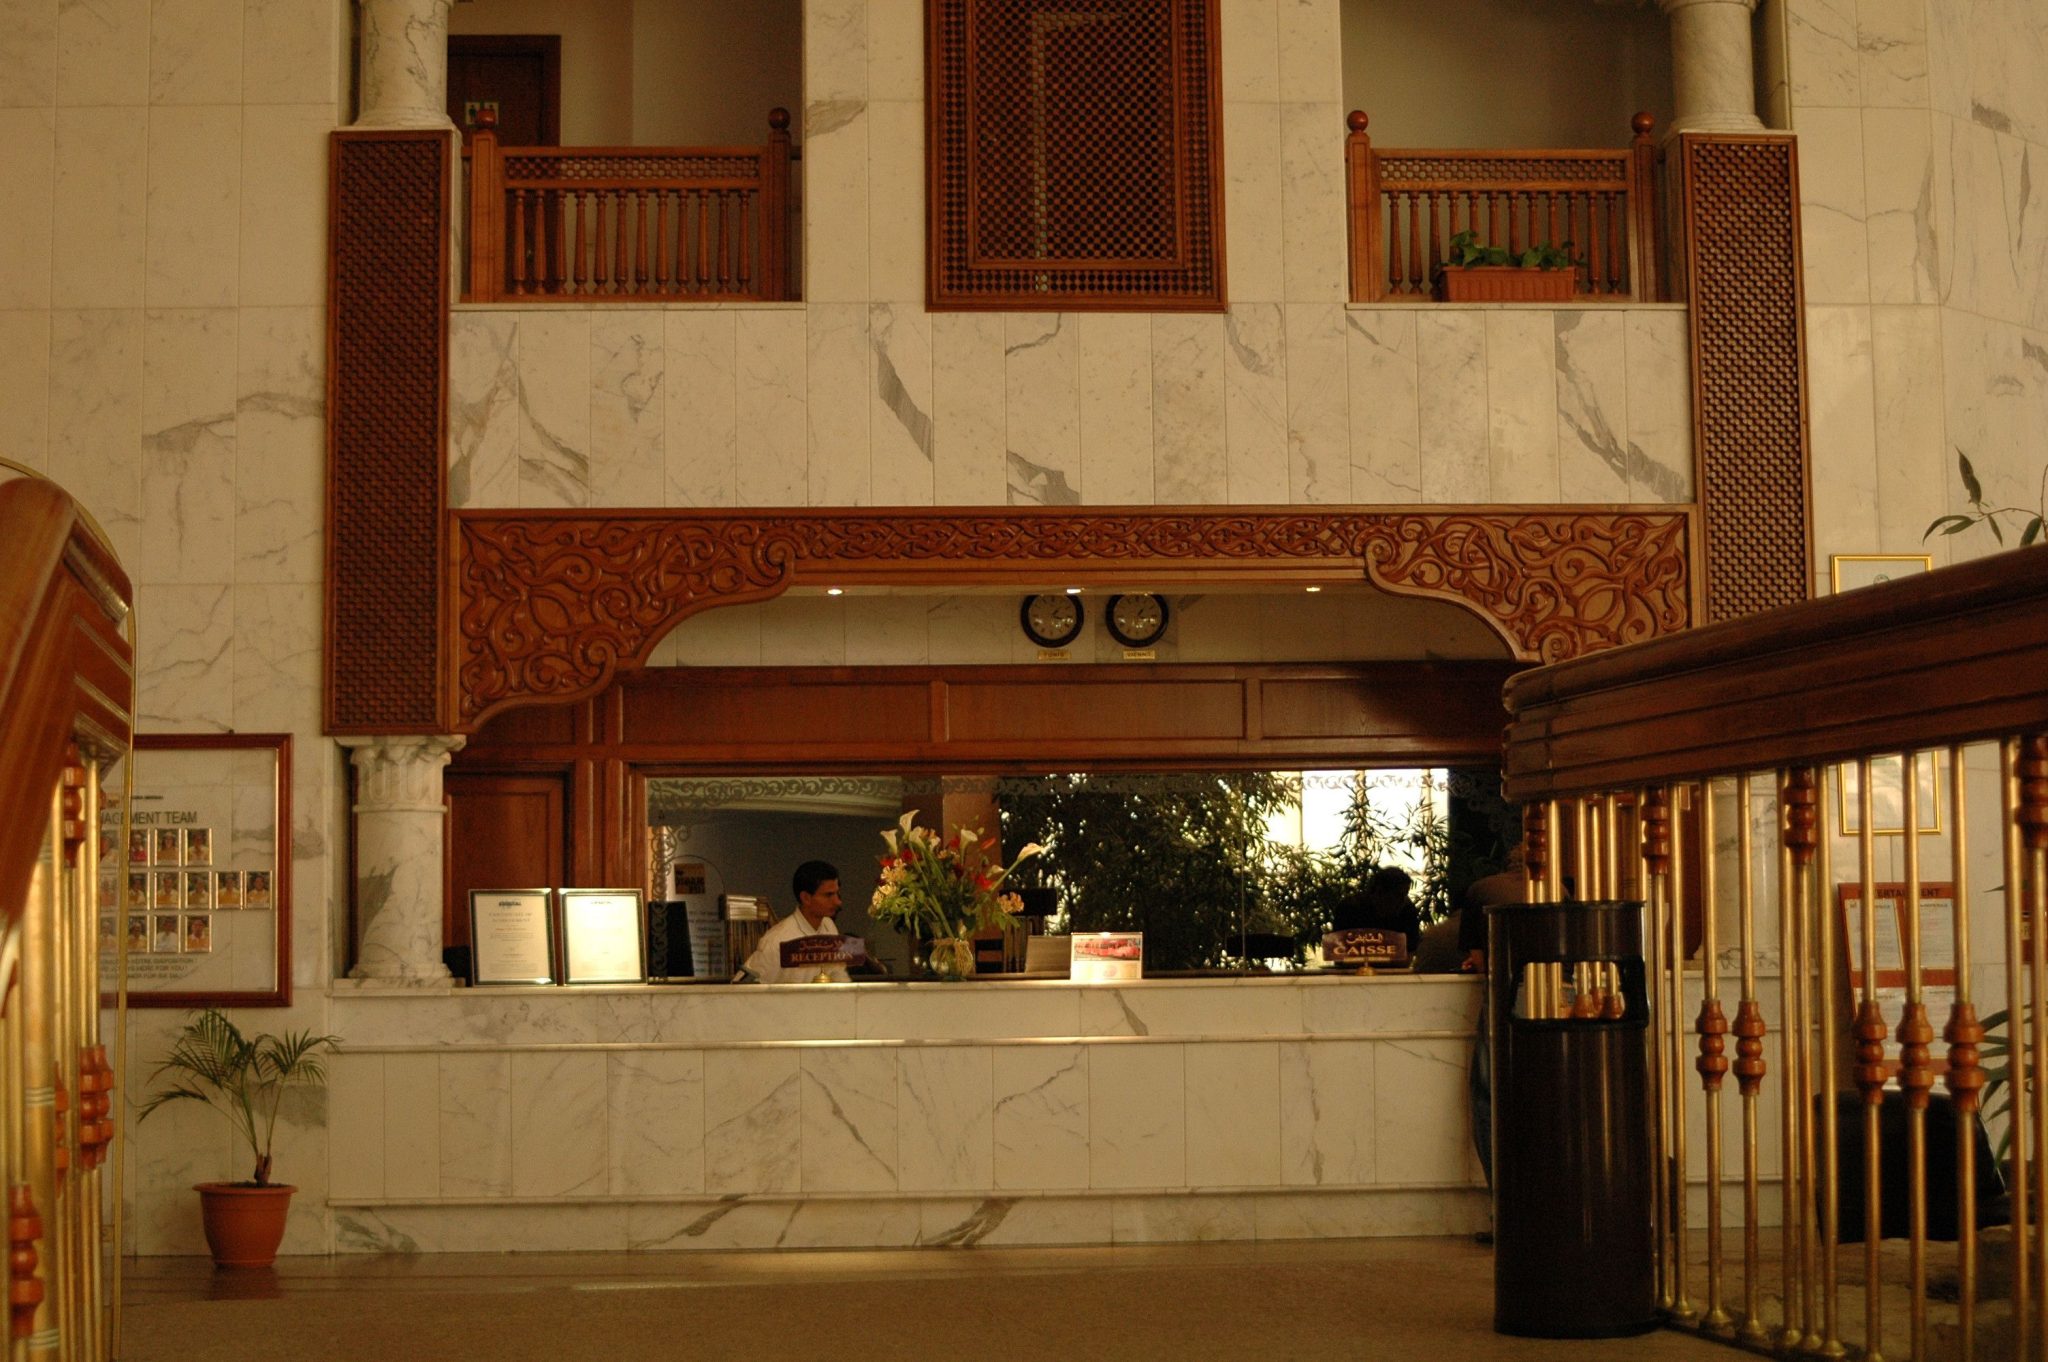
21. Frame a Marble Desk with Ornate Carved Wood Details
All that ornate, carved dark wood is absolutely magnificent, but it’s also a significant cleaning commitment. Dust will settle on every single curve and crevice of the intricate balcony railings and decorative panels. This isn’t a job for a simple cloth. To keep it looking rich and not just old, it will require regular, detailed dusting with a soft-bristled brush or a vacuum attachment. An occasional polish with a quality wood conditioner will also be necessary to maintain the luster of the dark wood and prevent it from drying out over time.
|
📋 Copy HEX 🔗 Share |
🧹 Maintenance Reality
that makes this space so breathtaking is the extraordinary level of hand-carved craftsmanship. In an age of mass production, the sheer artistry and attention to detail in the dark wood ornamentation—from the panels framing the reception opening to the intricate balcony railings—is what sets this design apart. It speaks to a commitment to traditional techniques and creates a sense of history and permanence that cannot be replicated with modern materials. It’s the human touch, writ large, that defines this grand space.
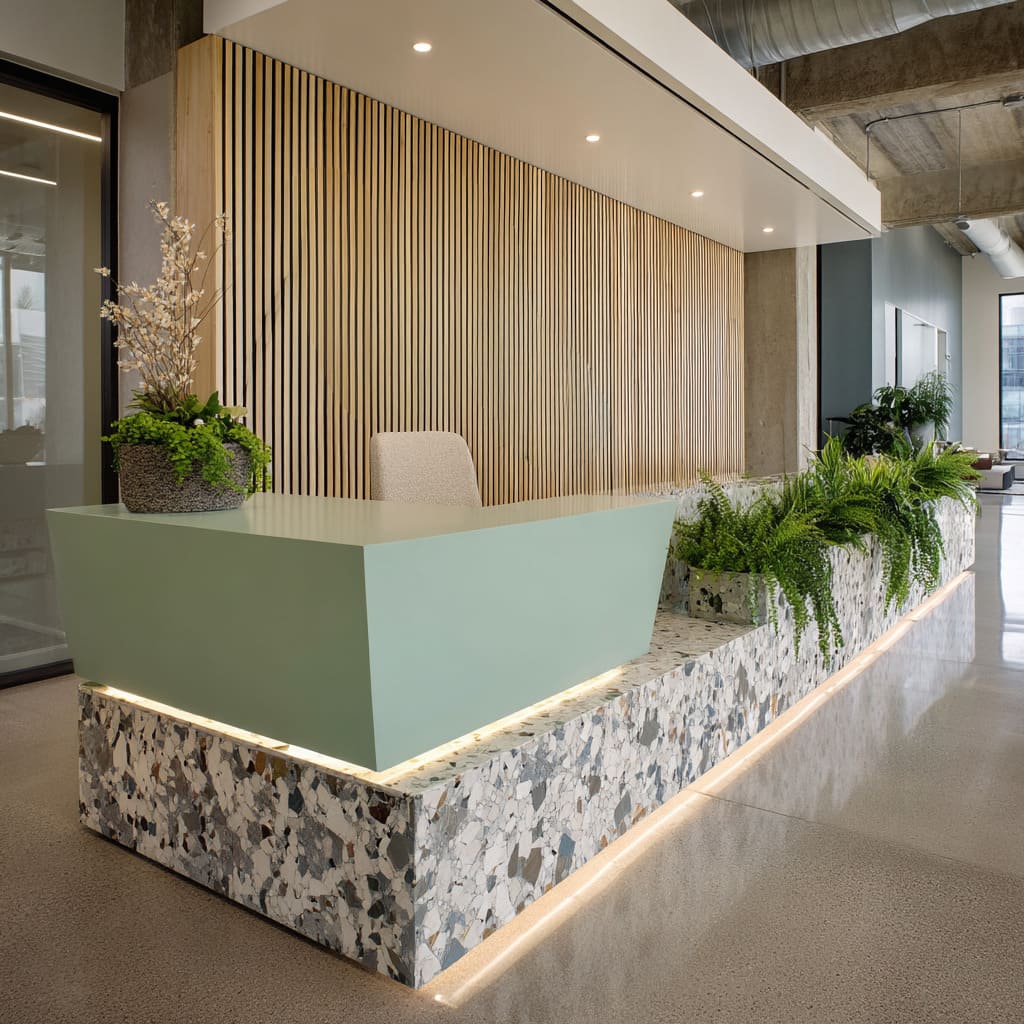
22. Try a Fresh Combination of Sage Green, Terrazzo, and Slatted Wood
This space is a perfect recipe for a modern, biophilic-inspired welcome. The formula is: 40% natural texture (the light wood slatted wall), 30% soft color (the sage green counter), 20% playful pattern (the terrazzo base), and 10% vibrant life (the lush green plants). The balance between the warm wood, the cool green, and the neutral-with-flecks-of-color terrazzo is spot-on. It feels fresh, organic, and sophisticated all at once. This color palette would work beautifully in a spa, clinic, or any space aiming for a calm and welcoming vibe. It is a more playful take on the green and wood palette seen in Idea #19.
|
📋 Copy HEX 🔗 Share |
🔧 How-To Brief
When designing a reception desk with an integrated planter, drainage is everything. A common mistake is to simply fill the cavity with soil, which leads to root rot and a dead plant. Instead, specify a custom-fit, waterproof fiberglass or plastic liner for the planter cavity. This liner should be removable for easy cleaning and plant maintenance. Ensure there’s a layer of gravel at the bottom of the liner before adding soil to allow for proper drainage away from the plant’s roots. This small technical detail is the key to keeping your integrated greenery alive and thriving.
23. Go Moody with a Black Fluted Desk and Backlit Shelving
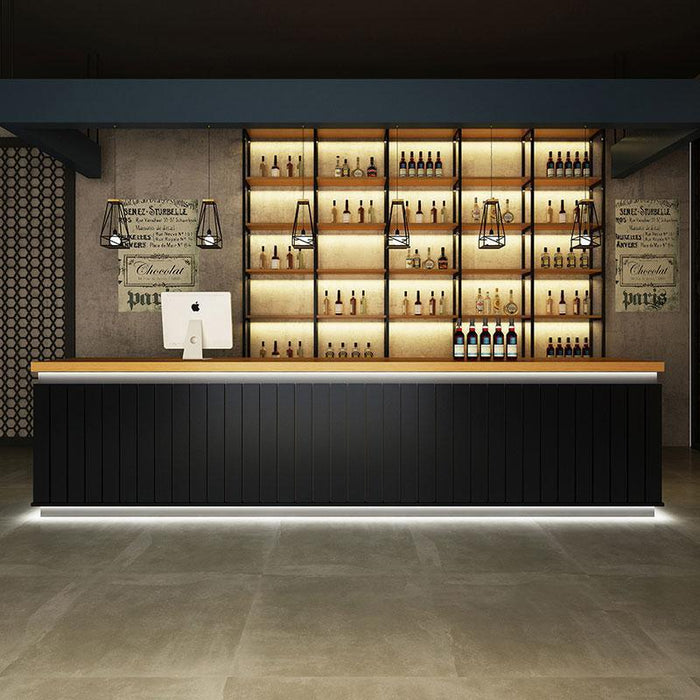
This design succeeds by embracing a dark, moody palette and then using light to carve out the space. The black fluted desk and dark walls could feel oppressive, but the warm glow from the backlit shelving and the under-counter lighting creates incredible depth and warmth. The light pulls you in and makes the space feel intimate and sophisticated, not cavernous. The texture of the fluted desk front catches the light, adding rhythm and detail that prevents the large black mass from feeling flat. It’s a lesson in how to do “dark” the right way. A similar, but lighter industrial feel can be found in Idea #6.
|
📋 Copy HEX 🔗 Share |
🔥 Trending Context
This bold, industrial look is highly adaptable in terms of scale, but it thrives in spaces with some ceiling height to accommodate the pendant lights and allow the dark colors to feel sophisticated rather than cramped. It works well in a long, relatively narrow space, as the length of the fluted bar and backlit shelving creates a strong directional pull. You’ll want a minimum ceiling height of 9 feet. The overall room could be anywhere from 150 to 500 square feet, making it a versatile choice for a boutique hotel bar, a modern office, or a salon.
24. Add Gleam with a Curved White Desk and Chrome Accents
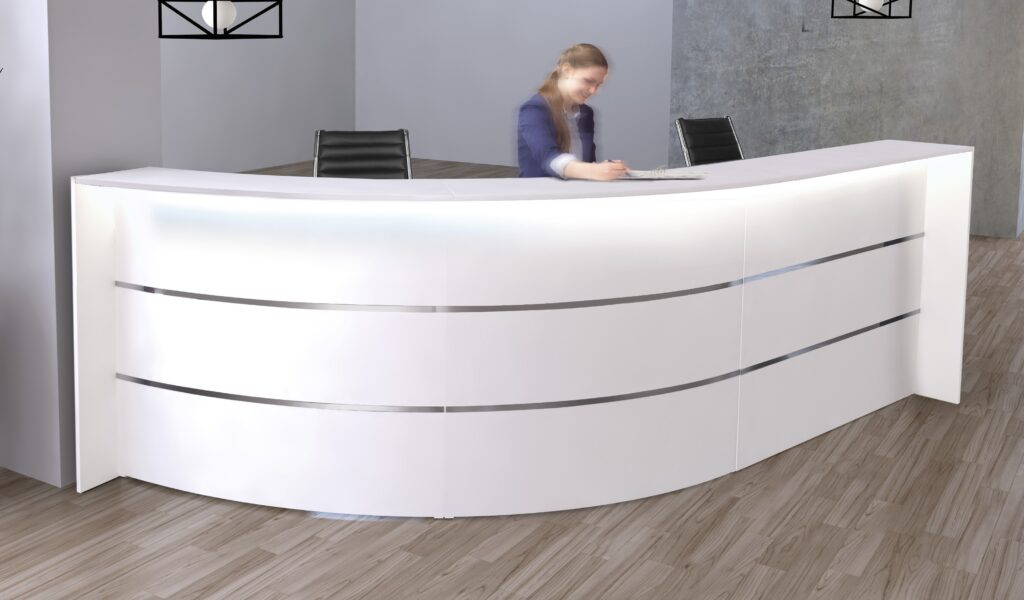
A custom curved desk with integrated lighting can be a major expense. For a similar sleek, modern feel on a tighter budget, look for a standard white waterfall-style desk from an office supply retailer. You can find these for $400-$700. The key is to add the chrome accents yourself. Purchase rolls of metallic peel-and-stick trim (marketed for automotive detailing) online for about $20. Carefully apply three parallel strips to the front of the desk. Then, install a simple, plug-in LED light strip under the countertop edge for that professional glow. You get 90% of the look for 20% of the cost.
|
📋 Copy HEX 🔗 Share |
💡 Designer Tip
A glossy white desk looks amazing… when it’s perfectly clean. The reality is that a high-gloss surface is the least forgiving finish available. It will show every fingerprint, smudge, and speck of dust. It can also be prone to “micros-scratches” from everyday use, which dull the finish over time. Be prepared for daily wipe-downs with a microfiber cloth. For a more practical but still modern look, consider a matte or satin white finish, which offers a similar brightness without being quite so high-maintenance.
25. Feature a White Marble Desk Against a Geometric Slatted Wood Wall
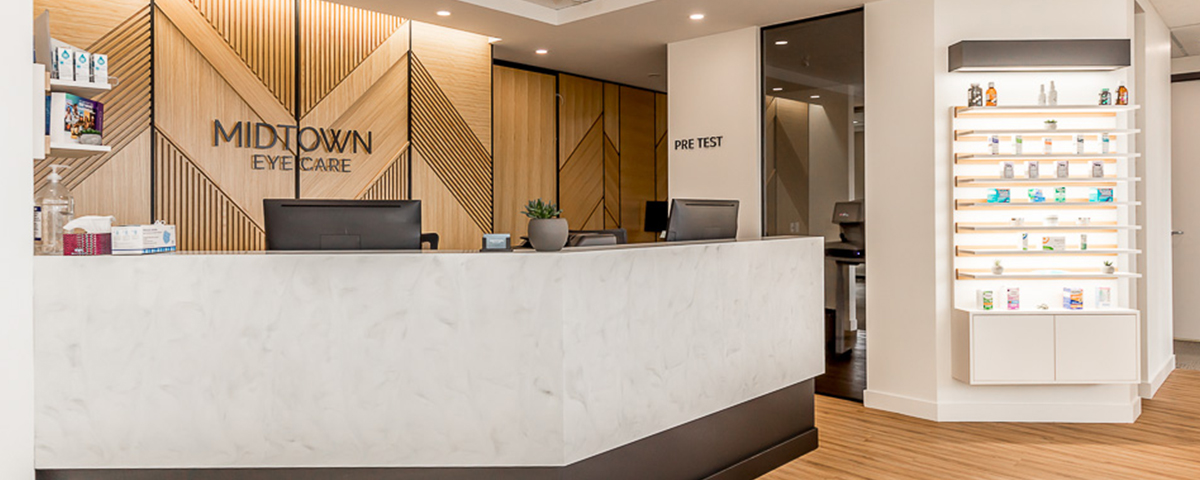
The element that truly defines this space is the geometric slatted wood wall. While the marble desk is beautiful, it’s a familiar sight. It’s the accent wall behind it that provides the unique character and architectural interest. The pattern is complex enough to be engaging but not so busy that it overwhelms the space. It adds warmth and a handcrafted feel that balances the cool, sleekness of the marble desk and the dark grey base, turning a simple reception area into a memorable design moment. Compare this to the grand marble wall in Idea #1, which serves a very different purpose.
|
📋 Copy HEX 🔗 Share |
⭐ The One Thing
When you have a long desk, you need to think about cable management from day one. A stream of messy cords for monitors, phones, and payment terminals can completely ruin the clean lines of a beautiful desk like this. Plan for this by having grommet holes drilled into the marble top in discreet locations (e.g., behind the monitor). The wiring can then be run down through the desk and into a cable management tray mounted to the underside, keeping everything completely out of sight.
26. Soften a Minimalist Desk with a Cream Palette and Wood Inset
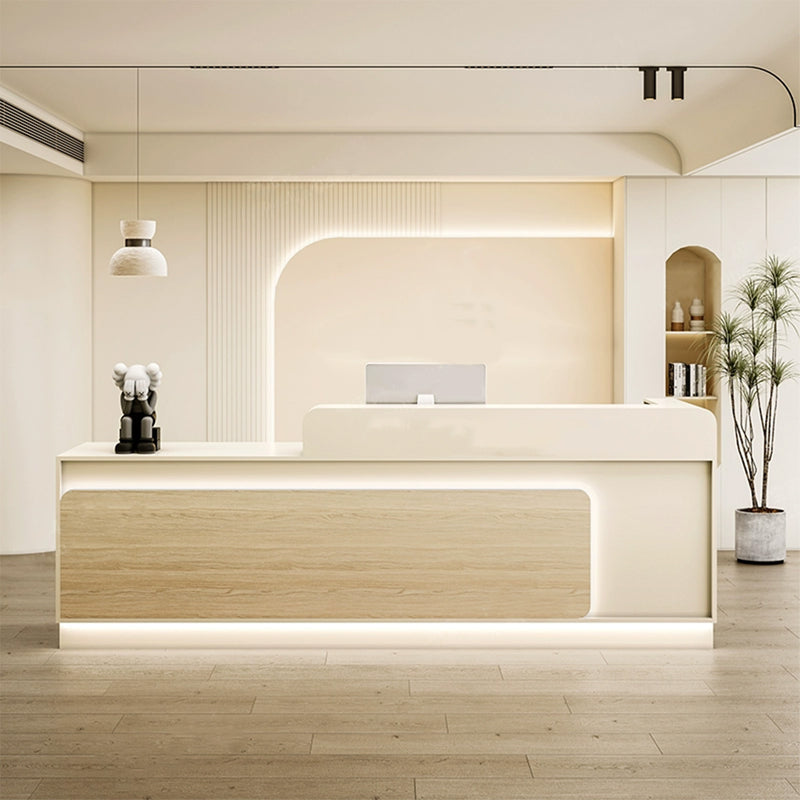
This look achieves its serene feel through a tightly controlled, warm minimalist formula: 70% soft cream/beige (desk body, walls), 20% light natural wood (inset panel), and 10% black accents (lighting, decor). This simple, three-part recipe ensures a space that feels calm, cohesive, and modern. You could swap the fluted wall panel for a smooth one or change the light wood to a slightly darker oak, and the fundamental sense of peacefulness would remain, thanks to the dominance of the warm, creamy base tone.
|
📋 Copy HEX 🔗 Share |
⚠️ Real Talk
This design is a masterclass in the power of curves. In a world dominated by straight lines and hard angles, the gentle curve of the desk, echoed in the arched wall accent and the rounded niche, creates an immediate sense of softness and flow. It guides the eye through the space and feels subconsciously more welcoming and less rigid. The integrated lighting at the desk’s base further enhances this by making the curved form appear to float, adding to the light, airy, and approachable atmosphere of the room.
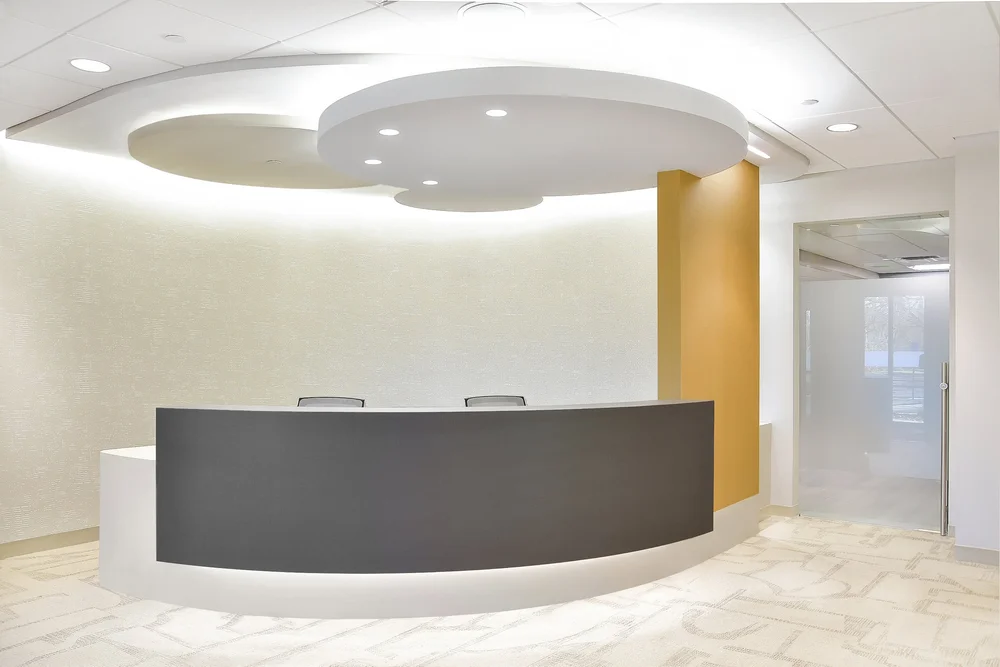
27. Design a Sculptural Ceiling with Cloud-Like Panels and Recessed Lighting
A multi-layered ceiling treatment like this needs volume to work. This idea is designed for spaces with high ceilings—a minimum of 12 feet is essential. The cloud-like panels are built down from the main ceiling, so if you start with a standard 8 or 9-foot ceiling, the result will feel oppressive and cramped. This design is perfect for double-height lobbies in hotels or corporate offices where the goal is to make a large volume of space feel more intimate and design-forward, while also cleverly hiding HVAC and sprinkler systems.
|
📋 Copy HEX 🔗 Share |
🎯 What Makes It Work
Creating that pop of color with an accent column is a simple but high-impact project. (Estimated time: 2-3 hours, Cost: $40-$60 for paint and supplies).
- First, protect the surrounding area. Tape off the ceiling, floor, and any adjacent walls using painter’s tape. Use a drop cloth to cover the floor.
- Lightly sand the column to remove any imperfections and ensure the primer will adhere properly. Wipe it down with a damp cloth to remove dust.
- Apply a coat of high-quality primer. This is especially important for a bold color like orange to ensure true color rendition.
- Once the primer is dry, apply your first coat of orange paint. Use a roller for the main surfaces and a brush for cutting in at the top and bottom.
- Let it dry completely, then apply a second coat for a rich, even finish.
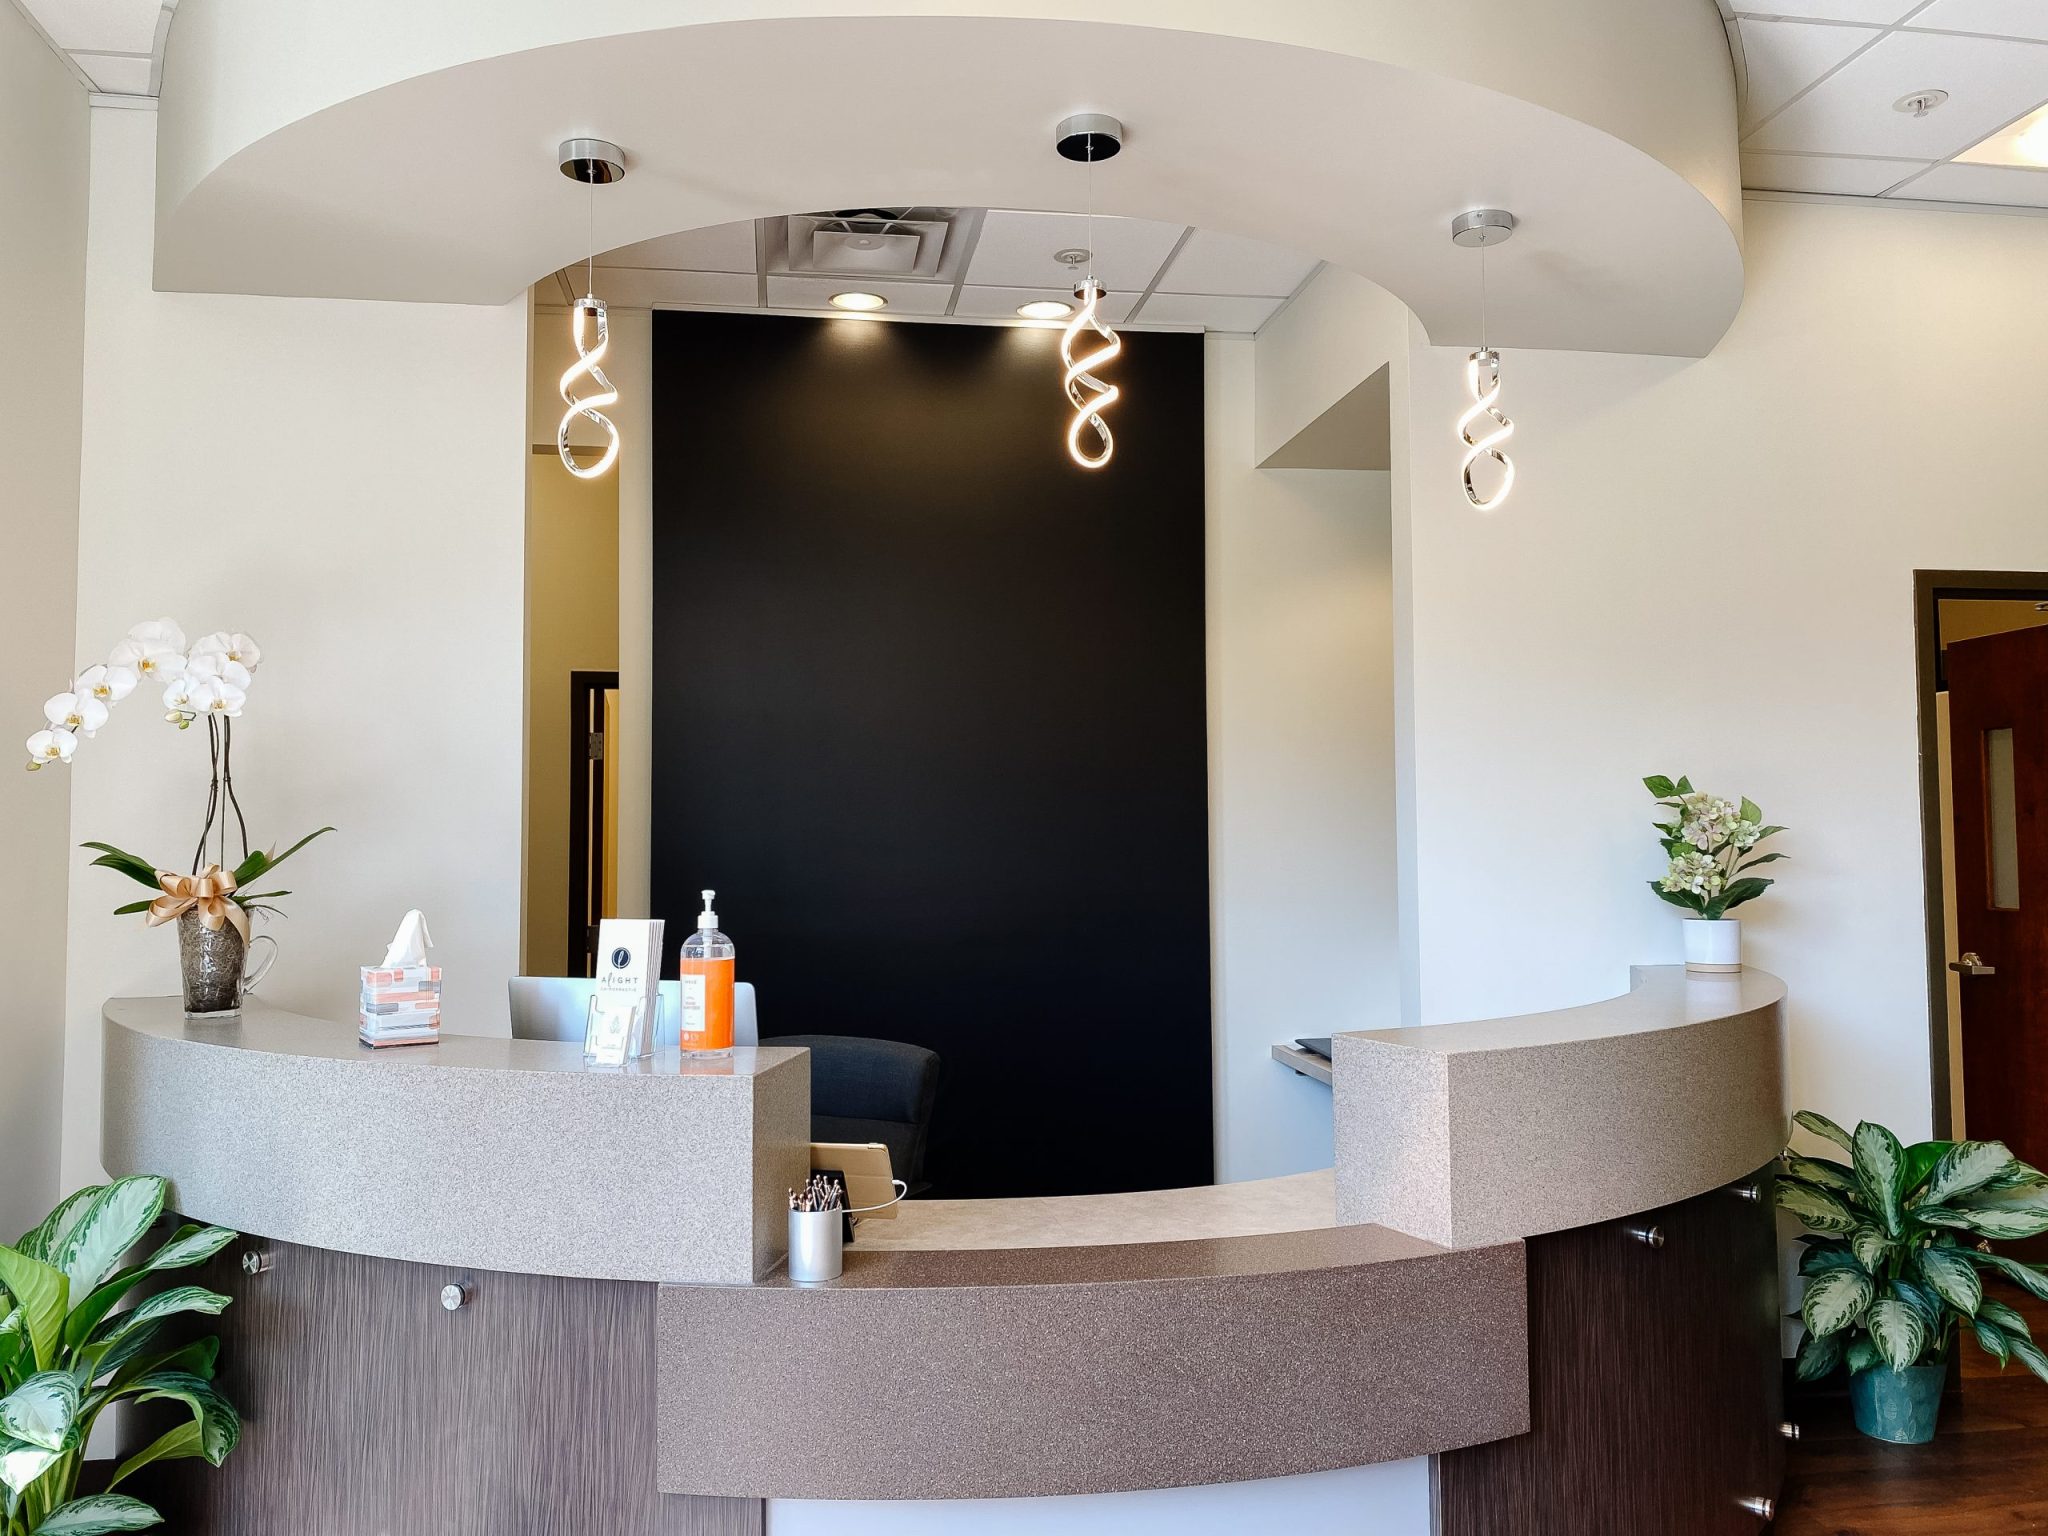
28. Layer Textured Surfaces Under an Arched Soffit
When using multiple textured surfaces on a single piece of furniture, as seen on this curved counter, the key to a cohesive look is to keep them in the same color family. Here, the speckled grey/beige top, the darker speckled brown face, and the warm wood grain base all share warm, earthy undertones. This allows the textures to create a rich, tactile experience without clashing. If you were to introduce a cool-toned texture, the design would lose its harmony. Stick to a consistent color temperature.
|
📋 Copy HEX 🔗 Share |
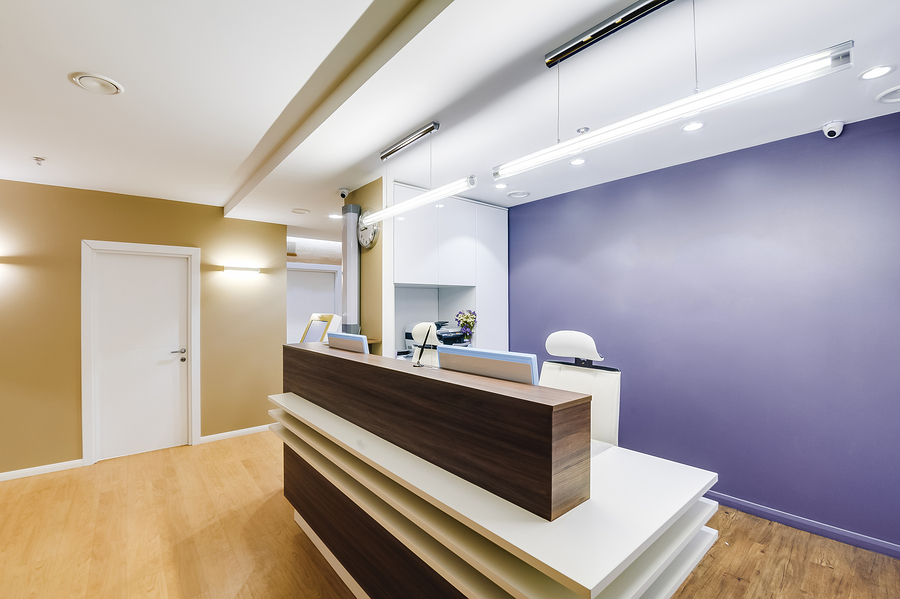
29. Contrast a Two-Tone Desk with a Muted Purple Accent Wall
A long, custom two-tiered desk can be a significant investment. You can get this functional, modern look for less. Start with two standard-height, dark wood grain office desks and one counter-height white desk from a place like IKEA or Wayfair. Place the two lower desks side-by-side, and then place the counter-height desk on top, pushed towards the back edge to create the tiered effect. Secure them together from the underside. This modular approach gives you the same functionality and two-tone look for a fraction of the price of custom millwork.
|
📋 Copy HEX 🔗 Share |
💰 Budget Breakdown
Choosing an “of-the-moment” accent color like this muted purple can be a fantastic way to make a space feel current. However, be aware of the trend cycle. While this dusty, sophisticated shade feels very fresh now, it may feel dated in five years. The good news? It’s just paint. An accent wall is one of the easiest and least expensive things to update in a space. If you love the color now, go for it! Just be mentally prepared that you might want to repaint it with the next trending shade sooner than you would a classic neutral.
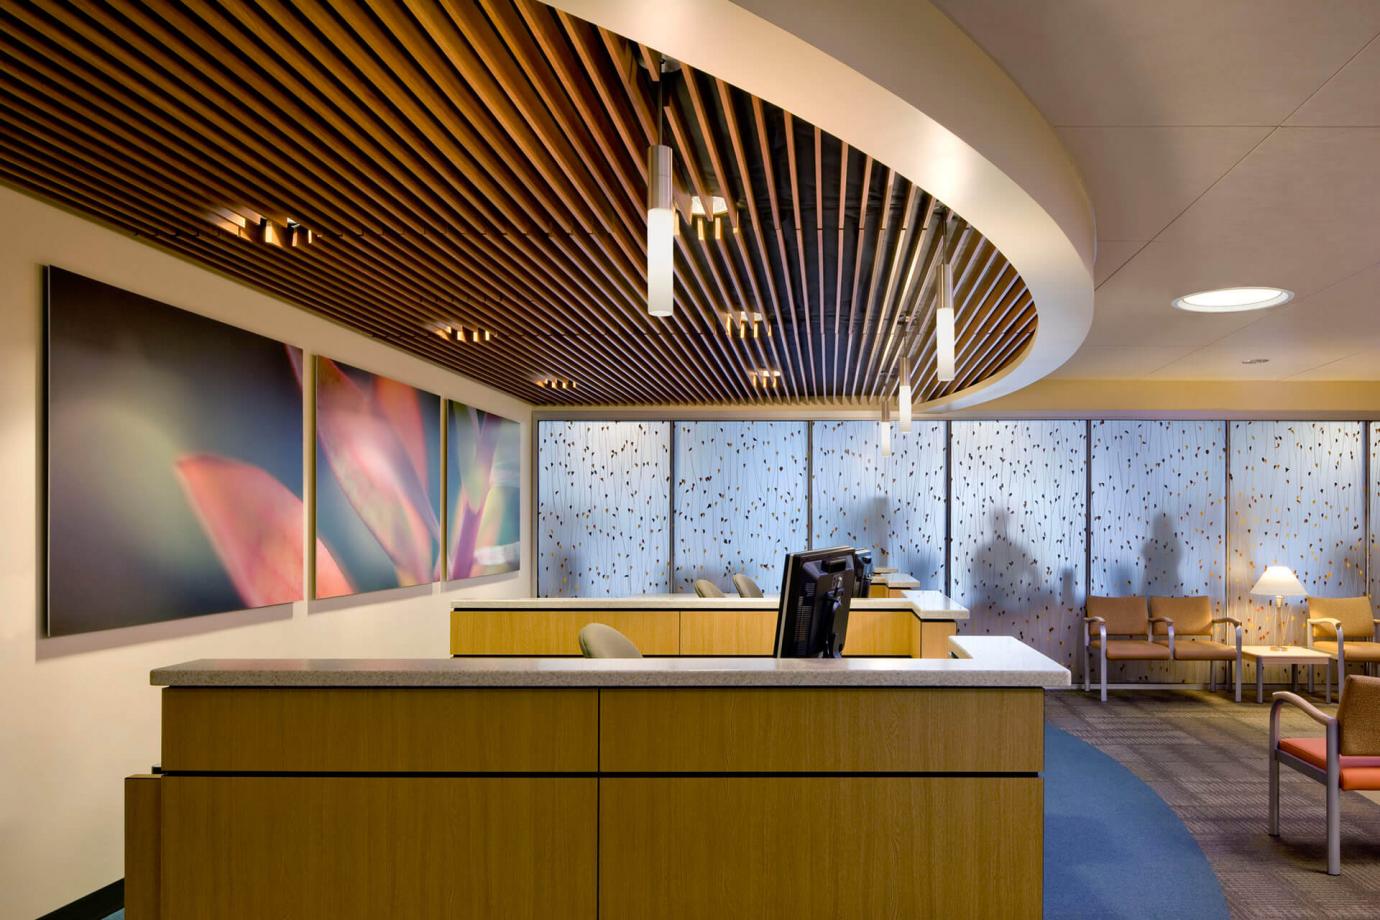
30. Create an Organic Feel with a Curved Wood Slat Ceiling
This reception space works because it creates a powerfully immersive, organic experience. The curved wooden slat ceiling is the hero, drawing the eye up and across the space in a graceful, sweeping motion. This strong architectural gesture is balanced by the abstract, nature-inspired artwork and the leaf-patterned screen, all of which reinforce a connection to the natural world. The use of warm wood throughout, from the ceiling to the desk, unifies the space and makes it feel like a protective, welcoming cocoon.
|
📋 Copy HEX 🔗 Share |
✅ Before You Start
This is a design that is all about making a statement in a large-volume space. The sweeping curve of the slatted ceiling needs significant room to unfold, both in height and width. This look is ideal for a large corporate headquarters, a modern health facility, or a hotel lobby with ceilings of at least 15-20 feet and a wide, open-plan layout. Trying to scale this down for a small room would diminish its impact and could feel overpowering. It’s an investment in architectural millwork that pays dividends in grand, open areas.
Your Welcome Story Starts Here
That first impression is everything, and your reception area sets the tone for the entire experience. Whether you’re drawn to grand marble statements or warm, minimalist wood, the perfect design is about reflecting your brand’s unique identity. Now you’ve got the inspiration—go create a welcome that no one will forget. Don’t forget to save your favorites to your Pinterest board!