You know that feeling when you finally find the fairy light idea that looks exactly right for your space, only to realize you have no idea how to actually pull it off? We’ve all been there, endlessly scrolling and saving pins. That’s why we did the hard work for you. After filtering through hundreds of options across Amazon, Target, and World Market, we narrowed it down to the looks that actually deliver, with ideas ranging from a simple $15 strand to a full $300 patio setup. Inside, you’ll find 30 curated ideas covering everything from cozy bedrooms and outdoor entertaining spaces to festive DIY decor. These aren’t just pretty pictures; they’re real, achievable designs that work for 2026 homes, where creating a personal, ambient glow is everything. And stay until the end—we break down the most common mistakes that can ruin these looks. 📌 Pin this guide for later—your future self will thank you when it’s time to decorate.
Please note: This post may contain affiliate links.
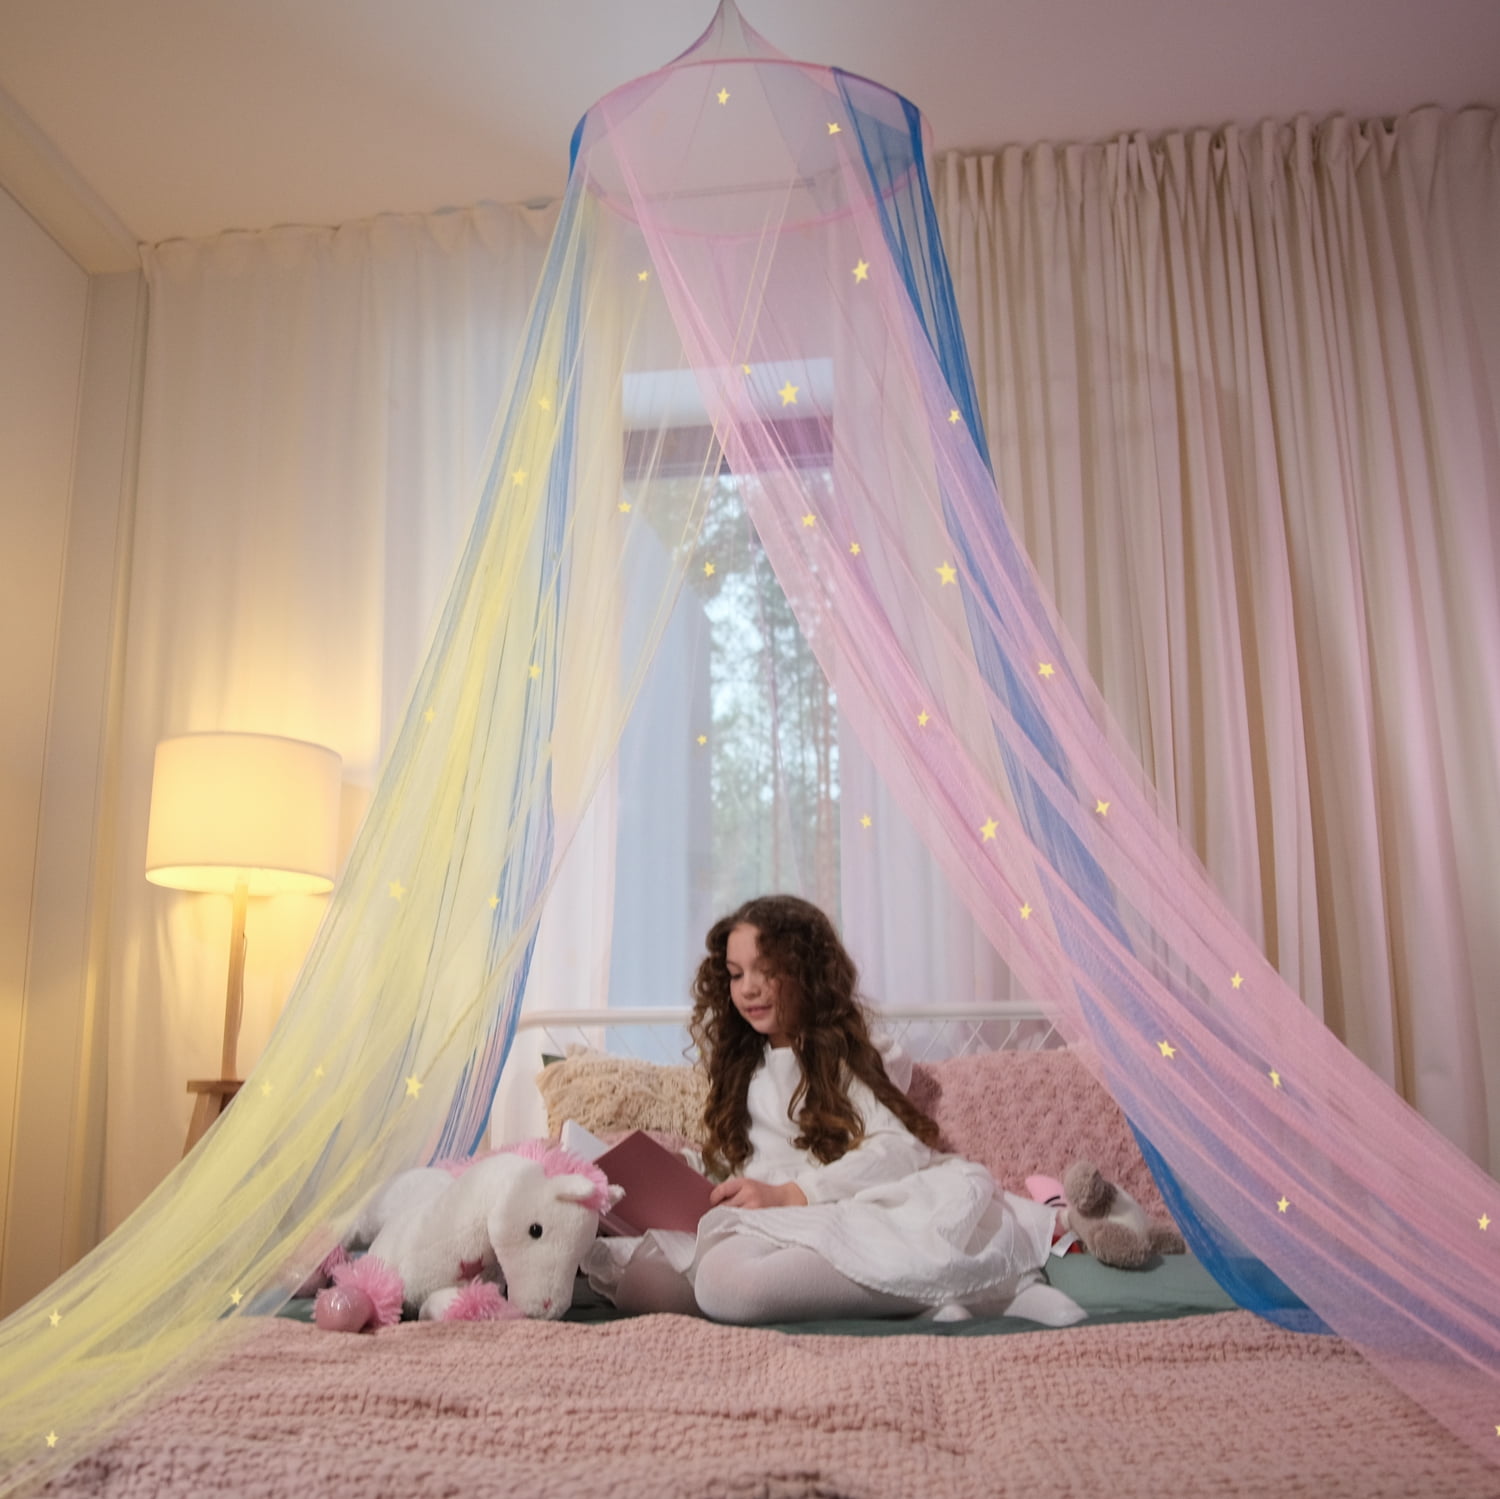
1. Create a Dreamy Pastel Canopy with Star-Shaped Fairy Lights
This look is pure magic because it layers light and color in a really smart way. The sheer, multi-colored canopy acts as a diffuser, softening the glow from the integrated star lights and preventing them from feeling like harsh pinpricks of light. This creates a gentle, ambient wash of color. The choice of pastels—soft pink, yellow, and blue—keeps the mood light and playful rather than overwhelmingly saturated. It’s a perfect example of how the fixture (the canopy) and the light source can work together as one cohesive element.
💰 Budget Breakdown
Let’s be honest: a sheer fabric canopy like this is a dust magnet. To keep it looking dreamy and not dreary, you’ll need to commit to regular cleaning. Plan on taking it down to wash or vacuum with a soft brush attachment at least once every month or two, especially if you have allergies. Also, consider the heat output of your fairy lights. Always choose low-heat LEDs for any application involving fabric to eliminate fire risk. This is non-negotiable for safety, especially in a bedroom.
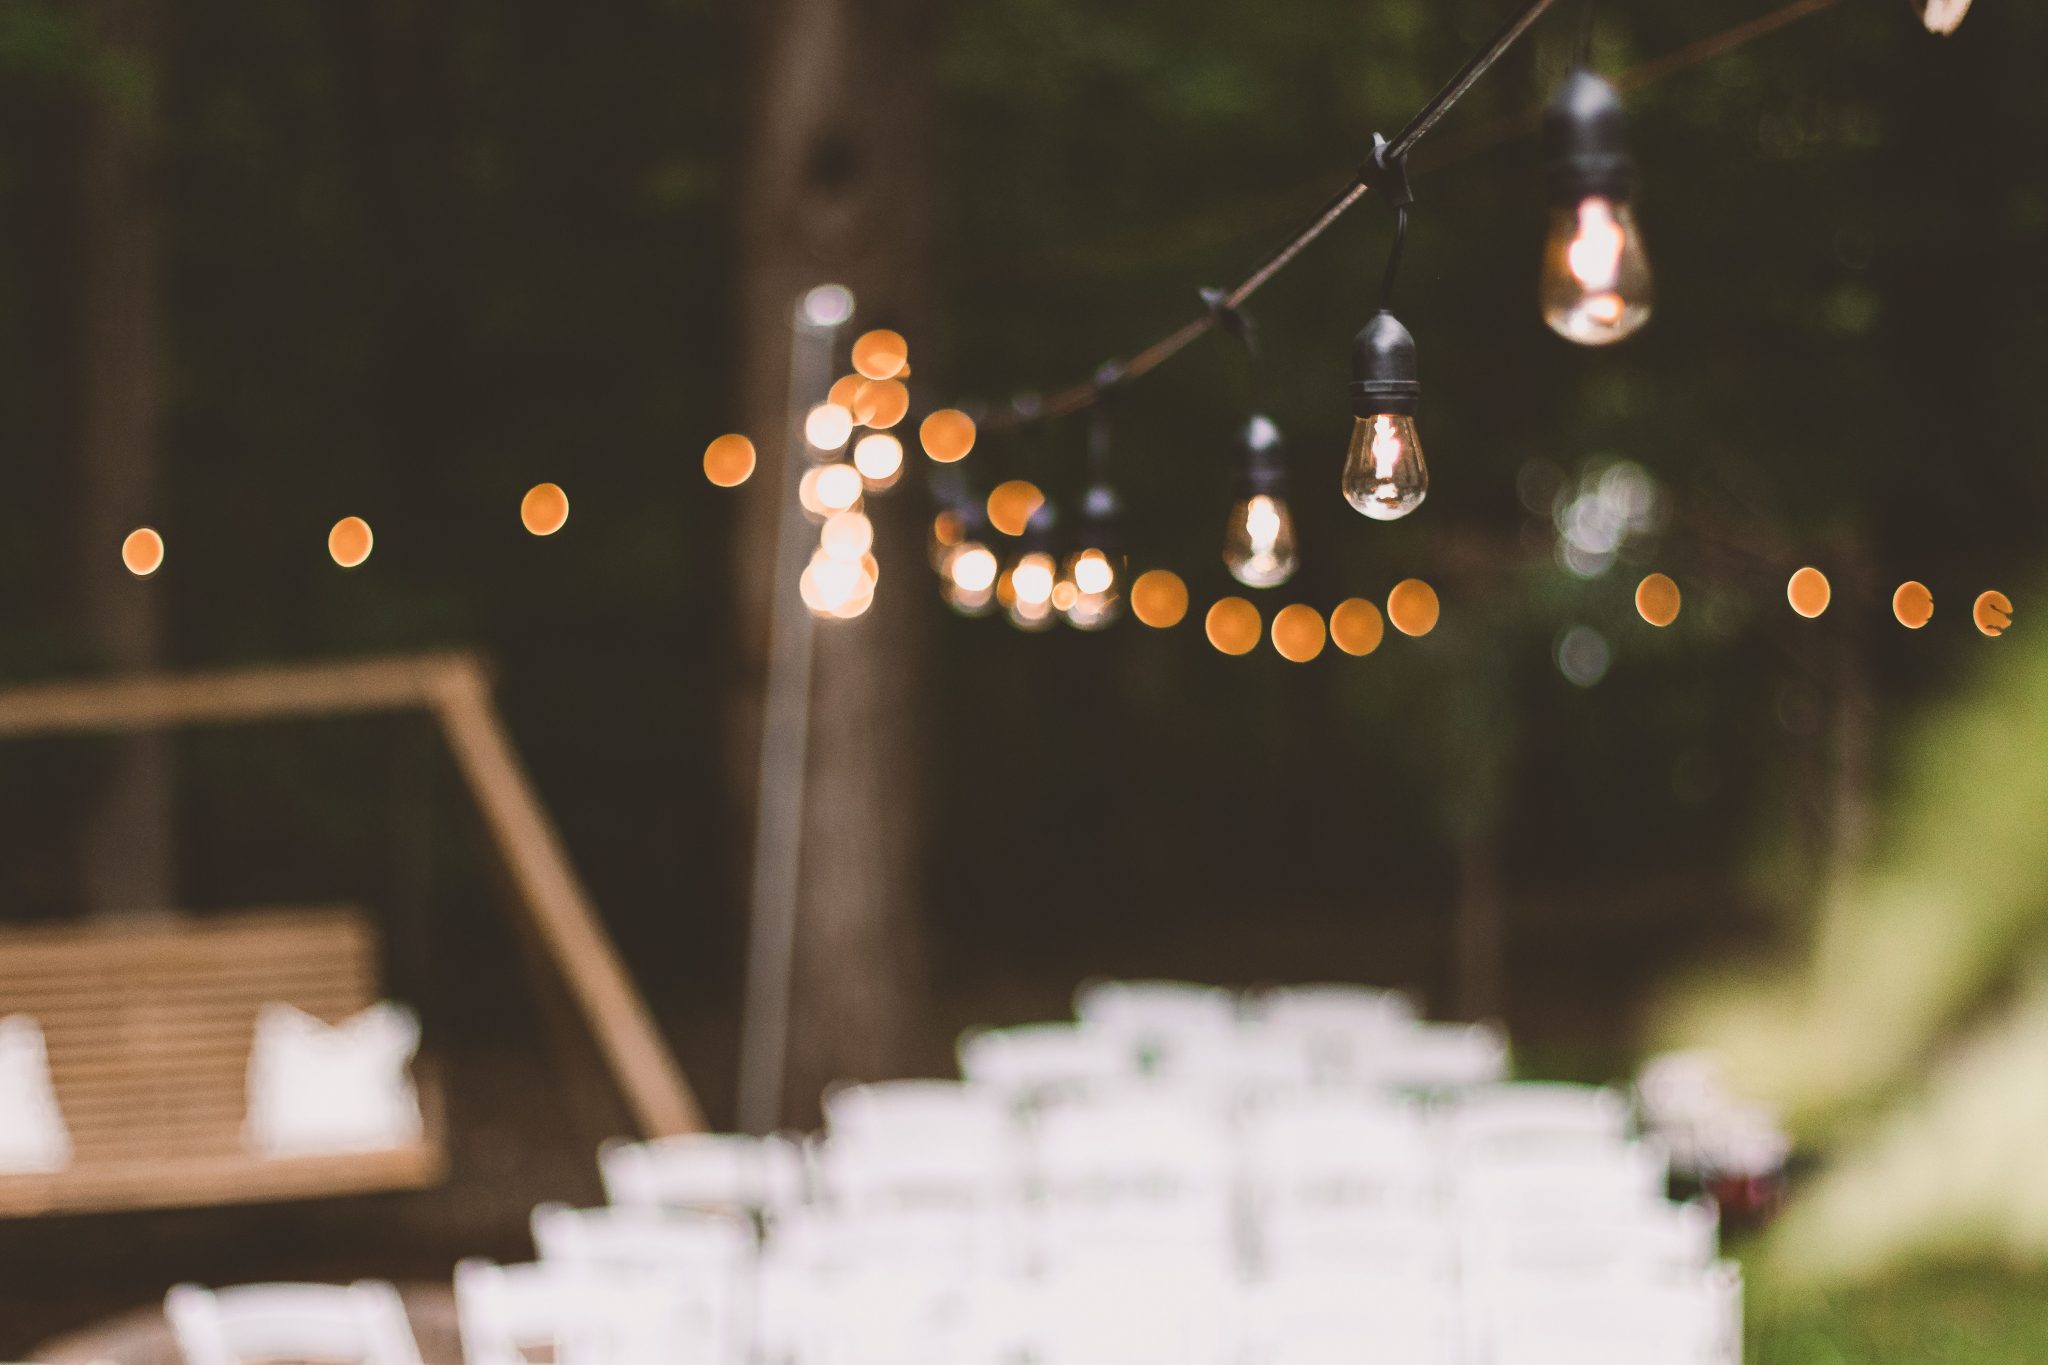
2. Drape Edison-Style String Lights for a Warm Outdoor Event
For draped string lights at an outdoor event, the key is the sag. Don’t pull the strands taut. A gentle, scalloped drape looks infinitely more relaxed and professional. As a rule of thumb, for every 20 feet of distance between anchor points, allow for about 12-18 inches of sag in the middle of the strand. This not only looks better but also puts less tension on the anchor points and the cord itself, which is crucial for safety, especially if you’re hanging them from trees or temporary poles.
⚠️ Real Talk
Commercial-grade Edison string lights can get pricey, often running $50-$100 per strand. To get this warm, festive glow for less, look for solar-powered versions. You can find great options at Target or on Amazon for around $25-$40. The bulbs might be plastic instead of glass and the glow a little less intense, but you’ll save on the product cost and your electricity bill. Just be sure to place the solar panel where it will get at least 6-8 hours of direct sunlight for a full night’s charge.
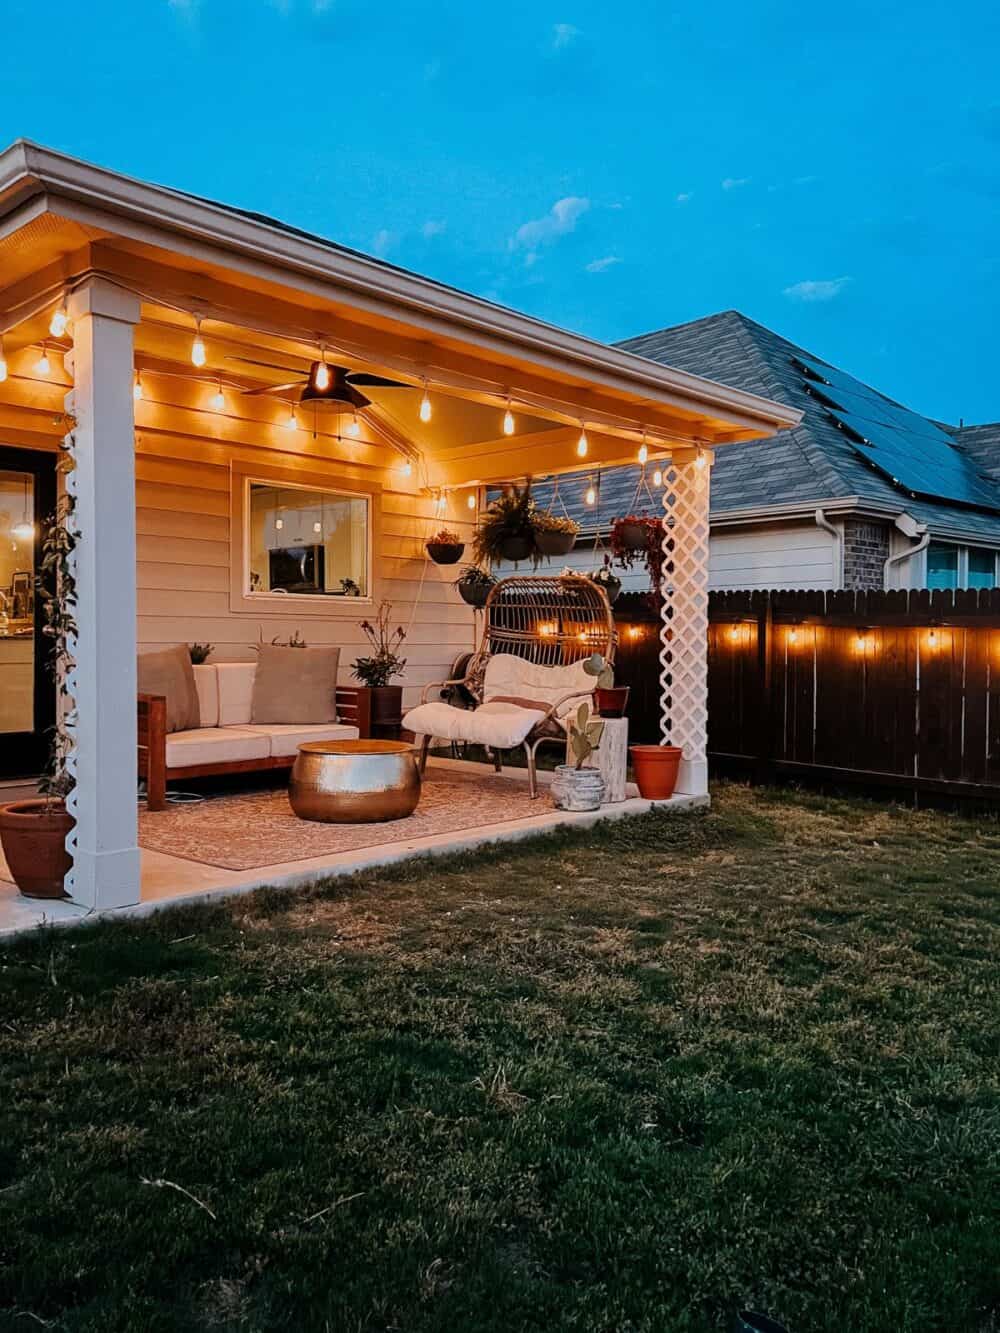
3. Layer String Lights on a Covered Patio for Ultimate Coziness
Recreating this cozy patio look is an investment in your outdoor living space, but it’s totally doable. Here’s a rough breakdown:
- Main Furniture (sofa, hanging chair): $900 – $2,500
- Lighting (commercial-grade string lights): $100 – $300
- Textiles (rug, pillows, throw): $200 – $500
- Decor/Accessories (coffee table, planters): $250 – $600
- TOTAL: $1,450 – $3,900
Budget alternative: Source the sofa and hanging chair from Facebook Marketplace and use solar-powered lights to get this look for about $600 – $1,200.
⭐ The One Thing
This layered lighting approach works best on a covered patio or porch that’s at least 10 feet by 12 feet. You need enough ceiling surface area to create that draped, overhead effect without the lights feeling too low or crowded. A minimum ceiling height of 8 feet is essential to allow the lights to hang naturally and still provide comfortable clearance. For a smaller balcony or narrow porch, you might be better off with a single strand along the perimeter, like the look in Idea #4, to avoid overwhelming the space.
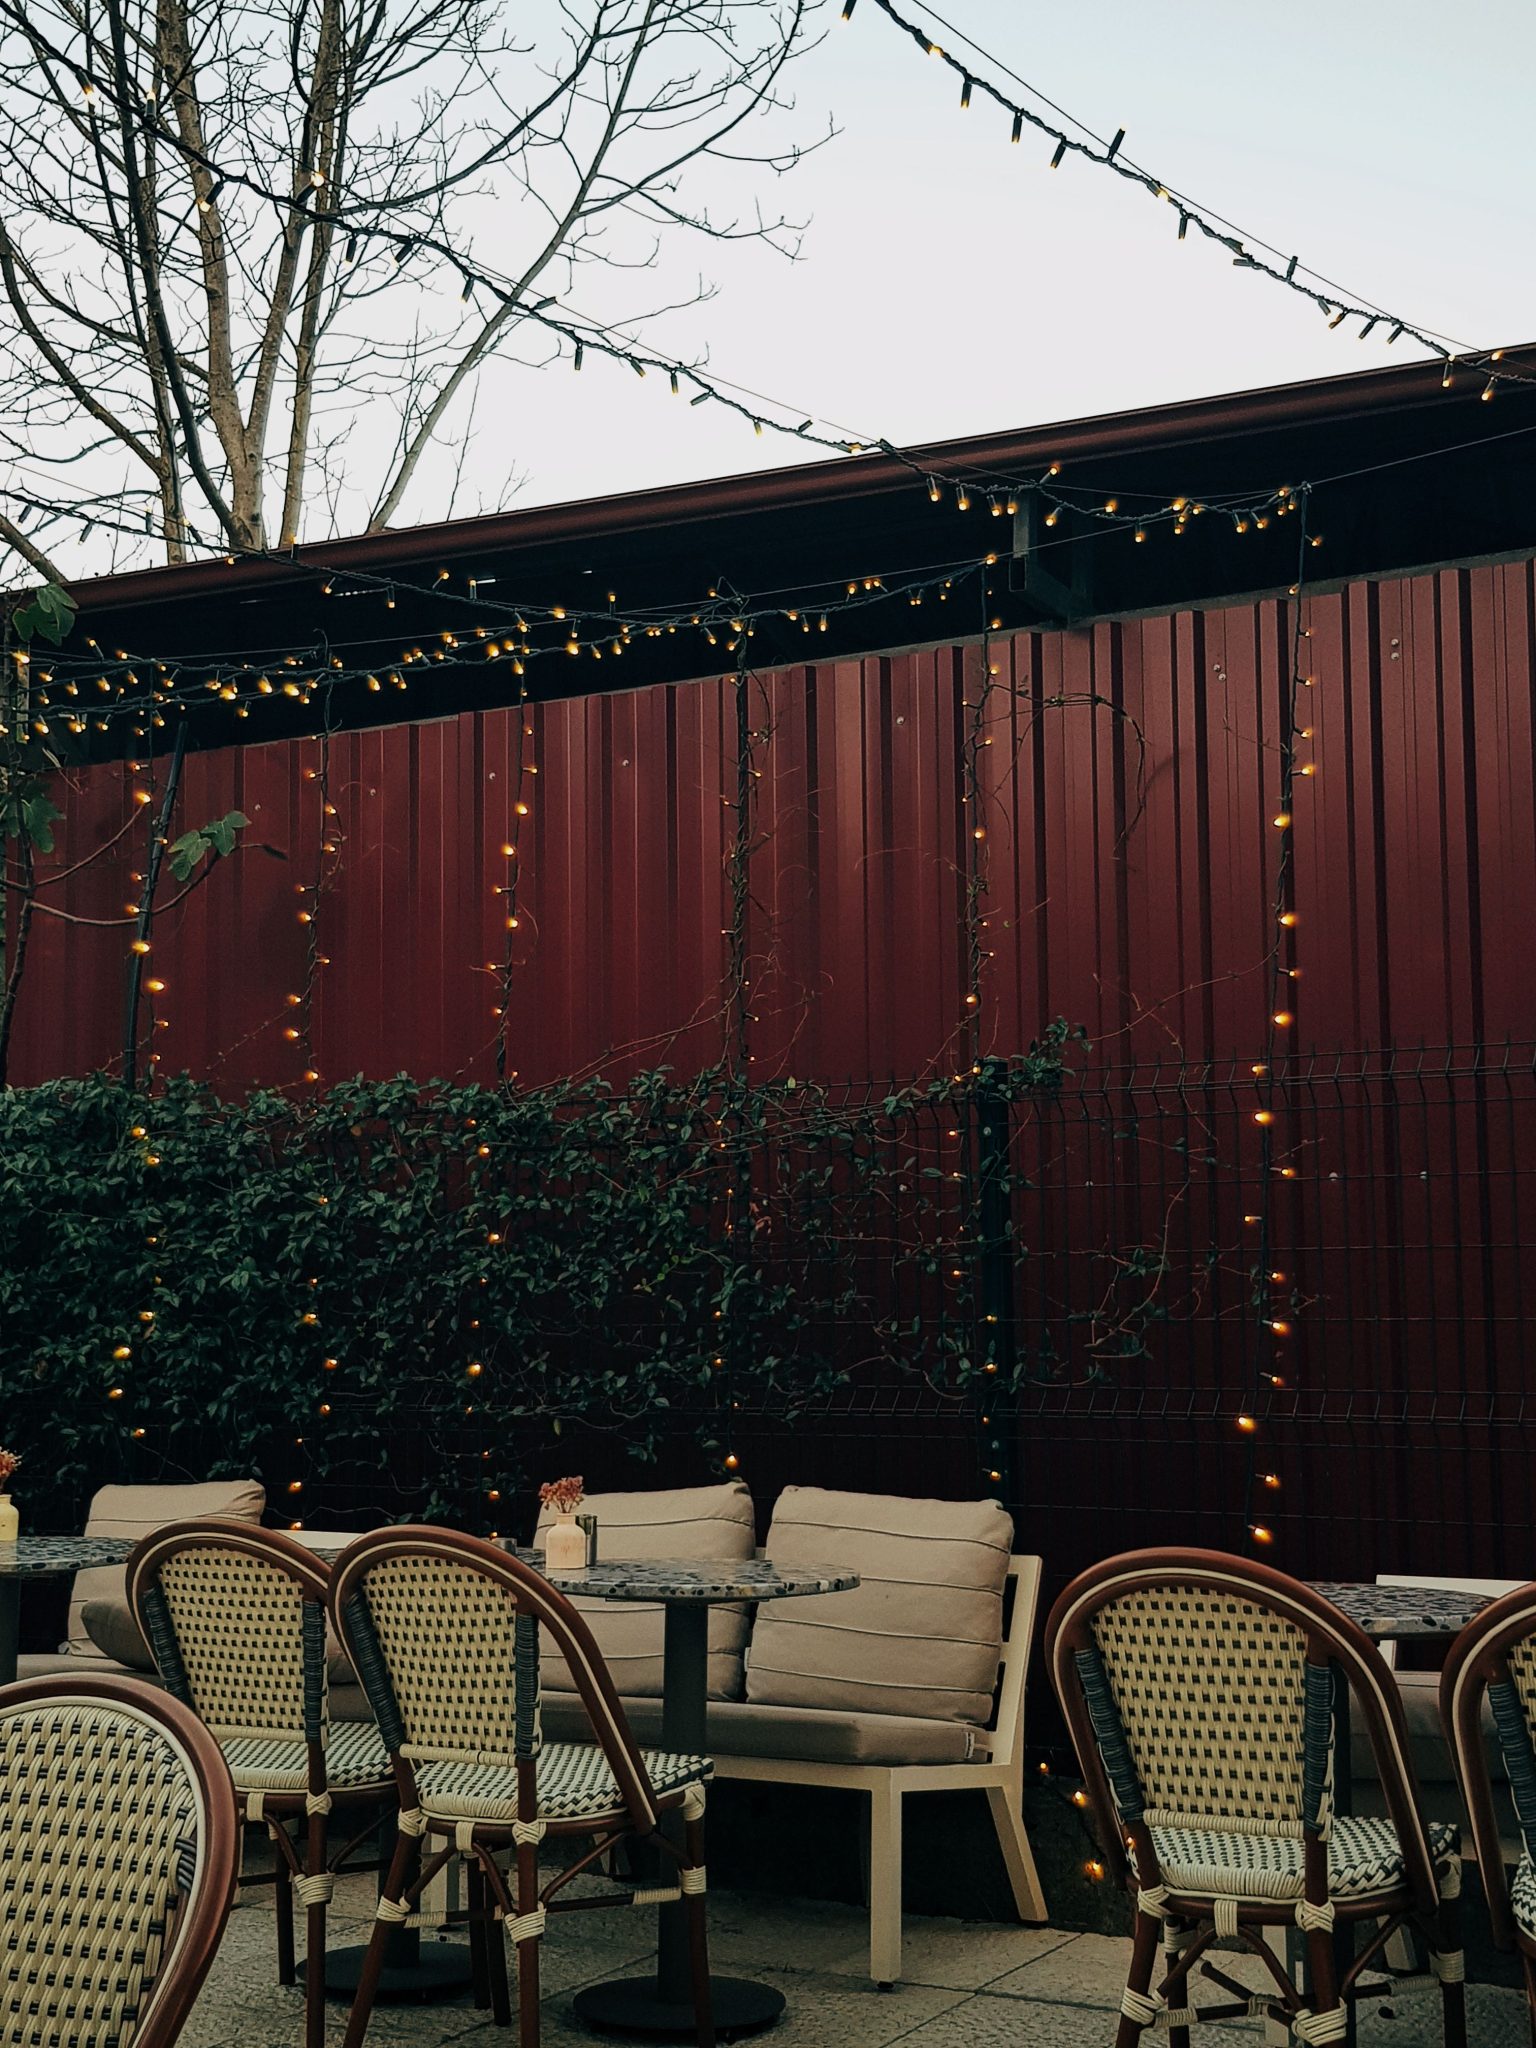
4. Contrast Warm Lights with a Dark Red Corrugated Fence
The single element that makes this patio so striking is the bold, dark red corrugated metal fence. Without it, the warm lights and rattan chairs would still be nice, but they wouldn’t have the same visual punch. The deep red color provides a rich, saturated backdrop that makes the warm yellow glow of the lights pop with intensity. The industrial texture of the metal also creates a fantastic contrast with the natural woven texture of the chairs, proving that mixing materials is always a good idea.
📏 Scale Guide
This look follows a simple but effective formula: 50% warm texture + 40% bold color + 10% glowing light. The warm texture comes from the woven rattan chairs and beige cushions. The bold color is the hero element—that dark red fence. The fairy lights are the final 10%, acting as the jewelry that pulls it all together. You could swap the elements while keeping the ratio. For example, try a deep navy blue wall (40%) with a wooden sectional (50%) and the same warm lights (10%) for a more nautical vibe with the same cozy-industrial balance.
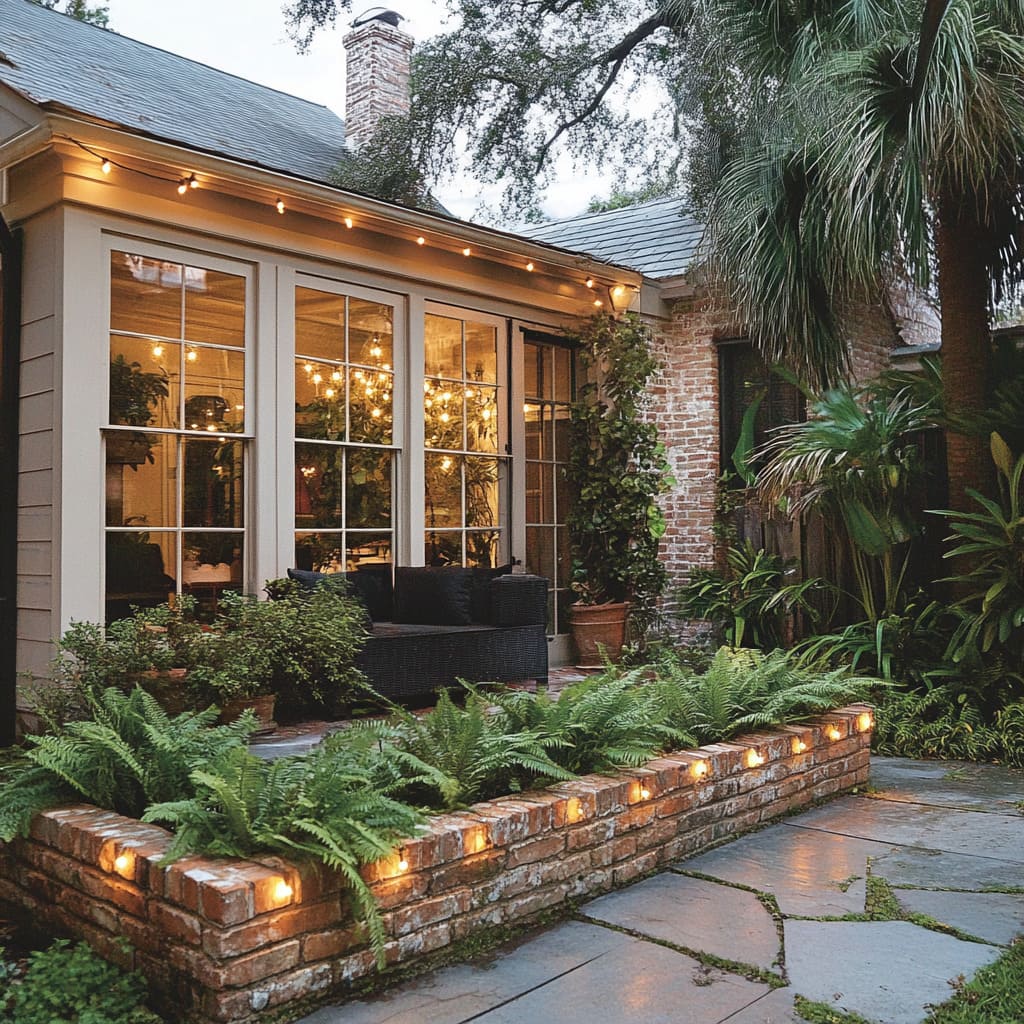
5. Illuminate a Raised Brick Planter with Subtle Accent Lights
This patio lighting feels so professional because it uses multiple layers of light. You have the overhead string lights providing general ambient illumination for the whole space. Then, you have a second, more subtle layer: the small individual lights nestled among the ferns in the brick planter. This is task and accent lighting 101. It highlights a beautiful feature (the planter), adds depth and dimension, and prevents the patio from having one flat, boring light source. The glow from the interior windows adds even another layer, connecting the indoor and outdoor spaces.
🔧 How-To Brief
Using lights in a planter looks gorgeous, but be prepared for some upkeep. Soil, water, and electricity require careful handling. Always use outdoor-rated, low-voltage lights (12V) for this application to minimize electrical risk. You’ll need to regularly clear away dead leaves and overgrown foliage to prevent them from covering the lights or creating a fire hazard. Expect to replace a few bulbs or even the whole strand every 2-3 years, as constant exposure to moisture and soil will degrade them faster than lights hung overhead.
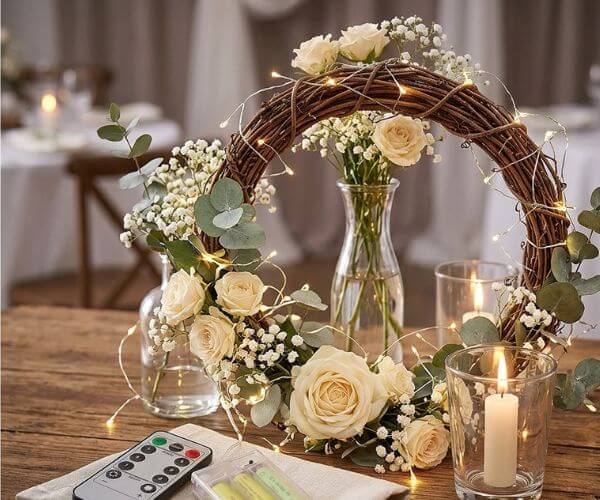
6. Weave Fairy Lights into a Rustic Branch and Rose Wreath
You can create a similar rustic wreath in an afternoon. Time: 1 hour. Cost: $30-$50. Here’s how:
- Start with a pre-made grapevine or twisted branch wreath base from a craft store.
- Secure your floral elements. Use floral wire to attach bunches of eucalyptus and baby’s breath first, creating a green base. Then, add your focal flowers, like these cream roses, tucking the stems into the branches and wiring them securely.
- Choose a battery-operated fairy light string with a thin, flexible wire (copper or silver wire is best). Start at the back and wrap the battery pack with floral tape, securing it to a thick branch.
- Weave the light string loosely through the foliage and around the branches, distributing the lights evenly. Don’t pull too tight—you want a natural, organic look.
✅ Before You Start
When adding fairy lights to a wreath or centerpiece, the biggest challenge is hiding the battery pack. The secret is to use floral wire or green floral tape to strap the pack securely to the back of the wreath form, positioning it behind the thickest cluster of foliage or a sturdy branch. Before you start wrapping the lights, make sure the on/off switch is accessible. For an even cleaner look, look for light strings that come with a small, slim battery pack and a built-in timer function, so you can set it and forget it.
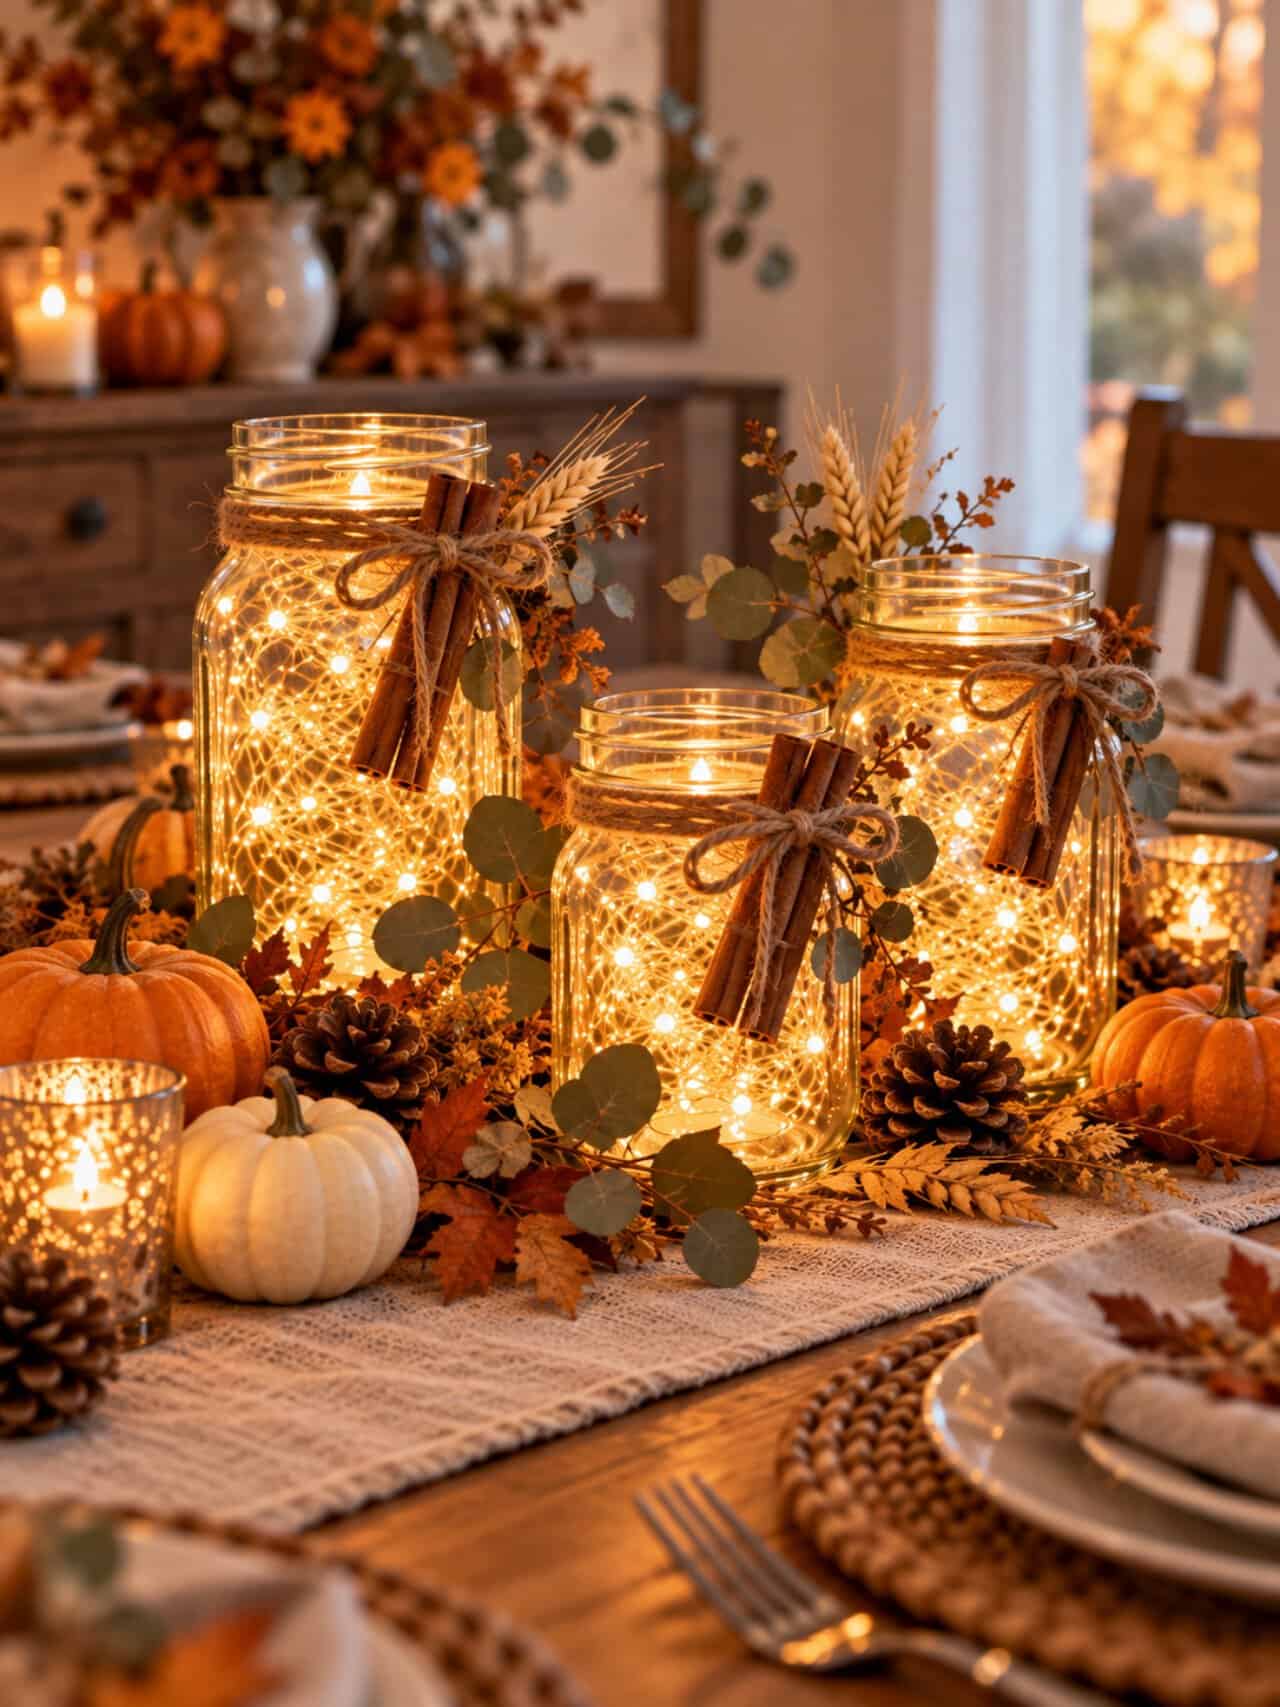
7. Fill Mason Jars with Fairy Lights for an Autumnal Centerpiece
This entire look is incredibly budget-friendly. You can recreate this cozy centerpiece for under $25. Start with mason jars you already own (or grab a pack from Walmart for about $10). A set of 3-6 battery-operated fairy light strings on Amazon costs around $10. For the filler, get creative with what’s free: gather pinecones and colorful leaves from your yard. A bundle of cinnamon sticks and some twine from the grocery or craft store will only set you back a few dollars. This is a perfect example of how to create high-impact decor with minimal spending.
📐 Style Math
The mason jar centerpiece is a cornerstone of the ‘cottagecore’ and modern farmhouse aesthetics that continue to dominate Pinterest. It’s popular because it feels both nostalgic and handmade. This specific autumnal version, with its pumpkins, cinnamon, and wheat, taps directly into the 2026 ‘seasonal nesting’ trend—the desire to make our homes feel extra cozy and celebratory for the fall season. It’s less about perfection and more about creating a warm, personal, and slightly rustic atmosphere that feels welcoming and real.
8. Intertwine Warm Fairy Lights with a Pine Garland Display
This simple combination is a holiday classic for a reason: it’s all about texture and warmth. The artificial pine provides a dense, dark green, slightly spiky texture that serves as the perfect backdrop. The warm white fairy lights introduce a contrasting element: soft, glowing points of light. When you weave them together, the light bounces off the ‘needles’ and the integrated pinecones, creating a beautiful play of light and shadow that feels incredibly rich and dimensional. It’s a simple pairing that delivers maximum coziness.

🧹 Maintenance Reality
Heads up: if you’re using real pine garland instead of artificial, be mindful of fire safety. Fresh garlands can dry out quickly indoors, especially near a heat source like a radiator or fireplace. Dried-out pine is highly flammable. If you love the real thing, spritz it with water every couple of days to keep it from drying out. More importantly, only ever use LED fairy lights, which produce virtually no heat. Never, ever use old-fashioned incandescent bulbs with a real or artificial garland. It’s just not worth the risk.
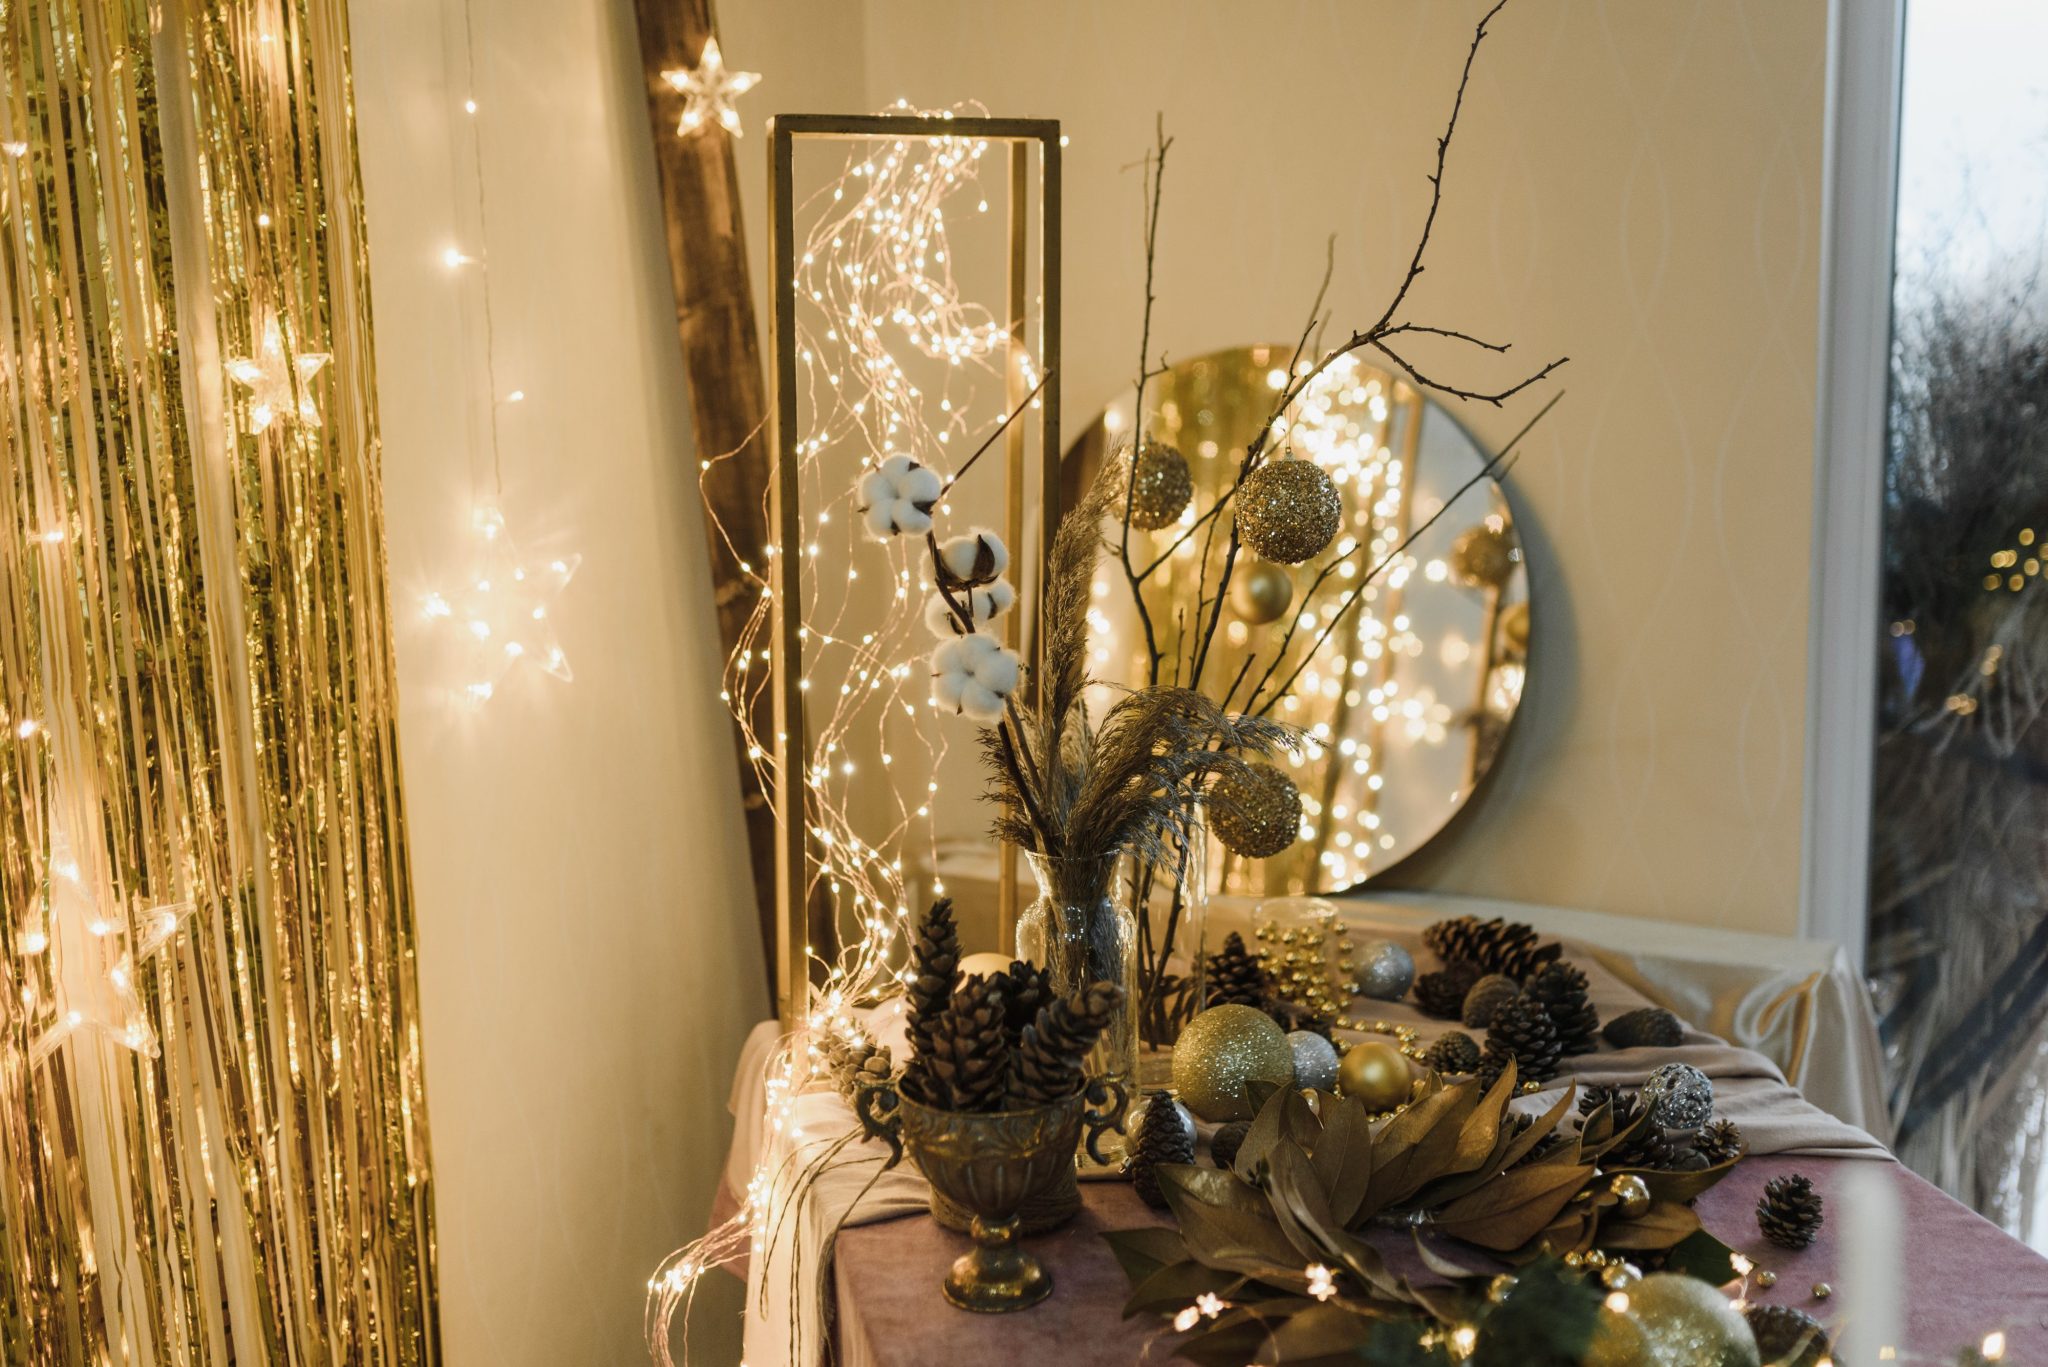
9. Create a Festive Tabletop with a Gold Tinsel and Light Backdrop
This glamorous look is a masterclass in layering reflective surfaces. The formula is approximately 60% shimmer + 30% soft texture + 10% natural elements. The shimmer comes from the gold tinsel curtain, the gold frame, the mirror, and the glittery baubles. The soft texture is provided by the pinkish-mauve fabric and the cotton branches. The natural pinecones are the 10% that grounds the whole display and keeps it from feeling too synthetic. The fairy lights are the magic ingredient that activates all the shimmer, making everything sparkle.
💸 Get This Look For Less
The single element holding this entire festive display together is the gold tinsel curtain. It’s the hero piece. It provides a wall of uninterrupted shimmer that serves as the perfect high-impact, low-effort backdrop. It catches the light from every fairy light bulb and reflects it back into the room, amplifying the sparkle tenfold. If you took it away, you’d still have a pretty collection of objects on a table, but you would completely lose the dramatic, celebratory, and immersive feeling it creates.
10. Mount a Cherry Blossom Fairy Light Branch Above a Bed
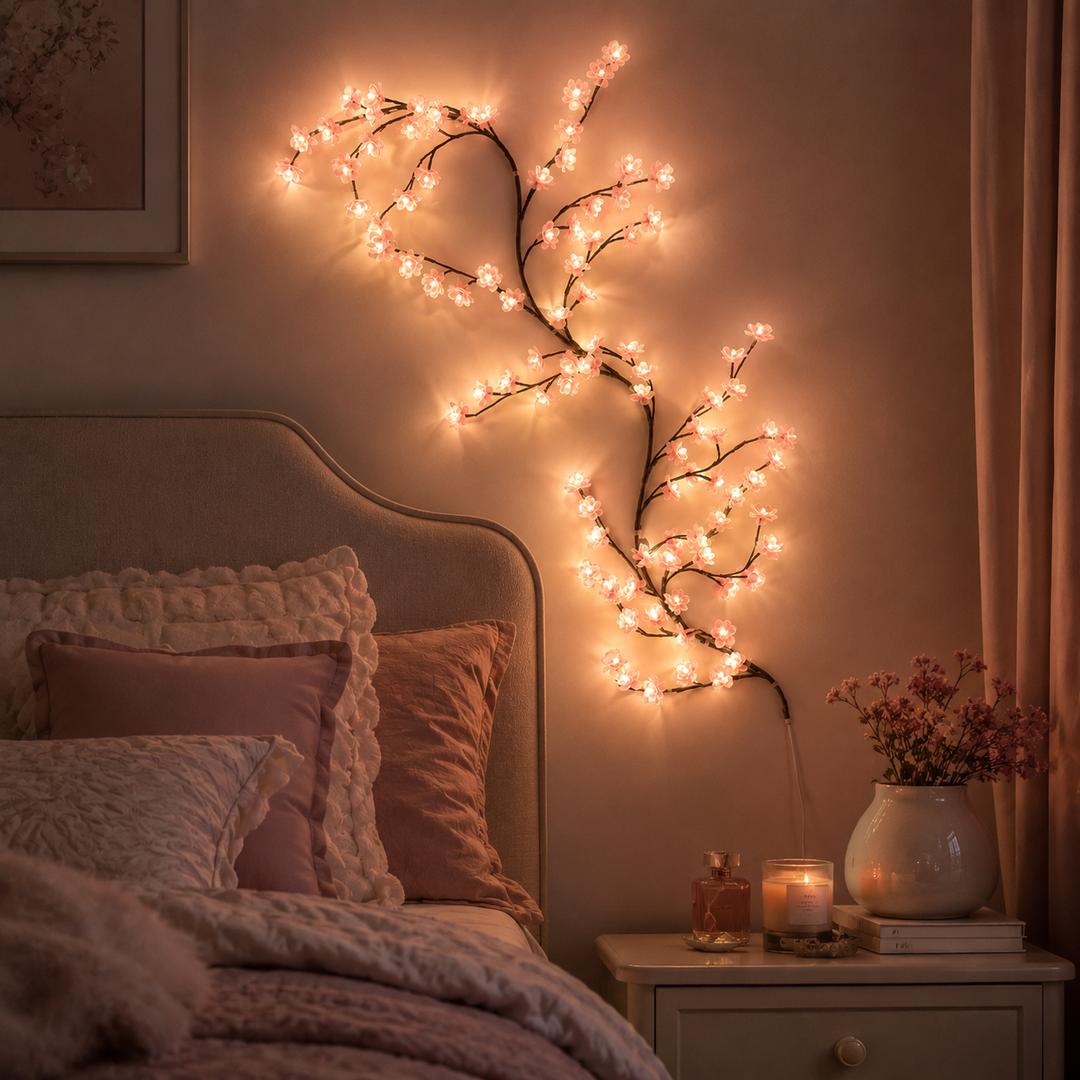
A statement piece like this cherry blossom branch light needs room to breathe. This works best on a wall space that is at least 4-5 feet wide, typically above a queen or king-sized bed. You want to have at least 6-12 inches of negative space on either side of the light fixture to the edge of the wall or window. Placing it in a space that’s too small will make it feel cramped and overwhelming. The ideal ceiling height is 8 feet or more, which allows the ‘branches’ to spread out without feeling too close to the ceiling.
🎯 What Makes It Work
The fastest way to ruin the magic of a wall-mounted light feature is with a dangling, visible cord. To get a clean, professional look, you have two options. The pro way: hire an electrician to install a recessed outlet directly behind where you plan to hang the light. The DIY way: use a paintable cord cover. You can get these at any hardware store. They stick to the wall, hide the cord inside, and can be painted the exact same color as your wall, making the cord virtually disappear. It’s an extra $20 step that makes a $1000 difference.
11. Create a Glowing Photo Wall with Cascading Fairy Lights
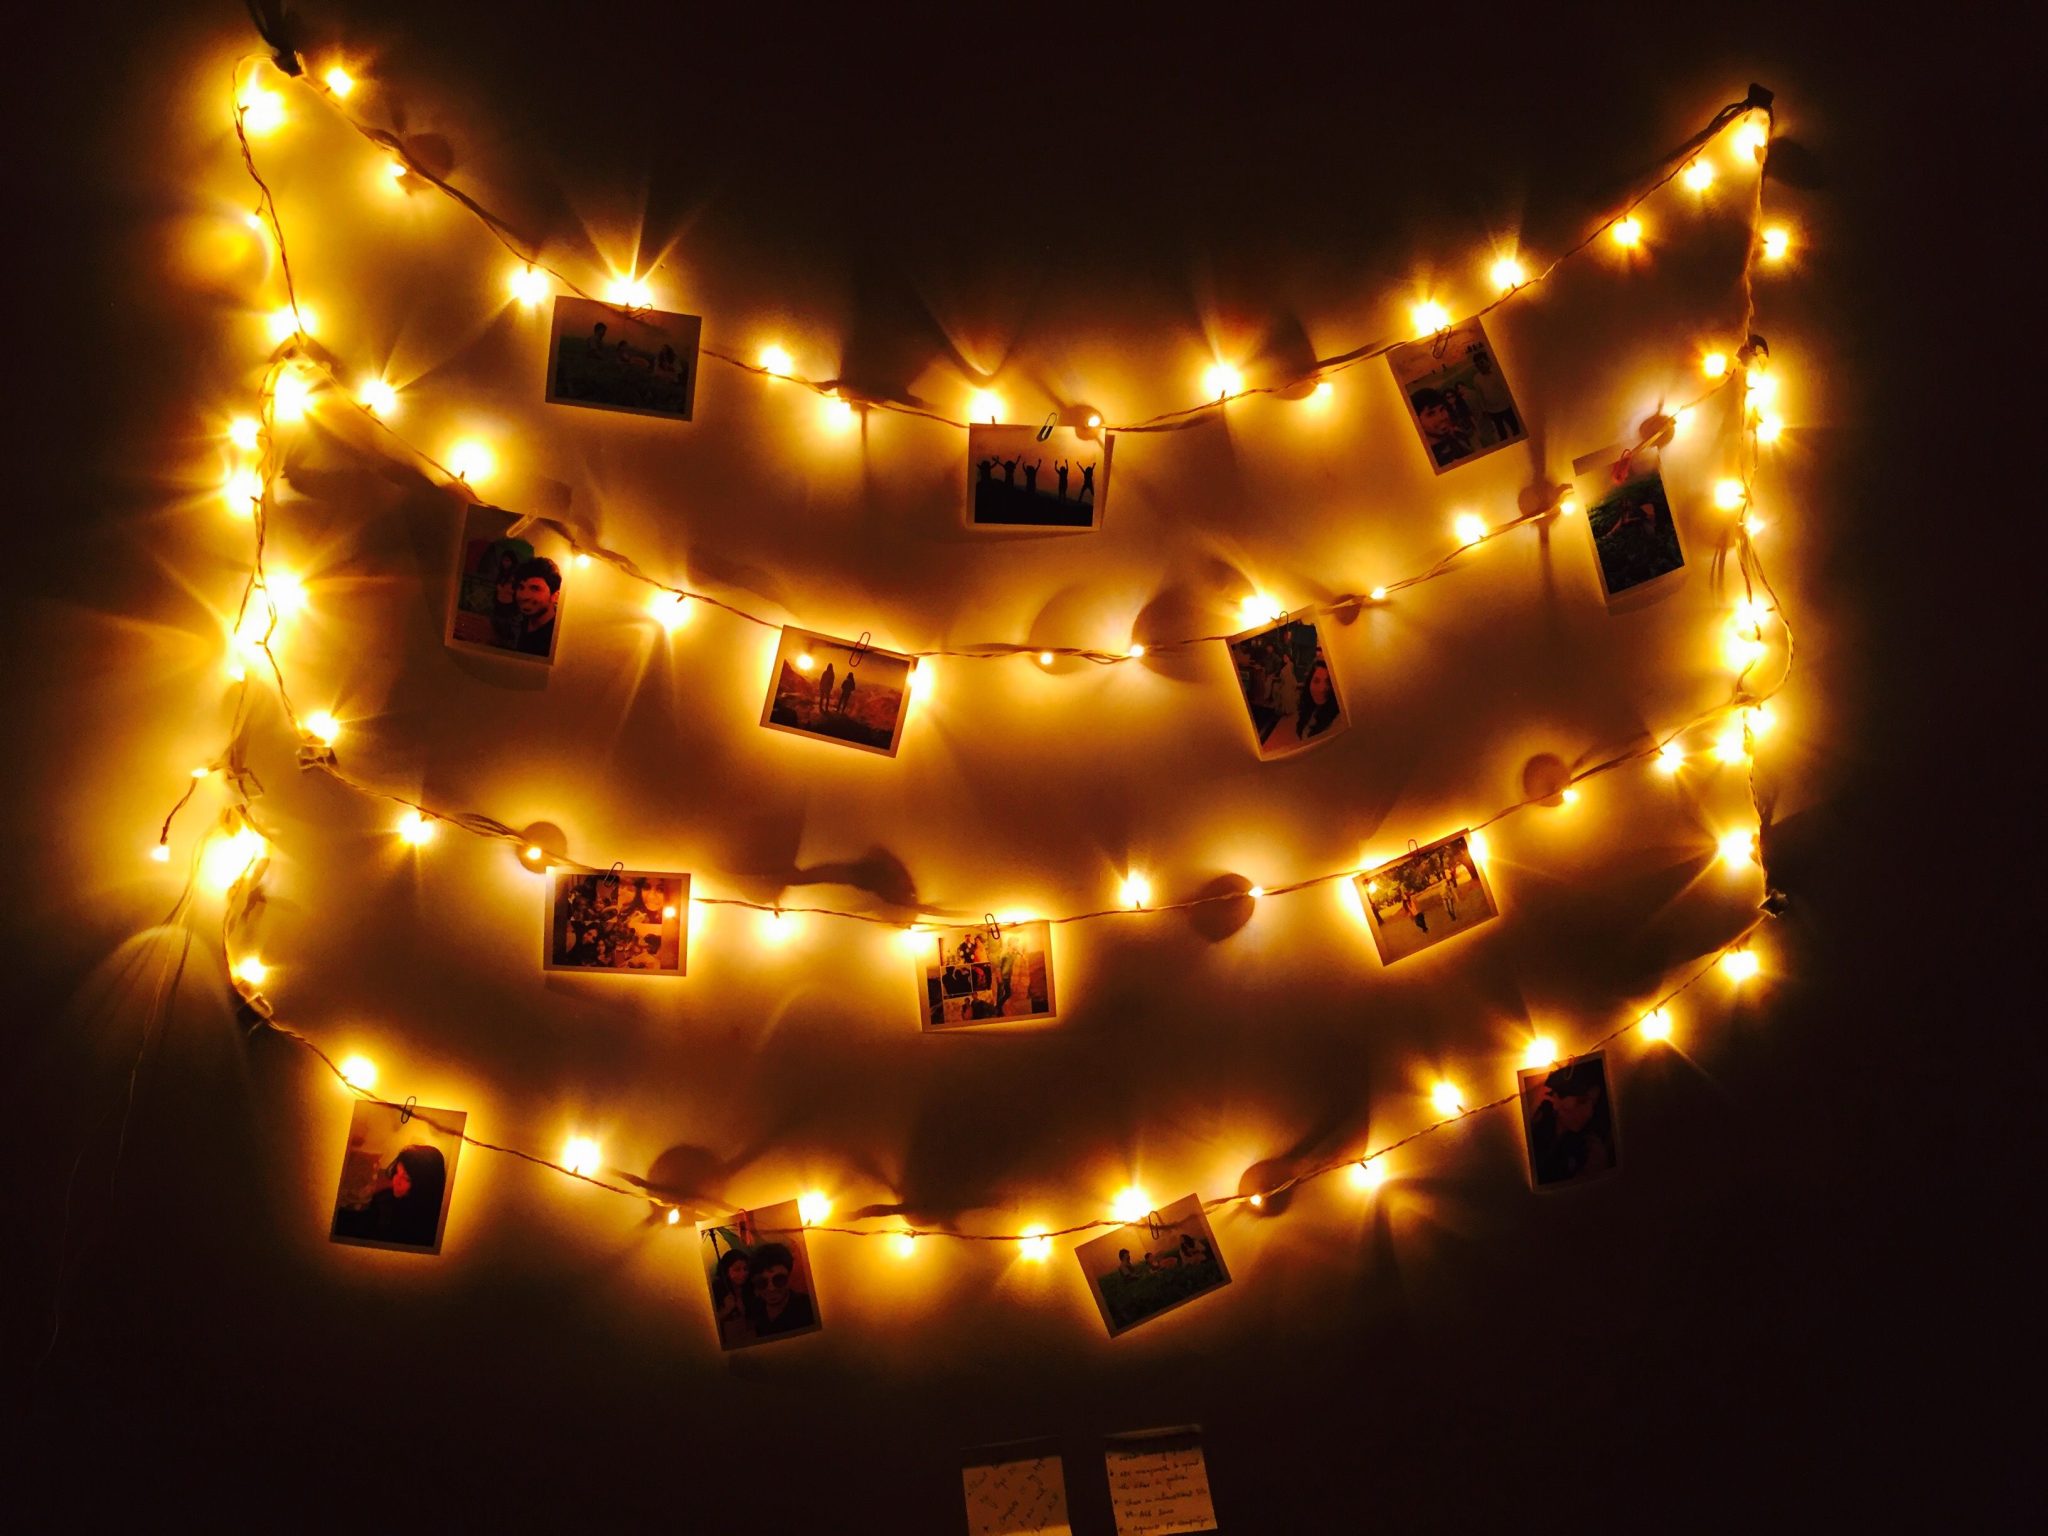
This is a super easy and personal decor project. Time: 30 minutes. Cost: $15-$30. Here’s the plan:
- Choose your light string. A copper or silver wire version works best as the wire itself is less visible. You’ll want a strand that’s at least 15-20 feet long.
- Use small, clear, removable hooks (like Command hooks) to anchor the string to the wall. Start at the top corner and create a zig-zag or cascading pattern across the wall, securing the wire every few feet.
- Print your photos! Small, square prints (like 4×4 or 3×3) with a white border have a classic, nostalgic feel that works perfectly for this.
- Use miniature clothespins (you can find them at any craft store) to clip your photos directly onto the light string. Mix up the spacing and orientation for a casual, collected look.
🔥 Trending Context
clipping photos to your wall, run through this quick checklist:
- Do you have enough wall space? You’ll need a clear wall at least 4 feet wide to create a nice cascading effect without it looking cluttered.
- Where is your nearest outlet? Plan your design so the end of the light string can discreetly reach a power source without a long, ugly cord stretching across the room.
- Are your walls delicate? If you have wallpaper or freshly painted walls, use the gentlest possible removable hooks to avoid damage. Test one in an inconspicuous spot first.
- What color is your wall? The warm golden glow of these lights looks best against a dark, moody wall color (like navy, charcoal, or deep green) which makes the lights pop.
12. Drape Fairy Lights Across a Bookshelf to Highlight Decor
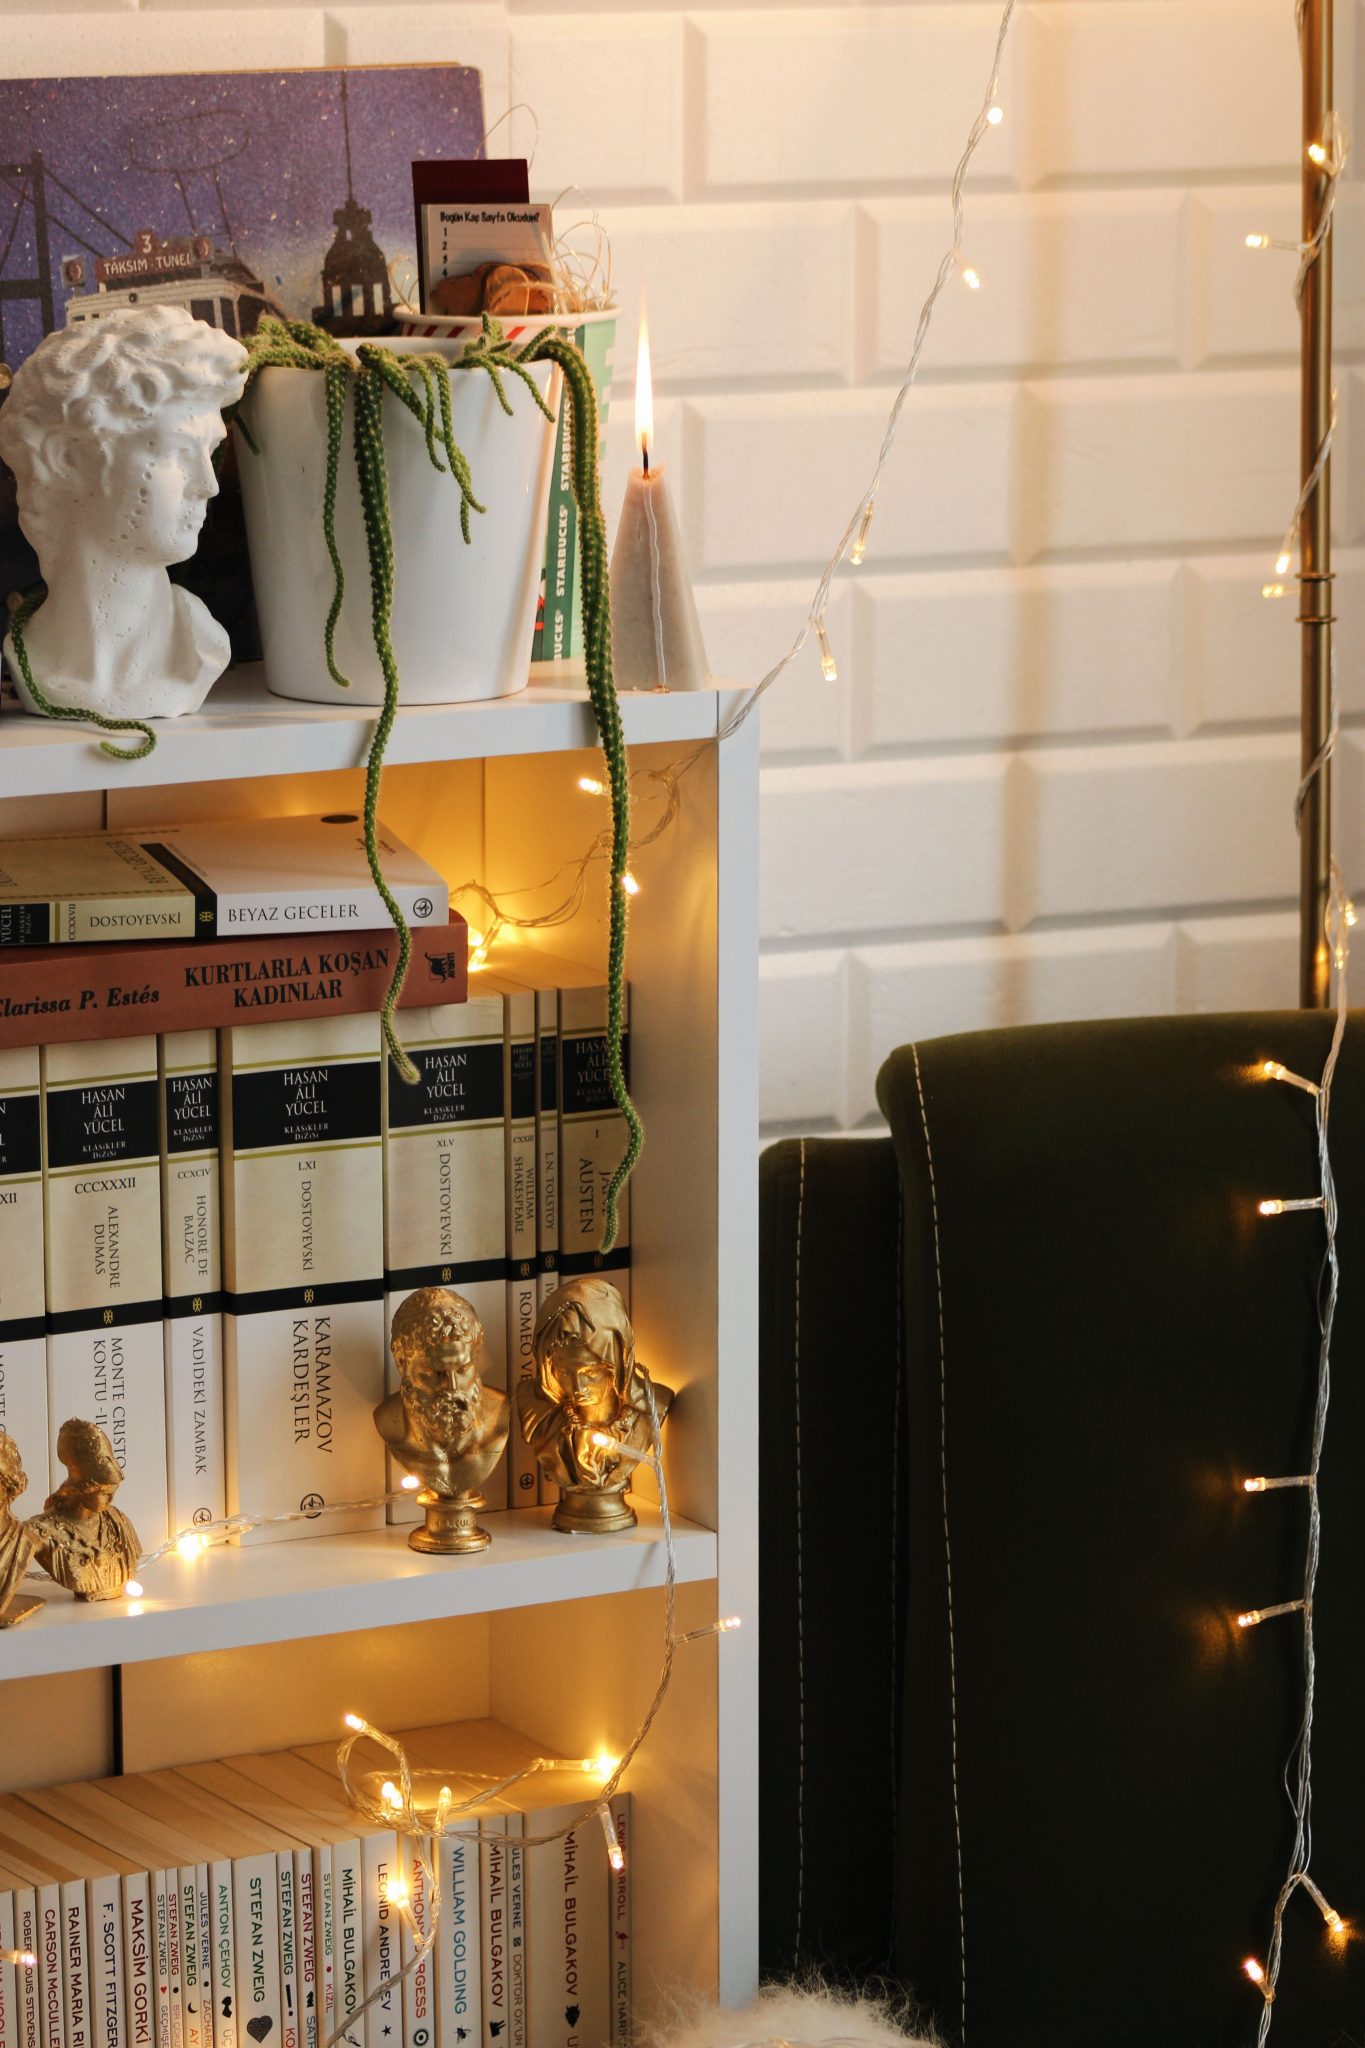
Adding fairy lights to a bookshelf is a designer trick for adding instant depth and warmth. Bookshelves can sometimes look flat and static. By weaving a string of lights in and out of the stacked books, plants, and decorative objects, you create pockets of light and shadow. This highlights your favorite pieces—like those gold busts—and makes the entire unit feel more dynamic and curated. The soft glow breaks up the hard lines of the shelves and books, turning a simple storage piece into a cozy, glowing feature.
💡 Designer Tip
Be warned: a beautifully styled bookshelf with integrated fairy lights is a magnet for dust. The warmth of the lights can actually attract more dust particles. You’ll need to commit to a more detailed dusting routine than you’re used to. Plan on using a microfiber duster or a soft brush attachment on your vacuum to carefully clean around the wires, bulbs, and every single object at least every two weeks. If you let it go, you’ll end up with fuzzy, dusty bulbs that kill the cozy vibe entirely.
13. Frame a Bed Nook with Fairy Lights and Cascading Vines
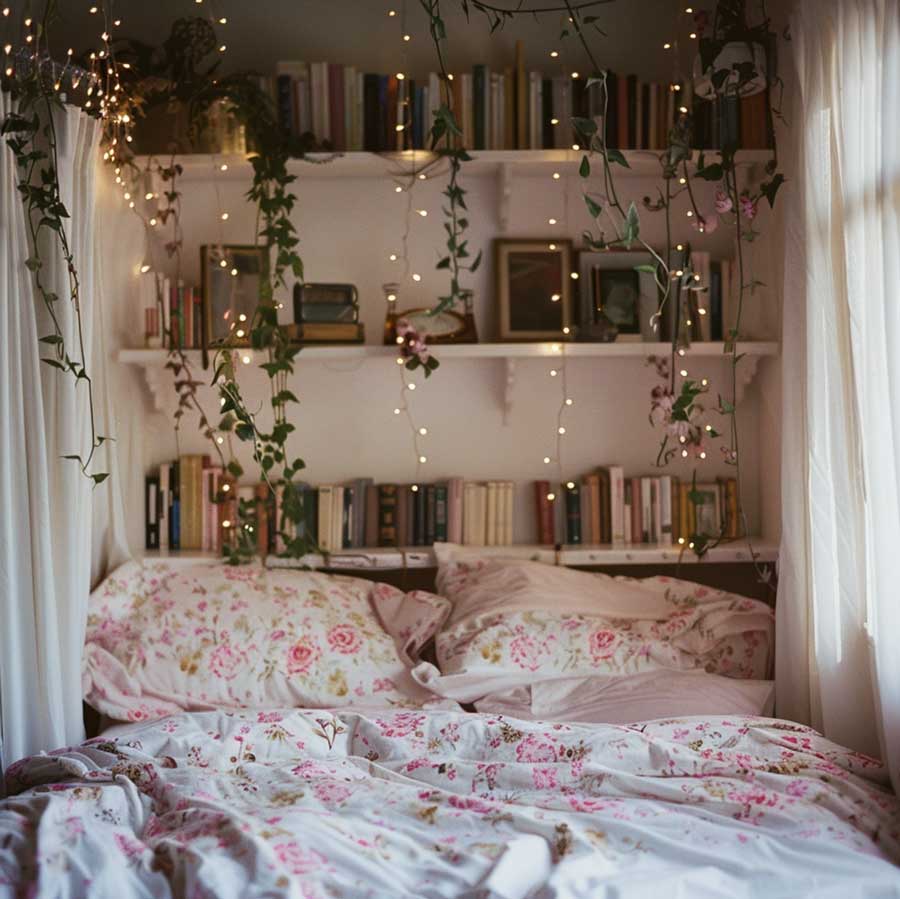
You don’t need to buy expensive pre-lit garlands to get this whimsical look. This is a super affordable DIY project. Buy a basic string of warm white fairy lights (around $15 on Amazon) and a separate string of simple, artificial ivy or eucalyptus vines (around $10-15). Then, simply twist the two strands together yourself before hanging them. This gives you way more control over the ratio of leaves to lights and often looks more natural than the pre-made versions. It’s a 10-minute task that can save you 50%.
💰 Budget Breakdown
While this looks incredibly romantic and cozy on Pinterest, the reality of living with long, draped strands of lights and vines around your bed can be tricky. They can get tangled easily, catch on your pillows when you make the bed, and collect a surprising amount of dust. If you’re a restless sleeper or someone who hates clutter, this might drive you crazy. To minimize the chaos, secure the strands firmly to the shelves and wall with clear hooks or clips to keep them in place. The looser the drape, the more potential for a tangled mess. For a similar but tidier vibe, check out the wall-mounted branch in Idea #9.
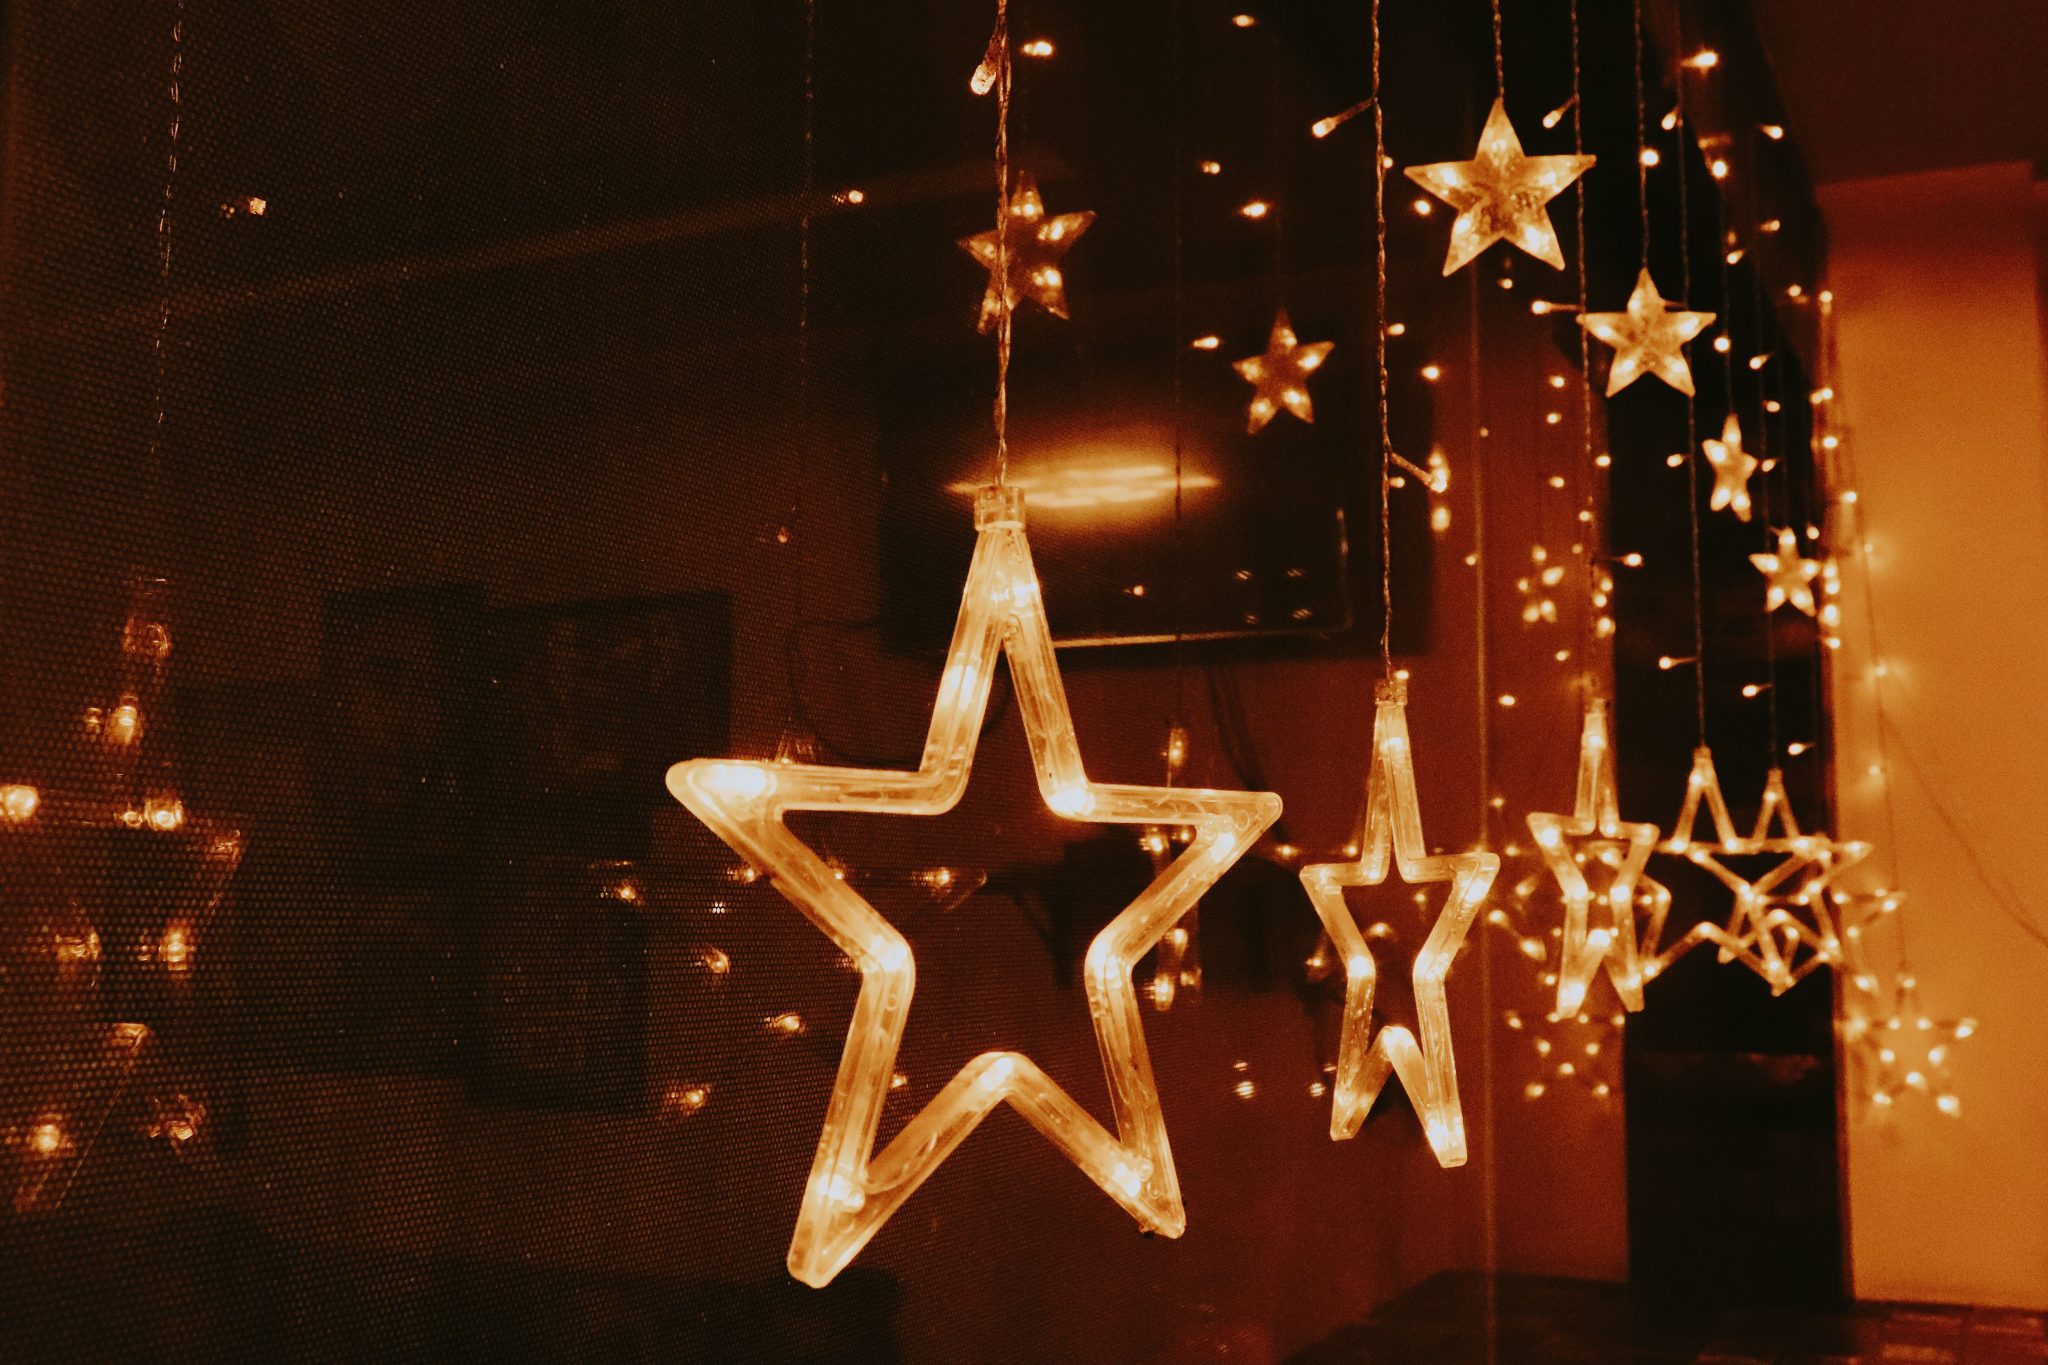
14. Hang a Warm White Star Fairy Light Curtain for a Magical Glow
It’s all about the shape. While any curtain of lights provides a nice glow, the star-shaped enclosures are what elevate this from a simple holiday decoration to a magical, year-round feature. The star is a universally recognized symbol of magic, dreams, and celebration. Using star-shaped lights instantly infuses a space with a sense of whimsy and wonder that you just don’t get from standard round bulbs. They cast a slightly more diffused, softer light than bare bulbs, contributing to the cozy, enchanting atmosphere.
⚠️ Real Talk
To make a fairy light curtain look truly integrated and luxurious, layer it behind a set of sheer curtains. Hang the light curtain on its own rod or with hooks directly against the wall. Then, install a second curtain rod 4-6 inches in front of it and hang simple, sheer white or off-white curtain panels. During the day, the lights are hidden, and at night, the sheer fabric diffuses the light beautifully, creating a soft, ethereal glow without the visual clutter of individual wires and bulbs. It’s a high-end look for minimal effort.
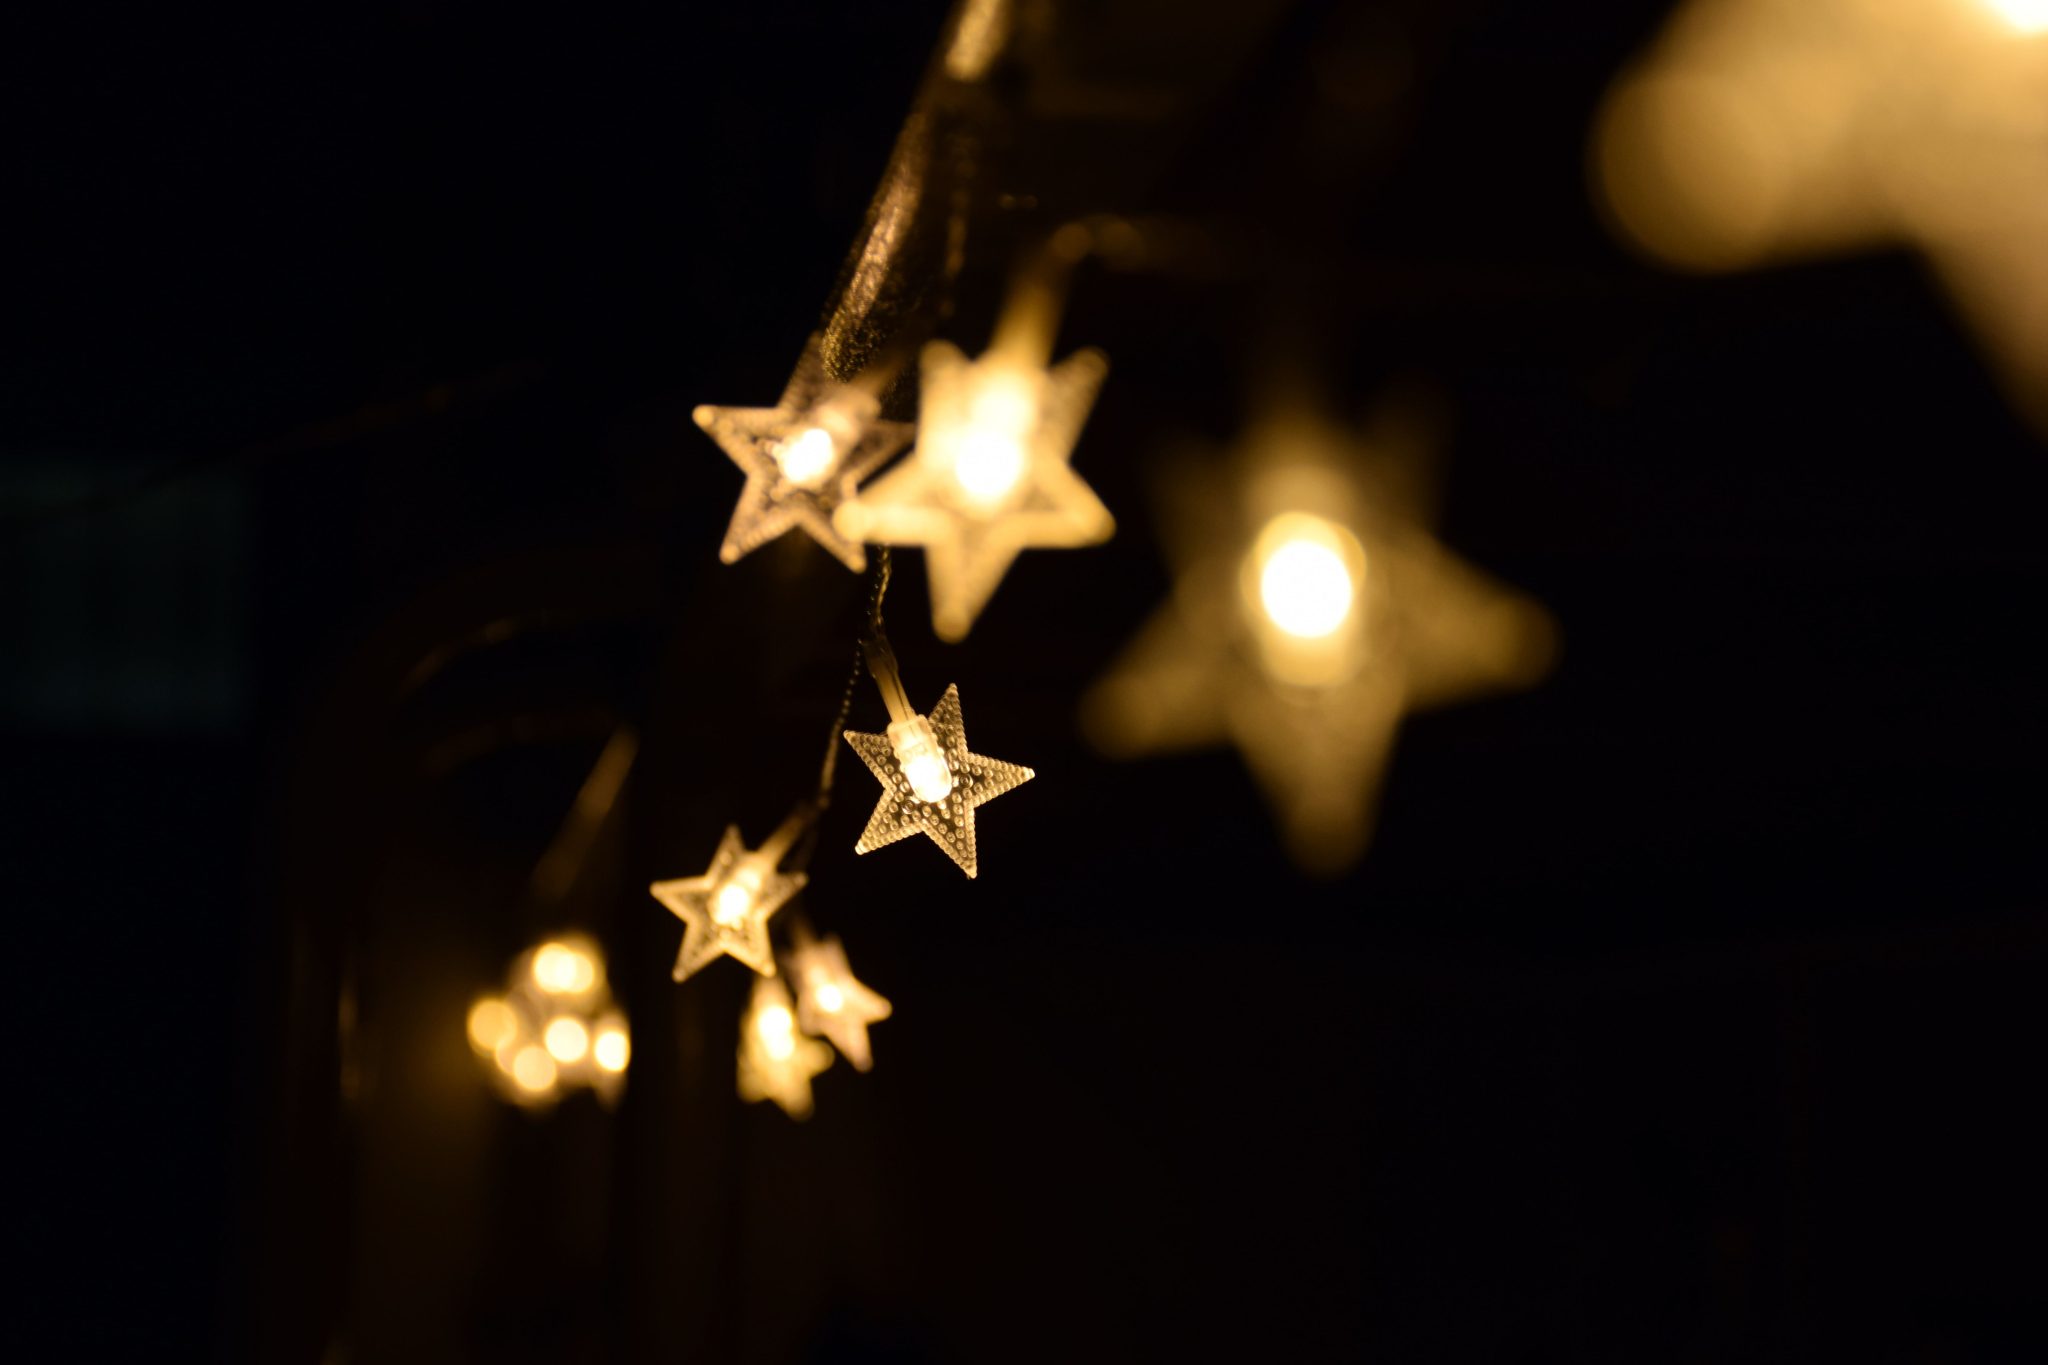
15. Use Textured Star-Shaped Lights for a Soft, Warm Glow
The magic of this image comes from a photography technique you can apply to your decor. The formula is: 20% sharp focus + 80% soft bokeh. In a real room, this translates to layering your lights. Place one string of these textured star lights in the foreground, perhaps on a mantel or headboard, where they are in sharp focus. Then, place another string in the background, maybe on a wall or in a corner, allowing them to become part of the soft, blurry backdrop. This creates depth and a dreamy, atmospheric quality that feels much more sophisticated than a single, flat string of lights.
⭐ The One Thing
This close-up, textural, and slightly blurry style of photography is huge right now, and it points to a larger trend in home decor: the move towards sensory experiences. People don’t just want their homes to look good; they want them to *feel* good. The warm, yellow-orange glow, the soft focus (bokeh), and the tactile-looking texture of the star enclosures all contribute to a feeling of calm and coziness. It’s part of the ASMR-ification of decor, where the visual texture and ambient qualities are just as important as the object itself.
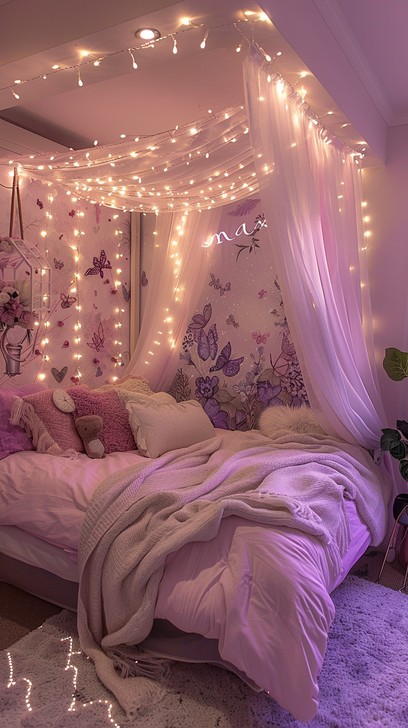
16. Go All-In with a Pink Bedroom and Cascading Canopy Lights
Achieving this full-on dreamy bedroom involves layering several elements. It’s more than just the lights.
- Bedding (duvet, sheets, pillows, knit throw): $200 – $600
- Lighting (multiple fairy light strings, neon sign): $100 – $250
- Decor (sheer canopy, butterfly decals, rug): $150 – $400
- Furniture (assuming you have a bed): $0
- TOTAL: $450 – $1,250
Budget alternative: Focus on the key elements. Get a simple canopy ($40), two long fairy light strings ($30), and a new pink duvet set ($80) to capture the essence for under $150.
📏 Scale Guide
A full canopy with cascading lights is a statement that works best in rooms with ceilings that are at least 8.5 to 9 feet high. This allows the canopy fabric to drape elegantly without overwhelming the bed or making the room feel shorter. The look is ideal for rooms that are at least 10×10 feet. In a smaller room, the sheer volume of fabric and lights can feel a bit claustrophobic. If you love this vibe but have a smaller space or lower ceilings, consider the more minimalist canopy look in Idea #0 which uses an integrated light canopy.
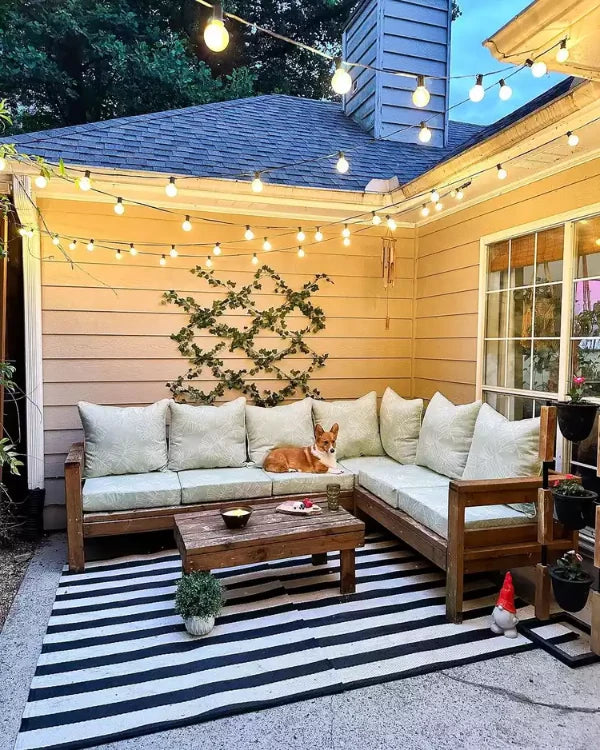
17. Define a Patio with Globe String Lights and a Wooden Sectional
This patio feels like a true outdoor room, and the lighting is a key reason why. The globe string lights strung overhead act like a ceiling, defining the boundary of the seating area and making it feel more intimate and contained. The choice of larger, round globe bulbs is also important; their scale is substantial enough to hold their own in an open outdoor space, unlike tiny fairy lights which might get lost. Paired with the striped rug that defines the floor, these two elements effectively create a ‘room’ without walls.
🔧 How-To Brief
When you’re hanging permanent outdoor string lights, you need to think about weather. Look for lights with a rating of at least IP44, but ideally IP65 for better water and dust resistance. This ensures they can withstand rain and debris. Also, check the bulb material. Glass bulbs offer a clearer, more classic light, but they can shatter in hail or if hit by a stray branch. Plastic or shatterproof bulbs are a much safer and more durable option for most backyards, especially if you have kids or pets running around.
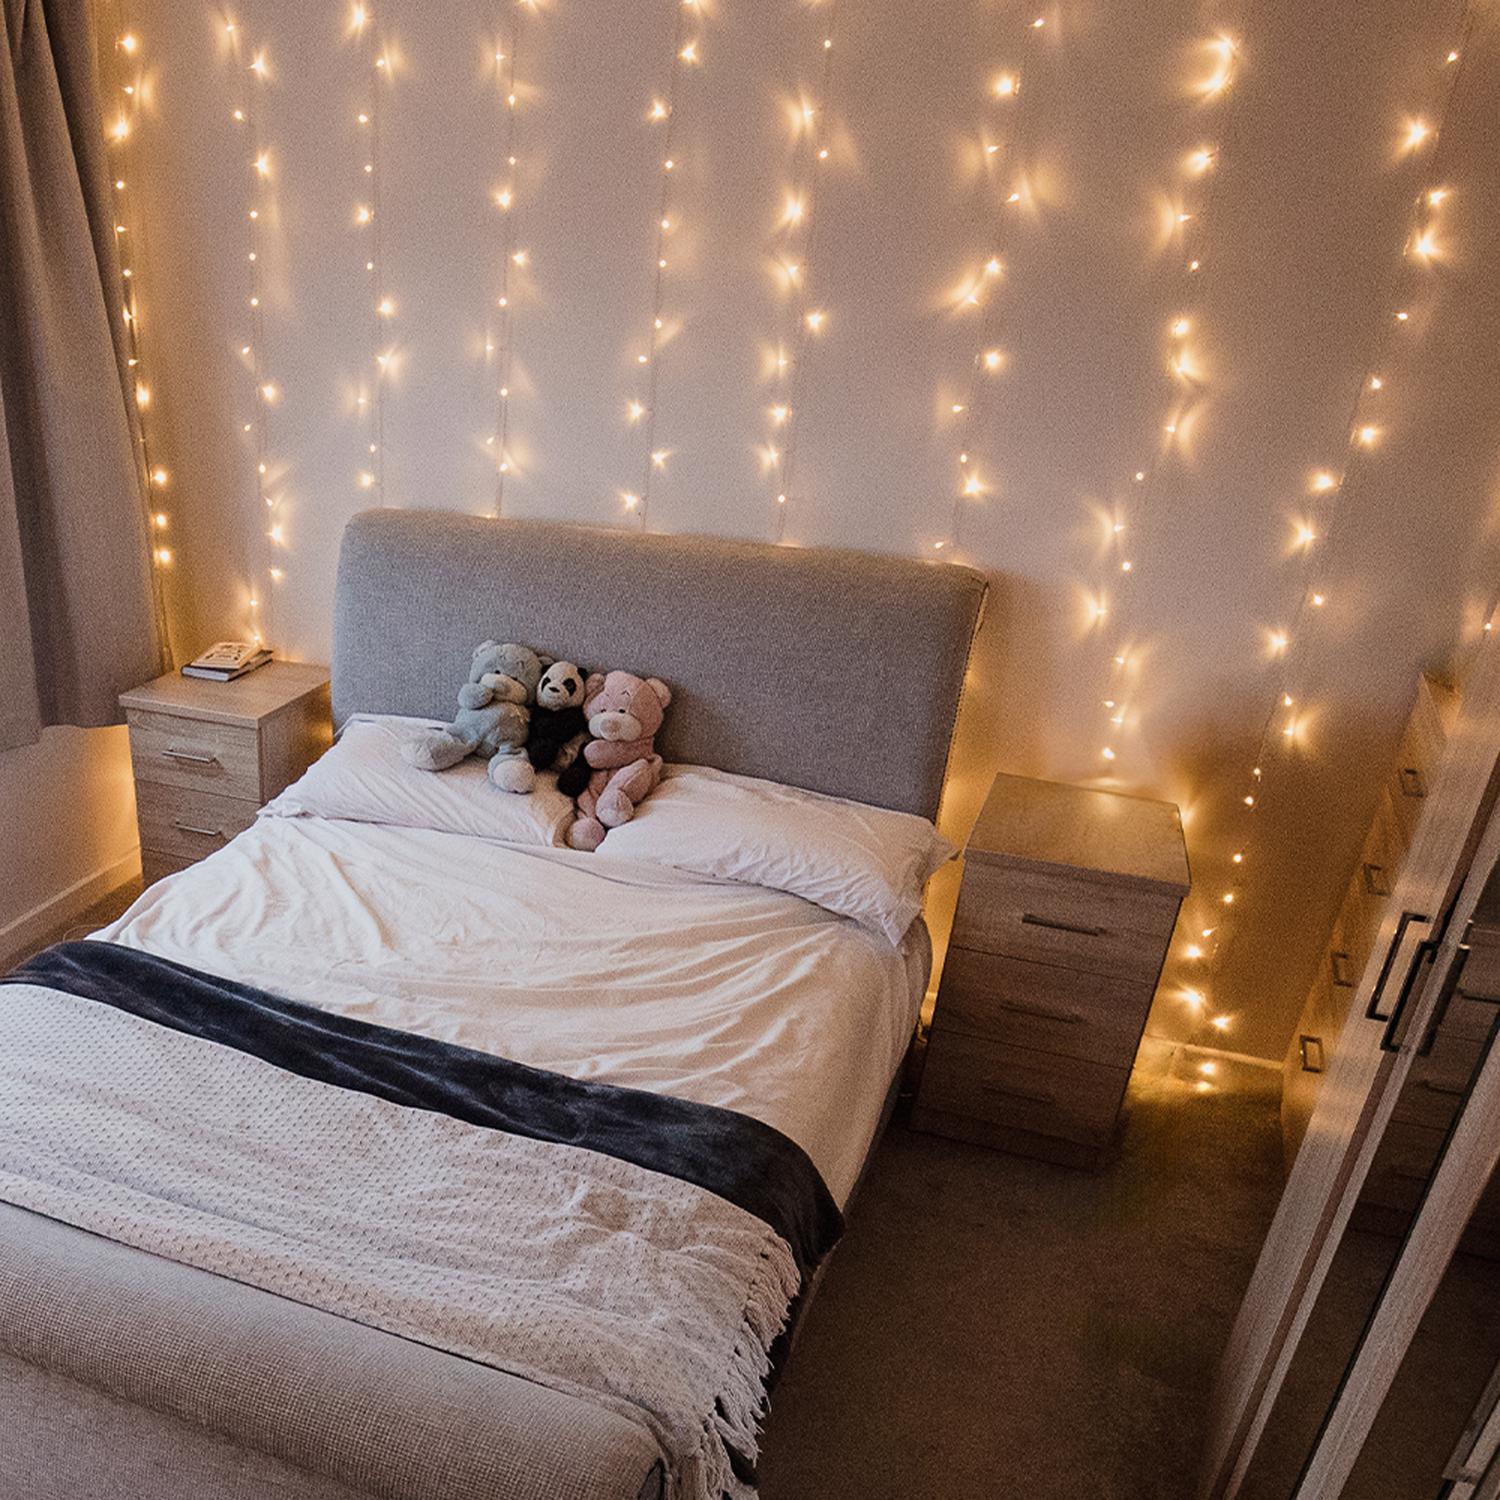
18. Create a Glowing Headboard with a Curtain of Fairy Lights
The key to making a fairy light curtain feel like a sophisticated design feature instead of a dorm room cliché is to install a dimmer. It’s a simple electrical swap that an electrician can do in under an hour, or you can buy plug-in dimmer modules for string lights for about $15. This allows you to adjust the brightness to match your mood. You can have it on full brightness for a cheerful glow while reading, or dim it down to a very faint, ambient twinkle for a relaxing, sleepy atmosphere. Control is everything.
✅ Before You Start
A full ‘curtain’ of lights with 10-12 vertical strands can cost $30-$50. To get a similar glowing headboard effect for less, you don’t need that density. Buy a single, extra-long (33-66 ft) string of copper-wire fairy lights for about $15. Then, use small, clear removable hooks to drape the single strand back and forth vertically behind the bed. You’ll use 4-5 strands instead of 12, but by spacing them a bit wider, you still get that gorgeous, warm backdrop for about half the price. It’s less of a ‘curtain’ and more of a ‘waterfall’.
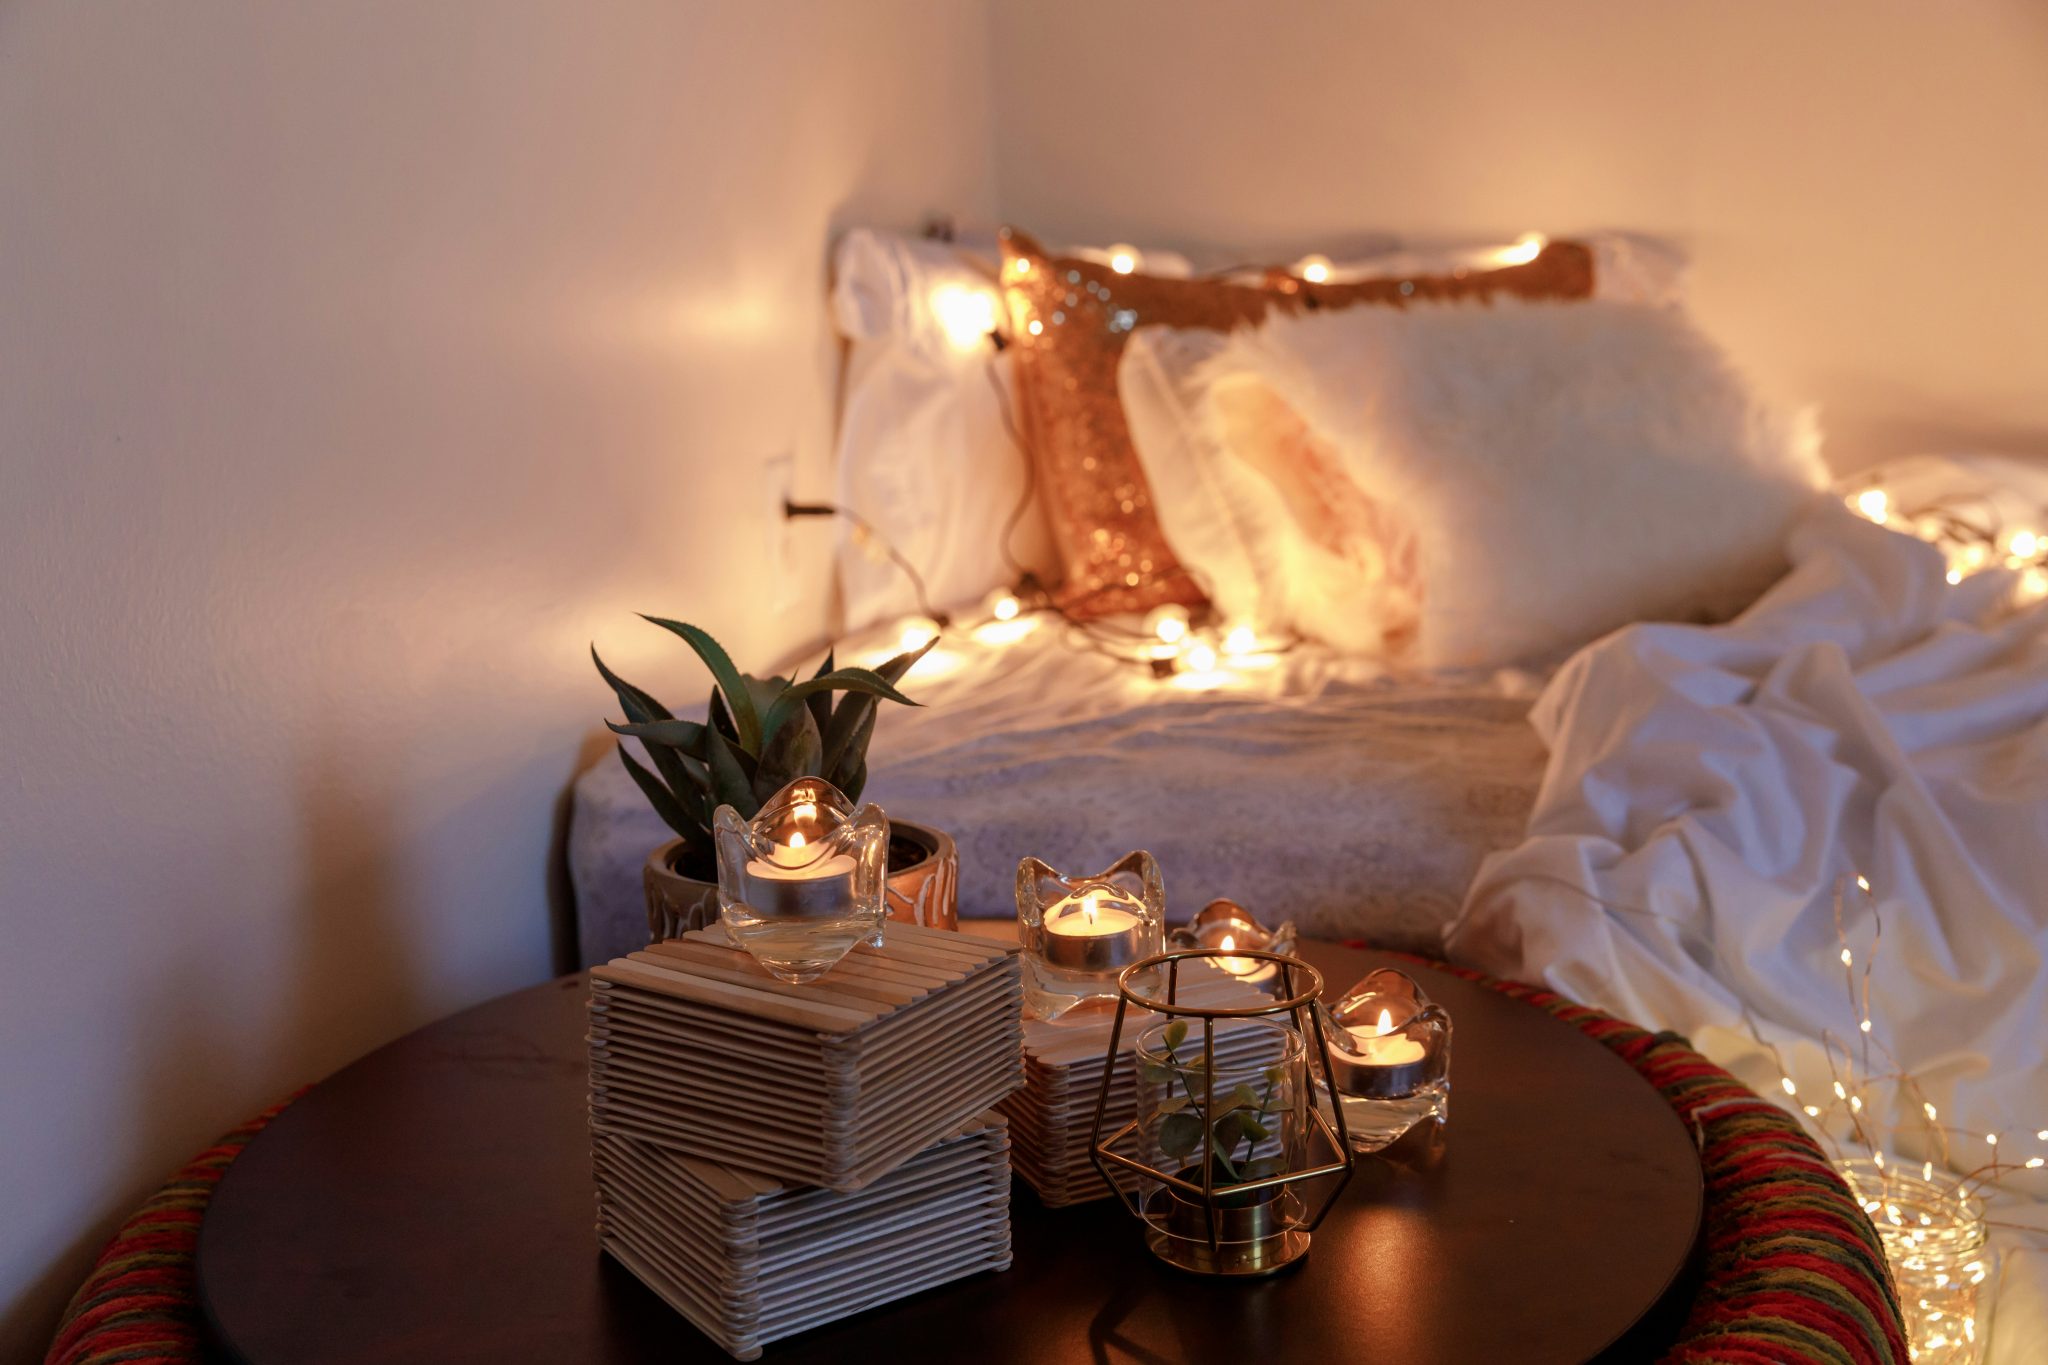
19. Layer Lights and Textures on a Bedside Table
that makes this corner so incredibly cozy is the mixing of light sources. You don’t just have fairy lights. You also have the flickering flames of the tealight candles. This combination is powerful. The steady, consistent glow of the fairy lights provides the base ambient light, while the dynamic, dancing flame of the candles adds life, movement, and a different quality of warmth. If you only had one or the other, it would be nice, but the combination of the two is what creates this truly rich, layered, and intimate atmosphere.
📐 Style Math
This cozy corner follows a tactile formula: 40% soft textiles + 30% warm light + 20% smooth surfaces + 10% metallics. The soft textiles are the white bedding and fluffy pillow. The warm light comes from both the fairy lights and candles. The smooth surfaces are the dark tabletop and the ceramic pot of the succulent. The pop of metallic comes from the gold sequin pillow and the geometric planter. This blend of textures is what makes the scene feel so rich and inviting to the touch, not just the eyes. Remove any one texture, and the look feels flatter.
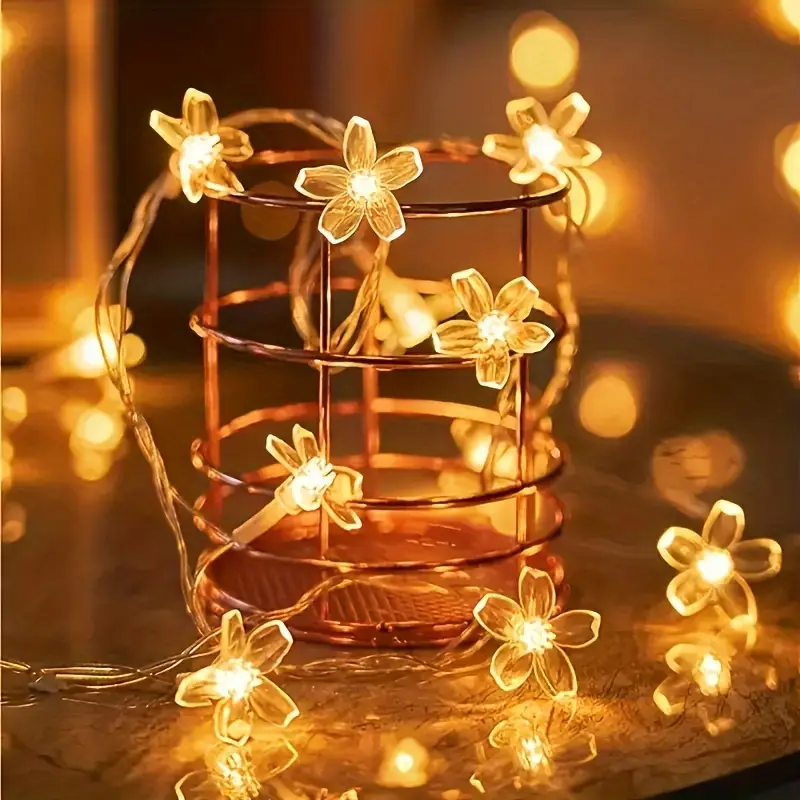
20. Showcase Flower-Shaped Fairy Lights in a Rose Gold Cage
This is a brilliant use of a decorative object to elevate a simple string of lights. The rose gold wire cage acts as a stage. Instead of just being a string of lights, they become a contained art piece. The metallic wire of the cage catches the light from the flower-shaped bulbs, creating a secondary layer of reflection and sparkle. The open structure of the cage also casts interesting, linear shadows, adding another layer of visual complexity. It turns a $15 string of lights into a sculptural table lamp.
🧹 Maintenance Reality
This idea is perfect for small-space decorating. A light-filled cage like this works beautifully on a nightstand, a small entryway console, or a bookshelf. It provides a significant visual impact within a very small footprint, typically no more than 6-8 inches in diameter. Because it’s a self-contained accent, it doesn’t require a large wall or open space. It’s a great solution for adding a touch of magic and ambient light to a tiny apartment, a dorm room, or a powder room countertop where a traditional lamp would be too bulky.
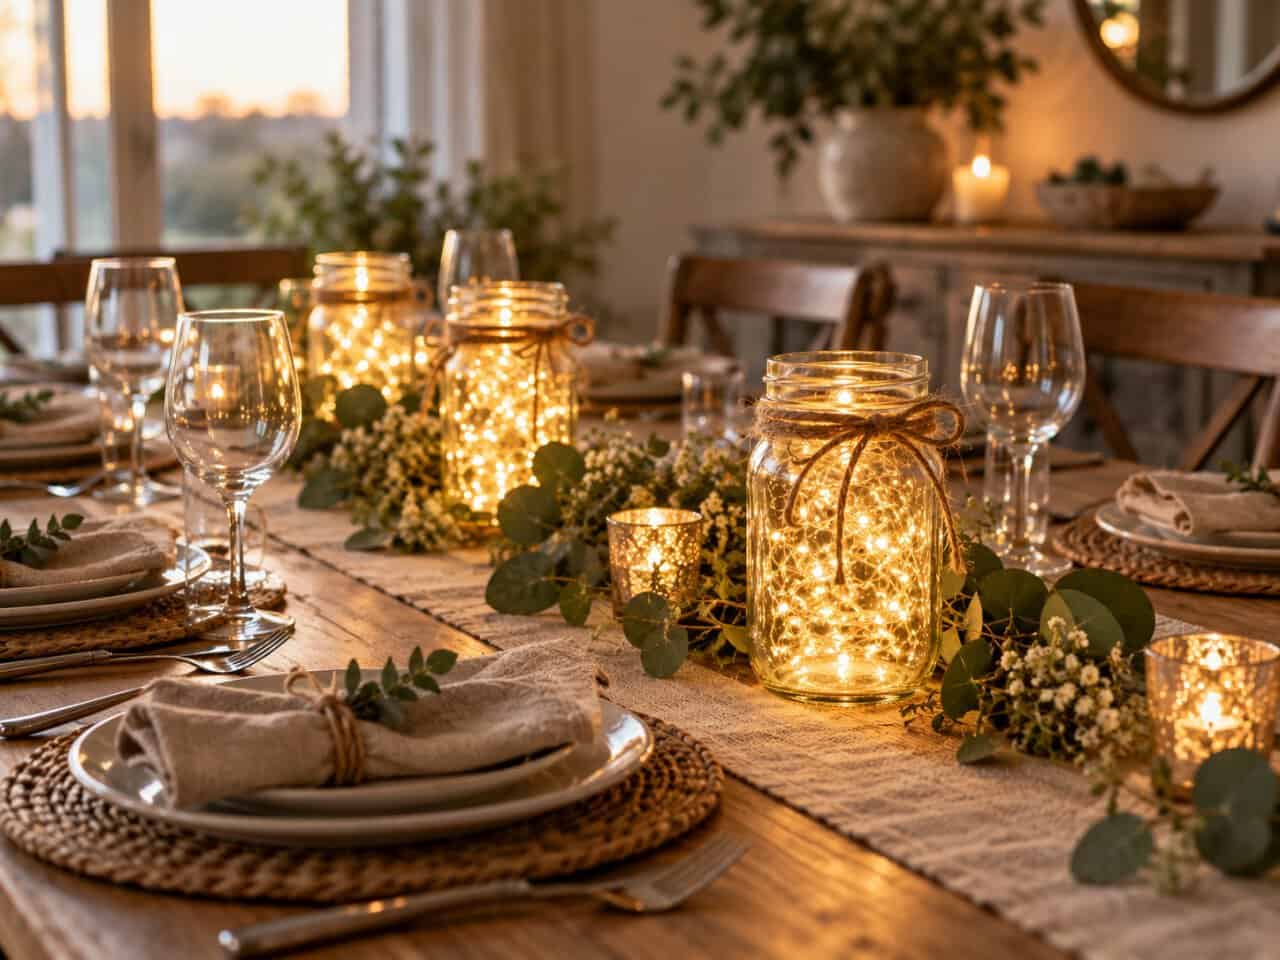
21. Design a Rustic Tablescape with a Mason Jar and Greenery Runner
This elegant, rustic tablescape feels expensive, but it’s surprisingly achievable. Here’s a likely cost for a table of 6-8:
- Centerpiece (jars, fairy lights, greenery, votives): $60 – $120
- Textiles (table runner, linen napkins): $50 – $100
- Tableware (woven placemats): $40 – $80
- TOTAL: $150 – $300
Budget alternative: Forage for your greenery, reuse jars you already have, and find placemats at a thrift store or HomeGoods. You can get this entire vibe for well under $75, especially if you already own the napkins.
💸 Get This Look For Less
A centerpiece that mixes fairy lights, open flames (candles), and potentially dry foliage requires your full attention. Never leave a tablescape like this unattended, even for a minute. Ensure the greenery and fabric runner are not close enough to touch the flames of the votive candles. It’s also wise to place the battery packs for the fairy lights at the very end of the runner, away from any potential spills. This look is stunning for a dinner party, but it should be fully disassembled or have the candles extinguished as soon as the party is over.
22. Layer Fairy Lights Behind Sheer Curtains for a Dreamy Glow
Creating this dreamy wall of light is a weekend project that makes a huge impact. Time: 2 hours. Cost: $75-$150. Here’s the rundown:
- Install two parallel curtain rods. A double curtain rod kit is the easiest option. Install the back rod as close to the wall as possible, and the front rod about 4-6 inches out.
- Hang your fairy light curtains. ‘Curtain’ style lights with vertical strands are perfect for this. Hang them from the back rod.
- Hang your sheer curtains on the front rod. This will hide the wires and create that beautiful, diffused glow.
- Plug everything in, preferably into a power strip with a single switch for easy on/off. Tuck the cords away neatly behind furniture.
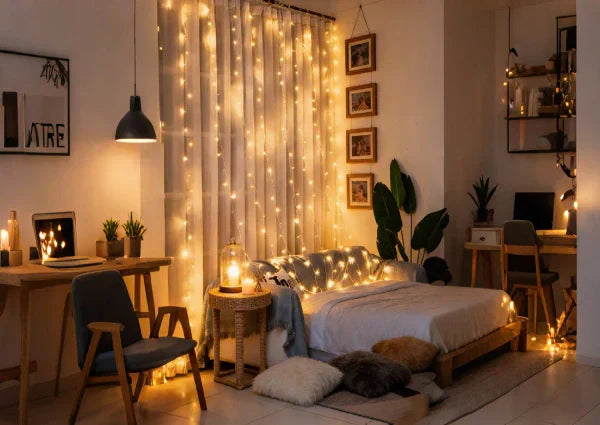
🎯 What Makes It Work
The fabric you choose for the sheer curtains makes all the difference. Avoid pure, bright white polyester, which can look cheap and have a bluish, cold cast. Instead, opt for a sheer fabric with a bit more texture and warmth. Look for ‘voile’ or ‘linen-look’ sheers in an off-white, cream, or natural flax color. These fabrics have a more organic texture that catches the light beautifully and provides a much softer, more high-end diffusion than basic sheer panels. The slight color variation will also enhance the warmth of the fairy lights.
23. Drape Warm Bulb Lights Over a Weathered Garden Fence
Letting a climbing vine intertwine with string lights creates a gorgeous, natural look, but it requires some thought. Choose a vine that isn’t overly aggressive, or you’ll spend every weekend cutting it back so it doesn’t swallow your lights. Also, be aware that when a light bulb burns out, you’ll have to carefully untangle the vine to replace it, which can be a delicate operation. For a lower-maintenance version of this look, hang the lights first and then train the vine to grow *around* but not *through* the main cord.
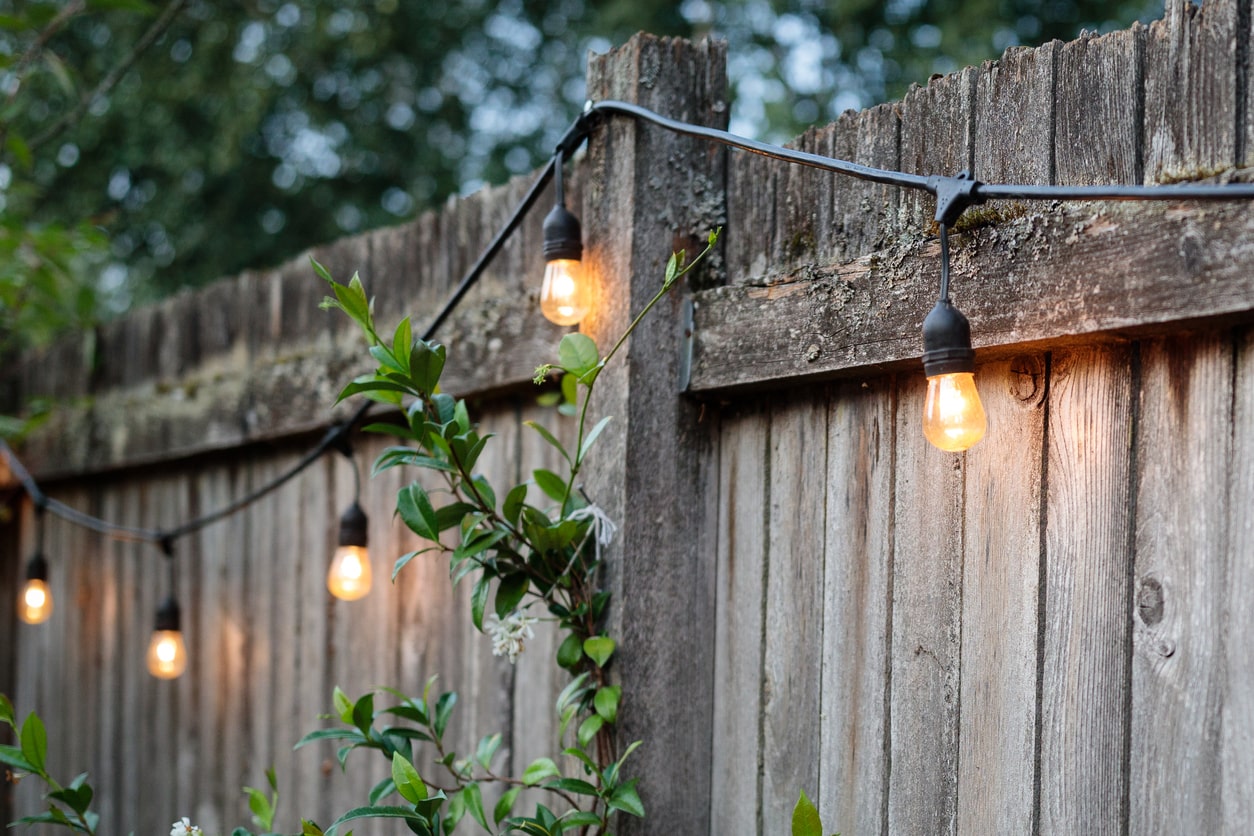
🔥 Trending Context
The most important detail here isn’t the lights themselves, but the color of their glow. These bulbs emit a distinct, warm, amber-toned light, not a neutral or cool white. This specific color temperature is what gives the scene its cozy, rustic, and slightly vintage feel. It complements the weathered gray wood and the dark green foliage perfectly. If you were to swap these out for bright white or bluish LEDs, the entire mood would shift from inviting and natural to harsh and sterile in an instant. The warmth is everything.
24. Hang Perforated Spherical Lights for a Decorative Patterned Glow
These lights are so effective because they do more than just illuminate—they decorate with light itself. The perforated metal spheres act like tiny lampshades, but instead of just softening the light, they shape it. The star and dot cutouts project patterns onto the surrounding surfaces (and onto the lights themselves), creating a complex, layered effect of light and shadow. This is far more visually interesting than a simple bare bulb, adding a touch of bohemian or Moroccan-inspired detail to the outdoor space, even when the lights are off.
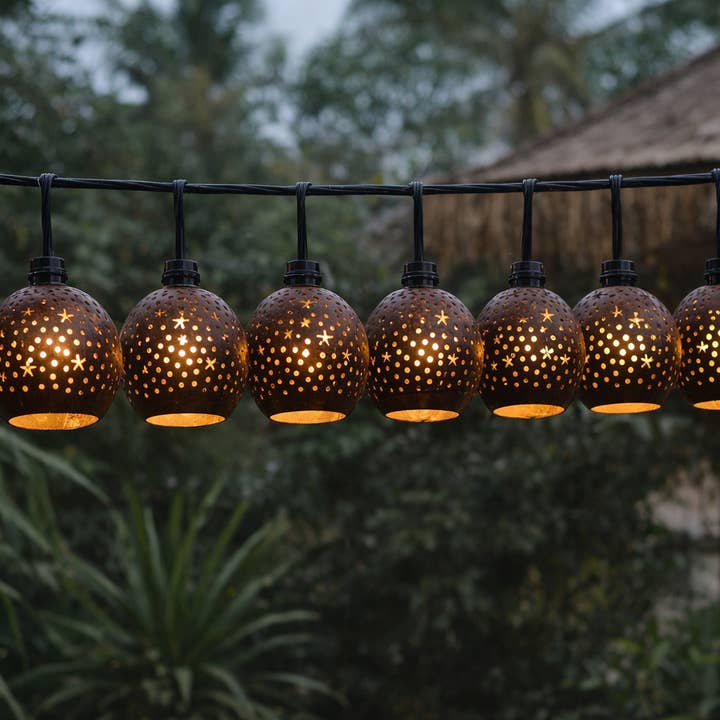
💡 Designer Tip
Because these lights are more decorative and cast a patterned, slightly dimmer light than exposed Edison bulbs, they are perfectly suited for smaller, more intimate outdoor spaces. Think balconies, small patios, or a cozy corner of a larger yard. A single strand is often enough to create a magical atmosphere without needing the high-lumen output required to light a large area. They’re ideal for spaces under 100 square feet where you want to create a mood, not provide bright, functional lighting.
25. Create a Cozy Backyard Fire Pit with White Adirondack Chairs
This classic campfire setup is a fantastic backyard addition. Here is a possible breakdown of the costs:
- Main Seating (4 Adirondack chairs): $400 – $1,200 (wood is more expensive than composite)
- Lighting (2-3 strands of outdoor string lights): $100 – $250
- Fire Feature (metal fire pit): $80 – $300
- Landscaping (mulch/gravel, plants, pots): $150 – $500
- TOTAL: $730 – $2,250
Budget alternative: Score used chairs on Facebook Marketplace, opt for a cheaper fire pit, and use solar string lights to bring this vision to life for under $400.
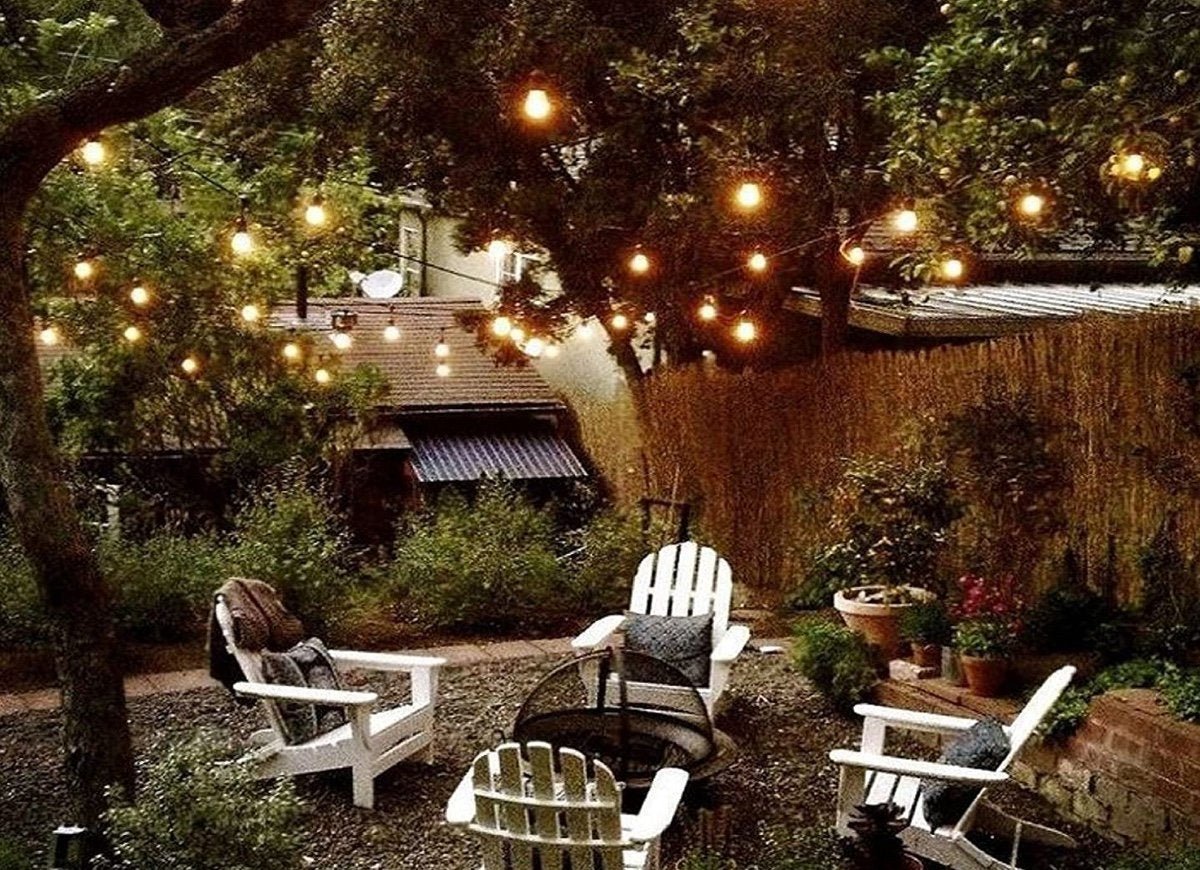
💰 Budget Breakdown
Before you commit to hanging string lights between trees, check a few things first:
- Are the trees healthy? Never anchor lights to dead or weak branches that could fall in a storm. Consult an arborist if you’re unsure.
- What is your power source? Will you need to run a long, outdoor-rated extension cord, or can you have an outdoor outlet professionally installed nearby? Plan your cord route to avoid creating a trip hazard.
- What is the distance? Measure the span between your anchor points. You may need to buy a separate galvanized steel guide wire to support the lights if the span is longer than 25 feet to prevent excessive sagging and strain on the light cord.
26. Accent a Gold-Framed Mirror with a Vine Fairy Light Garland
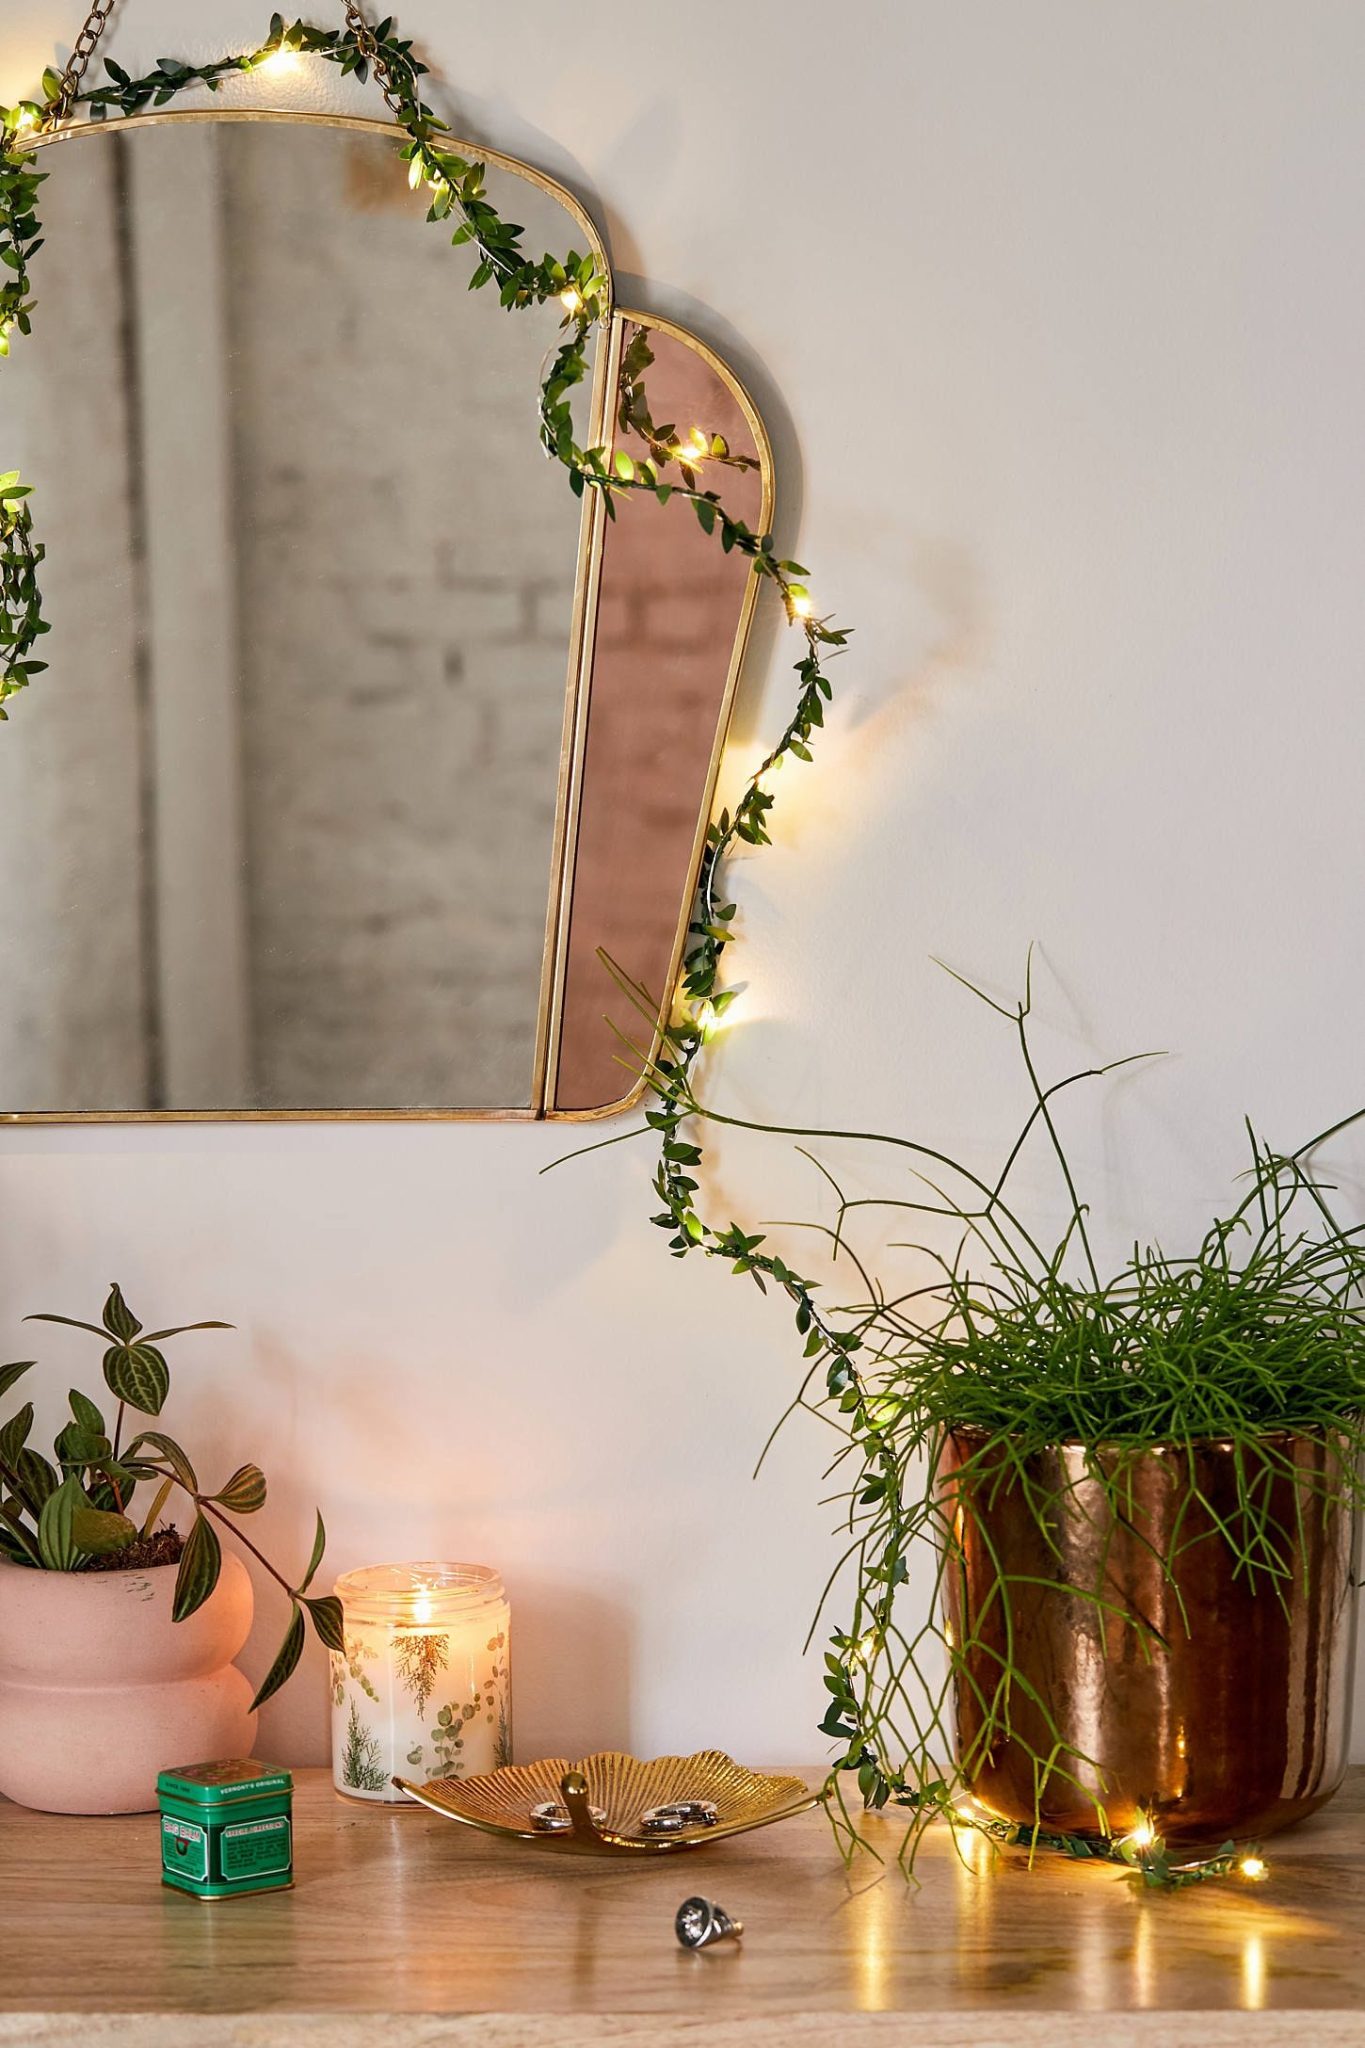
This chic little vignette is a lesson in mixing metallics. The formula is: 50% warm metal + 30% organic elements + 20% soft light. The warm metals are key: the primary gold frame of the mirror, the secondary copper of the planter, and the rose-gold tint of the mirror panel itself. The organic elements are the green vine garland and the potted plants. The soft light from the integrated fairy lights is what ties it all together, making the metals gleam and the leaves glow. It feels curated and luxe because of this deliberate, warm-toned mix.
⚠️ Real Talk
Using a mirror to amplify your fairy lights is one of the oldest tricks in the book. By draping the light garland over the mirror, you’re essentially doubling your light source for free. The mirror reflects each tiny bulb, creating the illusion of more lights and more depth. For maximum effect, choose a large mirror. A mirror that is at least 30-36 inches tall will create a much more significant and impactful reflection than a smaller one. Placing a candle in front of it, like in this setup, adds another layer of flickering, reflected light.
27. Decorate a Child’s Fabric Play Tent with Star Fairy Lights
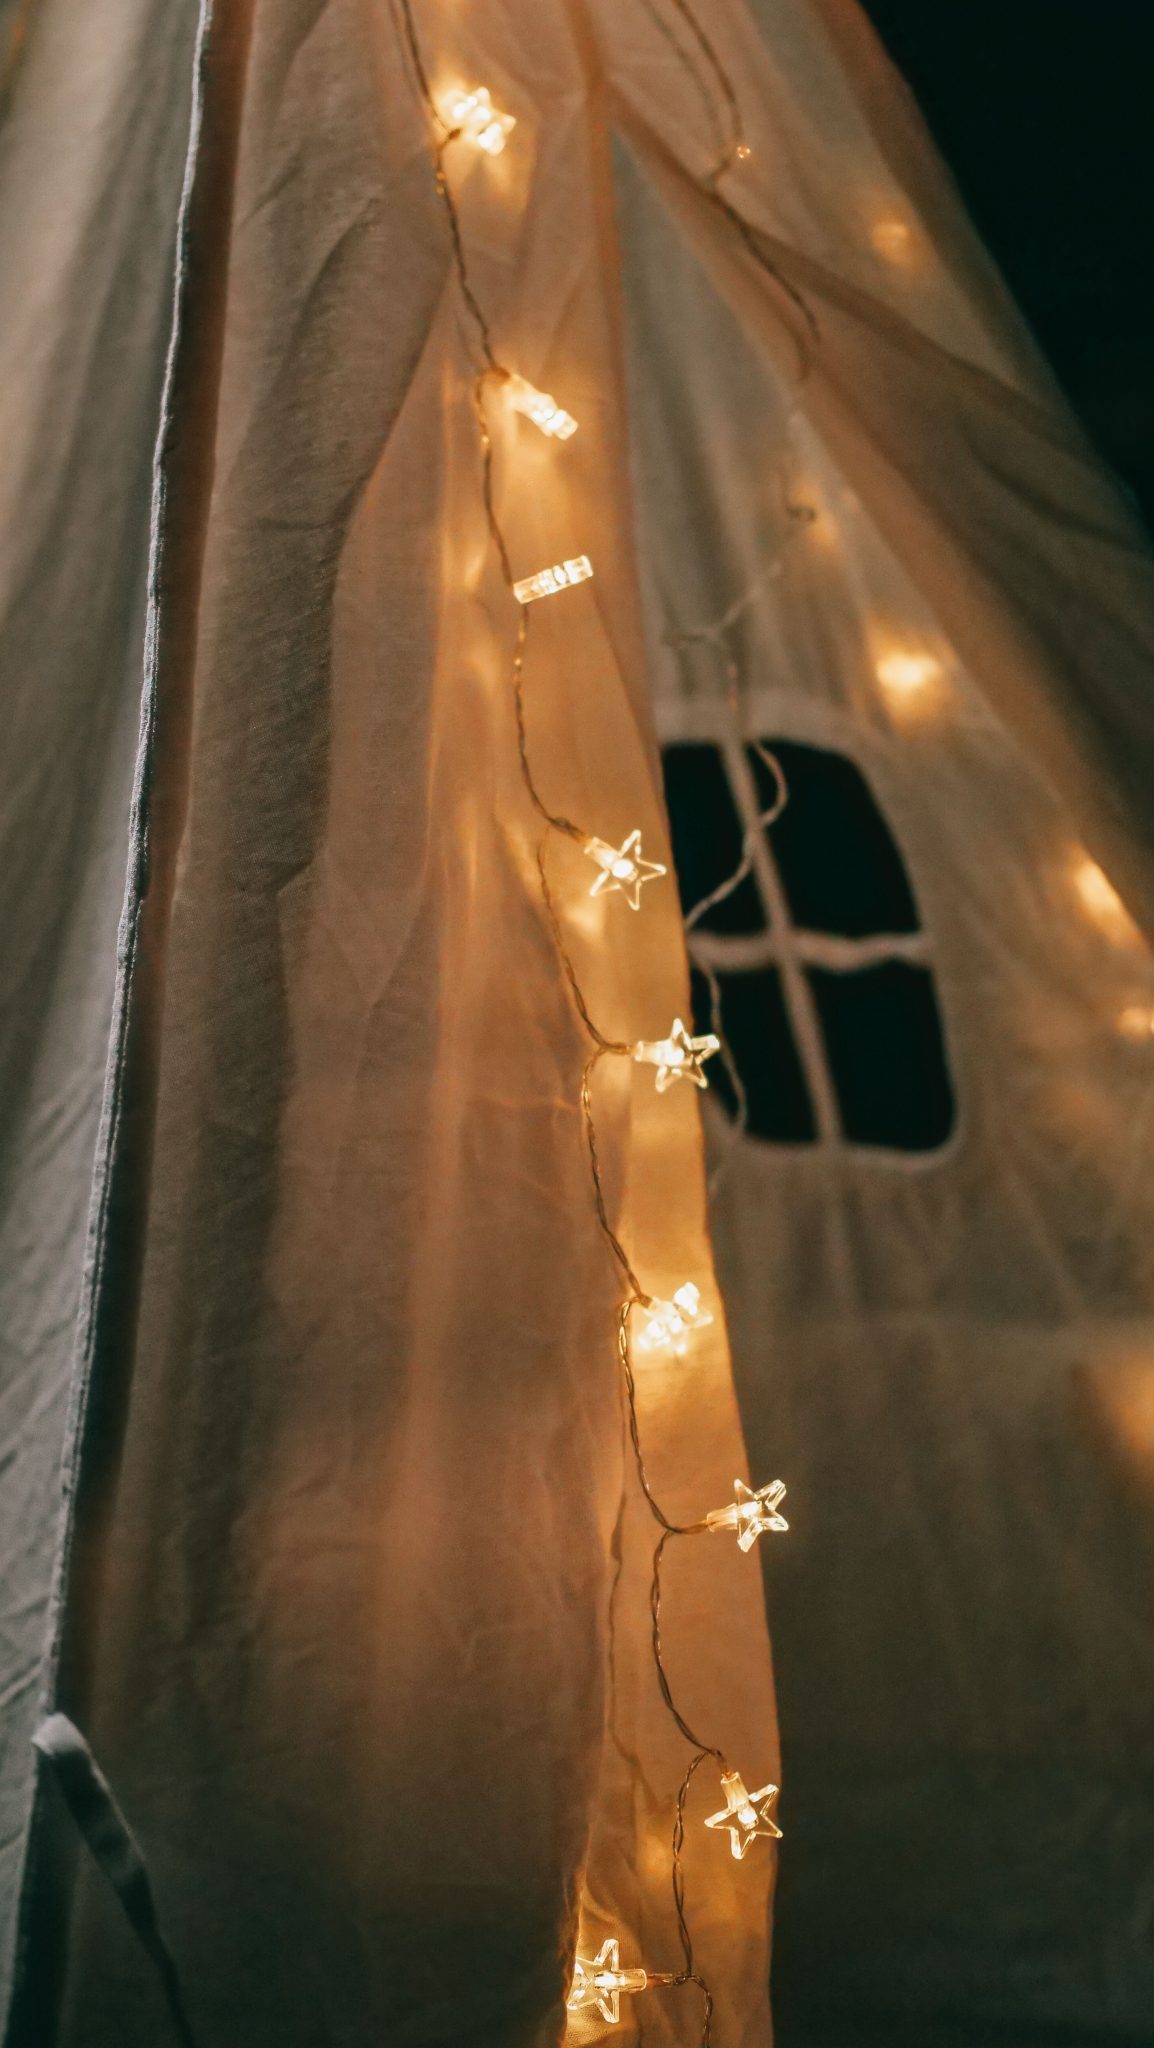
When using any kind of electrical item in a child’s play space, safety is the absolute top priority. Only use battery-operated fairy lights for this project. Never use plug-in lights in or around a play tent. This eliminates the risk of electrical shock and the hazard of a long cord. Also, ensure the battery pack is tucked away out of reach of very small children, and choose lights where the bulbs are sealed plastic units that can’t be easily broken or pulled off the string.
⭐ The One Thing
Fabric play tents and teepees can be surprisingly expensive, often running $80-$200. You can create the same magical hideaway for a fraction of the cost. Drape a simple flat sheet (a queen or king size works best) over a sturdy piece of furniture, like a dining table, or tie a rope between two chairs and drape the sheet over it. Then, add your battery-operated star lights ($15 from Amazon or Target). The effect is just as enchanting, and you can create an instant cozy fort for less than $20.
28. Make a College Dorm Room Feel Like Home with Fairy Lights
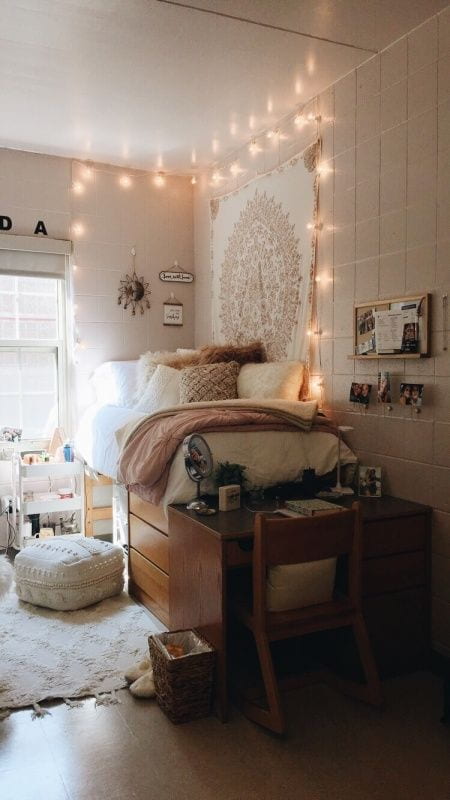
This look is practically designed for the standard college dorm room, which is typically around 130-200 square feet. The key is using vertical space. The raised loft bed is a classic dorm space-saver, and stringing lights along the ceiling perimeter and down the walls draws the eye upward, making the room feel a bit taller and more expansive. The lights also serve as much-needed soft, ambient lighting, a welcome relief from the harsh overhead fluorescent lights found in most dorms. This is small-space decorating at its coziest and most effective.
📏 Scale Guide
Worried about damaging the walls in your rental or dorm? You can hang all of this without a single nail. Time: 45 minutes. Cost: $10 for hooks. Here’s how:
- Wipe down the wall and ceiling surfaces with rubbing alcohol where you plan to place hooks. This ensures a clean surface for maximum adhesion.
- Use small, clear Command hooks or a similar brand of removable adhesive hooks. They are your best friend.
- For the ceiling perimeter, place a hook every 3-4 feet. For the tapestry, use larger Command strips designed for picture hanging.
- Drape your light strings, hooking the wire into the clips. Don’t pull the strings taut; a little drape looks more relaxed.
- When it’s time to move out, follow the removal instructions carefully to avoid peeling off the paint.
29. Achieve a Bohemian Vibe with a Canopy and Tapestry Wall
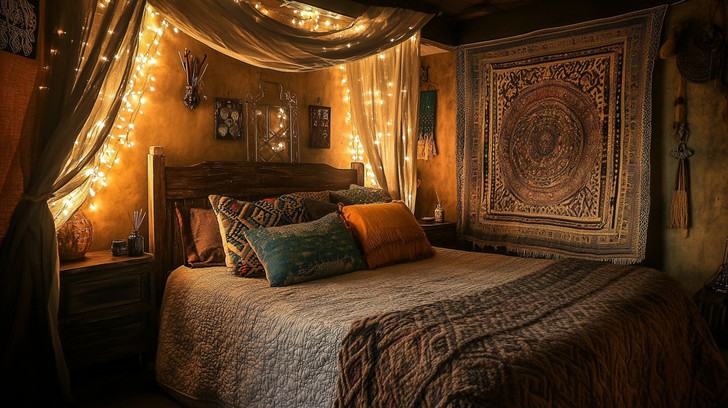
This bedroom feels so immersive and cozy because of the commitment to a warm, saturated color palette. The textured golden-orange walls provide a rich, glowing base that envelops the entire room. The fairy lights, with their own warm glow, amplify this effect. The dark wood of the bed frame and nightstands grounds the space and prevents the warm tones from becoming overwhelming. The teal and terracotta pillows add complementary and analogous colors, creating a sophisticated, layered look. This isn’t just a white room with boho accessories; it’s a fully realized color story. Compare the effect to the light and airy canopy in Idea #15.
🔧 How-To Brief
The singular element that anchors this entire bohemian look is the large, circular patterned tapestry. It serves as the undeniable focal point of the room, acting as a piece of art, a headboard, and a textural element all in one. Its grand scale and intricate pattern establish the room’s global, eclectic theme. The sheer canopy and fairy lights are beautiful supporting actors, but the tapestry is the star of the show. Without it, the wall would feel empty and the room would lose its central design anchor.
30. Frame a Window with Vertically Draped Fairy Lights
When you drape lights around a window, you’re not just decorating the window—you’re framing the view. This technique works best on a window that looks out onto something pleasant, even if it’s just the evening sky. For a more polished look, aim for symmetry. Use an equal number of light strands on both sides of the window. Secure the top of the strands with small, clear hooks placed just above the window frame, allowing the lights to hang straight down. This creates a clean, intentional look rather than a random jumble of wires.
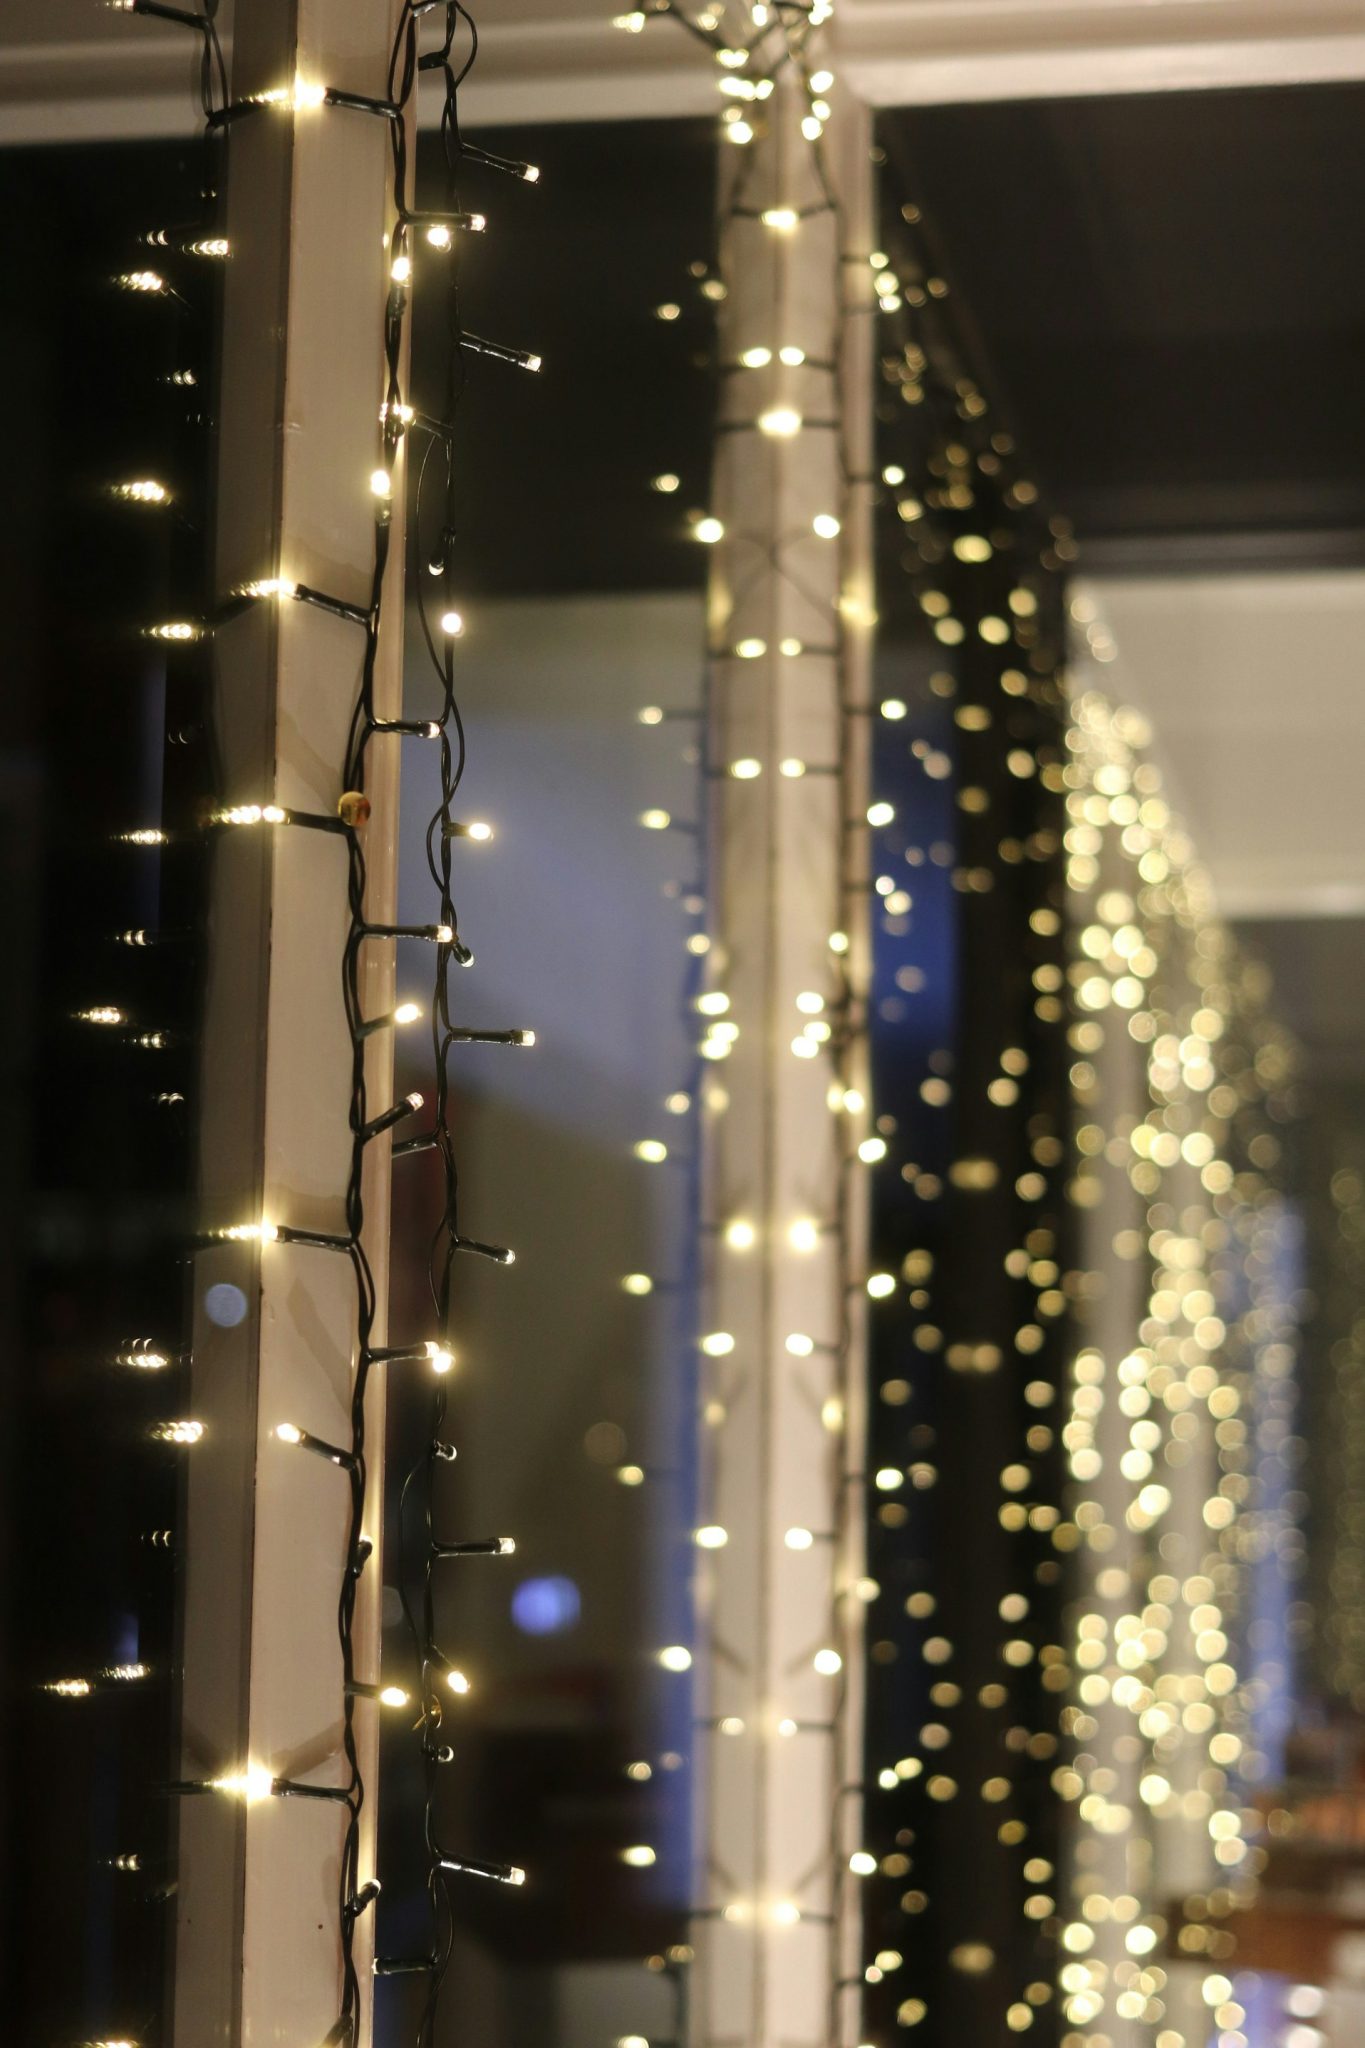
✅ Before You Start
One thing to consider before you do this is the reflection. At night, when it’s dark outside and bright inside, your window becomes a mirror. The individual points of light from the fairy lights will be reflected back into the room. Some people love this effect, as it doubles the sparkle. Others find the bright, reflected dots distracting or glaring, especially in a bedroom when you’re trying to wind down. It’s a matter of personal preference, but it’s something to be aware of before you commit to the look.
Find Your Glow: It’s Time to Light It Up
As you can see, fairy lights are so much more than just a holiday decoration. They’re one of the easiest and most affordable ways to add personality, warmth, and a touch of magic to any space, inside or out. Whether you’re creating a cozy bedroom retreat or a festive patio for entertaining, the right lighting can completely change the mood. So pick an idea that speaks to you, and get ready to add some sparkle to your home.
Don’t forget to save your favorite ideas to your ‘Home Decor’ board on Pinterest!