32+ Jaw-Dropping Christmas Village Display Ideas That Will Transform Your Home for 2026

Still scrolling through christmas village display ideas 2026 photos without knowing where to start? You’re not alone — miniature villages are the kind of holiday magic that can go wrong fast if you don’t have a clear visual plan. We spent serious time browsing Walmart, Etsy, Target, and Amazon to bring you only what’s worth your attention this year. You’ll find 32 curated setups, from traditional multi-level villages with model trains to pastel shelf displays, rustic gray-and-white scenes, and snowy winter activity towns. Prices span from around $12 for tiny bottle brush trees to $350 for larger lighted buildings. In 2026, scaled-down nostalgia is dominating Pinterest — people want cozy, miniature worlds that don’t require a full mantel commitment. Pin this guide for later — your future self will thank you when it’s time to actually do this.
1. Illuminated Miniature Village with Icy Blue Pond
Place a small blue acrylic sheet or mirrored glass under the faux snow to fake that icy pond effect. Keep the pond off-center and set a tiny figure or bottle brush tree at the edge so the reflection has an anchor point. Use waterproof double-sided tape under the sheet; it prevents sliding without adding visual bulk. This is exactly why the foreground glows instead of falling flat.
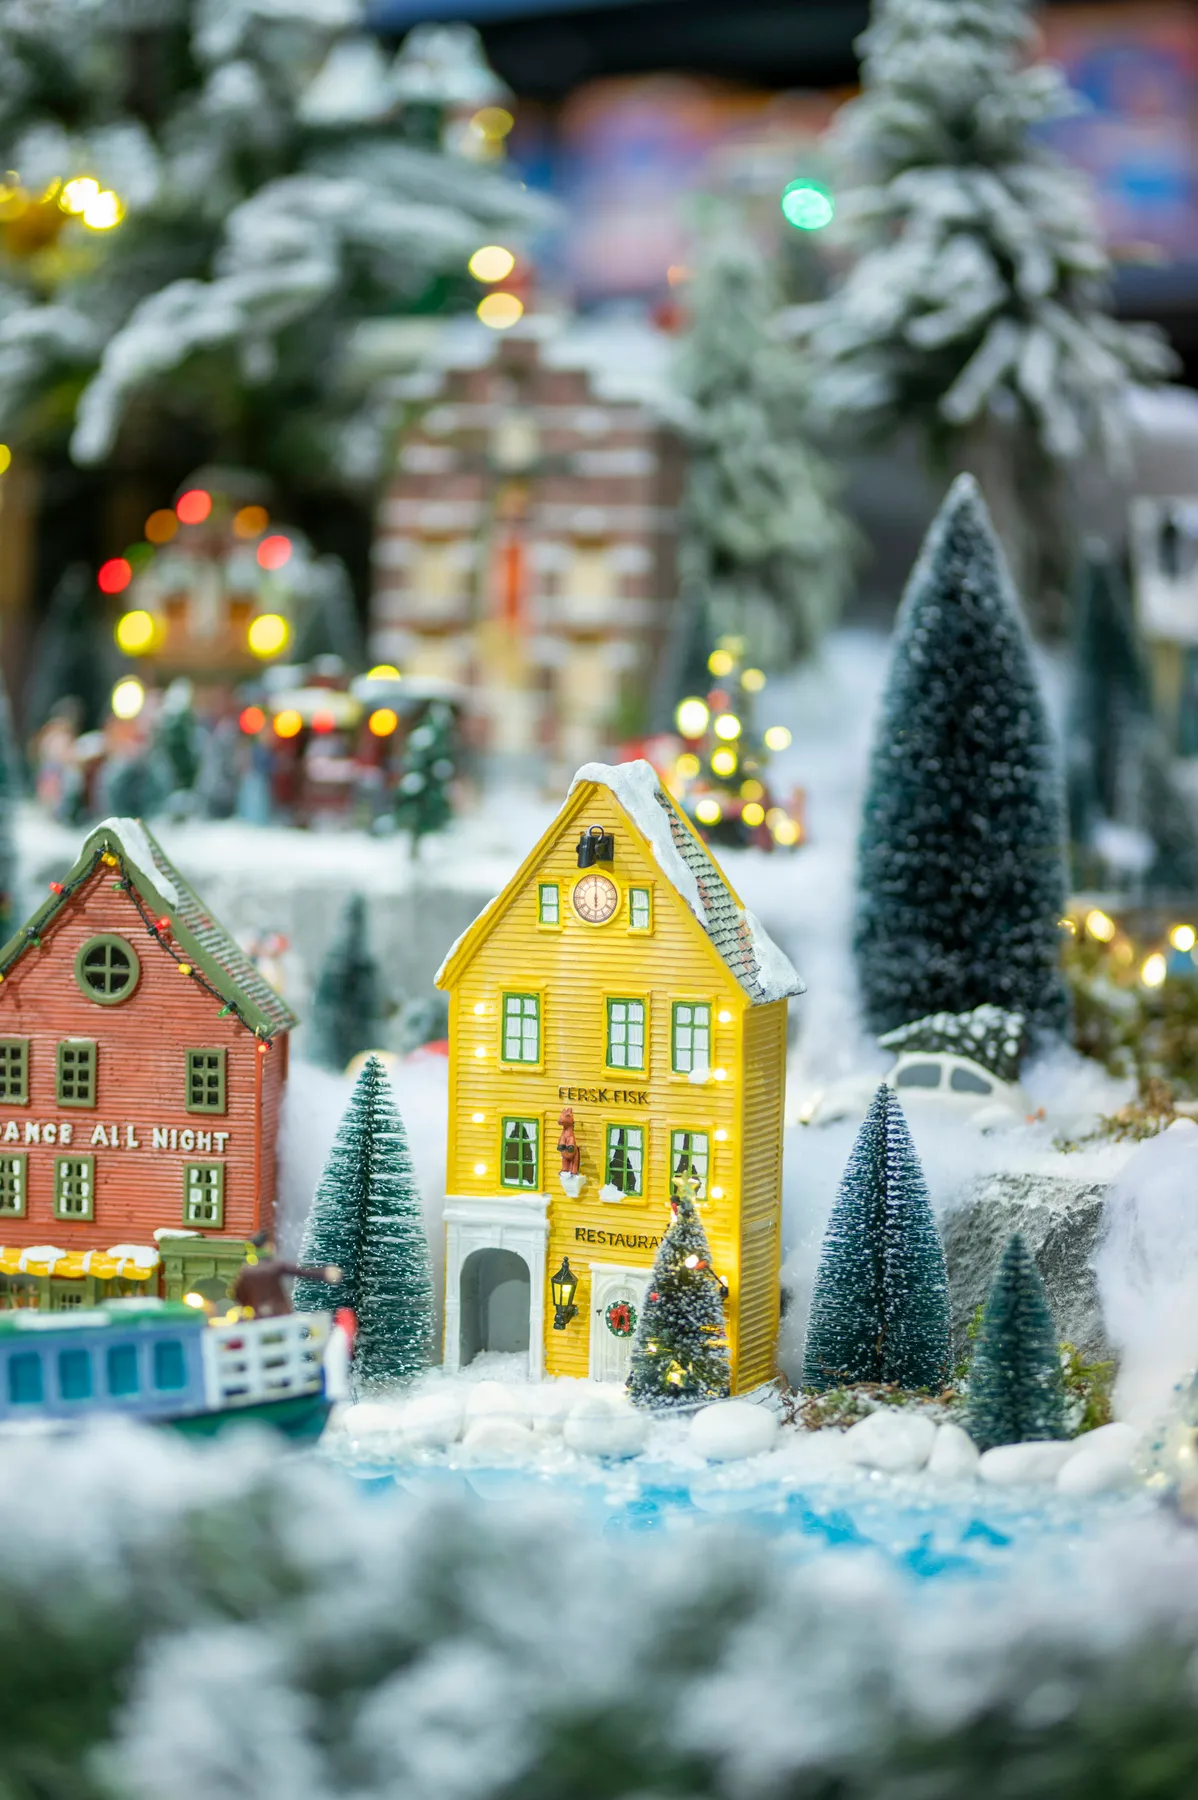
What makes this scene work is the deliberate tension between warm and cool. The yellow restaurant and red building anchor the center, while the light blue pond cools down the foreground so all that yellow light doesn’t feel one-note. Snow-dusted bottle brush trees repeat a vertical rhythm and keep the eye moving around the display rather than tunneling into the brightest house.
2. Lighted Multi-Shop Christmas Village with Carolers
This setup wants at least 4 feet of length and 18 inches of depth on a buffet or console. Ceiling height matters less, but the starry night backdrop works best if you have a dark wall behind the display. If your surface is only 3 feet long, keep the winery and the three strongest lit shops, and let go of the rest without guilt.
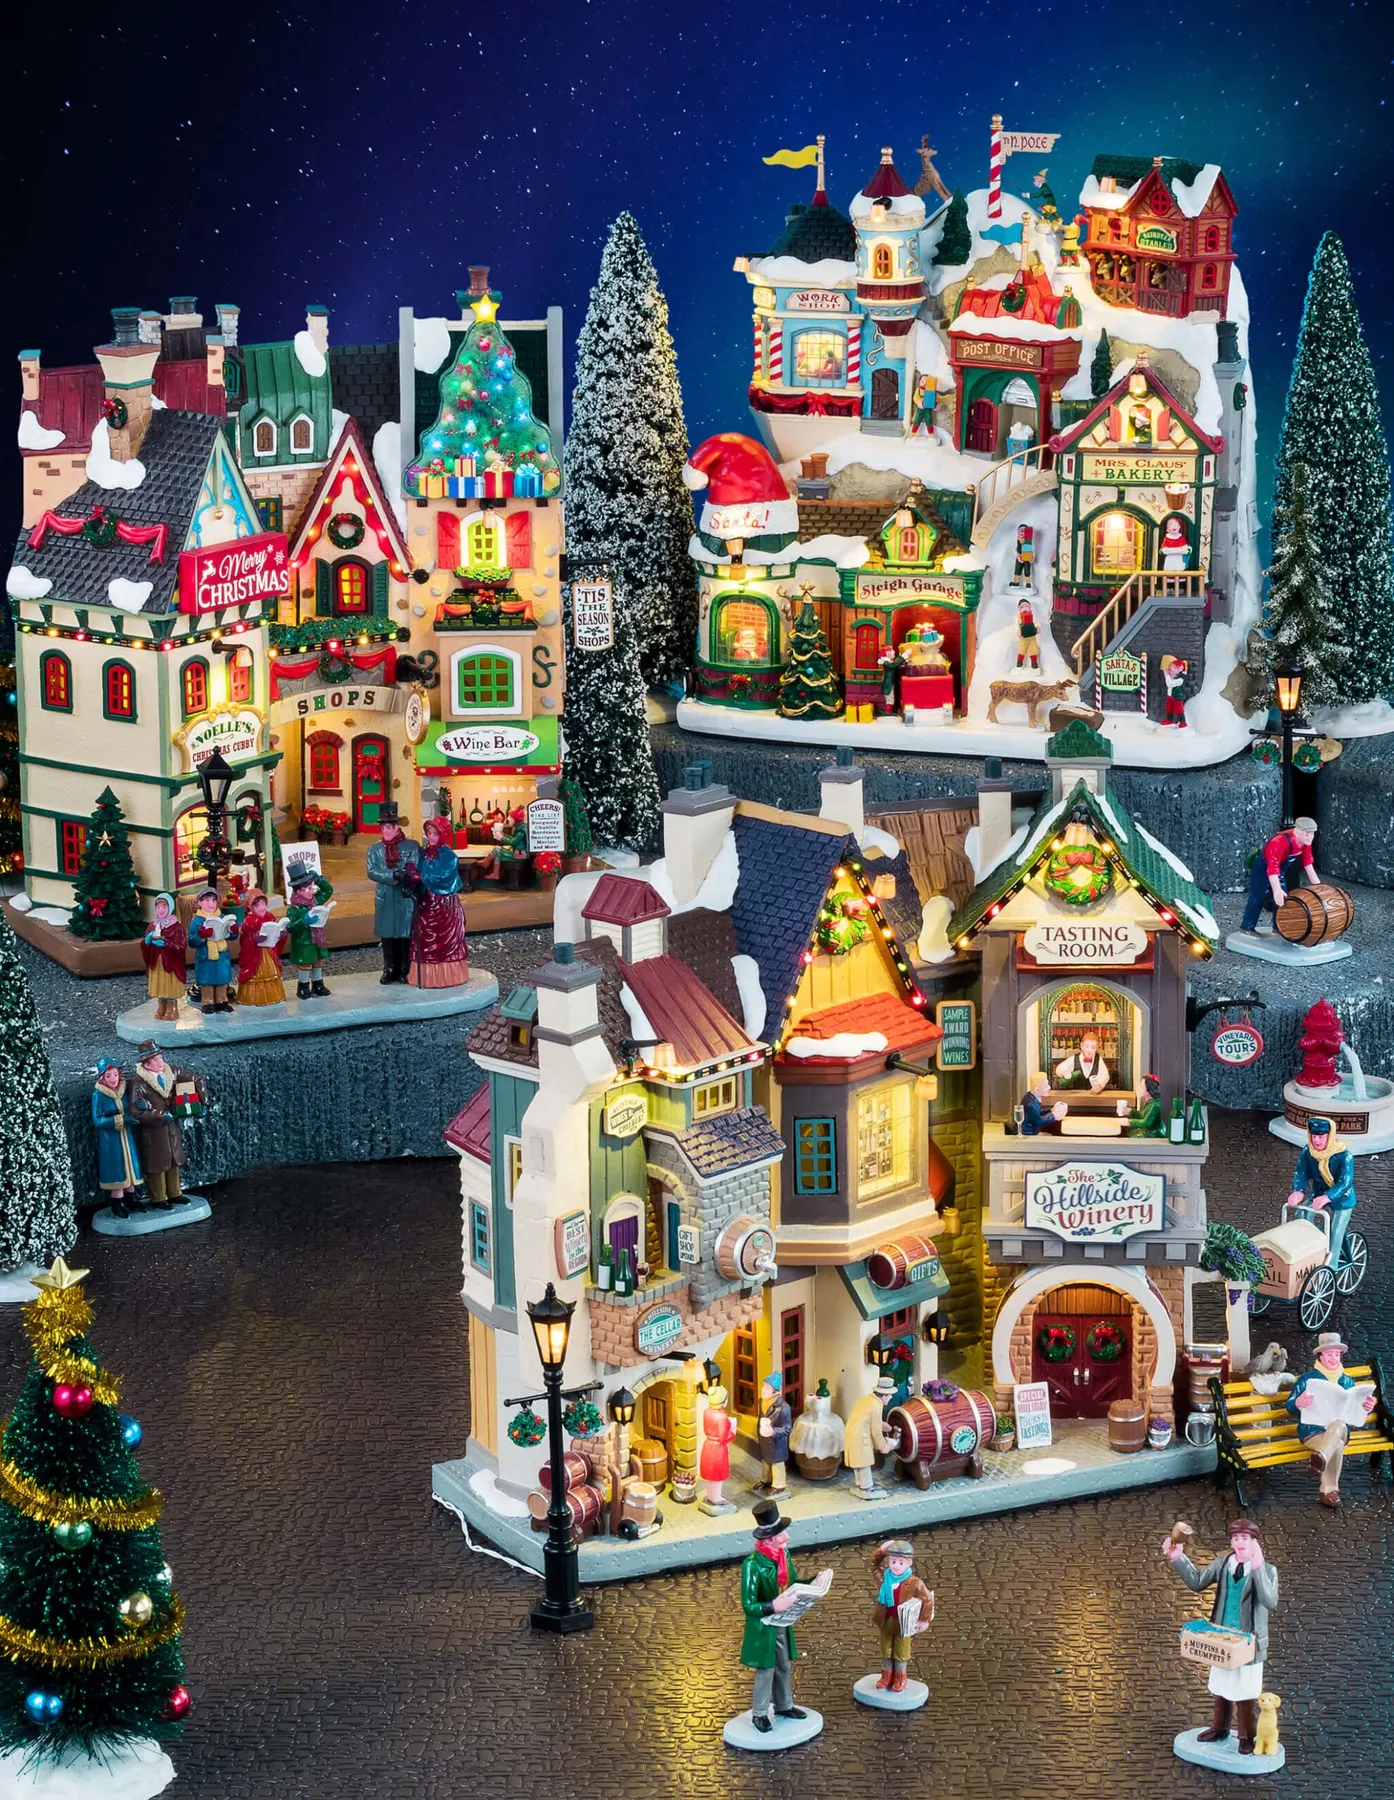
The starry night backdrop is the one thing you can’t skip. Without it, detailed buildings can feel like a collection of collectibles lined up on a table. A piece of dark blue fabric or black poster board with tiny pin lights instantly adds depth, so the carolers and street lamps read as part of a real nighttime street.
3. Multi-Level Amusement Park Christmas Village
amusement rides eat vertical space. The Ferris wheel can be 14 inches tall, so measure shelf clearance before you buy. Moving parts and tiny figures are not kid-proof; if toddlers roam, place the display above waist height. And don’t let multiple cords spoil the magic — use a cord-hiding box or battery-operated pieces wherever possible.
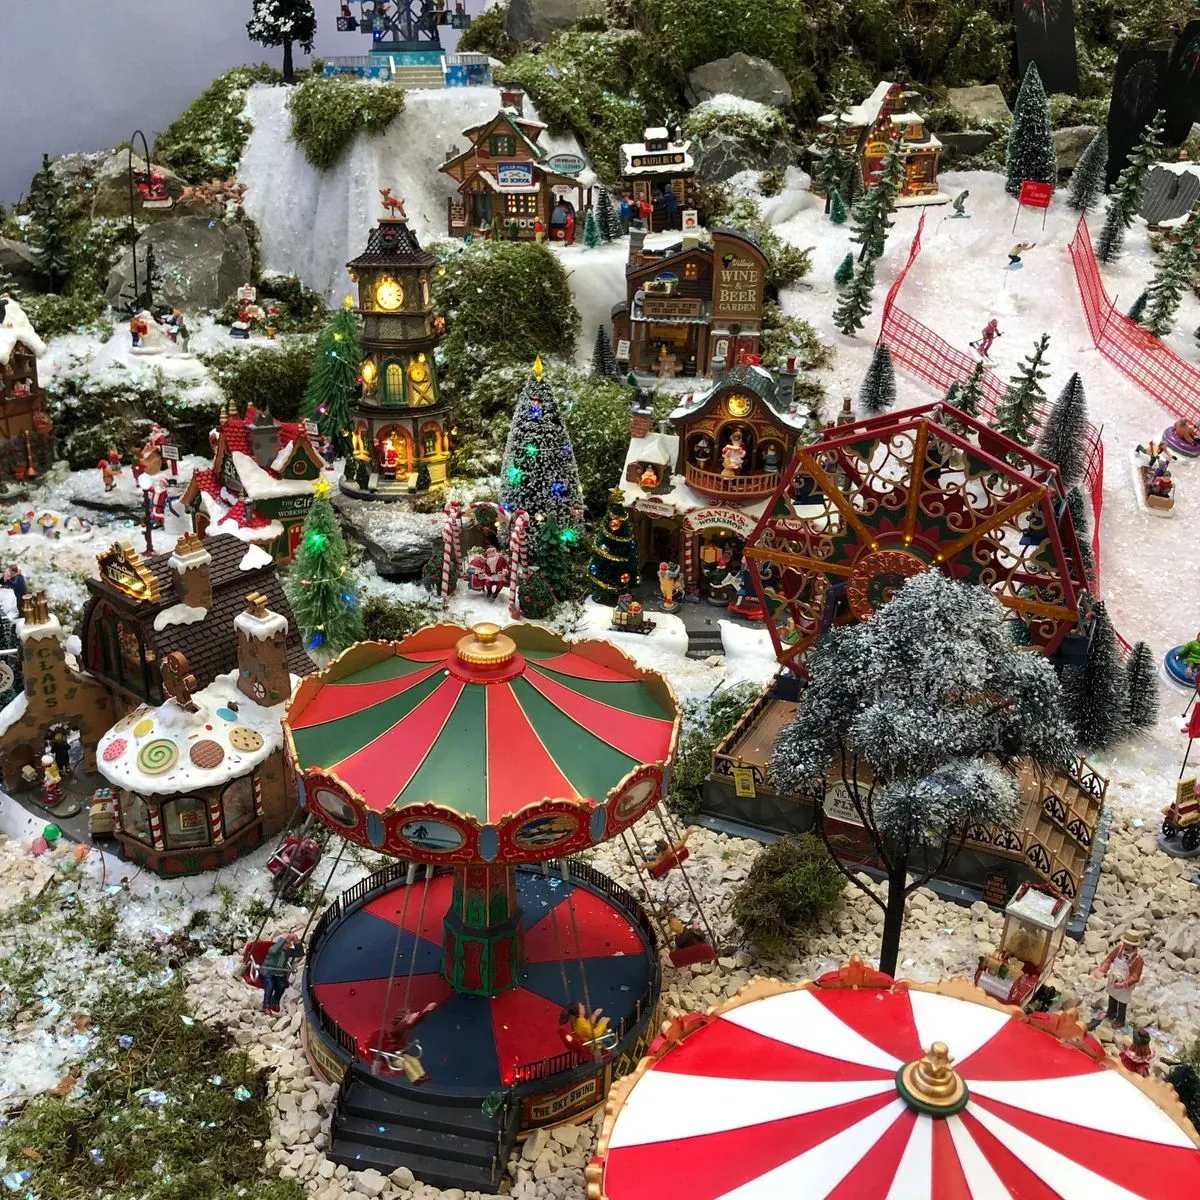
50% snow-white base and buildings, 25% forest green trees, 15% Christmas red accents, 10% warm yellow lights. You can swap the ski slope for a sledding hill or the red Ferris wheel for a striped carousel and the formula still holds. The red and green are the personality; the white keeps it from becoming chaotic.
4. Lighted Gingerbread House with Snowmen Pair
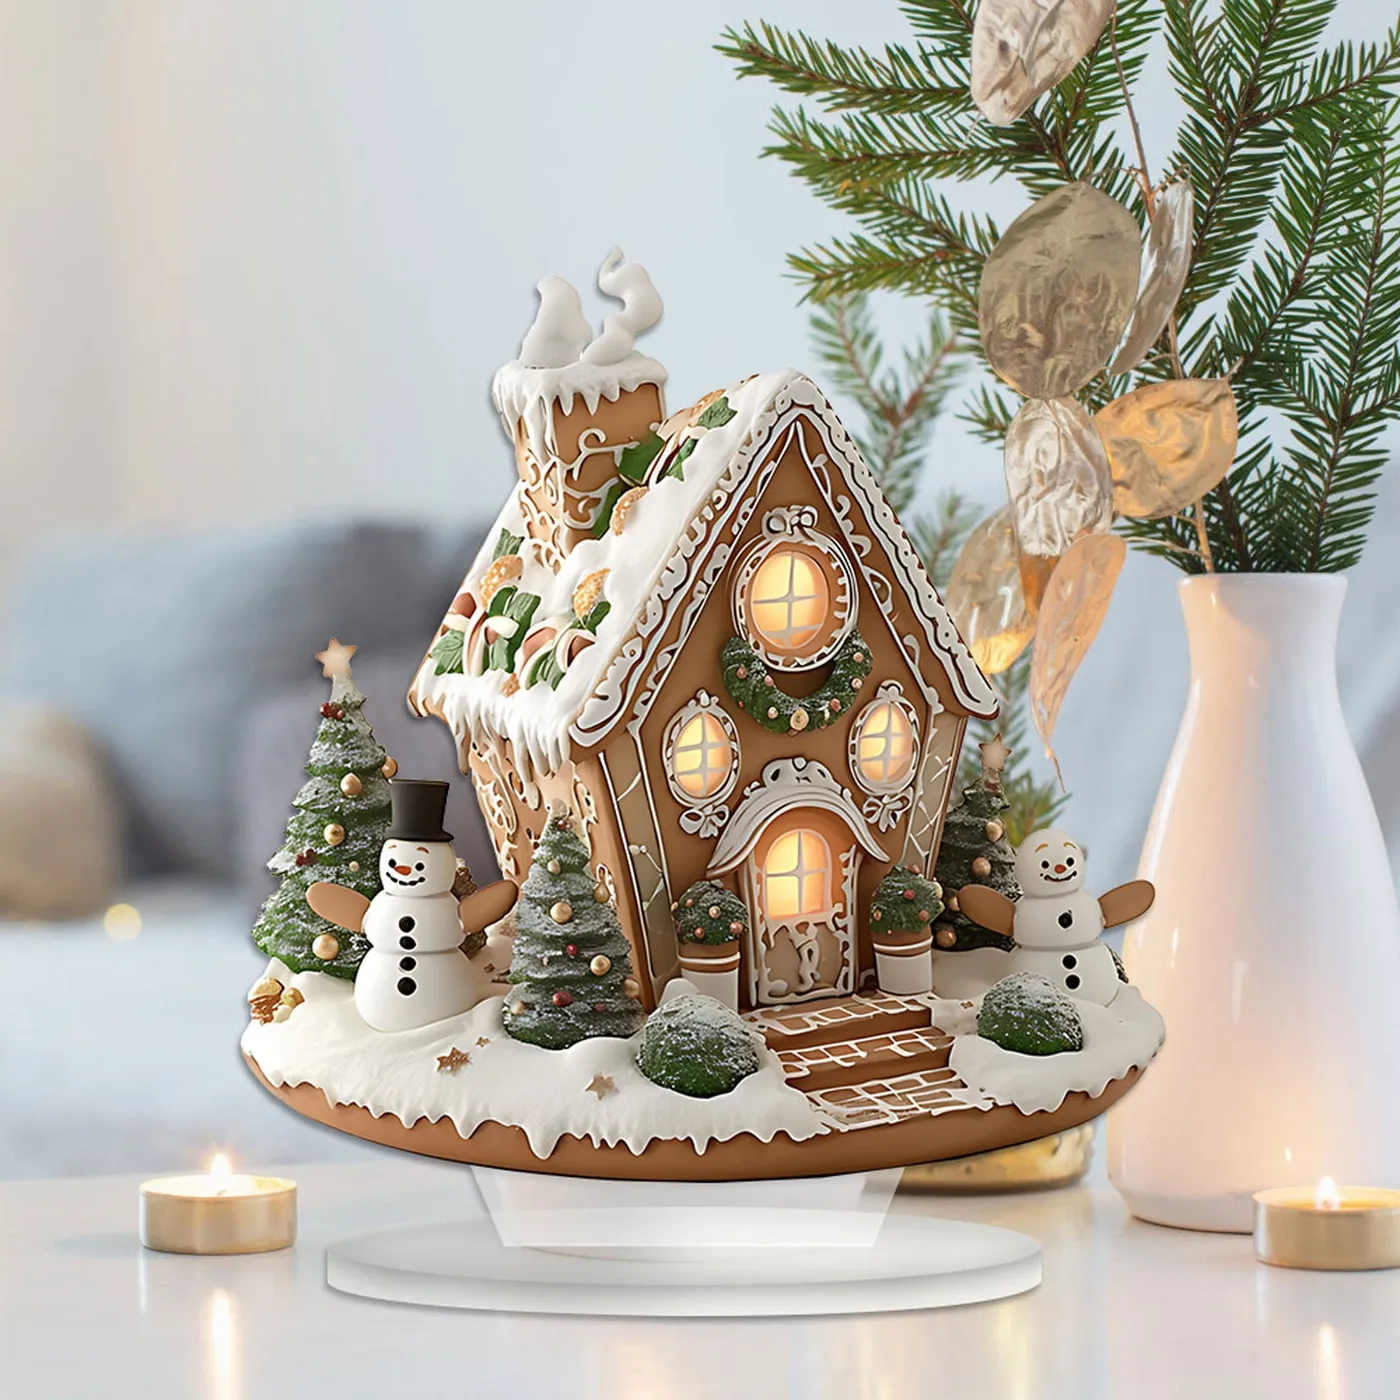
- Cut a piece of foam core to your display tray size, leaving a 2-inch border.
- Spread white joint compound or Sculptamold about 1/4 inch thick with an old knife.
- While it’s still wet, press in miniature bottle brush trees and snowmen.
- Sprinkle fine white glitter over the highest areas before the compound fully dries.
- Let it dry for 24 hours before moving the display indoors.
|
📋 Copy HEX 🔗 Share |
Time estimate: 30 minutes of hands-on work plus drying. Material cost runs about $12. You don’t need a pricey ceramic base — this method gives that soft, drifted snow look for almost nothing.
Walmart sells paintable ceramic gingerbread-style houses for $8 to $12. IKEA’s VINTERFINT mini trees are usually $5 a set. Thrift stores and estate sales often have ceramic snowmen for $1 to $3 each. Use battery-powered tea lights inside the house so you don’t have to fuss with cords.
5. Expansive Snowy Village with Decorated Tree
- Main miniature buildings, including church, shops, and houses: $60–$180
- Large decorated Christmas tree with mini lights: $25–$60
- Artificial snow blanket and foam risers: $15–$40
- Miniature figures like carolers, skaters, and a carriage: $25–$75
- Flocked evergreen trees: $20–$50
- Total to recreate: $145–$405
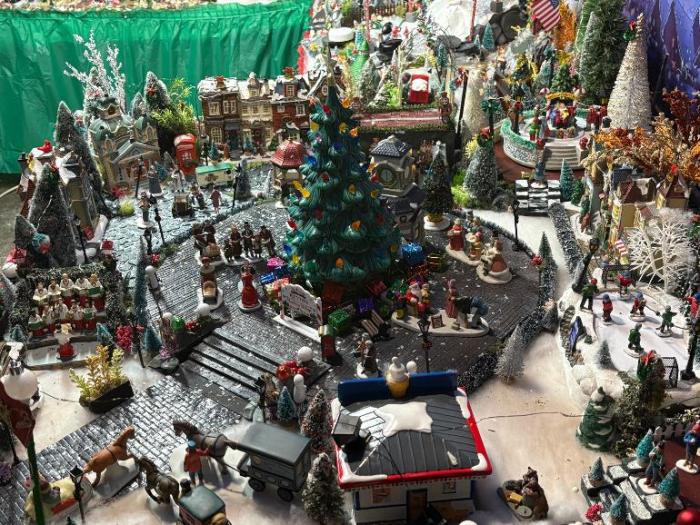
Budget alternative: use a quilted white fleece blanket for snow and hunt secondhand figures at estate sales; you can land a similar scene for under $90.
Why it works: the village is organized around a large decorated tree as the visual anchor, then paths and cobblestone roads lead your eye through the snow. The multiple levels prevent that dreaded strip-mall look. If you want the amusement park energy, compare with Idea #3 — same festive chaos, more ride-focused.
6. Snowy Village Table Runner with Dinner Settings
Tablescape villages became huge for 2026 holiday hosting because they don’t consume floor space. The white fluffy runner doubles as snow and softens center table clutter while dinnerware still gets used. People are finally blending decor and dining instead of choosing one or the other, and Pinterest is eating it up.
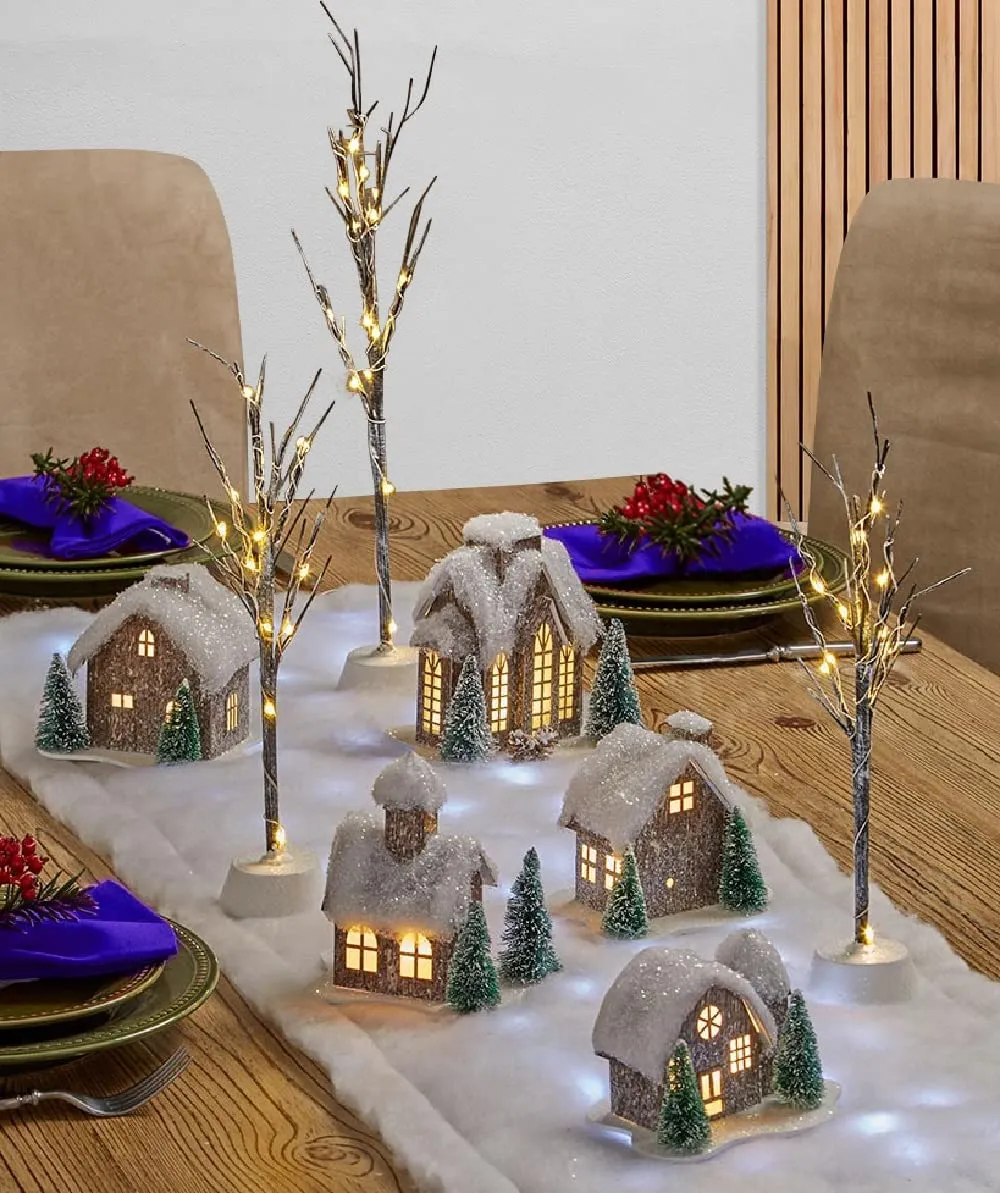
Set your place settings with charger plates first, then lay the village runner down the center, then tuck the wire under the runner before adding houses. Keep illuminated houses at least 12 inches from water glasses to avoid condensation disasters. Purple napkins and green plates do a lot of quiet work here — they add color without competing with the tiny lit windows.
7. Victorian Village with Glitter Snow and Carolers
The glitter snow base is the one thing holding this whole display together. Remove it and the older ceramic houses feel dated and dull. The reflective grit catches every warm light and makes even inexpensive buildings look expensive. Mix fine iridescent glitter with white sand so the sparkle isn’t overpowering.
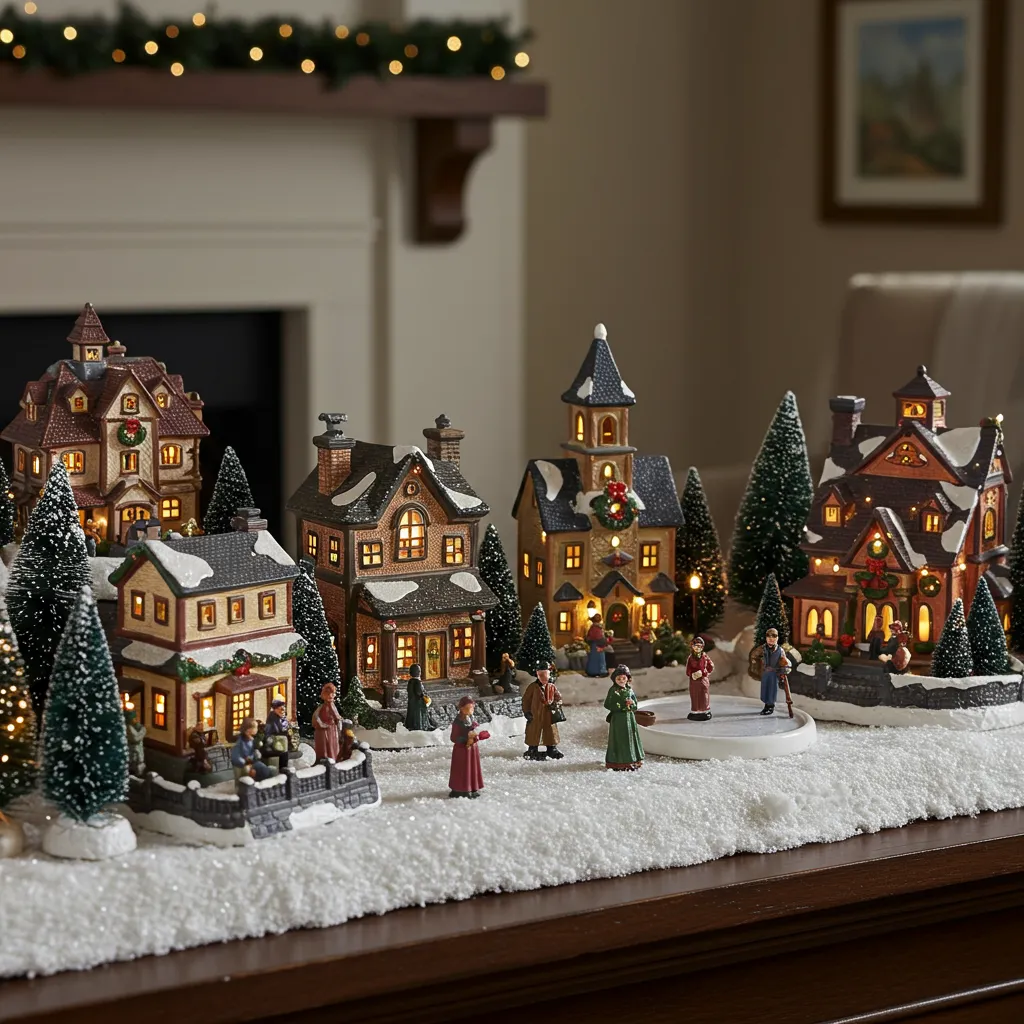
This arrangement wants a surface at least 20 inches deep and 30 inches wide. It thrives on a dark wood sideboard or buffet, but a narrow shelf won’t do. If you only have a 10-inch-deep ledge, use just the church and two houses with a single row of trees instead of the full street scene.
8. Illuminated Tabletop Village on Dark Surface
You don’t need an expensive table to get this glow. Use dark-stained plywood or even black poster board as the base. Amazon sells small ceramic village sets for $35 to $50, and Target’s Wondershop mini lit houses are often $15 each. Facebook Marketplace is full of older Department 56 pieces for $10 to $20 if you’re patient.
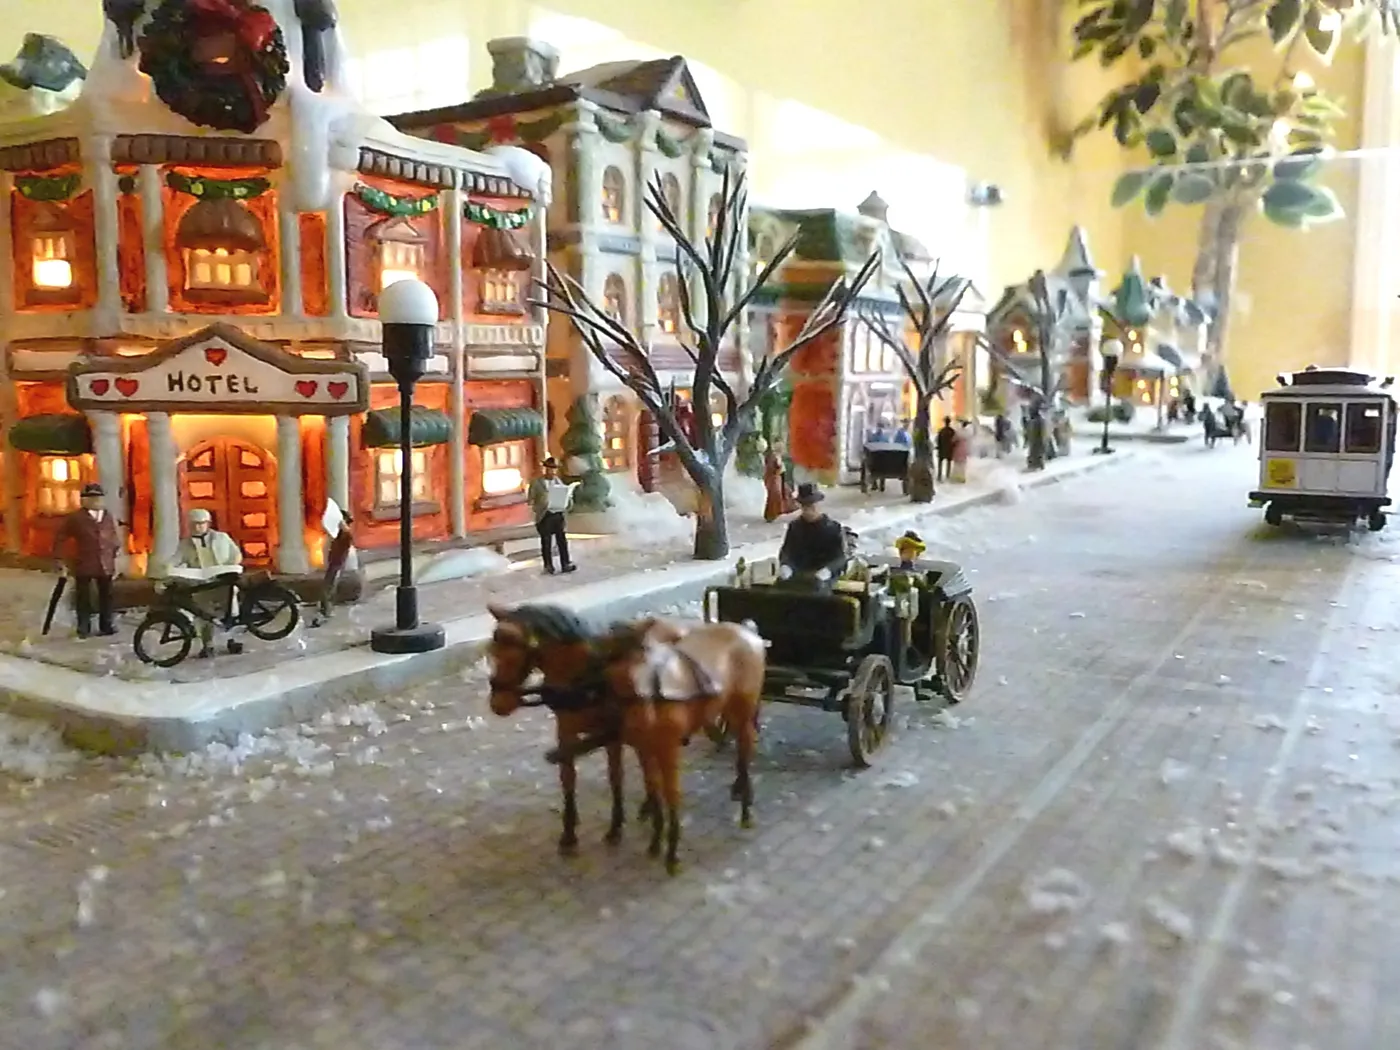
70% neutral dark base and white snow, 20% warm lit windows, 10% greenery. The dark surface absorbs light so the windows pop. If your existing furniture is light, add a dark runner underneath the display to keep that contrast. Otherwise the whole scene will look washed out by overhead light.
9. Winter Activity Village with Mercury Glass Candles
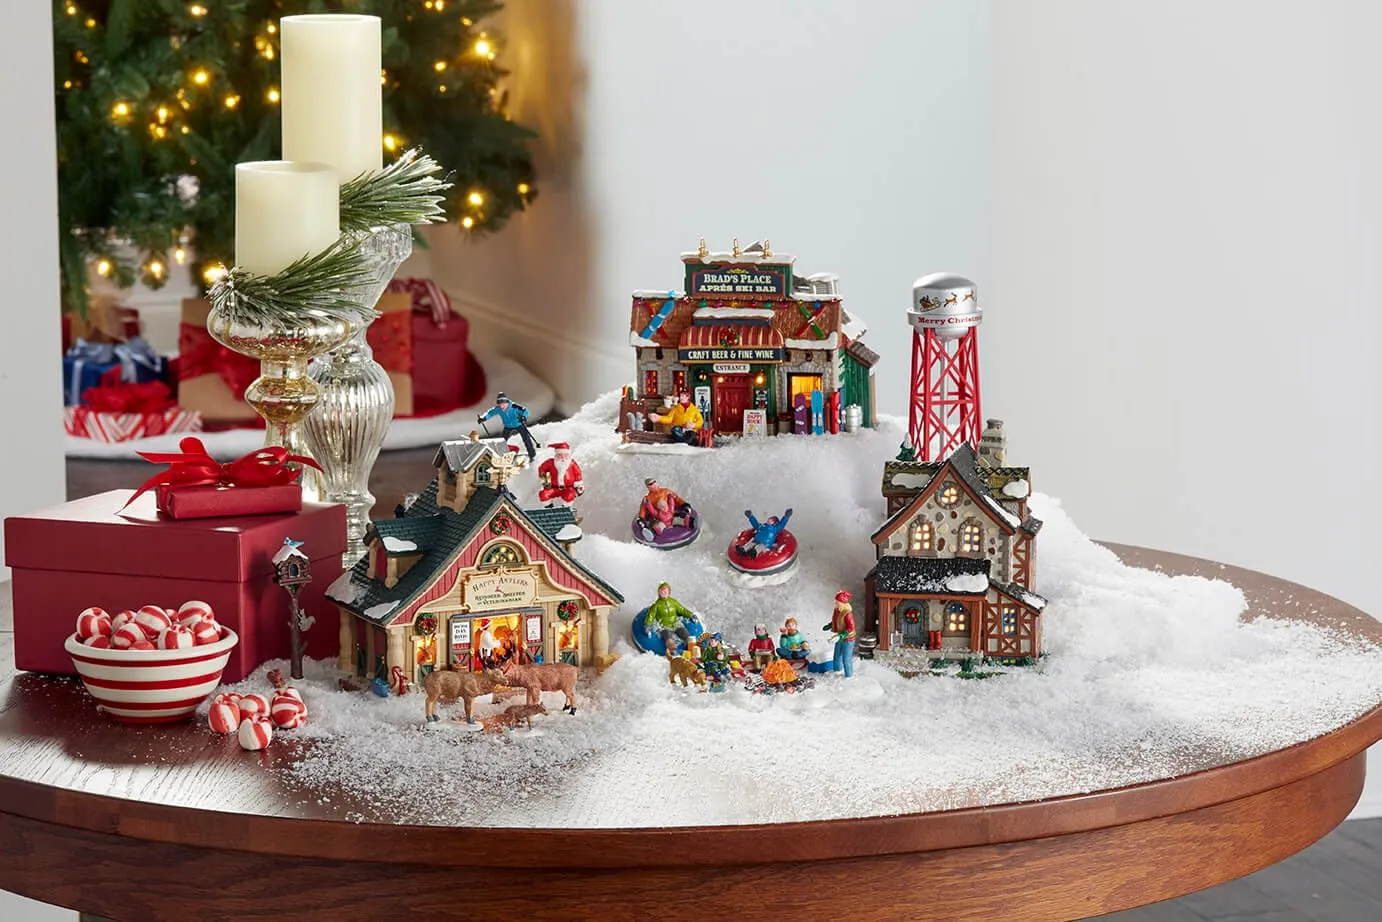
fire safety matters here. Use LED candles inside mercury glass holders if they’re anywhere near faux snow. A real flame can scorch acrylic snow and leave a chemical smell in the house. Keep the red gift box and peppermint bowl at least 6 inches from any open flame, and never walk away while lit.
|
📋 Copy HEX 🔗 Share |
- Lay a round white faux fur placemat or circle of quilt batting on the table.
- Set the village buildings first, leaving open spots for candles.
- Pile polyester fiberfill around building bases to create soft drifts.
- Press down in the middle so buildings won’t topple.
- Add figurines and peppermint candies last for foreground color.
Time estimate: 20 minutes. Material cost: under $25 if you use faux fur and battery candles from the craft store.
10. Carolers Cafe Miniature Village Scene
Use the red bicycle and cafe sign as a visual entry point near one edge. Small props like benches force the eye to pause instead of racing through the scene. Raise the main cafe even half an inch on foam board so its glow sits just above the snow line — that tiny lift makes it read as important.
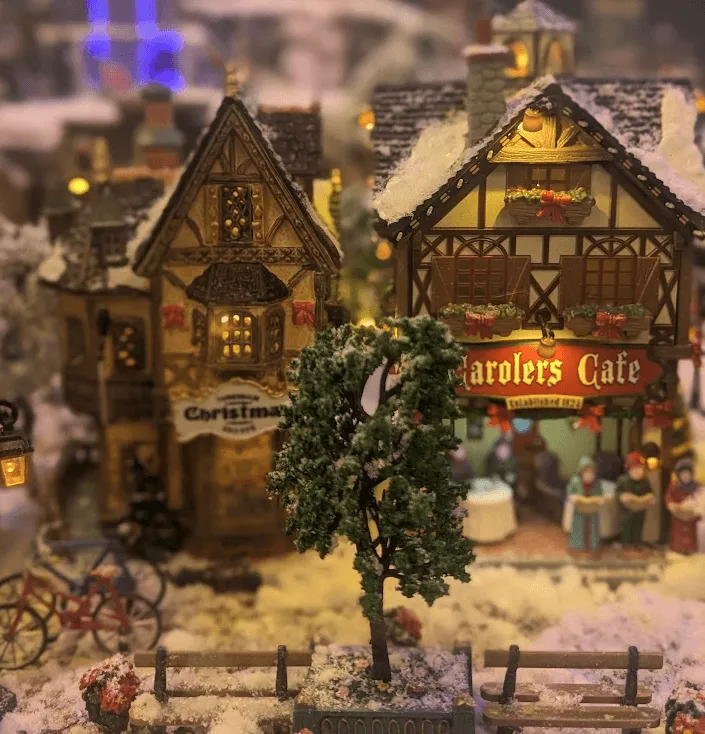
Christmas villages are trending toward lived-in scenes rather than static rows. A cafe named Carolers Cafe, small figures inside the window, and a red bicycle parked out front all tell a story. In 2026, collectors want narrative moments that feel like a screenshot from a holiday movie, not just an inventory of porcelain buildings.
11. Tiered Illuminated Christmas Village Shelf Scene
A tiered structure solves the biggest village problem: all houses blending at one height. Elevating back buildings creates depth and lets each warm light read individually. The white display stand also bounces light downward, which fills shadows and makes the whole scene feel magical after dark.
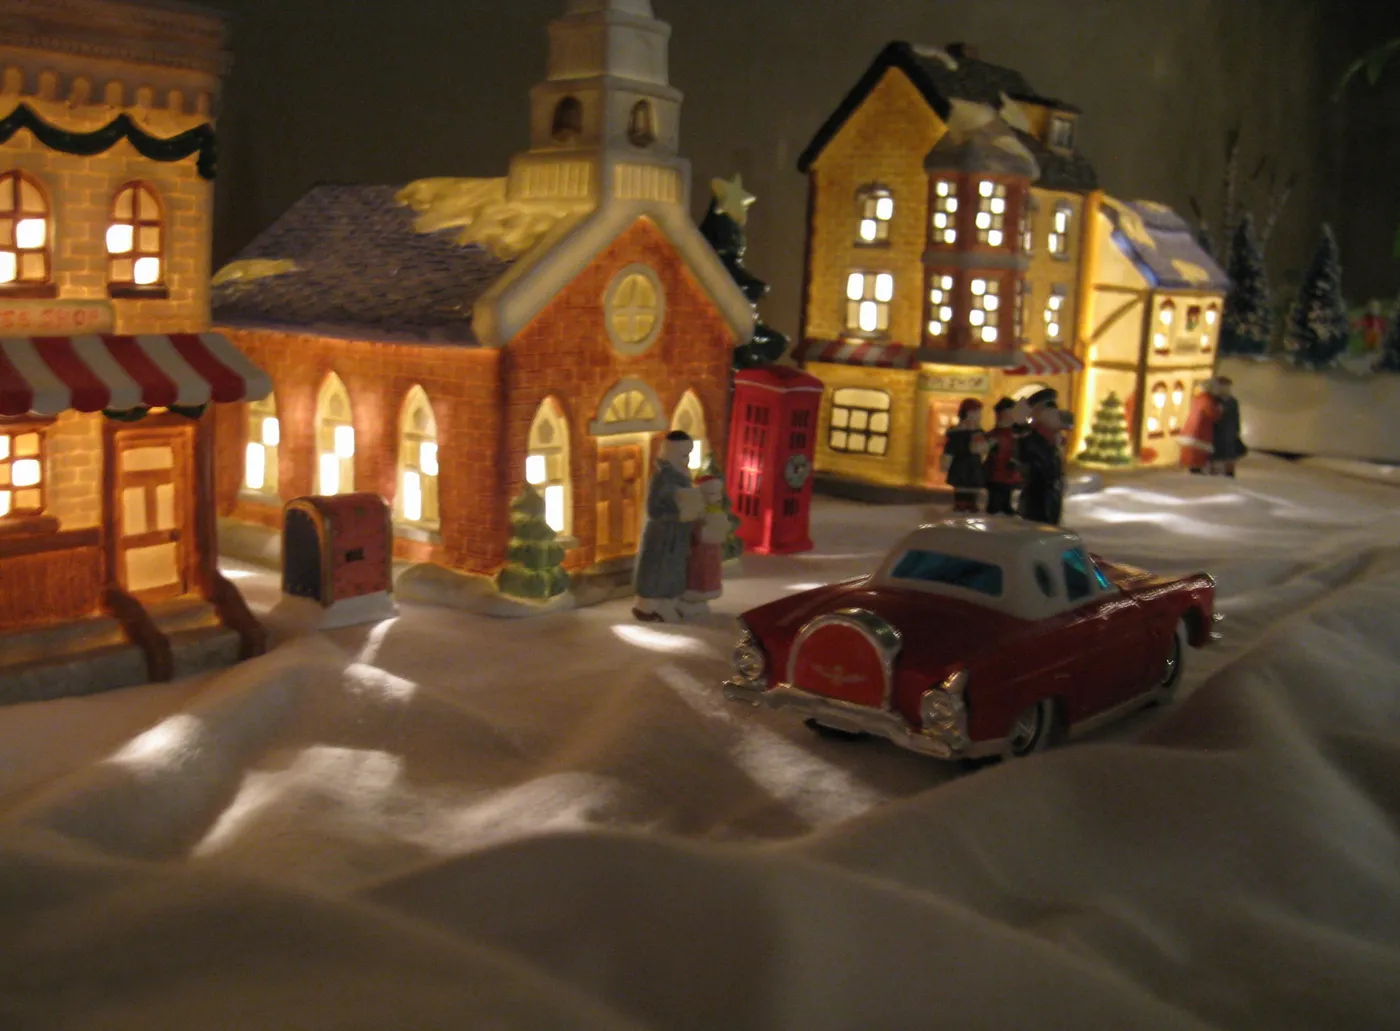
dust is the enemy on tiered displays. Feather dust the buildings weekly, but use canned air for tiny crevices and around battery wires. The white tiered stand will show dust faster than dark wood, so wipe it with a damp microfiber every two weeks. If you use vintage porcelain lighting, keep spare bulbs on hand because replacements can be hard to find mid-December.
12. Christmas Dioramas with Cocoa Shop and Fireplace
These dioramas work on a shallow console or wide windowsill; 12 to 14 inches of depth is enough. Because each scene is self-contained, you can split them. Put the fireplace room on one end of a sideboard and the Cocoa Shop on the other, with a few bottle brush trees bridging the gap.
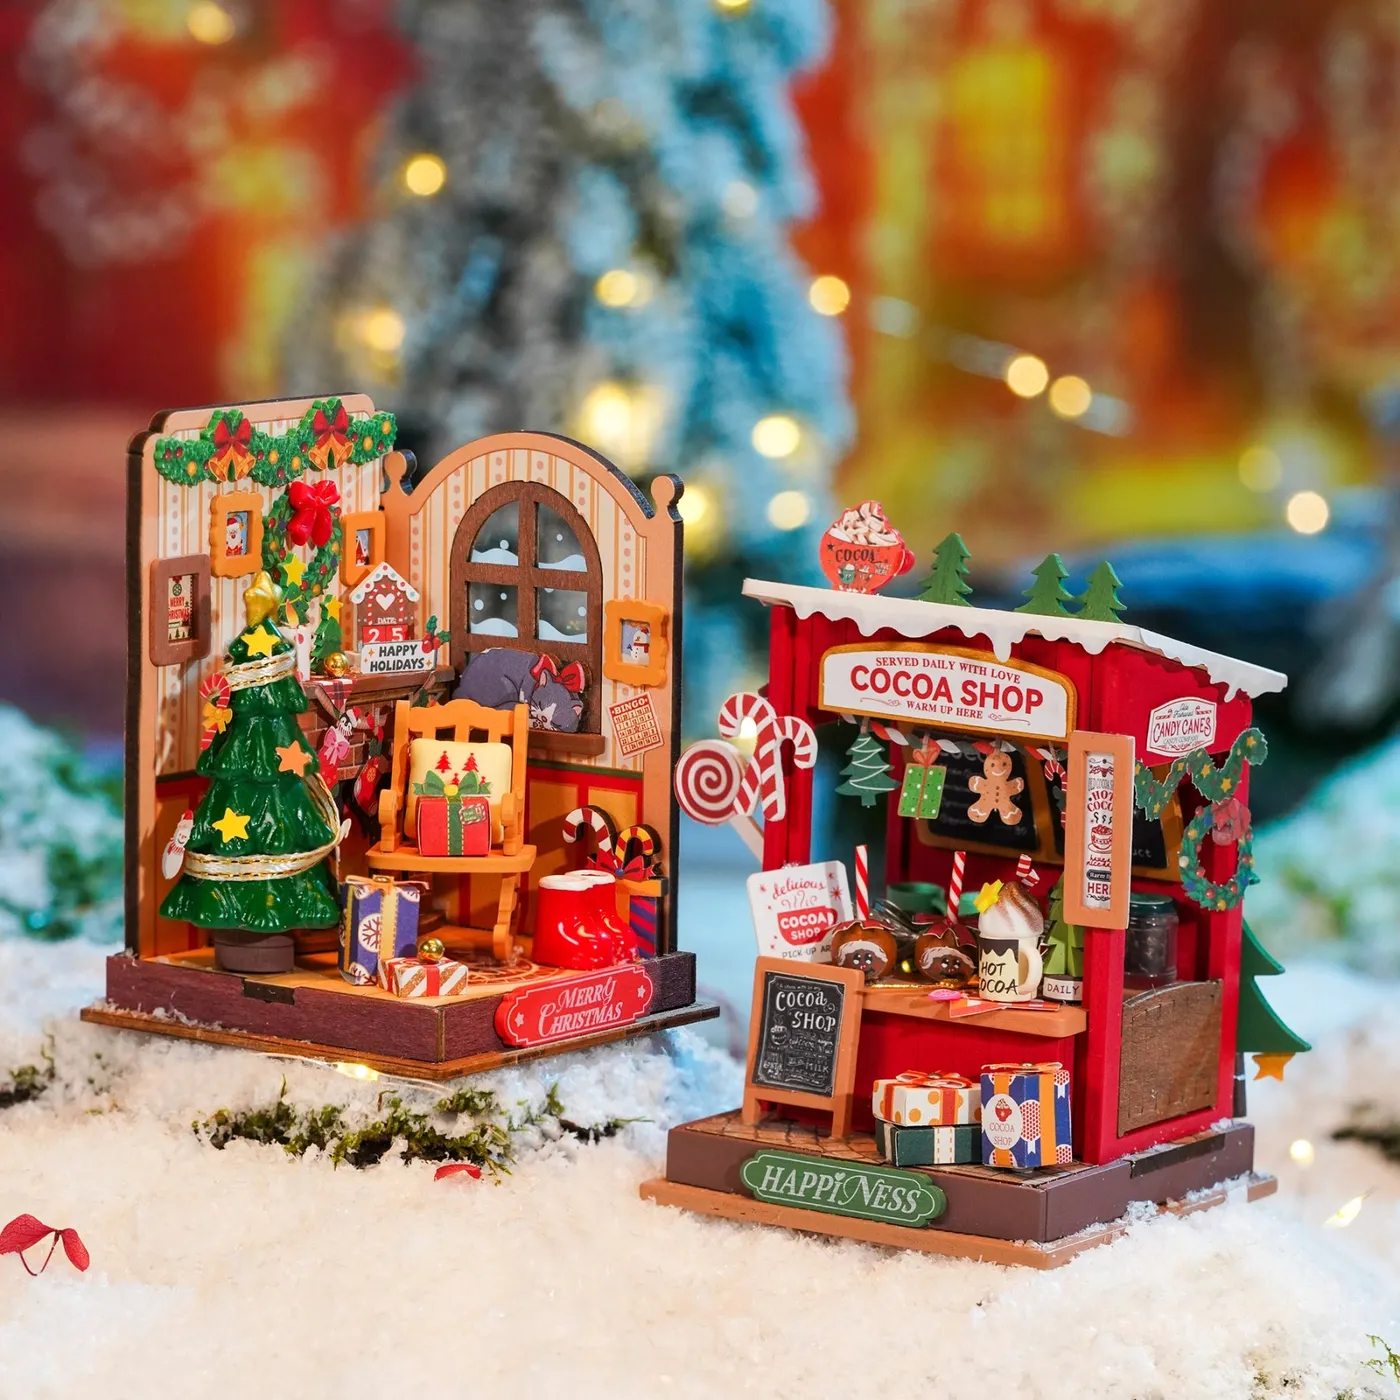
The indoor fireplace diorama is the star. It adds unexpected coziness — a tiny room with a Christmas tree, fireplace, and armchair sitting among outdoor shops. Without it, the display reads like a typical cocoa shop scene. That one interior vignette gives the whole table a private, peek-through-the-window kind of charm.
13. Christmas Village Reflected in Ornate Gold Mirror
- Lean a gold-framed mirror against the wall and secure the top with a furniture strap.
- Run a warm white LED strip along the back bottom edge of the console, hidden from view.
- Arrange the village on a white felt base about 4 inches in front of the mirror.
- Tilt the mirror back 2 to 3 degrees so it reflects the lights without throwing glare.
- Dim overhead lights for maximum depth and sparkle.
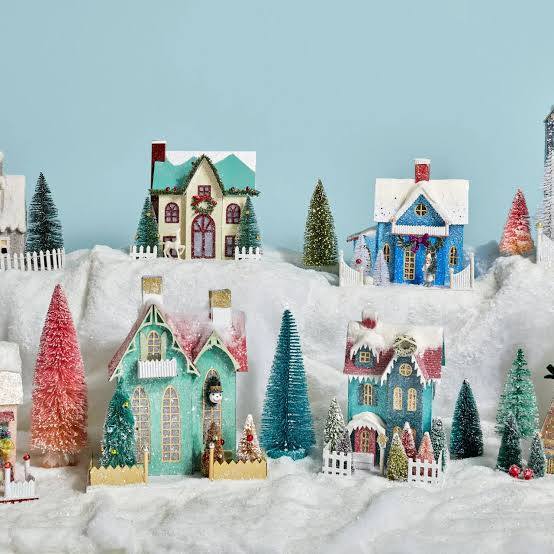
Time estimate: 45 minutes. Material cost: around $50 if you use a budget LED strip and felt.
Get the mirror look cheaper: check Facebook Marketplace for vintage gold-tone mirrors at $25 to $50. Thrift stores often have ornate frames you can spray gold. A plain mirror with dollar-store battery fairy lights tucked behind the village works too.
14. Pastel Ceramic Houses with Pink Twisted Candle
50% white snow and window frame, 30% pastel houses in pink, light green, and red, 15% dark green bottle brush trees, 5% pink candle as vertical anchor. Swap the pink candle for pale blue if your room leans cool, but keep one vertical element or the arrangement loses height.
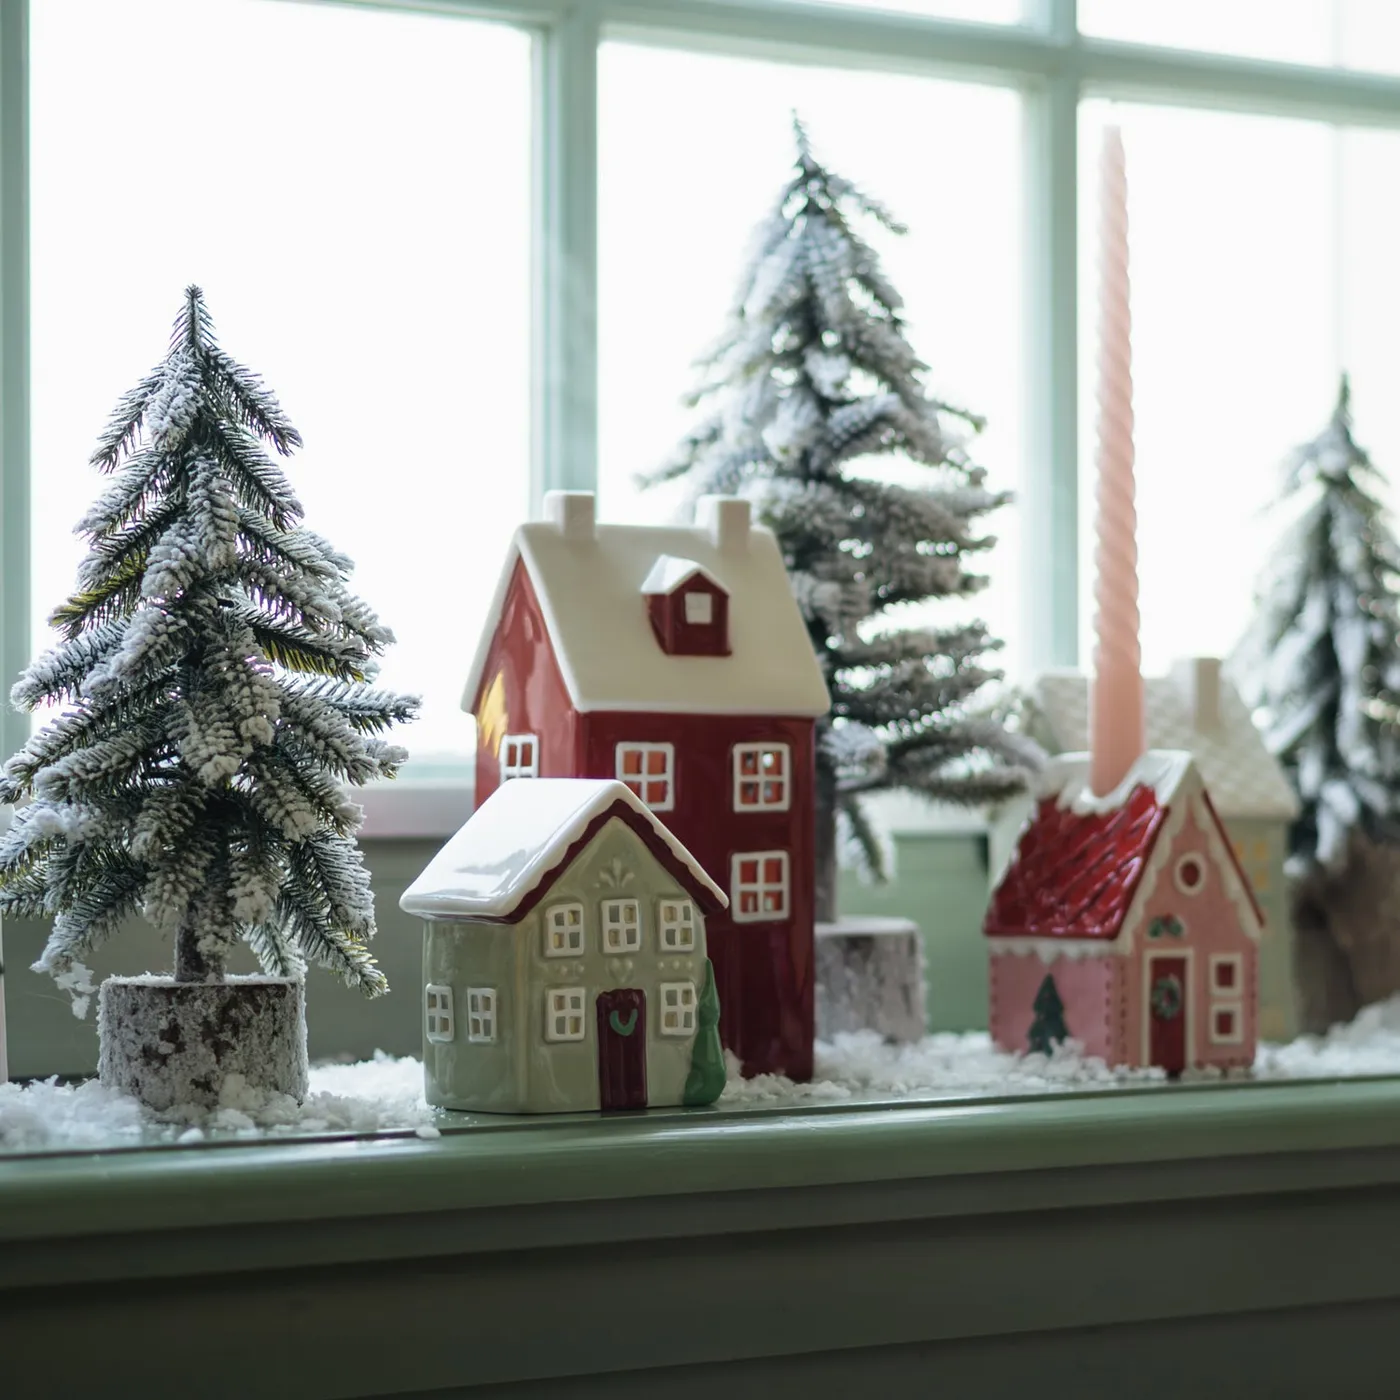
that tall pink twisted candle is beautiful, but real wax will drip on the white sill. Use a flameless flicker candle or set the real candle inside a clear glass hurricane. The light green sill with white frames is charming, but if window condensation drips onto the paint, it will need touch-ups before December is over.
15. Red Village Houses in Snowfall Scene
- Miniature red houses and church: $40–$120
- Artificial snow blanket: $10–$25
- Flocked evergreen backdrop trees: $15–$40
- Snowfall projector or falling snow light: $30–$60
- Total to recreate: $95–$245
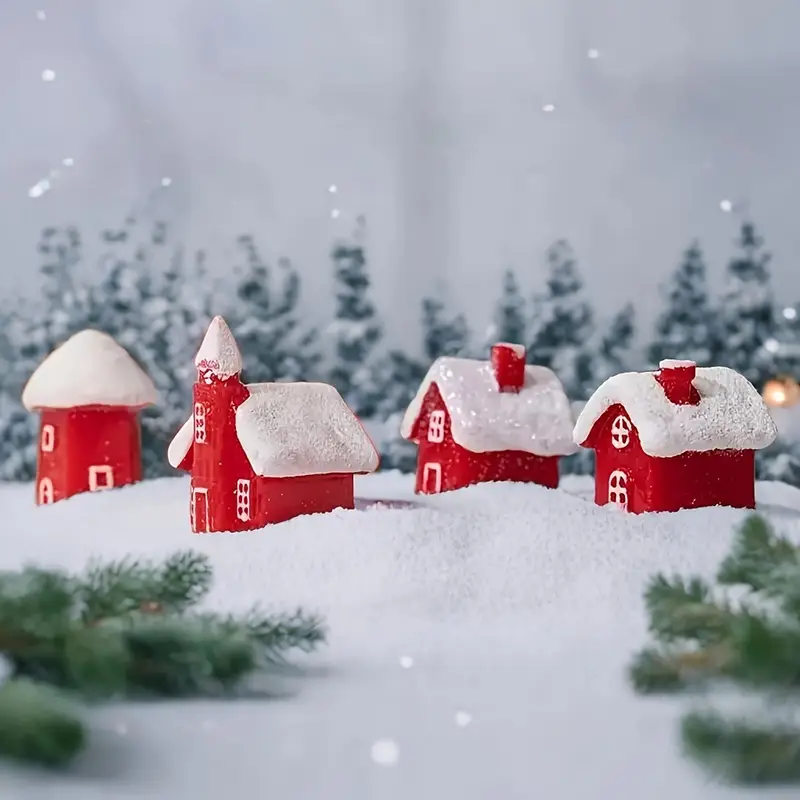
Budget alternative: use white batting and a $20 light projector. Red ceramic houses from thrift stores can be found for under $15 each.
Why it works: all-red structures against white and muted green is almost color-field design. The simulated falling snow adds motion, but the red stays saturated because the backdrop is blurred and desaturated. If you want a softer take on the same snowy window idea, compare with Idea #14 — pastel houses and a pink candle instead of bold red.
16. Rustic Gray and White Village with Twinkling Branches
Neutral Christmas decor is still rising in 2026 because it works in modern homes without fighting existing beige or charcoal furniture. Gray and white villages photograph beautifully and feel calm at the end of a busy holiday day. They also transition easily from December into January as winter decor.
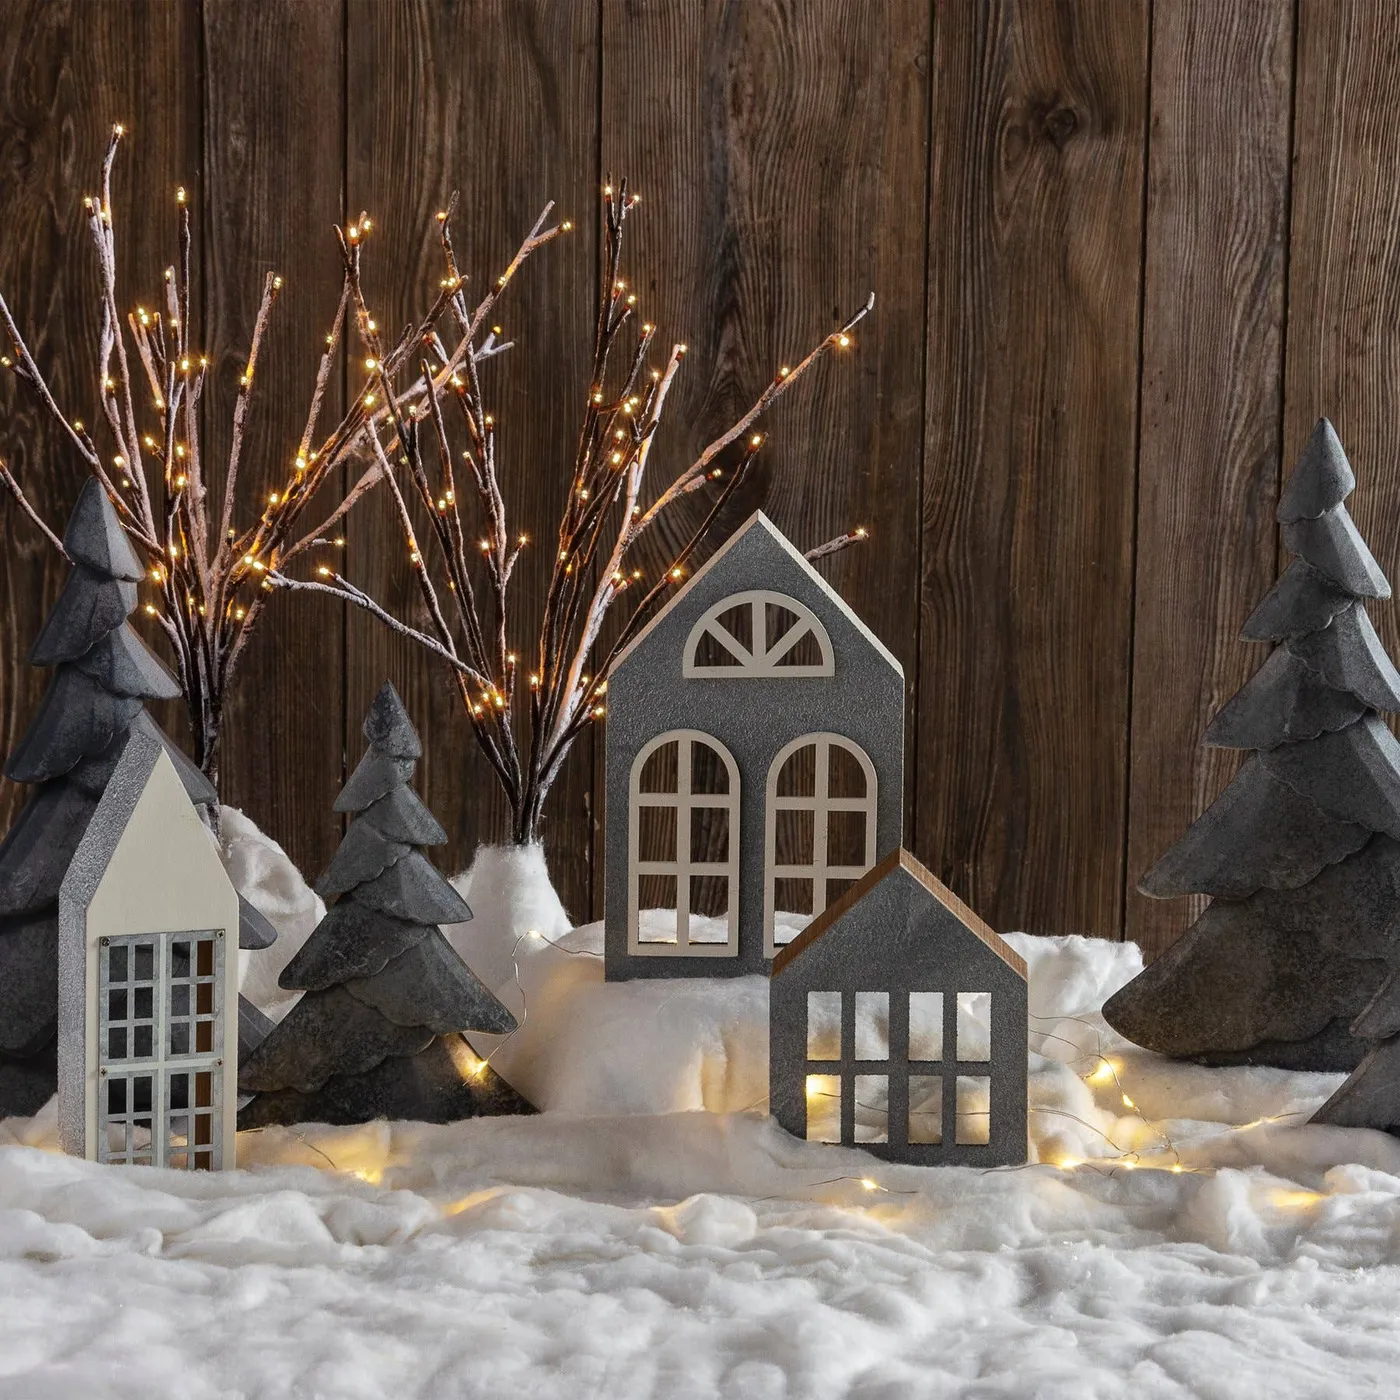
Use a dark wooden plank wall or a charcoal linen panel behind the display — even a dark piece of foam core works. The warm string lights need a dark, non-reflective surface behind them to read as individual points of light. Place the lighted bare branches off to one side, not centered, so the village still feels grounded rather than overwhelmed by twinkle.
17. Pastel Christmas Village on Kitchen Floating Shelves
The white subway tile backsplash is what makes this work. Pastel houses would get lost on painted drywall, but the glossy tile grid repeats structure and makes every glitter detail pop. Keep that backsplash visible — don’t cover it fully with garland or you’ll lose the texture that makes the pastels feel intentional.
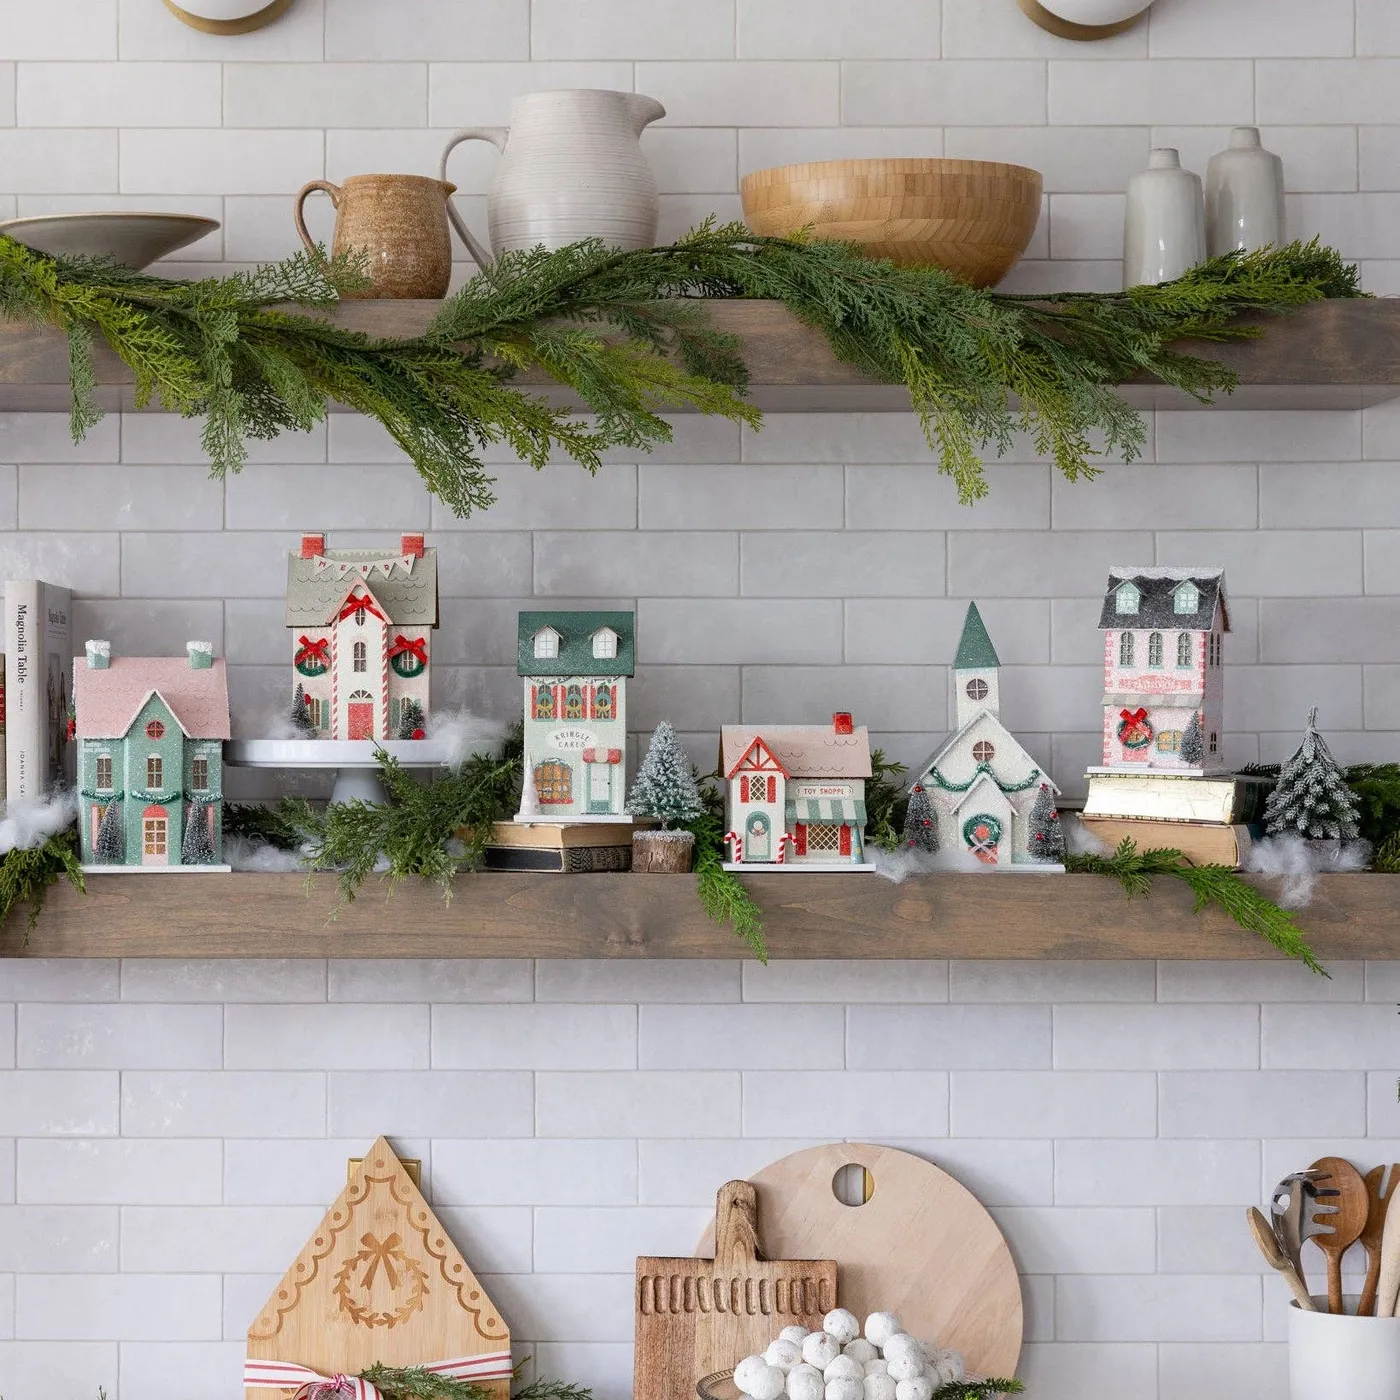
These shelves are likely 8 to 10 inches deep, so houses up to 6 inches deep can fit comfortably. If your shelves are only 6 inches deep, use smaller bottle brush trees and one or two low buildings. Compare with Idea #23 for a similar shelf look that adds cake stands and books for even more height variety.
18. Snow-Covered Church Village with Caroling Figures
Walmart sells small illuminated ceramic churches for $20 to $30. Use white felt for snow and pipe cleaner bottle brush trees from Dollar Tree. Miniature caroler figurines from craft stores run about $10 per set. Nothing here needs to be high-end collectible to feel serene.
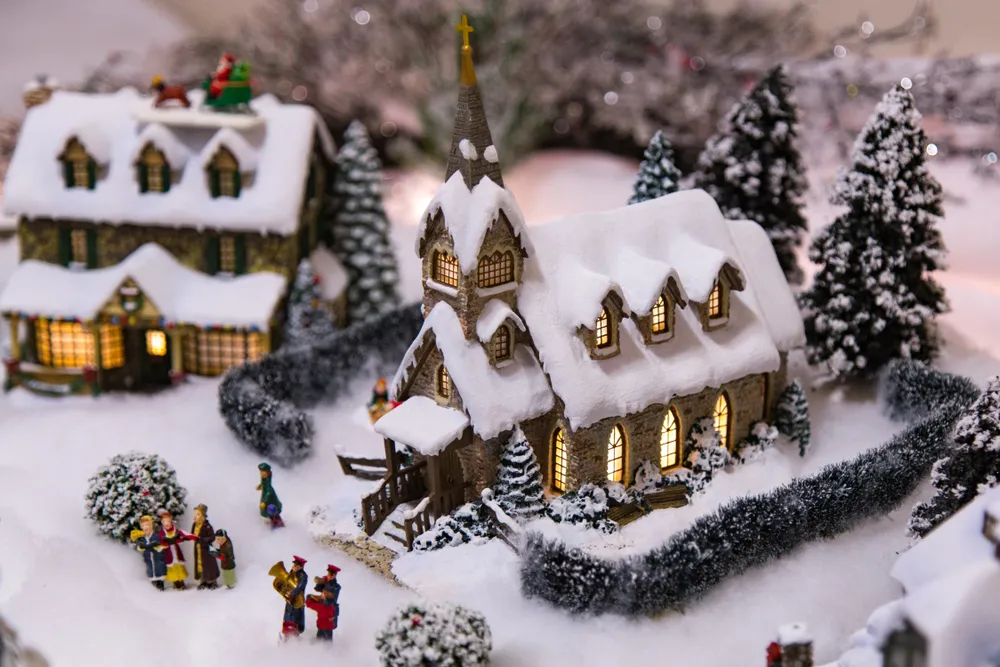
- Apply a thin layer of white tacky glue to the roof peaks.
- Dust with fine white sand or uncooked instant snow powder.
- Add a second thin layer to the edges where real snow would drift.
- Let it dry overnight, then touch up with white acrylic paint if the coverage looks too thin.
Time estimate: one hour plus overnight drying. Material cost: under $15.
19. Snowy Santa’s Shop Village with Figurines
figurine sprawl will kill this display. This scene uses many Santas, elves, and reindeer, and without clustering they look chaotic. Place figures in groups of two or three near lit windows or along paths, not evenly spaced. Let the textured rock formations act as natural boundaries between different activity zones.
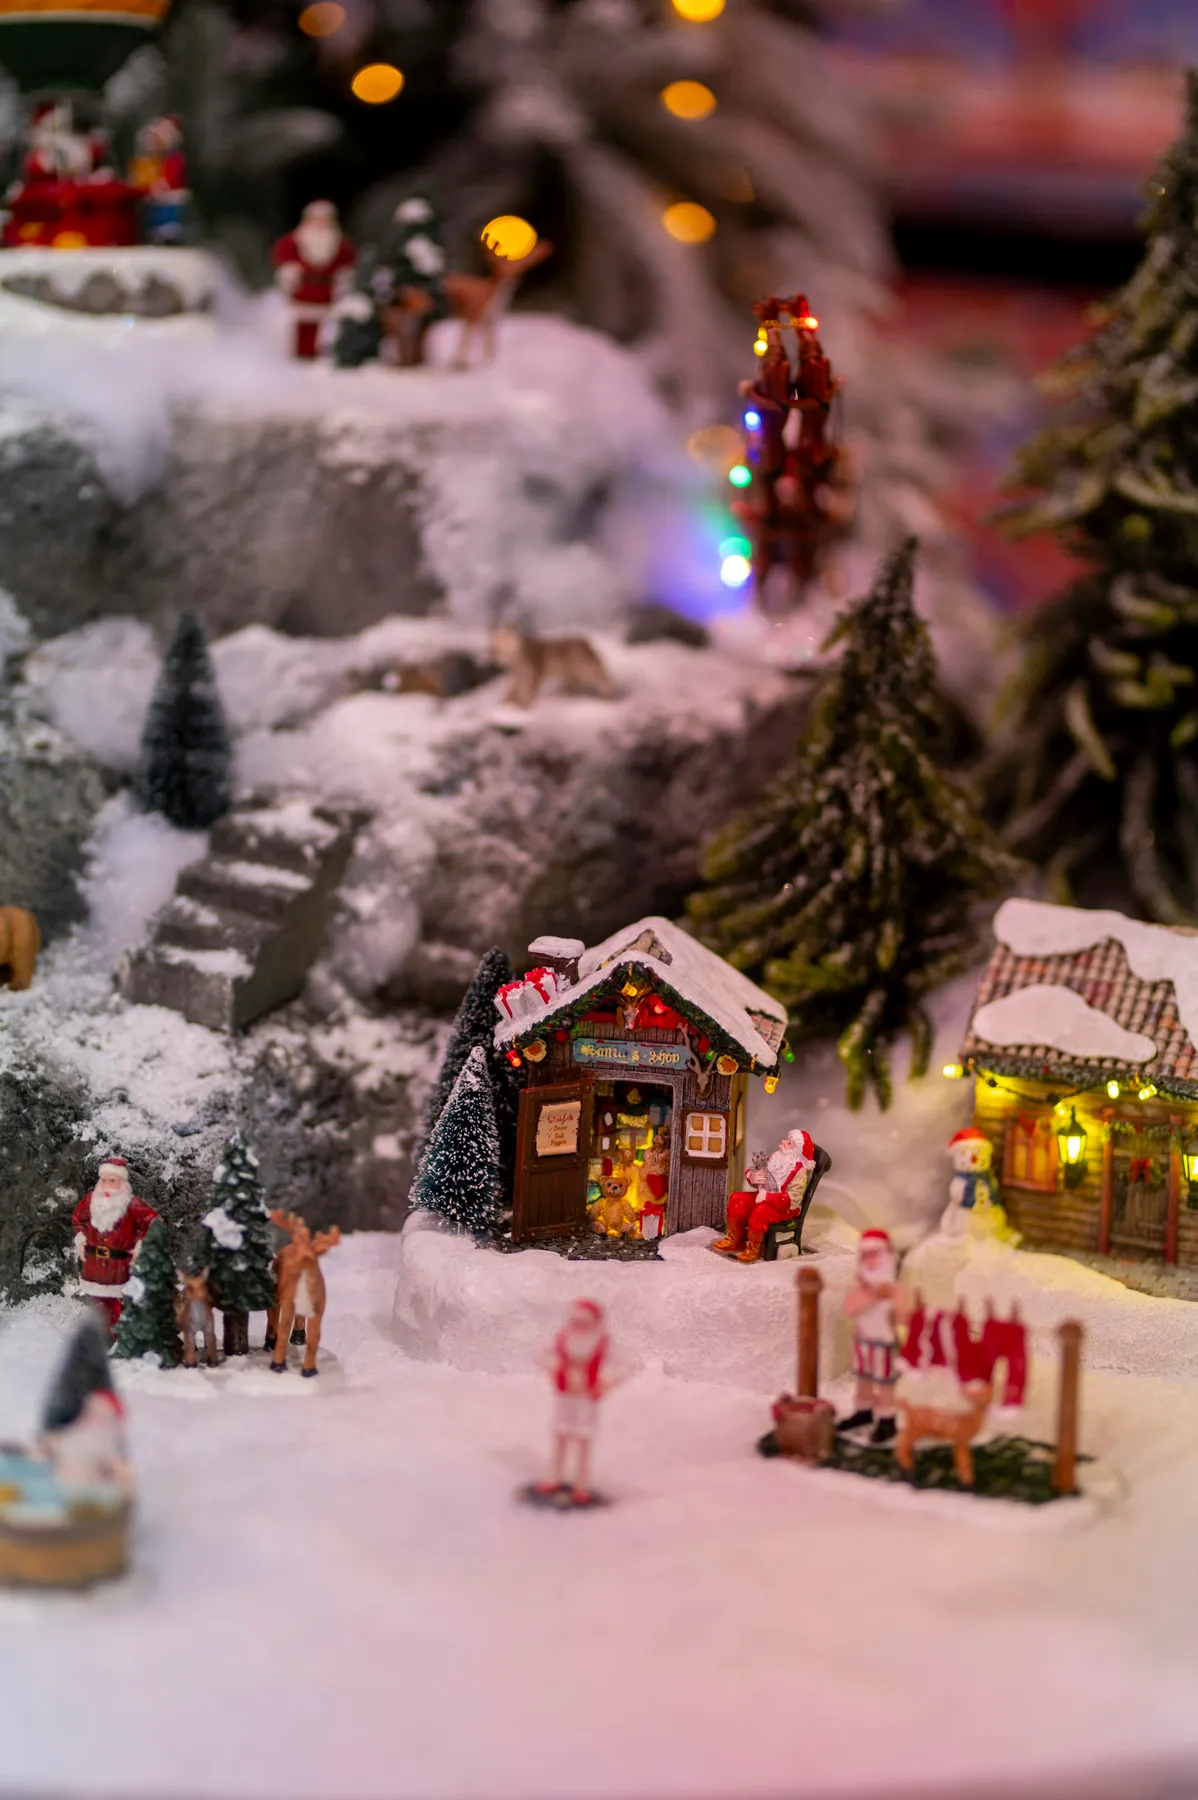
40% white snow, 20% deep green trees, 20% red Santa outfits, 10% brown wood buildings, 10% warm yellow light. If you swap Santa for snowmen, increase white to 50% and reduce red to 10%. The brown buildings keep it grounded so it doesn’t become a candy-colored blur.
20. Dense Illuminated Village with Bare Lighted Trees
For dense displays, hide wires with snow. Run cords under white felt strips before adding houses, and label each cord with small washi tape near the plug so troubleshooting doesn’t require moving the whole village. Battery-operated warm white micro LED strands work best for bare trees because they’re lightweight and easy to shape.
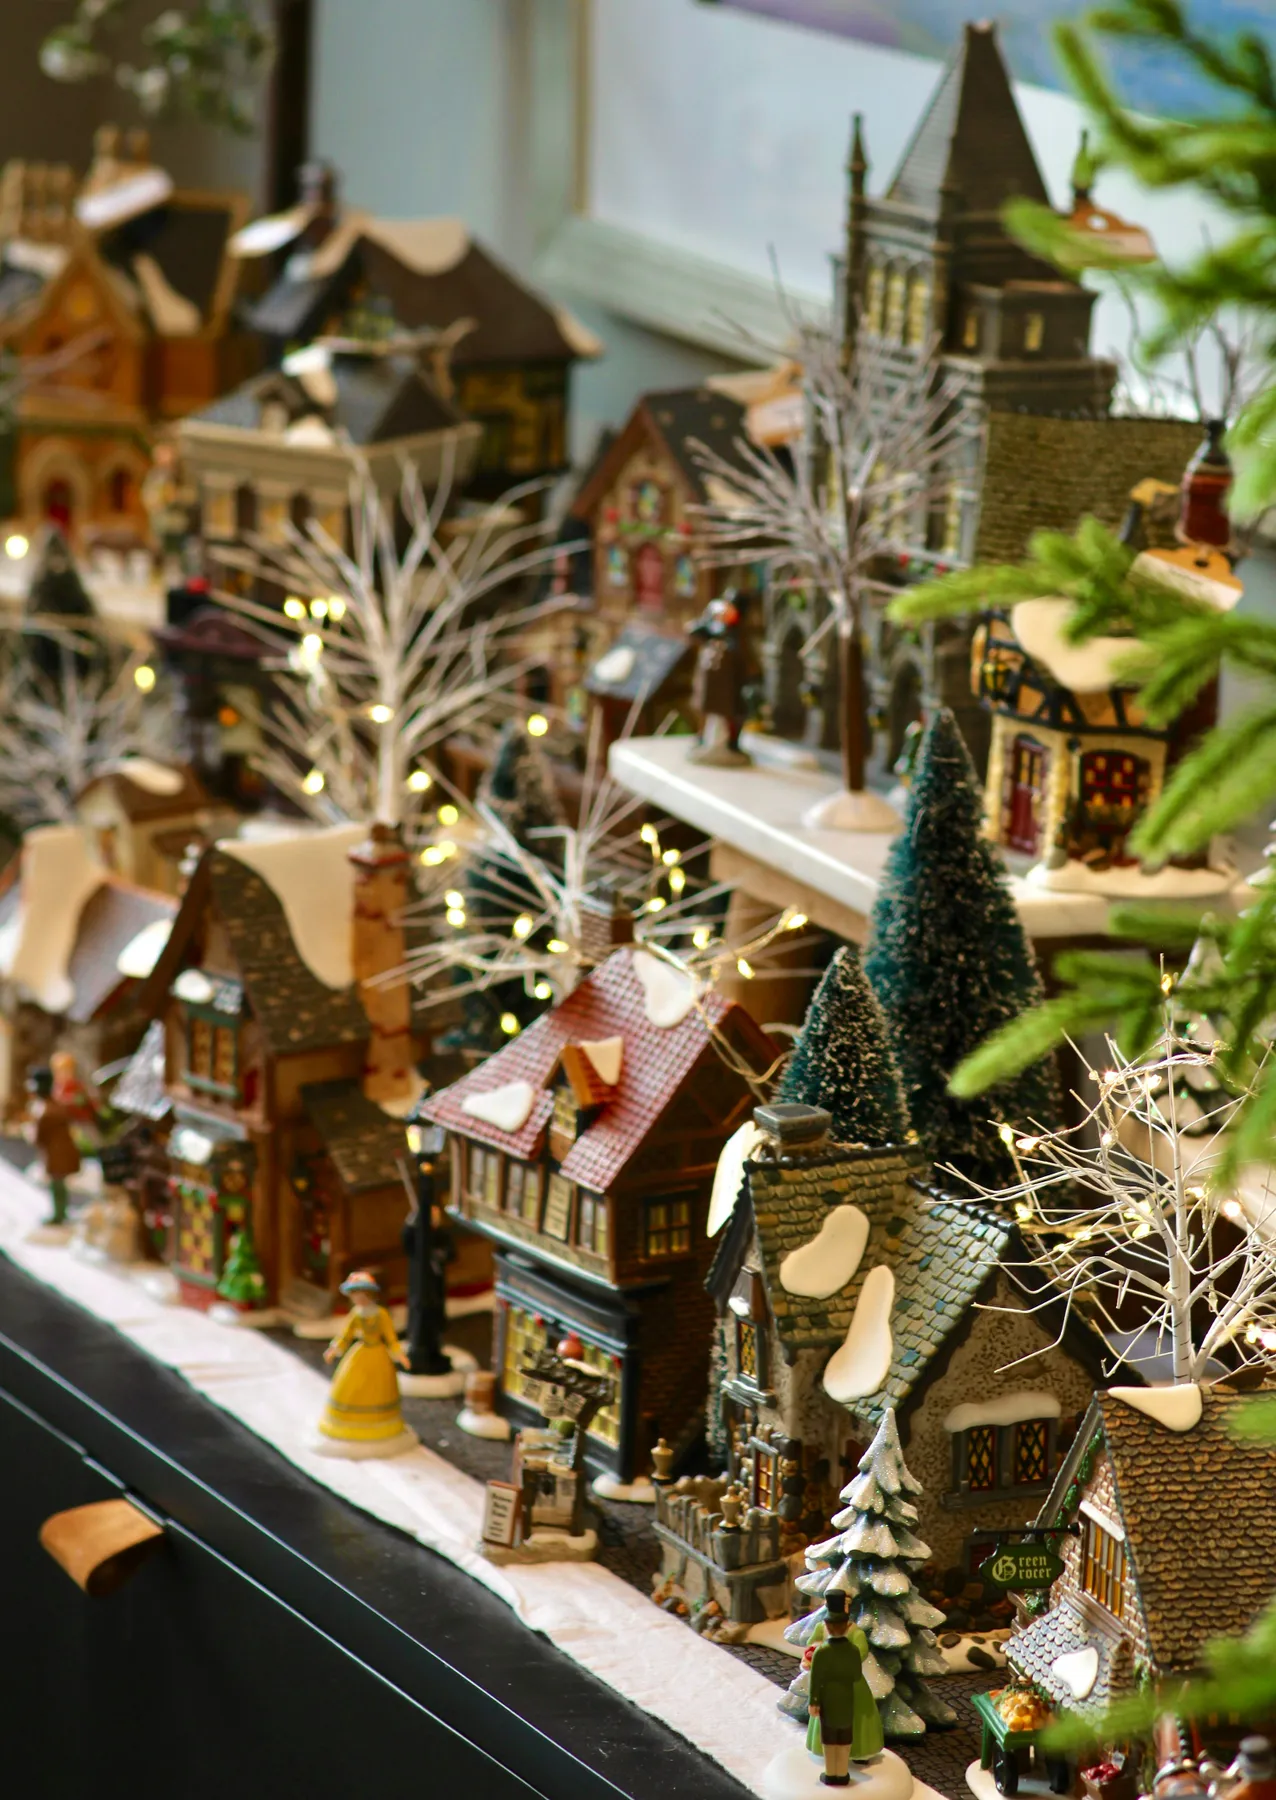
What makes this work is repetition of snow-covered rooftops plus taller bare white trees breaking the skyline. Warm white lights unify different building styles, while the dense layout reads as a real street rather than a single row. The bare trees add airiness, so the scene feels full but not claustrophobic.
21. Tabletop Christmas Village with Model Train
This requires a large table — at least 5 feet long and 2.5 feet deep for an oval track. Standard 8-foot ceilings are fine, but the train needs clearance under the bridge and around table edges. If your table is 3 feet, choose a small circle line and three buildings instead of a full town with train loops.
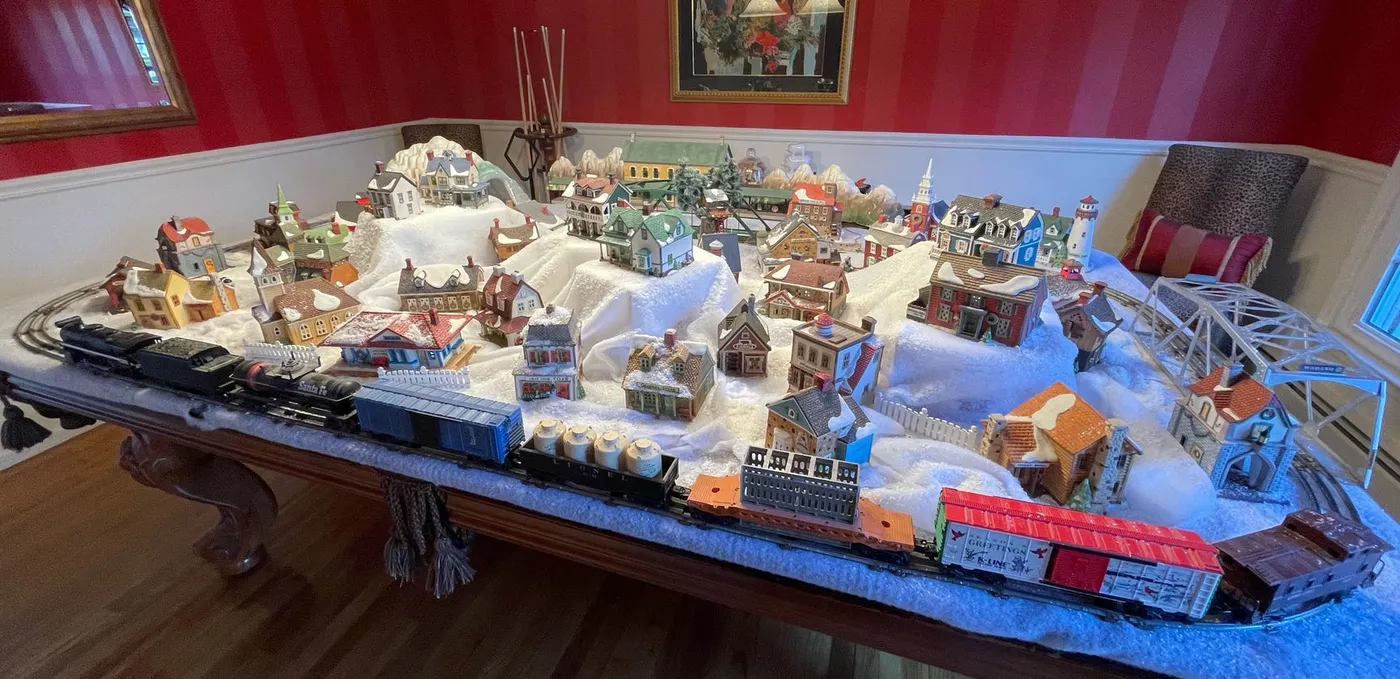
Model train maintenance is real. Clean the track with rubbing alcohol monthly and check wheel pickups for lint. Snow flocking can get sucked into locomotive gears, so keep flocked trees at least 2 inches from the track. Expect $20 to $40 a year for replacement track connectors, bulbs, and lubricant.
22. Three-Tier White and Silver Christmas Village
Monochromatic white-and-silver villages are the 2026 answer to holiday maximalism burnout. They feel serene and high-end, and they can stay out through January as winter decor. Pinterest users love them because they photograph well in any light and don’t fight with colorful gift wrap.
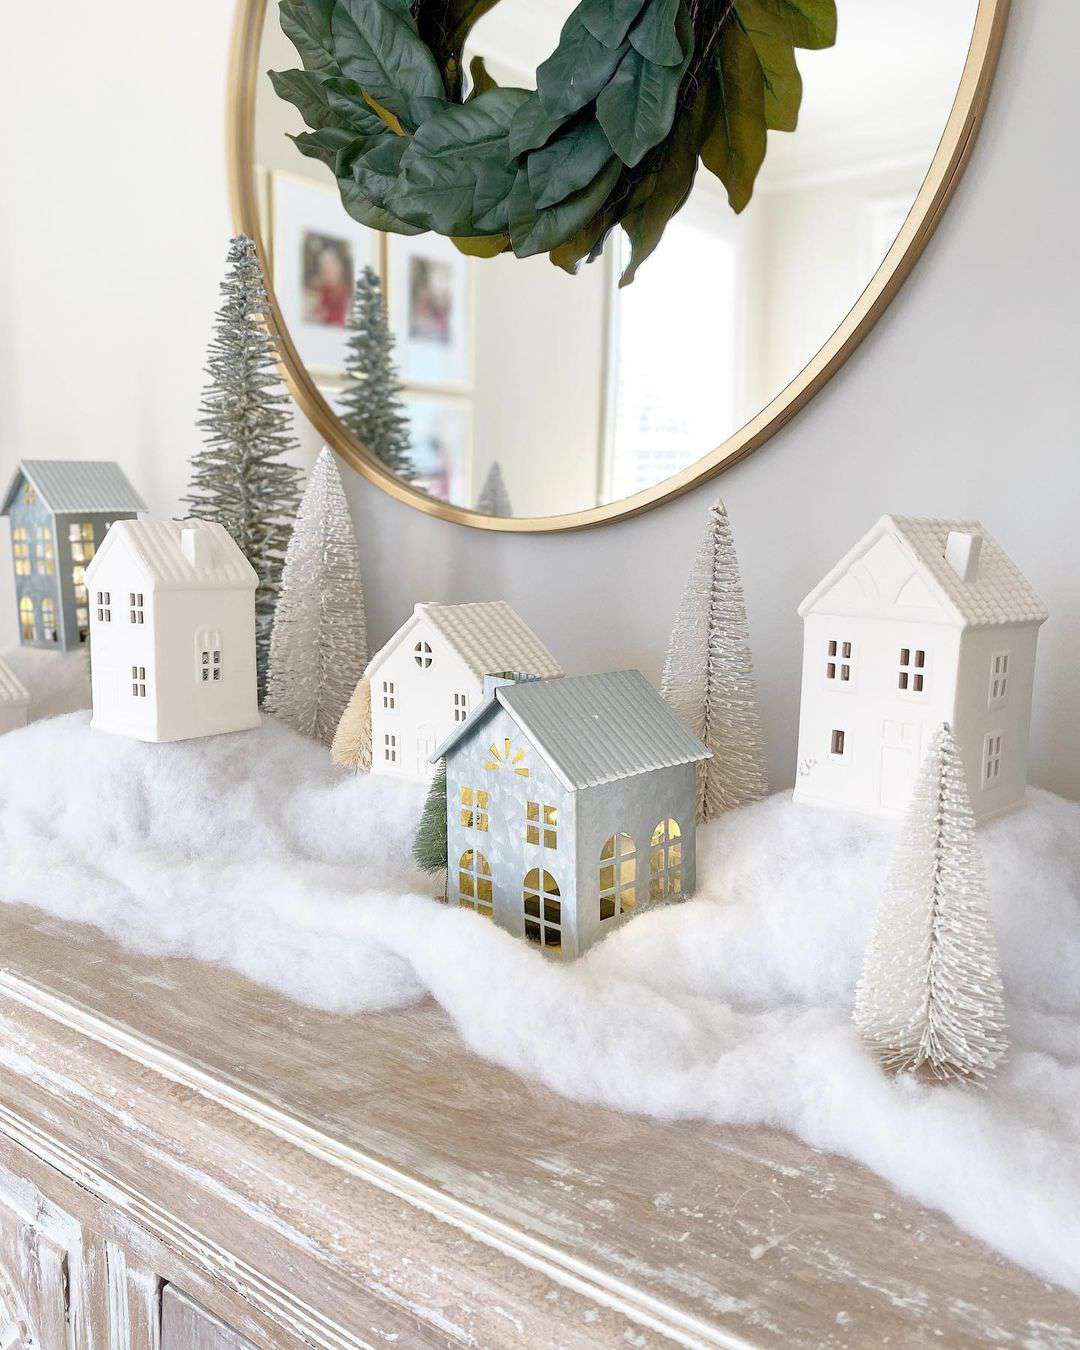
The three-tiered structure is what makes the monochrome palette work. Without graduated heights, all-white houses would blend into one pale blob. The platforms create shadows that define each silhouette and give the eye a place to rest. Compare with Idea #11 — same tier concept, warmer and more colorful.
23. Pastel Village on Rustic Wood Shelves with Cake Stands
- Start with the largest house left-of-center on a small stack of vintage books.
- Drape faux pine garland along the shelf front, letting it spill slightly over the edge.
- Add cotton batting snow fluff under and behind the village pieces.
- Place a bottle brush tree on a white cake stand for height variation.
- Step back and make sure the backsplash tile still shows as a grid.
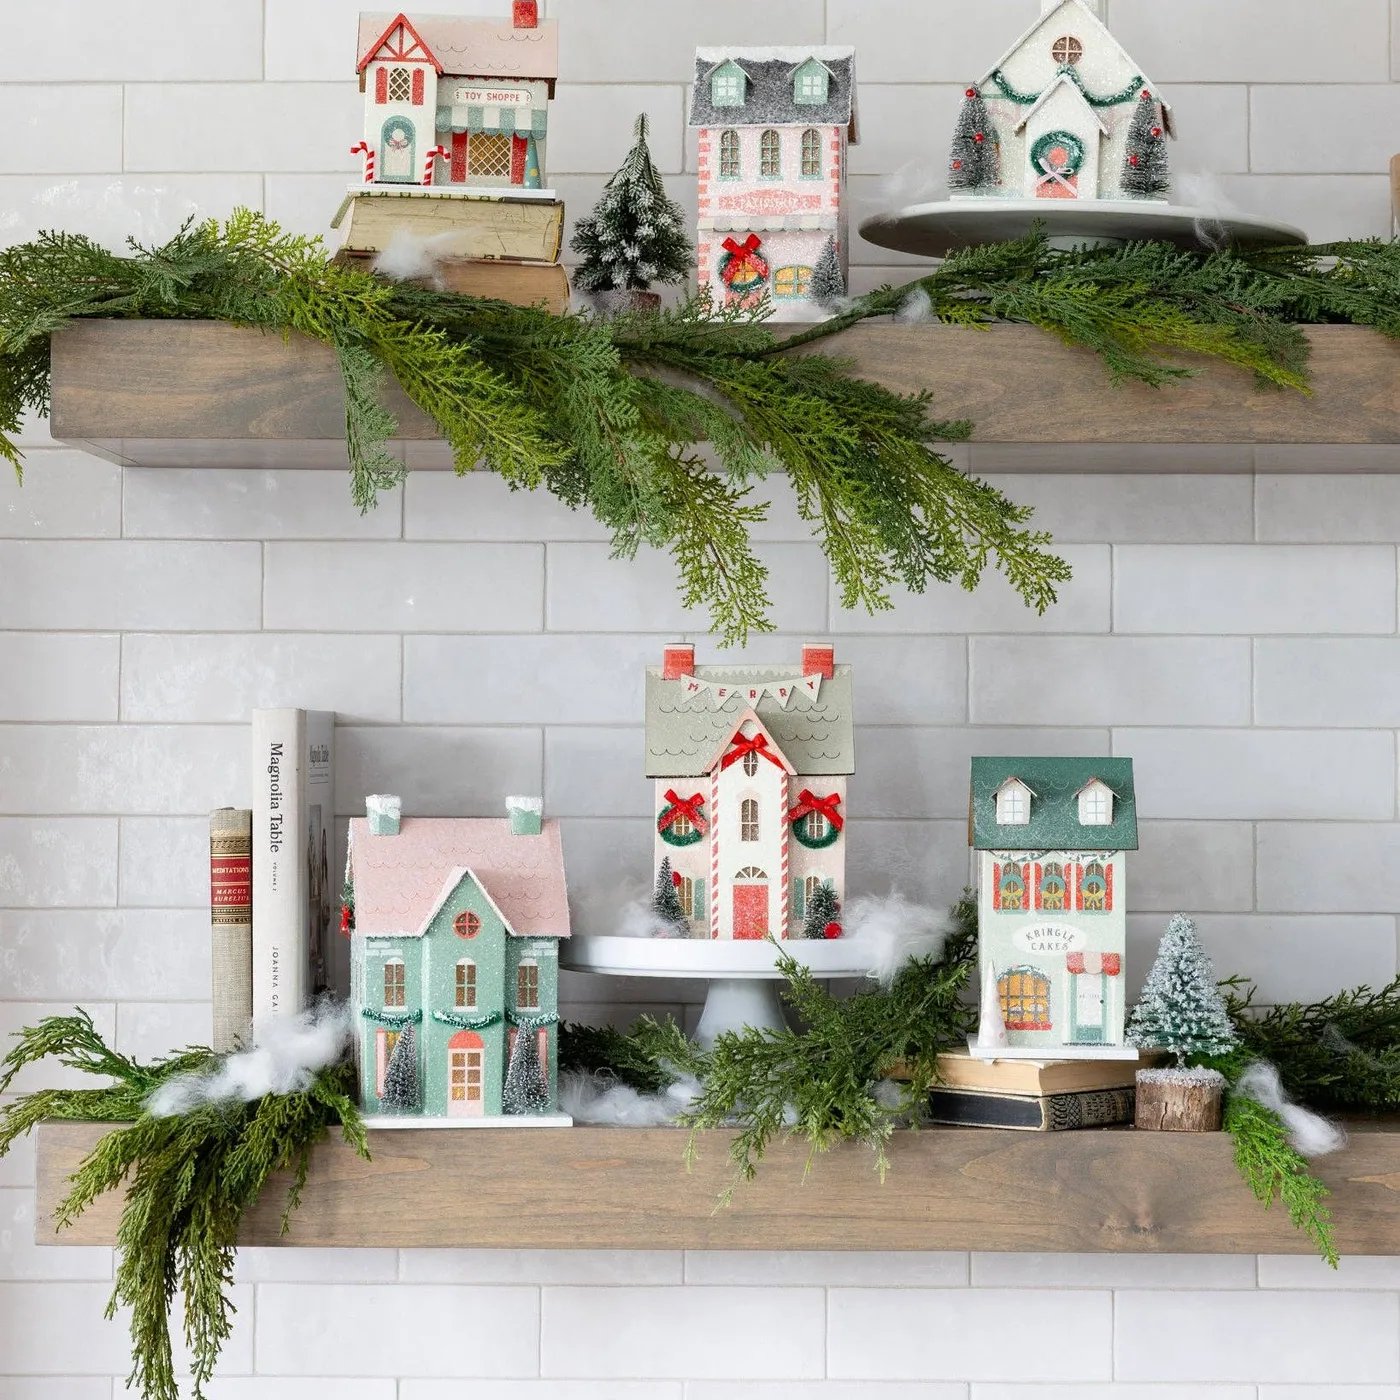
Time estimate: 25 minutes. Material cost: around $30 if you already have the shelves.
For less: use old books from a thrift store at $2 each, Target mini pastel houses at $10 to $15 each, and IKEA faux garland under $10. The cake stand can be a thrifted dessert stand spray-painted white.
24. Miniature European Village with Striped Market Stall
40% snow base, 25% green flocked trees, 15% warm window light, 10% red and blue market awning, 10% tiny figures. The awning brings the color contrast. If it were all red and green, the scene would feel less like a European street and more like a generic holiday shelf.
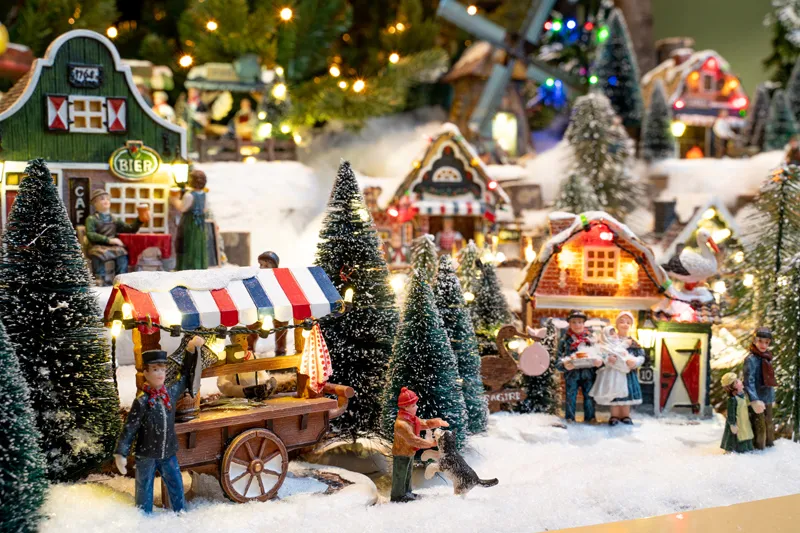
striped awnings and tiny market stalls are fragile. If you have cats, this display belongs in a closed cabinet or on a high shelf — one tail swipe can send pieces flying. Multicolored background lights can bleed into the scene, so keep them behind the village rather than directly overhead to preserve the warm glow.
25. Snowy Village with Train and Blue Sky Backdrop
- Miniature village building set with lights: $70–$200
- Model train starter set and track: $50–$150
- Blue cloudy backdrop panel or painted canvas: $20–$45
- Flocked evergreens and rocky hills: $25–$60
- Artificial snow base: $12–$30
- Total to recreate: $177–$485
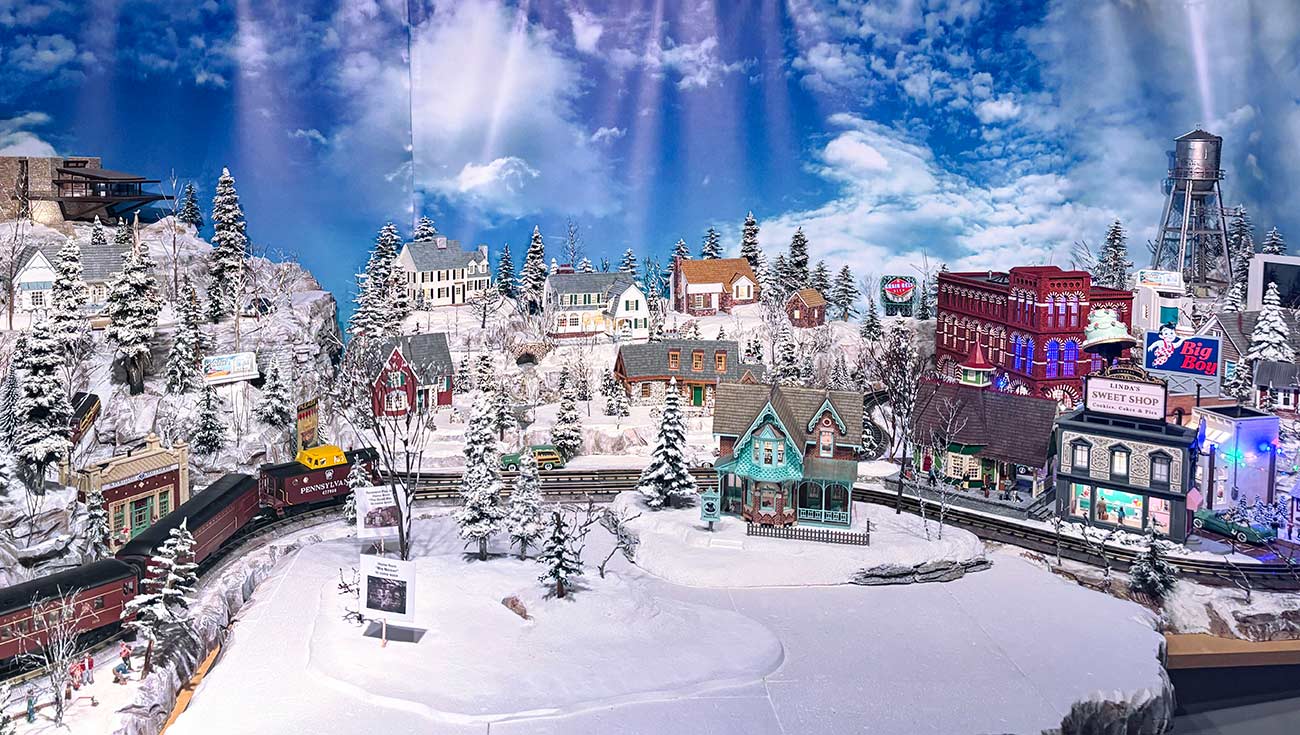
Budget alternative: use a blue poster board and a secondhand train set; you can recreate the vibe for under $120.
The blue backdrop is the workhorse in this scene. It gives the display outdoor daylight contrast against warm lit windows, and the white clouds keep it from feeling like a movie set. This is the more whimsical sibling of Idea #21 — same train idea, different light temperature and mood.
26. Ceramic Winter Village on Windowsill with Pinecones
Mix real evergreen sprigs and pinecones into a ceramic village to add scent and organic texture. Keep live greenery in a hidden water pick or replace it every five days, because dried needles will fall into the snow and look messy. If the windowsill gets drafts, use flameless LED candles instead of real flames.
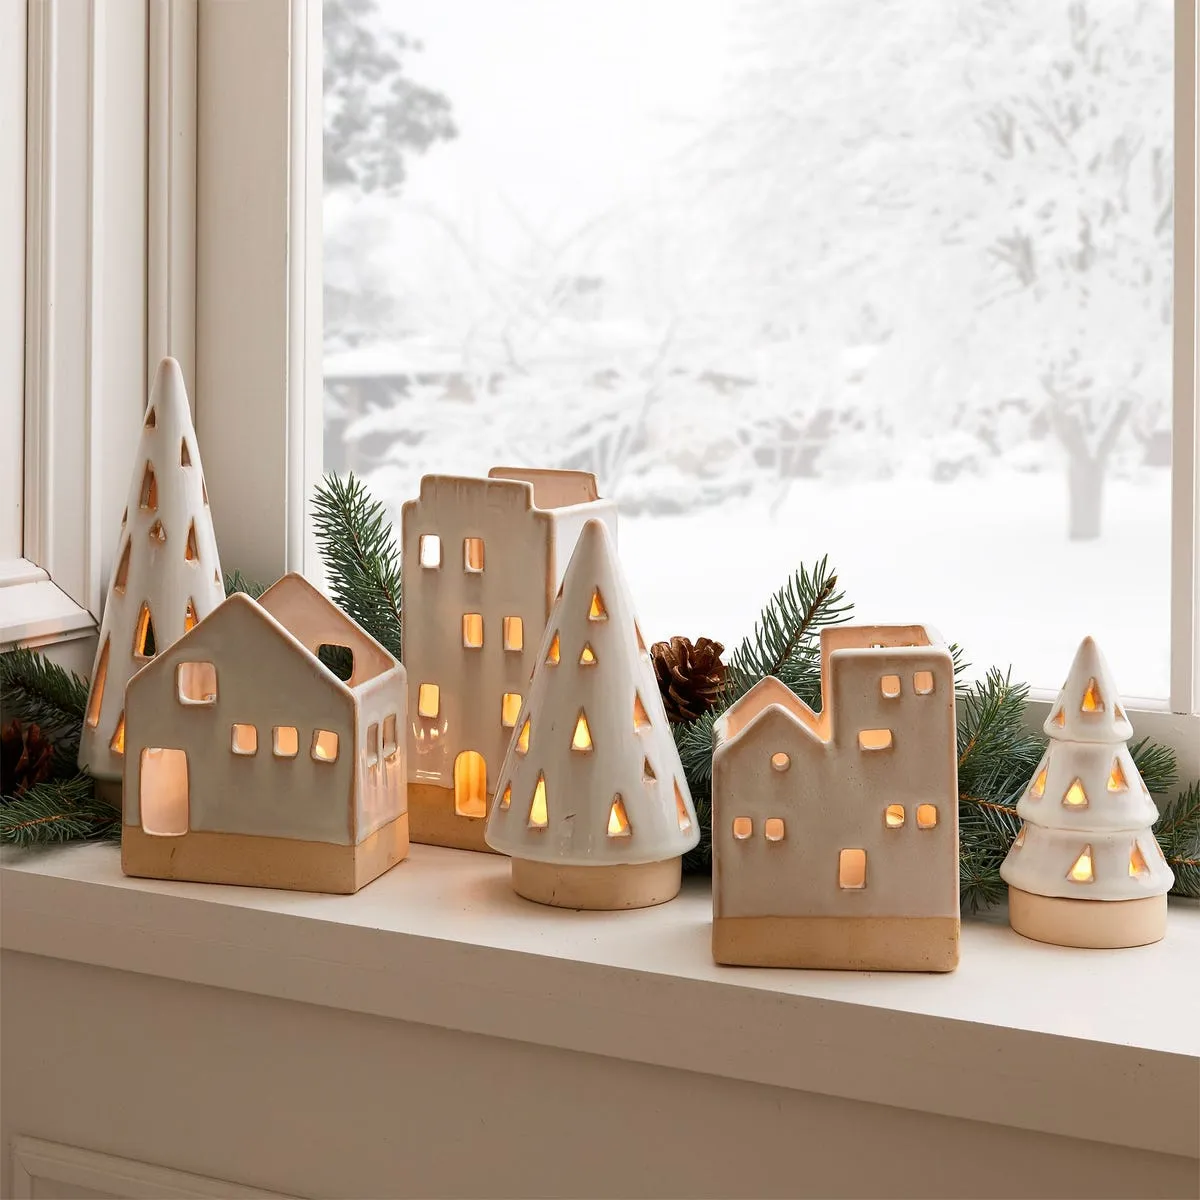
This works on a windowsill at least 8 inches deep; standard 4-inch ledges are too shallow. The snowy outdoor view through the glass provides a soft backdrop, but avoid placing lit ceramic houses against south-facing glass that fades paint over time. A north or east window is ideal for preserving color.
27. Intricate Multi-Level Village with Santa’s Sleigh
The forest backdrop with snowy trees sets the mood. Without it, even a great building collection looks like stuff on a counter. The dark tree line frames the scene and hides the wall, so your eye stays inside the miniature world. It’s the single element that makes this feel cinematic instead of cluttered.
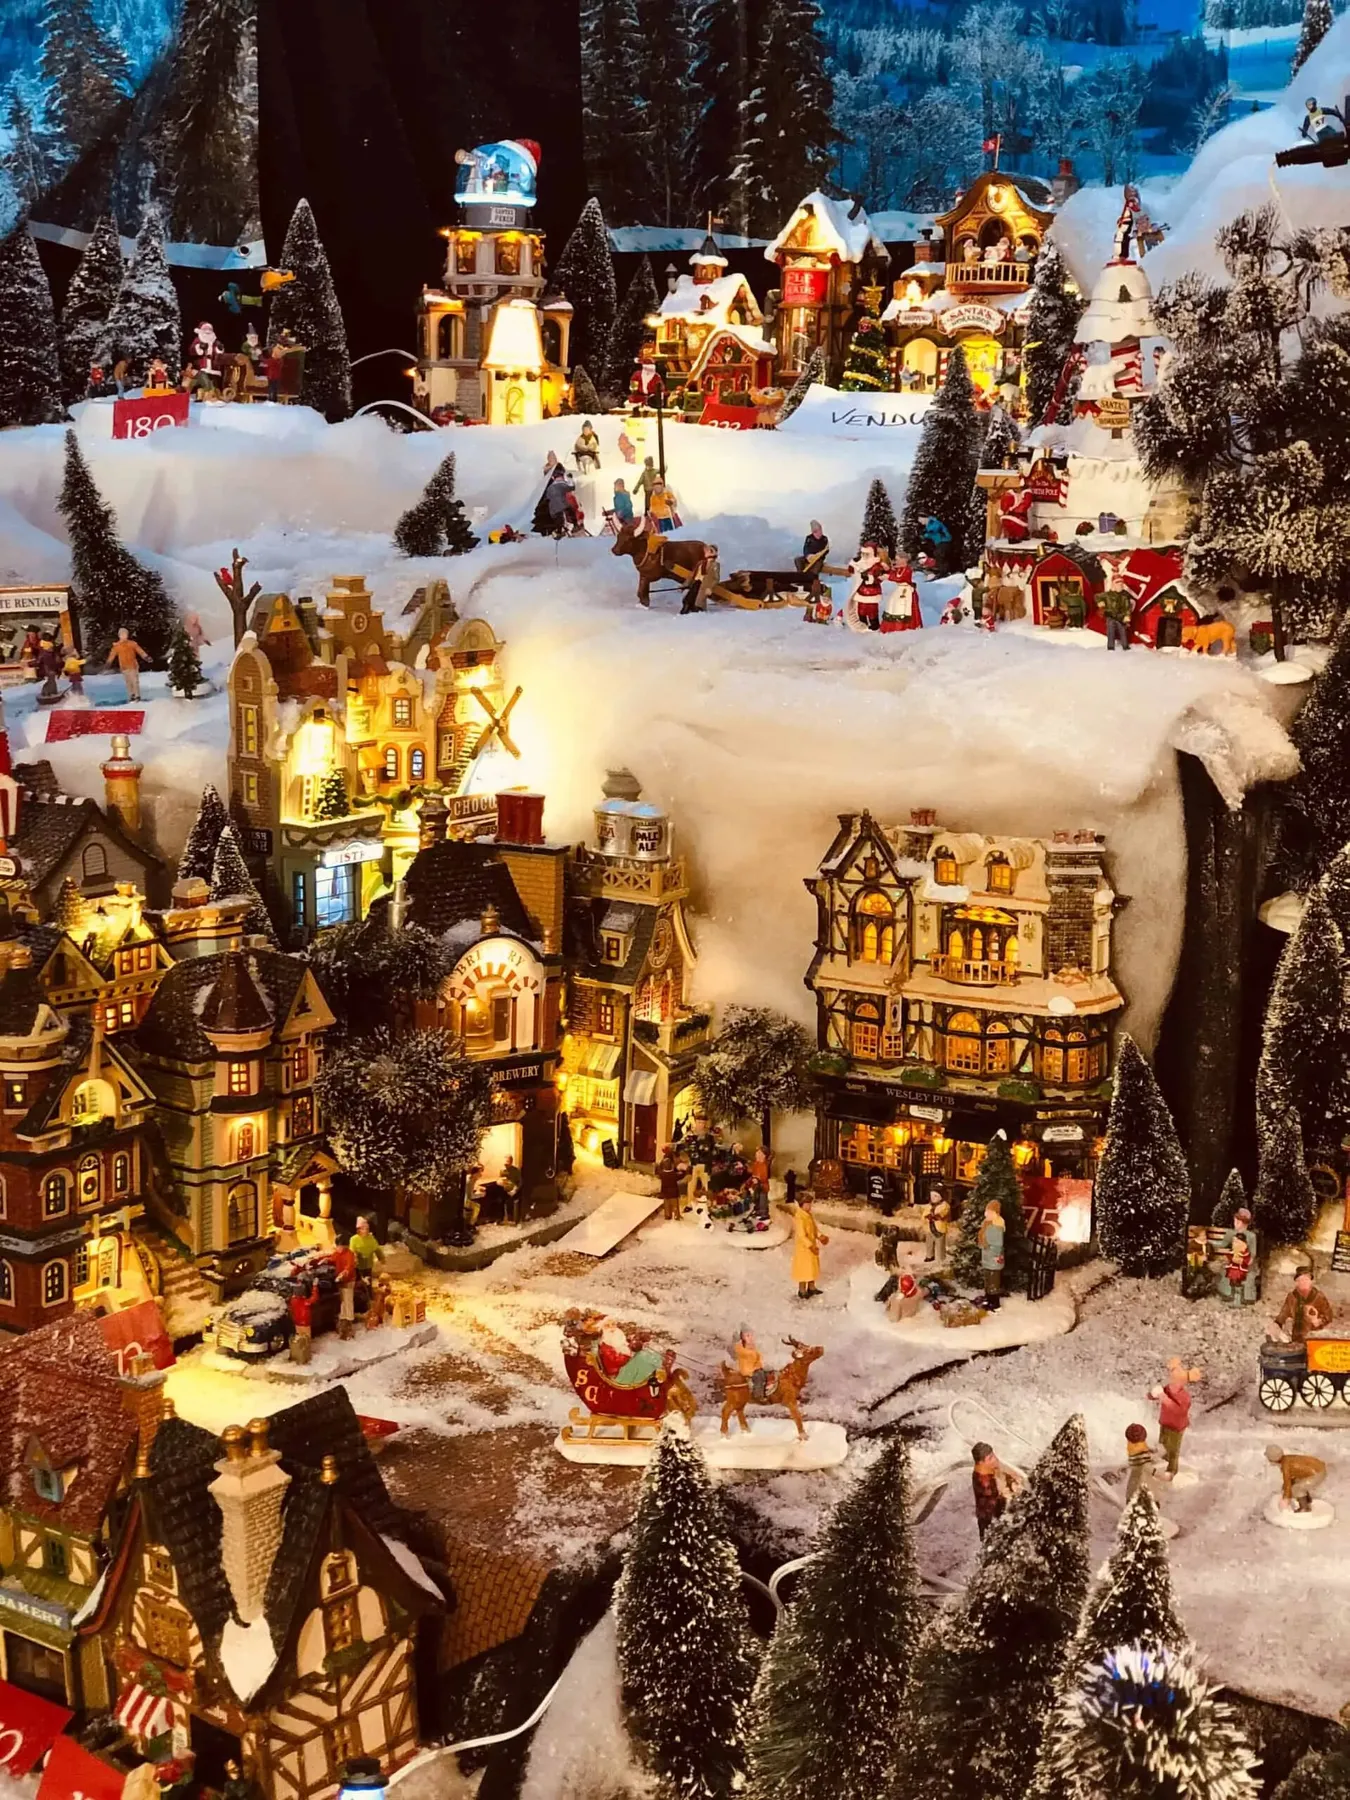
This level of detail takes consistent time. Dust all surfaces monthly, and replace tiny figures or reindeer antlers as they break. Artificial snow on terrain can yellow if exposed to direct sun. Keep the whole display away from heat vents that will blow snow and lightweight figures around.
28. Brick House and Treehouse Scene with Red Sweater Figure
- Insert a micro LED string through the back of the treehouse, securing it with tiny pieces of clear tape.
- Add small furniture inside if it’s visible through the window.
- Use a warm white 2700K bulb; cool white kills the cozy nighttime feeling.
- Run the wire down a back leg and cover it with faux snow.
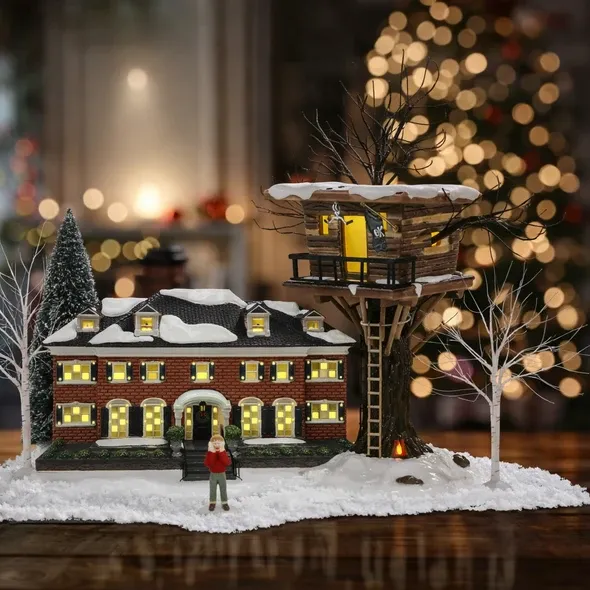
Time estimate: 30 minutes. Material cost: under $12 for a micro LED string.
Miniature scenes like a treehouse and brick house with a lone figure feel like a stop-motion story still. In 2026, Pinterest favors narratives over full streets — they’re more memorable, easier to personalize, and photograph beautifully because the eye settles on one quiet moment.
29. Miniature Village Scene with Red ATV and Tree
The red ATV is the hero, so you don’t need many buildings. Thrift a small toy ATV for $3, spray it red, add two tiny figures and a bottle brush tree. Use light grey or white craft gravel for the road texture. This whole vignette can come together for under $20 if you keep the background houses simple.
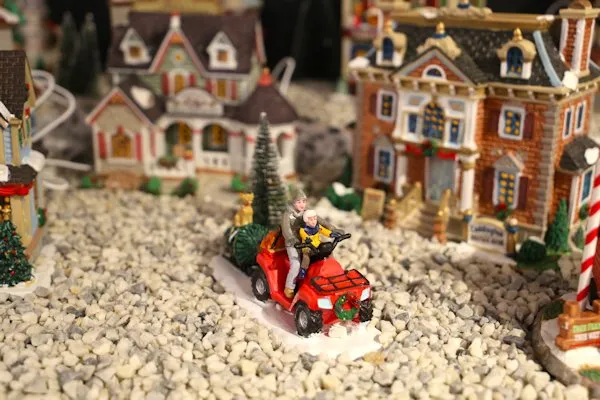
50% neutral gravel and brick houses, 20% red focal action from the ATV and accent roofs, 20% green trees, 10% white snow. Because the action is low to the ground, keep taller elements behind it. That way the red ATV stays the first thing people see.
30. Candle Shop Village with Flickering Facade Candles
Real flickering candles on a miniature shop look magical but risky. The faux snow around the base is often plastic or paper. Use LED flicker candles only. If you insist on real candles, set the shop on a non-flammable tray and never leave it unattended — this is a fireplace-mantel-level fire hazard.
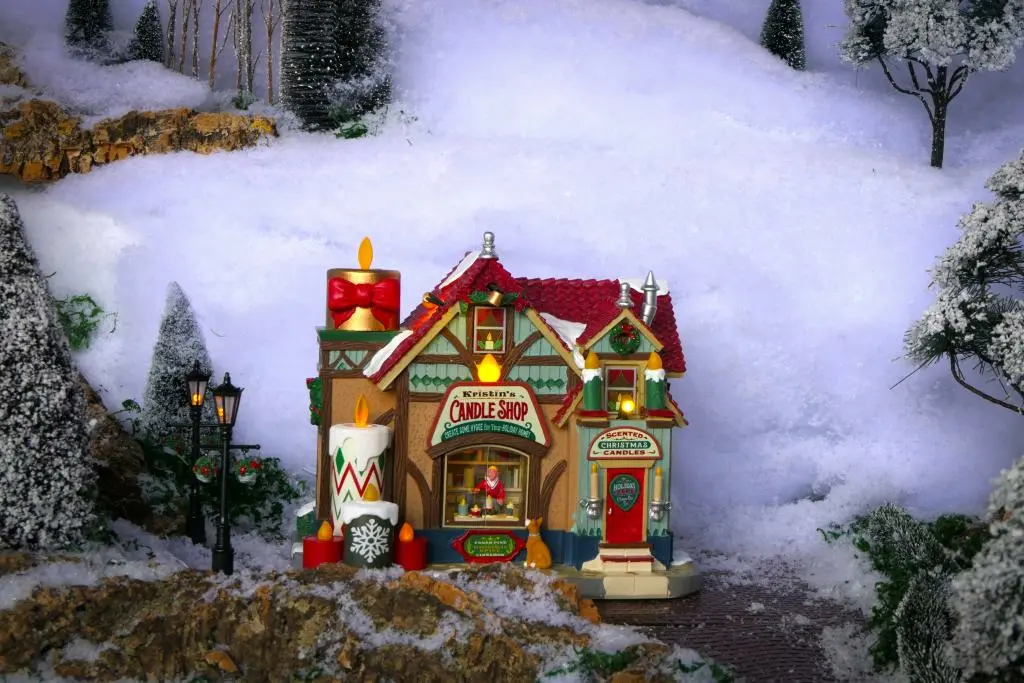
Use taller mini candles in uneven heights to mimic a working candle shop. Place them where they won’t block the shop door. The dark red shop door and black street lamp create nice contrast, so keep those details free of snow and lit from below if possible.
31. Lighted Pizzeria Street Scene with Red Scooter
The textured grey base mimics wet pavement, which makes the warm lights and red awning reflect like a real night street. Contrast is key: snowy trees against paved road. The red scooter adds movement and a focal point at medium height, breaking up the vertical lines of buildings and lamps.
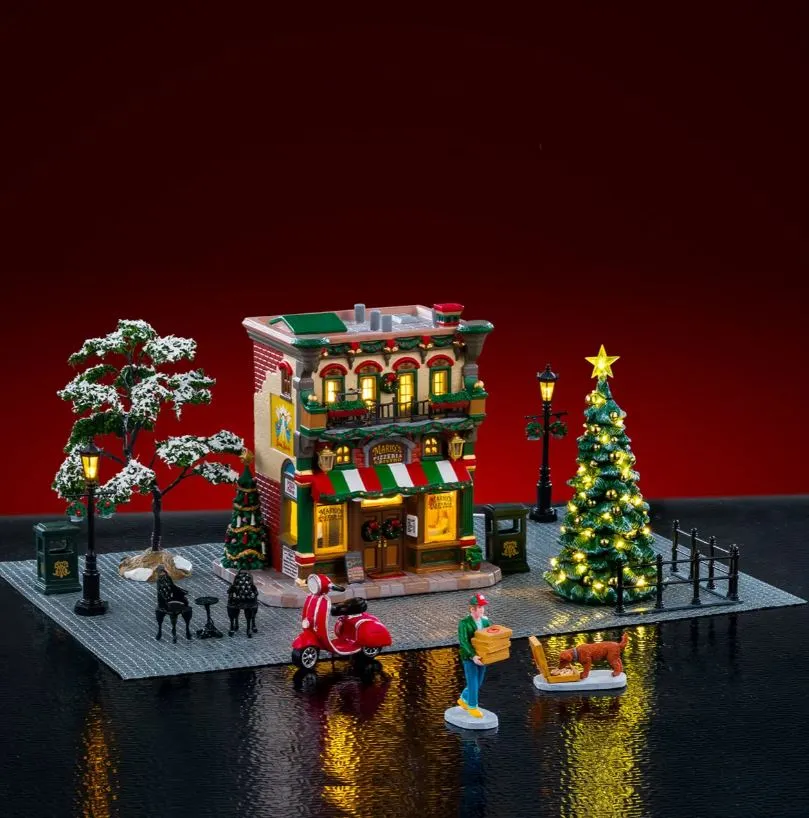
The red scooter is the one thing. Take it out and the scene becomes another row of buildings. It signals story — pizza delivery, a small town, holiday rush. Compare with Idea #29, another vehicle-driven miniature story, but there the ATV hauling a tree feels more rural than this urban curb.
32. Dense Christmas Village with Lighthouse and Santa’s Sleigh
Needs at least 4 feet by 2 feet, but density matters more than sheer size. A dense scene on a 3×2 surface can feel bigger if you place the lighthouse in the back corner and Santa’s sleigh in front. Keep vertical elements toward the rear so they don’t block the glowing houses.
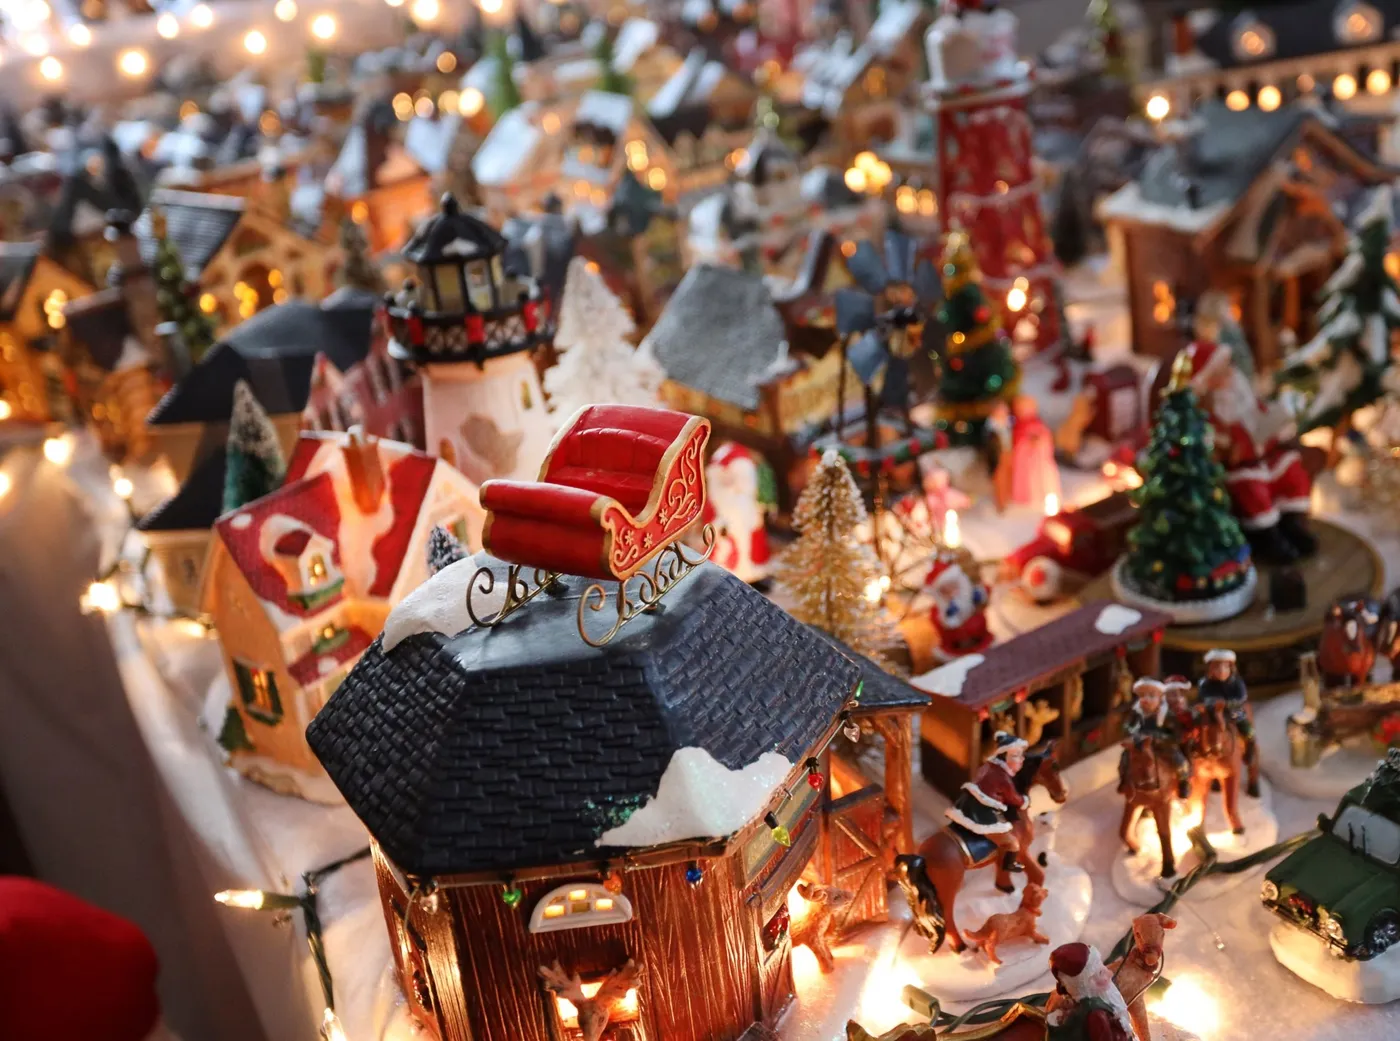
- Use a single multi-outlet cord strip under the table.
- Run each building wire down and back, not across the snow surface.
- Bundle wires in white felt channels or white zip ties.
- Label plugs under the table with a label maker.
- Turn on in segments to avoid overloading one outlet.
Time estimate: 45 minutes. Material cost: about $15 for cord management supplies.
Your Miniature Christmas World Is Calling
Whether you build a multi-level train village or tuck a few pastel houses onto kitchen shelves, the best display is the one that makes you pause and smile every time you pass it. Start with one hero piece, a little snow, and a strand of warm lights. Then save this post to Pinterest so you can come back when you’re ready to build your 2026 village.