You know that feeling when you finally find the butterfly garden idea that looks exactly right for your yard? That “aha!” moment is what this guide is all about. After filtering through hundreds of options from local nurseries, garden centers, and online retailers, we narrowed it down to the looks that truly deliver. We’re serving up 31 curated ideas covering every style imaginable, from wild cottage gardens to structured, modern layouts. The interest in rewilding our own backyards and creating mini ecosystems is bigger than ever for 2026, and a butterfly garden is the perfect place to start. Pin this guide for later—your future self will thank you when it’s time to get your hands dirty.
This post may contain affiliate links. As an Amazon Associate, we earn from qualifying purchases at no extra cost to you.
And stay until the end — we break down the most common mistakes that can ruin these looks.
📌 Save this to Pinterest for later — you’ll want to revisit these ideas.
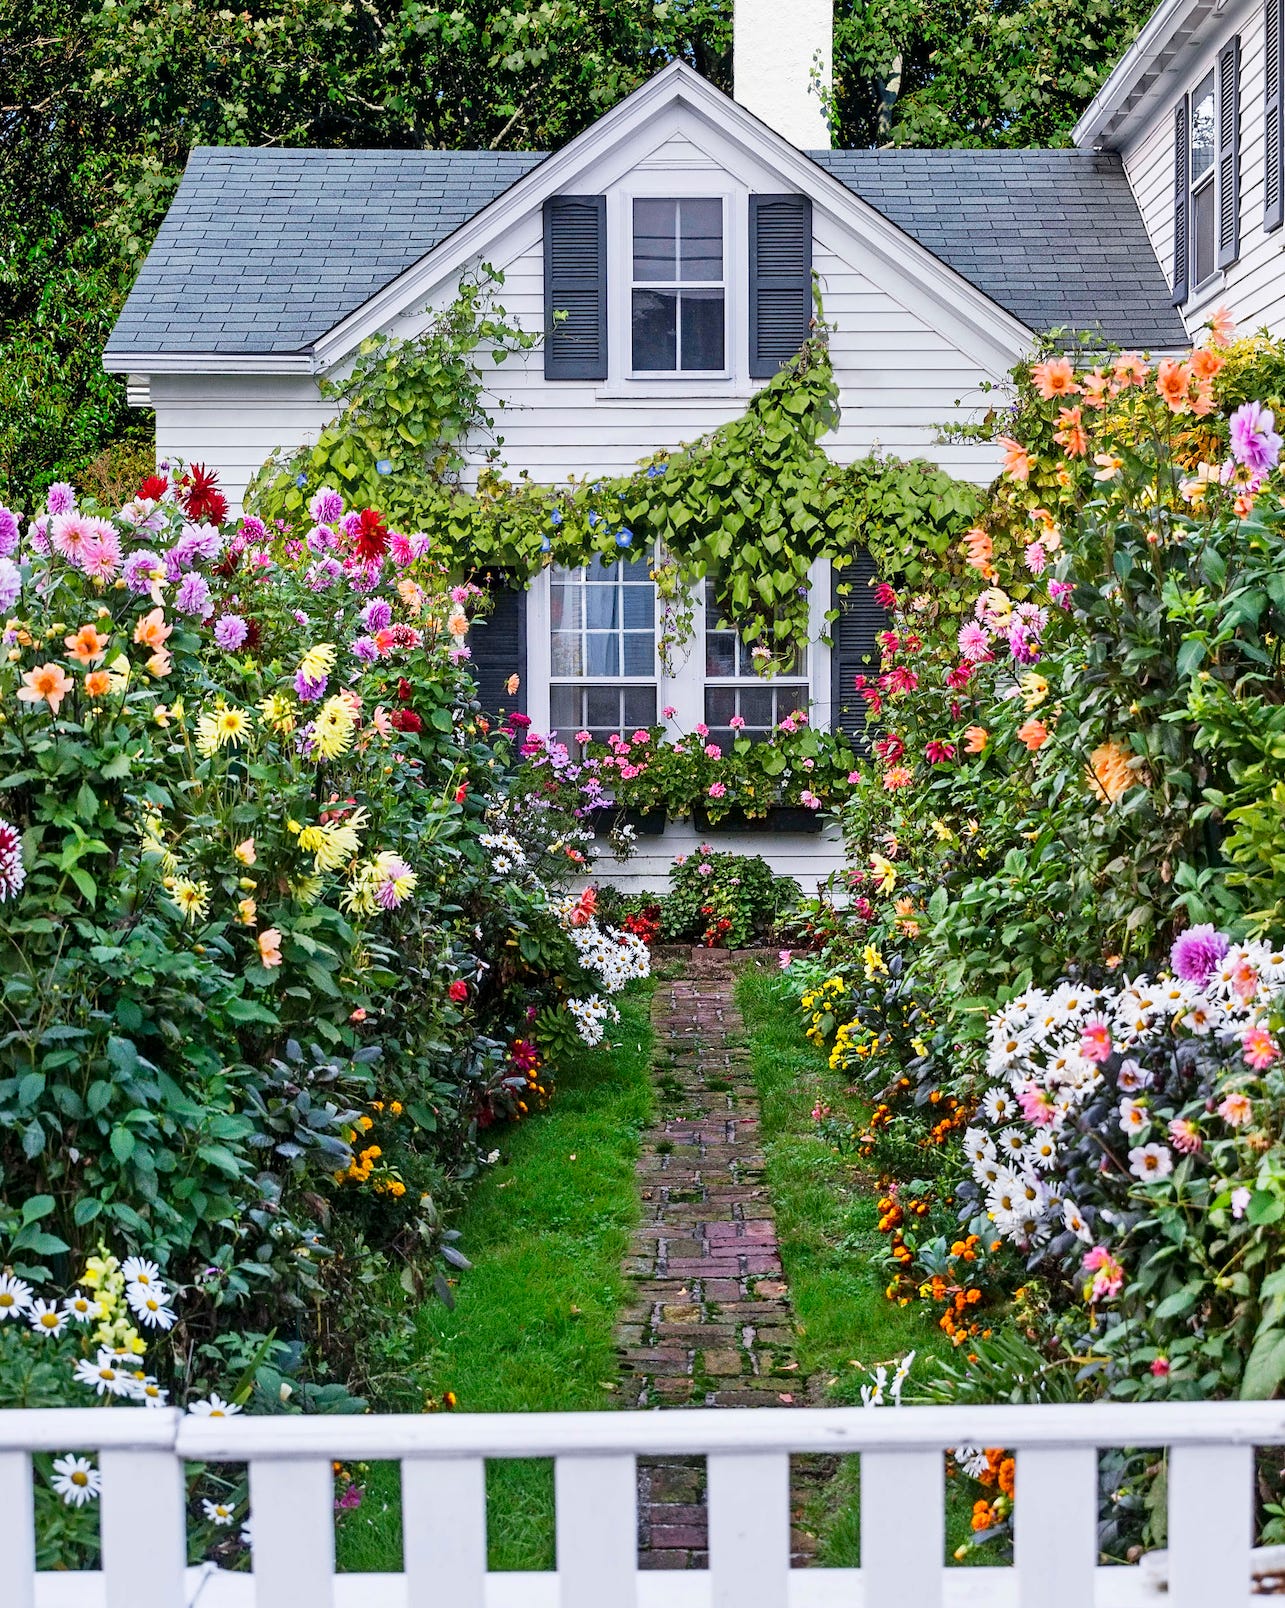
1. Create a Storybook Cottage Path with Overflowing Flower Beds
Budget Breakdown
|
📋 Copy HEX 🔗 Share |
|
$99.99
|
$18.55
|
$5.99
|


💰 Budget Breakdown
- Perennial Flowers & Vines: $400 – $900
- Brick Pathway Materials: $300 – $750
- Window Boxes & Shutters: $200 – $500
- Picket Fence: $250 – $600
- TOTAL: $1,150 – $2,750
- Budget alternative: Focus on fast-growing annuals and a simple gravel path to get a similar feeling for 40-50% less.
What Makes It Work
This look is all about controlled chaos. The formal structure of the brick path and the symmetry of the shutters provide a strong visual anchor, which allows the flower beds to be wild and overflowing without looking messy. The repetition of color—pinks in the window boxes and the beds, blues on the vine and in the plantings—ties the whole scene together into a cohesive, charming picture.
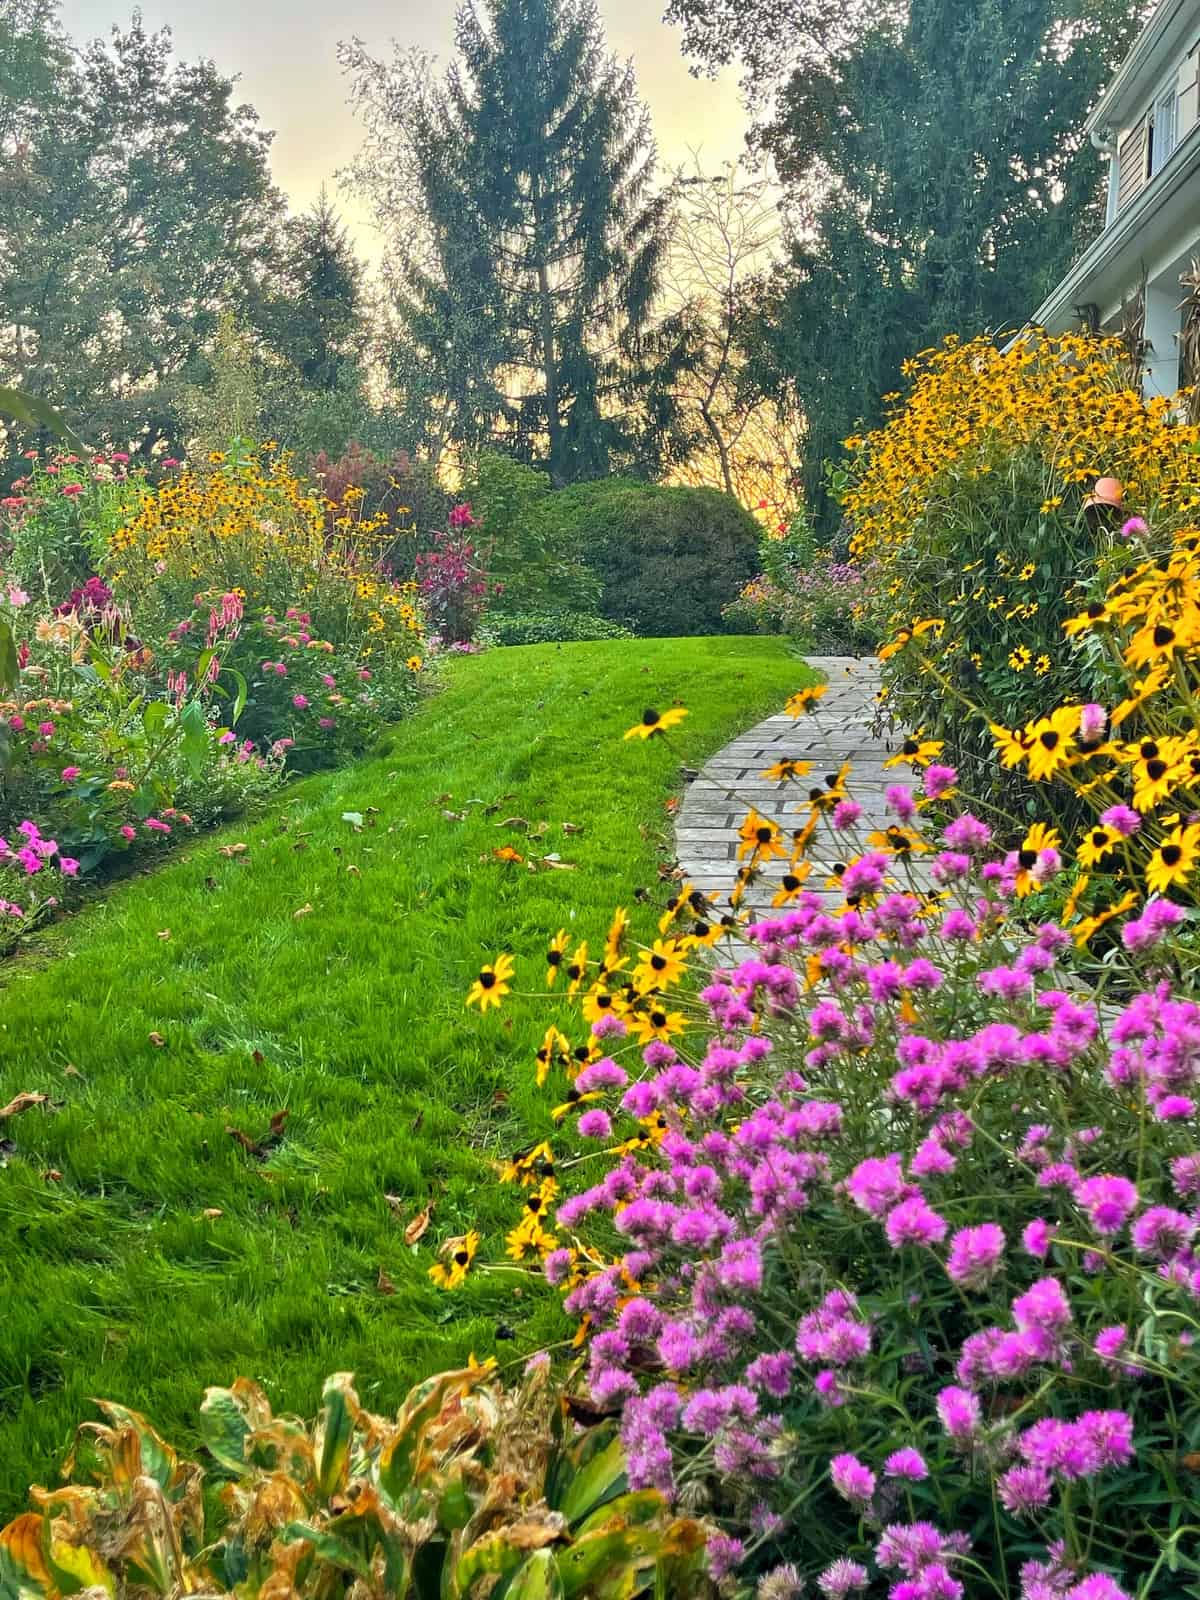
2. Carve a Winding Grass Path Through Colorful Perennial Beds
Designer Tip
📐 Style Math
To keep a grass path like this looking crisp, you need a defined edge. The curved stepping stones here are perfect. Install a flexible metal or plastic landscape edging just below the soil line between the grass and the flower beds. This prevents the turf from creeping into your perennials and dramatically cuts down on maintenance. Aim for an edging that’s at least 4 inches deep for best results.
Style Math
The formula here is simple but effective: 50% mixed-height perennials (like the pink Gomphrena and yellow Rudbeckia) + 30% dense green backdrop (tall trees and shrubs) + 20% dedicated walkway (the grass and stone path). By keeping the path as a significant element, the garden feels immersive and invites you to wander through it, rather than just view it from afar.
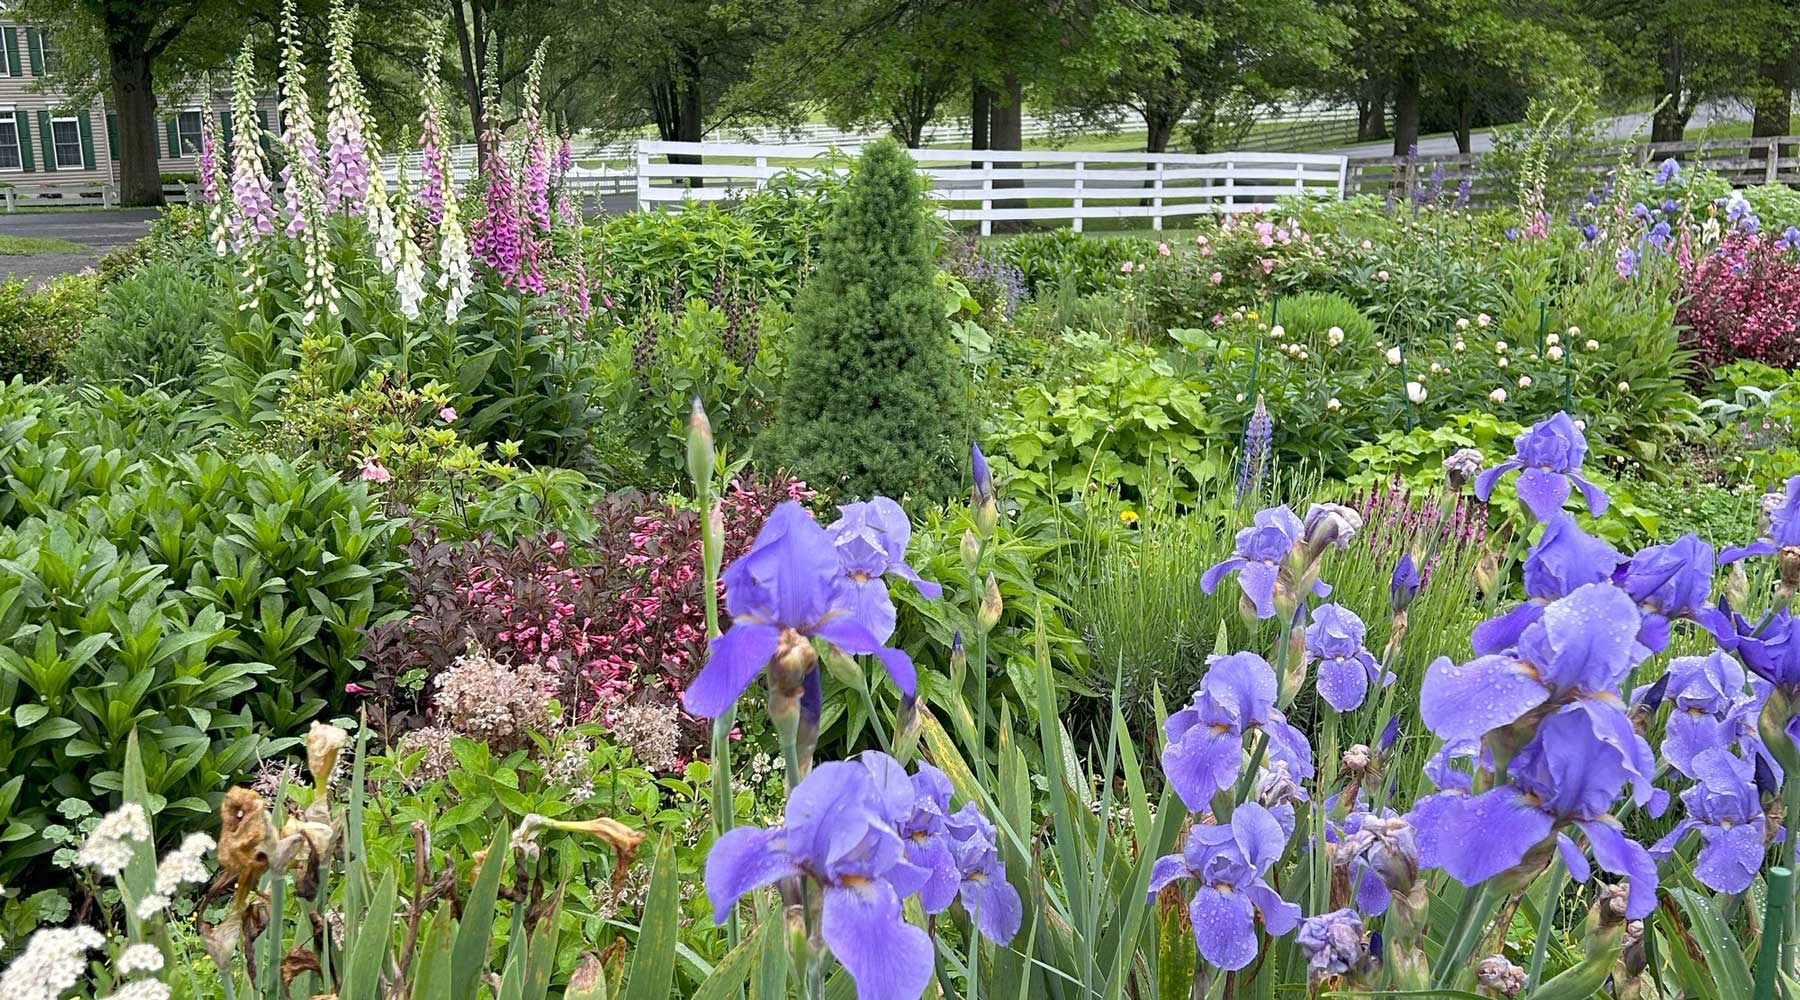
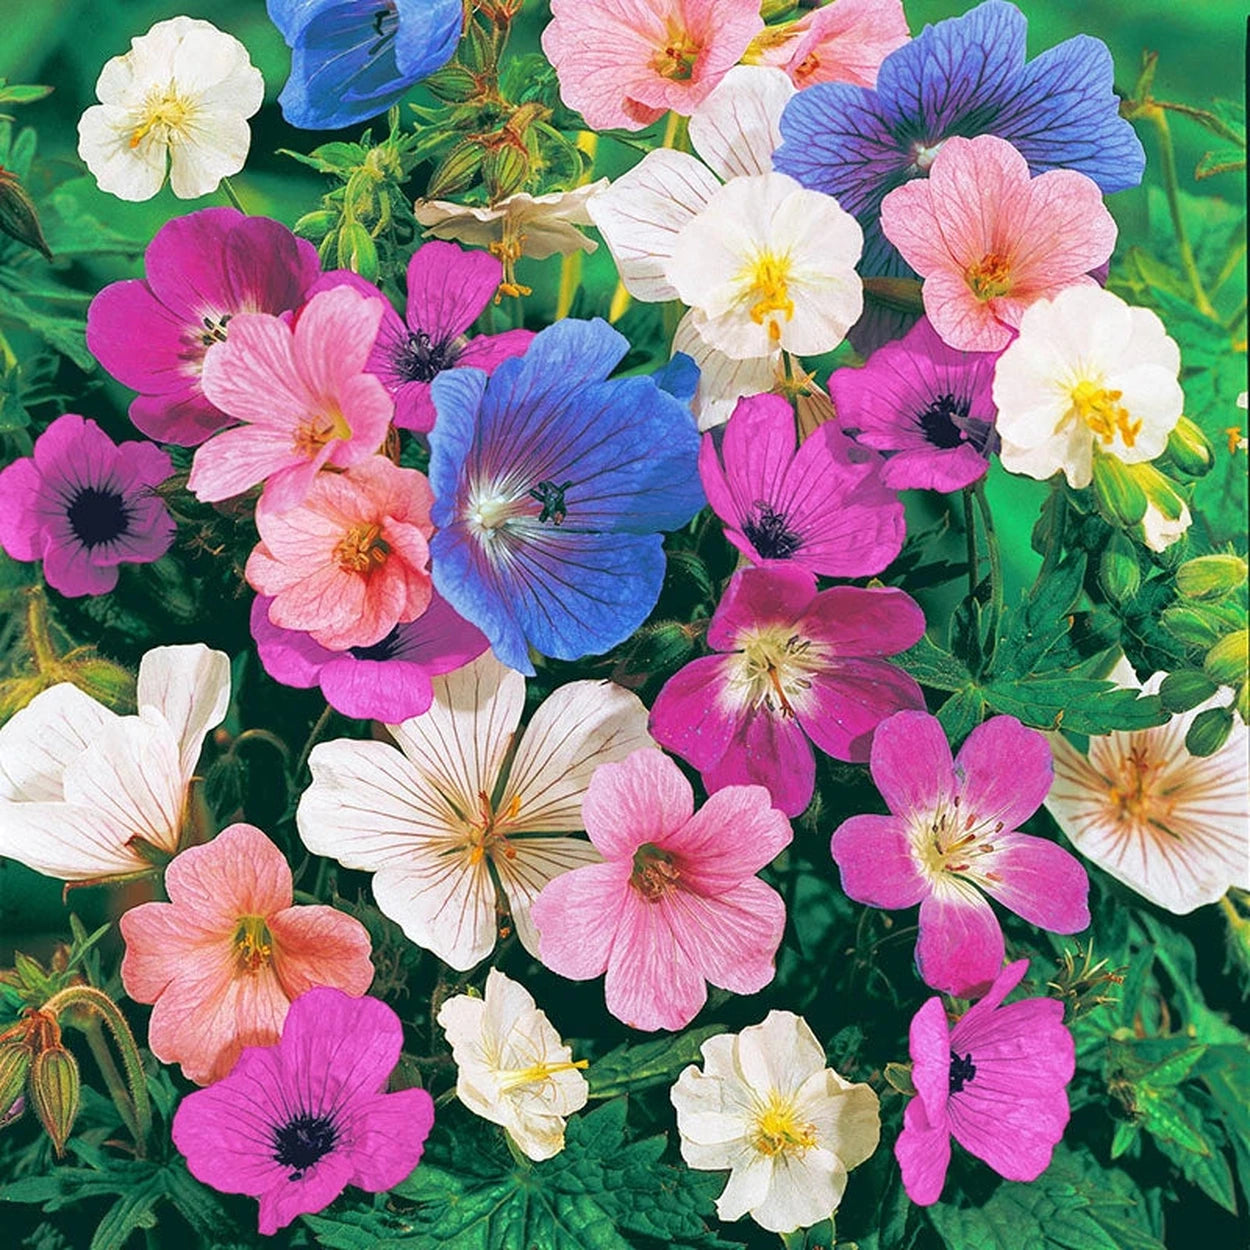
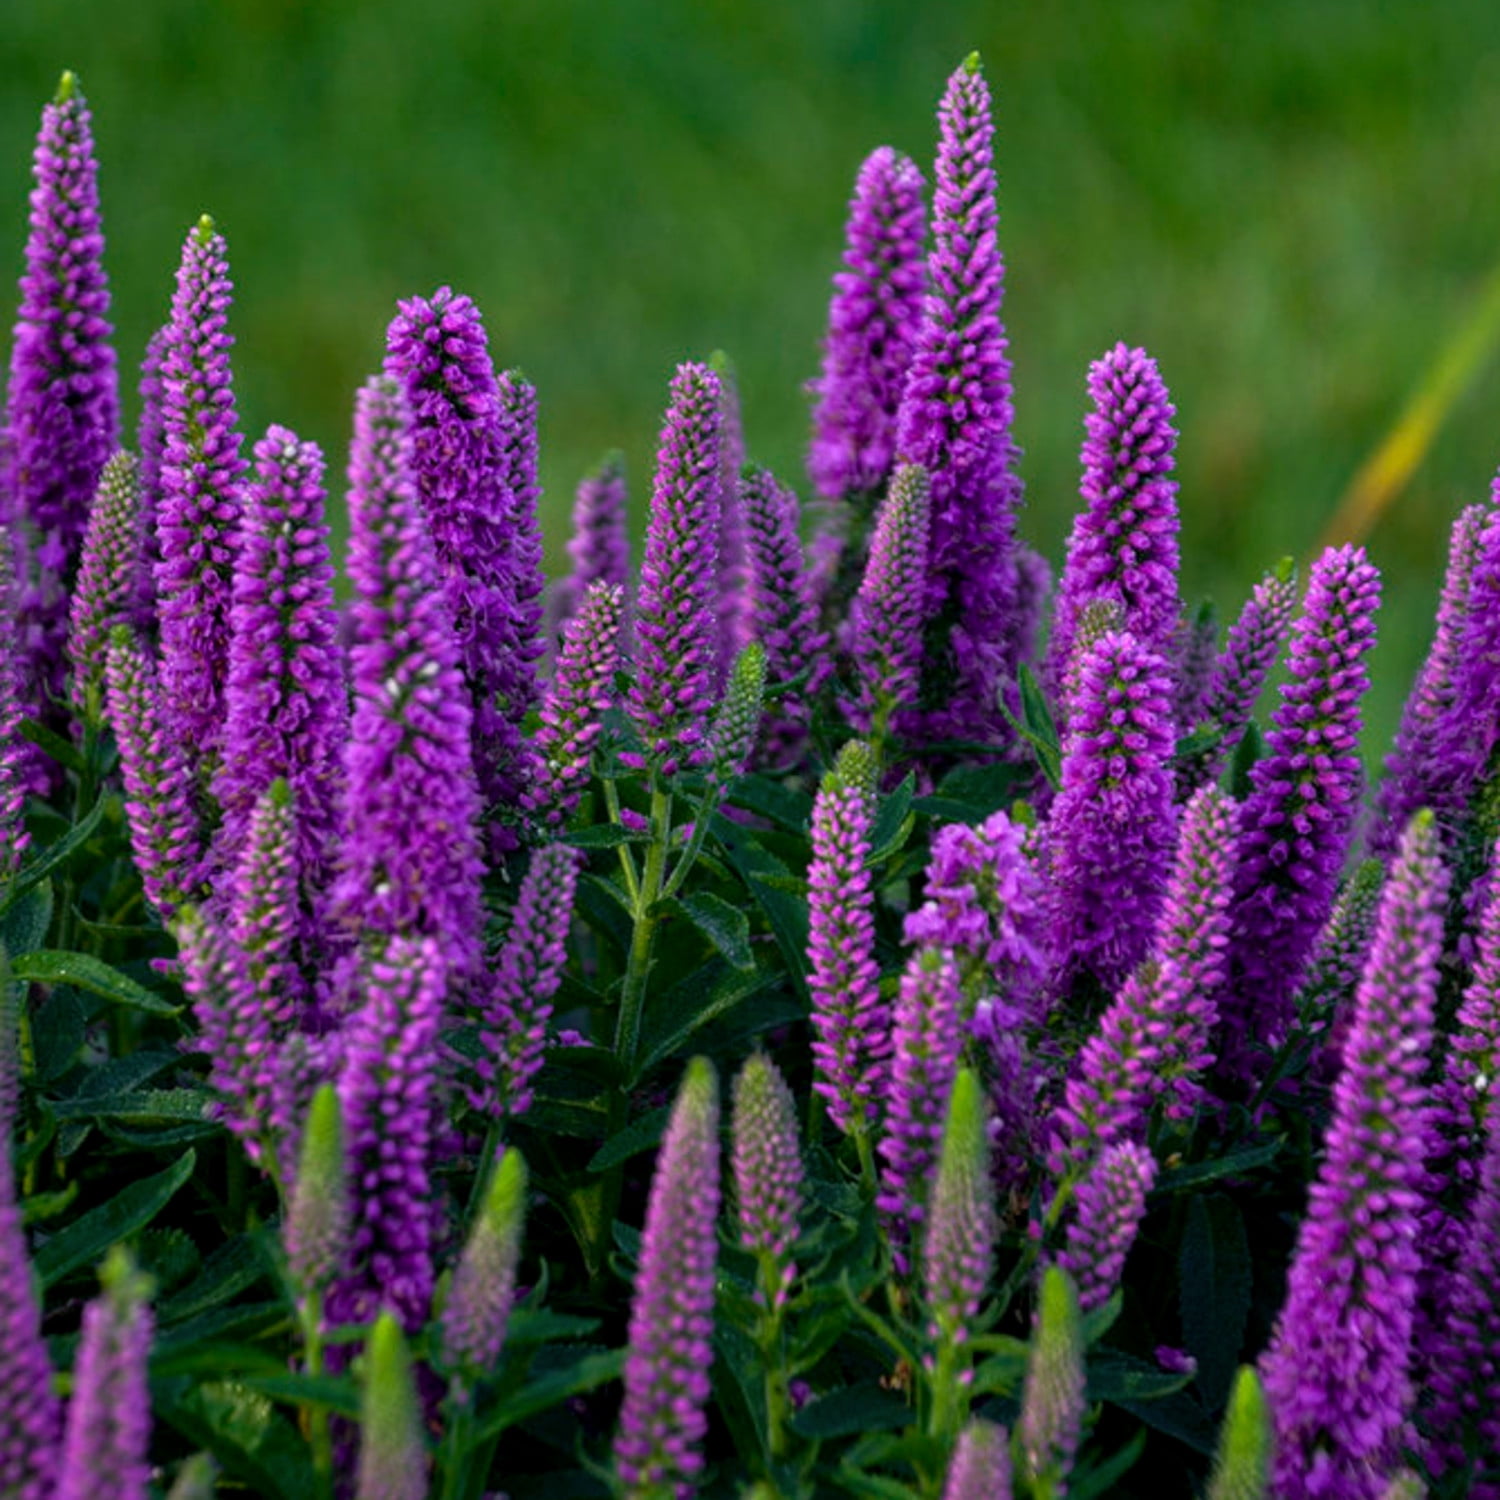
3. Layer Purples and Pinks with Irises and Foxgloves
The One Thing
|
📋 Copy HEX 🔗 Share |
|
$14.99
|
$13.00
|

📏 Scale Guide
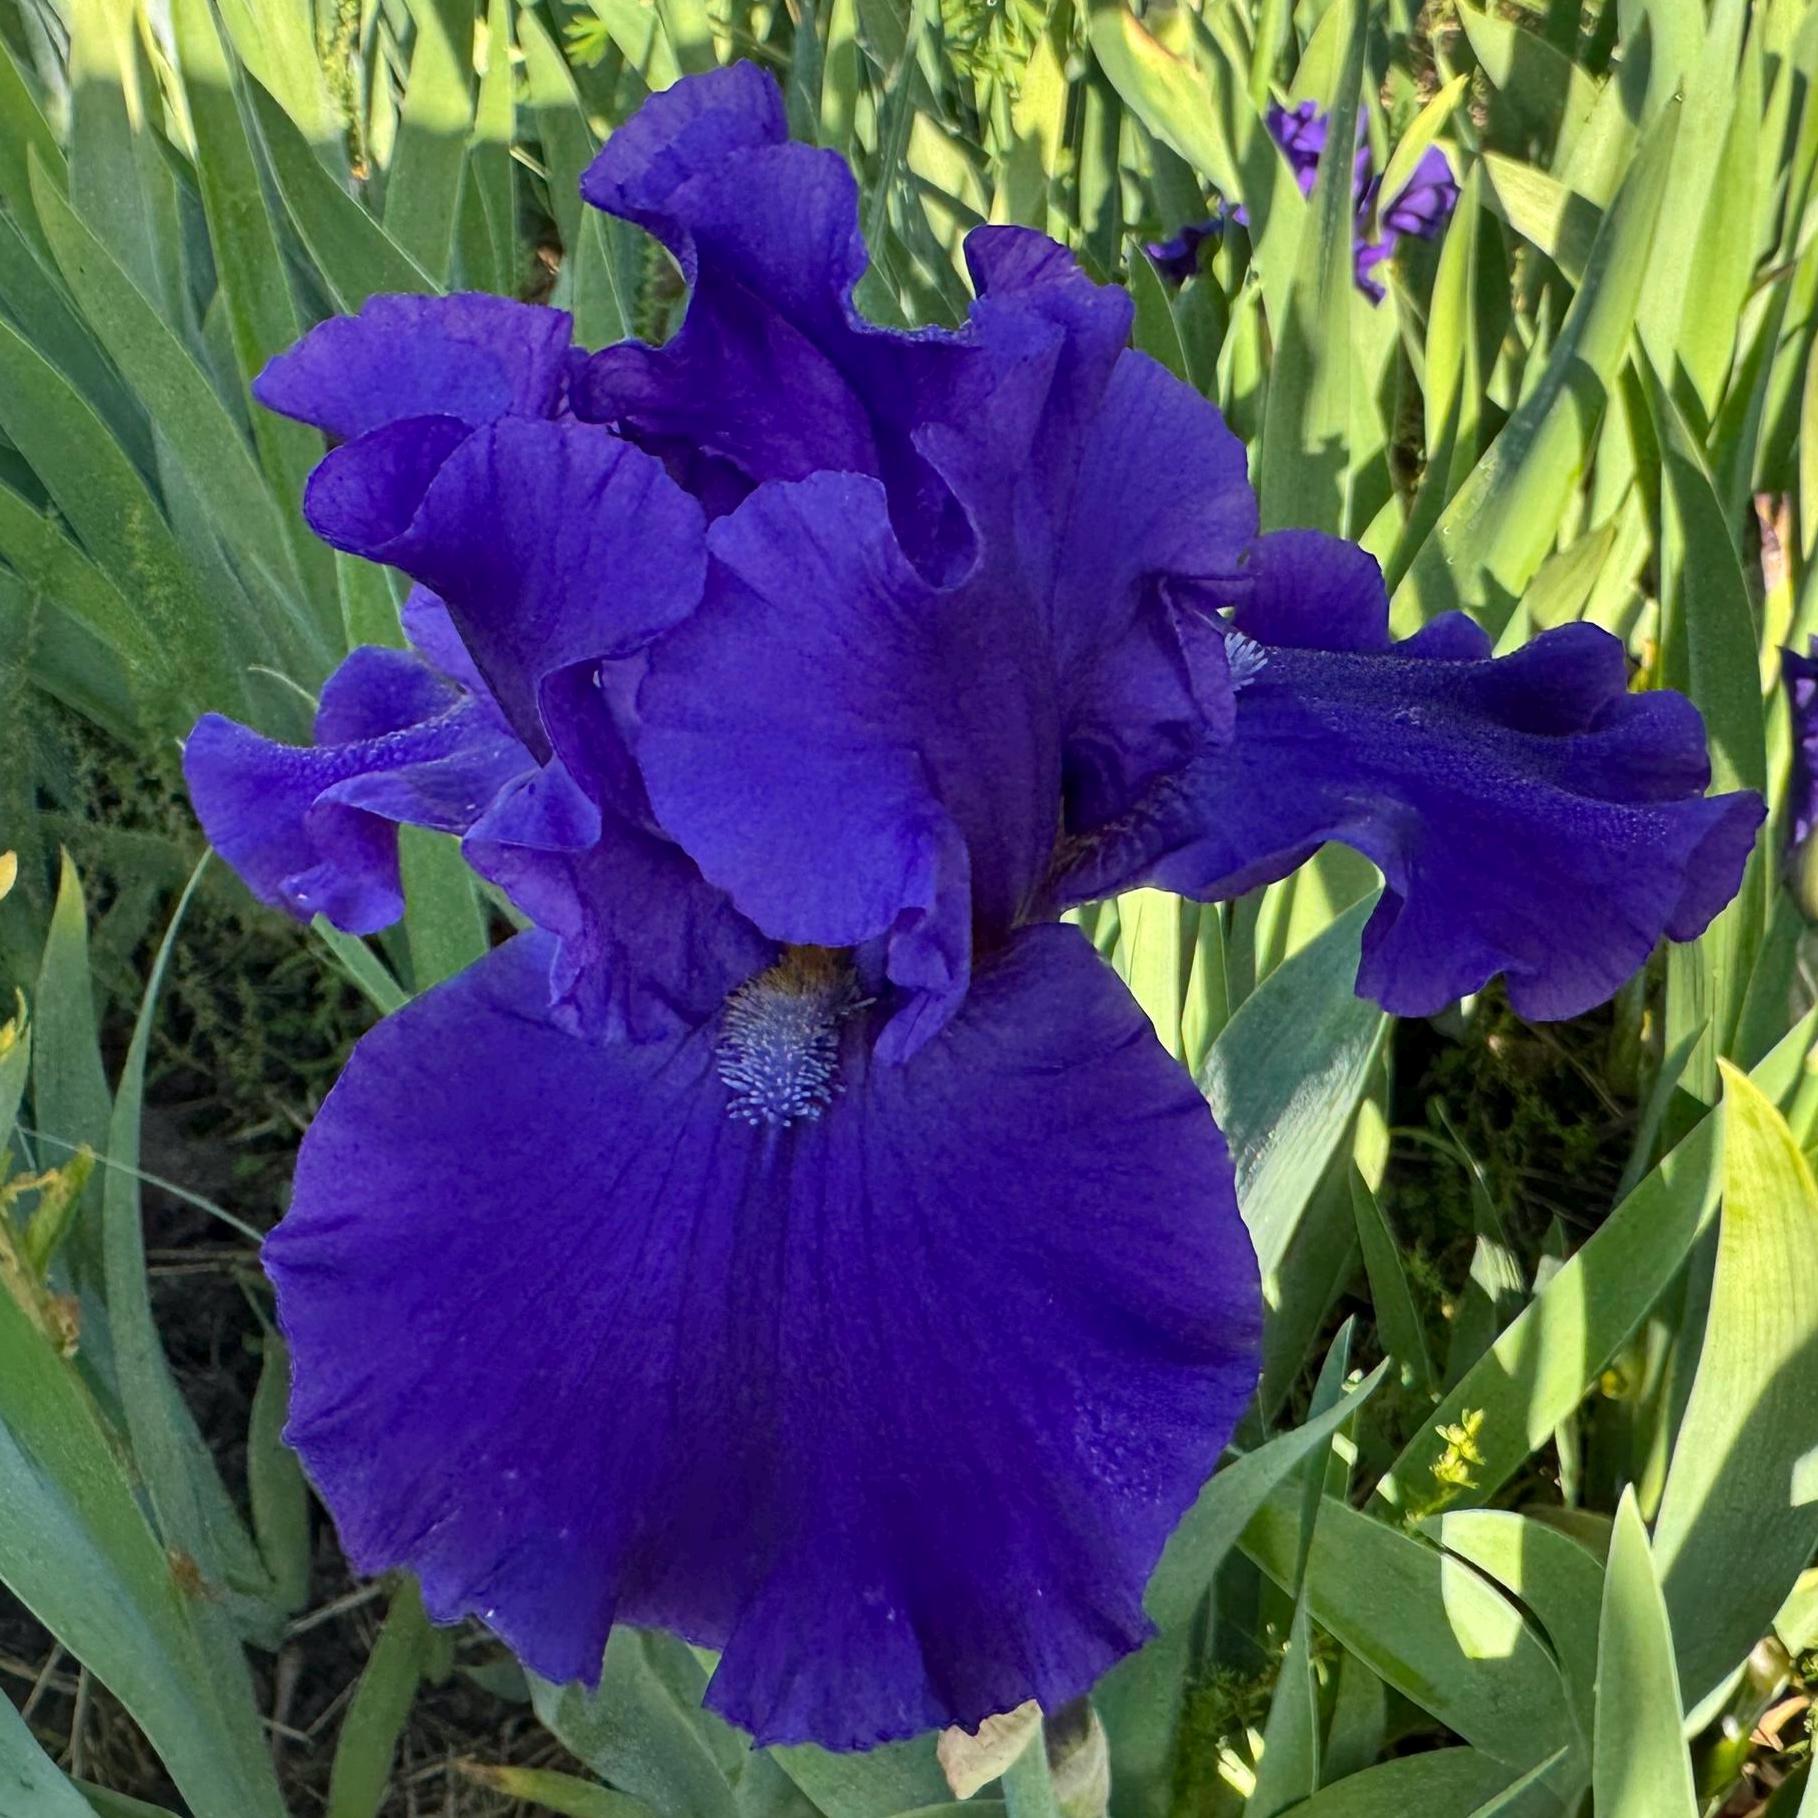
The large, bearded purple irises in the foreground are the undeniable stars. Their size, intricate detail, and deep, saturated color command attention. Without them, the garden would still be lovely, but it would lack a clear focal point. The water droplets clinging to their petals add a layer of texture and freshness that makes the whole scene feel immediate and alive.
Scale Guide
This multi-layered look works best in a space with some depth, at least 10-15 feet from front to back. The towering foxgloves need vertical space to make an impact, so this wouldn’t be ideal for a narrow border. It’s perfect for a corner lot or along a back fence line where you can build layers, starting with low-growing plants and stepping up to taller specimens like the foxgloves in the rear.
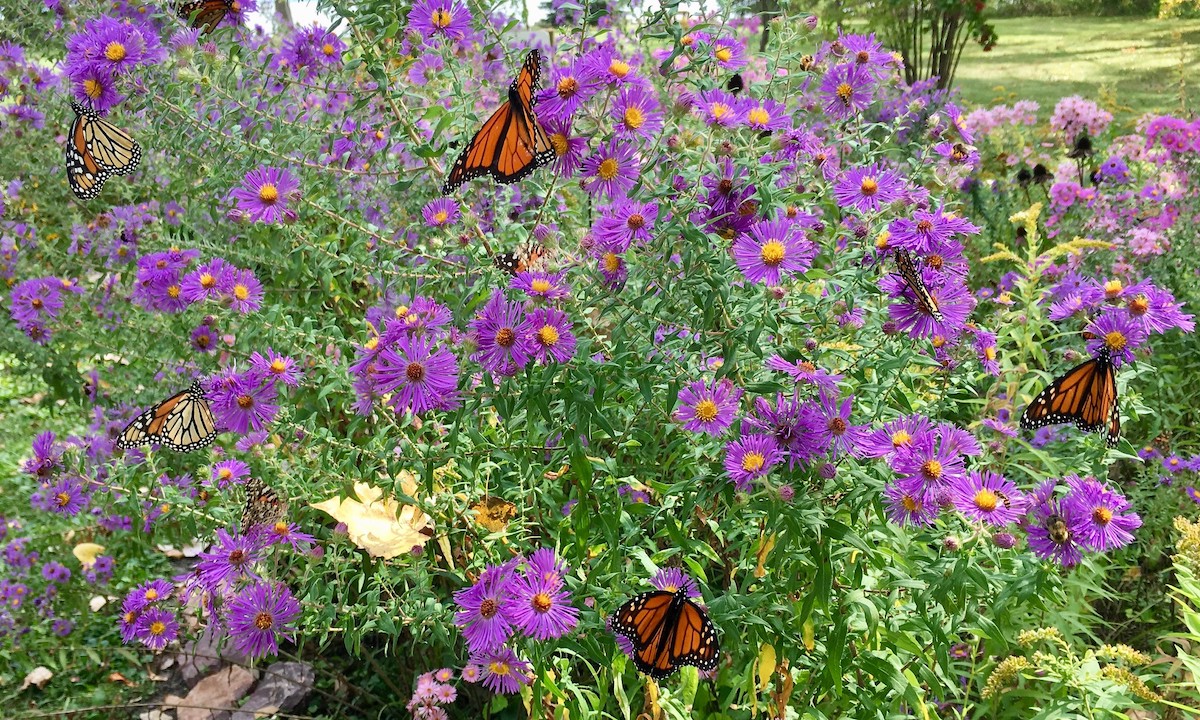
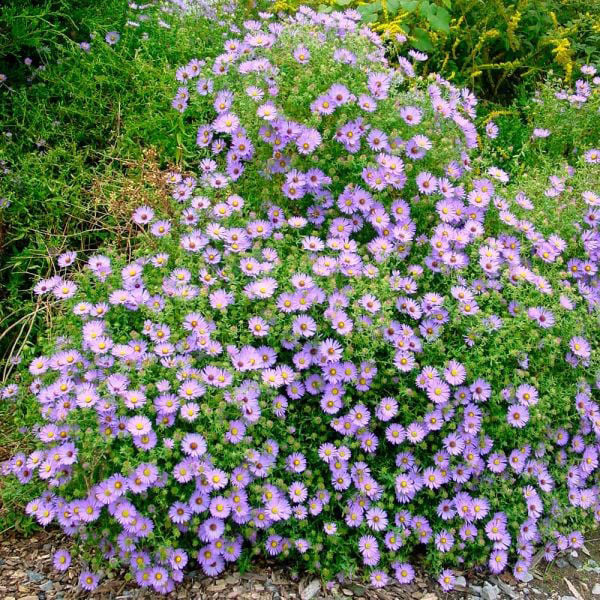
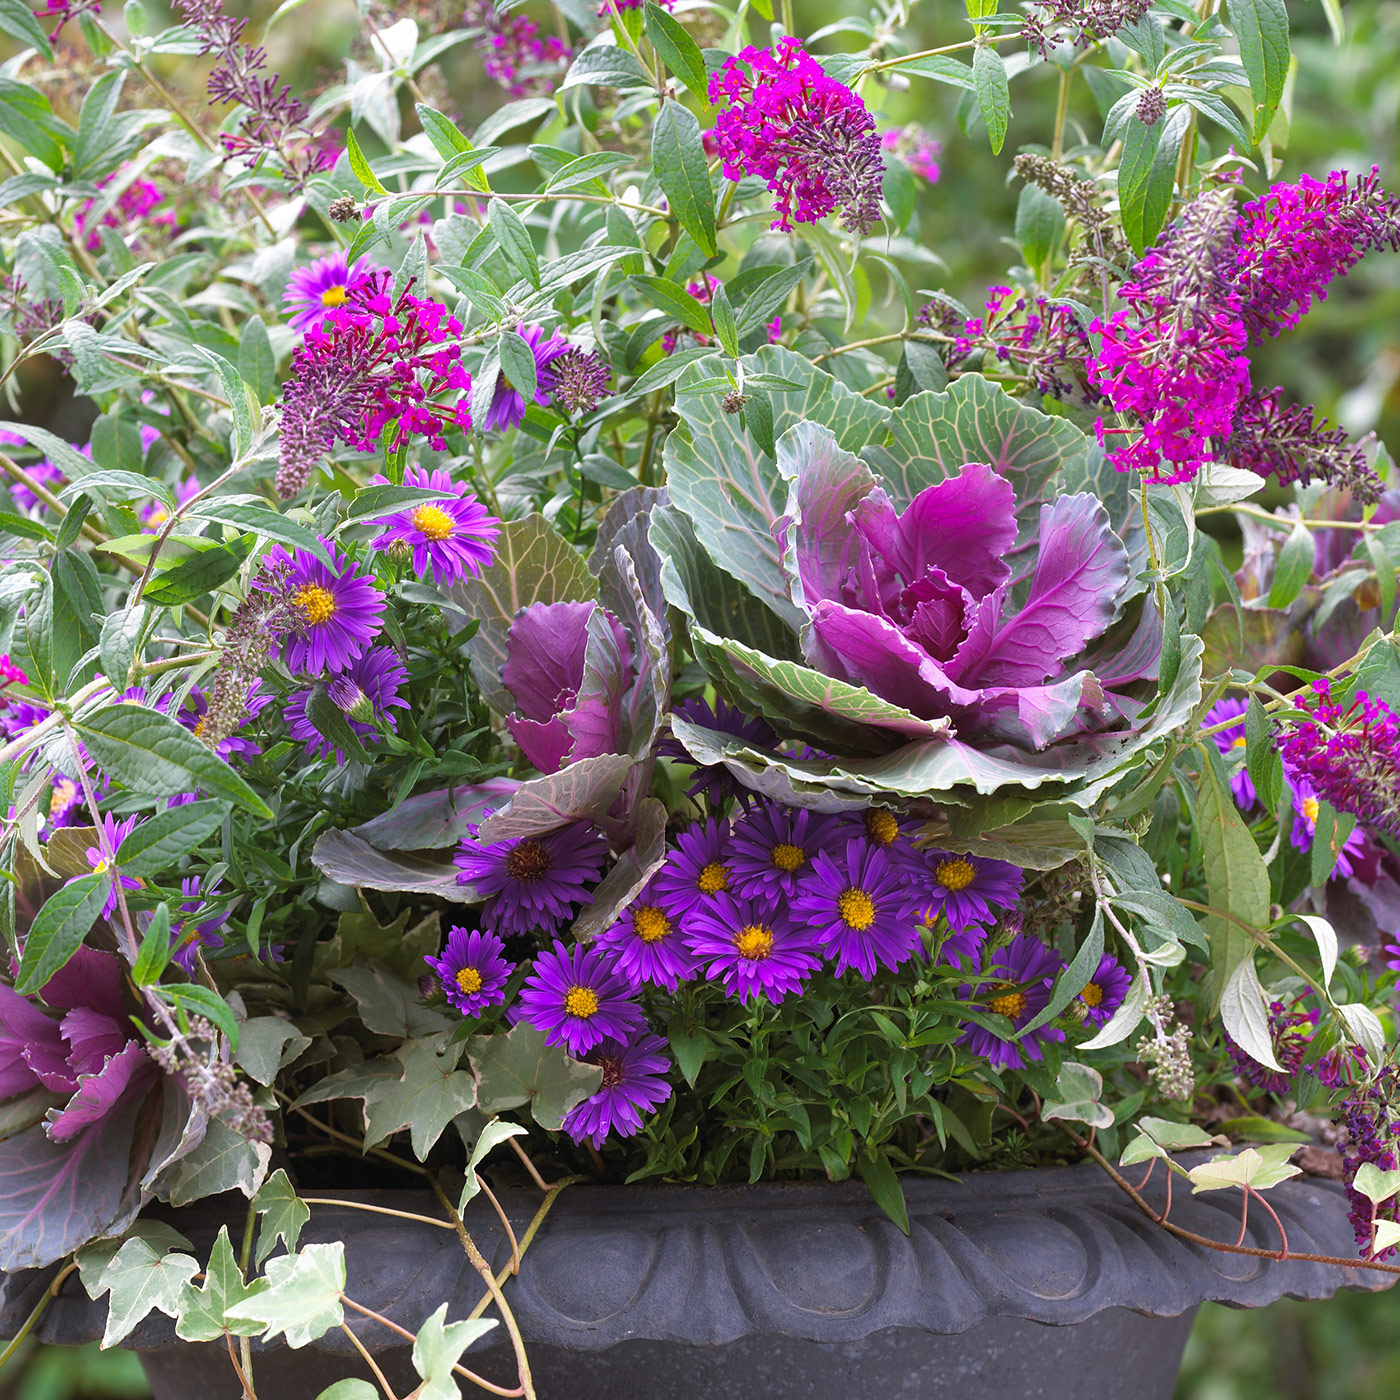
4. Plant Purple Asters to Attract Monarch Butterflies
What Makes It Work
|
$14.99
|
$13.59
|

✅ Before You Start
This is a masterclass in color theory. The vibrant purple of the asters and the fiery orange of the monarch wings are complementary colors on the color wheel, creating a high-contrast, visually stimulating scene. The bright yellow centers of the flowers add a tertiary pop of color that makes both the purple and orange feel even more intense. Nature is the best designer!
Real Talk
While asters are a fantastic late-season food source for butterflies, they can be prone to powdery mildew. To keep them healthy, ensure good air circulation by giving them plenty of space—don’t crowd your plants. Water at the base to avoid getting the foliage wet, and choose mildew-resistant varieties if it’s a common problem in your area. A little prevention saves a lot of headaches later.
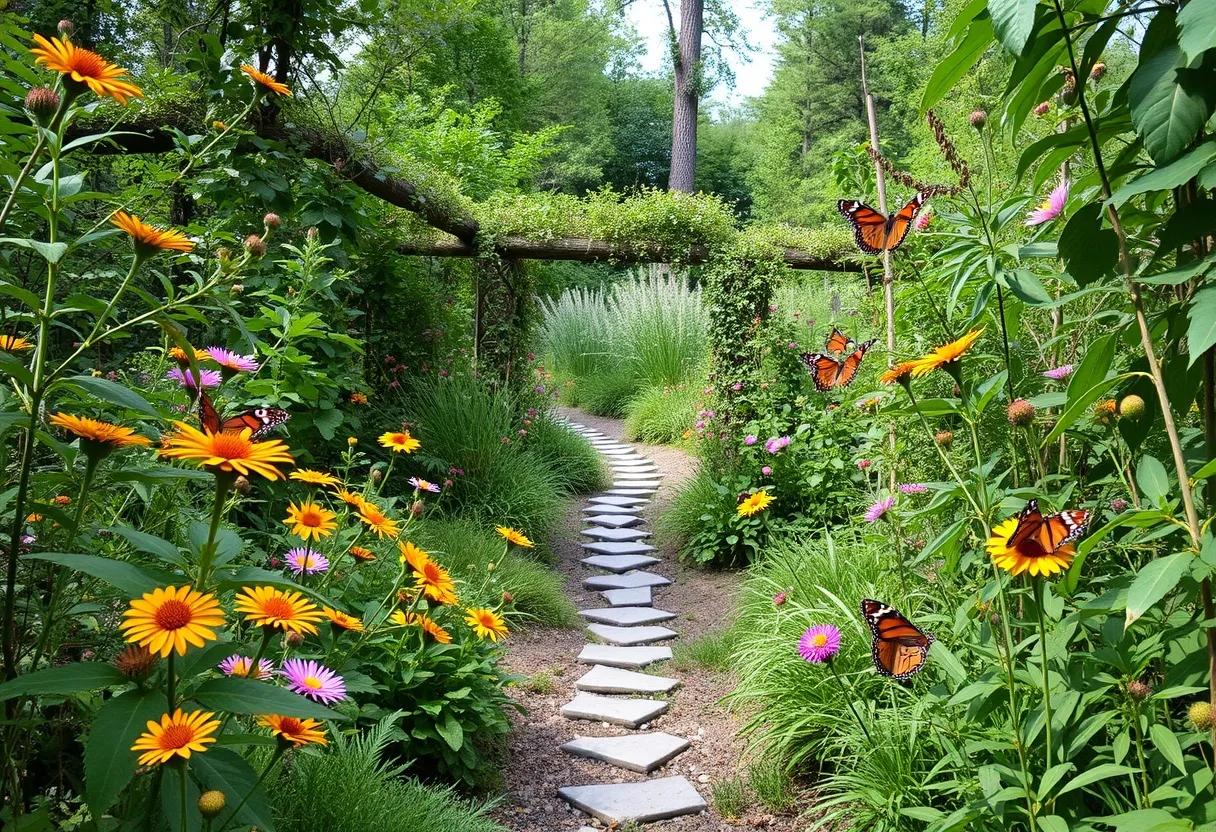
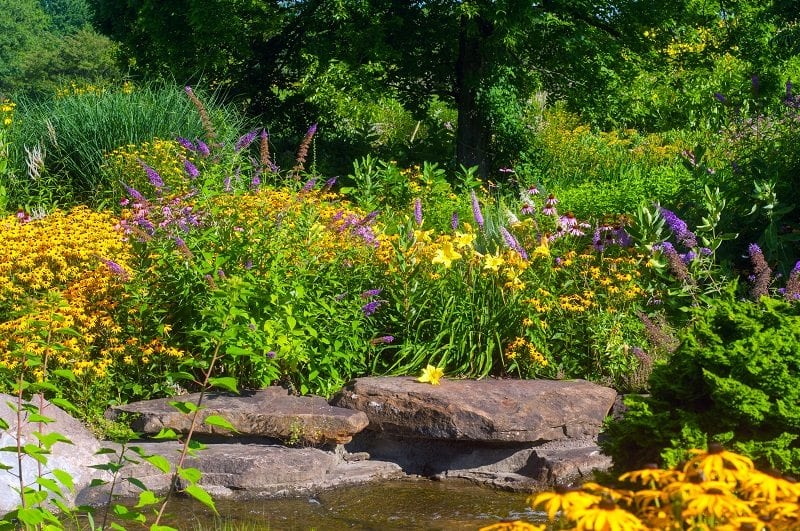
5. Weave a Stepping Stone Path Through a Butterfly Meadow
Trending Context
|
📋 Copy HEX 🔗 Share |
|
$380.00
|
$110.99
|

🧹 Maintenance Reality
The move towards “rewilding” and creating naturalistic, meadow-like gardens is huge right now, and this is a perfect example. We’re rejecting overly manicured lawns in favor of ecologically functional beauty. The combination of native, butterfly-attracting flowers like these daisy-like blooms, paired with a rustic arbor and simple stone path, hits that sweet spot between wild and intentionally designed. Compare the path here to the more structured feel of Idea #28.
Maintenance Reality
A garden this lush and dense requires diligent weeding, especially in the first few years as the perennials fill in. The irregular stepping stones can also be a challenge to mow or trim around. Consider planting a low-growing, walkable groundcover like creeping thyme between the stones to suppress weeds and reduce the need for meticulous edging. It will also add another layer of fragrance and texture.
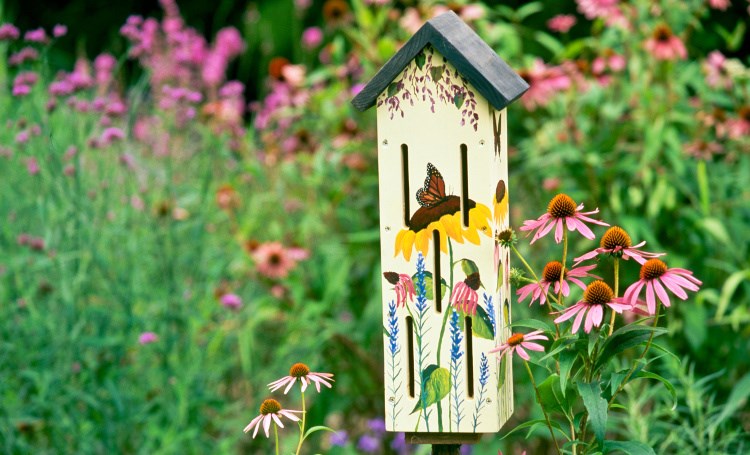
6. Add a Hand-Painted Butterfly House to Your Flower Bed
How-To Brief
|
$20.39
|
$7.00
|
$12.99
|


⚠️ Real Talk
- Time: 2-3 hours. Cost: $20-$40.
- Purchase a plain wooden butterfly house kit or pre-assembled box.
- Sand the exterior smooth and wipe with a damp cloth.
- Prime the wood with an outdoor-safe, non-toxic primer.
- Sketch your design lightly in pencil. Think about the flowers already in your garden!
- Paint your designs using non-toxic, water-based acrylic paints.
- Once dry, apply 2-3 coats of a clear, non-toxic, water-based outdoor sealant to protect your work from the elements.
Get This Look For Less
You don’t need to buy a fancy, pre-painted butterfly house. A simple, unfinished pine version from a craft store like Michael’s or a home improvement store runs about $15-$25. A handful of acrylic craft paints and a small can of sealant are all you need to create a completely custom piece for your garden. It’s a fantastic weekend project and much more personal than anything off the shelf.
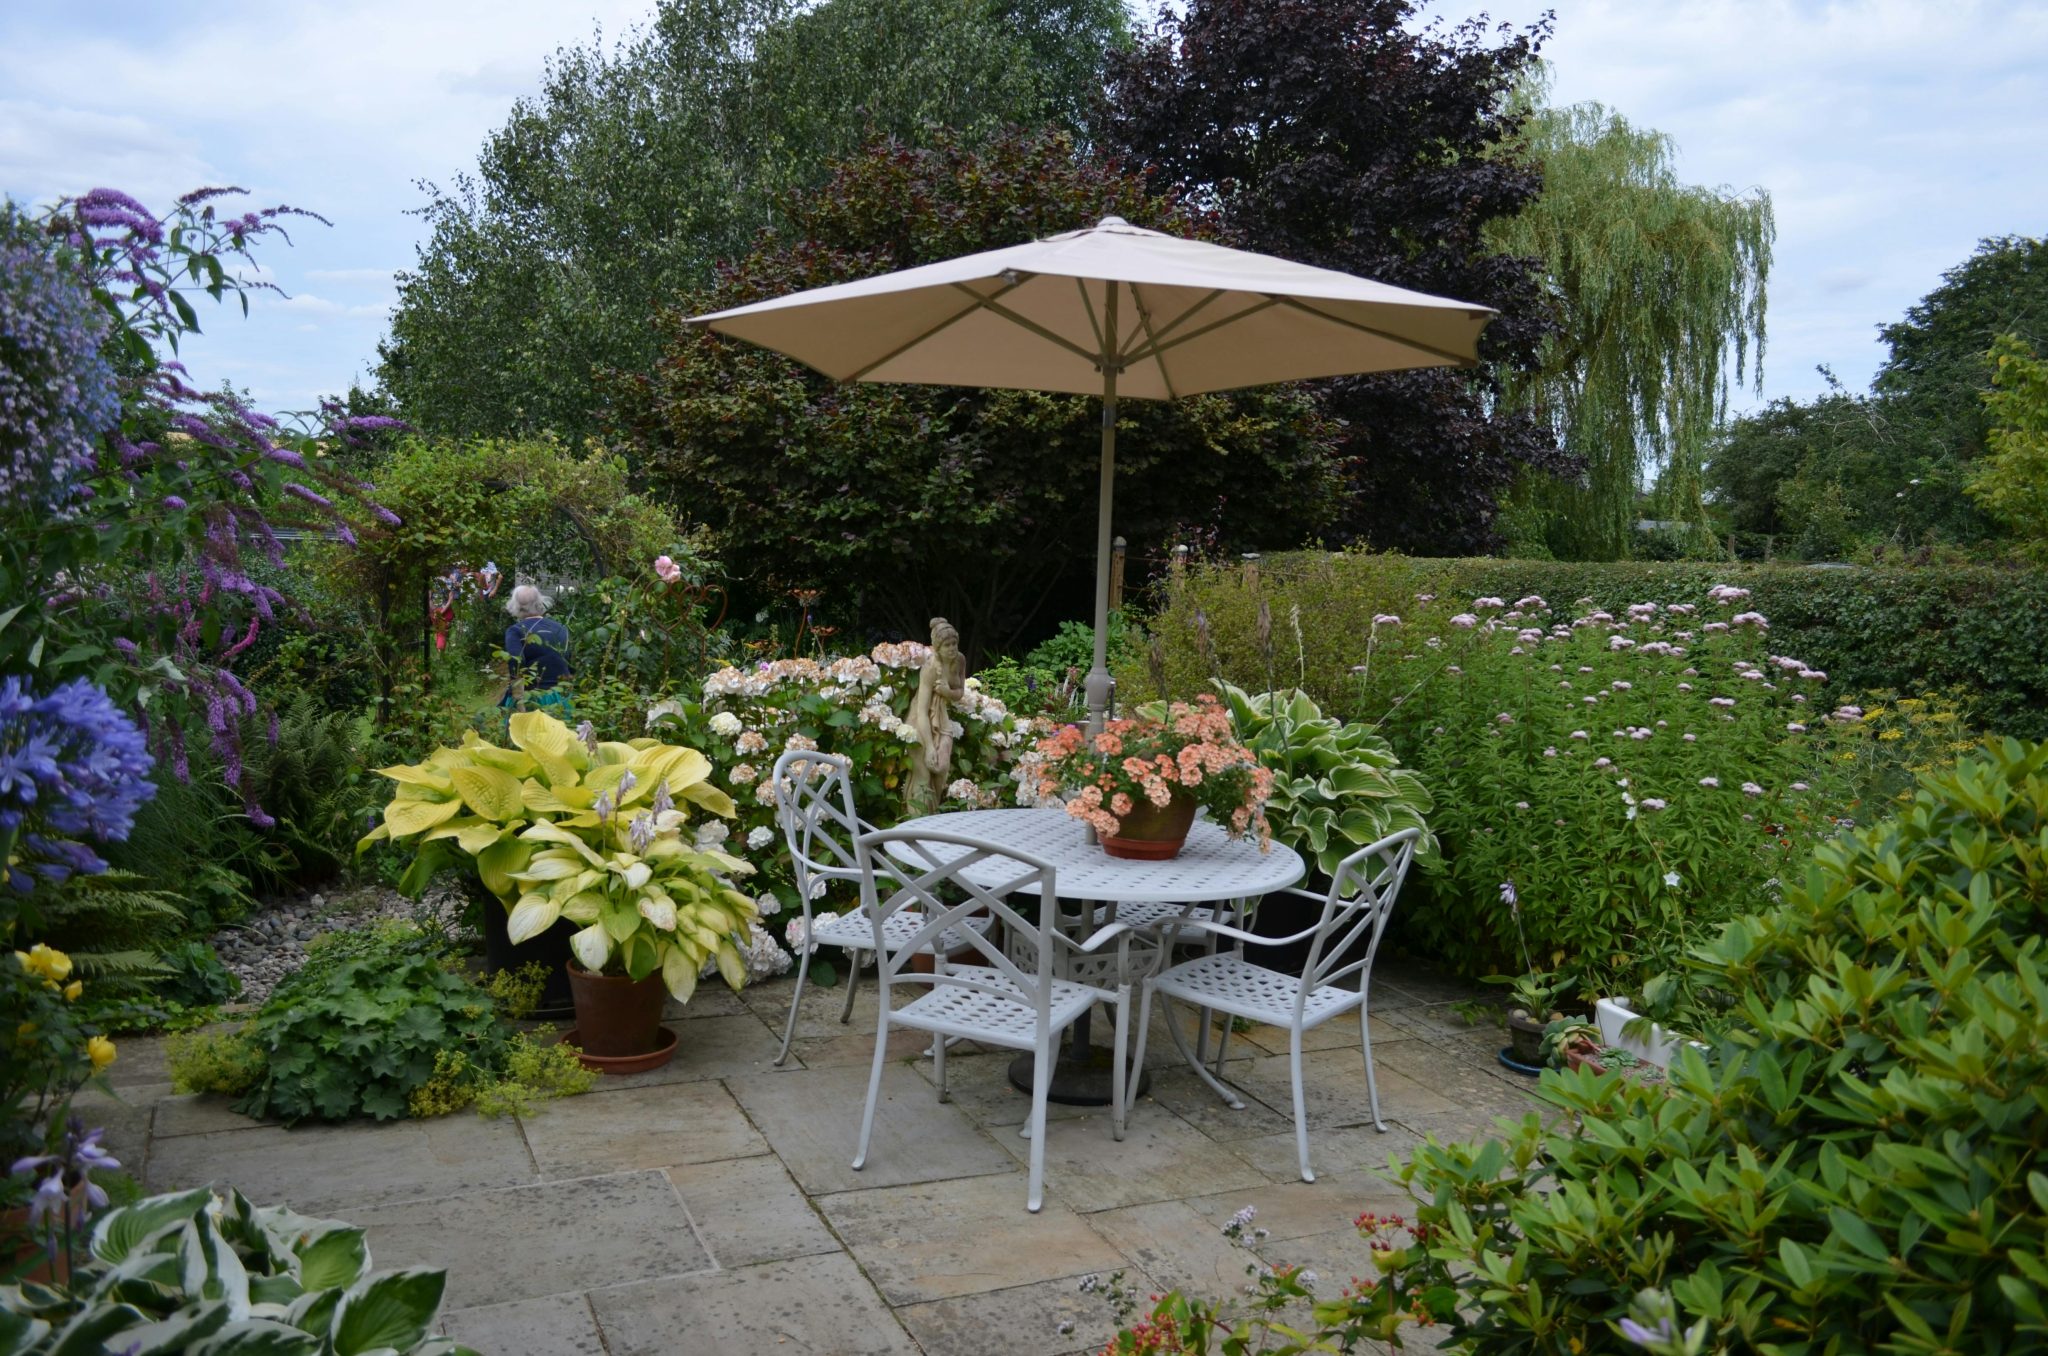
7. Surround a Patio Dining Area with Lush Greenery
Scale Guide
|
📋 Copy HEX 🔗 Share |
|
$22.99
|
$1,009.70
|
$39.99
|
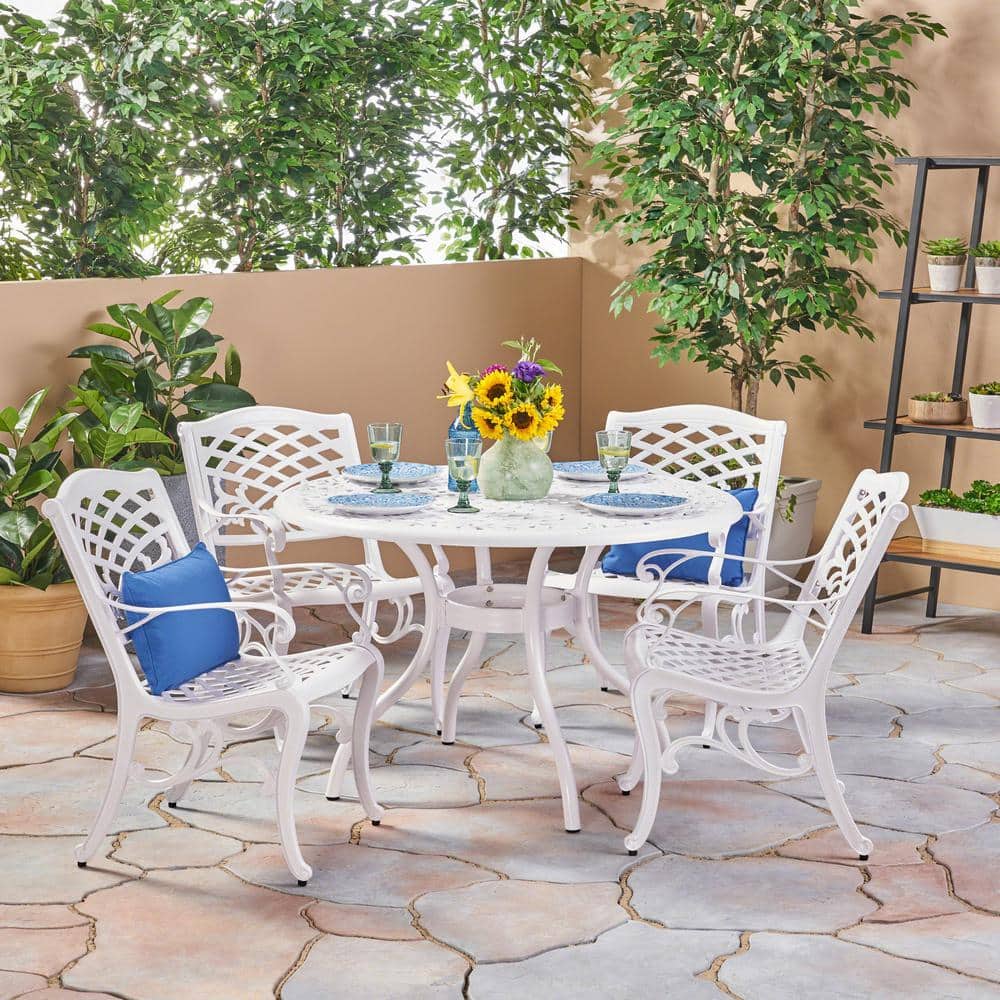
🔧 How-To Brief
This concept is surprisingly scalable. For a small patio (8×8 ft), use large planters filled with lush foliage like the hostas shown to create the feeling of being enveloped by greenery. For a larger space (12×12 ft or more), you can plant directly into surrounding garden beds. The key is to have the foliage rise up to at least the height of the tabletop to create that cozy, room-like enclosure.
Designer Tip
To make a patio feel like a true garden oasis, use a variety of leaf textures and shades of green. Don’t just plant a single row of the same shrub. Here, the broad, ribbed leaves of the hostas contrast beautifully with finer-textured ferns and the blooms of the purple and orange flowers. This textural play makes the space feel richer and more complex.
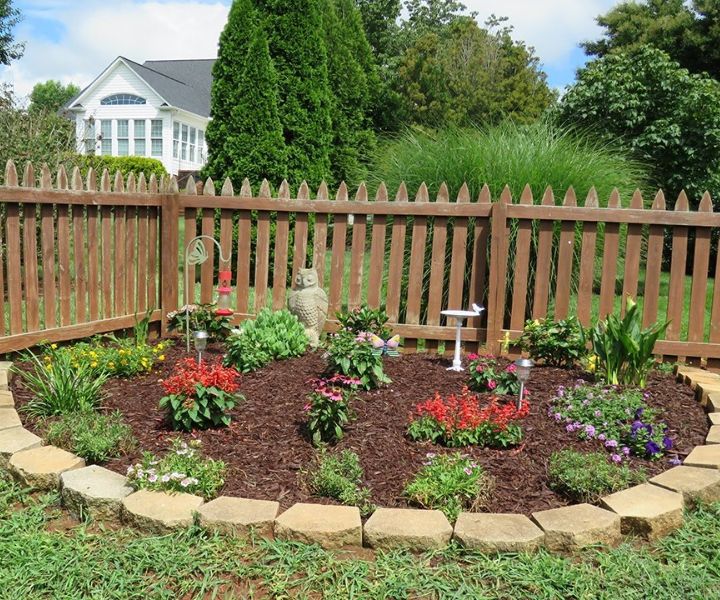
8. Define a Cottage Corner with a Picket Fence and Garden Decor
Before You Start Checklist
|
$48.99
|
$104.99
|
$2.00
|


⭐ The One Thing
- Check your sun exposure: Does this corner get at least 6 hours of direct sun for flowering plants?
- Measure the space: Do you have enough room for the layers of plants, mulch, edging, and fence?
- Plan your power: If you’re adding accent lights, where will the wiring run and what is the power source?
- Evaluate the backdrop: What is behind the fence? Ensure it provides a clean, uncluttered background for your garden bed.
The One Thing
The dark brown wood chip mulch is the secret hero of this design. It accomplishes three crucial things: it suppresses weeds, retains moisture for the plants, and provides a dark, uniform backdrop that makes the green foliage and colorful flowers pop. Without the mulch, the bed would look unfinished and chaotic.
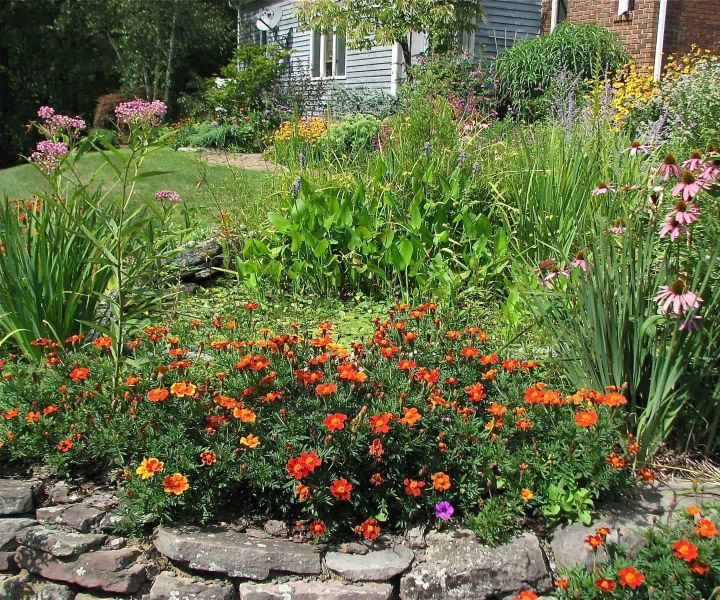
9. Use a Stone Wall to Layer Marigolds and Coneflowers
Style Math
|
📋 Copy HEX 🔗 Share |
|
$434.00
|
$34.27
|
$15.99
|
$3.27
|

💸 Get This Look For Less
Think of this as a 3-tier system. Tier 1 (Bottom): 20% structural hardscape (the rough stone retaining wall). Tier 2 (Middle): 40% low-growing, high-impact color (the dense orange and yellow marigolds). Tier 3 (Top): 40% tall, airy texture (the purple coneflowers and wispy green grasses). This formula creates visual depth on a sloped or terraced space.
What Makes It Work
The success of this design lies in its understanding of viewing angles. By placing the shortest, brightest flowers (marigolds) at the front and lowest level, they are unmissable. The taller, more muted pinks and purples are set behind and above, creating a beautiful backdrop that doesn’t compete for attention. It’s a clever way to ensure every plant gets its moment in the spotlight.
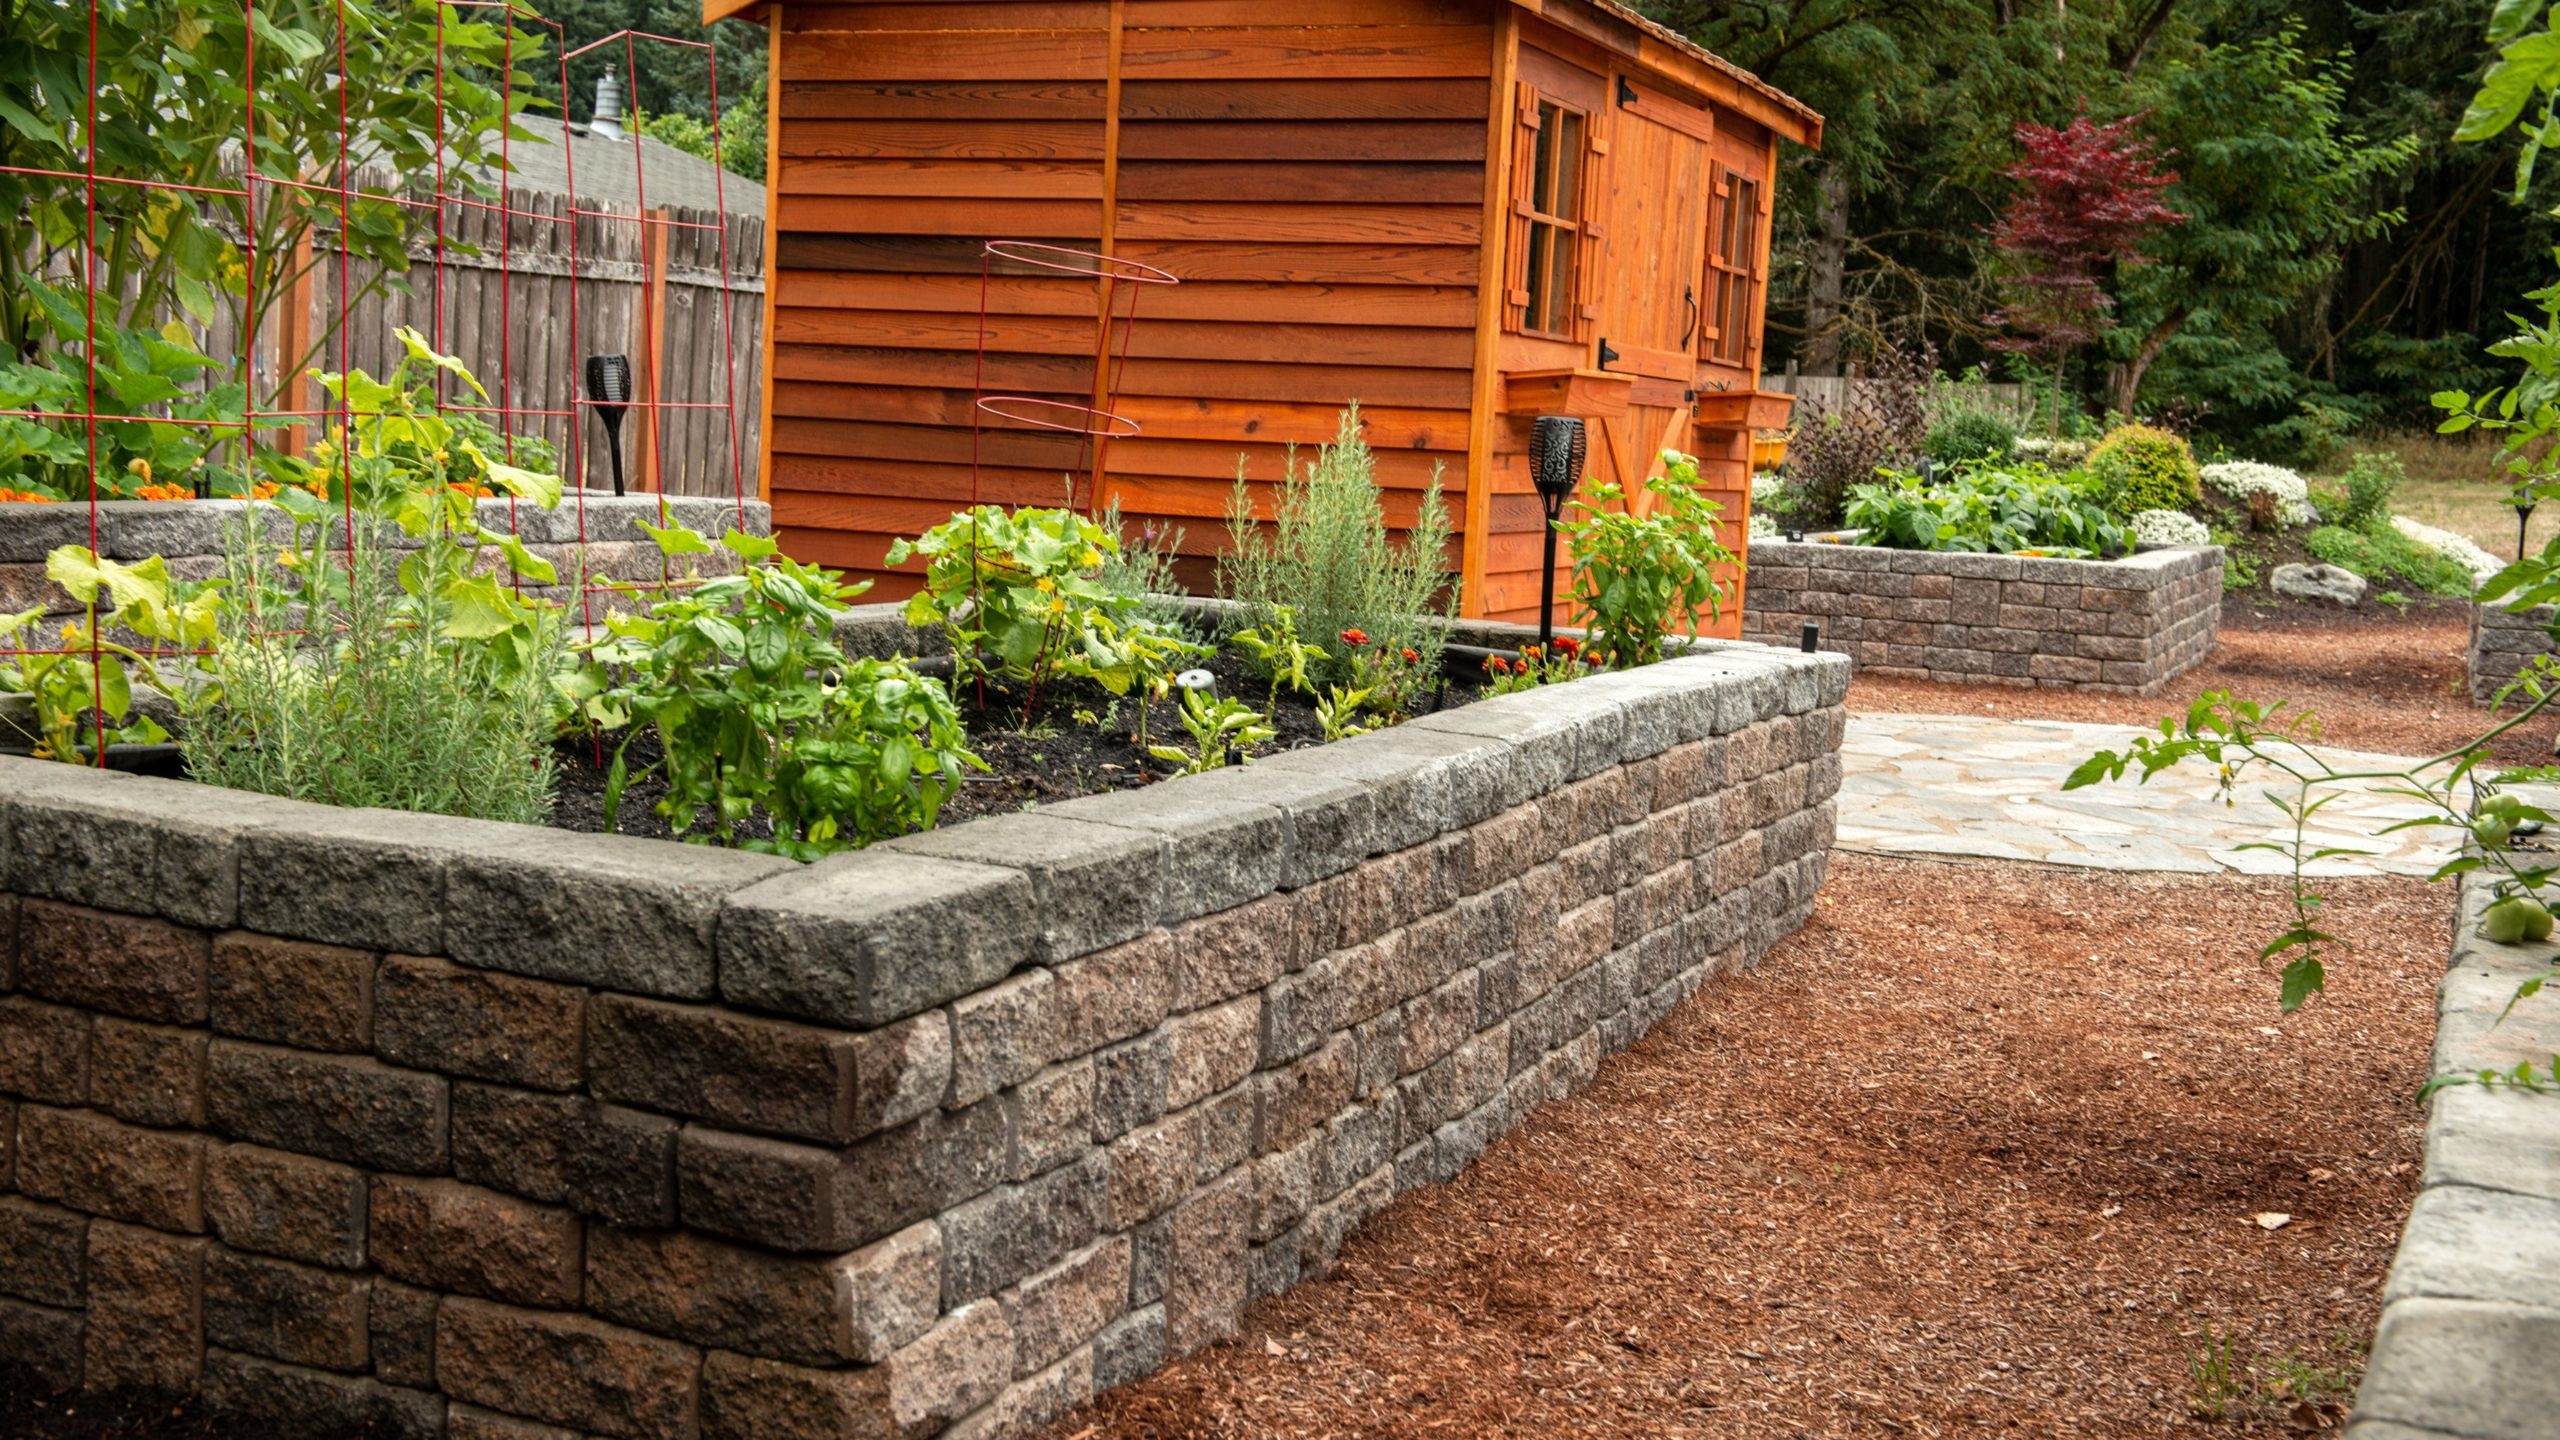
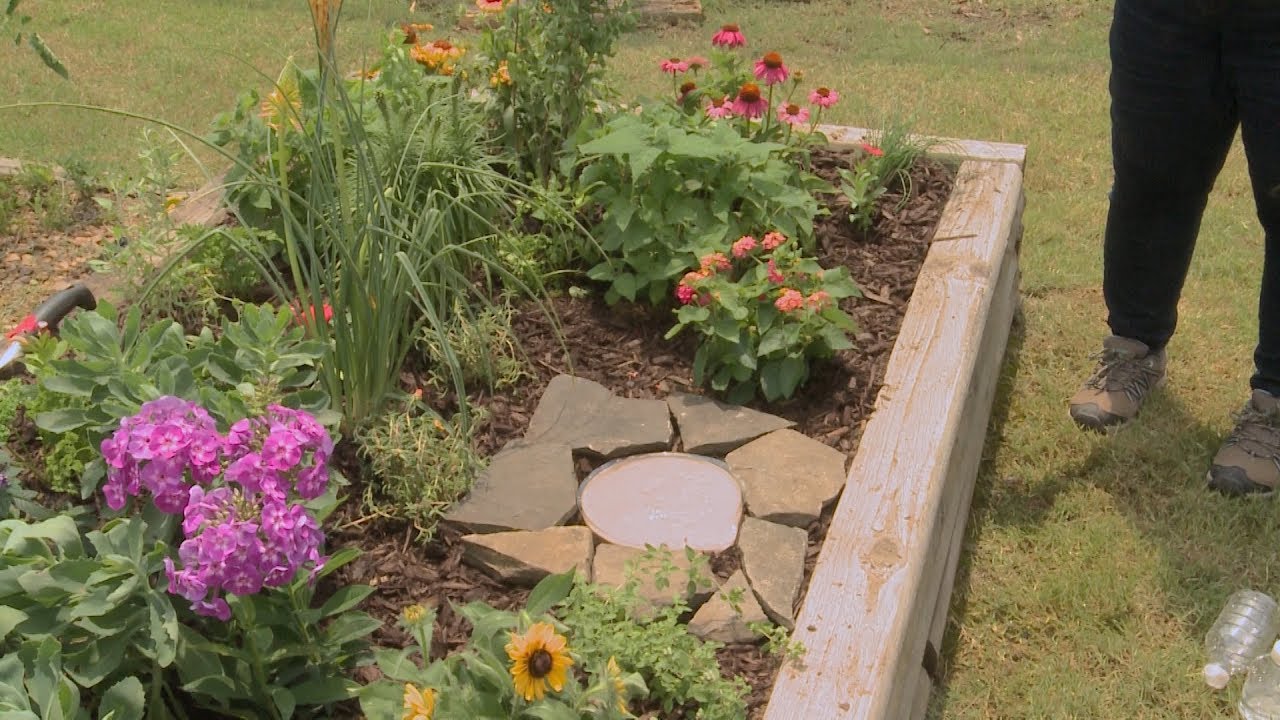
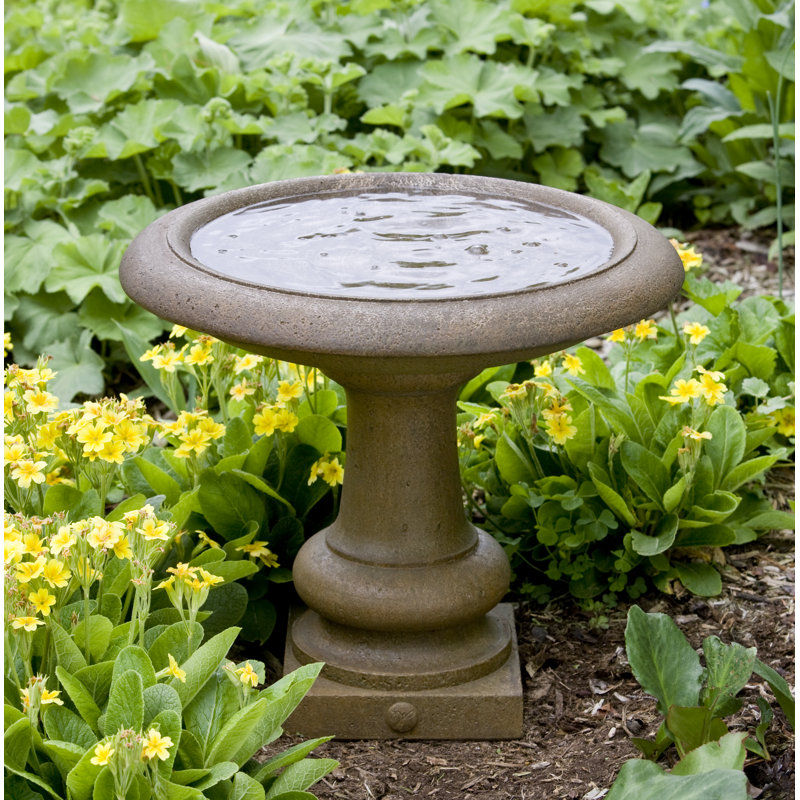
10. Build a Simple Raised Bed with a Stone Bird Bath
Maintenance Reality
|
$69.99
|
$8.99
|
$29.59
|

💡 Designer Tip
A DIY stone bird bath like this needs regular attention. The water will evaporate quickly in full sun and must be topped off daily. To prevent algae growth and mosquito larvae, you’ll need to dump the water, scrub the container, and refill it every 2-3 days. While beautiful and beneficial for wildlife, it’s not a set-and-forget feature. Compare this to the more formal fountain in Idea #22.
Get This Look For Less
Raised garden beds can be expensive. Skip the pricey kits and create a similar border using reclaimed wood, or even stacked cinder blocks (you can paint them or leave them raw for an industrial look). For the bird bath, a simple terracotta plant saucer placed on a few bricks works just as well as a custom stone feature. The focus should be on the lush plantings, which you can see in Idea #25 as well.
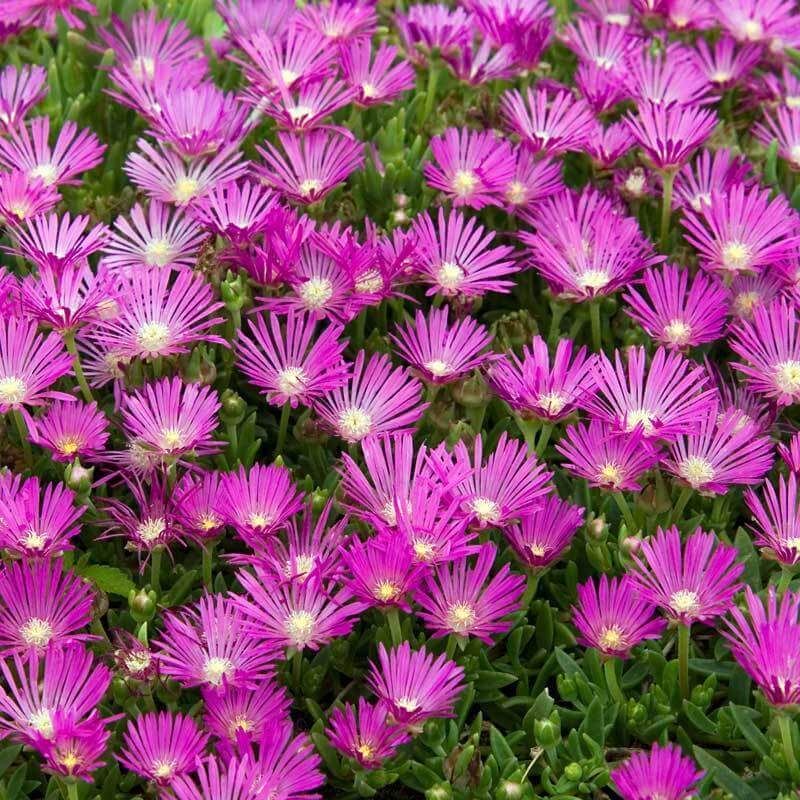
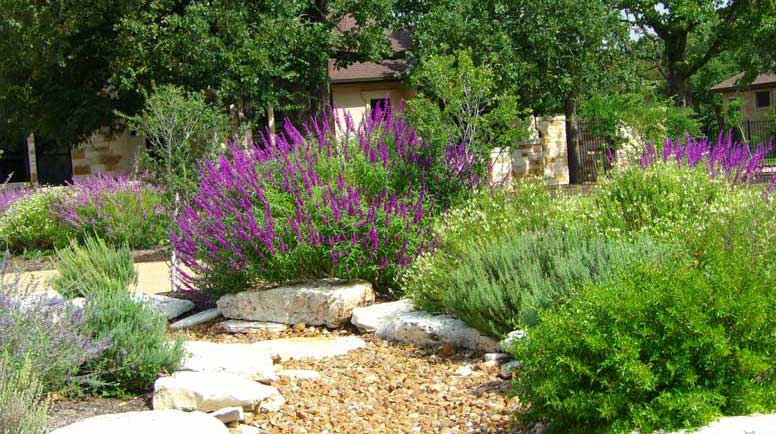
11. Combine Vibrant Purple Blooms with Golden Gravel
Real Talk
|
📋 Copy HEX 🔗 Share |
|
$266.45
|
$9.99
|
$5.47
|
$16.76
|
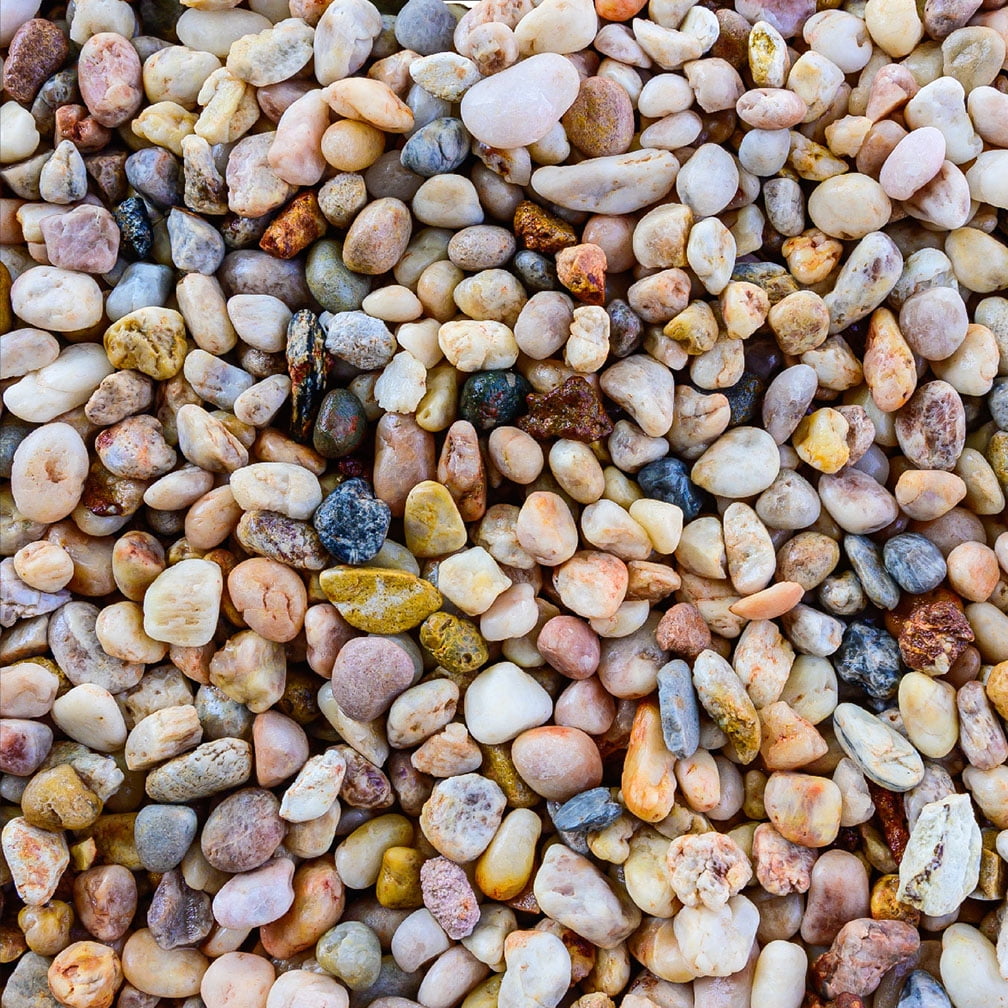

🔥 Trending Context
Gravel is a fantastic, low-water groundcover, but it’s not zero-maintenance. Weeds can and will eventually pop through. The best way to manage this is to lay down a high-quality landscape fabric *before* you put down the gravel. Even then, expect to do some hand-weeding of airborne seeds that germinate on top. Also, be prepared for the gravel to get kicked into your garden beds, requiring a bit of cleanup now and then.
Designer Tip
The key to making this bold color combination work is the use of large, rough-hewn stones as a border. They act as a neutral buffer zone between the vibrant purple flowers and the golden-brown gravel. This separation prevents the two strong colors from clashing, creating a more harmonious and intentional design. Without the stone border, the transition would be too abrupt.
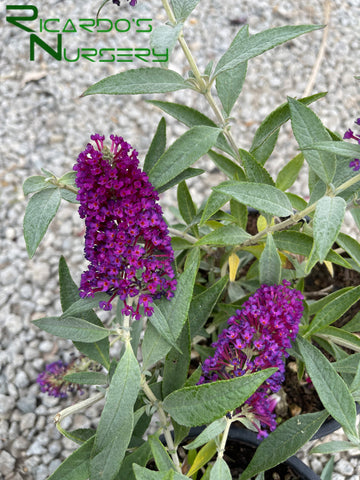
12. Border a Small Pond with Rocks and Butterfly Bush
The One Thing
|
$24.97
|
$5.59
|
$23.96
|
$4.40
|


🎯 What Makes It Work
The water is the essential element that elevates this from a simple flower bed to a true ecosystem. Even a small pond or water feature provides a critical drinking spot for butterflies and other pollinators, adding a layer of life and activity that plants alone cannot. The reflection of the sky and flowers on the water’s surface also adds a dynamic sense of depth and light.
Scale Guide
You don’t need a huge yard for a pond like this. A pre-formed pond liner of about 3×5 feet is perfect for a small, wildlife-friendly water feature. The key is to dedicate at least twice the surface area of the pond to the surrounding plantings. This ensures the pond feels like a natural part of the landscape rather than an disconnected plastic tub dropped in the ground.
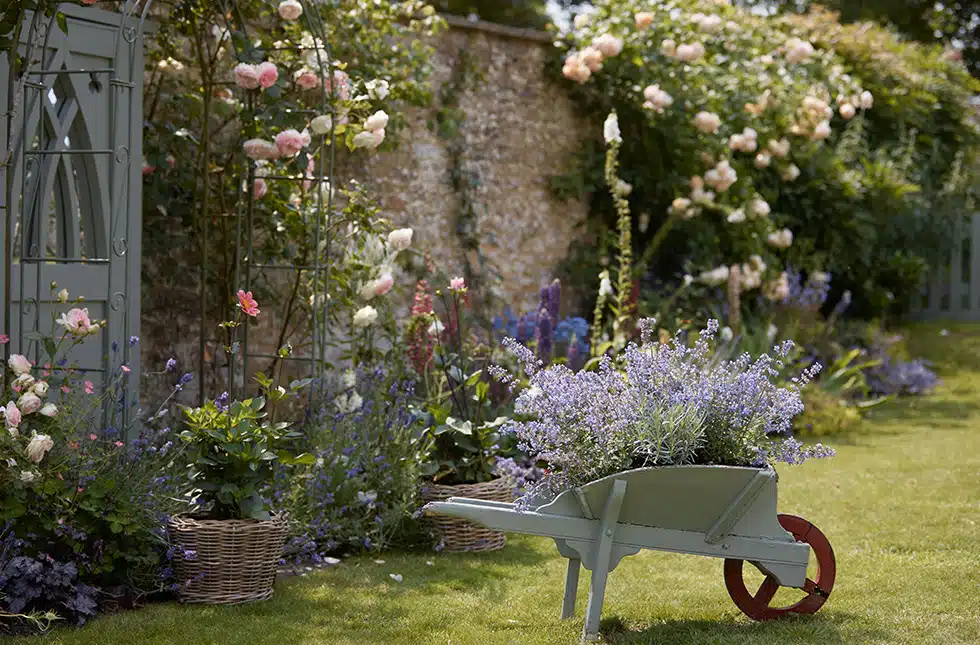
13. An English Garden Look with a Lavender-Filled Wheelbarrow
Trending Context
|
📋 Copy HEX 🔗 Share |
|
$17.25
|
$136.88
|
$34.99
|

💰 Budget Breakdown
The “cottagecore” aesthetic is still going strong, and this scene is a perfect embodiment of it. It’s about romanticizing a simpler, more rustic country life. The weathered wheelbarrow, climbing roses on a stone wall, and the casual-yet-curated mix of flowers like lavender all tap into this desire for a beautiful, productive, and slightly imperfect garden. It feels personal and collected over time, not installed in a weekend.
What Makes It Work
This design succeeds through its clever use of repetition and contrast. The pale green of the wheelbarrow is echoed in the garden gate/trellis, creating a sense of cohesion. This soft green contrasts beautifully with the vibrant purple lavender and the soft pink of the climbing roses. The mix of textures—the rough stone wall, manicured lawn, and delicate flower petals—adds richness and interest.
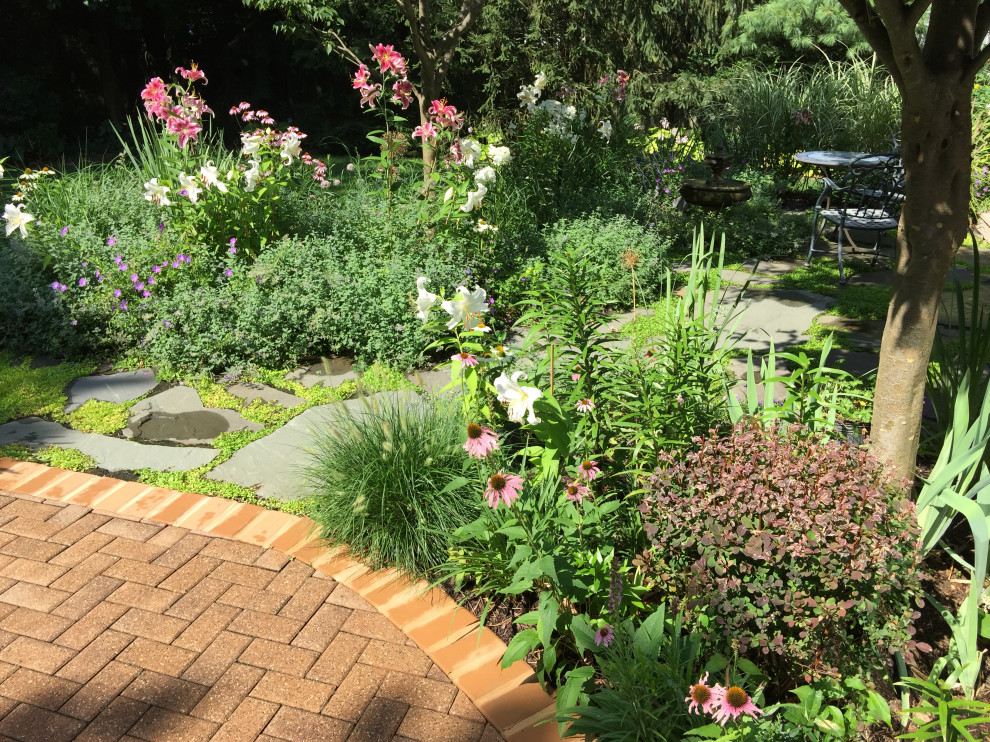
14. Integrate a Flagstone Path into a Lush, Mixed Border
Before You Start Checklist
|
$16.46
|
$115.99
|

📐 Style Math
- Test your soil drainage. A flagstone path with groundcover needs good drainage to prevent water from pooling and the plants from rotting.
- Map your sunlight. The groundcover between the stones needs to be chosen based on sun exposure (e.g., creeping thyme for full sun, Corsican mint for shade).
- Plan for traffic. Is this a main walkway or a gentle garden path? The spacing and stability of the stones will depend on its use.
- Source your materials. Do you want uniform flagstones or irregular shapes? Will the path border brick or another material? Plan the transition.
Style Math
The visual balance here is roughly 40% hardscape (the brick and flagstone) + 60% lush plantings. Within the planting area, it’s a mix of 50% foundational green foliage (shrubs, grasses) and 50% feature flowers (the lilies and coneflowers). This ensures the garden has structure and interest year-round, even when the main flowers aren’t in bloom.
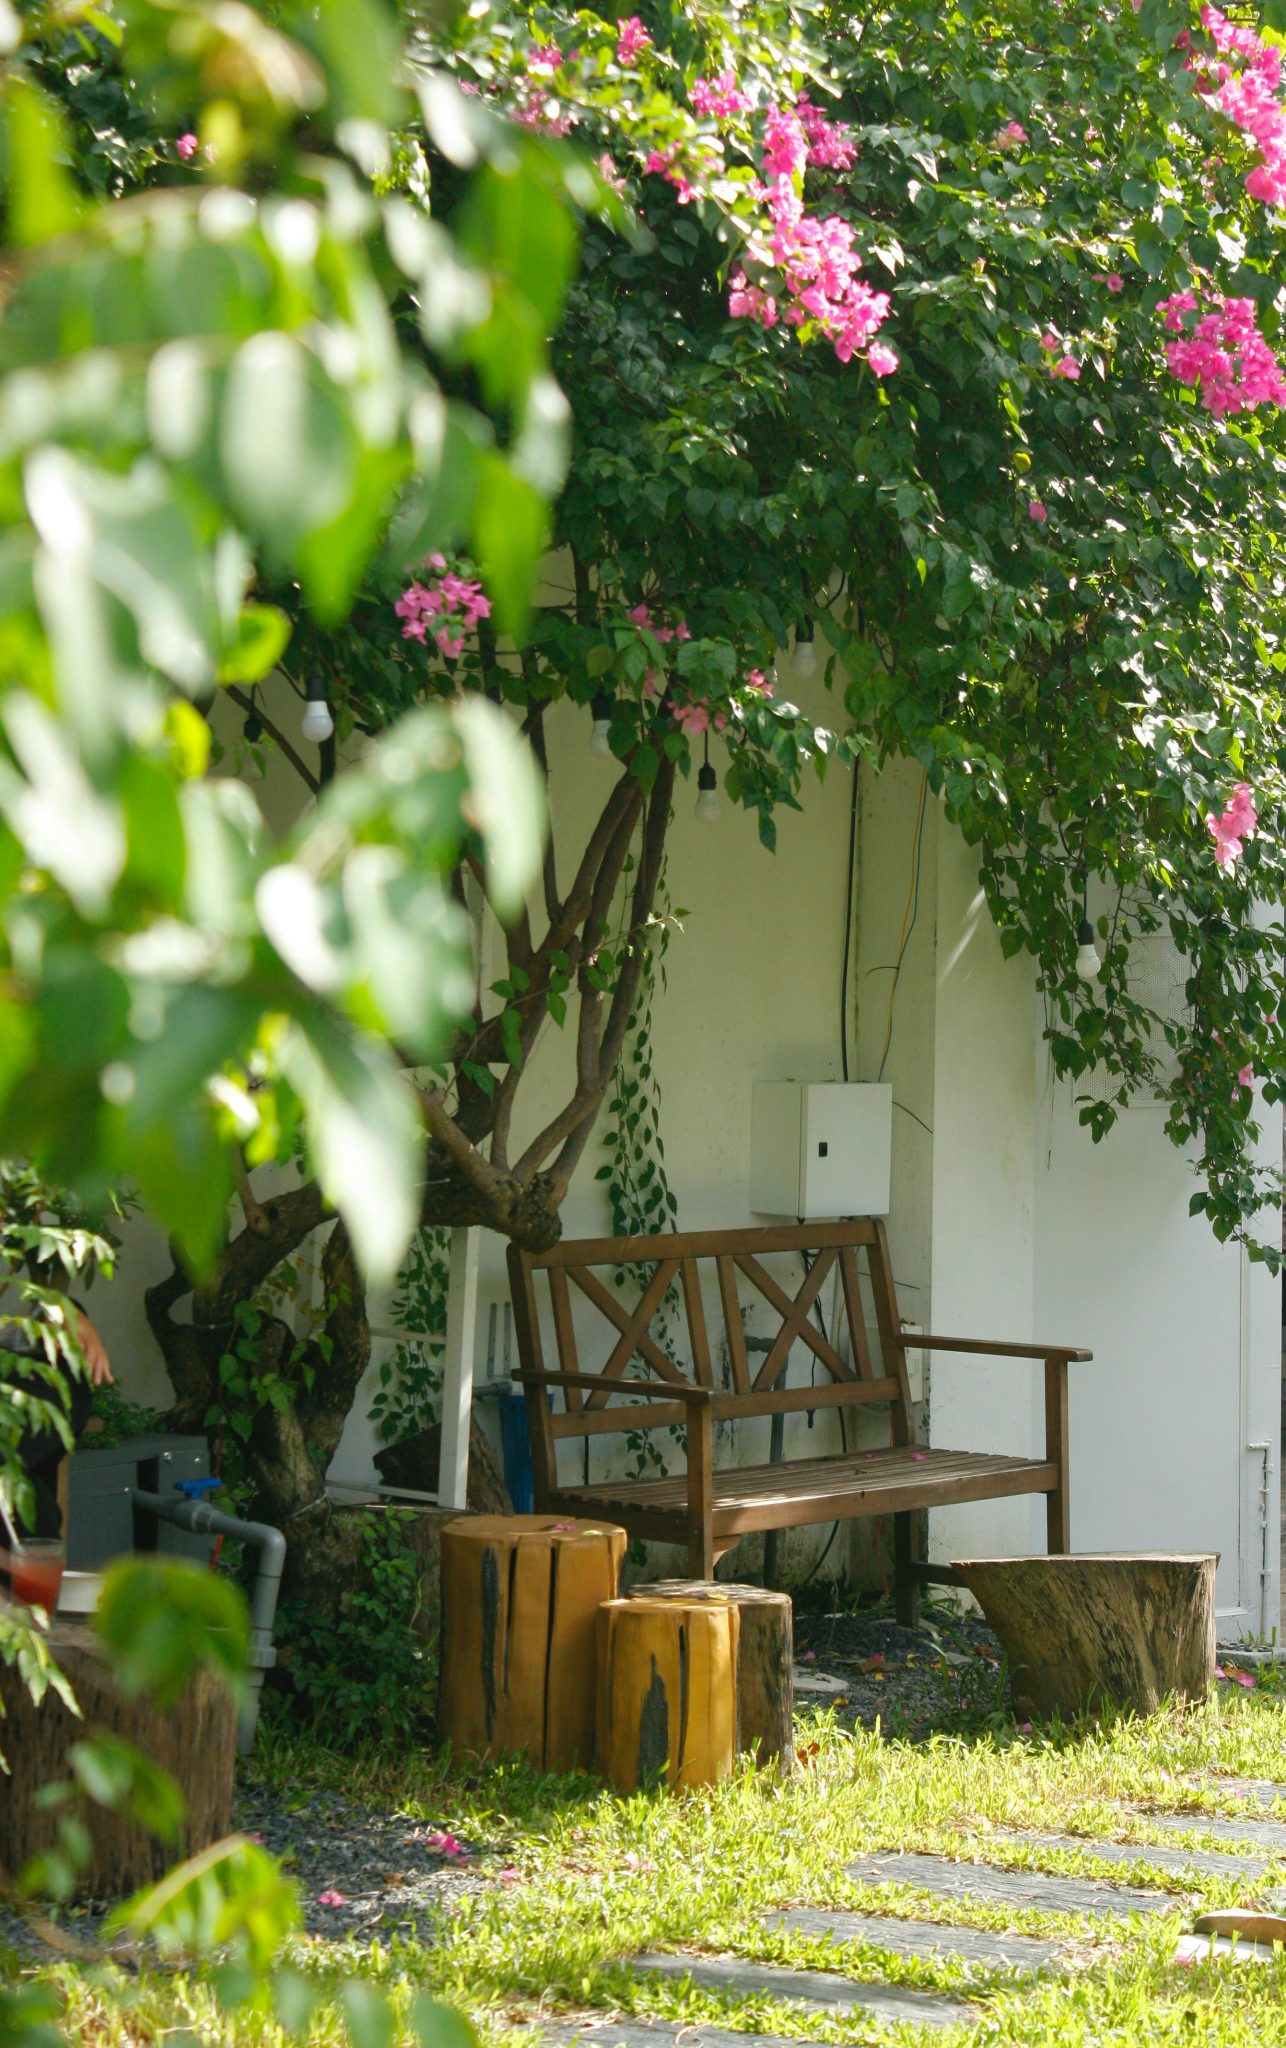
15. Create a Cozy Nook with a Bench, Vines, and String Lights
Designer Tip
|
📋 Copy HEX 🔗 Share |
|
$135.31
|
$179.99
|
📏 Scale Guide
To get this magical, integrated lighting effect, use micro LED string lights with a flexible wire (often called “fairy lights”). Instead of just draping them over the top, carefully weave them *through* the bougainvillea vines and foliage. This makes it look as if the plant itself is glowing from within. Opt for warm white bulbs on a green or copper wire to blend in seamlessly during the day.
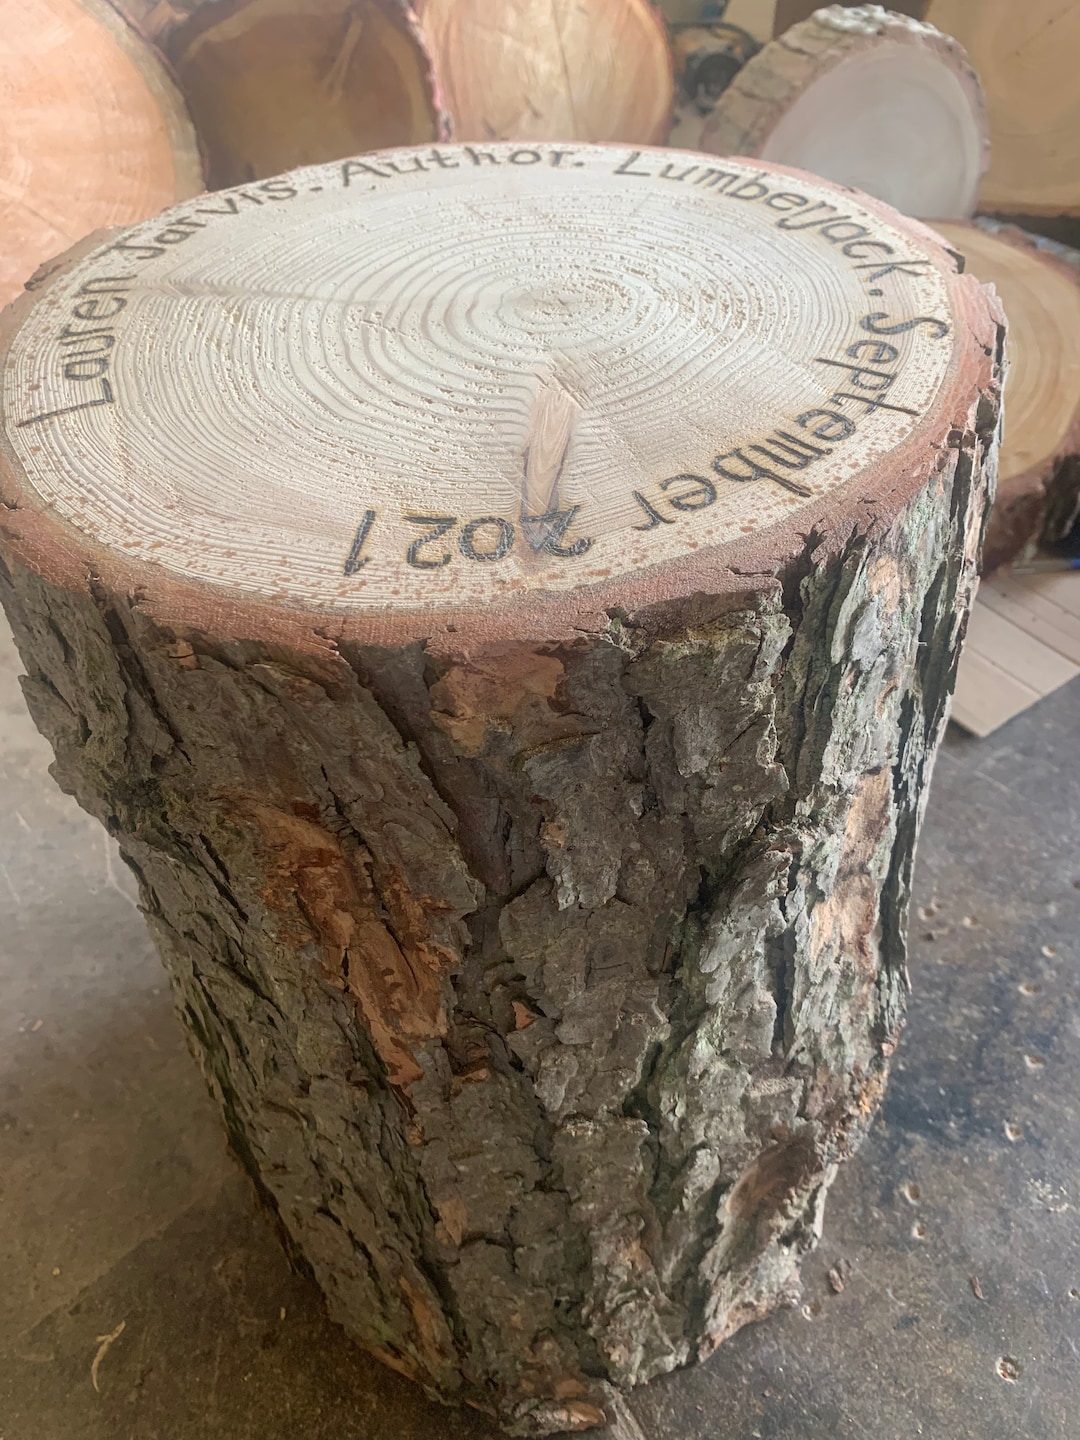
Real Talk
Bougainvillea is stunning, but it has two major considerations. First, it has thorns, so be careful placing it right next to a seating area where people might brush against it. Second, it’s a prolific grower and drops a lot of spent flower bracts, which will require regular sweeping to keep your patio tidy. It’s beautiful, but it’s not a low-maintenance plant. Also, those tree stumps look cool, but they can attract termites and other insects, so keep them away from your home’s foundation.
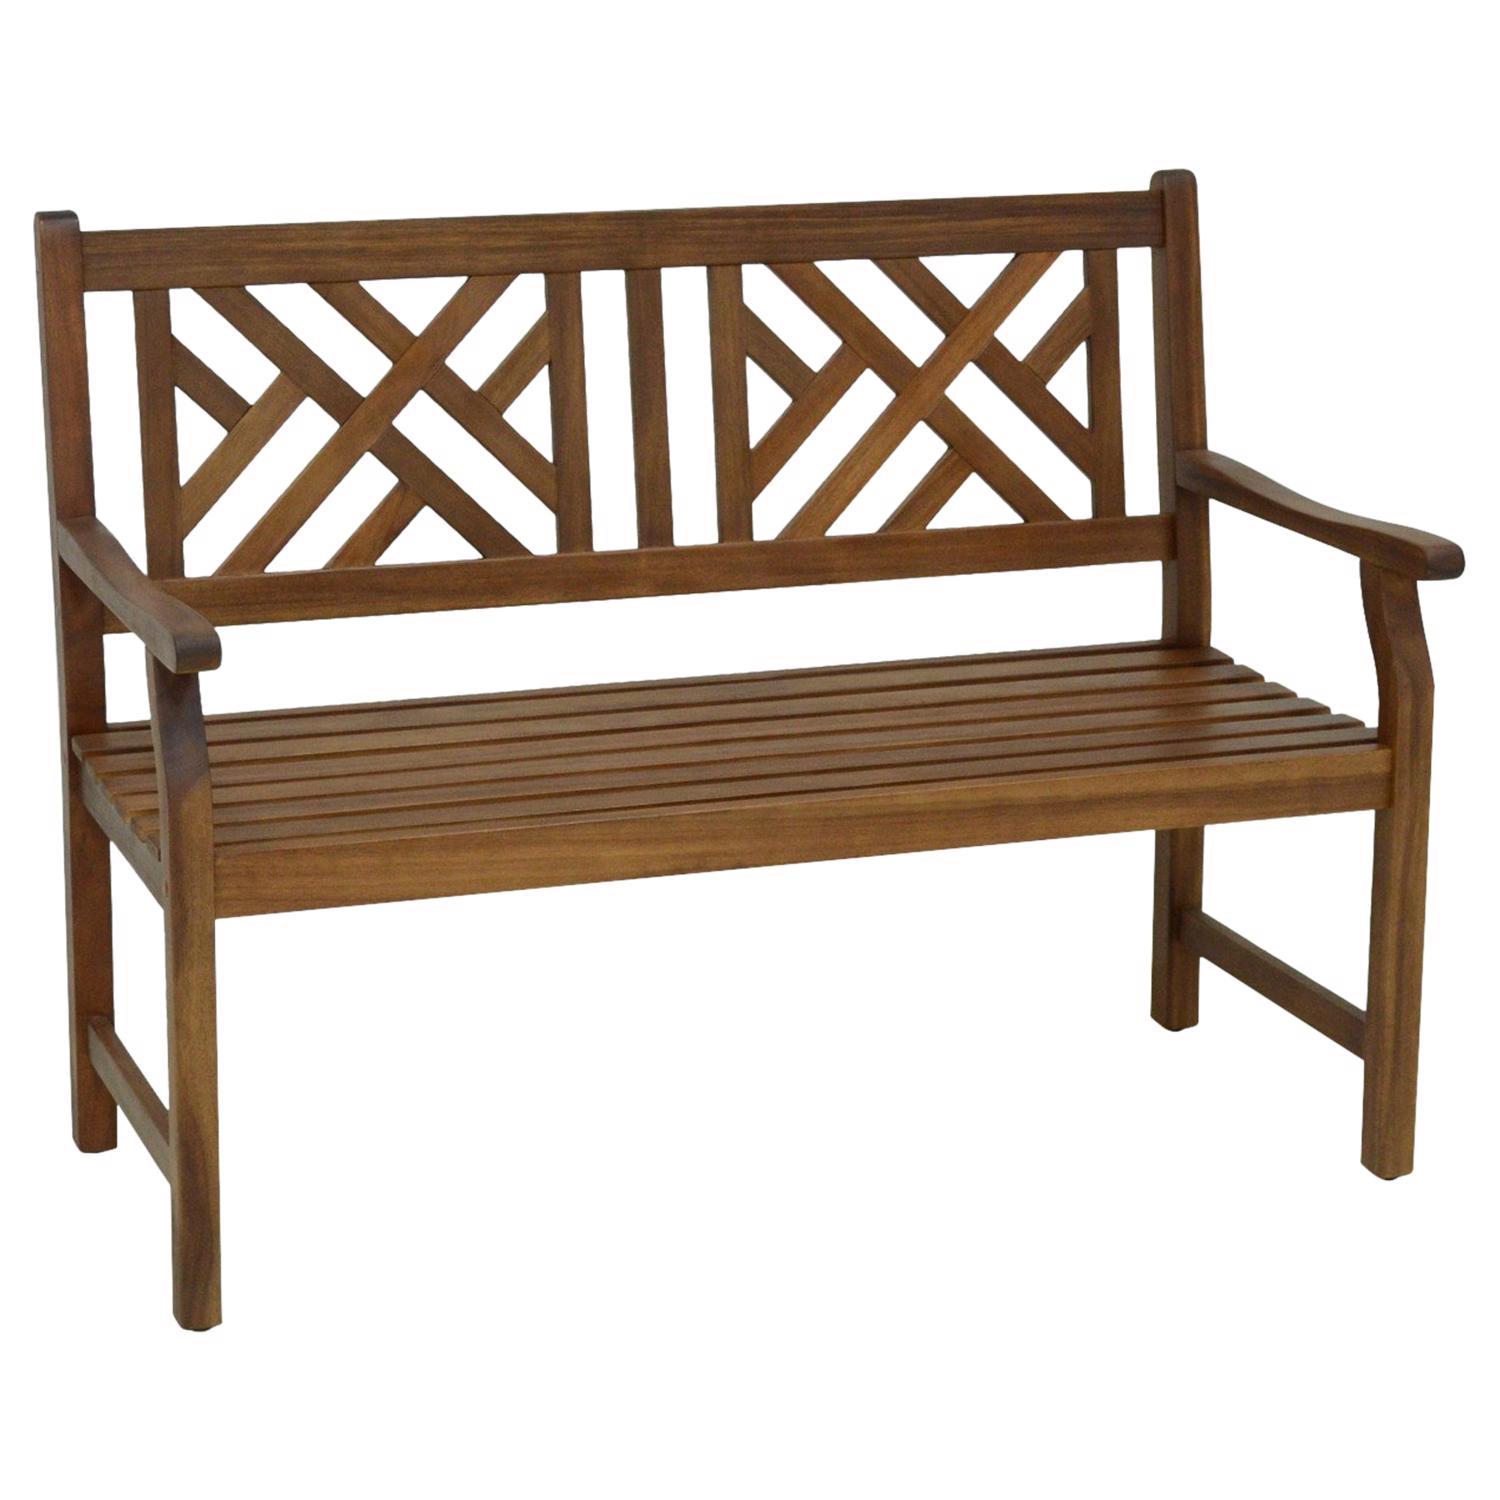
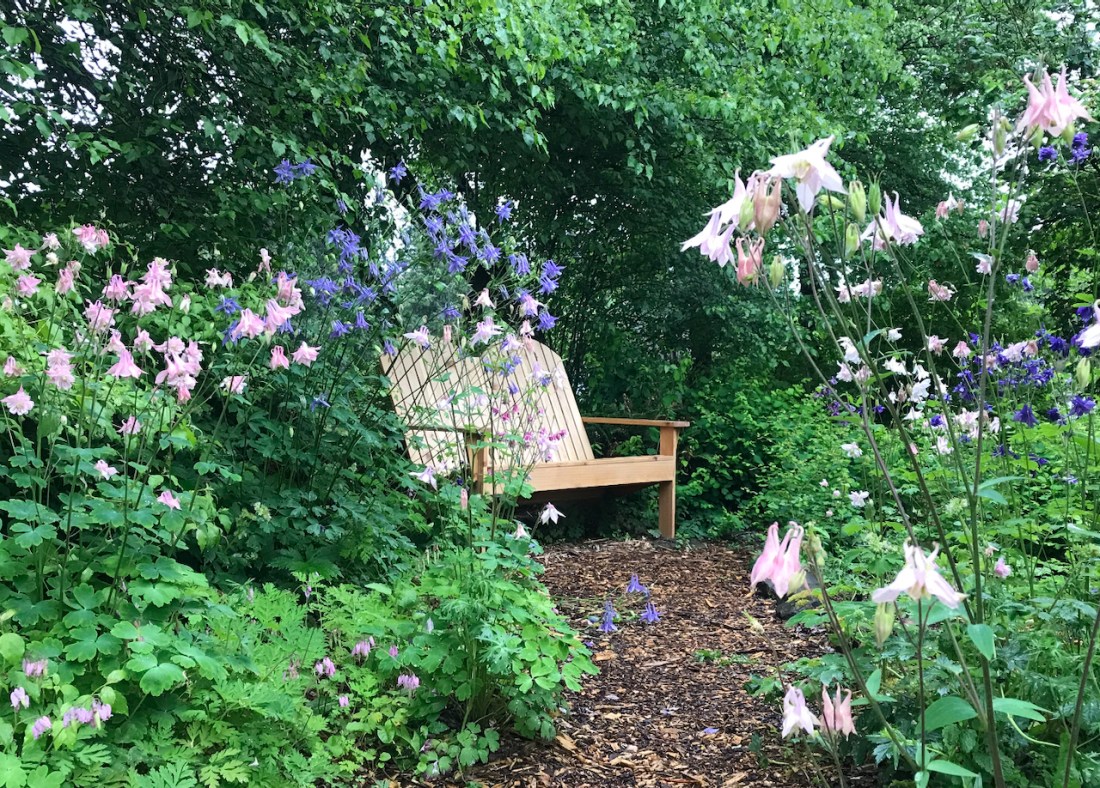
16. Place an Adirondack-Style Bench on a Woodland Path
The One Thing
|
$5.47
|
$112.99
|

✅ Before You Start
The Adirondack bench is the critical element. It’s more than just a place to sit; it’s a destination. Placing it at a curve in the path creates a sense of arrival and purpose. Its simple, classic design feels at home in the natural, woodland setting, and its light wood tone stands out just enough against the deep greens. It transforms a simple path into a quiet spot for rest and contemplation, similar to the goal of the bench in Idea #21 but with a more rustic feel.
Get This Look For Less
A high-quality wooden Adirondack bench can be pricey. Check Facebook Marketplace or local yard sales, where you can often find them for under $100. A fresh coat of paint or a weather-sealing stain can make a used find look brand new. For the path, skip bagged mulch and see if your municipality offers free wood chips from tree trimming services—it’s an incredibly cheap way to cover a large area.
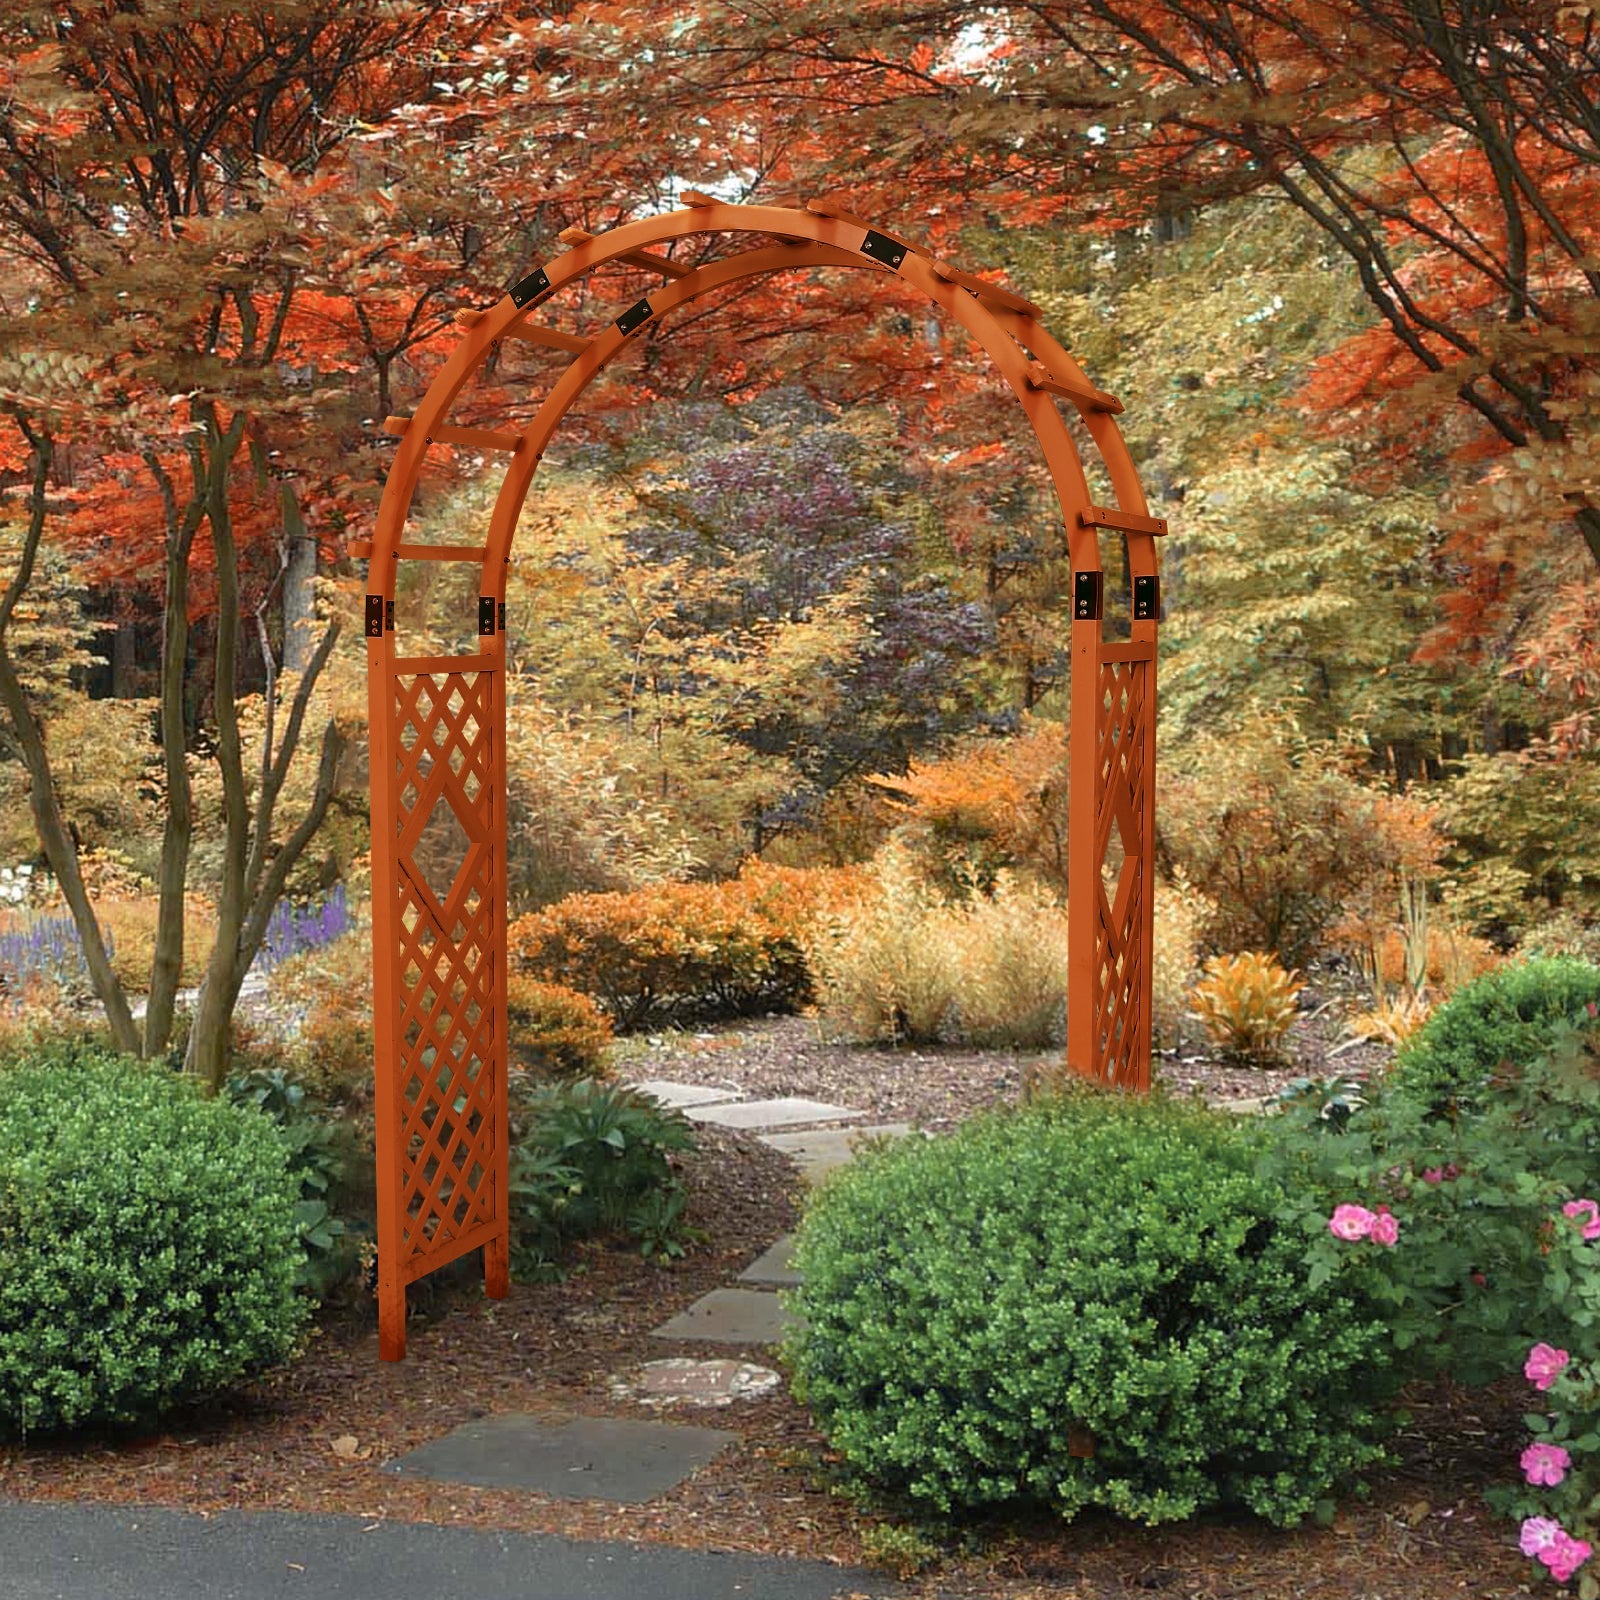
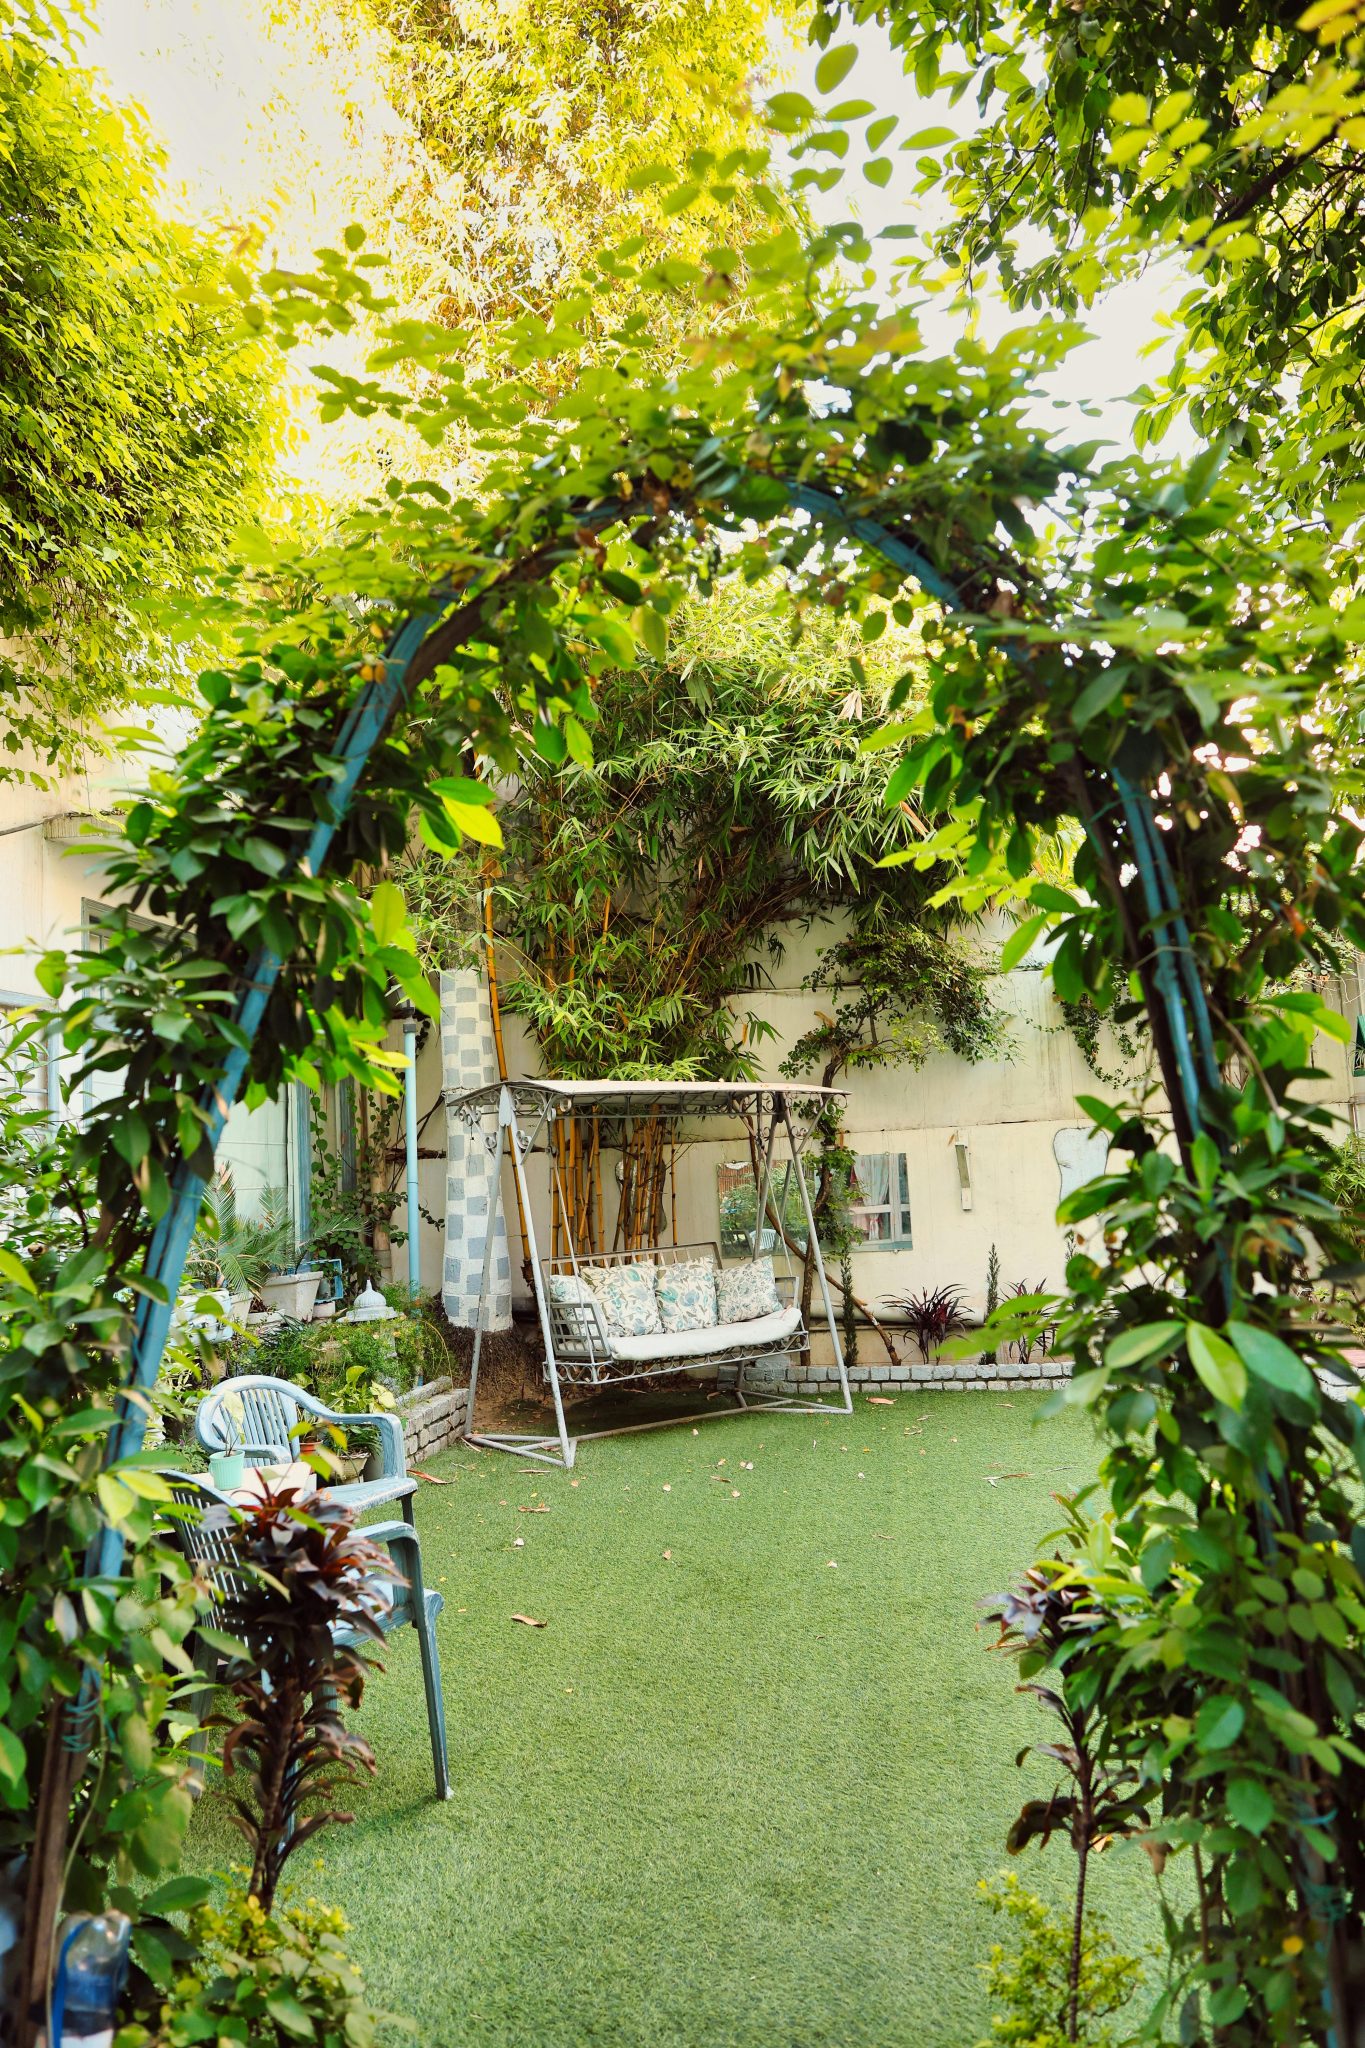
17. Frame a Garden View with a Foliage-Covered Archway
What Makes It Work
|
📋 Copy HEX 🔗 Share |
|
$23.73
|
$243.99
|
🧹 Maintenance Reality
This design uses a classic technique: framing. The dark blue archway, covered in green foliage, acts like a picture frame, drawing your eye through it to the scene beyond. This creates a sense of depth and mystery, making the garden feel larger and more intriguing. The contrast between the dark arch and the light-colored wall behind it further enhances this effect.
Scale Guide
A standard garden arch is about 7-8 feet tall and 4-5 feet wide. This is a great solution for adding vertical interest to a smaller yard or creating a distinct ‘entryway’ between two different garden ‘rooms’ without needing a huge amount of space. Make sure the path leading to and from the arch is at least 3 feet wide for comfortable passage.
18. Design a Shaded Walkway with a Canopy of Trees
Maintenance Reality
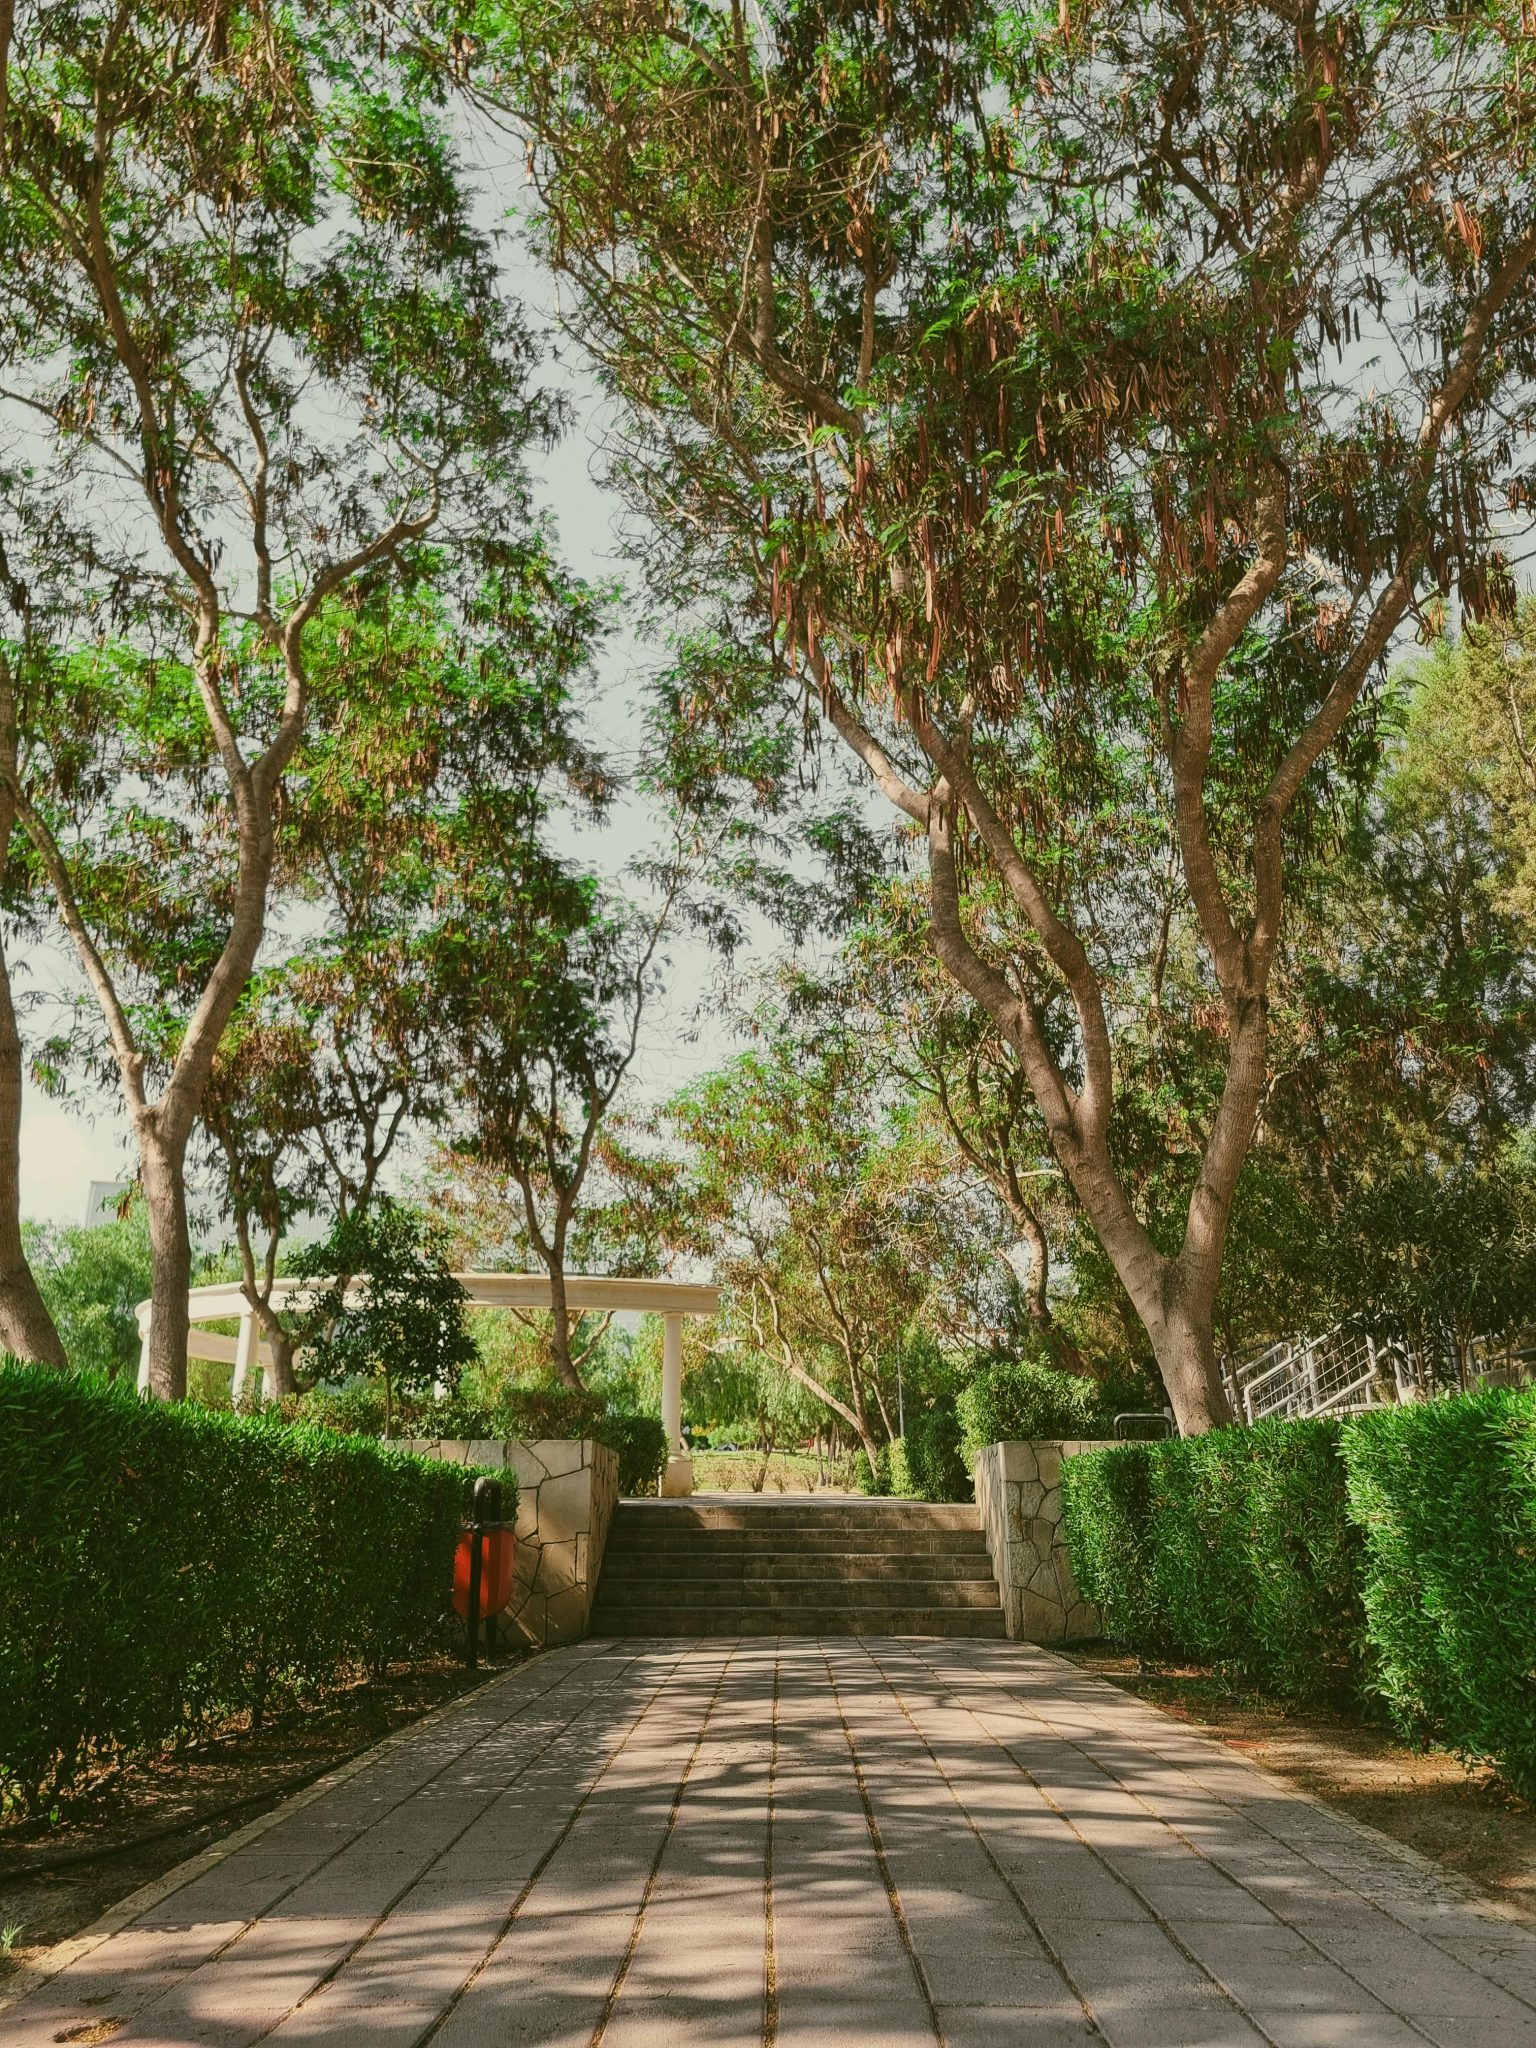
⚠️ Real Talk
A beautiful tree canopy comes with work. The brown seed pods visible in the image will eventually drop, creating a layer of debris on the path and hedges that will need to be cleared away. This is in addition to regular leaf cleanup in the fall. Before planting trees this close to a path, understand their litter habits (flowers, seeds, fruits, leaves) and decide if you’re up for the upkeep.
Designer Tip
The neatly trimmed hedges are key to keeping this shady path from feeling overgrown and chaotic. By maintaining a clean, sharp line along the walkway, you create a sense of order that contrasts with the wildness of the overhead canopy. For a hedge this precise, you’ll need to trim it 2-3 times during the growing season with a pair of sharp shears or a powered hedge trimmer.
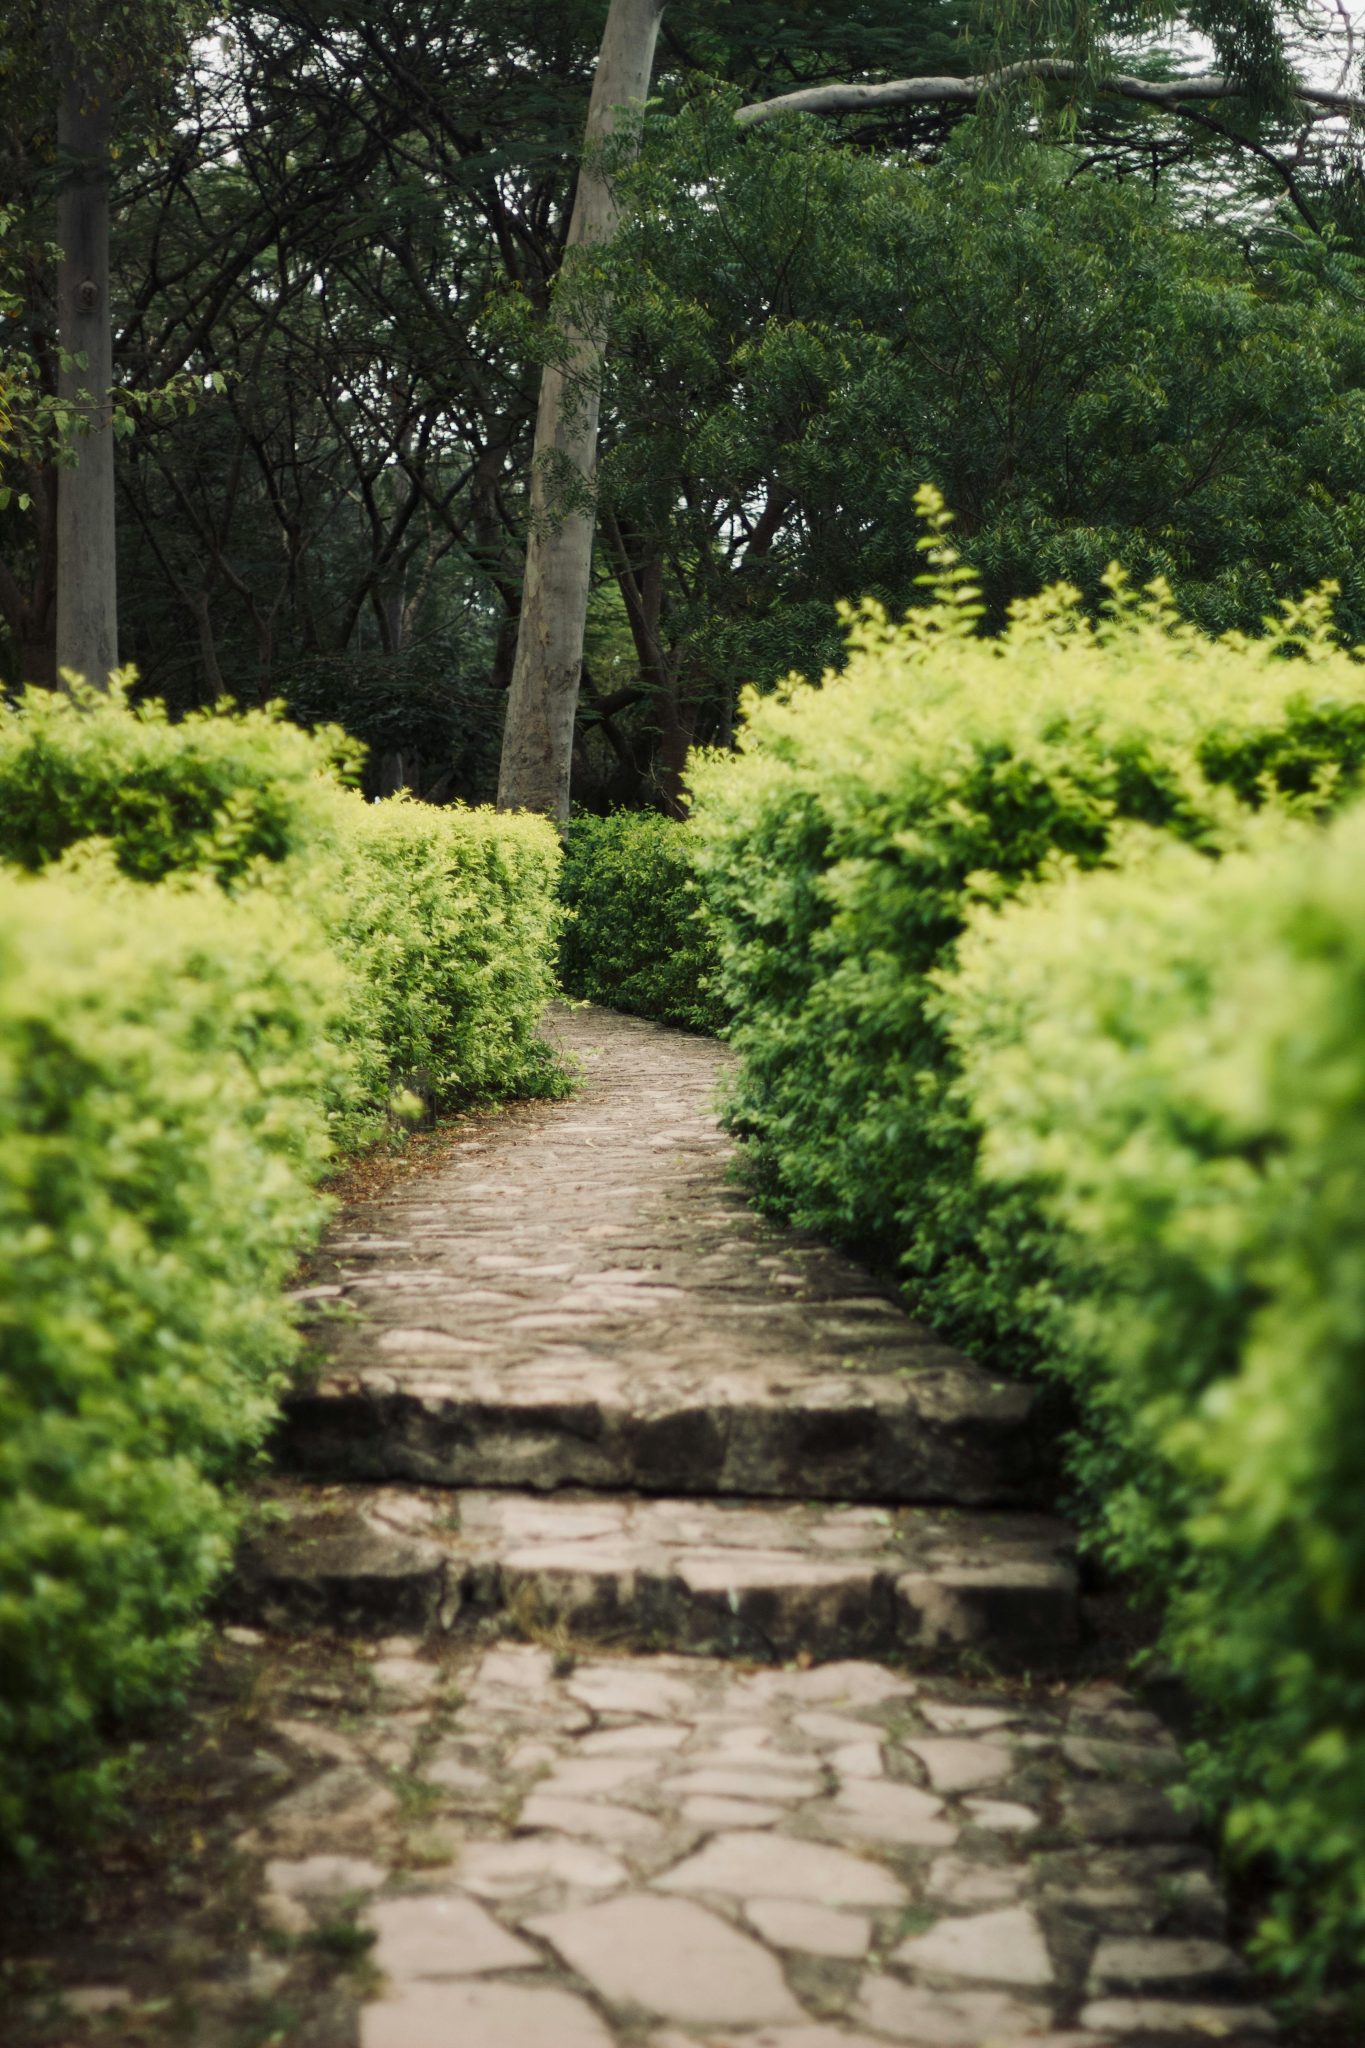
19. Carve a Stone Path Through Lush, Deep Green Hedges
Style Math
|
📋 Copy HEX 🔗 Share |
|
$476.92
|
$29.99
|
$845.06
|
🔧 How-To Brief
This is a study in monochromatic texture. It’s 90% green + 10% neutral stone. The magic comes from the variety within the green: the deep, fine texture of the hedges, the brighter green of the tree canopy, and the darker tones of moss on the tree trunks. By committing to a single color family and focusing on texture and light, the result is incredibly serene and immersive. This is a much more minimalist approach than the colorful chaos of Idea #2.
Real Talk
A fully-shaded garden path like this can be a challenge. The stone can become slippery with moss or algae, especially in damp climates. Regular scrubbing with a stiff brush or a pressure washer on a low setting is a must for safety. Also, the dense shade limits your planting options to only shade-loving species, so don’t expect bright, sun-loving flowers to thrive here.
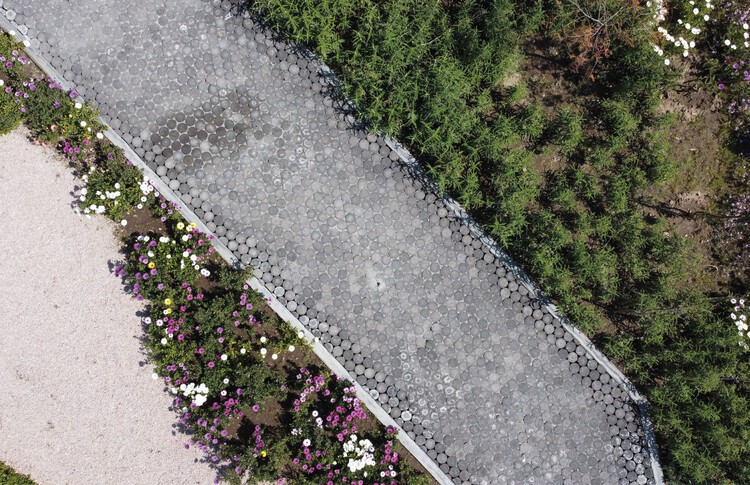
20. Lay a Geometric Path with Circular Stone Blocks
The One Thing
|
$12.97
|
$7.99
|
$12.84
|
$17.59
|


⭐ The One Thing
The circular shape of the paving stones is everything here. A standard square or rectangular paver would have resulted in a completely ordinary path. The round shape is unexpected and playful. It creates a rhythmic, almost cobblestone-like texture that feels both ancient and modern at the same time. The geometry of the path itself becomes a major design feature.
What Makes It Work
This design succeeds by creating distinct zones. You have the geometric, hardscaped zone of the path, the low-maintenance green shrub zone on one side, and the colorful, wilder flower zone on the other. This separation, almost like color-blocking in fashion, gives each area its own identity. It feels organized and intentional, preventing the different elements from becoming a visual mess.
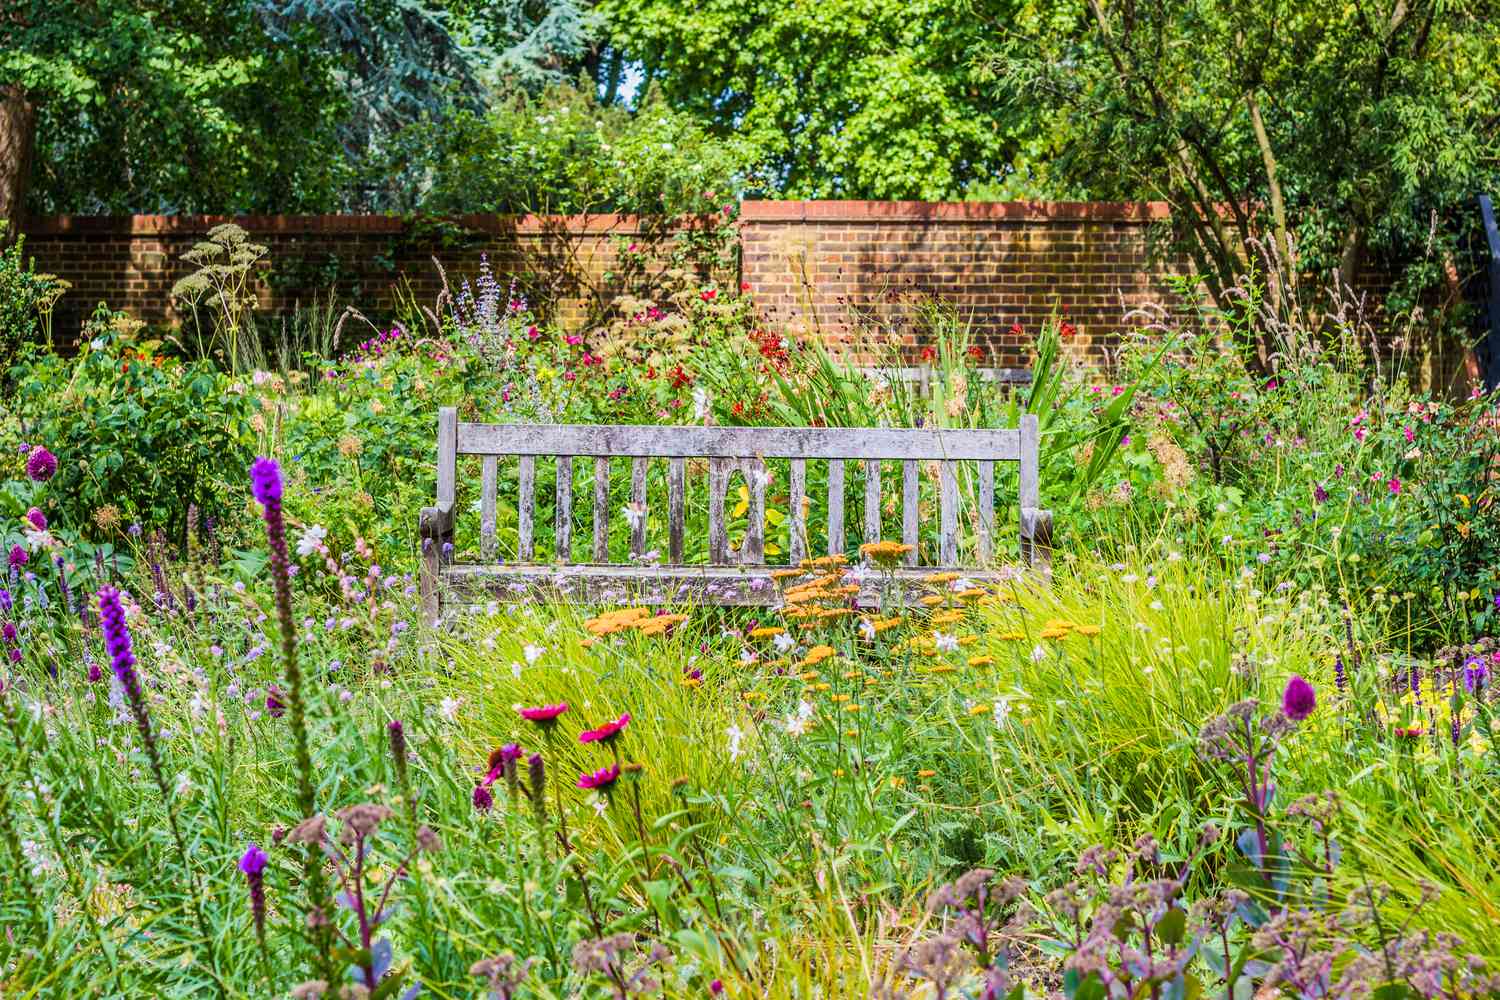
21. Nestle a Weathered Wooden Bench Against a Brick Wall
Trending Context
|
📋 Copy HEX 🔗 Share |
|
$689.00
|
💸 Get This Look For Less
The idea of a “secret garden” is a powerful driver in design, and this captures that feeling perfectly. The weathered bench tucked into a riot of wildflowers suggests a hidden, quiet corner of a larger space. It’s about creating intimate, personal moments within your landscape. The brick wall adds to this by providing a sense of enclosure and privacy, making the nook feel safe and secluded.
Get This Look For Less
Wildflower seeds are incredibly inexpensive. A single packet can cover a surprisingly large area, giving you this abundant look for just a few dollars. For the wall, if you don’t have existing brick, you can get a similar feel with faux brick panels or by creating a backdrop with a simple wooden fence painted a warm, terracotta red. You can often find weathered benches for cheap or even free on community giveaway sites.
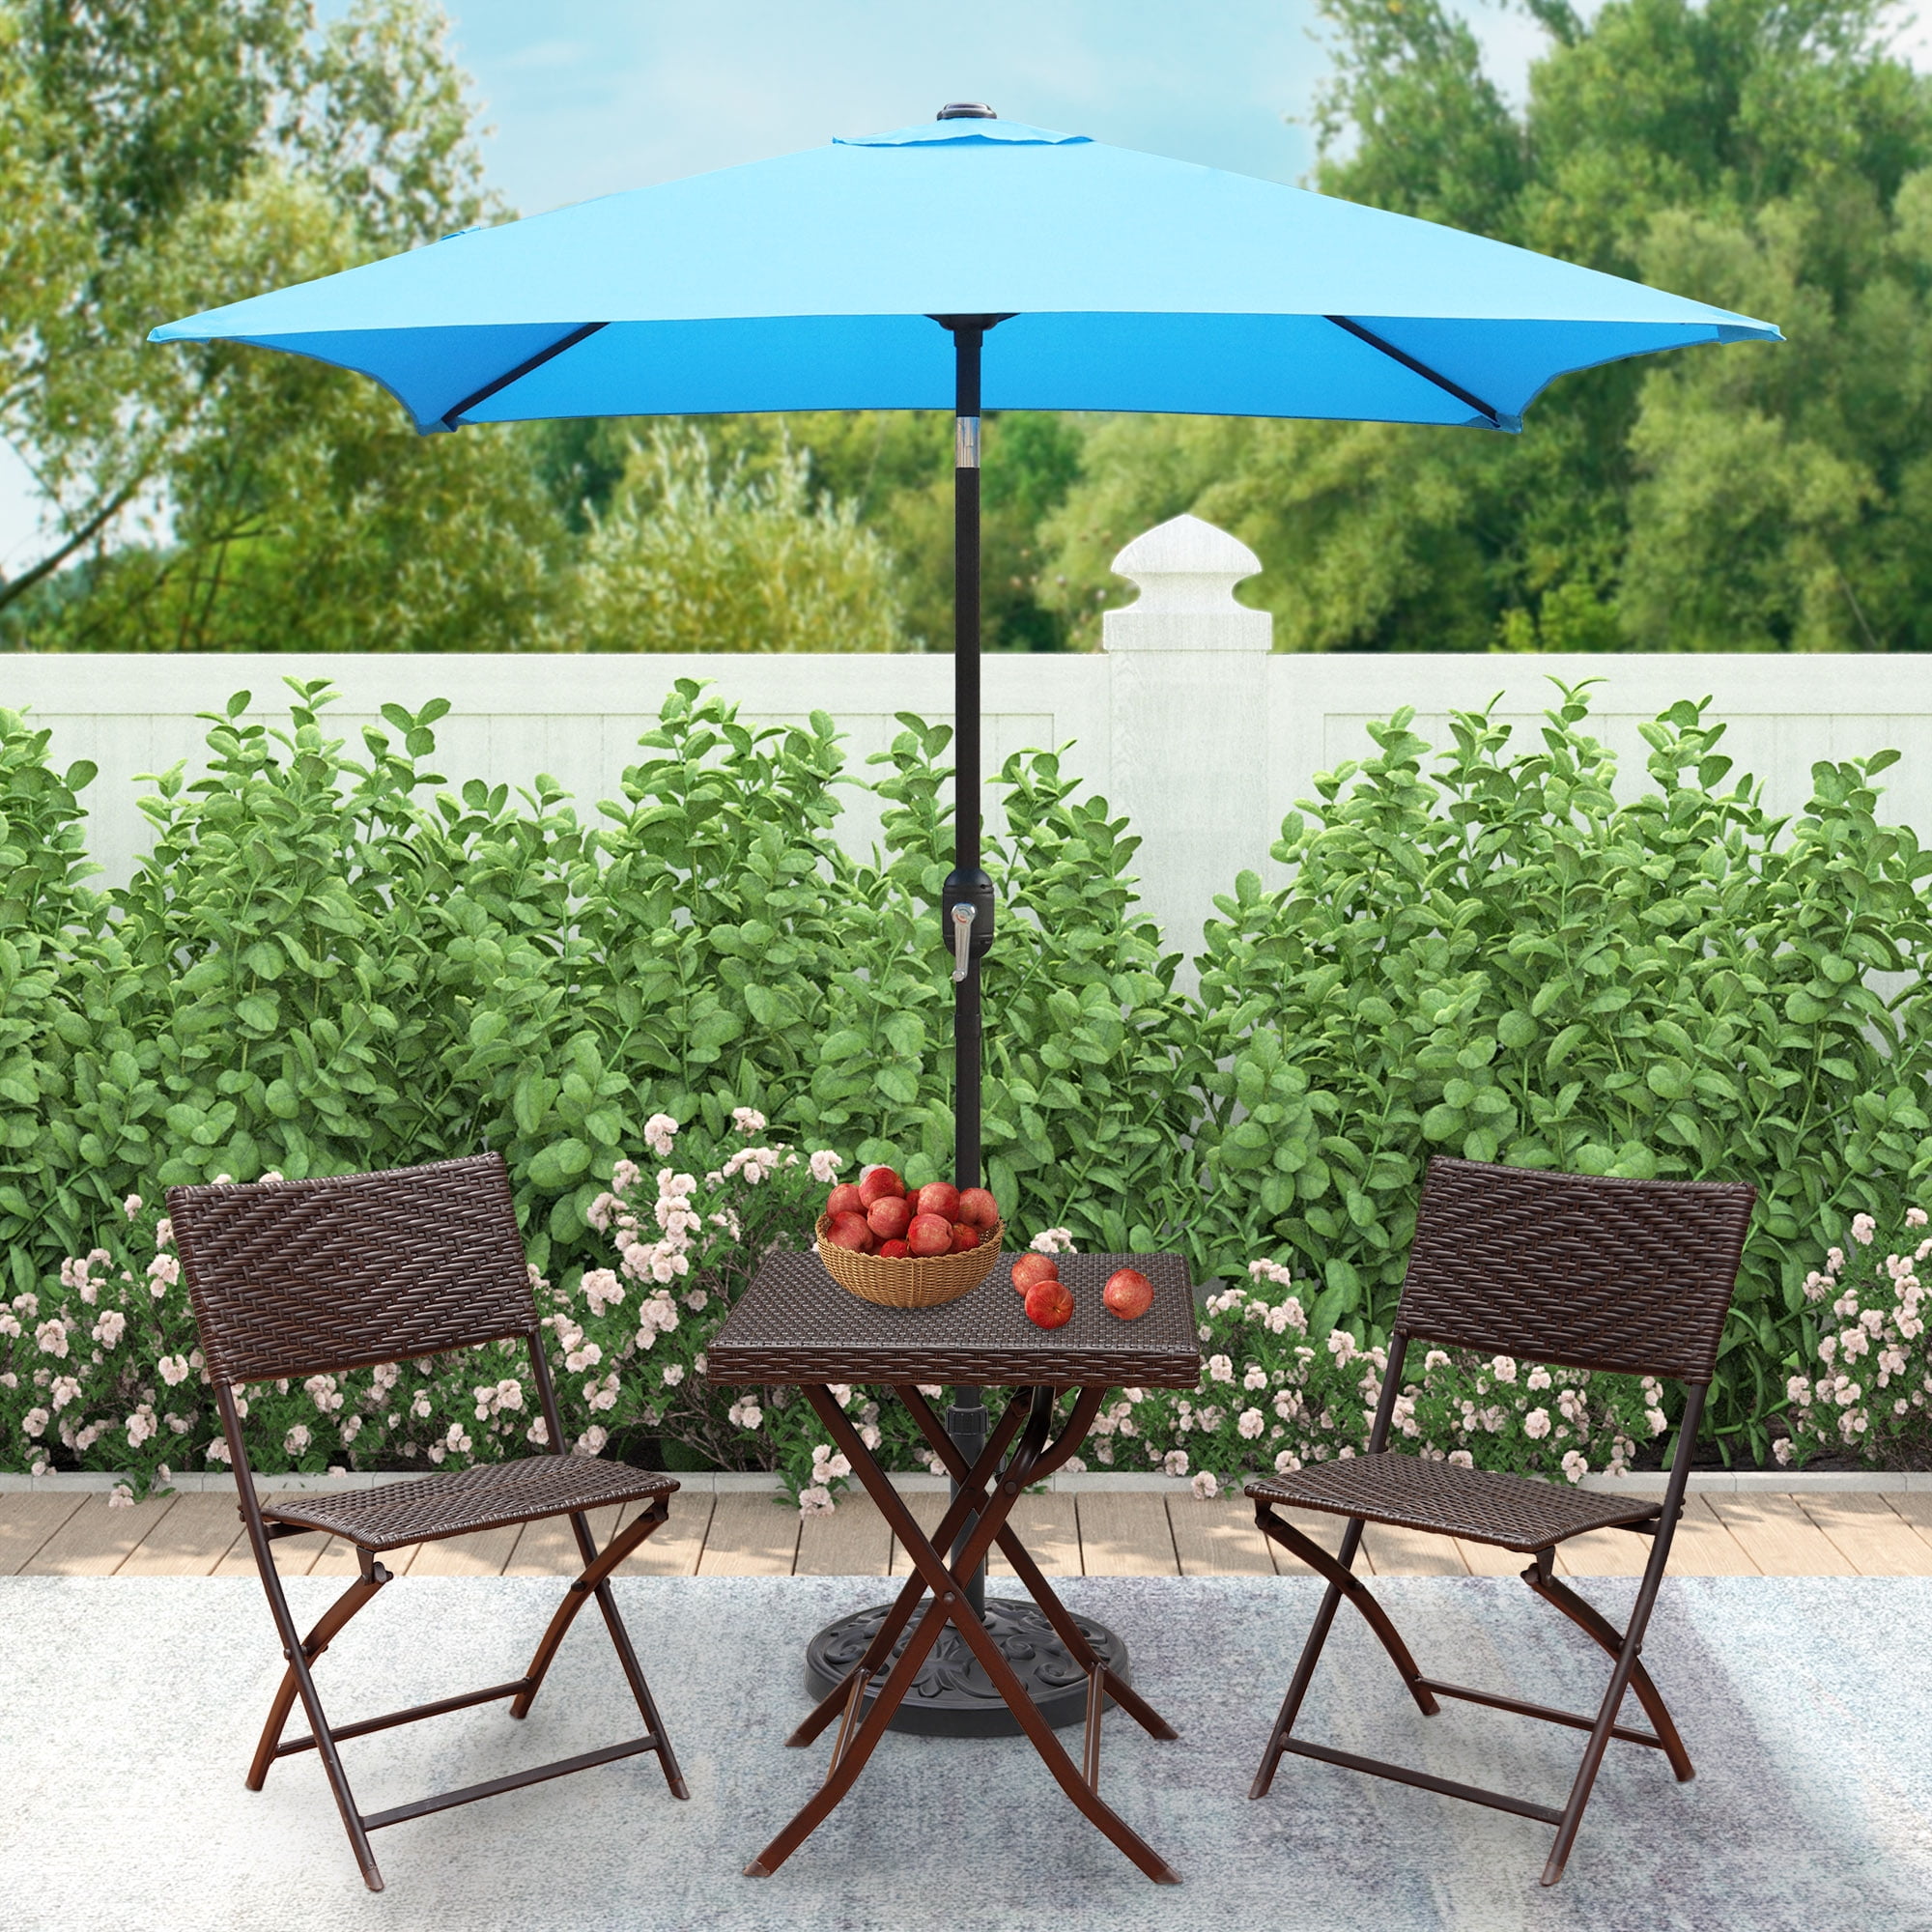
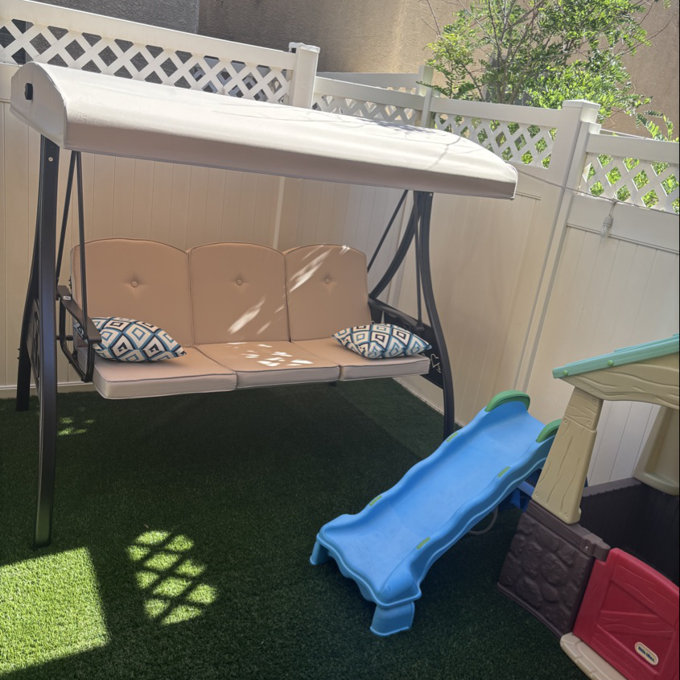
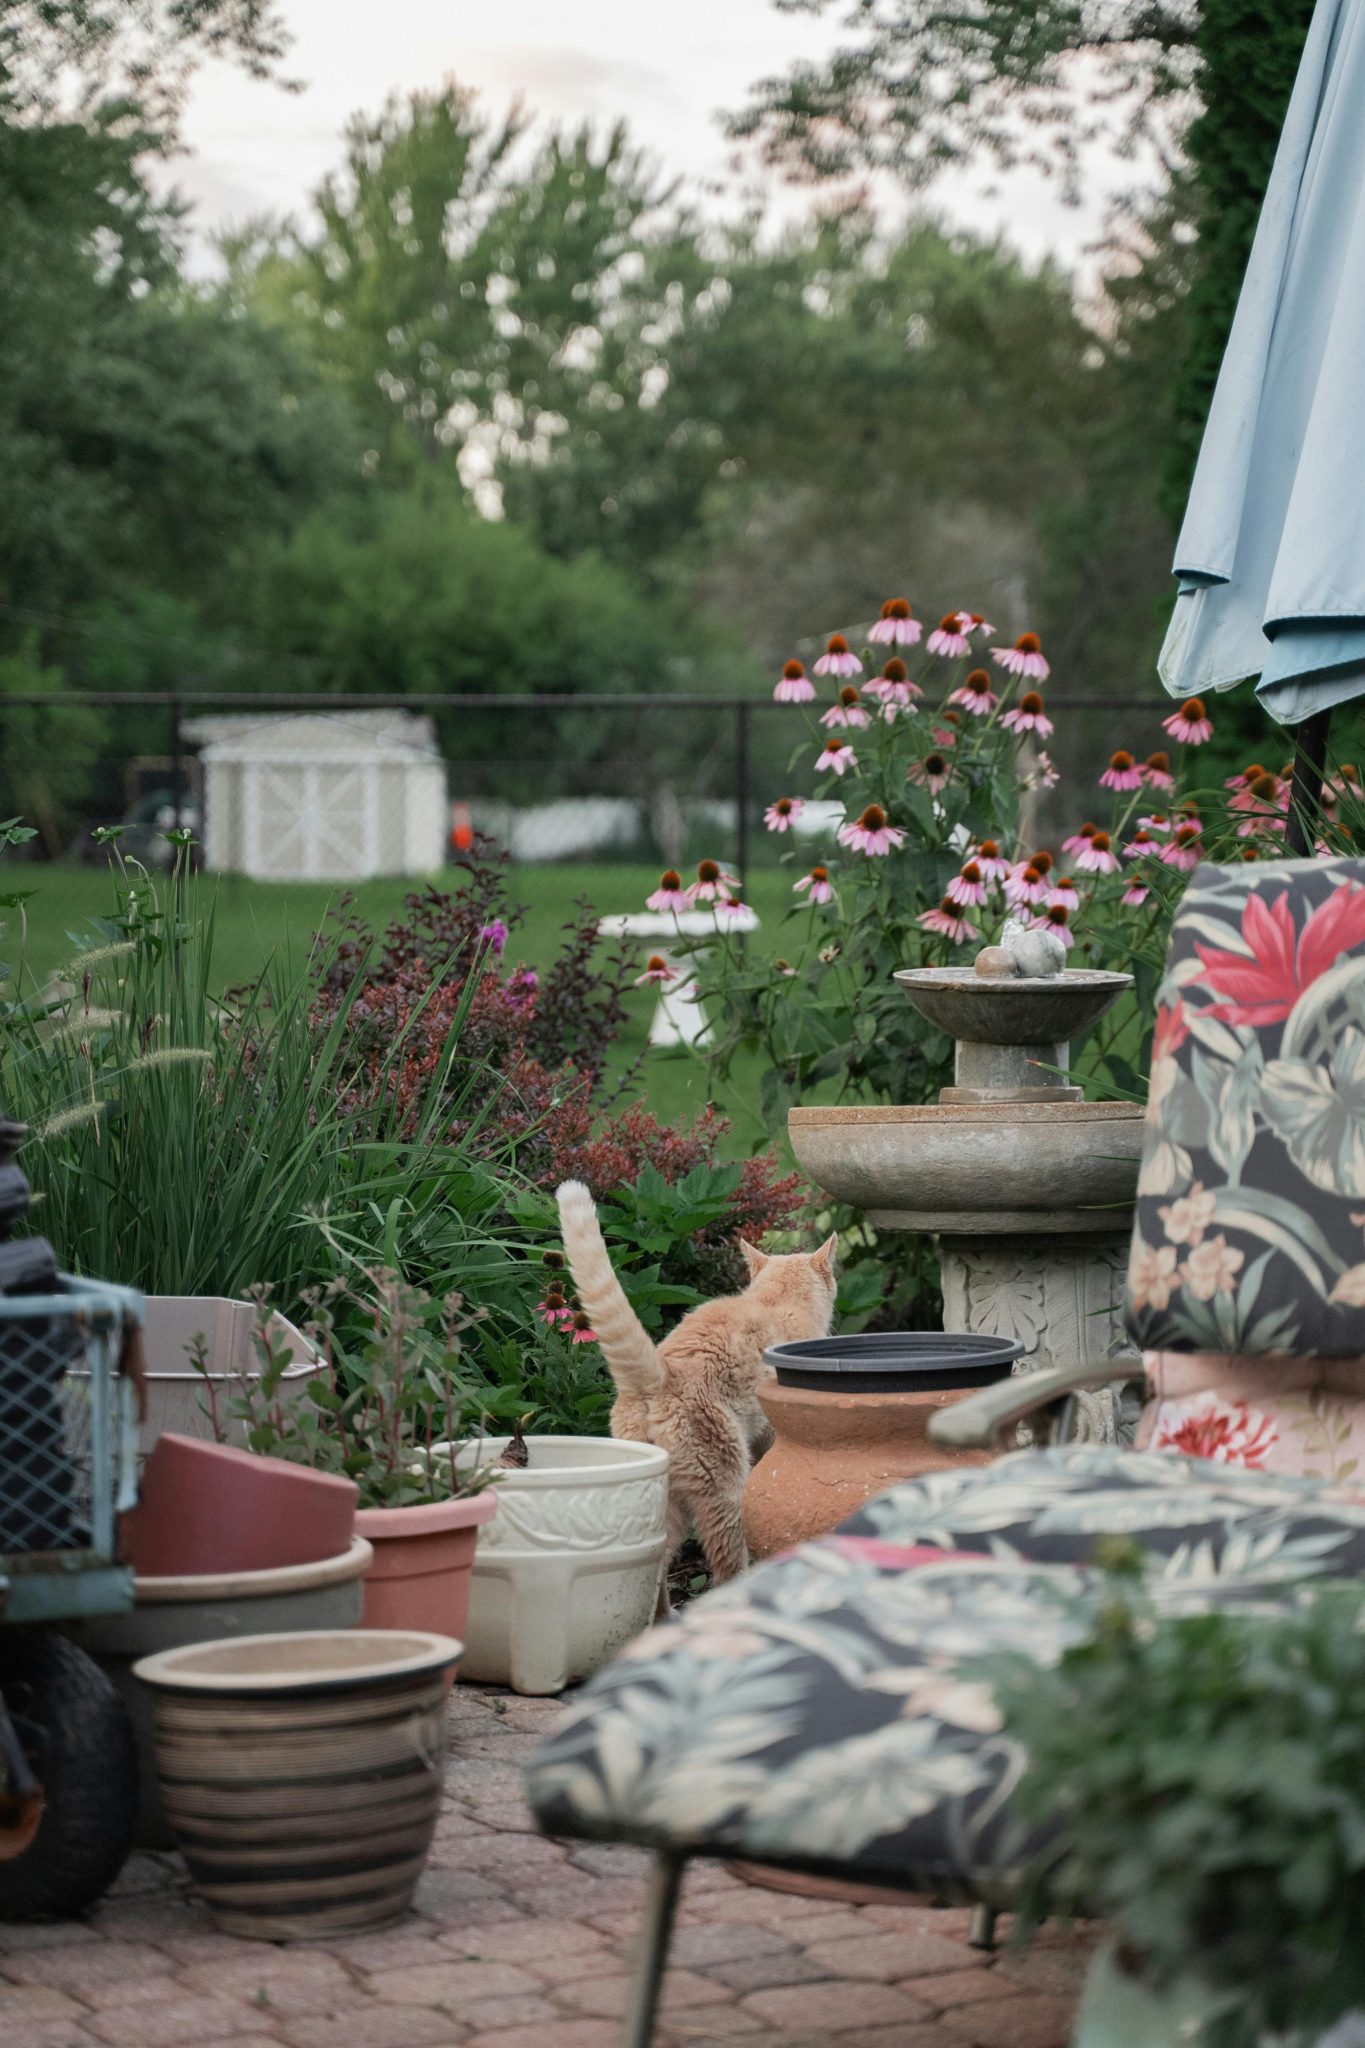
22. Create a Cozy Patio with a Fountain and Floral Chair
Designer Tip
|
$28.00
|
$334.99
|
$74.00
|
$160.59
|


💡 Designer Tip
The gentle sound of trickling water from a fountain can completely transform the atmosphere of a patio, masking neighborhood noise and creating a tranquil vibe. For maximum effect, place the fountain near your seating area, as seen here. The concrete fountain with river stones adds a lovely textural element, and the moving water is also a welcome hydration station for visiting birds and butterflies.
Scale Guide
This cozy setup is perfect for a small patio or a specific corner of a larger one, requiring a space of about 6×6 feet. The key is the density of the elements. By grouping the chair, fountain, and numerous potted plants tightly together, you create a sense of lushness and intimacy. Spreading these same items out over a larger area would dilute their impact.
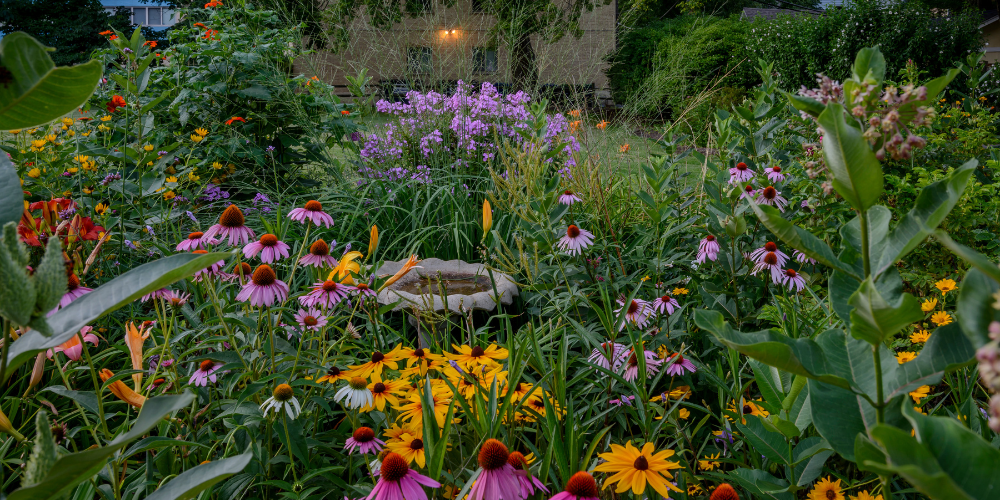
23. Plant a Dense Mix of Echinacea, Rudbeckia, and Verbena
What Makes It Work
|
📋 Copy HEX 🔗 Share |
|
$159.99
|
🔥 Trending Context
This garden is so successful because it uses plants with similar shapes but different colors. The prominent Echinacea (purple-pink) and Rudbeckia (yellow) both have a classic cone-and-petal shape, creating a pleasing repetition. The fine, clustered texture of the purple verbena and the wispy tall grasses provide a contrasting form that prevents the design from feeling too uniform. It’s a beautifully balanced composition.
Real Talk
A densely packed garden like this can be a hothouse for competition. Dominant plants can quickly crowd out more delicate ones. Be prepared to do some editing. Every year or two, you may need to divide overly enthusiastic perennials or remove volunteers that sprout in the wrong place. This isn’t a failure; it’s just what active gardening looks like!
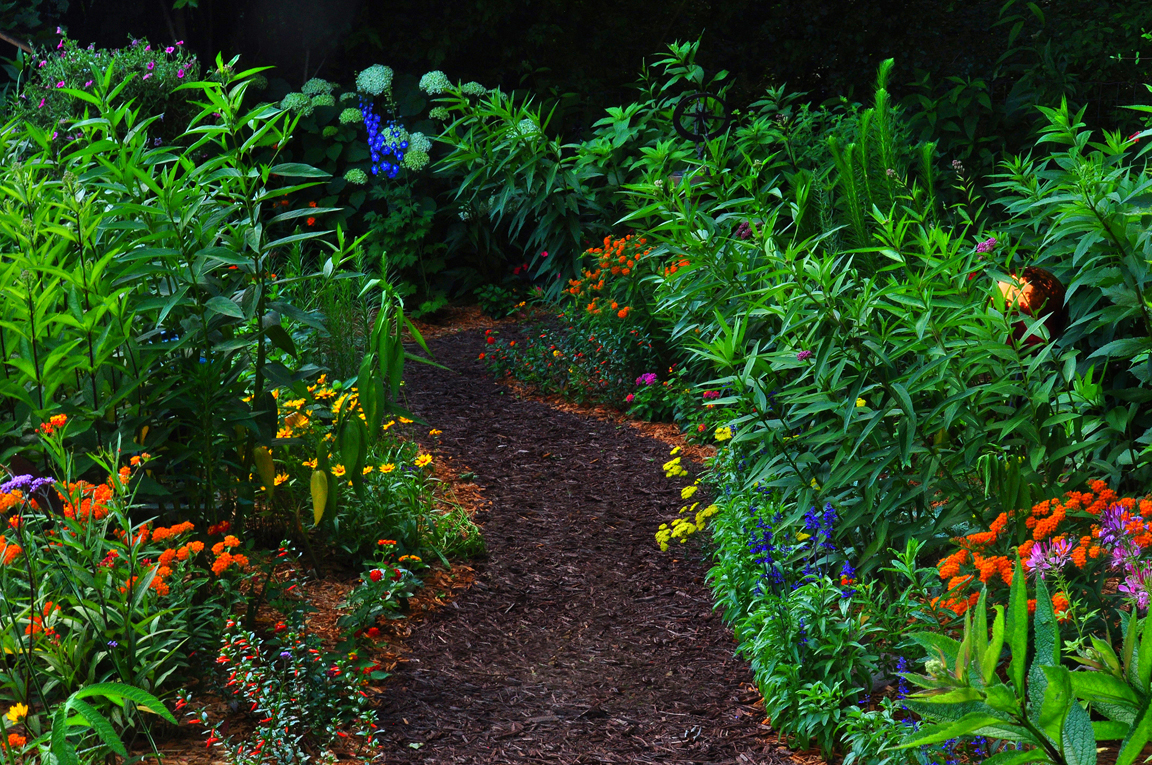
24. Let an Earthy Path Disappear into an Abundant Flower Garden
The One Thing
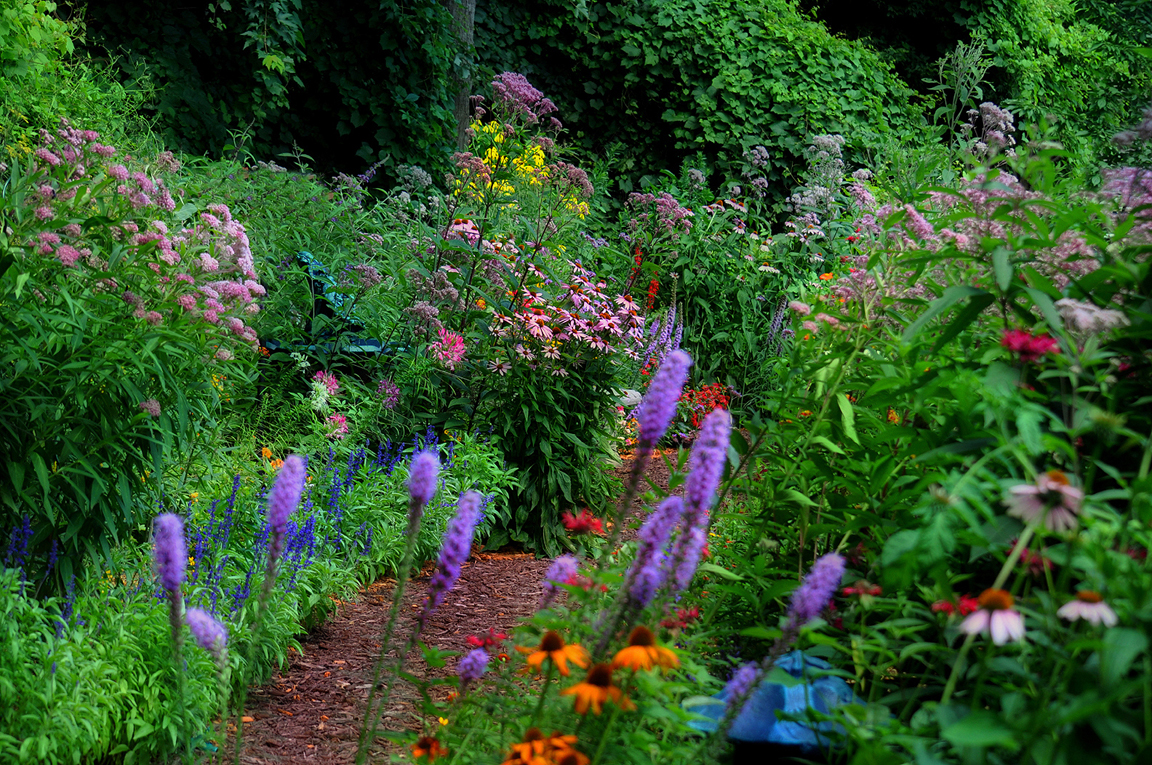
🎯 What Makes It Work
The narrow, informal dirt path is the key to the whole vibe. A wider, more structured path made of pavers or gravel would feel too formal. This simple, earthy path suggests a casual, personal trail that has been worn through the garden over time. It’s inviting and unpretentious, making the wild abundance of the flowers feel more accessible. It has a similar, but even more rustic, feel to the winding path in Idea #5.
Style Math
This is all about letting the plants dominate. The formula is 90% lush, multi-colored plantings + 10% simple pathway. By minimizing the hardscaping, the focus remains entirely on the texture, color, and form of the flowers and foliage. The burnt orange and deep purple coneflowers against the backdrop of deep green create a rich, jewel-toned palette that feels luxurious and natural.
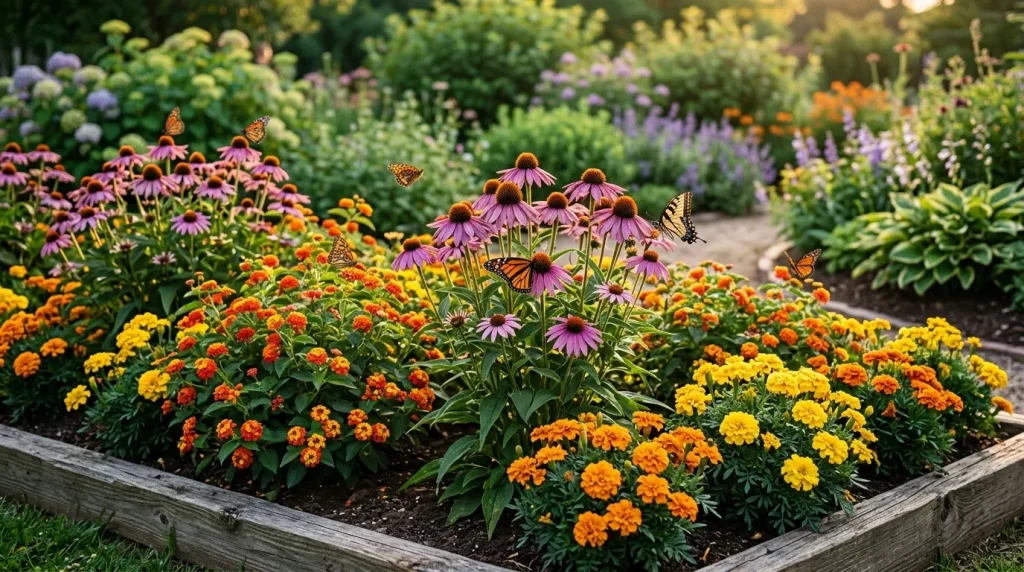
25. Pack a Raised Bed with Coneflowers and Warm-Toned Blooms
Designer Tip
|
📋 Copy HEX 🔗 Share |
|
$118.99
|
$2.97
|


💰 Budget Breakdown
When planting a raised bed for butterflies, think in color blocks. Instead of dotting individual plants around, plant in dense drifts or clusters of 3 to 5 of the same plant. The large patch of purple coneflowers and the adjacent mass of orange lantana are much more visible and attractive to butterflies than single specimens would be. This is how you create a true butterfly beacon. This concept is similar to what’s seen in Idea #10, but with a more intense color focus.
Maintenance Reality
Raised beds dry out faster than in-ground gardens. In the heat of summer, especially with this many plants packed in, you will likely need to water deeply every 1-2 days. Consider running a soaker hose or drip irrigation line through the bed before planting to make watering easier and more efficient. It saves water and keeps the foliage dry, which helps prevent disease.
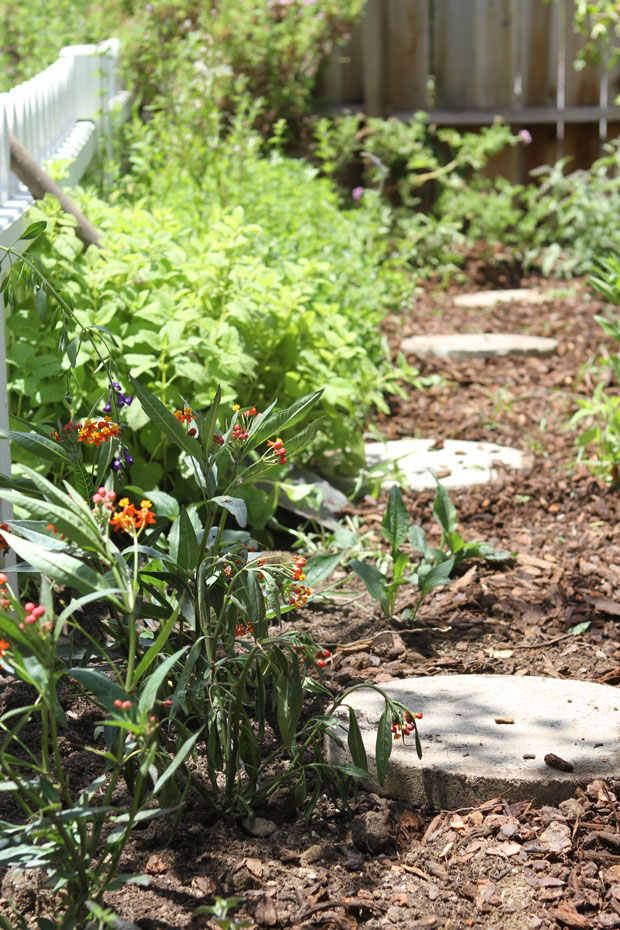
26. Lay Concrete Stepping Stones Through a Mulched Bed
Get This Look For Less
|
$19.99
|
$6.99
|
$3.67
|
$5.29
|


📐 Style Math
This is a fantastic, budget-friendly alternative to a solid patio or expensive flagstone path. A bag of concrete mix from a store like Home Depot or Lowe’s is under $10 and can make several pavers. You can buy molds or just form them by hand for a more organic shape. Wood chips are often available for free from local arborists or municipalities, making this a very low-cost and high-impact weekend project.
What Makes It Work
The visual success here comes from the high contrast between the materials. The light gray, smooth concrete pavers stand out sharply against the dark brown, textured wood chips. This clear definition makes the path easy to read visually and gives it a clean, modern feel, even in an informal garden setting. The white picket fence reinforces this clean, crisp aesthetic.
27. Define a Curved Path with Dark Brown Mulch
Real Talk
|
📋 Copy HEX 🔗 Share |
|
$1.96
|
$41.99
|

📏 Scale Guide
Mulch paths are great, but they aren’t permanent. Organic mulches, like the dark brown wood chips seen here, will decompose over time and need to be topped off every 1-2 years to maintain their depth and color. They can also get kicked around and spread into the garden beds, requiring occasional raking to keep the edges looking clean and defined. It’s a trade-off for an inexpensive and natural-looking path.
Scale Guide
For a comfortable walking path, aim for a width of at least 3 feet. This allows a single person to walk without brushing against the plants. The curve of the path should be gentle and sweeping, not tight and zig-zagging. A good way to plan it is to lay out a garden hose on the ground and adjust it until you get a curve that feels natural and easy to follow.
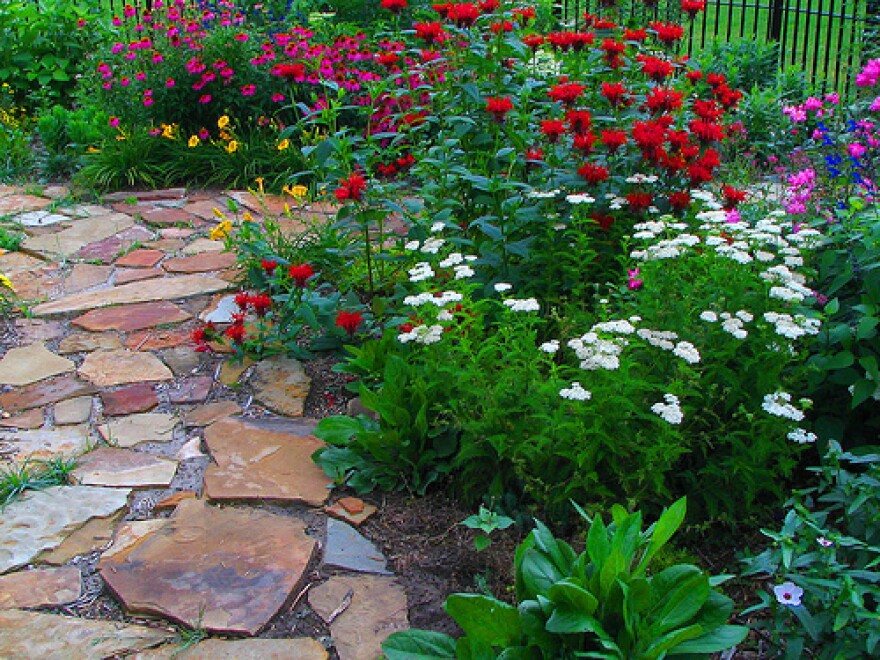
28. Combine Flagstones and a Black Metal Fence in a Flower Border
Style Math
|
$285.71
|
$8.05
|
$27.95
|


✅ Before You Start
This garden follows a classic formula: 60% green foliage (the foundation) + 30% colorful blooms (the ‘wow’ factor) + 10% hardscape (path and fence). The hardscape percentage is small but mighty; the dark flagstones and black fence provide essential structure and a neutral frame that makes the red bee balm and pink coneflowers appear even more vibrant. This is a more formal structure than the simple path in Idea #5.
Designer Tip
When using irregular flagstones, the gaps are just as important as the stones themselves. Here, they’ve been filled with soil and allowed to grow moss or small groundcover, which softens the look and integrates the path into the garden bed. For an even more intentional look, you can plant a specific, durable groundcover like creeping thyme or Dymondia between the stones for a walkable, green mortar.
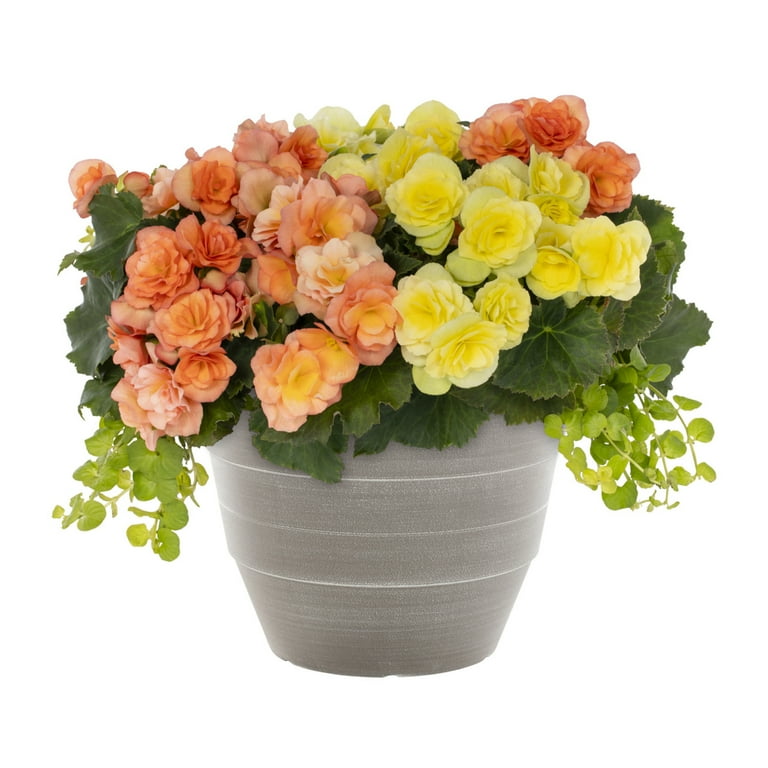
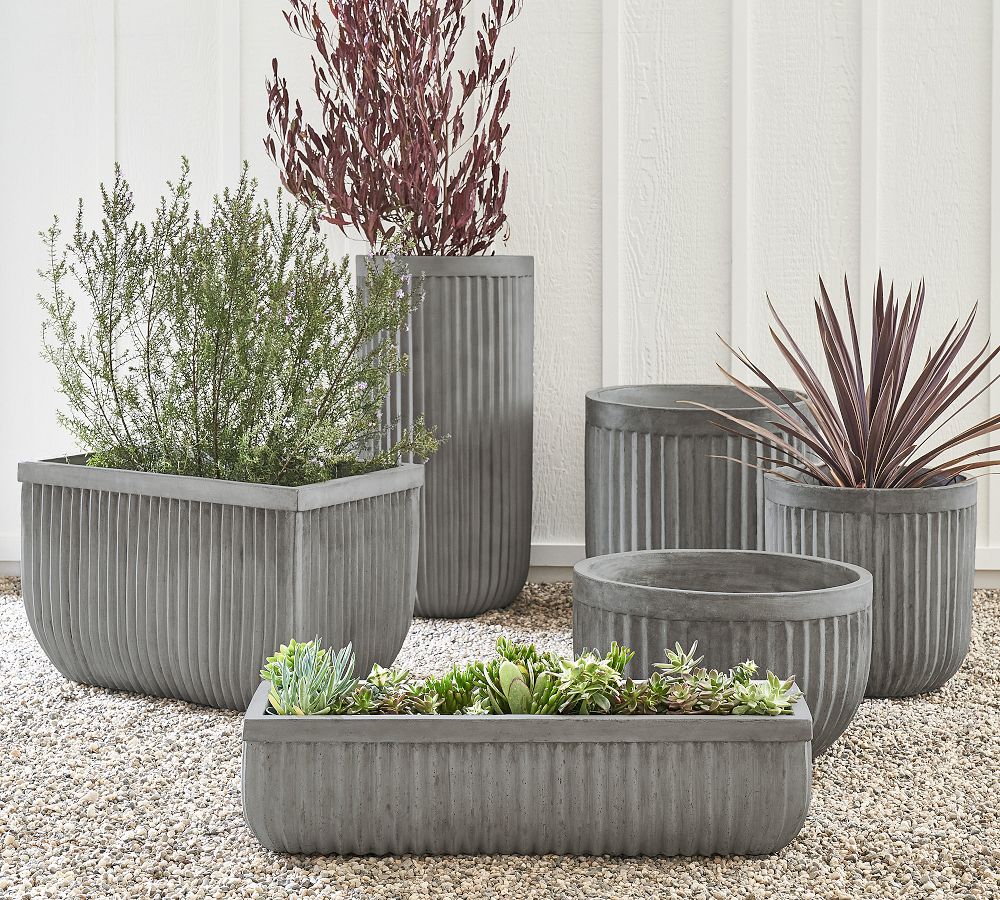
29. Create a ‘Thriller, Filler, Spiller’ Container Garden
The One Thing
|
📋 Copy HEX 🔗 Share |
|
$46.99
|
$12.00
|
$9.99
|
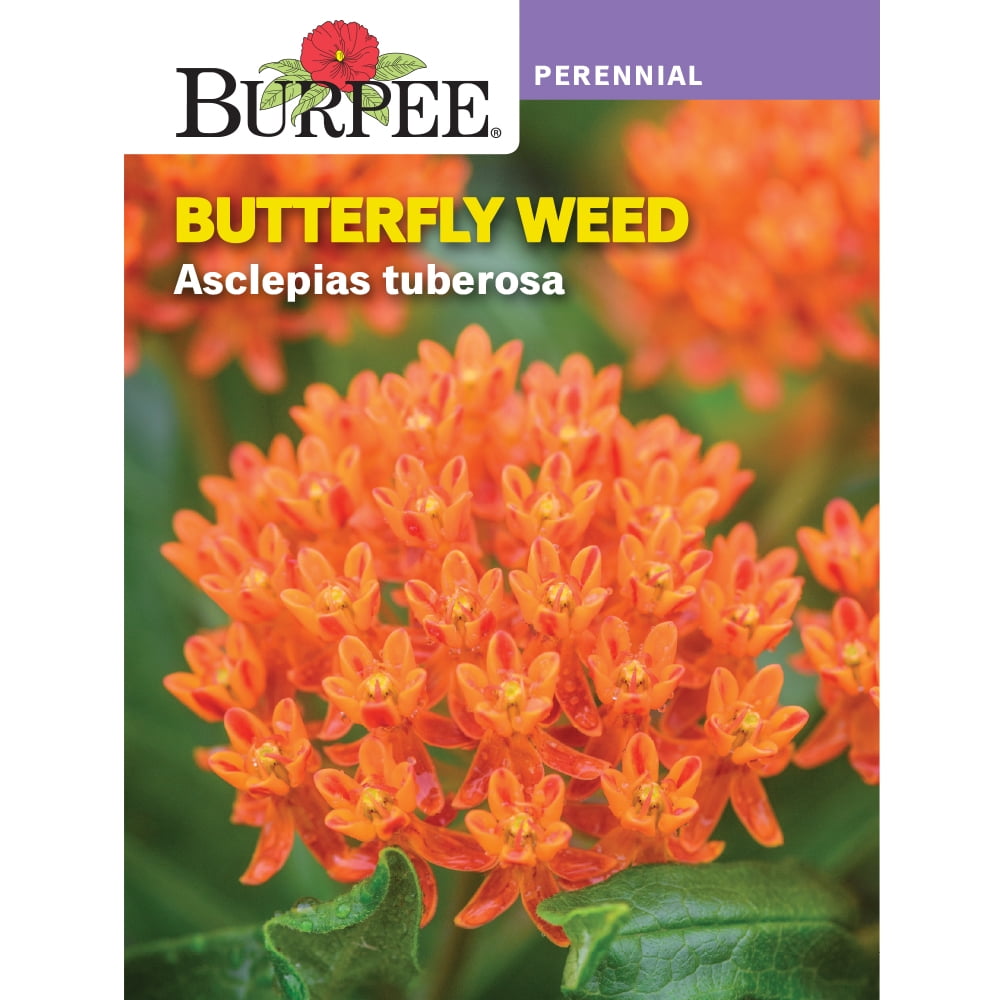
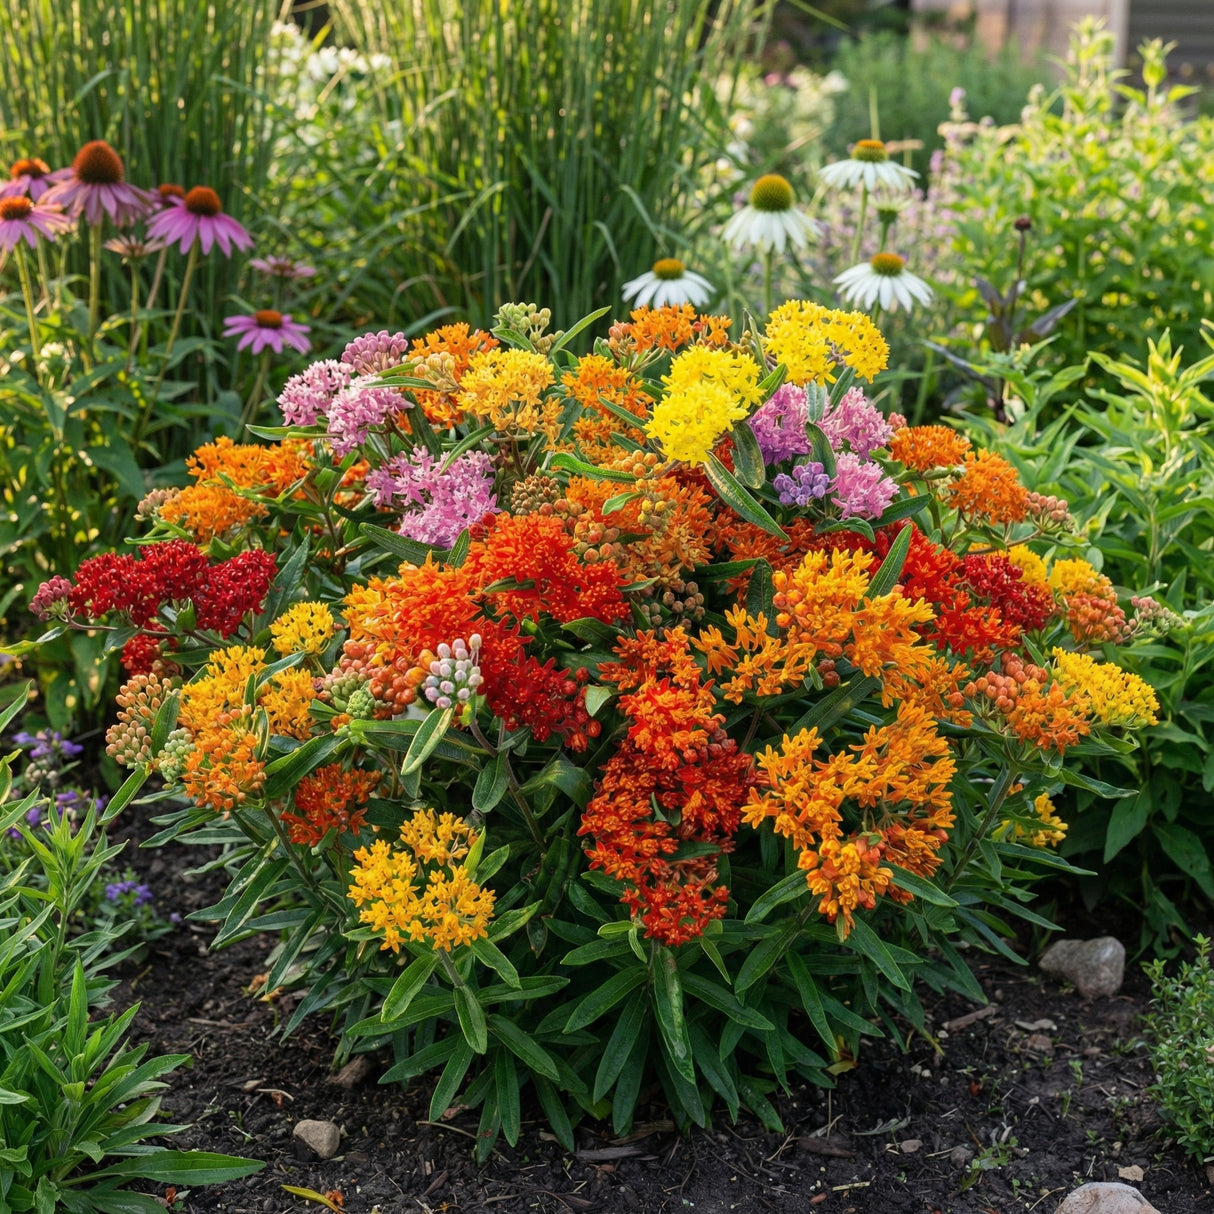
30. Mass Plant Milkweed for a Riot of Color
What Makes It Work
|
$17.49
|
$48.76
|
$17.95
|
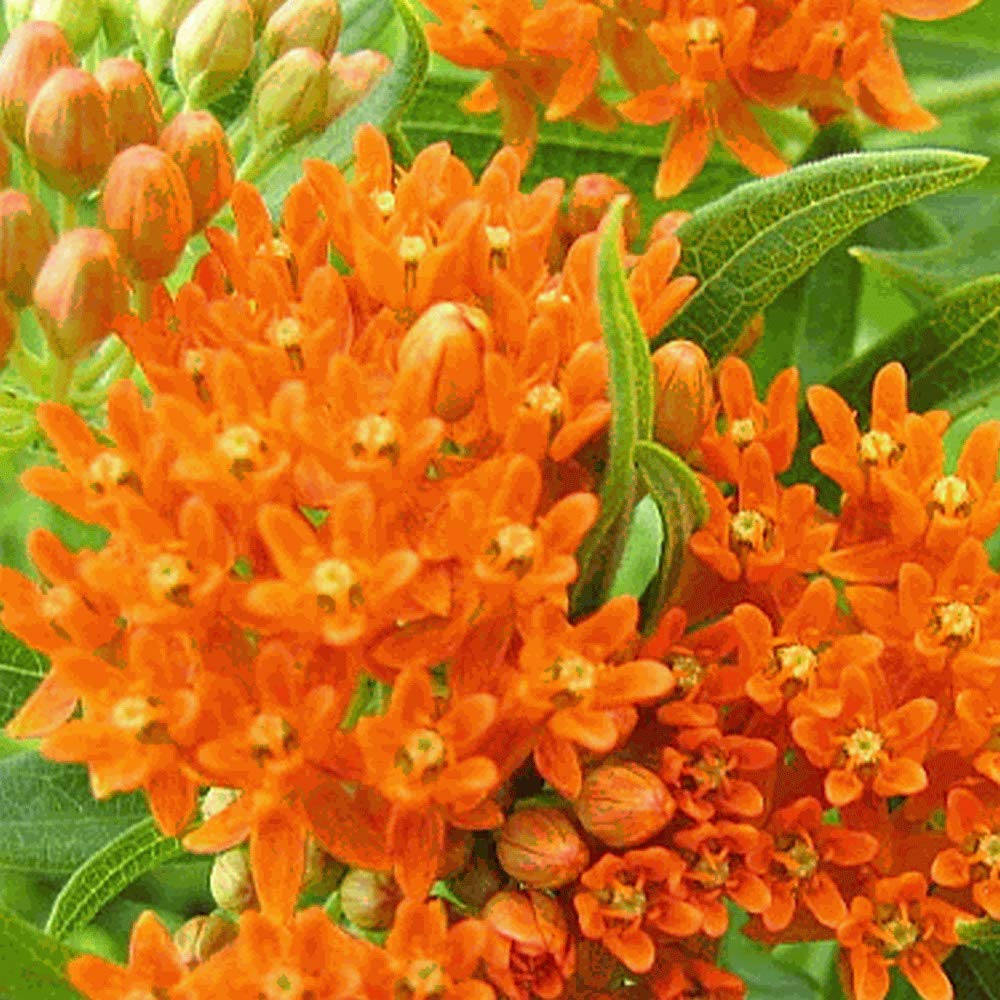


⚠️ Real Talk
This design is effective because it throws the rules out the window and commits to one spectacular plant family. The sheer volume of milkweed flowers in a kaleidoscope of red, orange, yellow, and pink creates an overwhelming and joyful visual impact. The repetition of the same flower structure in different colors provides unity, while the color variation provides excitement. It proves that sometimes, more is more. This is a great way to attract specific butterflies, like the Monarchs seen in Idea #4.
Trending Context
Planting milkweed has become a powerful act of ecological restoration in miniature. As the sole host plant for monarch butterfly caterpillars, awareness of its importance has skyrocketed. Home gardeners are now actively seeking out native milkweed species not just for their beauty, but for their crucial role in supporting endangered monarch populations. This isn’t just a trend; it’s a movement.
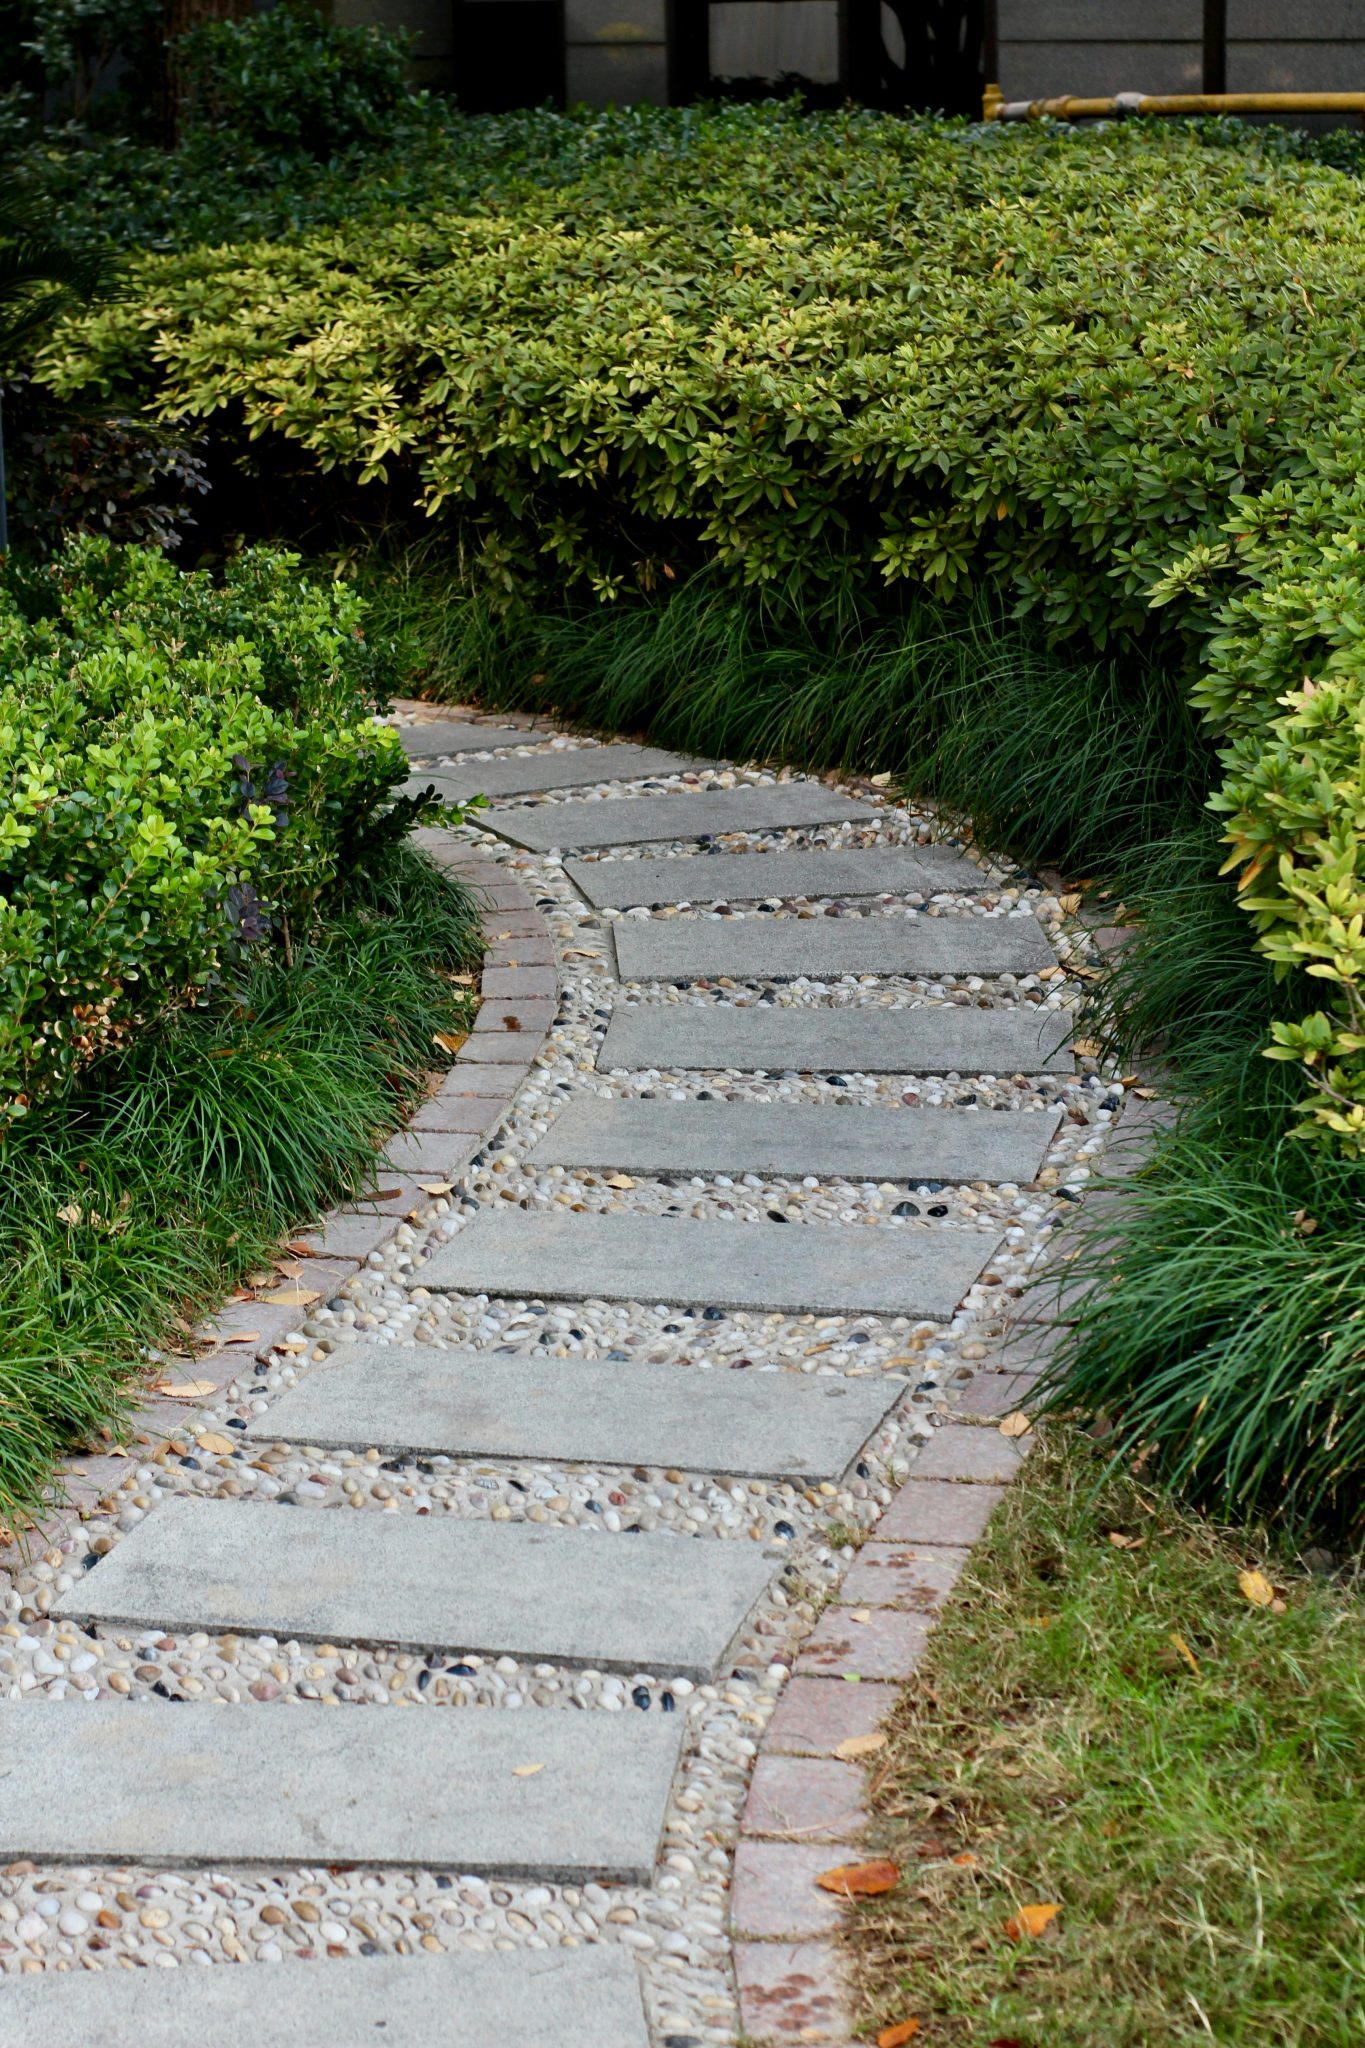
31. Alternate Modern Stepping Stones with Pebble Inlays
Scale Guide
|
📋 Copy HEX 🔗 Share |
|
$29.99
|
$4.48
|
$58.30
|
$6.97
|


🔧 How-To Brief
This path design is perfect for a narrow side yard or as a main walkway through a contemporary garden. The stepping stones are wide (likely 18-24 inches), creating a generous surface. The overall width, including the pebble borders, is probably around 4 feet. This substantial scale gives it a sophisticated presence and prevents it from looking flimsy or lost in the lush green landscape.
Designer Tip
When creating a path with pavers and pebbles, containment is everything. The red brick pavers used here as an edging are absolutely critical. They keep the small pebbles from migrating into the grass and garden beds, which would create a maintenance nightmare. Always install a sturdy border—be it brick, metal, or stone—to keep your materials separate and your lines crisp.
Your Garden’s Butterfly Era Begins Now
With so many different paths to a beautiful butterfly garden, the most important step is simply to start. Whether you build a single container garden or dedicate a whole corner of your yard, you’re creating a vital habitat that’s as beautiful for you as it is for the butterflies. Pick your favorite idea and make it your own. Happy planting!
Did you find your perfect inspiration? Pin your favorite ideas to your Pinterest board to keep them handy for when you’re ready to break ground!
Photo credits: Khazzam Landscape Design, AKOYA BEACH VILLA, Planted Well, The Spruce, Sponzilli Landscape Group, Love Your Landscape, LawnStarter, Fine Gardening, Eat • Drink • Garden, Nature Hills Nursery, Irene.life, Stacy Ling, American Meadows, Wildlife Botanical Gardens, Marfa Public Radio, Country Living Magazine, ArchDaily, Katharine Pooley, Garden Gate Magazine, Grow Gardenly, Mahoney’s Garden Center / Web, Taylor Thompson, Anderson Wei, Thanh Truc Ho, Flowers iso, Neville Hawkins, Ochi Ojie, madhav khanna / Pexels
Photo credits: Khazzam Landscape Design, AKOYA BEACH VILLA, Planted Well, The Spruce, Sponzilli Landscape Group, Love Your Landscape, LawnStarter, Fine Gardening, Eat • Drink • Garden, Nature Hills Nursery, Irene.life, Stacy Ling, American Meadows, Wildlife Botanical Gardens, Marfa Public Radio, Country Living Magazine, ArchDaily, Katharine Pooley, Garden Gate Magazine, Grow Gardenly, Mahoney’s Garden Center / Web, Taylor Thompson, Anderson Wei, Thanh Truc Ho, Flowers iso, Neville Hawkins, Ochi Ojie, madhav khanna / Pexels