28+ Stunning DIY Christmas Yard Decorations That Will Make Your Home Sparkle in 2026

You know that feeling when you finally find the christmas yard setup that looks exactly right for your space — and then realize you have zero idea how to recreate it without spending a fortune? We spent serious time browsing Home Depot, Lowe’s, Target, and Amazon to bring you only what’s worth your attention this year, from $12 wooden cutouts to $350 illuminated displays. Inside, you’ll find 28 curated ideas spanning rustic farmhouse, traditional Americana, whimsical character cutouts, and glowing LED structures. In 2026, the shift is toward handmade, weather-resistant pieces that look good up close and from the street — no more flimsy plastic that fades by New Year’s. Pin this guide for later — your future self will thank you when it’s time to actually do this. 📌 Save this to Pinterest for later — you’ll want to revisit these ideas.
1. Pyrography Snowflake Wood Slices With Red Metal Lanterns
Before you burn snowflakes into wood slices, sand the surface to at least 220 grit and trace your pattern with a graphite transfer paper. Use a pyrography pen with a ball tip at medium heat — about 500°F — for clean, even line work. A walnut or mahogany stain after burning makes the natural grain richer against red accents. Seal with spar urethane rated for outdoor use; otherwise the burned lines will fade after one rainy season.
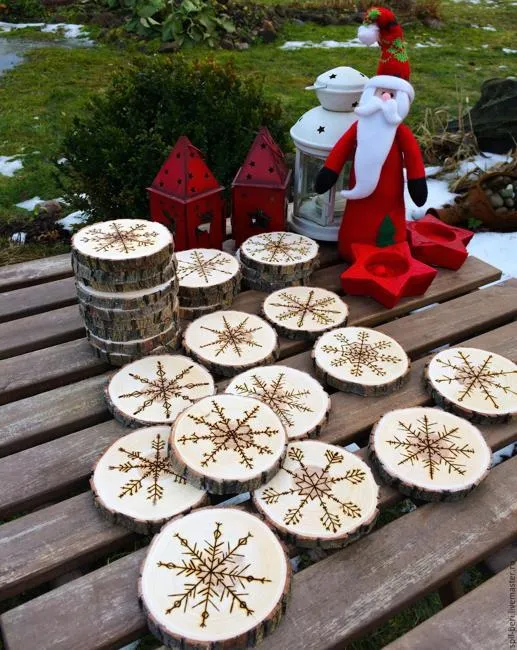
- Wood slices (pack of 12, 8–10″ diameter): $20–$35
- Pyrography pen kit: $25–$50
- Spar urethane outdoor sealer: $12–$20
- Plush Santa figure and red metal lanterns: $15–$40 each
- Total: $100–$210 for a full porch vignette
- Budget alternative: Use adhesive vinyl snowflake decals on unfinished slices from Hobby Lobby — $30 all-in.
The single element holding this look together is the contrast between raw wood and bright red metal lanterns. Remove the red lanterns and you’re left with craft-fair coasters. The red star-shaped candle holders and house-shaped lanterns give the display a traditional holiday anchor. Keep the wood natural and the red saturated — that’s the whole magic.
2. Peanuts Nativity Scene Cutouts Against a White Garage Door
The white ribbed garage door acts as a neutral gallery wall, which is why these flat painted cutouts read so clearly from the curb. The white snow on the ground creates a second horizontal line that visually ties the row together. Repetition of similar heights — angel, shepherds, stable — gives the display rhythm without feeling cluttered. The sky blue and forest green costume colors pop against all that white, so even from a distance you can tell it’s the Peanuts gang.
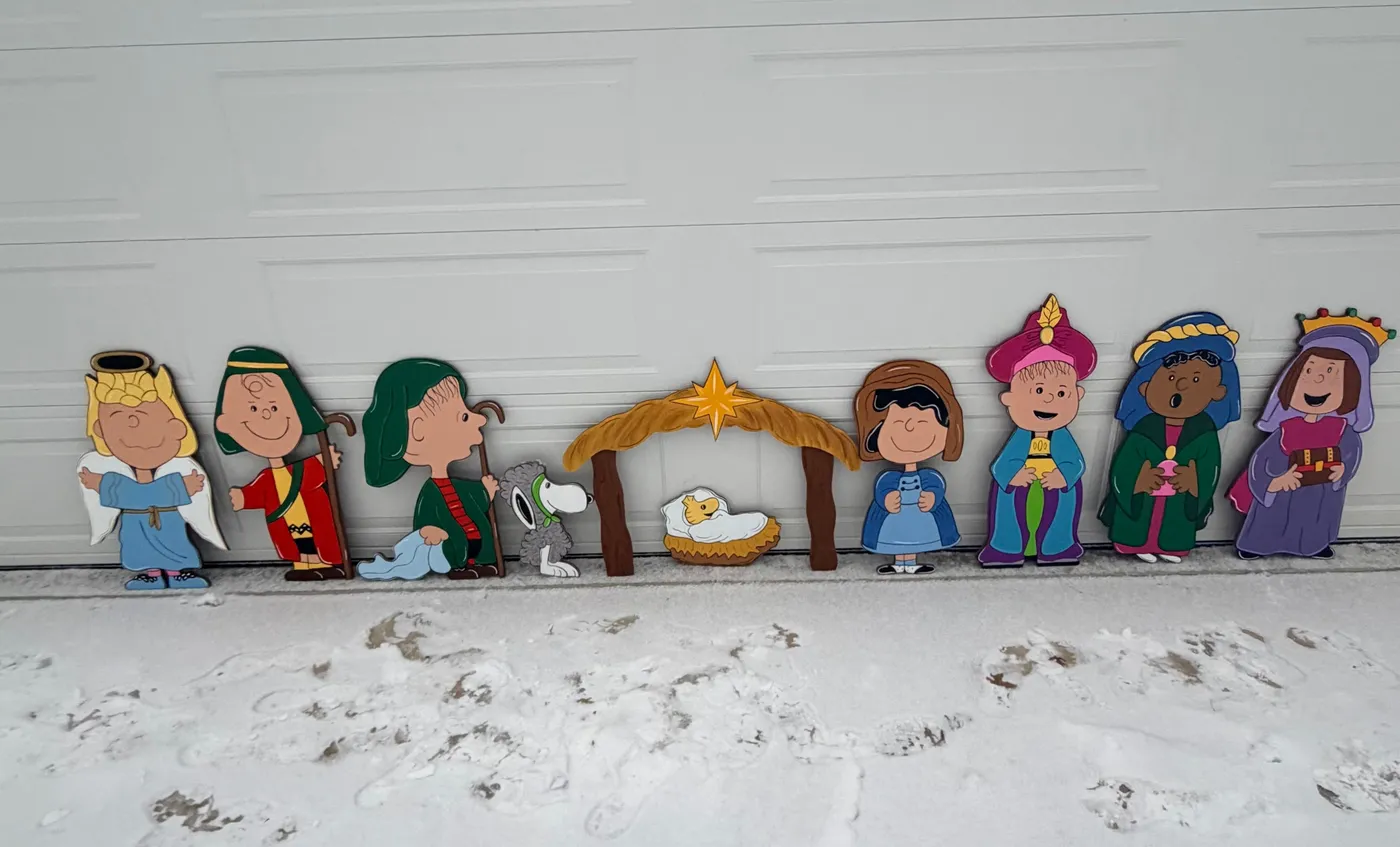
You don’t need to order custom wooden cutouts to get this nostalgic nativity moment. Trace Peanuts character outlines from a projector onto 1/2-inch plywood, cut with a jigsaw, and paint with exterior acrylics. Total material cost runs about $55 at Home Depot. For an even faster fix, search Facebook Marketplace for retired yard art — vintage wooden Peanuts nativity sets show up every November for $40–$80. Just add a coat of marine varnish and they’ll survive several winters. For a similar flat cutout approach with a different palette, see Idea #23.
3. Nighttime Gazebo Display With Multicolored Tree Lights
In 2026, more people are shifting from stark white LED displays back to saturated multicolor string lights — the kind you remember from childhood, but cleaner. This gazebo setup leans into that trend by layering warm white garland lights with a multicolored evergreen nearby. The dark blue sky and bare branches frame the whole scene like a movie still. It’s cozy and a little nostalgic, but the wooden gazebo keeps it feeling anchored rather than chaotic.
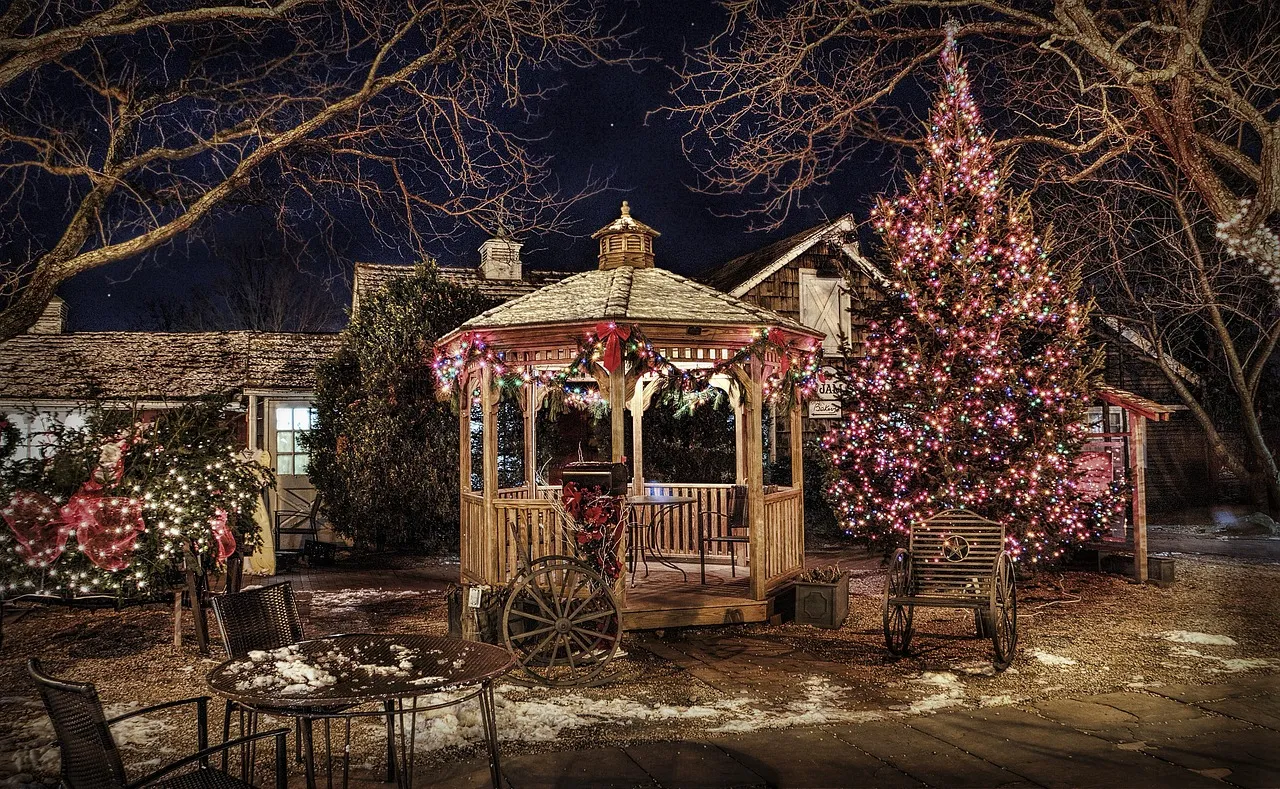
This display needs enough depth to let the eye move from the gazebo to the tree without feeling crowded. Aim for at least 400 square feet of open ground — roughly a 20 by 20 area — with the gazebo set back 10–15 feet from the main viewing angle. The tree should stand 8–12 feet tall so its lights don’t compete with the gazebo’s roofline. If your yard is smaller, skip the gazebo and use a single arbor wrapped in garland — same rhythm, half the footprint. Compare with Idea #18 for a full facade approach.
4. Dark Green Mailbox Dressed in Pine Garland and Stacked Gifts
When wrapping a mailbox, start from the bottom and work up: tuck a zip-tied layer of faux pine around the post base, then secure the garland to the mailbox lid hinge with outdoor-rated command hooks. Use warm white LED string lights with a timer so they glow from 4:30 to 10 PM without burning through batteries. Stack the gift boxes in odd numbers — three at the base, one on top — and wrap the largest in green and gold paper to echo the mailbox color. If you love the stacked gift look on a larger scale, check Idea #24.
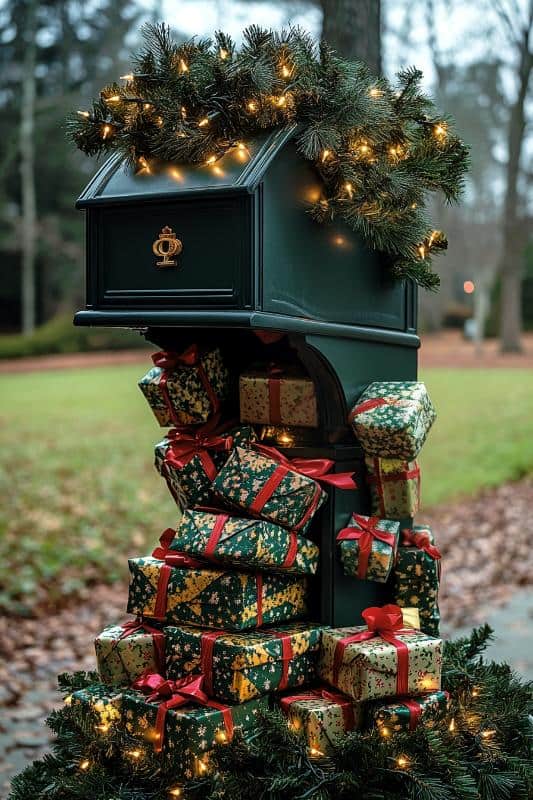
That pile of gift-wrapped boxes will turn into a soggy mess after one heavy rain unless you use weatherproof materials. Foam blocks wrapped in vinyl tablecloth fabric work better than cardboard boxes. If you live in a windy area, drill a small hole through each box and thread a metal rod down into the ground. Also, make sure the mailbox flag still moves — your mail carrier will appreciate not fighting a garland tangle every afternoon.
5. Winter White Porch With Illuminated Snowmen and Frosted Greenery
The frosted greenery garland with pinecones is the quiet hero here. It softens the stark white sofa and gives the snowman lanterns a textured stage. Without that garland, the whole porch would read as two glowing blobs on a white shelf. The pinecones introduce a natural brown-grey tone that keeps the frosted white trees from looking too staged. If you only steal one element from this idea, make it the garland.

|
📋 Copy HEX 🔗 Share |
Think of this porch as 60% white and cream base, 25% frosted green with pinecone texture, and 15% warm gold flicker from the string lights and lanterns. Swap the cream throw pillows for soft grey and the look still holds — the formula is about layering warm light against cool white surfaces. Keep the fairy lights tucked low, not draped from above, so the glow bounces off the distressed white table instead of getting lost in the siding. This is essentially the porch version of Idea #15‘s frosted gnome textures.
6. Evergreen Tree With Rustic Deer Ornaments on a Stone Patio
- Measure the diameter of your stone or paver circle — a 5–7 foot tree needs a base at least 36 inches wide.
- Check sun exposure: the burlap base will fade from dark tan to pale beige if it gets 6+ hours of direct afternoon sun.
- Confirm the tree is potted or can be staked before adding heavy ornaments; rustic deer ornaments are usually 8–12 ounces each.
- Budget at least $75 for the tree, lanterns, and woven basket if you’re starting from scratch.
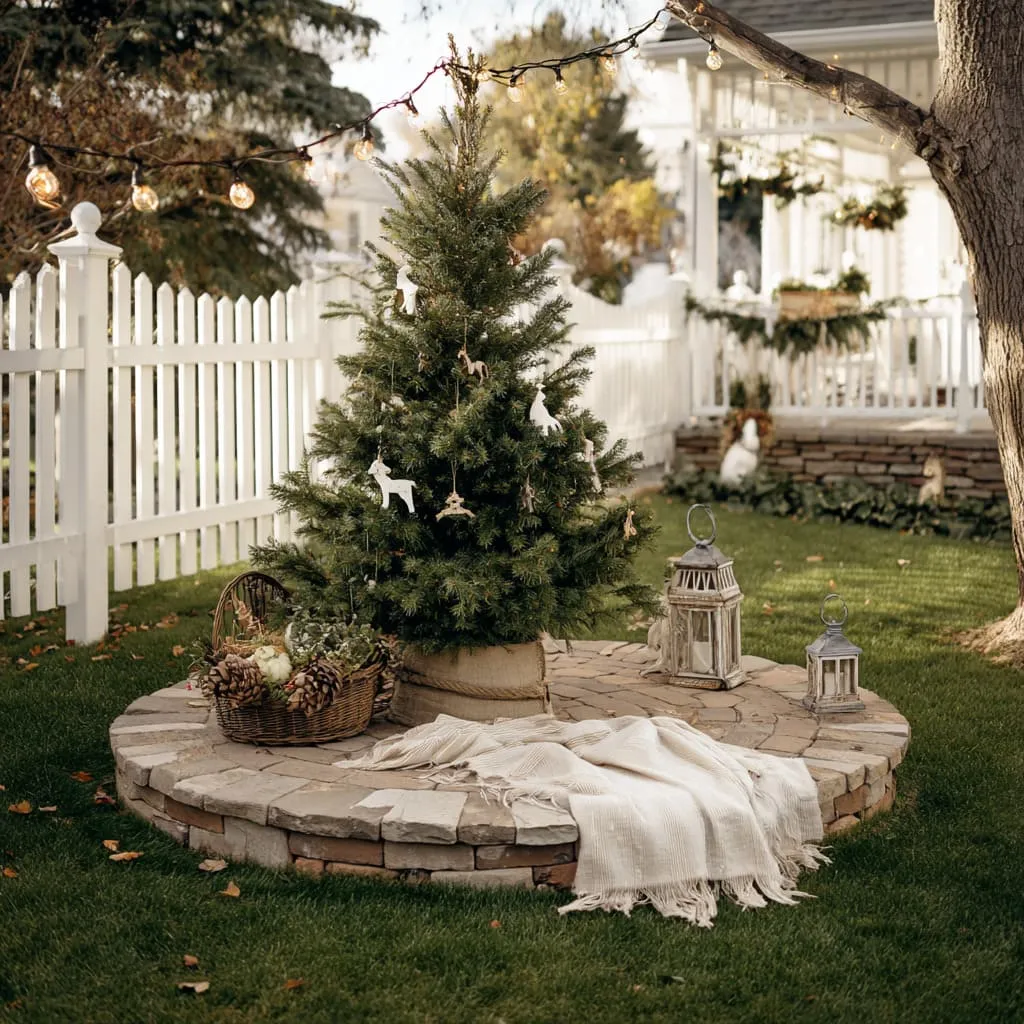
The circular raised stone patio acts as a natural frame, which is why this vignette feels so settled. The woven basket filled with pinecones, gourds, and greenery repeats the rustic texture of the burlap tree base — that repetition is what makes the styling look intentional, not accidental. The two metal lanterns on opposite sides create visual balance, while the cream fringed throw softens all that stone. It’s a masterclass in using a small patio as a stage.
7. Distressed White Wood Christmas Tree With Pinecone Garland
This distressed plank tree looks like a $300 Anthropologie piece, but you can build one with five 1×4 furring strips and a bottle of white chalk paint. Total cost at Lowe’s runs about $45 if you already have a saw. Sand the edges heavily, then dry-brush grey paint into the grain for that weathered look. The pinecone and metal ring garland is the priciest part — get a 6-foot strand from Target for $22 or make your own with hot glue and twine.
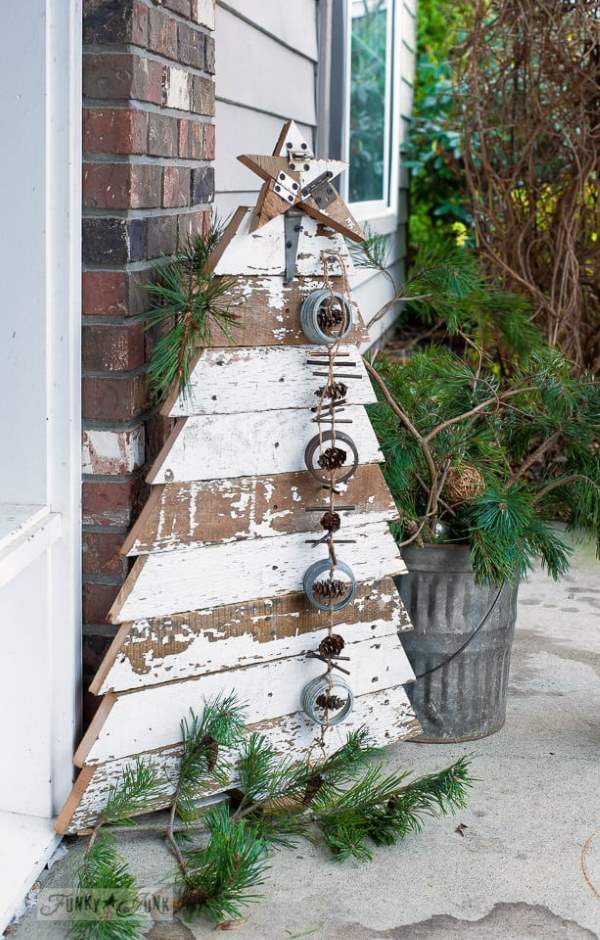
Here’s how to attach the pinecone and metal ring garland so it stays put through winter wind:
- Measure the tree’s center line from wooden star to base — typically 48–60 inches.
- Drill a small pilot hole every 8 inches along that line.
- Thread a 16-gauge wire through each hole and wrap it around the garland at matching intervals.
- Add a dab of exterior hot glue where the garland meets the wood to prevent sliding.
- Let it cure 2 hours before hanging the tree vertically.
Time: about 90 minutes. Material cost: under $10.
8. Distressed Wood Christmas Trees With Glass Lanterns on a Porch
Three distressed trees work because they vary in height — this setup needs at least 6 feet of porch width to avoid looking like a lumber rack. Place the tallest tree in the center, at least 4 feet tall, and keep the side trees between 2.5 and 3 feet. The glass lanterns should sit no more than 18 inches from the trees, creating a tight grouping. If your porch is only 4 feet wide, use one tree and two lanterns instead — same rustic mood, less visual weight.
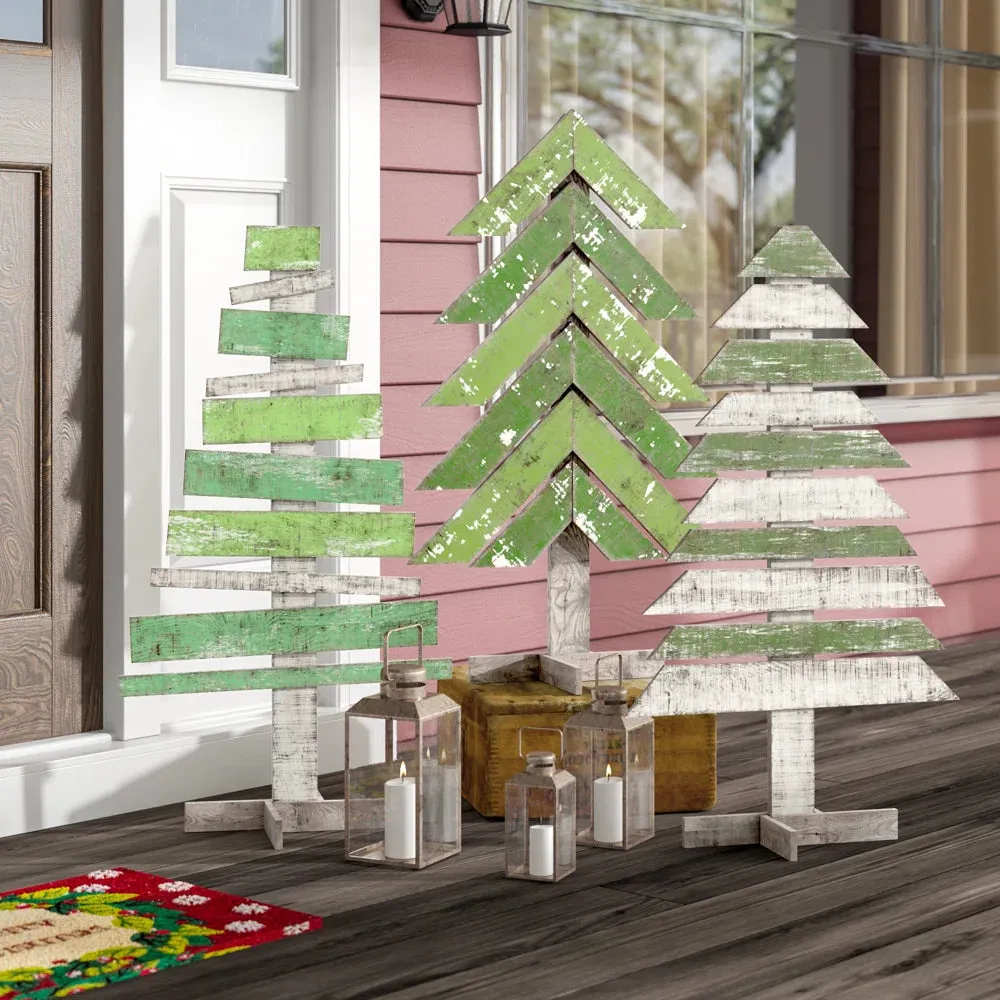
Glass lanterns with pillar candles on a dark wood porch are beautiful until the wind knocks them over. Switch to flameless LED pillar candles with a flicker setting — they cost $8 each and won’t crack concrete when they tip. Also, the light pink house facade will reflect warm light at dusk, which is lovely, but make sure the porch floor is swept; white wax drips show up instantly on dark stain.
9. Large Flat Green Christmas Tree Cutout With White Star
To keep a large flat cutout stable on patchy grass without a permanent concrete base, do this:
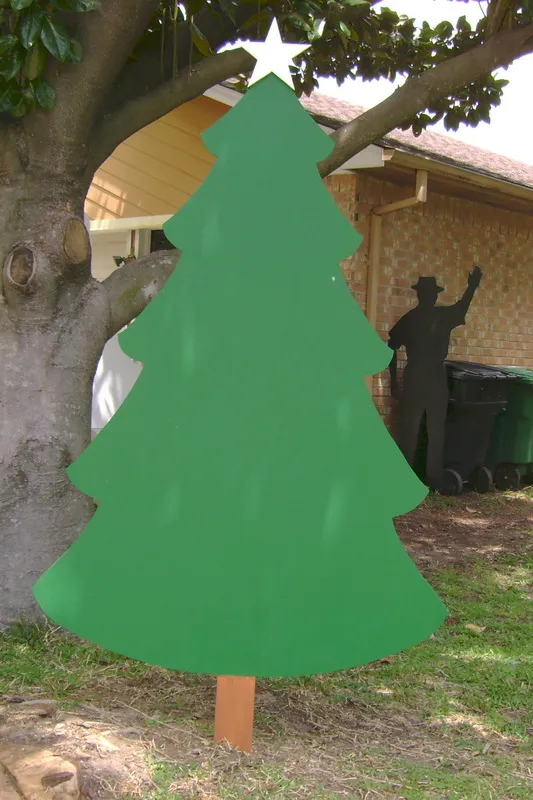
- Cut a 2×4 pressure-treated post to 36 inches.
- Screw the post to the back of the tree cutout using three 2-inch exterior screws.
- Dig a hole 10 inches deep and 8 inches wide where the grass is most even.
- Set the post in the hole, fill with quick-set concrete, and let it cure 4 hours.
- Touch up the grass edge with a thin layer of topsoil so it blends.
Time: about 2 hours. Material cost: $12.
The white five-pointed star topper is the only detail that keeps this from looking like a construction-site sign. In bright midday light, that star is what your eye finds first — it gives the whole cutout a clear holiday identity. Keep the star’s finish slightly glossy so it catches light, because the flat green body will fade into the lawn by December 12th otherwise.
10. Painted Wooden Elf Riding Rudolph With Glitter Accents
This piece balances 50% natural wood tones with 30% red and green glitter accents, 15% beige brick backdrop, and 5% gold from the candle holders. If you’re recreating the look, keep the elf’s tunic in a deep green glitter and let Rudolph’s red nose be the only bright red focal point. Swap the gold candle holders for black iron ones if you want the elf to pop less and the fireplace to recede. For a full yard character display, compare Idea #23.
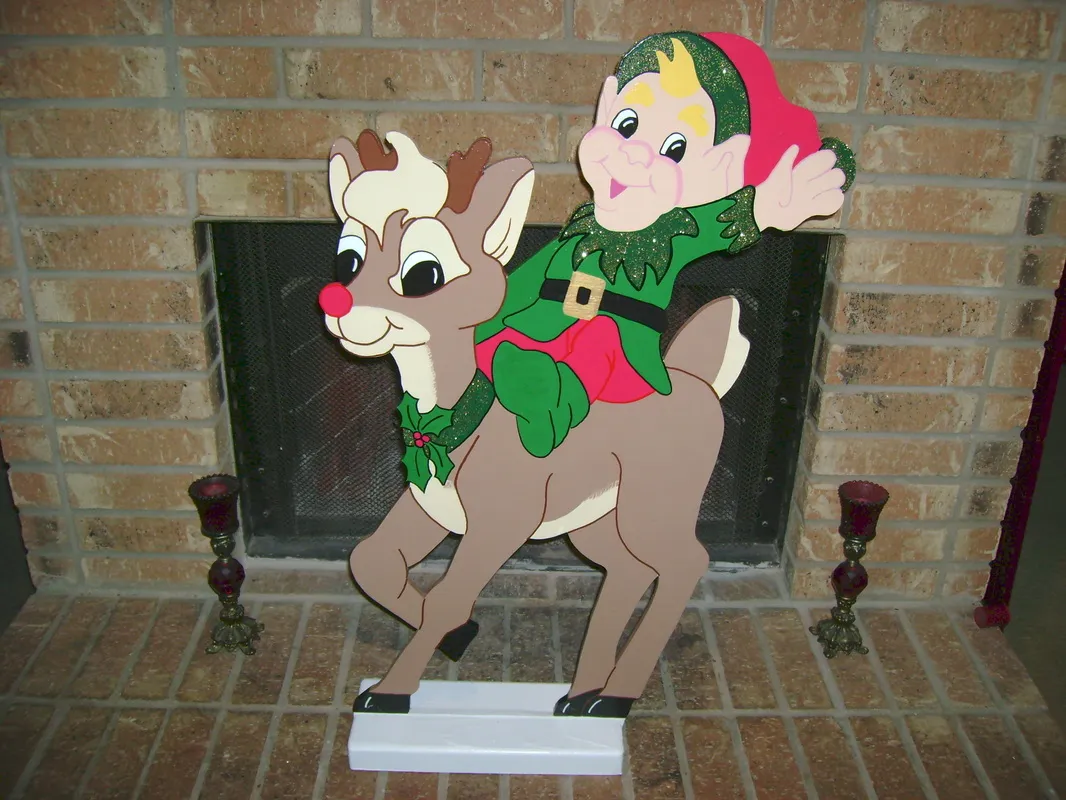
The white rectangular display base is doing more work than it gets credit for. It visually separates the cutout from the light brown brick fireplace, so the cartoon characters don’t compete with the masonry texture. Scale is key: the elf and reindeer stand about 30 inches tall, which is large enough to be seen from across the room but short enough to fit under a standard mantel height. The dark red glass candle holders frame the piece without stealing attention.
11. Outdoor Wooden Reindeer Yard Cutout With Natural Pine Grain
Handmade wooden reindeer cutouts are having a resurgence in 2026 because people are tired of plastic blow molds that crack in the first freeze. There’s something grounding about a reindeer cut from actual pine with the grain still visible. This silhouette style works with almost any house color — the natural wood tone warms up a snow-covered yard better than white plastic ever could.
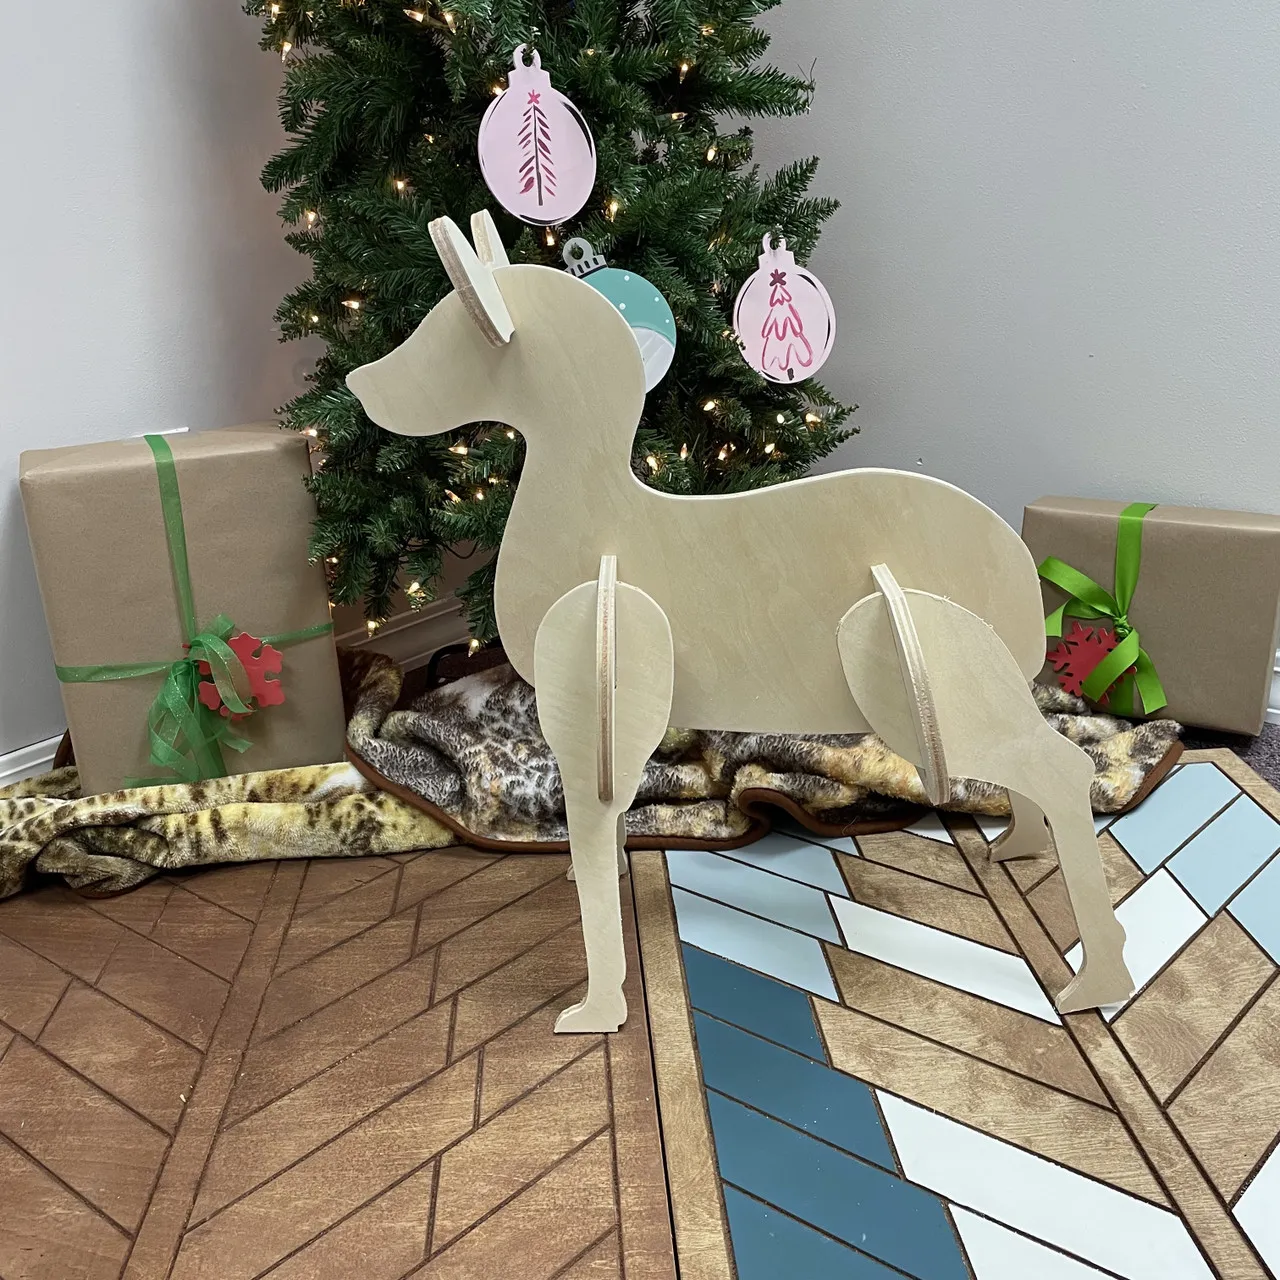
If you’re buying or cutting a flat reindeer silhouette, add a slight forward tilt to the legs by cutting the bottom edge at a 5-degree angle. That single change makes the deer look mid-stride instead of like a cardboard standee. Seal the entire thing with two coats of clear exterior polyurethane before placing it outside — pine absorbs moisture fast and will warp within two weeks if you skip this step. Add a small hook on the back for a floral bow in late November.
12. Grand Golden Nutcracker on a Snowy Porch With Multicolor Lights
- Verify the nutcracker’s base is at least 18 inches wide — a 6-foot golden nutcracker needs serious ballast against winter gusts.
- Check local wind exposure; if your house faces open fields, add two 25-pound sandbags inside the base.
- Plan the multicolor light strings before the snow comes — extension cords sink into slush and become tripping hazards.
- Budget $120–$250 for a large nutcracker, plus $40 for lights and garland.
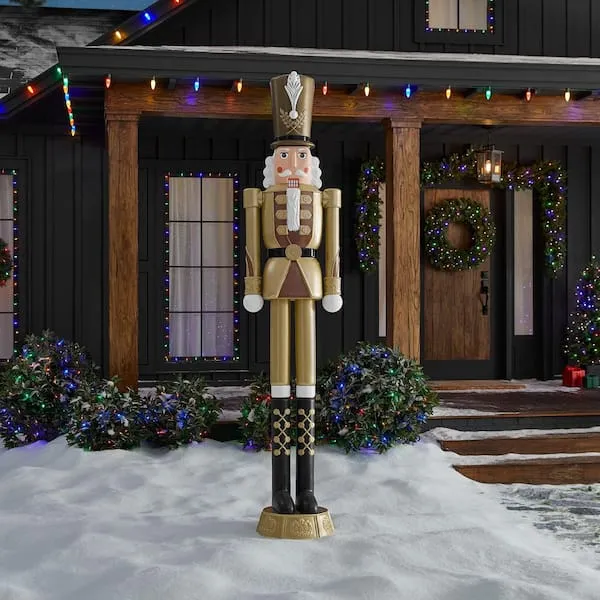
The dark vertical siding behind the golden nutcracker is the unsung hero — it creates the contrast that makes the gold pop. Without that dark backdrop, the nutcracker would blend into the snow and lose its grand presence. The wood porch columns frame the scene like a stage set, while the lit wreath on the door gives the whole front elevation a focal point. The multicolor roofline lights add festivity without stealing the nutcracker’s spotlight.
13. Illuminated Reindeer Against a Red Wooden Wall With Ornaments
This display’s entire energy comes from the red wooden wall cladding behind the glowing white reindeer. Take that wall away and you have a standard lawn deer lost in a yard. The vertical arrangement of shiny red, green, and white ornaments on the left repeats the wall’s red tone, pulling the composition together. If you’re recreating this, paint one section of fence or siding in a deep barn red — it’s the lowest-cost high-impact move you can make.
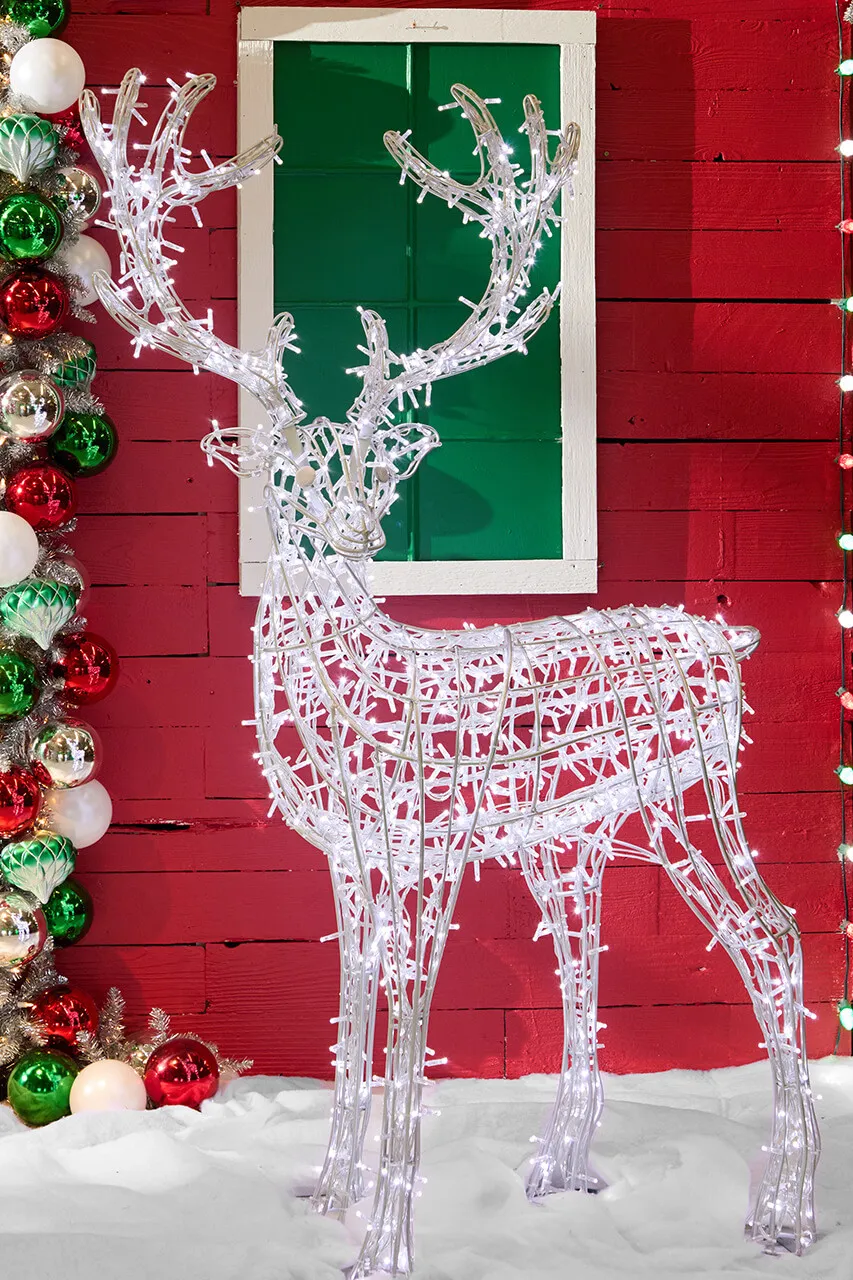
White artificial snow on the ground will scatter into your grass and flower beds by mid-January. Use a rubber-edged snow blanket instead of loose flakes if you have pets or children — it stays in place and washes off with a hose. Also, the illuminated reindeer’s internal bulbs can flicker in cold snaps; look for models rated to -20°F or run an outdoor-safe LED strip inside the frame instead of replacing mini bulbs every year.
14. Illuminated ‘MERRY CHRISTMAS’ Sign With Glitter Letters
Those glitter-covered letters look magical at night, but the glitter is the first thing to peel if the sign gets direct afternoon sun. Expect to touch up the red ‘MERRY’ and gold ‘CHRISTMAS’ with exterior glitter spray every two seasons — about $18 per can. The internal LED bulbs should last 5–7 years, so the real annual cost is just wiping snow off the sign with a soft broom. If you want a lower-maintenance option, choose a sign with sealed acrylic faces instead of loose glitter.

This illuminated sign reads best from at least 40 feet away, so it needs a front yard depth of 30–50 feet. At 3 feet wide, the letters are legible from the street but won’t overwhelm a small walkway. If your yard is only 20 feet deep, look for a 2-foot version and angle it slightly toward the street. Compare with Idea #20 — that conical tree light display works in even tighter front yards.
15. Frosted Evergreen Gnomes With Buffalo Plaid and Fleece Hats
These frosted evergreen gnomes can retail for $60–$90 each, but you can make three for under $70 total. Buy cone-shaped floral foam cages at Dollar Tree, wrap them in faux evergreen garland from Walmart, and hot glue a $2 foam ball as the nose. The fabric hats are just a quarter-yard of fleece or buffalo plaid from Joann cut into a triangle and sewn or glued into a cone. The frosted effect comes from a light spritz of canned snow spray — $6 a can.

To get the pom-pom nose to sit perfectly on a conical fur tree body:
- Wrap the evergreen garland around the floral cage, starting at the base and overlapping each row by 1 inch.
- Attach a 1.5-inch white pom-pom at what will be the front top edge of the cone.
- Place the fabric hat cone over the top, leaving only the pom-pom exposed below the brim.
- Hot glue the hat brim to the greenery in three spots, let cool 30 seconds.
- Set the whole gnome on a wood slice and sprinkle fake snow around the base.
Time: 45 minutes per gnome. Material cost: about $23 each.
16. Red and White Candy Cane Path Markers Along a Paved Walkway
This path design uses 70% natural green lawn and bushes as a base, 20% red and white striped segments, and 10% paved gray for structure. The key is keeping the candy cane stripes at a consistent 45-degree angle — irregular stripes start to look chaotic from the street. If you want a subtler version, swap the large upright candy cane for a set of three smaller red-and-white garden stakes, keeping the same path-line rhythm.
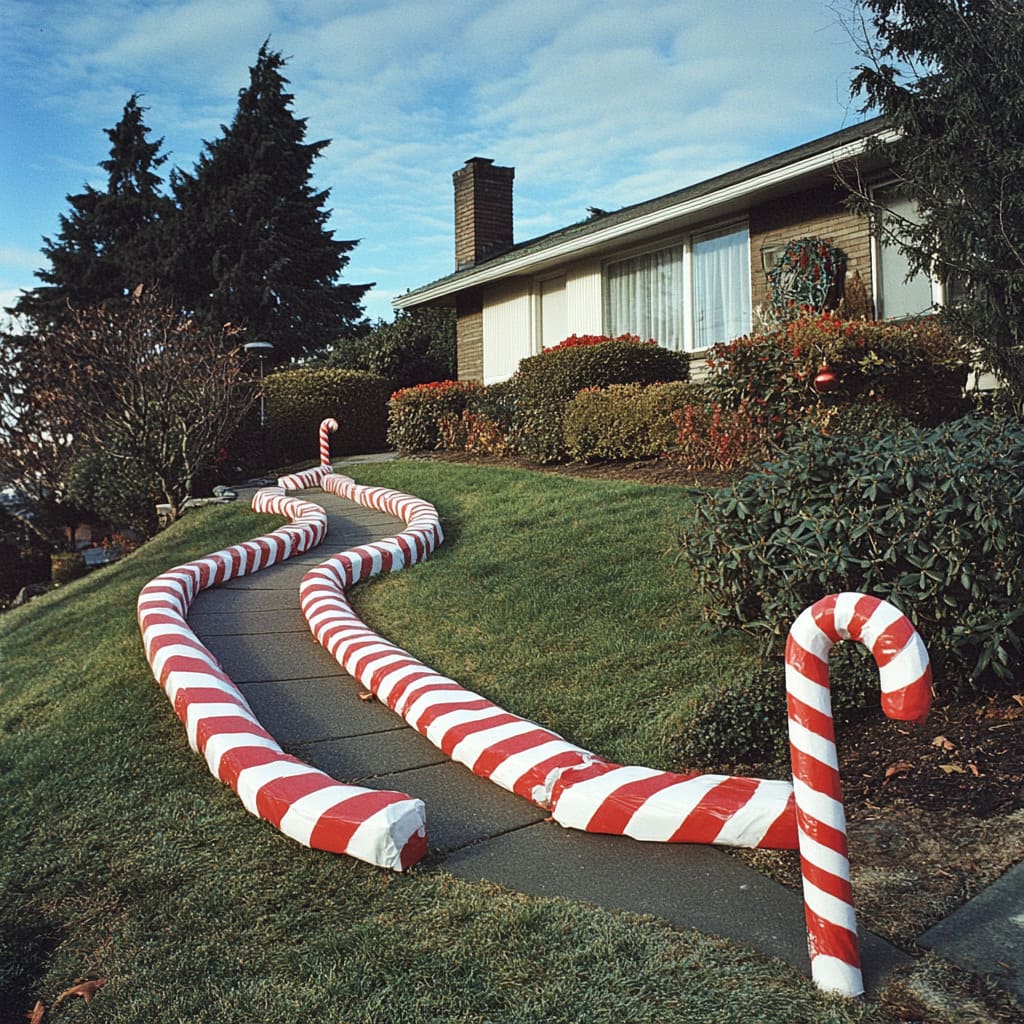
When placing candy cane path markers, space them every 5–6 feet and alternate which side of the path they lean toward. That alternating lean creates a gentle wave motion that pulls the eye toward your front door. Use PVC pipe cut into 18-inch segments for the base, painted with exterior red and white enamel, then slide each segment over a rebar stake pounded into the ground. They’ll survive snow, rain, and even a stray soccer ball.
17. Miniature Buffalo Plaid Sleighs With Frosted Wreath Display
Two miniature sleighs paired with a large red gift box and frosted wreath form a triangle — the sleighs at the bottom corners, the gift box and wreath as the apex. That triangular composition keeps the eye moving across the dark wooden surface instead of dropping off the edges. The gold buttons on the green tufted seats echo the gold runners, tying the small details together. This is a classic example of using repetition in metal finishes to make a staged tableau feel cohesive.
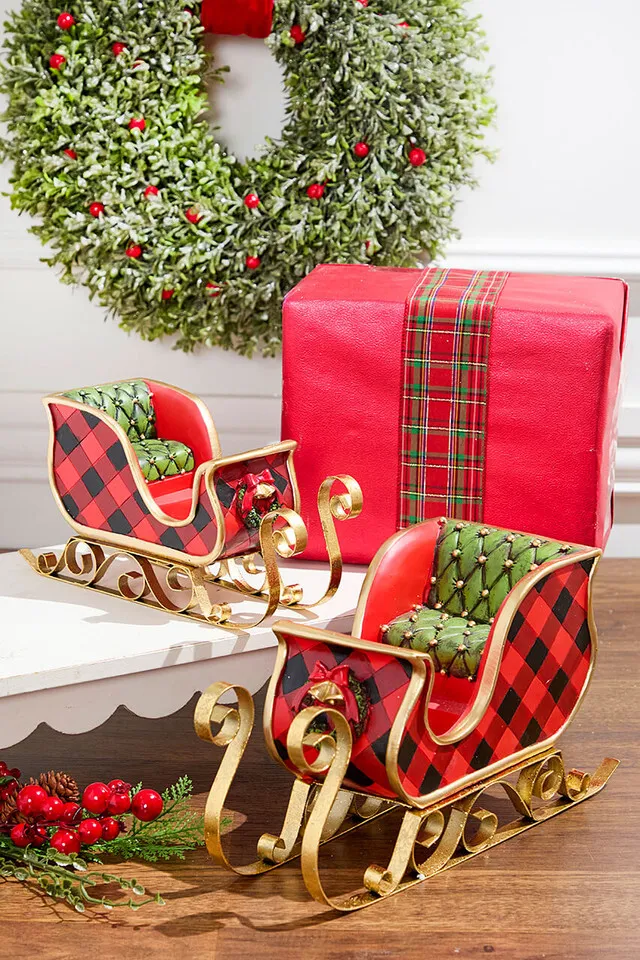
Buffalo plaid has been everywhere for five years, but in 2026 it’s being treated as an accent rather than a full-room commitment. Red and black plaid on miniature sleighs feels fresh because it’s contained — the green tufted seats and gold trim prevent it from reading as a lumberjack explosion. This small-scale approach to Christmas decor is popular for porches and entry tables where full-size plaid would be overwhelming.
18. White Farmhouse With Warm Icicle Lights and Illuminated Wireframes
A two-story facade like this needs at least 150 feet of roofline to support the icicle light effect without gaps. Plan for 10–12 wireframe yard pieces to fill a typical 50-foot frontage — any fewer and the display looks sparse. The illuminated reindeer, snowman, and candy cane work because they’re spaced 8–10 feet apart across the lawn. If you have a one-story ranch, drop the icicle lights and concentrate all your wireframes in a single tight cluster near the front door. The rooftop display in Idea #3 is a smaller-scale alternative.
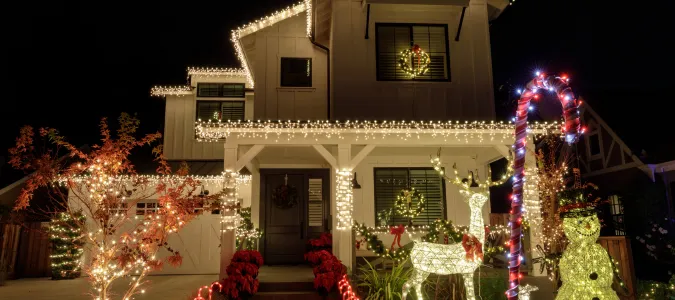
Warm white icicle lights fade to yellowish over three seasons and the clips crack in extreme cold. Budget $60–$90 every two to three years to replace the entire roofline set. Red poinsettias on the steps need to be swapped for fresh ones if temperatures drop below 25°F, or they’ll blacken. The wireframe deer and snowman are the lowest-maintenance pieces — just check for bent frames after heavy snowmelt.
19. Giant Blue LED Christmas Ornaments on a Wooden Porch
Those giant blue LED ornaments look stunning at night, but they can throw an unexpected blue glow that clashes with warm white house trim lights. Test one ornament on your porch at night before committing to three — the blue may read as cold and sterile next to a warm-lit wreath. Also, the silver glittered tops can oxidize in humid climates; a clear gloss sealant extends their life by two seasons. If your porch is small, one large ornament is better than three cramped spheres.
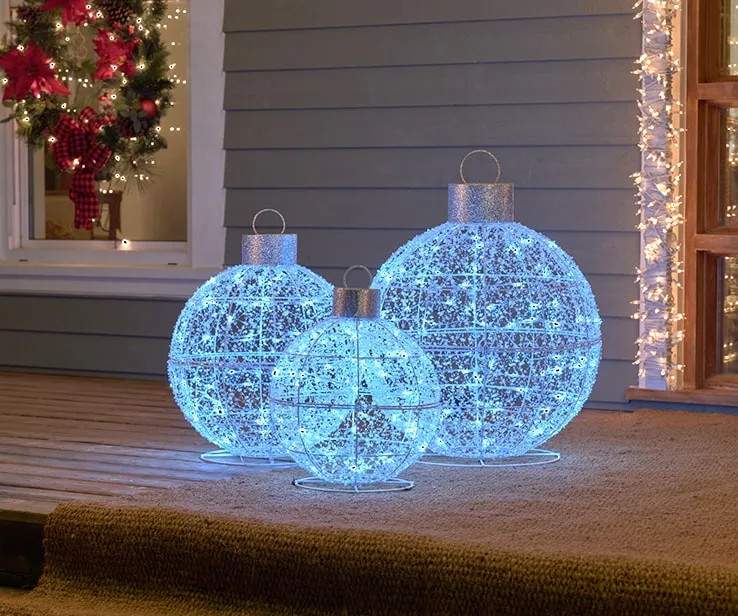
The wire frame structure is what gives these ornaments their magic — the blue LED points create a starburst effect that reflects off the wooden porch floor. If you used solid plastic orbs instead, you’d lose the depth and just have three glowing basketballs. The varied sizes break up the row and make the grouping feel intentional, but the wire frame is the element that elevates this from craft store shelf to designer porch.
20. Conical Tree Light Display on a Grassy Lawn at Night
To build your own conical tree light display, follow these steps — no welding required:
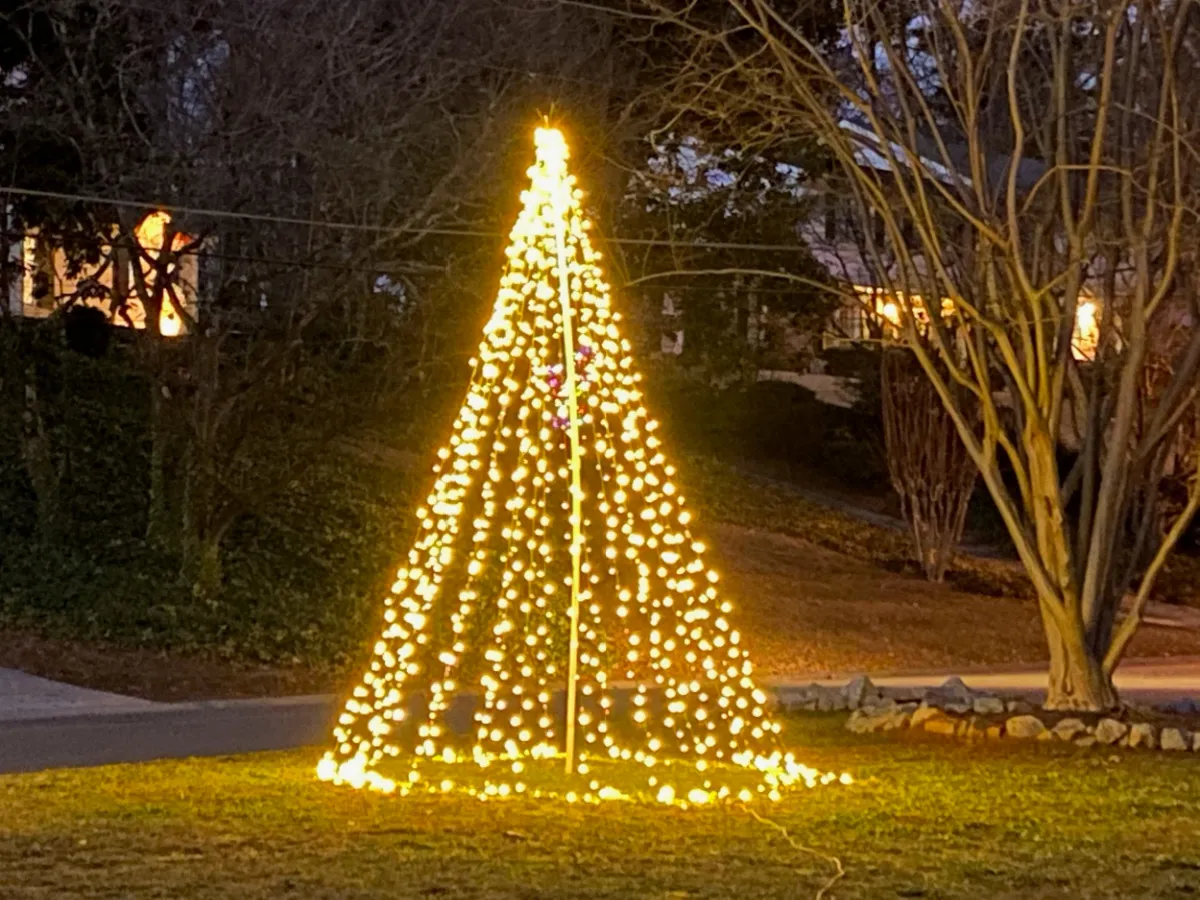
- Bend two 6-foot lengths of 1/2-inch PVC conduit into hoops and zip-tie them into a cone shape, 24 inches at the base and 8 inches at the top.
- Spiral 200 warm yellow LED string lights from base to tip, securing every 6 inches with twist ties.
- Screw the base onto a 24-inch plywood circle painted dark green.
- Run the power cord along the ground and cover it with a rubber cord ramp.
- Set a timer for dusk to 11 PM to avoid light pollution from the neighbors’ bedroom window.
Time: 3 hours. Material cost: under $70.
This display is 80% warm yellow light, 15% dark green grass, and 5% black night sky — which is why it feels so cozy against the bare tree branches. If you want a cooler, more modern version, swap the warm yellow LEDs for cool white and place the cone near a silver wireframe deer. The shape is what carries the tree identity; the light temperature changes the mood from nostalgic to crisp.
21. Warm White LED Santa Sleigh and Three Reindeer Silhouette
Commercial Santa sleigh displays with three reindeer run $300–$500, but you can mimic the silhouette with a projector and a string of warm white rope light. Trace the sleigh and reindeer shapes onto 1/4-inch plywood, then outline the edges with 50 feet of rope light from Amazon — total cost about $120. If you don’t want to cut wood, use a pre-made wireframe Santa with one reindeer and add two smaller reindeer from Target — the silhouette still reads from the street.
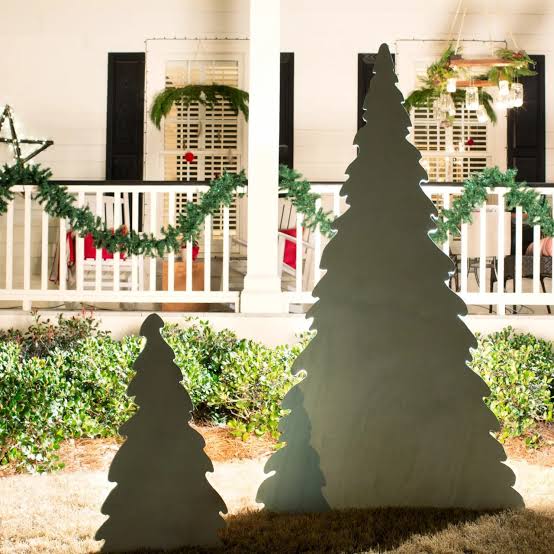
Place the entire sleigh and reindeer grouping on a slight diagonal across the lawn, not parallel to the street. A 15–20 degree angle makes the reindeer appear to be pulling the sleigh forward, which adds motion to an otherwise static display. Also, run the extension cord from the back-most reindeer so the cord disappears behind the grouping — no one wants a black snake running through the snow.
22. White Wooden Sleigh Filled With Gift-Wrapped Boxes on Green Grass
The red glittery bow on the front of the white sleigh is the detail that ties the whole scene together. Remove that bow and the sleigh becomes a white plank box with stuff in it. The bow’s sparkle catches daylight even on an overcast December afternoon, drawing the eye to the sleigh’s silhouette. Keep the bow oversized — at least 12 inches across — so it doesn’t get lost against the green grass.
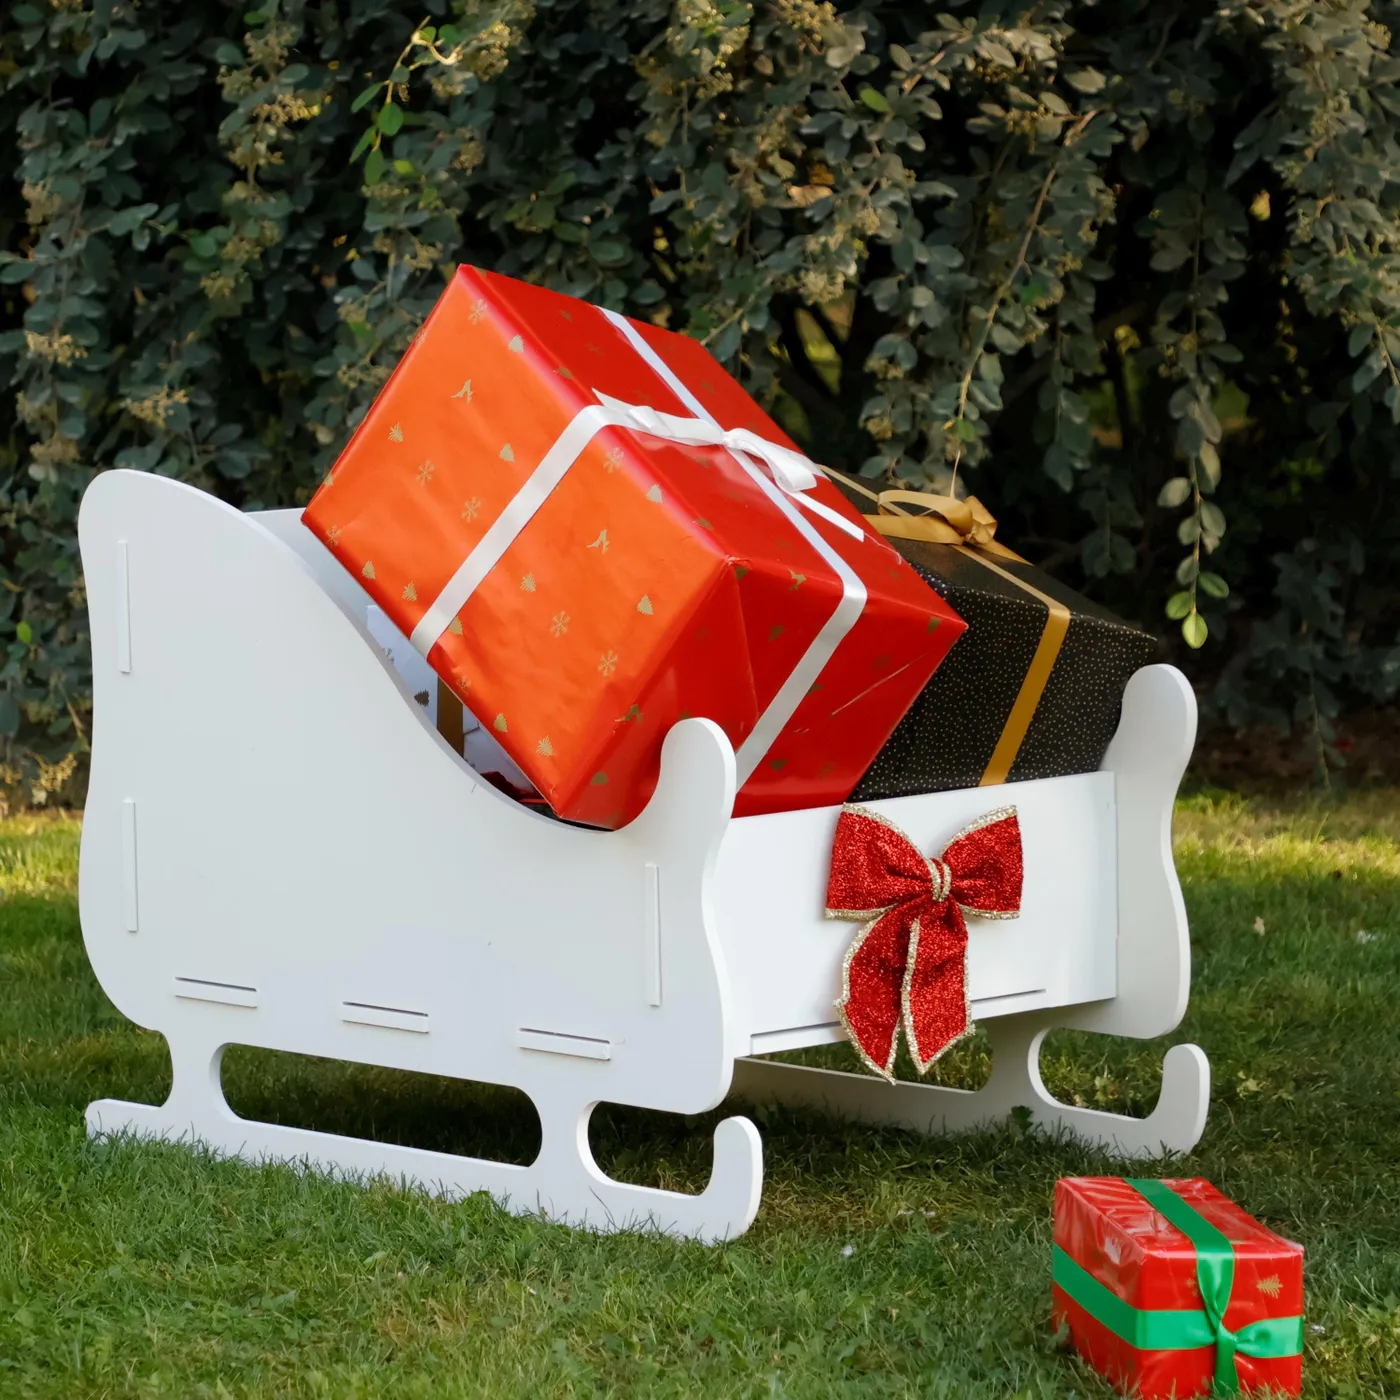
The white sleigh on vibrant green grass works because of the value contrast: bright white against mid-tone green reads clearly from the street. The wrapped gifts follow a strict color story — red with white ribbon, black with gold ribbon — which keeps the stacked boxes from looking like a yard sale. The single red gift box with green ribbon on the grass breaks the symmetry just enough to feel natural, not staged. This works as a lower-key version of Idea #17‘s plaid sleigh vignette.
23. Animated Character Cutouts With Christmas Tree on a Wooden Deck
Nostalgic cartoon character cutouts are blowing up on Pinterest because they tap into early 2000s childhood memories. In 2026, the trend is toward full-color, weather-laminated cutouts rather than hand-painted plywood — the colors hold up better in UV light. Pairing beloved characters with a classic Christmas tree cutout gives the display a storyline, which makes it more shareable on social media than a lone reindeer.
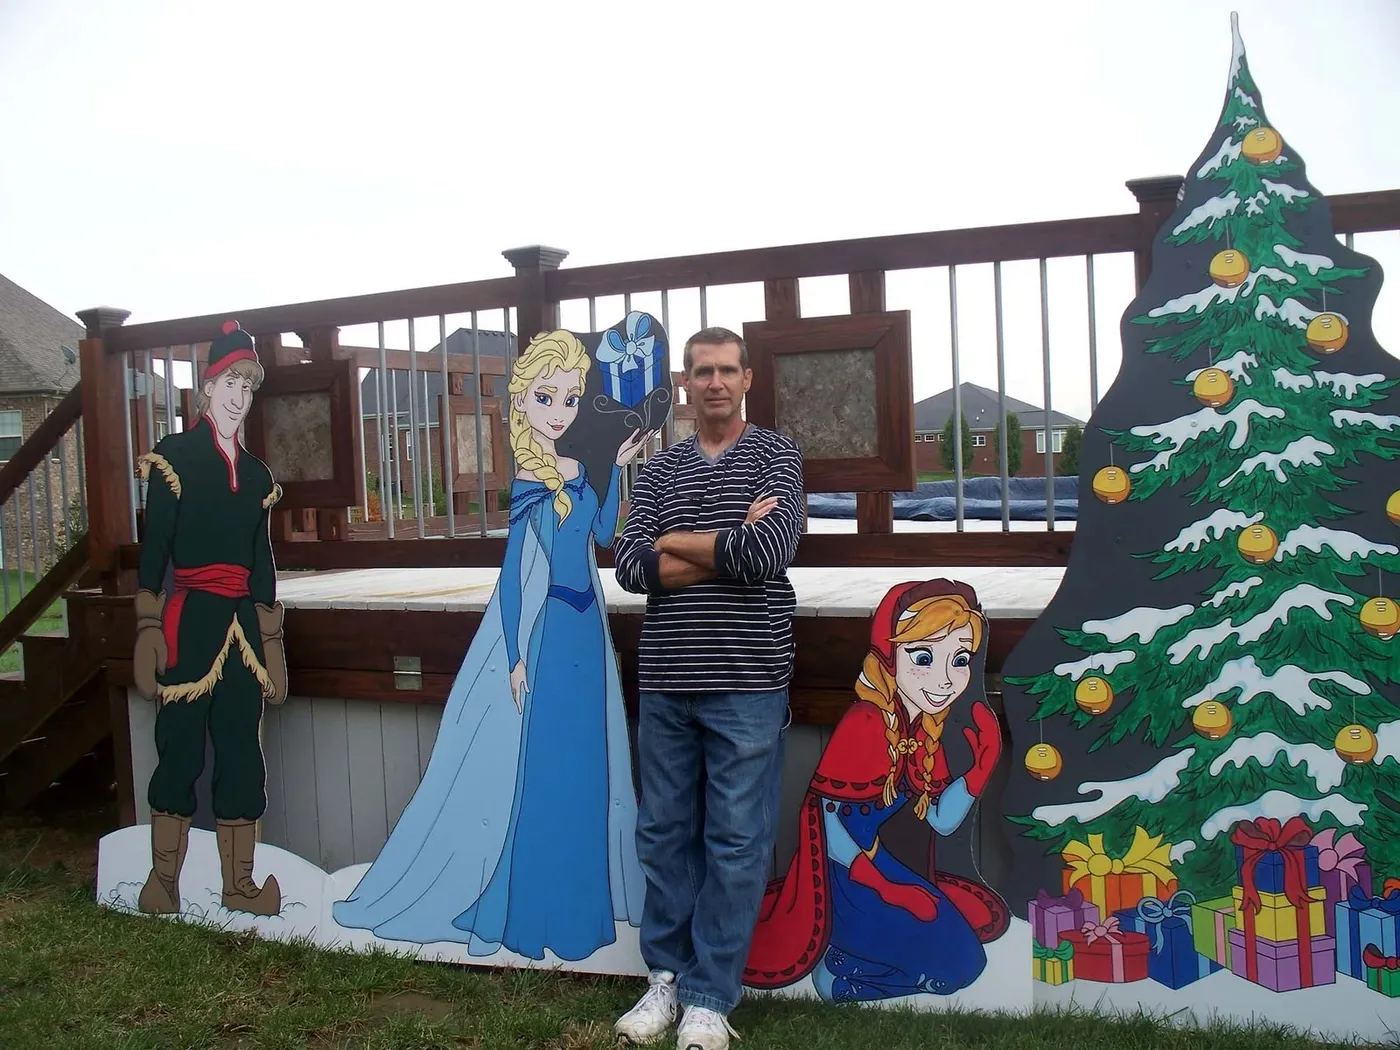
These cutouts look best when their feet are hidden by grass, but on a wooden deck railing backdrop they can appear to float if the base is too thin. Add a 4-inch dark green base strip across the bottom of each character so it visually anchors to the ground. Also, check your HOA rules — some neighborhoods consider character yard art a temporary sign and will send you a letter. The laminated versions are also slippery when wet, so stake them down with two ground staples each.
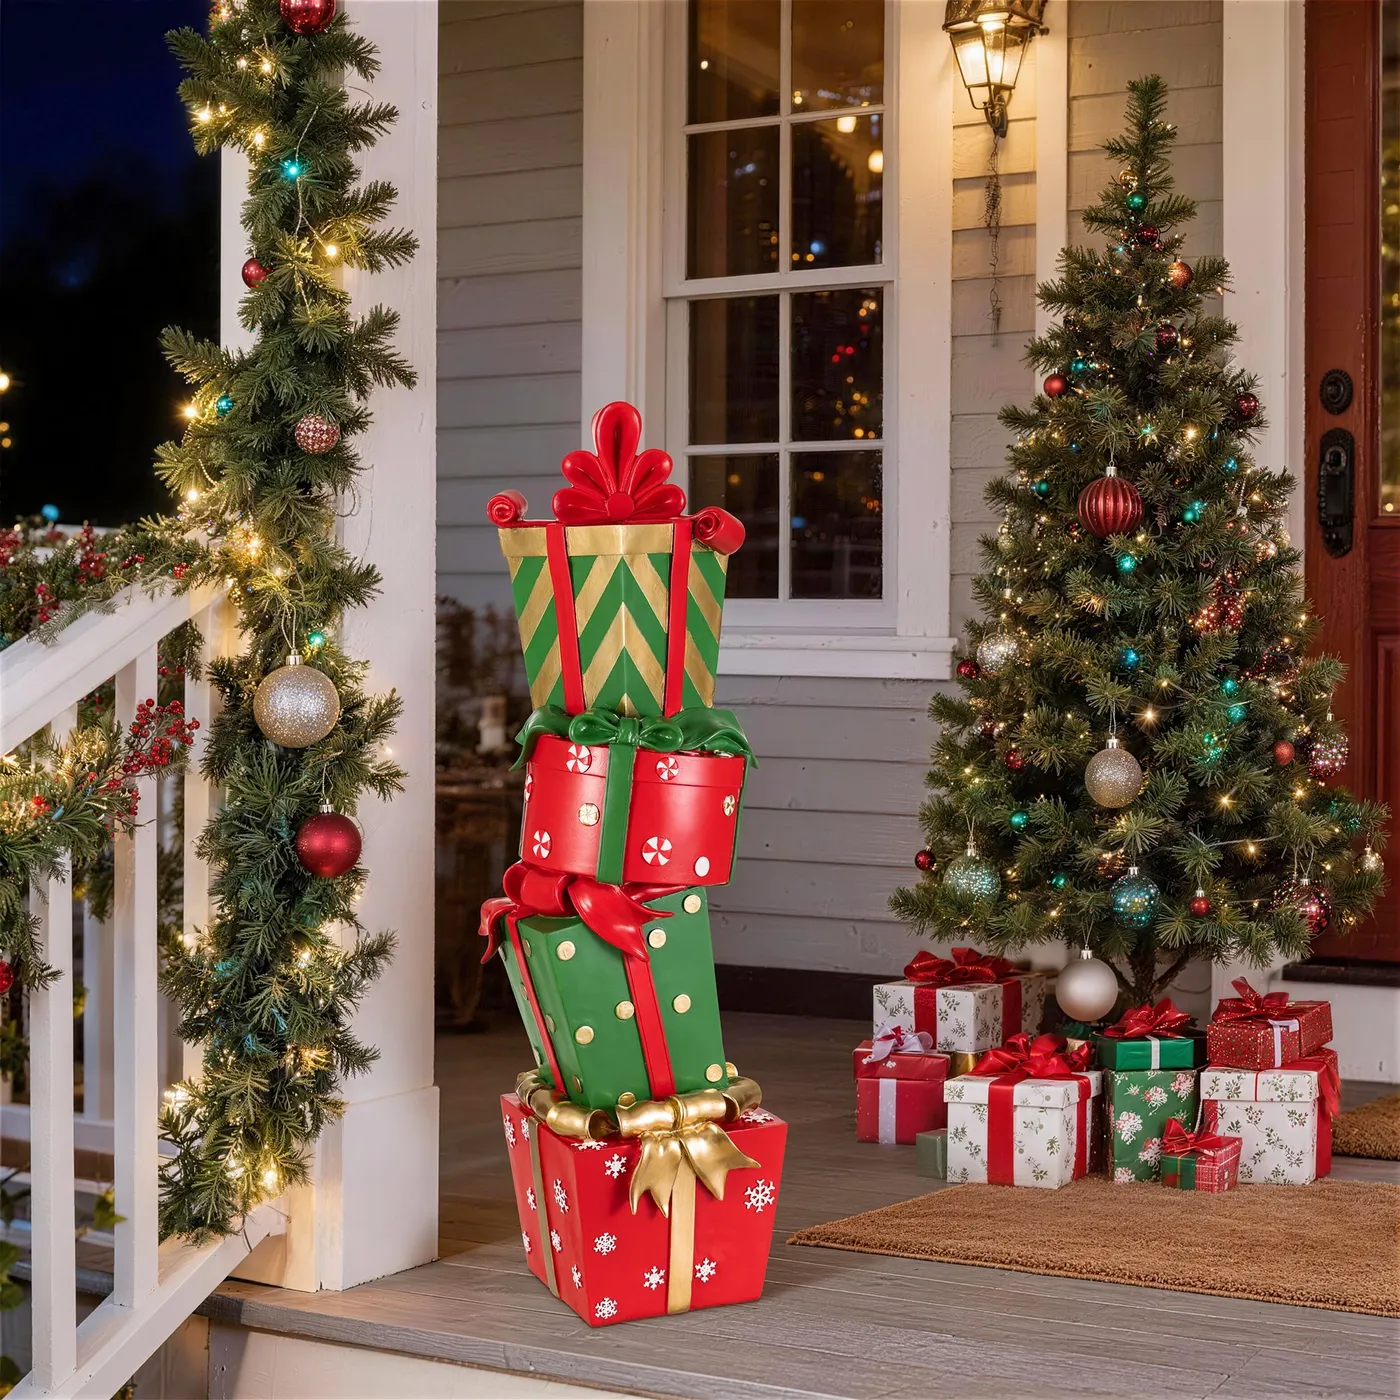
24. Festive Porch With Lighted Christmas Tree and Stacked Gift Decor
A porch railing with this much garland and a full-sized lighted tree needs at least 8 feet of railing length to avoid looking stuffed. The tree should be 4–5 feet tall, leaving 18 inches of clearance below the porch ceiling for the star or topper. Stack oversized gift boxes in a pyramid no more than 30 inches tall so they don’t block the railing’s red and green wrapped present cutouts. If your porch is narrower, ditch the tree and double down on the garland with berries — same effect, less floor space.
|
📋 Copy HEX 🔗 Share |
When draping garland along a white porch railing, attach it with zip ties every 18 inches, then fluff the branches outward from the top and bottom. That fluffing trick makes a 9-foot garland look twice as full without buying extra strands. Weave warm LED string lights through the garland before you mount it, not after — trying to add lights to an already-installed garland will scratch the white railing and make you question your life choices.
25. Natural Wood and White Plywood Reindeer Cutouts With Festive Bows
To get two contrasting reindeer cutouts like this — one stained wood, one white — in a single weekend:
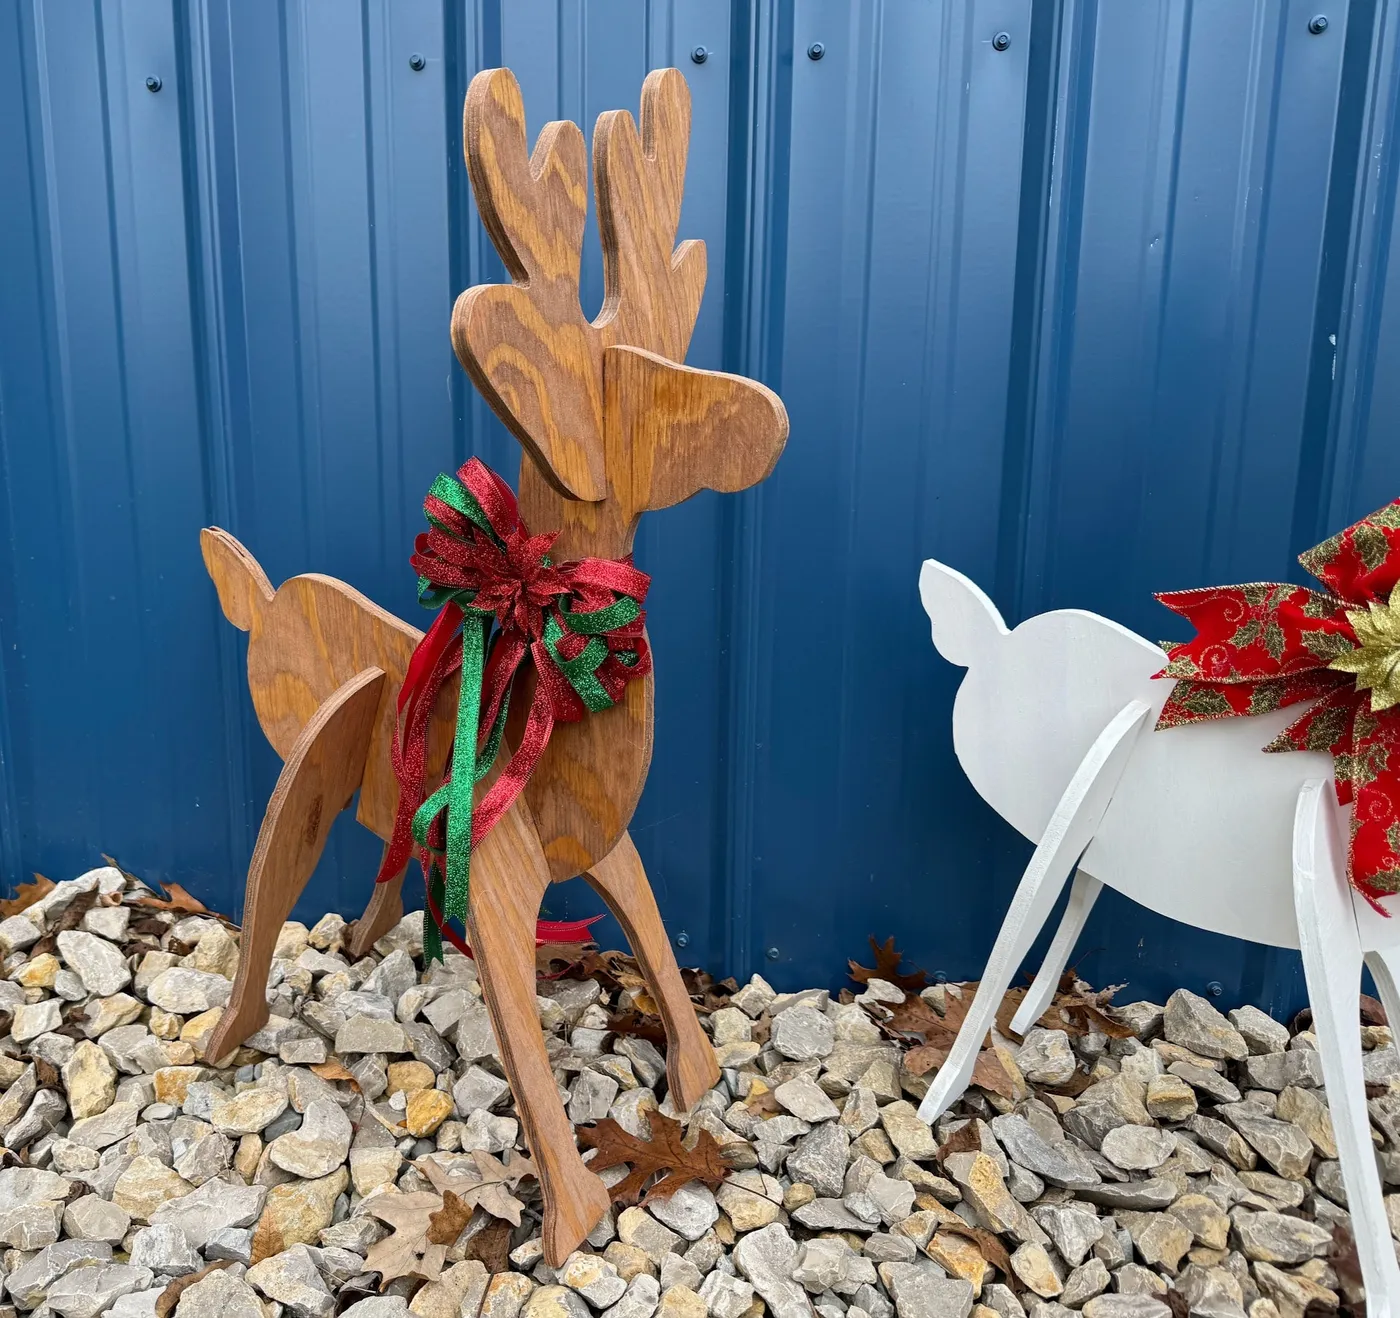
- Trace a reindeer silhouette onto 1/2-inch sanded plywood.
- Cut both shapes with a jigsaw using a fine-tooth blade.
- Stain one reindeer with medium brown exterior stain; paint the other with white exterior paint.
- Drill a 3/8-inch hole near the neck for the bow hanger.
- Attach a red-and-green glittery bow to the stained one and a red-and-gold patterned bow to the white one.
Time: 4 hours total. Material cost: $38 for both.
These flat reindeer cutouts are favorites of craft stores at $80–$120 each, but the corrugated blue metal wall in the background shows they don’t need a fancy setting. Search for pre-cut reindeer blanks on Etsy — you can often find unfinished pairs for $45. The bows are the expensive part if you buy them pre-made; make your own with 3 yards of wired ribbon from Hobby Lobby for $9. The gravel base is free if you have a driveway area.
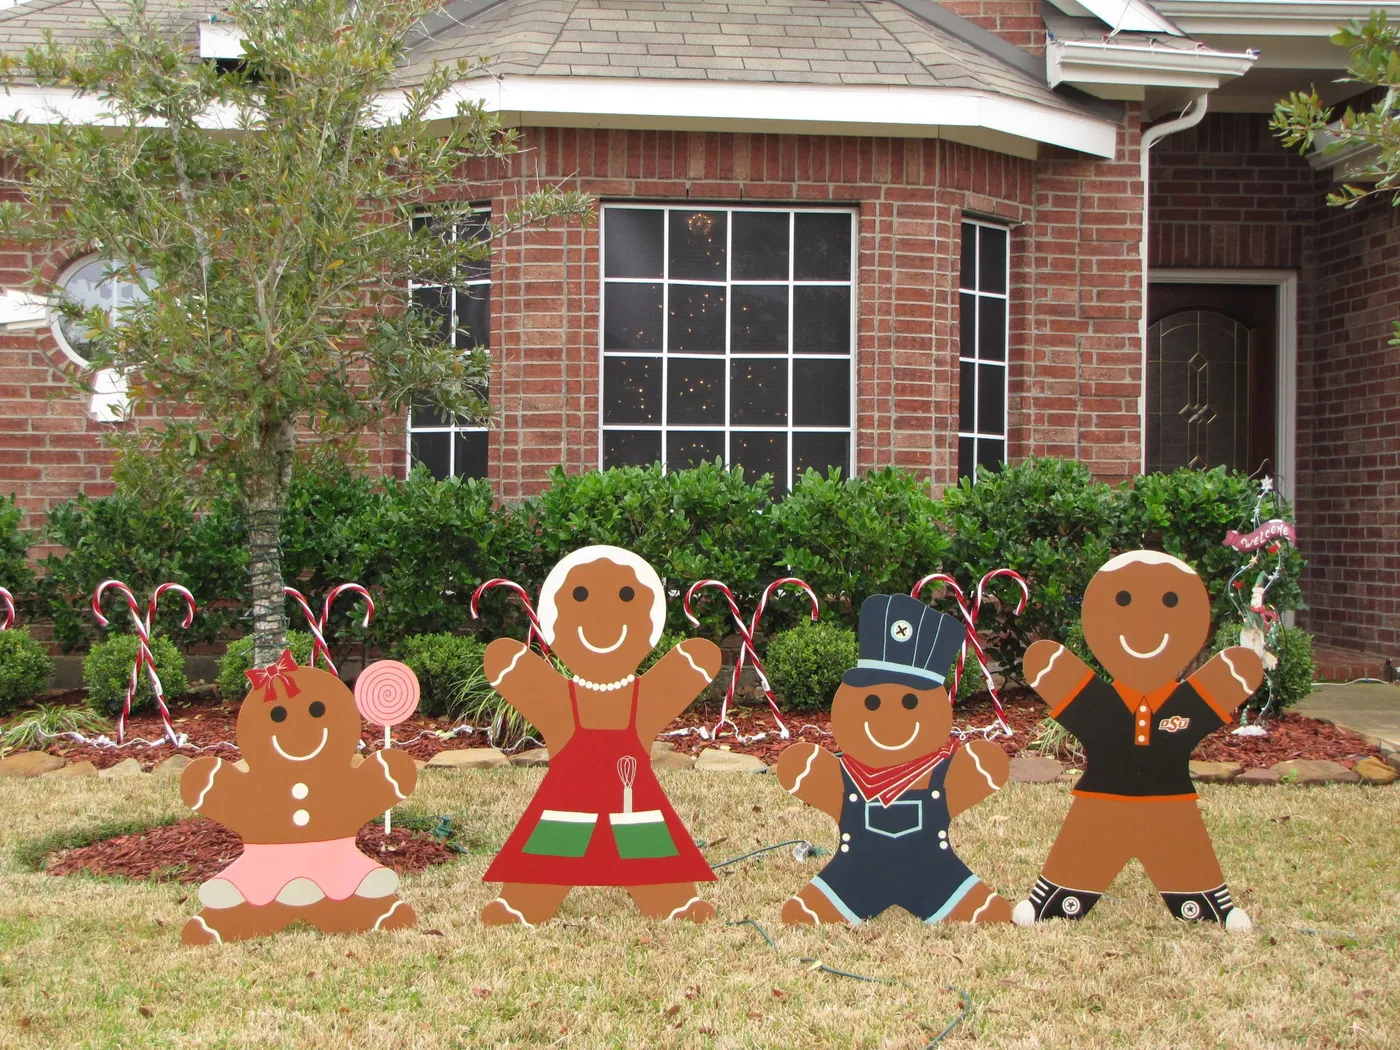
26. Gingerbread Person Cutouts With Candy Cane Stakes in a Red Mulch Bed
The red mulch garden bed is doing all the heavy lifting here — it visually unites the brown gingerbread cutouts and the red-and-white candy cane stakes. Without that red mulch, the four gingerbread people would look like lost cookies on a lawn. The line of cutouts creates repetition, while the small pink lollipop cutout breaks the rhythm just enough to be playful. The tree wrapped in string lights behind them adds height and keeps the display from reading flat.
|
📋 Copy HEX 🔗 Share |
Gingerbread-themed yard decor has moved beyond the front door in 2026. The current look is a full outdoor storyline — a family of gingerbread figures, candy cane path markers, and a few oversized lollipops — rather than a single lone cookie. This is part of a larger shift toward character-driven displays that tell a little story, which feels especially welcoming on streets with lots of young families.
27. Nighttime Wooden Snowman Cutouts With Multicolor Tree Lights
Wooden snowman cutouts can warp if the ground stays wet through January, especially if they’re placed directly on grass without a base. Elevate them on 2-inch pressure-treated feet and reseal the edges every fall with exterior polyurethane — $14 a can. The multicolor string lights on bare trees need a surge-protected outdoor timer; bare branches whip in winter wind and can short out a flimsy extension cord. Budget 30 minutes every December to check all connections.
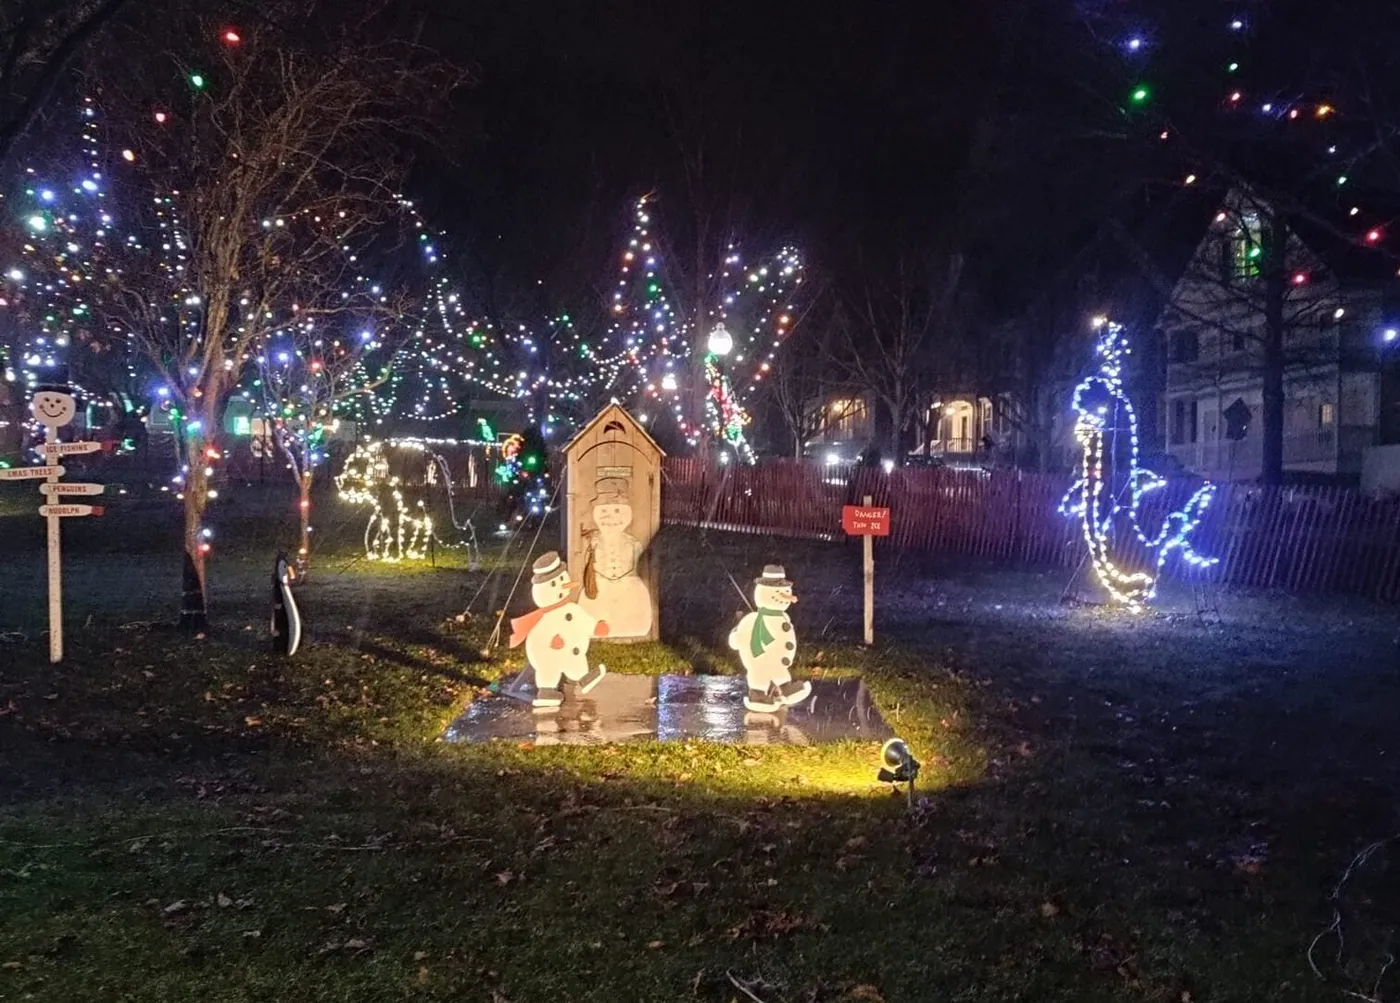
This nighttime display uses a small wooden shed as a focal point, so it needs a yard depth of at least 30 feet to let the multicolor tree lights frame the scene. The snowman cutouts work best at 2–3 feet tall, placed 5–7 feet in front of the shed so the ground spotlight creates defined shadows. If you have a smaller yard, skip the large animal figures and focus on one snowman plus a single tree wrapped in lights — the shed alone is enough architecture.
28. Eclectic Snowmen and Horned Character Cutouts With ‘Frosty’s Ice Fishing’ Shed
This display is deliberately weird, and that’s exactly why it works — but it’s not for every neighborhood. The large red horned figure with the crescent moon will read as either charmingly quirky or mildly alarming depending on your street’s vibe. If you have an HOA, check the bylaws before you commit to a winged demon cutout next to a ‘FROSTY’S ICE FISHING’ shed. The stained concrete base keeps the snowmen from sinking, but the flat cutouts need to be anchored with ground stakes in high wind.
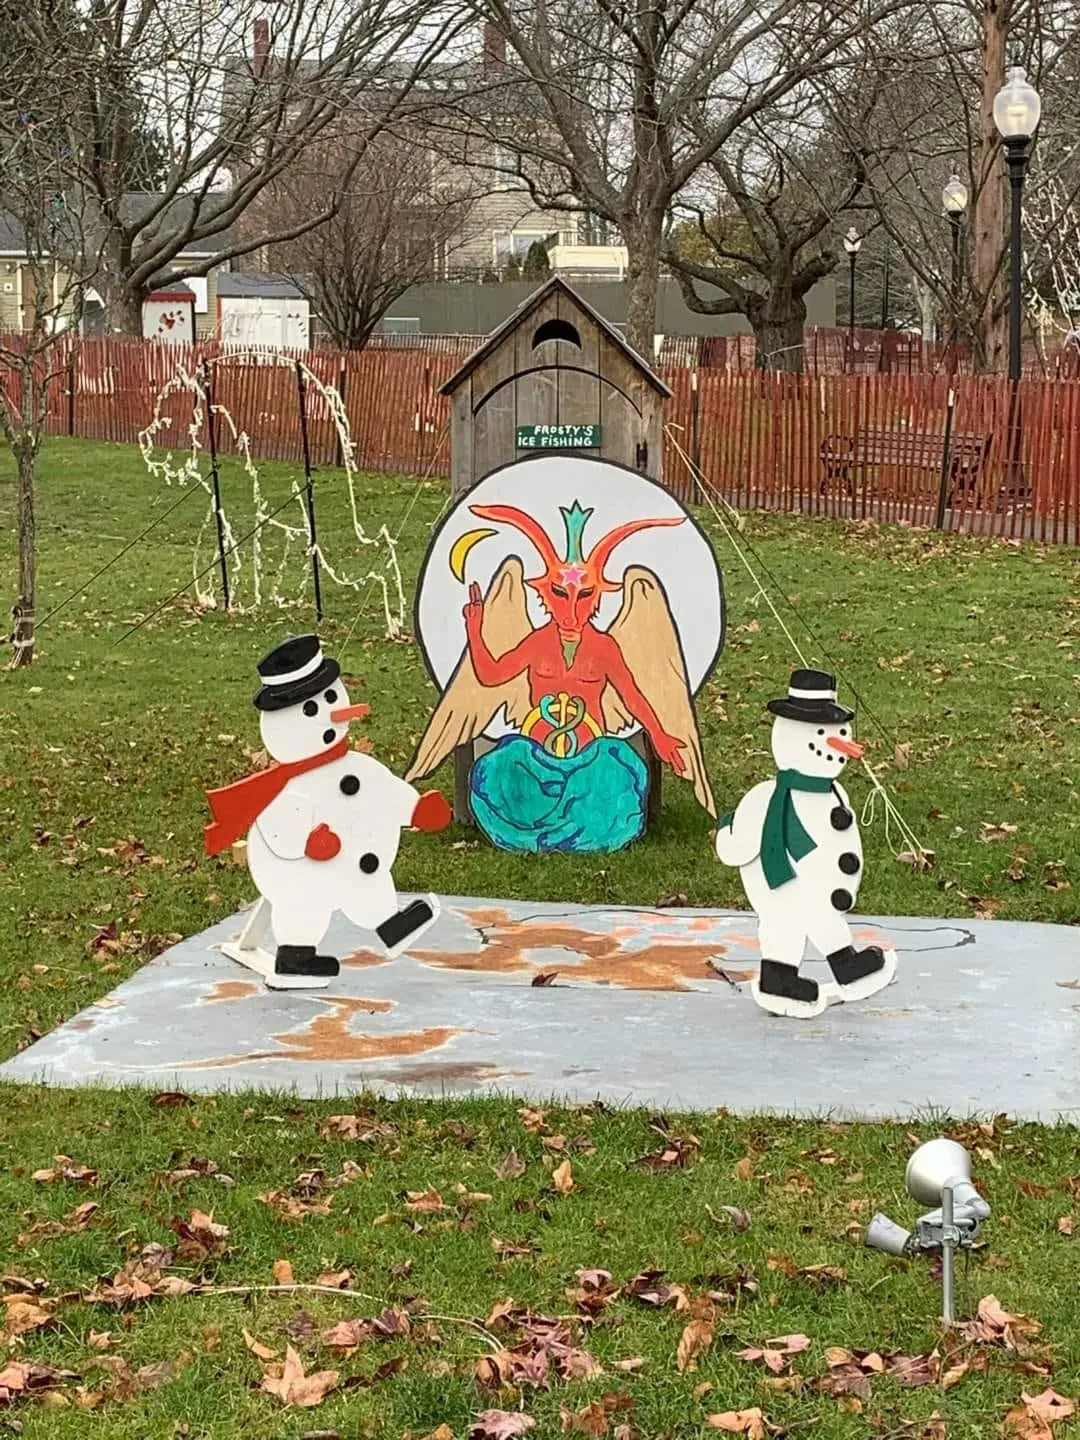
The small wooden ‘FROSTY’S ICE FISHING’ shed is the anchor that gives this whole eclectic display a sense of place. Remove the shed and you have a random pile of snowmen and a horned figure on a concrete slab. That little shed with its hand-painted sign turns the scene into a tiny story — these are characters at a frozen lake party, not just prop cutouts. Lean into the storytelling element if you’re going this unconventional route.
Your Front Yard Deserves More Than a Single Inflatable
Start with one idea that matches your house’s existing colors and your tolerance for extension cords, then build from there. The best Christmas yards aren’t the most expensive — they’re the ones with a clear point of view. Save this guide on Pinterest and share your own yard display — I’d love to see what you create.