You know that feeling when you finally find the candyland Christmas decor that looks exactly right for your space? I’ve been there—scrolling Pinterest at midnight, saving photos of pink trees and lollipop arrangements, only to realize half of them are AI renders. So we did the legwork. After filtering through hundreds of real-home photos across Etsy, Amazon, Wayfair, and HomeGoods, we narrowed it down to 27 ideas that actually deliver—from budget-friendly $12 ornament swaps to full $900 tree makeovers. Inside, you’ll find pastel whimsy, classic candy cane tabletops, and whimsical gingerbread vignettes, each with practical notes on cost, upkeep, and scale. And stay until the end—we break down the most common mistakes that can ruin these looks. 📌 Save this to Pinterest for later—you’ll want to revisit these ideas.
1. Vibrant Pink Tree with Multicolored Floral Ornaments
When mixing faux flowers with shiny ornaments, stick to a 40/60 ratio—40% flowers, 60% bulbs. That keeps the tree from reading as a craft project. Use three flower sizes (2.5″, 4″, 6″) and push the stems deep into the branches so they nestle instead of poking out. Warm white mini lights (not cool white) will make the gold, fuchsia, and blue baubles glow without washing out the pink.
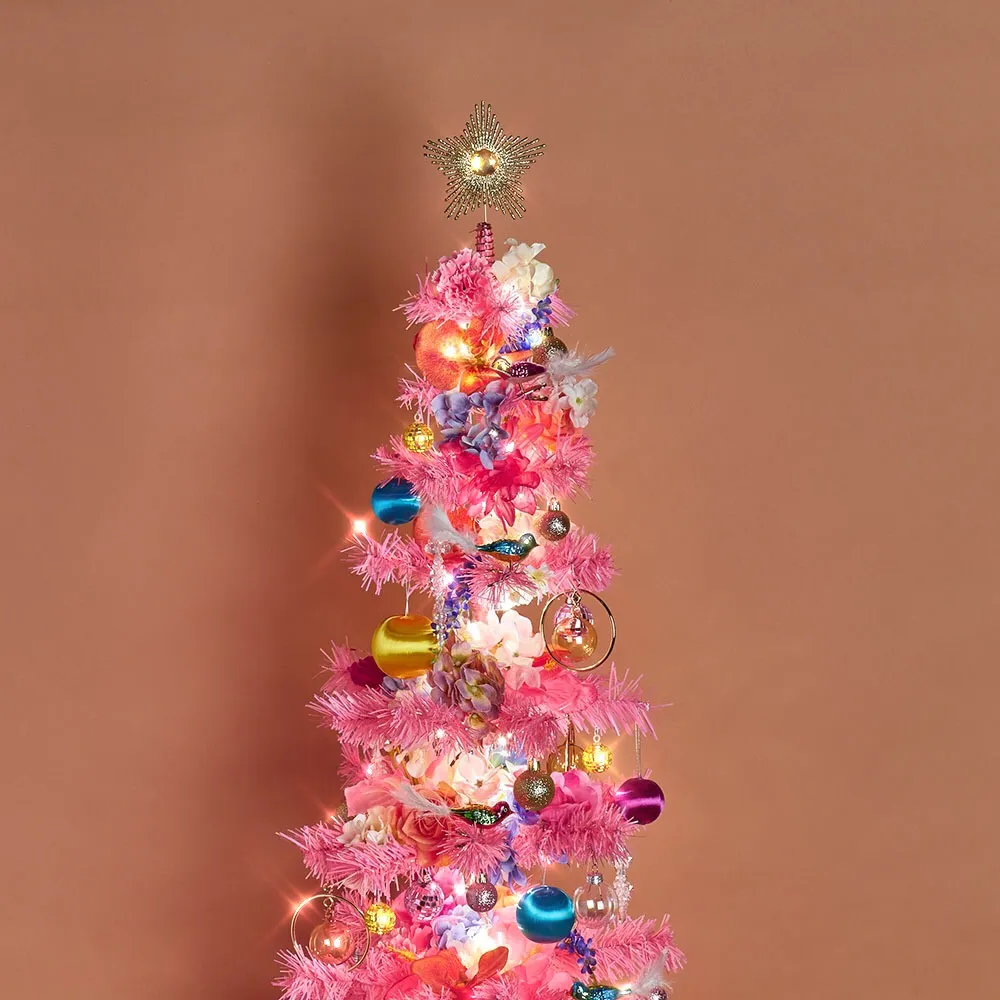
- Pink artificial tree (7.5 ft): $120–$350
- Assorted spherical ornaments (50 pack): $25–$60
- Faux flowers (pink, white, purple): $40–$90
- Warm white string lights (2 strands): $20–$40
- Gold star topper: $15–$35
- Total: $220–$575
- Budget alternative: Use a 6.5 ft pink tinsel tree from Amazon ($60), swap real glass ornaments for shatterproof ones from Target ($20), and hit the dollar store for faux flowers—you’ll get the same vibe for about $110.
2. Pastel Candy Wonderland Tree and Shop Display
The oversized nutcracker is the one thing holding this whole candyland vignette together. Take it away and the pastel tree, wicker baskets, and glitter ornaments all compete for attention without a clear focal point. Its vertical height pulls your eye upward, while its pastel palette ties the pink and blue wall panels into the tree. If you copy this, invest in one statement nutcracker—not a set of three. That single sculptural figure brings the whole corner to life.
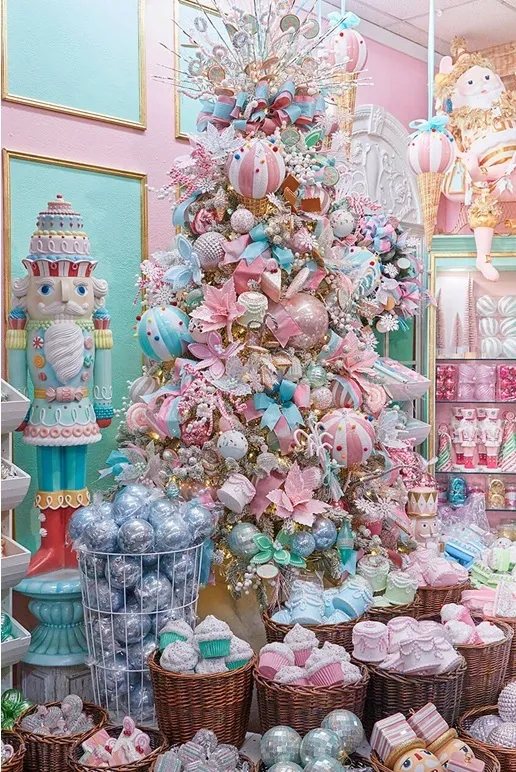
What makes this work is the balance between soft and structured. The pastel pink and blue wall panels create a flat, sugary backdrop, but the brown wicker baskets add natural texture that keeps the scene from feeling like a candy factory display. The repetition of round ornaments—cupcakes, ice cream cones, spheres—creates rhythm, while the large tree and nutcracker break up the scale. That contrast between glossy glitter and matte wicker is what saves it from being too childlike.
3. Grand Gingerbread House Under Construction
This look is a commitment. That gingerbread house isn’t a small tabletop decoration—it’s a floor-standing structure that needs at least a 10-by-12-foot open area and a high ceiling to feel grand rather than cramped. If your living room is under 200 square feet, skip it or scale down to a countertop version. The construction itself is surprisingly delicate; those icing details crack if someone bumps into a ladder. Also, the chefs in white uniforms are part of the charm, so plan for a professional baker or a very patient friend.
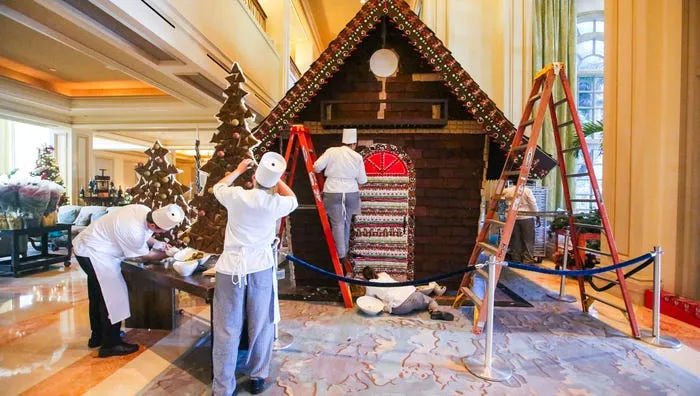
For this to work, you need a room with a minimum 9-foot ceiling and at least 120 square feet of clear floor space. The gingerbread house shown is roughly 7 feet tall; anything smaller loses the whimsy. Compare this to the pastel bottle brush centerpiece, which needs only a dining table—same festive energy, fraction of the footprint.
4. Red and White Candy Cane Tablescape
You don’t need a custom embroidered runner to steal this table. Hit IKEA for a plain white tablecloth ($15), Target for red berry stems ($8 for a bundle), and use red taper candles you probably already have. The key is layering: a $12 red-and-white striped placemat from HomeGoods under each plate gives that candy cane anchor. Total cost under $60 versus the designer version at $200+. The red berries are the real trick—they add height and texture without buying expensive centerpieces.
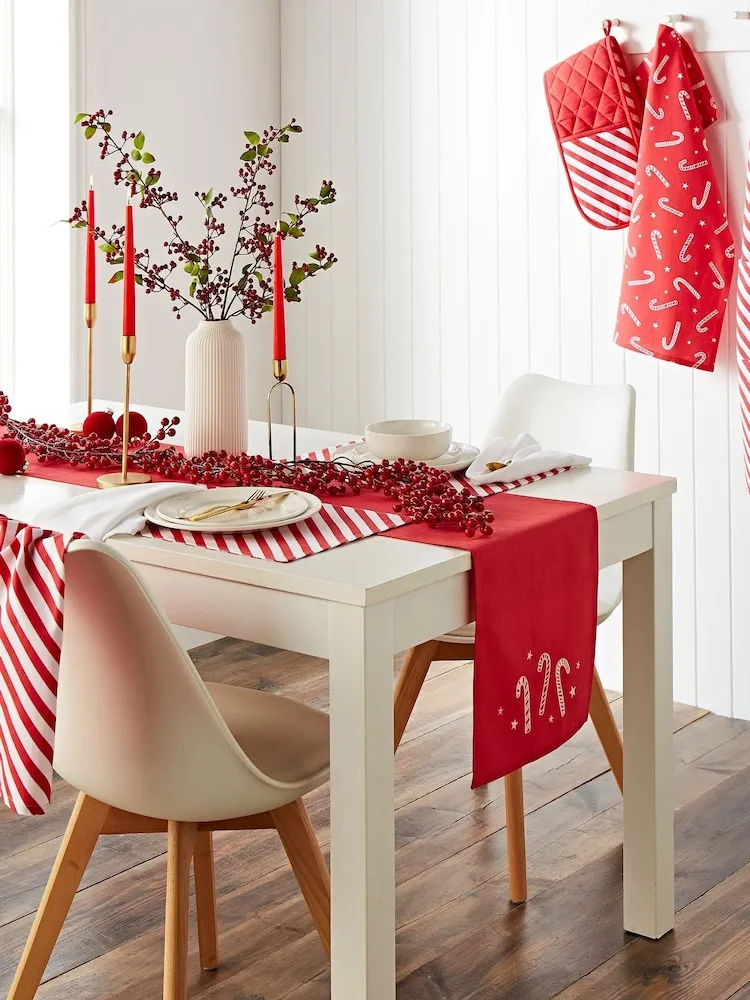
This tablescape is 50% red, 40% white, 10% gold. The dominance of red comes from the runner, berries, and candles, while white balances the plate stack and wall. Gold stays as a small metallic accent in the candle holders. Want a pastel twist? Swap the red for blush pink and the gold for silver—same proportions, completely different mood. Compare with Idea #27, which uses the same candy cane motif but in pillow form on a beige sofa.
5. Pastel Santa Figurines with Miniature Trees
These pastel Santas are part of a bigger 2026 shift away from heavy traditional red toward what designers call “dopamine decor”—soft greens, pinks, and greys that feel nostalgic but fresh. The blurred silver tinsel tree in the background is no accident; tinsel is back in a big way, especially paired with bottlebrush miniatures. This look is trending because it’s endlessly photographable and works in small doses—three figurines on a mantel or shelf can carry an entire holiday vignette without a full tree.
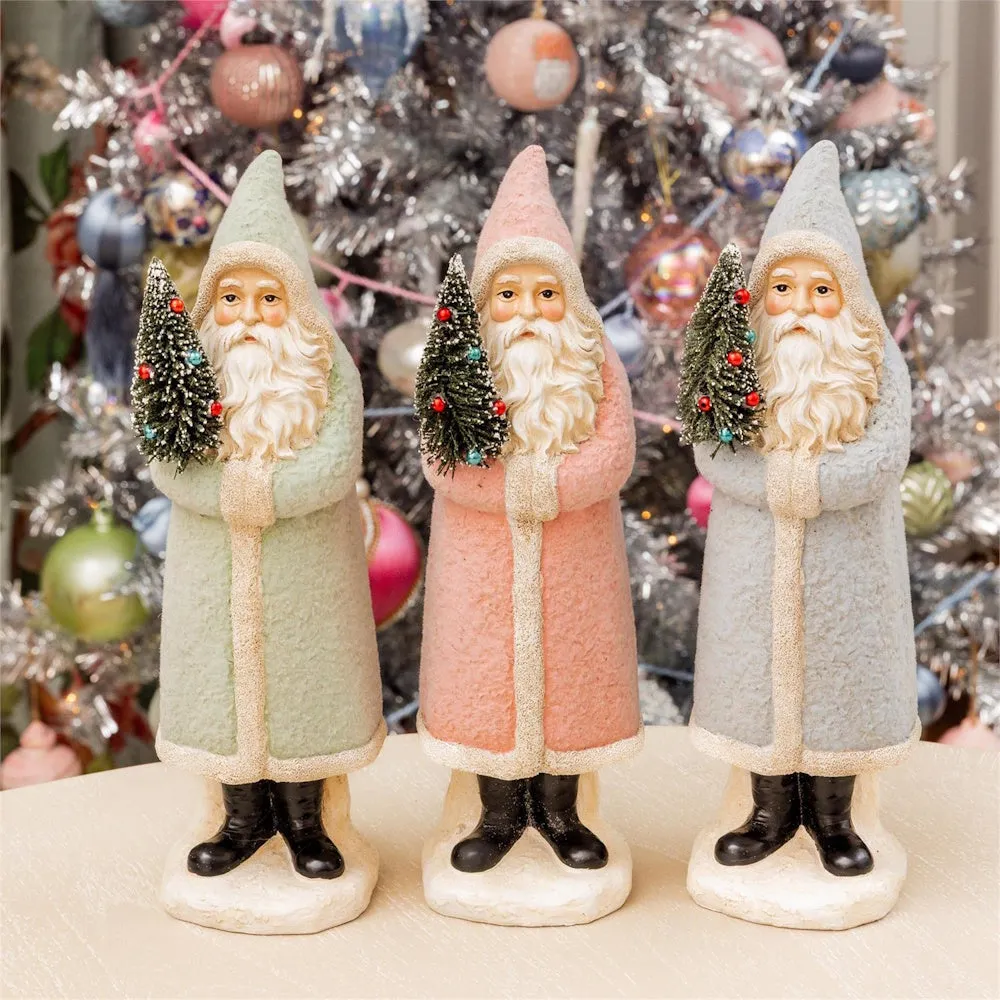
- Buy three identical Santa figurines in different pastel colors (green, pink, grey) for about $12–$18 each at craft stores.
- Gather three miniature bottlebrush trees in varying heights—IKEA and Target have sets under $15.
- Place the Santas in a triangle, with the tallest tree behind the center Santa.
- Add a strip of faux snow or white batting under the front two Santas to create depth.
- Step back and adjust until no two Santa hats are at the same height. Total time: 15 minutes. Cost: under $60.
6. Pastel Nutcrackers with Gingerbread and Cake Hats
Those glitter accents on the nutcrackers will shed like confetti every time you move them. Expect to vacuum the surrounding shelf weekly during December. The cake and gingerbread hats are delicate—a drop from counter height snaps the icing details. Keep them on a high shelf or inside a glass cabinet if you have cats. A soft microfibre cloth is your only safe cleaning tool; water will dissolve the sugar-paste look. If shedding bothers you, choose matte-painted versions instead—same whimsy, 80% less glitter clean-up.
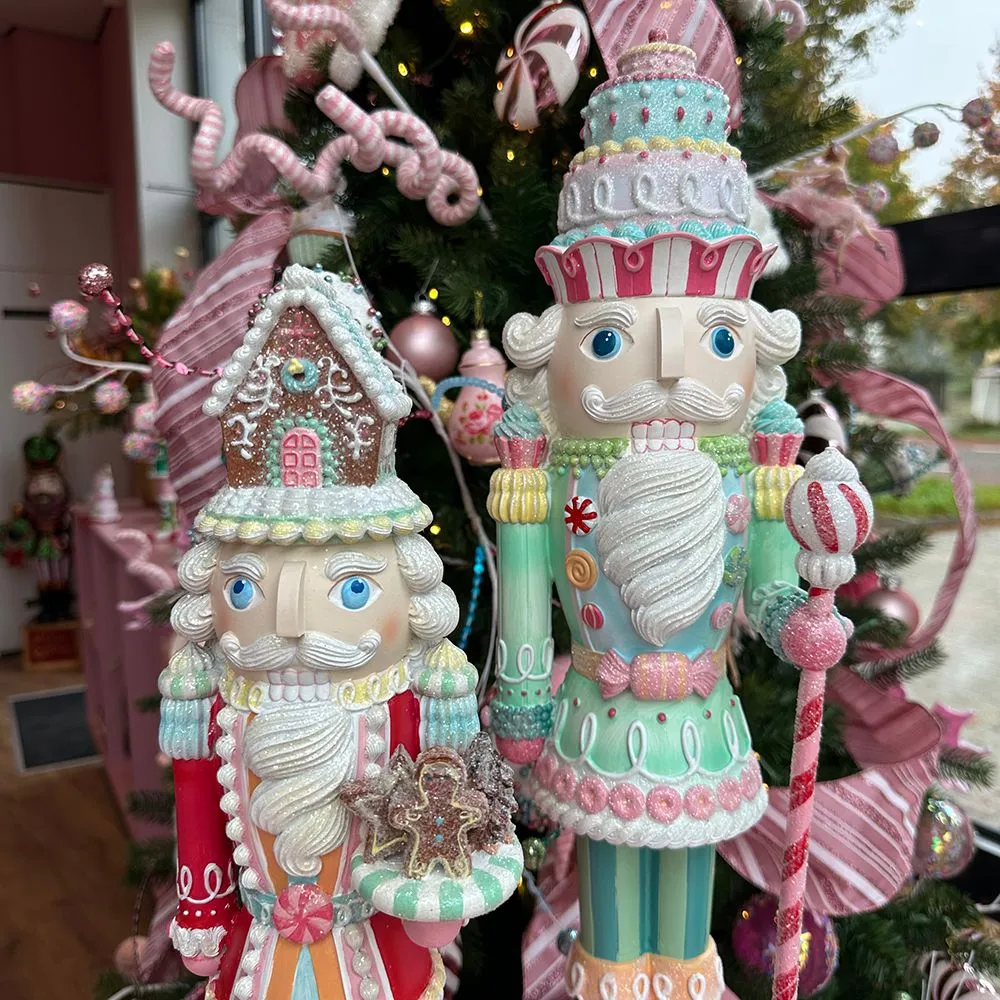
When styling two large nutcrackers, give them different hats—one gingerbread house, one tiered cake—so they feel like characters rather than twins. Place them 18–24 inches apart on a console, then let the Christmas tree’s warm lights blur behind them. That separation creates a visual dialogue and keeps the pastel palette from becoming one flat wall of sugar. Add one small striped candy cane staff between them as a connector, and you’ve got a curated moment, not clutter.
7. Pink Iridescent Beaded Ornaments
you can’t lose here is the beadwork. Plain pink iridescent ornaments are everywhere, but the dense clusters of green, white, and red microbeads turn each sphere into a tiny textile. That texture catches light differently—the smooth iridescent surface reflects, while the beads absorb and diffuse. Remove the beads and you’re left with a generic shiny ball. If you’re DIYing this, buy plain pink glass ornaments and a bead mix from the craft store, then glue in small patches for the same effect.
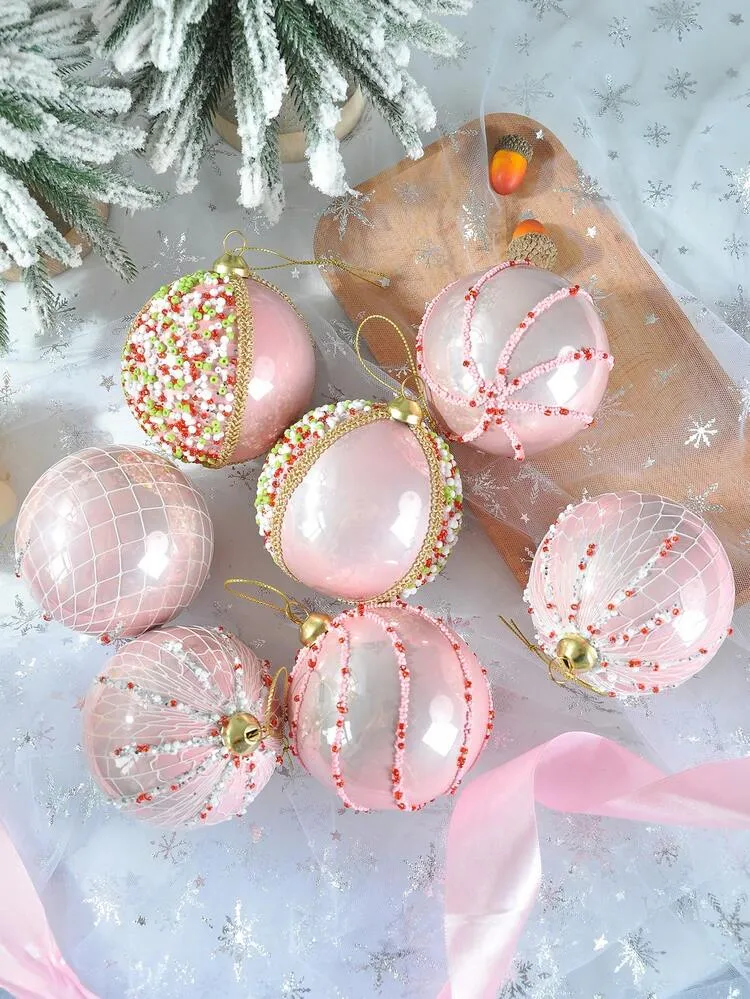
What makes this arrangement work is the tension between delicate and dense. The sheer snowflake fabric and frosted evergreen branches are airy and soft, while the beaded ornaments are heavy and intricate. That contrast draws your eye to the ornaments as the stars. The gold caps and hanging loops add a touch of warmth that keeps the pink from feeling saccharine. Keep the palette tight—pink, white, red, light green—and let the beads do the talking.
8. Close-Up Pink Tree with Fairy Lights
This close-up view works because the tree is dense enough to hide the mechanics. For this effect, you need a tree with at least 600 tips on a 6.5-foot model, or a 4-foot tabletop version if you’re tight on space. The fairy lights should be woven close to the trunk so they glow through the pink tinsel. Compare with Idea #1, which shows the full tree—same pink base, but here the ornaments do the heavy lifting instead of the overall silhouette.
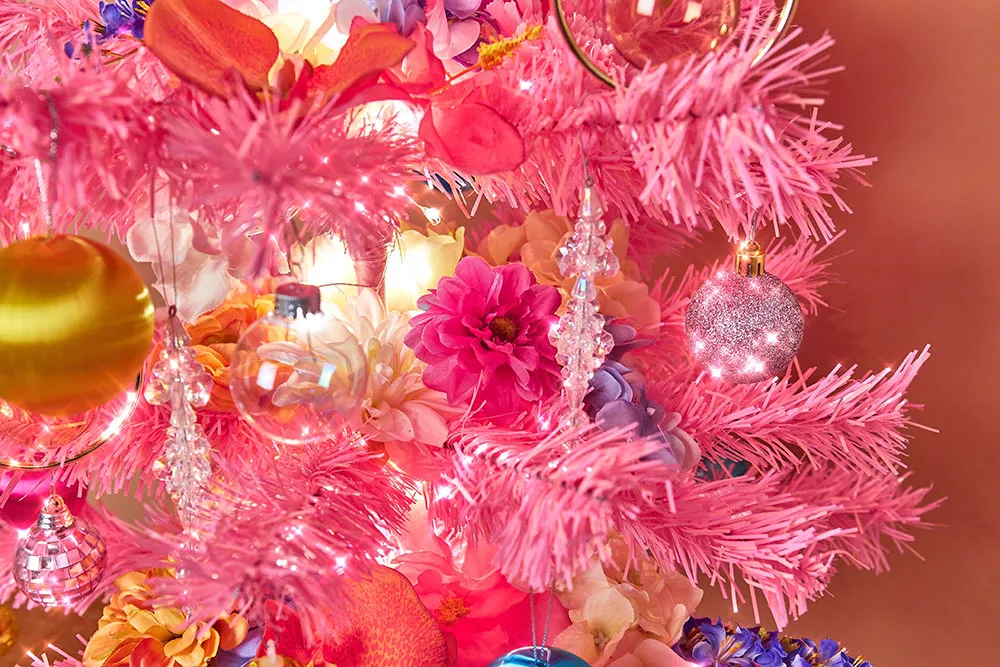
Walmart sells pink tinsel trees for around $35, and a 100-pack of shatterproof glitter baubles costs $15. Fake flowers from the dollar store (spray-painted with a light coat of glitter) add the floral drama. The key is layering—bunch three flowers together with a clear ornament in between, then stick the stems into the branches. You’ll spend under $70 for a tree that photographs like a designer installation.
9. Swirl Lollipop Ornament on Frosted Branch
- Cut two 5-inch circles from thick cardboard or foam sheets.
- Paint red, white, and mint green stripes in a swirl pattern using acrylic paint; let dry for 30 minutes.
- Wrap the edges with red ribbon and attach a small bow at the top.
- Hot-glue a wooden dowel or candy stick to the back, leaving 3 inches below the circle.
- Hang from a frosted branch with a red-and-white striped ribbon. Time: 45 minutes per ornament. Material cost: under $5 each.
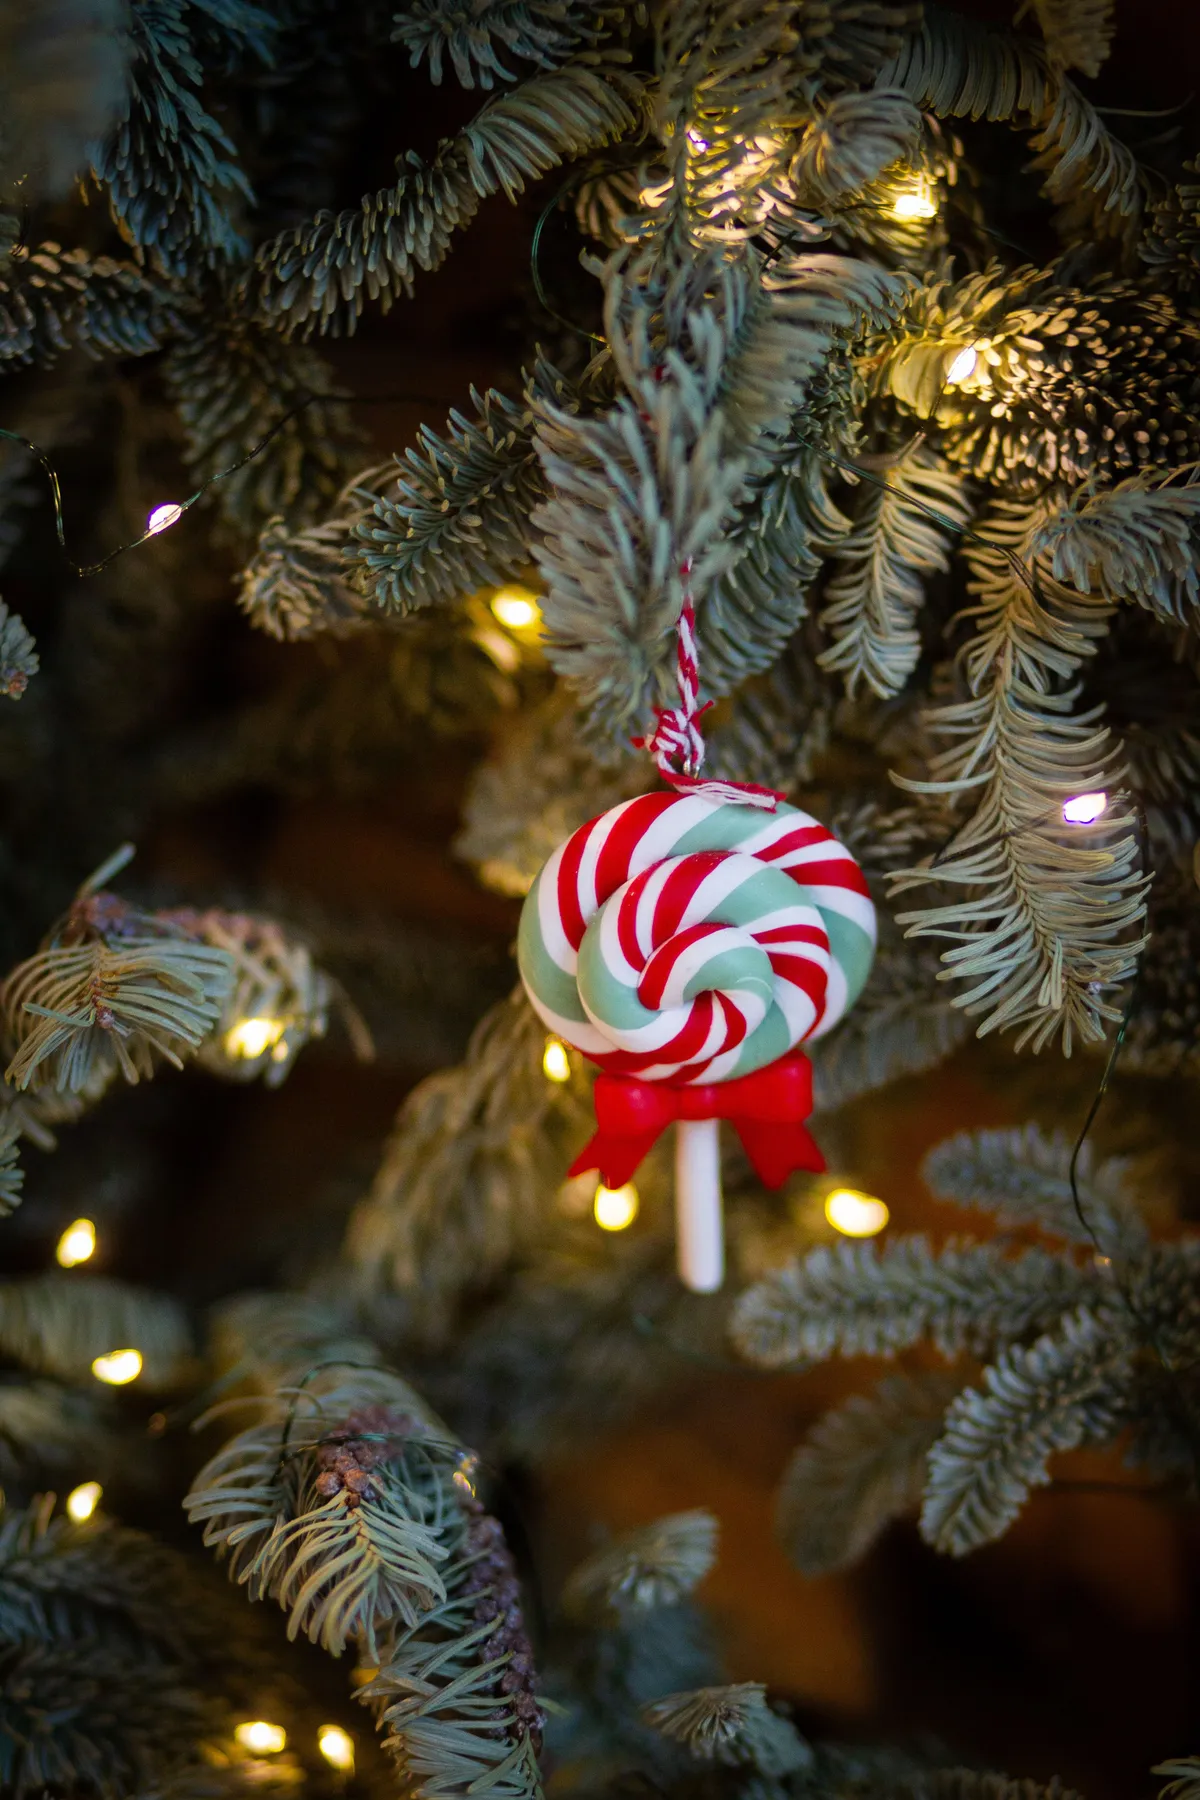
This lollipop ornament is adorable, but it can read as “kids’ craft” if you’re not intentional. The frosted branch and warm string lights elevate it, but on a bare green tree it looks lost. Also, hand-painted swirls chip if ornaments clank together—store them in separate tissue paper. If you want the look without the DIY time, buy pre-made lollipop ornaments at Michaels for about $8 each. They’re sturdy but still need gentle handling.
10. Sparkling Candy Cane Ornament Collection
This collection follows a 70/20/10 split—70% red and white candy cane shapes, 20% silver glitter bases and subtle sparkle, 10% plain red baubles for depth. To recreate it, pick a pre-made red and white ornament set, then add silver glitter spray or a dusting of fine glitter on every third piece. The silver acts as a bridge between the bright red and the white, softening the contrast. Swap red for pastel pink and silver for gold to get a pastel palette.

that makes this collection sing is the glitter. Without it, the candy cane ornaments read as plastic supermarket finds. The fine sparkle catches holiday twinkle lights and creates a cohesive sheen across different shapes—canes, spheres, wrappers. If you’re buying pre-glittered, look for ornaments with embedded glitter rather than loose top-coat, which sheds. That subtle sparkle is the difference between “cute” and “curated.”
11. Swirl Candy and Starburst on Lit Tree
What makes this pairing work is the shape contrast: a smooth, round candy ornament next to a spiky, angular starburst. The eye bounces between the two, creating visual interest without adding more colors. The pine green acts as a neutral backdrop, letting the red-pink swirl candy and silver starburst pop. The soft white lights blur in the background, adding depth and keeping the foreground crisp. This is a study in restraint—just two ornaments, but they hold the frame.
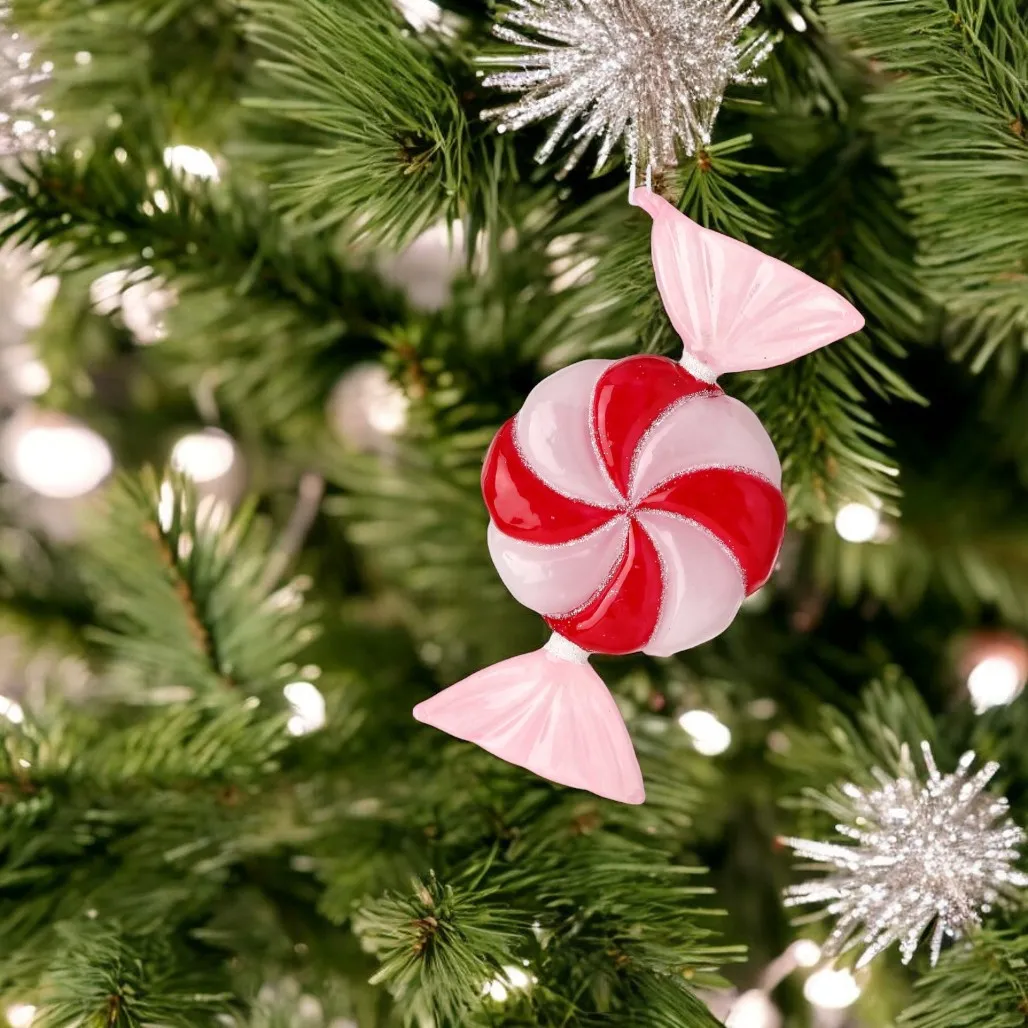
Starburst ornaments are having a real 2026 moment, riding the wave of 1970s retro nostalgia that’s all over Pinterest right now. Think atomic age shapes, brushed silver, and that mix of shiny and matte. Pairing them with candy-themed ornaments is a playful twist that feels both vintage and fresh. The trend has legs because it’s easy to incorporate—one starburst among your existing baubles instantly updates a tree without a full redecorate.
12. Snowman Candy Cane Glitter Ornament
Hang this ornament at eye level, about 12 inches from a warm white light string on the tree. The blurred bokeh in the background only works if the ornament is forward-facing, so position the snowman’s face toward the room. The red felt scarf is a tactile anchor—fluff it slightly when you first hang it. Use a dark green branch as the backdrop; it makes the red and white stripes snap. This ornament should be the first thing you hang, then build smaller baubles around it.

The glitter on the candy cane body will leave a fine dust on nearby branches every time you adjust the ornament. Store it in its own box or a plastic cup with tissue paper, not loose in an ornament bin. The felt scarf attracts lint; a quick pass with a lint roller each year keeps it crisp. If you have kids, this ornament is fragile—the top hat and berries are glued on and snap off easily. Consider hanging it higher on the tree where little hands can’t reach.
13. Two Large Lollipop Decorations with Glitter Bows
Those large lollipops are essentially foam discs with painted stripes and a glitter bow. Buy a 12-inch round foam board from the craft store ($6), paint red swirls on white using acrylics, then hot-glue two strips of red satin ribbon into a bow at the base. A 12-inch wooden dowel painted white becomes the stick. Total cost under $12 each, versus $45–$60 for store-bought versions. You can make a pair in an afternoon, and they’re lightweight enough to lean against a wall or prop in a basket.
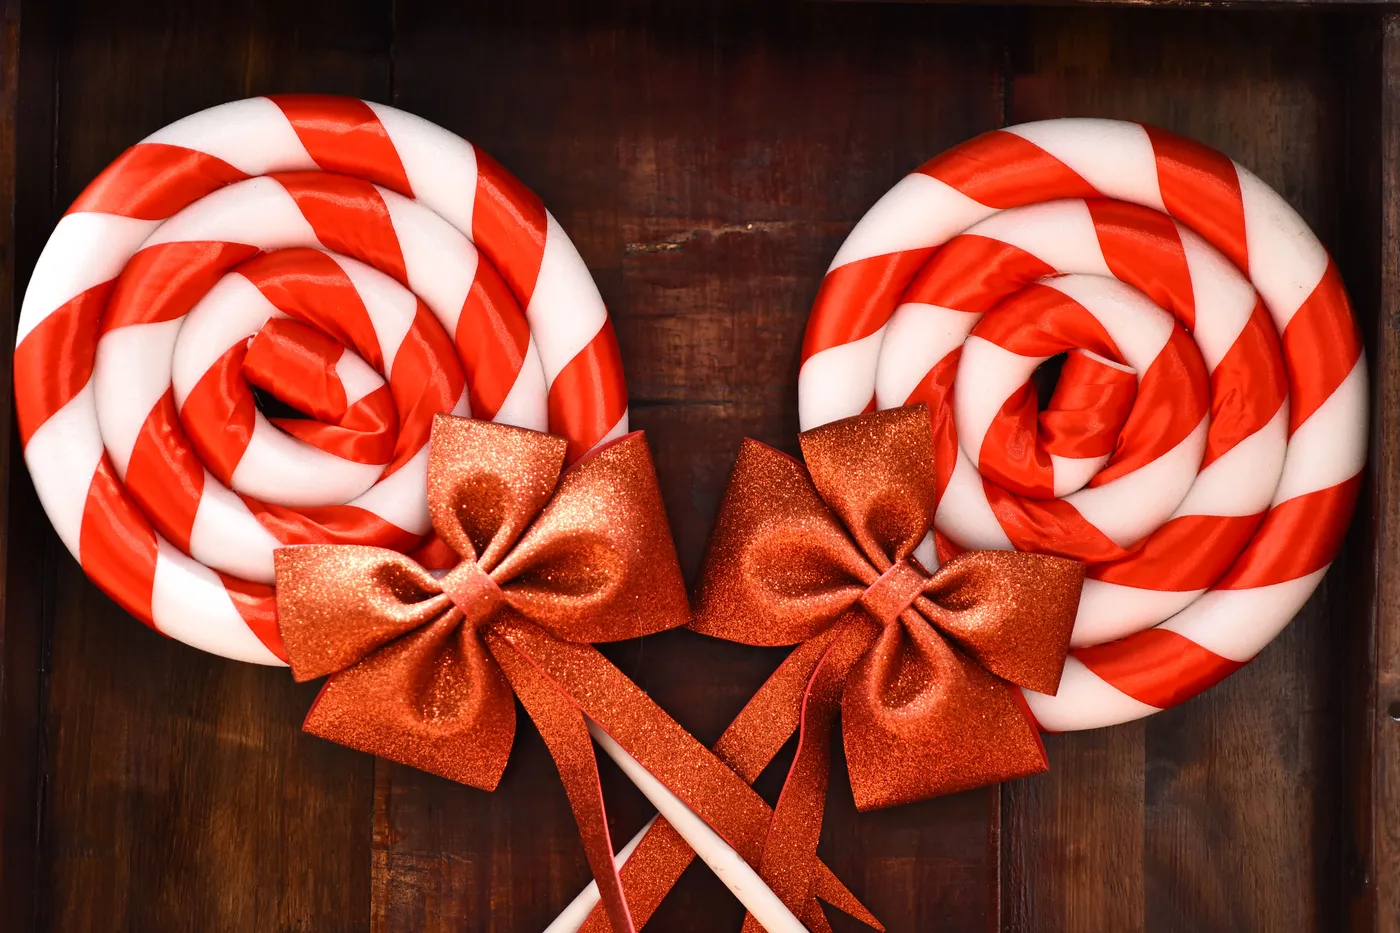
The visual weight is 80% lollipop, 15% glitter bow, 5% stick. That means the bow should be substantial—at least 6 inches across—but not so large it covers the swirl. The dark brown wooden background provides contrast, so keep the surrounding decor minimal; one or two of these against a plain wall will read as intentional. For a pastel twist, swap the red for pink and the brown background for a cream wall.
14. Intricate Gingerbread House Display with Blue Accents
This multi-story gingerbread house is spectacular, but it’s a display piece, not a toy. The white icing “snow” details are fragile—one curious child or a bump from a vacuum can crack a balcony. You need a dedicated sideboard or table at least 3 feet wide, with stanchions or ropes if you want to keep it safe. The illuminated windows require battery-operated tea lights; expect to replace them every 20 hours. If you have pets that jump, put this behind glass or skip it for a smaller version like Idea #24.
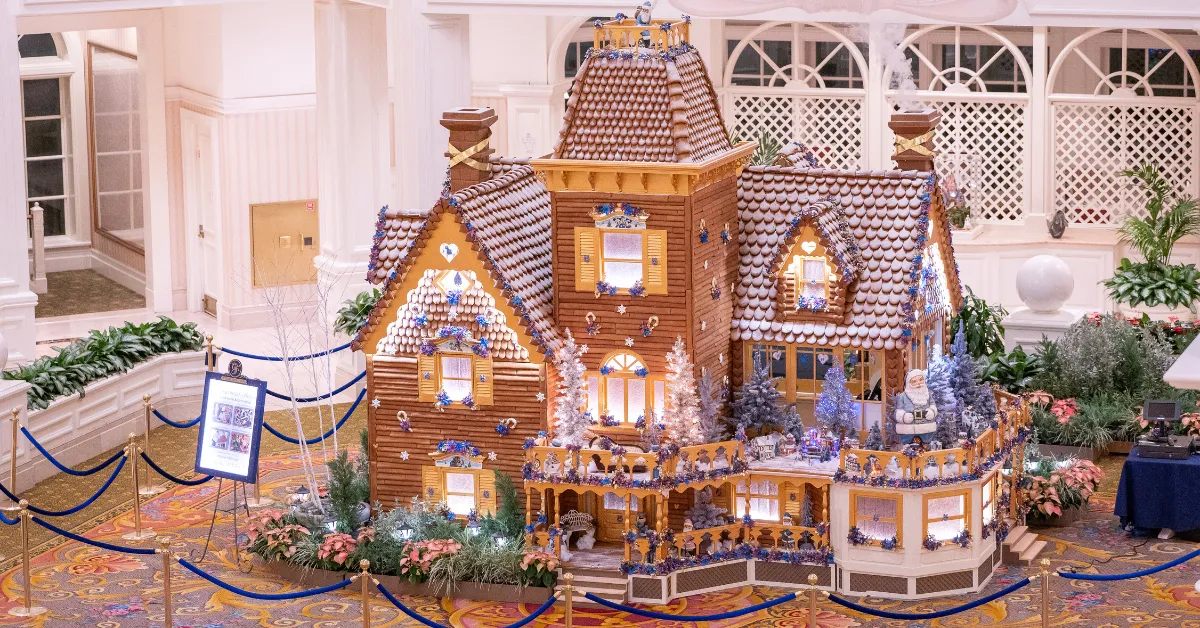
- Large gingerbread house kit (multi-story): $60–$140
- Blue and gold snowflake ornaments (set of 12): $15–$30
- Miniature frosted trees (6 pack): $18–$35
- Santa figurines (2–3 small): $12–$25
- Battery tea lights for windows: $10–$15
- Total: $115–$245
- Budget alternative: Use a pre-built cardboard gingerbread house from Target ($20), paint blue snowflakes yourself, and buy foam trees from the dollar store—total around $50.
15. Pastel Bottle Brush Tree Centerpiece
that makes this centerpiece feel like a design moment is the white artificial snow runner. Without it, a row of bottle brush trees on a pink tablecloth would look scattered. The runner creates a continuous snowy landscape that grounds the varying heights and colors. Use a 12-inch wide strip of quilt batting or faux snow fabric, scrunched slightly to create texture. Then nestle the trees into it, not beside it. That single element turns a table decoration into a cohesive winter vignette.
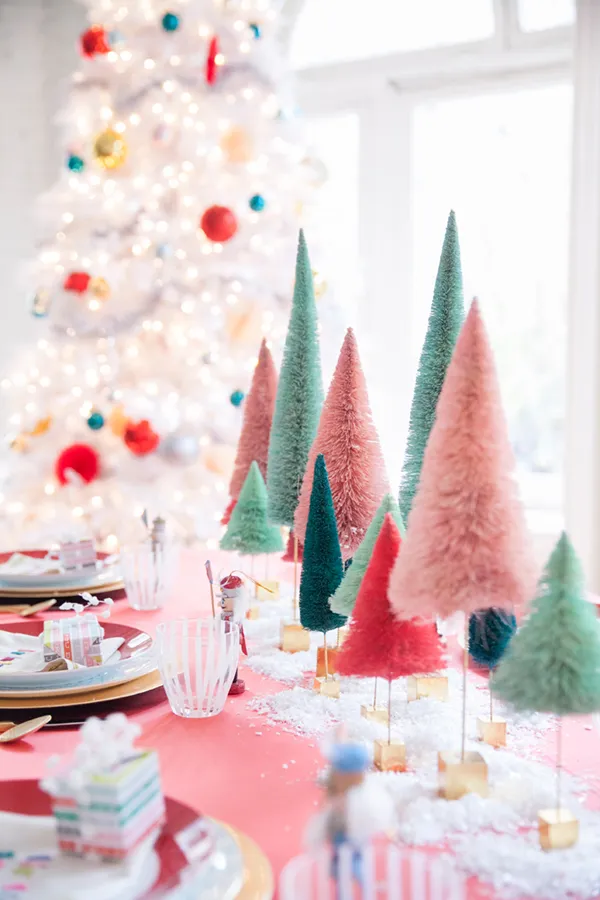
- Cut a 14-inch by 4-foot strip of white quilt batting or faux snow.
- Place it down the center of a bright pink tablecloth, letting it bunch naturally.
- Arrange 12–15 bottle brush trees in varied heights and colors (pink, teal, red), pressing their bases into the snow.
- Add gold charger plates at each place setting, overlapping the snow runner slightly.
- Use clear striped glasses to echo the candy theme. Time: 20–30 minutes. Cost: under $40 for materials.
16. Frosted Candy Cane and Holly Ornament Display
This circular ornament display needs a surface with at least 8 inches of depth so the clear acrylic stand and plaid fabric can breathe. On a narrow shelf under 5 inches, the mug and ornament would crowd each other. A mantel, sideboard, or wide console table is ideal. The light brown wooden surface provides warmth against the cool frosted ornament. For a smaller space, skip the mug and use just the ornament on a stack of two coasters—same effect, half the footprint.
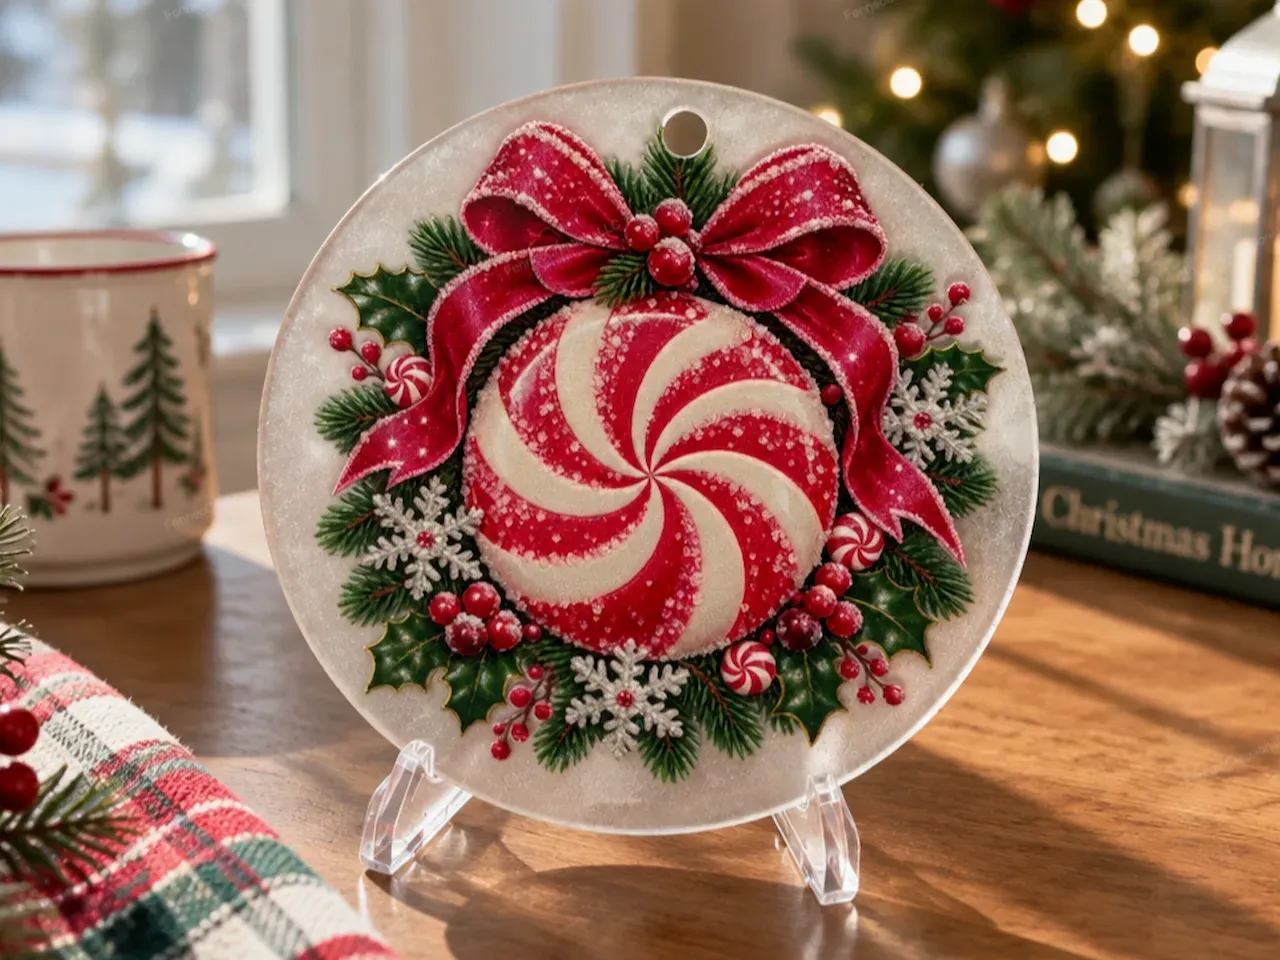
What makes this vignette work is the repetition of red and white. The ornament’s swirled candy center echoes the plaid fabric, while the holly berries and sparkly red bow add texture. The white mug with green trees introduces a subtle secondary color that keeps the red from overwhelming. The clear acrylic stand disappears, making the ornament appear to float. That negative space is crucial—it keeps the arrangement airy, not cluttered.
17. Whimsical Pink Gnome Ornaments and Gifts
Those wooden gnome ornaments are easy to DIY. Buy 3-inch wood slice ornaments from a craft store ($1 each), paint the gnome shape in various pinks, then add a tiny white pom-pom for the beard and a scrap of plaid ribbon for the hat. You can make a set of six for under $10. Wrap your gifts in kraft paper and tie with red satin ribbon to match the photo. The pine cones and red beads are optional—grab them from your yard or dollar store.
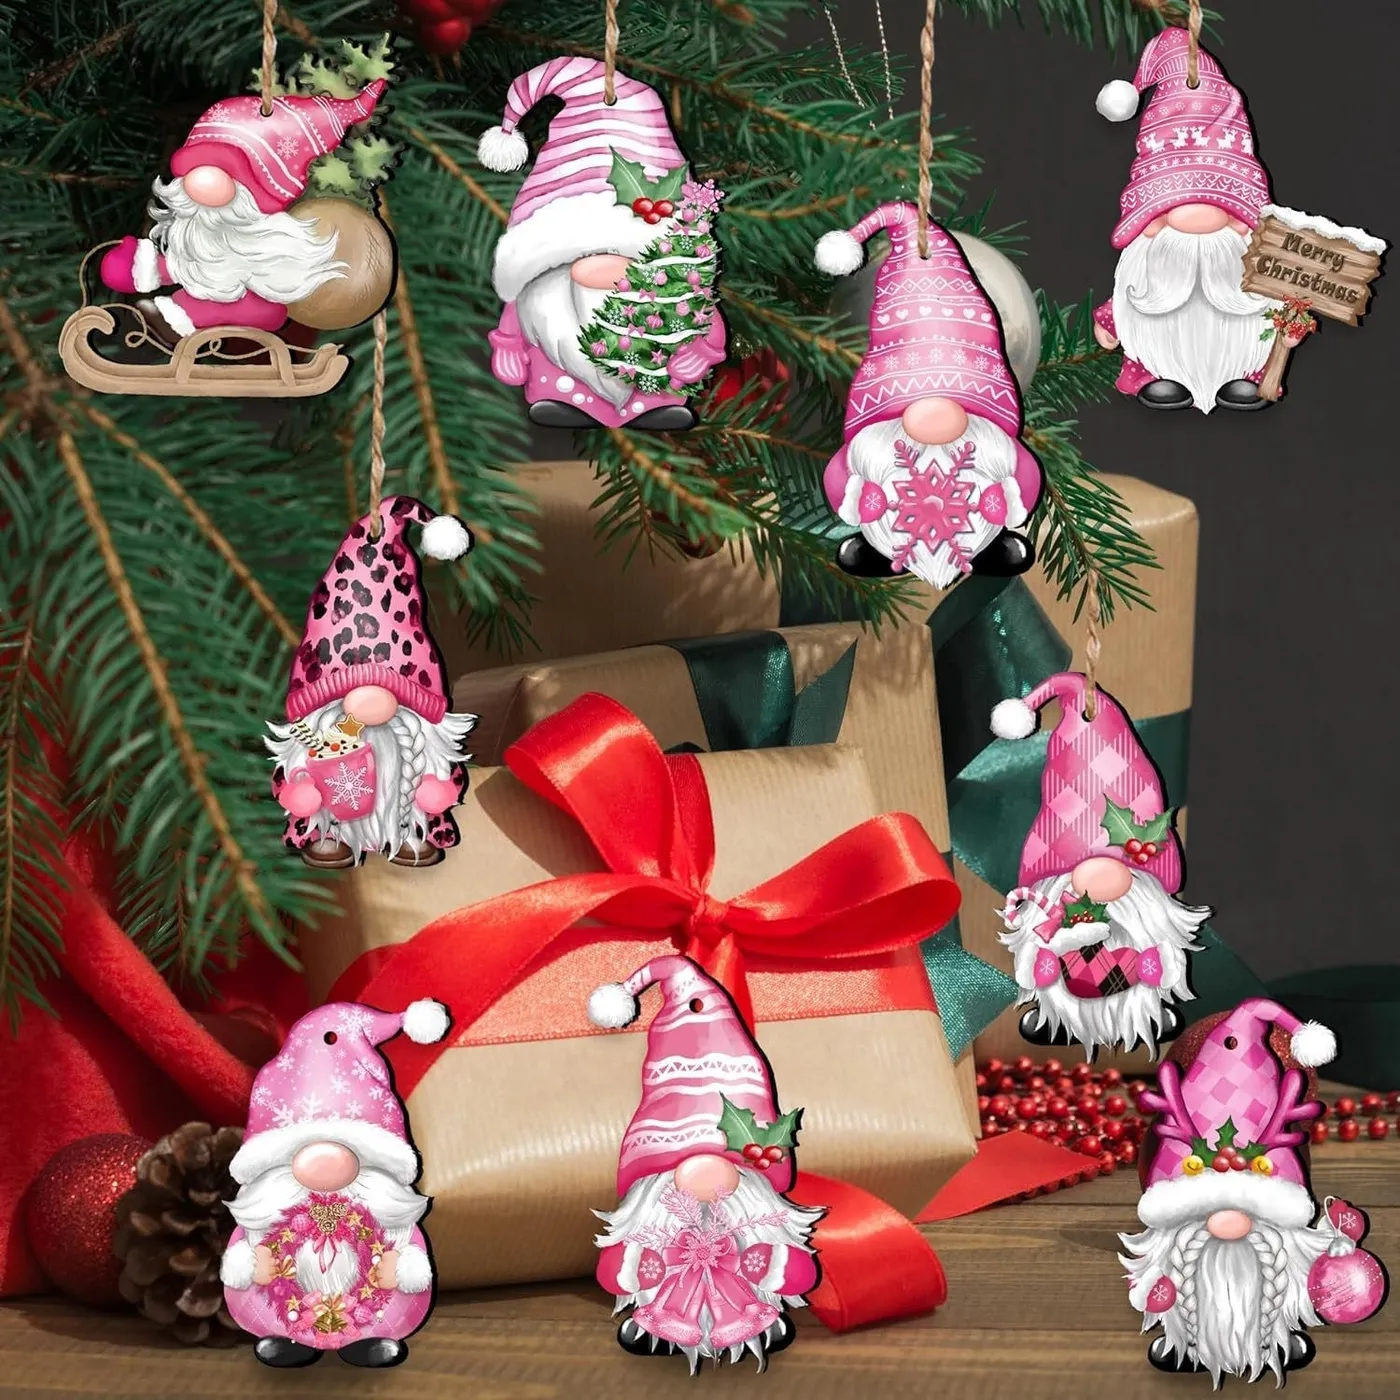
Pink gnomes are adorable, but this trend can go 0 to “grandma’s craft fair” real fast. Stick to a maximum of three gnome ornaments per tree or vignette. The kraft paper packages in this photo ground the pink with a natural, neutral texture—without that, the scene looks like a candy factory exploded. If you love the gnome look but want something more sophisticated, swap the wooden gnomes for ceramic versions in matte blush, and reduce the number to one statement piece per surface.
18. Quilted Fabric Christmas Ornament
Ornament composition is 60% red quilted fabric, 30% white/silver patterned sections, 10% clear jeweled tree embellishment. The red dominates but the silver sequin trim breaks it up and adds shine. To replicate, choose fabrics with snowflake motifs and alternate triangular sections. The jeweled tree at the center is the focal point—keep it small but high-contrast. If you’re making your own, use foam balls and fabric glue; it’s a 20-minute project.
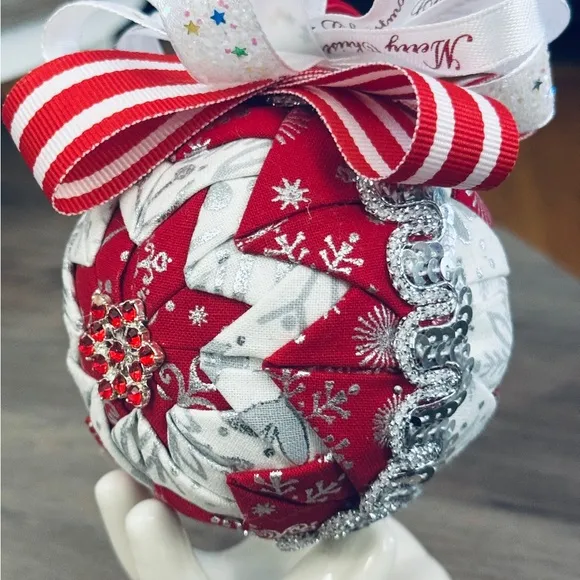
Quilted fabric ornaments are part of the 2026 “sew your own holiday” movement, driven by cottagecore and the desire for handmade, heirloom-quality decor. People are tired of mass-produced shiny plastic, so they’re turning to fabric textures that feel personal. This ornament bridges traditional red and white with subtle silver sparkle, making it appeal to both classic and modern tastes. Expect to see more quilted, embroidered, and fabric-wrapped ornaments on trees this year—this one is a perfect entry point.
19. Pastel Sprinkle Ornaments and Glitter Trees
When styling a coffee table or console, always start with a tray. Here, a gold beaded tray about 12 inches in diameter corrals the sprinkle ornaments, mini trees, and bells into one cohesive vignette. The tray acts as a frame—everything inside reads as intentional, everything outside reads as clutter. Choose a tray with a slight lip to keep round ornaments from rolling. Then layer: tallest items at the back, small ornaments and bells in front. The tray is doing 80% of the work here.
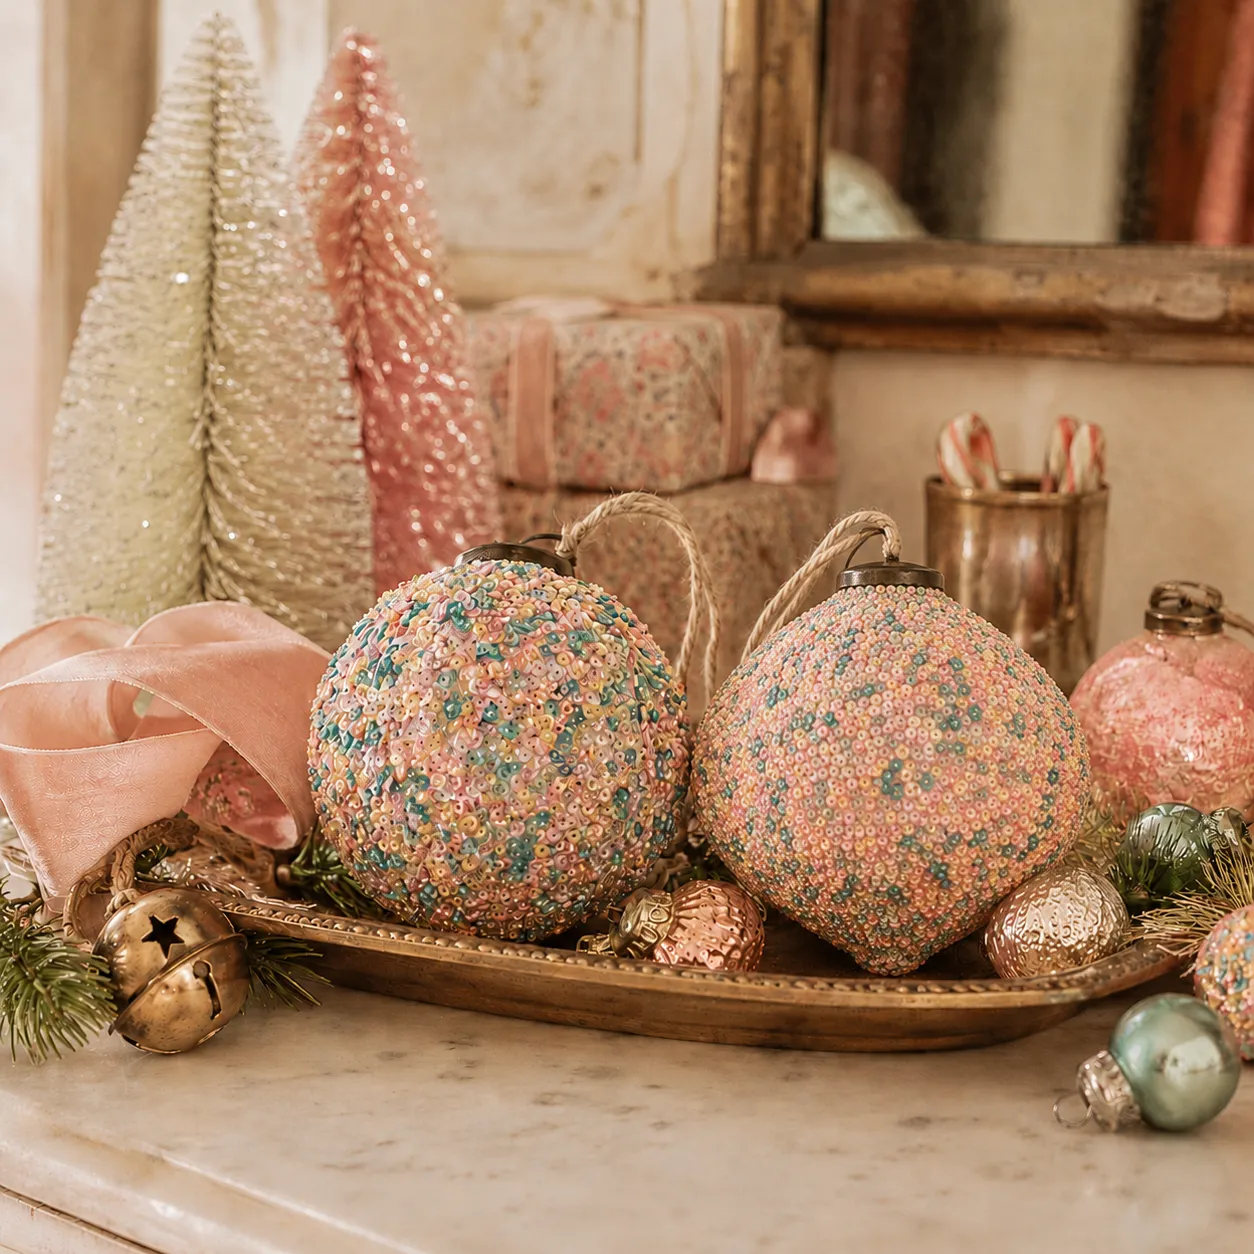
that elevates this scene is that gold beaded tray. Without it, the two large sprinkle ornaments and mini trees would look like random objects on a table. The tray gives them a defined boundary and adds a metallic warmth that balances the pastel palette. It also makes the vignette portable—you can move the whole thing to a sideboard when guests arrive. If you only buy one piece for your candyland decor, make it a statement tray.
20. Pink Glitter Santa Ornament on Tree
Pink glass ornaments with glitter accents are gorgeous but high-maintenance. The silver chain is delicate—it can snap if you pull too hard, sending Santa to the floor. Store this ornament in a dedicated box with tissue paper; never toss it in the general bin. The swirled candy belly design is painted on, so avoid rubbing it with a cloth. If you have a cat that climbs the tree, this should go on a high branch, out of paw range. A quick annual dusting with a dry, soft brush keeps the glitter sparkly.
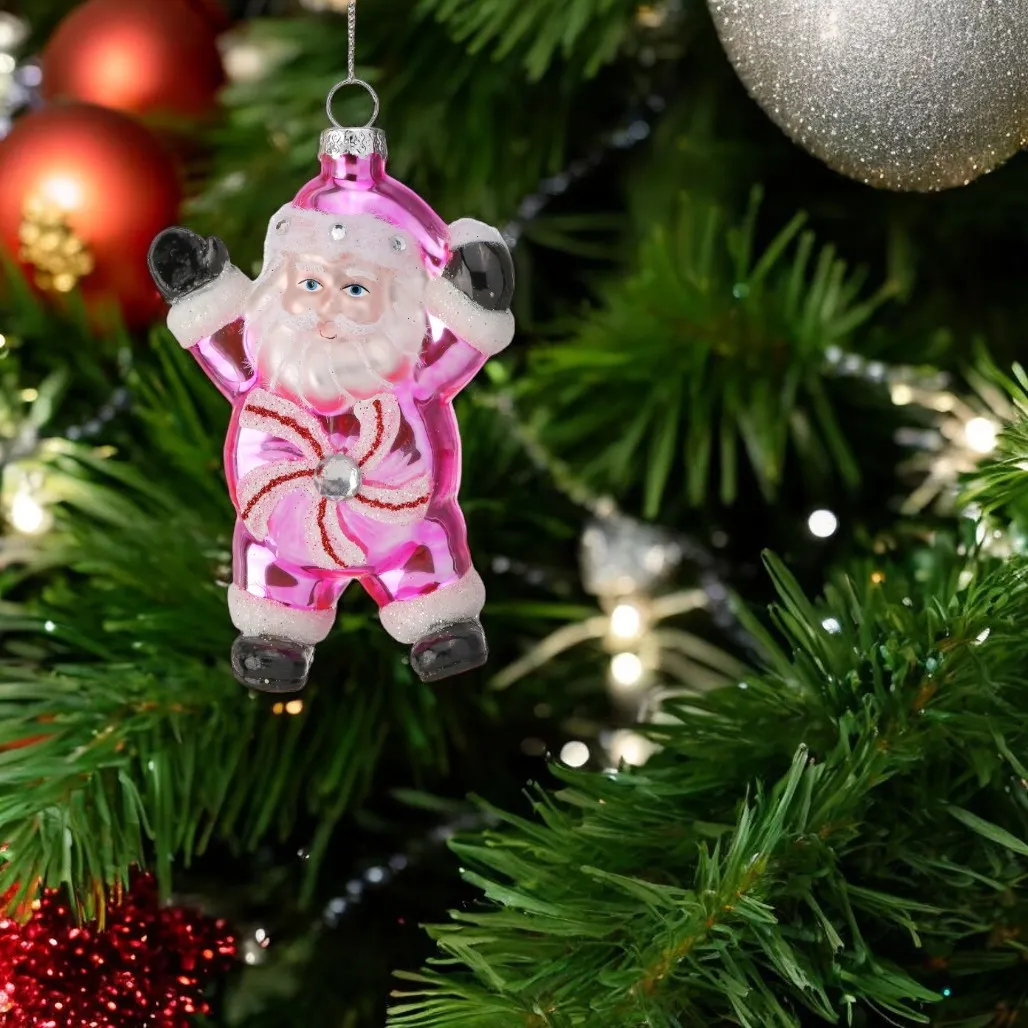
This ornament works best on a tree at least 6 feet tall, where the green branches provide enough contrast behind the pink glass. Hang it no lower than 3 feet from the floor to keep it safe from pets and small children. The warm white string lights should be placed behind and slightly above the ornament to create that soft glow. For smaller tabletop trees under 4 feet, choose a smaller version—this one is about 4 inches in diameter and will overwhelm a tiny tree.
21. Outdoor Gingerbread and Lollipop Decor
- Cut 2-foot diameter circles from 1/2-inch plywood using a jigsaw.
- Sand the edges smooth and paint with outdoor primer.
- Paint red and pink swirl stripes using exterior acrylic paint; let dry overnight.
- Attach a 4-foot PVC pipe painted white as the stick using strong adhesive.
- Anchor each lollipop in a bucket of sand covered with faux snow. Time: 3–4 hours for two lollipops. Cost: $40–$60.
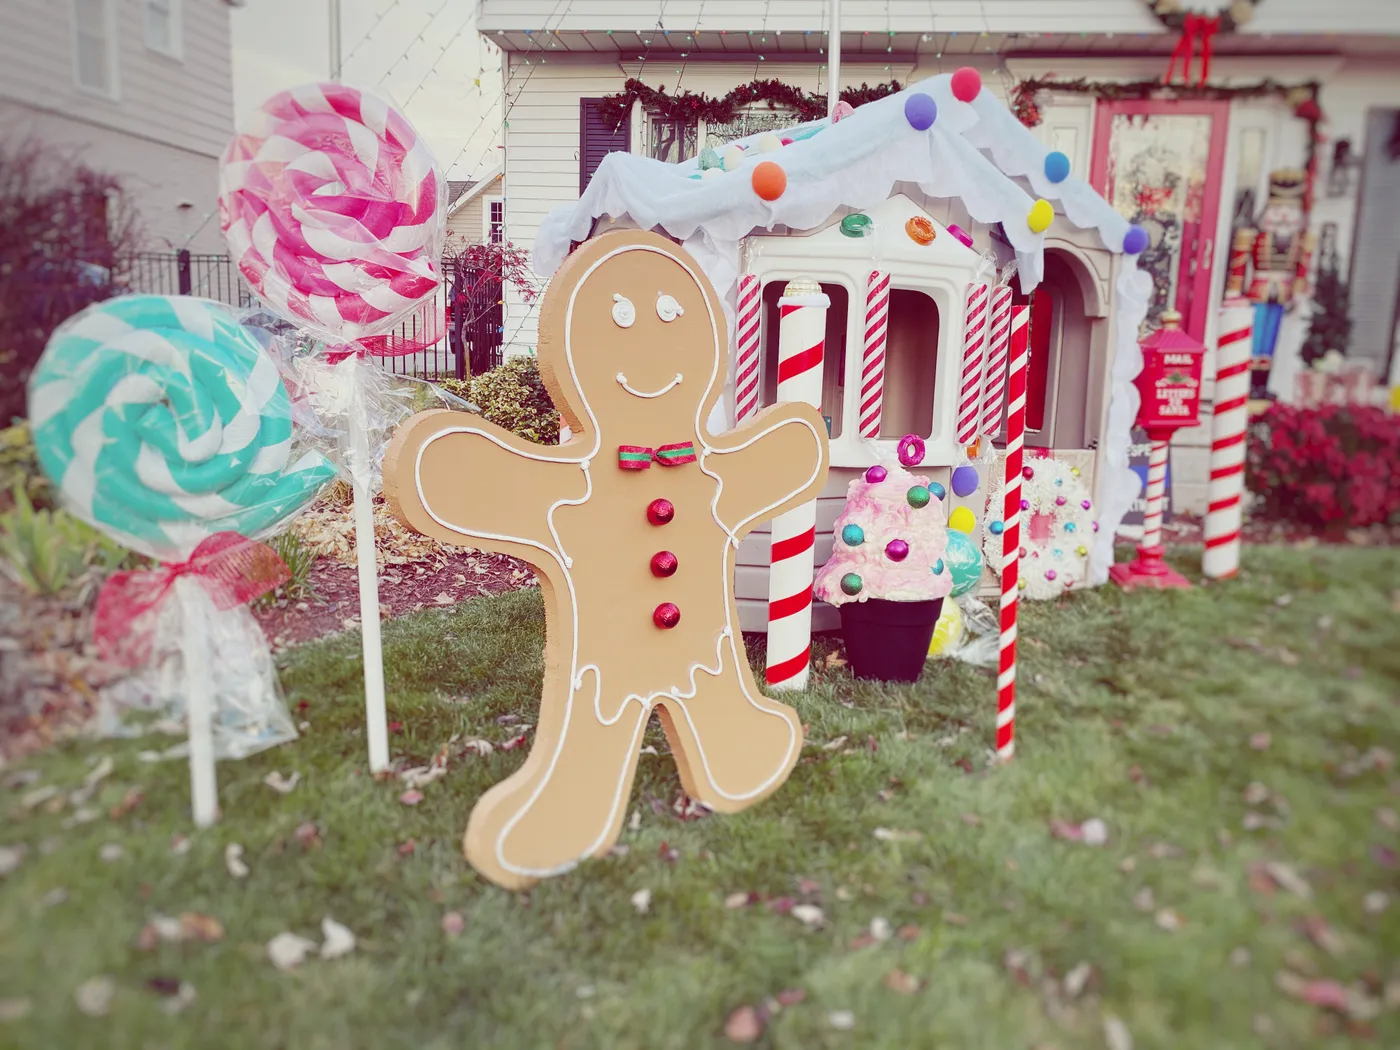
Large gingerbread man cutouts cost $30–$60 each if you buy pre-made, but you can make your own from a $25 sheet of plywood. Draw a simple gingerbread shape, cut with a jigsaw, paint tan with white icing outlines, and seal with outdoor polyurethane. The candy cane columns can be painted PVC pipes wrapped with red tape. Total for a full outdoor vignette: under $150, versus $300+ for store-bought pieces. Compare with Idea #13 for indoor lollipop decor on a smaller scale.
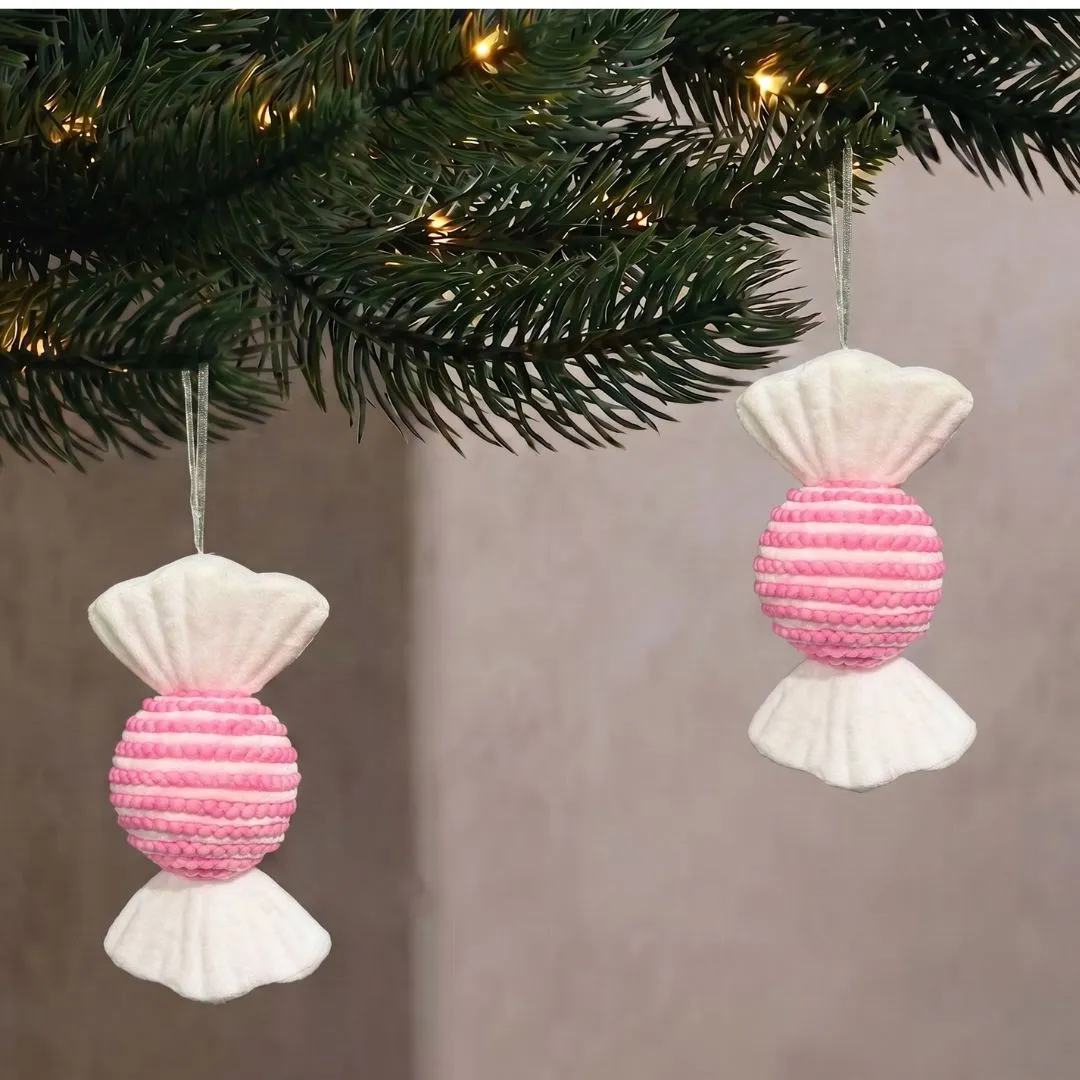
22. Textured Pink Candy Ornaments
What makes these ornaments work is the texture play. The raised horizontal stripes on the spherical pink body mimic a wrapped candy, while the gathered white fabric ends add a soft, fabric-like finish that contrasts with the hard ornament surface. Against the dark green branch and warm lights, they read as sweet but sophisticated. The thin hanging ribbons disappear, letting the ornament float. This is a great example of how texture can carry a design when the color palette is minimal.
|
📋 Copy HEX 🔗 Share |
Without the dark green tree and warm lighting, these ornaments can look like novelty soap. They need contrast to shine—a plain white tree or pale branch would wash them out. Make sure your tree has enough dark foliage and that the string lights are positioned to backlight the white fabric ends. If you’re using them on a sparse artificial tree, fluff the branches to create depth first. Two or three of these ornaments are cute; a dozen becomes monotonous.
23. Red and White Swirl Pillows on Couch
Candy cane pillows are trending hard in 2026 because they offer a low-commitment way to do holiday decor without buying new furniture. You can toss them on a cream couch, snap a photo, and put them away in January. The flocked tree with red and gold ornaments in the background adds depth, but the pillows are the star. People are leaning into textural holiday accents—knits, embroidery, raised patterns—because they photograph beautifully and feel cozy in real life. This look has staying power because it’s practical.
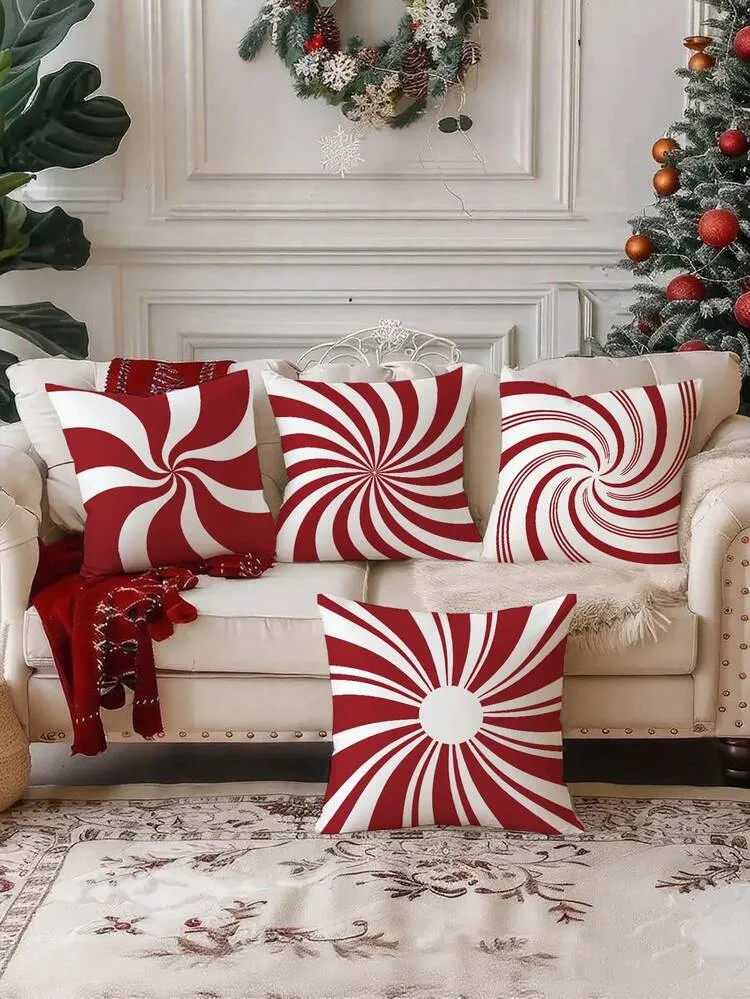
When mixing patterned holiday pillows, stick to one color family (here, red and white) and vary the scale of the patterns. Use a large swirl, a medium radial stripe, and a small knitted texture. Keep the sofa base neutral—cream or beige—so the pillows don’t fight each other. Add one solid red knitted throw blanket to anchor the group. Arrange pillows in odd numbers: five pillows shown here work better than four. Stand back and adjust until the patterns feel balanced from left to right.
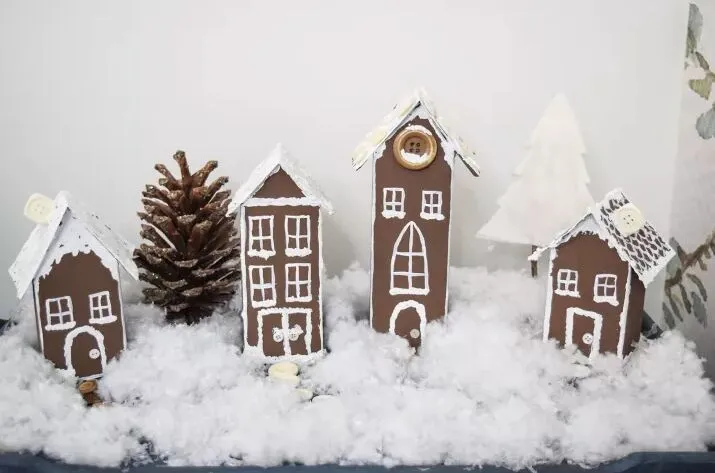
24. Miniature Gingerbread Village with Faux Snow
that transforms these simple brown houses into a holiday scene is the fluffy faux snow. Without that bed of white, the gingerbread-style houses would look like a random shelf of wood blocks. The snow creates a continuous landscape, filling gaps and soft edges. Use high-loft polyester batting or faux snow blanket, not flat fabric. Let it mound slightly around the houses’ bases. The large natural pinecone adds scale, making the tiny houses feel even cuter by contrast.
|
📋 Copy HEX 🔗 Share |
This display is 60% miniature houses, 30% faux snow, 10% natural accents like the pinecone and paper tree. The houses are the focal point, but the snow is what gives them a stage. To recreate the formula, choose four or five gingerbread-style houses of varying heights, place them on a white tray, and cover the tray with snow so only the roofs and walls peek out. Swap the pinecone for a sprig of real evergreen or a small glass cloche for a different accent without changing the balance.
25. Pink and White Candy Themed Tree
This full candyland tree needs breathing room. A 7.5-foot tree with 600+ tips is the minimum to support the large striped balls and cupcake ornaments without looking sparse. Ceiling height of at least 9 feet is ideal, with 2 feet of clearance on all sides for the branches to relax. For smaller spaces, use a 4.5-foot slim pink tree and reduce the number of large ornaments to a dozen. Compare with the tabletop bottle brush trees in Idea #15 if you’re working with a tight corner.

Cupcake ornaments and candy cane accents are not shatterproof. Expect to replace at least one or two broken pieces each season if you have kids or pets. The pink and white striped balls are usually plastic, but the frosting details can crack. Fluff the tree branches thoroughly before decorating, or the ornaments will sag. Plan to spend 20 minutes re-fluffing every week of December because the weight of the decorations compresses the branches. Use zip ties to secure candy canes if you want them to stay upright.
26. Red Swirled Glass Ornaments
- Buy clear glass ornaments in teardrop and sphere shapes ($4–$6 each).
- Pour a small amount of red acrylic paint inside the ornament; swirl gently to coat the interior in streaks.
- Let it drip out excess paint, leaving clear and red swirled patterns.
- Place on a paper towel upside down to dry overnight.
- Hang from gold string or display on a stack of red-covered books. Time: 15 minutes active, plus drying. Cost: under $10 for two ornaments.
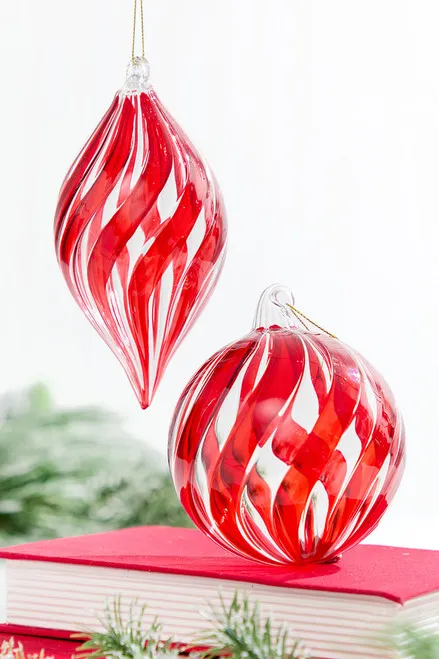
What makes this arrangement work is the juxtaposition of translucent and opaque. The clear glass lets light pass through, while the thick red swirls catch the eye. Placing one ornament on a stack of red-covered books adds height and reinforces the red accent, while the frosted pine sprigs introduce a natural, cool contrast. The gold hanging string ties into the warm tones of the books and the pine’s subtle bronze. It’s a simple vignette, but every element has a job.
27. Embroidered Candy Cane Pillow on Sofa
- Embroidered candy cane pillow (custom): $35–$75
- Beige tufted sofa (thrift or existing): $0–$800
- White Christmas tree (7 ft): $150–$400
- Red, gold, silver ornaments: $30–$70
- White fringed throw blanket: $25–$50
- Total: $240–$1,395
- Budget alternative: Use a plain cream pillow with iron-on candy cane embroidery from Etsy ($12), a white pencil tree from Walmart ($60), and thrifted ornaments—total under $120.
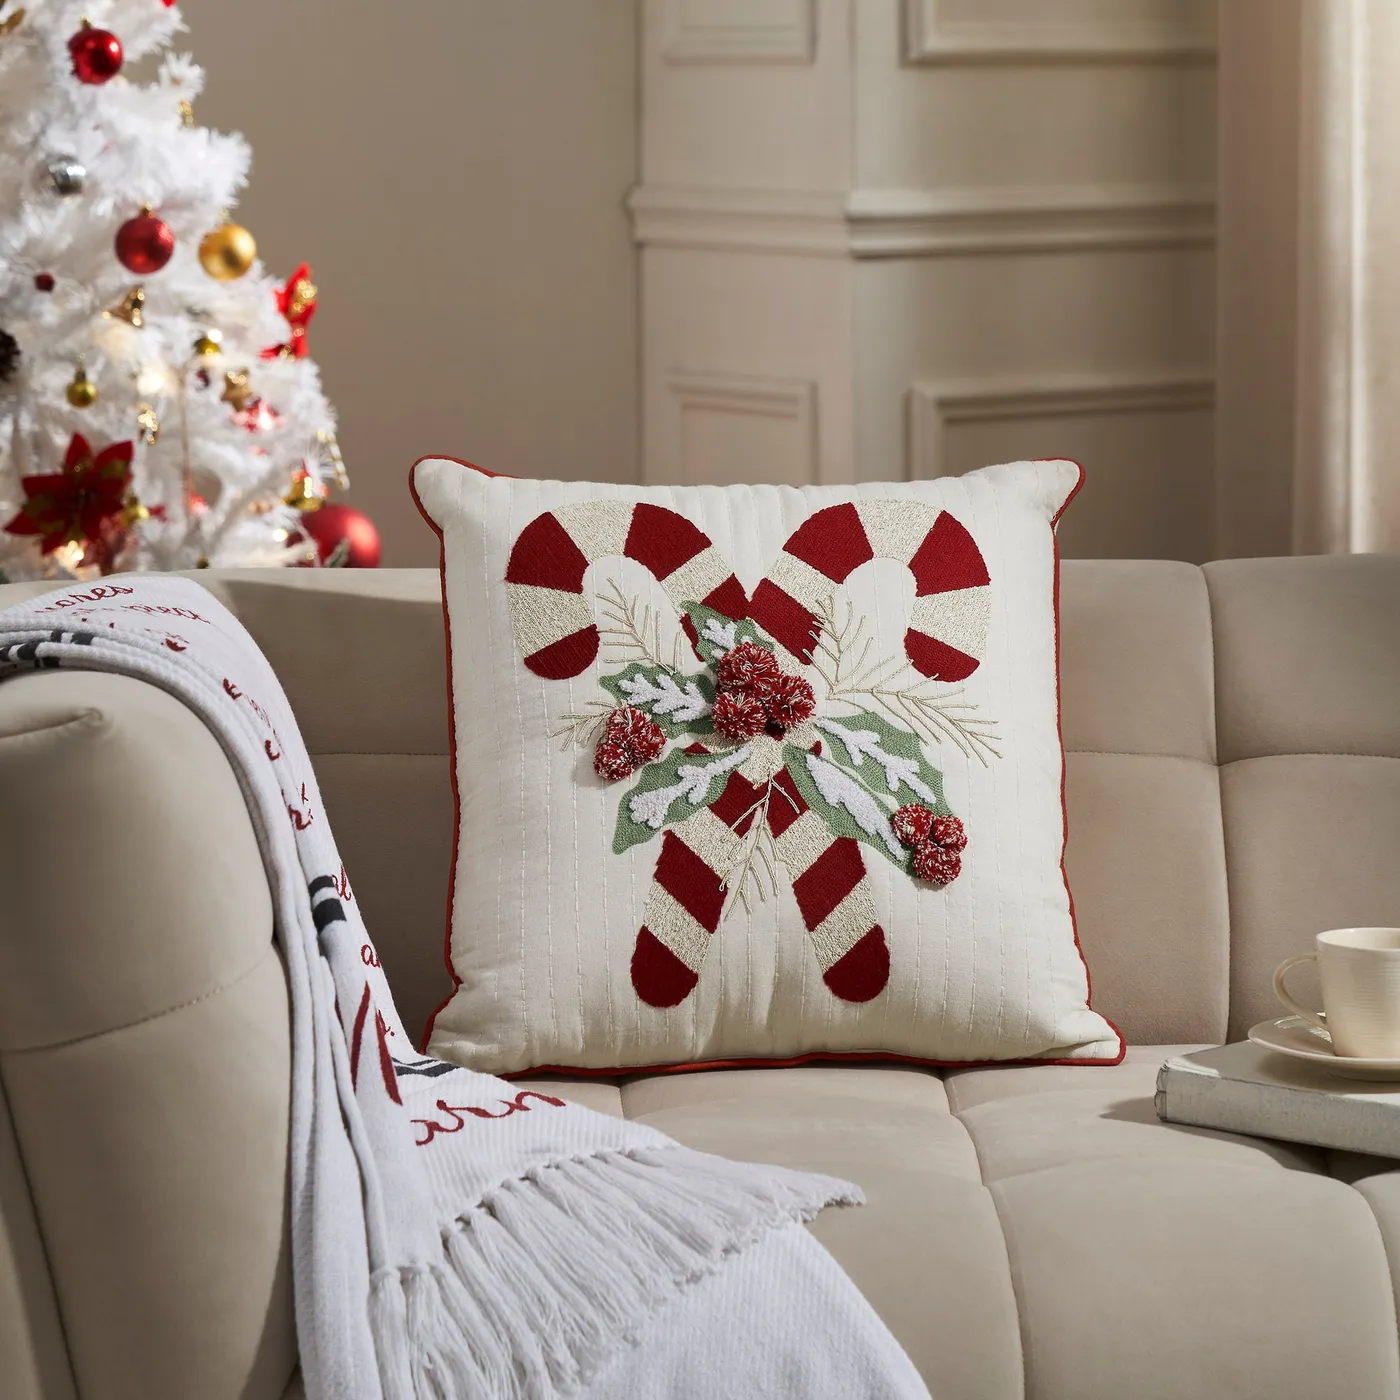
That embroidered pillow is stunning, but the raised pom-poms and stitched details will snag on rings and zippers. Keep it as a decorative pillow, not one you lean against while wearing jewelry. The white tree behind it is a dust magnet—plan to run a lint roller over it weekly. The beige tufted sofa is forgiving, but if you have kids, a washable slipcover in the same tone will save your sanity. Overall, this look is cozy but requires a bit of careful handling to stay photo-ready.
A Candyland Christmas You’ll Actually Want to Come Home To
You don’t need a professional designer or a $2,000 budget to pull off a candyland Christmas that feels curated, not chaotic. Pick two or three ideas that made you smile, start with the smallest one, and let the rest evolve. 📌 Save this to Pinterest now—your holiday decor planning will thank you in November.
