26 Jaw-Dropping Peppermint Christmas Tree Ideas That Will Elevate Your Holiday Decor in 2026

Still scrolling through peppermint Christmas tree photos without a clear starting point? You’re not alone—this is the year the candy-striped tree finally stops being a kids-only craft and becomes a legitimately chic holiday statement. We dug through Amazon, Etsy, Target, Wayfair, and Michaels to pull together 26 ideas worth your time, from $12 ornament updates to a $180 full-tree glow-up.
Inside, you’ll find flocked trees loaded with glossy red-and-white baubles, zero-waste crochet-inspired ornaments, black-and-white glam versions, and plenty of ways to borrow the palette without committing your whole living room. It’s trending hard in 2026 because people are leaning into small-scale, high-nostalgia decorating that still feels curated. And stay until the end — we break down the most common mistakes that can ruin these looks. 📌 Save this to Pinterest for later — you’ll want to revisit these ideas.
1. Flocked Candy Tree with Striped Ribbons and a Candy Spray Topper
The key to this candy-shop look is that the flocked tree gives your red and white ornaments a soft, snowy backdrop instead of competing with glossy evergreen. Big lollipops, wrapped candy picks, and wide striped ribbons read as deliberate repetition, not clutter, because the base stays pale and the warm white string lights keep everything honeyed rather than harsh. A fluffy white skirt at the bottom helps the tree feel anchored in the room, and that candy-like spray at the top replaces a traditional star without losing a sense of occasion.
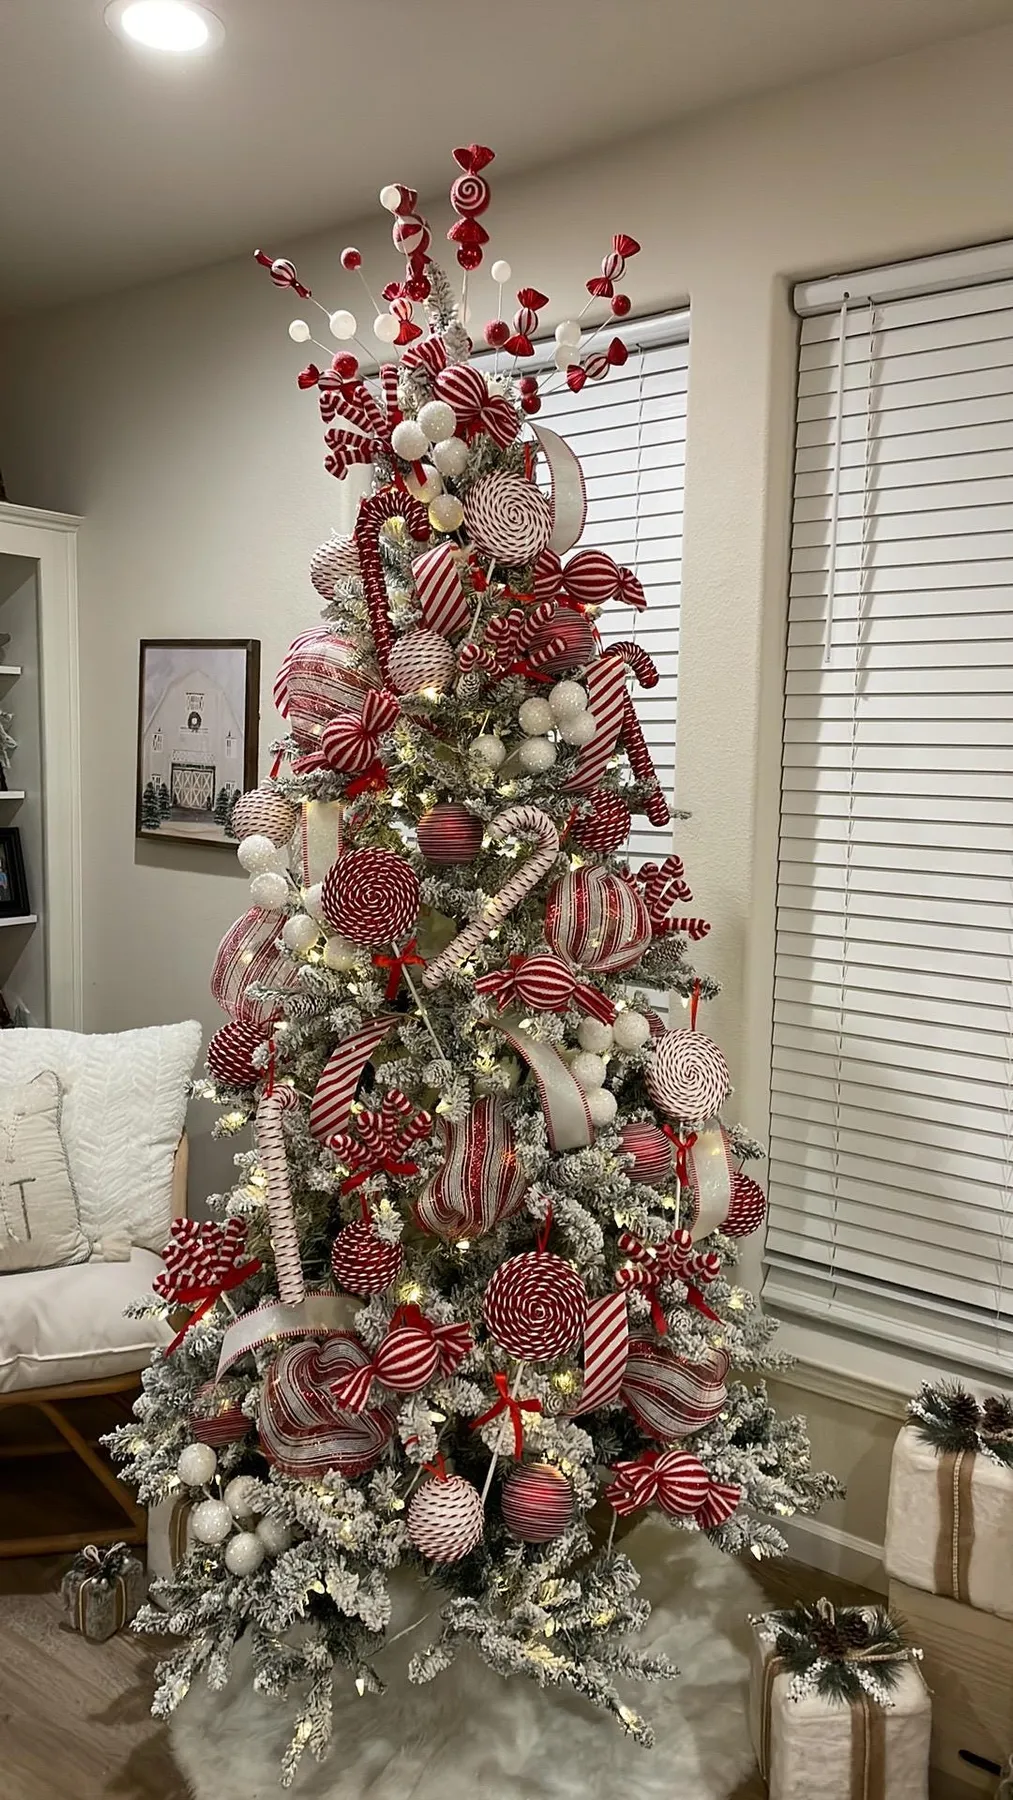
Use wired ribbon and cut it into 14–18 inch sections before tucking it in clusters of three. If you weave each piece in and let it coil naturally instead of laying it flat, the stripes catch the light and hide any bare spots near the trunk. For a tree this loaded, start with the largest ornaments first and work from the inside of the branch outward, not the other way around. That prevents the oversized candies from flattening the texture you just built with smaller picks and sprays.
2. Abundant Candy-Themed Tree with Red and White Poinsettia Picks
- Ornaments and picks (striped spheres, poinsettia-style picks, candy swirls): $40–$85 for a set of 24–36 pieces
- Wired ribbons (three 10-yard rolls of 2.5-inch red and white stripe): $18–$35
- Warm white string lights (two strands, 100-count): $15–$30
- Artificial tree, 7.5-foot dense: $120–$260 if you don’t already own one
- Total: $193–$410 depending on tree and ornament quality

But don’t panic if that number feels steep. You can recreate the same abundant look by buying a used 7.5-foot green tree from Facebook Marketplace and layering only the ribbon and focal ornaments this year; I see people pulling that off for under $90. Just know that a truly dense candy-themed tree is high-maintenance to store, and those glittery swirl ornaments shed. You’ll vacuum glitter for weeks, and the wired ribbons can become permanently creased if you don’t roll them on cardboard tubes.
3. Heart-Shaped Candy Swirl Ornament on a Fresh Evergreen Branch
What makes this vignette work is the unlikely mix of a heart-shaped glass ornament in a pink-to-yellow gradient with tiny candy swirls on a fresh green conifer branch. Take away that swirl detail and it’s just a pretty pastel bulb; add too many similar ornaments, and you lose the tension between sweet and natural. The light beige ribbon in the background pulls the pastel tones together without competing for attention.
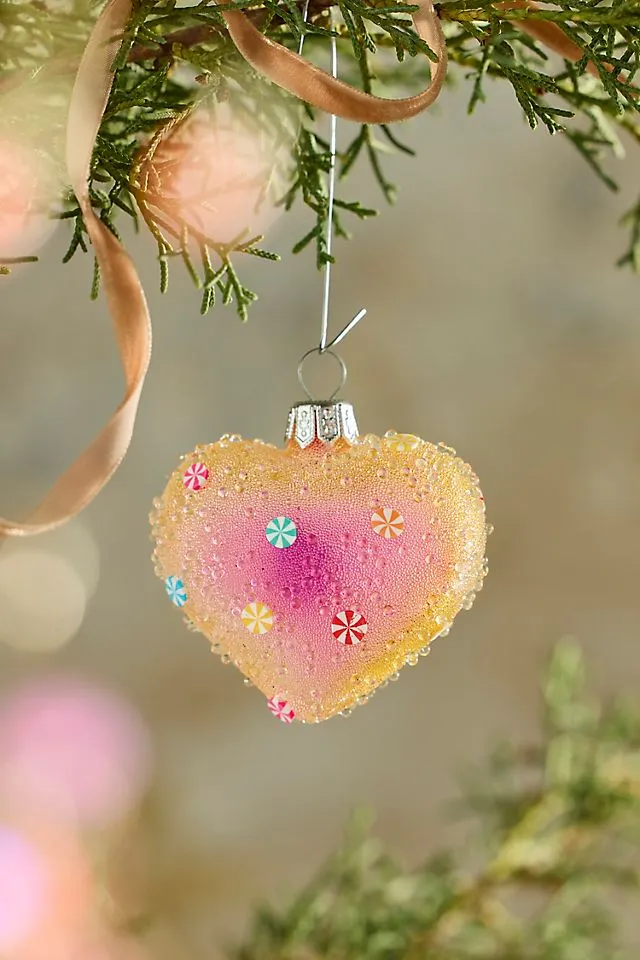
Think of it as 60% soft pastel gradient, 20% cool silver beaded texture, and 20% deep forest-green branch. To borrow the idea without copying it, swap the heart for a round blush, gold, or pale aqua ornament and keep the candy swirl motif small. The goal is one focal ornament per branch cluster, not a full tree of pastel everywhere, so the details stay crisp and intentional.
4. Red and White Lollipop Ornaments Hung on a Dense Green Tree
- Gather 6–8 oversized lollipop ornaments per visible branch band, plus matching red-and-white ribbon bows and small gold ties.
- Cut 4-inch pieces of 24-gauge wire for each ornament and loop through the hanger, twisting snugly against the branch.
- Place the largest lollipops on the outer third of branches, spacing them 6–10 inches apart vertically so they don’t tangle.
- Add the ribbon bows last, pinching the center and securing with the small gold tie, then fluff the loops outward.
- Stand 4 feet back and check for gaps; shift any ornament that faces the wall or disappears into the foliage.
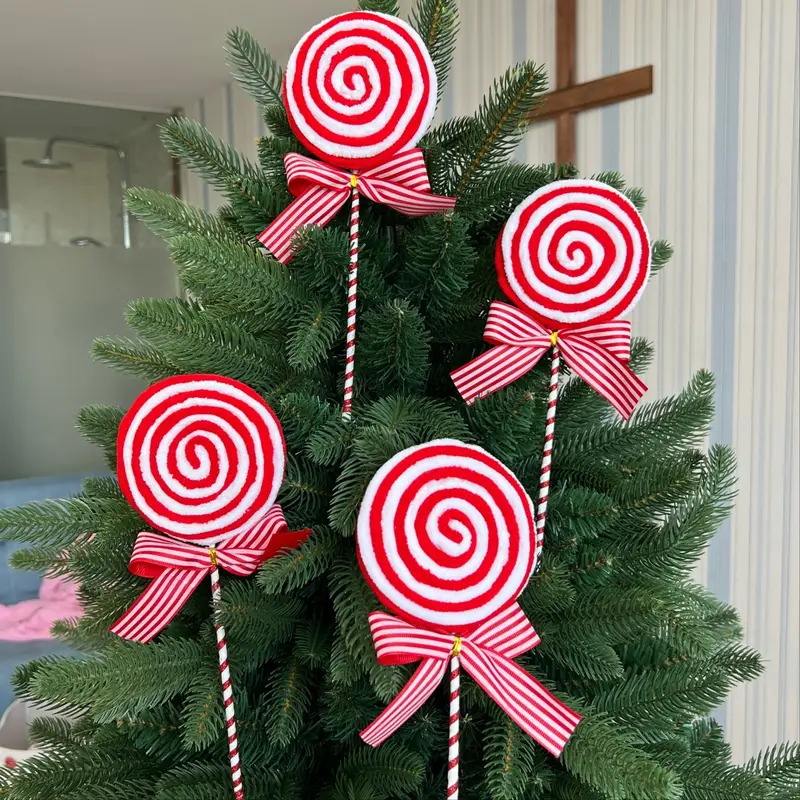
Time estimate: 45–60 minutes for a visible section; materials under $20 if you use craft-store ribbon and wire.
This is part of a broader 2026 shift toward sugarcoated, almost bake-shop holiday decor. After a decade of neutral and minimalist trees, people want recognizable, childlike candy references again—but with better materials and tidier placement. Lollipop ornaments are the easiest entry point because they read instantly from across the room and don’t demand a full theme.
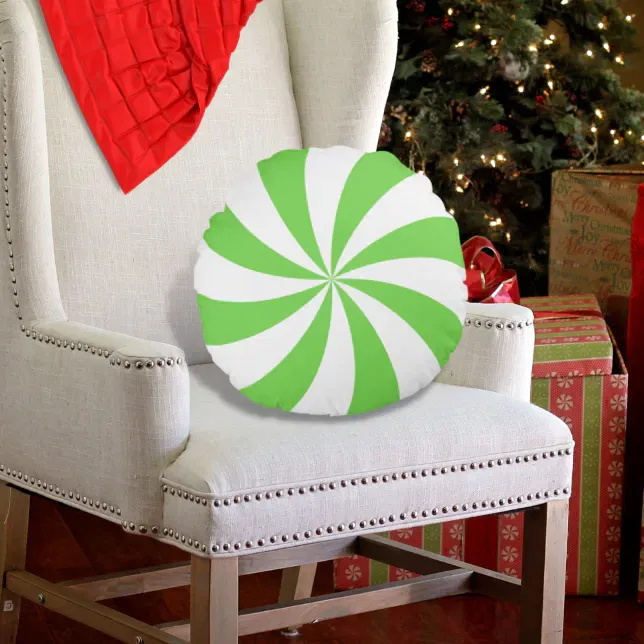
5. Wingback Chair Styled with a Candy Swirl Pillow and Red Throw
You don’t need a new wingback chair to get this moment. Hunt for a beige or oatmeal upholstered chair on Facebook Marketplace for $150–$300, then spend $25–$40 on a round green-and-white swirl pillow and $20–$35 on a chunky red throw at Target or HomeGoods. If you want the nailhead trim but your chair doesn’t have it, a $15 nailhead trim kit from Amazon gives you that crisp, tailored edge.
|
📋 Copy HEX 🔗 Share |
That red throw is the hero piece, but it pills. Go for a cotton-acrylic blend rather than 100% wool if you plan to actually use it, and wash it on cold before the first styling session so it softens. The pillow will shift and flatten; give it a karate chop in the middle once a week, and rotate it monthly if it sits in direct sun near the tree lights.
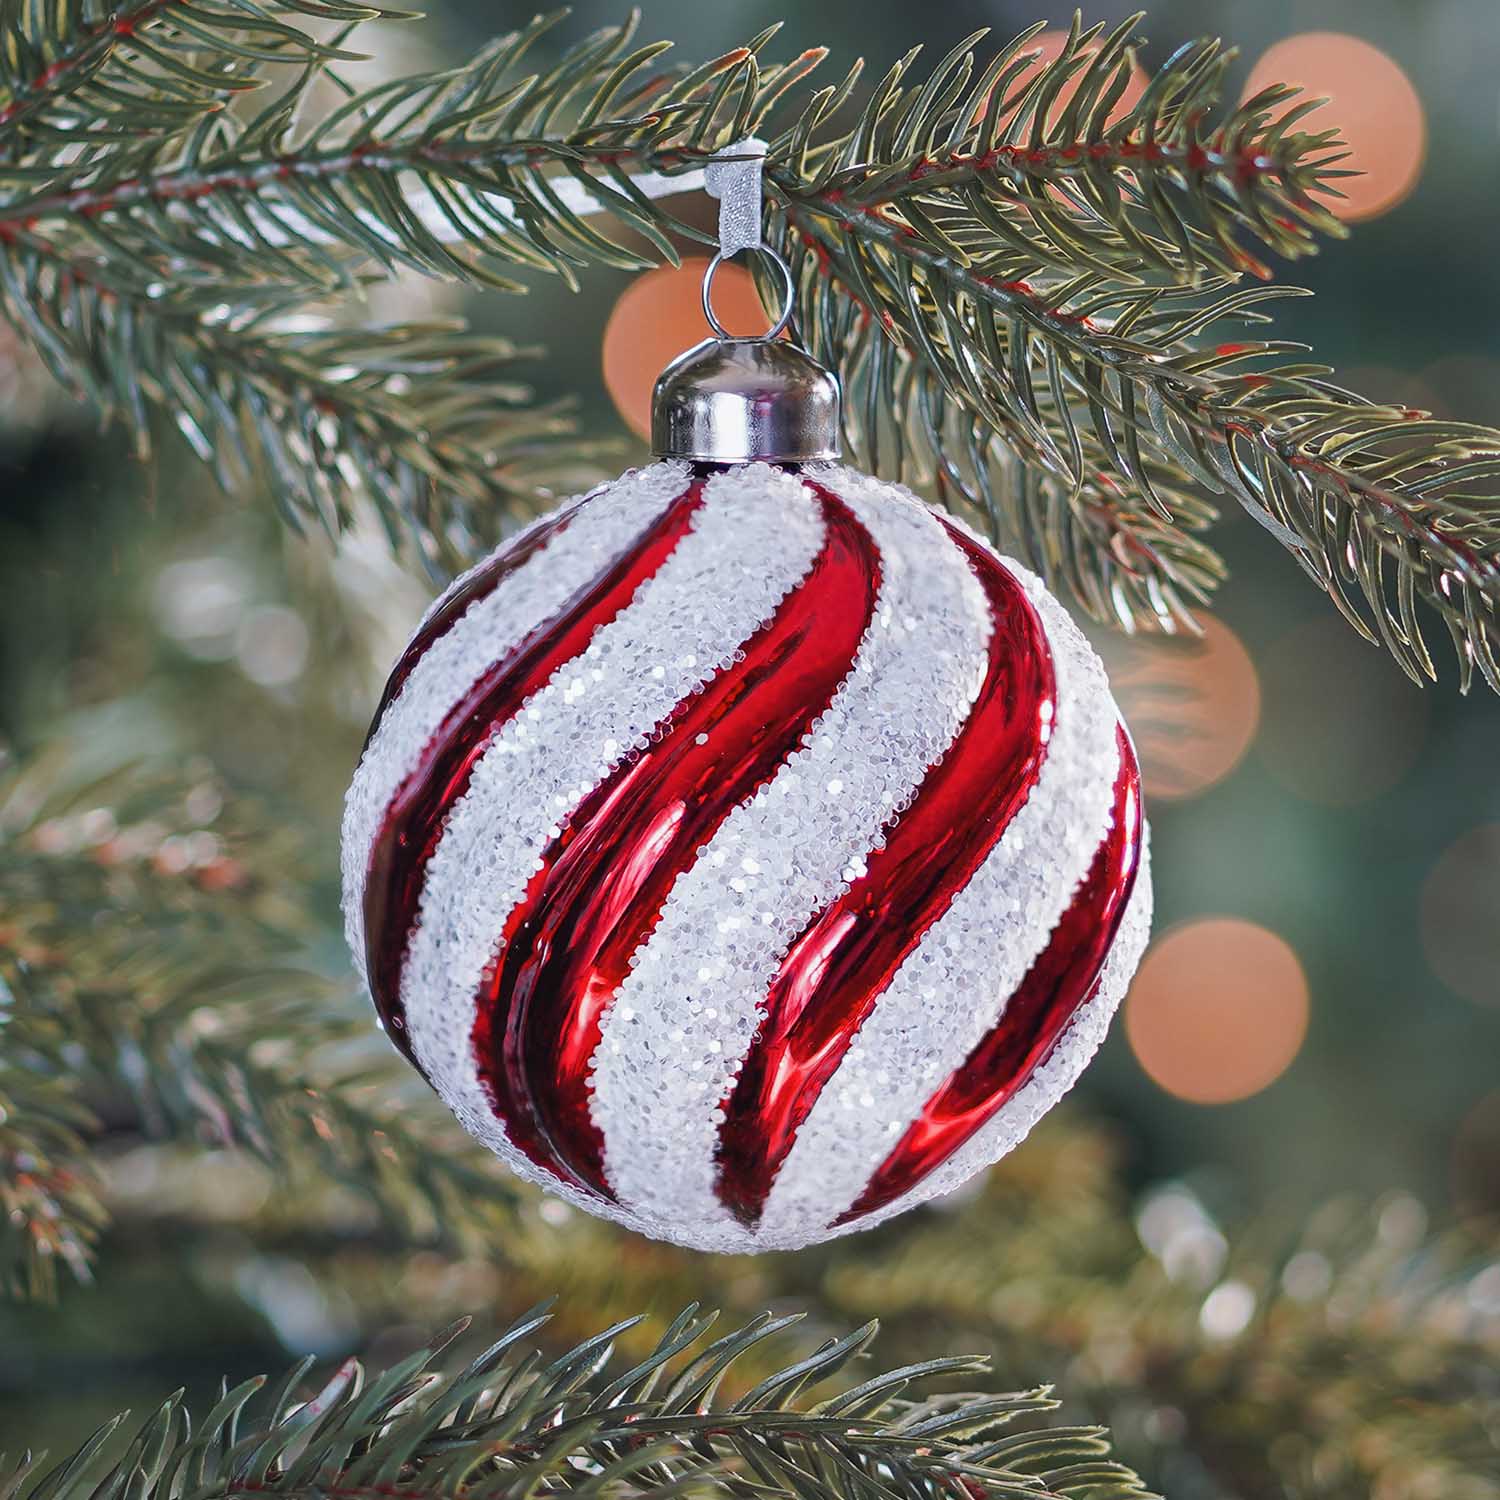
6. Glossy Red and Glittered White Swirl Ornament on a Fir Branch
The ornament works because it pairs two very different red-and-white personalities: high-shine glossy red and matte, textured white glitter. That contrast keeps the stripes from going flat, especially under warm fairy lights. The silver metal hanger adds a cool accent that stops the palette from feeling like a candy wrapper, while the soft warm bokeh in the background keeps the whole branch gentle.
|
📋 Copy HEX 🔗 Share |
When shopping for similar pieces, hold the ornament up to a lamp before you buy it and look for crisp stripe edges rather than fuzzy printing. You want a glass or hand-glittered piece, not a cheap plastic one; the glitter should be sealed so it doesn’t flake onto the branch. If you already have plain red balls, you can mimic this by taping off sections with painter’s tape and brushing on fine white glitter over a clear-dry craft glue.
7. Entryway Evergreen Arrangement with Striped Ornaments and Stair Bows
- Measure the console depth and leave at least 18 inches of clearance in front so the staircase bows don’t crowd the walkway.
- Check the height under your mirror; the vase arrangement should rise no more than 12 inches above the console top.
- Confirm you have at least two 9-foot evergreen stems that will arch without hitting the ceiling.
- Test the bow attachment method on the stair rail before hanging all of them—use removable zip ties or wide ribbon loops, not adhesive.
- Place a small towel under the vase base to protect the light wood console from scratches and water marks.
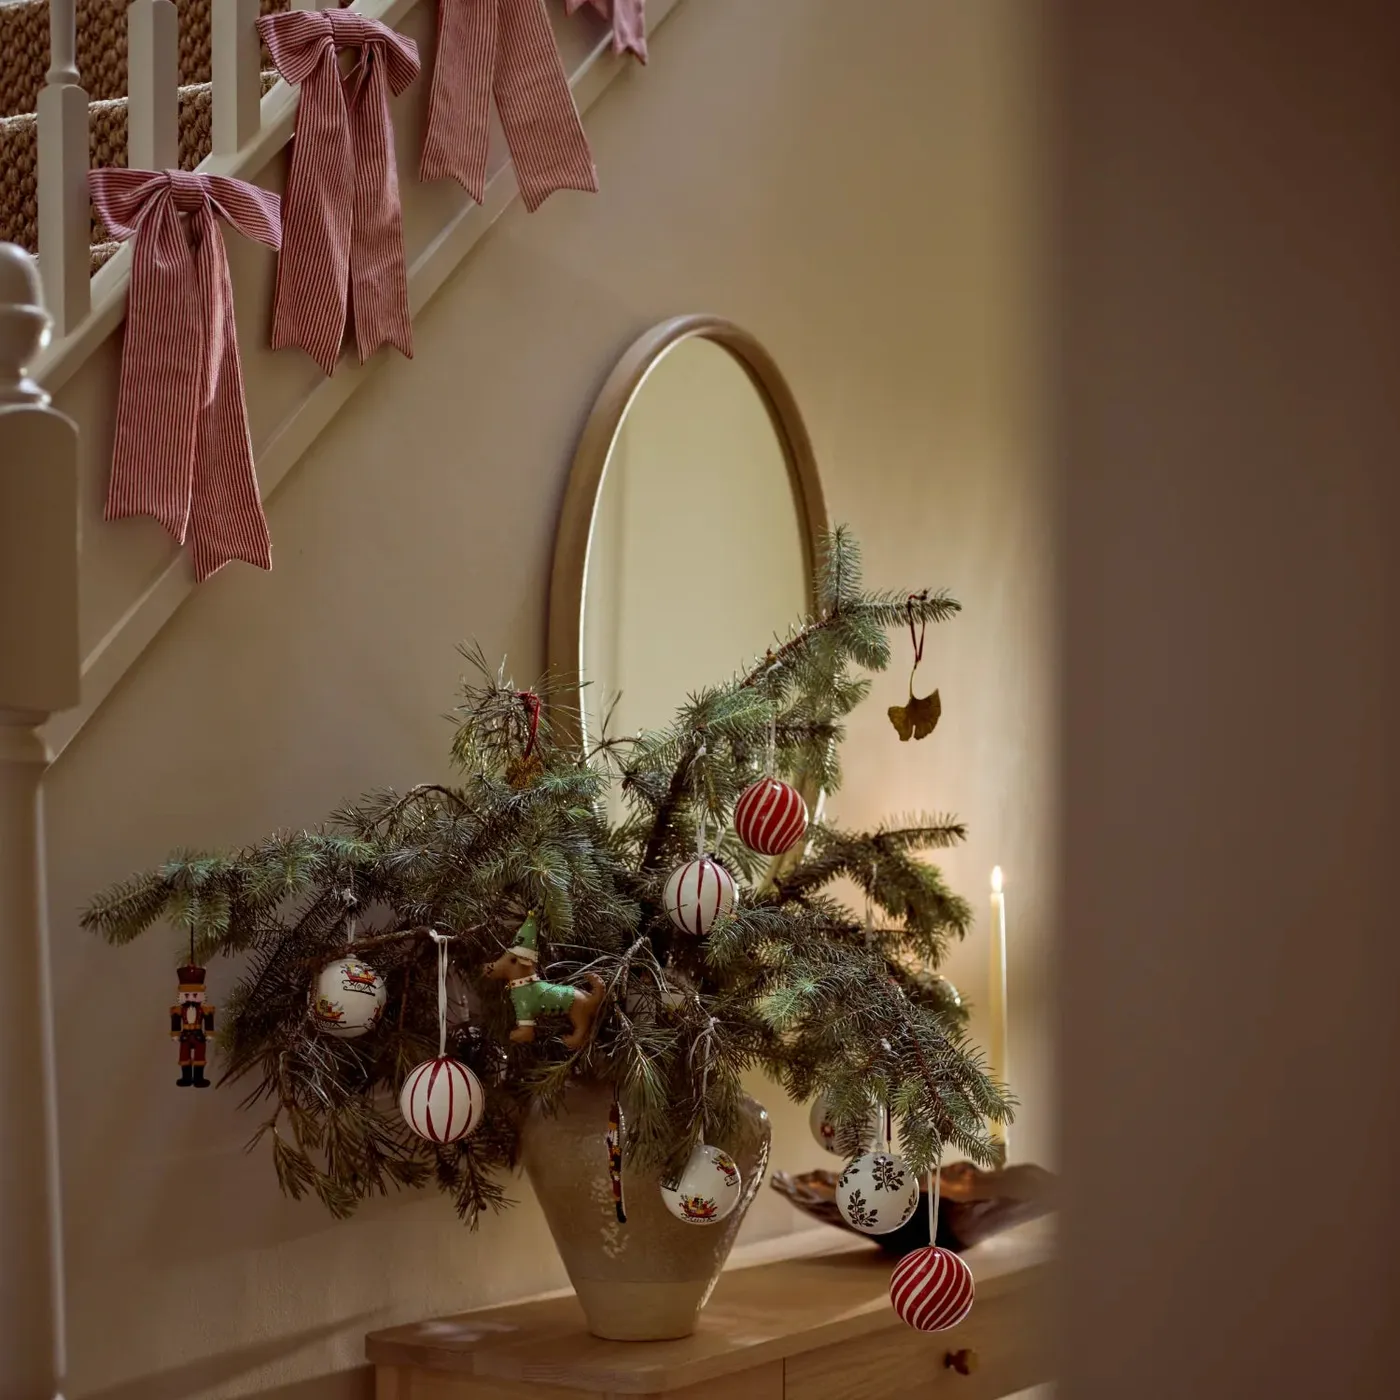
This entryway moment works best in a space at least 4 feet wide and 8 feet long; anything narrower and you’ll constantly dodge the greenery. If your entry is a skinny hallway, try the same idea on a small floating shelf (see Idea #21 for a more compact tree moment).
8. Flocked Tree Close-Up with Glossy Striped Spherical Ornaments
Think of this as 70% snowy white flocking, 20% saturated red-and-white stripes, and 10% blush or gold accents. That small blush ornament matters more than it seems—it interrupts the strict candy palette just enough to make the whole tree feel curated instead of supermarket seasonal, and the gold hangers tie both sides together without adding another color.
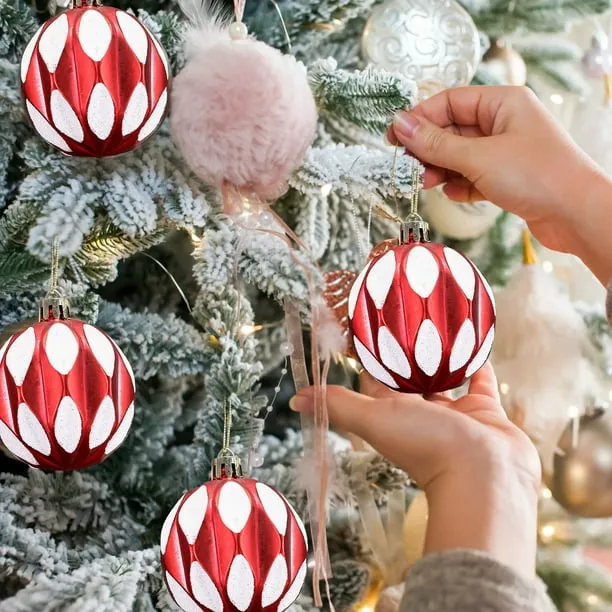
The hidden star is the gold ornament hanger. It sounds tiny, but those warm metal hooks keep each sphere facing outward and prevent the flocked tips from getting knocked off every time you brush past. If you lose them, that one soft pink ball becomes the detail people notice first, but the glossy striped spheres lose their crisp alignment.
9. Clear Glass Ornament with Deep Red Vertical Stripes
For this look, use a 3/8-inch red velvet ribbon cut to 8 inches per ornament and tie a simple loop with a 2.5-inch drop. That extra length lets the glass ornament spin slightly and catch the warm white string lights behind it. The clear glass body is what gives the red stripes their glowing quality, so don’t substitute solid red bulbs if you want that same luminous effect.
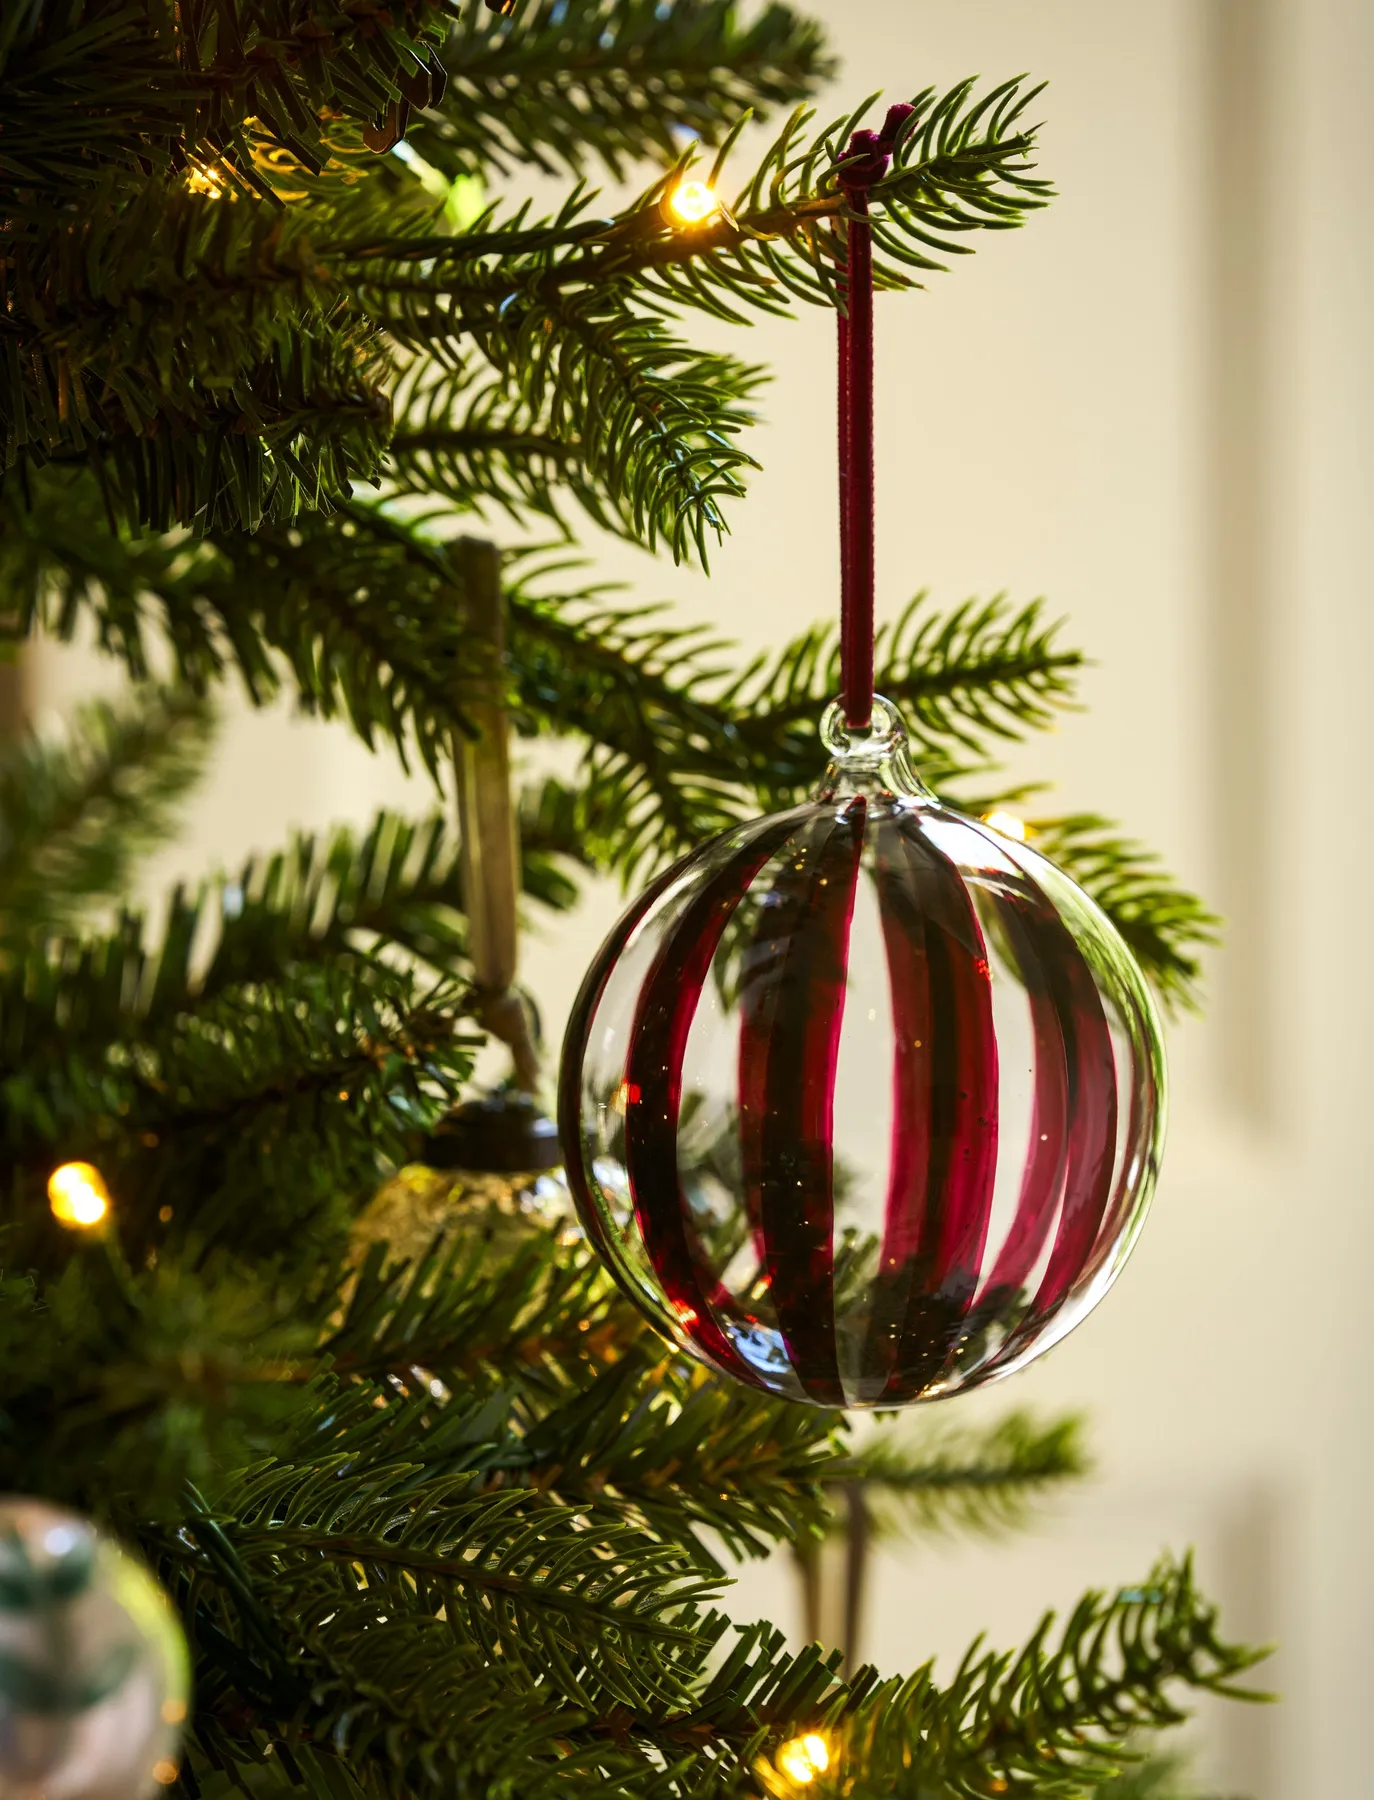
this is not the tree for a house with toddlers or a curious cat. Clear glass ornaments show fingerprints and will shatter if knocked into the trunk. Dust them with a soft dry cloth before hanging, and store each in a divided box rather than a shared bin. If you want the look with less worry, look for the same vertical stripe on shatterproof acrylic at Target or IKEA.
10. Green Tree Packed with Striped Ball Ornaments and Pinecones
This tree reads as sweet but not chaotic because the ornaments share one color story—red, white, forest green—while the natural pinecones break up the shine. The twisted red-and-white string hangers add a homespun texture that keeps the tree from looking like a flat department-store display, and the warm white lights pull all the reds toward a softer cherry tone rather than a harsh stop-sign red.
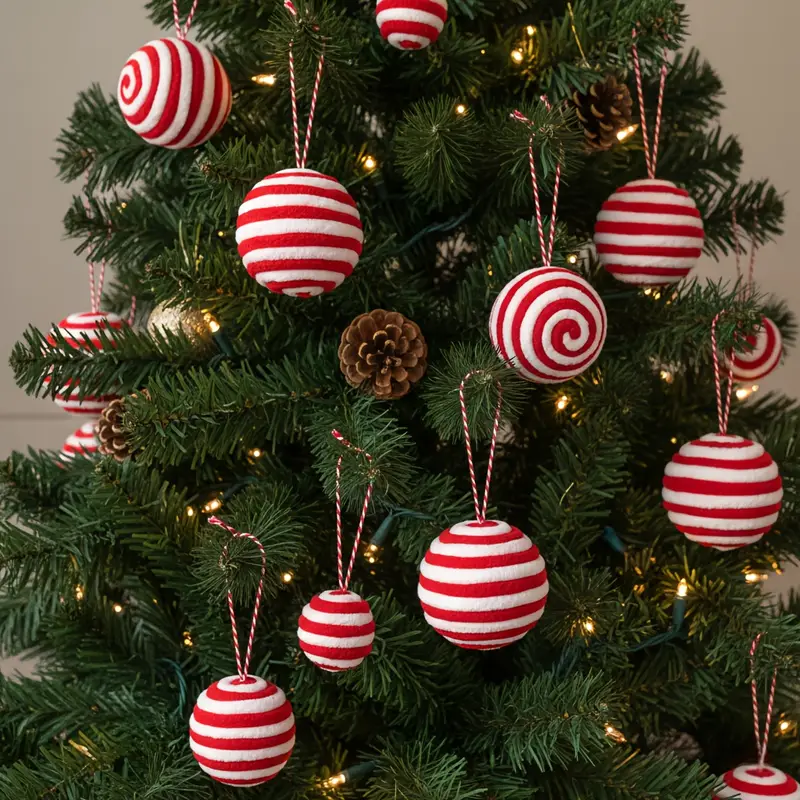
Just remember a dense green tree swallows light and small ornaments. If you go this route, choose 3-inch and larger balls, and don’t hang anything too close to the trunk. The natural pinecones can also drop bits of sap or bark, so give them a quick bake at 200°F for 20 minutes before decorating to avoid a mess on your tree skirt.
11. A Free Public-Domain Peppermint Candy Cane Tree Reference
The whole point of a peppermint candy cane tree is the unmistakable red-and-white hooked stripe repeated enough to feel like a theme. This version leans on that classic motif without extra color clutter. If you’re working from a public-domain reference, use it as a palette anchor: crisp red, true white, and deep green from the tree itself, then edit anything that doesn’t serve those three tones.
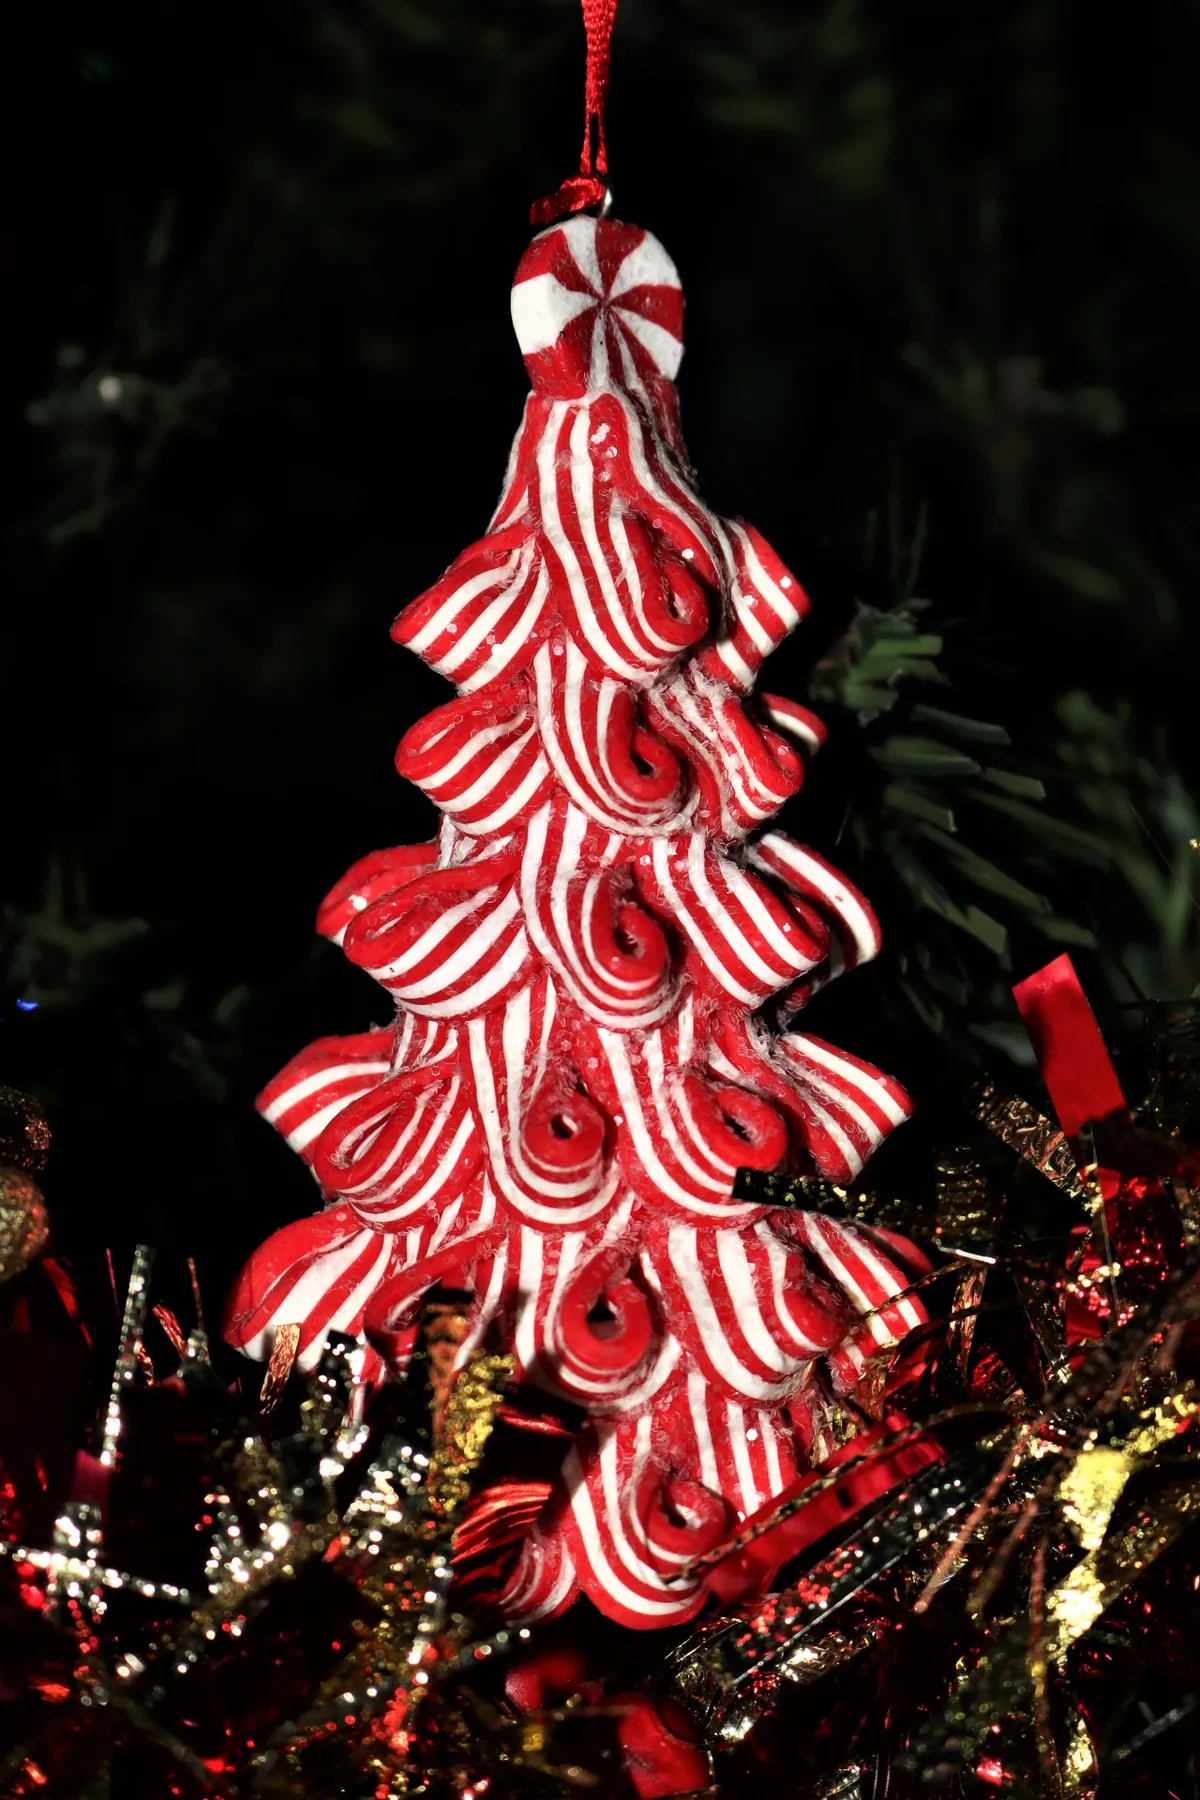
You can pull this off for under $40 by hitting IKEA or Target for plain red ball ornaments, then wrapping select balls in white electrical tape or adhesive vinyl to create candy stripes. Keep half the tree unstriped so the candy references don’t blur together. It’s the budget version of the glitzier ornament mixes in Idea #6.
12. Felt Peppermint-Striped Poinsettia Ornament with Pom-Pom Trim
- Cut five petal shapes from red, green, and white striped felt, each about 4 inches long and 2.5 inches wide at the tip.
- Glue white pom-pom trim around the outer edge of each petal with fabric glue, pressing for 20 seconds per section.
- Layer the petals in a star shape, rotating each about 45 degrees, and secure the center with a dab of hot glue.
- Glue a cluster of five or seven small white pom-poms in the middle, packing them tightly.
- Sew or glue a loop of clear fishing line to the back and hang it near a warm light on the tree.
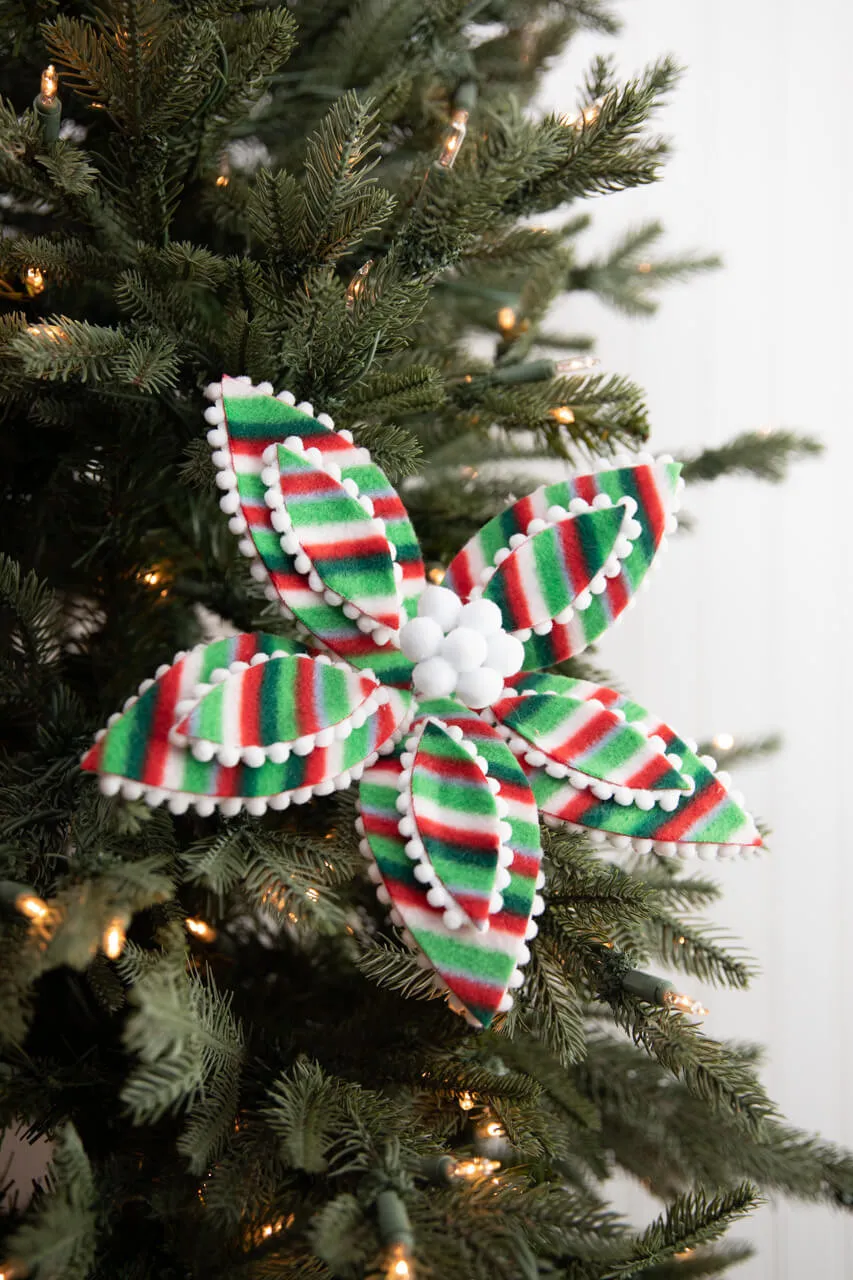
Time estimate: 30 minutes per ornament; materials under $10 for felt, trim, and glue.
This ornament works because the dark green artificial tree disappears behind the playful scale of the felt flower, letting the red, green, and white stripes do all the talking. The white pom-pom trim is the secret—it gives the poinsettia a soft, dimensional edge that feels crafted rather than mass-produced, and it catches the warm lights from every angle.
13. Red Velvet Poinsettia Ornament with Glitter on Pine Branches
- Six velvet poinsettia ornaments (8–10 inch diameter): $36–$70
- Two strands of warm white string lights: $15–$30
- Red glitter spray or craft glitter: $8–$16
- Set of plain deep red ball ornaments (24 count): $22–$40
- Total: $81–$156 for a bold upper-third tree statement
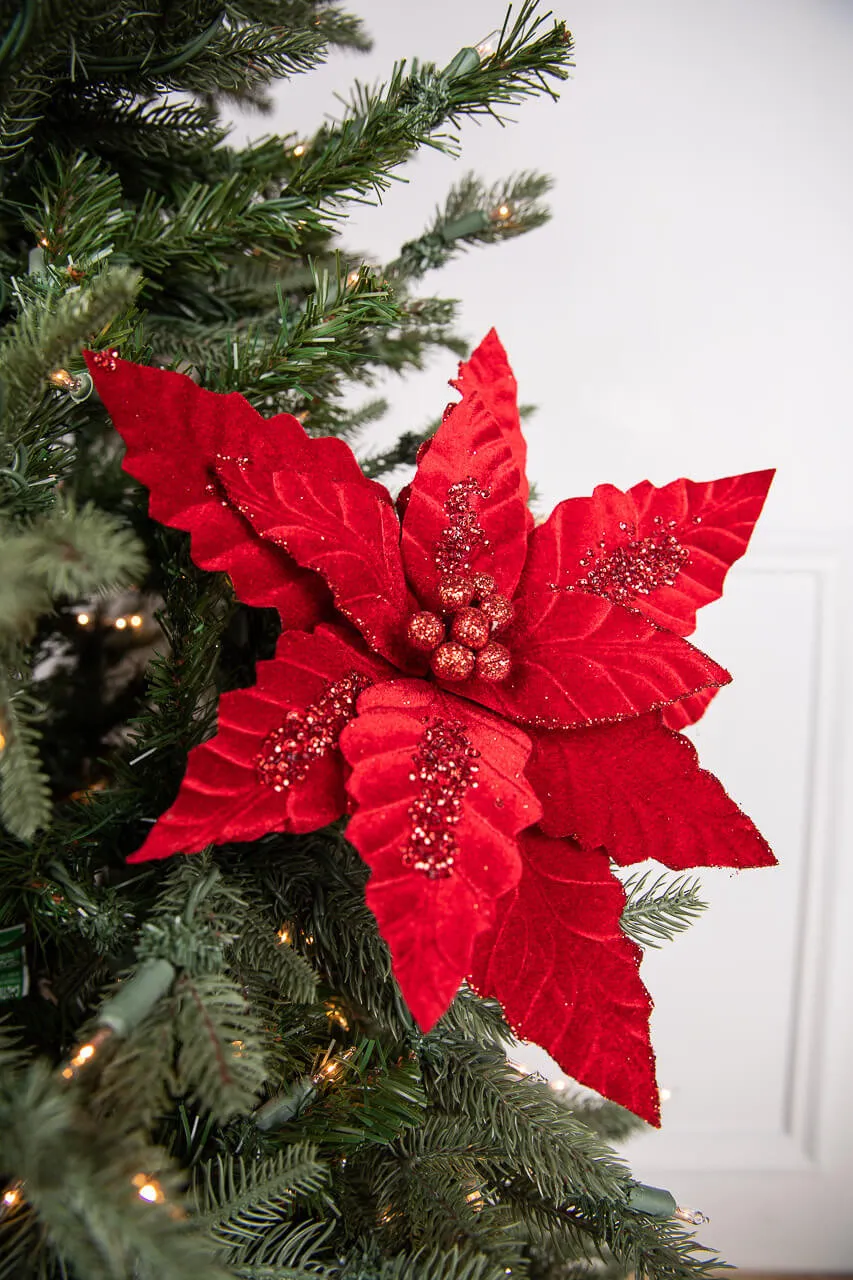
Aim for 75% velvet poinsettia blooms, 20% small deep red or gold balls for depth, and 5% red glitter accents. The glitter only on the petal tips or centers creates a more expensive look than dusting the whole bloom—less is definitely more with this one. Keep the poinsettias facing outward on the final 6 inches of each branch so they don’t disappear into the artificial pine needles.
14. Classic Tree Layer of Red, White, and Silver Baubles
Mix your ornament finishes in a 2:1:1 ratio—two matte for every one glossy and one glitter—so the tree doesn’t look over-shiny. For a red, white, and silver branch like this, place the matte white balls deeper in the tree, the red glossy balls mid-branch, and the silver glitter baubles on the outermost tips where they catch lamps and string lights. That layering creates the serene, collected feel you see on the best classic trees.

This gentle, uncomplicated palette is trending in 2026 because it feels like a palate cleanser after years of oversaturated social-media trees. It references traditional European glass ornaments but stays approachable with affordable shatterproof options. The silver gives the red-and-white story a cool note that keeps it adult, so it works in living rooms, dining rooms, and even little reading nooks without shouting.
15. Tiered Hard-Candy Ornament with Polka Dots and Glitter Stripes
The tiered shape is the whole reason this ornament works. If you swapped it for a standard round ball, you’d lose the hard-candy silhouette that makes the branch feel like a confectionery display. Those flared glossy sections with white polka dots and the center glitter-striped sphere create a rhythmic, stacked geometry that draws the eye even among a busy tree, and the warm string lights make the red look almost candy-apple glossy.
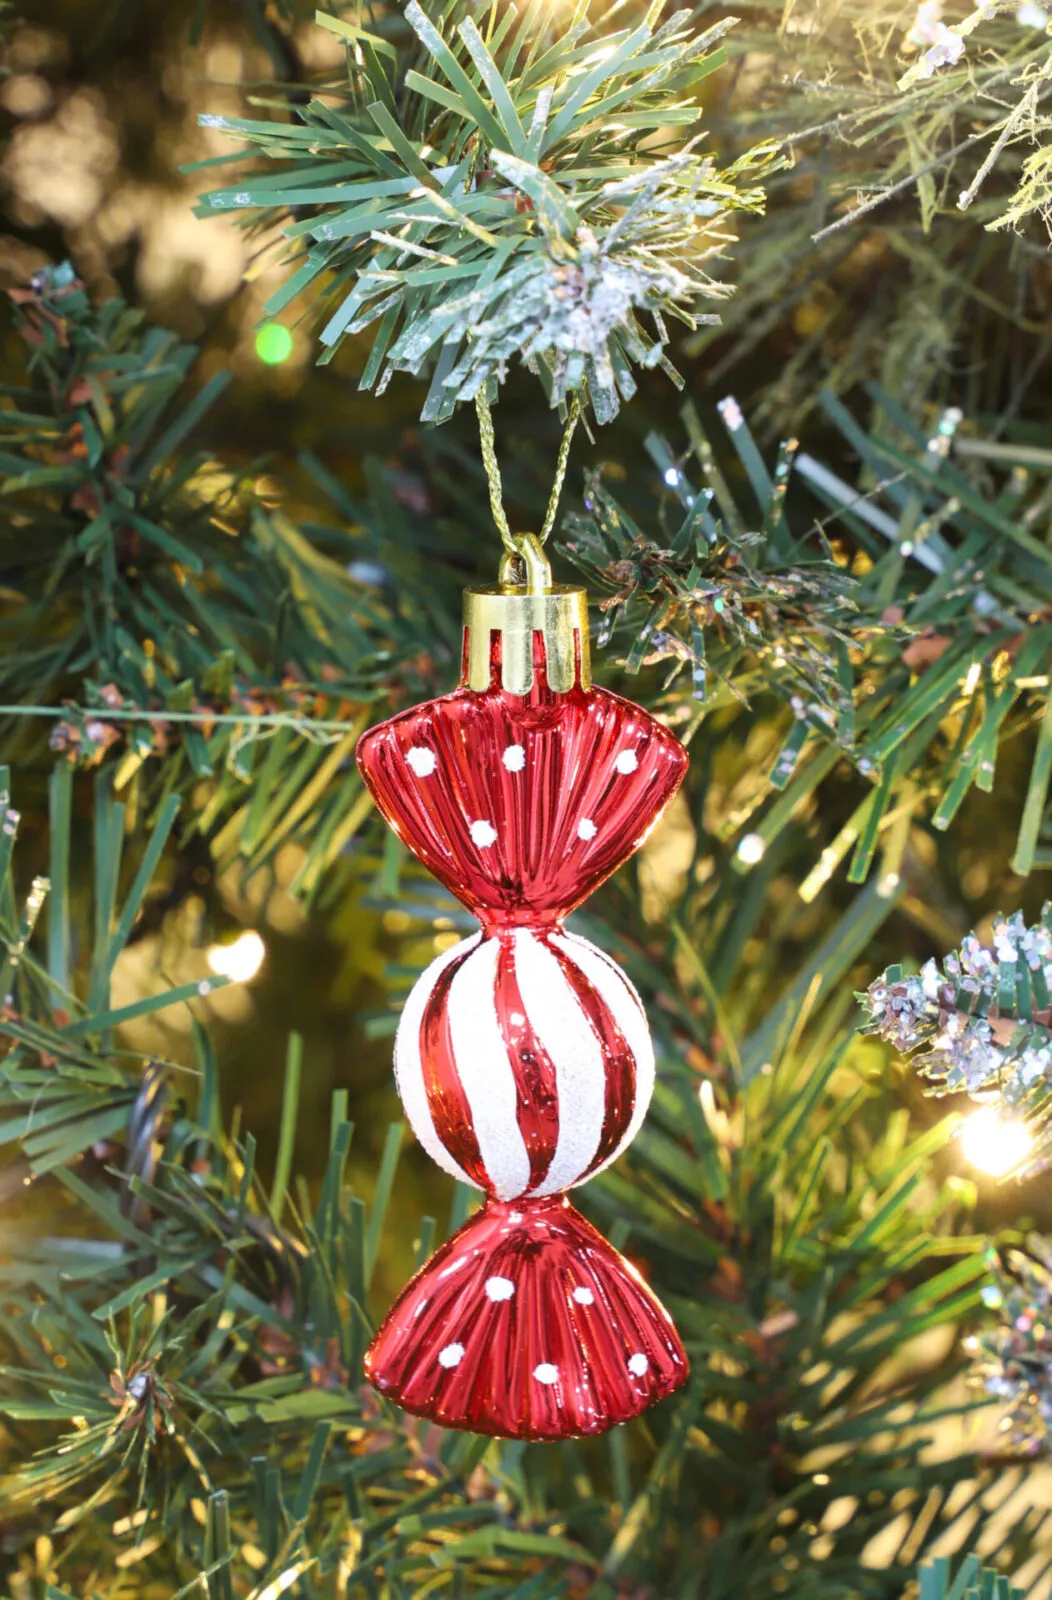
Keep in mind that glossy red surfaces fingerprint easily and those flared edges can chip if the ornament is stored loosely. Wipe each piece with a microfiber cloth before hanging, and store it in a divided ornament box, not a plastic bin where the tiers can knock against each other. If you have small kids, consider anchoring this ornament deeper on the branch with a wire twist, because it’s heavier at the bottom and loves to swing.
16. Glamorous Black and White Candy Ornaments on Frosted Branches
This tree looks striking because black and white flips the peppermint idea from cutesy to editorial. The glossy flared black ends with white dots frame a glittery striped sphere in the middle, so each ornament reads like jewelry. The frosted green branches and natural pinecones keep it from going too Halloween or too stark, while the warm white lights soften the contrast and add a little depth to the silver threads.
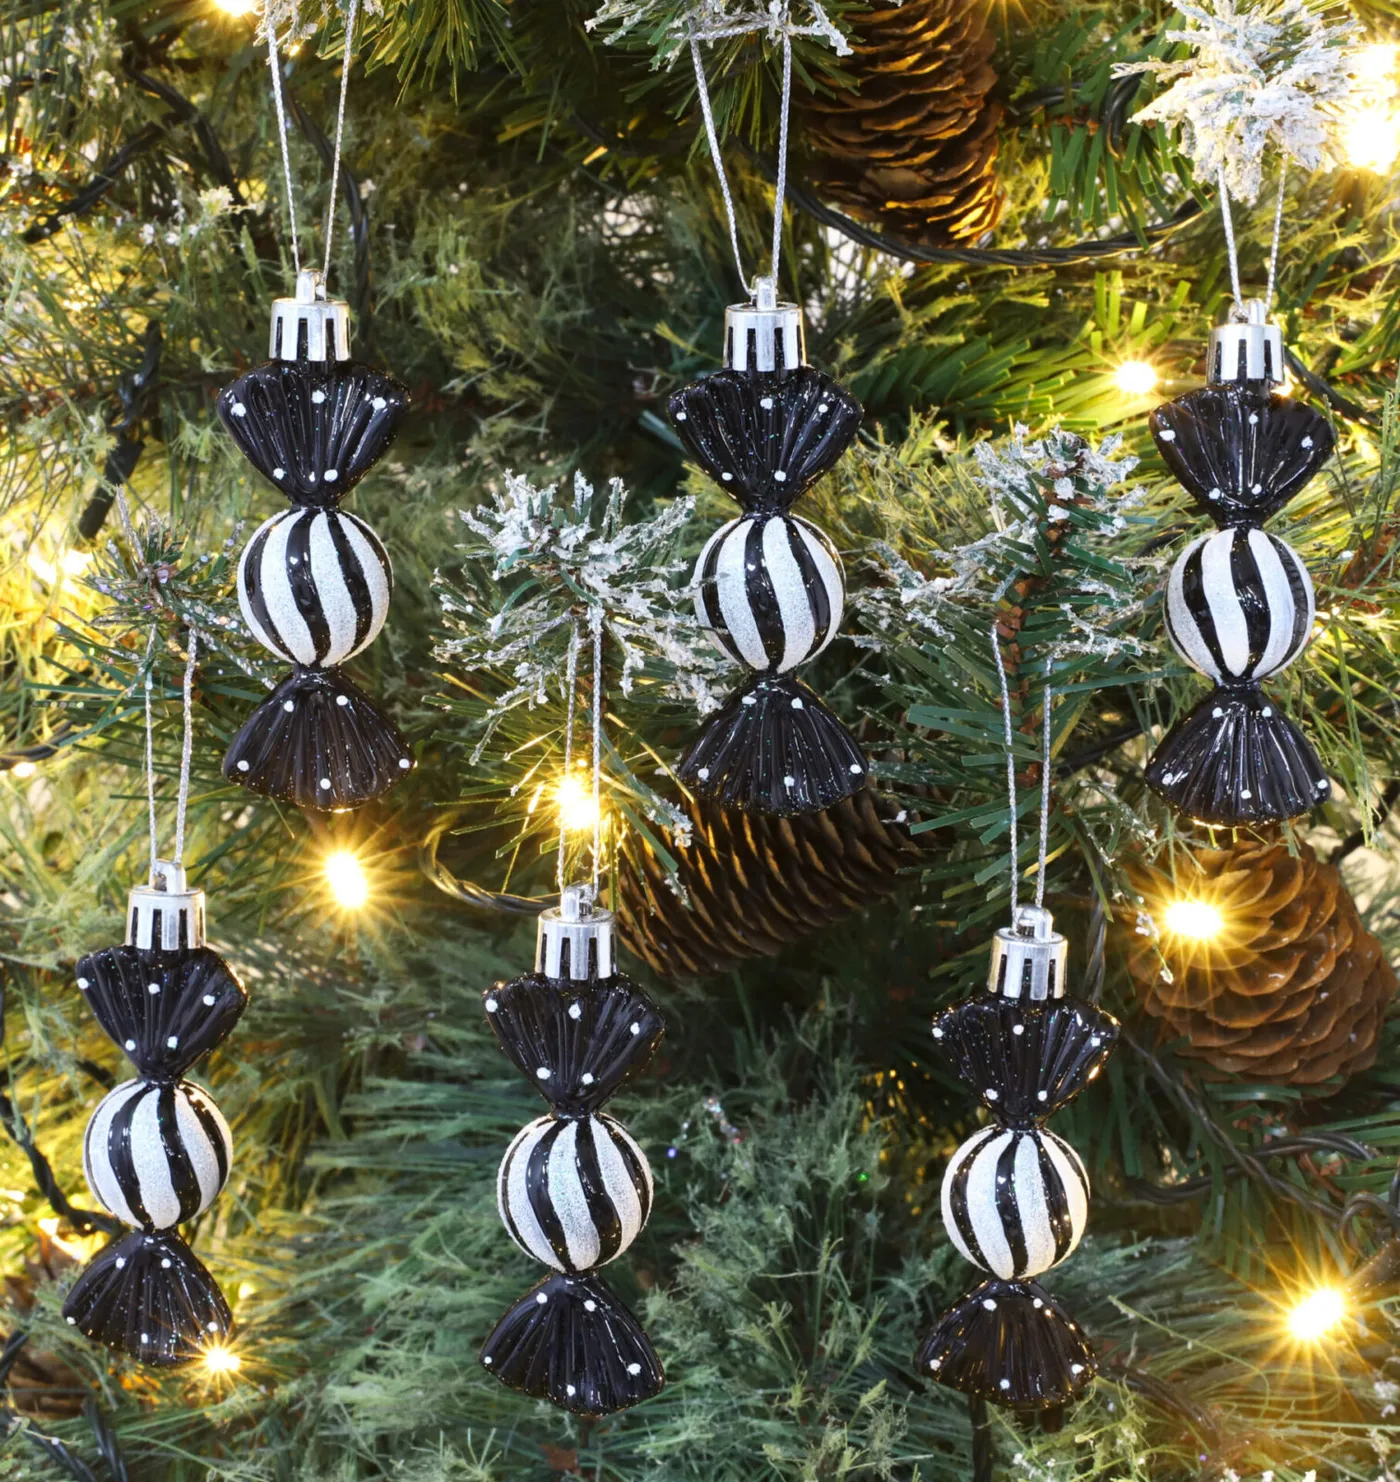
Because these ornaments have long, sculptural silhouettes, they need a tree with visible branch gaps—at least a 7-foot tree or a well-lit artificial branch section. On a slim 4-foot tree, they’ll tangle. If you have a smaller footprint, use only six of these as focal points and fill the rest with matte black and white balls (see Idea #17 for the non-candy alternative).
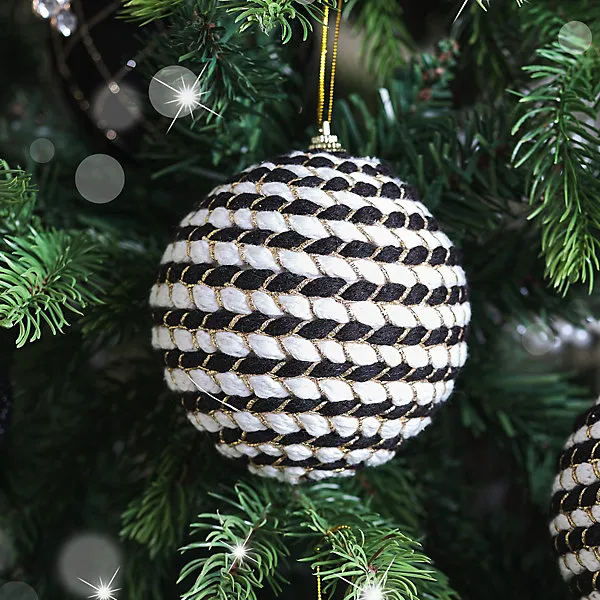
17. Braided Black-and-White Ornament with Gold Glitter Thread
This is one of the most expensive-looking ornaments on the list, but you don’t need designer pricing. Check Etsy or local craft fairs for handmade braided balls, or wrap a plain black ornament with black-and-white ribbon strips and add thin gold thread for under $6 each. A set of six will cost you $30–$40 total, compared to $60+ for glass versions with the same visual impact.
|
📋 Copy HEX 🔗 Share |
A word of caution: that gold glitter thread is fragile. It can snag on adjacent branches when you move the tree, and it doesn’t tolerate moisture well. Store this one in acid-free tissue inside a compartment box, and avoid hanging it near a doorway or air vent. If you love the look but need daily durability, choose a braided design printed on shatterproof plastic instead—it reads nearly the same from 4 feet away.
18. Striped Loop Candy Trees with Miniature Snow Globe Ornaments
- Start with two cone-shaped foam forms, one 12 inches and one 9 inches tall.
- Cut a 4-inch wide striped fabric or grosgrain ribbon into 5-inch loops, alternating white, pink, and green.
- Hot-glue the loops in concentric rows from the bottom up, overlapping each row by half.
- Glue a red-and-white swirl lollipop to each cone tip, pressing for 30 seconds.
- Arrange the finished trees beside two clear dome snow globes with miniature houses on artificial snow.
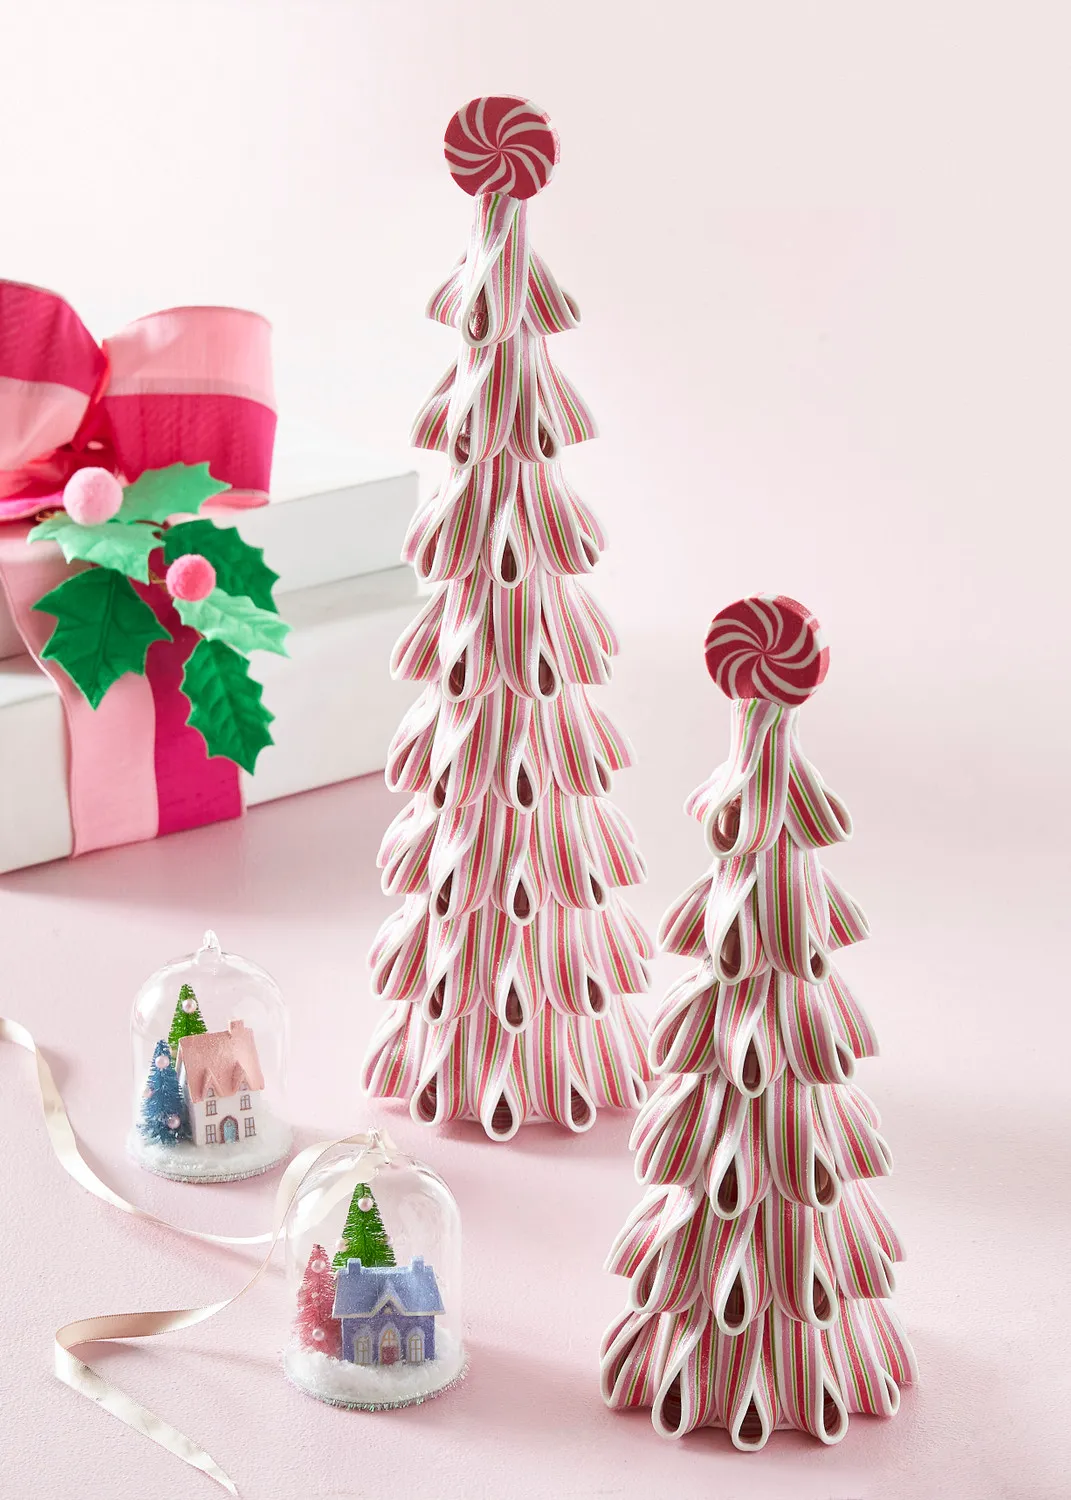
Time estimate: 1.5 hours; materials about $25 if you use craft-store ribbon and foam forms.
The visual formula here is 60% pink-and-white stripe, 20% clear snow globe reflection, 20% holiday red and green accents. Keep the lollipop tops as the only hard-candy circles, and let the globes act as the jewelry that bounces light. That keeps the vignette playful instead of overwhelming.
19. Mini Evergreen with Pom-Pom Garland and Candy Cane Ornaments
For a mini tree like this, use a pom-pom garland that’s no longer than three times the tree’s height and drape it in a loose helix rather than wrapping tight. Start at the top and pin it every 4–5 inches with small green florist wire so the pom-poms sit on the branch tips. Tuck in small candy cane ornaments after the garland so they look nestled, not stuck on, and let the warm string lights peek through the gaps.
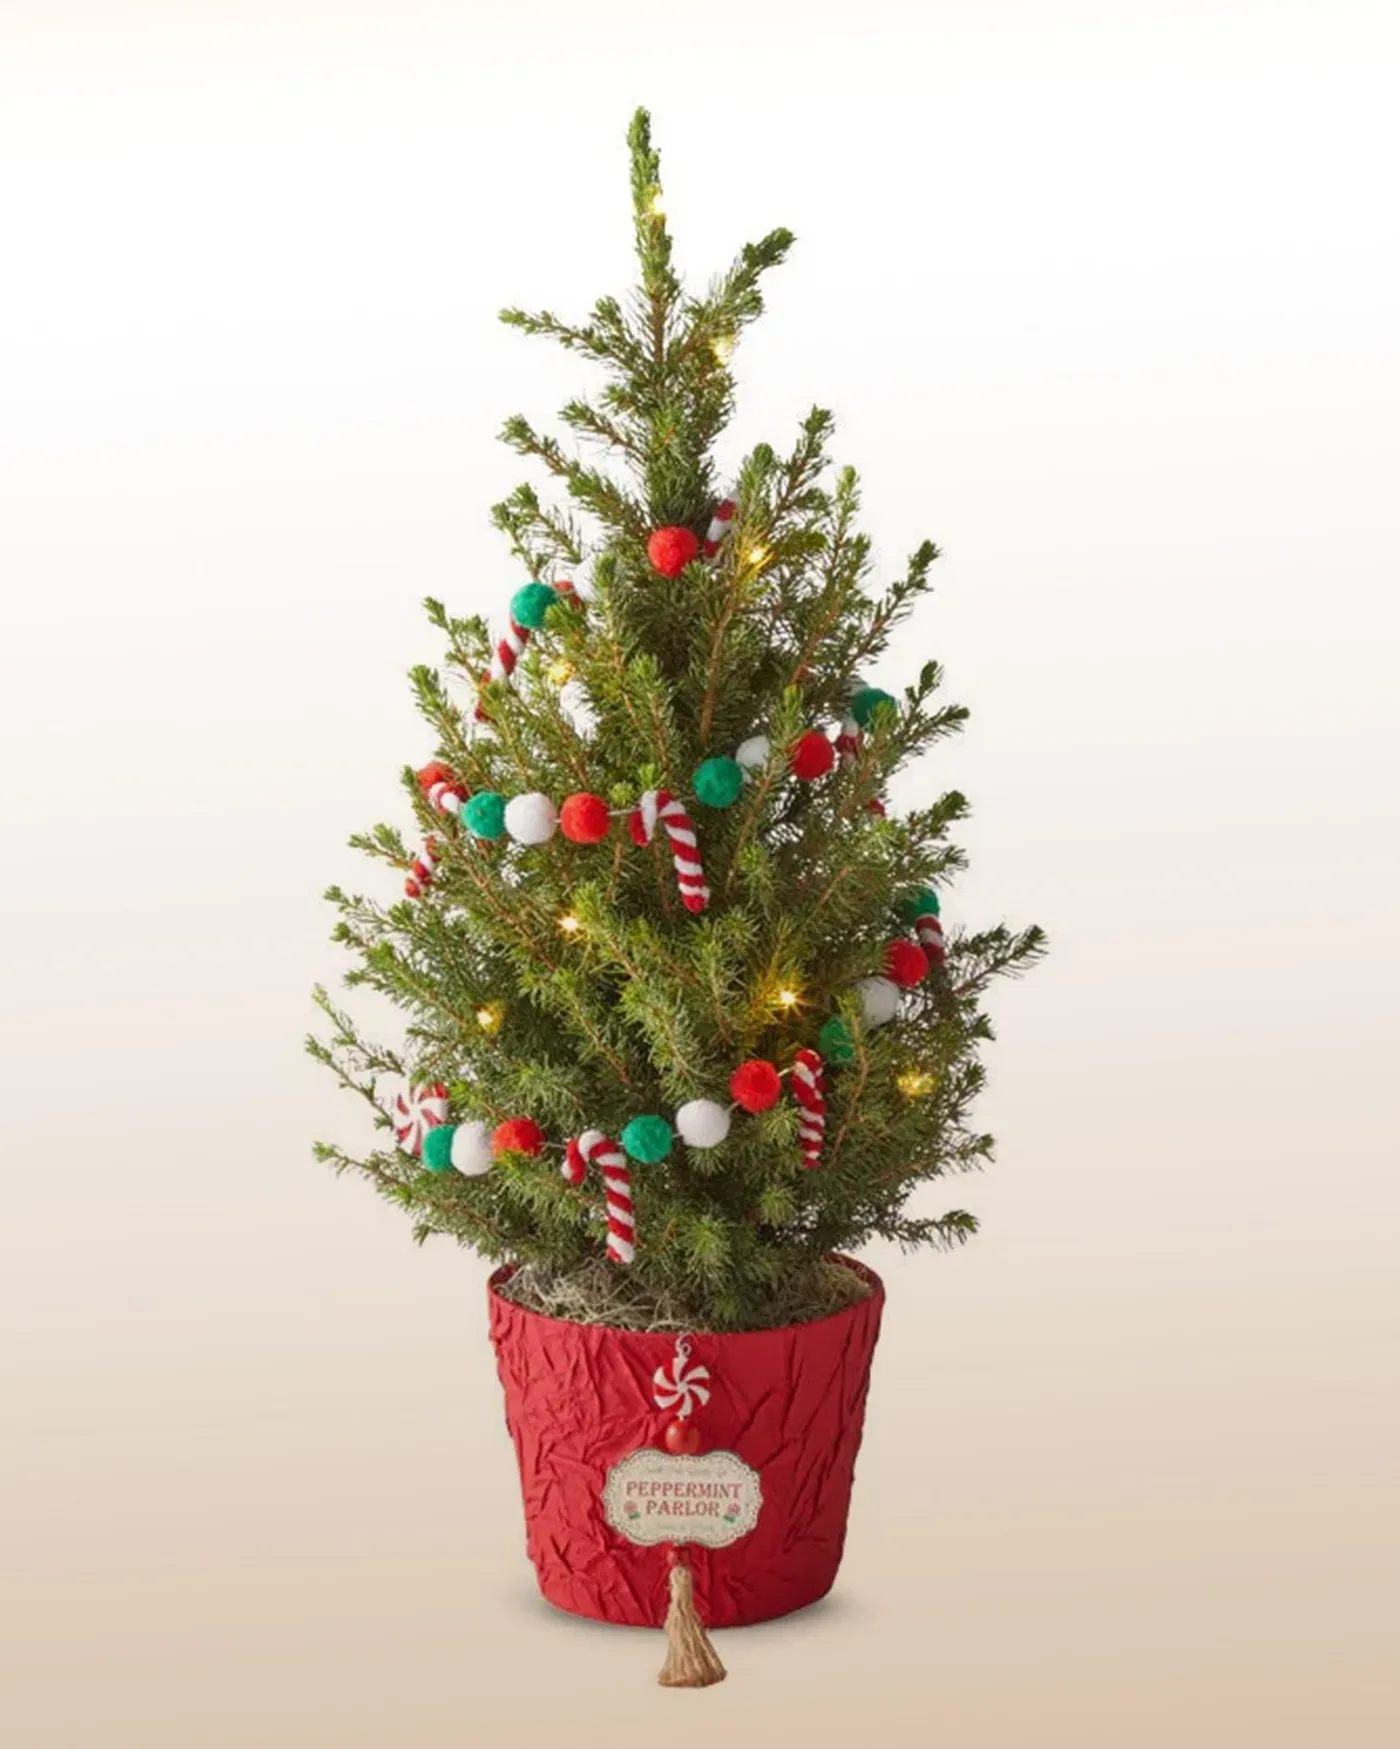
The crumpled red fabric pot cover is the detail that makes this feel styled rather than store-bought. That soft, slightly imperfect red base echoes the candy-cane ornaments up top and ties the whole tree to the table or shelf it sits on. If the pot were plain terra cotta, the top would feel floated and disconnected, and the entire vignette would lose its pulled-together charm.
20. Oversized Striped Bow Topper with Flowing Streamers on a Grand Tree
You don’t need a custom topper. Buy 10 yards of 6-inch red-and-white striped canvas or grosgrain ribbon for $20–$30, make a 16-inch bow with two long streamers, and secure it to the top branch with a heavy-duty zip tie or green floral wire. It’ll look just as full as the $80 pre-made versions, especially if you wire in a few red and cream ball ornaments behind it for dimension. If you prefer a quieter topper, see Idea #14 for a subtler red-and-silver layer.
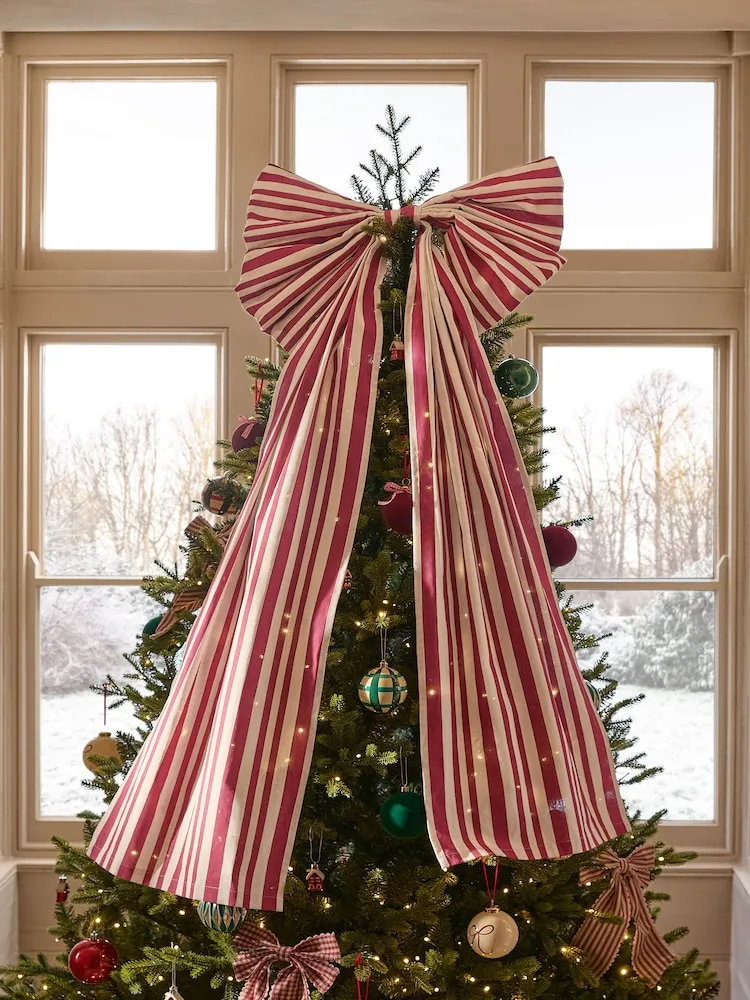
The oversized bow works because the streamers create a vertical line that pulls your eye through the whole tree instead of stopping at the top. Against a window with snowy light, the red stripes feel crisp and reflective, while the warm white lights below add a cozy contrast that keeps the room from feeling cold.
21. Slim Sunlit Tree with Green Leaf Ornaments and Neutral Gifts
The thing that separates this tree from a typical themed tree is its restraint. The sparse foliage and light green leaf ornaments let the negative space work in your favor, especially in a sunlit corner where heavy flocked branches would feel suffocating. The kraft paper gifts and fabric gnome add texture without asking for attention, while the white pleated cushion on the window seat picks up the soft holiday light.
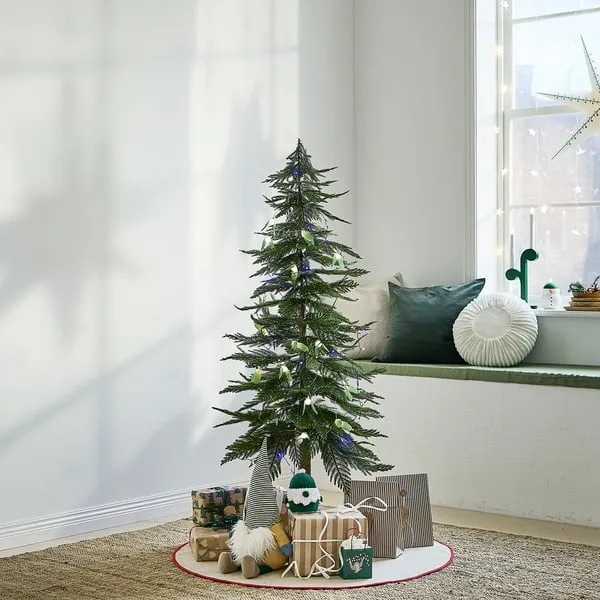
This look is ideal for rooms around 10 by 12 feet or smaller, or any corner with a window seat. A slim 5-foot tree can sit here without blocking the walkway, unlike the grand topper moment in Idea #20, which needs more visual breathing room. Keep the tree skirt flat and low—this one should feel airy, not bundled.
22. Crochet-Inspired Striped Baubles on a Christmas Tree
If you’re using a crochet kit for your tree, pick matte cotton stripes over shiny metallic yarn. The slower, handmade texture reads as intentional next to glass baubles, and it won’t create the sparkly overload that often happens on a peppermint theme. Work with one stripe scale—either wide, classic bands or fine pinstripes—not both on the same branch, so the tree doesn’t turn into a busy swatch card.
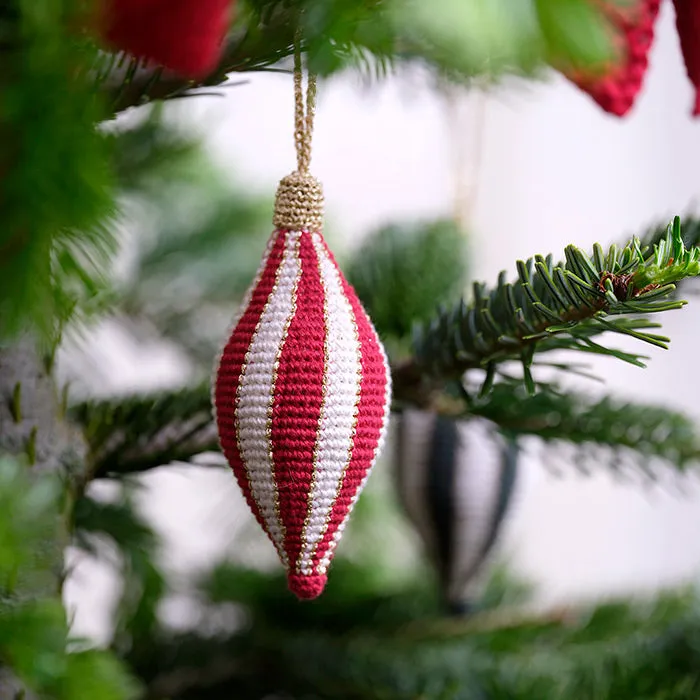
Use a 70/30 split: 70% crocheted or striped baubles, 30% solid red or white balls for visual pause. That keeps the tree from looking like a swatch card and lets your eye rest between patterns. This is the textured, budget-friendlier cousin of the high-shine look in Idea #10, and it’s especially good on a green tree with soft warm lights.
23. Red and White Spiral-Striped Ornament on Artificial Branches
- Start with a plain white or red shatterproof ball ornament, 3–4 inches in diameter.
- Wrap a strip of 1/4-inch masking tape in a slow spiral around the ball, pressing the edges down firmly.
- Paint the exposed sections with two coats of the opposite color using acrylic craft paint, waiting 20 minutes between coats.
- Remove the tape before the final coat is completely dry to get clean lines.
- Thread a gold string through the ornament cap and hang it where warm light can hit the spiral edge.
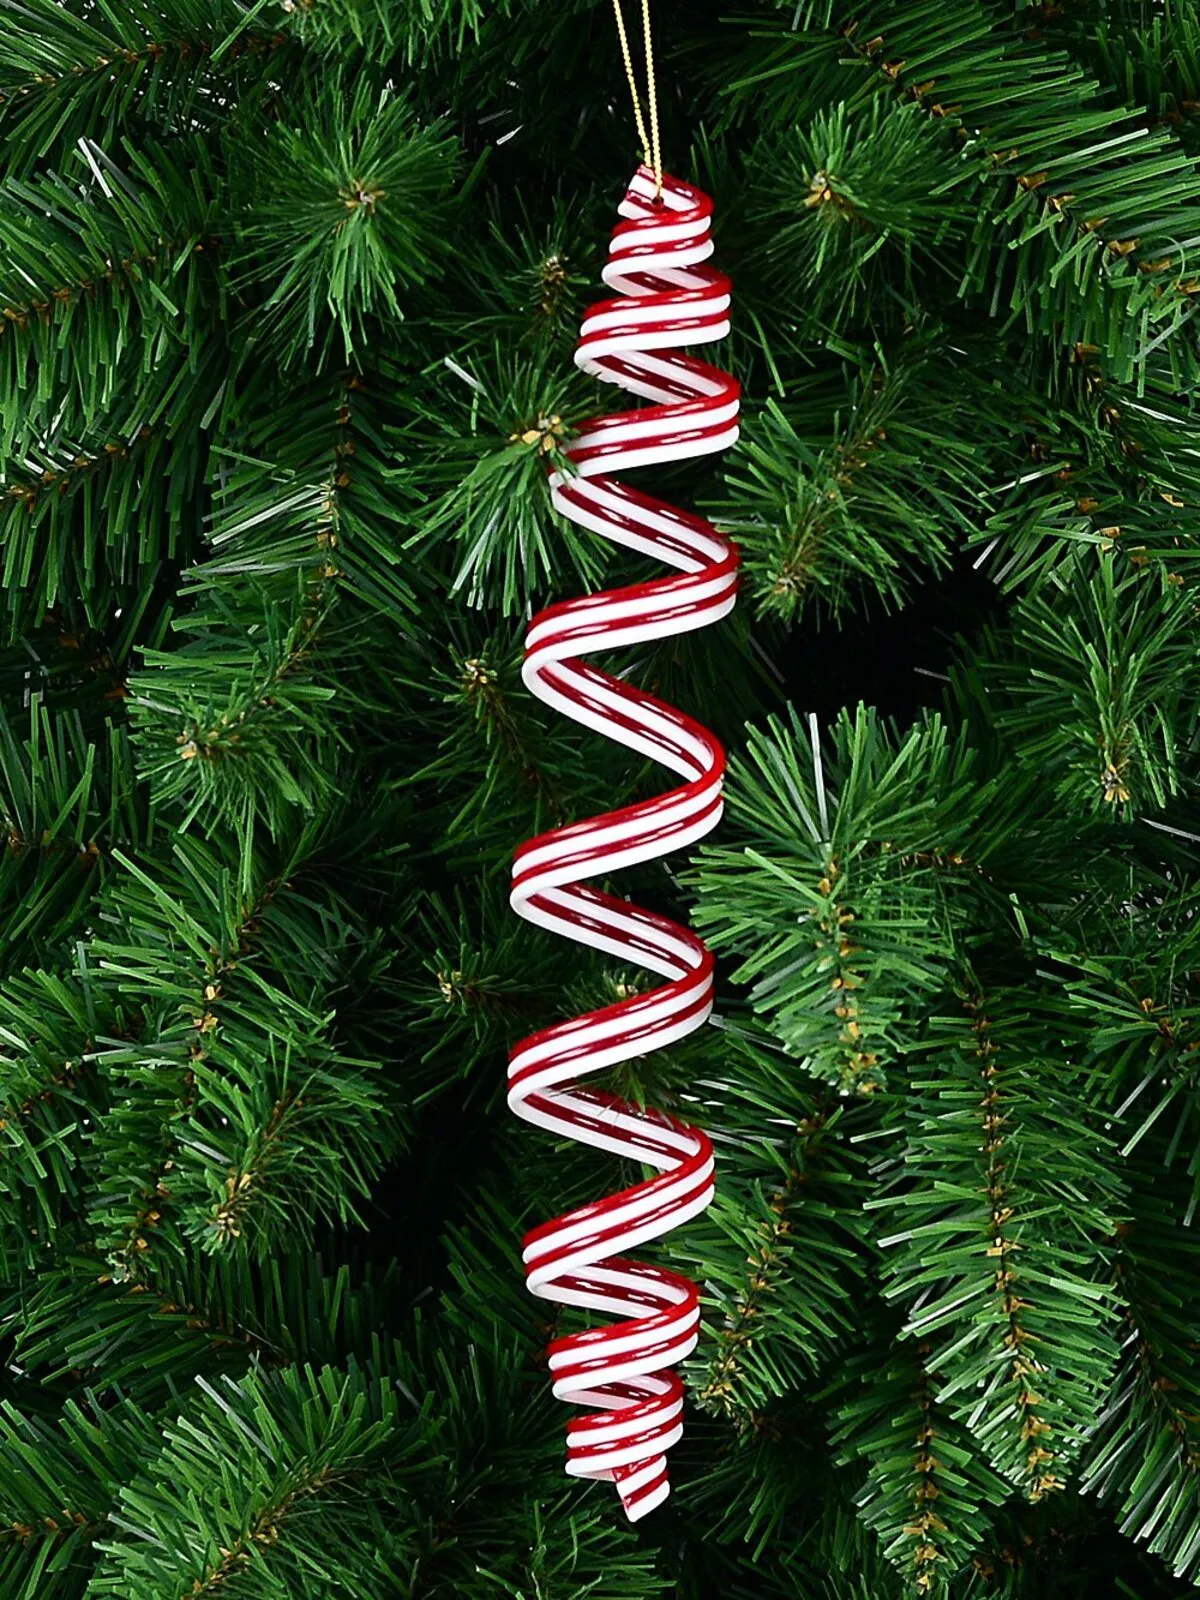
Time estimate: 45 minutes for four ornaments; materials under $12. The real caveat is that spiral stripes visually spin, so if your ornament is slightly off-balance, it will gradually twist on the branch. Give it a tiny dot of museum putty on the cap to keep it facing forward, and avoid hanging it in a high-traffic spot where it can bump against neighboring branches.
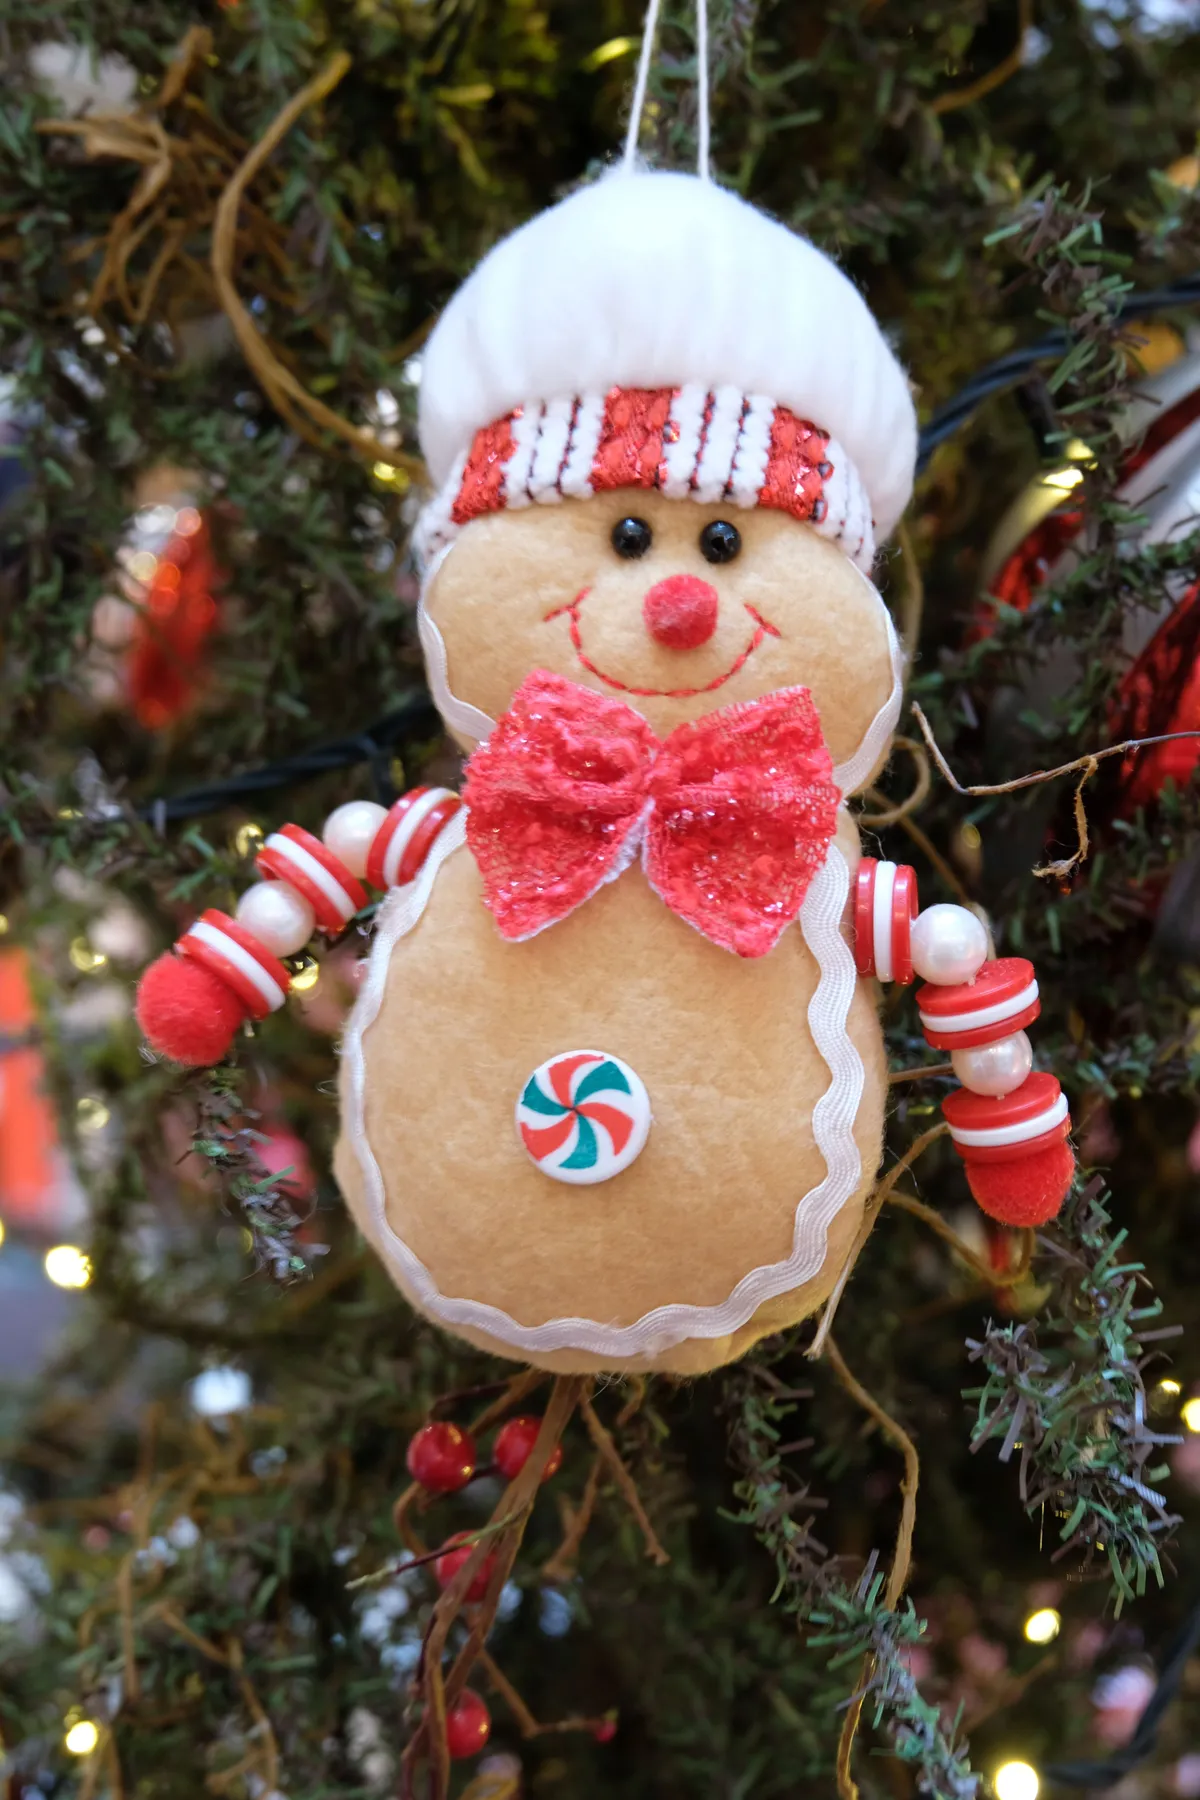
24. Gingerbread Man Ornament with Candy Cane Bead Limbs
This is a fantastic DIY project if you want the charm without the price tag. Use beige felt for the gingerbread body, white felt for a knitted-style hat, red glitter ribbon for the bow, and a small white-and-red button for the peppermint candy chest. A pack of red and white striped pony beads makes the candy-cane arms and legs. The entire ornament runs about $4–$6 per piece, versus $18+ for handcrafted versions online.

Be warned: those tiny beads are sewn or glued on, and they’ll pop off if the ornament is stored loose. Use fabric glue rated for felt and reinforce the bead holes with a dab of clear nail polish. Keep it away from the warmest tree lights, because felt and glitter ribbon can fade or curl over a season if they sit directly against hot bulbs.
25. Red and Cream Striped Ornaments with Velvet Ribbon Accents
Try 50% red-and-cream striped ornaments, 25% solid glossy red balls, and 25% matte or velvet burgundy pieces. That velvet ribbon draped on the left side is what gives the tree its richness; it breaks up the round shapes and adds a soft, light-absorbing surface against all that shine. Keep the warm white string lights tucked deeper so they glow through the velvet rather than washing it out.
|
📋 Copy HEX 🔗 Share |
This combination works because it mixes three values of red—bright candy red, deep burgundy, and creamy white—on a deep green base. The warm string lights bring the burgundies forward while the cream stripes keep the branch from getting too heavy. It’s a more sophisticated take than a strict red-and-white tree, and it plays beautifully in rooms with wood trim or richer wall colors.
26. Red Glitter ‘Merry Christmas’ Script Ornament with Gold String
Script message ornaments are having a real moment in 2026 because they act like a typographic anchor in a tree that’s already full of pattern. After years of subtle jewel tones, people are rediscovering the joy of a bold ‘Merry Christmas’ right in the center of the arrangement. This one reads as festive but not fussy because the red glitter stays tight to the letterforms and the gold string adds a little formality without overpowering the frosted foliage.

|
📋 Copy HEX 🔗 Share |
The single most important element here is the combination of the red glitter script and the gold-wrapped chocolate ornament beside it. One supplies the words, the other supplies the reward—like a visual promise at eye level. Without the gold chocolate, the script can feel a little flat; with it, the composition has a playful secondary moment that keeps the tree from taking itself too seriously.
Your Peppermint Tree Is Ready for Its 2026 Moment
Pick one ornament, one ribbon, or one chair-side moment and start there. These 26 ideas prove the peppermint look can be as playful or as polished as you want it to be. Pin your favorite branch to your holiday board and come back when you’re ready to shop.