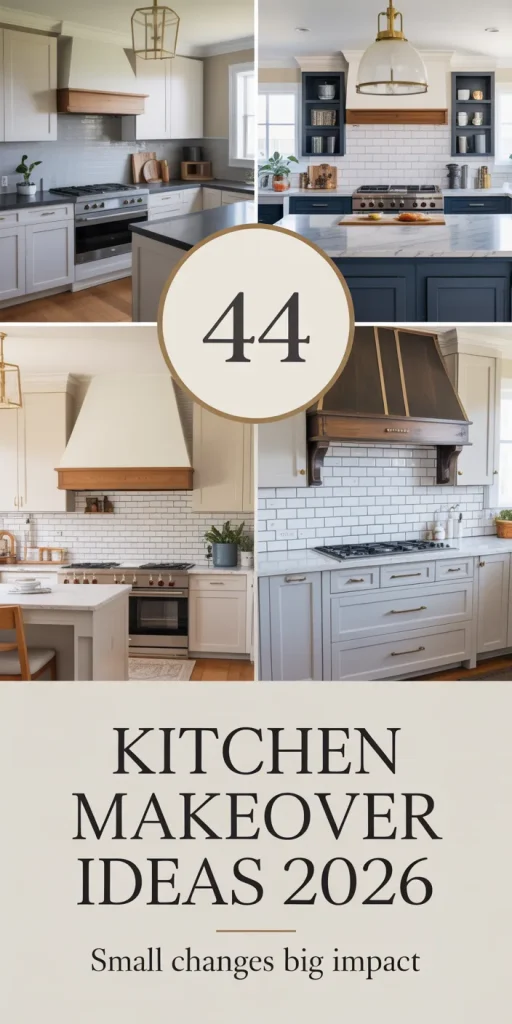
Kitchen makeovers are one of the most transformative home improvement projects you can tackle in 2026, and Pinterest is overflowing with inspiration for every style and budget. Whether you’re renting and need non-permanent solutions, working with a tiny galley layout, or dreaming of a full farmhouse-style renovation, there’s a design direction that fits your space and your wallet. American homeowners are increasingly seeking out ideas that balance aesthetic impact with practicality—from DIY updates that cost less than $500 to sophisticated modern transformations. In this guide, you’ll discover fresh kitchen makeover ideas tailored to real-life spaces, budgets, and lifestyles, complete with actionable tips and visual prompts to help you reimagine your cooking space.
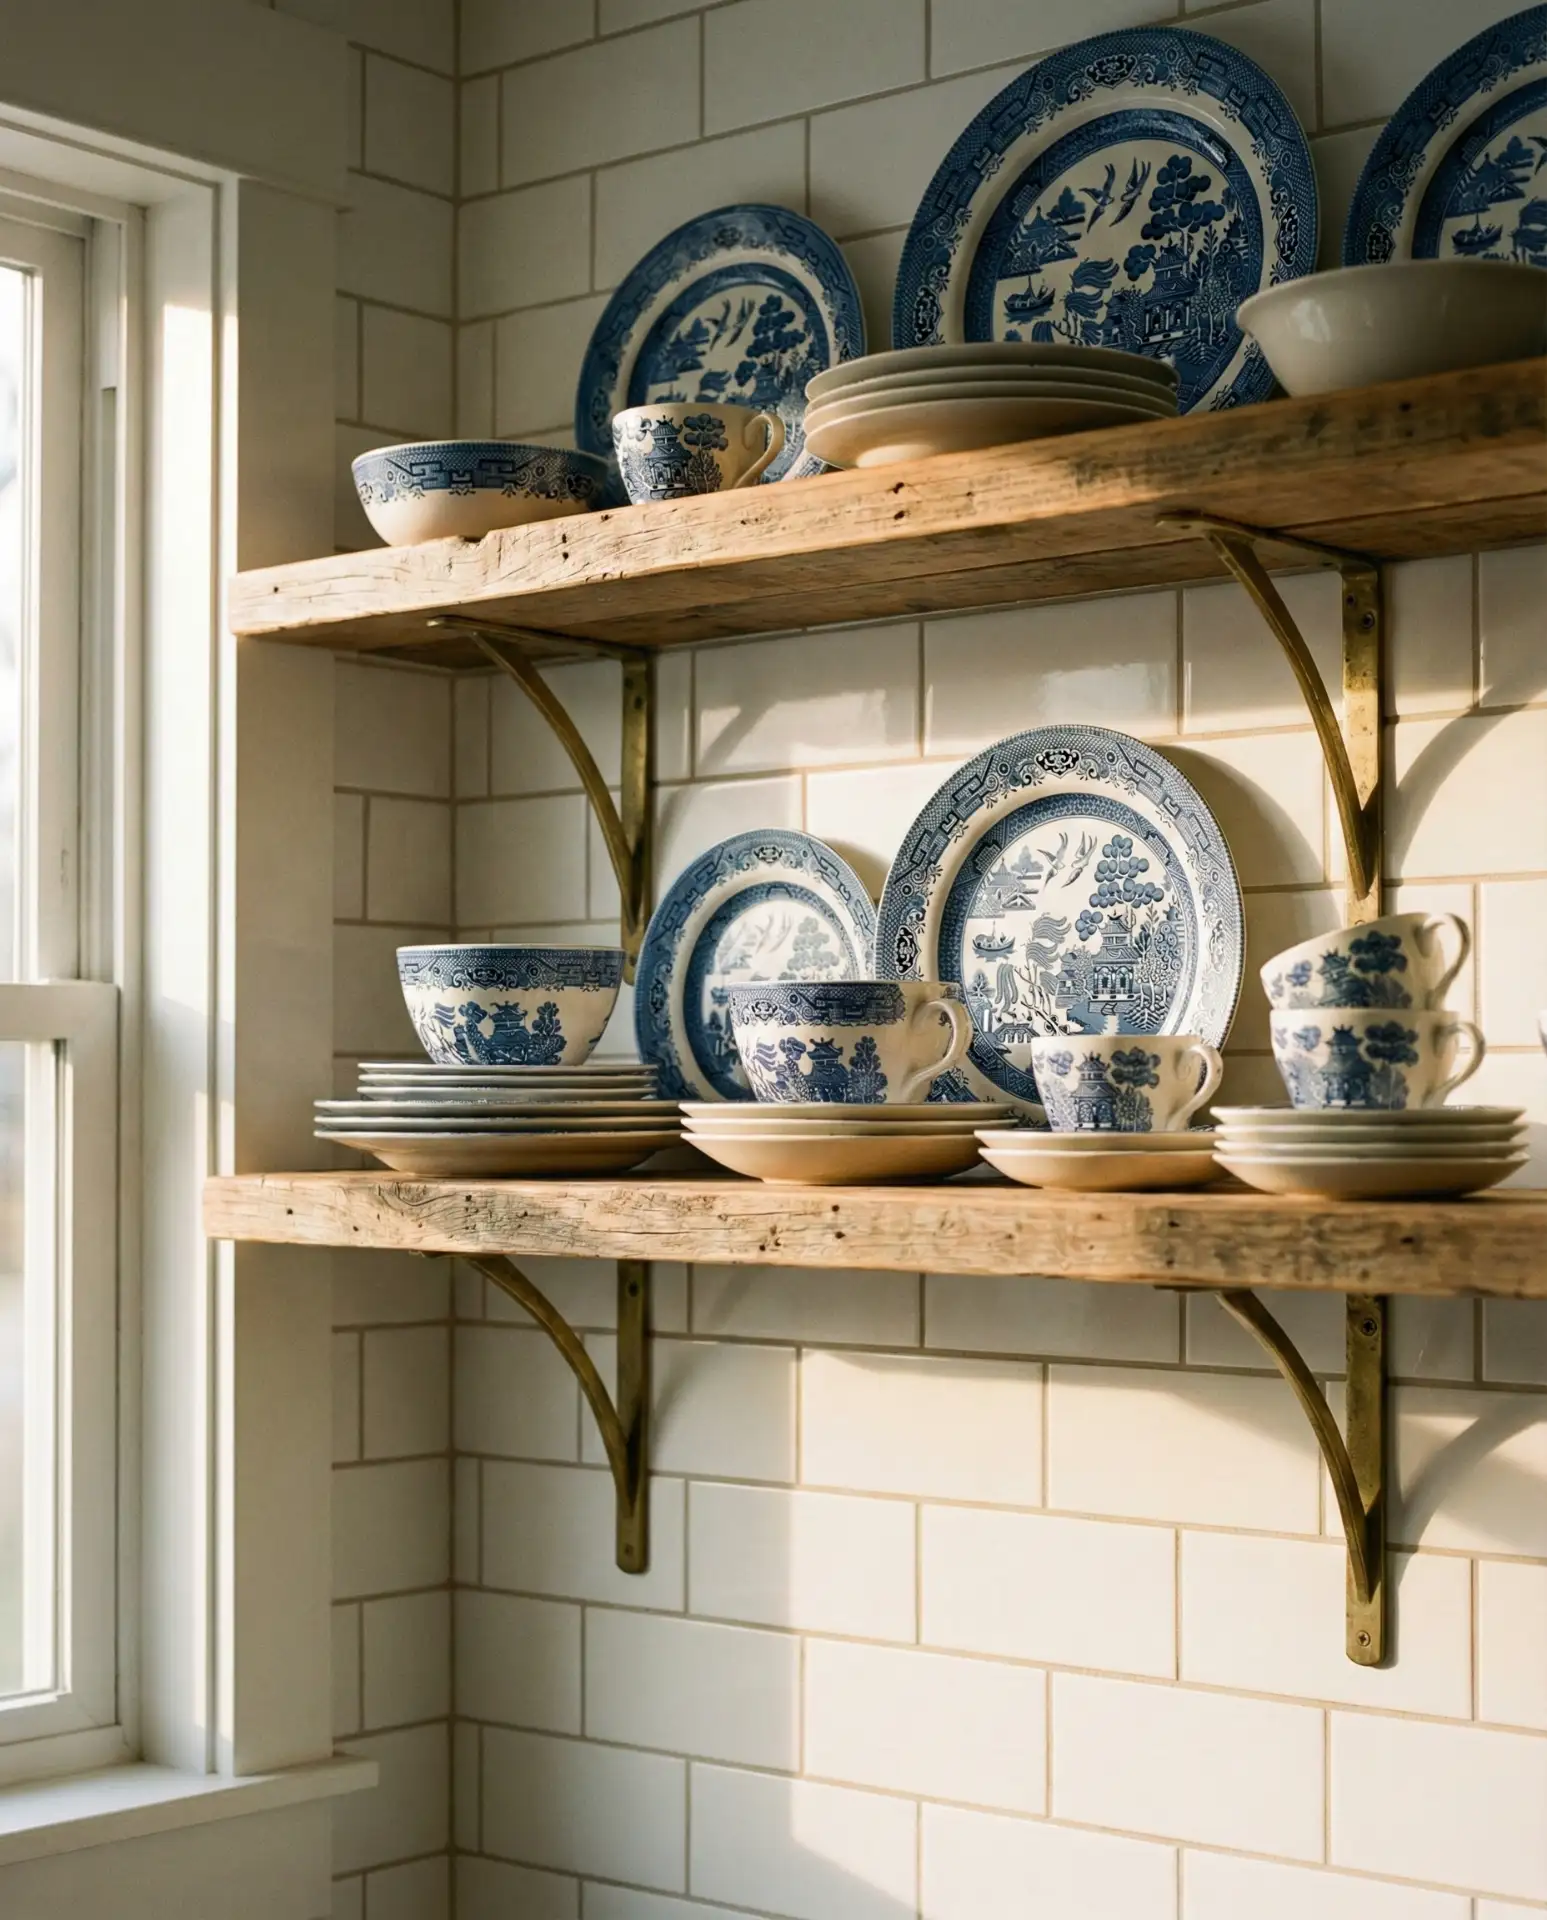
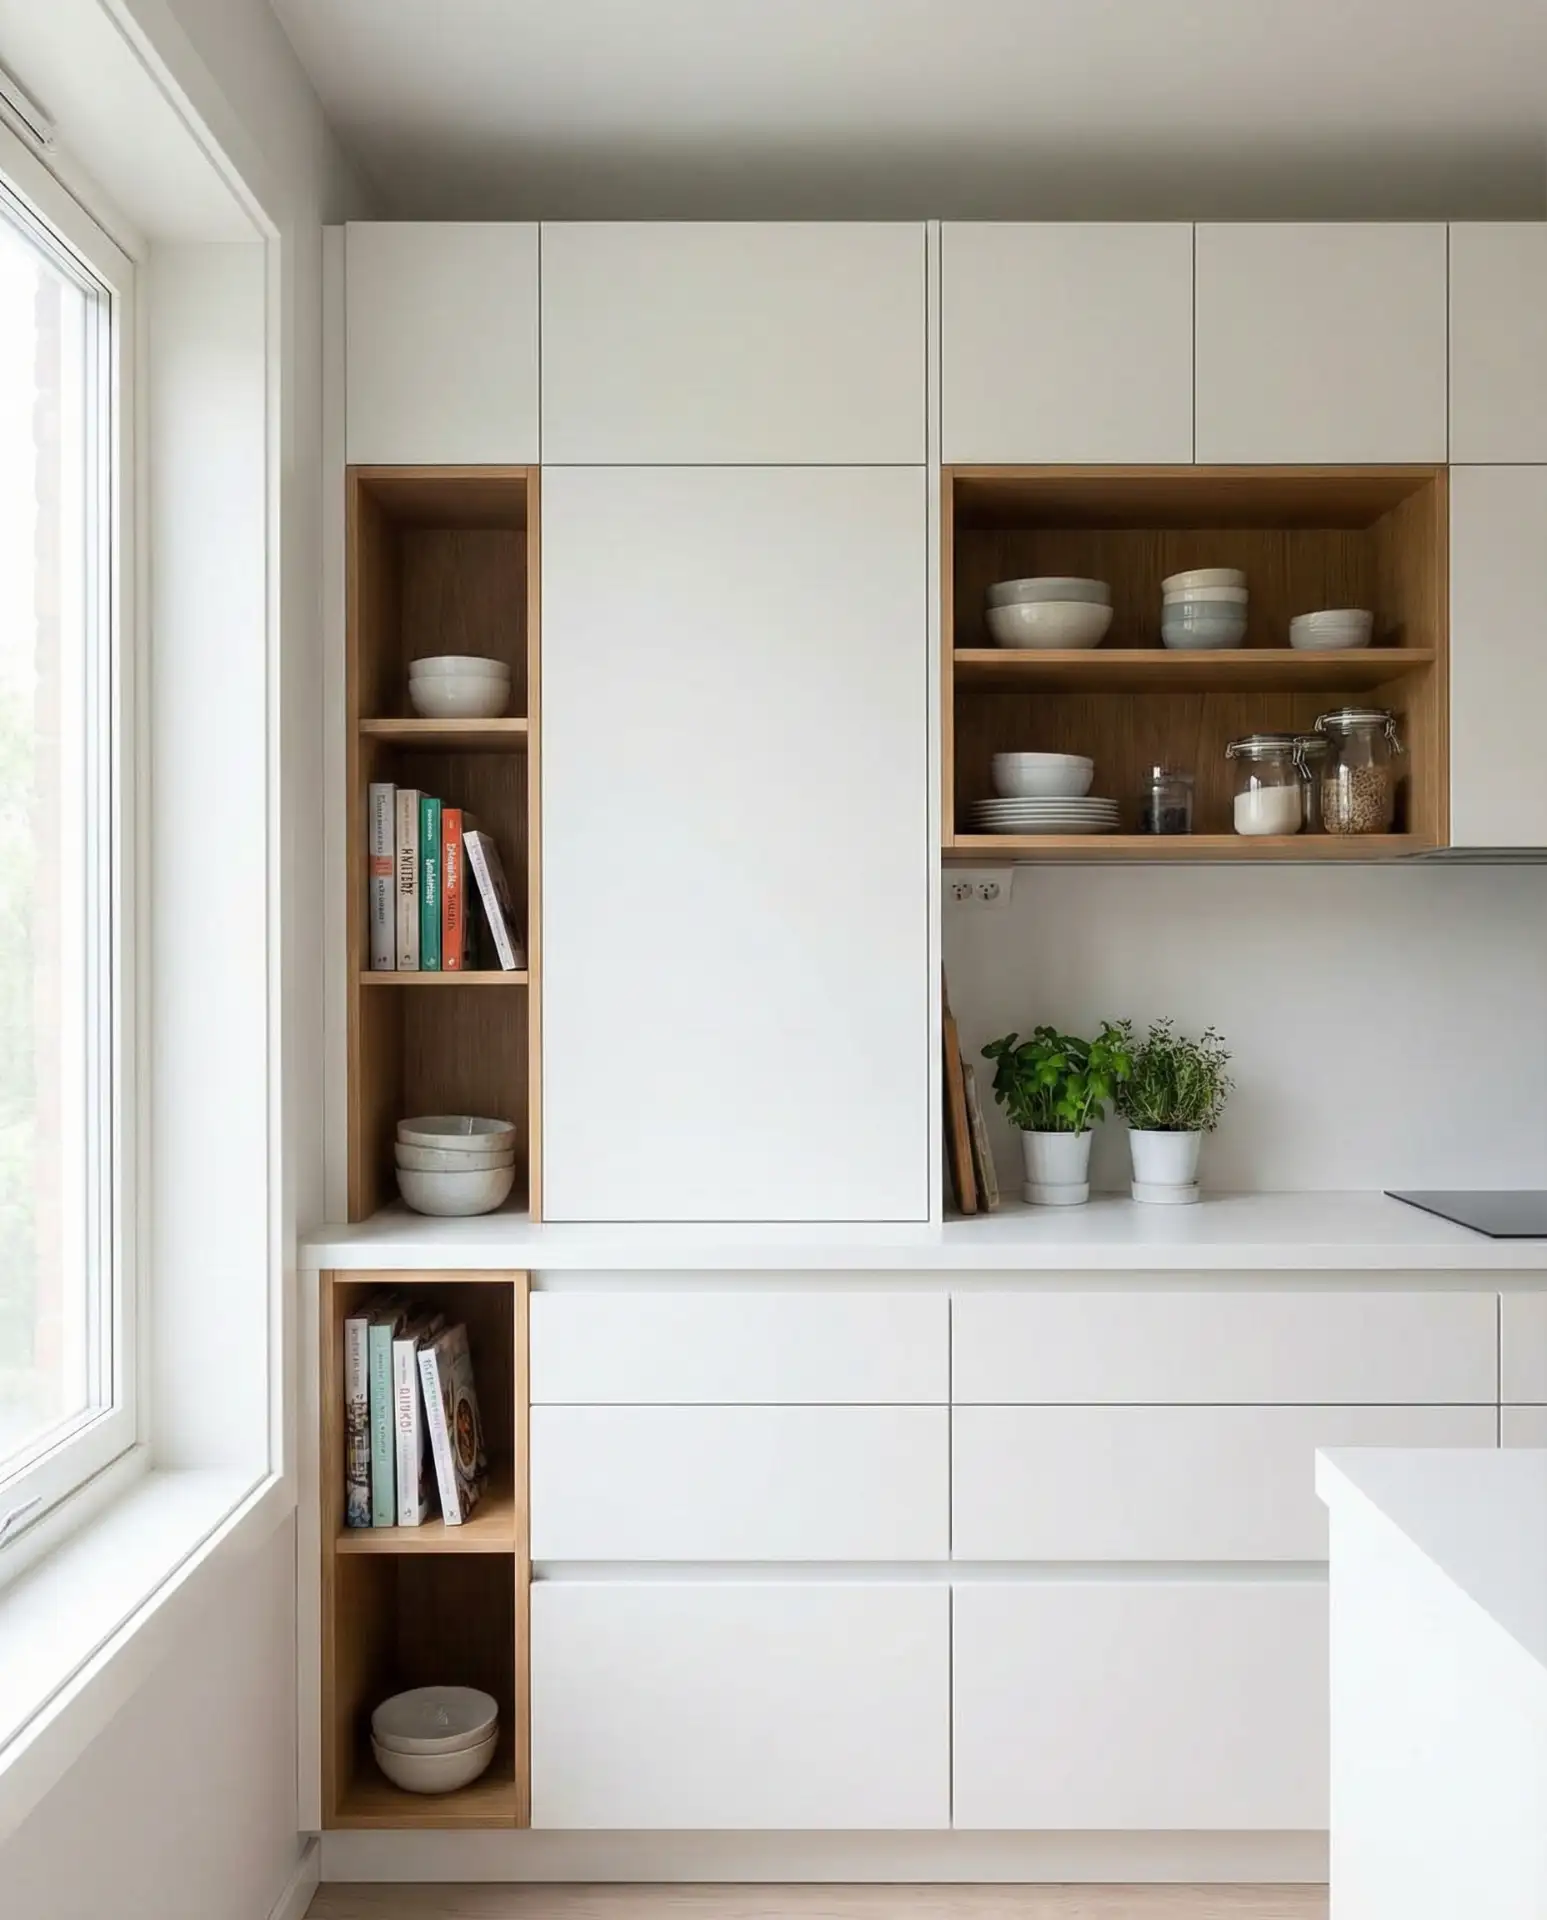
1. Warm Farmhouse Kitchen with Open Shelving
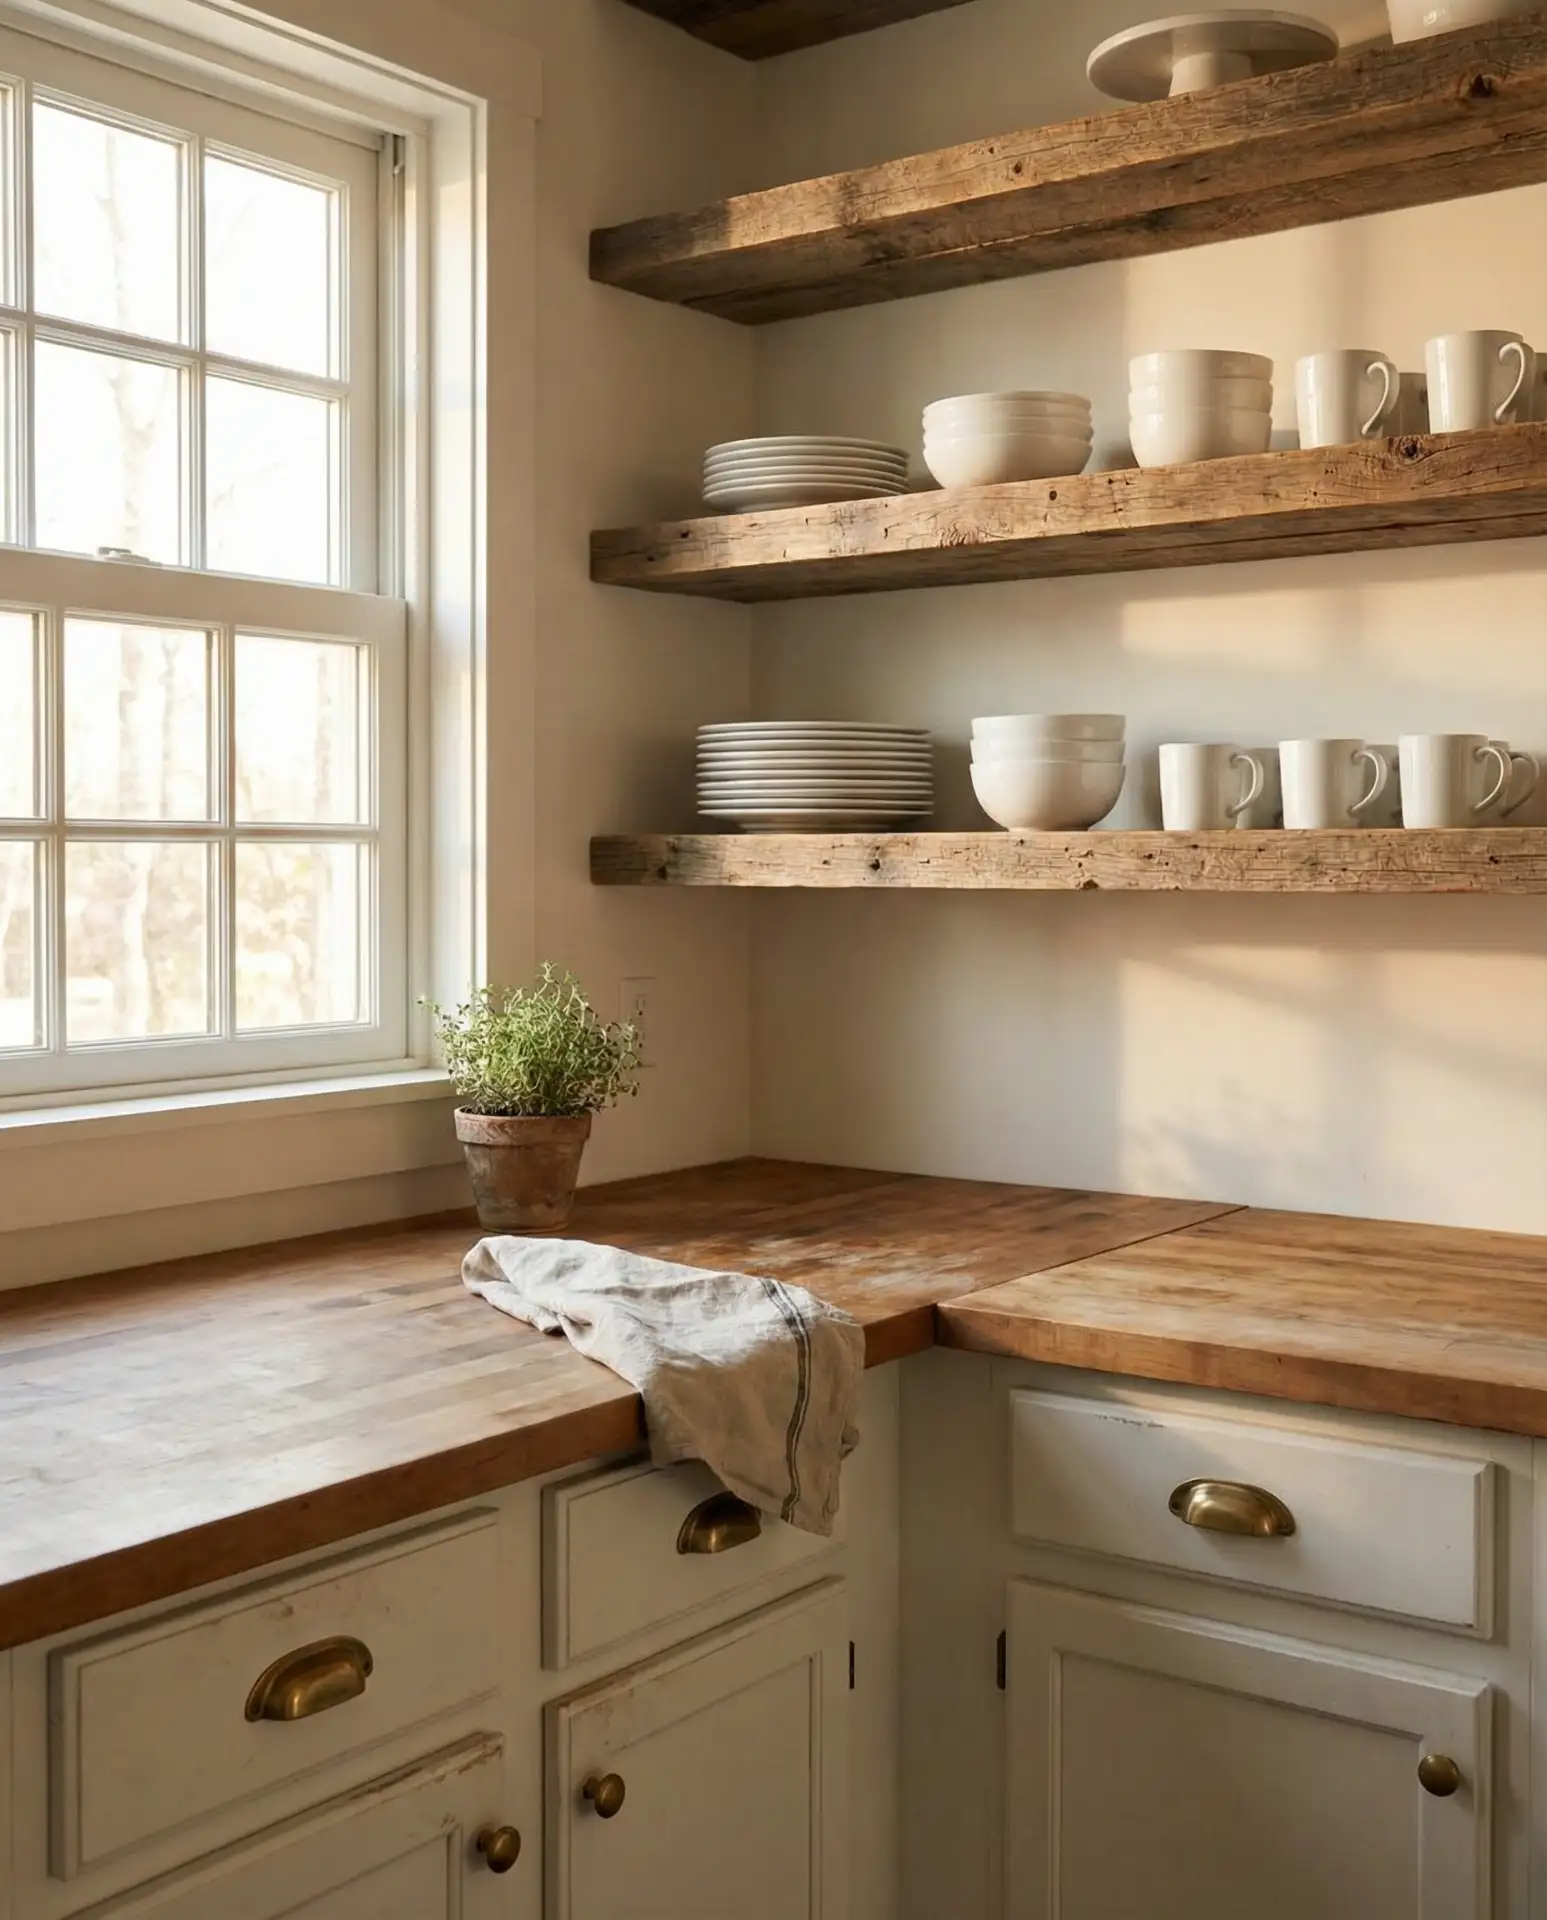
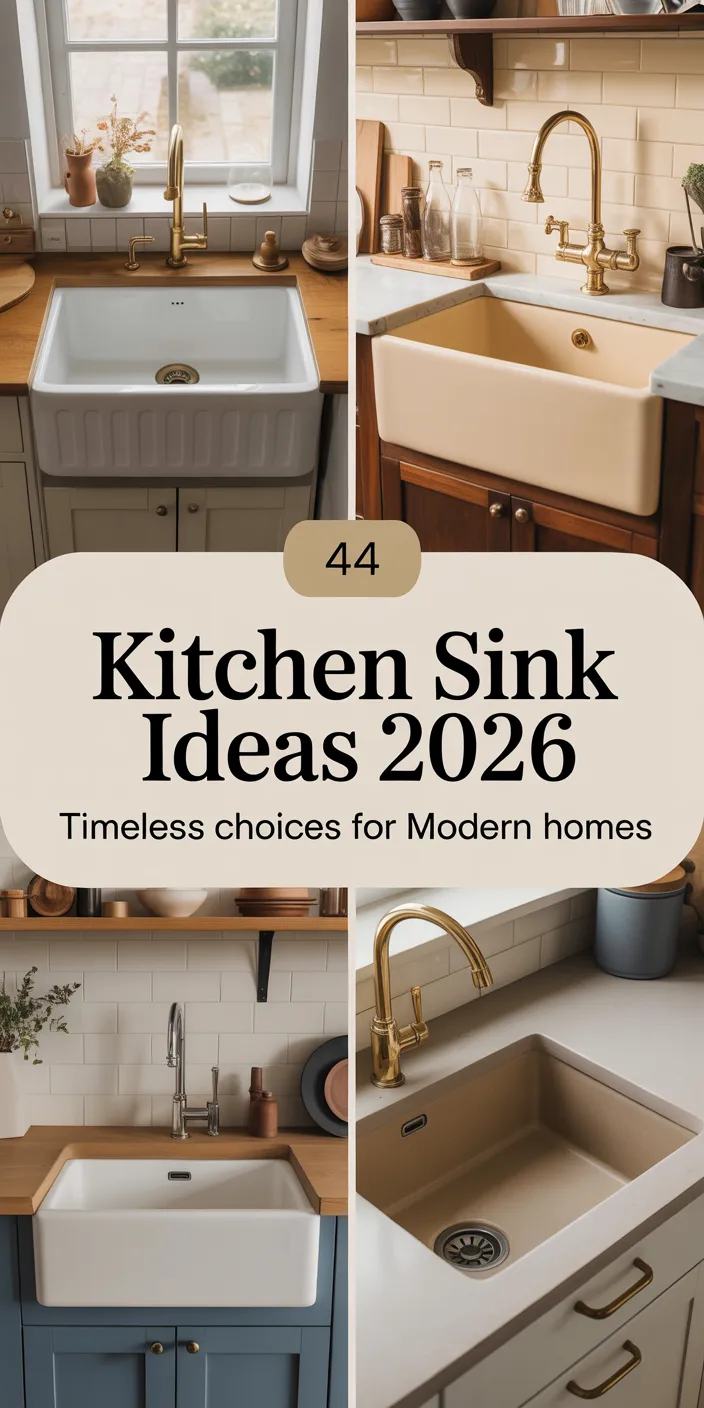
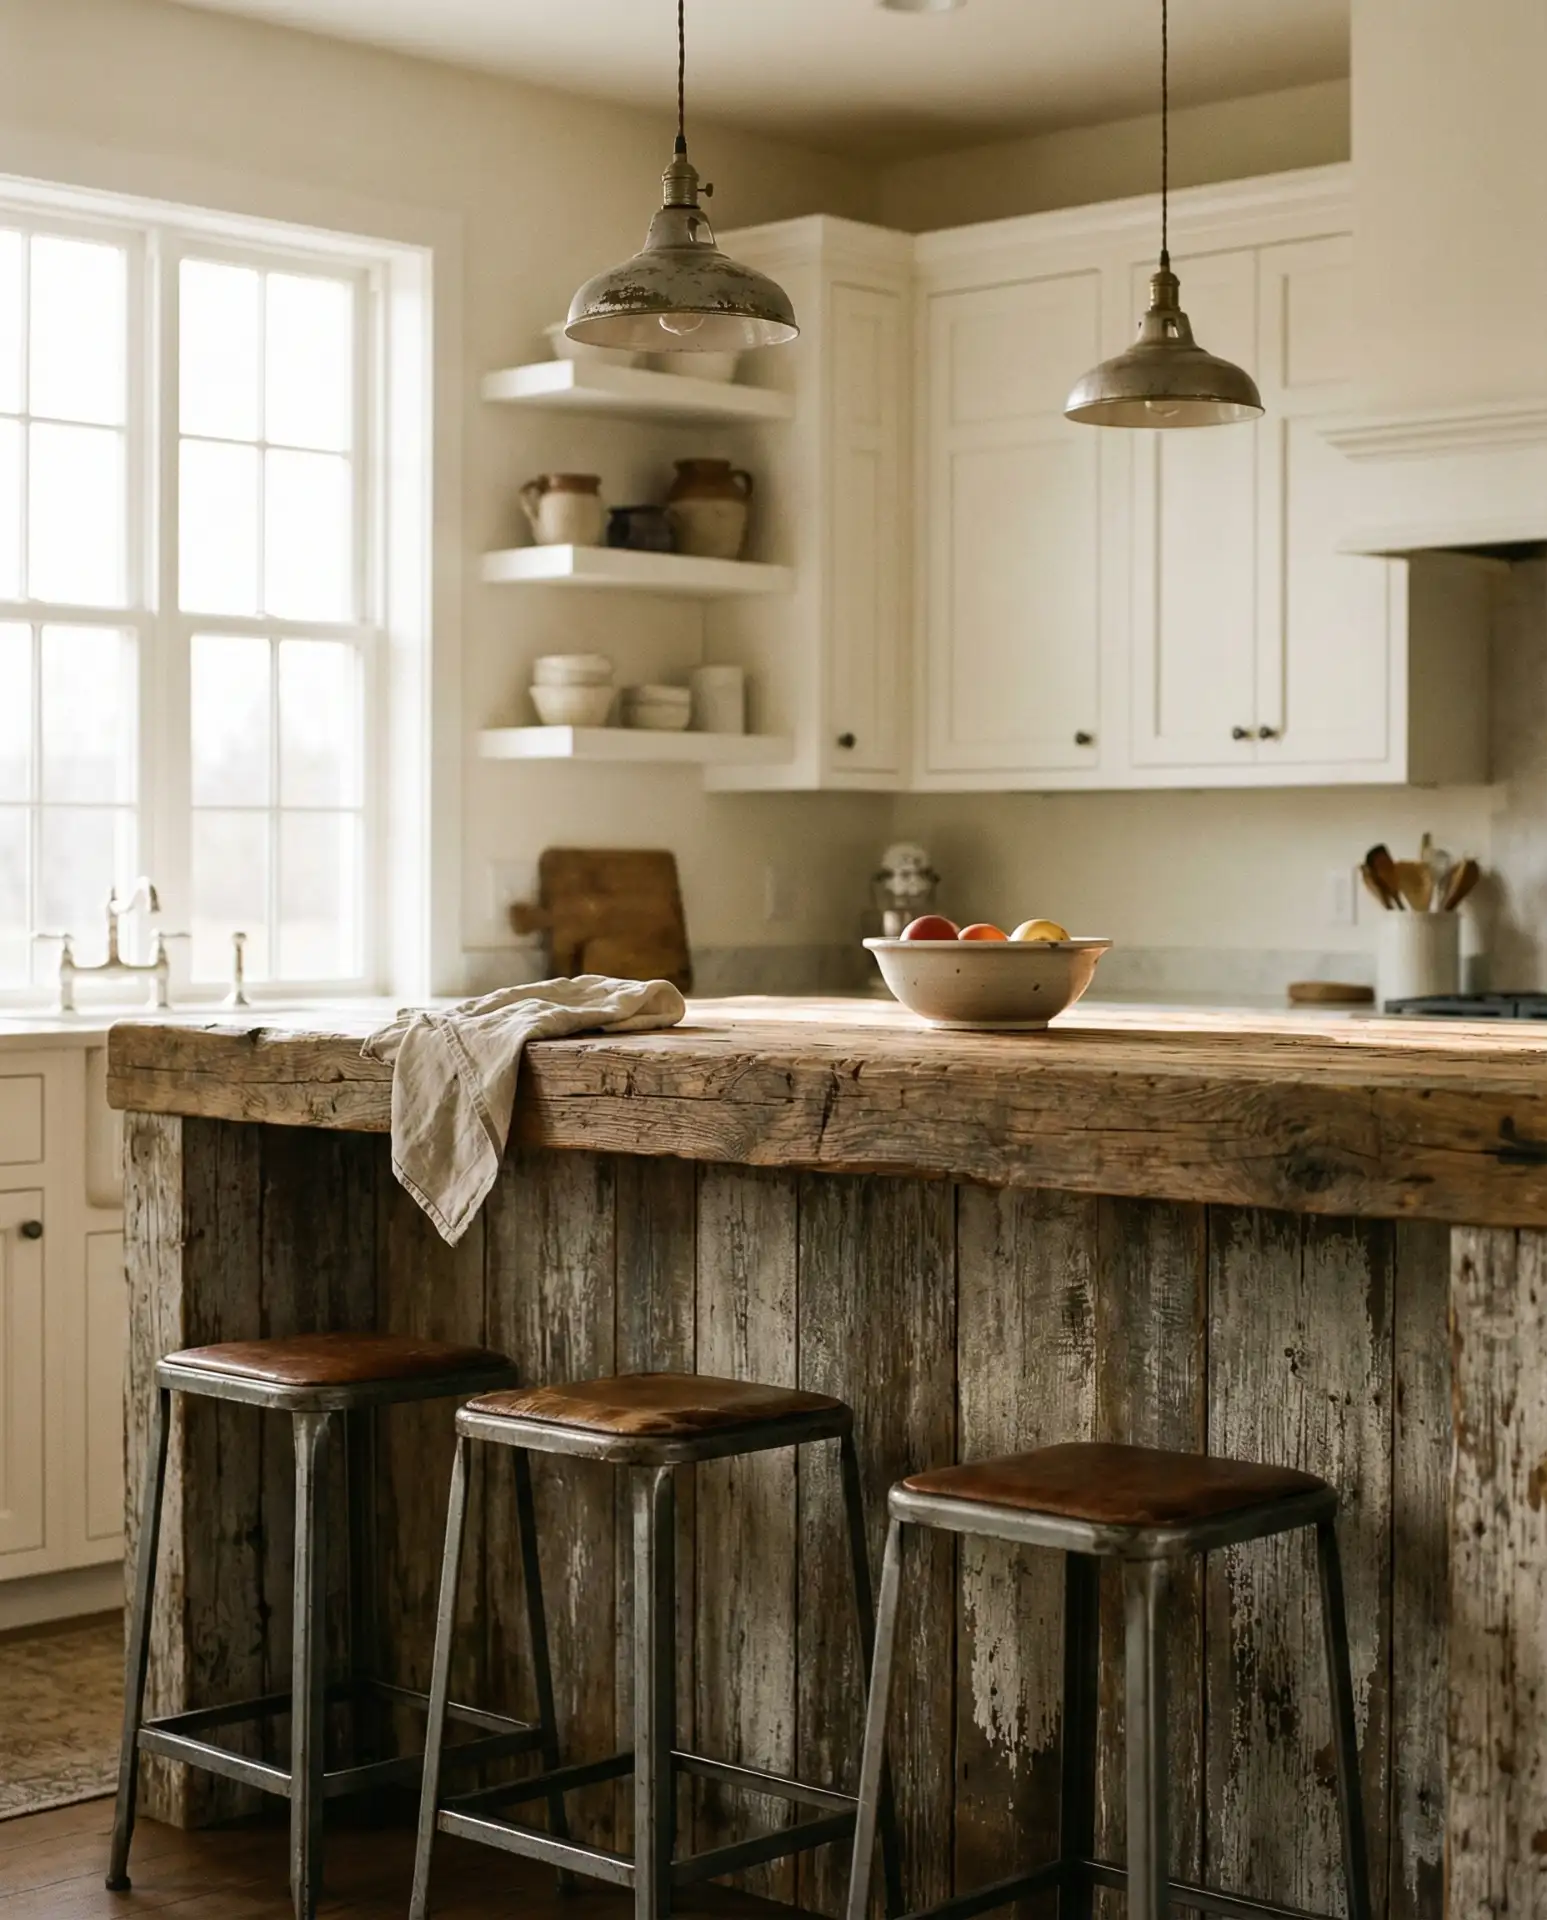
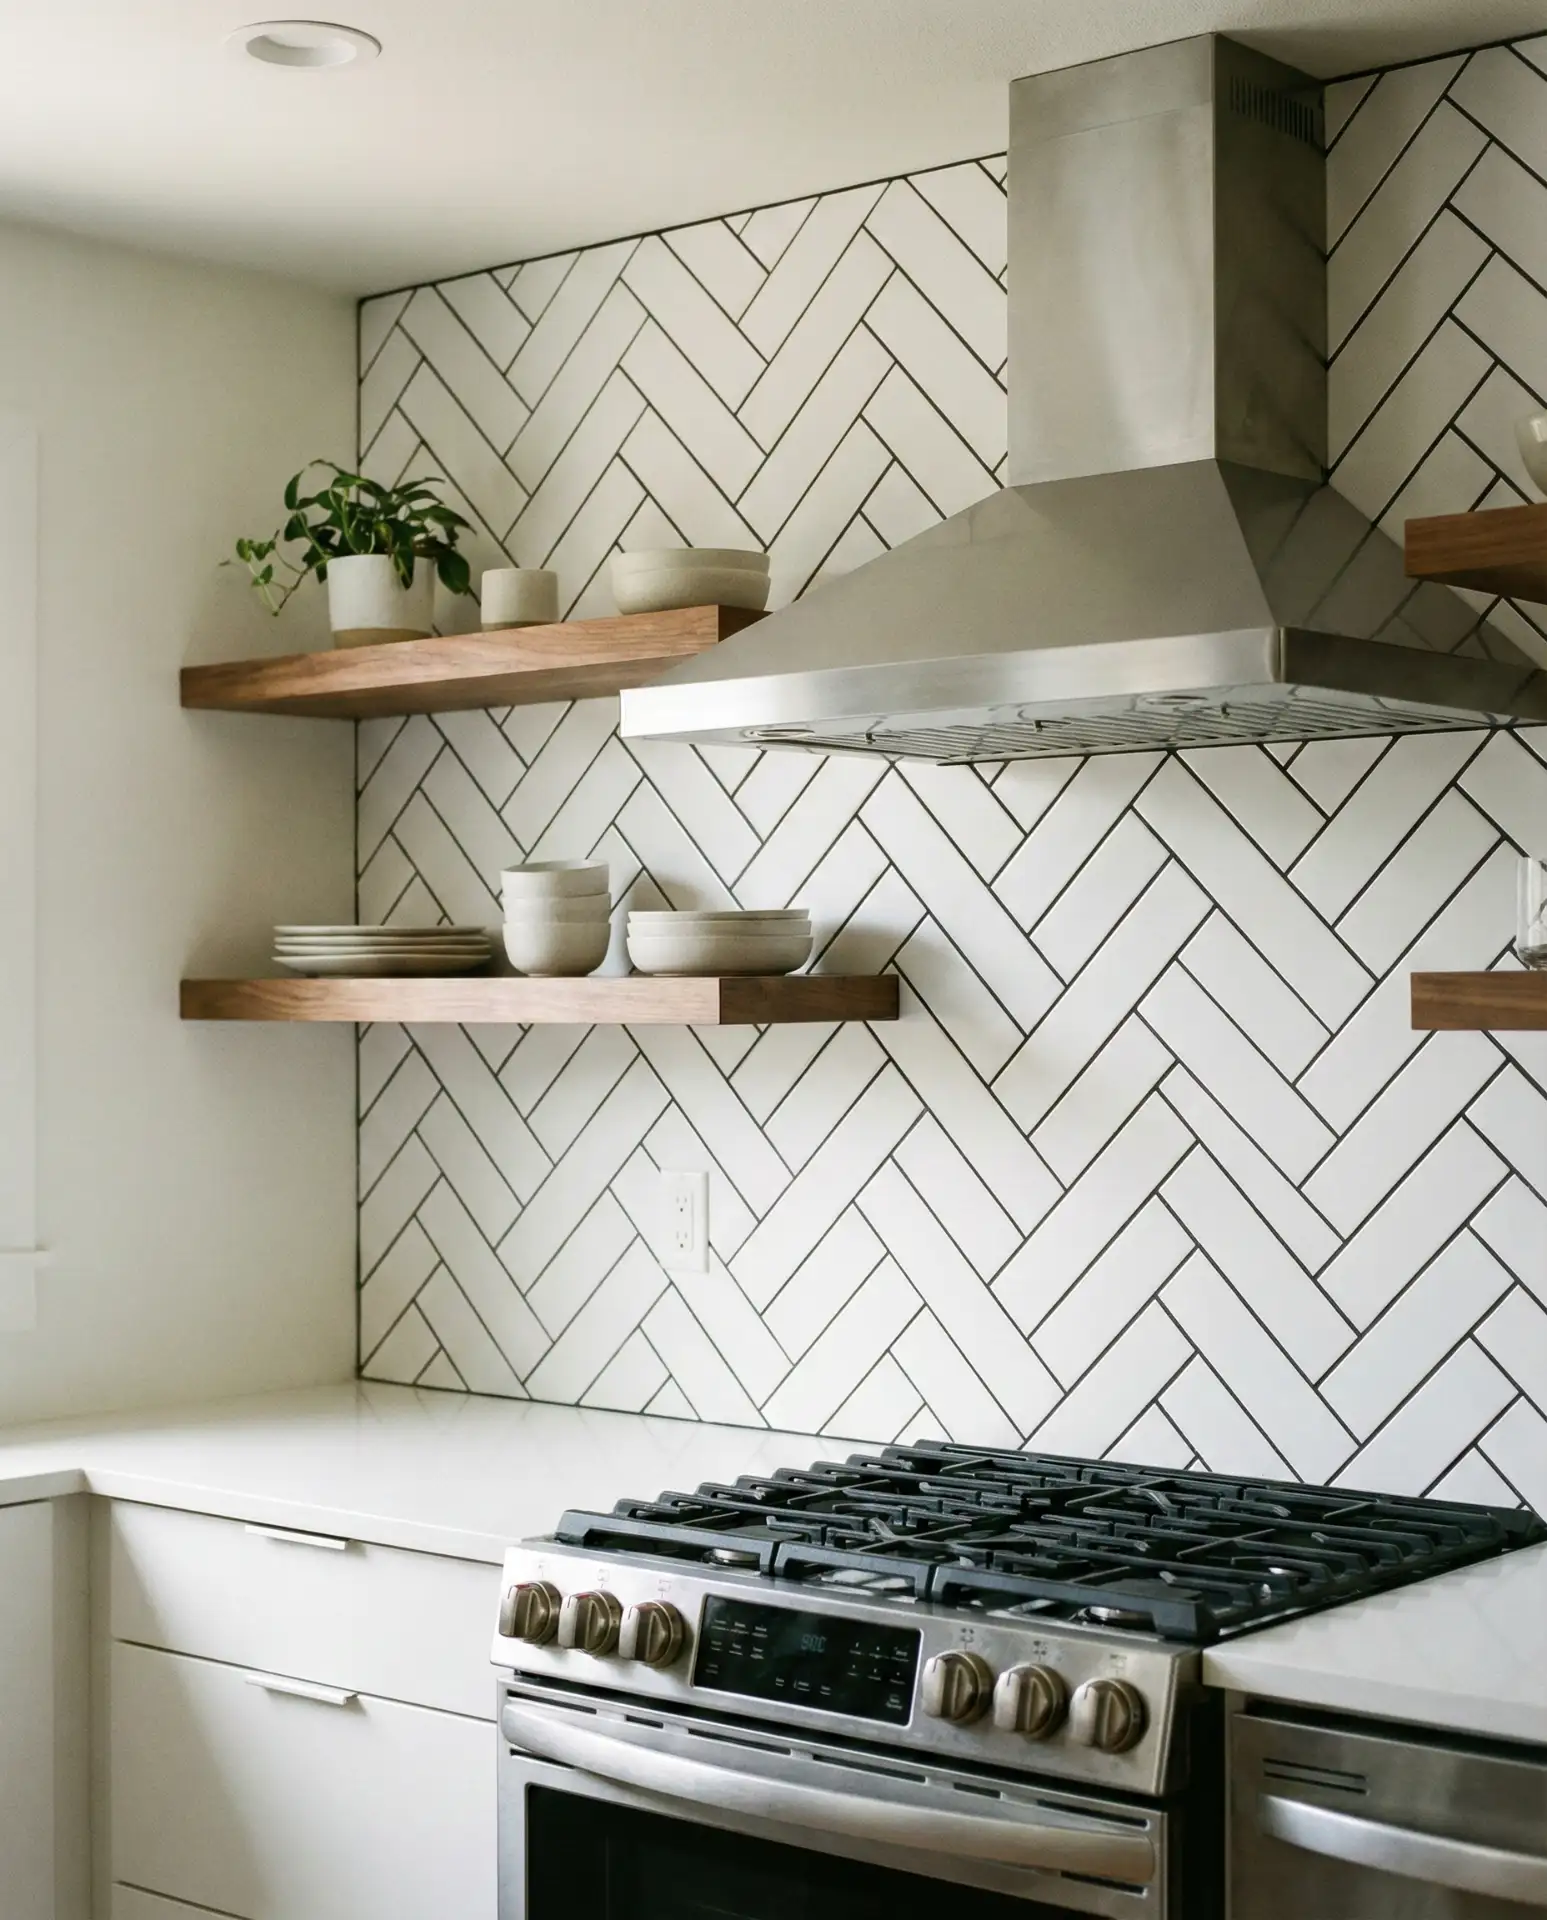
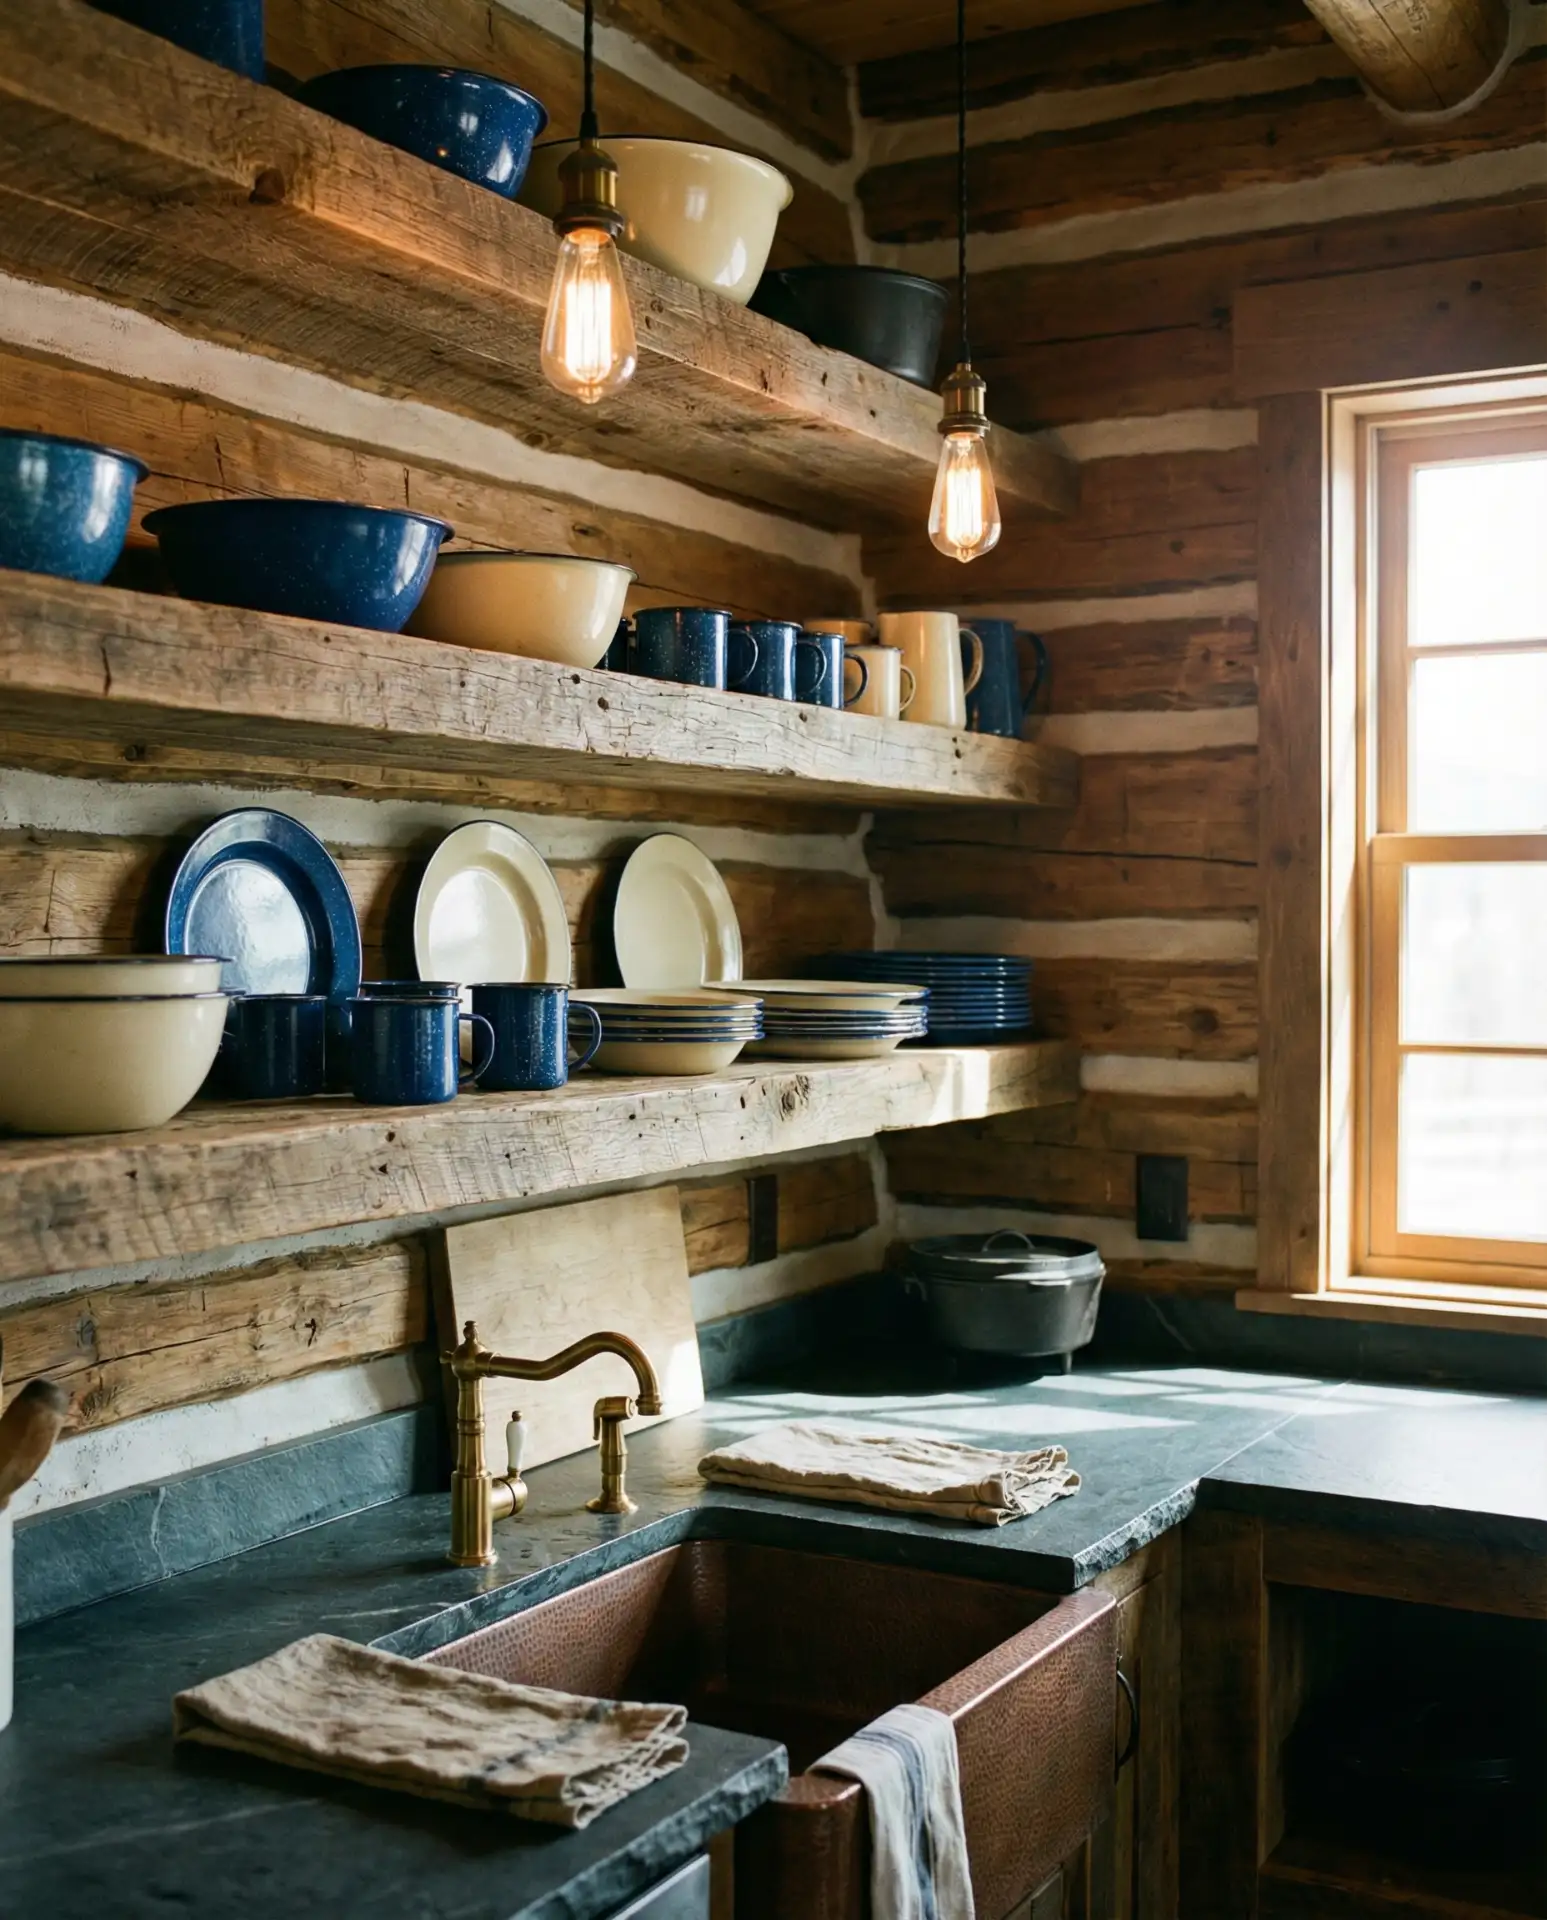
Transform your cooking space into a farmhouse-inspired retreat by replacing upper cabinets with open wooden shelves that display everyday dishes and vintage glassware. This approach works beautifully in rustic homes or country cottages where you want to highlight natural materials and handmade ceramics. The exposed shelving creates an airy feel while keeping your most-used items within easy reach, and it’s surprisingly budget-conscious since you’re removing rather than adding cabinetry.
In the Midwest and South, homeowners often pair this look with apron-front sinks and Edison bulb pendants to complete the vintage aesthetic. One common mistake is overcrowding the shelves—aim for 40% empty space so the display feels curated rather than cluttered. If you’re worried about dust, reserve open shelving for items you use daily and keep occasional pieces in closed cabinets below.
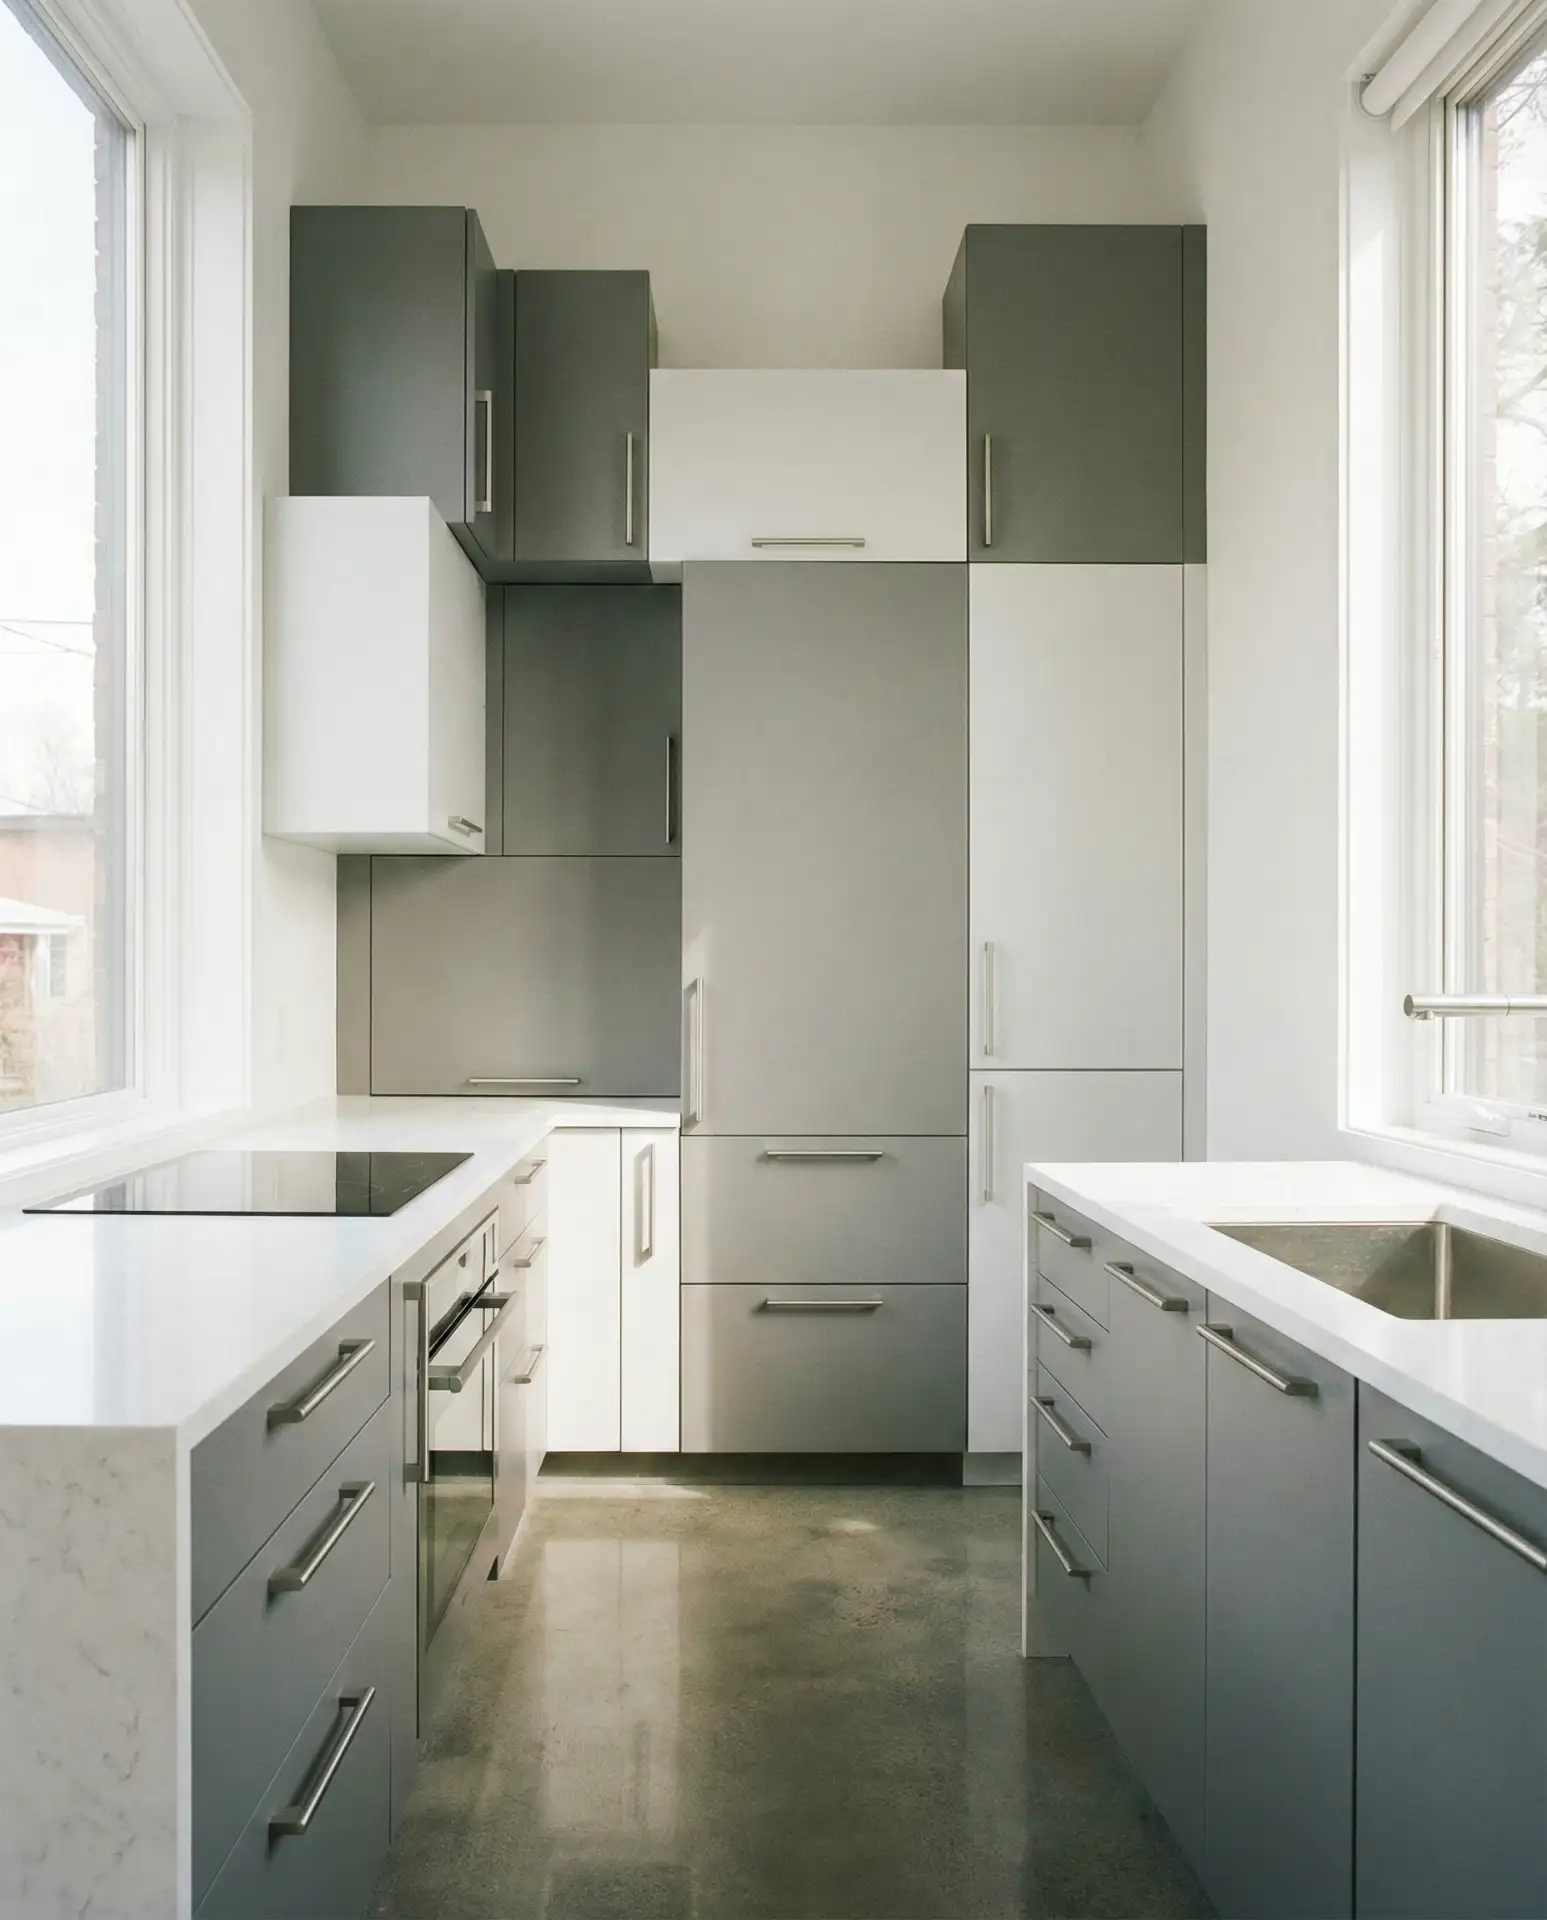
2. Sleek Modern Kitchen with Handleless Cabinets
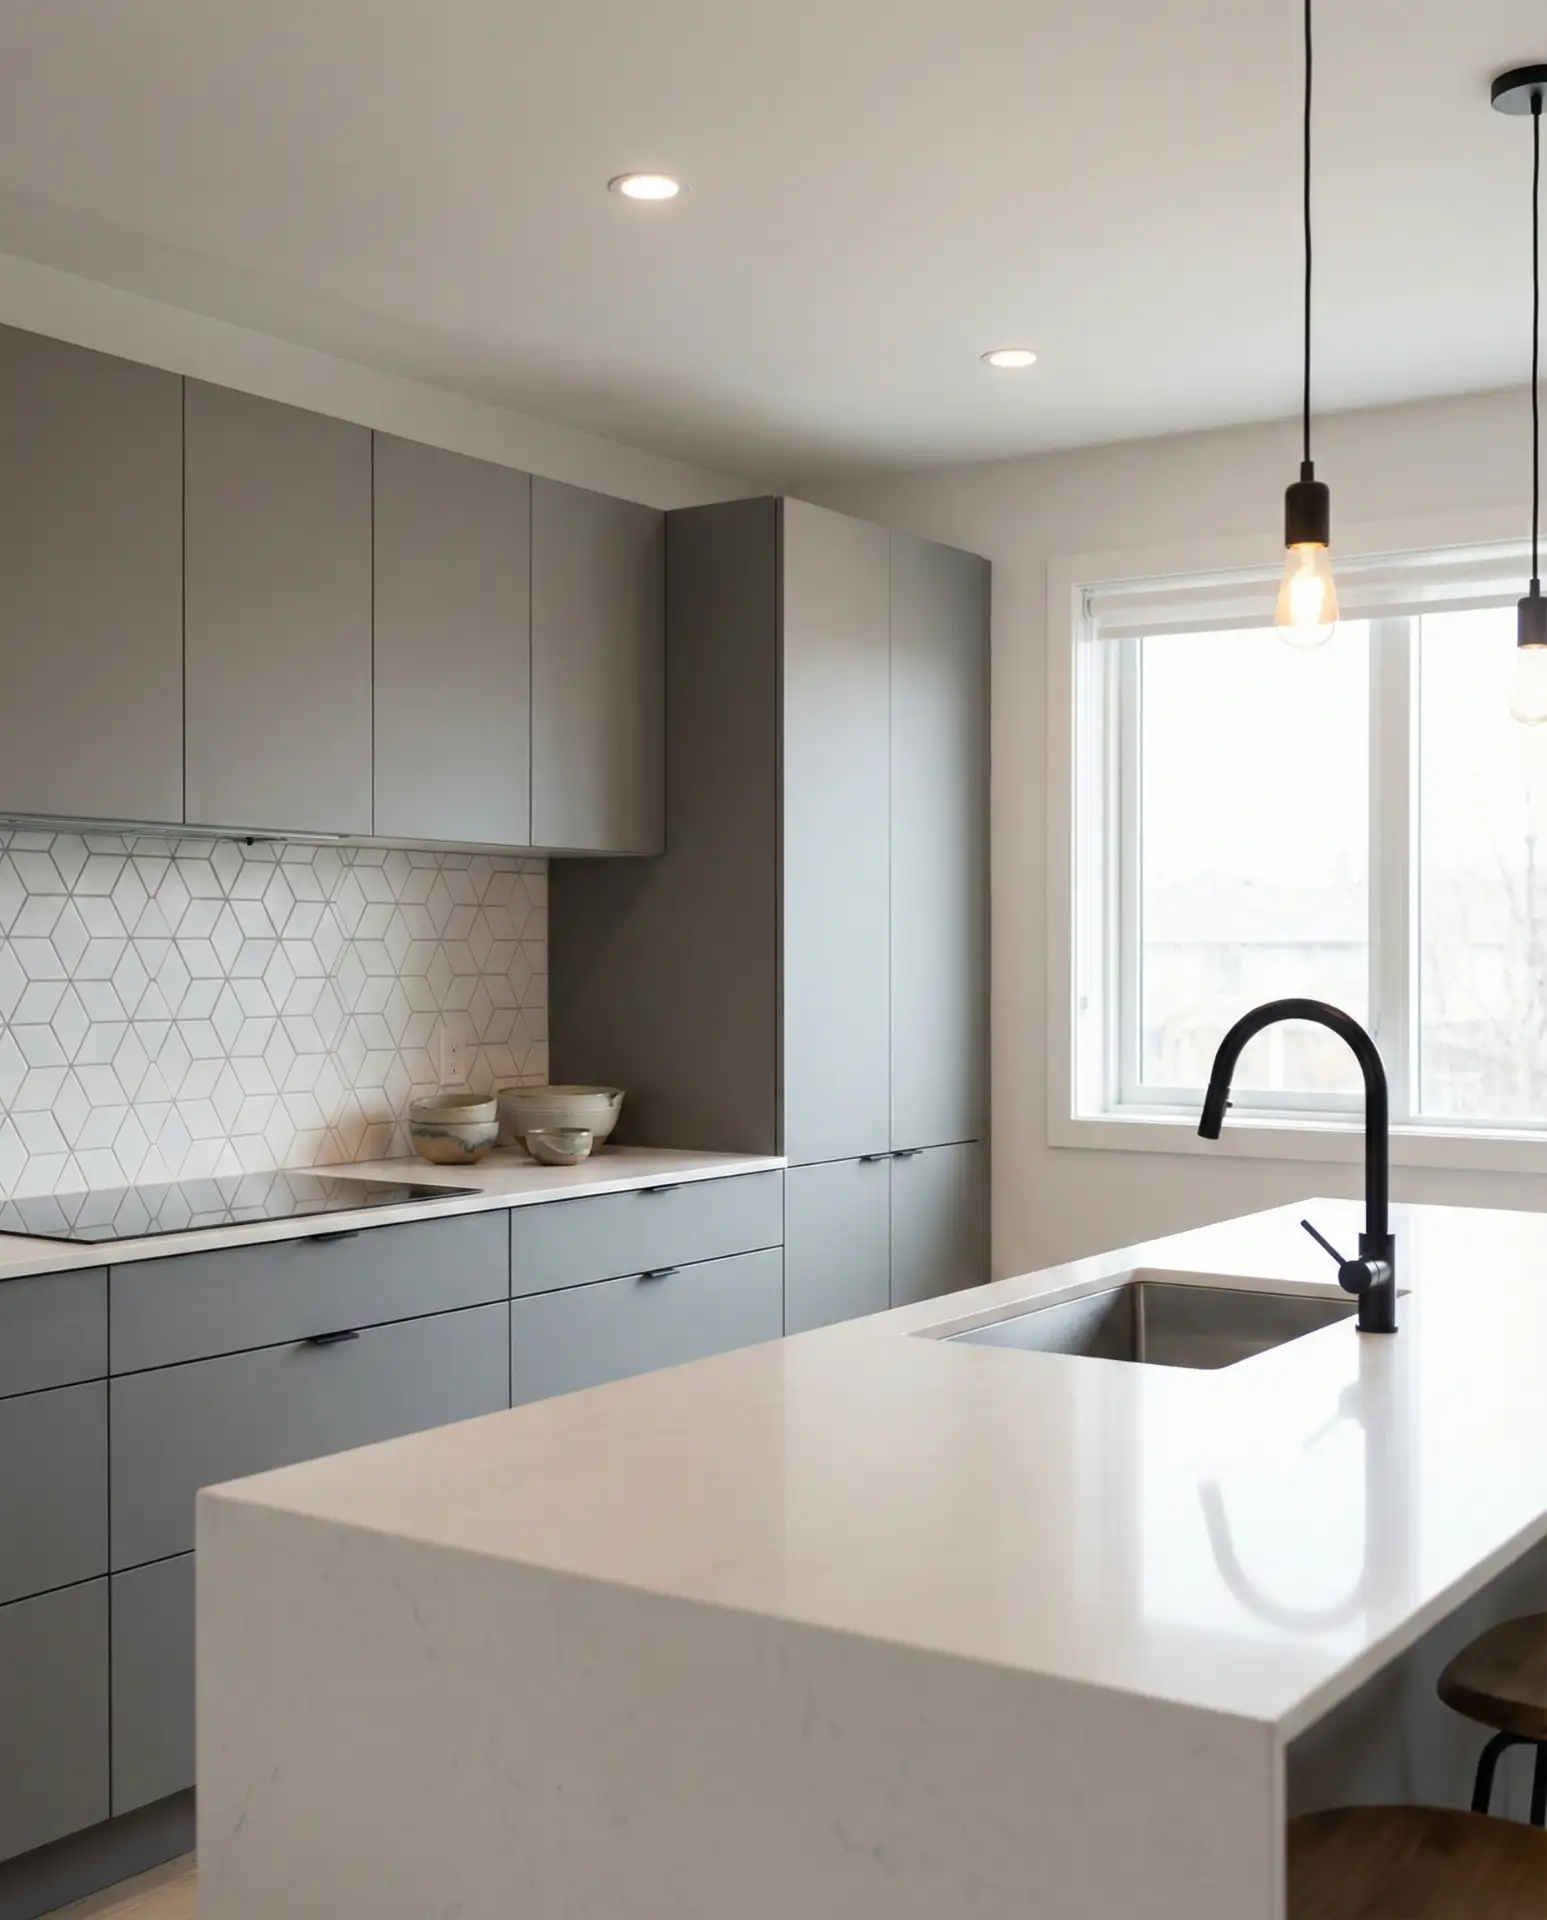
A modern kitchen makeover centers on clean lines and minimalist hardware, with push-to-open or integrated handle cabinets in matte white or grey finishes. This design philosophy eliminates visual clutter and creates a seamless look that’s perfect for contemporary homes or newly built condos. Pair these cabinets with quartz countertops and a geometric tile backsplash to emphasize the sleek, uninterrupted surfaces.
Handleless cabinets typically cost 10-15% more than traditional styles due to the precision engineering required for smooth operation, but they significantly boost resale value in urban markets. The push-to-open mechanism works best when cabinets are professionally installed and leveled—misalignment causes uneven gaps and sticky doors. Keep fingerprints at bay by choosing matte finishes over high-gloss, especially around the cooktop and sink areas.
3. Bold Blue Kitchen Island Accent
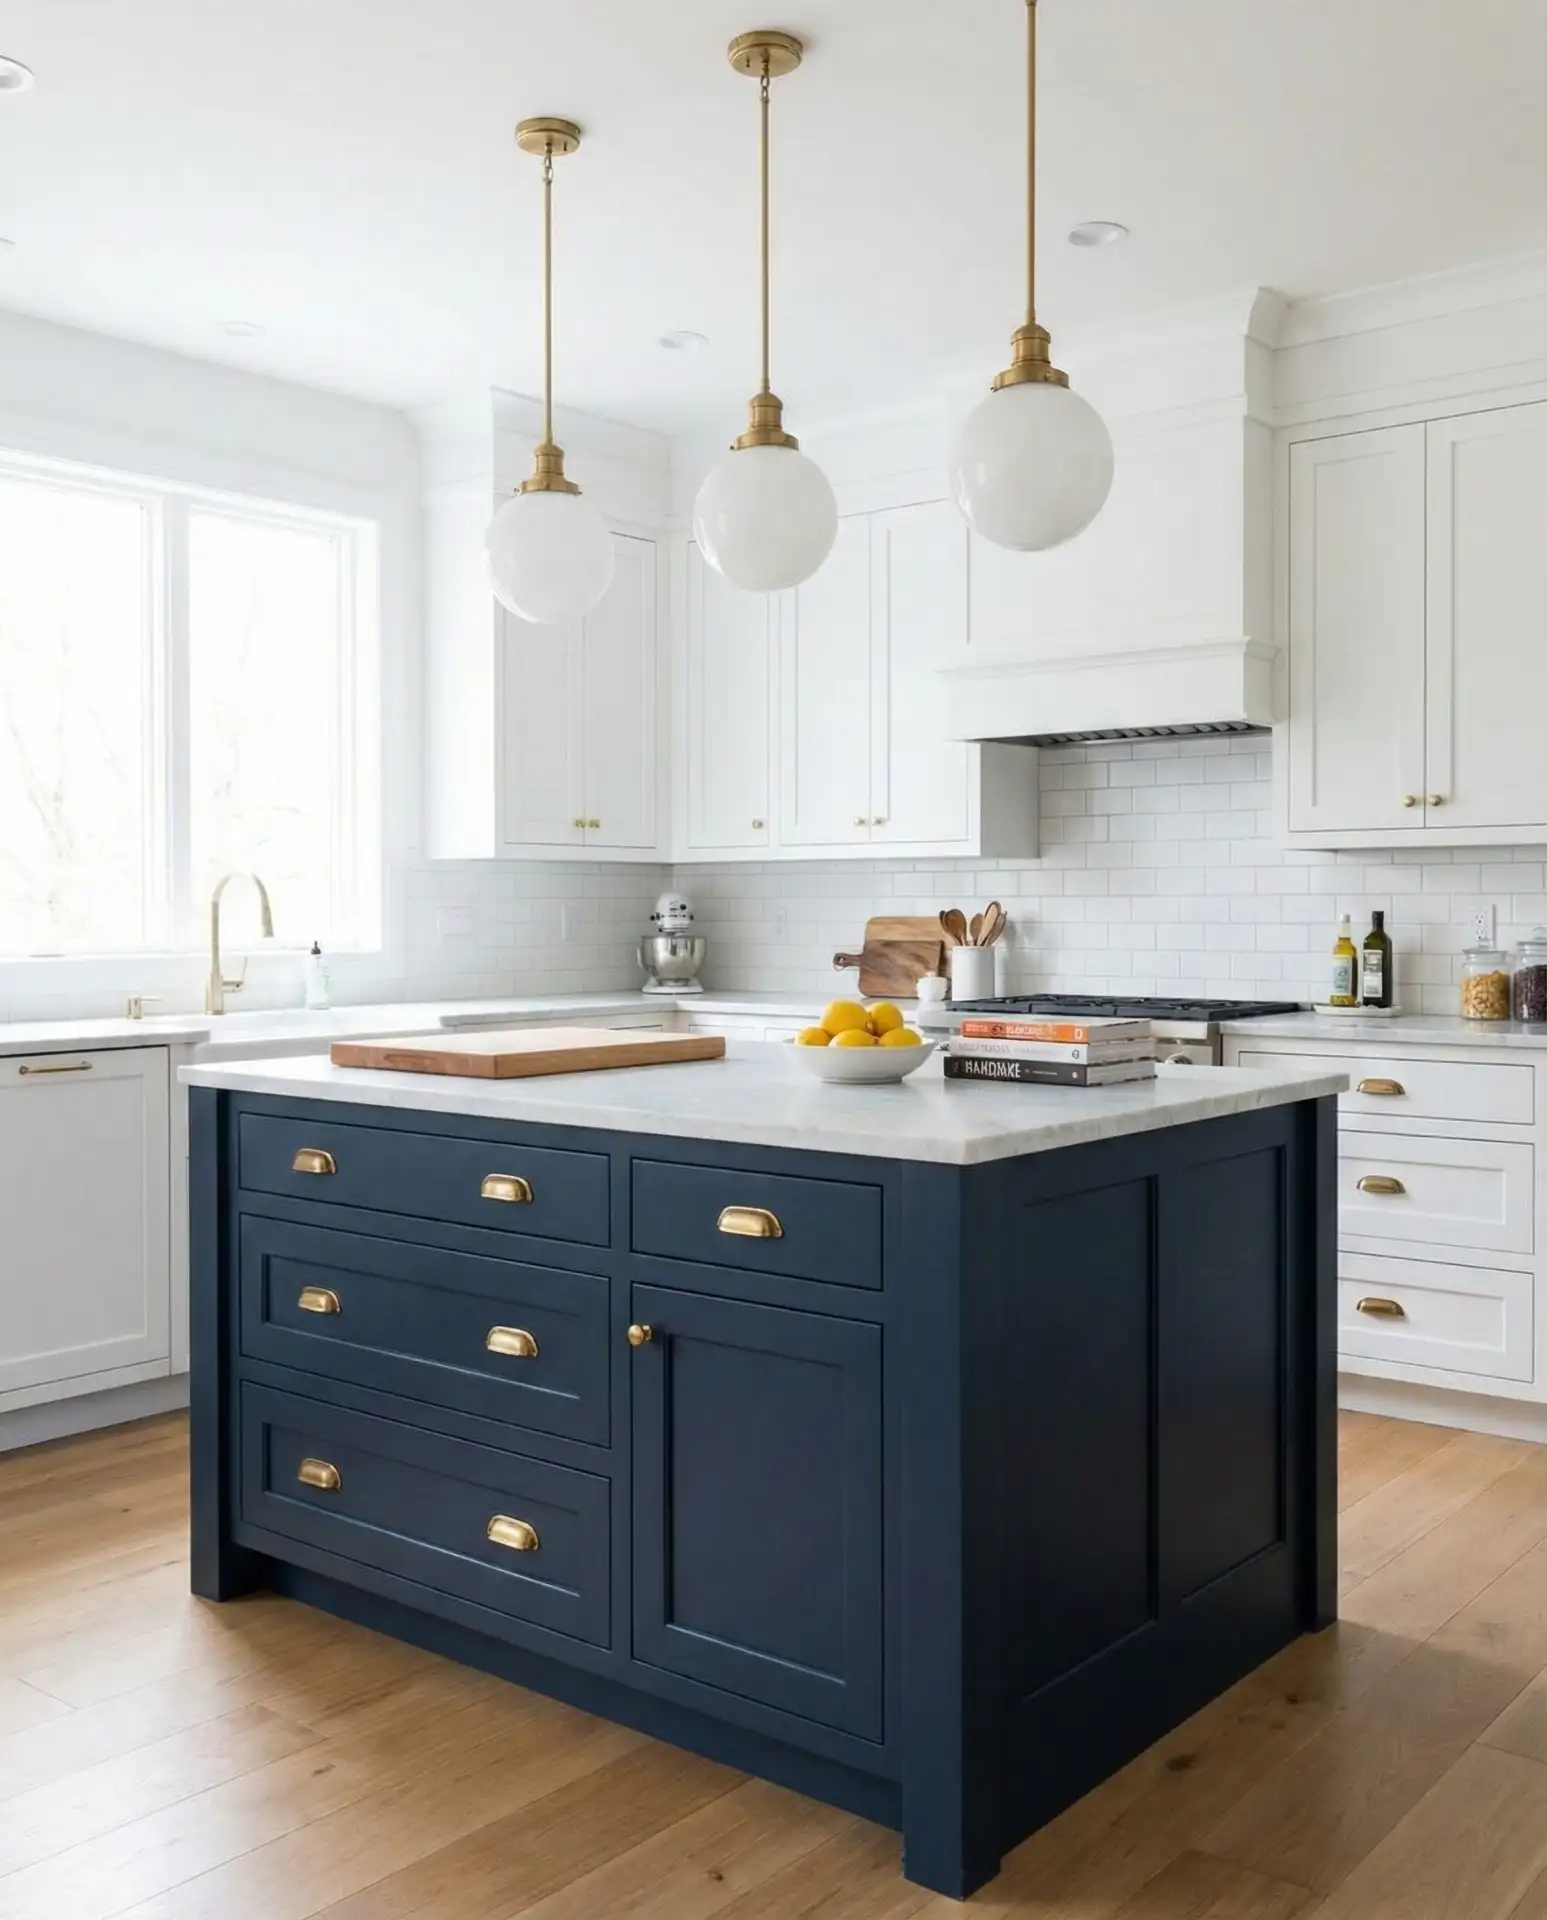
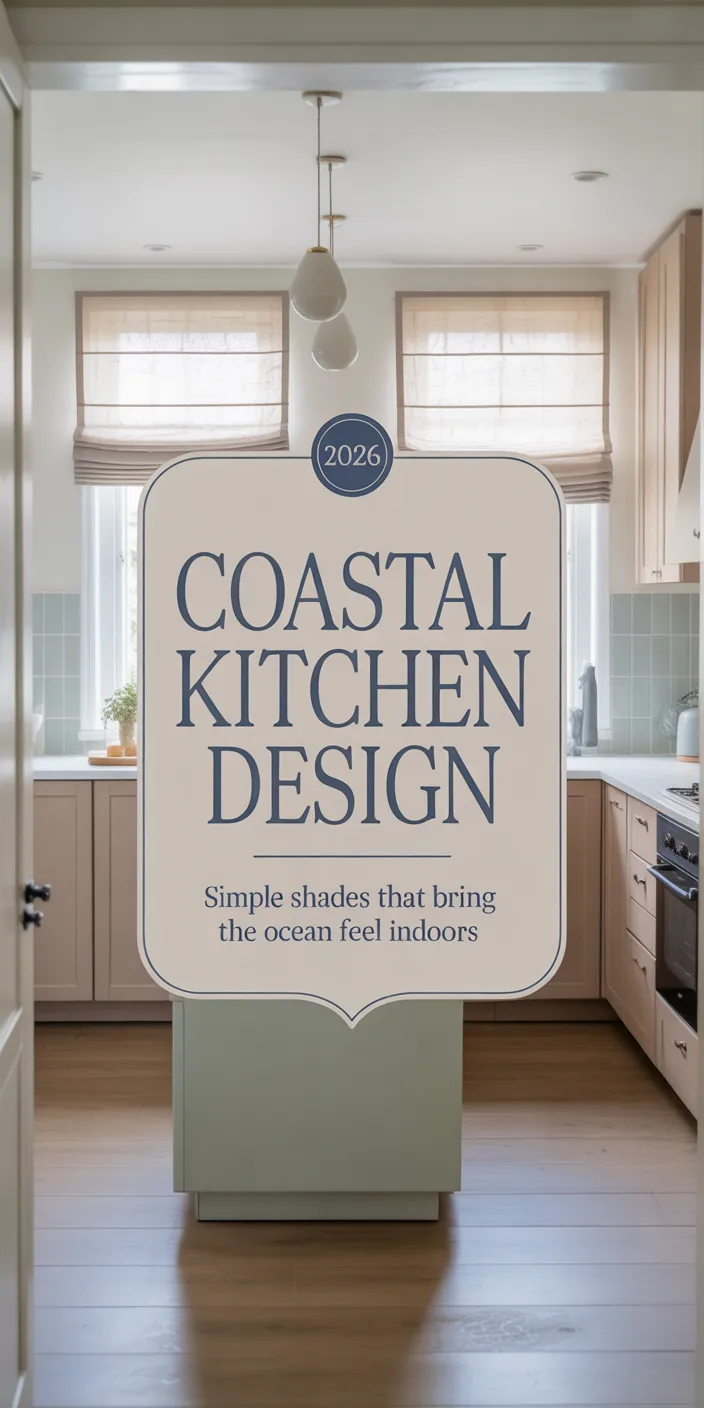
Painting just your kitchen island in a statement blue shade—from navy to powder blue—instantly adds personality without overwhelming the space. This technique works especially well in white or neutral kitchens where you want a focal point that draws the eye and anchors the room. The island becomes both a functional workspace and a piece of furniture that reflects your style, and it’s one of the easiest DIY projects to tackle over a long weekend.
A designer I spoke with in Charleston mentioned that blue islands have become her most requested feature, particularly in coastal homes where the color echoes the nearby water. She recommends using a satin or eggshell finish rather than matte, which shows scuff marks from daily use. If you’re nervous about committing to a bold hue, test the color on a large poster board and observe it in different lighting conditions throughout the day before painting.
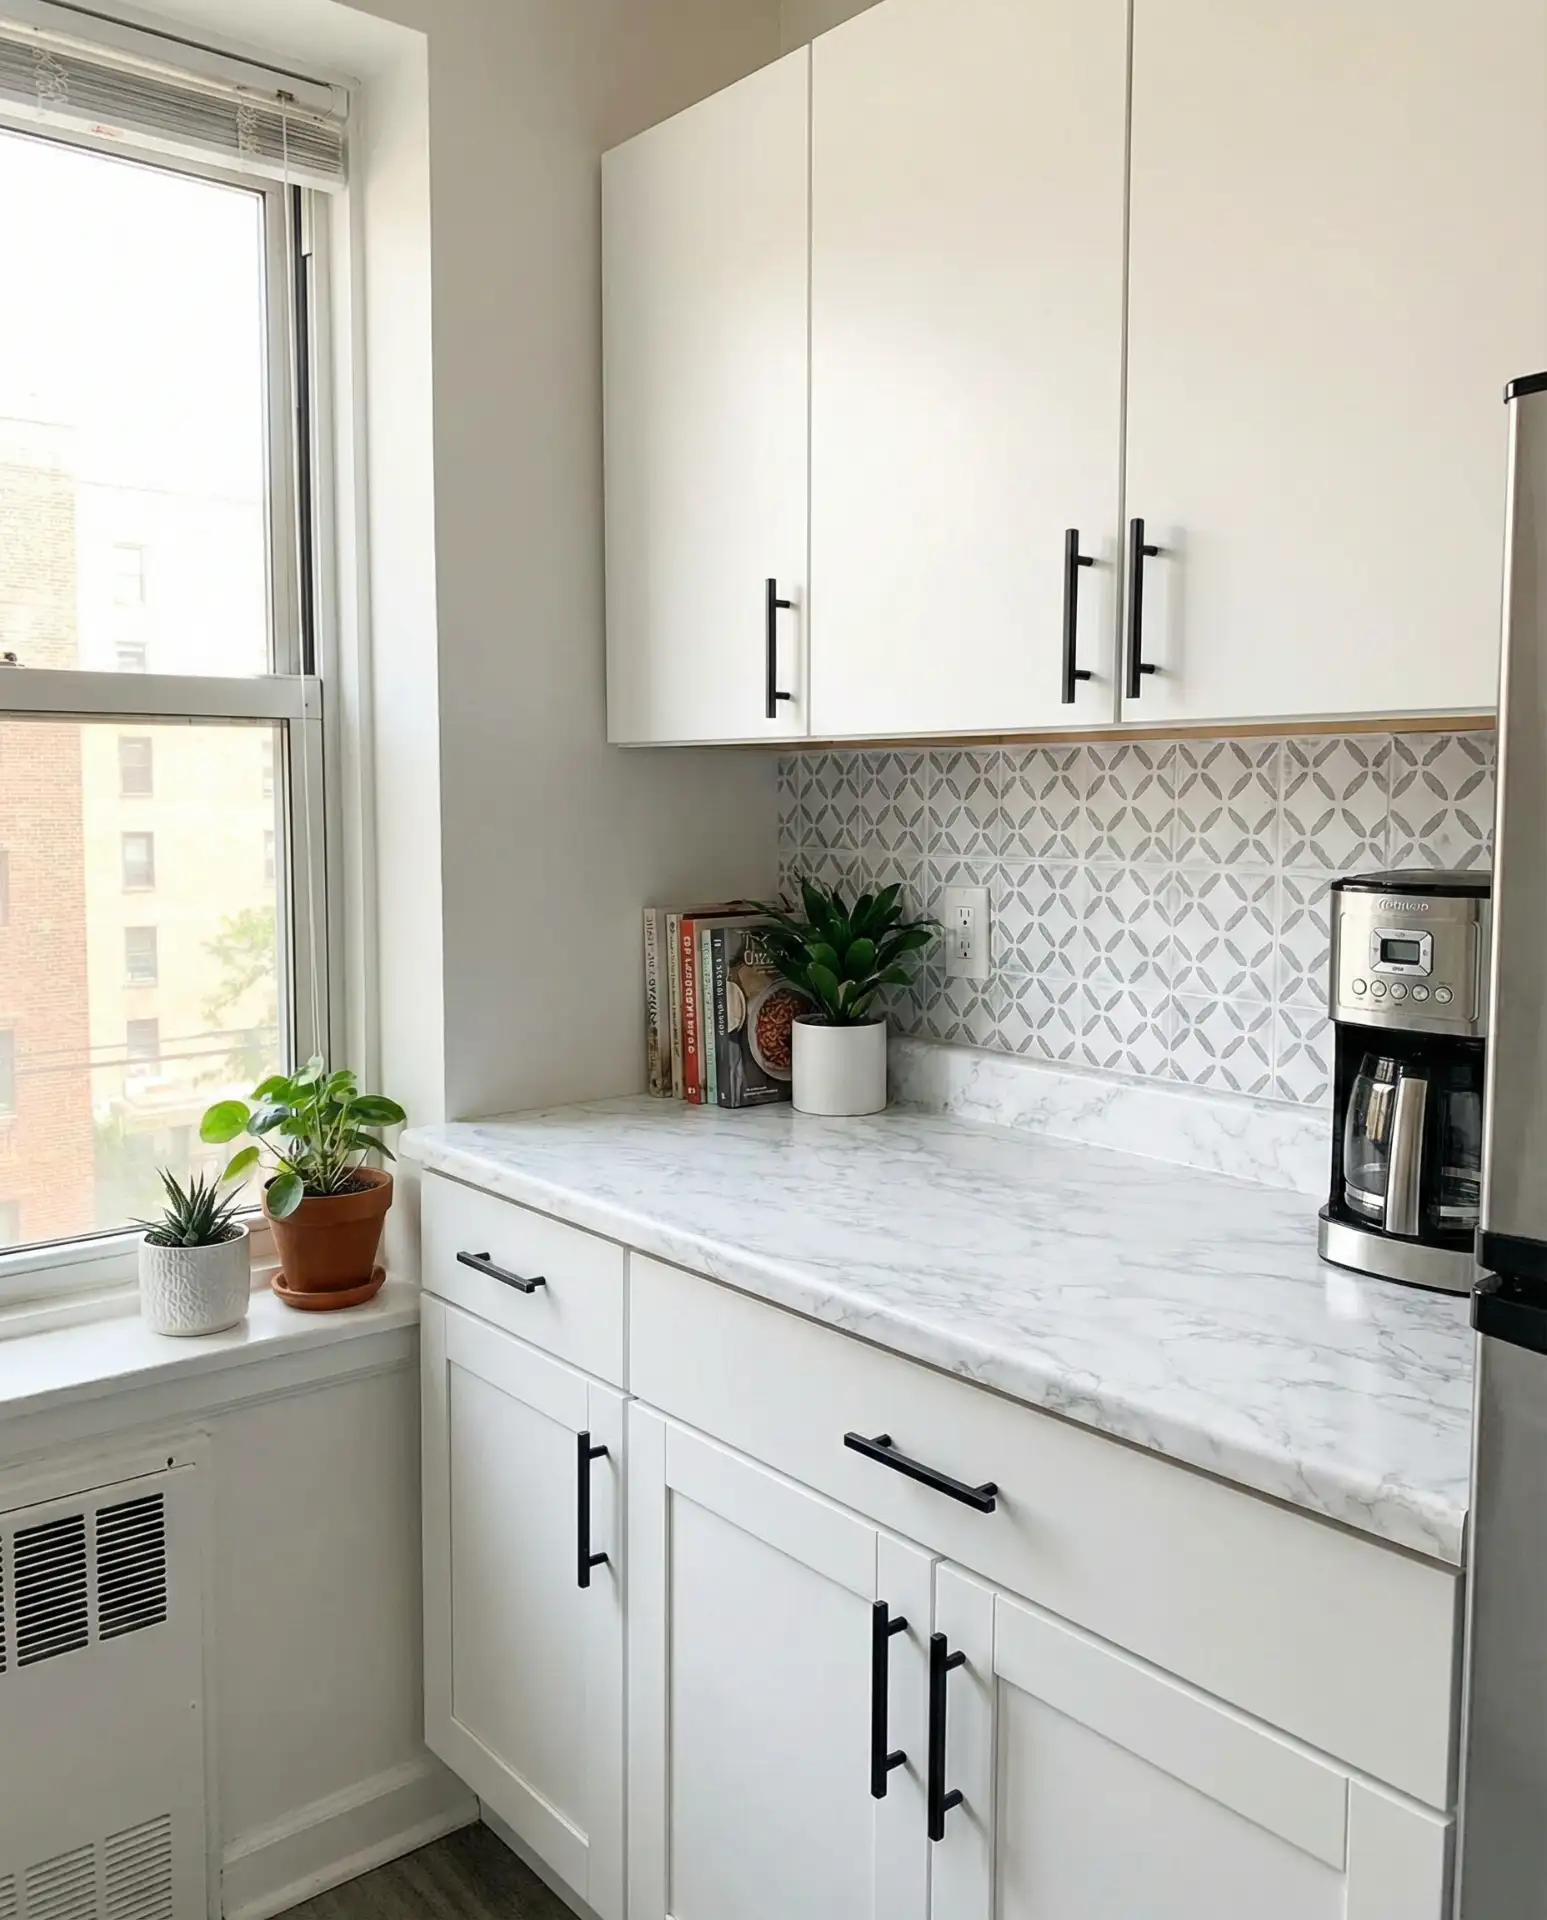
4. Renter-Friendly Peel-and-Stick Backsplash
For apartment dwellers and those in rental situations, removable peel-and-stick backsplash tiles offer a renter-friendly way to upgrade your kitchen without losing your security deposit. These adhesive tiles come in dozens of styles—from subway patterns to Moroccan prints—and can be installed in an afternoon with just scissors and a level. The key is thorough surface preparation: clean and dry walls ensure the tiles stay put for years yet peel off cleanly when you move.

This solution works best in kitchens where the backsplash area stays relatively cool—high heat near the stove can weaken adhesive over time. Consider using heat-resistant tiles in that zone or leaving a 6-inch buffer. Quality peel-and-stick options from brands like Stickwood or Aspect Tile cost $8-15 per square foot, making a typical 20-square-foot backsplash project run between $160 and $300, which is remarkably affordable compared to traditional tiling.
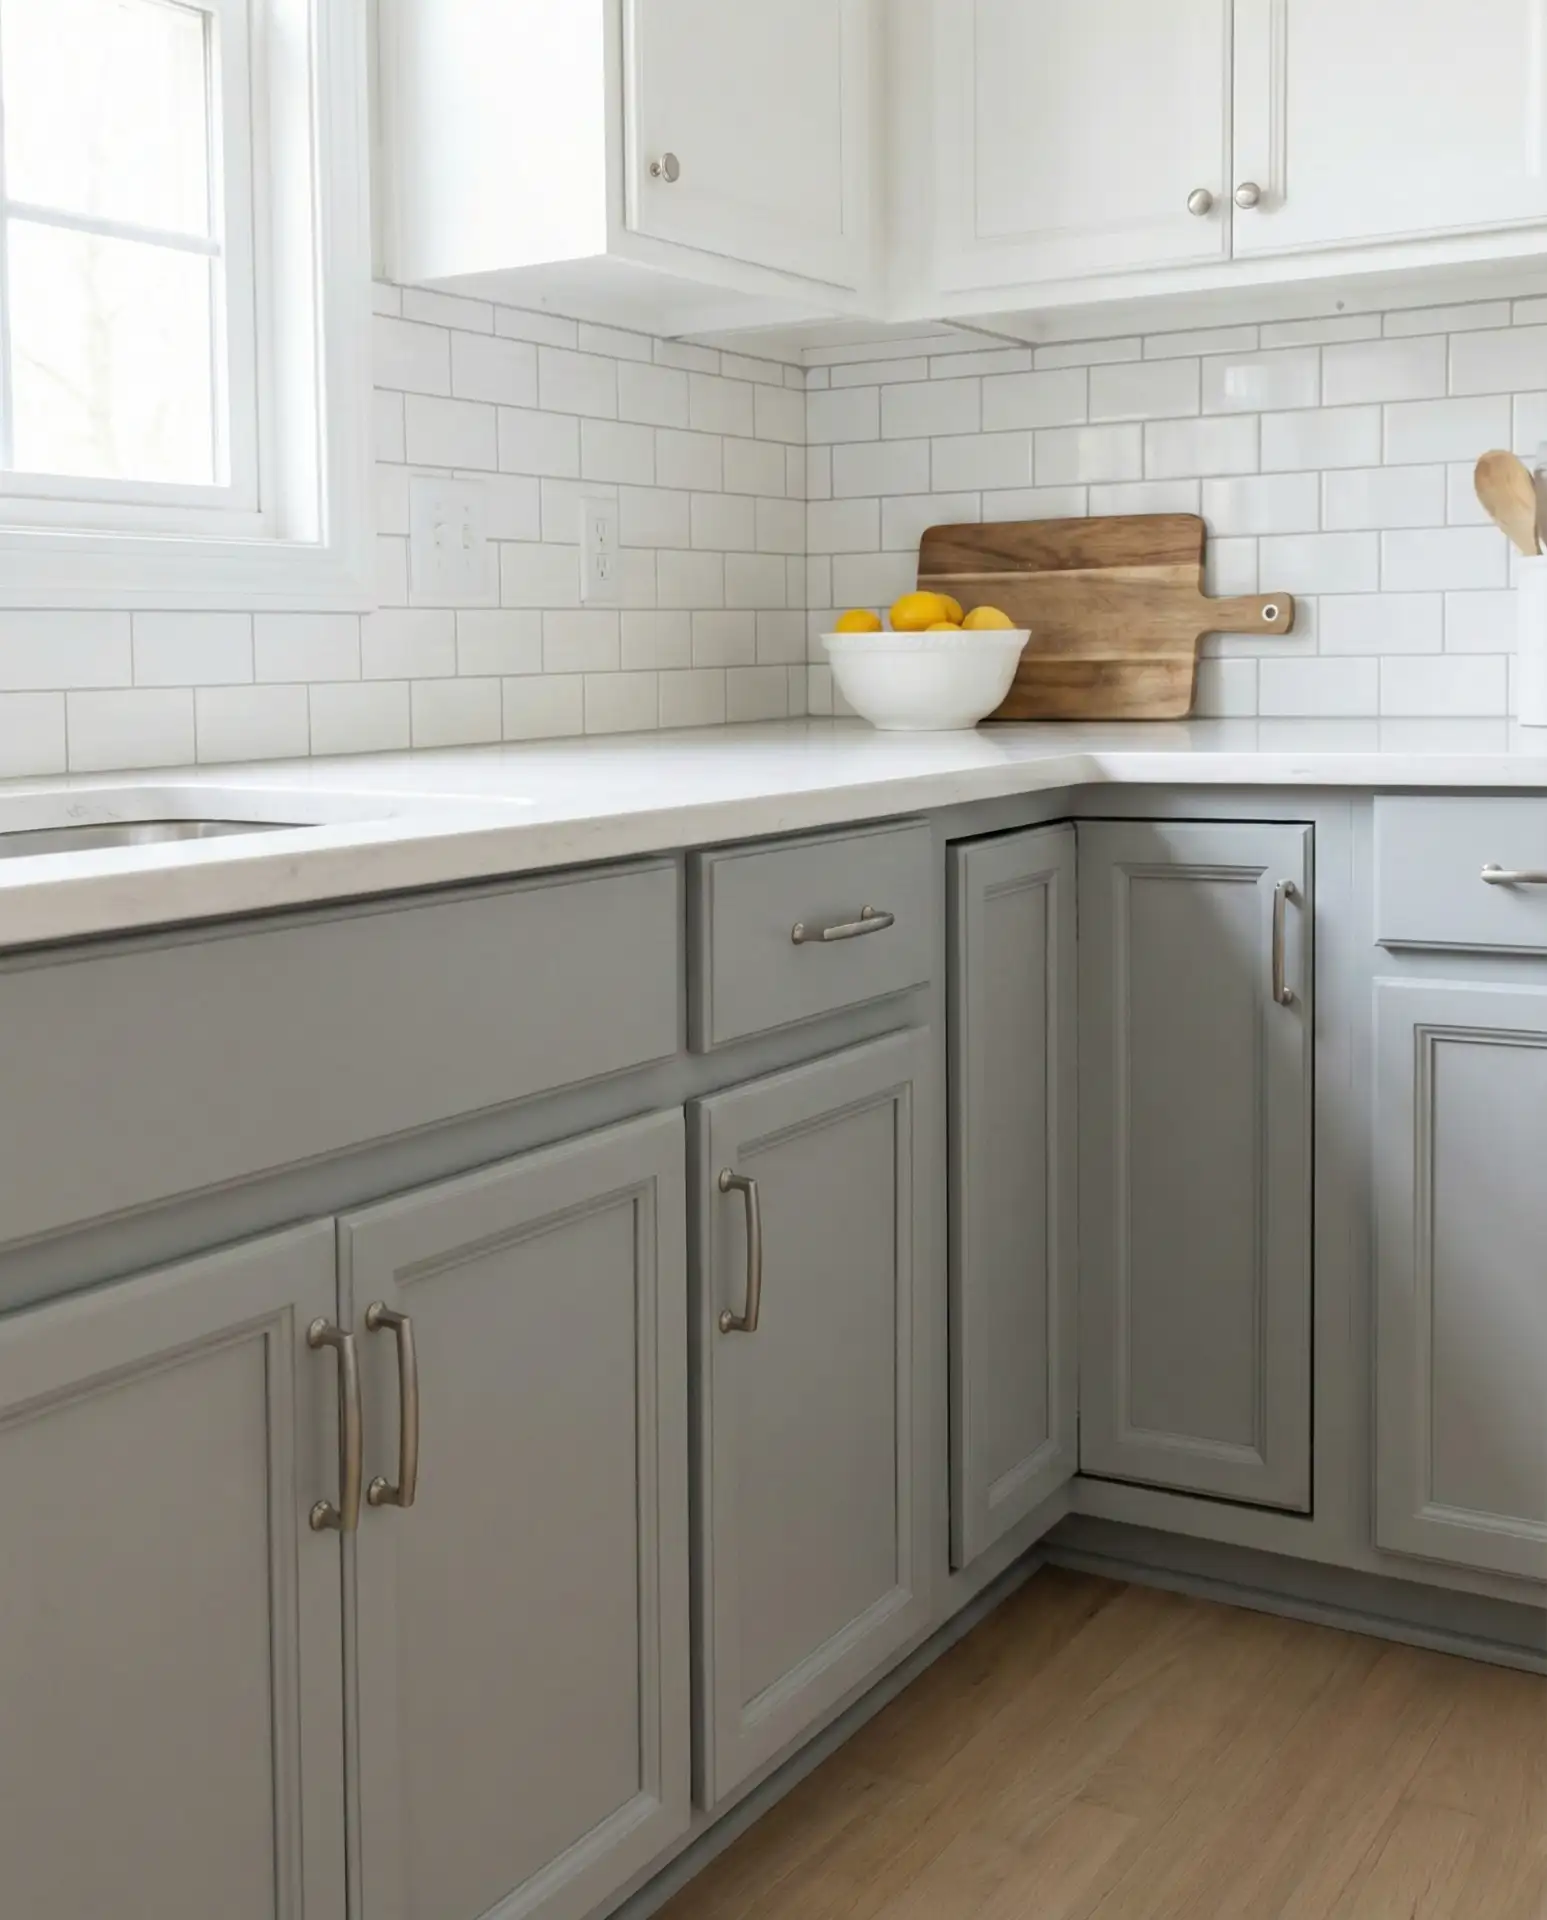
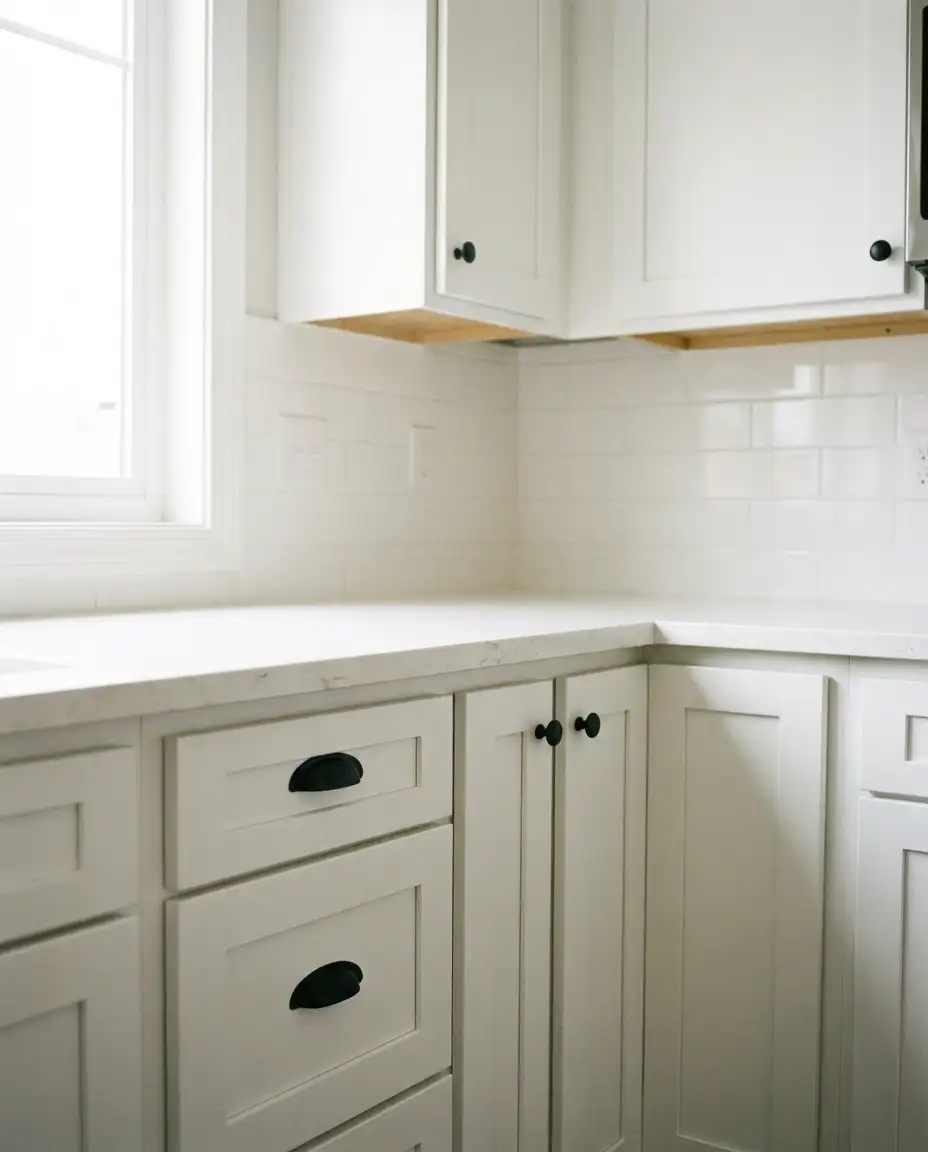
5. Two-Tone Cabinet Color Blocking
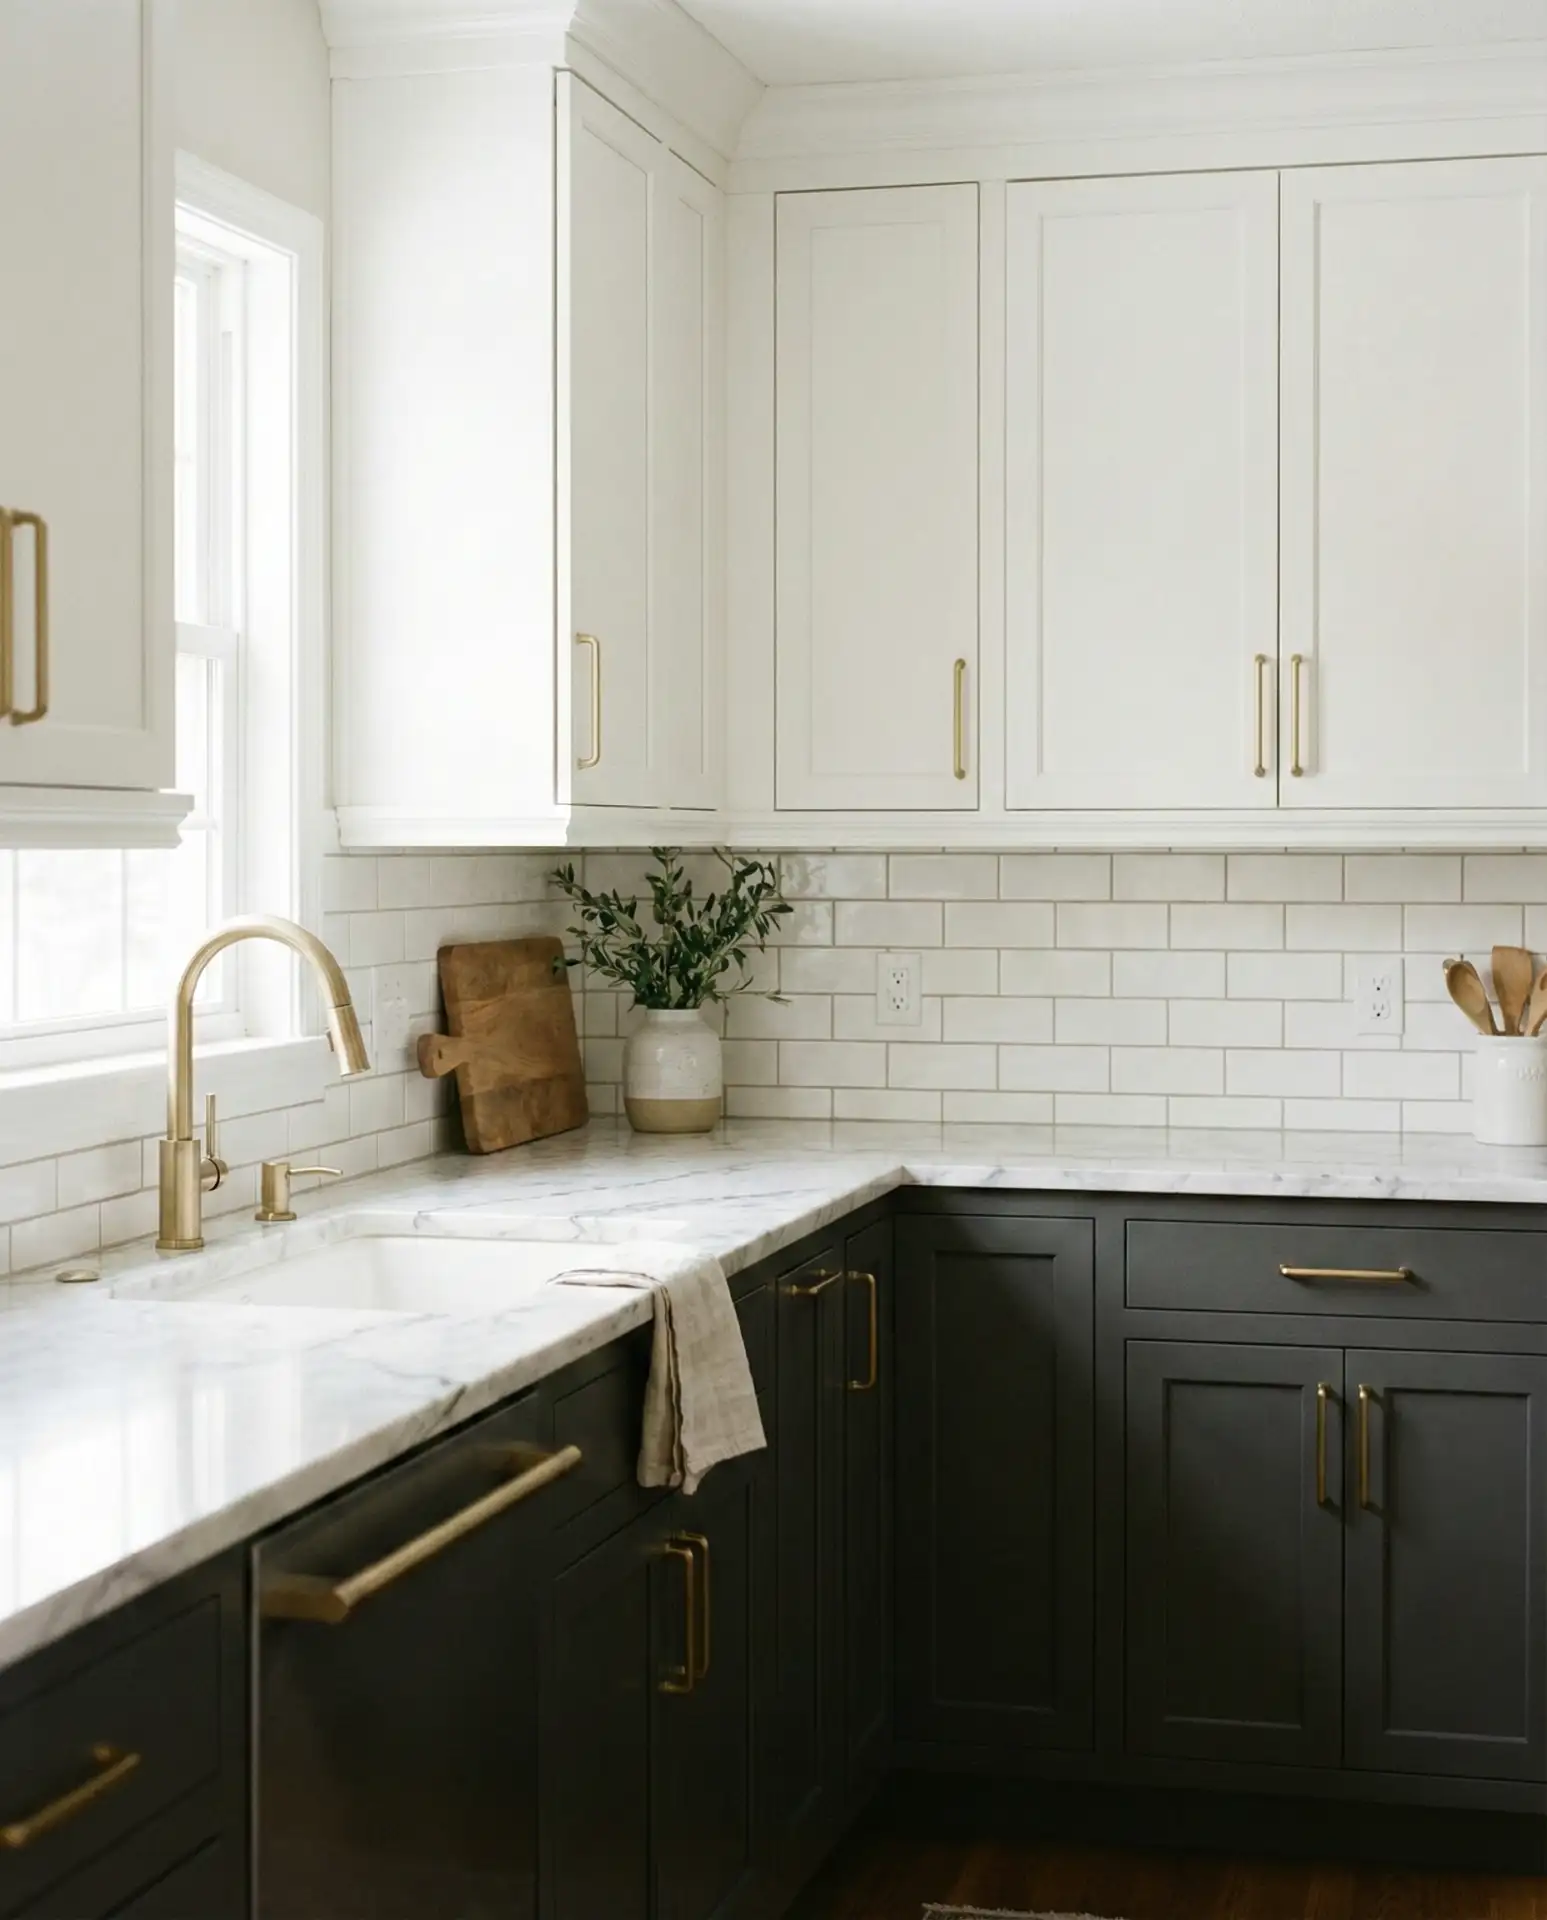
Combine white upper cabinets with grey or charcoal lowers to create visual depth and make your kitchen feel taller and more spacious. This modern technique breaks up large expanses of cabinetry and allows you to introduce contrasting hardware styles—brushed brass on top, matte black below—for added dimension. It’s particularly effective in galley kitchens where you want to draw the eye upward and avoid the tunnel effect.

Across the Pacific Northwest, this look pairs beautifully with natural wood floors and stone countertops, creating a balanced palette that feels grounded yet fresh. The darker lower cabinets hide scuffs and everyday wear better than all-white kitchens, which is why families with young children gravitate toward this approach. When choosing your colors, ensure they share the same undertone—cool greys with crisp whites or warm greys with creamy whites—so the combination feels intentional rather than mismatched.
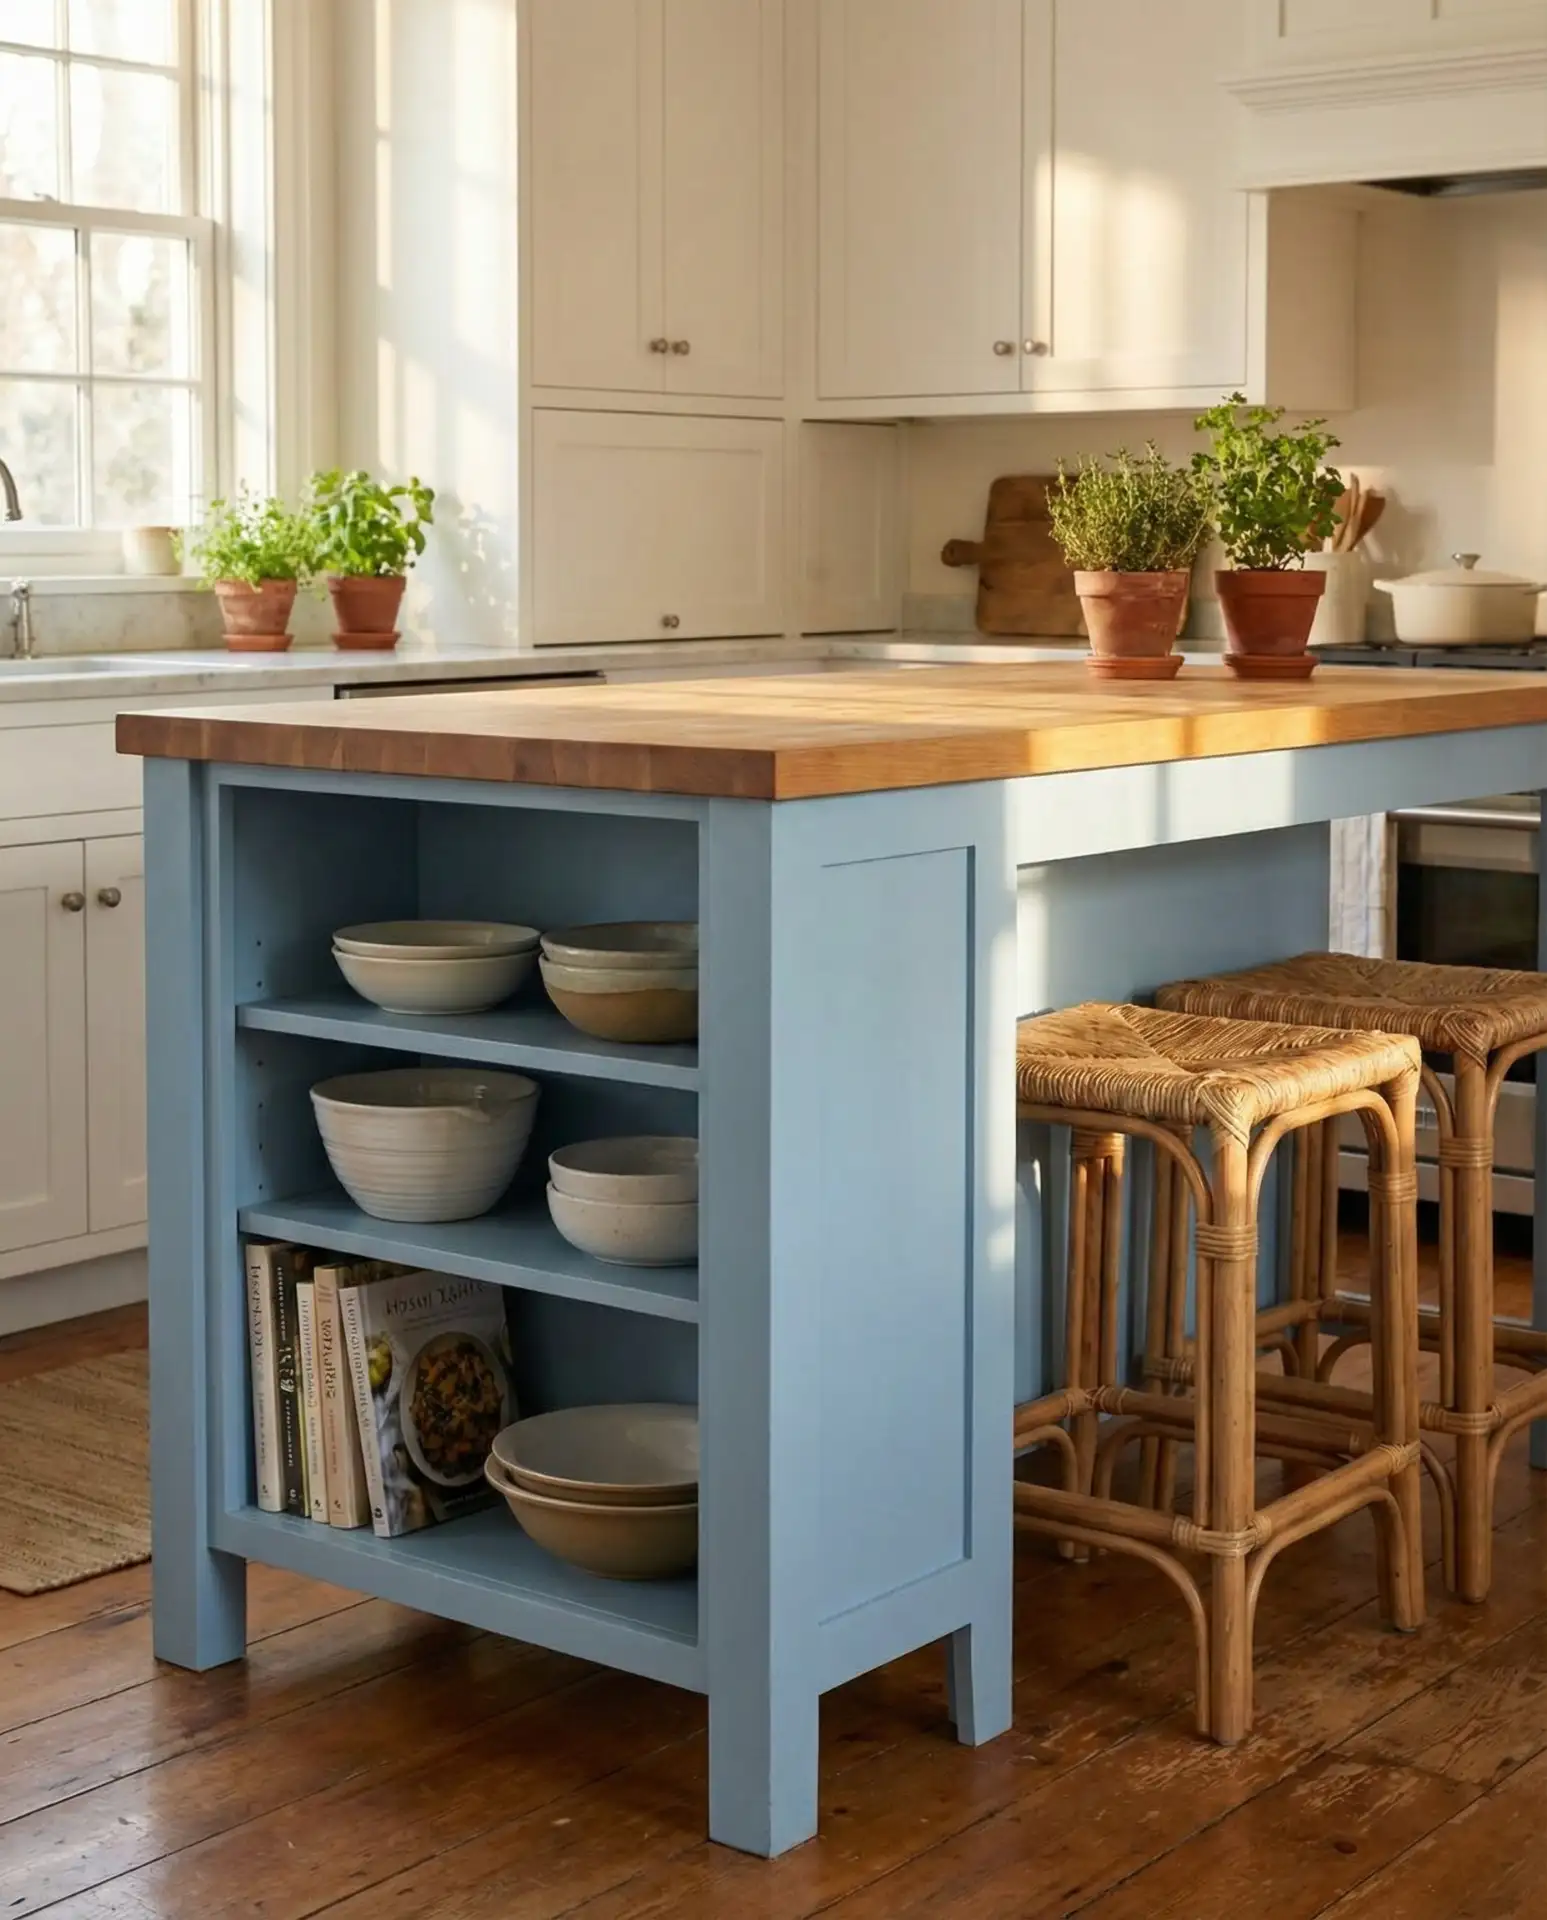
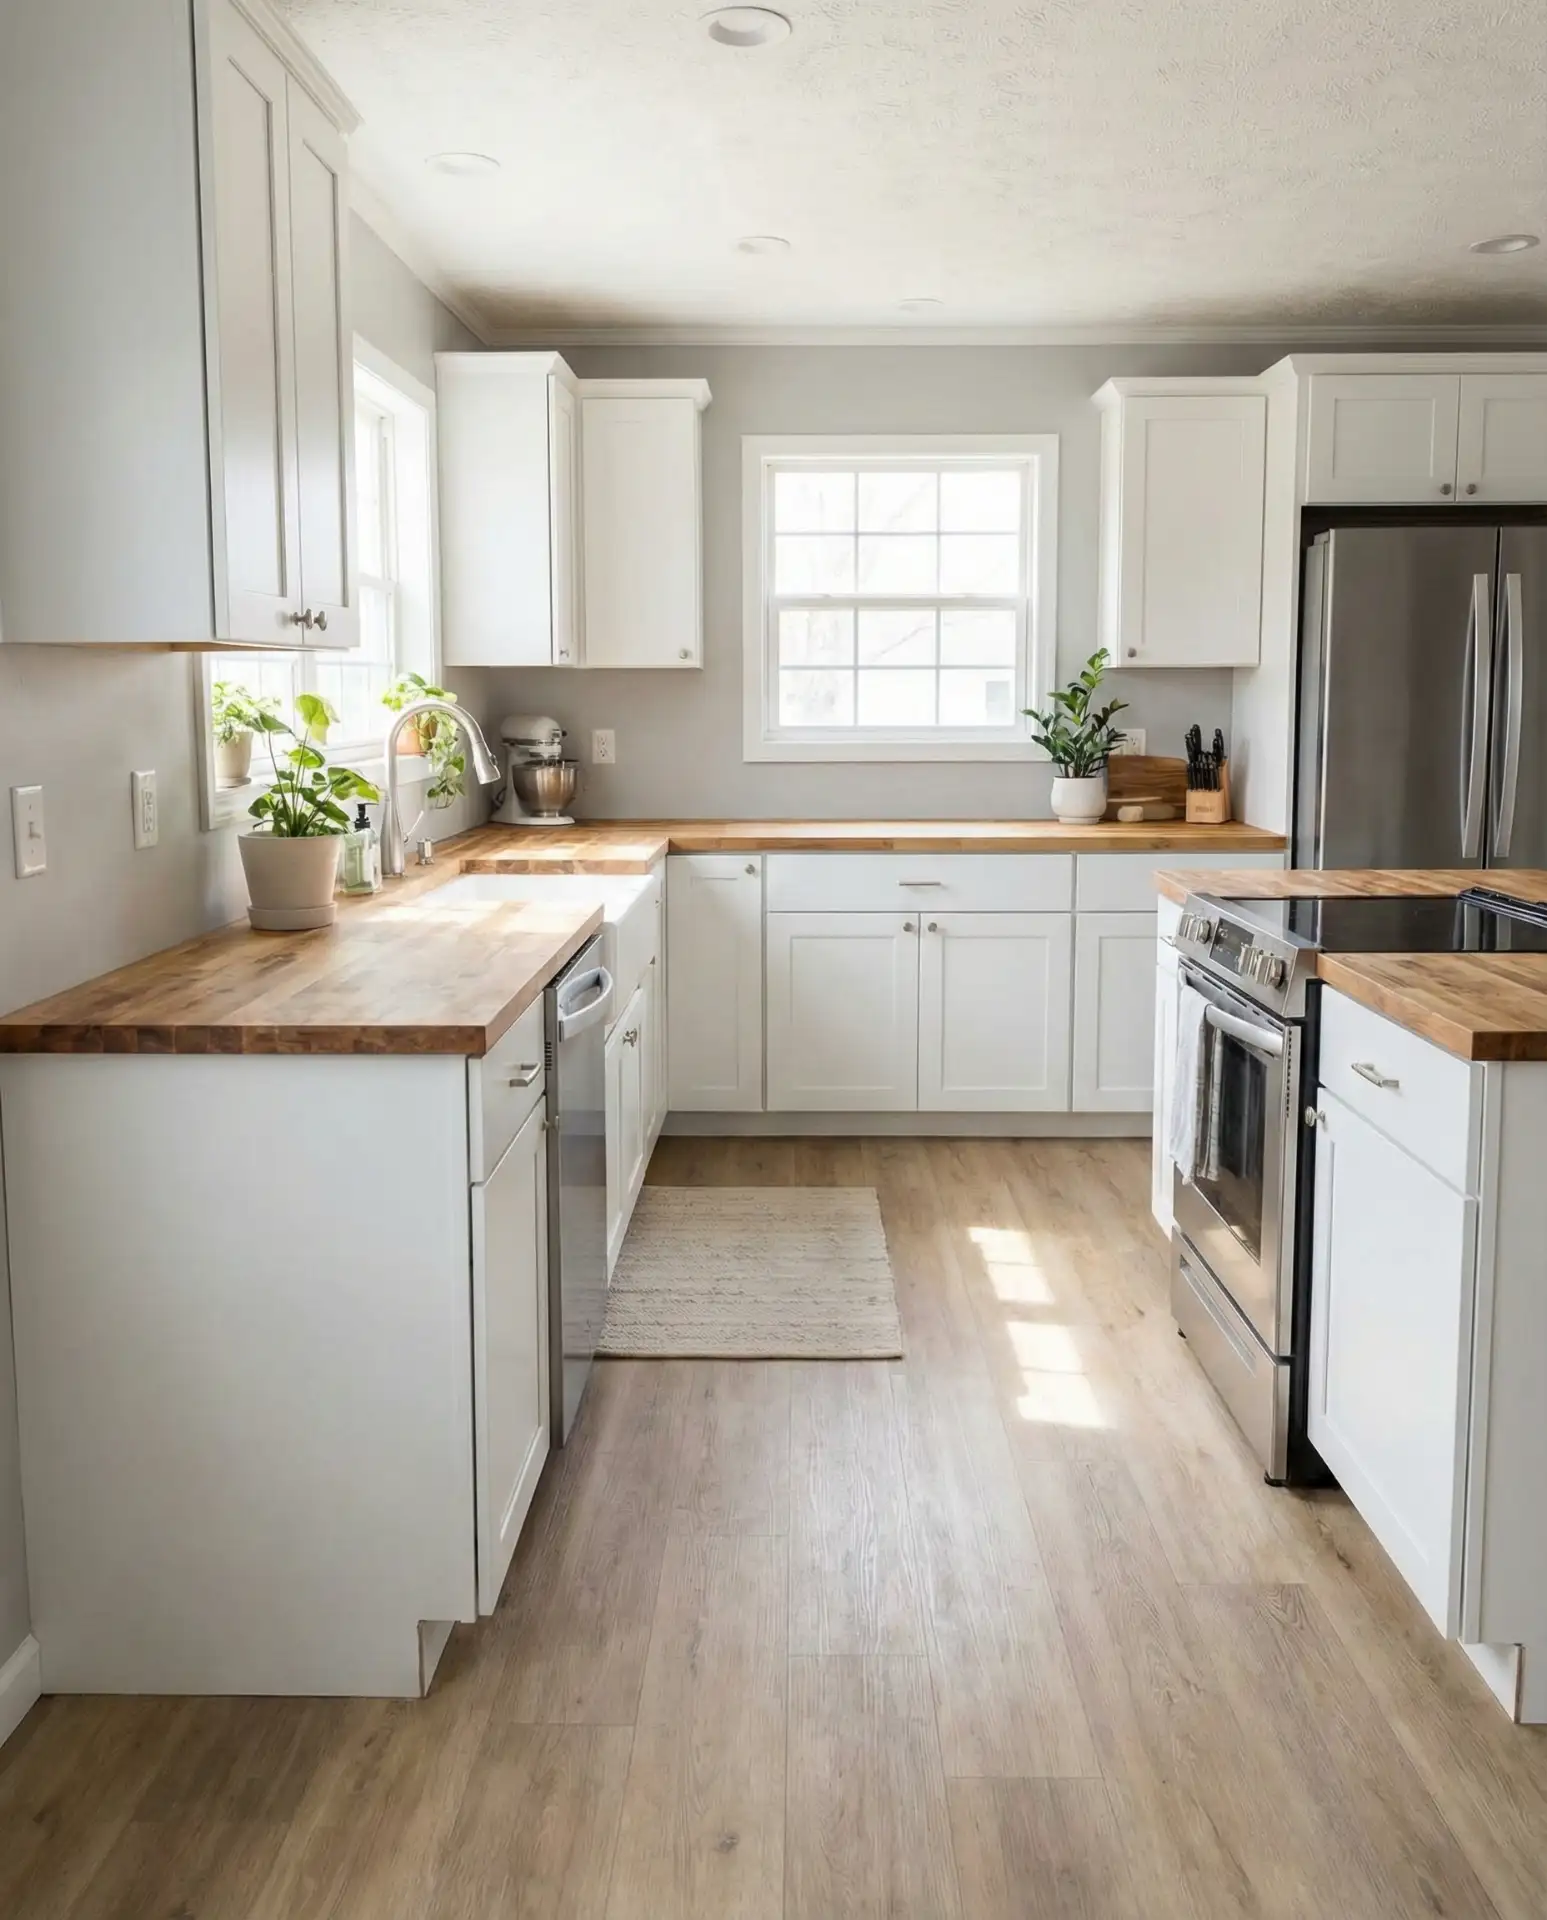
6. Open Concept Kitchen with Island Seating
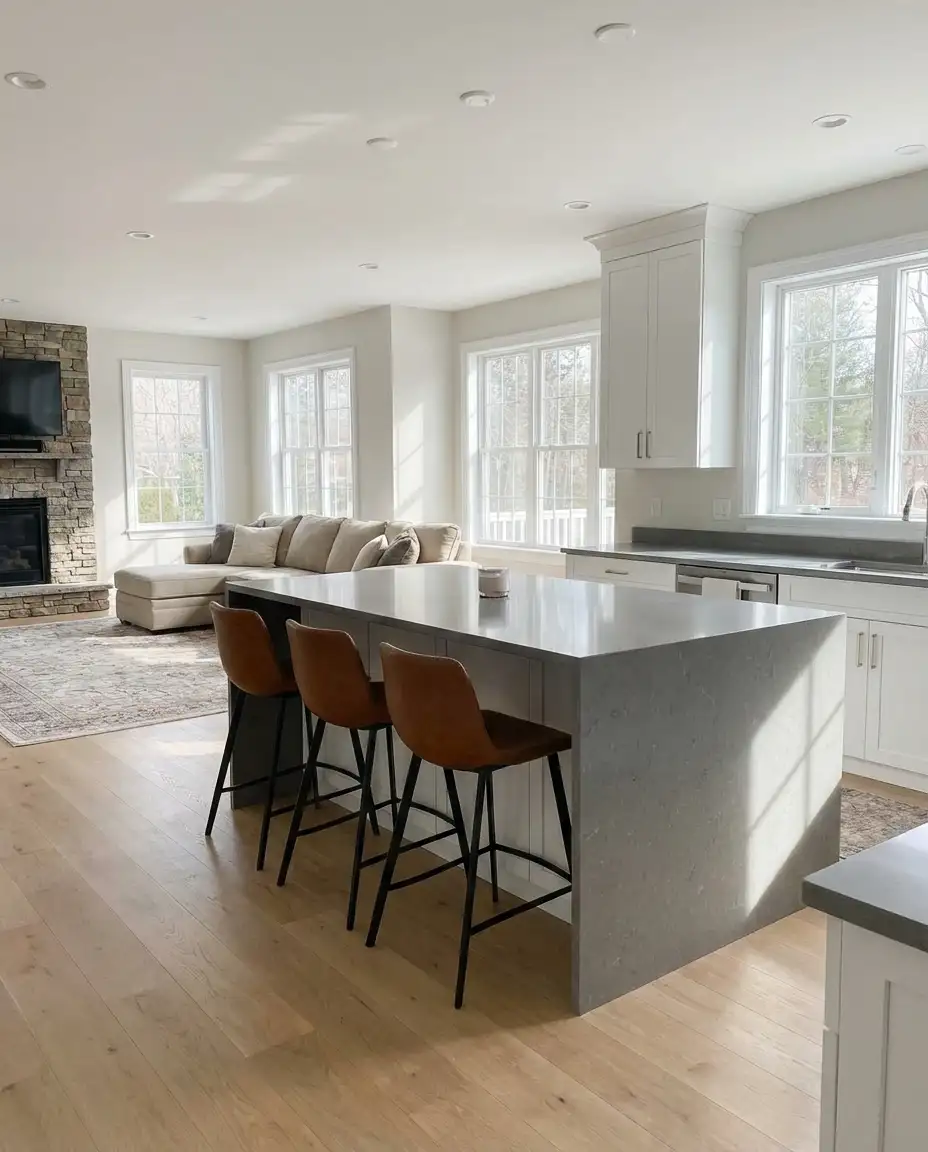
An open floor plan kitchen that flows into the living or dining area encourages family interaction and makes entertaining effortless, especially when paired with a generously sized island that seats four or more. This layout dominates new construction and remodels across suburban America, where homeowners want to cook while staying connected to conversations and activities. The island acts as a natural divider between zones without blocking sightlines, and it provides valuable prep space and storage.
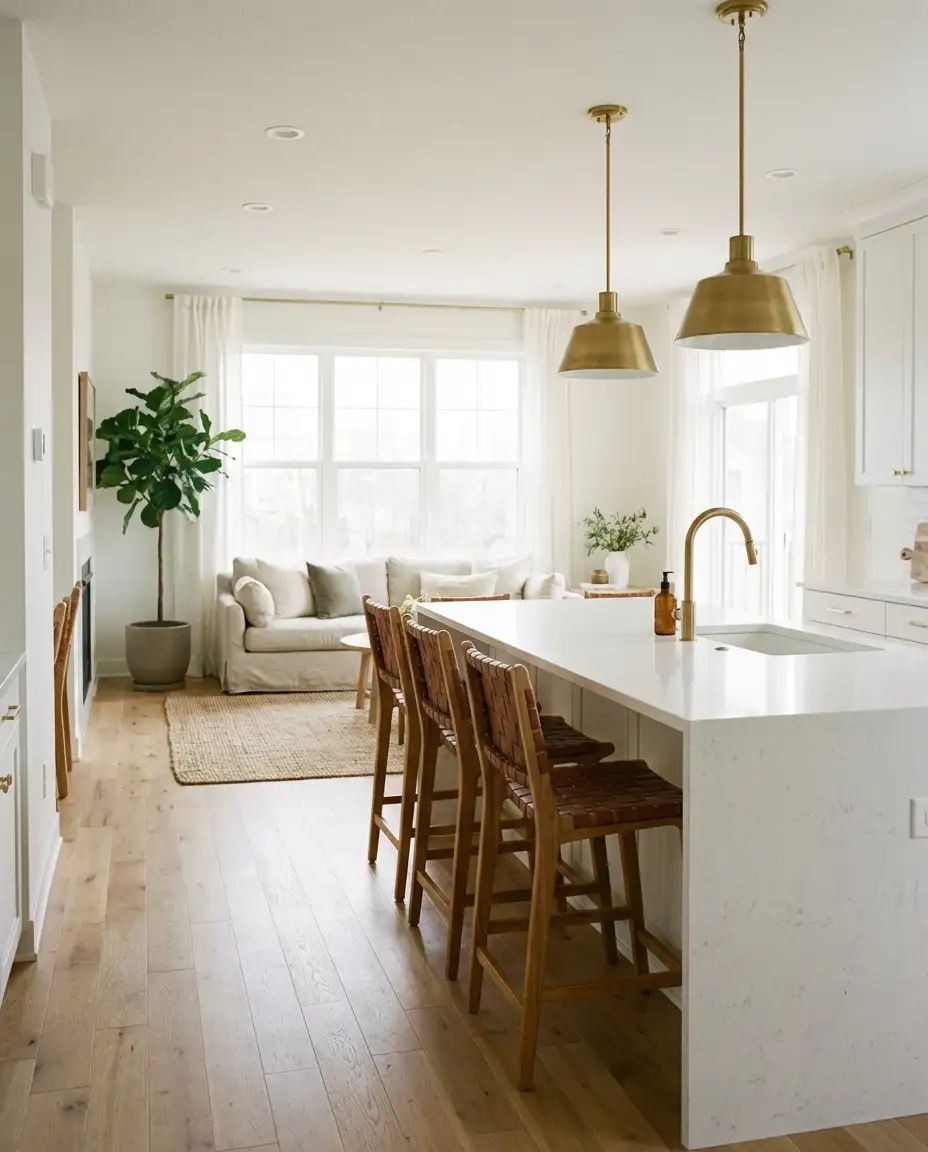
One practical insight: plan for at least 24 inches of knee space per seated person and a 15-inch overhang to comfortably accommodate legs. Many homeowners underestimate the importance of proper ventilation in open layouts—a powerful range hood that vents outside prevents cooking odors from drifting into living spaces. If you’re converting a closed kitchen to an open plan, consult a structural engineer before removing any walls, as some are load-bearing and require beam installation.
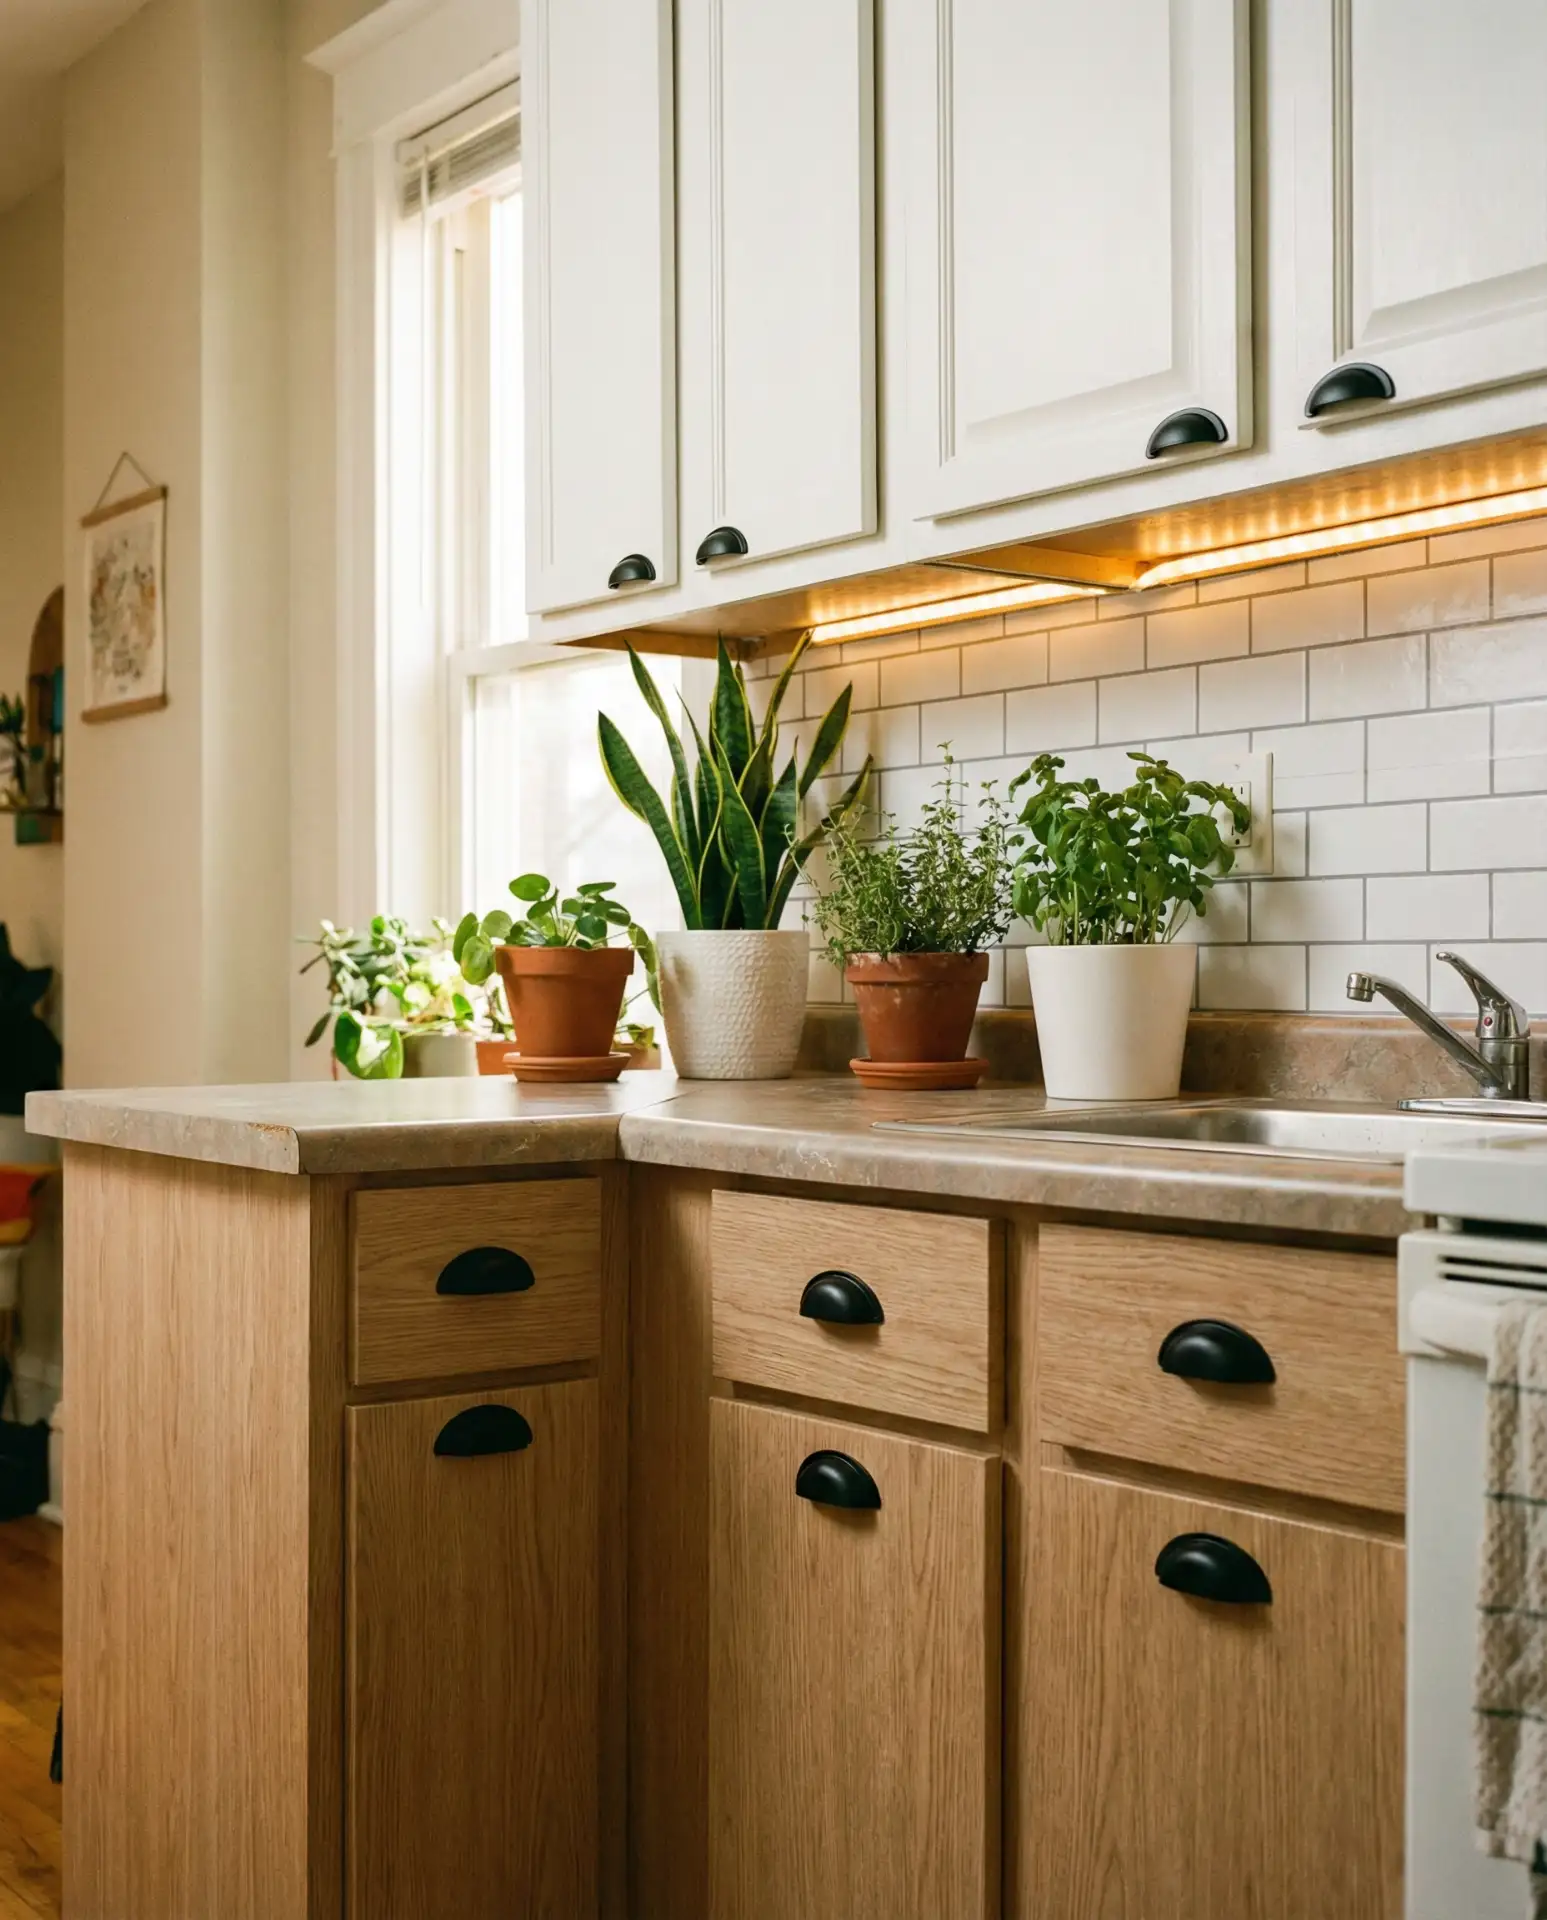
7. Budget-Friendly Cabinet Painting Project
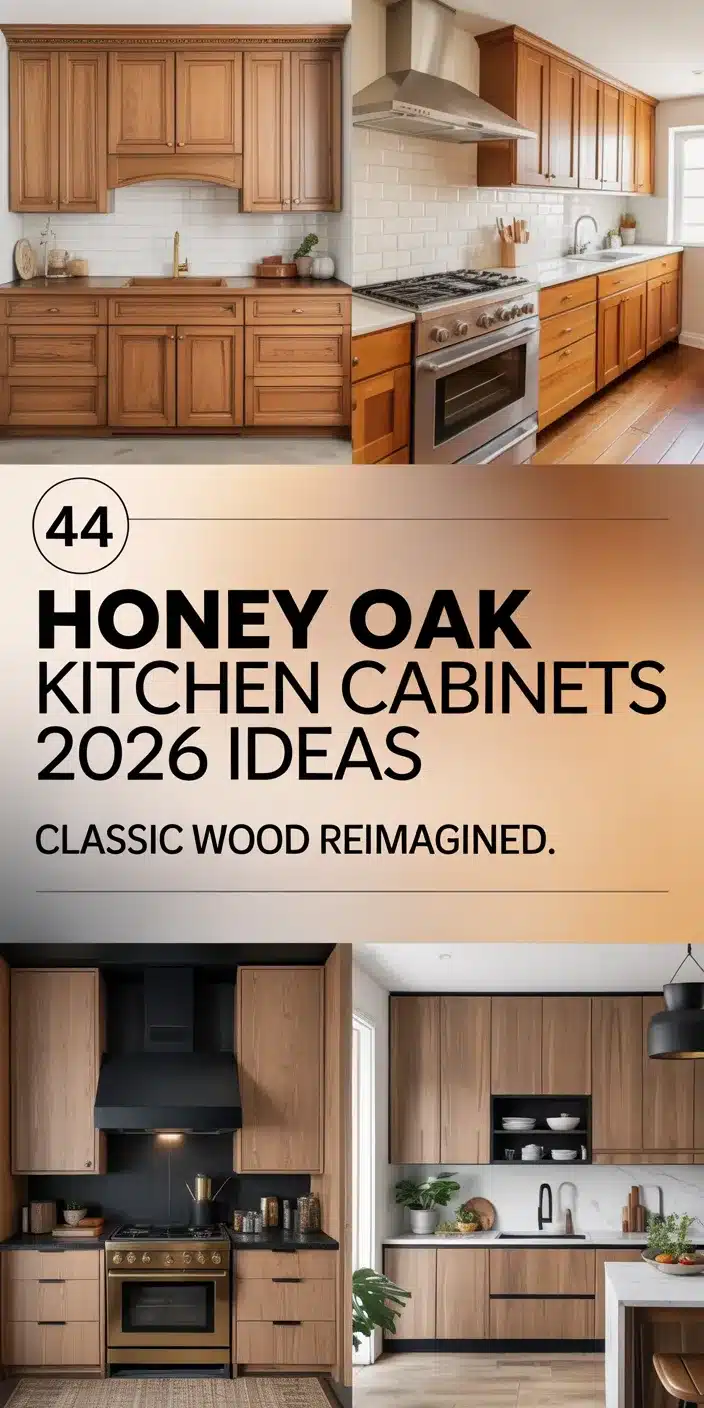
Repainting existing cabinets is the single most cost-effective way to achieve a dramatic kitchen transformation on a budget, often costing just $200-$400 in materials if you tackle it yourself. Choose a high-quality primer and cabinet-specific paint in a durable finish like satin or semi-gloss, and invest time in proper prep work—sanding, cleaning, and filling holes. This DIY project can completely modernize outdated honey oak or dark wood cabinets, turning them into fresh white, grey, or even bold-colored focal points.
The biggest mistake is rushing through the prep phase—skipping sanding or using cheap primer leads to chipping and peeling within months. Plan for three coats (primer plus two paint coats) and allow full curing time between each, which typically means living with your kitchen out of commission for 4-5 days. A paint sprayer yields the smoothest finish, but a high-quality foam roller works well too if you maintain a light touch and avoid overloading the roller with paint.
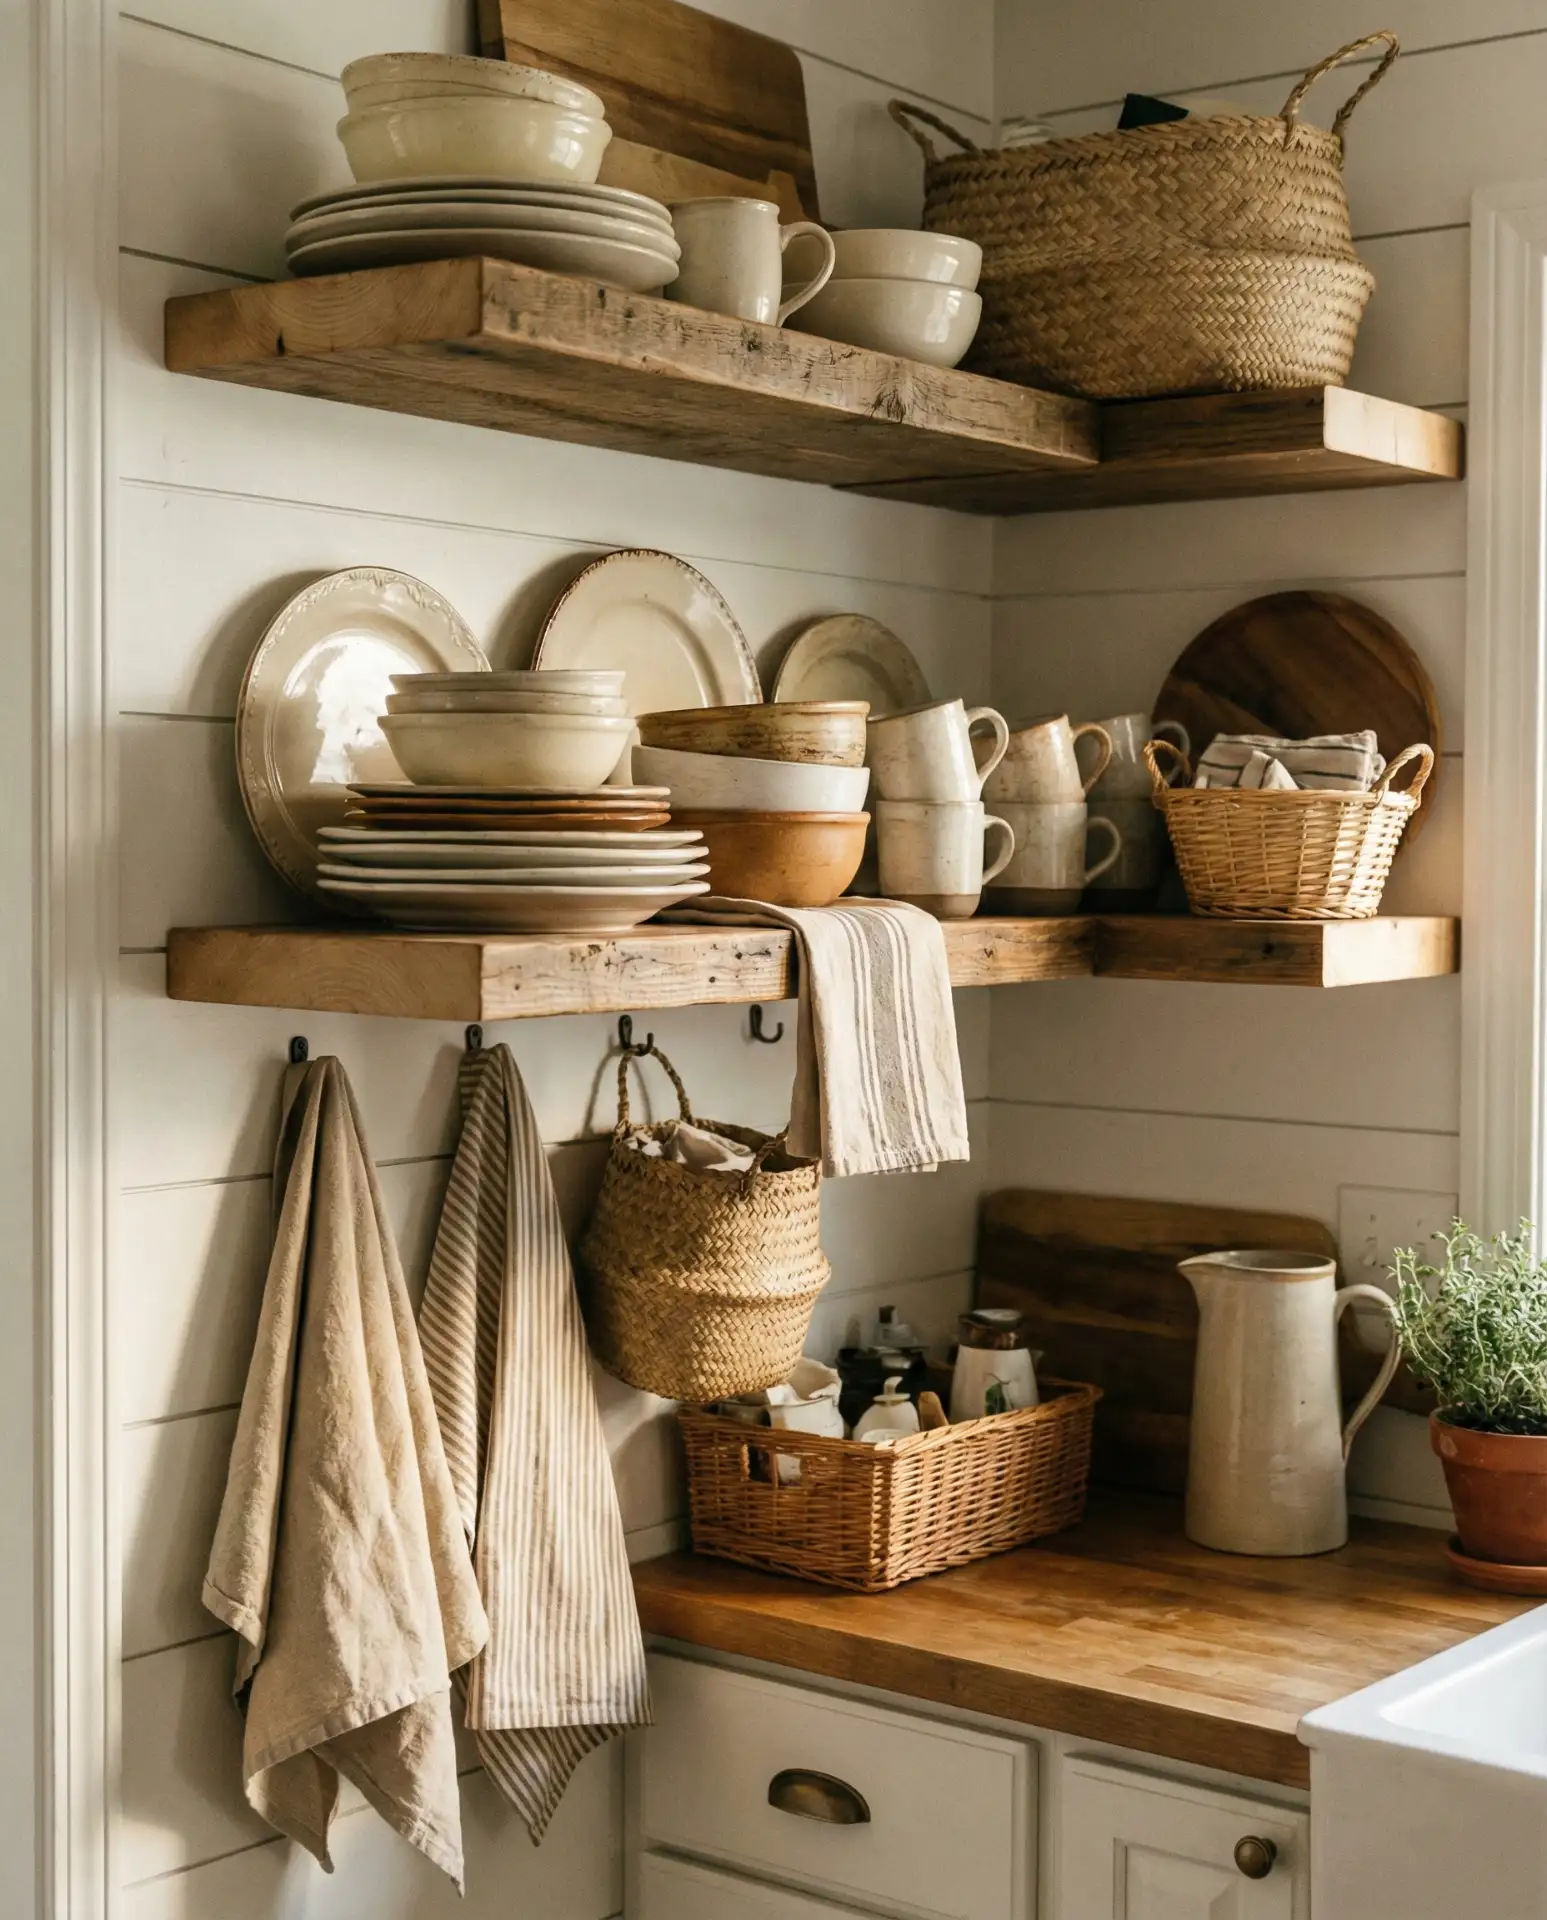
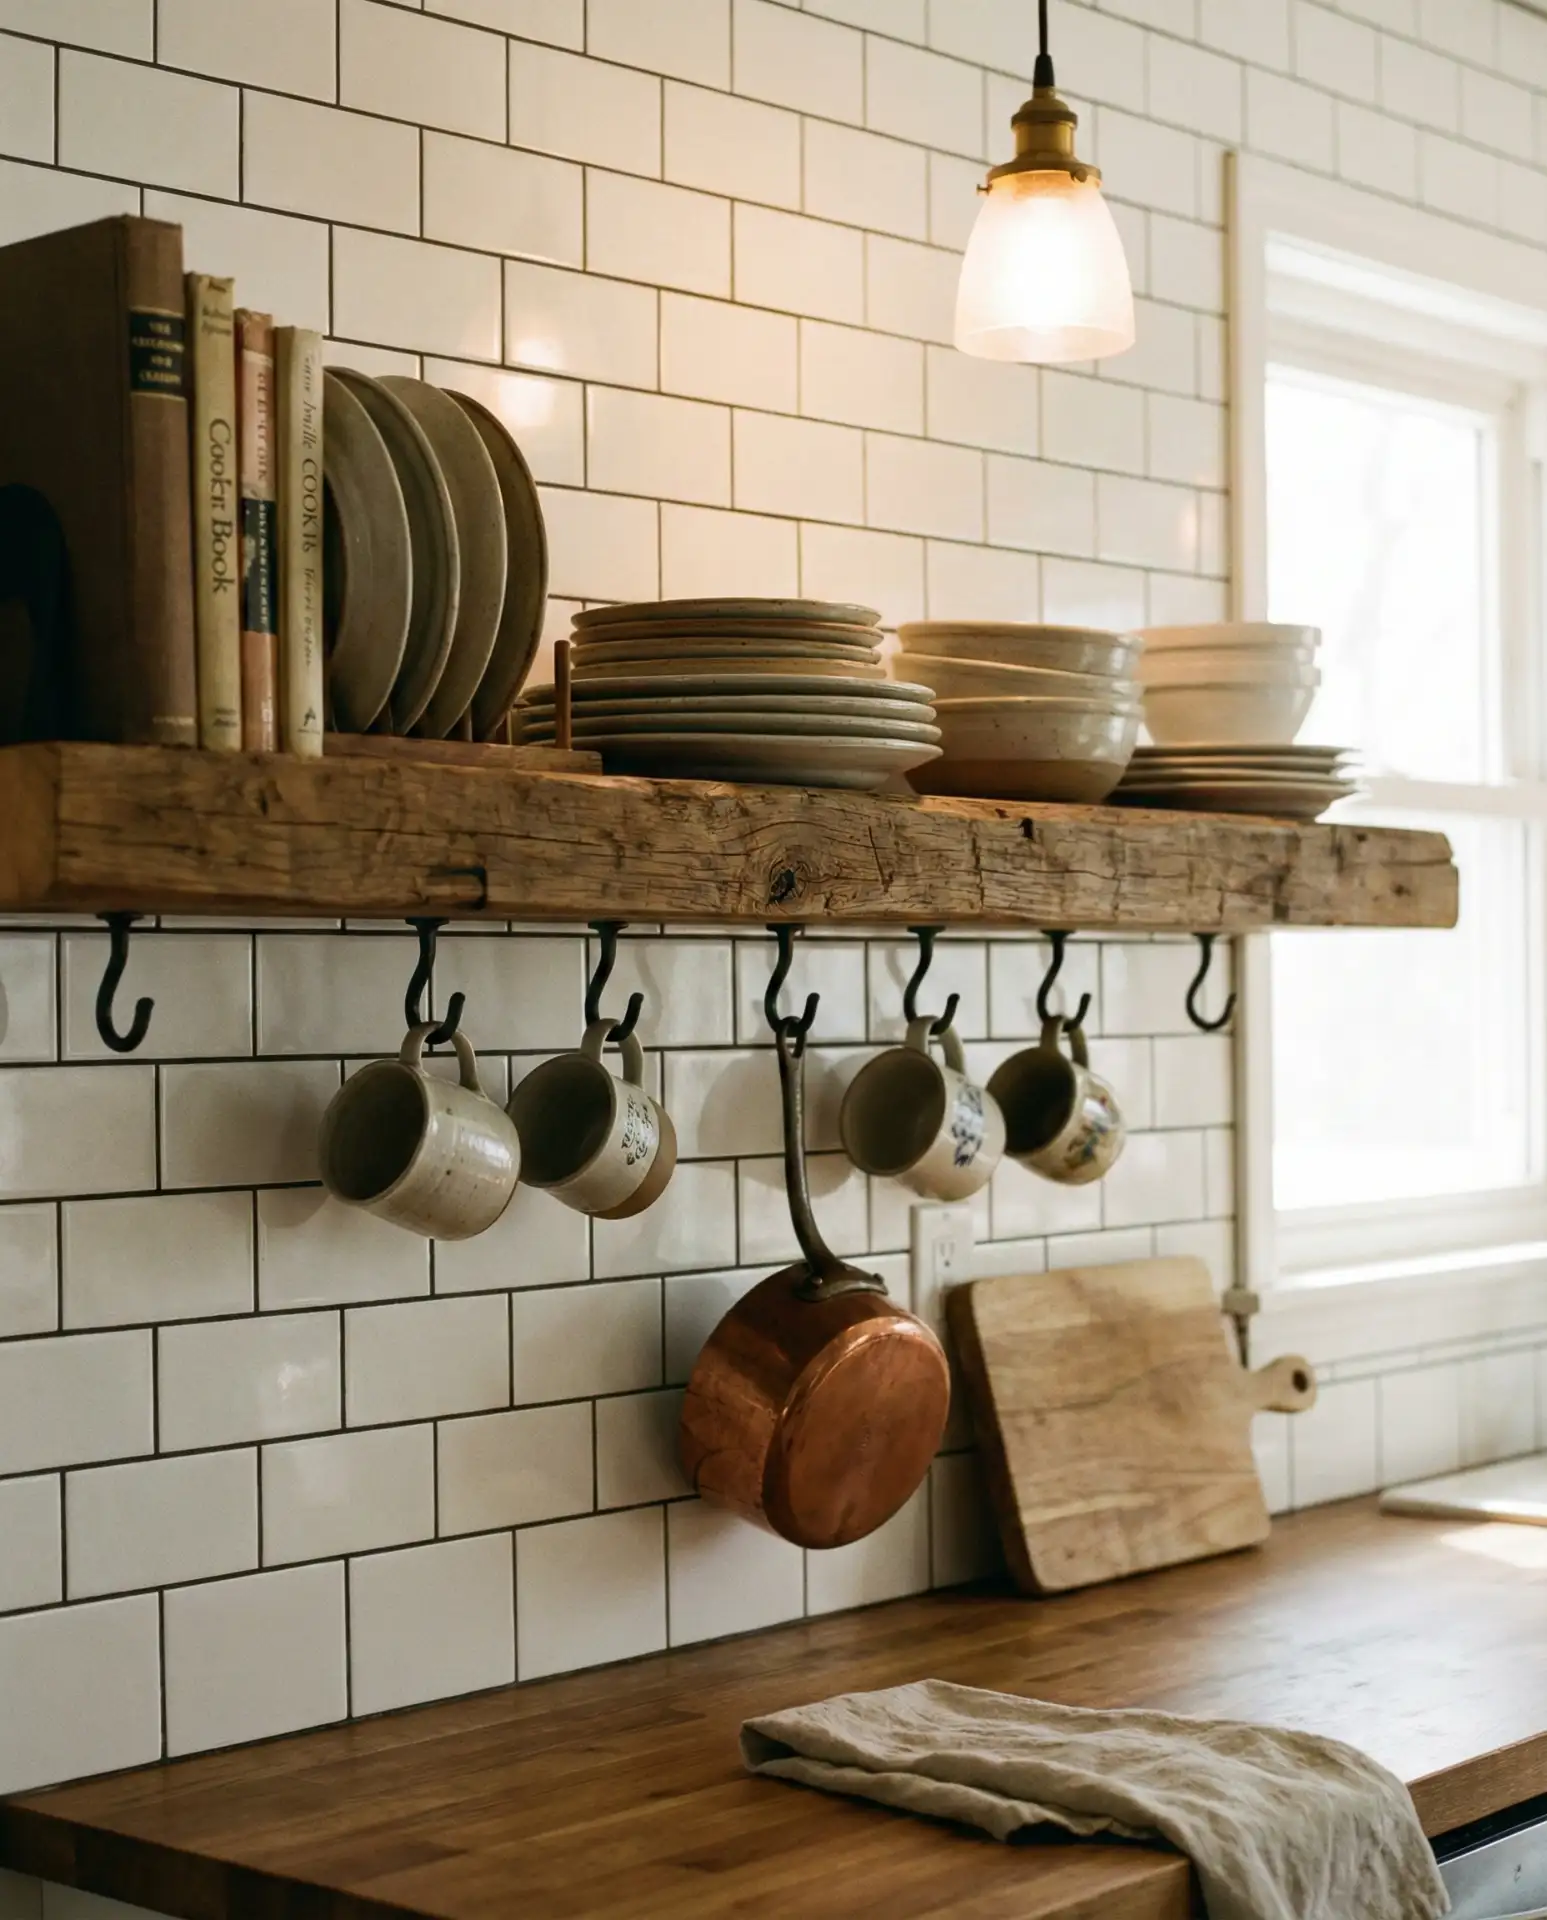
8. Rustic Reclaimed Wood Accents
Incorporate rustic warmth into your kitchen by adding reclaimed wood elements—a floating shelf made from an old barn beam, a salvaged door repurposed as a farmhouse-style island base, or weathered planks as an accent wall. These materials bring texture, history, and character to modern or transitional kitchens, creating a collected-over-time aesthetic that feels authentic. Reclaimed wood works particularly well in cabin kitchens or mountain homes where natural materials echo the surrounding landscape.
Salvage yards and architectural antique stores across the country stock reclaimed materials, though prices vary widely—expect to pay $8-20 per board foot depending on species and condition. Always seal reclaimed wood properly for kitchen use, as raw wood absorbs moisture and odors. A food-safe mineral oil or polyurethane topcoat protects surfaces while preserving the aged patina that makes these pieces special.
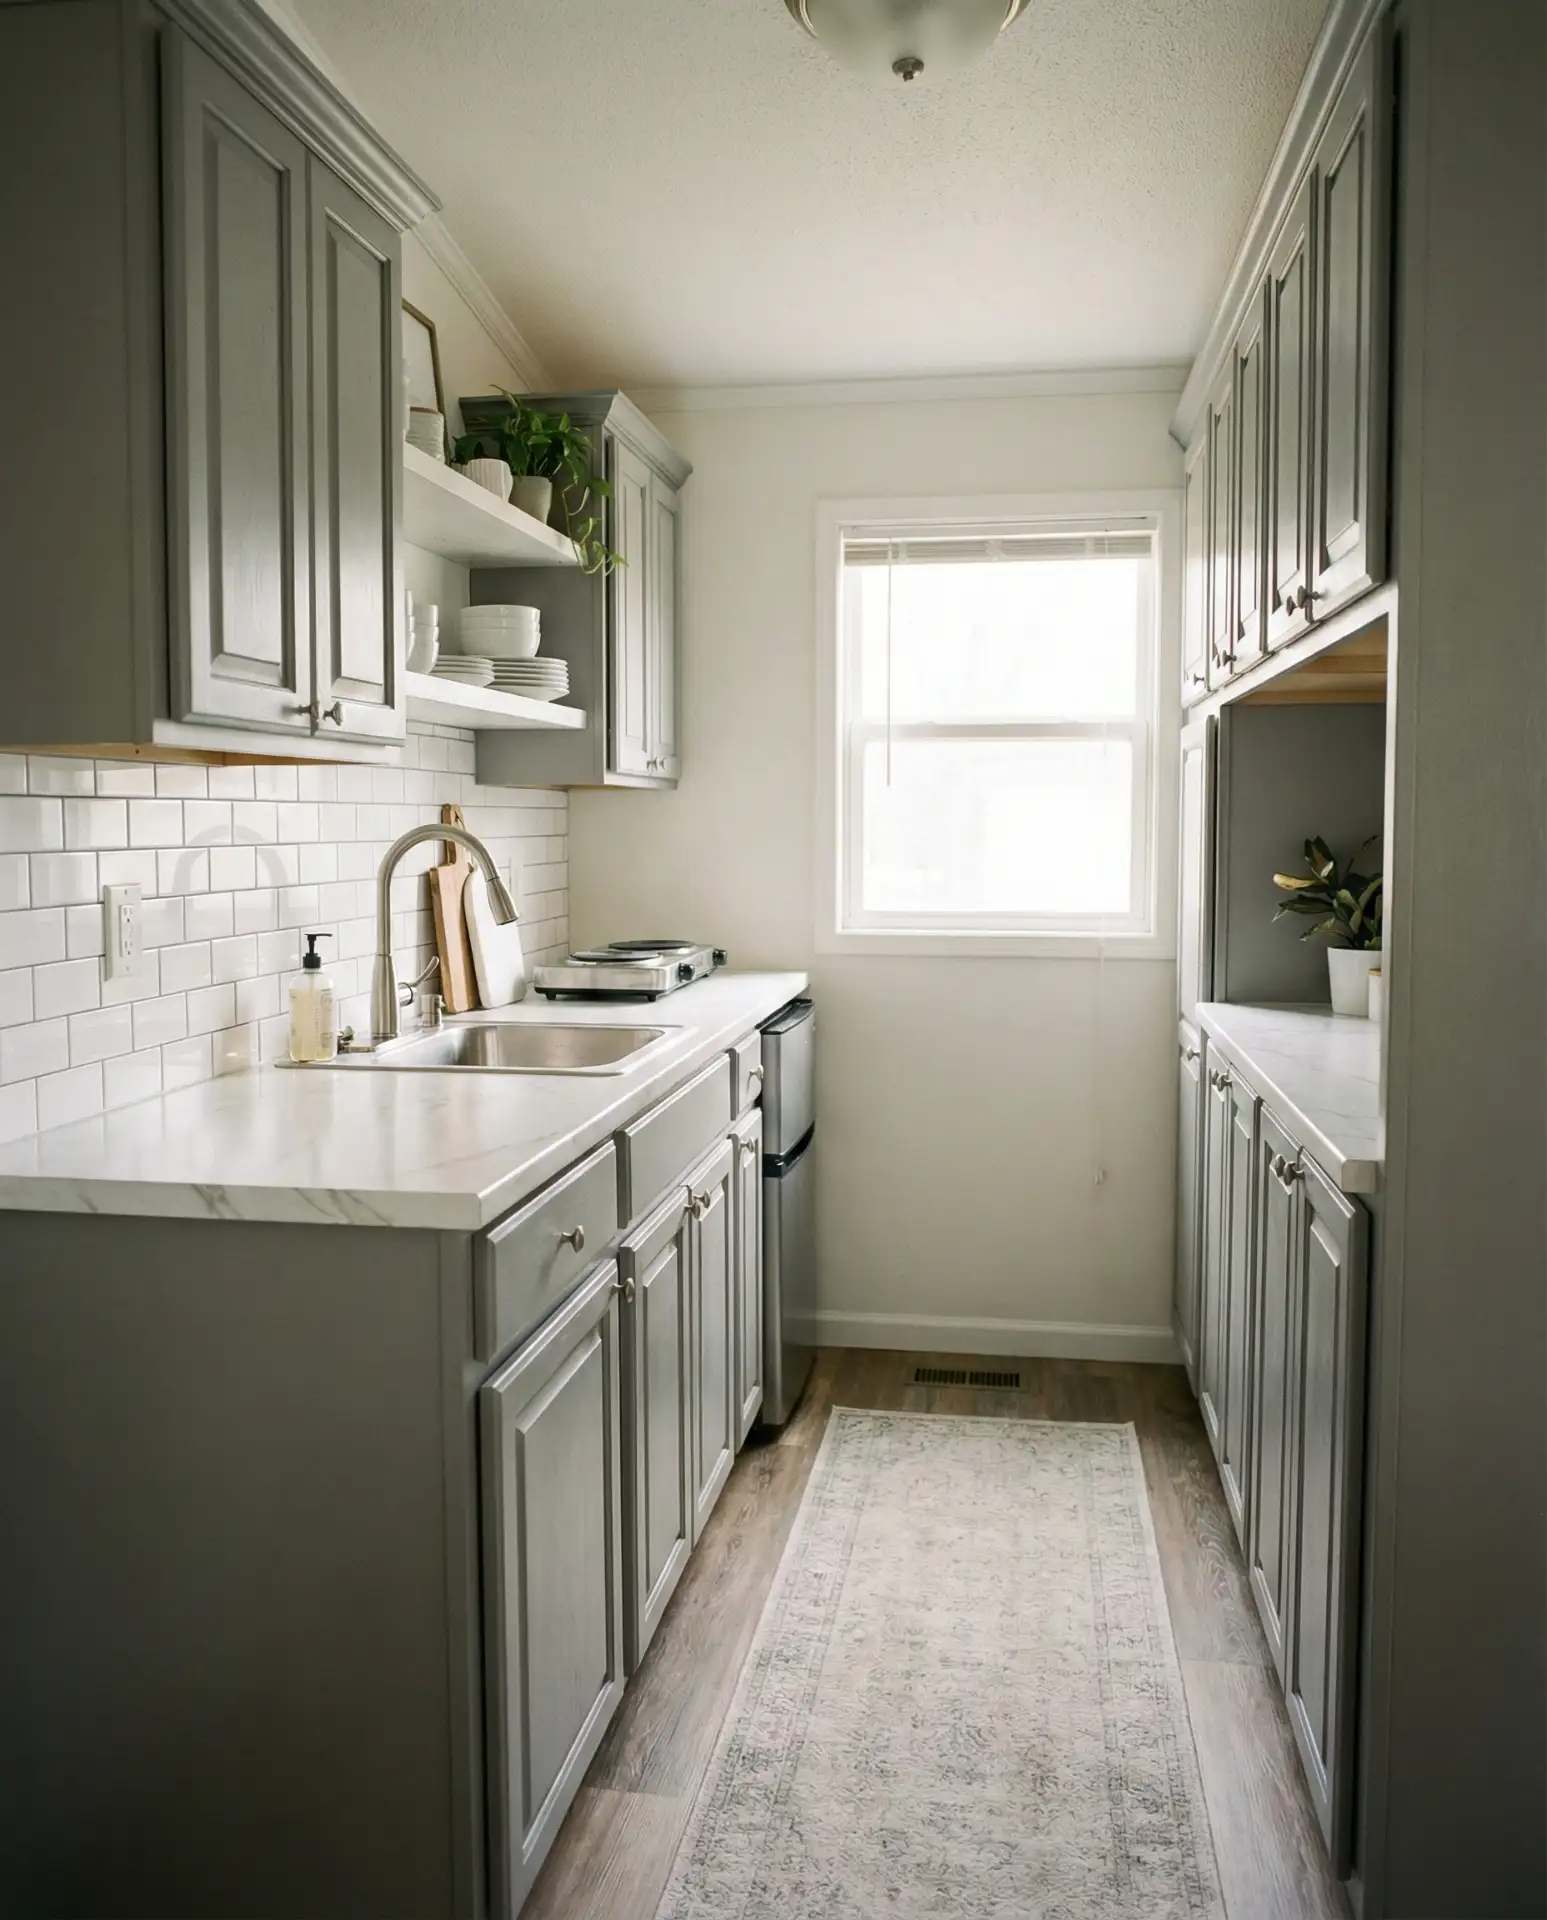
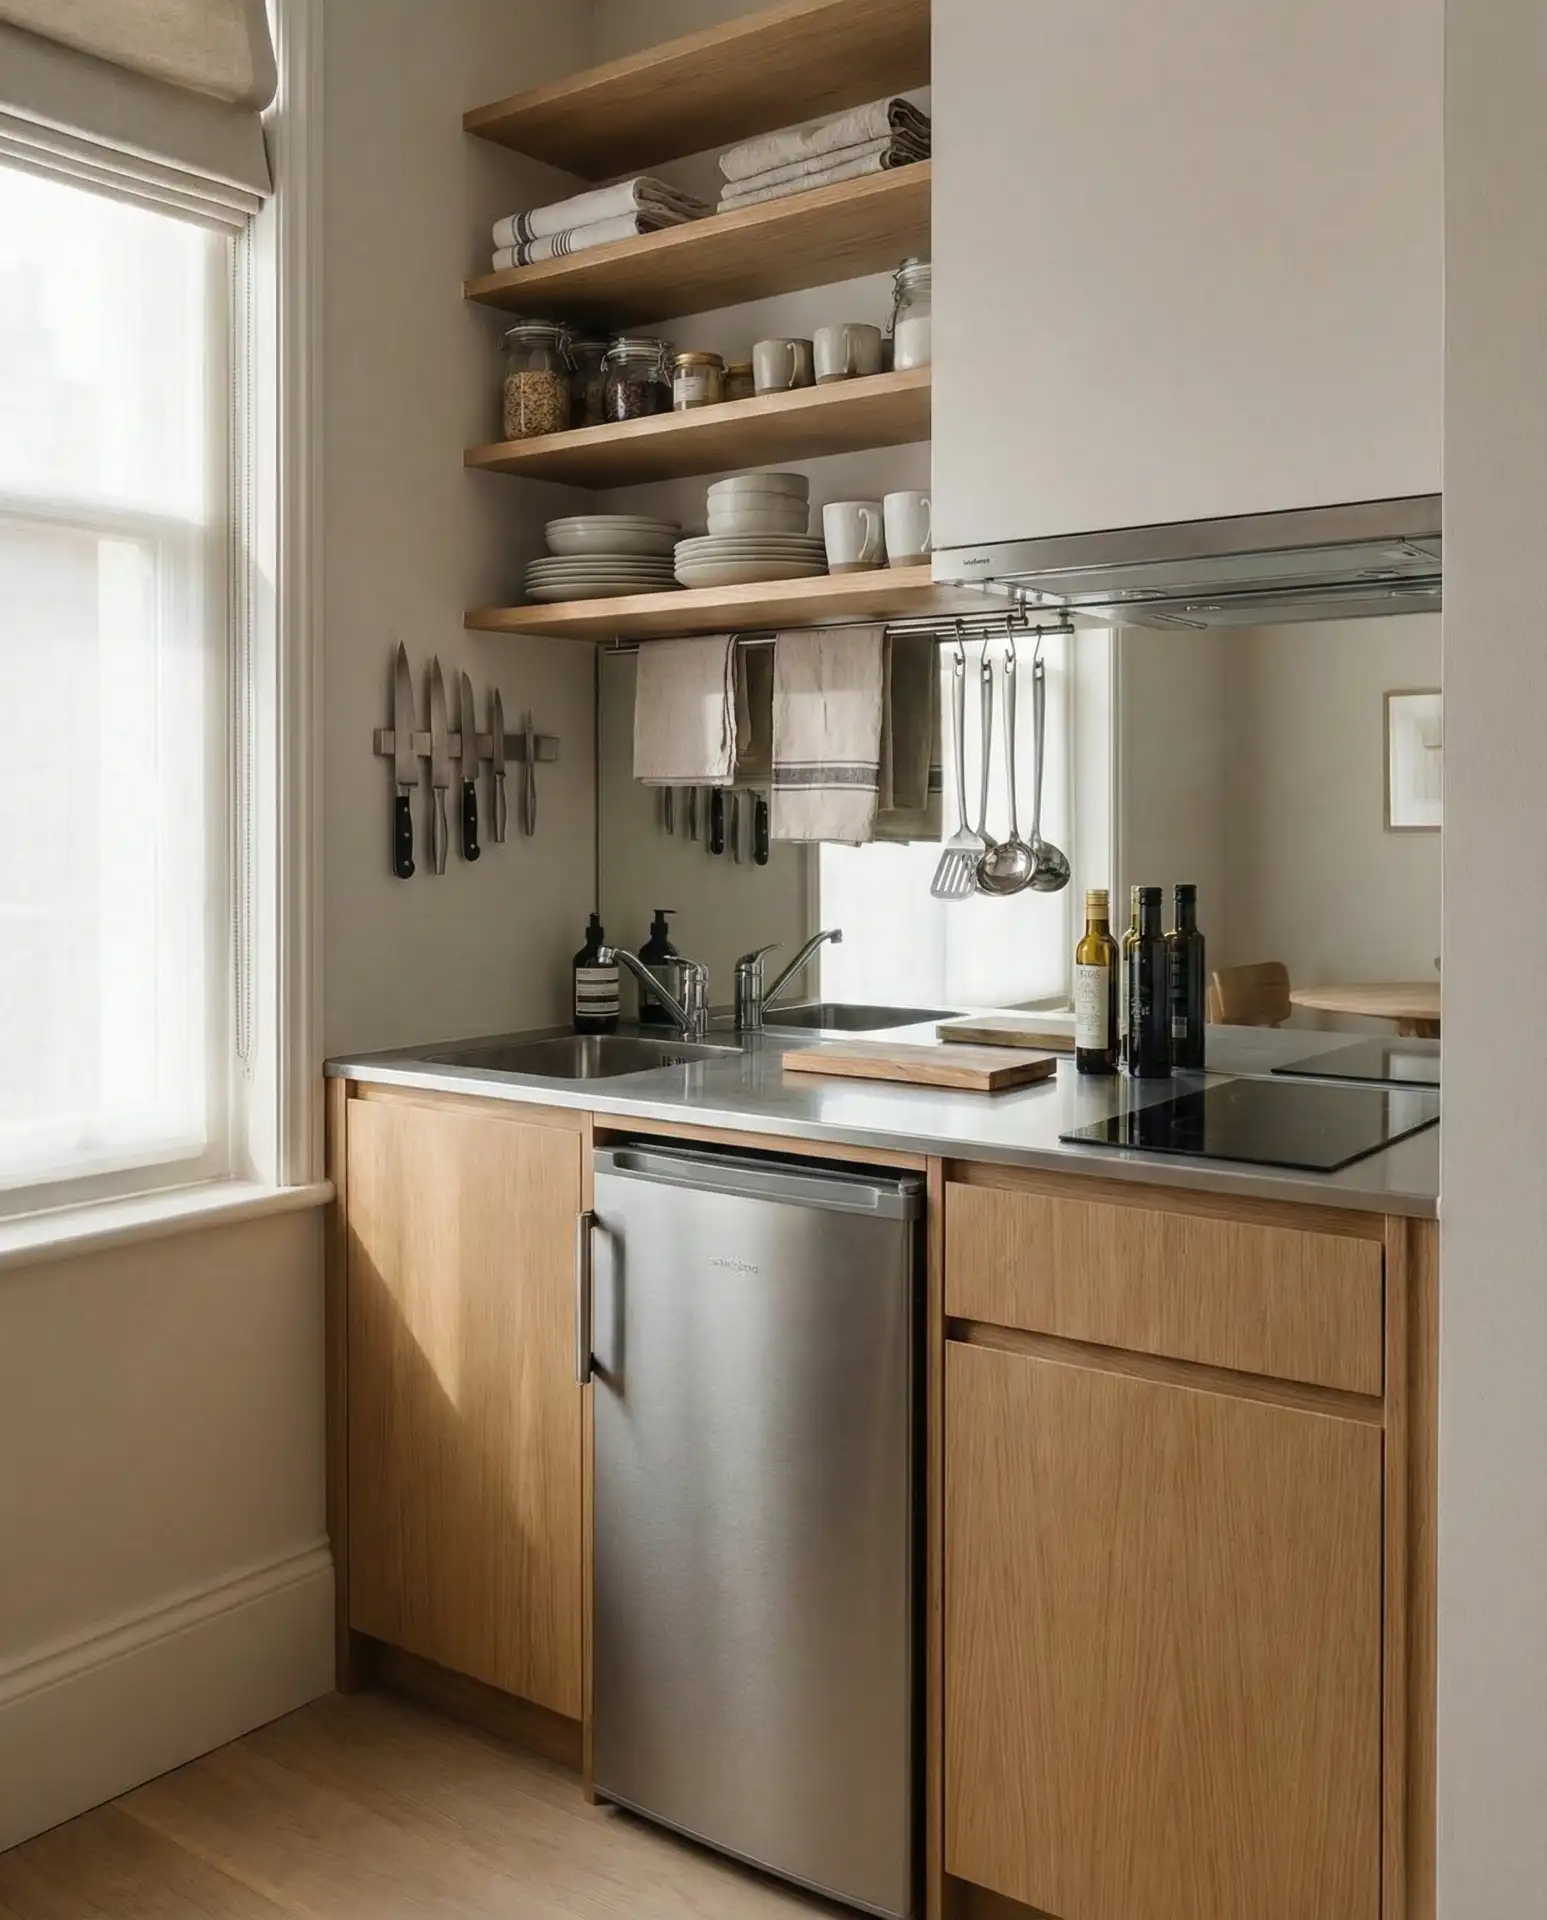
9. Compact Galley Kitchen Optimization
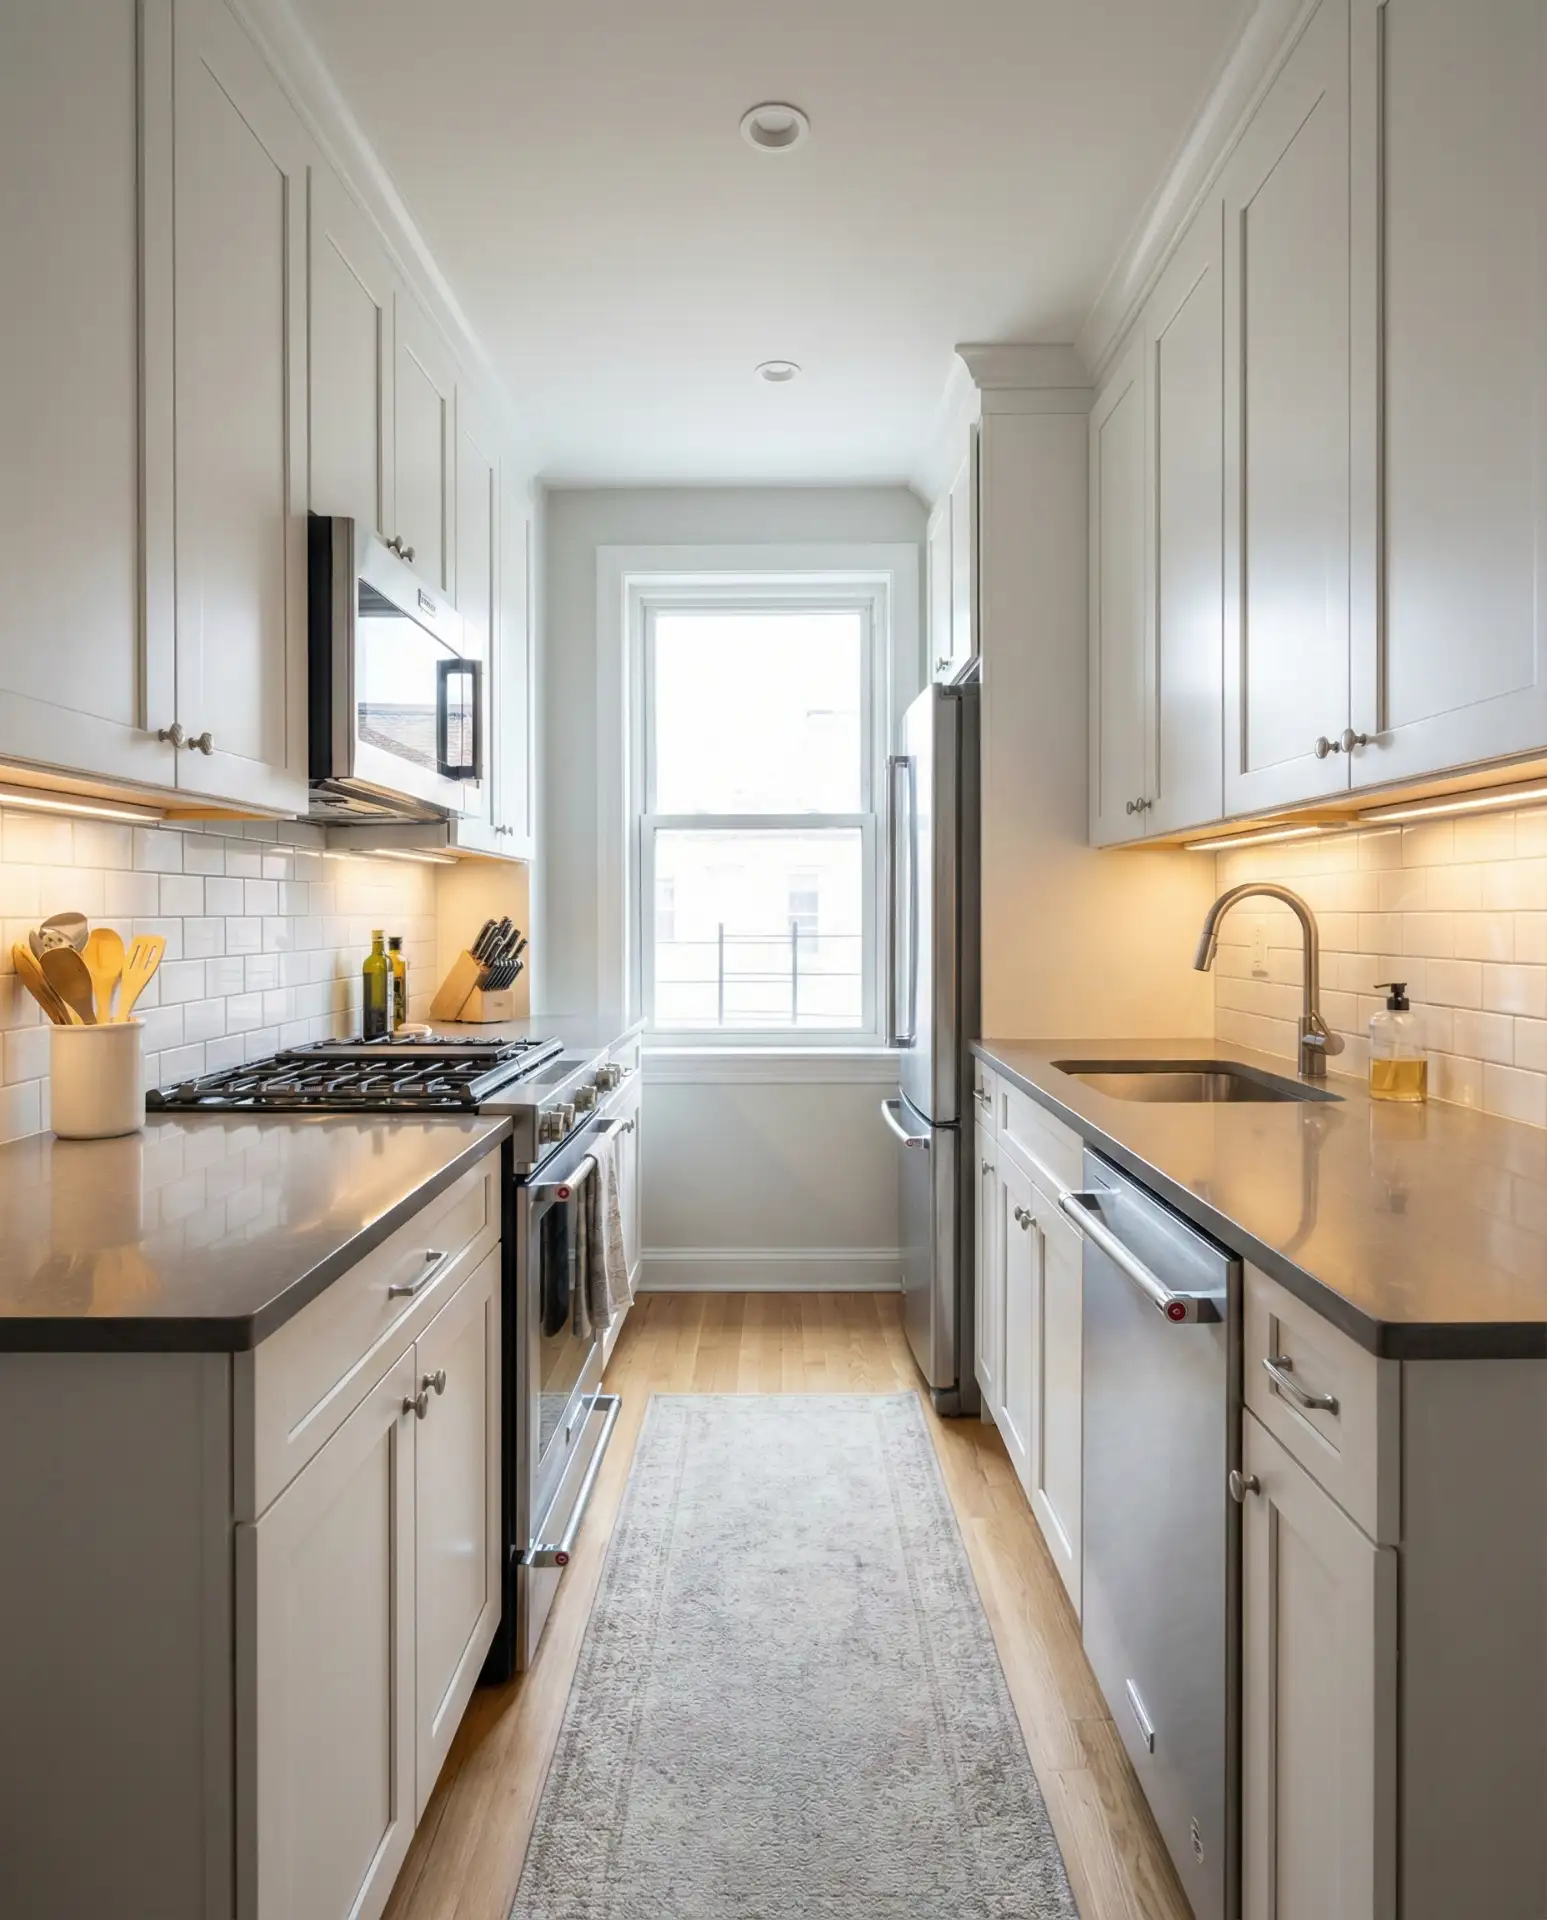
Maximize every inch of your narrow galley kitchen by installing floor-to-ceiling cabinets, incorporating slim pull-out pantries, and choosing appliances scaled for smaller spaces. This layout, common in older apartments and tiny homes, benefits from light colors and reflective surfaces that bounce light and create the illusion of width. Keep one wall for cooking and the opposite for prep and storage, maintaining a clear 42-inch walkway between to avoid feeling cramped.
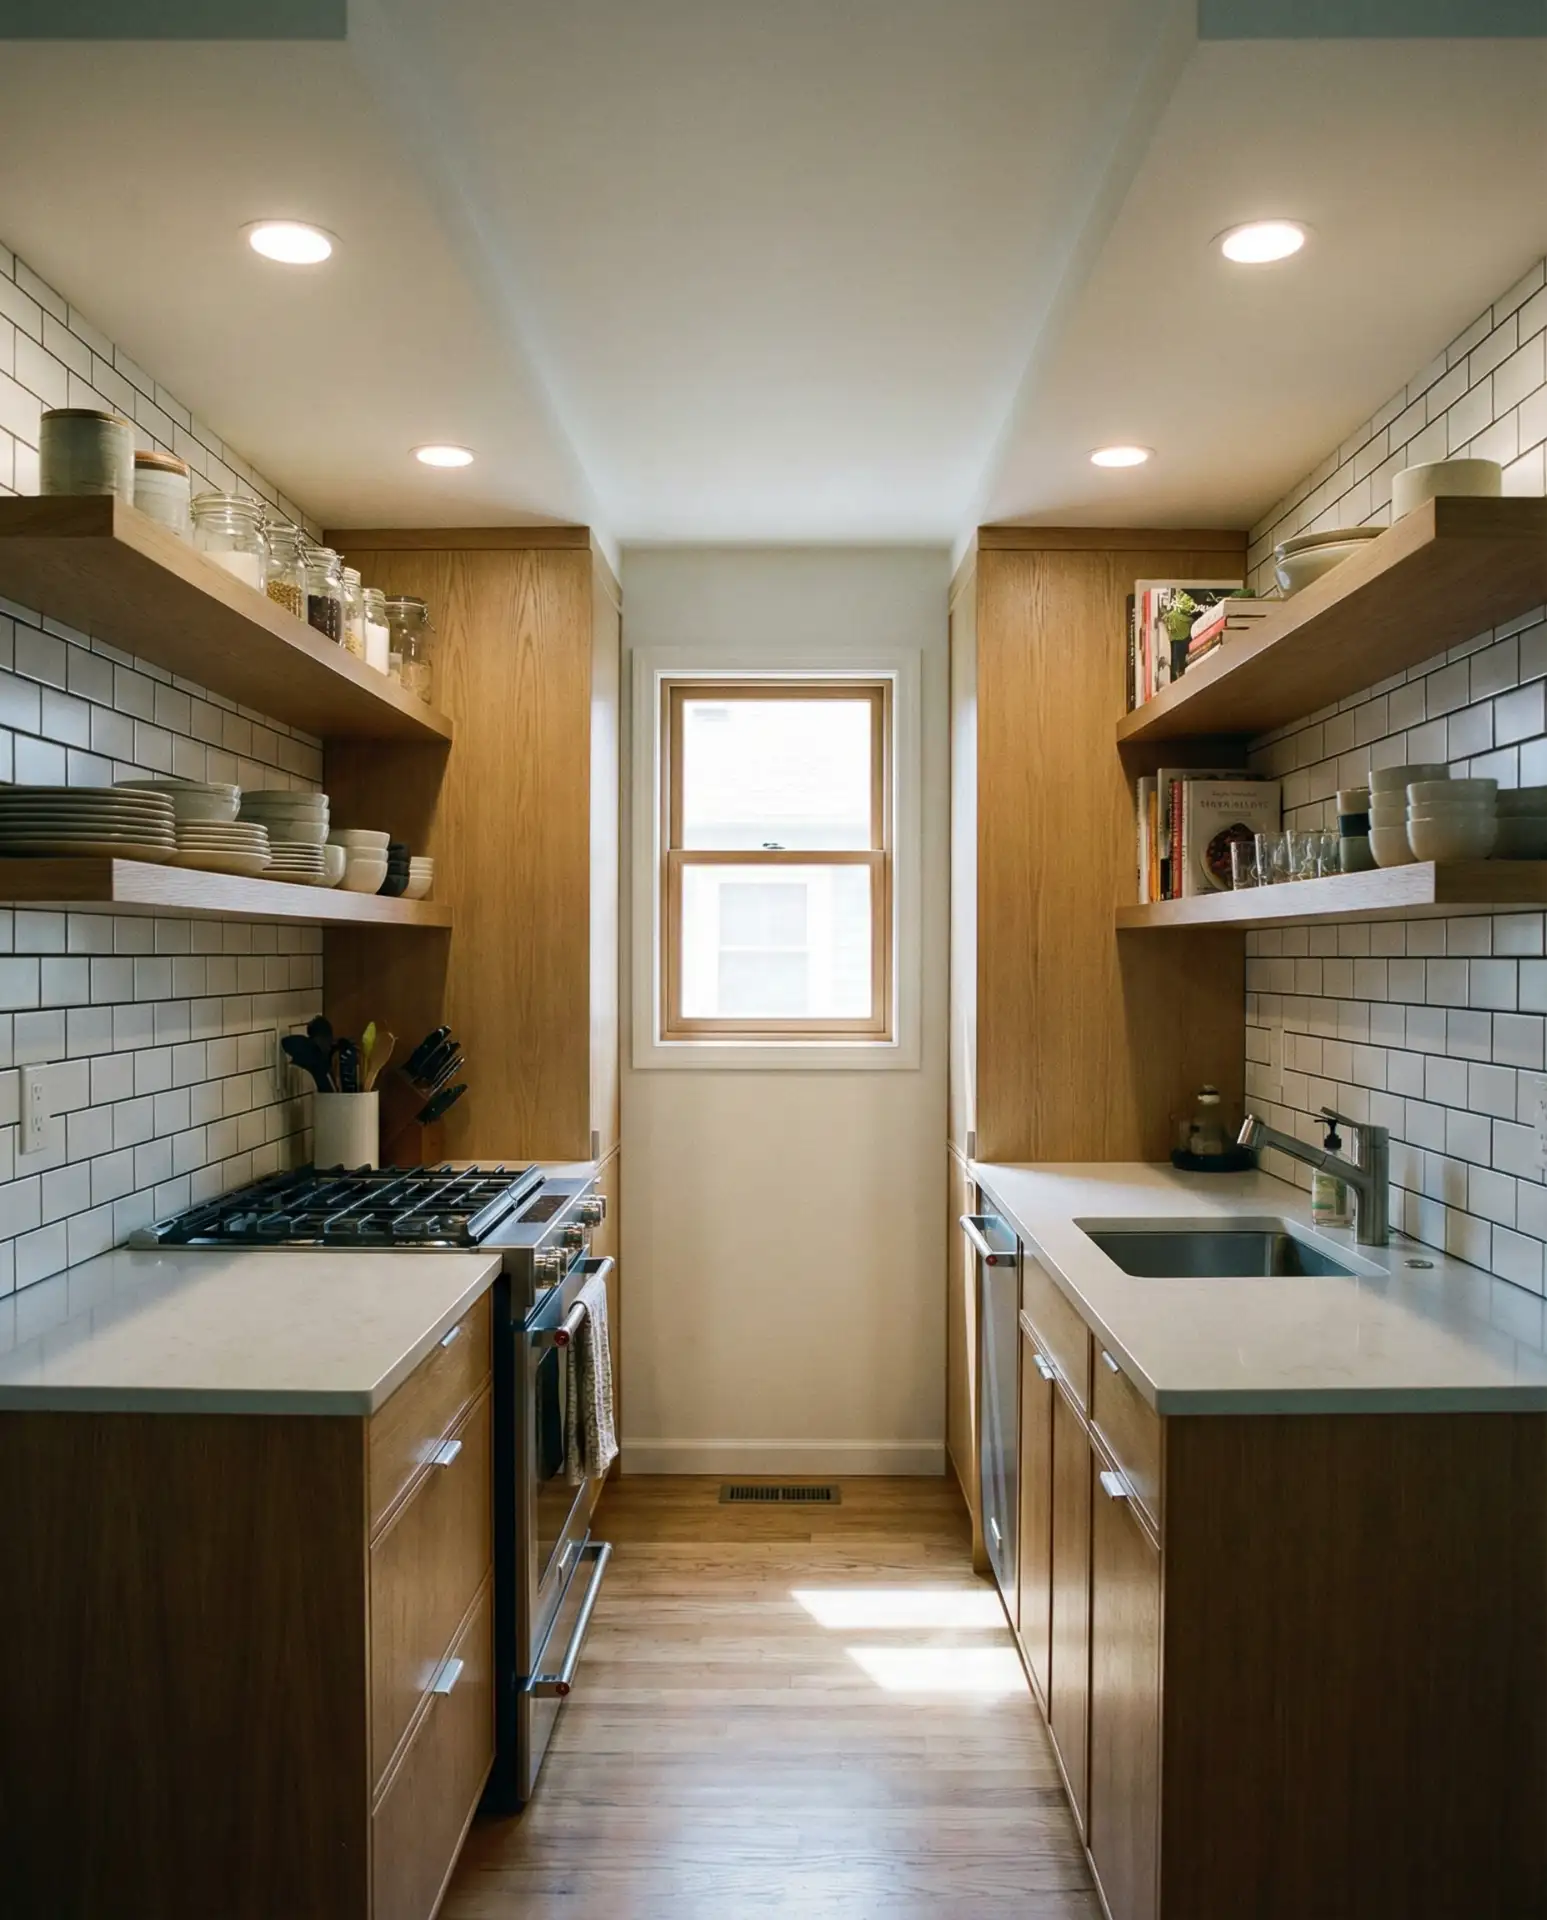
Galley kitchens work best when you embrace vertical storage and resist the urge to install upper cabinets on both sides, which can create a tunnel effect. Instead, try open shelving or a single run of uppers on one wall paired with a dramatic backsplash on the other. Real homeowners in cities like New York and San Francisco report that installing a sliding barn door instead of a traditional swing door reclaims valuable floor space and improves traffic flow.
10. RV Kitchen Upgrade with Space-Saving Solutions
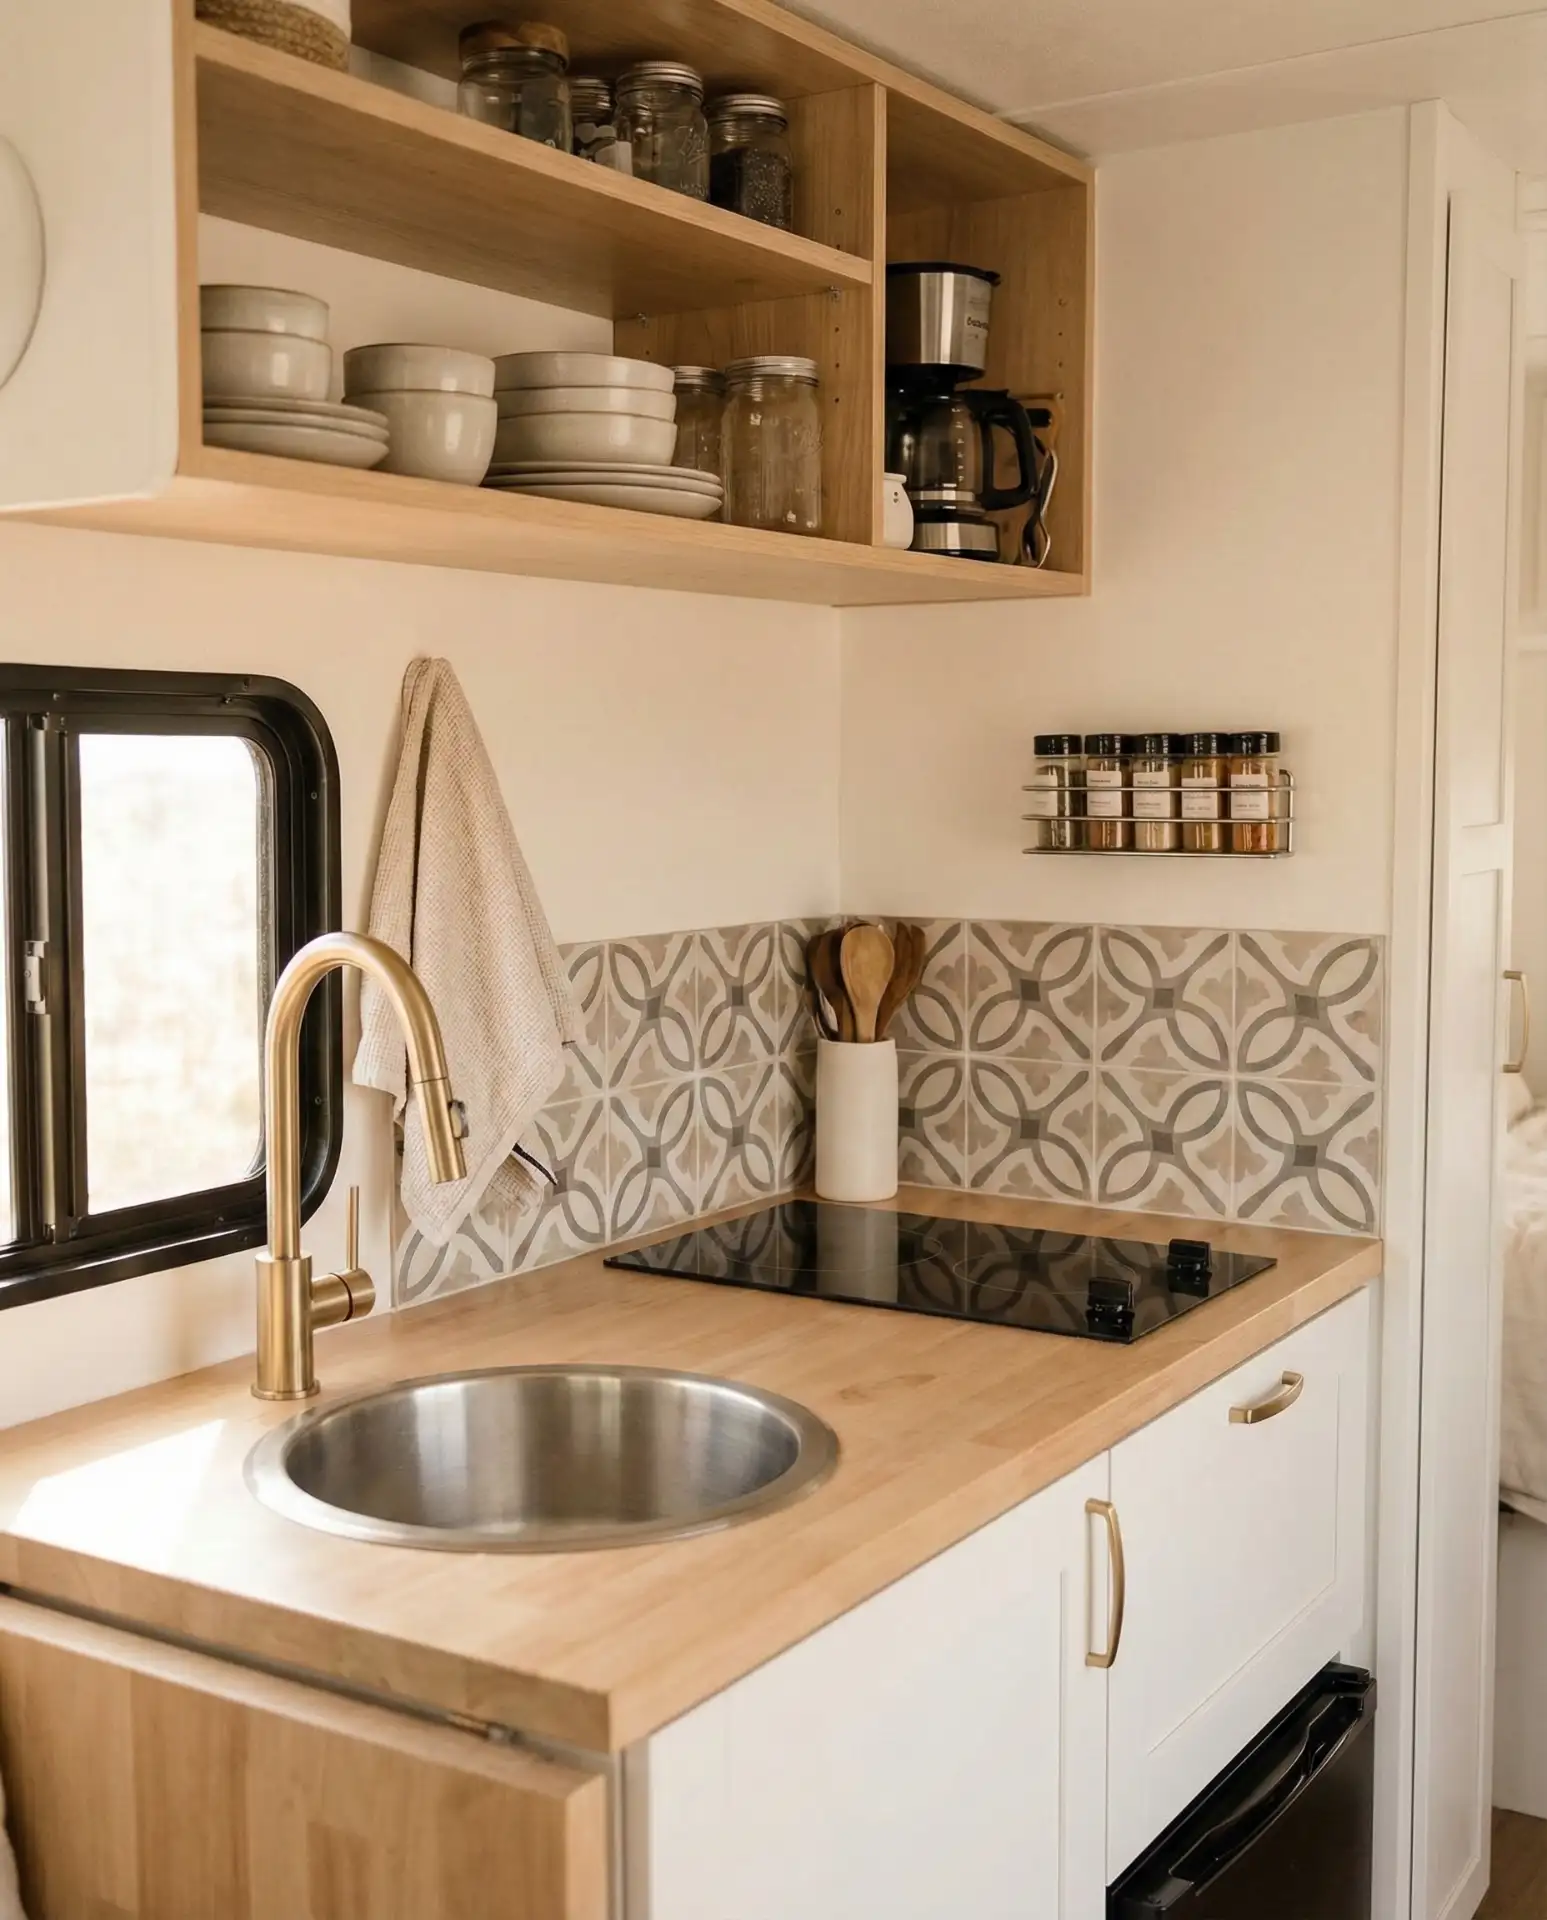
Transform your RV kitchen from basic to beautiful by replacing dated hardware, adding peel-and-stick tile, and installing compact organization systems designed for mobile living. Budget-friendly upgrades like magnetic knife strips, collapsible dish racks, and nested cookware maximize limited counter and cabinet space. Many full-time RVers paint laminate countertops with specialty kits to mimic stone or concrete, achieving a high-end look for under $100.
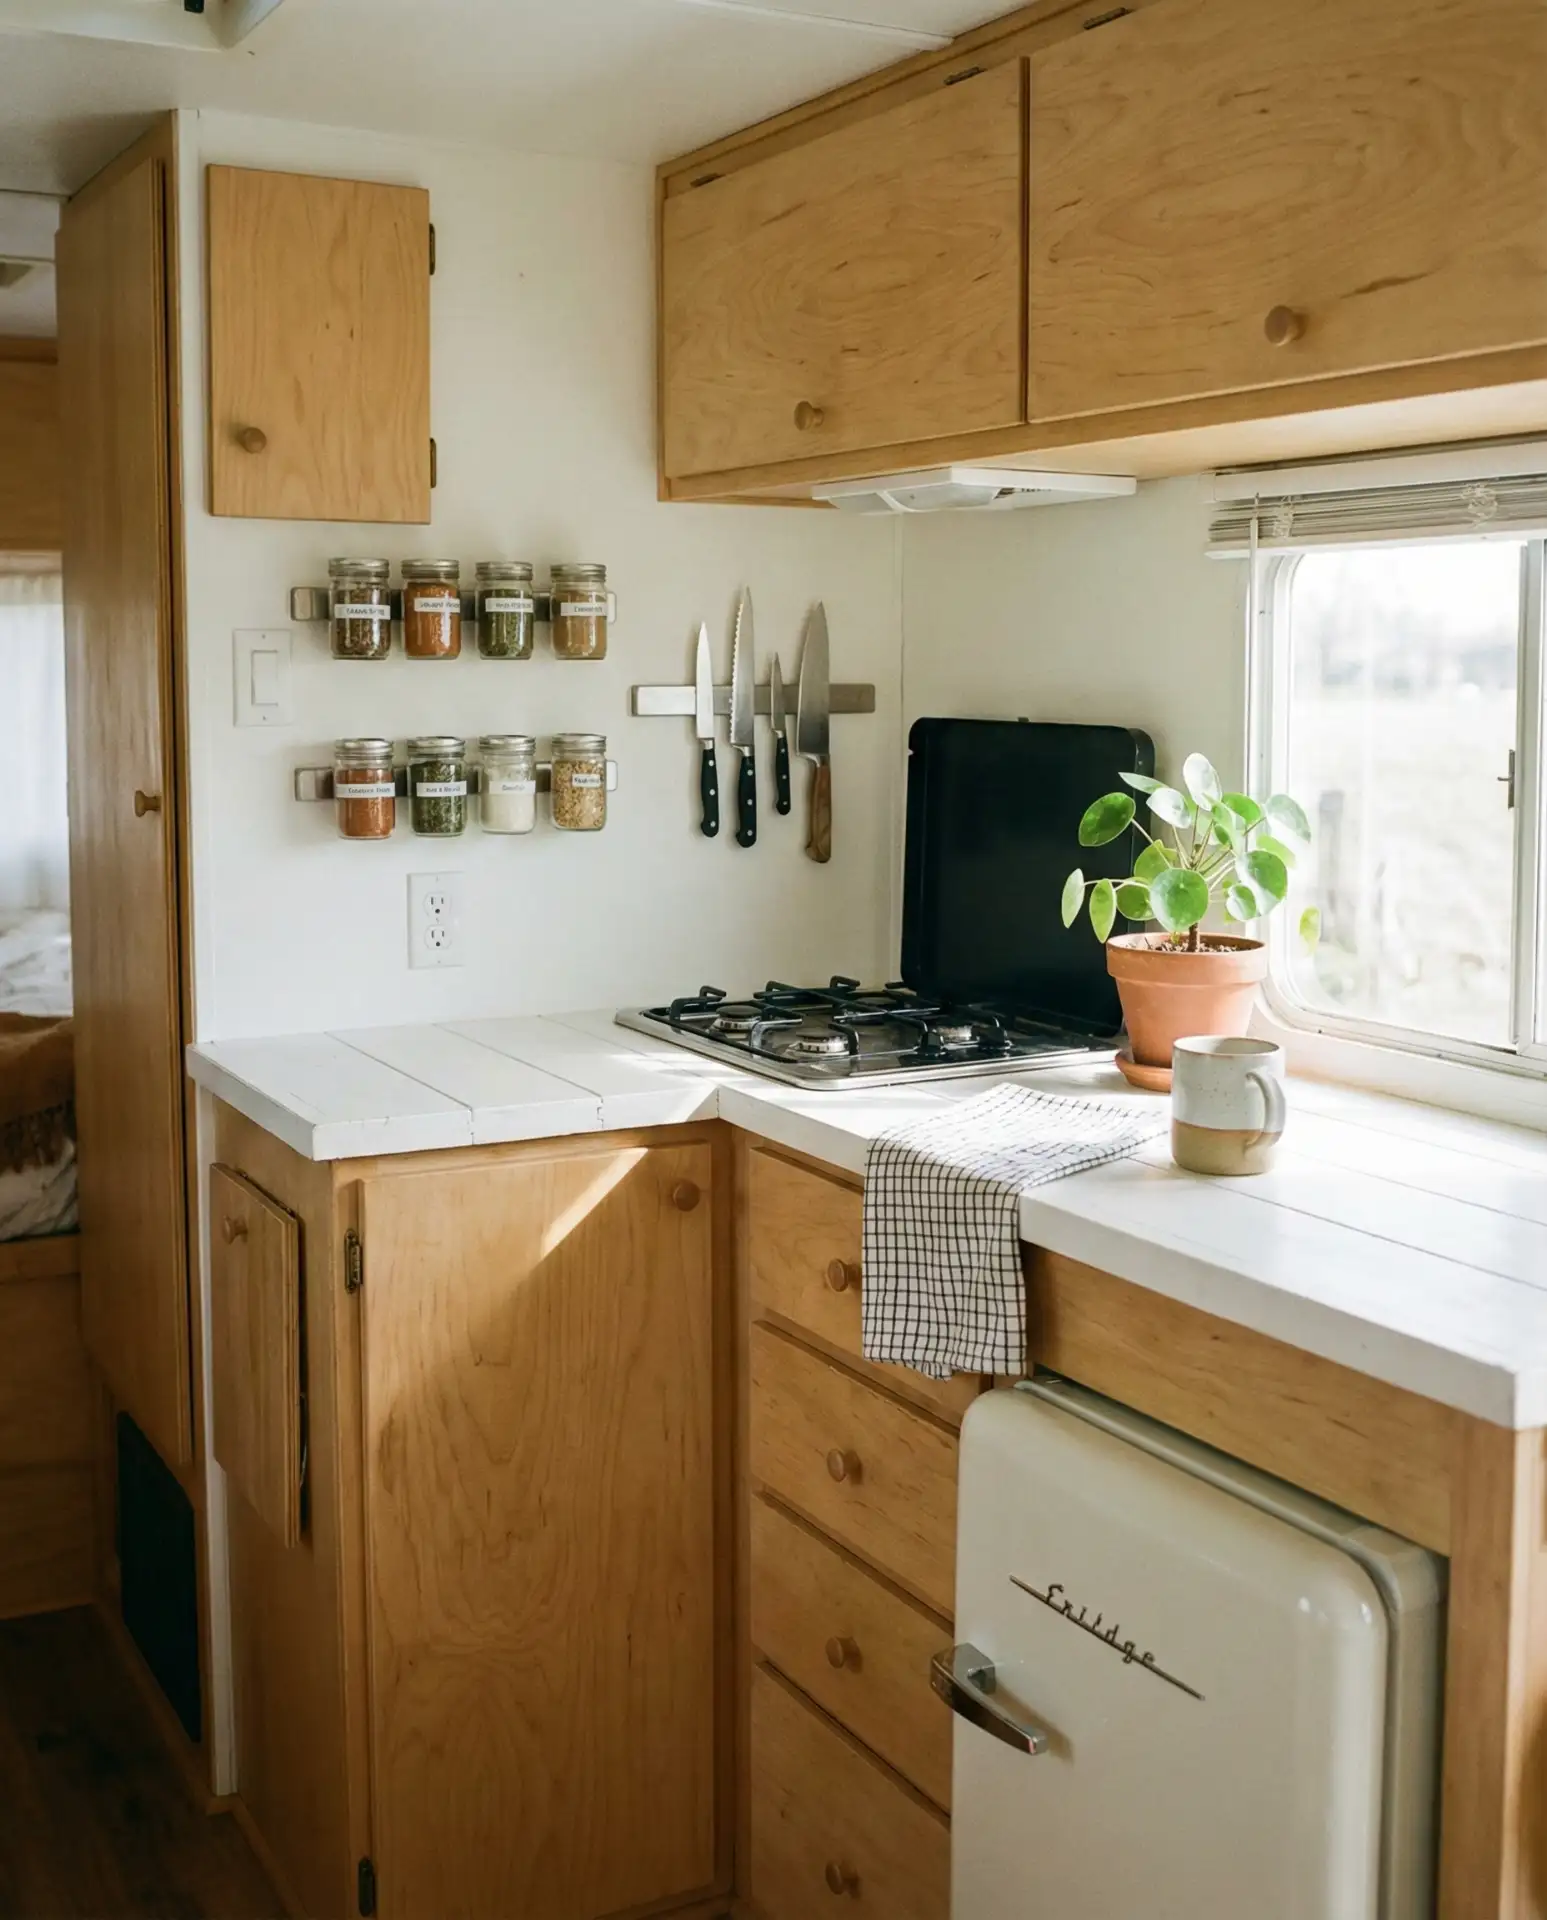
RV kitchens face unique challenges—vibration while driving, weight restrictions, and extreme temperature fluctuations—so choose lightweight materials and secure everything with museum putty or non-slip liners. Online communities like RV Living and Technomadia offer detailed tutorials on countertop refinishing and cabinet modifications specific to various RV models. The return on these small investments is significant: a well-designed RV kitchen makes full-time travel more comfortable and can boost resale value by several thousand dollars.
11. Indian-Inspired Spice Storage and Color
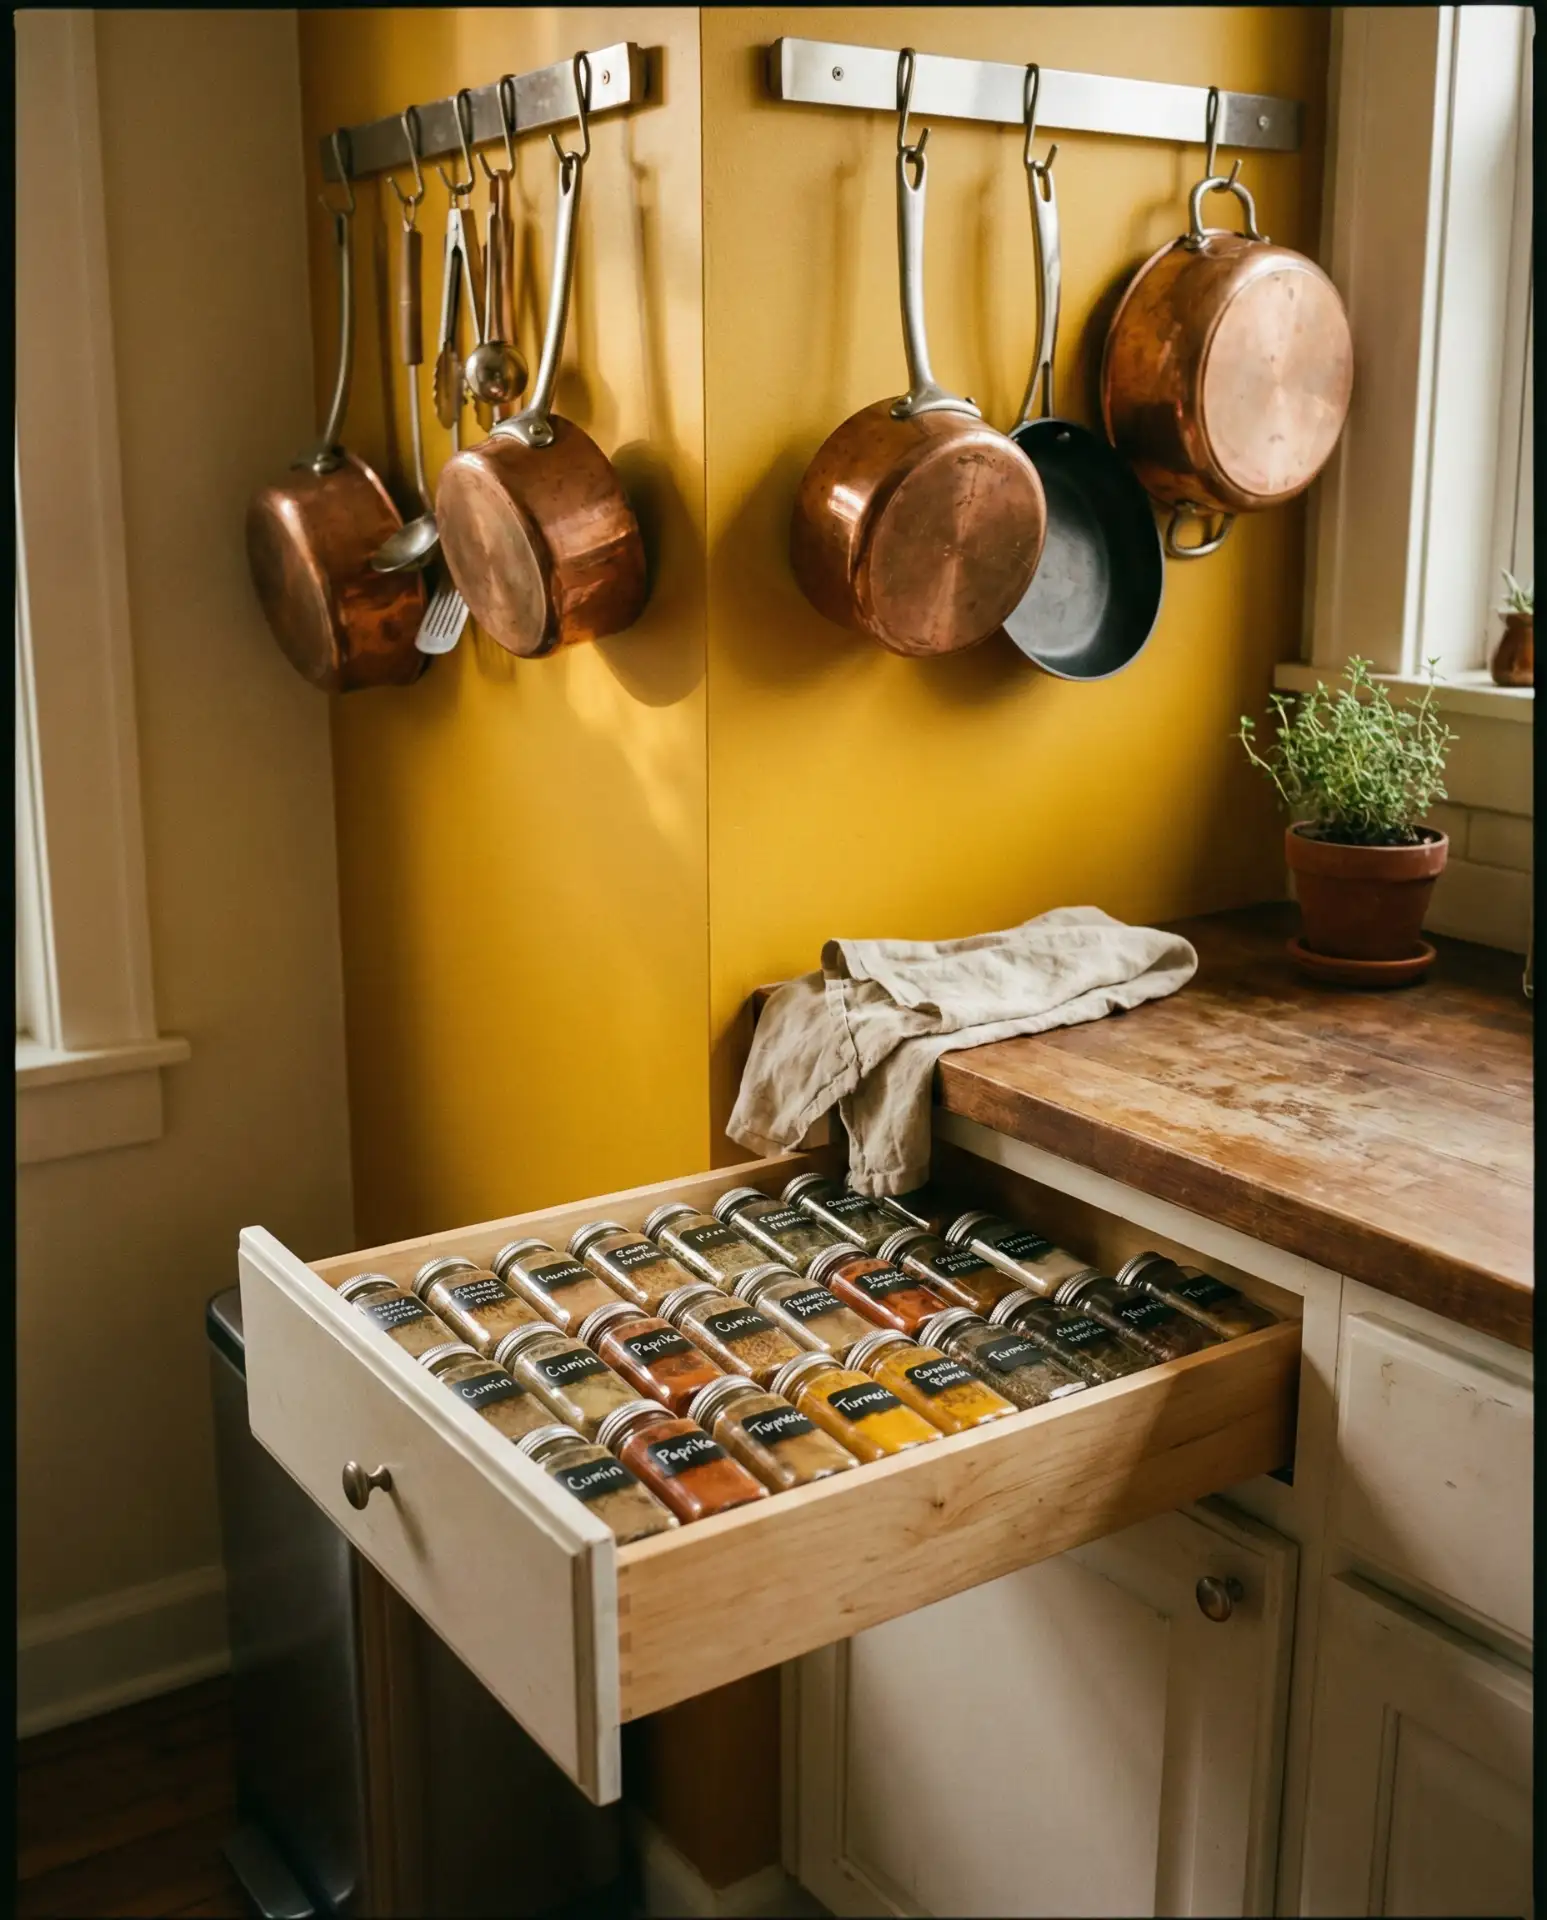
Celebrate Indian culinary traditions by dedicating a prominent area of your kitchen to organized spice storage—wall-mounted racks with labeled glass jars, pull-out spice drawers, or a dedicated masala station near your cooktop. Incorporate warm accent colors like saffron yellow, terracotta, or deep maroon through backsplash tiles, painted cabinets, or colorful textiles. This approach honors the central role of spices in Indian cooking while keeping dozens of varieties accessible and visible.
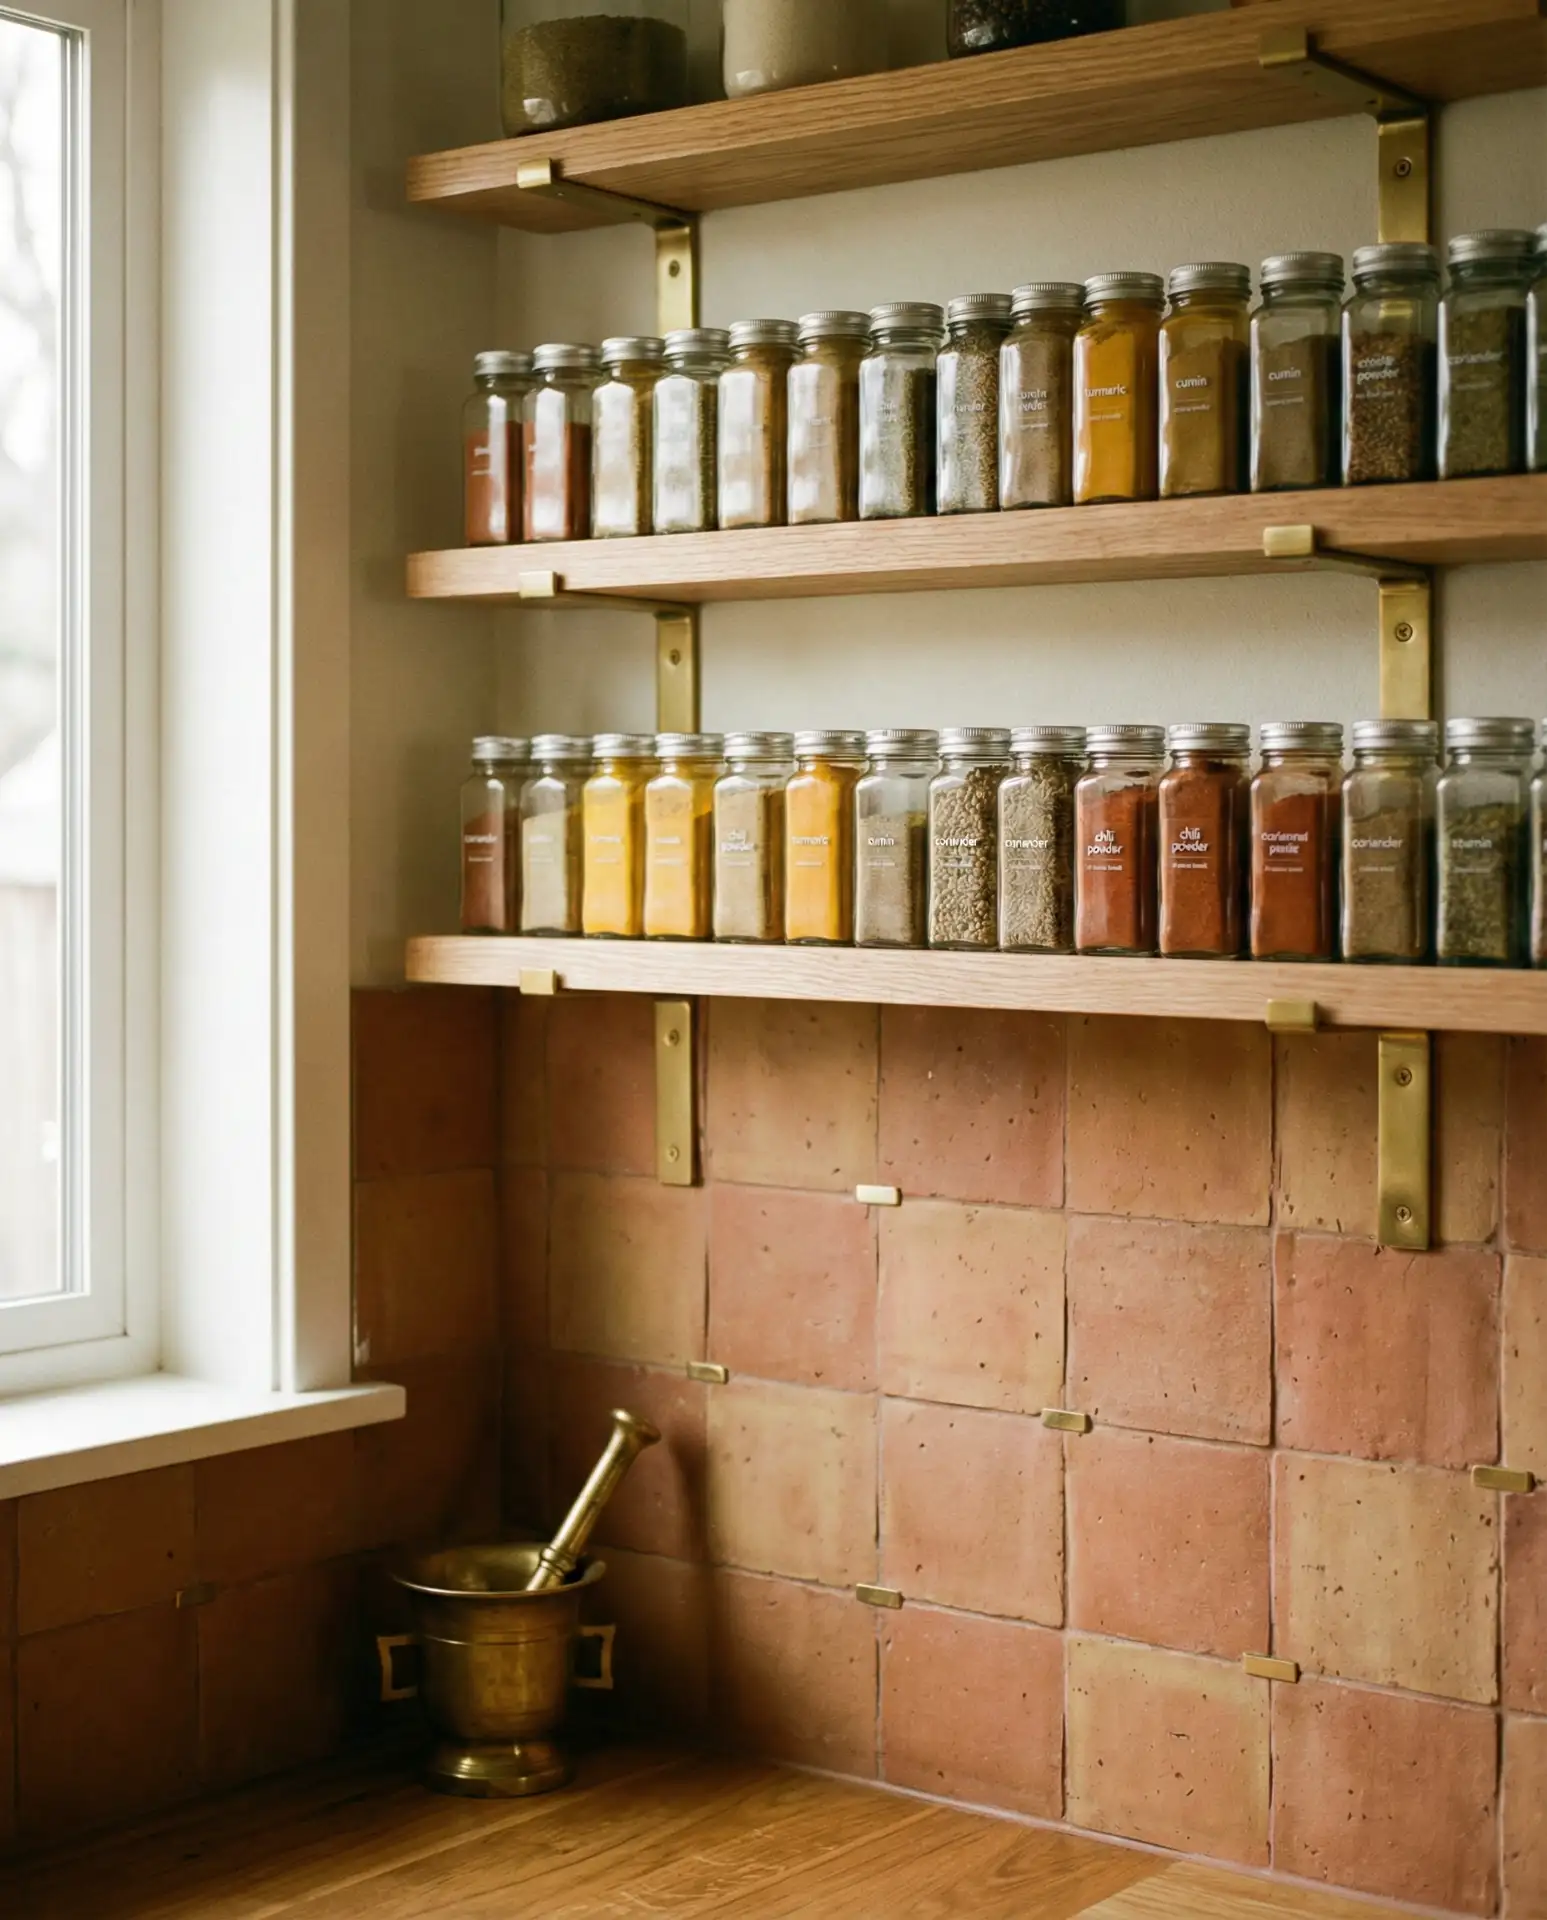
Across diverse American communities, Indian-American families often blend traditional organizational needs with contemporary aesthetics, creating kitchens that are both functional and culturally meaningful. Expert advice: store whole spices away from heat and light to preserve their potency, and consider a small coffee grinder dedicated to grinding fresh masalas. If you cook Indian food regularly, a separate ventilation system or powerful hood is essential, as aromatic spices linger longer than typical Western cooking smells.
12. Simple Subway Tile Refresh
Classic white subway tile remains one of the simplest yet most impactful kitchen updates, offering a clean backdrop that works with virtually any cabinet color and hardware style. Install it in a traditional horizontal brick pattern, or try a herringbone or vertical stack for a contemporary twist. The beauty of subway tile lies in its affordability—$5-12 per square foot installed—and its timeless appeal that won’t feel dated in five years.
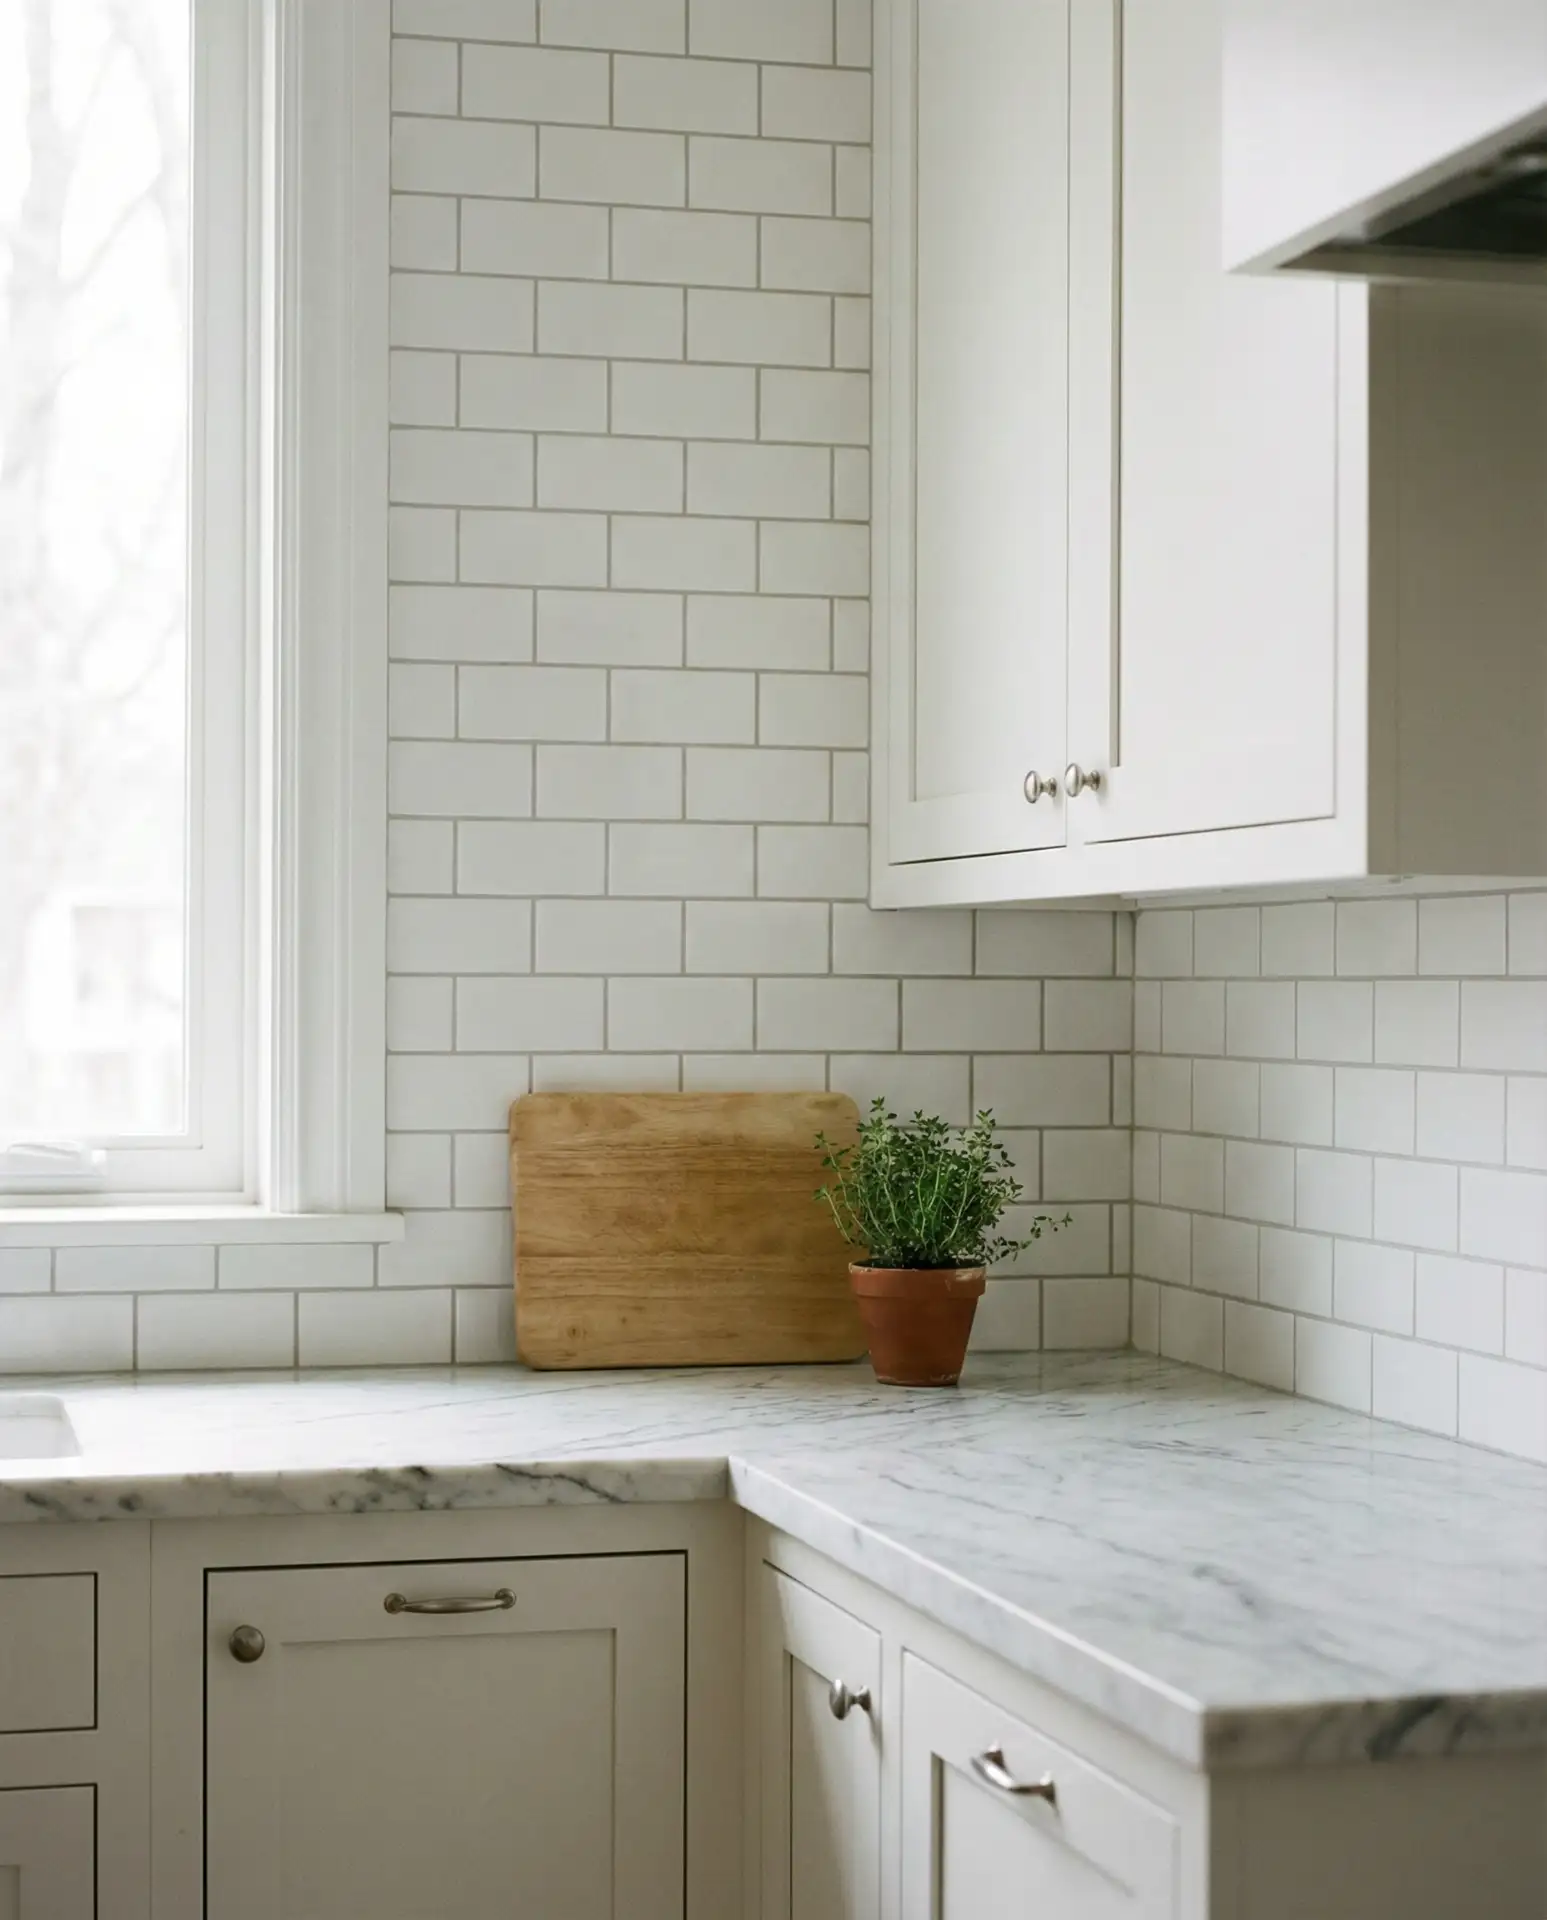
Grout color dramatically changes the overall look—white grout creates a seamless appearance, while grey or black grout adds definition and hides staining better over time. Many DIYers successfully tile their own backsplashes using premixed adhesive and a tile cutter from the hardware store, though corners and outlets require patience and precision. This project typically takes a weekend for a standard 20-square-foot area and yields professional results when you take time to properly space tiles and apply grout evenly.
13. Playful Kid-Friendly Kitchen Zone
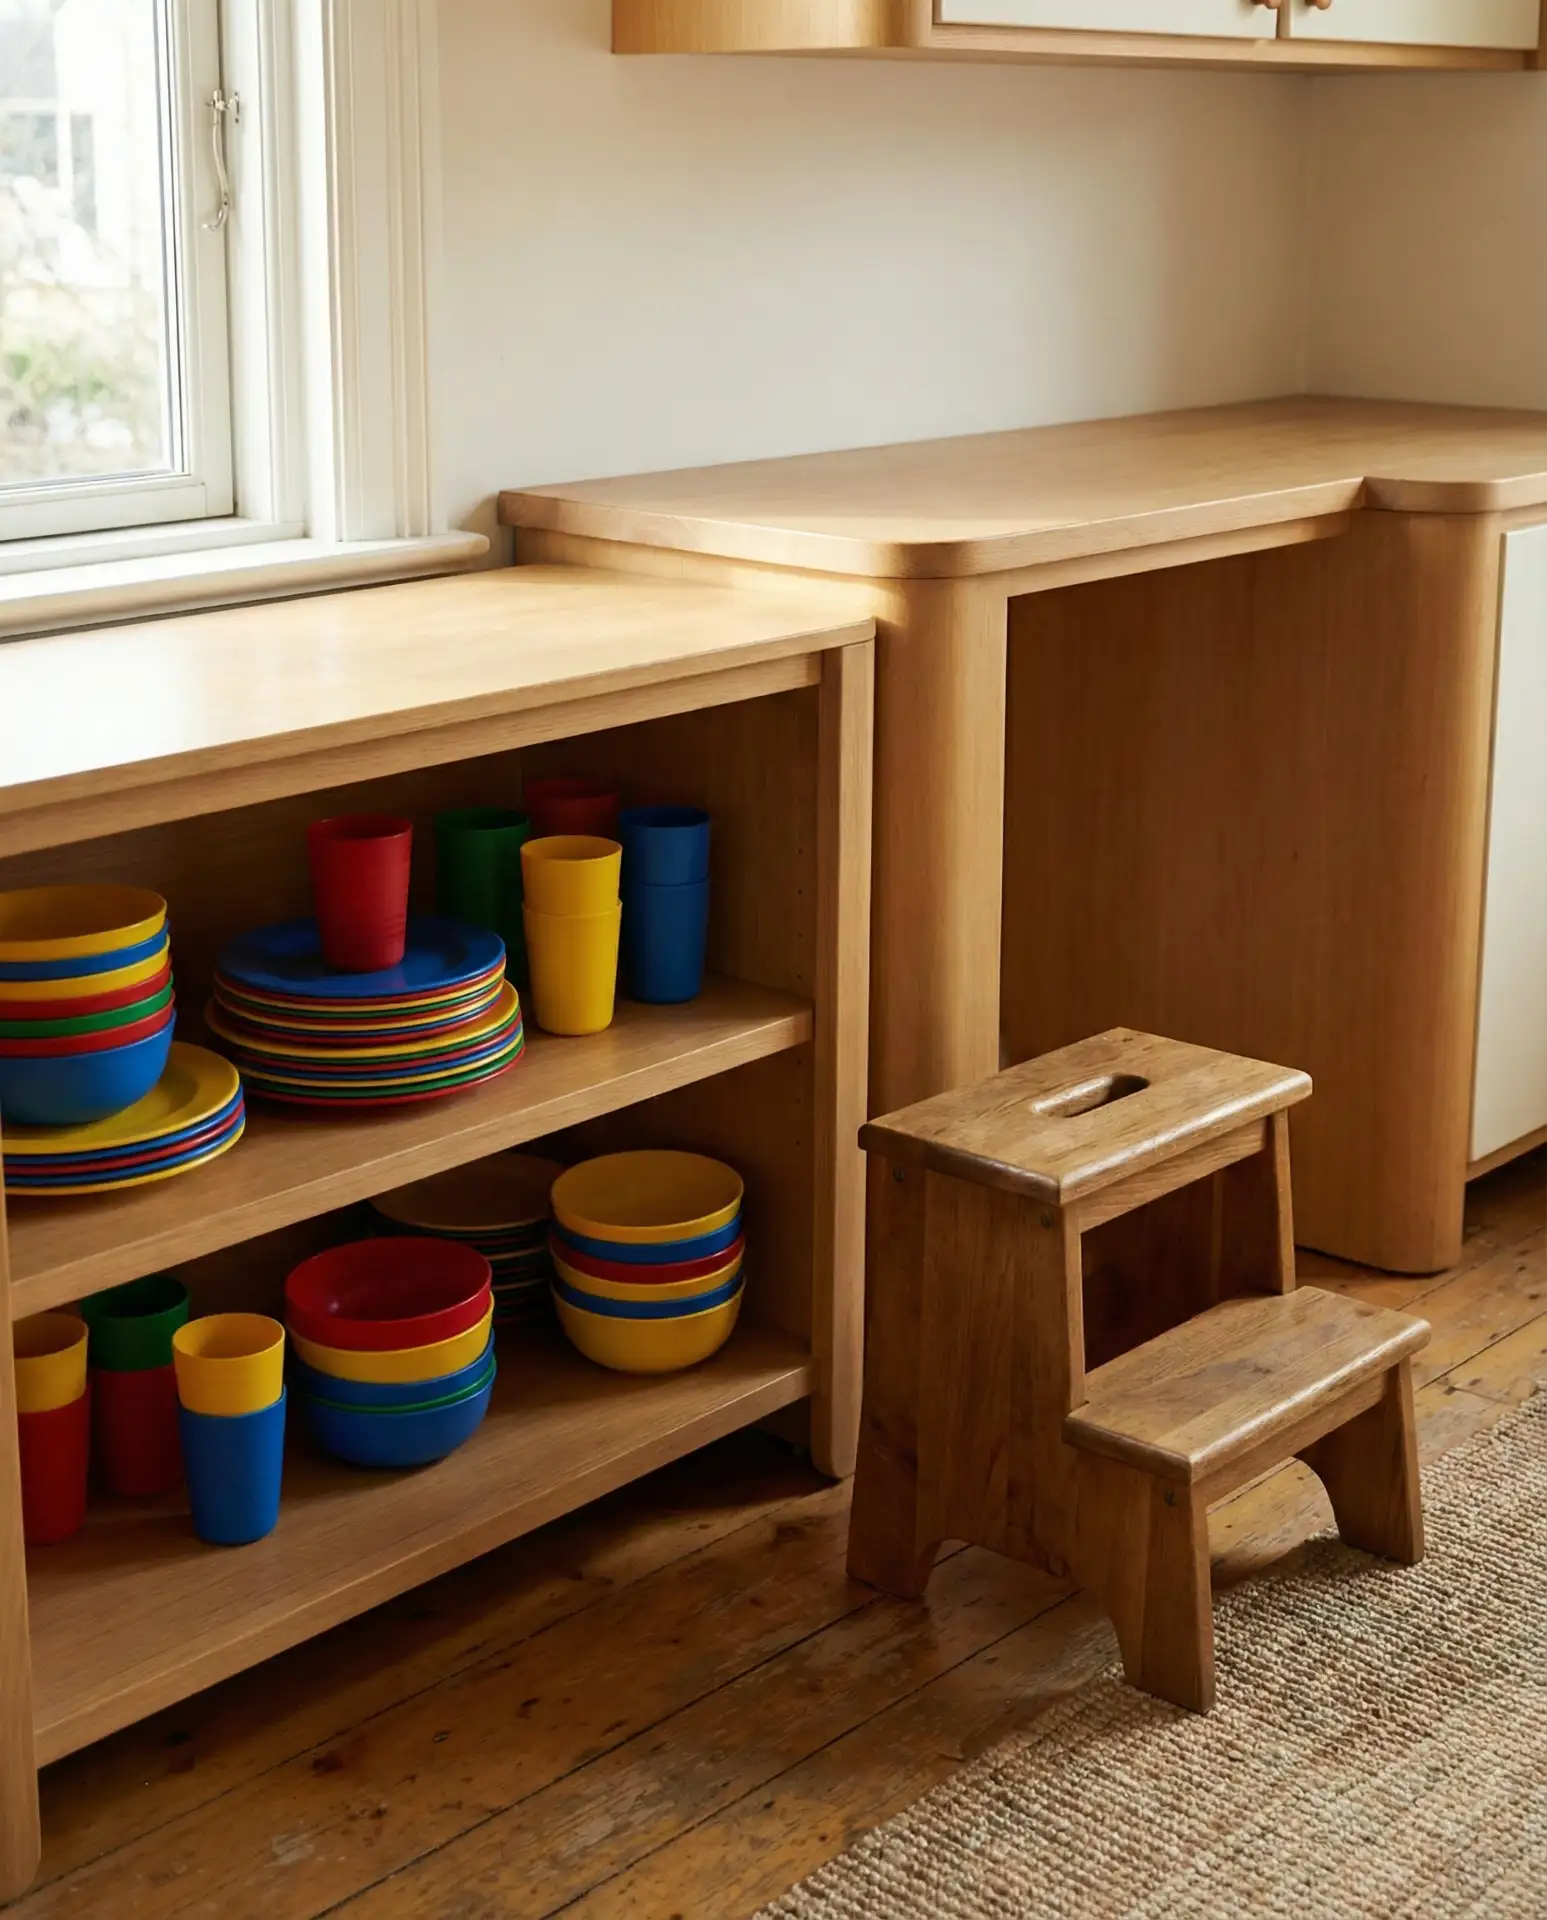
Designate a lower cabinet or drawer as a play kitchen area stocked with kid-safe utensils, plastic bowls, and a small step stool so children can participate in meal prep safely. Some families install a miniature KidKraft-style play kitchen adjacent to the real one, creating parallel cooking experiences that keep toddlers entertained while adults prepare dinner. Durable, wipe-clean surfaces and rounded corners minimize injury risks in these high-traffic family zones.
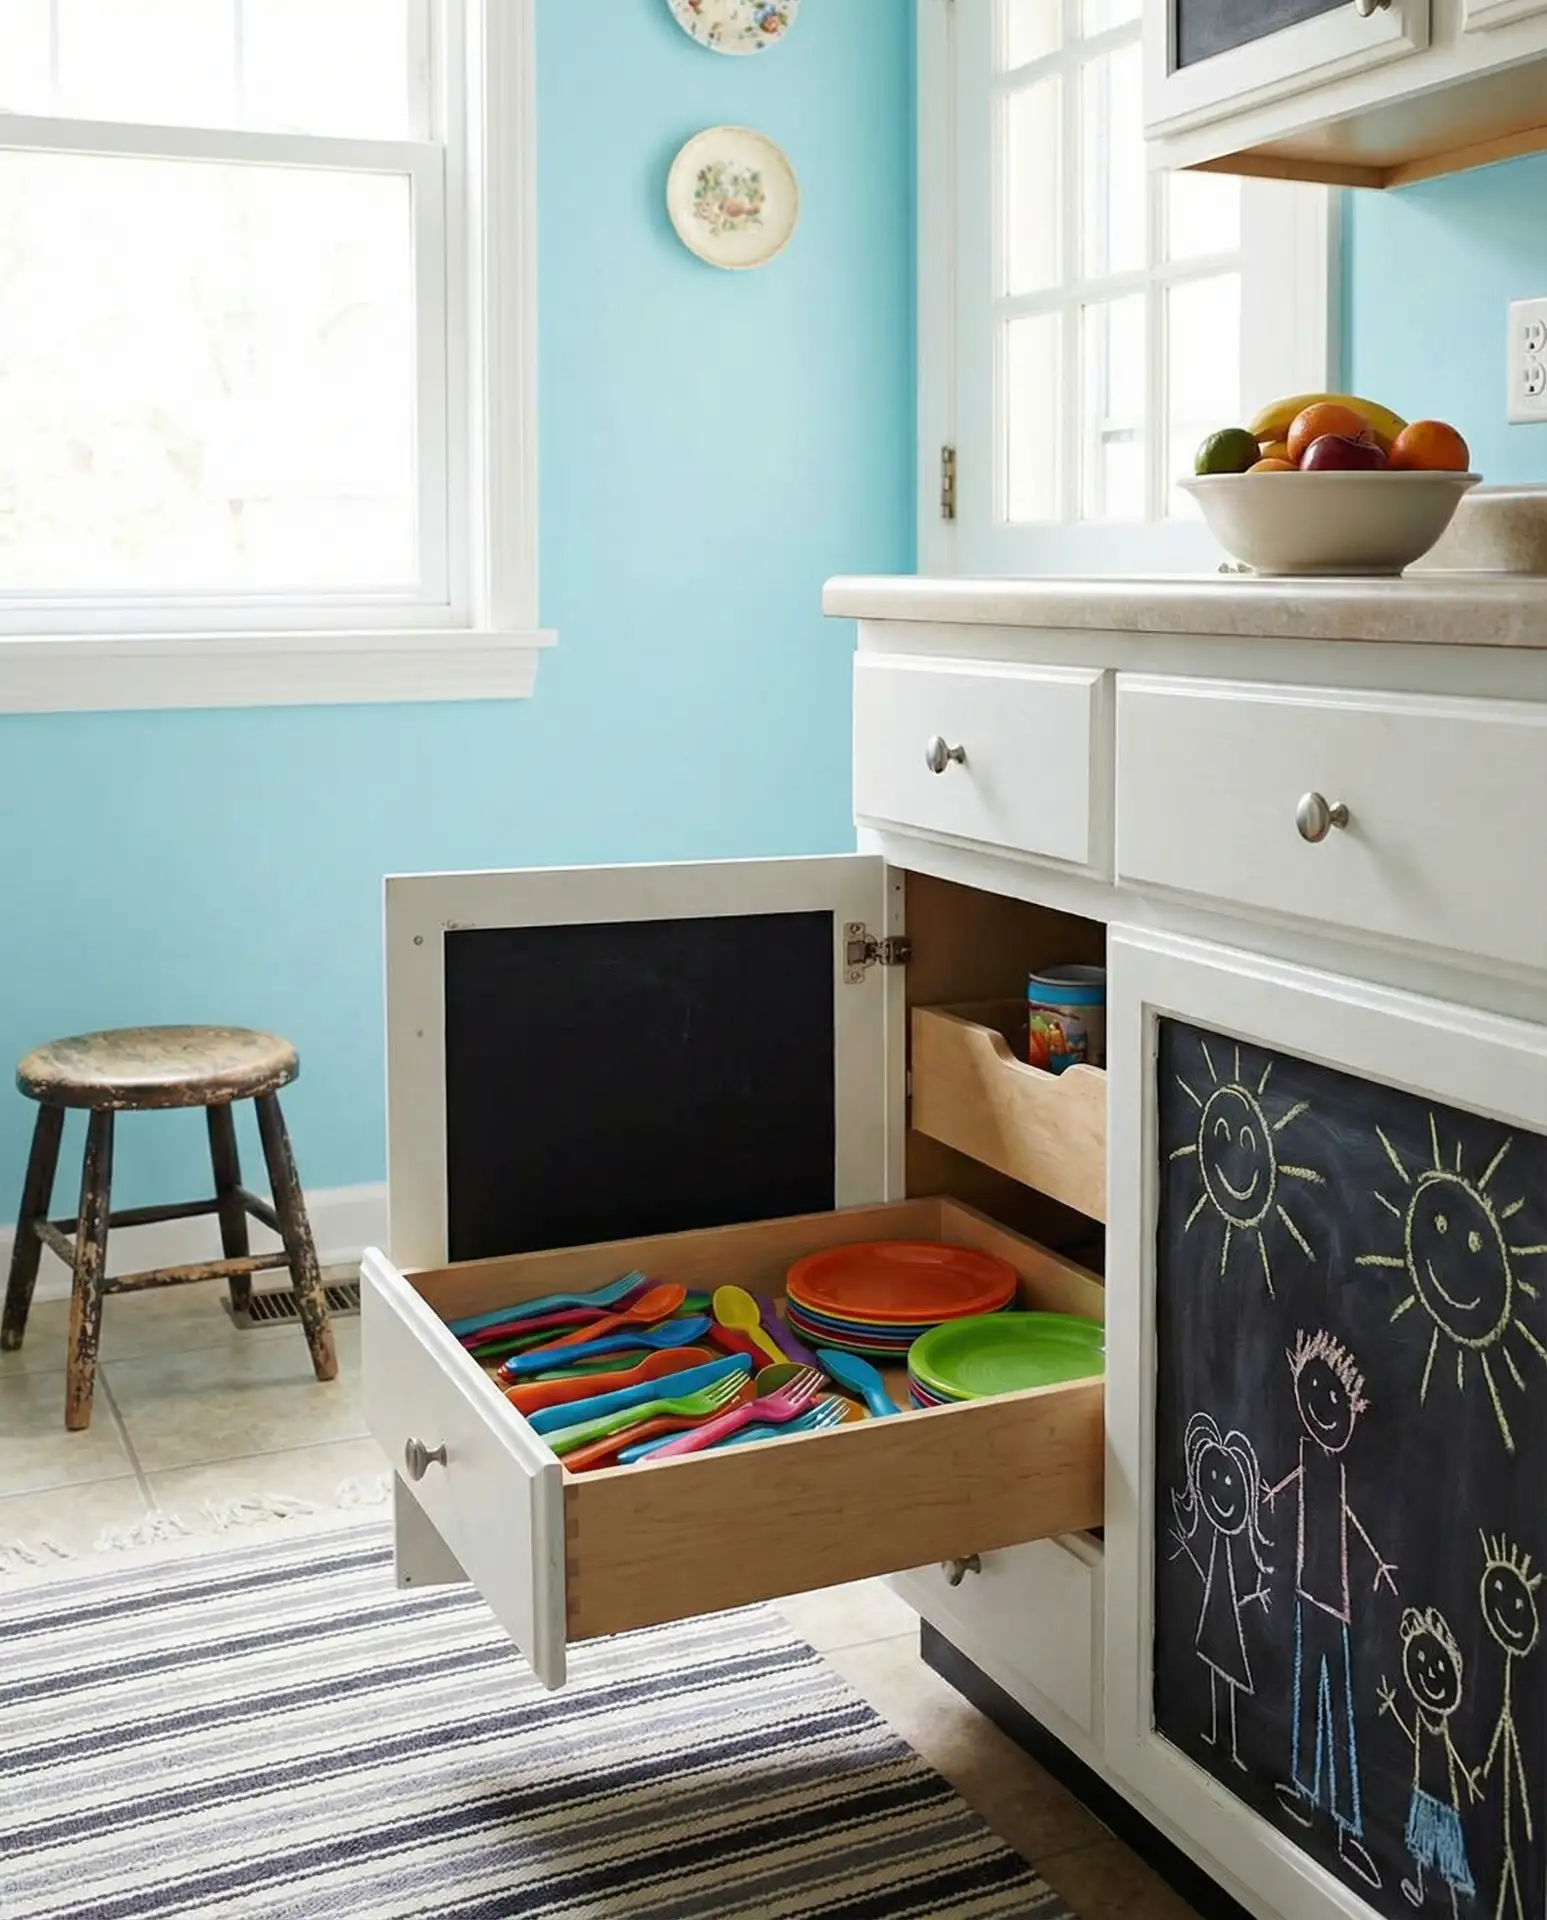
This setup works best in kitchens with an open layout where parents can supervise while cooking. A mom in Portland shared that giving her daughter ownership of specific drawers reduced kitchen meltdowns by 80% because the child felt included rather than excluded from cooking activities. Safety considerations include installing cabinet locks on anything containing cleaning products or sharp objects and ensuring the play zone is positioned away from the stove and hot surfaces.
14. Budget-Friendly Rental Kitchen Transformation
Renters can achieve a stunning kitchen makeover using entirely reversible methods: peel-and-stick tile, removable wallpaper on an accent wall, temporary countertop covers, and adhesive cabinet film in wood grain or solid colors. This budget-friendly rental approach typically costs $300-$600 and can be removed without damage when you move, protecting your deposit. Focus on high-impact areas like the backsplash and cabinet fronts rather than trying to change everything at once.
The key to success is investing in quality removable products from established brands—cheap adhesive materials often leave residue or damage paint upon removal. Test products in an inconspicuous spot first, and always take detailed photos before making changes to document the original condition. Renters in competitive markets like Los Angeles and Boston report that tasteful upgrades actually help when moving out, as landlords appreciate tenants who care for the space and make improvements at their own expense.
15. Blue Willow China Display Kitchen
Showcase a collection of blue willow china or other treasured dishware by installing glass-front upper cabinets or open shelving that turns functional storage into decorative art. This white and blue color scheme creates a classic, cottage-like atmosphere that feels both sophisticated and welcoming. The delicate patterns of blue willow become a focal point that adds visual interest without overwhelming the space.
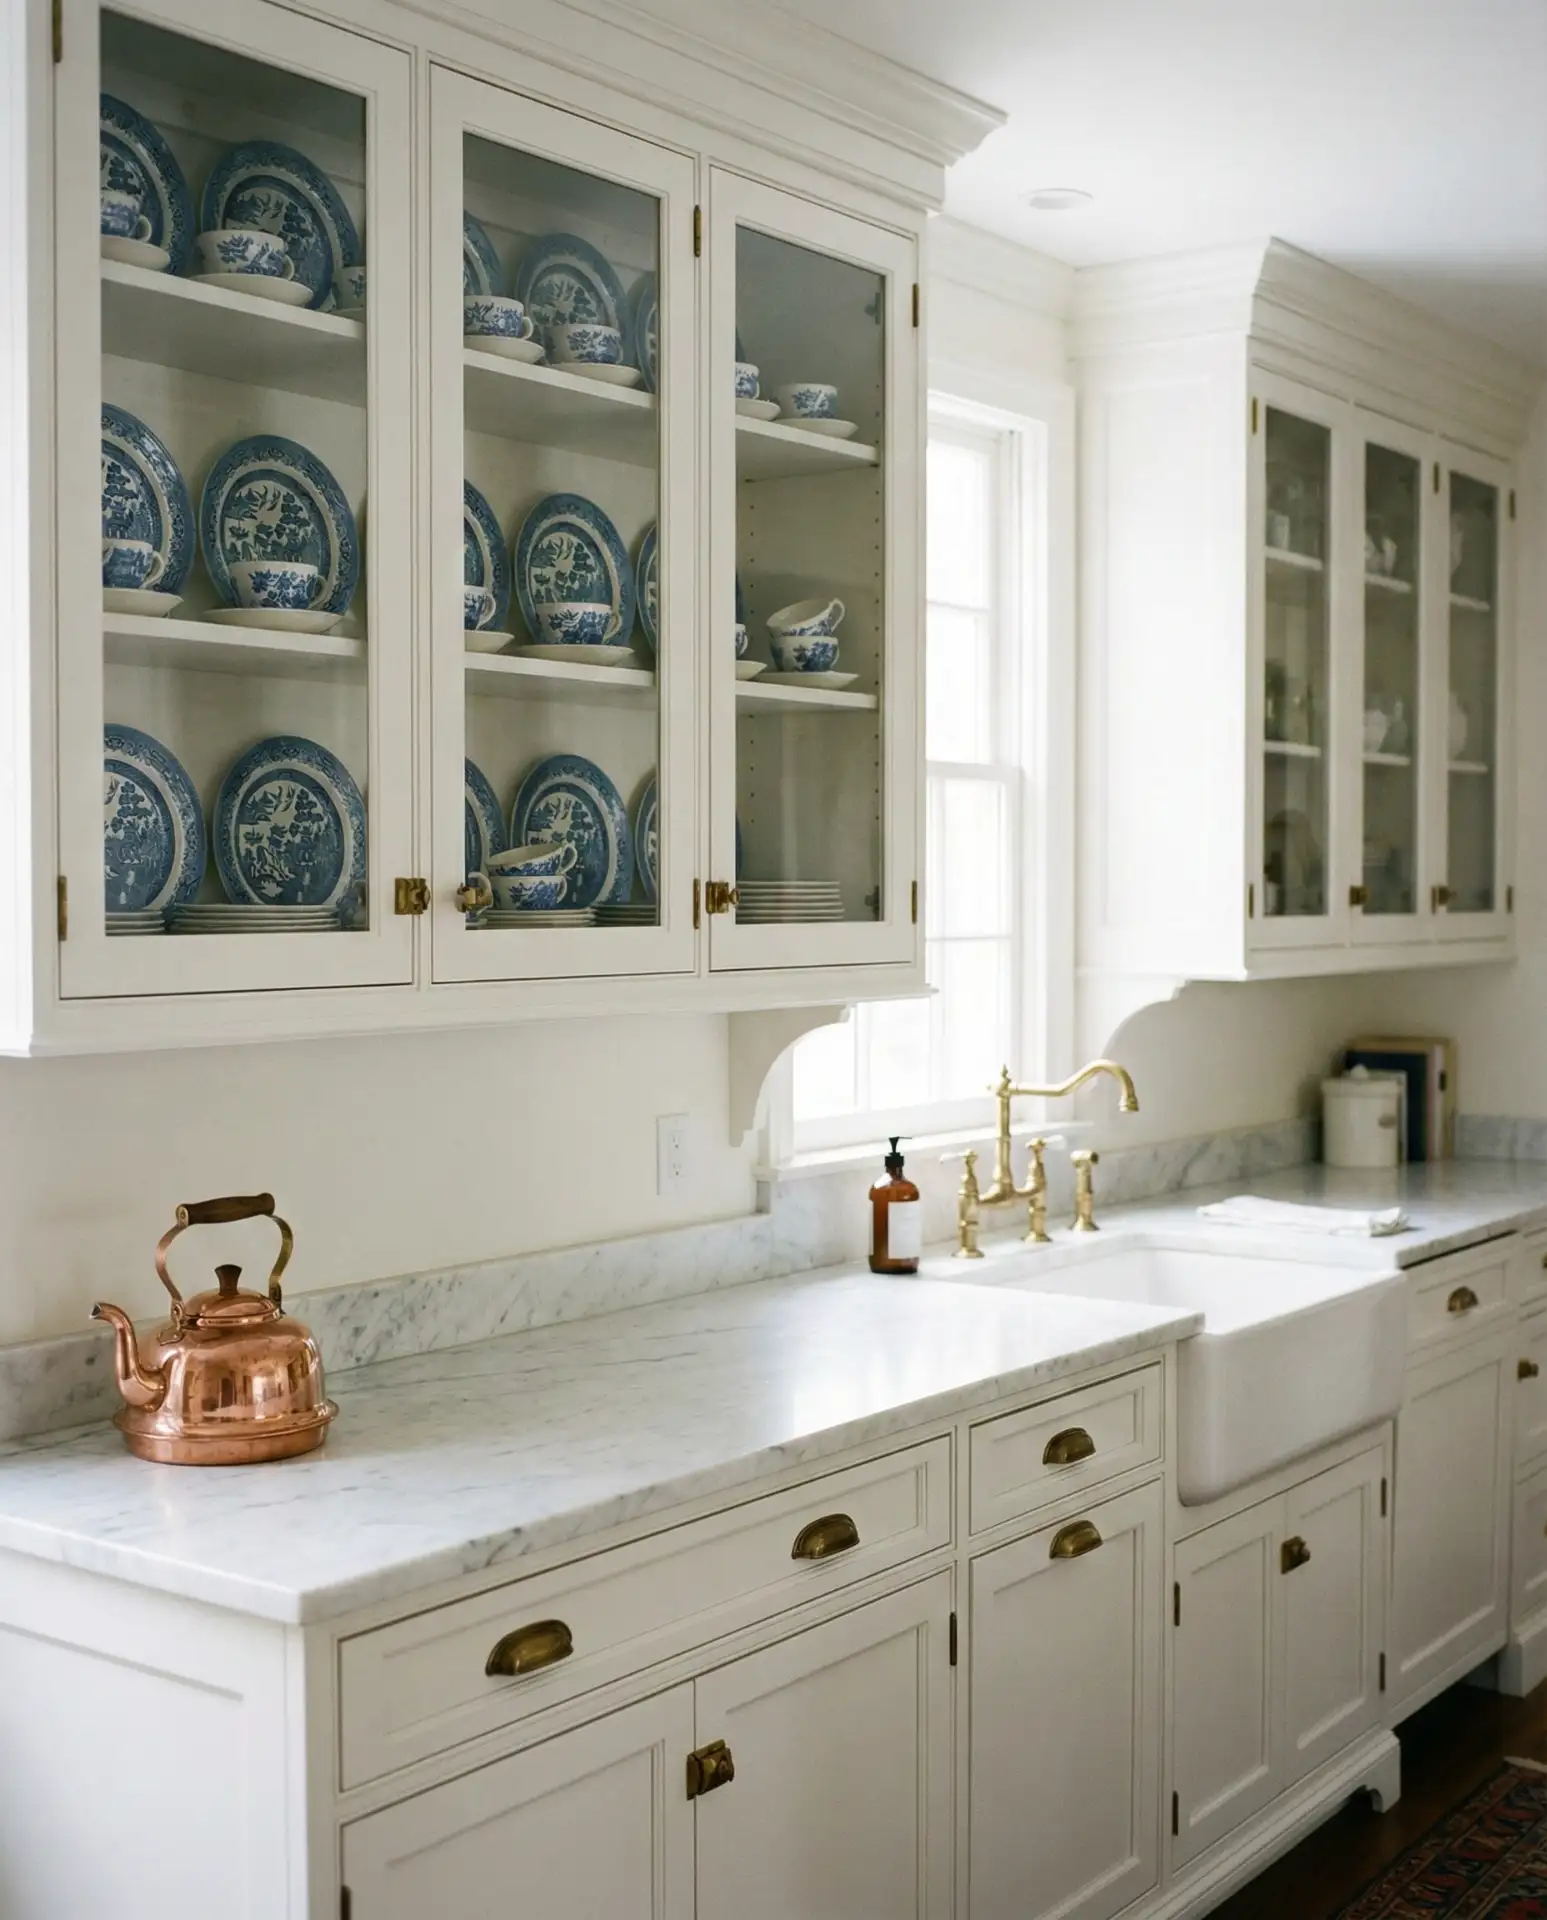
Collectors often inherit blue willow pieces from family members, making this display both practical and sentimental. Where it works best: kitchens with traditional or cottage-style architecture, particularly in the Northeast and South, where china collections are more common. If you use the displayed pieces regularly, position them on lower, easily accessible shelves and save higher spots for occasional-use or purely decorative items.
16. Mobile Home Kitchen Remodel
Upgrading a mobile home’s kitchen requires attention to weight distribution and unique structural considerations, but modern materials make dramatic improvements achievable on a modest budget. Replace dated laminate counters with lightweight butcher block or quartz alternatives, swap out builder-grade cabinets for refaced or freshly painted units, and install vinyl plank flooring that mimics hardwood. These changes can transform a dated manufactured home kitchen into a space that rivals site-built homes.
Mobile and manufactured homes often have narrower kitchens and specific appliance sizing—always measure carefully before ordering replacements. Standard 30-inch ranges and 18-inch dishwashers are common in these spaces. One homeowner in Arizona shared that removing the bulkhead above cabinets and extending them to the ceiling added valuable storage and made the 8-foot ceilings feel taller. Budget $3,000-$7,000 for a complete mobile home kitchen renovation when doing much of the work yourself.
17. Modular Kitchen System for Flexibility
Modular kitchen systems from brands like IKEA, Home Depot’s Martha Stewart line, or custom European manufacturers offer a DIY-friendly approach to kitchen design with pre-sized cabinet boxes that you can mix, match, and reconfigure as needs change. This flexibility appeals to homeowners who might relocate, change layouts, or want the option to expand their kitchen over time. The standardized dimensions and flat-pack delivery make installation manageable for confident DIYers.
Installation costs vary dramatically—hiring professionals typically runs $2,500-$5,000 for a standard kitchen, while determined DIYers can save that entire amount by investing a long weekend and following detailed tutorials. The most common mistake is underestimating the importance of precise measurements and level installation; even small errors compound when joining multiple units. Check whether your floor is level before beginning—most aren’t—and plan to use shims and careful adjustments to ensure doors align perfectly.
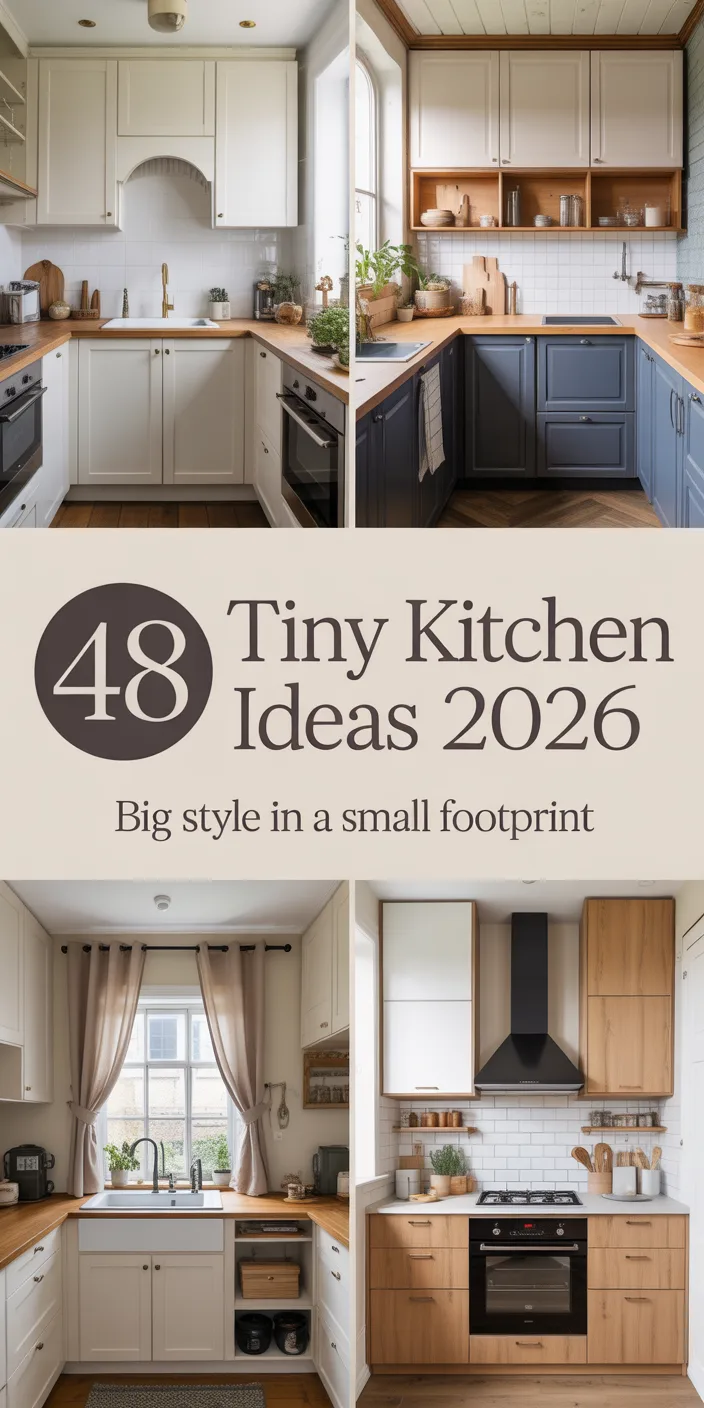
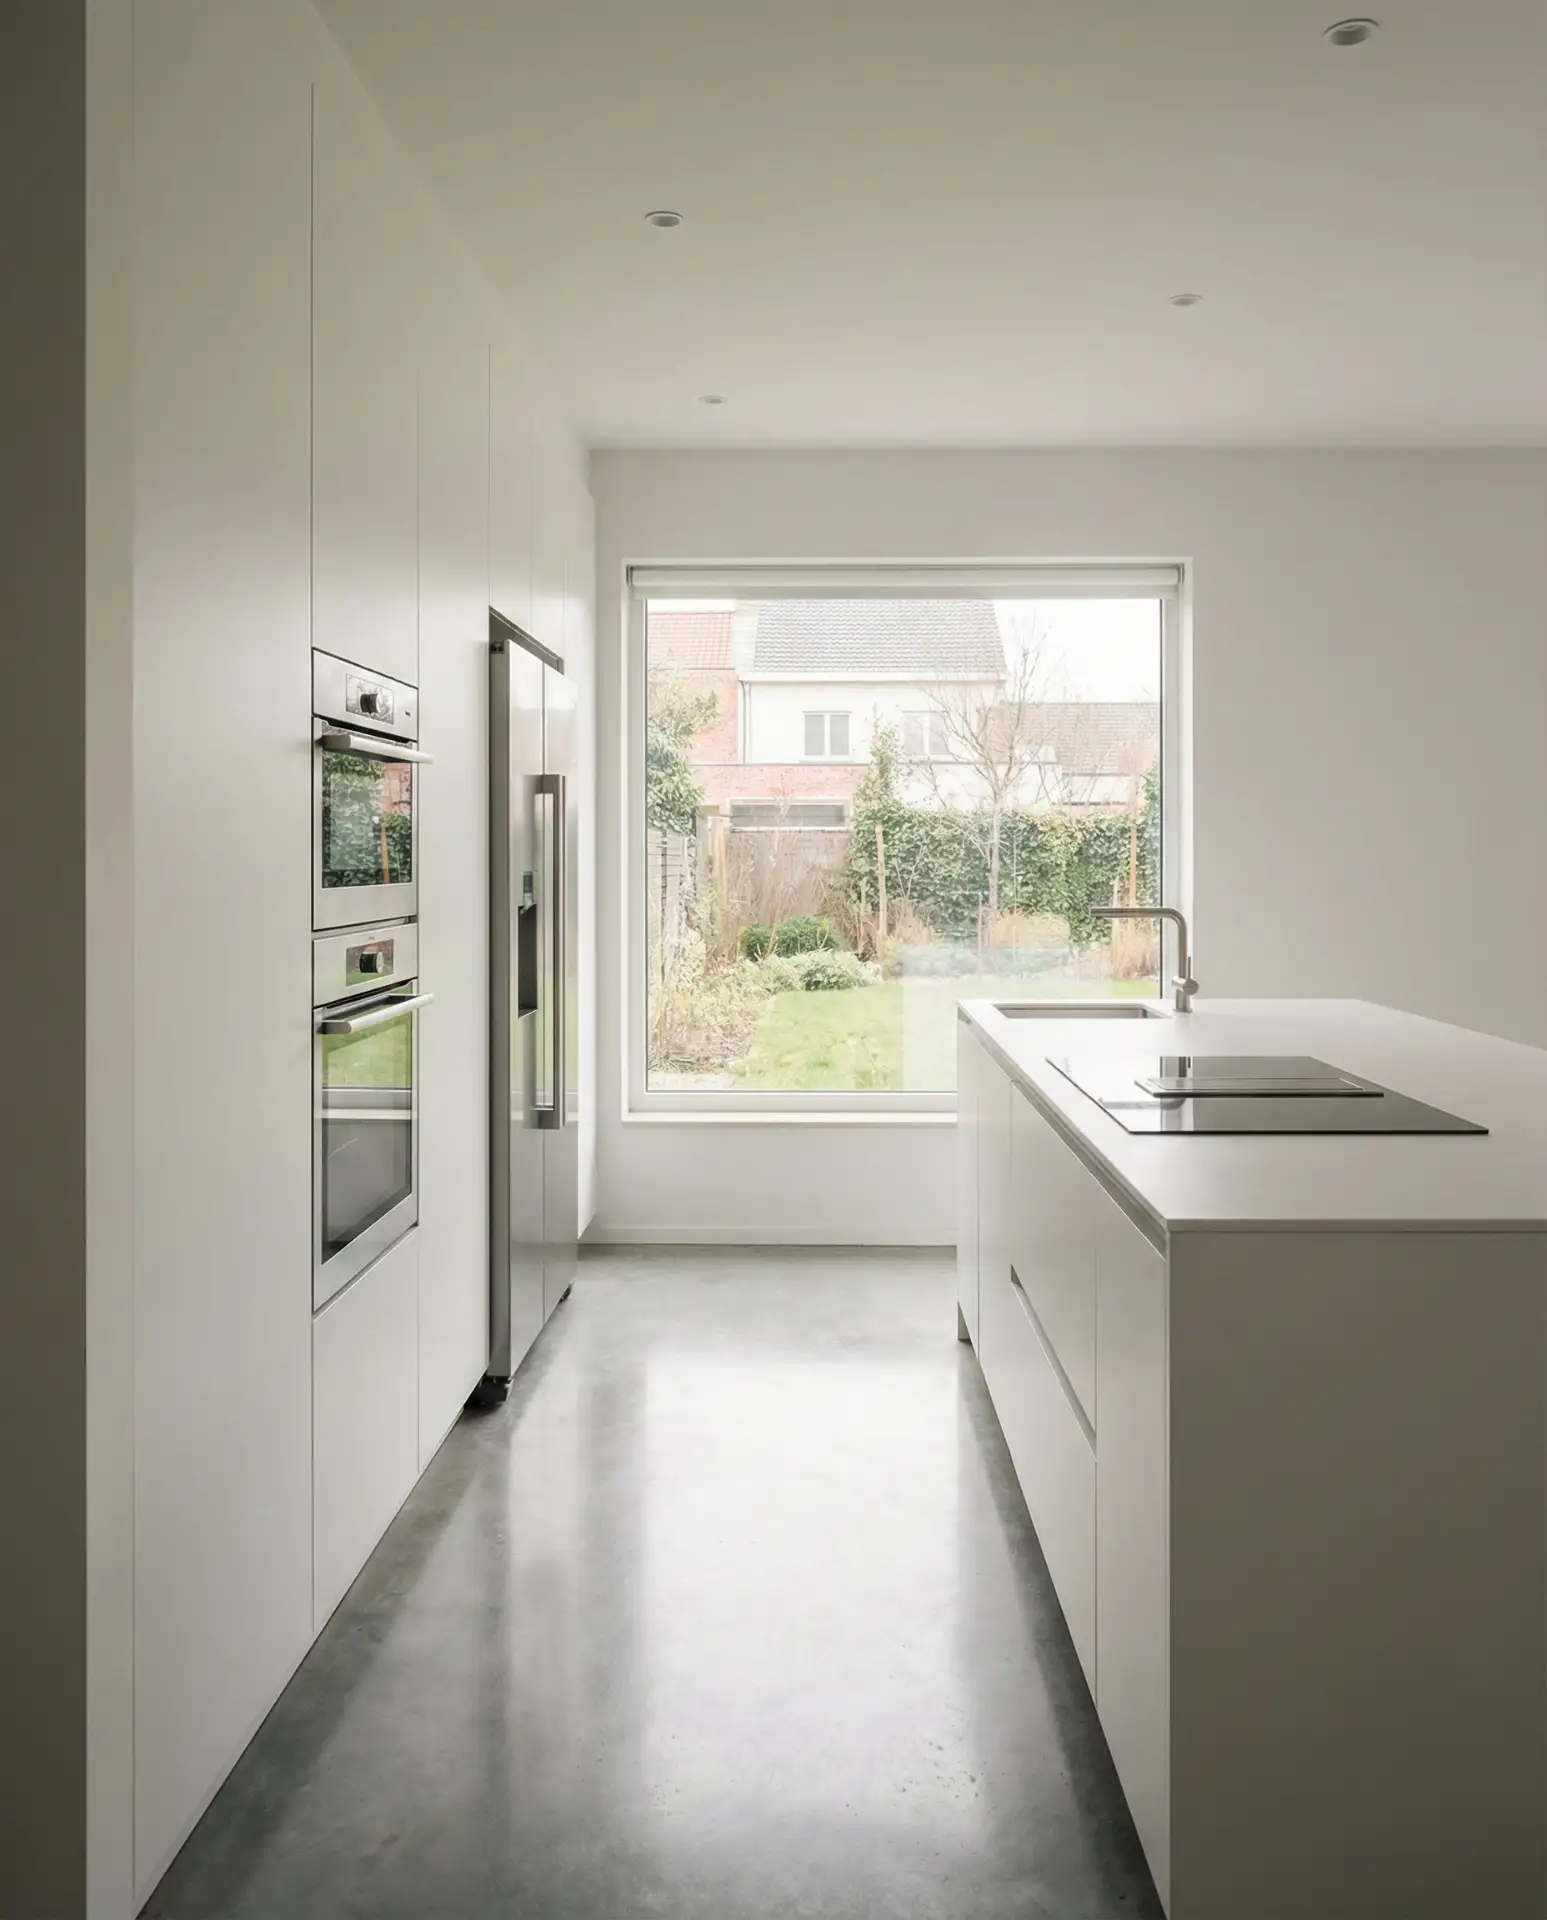
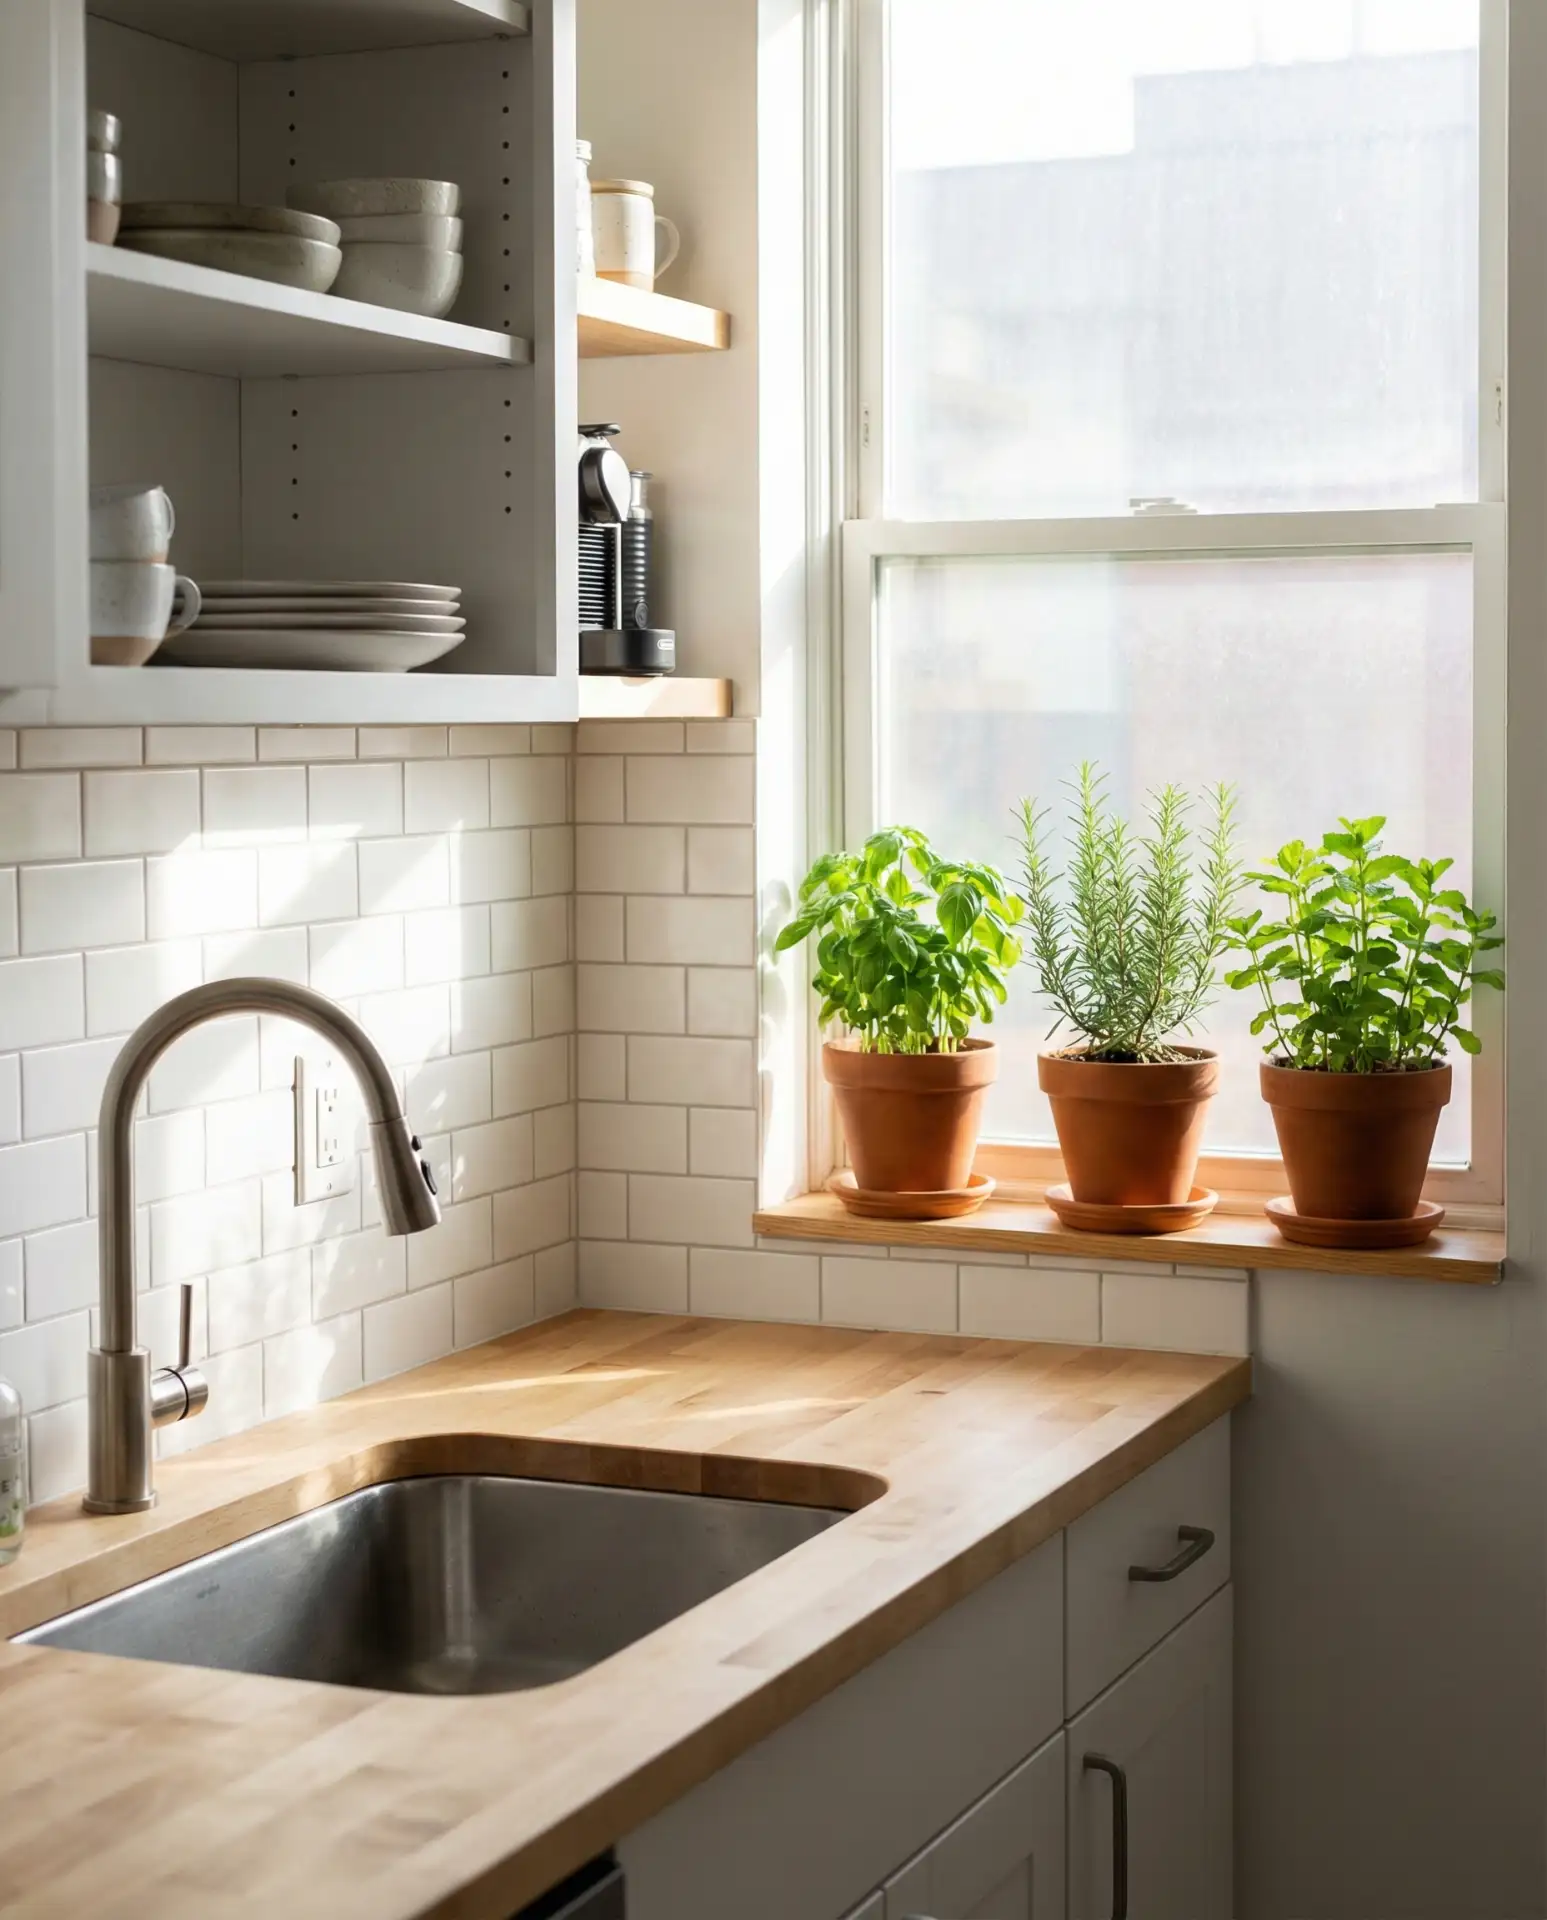
18. Tiny Kitchen Maximization Strategies
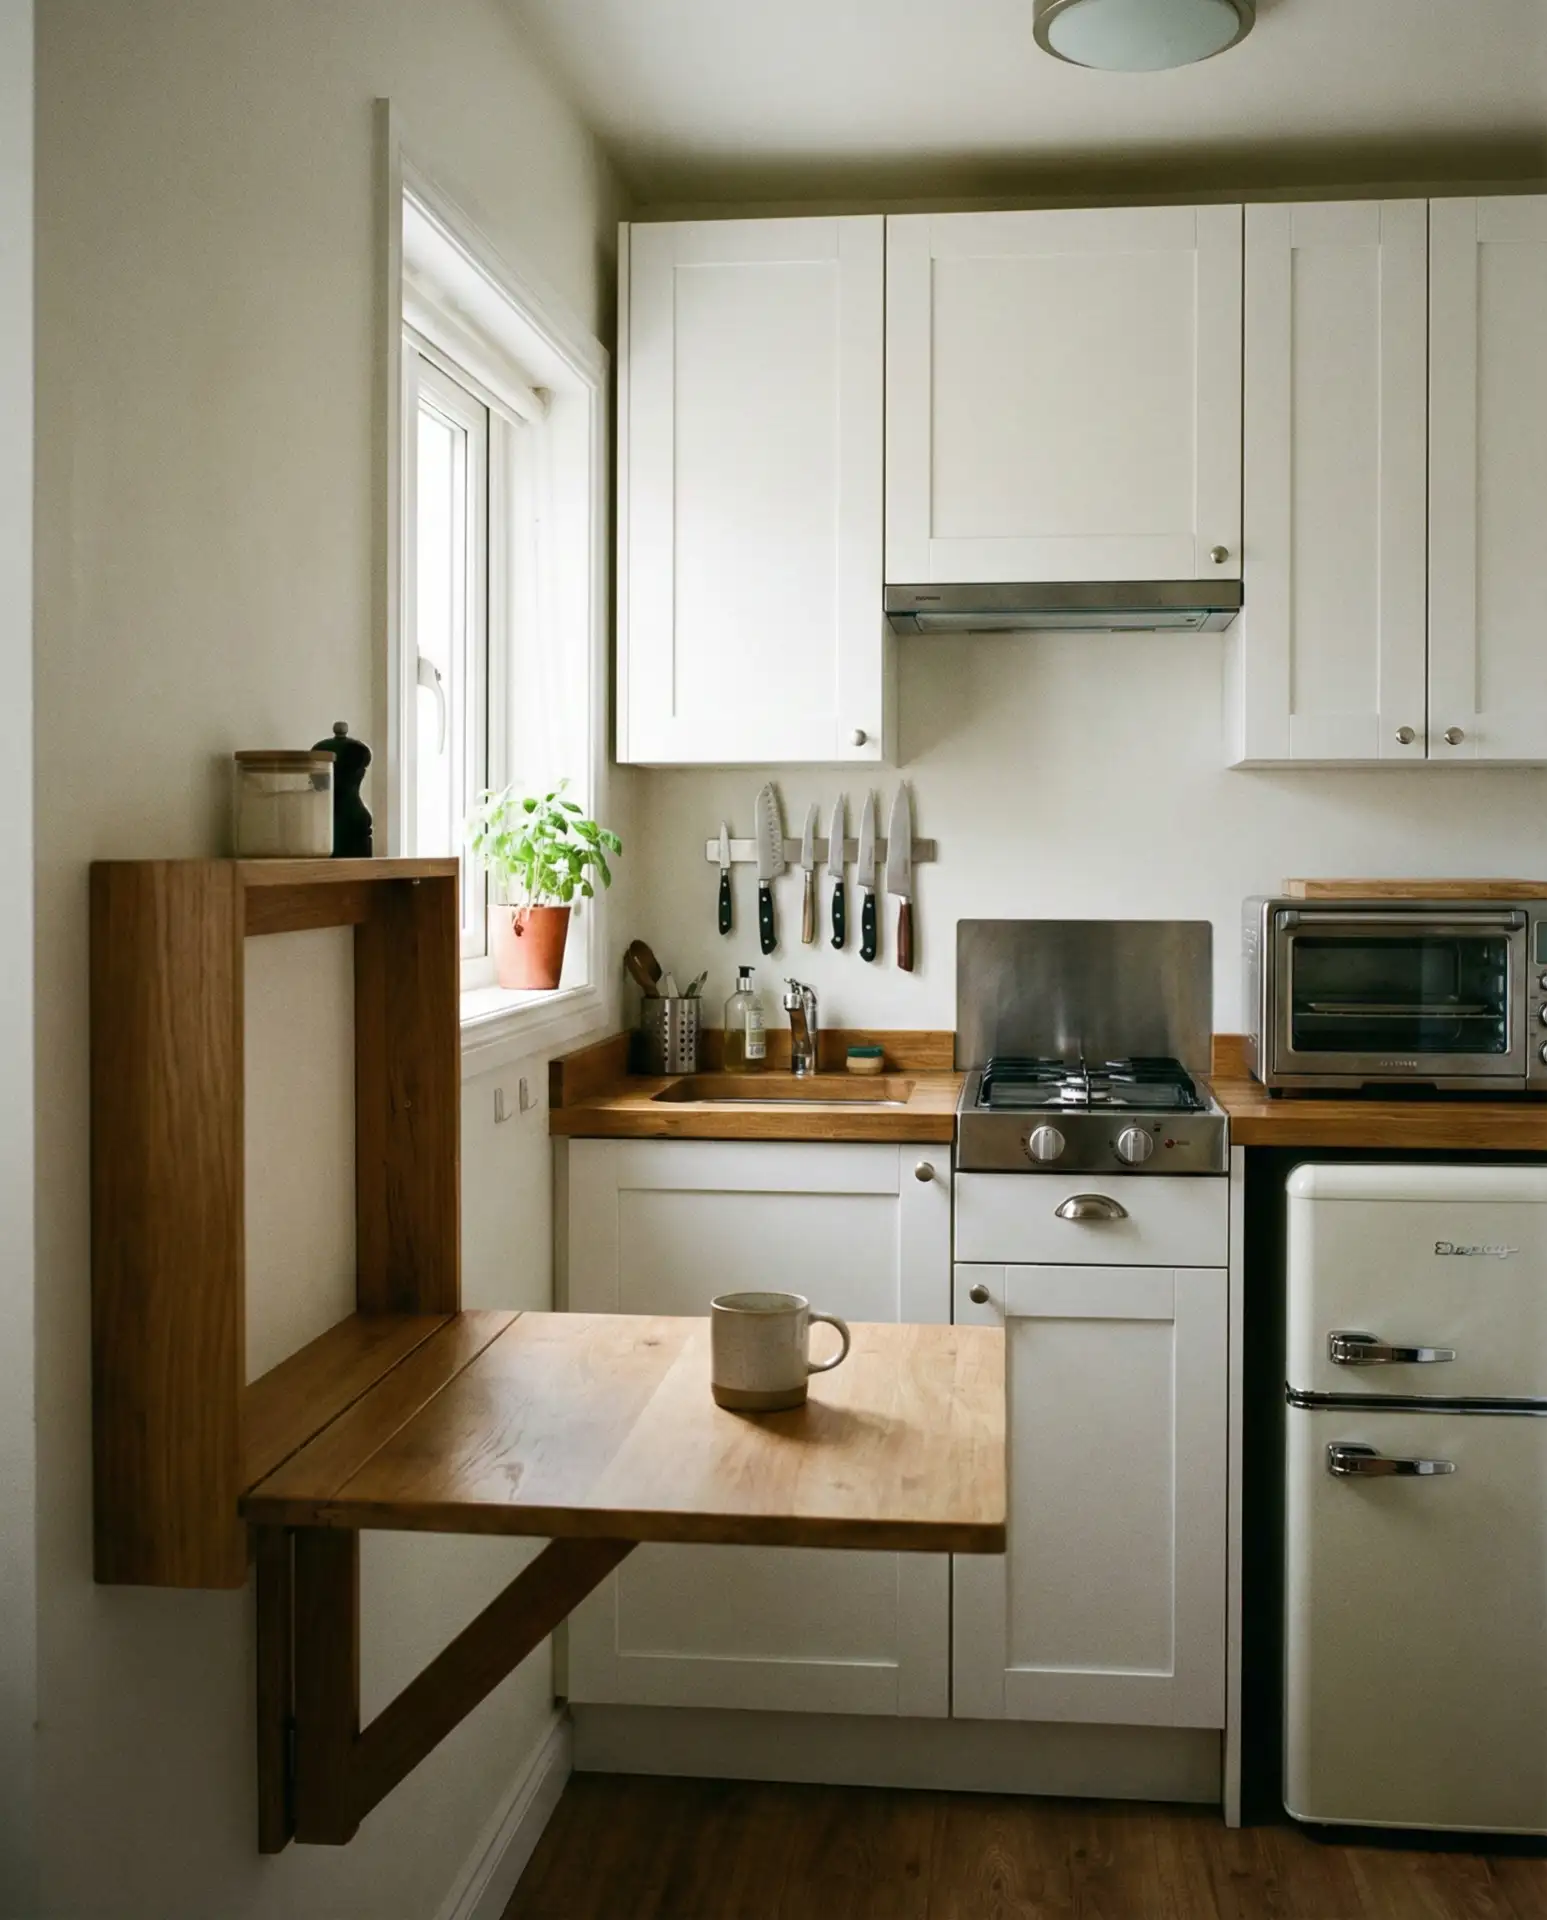
In a tiny kitchen measuring under 100 square feet, every design decision must prioritize function: install a fold-down table that tucks away when not in use, choose a slimline dishwasher and apartment-sized appliances, and use magnetic strips and wall-mounted racks to keep counters clear. Light colors, under-cabinet LED lighting, and reflective backsplashes help these compact spaces feel larger and more inviting. Resist the temptation to over-decorate—a few well-chosen pieces create more visual calm than cluttered shelves.
Tiny kitchens work best when you embrace a minimalist approach to cookware and dishes—keep only what you use weekly and store the rest elsewhere. Urban dwellers in cities like Seattle and Boston have mastered tiny kitchen living, often using rolling carts for additional prep space that can be moved to another room when entertaining. Corner cabinets with lazy Susans and pull-out pantry units that fit in 6-inch gaps extract storage from every available inch.
19. Cozy Cabin Kitchen with Natural Materials
A cabin kitchen embraces wood in all its forms—knotty pine cabinets, exposed beam ceilings, butcher block counters—and pairs these rustic elements with stone or slate backsplashes that echo mountain landscapes. Add wrought iron hardware, pendant lights with Edison bulbs, and open shelving to display earthenware and vintage enamelware. This approach creates a warm, lived-in atmosphere perfect for weekend retreats or year-round mountain living.
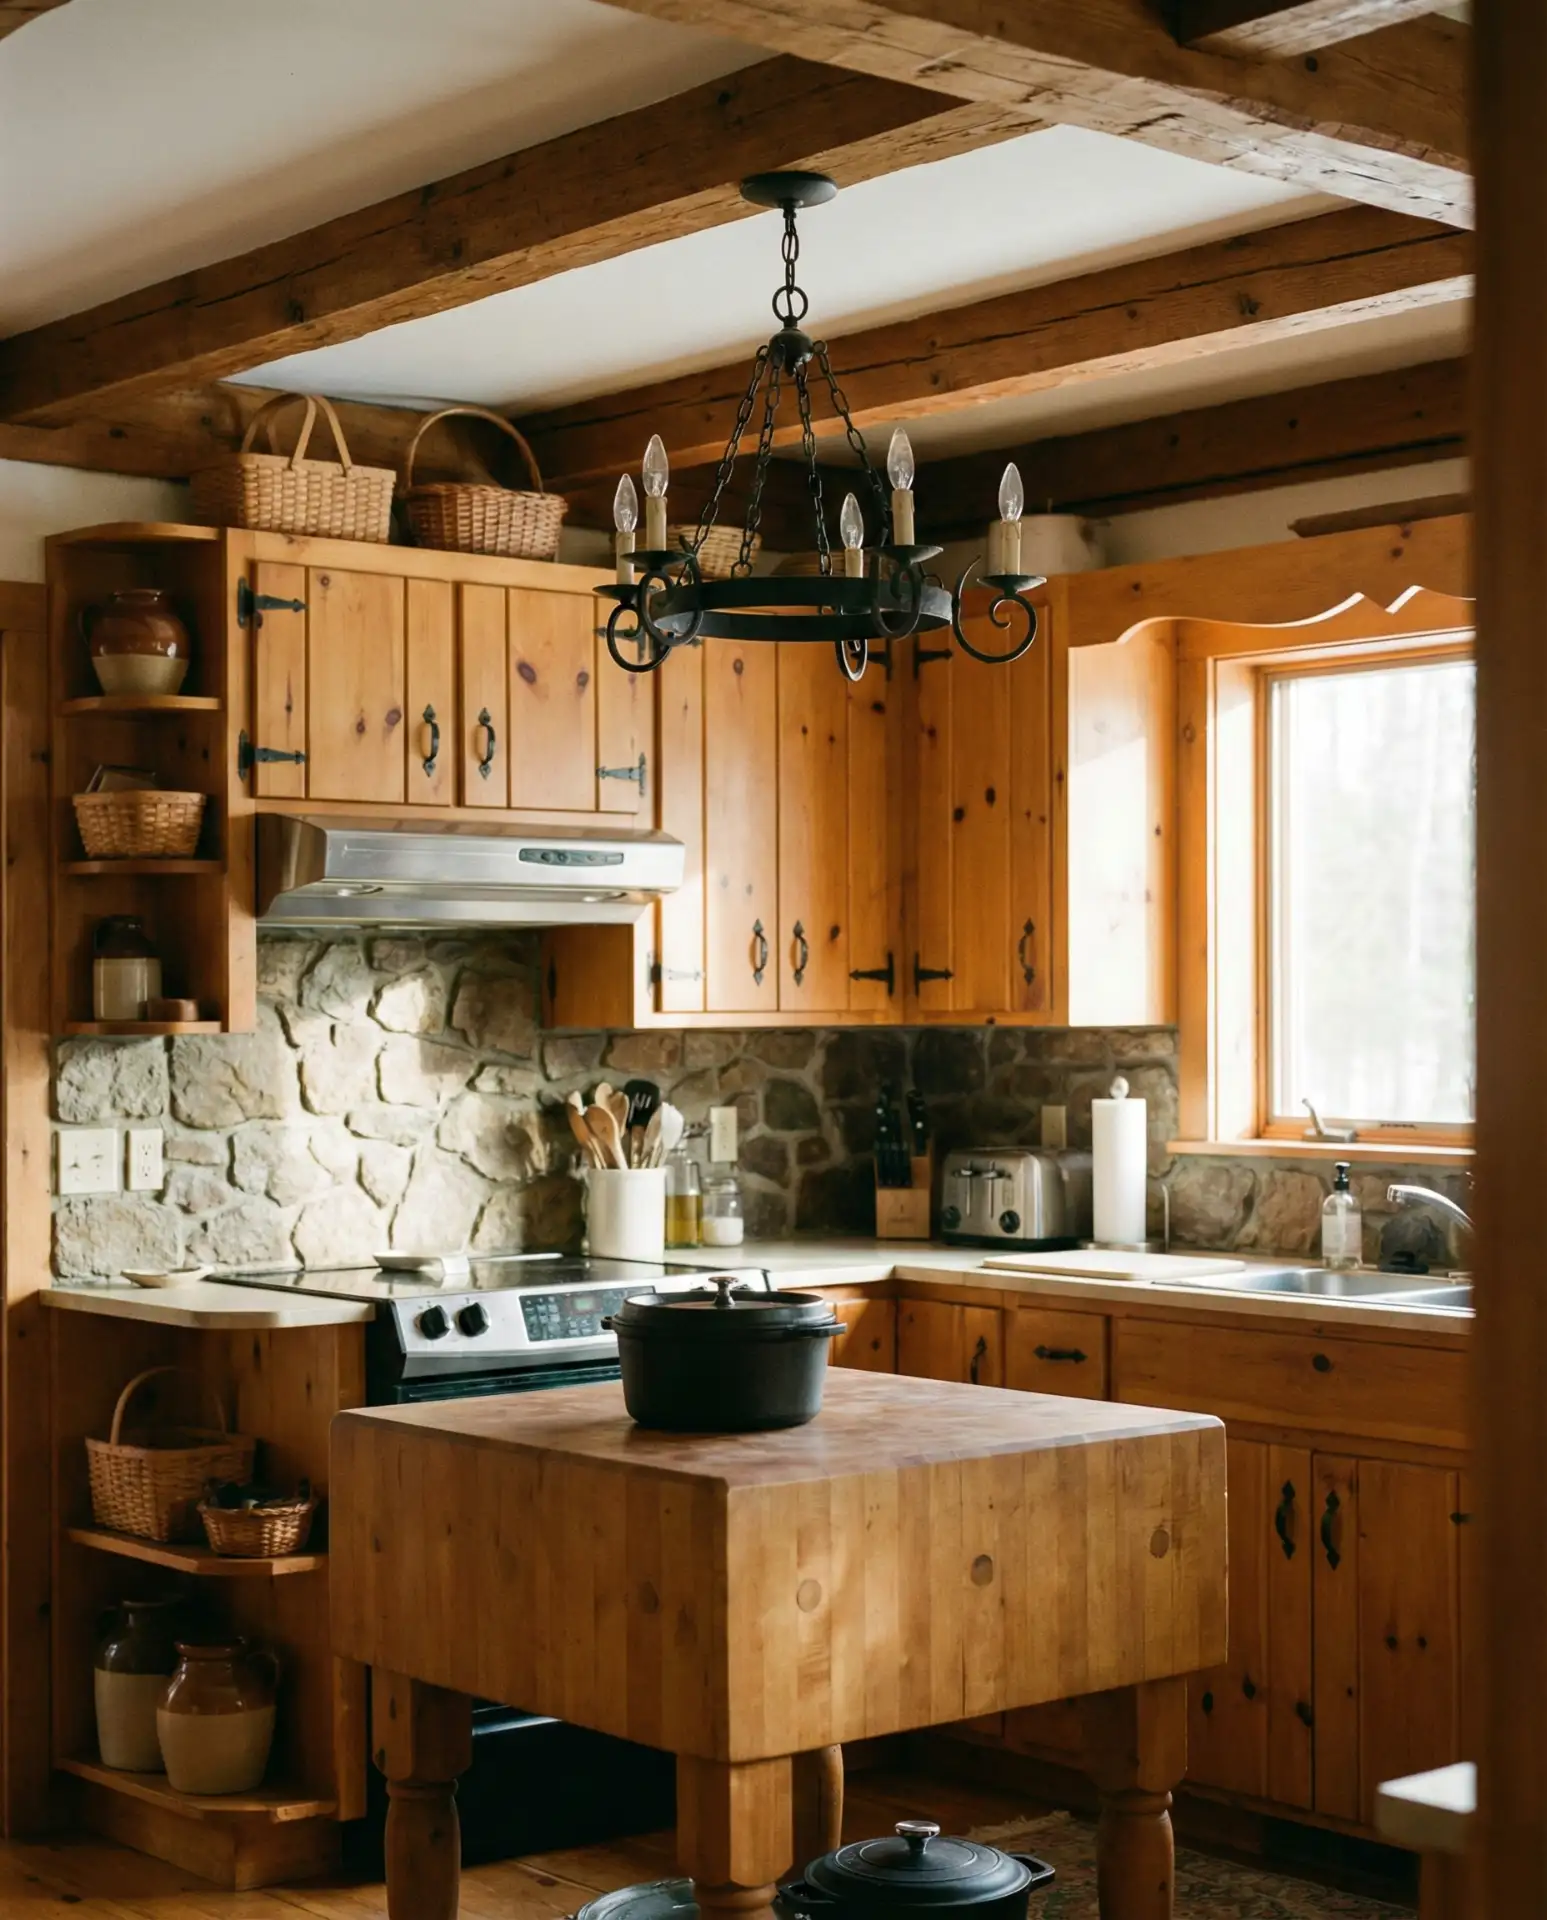
The Rocky Mountain region and Appalachian areas particularly favor this aesthetic, where kitchens serve as gathering spaces after hiking or skiing. Wood stoves or brick fireplaces occasionally integrate into cabin kitchen designs, providing both heat and cooking capability. To prevent the look from feeling too dark or heavy, incorporate plenty of natural light through skylights or large windows, and balance dark wood tones with lighter stone or painted elements.
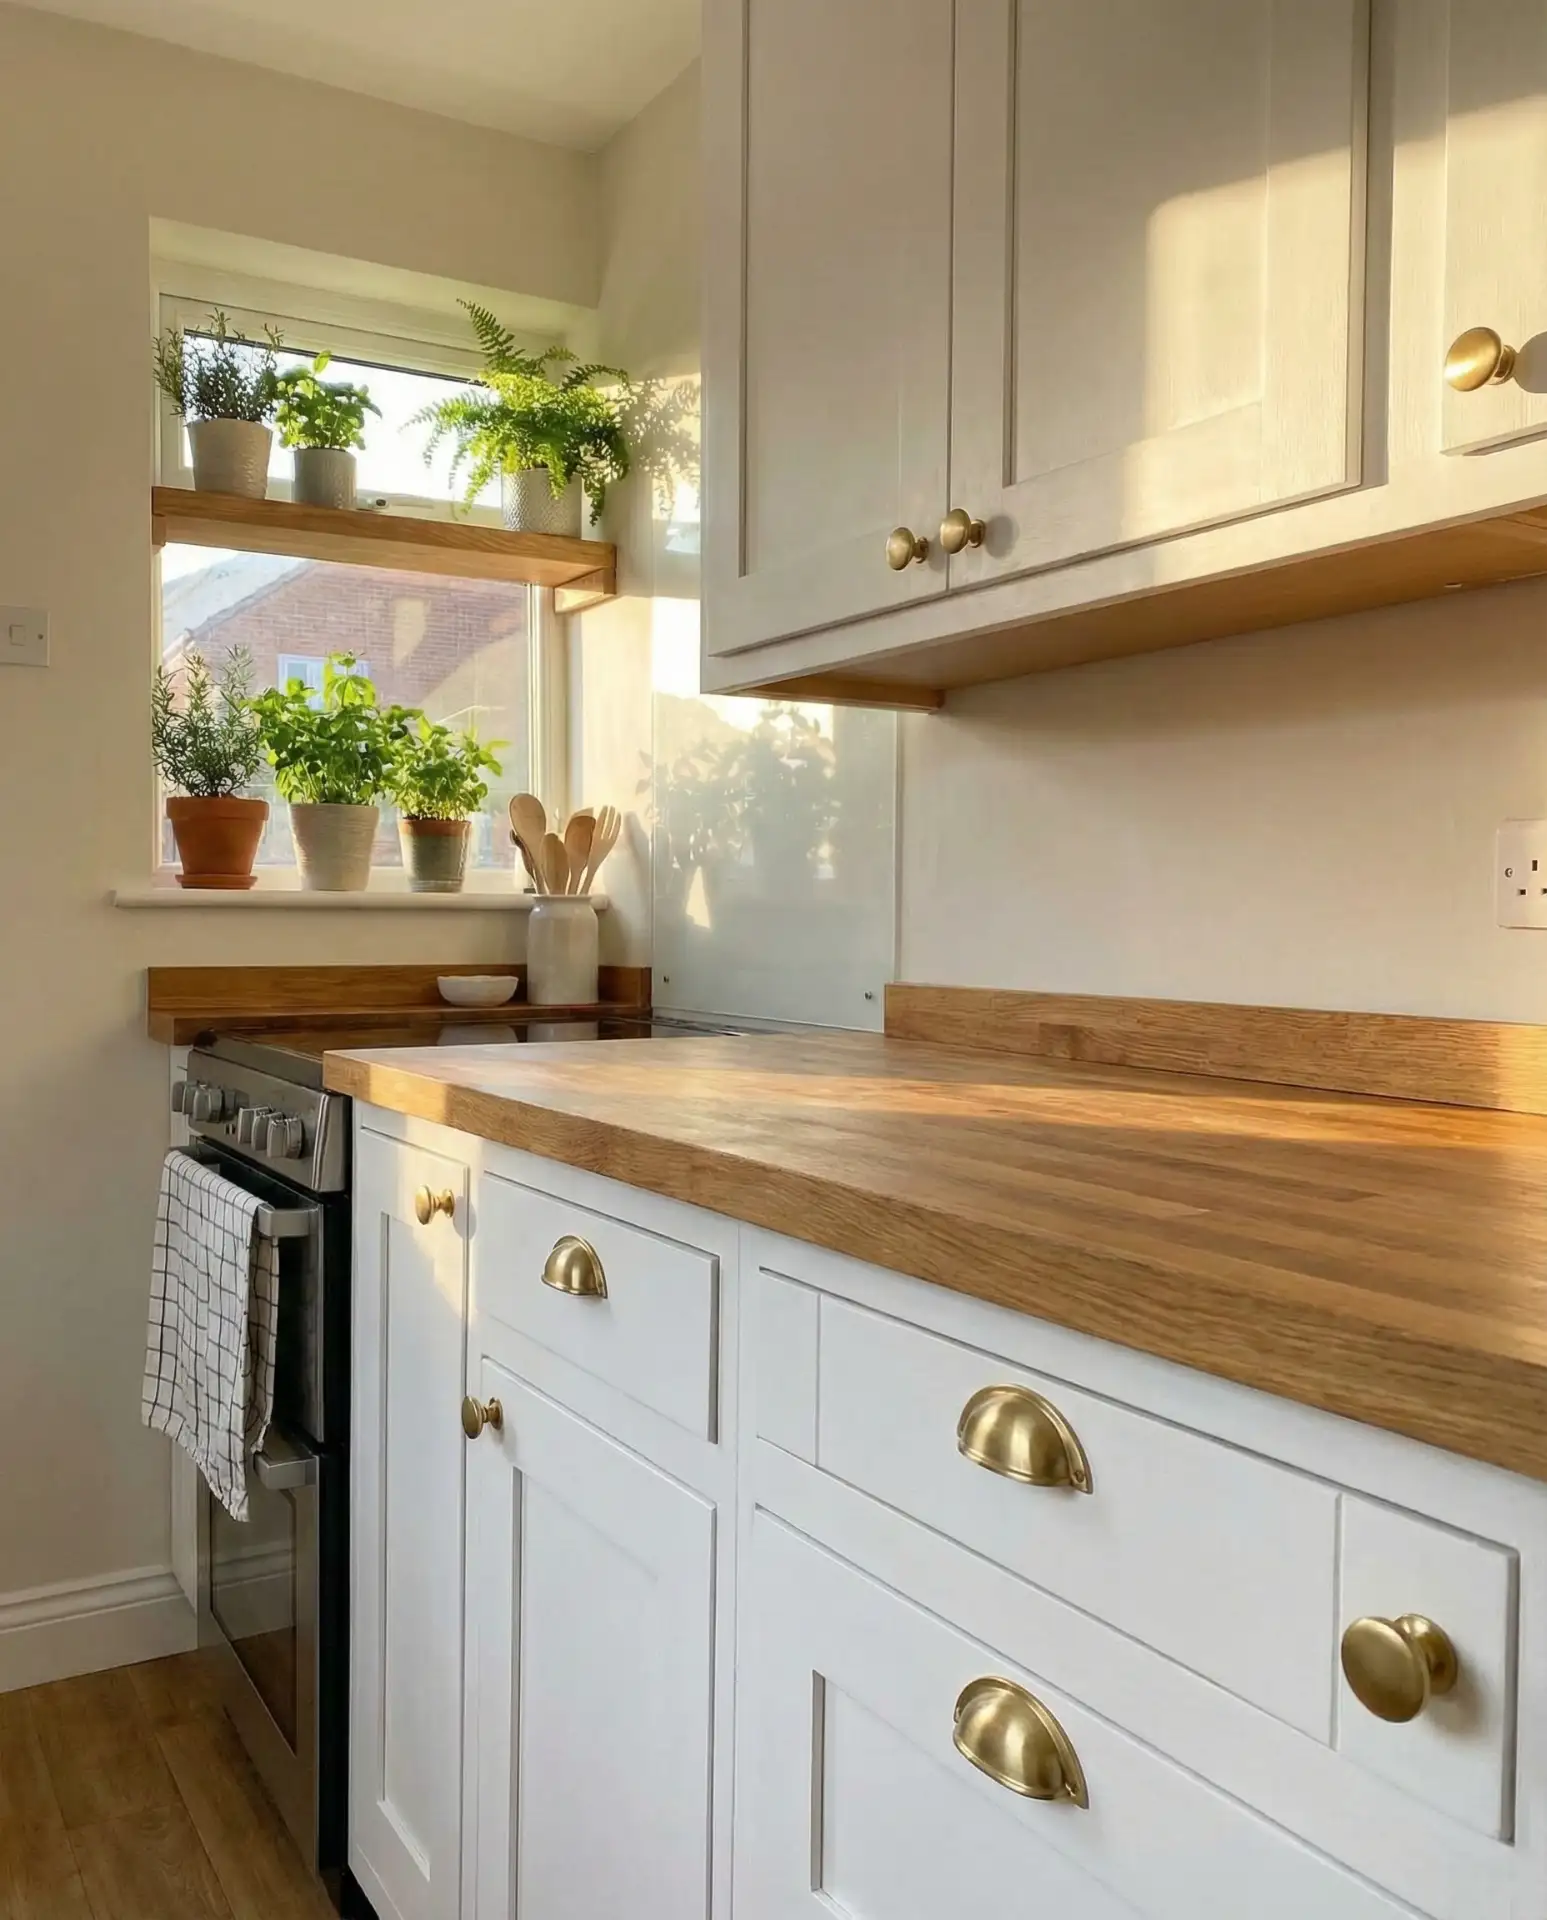
20. Cheap Quick-Impact Hardware Swap
Replacing outdated cabinet knobs and drawer pulls is the fastest and cheapest way to refresh your kitchen’s style, typically costing just $50-$150 for a full set depending on quality and finish. Swap builder-grade brass or chrome for modern matte black, brushed gold, or polished nickel options that instantly modernize the space. This simple afternoon project requires only a screwdriver and takes just 1-2 hours, yet the visual transformation rivals much more expensive updates.
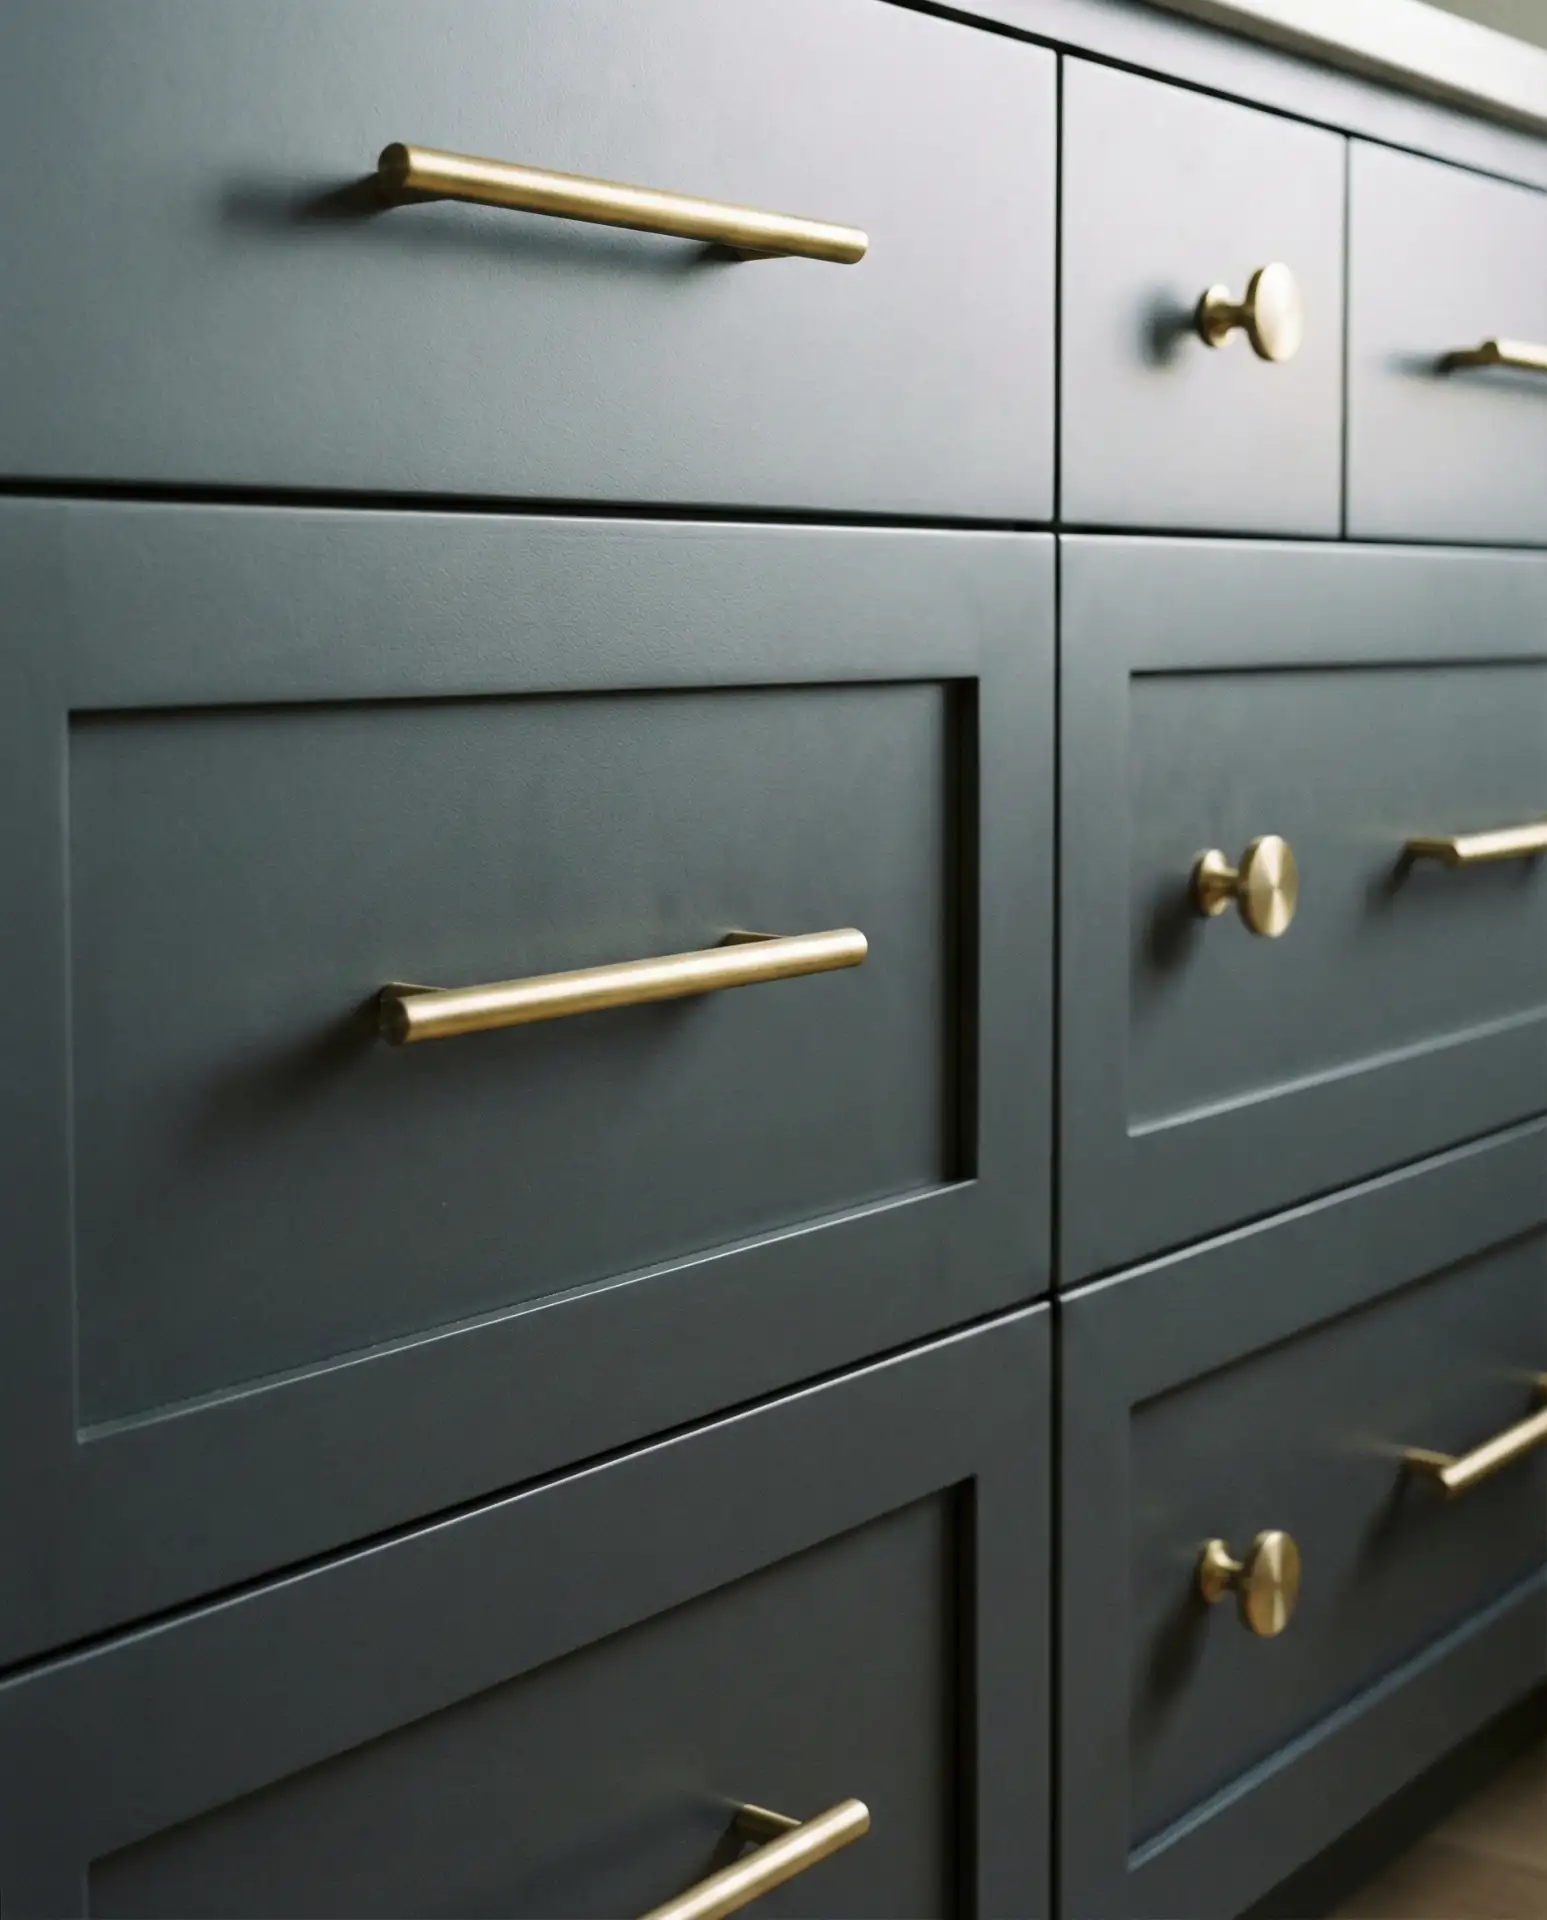
Before purchasing, measure your existing hardware hole spacing (the distance between screws, called the “center-to-center measurement”) to ensure your new pieces will fit without requiring new holes or wood filler. If you want to change the spacing or add pulls to drawer fronts that only have knobs, expect to drill new holes and fill old ones with wood putty, which adds time but is still well within DIY capabilities. Quality hardware makes a difference—solid brass or stainless pieces feel substantial and won’t tarnish or corrode like cheaper zinc alternatives.
21. Layered Lighting Design Strategy
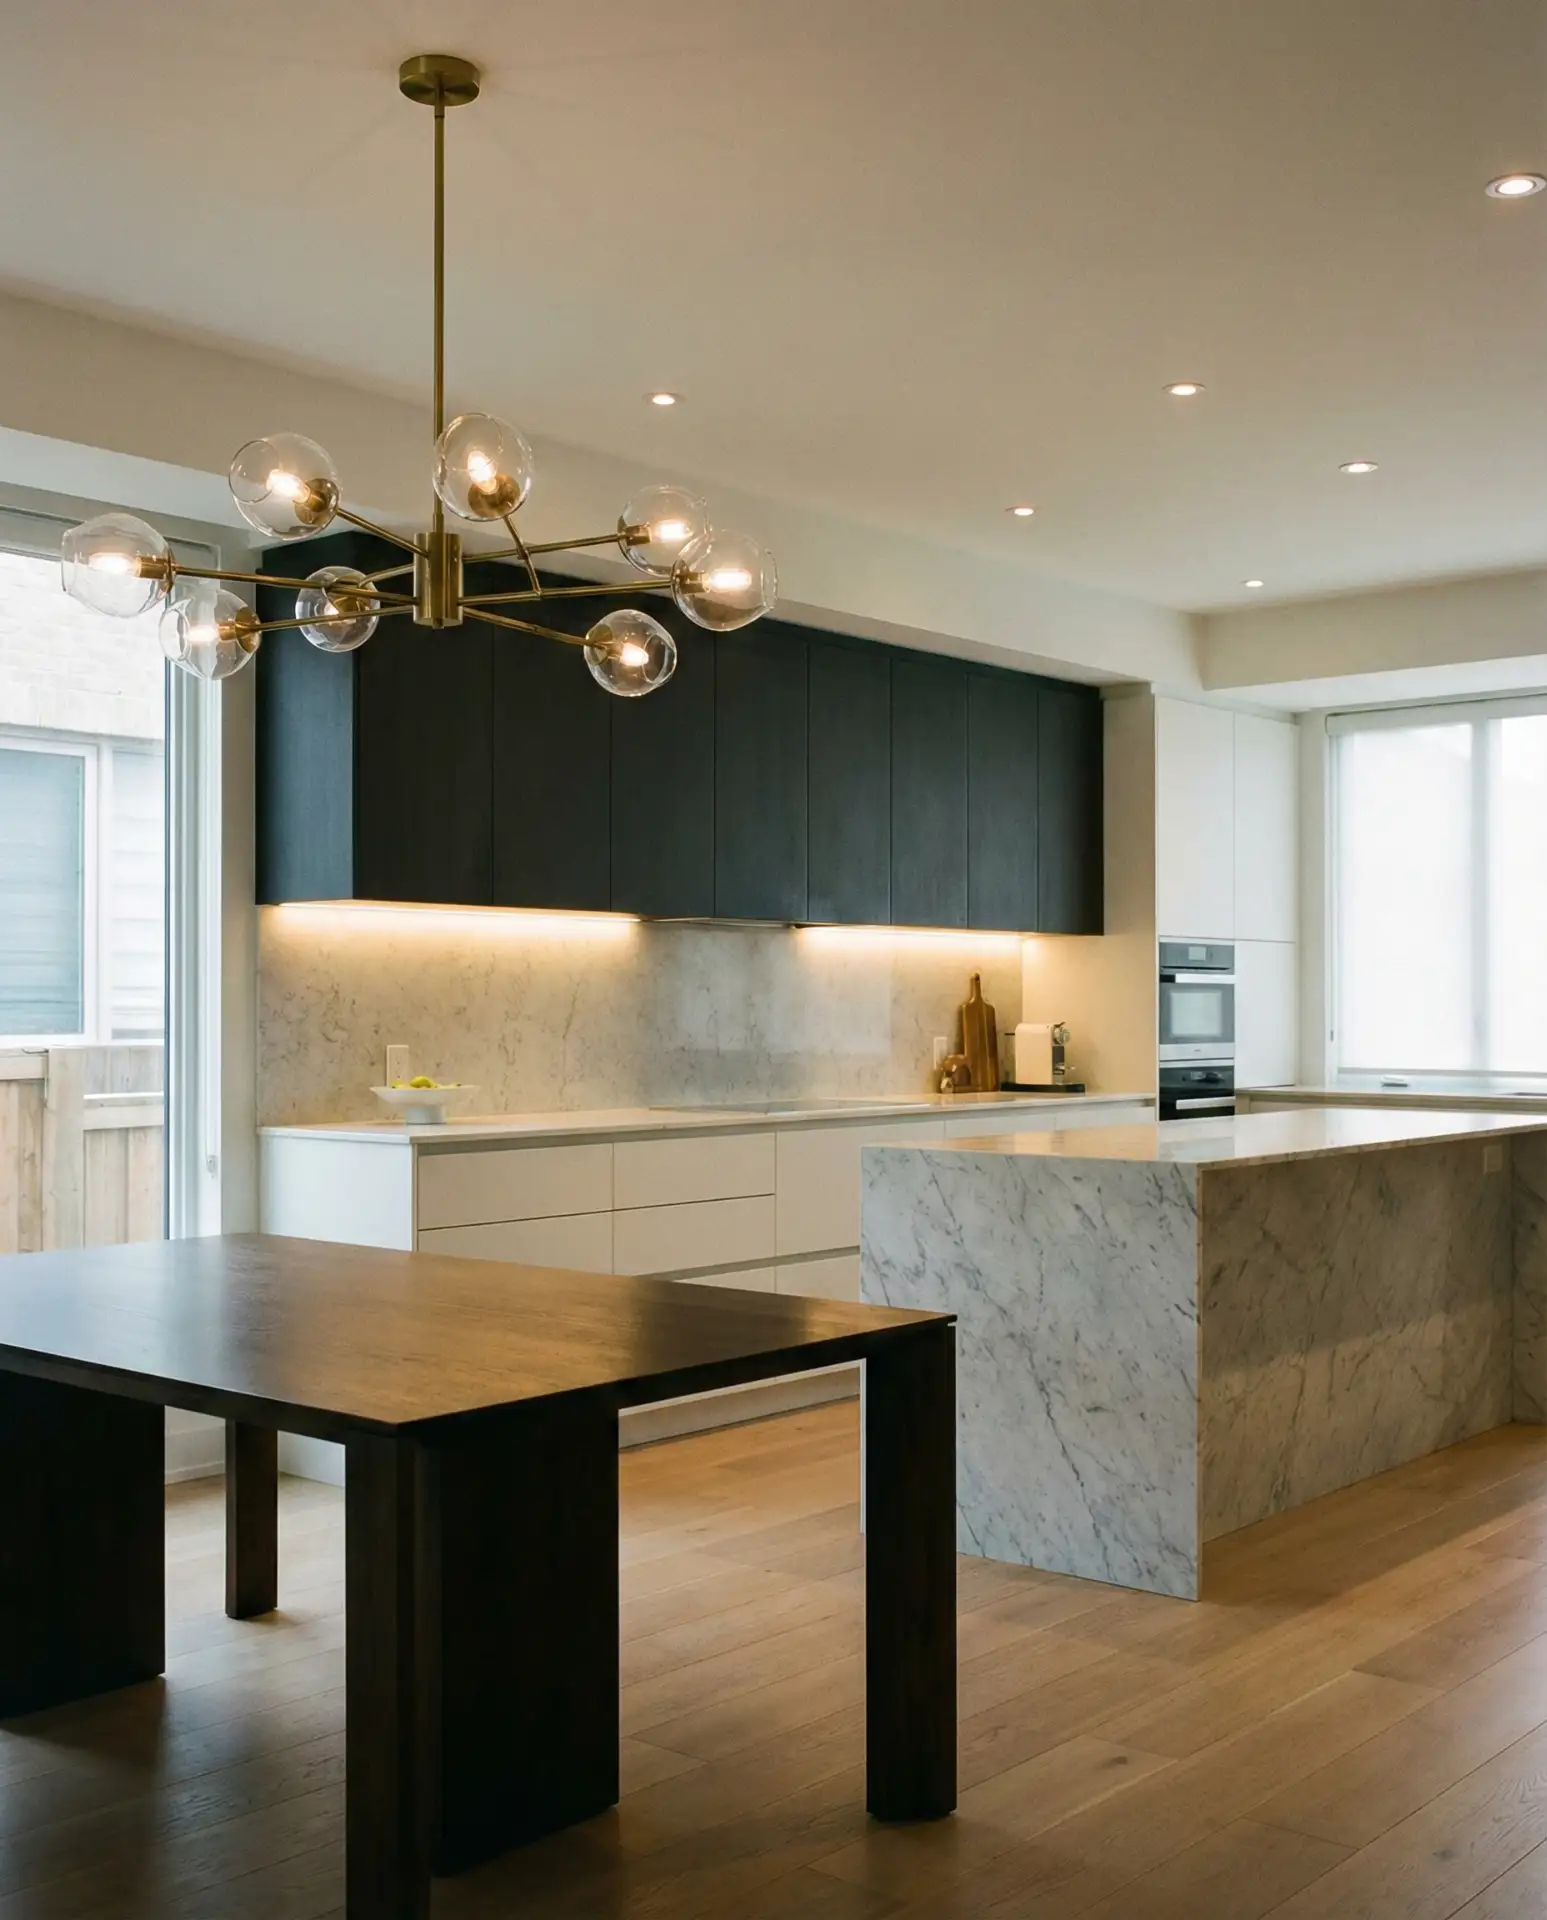
Transform your kitchen’s ambiance and functionality by implementing a three-tier lighting plan: overhead recessed or flush-mount fixtures for general illumination, under-cabinet LED strips for task lighting on counters, and statement pendants or a chandelier over the island for aesthetic impact. This modern approach eliminates shadows in work areas while creating visual interest and the ability to adjust mood through dimmer switches. Even cheap LED tape lights under cabinets make an enormous difference in food prep visibility.

Many kitchens rely solely on a single overhead fixture, which creates harsh shadows and makes the space feel flat. Real homeowner behavior shows that people gravitate toward well-lit kitchens for more than just cooking—they become natural gathering spots when lighting is warm and adjustable. Install all overhead lights on dimmers and choose LED bulbs in the 2700-3000K range for a warm glow that makes food and faces look their best.
22. Mixed Metal Finish Coordination
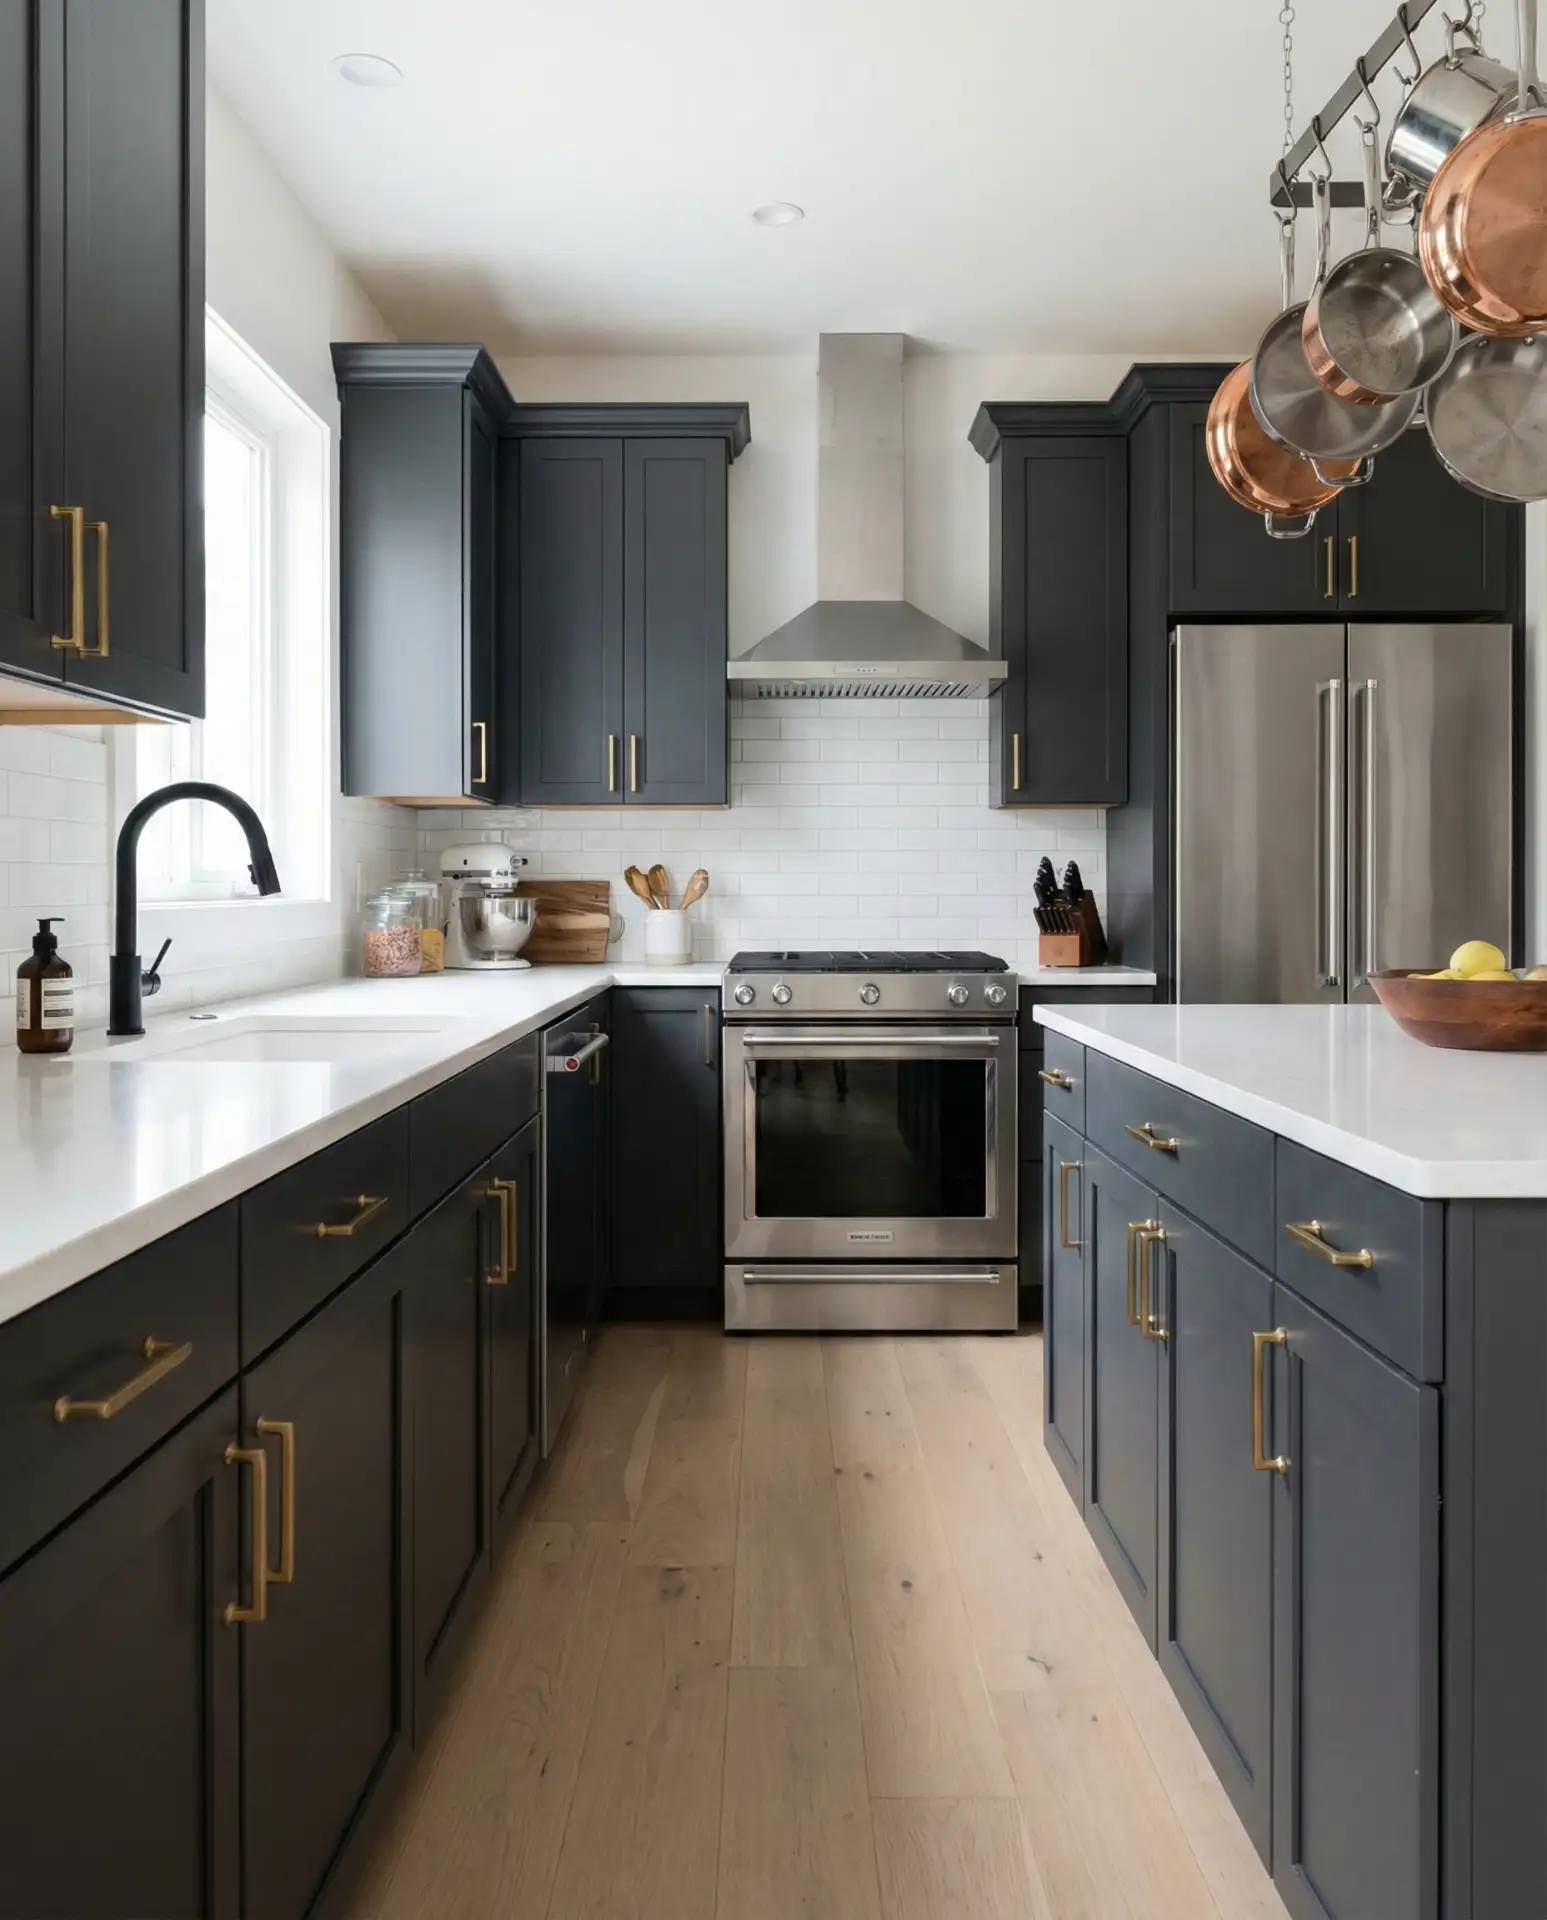
Combine two or three different metal finishes—such as brushed brass cabinet hardware with a stainless steel sink and matte black faucet—to add depth and sophistication to modern or transitional kitchens. This designer technique prevents the space from feeling too matchy-matchy while maintaining visual cohesion when you follow the 70-20-10 rule: choose one dominant metal (70%), a secondary accent (20%), and a third finish for small details (10%). Mixed metals work particularly well when you maintain consistent undertones—warm with warm, cool with cool.
Common mistakes and how to avoid them: don’t combine more than three different finishes, or the look becomes chaotic rather than intentional. Avoid mixing plating types that have drastically different sheen levels—pairing high-polish chrome with oil-rubbed bronze creates jarring contrast. Interior designers in Chicago and Miami increasingly recommend starting with your appliances (which are typically stainless) and building your metal palette around them, adding warmer tones through hardware, lighting, and plumbing fixtures to balance the industrial feel of stainless steel.
Conclusion
Whether you’re working with a spacious suburban kitchen or a compact rental galley, these makeover ideas demonstrate that meaningful transformation doesn’t always require a complete gut renovation or enormous budget. Start with one or two changes that speak to your lifestyle and aesthetic preferences, then layer in additional updates as time and resources allow. Share your own kitchen transformation journey in the comments below—we’d love to hear which ideas you’re planning to try first and how they turn out in your space.