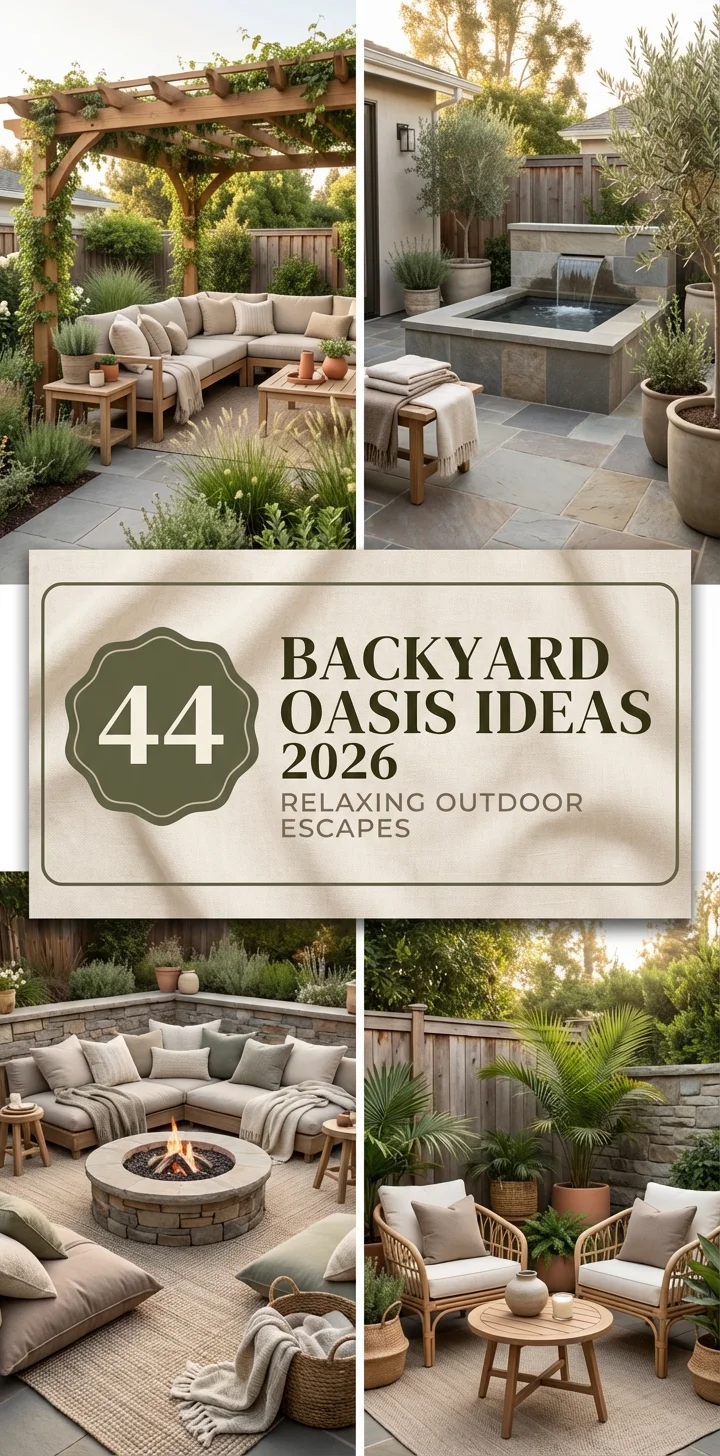
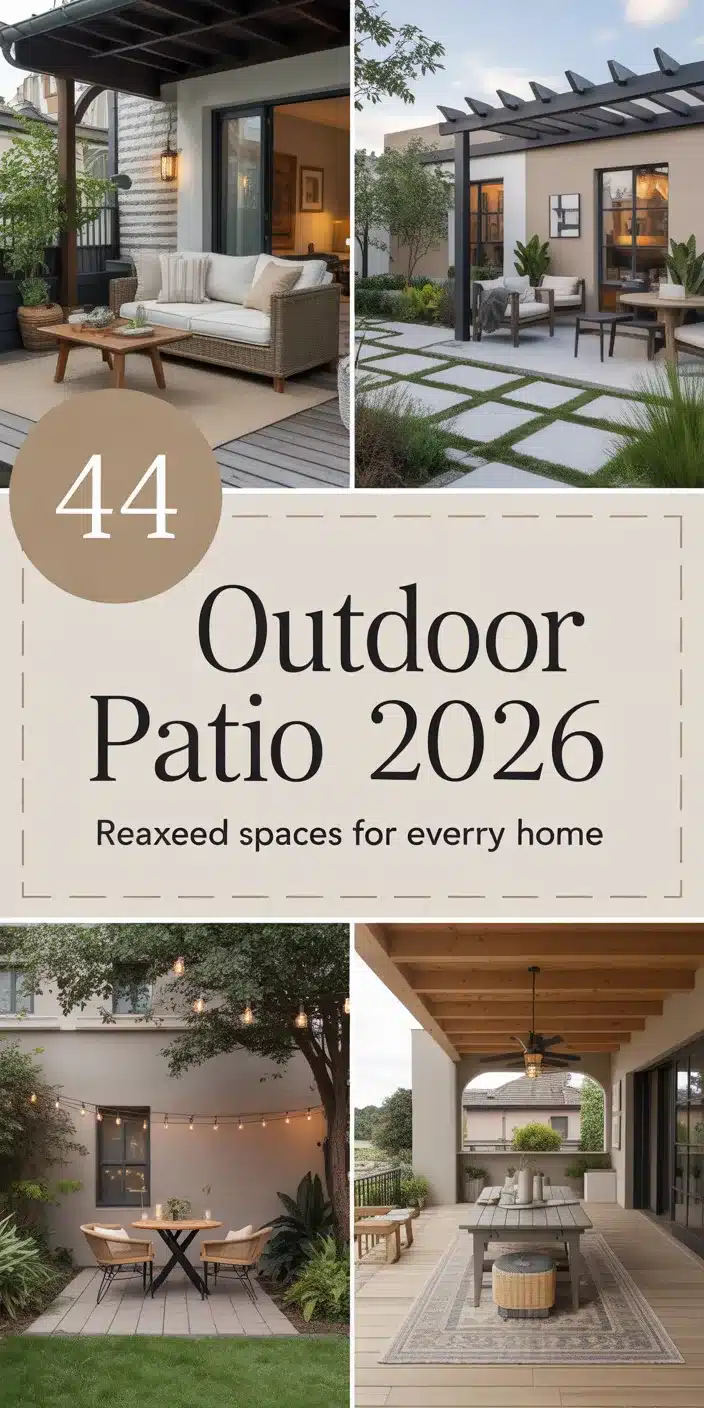
Patio tables have become the centerpiece of American outdoor living, and heading into 2026, homeowners are looking for fresh ways to make these essential pieces both functional and beautiful. Whether you’re transforming a tired wrought iron frame or building a custom wooden surface from scratch, the right patio table can completely change how you use your backyard. Pinterest is flooded with searches for makeover inspiration, tile designs, and creative centerpiece ideas—and for good reason. This article walks you through real-world ideas that combine style, durability, and personality, helping you create an outdoor space you’ll actually want to spend time in.
1. Mosaic Tile Tabletop Transformation
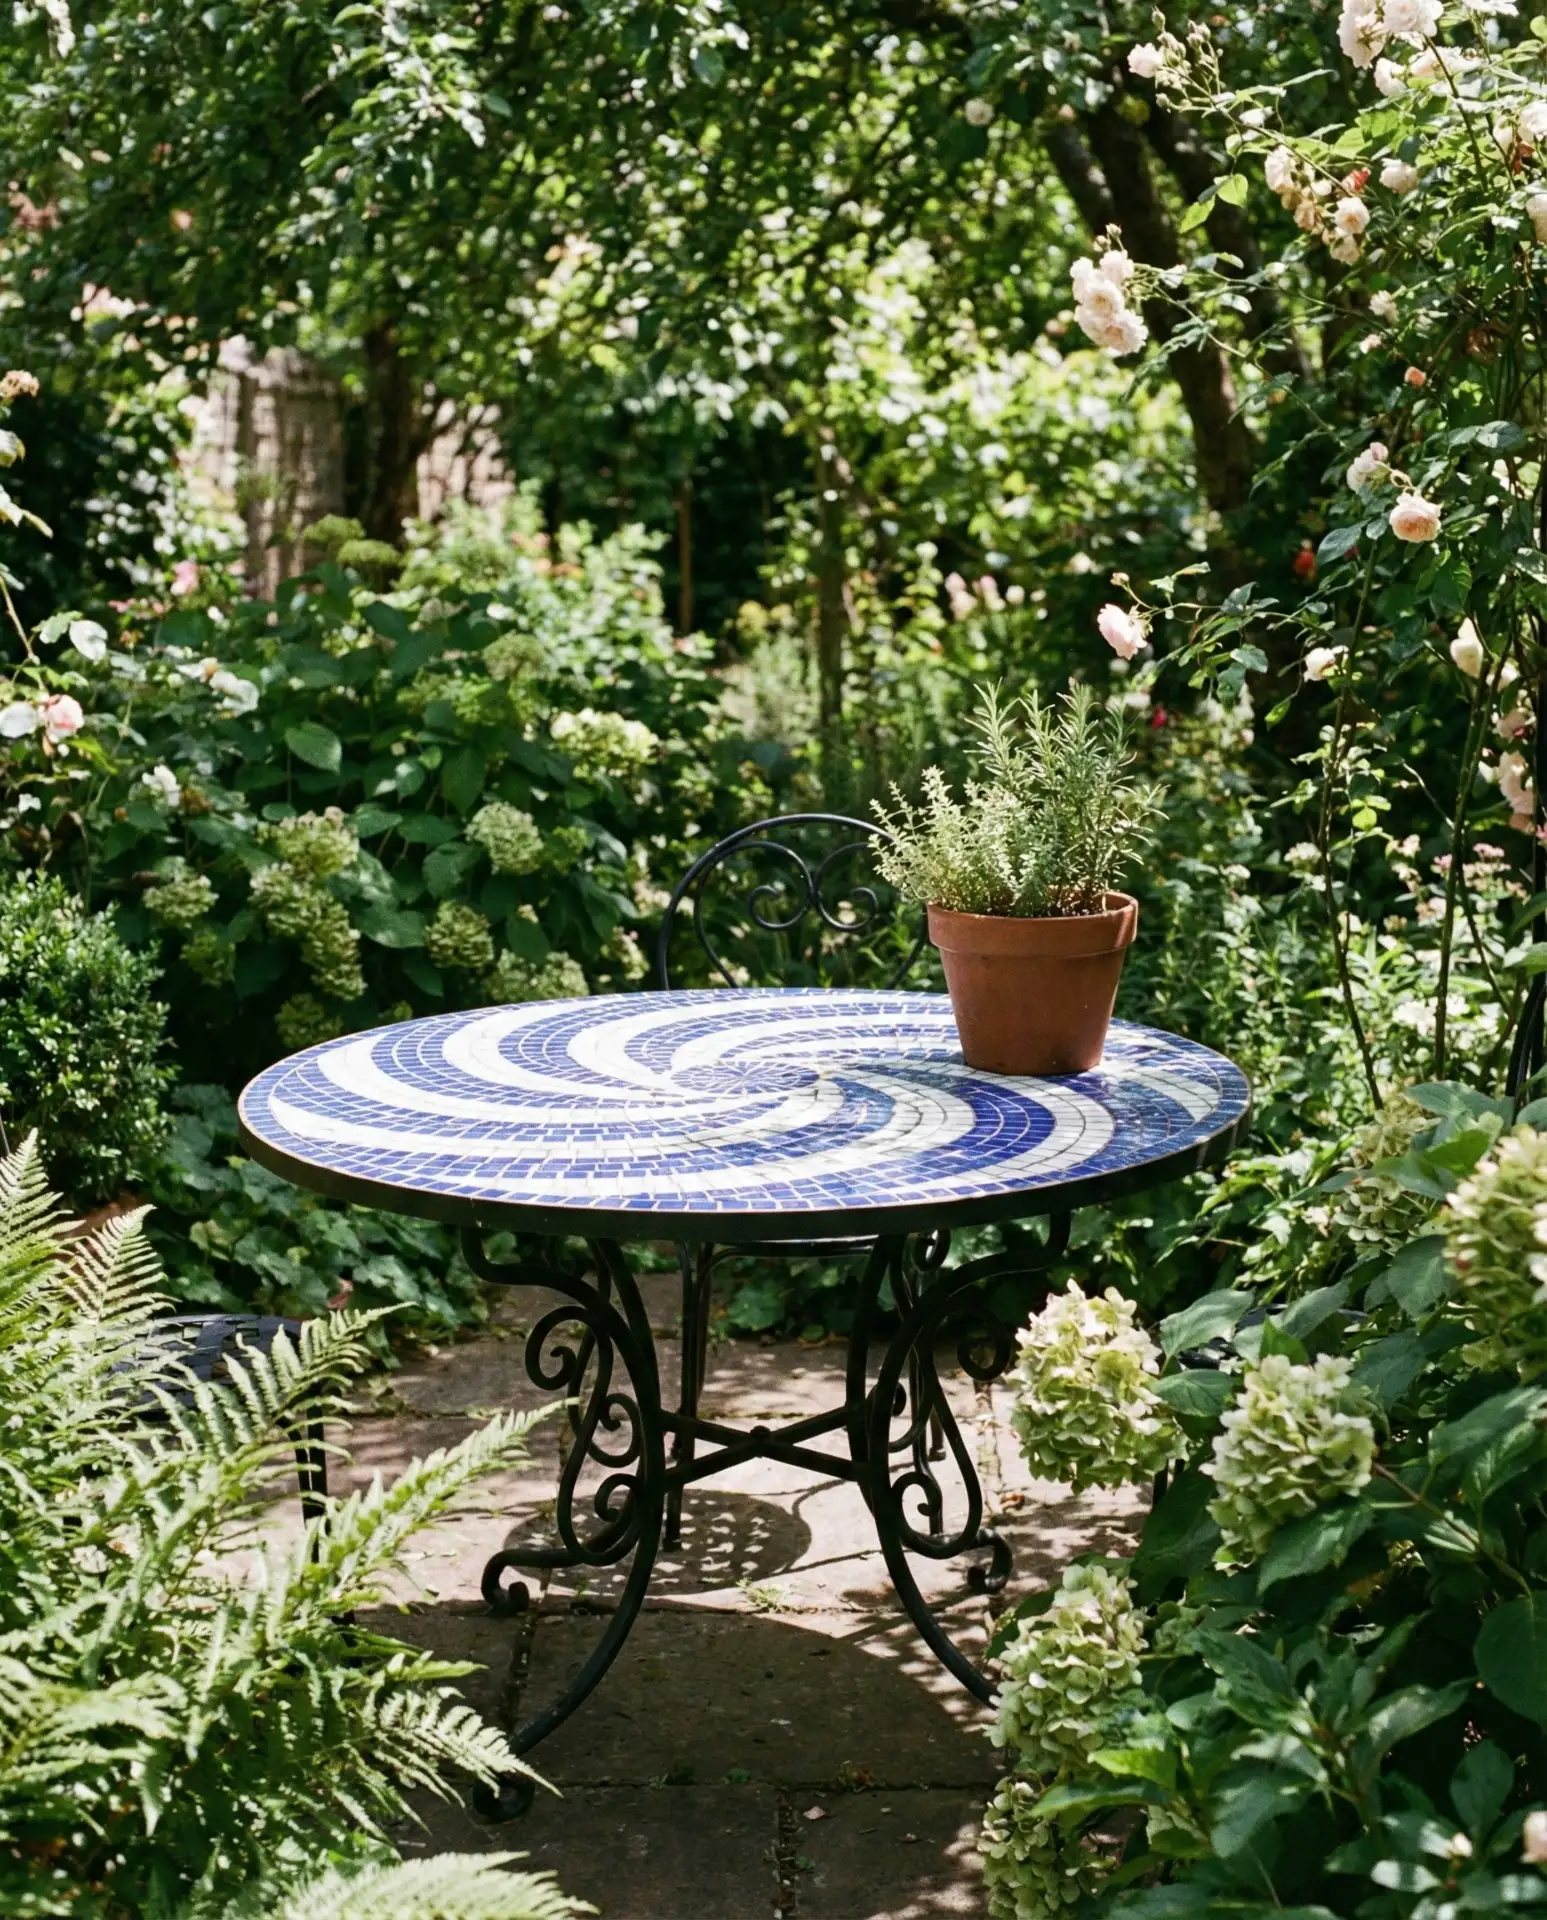
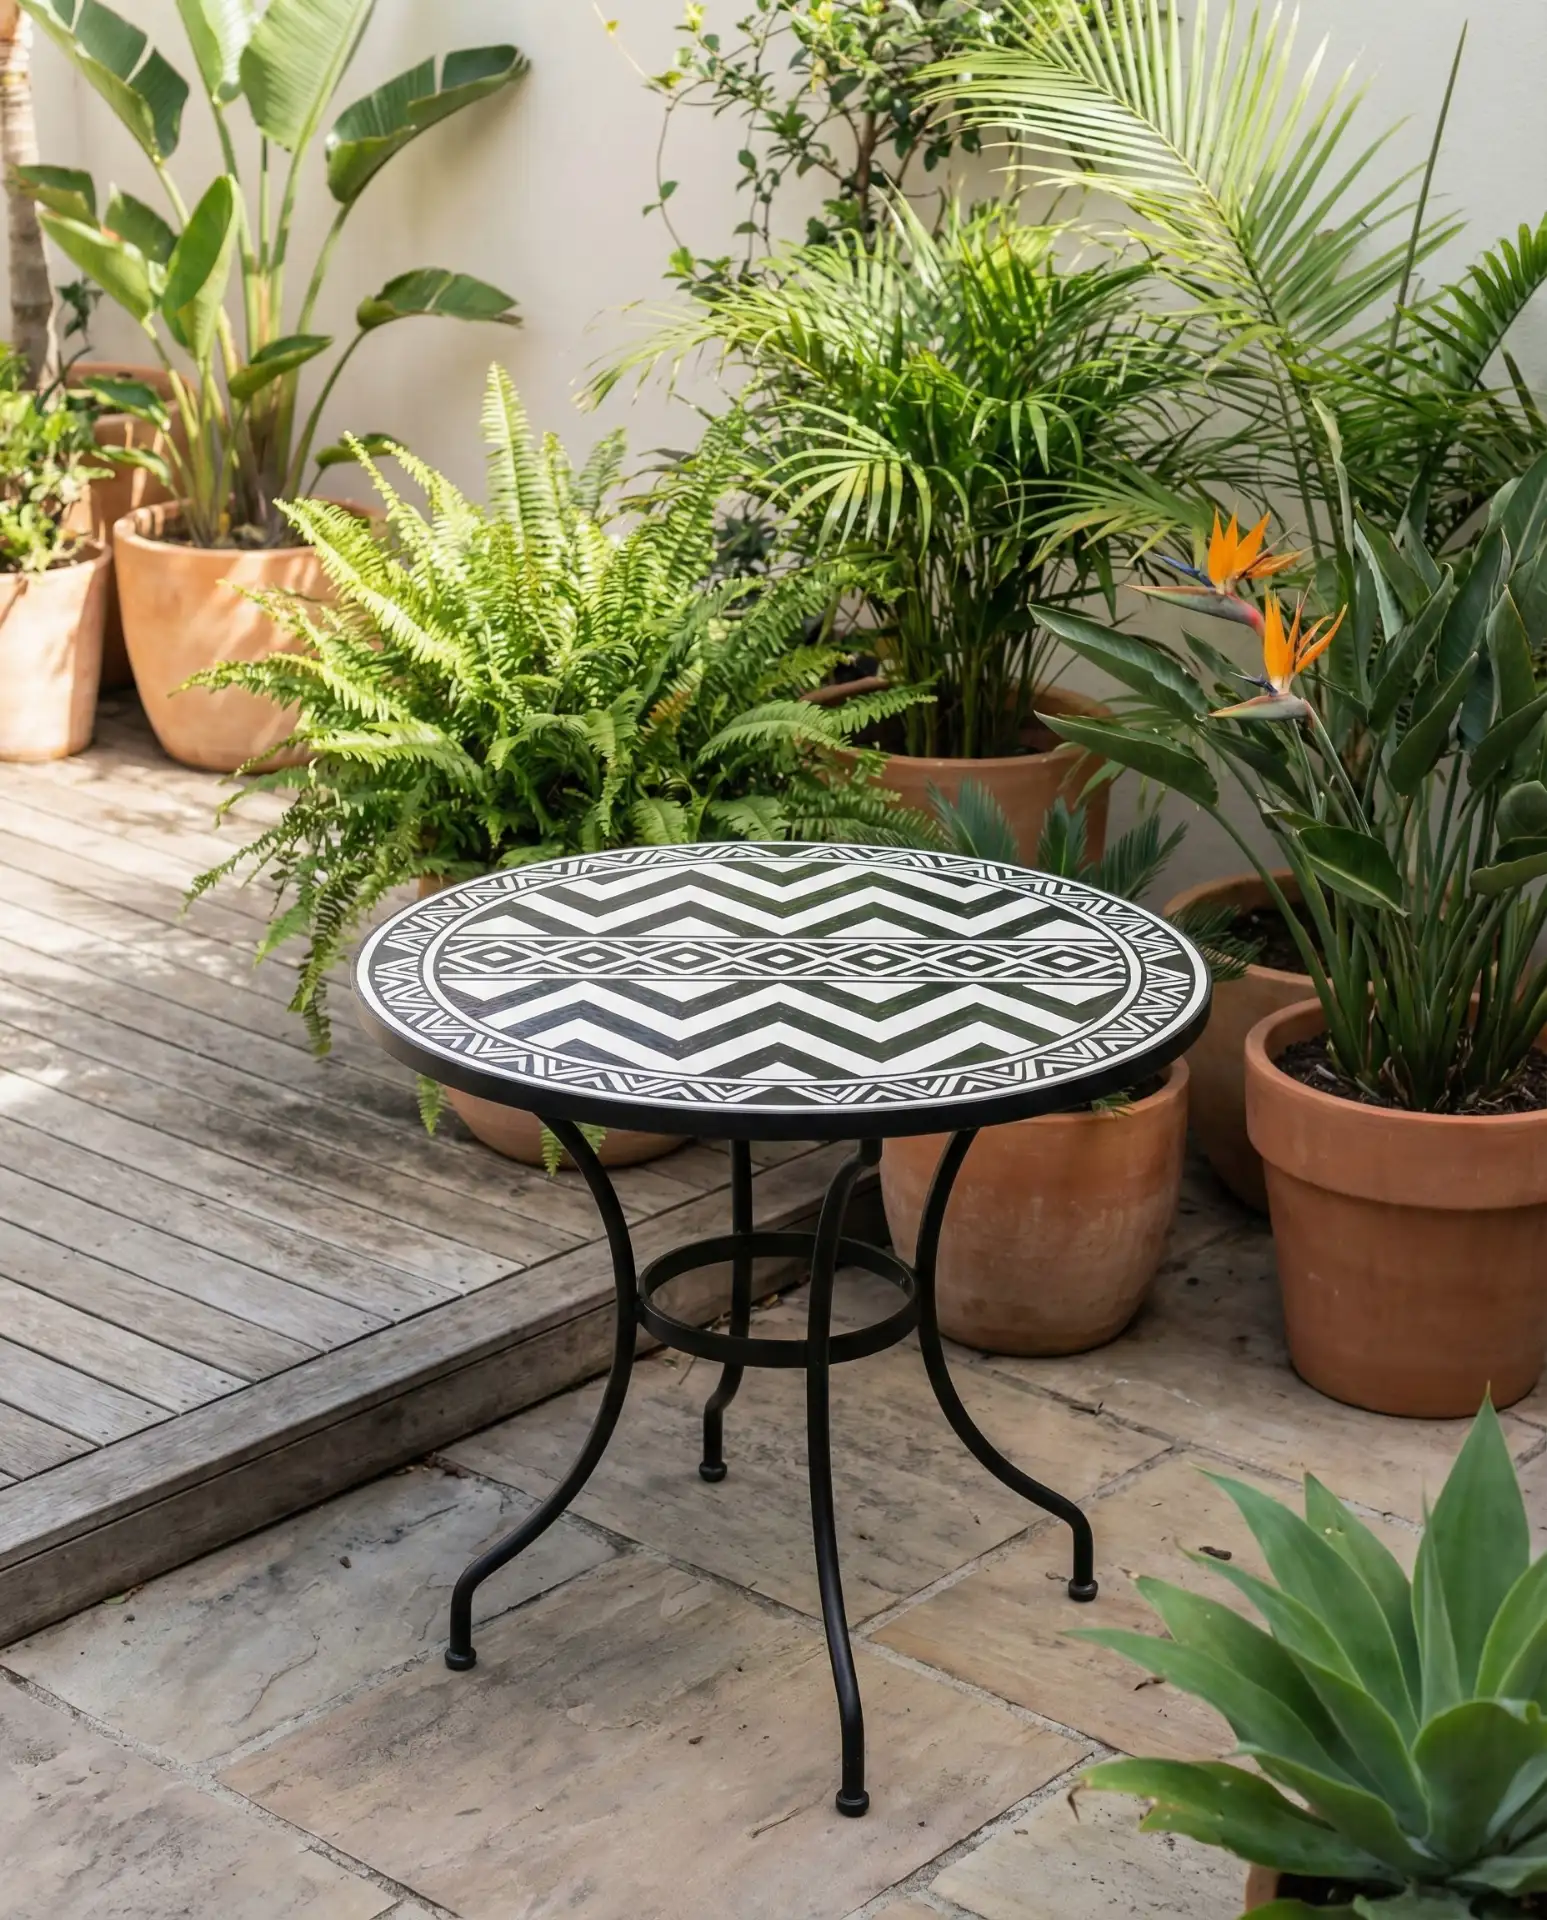
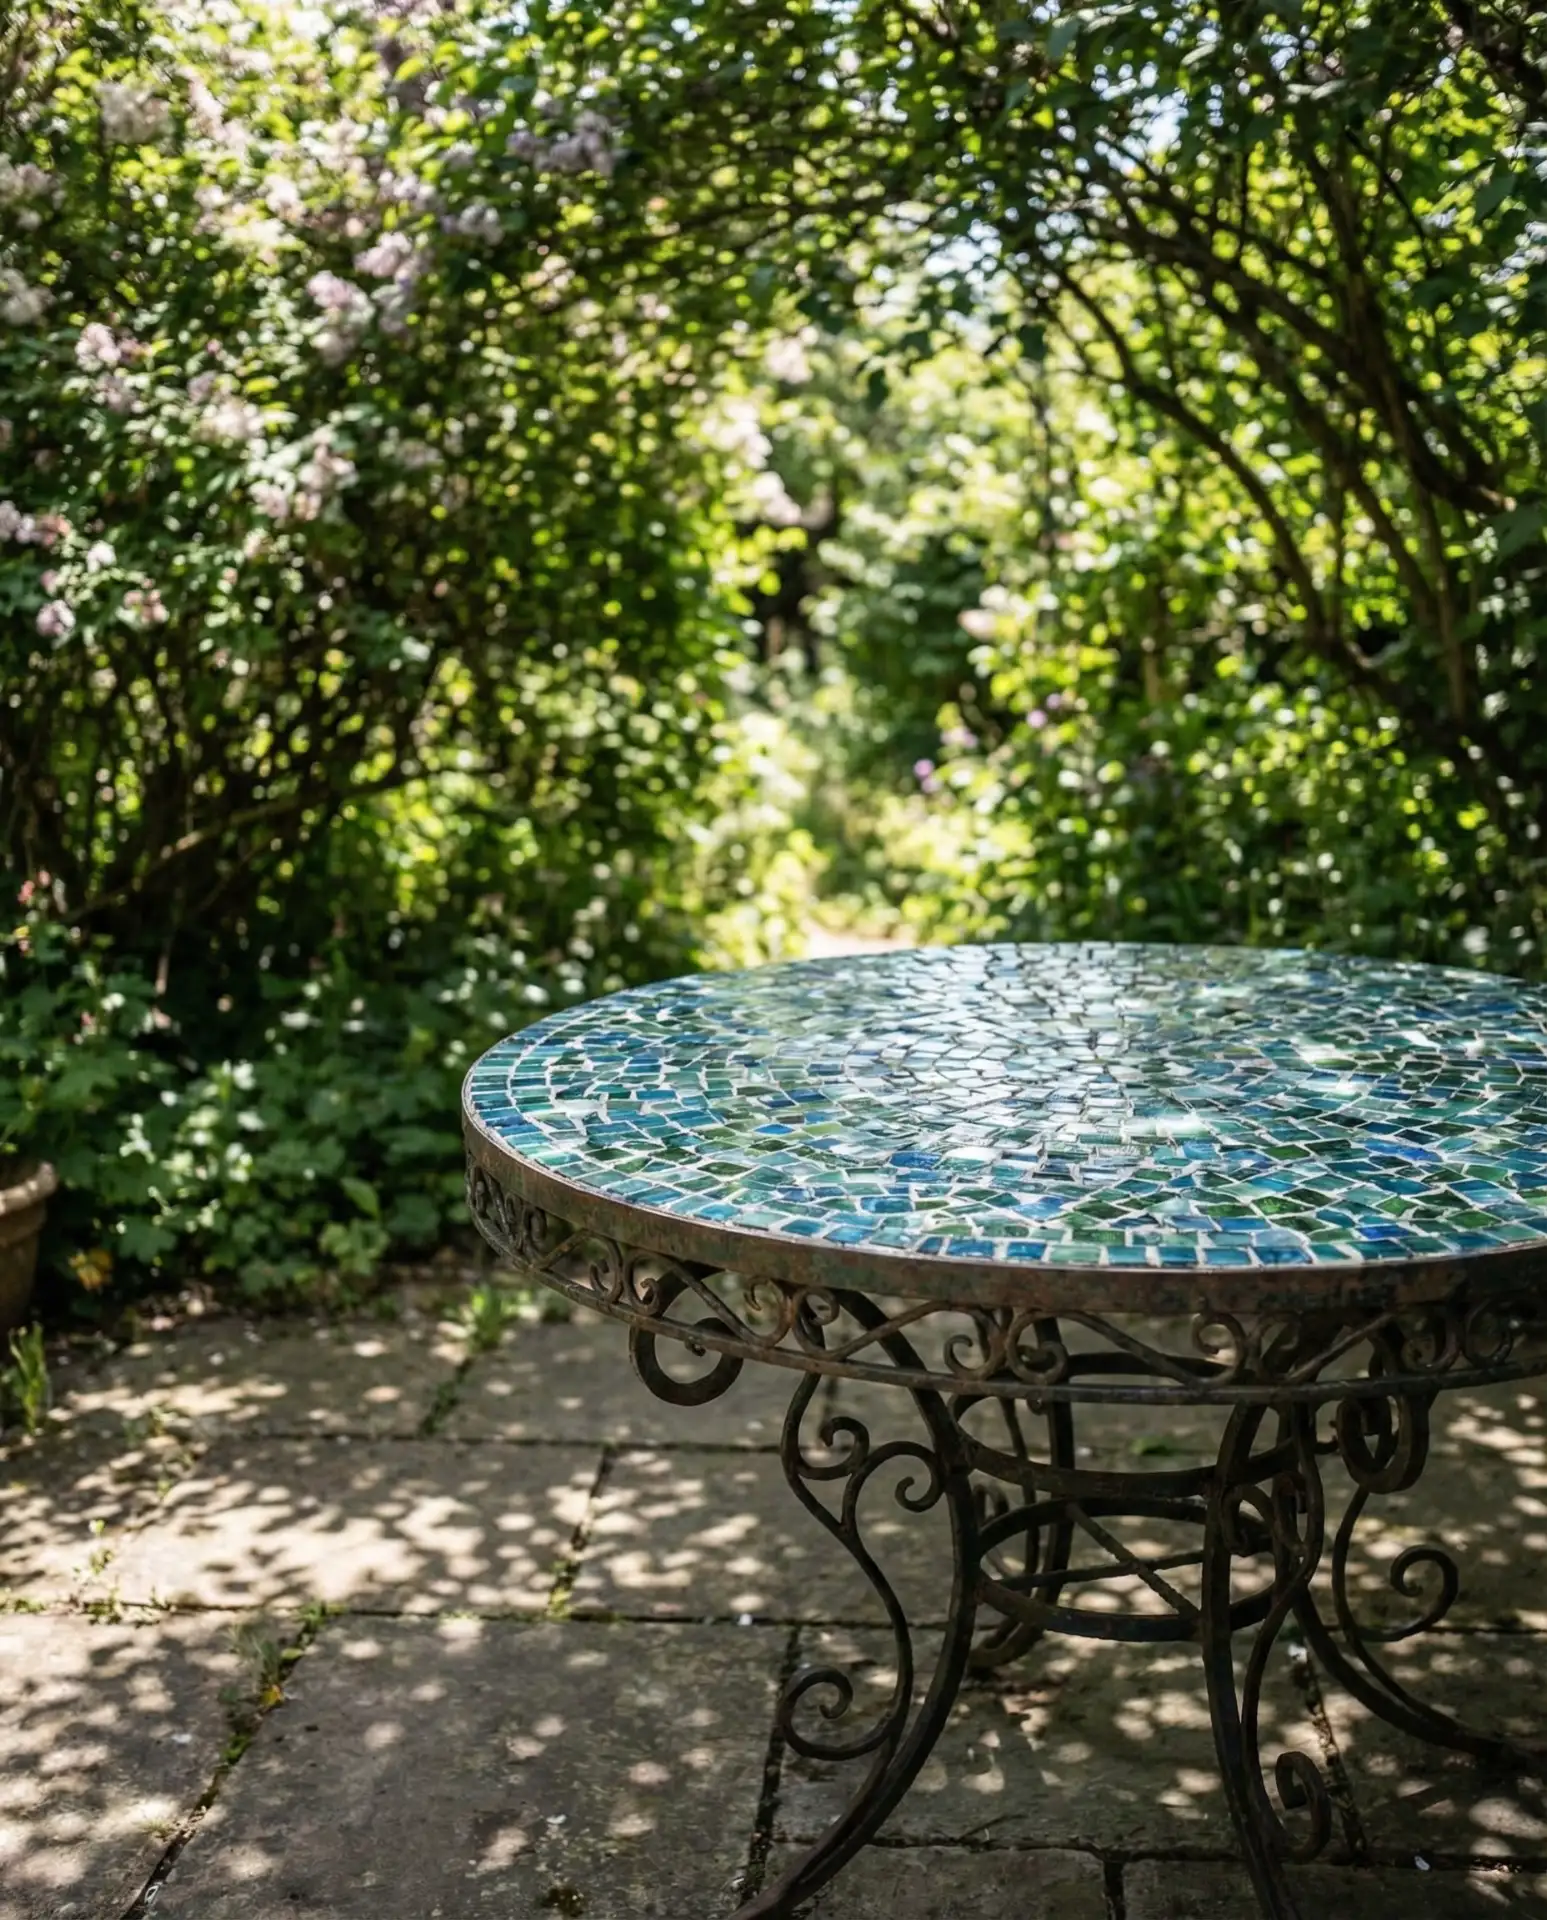
A mosaic surface can breathe new life into a plain or damaged patio table , turning it into a colorful focal point for your outdoor space. This approach works especially well for round tables where you can create radial patterns that draw the eye inward. The process involves adhering small tile pieces—ceramic, glass, or stone—directly onto a clean, primed tabletop, then grouting the gaps for a finished, weather-resistant look. 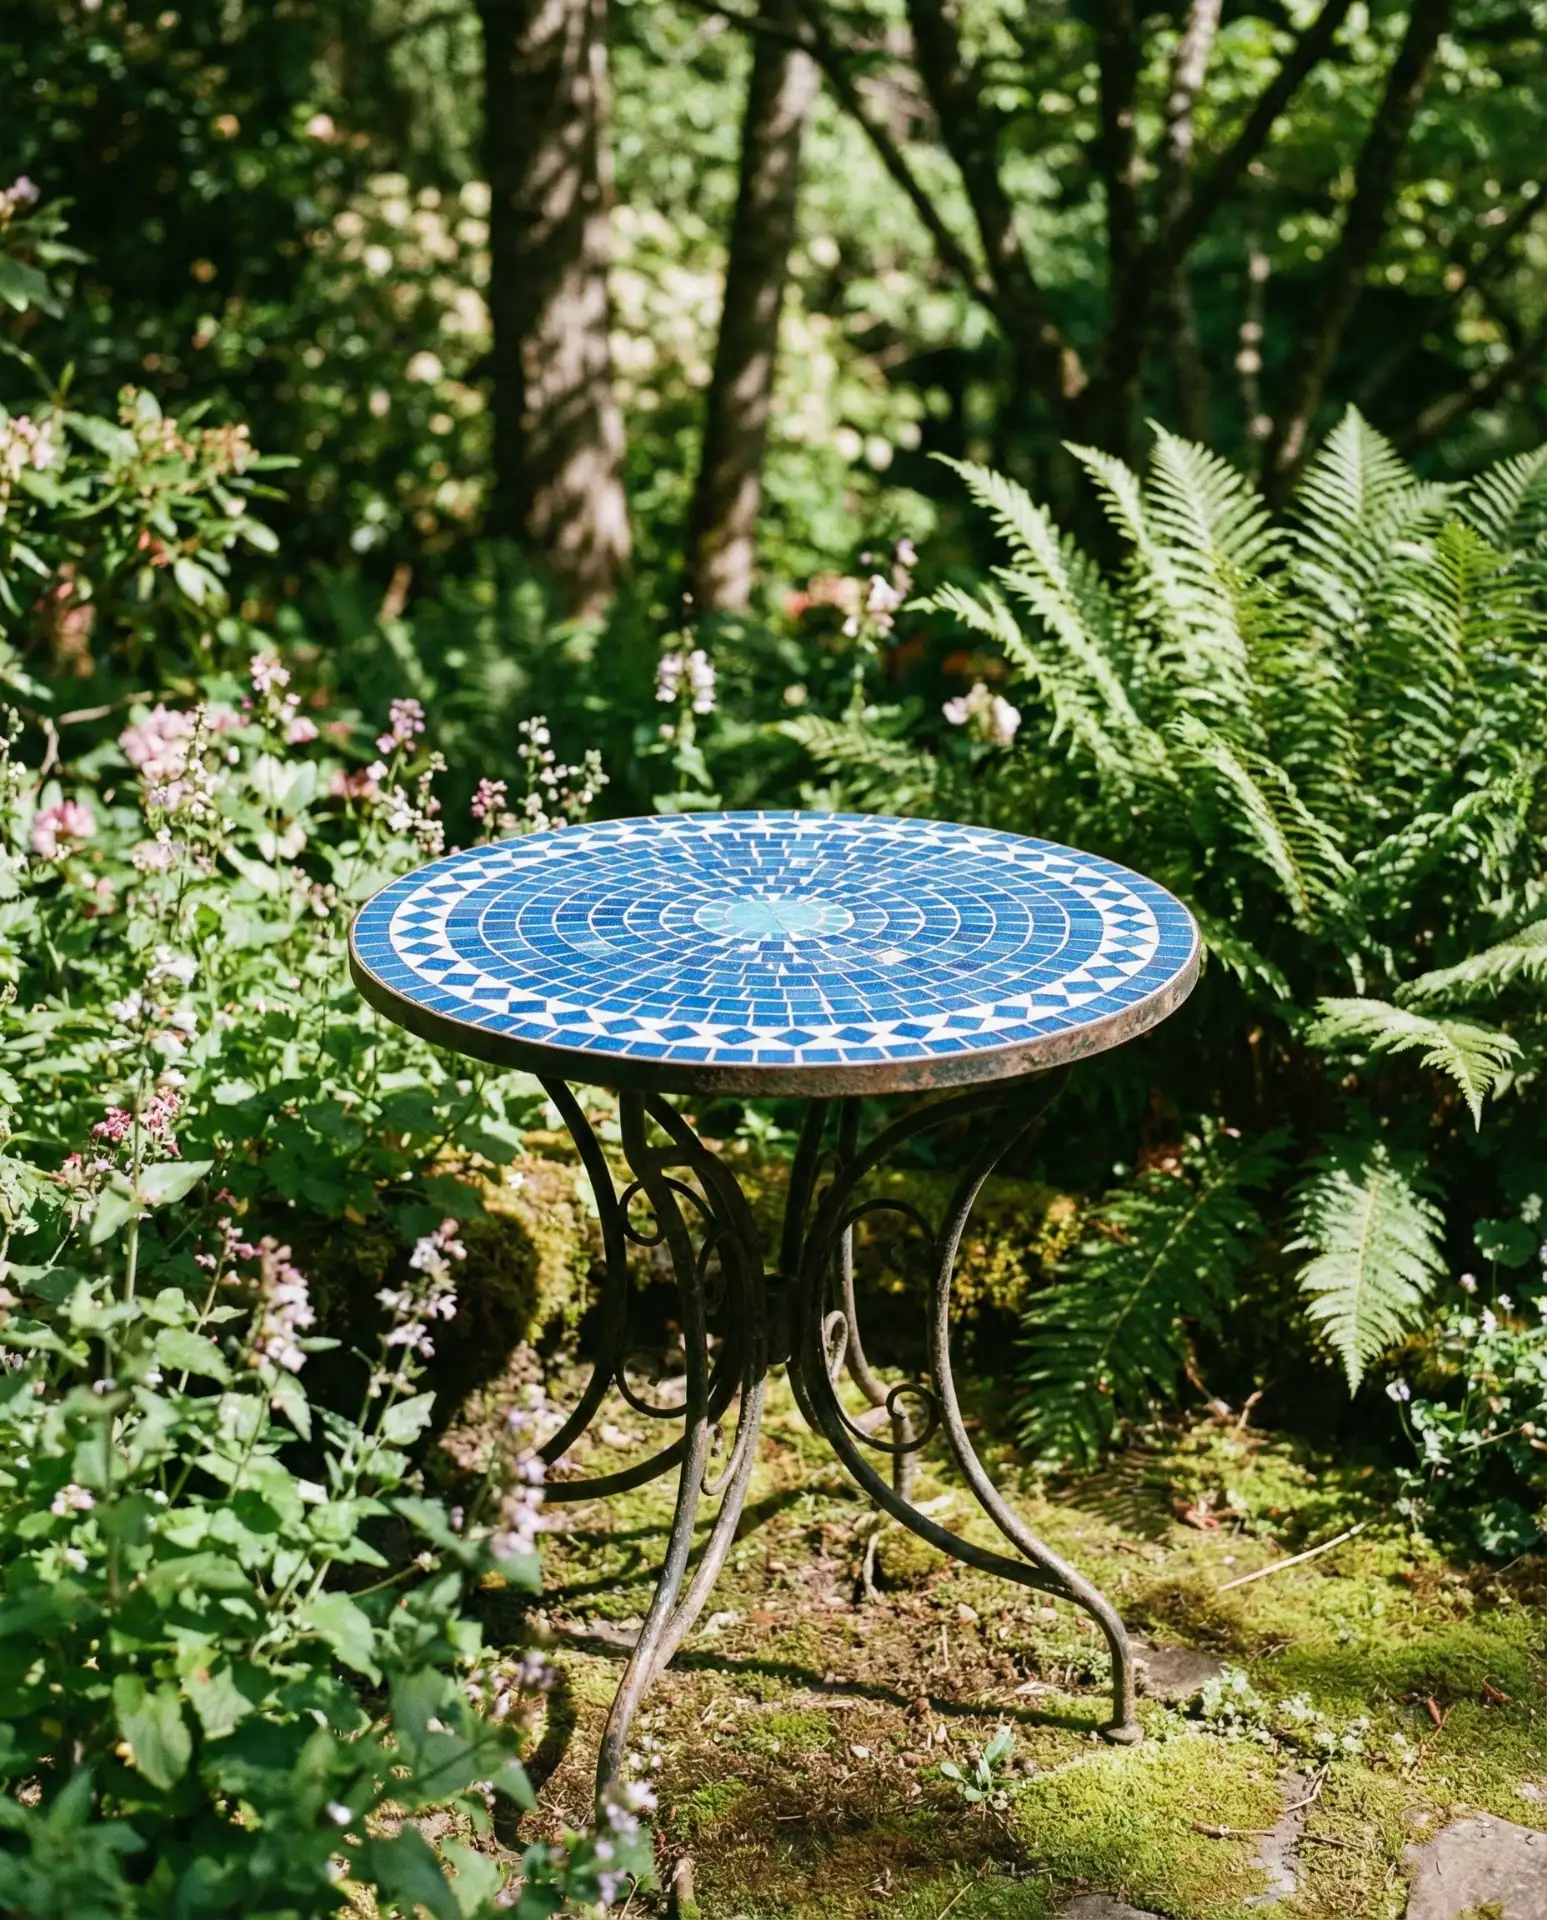
This technique works best in covered patios or areas with partial shade, where UV exposure won’t fade the grout over time. Many homeowners underestimate how much grout sealer matters—skipping this step leads to staining and moisture damage within a single season. If you’re working with a metal base, make sure it’s fully rust-free before you start, or the oxidation will bleed through and ruin your careful work.
2. Concrete Pour for Modern Minimalism
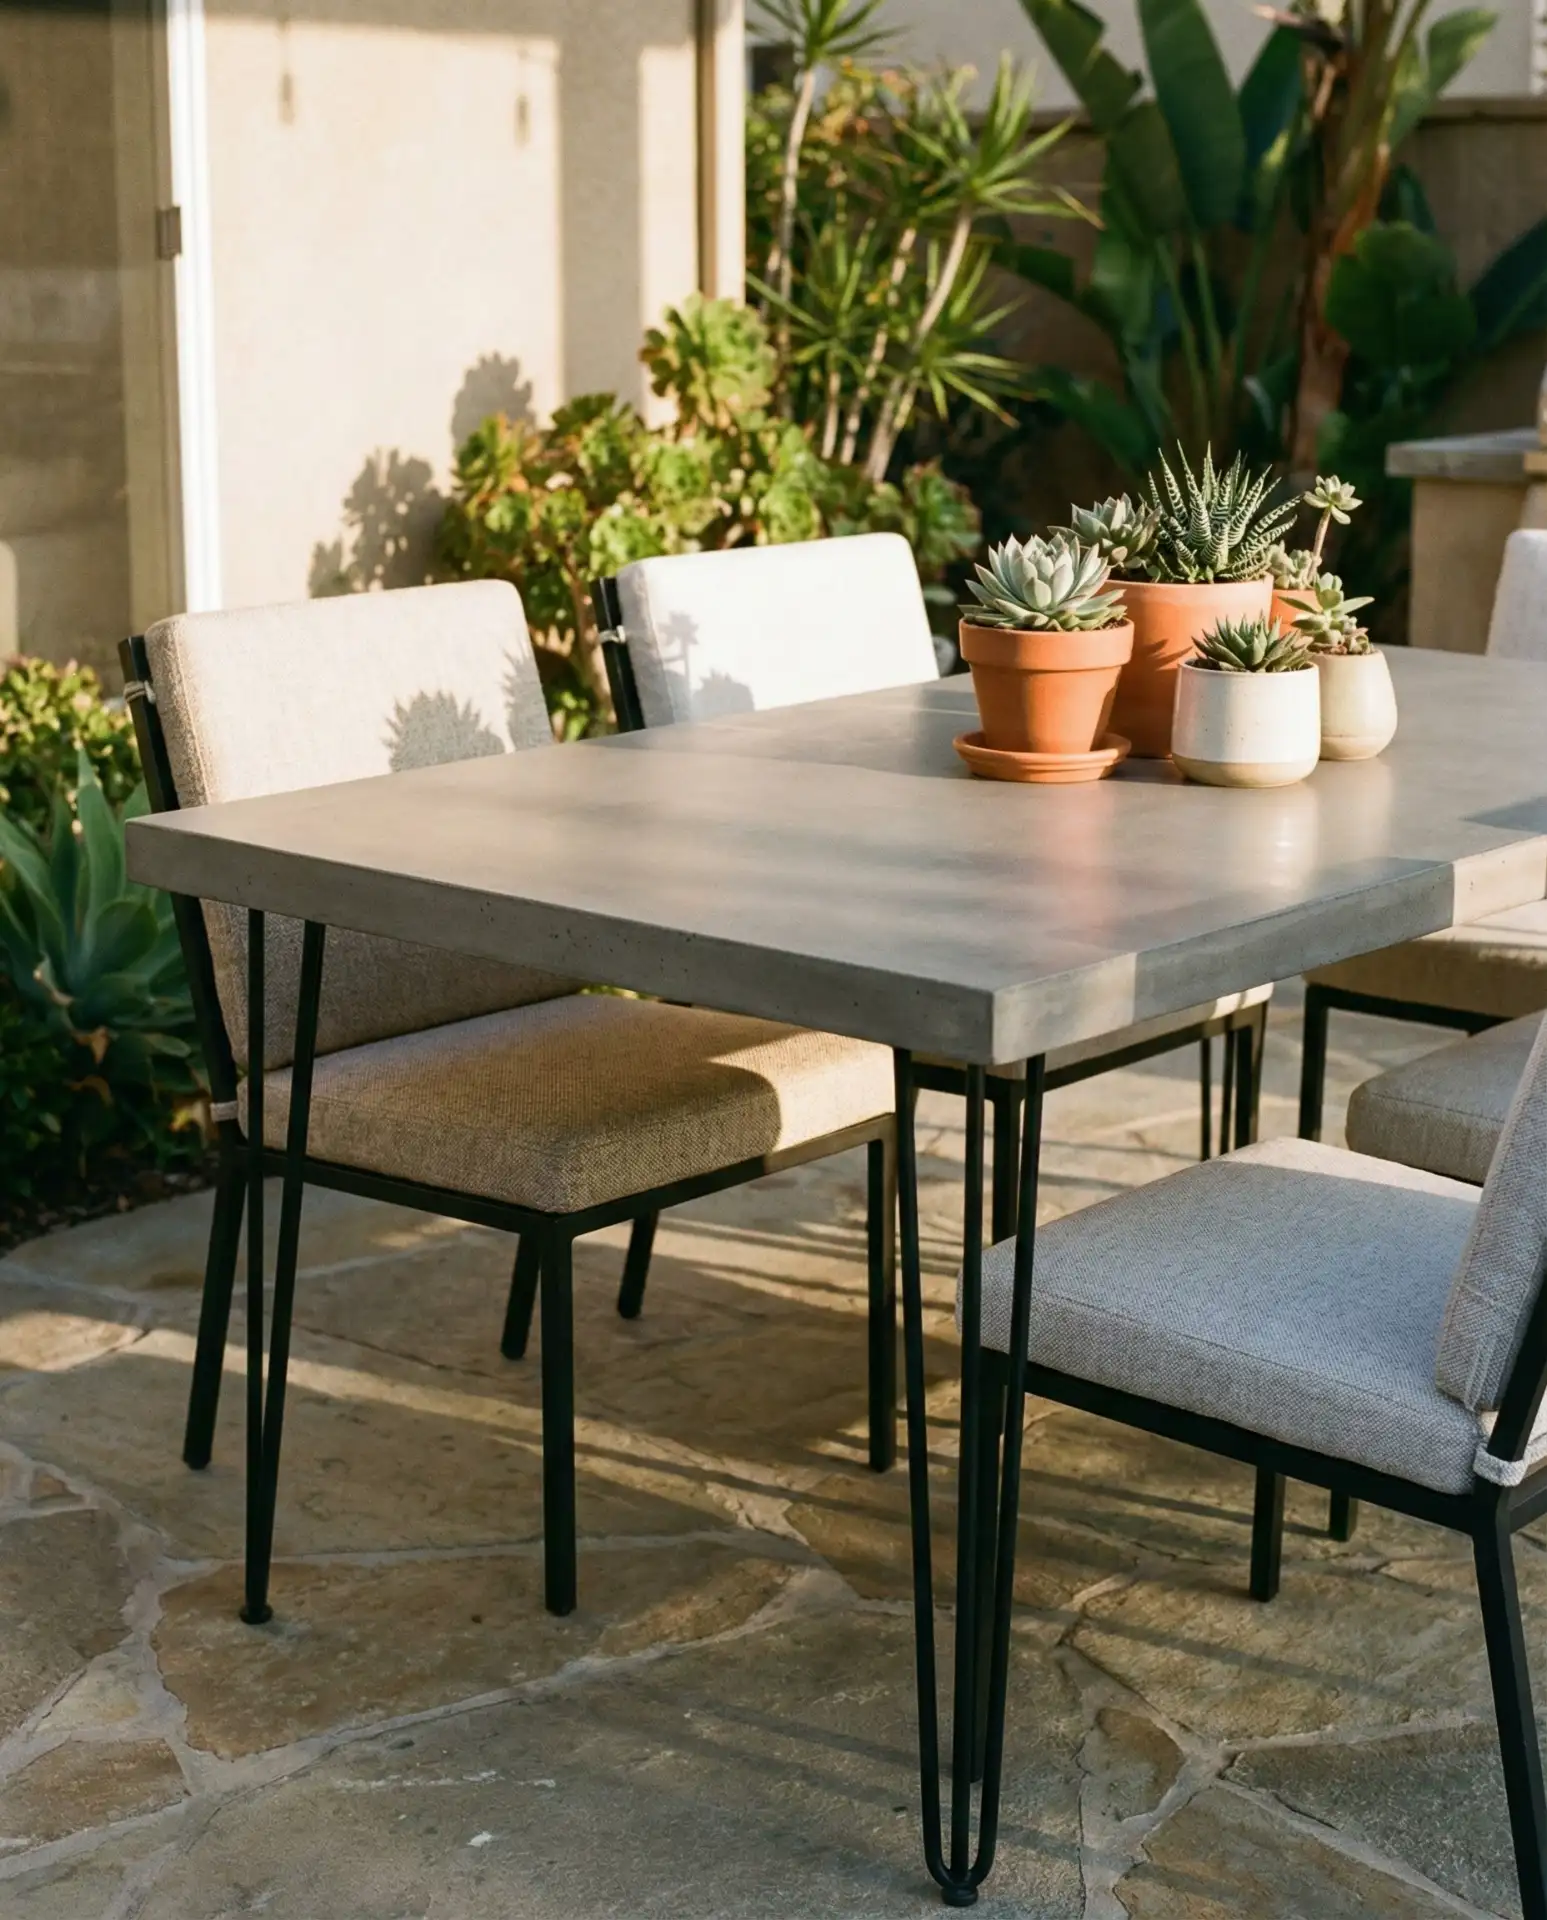
A concrete top offers a sleek, industrial aesthetic that pairs beautifully with black metal frames or minimalist wooden legs. The material is incredibly durable and can be tinted, polished, or left raw depending on your style. Pouring concrete into a custom mold allows you to control the exact dimensions and thickness, making it ideal for replacing a cracked glass or worn surface. 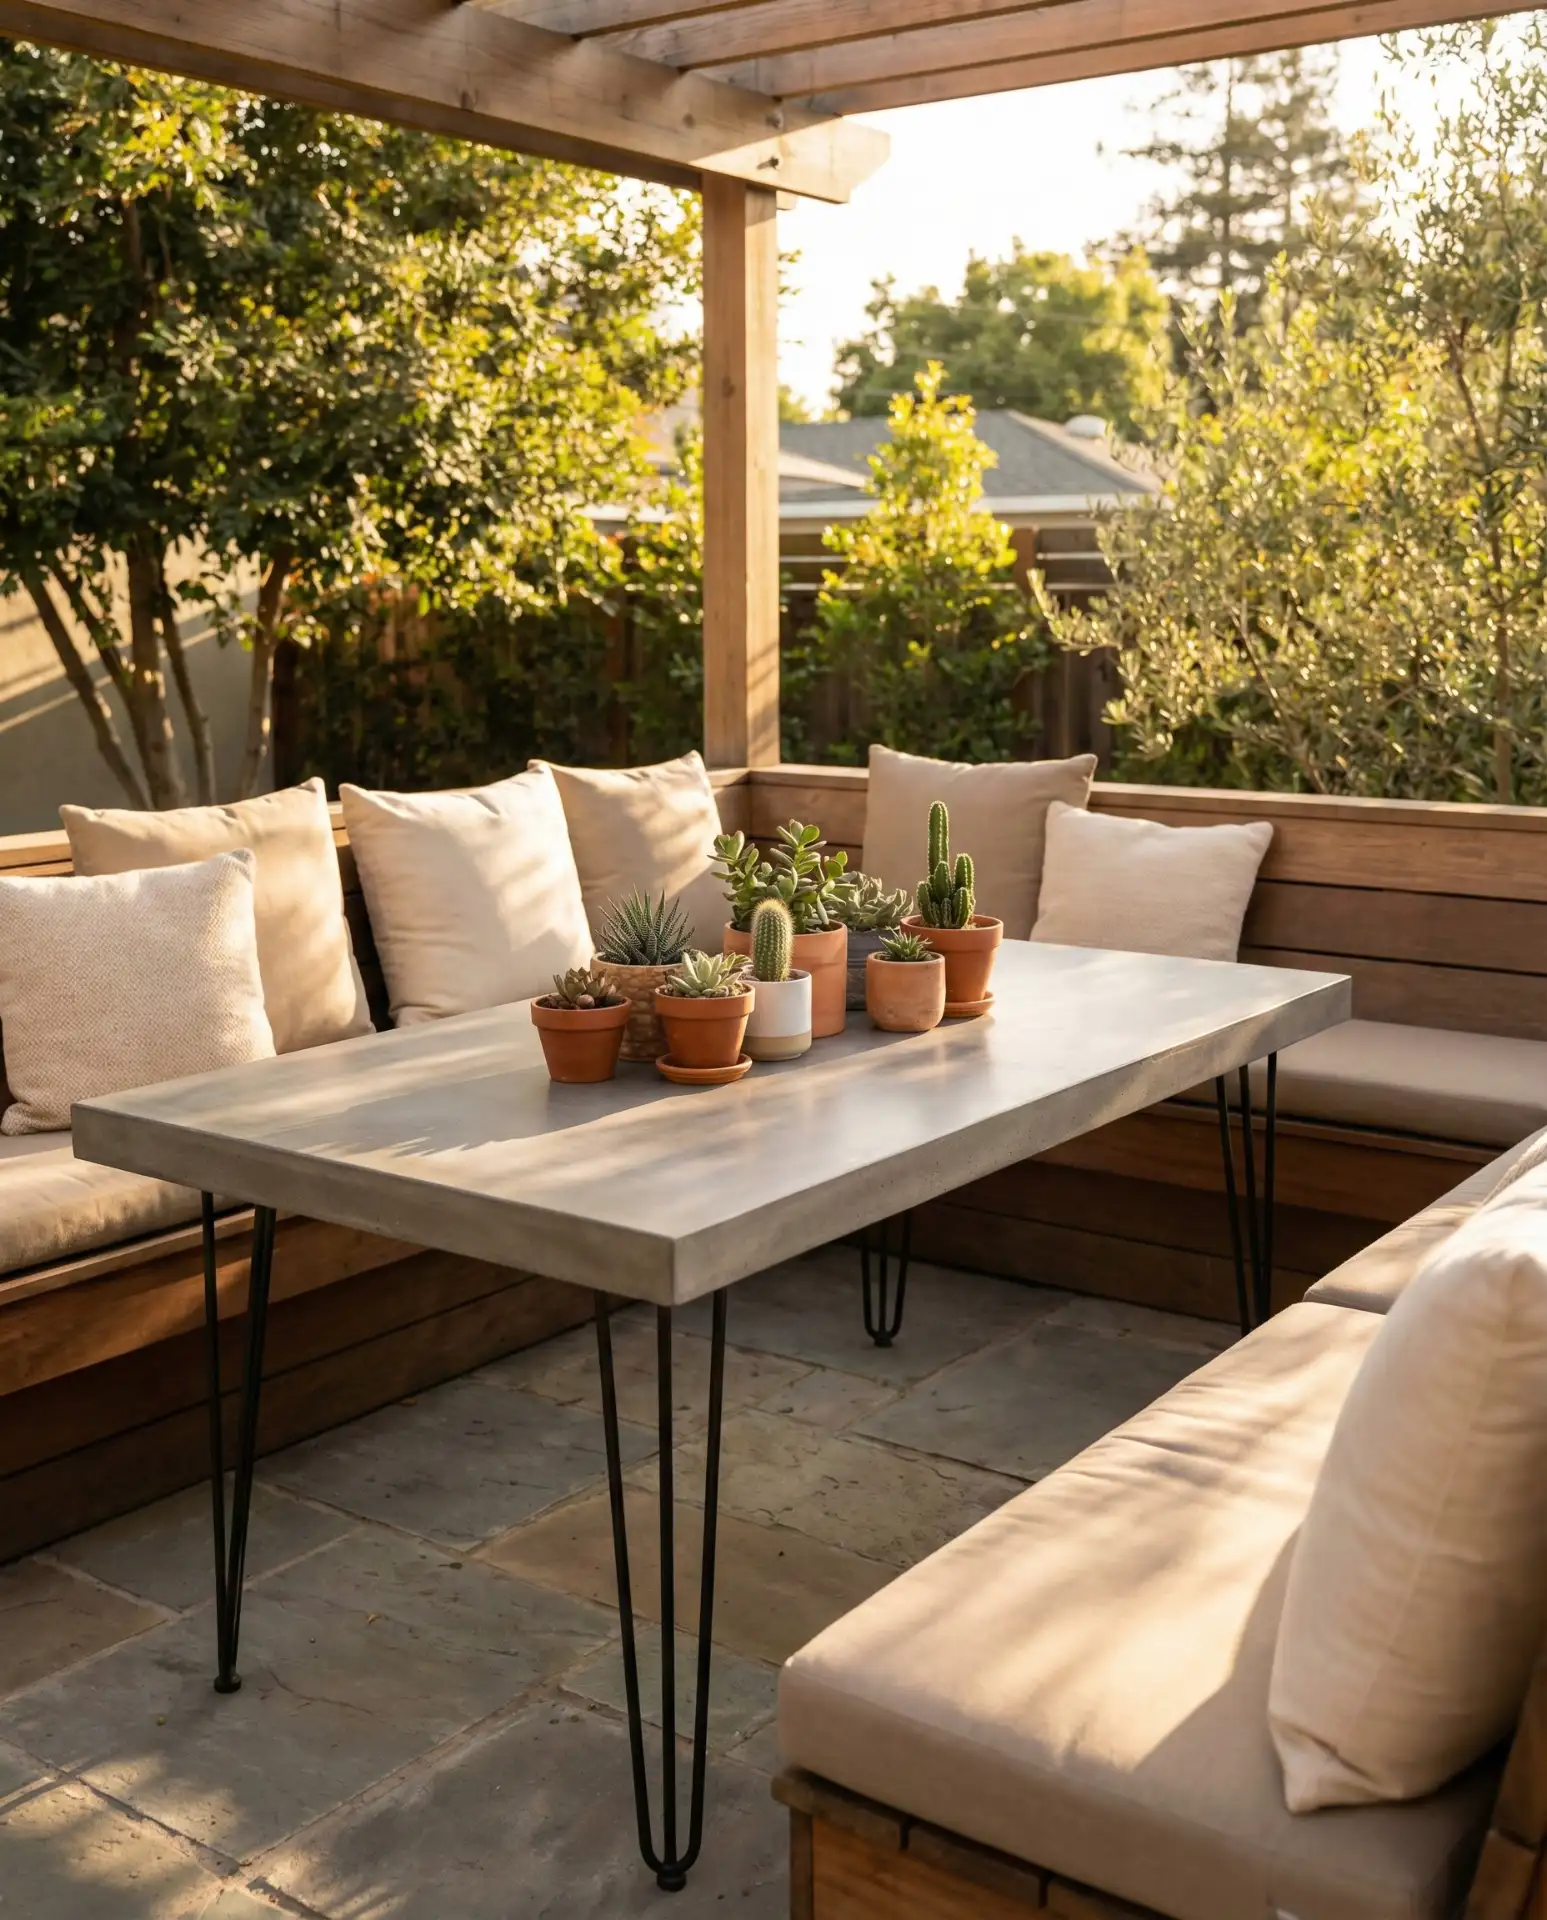
Concrete tables work particularly well in the Southwest and Southern California, where the aesthetic aligns with desert modernism and drought-tolerant landscaping. Budget-wise, a DIY concrete pour can cost as little as $40 in materials if you already have the mold and sealant, making it one of the most affordable top replacement ideas available. Just remember that concrete is heavy—factor in reinforcement if your base wasn’t originally designed to support that much weight.
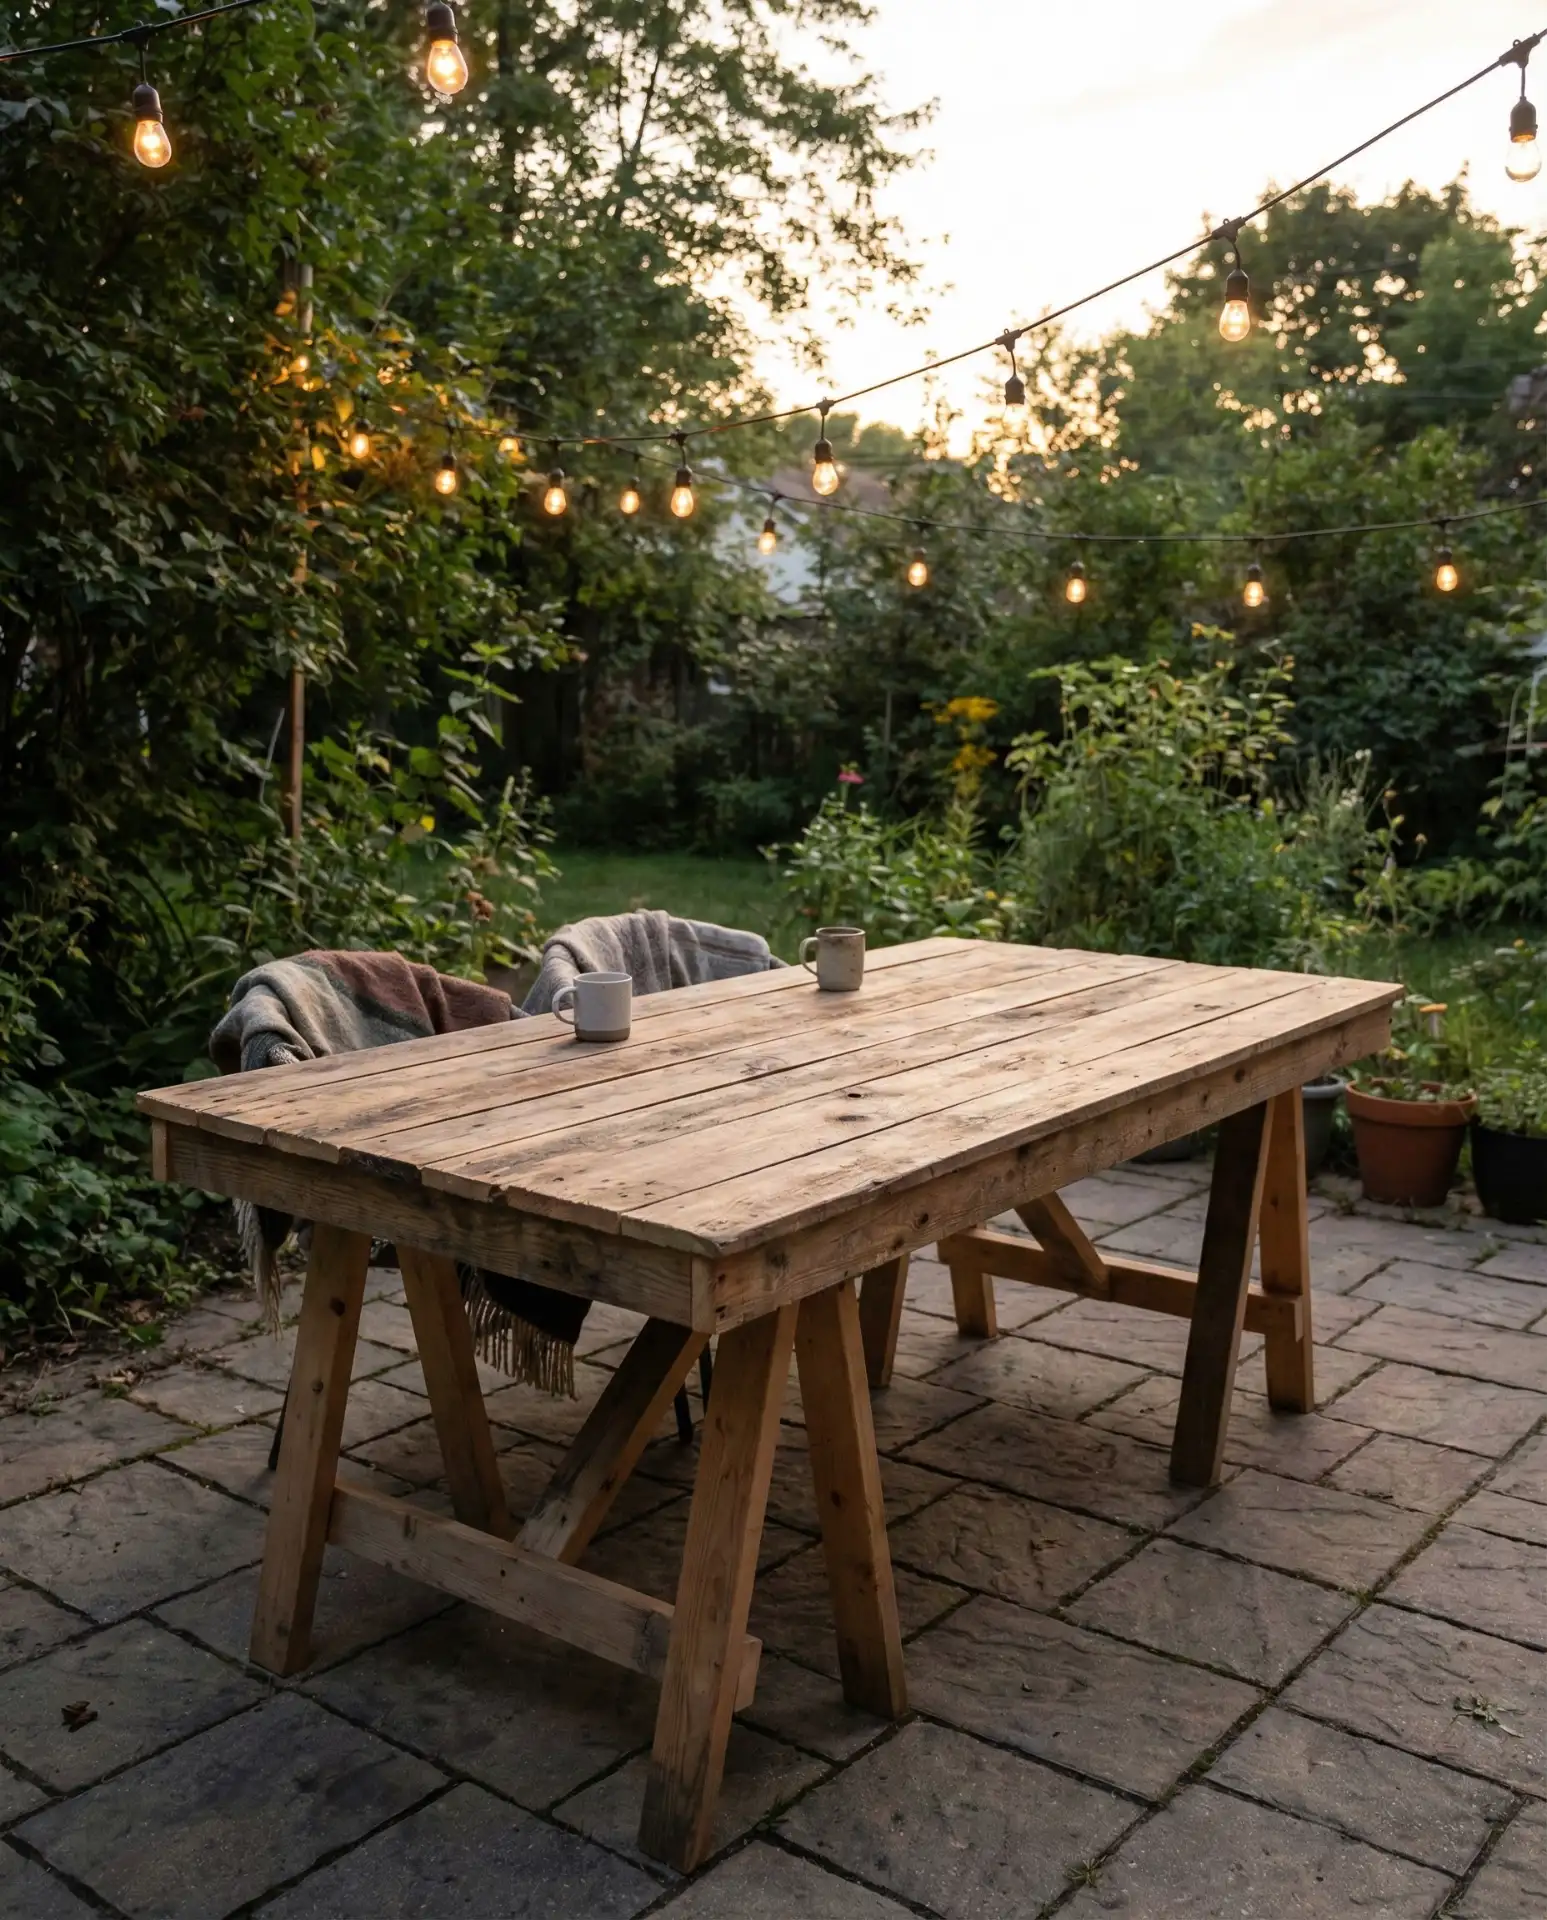
3. Reclaimed Wood Plank Overlay

Using reclaimed wood planks to resurface a patio table adds warmth and character that new lumber simply can’t replicate. The weathered texture and natural color variations make each piece unique, and the process is straightforward: secure the planks to a plywood base, sand smooth, and finish with an exterior-grade sealant. This is one of the most popular makeover techniques for homeowners looking to blend rustic charm with functional outdoor furniture. 
A neighbor in Portland refinished her table this way using barn wood from a demolished structure outside the city, and three years later it still looks fantastic—even with Oregon’s wet winters. The key is using a marine-grade polyurethane that can handle moisture without peeling. Many people make the mistake of using indoor wood glue, which fails within months when exposed to humidity and temperature swings.
4. Painted Geometric Patterns
A painted geometric design can completely transform a plain patio table without requiring advanced carpentry skills or expensive materials. This approach works on nearly any surface— wood , metal, or even sealed concrete —and gives you full control over color and pattern. Tape off your design with painter’s tape, apply outdoor acrylic paint in layers, and seal with a UV-resistant topcoat to protect against fading and weather damage. 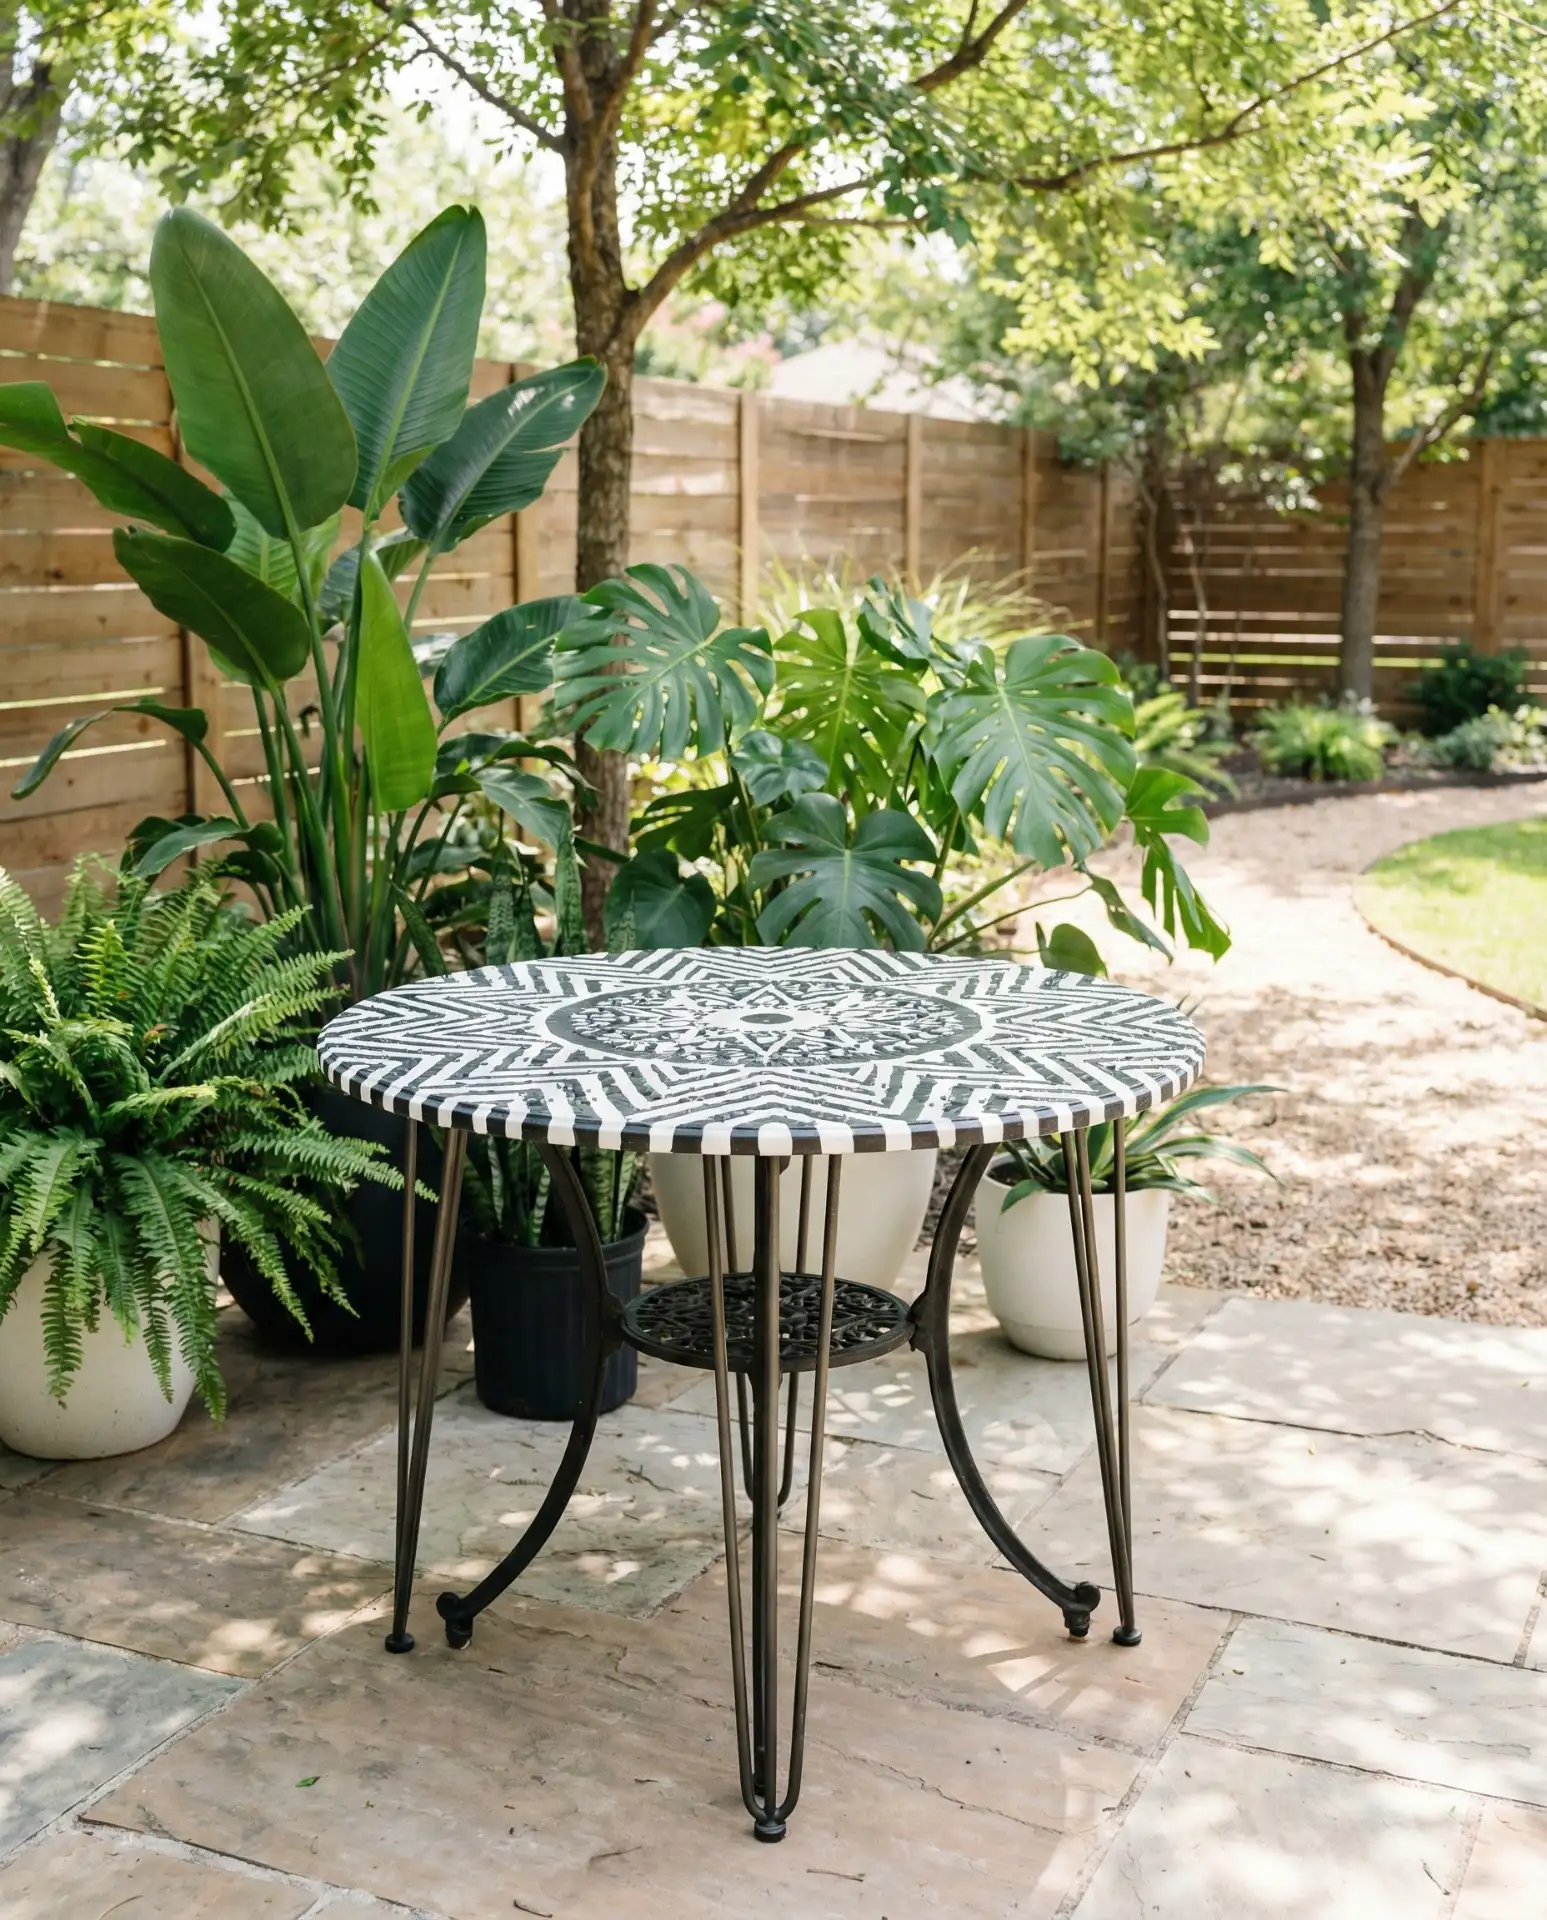
This technique is especially popular in warmer climates like Florida and Arizona, where bold colors and patterns reflect the vibrant outdoor lifestyle. The entire project can be completed for under $30 if you use leftover house paint and tape you already own. Experts recommend doing this work in temperatures between 50–85°F—paint that’s applied in extreme heat or cold won’t cure properly and will chip within weeks.
5. Live-Edge Slab for Natural Elegance

A live-edge wooden slab preserves the natural contours and bark line of the tree, creating a one-of-a-kind surface that celebrates organic beauty. These slabs—often sourced from walnut, oak, or cedar—can be mounted on existing wrought iron or steel bases, making them an excellent top replacement option for tables with sturdy frames. The raw edge and visible grain patterns make this style a favorite for backyard spaces that emphasize natural materials and craftsmanship. 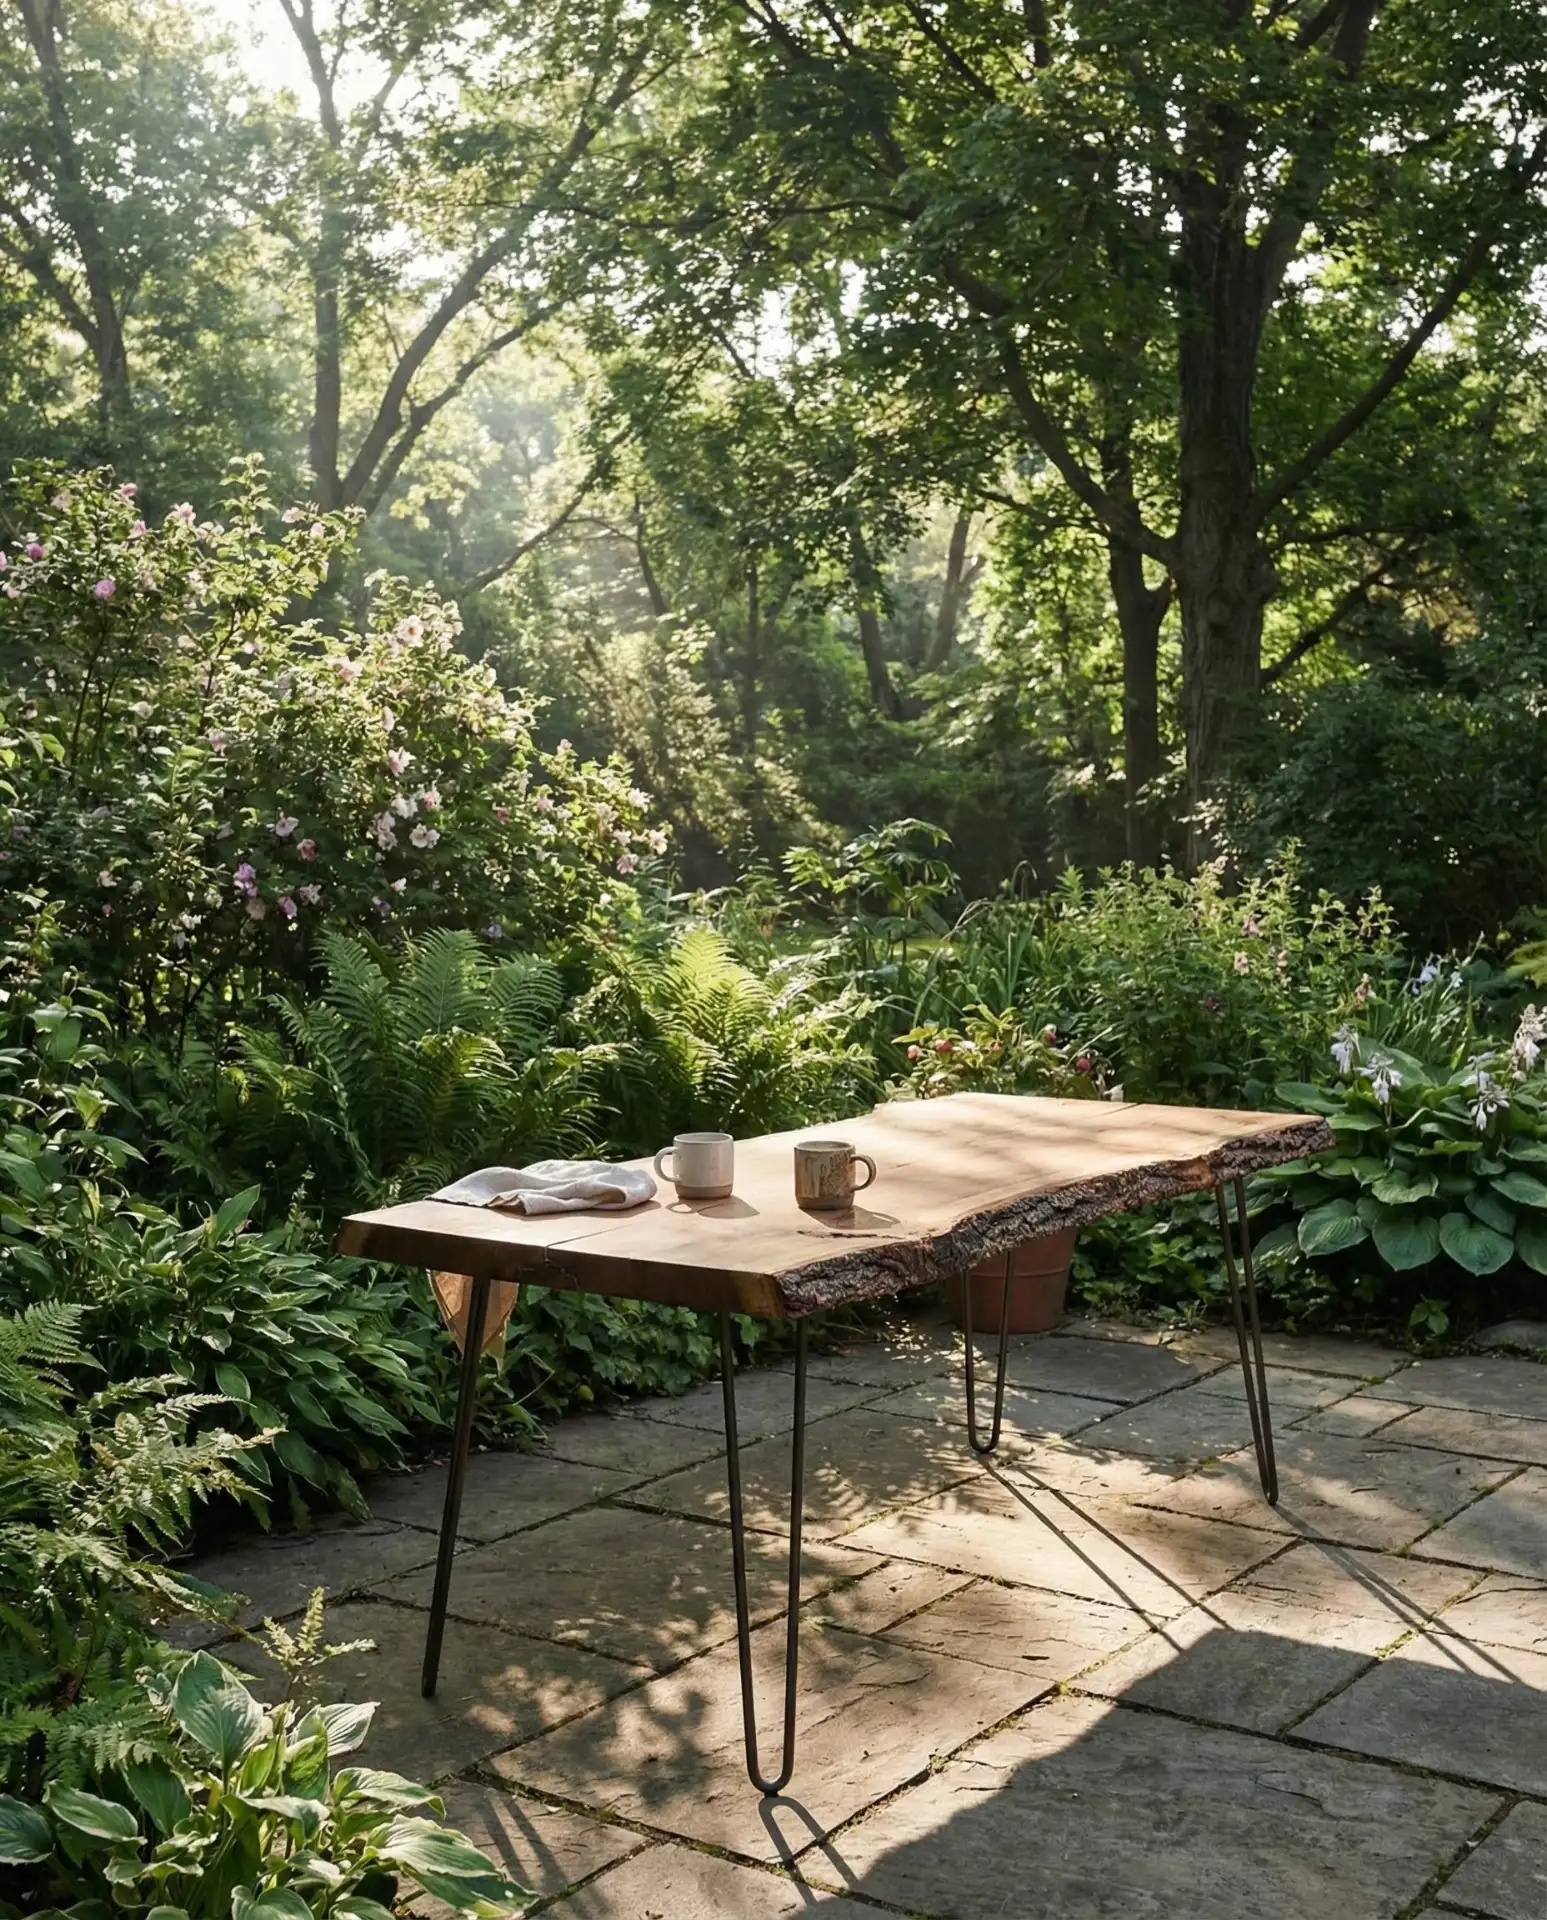
Real homeowners often struggle with finding slabs that are properly dried and sealed—green wood will warp and crack outdoors, no matter how much you paid for it. Look for kiln-dried slabs with moisture content below 12%, and plan to apply at least three coats of penetrating oil or epoxy resin to protect against water infiltration. This isn’t a weekend project, but the payoff is a table that becomes a conversation piece every time you host.
6. Outdoor Fabric-Wrapped Centerpiece Display
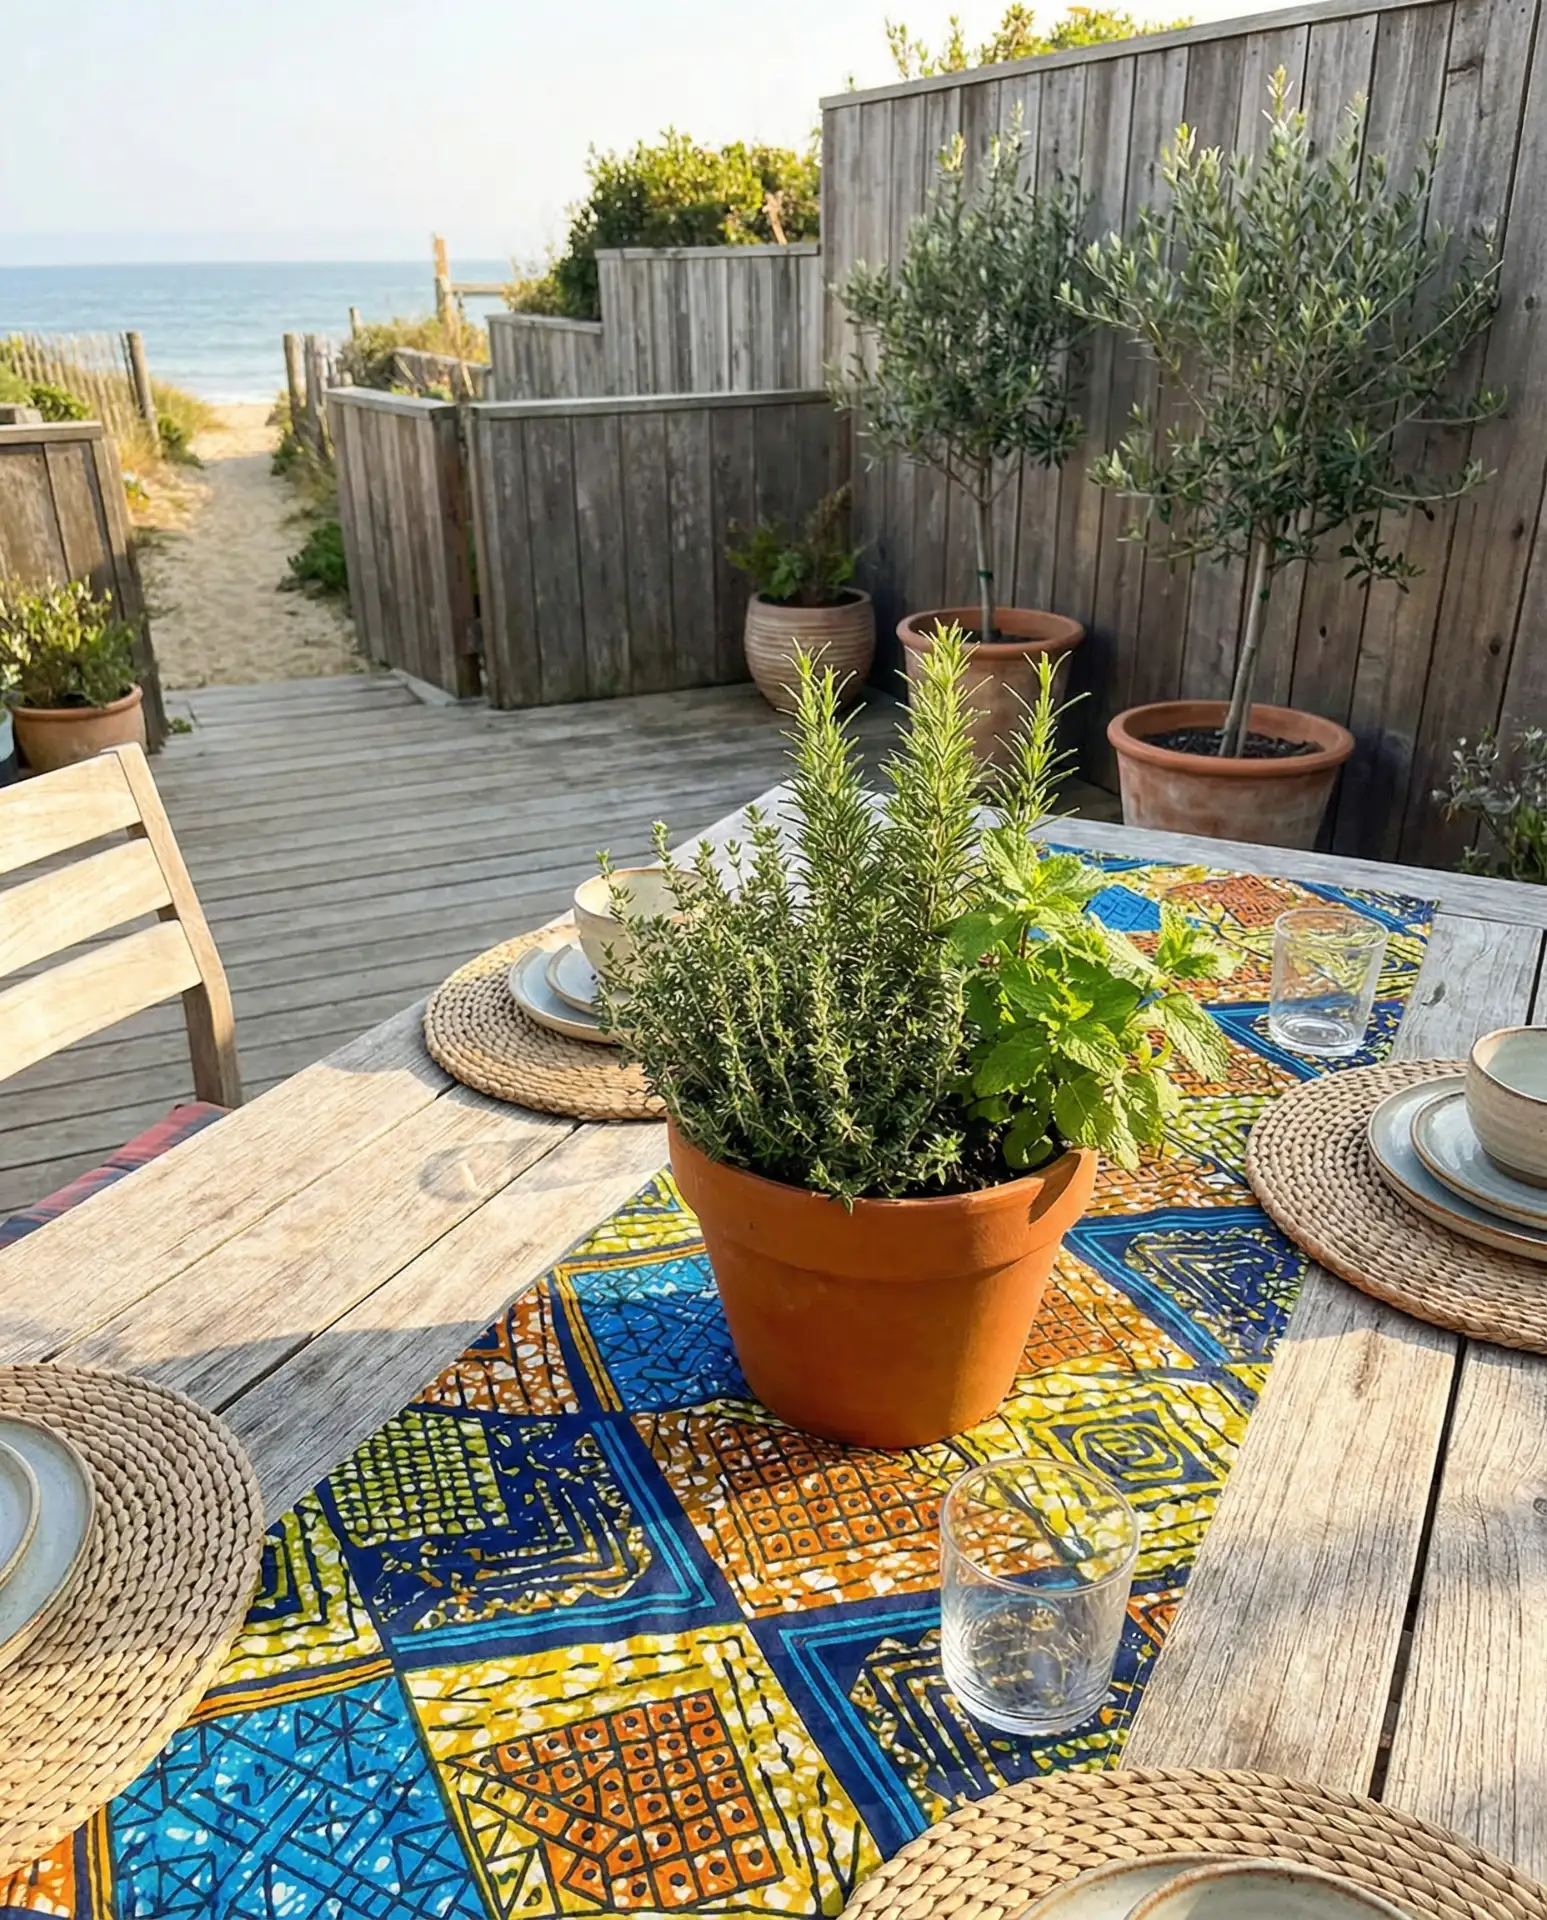
Creating a fabric-wrapped tray or runner as a centerpiece allows you to change the look of your patio table seasonally without committing to permanent decor . Use outdoor-grade fabric in weather-resistant materials like Sunbrella or solution-dyed acrylic, and wrap it around a wooden or metal base to create a textured, layered focal point. This approach is particularly effective for outdoor dining tables where you want to soften the hard surface and add color. 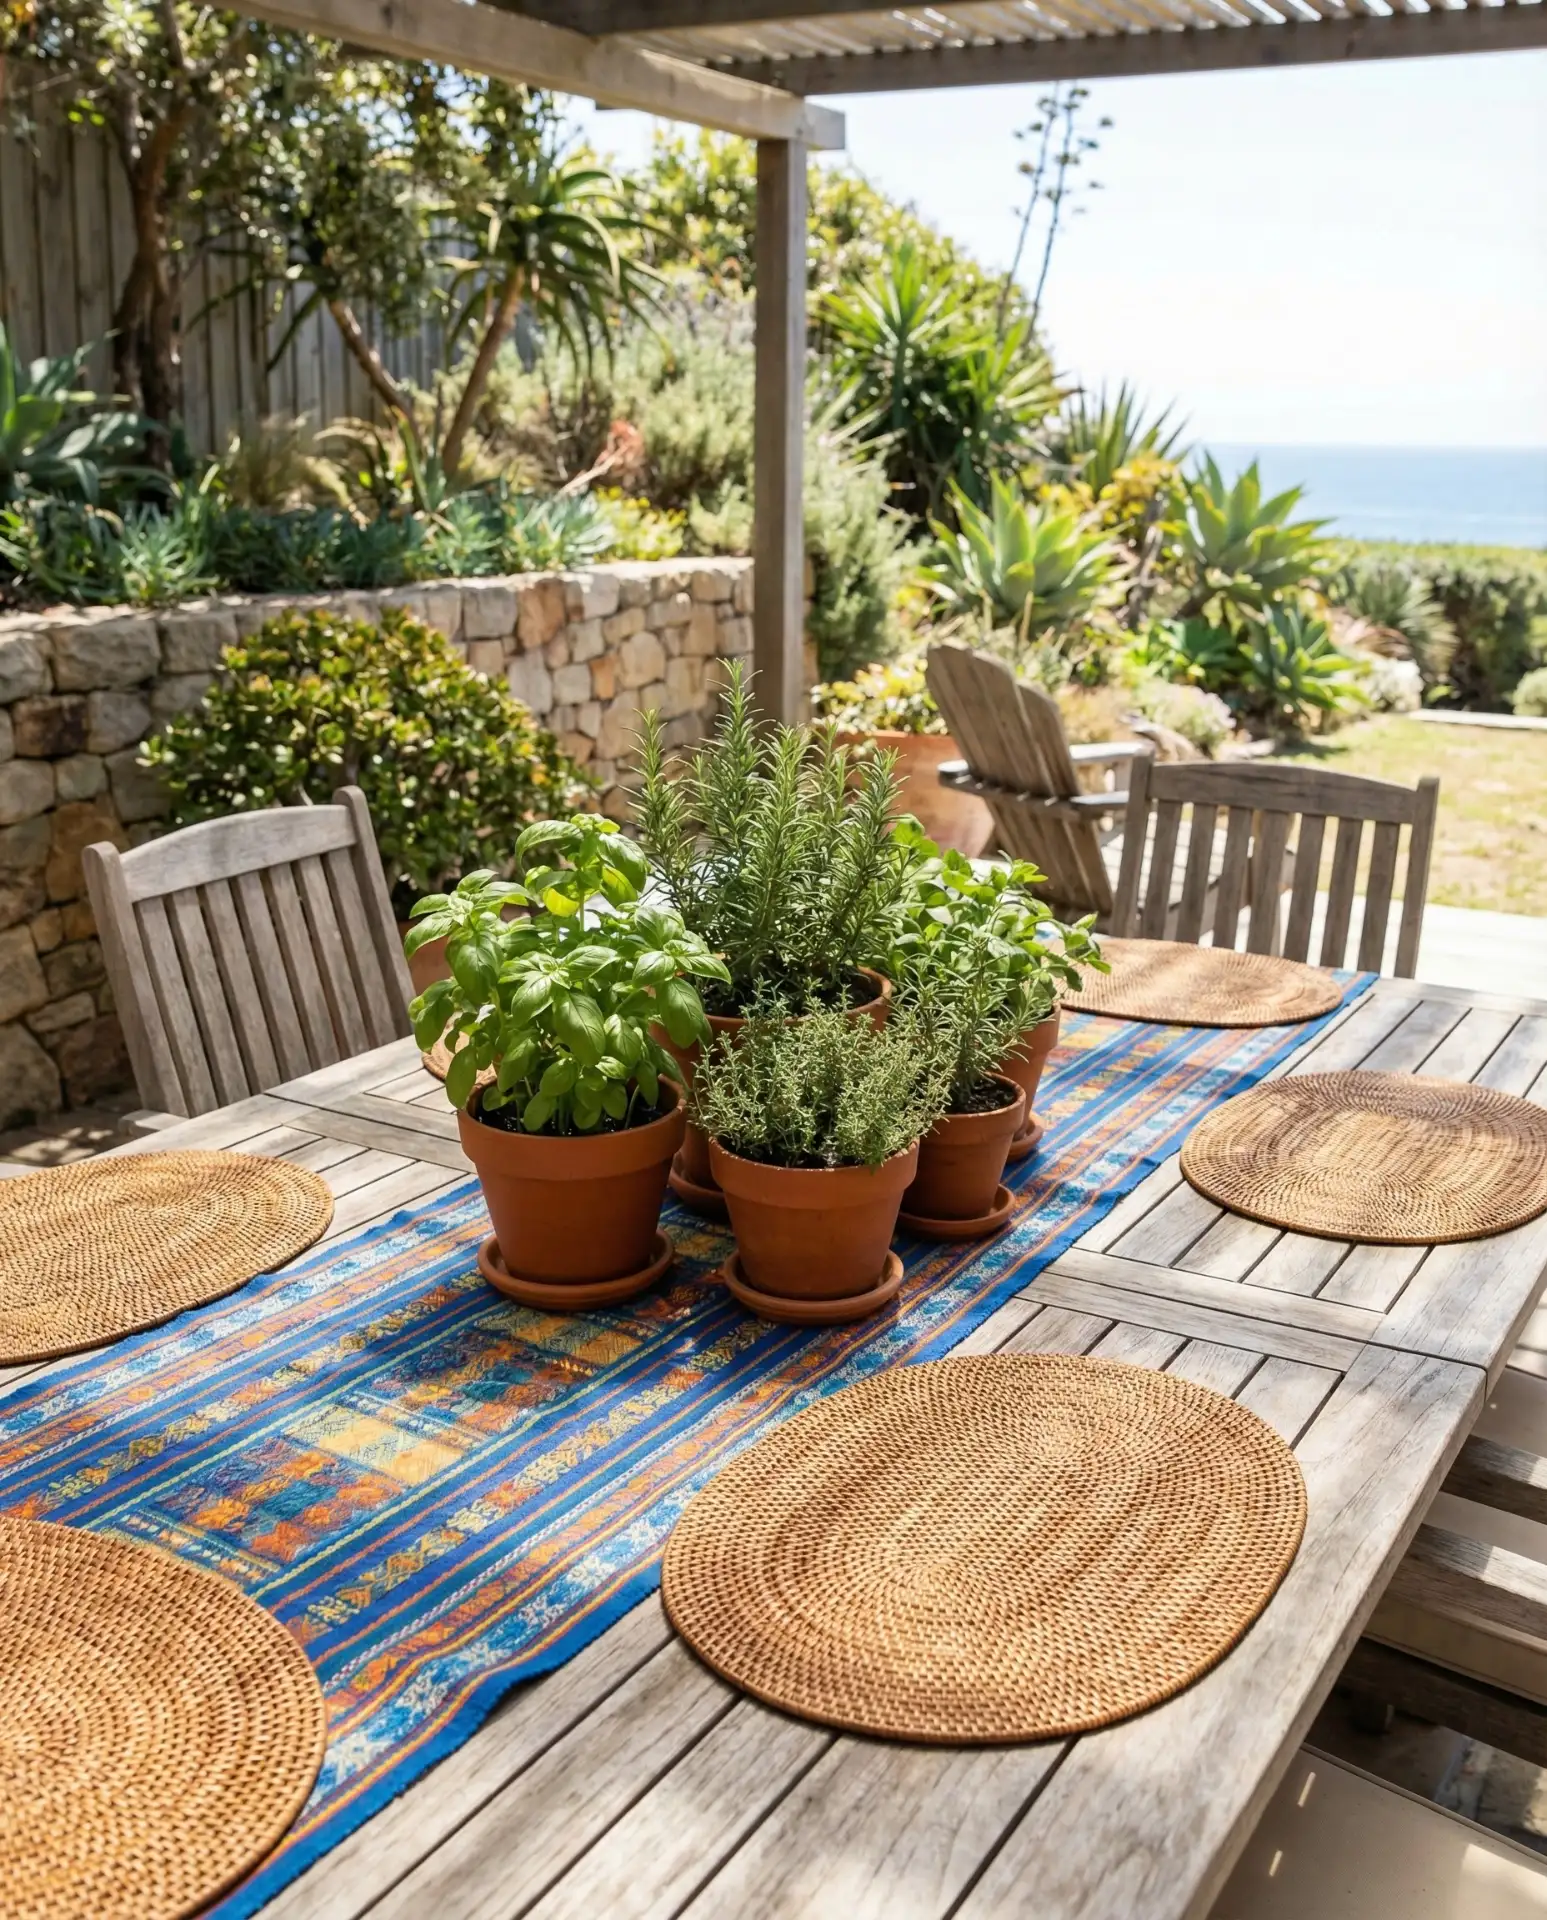
Fabric-based centerpiece outdoor arrangements work best on covered patios or under umbrellas, where direct rain won’t saturate the material. In the Midwest and Northeast, homeowners tend to swap fabrics three or four times a year—lightweight linens in summer, heavier textures in fall—to keep the space feeling fresh. The mistake most people make is choosing cotton or untreated fabrics, which mildew in days when exposed to morning dew.
7. Succulent Garden Embedded in Table Surface
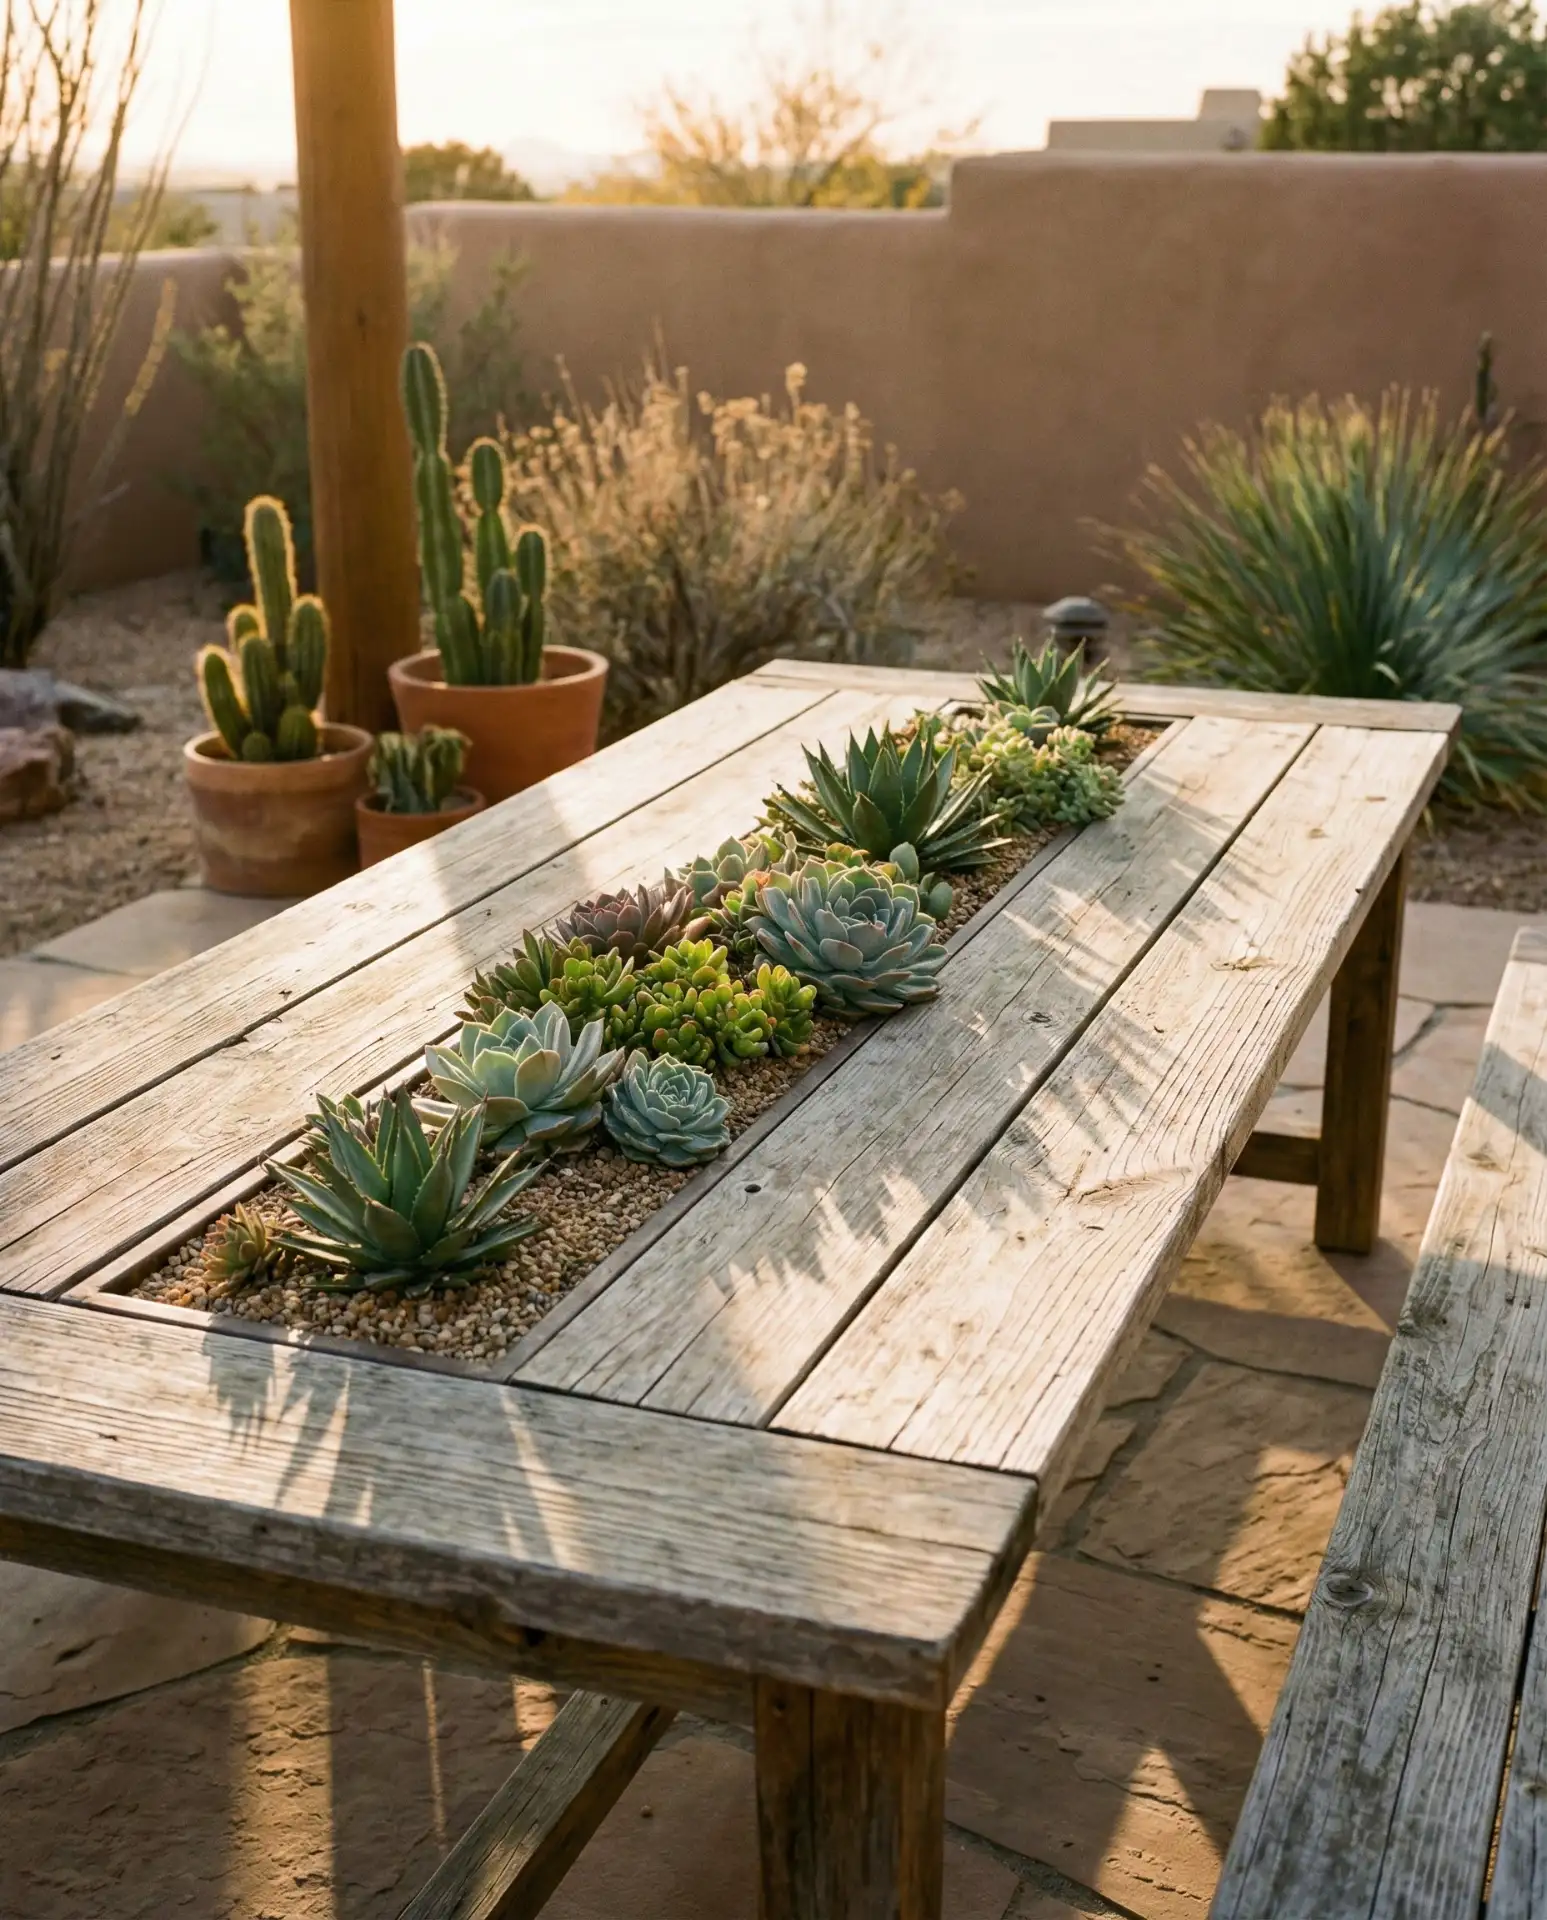
Cutting a channel or trough directly into your patio table and filling it with soil and succulents creates a living centerpiece that requires minimal maintenance. This DIY project works best with wooden tables where you can route out a section down the center, line it with waterproof membrane, and plant drought-tolerant varieties. The result is a striking blend of furniture and landscape design that’s especially popular in California and the Southwest. 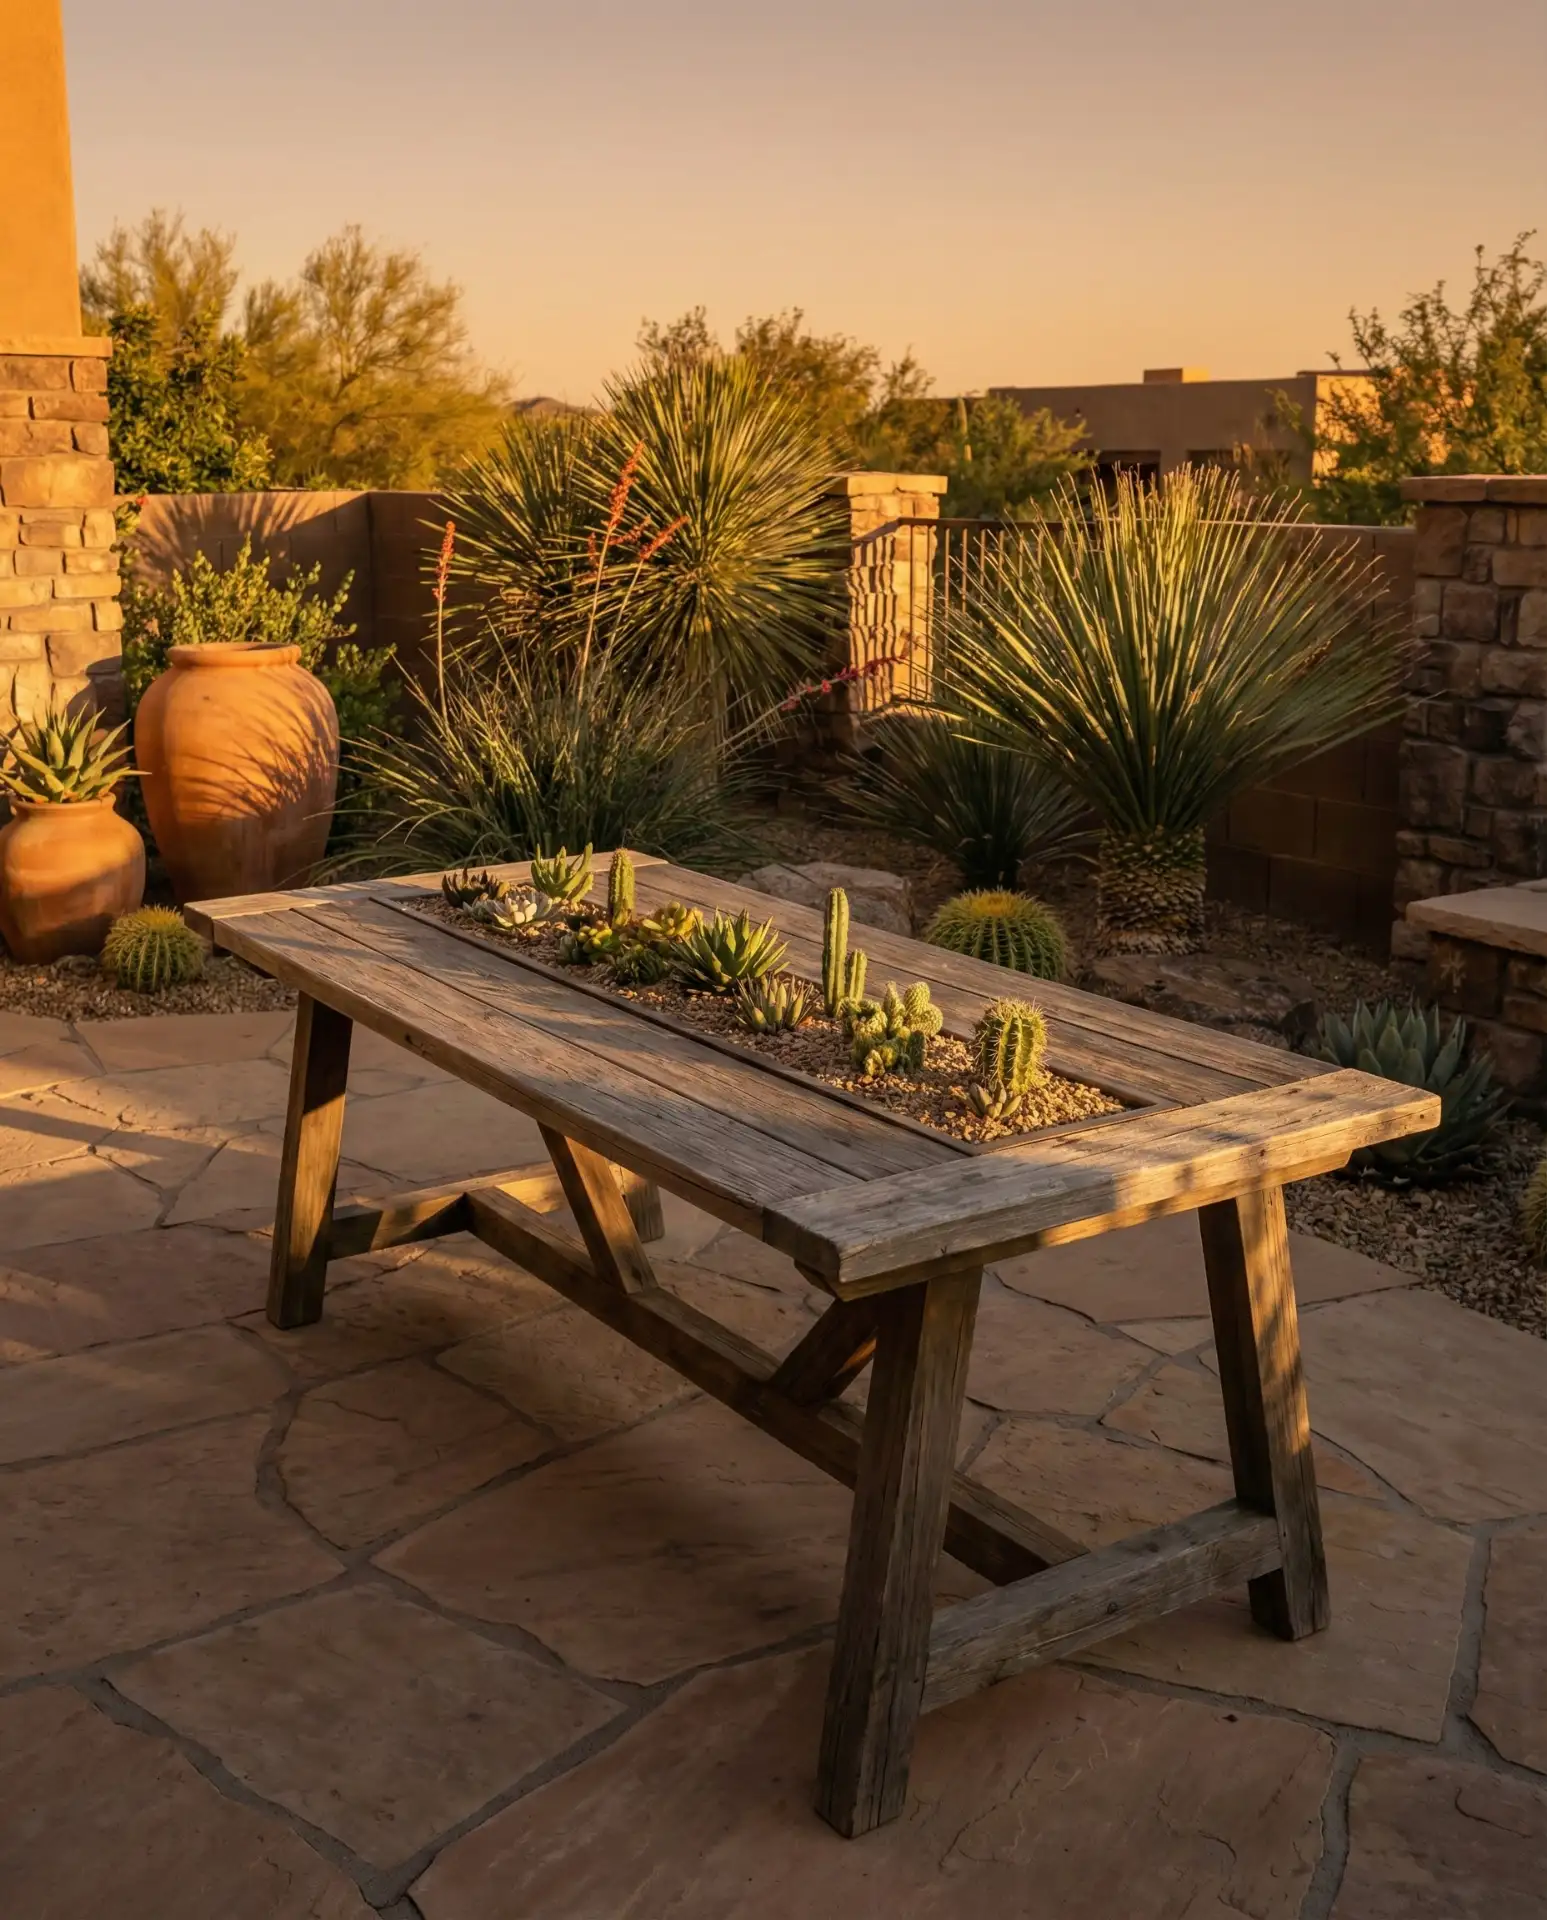
Where it works best: regions with low humidity and infrequent rain, where succulents can thrive without constant drainage concerns. In wetter climates, you’ll need to drill weep holes and use fast-draining cactus soil, or the plants will rot within weeks. One common mistake is planting succulents too densely—they need room to grow, and overcrowding leads to fungal issues and weak root systems.
8. Wrought Iron Frame with Glass Tile Inlay
Pairing a vintage or new wrought iron base with a custom glass tile top creates a durable, elegant surface that reflects light beautifully in outdoor settings. The glass tiles can be clear, frosted, or colored, and they’re adhered to a plywood or cement board substrate before being grouted. This combination is ideal for redo projects where the metal frame is still structurally sound but the original surface is beyond repair. 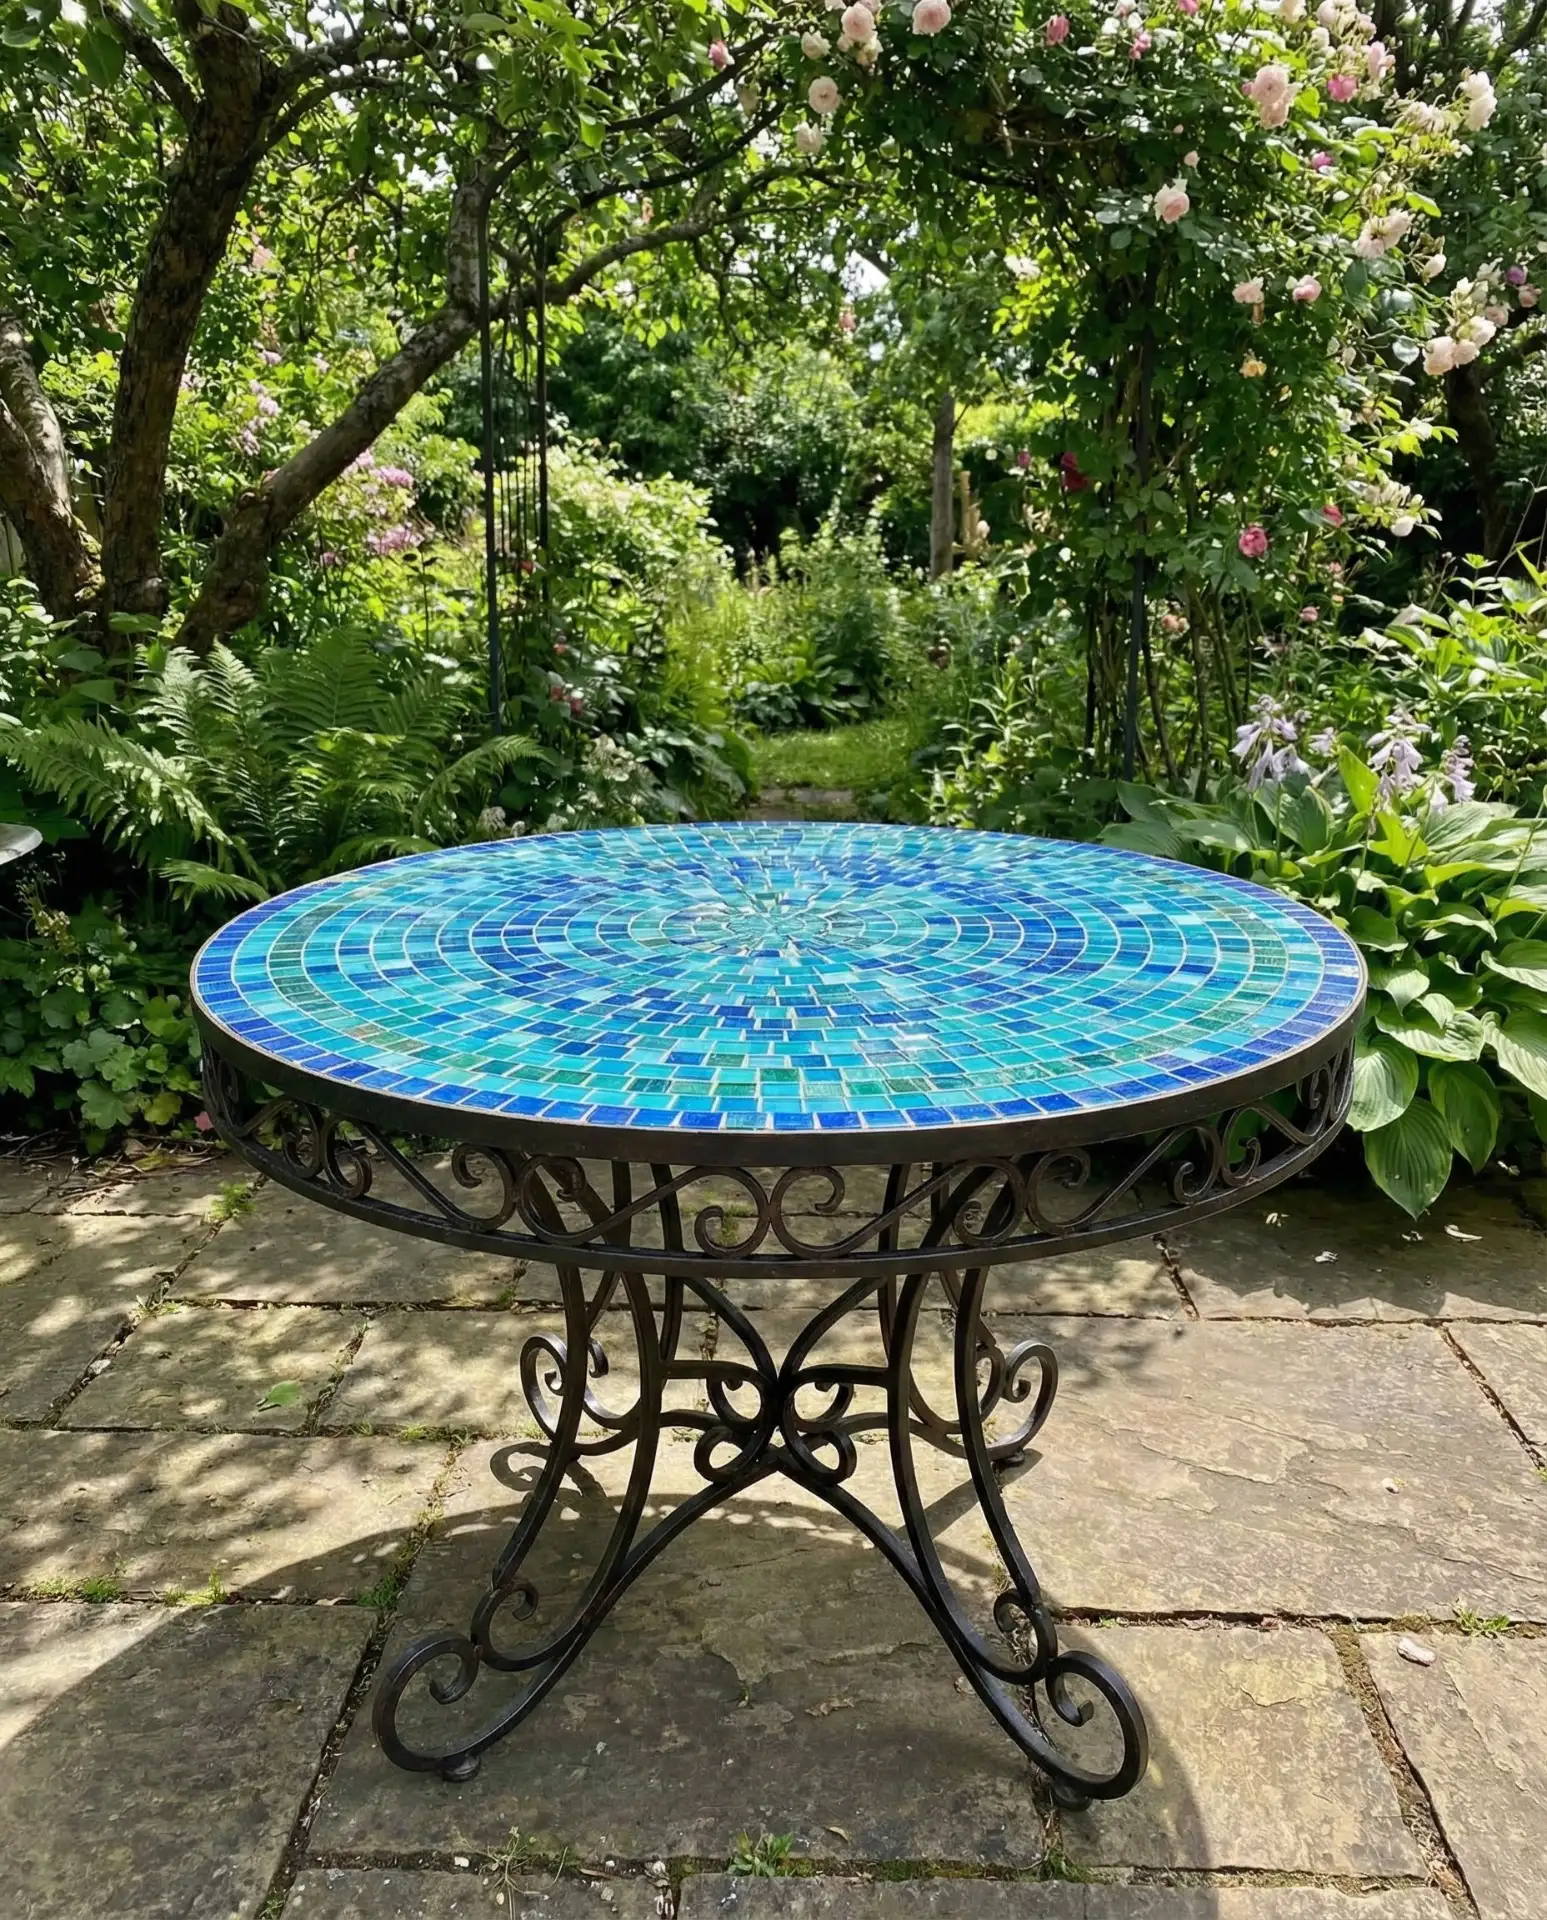
Glass tile is more forgiving than ceramic when it comes to temperature swings, which makes it a smart choice for regions with freeze-thaw cycles like the Northeast and Midwest. Homeowners often assume any tile adhesive will work, but you need a flexible, exterior-grade thinset that can handle expansion and contraction without cracking. Skipping this detail means you’ll be re-grouting every spring.
9. Pallet Wood Plank Table Build
Building a patio table entirely from reclaimed pallet wood is one of the most budget-friendly DIY projects available, and it delivers a rustic, farmhouse aesthetic that fits perfectly in backyard spaces. Disassemble the pallets, select the best planks, sand them smooth, and assemble them into a tabletop using wood screws and outdoor wood glue. The natural weathering and nail holes add character, and the entire project can be completed in a weekend. 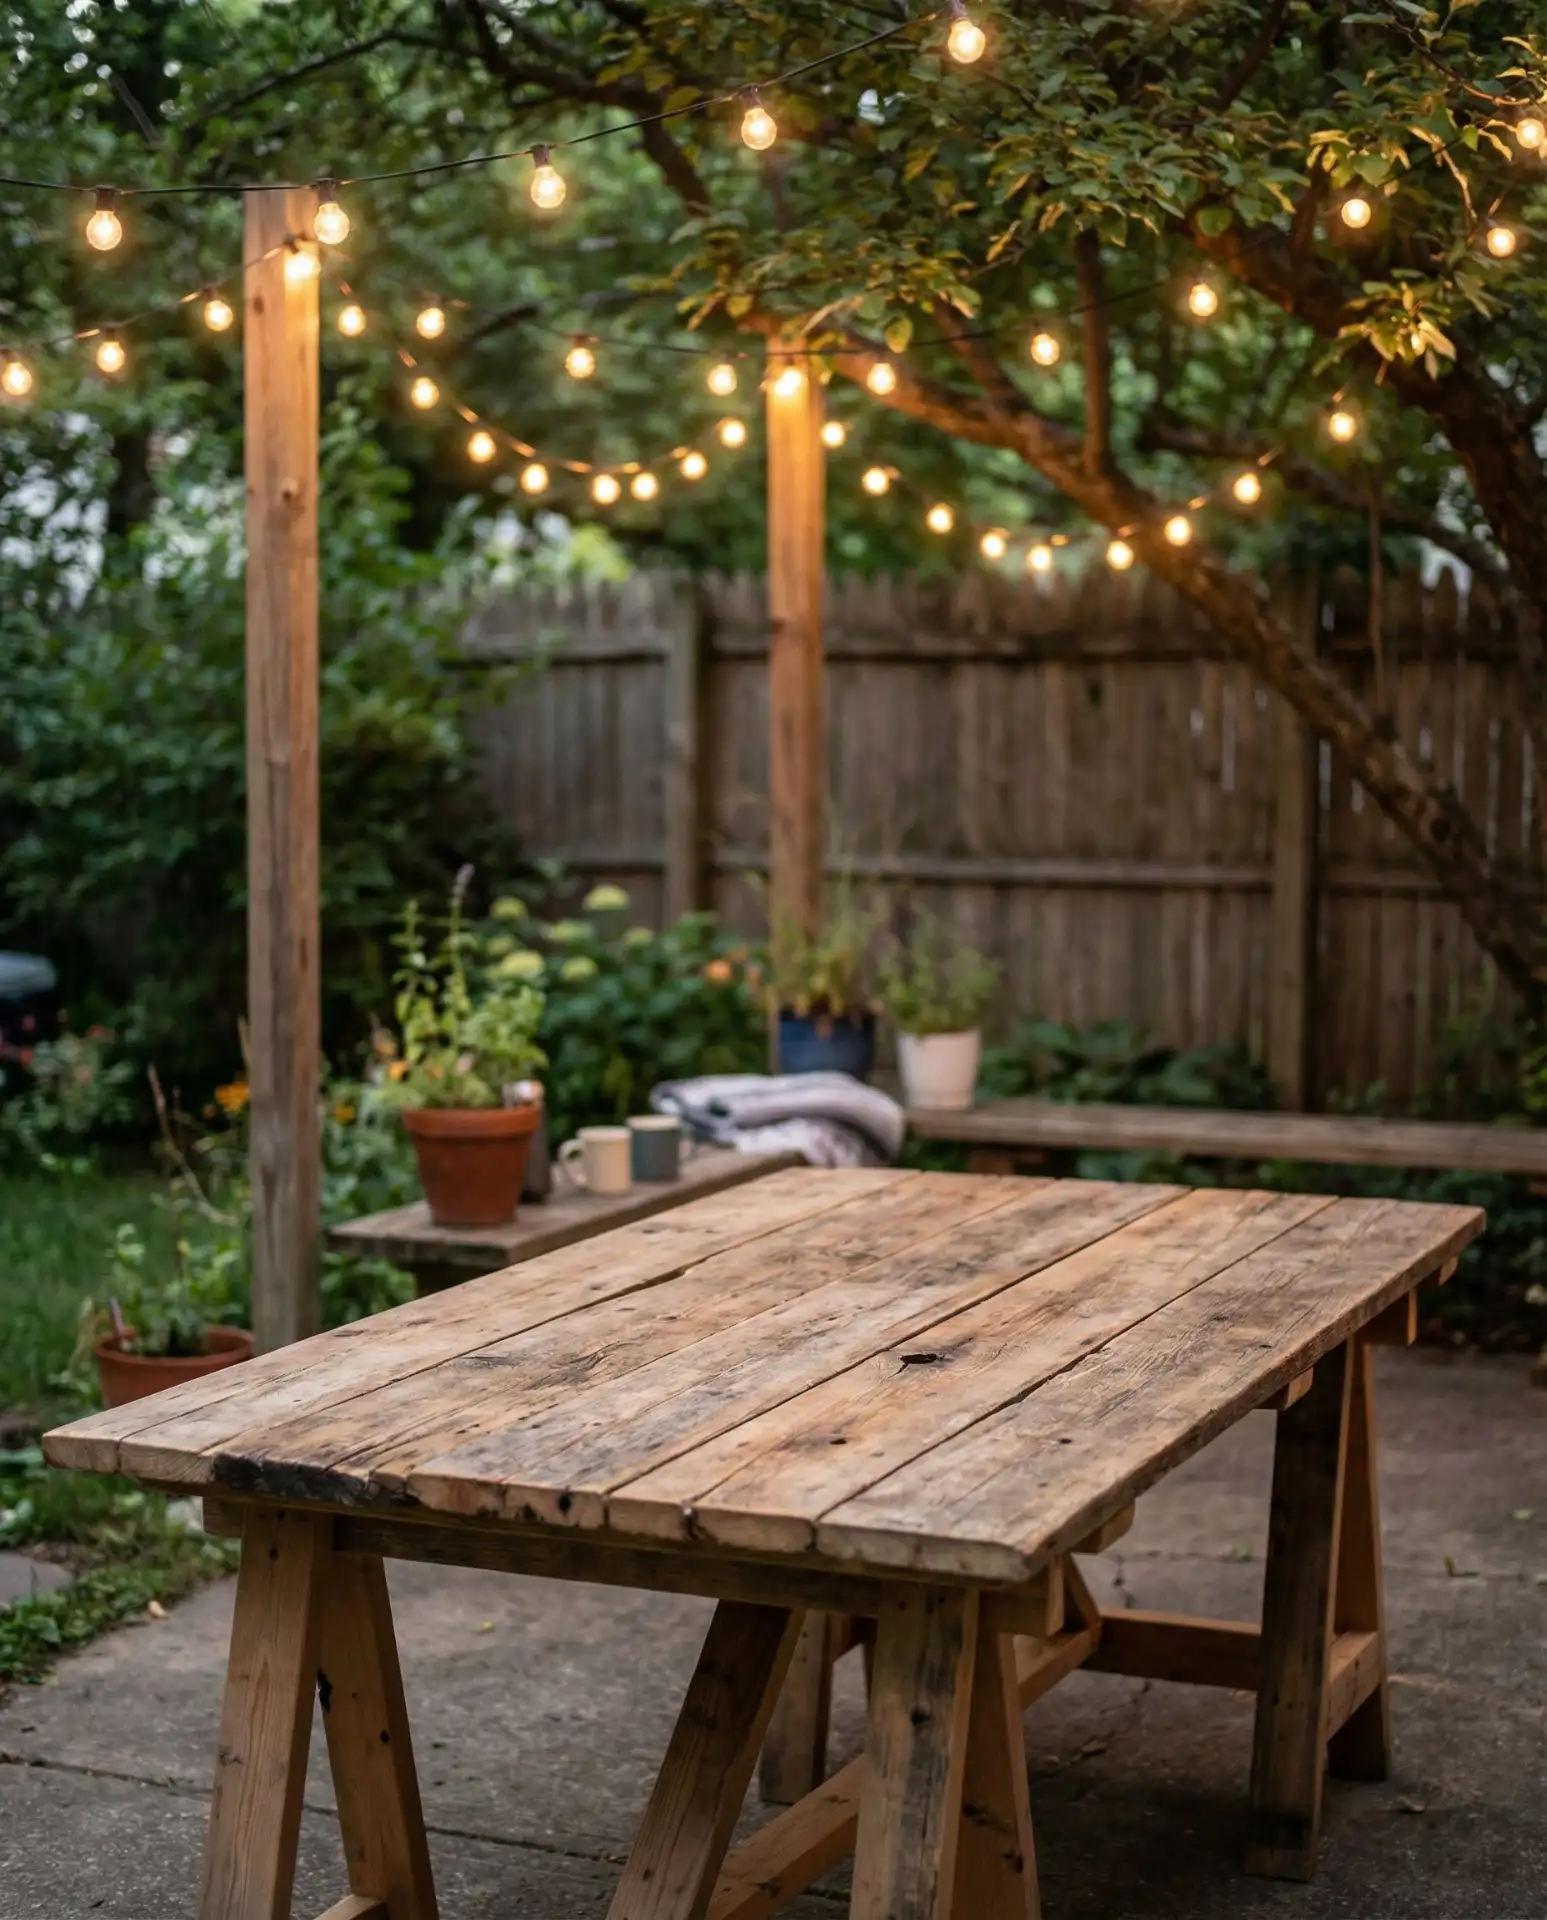
Practical insight: always check that pallets are stamped “HT” (heat-treated) rather than “MB” (methyl bromide-treated), as the latter contains chemicals you don’t want near food or prolonged contact. Many beginners also skip sanding the undersides, which leads to splinters and snags on clothing. A thorough sand and two coats of exterior stain will make pallet wood last five to seven years outdoors.
10. Umbrella Hole Reinforcement and Styling
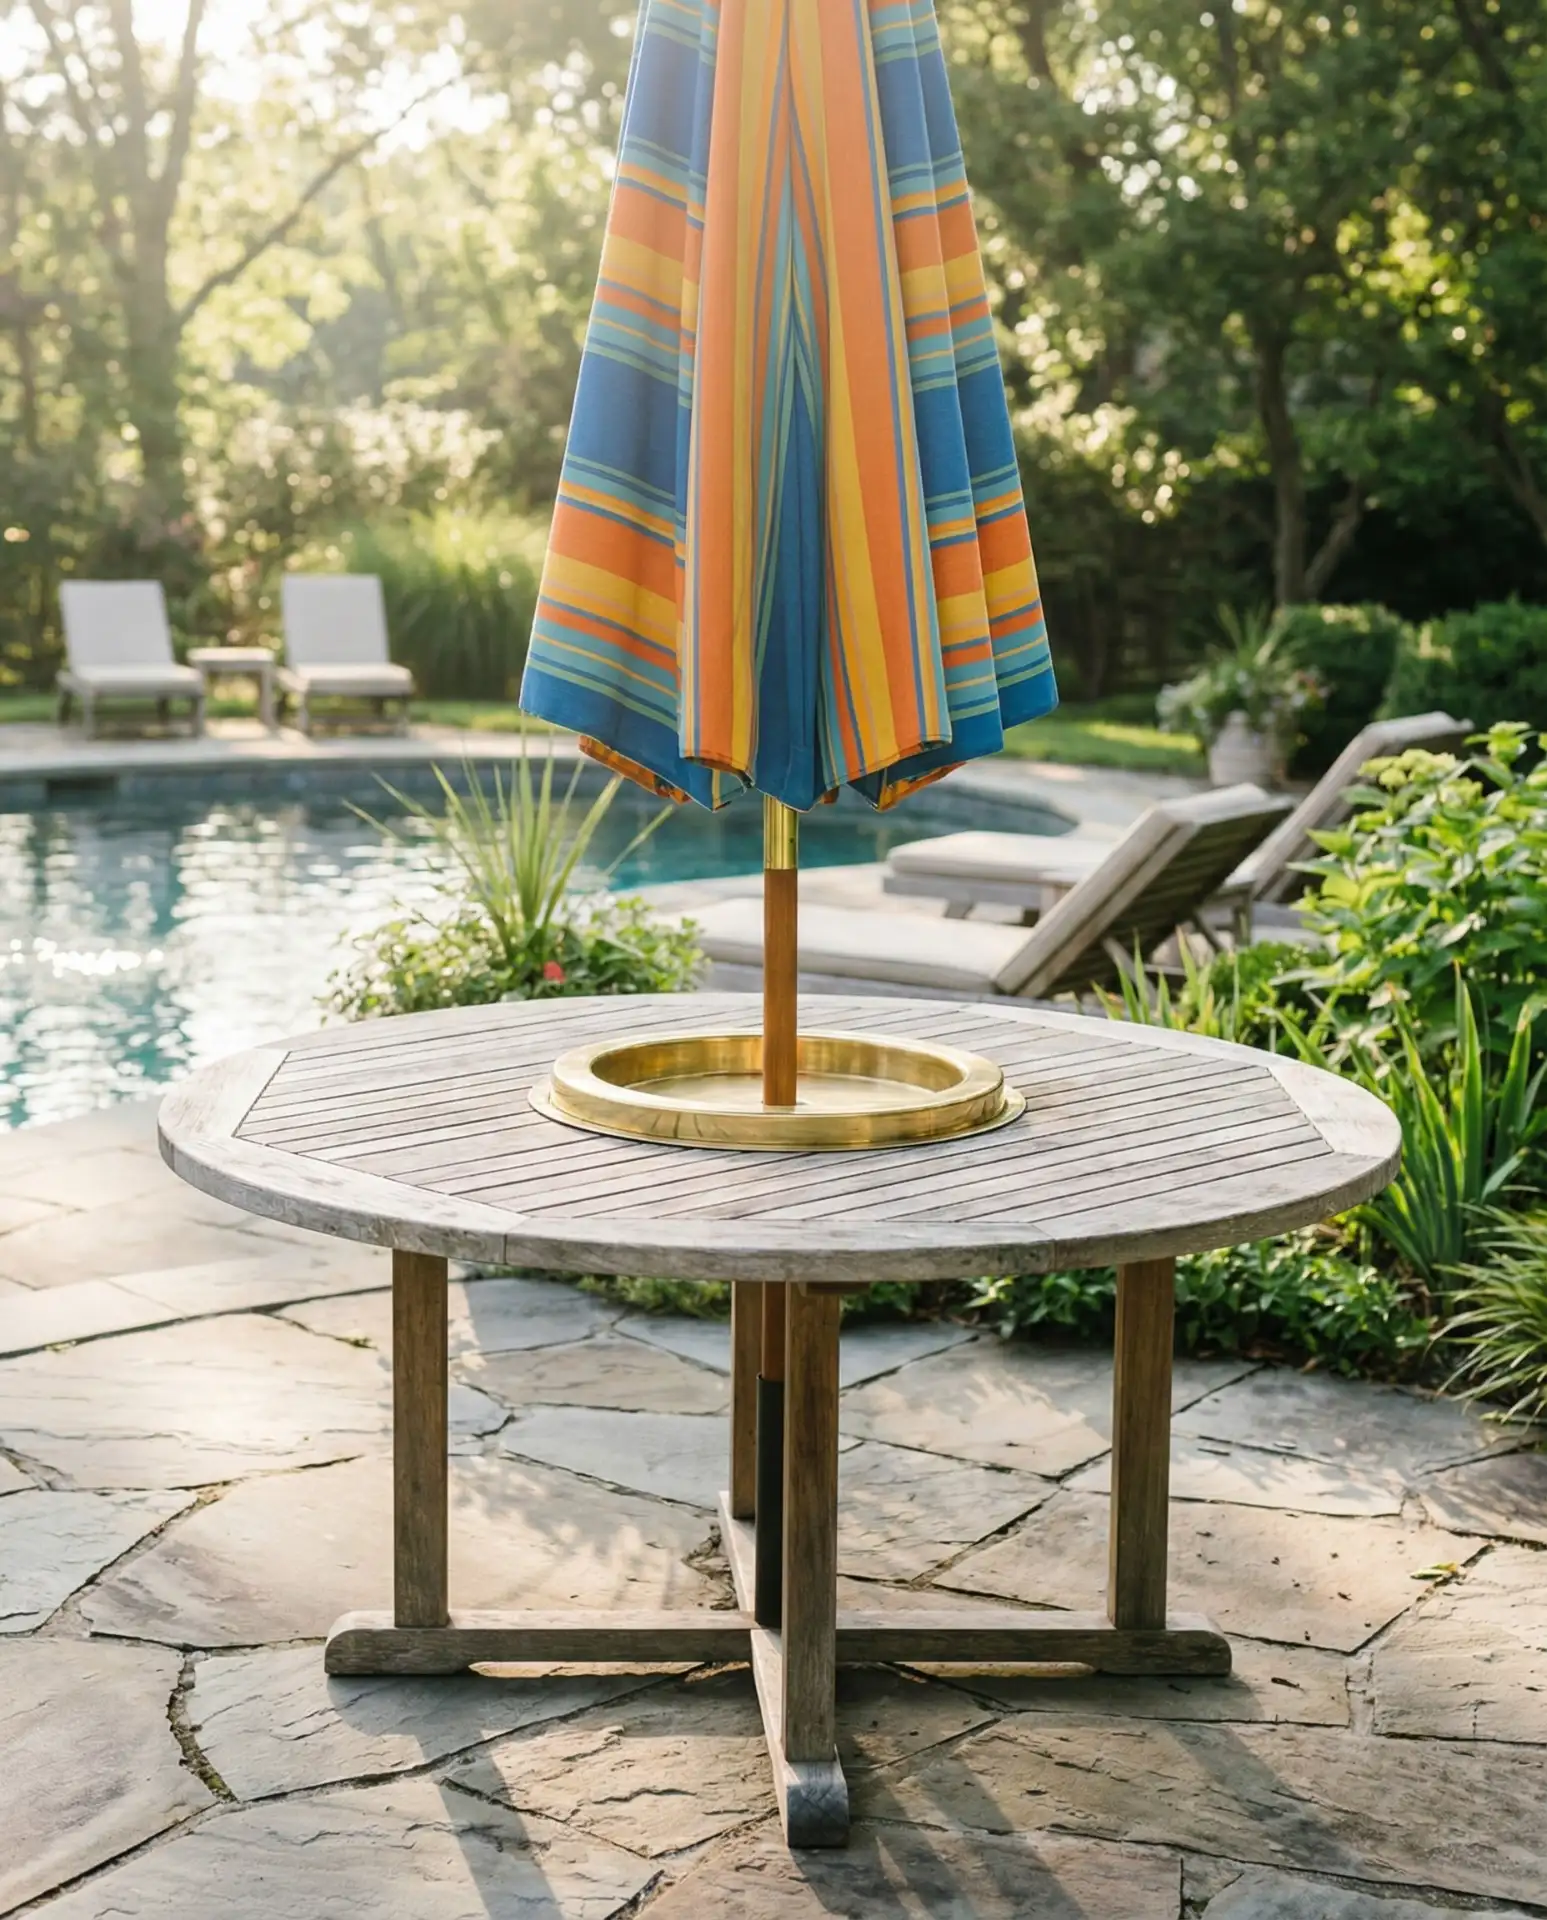
Adding or reinforcing an umbrella hole in your patio table can transform its functionality, especially in sunny climates where shade is essential. If your table doesn’t have one, you can drill and line the hole with a metal grommet or PVC sleeve to prevent splitting. For tables that already have a hole, consider upgrading the ring with a decorative metal insert that complements your outdoor decor while providing structural support. 
This upgrade is especially popular in Texas, Arizona, and Florida, where summer temperatures make unshaded outdoor dining uncomfortable. The typical cost for a grommet kit and drill bit is around $15, making it one of the easiest improvements you can make. Experts recommend drilling the hole slightly larger than the umbrella pole to allow for easy insertion and removal—too tight, and you’ll damage the wood or fabric every time you open and close the umbrella.
11. Rope-Wrapped Table Legs for Coastal Style
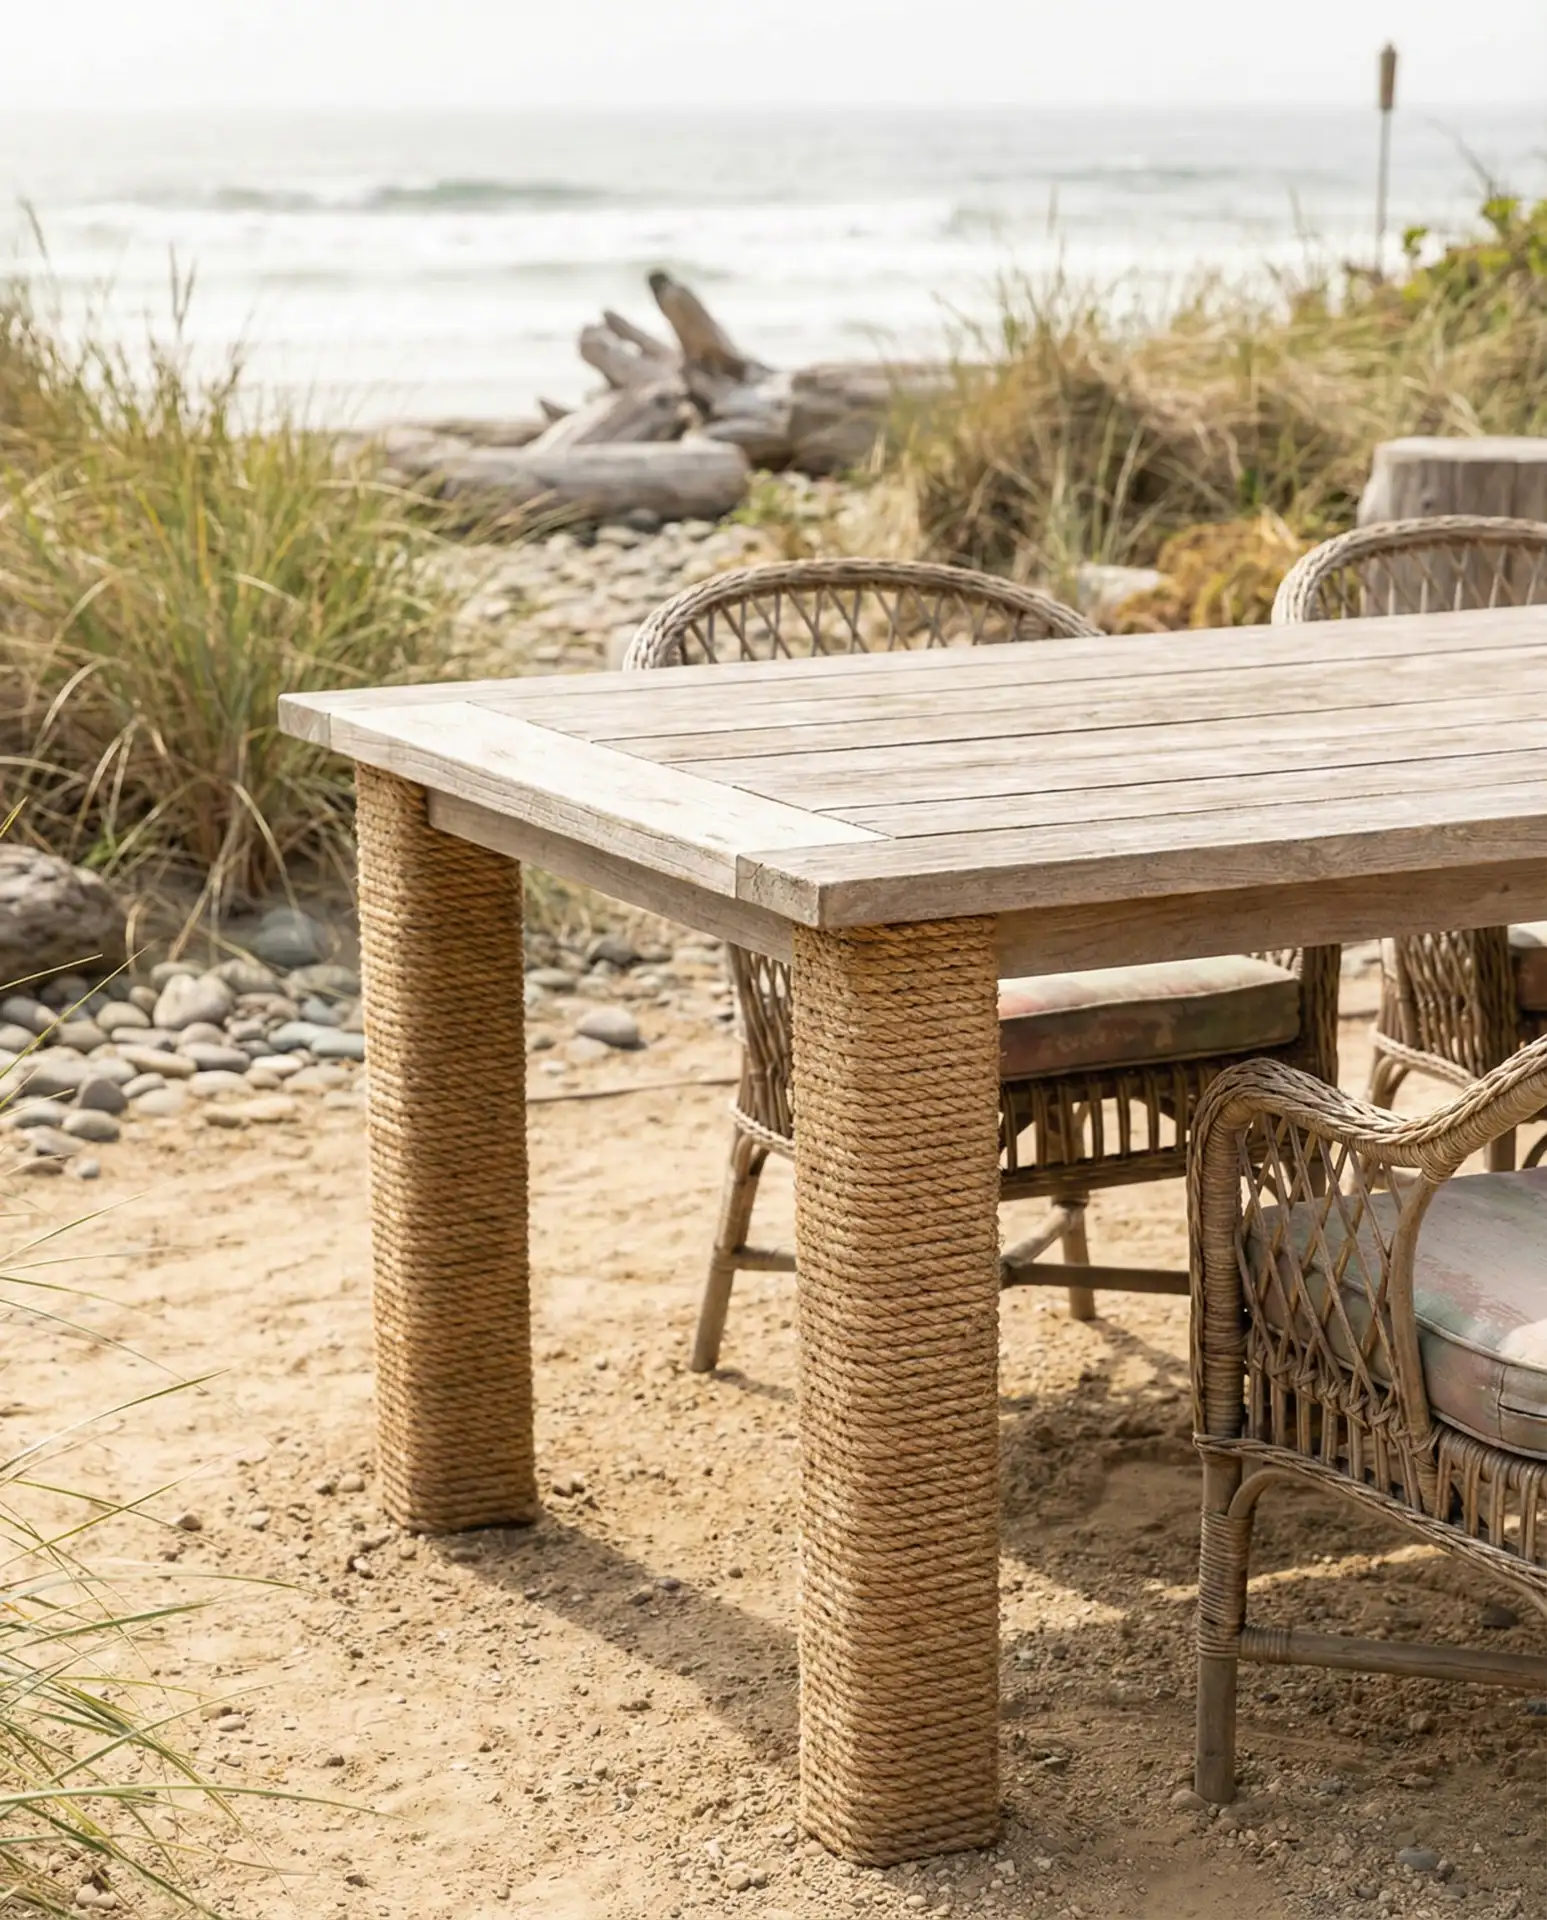
Wrapping table legs with thick marine rope adds texture and a nautical feel that’s perfect for coastal or lakeside patio settings. Use a strong outdoor adhesive to secure the rope as you spiral it tightly from top to bottom, ensuring no gaps or loose sections. This technique works on wooden , metal, or even plastic legs, making it a versatile makeover option that requires minimal tools and materials. 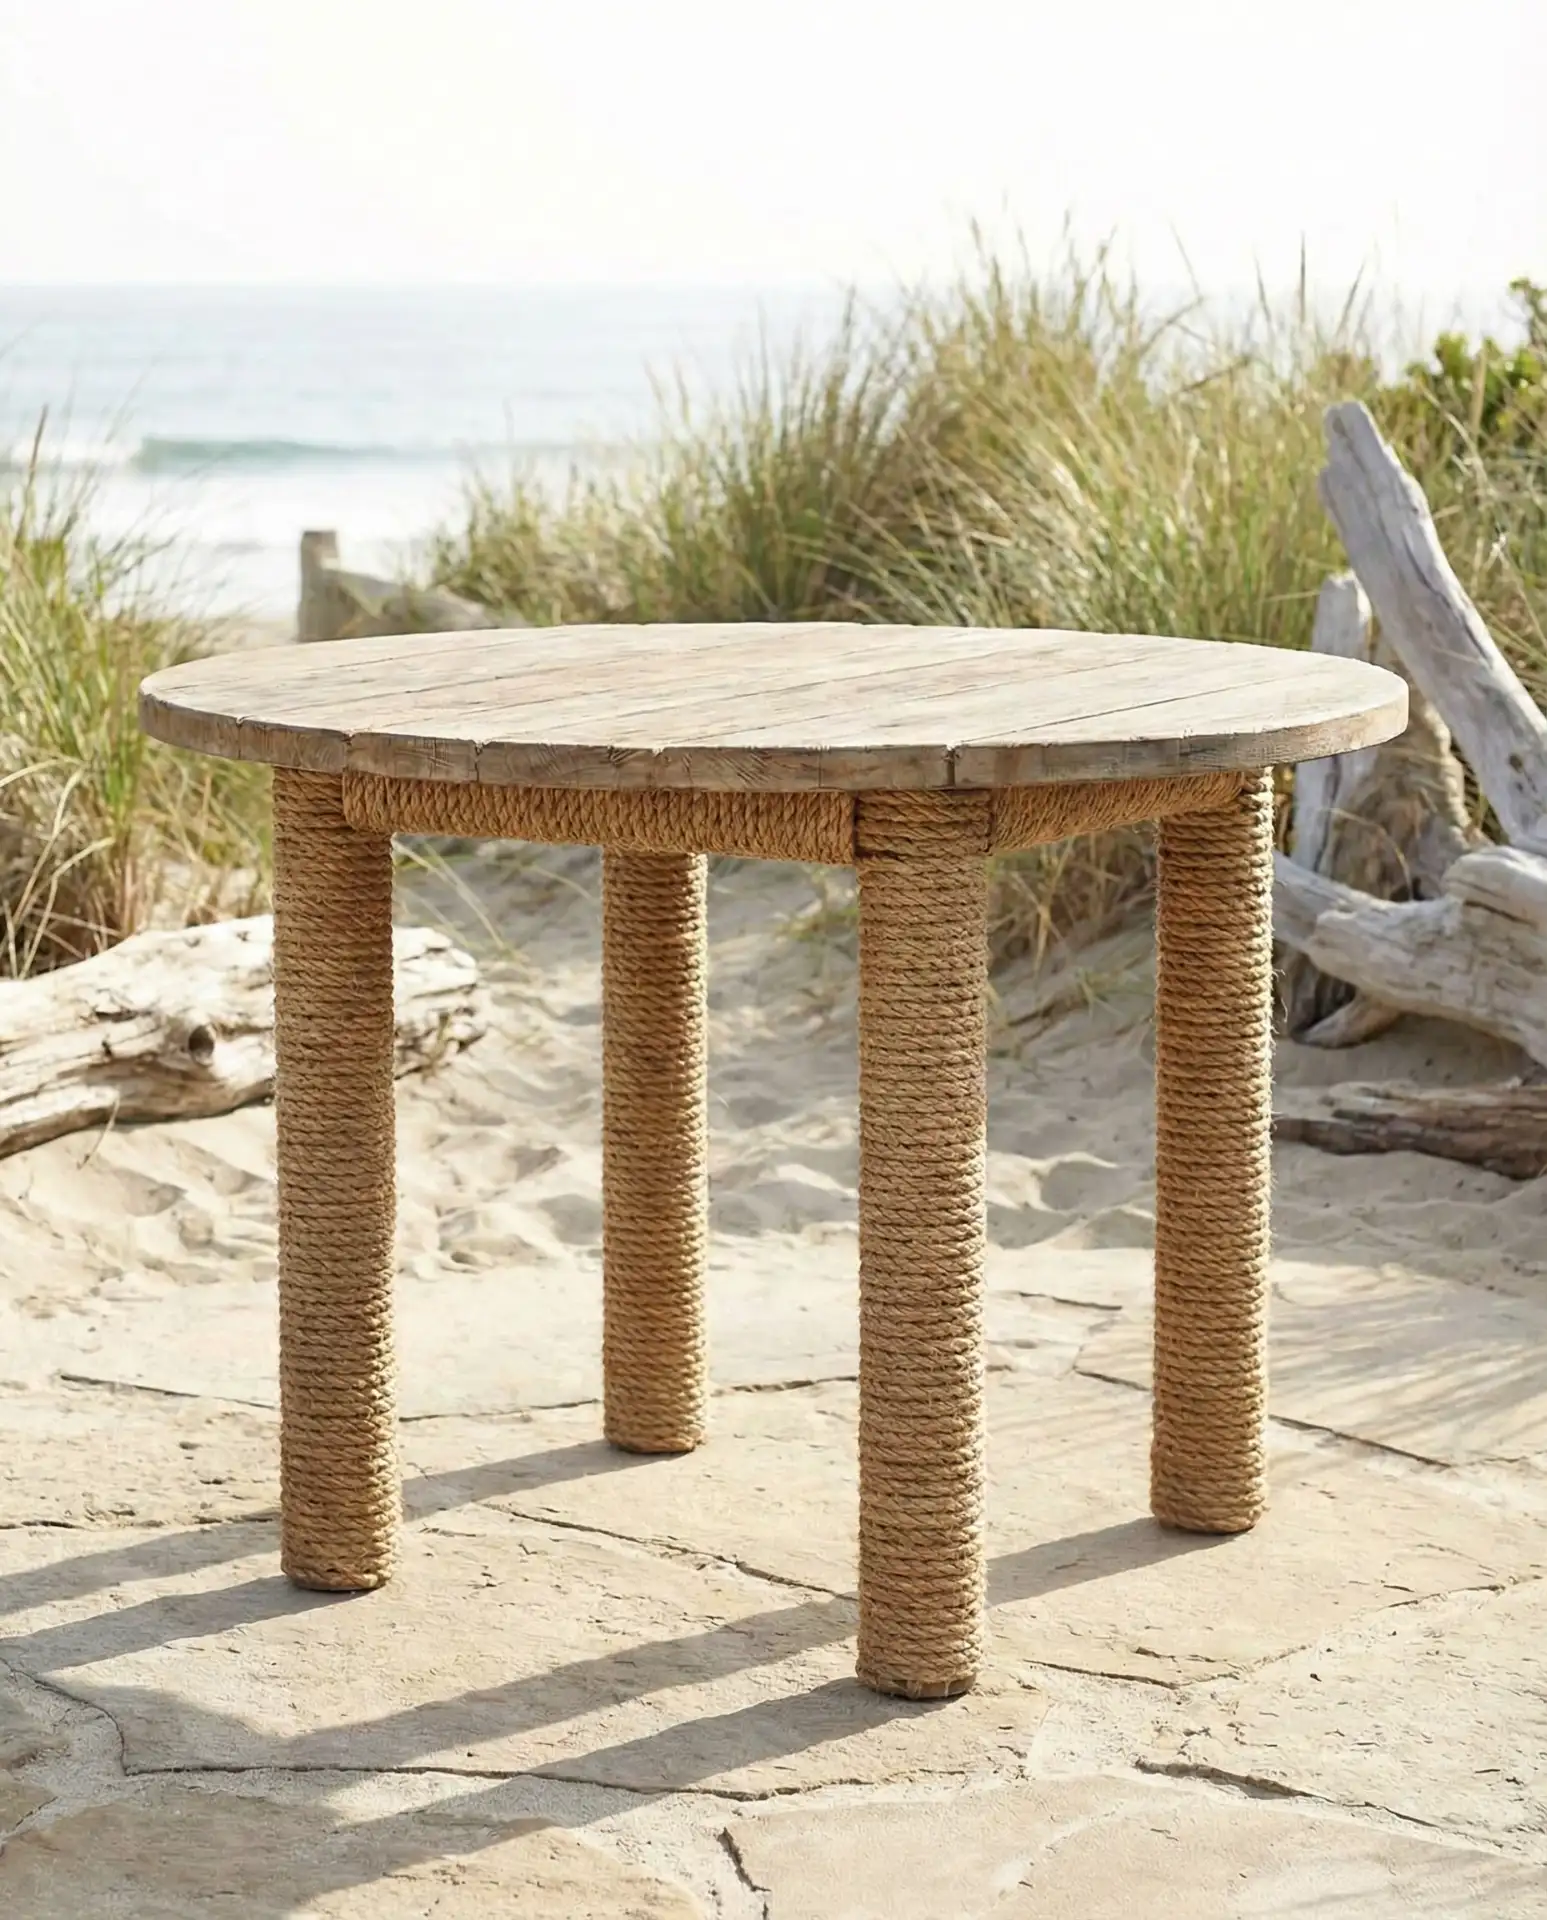
Where it works best: beachfront properties, lake houses, and homes with a New England or Cape Cod aesthetic. The rope needs to be synthetic or heavily treated—natural fibers will rot and smell if exposed to constant humidity. A friend in Charleston wrapped her table legs with untreated jute and had to redo the entire project within a month after mold set in, so invest in marine-grade rope from the start.
12. Built-In Ice Bucket or Cooler Insert
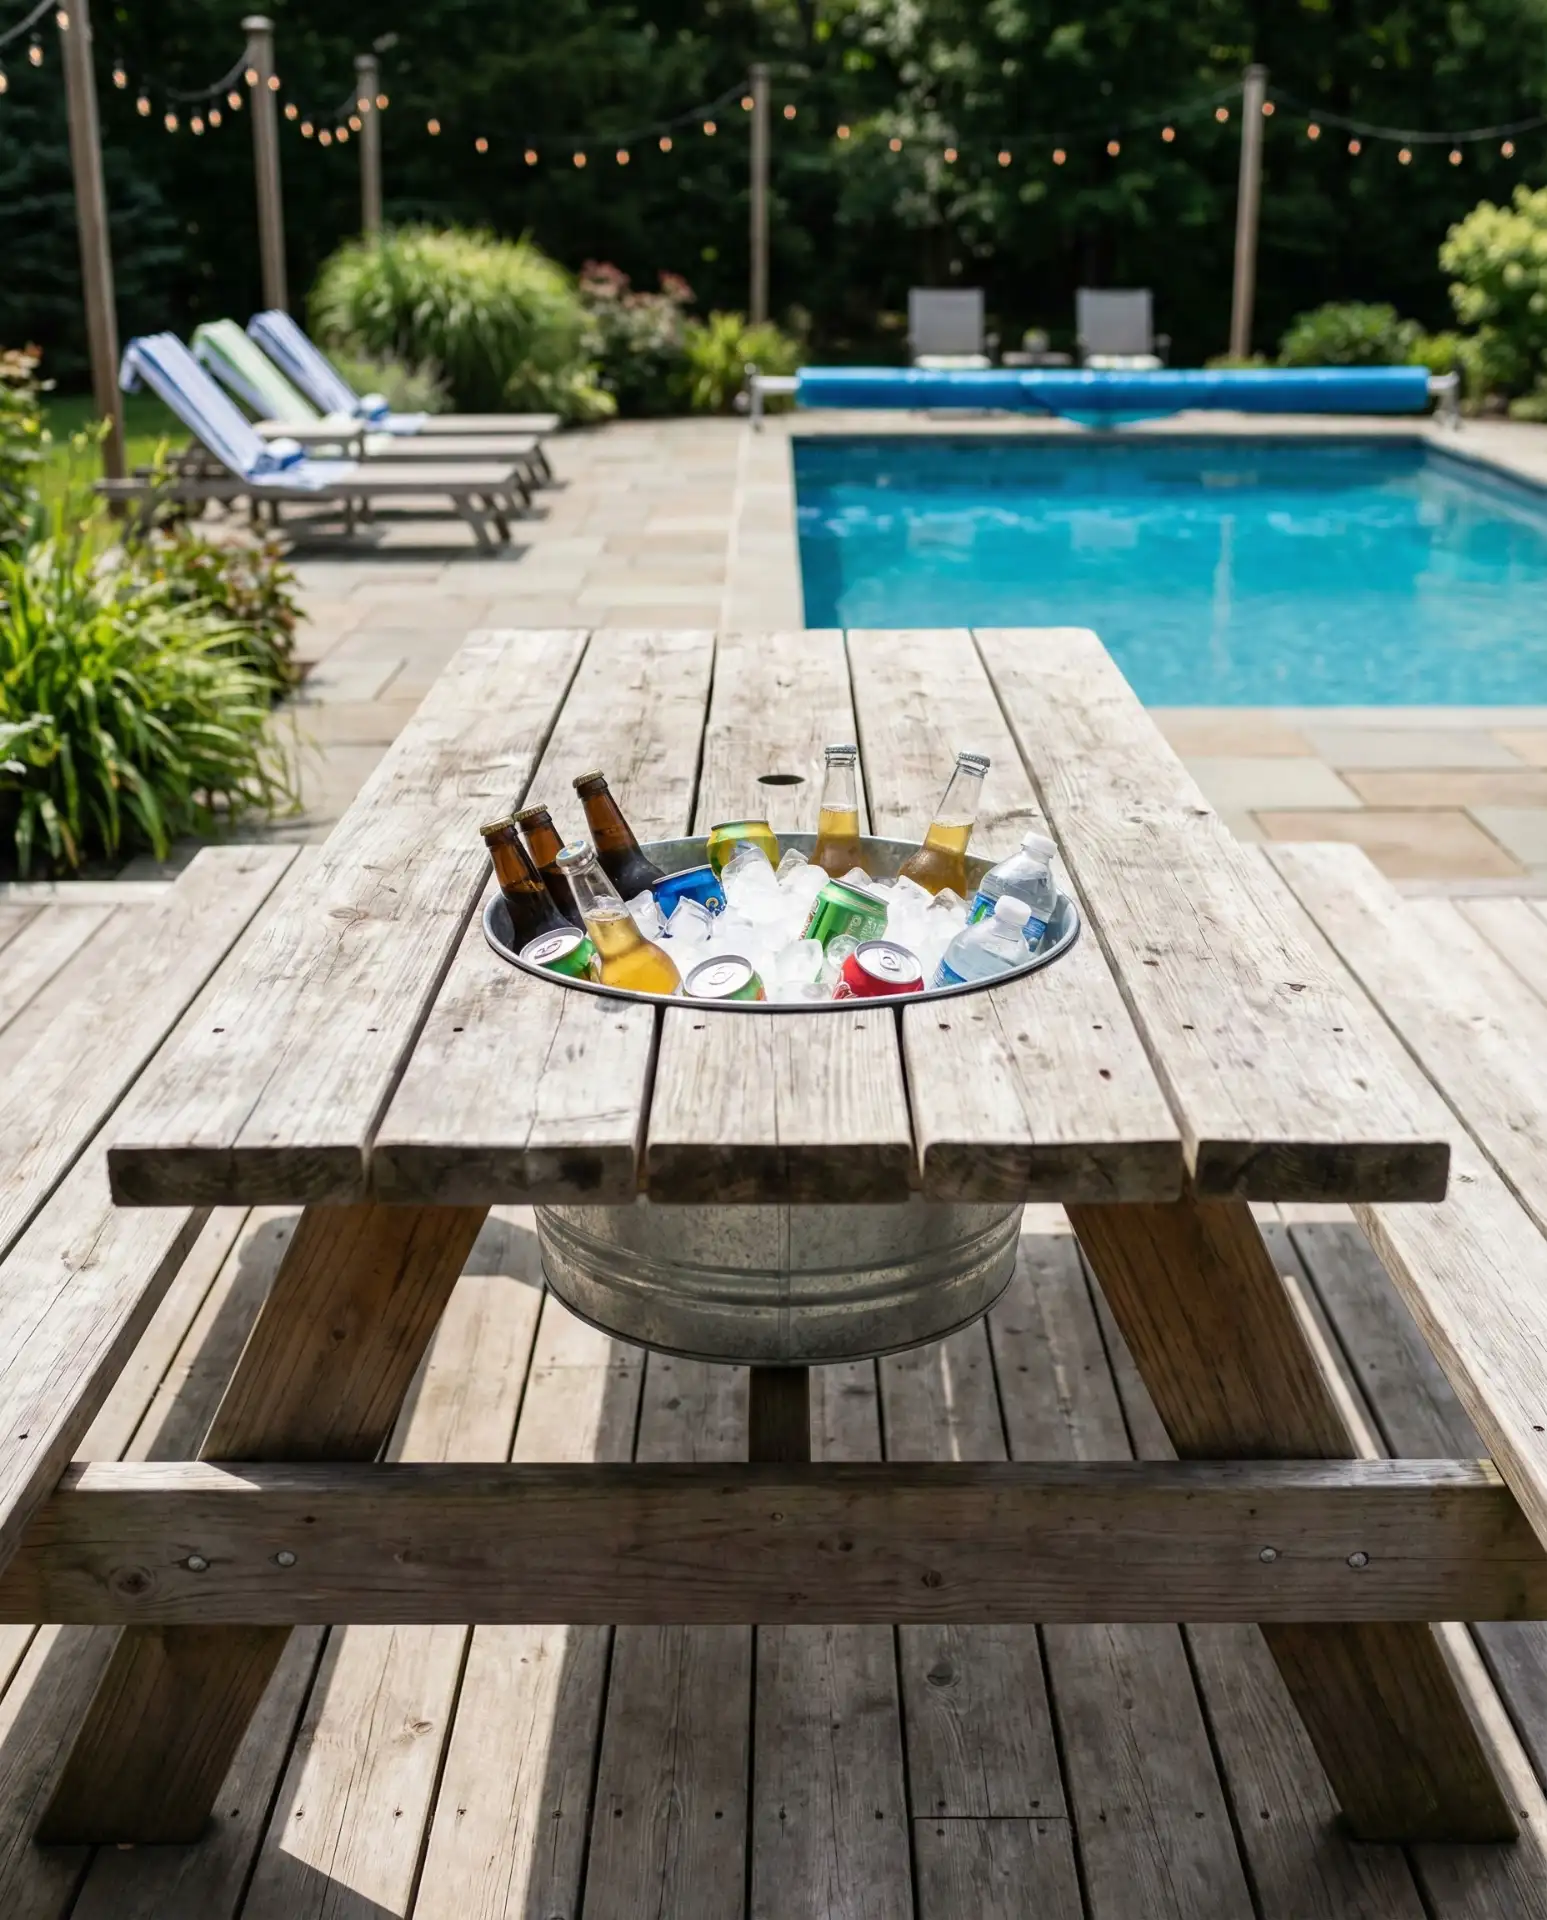
Cutting a section out of your patio table and dropping in a galvanized bucket or cooler basin turns the surface into a functional beverage station for outdoor entertaining. This DIY modification works best on larger tables where you can sacrifice a central or end section without losing too much usable space. Line the cutout with trim or metal edging for a polished look, and you’ll have a built-in cooler that keeps drinks cold and accessible during summer gatherings. 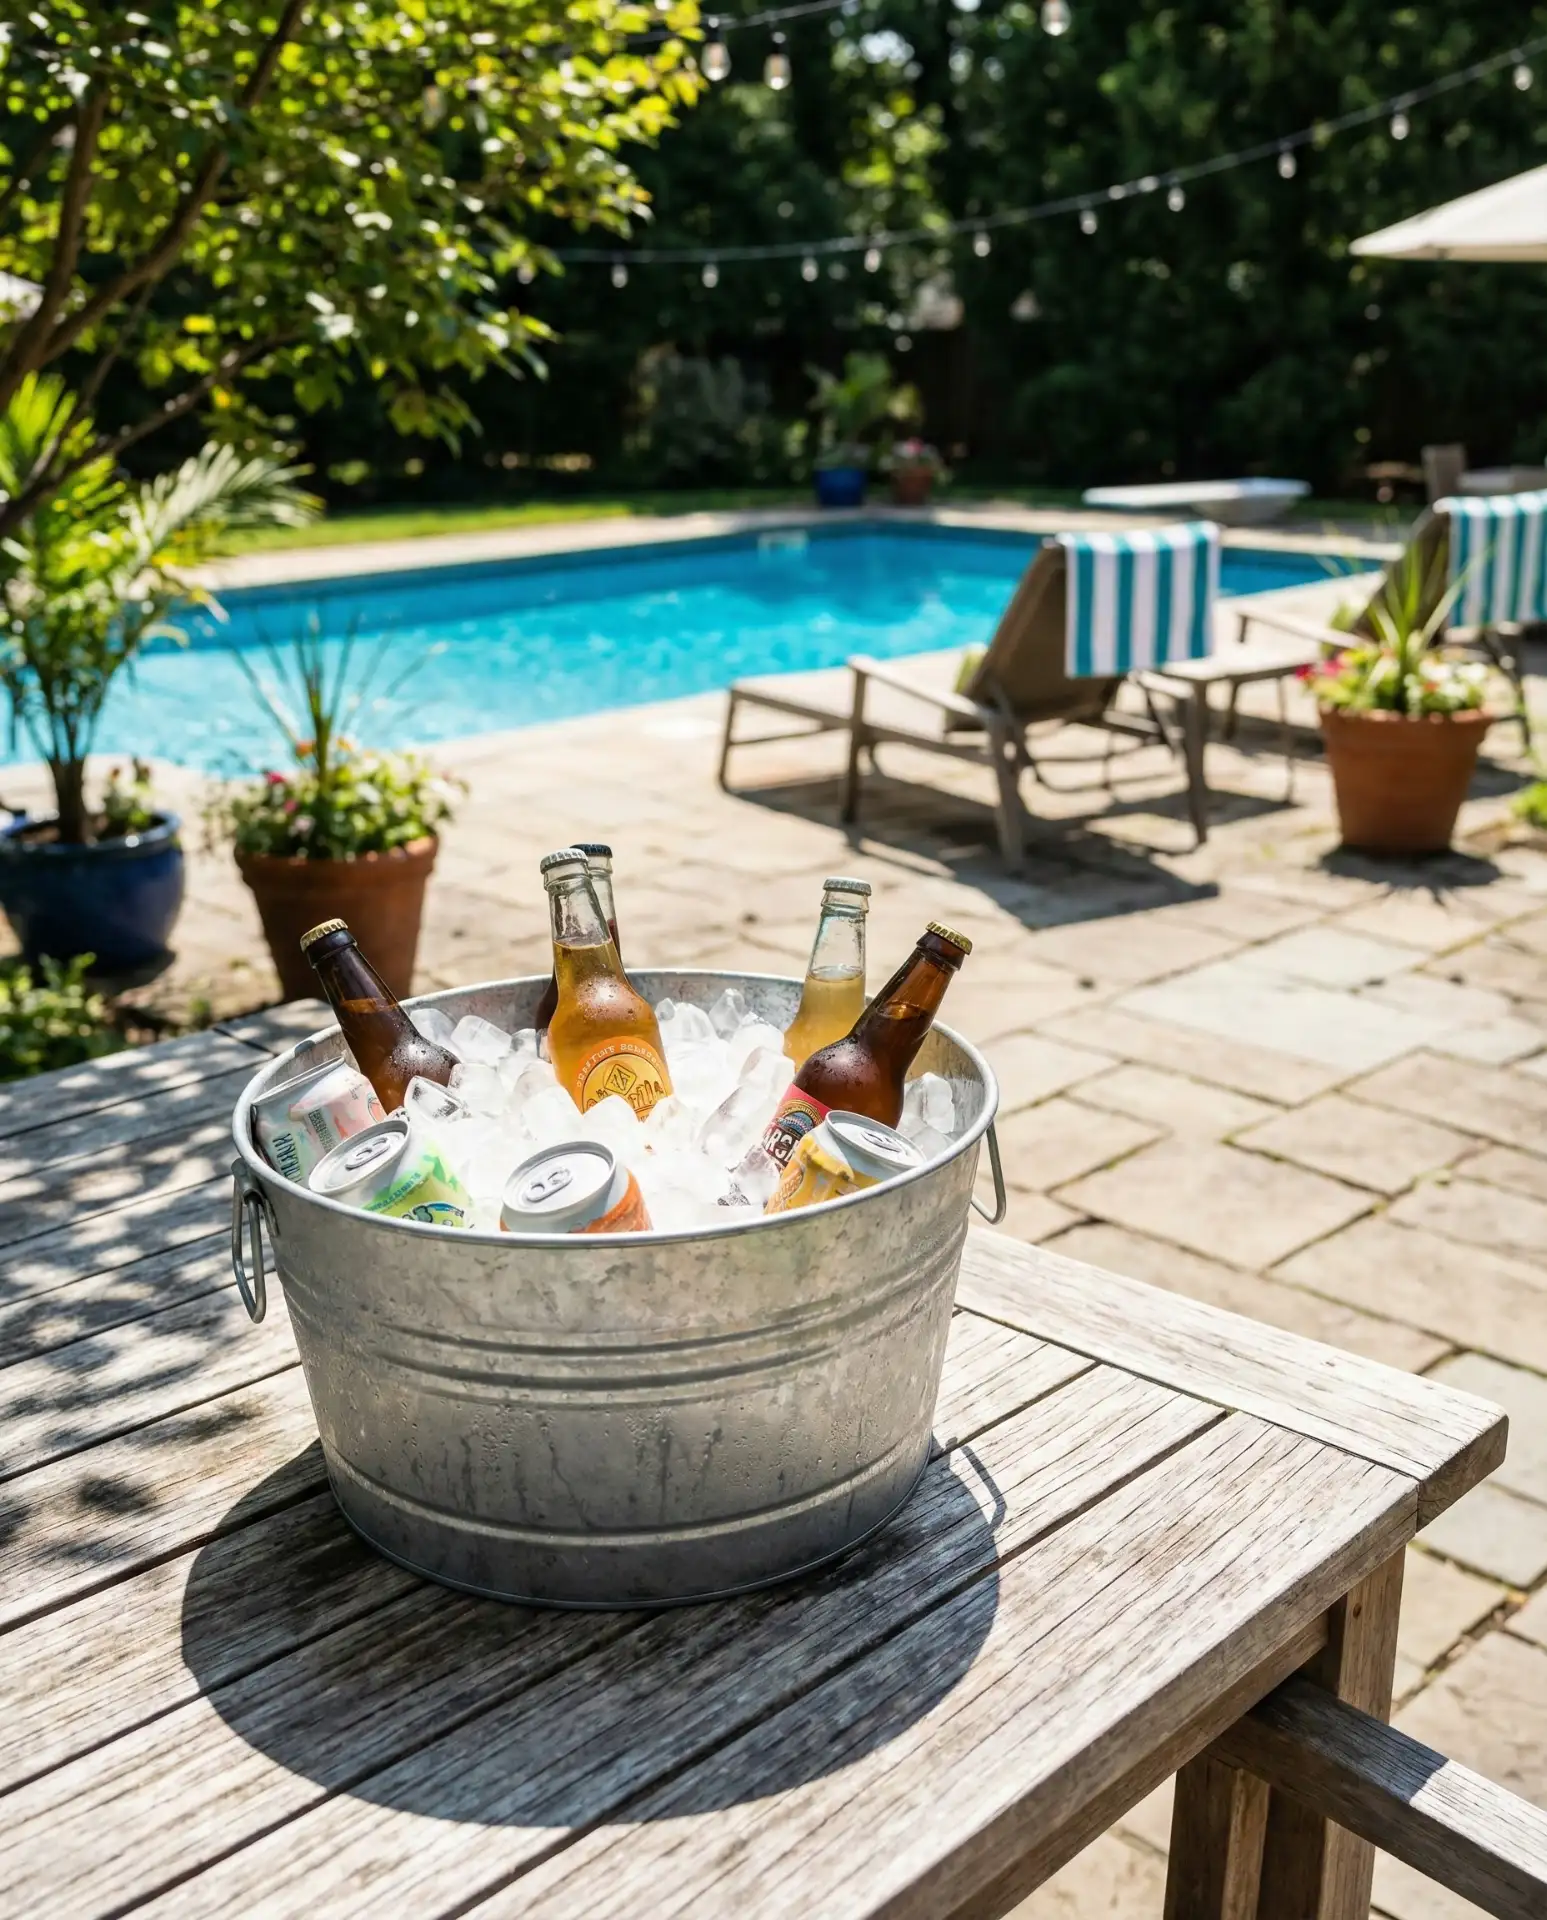
This feature is hugely popular in the South and Southwest, where outdoor entertaining season runs nearly year-round. Budget-wise, a galvanized bucket costs $10–20, and the rest is just carpentry. The common mistake is not sealing the wood around the cutout—condensation from the ice will seep into unsealed edges and cause warping and rot within a season.
13. Chalkboard Paint Surface for Interactive Dining
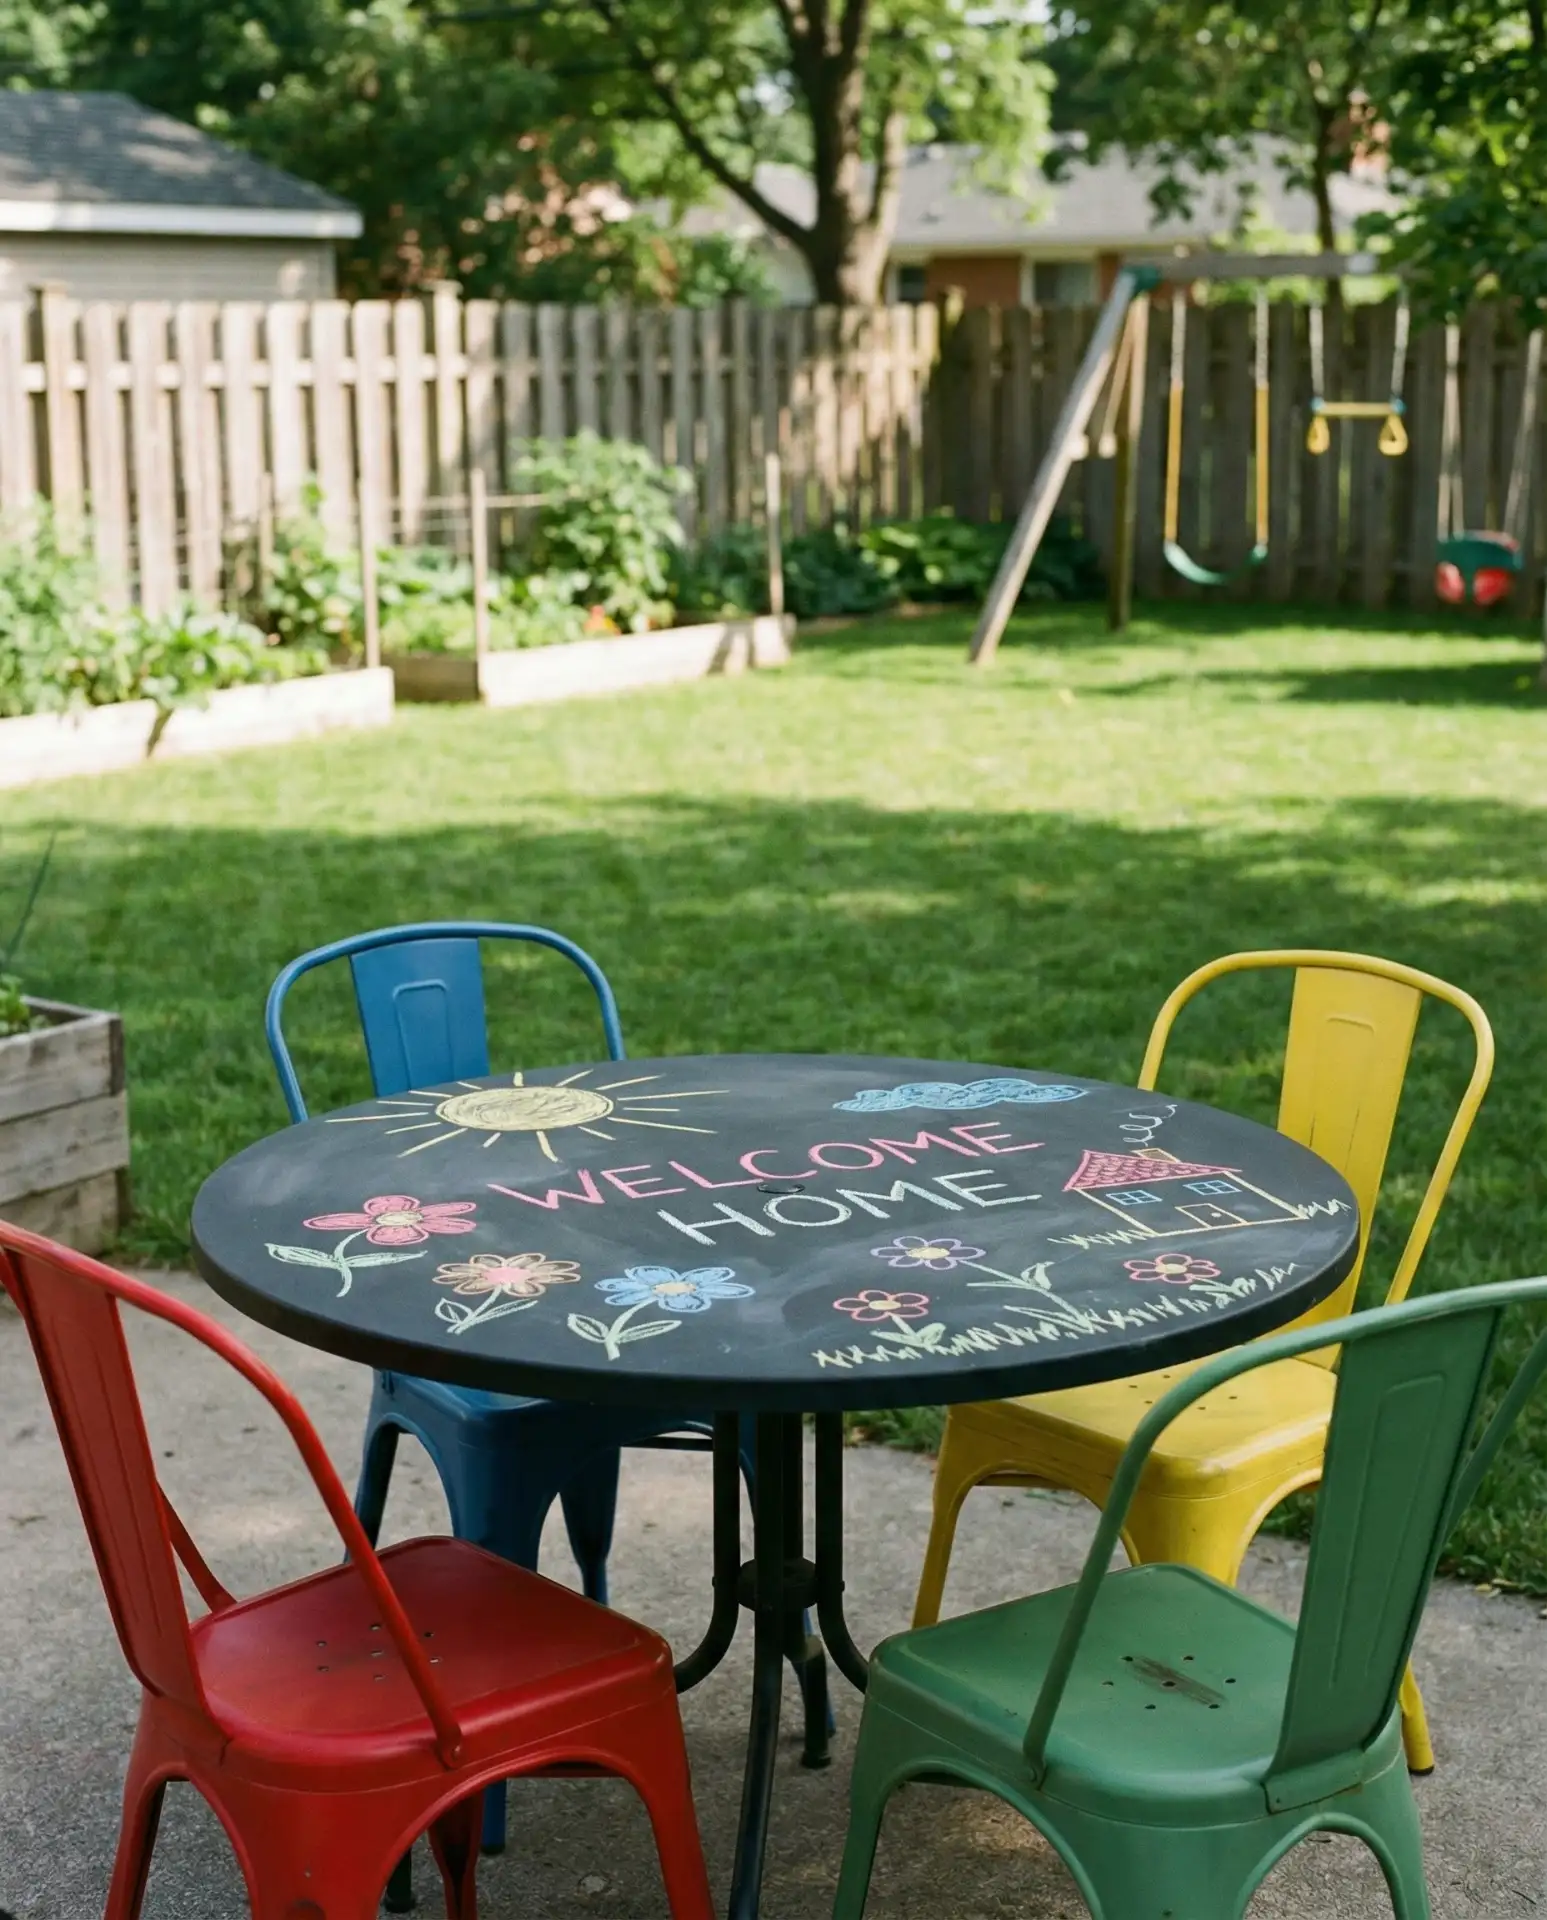
Applying chalkboard paint to your patio table surface creates an interactive, playful element that’s especially fun for families with kids. Use exterior-grade chalkboard paint and apply multiple thin coats over a primed surface for best results. The finished top can be used for drawing, games, or even menu planning during outdoor dinners, and it wipes clean with a damp cloth. 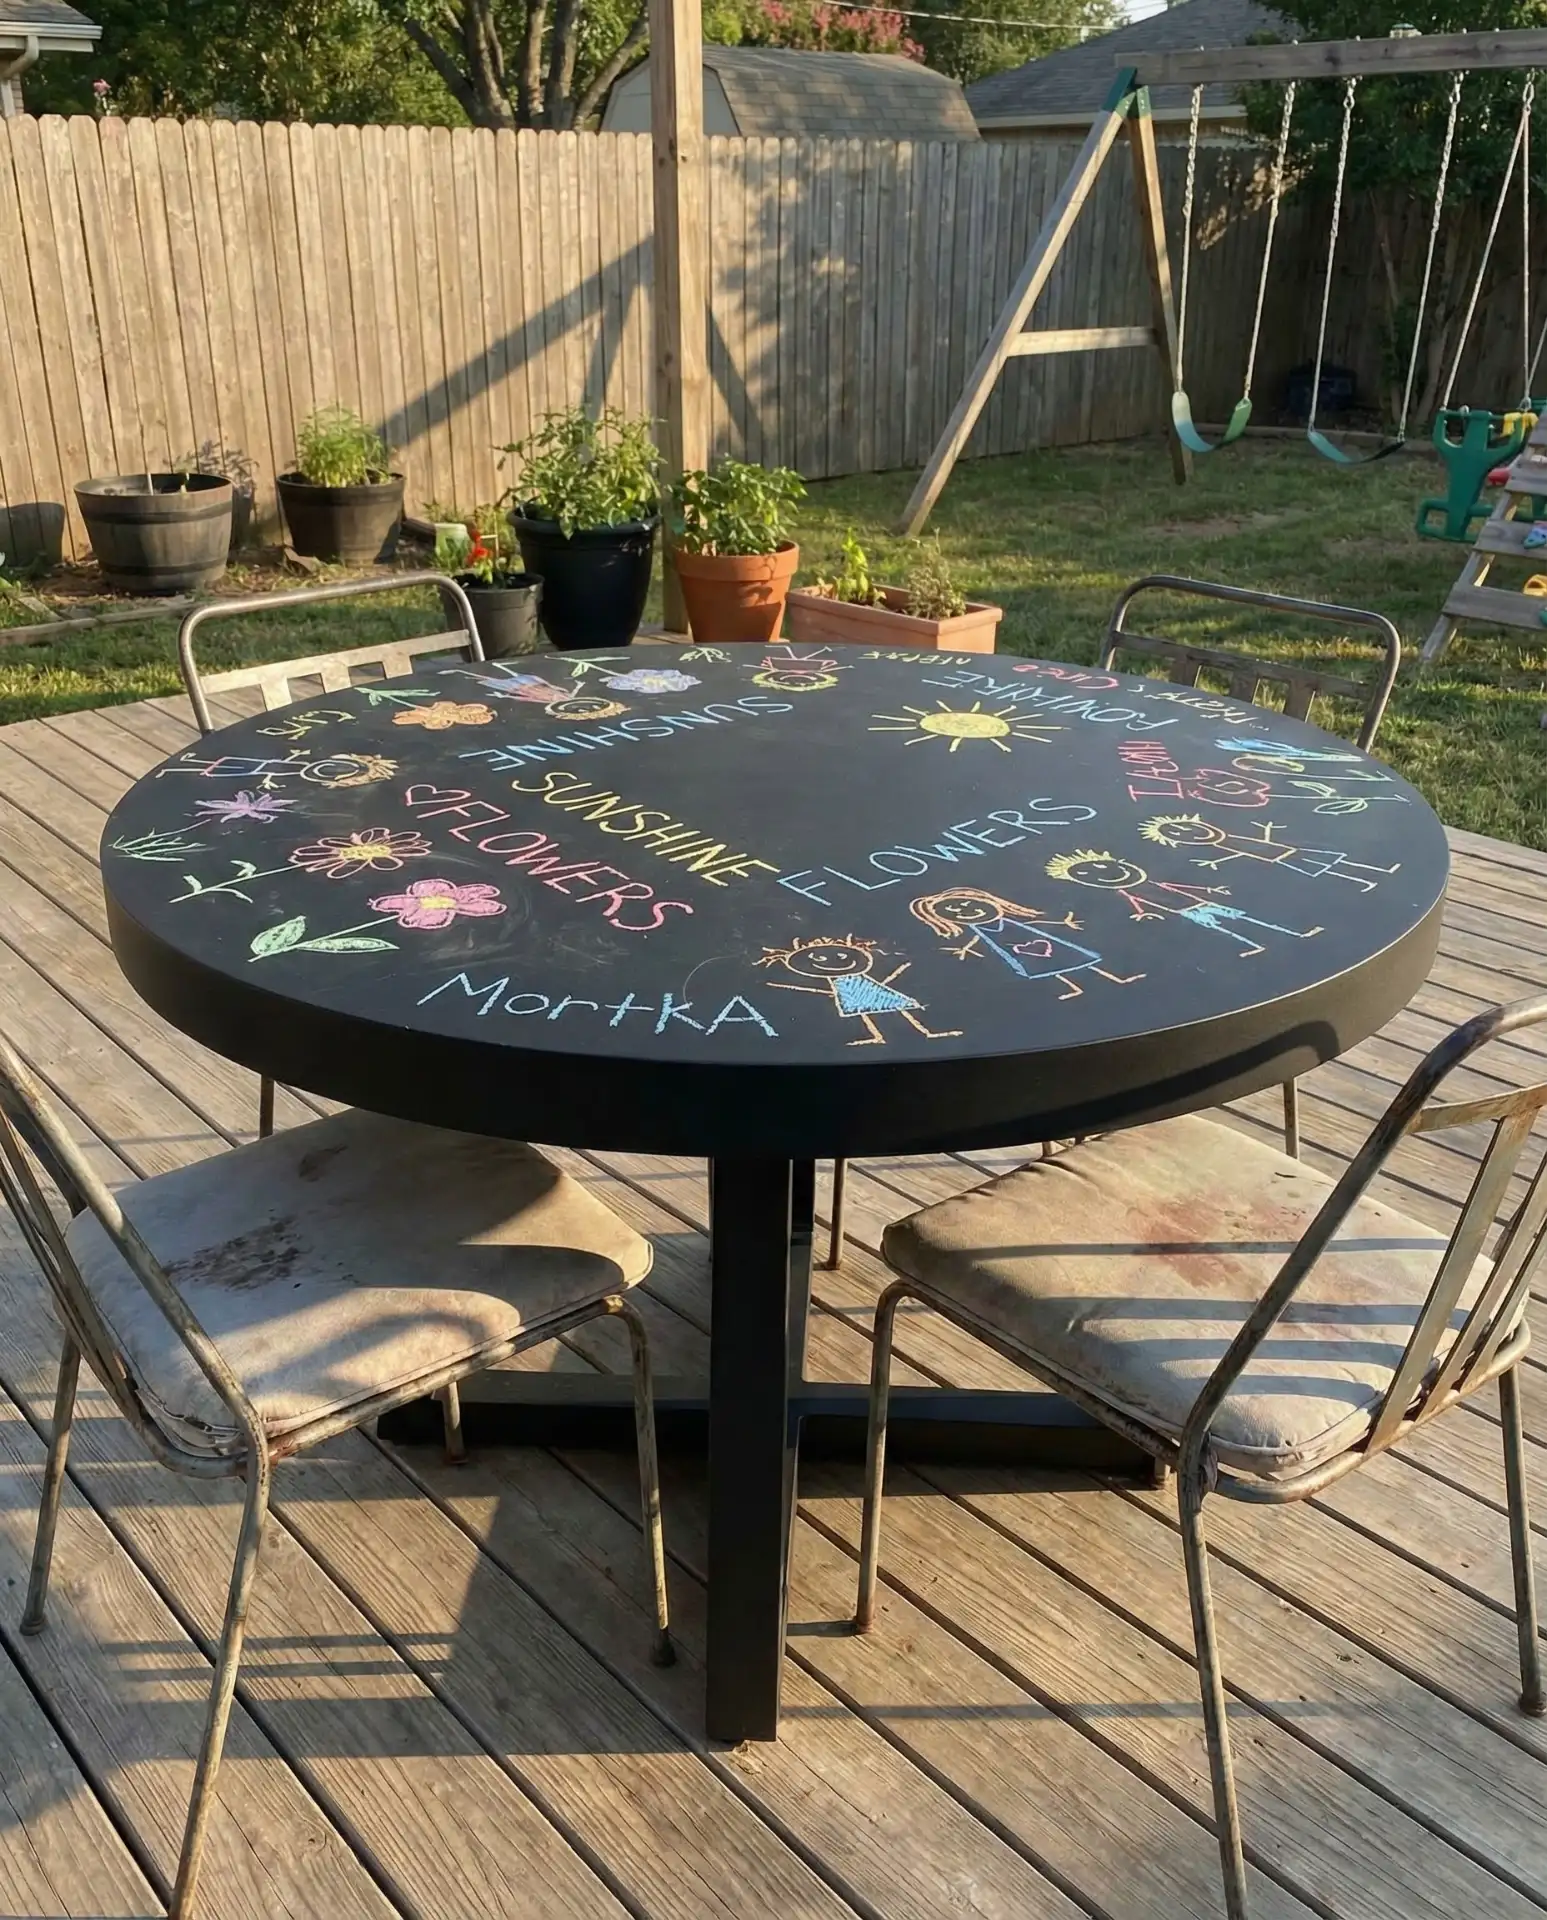
Real homeowner behavior: families with young children love this because it keeps kids entertained during long outdoor meals, reducing screen time naturally. The downside is that chalkboard surfaces scratch easily, so avoid dragging plates or serving dishes directly on the surface. A clear polyurethane topcoat will ruin the chalk-friendly finish, so maintenance is key—plan to repaint every two to three years depending on use.
14. Stained Glass Panel Inset
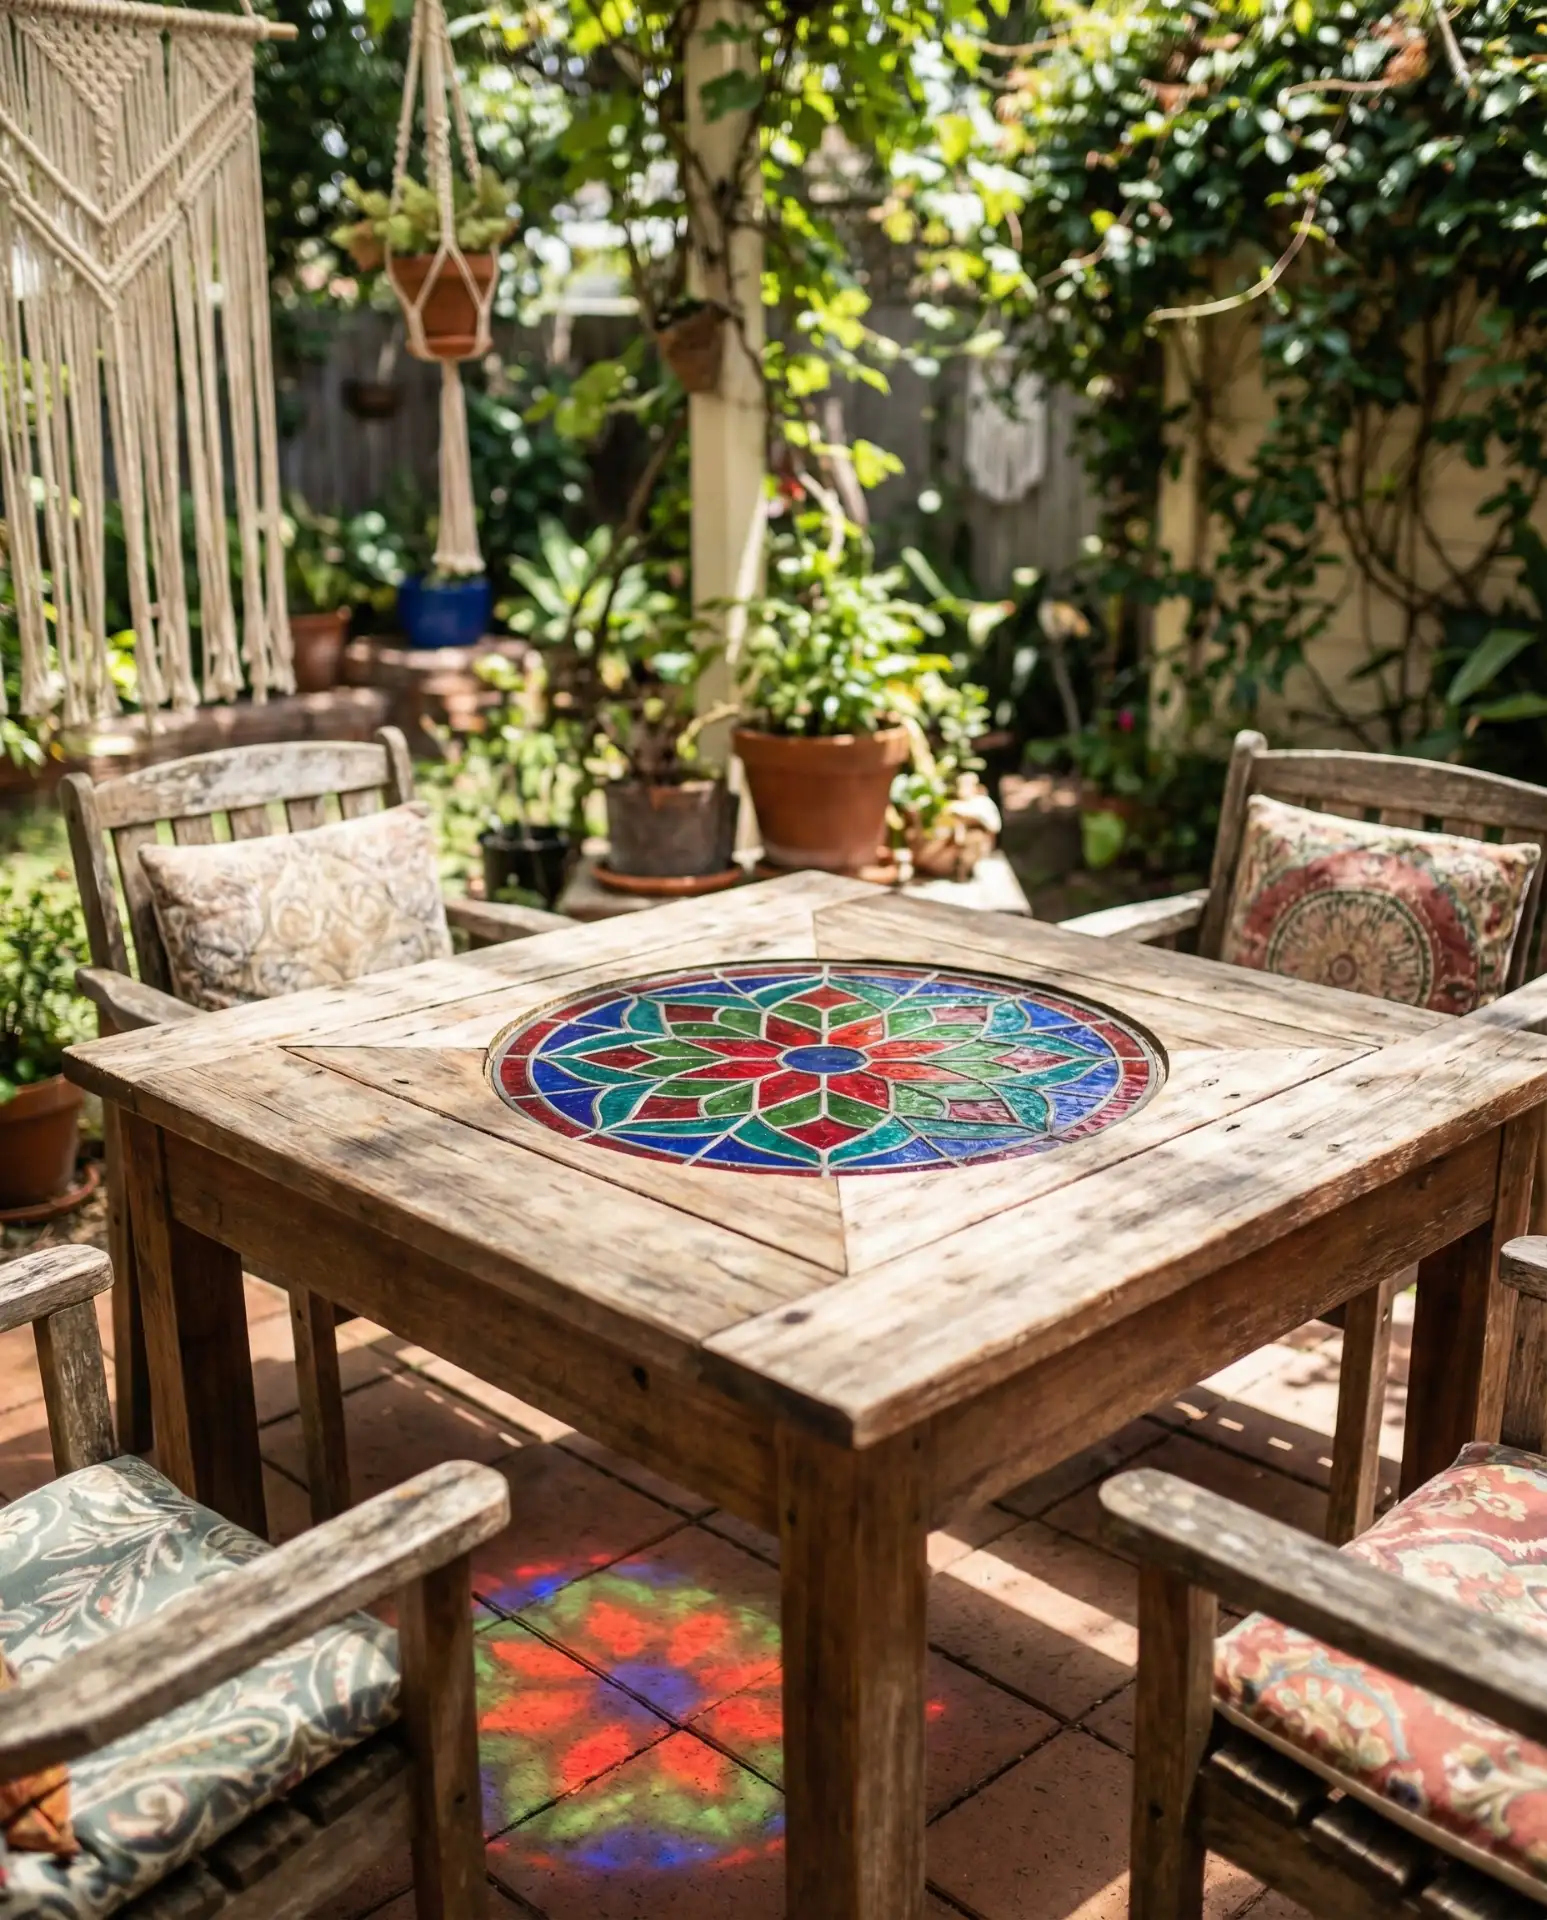
Embedding a stained glass panel into the center of your patio table creates a stunning visual effect, especially when sunlight filters through the colored glass. This technique requires building a recessed frame to hold the panel securely, then sealing the edges with silicone to keep moisture out. The result is a piece that functions as both furniture and art, making it a standout decorating ideas option for outdoor spaces. 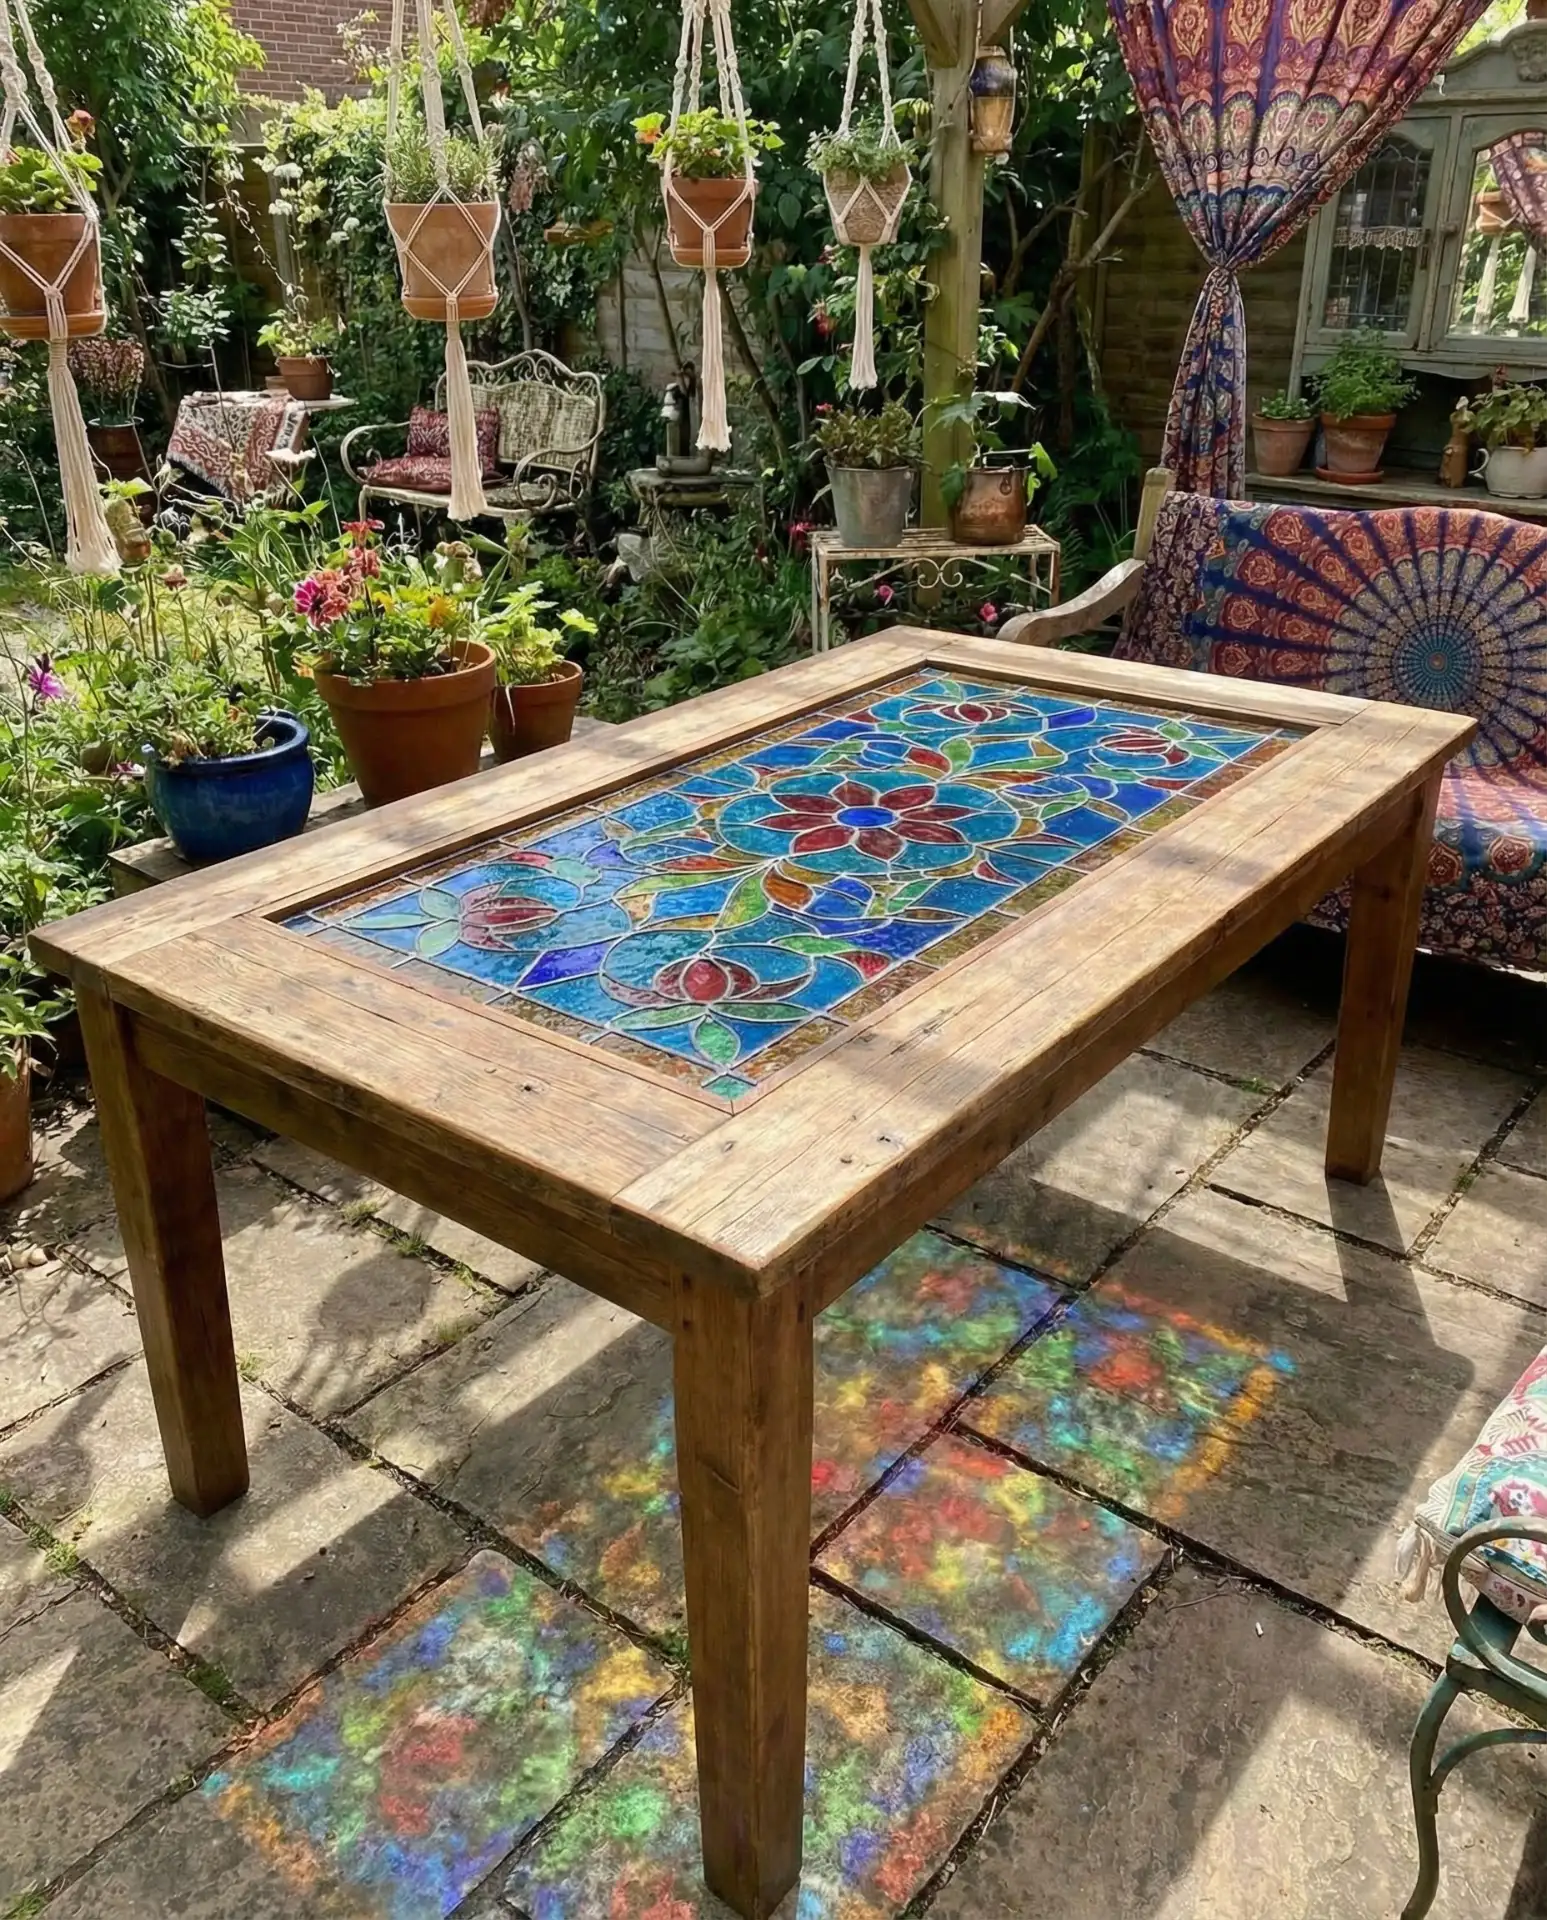
Expert-style commentary: this approach works best with tempered or laminated stained glass, which won’t shatter if something is dropped on it. Standard stained glass is too fragile for outdoor use and will crack under thermal stress or impact. Many people also underestimate the weight of glass—make sure your table base can support the added load, or you’ll end up with a sagging surface and potential breakage.
15. Epoxy Resin River Table Effect
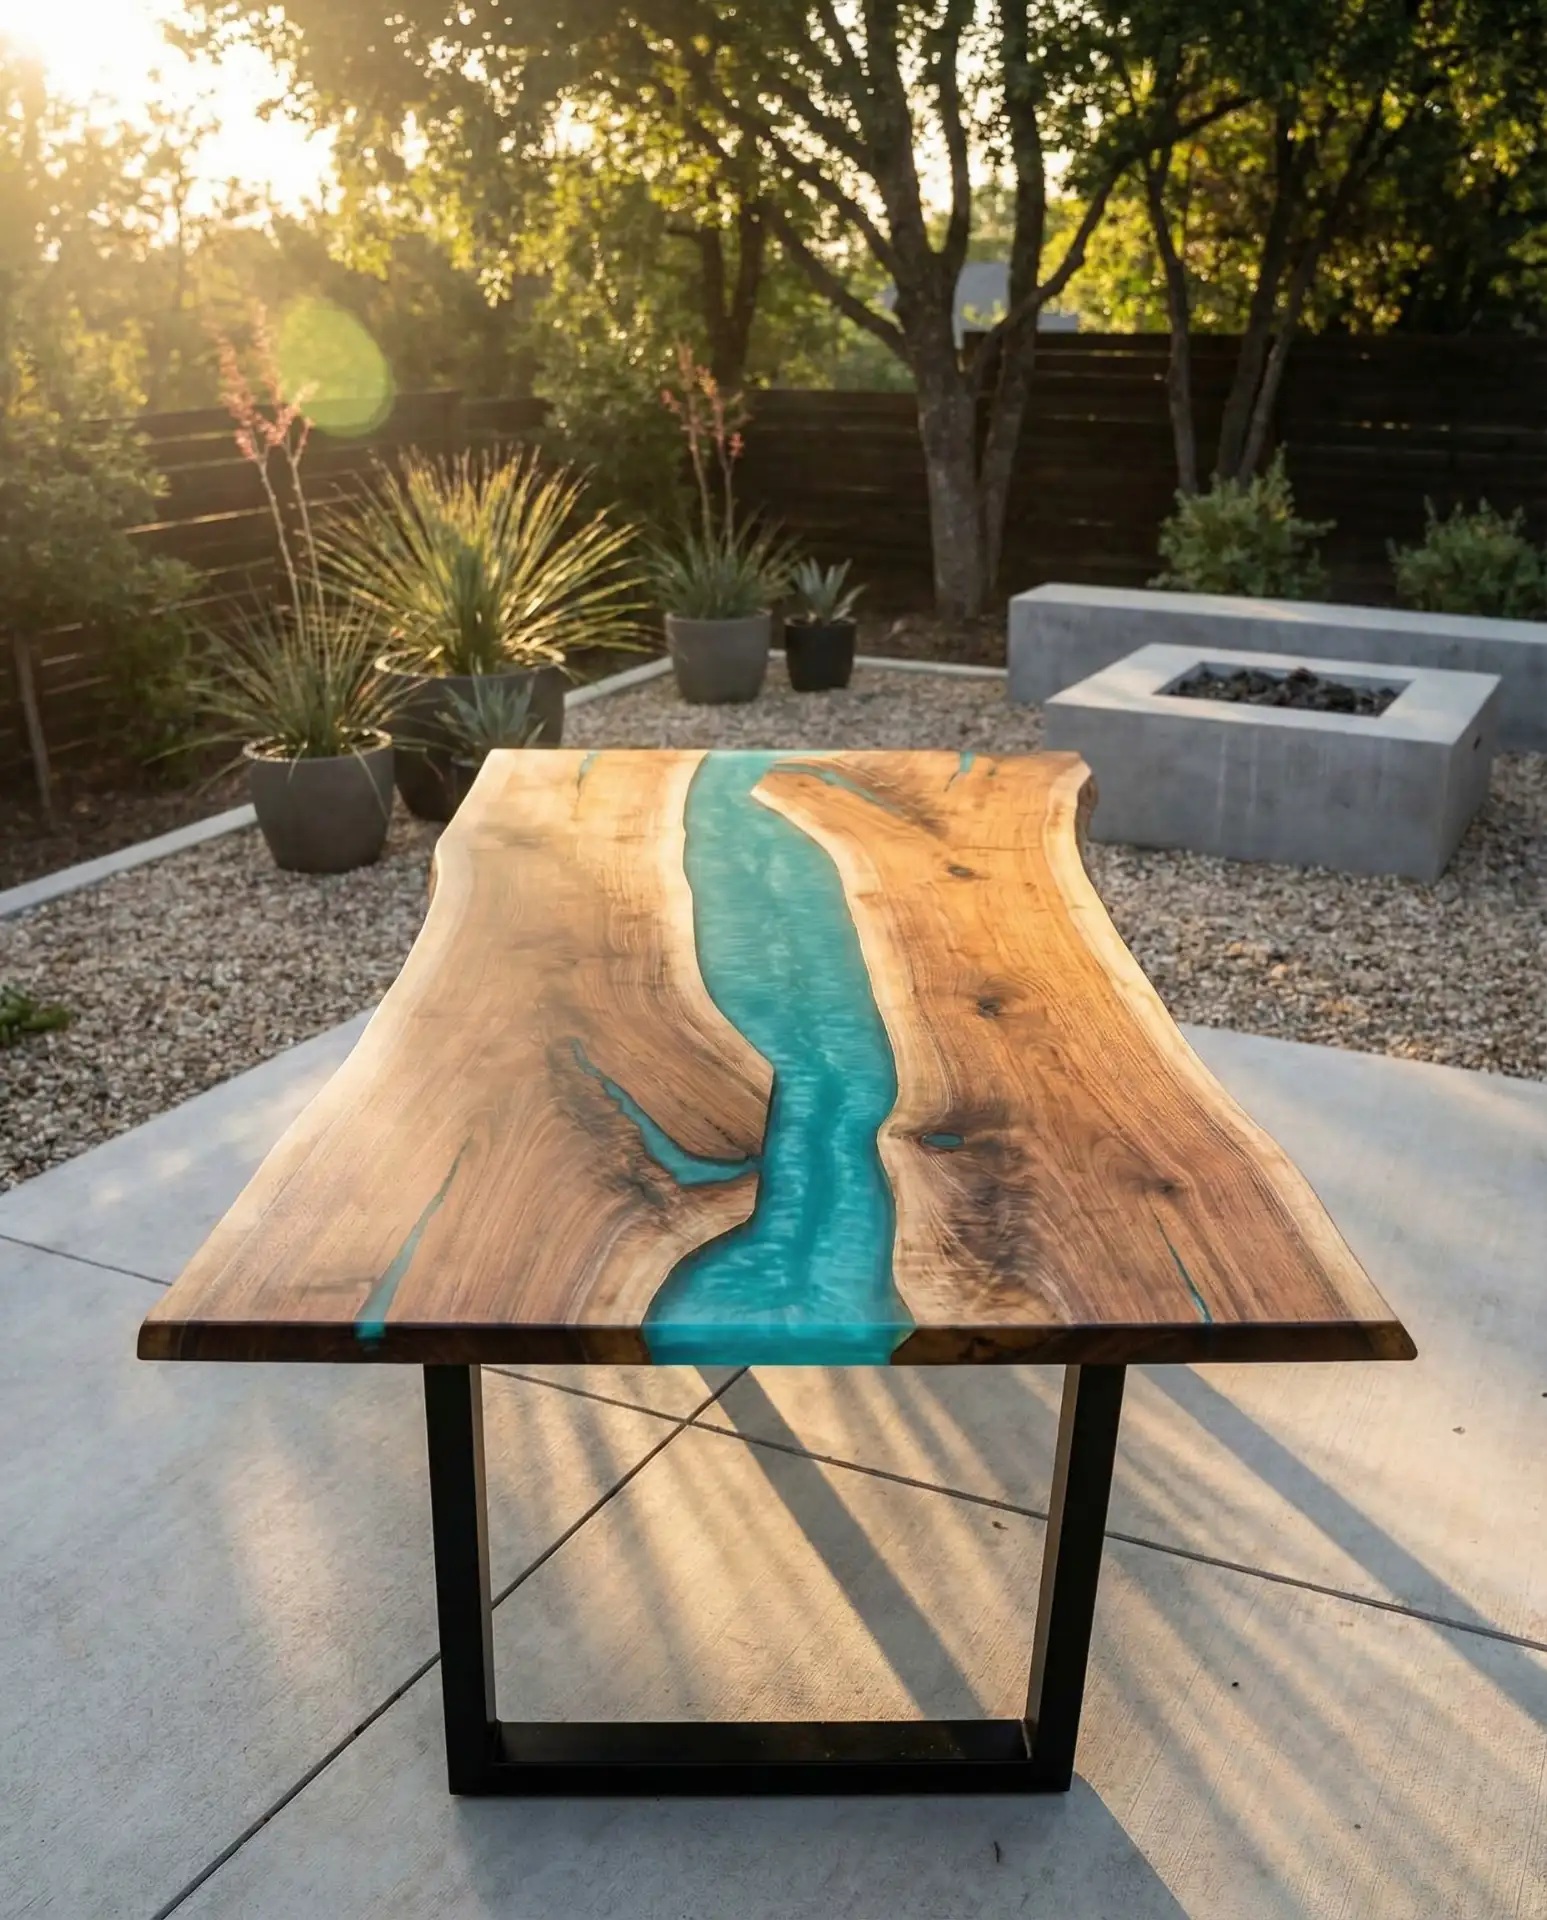
Pouring colored epoxy resin between two slabs of wood creates the dramatic “river table” effect that’s taken over Pinterest and design blogs. The resin acts as a waterproof, durable fill that can be tinted in any color, though blues and turquoise are most popular for mimicking water. This is an advanced DIY project that requires careful measuring, mixing, and curing, but the result is a showstopping patio table that looks far more expensive than it is. 
Budget angle: quality marine-grade epoxy resin runs $80–150 per gallon, and a typical table requires two to three gallons depending on the river width and thickness. The biggest mistake beginners make is working in temperatures below 70°F or above 85°F—temperature affects curing time and can cause bubbles or incomplete hardening. Always work in a climate-controlled space if possible, or wait for ideal weather conditions.
16. Metal Sheet Overlay with Patina Finish
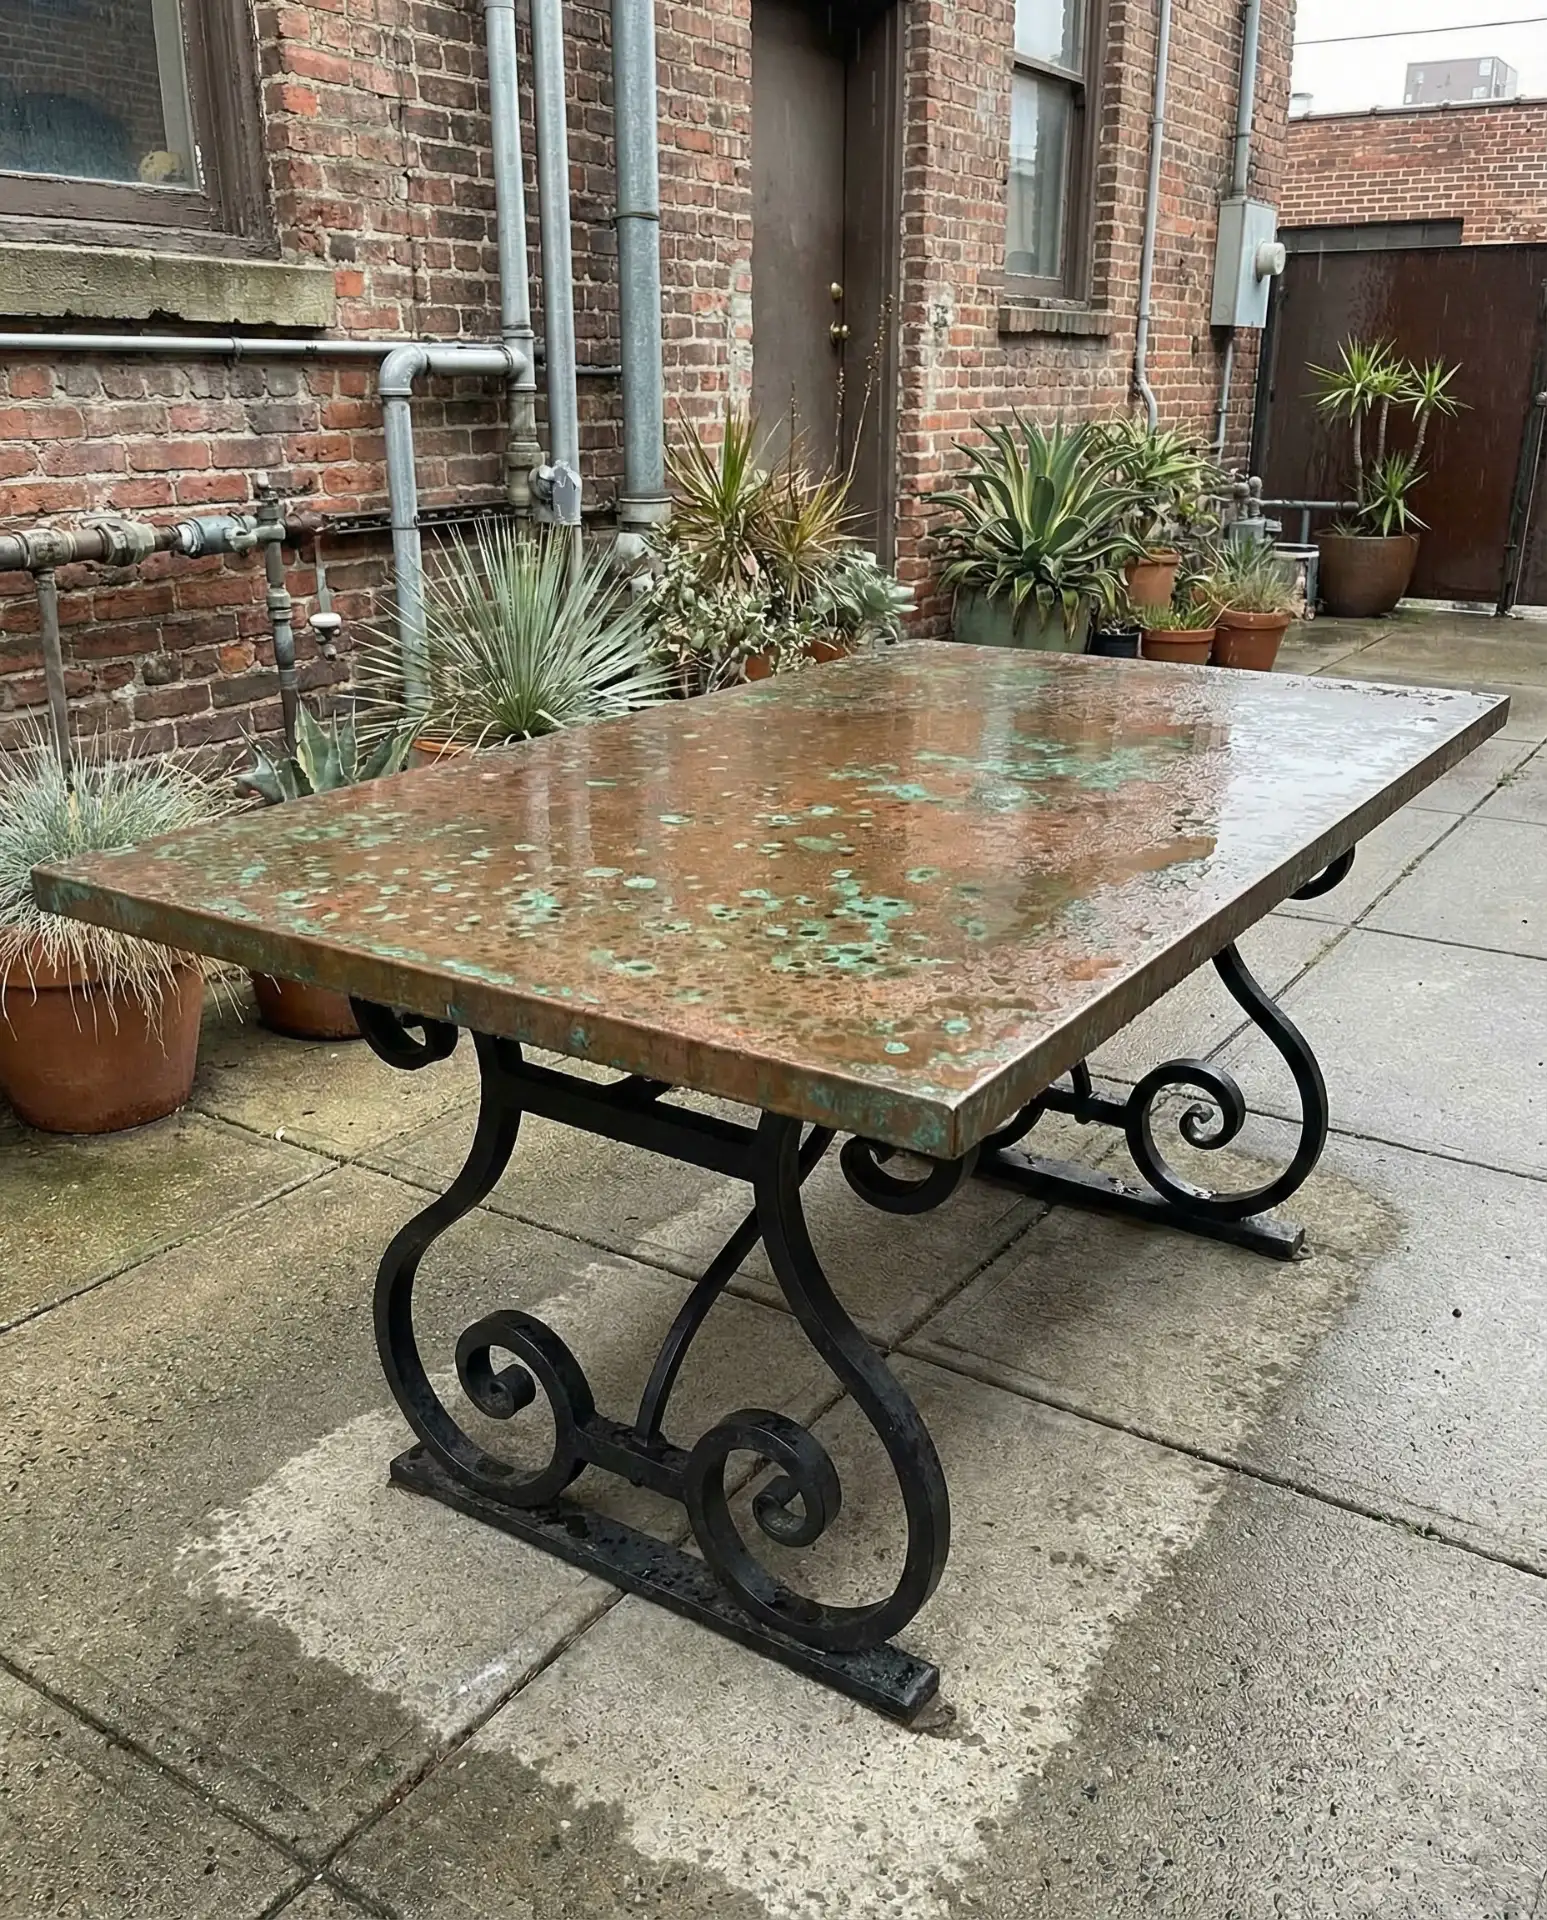
Adding a thin copper, brass, or galvanized steel sheet to your patio table top creates an industrial look that develops a natural patina over time. The metal is cut to size, attached with construction adhesive or small screws, and then treated with chemical patina solutions or left to weather naturally. This approach is a striking top replacement ideas option for outdoor tables where durability and low maintenance are priorities. 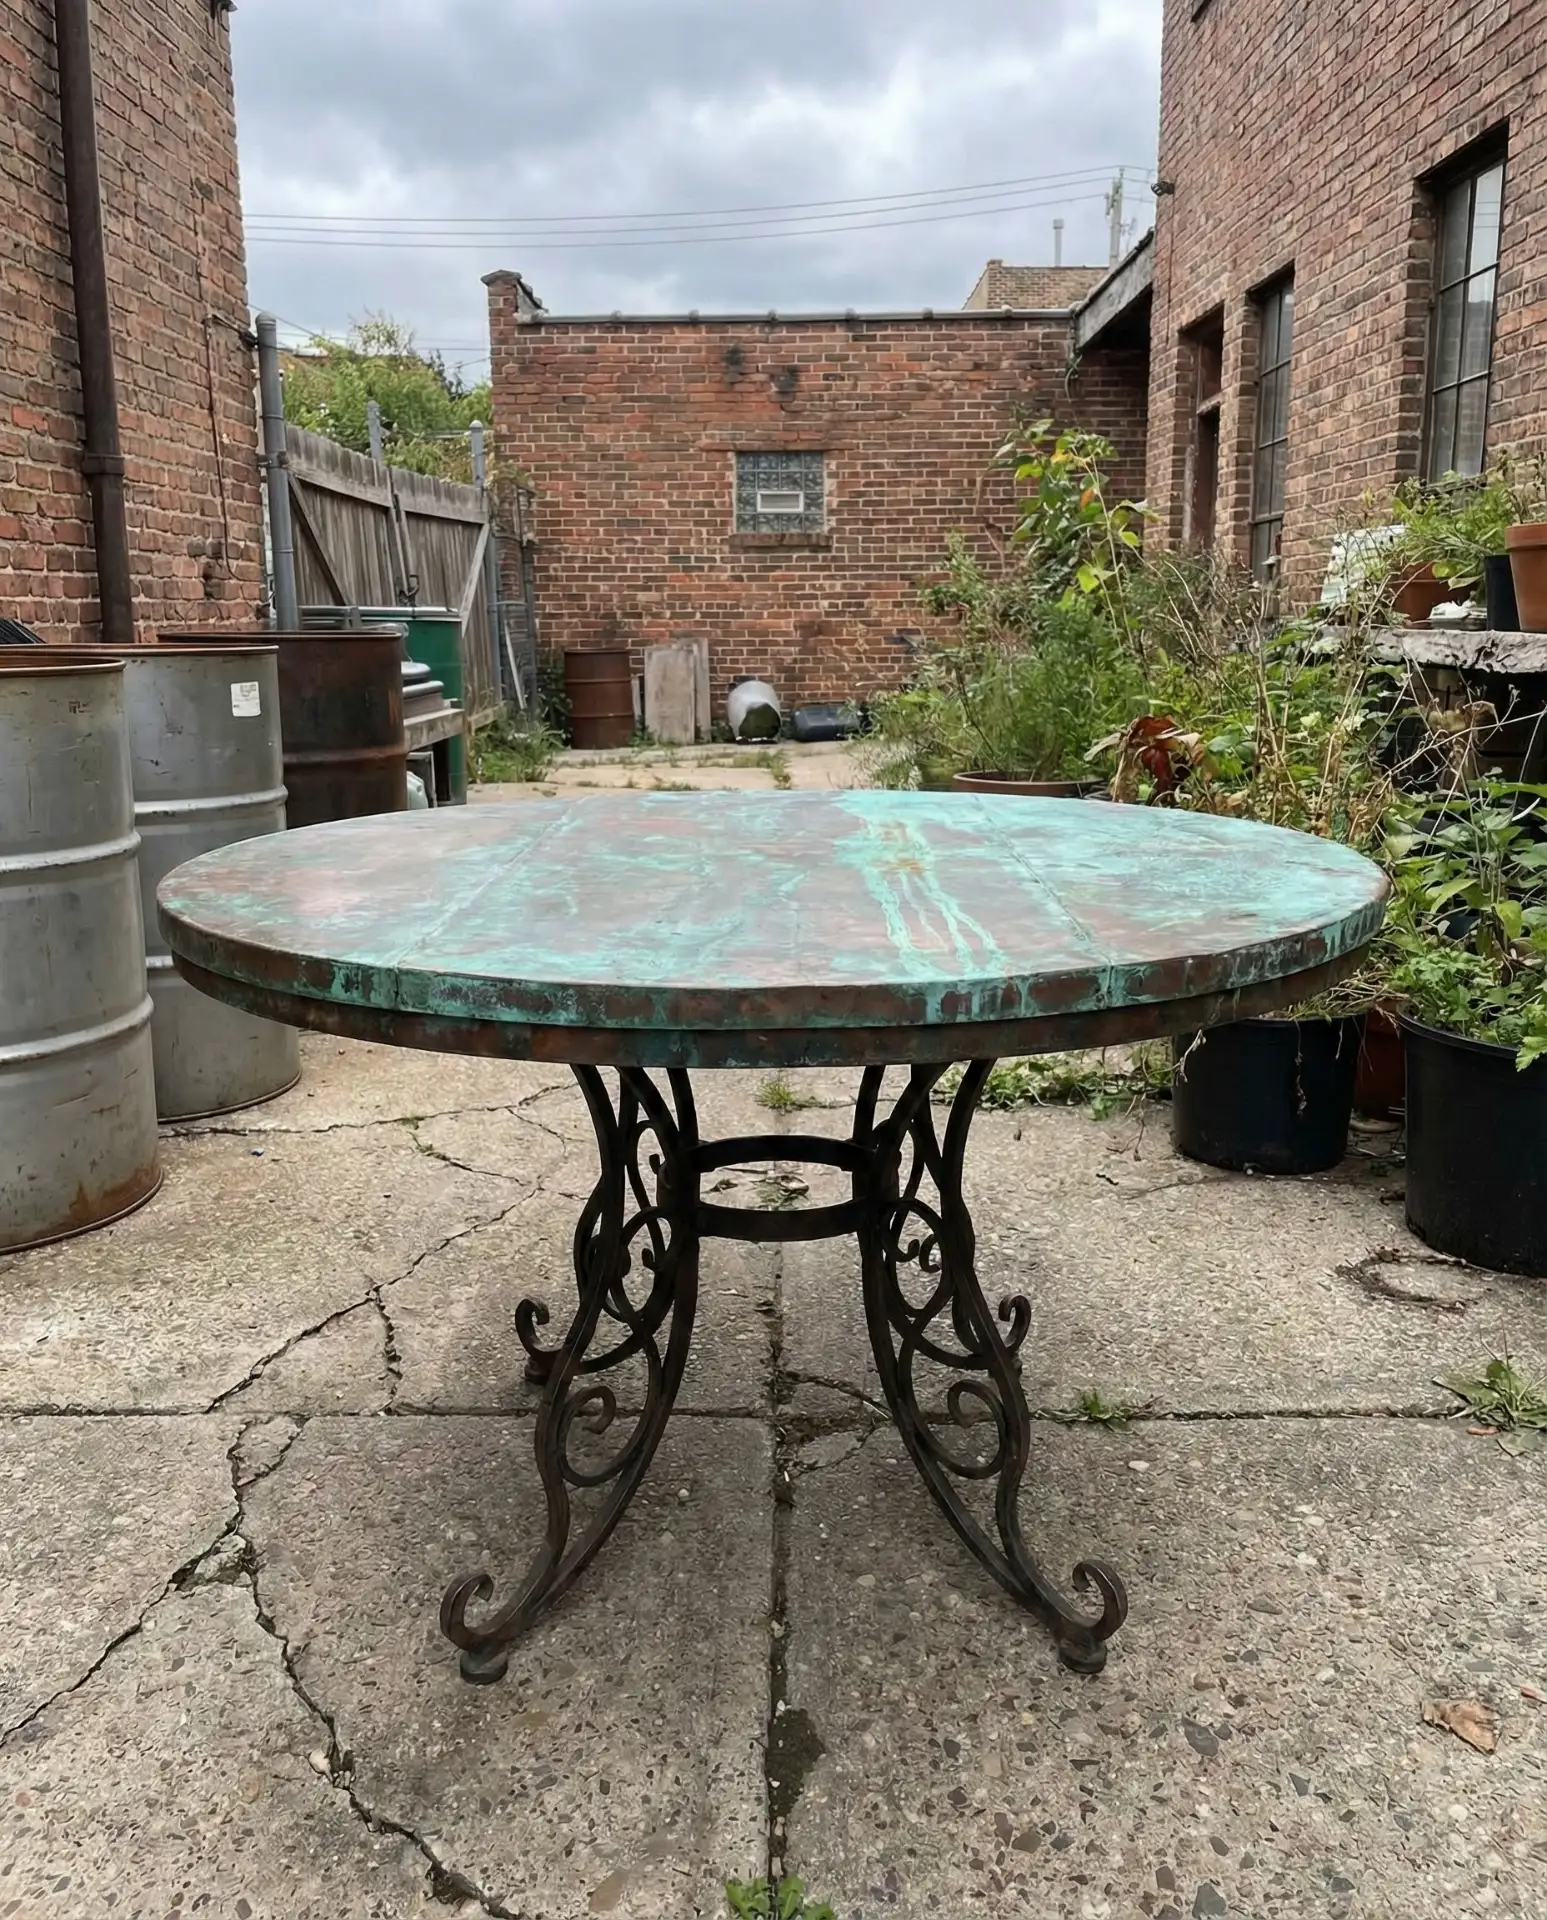
American lifestyle context: this style is especially popular in urban lofts and modern farmhouses, where industrial materials are mixed with natural textures. Copper sheeting costs more upfront—around $100–200 for a standard table—but it’s virtually indestructible and only improves with age. If you want to accelerate the patina, mix equal parts white vinegar, salt, and water, and spray it on the copper—you’ll see verdigris developing within hours.
17. Hydroponic Herb Garden Integration
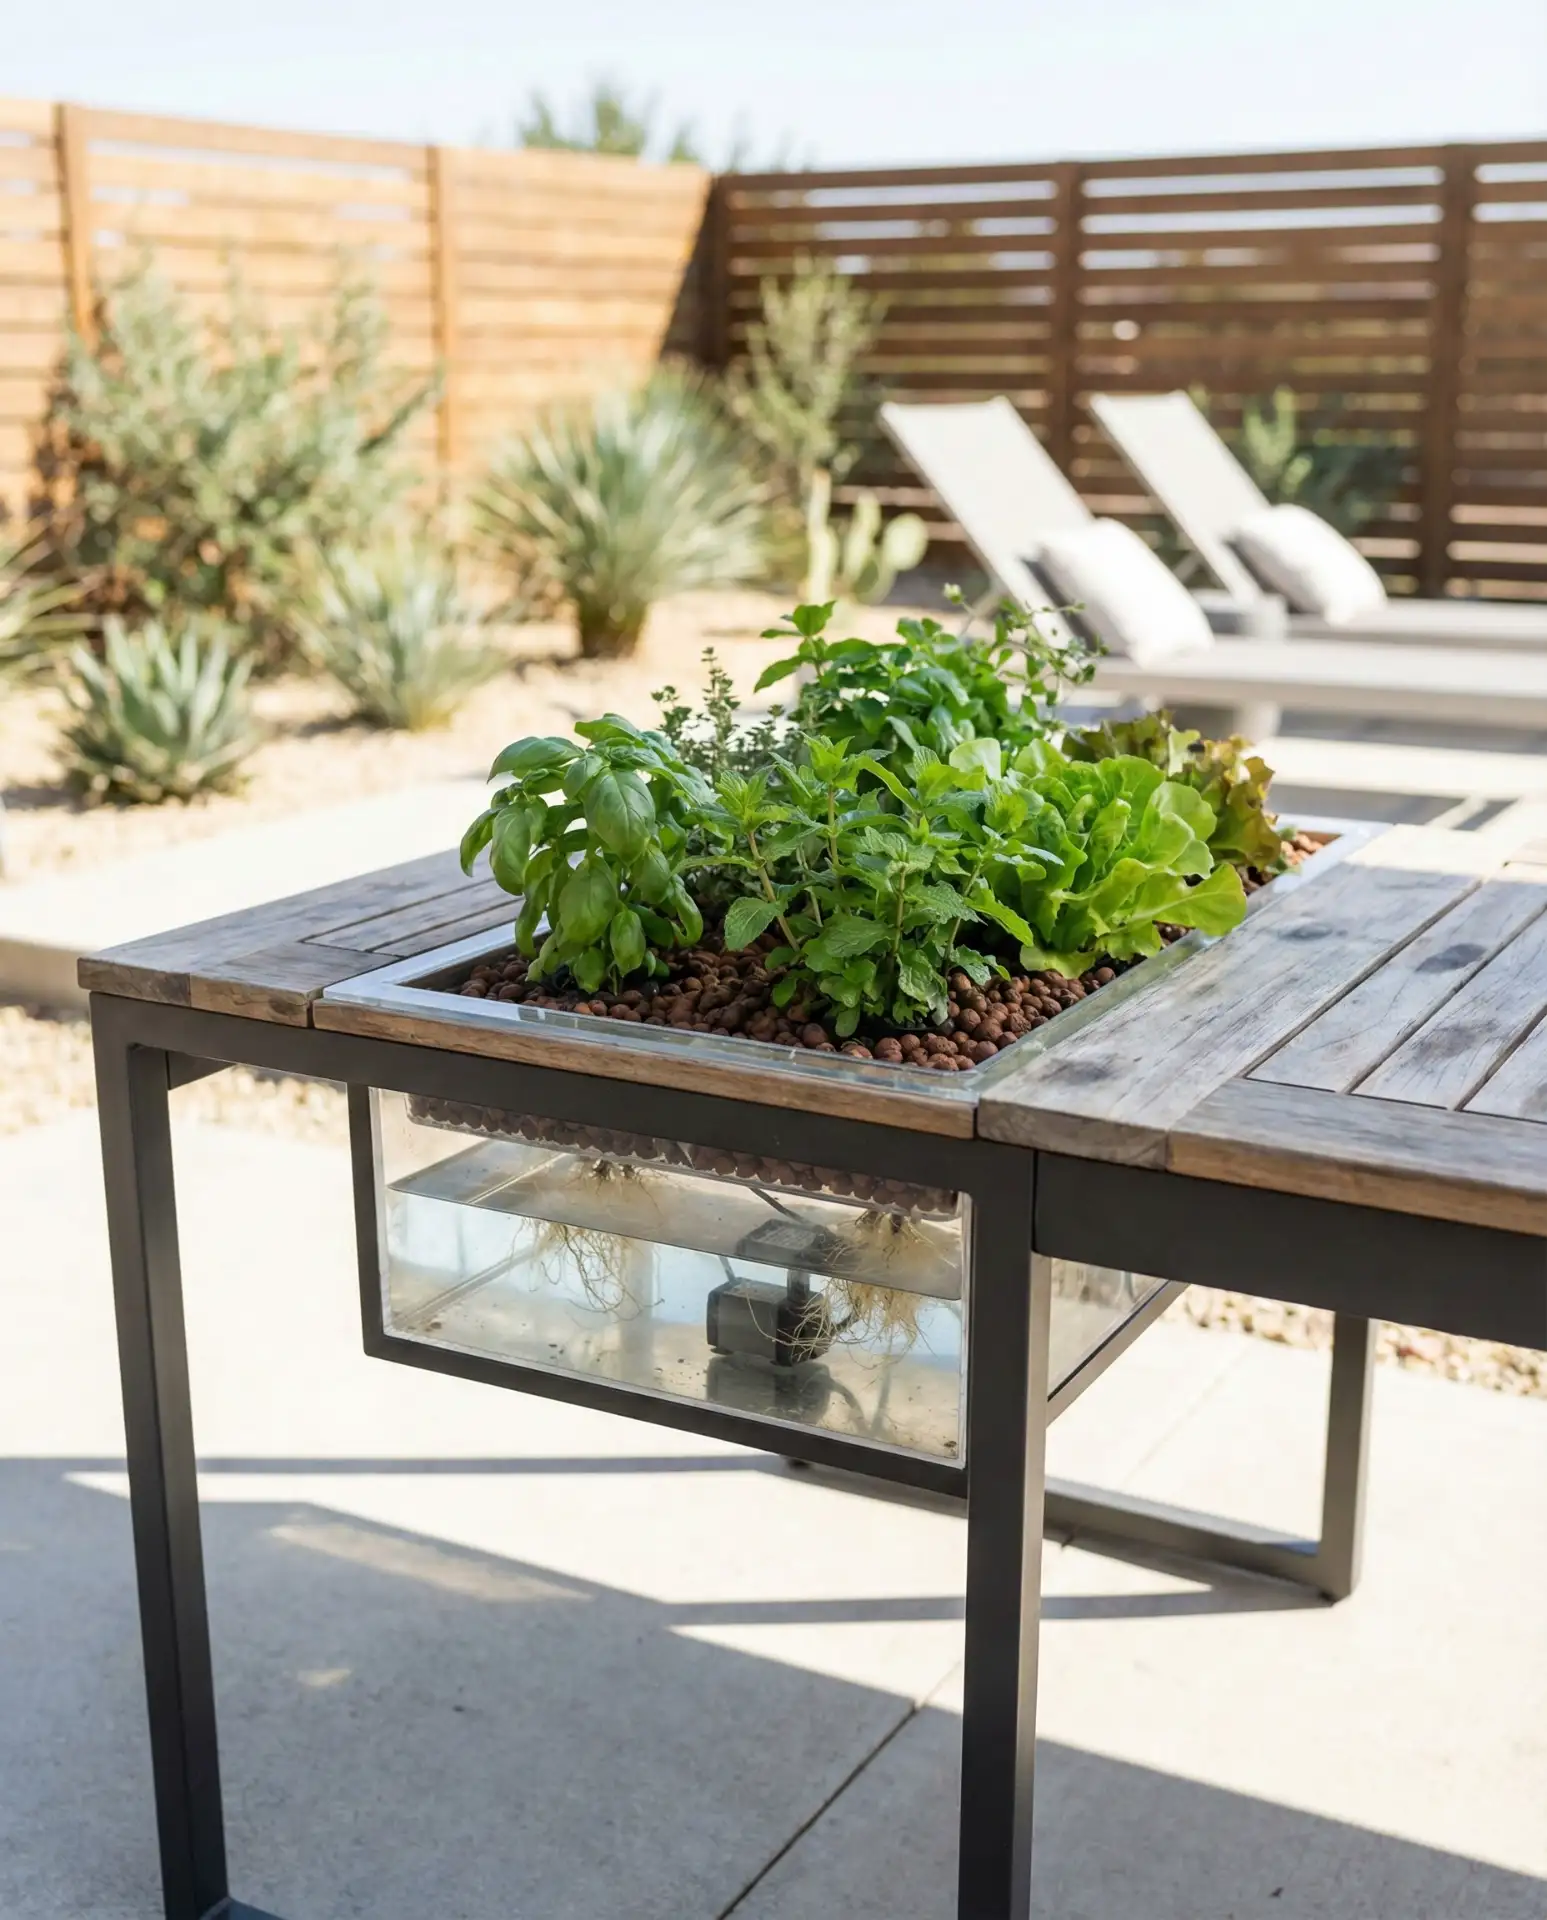
Building a shallow hydroponic tray into the center of your patio table allows you to grow fresh herbs right where you eat, combining function and beauty in a single outdoor feature. The system requires a watertight liner, a small pump, and grow cups, but the payoff is fresh basil, mint, or cilantro within arm’s reach during meals. This is one of the most innovative ideas for food-focused homeowners who entertain frequently. 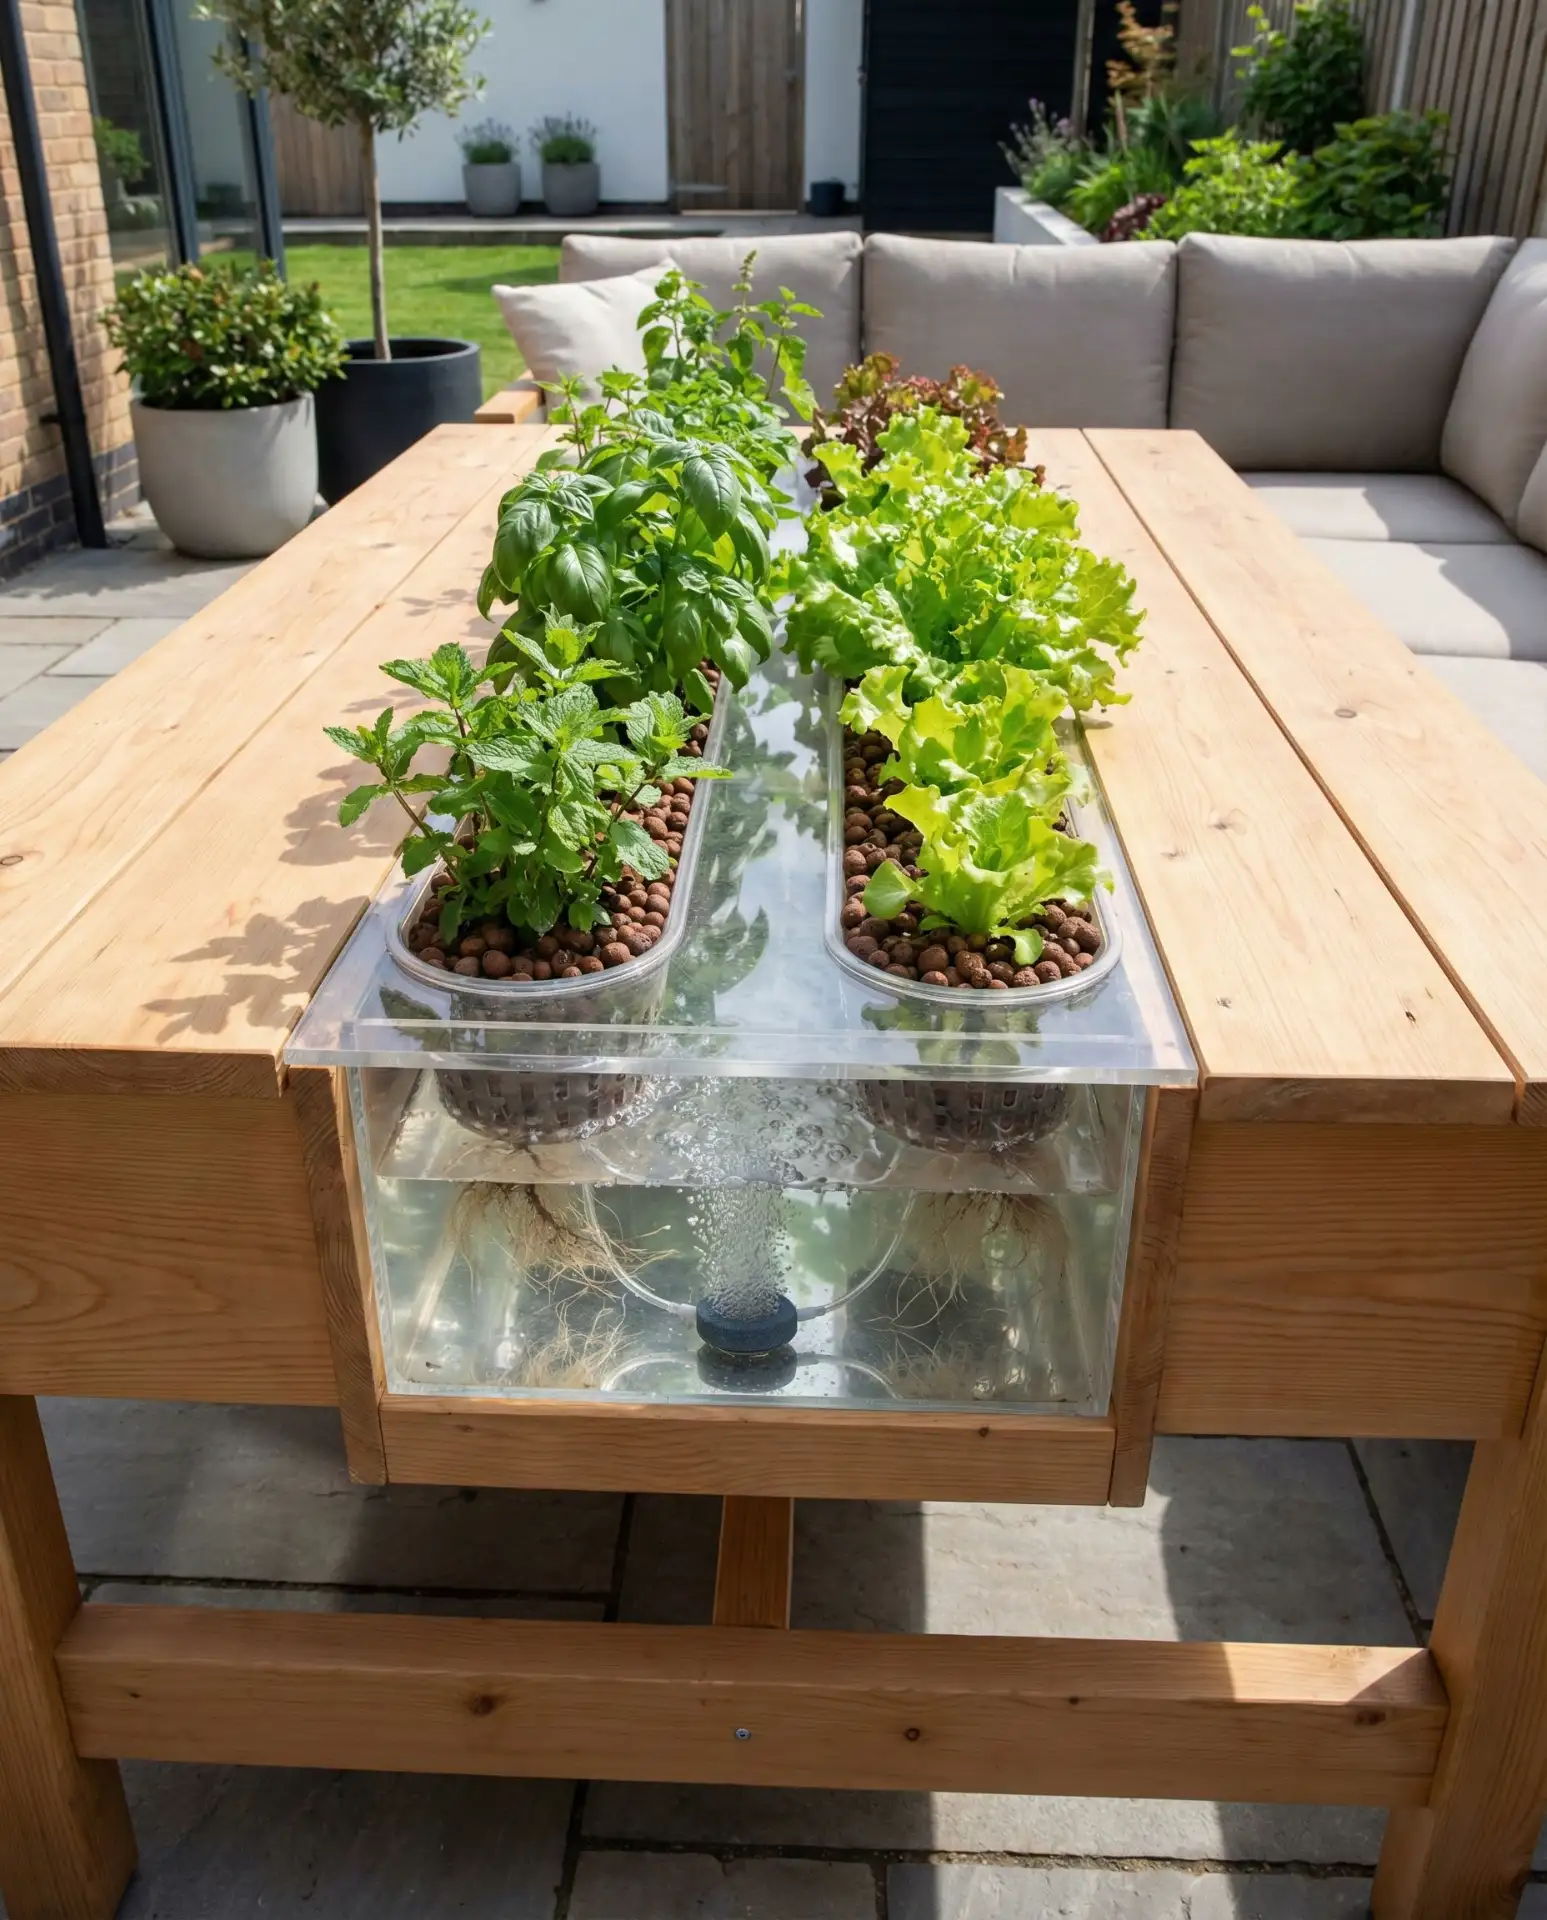
Where it works best: covered patios or areas with partial sun, where you can control light exposure and prevent algae growth in the water reservoir. The setup costs around $60–80 if you buy a basic pump and nutrient solution, making it surprisingly affordable. One common mistake is overfilling the reservoir—herbs need oxygen at the roots, and too much water leads to root rot and system failure within weeks.
18. Vintage Door Conversion
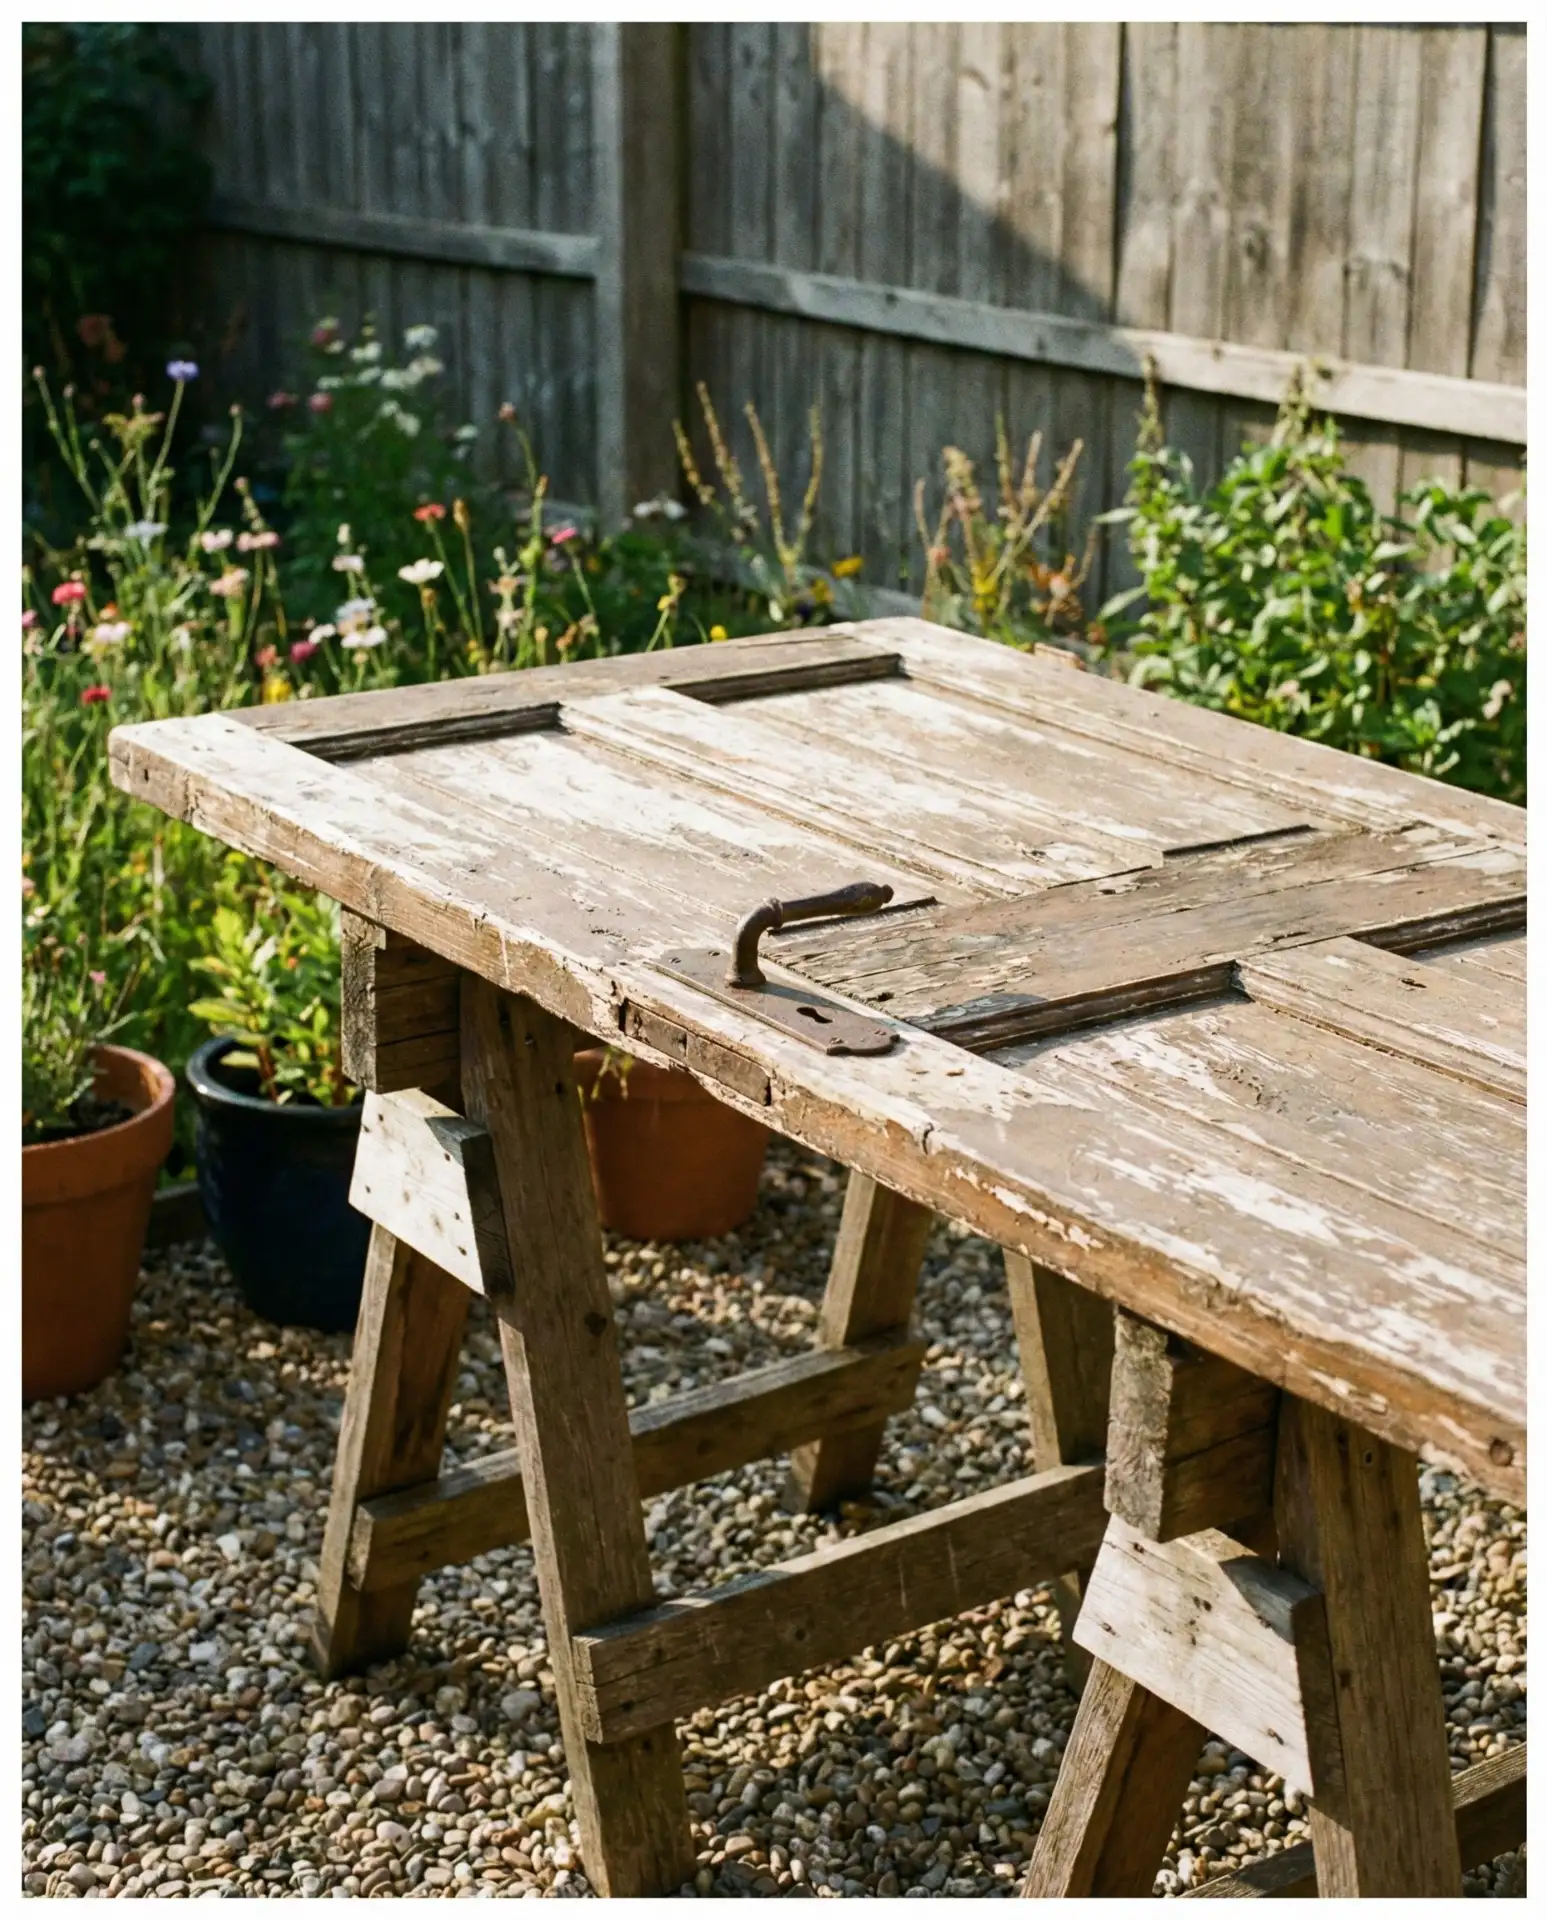
Repurposing an old wooden door as a patio table top preserves architectural history while creating a unique, oversized surface perfect for large gatherings. The door is cleaned, sanded, and sealed, then mounted on a sturdy base—sawhorses, metal legs, or custom-built supports all work well. The panels, hardware, and original paint or stain add character that you can’t replicate with new materials. 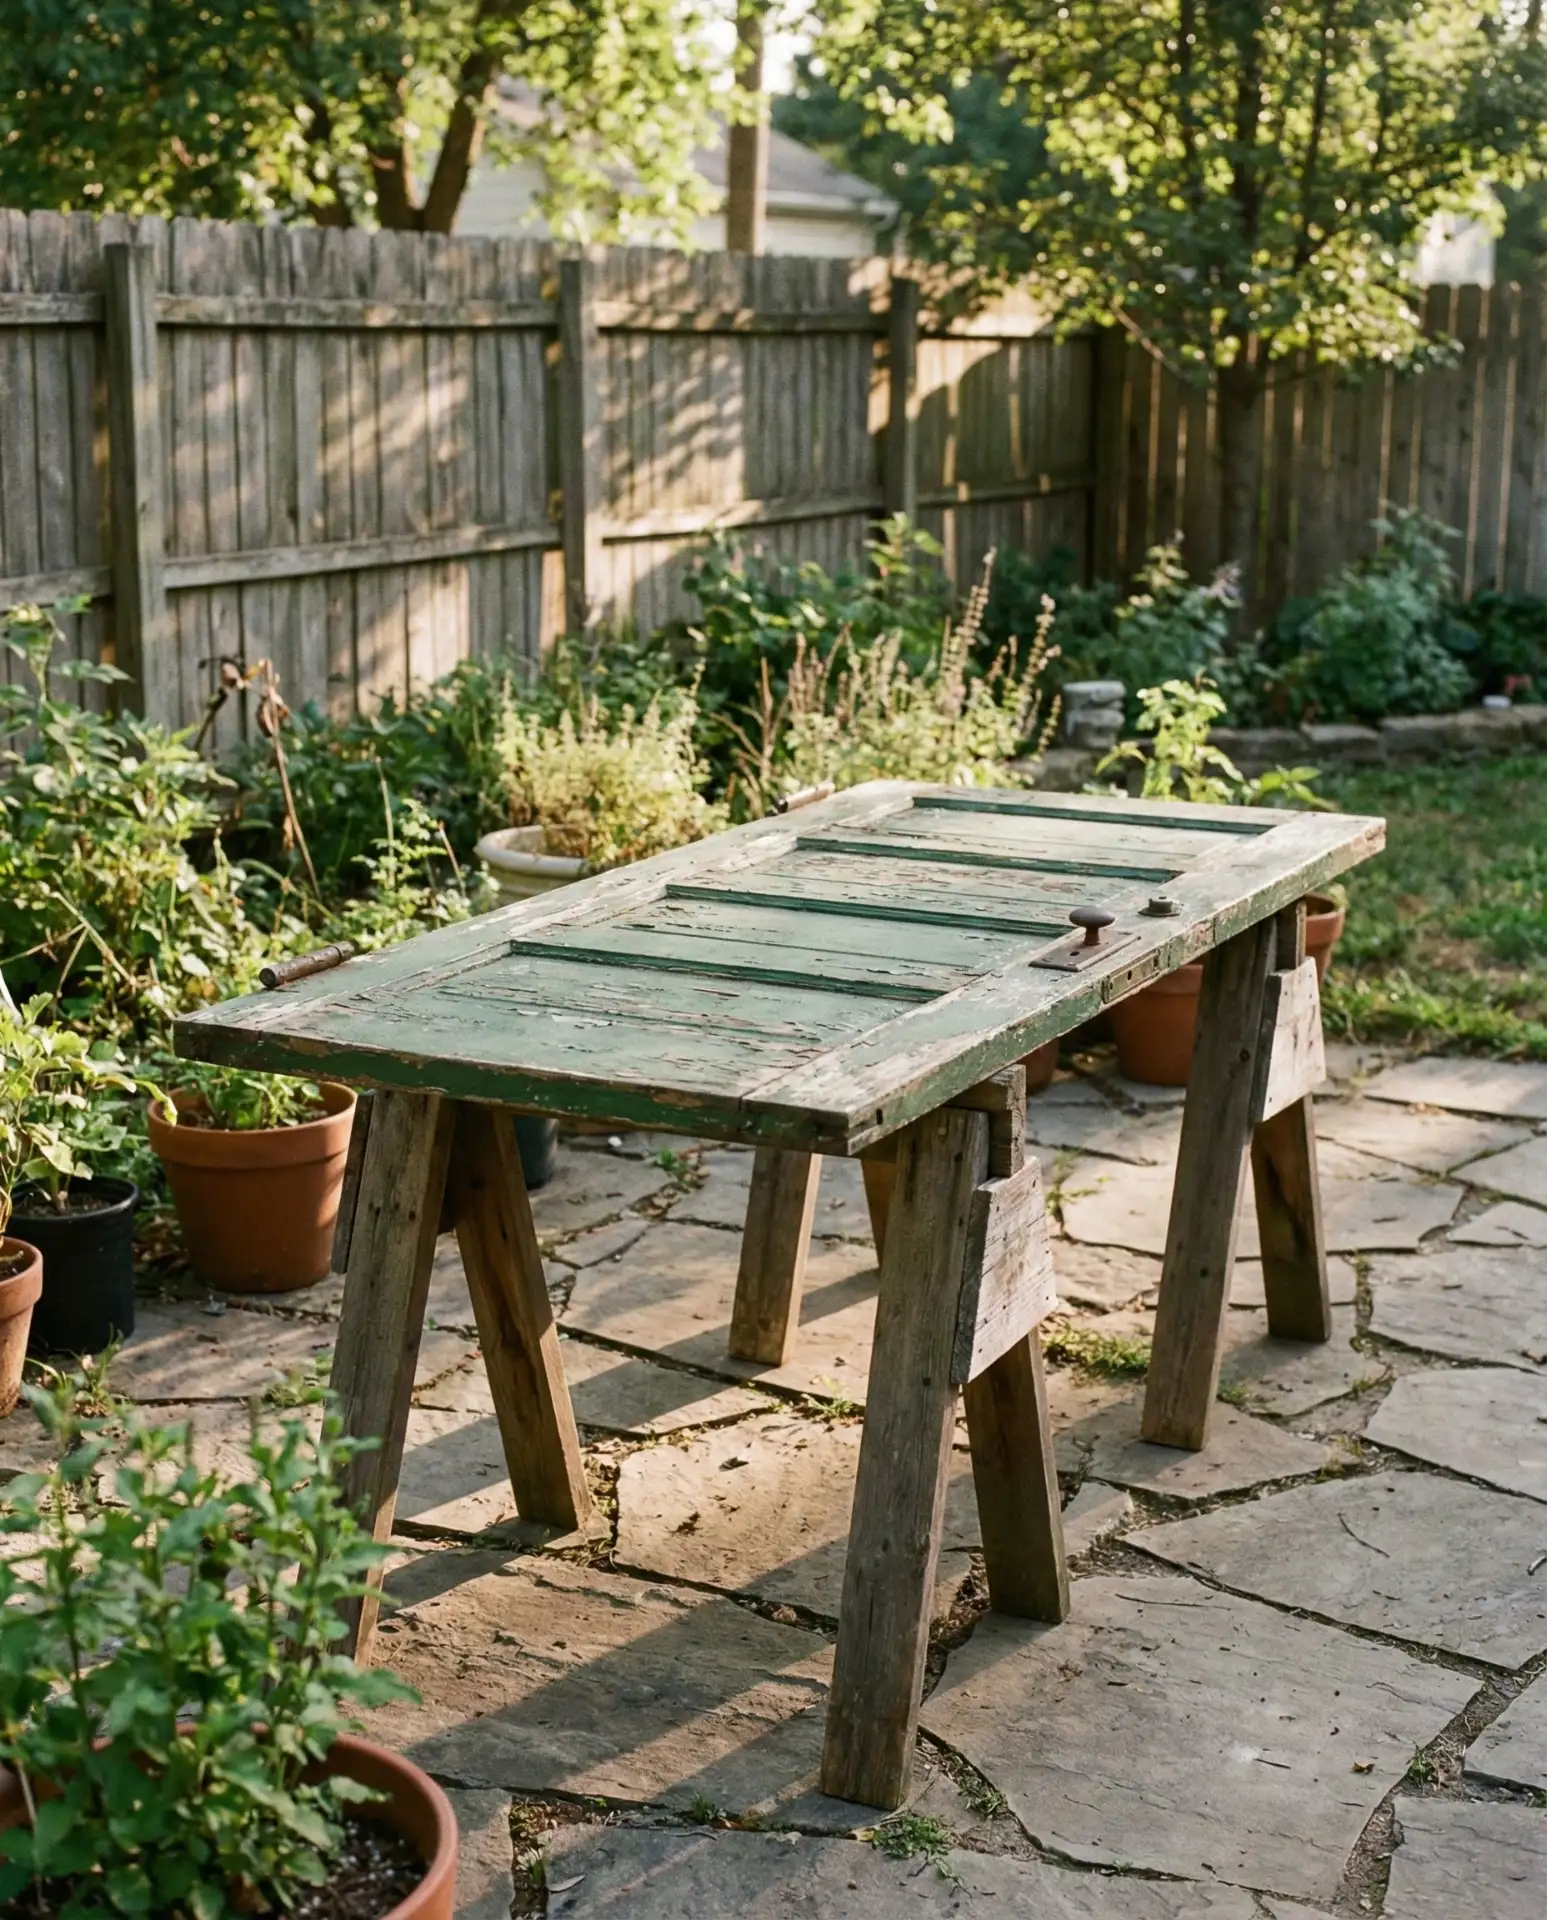
Regional context: this DIY trend is especially strong in the South and Pacific Northwest, where salvage yards and estate sales regularly offer solid wood doors from historic homes. A six-panel door can be sourced for $20–50, making it one of the most budget-friendly makeover projects available. The key is reinforcing the door from underneath with cross braces—without them, the panels will warp or separate within a season of outdoor exposure.
19. Outdoor-Safe Upholstered Bench Pairing
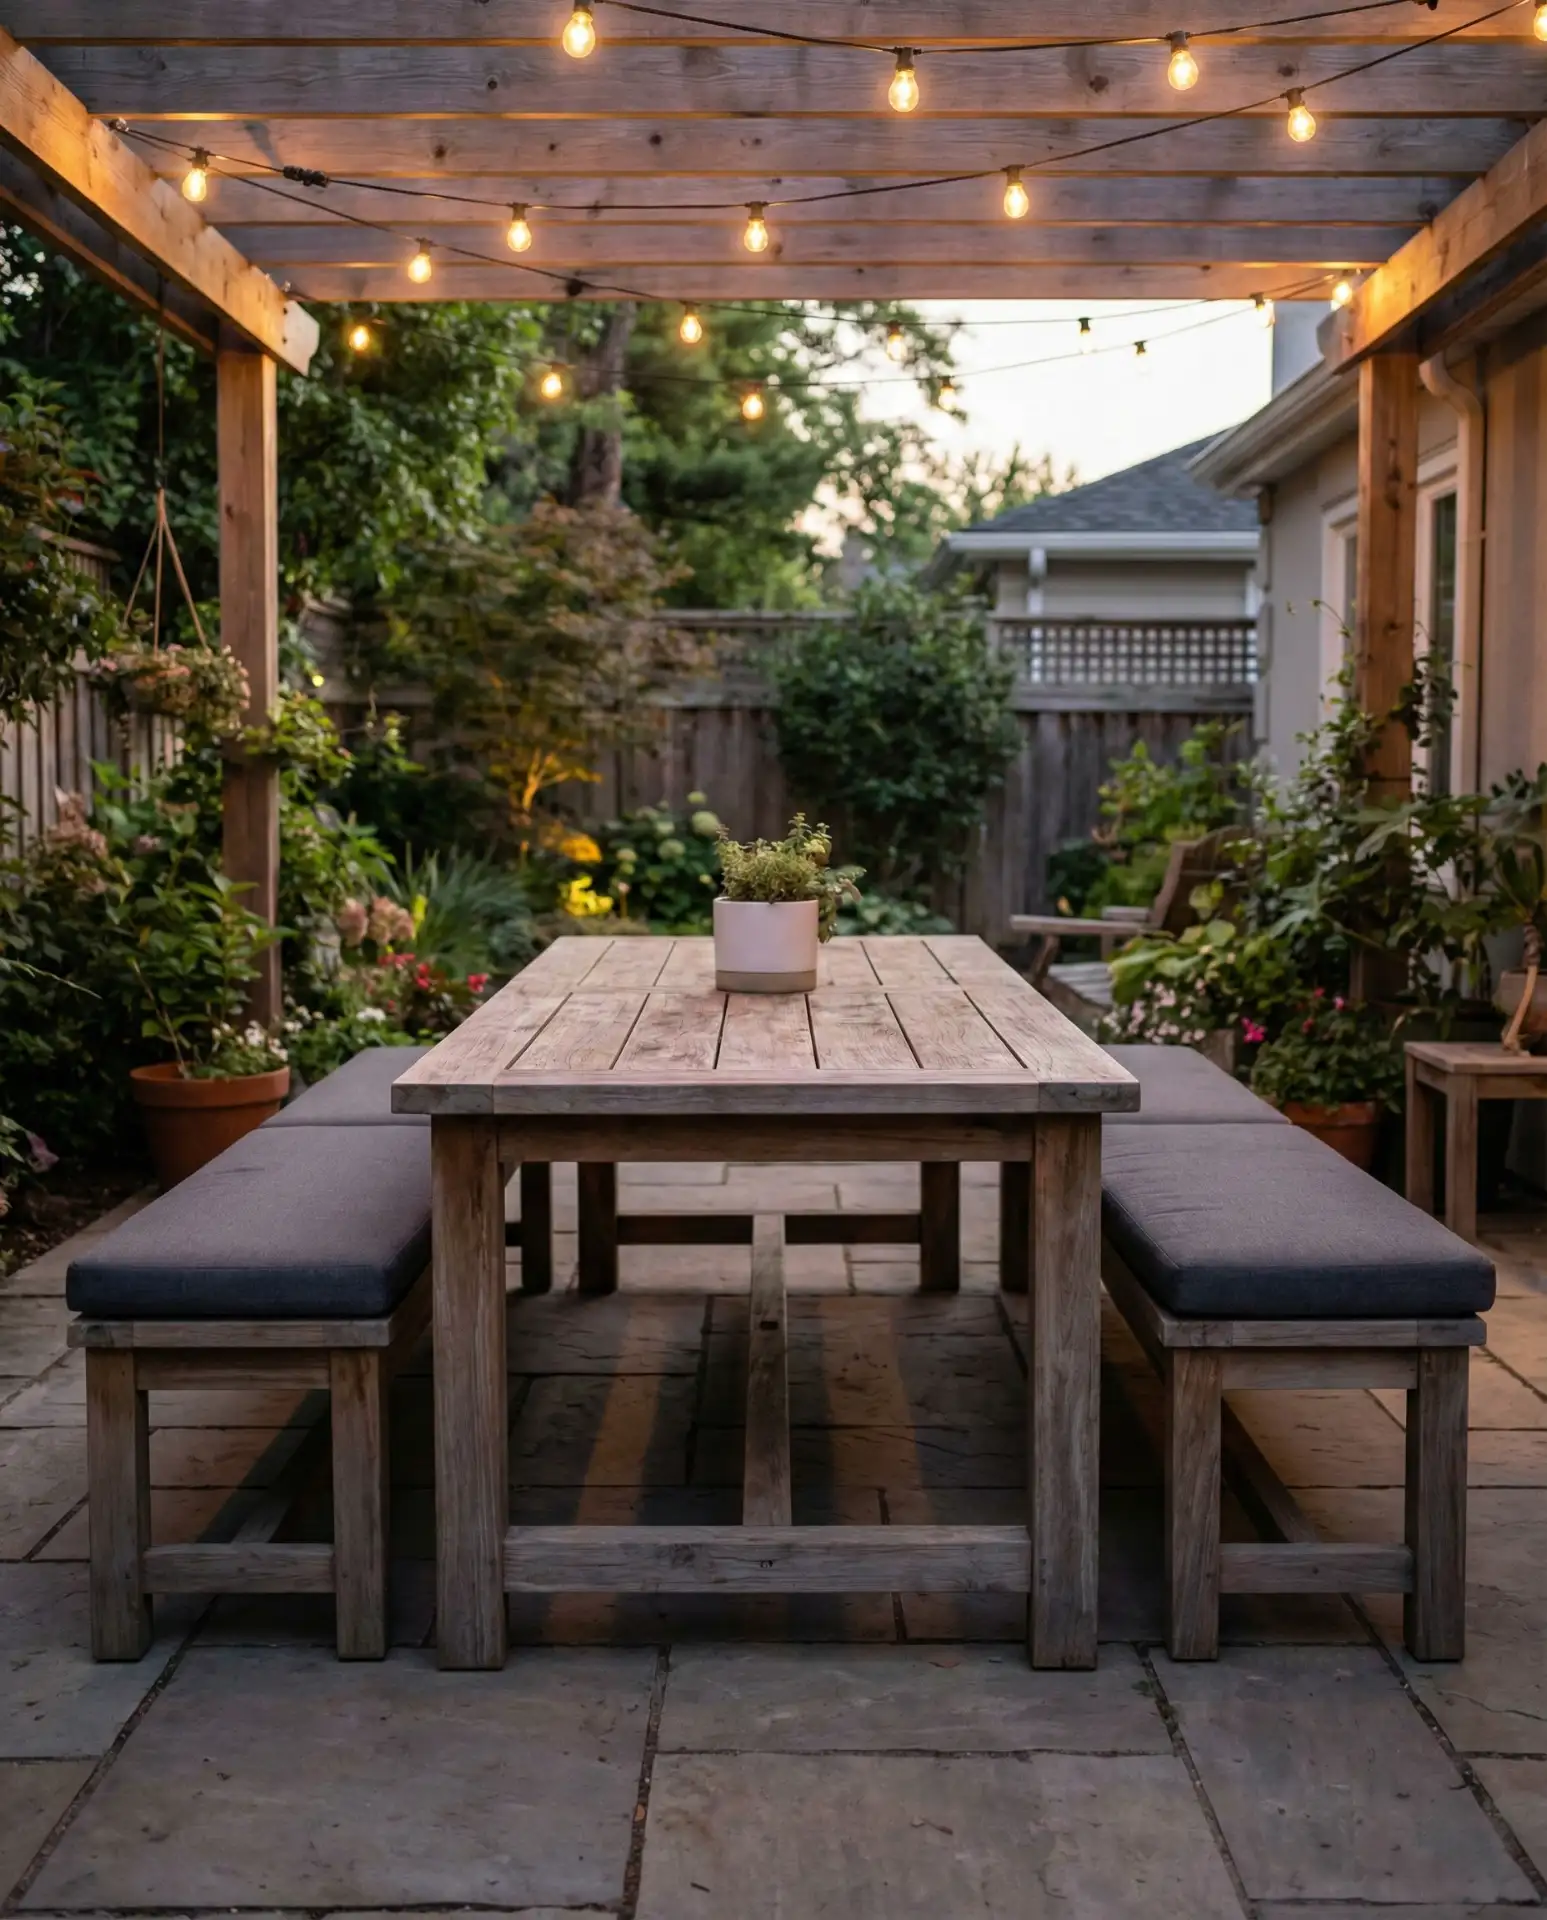
Pairing your patio table with custom-built upholstered benches creates a cohesive, restaurant-quality dining setup that encourages lingering. Use marine-grade foam and outdoor fabric like Sunbrella to withstand weather, and build simple wooden frames that match or complement the table. This combination of furniture transforms a basic outdoor area into a destination space that’s comfortable enough for hours of conversation. 
Real homeowners report that upholstered benches dramatically increase how much time their families spend outdoors—comfort matters more than most people realize. The typical cost for foam and fabric is $150–250 per bench, which is still cheaper than buying quality outdoor seating retail. Just avoid regular indoor foam—it holds water like a sponge and will mildew within days of the first rainstorm.
20. Faux Stone Textured Top
Creating a faux stone texture on your patio table using joint compound, paint, and sealant delivers the look of natural stone without the weight or expense. Spread the compound in irregular patterns, let it dry, then use multiple layers of gray, tan, and white paint to mimic granite or limestone. This technique is an impressive makeover that’s far easier than it looks and provides a durable, weather-resistant finish. 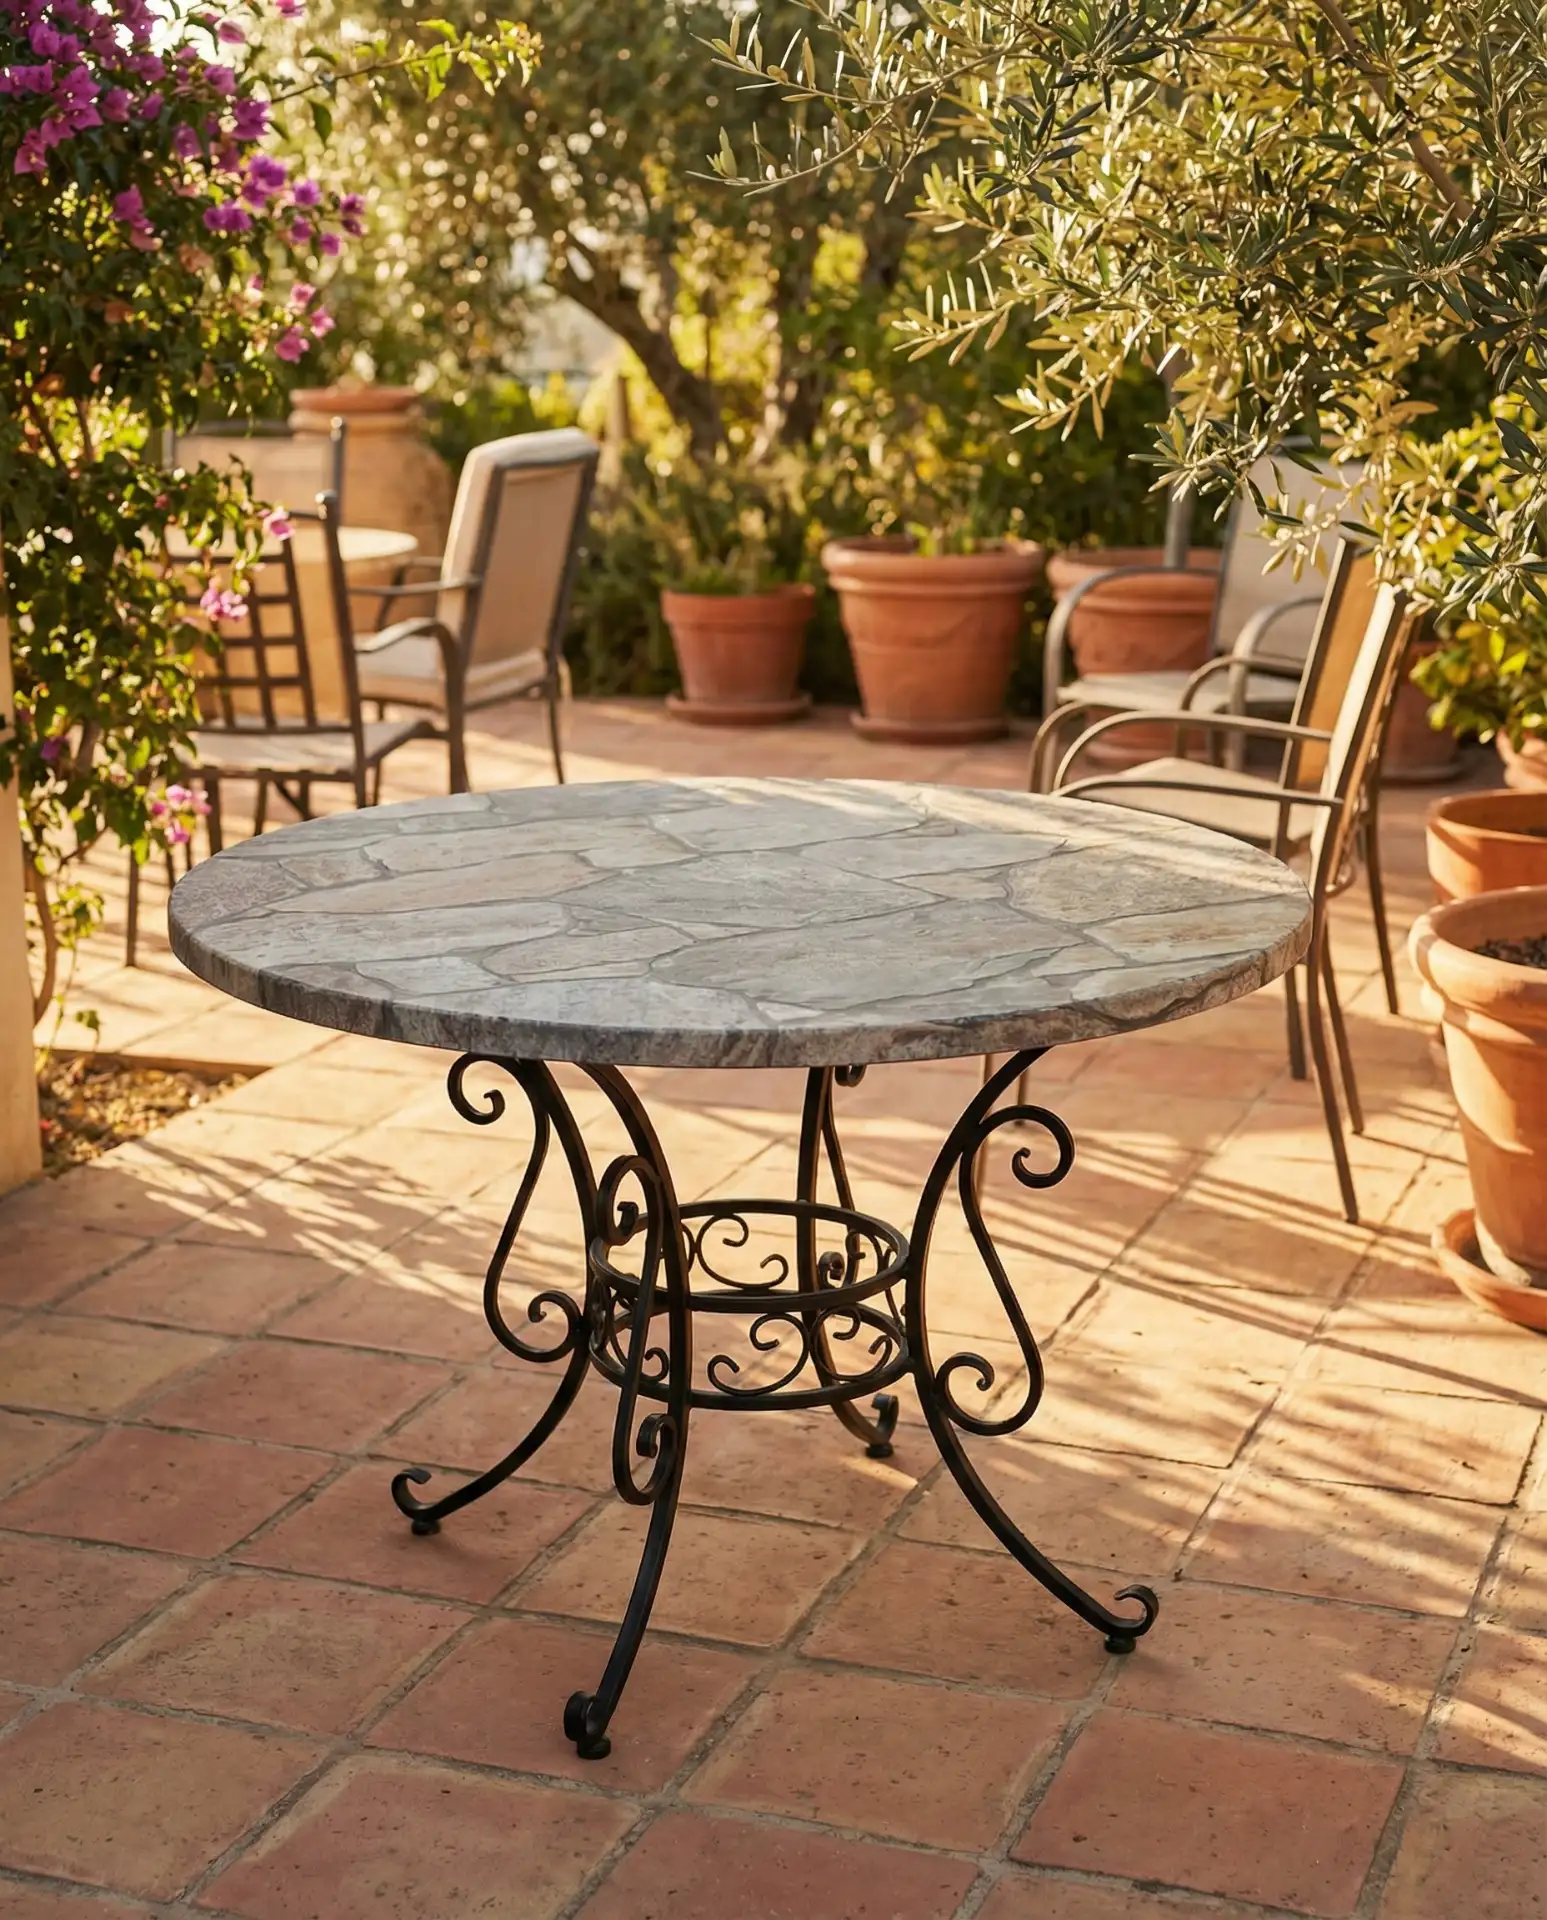
Practical insight: the key to realism is using at least three different paint colors in thin, overlapping washes rather than solid coats. Many DIYers rush this step and end up with a flat, obviously fake appearance. The entire project costs under $40 if you use leftover paint and compound, and the sealed surface will last three to five years outdoors with minimal maintenance.
21. Mirrored or Reflective Tile Accent
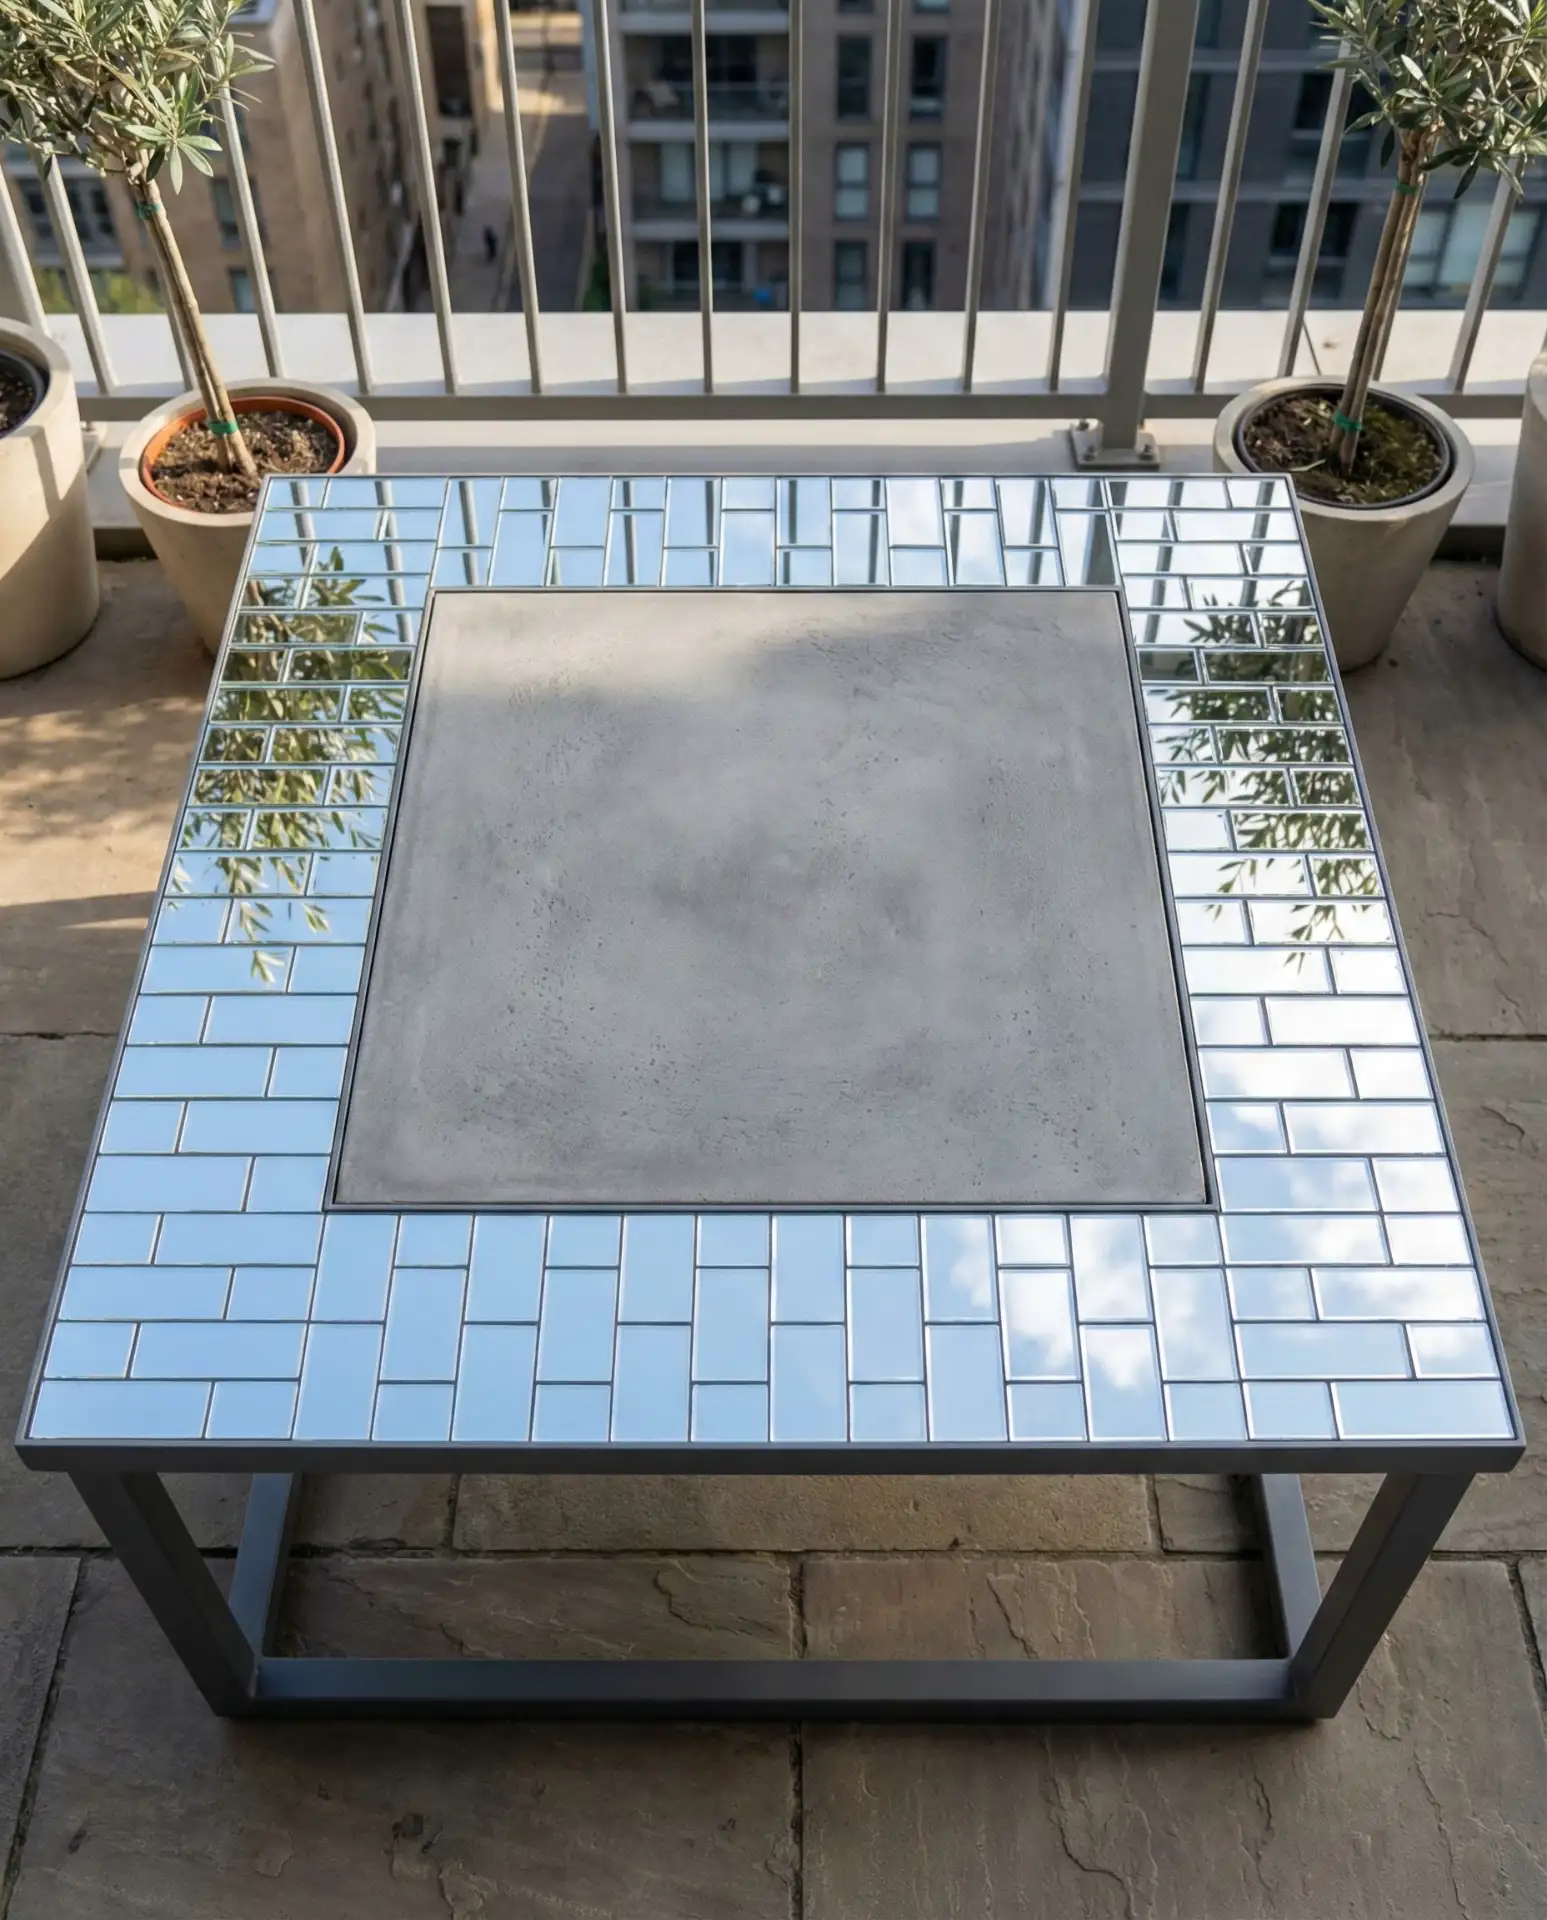
Adding mirrored or metallic tile accents to your patio table creates visual interest and reflects natural light, making small outdoor spaces feel larger and brighter. Use weather-resistant mirror tiles or metallic glass tiles arranged in geometric patterns or borders, then grout and seal as you would with standard tile work. This technique adds a touch of glamour that’s especially effective in urban balconies or courtyard settings. 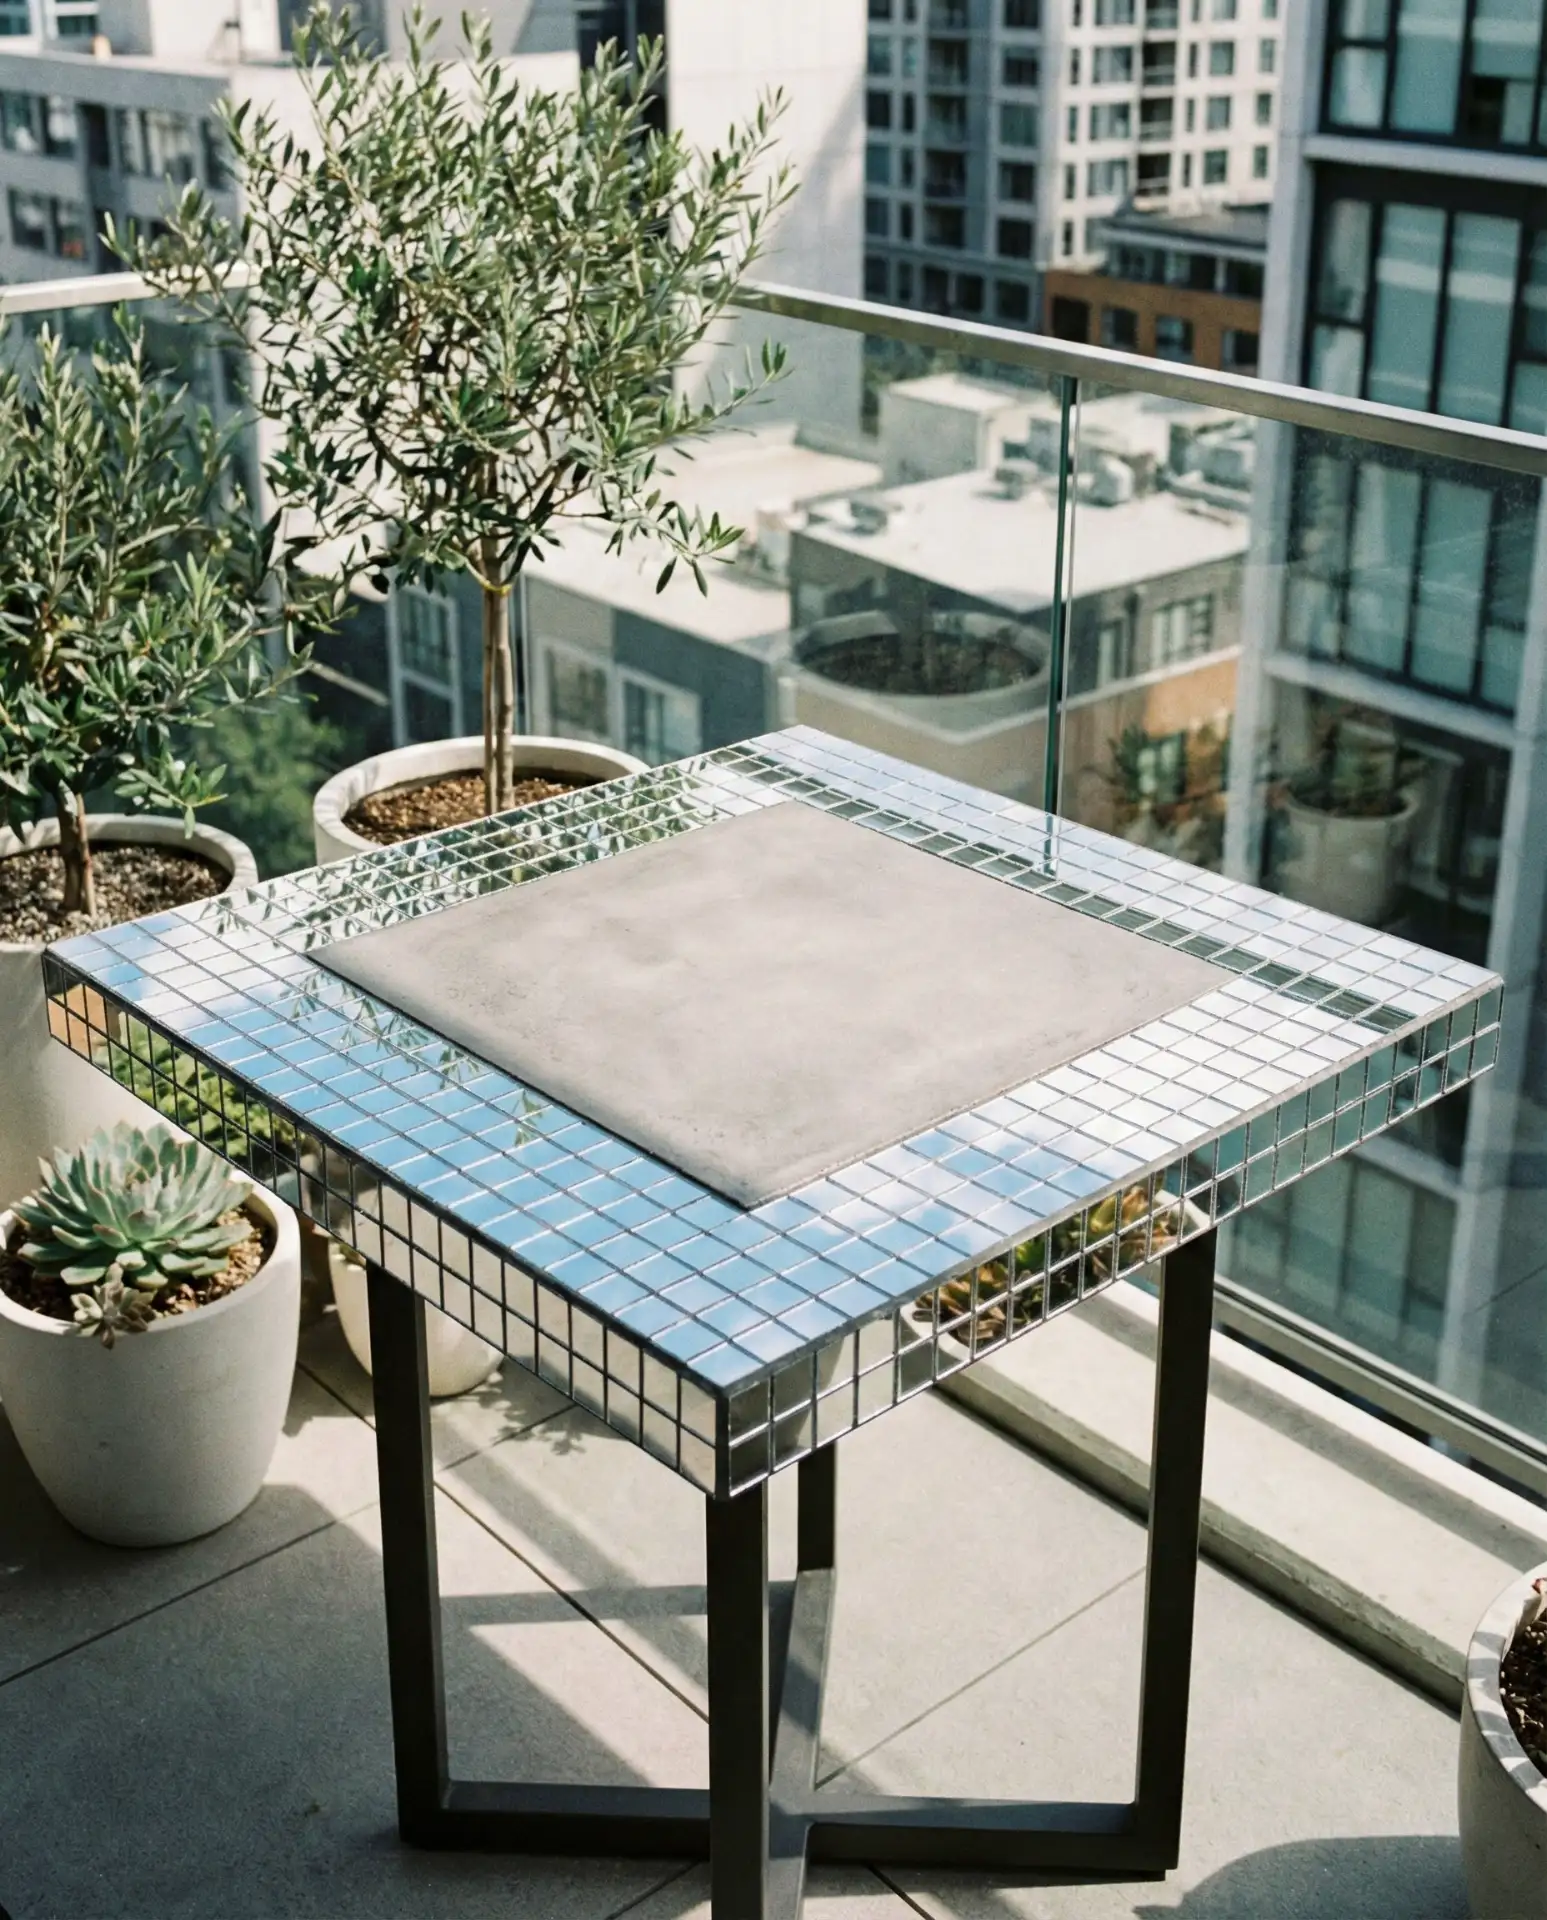
Where it works best: small patios, balconies, and courtyards where maximizing light and visual space is a priority. Mirror tiles cost around $3–8 per square foot, making this an affordable way to add luxury without breaking the budget. Avoid using mirror tiles in full sun exposure—the concentrated reflection can create hot spots that damage plants and even melt nearby plastics or fabrics.
22. Butcher Block Surface for Outdoor Prep
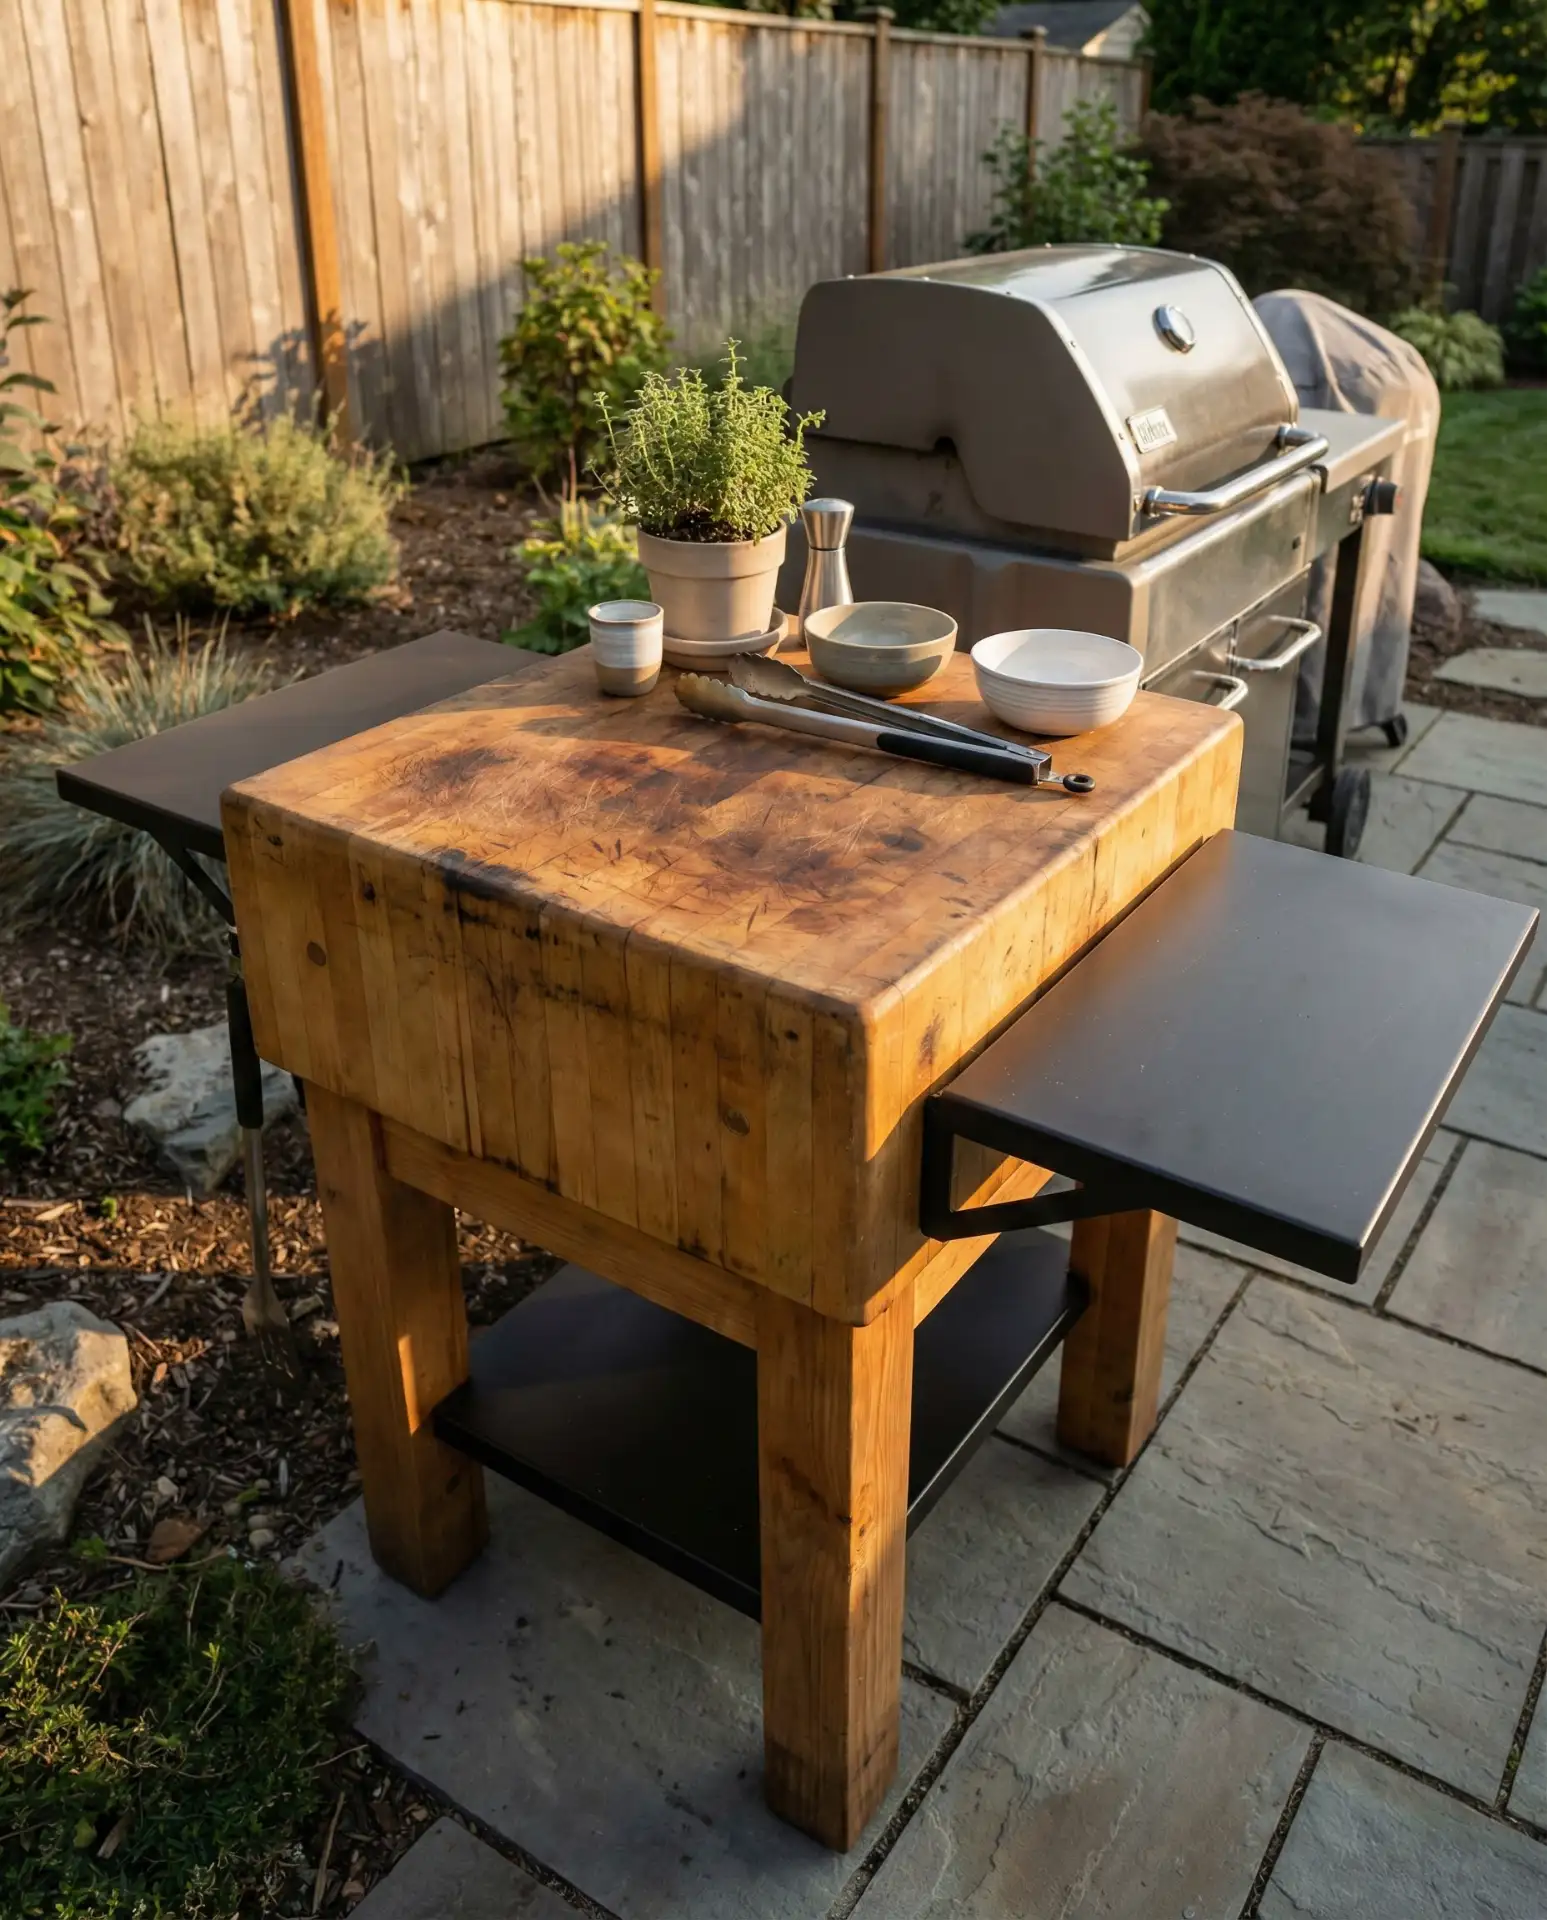
Installing a butcher block surface on your patio table turns it into a functional food prep station for outdoor cooking and entertaining. Use edge-grain maple or oak, seal it with food-safe mineral oil or beeswax, and maintain it regularly to prevent warping. This is one of the most practical ideas for homeowners who grill frequently or host outdoor dinners where prep space is limited. 
Expert advice: never use polyurethane or varnish on butcher block that will contact food—these finishes aren’t food-safe and will chip with knife use. Instead, treat the wood monthly with mineral oil to keep it hydrated and resistant to moisture. The biggest maintenance mistake is leaving the block exposed to rain—even well-oiled wood will crack and split if it absorbs too much water, so store it covered or bring it inside during wet weather.
23. Lighted Glass Insert for Evening Ambiance
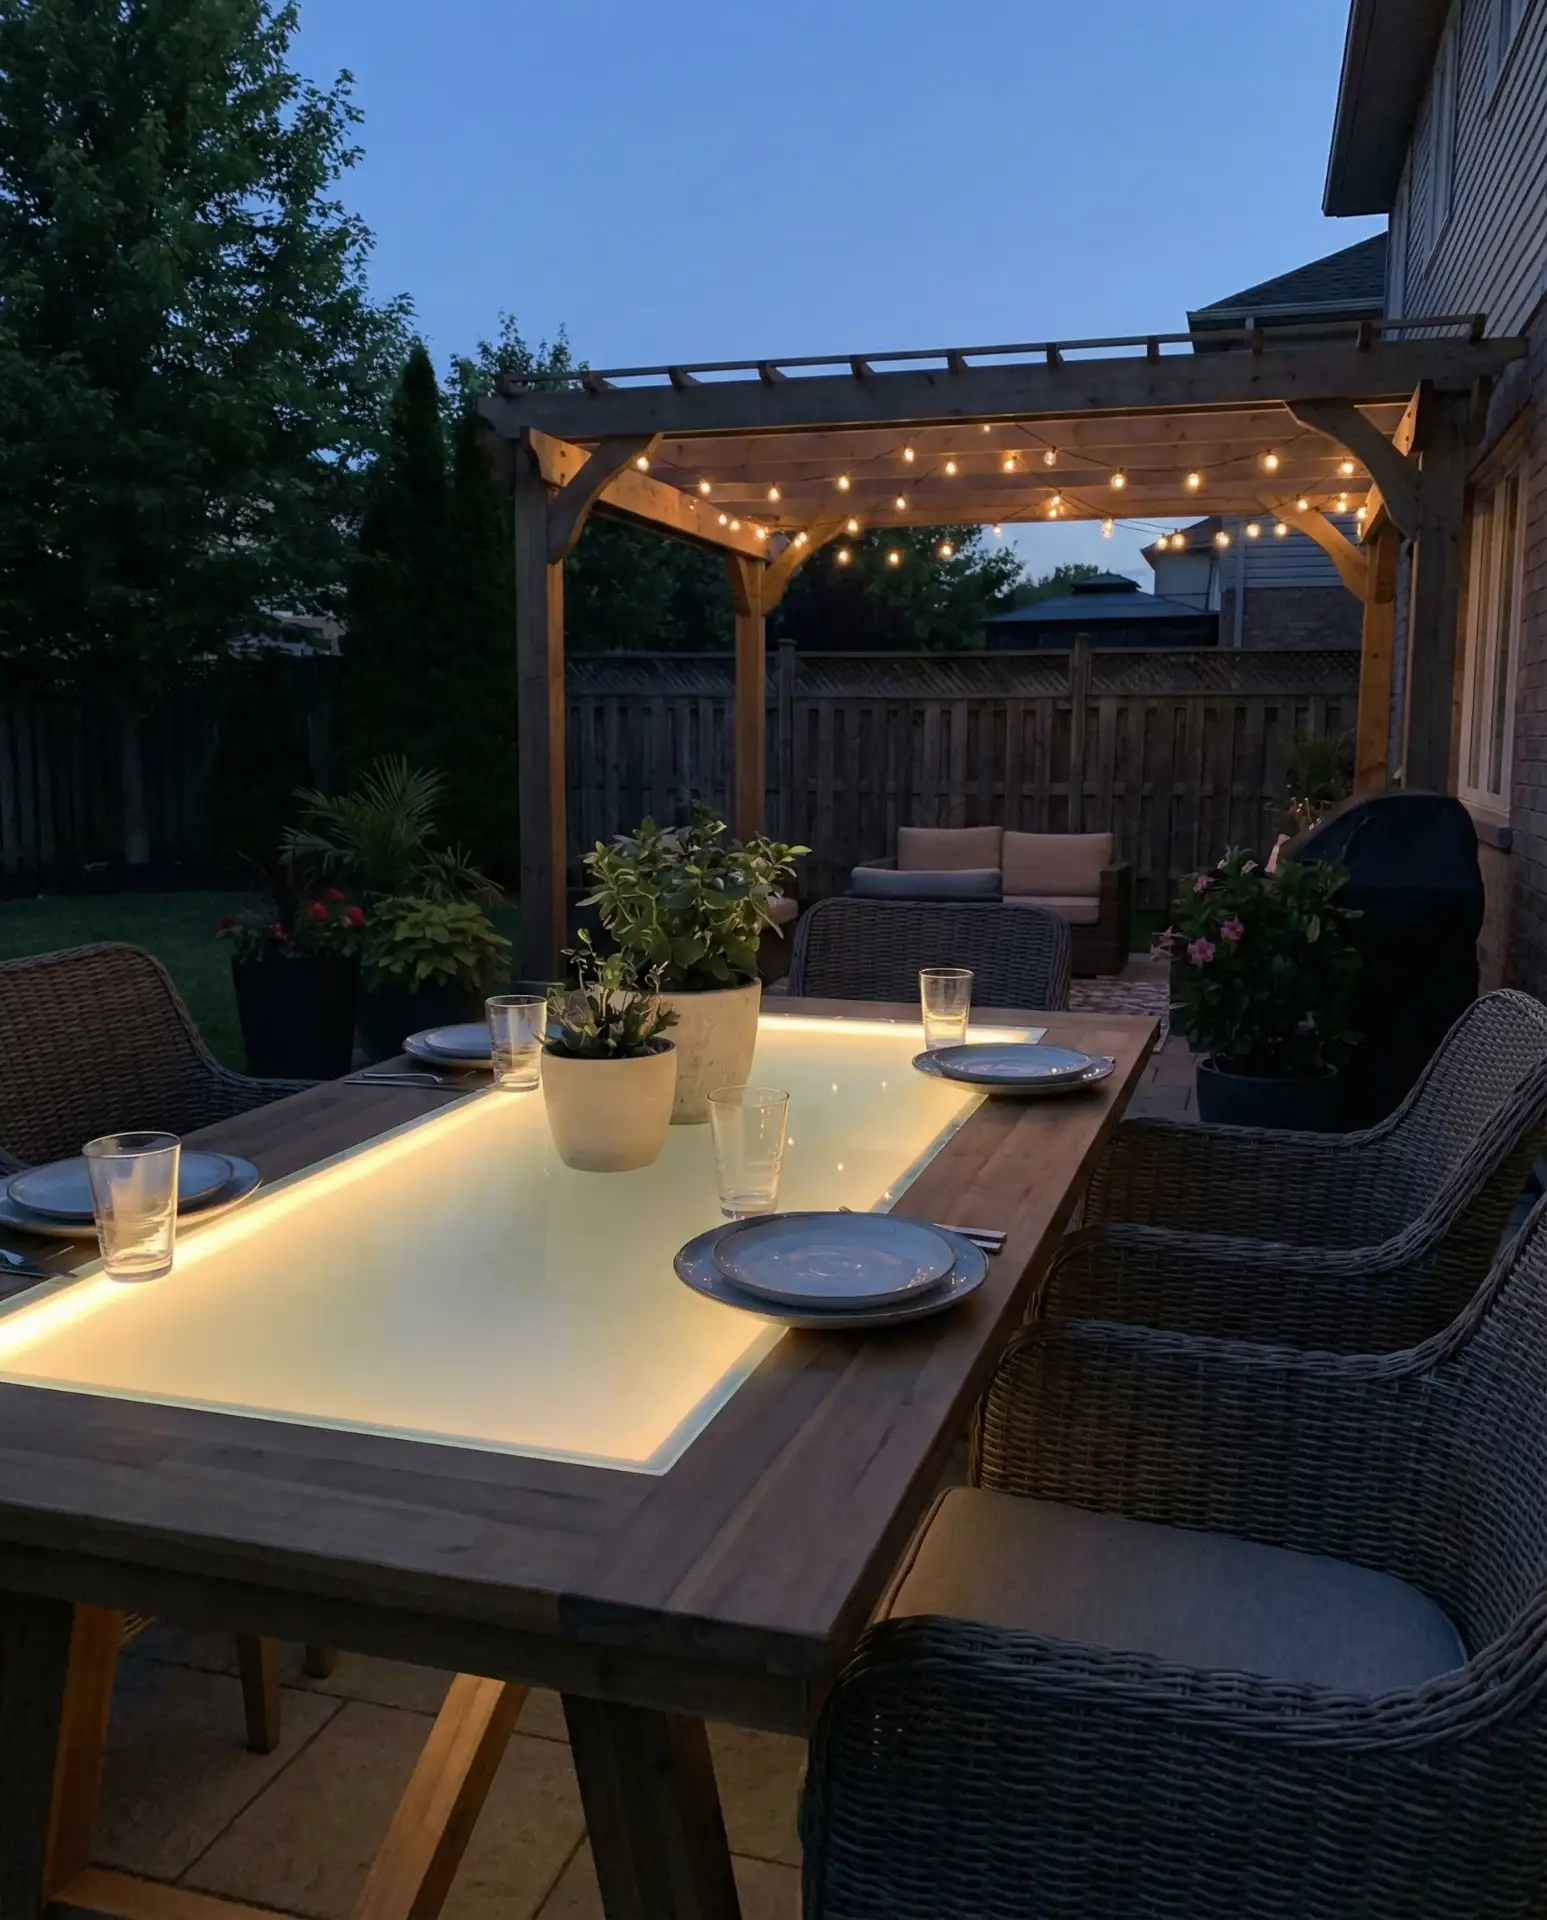
Embedding LED strip lights beneath a frosted or clear glass panel in the center of your patio table creates stunning evening ambiance for nighttime entertaining. The lights are wired to a low-voltage transformer and controlled with a simple switch or remote, allowing you to adjust brightness. This redo project combines function and drama, transforming the table into a glowing focal point that eliminates the need for candles or lanterns. 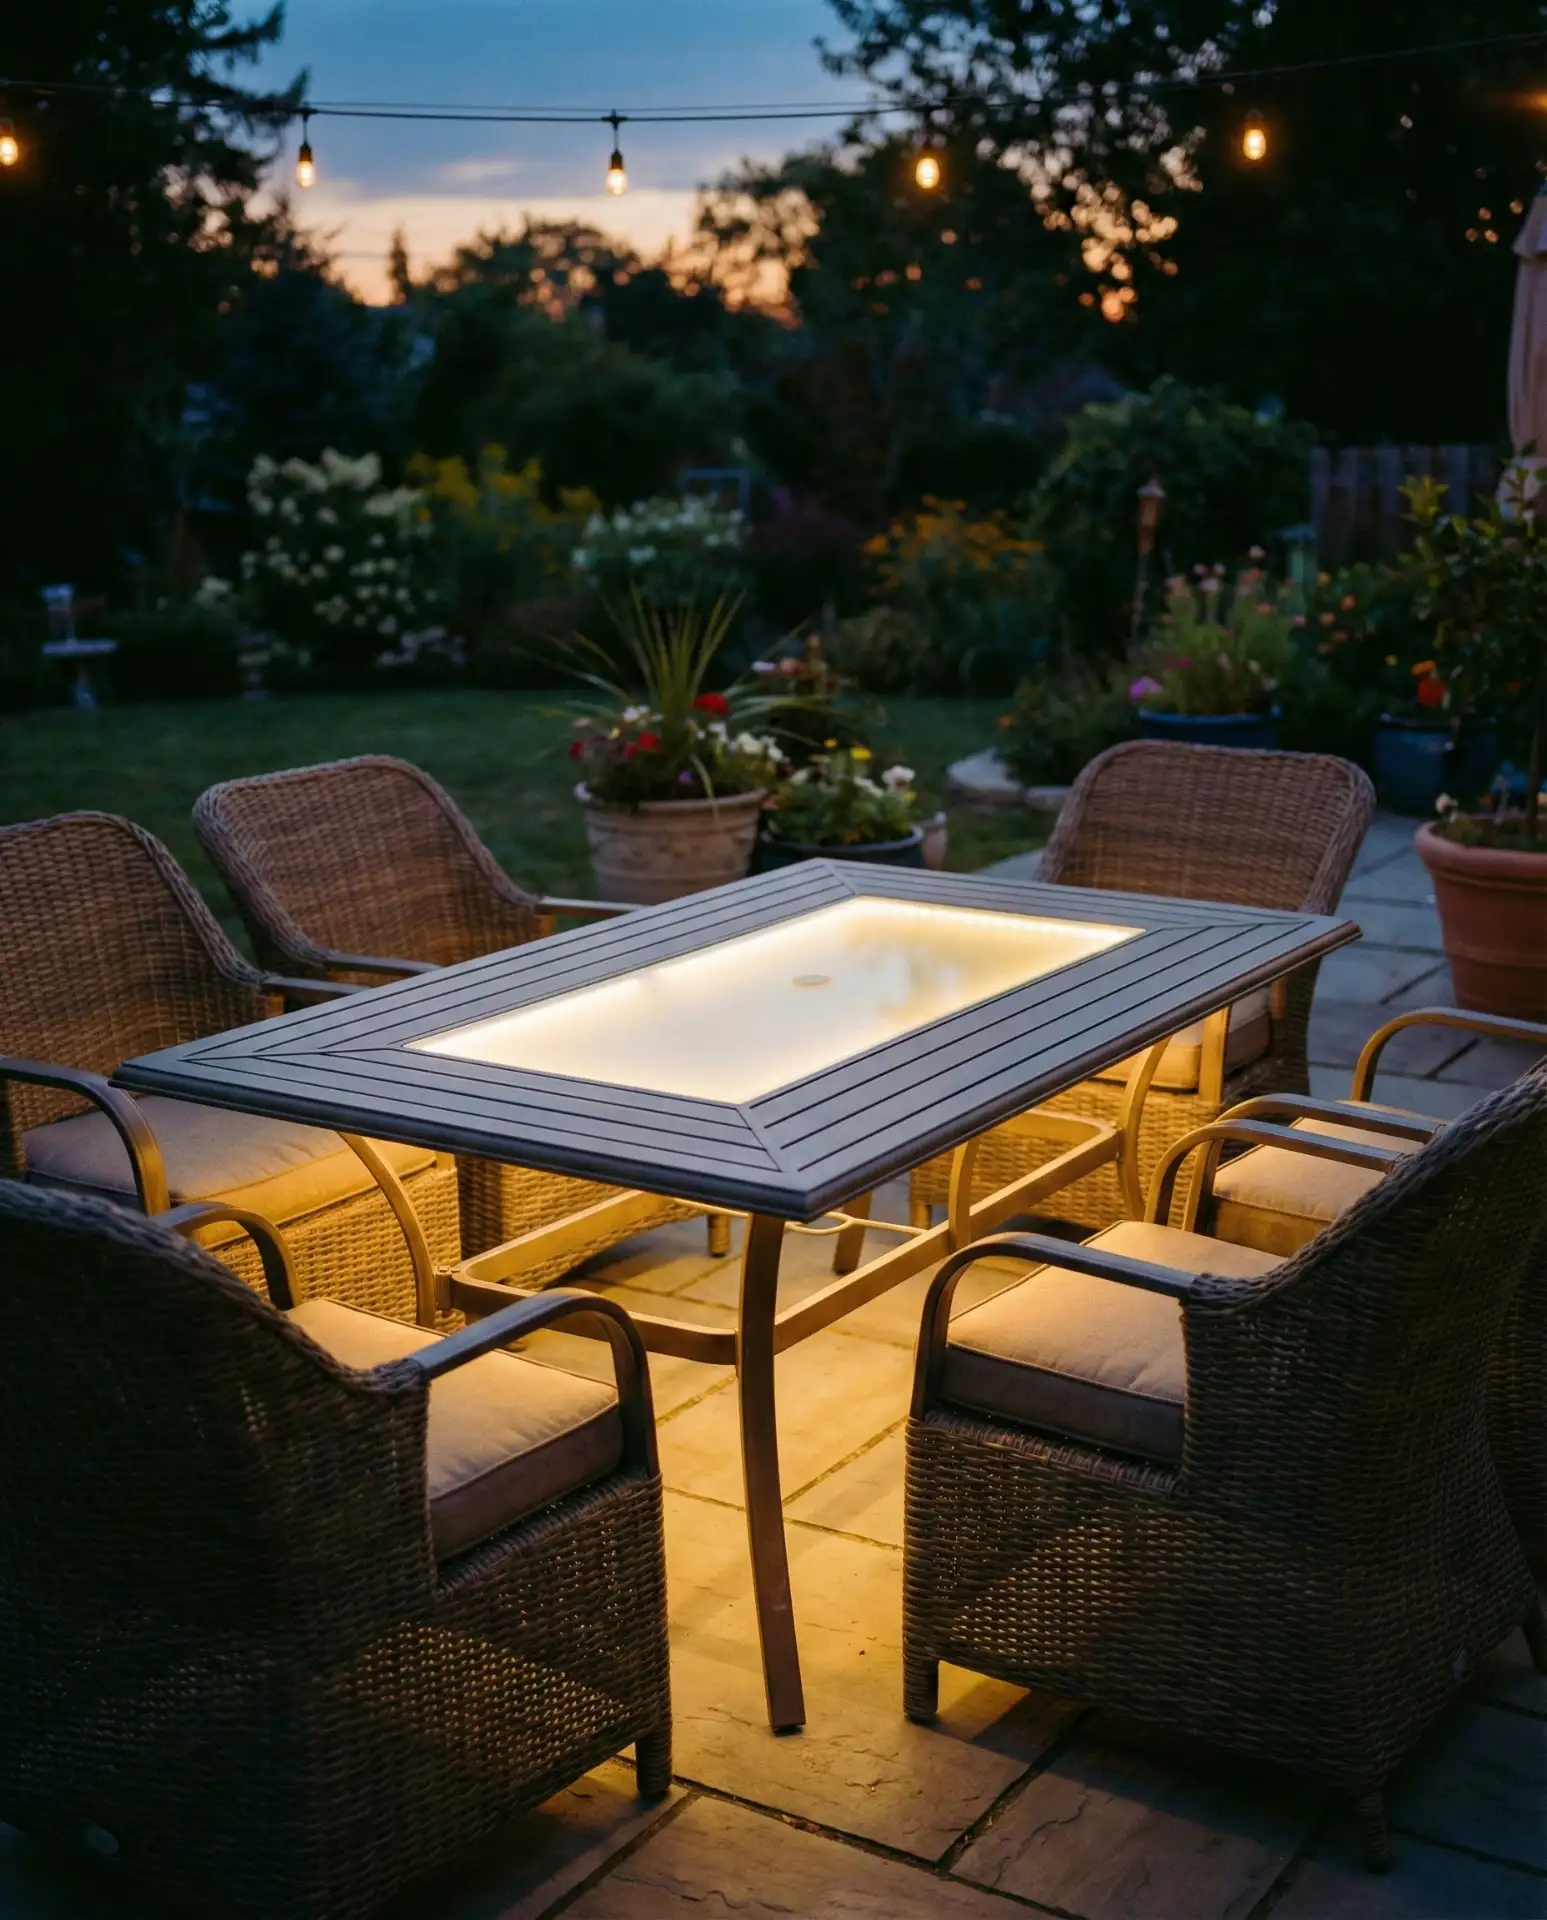
This feature is especially popular in the Pacific Northwest and Northeast, where extended summer evenings make outdoor dining a ritual. The LED strips cost $20–40, and tempered glass panels run $50–100 depending on size, making this a mid-range investment with high visual impact. Common mistakes include using non-waterproof LED strips or failing to create adequate ventilation—trapped moisture will short out the electrical components within weeks.
Conclusion
Your patio table is more than just a place to set plates—it’s the anchor of your outdoor living space, and these ideas prove there’s no limit to what you can create with a little planning and creativity. Whether you’re drawn to bold tile work, natural wood textures, or unexpected features like built-in coolers and lighting, the right project can completely transform how you use your backyard. Pick the idea that speaks to you, gather your materials, and share your results in the comments—we’d love to see how your outdoor space evolves.