Still scrolling through Tiny Backyard Ideas 2026 photos without knowing where to start? We totally get it. After filtering through hundreds of options across Walmart, Target, and Lowe’s, we narrowed it down to 33 ideas that actually deliver.
From Walmart’s latest drops to Lowe’s’s current bestsellers, we pulled the best Tiny Backyard Ideas 2026 options across every price point — from $0 to $6595. We’ve got 33 curated ideas for you, covering styles from bohemian to contemporary, farmhouse, and modern. Every single idea is also fully shoppable with direct product links to make your life easier.
The demand for personal outdoor sanctuaries is definitely shaping up to be a major design force in 2026, with Pinterest boards overflowing with small space transformations. This article is your ticket to turning those saved pins into reality. Pin this guide for later — your future self will thank you when it’s time to actually do this.
(Note: This article contains affiliate links, meaning we may earn a small commission if you purchase through our links, at no extra cost to you.)
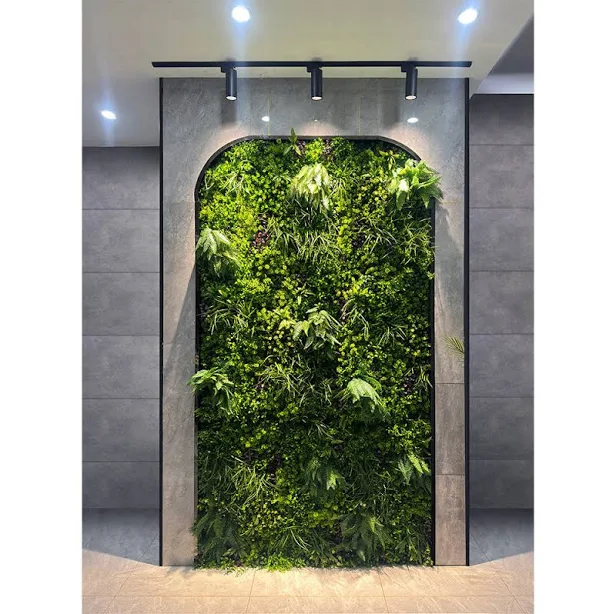
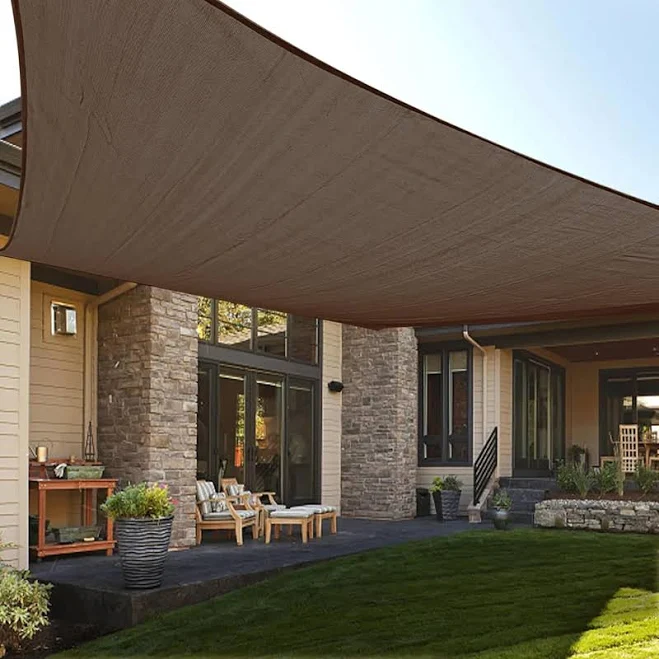
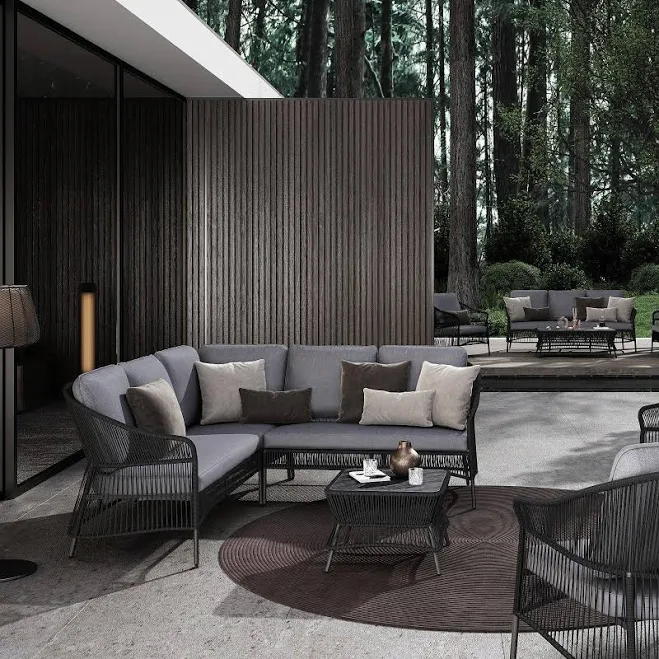
1. Modern Green Oasis with Vertical Garden Wall
Vertical gardens have truly exploded in popularity, driven by the urban gardening movement and a collective desire to reconnect with nature, even in the smallest spaces. For 2026, we’re seeing more sophisticated, integrated systems that go beyond basic planters – think full wall installations that feel architectural. It’s a trend that’s here to stay, as long as city living keeps us craving green.
The showstopper in this look is absolutely the vertical garden wall itself. Without it, you’d just have a nice patio. But with it, you get an immediate sense of lushness and privacy, turning a simple outdoor area into a true urban oasis. It’s the element that delivers maximum impact for minimal ground footprint.
|
Fake Living Wall Panel$429 |
Article Lubek Modern Outdoor Furniture Right Sectional Sofa$1689 |
Alaulm Propane Round Fire Pit Table$389.99 |
Mainstays 50-Count LED Solar Powered Mini Outdoor String Lights$9.97 |
As an affiliate, we earn from qualifying purchases.
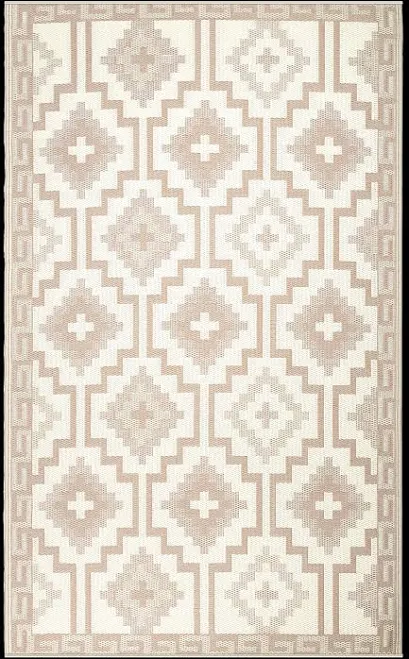
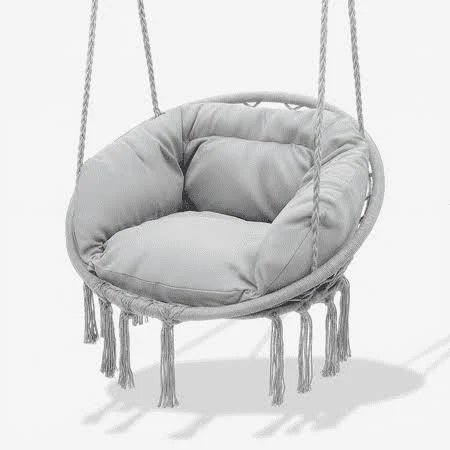
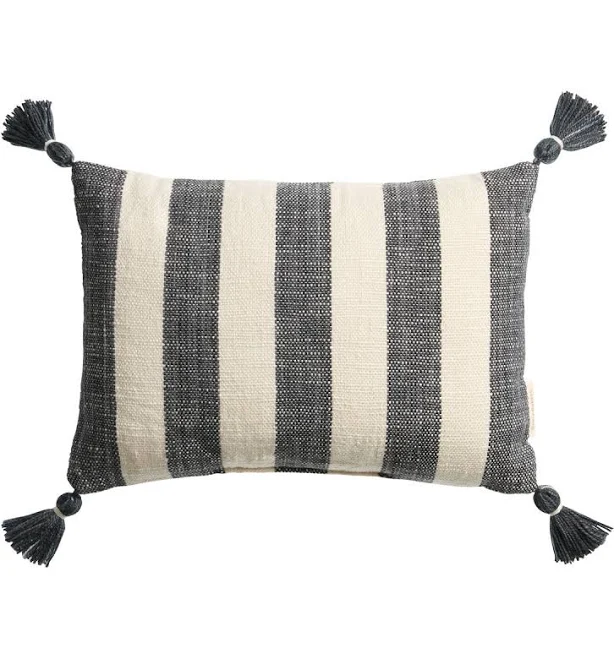
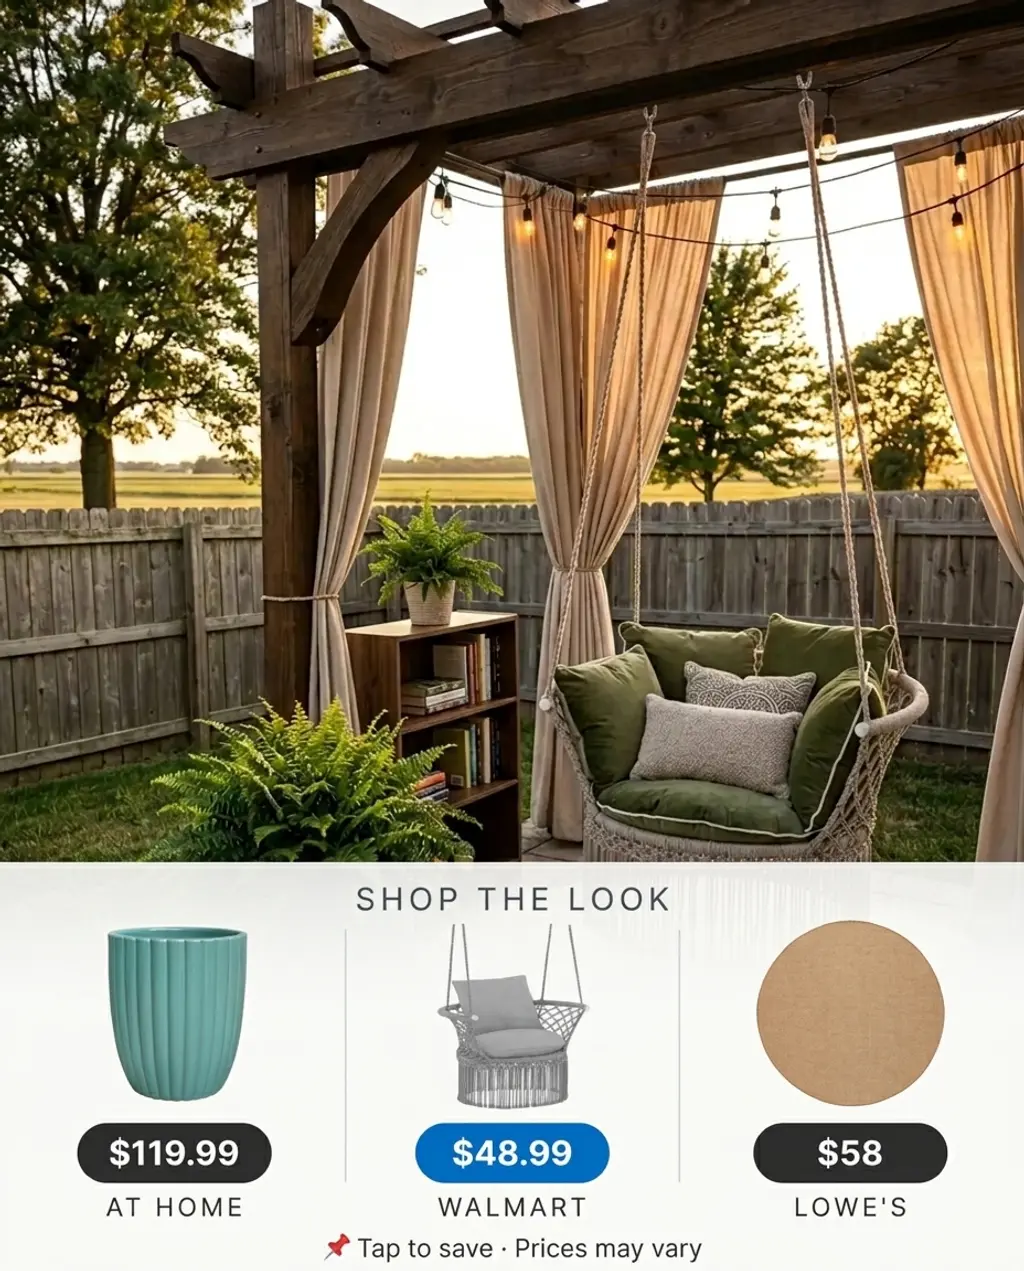
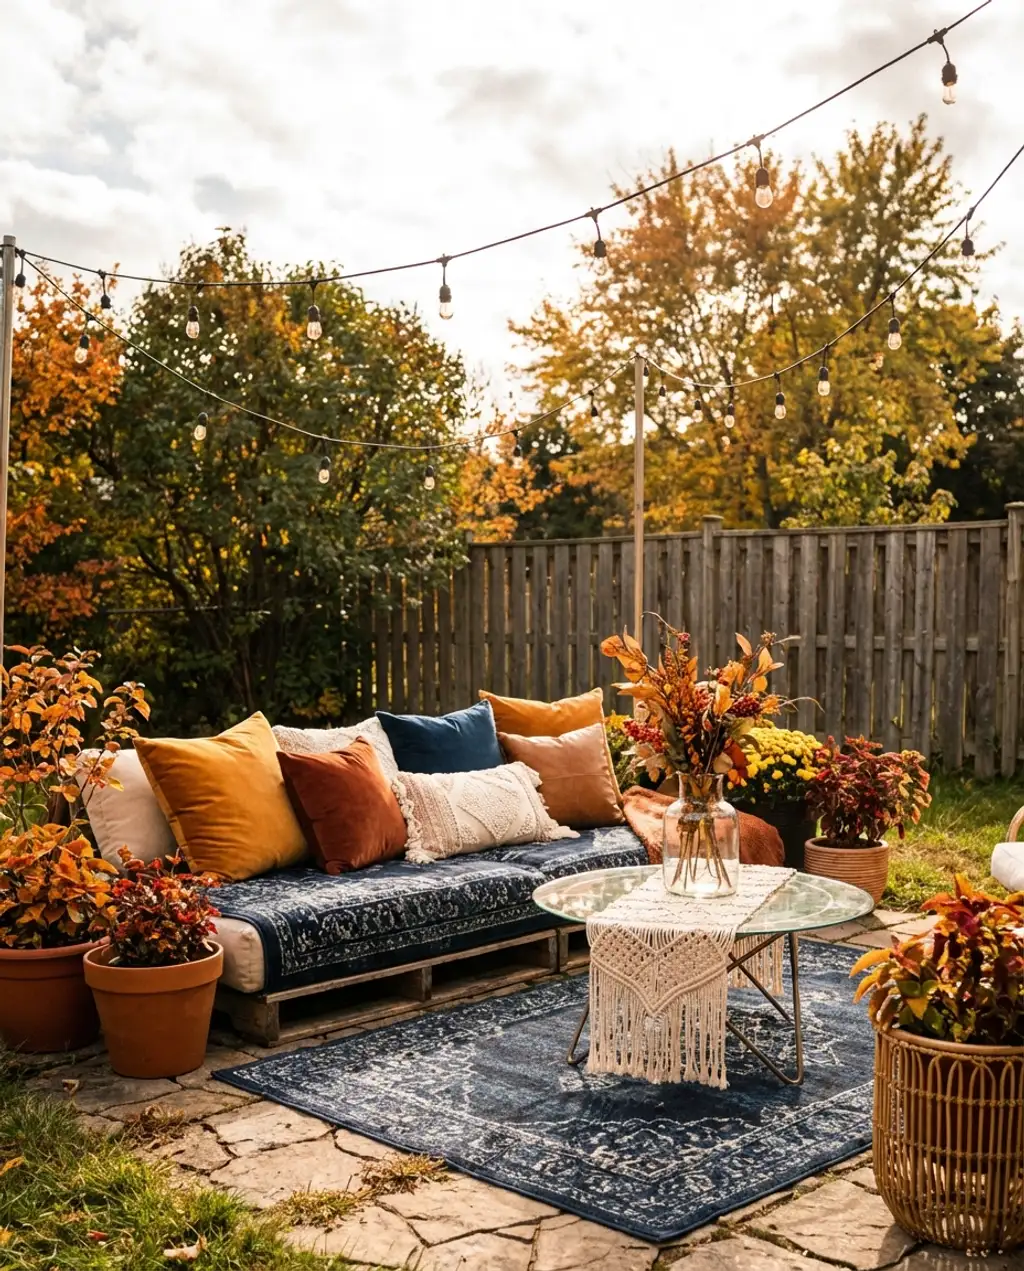
2. Budget-Friendly Boho Backyard Retreat
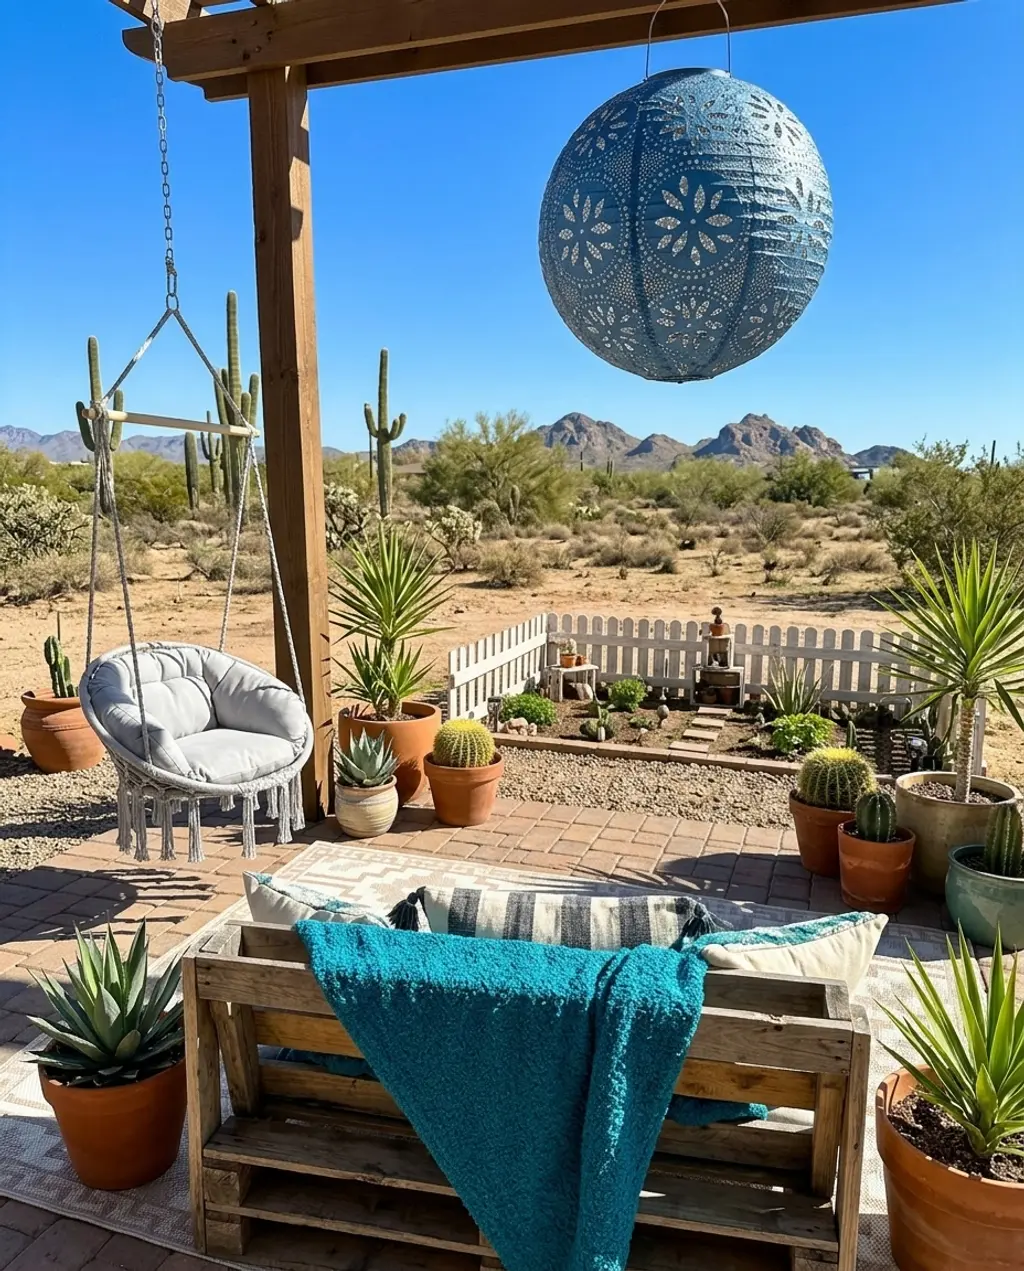
This is where your inner designer can really shine without emptying your wallet. Here’s a breakdown:
- Main furniture (pallet seating foundation): $0-$50 (if you source free pallets!)
- Textiles (colorful rug, pillows): $50-$150
- Decor/Accessories (macrame, lanterns): $30-$100
- Potted Plants: $40-$100
- TOTAL: $120-$400
Budget alternative: Hit up Facebook Marketplace or your local buy-nothing group for free pallets. DIY your macrame from thrifted yarn and snag a few colorful throw pillows and lanterns from Target or Walmart to get this vibe for under $100.
Real talk: DIY pallet seating looks amazing in photos, but be honest about the comfort level. Pallets can be splintery, and while cushions help, it’s not a plush sofa. Also, they’re heavy to move, so once you set them up, they’re probably staying put. Consider weatherproofing if your climate involves a lot of rain or humidity.
|
Fab Habitat Lhasa 5×8 ft Outdoor Rug$102.98 |
Osm Macrame Hanging Hammock Chair$72.99 |
World Market Woven Stripe Tassel Indoor Outdoor Patio Lumbar Pillow$24.99 |
Pottery Barn Soji Stella Boho Globe Solar Outdoor Lantern$49.99 |
As an affiliate, we earn from qualifying purchases.
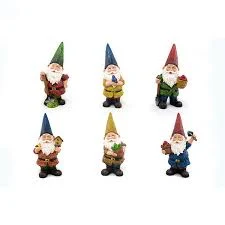
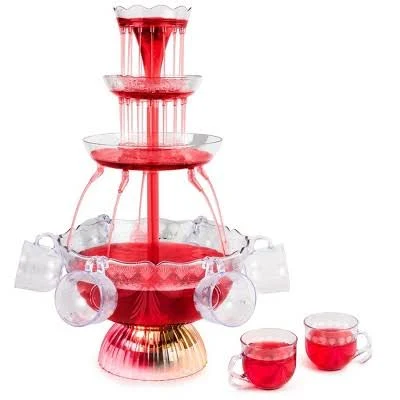
3. Enchanted Fairy Garden for Small Spaces
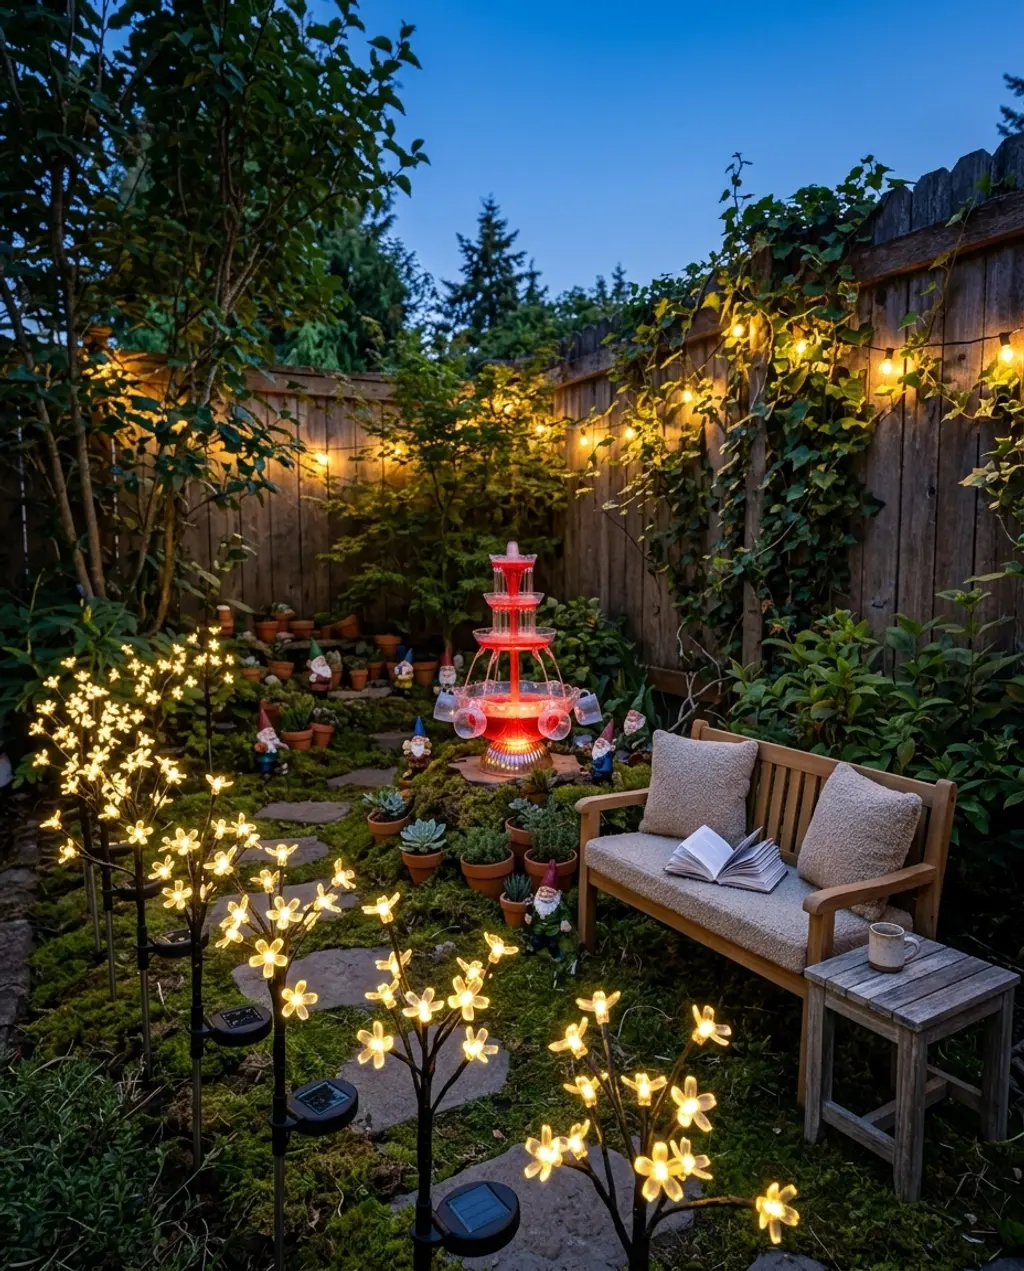
When creating a miniature garden, think in layers, just like you would a full-sized landscape. Elevate certain elements using small risers or varying pot heights to create depth. For fairy gardens, specifically, go for an odd number of focal points (like a gnome, a tiny fountain, and a miniature bench) and group them closely. This makes the arrangement feel deliberate and magical, not just a random collection of trinkets. Aim to have your tallest element be no more than 10-12 inches for true miniature scale.
This look works because it taps into a sense of wonder and nostalgia. The miniature scale encourages closer inspection, drawing the eye into a tiny world. The use of natural materials like moss and stepping stones, combined with whimsical accents, creates an immersive, enchanting experience that feels totally unique to your space. It’s all about storytelling on a micro-scale.
Before you commit to a fairy garden, consider these:
- Your space: Do you have a sheltered spot from direct sun? Miniatures can bake!
- Maintenance: These still need care! Are you ready to water tiny plants and keep moss green?
- Budget Minimums: While small, the individual elements can add up. Ensure your budget allows for quality pieces.
|
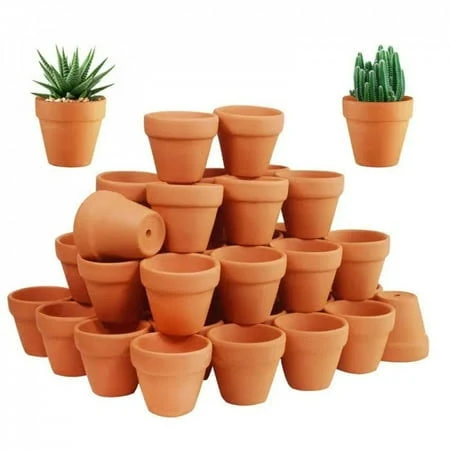
50 Pcs Tiny Terracotta Pots – 1.3 inch Small Mini Clay Pots with Drain$22.98 |
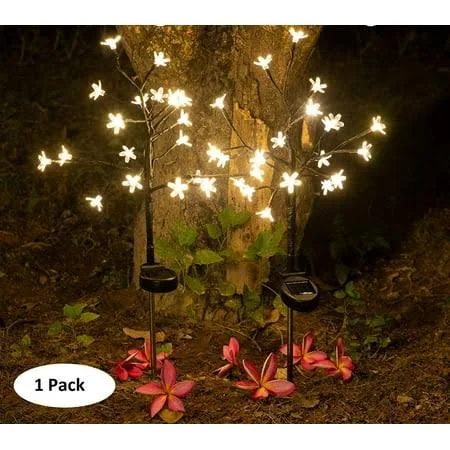
Epicgadget Solar Flower Fairy Light Warm White Stainless Steel Solar P$18.45 |
Garden Fun Miniature Gnomes Set of 4$8.99 |
Nostalgia 3-Tier Lighted Party Fountain$54.99 |
As an affiliate, we earn from qualifying purchases.
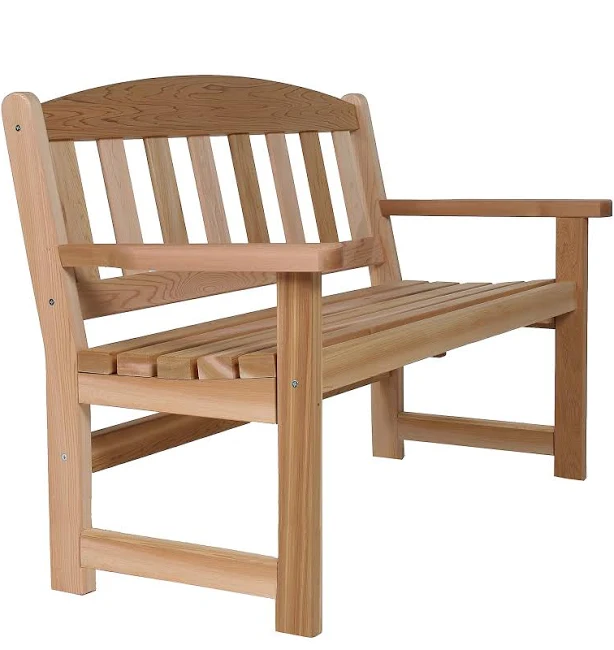
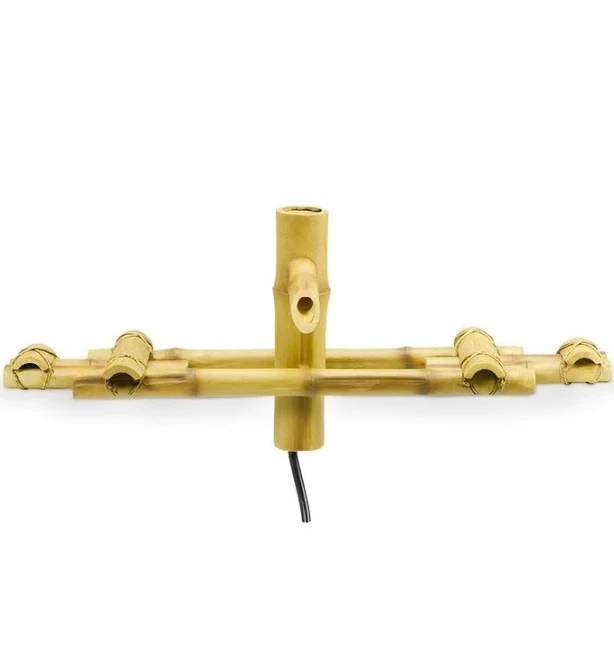
4. ZEN Serenity: Japanese-Inspired Tiny Garden
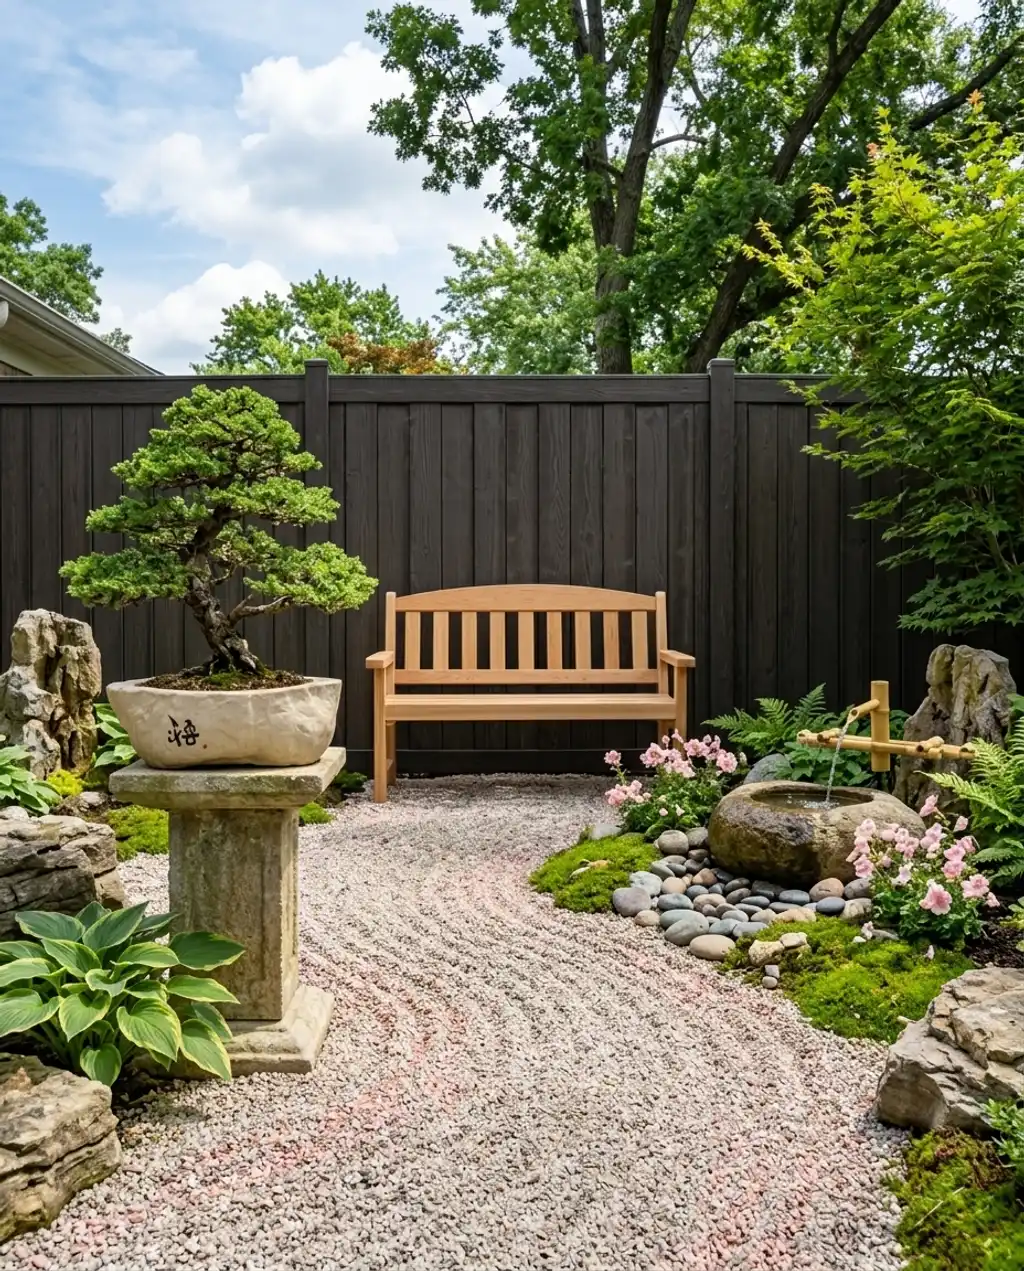
The single most important element in achieving true Zen serenity in a tiny Japanese-inspired garden is the rock garden or contemplative dry landscape. This isn’t just about throwing some rocks down; it’s about intentional placement, the raking patterns in the gravel, and the sense of stillness it evokes. It grounds the entire space, literally and figuratively, providing a focal point for meditation and calm.
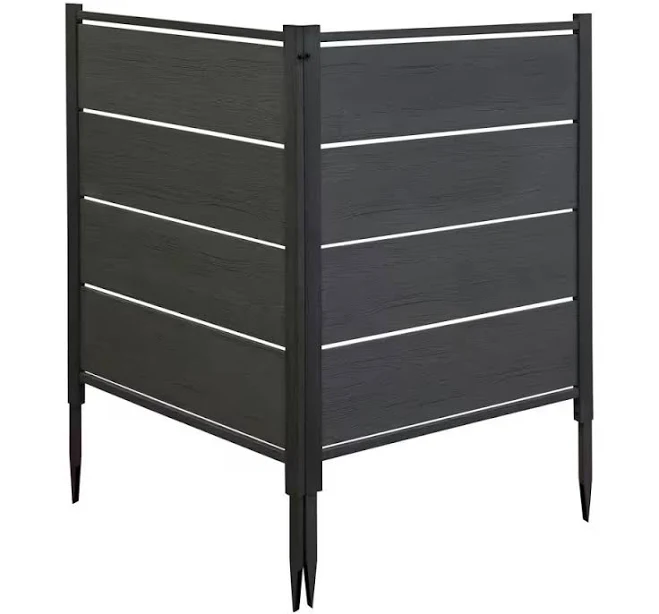
Here’s the real talk about Japanese-inspired tiny gardens: they require a significant commitment to minimalism and precision. This isn’t a ‘set it and forget it’ style. The gravel needs regular raking to maintain its patterns, bonsai trees demand specific care, and any clutter will immediately detract from the serene aesthetic. It also requires a calm backdrop; if your tiny backyard is surrounded by a chaotic urban environment, you’ll need robust privacy solutions to truly achieve the Zen.
|
Spirit of Japan Bonsai Ceramic Pot$29.99 |
All Things Cedar Garden Bench$292.18 |
Simtek Ashland Privacy Fence Panel$224.71 |
Aquascape Adjustable Pouring Bamboo Fountain 78308$79.99 |

As an affiliate, we earn from qualifying purchases.
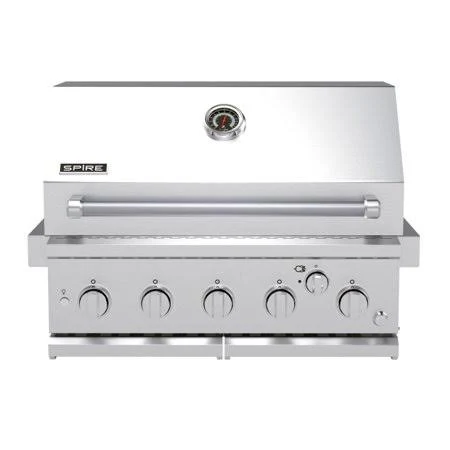
5. Compact Outdoor Kitchenette & Dining Nook
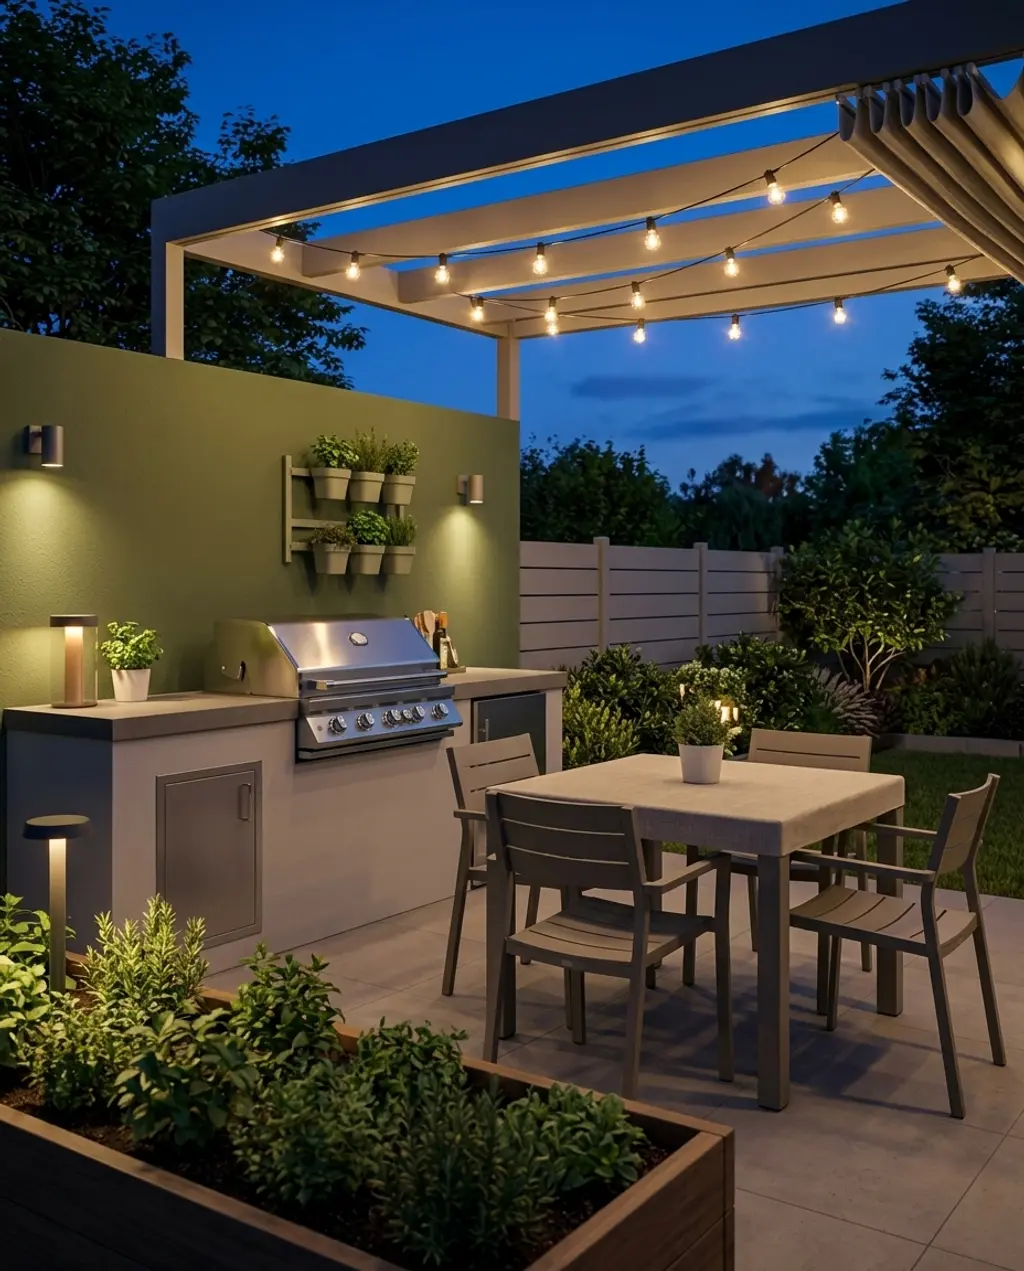
Creating a compact outdoor kitchenette and dining nook is all about smart space utilization. Think of it as: 50% functional built-in elements (grill, counter, storage) + 30% compact dining set + 20% living accents (herb garden, wall shelves). You can swap out materials – a stainless steel grill for a colorful tiled countertop – but keeping these proportions will ensure you have both practicality and style in a tight footprint.
- Main furniture (dining set, built-in grill): $400-$1500
- Lighting (wall-mounted shelves with integrated lighting): $50-$200
- Textiles (outdoor cushions): $30-$100
- Decor/Accessories (herb garden): $20-$80
- Paint/Wall Treatment (if applicable): $0-$100
- TOTAL: $500-$1980
Budget alternative: Skip the built-in grill and opt for a high-quality portable grill on wheels. Look for foldable bistro sets and repurpose old shelves from your garage. Target and IKEA are great for finding compact, stylish outdoor pieces that won’t break the bank, bringing your total closer to $300-$600.
|
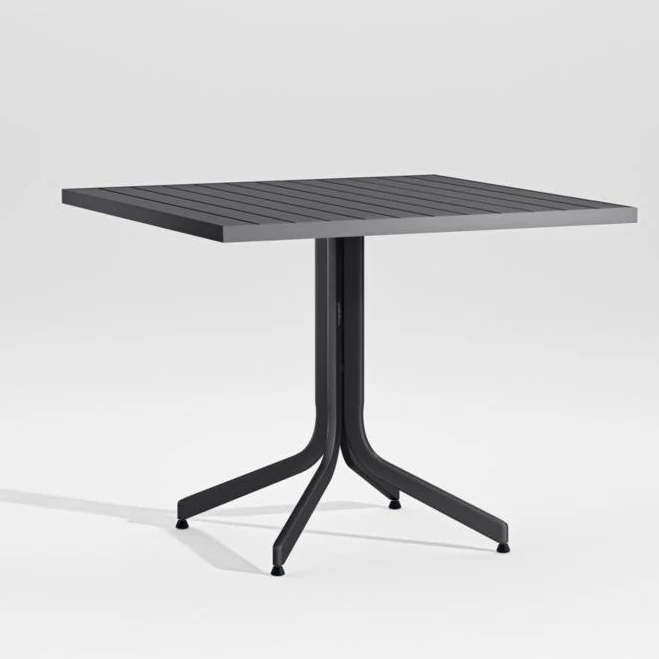
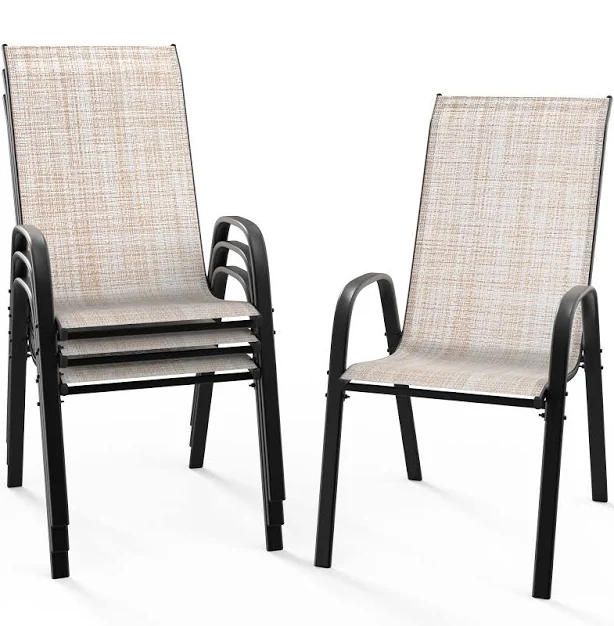
Crate & Barrel Lanai 35″ Square FlipTop Outdoor Dining Table$399 |
VINGLI 4-Pcs Stackable Outdoor Dining Chairs$89.99 |
Spire 5-Burner Built-In Propane Gas Island Grill Head with Rear Burner$999 |
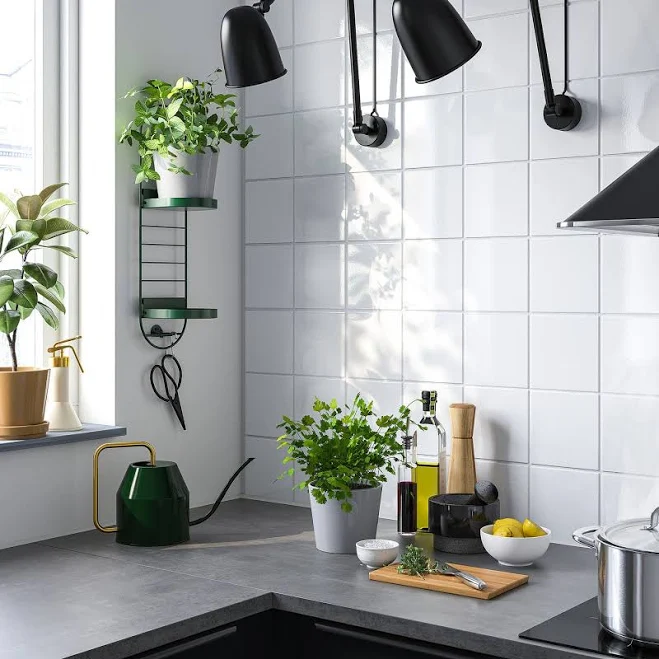
IKEA SKUGGRÖNA Wall-Mounted Plant Stand$14.99 |
As an affiliate, we earn from qualifying purchases.
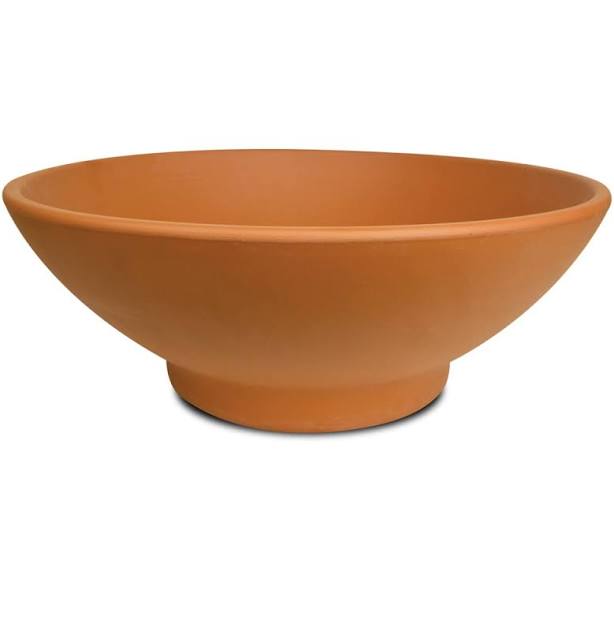
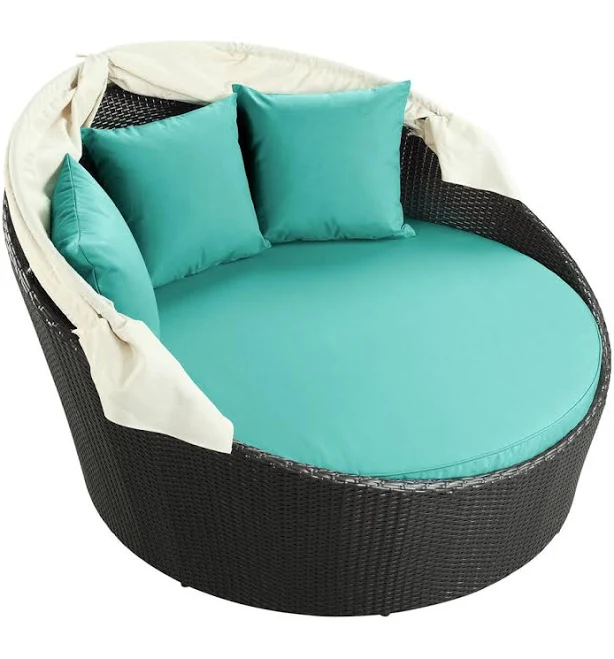
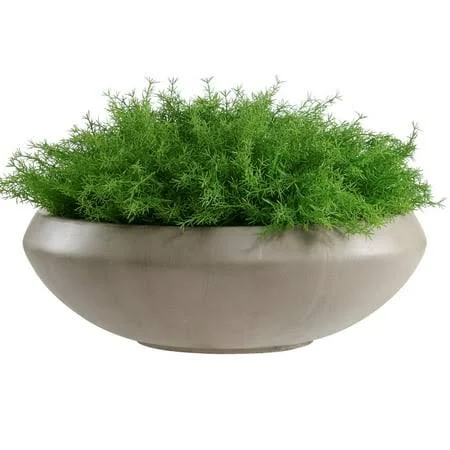
6. Lush Tropical Haven for Urban Backyards

To pull off a lush tropical haven, you really need a minimum of 8×10 feet to avoid it feeling cluttered rather than opulent. Ceiling height or surrounding wall height is also crucial; taller elements like bamboo or slender palm trees need space upward to create that canopy effect. If your space is smaller than this, look towards Idea #1 for vertical solutions or Idea #19 for a cozy, contained feel.
Achieving a truly lush tropical look in a small space means paying attention to texture and varied leaf shapes. Don’t just buy a bunch of the same plant! Mix broad-leafed plants like elephant ears with feathery ferns and spiky bromeliads. This creates visual interest and depth, making the small area feel more expansive and authentic. Also, consider placing taller plants towards the back and shorter ones in front for a layered effect, tricking the eye into perceiving more depth.
|
Pennington 12″ Terra Cotta Clay Garden Dish Bowl Planter$13.98 |
Modway Convene Canopy Outdoor Patio Daybed$635.99 |
Hi-Line Gift 7 Level Slate Stone Fountain with Light$146.45 |
Fun Express Monstera String Lights$5.77 |
As an affiliate, we earn from qualifying purchases.
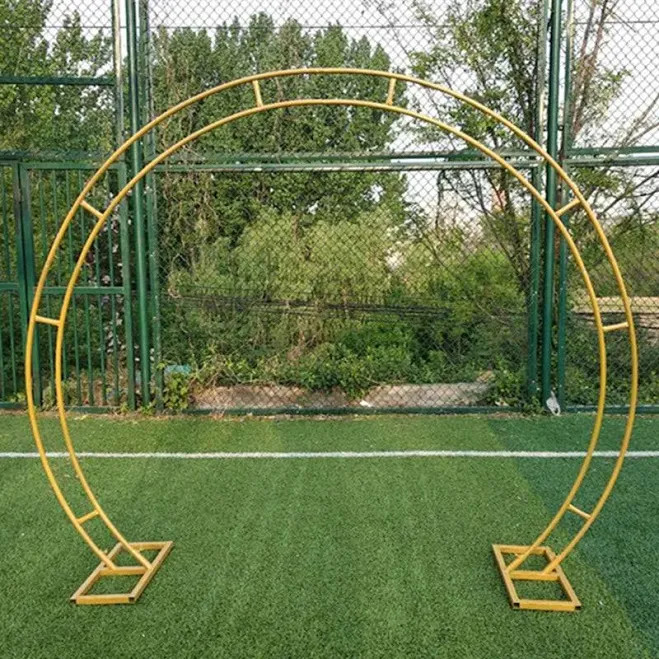
7. Small Backyard Wedding Ceremony Spot
✨ Luxury Version
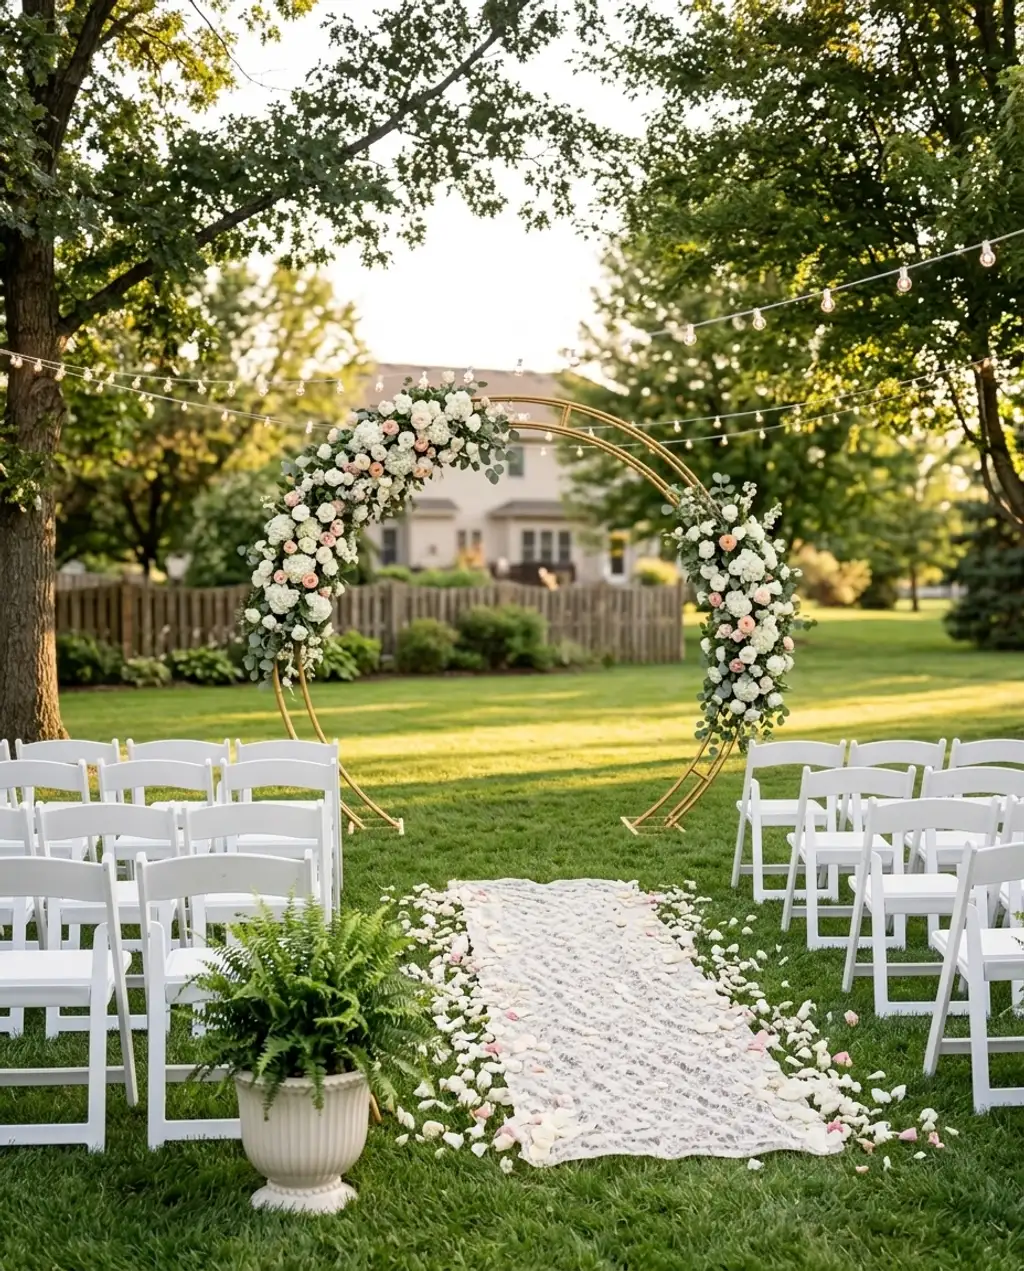
Want to create a gorgeous floral arch for your ceremony without hiring a pro? Here’s how:
- Choose your arch: Start with a basic metal or wooden arch (Cost: $50-$200).
- Greenery first: Secure faux or real long-stemmed eucalyptus or ruscus garlands with zip ties. Let them drape naturally. (Cost: $30-$100, Time: 30 minutes).
- Add focal flowers: Group larger blooms (roses, hydrangeas) at key points, like the top corner and halfway down each side. Use floral wire or green chenille stems. (Cost: $40-$150, Time: 45 minutes).
- Fill in with smaller florals: Tuck in smaller flowers and filler greens to create a lush, full look. (Cost: $20-$80, Time: 30 minutes).
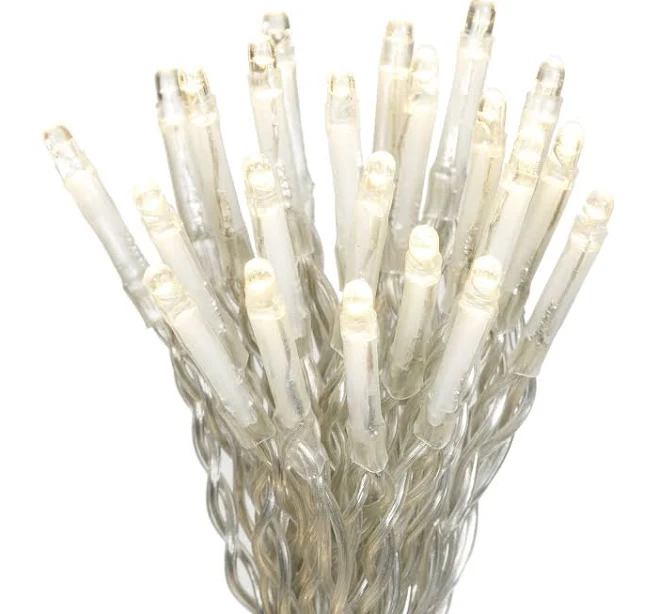
- Fairy lights: Weave in battery-operated fairy lights for a magical glow, hiding the battery packs. (Cost: $10-$30, Time: 15 minutes).
💸 Budget Version
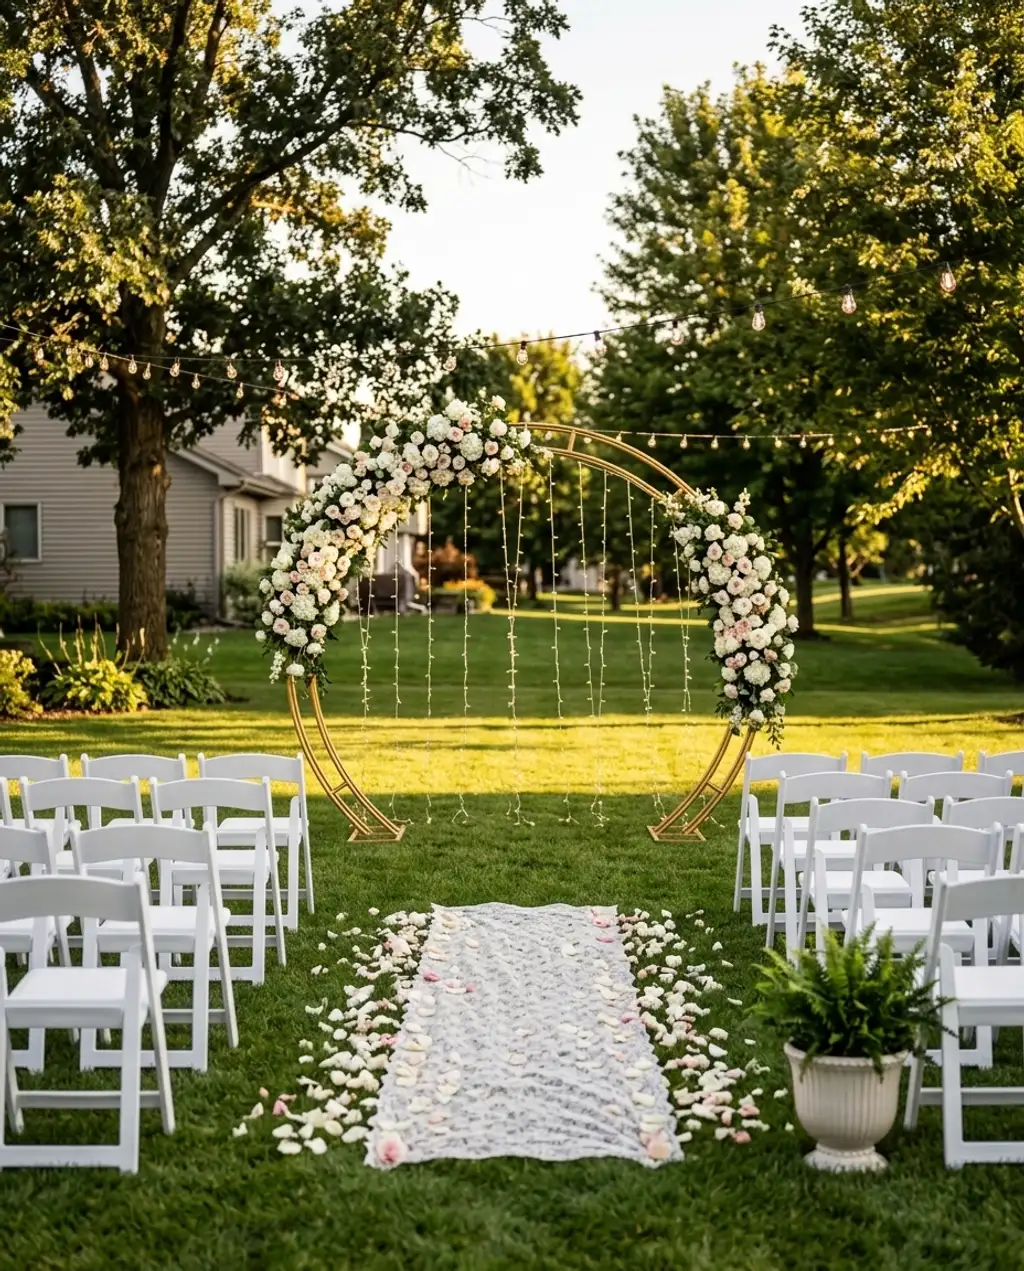
The overall process should take about 2-3 hours and cost around $150-$560 for materials.
Instead of custom floral arrangements and rented chairs, you can create a beautiful wedding ceremony spot on a budget. Look for an inexpensive wedding arch online (like the KetieStory Round Stand for around $166) and adorn it with faux flowers from a craft store like Hobby Lobby or Michaels. For seating, white resin folding chairs from Tent and Table are an affordable option, and you can add simple burlap or lace sashes for a personalized touch. Scatter some rose petals (fresh from a local florist or good quality faux ones from Amazon) and string up some solar-powered fairy lights from Walmart ($19.97). You can easily achieve a romantic vibe for $300-$500.
|
💰 Budget Pick Better Homes & Gardens 15- Strand LED Warm White Curtain Outdoor Strin$19.97 |
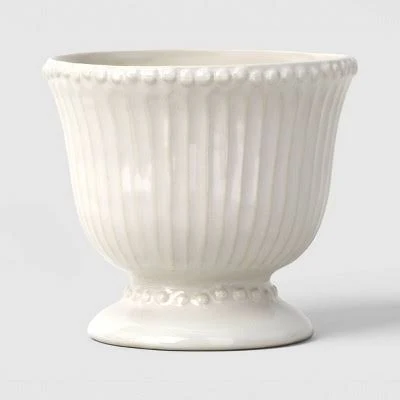
💰 Budget Pick Threshold Beaded Ceramic Planter$20 |
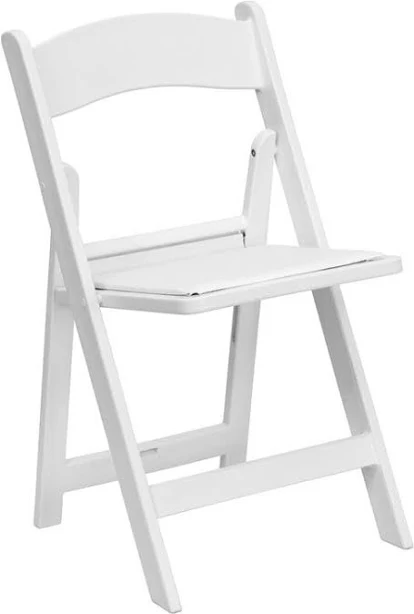
✨ Luxury Pick White Resin Folding Chairs$26.99 |
✨ Luxury Pick KetieStory Round Stand Wedding Props Wrought iron Double Pole Arch Art$166.4 |
As an affiliate, we earn from qualifying purchases.
8. Cozy Fire Pit Lounge for Small Patios
This setup works because it expertly blends comfort with rustic charm, creating an inviting atmosphere that encourages lounging and connection. The Adirondack chairs signal relaxation, while the wood-burning fire pit instantly becomes the focal point, drawing people in. The gravel patio keeps things low-maintenance and naturally complements the rustic aesthetic, truly embodying a cozy, laid-back vibe. This is about creating a destination, not just a seating area.
Before you jump into a fire pit lounge, consider these crucial points:
- Local fire codes: Are wood-burning fire pits allowed in your area? Check regulations!
- Proximity to structures: Ensure ample safe distance from your house, fences, or overhanging branches.
- Smoke direction: Which way does the wind usually blow? You don’t want to smoke out your neighbors.
- Storage for wood: Do you have a dry, accessible place for firewood?
💡 Loving these dark walls? Before you commit, we break down 3 common mistakes at the end of this article that could save you a costly repaint.
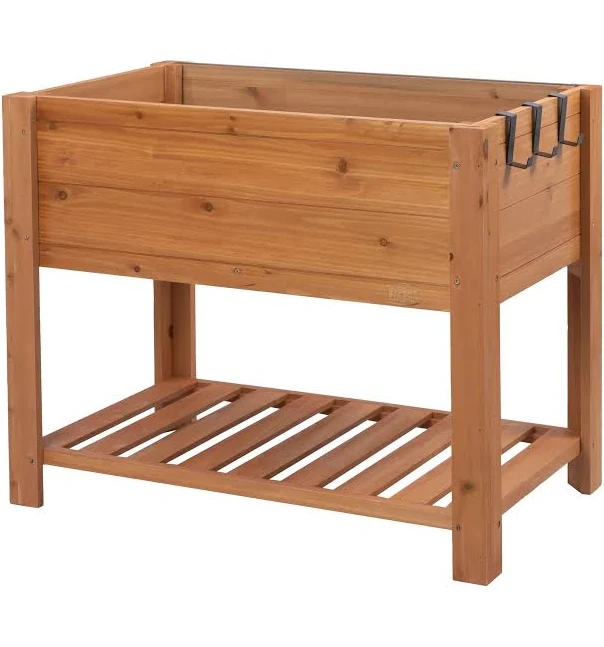
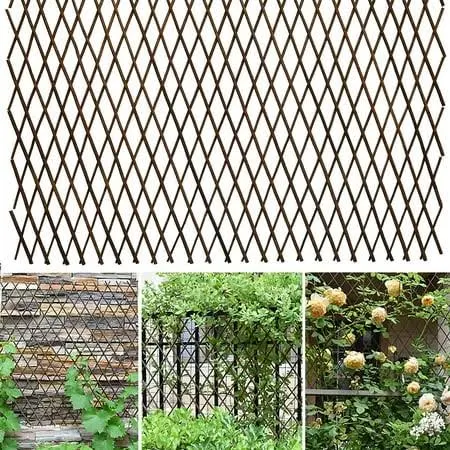
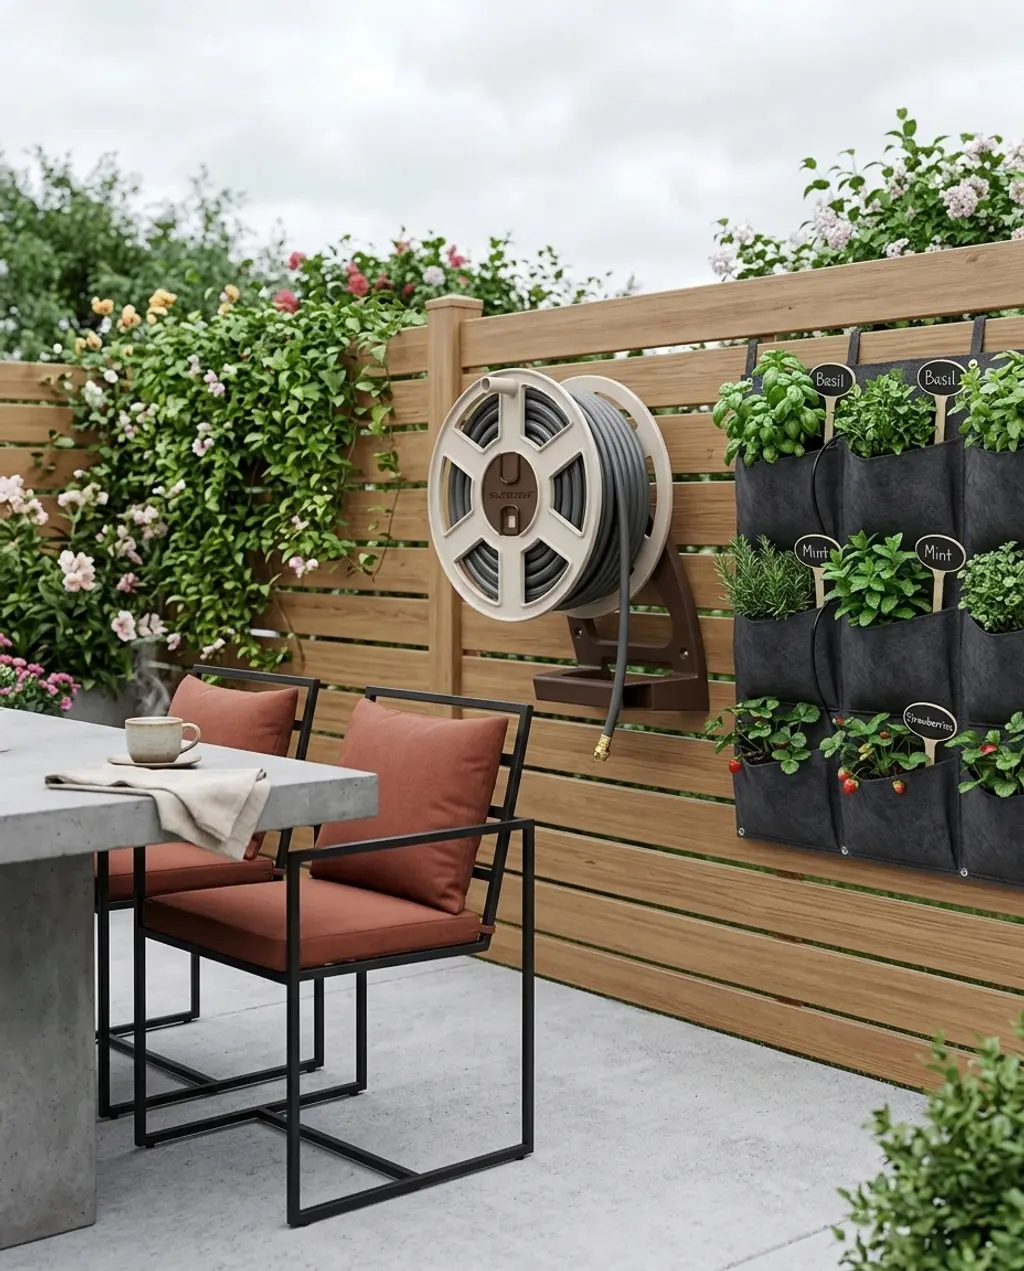
9. Miniature Herb & Vegetable Garden
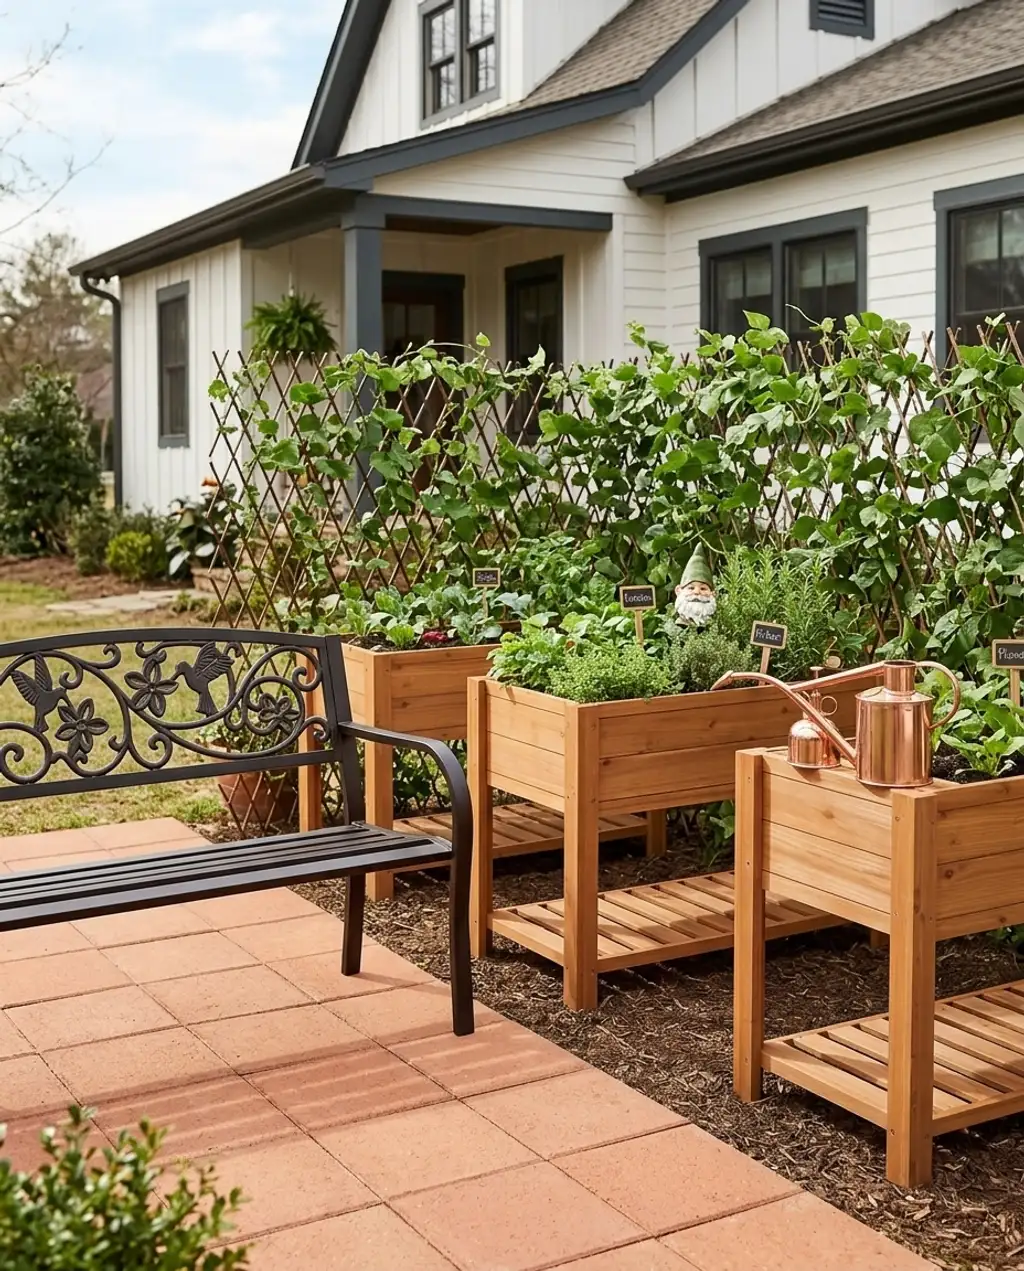
When planning a miniature herb and vegetable garden, focus on vertical growth and companion planting to maximize your yield in a small space. Use trellises aggressively for climbing plants like beans or cucumbers, and plant herbs that deter pests (like basil near tomatoes). Also, utilize containers of varying heights to create visual interest and distinguish different plant types. Ensure south-facing exposure for at least 6-8 hours a day for most edibles.
Want to build a simple raised garden bed? Here’s how:
- Materials: Acquire four untreated wooden planks (e.g., cedar or pine) for the sides, and corner brackets or screws. (Cost: $30-$100)
- Cut to size: Cut planks to your desired length and width (e.g., two 4-foot lengths and two 2-foot widths for a 4×2 bed). (Time: 15 min)
- Assemble the frame: Form a rectangle and screw the planks together at the corners, ensuring they are flush. (Time: 30 min)
- Line (optional): For longevity, staple a non-toxic landscape fabric or cardboard to the bottom to prevent weeds and hold soil. (Time: 15 min)
- Fill & plant: Fill with a good quality raised bed soil mix and get planting! (Cost: $20-$50 for soil, Time: 30 min)
Total time: 1.5 – 2 hours. Total material cost: $50-$150, not including plants.
|
Expert Gardener Small Raised Bed$56 |
Willow Expandable Lattice Fence$7.48 |
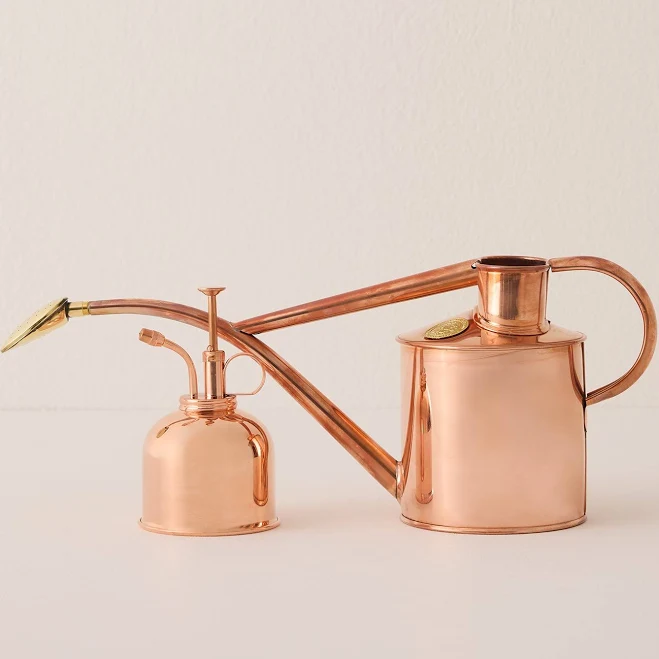
Haws Classic Copper Watering Gift Set$165 |
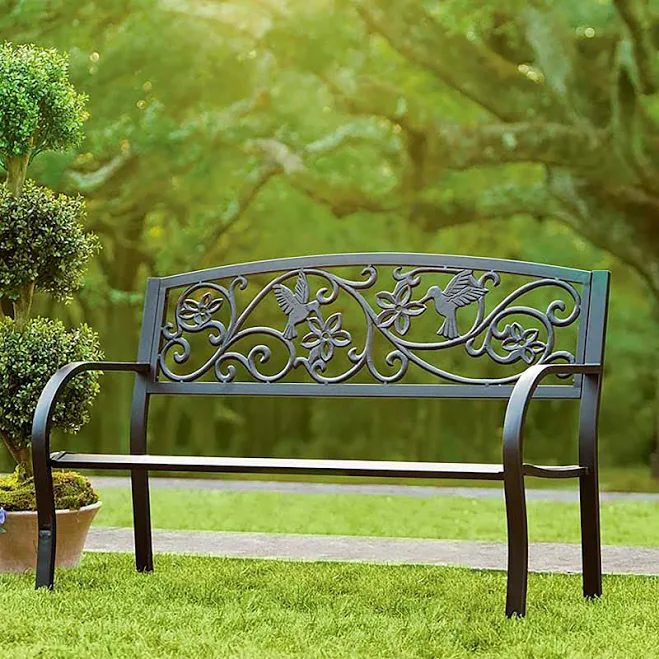
Plow & Hearth Hummingbird Metal Garden Bench$199.95 |
As an affiliate, we earn from qualifying purchases.
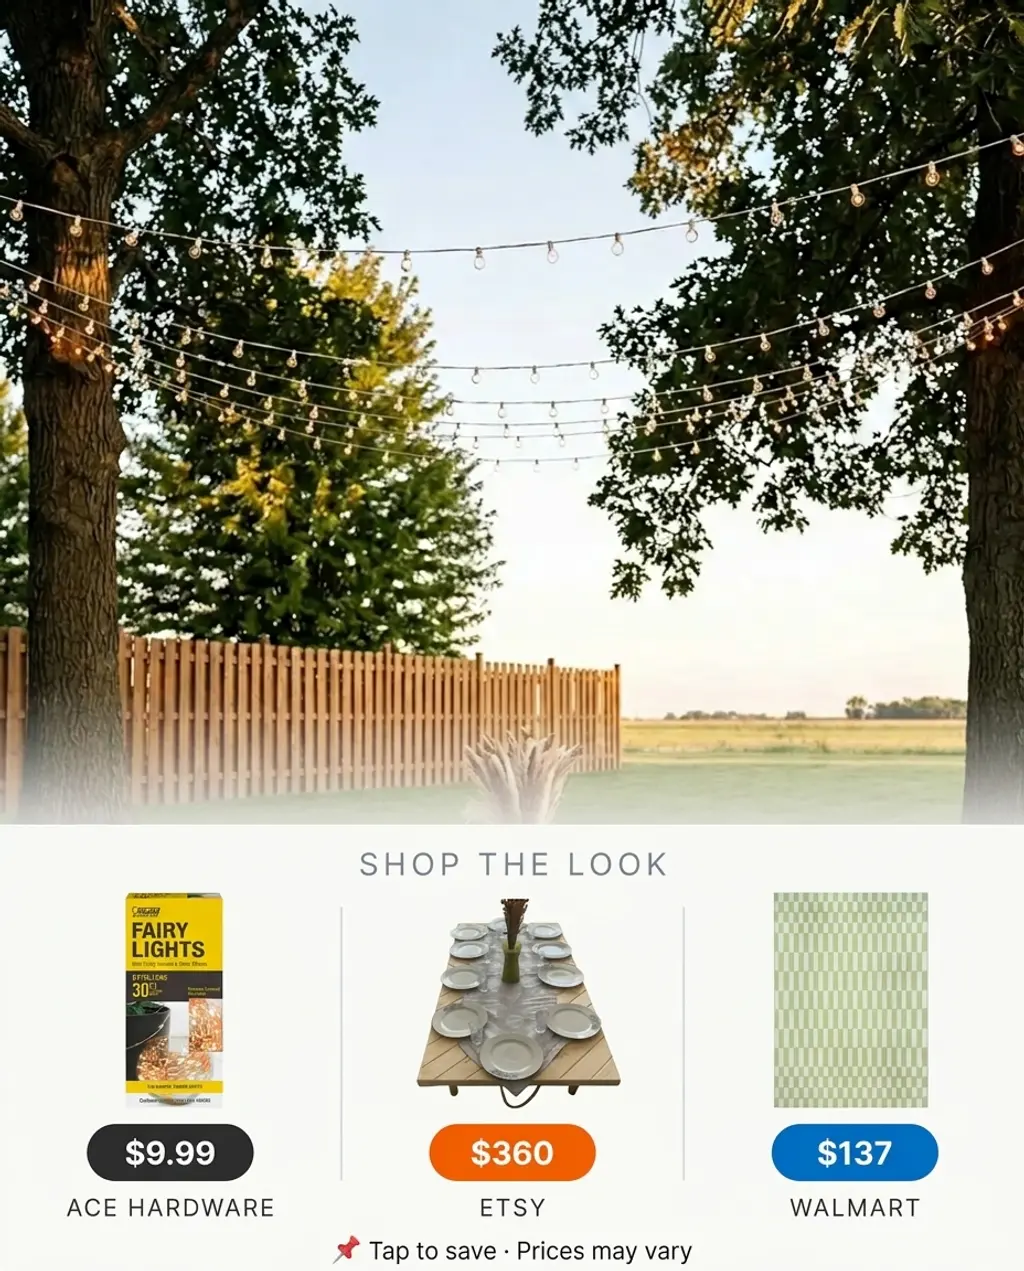
10. Sleek Urban Balcony Oasis
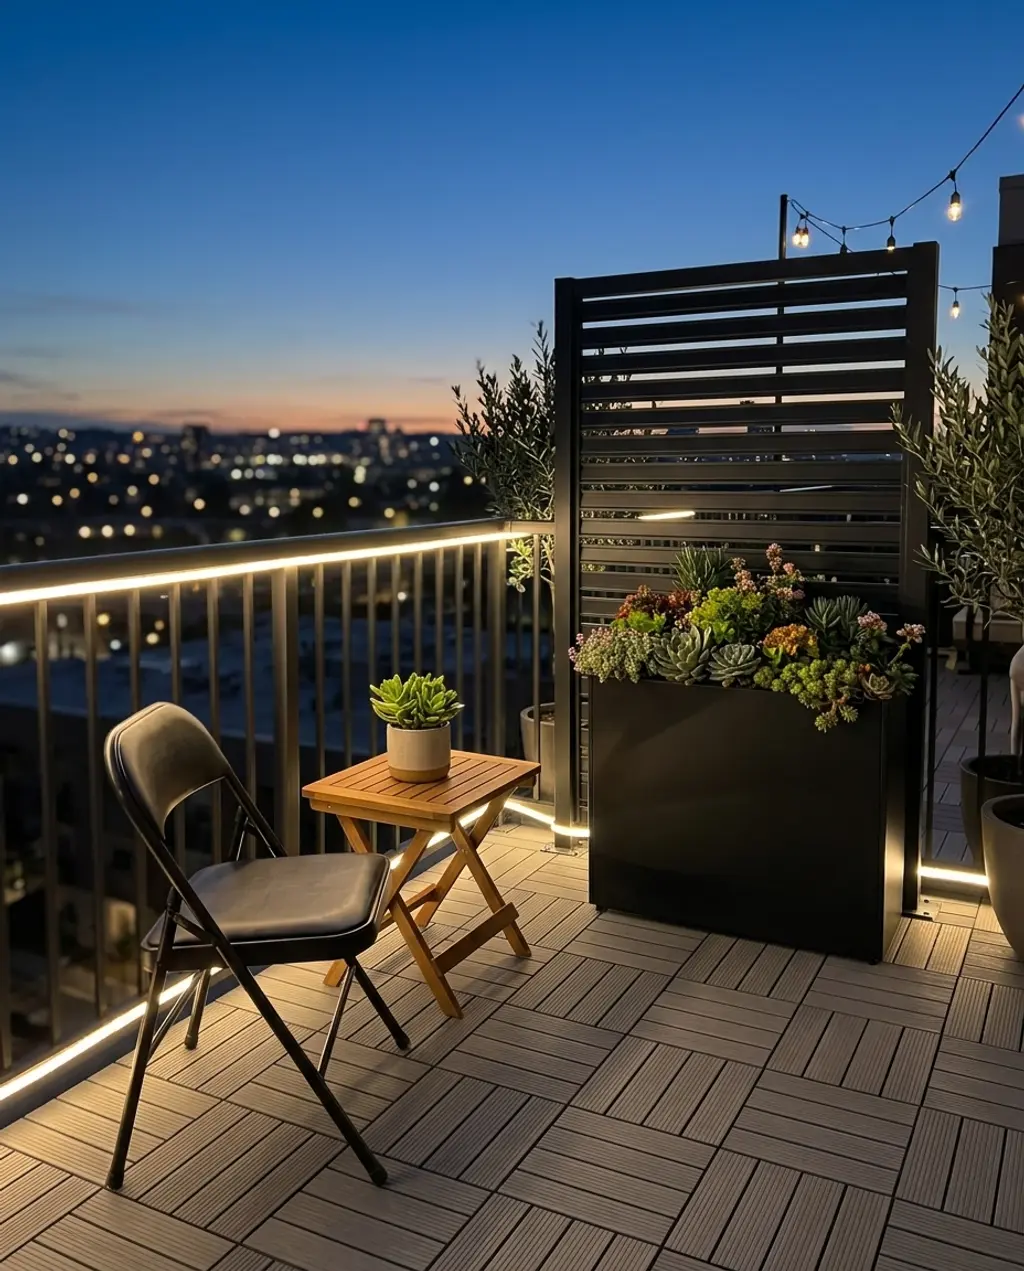
- Main furniture (foldable table/chairs): $100-$300
- Decking tiles: $50-$150
- Planters & Succulents: $40-$120
- LED strip lights: $20-$60
- Privacy screen: $50-$150
- TOTAL: $260-$780
Budget Alternative: Forage for free pallet wood to create your own decking or seating. Hunt for pre-loved metal folding chairs and tables on Facebook Marketplace. Use repurposed containers for plants; think old crates or even painted tin cans. IKEA and Walmart are your friends for affordable LED strips and simple privacy screens. You could pull this off for $100-$300.
The secret sauce for a sleek urban balcony oasis is undoubtedly the decking tiles. They instantly transform a plain concrete slab into a polished, warm, and inviting surface. This simple addition elevates the entire space, giving it a finished, designed feel that sets the stage for everything else. Without them, it’s just a balcony; with them, it’s an extension of your living space.
|
Pure Garden 6-Pack Gray Interlocking Deck Tiles$29.9 |
Flash Furniture Hercules Series Double Braced Metal Folding Chair$26.99 |
Bstjewey 24″ Tall Metal Planter Box$99.99 |
Waterproof IP65 LED Flex Strip$9.99 |
As an affiliate, we earn from qualifying purchases.
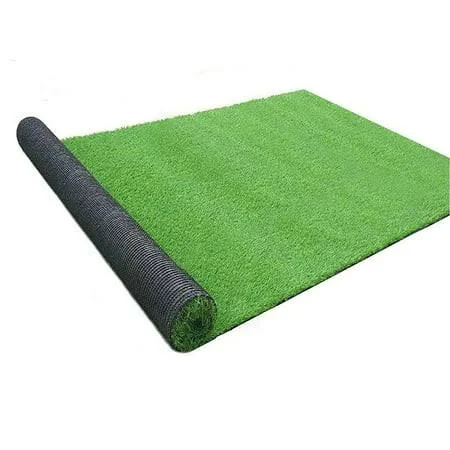
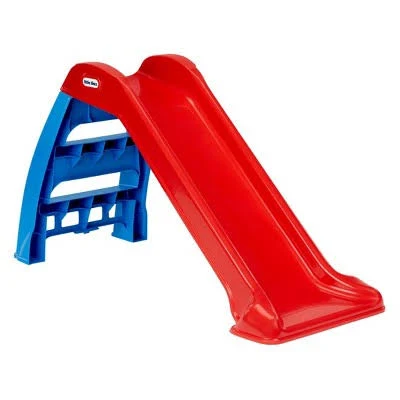
11. Family-Friendly Play Zone in a Small Yard
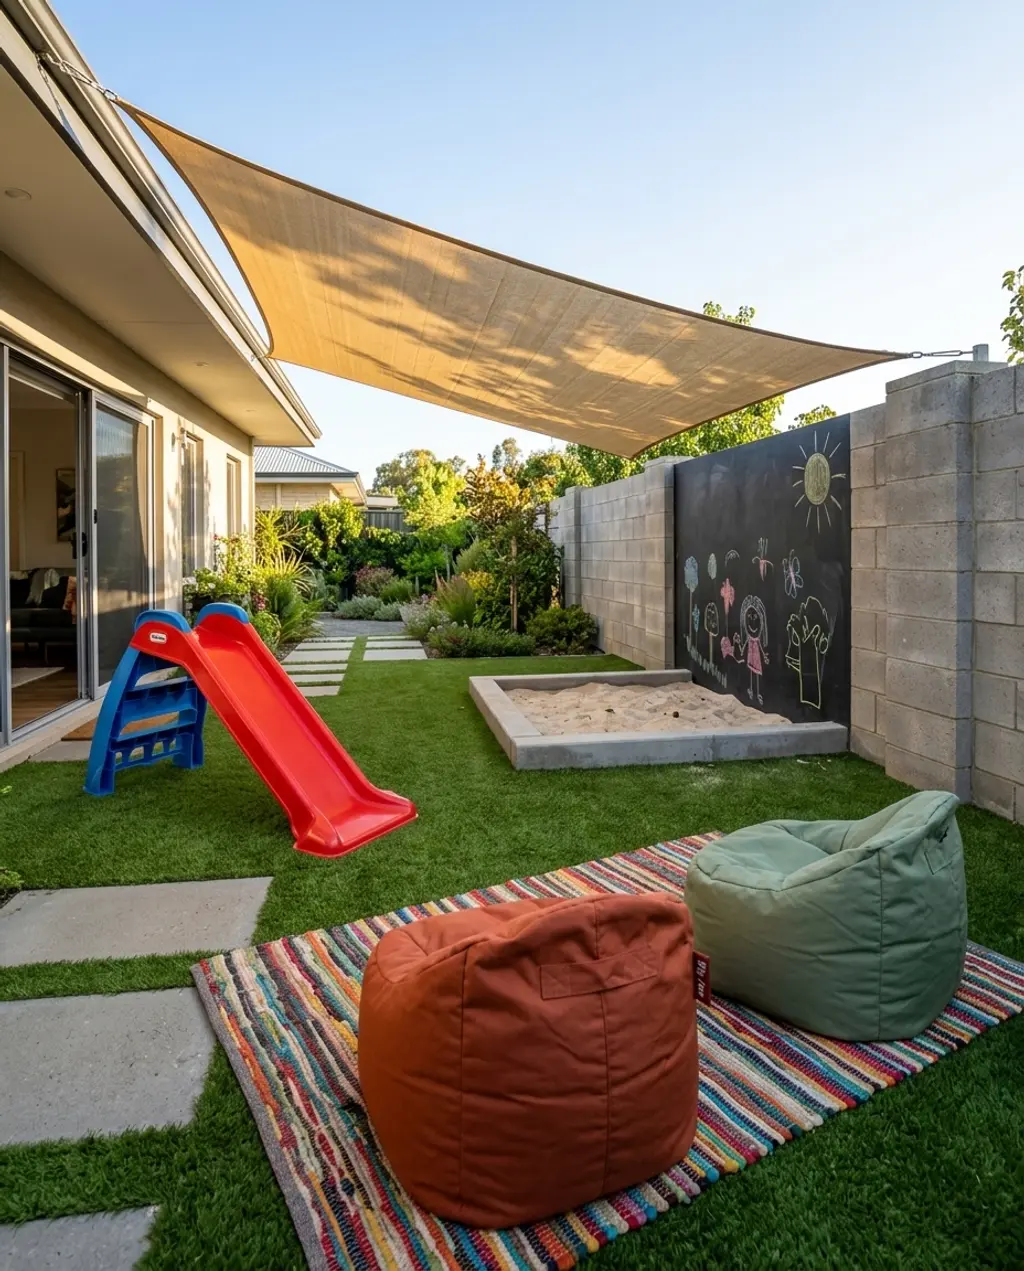
For a truly engaging family-friendly play zone, consider this style math: 40% open turf area (for running/general play) + 30% dedicated play structure (slide, sand pit) + 20% comfort/shade (bean bags, shade sail) + 10% creative elements (chalkboard wall). The key is to have enough open space to prevent it from feeling too cluttered while still packing in fun activities.
Realistically, a family-friendly play zone in a small yard is fantastic, but kids grow. That mini-slide might be perfect for toddlers, but a 7-year-old will quickly outgrow it. Plan for adaptability: can the sand pit become a raised garden bed later? Can the chalkboard wall be easily repainted? Also, factor in storage for toys – otherwise, your cute play zone will quickly become a messy dumping ground, and you’ll be tripping over stray balls and buckets all the time.
|
Premium Artificial Grass Turf Roll Realistic Green Synthetic Lawn Rug $8.89 |
Little Tikes First Slide$34 |
Big Joe Joey Junior Kids Bean Bag Chair$32.98 |
Love Story Sun Shade Sail Rectangle Canopy UV Block Cover for Outdoor $55.99 |
As an affiliate, we earn from qualifying purchases.
12. Chic Bistro Dining for Two
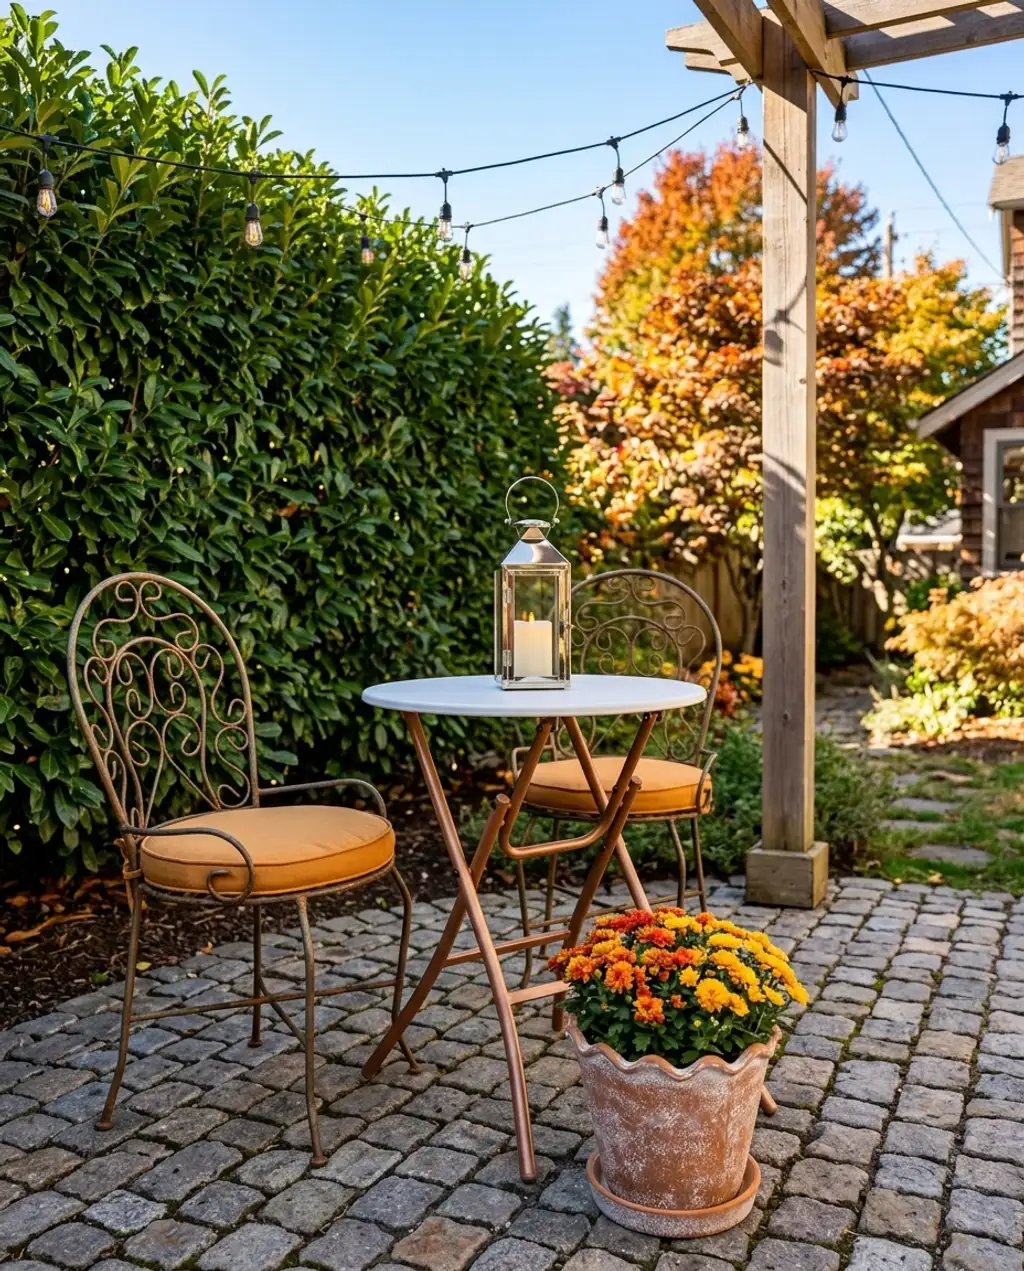
This chic bistro setup works because it prioritizes intimacy and a sense of European charm within a compact footprint. The bistro set itself is inherently space-saving, and when paired with lush potted flowers and soft lighting, it creates an inviting escape. The cobblestone patio or similar textured flooring adds a touch of old-world elegance, making the small area feel like a destination rather than just a corner of the yard. It’s about creating an experience, not just a functional eating spot.
You can absolutely get this chic bistro look for less. Instead of expensive cobblestone, consider affordable paver stones from Lowe’s or even a simple gravel patio. Opt for an affordable bistro set from Target (like the Threshold Round French Cafe Outdoor Patio Bistro Table for $70) or Facebook Marketplace. Load up on potted flowers from your local nursery and string up some budget-friendly battery-operated fairy lights from Walmart or Dollar Tree. For less than $200, you can have a charming spot for two.
|
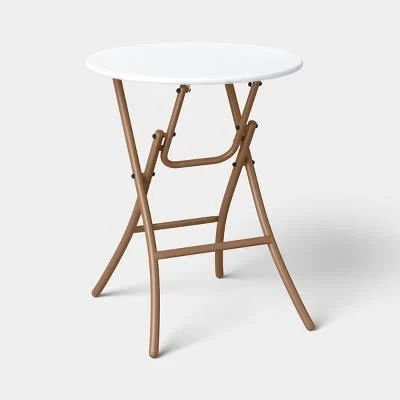
Threshold Round French Cafe Outdoor Patio Bistro Table$70 |
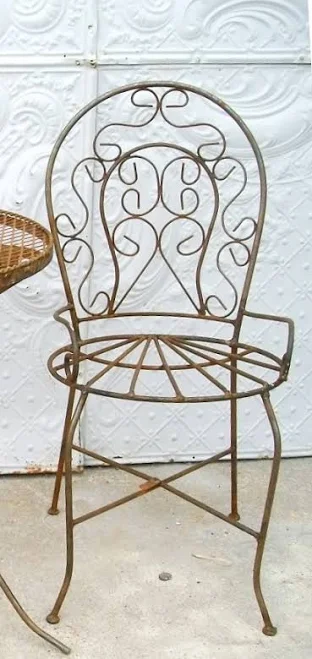
Wrought Iron Small Round Chair$99.95 |
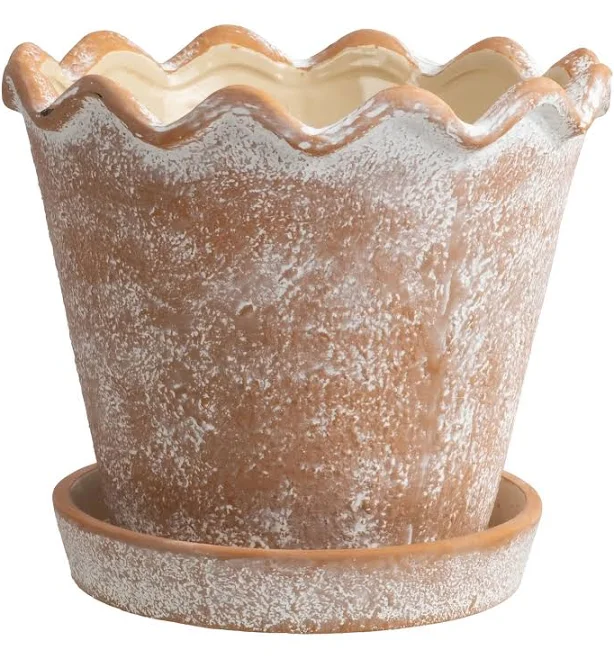
My Texas House Wave Terracotta Ceramic Planter Pot$16.88 |
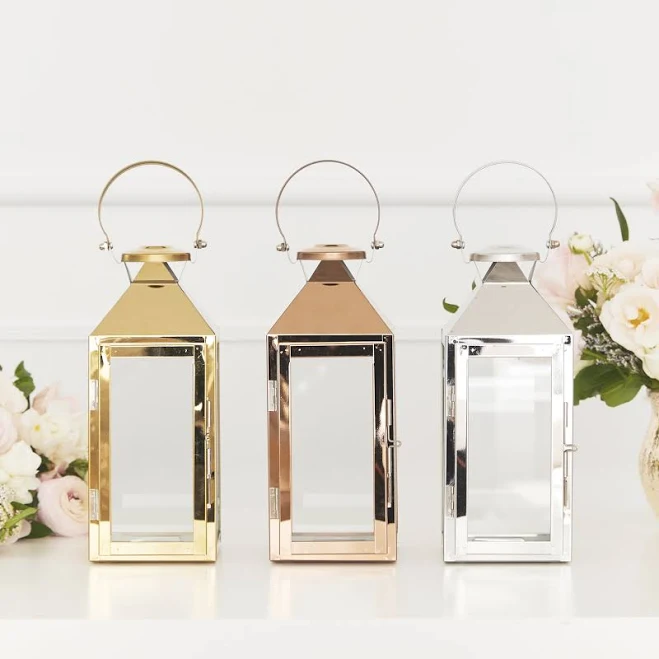
Weddingstar Manual Outdoor Decorative Lantern$21.99 |
As an affiliate, we earn from qualifying purchases.
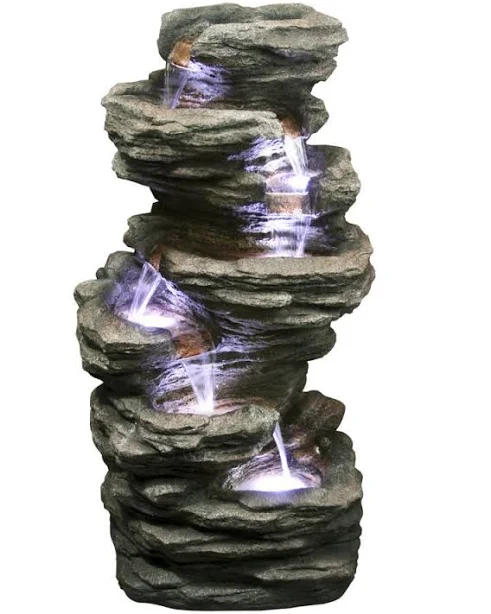
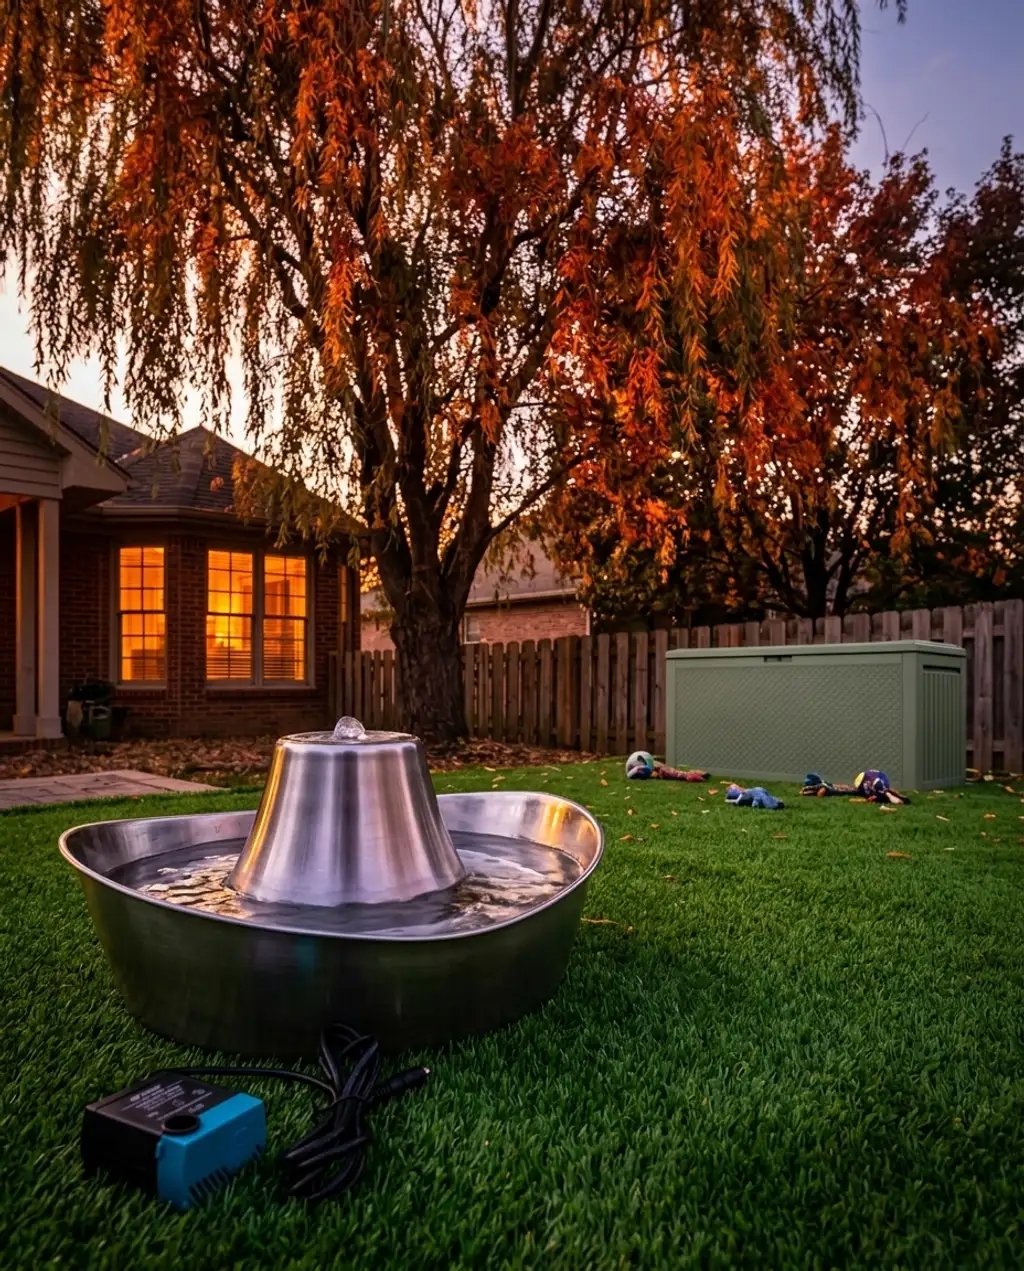
13. Compact Pond & Water Garden Feature

Compact pond and water garden features are gaining traction as people prioritize sensory experiences in their outdoor spaces. The sound of trickling water, even in a micro-pond, brings a calming element that’s highly sought after amidst busy urban lives. Pinterest is full of ‘mini pond kits’ and ‘patio water features’ as homeowners look to add dynamic, natural elements without extensive landscaping. It’s a mindful design trend that brings both visual beauty and soothing soundscapes.
When curating a mini pond, don’t overcrowd it. Stick to a ‘thriller, filler, spiller’ approach even with aquatic plants. Choose one striking lily pad or a small lotus (thriller), some oxygenating grasses (filler), and maybe something that trails over the edge like creeping jenny (spiller). Ensure you have a mix of plant heights and textures to create visual interest. And always, always ensure you have a filter to keep the water clear – nobody wants a murky pond, no matter how small!
This idea works best for spaces that are at least 5×5 feet if you want a true mini pond with lily pads and aquatic greens. For just a small water feature or bubbler, you can go as small as a 2×2 foot area on your patio. Keep the surrounding plants low, or focus on vertical growth upwards if you’re working with very limited ground space to prevent it from feeling overwhelmed.
|
MacCourt Aruba 50 Gal. Preformed Pond Liner$99.98 |
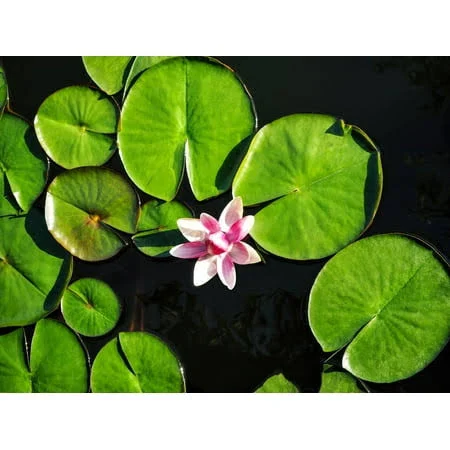
Lily Pad Plant$19.9 |
KolorScape River Rock$4.4 |
3 gal. Crimson Queen Dwarf Japanese Maple Tree$100 |


As an affiliate, we earn from qualifying purchases.
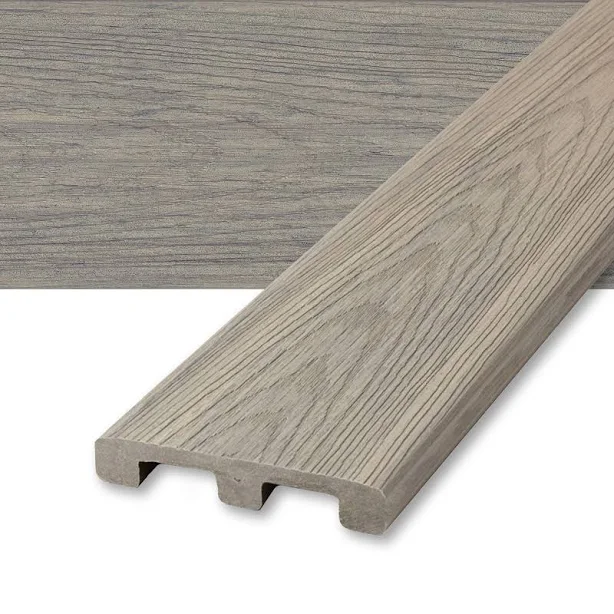
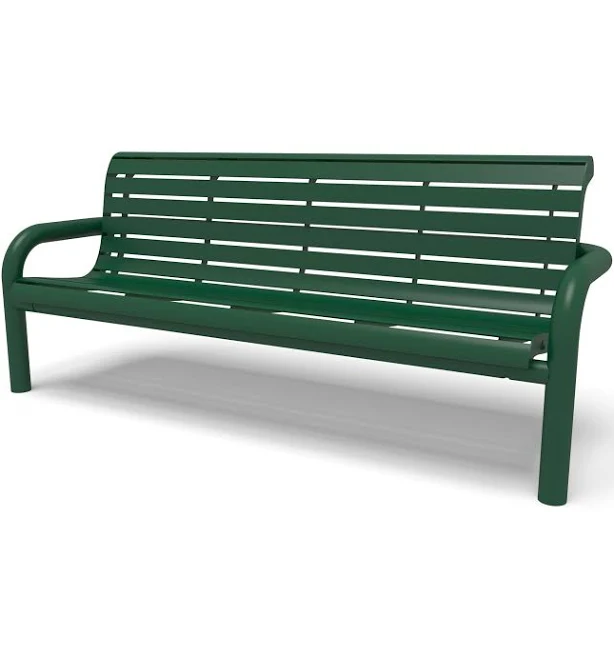
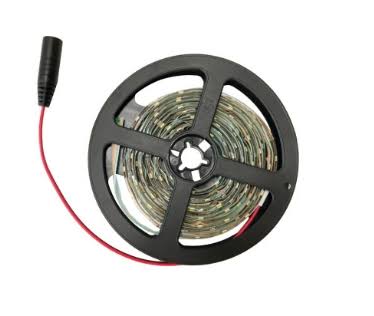
14. Elevated Deck with Built-in Seating
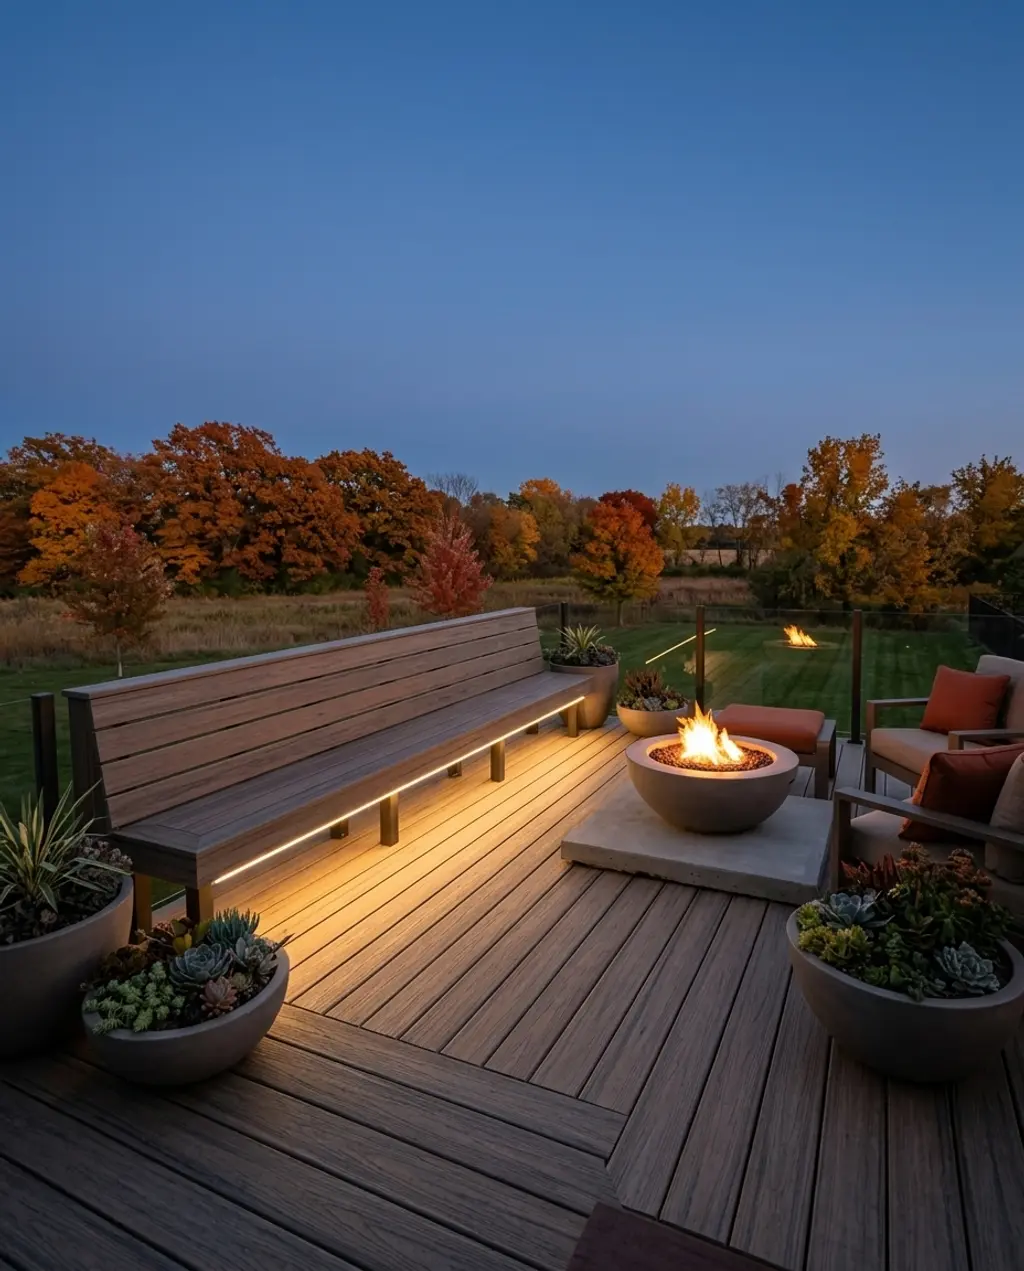
- Main structure (decking, built-in bench): $1000-$4000 (composite decking will be higher)
- Lighting (LED strip lighting): $100-$300
- Planters & Succulents: $50-$200
- Outdoor cushions: $80-$250
- Fire bowl: $100-$500
- TOTAL: $1330-$5250
Budget alternative: Instead of composite decking and professional construction, consider pre-made wood deck tiles from IKEA or Lowe’s that you can DIY. Forget built-in seating; grab some sturdy outdoor benches that can be pushed together to look custom. Regular string lights are much cheaper than LED strips. You can achieve this elevated look for closer to $500-$1500 if you’re handy.
The reality of an elevated deck with built-in seating is that it *looks* incredibly sleek, but it’s a big construction project. This isn’t a weekend DIY for most people. There are structural considerations, local building codes, and safety railings to think about. Also, built-in benches, while space-saving, aren’t always the most comfortable without generous cushions, which can be an ongoing investment in themselves, especially if they need to be stored during bad weather.
|
Deckorators Venture 1-in x 6-in x Composite Deck Board$40.53 |
Wabash Valley 6′ Contemporary Slat Inground Bench$1785 |
RDI Outdoor Lighting 92 Inch LED Strip Light$53 |
Concrete Bowl Planter, 23.2 Inch Dia x 8 Inch Height, Succulent Pot wi$125 |
As an affiliate, we earn from qualifying purchases.
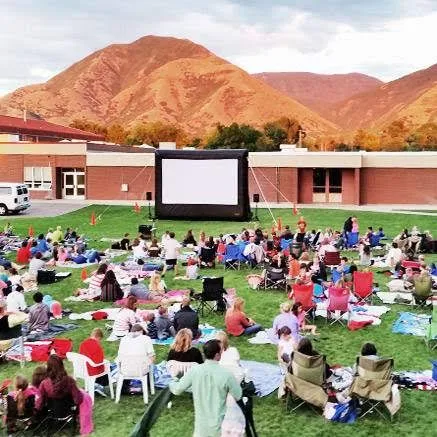
15. Romantic Outdoor Cinema & Lounge Area
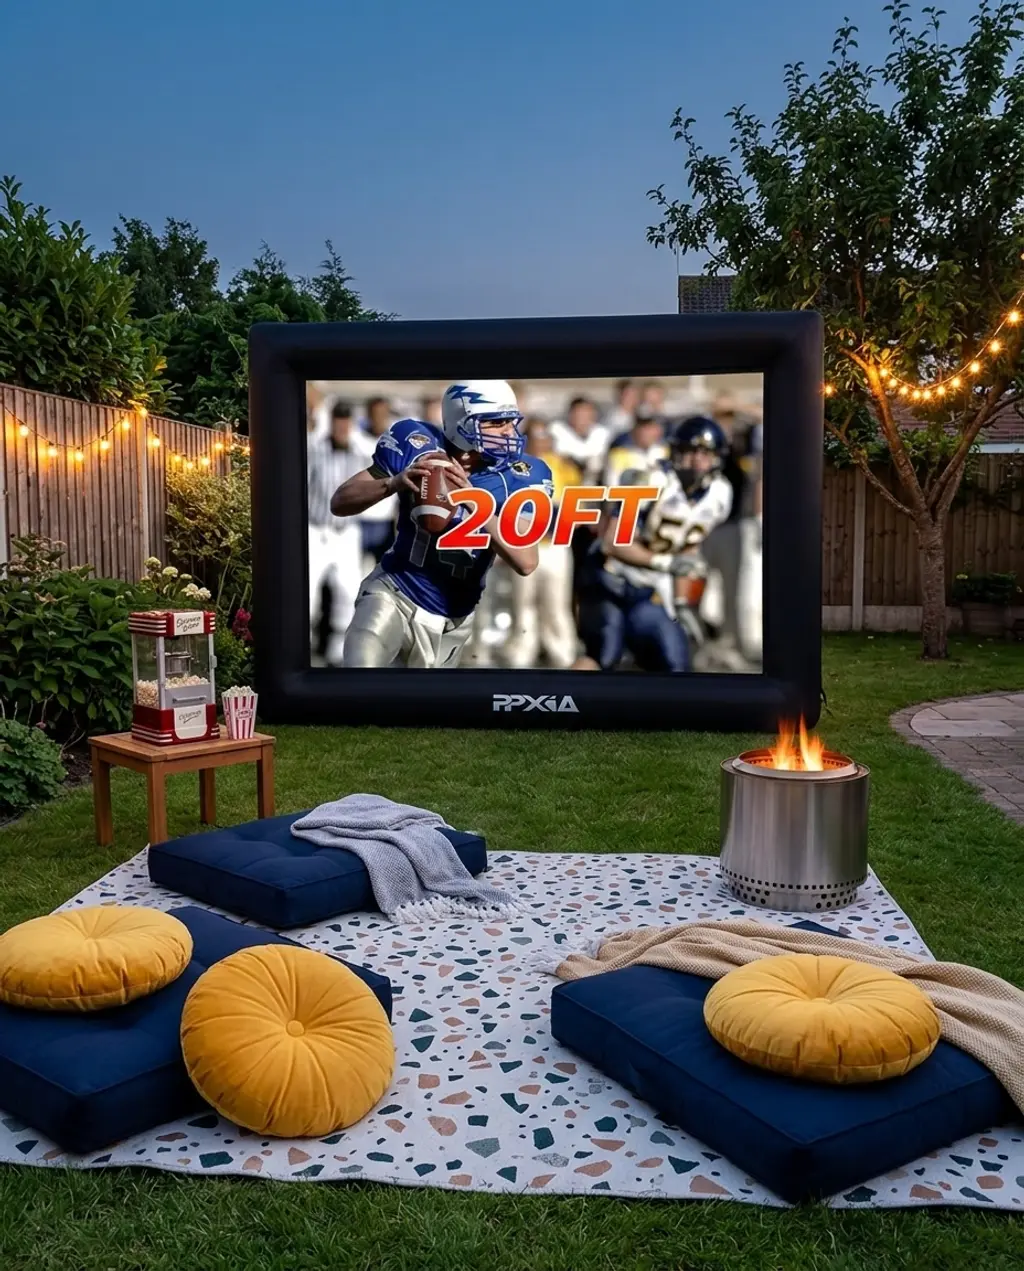
The formula for a romantic outdoor cinema is about creating cozy zones: 50% comfortable lounging (floor cushions, blankets) + 30% screen & projector setup + 20% ambient lighting (string lights, fire pit) + a dash of fun (popcorn machine). The key is balancing the tech with the comfort, ensuring the focus remains on relaxation and shared experience.
Outdoor cinemas have really surged in popularity post-pandemic, as people sought safe ways to socialize and entertain at home. What started as basic setups has evolved into more sophisticated, dedicated spaces. Platforms like Pinterest and Instagram are chock-full of ‘backyard movie night’ inspiration, making it a highly aspirational yet achievable leisure activity. This trend has serious staying power as it offers a unique, intimate entertainment option.
|
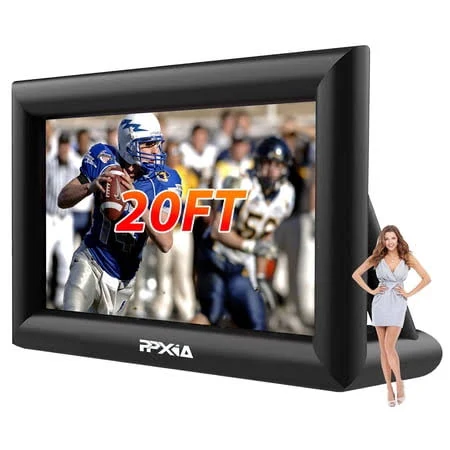
Open Air Cinema Pro Inflatable Movie Screen$3999 |
PPXIA 20ft Outdoor Inflatable Movie Screen$135.99 |
Water Resistant Floor cushion | Round Seat Cushion Large Size Outdoor $246.8 |
Sorra Home Solid Circle Tufted Floor Pillow$54.99 |

As an affiliate, we earn from qualifying purchases.
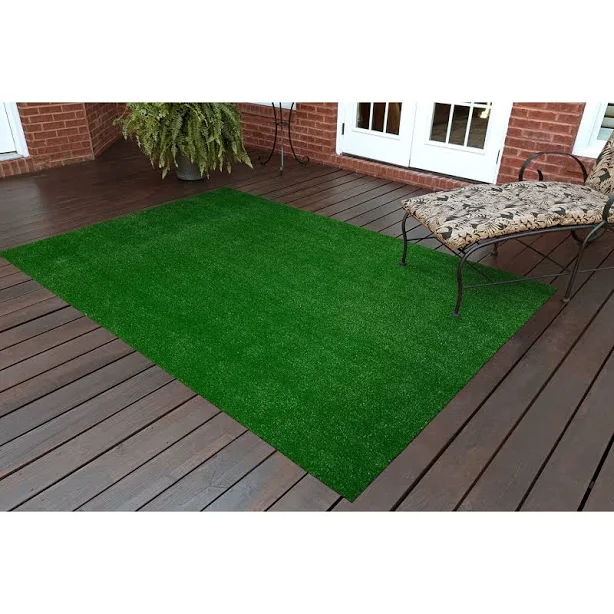
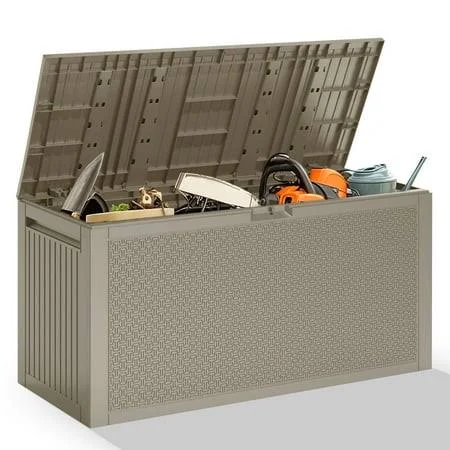
16. Pet-Friendly Backyard Play Area
The absolute game-changer for a truly pet-friendly backyard play area is the artificial grass. It sounds simple, but it’s the element that solves so many traditional backyard pet problems: no muddy paws, no yellow spots from urine, and no constantly re-seeding grass. It’s the clean, durable base that allows for all the fun-loving pet-specific features to truly shine. Compare this with Idea #16 which also discusses artificial grass, but with a different focus on aesthetics.
Maintenance reality for a pet-friendly backyard: artificial grass, while a lifesaver for mud, still needs cleaning. Regular hosing down is essential, especially in areas where pets relieve themselves, to prevent odors. If you have active dogs, you’ll still need to check for debris or potential damage to the turf. Splash pads need to be drained and cleaned regularly to prevent algae buildup, and any outdoor toys or equipment should be stored to prevent wear and tear from weather, or worse, chewing.
|
Style Selections Artificial Grass$24.98 |
PetSafe Seaside Stainless Pet Fountain$42.95 |
130 Gallon Outdoor Resin Storage Box$44.99 |
Weeping Willow Tree$104.95 |


As an affiliate, we earn from qualifying purchases.
17. Minimalist Art Installation Garden
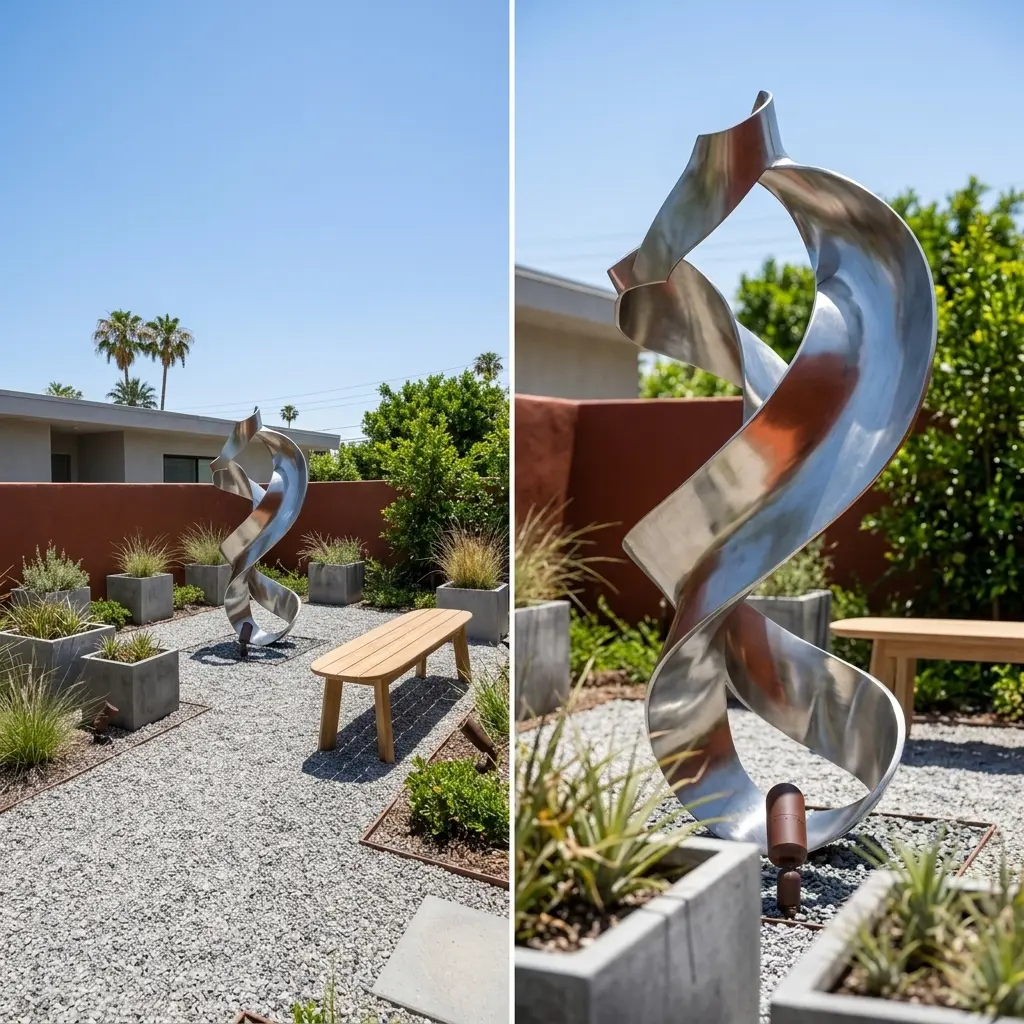
This minimalist art installation garden works because it simplifies the landscape to its core elements, allowing each piece to stand out. By using negative space, clean lines, and a limited material palette (gravel, concrete, metal), it creates a gallery-like effect. The deliberate choice of a single sculpture as a focal point draws the eye, while subtle up-lighting adds drama and extends its appeal into the evening. It’s thoughtful, quiet design that celebrates form and texture.
- Main elements (sculpture, bench): $500-$4000 (can vary wildly depending on art)
- Hardscaping (gravel path, concrete planters): $100-$500
- Lighting (up-lighting): $50-$200
- Native plants: $30-$100
- TOTAL: $680-$4800
Budget alternative: Find a striking geometric planter or a reclaimed metal object to serve as your ‘sculpture.’ Use a simple wooden bench you can build or buy affordably. Instead of expensive professional up-lighting, use solar-powered spotlights from Amazon or Walmart. You can create a compelling minimalist vibe for $200-$500, focusing on compelling shapes and contrasting textures rather than high-end art.
|
Finest Custom Modern Spiral Abstract Sculpture FS-129$3357 |
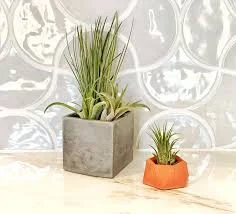
Square Concrete Planters — The Little Shop of Horticulture$15 |
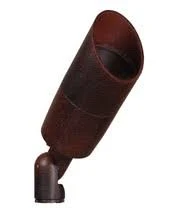
Up Light Bullet BPL105 Rust 12V Low-Voltage MR16 Landscape Light$18.8 |
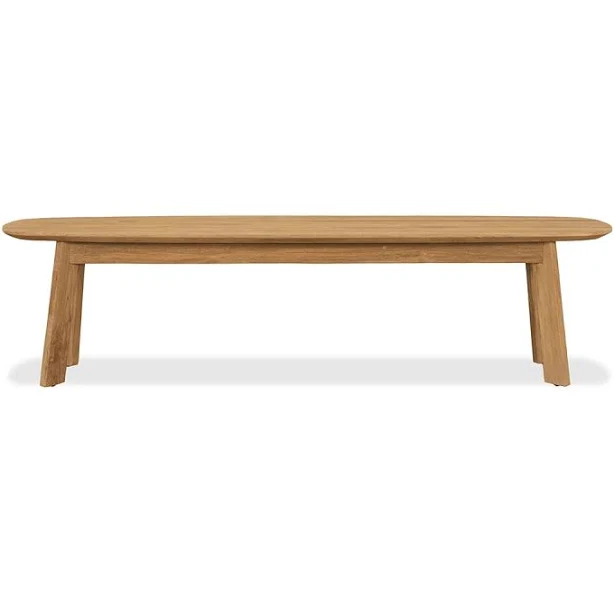
Scandinavian Designs Vinicio Outdoor Bench in Natural Teak$119 |

As an affiliate, we earn from qualifying purchases.
18. Mediterranean Courtyard Charm
✨ Luxury Version
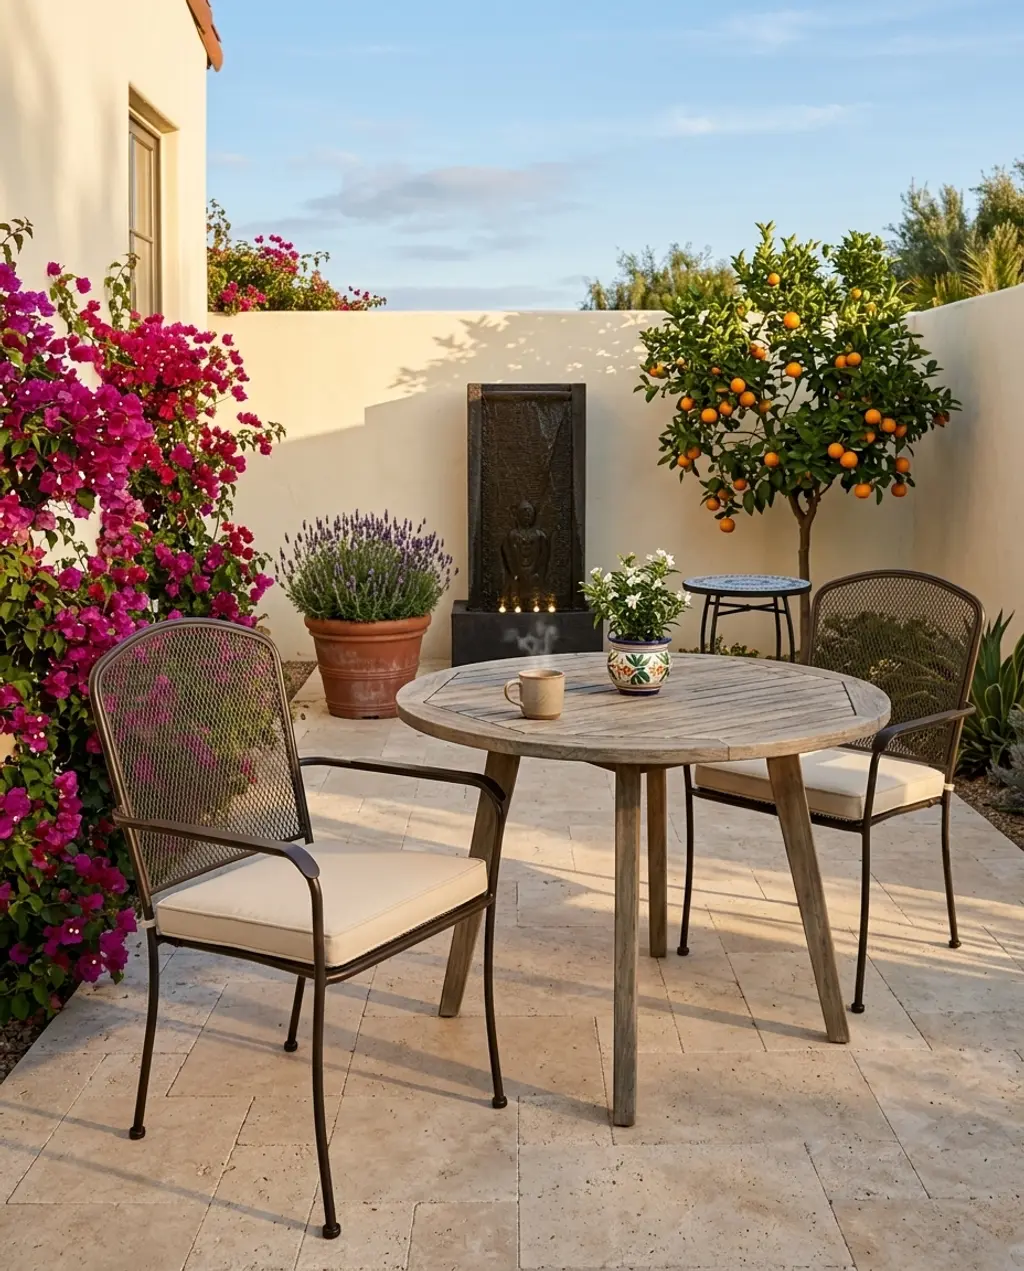
Want to infuse your tiny backyard with Mediterranean vibes? Here’s a quick guide:
- White wash walls: If applicable, paint any walls or fences a crisp white or light stucco color. (Cost: $50-150, Time: 2-4 hours).
- Terracotta pots: Introduce varying sizes of unglazed terracotta pots. (Cost: $30-$100).
- Citrus or Olive: Plant a dwarf citrus tree or a small olive tree in a large pot. (Cost: $50-$200).
- Wrought Iron: Add a small wrought iron bistro set or bench. (Cost: $100-$300).
- Bougainvillea: Incorporate trailing bougainvillea either in a pot or trained on a trellis for that pop of color. (Cost: $20-$80).
💸 Budget Version

Total time: 4-6 hours. Total material cost: $250-$830.
To truly capture Mediterranean charm, pay attention to scent. Integrate fragrant plants like jasmine, lavender, or even a small potted rosemary bush. The olfactory experience is a huge part of being in a Mediterranean garden. Also, consider the sound of water – even a small wall-mounted fountain can make a significant impact, adding that classic tranquil courtyard ambiance. Small details like mosaic-tiled stepping stones or a hand-painted ceramic pot also go miles for authenticity.
|
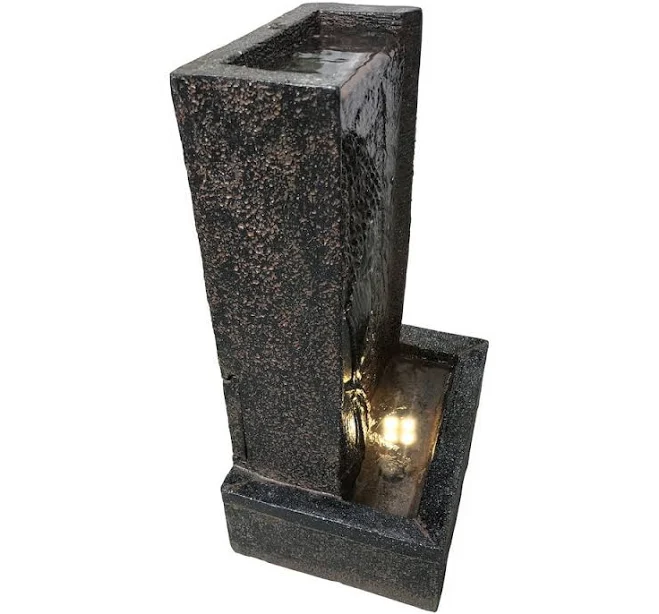
💰 Budget Pick Hi-Line Gift Ltd. Buddha Water Wall Fountain$35.94 |
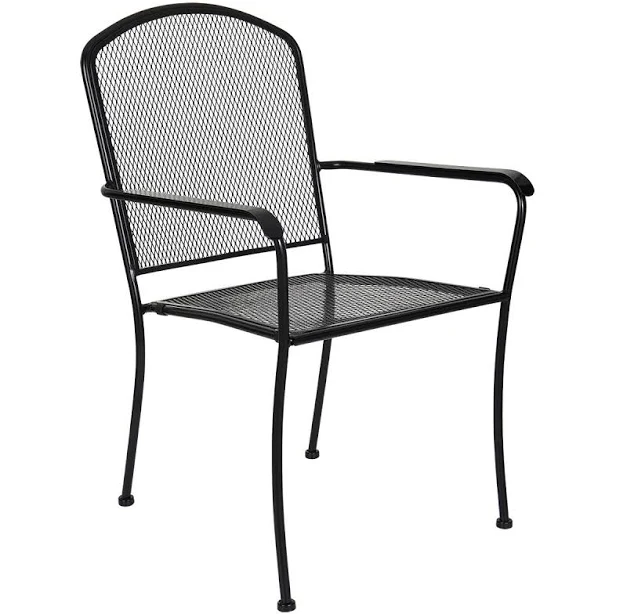
💰 Budget Pick Modesto Mesh Wrought Iron Patio Chair$40.99 |
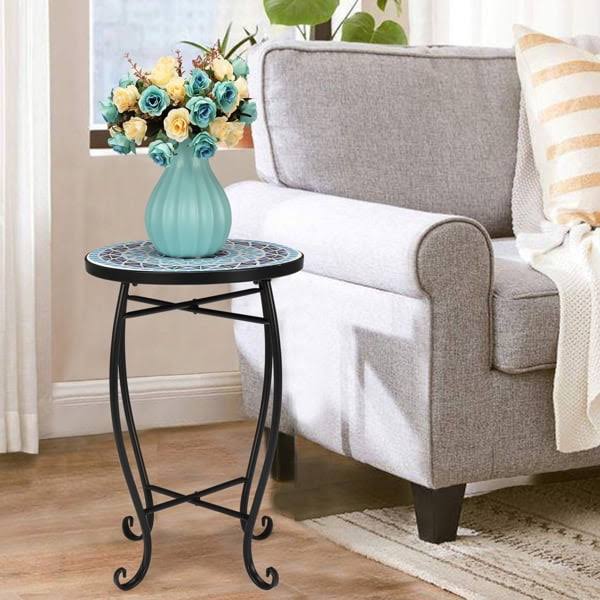
✨ Luxury Pick Blue Ocean Round Mosaic Bistro Table$49.89 |
✨ Luxury Pick Tusco Products Tusco Rolled Rim Planter$53.31 |
As an affiliate, we earn from qualifying purchases.
19. Reading Nook with Hanging Chair
A reading nook with a hanging chair feels luxurious, but it doesn’t have to be. Instead of a high-end designer hanging chair, check out Walmart – OSM for affordable macrame options like the Osm Boho Macrame Hanging Chair with Cushions for around $48.99. Use an inexpensive outdoor rug from Lowe’s (like the Nourison Courtyard COU01 Ivory Rug) and load up on thrifted or sale throw pillows. Craft stores often have sales on string lights, and you can repurpose old sheets or fabric remnants for a DIY privacy curtain. You can easily create this serene spot for under $150.
Before you hang that dream chair, a few checks:
- Support structure: Does your patio or deck have a sturdy beam or tree branch that can safely hold the chair’s weight (plus yours)?
- Clearance: Is there enough space for the chair to swing freely without hitting walls or other furniture?
- Sun exposure: Will the nook get too much direct sun, fading textiles and making it uncomfortable?
- Weatherproofing: Can your cushions and rug be easily stored or are they truly outdoor-rated?
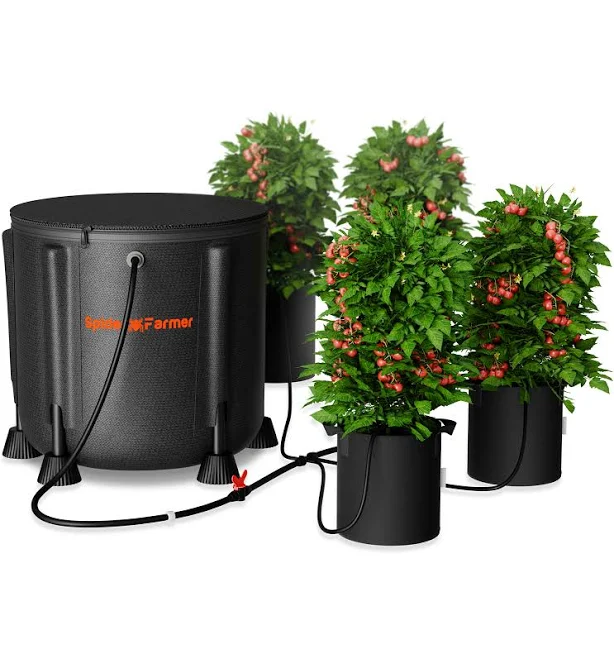
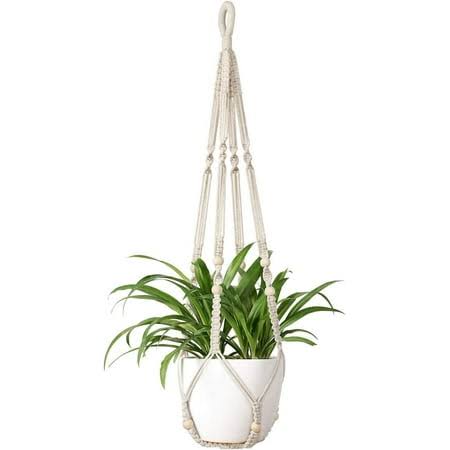
20. Vertical Living Wall for Produce
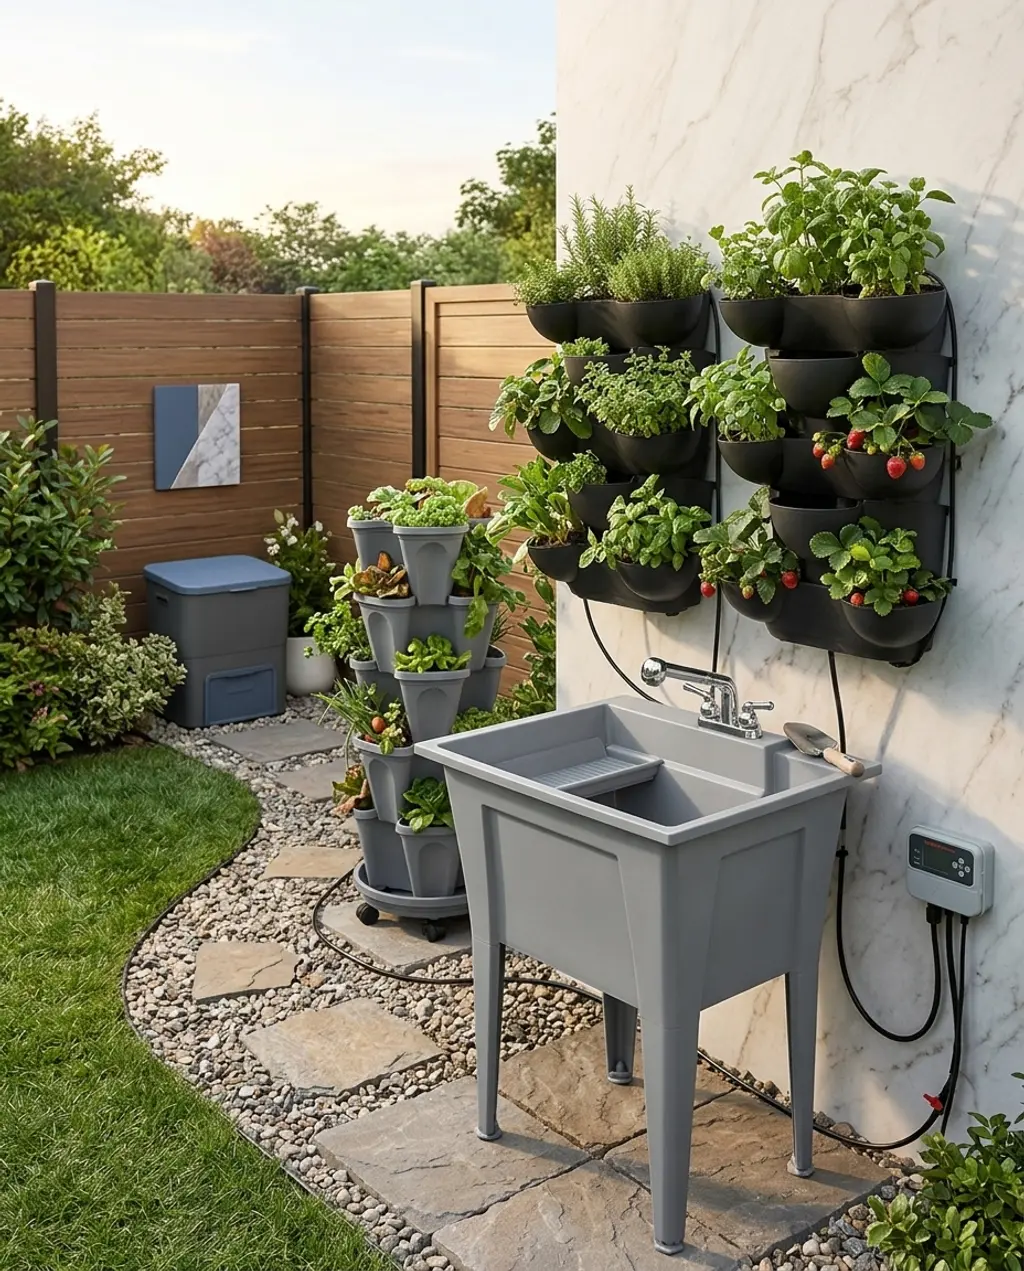
Vertical living walls for edible produce are absolutely booming in 2026. With more people interested in homesteading and sustainable living, even in urban environments, maximizing grow space is key. This trend is fueled by the desire for fresh, organic produce and the aesthetic appeal of a living wall feature. It’s popular on platforms like TikTok and Pinterest, with numerous DIY tutorials making it accessible. This trend merges functionality with beautiful design, making it a smart investment.
When designing a vertical living wall for produce, focus on access and water management. Position your wall where you can easily reach all the plants for harvesting and maintenance. For irrigation, a simple drip system is a game-changer; hand-watering vertical walls is tedious and often uneven. Group plants with similar water needs together to optimize the system. And don’t forget good drainage for each pocket to prevent root rot!
|
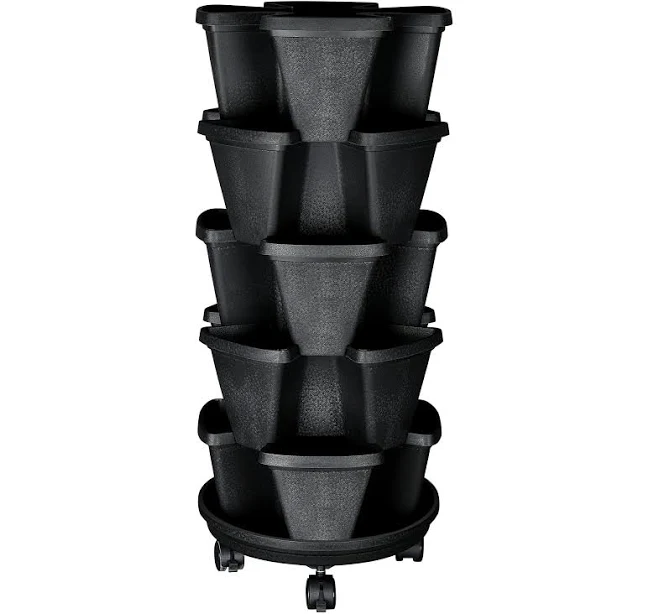
Style Selections Novelty Vertical Garden Planter$39.98 |
Stack & Grow Stackable Garden Planter$67.35 |
Spider Farmer Automatic Drip Irrigation System$79.99 |
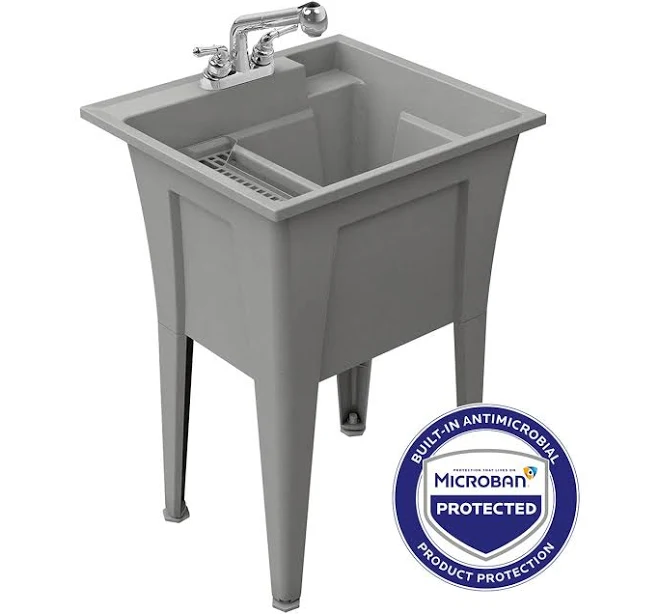
RuggedTub Freestanding Utility Tub$149 |
As an affiliate, we earn from qualifying purchases.
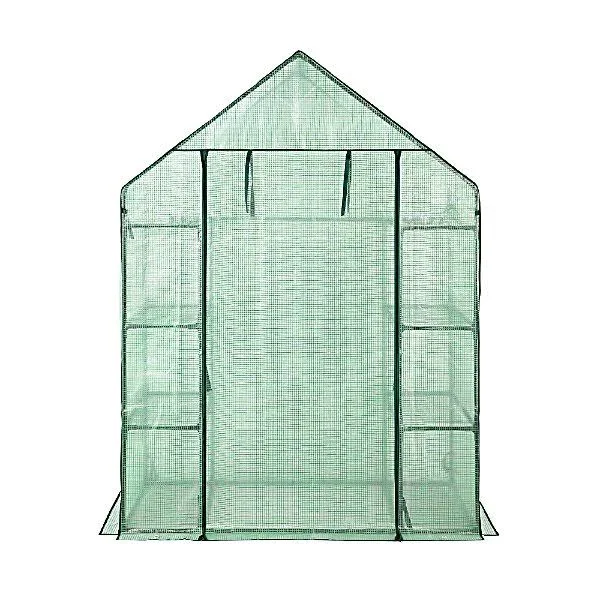
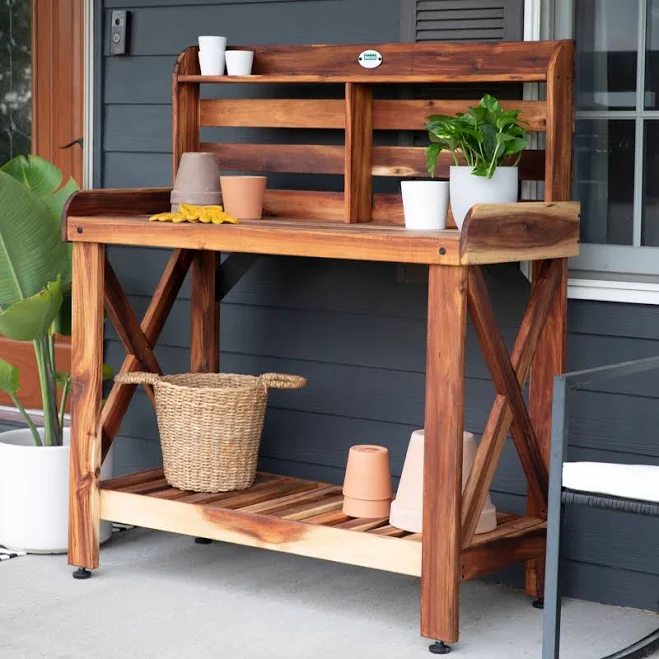
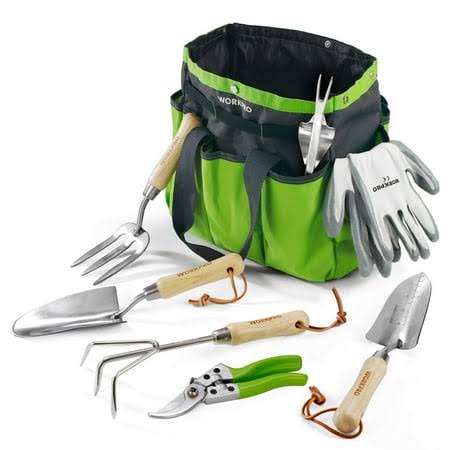
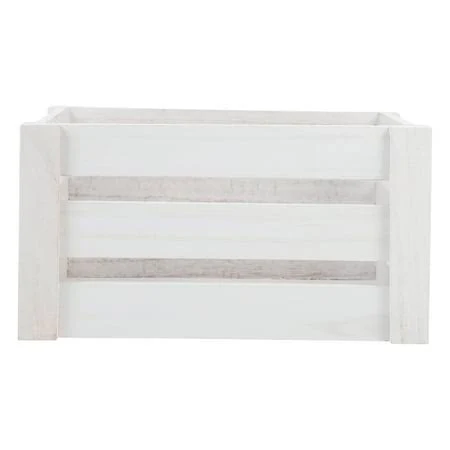
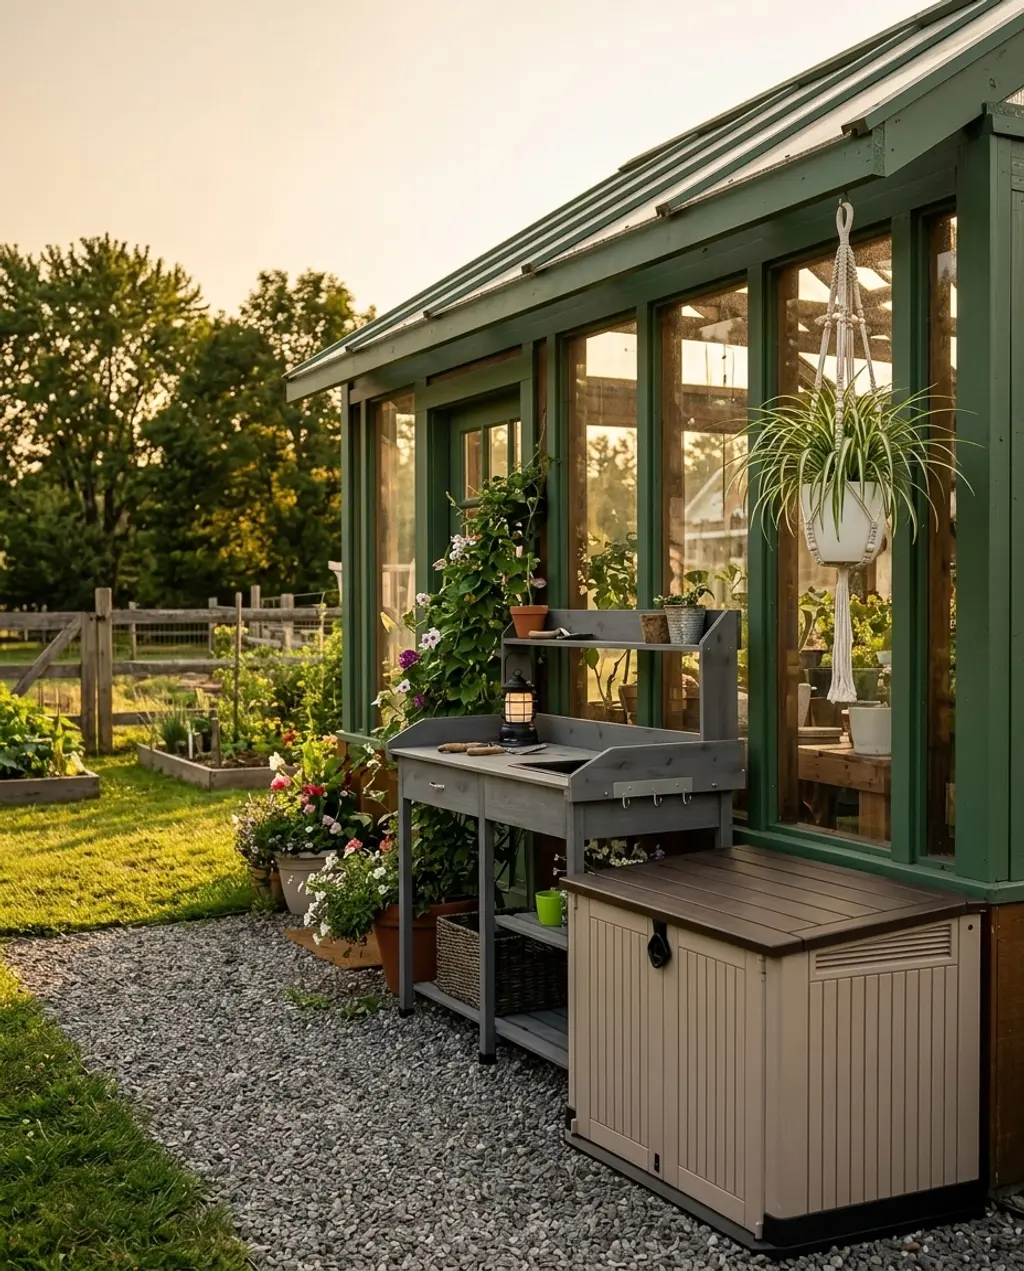
21. Backyard Greenhouse & Potting Station
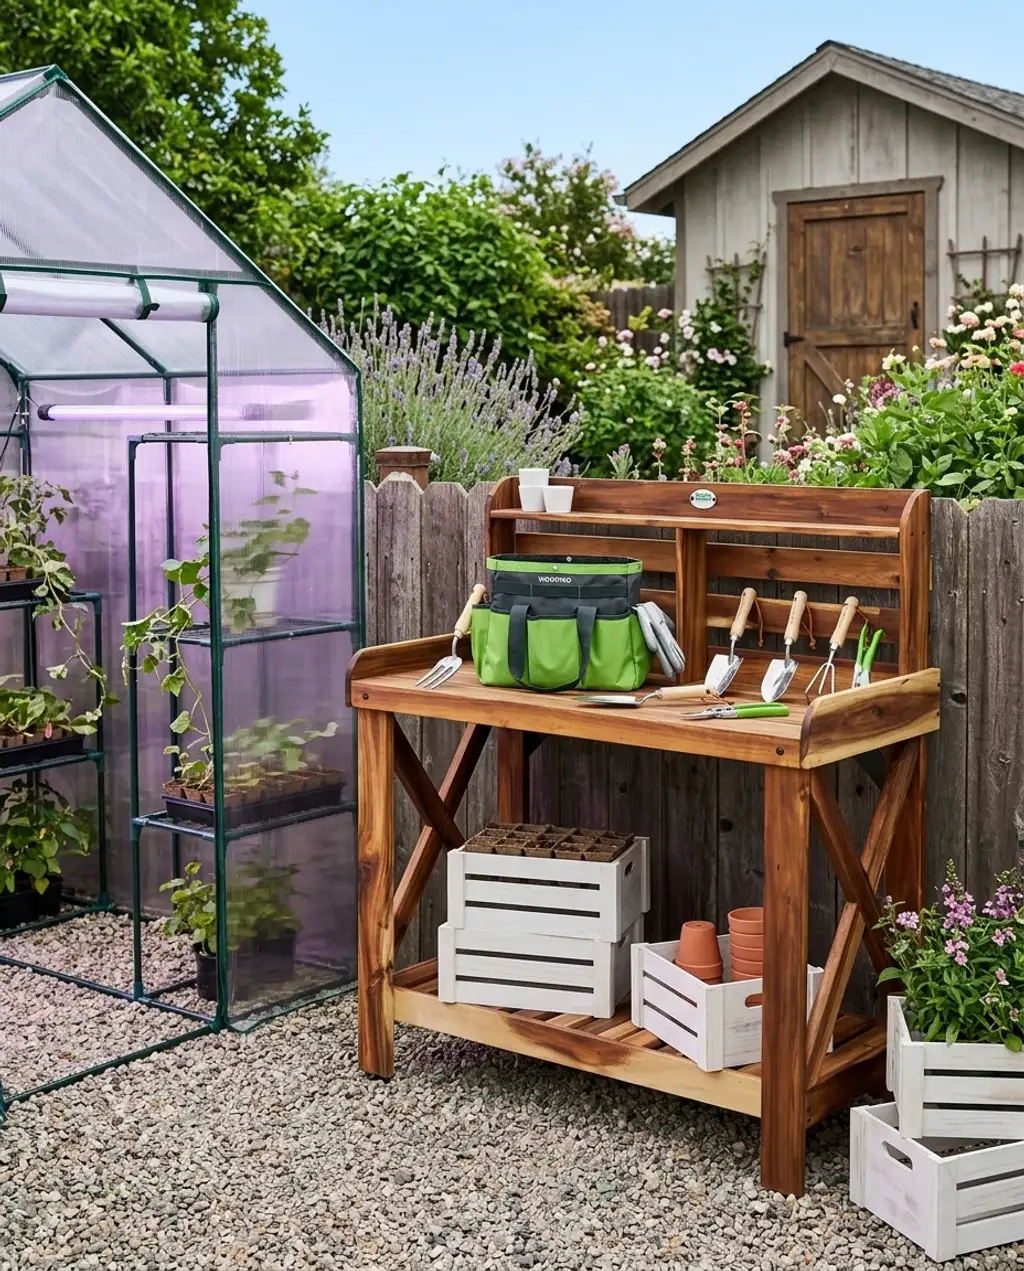
- Main structure (mini greenhouse, potting bench): $150-$500
- Tools & Supplies (seed trays, gardening tools, crates): $50-$200
- Vining plants: $20-$80
- Gravel (for floor): $30-$100
- TOTAL: $250-$880
Budget alternative: Instead of a dedicated mini-greenhouse, use clear plastic sheeting or old windows to create a temporary cold frame over a raised bed. Repurpose an old dresser or workbench as a potting station. Look for free wooden crates on Facebook Marketplace. You can get started with a functional potting station for under $100 if you’re resourceful.
Here’s the truth about backyard greenhouses: they look idyllic, but maintenance is key. You need to be actively engaged. That means regular ventilation to prevent overheating, pest checks, and often, supplementary watering systems, especially in small, enclosed spaces. If you’re not planning to use it consistently, it can quickly turn into an expensive storage shed or worse, a breeding ground for weeds. And while a potting bench is handy, it can easily become a cluttered catch-all if not organized meticulously.
This setup works because it creates a dedicated zone for gardening, even within a small footprint. The mini-greenhouse extends your growing season, while the potting bench keeps tools and supplies organized, reducing clutter elsewhere. It smartly combines a functional workspace with a place for propagation, making gardening in a tiny yard feel more professional and less like an afterthought. It centralizes your green thumb activities.
|
Groundwork Dual-Sided Walk-In Greenhouse$69.99 |
Backyard Discovery Acacia Wood Garden Potting Bench Serving Bar$249 |
WORKPRO Garden Tools Set$28.99 |
Retro Wooden Crate$28.59 |
As an affiliate, we earn from qualifying purchases.
22. Small Backyard Wedding Reception Bar
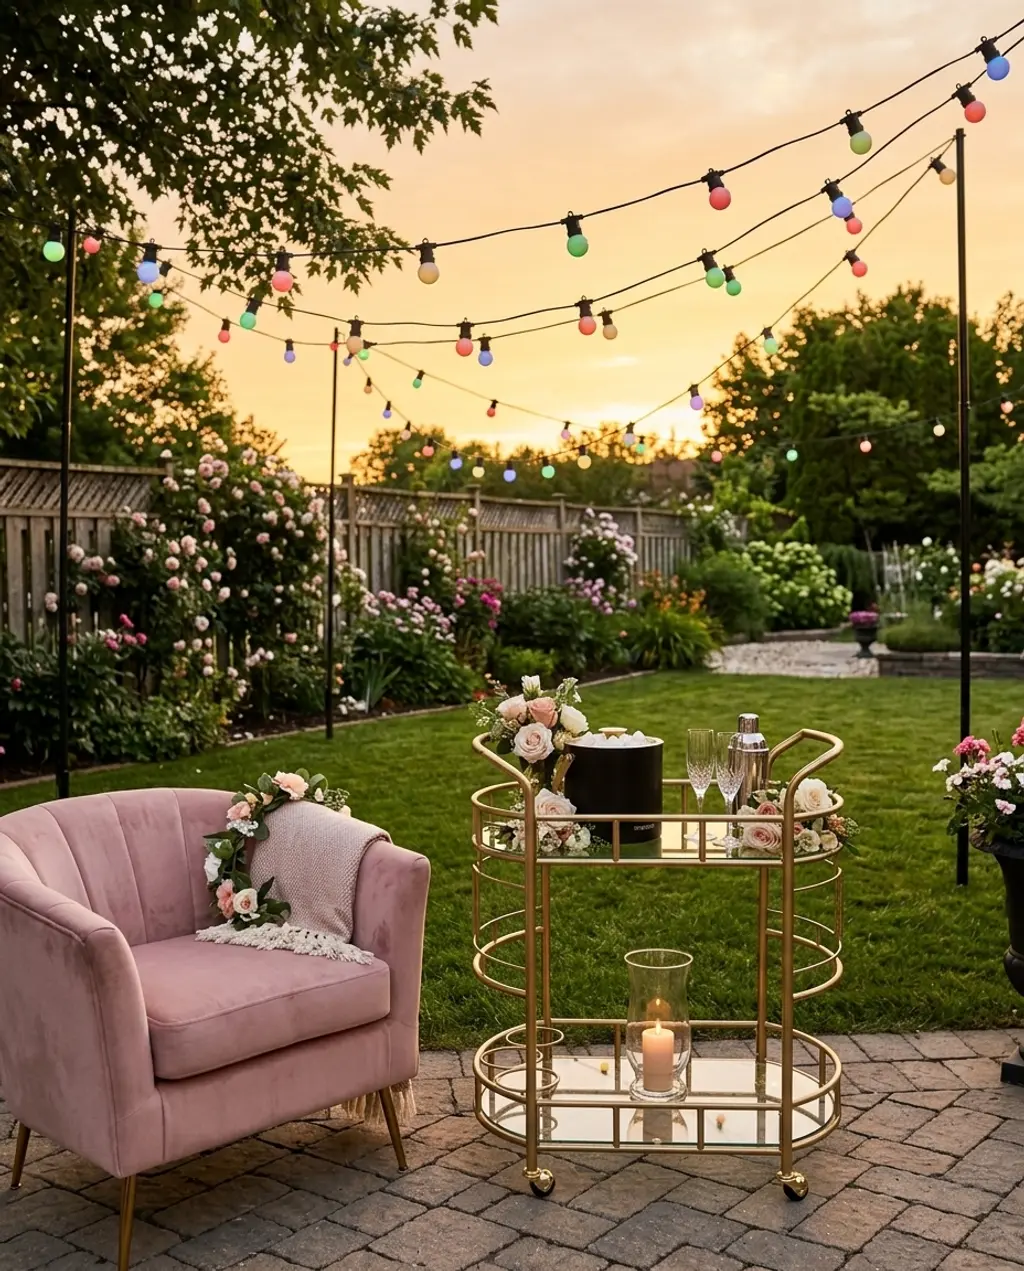
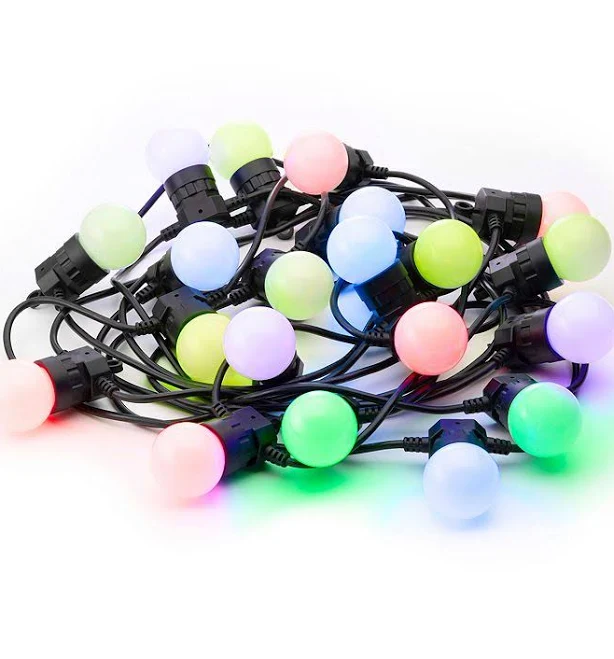
When setting up a small backyard wedding reception bar, think double duty! A bar cart can also serve as a dessert station or a welcome drink area. Stock it with pre-batched cocktails in attractive dispensers to reduce on-the-spot mixing. Use string lights to define the area and create a festive mood, and don’t underestimate the power of fresh floral arrangements to elevate even the simplest bar setup. This setup works exceptionally well when paired with Idea #7 for a cohesive wedding aesthetic.
A small bar area needs at least 6×6 feet of clear space to function without feeling cramped, allowing for the bar cart and a couple of small standing or seating areas. If your yard is super narrow, consider a wall-mounted fold-down bar to save floor space, perhaps even a bar window from the house like in Idea #31. The key is ensuring guests can approach, get a drink, and move away easily without creating a bottleneck.
|
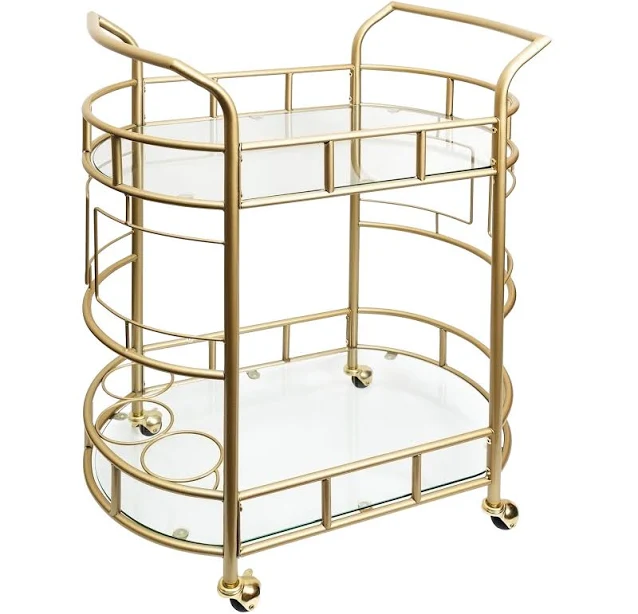
Better Homes & Gardens Fitzgerald 2-Tier Bar Cart$79.92 |
Twinkly Festoon Lights$97.49 |
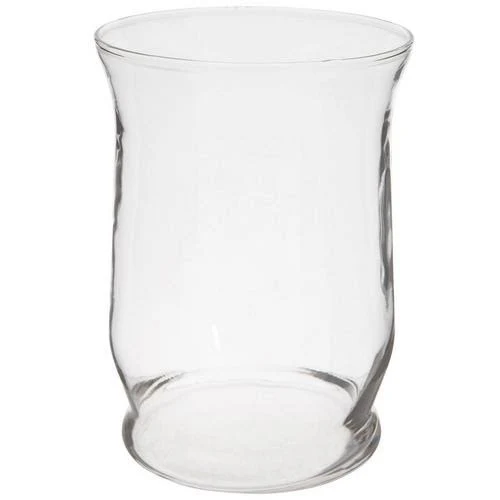
Libbey Adorn Hurricane Candleholder$5.99 |
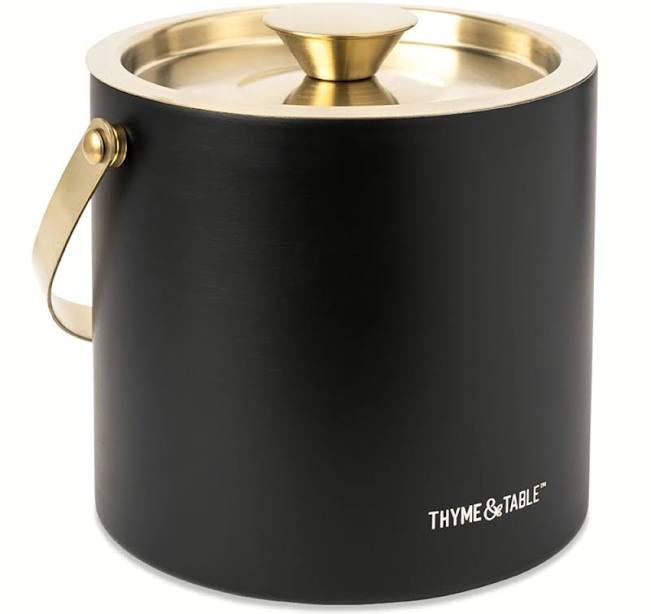
Thyme & Table Stainless Steel Ice Bucket$24.76 |
As an affiliate, we earn from qualifying purchases.
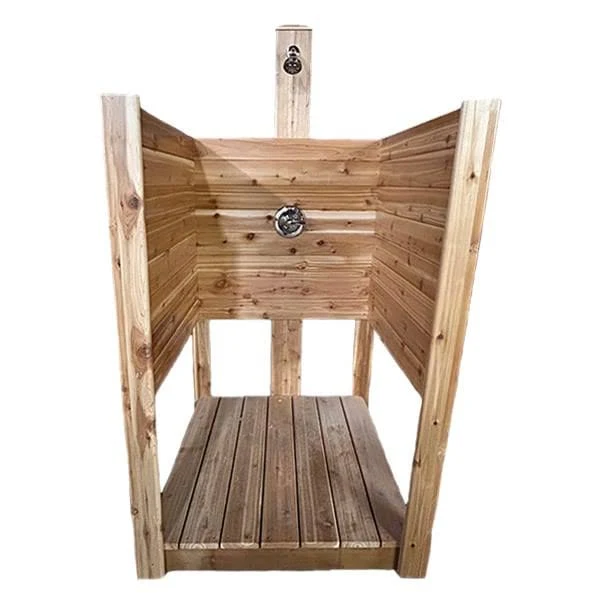
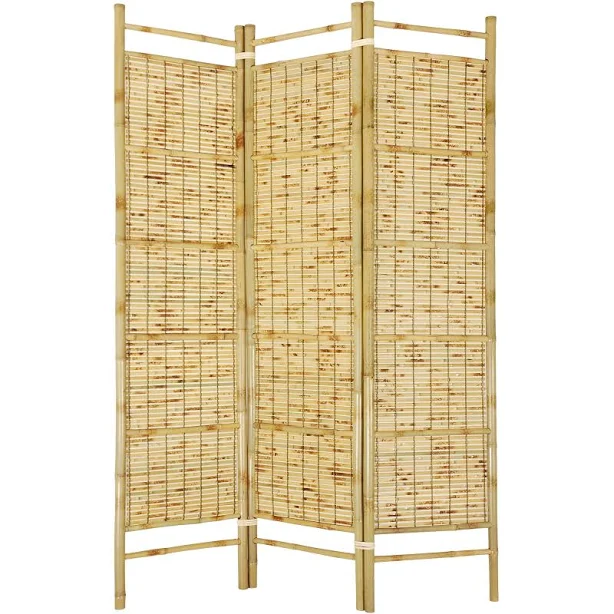
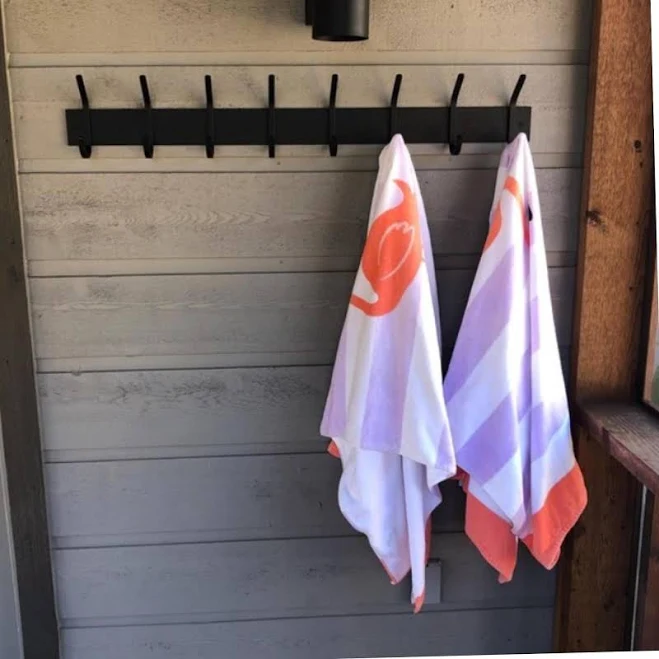
23. Outdoor Shower & Changing Nook
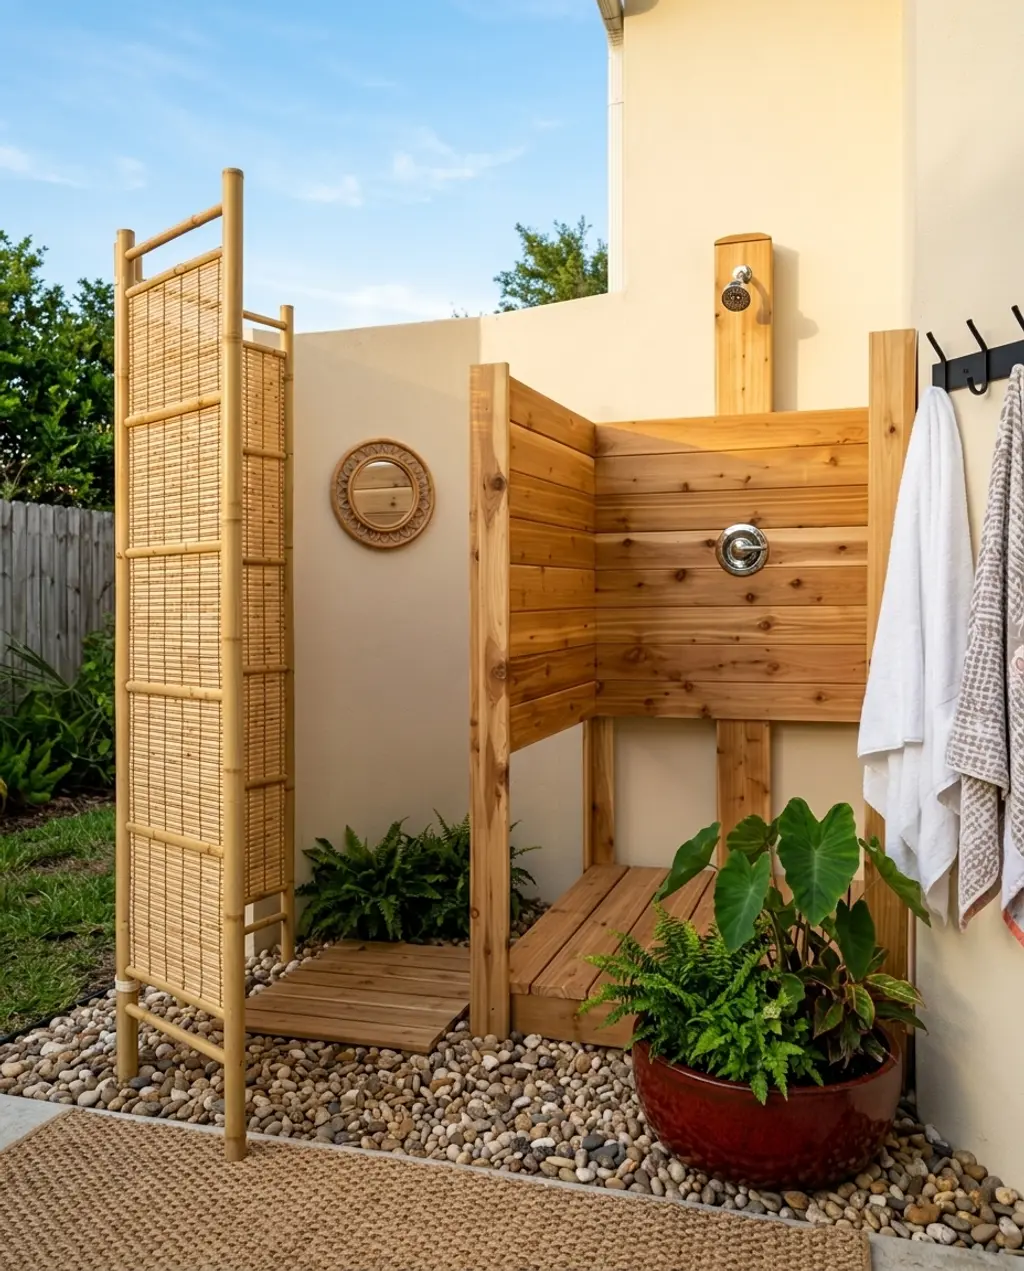
Outdoor showers are having a major moment, driven by the desire to extend indoor comforts to outside and create spa-like experiences at home. The ‘coastal escape’ and ‘wellness retreat’ aesthetics heavily feature these, making them a popular addition for pool-side homes or even just small urban backyards looking for a unique touch. This trend feels particularly fresh for 2026 as people continue to invest in their homes as personal sanctuaries.
Let’s be real about outdoor showers: while delightful, they are NOT low maintenance. You’ll need to consider drainage carefully, especially if you’re not on a natural grass area, otherwise you’ll create a muddy mess. The wood slats will need regular treatment to prevent rot and fading. And the privacy screen, while essential, will also require cleaning from water spots and potentially mildew. Plus, think about plumbing in colder climates – you’ll need to winterize!
|
Western Red Cedar Outdoor Shower$1400 |
Oriental Furniture 6 ft. Tall Burnt Bamboo Shoji Screen$121.6 |
Outdoor Towel Hooks, Out Towel Rack, Pool Towel Hooks, Towel Rack for $48.75 |
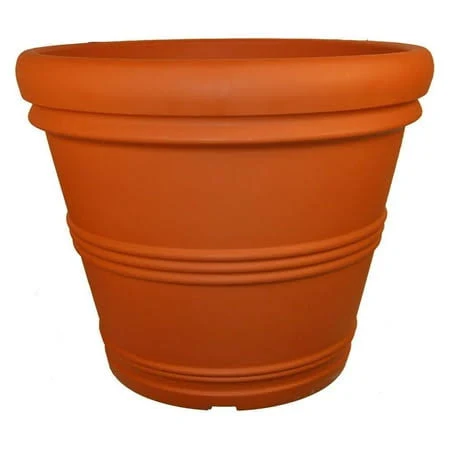
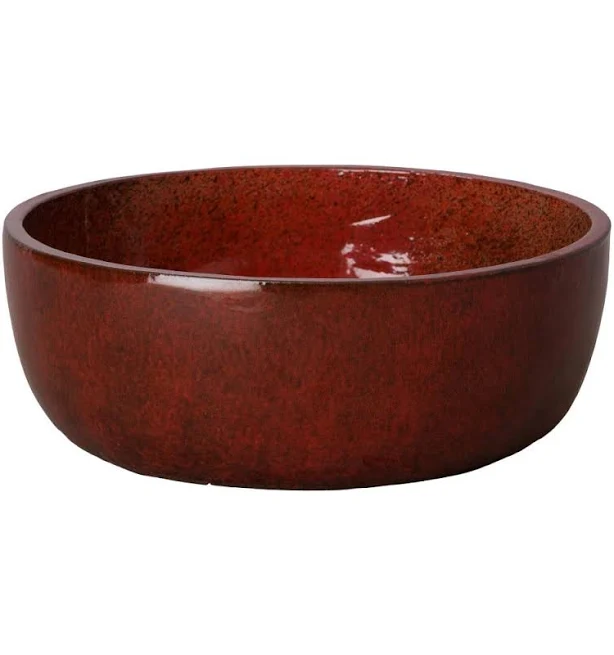
Emissary 22 in. Shallow Tropical Red Round Ceramic Planter$249 |
As an affiliate, we earn from qualifying purchases.
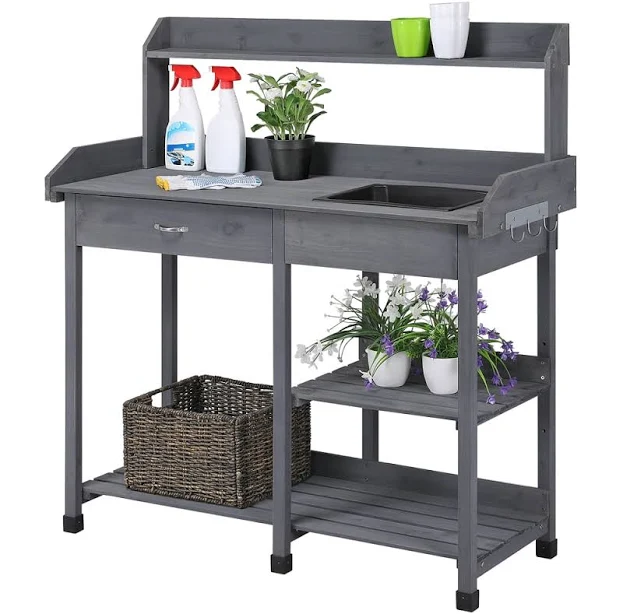
24. Tiny Backyard Greenhouse & Potting Shed Combo
- Main structure (shed, greenhouse windows): $300-$1000
- Potting bench & Tool storage: $100-$300
- Hanging plants & Containers: $50-$200
- Gravel path: $30-$100
- Lantern: $20-$60
- TOTAL: $500-$1660
Budget alternative: Look for a used shed on Craigslist or Facebook Marketplace that you can refurbish. Instead of installing full greenhouse windows, simply replace a portion of the wall with clear polycarbonate panels (available at hardware stores). Repurpose old cabinets or shelving units as a potting bench. You can create a charming and functional combo for $200-$500 with a bit of DIY elbow grease.
The quintessential element that makes this idea sing is the strategic integration of greenhouse windows into the shed structure. This isn’t just a shed with some plants; it’s a seamless blend of practical storage and a light-filled growing space. It transforms a utilitarian backyard element into a multi-functional powerhouse, giving you the best of both worlds for gardening and storage in a tiny footprint.
|
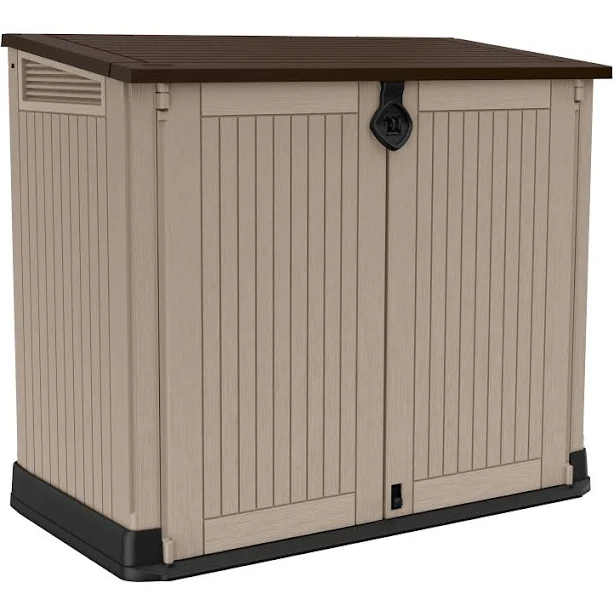
Keter Store-It-Out Midi Outdoor Storage Shed$259.99 |
Alden Design Wooden Potting Bench with Sink Drawer and 2 Shelves$124.99 |
Mkono Macrame Plant Hanger Indoor Hanging Planter Basket with Wood Bea$9.99 |
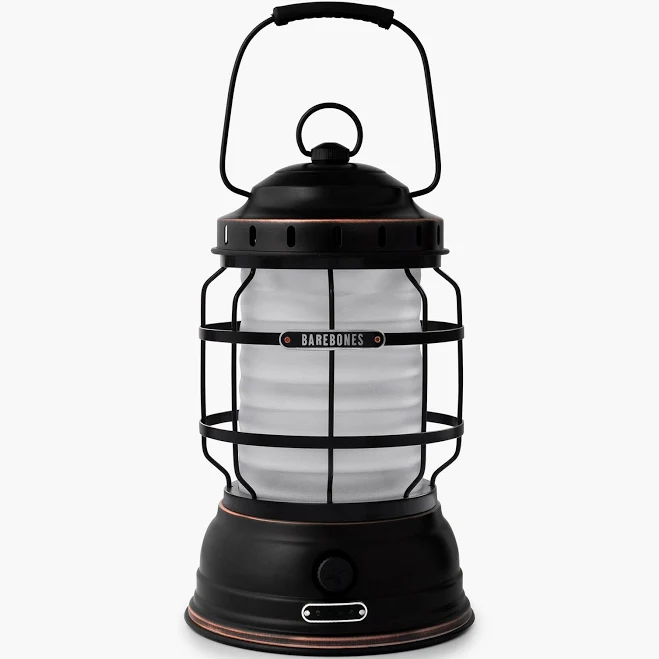
Barebones Forest Lantern$57.59 |
As an affiliate, we earn from qualifying purchases.
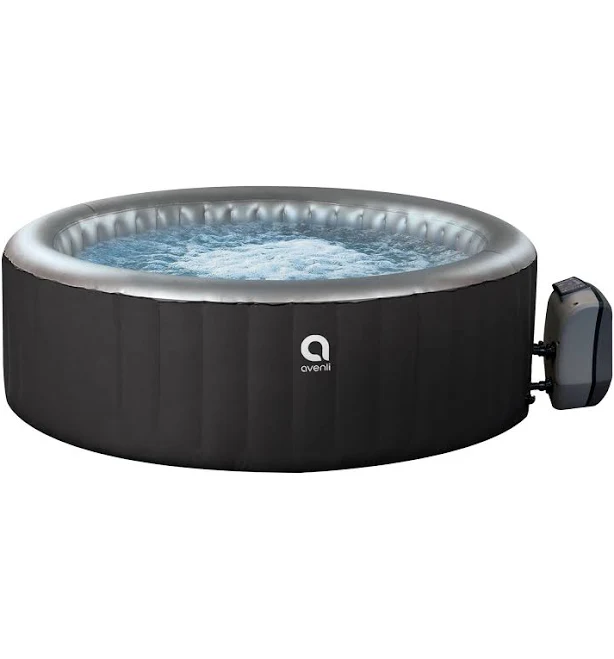
25. Compact Hot Tub Relaxation Zone

Creating a compact hot tub relaxation zone is all about creating intimacy and functionality: 40% hot tub + 30% privacy (screening, bamboo) + 20% comfortable support (storage bench, decking) + 10% mood lighting (string lights). The key is allowing the hot tub to be the star, but building a supportive cast around it that enhances the overall experience.
When planning your hot tub zone, consider the flow of electricity and water *before* anything else. You’ll likely need a dedicated electrical circuit for the hot tub, and easy access to a Wasserhahn for filling and draining. Don’t forget that inflatable hot tubs need a sturdy, level surface, but don’t require the intense structural support of a built-in model. This is where Idea #13‘s decking approach can be a huge benefit for a flat, stable base.
Even a ‘compact’ hot tub still needs space. For an inflatable 2-3 person hot tub, allow a minimum of 8×8 feet including surrounding decking and privacy screens to avoid feeling claustrophobic. Anything less will make it feel less like a relaxation zone and more like a cramped pool. If your space is truly tiny, consider a large soaking tub instead of a full hot tub to get a similar experience on a smaller scale.
|
Avenli London 2-3 Person Inflatable Hot Tub Spa + Cover$398 |
Enclo Privacy Screens Bessemer WoodTek Vinyl Charcoal 4 ft H x 3.3$131.06 |
MoistureShield 22.5-in x 22.5-in 4 -Pack Foundation Unfinished Vinyl/$80.04 |
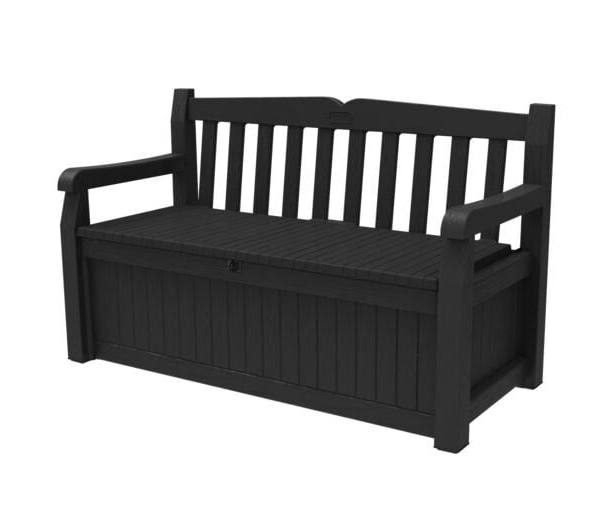
Keter Eden Outdoor 70 Gallon Weatherproof Resin Bench Storage Deck Box$119 |
As an affiliate, we earn from qualifying purchases.
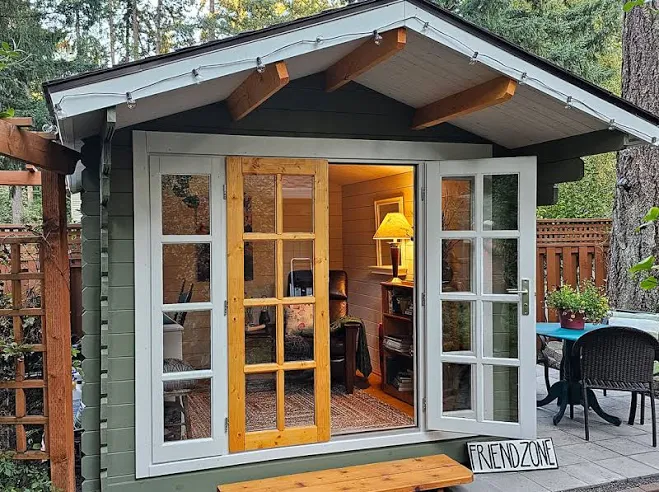
26. Outdoor Workspace & Creative Studio
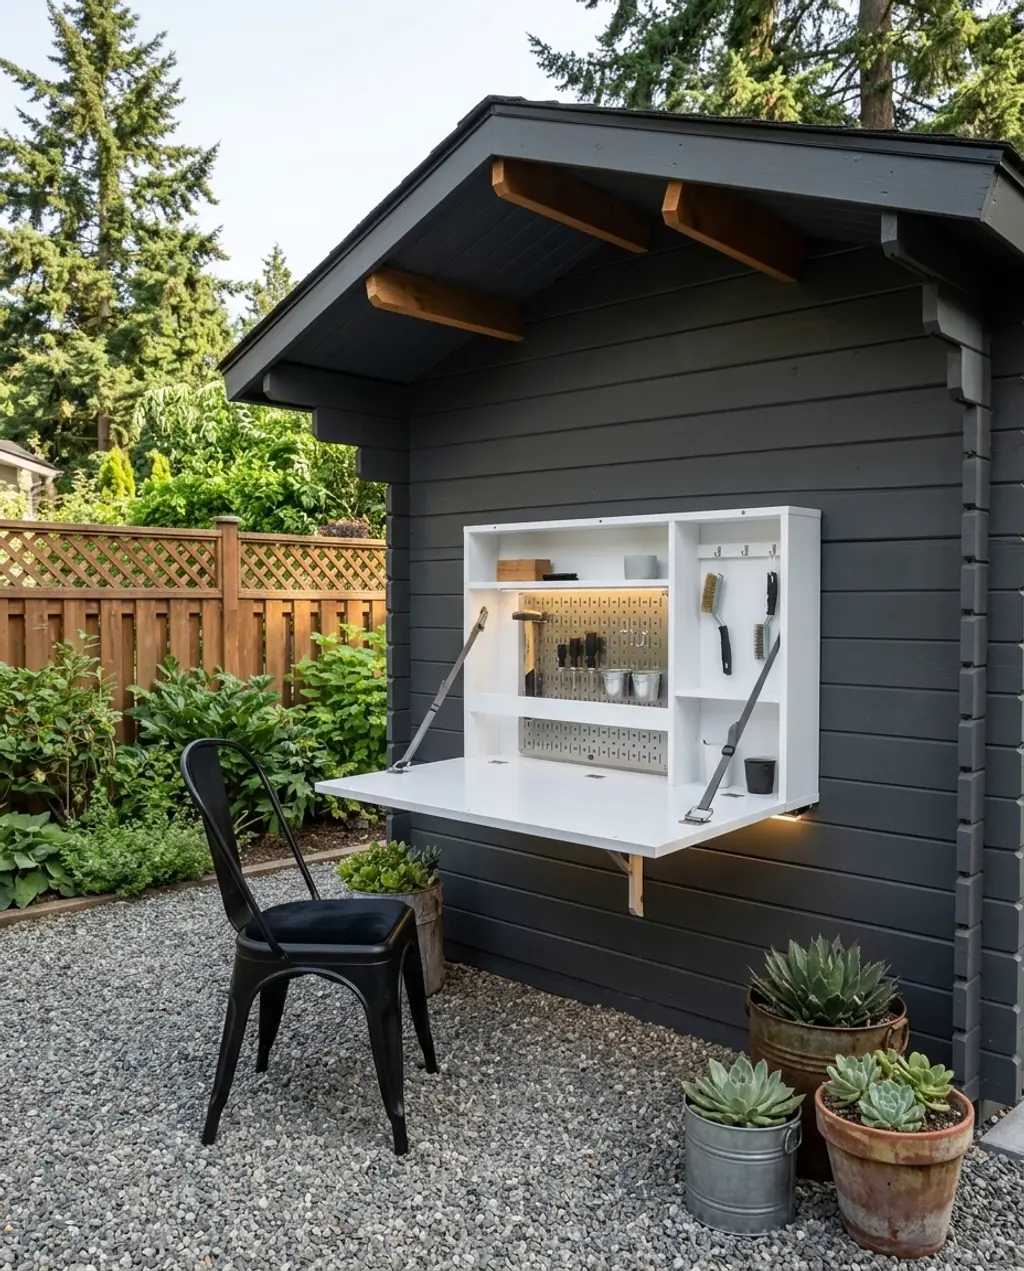
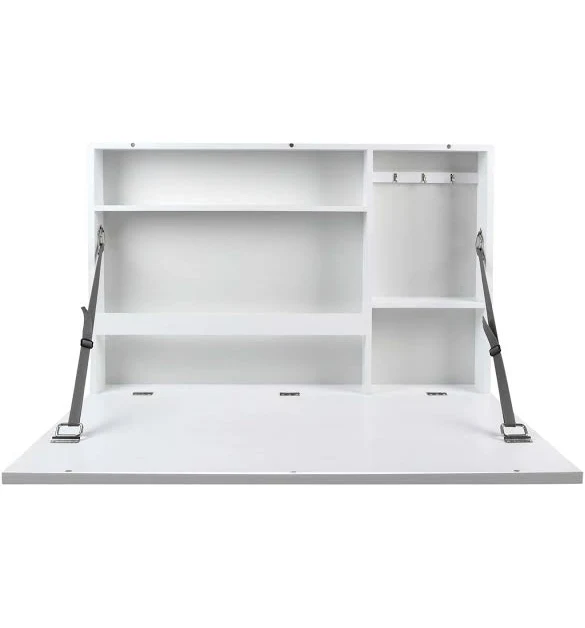
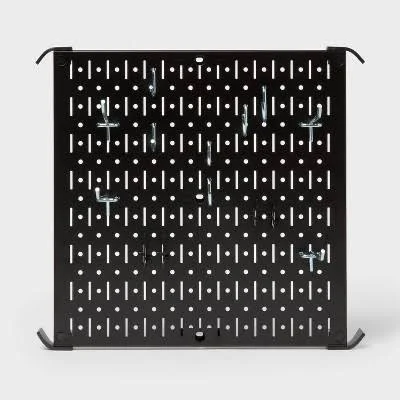
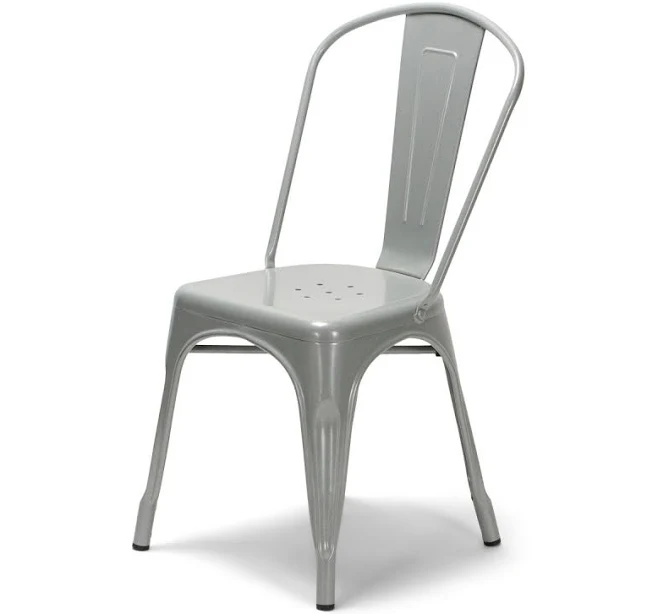
The shed office or ‘shoffice’ trend exploded during the work-from-home era and continues to be highly relevant in 2026. As hybrid work models become standard, people are looking for dedicated, distraction-free workspaces that aren’t inside the main house. Pinterest and Instagram are full of ‘she-shed’ and ‘man-cave’ office transformations, highlighting the desire for clearly defined work-life boundaries. This trend has strong staying power, evolving from a temporary fix to a permanent home feature.
The one thing that makes this outdoor workspace truly shine is the dedicated shed itself. It’s not just a desk on a patio; it’s a separate, defined zone that signals ‘work time’ or ‘creative time.’ This physical separation from the main house is crucial for focus and productivity, allowing you to mentally (and physically) clock in and out. Without the shed, it’s just working outdoors, which is nice but lacks the intentionality of a true studio.
|
Cottage-style garden shed Myrtle| 10×10 | 80 sq ft$6595 |
Prinz Murphy Desk$85 |
Brightroom 16″ Square Metal Pegboard$22 |
Titan Series Industrial Metal Chair$38.97 |
As an affiliate, we earn from qualifying purchases.
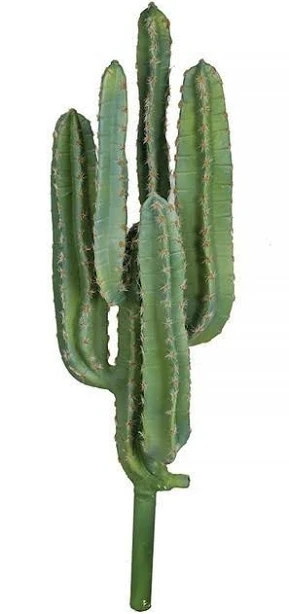
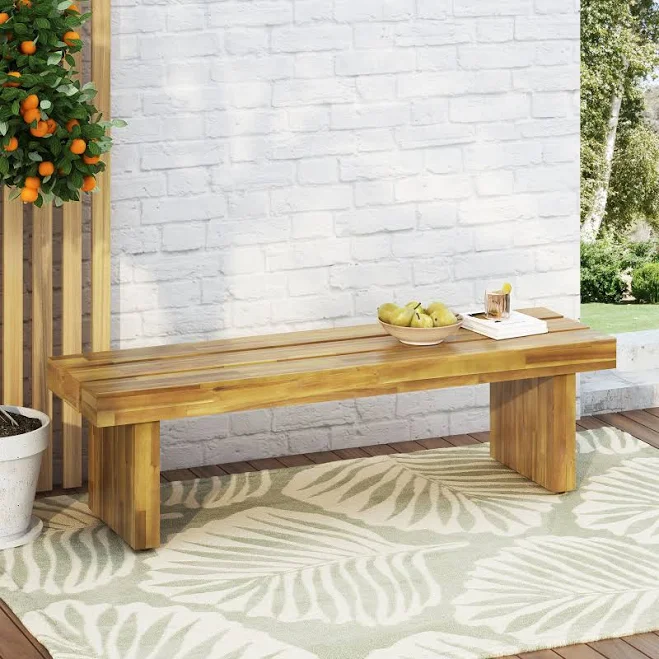
27. Waterwise Desert Landscape Oasis
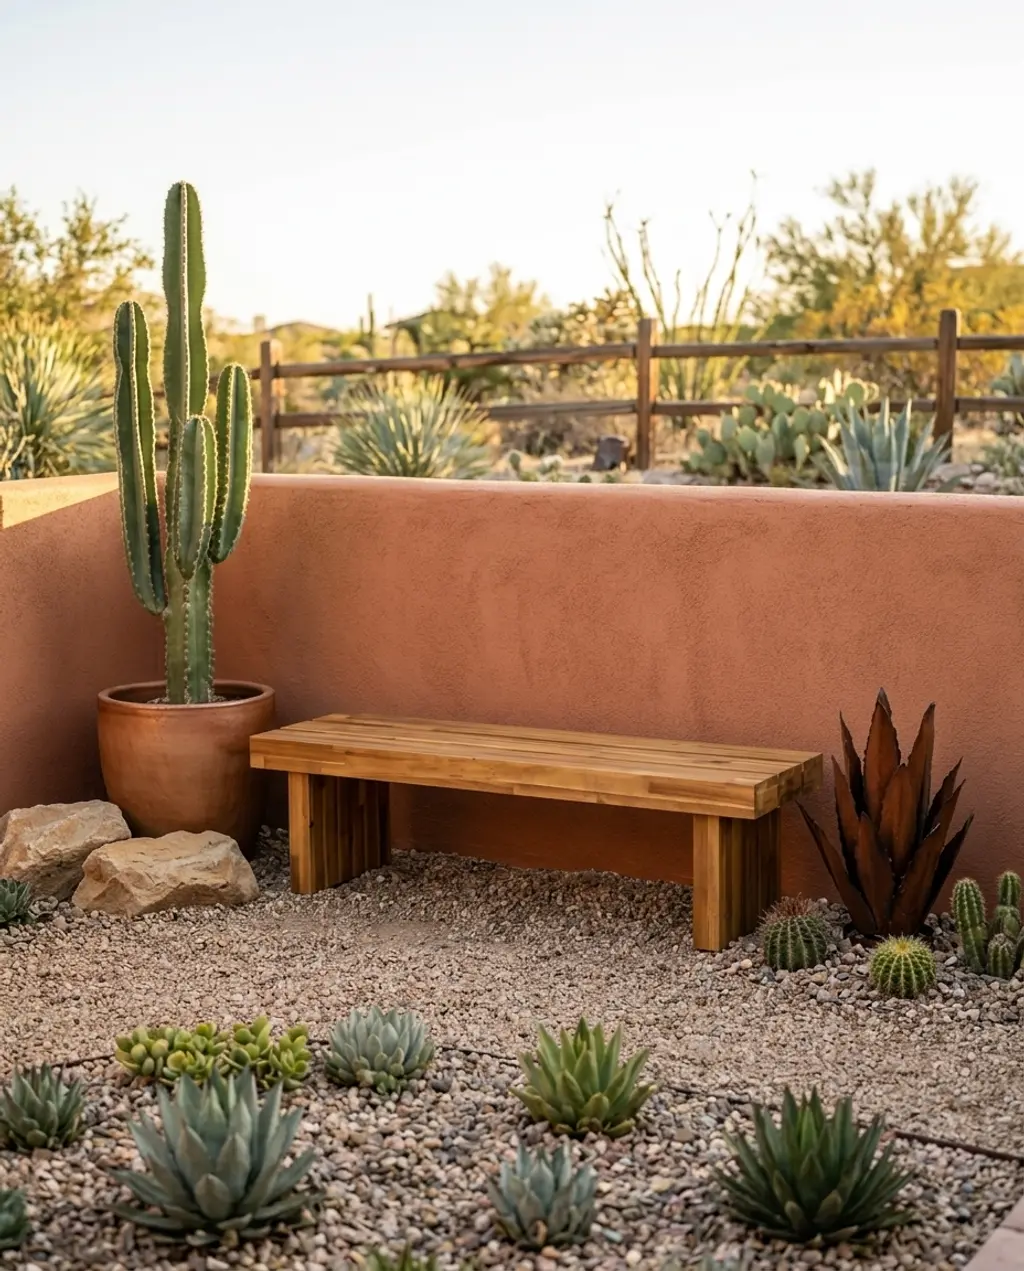
- Main elements (cacti, succulents, drought-tolerant plants): $50-$300
- Hardscaping (gravel beds, boulder accents): $100-$500
- Rusted metal art: $50-$200
- Simple bench: $50-$300
- TOTAL: $250-$1300
Budget alternative: Collect interesting rocks and stones from your own property or local landscaping companies (often sell by the pound much cheaper). Look for native succulents at local nurseries, often more affordable than specialty varieties. Instead of expensive metal art, repurpose old metal objects and let them naturally rust for an authentic look. You can find robust benches at Lowe’s or even Facebook Marketplace. Achieve this look for $100-$400 easily.
Maintenance reality for a waterwise desert landscape is generally low, but not zero. Cacti and succulents still need occasional watering, especially during establishment or prolonged dry spells, though much less than traditional gardens. Weeding is still necessary for gravel beds, as wind-blown seeds will inevitably land and sprout. Boulders and metal art might need light cleaning to remove dust or hard water spots. The good news: no mowing, very little pruning, and generally disease-resistant plants make this a more forgiving option in the long run.
|
Saguaro Cactus Plant$99.66 |
Sandstone Boulders$0.18 |
Rustic Metal Agave Sculpture: Arizona Desert Yard Art$53.6 |
Aoibox Nahanni Outdoor Rustic Slat Top Block Legs Bench$291.13 |


As an affiliate, we earn from qualifying purchases.
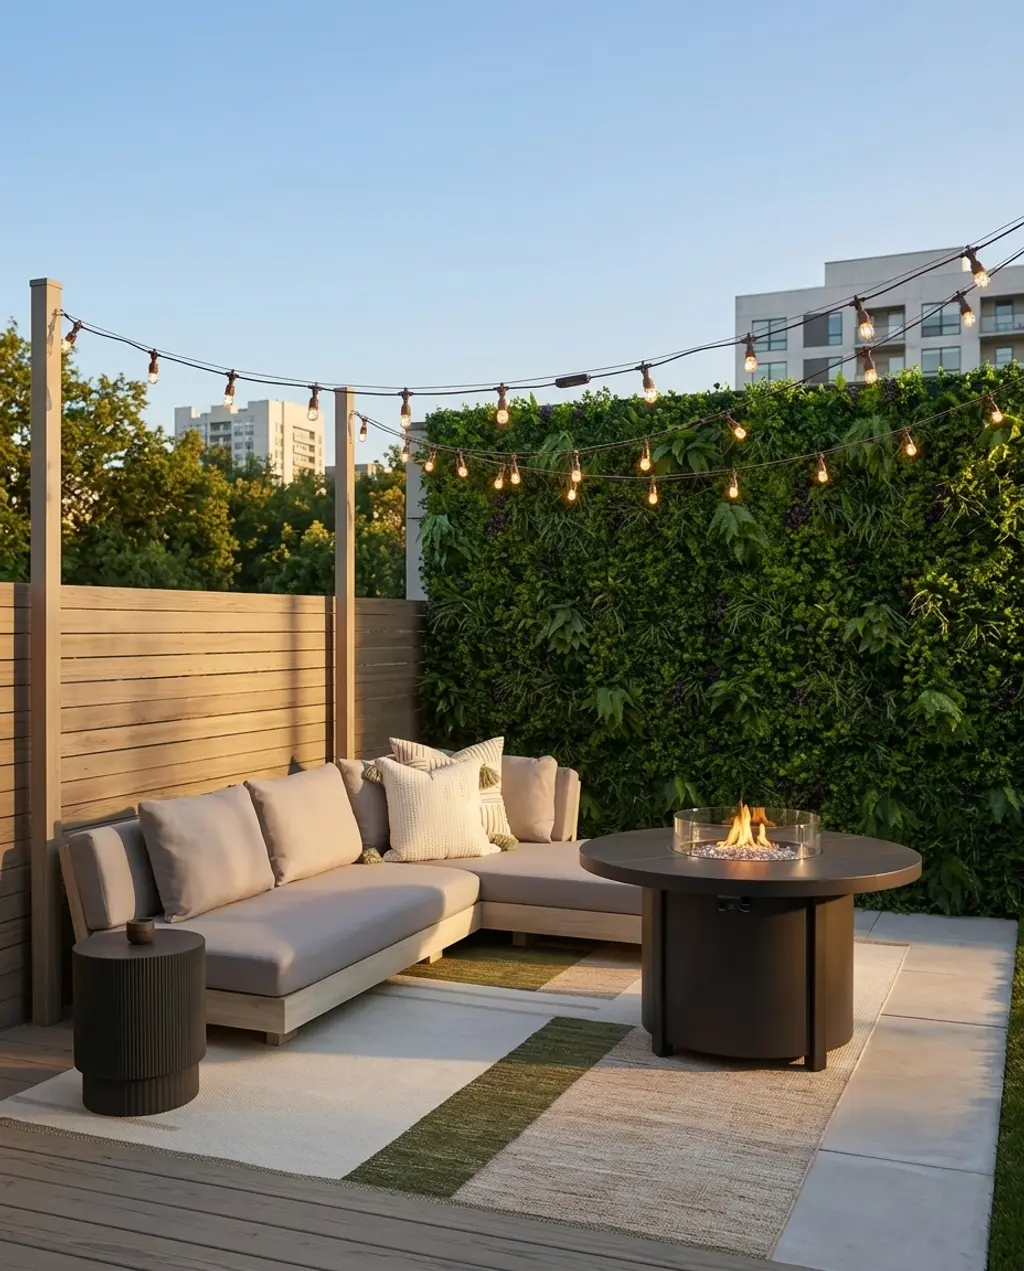
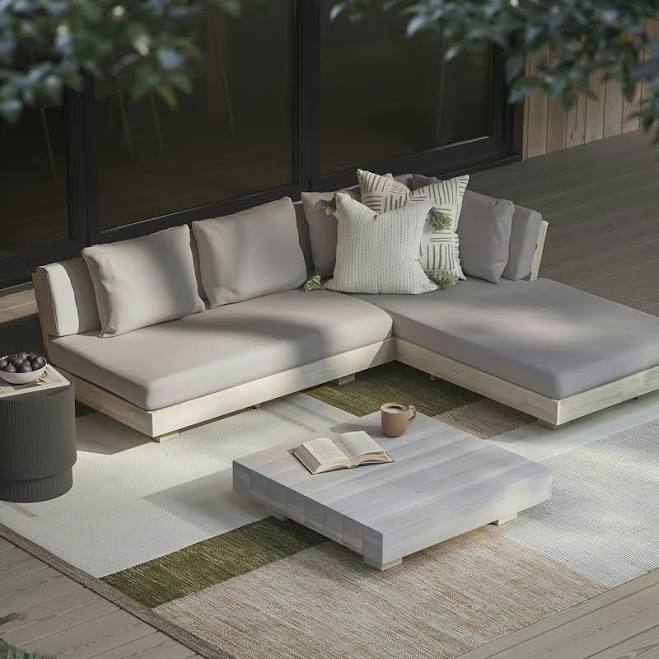
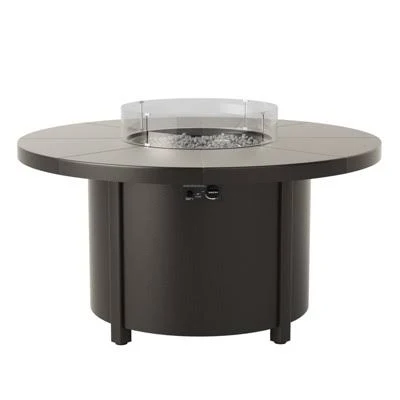
28. Modular Outdoor Living Room Space
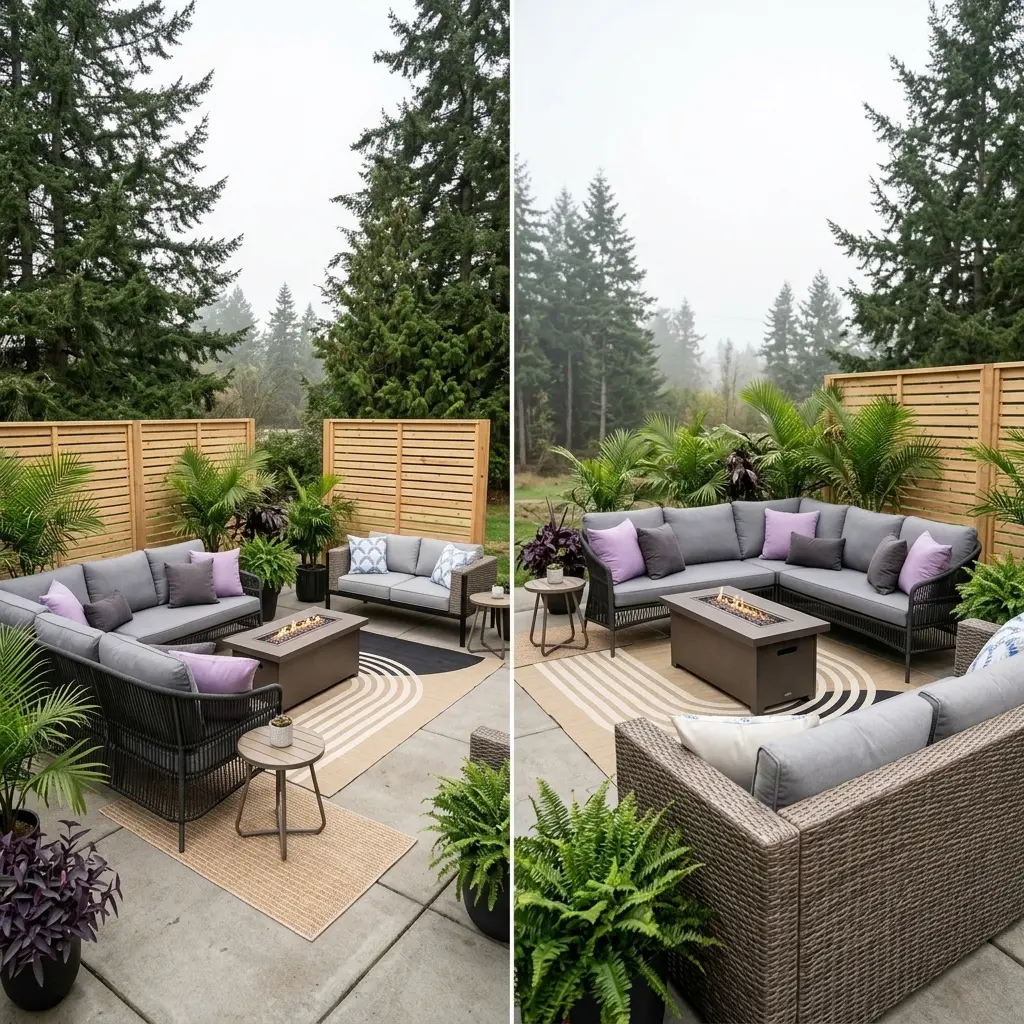
When designing a modular outdoor living room, think about flexibility. Choose pieces that can be easily reconfigured for different needs – for example, an ottoman that can be a footrest, extra seating, or a small coffee table. Use a large outdoor rug to anchor the space and define the ‘room.’ And always add a variety of throw pillows with different textures and patterns to make it feel truly inviting and not too monolithic. This is where Idea #28, with its focus on modularity, truly shines.
This modular outdoor living room works because it provides maximum flexibility in a small space, allowing you to adapt to different entertaining needs. The sectional sofa can be rearranged, and the use of an outdoor rug defines the outdoor ‘room,’ creating a sense of enclosure and coziness without walls. The fire pit table serves as a central gathering point, enhancing the lounge atmosphere and encouraging conversation. It smartly mimics an indoor living room experience, but under the sky.
Color Combinations That Work with a Neutral Base:
- Olive Green & Terracotta
- Deep Indigo & Cream
- Warm Rust & Sage
- Charcoal & Sunshine Yellow
- Soft Blush & Gray
|
Jardina L-Shaped Outdoor Sectional Set$998 |
Better Homes & Gardens Marlow Outdoor 2pc Patio Sectional Set$424 |
Campion Modern Geometric Indoor/Outdoor Area Rug$162.74 |
Modern Rainbow Easy Jute Area Rugs$51.99 |

As an affiliate, we earn from qualifying purchases.
29. Small Spaces Edible Wall Garden
✨ Luxury Version
Want to turn a plain wall into an edible garden? Here’s how to install pocket planters quickly:
- Choose your wall: Pick a sturdy wall that gets at least 6 hours of sun.
- Gather planters: Purchase hanging ‘pocket’ style vertical planters (like the Vertical Wall Hanging Planters from Walmart for $12.99).
- Mount: Use appropriate hardware (screws, wall anchors) to secure the top edge of each planter to the wall. Ensure they are level. (Time: 30 min per planter, Cost: $5-$10 hardware).
- Plant: Fill each pocket with good quality potting mix and your chosen herbs, strawberries, or leafy greens. Compact varieties work best. (Cost: $20-$50 for plants/soil).
- Irrigate: Consider a simple drip irrigation system to make watering easy and efficient, avoiding runoff. (Cost: $40-$80).
💸 Budget Version
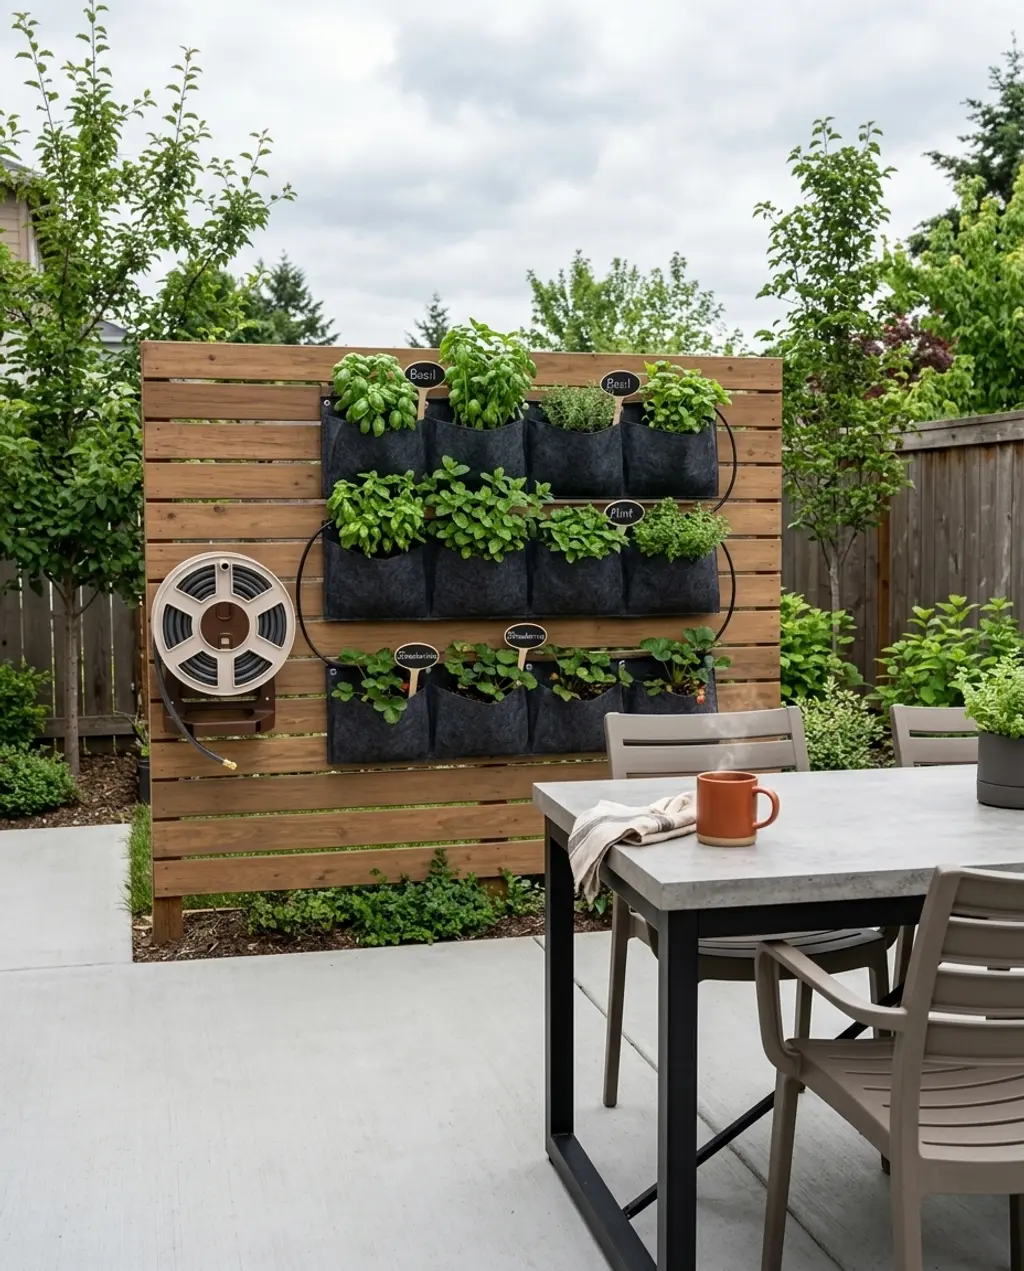
Total time: 1-2 hours for a few planters. Total material cost: $80-$150, excluding plants.
To create an edible wall garden on a tight budget, repurpose items you already have. Use old plastic bottles cut in half, painted tin cans, or even sturdy fabric bags as planters, hung with strong twine from a simple wooden pallet. Instead of a fancy drip irrigation system, use an old plastic jug with tiny holes poked in the bottom for slow watering. Look for seedling sales at local garden centers to get plants for cheap. You can genuinely start an edible wall for under $50 if you’re truly resourceful.
|
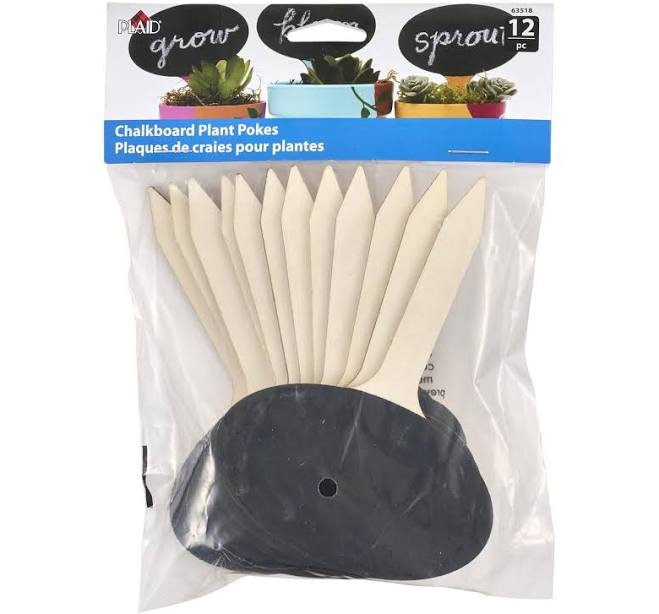
💰 Budget Pick Plaid Wood Surfaces Decorative Chalkboard Plant Pokes$6.22 |
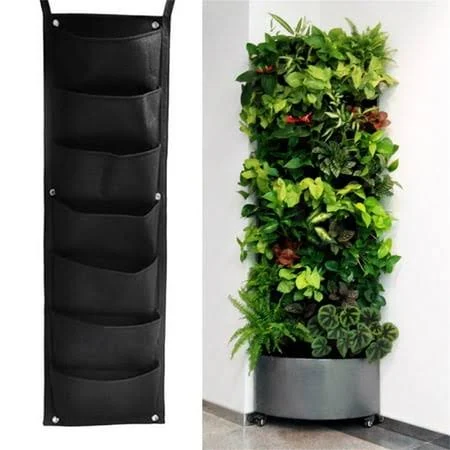
💰 Budget Pick Vertical Wall Hanging Planters$12.99 |
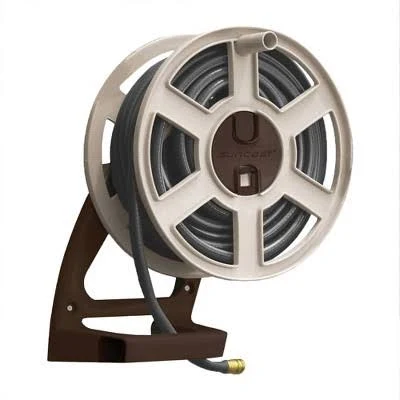
✨ Luxury Pick Suncast 100 ft. Sidewinder Wall Mount Hose Reel cplswa100$40.99 |
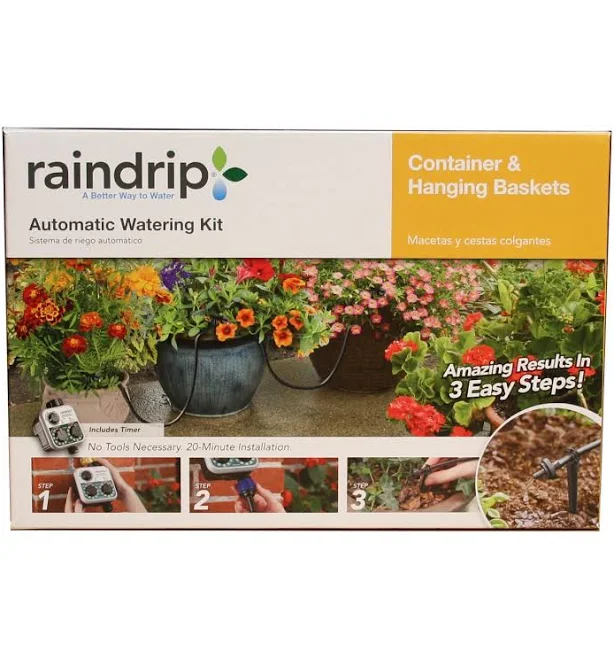
✨ Luxury Pick Raindrip R560DP Drip Irrigation Plant Watering Kit$41.99 |
As an affiliate, we earn from qualifying purchases.
30. Bohemian Backyard Wedding Reception
The bohemian backyard wedding reception works because it leans into relaxed elegance and embraces natural elements, making a small space feel incredibly intimate and special. The low tables and floor cushions encourage a communal, laid-back atmosphere, while the abundant use of string lights and layered rugs creates a magical, almost otherworldly glow. It’s all about creating a richly textured, inviting environment that feels both sophisticated and effortlessly cool.
Before you commit to a bohemian backyard wedding reception, run through this checklist:
- Guest count vs. space: Will everyone fit comfortably with low tables and cushions?
- Weather plan: What’s your backup for rain or unexpected wind?
- Comfort for all: Will older guests or those with mobility issues be comfortable on floor cushions?
- Lighting setup: Do you have enough power outlets for all those string lights?
- Rug protection: How will you protect rugs from dew, spills, or dirt?
31. Garden Shed with Outdoor Bar Window
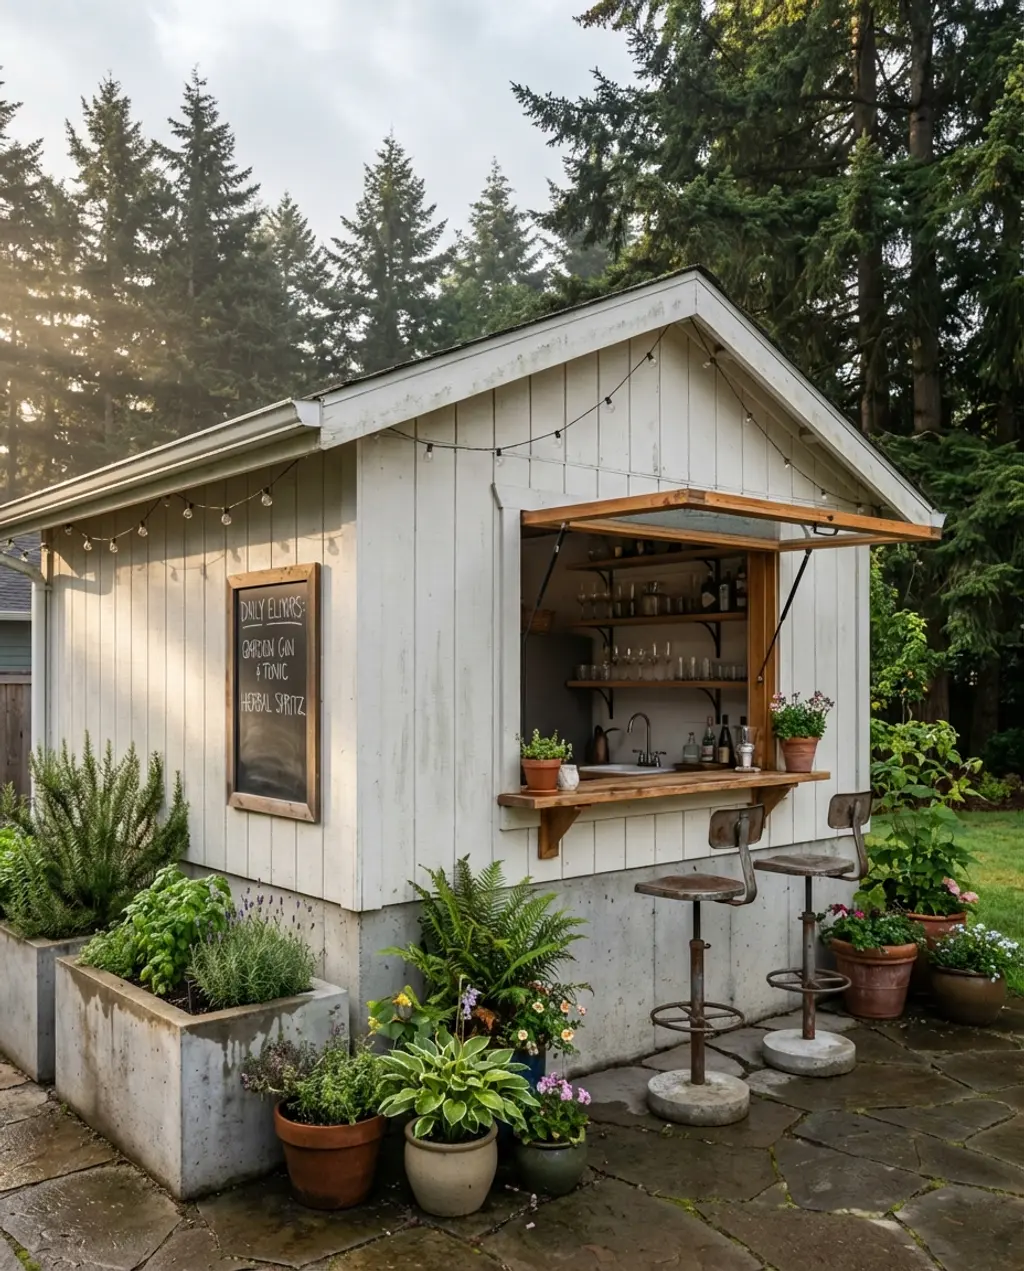
The secret to a successful garden shed with an outdoor bar window is about creating a seamless transition. Ensure the bar height inside the shed matches the bar height outside, allowing for easy serving. Use sturdy, weather-resistant materials for the fold-out bar itself. And critically, use lighting to highlight the bar area once dusk falls – string lights overhead or small task lights under the bar itself. This setup provides fantastic flexibility for entertaining; it’s perfect for small backyard wedding receptions.
This concept truly shines in a backyard that is at least 10×10 feet, giving enough room for the shed itself, the bar setup, and a small standing or seating area for guests. Anything smaller, and you risk the shed dominating the entire space or the bar feeling cramped. If your yard is very narrow, consider a garden shed with a *side* opening bar rather than a front-facing one, to better utilize the linear space.
- Quick comparison: Bar Cart vs. Bar Window
- Bar Cart: Portable, flexible, smaller footprint, good for occasional use.
- Bar Window: Permanent, integrated, larger serving area, ideal for frequent entertaining, requires shed construction.
32. Raised Planter Box Seating Area
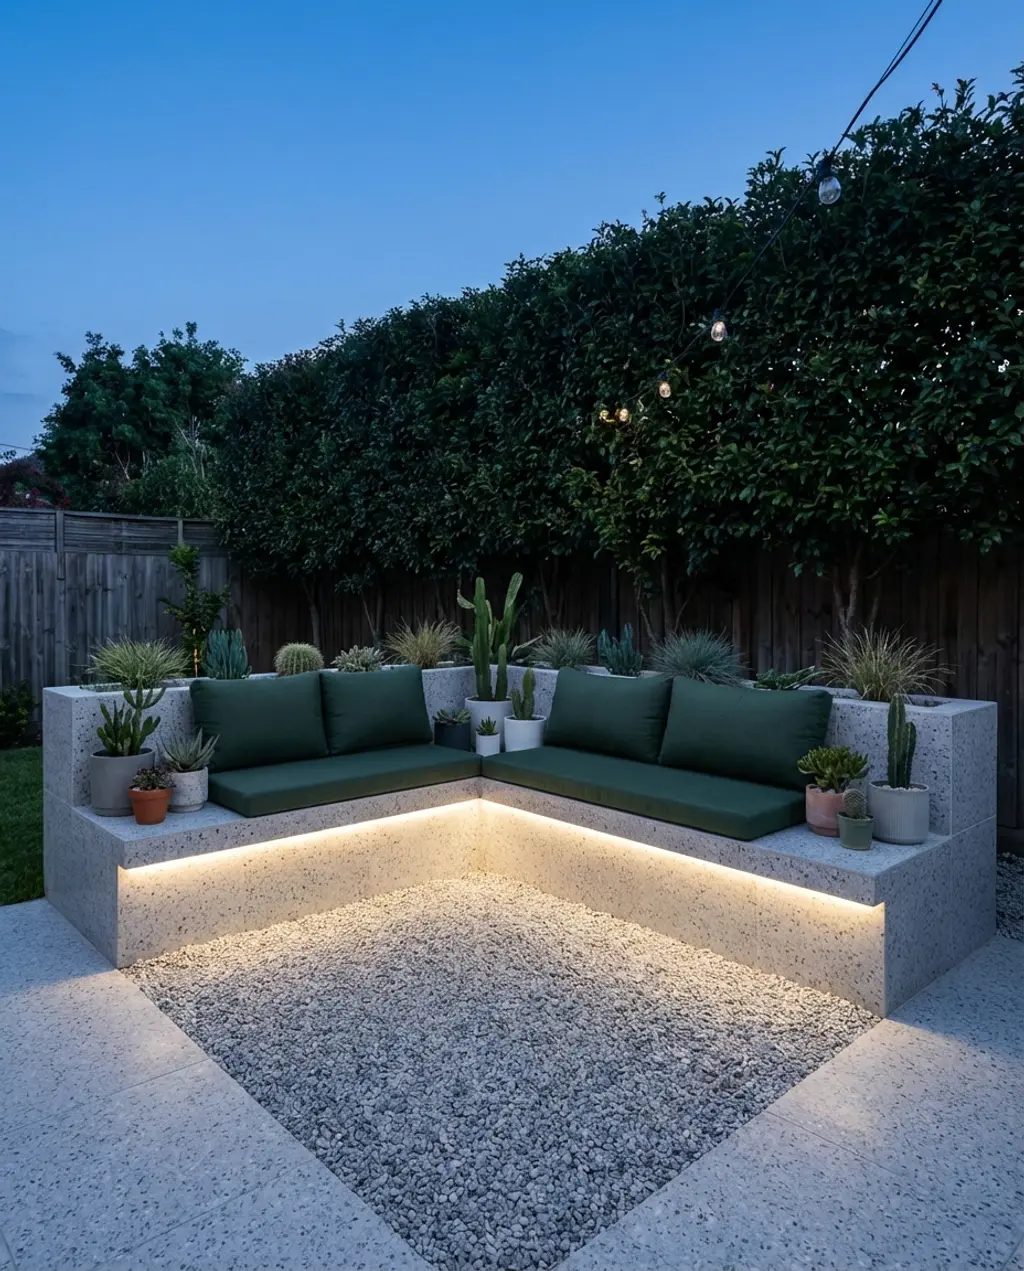
This raised planter box seating area works because it cleverly combines two functions into one, maximizing usefulness in a tight space. The planters provide natural greenery and a sense of enclosure, while the integrated bench seating offers comfortable spots for relaxation without needing extra furniture. It’s a smart design that creates a clear focal point and defines the outdoor living zone, giving a high-end, custom feel without complex construction.
While this idea looks low-maintenance, the reality for raised planter box seating is that those plants still need care. Expect to water regularly, especially if you have sun-loving succulents in hotter climates. The built-in bench, particularly if wood, will need annual cleaning and potentially sealing to maintain its appearance against weathering. Integrated lighting, while beautiful, may occasionally require bulb replacement or wiring checks. It’s not a set-it-and-forget-it, but it’s certainly more manageable than a full lawn!
33. DIY Pallet Furniture Lounge Spot
You can absolutely get a chic pallet furniture lounge spot for next to nothing. The key is sourcing free or cheap pallets (check local industrial parks, construction sites, or Facebook Marketplace). Instead of buying new cushions, hunt for robust outdoor fabrics at discount stores and DIY simple covers for foam mattress toppers or old pillows. Thrift stores are goldmines for unique outdoor rugs and throw pillows. Add some string lights from Walmart or Dollar Tree and a few potted plants from a nursery sale rack. For less than $75, you can create a surprisingly comfortable and stylish lounge.
Realistically, while DIY pallet furniture is incredibly trendy and eco-friendly, it’s not always the most comfortable or long-lasting. You’ll need substantial, thick cushions for decent seating, and those can sometimes cost more than the pallets themselves. Also, pallets need to be properly cleaned and sanded to avoid splinters and treated for outdoor use to prevent rot or insect infestations. They’re heavy and not easily rearranged, and can sometimes look a bit rough around the edges if not finished well. Choosing heat-treated (HT) pallets is important for safety, avoiding chemically treated (MB) ones.
🚫 Common Mistakes to Avoid
Now that you’ve seen what works — here’s what to watch out for. These mistakes are surprisingly common and can undermine even the best design intentions.
❌ Mistake #1: Overpowering a Small Space with Too Many Elements
A common pitfall in tiny backyards is the urge to cram in every feature you like. While a fire pit, a dining set, and a water feature all sound lovely, trying to fit them all into a small footprint makes the space feel cluttered and overwhelming. It loses any sense of a peaceful retreat and instead feels like a storage area for outdoor furniture.
The Fix: Choose one or two main functions for your tiny backyard and commit to them fully. Prioritize what’s most important to you – a cozy lounge, a dining nook, or a peaceful garden – and design around that.
❌ Mistake #2: Ignoring Vertical Space Potential
Many people focus solely on the ground level of their tiny backyard, missing out on valuable square footage straight up! Forgetting to look beyond the floor means you’re not maximizing your design potential for both aesthetics and functionality. This results in an underutilized space that feels flat and uninspired.
The Fix: Embrace vertical gardening, wall-mounted shelves, and tall, slender privacy screens or trees to draw the eye upwards and create depth and usable space.
❌ Mistake #3: Lack of Defined Zones
A tiny backyard that lacks clear zones can feel like a jumbled mess rather than a cohesive outdoor room. Without delineation, areas for dining, lounging, or gardening blend into each other, offering no real purpose or sense of comfortable immersion. This makes the space feel chaotic and less inviting.
The Fix: Use outdoor rugs, low privacy screens, changes in paving materials, or strategically placed planters to visually divide your space into functional and inviting zones.
❌ Mistake #4: Poor Lighting Choices
Often, tiny backyards suffer from either insufficient lighting (making it unusable after dark) or harsh, overhead floodlights (destroying any ambiance). The wrong lighting can make your carefully designed space feel unwelcoming or unsafe, effectively cutting short its usability once the sun sets.
The Fix: Layer your lighting with purpose: use string lights for ambient glow, path lights for safety, and small uplights to highlight features like plants or art, creating mood and functionality.
Final Thoughts
And there you have it—33 dazzling tiny backyard ideas to inspire your own outdoor transformation in 2026. From serene Zen gardens to vibrant entertainment hubs, your small space holds endless possibilities. Remember, thoughtful design is about maximizing joy, not just square footage. What are you waiting for?
Your perfect tiny backyard oasis is just a few well-placed plants and clever design choices away. So grab those Pinterest boards and get inspired to make your outdoor dreams a reality!