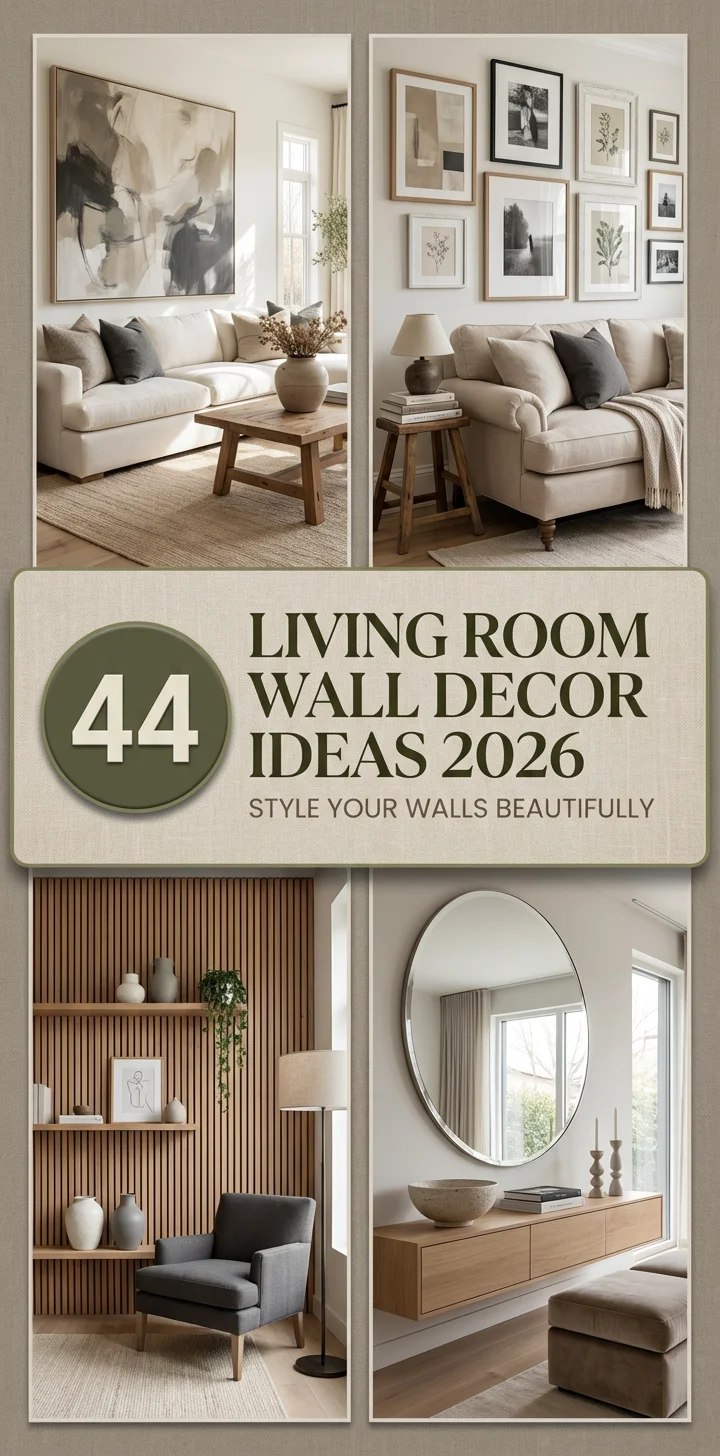
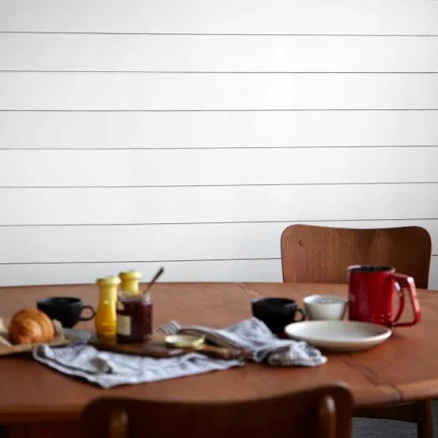
Still scrolling through Living Room Wall Decor Ideas 2026 photos without knowing where to start? We totally get it — the sheer volume of inspiration out there can feel overwhelming. After filtering through hundreds of options across west elm, Target, and Wayfair, we narrowed it down to 33 ideas that actually deliver.
From west elm’s latest drops to Walmart’s current bestsellers, we pulled the best Living Room Wall Decor Ideas 2026 options across every price point — from $4 to an eye-watering $4195. You’ll find 33 curated ideas, covering everything from contemporary to transitional, minimalist, and even bohemian vibes. And yep, every single idea is shoppable with direct product links so you can get the look instantly.
Living Room Wall Decor Ideas 2026 is having a major moment on Pinterest right now, as we all crave spaces that feel both personal and polished. This guide is designed to cut through the noise and give you exactly what you need. Pin this guide for later — your future self will thank you when it’s time to actually do this.
Heads up! This article contains affiliate links. If you buy something through one of our links, you won’t pay a penny more, but we may get a small commission, which helps keep our decor dreams alive!
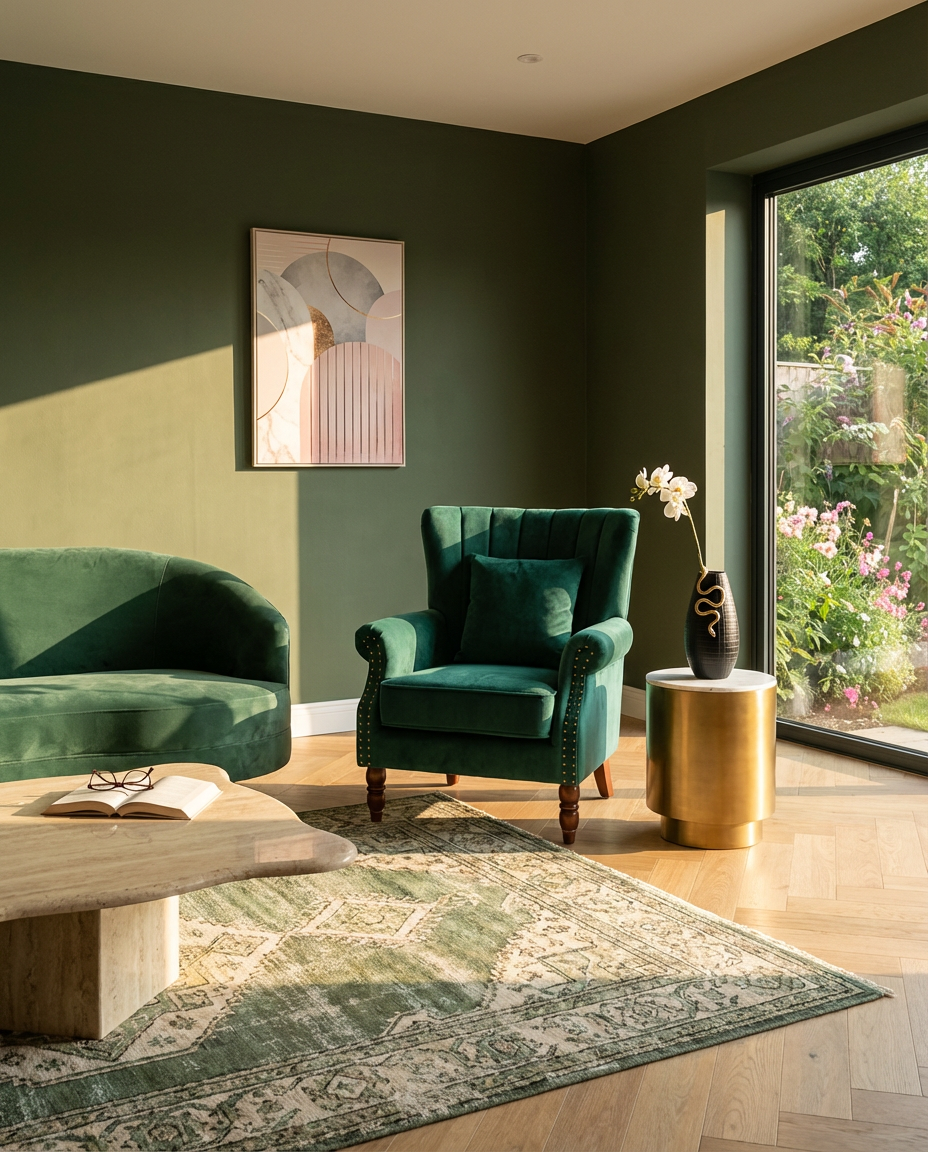
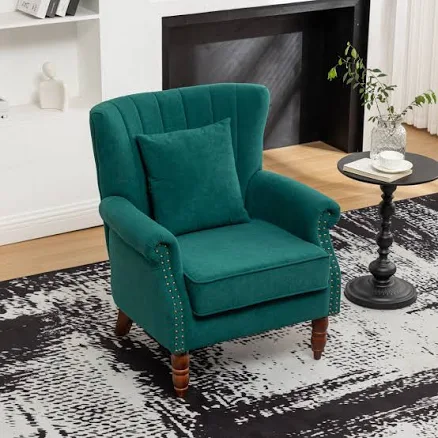
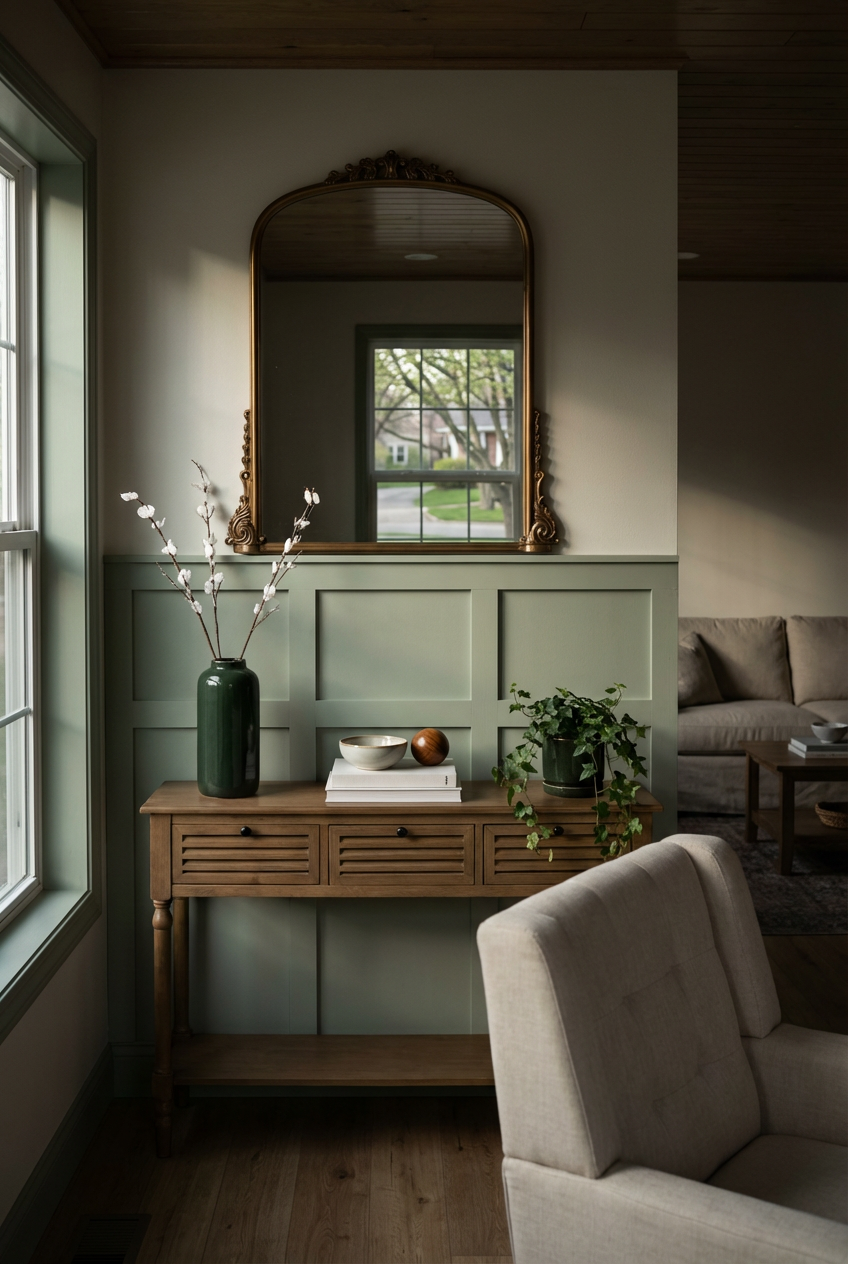
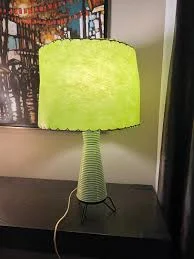
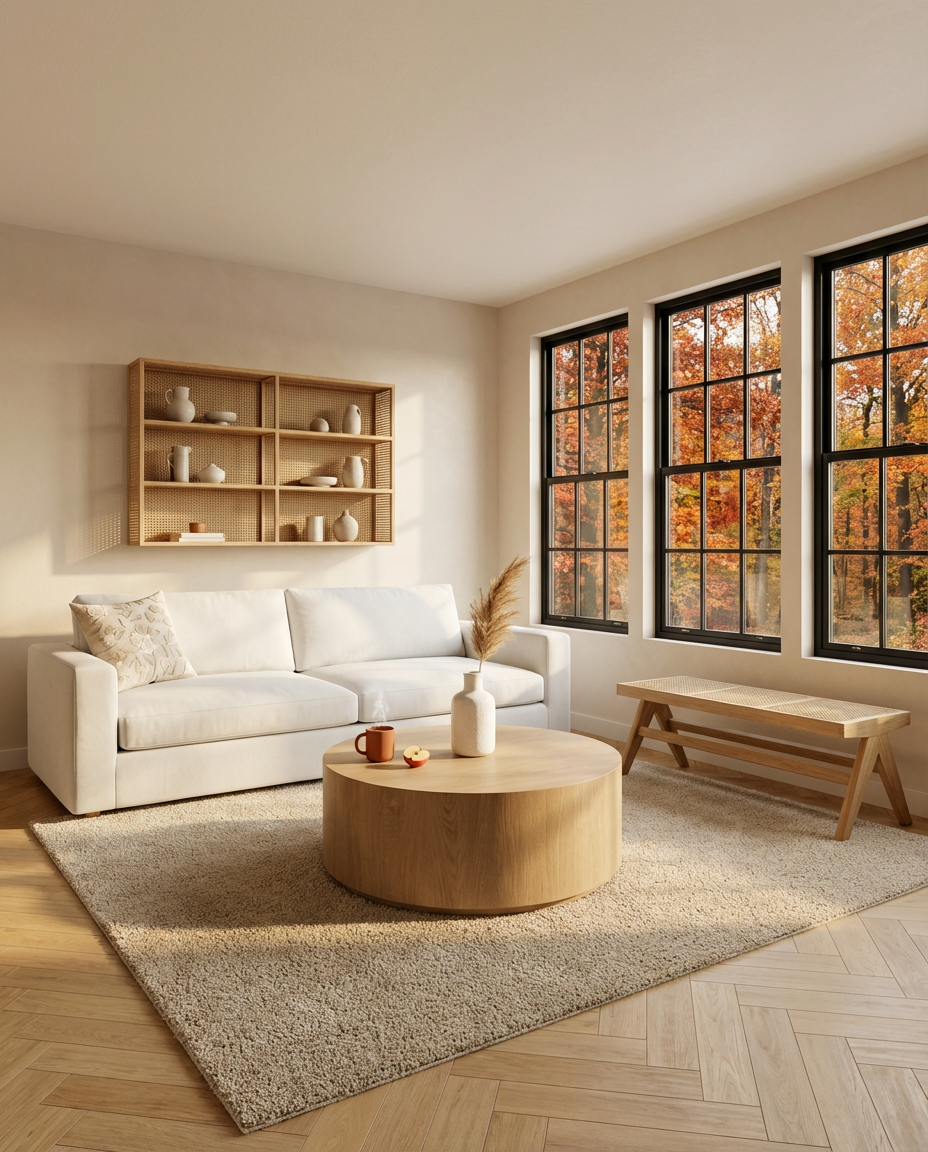
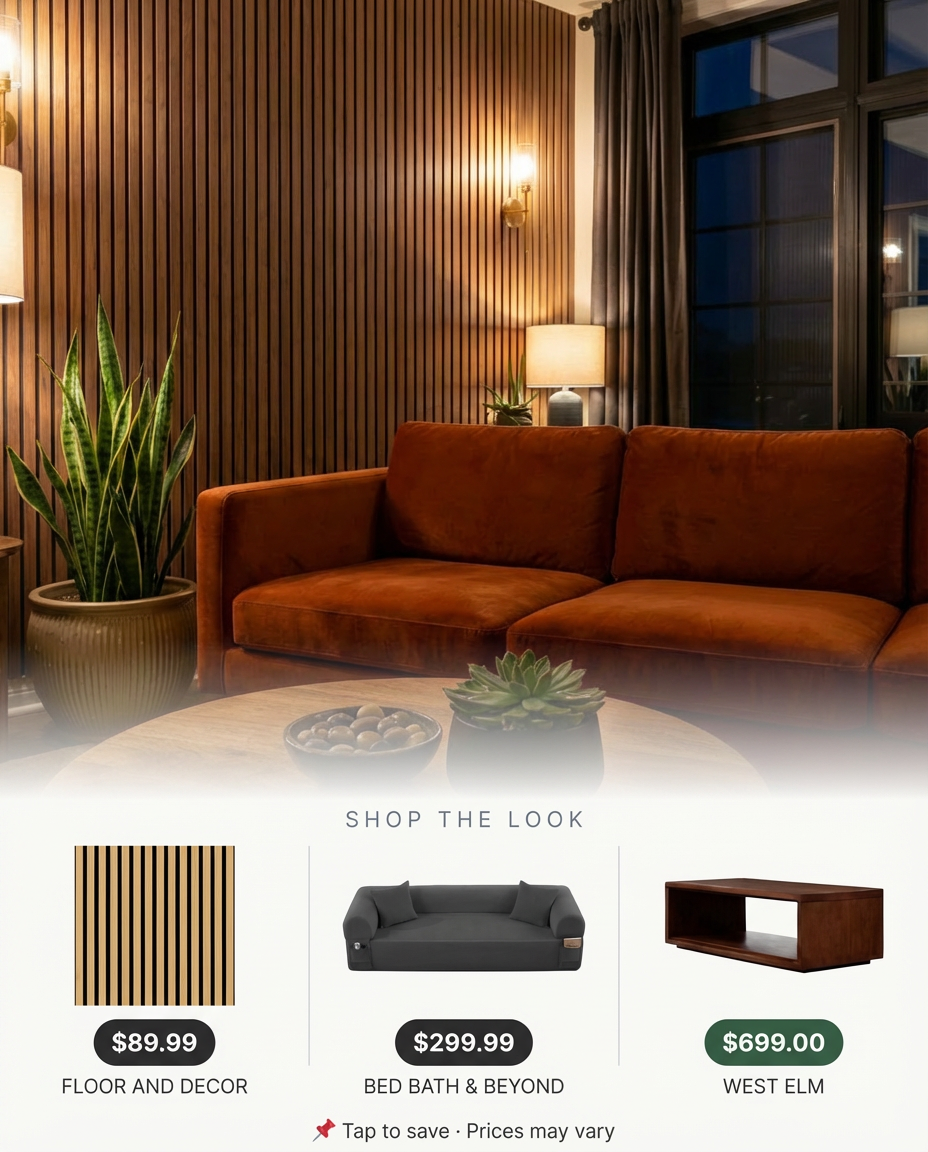
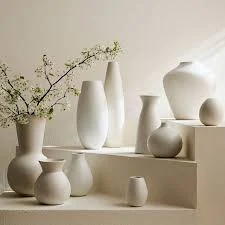
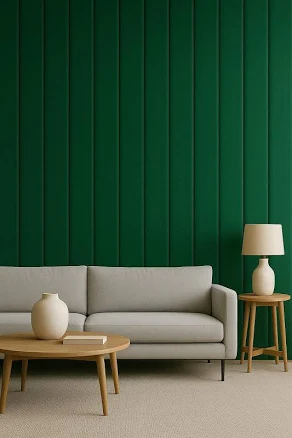
1. Biophilic Green Living Room with Textured Wall Panels
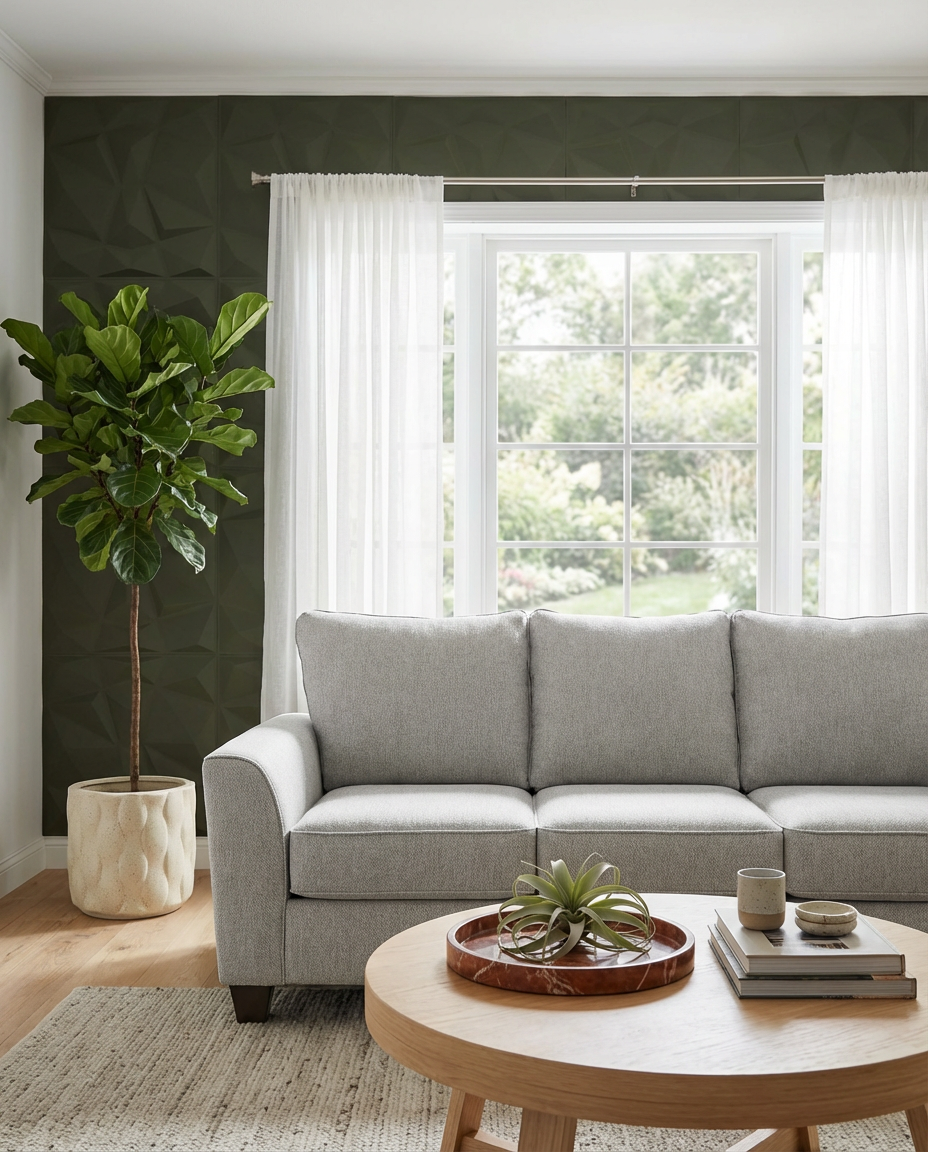
Biophilic design isn’t just a trend anymore; it’s a movement towards bringing the calm and serenity of nature indoors. In 2026, we’re seeing this evolve from just adding a few houseplants to fully integrating natural elements into our homes, especially through wall treatments. Textured green panels evoke a sense of living walls, without the high maintenance. It’s about creating a tranquil retreat from the digital world, connecting us with organic forms and soothing colors. Pinterest is brimming with examples of spaces that feel like a breath of fresh air, and this idea leans right into that desire for a more grounded, harmonious home.
Creating this natural haven can surprisingly fit various budgets. Here’s a breakdown:
- Main furniture (sofa, coffee table): $741 – $1,100
- Lighting (minimal, ambient): $50 – $150
- Textiles (throw, rug): $80 – $200
- Decor/accessories (plant pots, small accents): $50 – $150
- Paint/wall treatment (textured panels): $300 – $800
- TOTAL: $1,221 – $2,400
Budget alternative: Source pre-loved furniture from Facebook Marketplace, use faux plants, and DIY textured paint instead of panels for around $500 – $800.
|
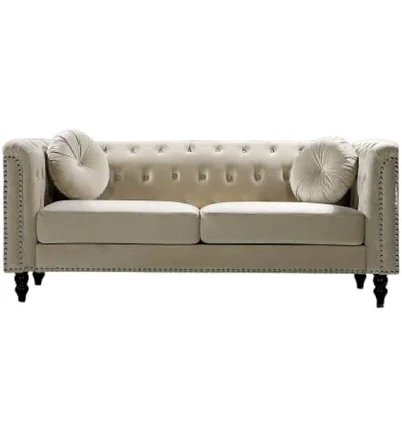
Dennin Heights Gray Sofa$555.00View on Rooms To Go |
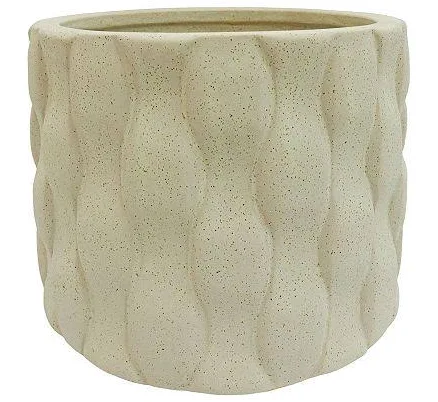
Sonoma Goods For Life Textured Ceramic Large Planter, Tan Med$23.99View on Kohl’s |
Plank+Beam Classic Round Coffee Table$186.33View on Bed Bath & Beyond |
Ekena Millwork 19 5/8″W x 19 5/8″H Niobe EnduraWall Decorative 3D Wall$20.98View on Home Depot |


As an affiliate, we earn from qualifying purchases.
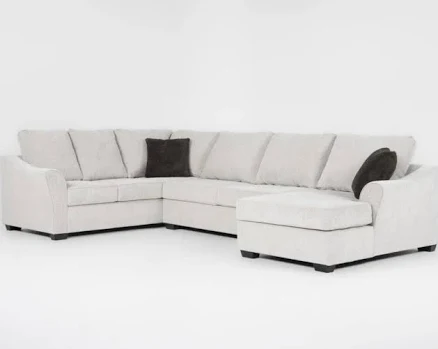
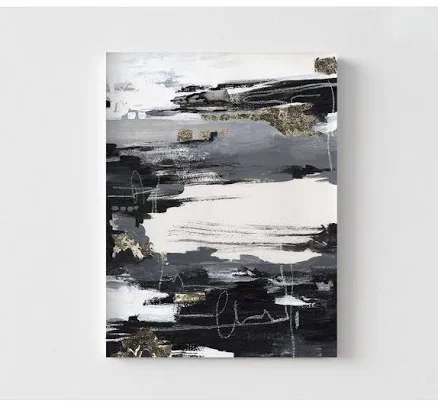
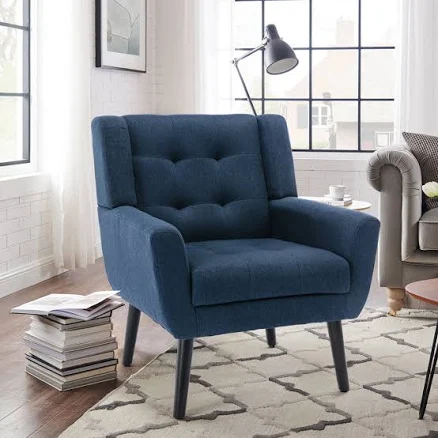
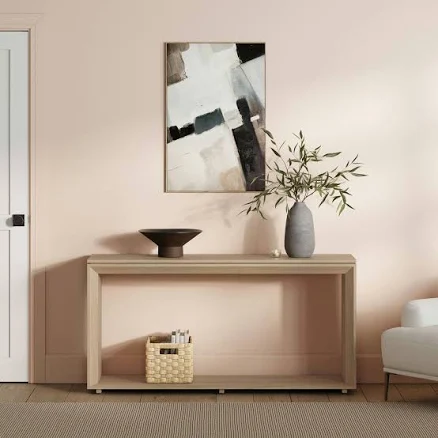
2. Bold Abstract Art Gallery Wall Above Couch
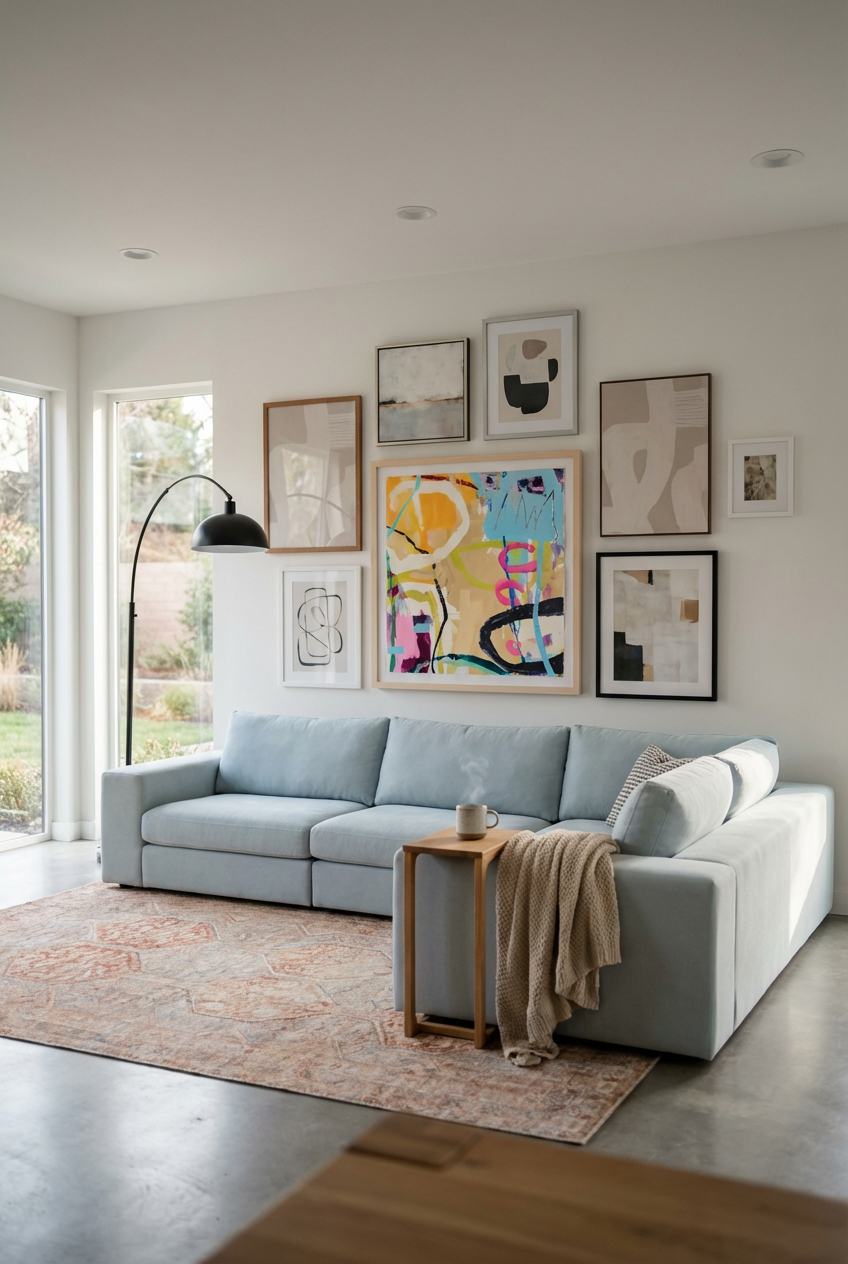
This look works because it leverages the ‘rule of odds’ for visual groupings and the power of a strong focal point. By using multiple pieces of abstract art, you create a dynamic, curated gallery wall that feels personal and expressive. The varied sizes and vibrant colors prevent the display from feeling static, drawing the eye across the entire arrangement above the couch. It’s also a fantastic way to introduce a burst of personality and a contemporary edge to an otherwise neutral space, making the sofa area feel more significant and intentional.
When planning a gallery wall like this, don’t just eyeball it. Lay all your art pieces out on the floor first. Arrange them until you have a composition you love, then use painter’s tape to mark the outside perimeter on your wall. Inside that perimeter, start hanging from the largest piece outwards, ensuring about 2-4 inches of space between frames. This ensures a cohesive, not cluttered, look. For maximum impact, consider a minimum of five pieces, with at least one oversized anchor piece.
|
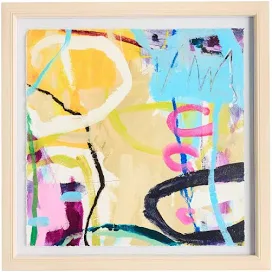
World Market Textural Abstract Framed Wall Art$139.99View on World Market |
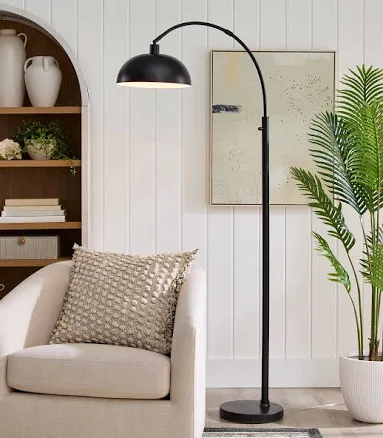
Better Homes & Gardens Dome Floor Lamp$75.12View on Walmart |
Chris Loves Julia x Loloi Jules Tangerine / Mist Rug$72.41View on Wayfair |
Article Beta Modern Furniture Modular L-Shaped Sectional Sofa$3,249.00View on Article |
As an affiliate, we earn from qualifying purchases.
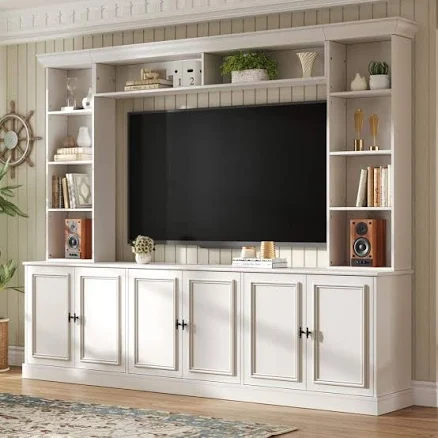
3. Integrated Wall Units for Minimalist Living
The single most impactful element here is the seamless integration of storage into the wall itself. Without these custom-built or carefully selected units, the minimalist ethos of the room would fall apart. They provide a place for everything, keeping surfaces clear and lines clean. This isn’t just about storage; it’s about making the storage disappear, creating an uncluttered backdrop that allows the architecture of the room to breathe. It’s the difference between a clean, calming space and one that feels like a constant battle against clutter.
Before you commit to integrated wall units, seriously consider what you actually need to store. While they look incredibly sleek, custom units can be pricey, and if you misjudge your storage requirements, you might end up with too much empty space (which defeats the cozy vibe) or not enough, forcing clutter onto other surfaces. Also, think about future flexibility. Moving or redecorating can be a huge headache with built-in pieces, so make sure this is a look you’re ready to live with for years. And don’t forget to factor in installation costs – this isn’t usually a DIY weekend project.
|
Room Essentials Chalk White Accent Table$42.00View on Target |
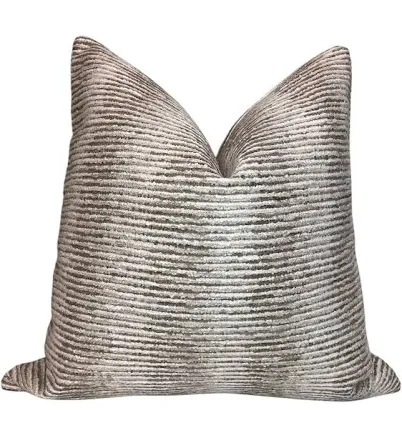
Textured Velvet Pillow Cover, Taupe and Ivory Striped Cushion, Modern $11.87View on Etsy |
Modern Large Wall Unit Entertainment Center$710.33View on Home Depot |
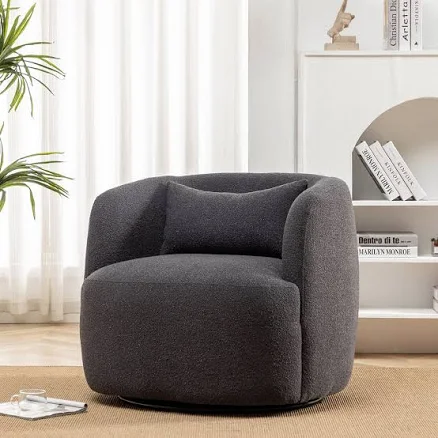
Kelly Clarkson Home Sydney Upholstered Swivel Armchair$369.99View on Wayfair |
As an affiliate, we earn from qualifying purchases.
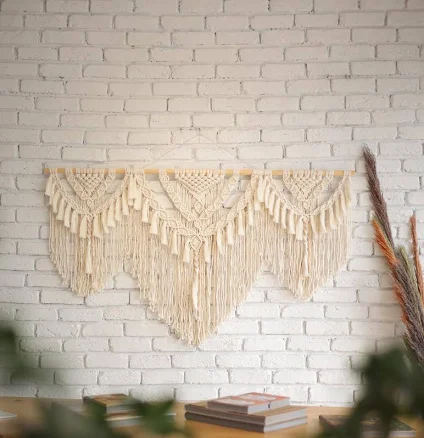
4. Textural Wall Hangings & Macrame Art
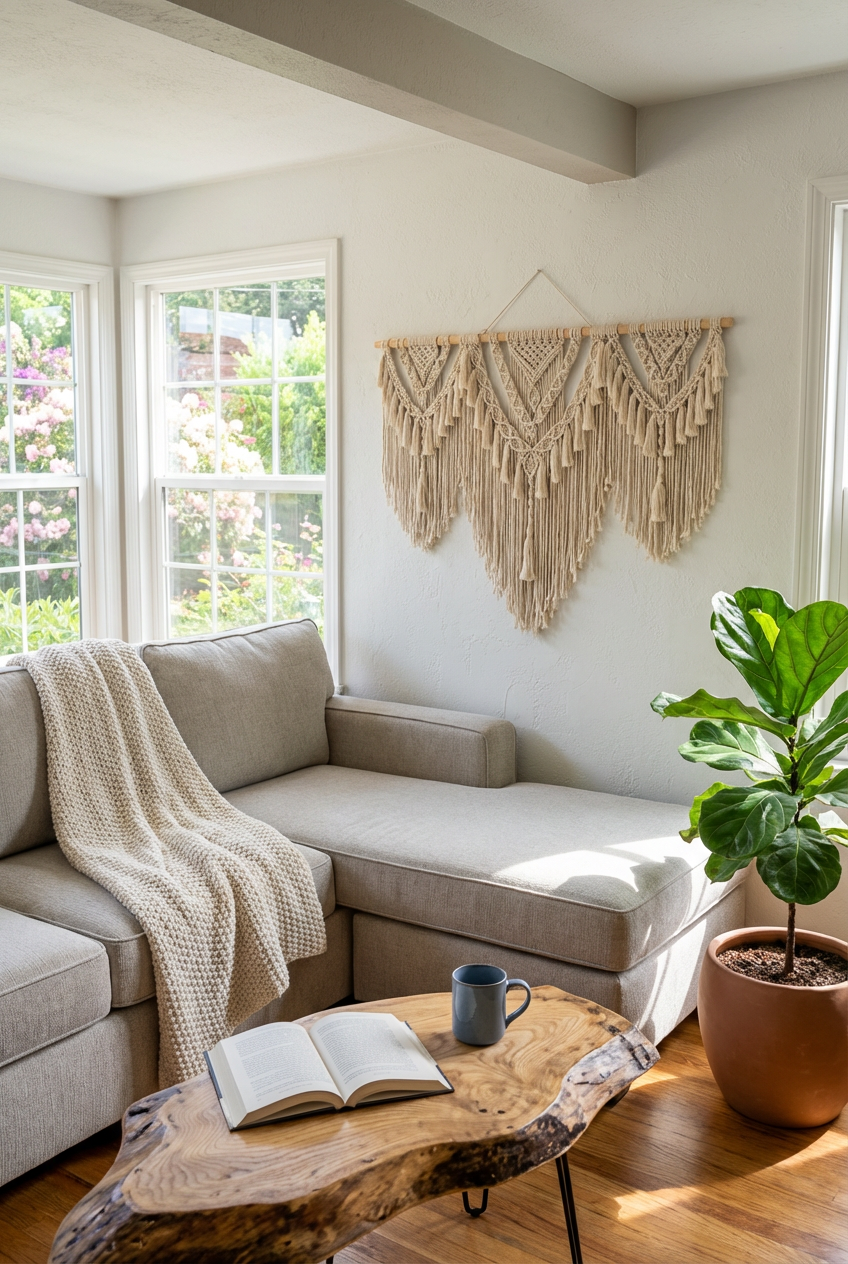
This organic, tactile look follows a simple ‘style math’: 70% natural fibers + 20% warm wood + 10% lush greenery. The dominant factor is the variety of natural textures – macrame, jute, woven elements – which create depth and visual interest without needing bright colors. The warm wood tones ground the space, while a touch of greenery adds life. You can totally swap the natural fiber type (think linen, cotton, wool) or wood finish (lighter oak, darker walnut) as long as you maintain the earthy, organic feel. It’s about building layers of soft, inviting textures.
While beautiful, these natural fiber wall hangings and macrame pieces aren’t zero maintenance. Jute and cotton can be dust magnets, especially in high-traffic areas or homes with pets. Expect to gently vacuum or dust them weekly with a soft brush attachment. They’re also susceptible to humidity and direct sunlight, which can cause fading or mildew over time if not properly managed. If you’re looking for a similar vibe with less hands-on care, consider framed textile prints under glass or large-format botanical art which offers durability.
|
Sectional Sofa – Hobson Linen 3 Piece Left Arm Facing Tux & Right Chai$995.00View on Living Spaces |
Extra Large Macrame Wall Hanging: Boho Chic Cotton Fiber Art$154.00View on Etsy |
The Home Depot Vigoro Phoebe Round Planter$54.97View on Home Depot |
Unique Live Edge Coffee Table, One Piece Oak and Ash Slab, Organic Sha$125.98View on Etsy |

As an affiliate, we earn from qualifying purchases.
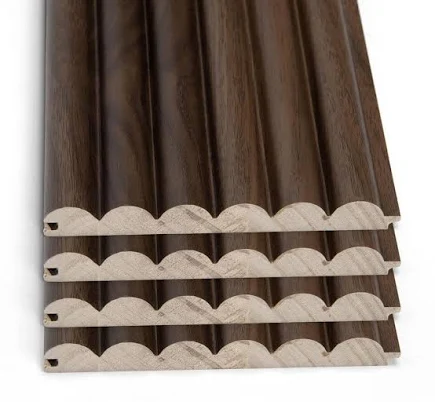
5. Modern Fluted Wall Paneling Accent
When incorporating fluted wall paneling, run it vertically from floor to ceiling for an instant illusion of higher ceilings. This simple trick draws the eye upwards, making any room feel more expansive and grand. The vertical lines add a subtle architectural detail that elevates the entire space without feeling overwhelming. For truly impactful results, extend the paneling across an entire accent wall rather than just a small section; it creates a more deliberate, sophisticated statement.
- Check your wall surface: Is it smooth and even, or will you need to prep it for the best panel adhesion and finish?
- Measure twice, cut once: Accurately measure your wall dimensions, accounting for outlets or switches that will need cut-outs.
- Consider the room’s light: Fluted panels react beautifully to light, creating shadows that add depth. How will natural and artificial light hit them throughout the day?
- Factor in door/window frames: Plan how the paneling will meet existing architectural elements to ensure a clean, seamless transition.
|
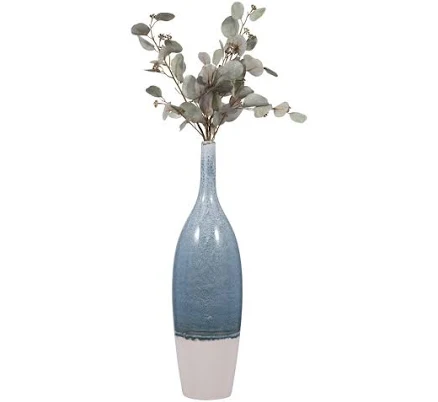
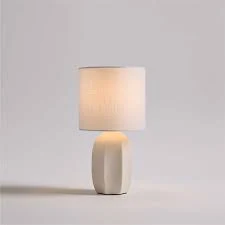
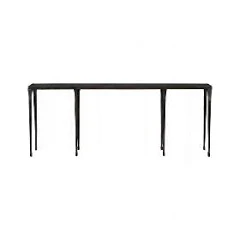
Rounded Fluted Walnut Decorative Slat Wall Paneling$109.99View on Home Depot |
Ivy Bronx 27″ Stoneware Vase$69.99View on Wayfair |
Crate & Barrel Amaryllis Mini Table Lamp$79.95View on crateandbarrel |
Crate & Barrel Silviano 84″ Rectangular Black Iron and Steel Console T$1,699.00View on crateandbarrel |
As an affiliate, we earn from qualifying purchases.
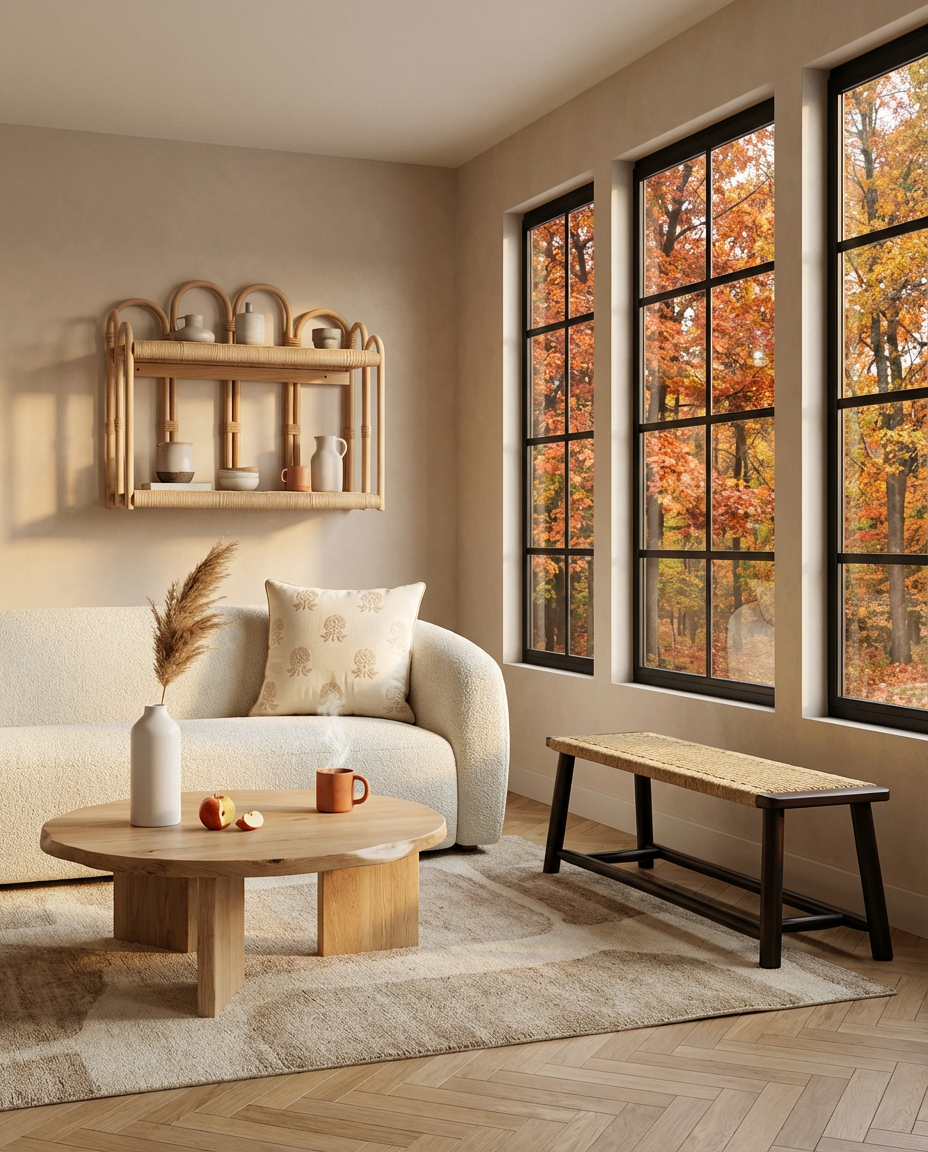
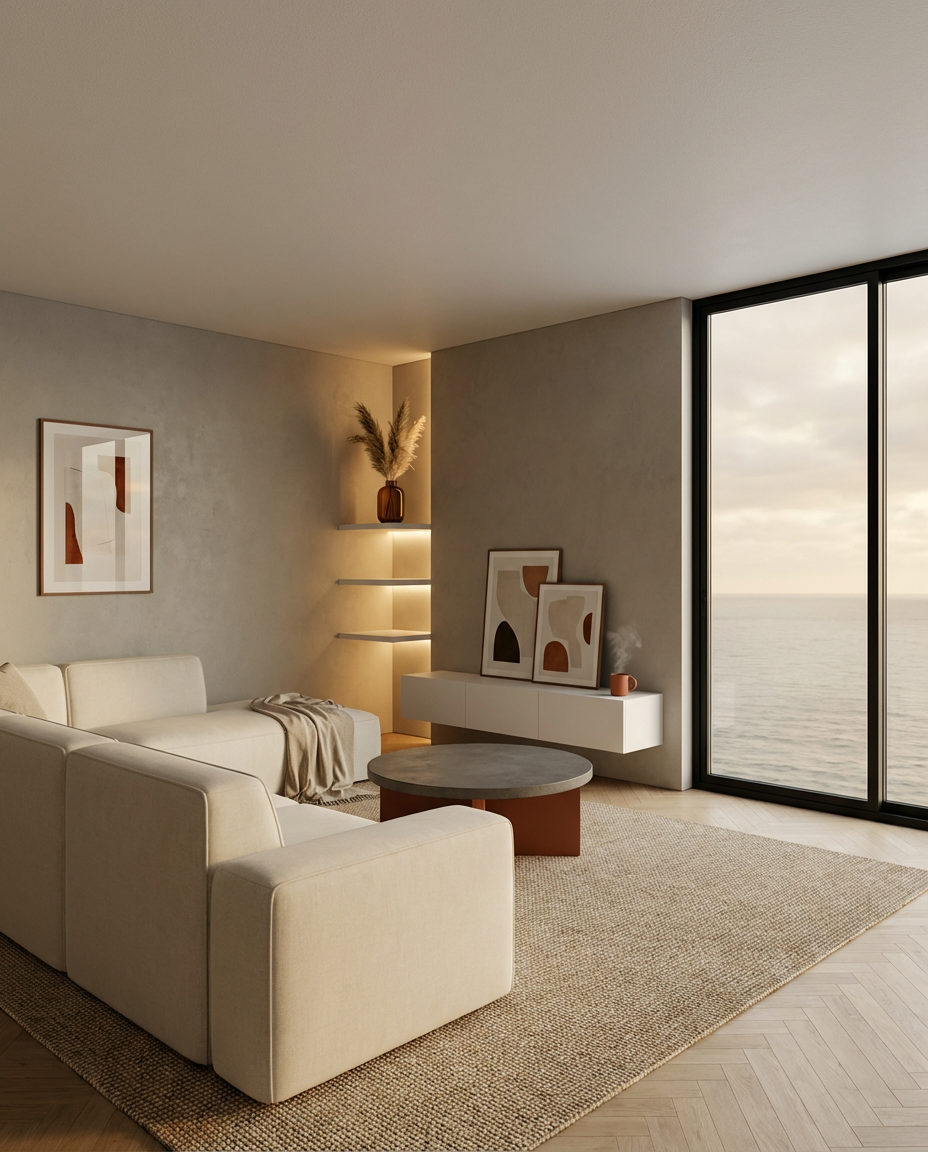
6. Curated Floating Shelves with Greenery
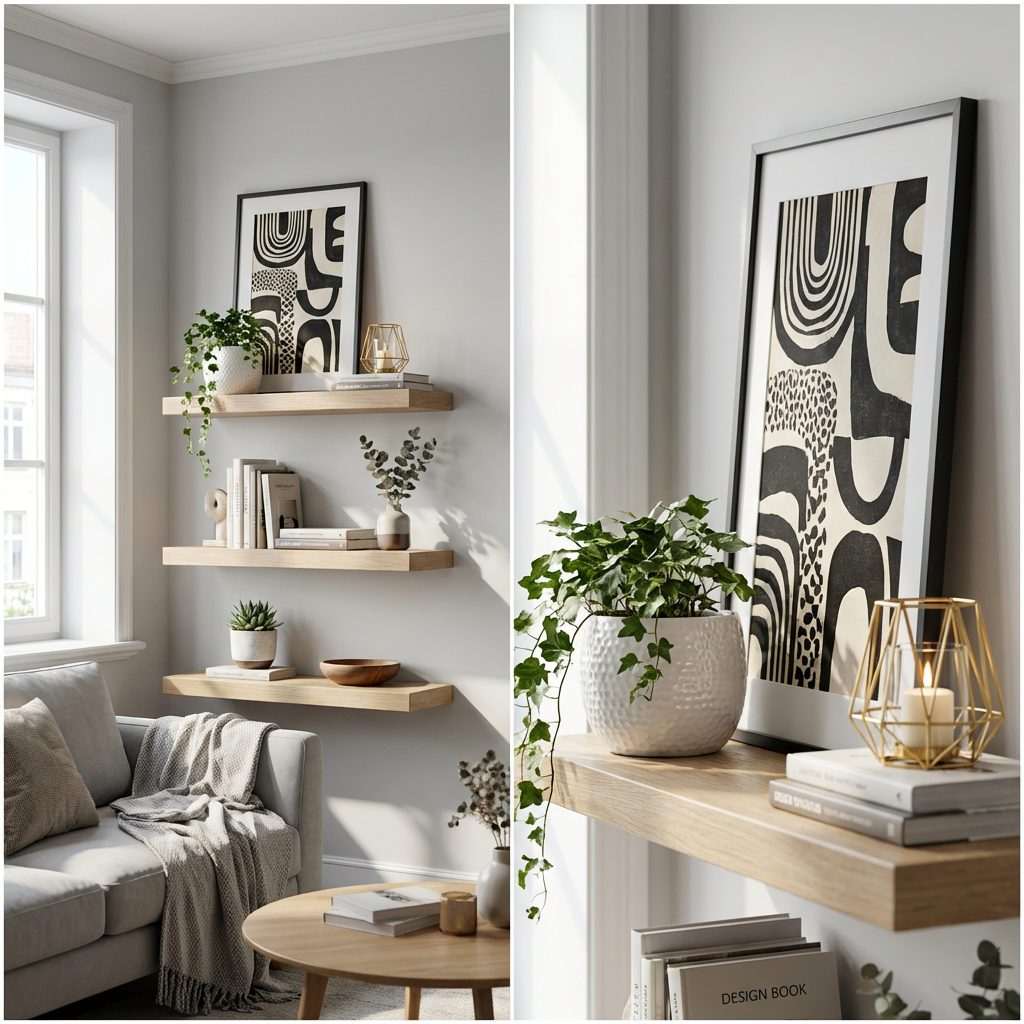
Floating shelves can easily become cluttered, but a curated display elevates them to art. Here’s how to style a chic, minimalist vignette:
- Start with a large anchor piece: A framed print like the one in Idea #16 or a substantial vase. (5 minutes, $40-100)
- Add height variation: Introduce smaller objects or books to create visual interest. (3 minutes, $10-50)
- Incorporate organic elements: A small trailing plant or a piece of driftwood brings life. (2 minutes, $15-30)
- Layer in smaller decor: A candle, a unique stone, or a tiny sculpture fills gaps without cluttering. (5 minutes, $5-20)
- Step back and edit: Remove anything that doesn’t add to the aesthetic. Less is often more. (1 minute, $0)
Total time: ~16 minutes. Total material cost: $70 – $200 (excluding shelves).
You absolutely don’t need designer shelves to achieve this look. IKEA’s LACK shelves are a classic, affordable option, or check out Target for decent quality floating shelves under $50. For the decor itself, hit up your local thrift store, Etsy, or even your backyard for unique finds. Spray paint an old vase for a fresh look, or grab some inexpensive succulents from Walmart. You can easily achieve this sophisticated shelf display for less than $100, including the shelves themselves.
|
Minted Colored Lines I Limited Edition Fine Wall Art Print$37.00View on Minted |
Geometric Brass Candle Votive: Art Deco Gold Tea Light Holder$18.00View on Etsy |
Ebern Designs Wall-Mounted Floating Shelves Set of 3$43.99View on Wayfair |
Vigoro Ellory Ceramic Pot$14.97View on Home Depot |

As an affiliate, we earn from qualifying purchases.
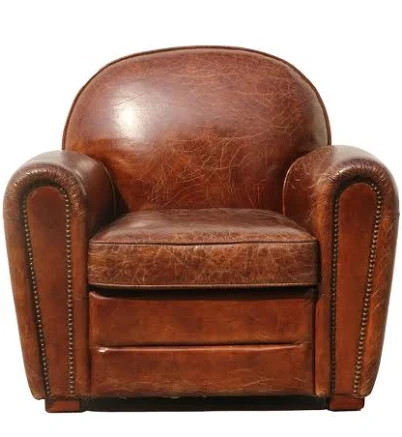
7. Velvet Art Deco Wall Painting Accents
✨ Luxury Version
💸 Budget Version
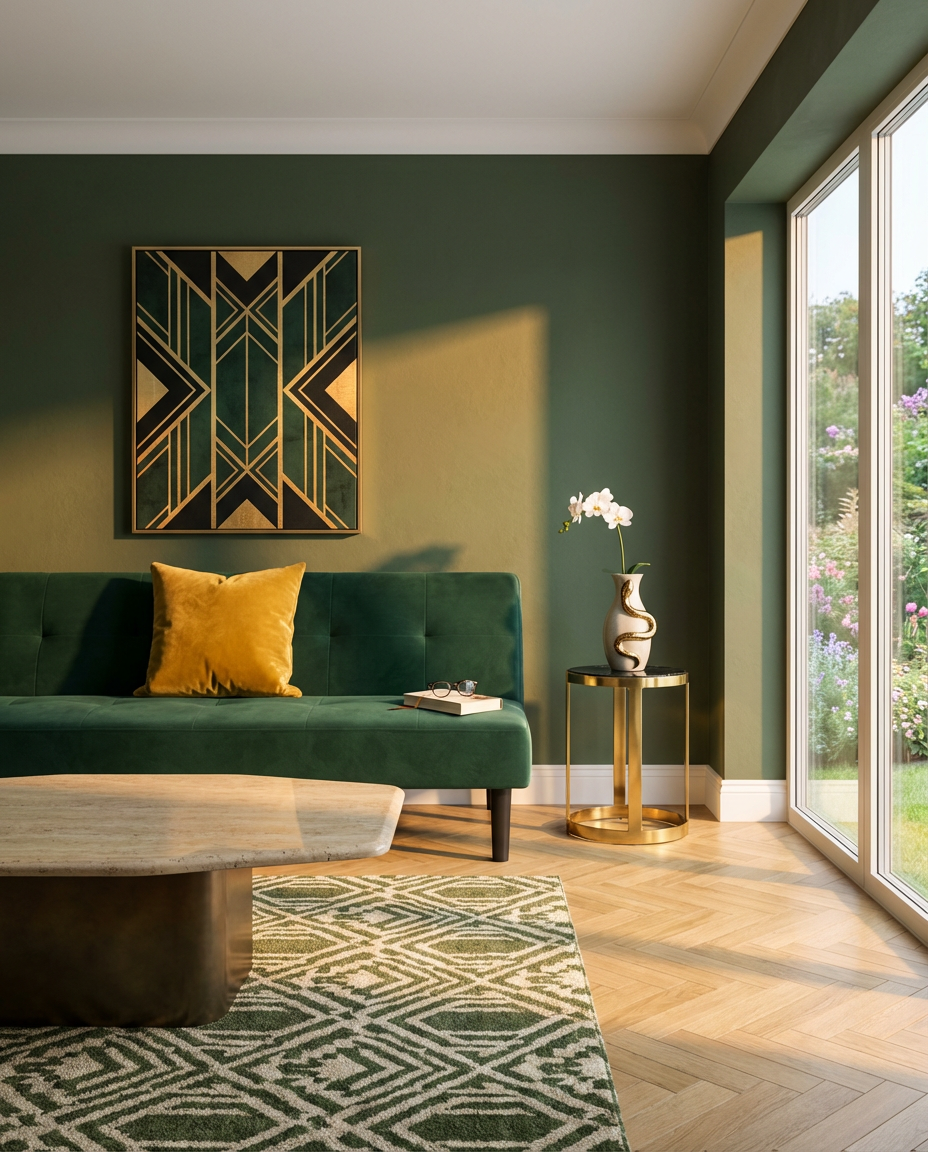
What makes this work so well is the intentional use of a bold, yet sophisticated, geometric pattern paired with rich Art Deco glamor. The velvet upholstery and gold accents of the furniture play off the sharp lines of the wall accents, creating a harmonious contrast. It’s a masterful blend of old-school opulence with modern artistic expression. The specific pattern choice introduces movement and energy, making the wall a dynamic focal point without being overwhelming, thanks to the controlled color palette.
The single element that truly defines this space and amplifies its Art Deco personality isn’t the furniture, but the geometric wall painting accents. Without these striking, graphic elements, the room would lose its distinctive edge and revert to a more generic glamorous look. They serve as the architectural backbone of the space, dictating the visual rhythm and drawing the eye to a perfectly executed period aesthetic. It’s the central design decision that makes everything else fall into place.
|
💰 Budget Pick Graham & Brown Art Deco Geo Canvas Wall Art$38.78View on Home Depot |
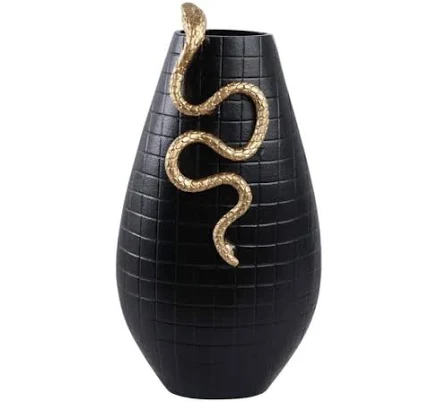
💰 Budget Pick Sagebrook Home Curved Snake On Vase$67.99View on Home Depot |
✨ Luxury Pick Antwanae 29″ Wide Armchair with Wingback Lark Manor Fabric$209.99View on Wayfair |
✨ Luxury Pick Meridian Furniture Presley End Table 209-E$307.18View on Walmart |
As an affiliate, we earn from qualifying purchases.
8. Serene Green Ombre Wall Decor
An ombre wall brings so much serenity and a unique touch, and the cost can be quite manageable:
- Main furniture (sofa, coffee table): $1,550 – $2,000
- Lighting (subtle floor lamp): $50 – $150
- Textiles (rug, throws): $150 – $300
- Decor/accessories (minimal): $20 – $70
- Paint/wall treatment (ombre mural): $300 – $800
- TOTAL: $2,070 – $3,320
Budget alternative: DIY the ombre effect with standard paint colors and a large brush for around $100-$200 in paint, saving hundreds on specialized murals. This could bring the total down to $1,000 – $1,500.
This serene ombre effect truly shines in rooms with at least 150 square feet and ceiling heights of 8 feet or more. The graduated color needs vertical space to breathe and display its full transition. In smaller rooms, the effect can feel truncated and less impactful. If your living room is cozier, consider a subtle ombre on just the top third of the wall, or opt for a single, calming shade of dark green like in Idea #13 to still create depth without needing extensive vertical flow.
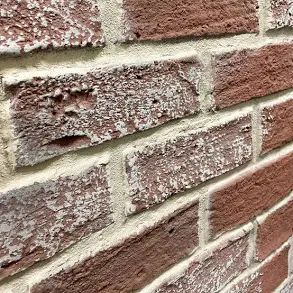
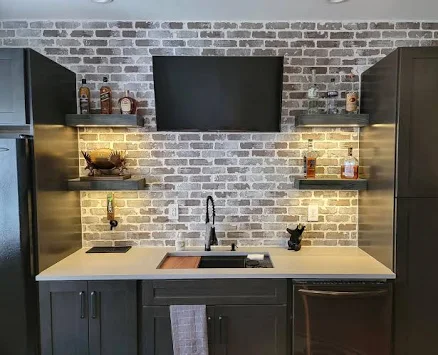
9. Industrial Chic Exposed Brick Wall
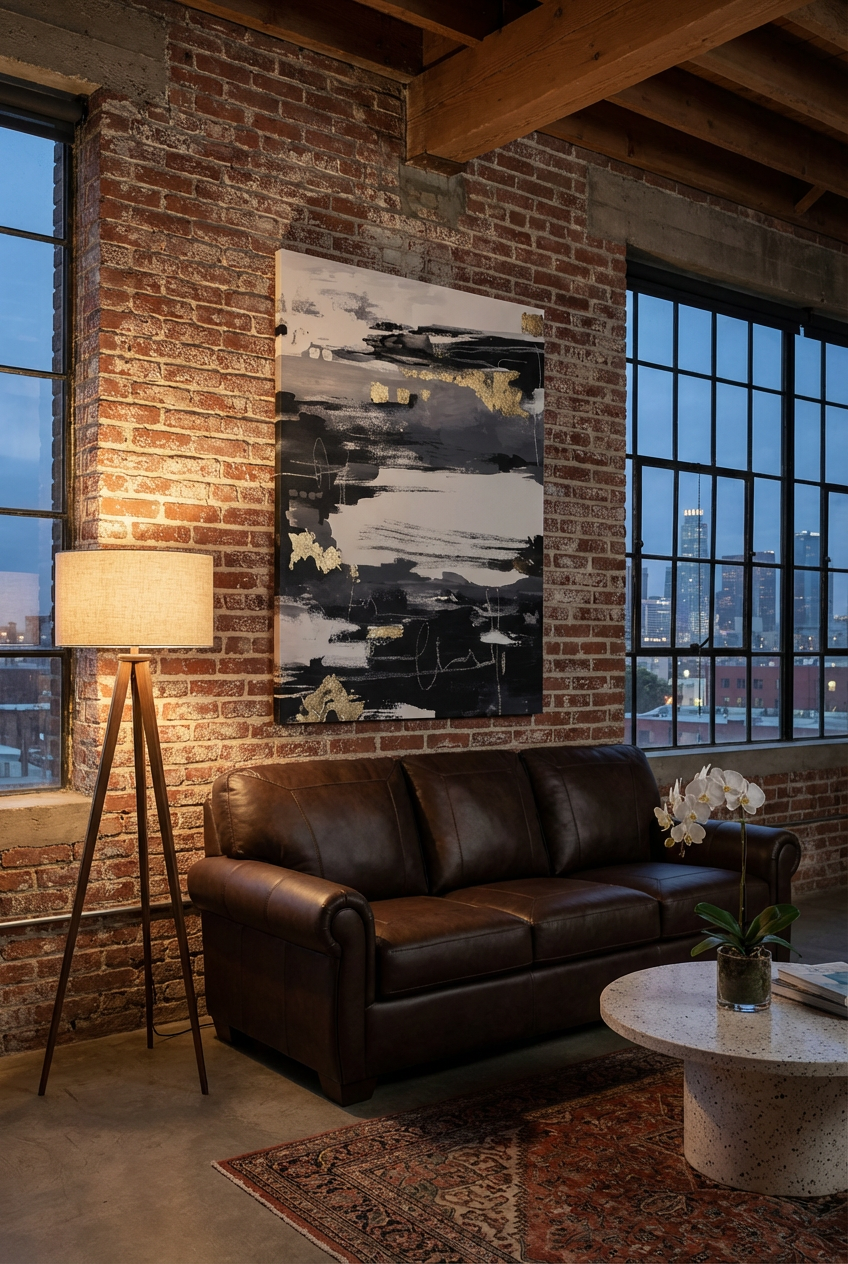
While an exposed brick wall adds incredible character, be prepared for potential issues. Old brick can be dusty and crumbly, requiring a sealant to prevent messy residue. It’s also incredibly absorbent, meaning any spills or moisture can lead to staining or mildew if not properly treated. Acoustically, brick walls can make a room echo-y, so you might need to compensate with soft furnishings and rugs. And if your room features actual exterior brick, insulation can become a concern, leading to higher heating or cooling bills. Always do a thorough inspection of the brick’s condition and consult a professional if you’re unsure.
The industrial chic look, with its exposed brick and raw textures, has been a perennial favorite, but it’s experiencing a resurgence in 2026. This isn’t just about recreating a loft apartment vibe; it’s about celebrating honesty in materials and a slightly grittier aesthetic that contrasts beautifully with polished modern design. As more people move to urban areas or seek to imbue suburban homes with a bit of city edge, this style offers a sense of history and authenticity that generic drywall simply can’t. Think less ‘distressed factory,’ more ‘curated urban cool,’ often seen on Instagram feeds of designers pairing brick with sleek furniture.
|
Gray Extra Large Wall Art Abstract, Abstract Oil Painting Oversized Wa$259.99View on Wayfair |
Hourwall classicBRICK reclaimedRED Faux Brick Panels$103.92View on Wall Theory |
World Market Director Tripod Floor Lamp$296.99View on World Market |
Ashley Furniture Colleton Sofa$727.99View on Homemakers Furniture |

As an affiliate, we earn from qualifying purchases.
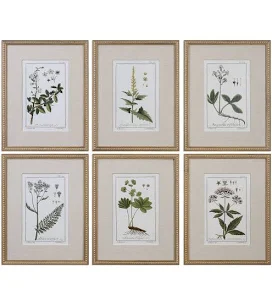
10. Gallery Wall with Botanical Prints Above Sofa
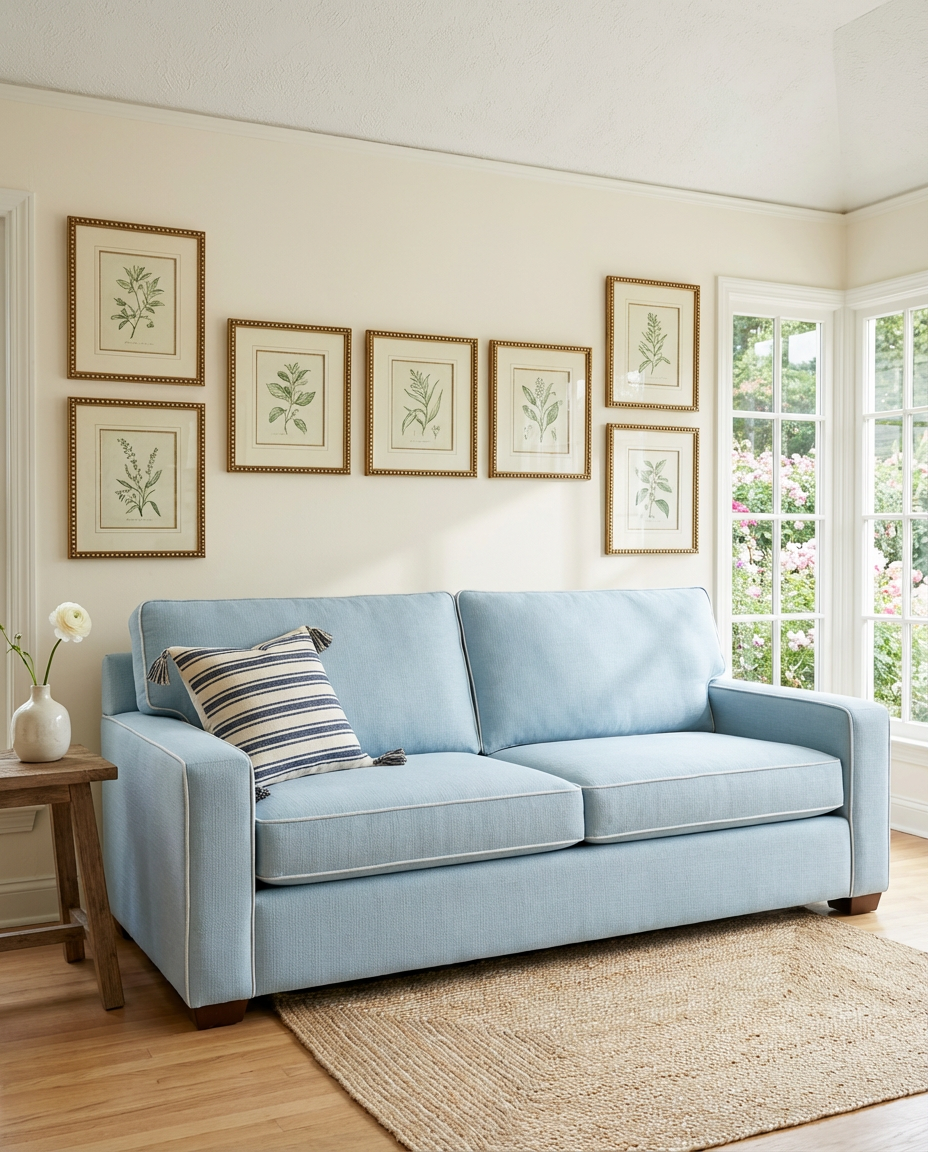
This coastal gallery wall thrives on a simple visual formula: 50% botanical prints + 30% light wood frames + 20% complementary coastal colors. The botanical elements are the heroes, bringing life and nature indoors. The light wood frames keep the look airy and natural, preventing it from feeling too heavy. A sprinkling of blues and whites, perhaps in an accent pillow like in Idea #31 or a small decorative object, ties it all together without overwhelming the serene palette. You can easily swap out specific botanicals (palms, ferns, wildflowers) or frame styles (white, natural bamboo) while maintaining this serene coastal essence.
Before you dive into creating your botanical gallery wall, consider these points:
- Wall size: Measure the space above your couch precisely to determine the optimal arrangement and number of prints.
- Existing color palette: Ensure your chosen botanical prints and frame colors complement your current rug, sofa, and other furniture.
- Lighting conditions: Will the natural light in your room enhance or wash out the colors of your prints?
- Frame styles: Choose a mix of light wood and perhaps one or two white frames for depth, but keep a cohesive feel.
|
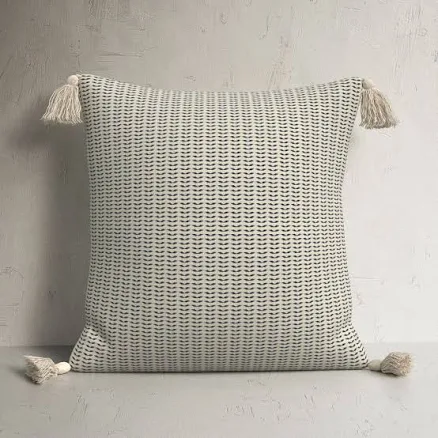
Birch Lane Brenly Striped Square Throw Pillow$30.00View on Wayfair |
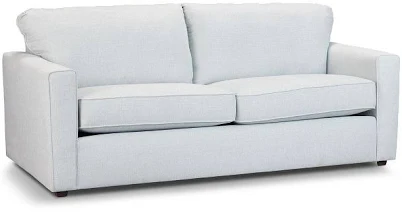
City Furniture – Modern Avalon Light Blue Fabric Sofa$499.95View on City Furniture |
Uttermost Green Floral Botanical Study Prints$405.60View on Daniel House Club |
Drew Barrymore Beautiful Natural Braided Jute Indoor Scatter Rug$31.97View on Walmart |
As an affiliate, we earn from qualifying purchases.
11. Sophisticated Grid Panel Wall Decor
While grid paneling adds architectural elegance, it’s not without its considerations. Unless you’re going for a perfectly smooth, factory-finished product, DIY paneling can show imperfections if your walls aren’t perfectly plumb. Painting it perfectly, especially in a crisp white or light neutral, can also be a challenge to get a streak-free finish. And if you plan to hang anything on these walls, you’ll need to know where the studs are or use appropriate anchors to avoid damaging the panels. It’s a beautiful look, but one that rewards meticulous installation and a good eye for detail.
You can absolutely get the sophisticated look of grid paneling without investing in custom carpentry. IKEA’s Kallax or Besta units, when arranged precisely and potentially topped with a custom piece of wood, can create a similar integrated, paneled feel for a fraction of the cost. For simpler wainscoting-style grids, budget-friendly MDF strips from Home Depot or Lowe’s can be cut, glued, and nailed to your wall. With a good coat of paint, you’d be hard-pressed to tell the difference from more expensive custom work, all for under $200 for a medium-sized wall.
|
Global Product Eucatex Country Cottage Wall Panel$29.98View on Lowe’s |
Sxiawe 24 in. W x 35 in. H Baroque Arched Classic Frame Handcrafted$115.56View on Home Depot |
Kirkland’s Home Asher 3-Drawer Console Table$269.99View on Kirkland’s Home |
Corrigan Studio Bolanle Tufted Upholstered Wide Back Armchair$141.99View on Wayfair |
As an affiliate, we earn from qualifying purchases.
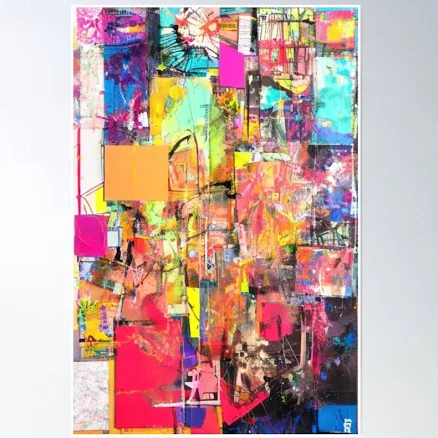
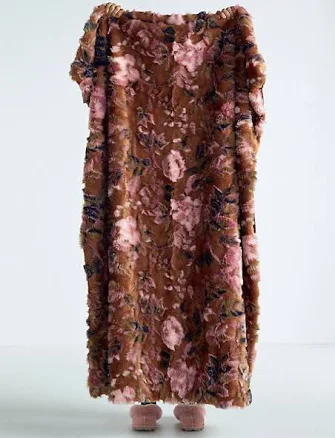
12. Eclectic Mixed Media Wall Art Display
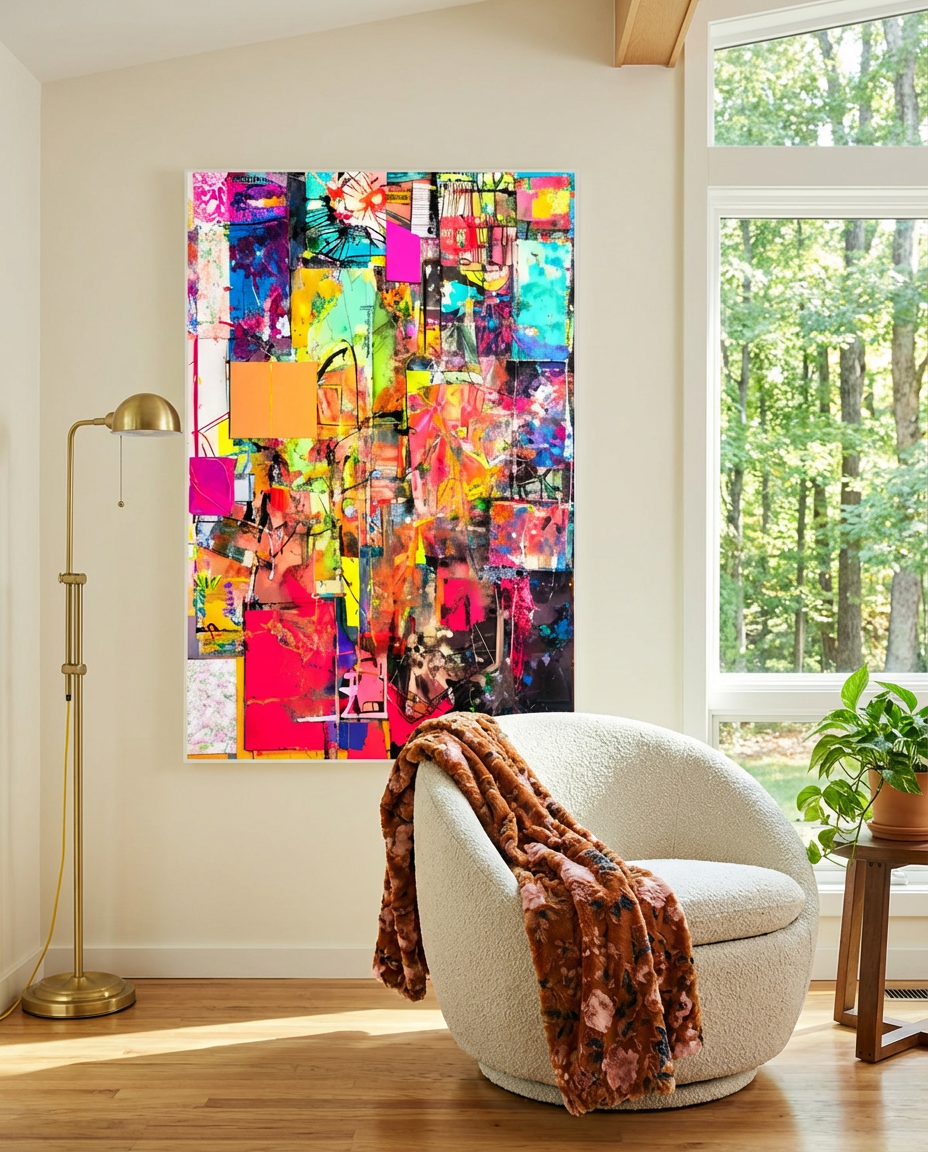
Eclectic mixed media displays are soaring in popularity in 2026 as people lean into more personal, narrative-driven decor. Forget matchy-matchy; this trend is all about collecting pieces that speak to you – a vintage poster, a child’s drawing, a travel memento, even a boldly colored abstract print like the one featured. It’s a rebellion against mass-produced art and a celebration of individuality. Pinterest and Instagram are catalysts, inspiring folks to proudly display their collected treasures, telling a unique story through their walls instead of following a rigid aesthetic. This trend has significant staying power because it’s inherently about personal expression.
The one thing that makes this ‘eclectic mixed media’ idea truly special isn’t any single piece of art, but the confident layering and intentional juxtaposition of diverse elements. If you simply hung a mixed bag of art without thought, it would look chaotic. But here, the magic happens in the fearless combination of different styles, textures, and even framing choices, all arranged with an underlying sense of balance. It’s the artfulness of the mix, the narrative created by these disparate items, that makes the wall sing with personality.
|
Vibrant Art In Neon Colors – Eclectic Mixed Media Collage Modern Abstr$14.16View on Redbubble |
Anthropologie Seren Floral Throw Blanket$138.00View on Anthropologie |
Cal Lighting Croby Floor Lamp$159.24View on Home Depot |
Better Homes & Gardens Mira Swivel Accent Chair$223.20View on Walmart |

As an affiliate, we earn from qualifying purchases.
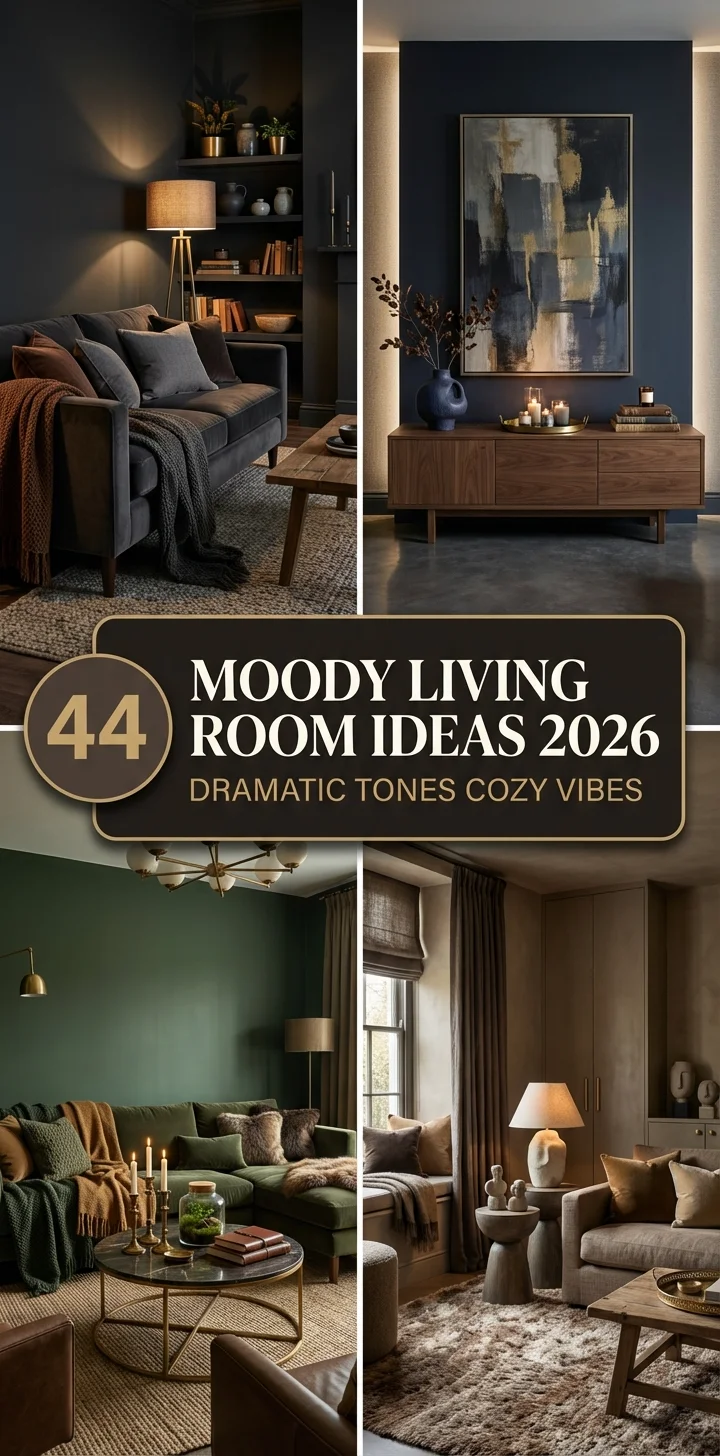
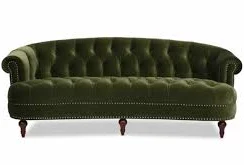
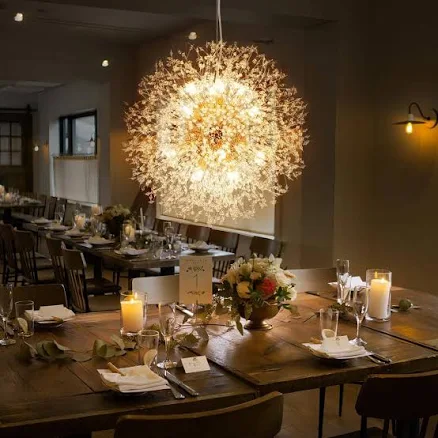
13. Dramatic Dark Green Feature Wall
✨ Luxury Version
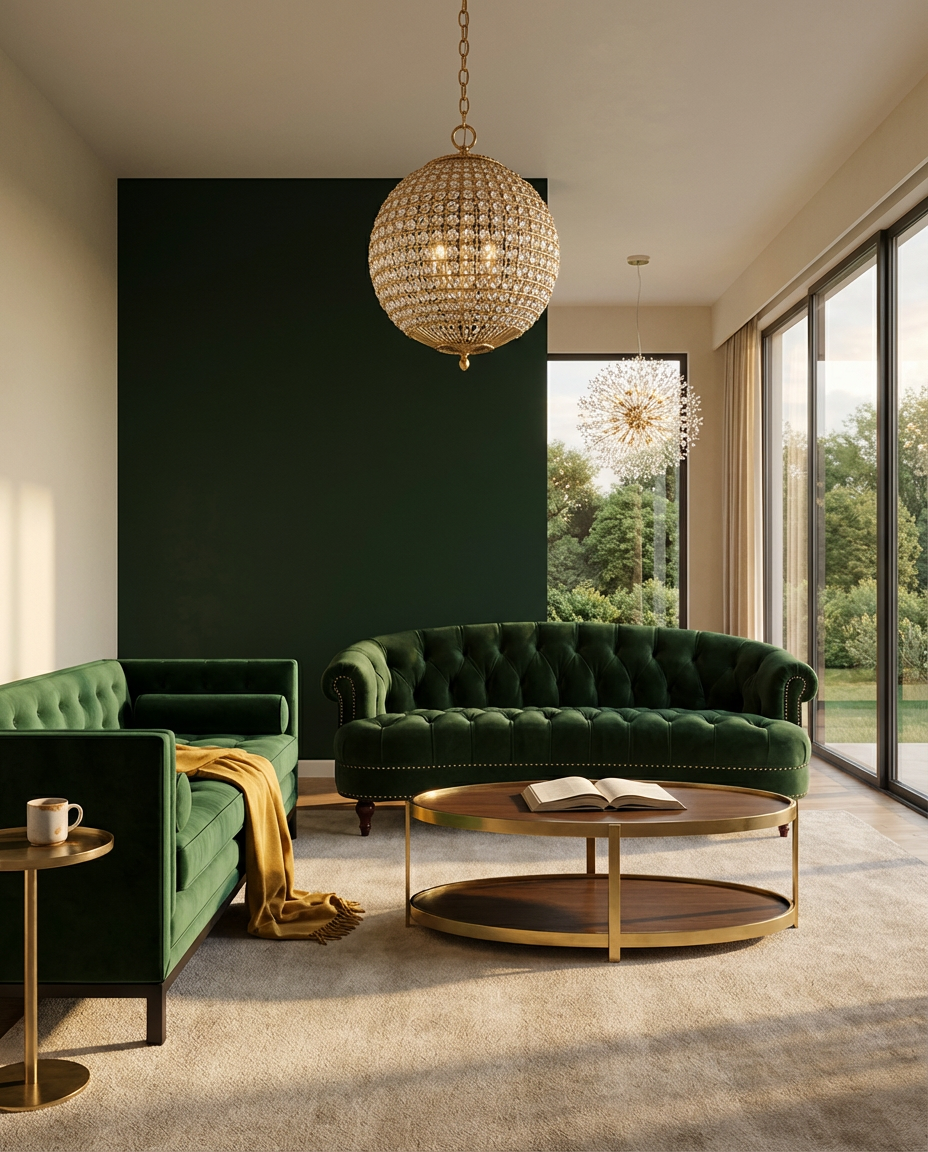
💸 Budget Version
When choosing a dramatic dark green for an accent wall, always opt for a paint with a very subtle sheen, like an eggshell or satin finish, rather than a flat matte. The slight sheen will catch and reflect light, preventing the dark color from feeling like a black hole and adding a luxurious, velvety depth to the wall. This also makes the color feel richer and more alive, especially when juxtaposed with metallic accents or plush textiles. It’s a small detail that makes a huge difference in how the deep hue performs in your space.
This dramatic dark green feature wall is a showstopper, and it truly thrives in rooms with ample natural light or significant artificial lighting. We’re talking at least 150 square feet in a main living area, with ceilings 9 feet or taller. The deep color can recede, making smaller rooms feel even more compact if not properly balanced. If your living room is on the smaller side, consider using a similar rich hue, but perhaps in a more subtle form, like the ombre wall from Idea #8, which offers depth without consuming the entire visual space.
|
💰 Budget Pick · Sofa La Rosa Victorian Chesterfield Tufted Sofa$300.00View on Lost and Found Event |
✨ Luxury Pick · Sofa Emerald Velvet Sofa$4,195.00View on Black Rooster Decor |
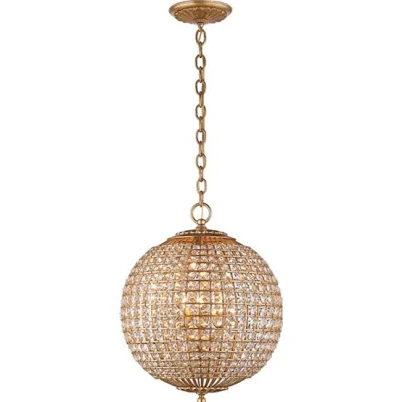
💰 Budget Pick · Chandelier RRTYO Barton 16-Light Gold Crystal Unique Sphere Chandelier$342.86View on Home Depot |
✨ Luxury Pick · Chandelier Aerin Renwick Small Sphere Chandelier$2,299.00View on Foundry Lighting |
As an affiliate, we earn from qualifying purchases.
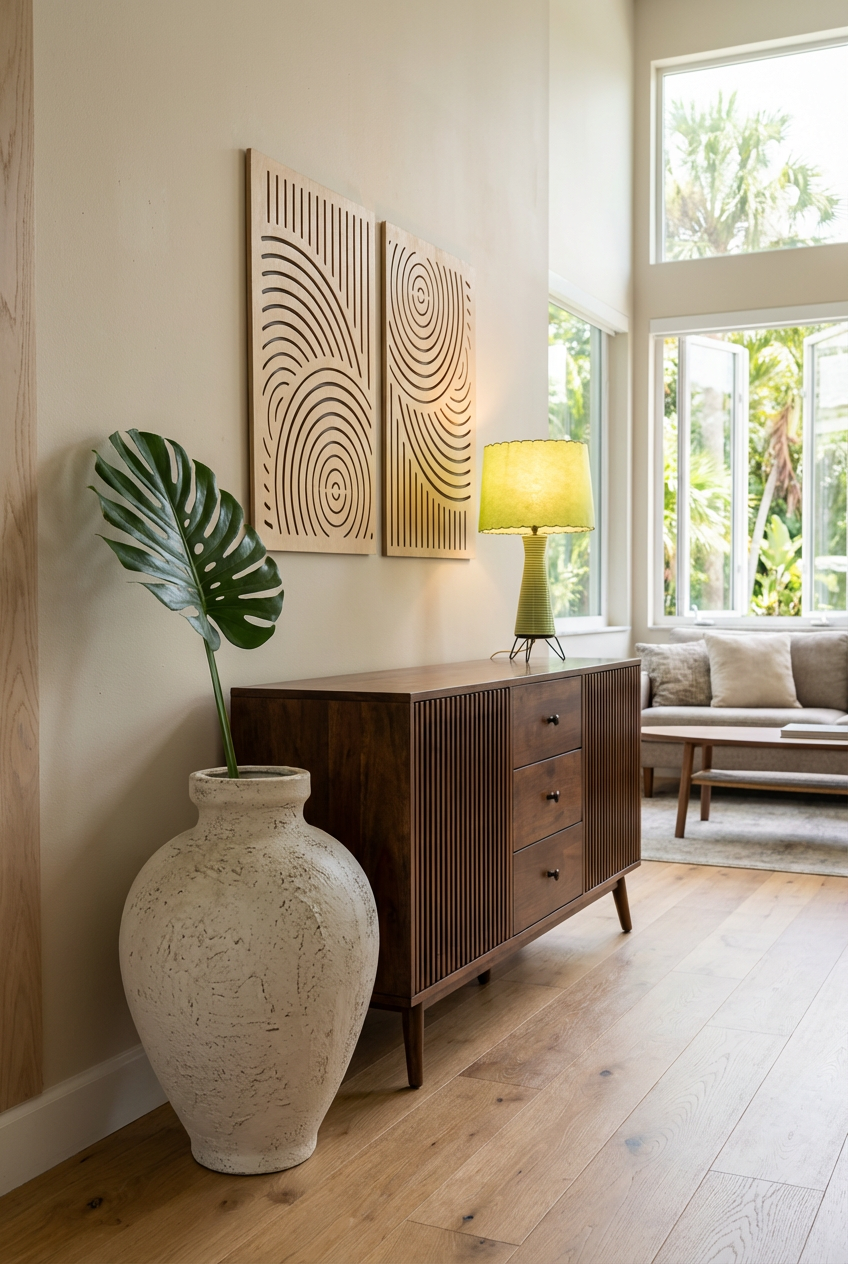
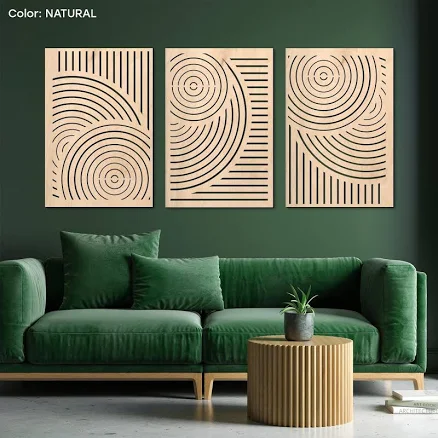
14. Geometric Wood Panel Wall Art
Adding geometric wood panel art can seem intimidating, but here’s a simplified approach for one section of a wall:
- Design your pattern: Sketch out your desired geometric pattern on paper. Aim for 2-3 repeating shapes for a cohesive look. (30 minutes, $0)
- Source wood panels: Purchase thin wood sheets (e.g., plywood, MDF) from a hardware store. Have them cut to size based on your design, or cut yourself if you have the tools. (2 hours, $50-150)
- Sand and stain/paint: Lightly sand all edges. Apply a wood stain or paint to achieve your desired finish, allowing for drying time. (4 hours with drying, $20-50)
- Measure and mark: Carefully measure your wall and mark out where each wood piece will be placed using a level and painter’s tape. (1 hour, $0)
- Adhere panels: Use a strong construction adhesive and/or small brad nails to attach each wood piece securely to the wall. (2 hours, $30-50)
Total time: ~9.5 hours (including drying time). Total material cost: $100 – $250.
This look, deeply rooted in mid-century modern aesthetics, works because it introduces sculptural, three-dimensional interest to a flat wall. The geometric patterns add a dynamic visual rhythm, while the warmth of the wood grounds the space. It’s a smart way to bring in architectural detail and a sense of craftsmanship without going full traditional paneling. The contrast between the rigid geometry and organic wood grain is what gives it so much appeal, creating an art piece that’s integrated into the very structure of the room.
|
Threshold Tall Textured Ceramic Vase$30.00View on Target |
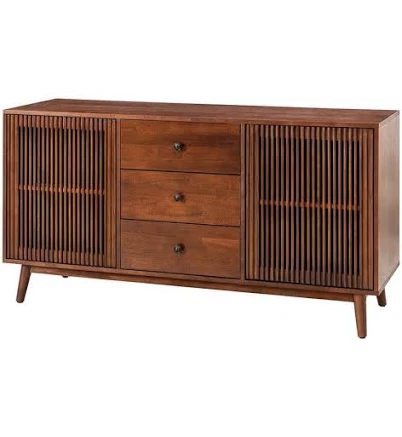
Cyril Mid-century Walnut 3 Drawer 58 in. Sideboard with Wooden Legs an$453.89View on Home Depot |
Mid-Century Green Ceramic Lamp with Fiberglass Shade & Tripod Legs$170.33View on Etsy |
Geometric wood wall art panel, Geometric wood wall set of 2 panels, Ab$31.50View on Etsy |

As an affiliate, we earn from qualifying purchases.
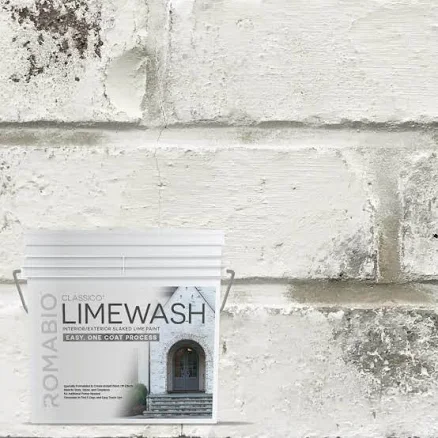
15. Monochromatic Texture Play Wall
This style works because it embraces the beauty of minimalism through tactile engagement rather than stark emptiness. By focusing on varied textures within a monochromatic palette, it creates depth and interest without relying on color. Limewash paint or plaster effects catch the light in unique ways, adding subtle shadows and highlights that change throughout the day. It’s about creating a serene, almost cave-like coziness that is deeply calming and sophisticated, proving that minimalist doesn’t have to mean boring.
While incredibly beautiful, a monochromatic texture wall, particularly with limewash or plaster, can be a commitment. Application can be tricky to get right, often requiring a professional for true, nuanced depth (which adds to the cost). Patching or repainting can also be a challenge, as matching the exact texture and subtle color variations is difficult. Keep in mind that heavy texture can also trap dust more easily than smooth walls, requiring more diligent cleaning. It’s a statement, and one that demands careful consideration of both installation and long-term maintenance.
|
Ashcroft Furniture Emma Mid Century Modern Sofa$844.55View on Luna Furniture |
ROMABIO Limewash Interior/Exterior Paint$62.81View on Home Depot |
Saje Wool Shag Rug$199.90View on Quince |
Kioni Round Travertine Coffee Table$419.00View on Lowe’s |

As an affiliate, we earn from qualifying purchases.
16. Oversized Abstract Painting Focal Point
When selecting an oversized abstract painting as a focal point, remember the ‘two-thirds’ rule. The artwork should typically be at least two-thirds the length of the furniture piece it hangs above (e.g., a sofa or console table). This ensures the painting feels substantial and appropriately scaled, rather than dwarfed by the furniture. For a truly dramatic statement, don’t be afraid to go even larger, allowing the art to command attention and anchor the entire wall. It’s a trick that ties the furniture and the art together, making the whole arrangement feel intentional and balanced.
You absolutely do not need to spend thousands on an oversized abstract painting. Etsy is a treasure trove for digital downloads of stunning abstract art, which you can then get printed at a local print shop (FedEx, Staples) for a fraction of the cost. Look for canvases at thrift stores that you can paint over yourself. Even HomeGoods or Target often have large-scale abstract prints on canvas for under $150. With a bit of hunting, you can find a statement piece for $100-$300, rather than the suggested $2000+, achieving a similar impactful aesthetic.
|
KeiraArt #AG 113 Large Colorful Abstract Art$2,072.30View on Keira Art |
Better Homes & Gardens Dome Floor Lamp$75.12View on Walmart |
Tree City Mid-Century Modern Faux Leather Accent Chair$133.32View on Target |
Threshold East Bluff Woven Drawer Console Table$262.50View on Target |
As an affiliate, we earn from qualifying purchases.
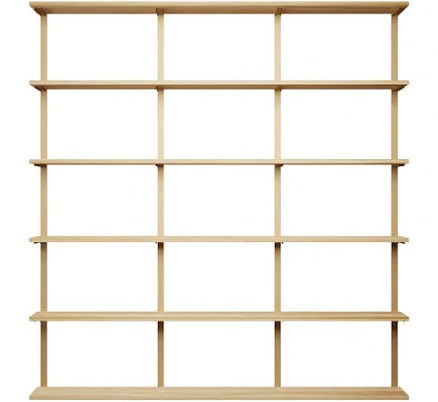
17. Built-in Bookshelves Wall Unit with Ladder
Built-in bookshelves with a ladder are seeing a heartwarming revival in 2026, driven by a desire for cozier, more personalized spaces. In an increasingly digital world, there’s a longing for the tactile comfort of physical books and a dedicated
|
Better Homes & Gardens Lillian Velvet Tufted Ottoman$58.62View on Walmart |
Pasargad Home Paris Club Genuine Leather Arm Chair$1,348.00View on English Elm |
Alera Table Lamp LMP537BZ$45.33View on Cicero Mfg. & Supply |
Large Wall Mount Bookshelf Custom Made in USA Shelves$3,179.99View on Vault Furniture |
As an affiliate, we earn from qualifying purchases.
18. Bohemian Jute & Rattan Wall Art Display
✨ Luxury Version
This bohemian display is a fantastic exercise in textural layering: 60% woven natural fibers (jute, rattan) + 30% soft textiles + 10% greenery. The large woven pieces create a foundational warmth and organic pattern, while soft elements like cushions or throws add inviting comfort. A touch of emerald green like the accent wall in Idea #13 from plants brings a living element. This formula keeps the space feeling balanced and harmonious, preventing the many textures from becoming overwhelming. You can swap out the specific woven materials (think seagrass, bamboo) or textile patterns (geometric, floral) while keeping the same relaxed, earthy vibe.
💸 Budget Version
To create a multi-layered jute and rattan wall display, here’s a mini-guide:
- Gather your pieces: Collect a mix of jute wall hangings, rattan mirrors, and woven baskets in varying sizes. (2 hours, $50-200)
- Plan your layout: Lay all pieces on the floor and arrange until you have a balanced composition, varying height and texture. (30 minutes, $0)
- Find your anchor: Start with the largest piece (e.g., a big rattan mirror) and center it, securing it to the wall. (15 minutes, $0)
- Build outwards: Add smaller jute pieces around the anchor, ensuring some overlap and proximity to create a layered effect. (30 minutes, $0)
- Add dimension: Integrate a small floating shelf with a plant pot or a sculptural vase to break up the flat surfaces. (10 minutes, $0)
Total time: ~3 hours 25 minutes. Total material cost: $50 – $200 (for art pieces, not including furniture).
|
💰 Budget Pick Threshold Texture Ceramic Vase$20.00View on Target |
💰 Budget Pick Threshold Square Embroidered Floral Decorative Throw Pillow$25.00View on Target |
✨ Luxury Pick H&M Home Rattan Wall Shelf$74.99View on H&M |
✨ Luxury Pick Ama Pear Farmhouse Modern Solid Wood Rattan Bench$179.62View on Lowe’s |

As an affiliate, we earn from qualifying purchases.
19. Sophisticated Vertical Slat Wood Paneling
Vertical slat wood paneling offers a sleek, sophisticated backdrop that works particularly well in living rooms that are at least 150 square feet with 9-foot ceilings. The vertical lines inherently draw the eye upward, making the room feel taller and more expansive – a huge win for those looking to counteract lower ceilings or a wider room. If your room is very compact, consider using this paneling on just one section of the wall or behind a console table, rather than an entire accent wall, to avoid it feeling overwhelming. Compare this with Idea #5 — same material, completely different energy.
While beautiful, vertical slat wood paneling does require a bit of upkeep. The grooves and gaps between the slats can become dust traps, so regular dusting with a microfiber cloth or a soft brush vacuum attachment is necessary to keep it looking crisp. Depending on the wood type and finish, direct sunlight might cause fading over many years, so consider UV-protective window treatments if your accent wall gets a lot of sun. It’s generally a durable option, but the texture means it won’t be as quick to wipe down as a smooth painted wall.
20. Chic Picture Ledge Display Above Couch
The beauty of a picture ledge is its flexibility. Instead of committing to permanent nail holes for every piece of art, use a picture ledge to layer different-sized framed prints, small plant pots, or decorative objects. The trick is to vary heights and depths, placing some items leaning against the wall and others slightly in front. This creates a casual, yet curated, look that you can easily refresh without patching holes. For optimal balance, ensure the ledge itself spans at least two-thirds the length of your sofa for a grounded feel.
This look is a winner because it offers an alternative to the traditional gallery wall, providing both display space and a modern aesthetic. The clean lines of the picture ledge create an architectural element that grounds the art above the couch. What makes it work is simplicity and versatility; it’s easy to change out your art, swap decor, and play with arrangements without causing damage to your walls. The slight elevation of the shelf also adds a subtle shadow line, giving the arrangement a more intentional, integrated feel than just hanging pictures directly on the wall.
|
Classic Home and Garden Cement Buddies Indoor/Outdoor Planter with Dra$8.42View on Home Depot |
Kate and Laurel Sylvie Tonal Abstract Framed Canvas Wall Art$109.99View on Home Depot |
Vivian Classic Velvet Kittleson Nailhead Chesterfield Sofa$1,027.49View on Home Depot |
Simple Mount 18″ No Stud Needed Photo Ledge$24.99View on Target |
As an affiliate, we earn from qualifying purchases.
21. Fresco-Style Mural Painting
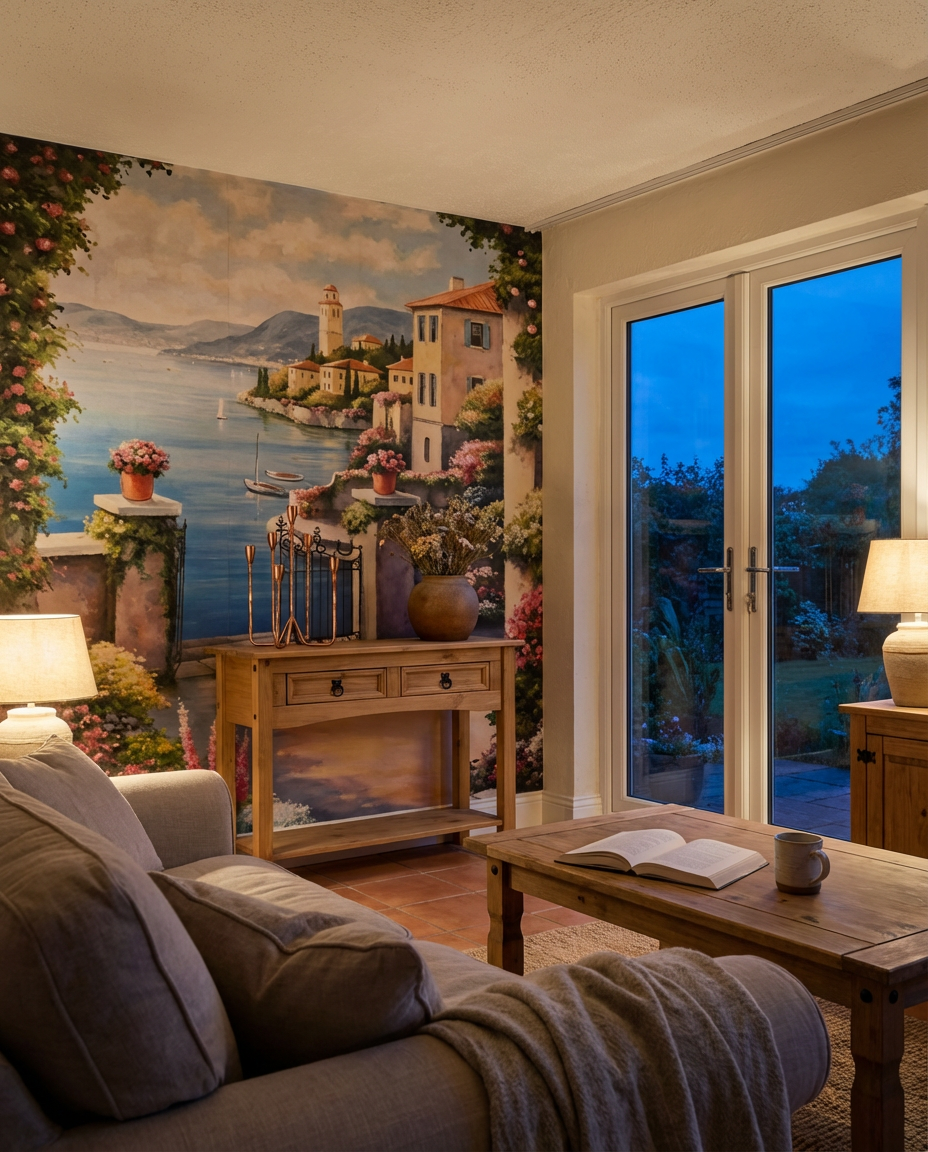
The single most transformative element in a fresco-style mural is its ability to evoke a sense of history and place, effectively transporting your living room to a sun-drenched European villa. Unlike a flat painted wall, the soft, organic brushstrokes and earthy hues create an immersive, atmospheric backdrop that feels timeless and unique. This isn’t just decor; it’s an experience, a subtle illusion that adds depth and character no other wall treatment can. It’s what makes the room feel truly special and transports you to another era.
A fresco-style mural, while impactful, can be created on a reasonable budget if you’re willing to DIY:
- Main furniture (minimal console): $70 – $150
- Lighting (ambient tabletop): $20 – $60
- Textiles (none specific): $0
- Decor/accessories (vintage vases, candle holders): $50 – $150
- Paint/wall treatment (mural): $150 – $400
- TOTAL: $290 – $760
Budget alternative: Use large-format, distressed wallpaper murals (like the example) for convenience, especially if professional painting is out of budget. For smaller accents, DIY a fresco effect with chalk paint and sponges on a canvas for under $50.
|
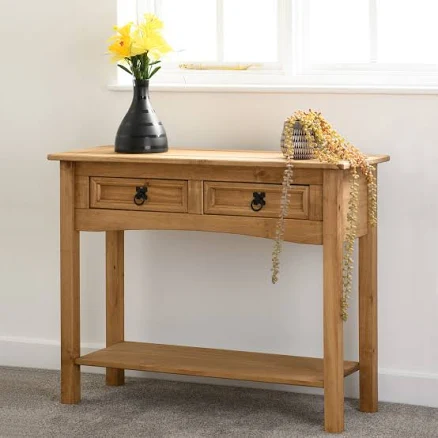
32.7” Wide Distress Waxed Pine Console Table$72.99View on Wayfair |
Sagebrook Home 16″ Forged 5-Taper Candle Holder$35.00View on Living Spaces |
Rust Round Terracotta Vase$19.99View on Hobby Lobby |
Mediterranean Patio Wall Mural | Murals Your Way$142.50View on Murals Your Way |

As an affiliate, we earn from qualifying purchases.
22. Bold Geometric Painted Accent Wall
Bold geometric painted accent walls are all the rage in 2026, especially as maximalism continues its vibrant comeback. People are increasingly ditching sterile white walls for joyful, expressive statements, and a geometric pattern like this hits all the right notes. It’s often fueled by the desire for a highly personalized, Instagrammable space that feels energetic and forward-thinking. Platforms like Pinterest are brimming with DIY geometric painting tutorials, making this daring trend accessible to anyone willing to tape off some lines. It’s a fun way to inject personality, but it might not have the longevity of classic styles – be prepared for a repaint if your tastes shift.
As fun as a bold geometric painted accent wall looks, there’s a serious ‘real talk’ moment here: execution is EVERYTHING. Taping off perfectly straight lines, especially with intricate patterns, is incredibly time-consuming and requires immense patience. Any bleed-through under the tape, or slight misalignment, will immediately cheapen the look. You’ll likely need multiple coats of paint for vibrant colors to pop, and the cost of quality painter’s tape can add up. Ensure your walls are perfectly smooth before you start, as any imperfections will be highlighted by the sharp lines. This isn’t a quick or easy DIY project to get right.
|
Geometric Ultra Flat Matte Resistant Emulsion 1 US Gallon$132.00View on grahambrown |
Funky Resin Coffee Table, Colorful Abstract Art, Round Wood Side Table$272.00View on Etsy |
Threshold Woven Block Print Square Throw Pillow$25.00View on Target |
Ashcroft Furniture Cole Lounge Chair$339.00View on Eve Furniture |
As an affiliate, we earn from qualifying purchases.
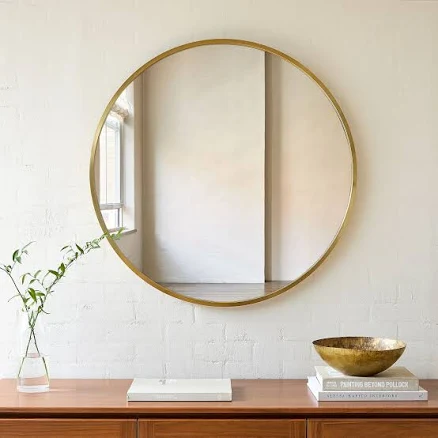
23. Oversized Round Mirror Wall Decor
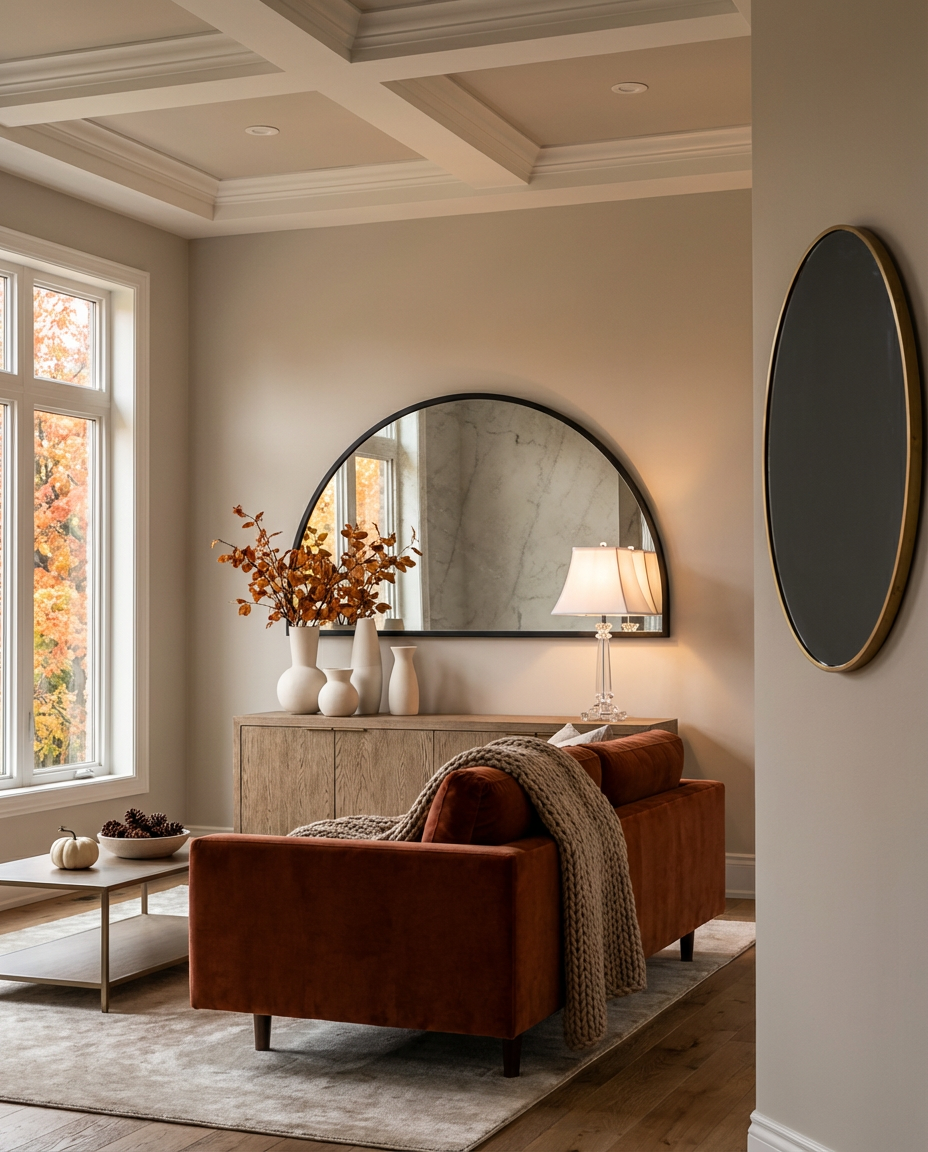
For an oversized round mirror to truly shine as a statement piece, position its center at eye level, roughly 60-65 inches from the floor, when standing. This ensures it feels balanced in the room and serves as a natural focal point whether you’re sitting or standing. If hanging above a console table like the one in Idea #32, leave at least 6-8 inches of space between the top of the table and the bottom of the mirror frame. This provides breathing room and prevents the arrangement from looking cramped, allowing both elements to be appreciated.
The single element that makes this idea so impactful is the oversized scale of the round mirror. It’s not just a reflective surface; it’s a dramatic art piece that amplifies natural light, makes the room feel larger, and creates a soft, organic contrast to otherwise linear furniture. Without its grand proportions, the mirror would recede into the background, losing its power as a glamorous focal point. It’s the bold choice in size that transforms it from a utilitarian object into a significant design statement.
|
Joss & Main Evelynn 36” Console Table$999.00View on Birch Lane |
West Elm Pure White Ceramic Vase$20.00View on west elm |
Vienna Full Spectrum Sannes 25″ Tapered Glass Column Table Lamp$124.99View on Target |
IKEA Lindbyn Mirror$79.99View on IKEA |

As an affiliate, we earn from qualifying purchases.
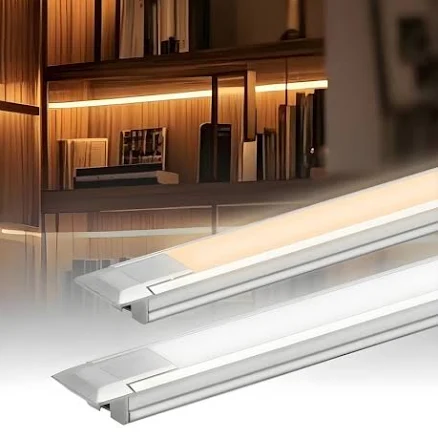
24. Display Shelves with Integrated Lighting
Integrated lighting in display shelves is a modern touch that’s surprisingly achievable:
- Main furniture (console, armchair): $150 – $300
- Lighting (integrated LED strips, sconces): $100 – $300
- Textiles (throw, pillow): $50 – $100
- Decor/accessories (vases, art): $70 – $150
- Paint/wall treatment (shelves): $150 – $400
- TOTAL: $520 – $1,250
Budget alternative: Use battery-operated puck lights or LED strips from Amazon (around $20-50 each) in existing bookshelves for a similar effect without needing professional wiring. This can bring total costs down to $300 – $600.
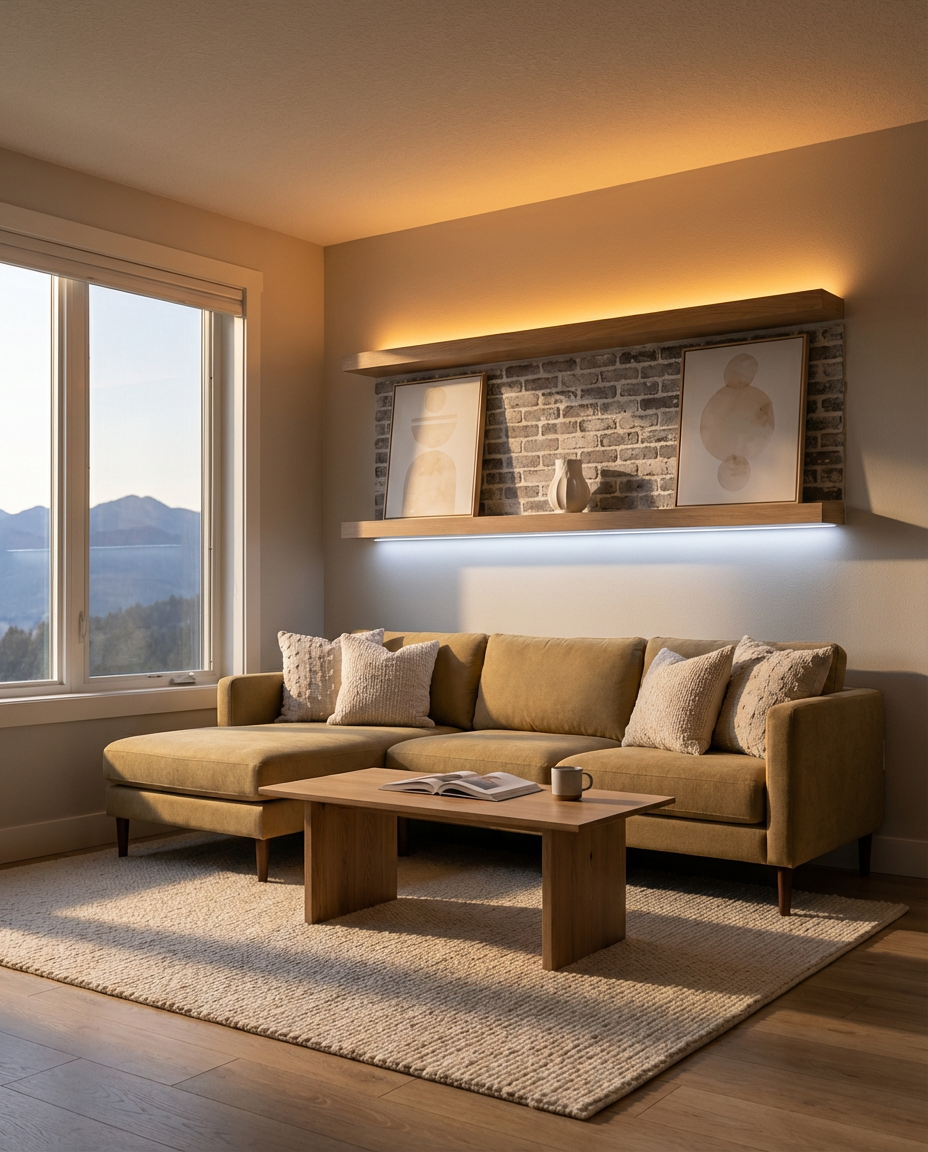
The current fascination with integrated lighting in display shelves is a direct response to the ‘smart home’ movement and our collective desire for sophisticated ambient lighting. In 2026, it’s not enough for shelves to just hold things; they need to contribute to the mood and atmosphere. This trend, heavily pushed on design blogs and luxury brand showcases, highlights curated collections and adds a futuristic glow to living spaces. It shows off your favorite pieces while creating a cozy, layered lighting scheme that makes a room feel instantly more expensive and thoughtful. It has strong staying power because it’s both functional and aesthetic.
|
Orbisify Recessed Liner Closet Lights$29.99View on Orbisify |
Custom Length LED Floating Shelf$90.61View on Hofina |
Threshold Abstract Shapes Framed Canvas Set of 2$73.50View on Target |
Hearth & Hand with Magnolia Pleated Ceramic Vase$34.99View on Target |
As an affiliate, we earn from qualifying purchases.
25. Rustic Shiplap Accent Wall
Shiplap, while undeniably charming, isn’t always the perfect fit. Firstly, despite its rustic appeal, it can sometimes lean too ‘farmhouse chic’ for more contemporary homes and might feel dated in a few years if the trend shifts dramatically. Secondly, the horizontal seams can be dust collectors, requiring more frequent cleaning than a smooth wall. Installation can also be tricky; achieving consistent spacing and perfectly level lines is crucial for a professional look. And remember, depending on the material, real shiplap can actually shrink and expand with humidity changes, potentially creating small gaps over time. Lastly, painting shiplap flawlessly can be a multi-step process, especially trying to get paint between the grooves.
This rustic shiplap accent wall works primarily by introducing texture and architectural interest that a plain painted wall simply can’t. The horizontal lines have a grounding effect, making the room feel wider and more expansive. The white-washed finish keeps the look fresh and bright, preventing the wood from feeling heavy, while still providing that cozy, farmhouse charm. It’s a classic material, but its application here as a feature wall makes it a compelling focal point, adding depth and visual warmth to the entire living room.
|
Drew Barrymore Beautiful Natural Braided Jute Indoor Scatter Rug$31.97View on Walmart |
Timeline Shiplap Wall Paneling$107.90View on Lowe’s |
Jennifer Taylor Home Knox Modern Farmhouse Sofa$952.49View on Jennifer Taylor Home |
Distressed Wood Coffee Table with Lower Shelf$319.99View on Overstock |
As an affiliate, we earn from qualifying purchases.
26. Oversized Botanical Print Painting
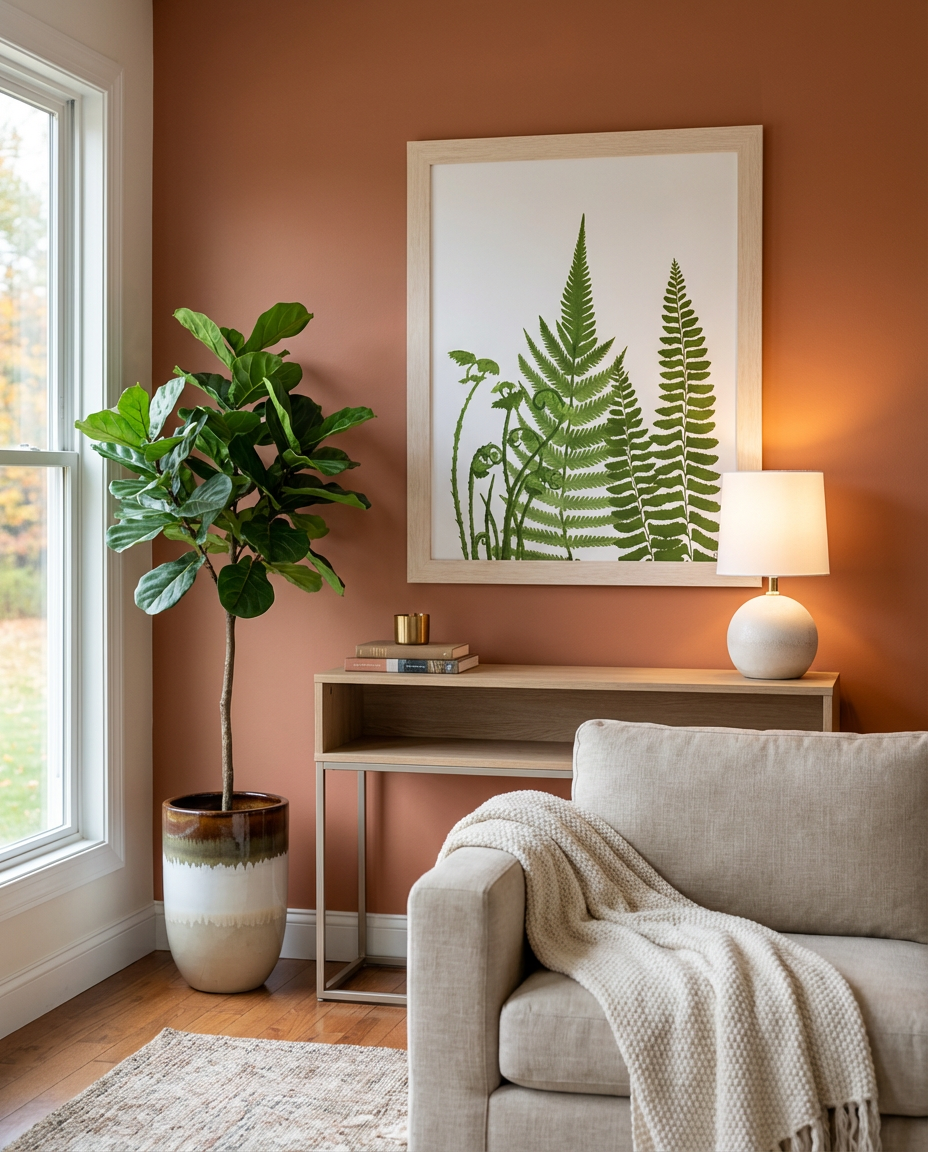
When choosing an oversized botanical print, don’t just pick something pretty – consider the negative space. An effective oversized print should have enough ‘breathing room’ within the composition so it doesn’t feel too busy. Look for prints with clean lines and a strong central subject, allowing the eye to rest. This ensures the artwork makes a statement without shouting, becoming a calming, biophilic focal point rather than an overwhelming one. A strong, simple botanical print can anchor a minimalist room with a single, powerful gesture.
For this look, the single element that truly defines the space and makes it work is the bold, oversized botanical print itself. It’s not just a piece of art; it’s a window to tranquility, bringing the calming essence of nature indoors on a grand scale. Without its commanding presence and natural motif, the room would lack its biophilic heart and become just another minimalist space. It’s the visual anchor that breathes life and serenity into the entire living room.
|
Article Modern Furniture Suri Minimalist Console Entryway Table$699.00View on Article |
Mainstays 12.75 Inch White Ball Table Lamp$12.58View on Walmart |
Botanical print, Fern art, Green leaf decor, Leaf canvas art, Fern lea$29.00View on Etsy |
Luna Beige Ceramic Tall Outdoor Planter, Medium, Neutral sold by At Ho$69.99View on At Home |

As an affiliate, we earn from qualifying purchases.
27. Artful Wall Sconces for Ambient Lighting
Installing artful wall sconces for ambient lighting can drastically change a room’s mood. Here’s a basic ‘how-to’ for one pair:
- Choose your sconce locations: Decide where on the wall you want the sconces. Symmetrically flanking a piece of art or a console table is a common approach. (15 minutes, $0)
- Consult an electrician: Unless they are plug-in, hardwired sconces require professional installation to ensure safety and proper wiring. (1 hour for consultation, $100-200)
- Mark and prepare: The electrician will mark where the electrical boxes need to be installed within the wall. (30 minutes, $0)
- Install wiring and boxes: This is where the pro comes in, running wires and setting up the electrical boxes. (2-4 hours, covered by electrician fee)
- Mount and connect sconces: Once wiring is in place, the sconces can be mounted and connected. (30 minutes per sconce, $0 for DIY if pre-wired, or extra electrician labor)
Total time: Varies greatly depending on electrician, but expect a day’s work. Material cost: Sconces ($100-500+), Electrician ($200-800+).
Artful wall sconces are particularly effective in living rooms where you want to create zones of light, especially in spaces around 150-250 square feet. They are brilliant for adding indirect, soft light, making a room feel more intimate and inviting. In very large, open-concept spaces, you might need more than just sconces, perhaps layering them with recessed lighting or integrated shelf lighting as in Idea #23. For smaller rooms, a single, carefully placed sconce can become a sculptural element, providing both light and artistic flair without taking up precious floor space.
|
West Elm Concrete Outdoor Pedestal Side Table$399.00View on west elm |
Threshold Texture Ceramic Vase$20.00View on Target |
West Elm Sculptural Sconce$169.00View on west elm |
World Market Textural Abstract Framed Wall Art$139.99View on World Market |
As an affiliate, we earn from qualifying purchases.
28. Living Room with Green Velvet Paneling
Indulging in green velvet paneling makes a bold statement, but can be done smart:
- Main furniture (sofa, bar cart): $1,100 – $1,600
- Lighting (statement chandelier): $200 – $500
- Textiles (pillows): $50 – $100
- Decor/accessories (vases, frames): $30 – $80
- Paint/wall treatment (velvet panels): $800 – $2,000
- TOTAL: $2,180 – $4,280
Budget alternative: Upholster large MDF boards yourself with budget-friendly velvet fabric for dramatic paneling for around $300-$600, significantly reducing the overall cost. This brings the total down to $1,400 – $2,300.
Alright, let’s be real about velvet paneling: it looks absolutely stunning, but it’s a commitment. Velvet is a luxurious fabric but can be a lint magnet and a challenge to keep pristine, especially in high-traffic areas or if you have pets. It also shows dust and fingerprints easily, so expect to gently brush or vacuum it regularly to maintain its plush appearance. And while it adds incredible texture, keep in mind that custom velvet panels can be expensive to install and aren’t easily changed if you decide to redecorate later. This is a design decision that requires genuine love for the material and a willingness to maintain it.
|
Better Homes & Gardens Fitzgerald 2-Tier Bar Cart$71.12View on Walmart |
Kelly Clarkson Home Glam Brass and Crystal Chandelier$209.99View on Wayfair |
Diamond Modern Furniture Meridian Velvet Sofa$1,039.12View on Walmart |
Emerald Green Velvet Wall Panels – Luxury Art Deco Headboard or Accent$67.15View on Etsy |
As an affiliate, we earn from qualifying purchases.
29. Integrated Backlit Wall Niche Shelving
✨ Luxury Version
💸 Budget Version
When designing an integrated backlit wall niche, always plan the lighting first. Opt for warm white LED strips (2700K-3000K) to create an inviting glow rather than a harsh, cold light. Install them along the perimeter of the niche, slightly recessed, so the light washes over your displayed objects without creating glare. This highlights your curated collection and adds an architectural wow factor, making the niche feel like a deliberate, artistic extension of the wall itself. It’s a key to making the objects shine and the niche feel truly integrated.
This smart design works because it creates purposeful dimenstion and display opportunities where there would otherwise be a flat wall. The integrated backlighting isn’t just for illumination; it adds depth, drama, and instant sophistication. By strategically placing the light source, it highlights the architectural recess and any objects within it, turning ordinary shelving into a focal point. It’s a minimalist approach that maximizes visual impact, creating a sense of luxury through deliberate design and subtle glow.
|
💰 Budget Pick Crate & Barrel Eider Brown Glass Bud Vase$14.95View on Crate & Barrel |
💰 Budget Pick Modfurne LED Wall Shelves – Lighted Display Shelves With Extra Hooks F$49.99View on Walmart |
✨ Luxury Pick Threshold Abstract Shapes Framed Canvas Set of 2$73.50View on Target |
✨ Luxury Pick White Floating Console Table With Drawers,Hallway Wooden Table,Entrway$283.81View on Etsy |
As an affiliate, we earn from qualifying purchases.
30. Layered Tapestry and Textile Wall Decor
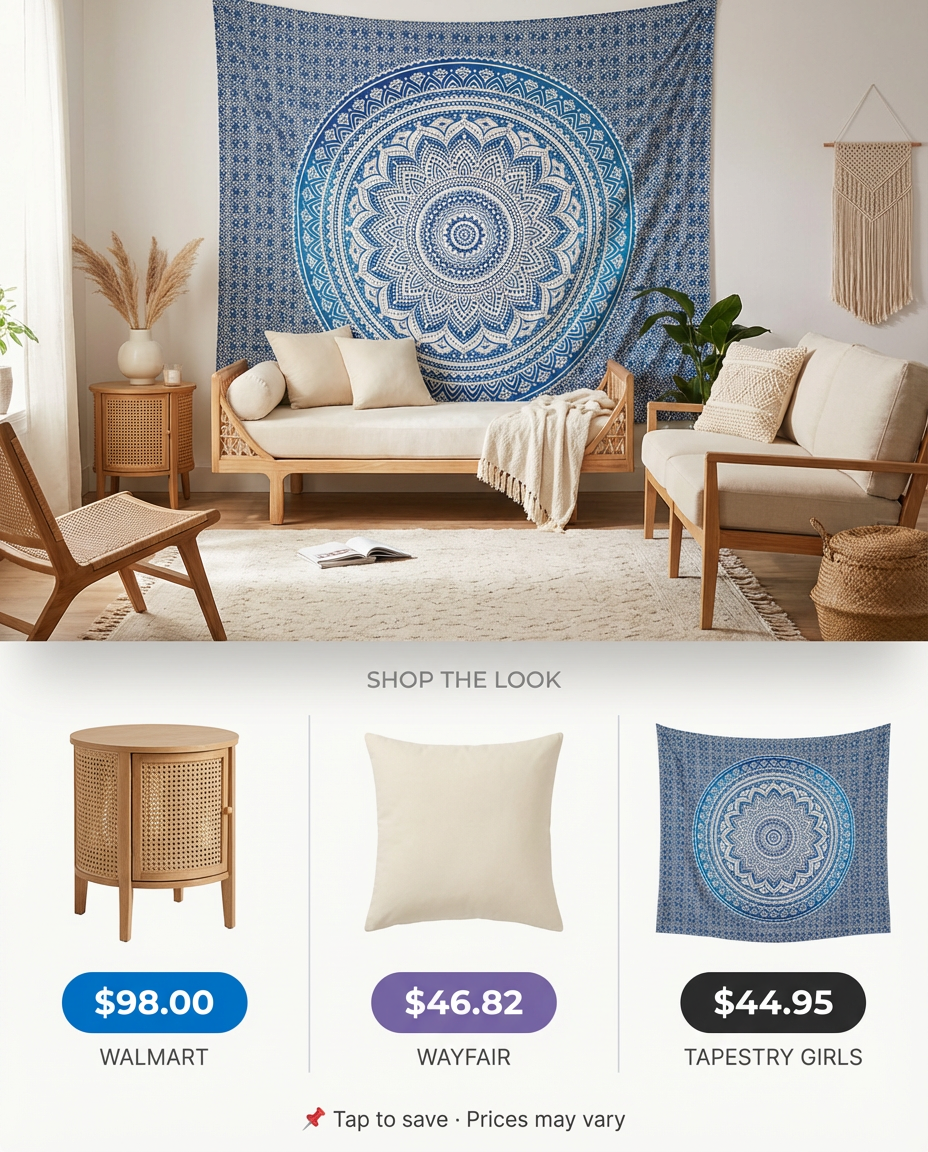
Layered tapestries and textile wall decor absolutely elevate a bohemian aesthetic, but they do come with a maintenance reality check. Fabric can be a significant dust and allergen trap, especially if layered in multiple pieces. Regular vacuuming with an upholstery attachment is a must, perhaps even weekly if you’re sensitive to dust or have pets. Some delicate textiles might also require professional dry cleaning periodically. Be mindful of direct sunlight, as vibrant colors can fade over time. For a similar look with less maintenance, consider framed textile prints instead, which offer the aesthetic without the constant upkeep.
Layered tapestries and textile wall decor are *huge* in 2026, especially as bohemian and global-inspired styles continue to evolve. This isn’t just about throwing a blanket on the wall; it’s a sophisticated play on texture, pattern, and global craftsmanship. Driven by Pinterest and a renewed appreciation for artisan-made goods, this trend allows for personal expression and a curated, well-traveled feel. It appeals to those wanting a cozy, unique, and visually rich space that feels deeply personal, moving away from mass-produced art towards storytelling through textiles. This trend will likely continue to grow as people seek more authentic and textured home environments.
31. Coastal Blue and White Striped Wall
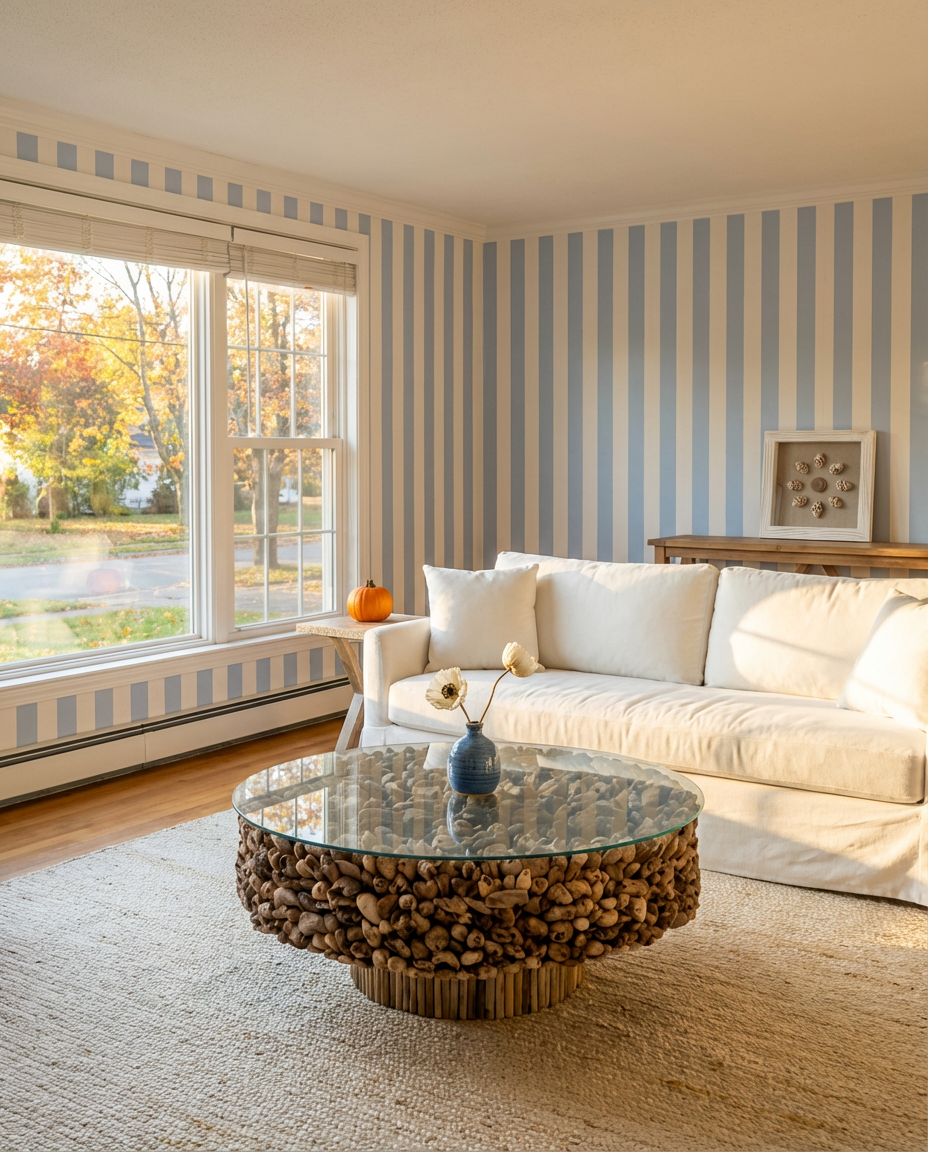
When painting bold stripes, especially for a coastal look, don’t just pick two colors. Introduce a third, very subtle color. For example, alongside a crisp navy and white, add a barely-there light grey or a sandy beige as a thin dividing line. This subtle addition breaks up the harshness of high contrast, making the stripes feel more intentional and sophisticated, rather than cartoonish. It’s a small detail that elevates the entire aesthetic, giving the wall a nuanced, designer-quality finish that looks more expensive than it is.
This kind of bold blue and white striped wall design really makes a splash in rooms with a relatively simple layout and perhaps a bit more square footage (120 sq ft minimum). The strong lines can be visually busy, so if your living room has many architectural features or a very open floor plan, it could feel overwhelming. It’s fantastic for anchoring a single wall above a sofa or as a feature in a dedicated sitting area. For smaller rooms, consider a more understated coastal nod, like the botanical gallery wall from Idea #10, which brings the same fresh vibe without such intense pattern repetition.
|
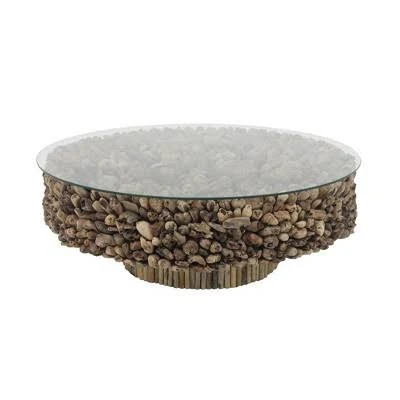
DecMode Natural Round Driftwood Glass Coffee Table$1,028.69View on Target |
Blue/White Smart Stripes 3 Surface Stripe Matte Finish Non-Pasted Viny$4.95View on Home Depot |
Beachcrest Home Wimberly Slipcovered Sofa$579.99View on Wayfair |
Everyday Decor Framed Seashell Tabletop Art, Multi$11.99View on Kohl’s |
As an affiliate, we earn from qualifying purchases.
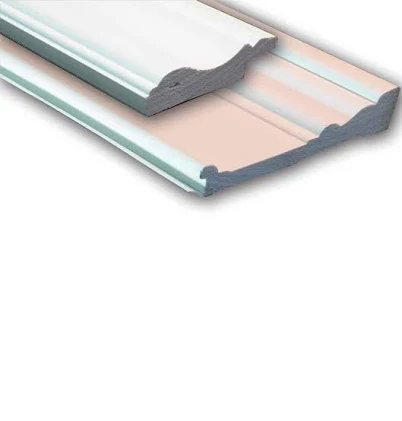
32. Architectural Moulding and Trim Play

Adding architectural moulding and trim is a classic way to elevate your walls. Here’s a basic step-by-step for a wainscoting effect:
- Plan your layout: Decide on the height of your wainscoting (typically 1/3 or 2/3 up the wall) and sketch out where each moulding piece will go. (1 hour, $0)
- Measure and cut: Measure your wall sections precisely and cut your moulding pieces to size, using mitered corners for a clean finish. (2-3 hours, $50-150 for wood)
- Attach primary pieces: Start with horizontal baseboards and cap moulding, then add vertical stiles. Use wood glue and a nail gun. (2 hours, $30-50 for glue/nails)
- Add decorative elements: Infill panels with smaller trim pieces to create a framed effect, if desired. (1 hour, $20-40)
- Caulk and paint: Fill nail holes, caulk all seams for a seamless look, then prime and paint. (4-6 hours with drying, $50-100 for paint/caulk)
Total time: ~10-13 hours (excluding extensive drying). Total material cost: $150 – $340.
The single element that defines this look is the layered dimension and architectural detail created by the moulding and trim. Without these raised, sculptural elements, the wall would be flat and lack the classic elegance, transforming the room from refined to generic. It’s the intricate framework, the shadow play it creates, and the classic character it imbues that makes the wall feel truly substantial and thoughtfully designed.
|
Pilgrim Sinclair Single Panel Fireplace Screen$271.39View on eFireplaceStore |
World Market Nisha Hand Carved Weathered Wheat Medallion Console Table$279.99View on World Market |
West Elm Round Wall Mirror$399.00View on west elm |
Everbilt PVC Chair Rail Moulding and Baseboard Wainscot$21.98View on Home Depot |
As an affiliate, we earn from qualifying purchases.
33. Living Room with Deep Teal Accent Wall
You absolutely don’t need a custom paint job for a deep teal accent wall. Visit your local Home Depot or Lowe’s for their paint sample lines; many offer stunning pre-mixed deep teals (e.g., Behr’s ‘Nocturne Blue’ or Sherwin-Williams’ ‘Riverway’). Or, for a truly budget-friendly option, look for slightly mis-tinted paints in the clearance section – you might just find your perfect jewel tone for under $20 a gallon. Pair it with a thrifted gold-framed mirror and some vibrant velvet pillows from Target for a high-end look that costs less than $200 overall for the wall itself.
While a deep teal accent wall is incredibly stylish, here’s the honest truth: painting a dark, saturated color perfectly can be tricky. It often requires multiple coats (sometimes 3-4) to achieve a rich, even finish without streaks, especially if you’re painting over a lighter color. Any imperfections on your wall will be more noticeable with a high-contrast dark paint, so careful prep work (patching, sanding) is crucial. And if you decide to change it down the line, be prepared for a good amount of priming and repainting to cover such an intense hue. It’s truly worth the effort, but plan for extra time and paint.
|
Streamdale Furniture Chesterfield Velvet Sofa$1,077.75View on Macy’s |
Pottery Barn Everson Round Glass Coffee Table$699.00View on Pottery Barn |
Wall Paint | Amethyst | Matt Emulsion Interior | Acrylic | Latex$99.95View on Hemway |
360 Lighting Serra Floor Lamp$149.99View on Target |
As an affiliate, we earn from qualifying purchases.
🚫 Common Mistakes to Avoid
Now that you’ve seen what works — here’s what to watch out for. These mistakes are surprisingly common and can undermine even the best design intentions.
❌ Mistake #1: Hanging Art Too High
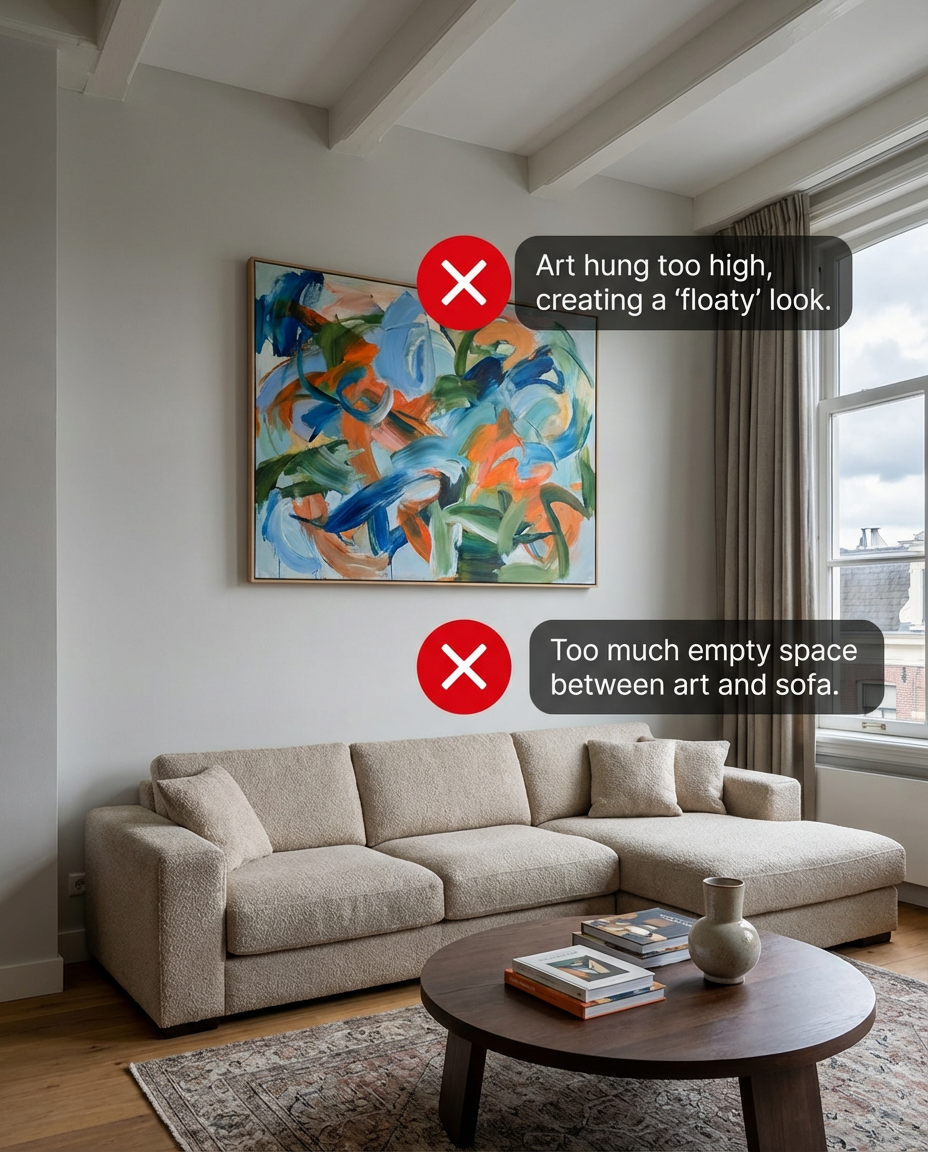
Lower your art so its center is at eye level, or 6-8 inches above furniture.
This is probably the most common mistake I see – otherwise beautiful art hung so high it looks like it’s floating aimlessly near the ceiling. It disconnects the art from your furniture and the rest of the room, making the space feel disjointed and uninviting.
The Fix: The center of your artwork should generally be at eye level (around 57-60 inches from the floor) when standing. If hanging above a sofa, leave 6-8 inches of space between the top of the sofa and the bottom of the frame.
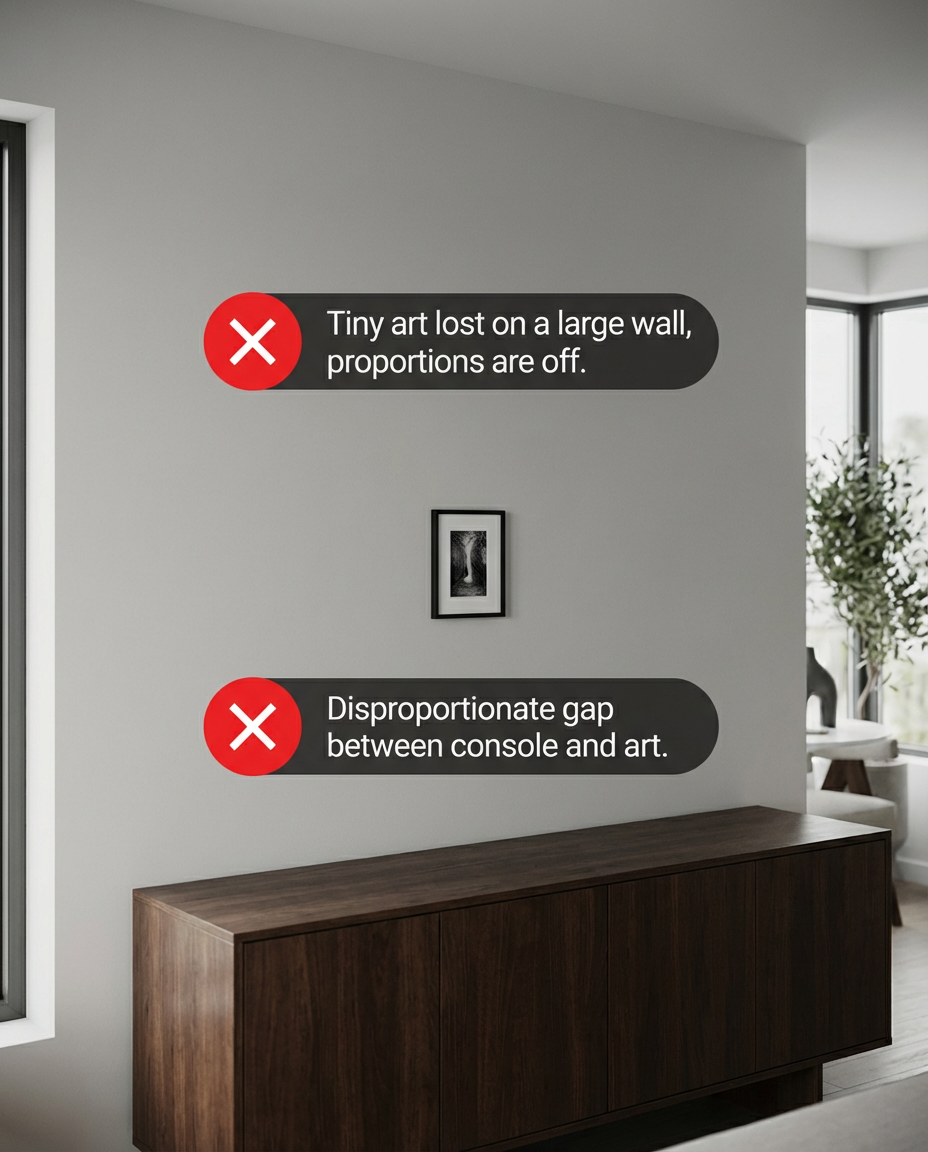
❌ Mistake #2: Ignoring Scale with Wall Decor
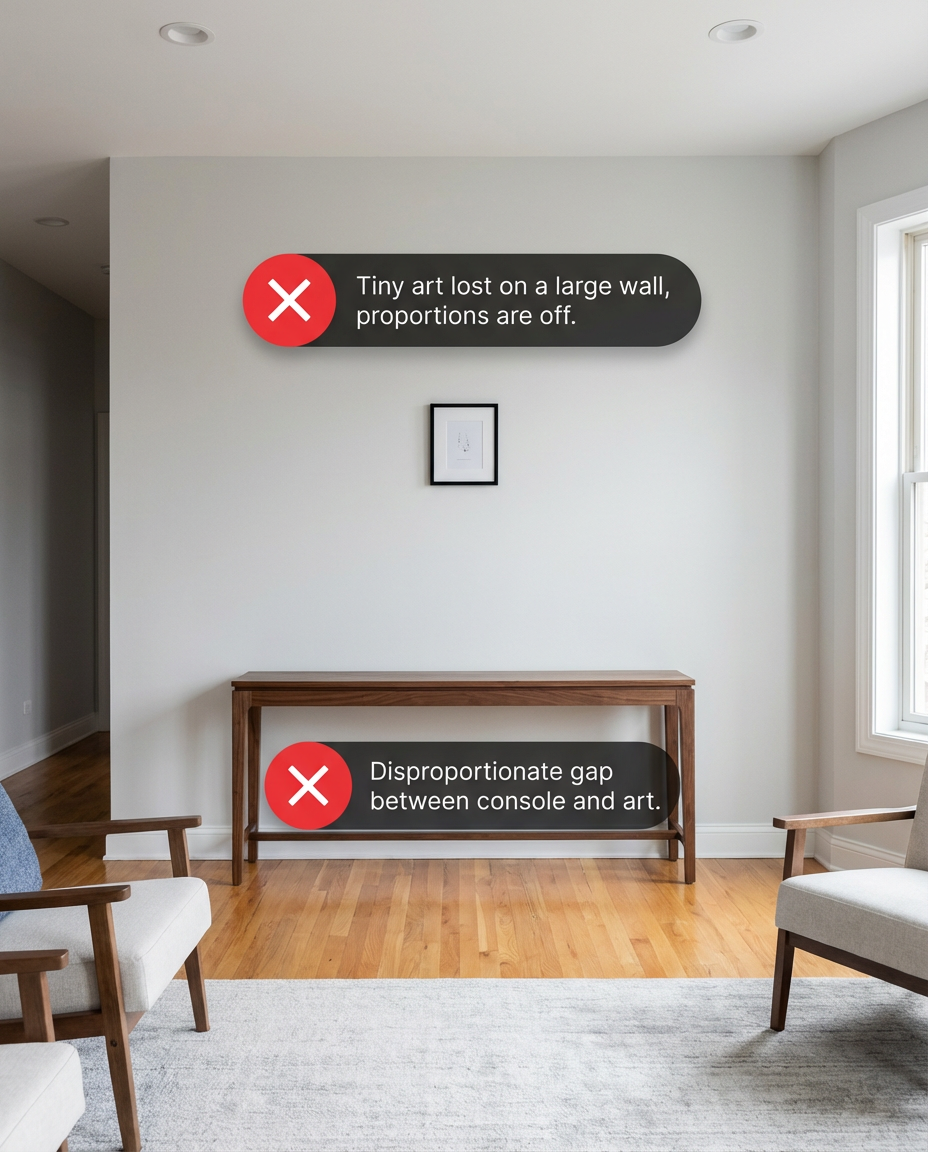
Match wall decor size to the wall or furniture it’s accenting.
A tiny painting on a huge wall, or a giant piece of art crammed onto a small wall, ruins the balance of the room. When wall decor is out of scale, it creates visual awkwardness, making the space feel either vast and empty or cramped and overwhelming.
The Fix: As a rule of thumb, wall decor should be about two-thirds the width of the furniture it’s above. For full walls, consider a collection of smaller pieces to fill the space, or one large piece that dominates purposefully.
❌ Mistake #3: Using Too Many Focal Points
Match wall decor size to the wall or furniture it’s accenting.
When every wall or every piece of decor tries to be
❌ Mistake #4: Using Too Many Focal Points
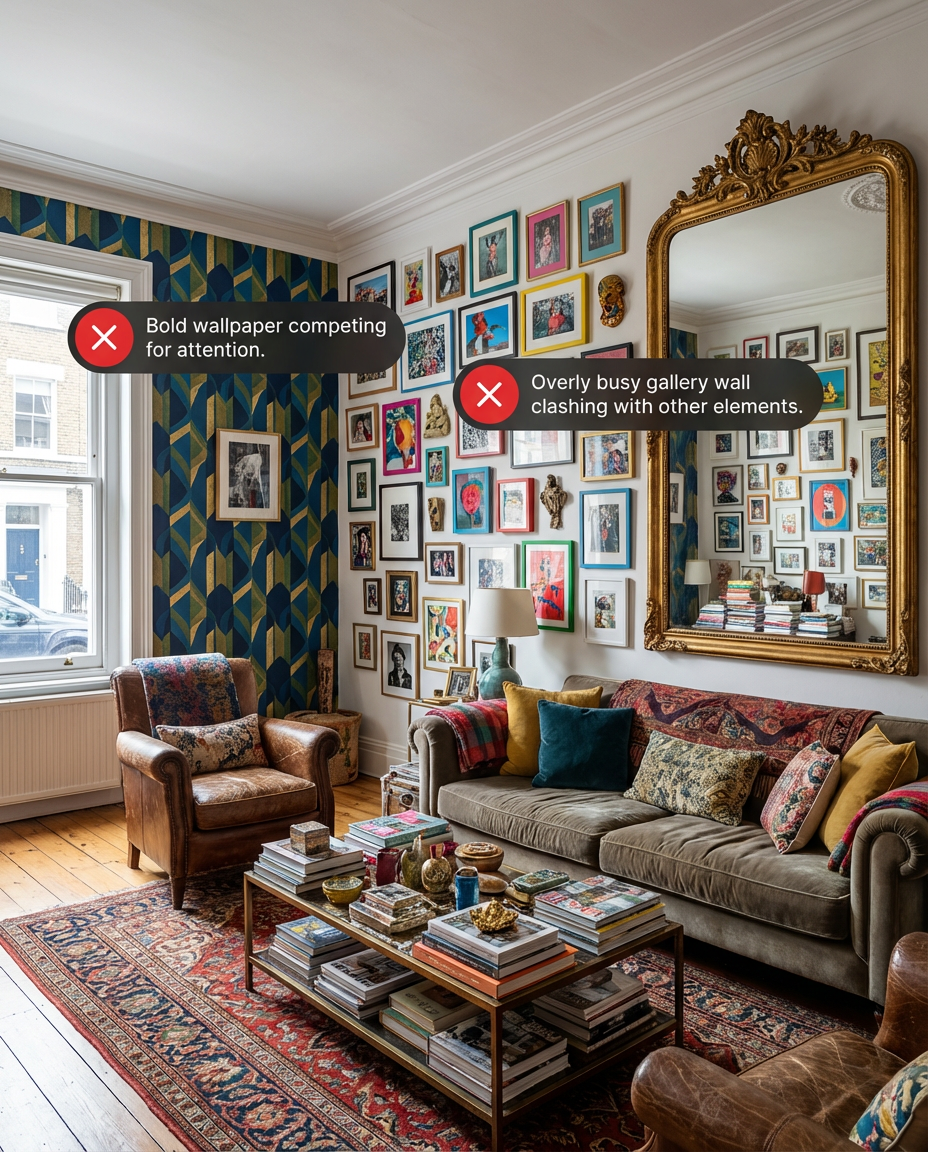
Choose one dominant focal point; let other decor complement it.
When every wall or every piece of decor tries to be ‘the star,’ your eyes won’t know where to land. This creates a visually chaotic and overwhelming environment, making a room feel busy and unfocused instead of cohesive and calming.
The Fix: Choose one dominant focal point per room – for example, an accent wall, a fireplace, or a large piece of art. Other wall decor should complement this focal point without competing for attention. Think of supporting actors in a play.
❌ Mistake #5: Underestimating Lighting Impact
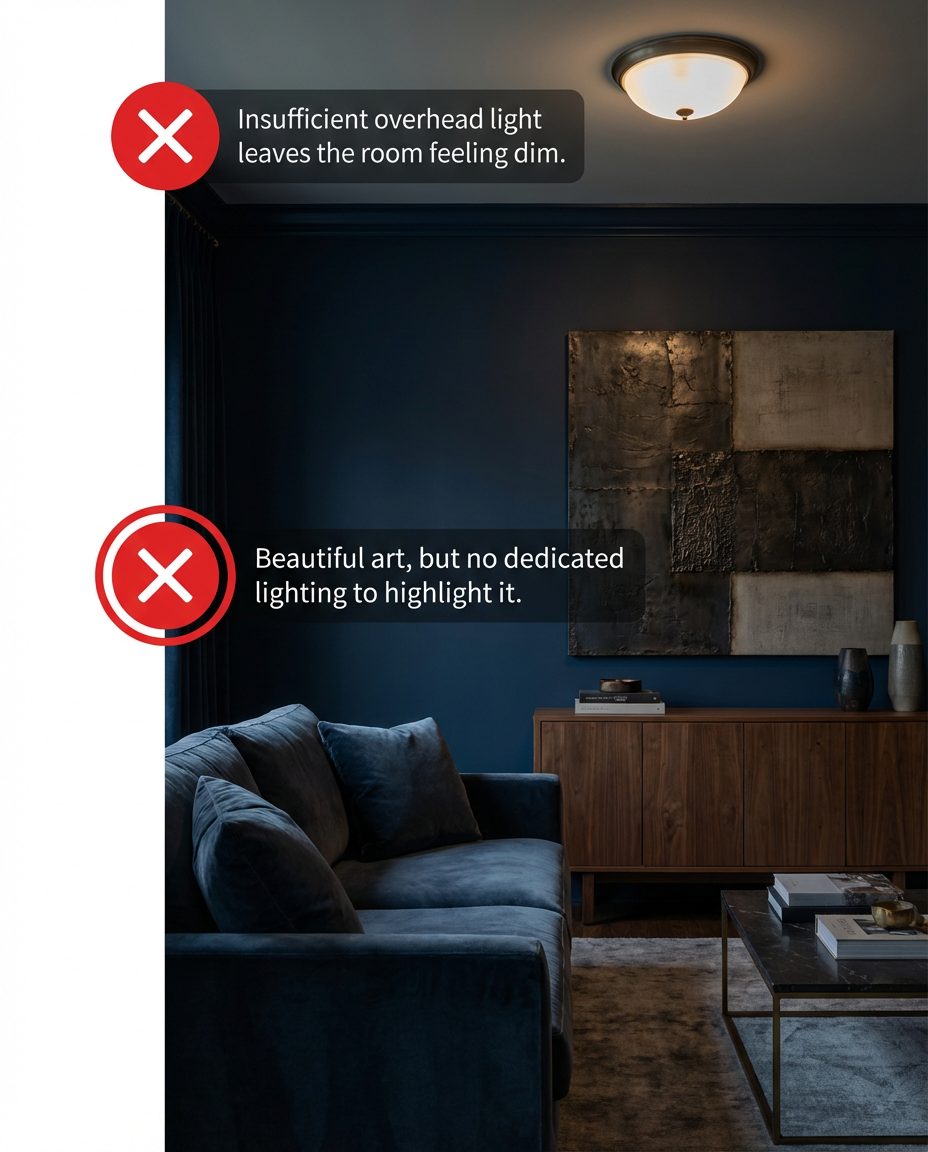
Use layered lighting to highlight wall decor and create ambiance.
You can have the most gorgeous wall decor, but if it’s poorly lit (or not lit at all), it loses its impact. Harsh overhead lighting can cast unflattering shadows, while too little light leaves your beautiful choices in the dark, making the room feel dull and uninteresting.
The Fix: Implement a layered lighting scheme. Use wall sconces, picture lights, track lighting, or even strategically placed floor lamps to highlight your wall decor and create a warm, inviting ambiance.
Final Thoughts
See? Creating a living room that truly reflects your style doesn’t have to be a guessing game. These 33 ideas, from subtle textures to dramatic accent walls, prove that your walls are more than just boundaries – they’re canvases waiting for your personal touch. Now that you’re armed with inspiration and actionable tips, go forth and make your living room dreams a reality.
Ready to bring these visions to life? Start pinning your favorites and share your progress with us on Pinterest!