If your Patio Shade Ideas 2026 situation has been bothering you for longer than you’d like to admit, this is the guide for you. We spent serious time browsing Target, Michaels Stores, and Lowe’s to bring you only what’s worth your attention this year. This curated guide features 33 ideas encompassing styles from bohemian to modern, showing you how to achieve amazing looks across every price point, from a mere $3 to a lavish $10000. Every idea here comes with direct links to products so you can shop your favorites instantly. With outdoor living becoming an extension of our homes, creating sheltered havens is a top priority, making patio shade solutions hotter than ever on Pinterest. Go ahead and save this — you’re going to want to reference it.
Note: This article contains affiliate links. We may earn a commission if you make a purchase through these links.
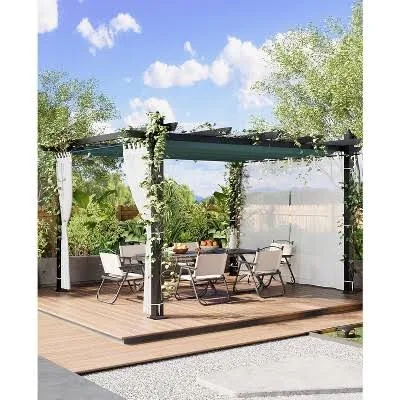
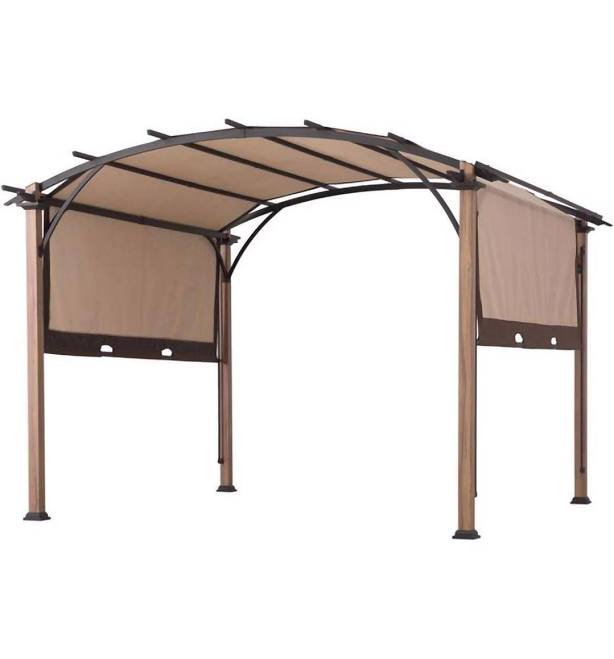
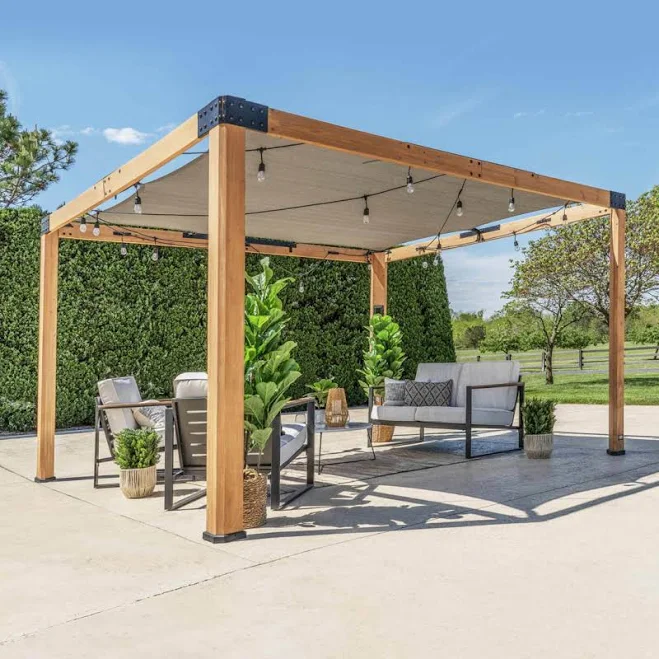
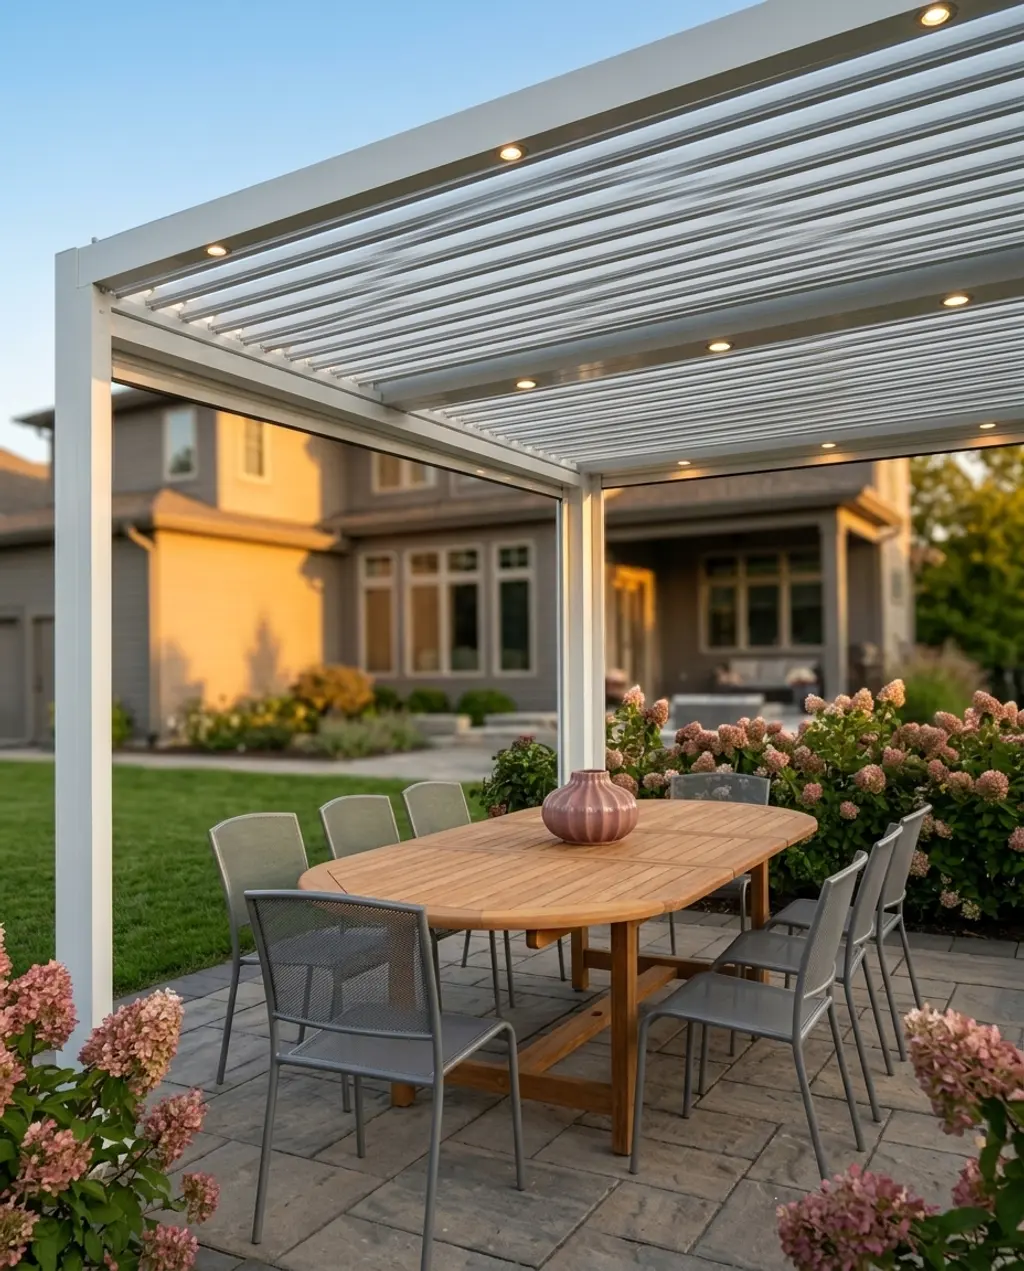
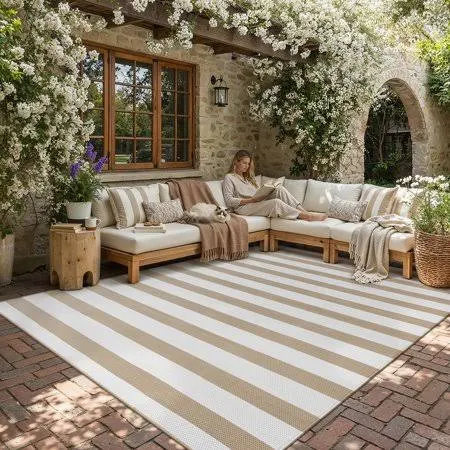
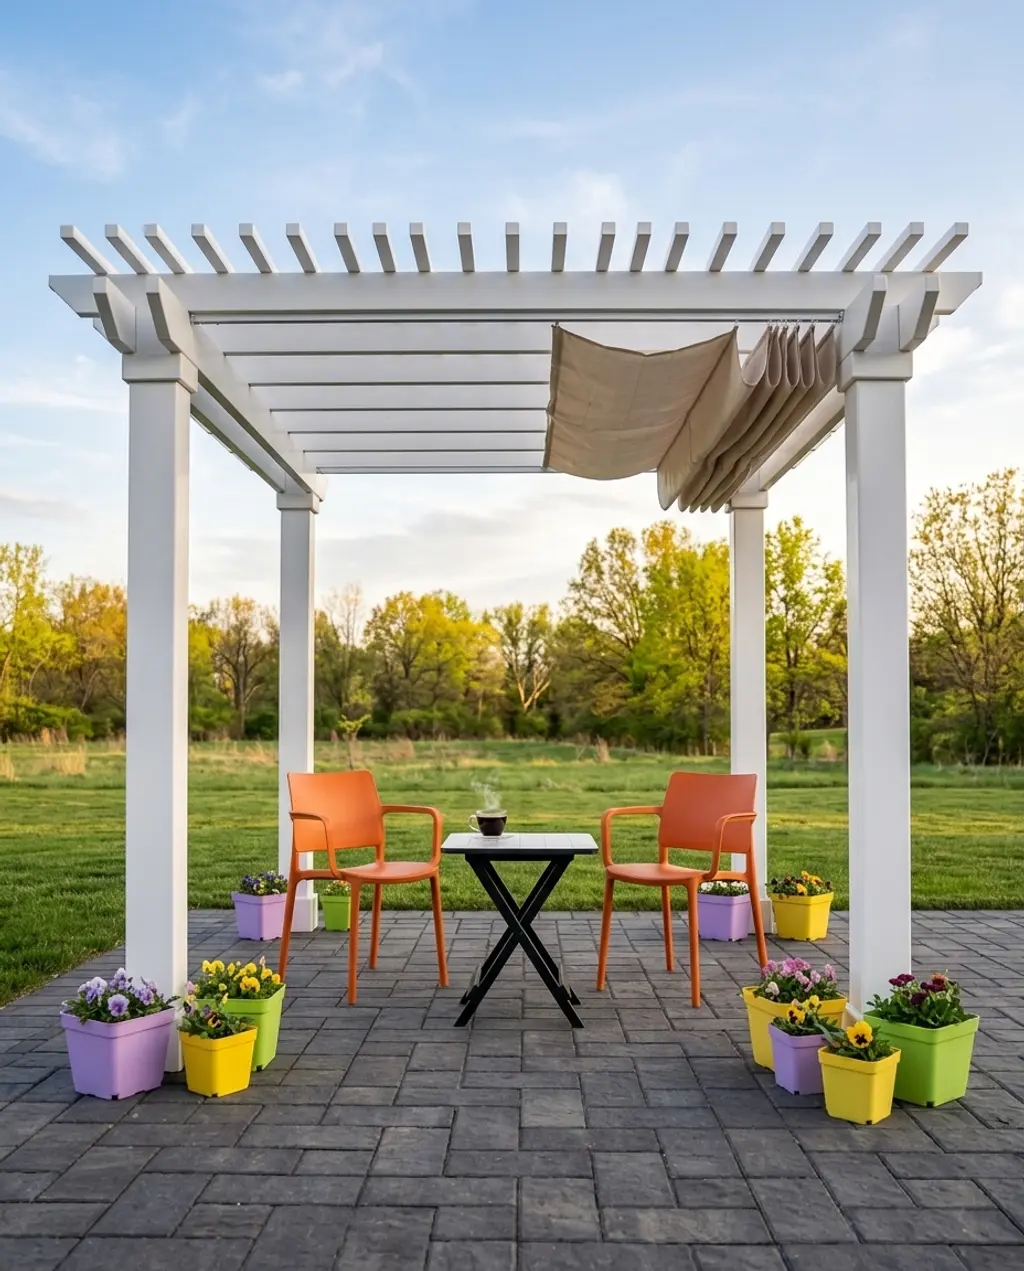
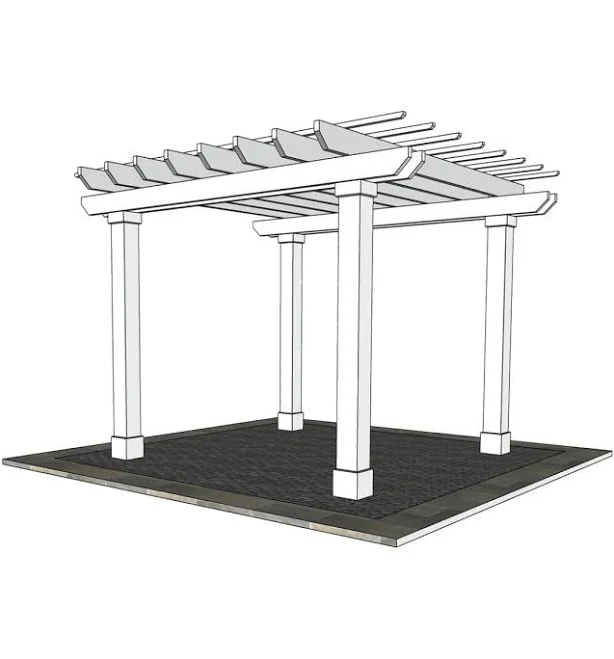
1. Modern Pergola with Retractable Canopy for Seamless Patio Shade
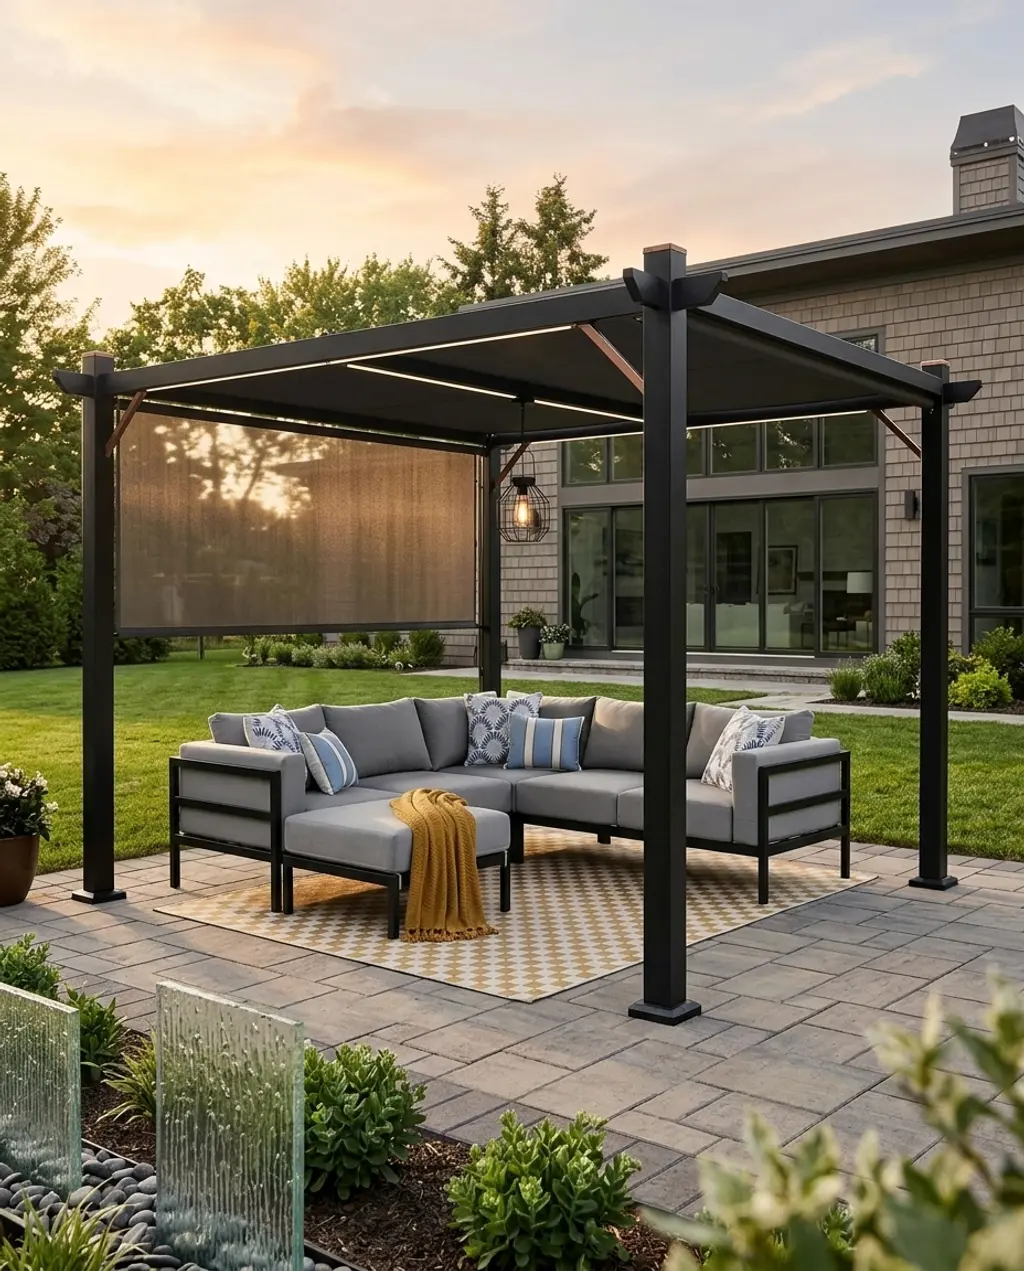
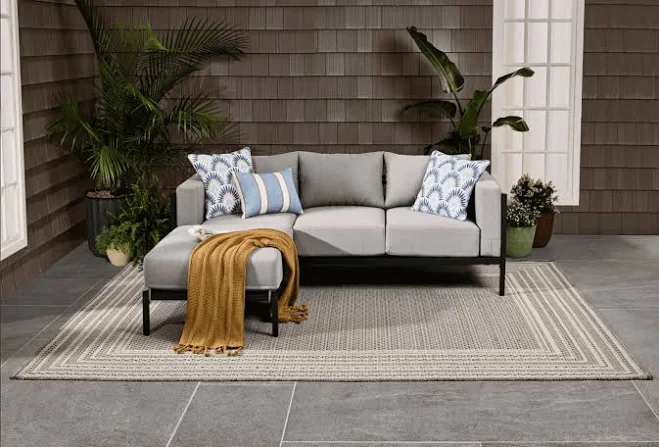
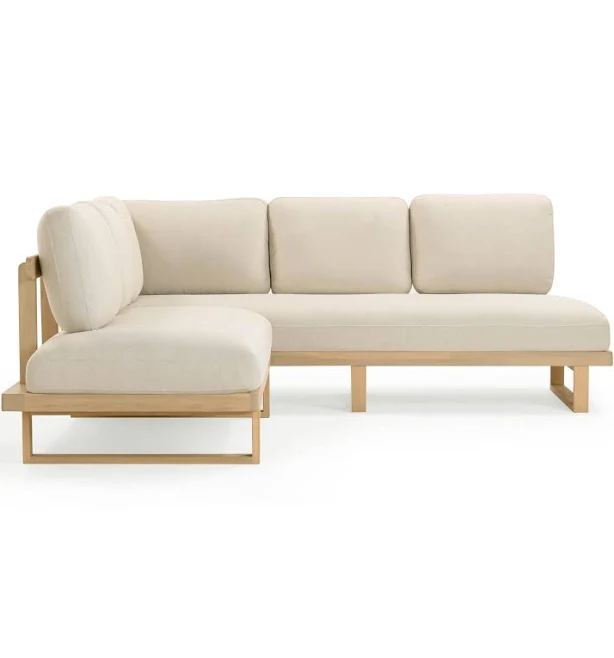
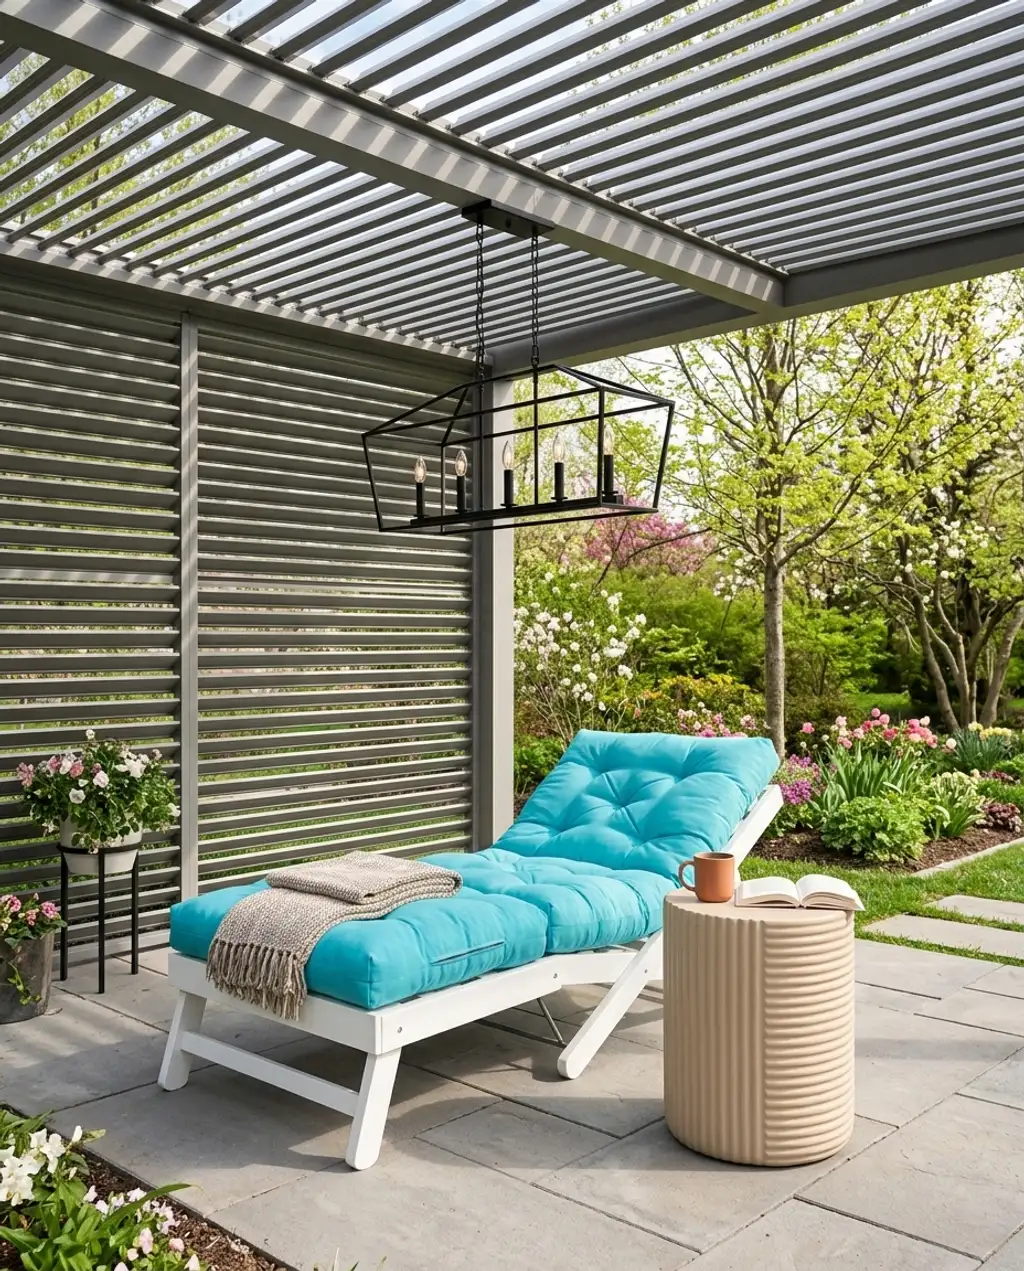
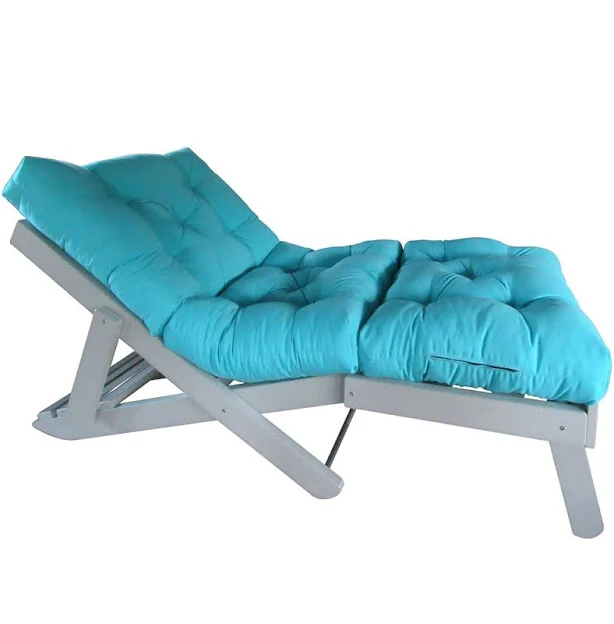
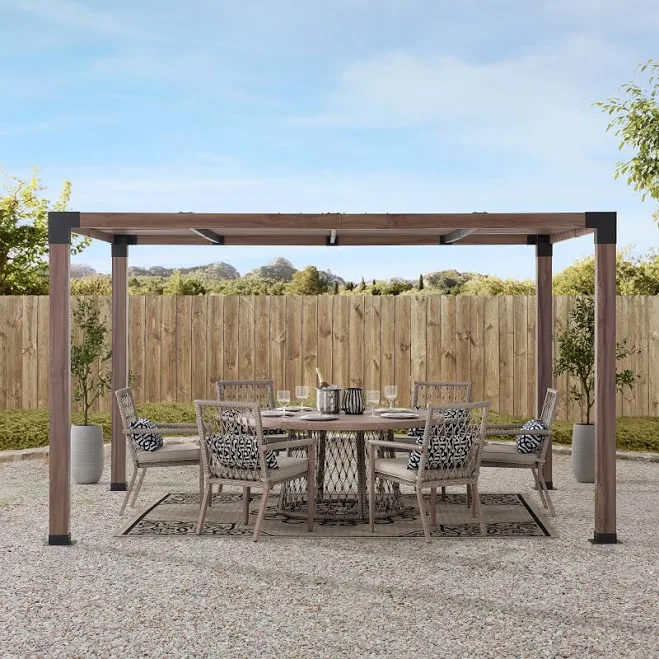
When you’re looking to upgrade, a retractable canopy on a modern pergola is a game-changer. It’s truly the best of both worlds: full sun when you want it, glorious shade when you don’t. The clean lines of an aluminum pergola give it that sleek, contemporary edge, and when paired with a comfy outdoor sectional, it creates an inviting lounge space that feels like an extension of your indoor living room. Think minimalist design, maximum comfort. The beauty here is in the flexibility; you’re not locked into one type of shade. It adapts to your day, your mood, and the unpredictable sun.
- Main furniture (outdoor sectional): $424 – $800
- Pergola with retractable canopy: $371 – $1500
- Textiles (rug, throw pillows): $50 – $150
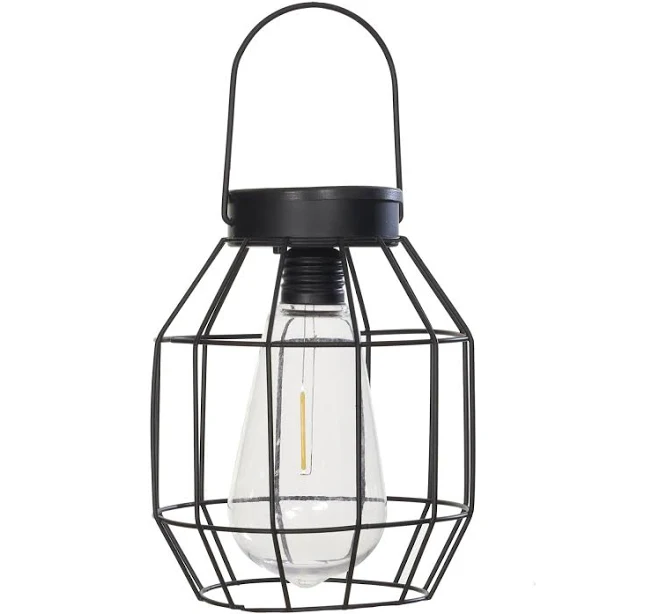
- Decor & Accessories (pendant light): $15 – $75
- Total Estimated Cost: $860 – $2525
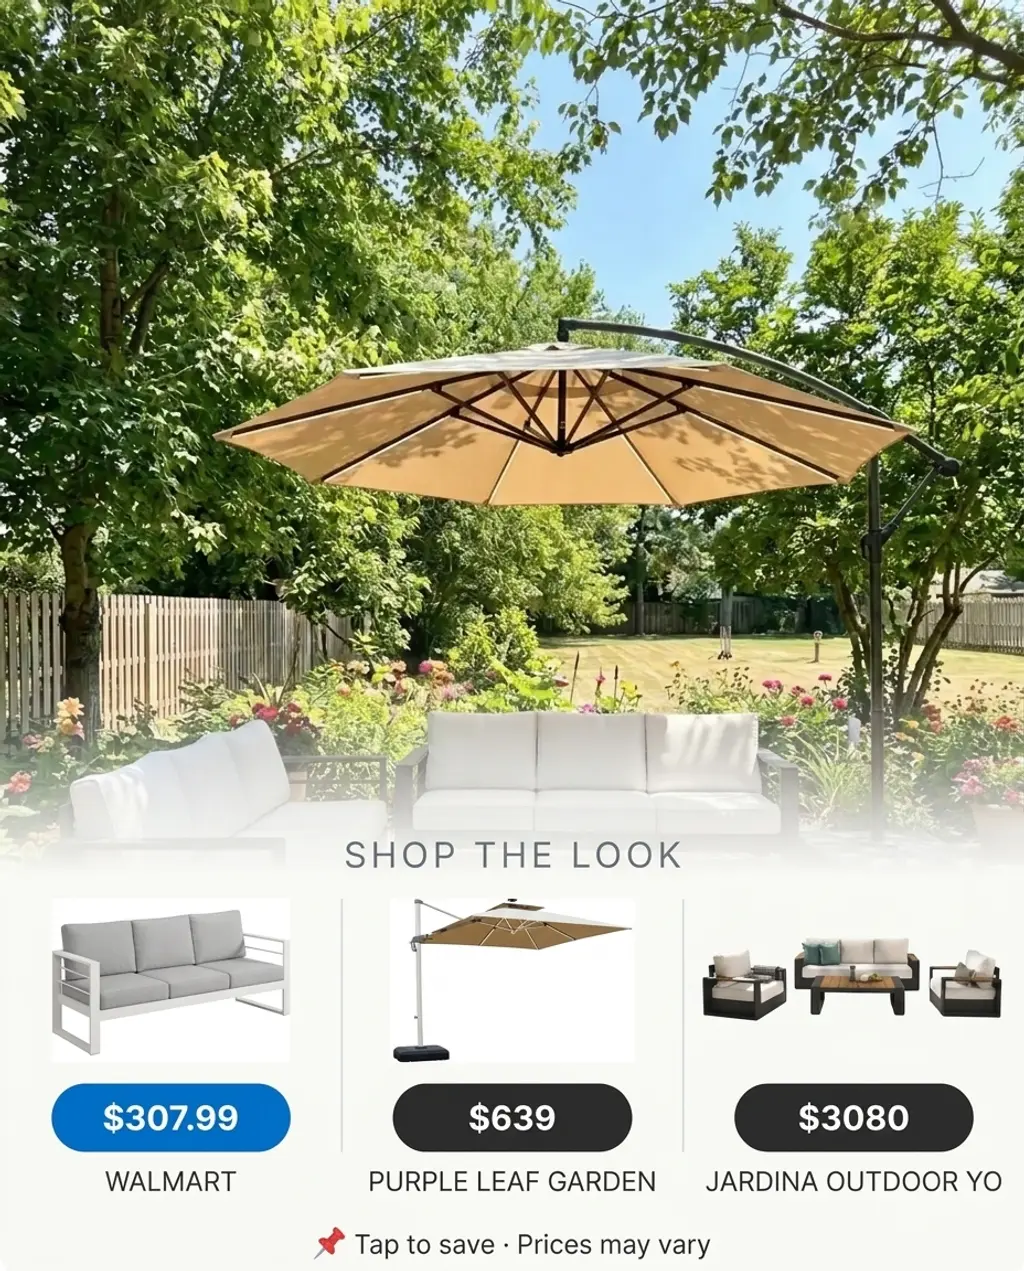
- Budget alternative: Use a large, modern cantilever umbrella ($150-$300) instead of a built-in pergola, paired with a more affordable sectional from Walmart ($300-$500) for a similar look at 40-60% less.
|
Retractable Aluminum Pergola with Sunshade and Mesh Panels$371 |
Better Homes & Gardens Marlow Outdoor 2pc Patio Sectional Set$424 |
AllModern Icon Geometric Indoor Outdoor Rug$51 |
Better Homes & Gardens Energy Efficient LED Outdoor Pendant Light$14.74 |
As an affiliate, we earn from qualifying purchases.
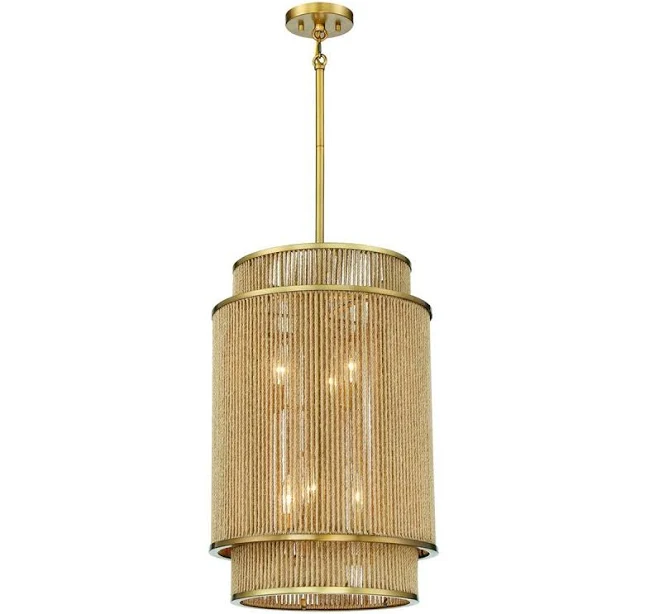
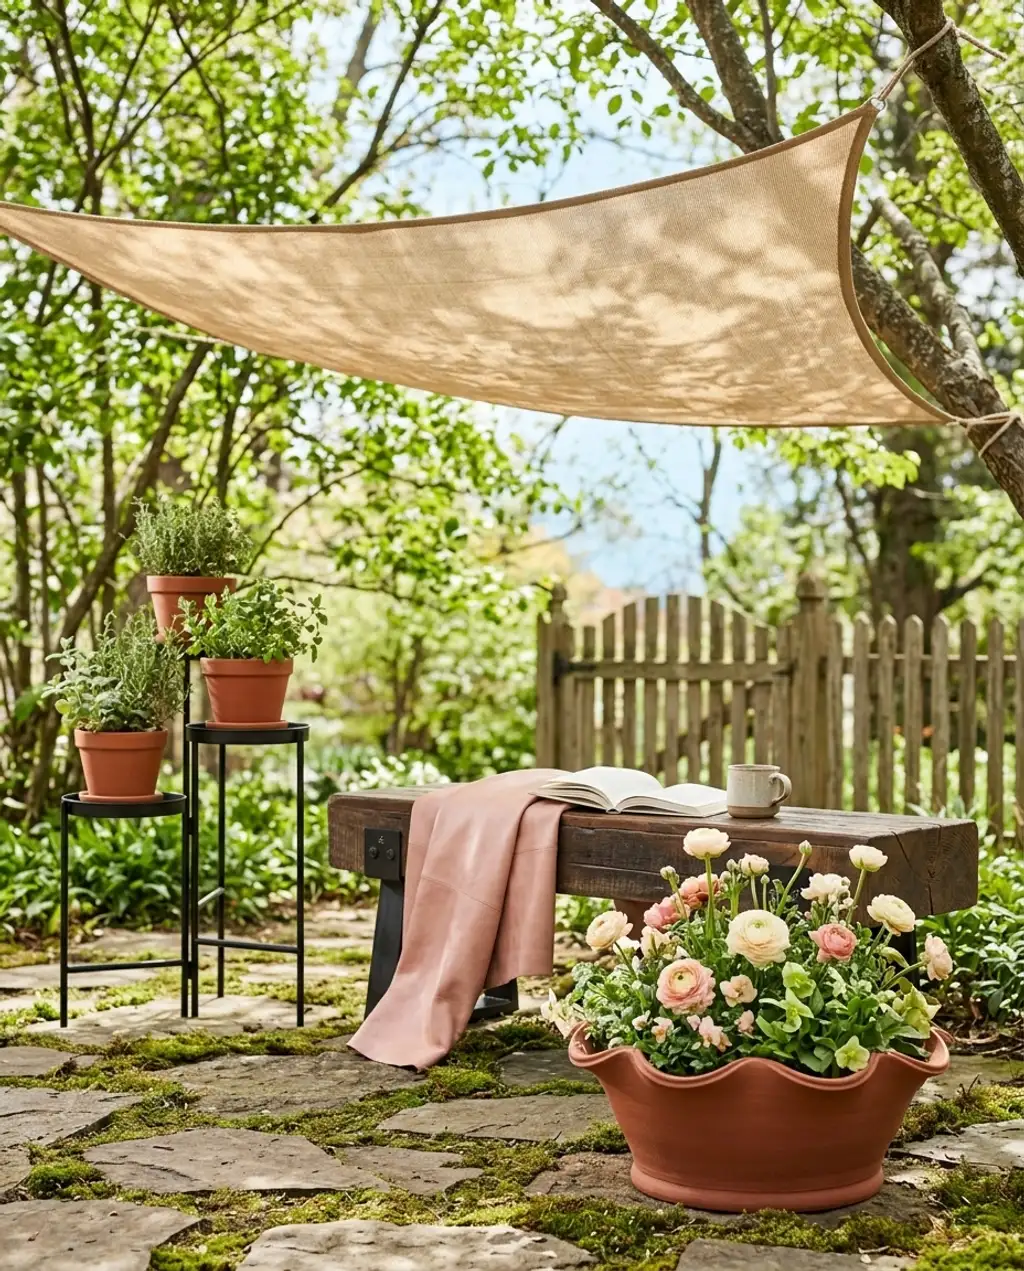
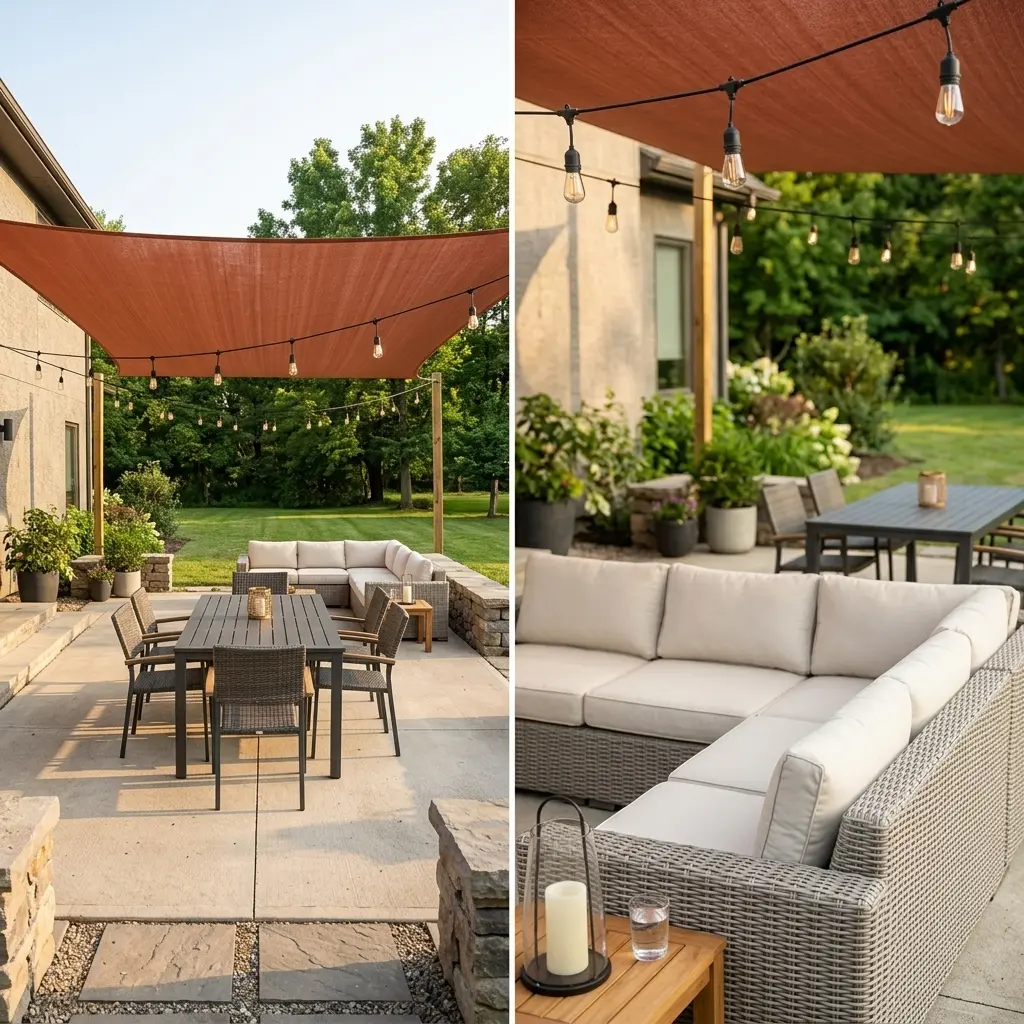
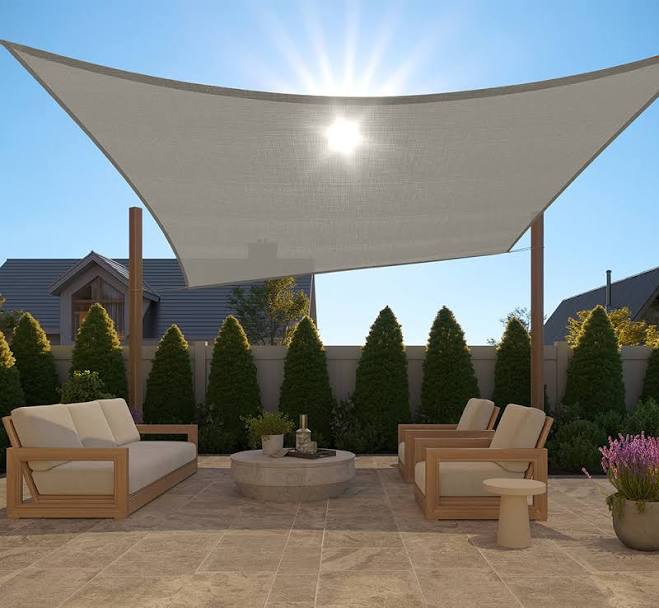
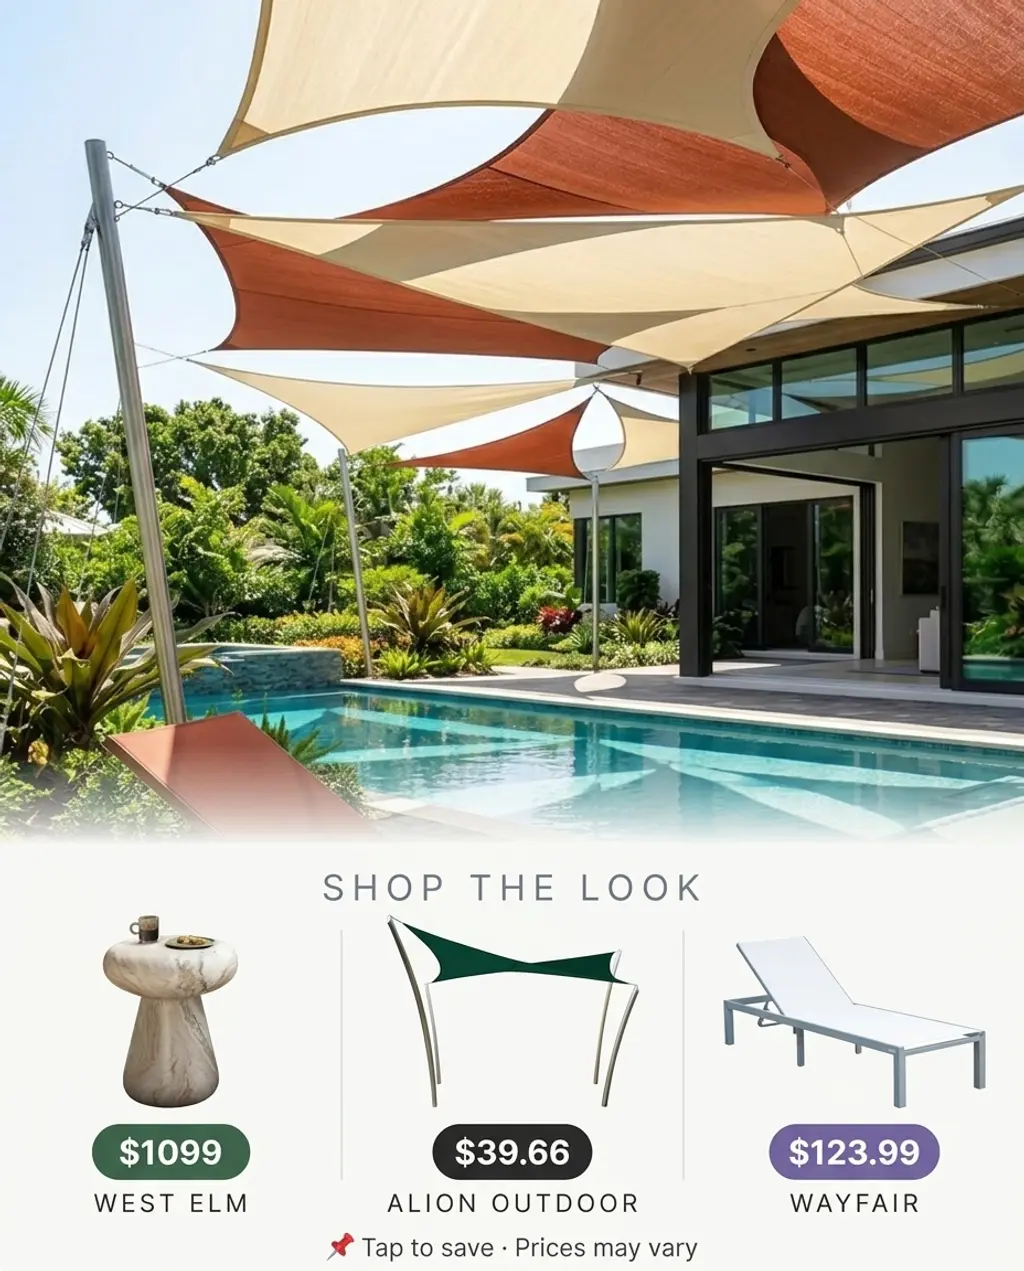
2. Bohemian Shade Sails for Renter-Friendly Patio Oasis
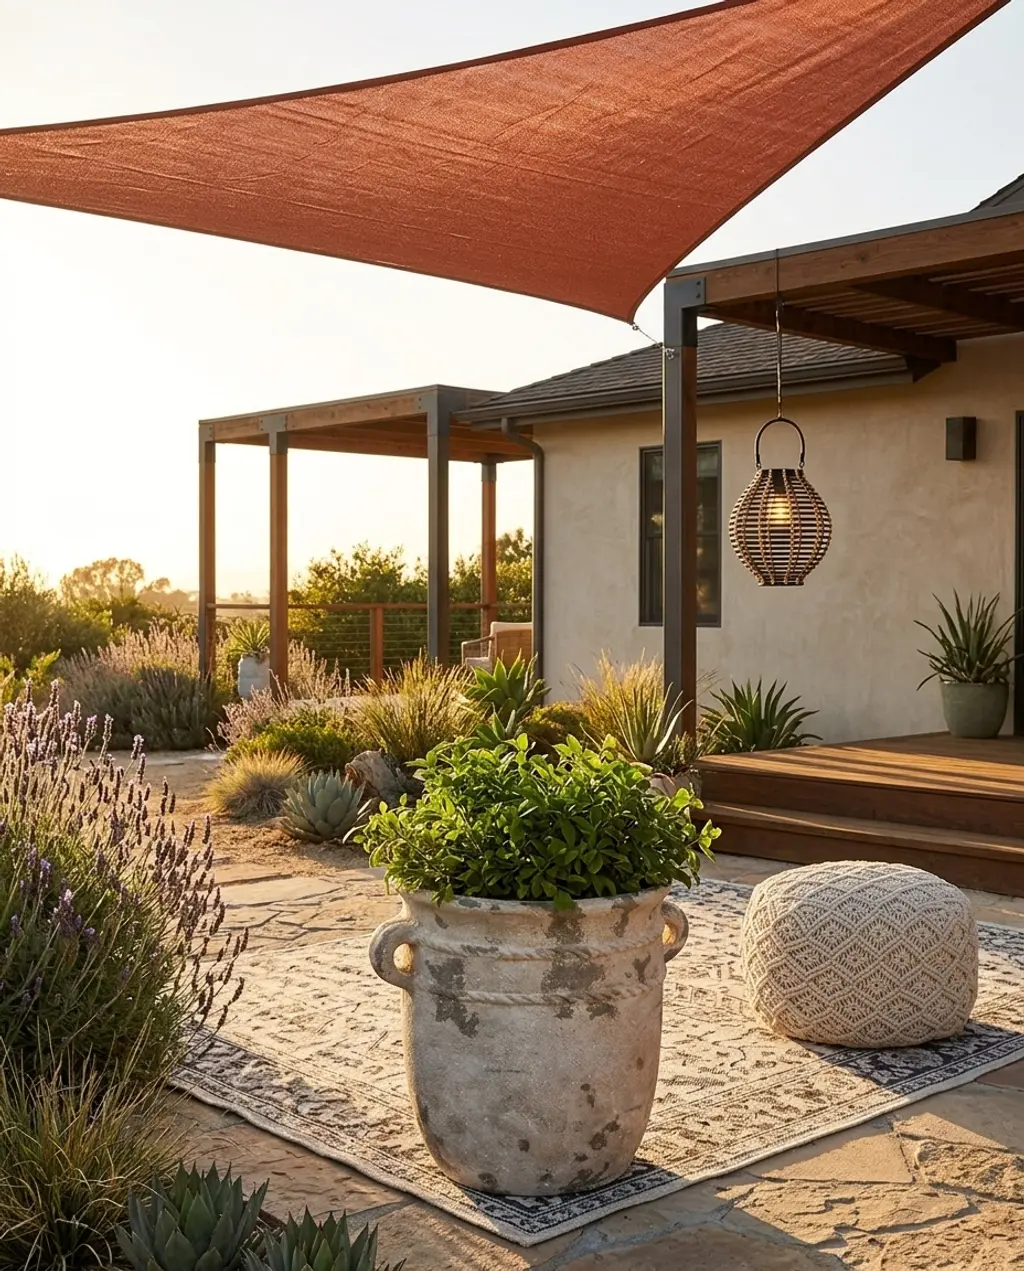
Okay, renter friends, this one’s for you! Shade sails are your secret weapon for transforming a drab patio into a bohemian oasis, no landlord approval needed. The beauty of these macrame or fabric triangles is their versatility; you can arrange them in countless configurations to create overlapping layers of shade and visual interest. Add some plush poufs and a scattering of string lights, and suddenly your rental patio feels like a permanent, intentional outdoor room. It’s all about creating that relaxed, free-spirited vibe with natural fibers and soft textures.
Bohemian style has been a steady Instagram favorite for years, but its application to outdoor spaces is really hitting its stride in 2026. People are craving that relaxed, wanderlust aesthetic in their own backyards, and shade sails deliver it perfectly without requiring major construction. Pinterest boards are brimming with examples of these fabric shades, often paired with global-inspired textiles and potted plants. It’s a trend that’s going to stick around because it’s so achievable and adaptable, especially for those who need renter-friendly options.
|
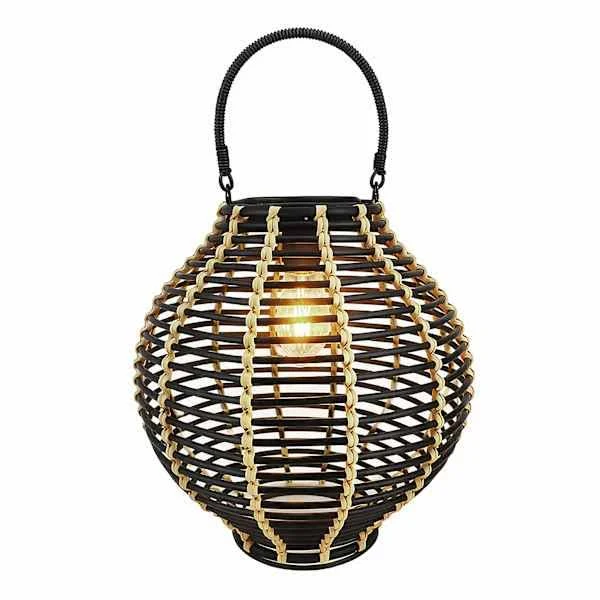
at Home 10in Rattan Solar Lantern$29.99 |
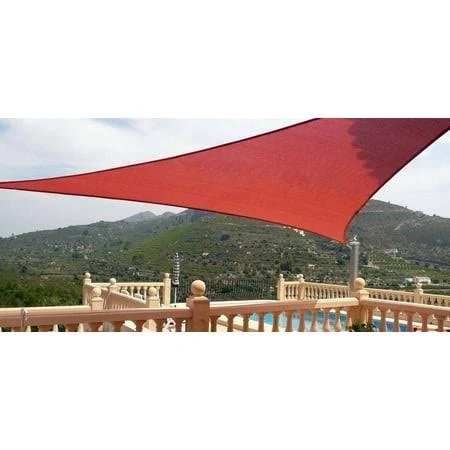
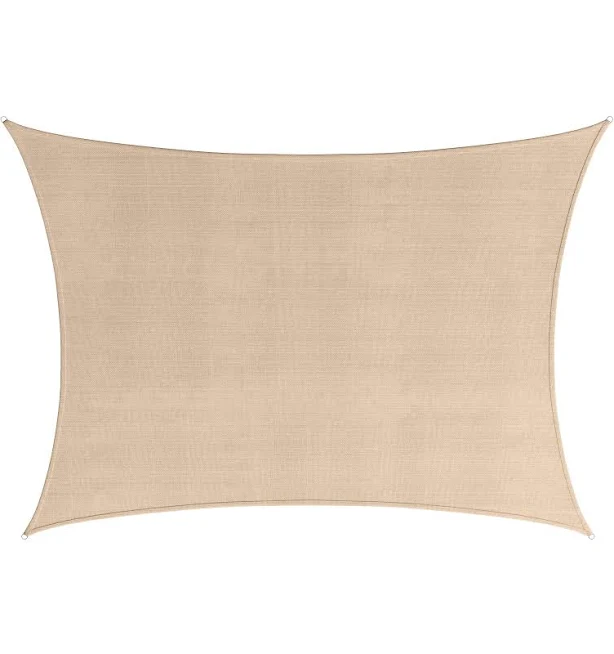
Petra’s 20 Ft. Terracotta Sun Sail Shade$71.99 |
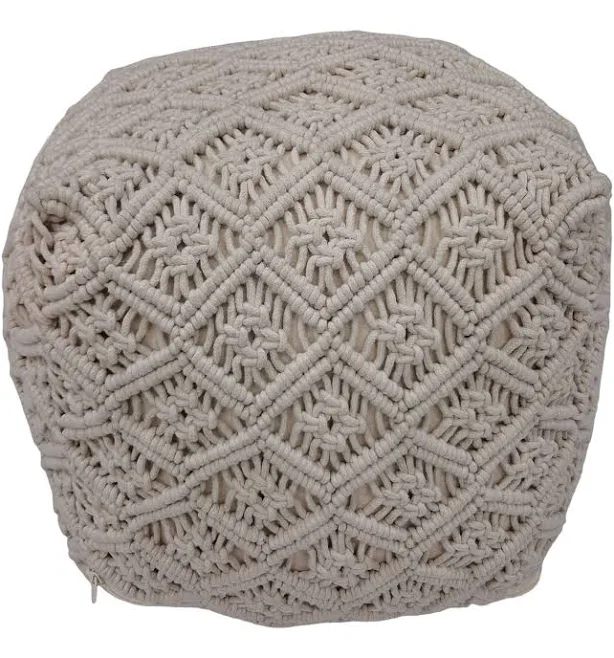
Ashland Macrame Decorative Pouf$34.99 |
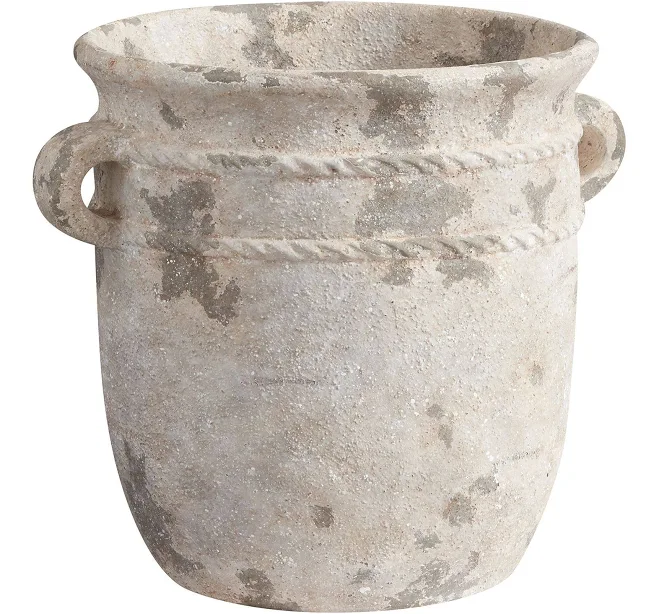
Pottery Barn Eclectic Villa Planter$299 |
As an affiliate, we earn from qualifying purchases.
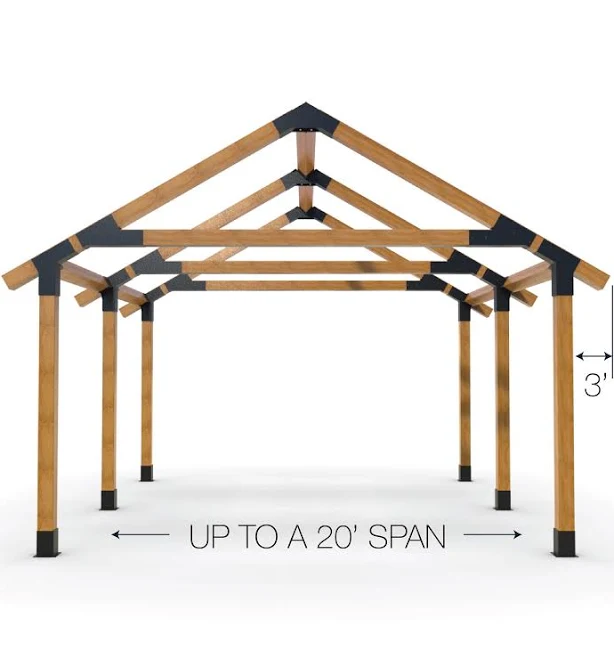
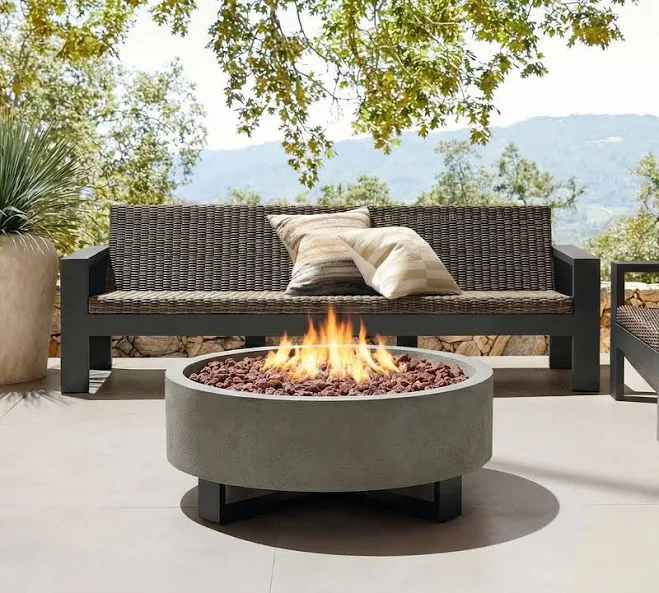
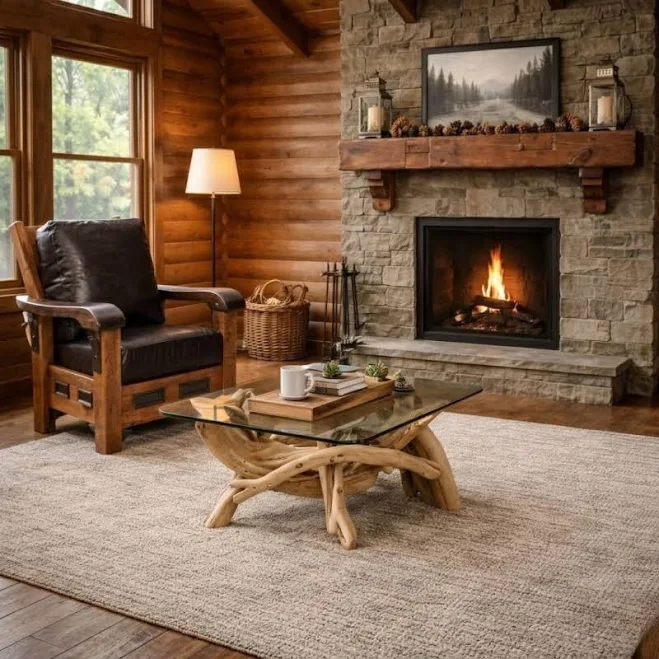
3. DIY Wood Pergola with Climbing Vines for Natural Shade
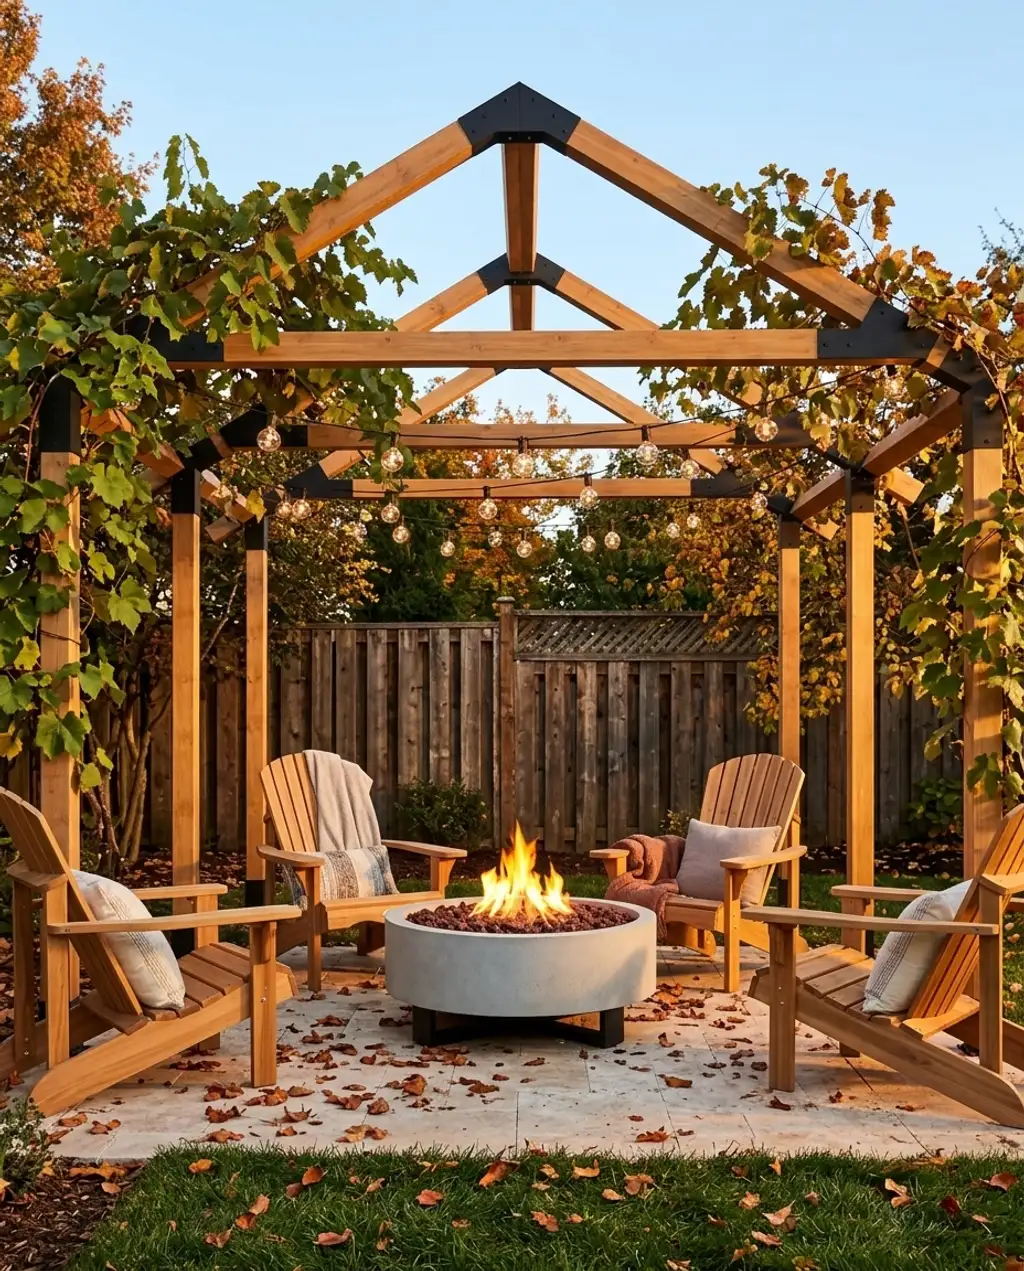
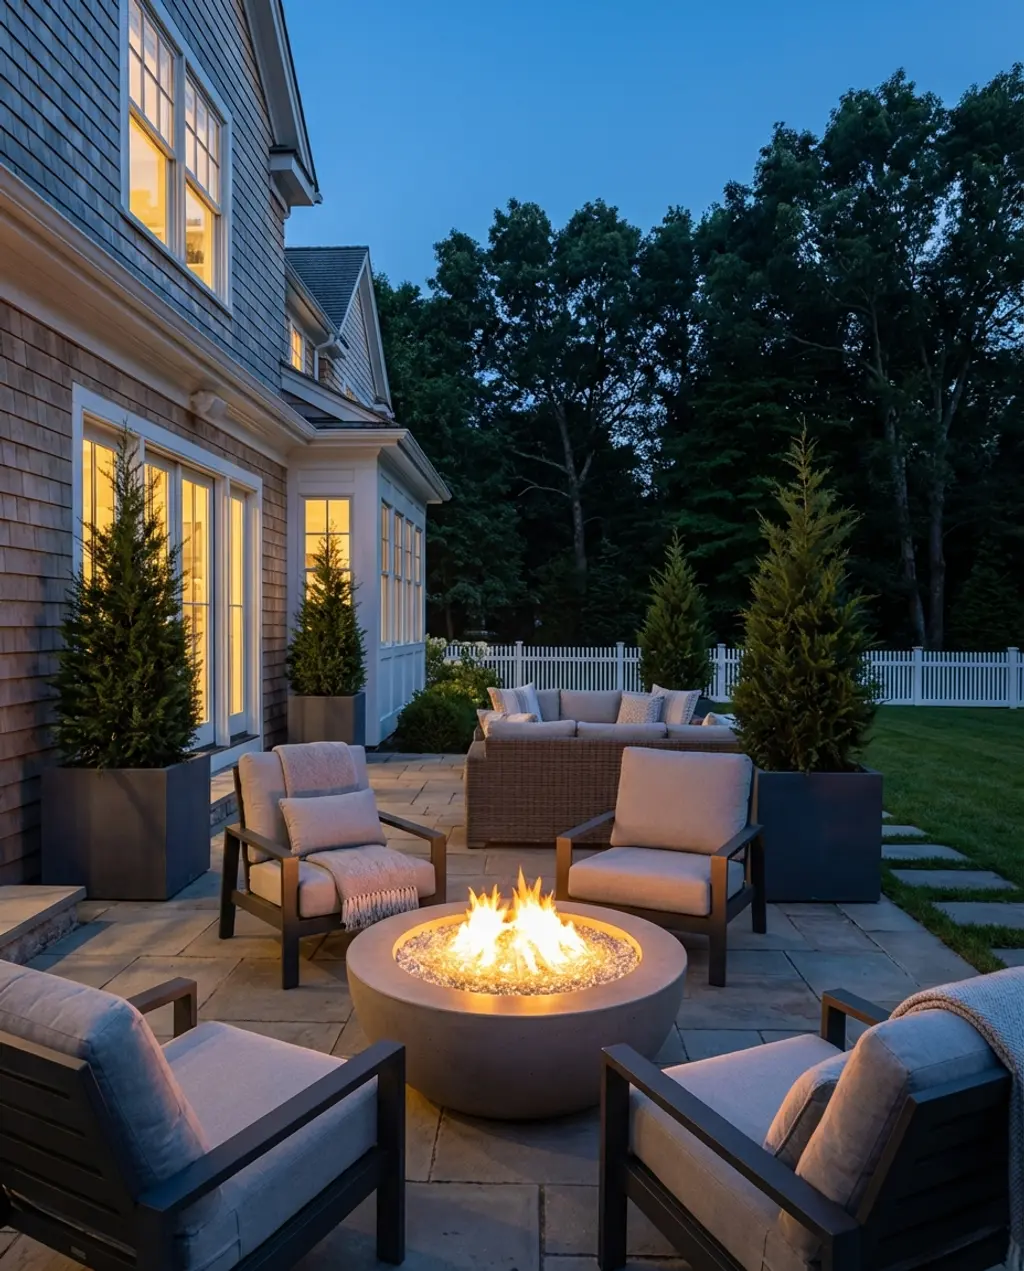
Want to feel like you’re escaping to a Tuscan vineyard every time you step on your patio? A DIY wood pergola with climbing vines is your answer. There’s something inherently charming and romantic about natural wood supporting a lush canopy like grapevine or wisteria. It gives you dappled, organic shade that cools the air and creates a truly cozy, garden-like sanctuary. Pair it with classic Adirondack chairs and a fire pit, and you’ve got an outdoor living space that feels wonderfully established and inviting.
- Source your wood: Look for weather-resistant options like cedar or redwood. You can buy pre-cut kits or lumber from your local hardware store. Cost: $300-$800.
- Assemble the frame: Follow kit instructions or build a simple 4-post structure with crossbeams. Time: 1-2 weekends.
- Install supports for vines: Add wire, netting, or extra slats across the top. Cost: $30-$100.
- Plant your vines: Choose fast-growing, non-invasive varieties like grapevines (for fruit!) or wisteria (for flowers). Cost: $20-$50 per plant.
- Guide the growth: Gently train the vines to climb the structure as they grow. Time: ongoing, low effort.
- Enjoy! Within a season or two, you’ll have natural, living shade.
While a living canopy looks incredible, don’t underestimate the upkeep. Vines need regular pruning to keep them from becoming too heavy or invasive, and you’ll need to clean up fallen leaves and plant debris. Some vines can attract insects, too, so be prepared for a bit of garden maintenance. If low-maintenance is your priority, consider Idea #16 which uses adjustable fabric panels for a similar feel without the green thumb.
|
DIY Gazebo Kit$799 |
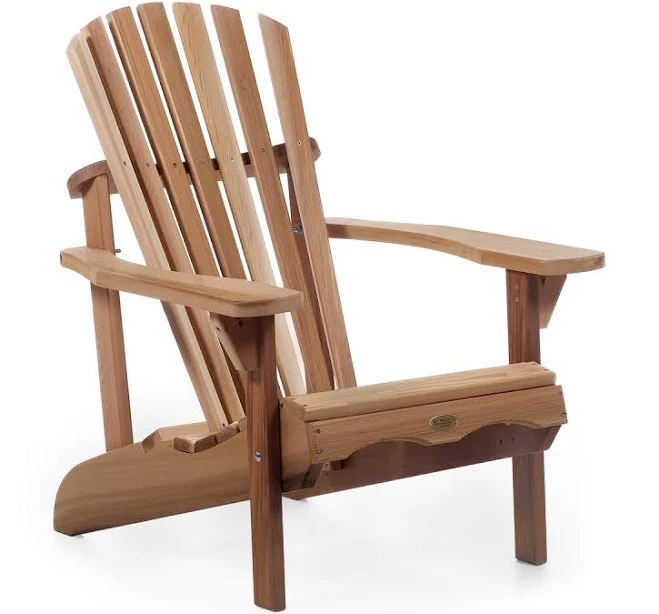
All Things Cedar Adirondack Chair$181.41 |
Pottery Barn Elmwood 40″ Round Concrete Outdoor Propane Fire Pit$1499 |
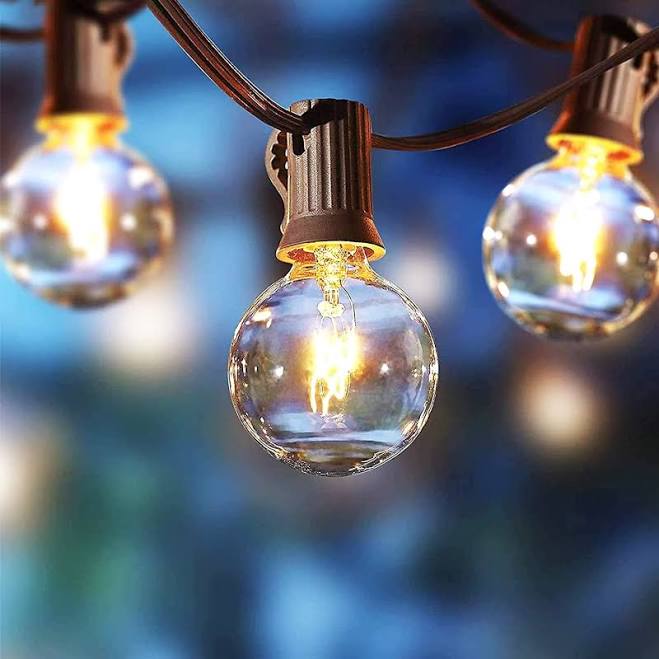
Better Homes & Gardens 20-Count Clear Glass Globe Outdoor Patio String$7.88 |
As an affiliate, we earn from qualifying purchases.
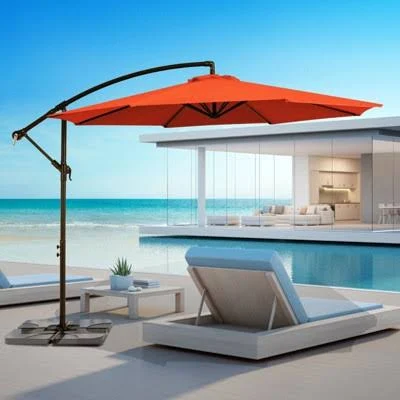
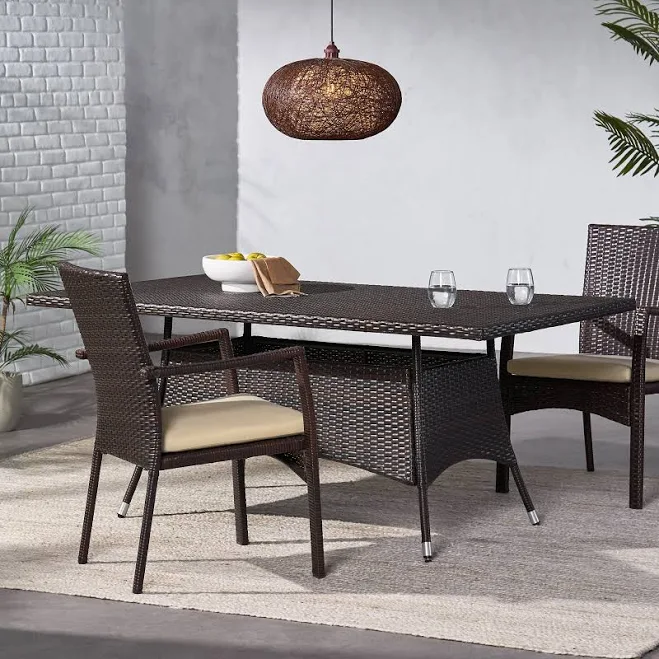
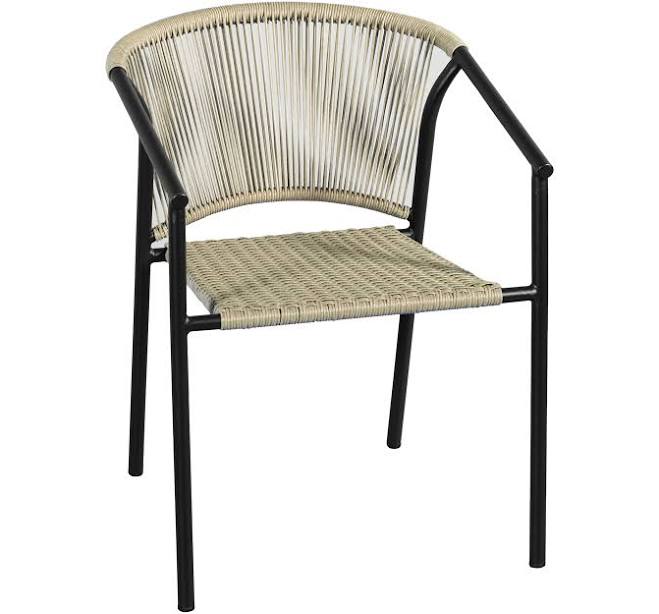
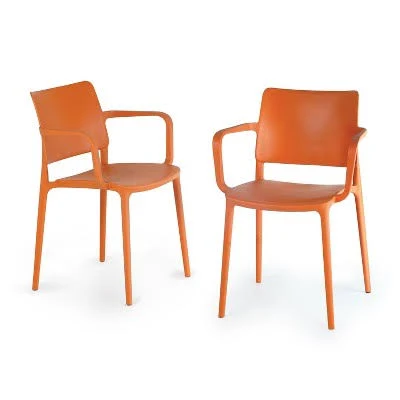
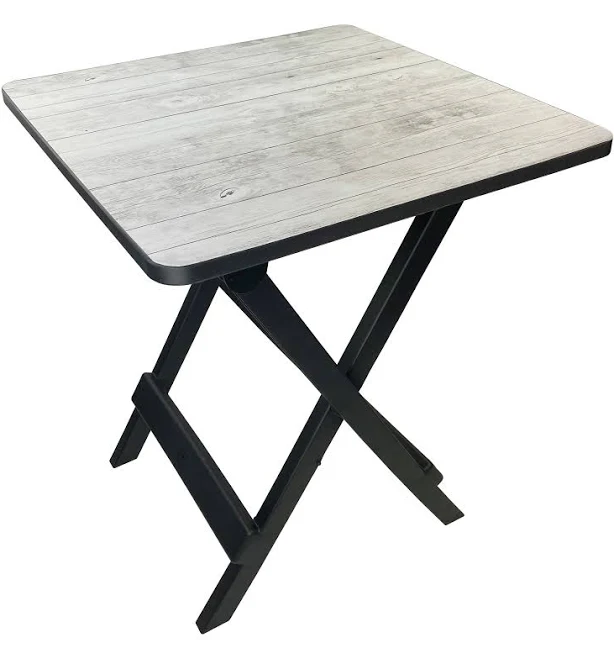
4. Budget-Friendly Umbrella Cluster for Flexible Patio Shading
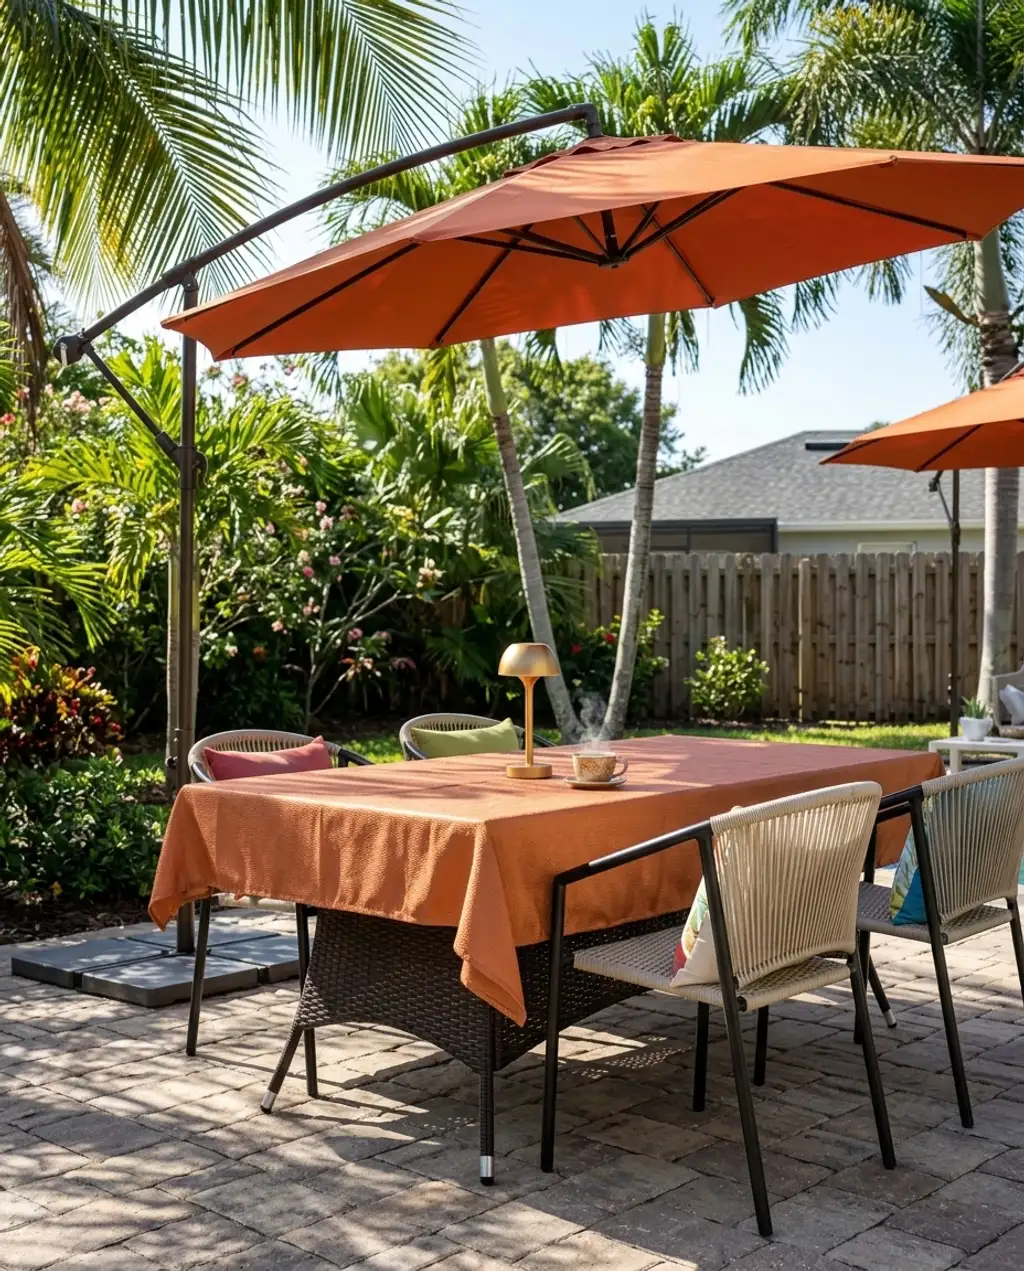
Who says you need one giant, expensive structure for shade? Not us! A cluster of colorful patio umbrellas offers incredibly flexible shade, and it’s super budget-friendly. Think of it like creating a playful, mosaic ceiling above your outdoor dining or lounge area. You can mix and match sizes, colors, and even shapes to create an eclectic, vibrant look. The best part? You can move them around as the sun shifts, or pack them away for winter. It’s a casual, fun approach to shade that doesn’t take itself too seriously.
- A 10ft cantilever umbrella can cost as little as $140 from Target.
- Pair it with two smaller 6-7ft market umbrellas, often on sale for $50-$70 each at Walmart or Lowe’s.
- Look for outdoor dining sets on Facebook Marketplace or thrift stores for under $100, then paint them a fun color.
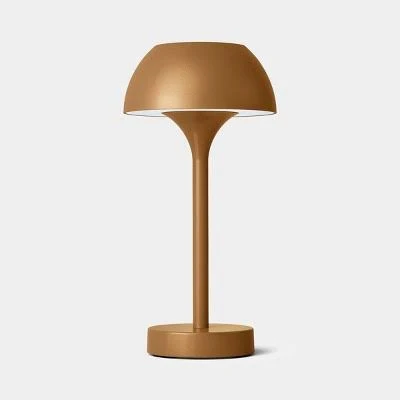
- Add string lights and solar-powered lanterns (like the Threshold Battery/ Solar LED Outdoor Touch Accent Table Lamp from Target for $25) for ambiance.
- Your total cost for ample, flexible shade could be under $400, giving you Idea #1‘s versatility for a fraction of the cost.
|
Hyleory 10ft Cantilever Patio Umbrella$139.99 |
Noble House Ramsey Outdoor Wicker Dining Table$227.79 |
Style Selections Pelham Bay Stationary Dining Chair CR-25S126W$49.98 |
Threshold Battery/ Solar LED Outdoor Touch Accent Table Lamp$25 |
As an affiliate, we earn from qualifying purchases.
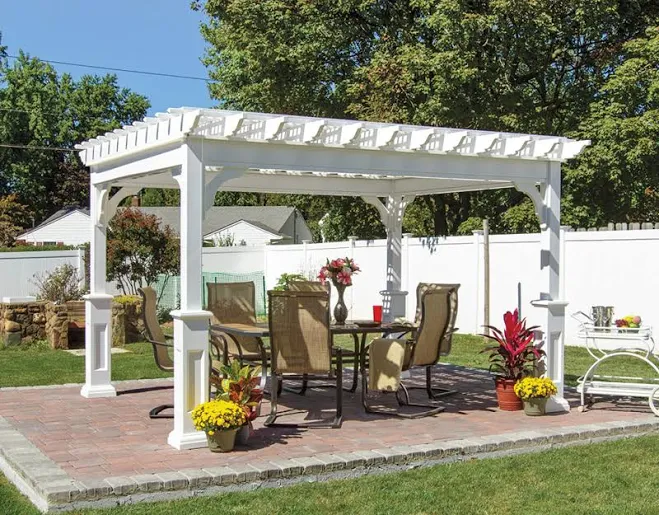
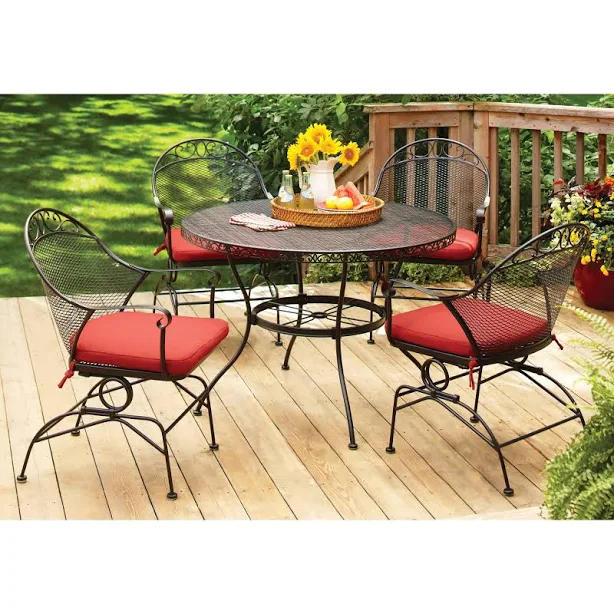
5. Sophisticated Latticework Gazebo with Potted Plants
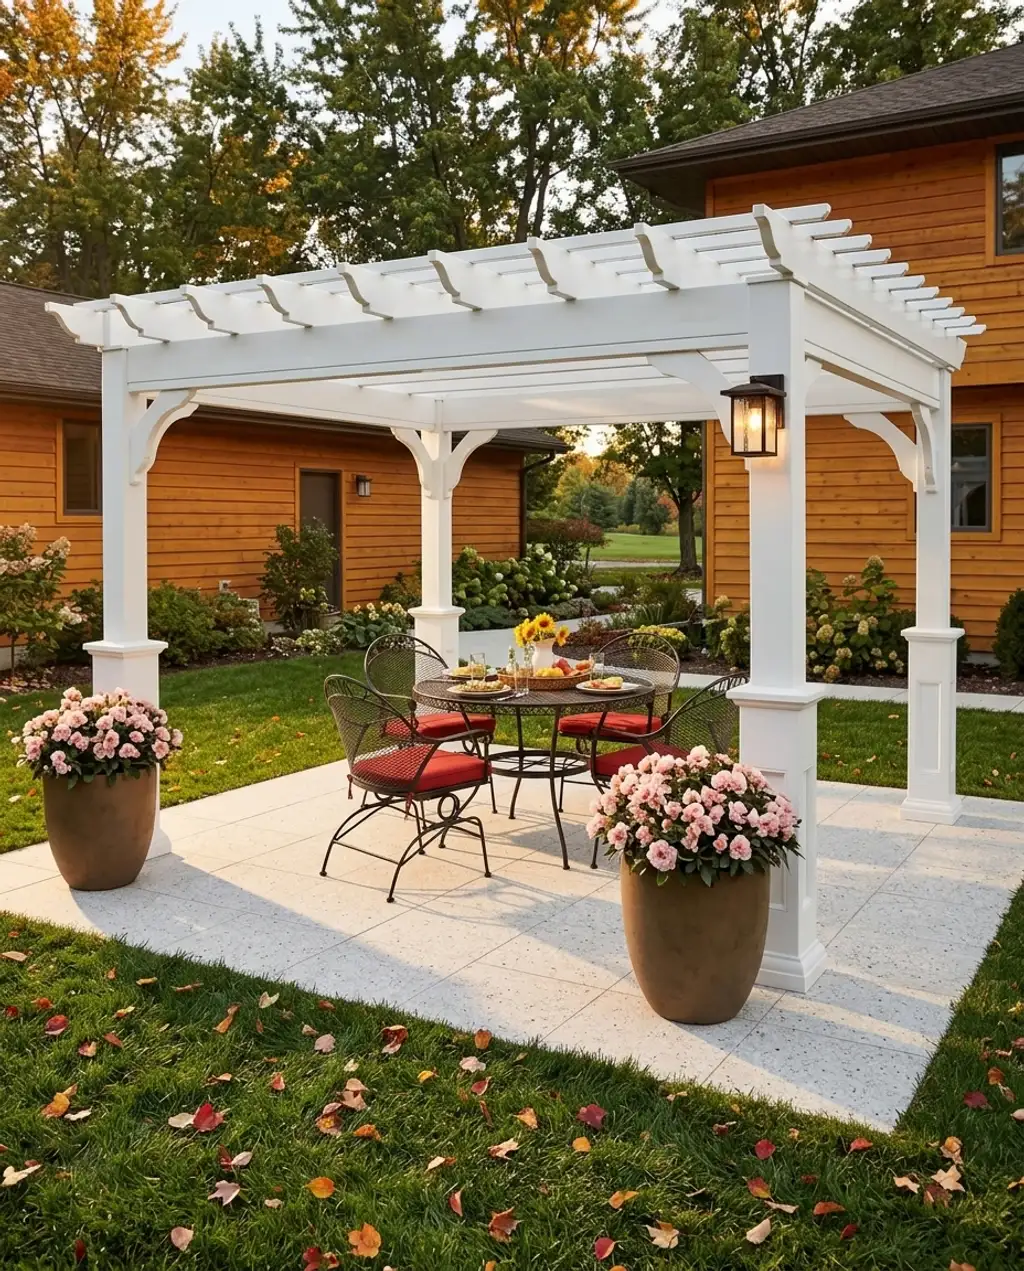
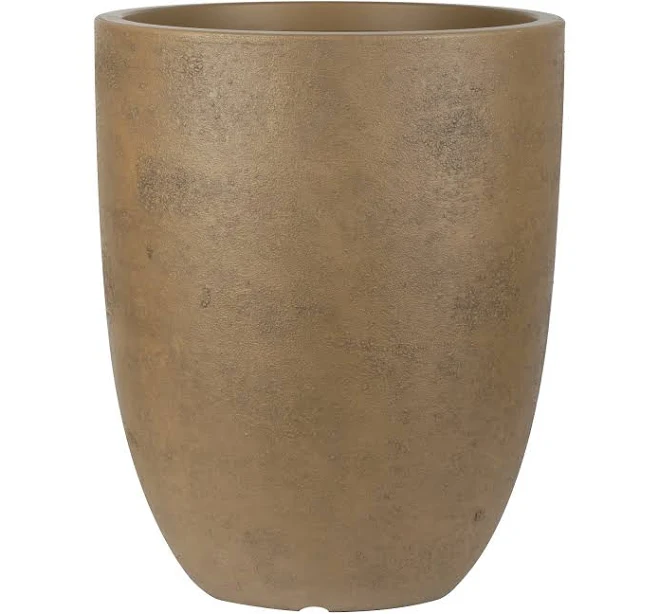
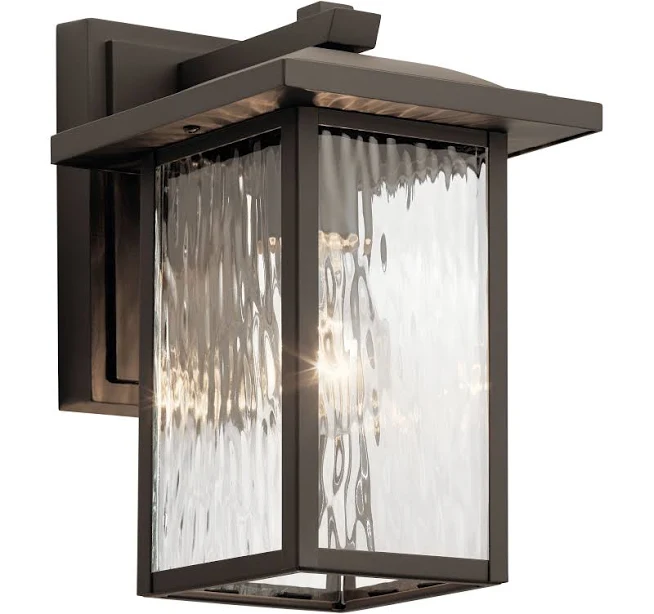
If you’re aiming for an elegant, structured outdoor dining experience, a latticework gazebo is just the thing. The lattice panels provide privacy without completely blocking the light, giving you that lovely dappled shade that feels so refined. Filling the spaces with beautiful potted plants — think ferns, topiaries, or climbing roses — elevates the look even further, blurring the lines between structure and garden. It’s perfect for creating a designated outdoor room where you can host dinners that feel a little bit fancy.
This kind of structure truly shines in medium to large patios, ideally those around 10×12 feet or larger, where it can define an outdoor dining area without overwhelming the space. If your patio is on the smaller side, this might feel a bit heavy. Instead, consider something like Idea #7, a retractable awning, which offers plenty of shade without taking up valuable floor space on a compact balcony. For taller ceilings or open areas, the structure gains even more presence.
|
10′ x 12′ Traditional Pergola | All Weather White Vinyl, Lattice Roof,$6700 |
Better Homes & Gardens Clayton Court 5-Piece Patio Dining Set$454 |
Better Homes & Gardens 18 inch Tall Terra Plant Pot$39.88 |
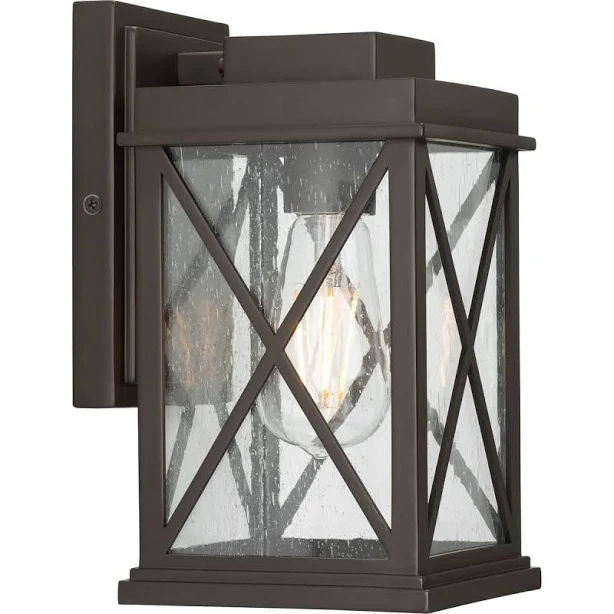
Kichler Capanna 1 Light Outdoor Wall$99.97 |
As an affiliate, we earn from qualifying purchases.
6. Industrial-Chic Deck Cover with Corrugated Metal Panels
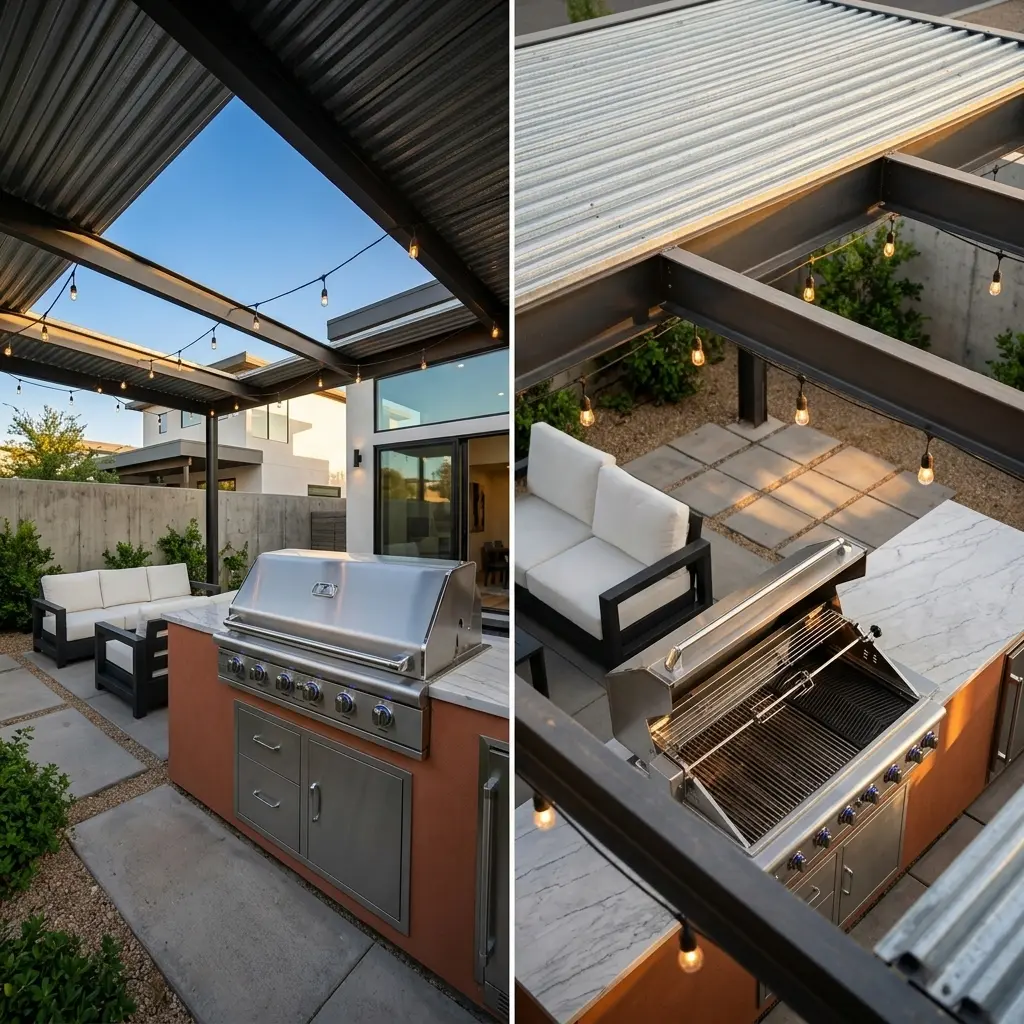
For an urban or industrial vibe, a deck cover featuring corrugated metal panels is surprisingly chic. It’s an unexpected material for a residential setting, which is precisely why it works so well for that raw, exposed-elements aesthetic. Paired with visible beams and strategically placed string lights, it creates an edgy, loft-like outdoor space. This look screams ‘cool,’ especially when combined with a modern outdoor sofa and a slick grill station. It’s about embracing the utilitarian and making it stylish.
Corrugated metal can get HOT. Seriously, it’s a heat conductor. While it provides excellent shade from direct sun, it can radiate heat downwards, making your patio feel warmer on scorching days. Also, rain can be noisy hitting metal. If you’re in a climate with intense sun or frequent downpours, you might want to consider adding a layer of insulation or a fabric lining underneath for sound dampening and heat reduction. Or check out the more temperate shade options in Idea #16.
|
Holdrite HydroFlame Pro Series Corrugated Metal Deck Plate$8.44 |
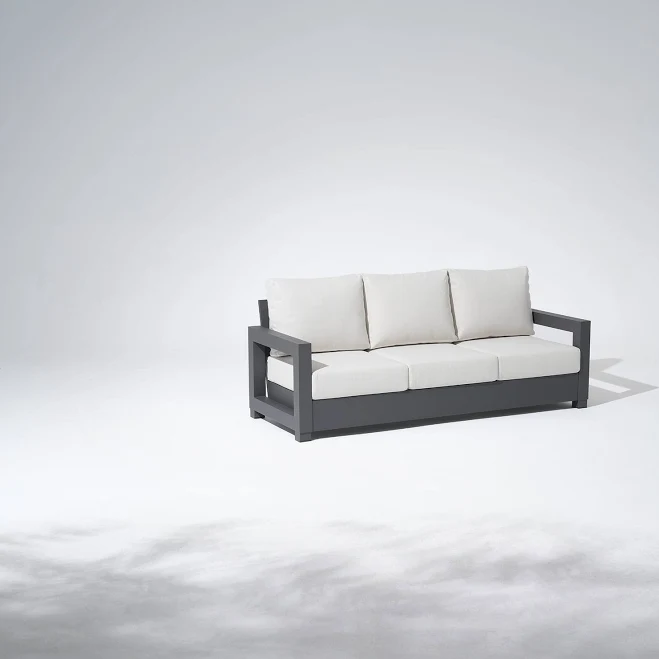
Vela Aluminum Black Outdoor Sofa, Olefin White Cushions$1400 |
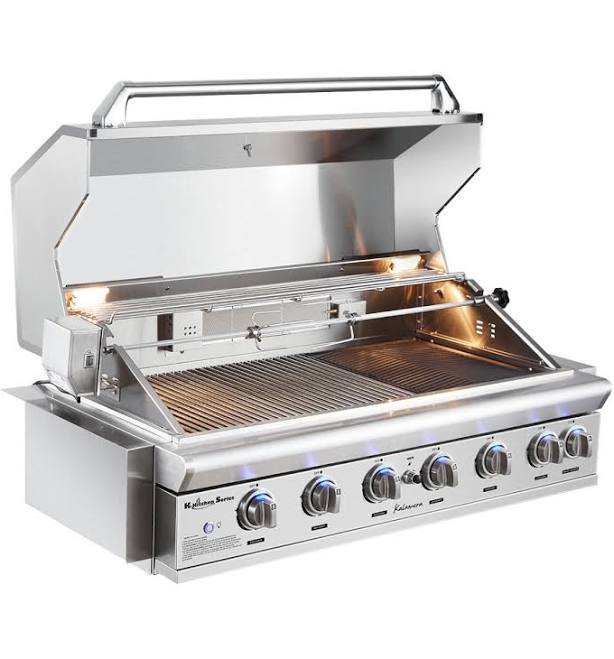
Kalamera K-Kitchen Series 6-Burner Built-In Outdoor S/S Grill$1074.31 |
At Home 30-Count UL D40 Commercial Style Edison Bulb$19.99 |
As an affiliate, we earn from qualifying purchases.
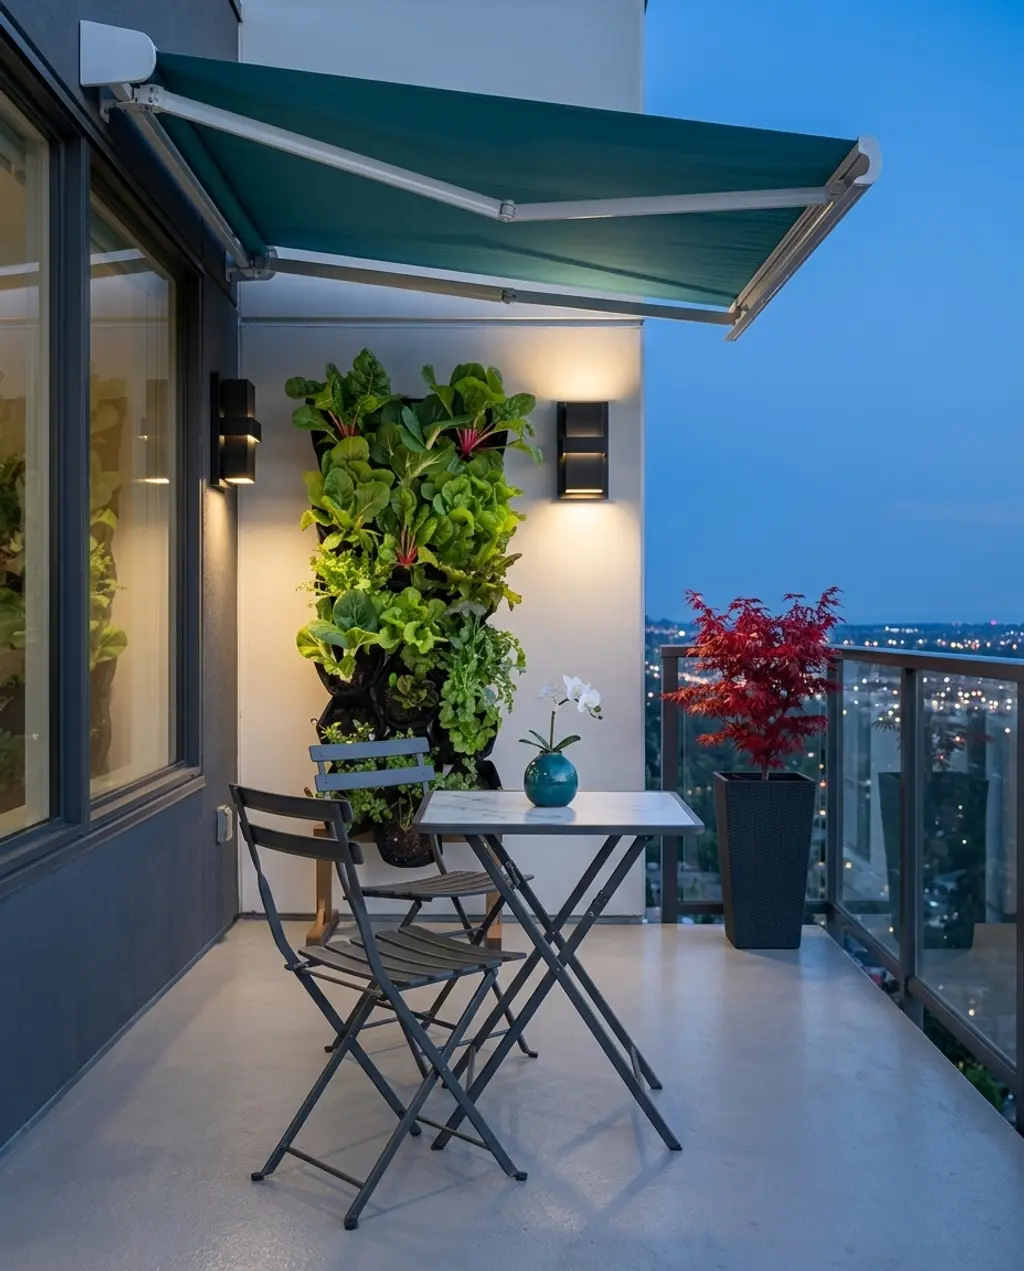
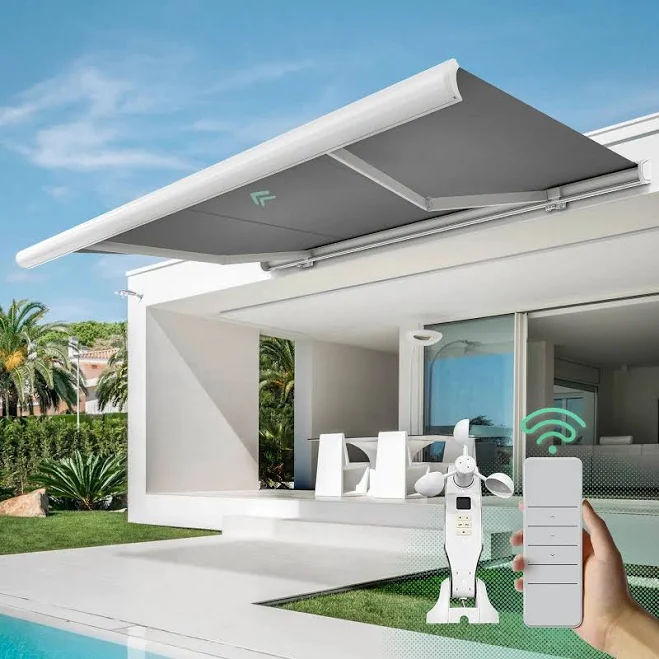
7. Retractable Awning for Small Apartment Balcony Shade
✨ Luxury Version
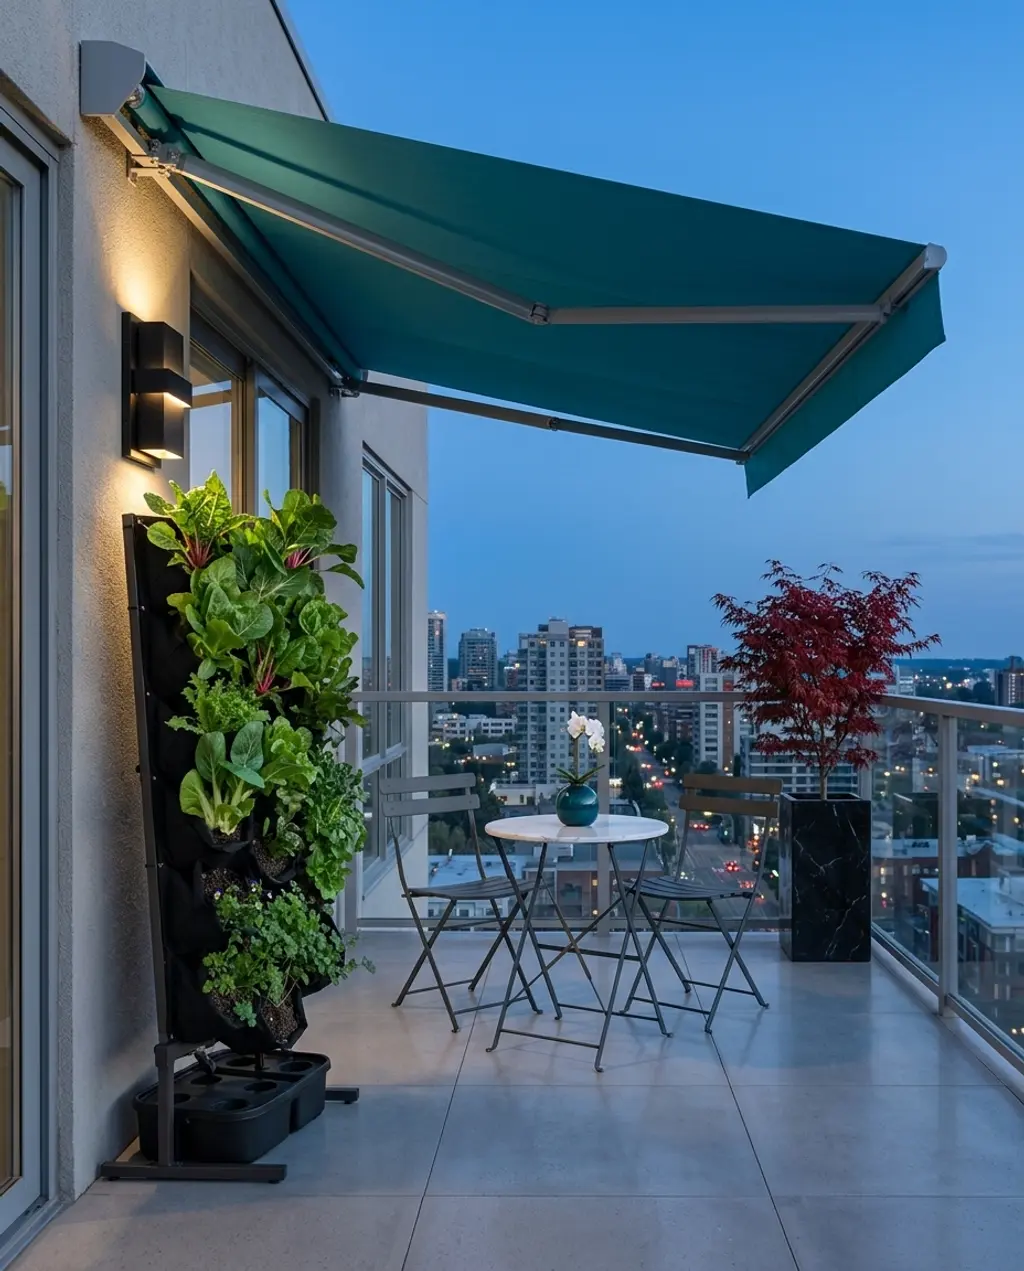
Balcony dwellers, rejoice! A retractable awning is your best friend when space is at a premium. It offers instant shade with the push of a button (or crank!) and then disappears when you want to soak up the sun. No bulky structures, no permanent fixtures – just pure, unadulterated shade on demand. Outfit your tiny balcony with a compact bistro set and a vertical garden, and you’ve got a private, shaded retreat perfect for morning coffee or evening cocktails with a city view.
💸 Budget Version
- Instead of a fully motorized awning, opt for a manual crank version from Amazon or Wayfair for around $200-$500.
- Find foldable bistro sets at Target or Walmart for under $100.
- DIY a vertical garden using tiered planters or simple hanging pots for $30-$50.
- Total savings can be well over $1000, bringing a chic balcony escape within reach for minimal investment.
|
💰 Budget Pick C Cattleya 2-Light Matte Black Aluminum Integrated LED Outdoor Wall Li$65.68 |
💰 Budget Pick VINGLI Outdoor Folding Bistro Table and Chairs Set of 2$81.99 |
✨ Luxury Pick Planted Wall Vertical Garden Structure with Recirculating Water System$599 |
✨ Luxury Pick Motorized Retractable Awnings for Patios & Decks$1799.1 |

As an affiliate, we earn from qualifying purchases.
8. Tropical Thatch Roof Pergola for Resort-Style Patio
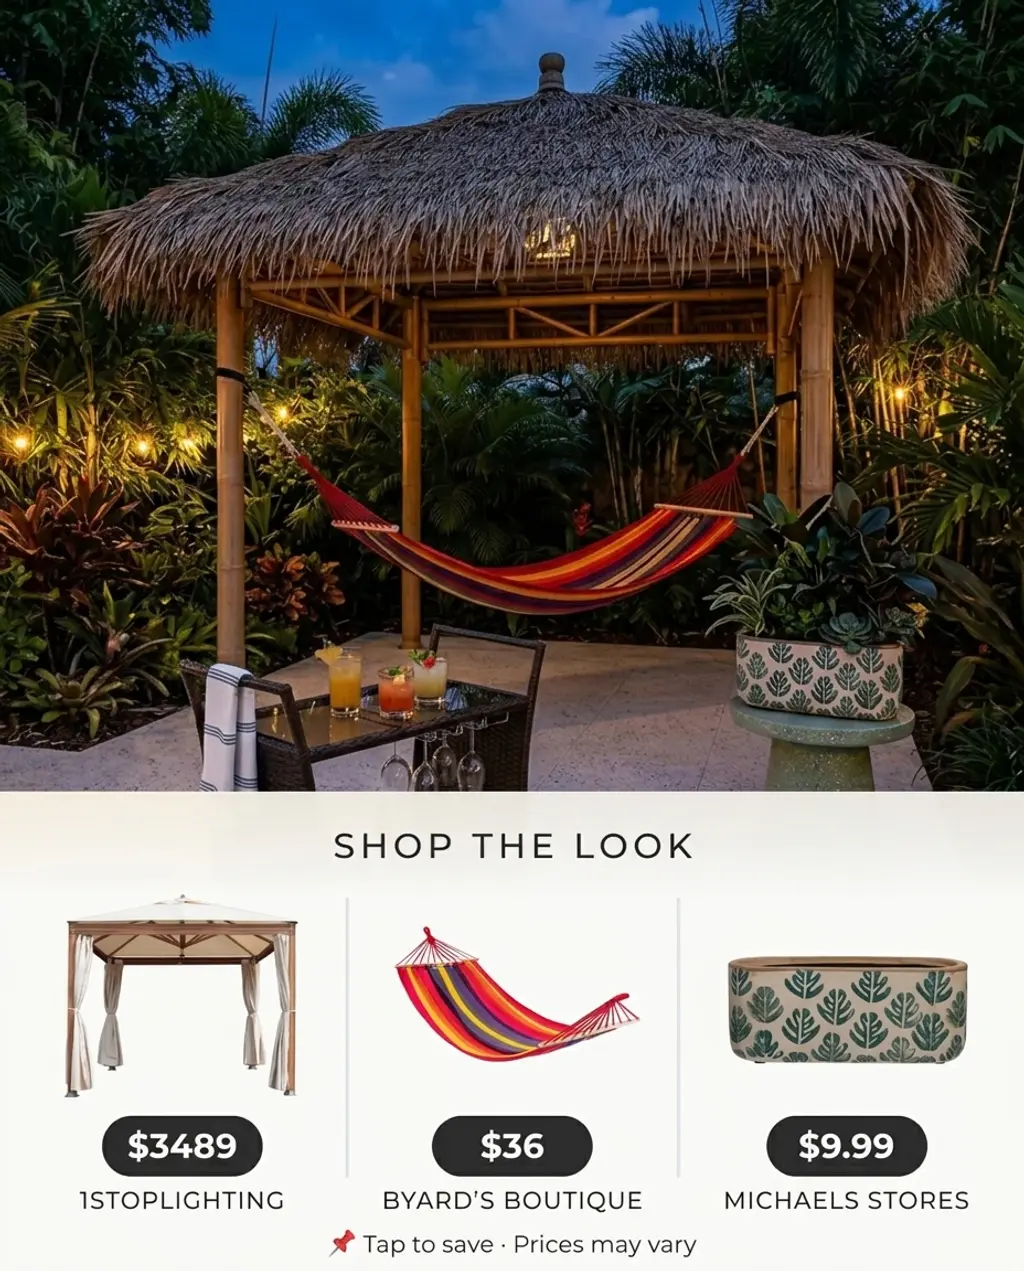
Transport yourself to a five-star resort right in your backyard with a tropical thatch-roof pergola. This isn’t just shade; it’s an entire mood. The natural texture of the thatch, often paired with bamboo elements, instantly evokes an exotic, vacation-like feel. Throw in a soft hammock and surround it with lush, leafy plants, and you’ve got a personal paradise. It’s the ultimate escape without leaving home, perfect for unwinding after a long day with a cool drink in hand.
This design absolutely sings in larger, open-concept patios and backyards where its unique silhouette can really stand out. You’ll want at least an 8×10 foot area, and ideally more, to truly capture that expansive resort feel. High ceilings or an unobstructed view of the sky above is a huge plus, allowing the natural light to highlight the thatch texture. If your space is smaller, a more streamlined option like Idea #2‘s shade sails can give a similar relaxed vibe without needing as much real estate.
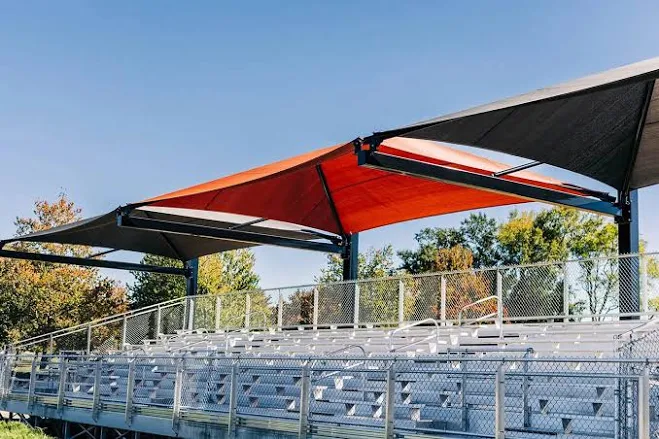
9. Minimalist Tensioned Cable Shade Structure
For something truly cutting-edge and minimalist, consider a tensioned cable shade structure. This isn’t your grandma’s patio cover; it’s an architectural statement. Sleek fabric panels are stretched taut with cables, creating geometric forms that cast fascinating shadows. It’s modern, industrial, and feels incredibly custom-designed. Perfect for a poolside lounge area or an urban patio, it provides effective shade while maintaining clean lines and a sophisticated, gallery-like aesthetic.
- Are you willing to invest in a professional installation for safety and aesthetic?
- Do you have clear, sturdy attachment points on existing structures or solid ground for the cables?
- Have you calculated the sun’s path to ensure optimal shade coverage given the fixed nature of this design?
- Is your local climate suitable? High winds might require more robust engineering.
This style of tensioned fabric structure is a direct response to the popularity of modern minimalist architecture and a desire for tailored outdoor solutions. You see similar concepts in high-end commercial spaces and public parks, and it’s now trickling into residential design, particularly for those who view their patio as an extension of their home’s contemporary aesthetic. It aligns with the
|
Commercial Shade Structures Cantilever Shades$10000 |
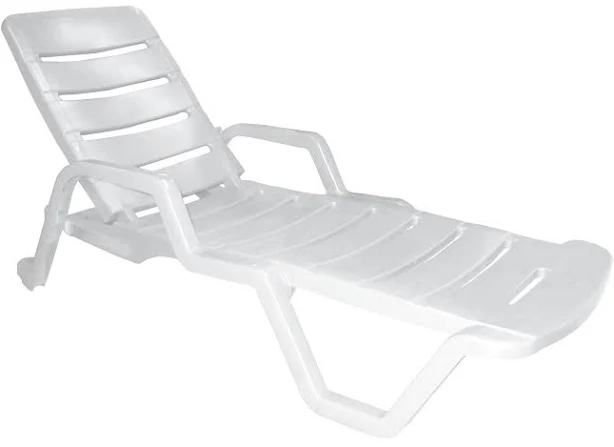
Adams MFG CO Resin Chaise Lounger$69.98 |
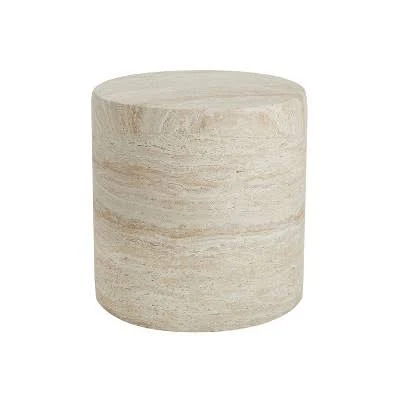
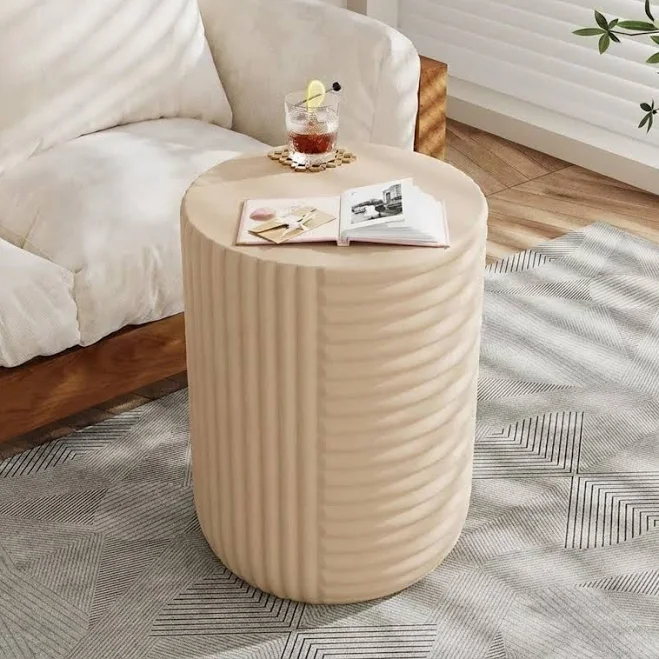
GDF Studio Outdoor Cylindrical Side Table$107.25 |
Pentair IntelliBrite 5G Color Underwater LED Pool Light 601001$609.99 |

As an affiliate, we earn from qualifying purchases.
10. Arched Fabric Patio Cover for Elegant Outdoor Living
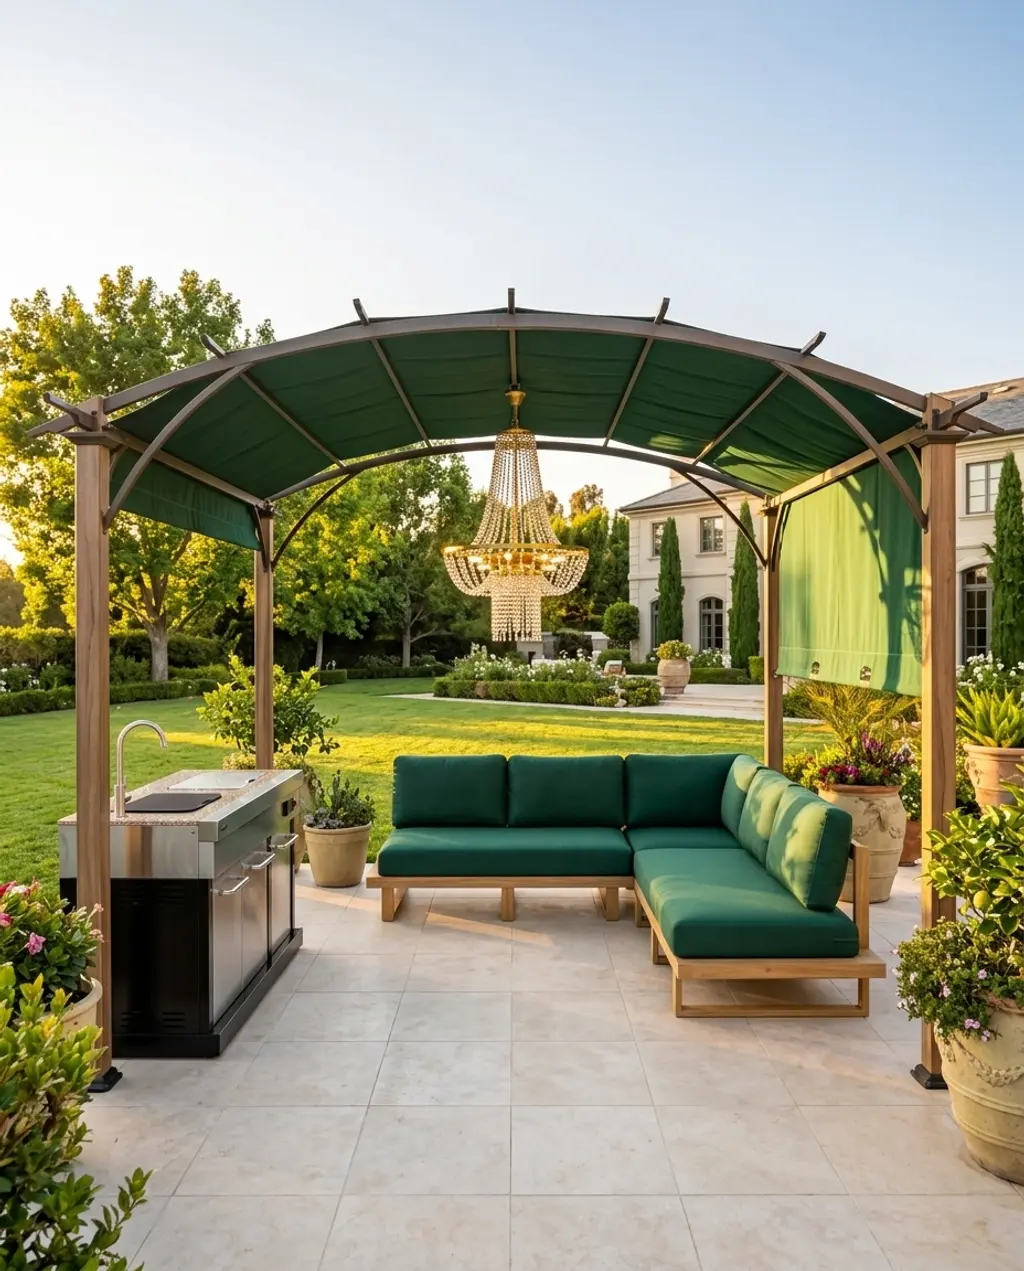
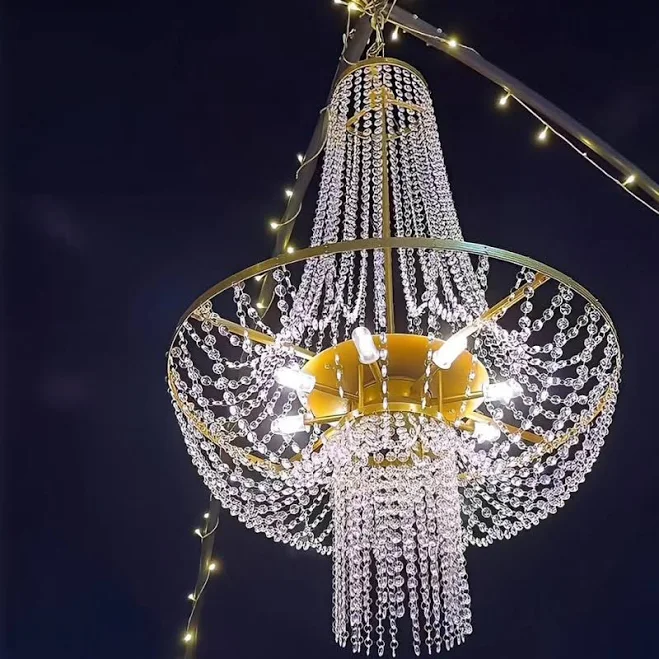
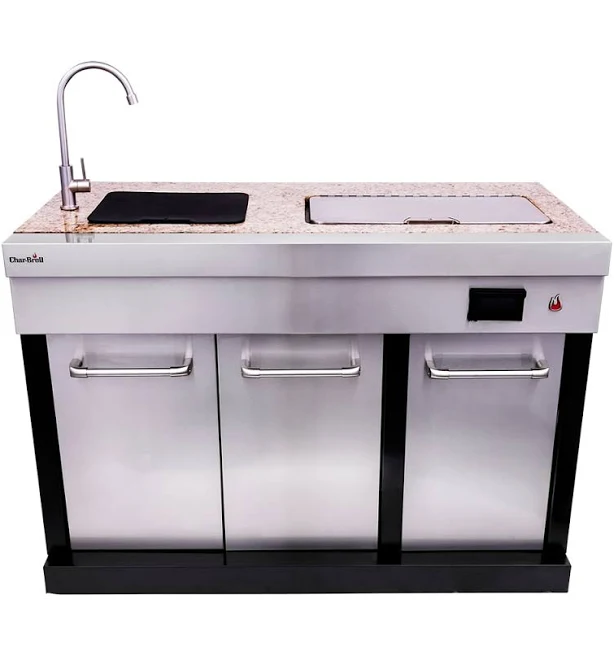
If you’re going for sheer elegance and a touch of the dramatic, an arched fabric patio cover is an absolute showstopper. This isn’t just about blocking the sun; it’s about framing your outdoor space with grace and creating a resort-like atmosphere. Picture lavish chandeliers, plush seating, and an outdoor kitchen tucked beneath a beautiful, flowing canopy. The arched design adds a softness that rigid structures can’t match, making it feel less like a cover and more like an integral part of a glamorous outdoor room.
Here’s the visual formula for this sophisticated look:
- 60% soft, neutral base (the arched fabric cover, often cream or white).
- 30% rich, accent color (velvet throw pillows, deep-toned planters, or a statement outdoor rug).
- 10% metallic sparkle (a dazzling outdoor chandelier, polished chrome bar cart, or decorative accents).
You can easily swap the accent color to emerald green or sapphire blue while maintaining that underlying sense of luxury and balance.
One major thing to consider with a fabric cover, especially one with significant arches, is wind and rain. Strong gusts can really batter fabric, and heavy rain can cause pooling if the arch isn’t designed with proper drainage. You’ll want to ensure the installation is robust and that the fabric is high-quality and weather-resistant. Also, fabric can fade over time, especially in direct sunlight, so factor in potential replacement costs down the line. Compare this to the more weather-resistant Idea #13 if durability is a top concern.
|
Living Accents Fabric Arched Pergola$499.99 |
Candelabra Home Devin Outdoor Sectional$1999 |
French Luxury Romantic Waterproof Outdoor Banquet Wedding Crystal Chan$619.99 |
Charbroil Medallion Series Modular Outdoor Kitchen Sink$1599 |
As an affiliate, we earn from qualifying purchases.
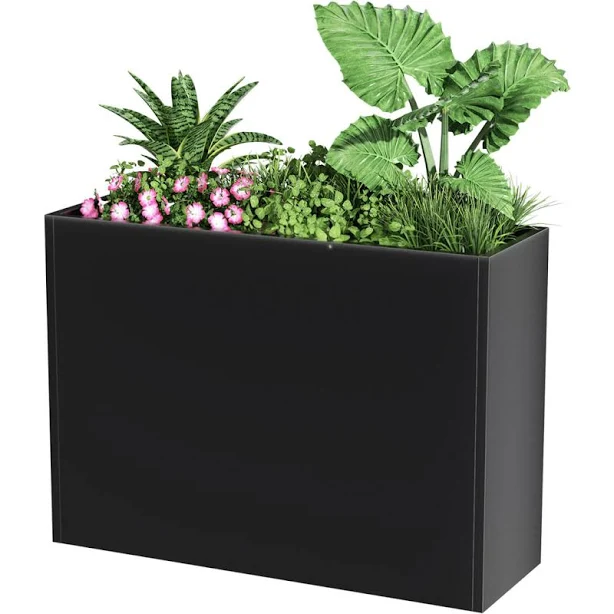
11. Cedar Pergola with Integrated Privacy Screens and Planters
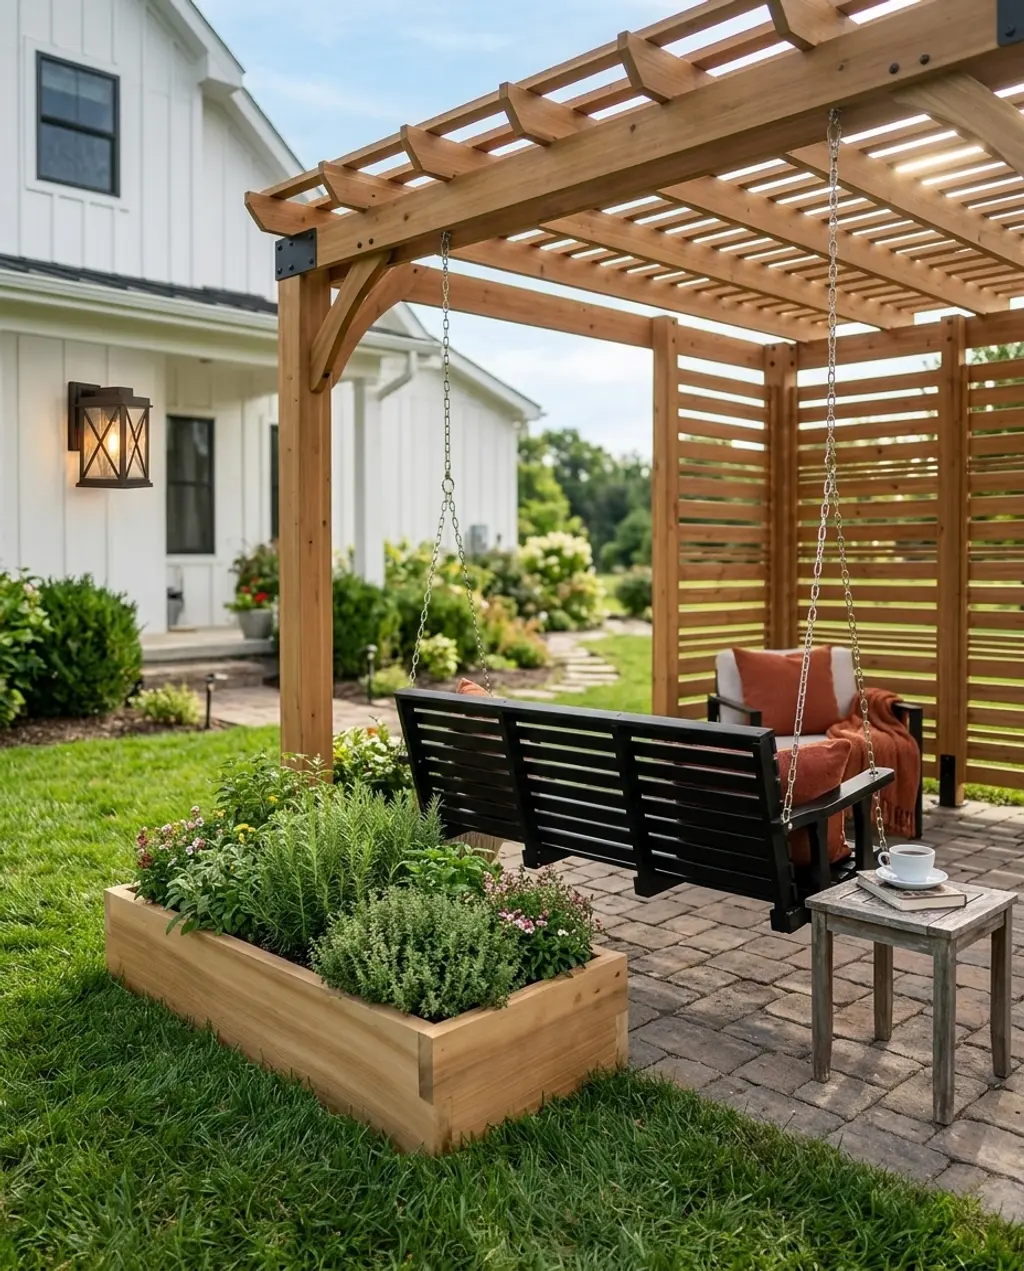
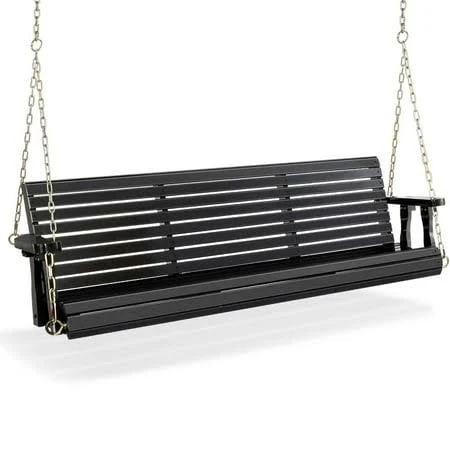
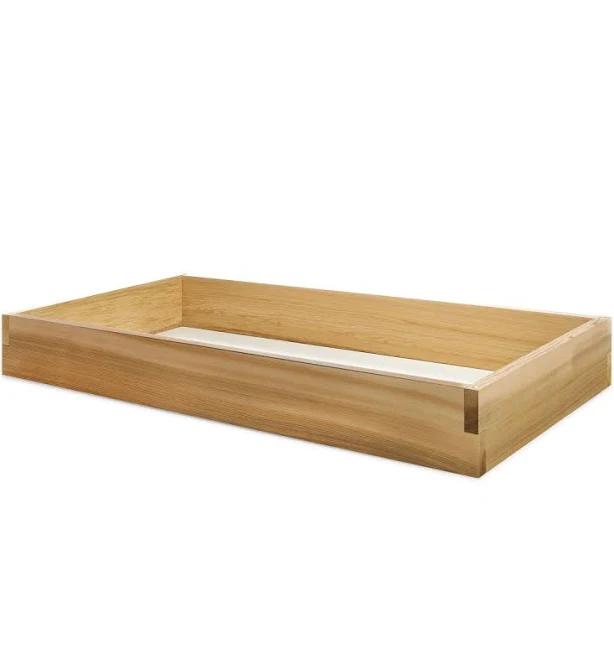
Embrace that cozy farmhouse charm with a cedar pergola that does double duty: shade and privacy. Integrating privacy screens and built-in planter boxes allows you to create a truly secluded haven. Imagine growing fragrant herbs or colorful annuals right within your structure, adding both scent and beauty. Add a porch swing for lazy afternoons, and you’ve got an outdoor room that feels both rustic and refined, perfect for quiet contemplation or intimate gatherings.
- Choose your cedar: Research pre-made kits or source raw cedar lumber for a custom build. Cost: $700-$1500.
- Assemble the pergola: Follow instructions carefully or hire a contractor. Time: 1-3 weekends DIY, or 1-2 days pro.
- Install privacy screens: These can be fixed cedar slats or trellis panels. Cost: $100-$300.
- Build or attach planter boxes: Ensure they have proper drainage. Cost: $50-$150.
- Plant your garden: Fill with herbs, flowers, or small shrubs that thrive in partial sun. Cost: $30-$100.
- Main structure (cedar pergola): $699 – $1500
- Seating (porch swing): $140 – $500
- Planters & plants: $100 – $300
- Lighting (exterior lantern): $50 – $150
- Total Estimated Cost: $989 – $2450
- Budget alternative: Use pressure-treated pine instead of cedar ($400-$800, but requires more maintenance) and a simple wooden bench ($80-$150) for a similar look for 40-50% less.
|
Backyard Discovery Brendan 12′ x 10′ Modern Pergola Kit$699 |
VINGLI Upgraded Patio Wooden Porch Swing$139.99 |
All Things Cedar 4-ft x 2-ft Raised Garden Box$70.45 |
Avec Wrenna Collection Farmhouse Outdoor Wall Lantern$49.94 |
As an affiliate, we earn from qualifying purchases.
12. Oceanic Blue Sail Shades for Coastal Patio Vibes
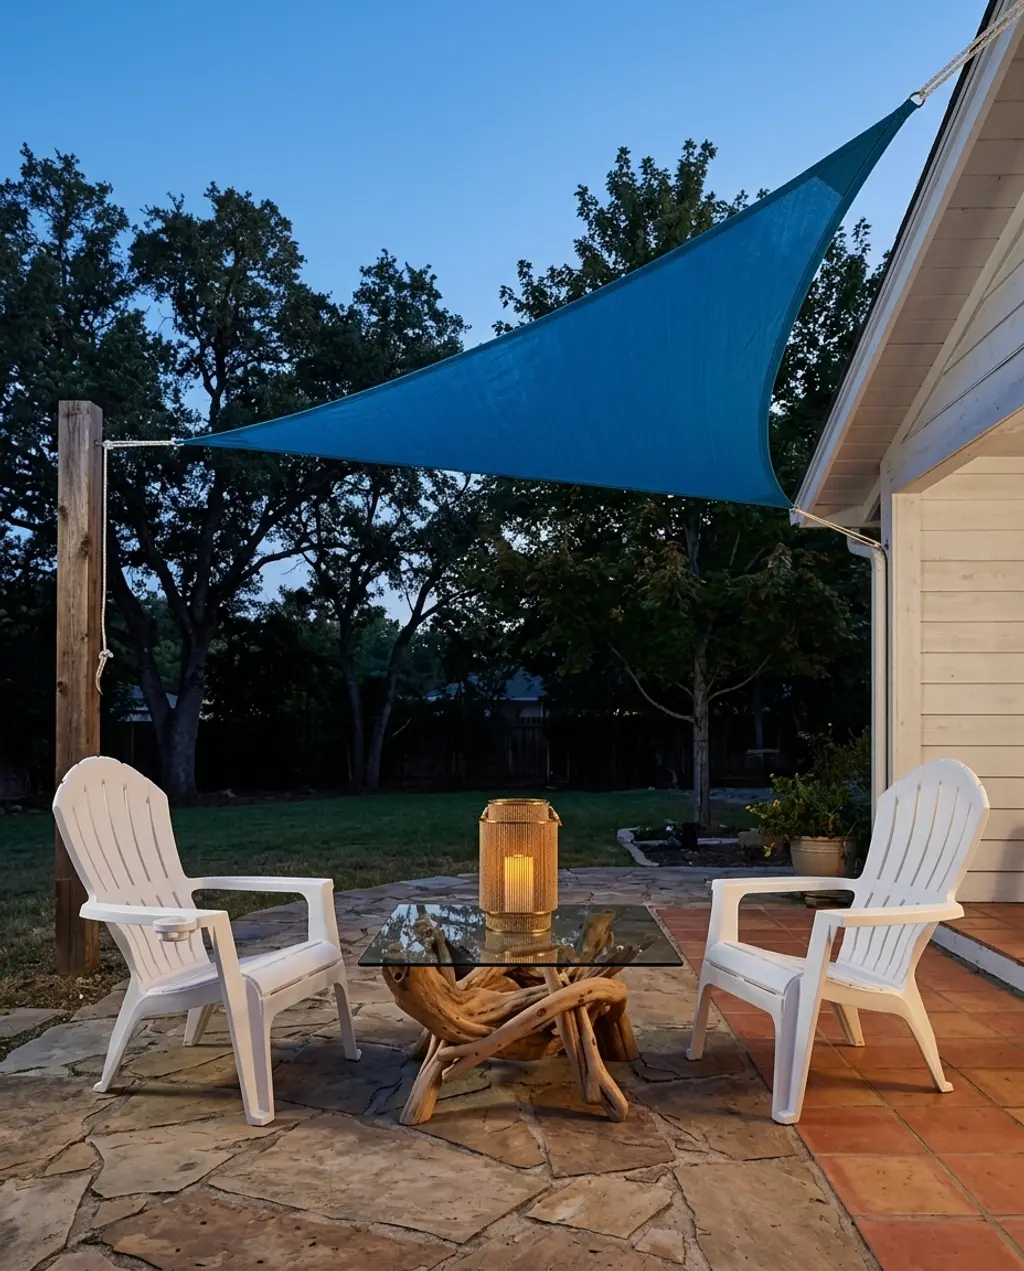
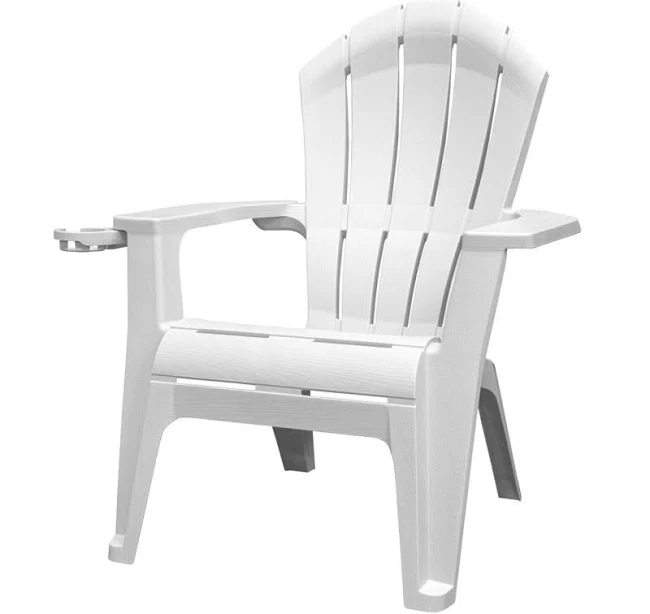
Bring the beach house vibe to your backyard with oceanic blue sail shades. These aren’t just practical; they’re a visual delight, evoking the breezy feeling of being by the coast. The cool blues and crisp whites create an airy, nautical theme that’s perfect for unwinding. Pair them with classic white Adirondack chairs and natural wood elements like driftwood tables, and you’ve got a patio that’s a constant reminder of seaside contentment. It’s all about creating an atmosphere of calm and relaxation.
The magic of this look truly hinges on the blue sail shades. Without that specific color and shape, you lose the signature coastal feel. It’s the single element that dictates the entire mood, transforming an ordinary patio into a seaside escape. While the white Adirondacks and driftwood tables enhance it, the sails are the non-negotiable heart of this aesthetic. If budget is a concern for the sails themselves (like the Coolaroo Kool Kolors Triangle Party Sail for $25), every other element can be thrifted or DIY’d to save money.
Here’s the style math for effortless coastal charm:
- 60% breezy neutrals (white furniture, light-colored patio pavers/decking).
- 30% oceanic blues (the shade sails, accent pillows, pottery).
- 10% natural textures (driftwood coffee table, woven lanterns, jute rug).
You can easily swap out the blue for an aqua or even a soft teal, but keeping a similar balance of cool, natural tones will help maintain that desired coastal effect.
|
Coolaroo Kool Kolors Triangle Party Sail$24.99 |
Adams RealComfort Deluxe Adirondack Chair$24.99 |
Log Furniture Place Rustic Organic Driftwood Coffee Table$1582 |
Verbenia Nautical Rope Lantern$819.4 |
As an affiliate, we earn from qualifying purchases.
13. Smart Louvered Pergola for Adjustable Sun/Shade Control
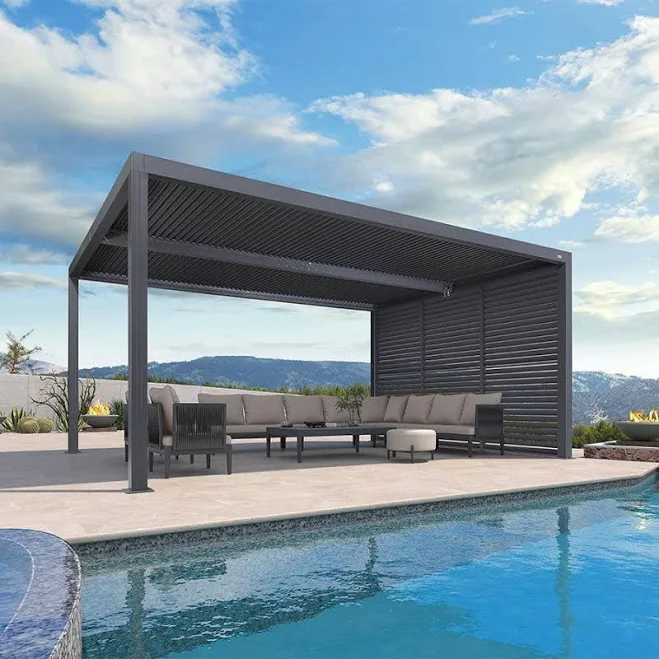
For the ultimate in modern convenience and luxury, a smart louvered pergola is a game-changer. Imagine adjusting your shade with an app on your phone, or having it automatically react to sun and rain. These bioclimatic pergolas are typically made from sleek aluminum and often include integrated lighting, making them perfect for outdoor kitchens and dining areas. They offer total control over your environment, letting you enjoy your patio year-round, rain or shine. It’s the future of outdoor living, and it’s here now.
When going for a smart louvered pergola, don’t skimp on the smart home integration. Make sure it connects seamlessly with your existing system (e.g., Google Home, Alexa) and that the controls are intuitive. Many models offer rain sensors, wind sensors, and even custom programming for different times of day. Invest in a robust system from a reputable brand like BON Pergola to avoid frustrating tech glitches later on. This level of automation is what truly sets it apart from traditional pergolas.
What makes this setup work so well is the principle of adaptive design. Unlike fixed shade solutions, the louvered roof allows for dynamic control of sunlight, airflow, and even rain protection. This adaptability extends the usability of your outdoor space, transforming it from a fair-weather spot into a genuine all-season ‘room.’ It’s about optimizing comfort and function, making your patio truly versatile. Compare this smart functionality with the simpler but equally effective shade of Idea #16.
|
Motorized Aluminum Pergola BON Pergola$6799 |
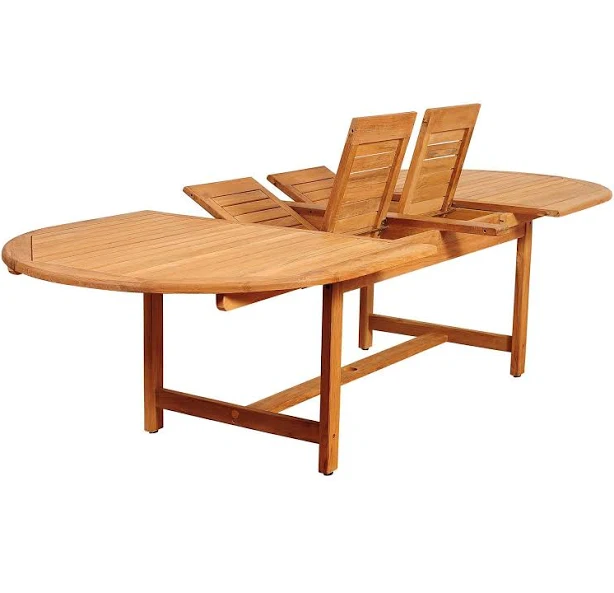
Pottery Barn Nassau Extending Outdoor Oval Table$999 |
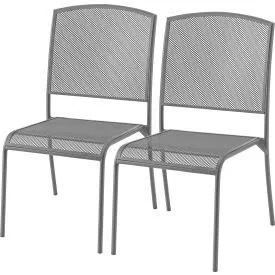
Global Industrial Outdoor Cafe Armless Stacking Chair$199.95 |
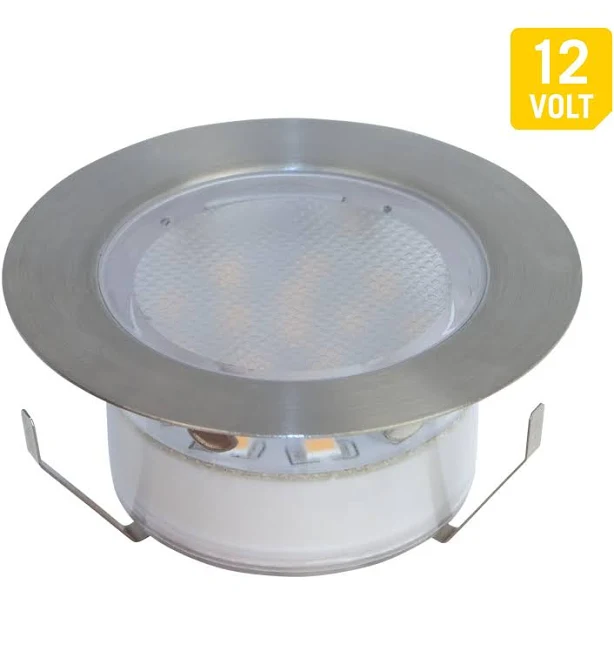
Armacost Lighting Portico White LED Outdoor Recessed Light brand$24.99 |
As an affiliate, we earn from qualifying purchases.
14. Upcycled Pallet Pergola with Fabric Drapes (DIY Budget)
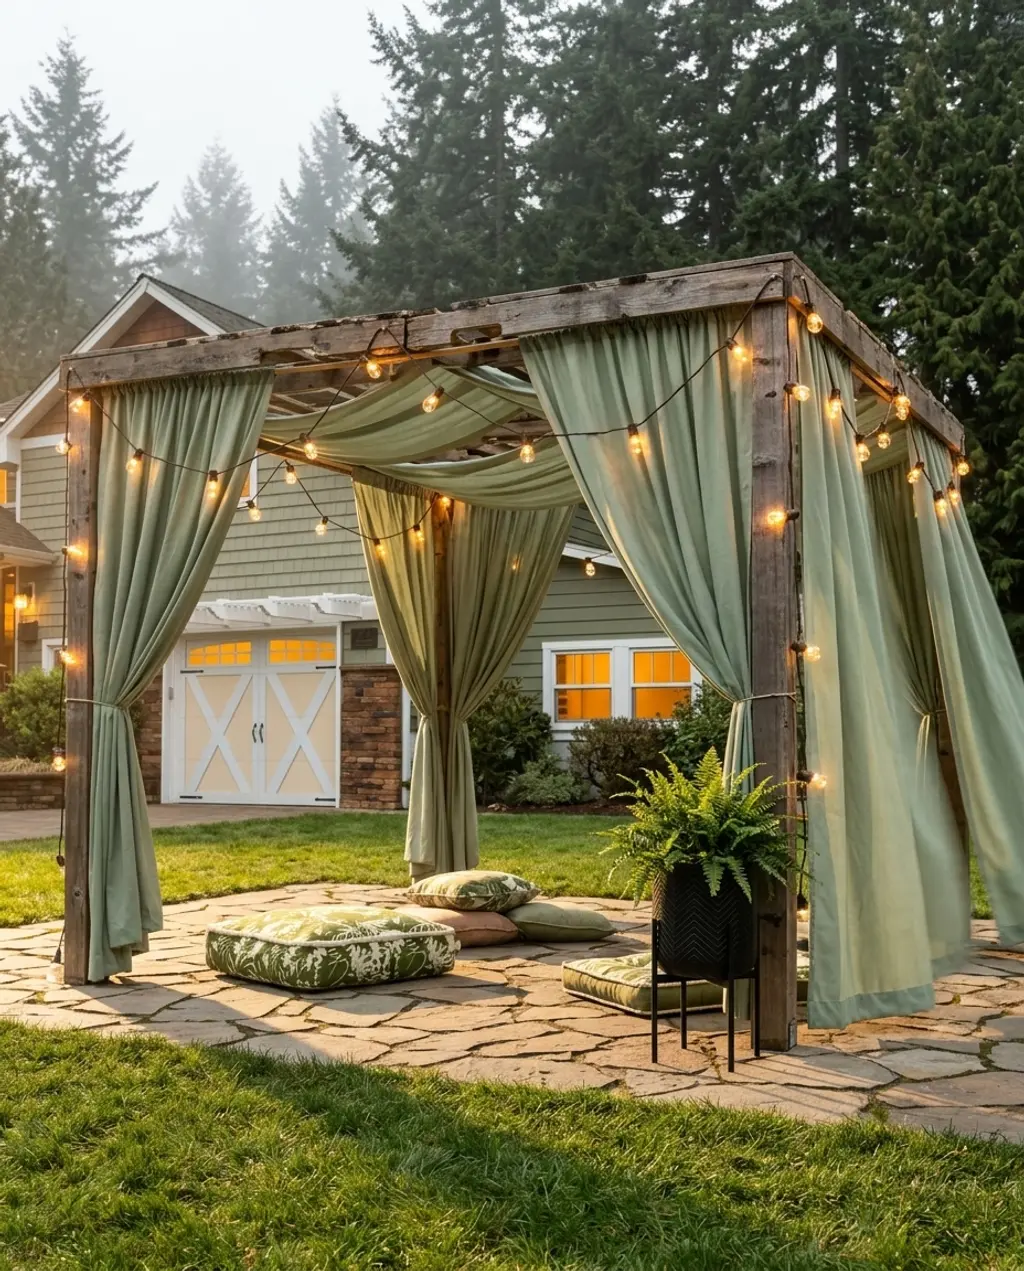
DIY enthusiasts and budget-conscious decorators, gather ’round! An upcycled pallet pergola with fabric drapes is rustic, charming, and incredibly wallet-friendly. It embraces that bohemian, eclectic vibe so naturally. The raw wood of the pallets creates a perfectly imperfect structure, and swathes of flowing fabric add softness and dramatic shade. Scatter some large floor cushions and string lights, and you’ve got a unique, inviting space that feels entirely your own, all without breaking the bank.
- Source free or cheap pallets (check local businesses or Facebook Marketplace).
- Purchase inexpensive fabric from a craft store or use old sheets/curtains ($20-$50).
- Grab some string lights from Walmart ($10-$20).
- Total cost can be as low as $50-$100 for substantial shade, saving you thousands compared to Idea #1.
- Collect pallets: Look for heat-treated (HT stamped) pallets, not chemically treated (MB). You’ll need about 6-10 depending on size. Time: 1-2 days sourcing.
- Clean and sand: Lightly sand rough spots to avoid splinters. Cost: $10 for sandpaper. Time: 2-3 hours.
- Assemble frame: Secure pallets together using brackets and screws to form uprights and crossbeams. Cost: $20-$40 for hardware. Time: 1 day.
- Hang fabric: Drape sheer curtains, old sheets, or inexpensive fabric over the top and sides, securing with zip ties or clips. Cost: $30-$70. Time: 1 hour.
- Add lighting: String outdoor lights for ambiance. Cost: $10-$30. Time: 30 minutes.
The fabric drapes are truly the star here, transforming rough pallets into a soft, inviting retreat. Without them, it’s just a raw wood structure. The fabric softens the industrial edge of the pallets, allowing light to filter through gently and creating a serene, bohemian atmosphere. Getting the right flow and texture with your fabric is key to making this idea shine.
|
Hello Honey Black Metal Planter with Stand$55.99 |
Eyebrow Pergolas$1574.99 |
Threshold 24″x6″ Outdoor Patio Floor Cushion$45 |
Mainstays 50-Count LED Solar Powered Mini Outdoor String Lights$9.97 |
As an affiliate, we earn from qualifying purchases.
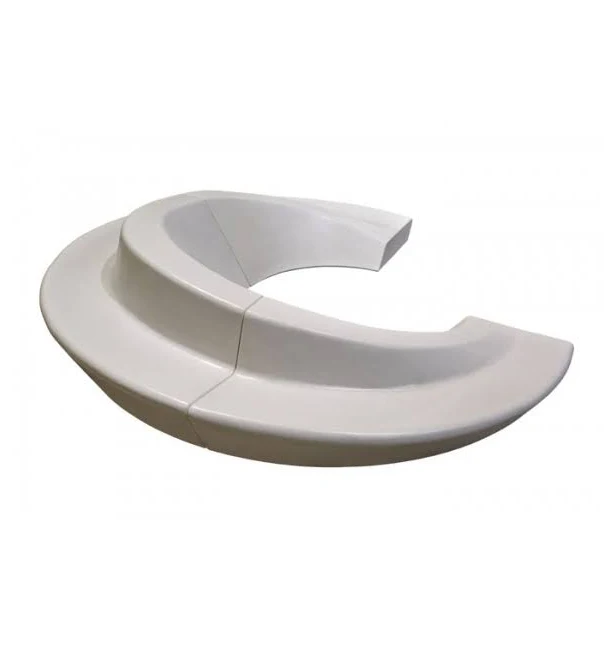
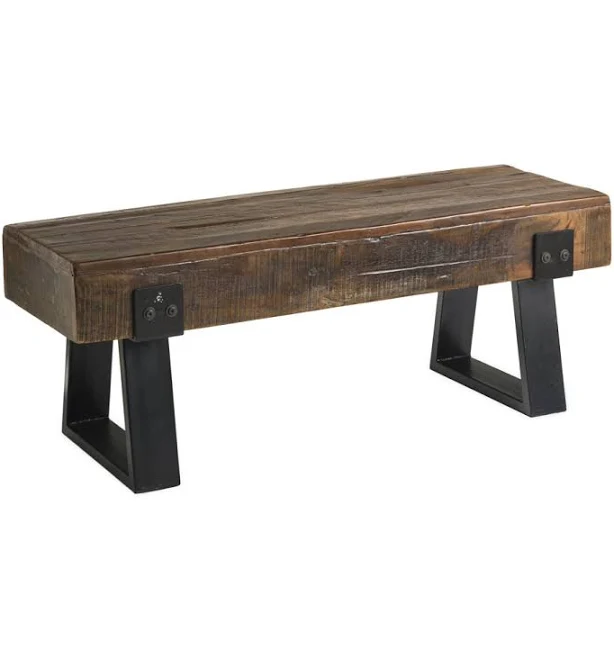
15. Shade Tree Integration: Patio Design Around Mature Tree
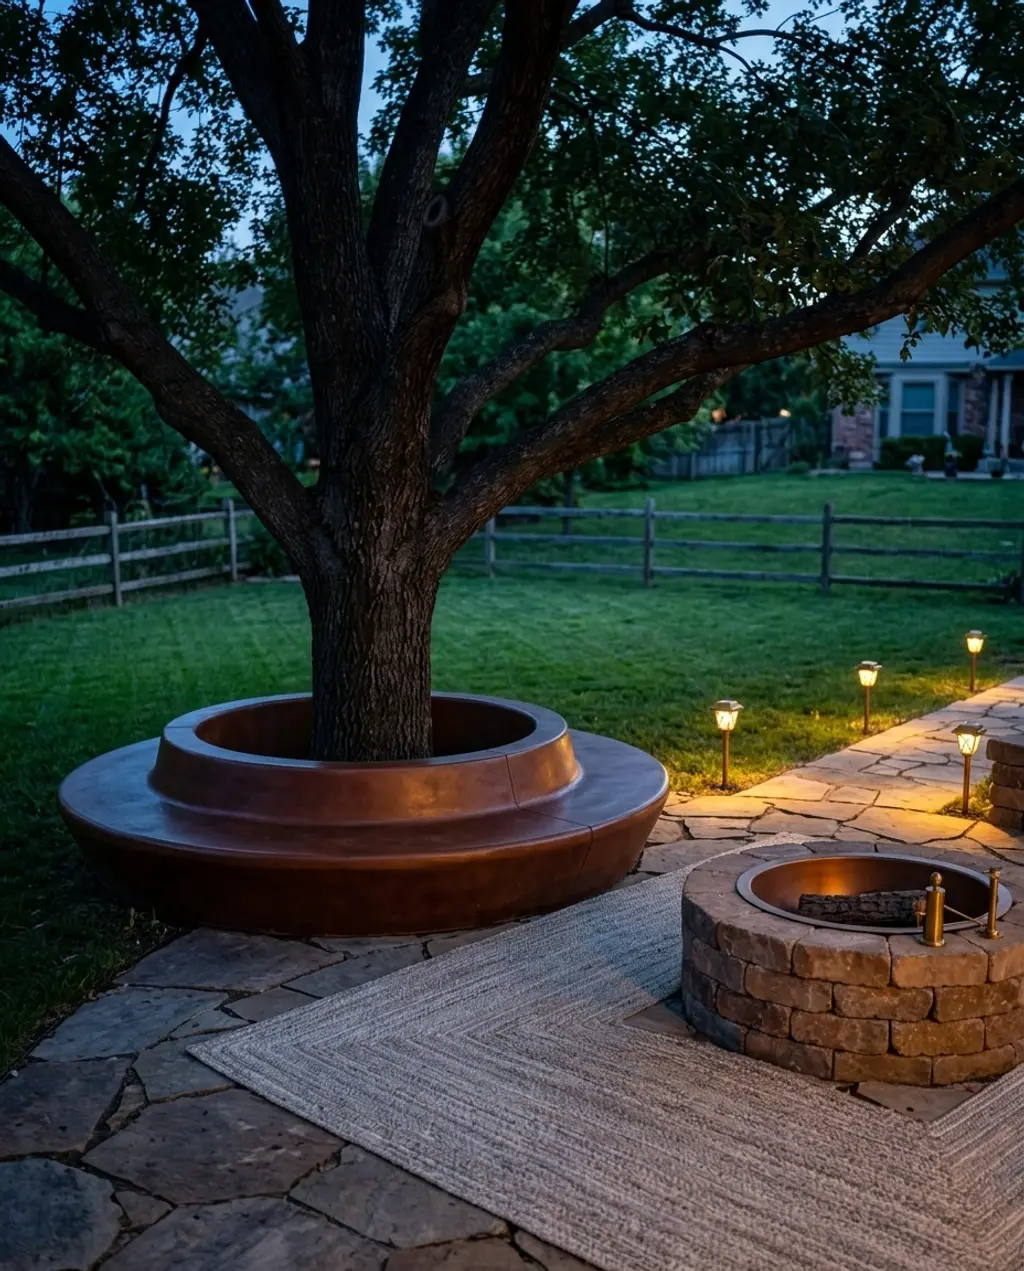
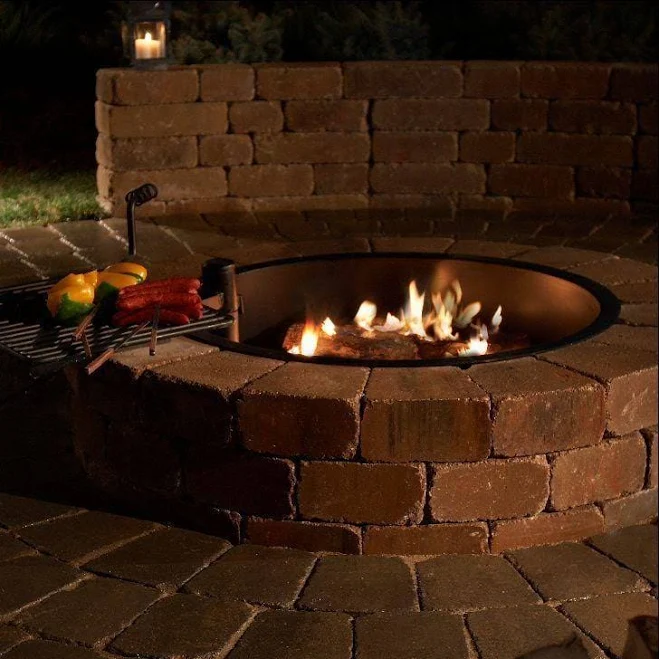
Sometimes, the best shade comes straight from nature! If you’re lucky enough to have a mature tree in your yard, designing your patio around it for natural shade is a brilliant move. Integrating a tree bench or carefully laying a stone patio around the trunk creates an organic, established feel. The tree becomes the focal point, offering not just shade but also a sense of tranquility and connection to the environment. Add a fire pit nearby, and you’ve got a dreamy spot for storytelling under the canopy.
This design harnesses the principle of natural integration, where existing landscape elements become central to the patio’s functionality and aesthetic. The tree provides dynamic, cooling shade and visual interest, linking the built environment with nature. This makes the space feel more harmonious and established, rather than an afterthought. It’s an approach that prioritizes longevity and environmental responsibility.
Designing around a mature tree sounds heavenly, but it comes with responsibilities. Tree roots can interfere with patio foundations over time, so careful planning is crucial. You also need to consider leaf drop, falling debris (think twigs, acorns), and potential sap. And if the tree has to come down one day, your entire shade strategy is gone. Plus, not all trees are suited for close-quarters patio living – some need more space for their root systems to thrive. So, consult an arborist early to avoid future heartache!
|
Nest – Tree – Concrete – Bench – Circular – (Designer Series)$9834 |
Necessories Grand Fire Pit Kit$1150 |
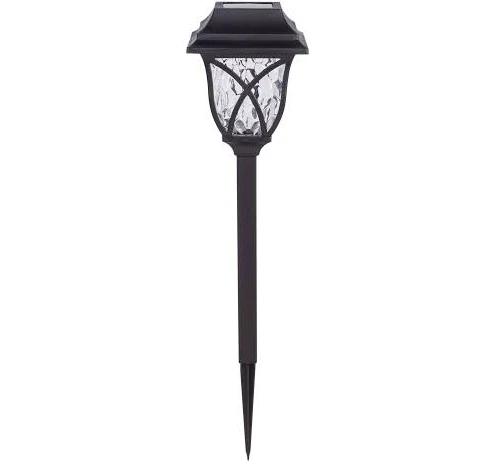
Portfolio 4X Brighter Solar Integrated LED Path Light$4.98 |
Threshold Natural Woven Rectangular Braided Outdoor Area Rug Heathered$180 |
As an affiliate, we earn from qualifying purchases.
16. Sleek Aluminum Pergola with Adjustable Fabric Panels
For an ultra-modern, flexible shade solution, consider a sleek aluminum pergola with adjustable fabric panels. This design screams contemporary cool with its clean lines and modular sensibility. The ability to slide panels open or closed means you can fine-tune your shade throughout the day, whether you want full sun for tanning or deep shade for napping on an outdoor daybed. Integrated lighting can extend its usability into the evening, creating a sophisticated outdoor lounge that feels truly bespoke.
Adjustable fabric panels offer incredible versatility, but they do require a bit of TLC. The fabric itself can collect dust, pollen, and mildew, especially in humid climates. You’ll likely need to clean them regularly (think a gentle wash with soap and water a few times a season). Over time, the tracking mechanisms can also get sticky or require lubrication, and the fabric may need replacement after several years of sun exposure. Consider this a slightly higher-maintenance option than a fixed structure.
- Have you measured the sun’s path at different times of day to ensure the panels will effectively block glare?
- Is your budget flexible enough to accommodate higher-quality aluminum and fabric for durability?
- Do you prefer manual or motorized operation for the panels? (Motorized will add to cost and complexity.)
- Are you prepared for the occasional cleaning and maintenance required for the fabric and tracks?
|
Louvered Aluminum Pergola with Shutter Wall$4288 |
Amish Siesta Patio Daybed Bright White Twin – Cabinfield$1815 |
Christopher Knight Home Aurelia Outdoor Side Table$91.99 |
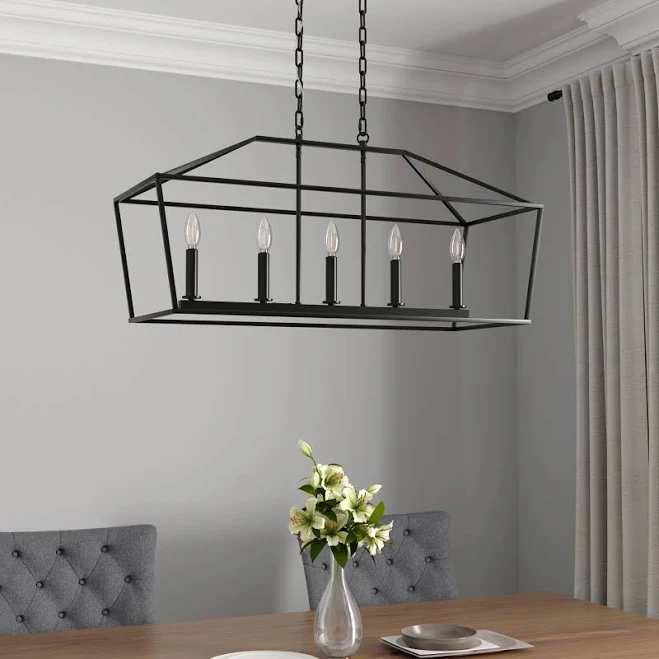
Allen + Roth Lane 5 -Light Matte Black Transitional Metal Linear Mediu$184.98 |
As an affiliate, we earn from qualifying purchases.
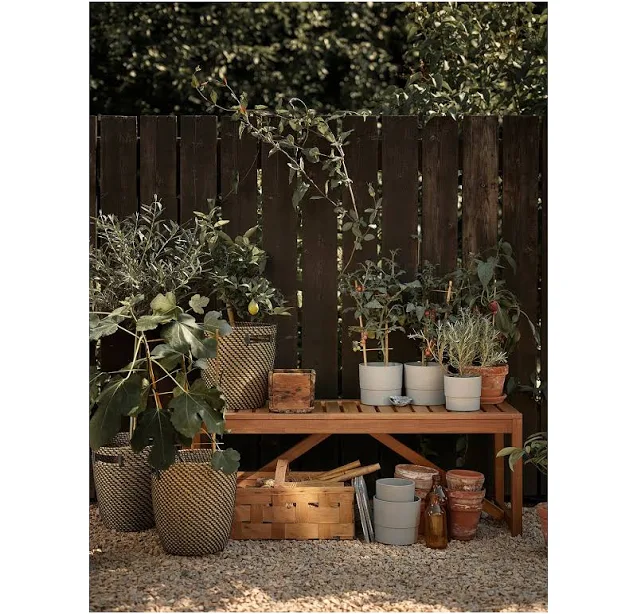
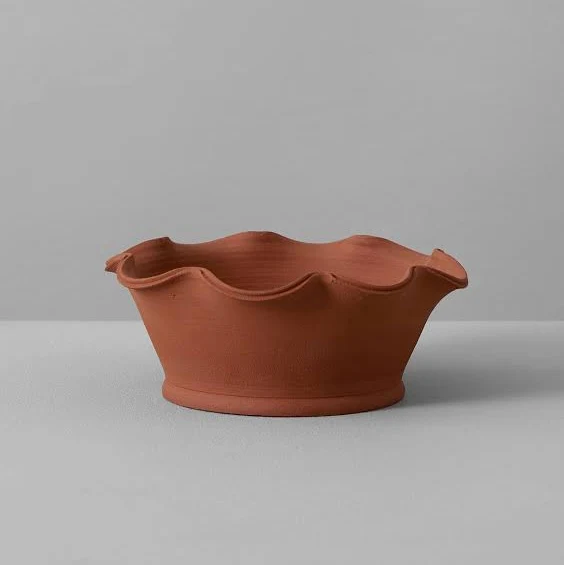
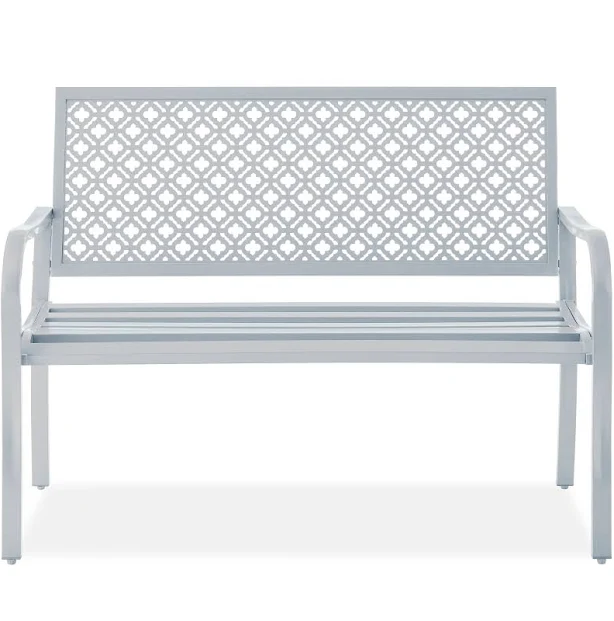
17. Japanese Garden Inspired Bamboo Screens for Patio Privacy & Shade
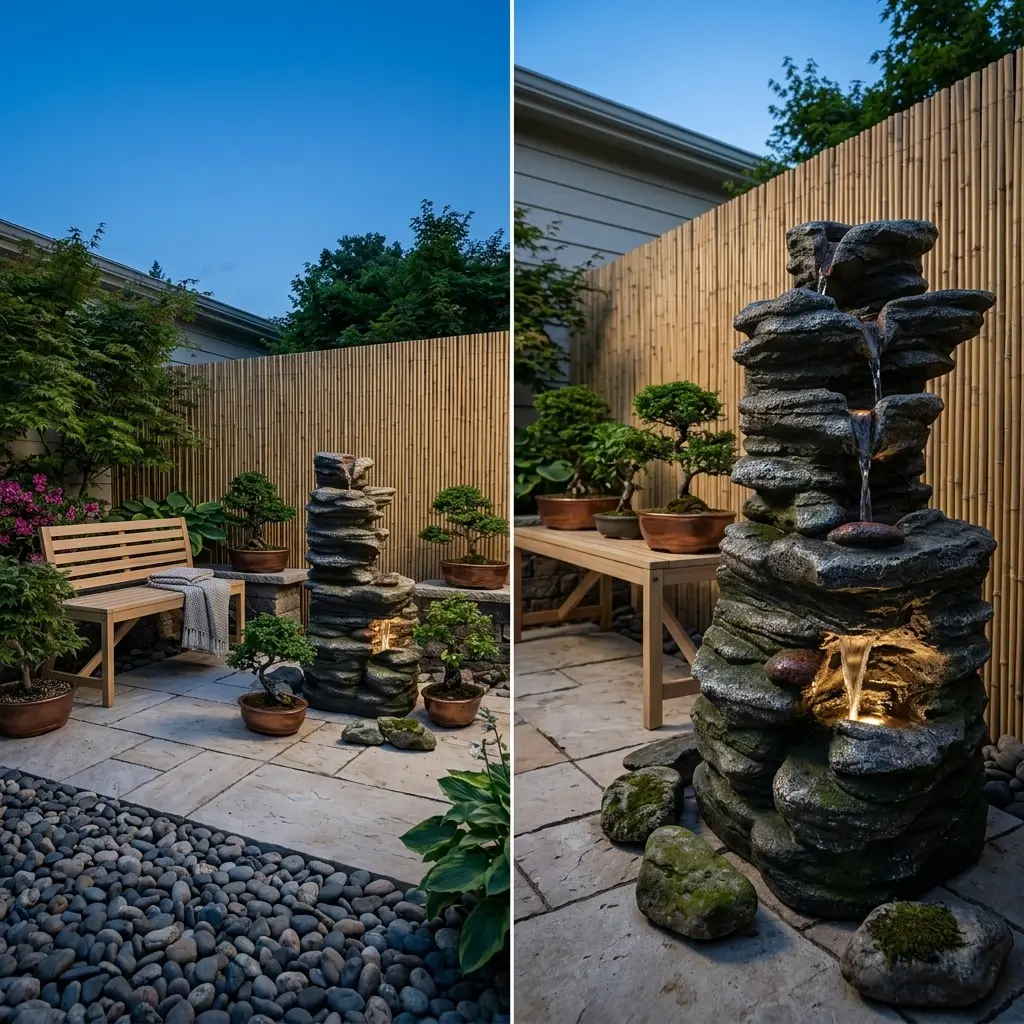
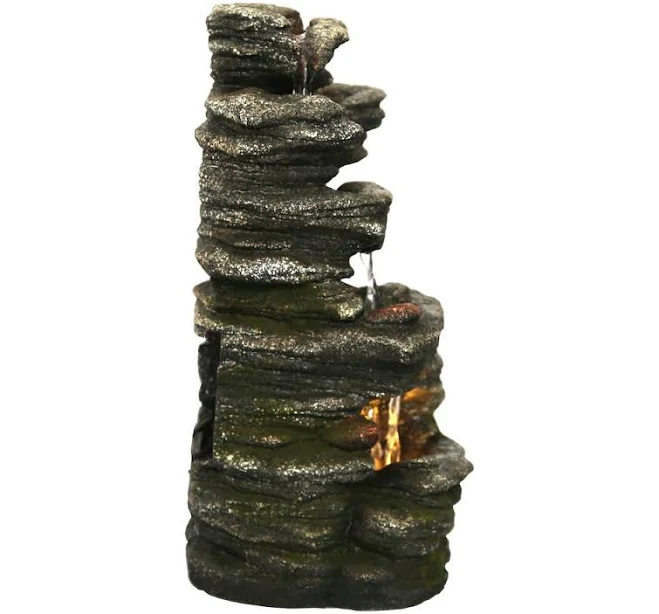
Create a serene, zen-like retreat with Japanese garden-inspired bamboo screens. These aren’t just for privacy; they provide beautiful dappled shade, softening the sunlight and imparting a sense of calm. The natural texture of bamboo instantly grounds the space, making it feel organic and tranquil. Pair them with minimalist outdoor benches, simple planters, and perhaps a small water feature, and you’ll have a meditation-worthy space that encourages unwinding and quiet reflection.
- Privacy screens (bamboo roll fence): $81 – $200 (for several sections)
- Outdoor bench: $100 – $300
- Small planters & plants: $50 – $150
- Water feature: $35 – $100
- Total Estimated Cost: $266 – $750
- Budget alternative: DIY screens using salvaged wood and inexpensive fabric panels ($50-$100) and use existing seating for a similar vibe at 60-70% less.
The rise of ‘wellness’ and ‘mindfulness’ in design is huge right now, and Japanese garden aesthetics perfectly align with that movement. People are seeking ways to de-stress and create peaceful sanctuaries at home. Bamboo screens offer an accessible way to introduce that calm, minimalist, and natural element to a patio. It’s a trend with staying power because the desire for tranquility isn’t going anywhere.
The bamboo screens are unequivocally the heart of this look. Without their natural texture and the way they filter light, the entire Japanese garden aesthetic would fall flat. They define the space, provide the unique dappled shade, and deliver the calming visual texture. If you’re going for this vibe, invest here – everything else builds around them.
|
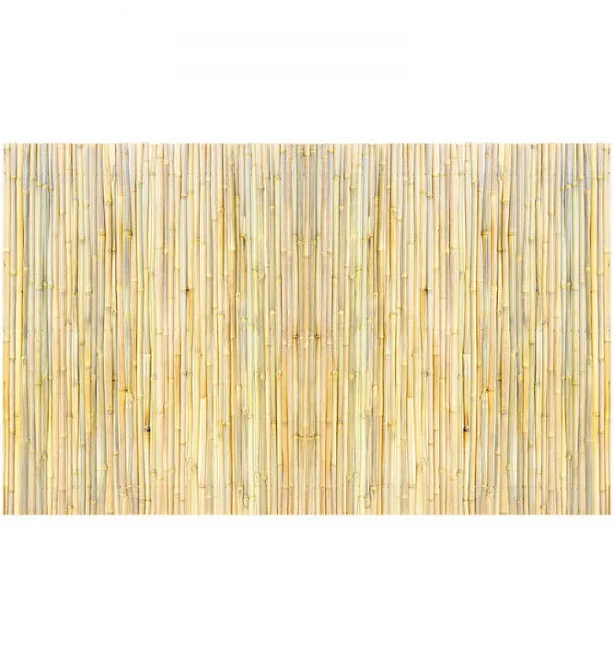
VEVOR Natural Rolled Bamboo Fence$80.99 |
IKEA NÄMMARÖ bench outdoor$100 |
Spirit of Japan Bonsai Ceramic Pot$29.99 |
Hi-Line Gift Ltd. Multi-Level Stone Fountain with Light$35.2 |

As an affiliate, we earn from qualifying purchases.
18. Vine-Covered Archway Entry to a Shaded Patio Dining Area
✨ Luxury Version
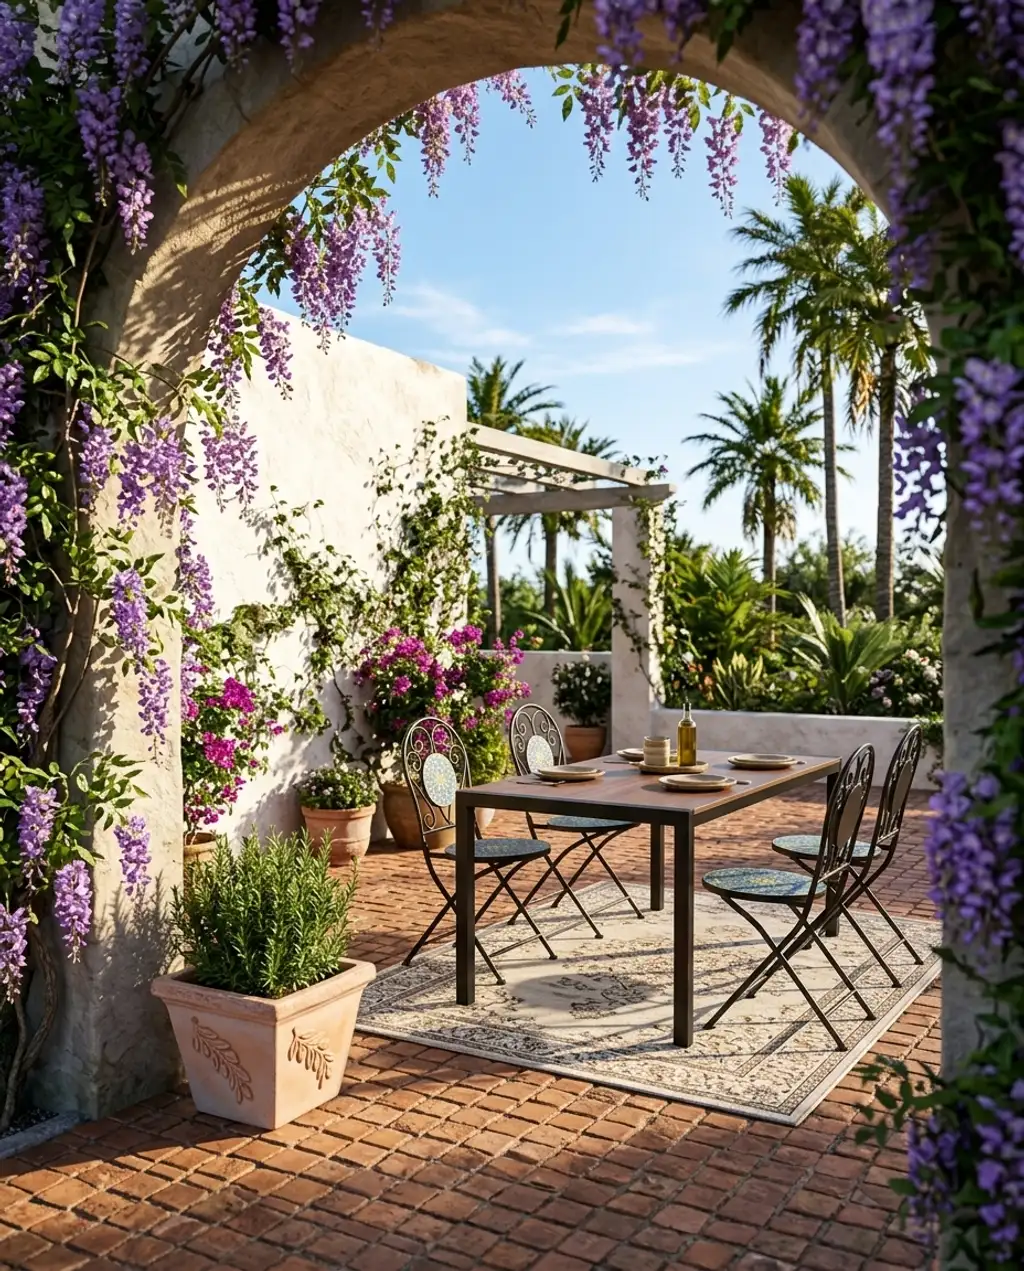
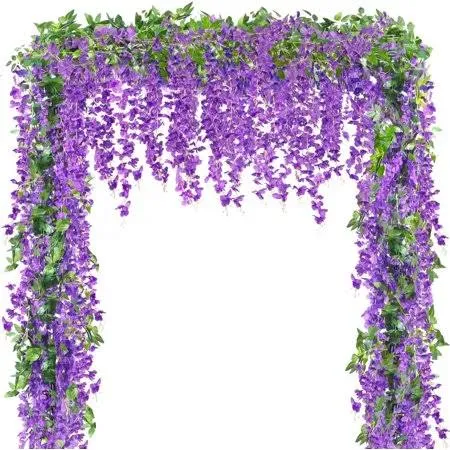
Imagine stepping through a vine-covered archway into your private, shaded dining area – pure Mediterranean romance! Wisteria, honeysuckle, or even colorful bougainvillea trained over an arch creates a breathtaking entrance and offers stunning organic shade. Pair it with terracotta pots, a sturdy dining set, and perhaps some cobblestone pavers, and you’ve got an old-world charm that feels pulled straight from a European countryside. It’s dramatic, inviting, and truly unforgettable.
- Instead of a pre-made archway, build a simple frame from pressure-treated lumber for $50-$100.
- Use fast-growing, inexpensive vines like morning glories or lima beans (for edible shade!) for $10-$20.
- Find a used outdoor dining table and chairs on Facebook Marketplace for $50-$150.
- Total savings can exceed $500, making this romantic dining escape achievable on a modest budget.
💸 Budget Version

This idea absolutely thrives in medium to large patios (think 10×10 feet and up) where the archway can have a natural lead-in and the vines have room to spread without overwhelming the space. Higher ceilings or an open sky above helps emphasize the verticality of the arch. If your patio is tiny, an archway might feel cramped; instead, try a smaller-scale vertical garden from Idea #24 for a similar living element.
While a vine-covered archway is beautiful, it’s a living, breathing thing that needs commitment. Vines can be aggressive growers, requiring regular pruning and training to maintain the arch’s shape and prevent them from taking over. Also, be prepared for falling leaves, petals, and sometimes even insects. And depending on the vine, it might take a season or two to achieve that lush, full coverage you’re dreaming of. It’s beautiful, but not zero maintenance!
|
💰 Budget Pick 4 Pcs 23ft in Total Vine Artificial Wisteria Garland$16.99 |
💰 Budget Pick Jamali Garden Square Quadra Olive Pot$19.99 |
✨ Luxury Pick Sunnydaze Decor Mosaic Tile Bistro Chair with Iron Frame (2-Pack)$178.67 |
✨ Luxury Pick Living Accents Black Steel Rectangular Dining Table$349.99 |
As an affiliate, we earn from qualifying purchases.
19. Cantilever Umbrella with LED Lights for Nighttime Ambiance
For maximum flexibility and sleek design, look no further than a cantilever umbrella with integrated LED lights. This is the modern, space-saving hero of patio shade. Because the pole is offset, you get an uninterrupted shade canopy over your lounge area, perfect for sinking into a plush outdoor sectional. The integrated LED lights mean your patio stays illuminated as the sun sets, creating a warm ambiance for evening gatherings. It’s practical, stylish, and adaptable to almost any patio layout.
The magic here is in the cantilever design, which cleverly places the support pole to the side, freeing up the space beneath to be fully utilized. This allows for flexible furniture arrangements without poles getting in the way, making your seating area truly open and inviting. The added LED lights extend the usability of the space into the evening, providing task and ambient lighting that enhances the overall experience.
When choosing a cantilever umbrella, pay close attention to the base. A heavy, stable base is absolutely crucial for safety, as these umbrellas can catch a lot of wind. Many come with hollow bases you fill with sand or water, but consider a solid concrete or weighted base for maximum stability. Don’t cheap out on the base – it’s the foundation of your safety and your umbrella’s longevity. Also, look for umbrellas with a crank mechanism for easy opening and closing.
20. Multipurpose Sun Shade Sail for Backyard Play Area
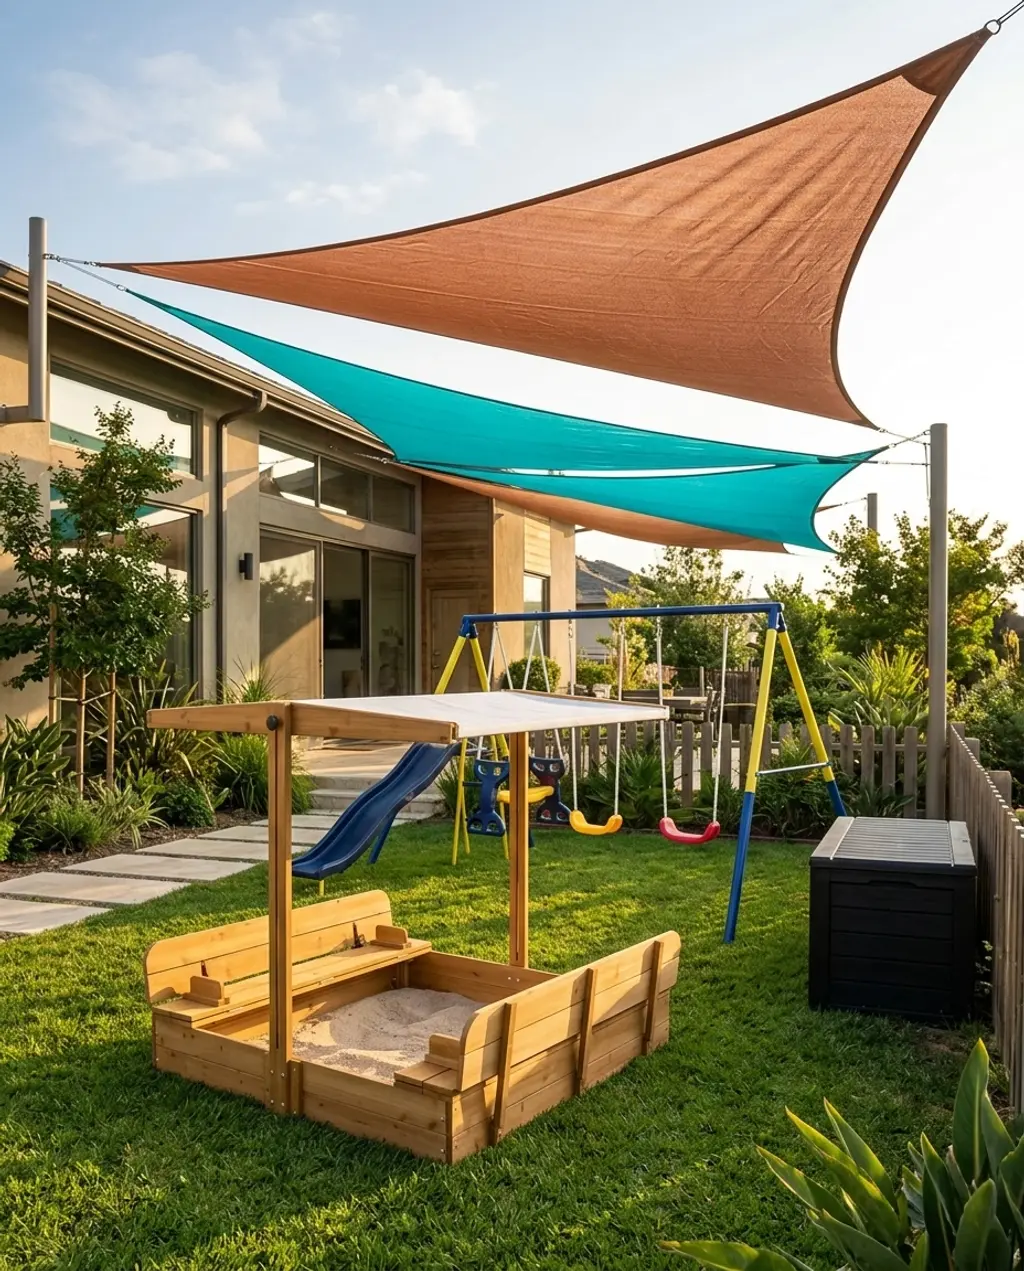
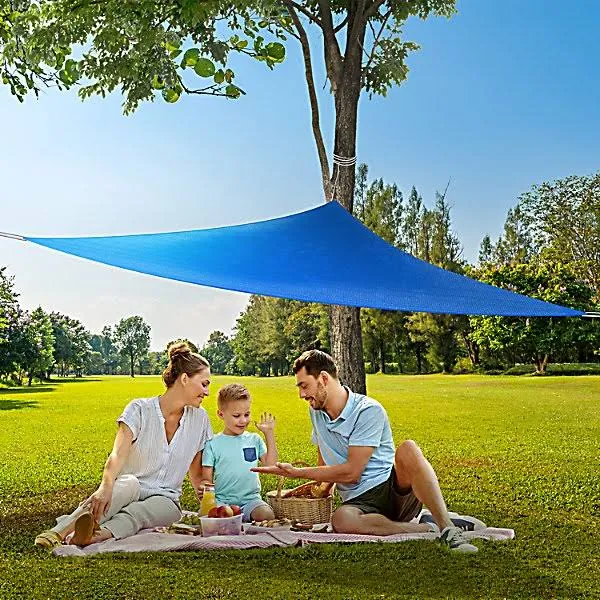
Let’s make outdoor play safe and fun! A multipurpose sun shade sail is perfect for a backyard play area. These durable fabric sails come in a rainbow of colors, creating a vibrant, yet protective canopy over sandboxes, swingsets, or climbing structures. It’s an easy, budget-friendly way to keep the harsh sun off little ones, giving them a cooler, safer space to burn off energy. Plus, the playful colors add a cheerful aesthetic to your backyard, making it an inviting space for the whole family.
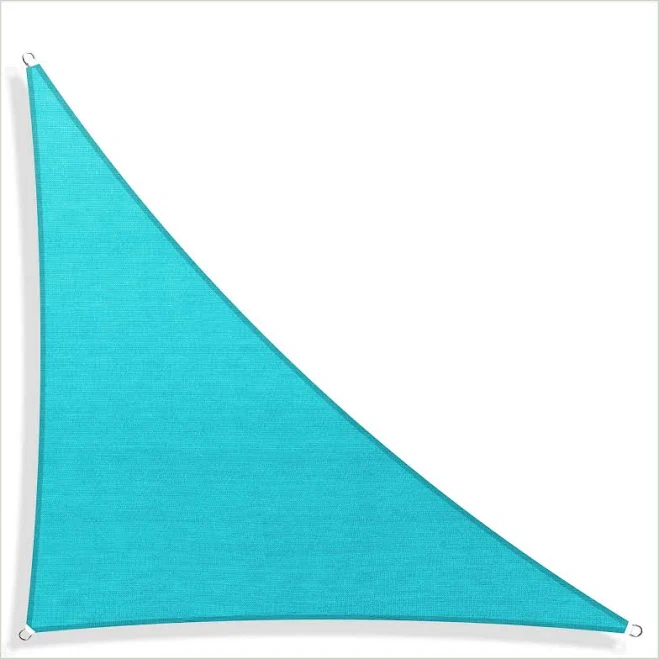
- Shade sails (triangle sail): $75 – $150 (for 2-3 sails)
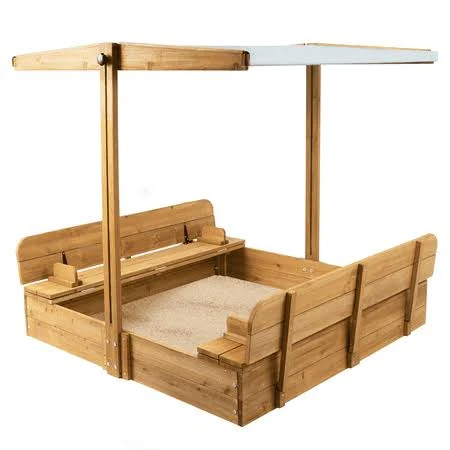
- Kid’s sandbox: $125 – $250
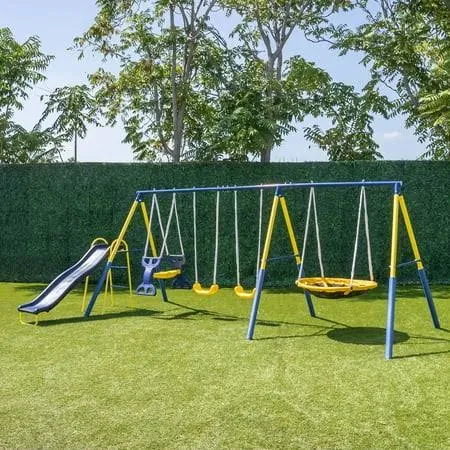
- Swingset (basic): $218 – $500
- Outdoor toy storage: $50 – $100
- Total Estimated Cost: $468 – $1000
- Budget alternative: Use a single, large rectangular tarp ($30-$50) or prioritize one shade sail over the main play element, then DIY other fun elements with recycled materials.
- Assess the area: Determine the best angles for shade coverage throughout the day. Time: 1 hour.
- Identify attachment points: Look for sturdy trees, fence posts, or existing house walls. Consider adding dedicated poles if needed. Cost: $0-$50 for poles. Time: 1 hour.
- Measure and purchase sails: Choose UV-resistant, breathable fabric. Cost: $50-$150 per sail. Time: 30 minutes.
- Install hardware: Use robust turnbuckles, D-rings, and tensioners to secure the sails. Cost: $20-$50. Time: 1-2 hours.
- Attach and tension: Pull the sails taut to prevent sagging and pooling. Time: 1 hour.
With parents increasingly prioritizing outdoor play and safety, shade solutions for children’s areas are a huge trend. Modern shade sails offer a stylish alternative to traditional, clunky play structures, often appearing on ‘aesthetic backyard’ Pinterest boards. The focus on vibrant colors and durable, UV-protective materials reflects a broader trend toward functional yet beautiful family-friendly outdoor spaces.
|
Triangle Sun Shade Sail Colourtree Shade$74.99 |
Wooden Sandbox with Lid Kids Sandbox with Canopy Foldable Bench Seats $124.99 |
Sportspower Super Star Swing and Slide Set$218 |
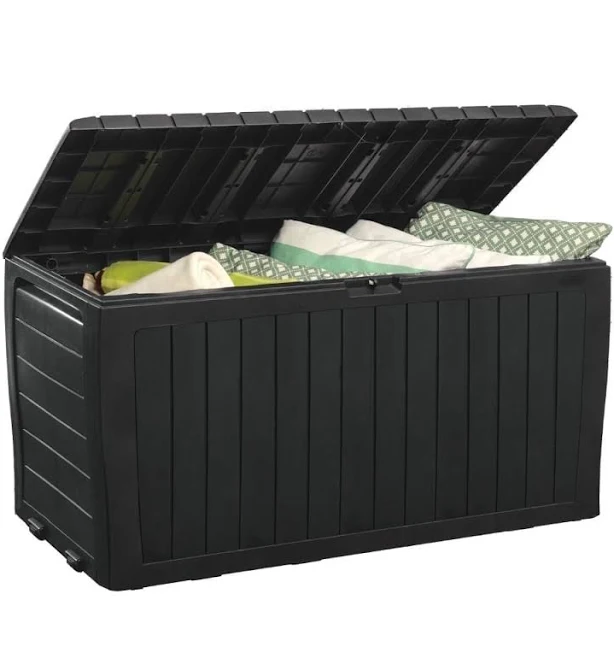
Keter Marvel Plus 71 Gallon Resin Outdoor Storage Box for Patio$52.59 |
As an affiliate, we earn from qualifying purchases.
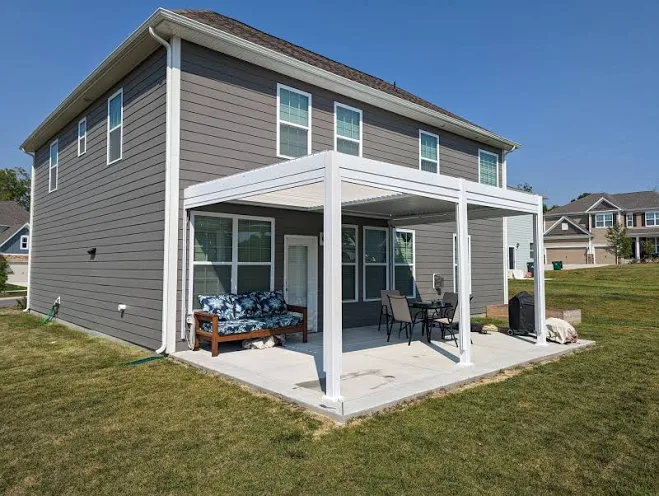
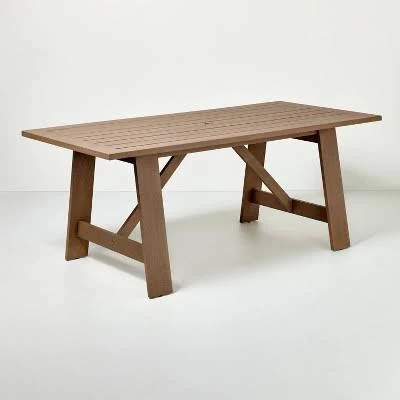
21. Attached Pergola with Modern Slat Roof for Patio Extension
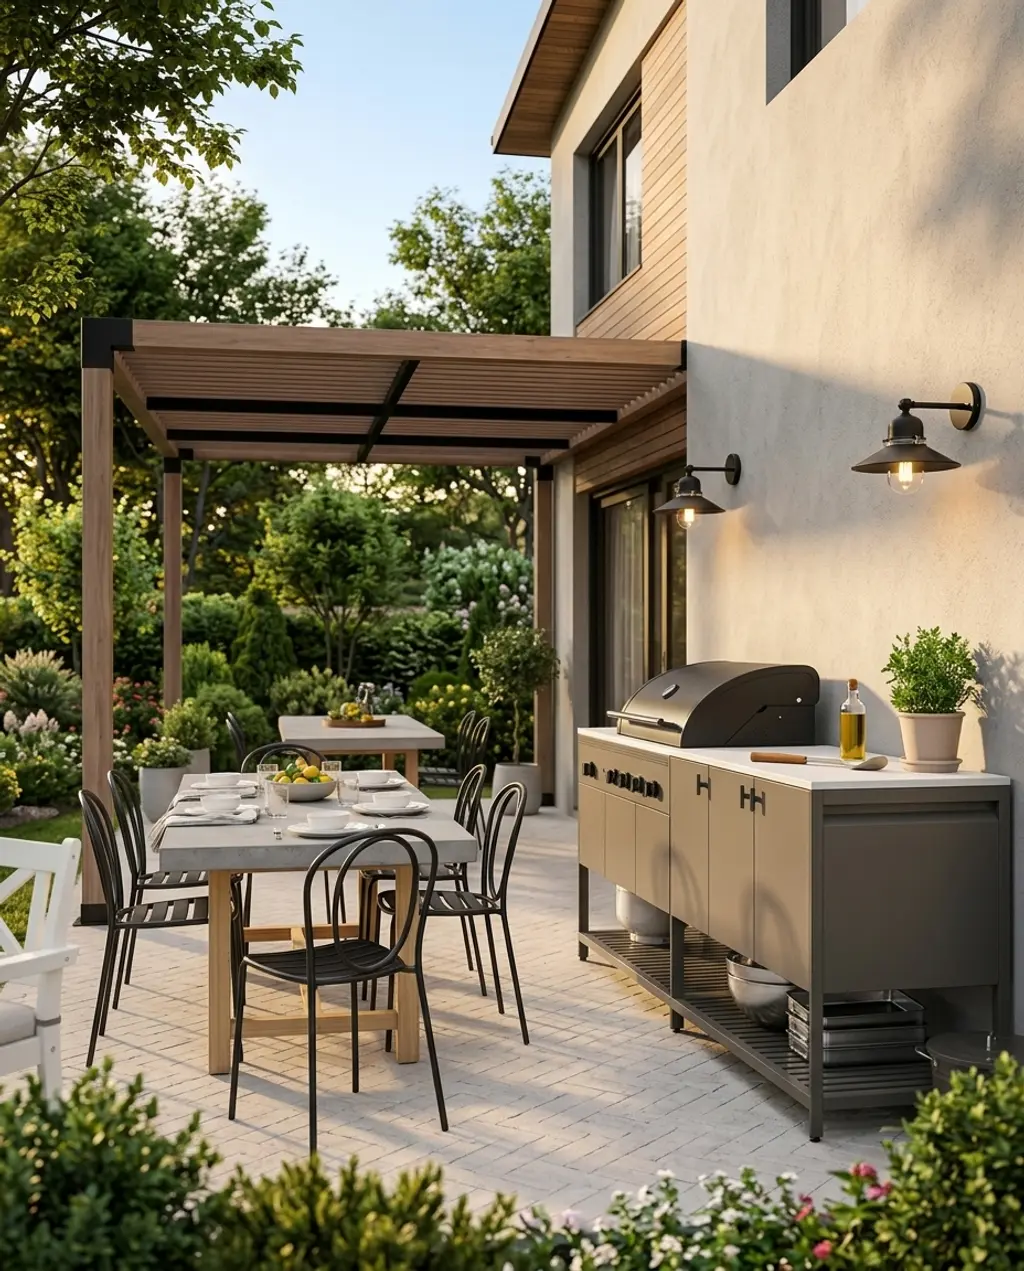
Extend your indoor living seamlessly with an attached pergola featuring a modern slat roof. This design acts like a natural transition point, blurring the lines between house and patio. The slats offer partial shade, creating intriguing patterns of light and shadow, and lending a contemporary, architectural feel. It’s perfect for integrating an outdoor kitchen or a dining area right off your home, making al fresco meals and entertaining effortless and stylish.
Here’s the style math for this integrated look:
- 70% architectural base (the attached pergola, sleek cedar wood).
- 20% functional integration (outdoor kitchen elements, built-in seating).
- 10% subtle accents (minimalist lighting, durable outdoor dining ware).
The key is keeping the color palette neutral and complementary to your home’s exterior, allowing the structure itself and the interplay of light to be the focus.
The slat roof is the defining feature of this attached pergola. It’s what differentiates it from a full solid roof, offering a unique type of dappled shade and architectural interest. Without the slats, it loses its distinctive modern charm and the soft play of light and shadow. The spacing of the slats also significantly affects the amount of shade, so consider your sun exposure before building.
When attaching a pergola to your house, proper flashing and waterproofing are absolutely critical to prevent moisture intrusion and damage to your home’s exterior. This is not the place to cut corners on installation. Consider hiring a professional builder or carpenter who has experience with attached structures to ensure it’s done correctly and safely, protecting your investment for years to come.
|
Sunjoy Brandon Pergola$582.25 |
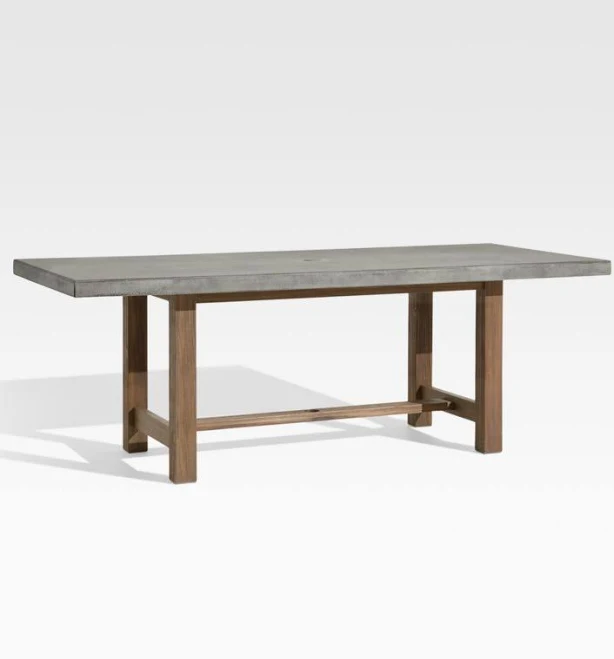
Crate & Barrel Abaco Outdoor Dining Table$1614 |
World Market Saville Round Back Outdoor Patio Stacking Dining Chair (S$179.98 |
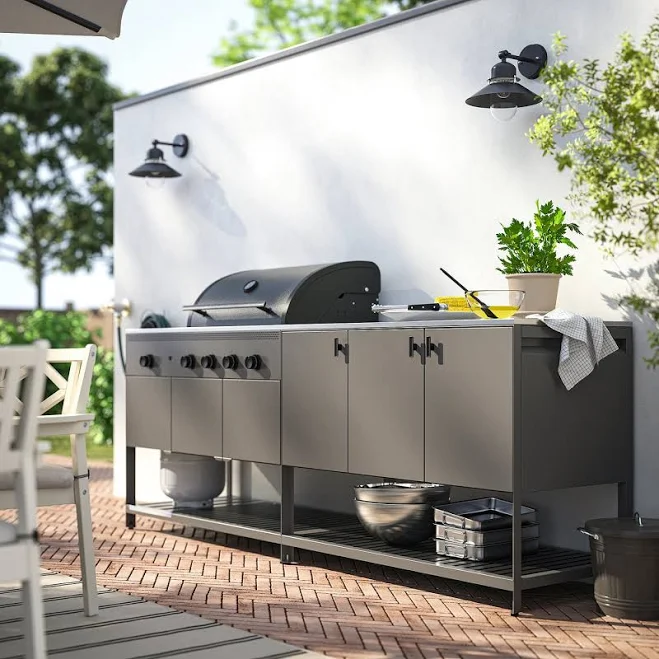
IKEA BÅTSKÄR outdoor kitchen with gas grill$1589 |
As an affiliate, we earn from qualifying purchases.
22. Shade Cloth Canopy for Greenhouse-Style Outdoor Seating
For a whimsical, greenhouse-style vibe, drape a shade cloth canopy over a cozy outdoor seating area. This isn’t about perfection; it’s about creating a rustic, airy garden nook filled with potted plants and relaxed seating. The shade cloth filters the harsh sun while still letting plenty of light through, making it feel like a secret garden room. It’s budget-friendly, charming, and perfect for anyone who loves that slightly overgrown, eclectic cottage aesthetic.
- Purchase a large shade cloth or inexpensive tarp ($20-$50).
- Use salvaged wood posts, existing trees, or even sturdy broom handles for support ($0-$20).
- Find an old bench or chairs at a thrift store ($20-$50).
- Pot plants in terracotta pots from Walmart or dollar stores ($10-$30).
- Total cost can be well under $150, creating a lovely shaded retreat on a shoestring budget.
Shade cloth can be incredibly effective, but it’s not always the prettiest solution on its own. It can look a bit utilitarian unless carefully draped and adorned. Strong winds can also tug and tear it if not properly secured, and cheaper options might degrade quickly in intense sun. If you’re looking for a more polished or long-term structural solution, you might want to explore the more robust options in Idea #26.
This idea is incredibly adaptable and works wonderfully for small, intimate corners or medium-sized patios where you want to create a defined reading or relaxation zone. It’s particularly good for areas up to about 10×10 feet, allowing the fabric to drape without excessive sagging. For tiny balconies, it might feel a bit too much, while very large patios might require multiple sections to achieve consistent coverage.
|
Pure Garden 10x13ft Sun Shade Canopy Sail$23.2 |
Shree Ram Art Reclaimed Railroad Ties Wood Bench$377.99 |
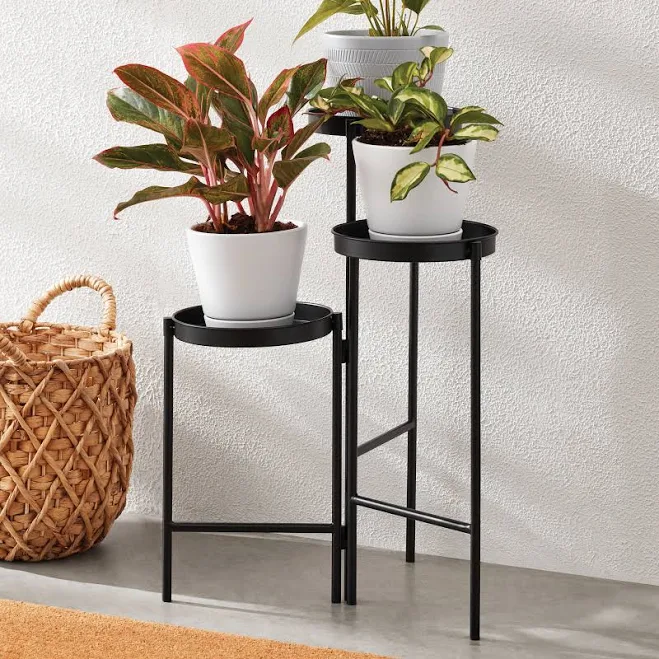
Willow Pottery Herb Pot$37 |
Mainstays 3 Tier Plant Stand$21.88 |
As an affiliate, we earn from qualifying purchases.
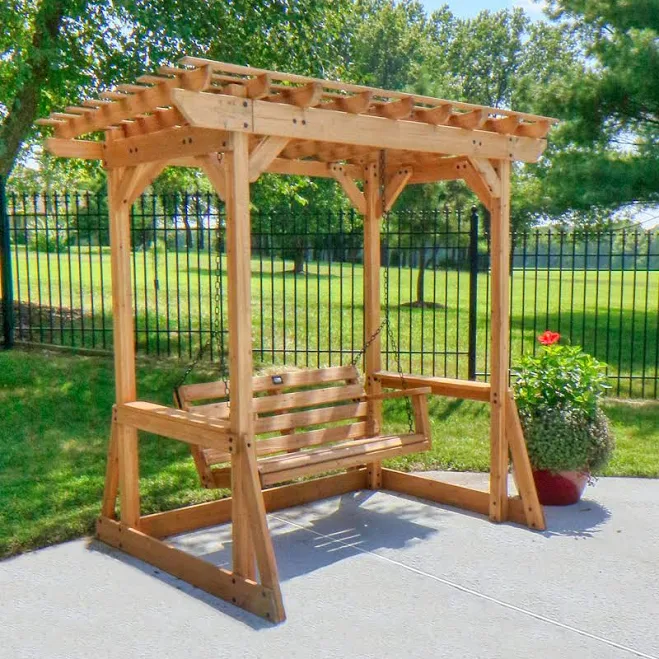
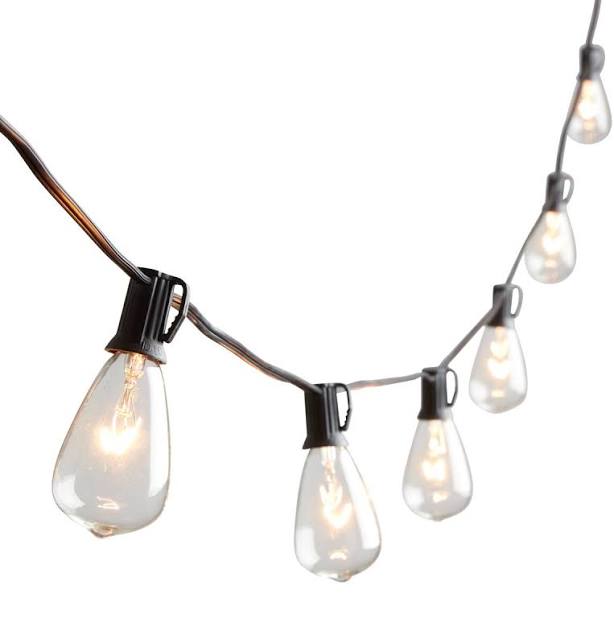
23. Pergola with Built-in Swings and String Lights
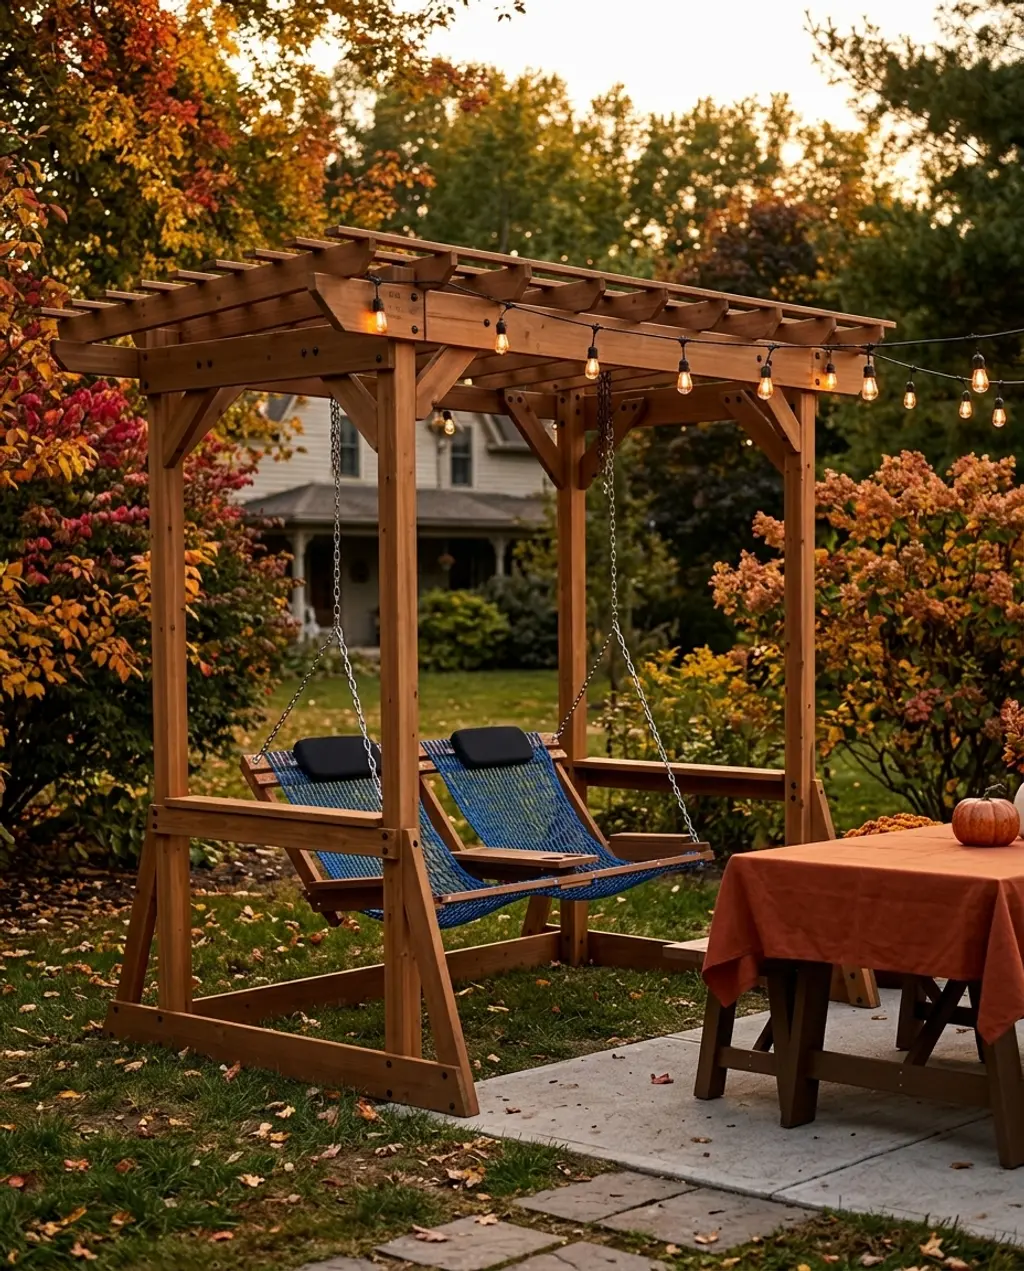
Who needs a separate swing set when your pergola comes with built-in swings? This farmhouse-style pergola with integrated swings and softly strung lights creates an irresistibly relaxing and family-friendly atmosphere. It’s the kind of spot where adults can sip iced tea while kids gently sway, and evenings turn magical under a canopy of warm glow. It perfectly blends shade, seating, and entertainment into one charming, cohesive structure.
- Pergola with built-in swings: $699 – $1500
- Additional porch swing (if desired): $140 – $500
- String lights: $50 – $150
- Outdoor table/seating: $100 – $600
- Total Estimated Cost: $989 – $2750
- Budget alternative: Build a simple A-frame swing set structure ($200-$400) and hang solar string lights ($20-$50) over an existing patio for a much lower cost.
The ‘comfort core’ or ‘cozy outdoor’ trend is big for 2026, and this idea nails it. People are investing in their backyards as true extensions of their homes, desiring spaces that are both functional and deeply relaxing. Features like built-in swings appeal to both adults seeking a moment of peace and families looking for safe, fun entertainment. It’s a blend of nostalgia and modern living that resonates strongly on platforms like Pinterest and Instagram, making it a very popular choice right now.
The success of this design lies in its multi-functionality. By integrating swings directly into the pergola’s design, it maximizes the use of space while providing both shade and recreation. This layered approach creates an engaging environment that appeals to different family members, making the patio a central hub for relaxation and fun rather than just a place to sit. It simplifies design decisions and creates a focal point.
|
Backyard Discovery Callahan Pergola Swing$699 |
Deluxe Double Cumaru Rope Hammock Swing$899.99 |
World Market Edison Style 30 Bulb String Lights$49.99 |
Hearth & Hand with Magnolia Mahogany Slat Top Rectangular Outdoor Pati$549.99 |

As an affiliate, we earn from qualifying purchases.
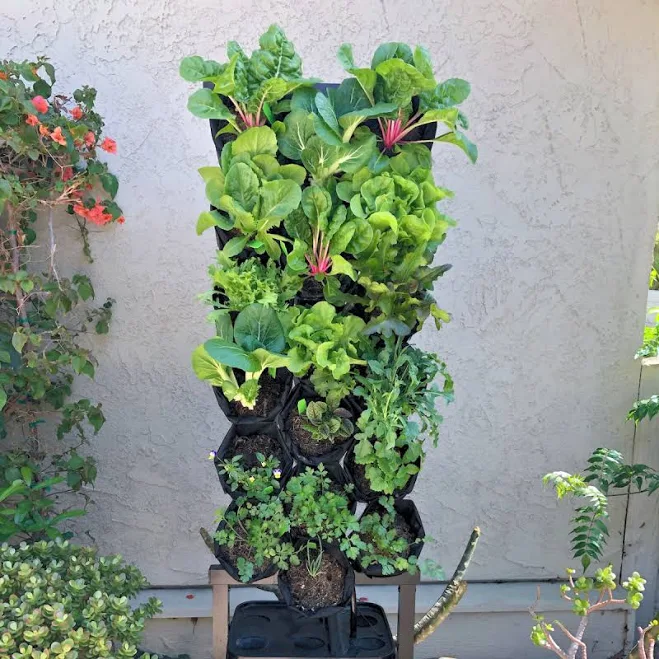
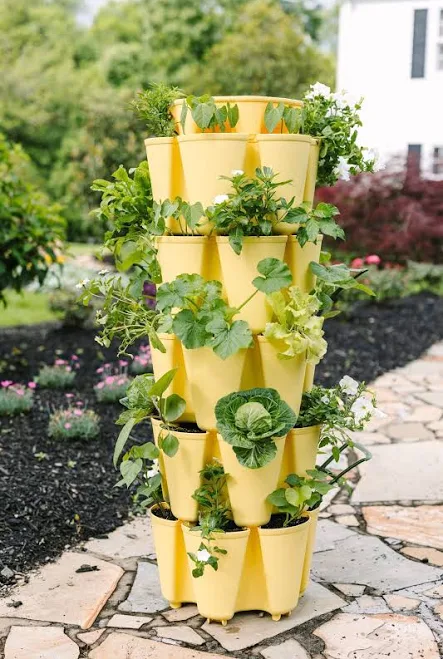
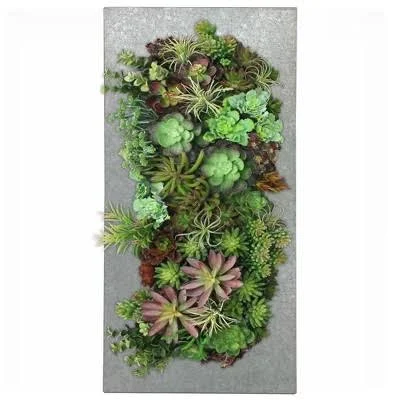
24. Vertical Garden Wall as a Living Shade Structure
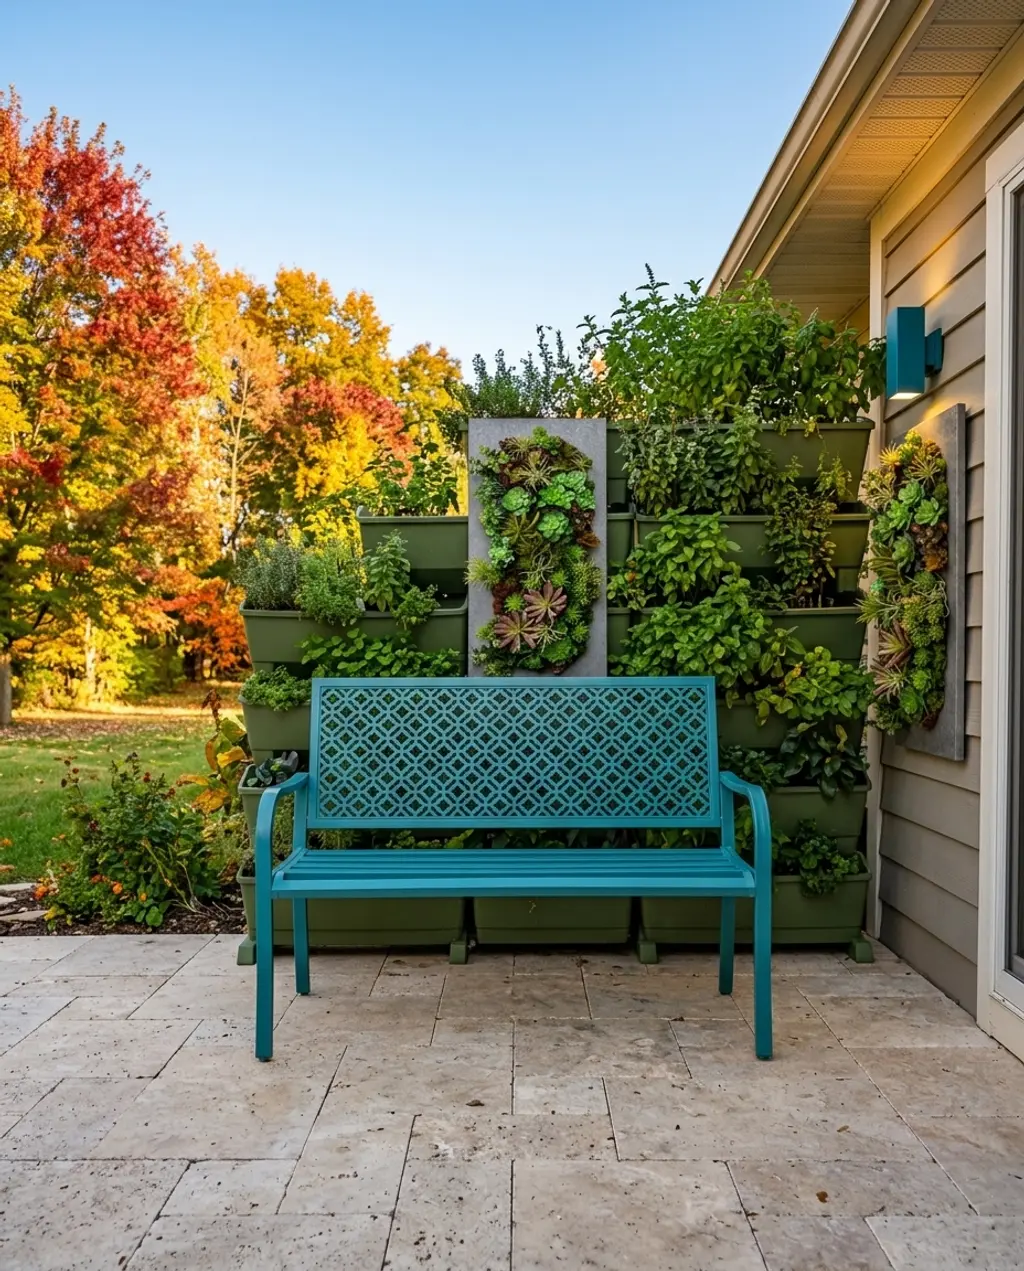
Turn your patio into a lush, biophilic sanctuary with a vertical garden wall doubling as a living shade structure. This is an incredible way to introduce natural beauty, privacy, and cooling shade, especially in urban environments. Imagine a wall of fragrant herbs, vibrant florals, or cascading succulents that filter the sun and create a truly immersive green experience. It’s sustainable, eye-catching, and brings life to even the most sterile patio. Plus, hello, fresh herbs for dinner!
The vertical garden itself is what makes this idea so unique and impactful. Without the living wall, it devolves into a plain screen. It’s the greenery that provides the true, breathable shade, cools the immediate area through evapotranspiration, and offers undeniable aesthetic appeal. This is where you should invest your time and resources to get the variety of plants and robust structure that will thrive.
- Choose a system: Research modular vertical planters, wall-mounted pocket systems, or DIY pallet gardens. Cost: $50-$200.
- Select plants: Opt for shade-tolerant varieties if the wall receives limited sun, or sun-lovers if it’s exposed. Herbs, ferns, and succulents are great choices. Cost: $30-$100.
- Install irrigation (optional but recommended): A drip irrigation system simplifies watering. Cost: $50-$150.
- Plant and arrange: Create a visually appealing display, considering plant heights and textures. Time: 1 day.
- Water regularly: Vertical gardens tend to dry out faster than traditional beds. Time: 15-30 mins/week.
While stunning, a vertical garden wall is a commitment. It requires consistent watering, especially in warmer climates, and regular pruning and feeding to keep the plants healthy and lush. You’ll also need to monitor for pests and potentially replace plants that don’t thrive. Consider this a living design element that demands ongoing attention, much like a regular garden, but on a vertical plane. However, the cooling effect and fresh oxygen are often worth the effort!
|
GreenStalk Garden Original Vertical Planter$149 |
Best Choice Products Indoor Outdoor Steel Garden Bench with Geometric $99.99 |
Modern Home Living Wall Succulent Planter$62.71 |
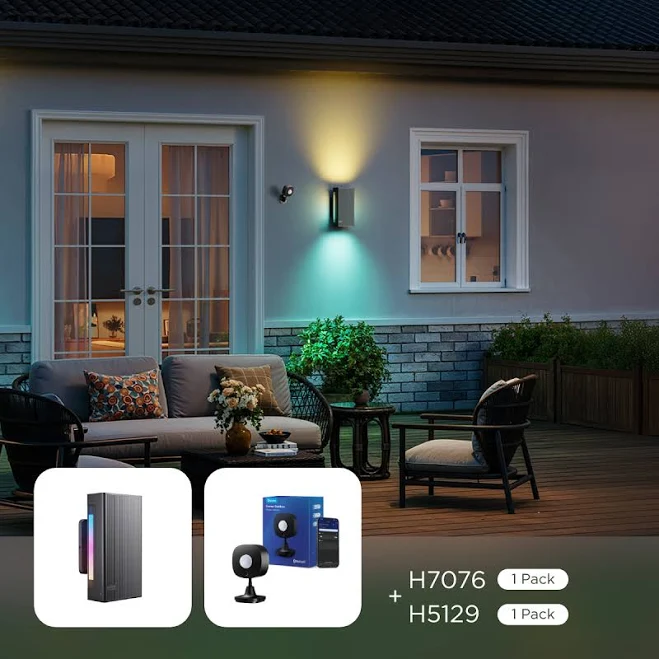
Govee Outdoor UpDown Wall Light$136.98 |
As an affiliate, we earn from qualifying purchases.
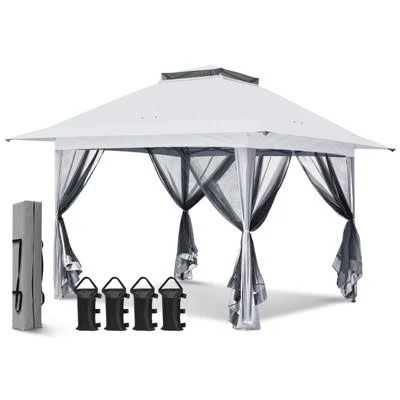
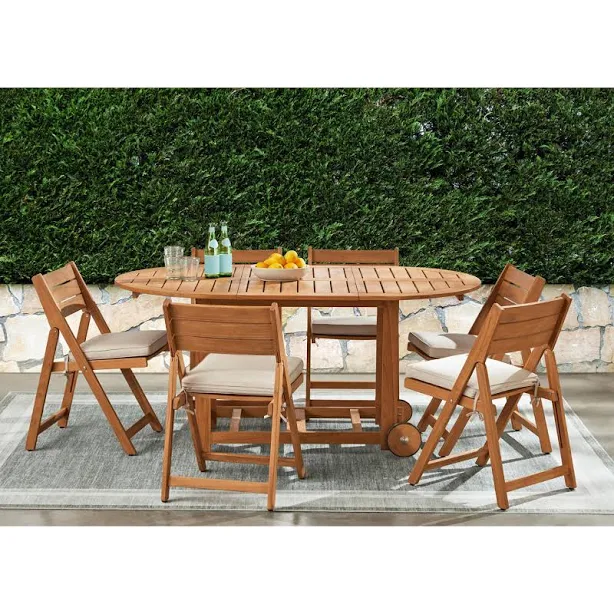
25. Renter-Friendly Pop-Up Gazebo with Mosquito Netting
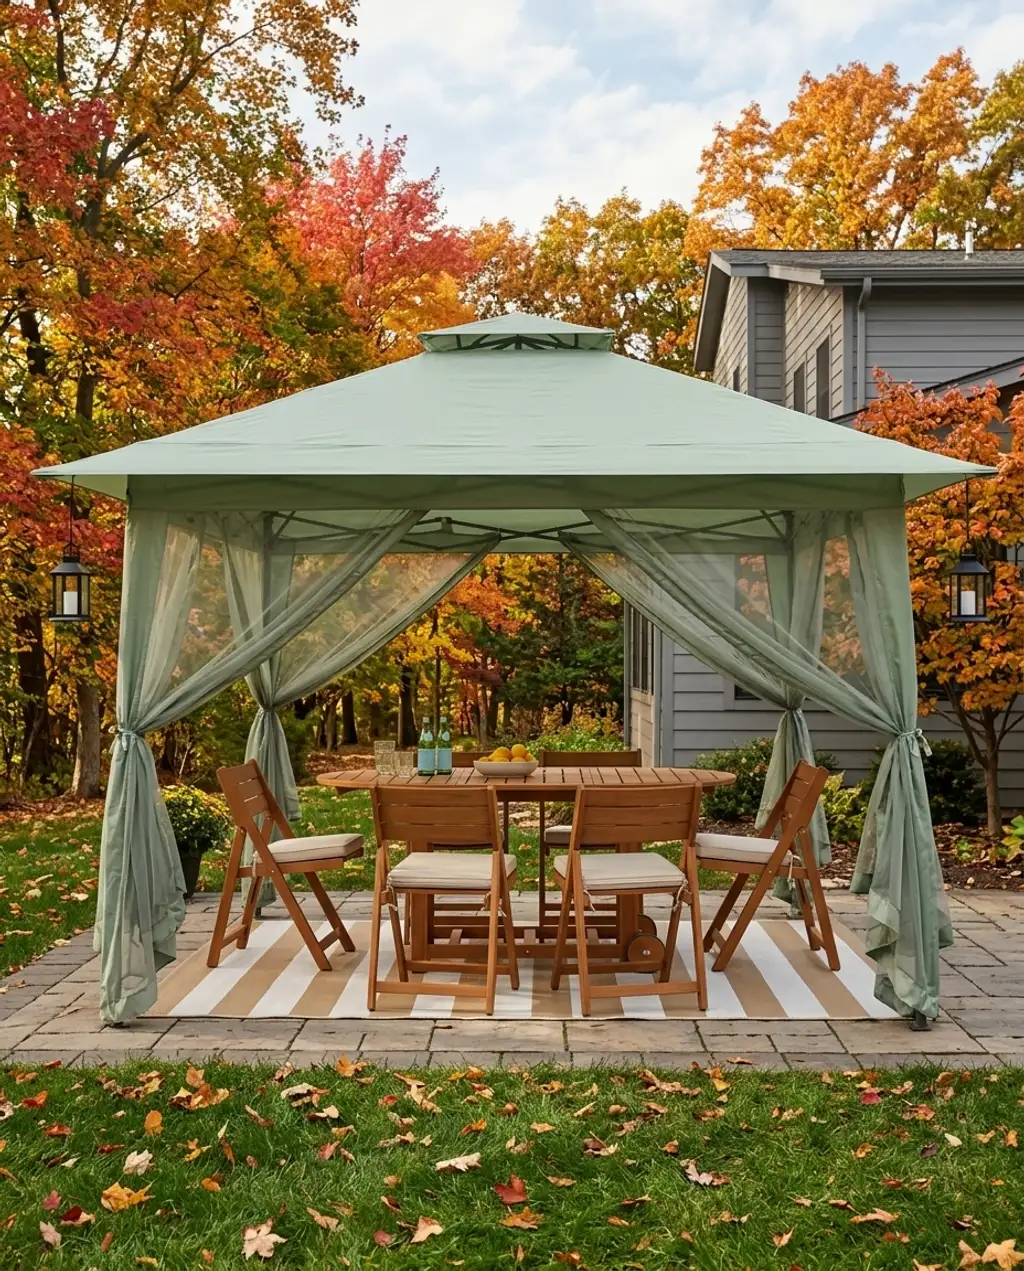
For renters, party hosts, or anyone who values flexibility, a pop-up gazebo with mosquito netting is an absolute lifesaver. It’s portable, easy to assemble (and disassemble!), and instantly transforms any outdoor space into a bug-free dining or lounge area. Imagine enjoying a peaceful dinner on your patio without unwelcome guests, or hosting a backyard BBQ knowing your guests are protected. It’s a no-fuss solution that provides shade and comfort with minimal commitment.
- Have you measured your patio/yard to ensure the gazebo will fit without obstructing pathways?
- Does the pop-up gazebo have sturdy stakes or weights to prevent it from flying away in a gust of wind?
- Are you looking for something truly temporary, or would you prefer a more permanent (but still renter-friendly) option like Idea #2‘s shade sails?
- Do you have a clear, level surface for setup to ensure stability?
This solution works incredibly well due to its emphasis on immediate problem-solving and practicality. It tackles two major outdoor dining challenges – sun exposure and pesky insects – with one portable, relatively inexpensive product. The ease of setup and breakdown means you’re not committing to a permanent structure, offering flexibility that’s invaluable, especially for renters or those who reconfigure their space often.
- Pop-up gazebo with netting: $160 – $300
- Outdoor dining set (basic): $1100 – $2000 (many renters already have this)
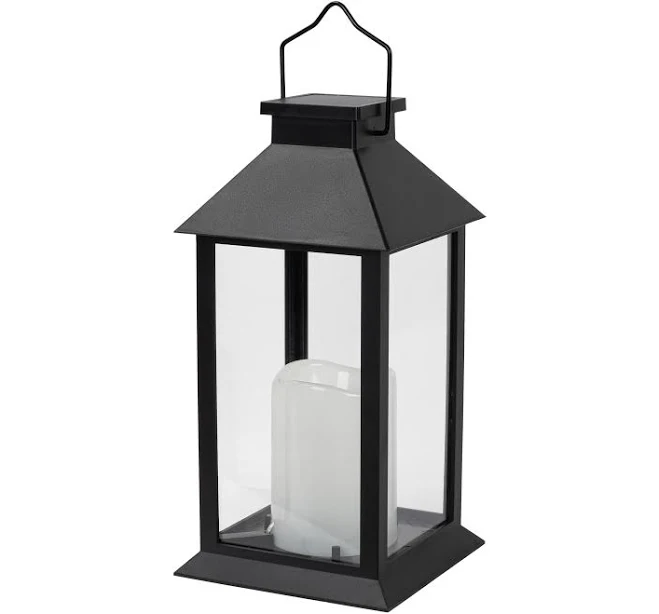
- Lanterns/lighting: $15 – $50
- Outdoor rug: $70 – $150
- Total Estimated Cost: $1345 – $2500
- Budget alternative: Use an inexpensive tarp ($30-$50) over a patio dining area and individual citronella candles/sprays ($20-$40) for insect control.
|
Eagle Peak 13 ft. x 13 ft. Pop-Up Gazebo Tent$159.99 |
Member’s Mark 7-Piece Folding Dining Set$1098.9 |
Mainstays Solar Lantern$13.74 |
Berthmeer 8’x10′ Waterproof Reversible Patio Rugs$72.99 |
As an affiliate, we earn from qualifying purchases.
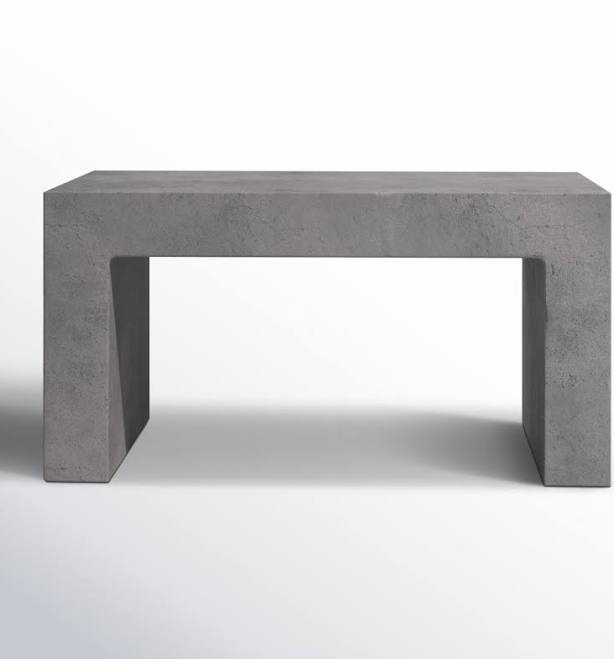
26. Architectural Steel Shade Structure with Laser-Cut Patterns
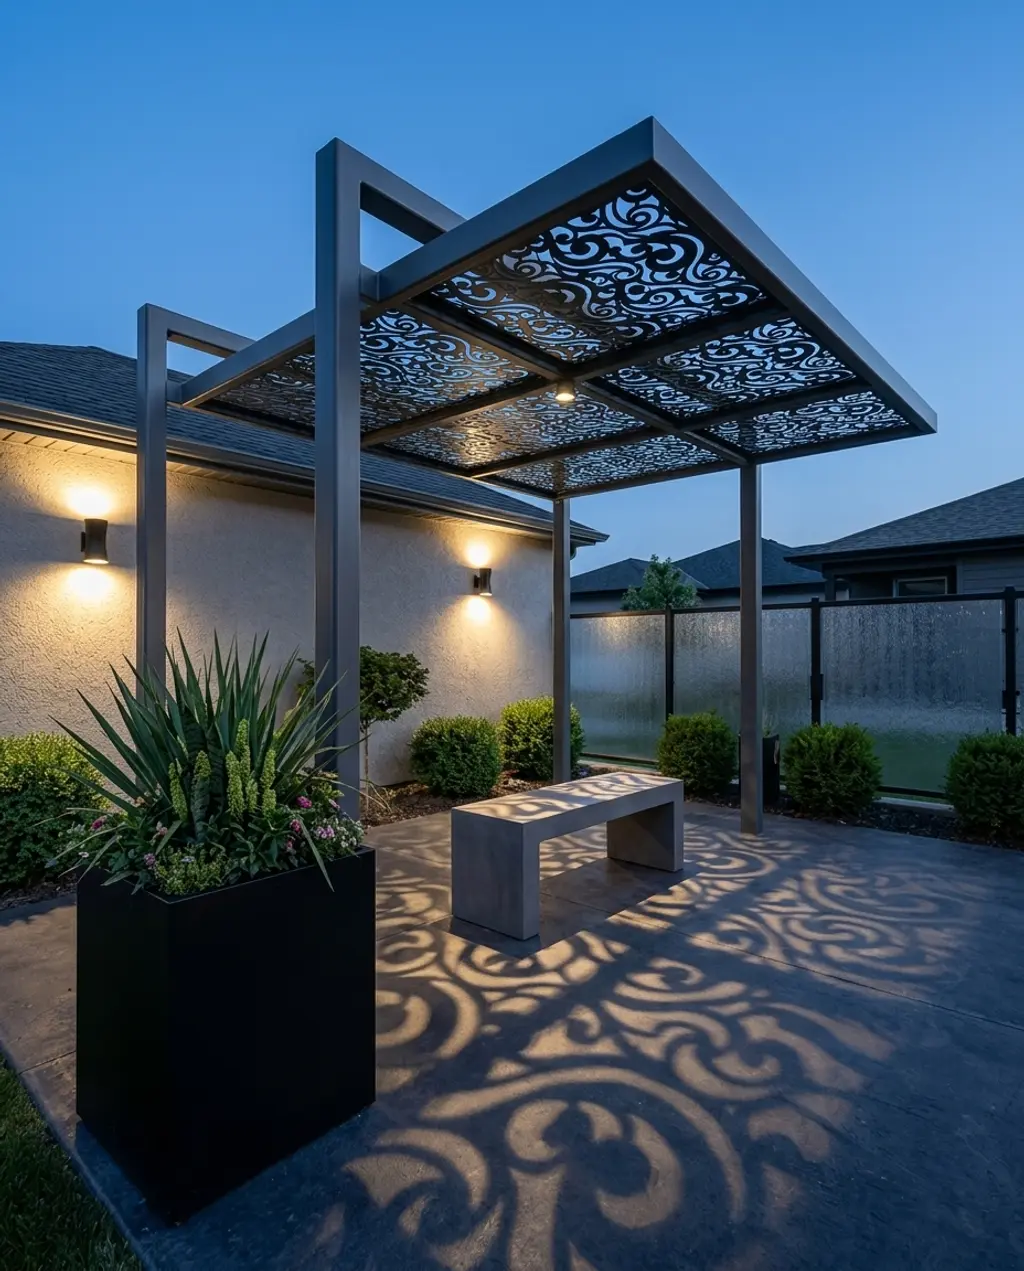
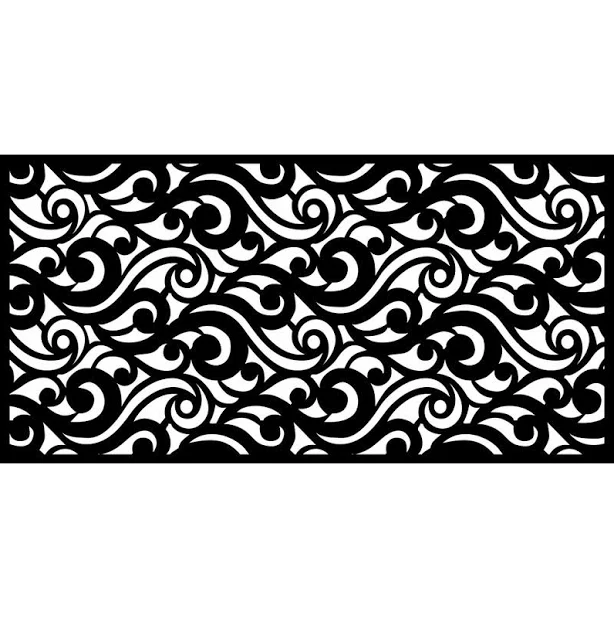
For an urban patio or a truly contemporary backyard, an architectural steel shade structure with laser-cut patterns feels less like a cover and more like a work of art. These bespoke structures cast intricate shadows that dance across your patio, transforming sunlight into a dynamic visual display. It’s a bold, modern choice that turns your outdoor space into an artistic extension of your home, perfect for those who appreciate custom design and industrial flair. Think of it as functional sculpture.
This aesthetic aligns perfectly with the current trend towards ‘architectural landscaping’ and the integration of art into outdoor spaces. People are looking for more than just shade; they want their patios to reflect their personal style and be conversation starters. Laser-cut metal offers that custom, high-design appeal, often seen in upscale urban environments and design-forward homes. It’s a statement piece that will maintain its value and allure for years to come.
This type of high-impact, custom structure truly shines on urban patios or smaller, well-defined outdoor rooms where its artistic details can be appreciated up close. It can be a showstopper in spaces as small as 8×8 feet, making a huge impact without needing vast acreage. For very large, expansive backyards, you might need multiple pieces or a significantly larger custom design to maintain its visual weight and impact. Conversely, for a tiny apartment balcony, a single laser-cut privacy screen (e.g., from Bed Bath & Beyond for $95) could give a similar effect without the full structure.
|
Laser Cut Metal Privacy Screen$95.49 |
AllModern Lionel Outdoor Bench$575 |
Tall Metal Cube Planter$89.99 |
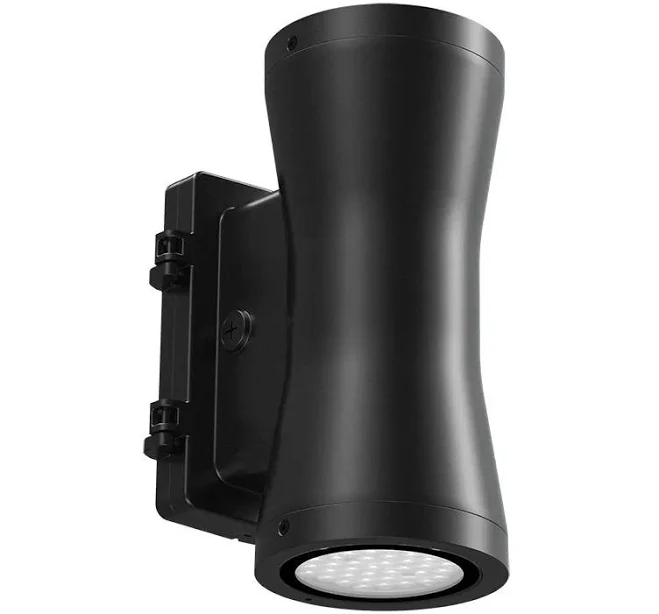
Westgate Architechtural 7in Up-Down Cylinder$272.58 |
As an affiliate, we earn from qualifying purchases.
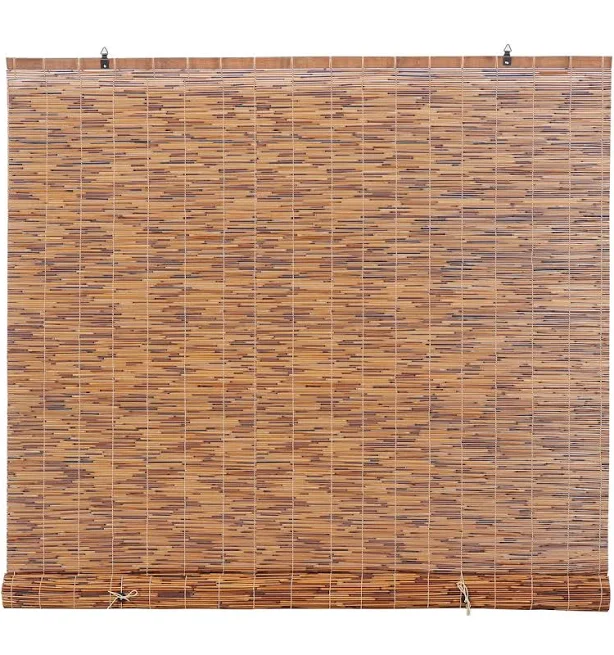
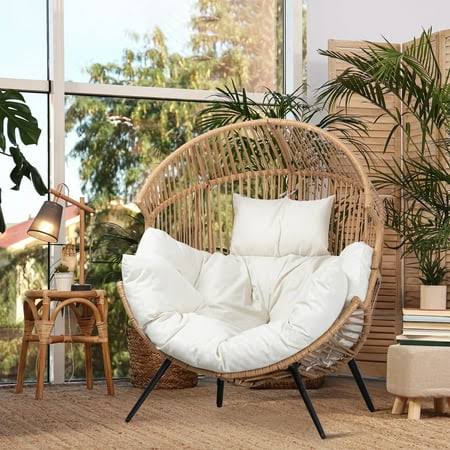
27. Woven Willow Fence and Bamboo Roll-Up Blinds for Deck Shade
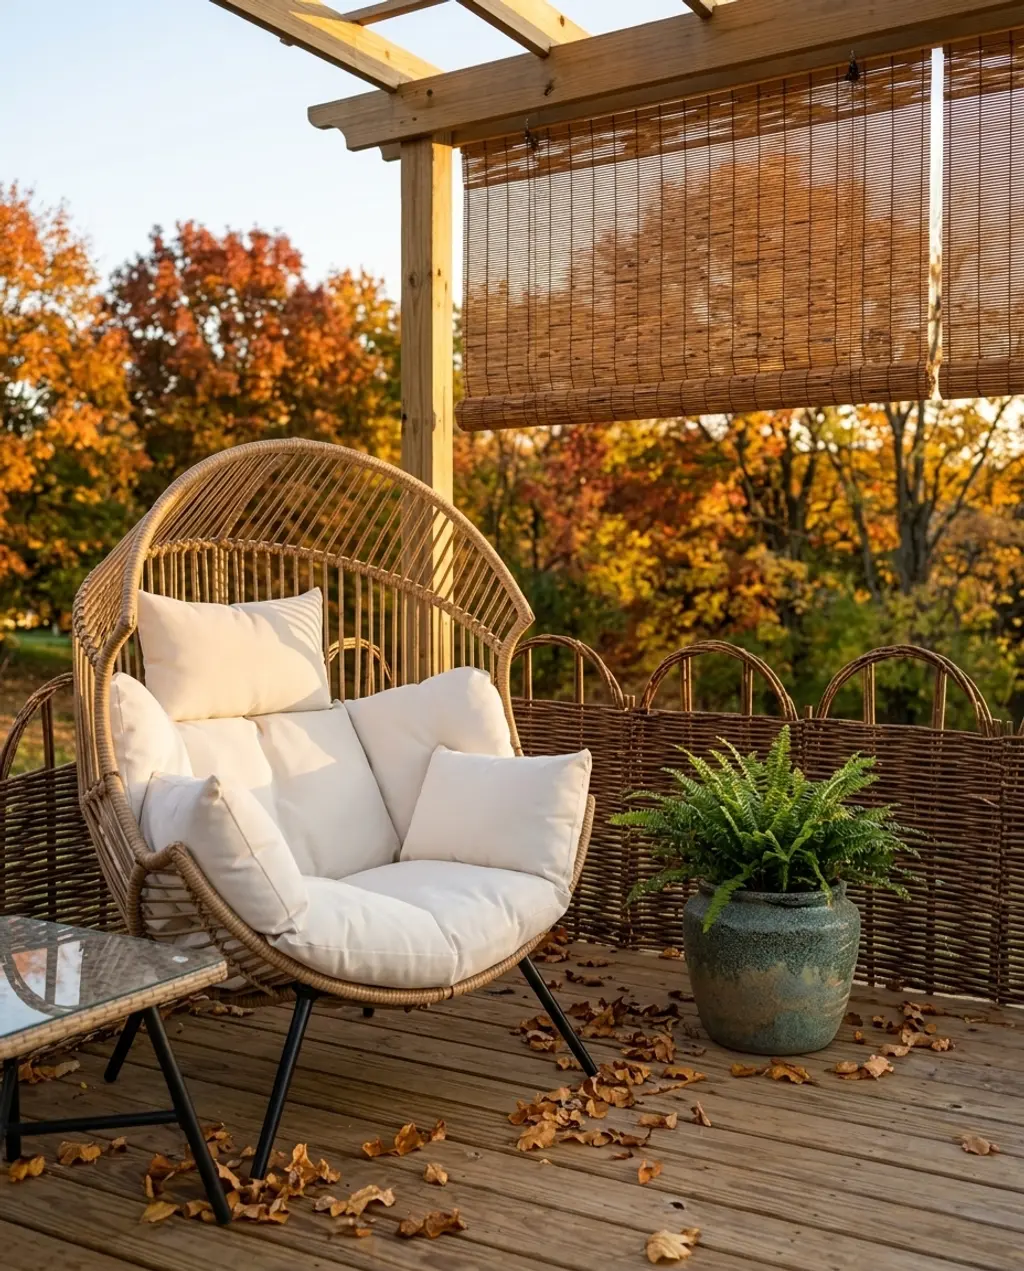
Create a truly private and organically textured deck shade with woven willow fences and bamboo roll-up blinds. This bohemian-inspired combination instantly transforms your deck into a secluded, nature-filled nook. The willow adds a rustic, earthy feel, while the bamboo blinds offer adjustable shade and a soft, filtered light. Fill it with potted ferns and comfortable seating, and you’ve got a dreamy spot to unwind, sip tea, and feel completely enveloped in natural beauty.
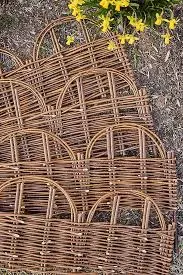
The woven willow fence is the secret ingredient here. It’s not just a boundary; it’s the textural foundation that sets the entire bohemian, organic tone for the space. Its natural, earthy aesthetic instantly provides privacy and a rustic charm that synthetic materials just can’t replicate. Without the willow, you lose that essential warmth and connection to nature that defines this look. Its irregular, hand-crafted feel is what truly grounds the space.
When selecting your bamboo roll-up blinds, make sure they are explicitly outdoor-rated and moisture-resistant. Indoor bamboo blinds will warp, mildew, and fall apart quickly in outdoor conditions. Look for treated bamboo or synthetic versions that mimic the look but can withstand the elements, ensuring longevity and preventing mold issues.
- Instead of full woven willow fence panels, use bamboo roll-up fencing (like the VEVOR Natural Rolled Bamboo Fence for $81) along the perimeter of your deck.
- DIY simple roll-up blinds using bamboo garden stakes and twine ($10-$20).
- Find an inexpensive egg chair or outdoor lounger on sale (Walsunny Egg Chair Outdoor Patio Chair Lounger Chair Cushion from Walmart – Walsunny Furniture for $152) or opt for floor cushions.
- This can bring the cost down to under $200 for a significant shade and privacy solution.
|
Woven Willow Arch Border Fencing, Set of 4$158 |
Backyard X-Scapes Cord Free Reed Roman Shades Manual Roll Up Blinds$29.98 |
Walsunny Egg Chair Outdoor Patio Chair Lounger Chair Cushion$151.99 |
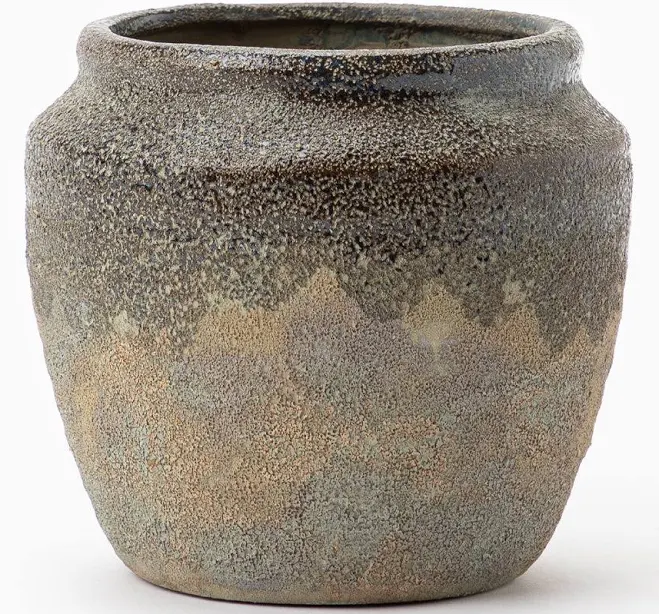
McGee & Co. | Earthy Textured Pot | Speckled Turquoise$48 |
As an affiliate, we earn from qualifying purchases.
28. Overhead Canvas Tarp System for Large Patio Coverage
If you have a large patio and a casual, family-focused vibe, an overhead canvas tarp system offers extensive coverage without needing a hefty permanent structure. Think of it as a giant, flexible umbrella that can span across a wide dining or lounge area. It’s incredibly budget-friendly compared to custom-built covers, and you can adjust the tension and even angle it to block the sun as it moves. Perfect for creating a relaxed, expansive entertaining space where everyone feels comfortable and shaded.
This system works by leveraging simplicity and scale. A single, large canvas tarp provides continuous overhead protection, eliminating the ‘gaps’ you might get with multiple smaller umbrellas. The adjustable nature of tarps allows for dynamic control over shade and helps manage wind and rain. This ‘big blanket’ approach fosters a relaxed, inclusive atmosphere, making the entire patio feel like a comfortable outdoor room.
While tarps are fantastic for coverage and budget, they do come with a few challenges. They can sag over time, collecting rainwater or debris, which requires periodic draining or tightening. In very windy conditions, they can become a sail, potentially tearing or pulling out their anchor points. So, invest in heavy-duty tarps and robust attachment hardware, and be prepared to take them down during severe weather. It’s a great temporary solution, but requires vigilance.
- Heavy-duty canvas tarp: $39 – $100
- Sturdy poles or attachment hardware: $50 – $150
- Outdoor dining set (basic): $520 – $1000
- Outdoor sofa/lounge (basic): $400 – $800
- String lights: $30 – $80
- Total Estimated Cost: $1039 – $2130
- Budget alternative: Use an existing wall, tree, or fence post for one or two anchor points, and generic rope instead of specialized hardware, to bring the initial setup cost down significantly ($50-$100).
|
Gorilla Grip Heavy Duty Sun Shade$38.99 |
Nuu Garden 7-Piece Outdoor Dining Set$519.98 |
West Elm Westport Outdoor 3-Piece L-Shaped Sectional$3997 |
Better Homes & Gardens 24-Foot Outdoor Commercial String Lights$26.97 |
As an affiliate, we earn from qualifying purchases.
29. Modern Gabled Roof Patio Cover with Skylights
✨ Luxury Version
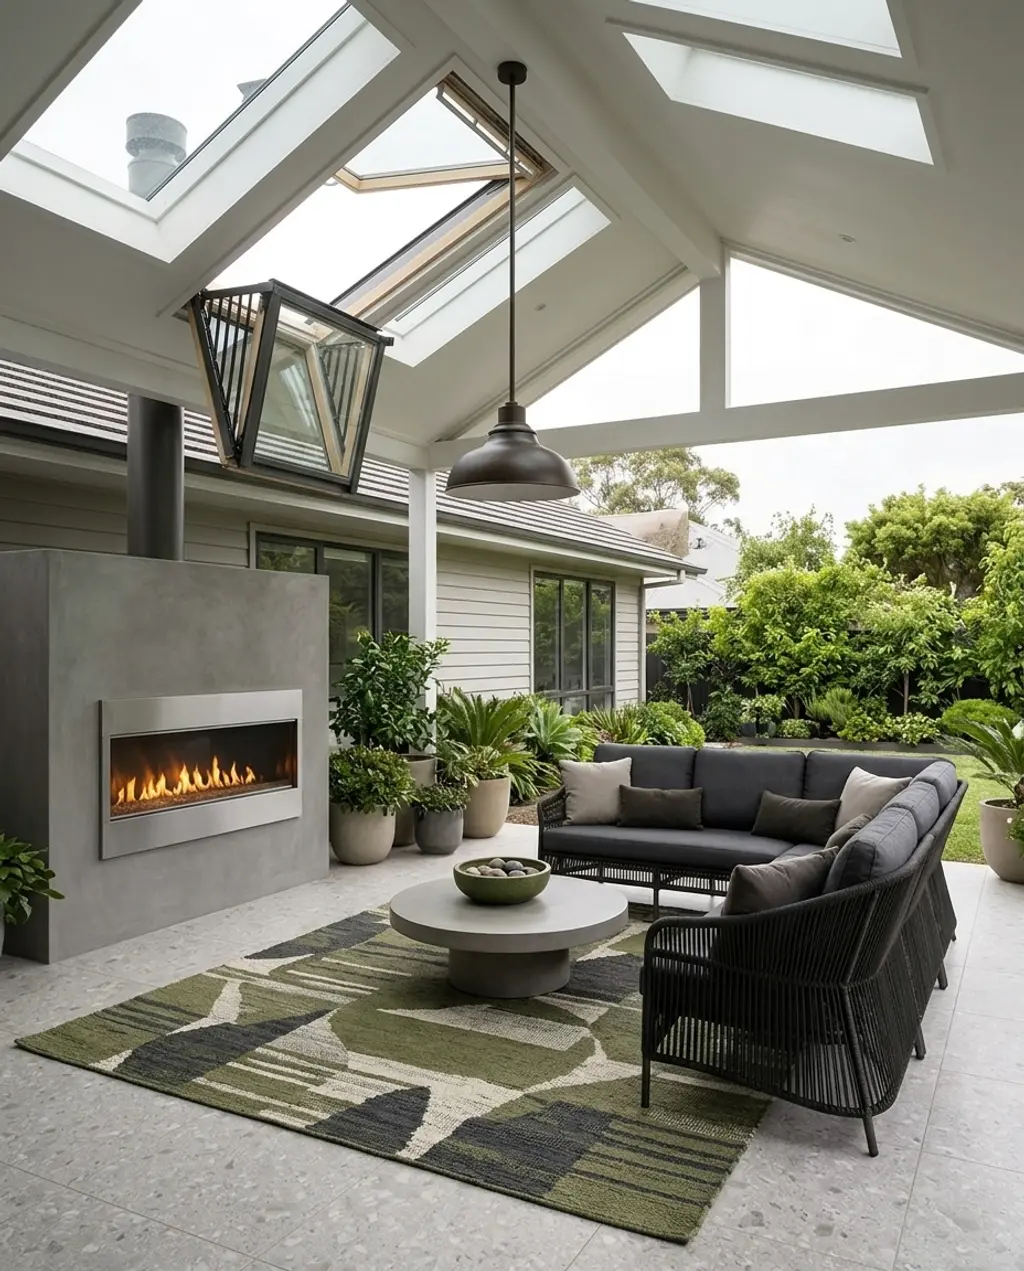
For an all-weather outdoor living experience, a modern gabled roof patio cover with integrated skylights is pure genius. This isn’t just shade; it’s a true extension of your home, offering full protection from rain and intense sun while still inviting natural light through the skylights. Imagine cozying up by an outdoor fireplace, even on a chilly or drizzly day, completely sheltered. It’s a sophisticated, permanent solution for those who want to maximize their outdoor time in comfort and style.
💸 Budget Version
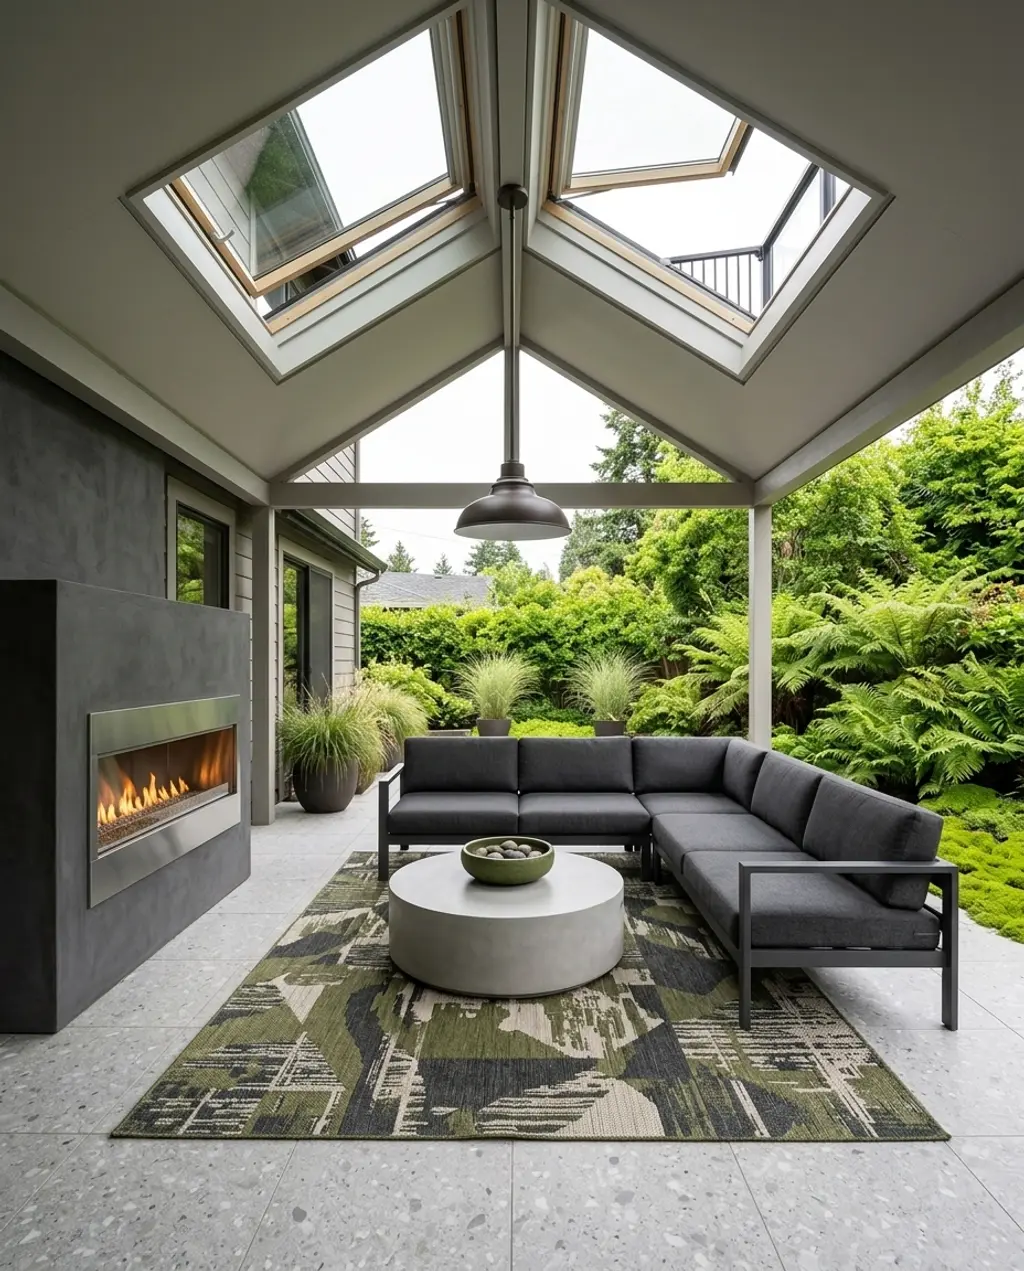
This substantial structure is best suited for larger patios where it can truly create a ‘room’ without feeling claustrophobic. Consider a footprint of at least 15×10 feet, allowing ample space for distinct dining and lounge zones. The gabled roof provides a sense of height, too, so it pairs well with homes that have a significant roofline or generous open outdoor spaces. It’s a big statement for a big impact. If your patio is smaller, consider the more compact but equally elegant Idea #13.
The skylights are the single, non-negotiable element that elevates this from a regular patio cover to a truly magnificent outdoor space. Without them, it would feel dark and enclosed. They allow natural light to flood the area, maintaining a connection to the sky and making the space feel open, airy, and inviting despite being fully covered. Choosing high-quality, insulated skylights will make a huge difference in comfort and energy efficiency.
As homeowners increasingly seek to blur the lines between indoor and outdoor living, permanent, all-weather patio covers like gabled roofs are becoming incredibly popular. The integration of skylights speaks to the desire for natural light, a hallmark of modern home design. This trend, often showcased on high-end real estate sites and luxury design blogs, emphasizes creating functional, beautiful outdoor rooms that can be enjoyed year-round, regardless of climate. It’s a reflection of our changing lifestyles and desire for more usable living space.
|
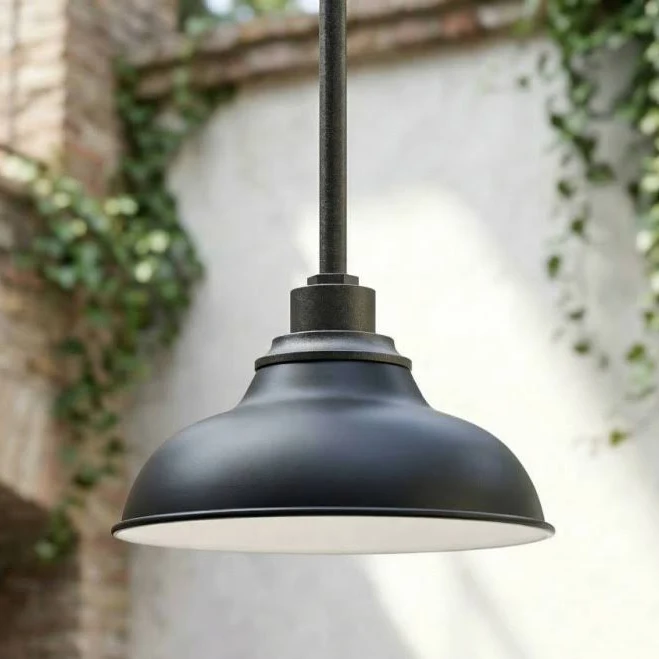
💰 Budget Pick Industrial Dome Metal Outdoor Pendant Light$260.1 |
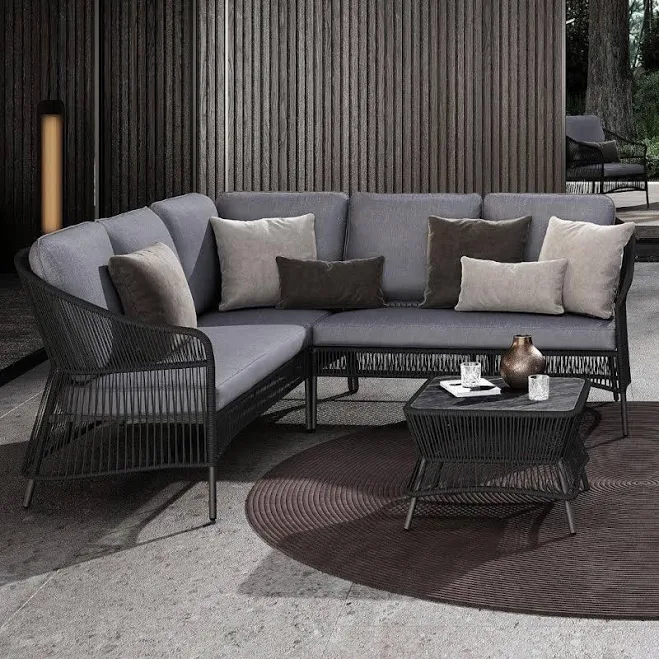
💰 Budget Pick Jardina L-Shaped Outdoor Sectional Set$998 |
✨ Luxury Pick VELUX Cabrio Balcony Roof Window GDL PK19$3711 |
✨ Luxury Pick Outdoor Lifestyles Lanai 60-Inch Linear Outdoor Natural Gas Fireplace$4909 |

As an affiliate, we earn from qualifying purchases.
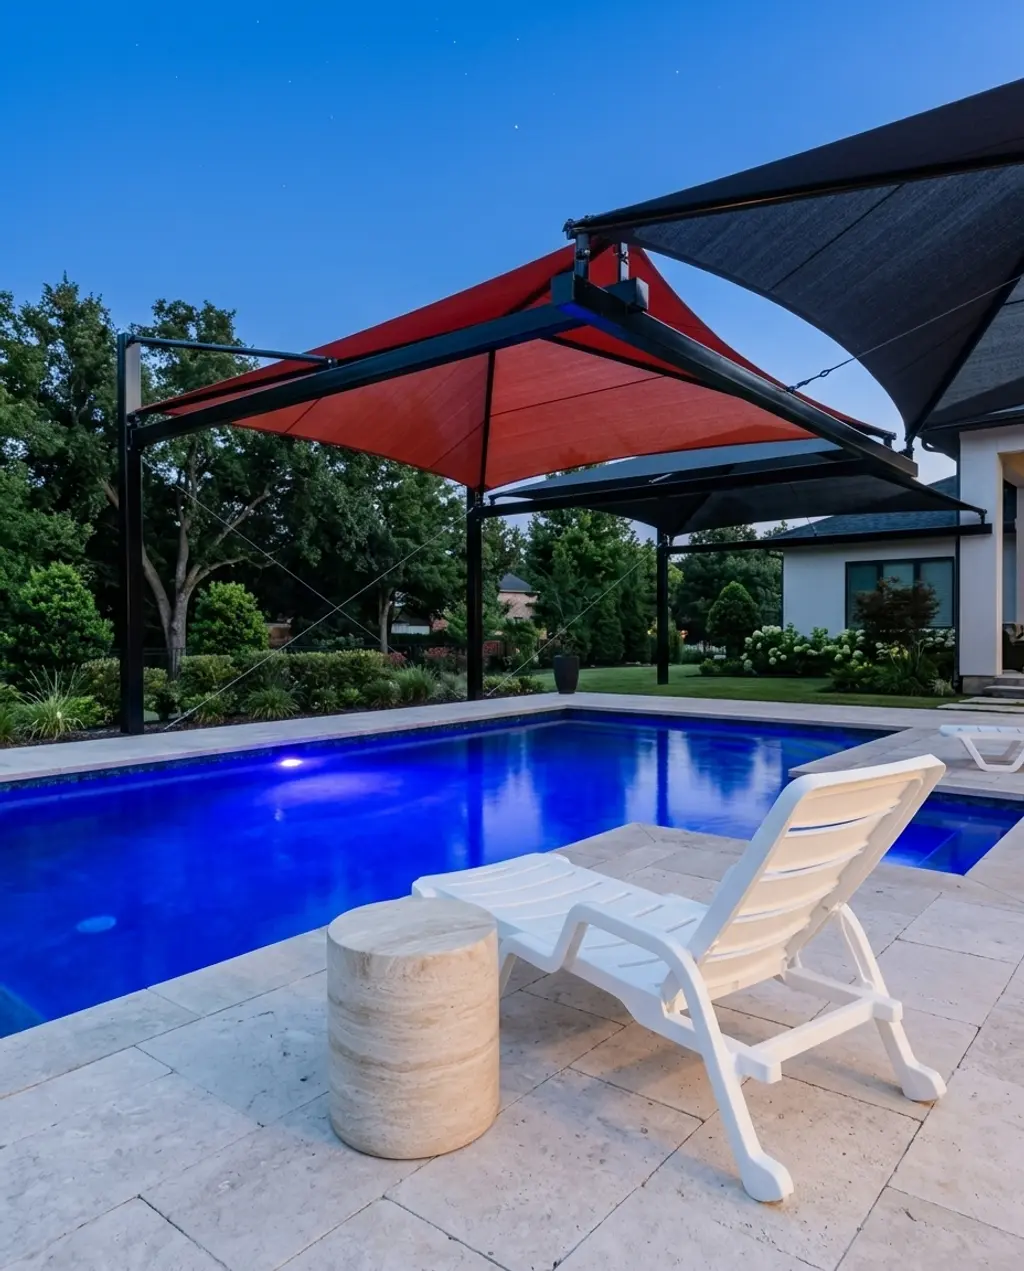
30. Curved Shade Sails for Dynamic and Artistic Patio Cover
Make a bold artistic statement with curved shade sails! These aren’t your typical flat fabric squares; they’re sculptural, dynamic, and create a truly bespoke, luxury feel. Arranged in overlapping, flowing forms, they create captivating shadow play and an incredible sense of movement above your patio. Perfect for a poolside lounge or a modern architectural home, these sails transform shade into an art form, adding a touch of glamour and sophisticated design.
- Consult a professional: Curved sails require precise measurements and engineering for safety and aesthetics. Time: ongoing consultation.
- Design the layout: Work with an architect or designer to plan the overlapping curves for optimal shade and visual impact. Cost: $200-$500 for design consultation.
- Select high-quality fabric: Choose marine-grade, UV-resistant fabric designed for tension structures. Cost: $100-$300 per sail.
- Install robust anchoring: This is critical for tensioned structures. Use heavy-duty poles, wall attachments, and turnbuckles. Cost: $200-$500+.
- Tension correctly: Achieve the desired curves and tautness for both aesthetics and wind resistance. Time: 1 day professional installation.
Here’s the style math for dramatic curves:
- 50% organic forms (the curved shade sails themselves).
- 30% sleek, minimalist base (simple lounge chairs, concrete pavers).
- 20% subtle luxury details (high-pile outdoor rug, sculptural side table).
The curves add a softness that contrasts beautifully with modern lines in other elements.
Curved shade sails are stunning, but they demand professional installation and ongoing maintenance. Achieving those perfect, taut curves without sagging or tearing requires expert knowledge of tensioning and load-bearing. Incorrect installation can lead to damage in high winds or premature wear of the fabric. Also, their sculptural nature means they’re often custom-made, which can significantly increase costs. This is not a casual DIY project! If a budget-friendly option is key, look towards Idea #31 and its DIY PVC pipe pergola.
31. DIY PVC Pipe Pergola with Removable Fabric Cover
For the ultimate DIY-er on a tight budget, a PVC pipe pergola with a removable fabric cover is a genius solution. It’s incredibly lightweight, easy to assemble and disassemble, and can be stored away when not in use. This isn’t just for shade; it’s a versatile structure for casual seating, outdoor crafts, or even a temporary dining spot. Plus, you can swap out the fabric cover for different colors or patterns to match your mood or the season! It’s proof that great shade doesn’t require a huge investment.
- Purchase PVC pipes and connectors (schedule 40 is recommended for durability) for $50-$100.
- Use an old sheet, shower curtain, or inexpensive fabric from a craft store for the cover ($10-$30).
- Outdoor furniture can be plastic chairs from Walmart ($10-$20 each) and a folding camp table ($15-$30).
- Your total cost for this entire setup could be under $200, making it an incredibly affordable shade solution.
- Have you measured the sun’s path to ensure the removable cover will provide adequate shade throughout the day?
- Do you have a level surface for the pergola to ensure stability, especially if using a lightweight PVC frame?
- Is your climate prone to high winds? PVC can be lightweight and might need extra anchoring.
- Are you comfortable with basic DIY assembly using PVC cement or screws?
|
Traditional Free Standing PVC Pergola Kit 12 ft. 8″ x 8′$3046.12 |
WRGHOME Garden Modern Outdoor/Indoor Stacking Patio Dining Chairs (Set$143.8 |
Ozark Trail 19-inch Folding Outdoor Camp Side Table$14.97 |
Bnng 10 Pack Colorful Square Plastic Flower Pots$3.11 |
As an affiliate, we earn from qualifying purchases.
32. Shade Trees in Large Planters for Flexible Patio Greenery
When permanent structures aren’t an option, or you simply love to rearrange, shade trees in large planters are your go-to. This idea offers flexible, mobile greenery and natural shade, bringing life and movement to your patio. Imagine strategically placing a small evergreen or a deciduous tree in a beautiful, oversized planter, allowing you to reconfigure your layout as needed. It’s perfect for modern farmhouse styles or any patio that values natural elements and adaptability.
This idea excels due to the power of flexibility and biophilic design. Mobile shade means you can literally chase the sun (or avoid it!) throughout the day without moving heavy furniture. Introducing living trees in planters brings all the benefits of nature – improved air quality, cooling effect, and aesthetic beauty – into a space where traditional planting might not be possible. It’s about bringing the garden to your living space, making it feel more vibrant and alive.
Potted trees require significantly more attention than their in-ground counterparts. They need consistent watering, often daily in hot weather, as their root systems are confined. You’ll also need to consider annual feeding and eventually repotting or root pruning as they grow, which can be a heavy, messy job. And don’t forget winter protection in colder climates! If you’re not up for consistent plant care, this beautiful solution might become a burden. Compare this with Idea #24‘s vertical garden for another living shade option.
33. Bamboo Pergola with Hanging Lanterns for Evening Glow
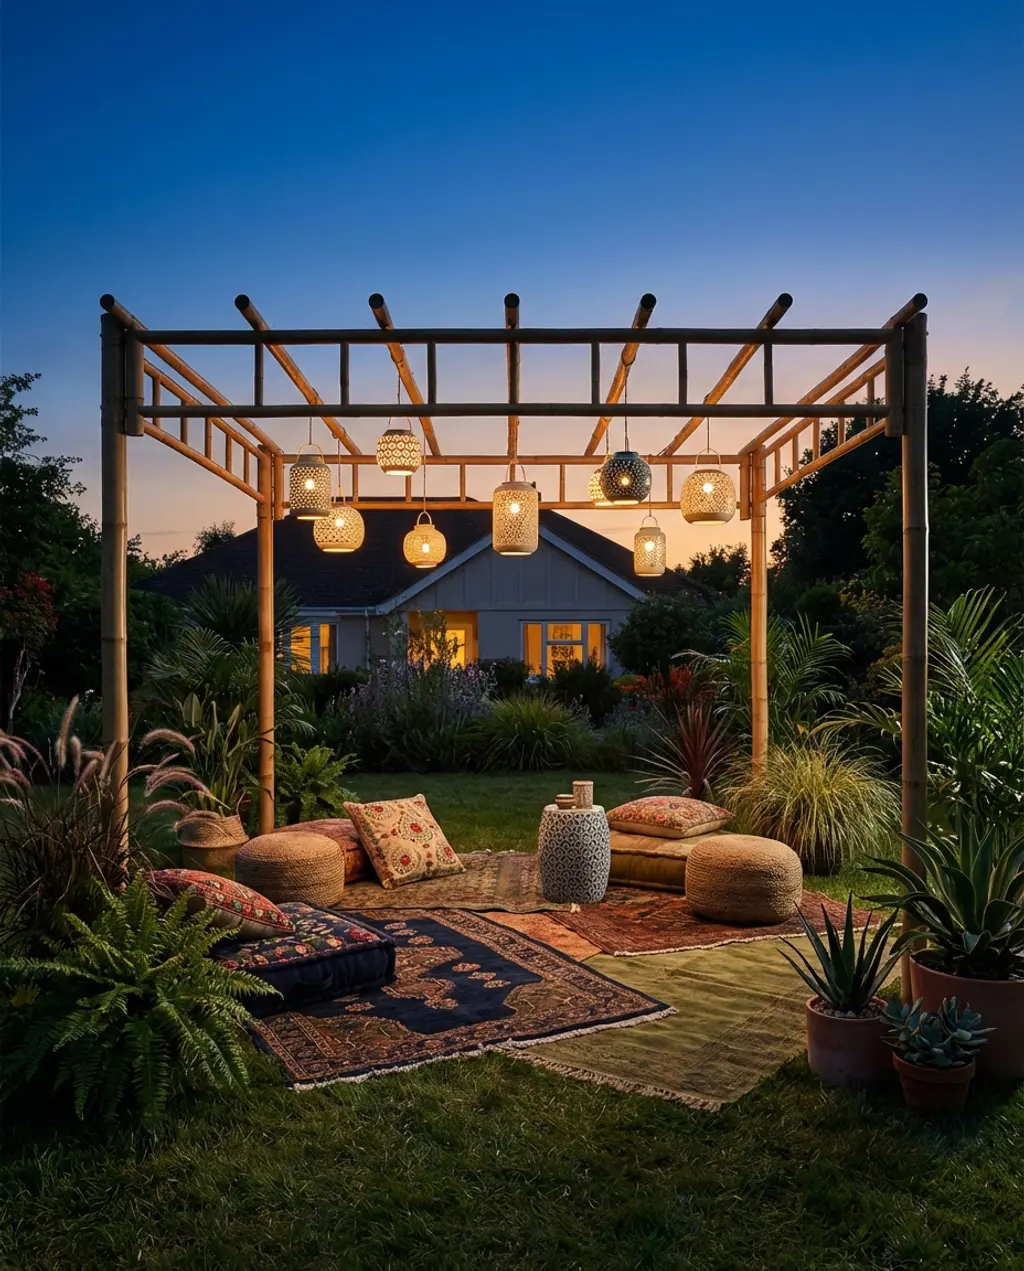
Transport your patio to a faraway land with a bamboo pergola adorned with hanging lanterns. This bohemian-meets-ethnic look creates an exceptionally warm and inviting ambiance, especially as evening falls. The natural, organic texture of the bamboo pairs beautifully with ambient light from various lanterns, casting dancing shadows. Add some plush, low seating and an ethnic rug, and you’ve got a dreamy, exotic retreat perfect for outdoor meditation or intimate conversations under a sky full of stars.
When selecting bamboo, opt for treated bamboo poles for increased longevity and resistance to rot and pests. Untreated bamboo might look charming, but it will degrade much faster, especially in humid climates or areas with significant rainfall. Invest a little more upfront in quality, treated bamboo to ensure your pergola stands strong and beautiful for years to come.
- Bamboo pergola (poles and assembly): $200 – $800 (DIY) / $1000 – $2500 (pre-made kit or professional install)
- Hanging lanterns: $50 – $200 (for several)
- Ethnic rugs: $50 – $250
- Low seating (floor cushions/poufs): $100 – $300
- Total Estimated Cost: $400 – $1550 (DIY) / $1200 – $3250 (pro)
- Budget alternative: Use thinner, less expensive bamboo stakes or even painted PVC pipes (as in Idea #31) for the structure, and solar-powered paper lanterns for lighting, saving hundreds.
The ‘global nomad’ and ‘mindful living’ trends are inspiring a lot of outdoor design right now. People are craving designs that evoke travel, offer a sense of escape, and encourage relaxation. Bamboo pergolas with hanging lanterns tap into this beautifully, offering an exotic yet calming aesthetic that’s highly sought after on platforms like Pinterest. It’s a style that transcends fleeting trends because its core appeal is connection to nature and a sense of peaceful retreat.
🚫 Common Mistakes to Avoid
Now that you’ve seen what works — here’s what to watch out for. These mistakes are surprisingly common and can undermine even the best design intentions.
❌ Mistake #1: Too Small Umbrella for the Space
A common mistake is choosing an umbrella that’s simply too dinky for the area it’s supposed to shade. It looks awkward, makes the furniture feel oversized, and frankly, doesn’t do its job. You’re left with patches of sun and a sense that something isn’t quite right, defeating the whole purpose of having shade.
The Fix: Always measure your patio and outdoor furniture grouping before buying. Aim for an umbrella canopy that extends at least 1-2 feet beyond your seating or dining area on all sides when open. This ensures everyone gets adequate shade and the proportions feel balanced.
❌ Mistake #2: Unsecured & Sagging Shade Sails
Nothing ruins the elegant look of shade sails faster than them being loose, saggy, or flapping wildly in the wind. Not only does it look messy and neglectful, but it also compromises their effectiveness at providing shade and can even be a safety hazard. Saggy sails collect water, creating mildew and eventually tearing.
The Fix: Use proper commercial-grade hardware (like turnbuckles and strong ropes) to tension your shade sails correctly. They should be taut, without wrinkles, and angled slightly for water runoff. Re-tension periodically as weather and time can loosen them.
❌ Mistake #3: Blocking Views with Overly Solid Structures
Some homeowners get so focused on blocking the sun that they forget about preserving sightlines. Installing an overly solid pergola or patio cover that completely blocks out a beautiful garden, a distant view, or even just the sky, can make your patio feel enclosed and disconnected rather than an open extension of your home. It’s a missed opportunity to enjoy your surroundings.
The Fix: When choosing a solid structure, consider adding skylights or open slat designs like those in Idea #28. If privacy is key, opt for latticework or vertical gardens (as in Idea #24) that offer filtered views rather than total blockage. Always balance shade needs with preserving your connection to the outdoors.
Final Thoughts
There you have it – 33 ways to bring beautiful, functional shade to your patio in 2026! Whether you’re dreaming of a resort-style retreat or a cozy, budget-friendly nook, there’s an idea here for every style and wallet. Remember, your outdoor space is an extension of your home, and with the right shade, it can become your favorite ‘room.’ Don’t forget to Pin your favorite looks to Pinterest for inspiration!