Let’s be honest: basements often get a bad rap. Dark, damp, and relegated to forgotten storage, they’re the unsung heroes of our homes, just waiting for a glow-up. But what if I told you your basement could be the most exciting, functional, and even beautiful space in your entire house? With a little vision (and a few clever tricks), it absolutely can be.
We’ve rounded up 32 incredible basement remodel ideas for 2026, from budget-friendly DIYs to stunning transformations. And stay until the end — we’re breaking down the most common mistakes that can ruin these looks, saving you from a basement blip!
(Note: This article contains affiliate links, meaning we may earn a small commission on purchases made through our links, at no extra cost to you.)
1. Split-Level Basement Entertainment Zone with Built-in Seating
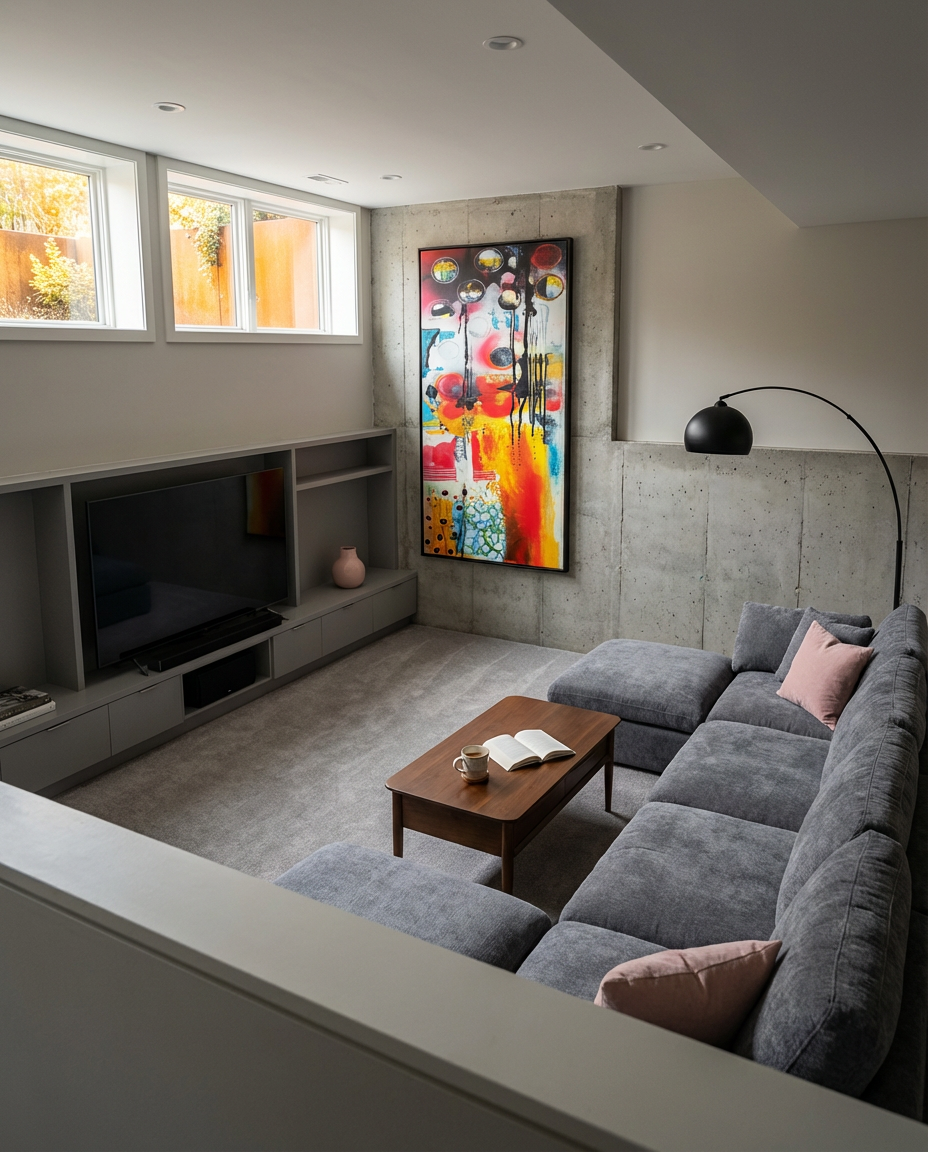
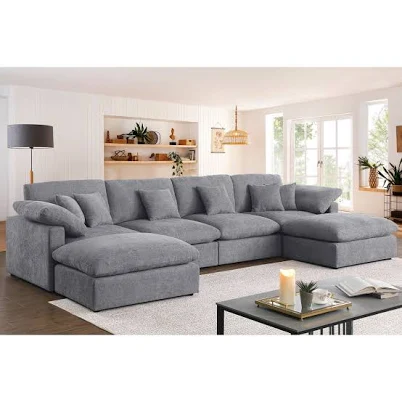
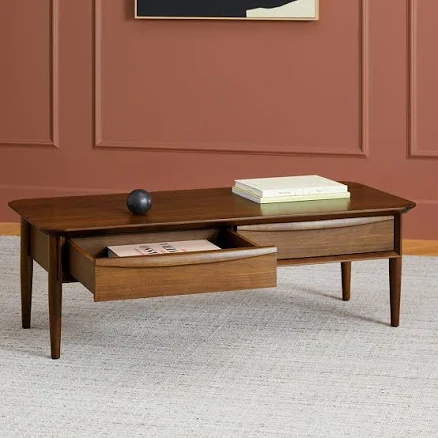
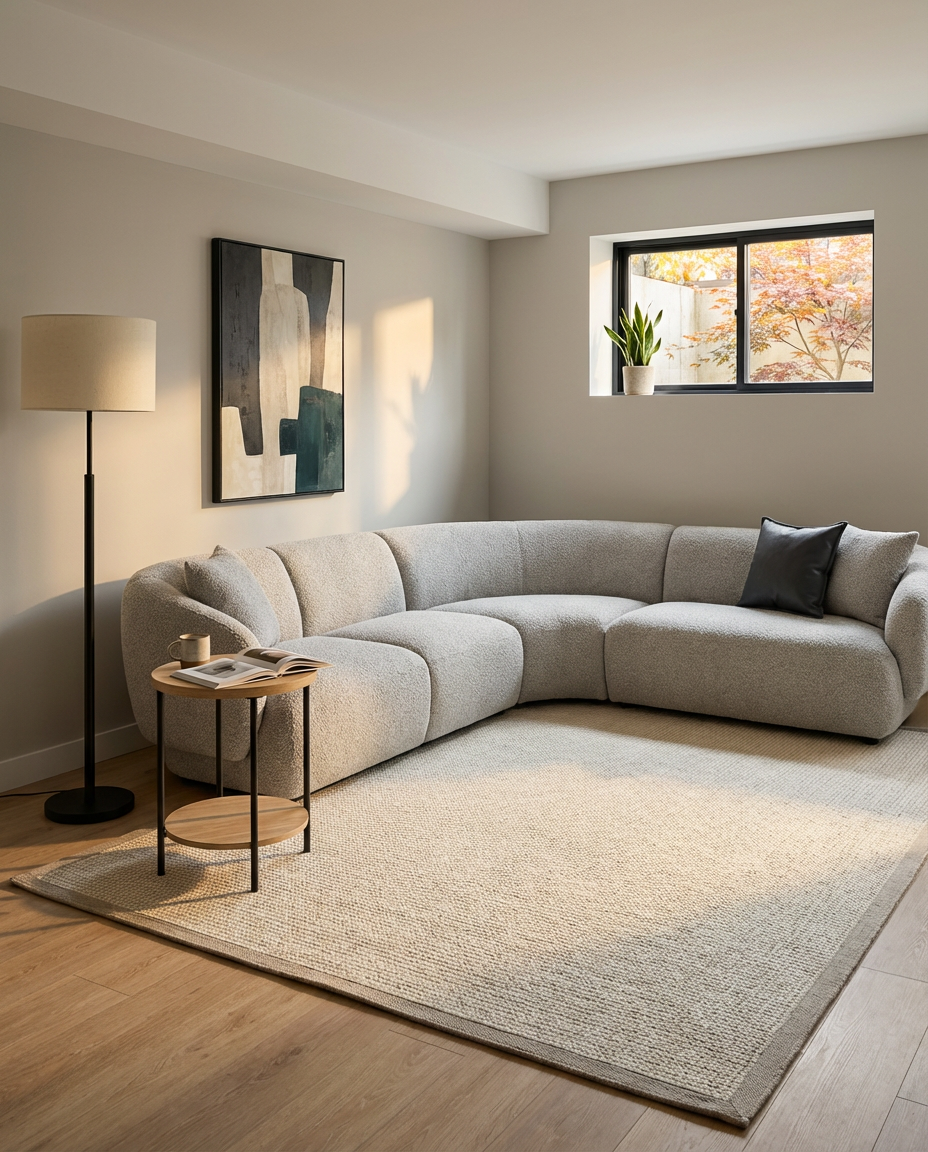
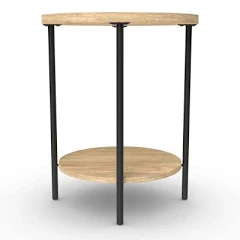
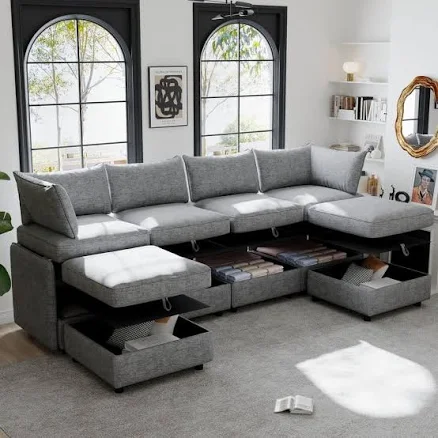
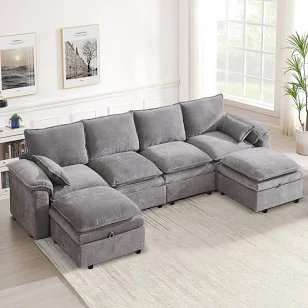
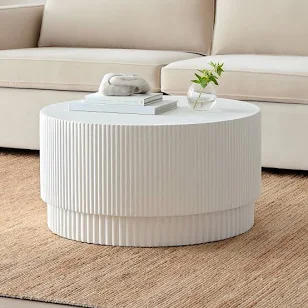
Split-level basements can feel tricky, but this idea embraces the different elevations to create distinct zones, all without needing full walls. An entertainment zone on one level, with built-in seating nestled into a cozy corner, creates an inviting hub. The subtle shift in floor height naturally defines the space, making it feel intentional and sophisticated. Think a plush sectional, a statement coffee_table like the Article Lenia, and dimmable lighting to set the mood for movie nights or game days.
- Main Furniture (sectional, coffee table): $2,000 – $5,000
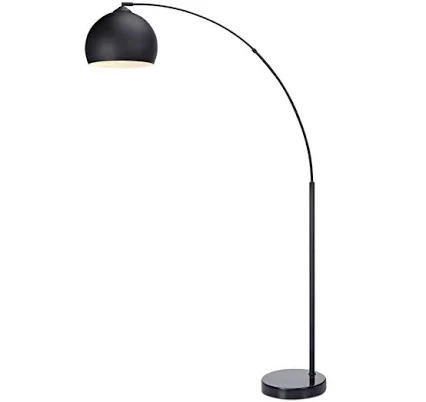
- Lighting (floor lamp): $100 – $300
- Textiles (pillows, throw blankets): $50 – $200
- Decor/Accessories (artwork, shelving): $200 – $800
- Paint/Wall Treatment: $50 – $250
- TOTAL: $2,400 – $6,550
- Budget alternative: Look for second-hand sectionals on Facebook Marketplace and DIY built-in seating with IKEA Kallax units and custom cushions for a similar vibe for $700-$1500.
|
Great BIG Canvas Abstract II Large Canvas Floating Frame Wall Art Prin$39.99 |
155.7″ U Shape Sectional Sofa Cloud Couch With Removable Ottomans Lati$1,500.00 |
Article Lenia Mid-Century Design Modern Bedroom Furniture Storage Coff$499.00 |
Teamson Home Arquer Floor Lamp$122.86 |

As an affiliate, we earn from qualifying purchases.
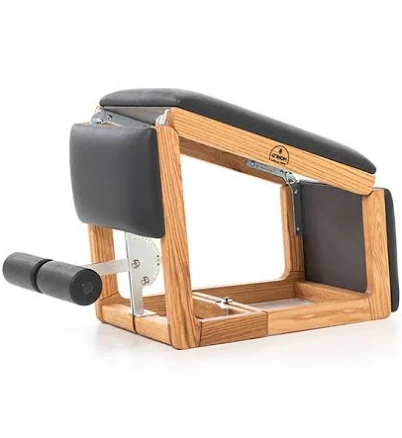
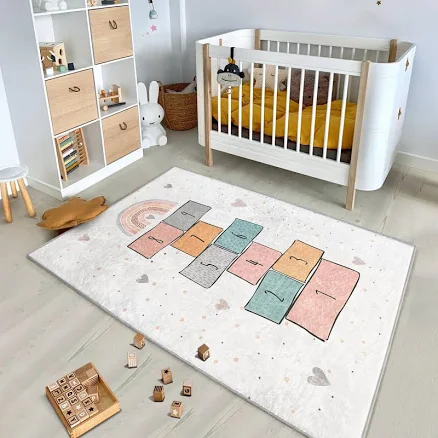
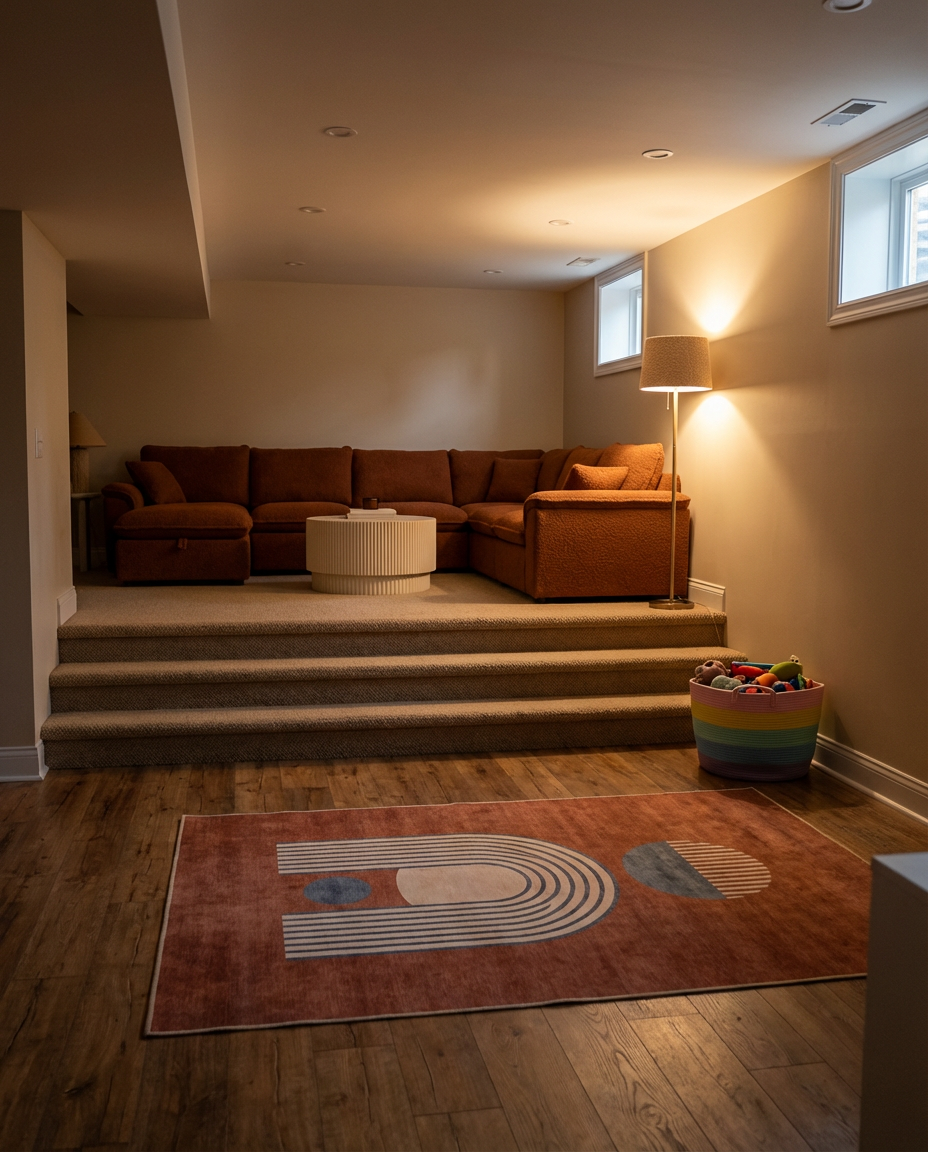
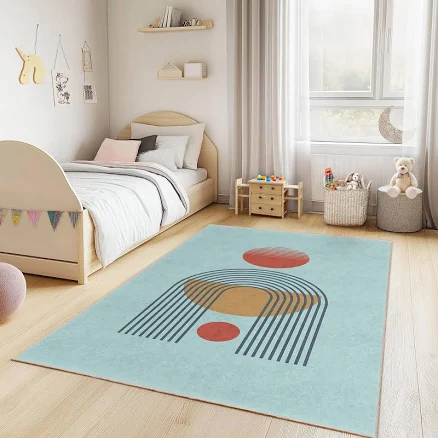
2. DIY Budget-Friendly Basement Home Gym & Play Area
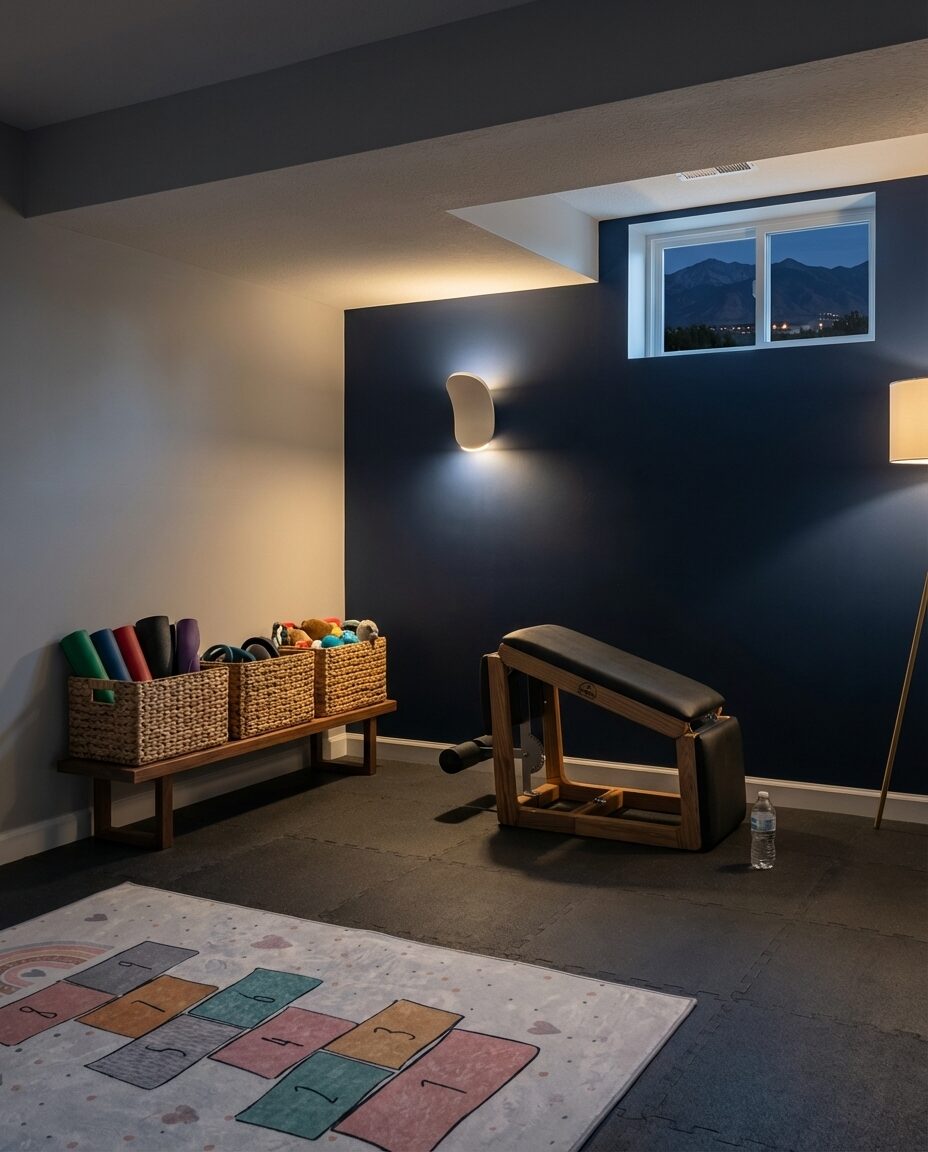
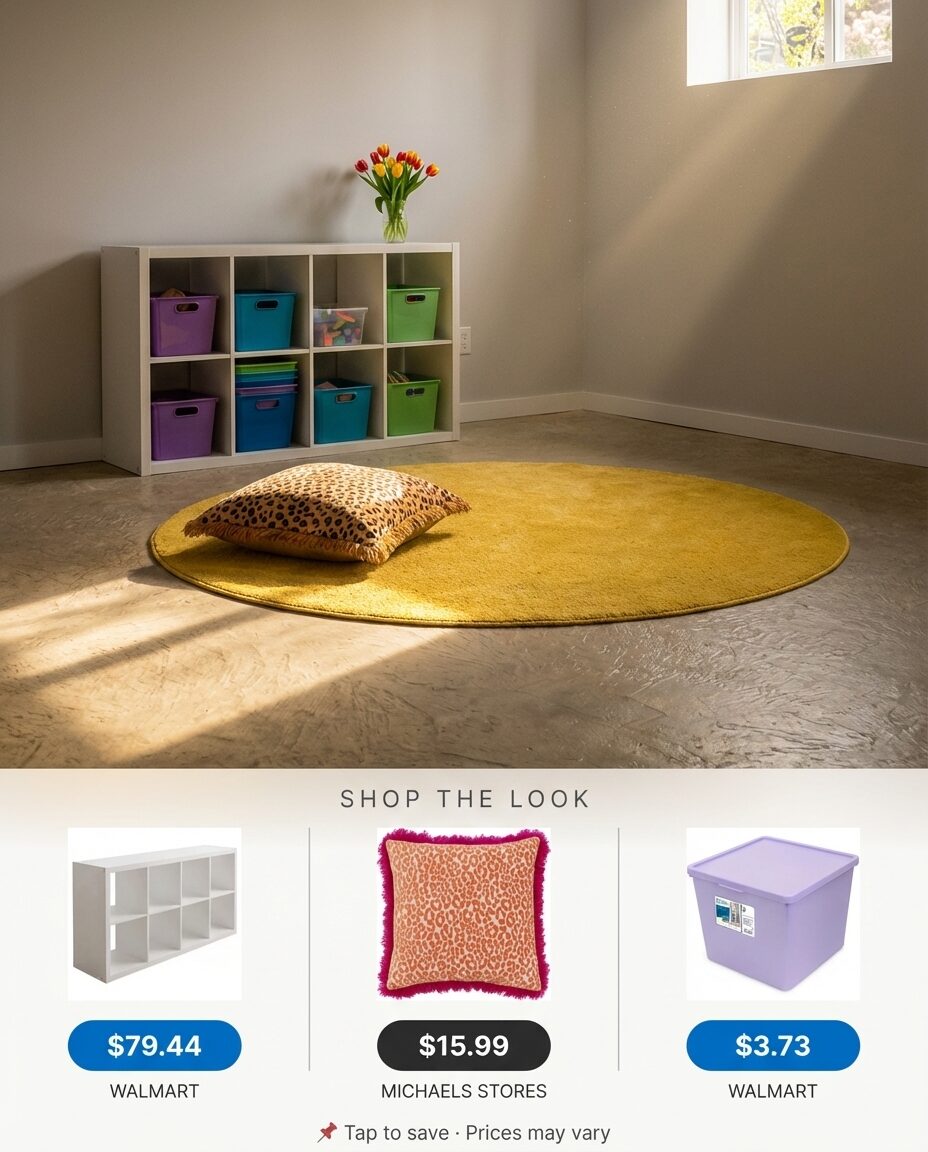
Creating a dual-purpose home gym and play area in your basement is a genius move, especially if you’re working on a budget. The key here is smart zoning without rigid walls. Use a vibrant rug, like the Hopscotch Nursery Play Rug, to define the play zone, and keep gym equipment tidy with sleek storage_basket. It’s about making both activities feel intentional, even if they share the same open space. Remember, fun and fitness can absolutely coexist.
It’s easy to think “minimalist gym” means just throwing equipment in a corner, but trust me, that quickly devolves into a messy storage unit. For a space that truly serves both gym and play, you need to think about sound. Kids playing loudly right next to your Peloton can be a recipe for stress. Consider acoustic panels or even heavy drapes to absorb some noise, especially if these activities happen simultaneously. And for the love of all that is holy, hide the weights when not in use!
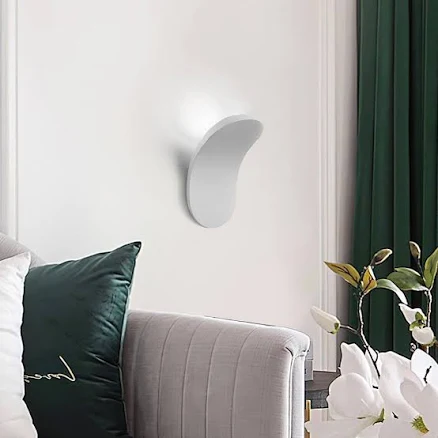
When designing a multi-functional space like this, think vertically for storage. Wall-mounted shelves and cubbies are your best friends. For workout items, consider a sleek wall_sconce like the HUOKU Nimbus Minimalist to keep floor space clear and illuminate just where you need it. For the play area, lower, open bins are great for toy rotation. Try to keep paths of travel at least 36 inches wide to avoid constant bumping and frustrated kids (and adults).
|
HUOKU Nimbus Minimalist 1-Light Matte White Minimalist Sleek LED Wall $46.79 |
Better Homes & Gardens 3-Piece Woven Natural Water Hyacinth Storage Ba$18.74 |
NOHrD TriaTrainer Bench$799.00 |
Hopscotch Nursery Play Rug – Colorful Geometric Squares Design Mat – K$32.13 |

As an affiliate, we earn from qualifying purchases.
3. Unfinished Basement Transformed into Cozy Reading Nook
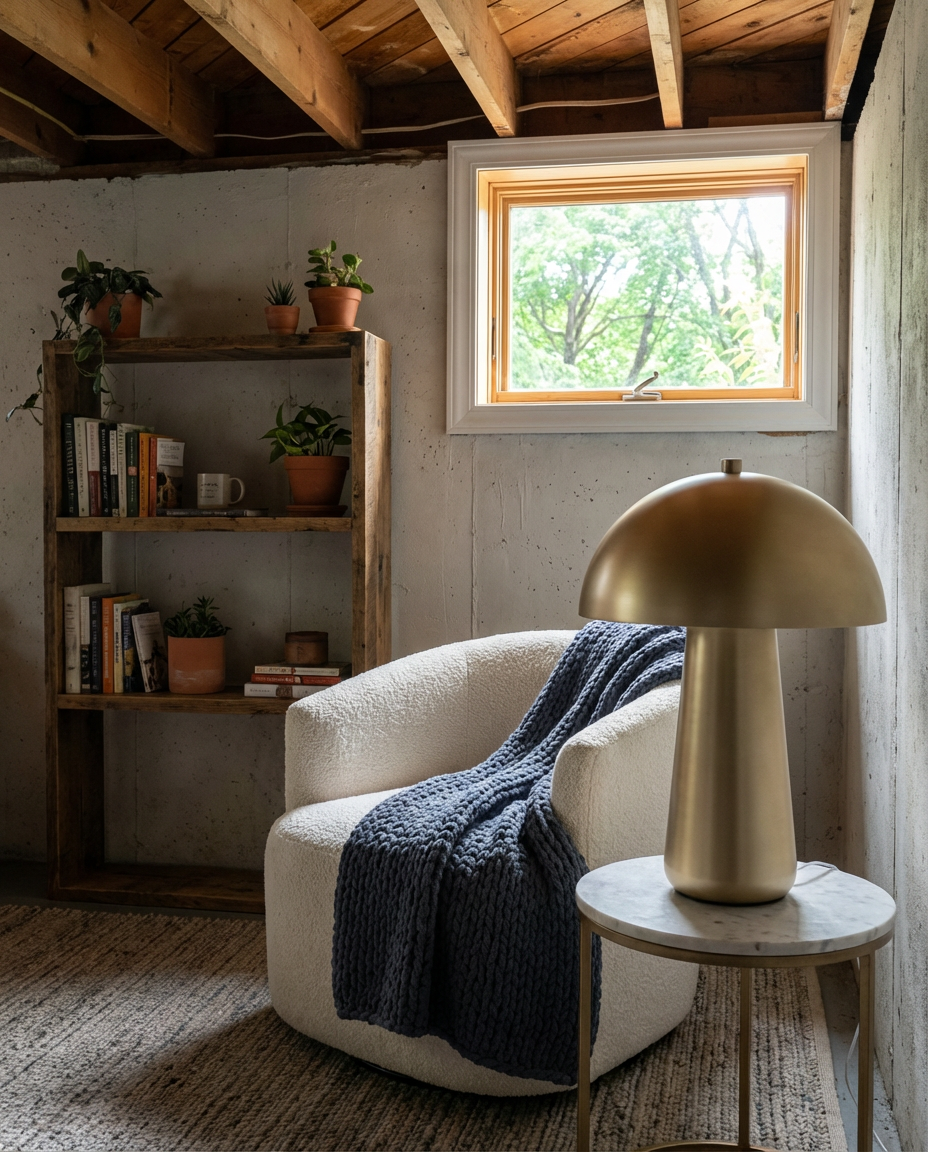
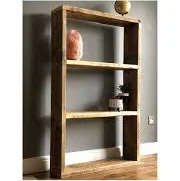
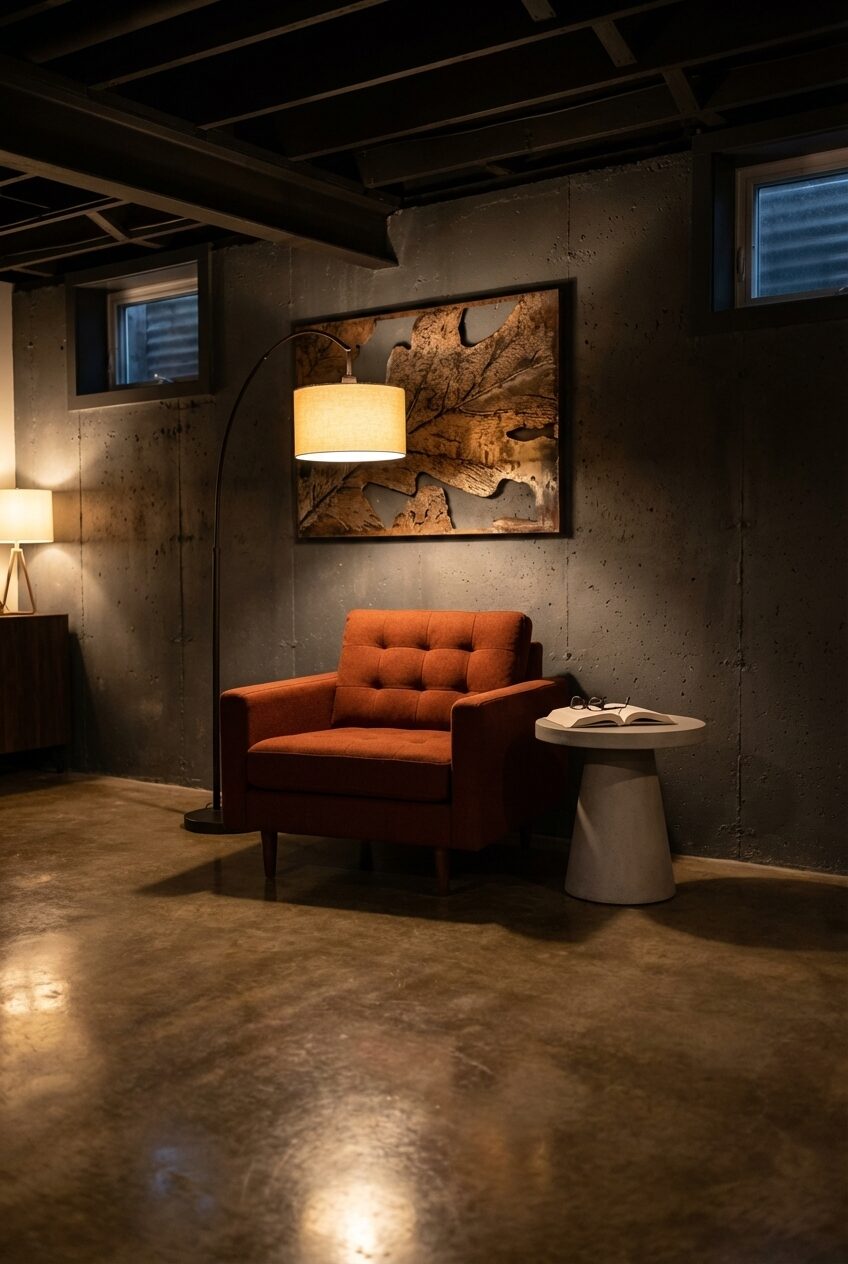
That forgotten, unfinished basement corner? It’s not a dark void; it’s your next cozy reading nook asking for a bohemian makeover. Think rich textures, soft lighting from a charming table_lamp like the Uixe Mushroom lamp, and a comfy armchair that practically hugs you. Add a reclaimed wood bookshelf brimming with your favorite reads, and this once-neglected space becomes a personal sanctuary. It’s about creating maximum hygge with minimal structural changes.
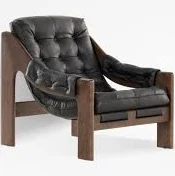
The absolute one thing that elevates an unfinished space to a “cozy reading nook” is the right armchair. More than the rug, the lighting, or even the books themselves, a truly comfortable, inviting armchair signals that this is a place for rest and relaxation. If you have to choose one big investment, make it the chair. A cheap, stiff chair will only make you regret making the space in the first place. You want something you can really sink into, like the Mainstays Boucle Swivel Accent Chair, that beckons you to stay a while.
Want to recreate that reclaimed wood bookshelf vibe without the hefty price tag? Here’s a quick DIY brief:
- Source 3-4 old wooden crates or sturdy planks (check Facebook Marketplace, garage sales, or local lumber yards for scrap). Cost: $20-$80.
- Clean and lightly sand any rough patches. (1 hour)
- Apply a dark wood stain or a whitewash for a rustic look. (2 hours, including drying time)
- Stack and secure the crates/planks with screws to create your desired bookshelf configuration. (1 hour)
- Accessorize with books, plants, and your favorite decor.
|
Uixe 15.7 in. Brass Mushroom Table Lamp with Bulb Included for Living $30.97 |
Mainstays Boucle Swivel Accent Chair$182.00 |
Pottery Barn Colossal Handknit Throw$106.99 |
Reclaimed wood bookcase | Living room | Office | Furniture | Custom si$98.19 |


As an affiliate, we earn from qualifying purchases.
4. Michigan-Inspired Lake House Basement Recreation Room
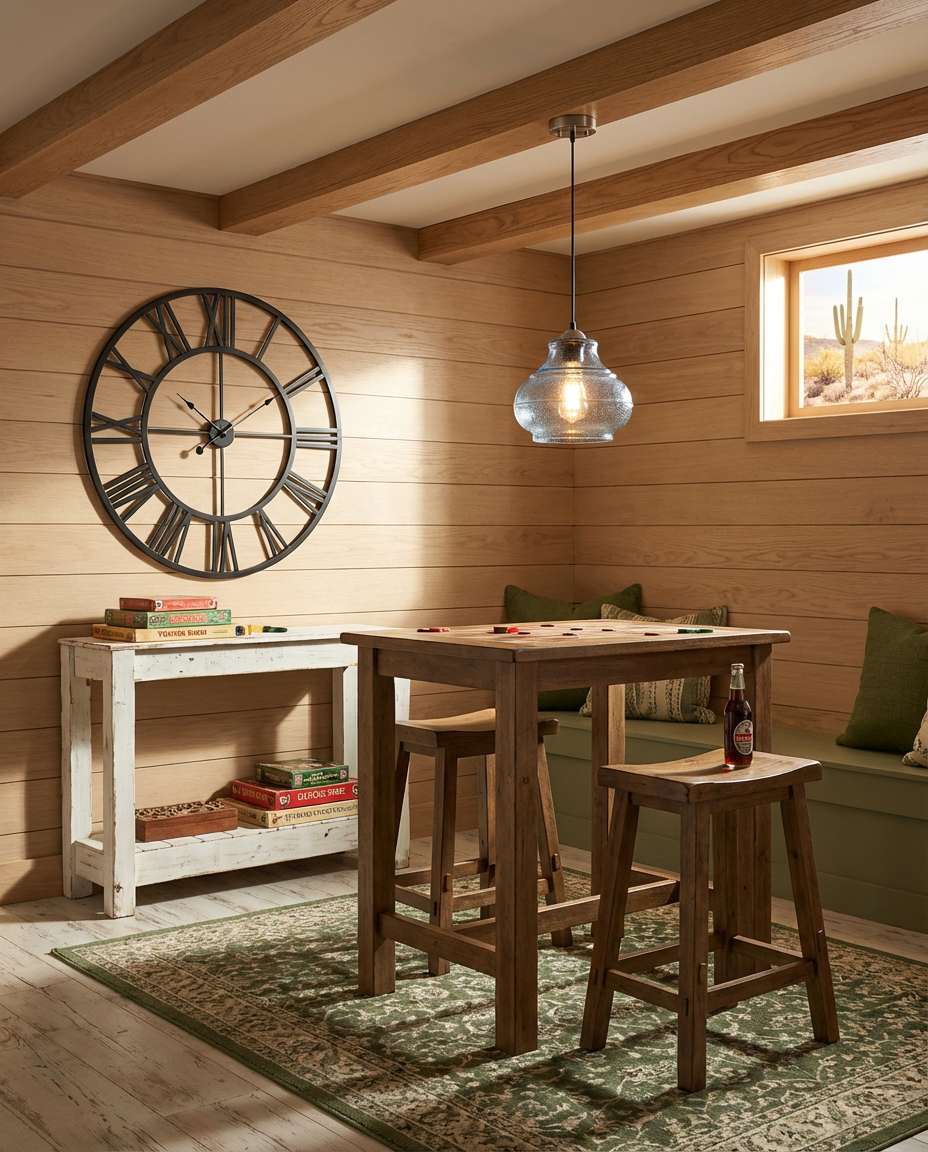
Even if you’re nowhere near the Great Lakes, a Michigan-inspired lake house basement recreation room brings instant charm and warmth. This farmhouse style is all about natural textures, comfortable seating, and a relaxed, welcoming atmosphere. Imagine a sturdy console_table as a snack station, a large wall_clock for a touch of rustic grandeur, and simple, durable barstools for easy gathering. It’s about bringing that tranquil, waterfront escape feeling into your own home, perfect for family fun or entertaining friends.
The modern farmhouse aesthetic has been a Pinterest darling for years, thanks to its blend of rustic charm, comfort, and timeless appeal. It speaks to a longing for simpler times and a cozy, inviting home. While some trends fade, the essence of farmhouse — natural materials, warmth, and hospitality — has strong staying power. It’s less about strictly replicating a trend and more about incorporating elements that create that feeling of a retreat, which is always in vogue. Just be careful not to overdo the shiplap, a mistake we address in the common mistakes section at the end of this article!
This particular lake house recreation room idea shines in basements that are at least 400 square feet. The open concept with defined zones (like a game area, lounge, and snack bar) needs room to breathe. If your basement is smaller, say under 300 square feet, consider focusing on a single-purpose zone like a dedicated media room or a guest suite (check out Idea #12 for inspiration). For lower ceilings, prioritize vertical elements like a tall wall_clock or pendant_light that draw the eye up, but be mindful of their hanging height.
|
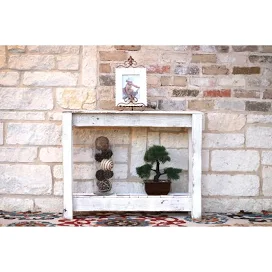
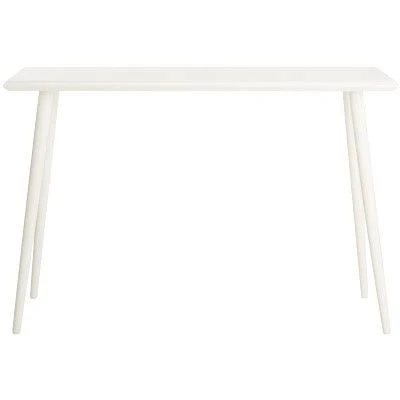
Rustic Entry Way Table$130.19 |
Mercana Stoke 54″ Round Giant Oversized Industrial Wall Clock$279.99 |
Halifax 23.81″ Farmhouse Wood Counter Height Barstool with Footrest Br$65.00 |
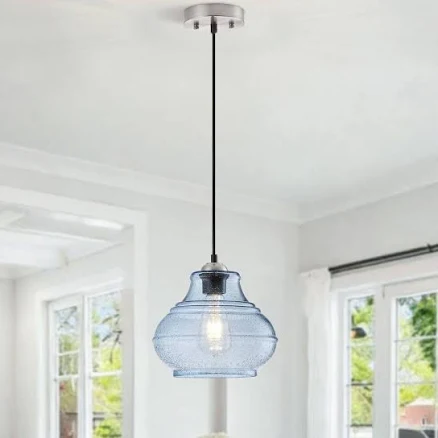
Henveton Jasslynn Modern Farmhouse Pendant Light$82.00 |


As an affiliate, we earn from qualifying purchases.
5. Budget-Conscious Basement Apartment with Integrated Kitchenette
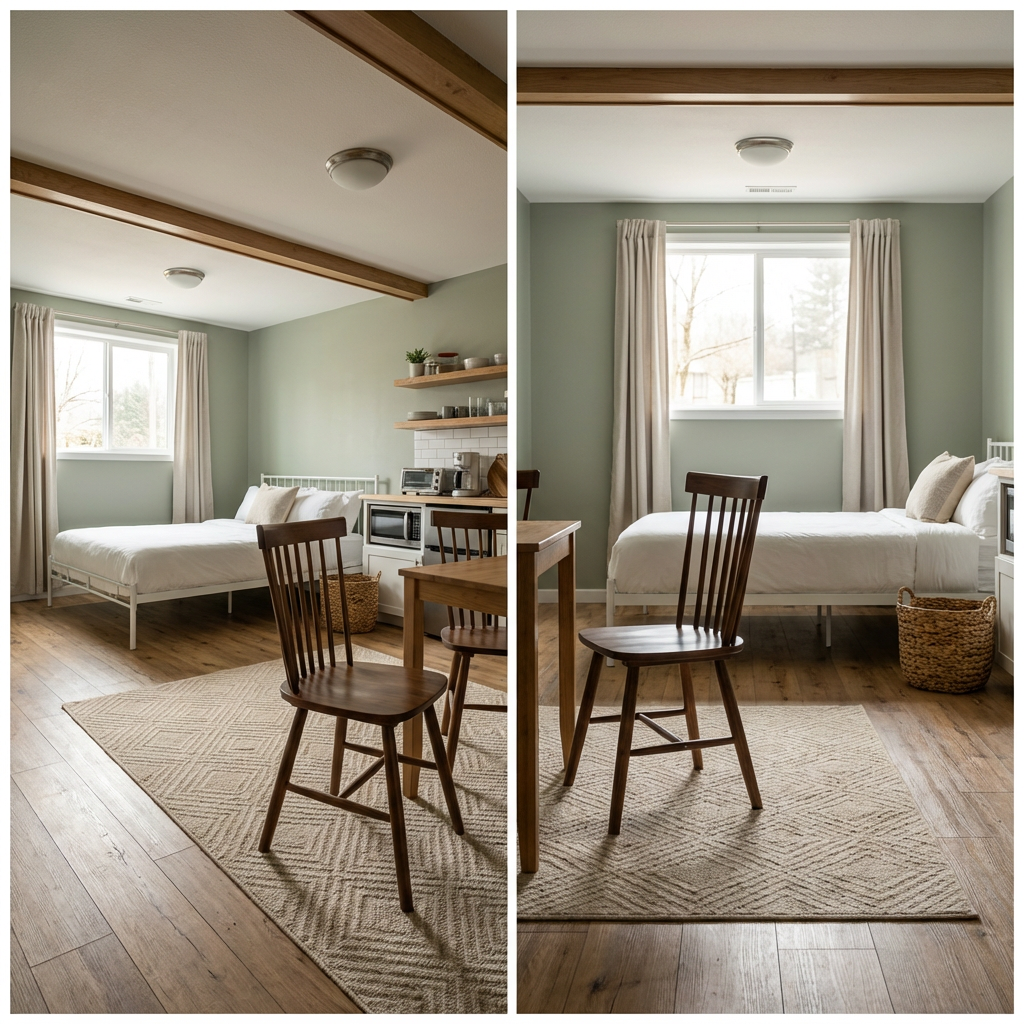
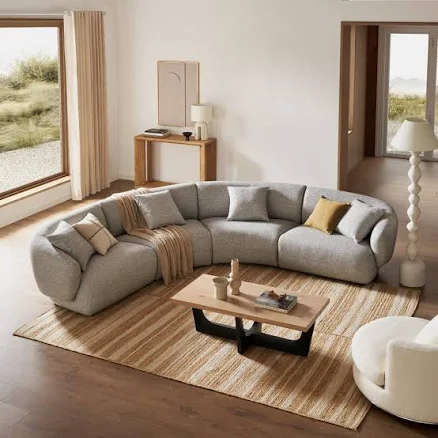
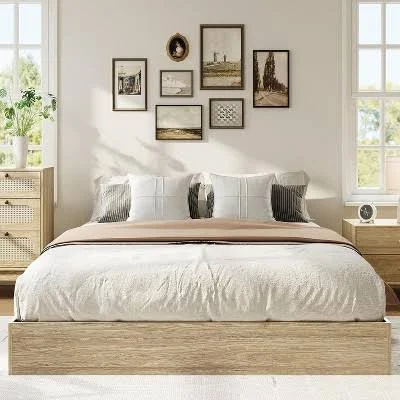
A basement apartment with an integrated kitchenette doesn’t have to break the bank. This idea focuses on minimalist design and clever space-saving. Think a sleek bed frame, a compact dining_table with versatile dining_chair, and tucked-away storage_basket that keeps clutter at bay. It’s about creating a fully functional living space that feels airy and bright, even in a basement, proving that small budgets can yield big style, especially when you focus on essentials.
You absolutely don’t need a massive budget to create a chic basement apartment. For about $1,000-$2,000, you can achieve this minimalist vibe. Start with an affordable bed frame like the Alecia Metal Platform Bed from Wayfair ($113.99). Pair it with a simple rug from Target ($60). For a kitchenette, consider repurposing a dresser or console table as a base, adding a mini-fridge and microwave. Dining chairs can be found for a steal at IKEA or via local online marketplaces. The focus is on clean lines and smart solutions, not expensive materials.
- Before you start converting your basement into an apartment, here are a few things to consider:
- Verify local zoning laws and building codes for basement apartments in your area. This is critical.
- Measure ceiling height. Most codes require at least 7 feet.
- Check for proper egress points (windows or doors) for safety.
- Assess plumbing and electrical infrastructure for kitchenette and bathroom additions.
- Determine your budget minimum: can you cover permits, materials, and potential professional help?
|
Poly & Bark Ligna Dining Chair$230.00 |
Alecia Metal Platform Bed Lark Manor$113.99 |
Threshold High Low Geo Area Rug 5’x7′$60.00 |
Better Homes & Gardens Extra Large Natural Woven Water Hyacinth Boat D$25.92 |


As an affiliate, we earn from qualifying purchases.
6. Durable Flooring Options for High-Traffic Basement Family Room
✨ Luxury Version
When planning a high-traffic basement family room, your flooring choice is paramount. Forget flimsy carpets or cold, unwelcoming tiles. This idea champions durable yet stylish options that can withstand spills, playtime, and constant foot traffic. A plush area rug, like the Nuloom Monica Geometric, can soften the space and protect the underlying floor, while a robust sectional offers ample, comfortable seating for everyone. It’s about creating a space that looks good and can take a beating.
💸 Budget Version
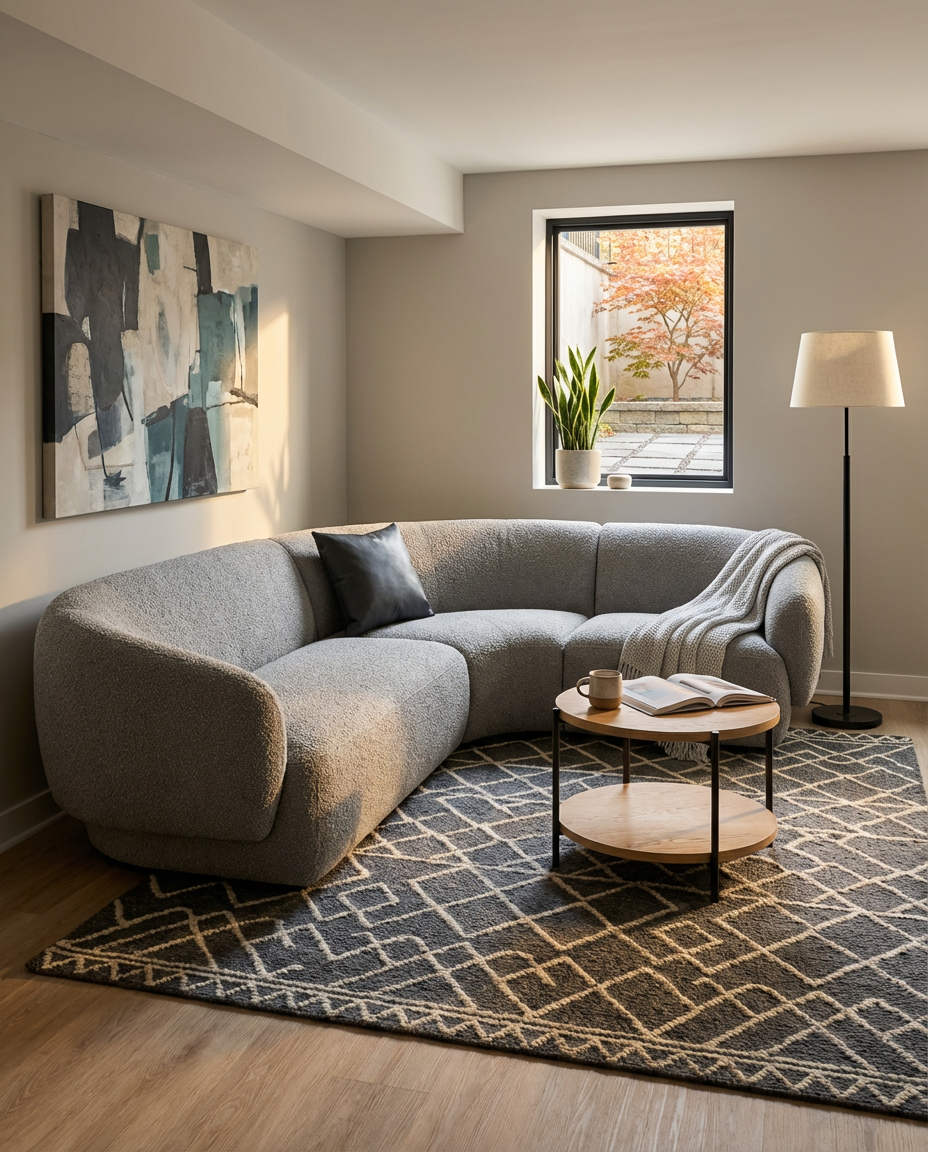
Let’s be real about basement flooring: many options claim to be “durable,” but few tell you the full story of maintenance. Laminate can scratch, engineered wood can cup with moisture, and some low-pile carpets show every single crumb. For a high-traffic family room, consider luxury vinyl plank (LVP) or tile. LVP is incredibly water-resistant and scratch-resistant, making it excellent for kids and pets. Tile is practically indestructible but can feel cold; radiant floor heating can solve that, but adds significant cost. Carpet tiles are a great alternative for easy replacement of stained sections. Whichever you choose, invest in good quality underlayment for sound dampening and comfort over concrete.
When laying out furniture in a high-traffic basement, create clear pathways. You don’t want people tripping over coffee tables or squeezing past the sectional just to get to the bathroom. Aim for a minimum of 3 feet (about 90 cm) for main thoroughfares and at least 18 inches (45 cm) between your side_table and your sectional. This ensures easy flow and prevents a cramped feeling, even if you have a large sectional like the Castlery Curve L-Shape. Always “draw” your furniture on the floor with painter’s tape before buying to test the flow.
|
💰 Budget Pick
Threshold Velvet Reverse Oblong Dec Pillow$25.00 |
💰 Budget Pick
Room Essentials Round End Table$35.00 |
✨ Luxury Pick
Nuloom Monica Geometric Wool Area Rug$328.99 |
✨ Luxury Pick
Castlery Curve L-Shape Sofa$4,096.00 |


As an affiliate, we earn from qualifying purchases.
7. Cheap & Chic Basement Home Office Nook with DIY Shelving

Who says you need a dedicated room for a home office? This stylish and cheap basement office nook proves you can carve out a productive space even in a tight corner. The secret is DIY shelving and a sleek floating desk, creating a minimalist yet highly functional workstation. Add a comfortable desk_chair and a personal touch with a small plant, and suddenly, that neglected corner becomes your new favorite place to conquer your to-do list.
Creating effective DIY shelving is simpler than you think. Here’s how to build a floating shelf that looks polished and professional:
- Measure your desired shelf length and depth. Choose wood (pine or common board works well) and cut to size. Cost: $15-$40 per shelf.
- Purchase heavy-duty floating shelf brackets (L-brackets or invisible supports work best). Cost: $10-$30 per bracket.
- Locate wall studs using a stud finder. This is crucial for stability.
- Mount the brackets securely into the studs, ensuring they are level. (1 hour)
- Place your shelf onto the brackets and secure it from underneath with screws. (30 minutes)
- Time estimate: 2-3 hours per shelf. Material cost: $25-$70 per shelf.
The formula for a cheap but chic home office nook is all about balance: 70% functional elements (desk, comfortable desk_chair, shelving) + 20% personality (a bright wall color, a small piece of art, a unique desk lamp) + 10% organization (pretty storage like small bins or trays). The “chic” comes from limiting clutter and using a consistent color palette, even with inexpensive items. This approach ensures it feels curated, not accidental.
8. Optimized Basement Layout for Multi-Generational Living
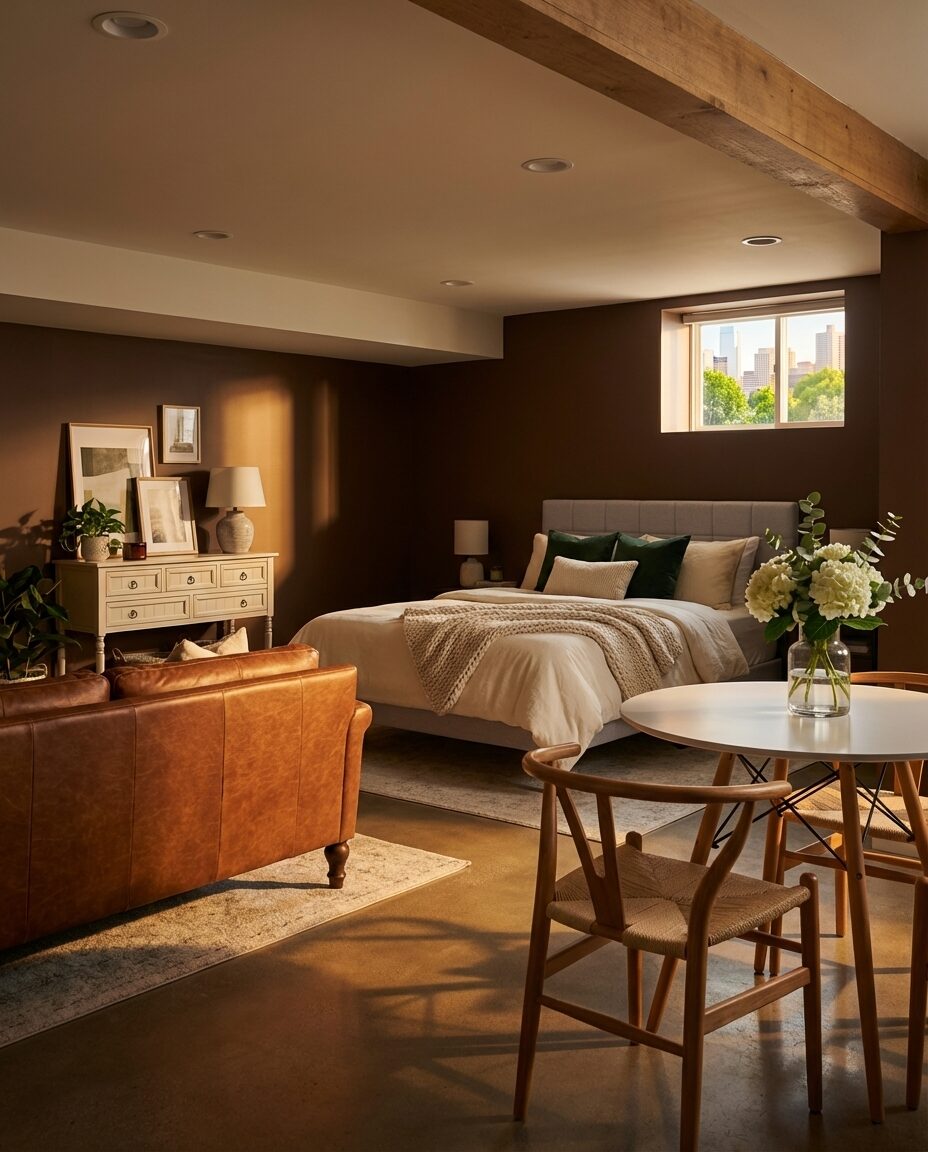
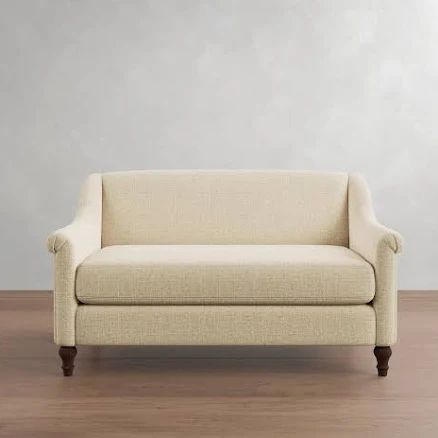
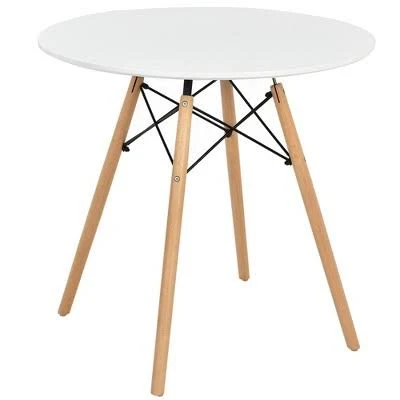
Designing a basement for multi-generational living is about more than just adding an extra bed; it’s about creating semi-independent spaces that feel connected yet private. This optimized layout includes a cozy bed area, a small lounge with a sofa, and perhaps a compact console_table for a mini-kitchenette or personal belongings. It’s about respecting individual needs while fostering family connection, making your basement a truly inclusive part of your home.
Multi-generational living has been a growing trend, accelerated by economic shifts and a desire for stronger family bonds. Pinterest and Instagram are overflowing with beautiful examples, as families seek creative ways to keep loved ones close. This isn’t just about saving money; it’s about providing care, fostering community, and sharing responsibilities. When designing for it, consider adaptable furniture and clear pathways. The trend has staying power because it addresses fundamental human needs for connection and support.
The one thing that absolutely makes a multi-generational basement layout work is a dedicated, comfortable lounging area separate from the sleeping zone. This provides a crucial sense of autonomy and a place for quiet reflection or entertaining without disturbing others. A small, cozy sofa or a pair of armchairs, perhaps with a small dining_table like the Costway 31.5″ Modern Round Dining Table from Target, can transform a bedroom into a mini-suite, signaling “this is your personal haven.” Without it, the space can feel like just a bedroom, not a living area.
|
Mainstays Upholstered Platform Bed$128.00 |
Costway Narrow Console Table$114.99 |
Pottery Barn Josie Upholstered Sofa Polyester Wrapped Cushions$1,099.00 |
Costway 31.5″ Modern Round Dining Table$99.99 |

As an affiliate, we earn from qualifying purchases.
9. Integrated Storage Solutions for a Clutter-Free Basement
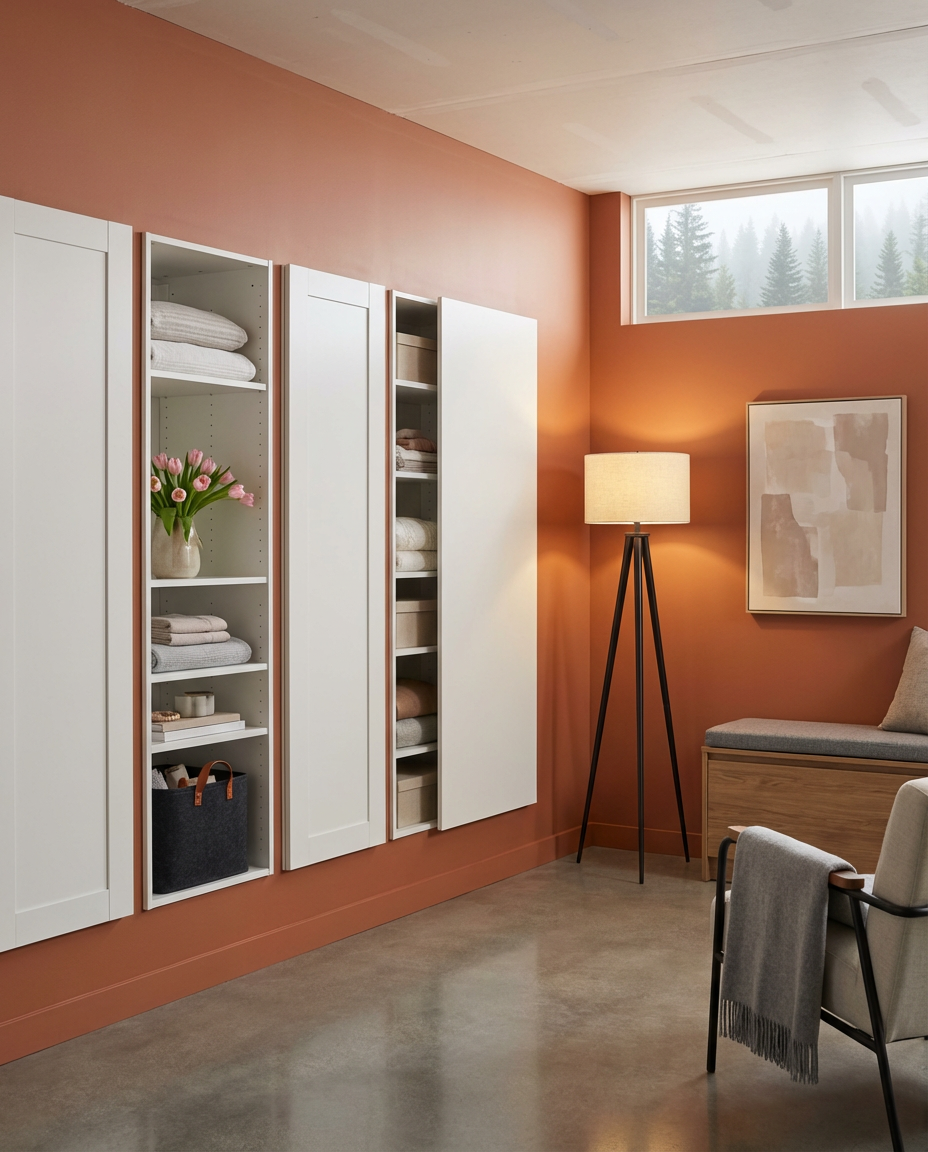
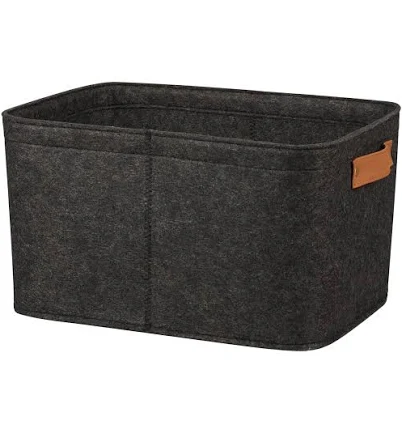
Clutter can kill even the best basement remodel. This idea focuses on simple, integrated storage solutions that keep everything tidy and out of sight, yet easily accessible. Think sleek bookshelves that blend into the wall, clever storage_basket for smaller items, and a general philosophy of “everything has a home.” It’s about creating a calm, streamlined environment where functionality and aesthetics go hand-in-hand.
Getting a clutter-free, organized basement doesn’t require custom cabinetry. Head to IKEA! Their PAX wardrobe system or Kallax shelving units are incredibly versatile and can be customized with baskets and inserts to look built-in for a fraction of the cost. For smaller items, pretty storage_basket from Walmart or Target ($10-$20 each) can hide a multitude of sins. You can achieve a highly organized, stylish basement for under $500 this way. It’s about smart choices, not expensive ones.
- Before diving into a massive storage overhaul, ask yourself these questions:
- What are the primary functions of this basement? Storage for holiday decor, seasonal clothing, or active living?
- What existing items absolutely MUST stay in the basement? Don’t try to store things you should declutter.
- Are there any moisture issues that need to be addressed before bringing in porous storage materials?
- What is your budget for storage solutions? Are you open to DIY or only pre-made solutions?
- How often do you need to access these items? This will dictate open shelving versus closed cabinets.
|
IKEA Pax Wall-Mounted Storage Frame$200.00 |
allen + roth Tripod Floor Lamp$119.98 |
Mainstays Medium Felt Decorative Storage Basket$14.26 |
Kate and Laurel Sylvie Tonal Abstract Framed Canvas Wall Art$109.99 |


As an affiliate, we earn from qualifying purchases.
10. Low Ceiling Basement Media Room with Acoustical Panels
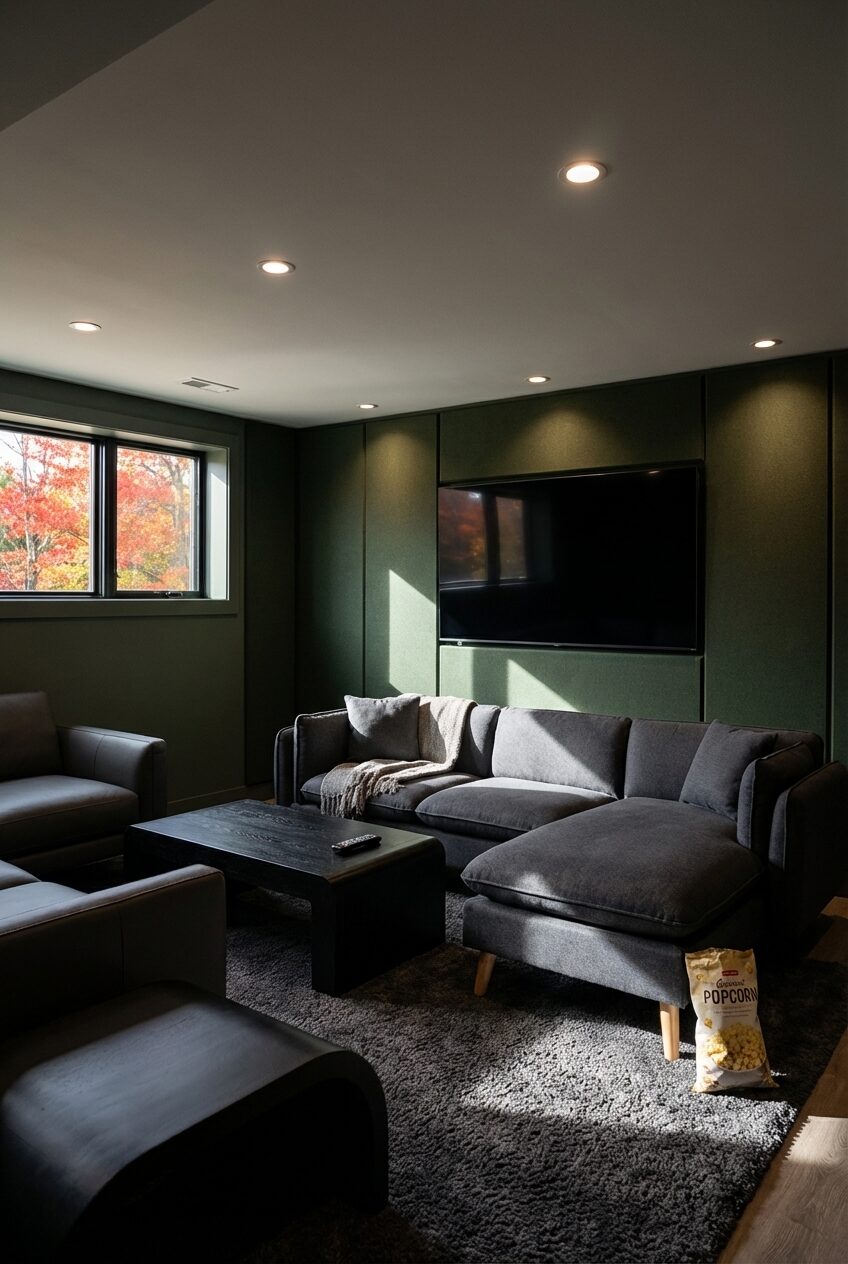
Low ceilings are a common basement challenge, but they don’t have to doom your media room dreams. This idea tackles the issue head-on with smart design choices: careful lighting, perhaps even a sleek sectional that sits close to the floor, and acoustical panels that not only improve sound but can also visually recede. It’s about creating a sophisticated, immersive experience where the ceiling height becomes an architectural feature, not a limitation.
Let’s get real about low-ceiling basements: while you can do a lot with clever design, you can’t magically make the ceiling disappear. The biggest mistake people make is trying to hang large, ornate light fixtures or even ceiling fans, which visually chop the already limited vertical space. Instead, prioritize recessed lighting and sconces. If you must have a pendant, make sure it’s very flat and wide, not long. Also, consider furniture with lower profiles, like the Lilola Home Brayden sectional, so it doesn’t make the room feel even more compressed. And skip the elaborate crown molding – it only draws attention to the low height you’re trying to downplay.
When dealing with low ceilings, every inch counts. Instead of a traditional coffee_table, consider an ottoman that can double as a footrest or extra seating, or even a low-profile sectional with built-in trays. If you do go for a coffee table, keep it to 16-18 inches in height to maintain a sense of spaciousness. For acoustical panels that don’t feel heavy, choose slim, fabric-covered options that match your wall color, or even opt for textured wallpaper with sound-absorbing properties.
|
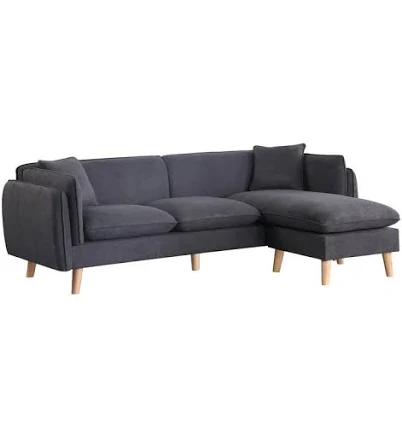
💰 Budget Pick · Sofa
Lilola Home Brayden Fabric Sectional Sofa Chaise$471.43 |
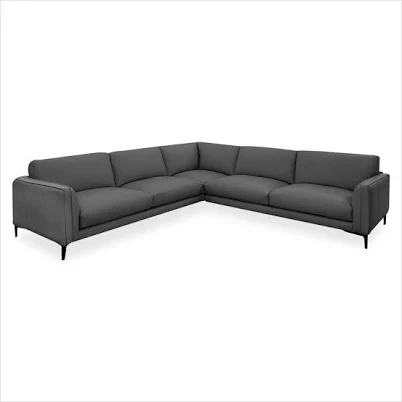
✨ Luxury Pick · Sofa
Victor Sectional$7,485.00 |
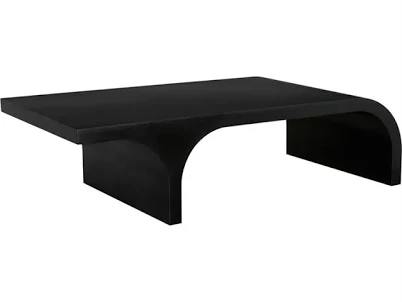
💰 Budget Pick · Coffee Table
Black Wood Rectangle Waterfall Coffee Table Modern – 50″W x 30″D x 18″$565.00 |
✨ Luxury Pick · Coffee Table
Noir Furniture Maximus Coffee Table$3,154.40 |

As an affiliate, we earn from qualifying purchases.
11. Split-Level Basement with Elevated Bar Area and Lounge
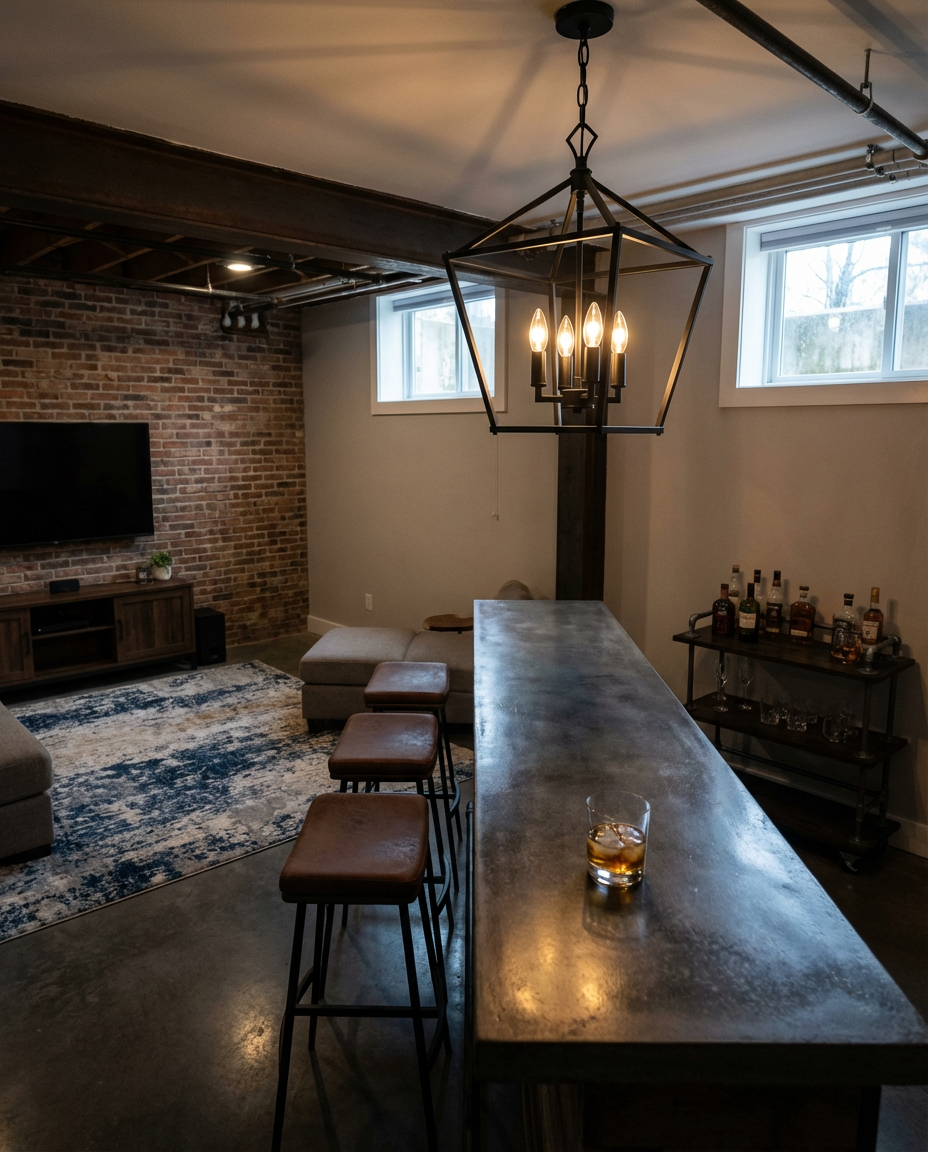
A split-level basement is a prime candidate for an elevated bar area and lounge. This industrial-style concept uses the existing elevation changes to naturally segment the space, giving the bar a grand, stage-like presence. Imagine exposed brick or concrete elements, sleek metal barstools, and statement pendant_light that draw the eye up. It’s about capitalizing on architectural quirks to create distinct zones for relaxing and entertaining, making your basement the ultimate party spot.
The magic formula for this industrial elevated bar and lounge is: 50% raw materials (exposed brick, concrete, metal) + 30% warm accents (wood tones, leather, soft lighting) + 20% comfort (plush seating, an inviting rug like the Nuloom Wilde). This balance ensures the industrial elements don’t feel cold or sterile, but rather inviting and stylish. You can swap out the warm accents for pops of vibrant color or the raw materials for more refined textures like polished concrete, as long as you maintain the core proportions.
This design works because it leverages contrasting textures and heights. The rough, untreated feel of industrial elements (like a bar_cart with pipe decor) against softer furnishings creates a dynamic visual interest. The elevated bar automatically becomes a focal point, drawing attention to the distinct function. This use of varying heights creates depth and interest, preventing the basement from feeling like one flat, undifferentiated space. It’s a masterclass in dynamic zoning without needing a single additional wall.
|
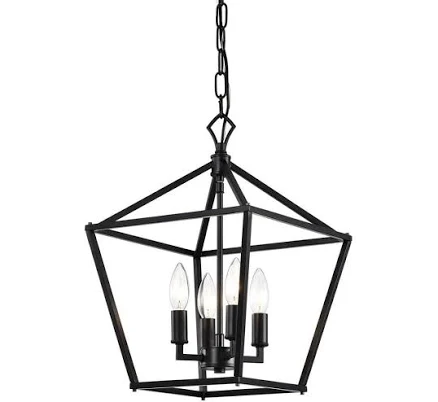
Edvivi Renzo 4-Light Matte Black Caged Pendant$62.94 |
Nuloom Wilde Abstract Distressed Area Rug$139.00 |
Nathan James Arlo Modern Backless Upholstered Kitchen Counter Bar Stoo$90.99 |
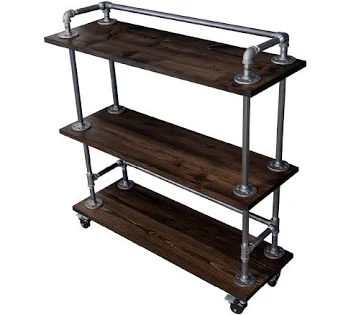
Pipe Decor Restore Bar Cart Kit$279.99 |


As an affiliate, we earn from qualifying purchases.
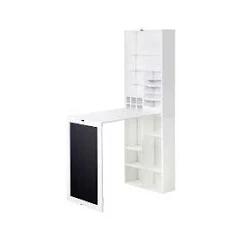
12. DIY Basement Guest Suite with Built-in Wardrobe
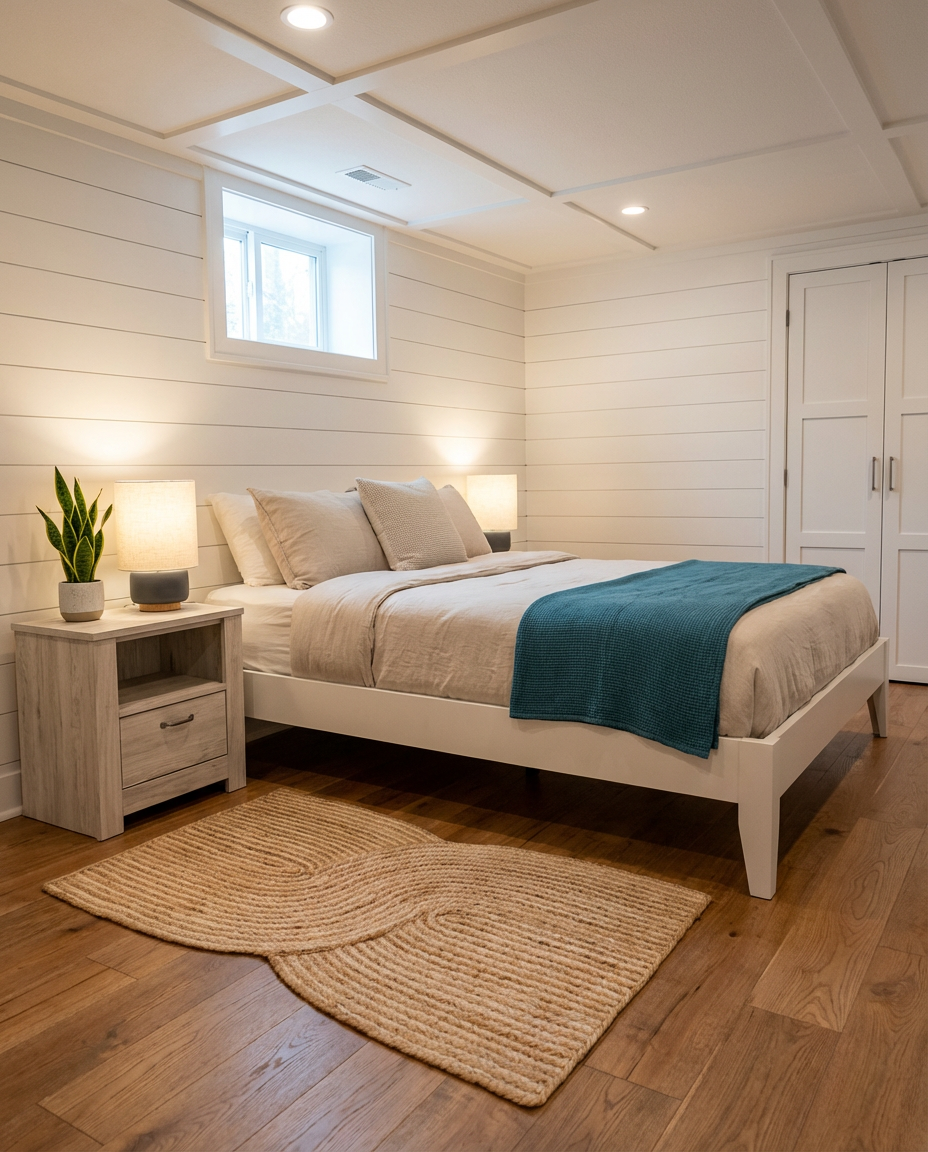
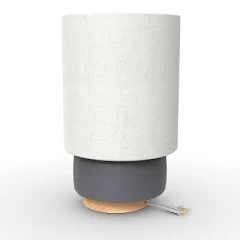
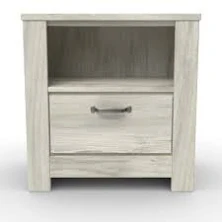
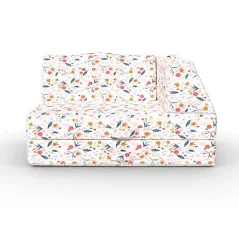
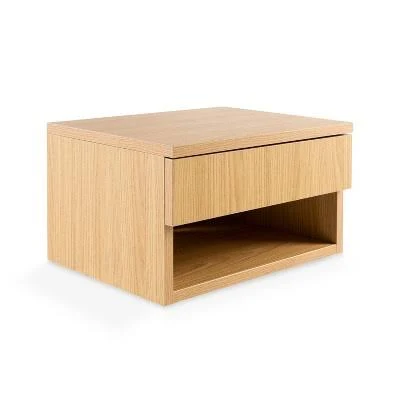
A DIY basement guest suite with a built-in wardrobe is the ultimate hospitality upgrade, offering comfort and privacy for visitors. This farmhouse-style approach brings warmth and a touch of rustic elegance. Think a cozy bed with a charming quilt, a practical nightstand with a simple yet elegant table_lamp, and a thoughtful built-in wardrobe that maximizes storage without encroaching on precious floor space. It’s about creating a retreat that feels welcoming and functional for anyone staying over.
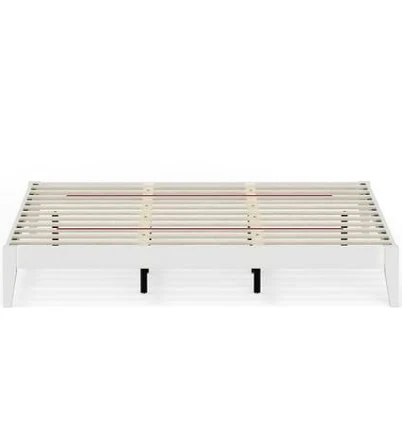
When designing a guest suite, don’t just shove an old bed frame down there. Invest in a truly comfortable bed, even if it’s an affordable platform bed like the Comfort Serene Farmhouse Style frame. Your guests will thank you! For the “built-in” wardrobe without the custom cabinet price tag, consider using IKEA PAX wardrobe frames and adding custom trim and paint to make them look seamless. This DIY approach can save you thousands. Also, remember a small, easily accessible rug, like the Drew Barrymore Beautiful Natural Braided Jute rug, adds instant warmth and defines the sleeping area.
- Main Furniture (bed, nightstand): $400 – $1,500
- Lighting (table lamp): $50 – $150
- Textiles (rug, bedding, throw blanket): $150 – $400
- DIY Wardrobe Materials (IKEA frames, trim, paint): $300 – $800
- Decor/Accessories: $50 – $200
- Paint/Wall Treatment: $50 – $250
- TOTAL: $1,000 – $3,300
- Budget alternative: Prioritize a comfortable mattress and buy a simple metal frame. Utilize open shelving with curtains for a “wardrobe” effect, for a similar look for $400-$800.
|
Drew Barrymore Beautiful Natural Braided Jute Indoor Scatter Rug$31.97 |
Threshold Table Lamp 17×9.5″$50.00 |
Ashley Bellaby One Drawer Nightstand$173.03 |
Comfort Serene Farmhouse Style Wood Bed Frame$220.56 |

As an affiliate, we earn from qualifying purchases.
13. Unfinished Basement to Modern Kid’s Playroom

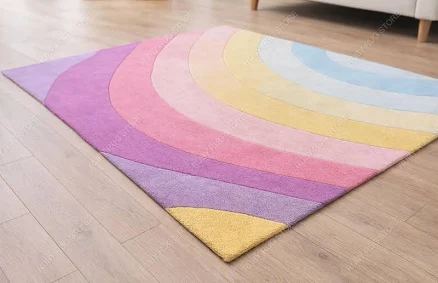
Transforming an unfinished basement into a modern kid’s playroom is a dream come true for parents and kids alike. This contemporary style embraces bright colors, durable materials, and smart storage solutions for toys (hello, H&M Home Baby Small Quilted Storage Basket!). Think a low-profile sectional for comfy lounging, a vibrant rug for play, and plenty of open space for imagination to run wild. It’s about creating a safe, stimulating environment that can evolve as your children grow.
- Before you start converting that unfinished space into a kid’s paradise, consider these key points:
- Check for any dampness or moisture issues. Basements and kids’ playrooms require a dry environment.
- Plan for durable, easy-to-clean flooring. LVP or carpet tiles are excellent choices.
- Ensure electrical outlets are child-proofed and easily accessible for toys and charging stations.
- Consider soundproofing if you’re worried about noise traveling upstairs.
- Think long-term: can this playroom convert into a teen hangout or guest space later?
Here’s the honest truth about converting an unfinished basement into a kid’s playroom: it sounds like a dream, but it can quickly become an overwhelming toy graveyard if you don’t have a serious storage plan. I’ve seen countless clients create beautiful play spaces that are instantly cluttered because they underestimated the sheer volume of kid stuff. Prioritize easy-access, open storage bins and baskets that even little ones can use for cleanup. And consider a “toy rotation” system to keep things fresh and manageable. Otherwise, you’ll spend all your time tidying, not playing. Also, remember that a low-profile sectional like the Pillowfort Floral Sectional, while cute, will inevitably become a fort, so factor in wear and tear!
|
Whimsical Cat Canvas Wall Art Colorful Cats Mystical Night Sky Wall De$31.58 |
H&M Home Baby Small Quilted Storage Basket$10.49 |
Pillowfort Floral Sectional Sofa$175.00 |
Modern Abstract Pastel Rainbow Design Soft Wool Handmade Area Rug for $64.29 |


As an affiliate, we earn from qualifying purchases.
14. Michigan Basement Mudroom with Integrated Pet Bath
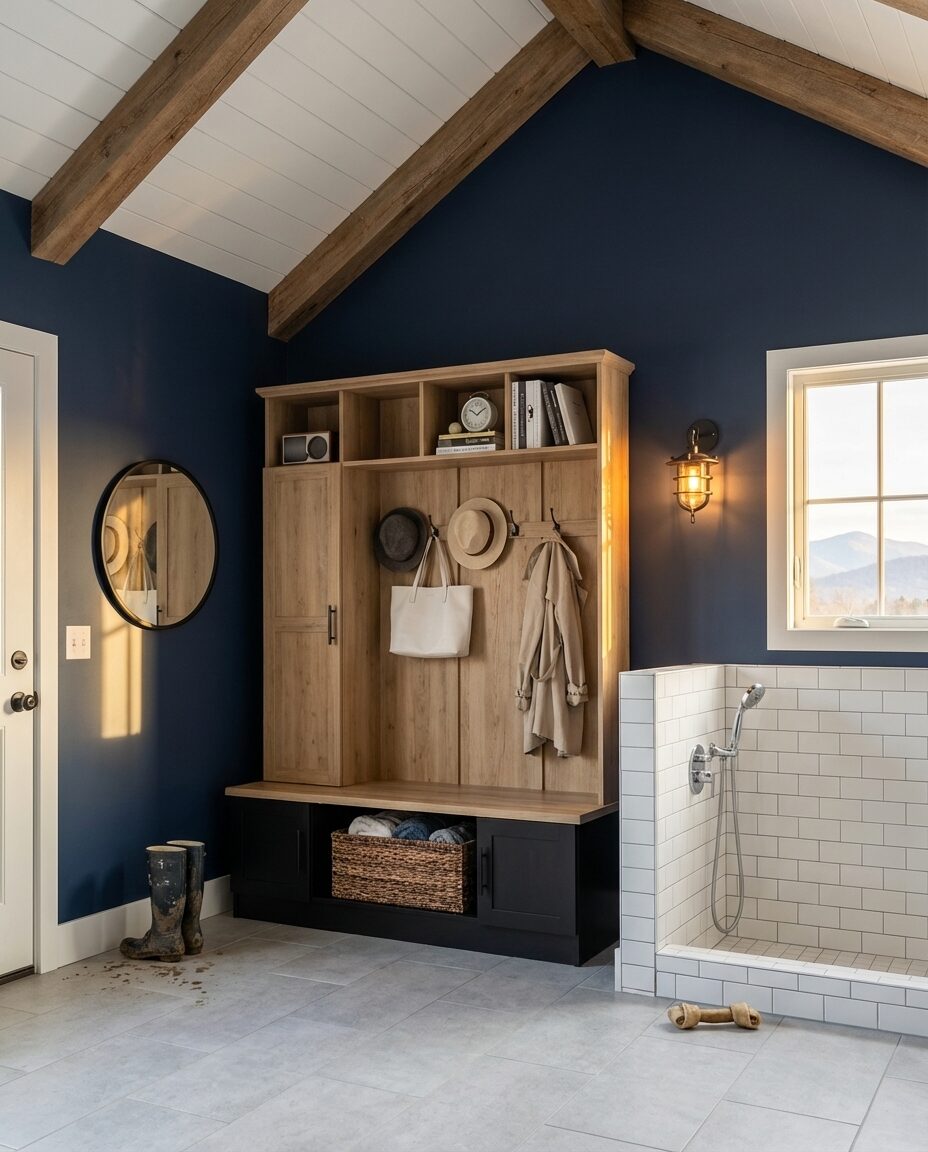
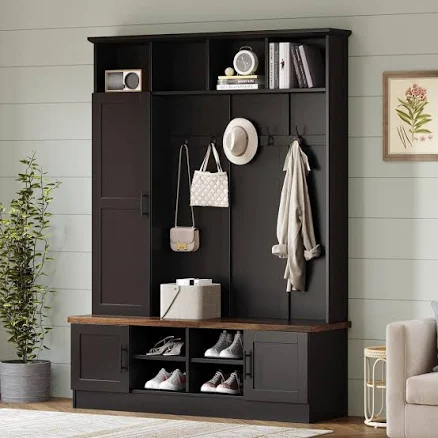
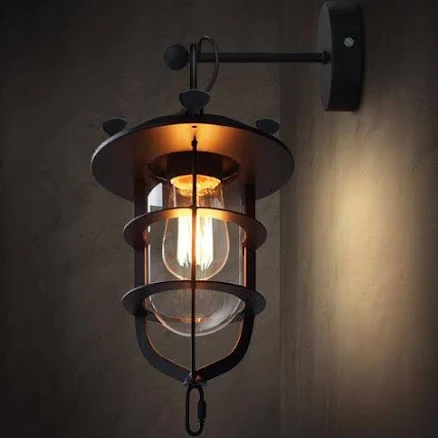
A Michigan basement mudroom with an integrated pet bath is not just practical; it’s downright essential for active families and their furry friends. This farmhouse-style haven combines durable surfaces, smart storage, and a dedicated pet washing station. Imagine a sturdy bench for shoe removal, ample storage_basket for leashes and gear, and a handy mirror for a quick check before heading out. It’s about making post-outdoor adventures seamless and mess-free.
The absolute one thing that elevates a mudroom from “just a hallway” to a truly functional space, especially in a Michigan basement, is the combination of durable, high-traction flooring and a sturdy bench. The ability to sit down, take off wet shoes, and have a designated spot for them is critical. This prevents slips and keeps mess contained. Without a robust floor that can handle mud, snow, and paw prints, and a bench that invites you to stay a moment, the space will never live up to its full potential. The Red Barrel Studio Farmhouse Hall Tree offers seating and storage, tying the space together.
Want to build a simple, integrated pet bath station? Here’s a mini how-to:
- Choose a durable, waterproof tub or large sink. Look for utility sinks at Home Depot ($100-$300).
- Frame out an area for the tub with pressure-treated lumber posts. This can be as simple as a 3×3 foot enclosure. Cost: $50-$100. (2-3 hours)
- Install water-resistant cladding around the enclosure (e.g., PVC panels, tile backer board with tile). This is your splash guard. Cost: $100-$300. (4-6 hours)
- Plumb in hot and cold water lines and a drain. This may require a plumber, adding approx. $300-$800.
- Add a handheld shower sprayer for easy bathing. Cost: $30-$80.
|
Room Essentials 20″ Round Wall Mirror$12.00 |
Brightroom Large Woven Abaca Crate$20.00 |
Red Barrel Studio Farmhouse Hall Tree$479.99 |
Lyndon Metal Cage Retro Industrial Wall Sconce Light$200.84 |


As an affiliate, we earn from qualifying purchases.
15. Budget-Friendly Basement Home Theater with DIY Seating
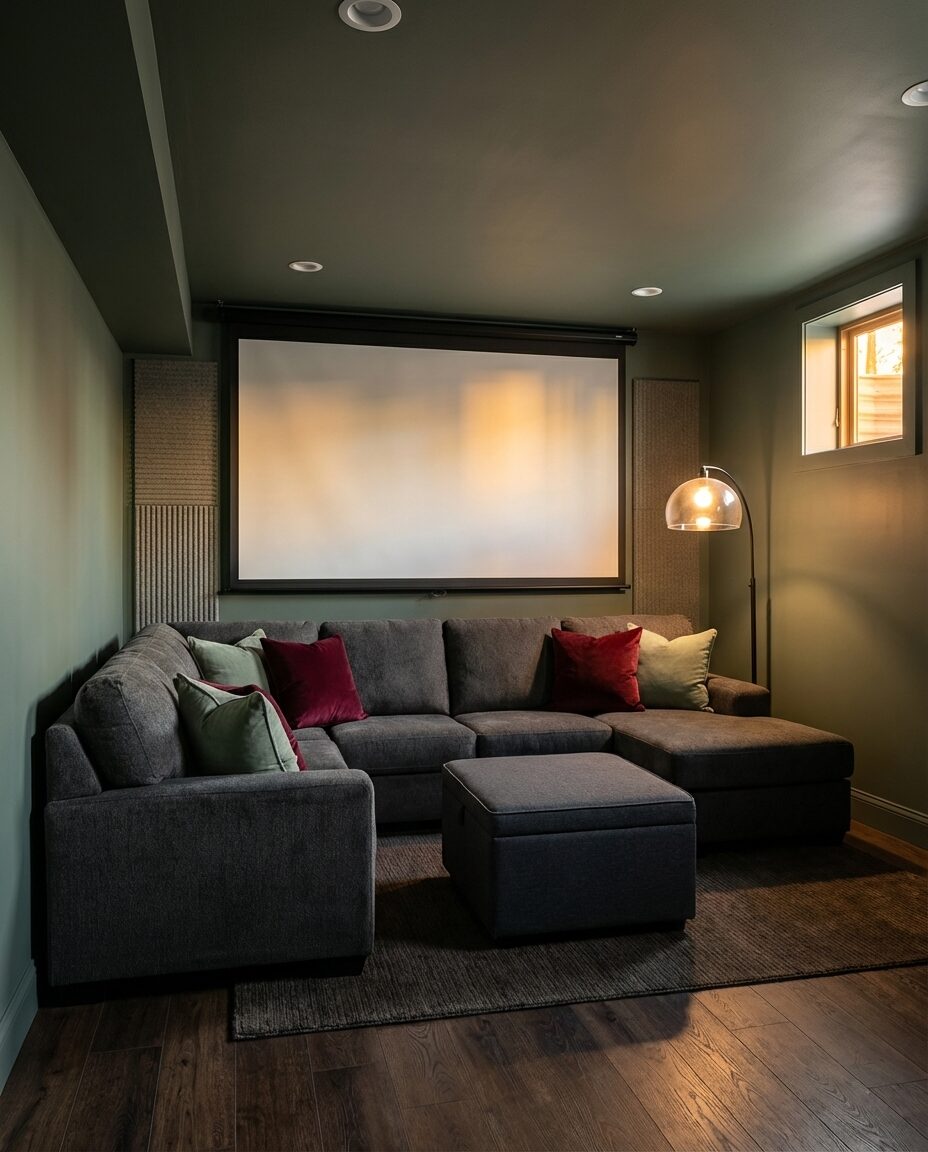
Creating a budget-friendly basement home theater with DIY seating is entirely achievable! This contemporary idea focuses on maximizing comfort and cinematic ambiance without breaking the bank. Think a plush sectional, strategically placed floor_lamp for mood lighting, and clever DIY ottomans for extra seating or footrests. It’s about tricking the eye into thinking it’s a high-end cinema, all while keeping costs low.
The style math for a successful budget home theater is: 50% comfortable seating (sectional, floor pillows) + 30% immersive technology (projector, screen, soundbar) + 20% intentional ambiance (dark walls, layered lighting, blackout curtains). The “DIY seating” often means augmenting your main sectional with large floor cushions or poufs, or even repurposing pallets for a tiered seating effect (with proper bracing and cushions!). The key is to create a cozy cocoon that draws you into the movie, not distracts you with unfinished edges.
You can absolutely get this home theater vibe for under $1,500. Instead of expensive recliners, opt for a comfortable, large sectional like the Ashley Ballinasloe, often found on sale for under $1,000. For the “DIY seating,” think big throw_pillow and beanbags from Target or Walmart. A projector and screen combo can be found for $200-$500. Paint your walls a dark, matte color yourself, and use floor_lamp with dimmers for ambiance. It proves you don’t need a Hollywood budget for a cinematic experience.
|
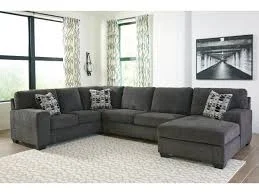
Ashley Ballinasloe 3-Piece Sectional with Chaise$990.32 |
Pillow Decor Castello Throw Pillows$39.41 |
Threshold Storage Ottoman$110.00 |
Better Homes & Gardens Dome Floor Lamp$75.12 |


As an affiliate, we earn from qualifying purchases.
16. Versatile Basement Layout with Movable Partitions
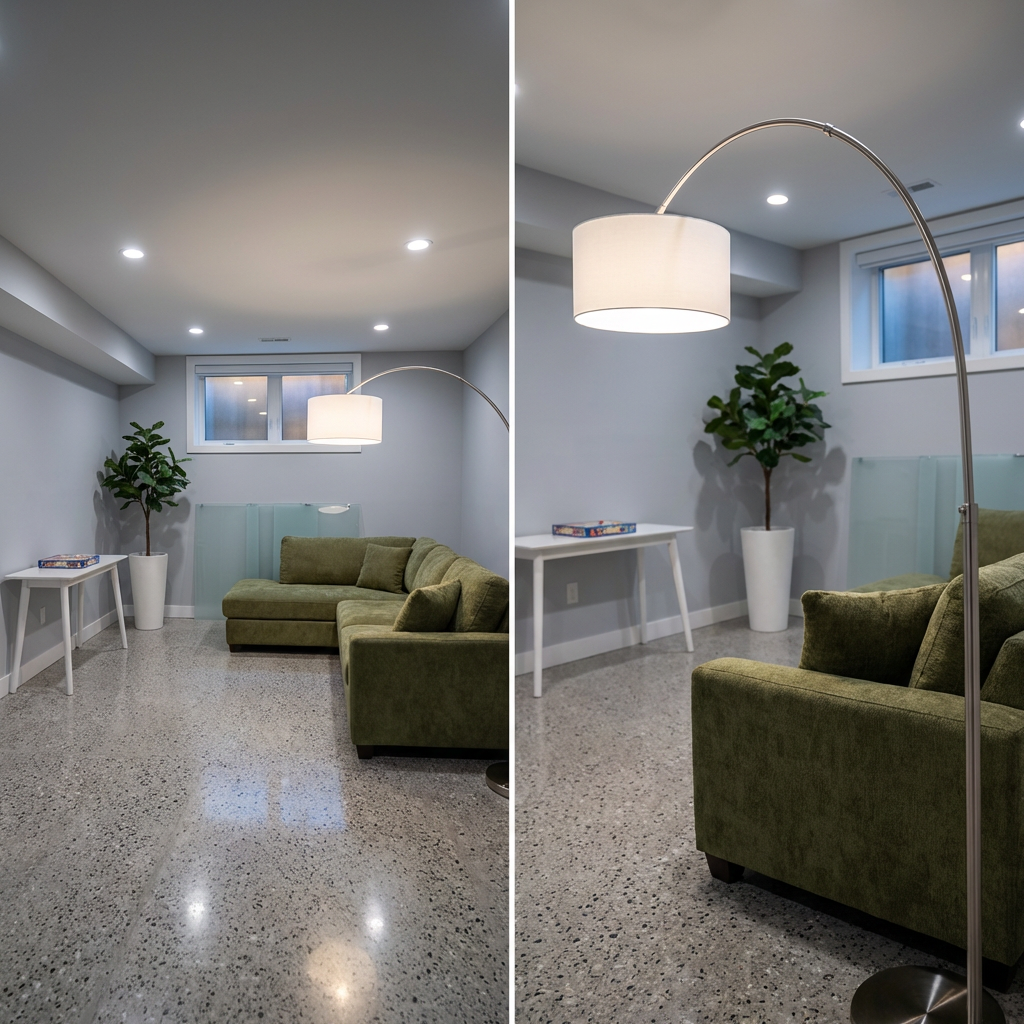
Unlock the full potential of your basement with a versatile layout featuring movable partitions. This modern approach allows you to transform the space on a whim, from an open-concept entertainment hub to separate zones for work and play. Imagine sleek floor_lamp to illuminate different areas, a modular sectional that reconfigures easily, and a lightweight console_table that can be repositioned. It’s about flexibility and adaptability, making your basement work for whatever life throws your way.
The desire for flexible living spaces has exploded, especially in the wake of more people working and schooling from home. Movable partitions, like sliding barn doors, large screens, or even ceiling-mounted fabric panels, are trending on platforms like Pinterest because they offer on-demand privacy and zoning without the commitment of fixed walls. This trend is here to stay as homes increasingly need to serve multiple functions. Just be mindful that while partitions offer visual separation, they provide minimal sound dampening.
Movable partitions thrive in basements with at least 8-foot (2.4m) ceilings and relatively open floor plans (400 sq ft or more). The higher ceilings prevent the partitions from feeling claustrophobic when closed. If your basement has lower ceilings, opt for lightweight, open-frame partitions that allow some light and air to pass through, reducing the visual impact. For smaller basements, instead of large partitions, consider using furniture groupings or large area rugs to define zones (similar to Idea #1, but for smaller footprints).
|
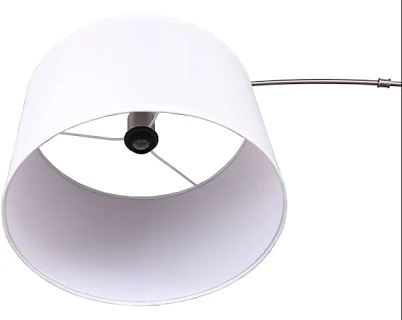
Allen + Roth 73-in Brushed Steel Arc Floor Lamp with Fabric Shade$119.98 |
Convertible Modular 129 in 6 Piece Chenille Sectional Sofa$1,012.25 |
Safavieh Marshal Console Table$80.50 |
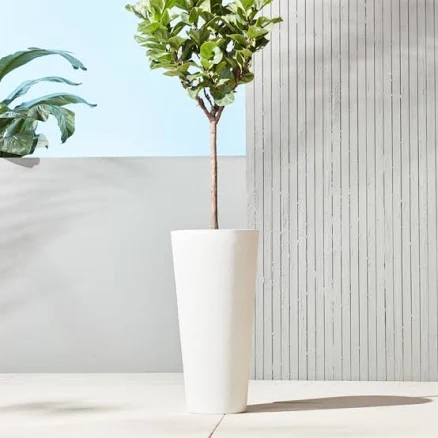
Shore White Cement Indoor/Outdoor Large Planter 28″H – CB2$119.00 |
As an affiliate, we earn from qualifying purchases.
17. Unfinished Basement to Rustic Game Room with Bar
✨ Luxury Version
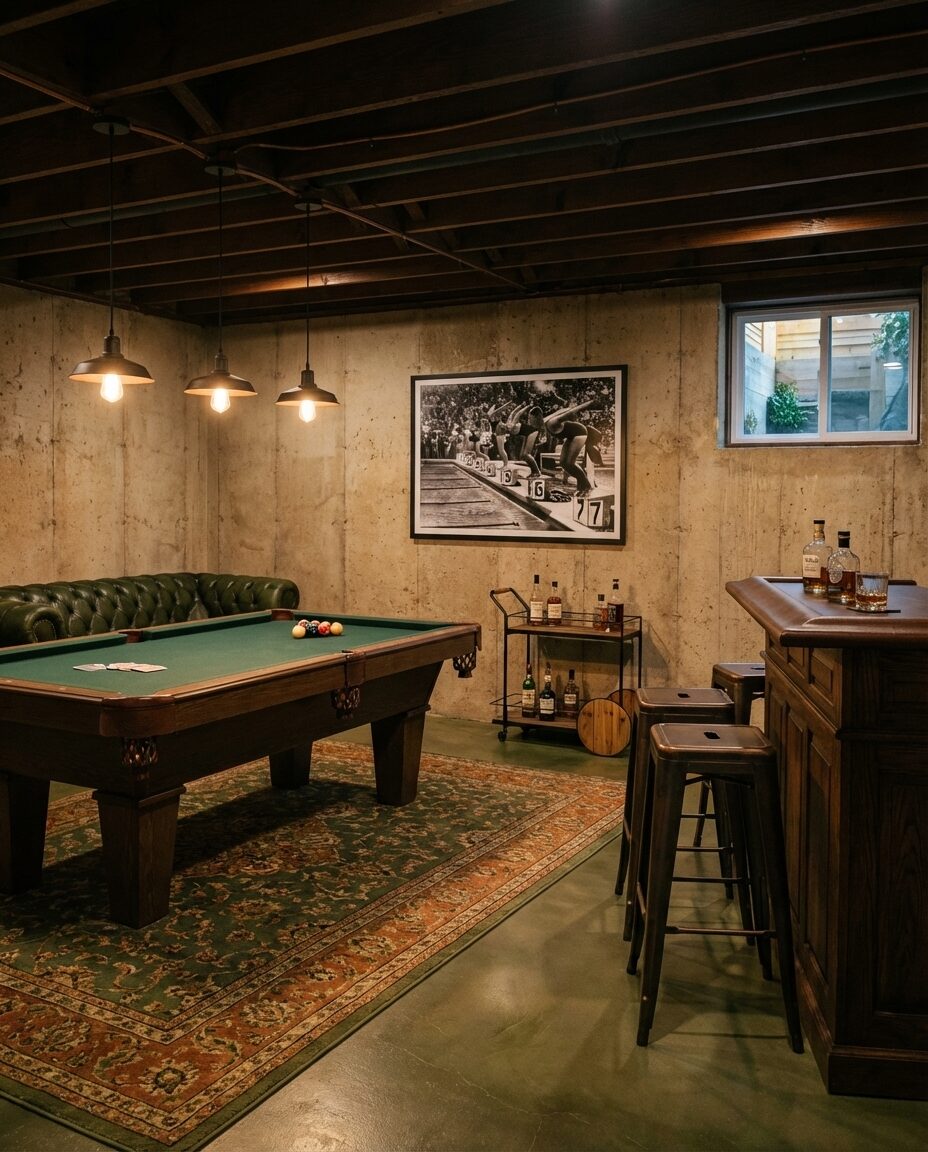
Turn that unfinished basement into a rustic game room, complete with a cozy bar for entertaining. This idea embraces exposed elements and natural textures, creating a laid-back, inviting atmosphere. Think a sturdy bar_cart, comfortable stools, and industrial-style pendant_light that adds character without feeling fussy. It’s about celebrating the raw charm of the basement while adding functional, fun elements for endless entertainment. Think exposed concrete or brick for a truly authentic feel.
💸 Budget Version
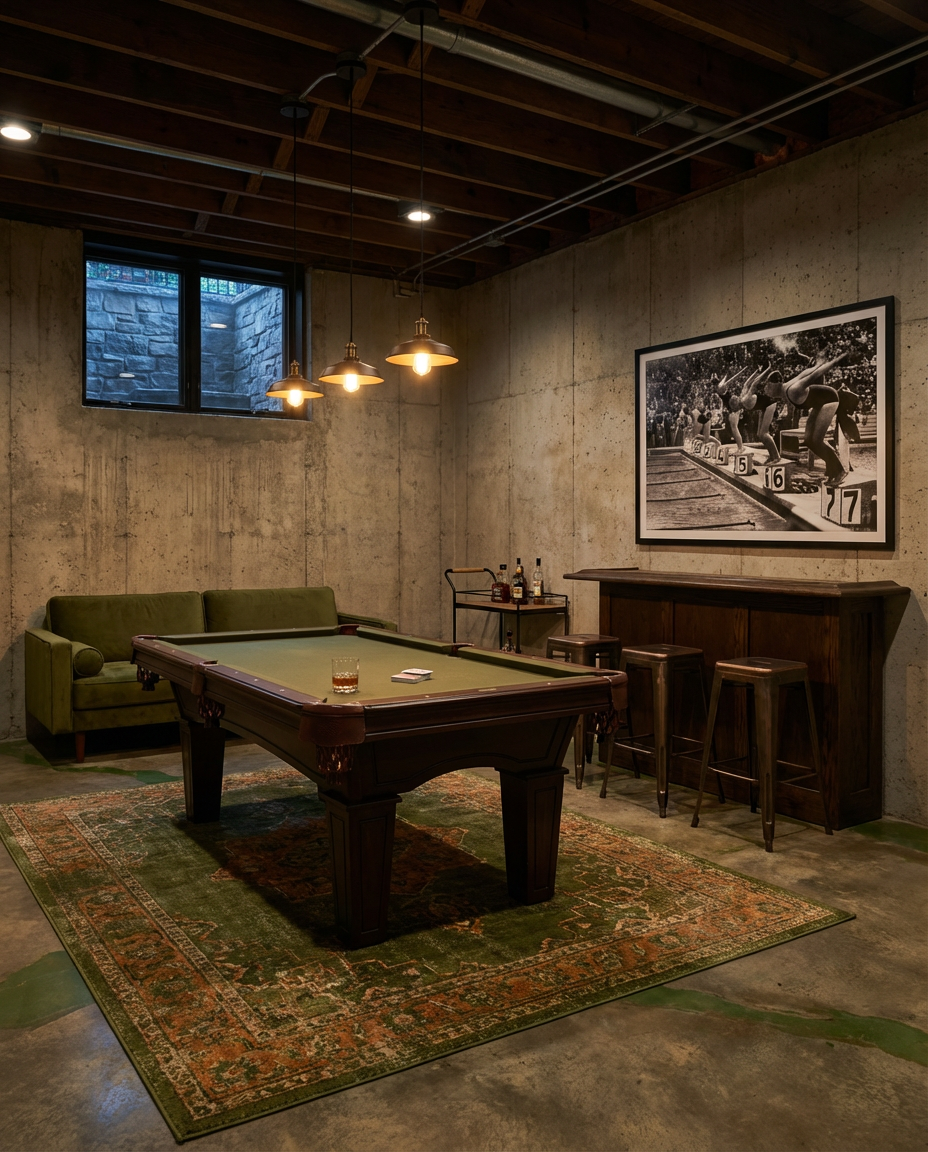
This rustic game room works because it leverages the inherent “unfinished” quality of a basement rather than fighting against it. Exposed pipes or concrete walls, when embraced and highlighted, become design elements rather than flaws. The rustic style complements this, creating a cohesive, authentic look. Mixing in warm wood tones, comfortable seating, and playful elements like framed artwork of vintage games (or literally vintage games!) creates a space that feels lived-in, relaxed, and ready for fun, even with modest finishes.
- Bar (cart or small cabinet): $200 – $600
- Stools: $100 – $400
- Lighting (pendant light, wall sconces): $50 – $200
- Games/Entertainment (pool table, arcade, dartboard): $300 – $2,000+
- Decor/Artwork: $50 – $200
- Paint/Wall Treatment (if any): $50 – $250
- TOTAL: $750 – $3,650+
- Budget alternative: DIY a bar from pallets, scour thrift stores for vintage stools, and focus on smaller, board games instead of large arcade machines for an even cheaper option, around $300-$800.
|
💰 Budget Pick
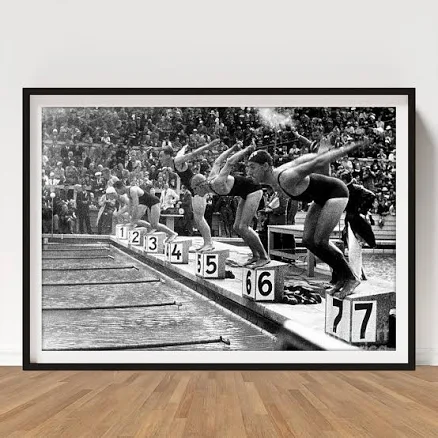
Swimming Competition at Berlin Olympic Poster$17.56 |
💰 Budget Pick
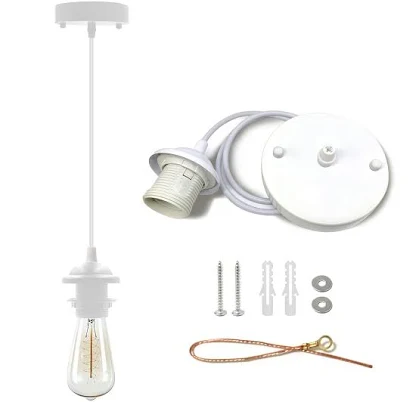
VTYXCTIGJ Industrial Mini Pendant Light Kit$17.68 |
✨ Luxury Pick
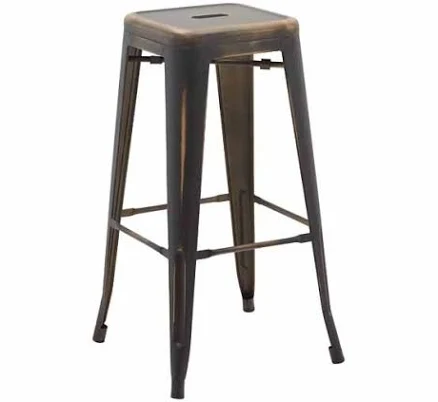
Modesto Distressed Copper Stamped Metal Bar Stool$39.99 |
✨ Luxury Pick
SEI Furniture Bar Cart$187.20 |
As an affiliate, we earn from qualifying purchases.
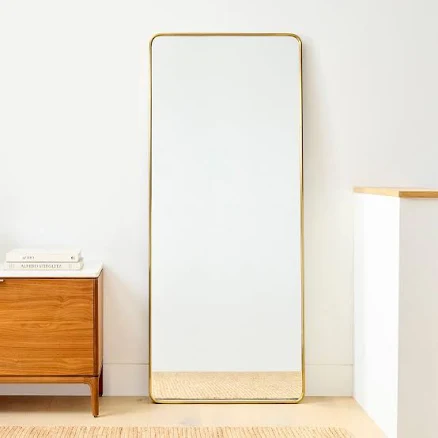
18. Low Ceiling Basement with Clever Lighting & Mirror Tricks
A low-ceiling basement doesn’t have to feel like a cave. This idea uses clever lighting and mirror tricks to create the illusion of height and spaciousness. Think strategically placed mirrors, like the Pottery Barn Rienne Frameless Mirror, to reflect light and expand the visual space, combined with recessed or sconce lighting rather than overhead fixtures. A slim console_table can add surface area without clutter. It’s all about perception and making the most of what you have.
The crucial design trick for low-ceiling basements is to draw the eye horizontally or use uplighting. Avoid anything that hangs down from the ceiling. Instead, use floor_lamp that bounce light upwards, or wall sconces that illuminate the walls without taking up precious vertical space. Large, frameless mirrors positioned strategically can double the apparent size of a room, but make sure they reflect something appealing, not an cluttered corner!
The absolute one thing that can transform a low-ceiling basement from “cramped” to “clever” is the strategic use of oversized mirrors. More than paint color or specific lighting, a large mirror (or a grouping of mirrors) creates an optical illusion of depth and reflects light, instantly making the room feel larger and brighter. A mirror like the Glacier Bay Rectangular Frameless Wall Bathroom Vanity Mirror extends the visual space, especially when paired with a slim console_table situated below it. Without it, the room can easily feel like a box.
19. Split-Level Basement with Kids’ Play Area Below, Adult Lounge Above
Split-level basements are perfect for creating distinct zones, and this idea capitalizes on that by placing a vibrant kids’ play area below and a sophisticated adult lounge above. This contemporary design uses clever color palettes and furniture to define each space, keeping toys contained with storage_basket while adults unwind with a chic sectional and a modern coffee_table. It’s about harmony and function, giving everyone their own slice of basement paradise.
The concept of “zones” within a home, particularly an open-plan living area or a basement, has become incredibly popular as families seek to maximize their space and cater to diverse needs. This split-level idea specifically addresses the reality of families with young children and adults who both need dedicated spaces for relaxation and activity. Pinterest is full of “zone living” inspiration, showing how rugs, furniture placement, and even distinct color palettes (like a playful rug for kids, a more subdued one for adults per Idea #29) can create these subtle divisions. This trend is highly practical and will continue to be relevant for years to come.
Want to easily define a kids’ play area in an open basement without building walls? Here’s a quick setup:
- Choose a durable, easy-to-clean rug in a fun pattern or bright color (e.g., the Geometric Shapes Patterned Play Rug). Cost: $40-$150.
- Place a low-profile, kid-friendly sectional or floor cushions on the rug. (1 hour)
- Add dedicated, easily accessible storage_basket for toys around the perimeter of the rug. (30 minutes)
- Time estimate: 1.5 – 3 hours. Material cost: $100-$400.
|
Geometric Shapes Patterned Rectangular Play Rug for Kids, Modern Nurse$40.00 |
Latitude Run 6 Seat U Shaped Modular Sectional Sofa with Storage$970.00 |
at Home Round Kids Rainbow Poly Rope Basket$19.99 |
West Elm Fluted Ceramic Coffee Table$479.20 |

As an affiliate, we earn from qualifying purchases.
20. Basement Flooring Options: Polished Concrete with Radiant Heat
For basement flooring that’s both stylish and incredibly practical, look no further than polished concrete with radiant heat. This industrial-style choice offers a sleek, modern aesthetic that’s easy to clean and wonderfully warm underfoot. Pair it with a statement armchair and a sturdy side_table for a minimalist yet inviting lounge. It’s about investing in a foundational element that elevates the entire space, creating a versatile canvas for any design.
Polished concrete flooring with radiant heat sounds amazing, and it is! But let’s talk maintenance reality. While incredibly durable, polished concrete can still be prone to staining if acidic liquids sit on it. You’ll need to re-seal it every few years to maintain its luster and protective qualities—a job that can cost $1-$3 per square foot. And while the radiant heat is a dream, if something goes wrong with the system, repairs can involve tearing up the floor, which is a major undertaking. Consider a good quality commercial-grade sealer and be diligent with spills to protect your investment.
If you’re committing to polished concrete, you can’t ignore the acoustics. All those hard surfaces will make the room echo, which is terrible for a cozy lounge or media room. Factor in sound-absorbing elements like large area rugs, upholstered furniture (a plush armchair like the Crate & Barrel Halston is perfect), and even wall art made of fabric or acoustic panels. Don’t let gorgeous flooring ruin your room’s sound quality; aim for at least 30-40% of your wall and floor surfaces to be soft or sound-absorbing.
|
Crate & Barrel Halston Tufted Accent Chair$1,999.00 |
Montreal Light Grey Round Stone Outdoor Patio Side Table$99.97 |
Better Homes Gardens Arc Floor Lamp$98.97 |
Rustic Metal Wall Art$785.97 |

As an affiliate, we earn from qualifying purchases.
21. Cheap Basement Refresh: Paint, Peel-and-Stick Tile, & New Lighting
Give your basement a cheap and cheerful refresh with just paint, peel-and-stick tile, and new lighting. This contemporary idea proves you don’t need a massive remodel to make a big impact. A fresh coat of paint brightens the space, peel-and-stick tiles offer an instant floor upgrade, and strategically placed pendant_light can transform the ambiance. Add a simple dining_table with colorful dining_chair, and you’ve got a brand new look for a fraction of the cost.
This is where DIY truly shines! You can refresh your basement for under $500. A few gallons of paint, even in a bold color, can completely change the mood ($50-$150). Peel-and-stick vinyl tiles are available for $1-$3 per square foot, making a significant flooring upgrade incredibly affordable. Swap out old, dingy light fixtures for modern pendant_light or even just updated LED bulbs. Target and Walmart are fantastic for affordable dining_chair and simple decor. It’s all about selecting high-impact, low-cost changes that make a dramatic difference.
- Before you commit to a “cheap refresh,” run through this checklist:
- Inspect for any lingering moisture issues; paint and peel-and-stick won’t adhere well to damp surfaces.
- Test a small area of peel-and-stick tile to ensure it adheres properly to your existing flooring.
- Check the electrical wiring before installing new light fixtures. If unsure, hire an electrician.
- Declutter and completely empty the space. A refresh works best on a blank canvas.
- Set a realistic timeframe for your DIY efforts. Even small projects take longer than you think!
|
Plaid Terra Cotta Pot Set$2.72 |
Set of 4 Stackable Dining Chairs$89.98 |
Maven Lane Zola Traditional Round Wooden Dining Table$589.99 |
Jeanne Fluted White Porcelain Dome Pendant Light$299.00 |


As an affiliate, we earn from qualifying purchases.
22. Basement Layout for Home Bar & Wine Cellar Integration
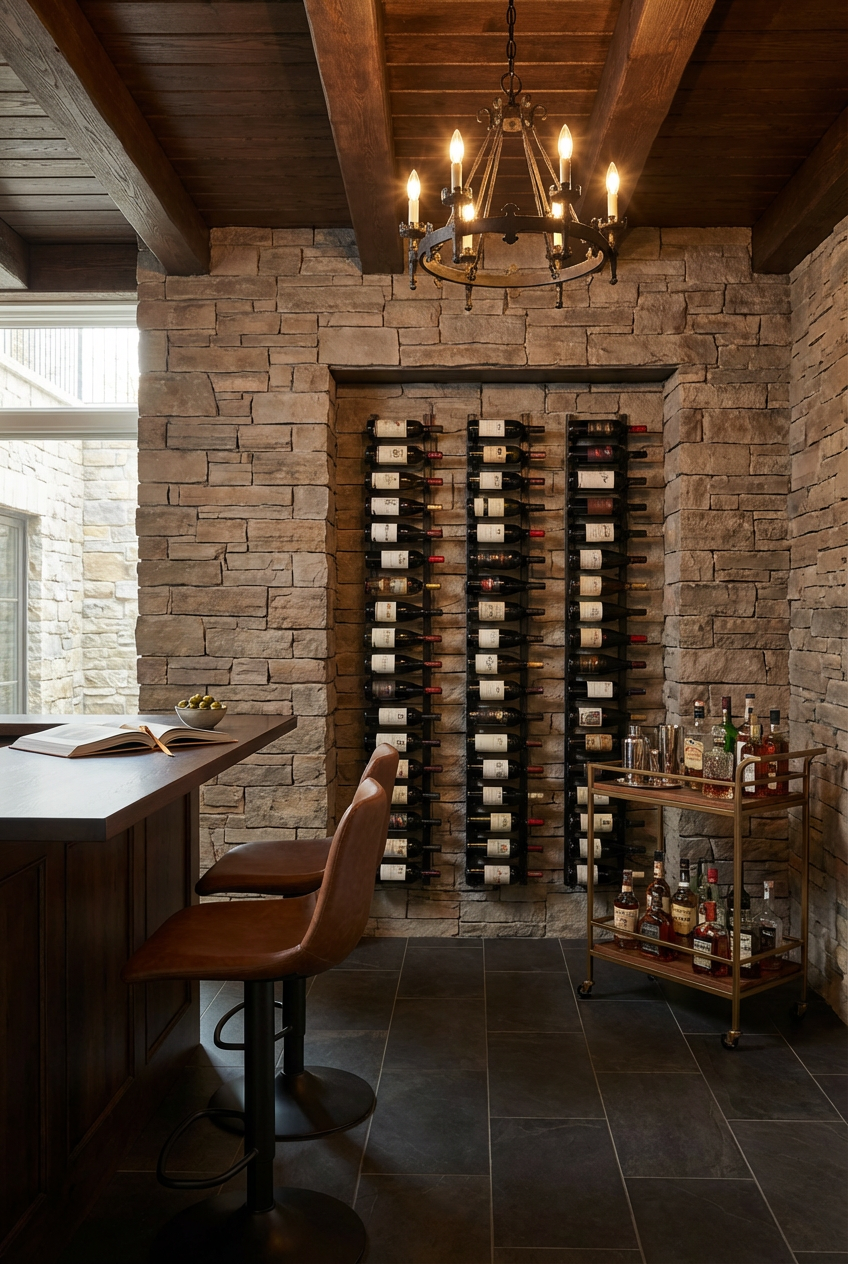
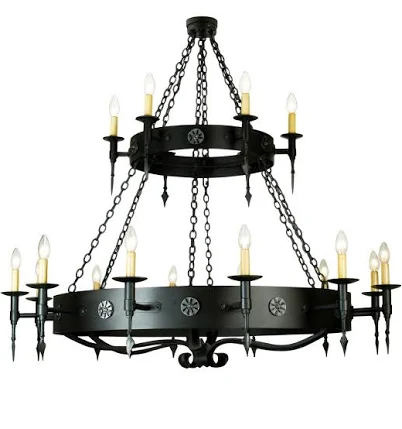
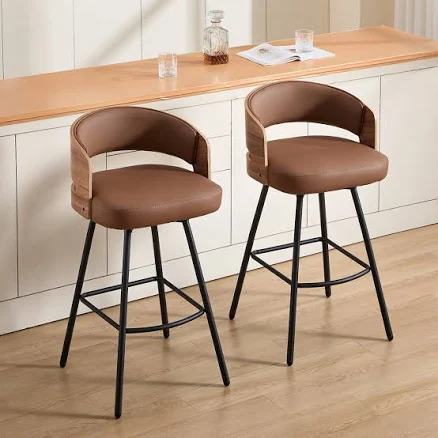
Integrate a sophisticated home bar and wine cellar into your basement layout, creating the ultimate zone for entertaining and connoisseurship. This rustic-style idea embraces rich wood tones, elegant wine_rack, and stylish barstools, all illuminated by a statement chandelier. It’s about crafting a dedicated space that feels both luxurious and inviting, perfect for hosting tastings or simply enjoying a quiet evening with a favorite vintage.
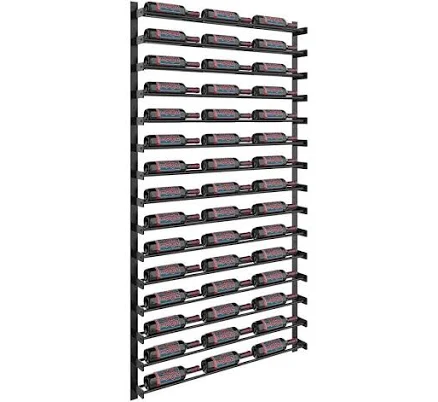
The one thing that absolutely makes a basement bar and wine cellar integration successful is the intentional design of the wine storage itself. It’s not just about racks; it’s about creating a temperature-controlled environment and a display that celebrates your collection. Whether it’s a custom-built, climate-controlled cellar or an elegant wine_rack that acts as a focal point, the wine storage should feel integrated and purposeful, enhancing the bar area. Without it, it’s just a bar; with it, it’s a true experience. Look at modular systems like the Evolution Wine Wall for a high-impact solution.
Home bars and dedicated wine cellars have seen a massive surge in popularity, especially since the pandemic. With more people entertaining at home, these spaces are no longer just for luxury homes but a desirable feature for anyone who enjoys hosting. Pinterest is swimming with “home bar ideas” and “DIY wine cellar” pins. This trend reflects a shift towards creating personalized, experience-driven spaces within the home. Expect this to have strong staying power as a valued home amenity, as long as it’s well-ventilated and designed for appropriate climate control for the wine itself.
|
Evolution Wine Wall Modular Mounted Metal Wine Rack$934.00 |
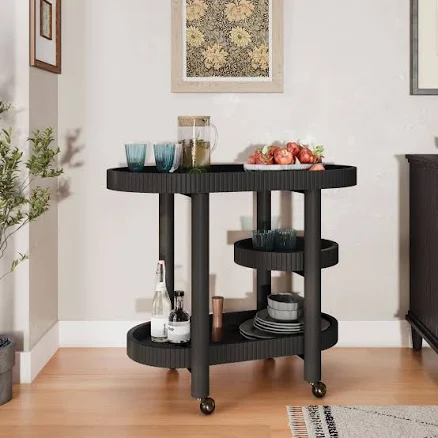
Drew Barrymore Beautiful Bar Cart$125.00 |
Gothic Revival Wrought Iron Chandelier$2,500.00 |
Corrigan Studio Modern Swivel Faux Leather Counter Stools (Set of 2)$213.99 |
As an affiliate, we earn from qualifying purchases.
23. Storage Solutions for Small Basement Craft Room
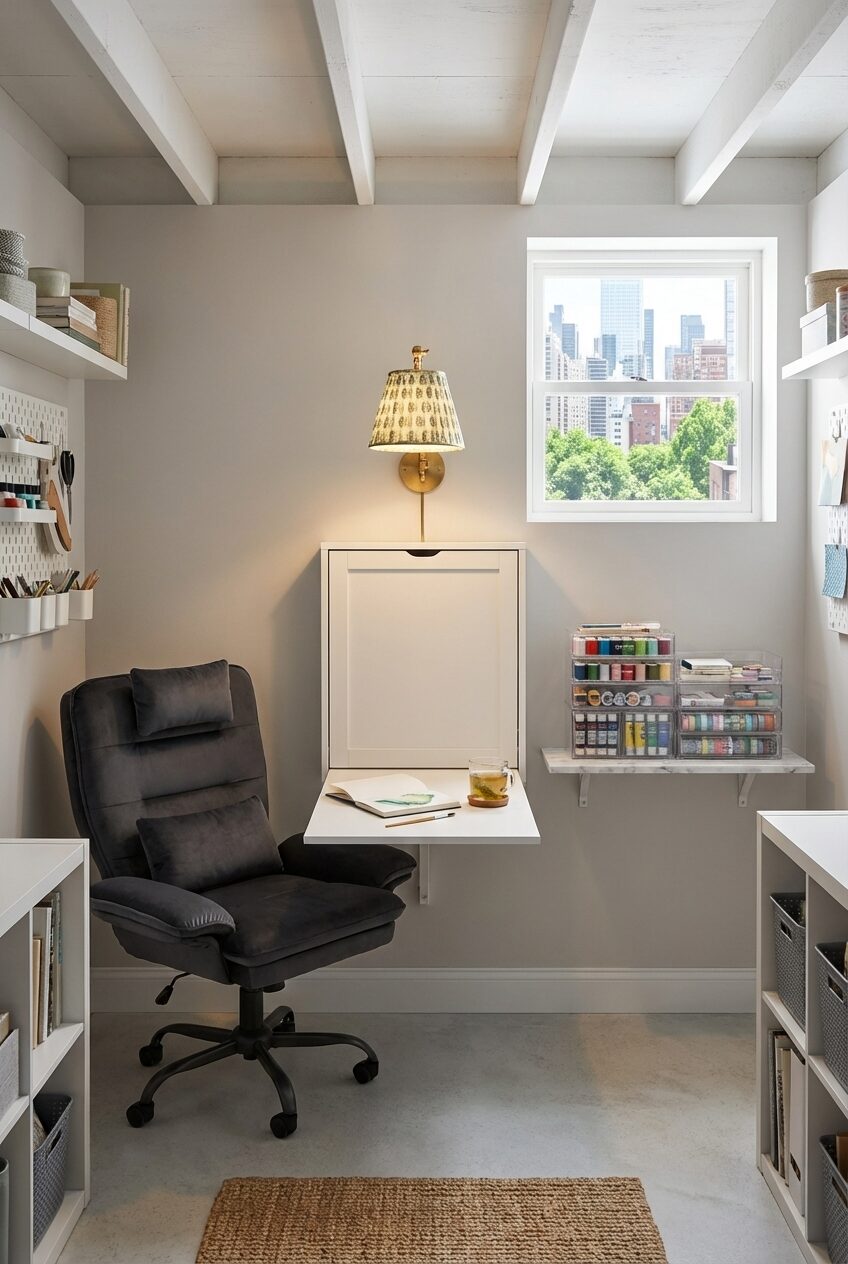
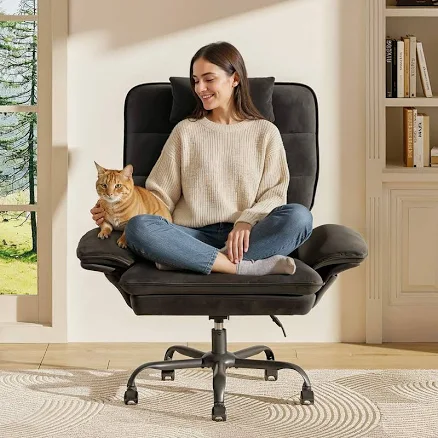
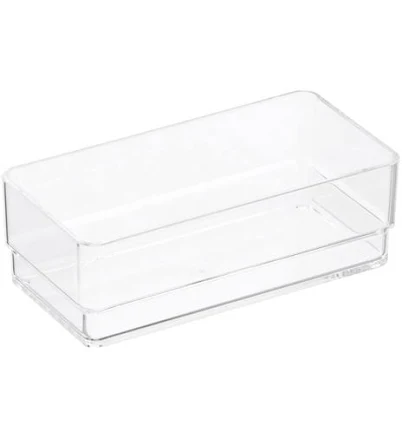
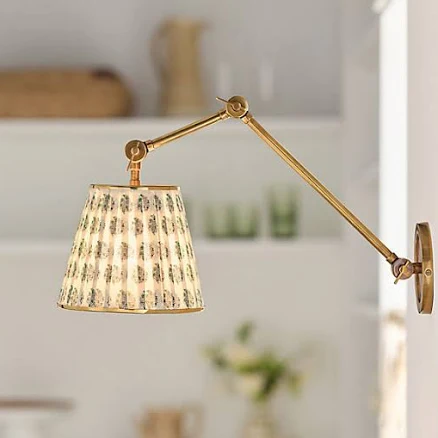
Even a small basement corner can become a highly functional craft room with smart storage solutions. This contemporary idea focuses on vertical organization, wall-mounted desks, and clever containers to keep supplies tidy. Think a fold-down Utopia Alley SH3WW desk, acrylic drawer organizers, and task lighting from a stylish wall_sconce. It’s about maximizing every inch to create a dedicated creative zone that inspires without feeling cluttered.
For a small basement craft room, vertical storage is king. Don’t underestimate the power of wall-mounted pegboards, magnetic strips for tools, and floating shelves. When choosing a desk, a fold-down mounted desk like the Utopia Alley SH3WW is ideal as it disappears when not in use, instantly expanding your floor space. Keep your desk_chair on wheels so it can be tucked away easily. Remember, the goal is to keep as much off the floor as possible!
The style math for a small but mighty craft room is: 60% vertical storage (shelving, pegboards, wall-mounted cabinets) + 25% efficient workspace (fold-down desk, rolling cart) + 15% inspiring elements (colorful supplies displayed neatly, a favorite piece of art). The key is to make everything you need accessible without overwhelming the small footprint. By prioritizing vertical storage, you keep your main workspace clear and functional, making it feel larger than it is.
|
Bestier Ergonomic Velvet High-Back Swivel Executive Office Chair$199.99 |
Utopia Alley SH3WW Collapsible Fold Down Desk Table$230.80 |
The Container Store Acrylic Drawer Organizer$7.49 |
Anthropologie Lee Ruched Printed Articulating Task Sconce$278.00 |
As an affiliate, we earn from qualifying purchases.
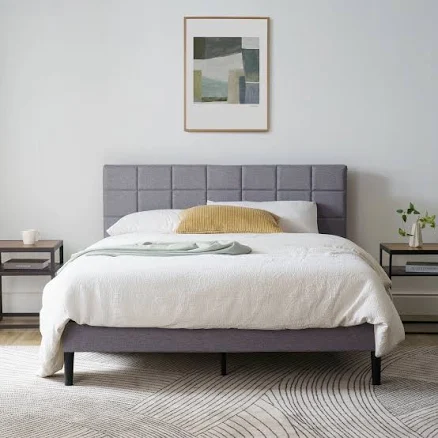
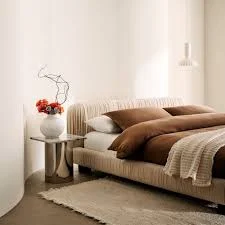
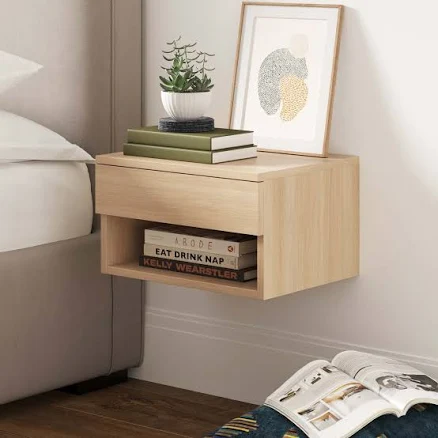
24. Low Ceiling Basement Guest Bedroom with Wall-Mounted Headboard
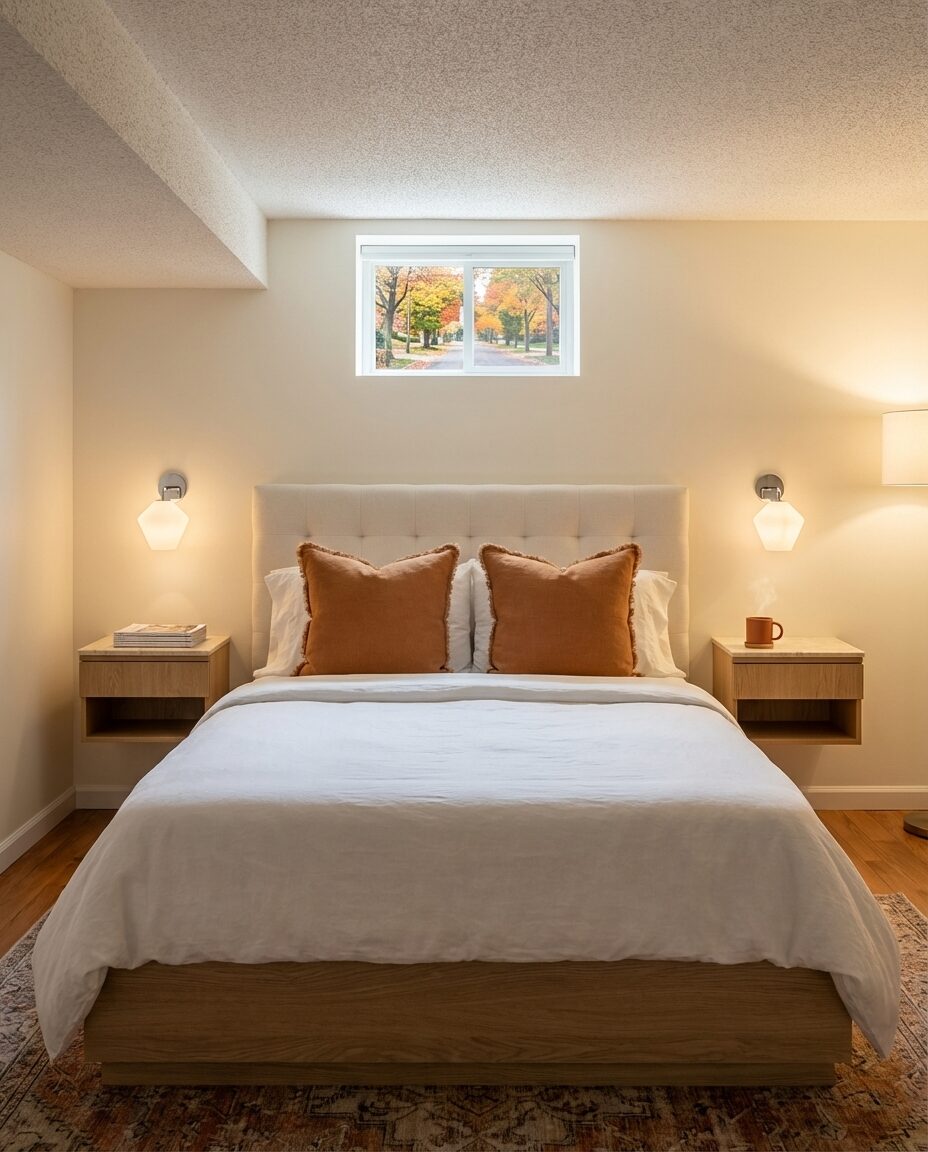
A low-ceiling basement can still host a beautiful guest bedroom by focusing on minimalist design and clever vertical tricks. This idea incorporates a wall-mounted headboard to save space, ambient recessed lighting, and a low-profile platform bed. Think simple nightstands that float, and cozy throw_pillow for warmth. It’s about creating a serene, inviting retreat where the ceiling height doesn’t detract from the comfort or style. The emphasis is on clean lines and smart solutions throughout.
- Bed (platform frame): $150 – $500
- Nightstand/Floating Shelf: $50 – $200
- Lighting (wall sconces, recessed lights): $100 – $400
- Textiles (bedding, throw pillows, rug): $100 – $300
- Wall-Mounted Headboard (DIY materials/fabric): $50 – $200
- Paint/Wall Treatment: $50 – $250
- TOTAL: $500 – $1,850
- Budget alternative: Use an existing mattress on a simple frame, add DIY floating shelves with brackets, and focus on warm, soft bedding for a cozy feel on a lower budget ($250-$700).
Here’s the honest truth about low-ceiling basement bedrooms: while clever lighting and low furniture help, you still need proper ventilation and good air quality. Basements can be prone to mustiness, which is a definite no for a comfortable guest experience. Invest in a good dehumidifier (like those mentioned in Idea #28), and make sure there’s at least one window that opens (for both fresh air and egress). No matter how beautiful the room, if it smells like damp earth, your guests won’t be sleeping soundly. Also, be wary of dark paint colors, as they can make an already low ceiling feel even more oppressive.
|
Threshold Oversized Reversible Linen Square Throw Pillow with Frayed E$30.00 |
Burlywood Size Wood Platform Bed Frame Solid Wood Construction$159.99 |
JONATHAN Y Ettore Mid-Century Modern Floating Wall Mounted Nightstand $105.99 |
West Elm Sculptural Sconce$129.00 |


As an affiliate, we earn from qualifying purchases.
25. Split-Level Basement with Dedicated Home Office Zone
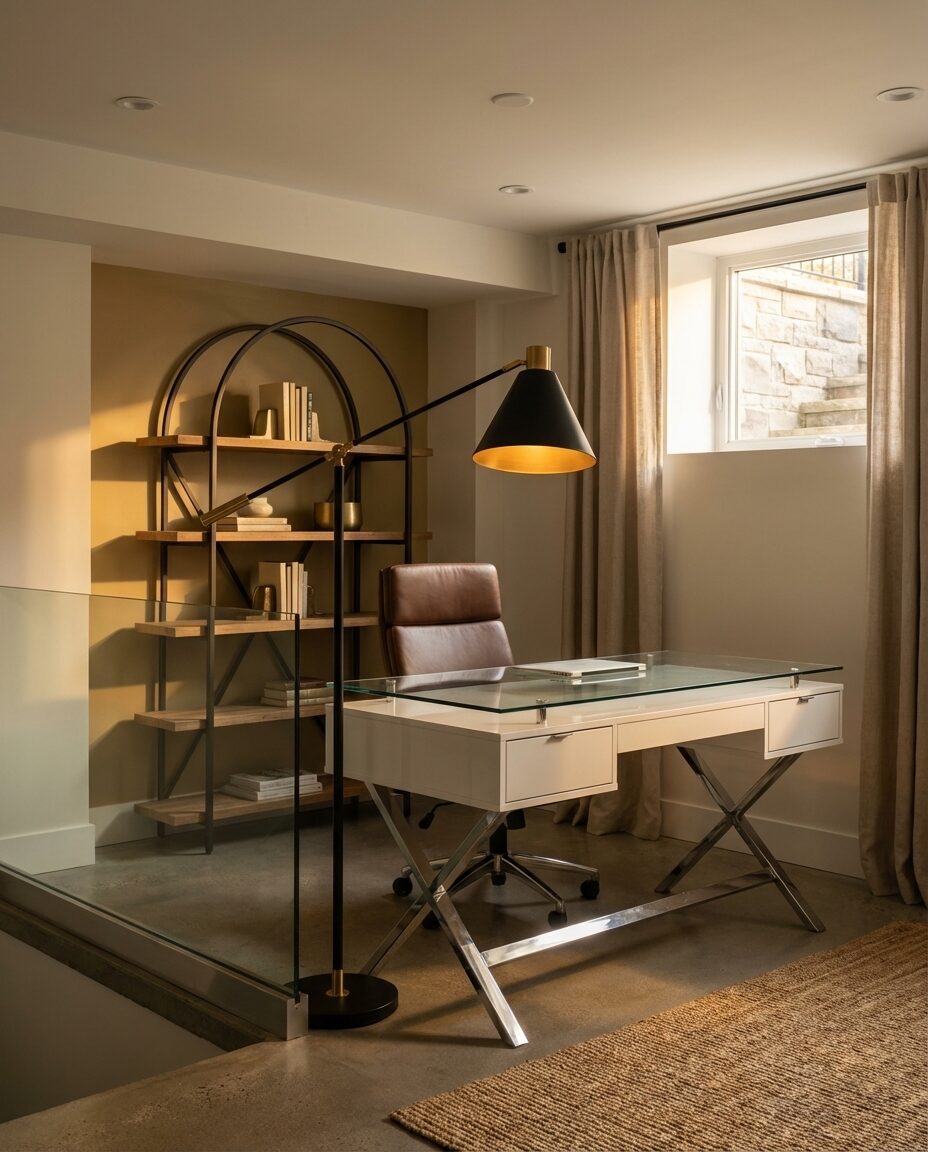
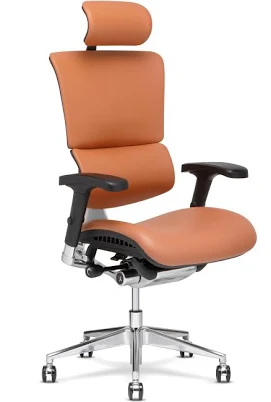
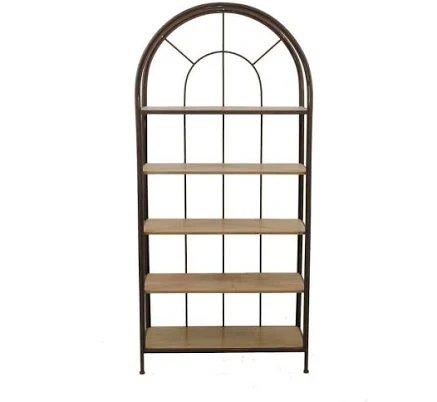
Capitalize on a split-level basement’s natural divisions by creating a dedicated home office zone on one of the levels. This modern approach uses clean lines, ample natural light (if available), and ergonomic furniture to design a highly productive workspace. Imagine a spacious desk, a comfortable desk_chair, and functional bookshelves that keep everything organized. It’s about transforming a potentially awkward space into a highly valuable and inspiring area for focus and productivity.
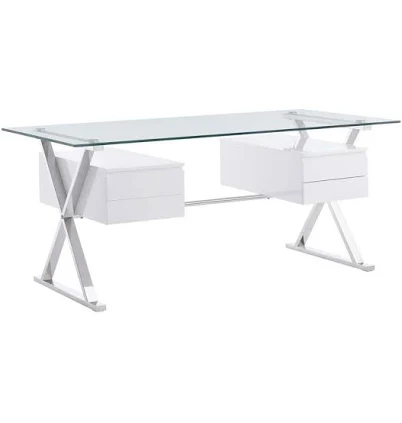
This dedicated home office zone works best in split-level basements where the different levels create a clear, natural separation for the workspace. This often means a minimum of 100-150 square feet for the office zone itself, allowing for a full-size desk (like the Modway Sector 71″ Glass Top Office Desk), an ergonomic desk_chair, and storage without feeling cramped. If your split-level only offers a small mezzanine, consider a minimalist floating desk and shelf system (as seen in Idea #7) to maximize every inch, rather than trying to fit too much into a tight space.
When planning a home office in a split-level basement, don’t put your desk facing a blank wall if you can help it. Position your desk so you can look out into the other part of the basement, or if there’s a window, orient it to face the window (though be mindful of glare on your screen). This helps prevent that “dungeon” feeling that can come with basement offices. If you must face a wall, hang some inspiring artwork or a whiteboard to add visual interest. Ensure your desk lamp provides ample task lighting (around 500 lumens) to reduce eye strain, especially if natural light is limited.
|
Mainstays 64 Inch Black Architect Floor Lamp$42.92 |
Modway Sector 71″ Glass Top Office Desk$727.10 |
X Chair X4 Brisa Brown Leather Executive Chair$1,249.00 |
Creative Co-Op Metal Framed Bookshelf with 5 Wood Shelves$462.00 |

As an affiliate, we earn from qualifying purchases.
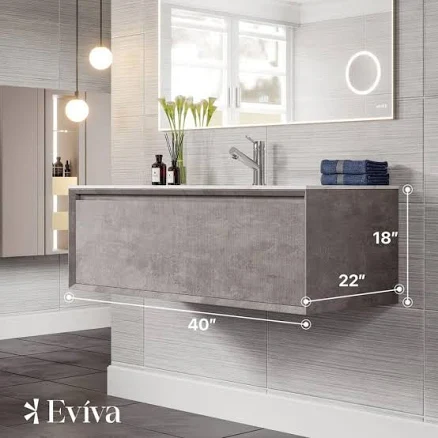
26. DIY Basement Bathroom with Industrial Touches
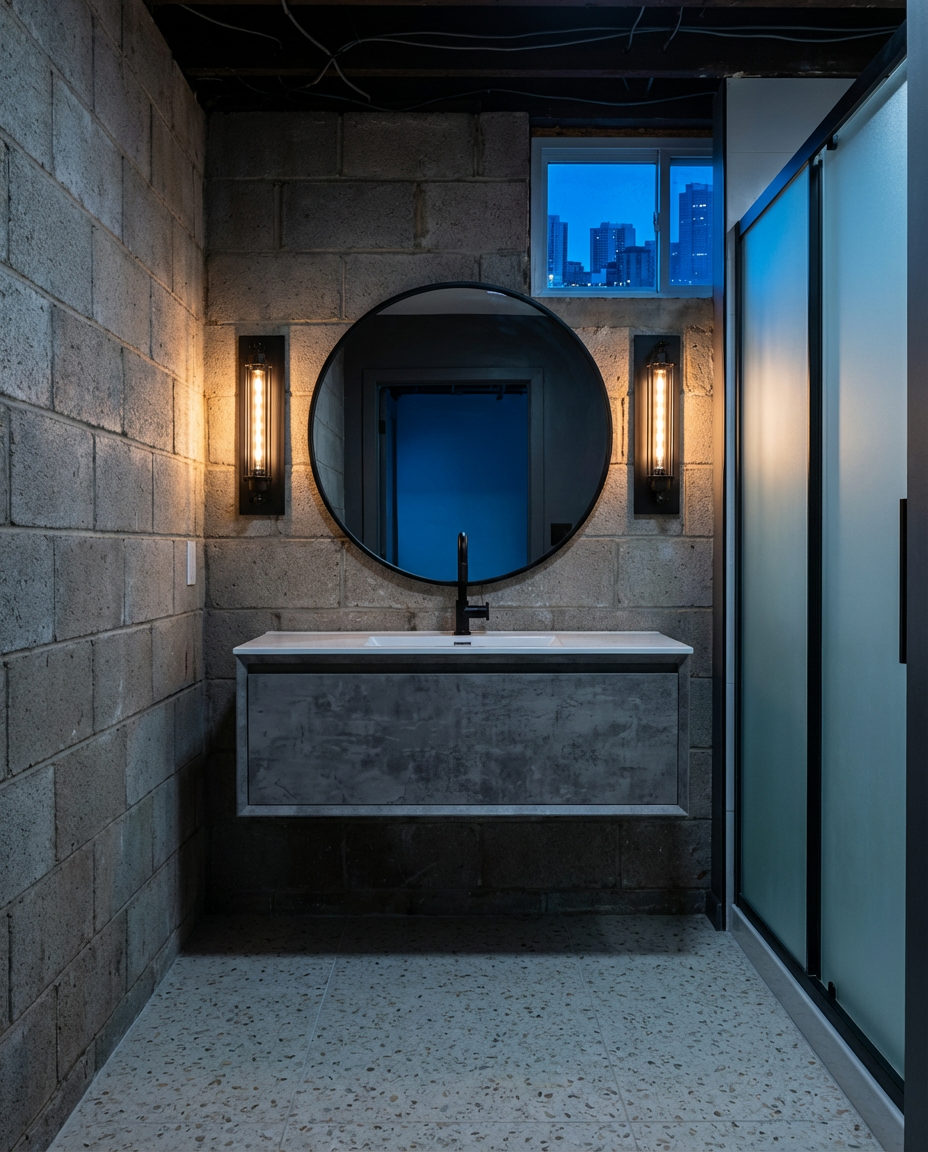
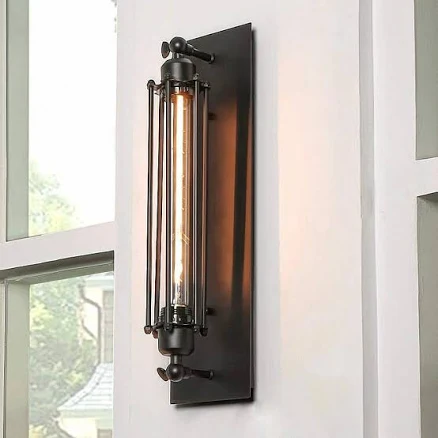
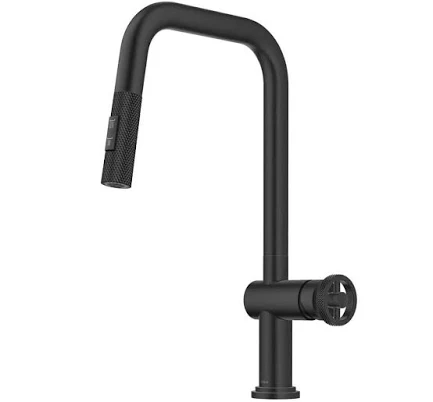
A DIY basement bathroom with industrial touches is a surprisingly achievable project that adds major value. This idea embraces raw materials like exposed piping (if safe and legal!), concrete-style vanity tops, and utilitarian wall_sconce. Think a simple mirror paired with a functional vanity and a sleek faucet. It’s about celebrating the rugged charm of industrial design while creating a highly practical and stylish bathroom space in your lower level.
Want to achieve that industrial-style concrete vanity top without pouring concrete yourself? Here’s a DIY brief:
- Purchase a pre-made laminate or wood vanity. Cost: $200-$500.
- Buy a concrete resurfacer kit (available at most home improvement stores). Cost: $30-$60.
- Prep the vanity surface by sanding lightly and cleaning thoroughly. (1 hour)
- Mix and apply the concrete resurfacer according to instructions, often in thin layers. (2-4 hours, including drying between coats)
- Seal the finished surface with a concrete sealer for durability and water resistance. (2 hours, including drying)
- Time estimate: 1-2 days (mostly drying time). Material cost: $280-$560.
- Vanity/Sink (Eviva Aurora): $400 – $1,000
- Mirror (Mainstays Traditional Round): $20 – $100
- Lighting (wall sconce): $30 – $100
- Faucet (Kraus Urbix Industrial): $100 – $300
- Shower/Toilet (if applicable, can add $300-$1,000+ for fixtures + installation)
- Flooring/Wall Tile (DIY): $100 – $500
- TOTAL (for basic bathroom with DIY elements): $650 – $3,000+
- Budget alternative: Use a reclaimed dresser as a vanity, a simple utility sink, and a shower curtain instead of a glass door for significant savings, around $300-$800.
|
Mainstays Traditional Round Wall Mirror$19.97 |
YANSUN 1-Light Black Industrial Wall Sconce$34.53 |
Eviva Aurora 40″ Single Sink Floating Bath Vanity$837.00 |
Kraus Urbix Industrial Pull-Down Single Handle Kitchen Faucet$274.95 |

As an affiliate, we earn from qualifying purchases.
27. Unfinished Basement into a Budget-Friendly Home Brewery
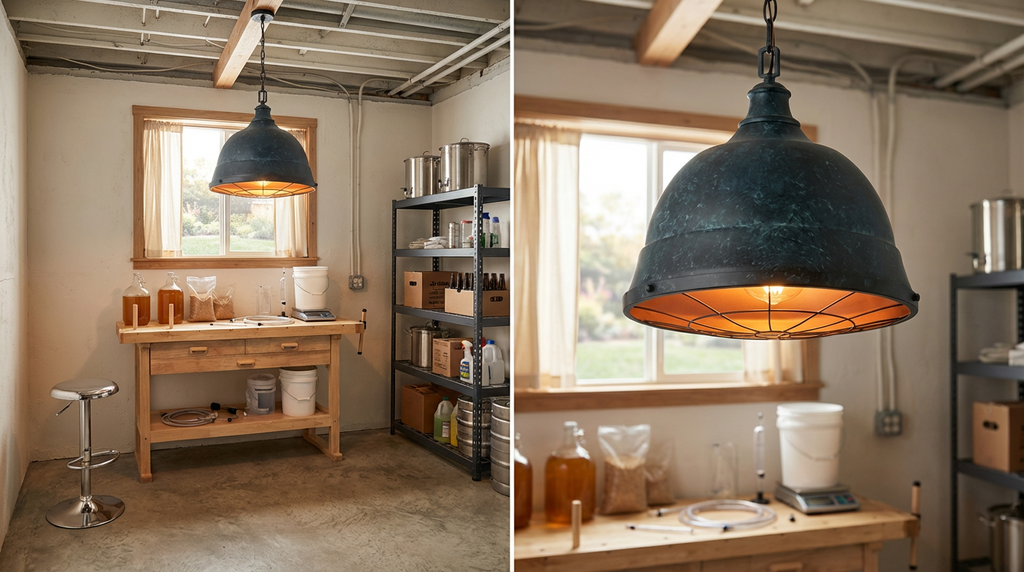
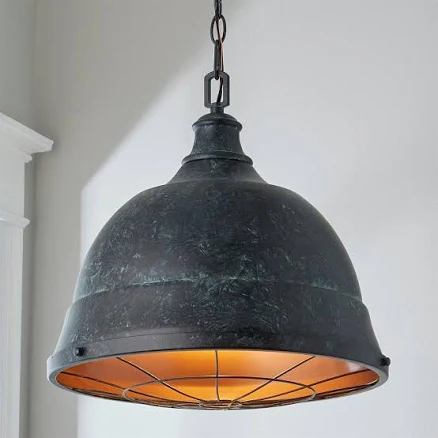
Transforming an unfinished basement into a budget-friendly home brewery is a passion project that adds a unique functional space to your home. This rustic idea leans into the raw, utilitarian aesthetic of brewing, utilizing heavy-duty storage_shelving, a sturdy workbench, and industrial-style pendant_light. It’s about creating a dedicated zone for your hobby that’s both practical and stylish, an homage to the craft beer revolution that’s happening right in your own home.
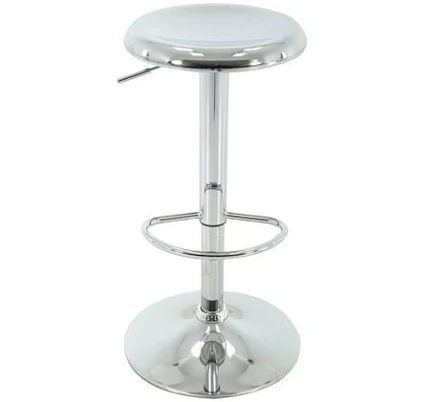
The rustic home brewery aesthetic follows this style math: 60% utilitarian function (stainless steel equipment, heavy-duty shelving, workbench) + 25% raw industrial elements (exposed pipes, concrete floor, metal stools) + 15% cozy, pub-like touches (warm lighting, a framed beer poster, a comfortable stool like the Brage Living Adjustable Bar Stool). The key is to make the “work” part look integrated and intentional, not like a messy garage. This balance lets you celebrate the process while having a welcoming space for tasting.
Here’s some real talk about turning an unfinished basement into a home brewery: you absolutely need to consider ventilation. Brewing produces steam, heat, and sometimes strong odors, which can lead to moisture issues and mold if not properly vented. Factor in an exhaust fan that vents directly outside, and a good dehumidifier is a must-have (revisit Idea #28 for details). Also, be honest about the mess factor—spills happen. Choose flooring that can handle liquid, and make sure electrical outlets are GFCI-protected for safety around liquids.
|
Weathered Industrial Caged Pendant$250.00 |
Brage Living Adjustable Bar Stool$66.98 |
Husky 5-Shelf Heavy-Duty Garage Storage Shelving Unit$169.00 |
Yukon 60 in. 3-Drawer Hardwood Workbench$159.99 |

As an affiliate, we earn from qualifying purchases.
28. Michigan Basement with Enhanced Humidity Control & Air Quality
✨ Luxury Version
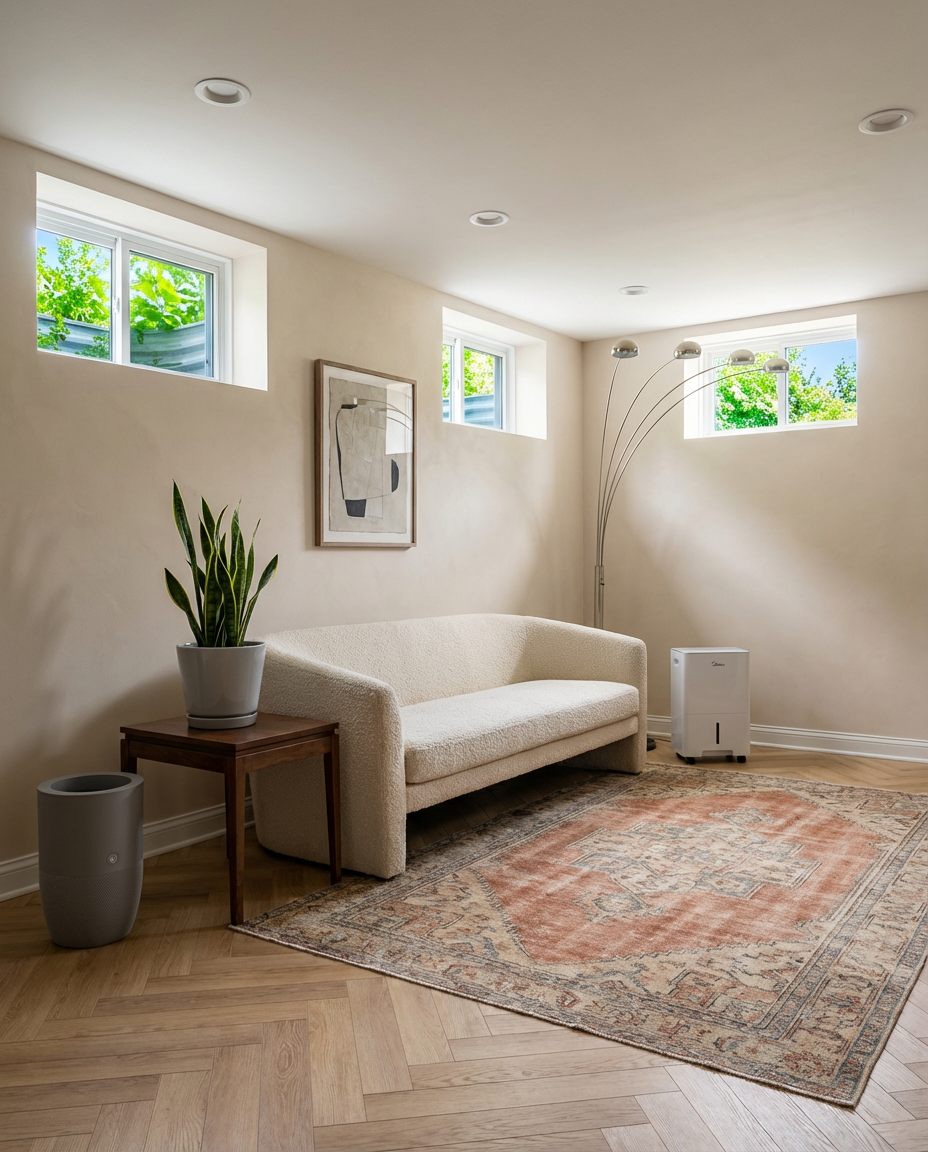
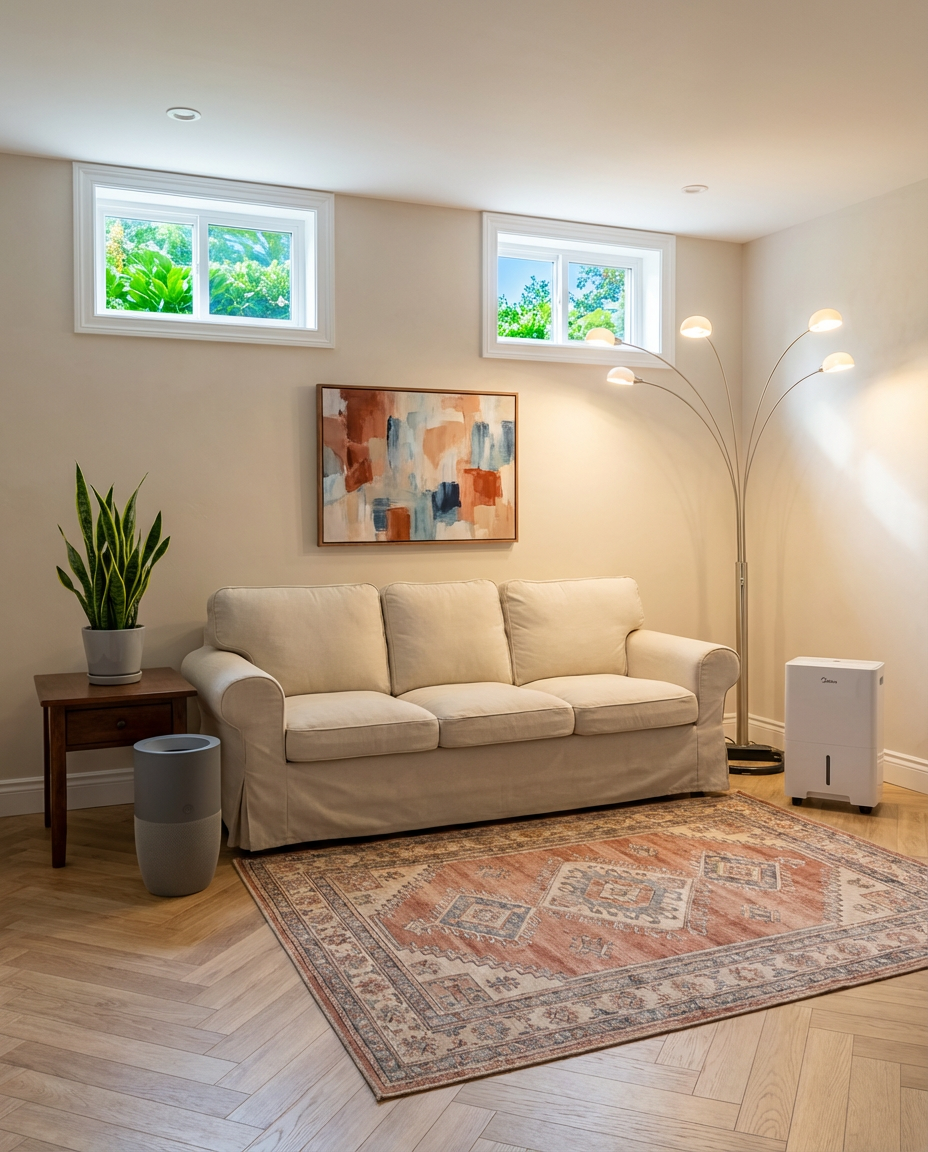
A Michigan basement, with its unique construction, often benefits greatly from enhanced humidity control and air quality. This transitional idea focuses on creating a healthier, more comfortable environment using smart technology and thoughtful design. Think a powerful dehumidifier, an efficient air_purifier, and subtle ambient lighting from a floor_lamp. It’s about ensuring your basement is a safe and pleasant space, addressing common issues head-on for a truly usable lower level.
💸 Budget Version
Maintaining optimal humidity and air quality in a basement isn’t just about comfort; it’s about protecting your home and health. Molds thrive in humidity above 60%, leading to structural damage and respiratory issues. Your dehumidifier will likely need to run continuously, consuming electricity (factor in an extra $30-$80/month depending on your climate and unit efficiency). Air filters in purifiers need regular replacement (every 3-6 months, $30-$100 each). This isn’t a set-it-and-forget-it; it’s an active maintenance commitment to ensure your basement remains healthy and inviting.
The one thing that absolutely makes a Michigan basement feel healthy and truly livable is a robust, properly sized dehumidifier. More than paint, flooring, or even an air_purifier, managing the ambient humidity is paramount to preventing mustiness, mold, and structural issues inherent in many older basements. A smart dehumidifier like the Midea 22 Pt. unit, which can connect to your phone and alert you to conditions, is a game-changer. Without proper humidity control, all other efforts to make the basement inviting will be undermined by dampness and potential allergens.
|
💰 Budget Pick
Vigoro Piedmont Small Gray Ceramic Planter$8.97 |
💰 Budget Pick
Ore International Ore 5 Arms Arch Floor Lamp$140.99 |
✨ Luxury Pick
Midea 22 Pt. Smart Dehumidifier$149.99 |
✨ Luxury Pick
Bloom Air Purifier$249.99 |


As an affiliate, we earn from qualifying purchases.
29. Modular Storage Solutions for Basement Playroom
A basement playroom calls for modular storage solutions that can adapt to ever-changing toy collections and play patterns. This contemporary idea utilizes versatile bookshelves like the Better Homes & Gardens 8 Cube, colorful storage_basket for easy cleanup, and a bright rug to define the play zone. It’s about creating a flexible, organized system that keeps clutter at bay while encouraging creative play, ensuring your playroom remains functional and fun for years.
Modular storage for a playroom doesn’t need to cost a fortune. IKEA Kallax units or similar cube storage systems from Walmart (like the Better Homes & Gardens 8 Cube) are incredibly affordable and versatile. Pair them with colorful bins and baskets from Target or dollar stores for an instant organization system. For around $100-$300, you can outfit a significant portion of your playroom with storage that looks great and keeps toys tidy. It’s all about stacking and combining budget-friendly units.
Want to turn simple cube storage into integrated playroom storage? Here’s your how-to:
- Acquire 2-3 modular cube storage units (e.g., 2×2 or 2×4 cubes). Cost: $50-$150.
- Arrange them along a wall to create a continuous storage bank. (30 minutes)
- Fill cubes with brightly colored storage_basket for toys, puzzles, and art supplies. (1 hour)
- Optional: Add a plywood top secured with screws to create a continuous bench or display surface. Cost: $20-$50. (1 hour)
- Time estimate: 2.5 – 4 hours. Material cost: $70-$250.
30. Low Ceiling Basement Bedroom with Recessed Lighting & Platform Bed
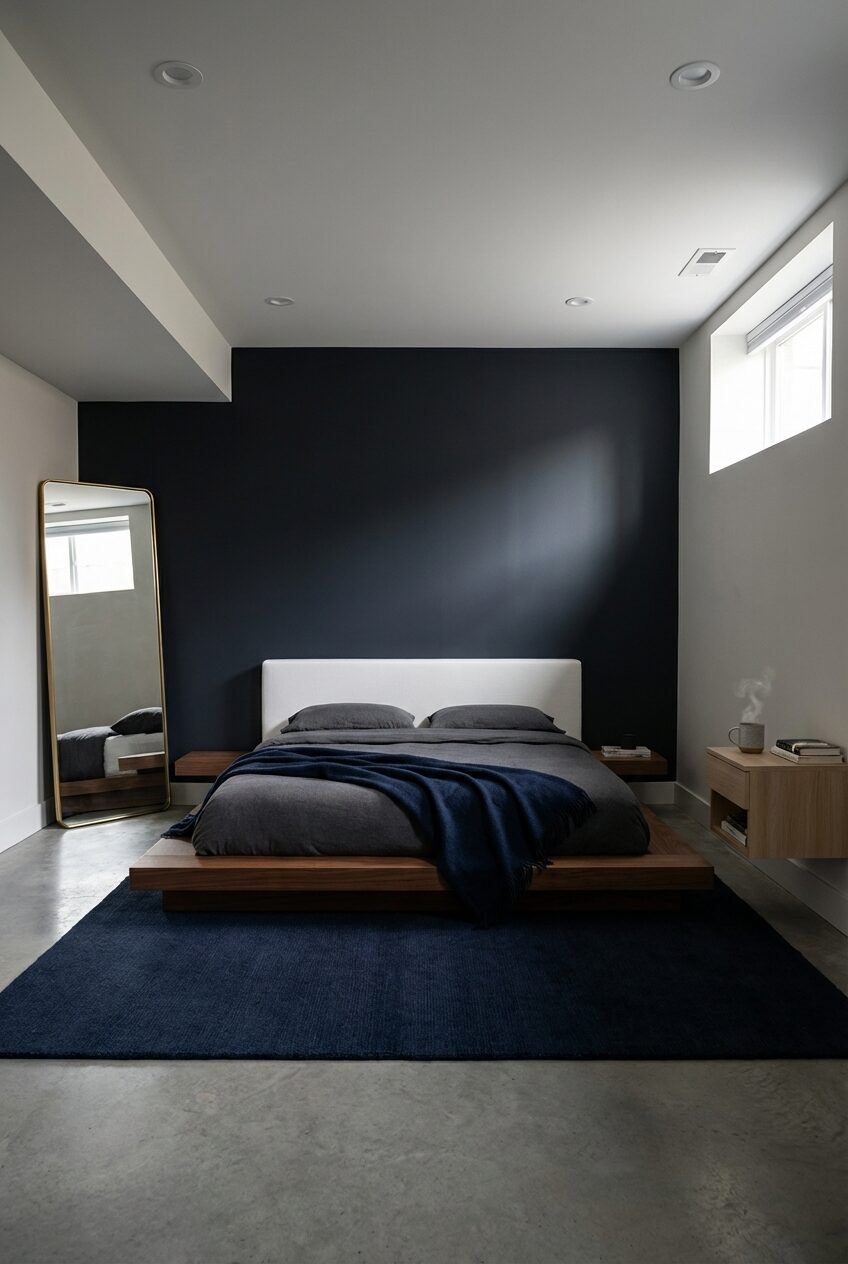
A low-ceiling basement bedroom designed with minimalist principles can be incredibly serene and stylish. This idea thoughtfully incorporates recessed lighting, a low-profile platform bed, and clean-lined nightstands to maximize the feeling of space. A luxurious rug adds warmth and texture without visually cluttering the room. It’s about creating a tranquil retreat where less is truly more, allowing the simplified aesthetic to bring a sense of calm and openness, even with limited vertical space.
In a low-ceiling basement bedroom, lighting is your most powerful tool. Forget pendants or chandeliers; they’ll only make the ceiling feel lower. Instead, rely heavily on recessed lighting, wall sconces that cast light upwards or downwards, and low-profile table lamps on your nightstands. The goal is to create pools of light rather than glaring overhead illumination. And yes, a platform bed is a must, but ensure it’s truly low-profile and complements the simple lines of the room, rather than adding bulk. For instance, the Arata Japanese Platform Bed is an excellent choice for this aesthetic. Also, consider painting the ceiling a lighter color than the walls to trick the eye into seeing more height, a common mistake we address in the common mistakes section at the end of this article.
This minimalist low-ceiling bedroom works so well because it embraces the limitations rather than fighting them. The platform bed and floating nightstand reduce visual clutter and keep furniture height low, which makes the ceiling appear higher by comparison. Recessed lighting provides ample illumination without infringing on vertical space. And the simple, uncluttered aesthetic prevents the room from feeling busy or overwhelming, which would only amplify the feeling of confinement. It’s a cohesive strategy that creates an oasis of calm.
|
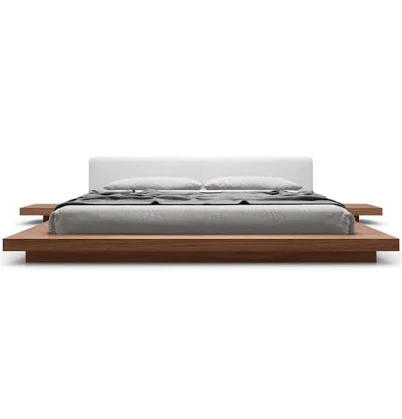
Arata Japanese Platform Bed$2,315.00 |
Nathan James Jackson Modern Floating Bedroom Nightstand$69.99 |
Quince Brenner Wool Rug$279.90 |
West Elm Modern Streamline Floor Mirror$599.00 |

As an affiliate, we earn from qualifying purchases.
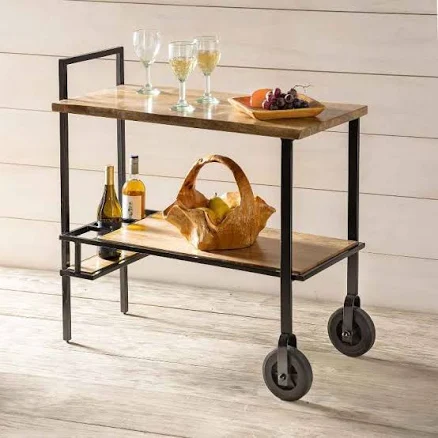
31. DIY Basement Bar with Pallet Wood Accents
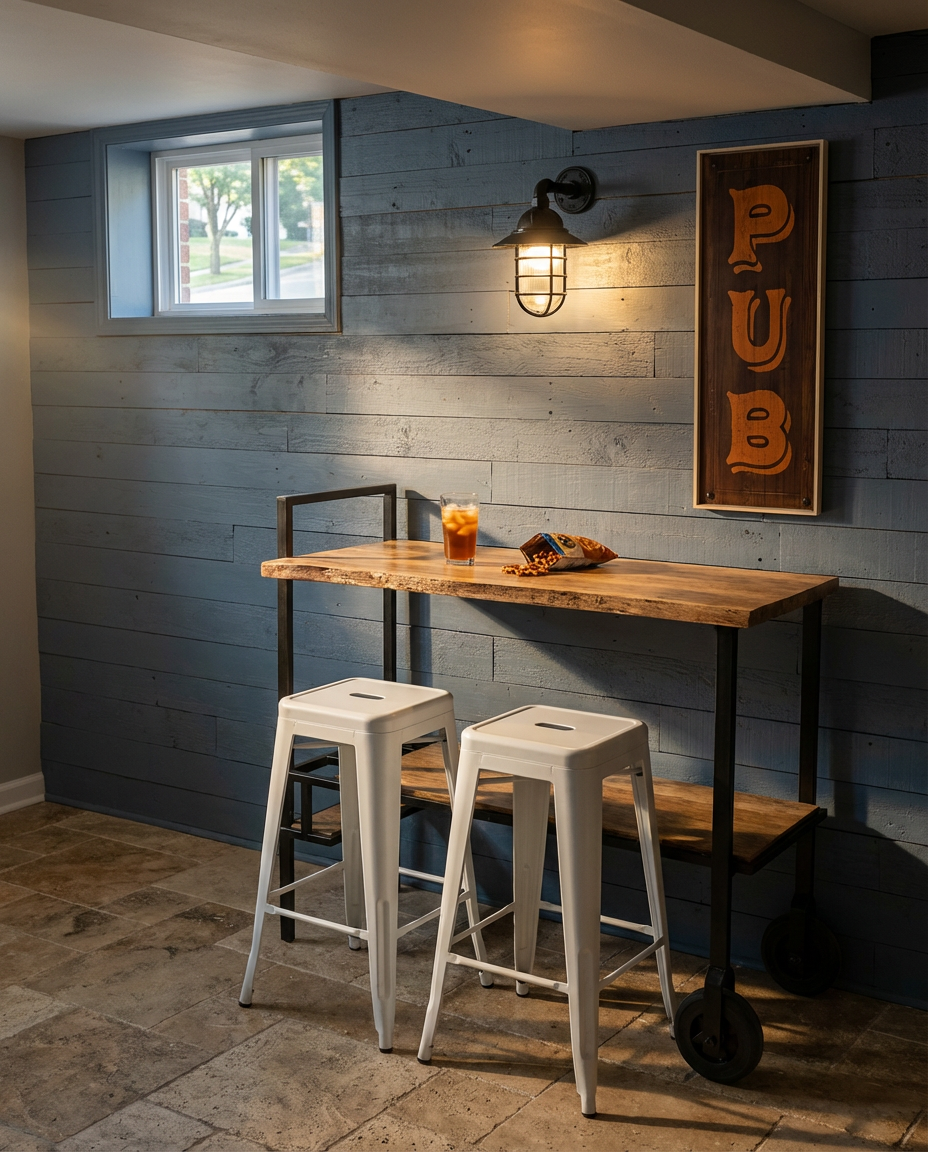
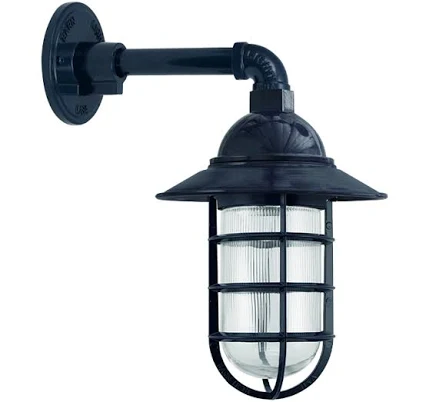
Embrace the rustic charm of pallet wood with a DIY basement bar. This idea highlights the texture and warmth of reclaimed materials, creating a unique and inviting space for entertaining. Think a substantial bar_cart for serving, sturdy stools for gathering, and industrial-style wall_sconce to set the mood. It’s about crafting a personalized bar that tells a story, making your basement the go-to spot for casual drinks and good company.
Building a pallet wood bar is incredibly budget-friendly! You can often find free pallets on Facebook Marketplace, Craigslist, or by asking local businesses. For under $200 (excluding the bar cart and stools), you can construct a substantial bar. The cost will primarily be for screws, wood glue, sandpaper, and a sealant. Pair it with affordable stool sets and a simple artwork to complete the look without breaking the bank. It’s a high-impact DIY that looks more expensive than it is.
The one thing that makes a DIY pallet wood bar truly successful and not just a pile of wood is proper finishing and sealing. Pallet wood, while charming, can be rough, splintery, and sometimes carry unknown residues. Sanding it smooth, applying a food-safe sealant (like polycrylic or beeswax finish) to the bar top, and a clear coat to the vertical surfaces is crucial for both aesthetics and hygiene. Without this finishing touch, it will look unkempt and be impractical for use. It’s the sealant that transforms raw wood into a functional, wipeable surface, ready for drinks and snacks.
|
Reclaimed Live-Edge Wood Bar Cart$399.00 |
Set of 2 Backless Metal Bar Stools$79.99 |
Industrial Guard Wall Sconce$315.00 |
Great Big Canvas Wooden Pub Sign Wall Art Print$74.99 |

As an affiliate, we earn from qualifying purchases.
32. Unfinished Basement Transformed into a Functional Laundry Room
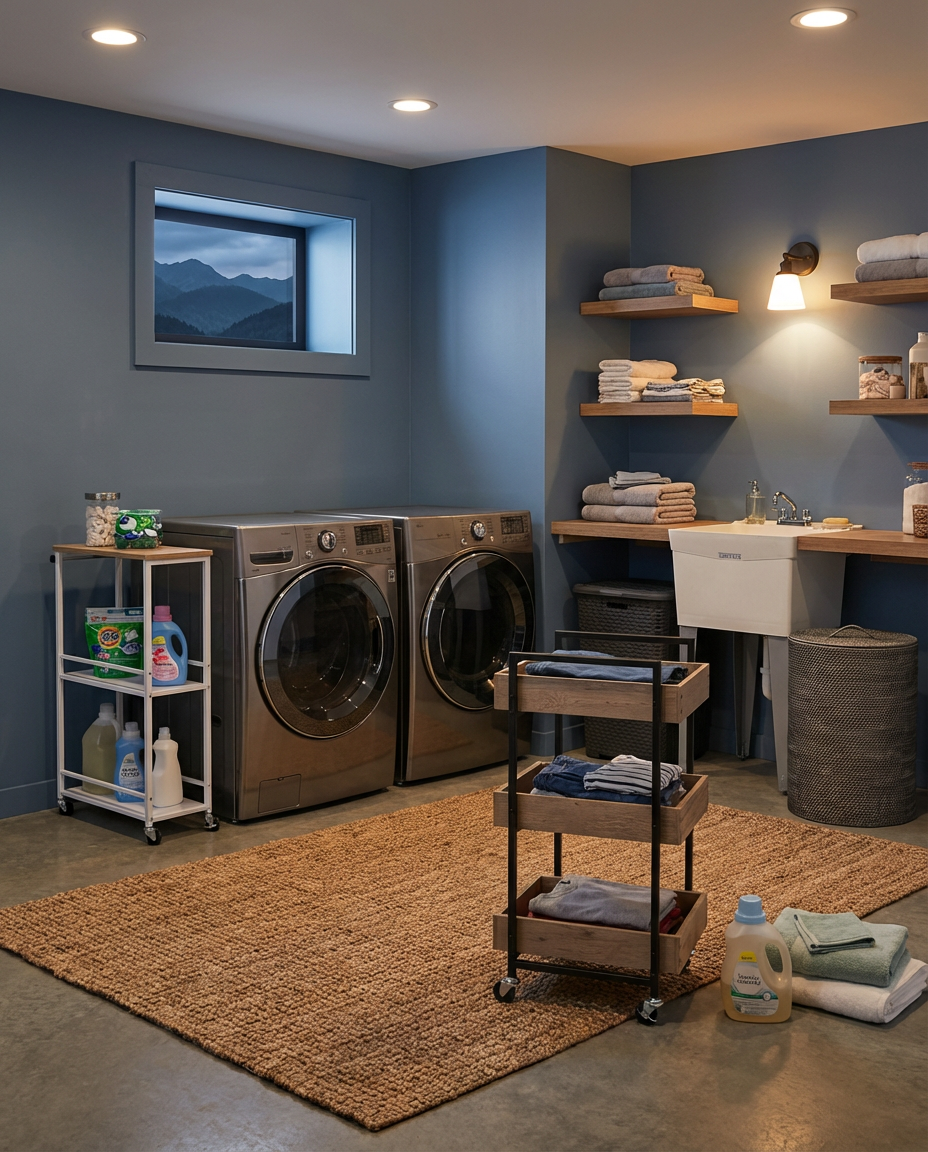
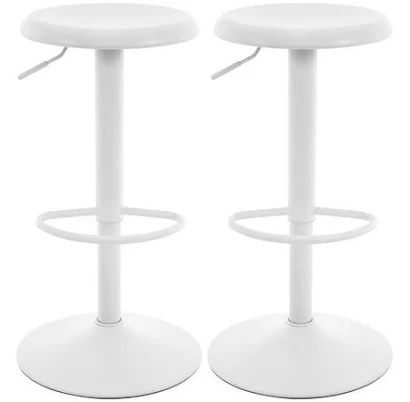
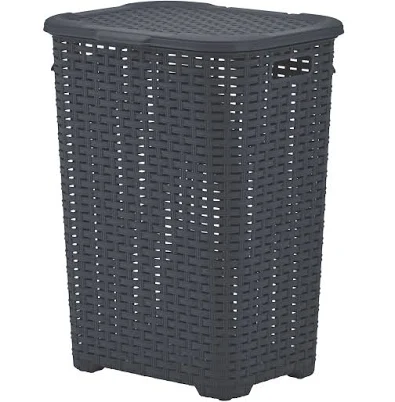
Transform that unfinished basement into a functional, serene laundry room. This minimalist idea focuses on efficiency and smart storage, making laundry less of a chore. Think dedicated storage_basket for sorting, a slim laundry_cart for easy transport, and plenty of counter space for folding. It’s about creating an organized, pleasant environment that makes practical tasks feel less daunting, proving even utility spaces can be beautifully designed.
- Before you tackle transforming your unfinished basement into a laundry room, consider these essentials:
- Map out plumbing hookups for washer and dryer, and ensure you have proper drainage.
- Verify electrical capacity for your appliances (typically 240V for electric dryers).
- Plan for ventilation, especially for the dryer, which needs to vent directly outside.
- Address any moisture issues or potential leaks before installing drywall or flooring.
- Determine your storage needs: hamper space, folding area, supply storage?
This design works because it prioritizes function and flow in every element. The use of separate storage_basket for sorting laundry prevents piles from accumulating on the floor, streamlining the process. A rolling laundry_cart ensures efficiency, allowing you to move laundry easily. The minimalist aesthetic, with clean lines and understated colors, contributes to a calm environment, making the often-dreaded task of laundry feel more manageable and less chaotic. It’s about intelligent design easing the burden of daily chores.
|
💰 Budget Pick · Storage Basket
Superio Wicker Laundry Hamper$29.99 |
✨ Luxury Pick · Storage Basket
Crate & Barrel Sedona Grey Hamper$169.00 |
💰 Budget Pick · Laundry Cart
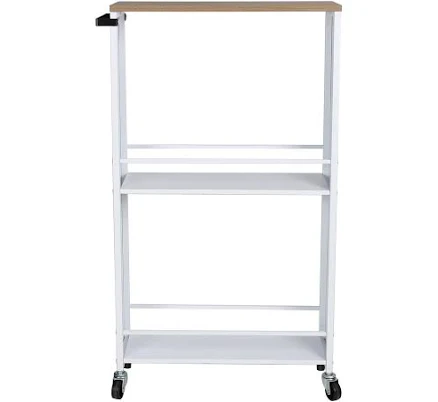
Better Homes & Gardens Slim Utility Storage Cart$37.18 |
✨ Luxury Pick · Laundry Cart
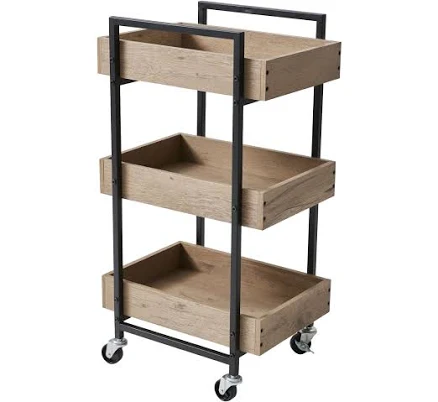
Better Homes & Gardens 3-Tier Rolling Laundry Cart$42.44 |

As an affiliate, we earn from qualifying purchases.
🚫 Common Mistakes to Avoid
Now that you’ve seen what works — here’s what to watch out for. These mistakes are surprisingly common and can undermine even the best design intentions.
❌ Mistake #1: Ignoring Moisture Control
This is the number one blunder in basement remodels. Thinking you can just paint over a damp spot or throw down carpet over a slightly moist concrete slab is a recipe for disaster. You’ll end up with peeling paint, buckled flooring, and a potential mold problem that’s far more costly (and unhealthy) to fix than proactive moisture control.
The Fix: Address any leaks, cracks, and condensation issues first. Invest in a good vapor barrier for floors and walls, and run a high-quality dehumidifier regularly. Consider a French drain if exterior water is the culprit.
❌ Mistake #2: Poor Lighting Choices for Low Ceilings
We get it, you want a statement light. But in a basement with low ceilings, a large pendant or chandelier just visually chops the room in half, making it feel even more cramped and cave-like. It draws attention to the very thing you’re trying to downplay.
The Fix: Prioritize recessed lighting, flush-mount fixtures, and wall sconces that cast light upwards or downwards. Use floor lamps and table lamps to add layers of ambient light without encroaching on vertical space.
❌ Mistake #3: Neglecting Egress Windows and Code Compliance
It’s tempting to finish a basement bedroom without thinking about egress windows. However, failing to install proper egress in a basement living or sleeping space isn’t just a safety hazard; it’s a major code violation that can prevent you from getting permits and selling your home down the line. It also blocks natural light, making the space feel gloomy.
The Fix: Plan for at least one properly sized egress window or door in any basement bedroom or living space. This involves digging an appropriate window well if necessary and ensuring it meets local building codes for size and ease of opening.
Final Thoughts
See? Your basement never had to be just a storage unit or a dusty dungeon. With these 32 imaginative ideas and a proactive approach to common pitfalls, you’re well on your way to transforming your lower level into a vibrant, functional, and downright gorgeous extension of your home. It’s time to unleash its full potential!
Now go forth, get inspired by countless Pinterest boards, and start sketching out your dream basement. Which idea will you tackle first?