Still scrolling through Basement Remodel Ideas 2026 photos without knowing where to start? We totally get it. Sometimes it feels like you’re seeing the same few looks repackaged, and it’s hard to tell what will actually work in your space.
After filtering through hundreds of options across Walmart, Target, and Lowe’s, we narrowed it down to 31 ideas that actually deliver. We’ve curated everything from budget-friendly finds starting at $3 to more lavish splurges up to $24715, because a great design doesn’t have to break the bank. You’ll find 31 curated ideas, covering main styles like contemporary, minimalist, rustic, and modern, all with direct product links so you can shop your favorites right away. Plus, we’re even comparing budget-friendly and luxury versions side-by-side to show you what’s possible.
Basements are truly having a moment in 2026, as homeowners look to maximize every square inch, turning overlooked spaces into functional and fabulous extensions of their homes. This shift towards intentional, multi-functional living means basement remodels are no longer just for storage.
Go ahead and save this — you’re going to want to reference it.
Note: This article contains affiliate links. We may earn a small commission if you make a purchase through these links, at no extra cost to you.
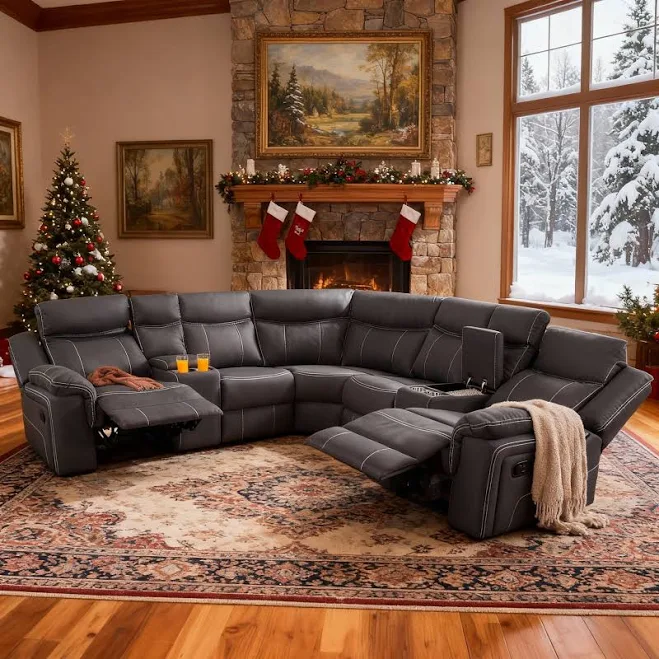
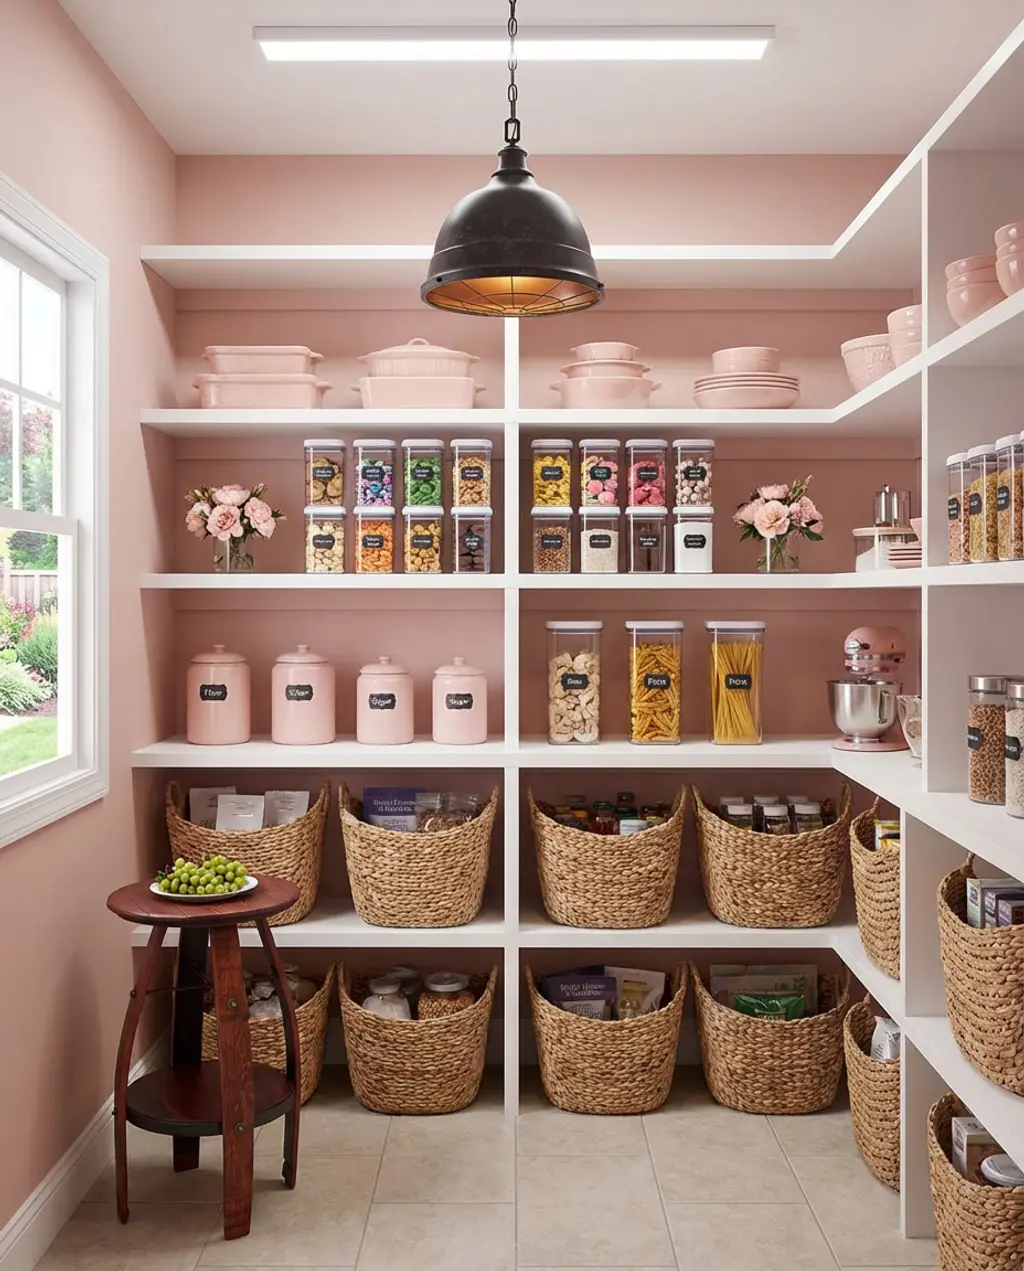
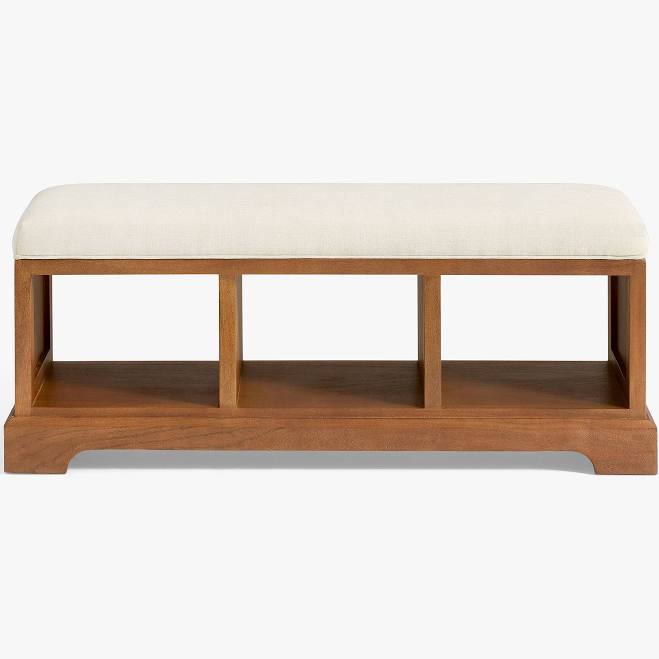
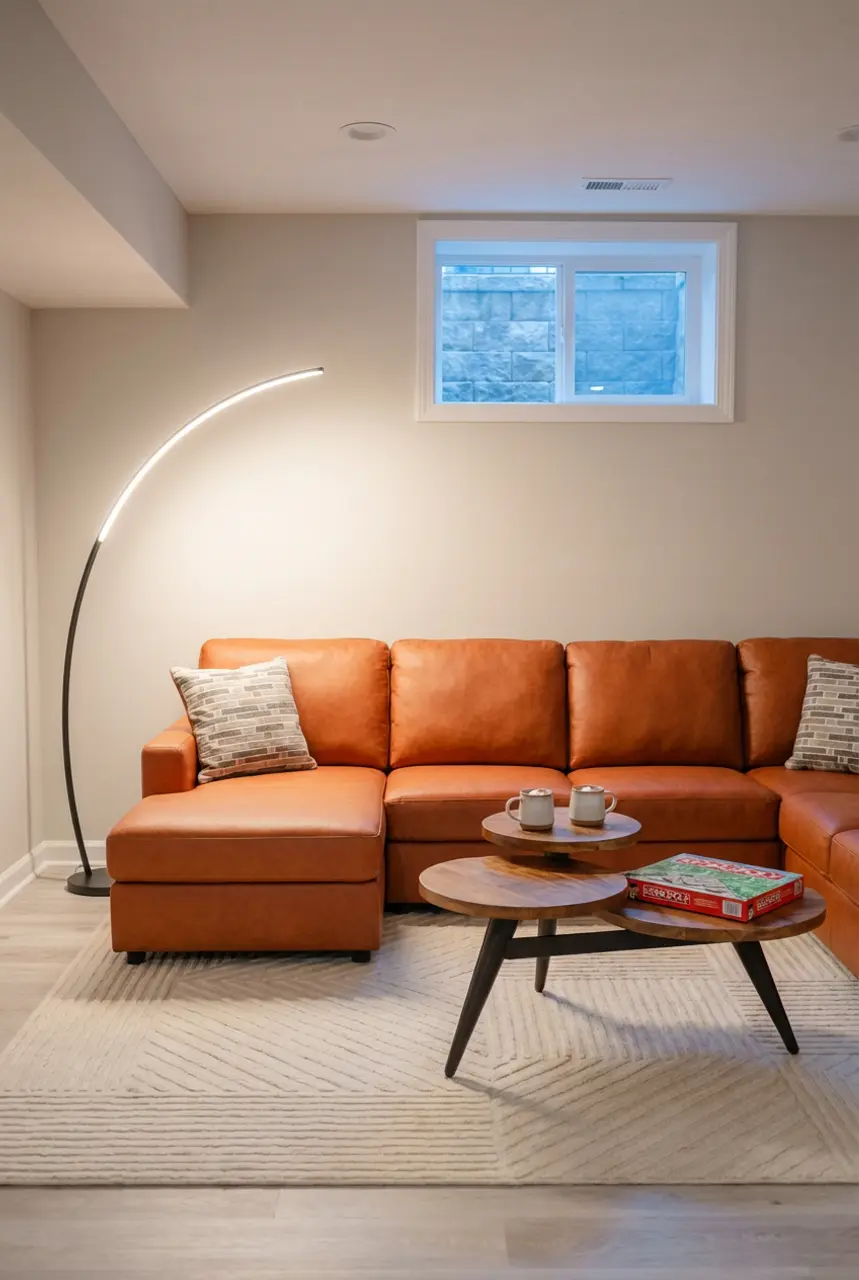
1. Budget-Friendly Basement Game Room with DIY Storage
✨ Luxury Version
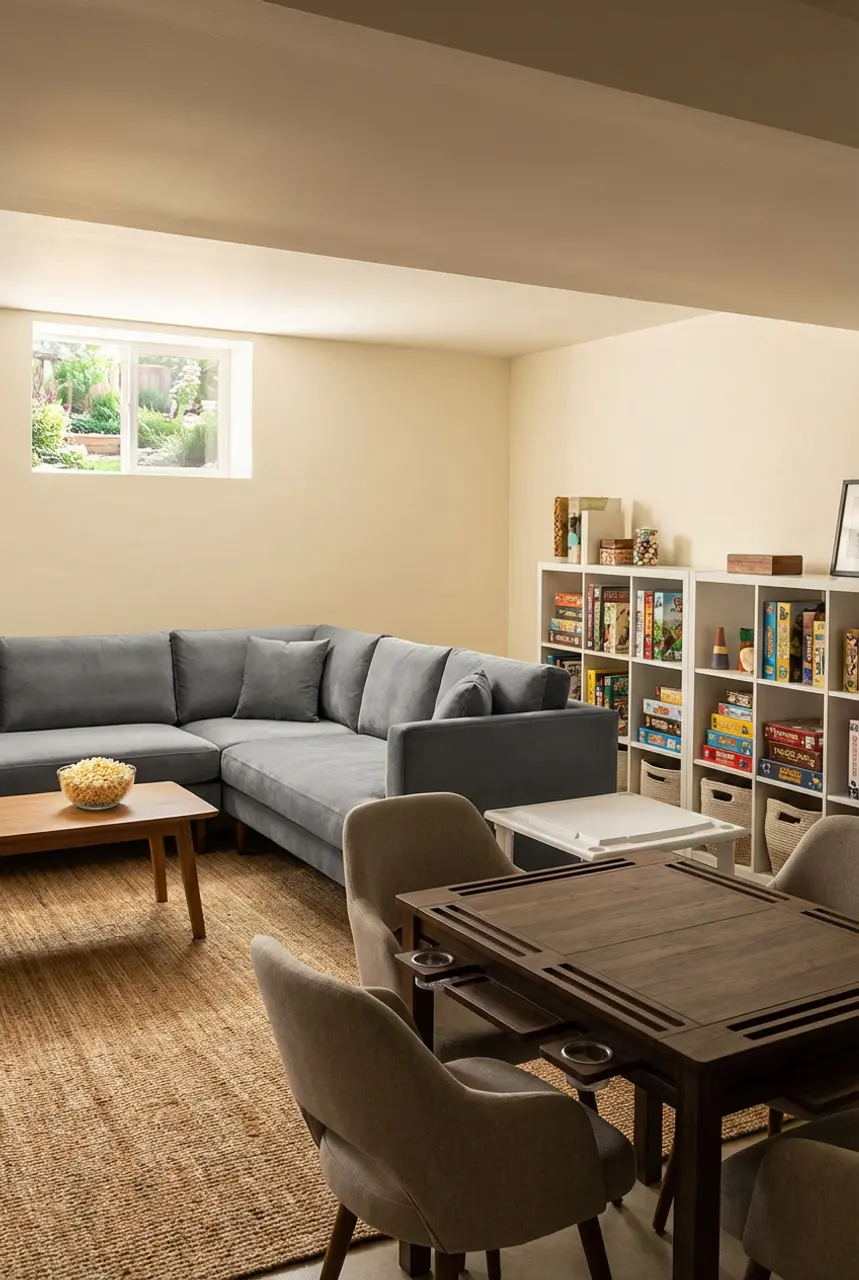
Turning your basement into a fun game room doesn’t have to empty your wallet. The key here is focusing on multi-functional furniture and smart DIY storage to keep things organized and playful. Think casual seating like a comfy sectional that can take a bit of wear and tear, and a game table that serves as both a focal point and an activity hub. Adding some bright, energetic colors through accessories really brings this laid-back vibe to life without extensive renovations. Modular shelving is your best friend for stashing board games, extra blankets, and anything else you need to keep tucked away but easily accessible when game night rolls around.
- Main furniture (sectional, game table): $1,000 – $3,000
- Lighting (floor lamps, overhead): $200 – $500
- Textiles (rug, throw pillows): $150 – $400
- Decor/accessories (wall art, storage bins): $100 – $300
- Paint/wall treatment: $50 – $150
- TOTAL: $1,500 – $4,350
💸 Budget Version
Budget alternative: Score a gently used sectional on Facebook Marketplace, grab a folding game table, and use colorful storage crates instead of built-ins for around $600 – $1,500.
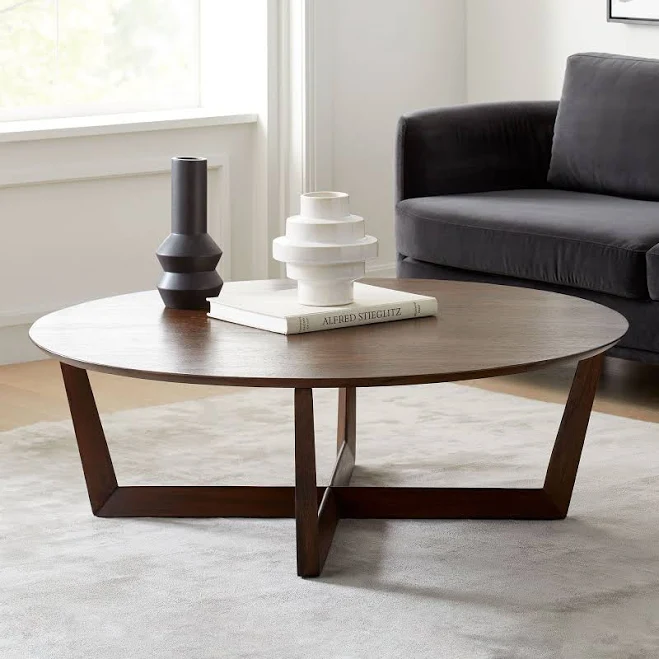
When selecting your game table, aim for one with a diameter between 36 and 48 inches if you want it to comfortably seat four adults without overwhelming a typical basement space. If you’re mixing game types, ensure there’s at least 3 feet of clear space around the table for players to move and pull out chairs.
|
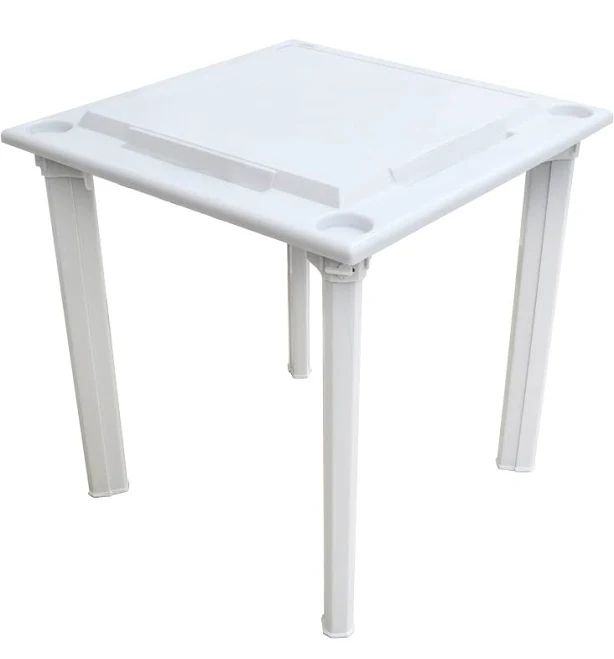
💰 Budget Pick · Game Table Bene Casa 4-Player Game Table with Built-In Racks and Drink Holders$92.4 |
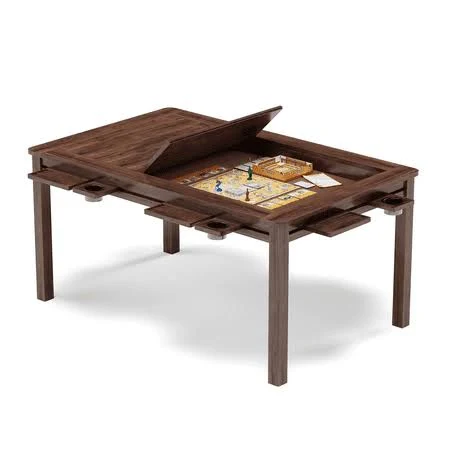
✨ Luxury Pick · Game Table Lausaint Home Board Game & Card Table$409.99 |
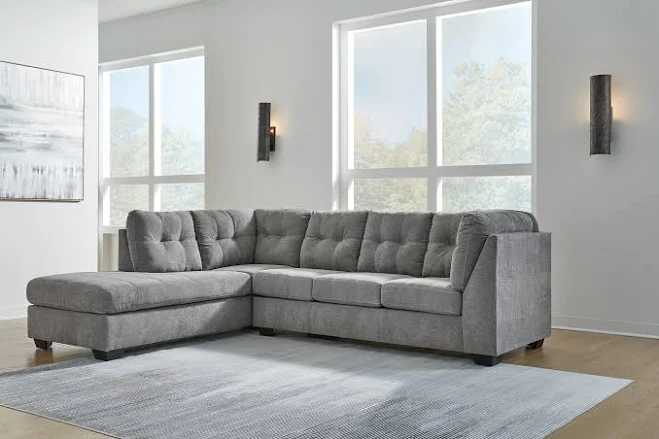
💰 Budget Pick · Sofa Ashley Marleton 2-Piece Sectional with Chaise$999.98 |
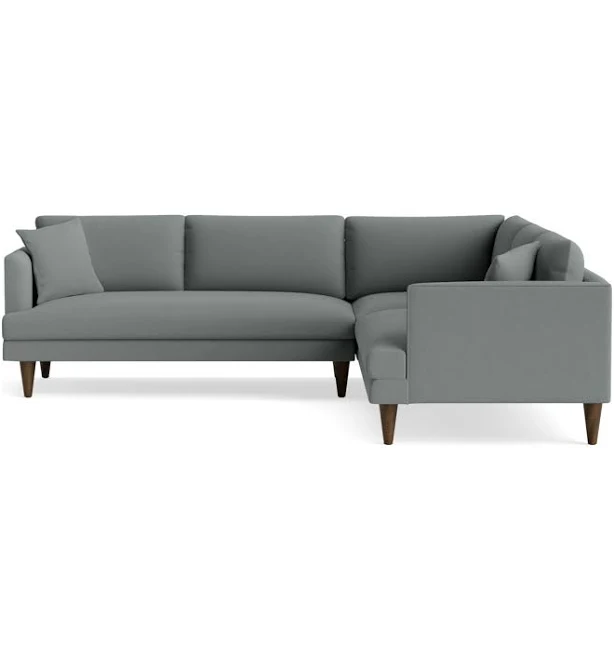
✨ Luxury Pick · Sofa Lewis Corner Sectional$4947 |
As an affiliate, we earn from qualifying purchases.
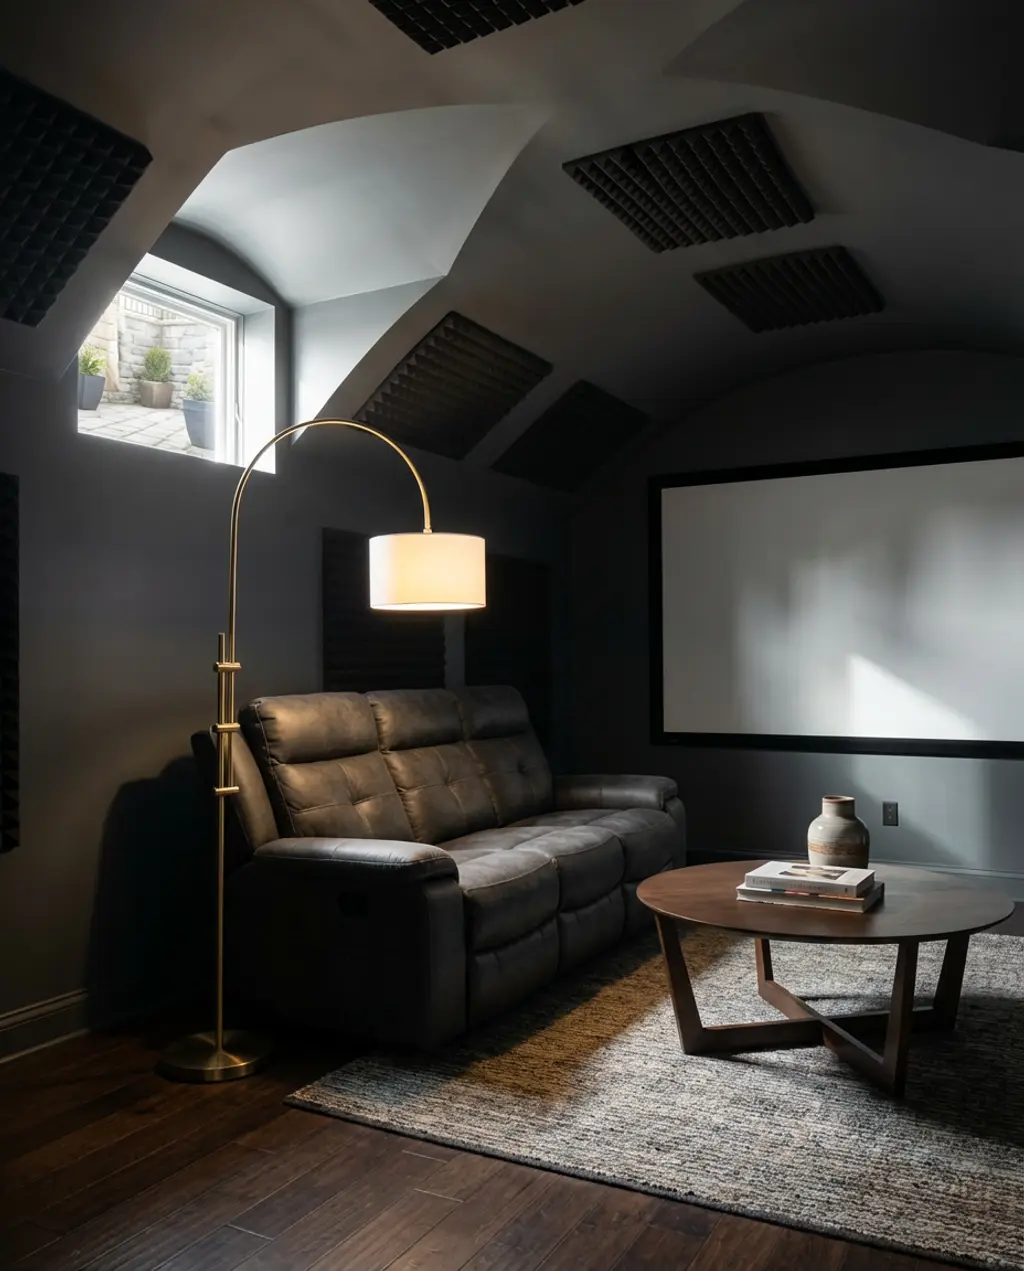
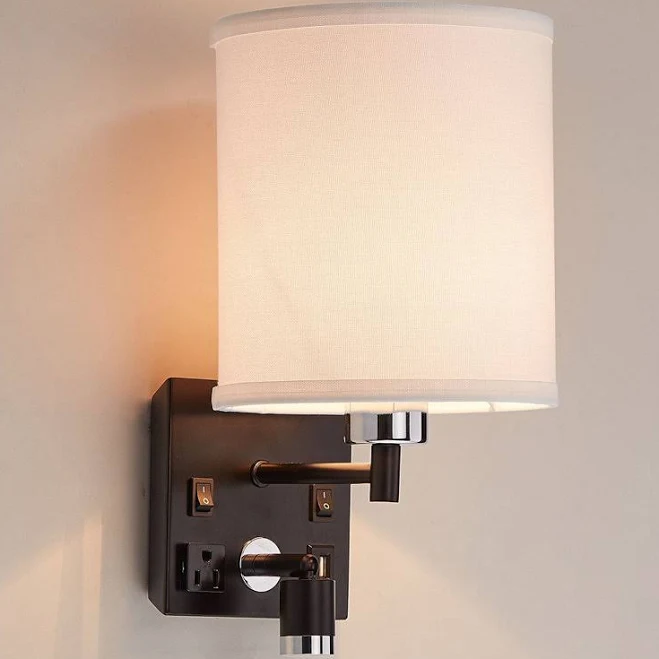
2. Low Ceiling Basement Media Room with Recessed Lighting
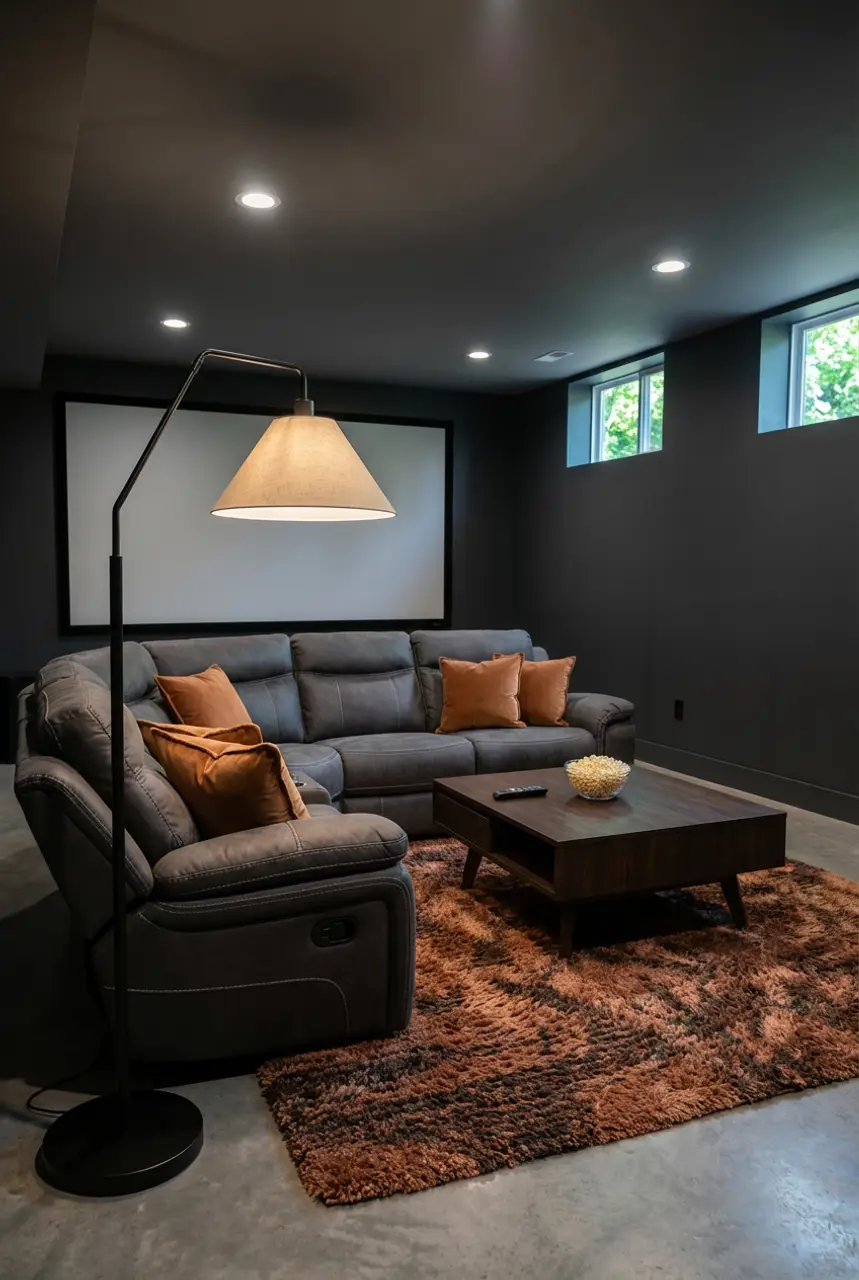
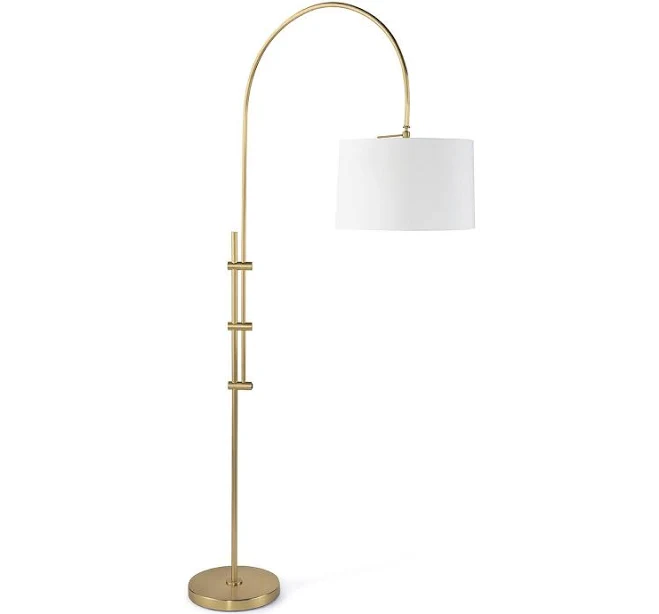
Dealing with a low ceiling in a basement can feel like a design challenge, but it’s actually an opportunity to create something super cozy and immersive, like a media room. The trick is to lean into the ‘cave-like’ feel rather than fighting it. Dark, rich wall colors like charcoal, deep navy, or even black absorb light rather than reflecting it, making the ceiling visually recede. Recessed lighting is non-negotiable here; it provides ample light without intruding on headspace. A large projector screen and plush seating complete the cinema experience.
To master this look, think of it as 70% dark, enveloping colors (walls, ceiling, large furniture), 20% soft, textured elements (shag rug, velvet pillows), and 10% intentional, low-profile lighting (recessed lights, a subtle arc floor lamp). The textured elements break up the darkness, inviting you to sink in and relax, while the lighting prevents the room from feeling like a literal cave.
Be honest with yourself about external light sources. If you have any windows, even small ones, managing the light can be tricky. You’ll need blackout blinds or curtains to prevent glare and maintain the dark, cinematic atmosphere during the day. Also, consider the echo factor in dark, contained spaces; acoustic panels or sound-dampening decor (like heavy drapes or thick rugs) might be worth the investment, particularly if you’re serious about sound quality.
|
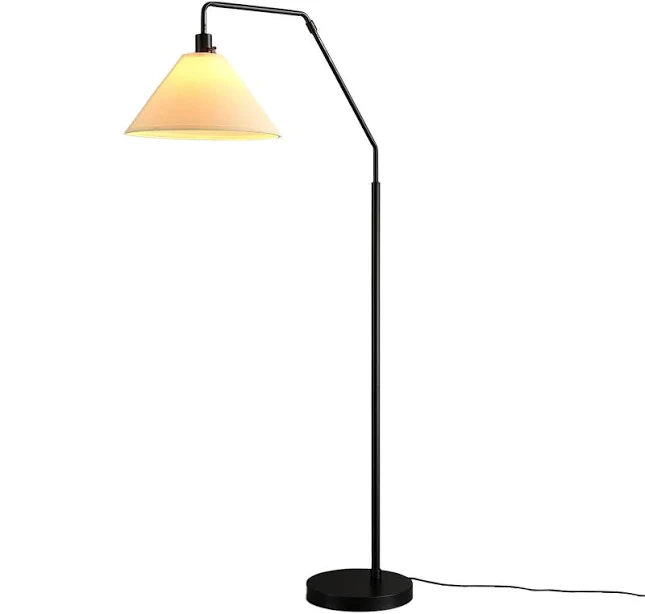
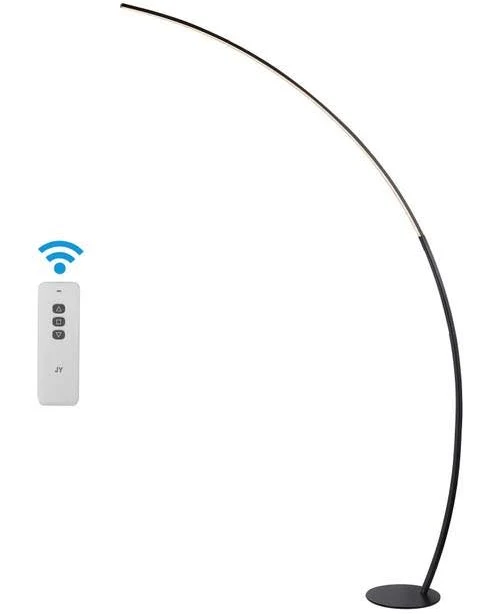
Globe Electric 65-in Matte Black Arc Floor Lamp with Fabric Shade$89.99 |
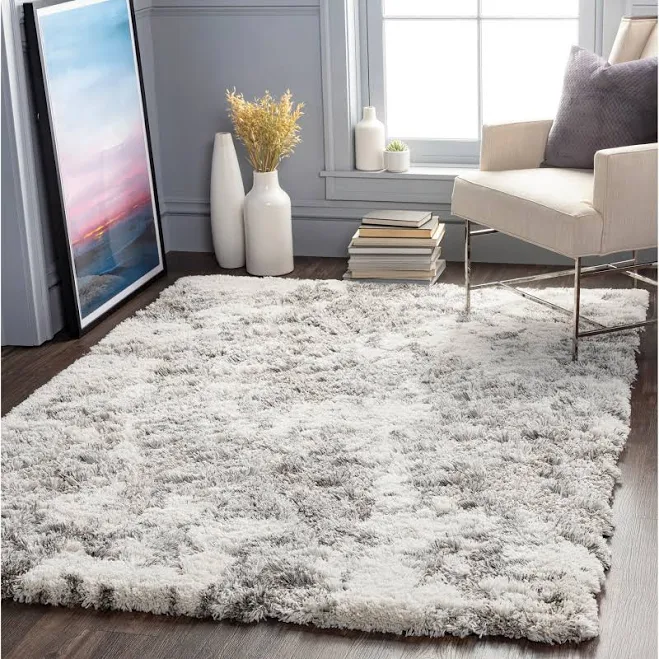
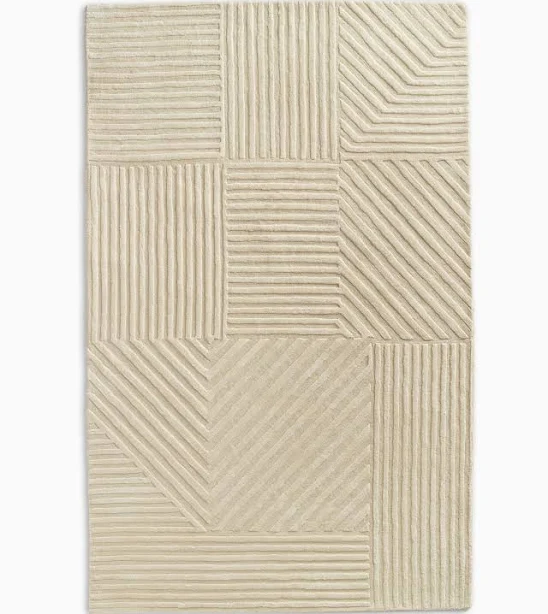
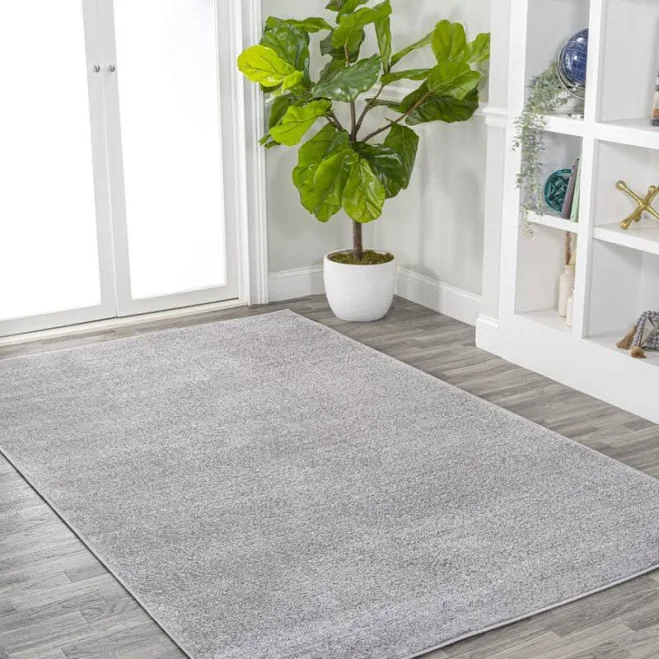
Livabliss Kyler Modern Abstract Shag Area Rug$42.65 |
Relaxed Washed Organic Cotton Velvet 20″x20″ Throw Pillow Insert$49.95 |
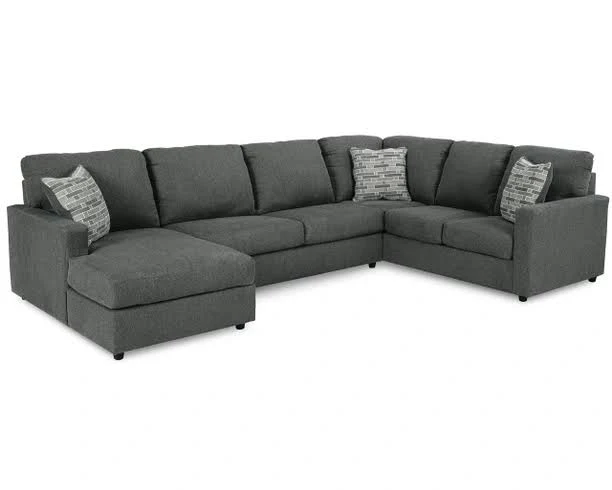
Gewnee Gray Sectional Sofa$1498 |

As an affiliate, we earn from qualifying purchases.
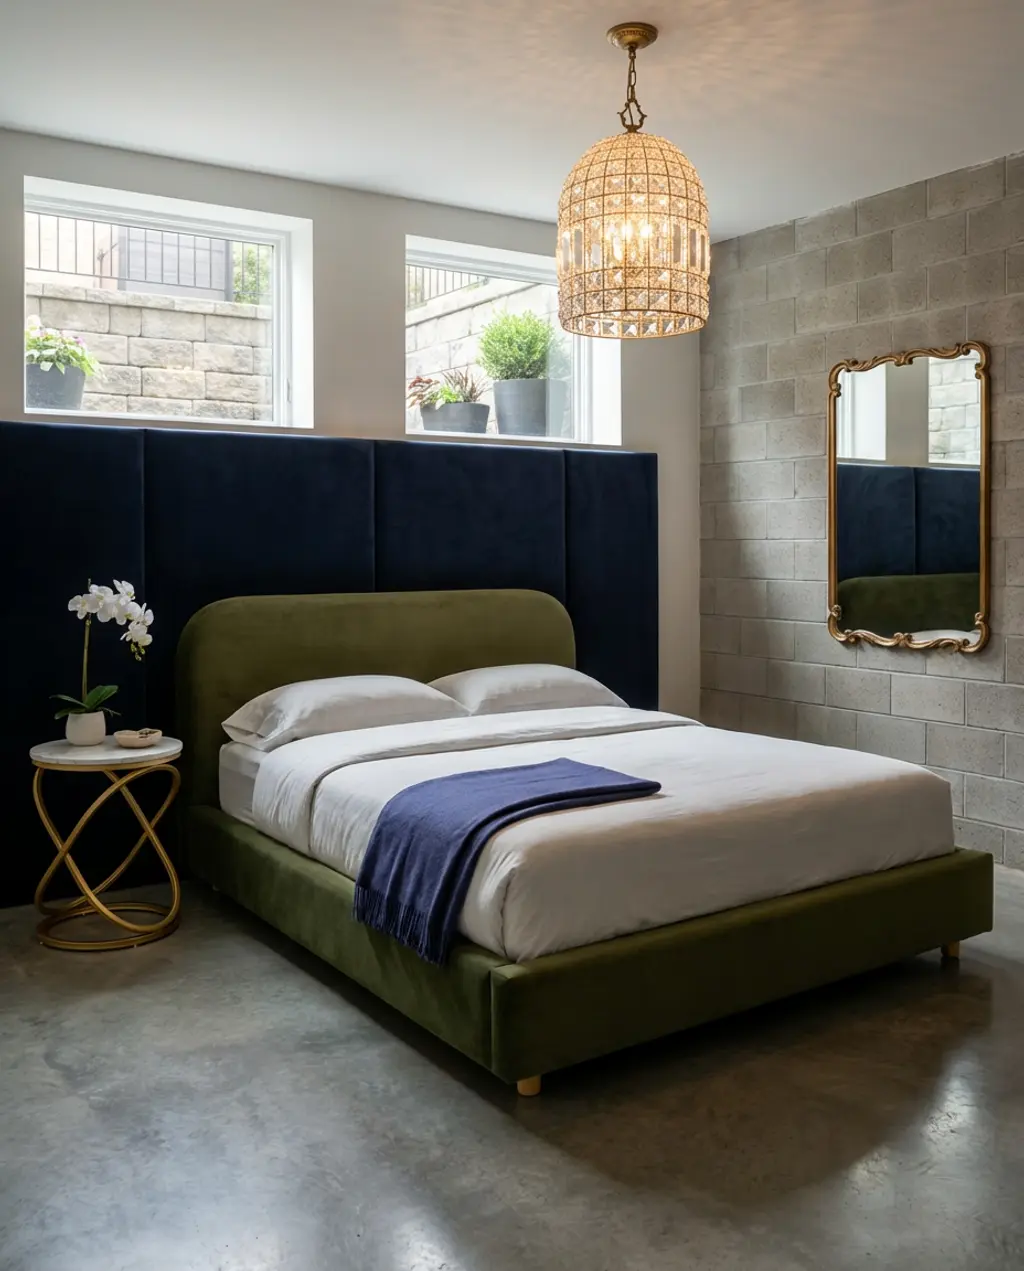
3. Luxury Basement Guest Suite with Spa Bathroom
If you’re going to splurge on one area in your basement remodel, a luxury guest suite with a spa bathroom is absolutely top-tier. Imagine your guests feeling like they’ve checked into a five-star hotel. This isn’t just about a place to sleep; it’s about an experience. We’re talking opulent finishes, strategic lighting, and thoughtful amenities that make every stay feel special. Built-in storage keeps things tidy, while marble and gold accents scream sophistication.
The rainfall shower isn’t just a feature; it’s the absolute star of this spa bathroom. Remove it, and you lose the entire ‘luxury spa’ ethos. It’s the singular element that transforms a functional bathroom into an indulgent escape, making guests feel pampered and truly cared for. This is where you invest if you want to elevate the entire guest experience.
This look works because it leverages the psychological impact of luxury materials and thoughtful design. We’re using repetition with gold accents throughout the room to create visual cohesion and a sense of deliberate curation. The generous scale of the rainfall shower and perhaps an oversized vanity mirrors the spaciousness and indulgence found in high-end hotels. And by focusing on plush, comfortable textures—think thick towels, soft bedding—we’re appealing directly to comfort and relaxation, which is the ultimate goal for a guest retreat.
|
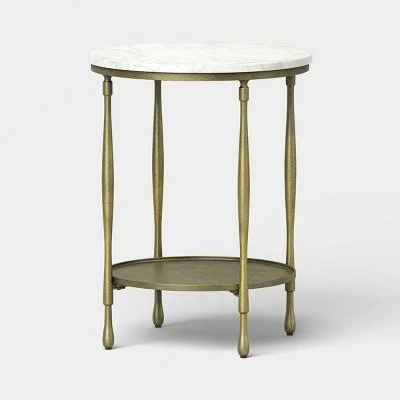
Threshold White Marble Accent Table$104 |
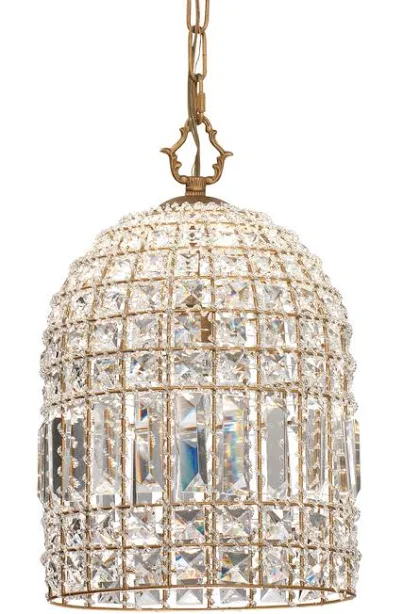
Solitude Mini LED Crystal Pendant Light$473 |
AMERLIFE King Velvet Upholstered Platform Bed$304.6 |
Crystal Art Gallery Filigree Arched Wall Decor Mirror$59.93 |


As an affiliate, we earn from qualifying purchases.
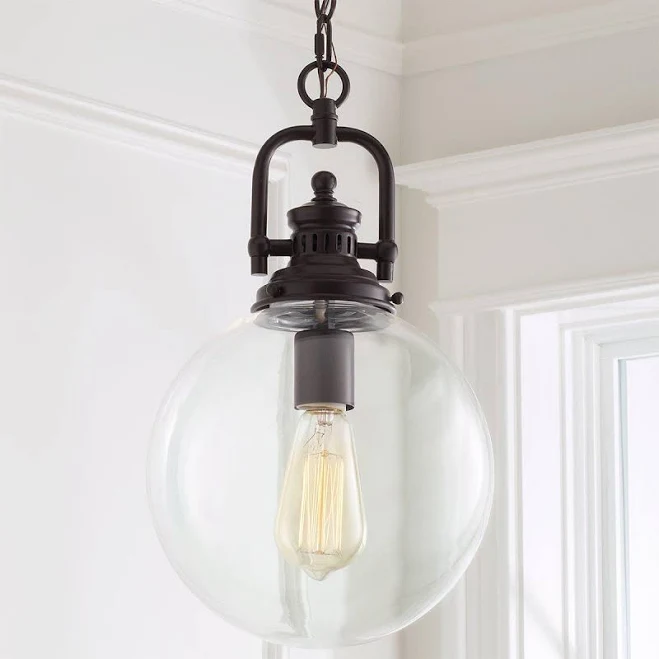
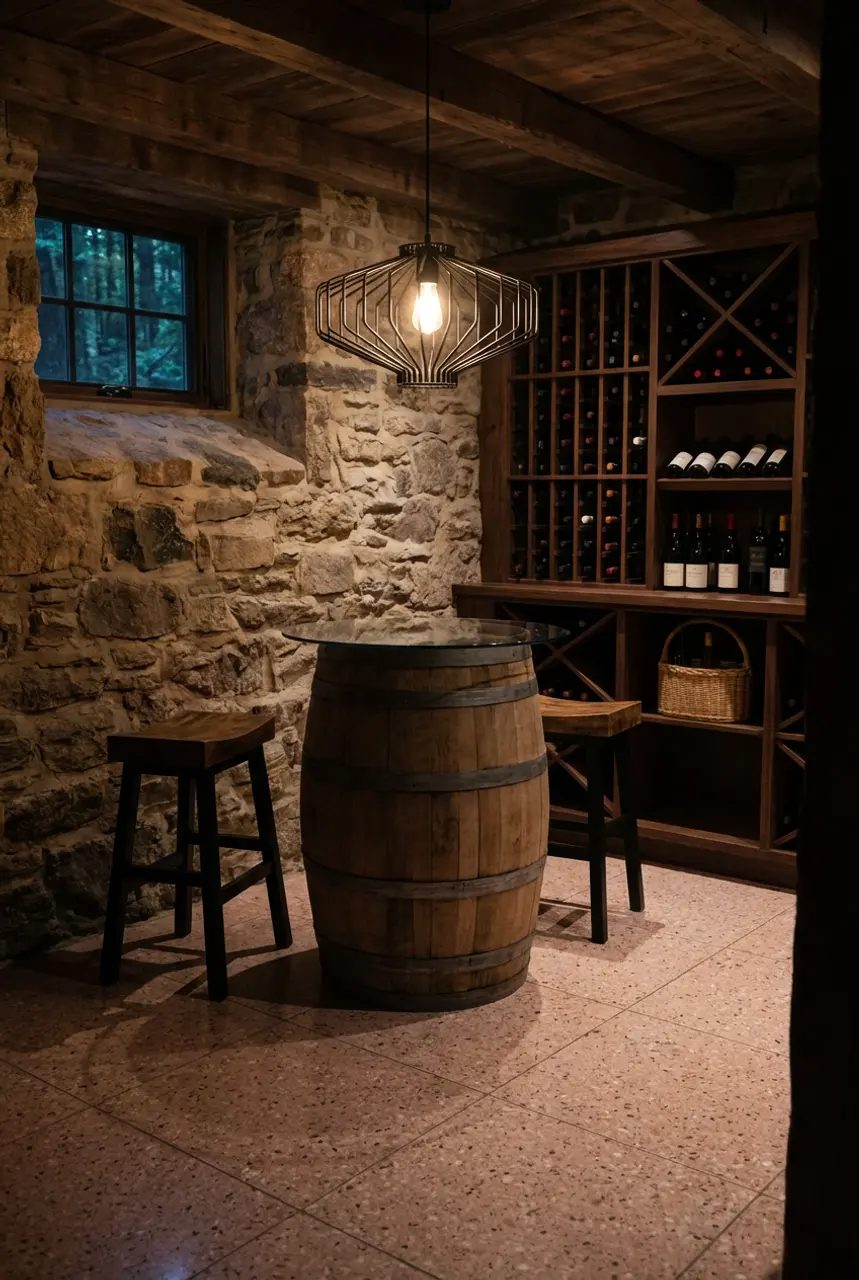
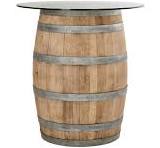
4. Rustic Basement Wine Cellar with Stone Walls
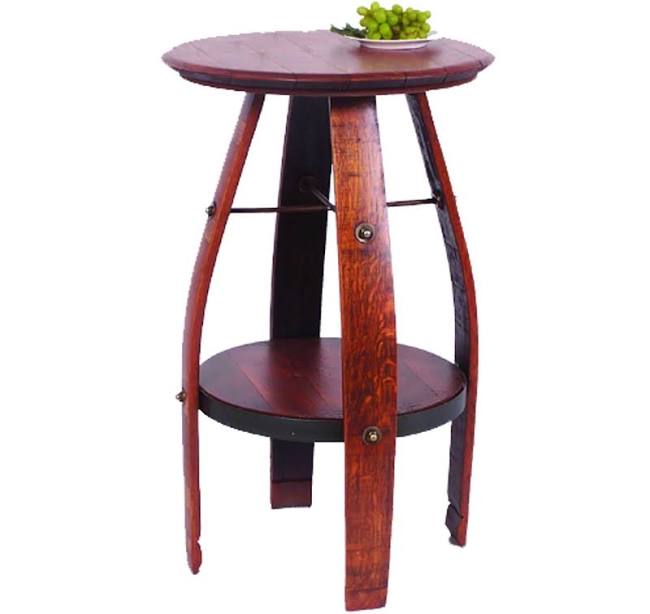
A rustic basement wine cellar with stone walls is a classic for a reason. It evokes a timeless, cozy charm that’s hard to beat. This look is all about rugged textures, warm lighting, and a feeling of old-world elegance. Think reclaimed wood racks, dim, atmospheric pendant lights, and maybe even a repurposed barrel for a tasting table. It’s perfect for the wine enthusiast who wants a dedicated, evocative space to store and enjoy their collection, or just for someone who loves the earthy, authentic vibe.
While the overall movement towards highly personalized, experiential home spaces has been growing for years on platforms like Pinterest, the rustic wine cellar is seeing a quiet resurgence. People are moving away from sterile, ultra-modern interpretations and craving authentic textures and a sense of history. This style taps into a desire for connection to nature and craftsmanship, offering a unique, atmospheric escape right in your own home. It feels enduring, not fleeting, and will likely hold its appeal for years to come.
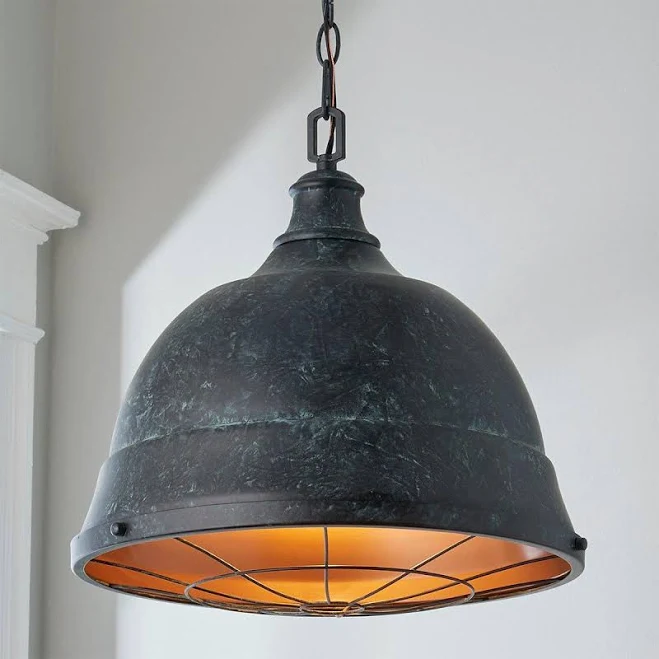
You don’t need a massive budget to evoke a rustic wine cellar feel. Instead of real stone, try faux stone panels which are significantly cheaper and easier to install yourself (around $5-$10 per square foot). For wine storage, look for pre-made modular wood racks at stores like IKEA or even DIY some from simple lumber for a fraction of the cost of custom built-ins. A reclaimed wood pallet can become a unique display shelf for bottles, and a thrifted small dining table can substitute for a barrel table for under $100. Adding string lights or low-wattage Edison bulb pendants (like the Industrial Caged Iron Pendant for $49.99) from an online retailer can set the mood without breaking the bank.
|
Better Homes & Gardens Extra Large Natural Woven Water Hyacinth Boat D$25.92 |
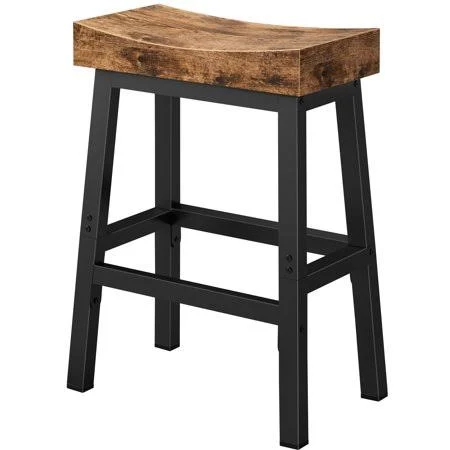
Halifax 23.81″ Farmhouse Wood Counter Height Barstool with Footrest Br$65 |
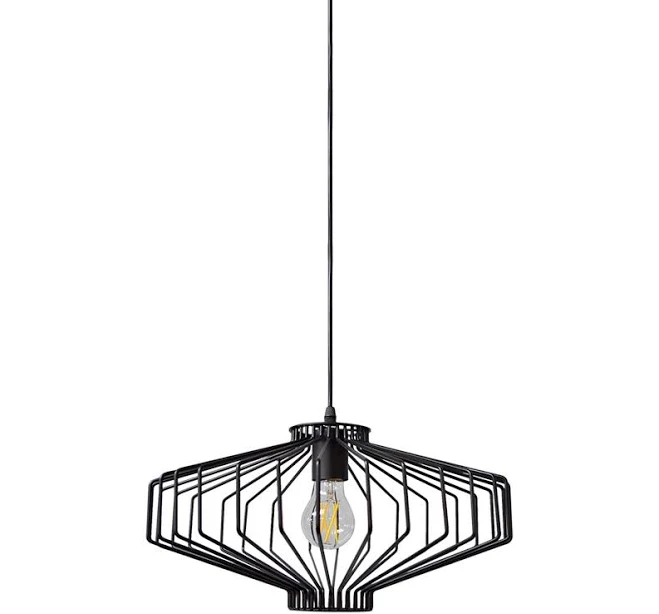
Weathered Industrial Caged Pendant$250 |
Wine Barrel Tasting Bistro Table$522.5 |


As an affiliate, we earn from qualifying purchases.
5. DIY Basement Home Theater with Soundproofing
Creating a dedicated home theater in your basement can be a game-changer for movie nights. The beauty of this setup is in its ability to completely immerse you in the cinematic experience. Think dark wall colors, plush recliners, and crucial soundproofing. It’s about building a cocoon where you can truly escape, whether you’re binging a new series or hosting a premiere party.
This setup really shines in a dedicated, rectangular basement space of at least 12×18 feet to allow for proper projector throw, tiered seating, and ideal speaker placement. If your basement is smaller, say 10×12 feet, you might need to opt for a large flat-screen TV instead of a projector and stick to a single row of seating to prevent the room from feeling cramped. For really compact spaces, consider something like Idea #23 which focuses on acoustical panels for a media room without the full-blown tiered seating.
For DIY Soundproofing: Installing Acoustic Panels
- Assess your space: Identify the walls most prone to sound transfer.
- Choose your panels: Purchase foam or fiberglass acoustic panels. You’ll need enough to cover about 15-20% of your wall surface area for noticeable improvement.
- Plan placement: Strategically place panels on opposing walls and behind speakers to reduce echo and absorb sound.
- Install panels: Follow manufacturer instructions, usually involving adhesive or mounting clips. Ensure they are level.
Time estimate: 2-4 hours for a small to medium room.
Material cost: $100-$500, depending on panel quality and quantity.
|
Mainstays Titan Indoor Area Rug$24.68 |
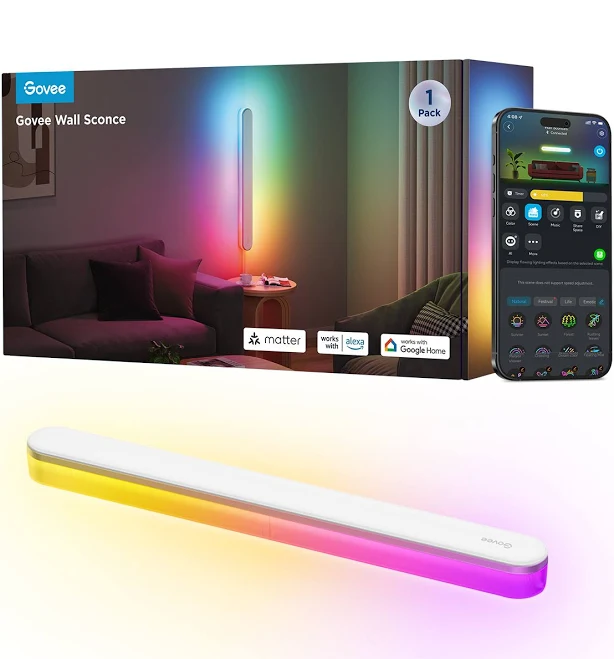
Govee Wall Sconce$79.99 |
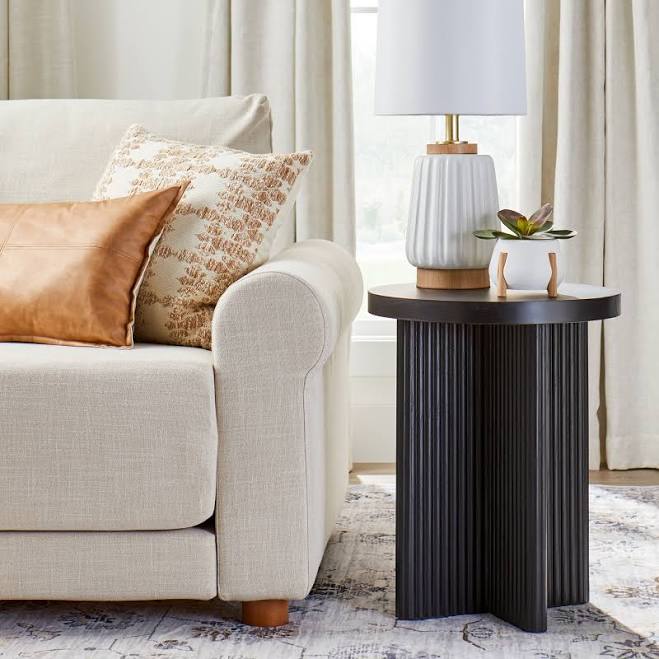
Better Homes & Gardens Lillian Fluted End Table$98 |
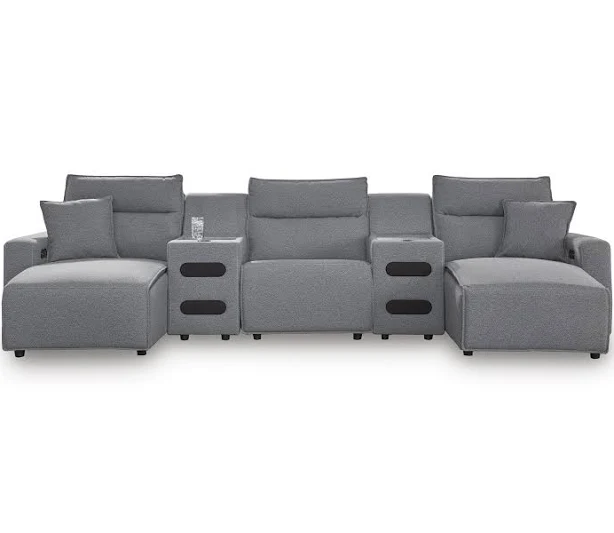
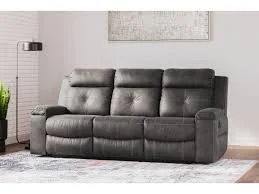
Ashley ModMax II 5-Piece Next-Gen Nuvella Performance Fabric Dual Powe$2037 |

As an affiliate, we earn from qualifying purchases.
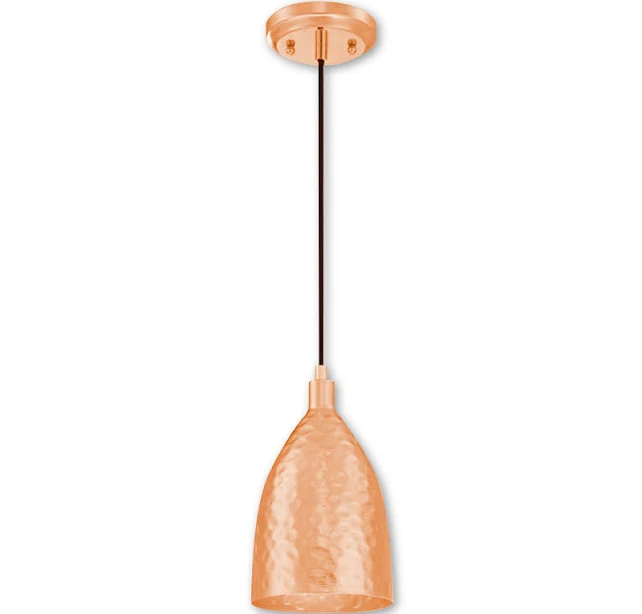
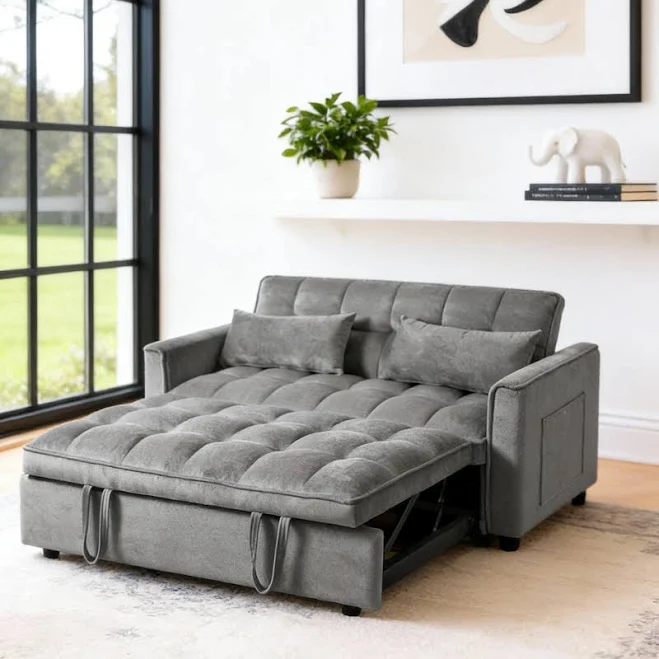
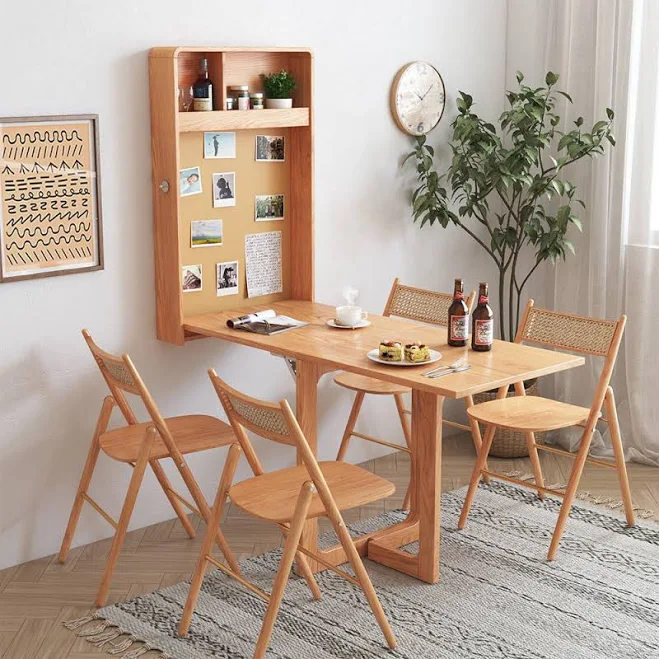
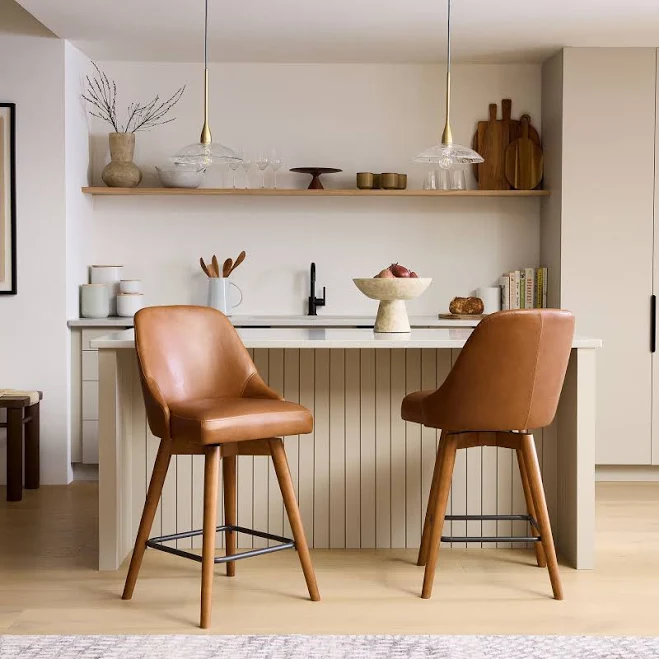
6. Small Basement Apartment with Compact Kitchenette
✨ Luxury Version
Converting a small basement into a functional apartment or studio requires some serious cleverness and a minimalist mindset. The goal is to make every square inch count, using multi-functional furniture and a bright, airy color palette to make the space feel larger than it is. A compact kitchenette is a must, but it doesn’t have to be basic. Think sleek, integrated appliances and smart storage solutions that blend seamlessly into the background, maintaining a clean and uncluttered aesthetic.
- Have you checked local zoning laws and building codes for basement apartments? This is critical!
- Are your ceilings at least 7 feet high? Any lower can feel genuinely claustrophobic.
- Is there adequate natural light or are you prepared to invest in robust artificial lighting solutions?
- What existing plumbing or electrical infrastructure can you leverage to minimize renovation costs?
- How will you integrate a kitchen, bathroom, sleeping, and living area without it feeling like a single, cramped zone?
💸 Budget Version
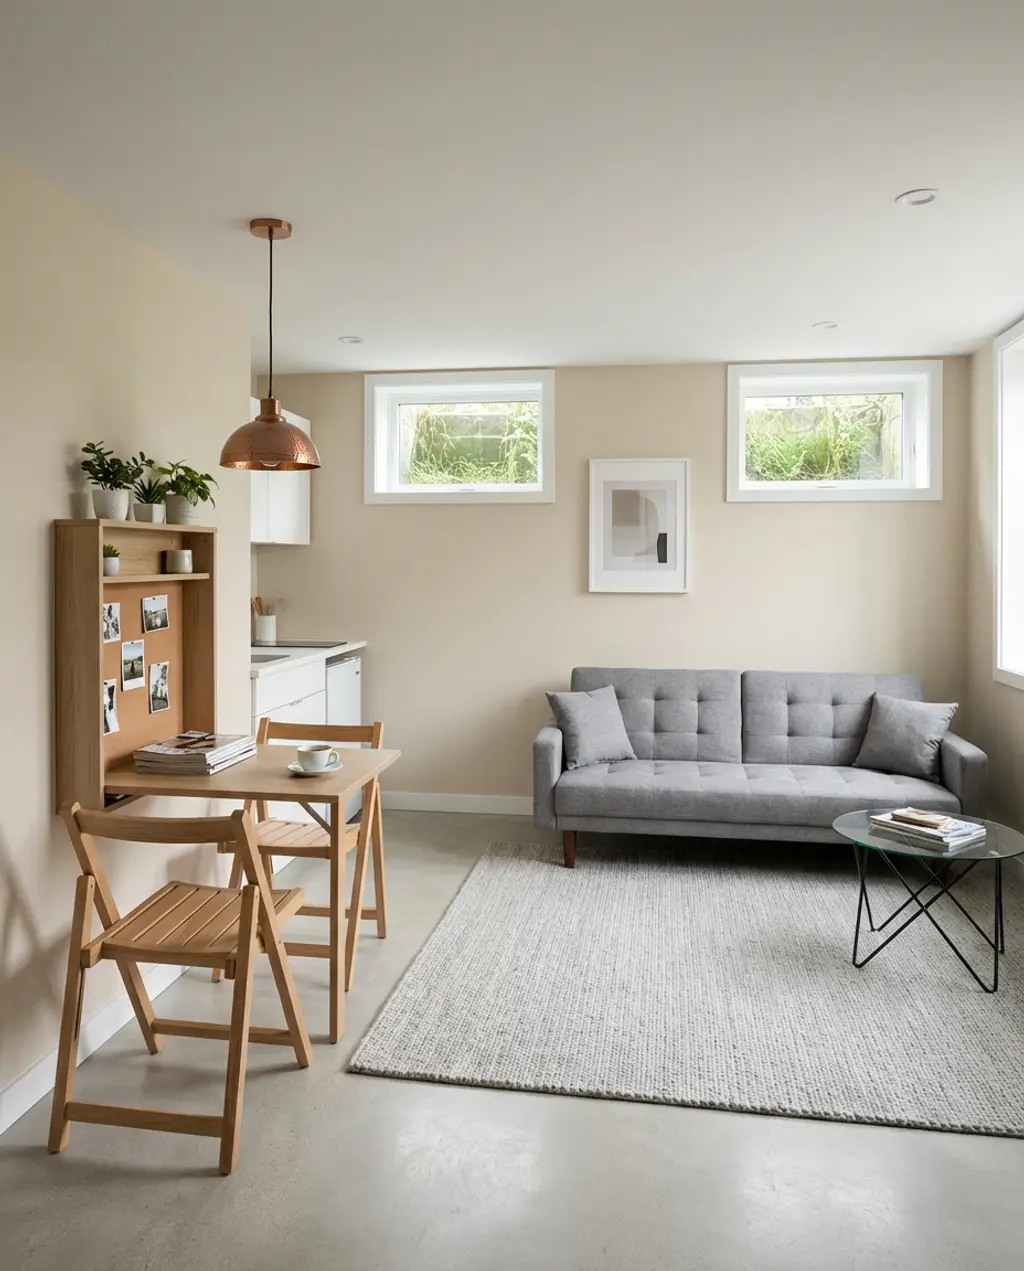
When planning your kitchenette, opt for a compact, counter-depth refrigerator. This seemingly small detail saves precious inches in a tight galley kitchen setup without sacrificing much storage, allowing for a more generous walkway or prep space. Also, for cabinet hardware, use integrated pulls or push-to-open mechanisms for a seamless, handle-free look that won’t visually clutter the small space or catch on clothing.
|
💰 Budget Pick Westinghouse One Light Mini Pendant 6105400$57.75 |
💰 Budget Pick Hand Knotted Light Gray Wool Rug – Solid Minimalist Modern Carpet, Cus$61.2 |
✨ Luxury Pick Gewnee 52.75 inch Convertible Sleeper Sofa Bed with Pillows and Adjust$197 |
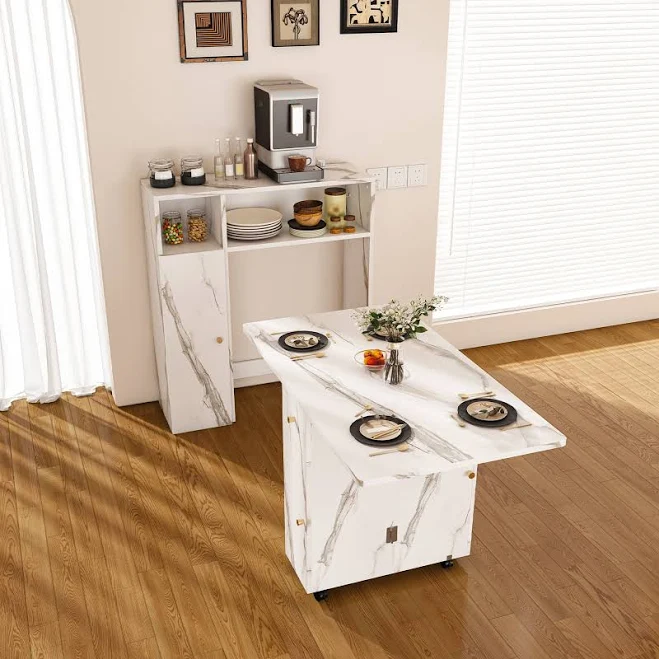
✨ Luxury Pick JASIWAY Wall-Mounted Folding Dining Table$679.99 |

As an affiliate, we earn from qualifying purchases.
7. Bohemian Basement Lounge with Textured Decor
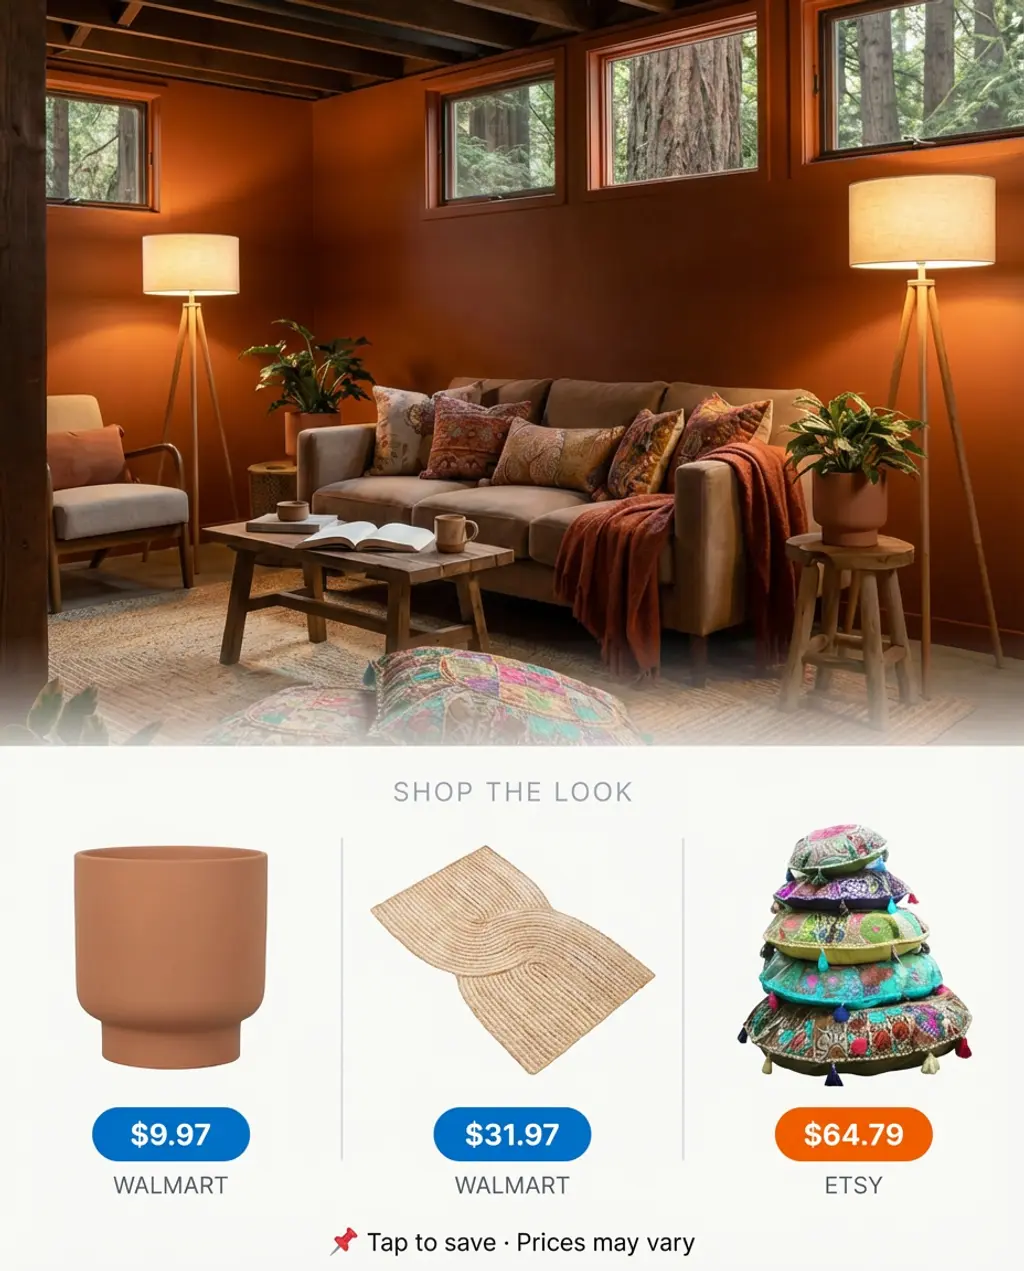
A bohemian basement lounge is all about creating a relaxed, free-spirited vibe. It’s a space that invites you to kick off your shoes and unwind, surrounded by natural materials, lush plants, and a mix of global textures. Layered rugs, macrame hangings, and an abundance of floor pillows make it feel incredibly cozy and inviting. This specific look really champions a carefree, collected aesthetic, perfect for creative souls or anyone needing a serene escape.
The beauty of layered rugs is undeniably part of the bohemian charm, but let’s be real: they can be a tripping hazard if not secured. Invest in good quality rug pads for each layer, not just the bottom one, to prevent shifting. Also, the abundance of natural fibers like jute and macrame, while beautiful, are dust magnets. Expect more frequent vacuuming and occasional spot cleaning. If you have pets or active kids, consider alternative materials like washable cotton rugs or even outdoor-safe options (Idea #19 showcases durable flooring) that mimic the look with less upkeep.
This idea works so well because it masterfully plays with texture and layering, which are core tenets of bohemian design. The combination of varied rug piles, woven baskets, macrame, and different plant textures creates a rich sensory experience that feels deeply inviting. The use of natural materials throughout also establishes a grounded, organic feel, fostering a sense of calm. Crucially, the absence of rigid lines and formal furniture encourages relaxation and an effortless, lived-in comfort that defines the bohemian aesthetic.
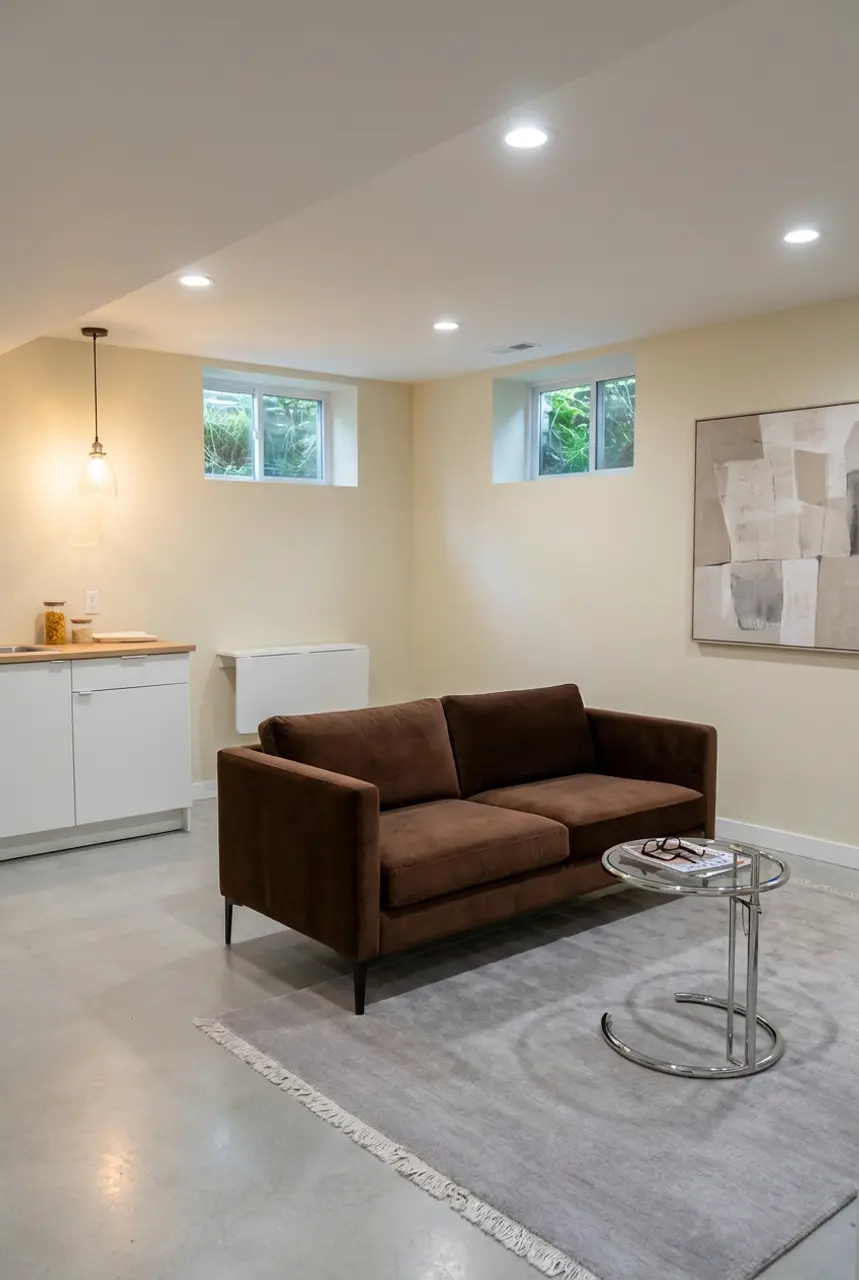
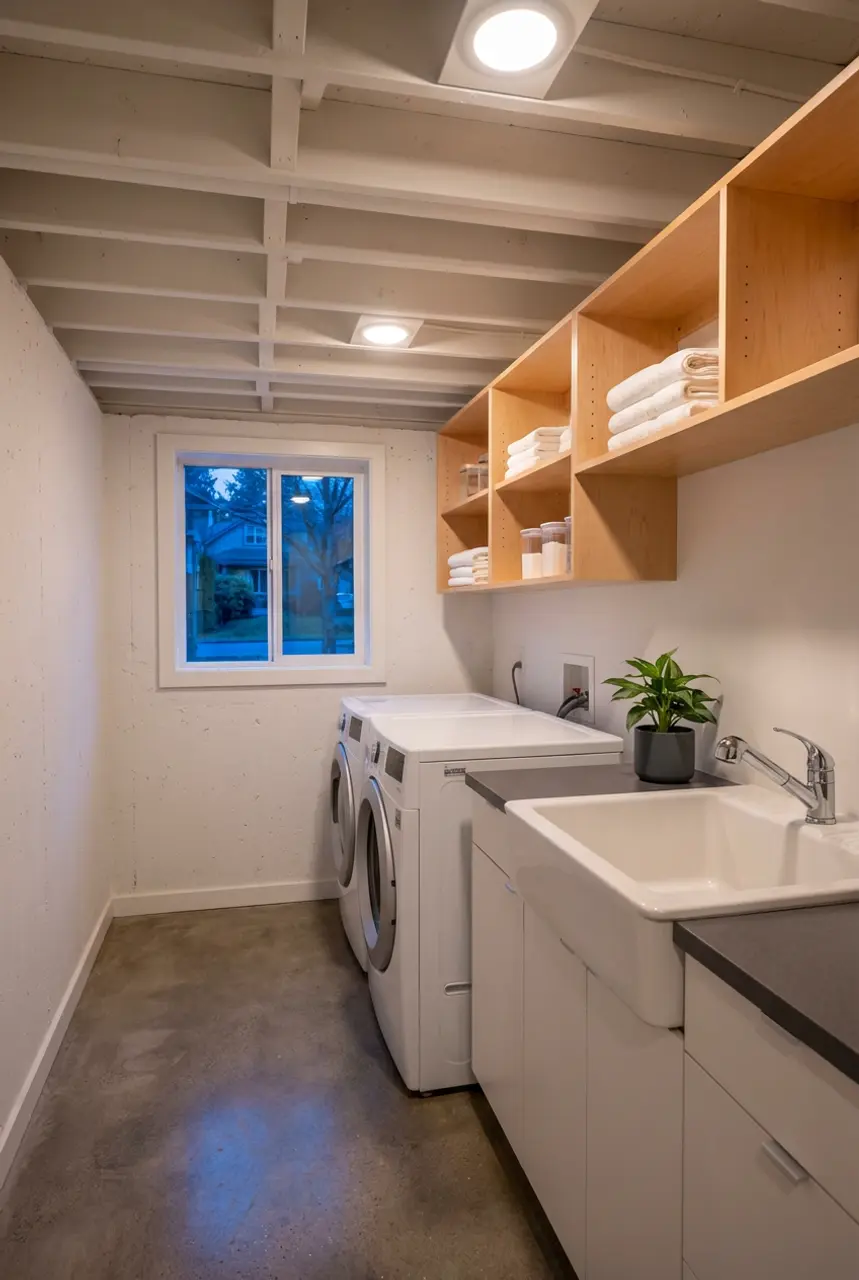
8. Unfinished Basement into a Budget-Friendly Laundry Room
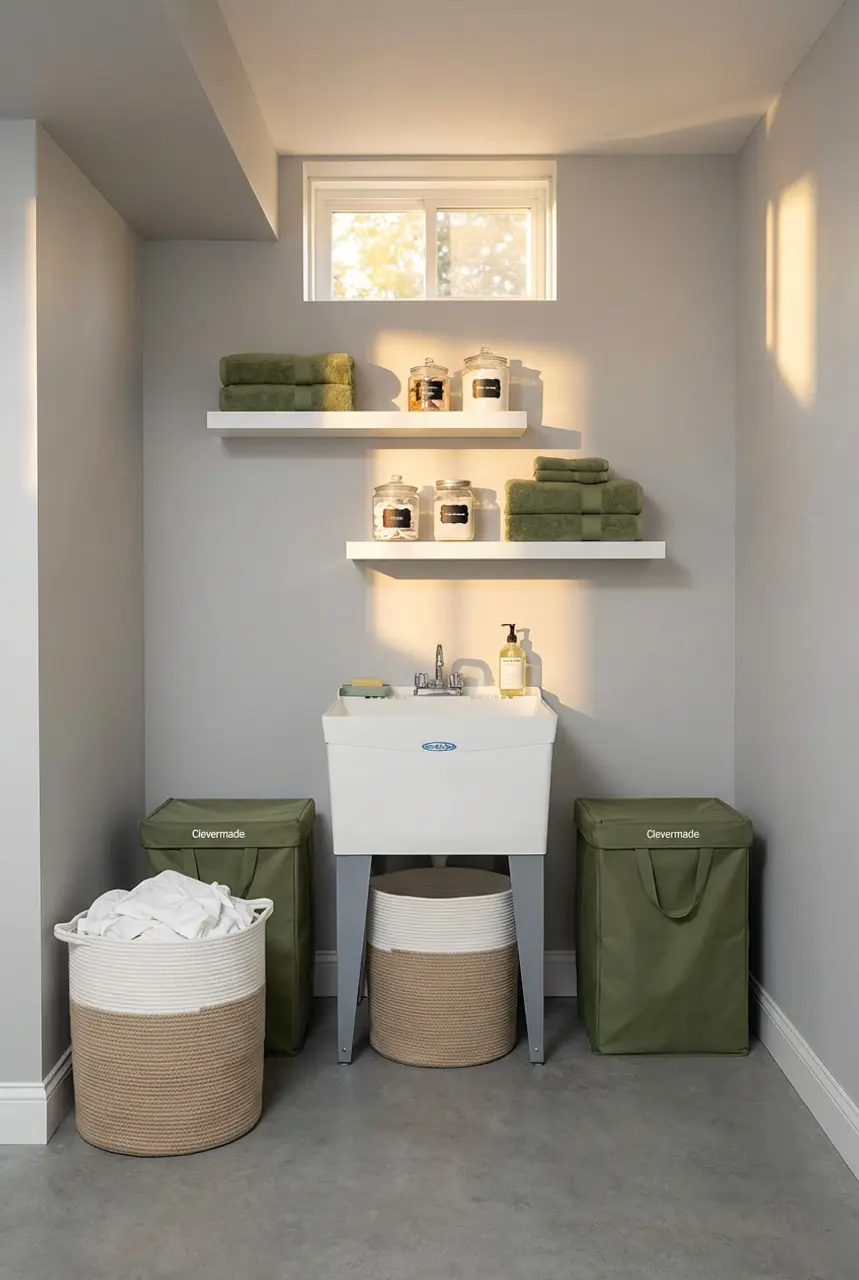
Don’t under-estimate the power of transforming an unfinished basement corner into a functional, budget-friendly laundry room. This isn’t about fancy finishes; it’s about making a utilitarian space efficient, clean, and perhaps even a little cheerful. Think open shelving for easy access to supplies, a sturdy utility sink for pre-treating, and bright, easy-to-clean surfaces. The goal is to take a raw space and make it work hard for you without extensive renovations.
- Utility sink & faucet: $100 – $300
- Open shelving (DIY or pre-made): $50 – $200
- Lighting (utility fixtures): $50 – $150
- Paint and basic wall treatment: $50 – $150
- Laundry hampers & storage baskets: $50 – $150
- TOTAL: $300 – $950
Budget alternative: Utilize reclaimed lumber for shelving, find a used utility sink on Facebook Marketplace, and use existing light fixtures to get a similar space for under $200.
For DIY Open Shelving:
- Measure and plan: Decide on shelf lengths and heights.
- Gather materials: Purchase sturdy wood planks (pine or plywood works well), L-brackets, screws, and a drill.
- Install brackets: Mark stud locations for secure mounting. Attach L-brackets to the wall, ensuring they are level and spaced appropriately for your shelves.
- Place shelves: Rest the wood planks on the brackets and secure them with screws from underneath.
Time estimate: 1-2 hours per shelf unit.
Material cost: $30-$80 per shelf unit.
|
SONGMICS Cotton Rope Laundry Basket$25.99 |
SONGMICS Cotton Rope Laundry Basket$25.99 |
Mainstays Floating Shelves Set of 2$11.64 |
E.L. Mustee & Sons Utilatub Floor Mount Laundry/Utility Tub$84.99 |
E.L. Mustee & Sons Utilatub Floor Mount Laundry/Utility Tub$84.99 |
Clevermade Collapsible Fabric Laundry Hamper$19.92 |
Mainstays Floating Shelves Set of 2$11.64 |
Clevermade Collapsible Fabric Laundry Hamper$19.92 |


As an affiliate, we earn from qualifying purchases.
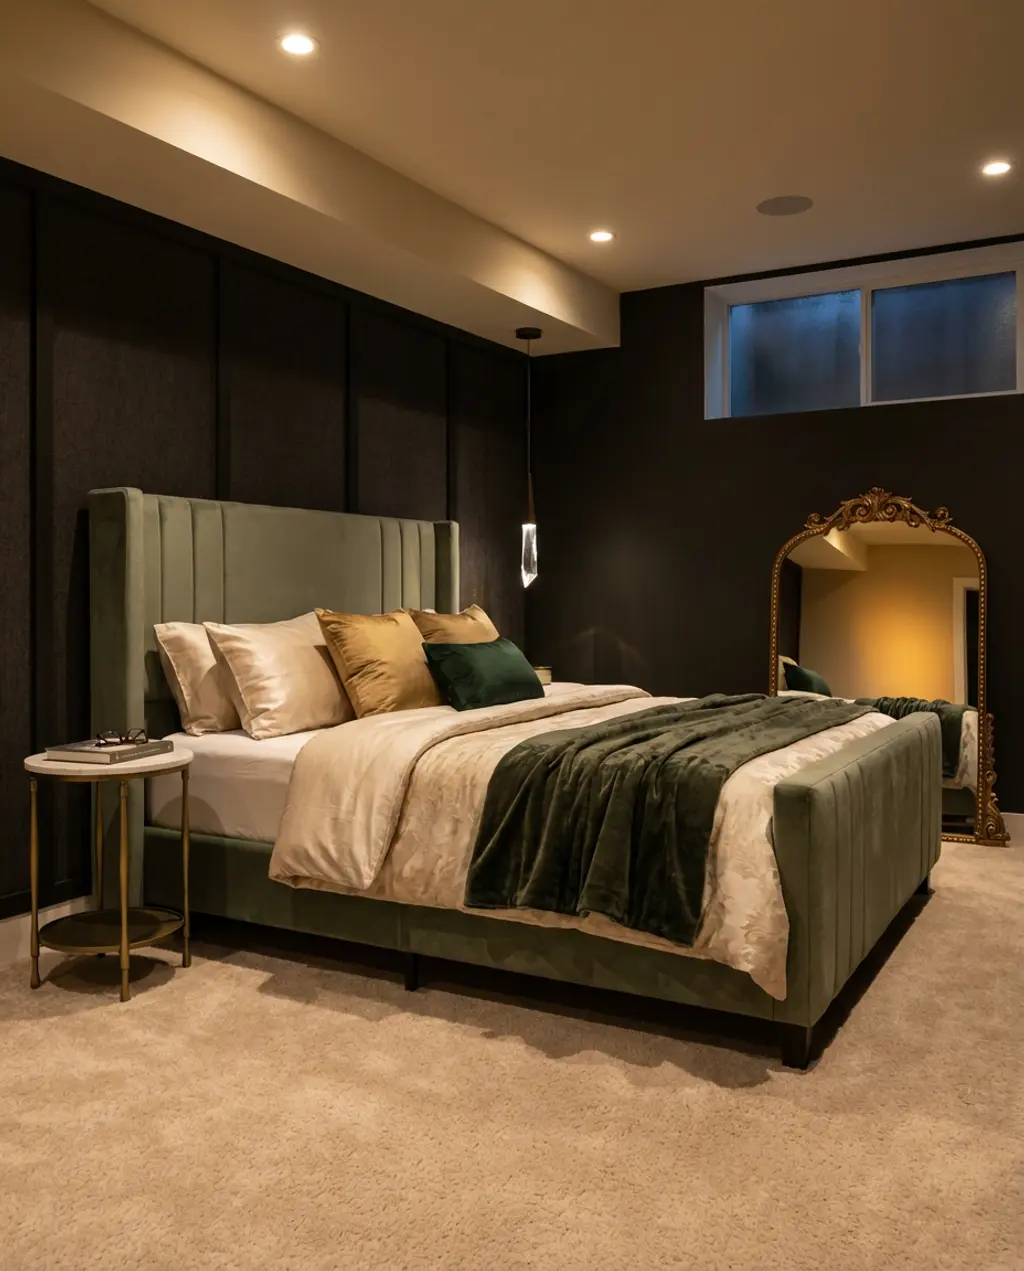
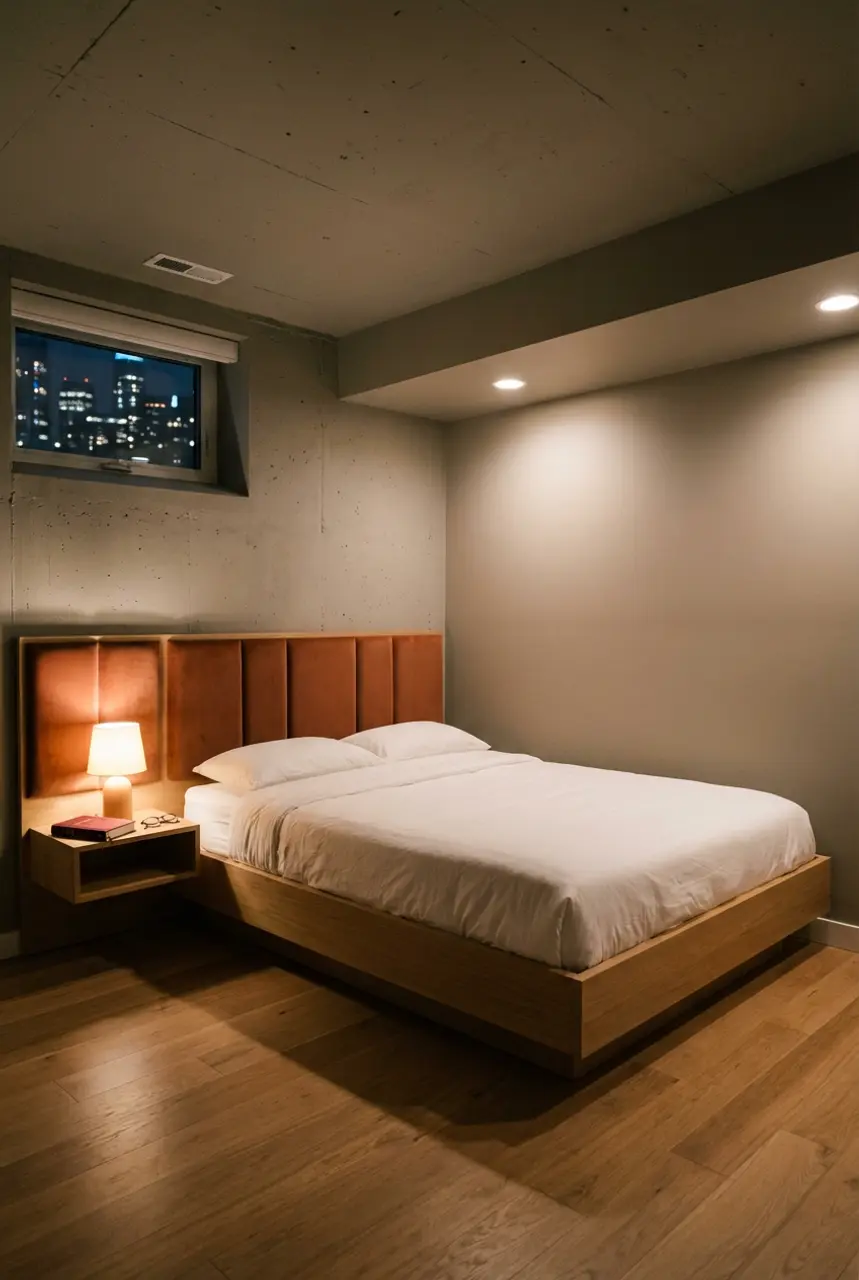
9. Low Ceiling Basement Guest Bedroom with Wall-Mounted Headboard
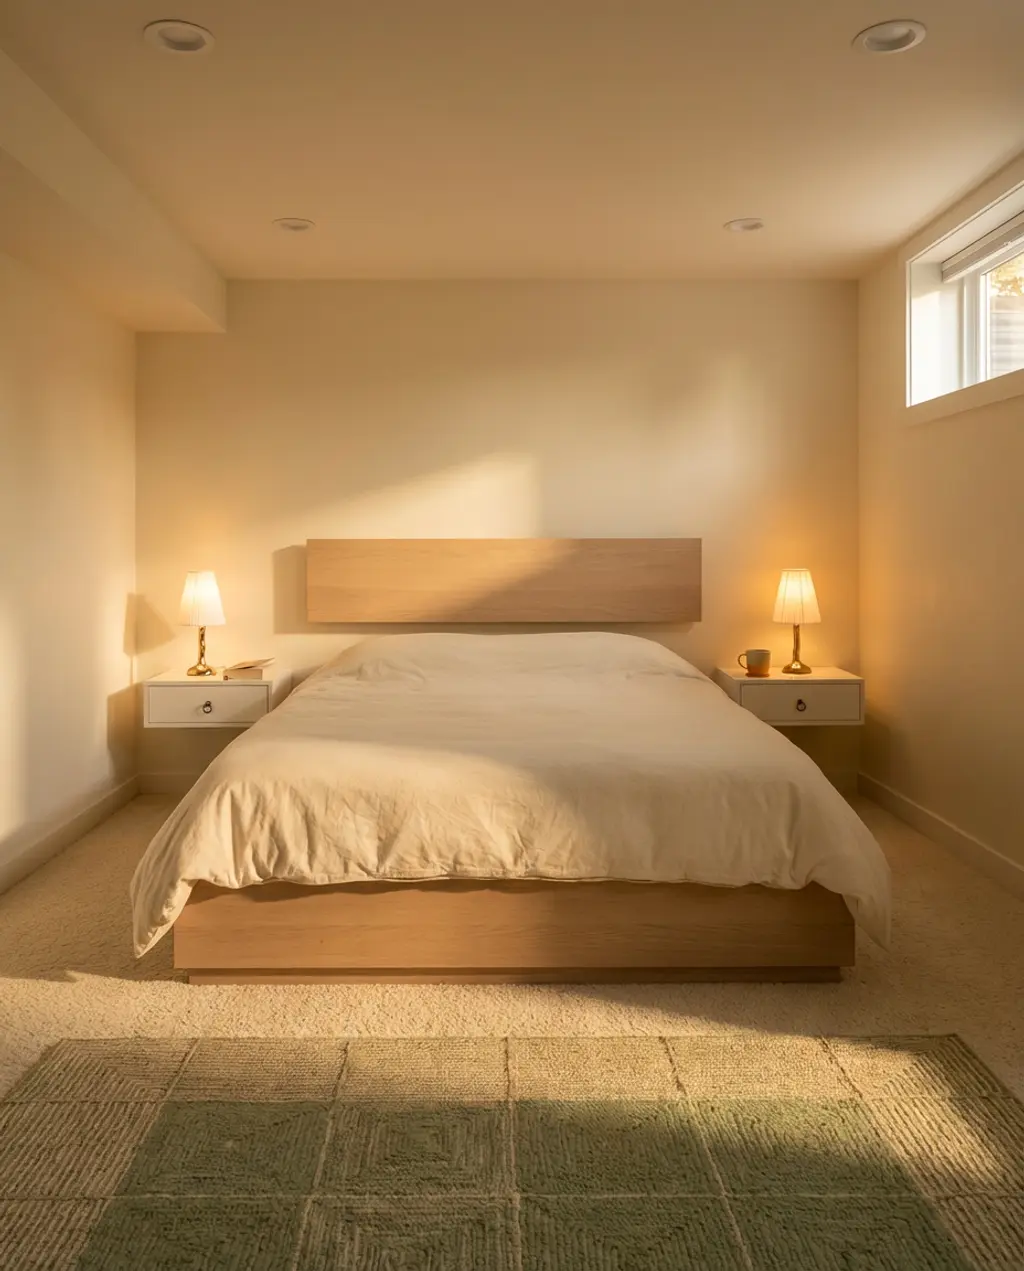
A low-ceiling basement guest bedroom doesn’t have to feel like a dungeon. In fact, you can create a super sleek and inviting space by embracing clever design choices that maximize perceived height and space. The trick here is a wall-mounted headboard paired with a low-profile platform bed, creating an illusion of more vertical space by keeping the eye line horizontal and uncluttered. Recessed lighting is a must, providing ample illumination without infringing on precious headroom.
To really make a low-ceiling room feel taller, mount your curtains as close to the ceiling as possible – even if the window frame is much lower. Let them fall all the way to the floor. This draws the eye upward, elongating the walls and making the entire room feel more spacious and grand. It’s an old trick that still works wonders.
The wall-mounted headboard is the undisputed hero of this design. By attaching it directly to the wall, you eliminate the visual bulk of a traditional freestanding headboard and often gain a few precious inches of floor space. But more importantly, it tricks the eye into perceiving more open space above the bed, essential in a low-ceiling environment. Without it, the room risks feeling compressed, losing that sleek, intentional design element that makes it so successful.
💡 Loving these dark walls? Before you commit, we break down 3 common mistakes at the end of this article that could save you a costly repaint.
|
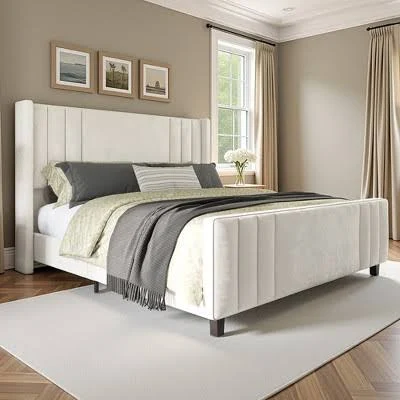
Burlywood Size Wood Platform Bed Frame Solid Wood Construction$134.99 |
Chris Loves Julia x Loloi Geometric Hooked Wool Rug in Green, Size: 3’$99 |
VINGLI Floating Nightstand with Drawer Set of 2$49.99 |
Burlywood Size Wood Platform Bed Frame Solid Wood Construction$134.99 |
VINGLI Floating Nightstand with Drawer Set of 2$49.99 |
Chris Loves Julia x Loloi Geometric Hooked Wool Rug in Green, Size: 3’$99 |
Colette Hammered Brass Mini Table Lamp with Fabric Shade 13$119.2 |
Colette Hammered Brass Mini Table Lamp with Fabric Shade 13$119.2 |


As an affiliate, we earn from qualifying purchases.
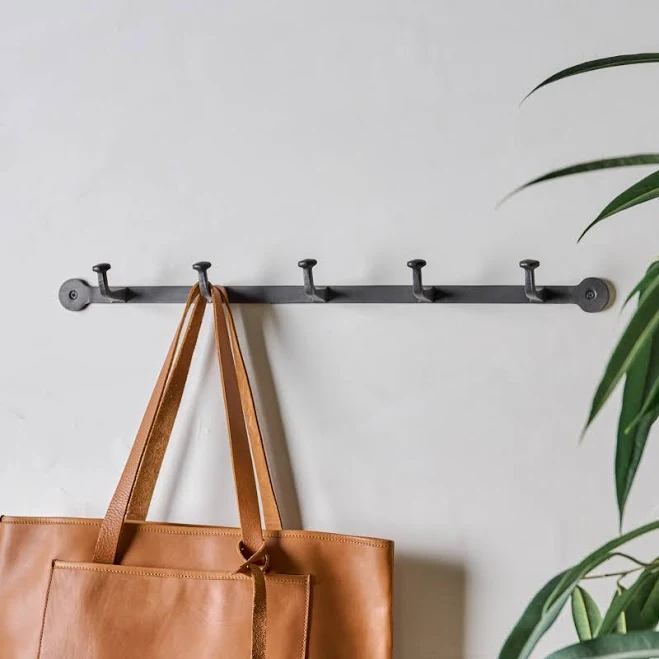
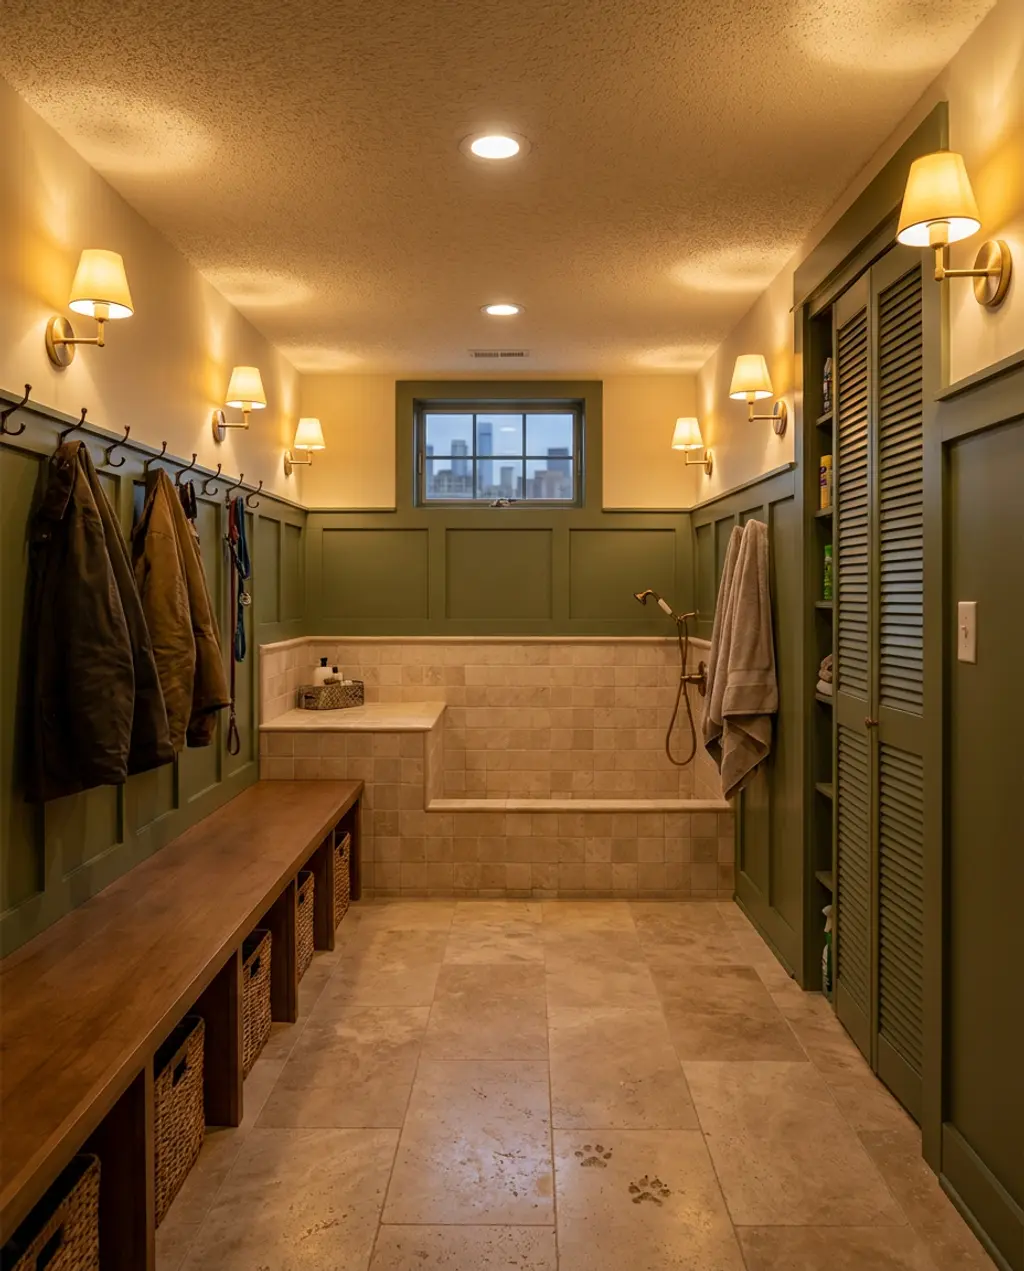
10. Michigan Basement Mudroom with Integrated Pet Bath

For homeowners in Michigan, a mudroom is less of a luxury and more of a necessity, especially one integrated with a pet bath. Winters mean snowy, muddy paw prints, and falls mean wet, leaf-covered coats. This idea tackles that head-on with durable materials, built-in storage to corral boots and leashes, and an easy-access pet bathing station. It’s all about creating a highly functional, easy-to-clean zone that protects the rest of your home from the elements.
The rise of practical, hardworking spaces like this reflects a broader trend of homes adapting to busy, active lifestyles and a growing focus on pet-friendly design. On platforms like Pinterest, ‘mudroom organization’ and ‘pet wash station ideas’ are skyrocketing, especially in colder climates. People are seeking design solutions that genuinely make daily life easier and reduce household chores, rather than just looking good. This isn’t just a trend; it’s a permanent shift towards smarter, more resilient home design.
This type of setup is ideal for basements that are at least 8×10 feet, allowing enough space for both a dedicated mudroom bench/storage area and a separate pet bath or wash-down zone. If your basement entrance is smaller, you’ll need to prioritize. For instance, you could integrate a smaller, elevated pet shower into a multi-functional laundry room (similar to Idea #29 but with a pet element) or opt for a simple utility sink with a sprayer if space is truly tight. The key is clearly defined zones, even in a compact footprint.
|
The Container Store Large Montauk Rattan Rectangular Bin$22.49 |
Pottery Barn Scarlett Entryway Storage Bench$638.99 |
Ivy Hill Tile Matte Limestone Look Porcelain Floor and Wall Tile Bond $153.35 |
Hammered Aged Iron Wall Hooks$19.2 |

As an affiliate, we earn from qualifying purchases.
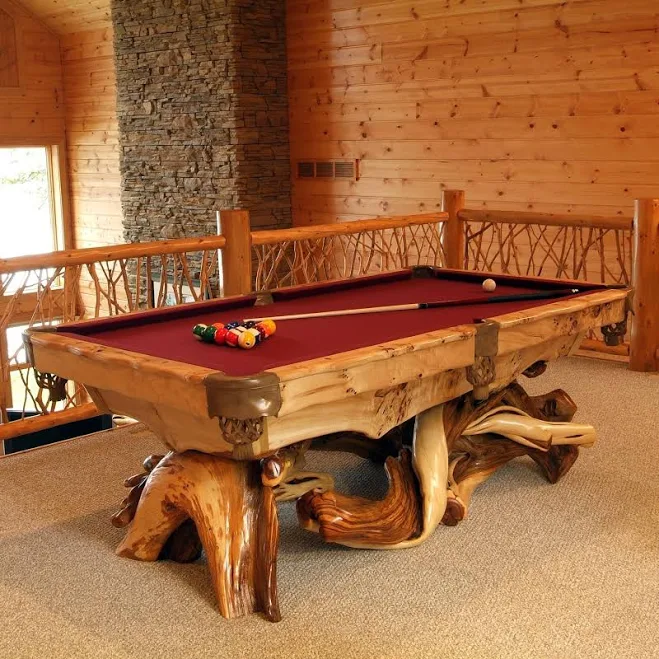
11. Unfinished Basement to Rustic Game Room with Bar
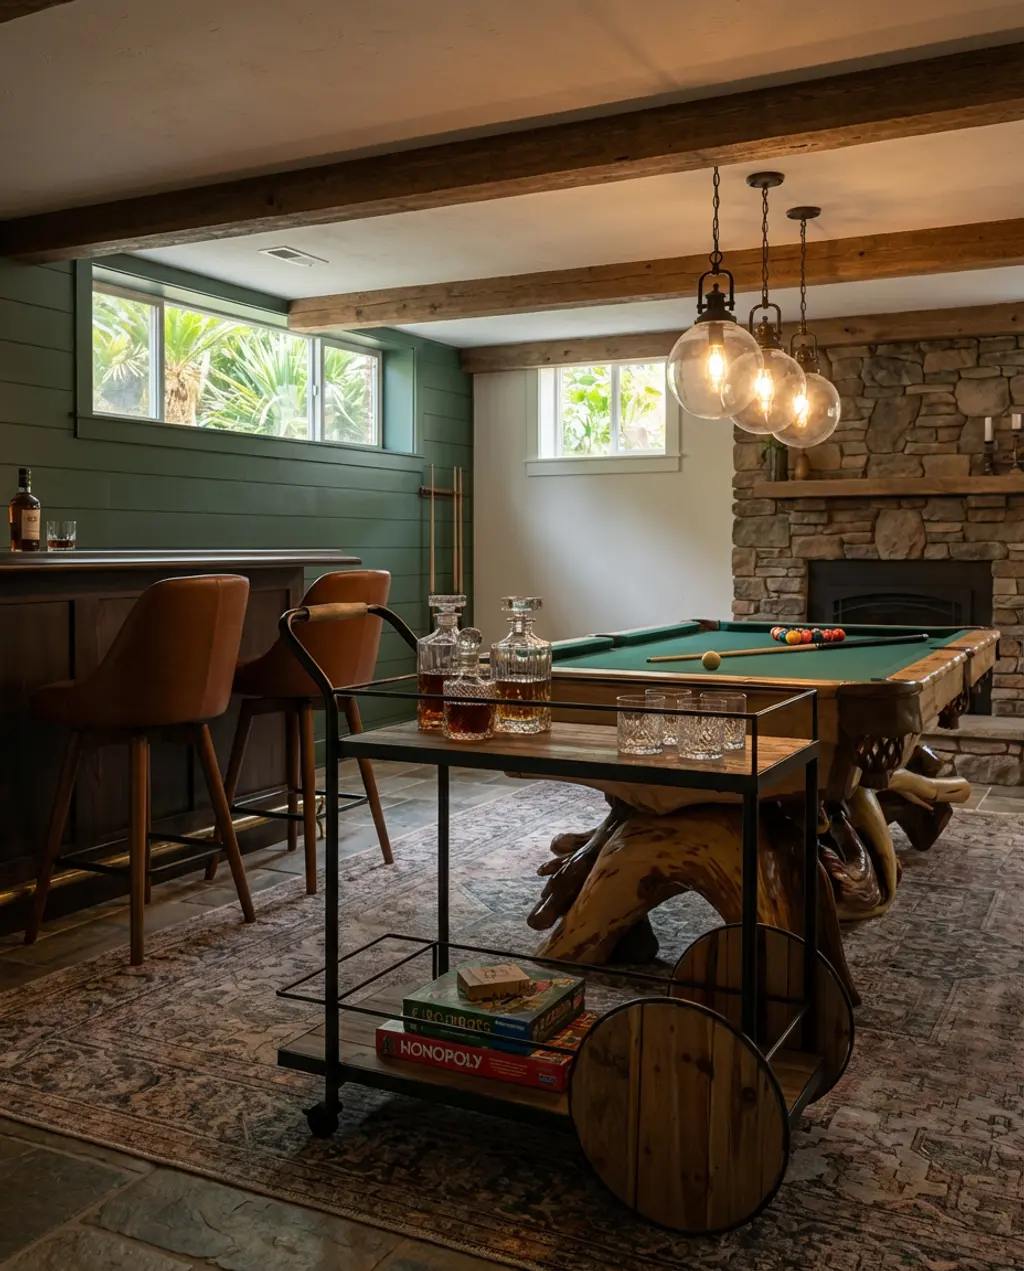
Transforming an unfinished basement into a rustic game room with a bar is the ultimate man-cave or entertainment hub. We’re talking exposed beams, a statement pool table, and maybe even a cozy stone fireplace, all wrapped in a warm, inviting ambiance. It’s a space that encourages relaxation and friendly competition, making the most of a previously underutilized area. The rustic elements bring a sense of history and charm, creating a welcoming retreat from the everyday.
This design successfully marries the raw, authentic charm of rustic elements with the sophisticated fun of an entertainment space. Exposed beams and stone accents ground the room in natural textures, while the strategic placement of a pool table creates a clear zone for activity. The warmth of wood tones and dim, ambient lighting generates an inviting atmosphere that encourages lingering and socializing. It’s about creating a coherent narrative where ruggedness meets refined leisure.
Be aware of the potential for uneven temperatures, especially with an unfinished basement. You’ll need to address proper insulation to ensure comfort year-round, otherwise, that stone fireplace won’t be enough to combat the chill. Also, consider the weight of a full-size pool table – ensure your flooring and joists can properly support it without causing structural issues down the line. Finally, if you’re installing a wet bar, professional plumbing is non-negotiable to avoid nasty leaks and water damage.
|
Mid-Century Swivel Counter Stool$549 |
Artistic Log Pool Table$24715 |
Clear Glass Globe Industrial Pendant$199.2 |
SEI Furniture Bar Cart$187.2 |

As an affiliate, we earn from qualifying purchases.
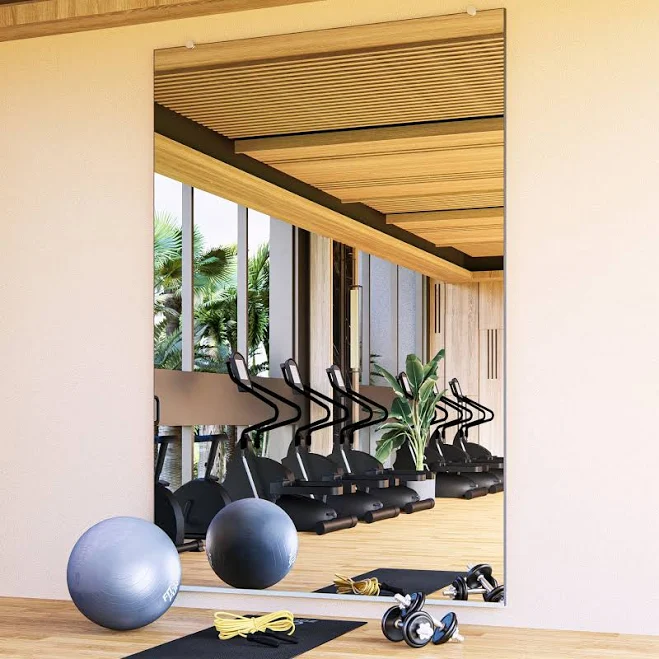
12. Low Ceiling Basement with Clever Lighting & Mirror Tricks
When you’re faced with a low-ceiling basement, your best friends are clever lighting and mirror tricks. These aren’t just decorative elements; they’re strategic tools to make a small, dim space feel expansive and airy. By using techniques that bounce light and create optical illusions, you can completely transform the perception of height and depth, turning a restrictive basement into a surprisingly bright and modern area.
Here’s the visual equation for making a low-ceiling basement feel bigger: 50% strategic mirrors (large, frameless, or mirrored panels) + 30% uplighting (floor lamps, hidden LED strips) + 20% light, reflective surfaces (glossy console table, pale walls). The mirrors double the perceived space, uplighting pushes the eye towards the ceiling, and light surfaces bounce every bit of available light around the room. Consider how Idea #12 also uses clever tricks, but for storage.
- Choose the right mirror: Opt for a large, frameless mirror or multiple panels that can cover a significant portion of a wall. This is more about creating an illusion of space than functional reflection.
- Strategic placement: Position the mirror on the longest wall possible, or opposite a light source (like your uplight or even a small window) to maximize light reflection and depth. Ensure it’s mounted securely.
- Complement with uplighting: Place floor lamps or LED strips at the base of the mirrored wall, shining light upwards. This illuminates the mirror and further enhances the illusion of height.
- Keep it clean: Regularly clean your mirror to ensure maximum reflectivity. Smudges can diminish the effect.
Time estimate: 1-2 hours for mounting a large mirror.
Material cost: $50-$300+ depending on mirror size and quality.
|
Libbey Cylinder Vase 9″$3.49 |
Project Source 3642 6S Polished Frameless Wall Mirror$76.98 |
Mainstays Modern 71″ LED Floor Lamp$25.14 |
IKEA Lack Console Table$129.99 |


As an affiliate, we earn from qualifying purchases.
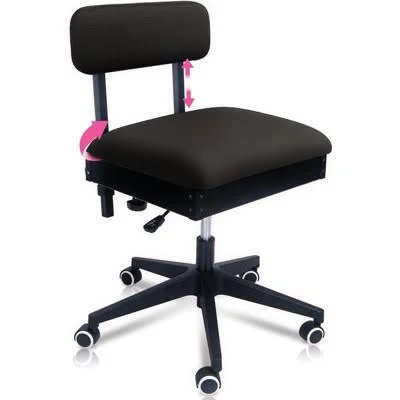
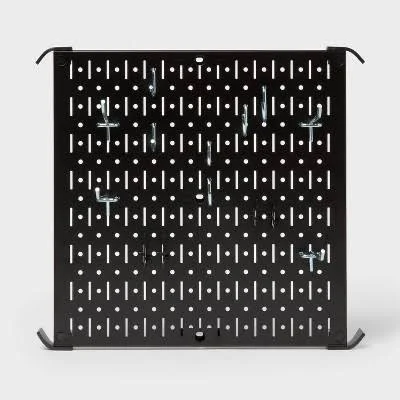
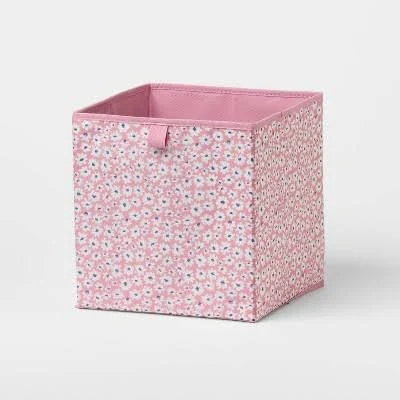
13. Creative Storage Solutions for a Small Basement Craft Room
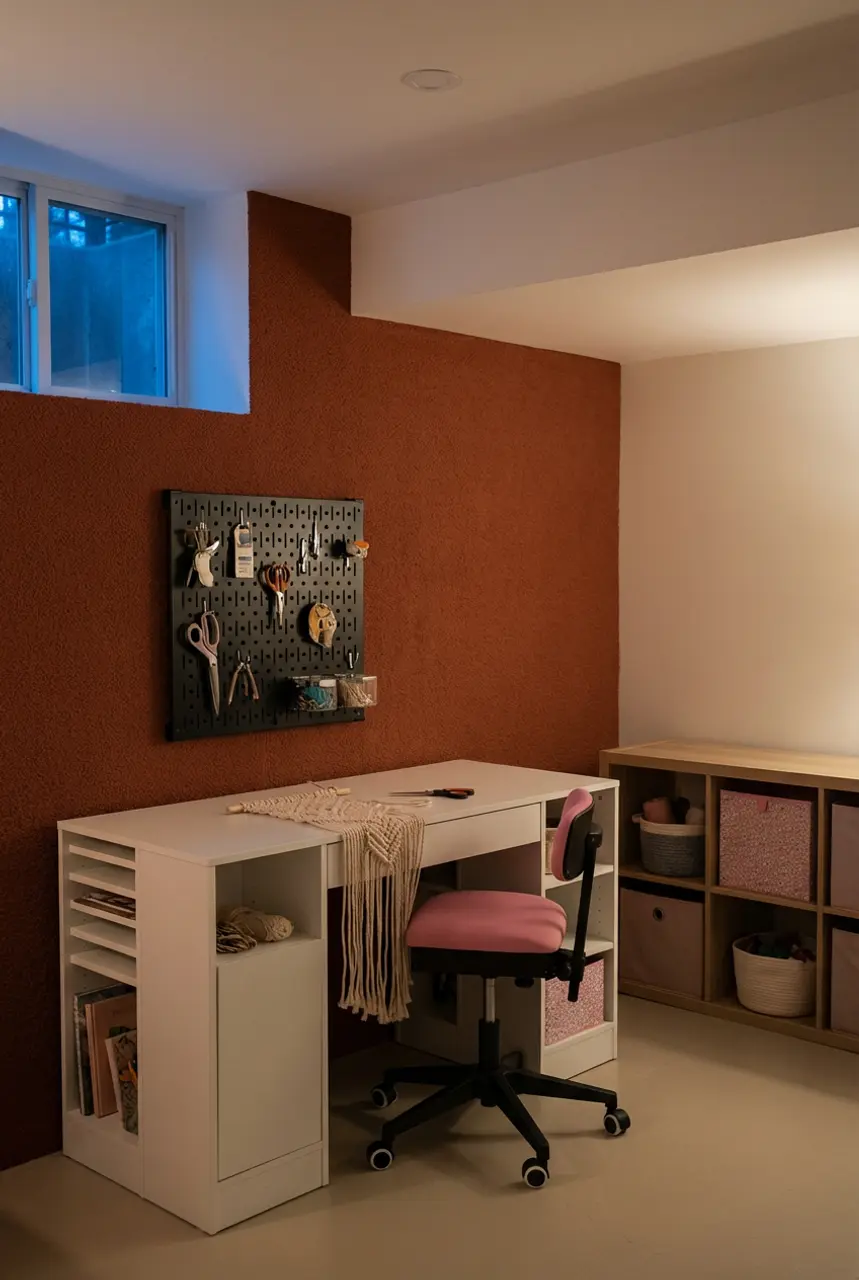
For the avid crafter, a small basement craft room is a dream come true, provided it’s packed with creative storage solutions. This isn’t just about putting things away; it’s about making every tool, every spool of thread, and every piece of paper immediately accessible and visible. Think pegboards, clear bins, wall-mounted shelves, and a desk that offers both workspace and hidden compartments. The goal is an organized, inspiring hub where creativity can truly flourish.
- Have you measured all your crafting supplies to ensure your chosen storage solutions will actually fit them?
- What kind of task lighting will you need? Crafting requires excellent, shadow-free illumination.
- Will you primarily be standing or sitting? This impacts desk height and chair selection.
- Are there enough electrical outlets for all your machines (sewing machine, glue gun, cutting tools)?
- How will you protect surfaces from spills, paint, or glue?
When incorporating pegboards, don’t just hang things randomly. Create “tool zones” – for example, all cutting tools on one section, all brushes on another. Then, use colored electrical tape (removable!) to delineate these zones right on the pegboard. This provides a clear visual cue for where everything belongs, making cleanup intuitive and efficient for even the most chaotic crafters.
|
Pink Power Black Sewing Chair$299.99 |
Brightroom 16″ Square Metal Pegboard$17.6 |
Brightroom 11″ Fabric Bin$5 |
South Shore Crea Craft Table$271.99 |
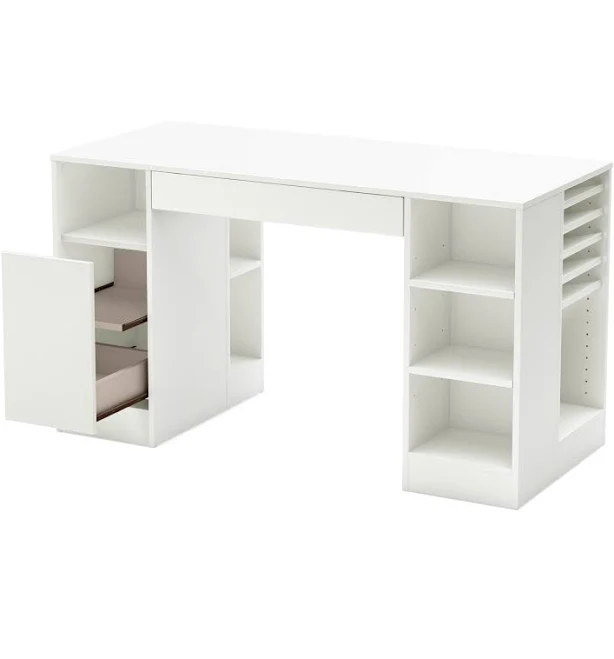
As an affiliate, we earn from qualifying purchases.
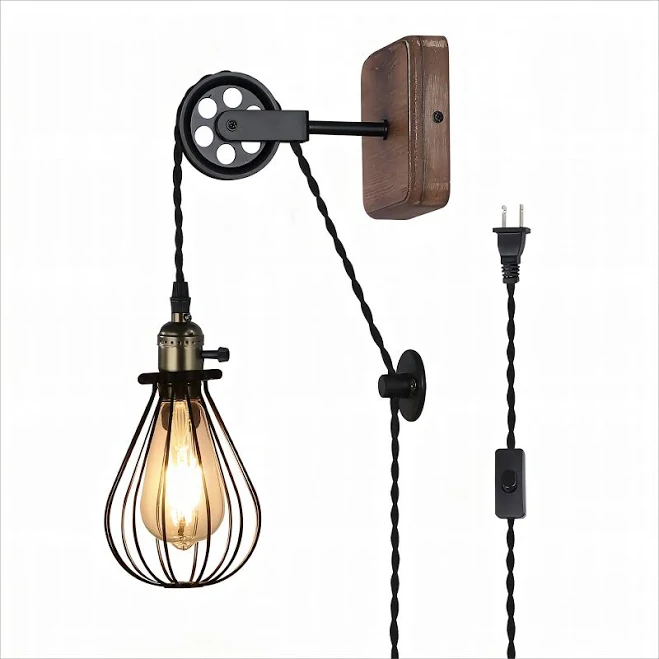
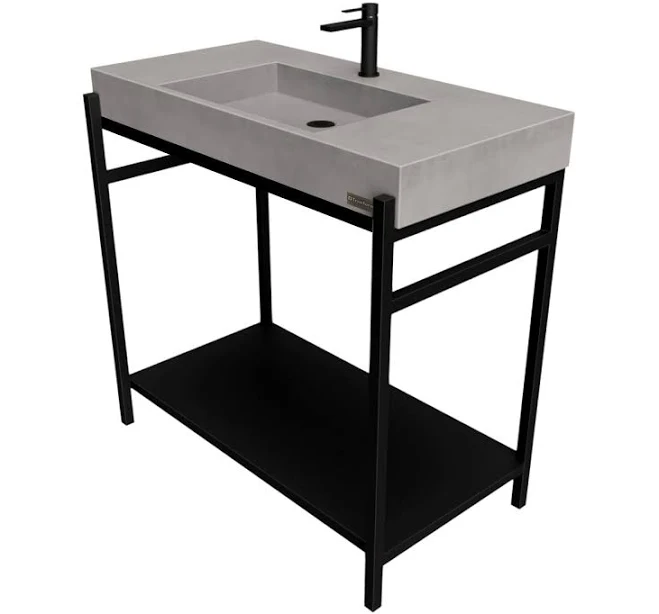
14. DIY Basement Bathroom with Industrial Touches
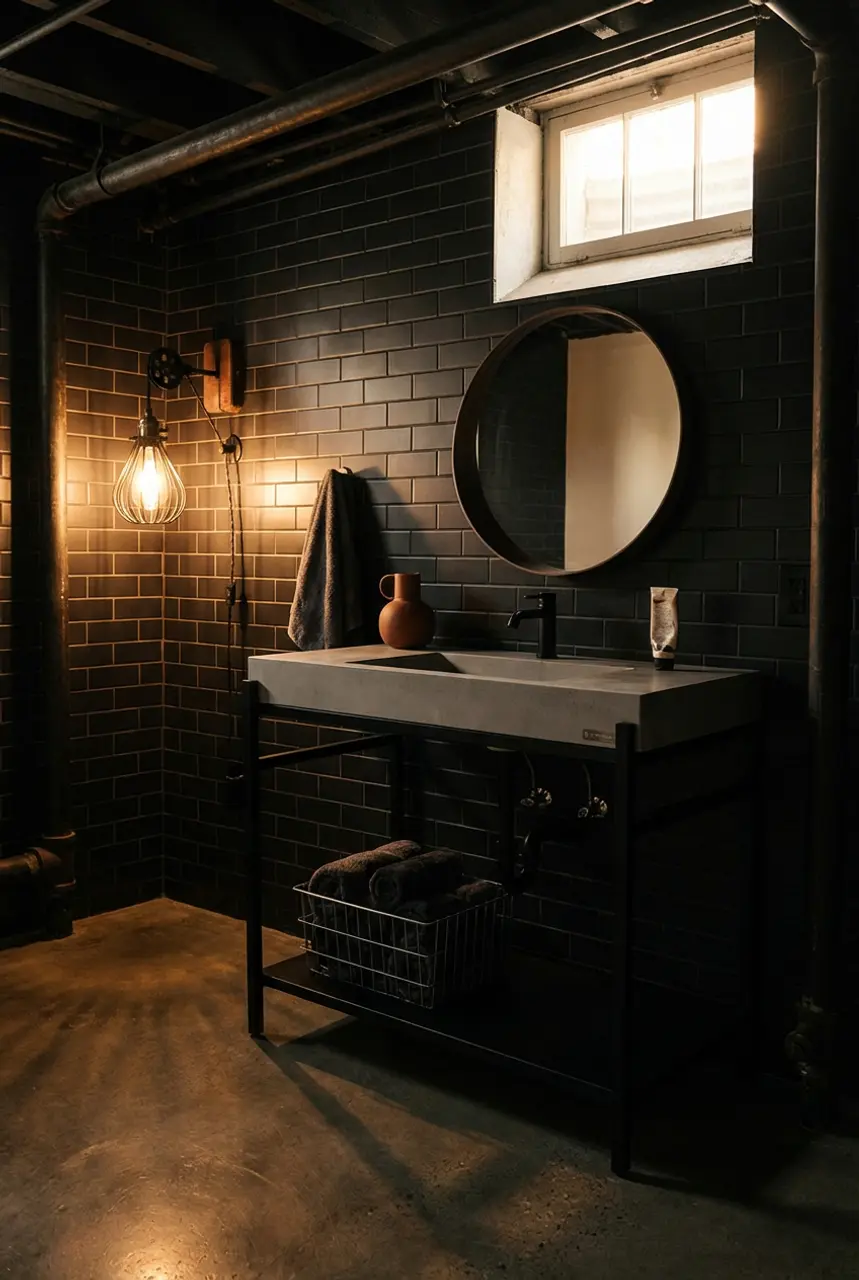
A DIY basement bathroom with industrial touches can be surprisingly chic and incredibly functional. It’s about embracing raw materials and utilitarian elements like exposed pipes, a concrete vanity, and classic subway tile. This look is rugged yet refined, showcasing an appreciation for a stripped-down, honest aesthetic. The beauty lies in its unpretentious nature and the juxtaposition of rough textures with clean lines.
- Vanity & sink (DIY concrete, stock cabinet): $200 – $800
- Shower (kit, subway tile): $300 – $1,000
- Toilet: $100 – $300
- Flooring (concrete seal, tile): $150 – $400
- Lighting & mirror: $100 – $300
- Fixtures (faucet, showerhead): $150 – $400
- TOTAL: $1,000 – $3,200
Budget alternative: Use an existing utility sink with a new faucet, paint existing walls, and source a vintage mirror from a thrift store for under $500.
The concrete vanity is the absolute game-changer in this industrial bathroom. It grounds the entire space with its raw, weighty presence and instantly communicates the aesthetic. Without it, you’d lose that crucial raw material juxtaposition and the sense of rugged authenticity that defines the industrial style. This is your centerpiece, your anchor—everything else builds from its unpretentious foundation.
|
SUNLLOK Wood Cage Wall Lamp LV310-N$48.55 |
The Container Store Wire Basket$11.24 |
Zara Home Round Wall Mirror$149 |
Nolita 36″ Vanity Sink$2175 |


As an affiliate, we earn from qualifying purchases.
15. Unfinished Basement into a Budget-Friendly Home Brewery
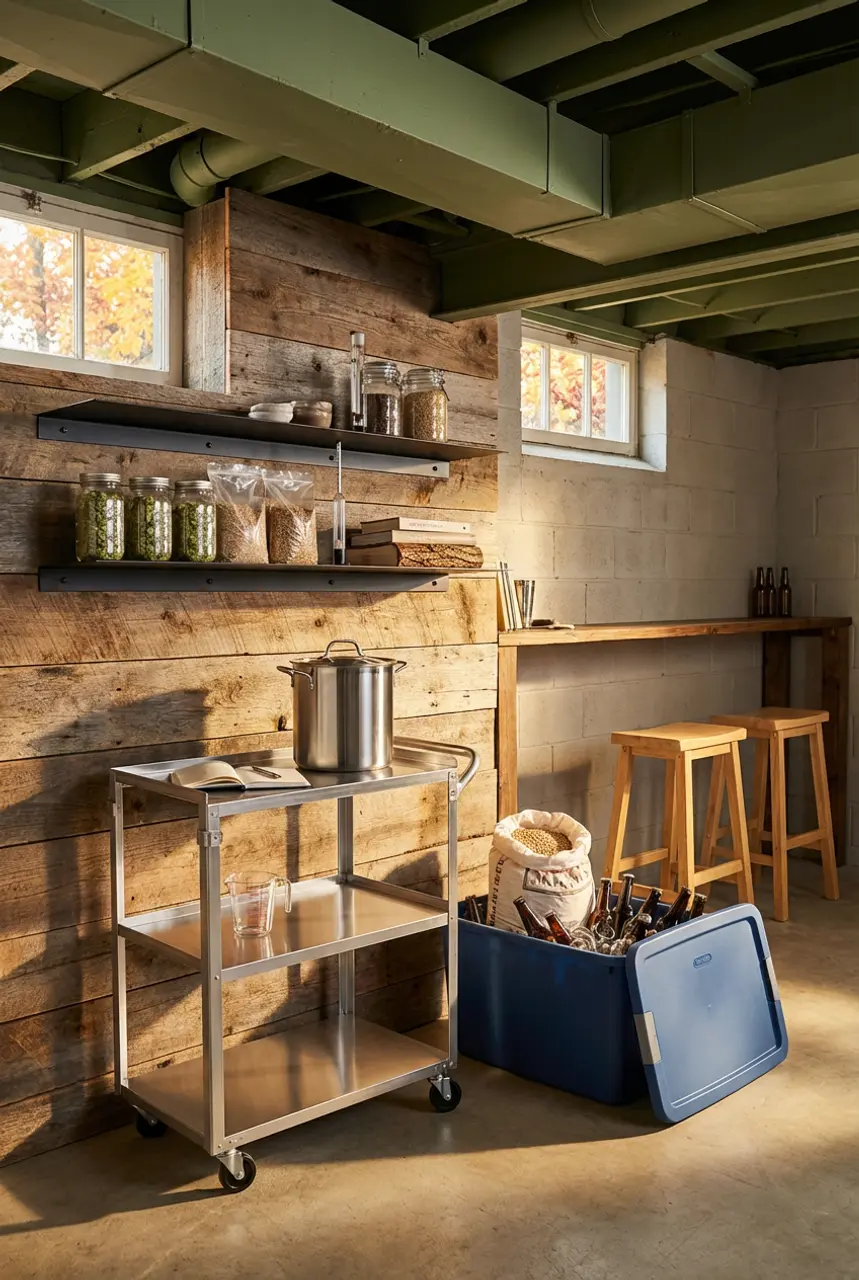
Turning an unfinished basement into a budget-friendly home brewery is one of those projects that combines passion with practicality. It embraces the raw, industrial aesthetic of a basement while creating a specialized utility space tailored for craft beer creation. Think durable, easy-to-clean surfaces, smart storage for equipment, and industrial elements that nod to the brewing process itself. It’s functional, masculine, and perfect for the homebrewer.
Home brewing has exploded in popularity, and with it, the demand for dedicated crafting spaces. What was once a niche hobby is now a lifestyle, popularized by countless YouTube channels and Instagram communities. This idea resonates with the contemporary maker movement and the desire for personalized, functional zones within the home. It’s less about a fleeting design trend and more about supporting a growing and active hobby, making it quite enduring in its appeal.
To pull off this brewery vibe on a shoestring, forget custom cabinetry. Use sturdy, open metal shelving or even robust industrial-style wire racks from hardware stores for equipment storage. Instead of a fancy bar, build a simple workbench with a durable countertop (a reclaimed solid-core door can work!) and add some affordable bar stools from Target or Walmart (like the Room Essentials stools for around $42 for a set of two). For lighting, exposed utility lights or a couple of simple pendants (like the Industrial Caged Iron Pendant for $49.99 can create the right atmosphere. Focus on functionality over frills, and lean into the unfinished look.
|
Brewer Stainless Steel All Purpose Utility Cart$336.99 |
Sterilite 20 Gallon Large Storage Bin$8.97 |
Room Essentials Set of 2 24″ Solid Wood Backless Saddle Counter Height$42 |
Wall Mounted Metal Shelf$44 |


As an affiliate, we earn from qualifying purchases.
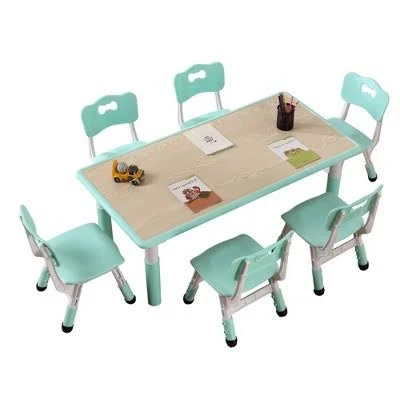
16. Bright Basement Playroom with Creative Storage Solutions
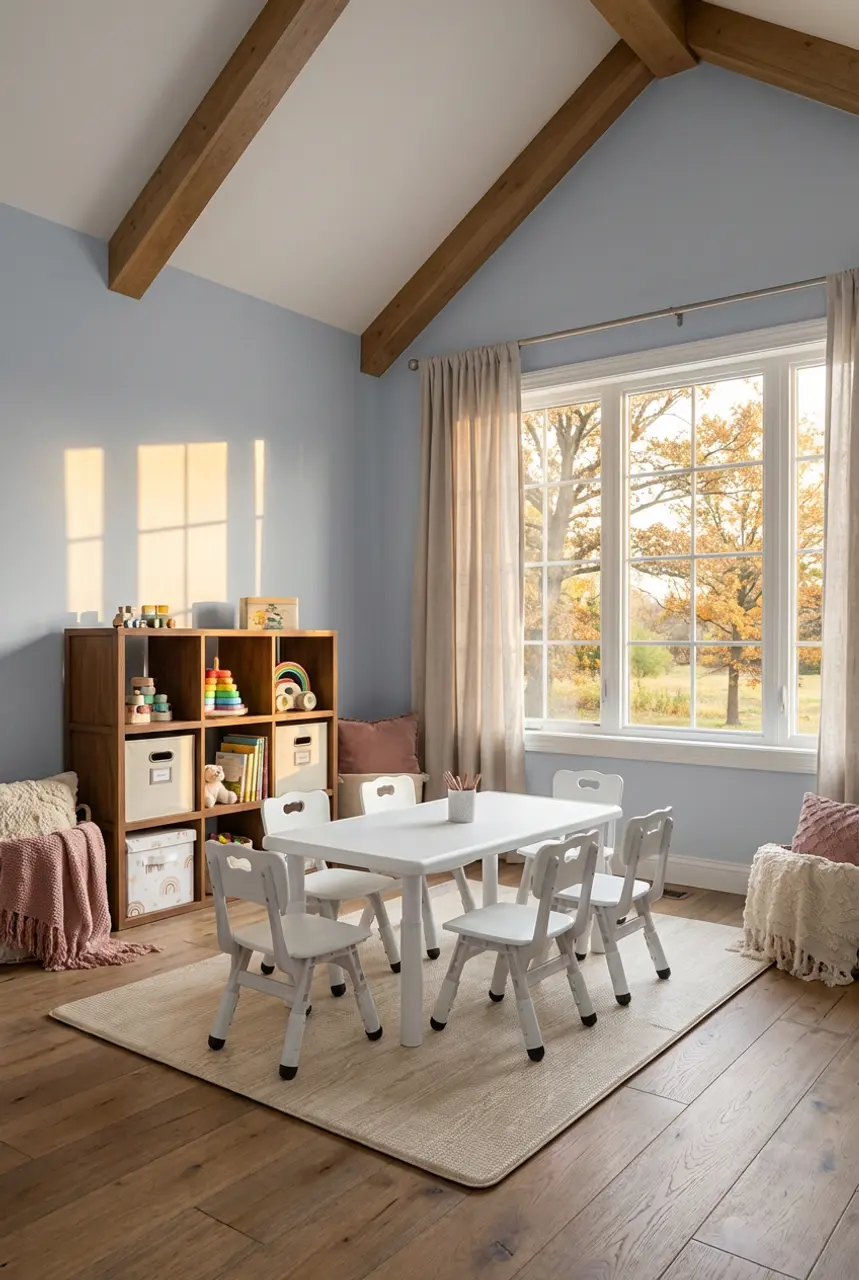
A bright basement playroom with creative storage solutions is every parent’s dream. It’s about creating an organized, engaging, and above all, child-friendly space where kids can play freely and messes can be easily contained. Think vibrant colors, soft rugs, and modular storage units that adapt as your kids grow. The goal is a joyful and functional zone that fosters creativity while keeping clutter at bay.
For toy storage, always choose open-front bins or clear containers at child-height. This allows kids to see exactly what’s inside, promoting independent play and making cleanup much easier (because they know where everything goes!). For an added bonus, label the bins with both text and a picture for pre-readers.
This idea is fantastic for basements that are at least 15×15 feet, providing enough open floor space for active play, a dedicated craft zone, and ample storage. If your basement is smaller, you’ll need to be even more strategic with vertical storage and multi-functional furniture. For instance, a storage bench with a pull-out play mat (similar concept to Idea #18) can serve double duty. The key is to avoid overcrowding the space to ensure safe play and easy movement.
|
Kids Table and 6 Chairs Set$149.99 |
Sweet Jojo Designs Boho Rainbow Fabric Toy Bin$32.99 |
John Louis Home Solid Wood 9 Cube Organizer$286 |
Comfy Cubs Premium Play Mat$34.99 |

As an affiliate, we earn from qualifying purchases.
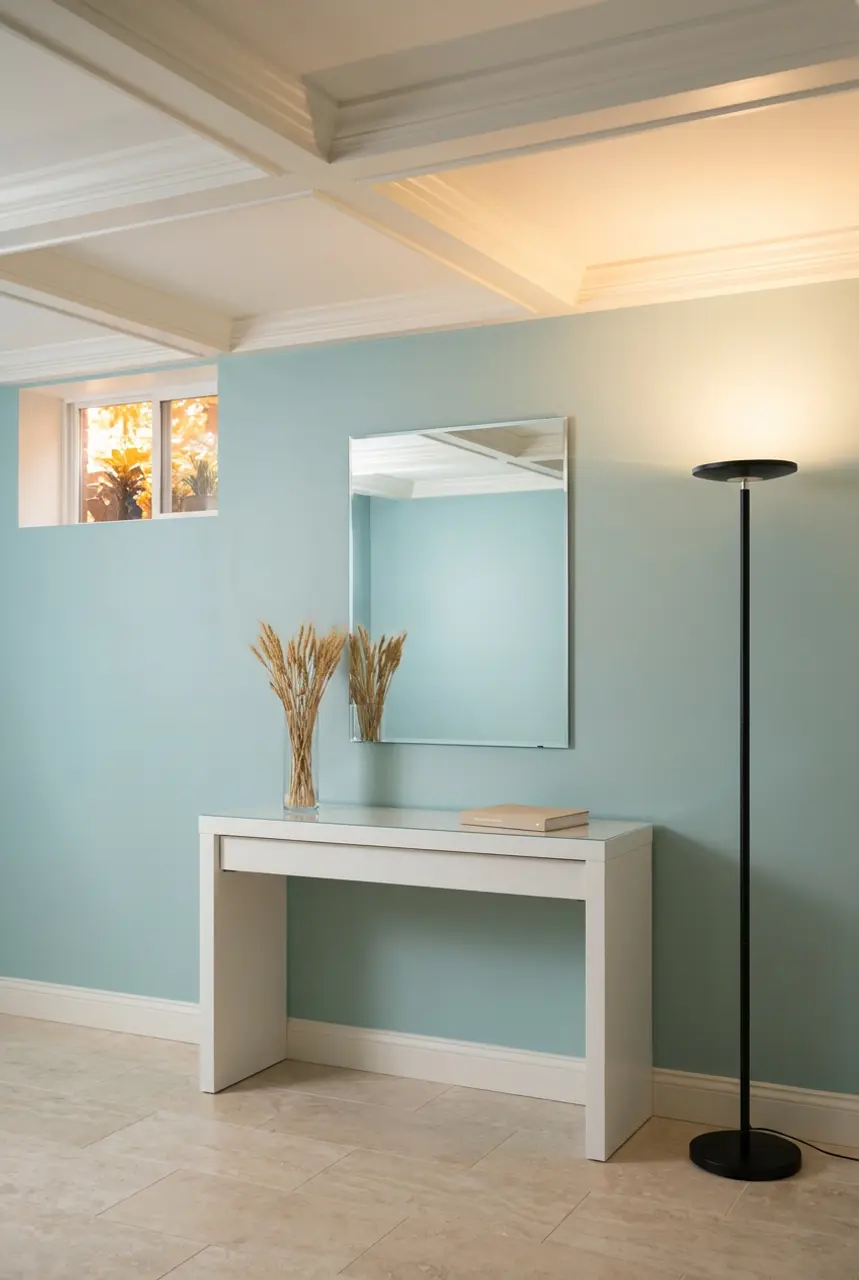
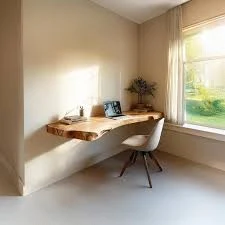
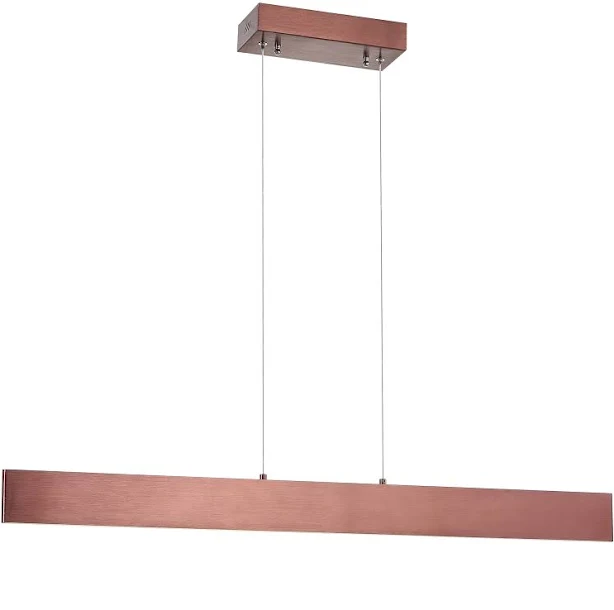
17. Split-Level Basement with Dedicated Home Office Zone
✨ Luxury Version
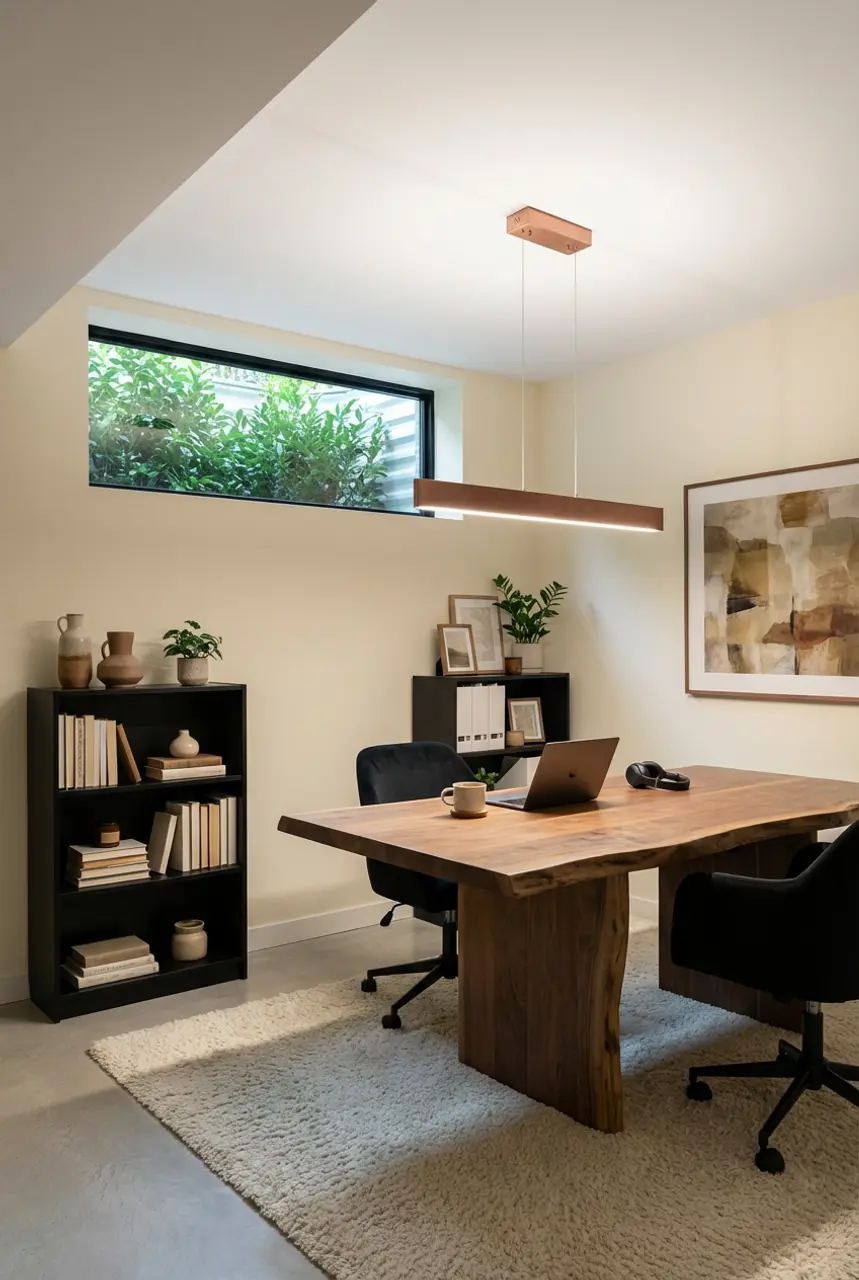
A split-level basement with a dedicated home office zone is a smart way to maximize space and create distinct functional areas. The subtle elevation change already helps define the zones, and you can enhance this with elements like glass partitions or even clever flooring changes. It’s about creating a productive, sleek workspace that feels integrated into the home but also separate enough for focus. Natural light, wherever possible, is a huge bonus here.
💸 Budget Version
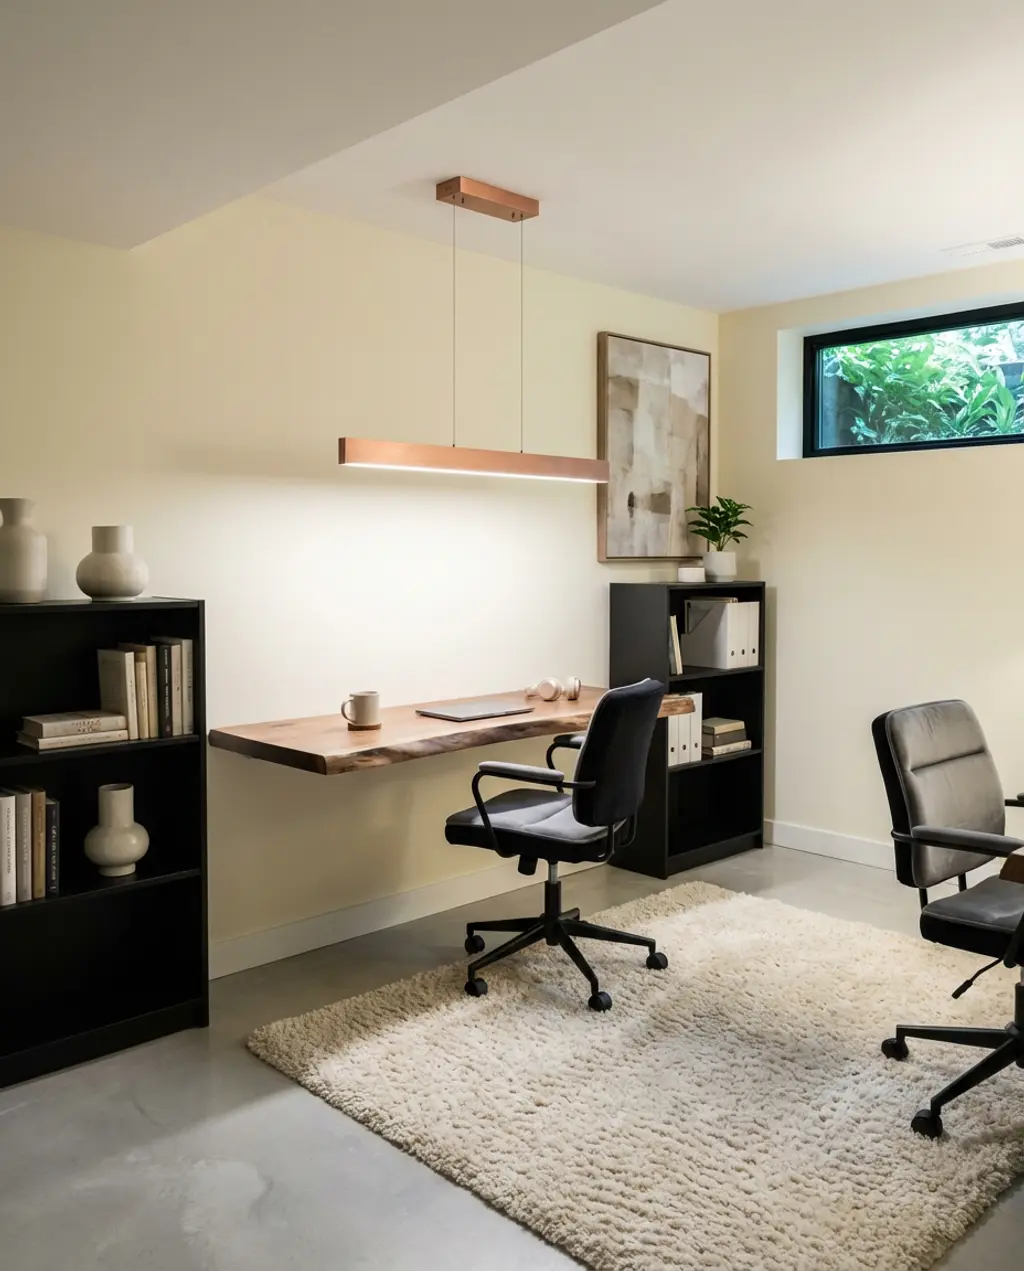
The visual formula for this modern office space would be: 60% clean lines and neutral base (walls, large furniture) + 30% natural light and transparency (glass partition, open shelving, floating desk) + 10% purposeful plant life for freshness and visual relief. The clean lines keep it professional, the transparency prevents it from feeling boxed-in, and the greenery adds that touch of life that really helps with focus.
While a glass partition looks incredibly sleek, it’s worth considering the practical reality of privacy and sound. Glass offers visual separation but very little acoustic privacy. If you’ll be on frequent video calls or need quiet for deep work, this might be a deal-breaker. You might need to invest in acoustically treated glass or consider an alternative like a half-wall combined with a sliding barn door for occasional privacy. Also, consider glare on computer screens if the partition is near a window.
|
💰 Budget Pick Floating Live Edge Desk – Handmade Natural Wood Table – Minimalist Hom$77.04 |
💰 Budget Pick Floating Live Edge Desk – Handmade Natural Wood Table – Minimalist Hom$77.04 |
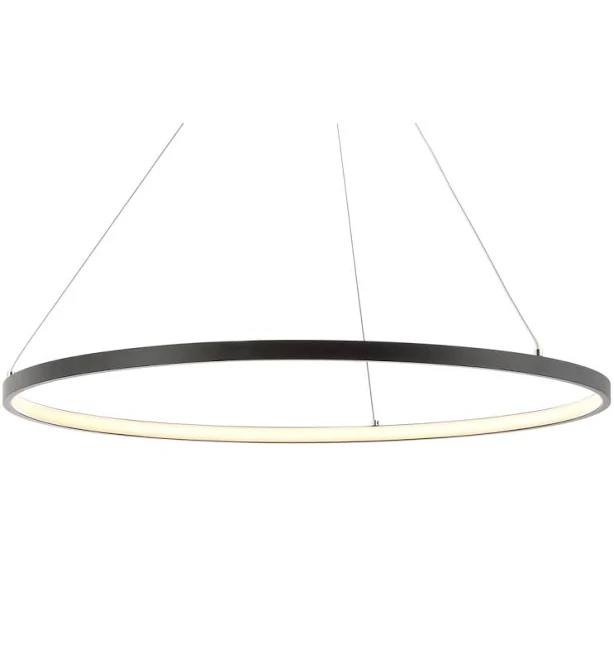
✨ Luxury Pick Jonathan Y Draper 40″ Dimmable Adjustable Integrated LED Linear Pendan$143.53 |
✨ Luxury Pick Jonathan Y Draper 40″ Dimmable Adjustable Integrated LED Linear Pendan$143.53 |

As an affiliate, we earn from qualifying purchases.
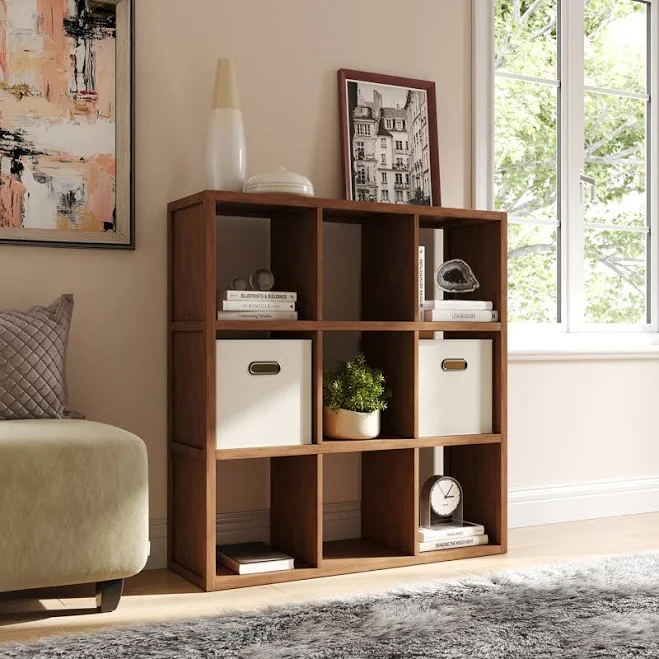
18. Modular Storage Solutions for Basement Playroom
For any playroom, basement or otherwise, modular storage solutions are your secret weapon against clutter. This isn’t just about throwing toys into bins; it’s about creating a flexible, reconfigurable system that adapts to your kids’ ever-changing interests and toy collections. Think colorful cubes, lidded baskets, and robust shelf units that can be moved, stacked, and rearranged. It’s all about empowering easy cleanup and keeping the space bright and inviting.
- Modular storage cubes (plastic or fabric): $50 – $200
- Storage baskets (fabric, plastic): $30 – $100
- Shelf unit (for cubes): $50 – $150
- Toy chest/box: $40 – $100
- Wall shelves: $20 – $50
- TOTAL: $190 – $600
Budget alternative: Utilize existing bookshelves, repurpose large laundry baskets, and scour thrift stores for sturdy wooden crates to get a similar system for under $100.
The humble modular storage cube is the unsung hero here. Without the ability to reconfigure, stack, and adapt your storage system, the playroom quickly devolves into chaos as toys come and go. Its versatility means your storage grows with your children’s needs, making it the one essential element that keeps this playroom functional and tidy in the long run.
19. Inviting Basement Family Room with Durable Flooring
An inviting basement family room with durable flooring is ideal for homes with kids, pets, or just a lot of lively activity. The goal is maximum comfort and resilience, without sacrificing style. LVP (Luxury Vinyl Plank) flooring is a superstar here—it’s tough, waterproof, and comes in gorgeous finishes that mimic real wood or stone. Paired with comfortable, stain-resistant seating and warm tones, it creates a welcoming hub for family life.
- What kind of subfloor do you have, and is it completely dry and level? Any moisture issues must be resolved first.
- What’s your insulation situation like? A well-insulated basement is key for year-round comfort.
- How much natural light does the room get? This will influence your color palette to avoid a cave-like feel.
- Will the main thoroughfares have enough clearance once all furniture is in place? Don’t forget circulation paths.
- Have you calculated the square footage for flooring and ordered extra for cuts and repairs?
When selecting your LVP flooring, always choose one with a wear layer of at least 12 mil, especially for high-traffic basement areas. This metric—the thickness of the clear, protective top coating—is a better indicator of durability against scratches and daily abuse than the overall plank thickness alone. A higher mil number means it will stand up to kids, pets, and dropped popcorn for years.
|
Quince Flint Wool Textured Rug$149.9 |
Edenfield 3-Piece Chaise Sectional by Ashley Furniture$947.99 |
World Market Multi Level Coffee Table$209.99 |
JONATHAN Y Enzo Floor Lamp$106 |
Edenfield 3-Piece Chaise Sectional by Ashley Furniture$947.99 |
Quince Flint Wool Textured Rug$149.9 |
World Market Multi Level Coffee Table$209.99 |
JONATHAN Y Enzo Floor Lamp$106 |

As an affiliate, we earn from qualifying purchases.
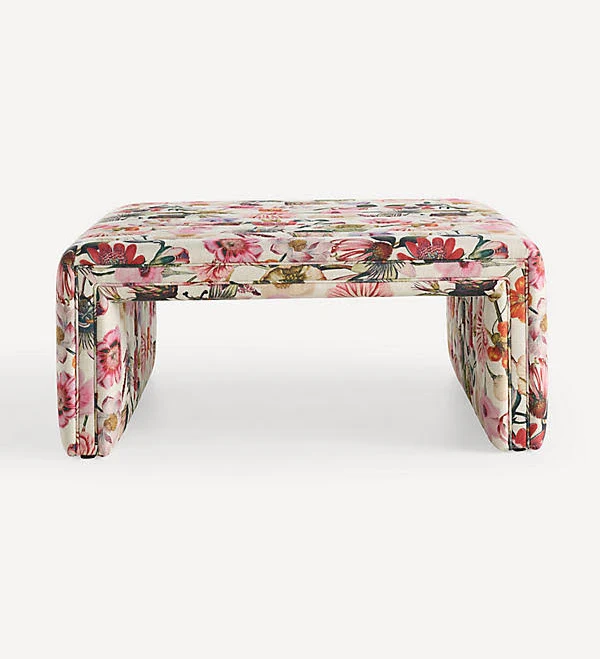
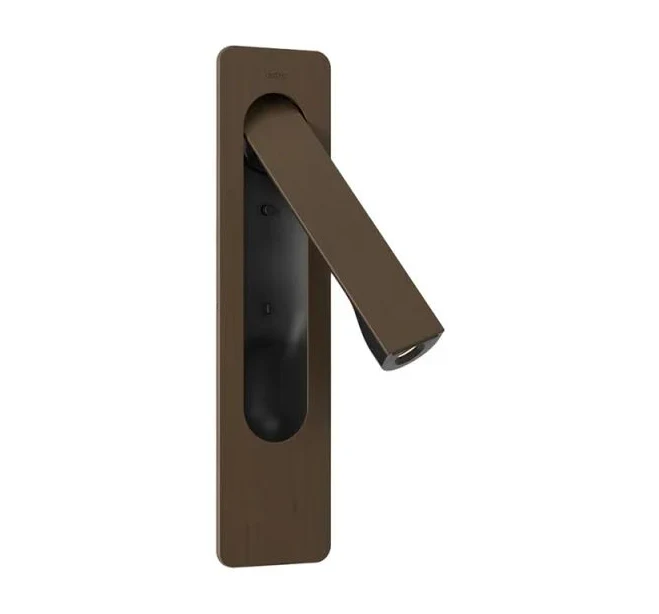
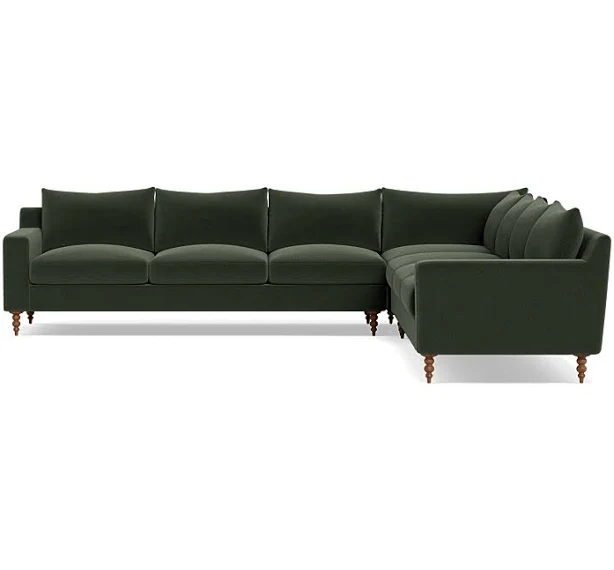
20. Split-Level Basement Entertainment Zone with Built-in Seating
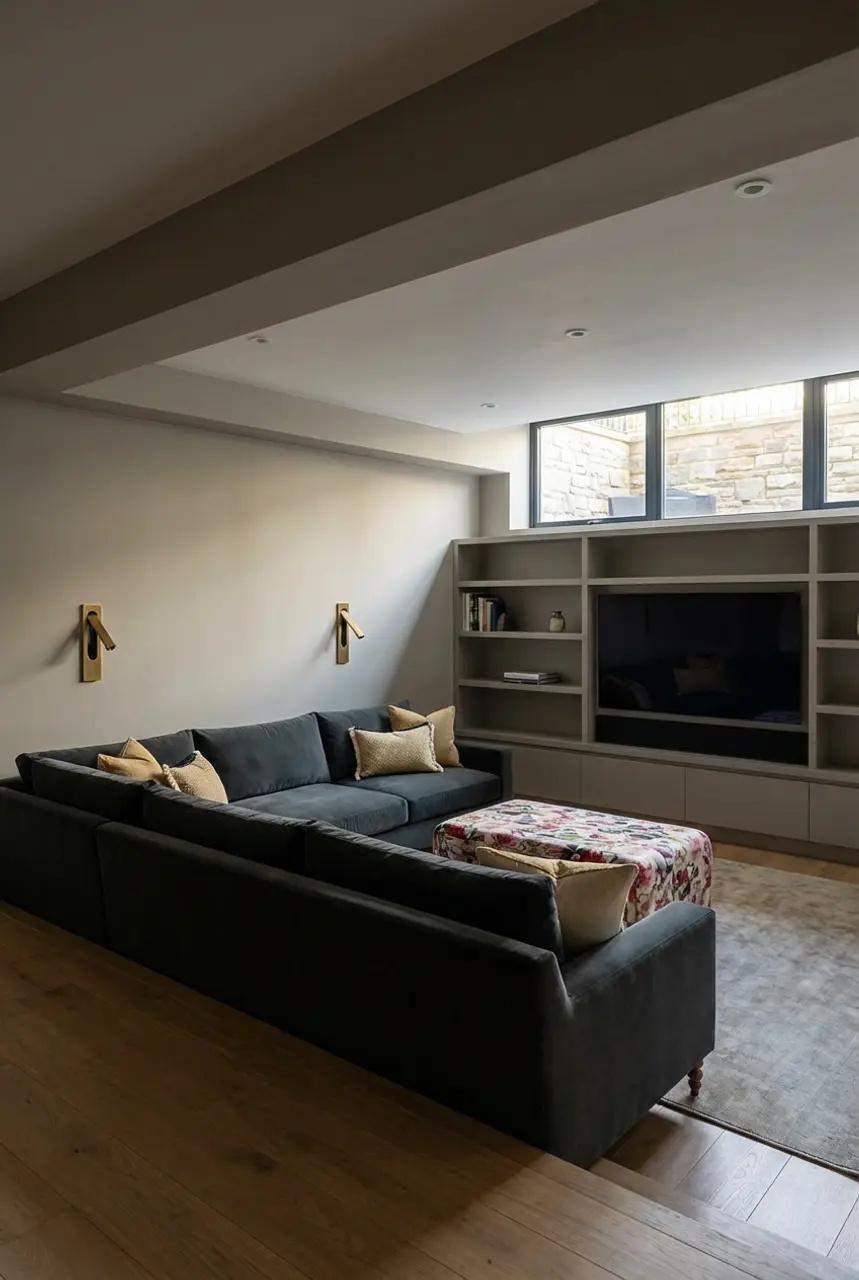
A split-level basement entertainment zone with built-in seating is the epitome of integrated design and maximizes every architectural nuance. By leveraging the natural elevation changes, you can create distinct areas—like a media wall and stadium-style seating—that flow seamlessly together. This is a custom-build approach focused on sleek lines and a modern aesthetic, perfect for serious entertainers or families who love to gather.
This integrated design relies on a precise formula: 50% built-in elements (seating, media wall) + 30% strategic lighting (recessed, wall sconces like the Astro Lighting Keta LED Reading Light) + 20% comfort and texture (throw pillows, soft rug). The built-ins are the foundational structure, the lighting highlights the zones, and the soft furnishings make the custom elements feel inviting rather than rigid. Compare this layered approach to Idea #27, which uses similar principles in a much smaller apartment footprint.
Building a Basic Media Wall Section:
- Design & measure: Sketch out your desired media wall dimensions, accounting for screen size, components, and storage.
- Frame the structure: Use 2x4s to build the basic frame for your wall unit. Secure it to existing studs.
- Add shelves/cabinets: Integrate custom-cut plywood shelves or pre-made cabinet boxes within the frame.
- Apply drywall/panels: Cover the frame with drywall or decorative wall panels. Finish and paint to match.
Time estimate: 2-4 days (depending on complexity).
Material cost: $200-$1,000+ (depending on finish materials).
|
Anthropologie Alexander Coffee Table Ottoman$698.6 |
Astro Lighting Keta LED Reading Light$319.78 |
Crate & Barrel Geo Fringe Throw Pillow$17.97 |
Sloan Custom 6-Seat Corner Sectional$4616.25 |

As an affiliate, we earn from qualifying purchases.
21. DIY Budget-Friendly Basement Home Gym & Play Area
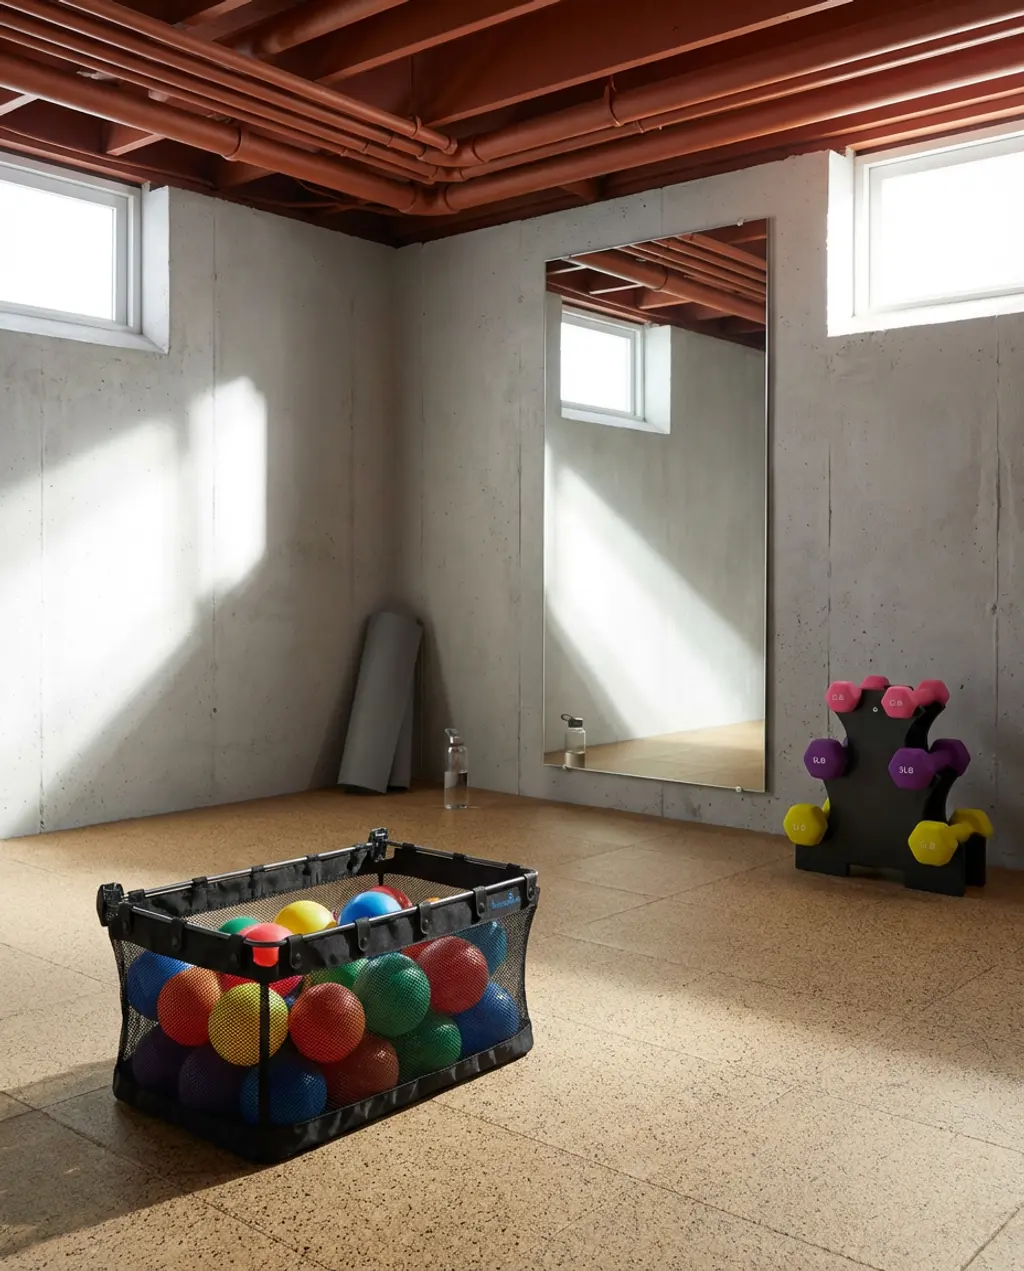
A DIY budget-friendly basement home gym and play area is all about versatility and functionality. It’s about creating a multi-purpose zone where adults can work out and kids can play, without extensive renovations. Rubber flooring is key for durability and shock absorption, simple equipment keeps costs down, and bright lighting ensures both safety and an energized atmosphere. It’s a practical solution for maximizing an unused basement space.
Rubber gym flooring, while excellent for impact absorption and durability, does require specific care. It can off-gas a rubber smell, especially when new; ensure good ventilation during installation and for a few weeks after. It’s generally easy to clean with a damp mop, but avoid harsh chemicals or oil-based cleaners as they can degrade the rubber. Spills from protein shakes or water cups should be wiped up quickly to prevent staining or mildew underneath. For a similar multi-functional space with less specific flooring needs, check out Idea #16.
This idea works so well because it embraces a dual-purpose design with efficiency. By choosing highly durable, multi-functional materials like rubber flooring, it caters to both active play and serious workouts without compromising safety or longevity. The minimalist approach to equipment and storage prevents clutter, emphasizing wide-open space for movement. It’s a success of practical design, demonstrating that you don’t need extravagant finishes to achieve a highly usable and effective multi-zone area.
|
Mesh Sports Basket$105.41 |
Large Fitness Room Shatterproof Mirror with Safety Backing 48″ x 72$399.99 |
Extreme Rubber Gym Tiles$33.17 |
Balance From Fitness Dumbbell Set with Stand$34.99 |


As an affiliate, we earn from qualifying purchases.
22. Budget-Friendly Basement Game Room with DIY Storage
Another take on the budget-friendly basement game room involves really leaning into DIY storage and clever repurposing. This approach focuses on making the most of what you have or can easily acquire, keeping the vibe bright, fun, and incredibly versatile. It’s about creating a space where everyone feels welcome to pull up a chair and join in, proving that you don’t need a huge budget to have a highly entertaining basement.
- Main furniture (sectional, game table): $800 – $2,500
- Lighting (pendant, floor lamp): $150 – $400
- Textiles (rug, throw pillows): $100 – $300
- Decor/accessories (storage baskets, wall art): $100 – $250
- Paint/wall treatment: $50 – $150
- TOTAL: $1,200 – $3,600
Budget alternative: Find a pre-owned gaming table on Facebook Marketplace or at a local consignment shop, pair it with an affordable sectional from Bob’s Discount Furniture (like the Dylan Sectional for $999), and use DIY shelving from reclaimed wood for under $700.
When placing game tables, ensure each player has at least 24 inches of personal space at the table’s edge for comfortable movement, plus another 18-24 inches behind their chair if it’s against a wall. This prevents elbows from clashing and allows for easy entry and exit, especially for games that require leaning in or moving around.
|
Hexagonal Solid Wood Board Game Table For 4-6 Players,convertible Dini$539.99 |
Casa & Beyond Elegant Rattan Weave Basket Set$69.99 |
Modern Geometric Gold Pentagon LED Pendant Light$129.99 |
Bob’s Discount Furniture Dylan 112” 2 Piece Arm Facing Chaise Section$999 |

As an affiliate, we earn from qualifying purchases.
23. Low Ceiling Basement Media Room with Acoustical Panels
For an ultimate low-ceiling basement media room, the focus shifts slightly to acoustical panels to really dial in the sound experience. This creates a cinema-quality environment where sound echoes are minimized, and dialogue is crisp. Dark colors continue to play a crucial role in creating an immersive atmosphere, while ambient lighting adds a layer of sophistication without taking away from the screen experience. Plush seating is, of course, a non-negotiable comfort.
The acoustic panels are the absolute MVP in this setup. Without them, you’re just creating a dark room with a screen; with them, you’re crafting an actual home cinema. They transform the auditory experience, making dialogue clearer and sound effects richer, which is paramount for a media room. This is where you prioritize your budget if sound quality is your top concern.
While acoustical panels are great for sound absorption, don’t confuse them with soundproofing. They’ll improve the sound quality *within* the room by reducing echo, but they won’t necessarily stop sound from traveling *out* of the room and disturbing others. If noise leakage is a concern, you’ll need to consider additional measures like solid core doors, insulated walls, and perhaps specialized drywall, which can significantly add to your budget and complexity. Also, remember that dark walls show dust and pet hair more easily, so be prepared for more frequent cleaning!
|
Regina Andrew Arc Floor Lamp$870 |
Gator Acoustic Foam Pyramid Panels$39.99 |
West Elm Stowe Coffee Table$399 |
Ashley Furniture Jesolo Reclining Sofa$397.1 |

As an affiliate, we earn from qualifying purchases.
24. Luxury Basement Guest Suite with Spa Bathroom
This luxurious basement guest suite, complete with a spa bathroom, is designed to be fully immersive. Every detail, from the opulent chandeliers to the marble finishes and gold accents, is chosen to convey a sense of lavish comfort. Built-in storage maintains a sleek, uncluttered environment, allowing the high-end materials to truly shine. It’s about creating a truly indulgent escape for visitors, making them feel utterly pampered.
This high-end guest suite is best suited for basements of at least 20×20 feet to comfortably accommodate a King-size bed, ample seating, and a generous spa-like bathroom (think 8×10 feet for that!). If your basement is smaller, you can still achieve a luxurious feel with a queen bed and a well-appointed 5×8 foot bathroom by focusing on quality finishes in a more compact footprint. Consider Idea #30 for clever space-saving in a guest bedroom.
The trend towards ‘hotelification’ of homes is huge right now, and this basement guest suite is a prime example. People are looking to recreate the luxury travel experience within their own four walls, driven by a desire for comfort, convenience, and a touch of indulgence. Pinterest is packed with ’boutique hotel bathroom ideas’ and ‘luxury guest room inspiration,’ reflecting this ongoing shift. This isn’t a fleeting fad; it’s a permanent upgrade in how we view hospitality within our homes.
|
Alden Decor Madison Crystal Pendant Chandelier$570 |
Kirkland’s Home Cinnabar Road Xander Ornate Wall Mirror$145.99 |
Christopher Knight Home Dylan Upholstered Platform Bed$437.03 |
26 Inches White and Gold Faux Marble Round End Table$121.49 |
As an affiliate, we earn from qualifying purchases.
25. Rustic Basement Wine Cellar with Stone Walls
A rustic basement wine cellar with stone walls is a classic choice for a reason. It truly transports you. The combination of rough, natural stone, rich wood tones, and soft, atmospheric lighting creates an almost European, old-world charm. It’s perfect for those who appreciate the ritual of wine and want a dedicated, beautiful space to house their collection and perhaps enjoy an intimate tasting.
Here’s the sensory recipe for this rustic retreat: 60% natural textures (stone, wood) + 30% warm, dim lighting (pendants, concealed strips) + 10% vintage or unique accents (barrel table, antique-style storage basket like the Serena & Lily Laurel Wine Bottle Carrier). The textures ground the space, the lighting creates atmosphere, and the accents add personality. This balance ensures the room feels both rugged and refined, avoiding a cold or sterile impression.
This design functions by engaging multiple senses simultaneously. The visual weight and texture of stone walls provide a strong, earthy foundation, while the rich, warm tones of wood racks add natural elegance. The dim, indirect lighting creates an immediate sense of intimacy and reverence, enhancing the tasting experience. It’s a masterclass in creating an immersive atmosphere through a cohesive blend of natural materials and thoughtful illumination, appealing to both sight and touch, not unlike Idea #11.
|
Reclaimed Wine Barrel Pub Table with Glass Top$57.07 |
Rustic Bar Stools, 24 Inch Barstools, Counter Height Stools with Footr$57.32 |
Industrial Caged Iron Pendant Light$49.99 |
Serena & Lily Laurel Wine Bottle Carrier$89.99 |

As an affiliate, we earn from qualifying purchases.
26. DIY Basement Home Theater with Soundproofing
A DIY basement home theater with soundproofing turns a regular basement into a dedicated escape. This is where movie nights become events, and binge-watching reaches cinematic highs. The focus is on dark, encompassing colors that draw you into the screen, comfortable tiered seating for optimal viewing, and crucial soundproofing measures to keep the outside world out and the immersive sound in. It’s a precise build for a specific goal: total entertainment.
- Seating (recliners, modular sofa): $1,000 – $4,000
- Projector & screen: $500 – $2,000
- Soundproofing materials (panels, insulation): $300 – $1,000
- Lighting (wall sconces, recessed): $200 – $600
- Paint & wall treatment: $150 – $400
- Side tables/accessories: $100 – $300
- TOTAL: $2,250 – $8,300
Budget alternative: Use existing comfortable furniture, a large TV instead of a projector, and DIY sound absorption panels with heavy blankets or moving pads for under $1,000. For instance, you could grab an affordable rug like the Threshold Washable Herringbone Accent Rug from Target for just $24.
Building a home theater like this requires careful consideration of electrical loads. Projectors, sound systems, and multiple recliners can draw significant power. Ensure your basement electrical panel can handle the increased demand, or be prepared to add dedicated circuits. Overloading a circuit in a dark, enclosed space is not just inconvenient, it’s a fire hazard. Also, the heat generated by electronics can be substantial; proper ventilation or even a mini-split AC unit might be necessary to keep the room comfortable during long viewing sessions.
|
1-Light LED Wall Sconce$82.83 |
Threshold Washable Herringbone Accent Rug$24 |
Diamante Modular Home Theater Seating$3359 |
Project 62 Glasgow Metal End Table$95 |


As an affiliate, we earn from qualifying purchases.
27. Small Basement Apartment with Compact Kitchenette
✨ Luxury Version
Designing a small basement apartment with a compact kitchenette means mastering the art of the illusion. It’s about maximizing every inch with clever, multi-functional furniture and creating an atmosphere that feels light, bright, and surprisingly spacious. The most successful versions are those that achieve a studio-style living experience without feeling cramped or cluttered, often through sleek, space-saving designs.
💸 Budget Version
In a small apartment layout, paint your ceiling the exact same color as your walls, even if it’s a darker hue. This blurs the visual line where the walls end and the ceiling begins, making the room feel like a continuous, taller volume rather than a box with a distinct lid. This trick works wonders in low-ceiling basements.
This layout is designed for true compact living, ideally within 300-500 square feet, where every piece of furniture serves at least two purposes. If your basement is larger, say 600-800 square feet, you might consider incorporating a dedicated, albeit small, bedroom zone with a sliding door or partial wall for privacy, as seen in some elements of Idea #5. However, for genuinely tiny spaces, embracing the open-concept studio feel is often the most successful approach.
|
💰 Budget Pick Latitude Run Asaiah Solid Low-Pile Light Gray Rug$53.99 |
💰 Budget Pick Noble House 2-in-1 Folding Table with Wall-Mounted Sideboard and Socke$188.98 |
✨ Luxury Pick AllModern Odin Single Light Dimmable LED Pendant$209 |
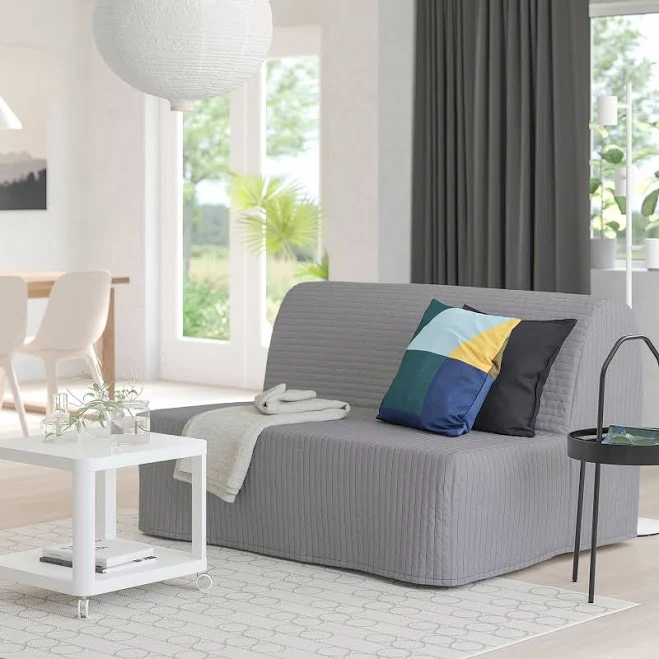
✨ Luxury Pick IKEA LYCKSELE LÖVÅS sleeper sofa$549 |
As an affiliate, we earn from qualifying purchases.
28. Bohemian Basement Lounge with Textured Decor

A bohemian basement lounge is all about creating a relaxed, free-spirited vibe that feels effortlessly curated and deeply inviting. It’s a space filled with texture, natural elements, and a sense of wanderlust. Think layered rugs, macrame hangings, floor pillows for casual seating, and an abundance of lush greenery to bring the outdoors in. This aesthetic encourages unwinding and embraces a collected, eclectic style that feels personal and unpretentious.
This style works because it inherently values comfort, texture, and a laid-back atmosphere. The layering of rugs and textiles creates a soft, inviting surface that encourages lounging. The use of natural materials like macrame, rattan, and various plant life brings an organic, earthy feel, contrasting beautifully with the basement’s typically structured environment. It’s a highly tactile and visually soft approach that instantly makes the space feel more hospitable and less like a ‘basement’.
- What kind of natural light do you have, and how can you maximize it or compensate with warm artificial light?
- Are your walls a neutral canvas, or will you need to repaint to allow the textures and colors to pop?
- Do you have enough comfortable floor seating or will you need to source large cushions and poufs?
- What’s your tolerance for eclectic, mismatched decor, or do you prefer a more refined bohemian look?
- How will you incorporate greenery, considering potential low light conditions, with appropriate plant choices?
29. Unfinished Basement into a Budget-Friendly Laundry Room
Transforming an unfinished basement into a budget-friendly laundry room is all about function over frills. It’s about creating a practical, easy-to-clean space where utility reigns supreme. Think exposed block walls, a durable utility sink, and simple open shelving to keep everything accessible. The goal is a straightforward, no-nonsense zone that makes laundry less of a chore without significant investment.
While the “unfinished” look can be charmingly industrial, exposed concrete floors and walls can be prone to dust and can feel very cold. You’ll need to regularly sweep or vacuum, and consider a concrete sealer for the floor to prevent dusting and make it easier to clean. If you’re opting for open shelving for laundry supplies, be prepared for them to gather dust and require more frequent wipe-downs compared to enclosed cabinets. An alternative could be simple, stackable plastic utility drawers which are easy to clean and conceal clutter.
The push for practical, highly functional utility spaces is a quiet but consistent trend on home improvement platforms. People are realizing that not every room in the house needs to be ‘magazine perfect’; some spaces need to simply *work well*. This idea aligns perfectly with the DIY and budget-conscious movements, where homeowners are empowered to create useful areas with readily available materials and basic skills, rather than costly professional renovations. It’s about smart problem-solving for everyday needs, reflecting a mature and sensible approach to home design in 2026.
30. Low Ceiling Basement Guest Bedroom with Wall-Mounted Headboard
Even a low-ceiling basement can house a tranquil guest bedroom, especially when you employ smart tricks to make it feel more expansive. The key here is a carefully chosen wall-mounted headboard and a low-profile platform bed. This combination minimizes visual clutter and maximizes the perceived vertical space, creating a calm, minimalist sanctuary. Recessed lighting further contributes to the illusion of height by keeping the ceiling plane clear.
The wall-mounted headboard is the absolute superstar in a low-ceiling scenario. By fixing it directly to the wall, you instantly eliminate the bulk of a traditional headboard while keeping the overall bed profile low. This clever visual trick helps the eye travel up the wall uninterrupted, making the ceiling feel higher than it actually is. It’s a small detail with a huge impact on spatial perception.
For a low-ceiling bedroom, instead of traditional nightstands, opt for floating shelves or compact, wall-mounted side tables. This keeps the floor clear, enhancing the sense of spaciousness and giving the illusion of more square footage. Make sure they are mounted at a height that is still functional for a reading light and a glass of water.
31. Michigan Basement Mudroom with Integrated Pet Bath
For anyone in a climate like Michigan, a dedicated mudroom is a game-changer, but integrating a pet bath elevates it to pure genius. This isn’t just about functional storage; it’s about intelligent design that anticipates daily needs – muddy boots, wet coats, and dirty paws. Durable materials, intelligent built-ins, and a well-placed pet wash make this space a fortress against the elements, keeping the rest of your home clean and organized.
This design is successful because it addresses multiple practical needs simultaneously with durable, easy-to-clean materials. The use of robust floor tiles ensures longevity and simplifies cleanup, while built-in storage provides a dedicated place for every item, reducing general clutter. The integrated pet bath is a stroke of genius, offering a specific, contained zone for grooming that prevents dirt from spreading throughout the house. It’s a highly functional, problem-solving space that works for the reality of active households.
- Have you measured the entrance point to ensure there’s enough room for both human and pet traffic?
- What kind of drainage is available for the pet bath, and is your water heater capacity sufficient for pet baths?
- Are your chosen flooring and wall materials truly waterproof and durable enough for consistent mud and water?
- Do you have a plan for adequate ventilation to prevent moisture build-up and odors, especially with a pet bath?
- Have you considered appropriate bench height and hooks for both adults and children/pets, ensuring easy access for all?
🚫 Common Mistakes to Avoid
Now that you’ve seen what works — here’s what to watch out for. These mistakes are surprisingly common and can undermine even the best design intentions.
❌ Mistake #1: Ignoring Proper Insulation and Vapor Barriers
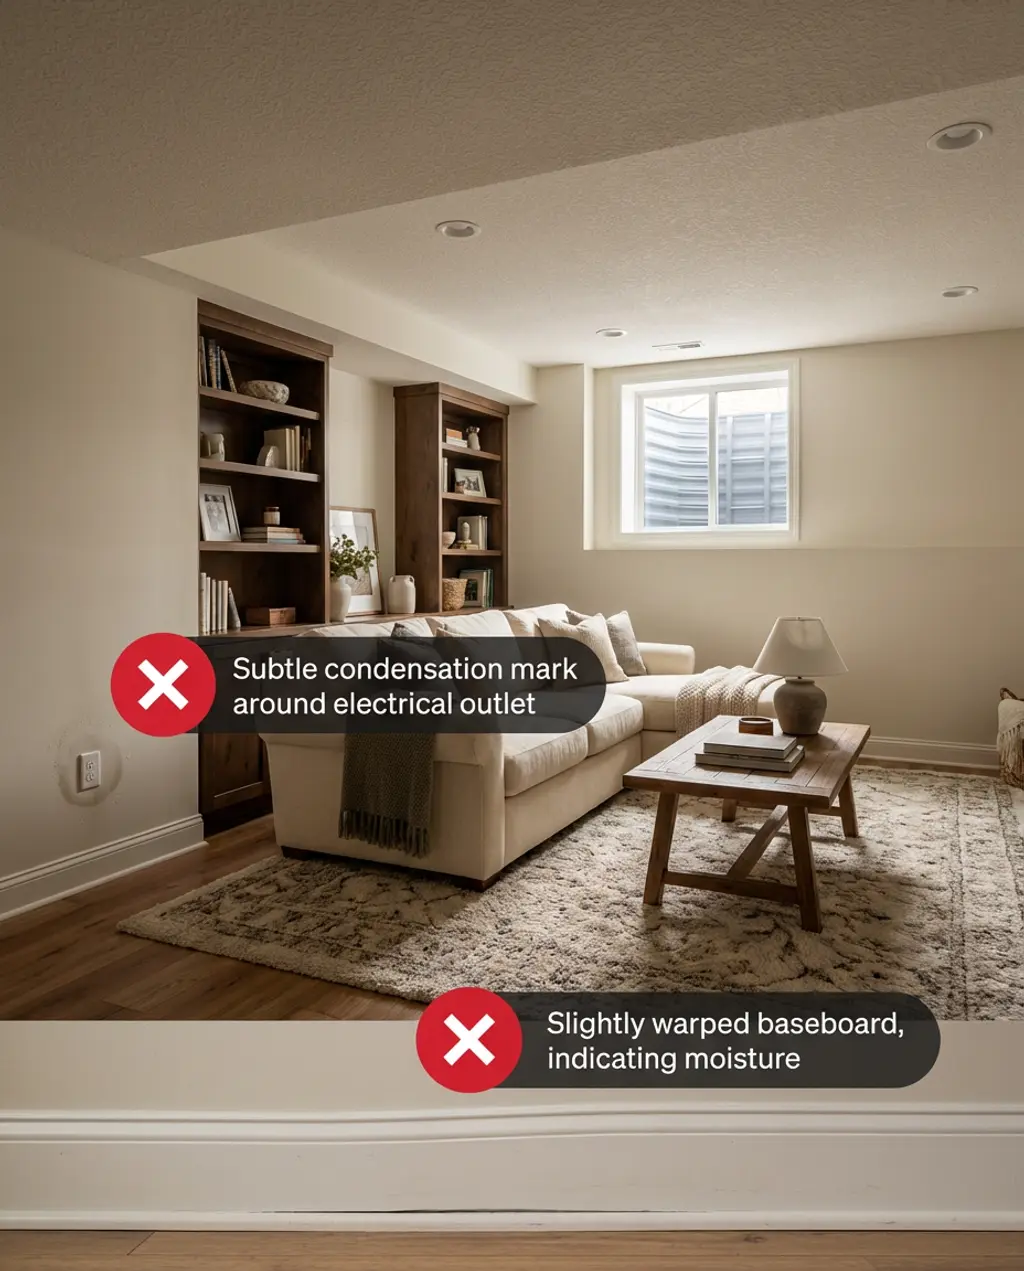
Always address insulation and vapor barriers upfront.
A common mistake in basement remodels is neglecting proper insulation and vapor barriers. Homeowners often focus on aesthetics, forgetting that basements are inherently prone to moisture and temperature fluctuations. Without adequate protection, you risk mold growth, condensation, high energy bills, and ultimately, damage to your beautiful new finishes.
The Fix: Before any drywall or flooring goes in, invest in high-quality insulation (rigid foam or mineral wool) and a continuous vapor barrier on the warm side of the insulation layer. This will regulate temperature, prevent moisture buildup, and protect your investment for decades.
❌ Mistake #2: Inadequate Lighting Design
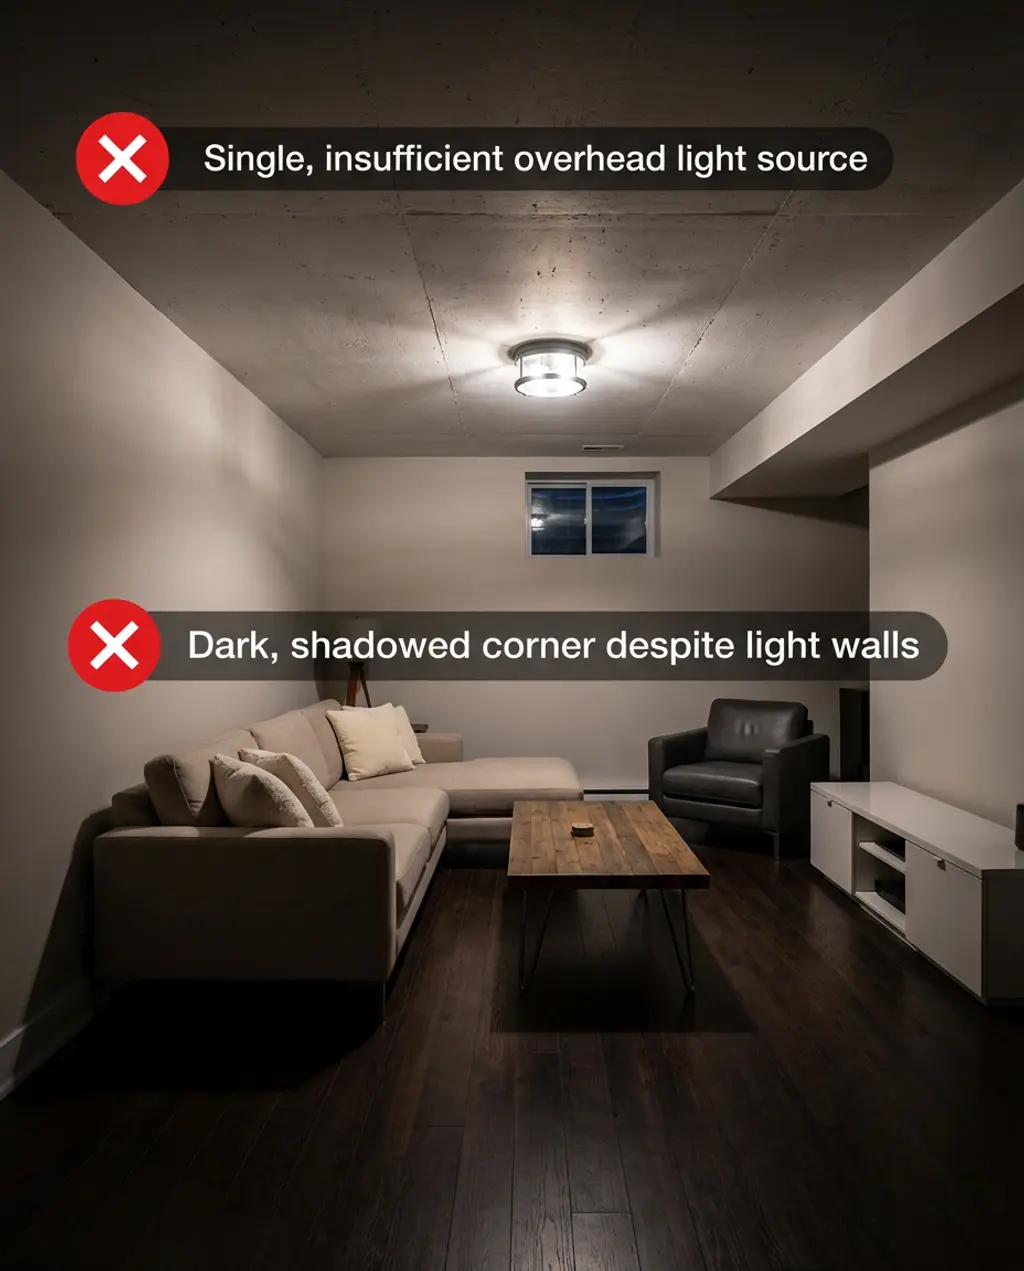
Layer lighting for brightness and ambiance.
Many basement remodels suffer from inadequate lighting. Basements notoriously lack natural light, and simply adding a few overhead fixtures often results in a dim, uninviting, or unevenly lit space. This can make the room feel gloomy, even with bright paint colors, and detract from all your hard work.
The Fix: Plan a layered lighting scheme. Combine general ambient lighting (recessed lights, flush mounts), task lighting (pendant over a bar, desk lamp in an office), and accent lighting (LED strips in shelving, floor lamps to uplight walls). Use dimmers to control the mood and strategically place mirrors to reflect light.
❌ Mistake #3: Forgetting Egress Windows
A critical, often overlooked, and legally required mistake in basement remodels is not installing proper egress windows, especially if you’re adding a bedroom or converting it into a habitable space. Egress windows are essential for safety, providing an emergency escape route in case of fire, and also bring much-needed natural light and ventilation to basements.
The Fix: If you’re adding a bedroom or converting the basement to living space, research your local building codes immediately. You’ll almost certainly need to install an egress window that meets specific size, height, and accessibility requirements. This is non-negotiable for safety and legality.
❌ Mistake #4: Ignoring Floor Levelling and Moisture Control

Always level the subfloor and control moisture.
Installing new flooring directly onto an uneven or damp concrete basement slab is a recipe for disaster. Uneven floors lead to squeaks, cracks, and difficulty with furniture placement, while undetected moisture can cause buckling, warping, and mold under your new beautiful flooring. It’s a foundational mistake that impacts the entire room’s longevity and appearance.
The Fix: Conduct a thorough moisture test on your concrete slab (the plastic sheet test is a good DIY start). If moisture is present, you’ll need a proper vapor barrier. Then, use a self-leveling compound to create a perfectly flat subfloor before installing any new materials. This upfront work saves immense headaches and costs down the line.
Final Thoughts
There you have it—31 fresh ideas to transform your basement into a space you’ll genuinely love spending time in. From cozy media rooms to practical mudrooms and serene guest suites, your basement holds incredible untapped potential.
Don’t let a dark or unfinished basement intimidate you any longer. Start envisioning the possibilities, get inspired by these ideas, and remember: small, smart changes can make a huge difference. Ready to get started? Pin your favorites, gather your inspiration, and make 2026 the year your basement dreams become a reality!