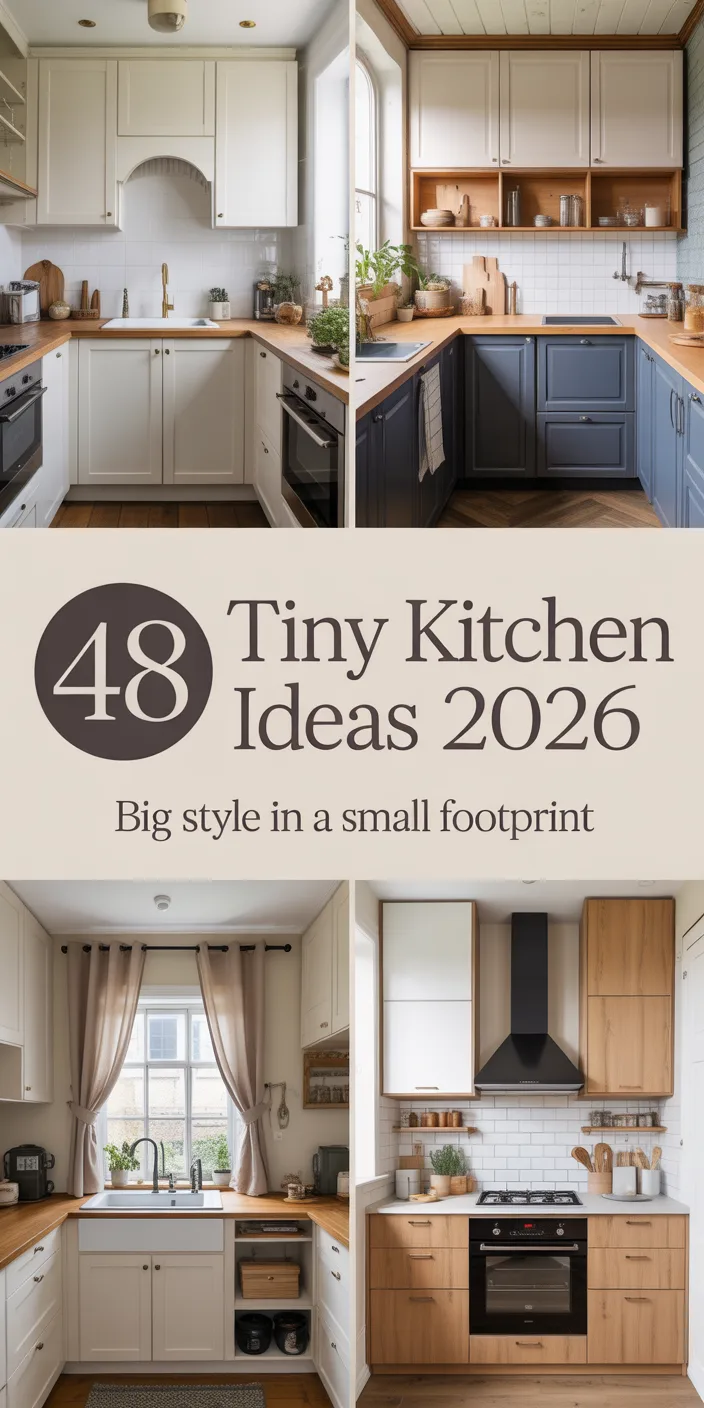
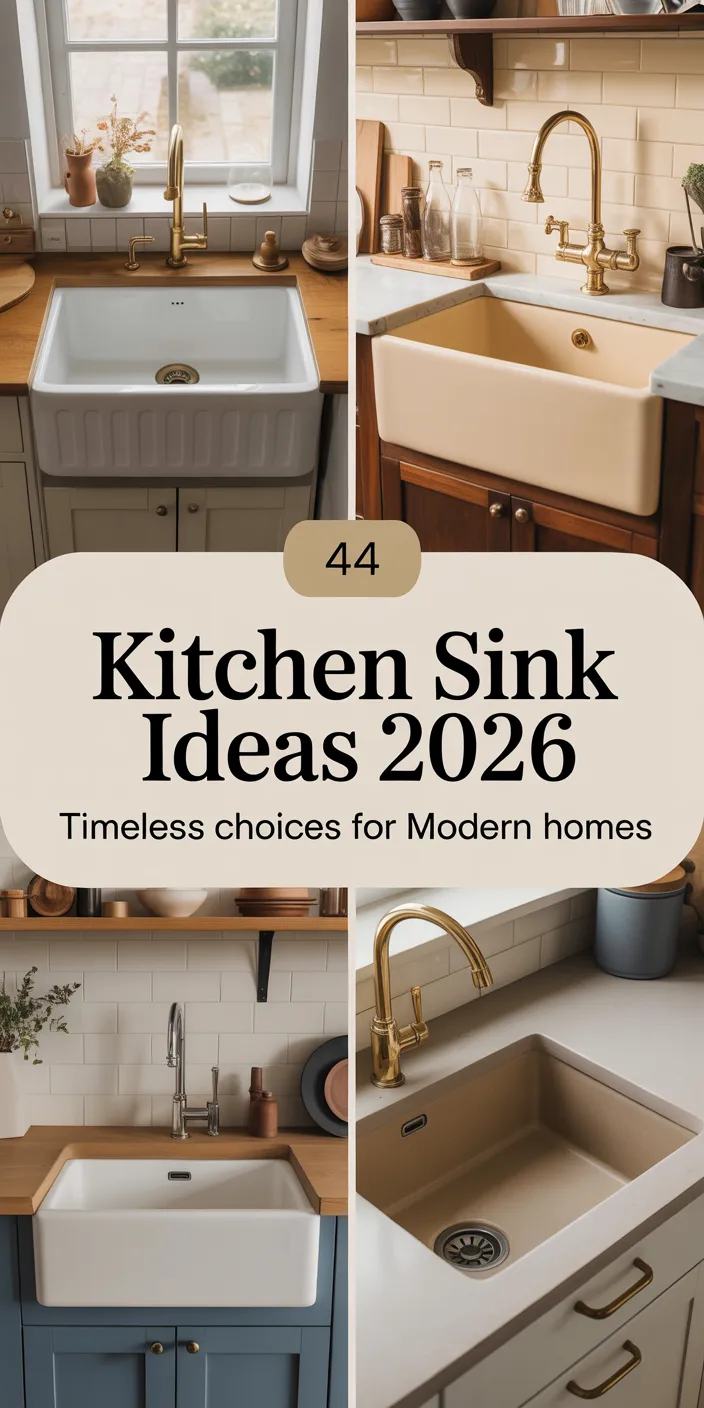
You know that feeling when you finally find the 2026 Kitchen Trends Ideas that looks exactly right for your space?
After filtering through hundreds of options across Lowe’s, IKEA, Home Depot, and Wayfair, we narrowed it down to 30 ideas that actually deliver. We pulled the best 2026 Kitchen Trends Ideas options across every price point — from $0 to $5999.
Inside, you’ll find 30 curated ideas covering everything from modern to transitional, minimalist, and eclectic styles. Every idea is completely shoppable with direct product links, so you can bring your vision to life without the guesswork. We’ve even compared budget and luxury versions side-by-side to help you navigate your choices.
In 2026, kitchen design is all about blending functionality with personal expression, prioritizing materials that tell a story and smart solutions that simplify life. It’s less about rigid rules and more about creating a space that genuinely feels like you, perfectly timed with our collective desire for more intentional living.
Go ahead and save this — you’re going to want to reference it.
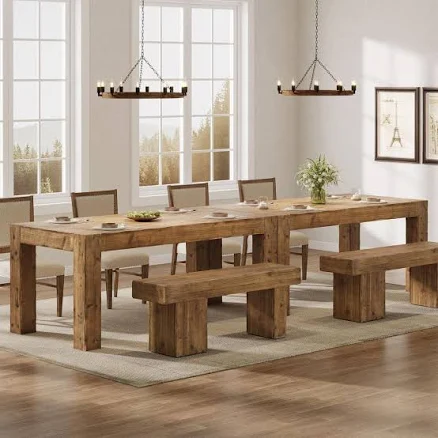
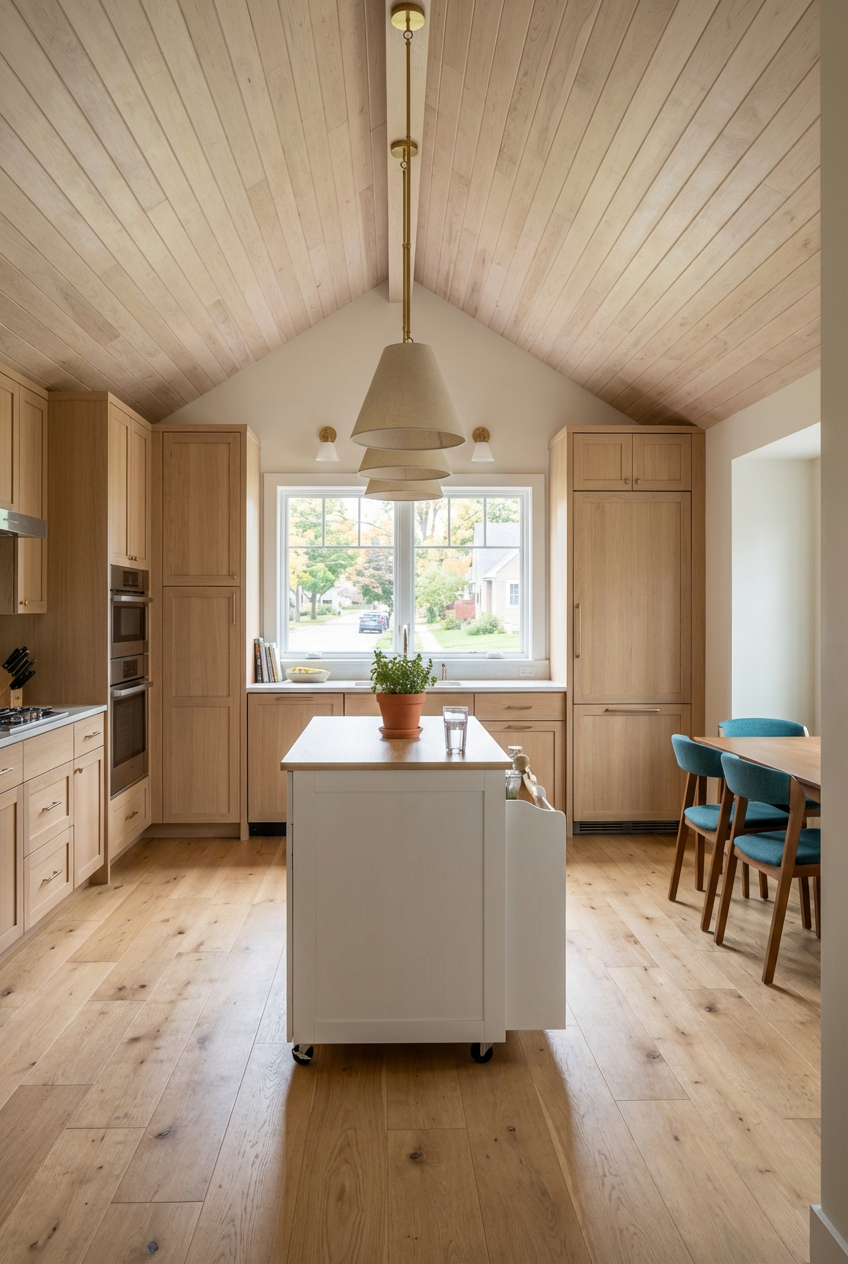
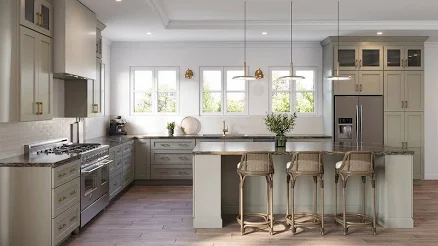
1. Biophilic Modular Kitchen with Integrated Living Wall
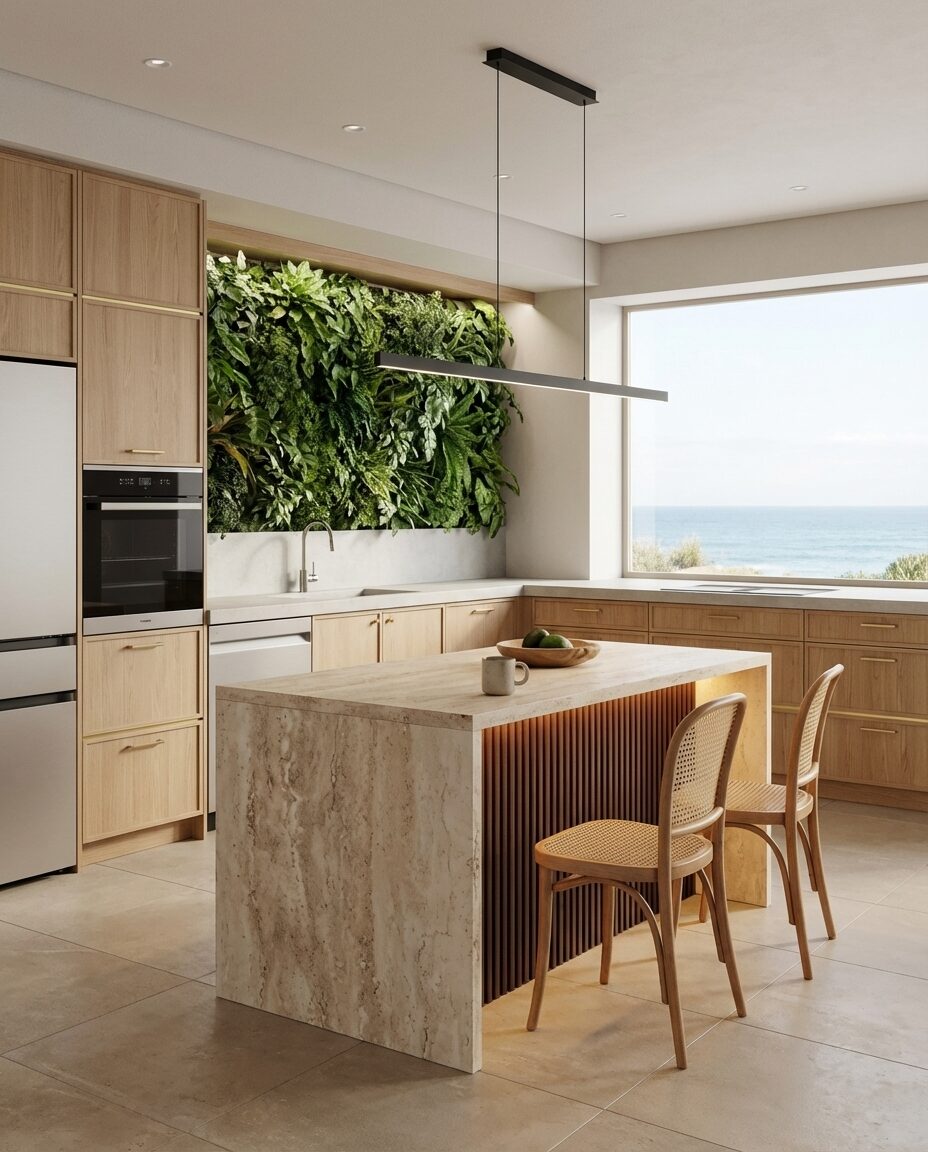
Biophilic design has been whispering in the background for a while, but 2026 is the year it truly steps into the kitchen spotlight. It’s not just about a few potted plants anymore; we’re talking about seamlessly integrated living walls that bring a genuine sense of nature indoors. This trend is a direct response to our increasingly screen-heavy lives, offering a visual and tactile escape right where we prepare our food. It’s all over Pinterest and Instagram, with designers showcasing how these green elements can transform a sterile kitchen into a vibrant, breathable sanctuary. It’s truly about well-being, grounding your space in the natural world. Don’t worry, the maintenance isn’t as scary as it sounds – newer hydroponic systems make these surprisingly low-effort.
The integrated living wall is absolutely *the* defining element here. Without it, you just have a very chic, minimalist modular kitchen—which is great, but it loses that unique biophilic hook. This isn’t just a pretty backdrop; it’s a dynamic, living art piece that constantly shifts with the seasons. It impacts the air quality, the acoustics, and frankly, your mood. So, if you’re going for this look, invest in a quality system and consider the long-term enjoyment it brings. It’s not just decor; it’s an experience.
|
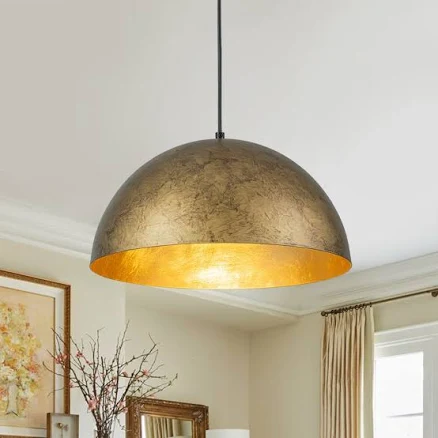
lsland 72″ Waterfall Wood Kitchen Fluted Panel with Storage and LED Li$1,529.99 |
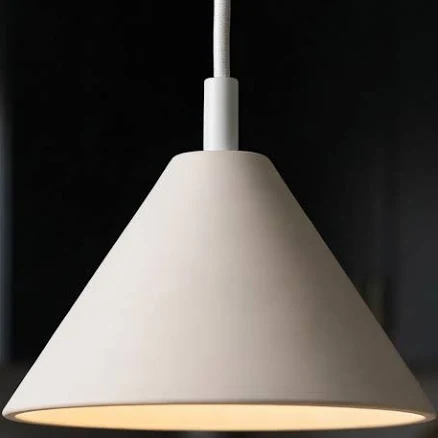
EDISLIVE Neculina 1-Light Integrated LED Island Linear Pendant Light$145.99 |
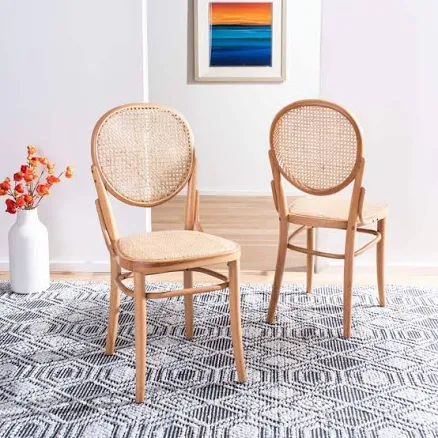
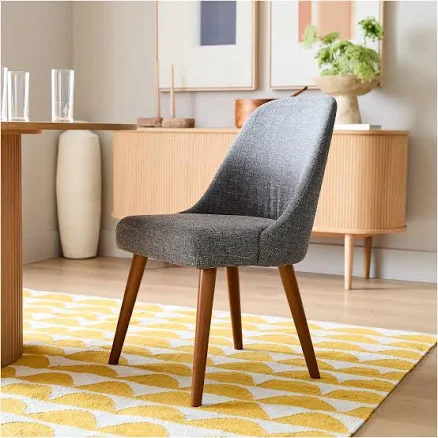
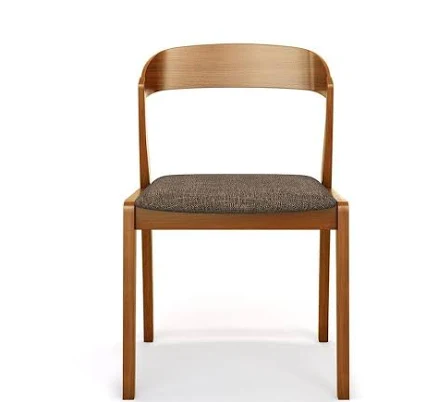
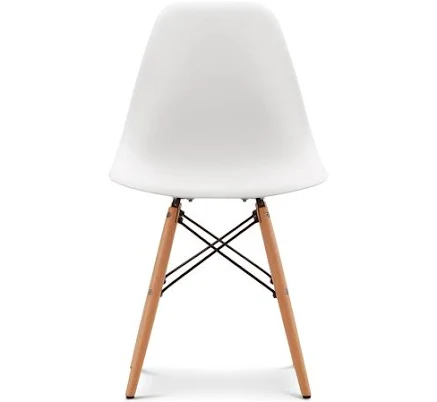
Safavieh Sonia Cane Dining Chair (Set of 2)$331.78 |
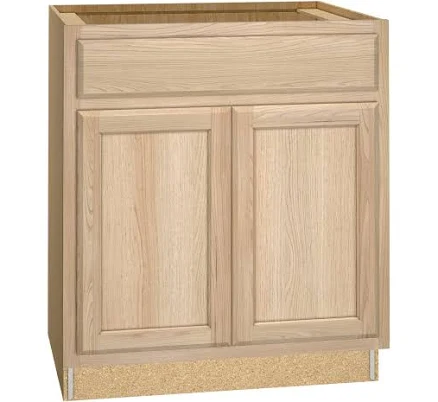
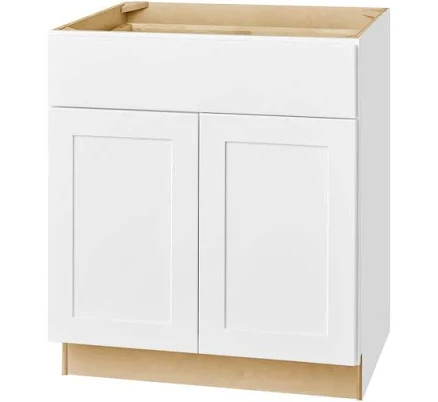
Project Source 30″ x 35″ x 23.75″ Natural Unfinished Oak Door & Drawer$154.00 |
As an affiliate, we earn from qualifying purchases.
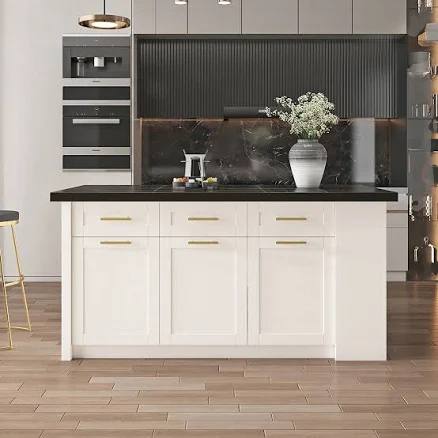
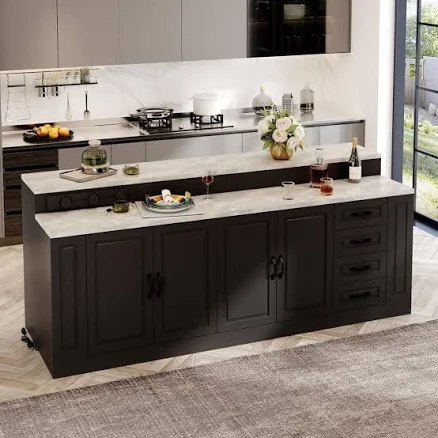
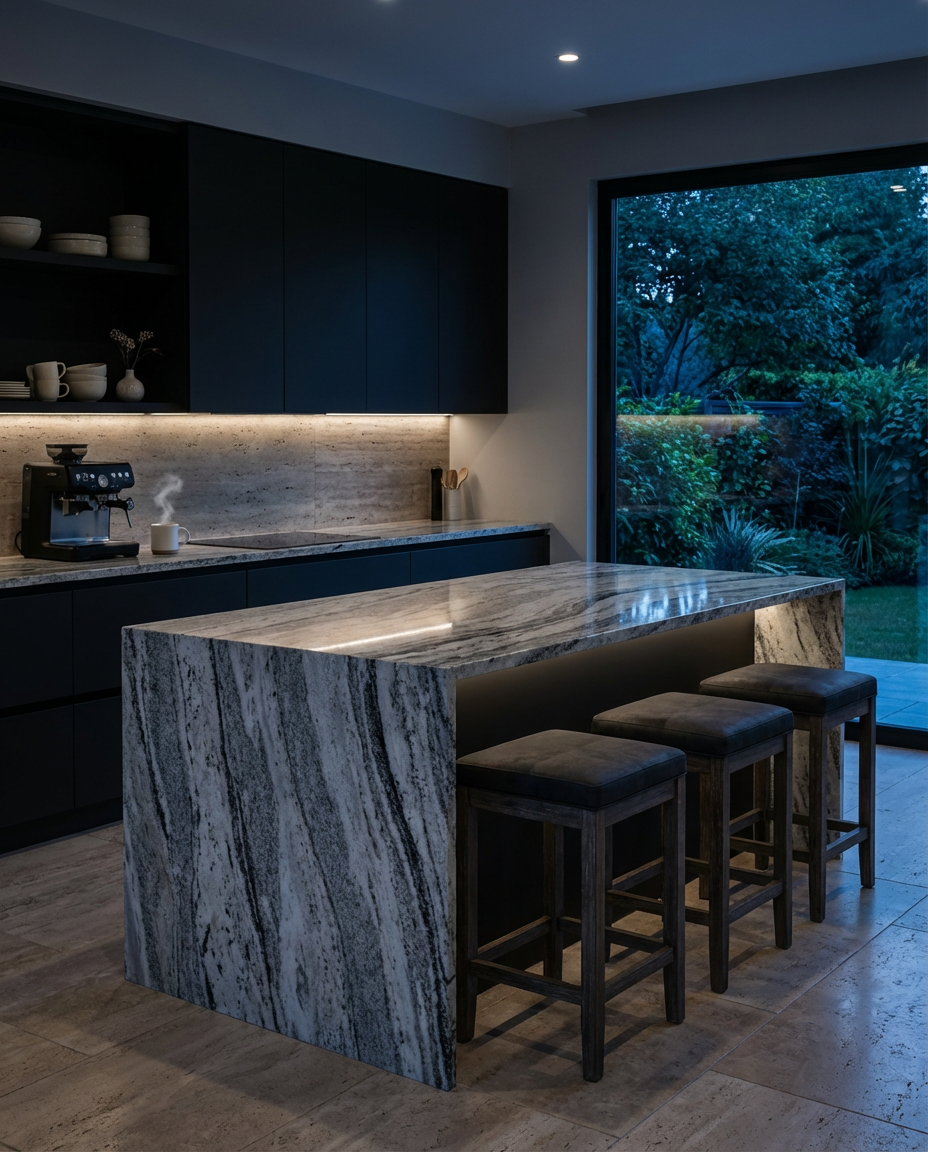
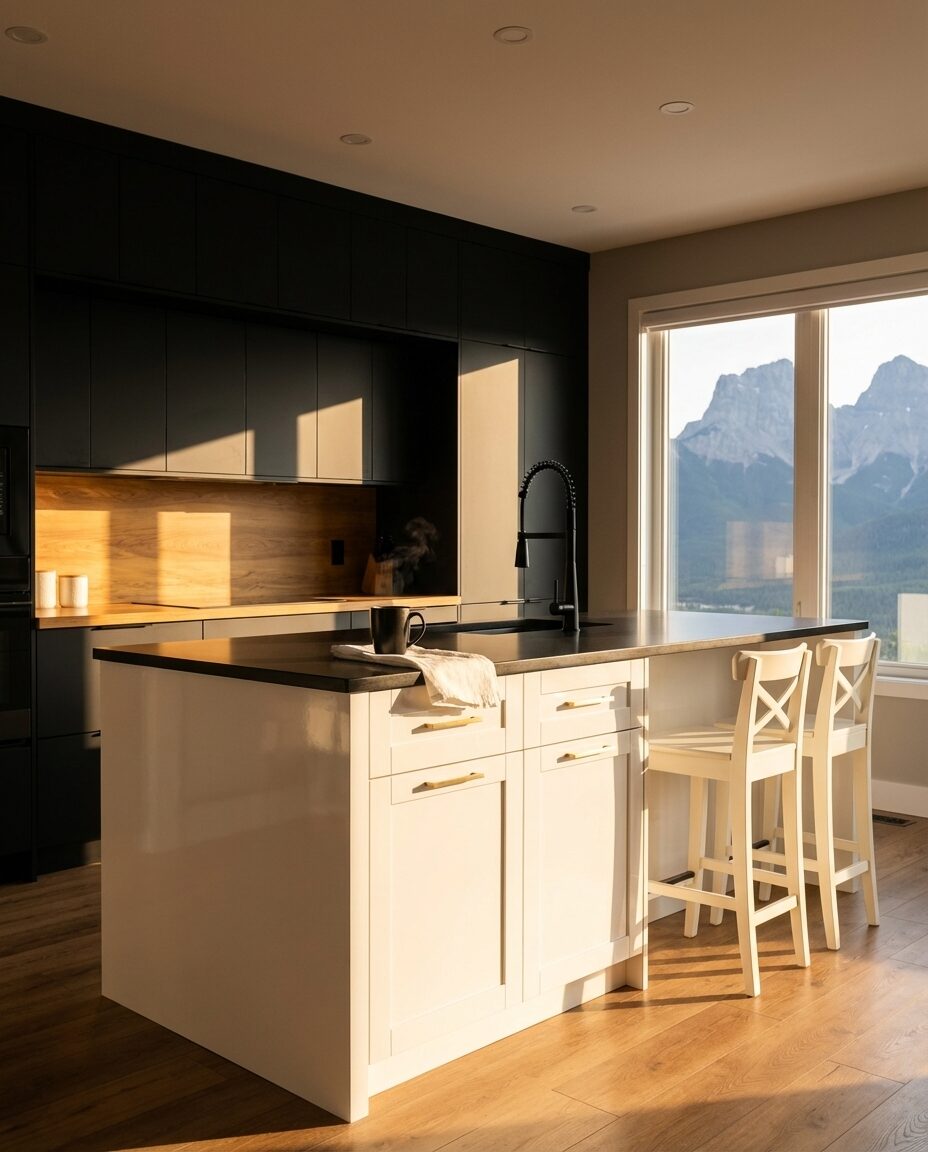
2. Dramatic Black Kitchen with Statement Faucet & Warm Wood Accents
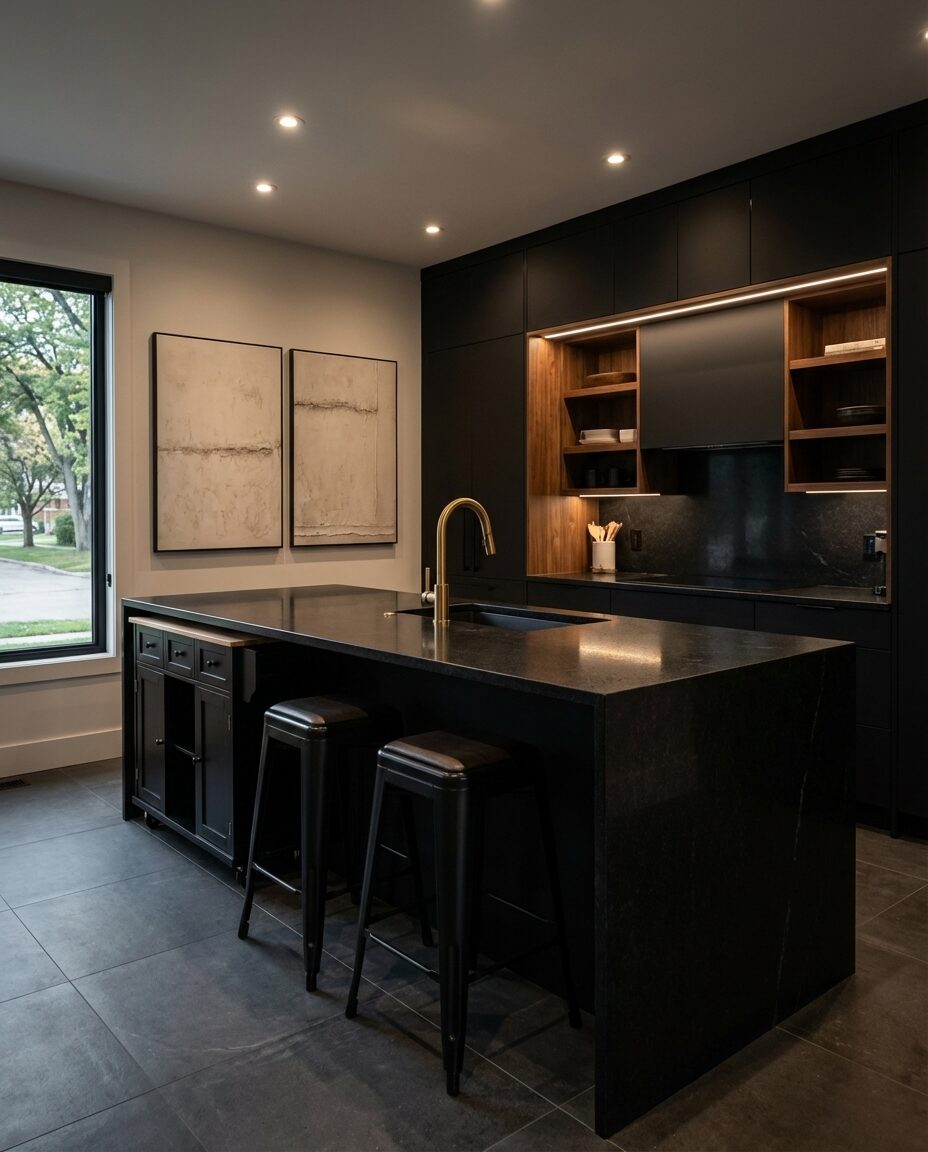
When you’re diving into a dramatic black kitchen, it’s easy to get carried away and make everything dark. The biggest pitfall I see is designing a space that feels more like a cave than a culinary sanctuary. Dark kitchens can absorb light, making them feel smaller and less inviting if not balanced correctly. You also need to think about fingerprints and dust; matte black finishes, while stunning, can be high maintenance if you have a busy household. I’m not trying to scare you off, but it’s important to be honest! Another thing people often overlook is how sound behaves in dark, minimalist spaces. Hard surfaces and dark colors sometimes make rooms feel echoey, so consider textiles or a patterned rug to absorb some sound.
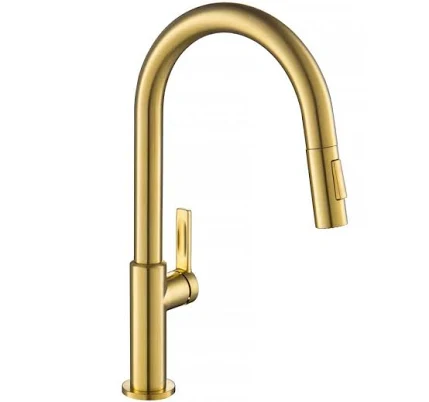
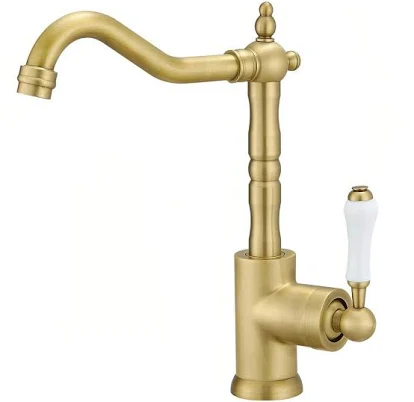
For a dramatic black kitchen, truly make your statement faucet shine by ensuring it contrasts strongly with your backsplash or sink. If you have matte black cabinetry, opt for a polished black, brass, or even a brushed gold faucet for a subtle but impactful visual pop. Make sure the faucet extends at least 8-10 inches from the wall for functionality, and choose a style with a clean, sculptural form that can hold its own against the bold backdrop. A waterfall or gooseneck style works beautifully here to draw the eye. Don’t let your faucet get lost in the dark.
|
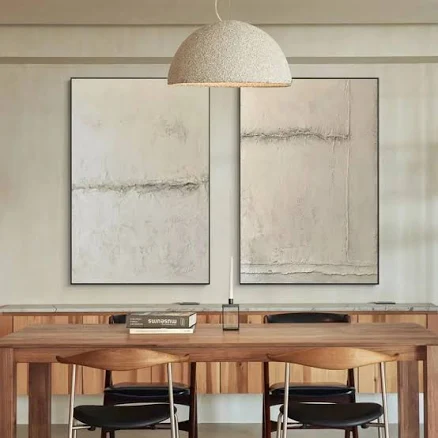
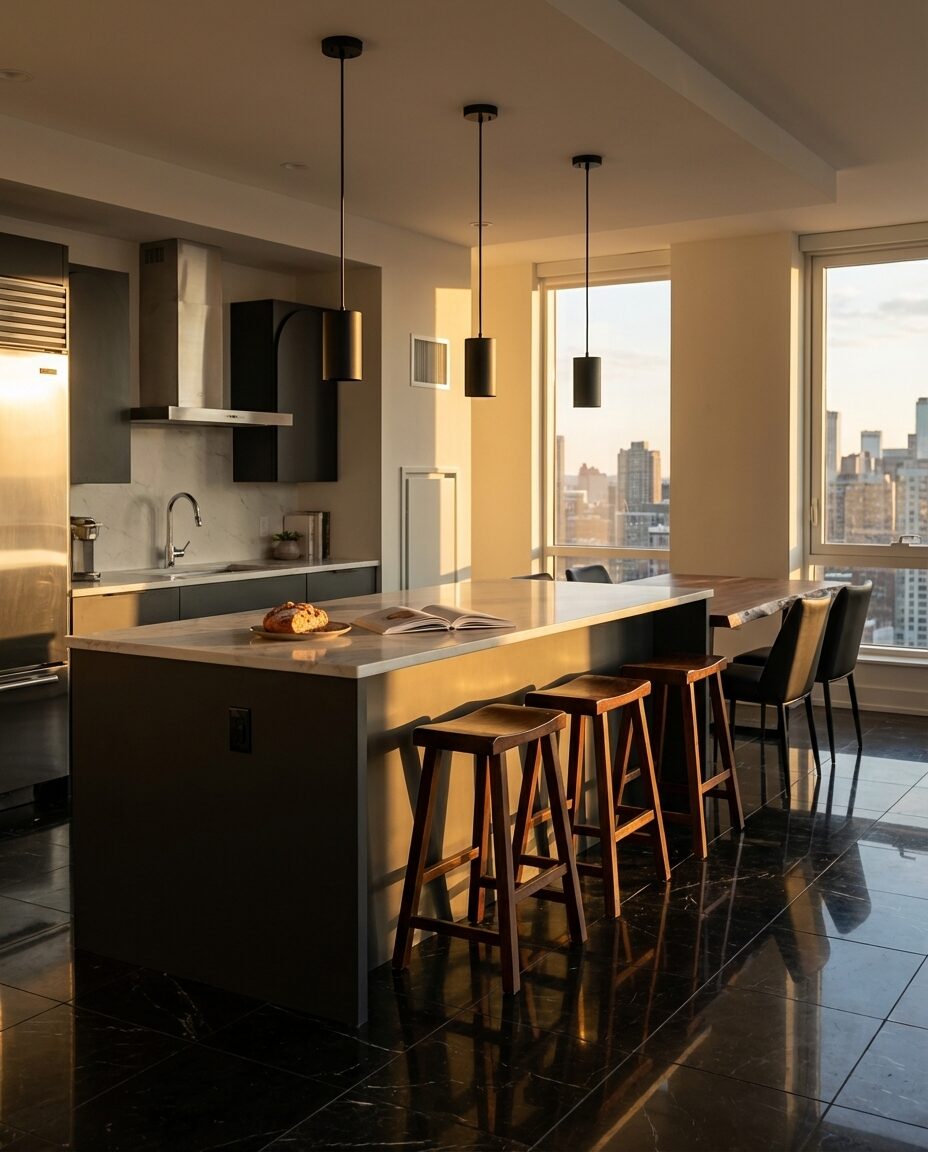
Set of 2 Wabi Sabi Minimalist Neutral Canvas Wall Art$269.00 |
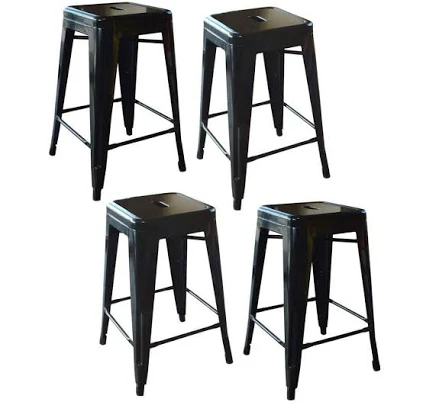
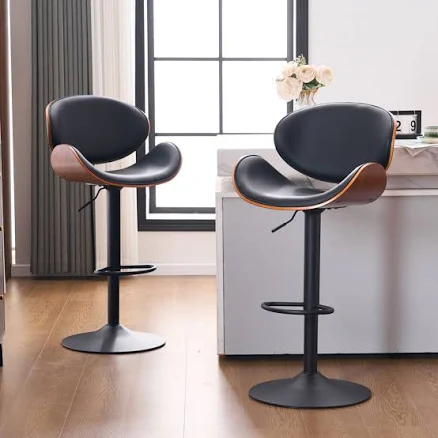
AmeriHome Loft Bar Stool$153.11 |
KRAUS Oletto Single Handle Pull-Down Kitchen Faucet$259.95 |
Ridstar Kitchen and Dining Cabinets$446.06 |
As an affiliate, we earn from qualifying purchases.
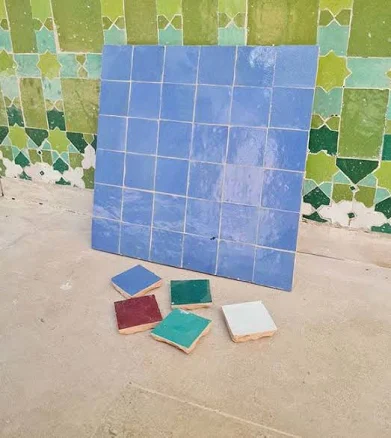
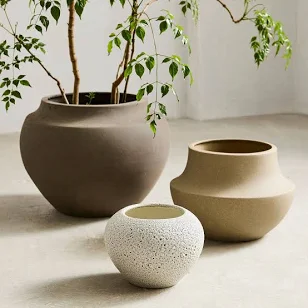
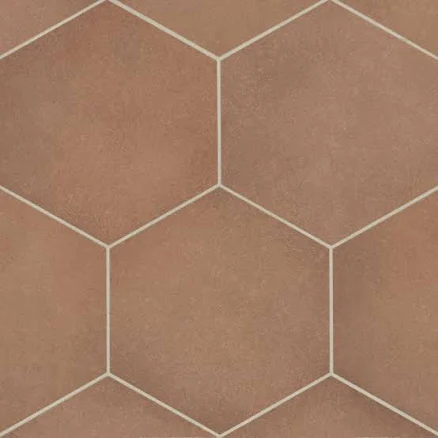
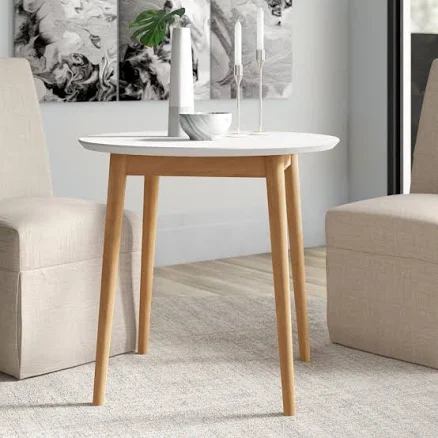
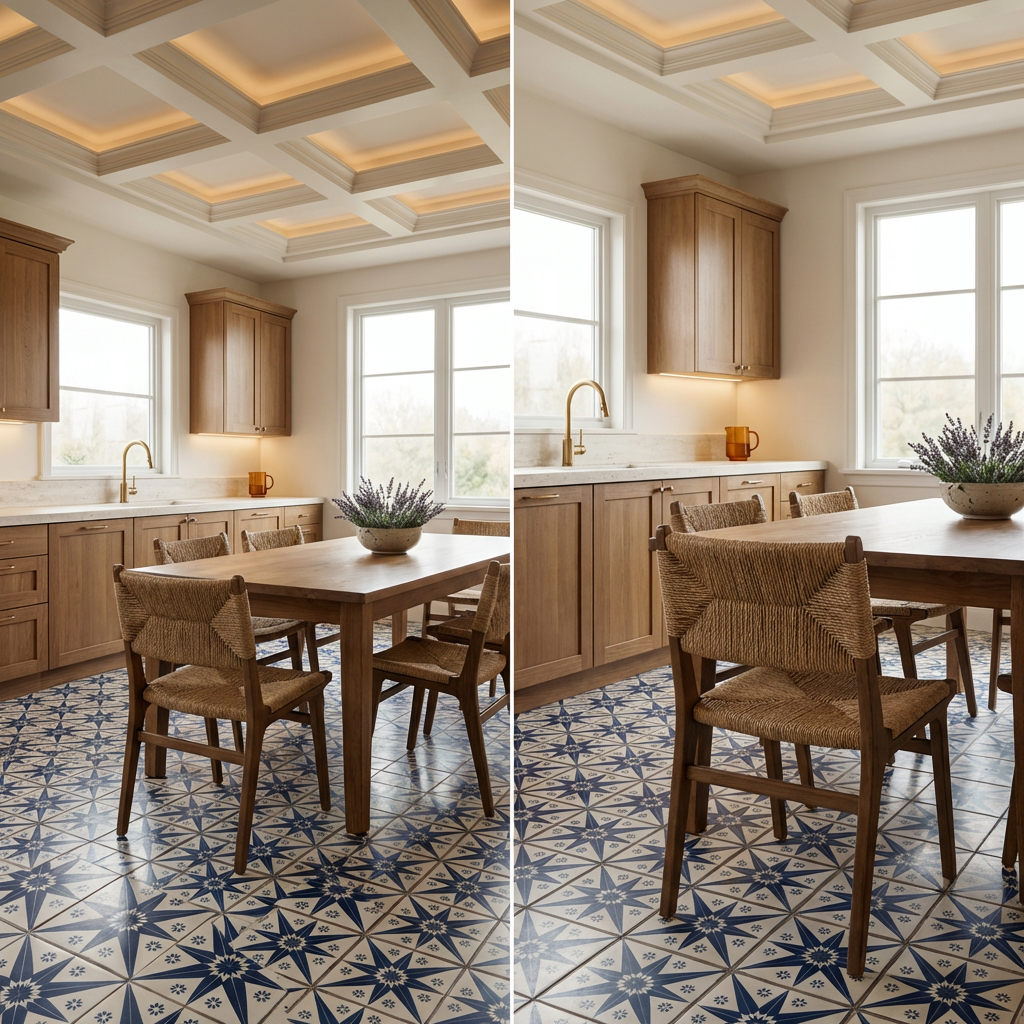
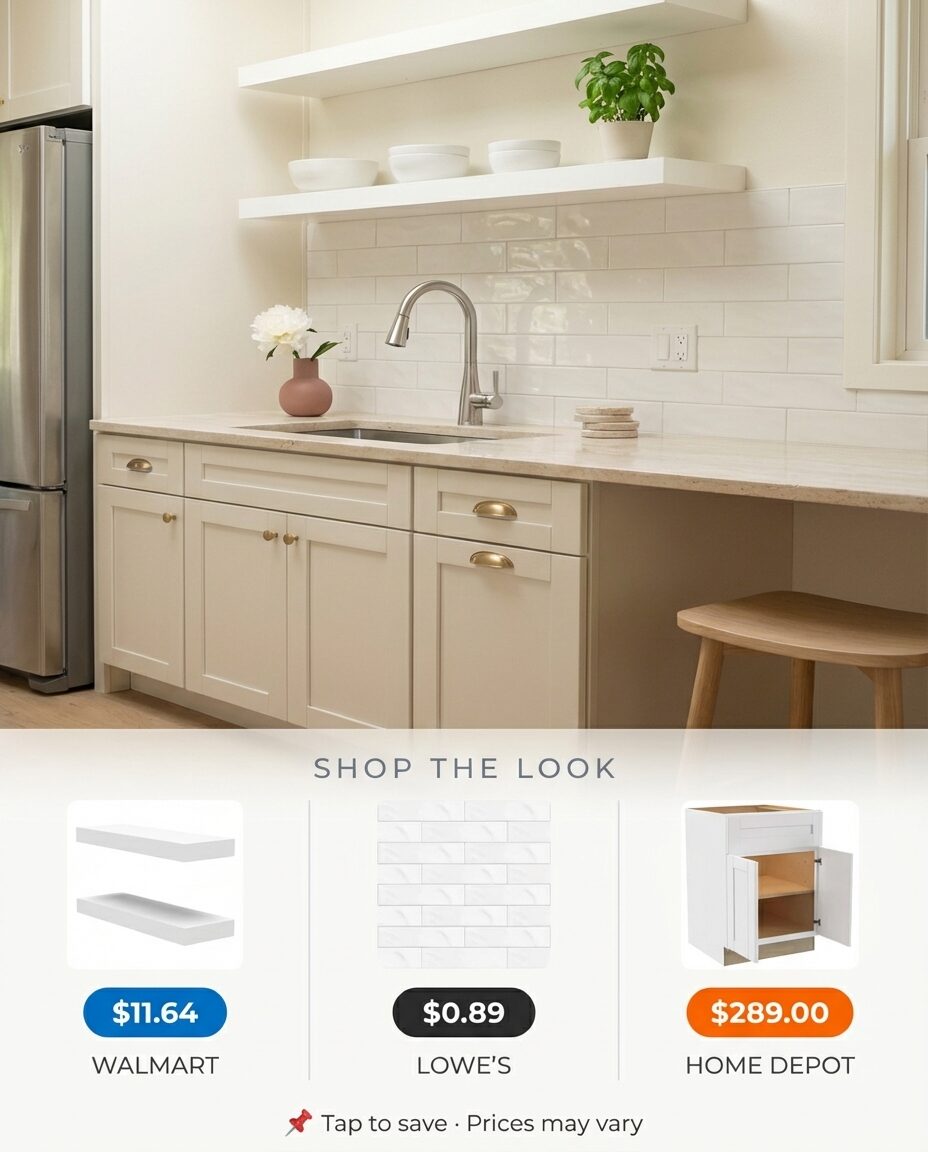
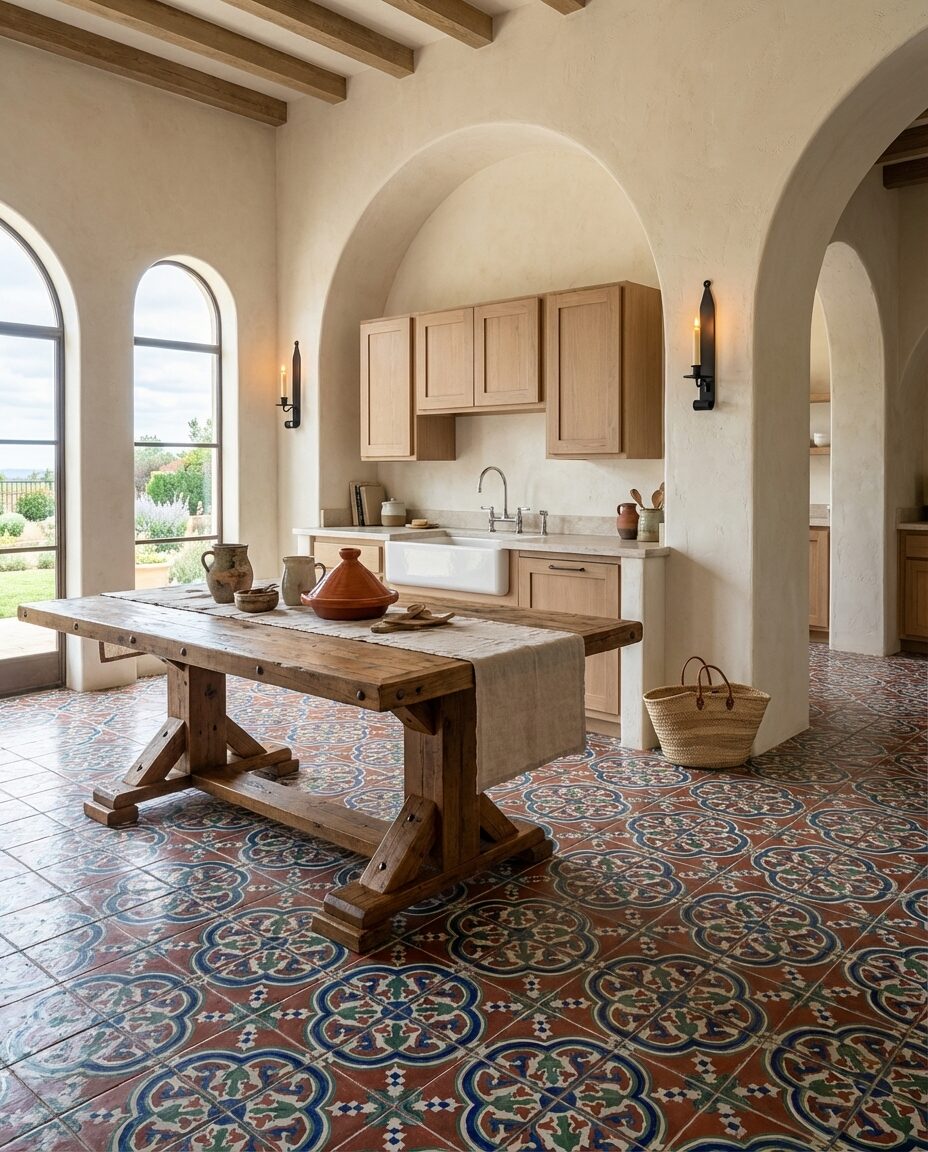
3. Simple & Serene Kitchen with Terracotta Floor Tile
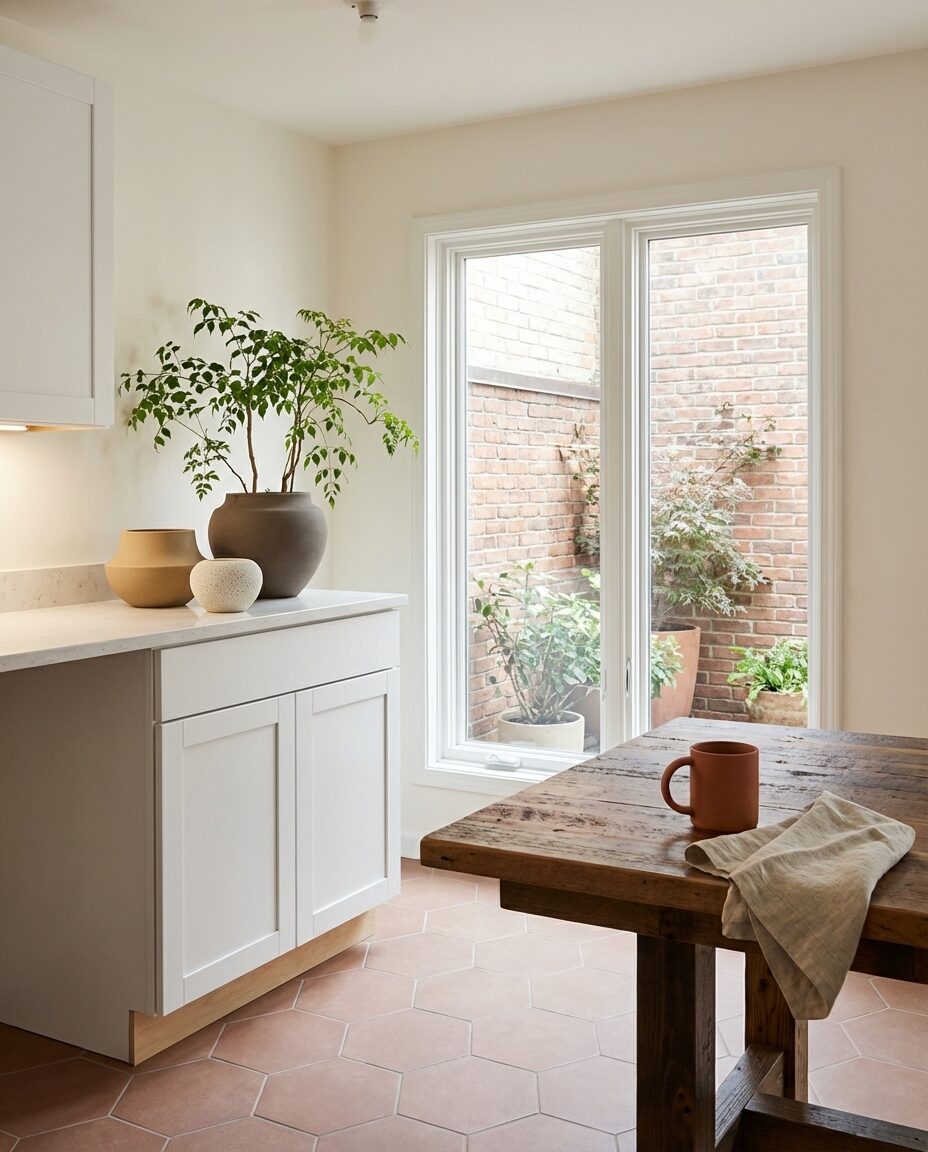
This simple and serene kitchen works wonders because it masterfully balances warmth with minimalism. The secret sauce? A killer material palette. You’ve got the earthy, grounding texture of terracotta on the floor—which immediately makes the space feel welcoming and lived-in—paired with crisp, unfussy cabinetry. This contrast prevents the minimalism from feeling cold. Plus, taking full advantage of natural light is key here; those big windows aren’t just for show. They flood the room, enhancing the warm tones and making the space feel expansive and airy. It’s all about creating an inviting atmosphere without unnecessary clutter, proving that simple doesn’t mean boring.
- Main furniture (dining table, cabinet bases): $2,357 – $4,500
- Lighting (none prominent, assumes recessed): $150 – $300
- Textiles (minimal, maybe a small rug): $50 – $200
- Decor/Accessories (planters, simple items): $100 – $300
- Paint/Wall Treatment (warm white): $75 – $150
- TOTAL: $2,732 – $5,450
- Budget alternative: Look for reclaimed wood dining tables on Facebook Marketplace ($200-$500). Opt for peel-and-stick terracotta-look floor tiles ($1-$2 per sq ft). Simple, ready-to-assemble white cabinets from IKEA or Habitat for Humanity ReStore can save you thousands. You could get a similar look for $1,200 – $2,500.
|
West Elm Sahar Ceramic Tabletop Planter Brown$99.00 |
Bedrosians Makoto Hexagon Matte Porcelain Tile$2.99 |
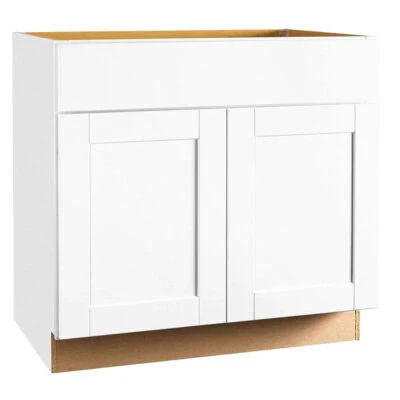
Hampton Bay Avondale Shaker Base Kitchen Cabinet$341.00 |
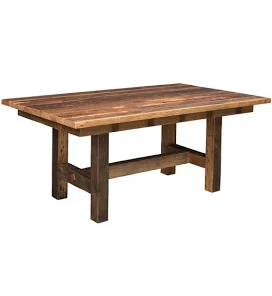
Reclamation Grove Barn Wood Dining Tables$2,016.00 |
As an affiliate, we earn from qualifying purchases.
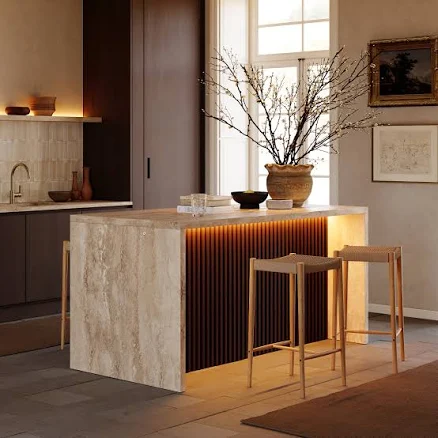
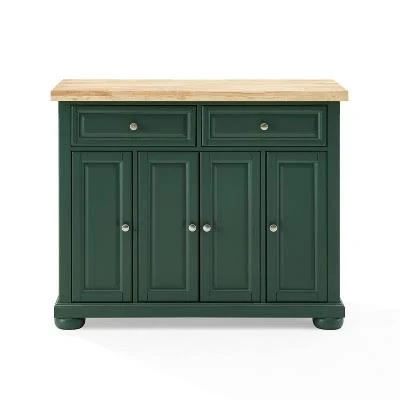
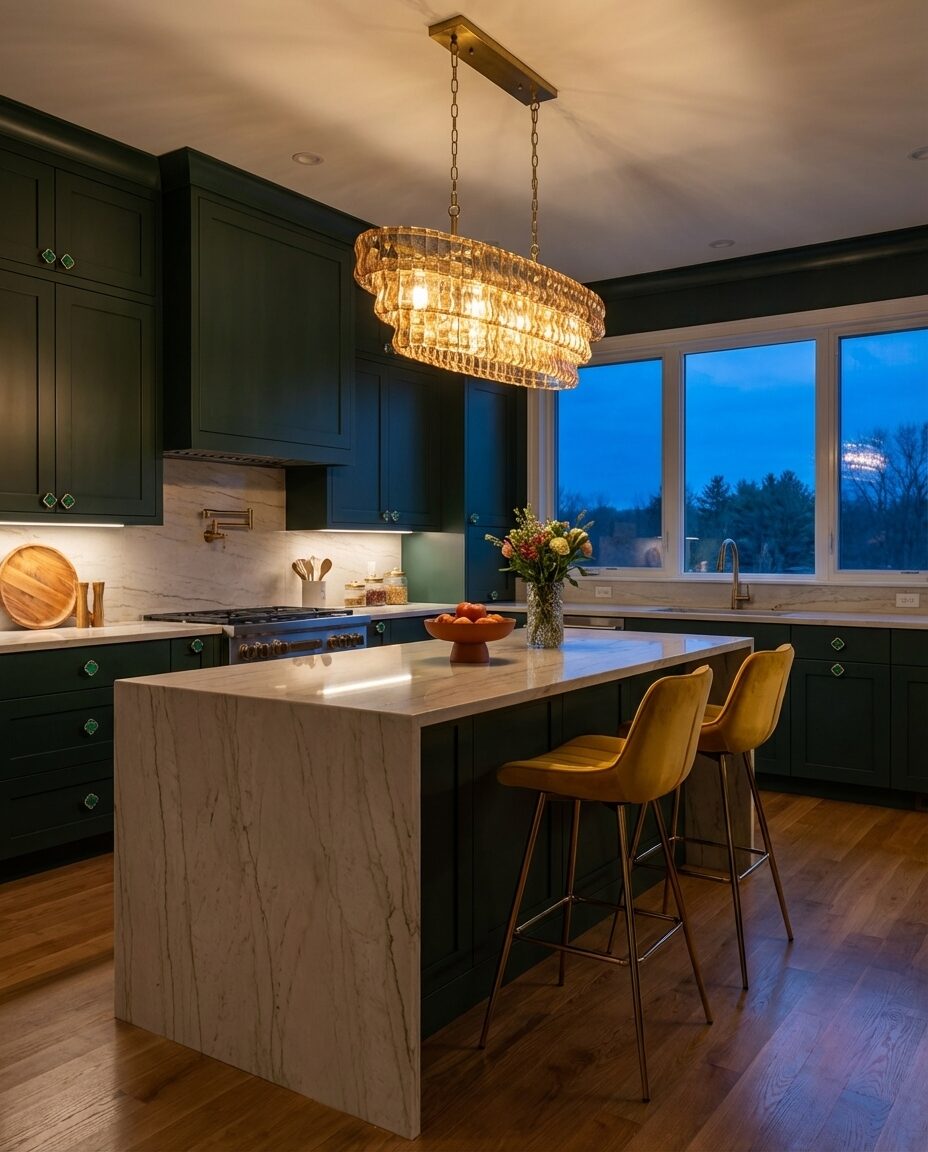
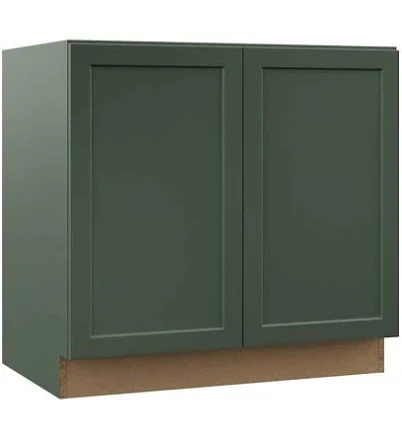
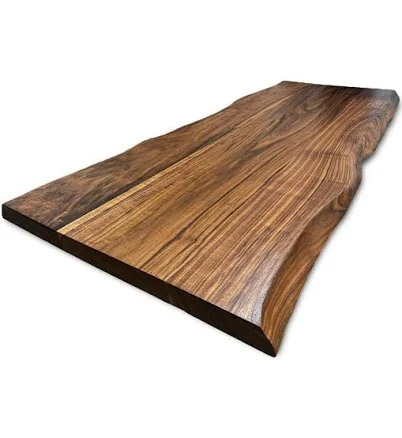
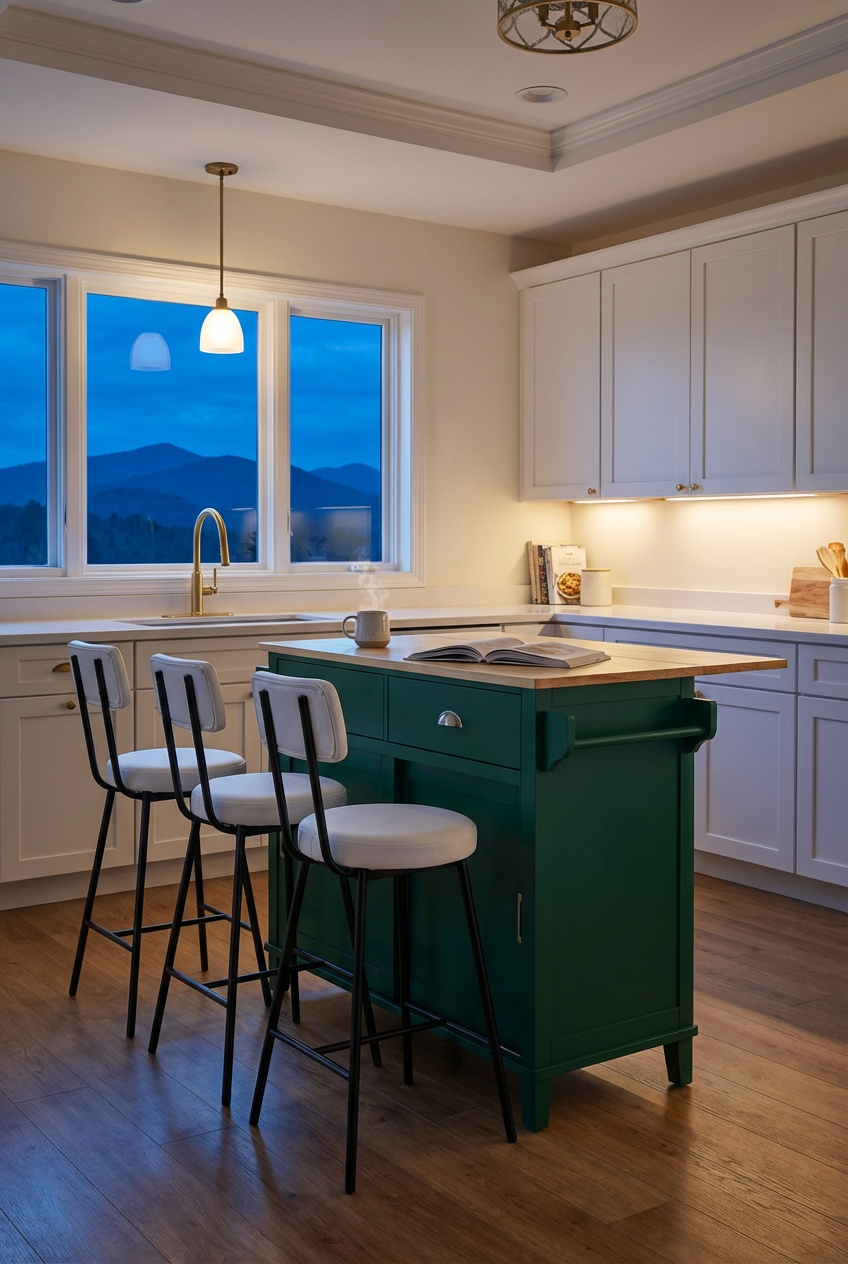
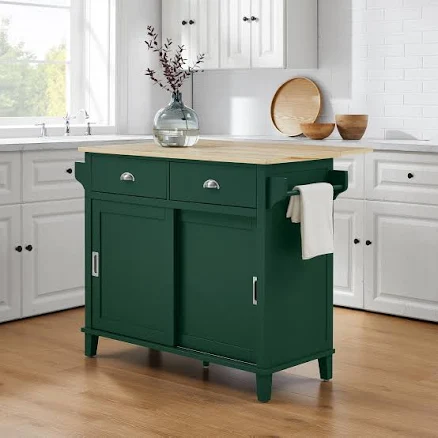
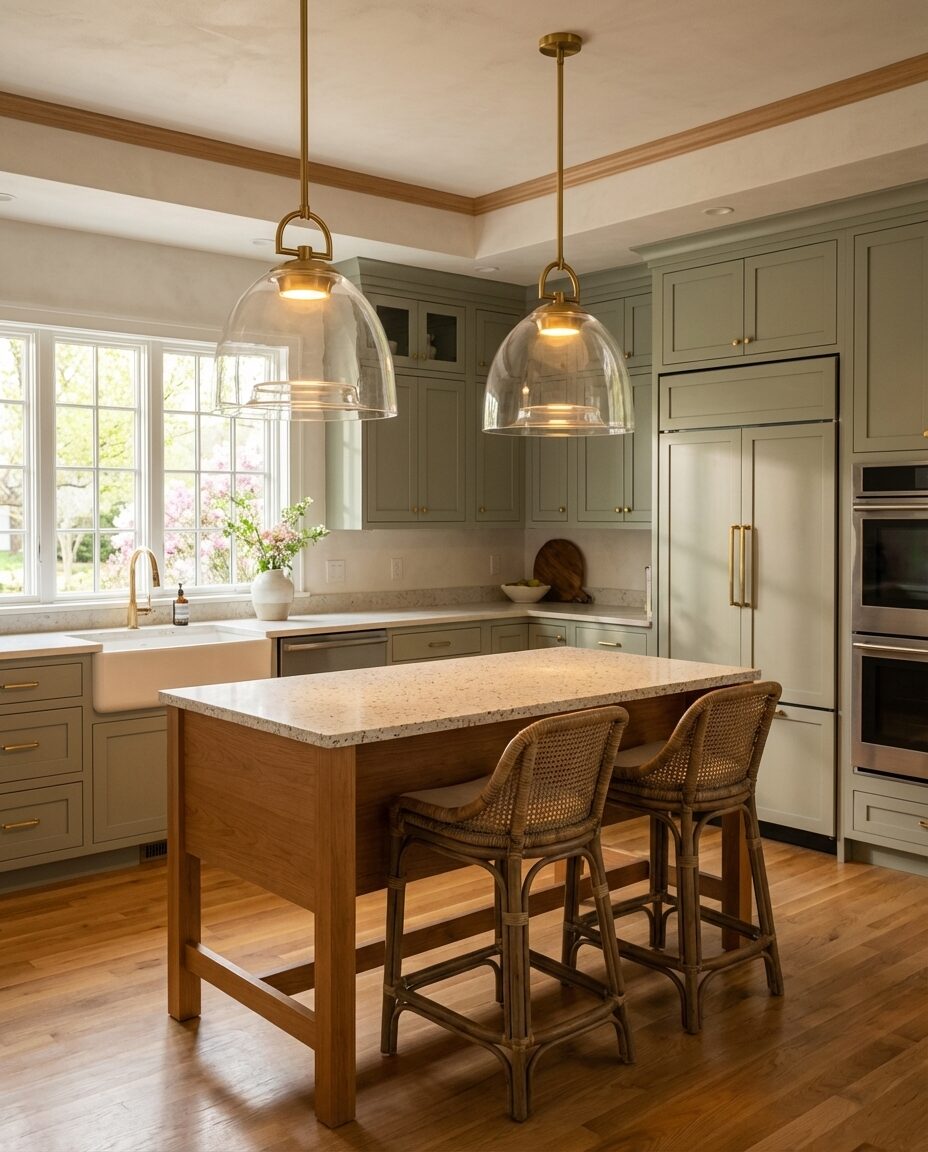
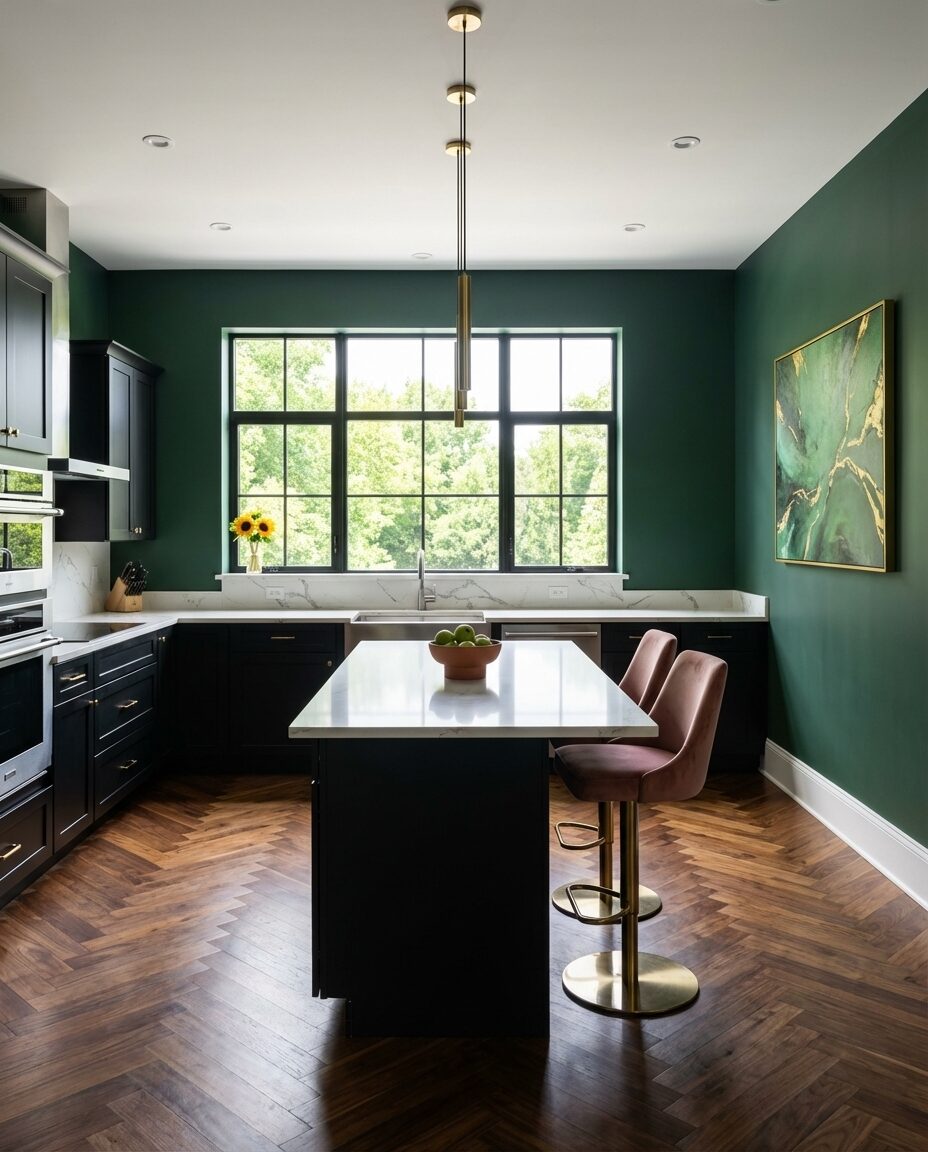
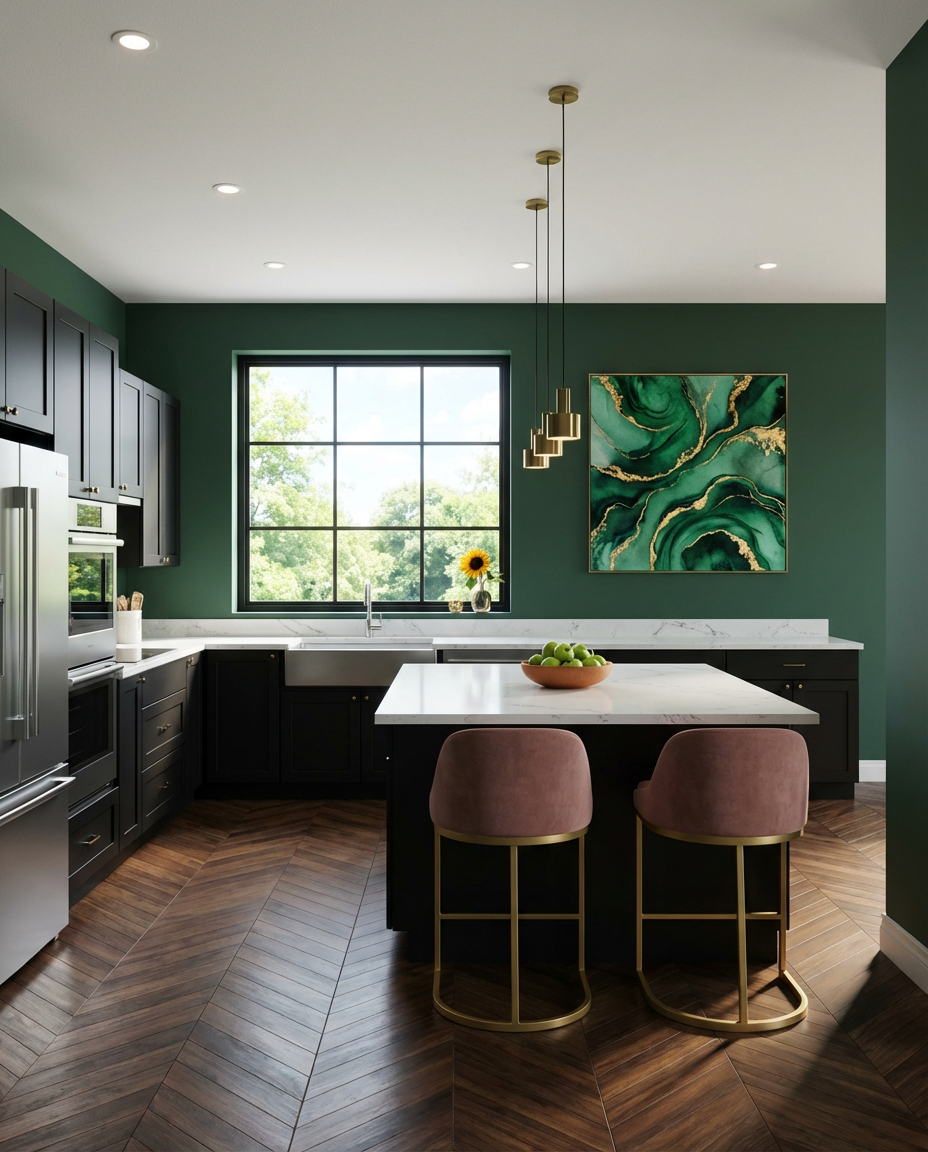
4. Modern Green Kitchen with Fluted Panel Island
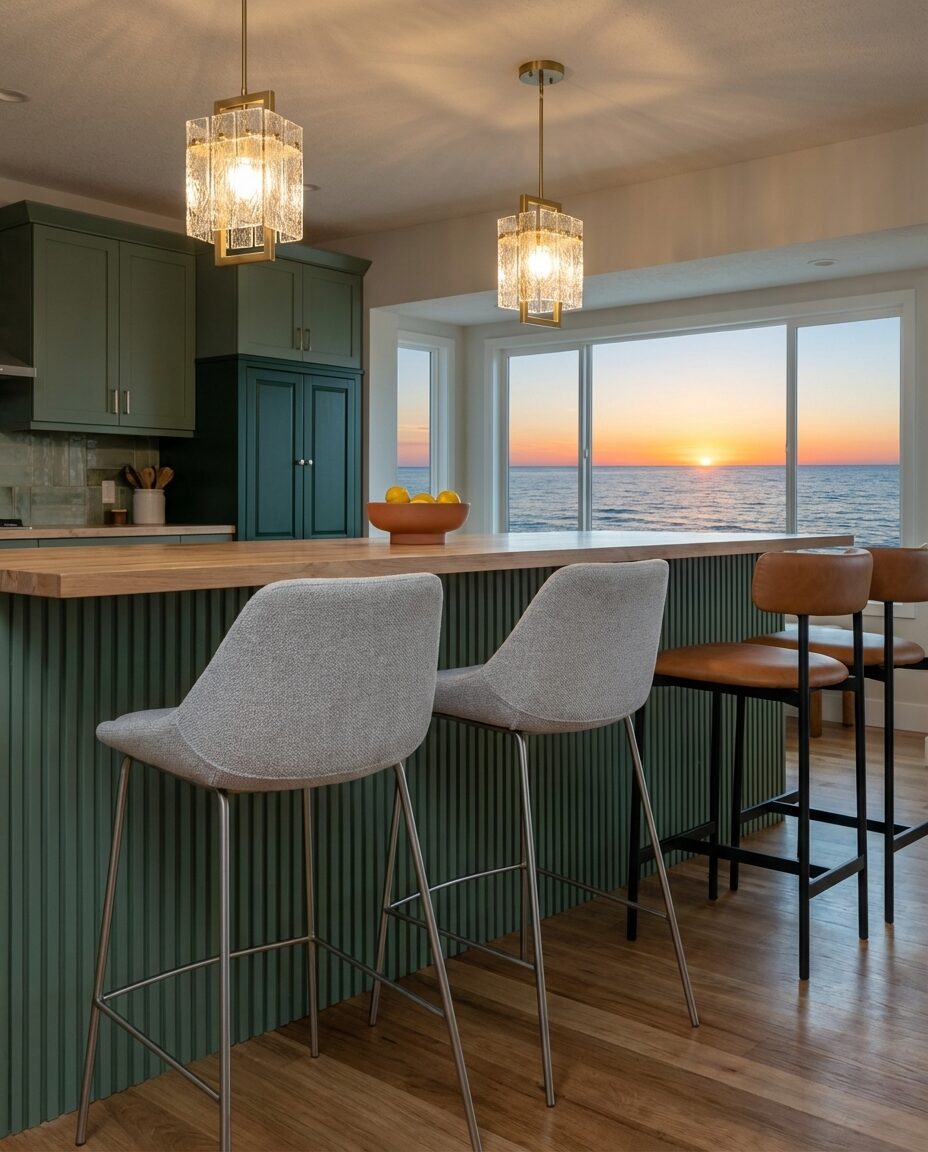
The formula for this modern green kitchen is surprisingly straightforward, yet incredibly effective: 60% Verdant Green + 30% Light Wood + 10% Metallic Accents. The green cabinetry, in a rich, nature-inspired hue, forms the dominant visual. It’s a color that feels both fresh and sophisticated. Then, the lighter wood tones—think natural oak or birch—come in for depth and warmth, usually through shelving, a kitchen island top, or even flooring. Finally, the metallic accents, typically brass or matte black hardware and lighting, add that crucial sparkle and refined edge. You could swap the green for a deep navy or even a plum, keeping the same proportions, and achieve a similarly sophisticated, modern vibe.
You absolutely don’t need to break the bank for this modern green fluted panel look. Hit up IKEA or Lowe’s for their ready-to-assemble green shaker cabinets – you can find full sets for under $1000. For the fluted island effect, a simple MDF panel from Home Depot can be cut and painted, then glued onto a basic island base. Pair with some sleek, budget-friendly lighting from Target (I’ve seen great pendant lights for $50-$80) and bar stools from Walmart or Wayfair, often on sale for under $100 for a set. You could realistically pull off this vibe for around $1,500 – $2,500.
|
Washington Shaker Verdant Green Assembled Plywood Kitchen 12 ft. Kitch$2,280.00 |
Crosley Furniture Crosley Madison Kitchen Island/Cart$385.99 |
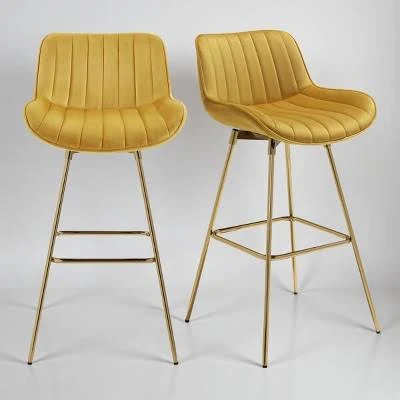
West Elm Grier Counter Stool$399.00 |
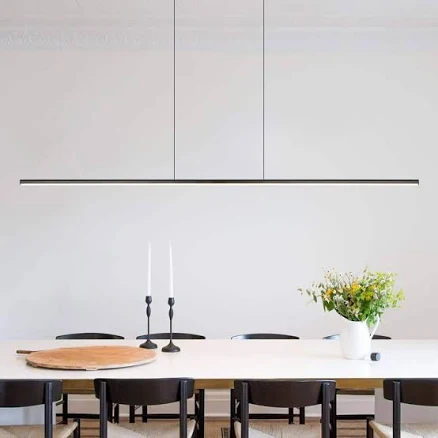
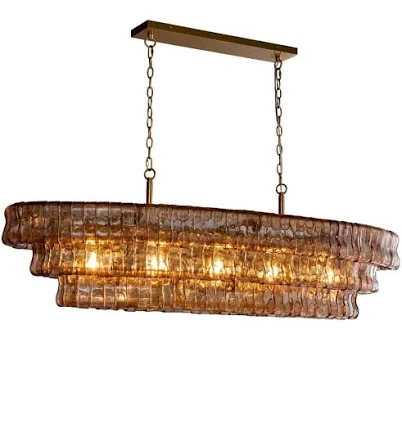
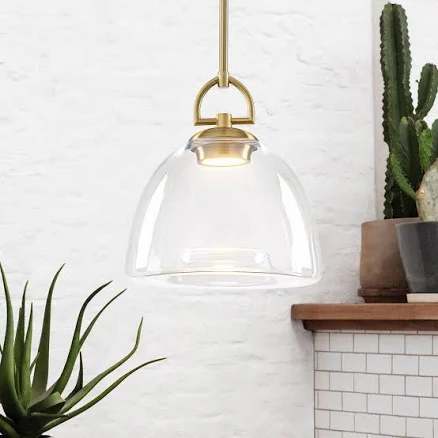
Modern Geometric Brass Pendant Light – Single Bulb Fixture with Ripple$188.99 |
As an affiliate, we earn from qualifying purchases.
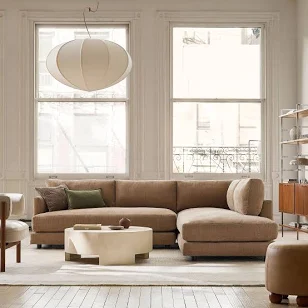
5. Seamless Kitchen & Living Room with Integrated Cabinetry

This seamless kitchen and living room integration truly shines in open-concept spaces with a minimum square footage of 400-500 sq ft for the combined area. You need enough room for both a functional kitchen triangle and a comfortable living zone without feeling cramped. Ceiling height is less critical, but a standard 8-foot ceiling works perfectly fine. If your space is smaller, you might need to scale down the furniture dramatically, perhaps opting for a narrower island or a sofa without a chaise. For smaller apartments, consider Idea #17’s compact modular kitchenette – it gives you that integrated feel without demanding a huge footprint. The goal is flow, not forced fitting.
- Have you measured the combined kitchen and living space to ensure adequate flow between zones?
- What existing design elements (flooring, major focal points) do you need to integrate or work around?
- How will natural light affect both the kitchen and living areas throughout the day?
- Have you identified clear sightlines to avoid visual clutter from either space?
|
allen + roth Lunar Veil Gray/Beige Indoor rug$249.98 |
West Elm Haven 2-Piece Left Bumper Chaise Sectional$3,598.00 |
Lait Grey Shaker RTA Kitchen Cabinets 10Ft Run at Wholesale Price. Buy$1,488.75 |
Crate & Barrel Troupe Ribbed Round Coffee Table$2,499.00 |
As an affiliate, we earn from qualifying purchases.
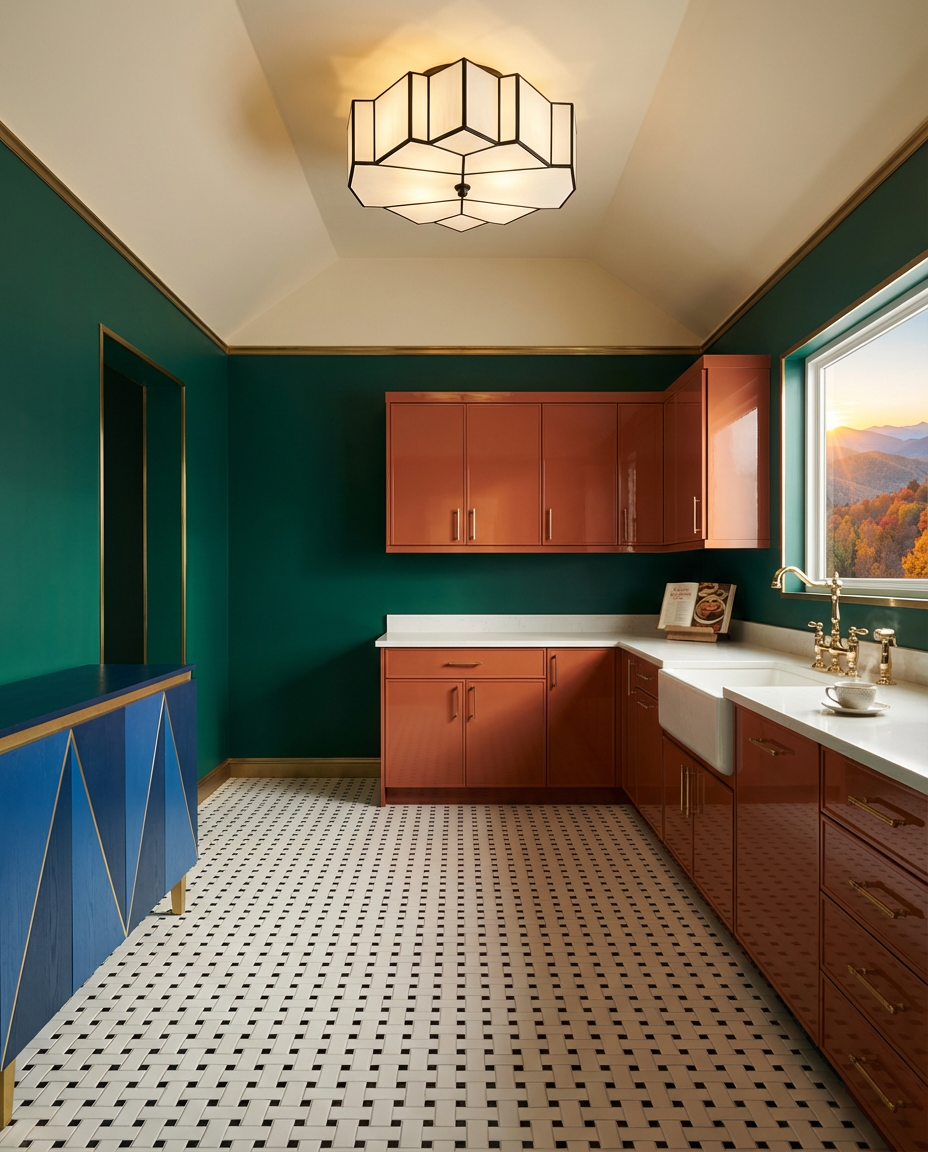
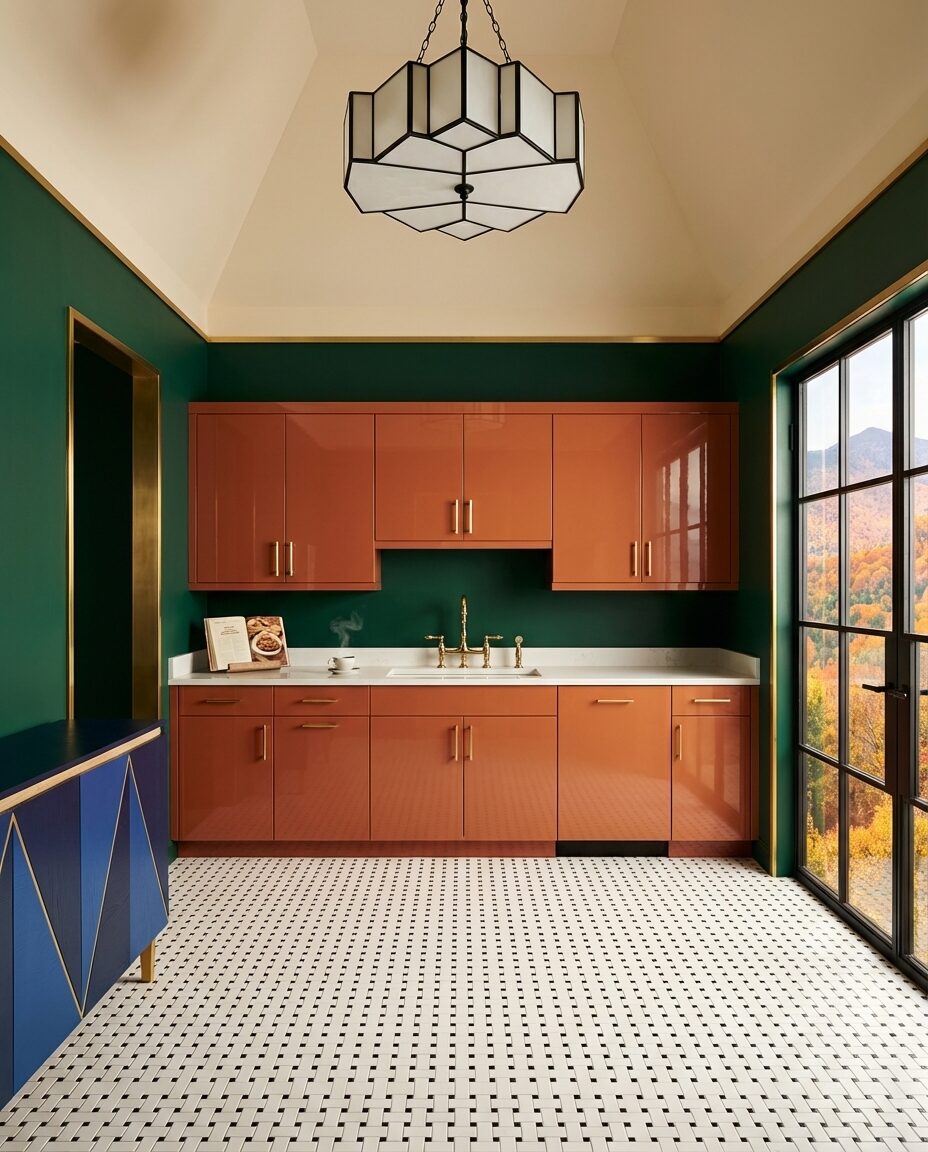
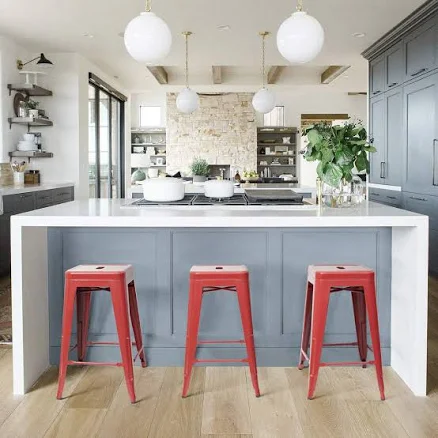
6. Bold Colours: Terracotta & Blue Chef’s Kitchen
✨ Luxury Version
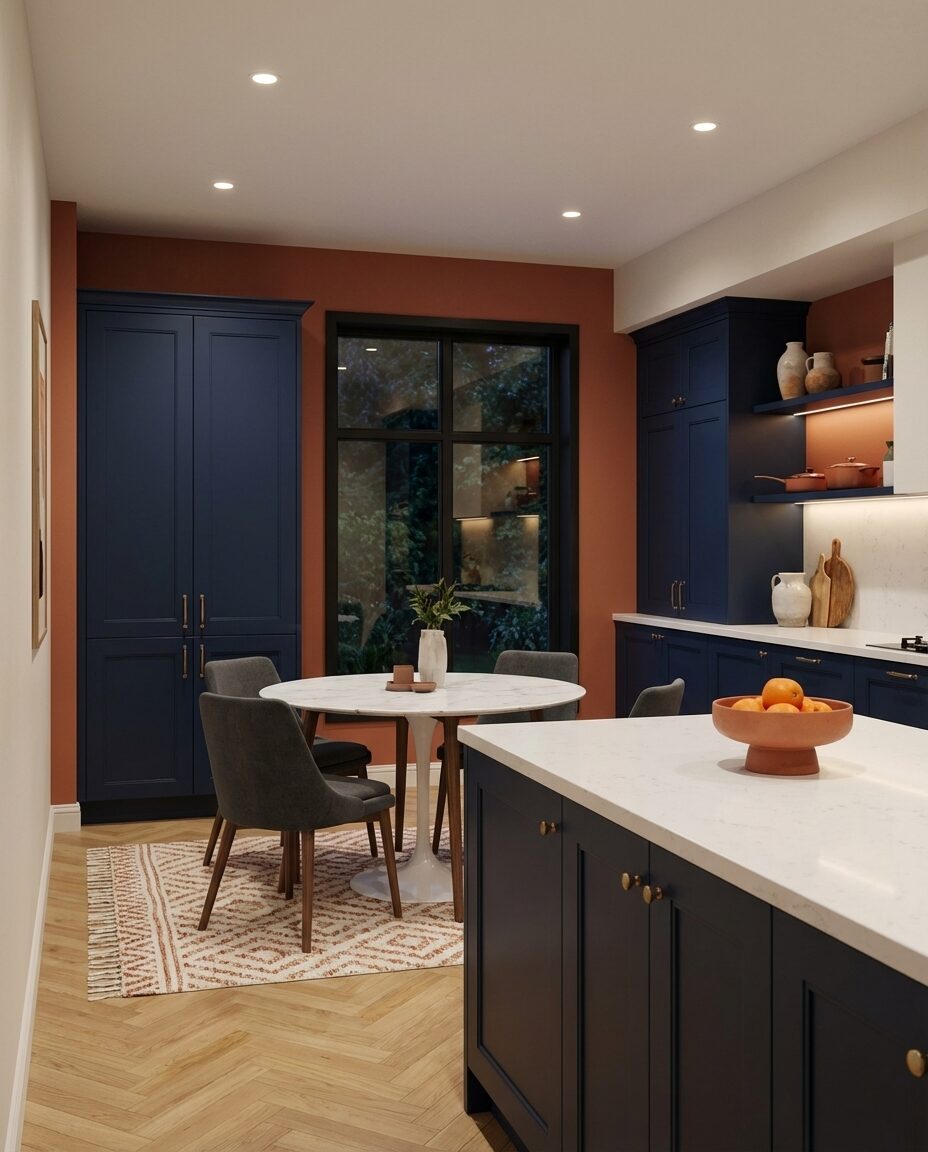
When combining bold colors like terracotta and blue in a kitchen, the key is to assign a dominant color (60-70% of your color palette) and let the other be the accent (30-40%). For example, if you go with terracotta cabinetry on your base units, keep your wall cabinets or island in a more subdued blue, or vice versa. This prevents the space from feeling overwhelmingly colorful. Also, use a neutral break—think a white or very light gray backsplash or countertop—to give the eye a resting place between the two strong hues. This is much more sophisticated than just painting every surface a different bold color.
💸 Budget Version
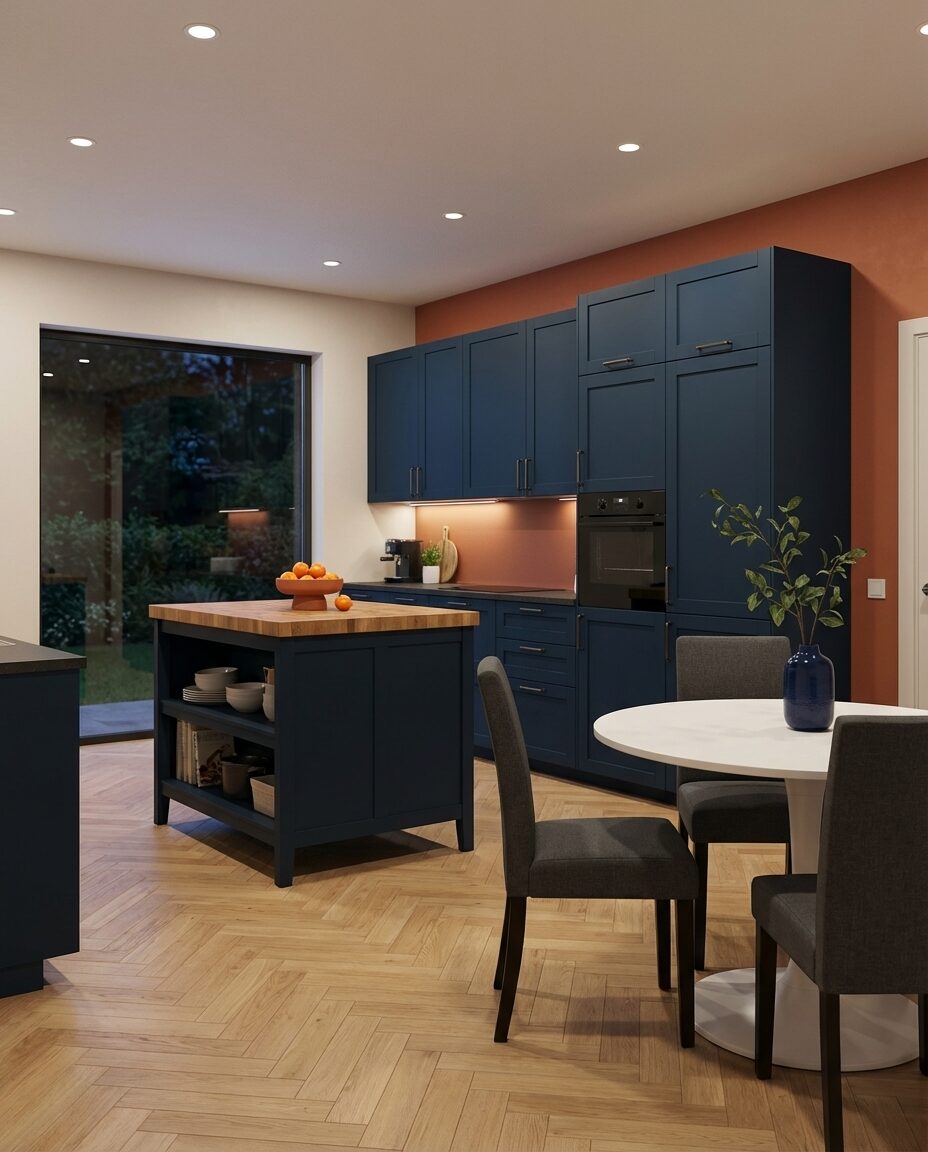
In a bold kitchen like this terracotta and blue chef’s space, the absolute ‘one thing’ is the *intentional color pairing*. It’s not just a splash of color; it’s a deliberate and confident decision to marry two powerful, earthy tones that, when done right, create incredible depth and personality. Remove either the terracotta or the navy, and the kitchen loses its distinct ‘chef’s kitchen’ edge and becomes just another nice kitchen. This pairing is what gives it that layered, custom, and slightly daring feel. It signals creativity and a love for flavorful design.
|
💰 Budget Pick · Kitchen Cabinetry Hampton Bay Avondale Shaker Wall Kitchen Cabinet$189.00 |
✨ Luxury Pick · Kitchen Cabinetry J Collection Devon Wall Kitchen Cabinet$411.84 |
💰 Budget Pick · Dining Chair Renwick Modern Upholstered Dining Chairs (Set of 2)$79.99 |
✨ Luxury Pick · Dining Chair West Elm Mid-Century Upholstered Dining Chair$449.00 |
As an affiliate, we earn from qualifying purchases.
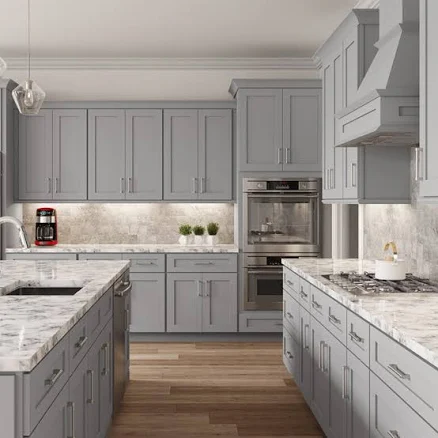
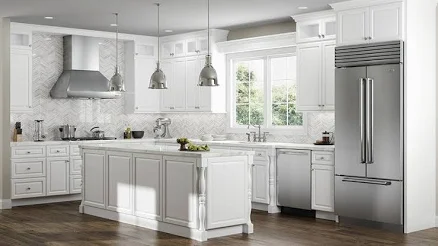
7. Minimalist White Kitchen with Black Accents
The style math for this minimalist white kitchen with black accents is classic for a reason: 80% Pristine White + 15% Matte Black + 5% Natural Texture. The overwhelming majority of the space should be white – think bright white cabinetry, countertops, and walls. This creates that clean, expansive, and airy feel. Then, introduce matte black through deliberate accents: a statement faucet, cabinet hardware, or sleek lighting fixtures. These black elements act like crisp lines, defining the space without overpowering it. Finally, a tiny touch of natural texture, perhaps through a wooden tray, a small plant, or a linen dishtowel, brings warmth and prevents the look from feeling too stark or sterile. This formula ensures balance and sophistication.
While a minimalist white kitchen with black accents looks incredibly chic in photos, let’s keep it real: it requires commitment to maintenance. Every smudge, every crumb, every fingerprint is going to show up like a spotlight on those pristine white surfaces. If you have kids or pets, or simply enjoy cooking without worrying about immediate cleanup, this might lead to daily frustration. Also, beware of cheap white finishes that can yellow over time; invest in quality materials if you want this look to last. And remember, too much stark white can feel a bit clinical if you don’t soften it with a few intentional, textural elements.
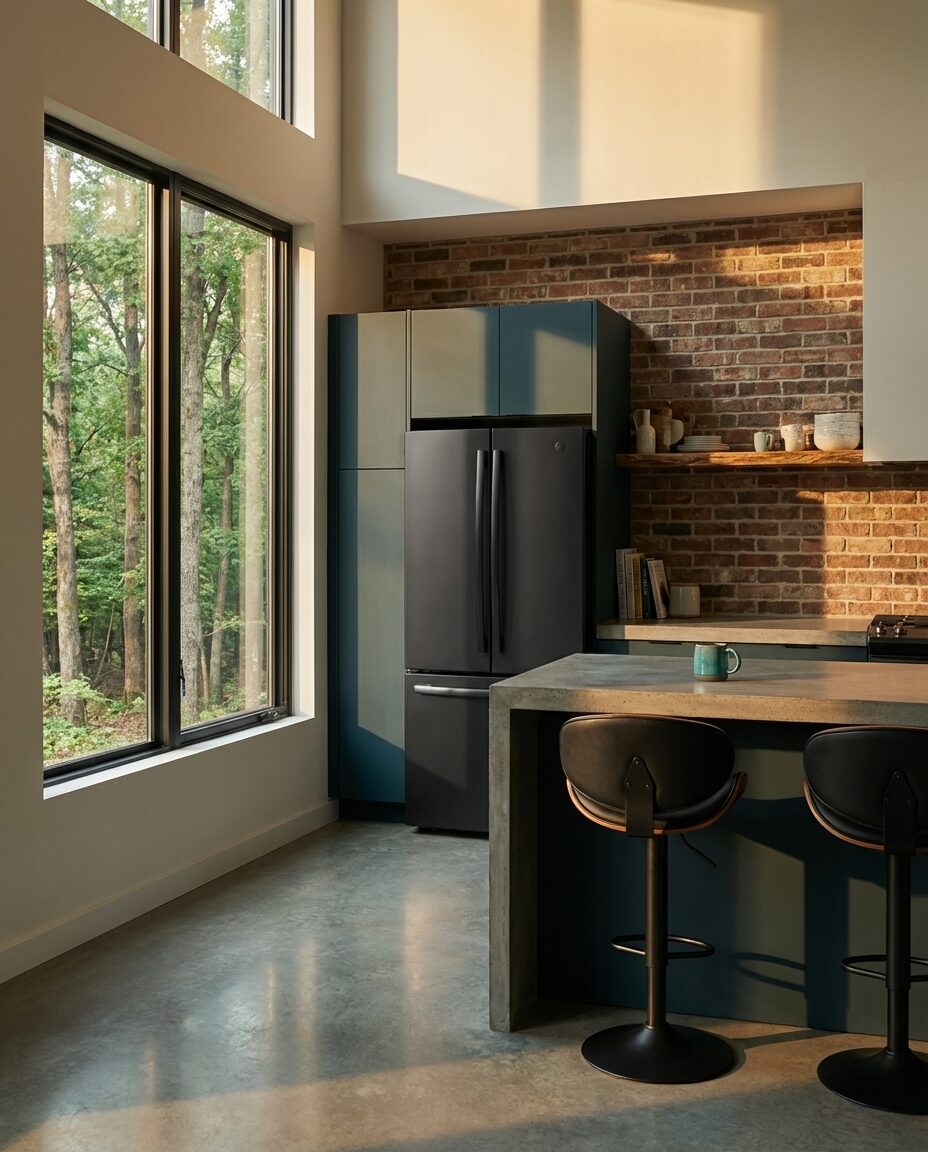
8. Industrial Modern Kitchen with Exposed Brick & Statement Lighting
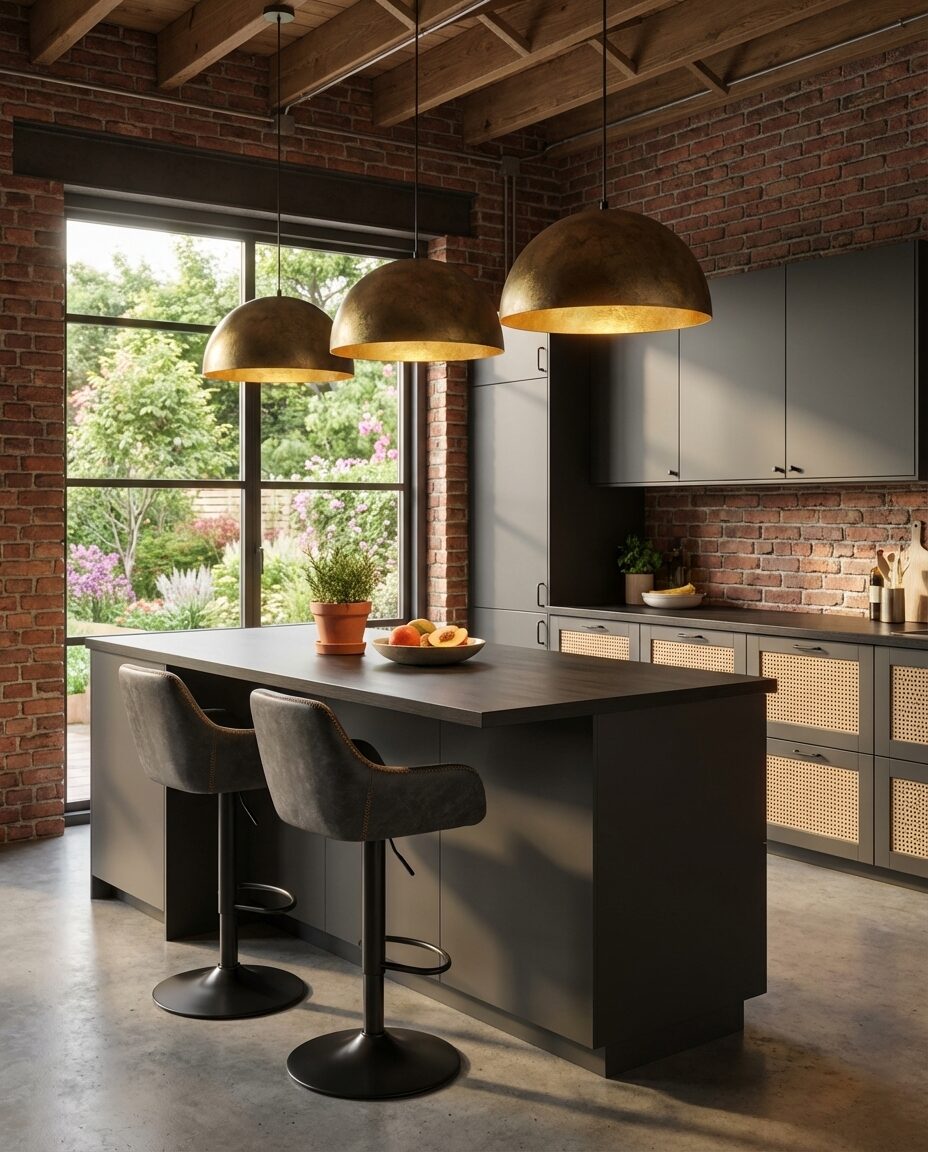
You can absolutely get an industrial modern vibe with exposed brick without buying an expensive loft. For the exposed brick, consider using brick veneer panels (found at Home Depot or Lowe’s for $30-$60 per panel) which are much easier to install than real brick. Pair these with IKEA’s Knoxhult kitchen cabinets – they’re incredibly customizable and budget-friendly. Look for industrial-style bar stools and pendant lights on Wayfair or Amazon, often under $100 for a set or individual fixture. Swap out expensive stone countertops for a laminate that mimics concrete or dark granite, costing a fraction of the price. You can achieve this look for a budget of $1,500 – $3,000, significantly less than a full Reno. Compare this with Idea #8 — same dark countertops, completely different energy.
This industrial modern aesthetic, with its exposed brick and statement lighting, is having a major moment as we move into 2026, especially among urban dwellers and those who appreciate raw, authentic design. Platforms like Pinterest and Instagram are inundated with images of old factories converted into stylish living spaces, and this kitchen trend is a direct nod to that. It champions durability, functionality, and a certain no-frills honesty in materials. It’s a style that feels both timeless and perfectly current, appealing to those who want a kitchen with character and a story, rather than something overly polished and sterile. Plus, the robustness of the materials makes it incredibly practical for active households.
|
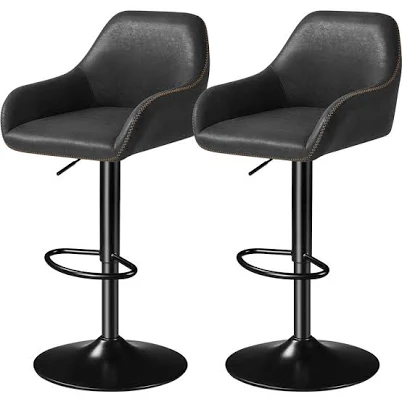
Trent Austin Design Eastway Swivel Upholstered Adjustable Height Count$153.99 |
LightFixturesUSA Industrial Oversized Large Metal Dome Pendant Light$128.50 |
IKEA Knoxhult Kitchen$355.00 |
IKEA EKBACKEN countertop effect/laminate$179.00 |
As an affiliate, we earn from qualifying purchases.
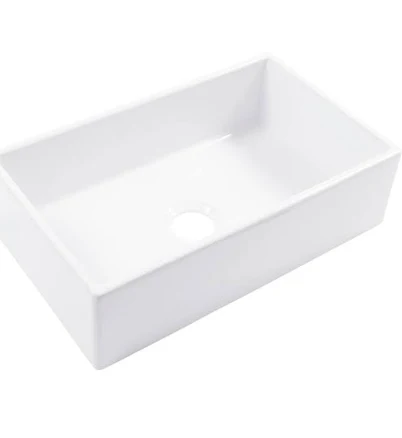
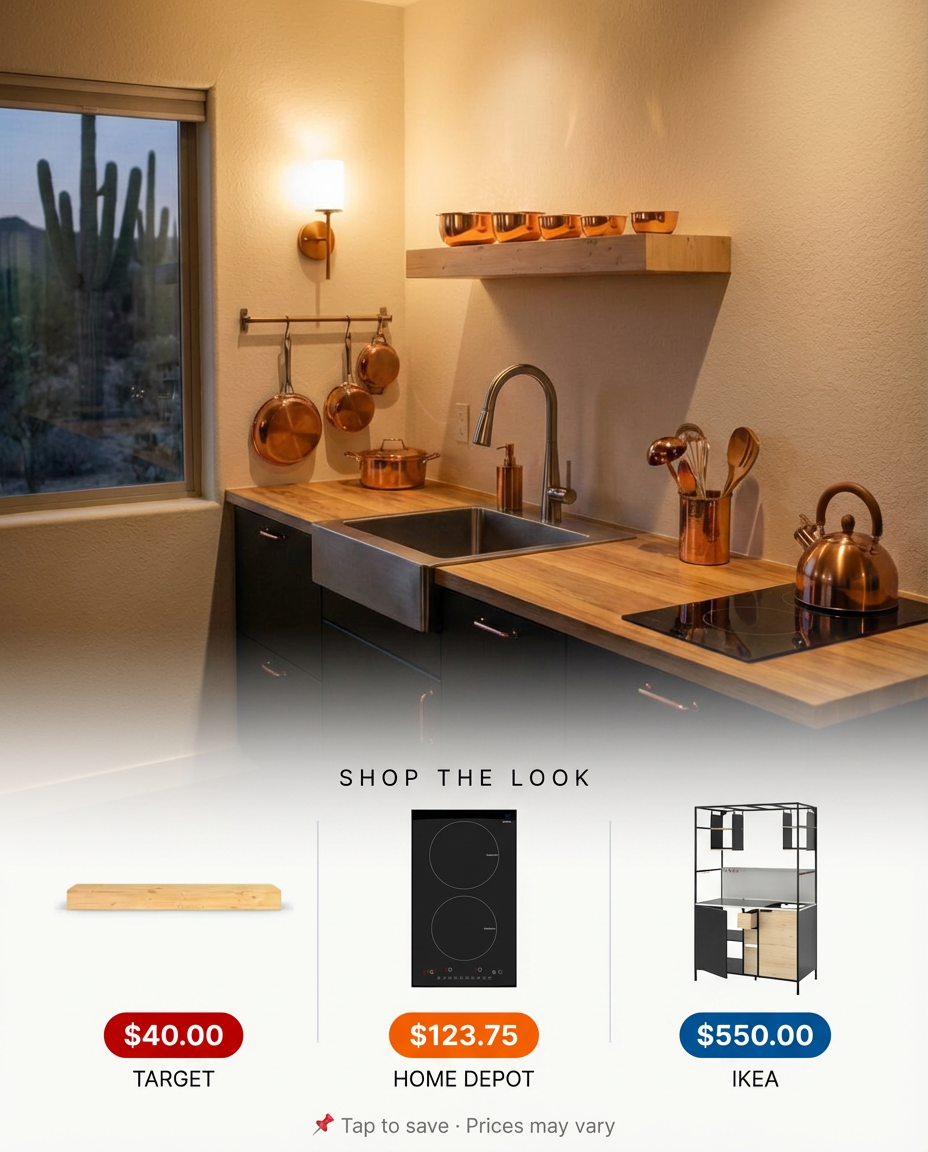
9. Warm & Inviting Kitchen with Wood & Natural Stone
Building a custom wood and stone range hood cover is easier than it sounds and adds so much character to this warm, inviting kitchen. Here’s a brief:
- Measure: Determine desired dimensions for height, width, and depth, ensuring it fully encloses your existing range hood insert.
- Gather Materials: Purchase wood planks (reclaimed barn wood for rustic charm, or new pine for a cleaner look), and thin stone veneer sheets. You’ll also need wood glue, screws, a drill, and a saw.
- Subframe Construction: Build a simple box frame from wood to fit around your range hood insert, securing it to the studs in your wall.
- Clad with Wood: Attach wood planks to the subframe, mitering corners for a seamless look. Use wood glue and finish nails.
- Apply Stone Veneer: Cut stone veneer sheets to size and adhere them to specific sections of the wood frame using a strong construction adhesive. Press firmly and allow to cure.
- Finish: Seal the wood with a natural oil or clear coat for protection. Time estimate: 1-2 days. Material cost: $200-$500.
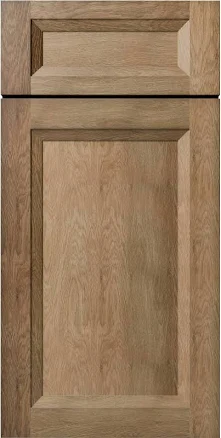
While the warm wood and natural stone in this kitchen create an incredibly inviting atmosphere, let’s talk about the reality of maintenance. Wood countertops, if you opt for them, need regular oiling (every 3-6 months) to resist water damage and staining. They scar and dent, which can be charmingly rustic or frustrating, depending on your personality. Natural stone, like marble or unsealed granite, can be porous and susceptible to etching from acidic foods (lemon juice, wine). If you choose these, be prepared for immediate wipe-downs and consider professional sealing every 1-3 years, potentially costing $100-$300 each time. For a similar look with less fuss, opt for honed quartz that mimics marble or granite, and consider wood-look porcelain tiles for flooring instead of real wood planks.
|
BYBLIGHT Roesler Brown Solid Wood 63 in. 4 Legs Dining Table Seats 4-6$315.24 |
Turner Crisp White Fireclay 30″ Single Bowl Farmhouse Apron Front Unde$249.00 |
Rustic Hickory Kitchen Cabinets$3,423.87 |
STONEMARK Granite Countertop Sample$3.99 |

As an affiliate, we earn from qualifying purchases.
10. Sophisticated Kitchen with Custom Modular Storage
The ‘one thing’ that absolutely makes this sophisticated kitchen with custom modular storage special is the *integrated, handleless cabinetry*. It’s not just about storage; it’s about the seamless, almost invisible way it blends into the architecture, creating a monolithic, sculptural feel. Those clean lines and lack of visible hardware are what elevate this from a merely functional kitchen to a piece of modern art. Remove the integrated handles, and suddenly you have a traditional cabinet front; it loses that sleek, contemporary edge that defines its sophistication. This is where you invest if you want that truly bespoke, high-end look.
This sophisticated kitchen with its custom modular storage truly excels in medium to large kitchens, ideally those with at least 150 sq ft of floor space and standard 8-9 foot ceiling heights. The beauty of modularity is its adaptability, allowing for tailored storage solutions around tricky architectural features or in specific zones. If your kitchen is on the smaller side, say under 100 sq ft, focus on integrating a single wall of modular units rather than a full room, and opt for lighter finishes to prevent it from feeling too heavy. For truly compact spaces, revisit Idea #17’s modular kitchenette for inspiration on maximizing every inch.
|
FUFU&GAGA Kitchen Island and Dining Bar Table$598.49 |
Faber Stratus Isola 36″ Ceiling Mounted Range Hood$1,939.00 |
Walker Edison Minimalist Solid Wood Counter Stool (Set of 2)$145.00 |
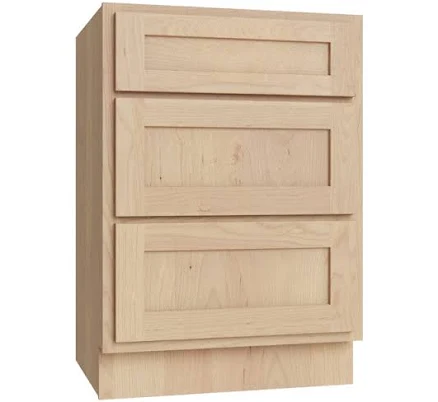
Shaker Modular Tall Pantry Utility Cabinet$1,069.95 |
As an affiliate, we earn from qualifying purchases.
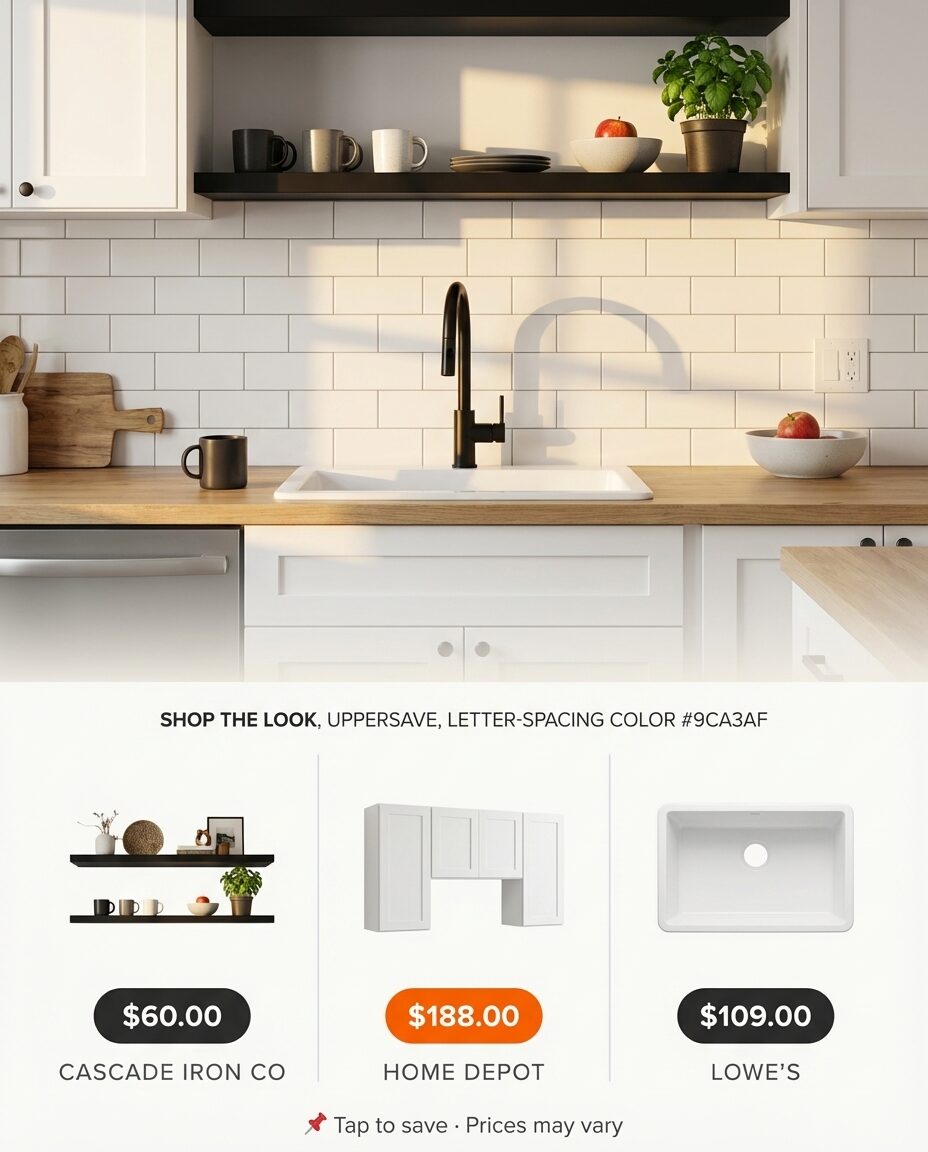
11. Statement Black Faucet in a Bright White Kitchen
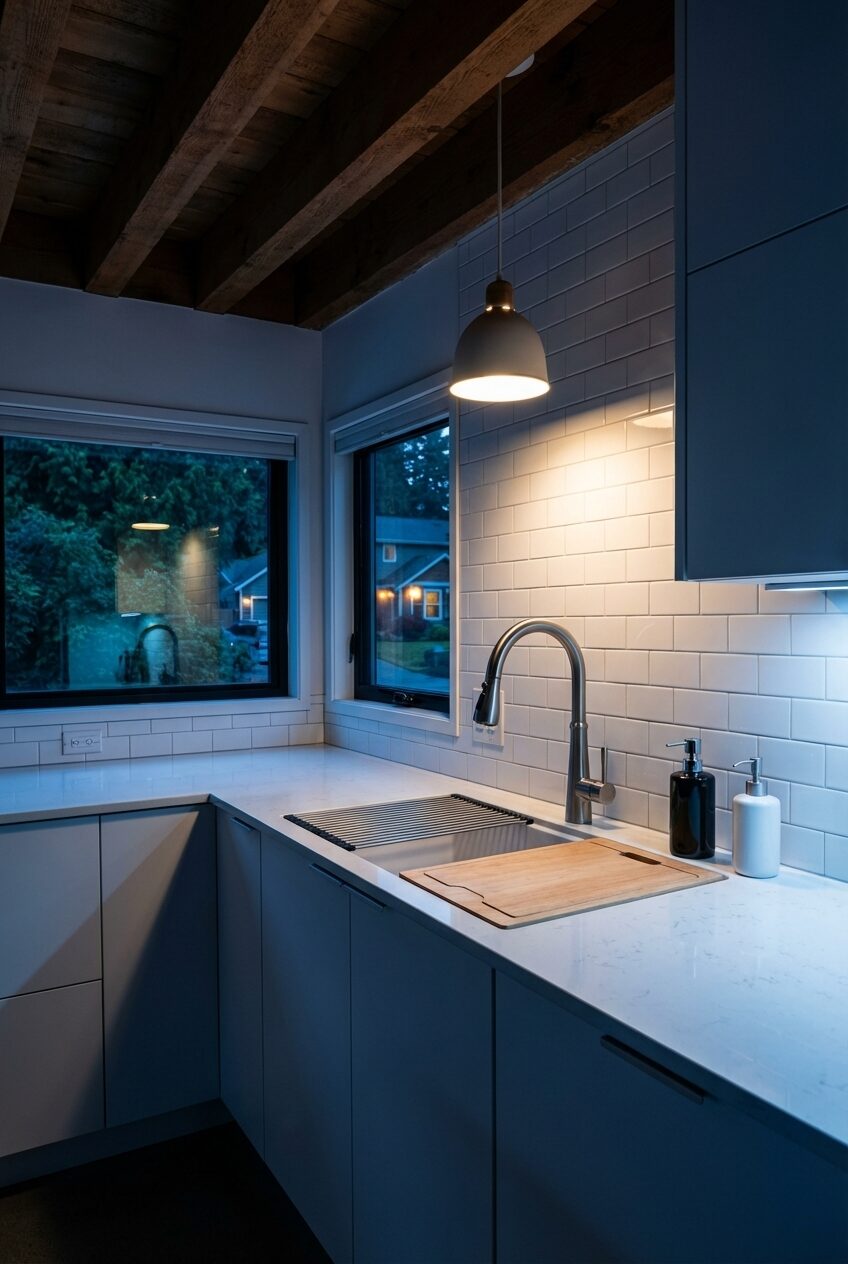
- Main furniture (cabinetry, sink): $700 – $1,500
- Lighting (assumes recessed or minimal): $80 – $200
- Textiles (minimal): $20 – $50
- Decor/Accessories (soap dispenser, small plant): $10 – $30
- Paint/Wall Treatment (white paint, subway tile): $100 – $300
- TOTAL: $910 – $2,080
- Budget alternative: Look for basic white shaker cabinets at Habitat for Humanity ReStore or via local contractors. Use inexpensive subway tile from Lowe’s or Home Depot (often less than $1 per square foot). Pair with a black budget faucet from Amazon (many options for $50-$70). You could achieve this look for $500 – $1,000.
This idea—a statement black faucet in a bright white kitchen—is so effective because it leverages the power of high contrast and visual focus. The crisp white background acts as a perfect canvas, allowing the matte black faucet to pop like a piece of jewelery. It’s a deliberate choice that draws the eye and anchors the sink area as a focal point. This isn’t just about functionality; it’s about adding a touch of modern drama and sophistication to an otherwise minimalist space. The contrast also offers a playful nod to a tuxedo aesthetic, making the kitchen feel tailored and chic without being overly ornate.
|
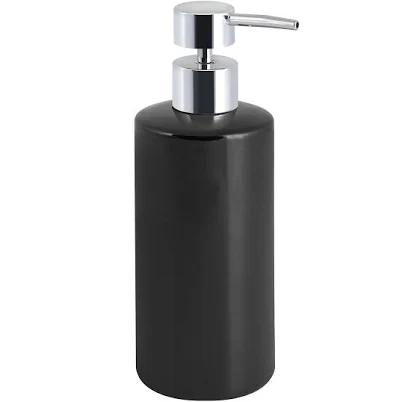
Mainstays Basic Ceramic Lotion Pump$7.97 |
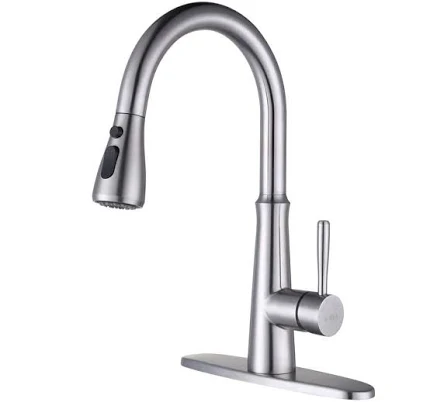
WOWOW Single Handle Deck Mount Gooseneck Pull Down Sprayer Kitchen Fau$74.24 |
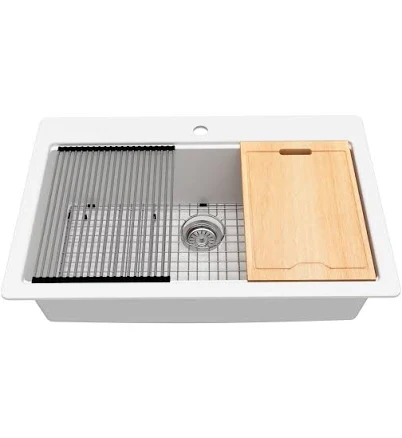
allen + roth Kaiden Drop-in or undermount 33-in x 22-in Quartz Single $389.00 |
Satori Hudson Brilliant White Glossy Ceramic Subway Wall Tile$0.13 |
As an affiliate, we earn from qualifying purchases.
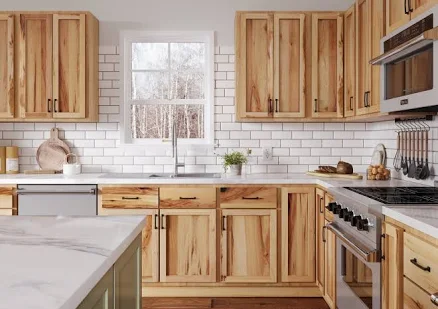
12. Warm Wood Modular Kitchen with Smart Storage
When designing a warm wood modular kitchen with smart storage, focus on uniform lines for wall-mounted cabinetry to enhance the ‘modular’ feel. A common mistake is to mix different cabinet heights or depths too much. Instead, aim for consistency across your upper cabinets, often installed at 18 inches above the countertop, to create a sleek, unbroken visual. For smart storage, integrate pull-out pantries or magic corners in lower cabinets; these are game-changers for usability and can be found as aftermarket additions if your chosen cabinets don’t include them from the start.
People are absolutely flocking to warm wood modular kitchens right now, and for good reason. Heading into 2026, there’s a huge collective craving for spaces that feel both organized and inviting. This Scandinavian-inspired look directly taps into that desire, offering smart storage solutions without sacrificing warmth or style. On Pinterest, boards filled with ‘Scandi kitchen’ and ‘natural modern’ are exploding, showcasing the beauty of light-filled spaces complemented by rich wood grains. It’s a trend with serious staying power, rooted in timeless design principles of functionality and hygge, so you won’t feel dated in three years.
|
Latitude Run Kitchen Island$135.99 |
Slim Light White Oak RTA Kitchen Cabinets Shaker 10 Ft Basic at Wholes$1,423.13 |
Scandinavian Designs Soro Dining Chair$429.00 |
Brooklyn Bulb Co. Luca Large Conical Pendant$369.00 |

As an affiliate, we earn from qualifying purchases.
13. Sophisticated Green Kitchen with Gold Hardware
Let’s do the style math for this sophisticated green kitchen: 70% Deep Emerald or Forest Green + 20% Polished Gold Hardware + 10% Crisp White or Cream. The deep green, typically on the cabinetry or a large island, forms the luxurious base, giving the room its signature glamorous feel. Then, the gold hardware—think handles, faucets, and light fixtures—comes in as the opulent accent, providing that jewelry-like sparkle. Finally, the crisp white or cream elements, usually found in countertops, backsplashes, or ceiling details, act as a clean break, preventing the darker tones from feeling overwhelming and adding brightness. This balance creates a space that feels rich but not heavy.
While a sophisticated green kitchen with gold hardware looks absolutely stunning, a quick reality check: this glamorous look demands good lighting to really shine. Deep green cabinets can absorb a lot of light, making a kitchen feel dark and perhaps a bit moody (not always a bad thing, but be aware!). If your kitchen doesn’t get ample natural light, you’ll need to invest heavily in a layered lighting scheme—recessed, under-cabinet, and statement fixtures—to ensure the space feels bright and inviting, not gloomy. Otherwise, your beautiful green can appear dull, and your gold hardware won’t sparkle as intended. This is one of the common mistakes at the end of this article that could save you a costly repaint.
|
YUYI Modern 5-Lights Linear Chandelier$1,538.98 |
Art Leon Comfortable Velvet Swivel Barstool with Golden Legs (Set of 2$139.99 |
8.7″ Large Imitation Marble Kitchen Island$285.98 |
Amerock Accents 1-1/4 Inch Length Cabinet Knob 2pk36970$16.19 |
As an affiliate, we earn from qualifying purchases.
14. Minimalist White & Wood Kitchen with Hidden Pantry

- Have you considered the existing architectural features (windows, doorways) and how the seamless design will integrate?
- Is your current kitchen layout suitable for a hidden pantry or will it require significant structural changes?
- What is your total budget for cabinetry, as seamless integration often requires custom or semi-custom solutions?
- How much storage do you truly need, and where can you strategically place a hidden pantry for maximum efficiency?
- What is the overall direction of natural light in your kitchen? This can greatly impact how white and wood tones appear.
For a minimalist white and wood kitchen with a hidden pantry, the trick is to use an overlay or secret door hinge system that completely conceals the pantry entrance. This isn’t just about paint matching; it’s about making the door indistinguishable from the surrounding cabinetry. Aim for 2-3mm reveals (the small gap between cabinet doors) throughout your entire kitchen for ultimate consistency. And here’s a tip: integrate a simple push-latch system on the pantry door rather than a pull handle, so it disappears completely into the wall when closed. This level of detail is what makes the illusion work.
|
Crate & Barrel Terra 78″ Marble Top Natural Oak Wood Kitchen Island wi$4,799.00 |
10×10 Key Largo White RTA Kitchen Cabinets by Lily Ann Cabinets$1,443.79 |
Flynn Mid-Century Modern Dining Chair Set of 2$59.00 |
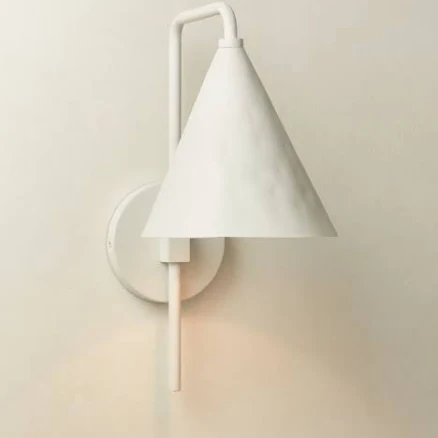
Lani White Wall Sconce – CB2$186.00 |
As an affiliate, we earn from qualifying purchases.
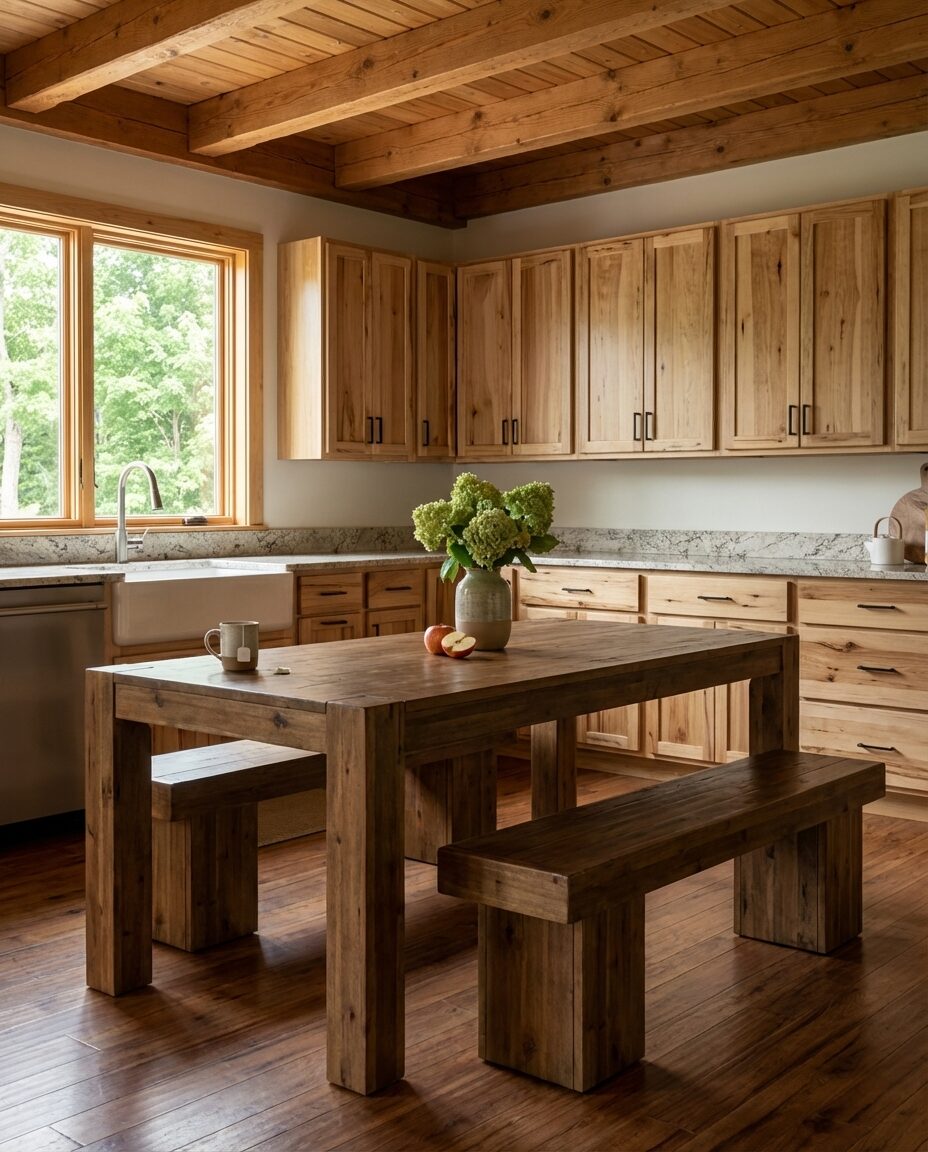
15. Modern Farmhouse Kitchen with Dark Green Shaker Cabinets
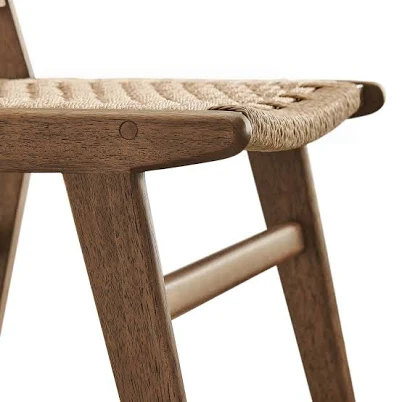
The one thing that ties this modern farmhouse kitchen together with such warmth and character? It’s the *contrasting island*. Not just any island, but a rustic wood-toned piece that provides a grounding, earthy counterpoint to the more classic dark green shaker perimeter cabinets. Without this island, the kitchen would feel much more conventional and less ‘farmhouse’. The wood brings in texture, history, and a touch of rugged charm that balances the sophistication of the green. It’s the visual anchor that says, “this isn’t just a kitchen, it’s the heart of the home.” Investing in a quality wood island is key here.
Creating open shelving in a modern farmhouse kitchen is a great way to display curated decor and add character. Here’s a quick guide:
- Plan Placement: Decide whether shelves will flank your range hood, replace upper cabinets entirely, or be a small accent. Measure carefully to ensure proper clearance (18-24 inches above countertops is standard).
- Choose Materials: Opt for thick, solid wood shelves (reclaimed wood planks or sturdy pine) to fit the farmhouse aesthetic. Brackets can be matte black, wrought iron, or chunky wood corbels.
- Gather Tools: You’ll need a level, stud finder, drill, screws appropriate for wall studs, and possibly a saw if cutting shelves.
- Install Brackets: Locate wall studs and securely mount your chosen brackets. Spacing them 24-36 inches apart typically provides sufficient support for most items.
- Attach Shelves: Place your wood planks on the brackets and secure them from underneath with screws, ensuring they are level.
- Style: Resist the urge to clutter. Arrange a mix of practical items (dishes, glasses) with decorative pieces (small plants, artwork) for an intentional, curated look. Time estimate: 2-4 hours per shelf run. Material cost: $50-$200 per shelf, depending on materials.
|
Progress Lighting Aleswith Collection 12 in. 1-Light Matte Black Rusti$89.98 |
Hampton Bay Designer Series Melvern Shaker Base Kitchen Cabinet$312.00 |
Set of 2 Backless Metal Bar Stools$79.99 |
Rustic Reclaimed Wood Kitchen Island$5,999.00 |

As an affiliate, we earn from qualifying purchases.
16. Art Deco Inspired Kitchen with Geometric Floor Tile
✨ Luxury Version
Art Deco-inspired kitchens are making a roaring comeback in 2026, riding a wave of nostalgia for glamour and opulent design. It’s popping up everywhere from high-end design magazines to Pinterest boards featuring ‘vintage modern’ and ‘geometric chic.’ This style offers a fantastic antidote to years of minimalist dominance, providing an opportunity to inject personality and sophisticated flair. While some might worry it will feel dated, the current iteration is more about subtle nods to the era—geometric floor tile, brass accents—rather than full-blown theatricality, giving it a timeless appeal with a modern twist. It’s sophisticated and, frankly, a lot of fun.
💸 Budget Version
When selecting geometric floor tile for an Art Deco-inspired kitchen, ensure the pattern isn’t too busy for your specific room size. In smaller kitchens (under 100 sq ft), a large-scale, simpler geometric pattern will make the space feel bigger. In larger kitchens, you can experiment more with intricate designs, but always lay out a portion of the pattern (a 3×3 section is a good test) before committing, to ensure you love it. Also, consider the grout color—black grout enhances the graphic nature of the pattern, while a lighter gray softens it.
|
💰 Budget Pick The Tile Shop Basketweave Matte White with Black Mosaic Wall and Floor$100.76 |
💰 Budget Pick Kelsar Art Deco Tiffany Ceiling Light – Geometric Stained Glass Flush $263.23 |
✨ Luxury Pick Harper&Bright Designs Mid-Century Art Deco 4-Door Sideboard with Adjus$394.49 |
✨ Luxury Pick Signature Hardware Delacour Bridge Kitchen Faucet$437.92 |

As an affiliate, we earn from qualifying purchases.
17. Compact & Functional Modular Kitchenette
- Main furniture (modular kitchenette unit, shelving): $675 – $1,100
- Lighting (assumes integrated or minimal): $30 – $80
- Textiles (kitchen towels, small rug): $20 – $50
- Decor/Accessories (small plant, wall art): $20 – $60
- Functional Appliances (integrated cooktop, mini-fridge if needed): $100 – $300 (depending on chosen appliances)
- TOTAL: $845 – $1,590
- Budget alternative: Look for refurbished mini-fridges and induction cooktops on Craigslist or Facebook Marketplace. IKEA’s ÄSPINGE kitchenette series is incredibly affordable ($550) and can be customized with floating shelves from Target ($40). A simple, sleek faucet can be found from Home Depot for under $100. You could get a similar compact setup for $500 – $800.
A compact and functional modular kitchenette is brilliant for small spaces, but here’s some real talk: you *will* feel the limitations if you love to cook elaborate meals or entertain frequently. You’ll be sacrificing counter space, storage, and possibly appliance size. Before committing, consider your actual lifestyle. How often do you cook? Do you need a full-size oven or will a countertop convection oven suffice? Also, be mindful of noise if it’s in a studio apartment; a powerful range hood is crucial. It’s fantastic for efficiency, but it’s a game of strategic compromises. Don’t underestimate the power of clever pull-out storage to maximize every inch.
18. Sophisticated Black & Wood Kitchen with Natural Light
This sophisticated black and wood kitchen excels in creating a sense of understated luxury, primarily due to its thoughtful use of contrast and natural light. The dark, sleek cabinetry provides a dramatic, modern backdrop, immediately drawing you in. But it doesn’t feel oppressive because it’s perfectly balanced by the warmth of natural wood—seen in the dining table, often a large island, or even hidden details within the cabinetry. Crucially, the presence of large windows isn’t just about brightness; it’s about how that natural light interacts with the dark surfaces, creating reflections and softening the intensity. It’s a masterclass in how to use dark colors without making a space feel small or gloomy. This careful pairing makes the space feel rich, inviting, and incredibly chic.
When designing a sophisticated black and wood kitchen, one key professional tip is to introduce varied textures to prevent the dark elements from falling flat. Think beyond just matte black cabinets; consider a subtly textured black backsplash, a rough-hewn wood dining table, or perhaps even a fluted wood panel on an island. These textural layers—even within the same color family—create visual interest and depth, making the space feel more curated and less one-dimensional. Aim for at least three different textures within your primary material palette to achieve this effect. This will make an amazing difference.
|
Style Selections Matte Black Transitional Cylinder Mini Pendant Light$29.98 |
Nathan James Arched Kitchen Cabinet Set of 2$739.98 |
6ft Kitchen island with quartz top$3,800.00 |
Custom Walnut Live Edge Dining Tables$354.83 |
As an affiliate, we earn from qualifying purchases.
19. Transitional Kitchen with Emerald Green Island & Unique Faucet
A transitional kitchen with an emerald green island really sings in kitchens that are at least 120-180 sq ft, giving the island enough room to be a true centerpiece without obstructing flow. Ceiling height isn’t as critical, but 8-9 ft works well. The key here is balance: if your kitchen is smaller, you might opt for a smaller, perhaps movable, green island (like a cart) and keep the perimeter cabinetry white. If your kitchen is expansive, you can go with a larger, built-in statement island and incorporate more brass accents. This design is versatile, but always ensure generous walkways—a minimum of 36 inches around the island is ideal, 42 inches if it’s a high-traffic area. If your room can’t handle this scale, Idea #7’s industrial modern kitchen offers a similar bold mood in a completely different footprint.
To get the look of an emerald green island with white perimeter cabinets on a budget, look for an inexpensive existing island (even a simple wooden one) on Facebook Marketplace or at a thrift store. Sand it down and paint it with a high-quality emerald green cabinet paint. For the white perimeter, basic Hampton Bay shaker cabinets from Home Depot are a fantastic, affordable option. For that ‘unique faucet’ feel, scour Wayfair or Amazon for pull-down sprayers in brass or matte black; many great options are available for under $100-$150. You can realistically achieve this sophisticated transitional look for $1,500 – $3,000, saving thousands on custom cabinetry and high-end fixtures.
|
Modern Upholstered Bar Stools (Set of 4)$137.99 |
Crosley Cora Drop Leaf Kitchen Island$318.99 |
Kohler Revolv Single Handle Pull Down Sprayer Kitchen Faucet$249.00 |
Hampton Bay Shaker Sink Base Cabinet$250.00 |

As an affiliate, we earn from qualifying purchases.
20. Scandinavian Simple Kitchen with Light Wood & White
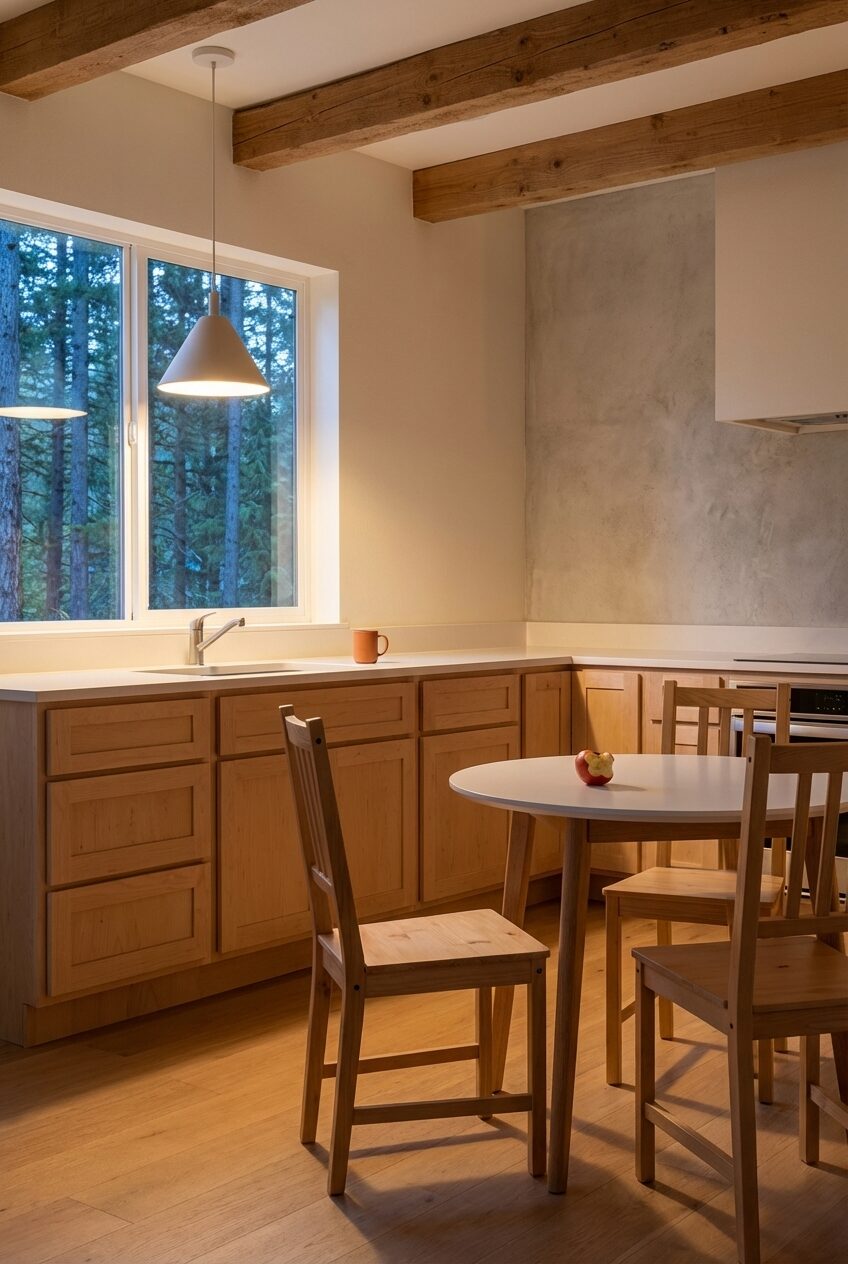
The Scandinavian simple kitchen, with its light wood and white palette, continues to dominate in 2026 because it perfectly aligns with our collective desire for more mindful, less cluttered living. On platforms like Pinterest, ‘Japandi style’ (a fusion of Japanese and Scandinavian aesthetics) and ‘minimal home’ are huge, driving interest in clean lines, natural materials, and an emphasis on functionality over ornamentation. This trend isn’t just about aesthetics; it’s a whole philosophy of living that supports calm and well-being. It’s a design choice that truly feels good to live with, ensuring it has significant staying power beyond fleeting fads.
In a Scandinavian simple kitchen, the single most crucial element is the *light wood*. It’s not just a material choice; it sets the entire tone for the space. Without the warmth and organic texture of light, natural wood—whether in the cabinetry, flooring, or dining furniture—the kitchen would risk feeling sterile and cold, rather than inviting and serene. That light wood is what infuses the minimalist white backdrop with coziness and a connection to nature. It’s the grounding element that brings ‘hygge’ into the heart of your home. Everything else can be simpler, but the wood needs to be right.
|
KCD Unfinished Birch KD Shaker 24″ Drawer Base-3 Drawer | Home Outlet$292.99 |
IKEA PINNTORP chair stained$45.00 |
Minimalist Cone Ceramic Pendant Light for Modern Kitchens, Personalize$175.20 |
George Oliver Bedolla Mid Century Round Dining Table$169.99 |

As an affiliate, we earn from qualifying purchases.
21. Modern Loft Kitchen with Matte Black Appliances & Brick Wall
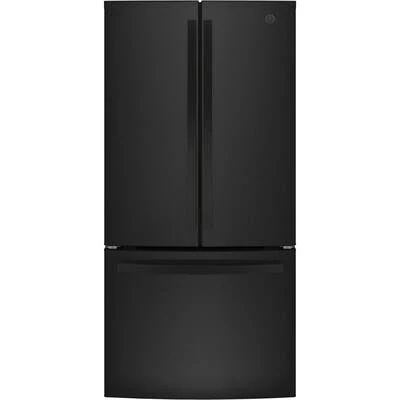
A modern loft kitchen with matte black appliances and an exposed brick wall looks incredibly cool, but let’s talk maintenance. Matte black finishes, especially on appliances like refrigerators, are notorious for showing fingerprints, smudges, and water spots. Be prepared for regular wiping, potentially with specific cleaning products to avoid streaks. Exposed brick, while beautiful, can be a dust and grease trap in a kitchen. Ensure it’s properly sealed to prevent absorption of cooking odors and to make cleaning easier—a good quality brick sealer might need reapplication every 3-5 years, costing around $50-$100 for the materials. Otherwise, you’ll find yourself with a grimy-looking wall that’s difficult to clean.
When designing a modern loft kitchen with exposed brick, don’t let the brick dominate the space too much. A professional trick is to use it as a feature wall, not on every surface. Aim for a 60/40 split: 60% sleek, modern surfaces (think matte black or dark wood cabinetry) and 40% exposed brick. This creates balance and allows the brick to be an architectural accent rather than an overwhelming texture. Also, strategically place your exposed brick where it won’t directly get splattered with grease from the cooktop, or ensure it’s properly sealed behind a backsplash panel.
|
GE 18.6 Cu. Ft. French-Door Refrigerator GWE19JGLBB$1,979.00 |
Hardwood Lumber Company Slab Cabinet$243.00 |
George Oliver Adjustable Black Metal Frame Bar Stool with Swivel Back$164.99 |
Natural Edge Wood Floating Shelf$53.00 |
As an affiliate, we earn from qualifying purchases.
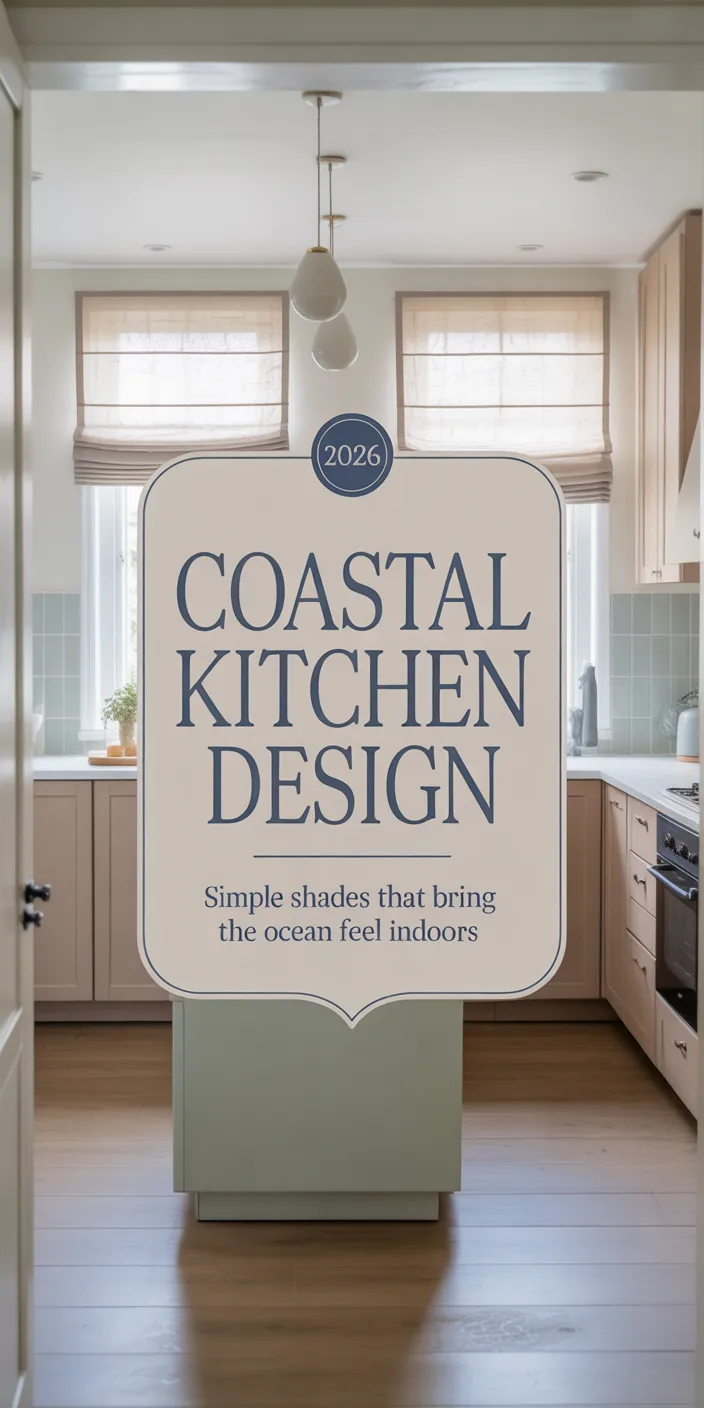
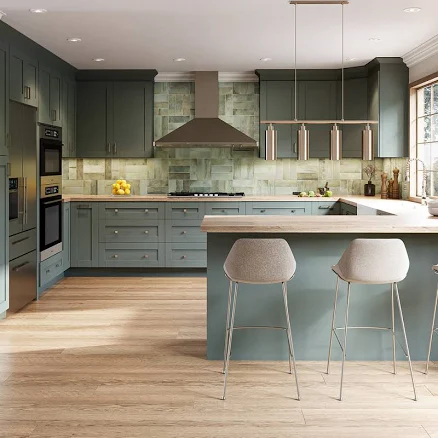
22. Coastal Kitchen with Soft Green Cabinets & Brass Hardware
- Main furniture (cabinetry, island): $3,000 – $6,000
- Lighting (pendants, recessed): $200 – $500
- Textiles (minimal): $50 – $150
- Decor/Accessories (bar stools, small plants): $200 – $500
- Paint/Wall Treatment (soft green paint): $75 – $150
- TOTAL: $3,525 – $7,300
- Budget alternative: Purchase unfinished stock cabinets from a local hardware store and paint them a soft sage green. Look for simple, classic brass pull hardware on Amazon or Etsy ($5-$10 per piece). A basic kitchen island can often be found used or on sale at Target or Wayfair for under $400, which you can also paint. You could achieve this coastal look for $1,800 – $3,500.
- What is the existing color palette in adjacent rooms?
- How much natural light does your kitchen receive, and from what direction?
- Are you committed to brass hardware, or is flexibility an option for other metallics?
- What is your budget range for custom or semi-custom green cabinetry?
- Do you have any existing natural textures (e.g., wood flooring) that need to be complemented?
|
Rennnsan Arven 10-Watt 10.6 in. 1-Light Brass Modern Bell LED Pendant $160.28 |
Sage Green Shaker 10×10 RTA Kitchen$2,197.84 |
Room & Board Modern Linden Kitchen Island$3,799.00 |
World Market Riverstone Saddle Seat Stool$223.99 |
As an affiliate, we earn from qualifying purchases.
23. Eclectic Kitchen with Patterned Floor Tile & Mixed Materials
The style math for an eclectic kitchen with patterned floor tile is all about confident layering: 40% Neutral Base + 30% Patterned Floor Tile + 20% Mixed Materials (wood, metal, stone) + 10% Bold Color Accents. Start with a calming, neutral foundation on your walls and maybe some upper cabinets; this is your canvas. Then, let the patterned floor tile be the bold star, drawing the eye and setting the eclectic tone. Next, bring in various materials through your countertops, hardware, and furniture—think a rich wood island, industrial metal stools, or a unique stone backsplash. Finally, inject small pops of vibrant color through decor, artwork, or textiles. This formula ensures a dynamic look without chaos.
An eclectic kitchen with patterned floor tile and mixed materials is fantastically personal, but here’s the real talk: it’s not for the faint of heart, and it can go wrong quickly. The biggest pitfall is making it look like a cluttered mishmash rather than a curated collection. It demands a keen eye for balance and a willingness to commit to bold choices. If you’re someone who changes their mind frequently or worries about trends, this might be a style that feels overwhelming in a few years. Also, intensely patterned floor tiles can make a large statement, so ensure it’s a pattern you genuinely love for the long haul—it’s not a quick or cheap thing to change down the line.
|
Modern Geometric Decor Tile$89.00 |
94986 Modern Blue and Wood Kitchen Cabinets$600.00 |
Lehman Counter Stool with Metal Frame Williston Forge$139.99 |
EFPERFECT Retro Industrial Pendant Light – Black Tubular Cage Design w$159.99 |
As an affiliate, we earn from qualifying purchases.
24. Sleek Modern Black Kitchen with Integrated Lighting
When planning integrated lighting in a sleek modern black kitchen, don’t just put LED strips everywhere. Focus on layers: primary task lighting (under-cabinet for work surfaces), ambient lighting (recessed ceiling lights for overall illumination), and accent lighting (toe-kick lighting or backlighting behind open shelving for drama). A specific tip: use warm-toned LEDs (2700K-3000K) to prevent the black from feeling cold and sterile. This adds an inviting glow that enhances the sophistication, rather than creating a harsh, commercial feel. Seriously, warm light makes all the difference in a dark kitchen.
The single most crucial element in this sleek modern black kitchen is the *absence of handles and visible hardware* paired with the *integrated lighting*. This combination is what creates the truly seamless, almost monolithic aesthetic. The handleless design allows the cabinetry to merge into a single, clean surface, while the integrated lighting (often subtle strip lights or hidden fixtures) enhances this sleekness by highlighting the forms and textures, rather than distracting with visible light sources. Without this seamless integration, it’s just a black kitchen. This is where the magic (and often, the investment) lies.
Installing integrated under-cabinet LED lighting really elevates a sleek black kitchen. Here’s a brief how-to:
- Measure & Plan: Measure the length of all cabinet runs where you want light. Decide between strip lights (for continuous glow) or puck lights (for spotlights).
- Choose Type: Opt for low-profile LED strips (preferably dimmable) that adhere easily under cabinets. Aim for 2700K-3000K color temperature for warmth.
- Gather Materials: LED strips with adhesive backing, power supply/driver, connectors, wire cutters, and possibly an in-line dimmer switch.
- Clean Surface: Ensure the underside of your cabinets is clean and dry for optimal adhesion.
- Install Strips: Adhere the LED strips along the front underside edge of your upper cabinets, facing slightly inward for best light distribution without glare. Cut to length as needed.
- Connect Power: Route wires to your power supply (often hidden in an upper cabinet) and plug into an outlet. Test before securing all wires with clips. Time estimate: 2-4 hours. Material cost: $50-$150 per cabinet run.
|
SenSa Waterfall Granite Kitchen Countertop Sample$7.98 |
True Black Matte RTA Kitchen Cabinets by Wholesale Cabinets$1,746.05 |
Nathan James Cohen 24 Wood Mid-Century Faux Leather Counter Height Bar$219.99 |
24″ LED Under Cabinet Low Profile Light Bar$35.89 |

As an affiliate, we earn from qualifying purchases.
25. Global Inspired Kitchen with Moroccan Floor Tile
Global-inspired kitchens, particularly those drawing from Moroccan aesthetics, are surging in popularity for 2026. This trend is driven by a desire for spaces that feel unique, traveled, and full of character after years of more minimalist interiors. Pinterest and Instagram are overflowing with images tagged #globaldecor and #bohokitchen, showing how vibrant patterns and earthy textures can transform a home. What’s fantastic about this trend is its versatility; you can lean heavily into it as seen here with the floor tile, or just add subtle nods with tapestries, specific brass lanterns, or a collection of artisan ceramics. It’s a style that genuinely invites storytelling into your kitchen.
In a global-inspired kitchen like this, the absolute ‘one thing’ is the *Moroccan floor tile*. It’s not just a surface; it’s a bold, artistic statement that immediately sets the tone and narrates the global story. Without this richly patterned and textured tile, the kitchen would lose its distinctive cultural anchor and become far more generic. This tile acts as the vibrant rug and the art piece all in one, injecting spirit and movement into the space. It’s the element that brings that faraway bazaar feel right into your home, making it utterly unique and memorable. Don’t skimp here; it’s the investment piece.
|
Moroccan Terracotta Tiles – Hand Painted Clay Zellige from Fez$5.60 |
Modway Saoirse Woven Rope Wood Dining Side Chair$322.75 |
HOMEMYSTIQUE Single Handle High-Arc Standard Kitchen Faucet$58.99 |
Natural Shaker 10×10 RTA Kitchen$1,657.96 |

As an affiliate, we earn from qualifying purchases.
26. Sophisticated Kitchen Walls with Deep Green Paint
✨ Luxury Version
The style math for sophisticated kitchen walls with deep green paint often looks like this: 50% Deep Green Walls + 30% White/Neutral Cabinetry + 15% Brass Accents + 5% Rich Wood. The deep green acts as the primary atmospheric factor, giving the room its luxurious, enveloping feel. It’s grounded by classic white or a soft, light neutral on the cabinetry, preventing the space from becoming too dark. Brass accents then serve as the jewelry, adding sparkle and warmth through hardware, lighting, or a sleek faucet. A touch of rich wood—perhaps on a cutting board, a bar stool, or open shelving—brings in organic texture and completes the sophisticated palette. This blend creates depth and elegance.
💸 Budget Version
When painting kitchen walls a deep green, selecting the right finish is paramount for durability and appearance. Use an eggshell or satin finish for walls, as these are more scrubbable and resistant to moisture than flat paints, crucial for a kitchen environment. For cabinets, a semi-gloss or even high-gloss finish is ideal for both durability and ease of cleaning, plus it reflects light beautifully, which is key with dark colors. A specific tip: always do a large paint sample (at least 2×2 feet) on your actual wall and observe it at different times of day to see how the light affects the color before committing to the whole room.
Deep green painted walls in a kitchen are gorgeous, but be aware of the inherent maintenance. While a good quality, scrubbable paint can withstand splashes, dark walls show grease splatters and fingerprints far more prominently than lighter colors. You might find yourself wiping down walls around cooking zones more frequently. Also, if your kitchen receives strong direct sunlight, darker paint colors can fade slightly over time, leading to unevenness. Consider using a super durable, washable eggshell or satin finish to mitigate these issues, or opt for a dark green tile backsplash behind the stove for easy cleaning.
|
💰 Budget Pick Vingli Velvet Counter Height Bar Stools (Set of 2)$122.98 |
💰 Budget Pick Farrow Ball No$149.00 |
✨ Luxury Pick Modern Green Gold Abstract Canvas Wall Art$229.00 |
✨ Luxury Pick Hampton Bay Shaker Base Cabinet$236.00 |
As an affiliate, we earn from qualifying purchases.
27. Bright & Simple Kitchen with White Subway Tile
- Main furniture (cabinetry, sink base): $500 – $1,000
- Lighting (assumes recessed or simple flush mount): $50 – $150
- Textiles (minimal): $20 – $50
- Decor/Accessories (wall shelves, small plants): $20 – $100
- Paint/Wall Treatment (white paint, subway tile): $100 – $300
- TOTAL: $690 – $1,600
- Budget alternative: Get basic white melamine cabinets from a home improvement store. Look for subway tile
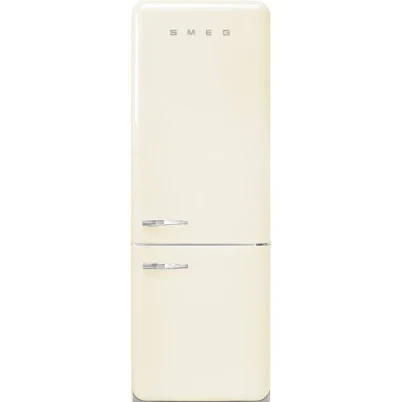
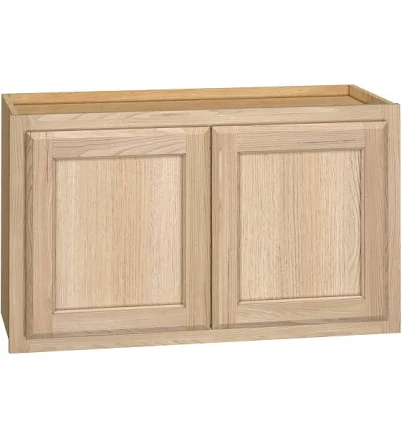
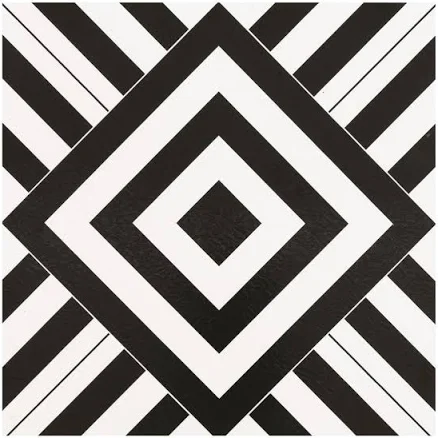
28. Retro Modern Kitchen with Bold Floor Tile & Appliances
Herman Miller Eames Molded Plastic Side Chair$495.00
Smeg Retro Style 28 in. 18.0 Cu. Ft Bottom Freezer Refrigerator$4,069.99
Project Source Oak Brook 24-in W x 30-in H x 12-in D Natural Unfinishe$94.98
Achim Retro Geometric Self-Adhesive Vinyl Floor Tile$22.20
As an affiliate, we earn from qualifying purchases.
29. Sophisticated Black & White Modern Kitchen
70.9″ Kitchen Islands with Multi-Storage Modern Kitchen Cabinet$1,599.99
Pure White Quartz Countertop$75.00
Moen 5925 Sleek One-Handle Pulldown Kitchen Faucet$265.13
IKEA ROSENTORP bar stool with backrest$70.00
As an affiliate, we earn from qualifying purchases.
30. Mediterranean Kitchen with Patterned Floor Tile
JeenaLavie-Royal Blue Cornflower Terracotta Zellije “36 50 x 50mm Tile$110.50
Hampton Bay Sinclair 30 in. W x 12 in. D x 30 in. H Assembled Wall Cab$225.00
Windy Stables Reclaimed Barn Wood Trestle Dining Table$4,135.00
Wrought Iron Wall Sconce$11.99
As an affiliate, we earn from qualifying purchases.
🚫 Common Mistakes to Avoid
Now that you’ve seen what works — here’s what to watch out for. These mistakes are surprisingly common and can undermine even the best design intentions.
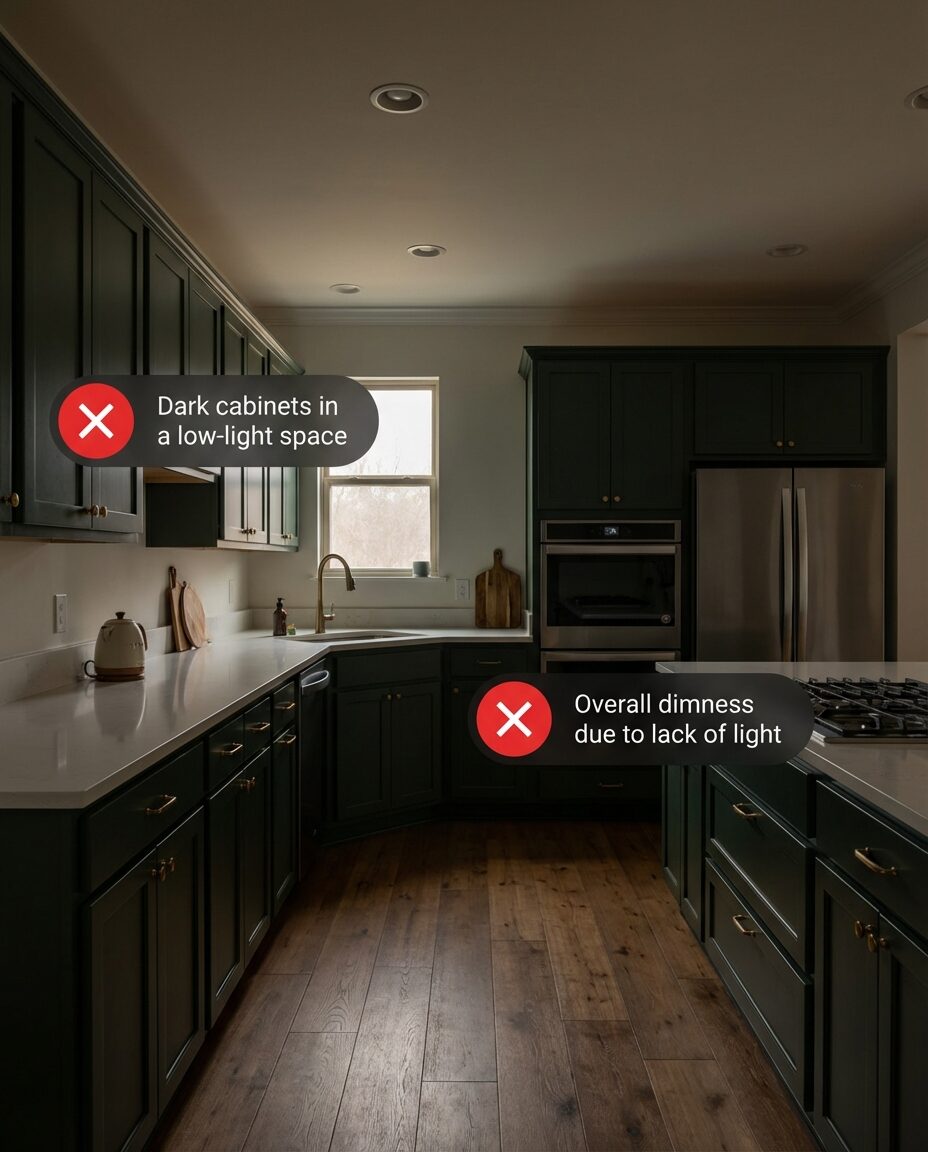
❌ Mistake #1: Ignoring Your Kitchen’s Natural Light
 ✅ The Fix:
Match your color palette to your kitchen’s natural light.One of the biggest blunders I see in kitchen design is choosing a color scheme or material palette without first considering how much natural light the room actually receives. Dark colors in a north-facing kitchen with minimal windows can make it feel like a cavern, even with ample artificial lighting. Conversely, an overly bright, reflective kitchen in a south-facing room can feel harsh and glary.
The Fix: Always assess your kitchen’s natural light direction and intensity at different times of day before making major color or material decisions. For low-light kitchens, lean into brighter palettes, lighter wood tones, or reflective surfaces. For sun-drenched spaces, you can experiment more with deeper, moodier colors and matte finishes.
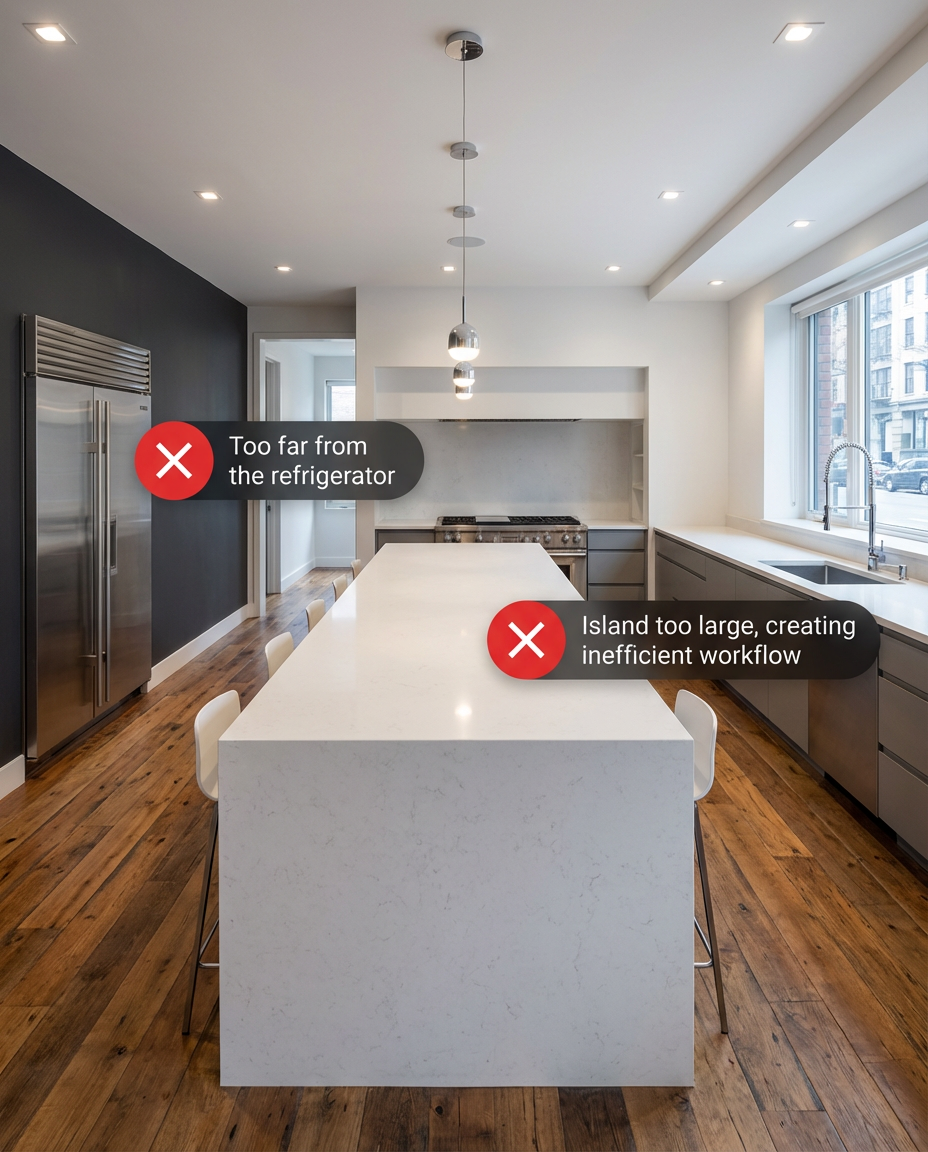
❌ Mistake #2: Choosing Form Over Function (The Workflow Trap)
 ✅ The Fix:
Prioritize efficient workflow over oversized elements.It’s easy to get swept away by gorgeous Pinterest photos, but sometimes those aspirational layouts aren’t practical for daily cooking. A common mistake is prioritizing aesthetics over the functional “work triangle” (sink, stove, refrigerator) or creating islands that are too large, making distances between key zones inefficiently vast. This leads to a beautiful but annoying kitchen to actually cook in.
The Fix: Before committing to a layout, map out your typical workflow. Ensure your main appliances are easily accessible and that there’s adequate counter space for prep between the sink and stove. Test island dimensions with painter’s tape on the floor to ensure enough clearance (at least 36-42 inches) around all sides. A beautiful kitchen should also be a joy to use.
❌ Mistake #3: Ignoring the Power of Layered Lighting
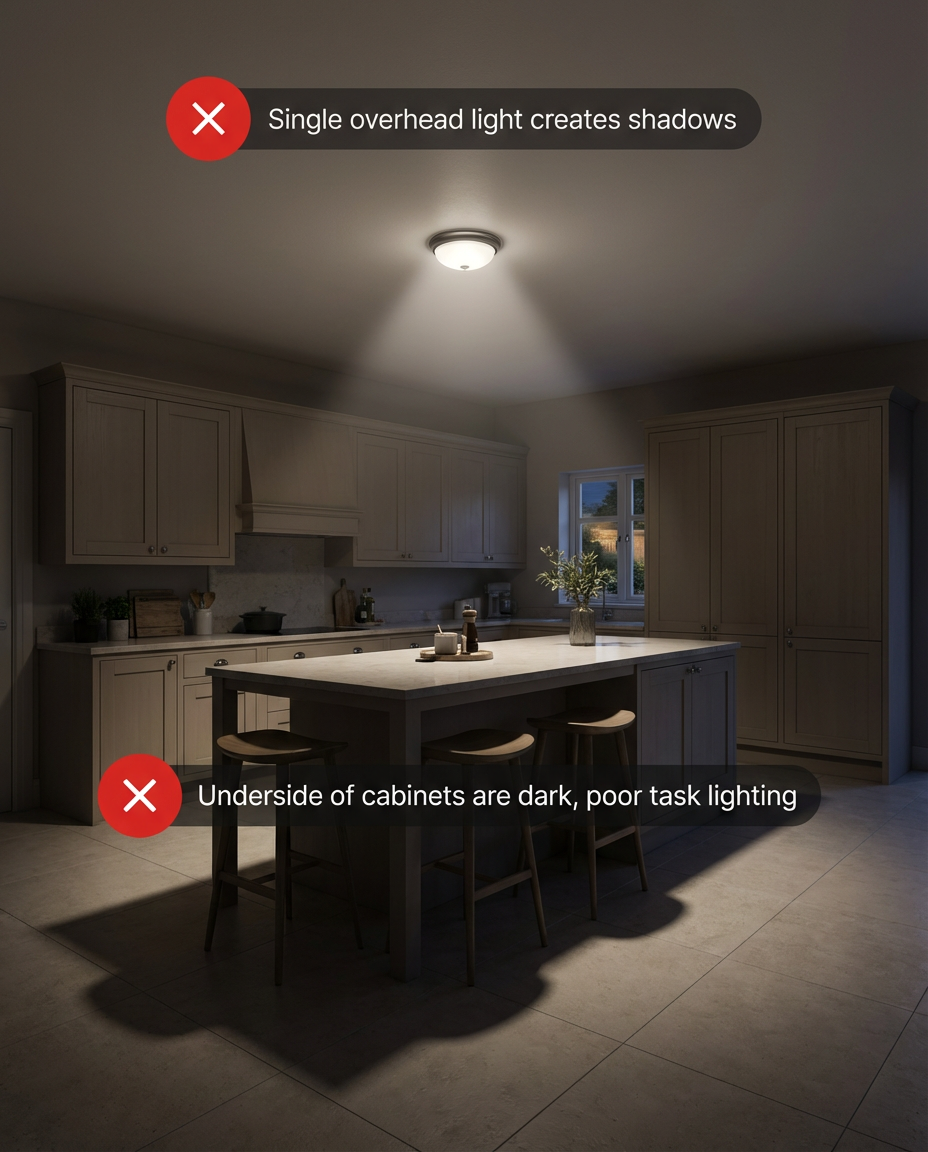 ✅ The Fix:
Layer your lighting for both function and ambiance.A single overhead light in a kitchen is a recipe for design disaster. It creates shadows, makes prep work difficult, and strips away any potential ambiance. Many people overlook the importance of layering different types of lighting, which is crucial for both functionality and creating a warm, inviting atmosphere.
The Fix: Design your kitchen lighting with three layers: ambient (general overhead light like recessed cans), task (focused light over work areas like under-cabinet strips), and accent (for mood or highlighting features, like pendant lights or toe-kick lighting). Use dimmers to control the intensity and create different moods. Even in a small galley kitchen, multiple light sources make a world of difference.
Final Thoughts
So there you have it—30 kitchen trends ready to transform your space in 2026. From the dramatic to the serene, these ideas prove that your kitchen can be as functional as it is beautiful. Don’t be afraid to mix and match elements that speak to you, creating a space that truly reflects your style.
Ready to start planning your dream kitchen? Head over to Pinterest and start pinning your favorite ideas from this guide—it’s time to bring that inspiration to life!