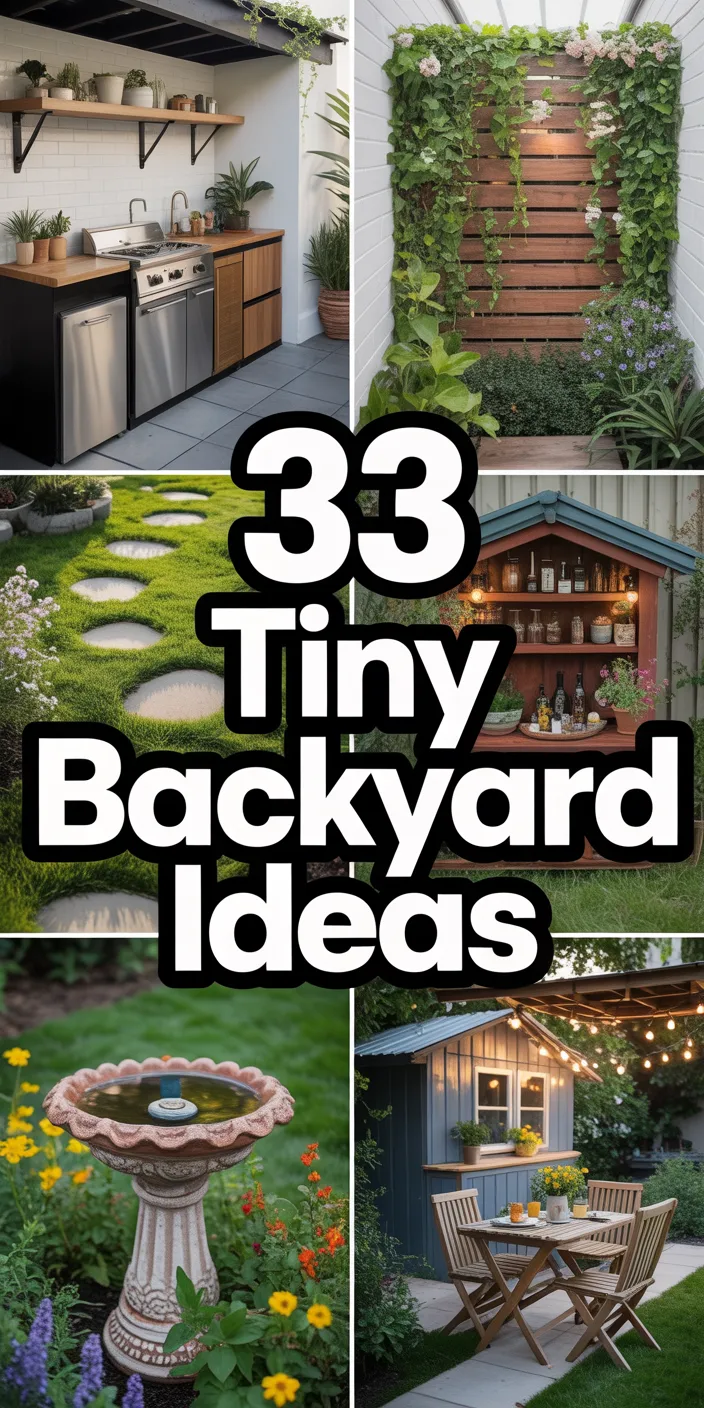
Still scrolling through Garden Decor 2026 photos without knowing where to start? We’ve all been there, endlessly pinning without a clear path forward. This year, let’s change that.
We spent serious time browsing Target, Lowe’s, and Walmart, Etsy, and Hobby Lobby to bring you only what’s worth your attention this year. From Target’s latest drops to Lowe’s’s current bestsellers, we pulled the best Garden Decor 2026 options across every price point — from $2 to $7327.
Inside, you’ll find 30 curated ideas spanning rustic charm, vintage elegance, bohemian whimsy, and serene Japanese aesthetics. And yes, every single idea is shoppable with direct product links, making it easier than ever to bring these looks to life.
In 2026, garden spaces aren’t just an afterthought; they’re an extension of our indoor living, a personal sanctuary driven by a desire for natural connection and mindful design.
Pin this guide for later — your future self will thank you when it’s time to actually do this.
**Affiliate Disclosure: This article contains affiliate links. We may earn a commission from purchases made through these links, at no extra cost to you.
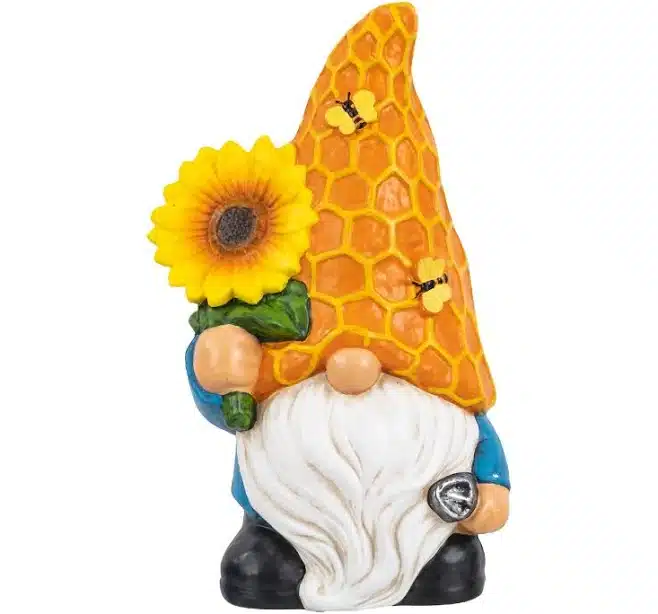
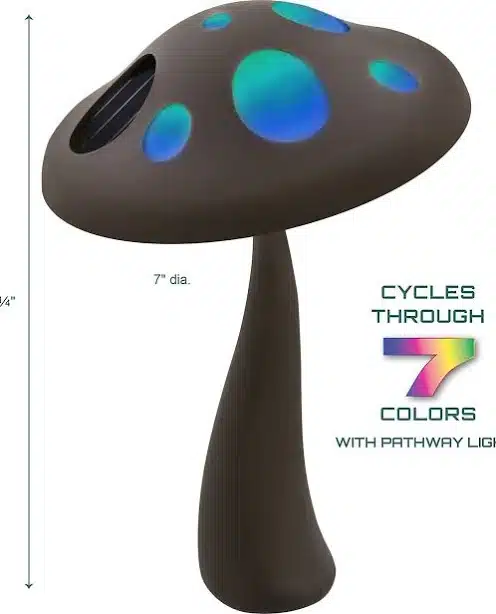
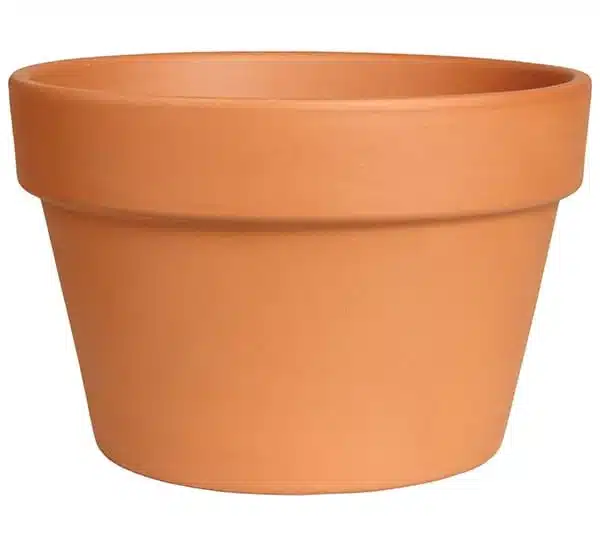
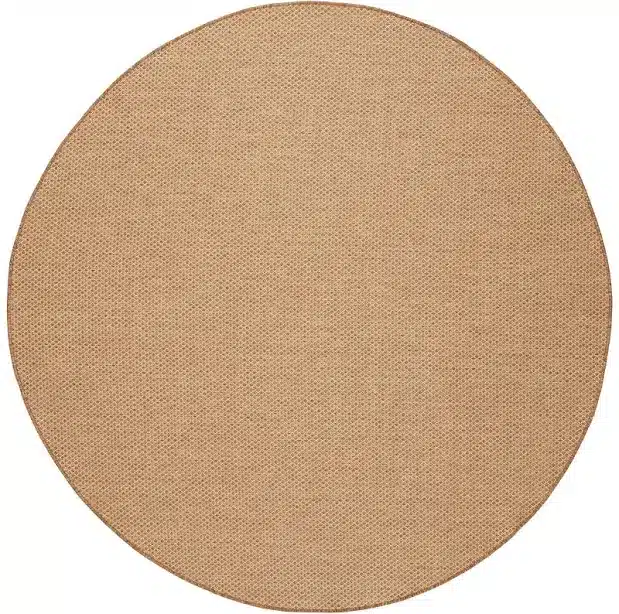
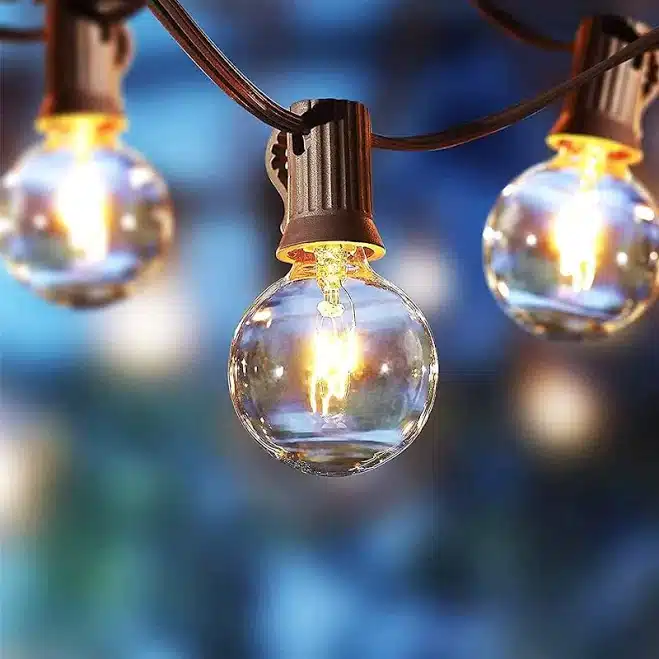
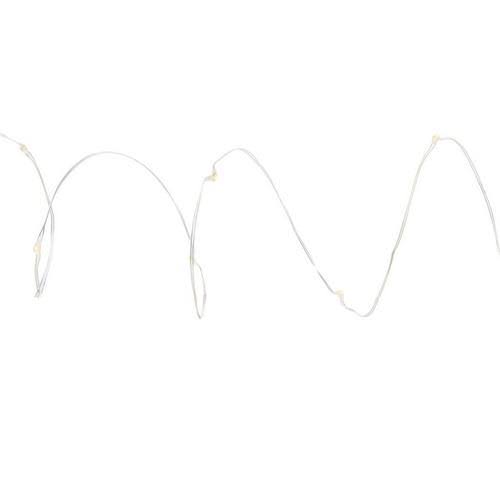
1. Whimsical Mushroom Garden Path with Twinkling Lights
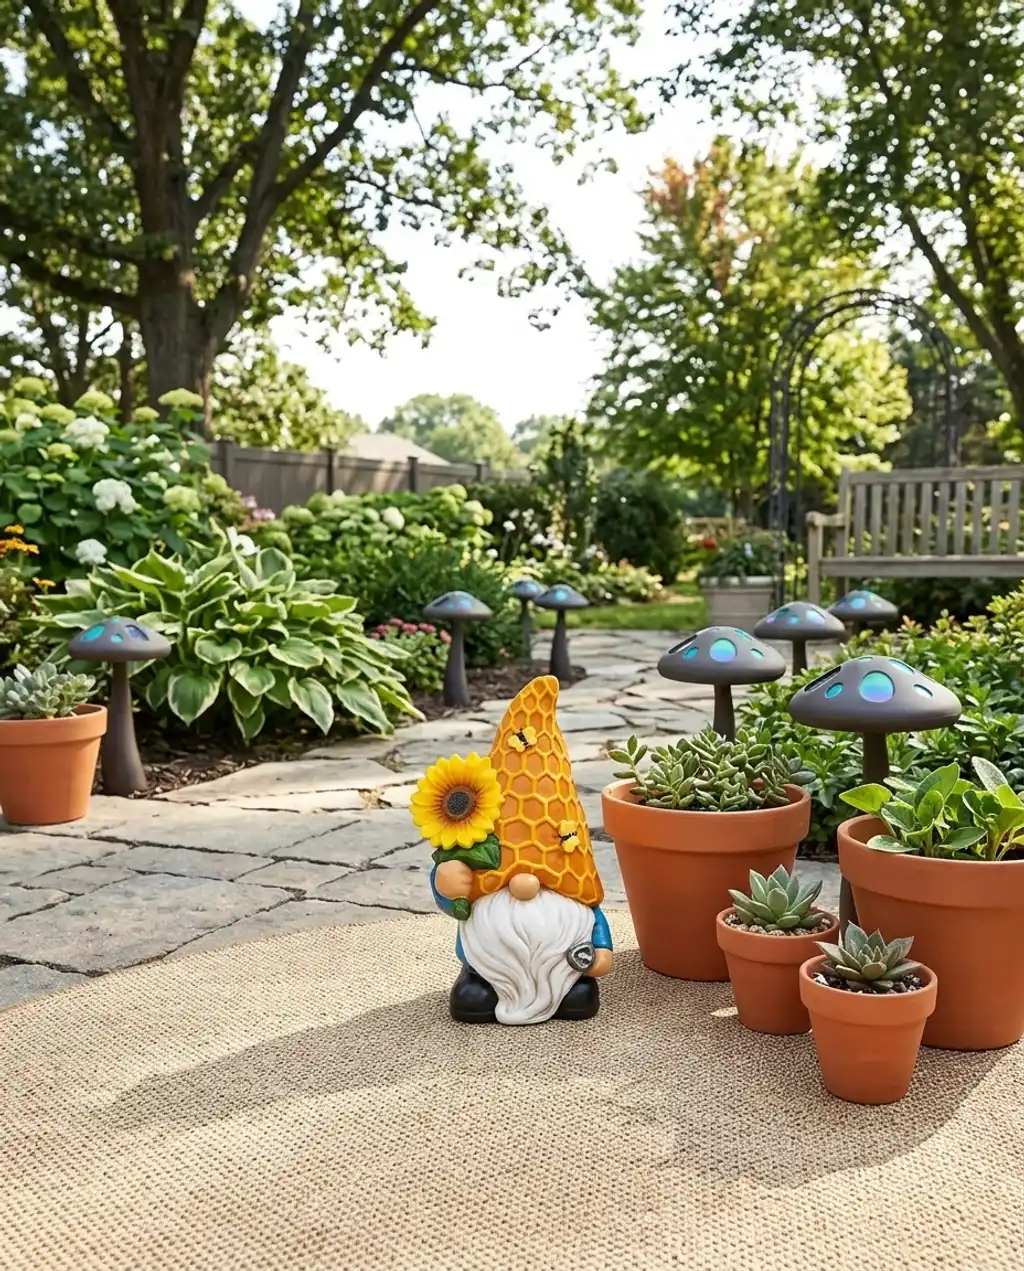
There’s something universally enchanting about stepping into a garden path lit by soft, twinkling lights and surrounded by whimsical elements. This look, often seen on cottagecore Pinterest boards, has really taken off as people embrace more playful, storybook aesthetics in their outdoor spaces. It’s perfect for creating a dreamy atmosphere without feeling overly cutesy, leaning into a grown-up sense of wonder that resonates deeply right now.
What makes this specific idea sing is the blend of natural elements with unexpected, magical touches. The mushroom shapes provide a focal point that feels organic yet slightly fantastical, instantly transporting you. When paired with delicate lights, it creates layers of visual interest and a sense of depth. It’s about crafting a soft, inviting glow that guides the eye and evokes a sense of peace and discovery.
|
Mainstays Resin Outdoor Garden Gnome Statue with Sunflower Decoration$14.94 |
Mushroom Solar Pathway Light$8 |
Terra Cotta Clay Pot$4.99 |
Nourison Courtyard COU01 Ivory Rug$58 |
As an affiliate, we earn from qualifying purchases.
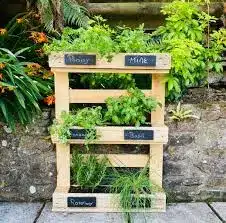
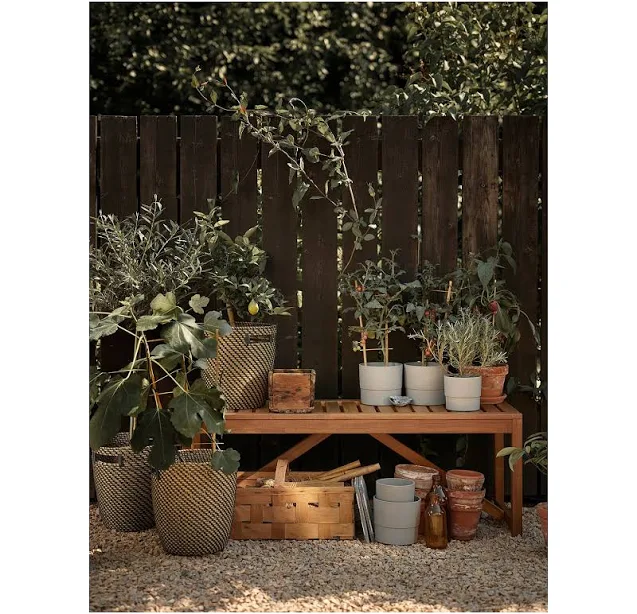
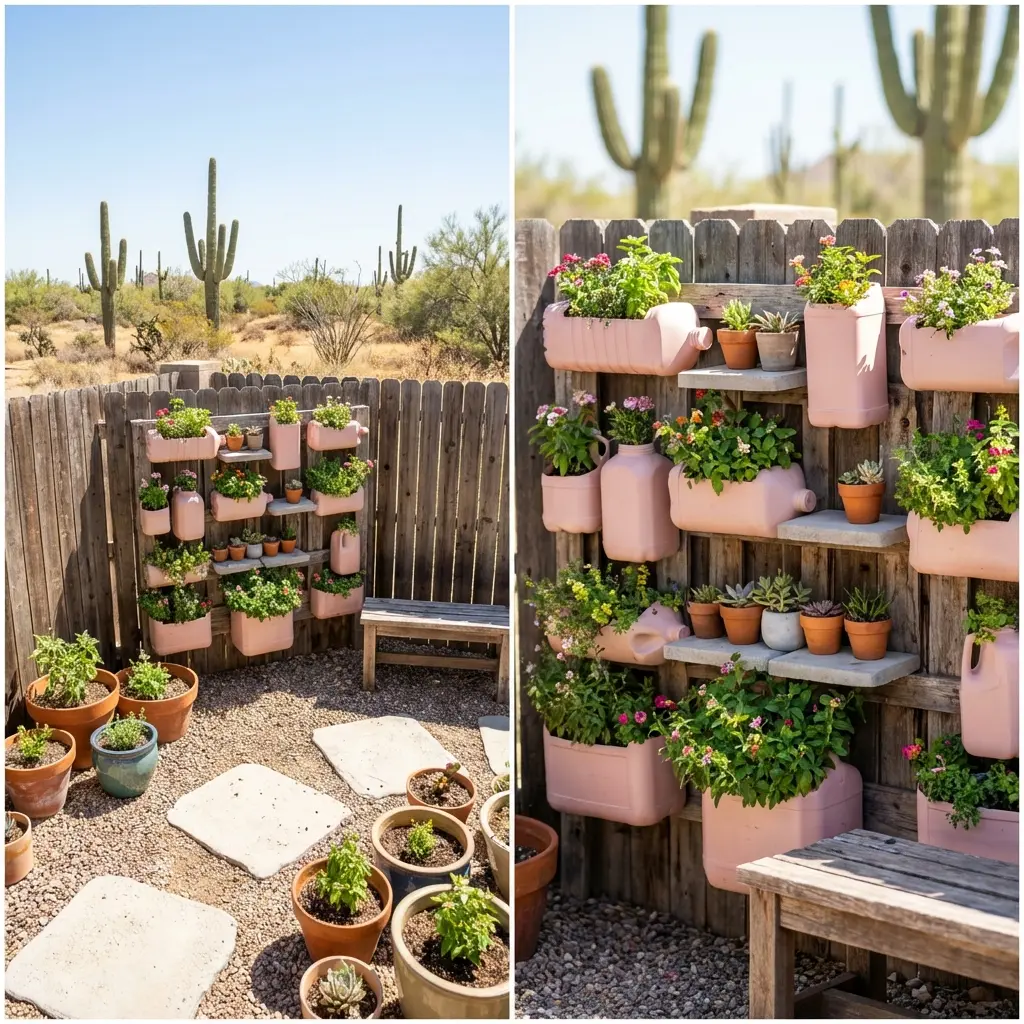
2. DIY Rustic Pallet Herb Garden Wall
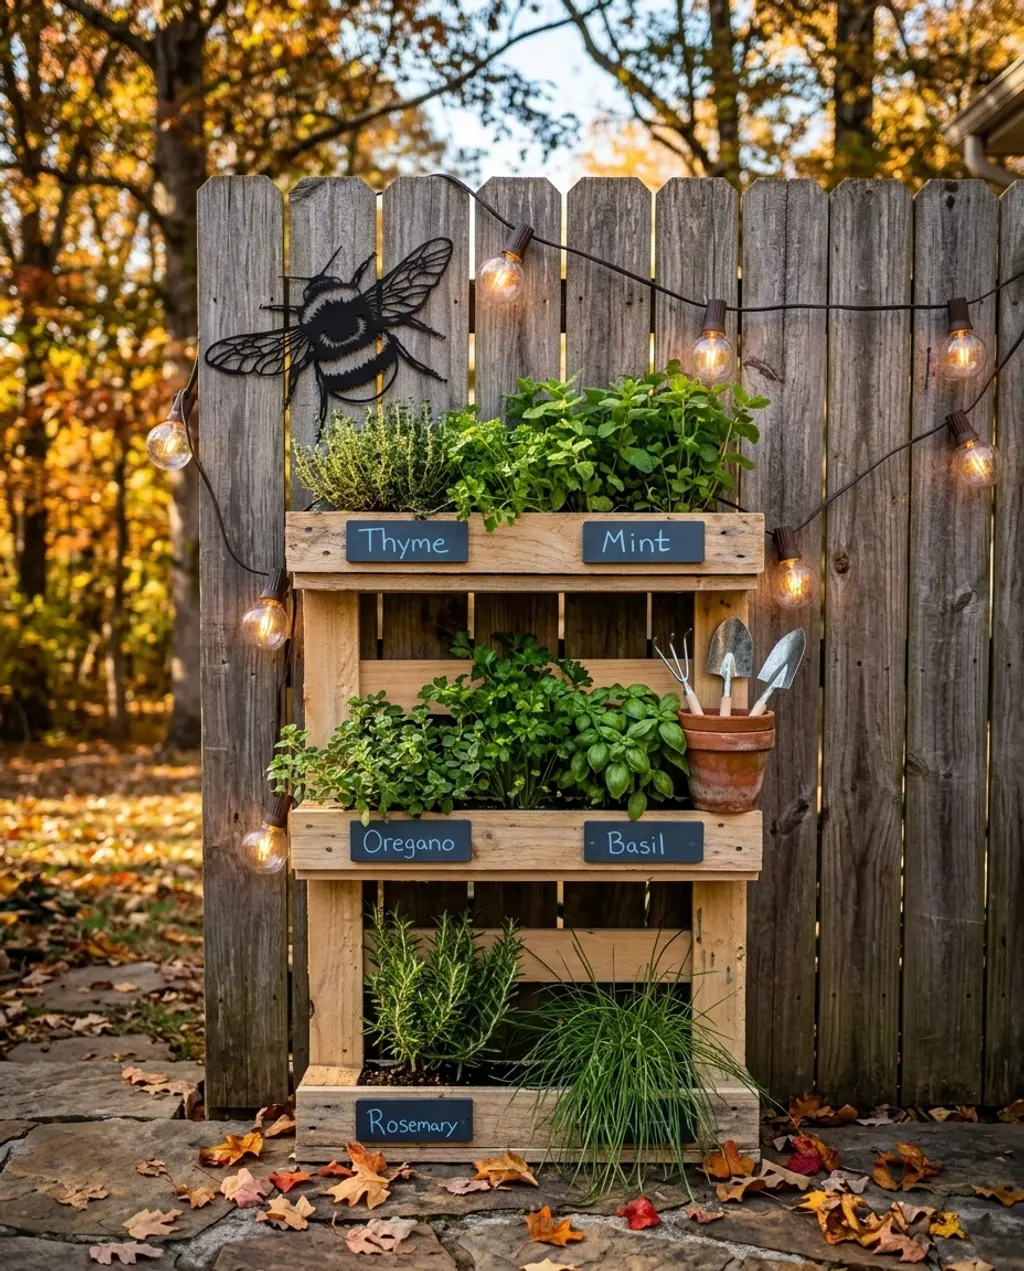
When constructing a pallet wall like this, don’t just stack them. For stability and longevity, secure your pallets to a sturdy fence or wall structure using L-brackets or heavy-duty screws, especially if you live in a windy area. Aim for at least two secure points per pallet to prevent warping or collapse over time. Make sure you’re using heat-treated (HT) pallets, not chemically treated (MB) ones, if you’re growing edibles!
- Main furniture (repurposed pallets, minimal cost): $0 – $50
- Planters (small pots, various materials): $50 – $150
- Gardening tools & wall art: $60 – $150
- Outdoor lighting (string lights): $10 – $30
- TOTAL Estimated Cost: $120 – $380
Budget alternative: Scour Facebook Marketplace and local free groups for pallets. Use old tin cans or plastic bottles as planters after drilling drainage holes. Total cost could be as low as $20.
While a DIY pallet herb garden wall looks fantastic, keep in mind its lifespan. Pallets exposed to the elements will degrade over time, typically lasting 3-5 years before needing significant repairs or replacement. Also, ensure even watering across all levels; the top rows will dry out faster, which means more frequent checks, especially during hot spells. Consider a drip irrigation system for hands-off maintenance.
|
Wooden Pallet Planter | Recycled Herb Garden | Chalkboard$67.24 |
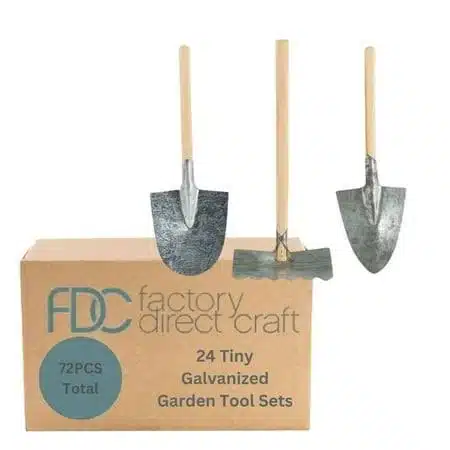
Tiny Galvanized Garden Tool Sets$25.93 |
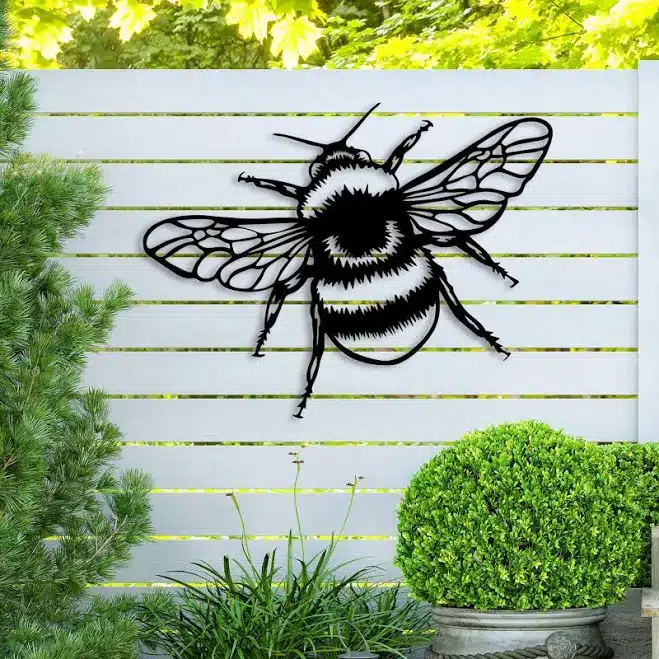
Bee Metal Garden & Wall Art$39.95 |
Better Homes & Gardens 20-Count Clear Glass Globe Outdoor Patio String$7.88 |
As an affiliate, we earn from qualifying purchases.
3. Enchanted Vintage Teacup Fairy Garden
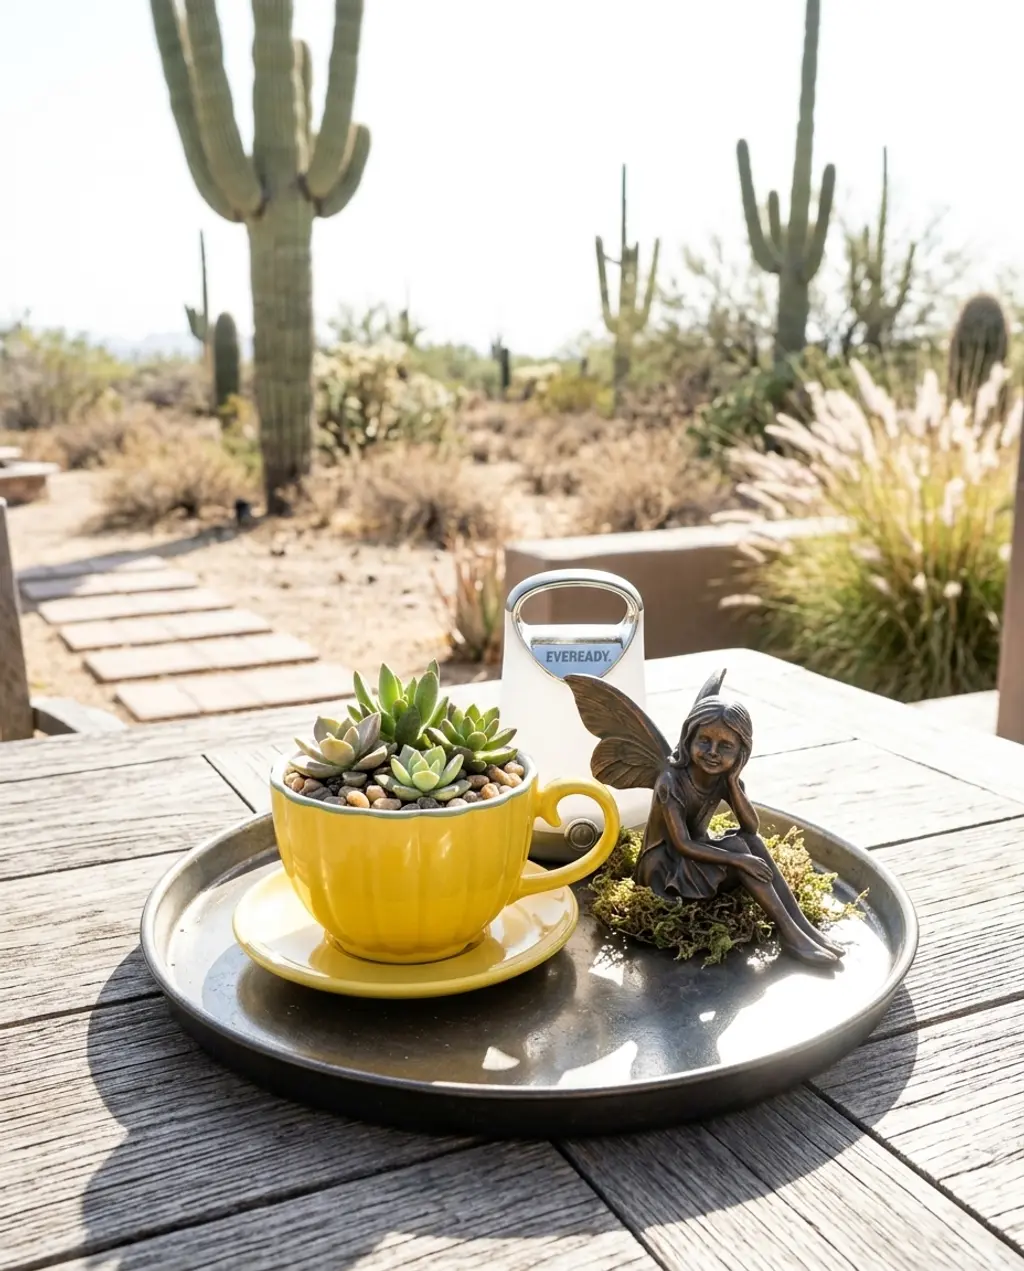
The single most impactful element here is the vintage teacup itself. It’s not just a planter; it’s the miniature stage, the charming foundation that instantly sets the tone for a whimsical, scaled-down world. Without the teacup, you’d just have a tiny garden. With it, you have a story, a connection to nostalgia, and an immediate sense of delicate charm.
- Materials: Gather your vintage teacup, a small amount of potting soil, miniature plants (succulents, moss, or tiny ferns work well), and tiny decorative elements like miniature figurines or pebbles.
- Drainage: If your teacup doesn’t have a drainage hole (most don’t), add a thin layer of small pebbles or activated charcoal at the bottom to prevent root rot.
- Planting: Gently add soil and then your miniature plants. Don’t overfill the cup.
- Decorate: Arrange your fairy garden accessories like a tiny bridge, a miniature gnome statue, or some polished river rocks.
- Watering: Mist very lightly with water every few days, checking the soil moisture. Err on the side of underwatering.
Time estimate: 30 minutes. Material cost: $15-$40.
|
Yellow – Ribbed Teacup Planter$11.39 |
Gerson Fairy Resin Figurine$17.99 |
Pottery Barn Metal Decorative Tray$99 |
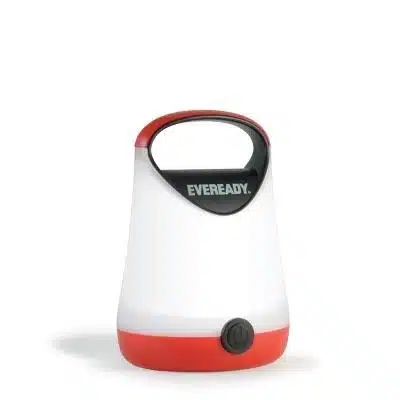
Eveready Compact LED Lantern$9.29 |


As an affiliate, we earn from qualifying purchases.
4. Minecraft-Inspired Pixelated Garden Beds
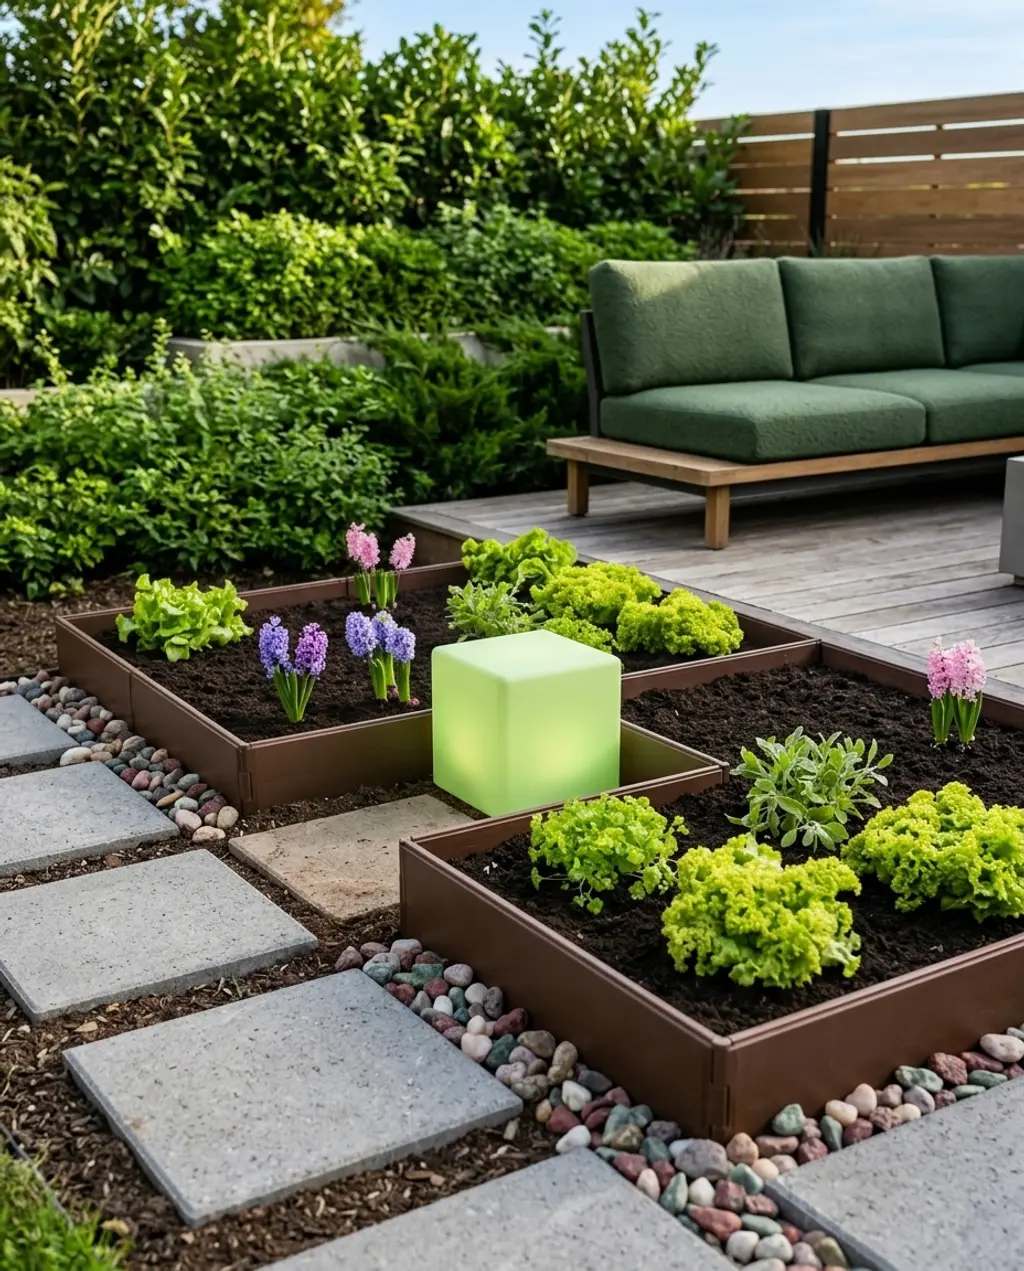
This is all about visual rhythm and bold contrast. Think of it as 80% structured geometry + 20% playful color accents. The base is clean lines, orderly raised beds, and perhaps a gridded path, providing a neutral backdrop. Then, you layer in bright, saturated pops of color through blocky plants, painted sections, or even pixelated stepping stones. You can swap out the specific colors — maybe cool blues and greens instead of reds and yellows — but maintaining that strong structural base and limited, impactful color palette is key.
What makes these pixelated garden beds so effective is their unexpected twist on traditional garden aesthetics. They play with perception, creating a delightful visual puzzle that’s both modern and nostalgic. The clean, geometric forms create a sense of order and intentionality, while the ‘pixelated’ quality adds a playful, almost gaming-inspired touch. It’s a fantastic way to introduce contemporary art into the garden, making a bold statement without sacrificing functionality.
This style is blowing up thanks to a unique blend of digital-age nostalgia and a desire for truly personalized outdoor spaces. The aesthetic draws heavily from the enduring popularity of Minecraft, appealing to a generation that grew up building digital worlds and now wants to translate that creativity into real-life environments. It’s currently trending on platforms like Instagram and TikTok, with DIY enthusiasts showcasing their blocky garden transformations.
|
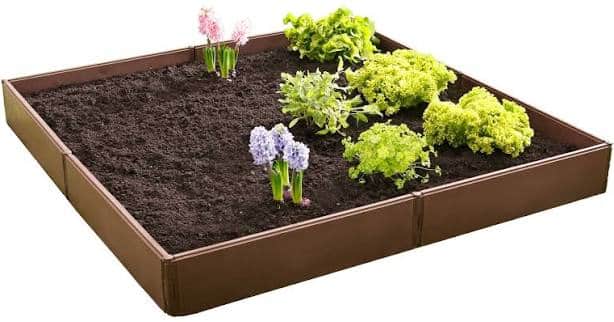
Bloomers Modular Raised Bed Garden$34.98 |
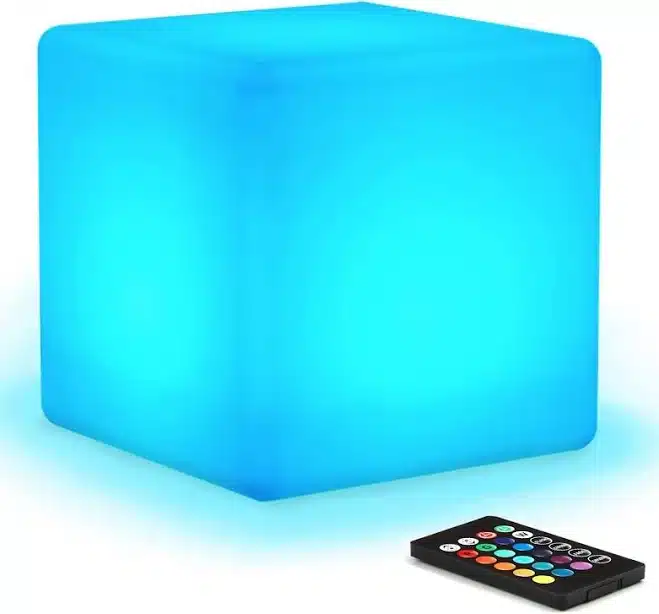
Spectrum Cubes – RGBW LED CUBE – Outdoor and Indoor Light – Rechargeab$24 |
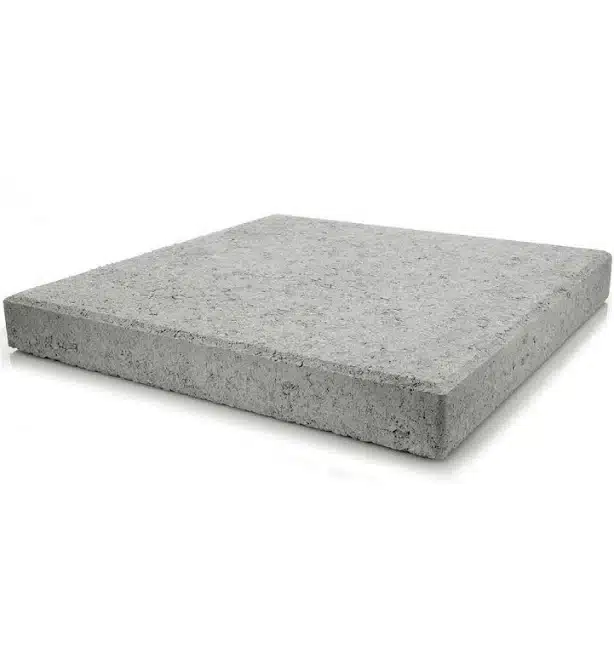
Pavestone Pewter Square Concrete Step Stone$4.98 |
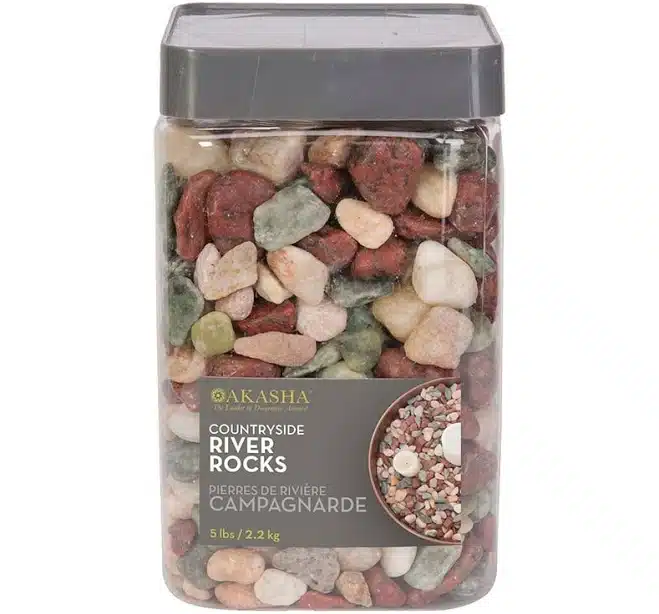
AKASHA River Rock$6.78 |
As an affiliate, we earn from qualifying purchases.
5. Cozy Outdoor Reading Nook with Rustic Details
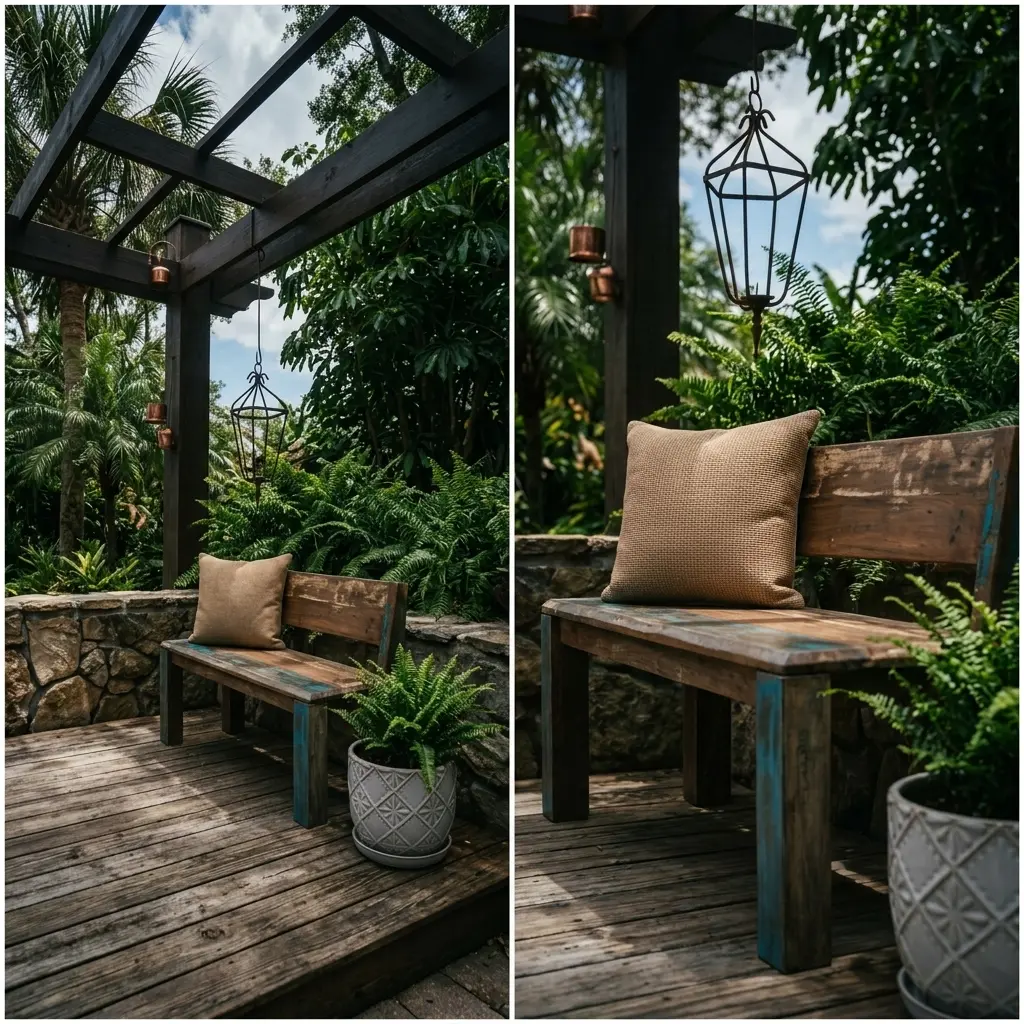
This cozy reading nook thrives in spaces that allow for intimacy without feeling cramped. Ideally, you’d want a minimum of 8×8 feet to comfortably fit a bench or comfy chair, a small side table for your book and drink, and a lantern. If you have a larger space, say a 12×12 patio, you can expand this to include a second chair or a small outdoor rug to define the zone. For smaller balconies or patios, you might need to swap the bench for a single, smaller chair and consider vertical planters to maximize green space without sacrificing floor area.
- Consider the sun’s path: Will your nook get too much direct sun during reading hours?
- Measure your ideal seating: Ensure your chosen bench or chair fits comfortably with enough elbow room.
- Check for existing privacy: Do you need to add trellises or screens, or is the spot naturally secluded?
- Budget minimum: Have at least $300-$500 set aside for quality, comfortable pieces that will last outdoors.
|
Crate & Barrel Sierra Tan 20″x20″ Soft Textured Indoor/Outdoor Throw$79.95 |
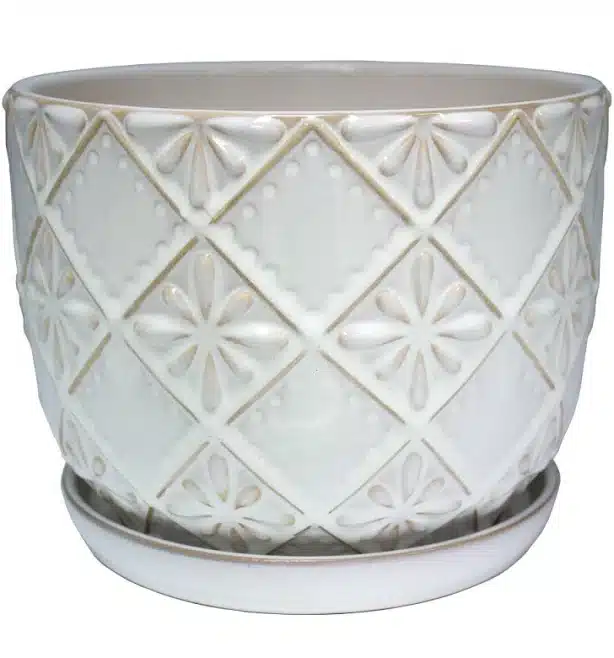
allen + roth Ceramic Indoor Planter$44.98 |
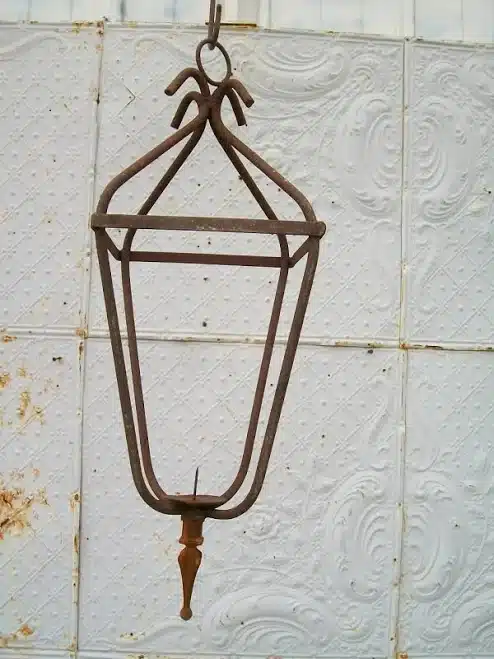
Wrought Iron Hanging Lantern$49.95 |
Timbergirl Old Reclaimed Wood Bench$269.99 |

As an affiliate, we earn from qualifying purchases.
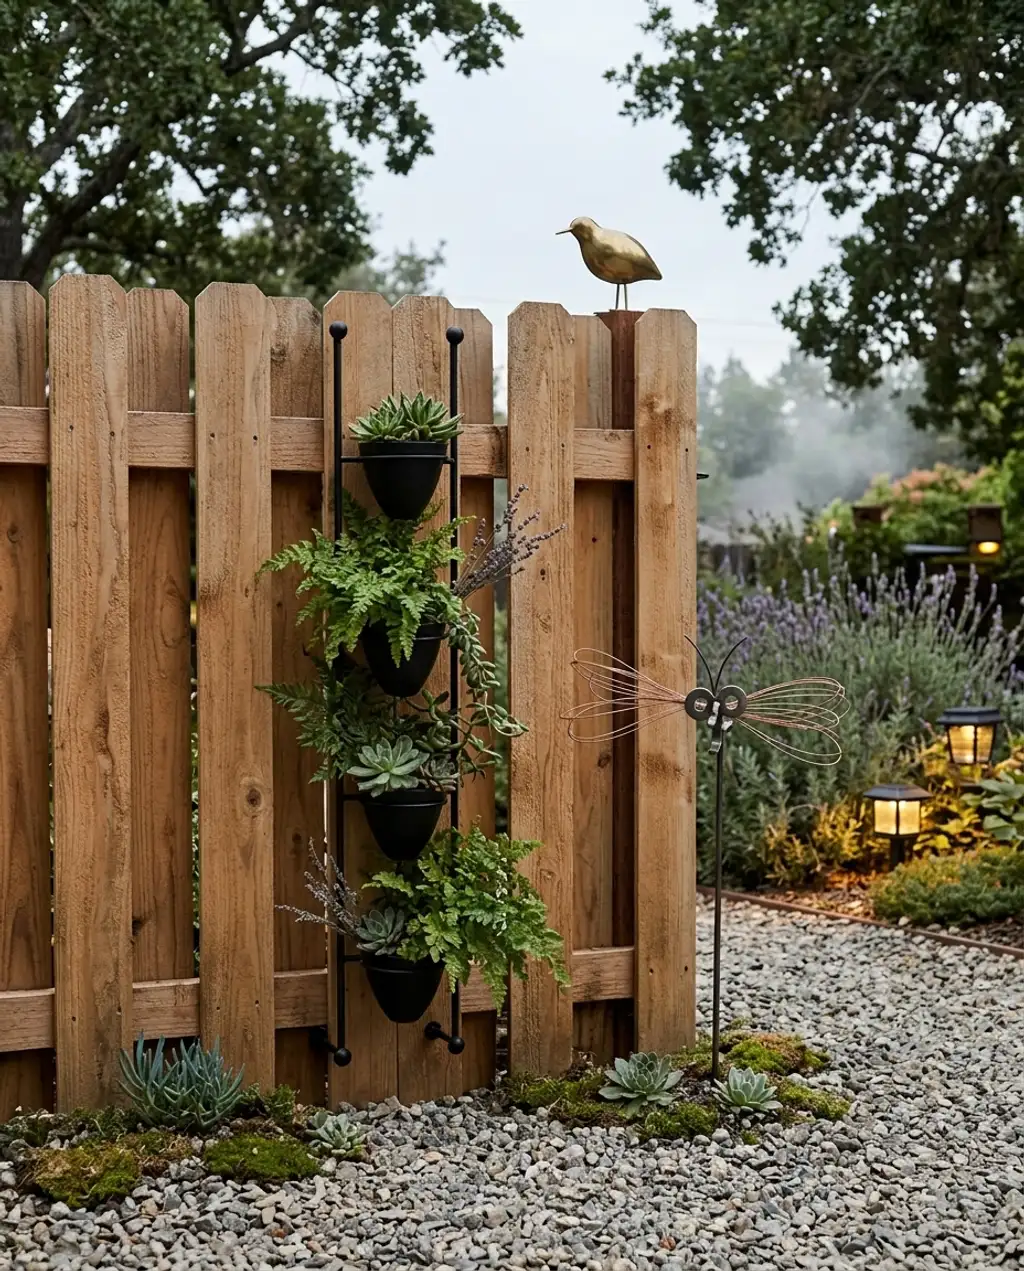
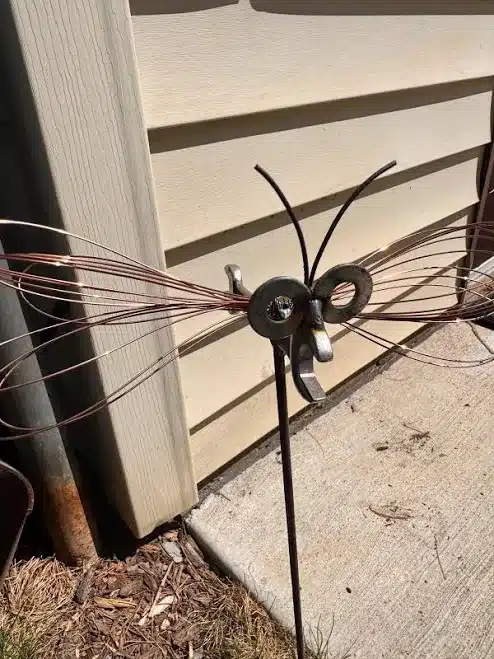
6. DIY Garden Art with Repurposed Vintage Tools
✨ Luxury Version
- Main elements (repurposed tools, existing fence): $0 – $75
- Small planters: $15 – $40
- Wall decor (bee art, other small decorative items): $40 – $100
- Sculpture (bird): $30 – $50
- TOTAL Estimated Cost: $85 – $265
Budget alternative: Scavenge old tools from garage sales or family members for free. Use simple, inexpensive fence pickets from a home store instead of a pre-made panel. Get creative with spray paint to unify disparate items. This look can be almost free if you’re resourceful.
💸 Budget Version
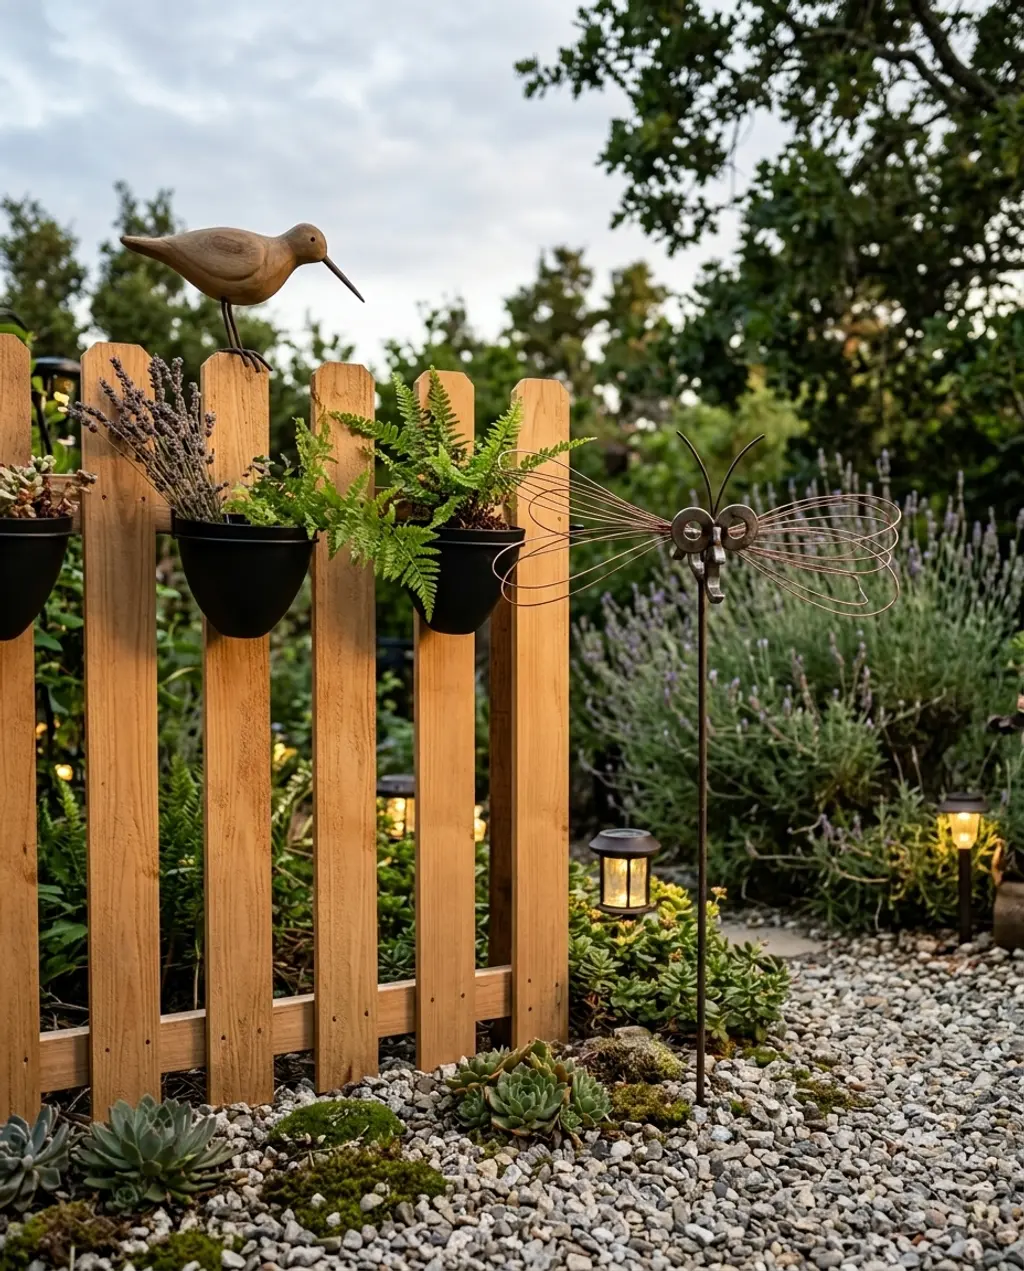
The beauty of garden art made from repurposed vintage tools is its low maintenance, but there are a few things to consider. Metal tools will continue to rust, which adds to the rustic charm but can stain surfaces they touch, so place them carefully. Wooden handles might rot or degrade over time, especially in damp climates, so seal them with an outdoor-grade varnish every couple of years if you want to prolong their life. Dust and cobwebs will accumulate, so a quick wipe-down or hose-off once a month will keep them looking their best.
|
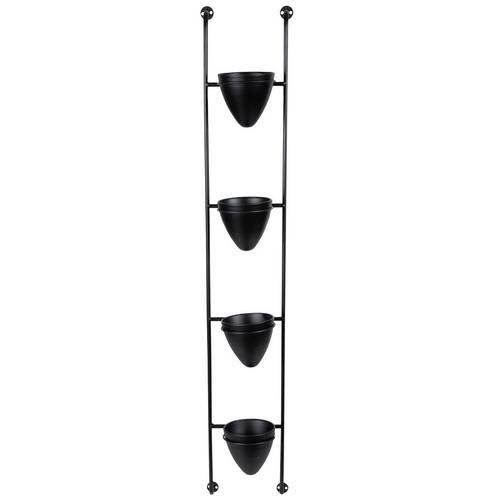
💰 Budget Pick Matte Black Metal Wall Planter$14.99 |
💰 Budget Pick Wrench garden poke recycled upcycle art stake$21.95 |
✨ Luxury Pick Crate & Barrel Piper Decorative Bird Sculpture$34.99 |
✨ Luxury Pick YARDLINK Cedar Dog Ear Fence Panel$39.99 |

As an affiliate, we earn from qualifying purchases.
7. Elegant Miniature Zen Garden Tabletop Decor
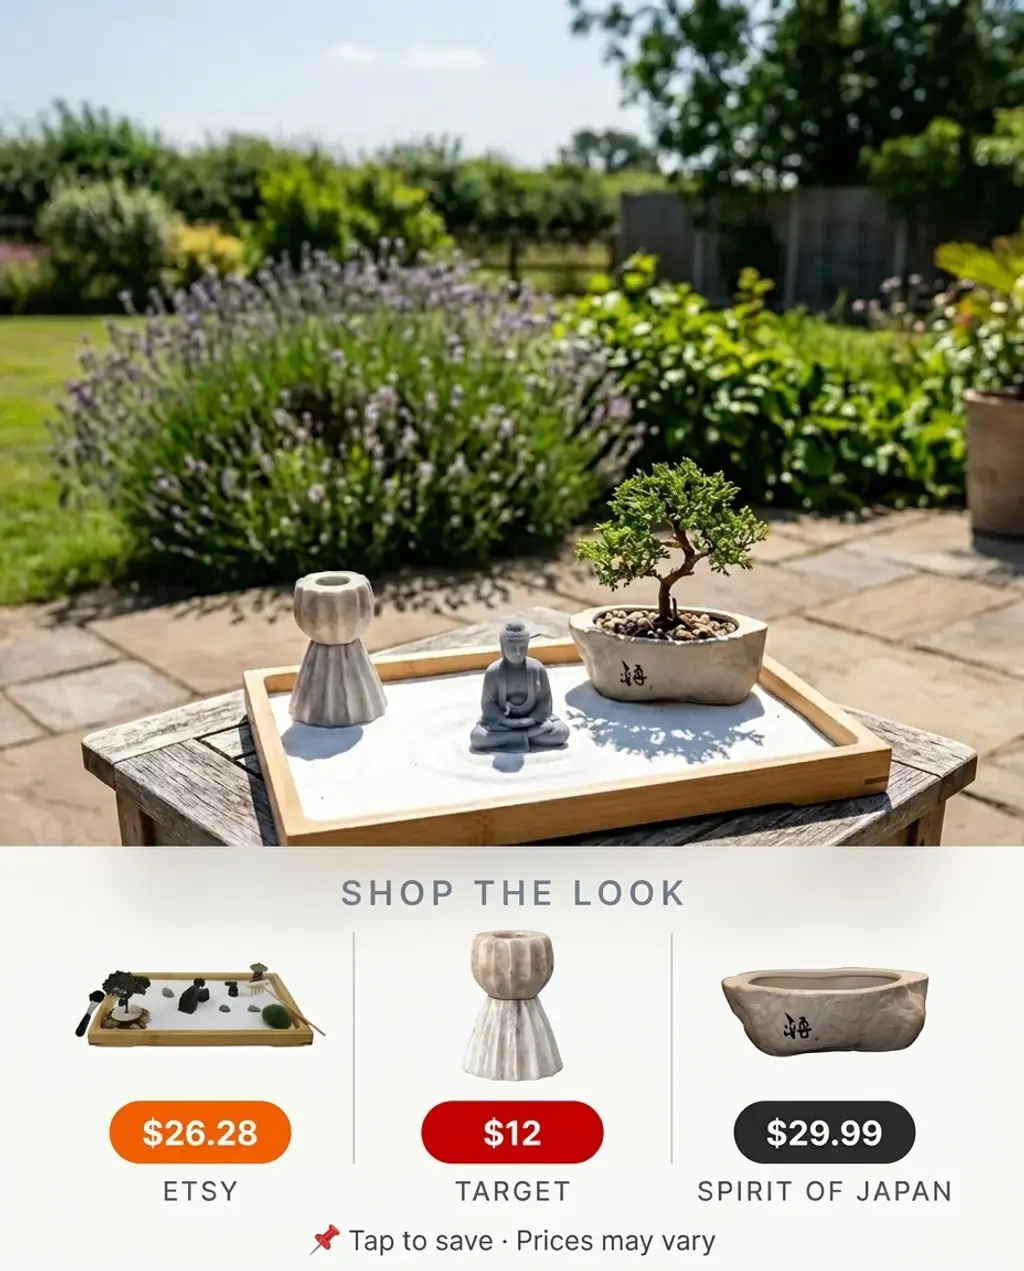
When arranging your miniature Zen garden, embrace asymmetry and odd numbers. Instead of perfectly centering a single element, offset it slightly. Use three rocks of varying sizes rather than two or four. This creates a more dynamic and natural composition, echoing traditional Japanese landscape design principles that avoid rigid symmetry in favor of harmonious balance. Think of it as creating a miniature landscape, not just a collection of objects.
What makes a miniature Zen garden so compelling is its ability to create a sense of calm and focus in a tiny footprint. It works because it simplifies complex natural elements into their most essential forms – sand representing water, rocks representing mountains. This minimalist approach, combined with the symbolic act of raking sand, encourages mindfulness and contemplation. It’s a powerful reminder that tranquility can be found even in the smallest of spaces.
8. DIY Mushroom & Fairy Garden Lantern Project
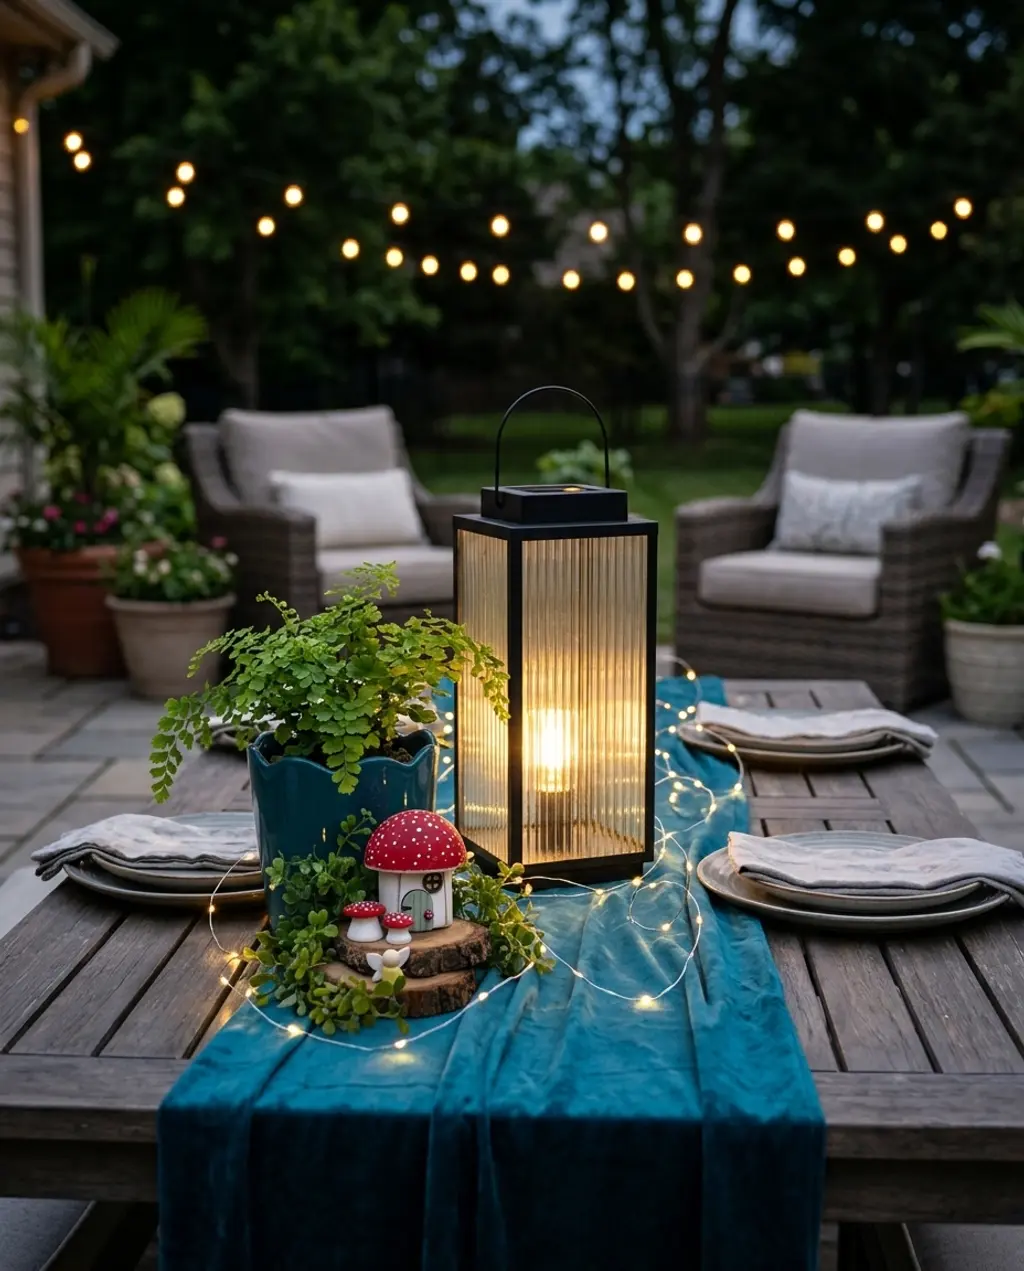
- Choose your lantern: A clear glass lantern works best to showcase your miniature scene.
- Base layer: Add a thin layer of small pebbles or decorative sand at the bottom for drainage and aesthetic.
- Fairy landscape: Arrange a small amount of potting mix, then place a tiny plant or moss patch.
- Mushroom magic: Position your miniature mushrooms and fairy figurine. Secure with a dab of hot glue if needed.
- Twinkle factor: Carefully weave battery-operated fairy lights through your scene, hiding the battery pack at the back or beneath the base layer.
- Finishing touches: Close the lantern and find the perfect spot.
Time estimate: 45 minutes. Material cost: $25-$70.
The absolute star of this whimsical project is the lantern itself. It acts as a contained little world, a glass stage that both protects and magnifies the miniature scene inside. The enclosure creates a sense of intimacy and magic, drawing your eye into the tiny details. Without it, the fairy and mushroom elements would simply be décor; within the lantern, they become an enchanted tableau, a glowing microcosm of wonder.
|
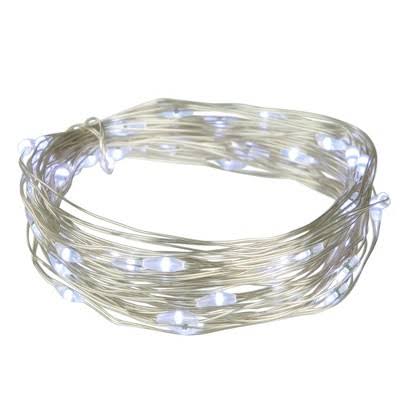
Warm White LED Fairy Lights$2.49 |
Alfresco Black Metal and Glass LED Solar Outdoor Lantern 19$249 |
DIY Mushroom Fairy House Kit: Miniature Garden Playset$22 |
Mainstays Scallop Ceramic Planter$3.97 |

As an affiliate, we earn from qualifying purchases.
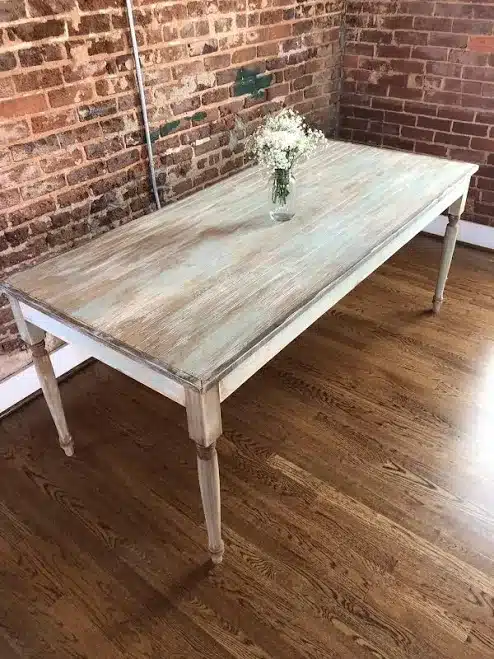
9. Rustic Farmhouse Style Patio with Vintage Accents
To get this rustic farmhouse patio look for less, hit up local antique fairs, flea markets, and Facebook Marketplace for distressed wood tables and charming vintage lanterns. You might find an old farm table that just needs a good cleaning and sealing for outdoor use. Instead of expensive new planters, repurpose galvanized buckets or old milk cans. For seating, look for simple metal bistro chairs that can be spray-painted to match. You could achieve a similar vibe for under $500, especially if you’re handy with a paintbrush and willing to hunt for treasures!
When curating a farmhouse patio, make sure you mix materials to prevent it from feeling too one-note. For instance, if your outdoor dining table is wood, introduce metal chairs and ceramic planters. If you have a stone patio, juxtapose it with woven textiles like outdoor rugs and cushions. This layering of textures — wood, metal, stone, fabric — is what gives farmhouse style its inviting, lived-in depth and prevents it from feeling sterile or overly theme-y.
|
Spring Porch Dining Table, Distressed Wood Farmhouse Cottage Outdoor P$900 |
Tusco Products Tusco Rolled Rim Planter$115.29 |
Meadow Creek Two Mantle Metal/Wood Hurricane Lantern$89.99 |
Slatted Metal Patio Chair$115 |
As an affiliate, we earn from qualifying purchases.
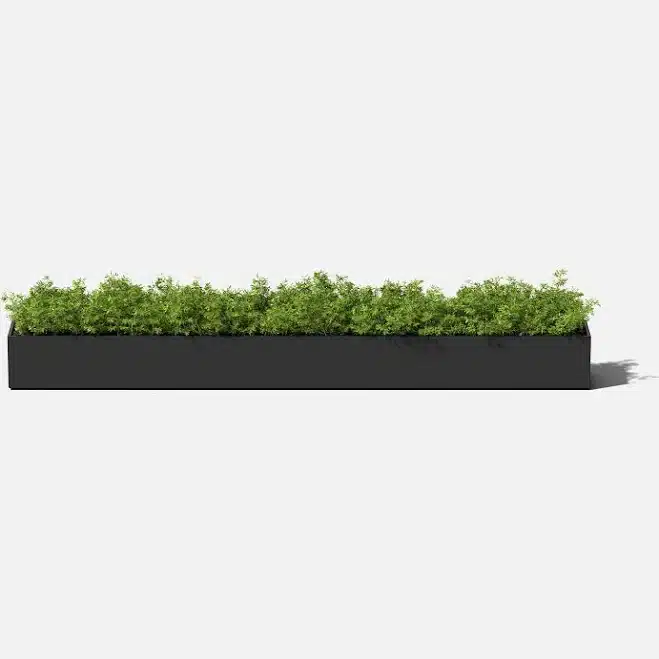
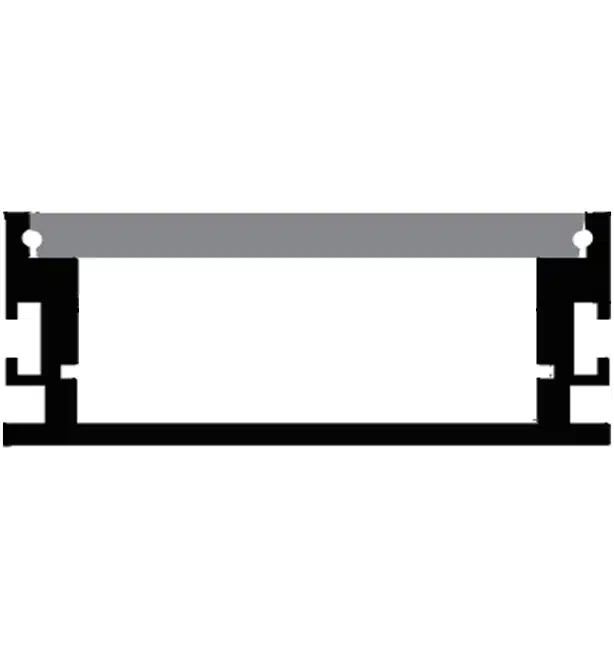
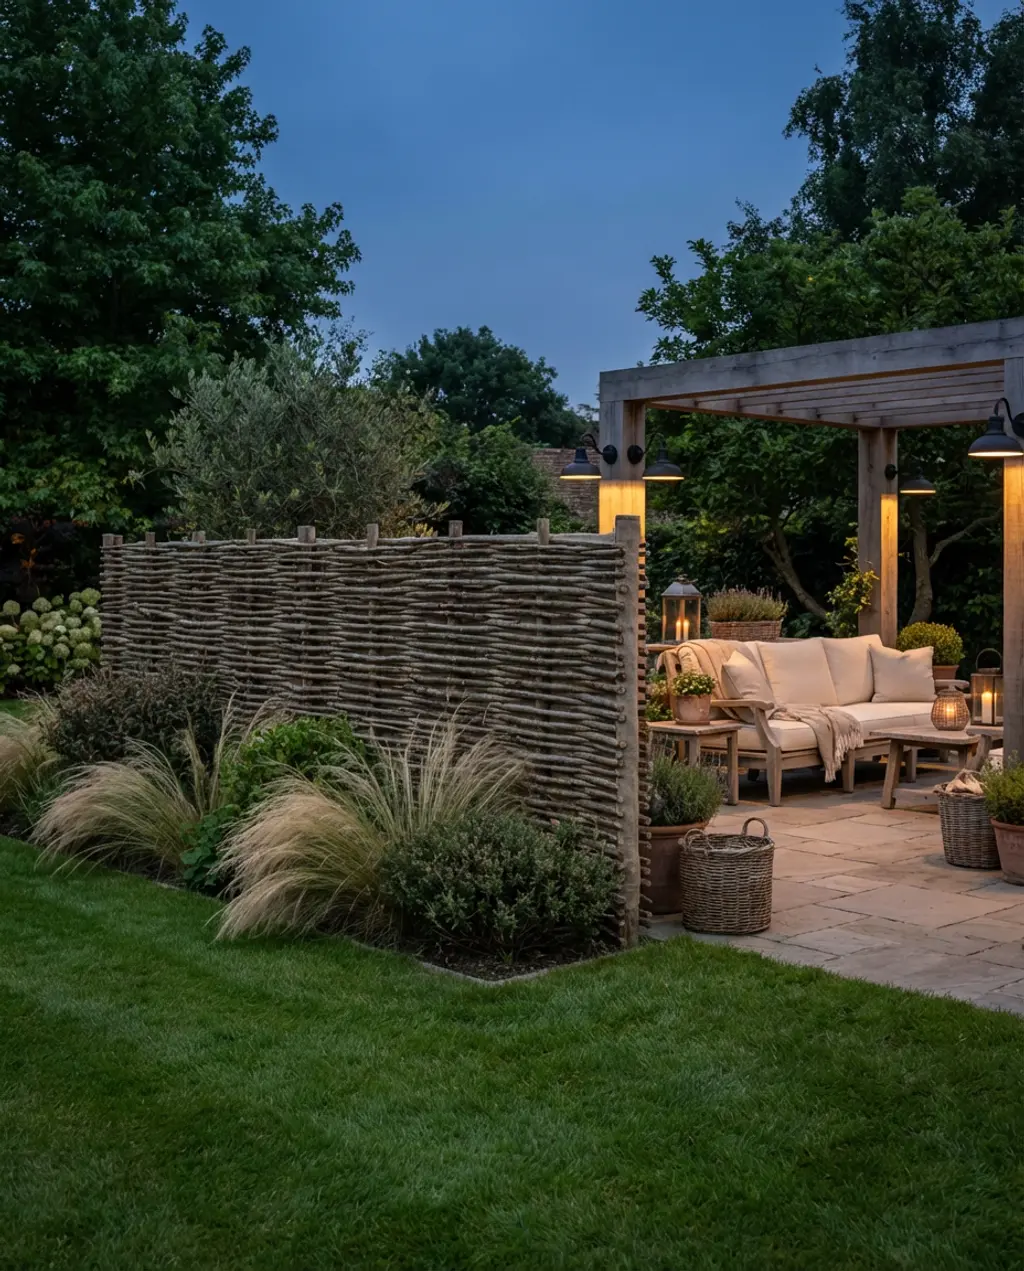
10. Modern Garden Pathway with Integrated Lighting
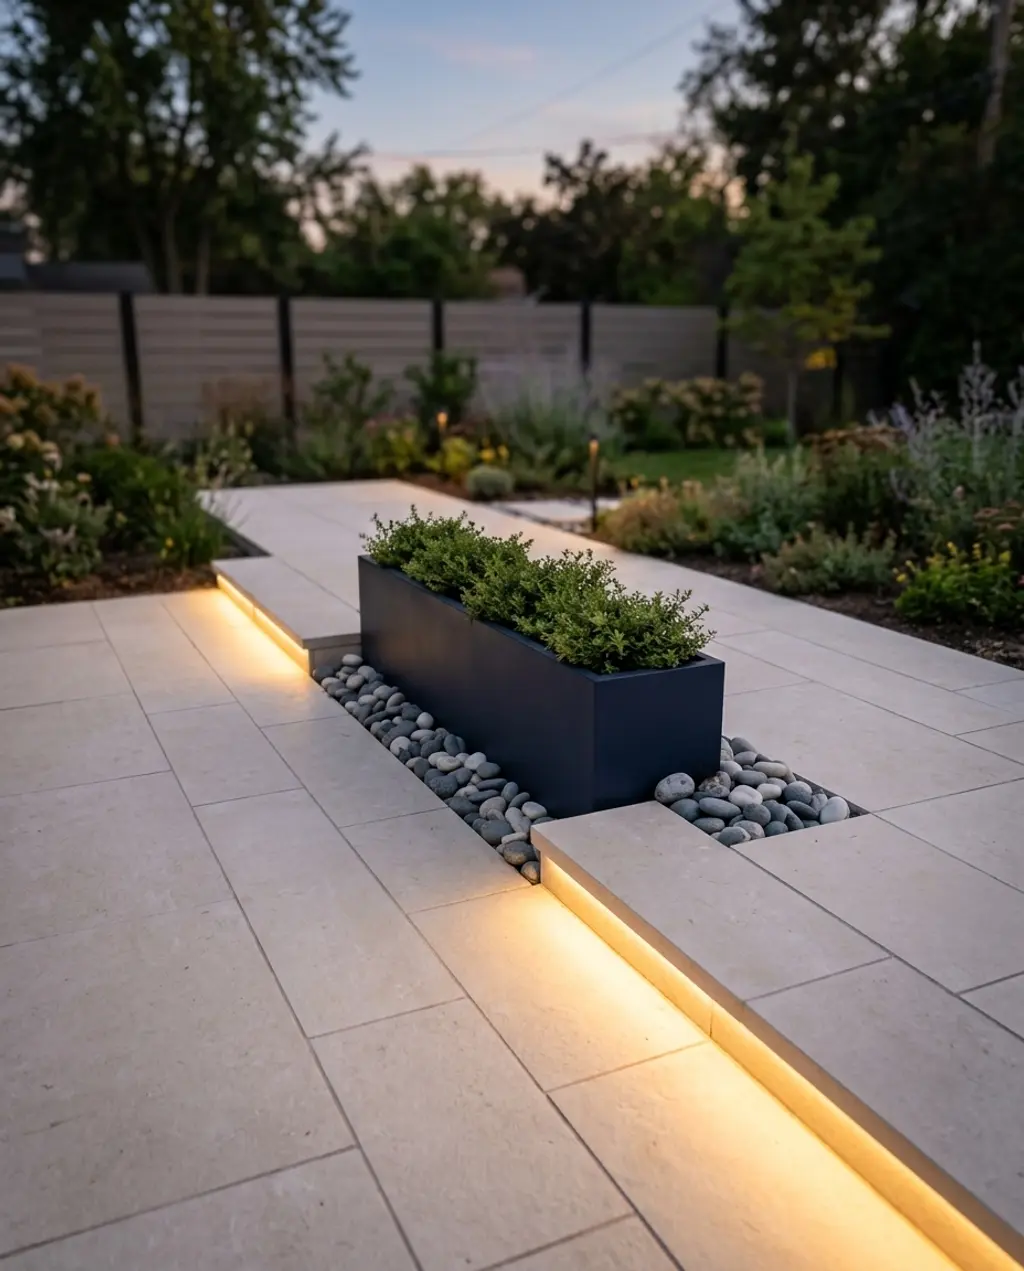
💡 Loving these dark walls? Before you commit, we break down 3 common mistakes at the end of this article that could save you a costly repaint. This modern pathway aesthetic really shines in gardens with a straightforward, intentional layout. It works beautifully in spaces 10×15 feet or larger, where you have enough room to lay out consistent paver patterns and integrate sleek, linear lighting without it feeling cluttered. If you have a smaller garden or a more winding path, consider using smaller, individual paver steps with accent lights rather than continuous strips. Compare this with Idea #1 — same pathway purpose, completely different energy.
The power of this modern garden pathway lies in its deliberate simplicity and integrated functionality. It works by prioritizing clean lines and understated materials, which create a sense of calm and order. The integrated lighting isn’t an afterthought; it’s part of the design, subtly illuminating the path and defining the garden’s edges without creating visual noise. This thoughtful blend of form and function elevates a simple pathway into a striking design element.
|
MSI Living Style Cream 2 cm. x 24 in. x 24 in. Matte Porcelain Stone L$78.99 |
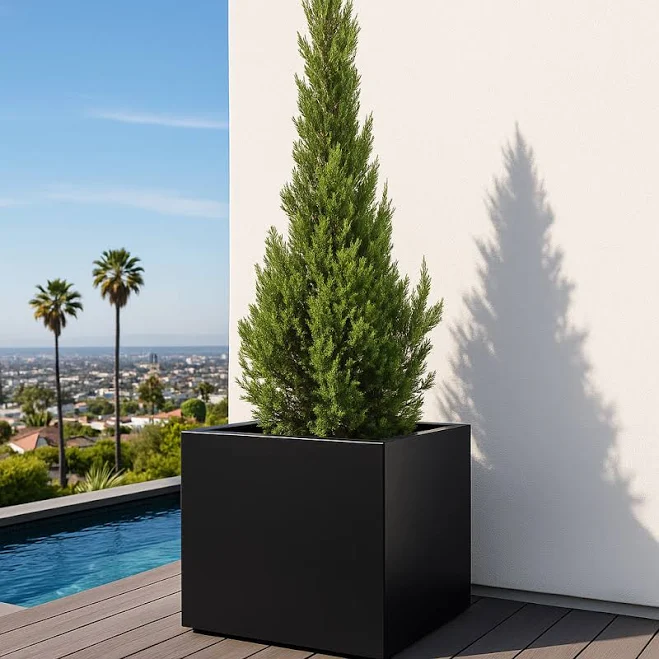
Veradek Geo Series Planter$34.99 |
Threshold River Stone Decorative Filler$10 |
60mm Super Wide LED Pathway Strip Lighting Connectable Profile$40.98 |


As an affiliate, we earn from qualifying purchases.
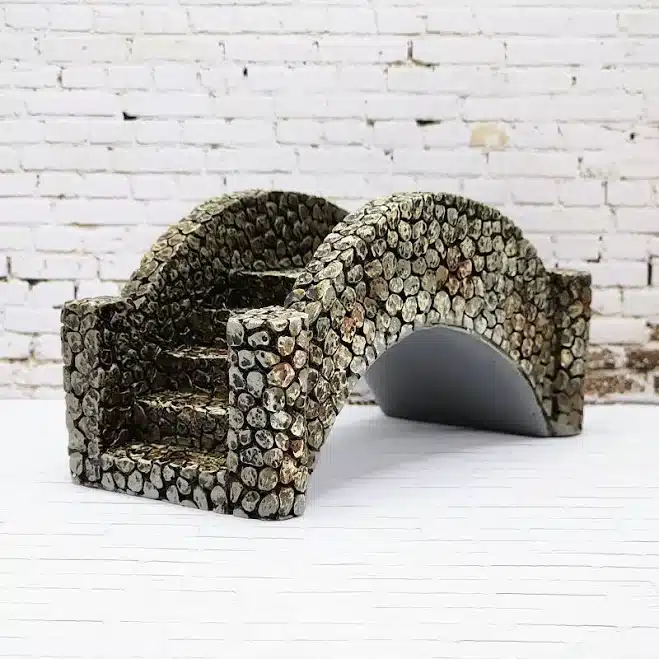
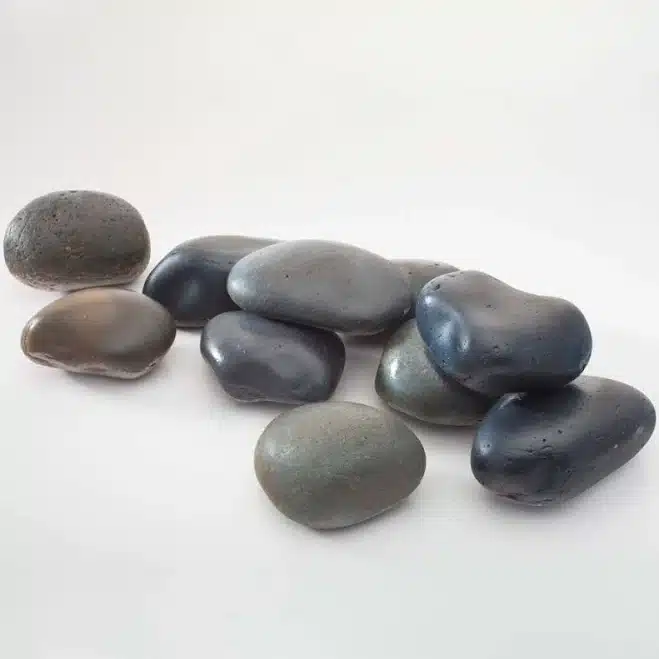
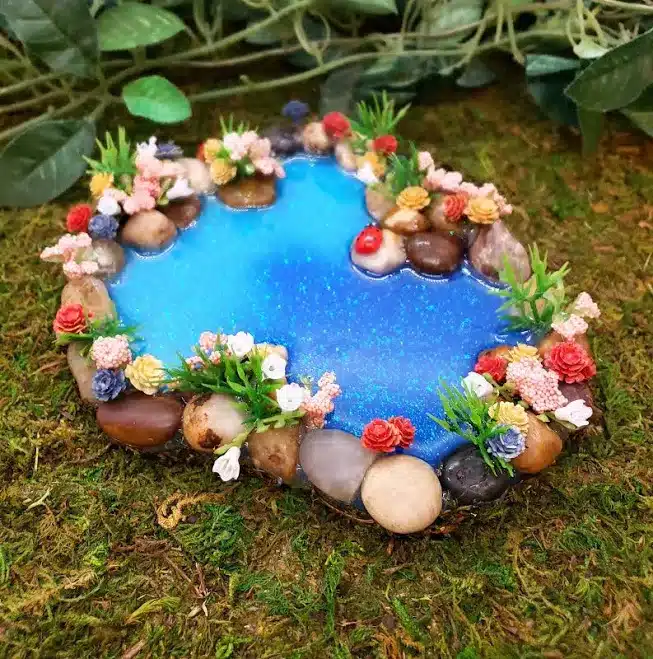
11. Miniature Secret Garden with Tiny Pond
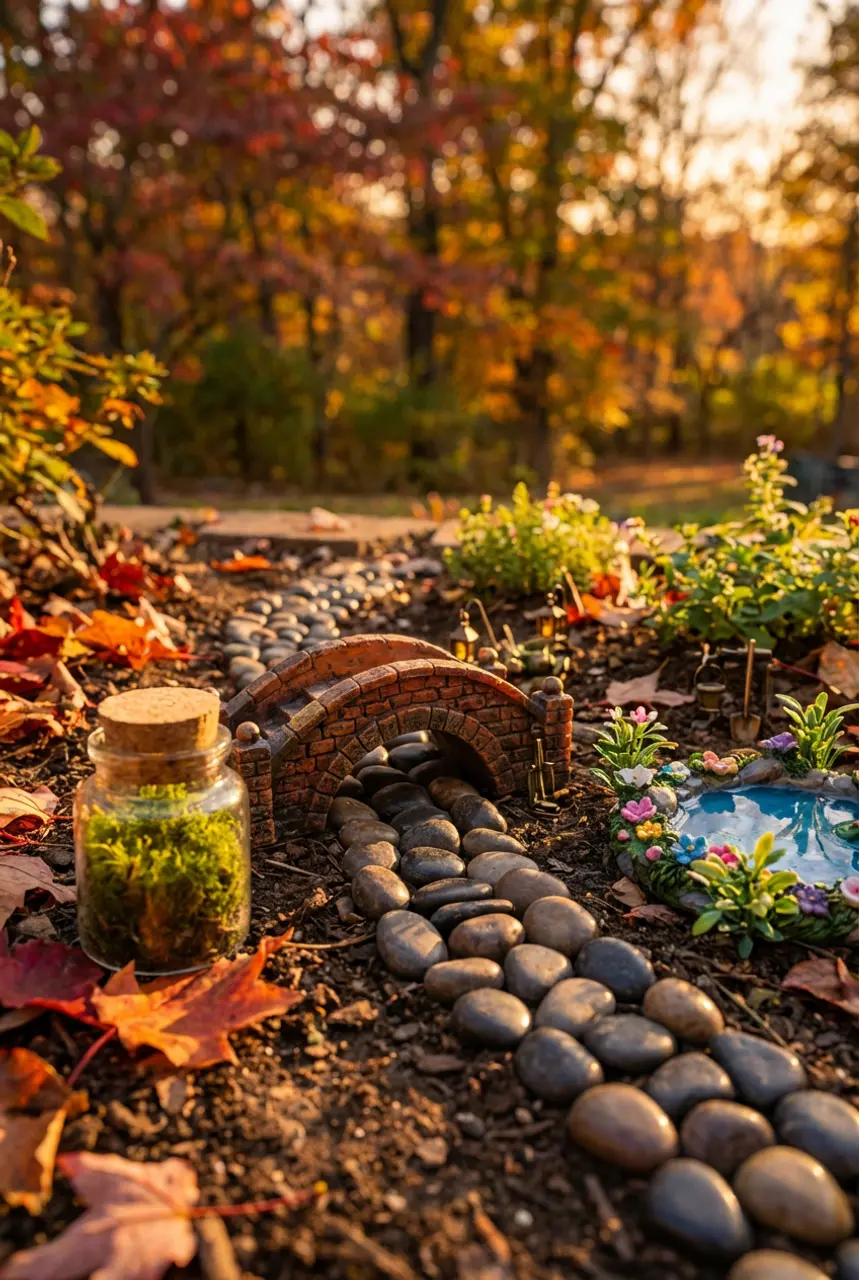
When planning a miniature pond, make sure to use a non-toxic, aquatic-safe sealant for any container you choose, even if it claims to be waterproof. Small cracks or permeable materials can lead to leaks, which are a huge hassle to fix once the pond is established. Also, opt for a small, recirculating pump if you want running water – the gentle sound adds to the serenity and prevents stagnation, but remember to keep the water level topped up.
Building a miniature secret garden with a tiny pond sounds enchanting, and it absolutely is, but be prepared for more maintenance than a dry miniature garden. Tiny ponds can quickly become breeding grounds for algae if not properly balanced. You’ll need to regularly remove debris, top up water due to evaporation, and carefully monitor water quality. If you introduce any miniature aquatic life, like tiny snails, their needs will add another layer of responsibility.
|
Miniature Aged Stone Bridge,1:12 Scale,Stone Walkway,Steps,Stone Stair$25.99 |
Polished River Rock-sold by the pound$4.95 |
Miniature Mossarium$4.99 |
Fairy Garden Pond with Flowers and Fairy Plants Surrounding the Entire$32 |

As an affiliate, we earn from qualifying purchases.
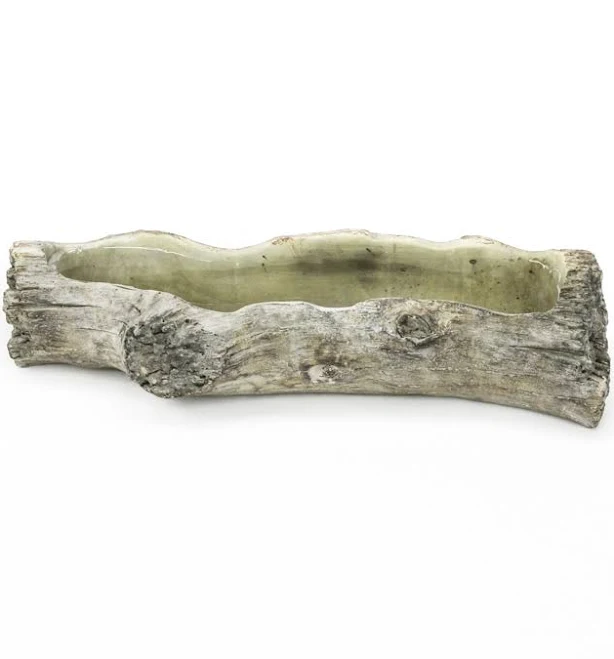
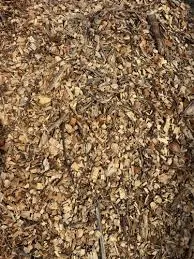
12. Rustic Log Planters for a Woodland Garden
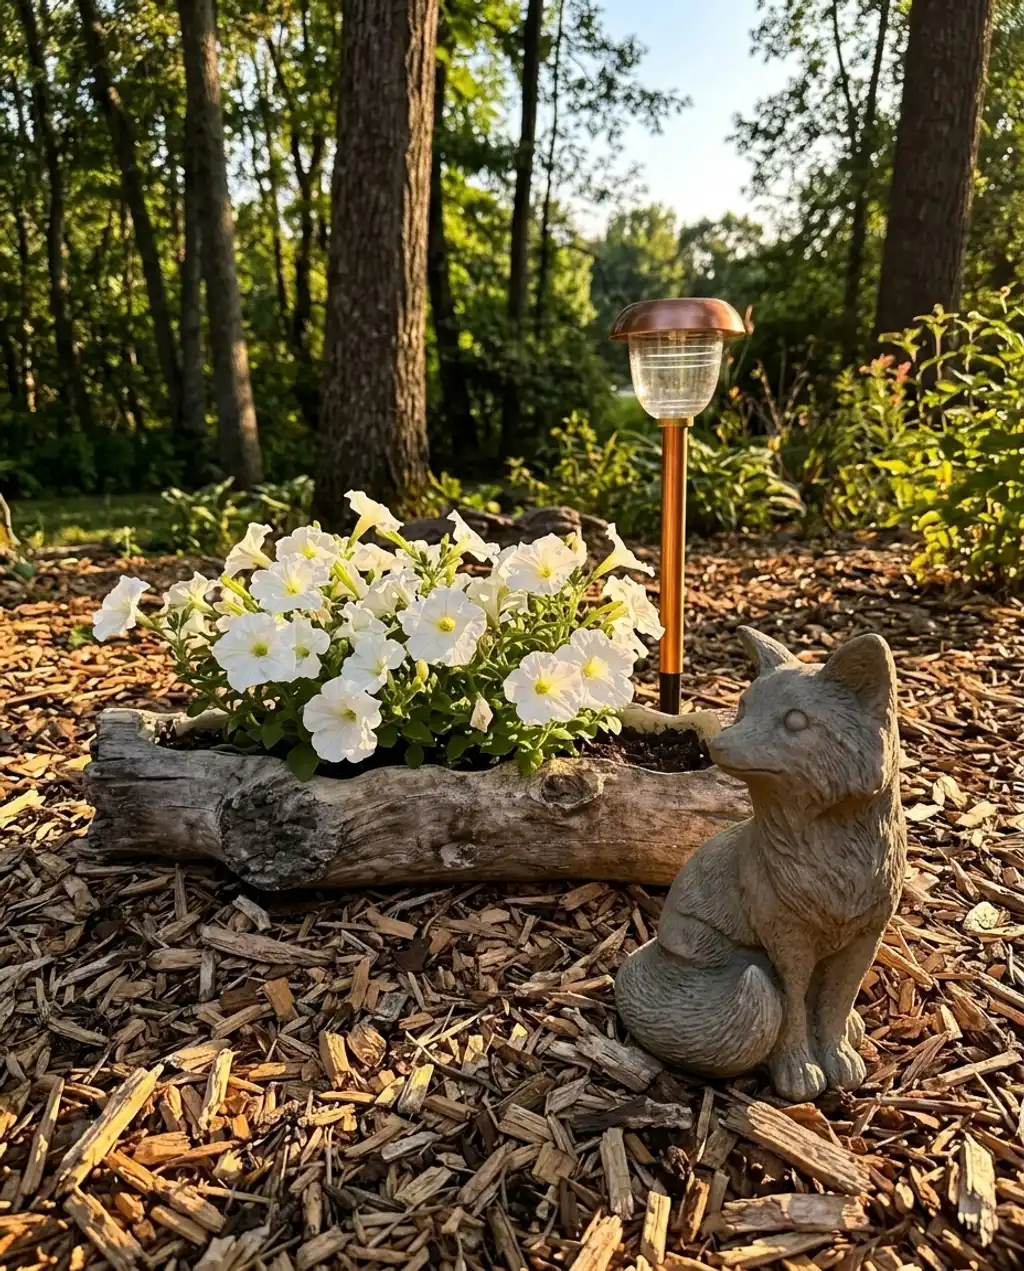
- Main elements (repurposed logs/planters): $0 – $60
- Plants (woodland varieties): $50 – $150
- Outdoor lighting (pathway solar lights): $20 – $50
- Garden statue (fox): $30 – $60
- Path material (wood chips): $10 – $30
- TOTAL Estimated Cost: $110 – $350
Budget alternative: Source fallen logs from your own property or ask neighbors if they have any cut branches. Propagate woodland plants from trimmings or seek out discounted end-of-season sales. Use simple LED tealights in glass jars for lighting. This can easily be achieved for under $100.
Log planters and woodland gardens are having a major moment in 2026, largely fueled by the ‘rewilding’ movement and a desire to connect with nature on a deeper, more authentic level. Pinterest and Instagram are brimming with examples of gardens that embrace natural materials and a less manicured, more organic aesthetic. This trend speaks to a longing for simplicity and the beauty of imperfection, and it has serious staying power as people continue to prioritize sustainable and natural living.
|
Threshold Copper Pathway Solar Outdoor Single Path Light$10 |
14″ Driftwood Log Planter$18.65 |
Stone Garden Cute Sitting Fox Statue Ornament$40.32 |
Wood Chips$9 |


As an affiliate, we earn from qualifying purchases.
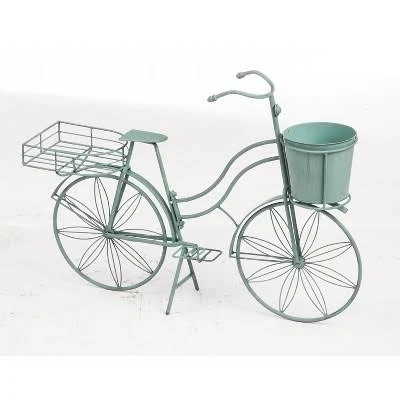
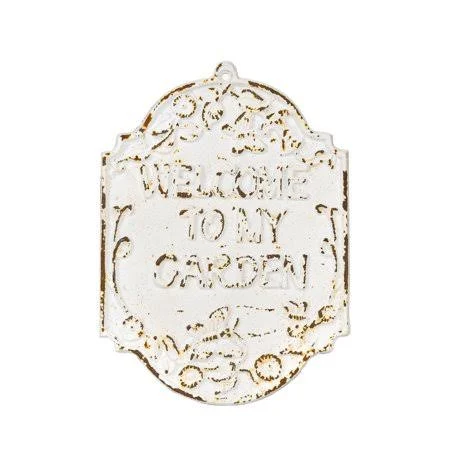
13. Vintage Bicycle Planter with Cascading Flowers
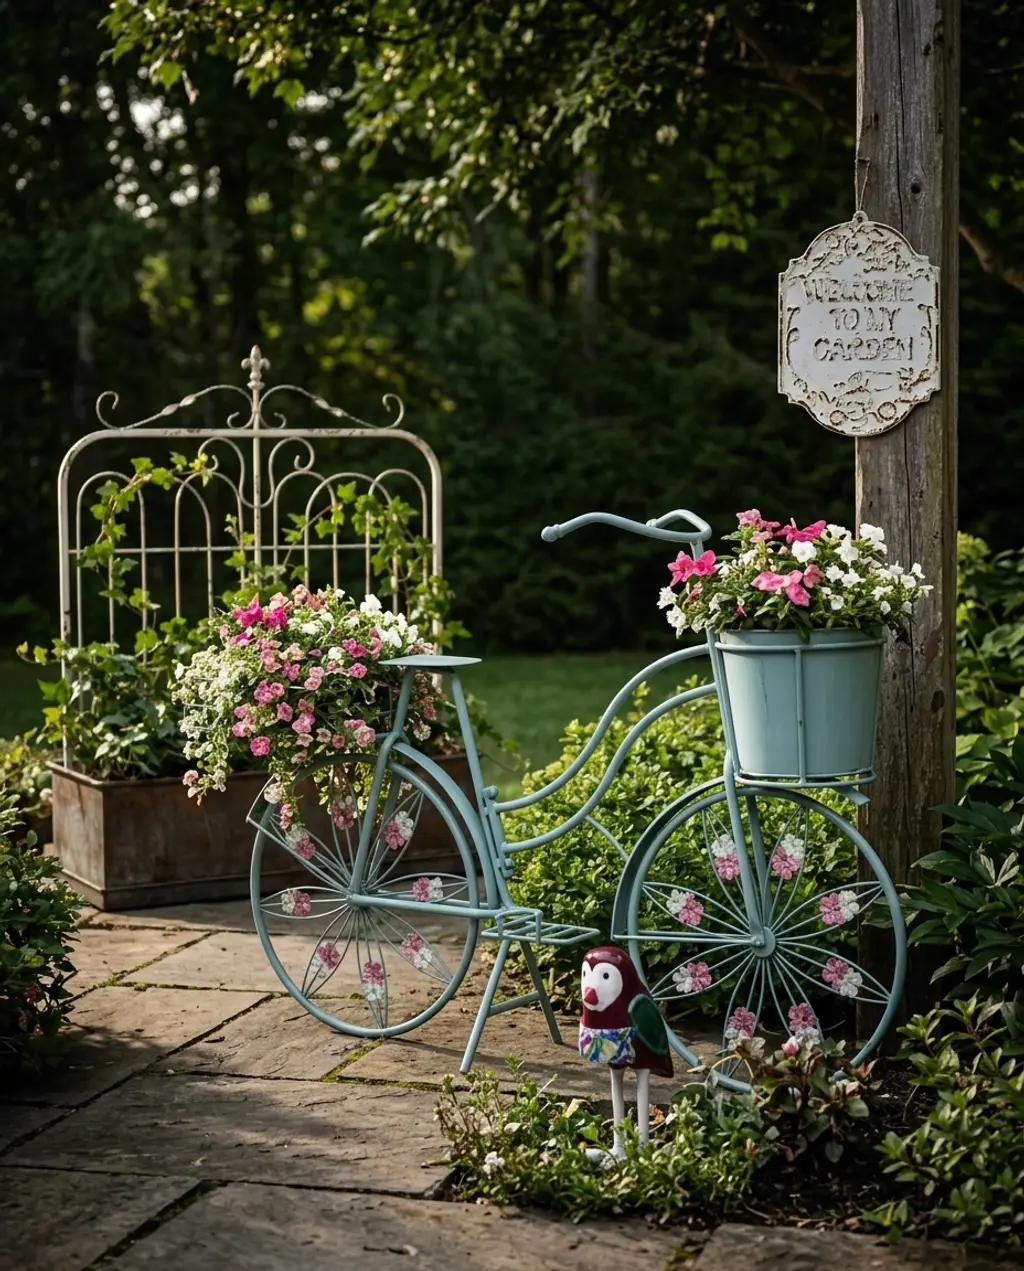
- Check local regulations: Some HOAs might have rules about garden ornaments that stand out.
- Measure your space: Ensure the bicycle isn’t so large it overwhelms your garden or path.
- Assess sun exposure: Where will your bike planter be placed, and do your chosen flowers thrive in that light?
- Consider drainage: Is there a built-in drainage system in your planter baskets, or will you need to add holes?
The unquestionable star of this look is the vintage bicycle itself. It’s more than just a planter holder; it’s a piece of kinetic sculpture that evokes nostalgia, romance, and a bygone era. It’s unique, instantly eye-catching, and creates a focal point that’s whimsical yet grounded. Without the bike, you’d just have flowers; with it, you have a story, a charming conversation piece that defines the entire aesthetic.
|
Cape Craftsmen Bicycle Planters$140.99 |
Sungmor Rustful Crafts Welcome to My Garden Sign$25.99 |
Threshold Featherly Friend Statuary$10 |
A Cottage in The City Aged Garden Gate$49 |

As an affiliate, we earn from qualifying purchases.
14. DIY Garden Projects: Upcycled Tire Planters
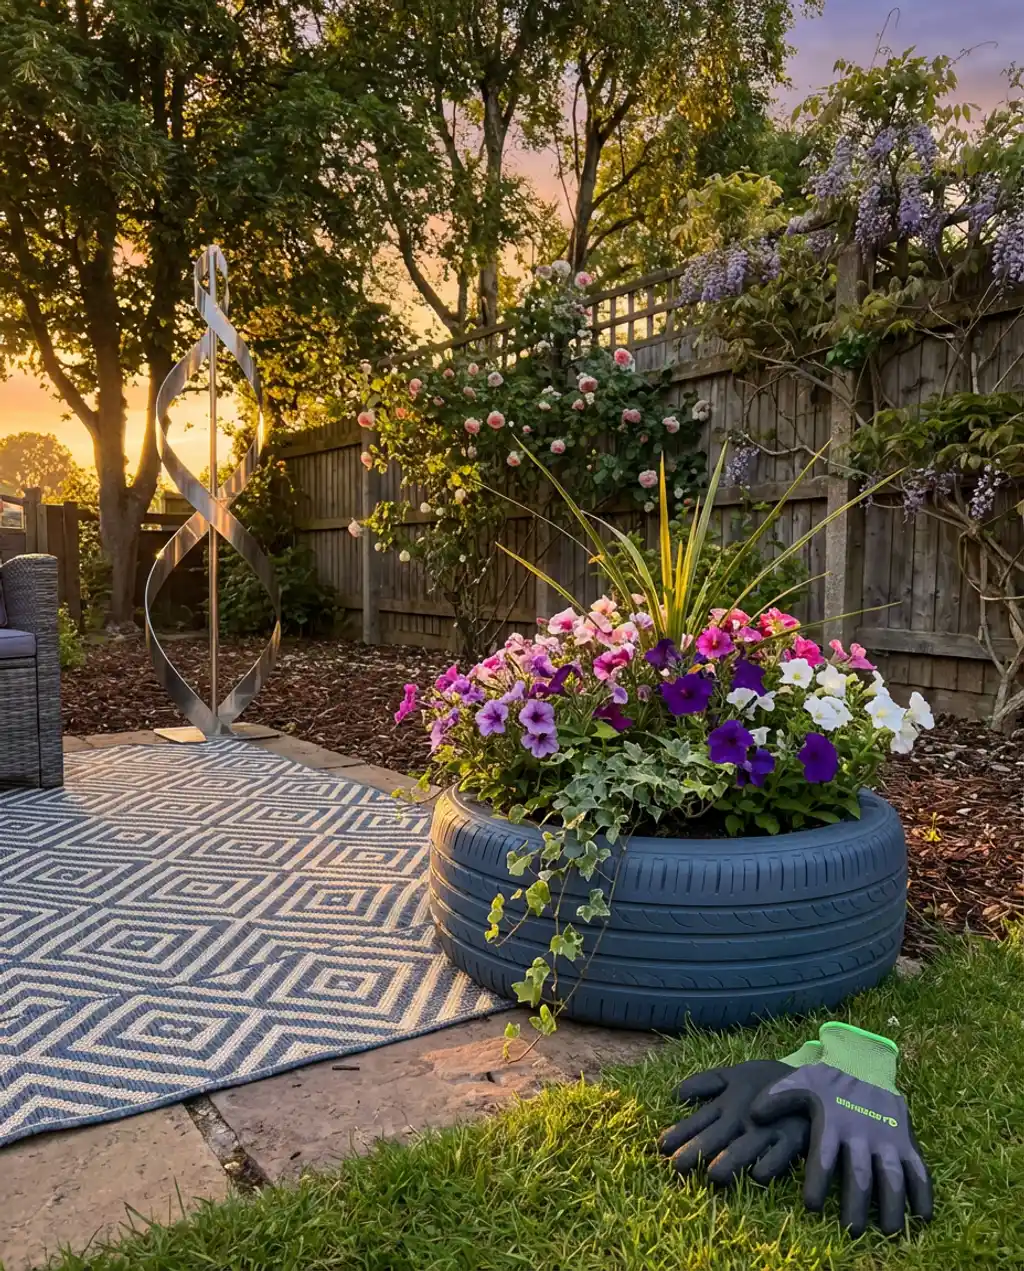
- Source your tires: Get old tires from local mechanics (often free) or tire shops. Ensure they are clean.
- Clean them: Scrub thoroughly with soap and water, then rinse and let dry completely.
- Prime (optional): For best paint adhesion, use an outdoor-grade primer.
- Paint: Use outdoor-specific spray paint or brush-on acrylics in vibrant colors. Consider geometric patterns.
- Drainage: Drill several drainage holes in the bottom sidewall of the tire.
- Plant: Fill with potting mix and your favorite plants.
Time estimate: 2-3 hours (including drying time). Material cost: $10-$40 (mostly paint).
While upcycled tire planters are a fantastic eco-friendly DIY, they do come with a couple of practical considerations. Firstly, old tires can leach chemicals into the soil over time, which might be a concern if you’re growing edibles. Consider lining the inside with heavy-duty pond liner or thick fabric planting bags if you’re planting vegetables or herbs. Secondly, tires can get incredibly hot in direct sun, potentially stressing some plant roots, so choose heat-tolerant plants or position them in partial shade.
|
Recycled Tire Planter$33.6 |
Heavy Duty Gardening Gloves 7/Small$18 |
AllModern Icon Geometric Indoor Outdoor Rug$48 |
Modern Abstract Stainless Steel Metal Sculpture Garden Sculpture In/Ou$175 |


As an affiliate, we earn from qualifying purchases.
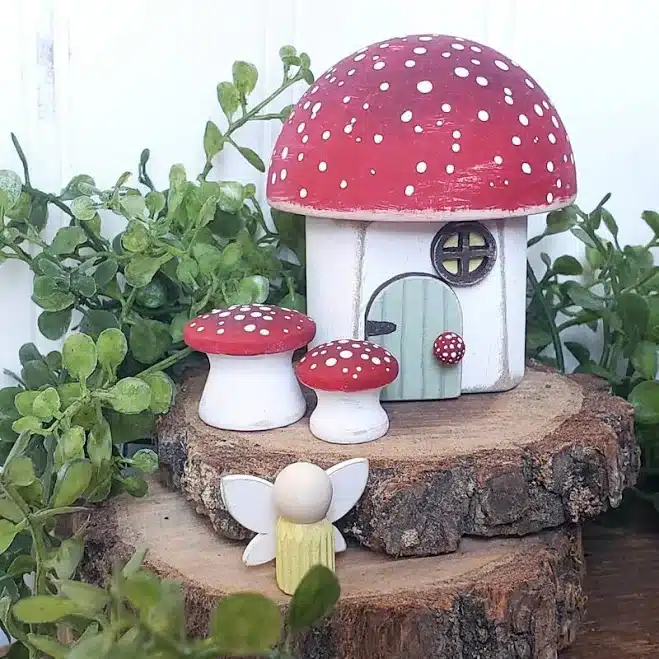
15. Enchanted Mushroom Village Miniature Display

You don’t need to splurge on brand-new miniature elements. Scour thrift stores for tiny ceramic animals or dollhouse furniture. Create your own mushroom caps from polymer clay and paint them. Use gathered moss and small twigs from your yard for landscaping. Little glass pebbles from the dollar store can create a ‘stream’. You can bring this enchanting mushroom village to life for under $50 by being clever with crafting and repurposing.
What makes an enchanted mushroom village so captivating is its ability to evoke a sense of wonder and escape, regardless of your actual garden size. It works by tapping into our innate desire for storytelling and miniature worlds. The layering of different-sized mushrooms, tiny structures, and delicate lighting creates a believable, immersive scene that draws the eye in and encourages closer inspection. It’s an exercise in scale and imagination that brings a truly unique charm to any outdoor space.
|
Northlight LED Micro Fairy Lights$21.99 |
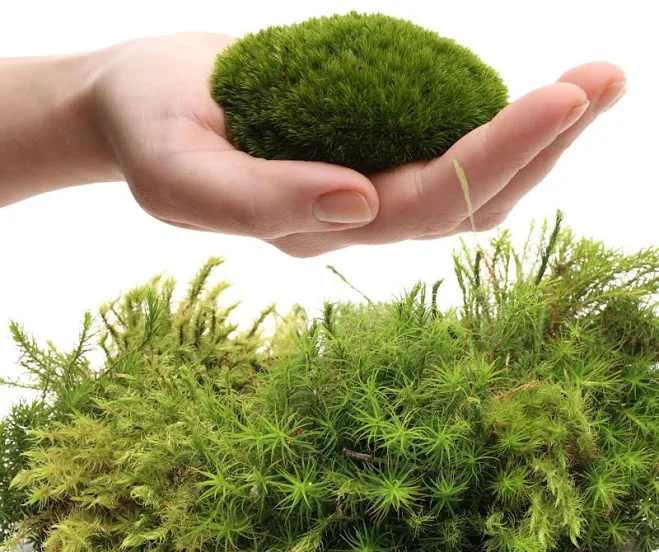
Live Moss Plants for Terrarium Use (Variety Pack)$12.99 |
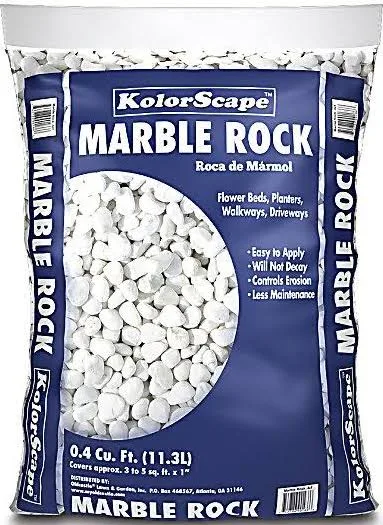
KolorScape White Marble Decorative Rock$8.99 |
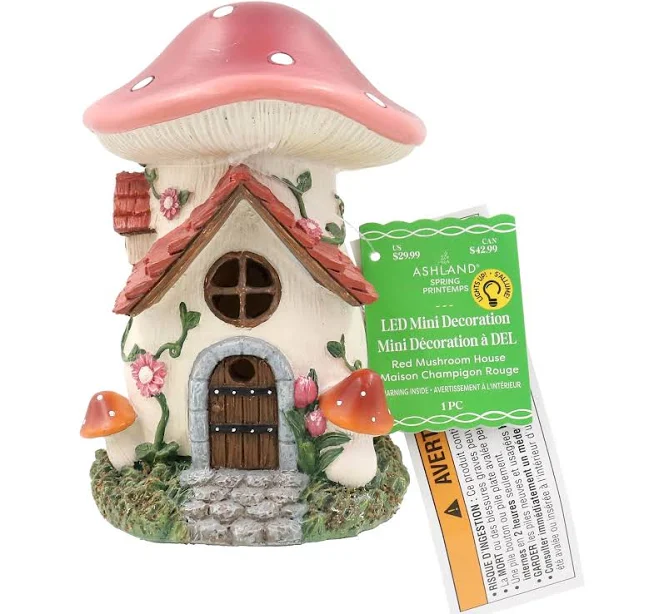
Ashland Mini LED Red Mushroom House$14.99 |
As an affiliate, we earn from qualifying purchases.
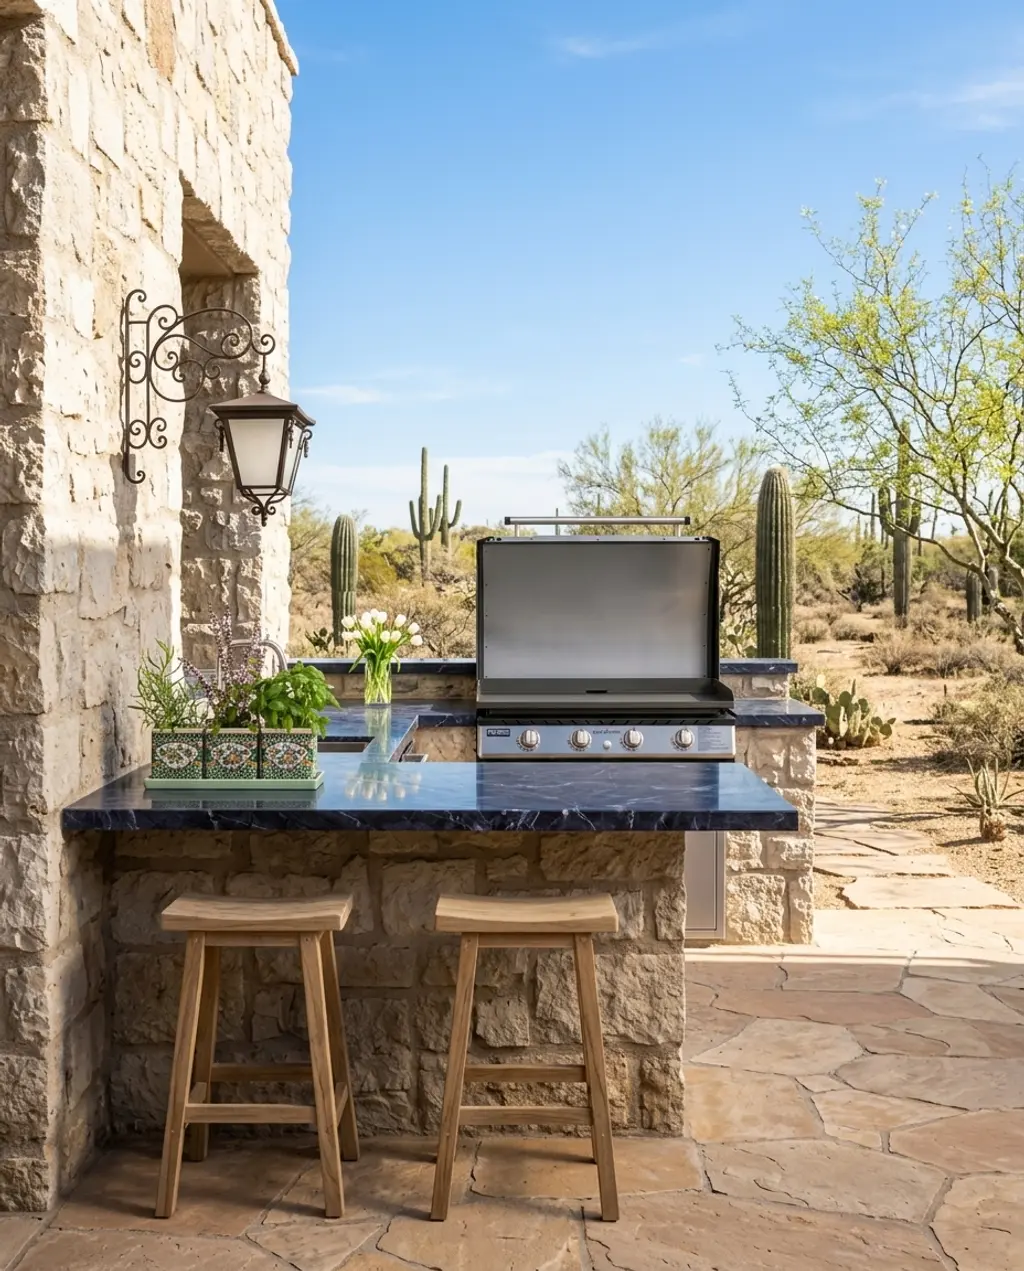
16. Rustic Outdoor Kitchen with Stone Accents
✨ Luxury Version
- Thin, flimsy steel that dents easily indicates poor durability.
- Lack of a tight seal on the lid suggests inefficient heat retention.
- Plastic components in high-heat areas signal a short lifespan.
- Poorly secured grates or unstable legs point to a safety hazard.
- Rust or corrosion on new models means inferior materials or improper storage.
When designing an outdoor kitchen, think about workflow just like you would indoors. Place your grill (the cooking zone) close to a counter surface for prep, and make sure there’s another counter for plating and serving nearby. Consider proximity to your indoor kitchen for easy transport of dishes and supplies. Finally, always account for ventilation and safety clearances, especially if you’re incorporating a built-in grill or pizza oven.
💸 Budget Version

The rustic outdoor kitchen is booming in 2026, echoing a broader cultural shift towards alfresco living and home-centric entertaining. With more people investing in their homes as primary gathering spots, the outdoor kitchen has evolved from a simple grill setup to a fully functional space. This style, in particular, resonates with a desire for authenticity and connection to nature, popularized by designers who champion local materials and a ‘slow living’ aesthetic that’s constantly celebrated on Instagram.
|
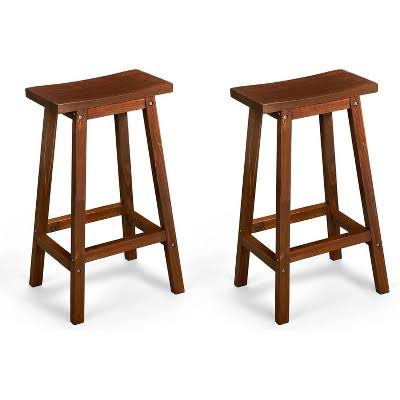
💰 Budget Pick Outdoor Wooden Bar Stools$61.24 |
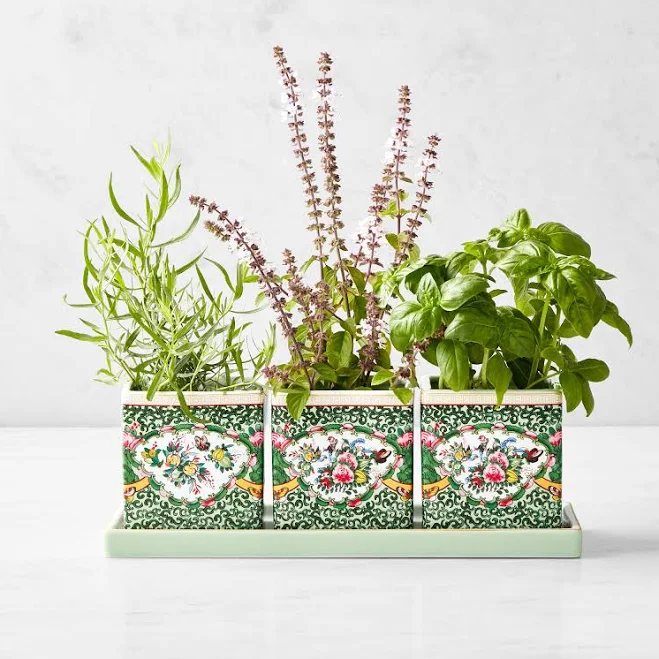
💰 Budget Pick FAMILLE Rose Herb Planter with Tray (Set of 3)$89.95 |
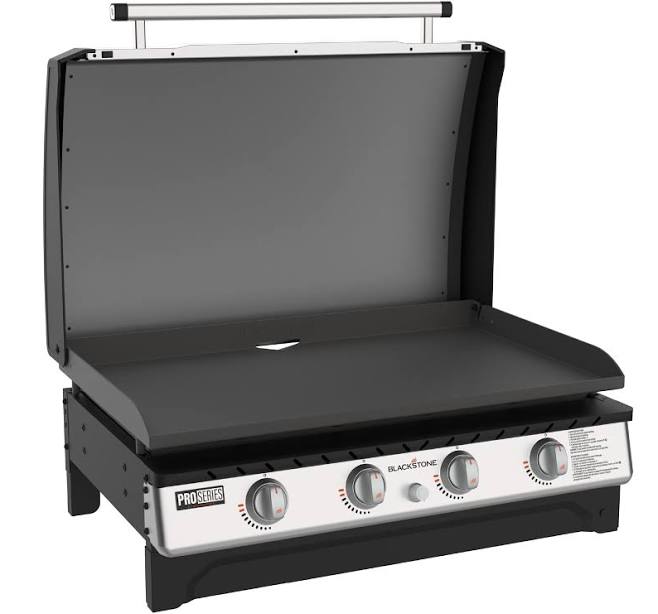
✨ Luxury Pick Blackstone Pro Series 4-Burner 36″ Propane Omnivore Drop-In Outdoor Gr$397 |
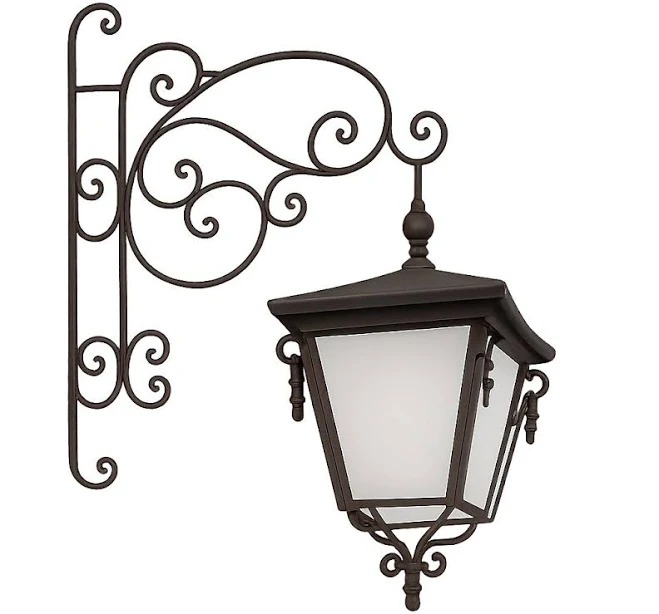
✨ Luxury Pick Wrought Iron Wall Lantern with Bracket$1600 |
As an affiliate, we earn from qualifying purchases.
17. Vintage Garden Gate with Climbing Roses
A vintage garden gate can be a stunning focal point, but its impact is heavily dependent on scale. For a grand entrance, a gate 4-6 feet wide and 6-8 feet high works well for properties with established garden walls or hedgerows, creating a dramatic sense of arrival. For smaller cottage gardens or to mark a distinction between garden ‘rooms,’ a narrower 3-4-foot gate at standard fence height is more appropriate. The key is to ensure it aligns proportionally with the surrounding fence or wall to avoid looking either dwarfed or oversized.
- Main element (vintage style gate): $200 – $800
- Climbing roses (starter plants): $40 – $100
- Exterior lighting: $50 – $150
- Mailbox (adds to rustic charm): $30 – $70
- TOTAL Estimated Cost: $320 – $1120
Budget alternative: Find an old, simple iron gate at an architectural salvage yard or flea market that just needs a good cleaning and a fresh coat of paint. Plant fast-growing, less expensive climbing annuals instead of perennial roses initially. Your total cost could be closer to $150-$300.
18. Minecraft Block Planters for Edible Gardens
- Design: Sketch out your desired pixelated shape and dimensions.
- Materials: Cut wood planks (cedar or treated pine for outdoors) into squares or rectangles.
- Assembly: Use wood glue and screws to assemble your ‘blocks’. Think modular units you can stack.
- Lining: Line the inside with heavy-duty landscape fabric to protect the wood and prevent soil leakage.
- Drainage: Ensure adequate drainage holes are drilled in the bottom of each block planter.
- Paint (optional): Use bright, outdoor-safe paints to mimic Minecraft’s aesthetic, or leave natural for a more subtle look.
Time estimate: 1-2 hours per block. Material cost: $20-$50 per block.
While Minecraft block planters are fun and eye-catching, they do require some forethought. The blocky design means drainage can be tricky; make sure to raise them slightly off the ground to prevent water from pooling underneath. Also, consider the weight once filled with soil – these can be surprisingly heavy and difficult to move, so plan their permanent location carefully. If using wood, go for naturally rot-resistant species or treated lumber to ensure longevity, otherwise, you might be rebuilding them in just a few years.
|
VINGLI Stackable Round Stools (Pack of 6)$61.09 |
NMN Designs Seeley Cube Planter$1200 |
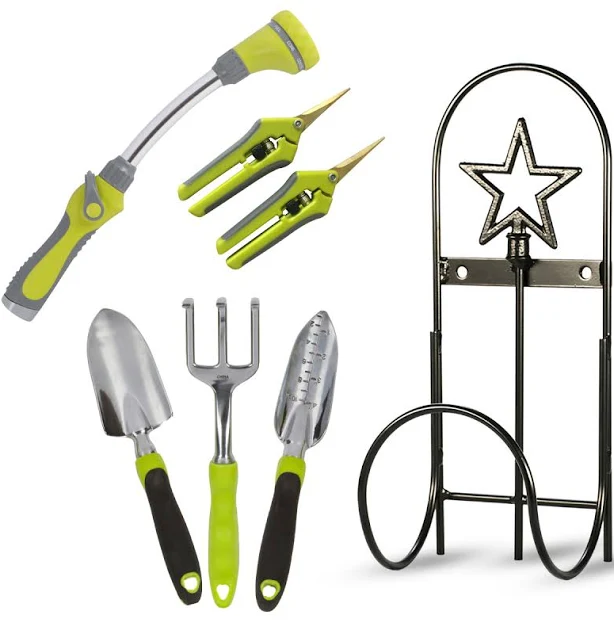
7-Piece Ergonomic Garden Tool Gift Set$65.99 |
Pixelated Prism Indoor And Outdoor Area Rug Rugolution Rug Size: Recta$79.99 |
As an affiliate, we earn from qualifying purchases.
19. DIY Projects: Upcycled Bottle Hummingbird Feeders

The single most crucial element for this idea is the upcycled bottle itself. It’s not just a vessel for nectar; it’s a statement of creativity and sustainability, providing a unique aesthetic that mass-produced feeders can’t match. The color, shape, and individual character of the repurposed bottle are what truly elevate this from functional item to garden art, making it a conversation starter and a testament to resourcefulness.
When crafting your upcycled bottle hummingbird feeder, pay careful attention to the feeding tube mechanism. The hole needs to be small enough to prevent bees and other insects from accessing the nectar easily, but large enough for hummingbird beaks. Consider using a ready-made feeder stopper from an old feeder you’re replacing, or construct one from a food-grade rubber stopper with a narrow, red-tipped tube. Placing a small, red bead near the opening can also help attract hummingbirds.
|
Rch Supply Company Round Welded Decorative Fixture Chain$13.6 |
Glass Hummingbird Feeder$38 |
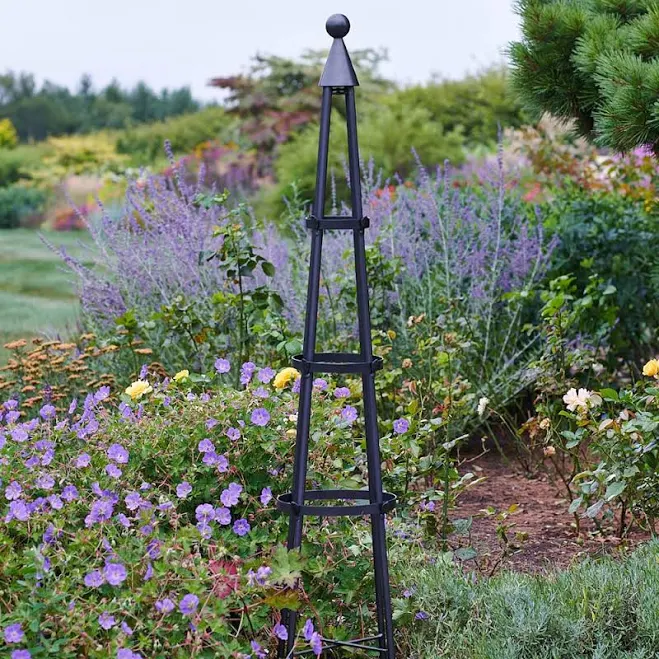
White Flower Farm Wrought Iron Garden Obelisk Trellis$99 |
12 Pcs Tiny Bird Statue Miniature Bird Decors Mini Resin Bird Figurine$8.84 |


As an affiliate, we earn from qualifying purchases.
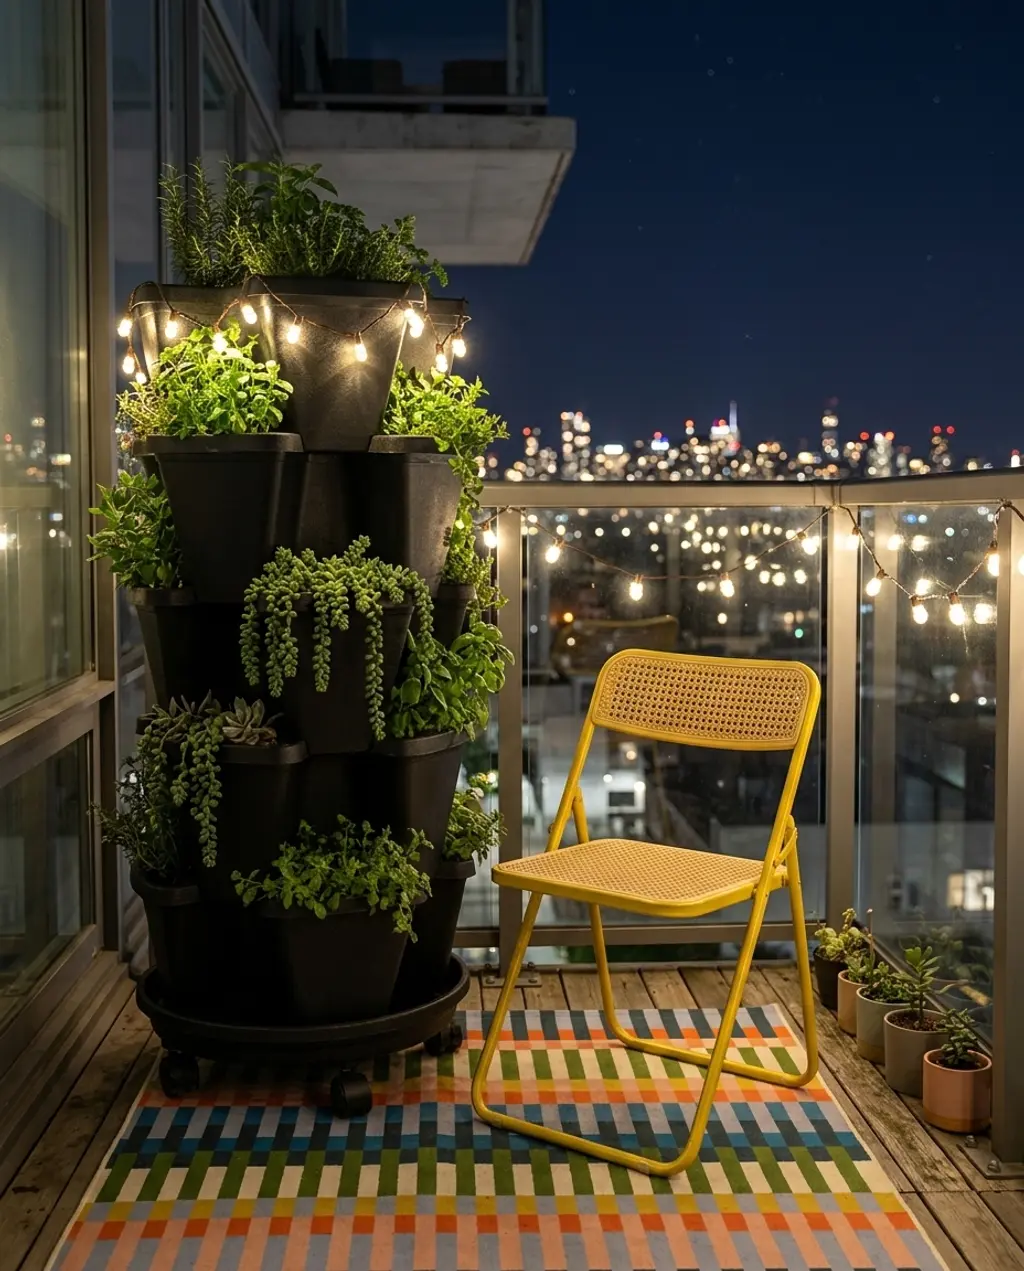
20. Elegant Balcony Garden with Vertical Planters
- Main elements (vertical planter system): $40 – $150
- Small outdoor chair: $50 – $150
- Outdoor rug: $40 – $80
- String lights: $20 – $50
- TOTAL Estimated Cost: $150 – $430
Budget alternative: Utilize repurposed plastic bottles or tin cans as individual vertical planters, securing them to a pallet or simple frame. Use a single folding chair you already own. String up basic solar fairy lights. You could easily achieve a similar effect for under $80, focusing on the green wall as the primary feature.
This smart balcony garden is absolutely perfect for small spaces, from a tiny 4×6 foot balcony to a compact 8×10 foot patio. The vertical planters are the real MVP here, allowing you to maximize greenery without sacrificing precious floor space. If you’re working with an even narrower space, consider a single, tall vertical planter unit instead of a wider one, or look for tiered planters that stack upwards. This approach is all about making every square inch count, so keep your furniture slim and multi-functional.
|
Style Selections Novelty Vertical Garden Planter$39.98 |
VINGLI Folding Chair$89.99 |
Urban Outfitters Elena Icon Geometric Indoor/Outdoor Rug$39 |
Better Homes & Gardens Willow Tree Solar Powered LED Outdoor String Li$19.97 |

As an affiliate, we earn from qualifying purchases.
21. Japanese Inspired Rock Garden with Bonsai

What makes a Japanese-inspired rock garden so deeply impactful is its ability to evoke profound tranquility through intentional negative space and symbolic arrangement. It works by inviting contemplation, using the careful placement of elements like rocks (representing mountains or islands) and raked gravel (representing water) to create a minimalist landscape that whispers rather than shouts. The absence of clutter and the emphasis on natural forms encourage a serene, meditative state, making it a true oasis from the everyday.
When designing a Japanese rock garden, pay meticulous attention to the raking patterns in your gravel or sand. These aren’t just decorative; they symbolize water, streams, or calm seas. Practice different patterns – concentric circles around a rock for ripples, or straight lines for flowing water. The precision and mindfulness in this act are central to the Zen aesthetic, and how neatly your gravel is raked will significantly impact the contemplative feel of the entire space.
|
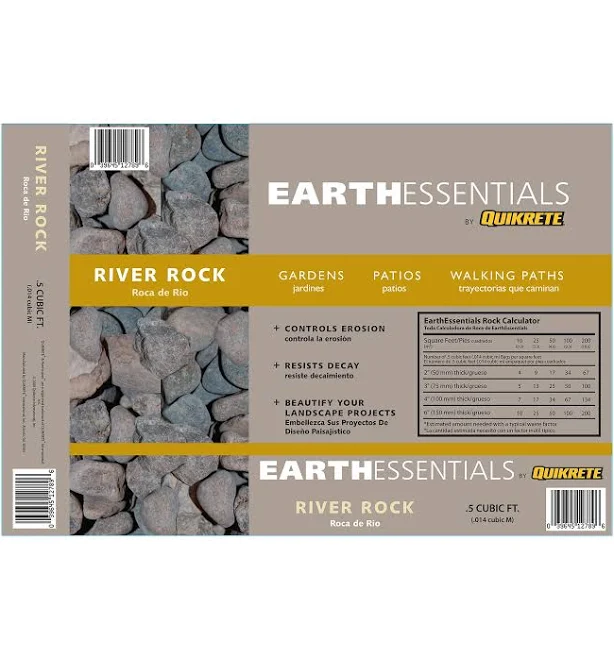
EarthEssentials River Rock$6.18 |
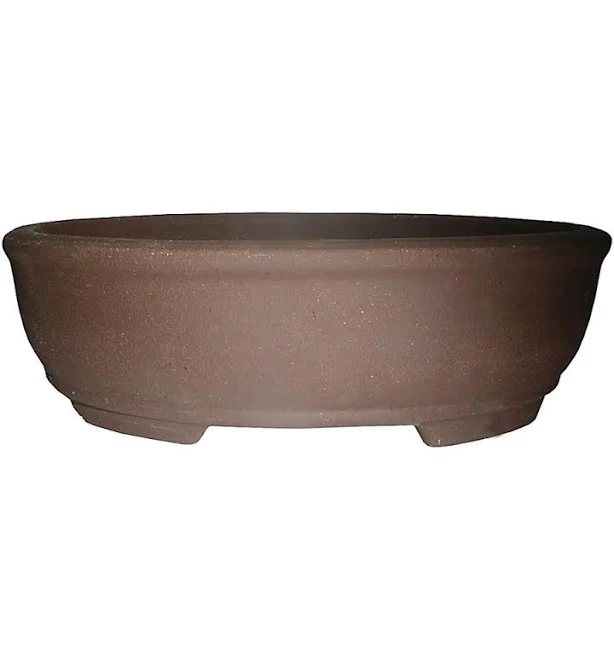
Brussel’s Bonsai Round Indoor/Outdoor Planter$26.98 |
IKEA NÄMMARÖ bench outdoor$100 |
Solid Rock Stoneworks 2 Piece Autumn Brown Lantern$160 |

As an affiliate, we earn from qualifying purchases.
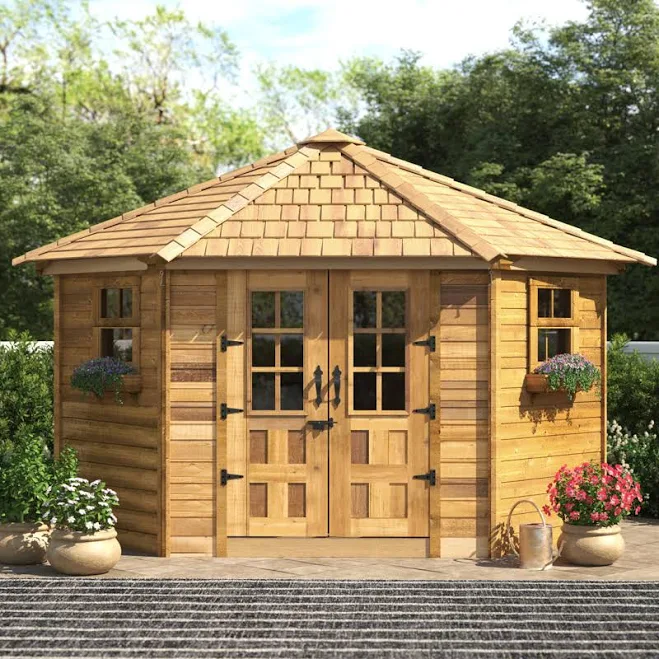
22. Rustic Garden Shed with Green Roof and DIY Planters
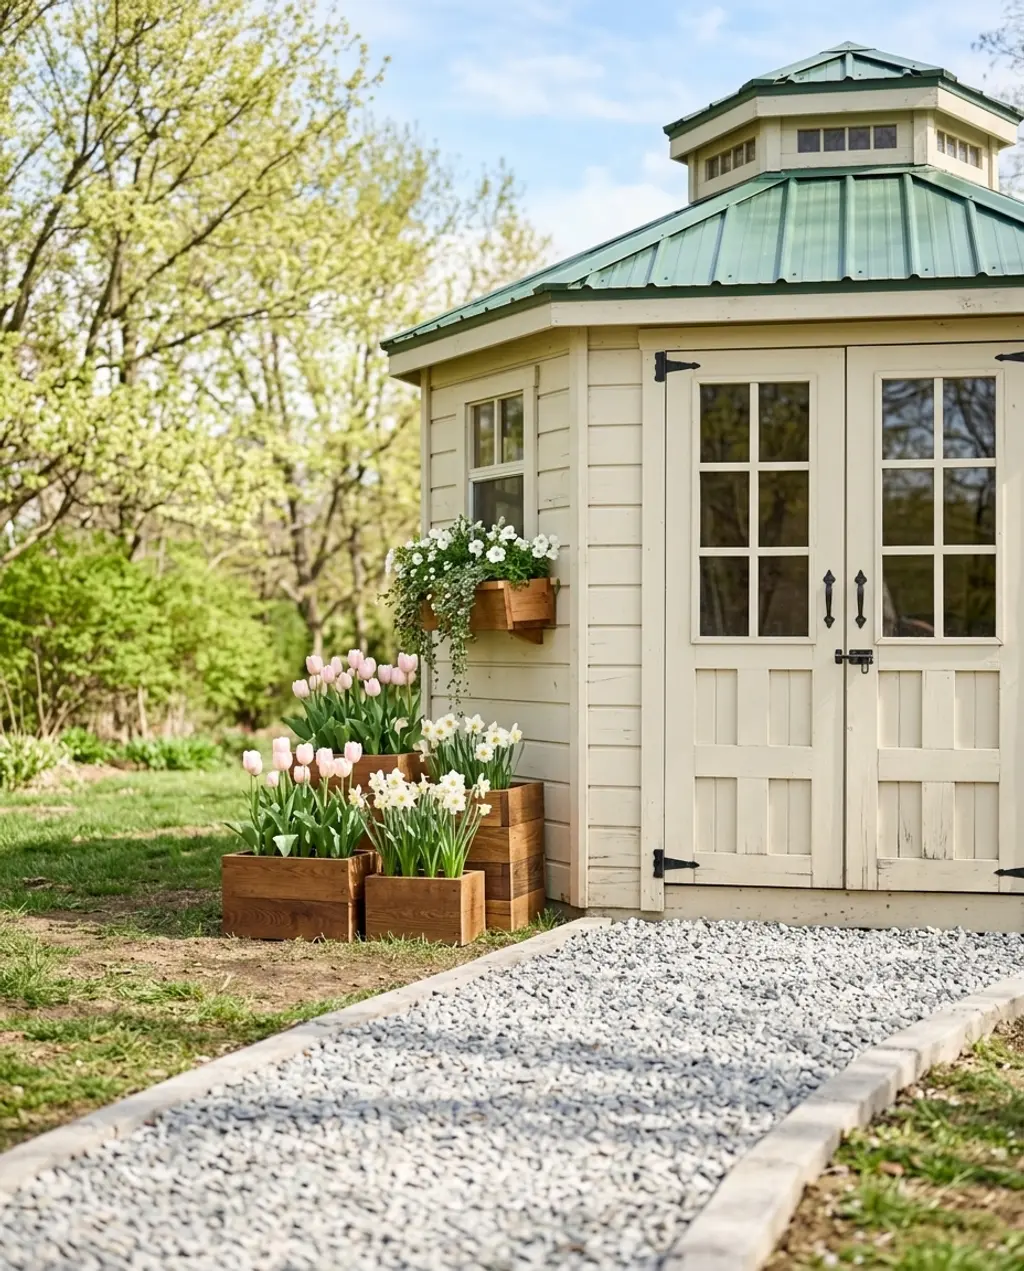
While a rustic garden shed with a green roof looks absolutely charming and eco-conscious, it does demand a bit more commitment than a standard roof. You’ll need to ensure the shed structure is robust enough to support the significant weight of saturated soil and plants – this often means extra reinforcement. Proper waterproofing and drainage are also critical to prevent leaks and rot, so don’t skimp on those steps. Also, be prepared for ongoing maintenance like weeding and watering, especially during dry spells.
- Reinforce: Ensure your shed roof can handle the extra weight of soil and plants (check with a structural engineer if unsure).
- Waterproof: Install a heavy-duty rubber pond liner or EPDM membrane over your existing roof, extending slightly past the edges.
- Drainage layer: Add a layer of gravel or a drainage mat on top of the liner.
- Filter fabric: Lay down a layer of permeable landscape fabric to prevent soil from clogging the drainage.
- Soil: Apply a lightweight green roof growing medium (typically 4-6 inches deep).
- Plants: Plant drought-tolerant sedums, mosses, or low-growing native perennials.
Time estimate: 1-2 days. Material cost: $200-$500 depending on roof size.
|
#57 Gravel – by the cubic yard — Stratford Landscape Supply | Your loc$73 |
Reclaimed Wood Rectangle Planters$40 |
Outdoor Living Today 9’x9′ Penthouse Garden Shed$7327.16 |
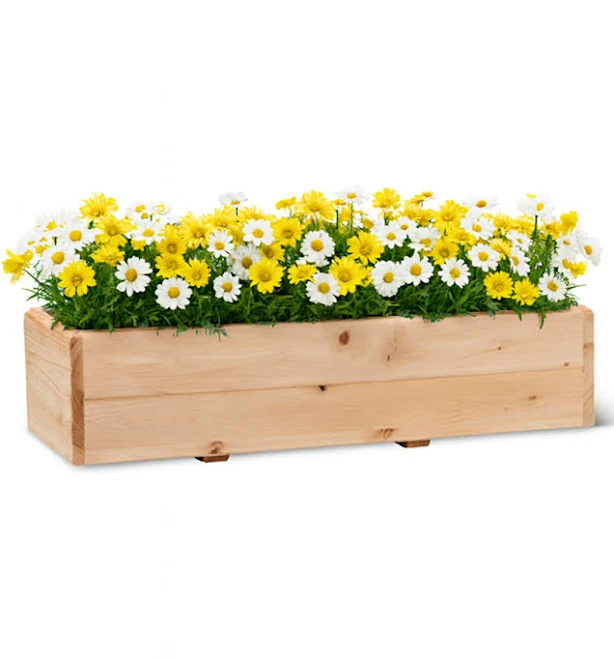
Hermosa Cedar Window Box with Cleat$69.97 |
As an affiliate, we earn from qualifying purchases.
23. Vintage Greenhouse with Terracotta Pots and Fairy Lights
✨ Luxury Version
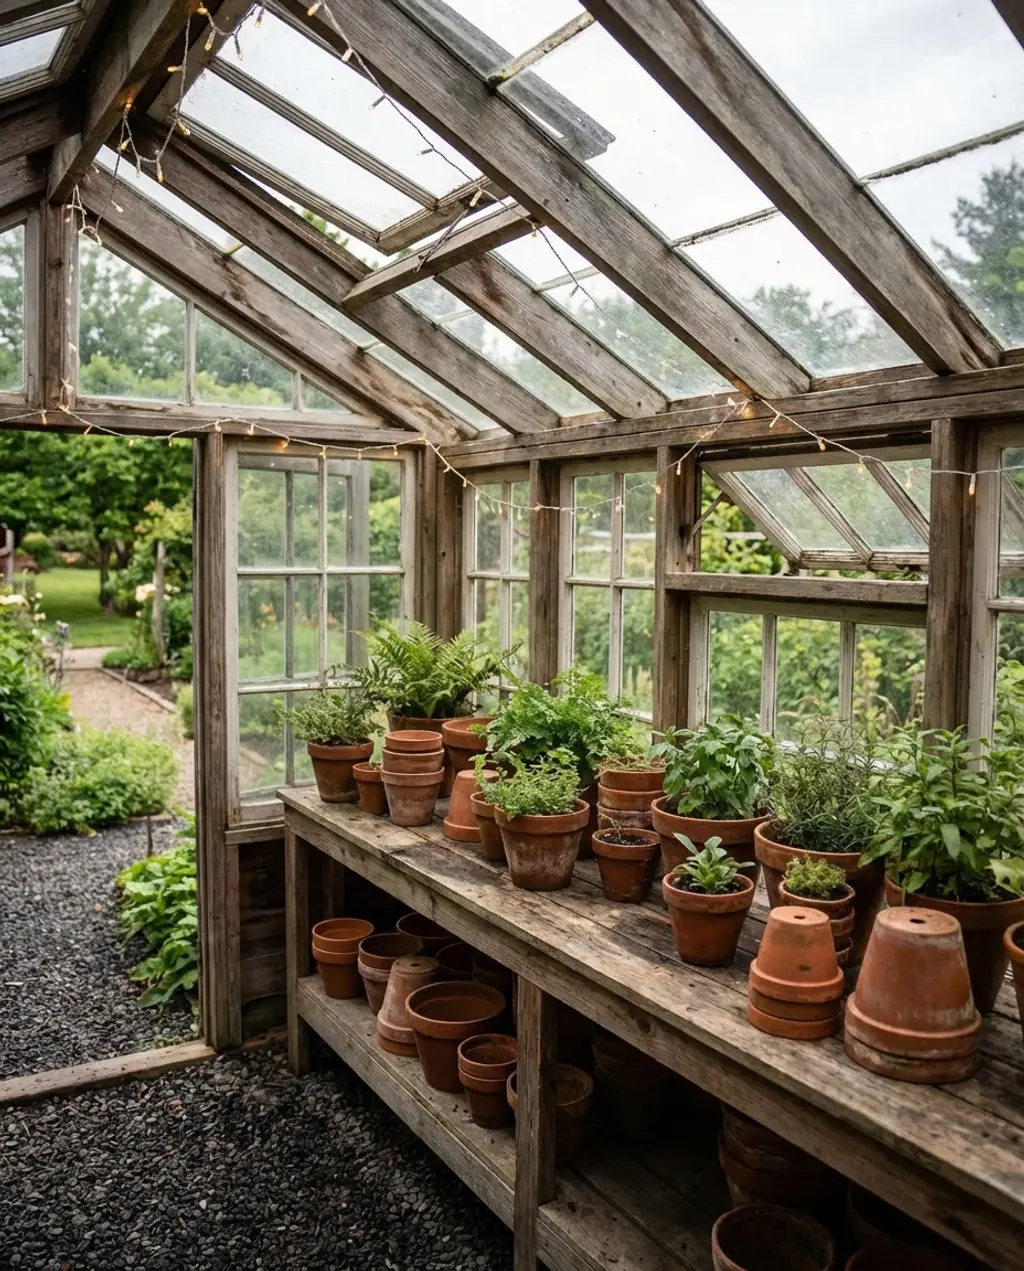
The vintage greenhouse aesthetic, particularly with terracotta pots and fairy lights, is having a massive resurgence in 2026. It speaks to a yearning for romanticized, nurturing spaces and the slow living movement. This trend is constantly pinned on Pinterest and showcased by garden influencers who champion a blend of historical charm and practical horticulture. It’s a style that offers enduring appeal, beautifully marrying function with a dreamy, almost ethereal beauty that won’t feel dated anytime soon.
💸 Budget Version
To truly nail that vintage greenhouse look, prioritize natural materials. Think aged wood frames, glass panes (or polycarbonate for safety and insulation), and an abundance of terracotta pots. Avoid plastic containers where possible. Introduce woven elements like wicker baskets or macrame hangers, and allow a slight patina to develop on metal elements. This authentic material palette is what gives the space its rich, lived-in character and classic charm.
24. Mushroom-Shaped Bird Bath and Feeder Set
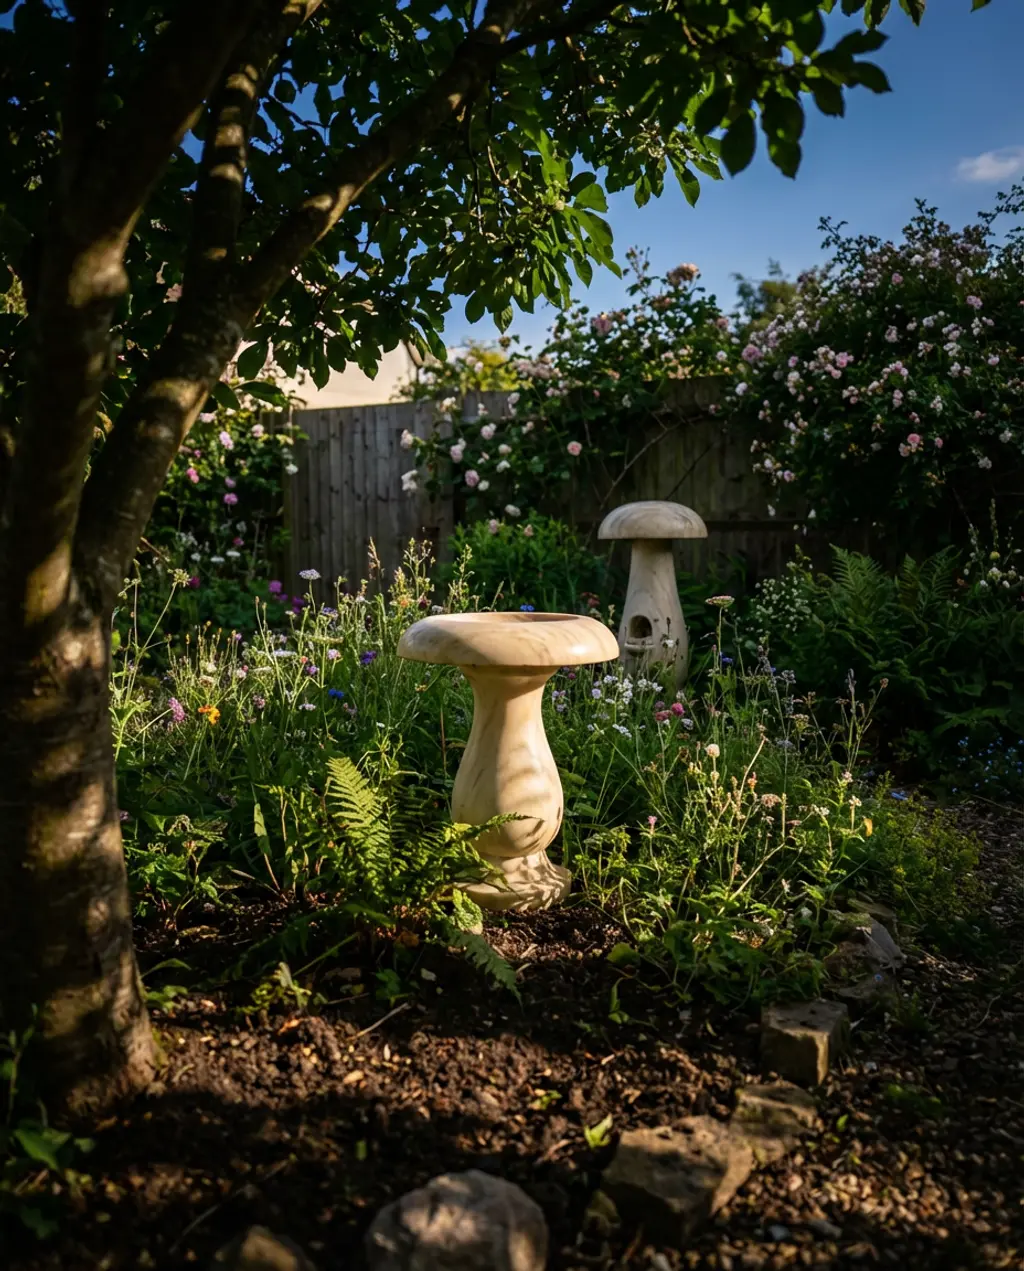
The core element that makes a mushroom-shaped bird bath and feeder so singularly special is its whimsical, organic form. It’s not just functional; it’s a piece of garden sculpture that seamlessly integrates into a natural setting while adding a touch of storybook charm. The mushroom shape itself is instantly recognizable and evokes a sense of woodland magic, making it a central, delightful focal point that nurtures wildlife while captivating human observers.
Designing this look is essentially about 70% organic form + 30% functional detail. The dominant mushroom shape provides the primary visual interest. The ‘functional detail’ comes in the form of careful placement for bird access and visibility, ensuring the water basin is shallow enough, and the seed tray is easily refillable. You can vary the colors, opting for earthy tones or brighter, fantastical hues, but the integrity of that natural, playful mushroom silhouette is what makes it work.
25. DIY Vertical Garden with Repurposed Plastics
While a DIY vertical garden from repurposed plastics is incredibly clever and sustainable, there are a few practical considerations. Plastic bottles, especially clear ones, can heat up significantly in direct sunlight, potentially cooking plant roots. Opt for opaque plastics or provide some shade during the hottest parts of the day. Also, ensure very robust anchoring for your vertical structure, as a fully watered vertical garden can become surprisingly heavy, and you don’t want it to collapse in a wind gust.
This DIY vertical garden works because it brilliantly solves the perennial problem of limited space while embracing sustainability. By repurposing plastics, it turns waste into a vibrant, living wall, maximizing planting area in a truly clever way. The staggered arrangement of bottles or containers creates visual texture and allows for a diverse array of plants, transforming a bland wall into a dynamic, eco-conscious feature. It’s functional art that gives back to the environment.
26. Rustic Stone Fire Pit with Adirondack Chairs
✨ Luxury Version
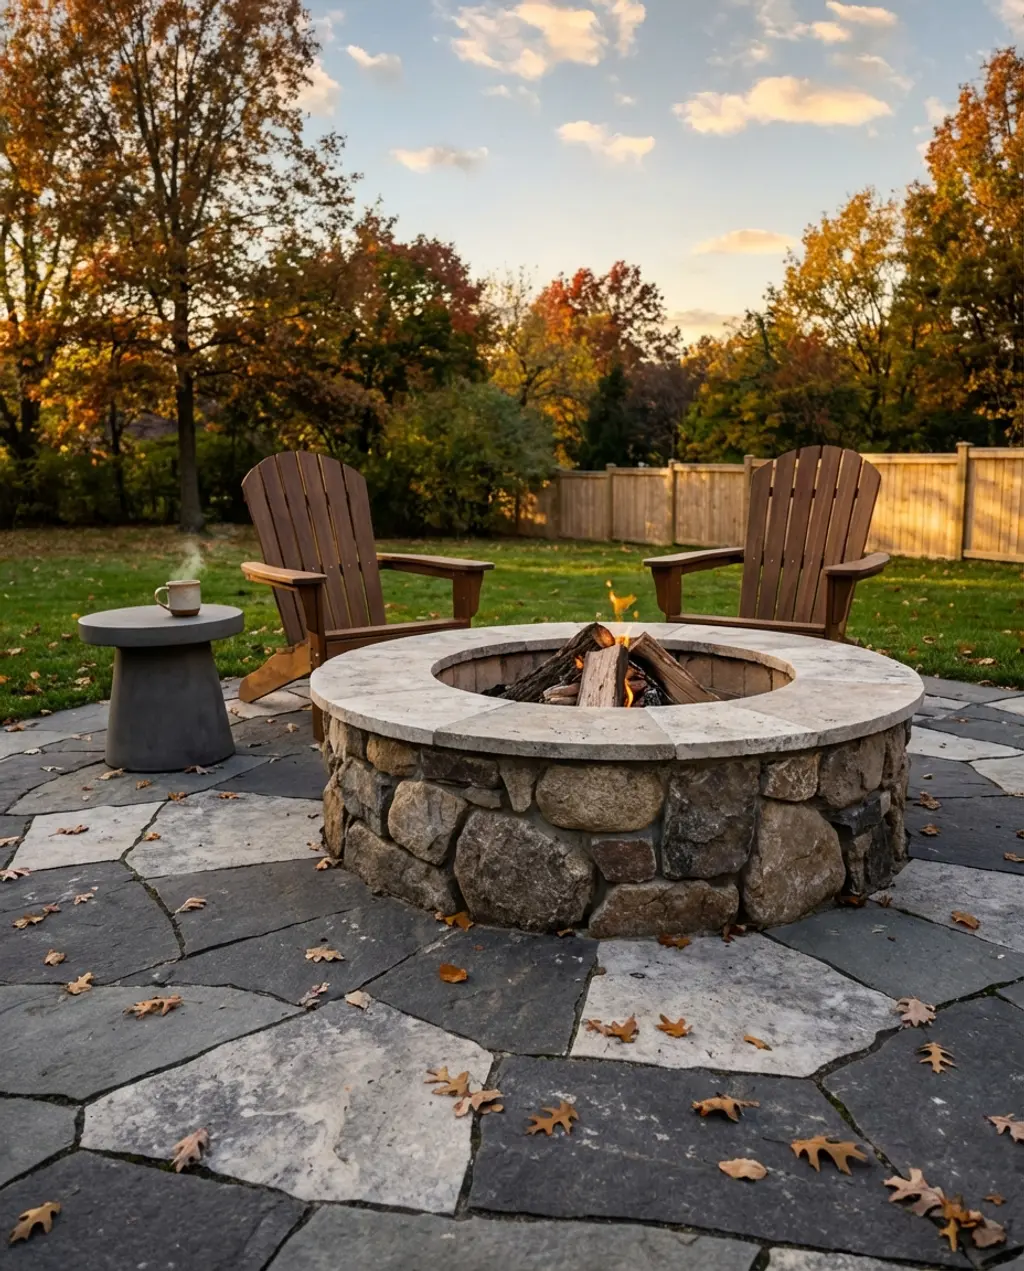
You absolutely can get this cozy fire pit vibe for less. Instead of a pre-made stone fire pit, build your own using retaining wall blocks from a home improvement store – it’s often more affordable and a satisfying DIY project. Look for Adirondack chairs on Facebook Marketplace or at second-hand stores; a little sanding and staining can transform them. Forget expensive specialty firewood; local tree services often sell seasoned wood at a fraction of the cost. You could easily save hundreds with a smart approach!
💸 Budget Version
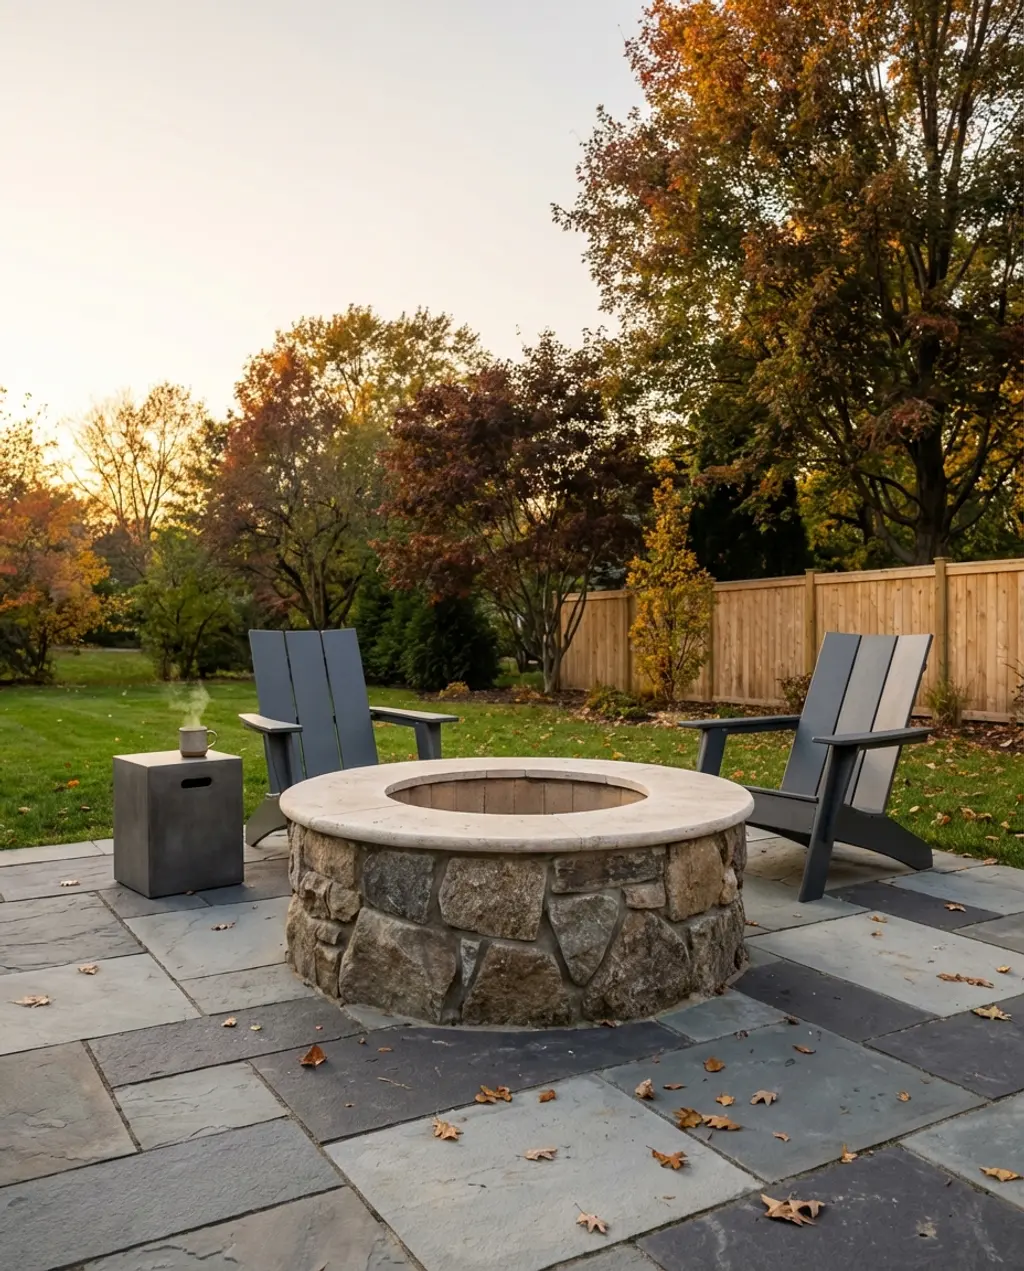
When placing a fire pit, always consider safety first: ensure it’s at least 10 feet away from any structures, overhanging branches, or combustible materials. On a stone patio, use a fire pit pad underneath for extra protection. Also, think about prevailing winds – you don’t want smoke constantly blowing into your seating area. A well-placed fire pit enhances ambiance, but a poorly placed one can be a real nuisance, or worse, a hazard.
27. Miniature Japanese Garden Pond with Koi Fish
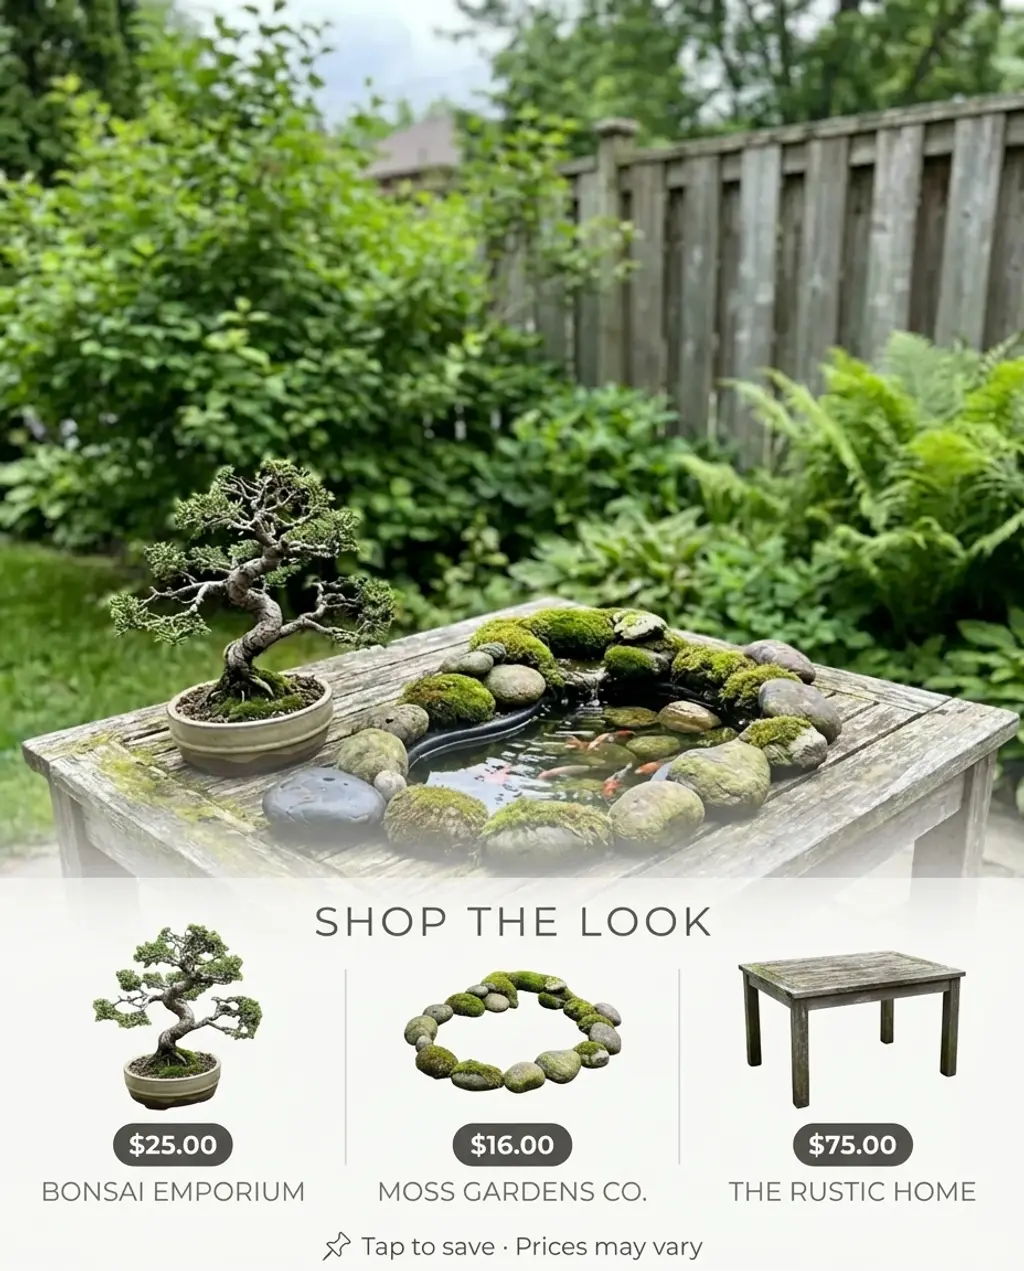
A miniature Japanese garden pond with koi fish is, without a doubt, stunning, but be prepared for a significant commitment. Koi require specific water parameters and excellent filtration, which means weekly water testing and potentially daily checks if issues arise. Pond maintenance involves skimming debris, cleaning filters, and dealing with algae growth. They also need specific food and can suffer from various diseases. It’s a rewarding but highly involved hobby, so don’t underestimate the time and effort required for healthy koi and a pristine pond.
The beauty of a miniature Japanese garden pond lies in its ability to condense vast natural beauty into a tiny, tranquil tableau. It works by creating a focal point of serene movement and sound, drawing the eye and ear into a meditative experience. The careful integration of water, stones, and miniature plants, often mimicking larger landscapes, crafts a sense of depth and peacefulness that belies its small scale. It’s a living, breathing artwork that continuously shifts and evolves.
28. DIY Rustic Woven Branch Garden Fence
- Gather materials: Collect sturdy, relatively straight branches (2-4 inches thick) for upright posts and thinner, flexible branches (1/2-1 inch thick) for weaving.
- Install posts: Drive your thicker branches securely into the ground every 2-3 feet along your desired fence line. Ensure they are deep enough to be stable.
- Weave horizontal branches: Begin weaving your thinner, flexible branches horizontally between the upright posts, alternating over and under each post.
- Compress: Periodically push down your woven layers to compact them tightly.
- Secure ends: Tuck in the ends of the woven branches or secure them with natural twine to an upright post.
- Repeat: Continue layering until you reach your desired fence height.
Time estimate: 2-4 hours per 10-foot section. Material cost: Free (if gathering your own branches).
While a DIY rustic woven branch garden fence offers undeniable charm and an organic aesthetic, it’s crucial to understand its limitations. This type of fence is primarily decorative and won’t offer much in the way of security or containing pets. Its lifespan is also considerably shorter than a conventional fence, typically lasting 3-7 years depending on climate and wood type, as the branches will naturally decompose. Be prepared for ongoing maintenance, like replacing rotting sections and re-weaving breaks, if you want to keep it looking tidy.
29. Vintage-Inspired Garden Bench with Botanical Prints
The single, irreplaceable element in this idea is the botanical print itself. It transforms a simple bench into a piece of art, imbuing it with a sense of history, romance, and connection to the natural world. This isn’t just about a print; it’s about the specific aesthetic of botanical illustrations – detailed, often delicate, and inherently beautiful. It elevates the bench from merely functional seating to a charming focal point that tells a story.
- Check for weatherproof materials: Ensure the bench is outdoor-rated or can be safely treated.
- Assess the print’s durability: Is the botanical print waterproof, UV-resistant, or protected under a sealant?
- Consider your garden’s existing colors: Will the print clash or complement your plants and flowers?
- Budget minimum for style: Be willing to invest at least $100-$300 for a quality bench that will last.
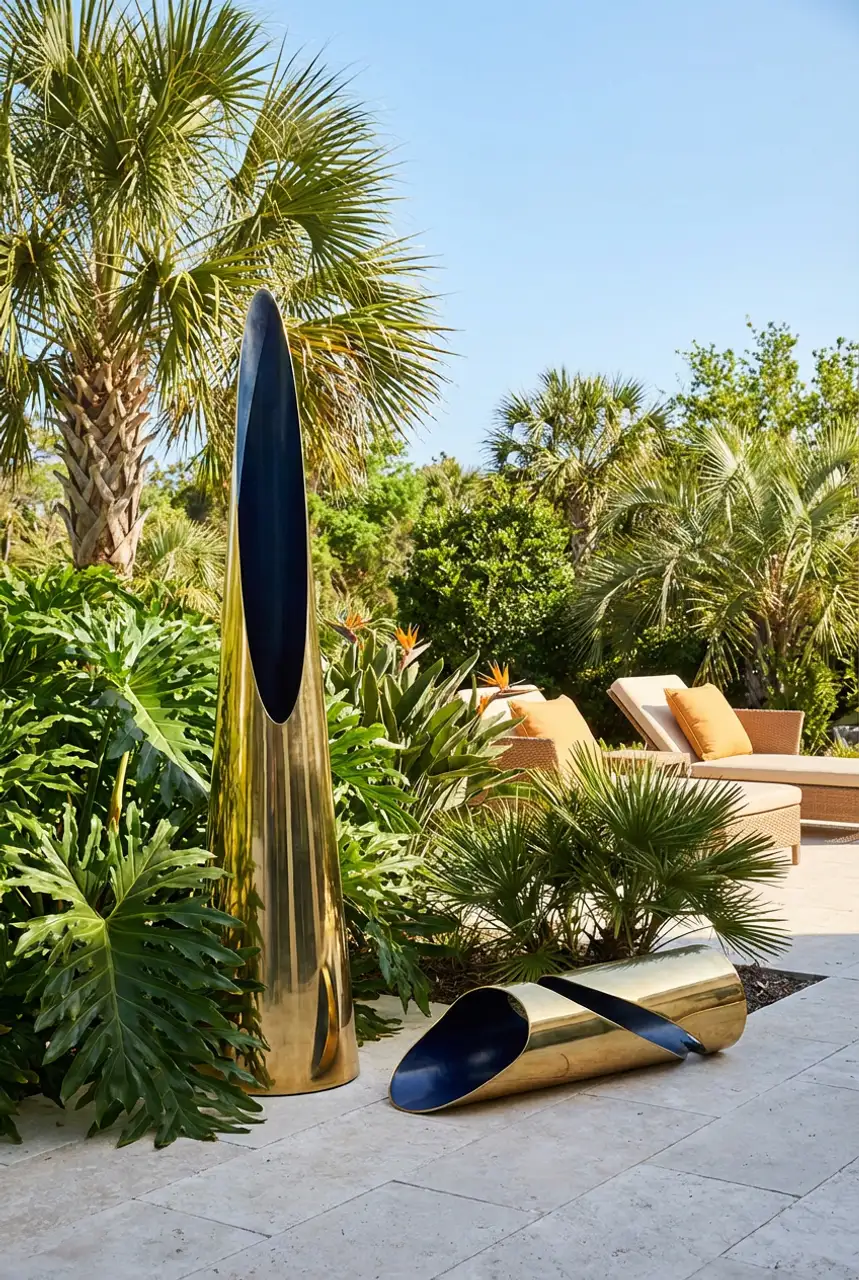
30. Modern Minimalist Garden Lighting with Sculptural Forms
- Stainless Steel: Durable, sleek, weather-resistant.
- Anodized Aluminum: Lightweight, corrosion-resistant, comes in various finishes.
- Corten Steel: Rustic, develops a beautiful rust-like patina, very low maintenance.
- Concrete: Architectural, grounding, creates a brutalist aesthetic.
- Powder-Coated Metal: Available in many colors, durable, good value.
This look is all about a clean visual formula: 70% subtle integrated lighting + 30% sculptural form. The majority of the lighting should be understated, perhaps hidden LED strips or low-profile path lights that provide a glow rather than a harsh beam. Then, a smaller percentage is dedicated to one or two truly sculptural light fixtures that act as art pieces. These sculptural forms can vary greatly – abstract shapes, geometric designs, or even minimalist lanterns – but their purpose is to add a distinct design element that stands out subtly.
What makes modern minimalist garden lighting so effective is its ability to blend seamlessly into the landscape while providing powerful functionality. It works by eschewing ornate details in favor of clean lines, simple forms, and often, indirect light. This design philosophy creates a sense of sophistication and calm, allowing the garden’s natural beauty to take center stage. The lighting highlights pathways and features without being obtrusive, cultivating a refined nighttime ambiance that feels both contemporary and timeless.
Final Thoughts
There you have it—30 ideas to inspire your most beautiful garden yet. From whimsical retreats to serene Zen spaces, your outdoor area deserves the same care and attention as any room inside your home. Don’t be afraid to mix and match elements, trust your gut, and create a space that truly reflects you.
Now go forth and transform your garden! And for even more ideas, remember to save this guide and explore Pinterest – your next outdoor adventure awaits.