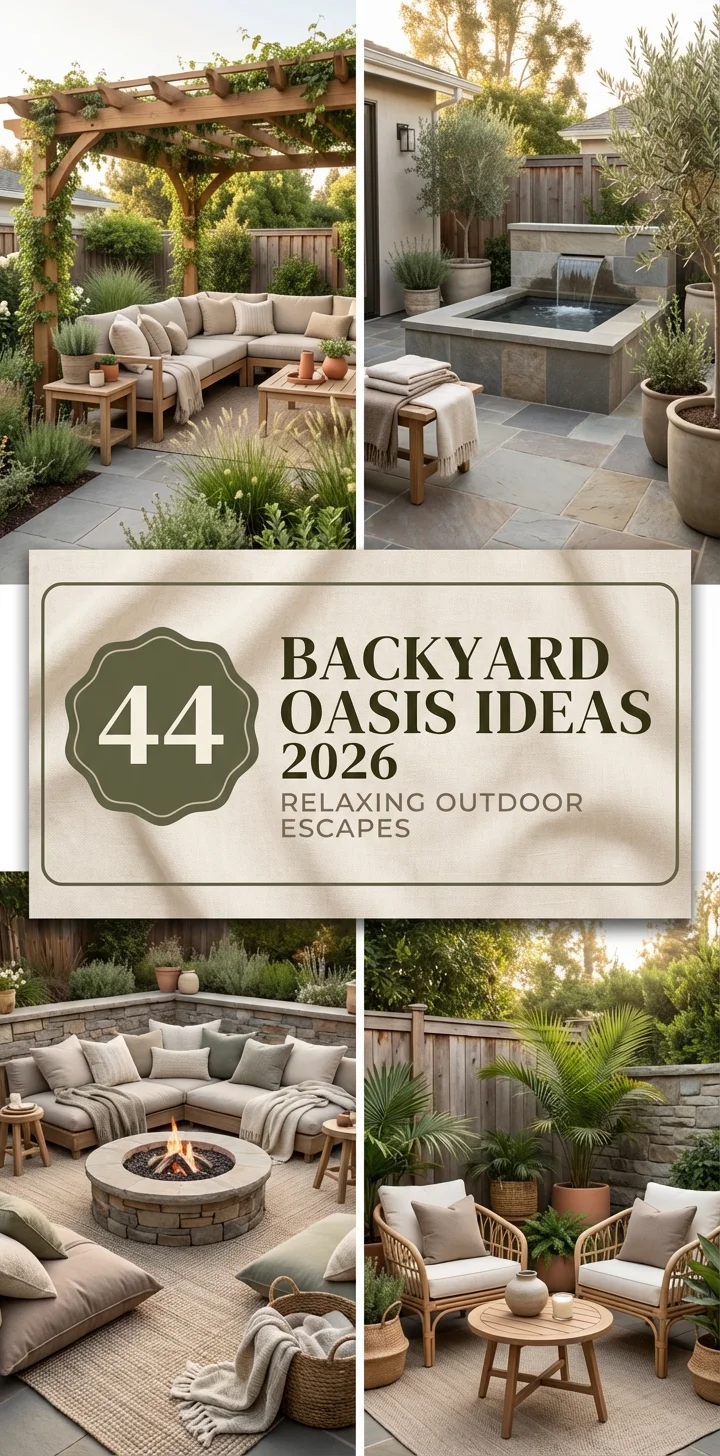
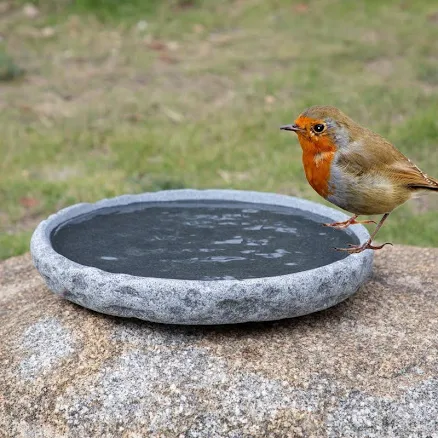
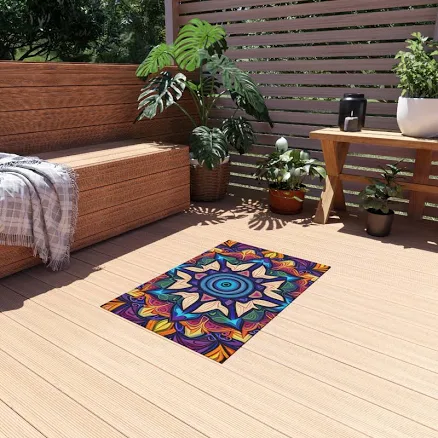
Still scrolling through Backyard Oasis Ideas 2026 photos without knowing where to start? We totally get it. That endless Pinterest feed can be inspiring and overwhelming all at once. We spent serious time browsing Home Depot, Walmart, and Target to bring you only what’s worth your attention this year. From Home Depot’s latest drops to Walmart’s current bestsellers, we pulled the best Backyard Oasis Ideas 2026 options across every price point — from $6 to $8495.
Inside, you’ll find 30 curated ideas covering everything from rustic charm to minimalist zen, and contemporary cool to sleek modern designs. We’ve even compared budget-friendly options side-by-side with their luxury counterparts so you can see what’s possible at any price point. Every single idea is fully shoppable with direct product links to make your dream backyard a reality.
The push for personal outdoor retreats is stronger than ever in 2026, with a noticeable shift towards creating truly livable, year-round spaces that extend your home’s footprint. Investing in your backyard isn’t just about curb appeal anymore; it’s about creating a sanctuary to escape the everyday. Pin this guide for later — your future self will thank you when it’s time to actually do this.
Our editors independently research, test, and recommend the best products; you can learn more about our review process here. We may receive commissions on purchases made from our chosen links.
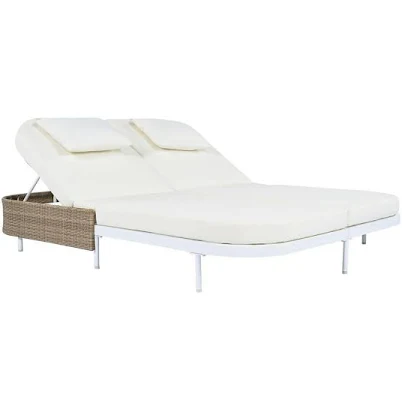
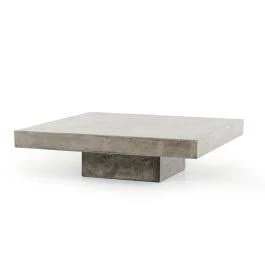
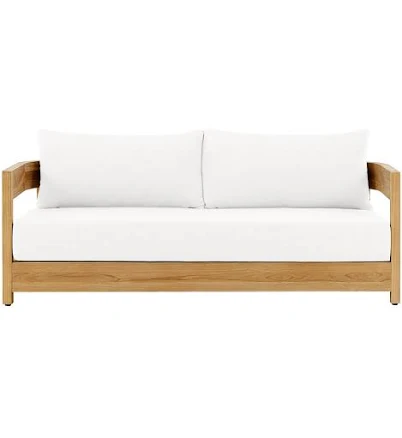
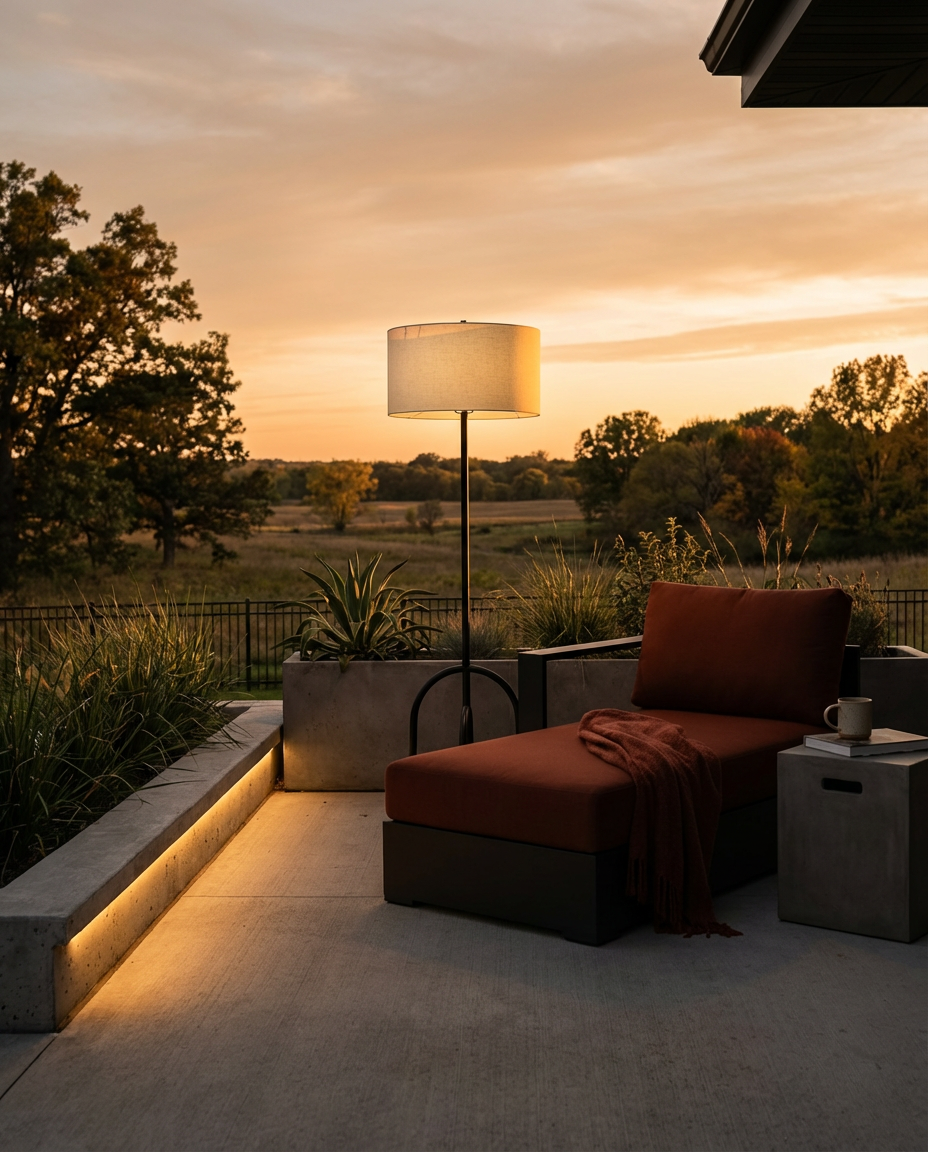
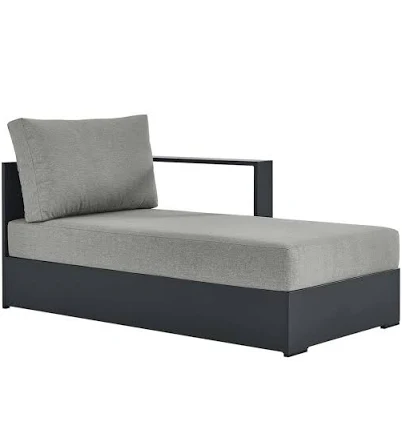
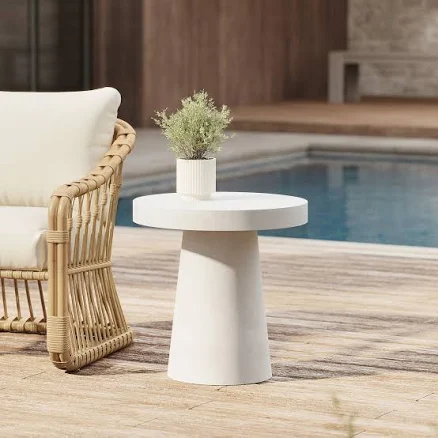
1. Modern Minimalist Poolside Retreat with Lounge Deck
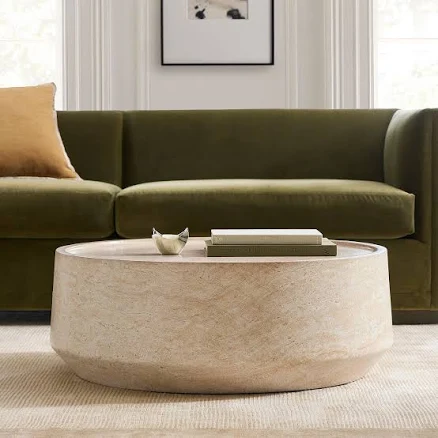
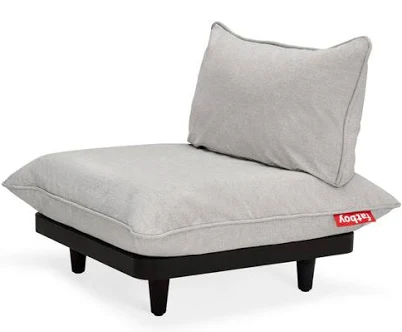
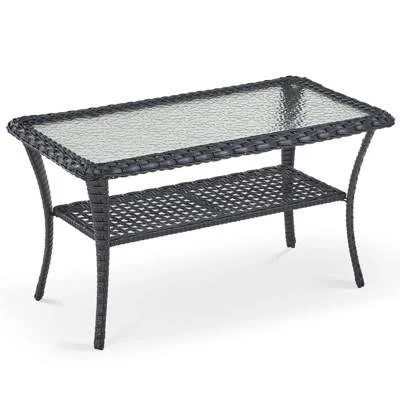
When you want to capture that super sleek, modern poolside vibe, it’s all about intentional choices. Think clean lines, a muted color palette, and materials that celebrate their natural beauty, like concrete and wood. This isn’t about clutter; it’s about curated comfort. Imagine sprawling out on a low-profile daybed, the only sound the gentle ripple of an infinity pool. It sounds expensive, but a lot of the magic happens in material choice and careful placement, which you can absolutely achieve on a budget by being resourceful.
Designer Tip:
When selecting outdoor furniture for a modern minimalist look, aim for pieces with slim profiles and elevated legs. For a daybed, choose one where the mattress sits no higher than 18 inches off the ground to maintain a grounded, serene aesthetic. This creates a really impactful visual line and prevents the space from feeling too busy. Pair it with a substantial but clean-lined coffee table, preferably in concrete or a similar material, that sits about 12-15 inches high.
Budget Breakdown:
- Main Furniture (Daybed, Coffee Table): $1,000 – $3,500
- Lighting (Pathway, Ambient): $150 – $500
- Textiles (Outdoor Pillows, Throws): $100 – $300
- Decor/Accessories (Planters, Abstract Art): $200 – $800
- Paint/Wall Treatment (Exterior Wall or Fence): $500 – $1,500
- TOTAL: $1,950 – $6,600
- Budget alternative: Focus on a smaller lounge area with a few key pieces. Look for sales on concrete-look side tables and DIY a simple wood platform for a mattress. You could get a similar look for $800 – $1,500.
|
|
|
|
As an affiliate, we earn from qualifying purchases.
2. Tropical Oasis with Plunge Pool and Lush Greenery
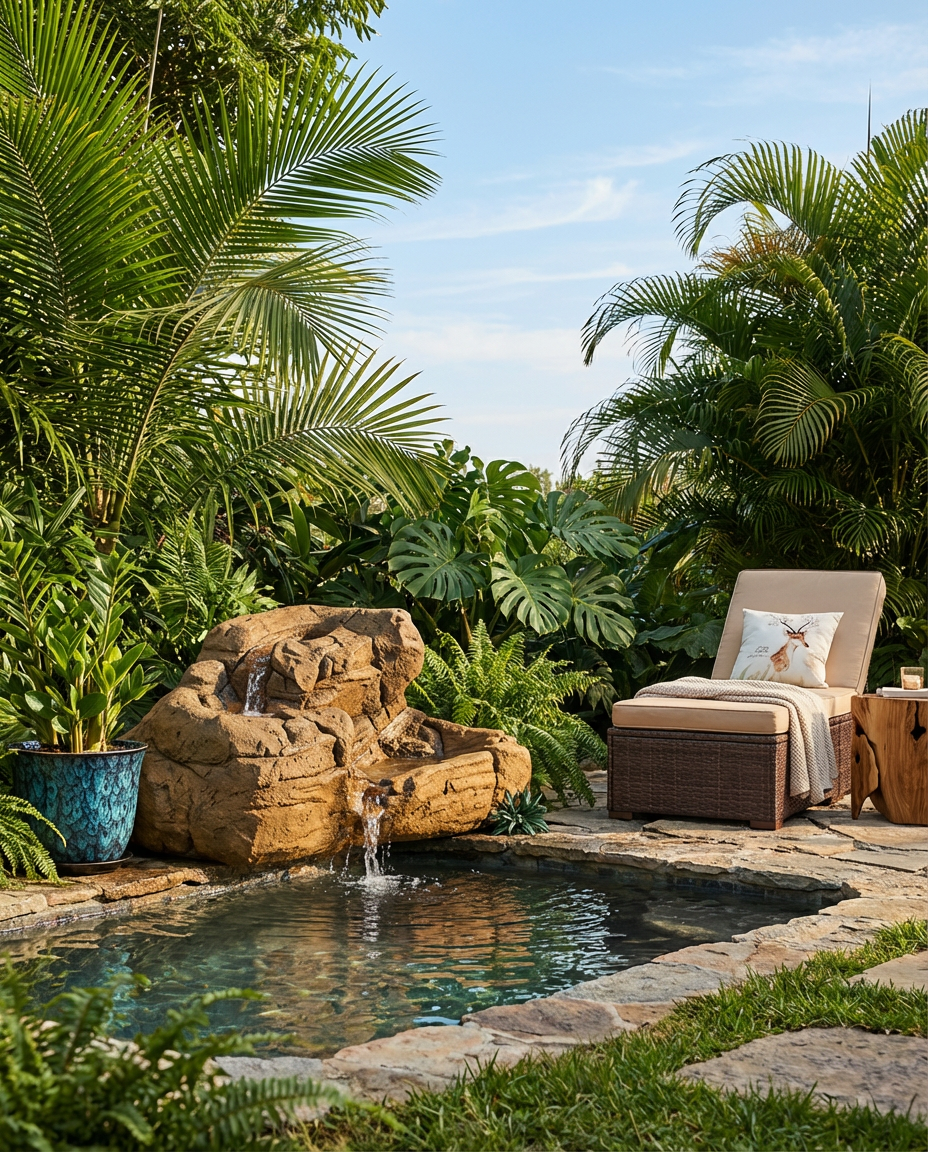
A tropical oasis, even in a smaller backyard, feels like a perpetual vacation. The key ingredients? A refreshing plunge pool, a symphony of lush, oversized greenery, like palms and bamboo, and perhaps a subtle water feature. It’s all about creating an immersive, sensory experience. The sound of trickling water, the visual privacy of dense foliage, and the cooling effect of the water work together to transport you far away from your everyday. This vibe is less about perfect symmetry and more about vibrant, organic beauty.
What Makes It Work: The Power of Immersion
This look succeeds by fully committing to the tropical theme through several principles. First, there’s the sensory experience: the sound of a small waterfall or the rustle of bamboo creates an auditory escape. Second, layered greenery is critical – using plants of varying heights and textures (think tall palms, dense shrubs, and trailing vines) builds a lush, enveloping atmosphere. Finally, the inclusion of a small pool with a waterfall, even a modest one, is a focal point that instantly evokes resort-style luxury. It’s about creating an environmental bubble.
Scale Guide: Perfect for Compact Spaces
This tropical oasis really shines in small to medium-sized backyards, ideally those around 300-800 square feet. The beauty of a plunge pool is that it offers the cooling benefits of a larger pool without requiring a massive footprint. If your yard is on the smaller side (think 300-500 sq ft), focus on vertical planting with bamboo or tall, slender palms to maximize green impact without eating up precious floor space. For larger yards, you can expand the pool area or add more distinct zones for lounging or dining, but the core principles still enhance a more intimate feel. This approach works better than trying to squeeze a full-sized lap pool into a small area, which can make the space feel cramped rather than luxurious.
|
|
|
|


As an affiliate, we earn from qualifying purchases.
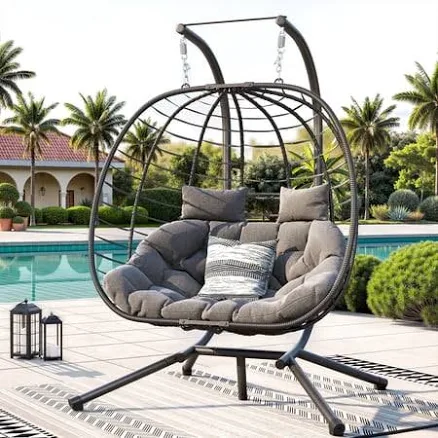
3. Boho Chic Patio with Hanging Egg Chairs and Macrame Accents
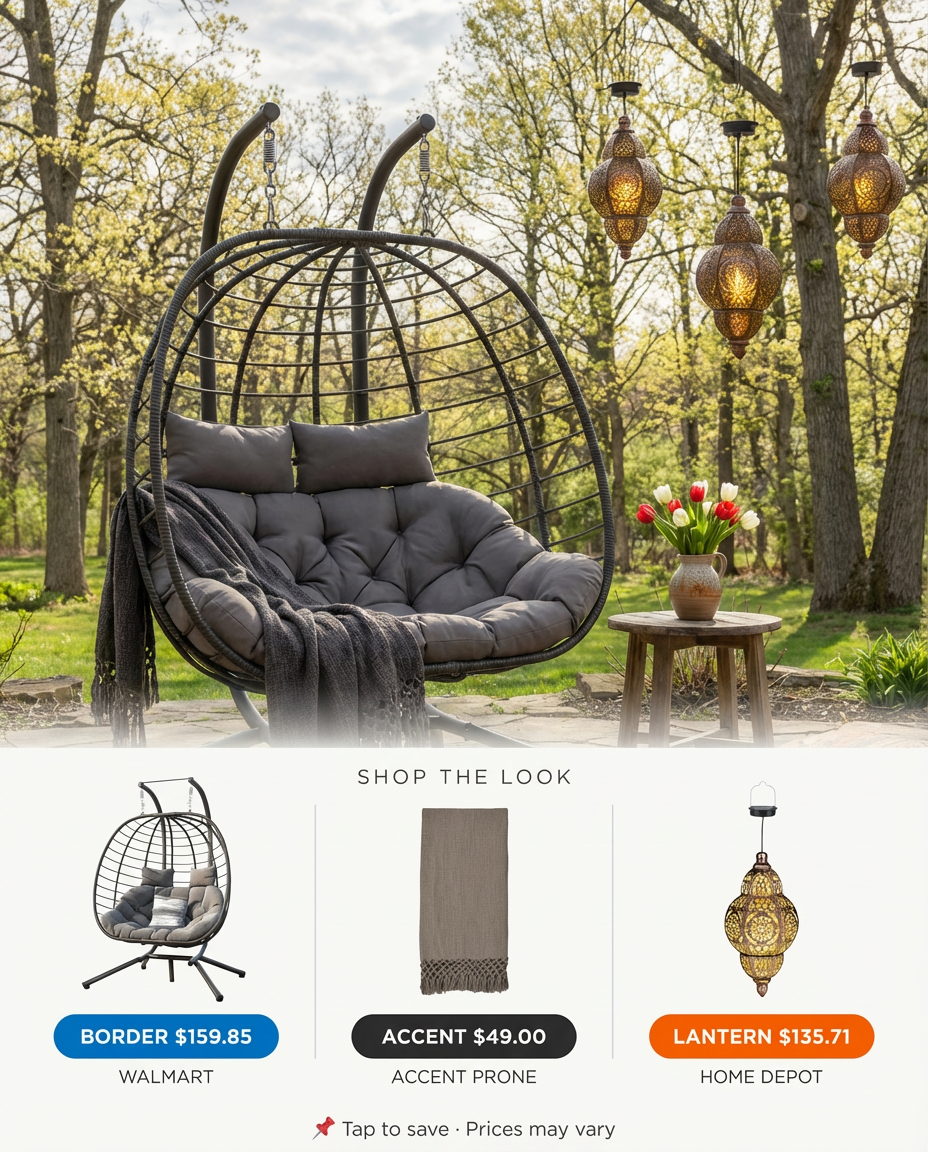
The boho chic patio is all about relaxed comfort and a global-inspired aesthetic. Think layers of texture, patterned rugs, and of course, those iconic hanging egg chairs. It’s a space that invites you to kick off your shoes, grab a good book, and just…be. The macrame accents and floor cushions contribute to that laid-back, collected feel, making it perfect for unwinding or hosting casual get-togethers. String lights are, of course, non-negotiable for setting that perfect evening mood.
The One Thing: The Hanging Egg Chair
Hands down, the single element that *makes* this boho-chic patio work is the hanging egg chair. It’s not just seating; it’s an experience. The cocoon-like shape offers a sense of privacy and comfort, immediately signaling relaxation. Visually, its unique form adds a sculptural element that breaks up traditional furniture arrangements. Without it, the space loses its playful, whimsical charm and becomes just another patio with pretty decor. It truly embodies the ‘chic’ in boho chic, elevating simple comfort into a statement of style. Prioritize this piece if you’re aiming for this specific vibe.
Trending Context: The Enduring Appeal of Boho
Boho chic has been a design darling for years, but in 2026, it’s evolving from purely maximalist to a more refined, curated look. The ongoing desire for comfort, global inspiration, and a connection to nature (think natural materials and plants) continues to fuel its popularity. Instagram and Pinterest feeds are still full of these dreamy setups, and brands like UO Home and Anthropologie continue to champion the aesthetic. While pure trends can sometimes feel dated quickly, the core elements of bohemia—texture, comfort, and collected pieces—have staying power, making this a smart long-term investment in your outdoor style. It’s less about chasing a fad and more about embracing a lifestyle.
|
|
|
|


As an affiliate, we earn from qualifying purchases.
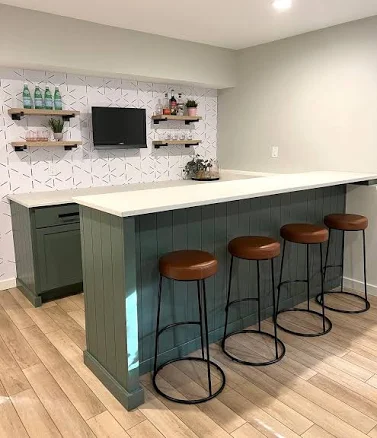
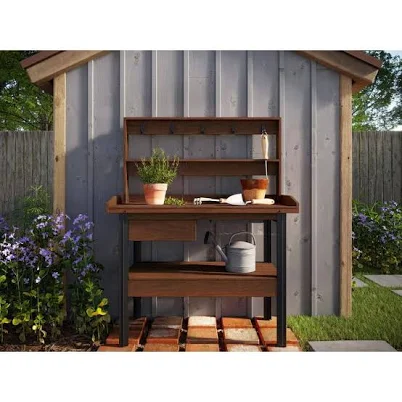
4. Outdoor Kitchen Nook with Built-in Grill and Bar Seating

Ready to really step up your outdoor entertaining game? An outdoor kitchen nook with a built-in grill and bar seating is a total game-changer. It transforms your backyard from a place you simply hang out to a true extension of your home, perfect for hosting summer soirées or just grilling up a quick weeknight meal. The beauty of a dedicated nook is that it feels contained and purpose-built. Concrete countertops and sleek barstools keep it feeling contemporary and fresh.
Style Math: The Functional Entertainer
Achieving this modern outdoor kitchen requires a solid formula: 70% functional cooking zone + 20% integrated seating + 10% sophisticated accents. The bulk of your effort and budget goes into the built-in grill, counter space, and plumbing/electrical. The integrated bar seating creates a natural social hub without feeling separate. The remaining 10% is where details like stainless steel fixtures, a sleek outdoor light, or a strategically placed planter elevate the overall contemporary feel. You can swap materials (e.g., stone countertops instead of concrete) or finish types (e.g., wood panels instead of stucco for the base) as long as you maintain these core proportions for a highly functional and stylish setup.
Real Talk: The Hidden Costs of Outdoor Kitchens
Okay, let’s get real about outdoor kitchens for a second. While they look amazing, the ‘built-in’ aspect means you’re not just buying appliances. You’re potentially dealing with electrical work for outlets and lighting, plumbing for a sink, and gas lines for the grill. These aren’t DIY-friendly tasks for most and often require licensed professionals. Don’t forget proper ventilation and durable, weather-resistant materials for the cabinetry and countertops – these can add significant costs compared to freestanding units. I’ve seen too many people start with visions of grandeur and then get sticker shock on the infrastructure. Factor in these trades and materials from the beginning to avoid nasty surprises down the line.
|
|
|
|
As an affiliate, we earn from qualifying purchases.
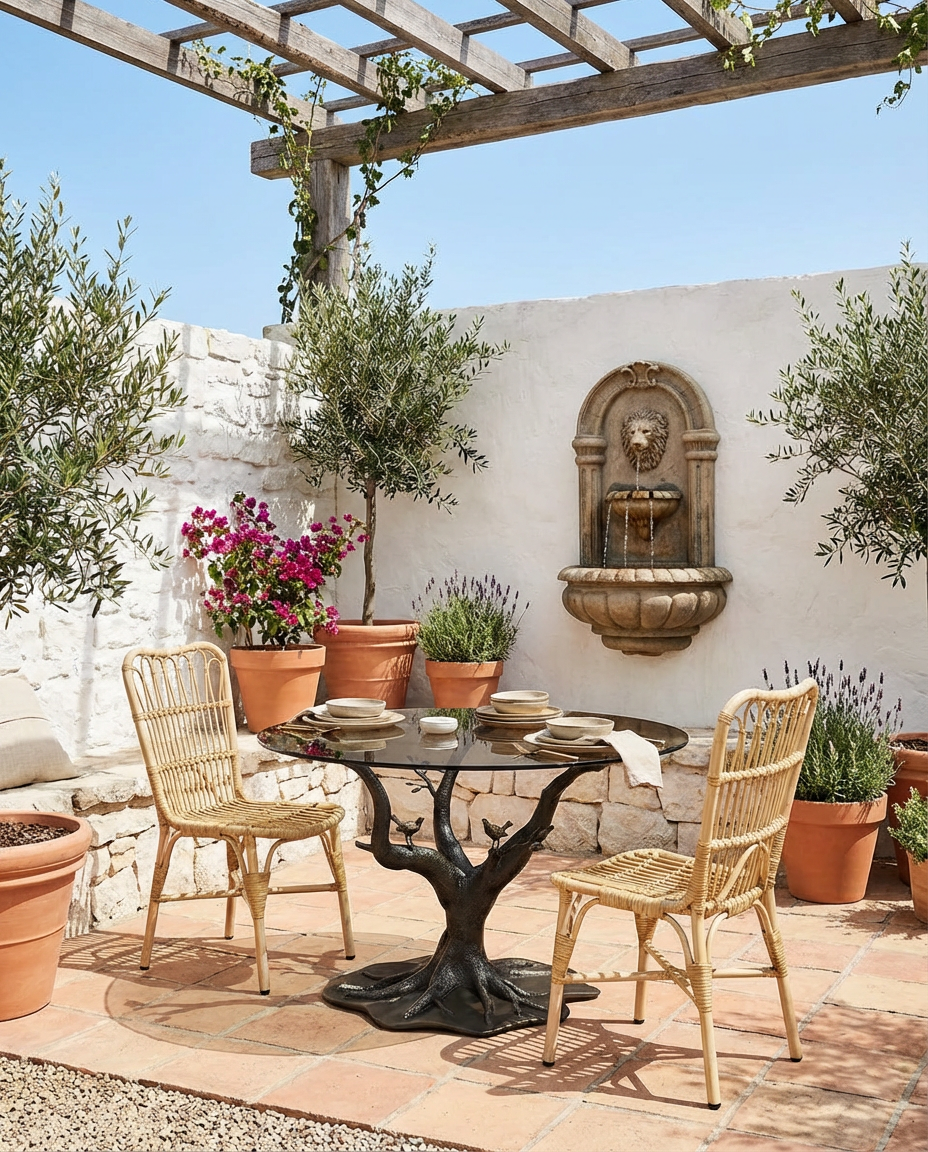
Imagine stepping into a sun-drenched Mediterranean courtyard – whitewashed walls, the warm glow of terracotta pots, and the subtle scent of olive trees. This isn’t just a design; it’s an escape to a sun-drenched villa. The tiled patio underfoot and the gentle trickle of a fountain complete the picture, making it an ideal spot for long lunches or evening aperitifs. It’s a timeless look that feels both grand and inviting, perfect for anyone who loves classic European aesthetics.
What Makes It Work: Light, Texture, and Scent
This Mediterranean courtyard style works because it engages multiple senses and design principles. First, the whitewashed walls act as a bright, clean canvas that reflects sunlight and makes the space feel larger. Second, texture contrast is key: the rustic, earthy terracotta pots and natural stone or tile patio provide a beautiful counterpoint to the smooth walls. Finally, incorporating aromatic plants like olive trees, lavender, or citrus not only looks authentic but also adds a crucial olfactory element, completing the immersive experience. It’s a cohesive blend that transports you.
Before You Start Checklist:
- Sun Exposure: Does your courtyard get ample direct sunlight for most of the day? This style thrives on it.
- Wall Condition: Are your existing walls suitable for a whitewash treatment, or will they need significant prep/repair?
- Drainage: Is your patio area adequately sloped for drainage, especially if adding a fountain?
- Water Access: Do you have an outdoor spigot nearby for watering plants and refilling a fountain?
- Terracotta Sourcing: Research local nurseries or online stores for authentic, good quality terracotta pots – cheap versions can crumble quickly.
|
|
|
|
As an affiliate, we earn from qualifying purchases.
6. Eco-Friendly Rain Garden Oasis with Native Plants
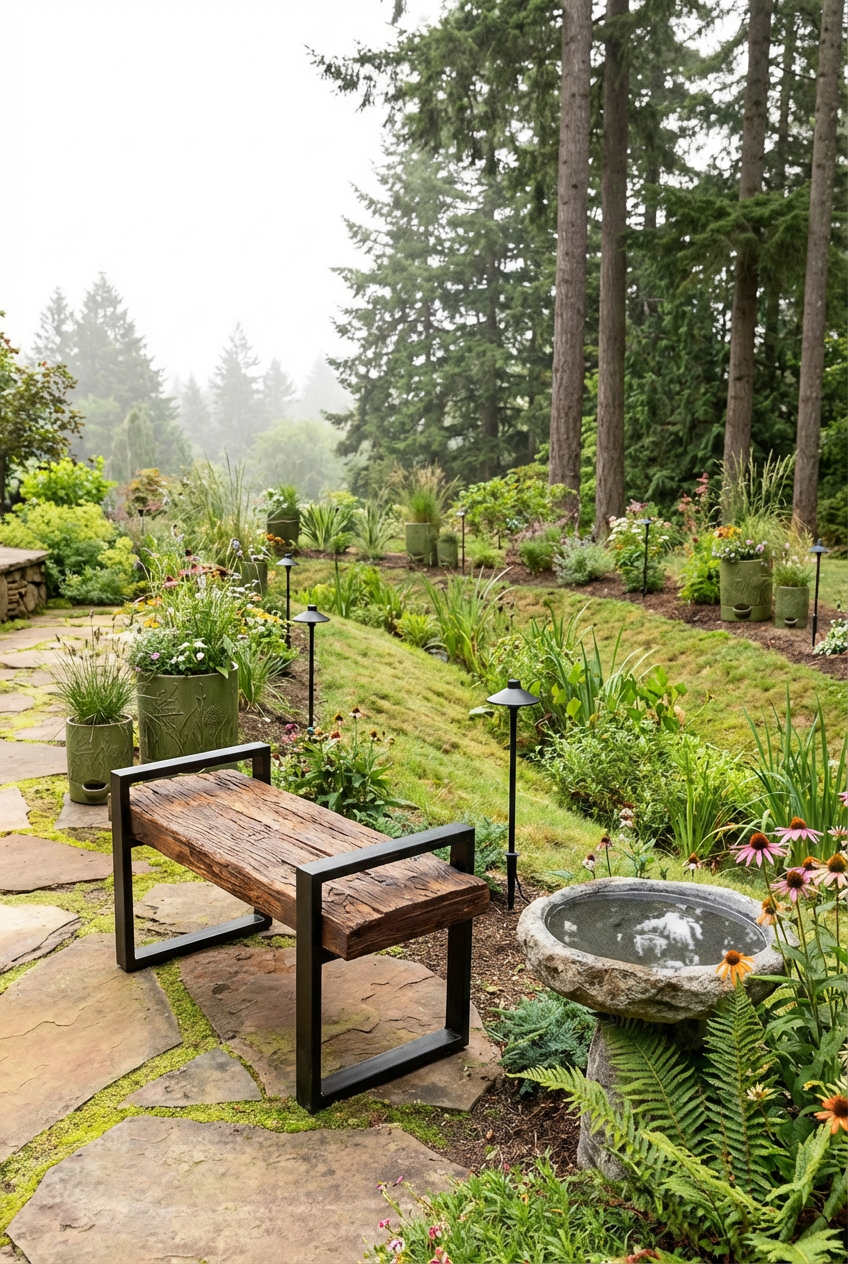
Creating an eco-friendly rain garden isn’t just beautiful; it’s a fantastic way to be kind to the planet and create an interesting landscape feature. Native plants thrive in your local environment, making them easier to care for, and a properly designed rain garden helps manage stormwater runoff. Think lush, low-maintenance plantings, a winding rock path, and a space that attracts pollinators. It’s a naturalistic approach that celebrates the beauty of your local ecosystem.
Maintenance Reality: The Low-Maintenance Myth (Sort Of)
While rain gardens are often touted as ‘low maintenance’ due to their use of native plants, that’s not entirely true in the first 1-2 years. You’ll need to be diligent about weeding to ensure your native plants establish themselves without competition. After establishment, maintenance significantly drops, but occasional weeding, mulching, and checking for proper drainage will still be required quarterly. Unlike a traditional lawn, you won’t be mowing weekly, but it’s not a ‘set it and forget it’ situation. The payoff, however, in terms of biodiversity and reduced watering, is absolutely worth the initial effort. If you’re looking for even lower maintenance, consider a full xeriscape design.
Style Math: Functional Beauty
The visual formula for a successful rain garden is all about natural harmony and function: 50% native, water-loving plants + 30% permeable hardscaping (rock path, bioswale) + 20% natural accents (boulders, bird baths). The majority of the space should be dedicated to the plants that filter water and provide habitat. The permeable hardscaping guides water flow and provides access without compacting soil. The accents are chosen to blend seamlessly and enhance the natural feel. You can vary the specific plant types or rock colors, but maintaining these proportions ensures both ecological effectiveness and aesthetic appeal.
|
|
|
|
As an affiliate, we earn from qualifying purchases.
7. Modern Farmhouse Patio with Herringbone Brick and String Lights
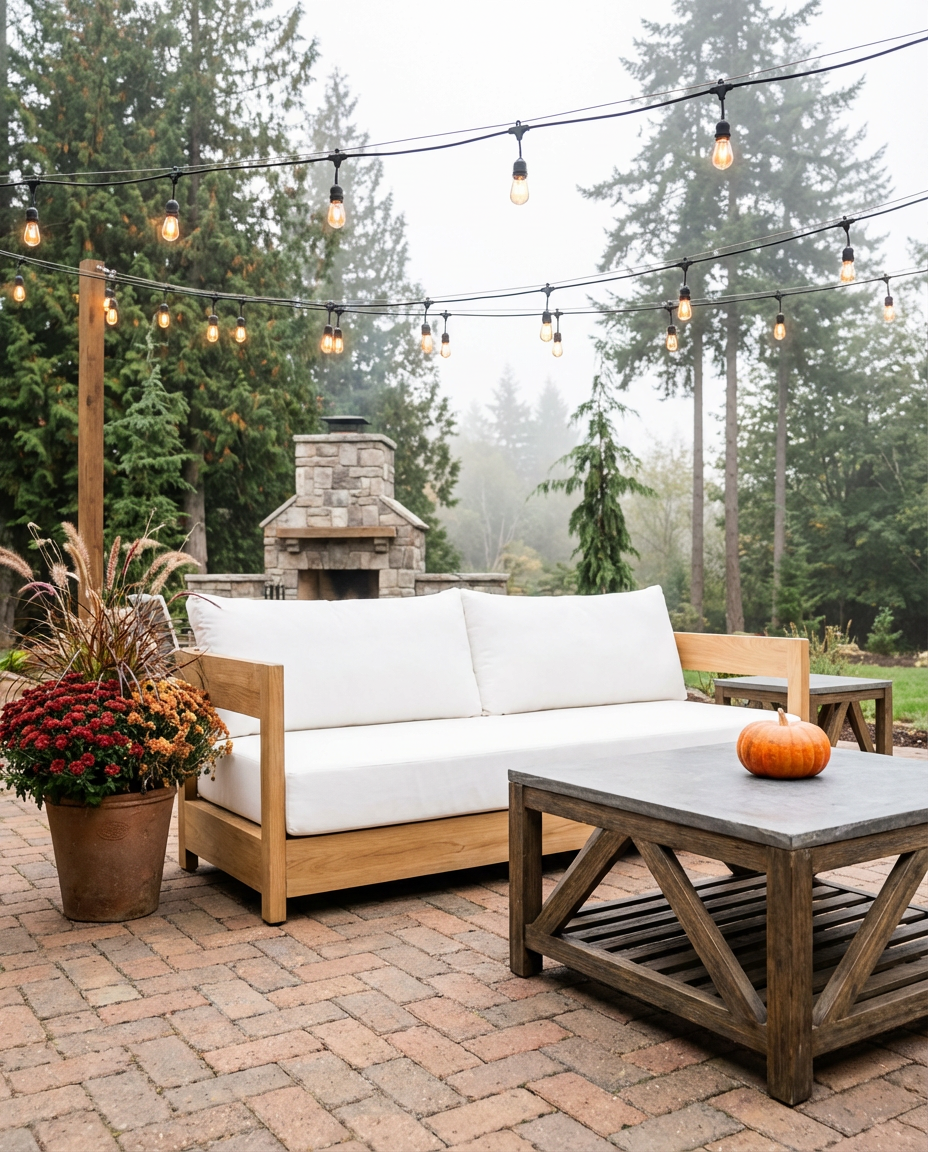
A modern farmhouse patio is the perfect blend of cozy charm and contemporary style. The herringbone brick pattern for the patio instantly elevates the space, adding a touch of classic elegance, while string lights keep things relaxed and inviting. Adirondack chairs, perhaps around an outdoor fireplace, complete the picture of rustic comfort. It’s all about creating an outdoor living room that feels both sophisticated and welcoming, making it ideal for gathering with friends and family. And that little touch of galvanized metal? Chef’s kiss.
💡 Loving these dark walls? Before you commit, we break down 3 common mistakes at the end of this article that could save you a costly repaint.
Before You Start Checklist:
- Patio Foundation: Is your ground level and properly prepped for a herringbone brick installation, which can be a bit more complex than simple pavers?
- Fireplace Feasibility: Research local regulations and safety codes for outdoor fireplaces, including proximity to combustible materials.
- Electrical Access: Do you have readily available outdoor outlets for string lights and any other electrical needs?
- Furniture Style: Ensure your chosen outdoor furniture truly aligns with the modern farmhouse aesthetic – avoid overly ornate or ultra-modern pieces.
- Galvanized Accents: Plan where your galvanized pieces will go. Too many can look cluttered, too few can get lost.
Designer Tip: The Herringbone Direction Matters
When laying a herringbone brick patio, pay close attention to the direction of the “V” pattern. For a modern farmhouse look, I recommend running the points of the “V” (the direction the bricks primarily point) towards the main focal point of your patio, whether that’s an outdoor fireplace or a key seating arrangement. This creates a strong visual pull and makes the space feel more intentional and cohesive. It’s a subtle detail, but it makes a huge difference in the perceived quality and design of the hardscaping. If you’re feeling ambitious with your DIY, this is where adding that extra layer of thought pays off.
|
|
|
|

As an affiliate, we earn from qualifying purchases.
8. Small Backyard Oasis with Vertical Garden and Bistro Set
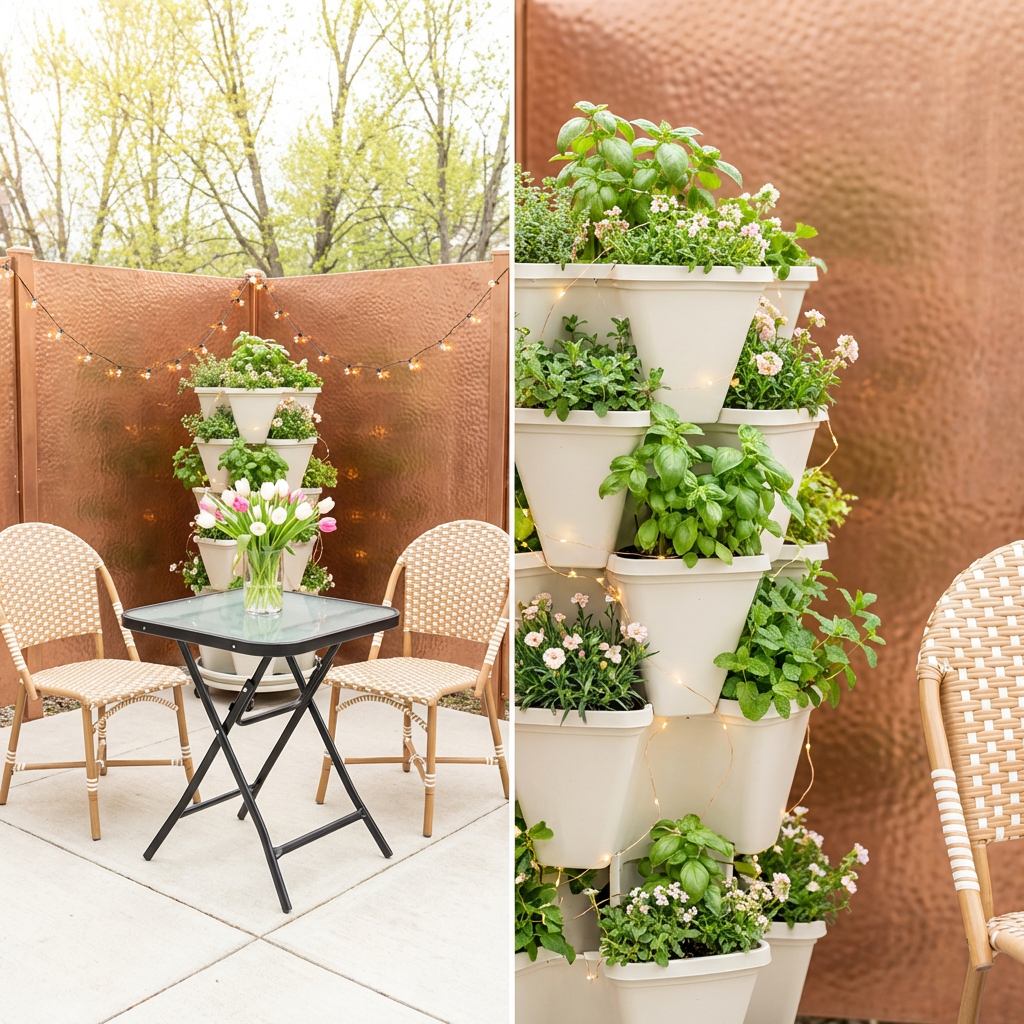
Even the smallest backyard can become a true oasis! This idea is all about maximizing every inch with smart choices like a vertical garden and a charming bistro set. It’s perfect for urban dwellers or anyone with limited outdoor space who still craves a green sanctuary. A privacy screen and some strategically placed fairy lights can transform a tiny patio into a magical, intimate retreat. It proves you don’t need a sprawling estate to have a beautiful and functional outdoor area.
Trending Context: Urban Escapism & Micro-Gardening
The vertical garden and bistro set combo is having a moment in 2026, driven by a few key trends. First, increasing urbanization means smaller outdoor spaces, making vertical solutions like herb garden walls essential. Second, there’s a growing desire for ‘urban escapism’—creating calming, green havens in busy city environments. Social media platforms like Pinterest and TikTok are overflowing with DIY vertical garden tutorials, celebrating the idea that anyone can have a green thumb, even on a balcony. This trend has serious staying power as livable square footage continues to shrink in many urban areas, making efficiency and greening vital for well-being.
How-To Brief: Setting Up a Vertical Garden for Small Spaces
Want a green wall but don’t know where to start? Here’s how to get a vertical garden set up in your small space:
- Choose Your System (1 hour, $50-$200): Decide between a pocket system (fabric or felt), stackable planters, or a wall-mounted grid with individual pots. Consider your wall space and desired plant types.
- Select Your Plants (1 hour, $30-$150): Opt for compact, shallow-rooted plants like herbs, succulents, small ferns, or trailing annuals. Mix textures and colors for visual interest.
- Prepare the Wall (30 mins, $0): Ensure your wall can support the weight of the system and watered plants. Clean the surface.
- Install the Structure (1-2 hours, $10-$50 for screws/anchors): Follow manufacturer instructions. Use appropriate anchors for brick, wood, or drywall. Ensure it’s secure and level.
- Plant & Water (1-2 hours, $0): Fill pockets or pots with appropriate soil and plant your selections. Water thoroughly after planting.
- Maintain (Ongoing, $0): Regular watering (vertical gardens dry faster!), occasional fertilizing, and pruning will keep your living wall thriving.
|
|
|
|
As an affiliate, we earn from qualifying purchases.
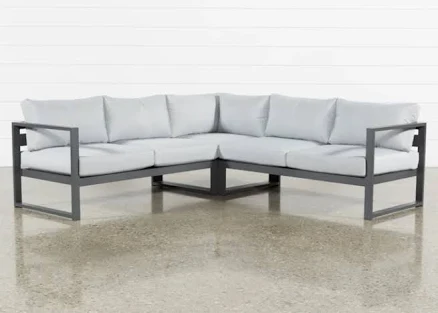
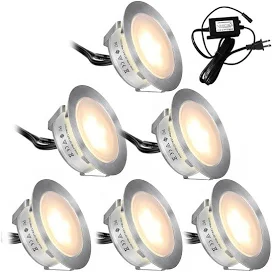
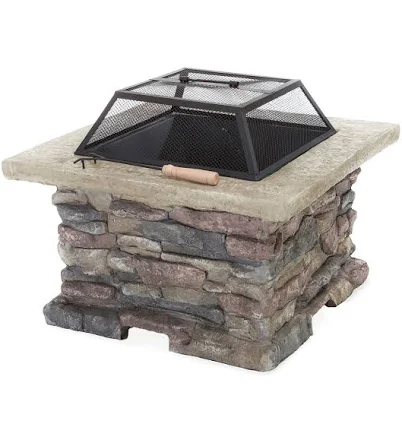
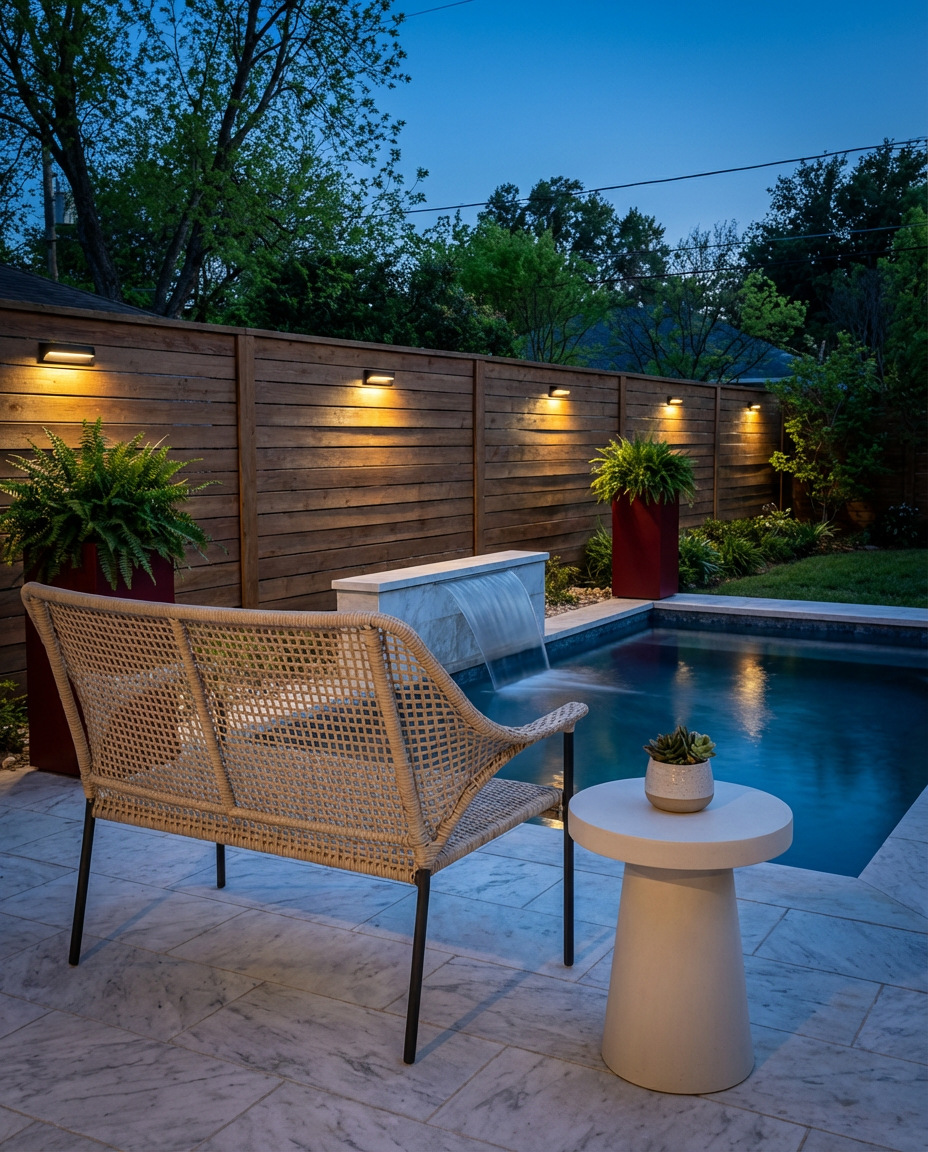
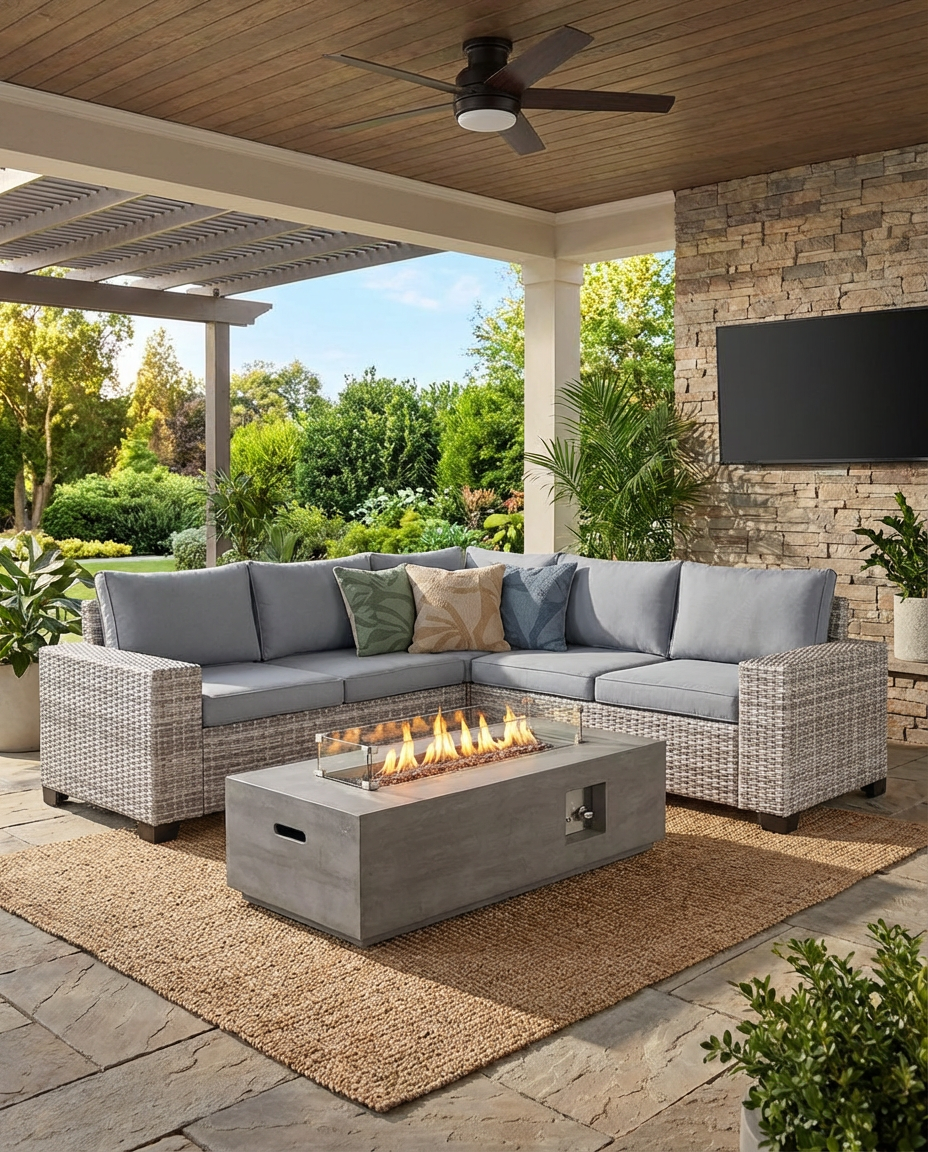
9. Luxury Pool Deck with Sunken Seating and Fire Pit
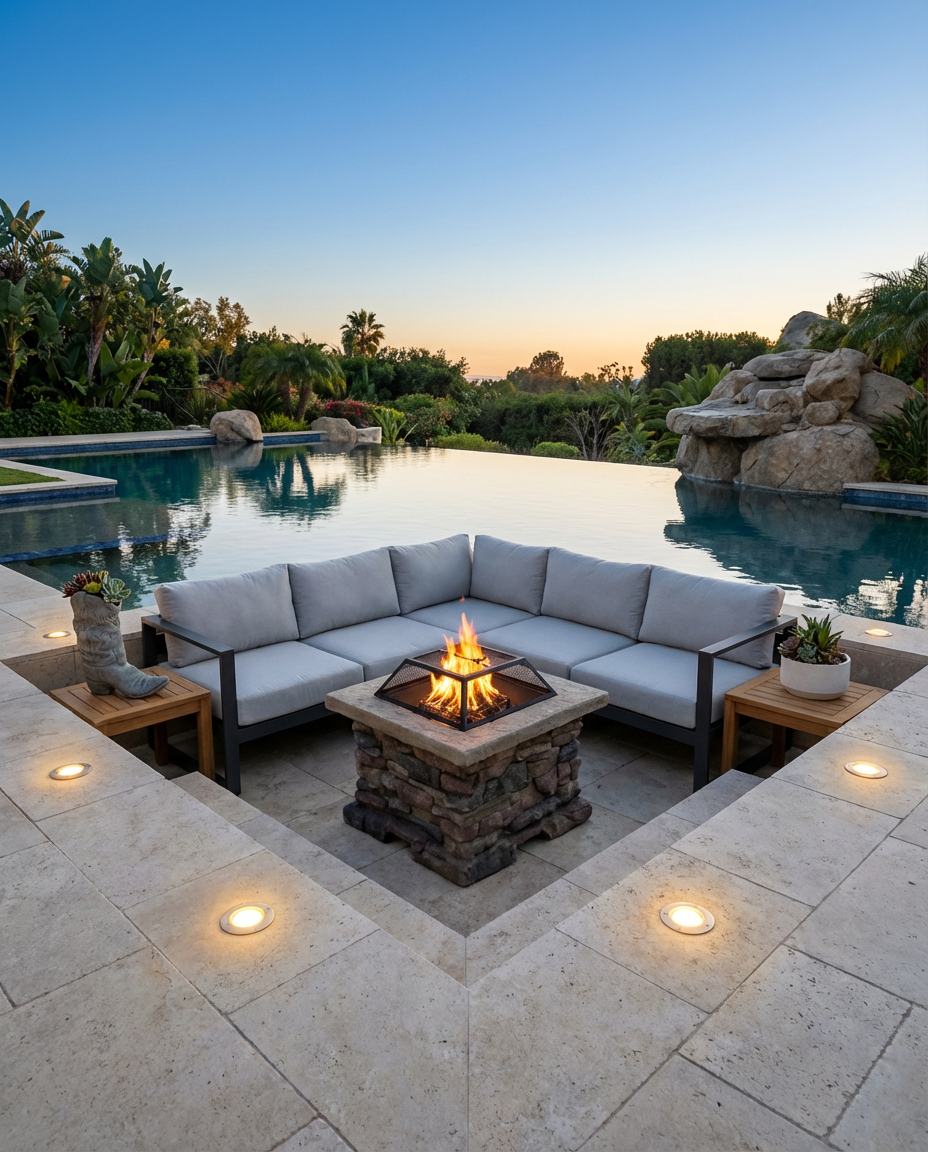
When you picture true luxury in a backyard, images of a sunken seating area perfectly integrated into a pool deck, complete with a fire pit, probably come to mind. This is next-level design. It creates an intimate, conversation-friendly zone that feels uniquely special, especially on a cool evening. The linear design of composite decking and the infinity edge of the pool amplify that high-end, modern aesthetic. This isn’t just about a pool; it’s about an architectural statement.
Budget Breakdown: The Premium Outdoor Lounge
- Main Furniture (Sectional, Fire Pit Table): $2,500 – $8,000
- Decking (Composite for Sunken Area + Surrounds): $3,000 – $10,000 (Varies greatly by size)
- Lighting (Recessed Deck Lights, Mood Lighting): $500 – $2,000
- Landscaping/Planters: $300 – $1,000
- Fire Pit Installation (Gas Line, etc.): $1,000 – $3,000
- TOTAL: $7,300 – $24,000+
- Budget alternative: Skip the sunken seating and opt for a high-quality freestanding modular sectional and a separate fire pit. Use standard wood decking around your pool. You could get a similar luxury *feel* for $4,000 – $8,000.
The One Thing: Sunken Seating Area
The absolute defining feature that makes this luxury pool deck truly stand out is the sunken seating area. It’s not just a place to sit; it’s an architectural statement that creates an immediate sense of intimacy, exclusivity, and drama. By sinking the lounge below deck level, it creates a cozy, contained ‘room’ within the wider outdoor space, protecting guests from wind and offering a unique perspective of the pool. Without this deliberate design choice, the space loses its signature high-end allure and distinctive functional zoning, becoming a much more conventional pool deck. If you’re going for this look, this is where you invest.
|
|
|
|

As an affiliate, we earn from qualifying purchases.
10. DIY Stock Tank Pool Oasis with Wood Decking
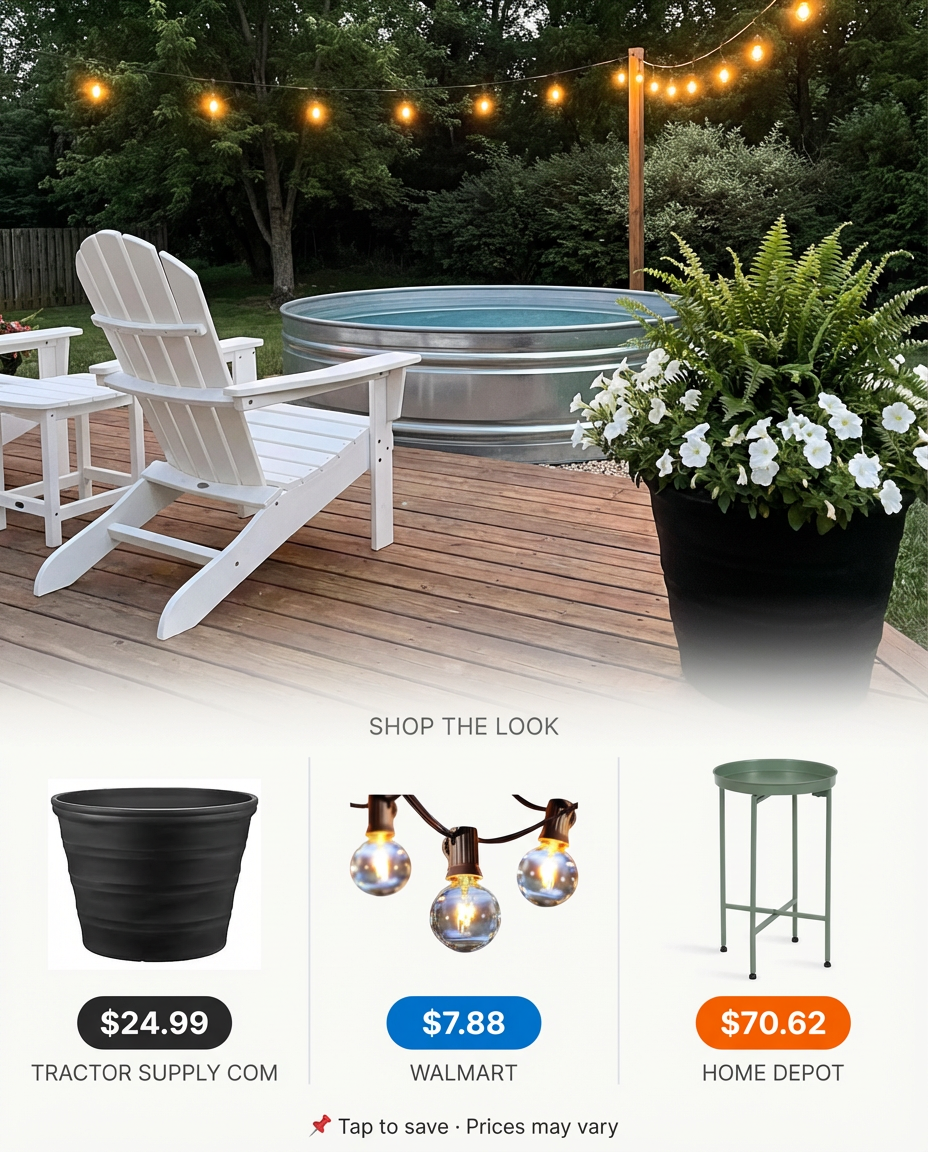
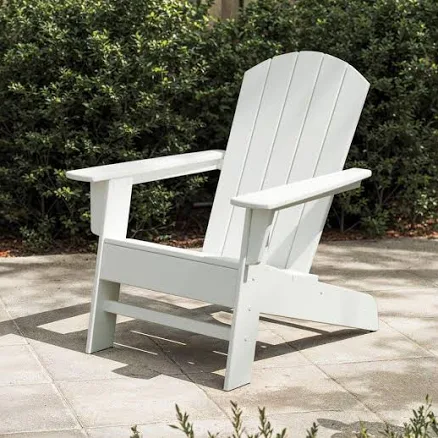
Who says you need a massive budget for a cool pool? A DIY stock tank pool surrounded by simple wood decking is the ultimate blend of rustic charm and affordable fun. It’s refreshingly unpretentious, perfect for cooling off on a hot day, and can be personalized with string lights and comfortable seating. This idea proves that creativity and resourcefulness can go a long way in creating a memorable backyard oasis, making it a favorite for those who love a good DIY project.
Get This Look For Less: Stock Tank Pool Magic
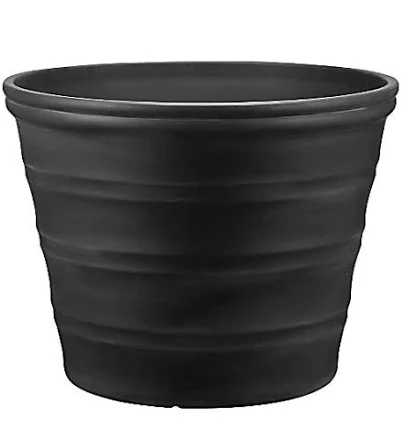
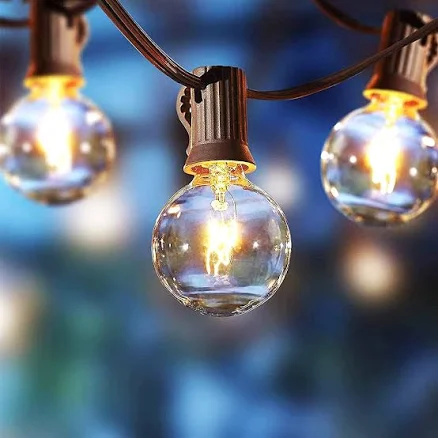
The beauty of the stock tank pool is its inherent affordability! You can grab a large, galvanized stock tank for around $300-$700 at farm supply stores. For the decking, reclaimed wood pallets or inexpensive pine treated for outdoor use can vastly cut costs compared to composite. Instead of expensive outdoor furniture, opt for a couple of classic Adirondack chairs from Walmart or Target for under $100 each, or even build simple benches using more reclaimed wood. String lights are super affordable (like these from Walmart for $7.88), and a small accent table from Home Depot will finish it off without breaking the bank. You could achieve this entire look for under $1,000.
How-To Brief: DIY Stock Tank Pool Prep
Thinking about a stock tank pool? Here’s the essential prep work:
- Level the Ground (1-2 hours, $0-$50): Choose a sunny, level spot. Use a shovel, rake, and level to ensure the ground is perfectly flat to prevent uneven water distribution.
- Add a Base (1 hour, $50-$100): Place a layer of sand or paver base under the tank to protect its bottom and improve stability.
- Install Filtration (1-3 hours, $100-$300): You’ll need a small pump and filter system. Many DIYers use an above-ground pool pump. You’ll need to drill holes for intake and outflow, so be prepared!
- Plan Drainage (30 mins, $0): Ensure there’s a plan for draining the pool for cleaning or winterizing without flooding your yard.
- Decking/Surround (Variable, $100-$500+): Whether it’s simple wood pallets or a more involved custom deck, start planning this *before* you fill the pool for easier installation.
Top 5 materials for a Rustic Backyard Oasis:
- Reclaimed Wood
- Galvanized Metal
- Natural Stone/Gravel
- Wrought Iron
- Rough-Cut Lumber
|
|
|
|
As an affiliate, we earn from qualifying purchases.
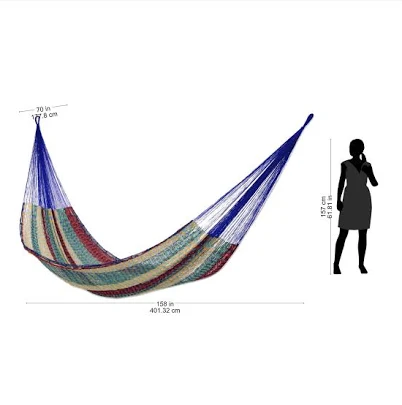
11. Coastal Retreat with Hammock and Dune Grasses
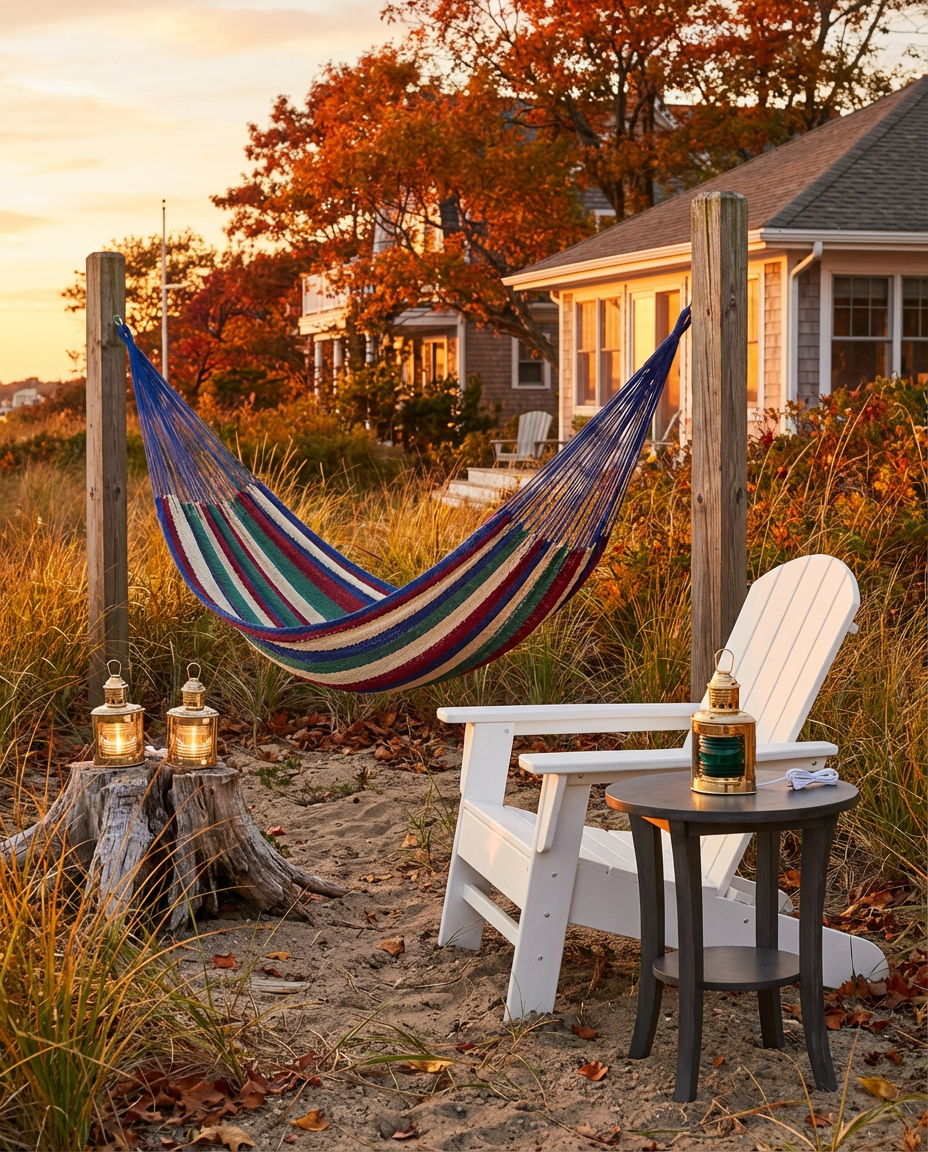
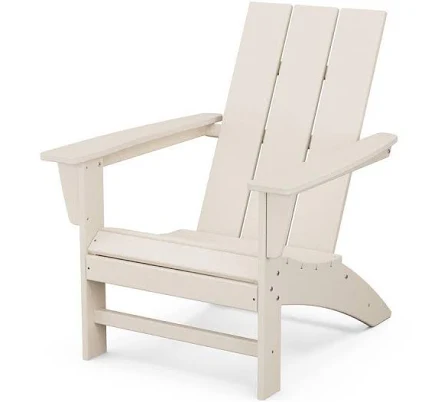
A coastal retreat is all about fostering a sense of serene escape, much like being at the beach. This look isn’t trying too hard; it’s relaxed, effortless, and infused with the calming elements of the sea. Picture a comfortable hammock swinging gently between two posts, surrounded by wispy dune grasses, with the warm tones of driftwood integrated into the design. Adirondack chairs complete the picture, providing classic, comfortable seating. It’s less about bright ocean motifs and more about subtle textures and sandy hues that evoke a sophisticated shoreline vibe.
What Makes It Work: Lightness, Texture, and Breeziness
This coastal aesthetic excels by employing several core design principles. First, the light, sandy color palette (think pale neutrals, soft blues, and greens) makes the space feel open, airy, and inherently relaxing. Second, the incorporation of natural, weathered textures like driftwood, rope, and rough-hewn wood for chairs provides tactile richness without overwhelming the senses. Third, the strategic placement of a hammock creates a focal point that embodies leisure and movement, offering a psychological invitation to relax and enjoy the breeze. It’s a cohesive blend that communicates calm and unhurried coastal living.
Scale Guide: Flexible Charm for Any Size
The coastal retreat is incredibly adaptable, working beautifully in backyards from small urban patios (200-400 square feet) to sprawling suburban landscapes (1,000-5,000+ square feet). For smaller spaces, focus on a single hammock or a pair of Adirondack chairs, paired with a few potted dune grasses and a driftwood accessory to capture the essence. Expand by adding more seating, a fire pit, and larger groupings of native grasses for bigger yards. The key is maintaining the light color palette and natural textures. If your space is really tiny, focus on vertical gardens and compact bistro sets.
|
|
|
|
As an affiliate, we earn from qualifying purchases.
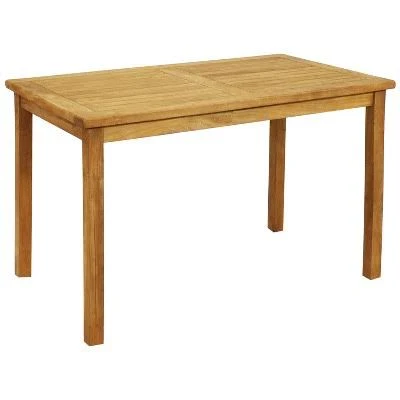
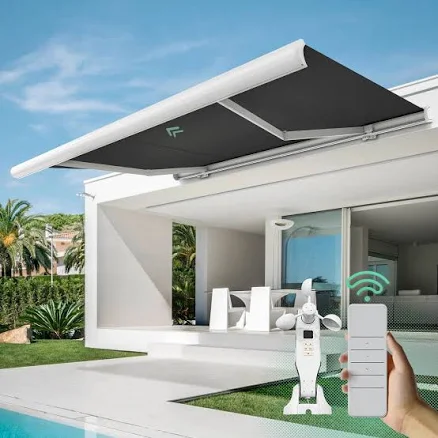
12. Shaded Dining Oasis with Retractable Awning and Outdoor Kitchenette
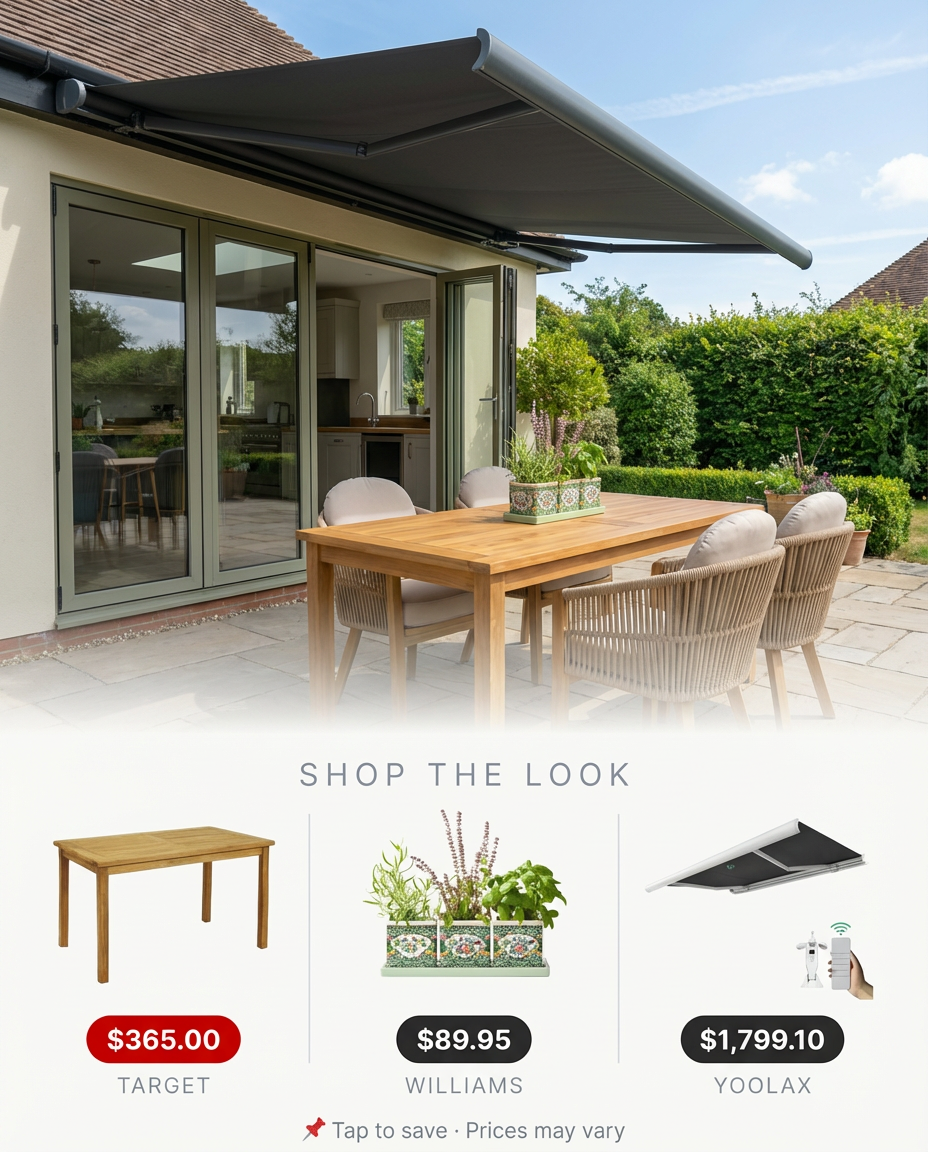
When you want your patio to be a true extension of your indoor living, a shaded dining oasis with a retractable awning and outdoor kitchenette is the way to go. This setup screams functionality and versatility, allowing you to dine al fresco regardless of the weather. Imagine hosting a pizza night with a built-in oven, or simply enjoying a protected meal with friends, then retracting the awning to stargaze. It’s all about creating a seamless, highly functional outdoor room that adapts to your needs.
Real Talk: Retractable Awning Investment
Let’s be honest: a good quality retractable awning is a significant investment (often $2,000 to $10,000+ installed). While the convenience and weather protection are undeniable, you need to consider a few things. First, motorization is a huge plus for ease of use, but it adds to the cost and introduces potential electrical issues. Second, make sure the awning fabric is high-quality, UV-resistant, and comes with a good warranty, as it will take a beating from the sun and elements. Third, factor in professional installation to ensure it’s securely mounted and operates smoothly. This isn’t a place to cut corners, as a poorly installed or cheap awning can be a headache down the line, especially in high winds. It’s an investment in comfort and function, so do your homework.
The One Thing: The Retractable Awning
The star of this functional dining oasis is unequivocally the retractable awning. Without it, you simply have an outdoor dining area, perhaps with a basic grill. The awning transforms the space from ‘patio’ to ‘versatile outdoor room,’ offering essential shade from the midday sun, protection from unexpected rain showers, and extending the usability of your outdoor kitchen. It provides flexibility that fixed structures can’t, allowing you to control your environment with a push of a button. It’s the element that truly enables all-weather entertaining and elevates the entire concept.
|
|
|
|

As an affiliate, we earn from qualifying purchases.
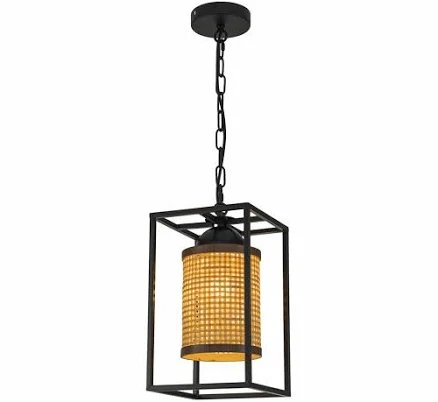
13. Enclosed Pergola with Curtains and Plush Outdoor Seating
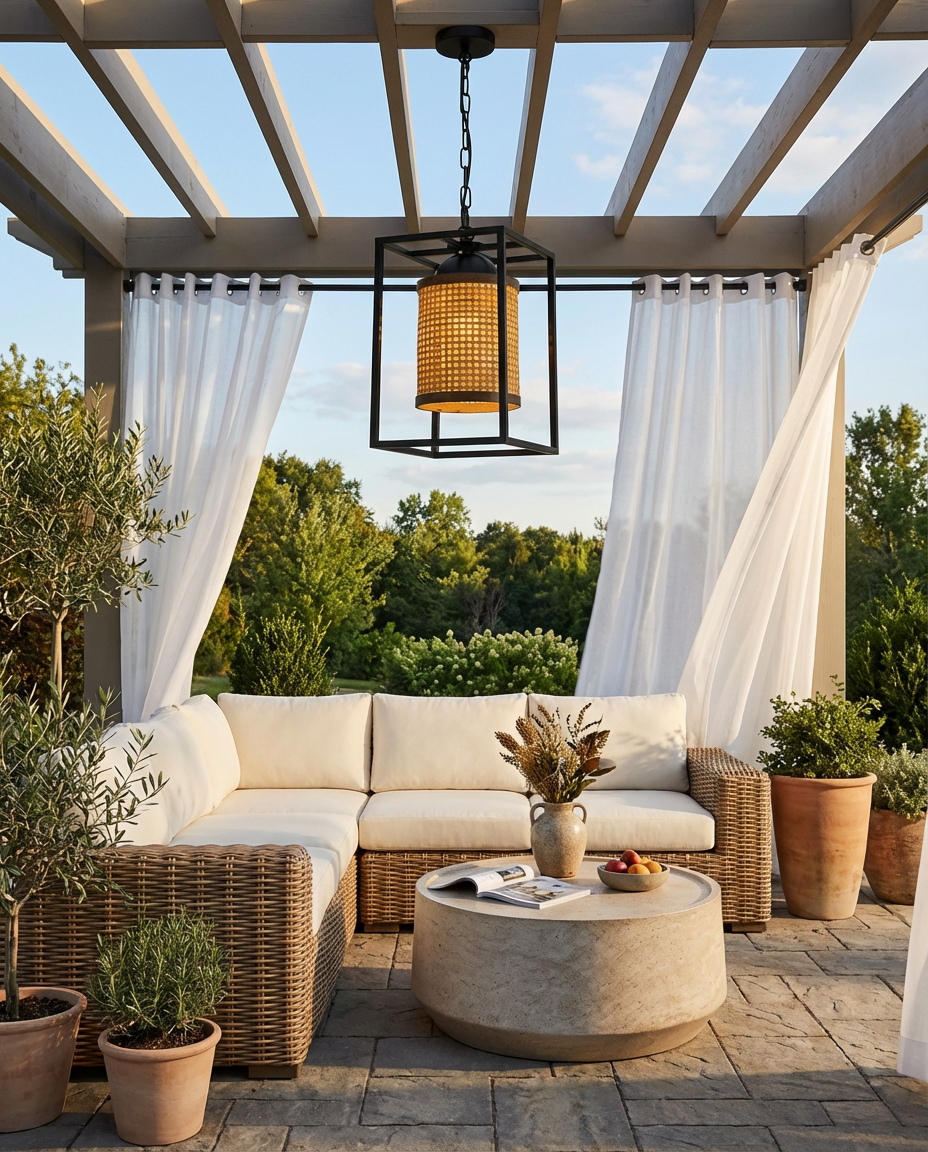
For those who love a bit of glamour and privacy, an enclosed pergola with flowing curtains and plush outdoor seating is a dream come true. This design creates an incredibly luxurious outdoor room that feels intimate and exclusive. Add an outdoor chandelier, and you’ve got a space that’s perfect for romantic evenings or sophisticated gatherings. It’s about bringing the comfort and elegance of your living room outdoors, with the added benefit of fresh air and a sense of escape.
Budget Breakdown: The Glamorous Outdoor Room
- Main Furniture (Plush Sofa, Coffee Table): $2,000 – $6,000
- Pergola Structure (Wood or Metal): $1,500 – $5,000
- Outdoor Curtains (Weather-resistant): $300 – $1,200
- Lighting (Chandelier, String Lights): $200 – $800
- Decor/Accessories (Pillows, Throws, Planters): $200 – $700
- TOTAL: $4,200 – $13,700
- Budget alternative: Use an existing patio cover or a simpler, smaller pergola kit. Opt for a more budget-friendly modular sectional and less expensive outdoor curtains from Target or Amazon (No. 918 Emily Sheer Voile Curtain Panel is a steal at $19.99). You could achieve a similar luxurious vibe for $1,500 – $3,500.
What Makes It Work: Enclosure and Softness
This glamorous outdoor room works so well due to the interplay of enclosure and softness. The pergola structure provides a clear sense of ‘room’ with defined boundaries, making the space feel purposeful and intimate. The flowing outdoor curtains add a critical layer of softness and privacy, transforming hard architectural lines into a more inviting and luxurious environment—they literally soften the edges. This combination creates a cocoon-like feeling, allowing for both relaxation and grand entertaining, unlike an open patio which often lacks this sense of defined purpose.
|
|
|
|

As an affiliate, we earn from qualifying purchases.
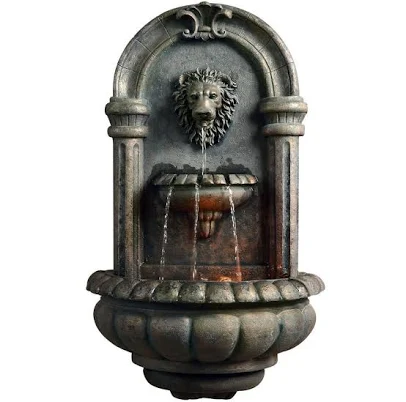
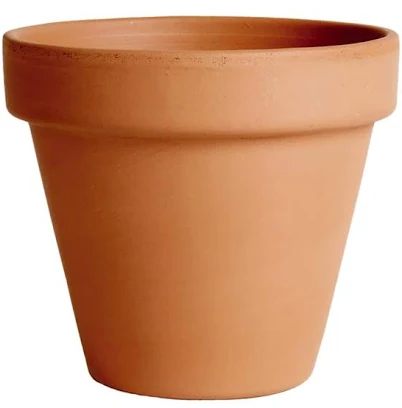
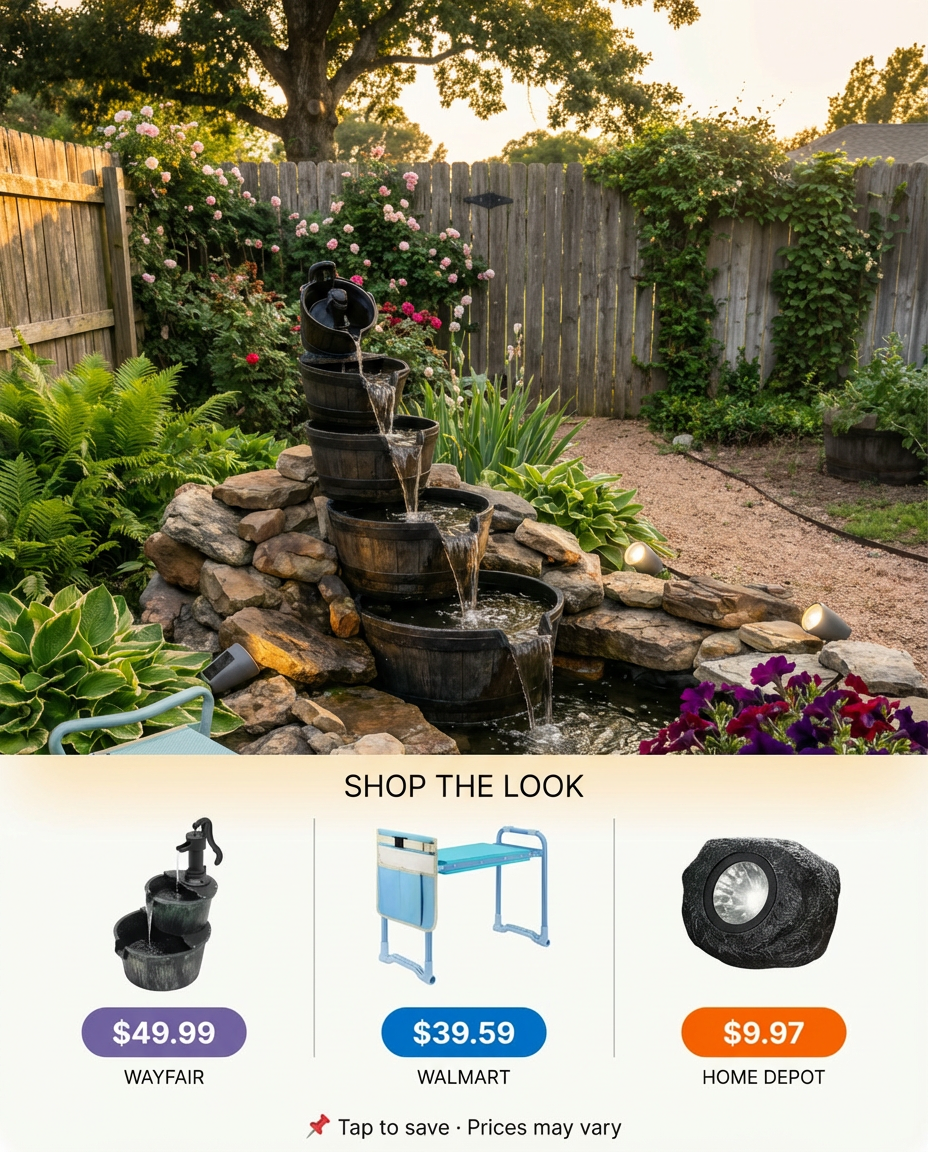
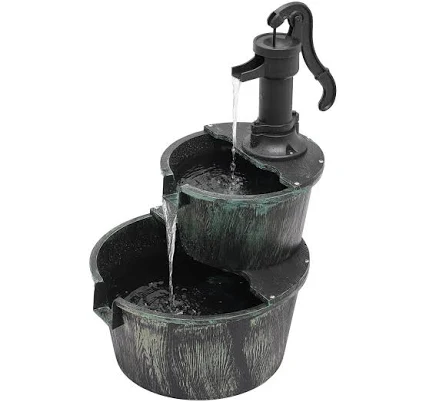
14. Budget-Friendly DIY Fountain with Rock Edging
A DIY fountain with rock edging is a fantastic way to introduce the calming sound of water into your backyard without a huge investment. It’s rustic, charming, and surprisingly achievable for the average DIYer. Repurposed elements, like an old wine barrel or a large ceramic pot, can become the foundation for a unique water feature that feels both personal and natural. The rock edging blends it seamlessly into a garden, creating a peaceful focal point perfect for quiet reflection.
Designer Tip: Choose Your Rocks Wisely
When creating rock edging for a DIY fountain, don’t just grab any old rocks. Select stones that are naturally rounded and varied in size, but all within a similar ‘family’ of color and texture. This creates a more organic, natural look that blends seamlessly with the water feature. Avoid sharply angular or brightly colored rocks that might stand out too much. If possible, use local fieldstones or river rocks – they’ll naturally complement your regional landscape and often come at a lower cost than imported decorative stones.
Get This Look For Less: Repurposed Water Feature
The beauty of a DIY fountain is how much you can repurpose! An old whiskey barrel, a large ceramic pot, or even a galvanized tub can serve as your main reservoir for the fountain. You can find small submersible pumps at Home Depot or Lowe’s for $30-$70. For the rock edging, scour local landscaping supply yards for inexpensive irregular flagstones or river rock by the yard (way cheaper than bags!). Instead of buying expensive plants, propagate cuttings or use divisions from existing garden plants. You can easily pull off a charming water feature like this for under $200, often significantly less if you have materials on hand. The Jackielynn 27″ Barrel and Pump Fountain from Wayfair is already a great start at $49.99 if you want to modify a semi-DIY version!
|
|
|
|
As an affiliate, we earn from qualifying purchases.
15. Modern Desert Oasis with Xeriscape Landscaping
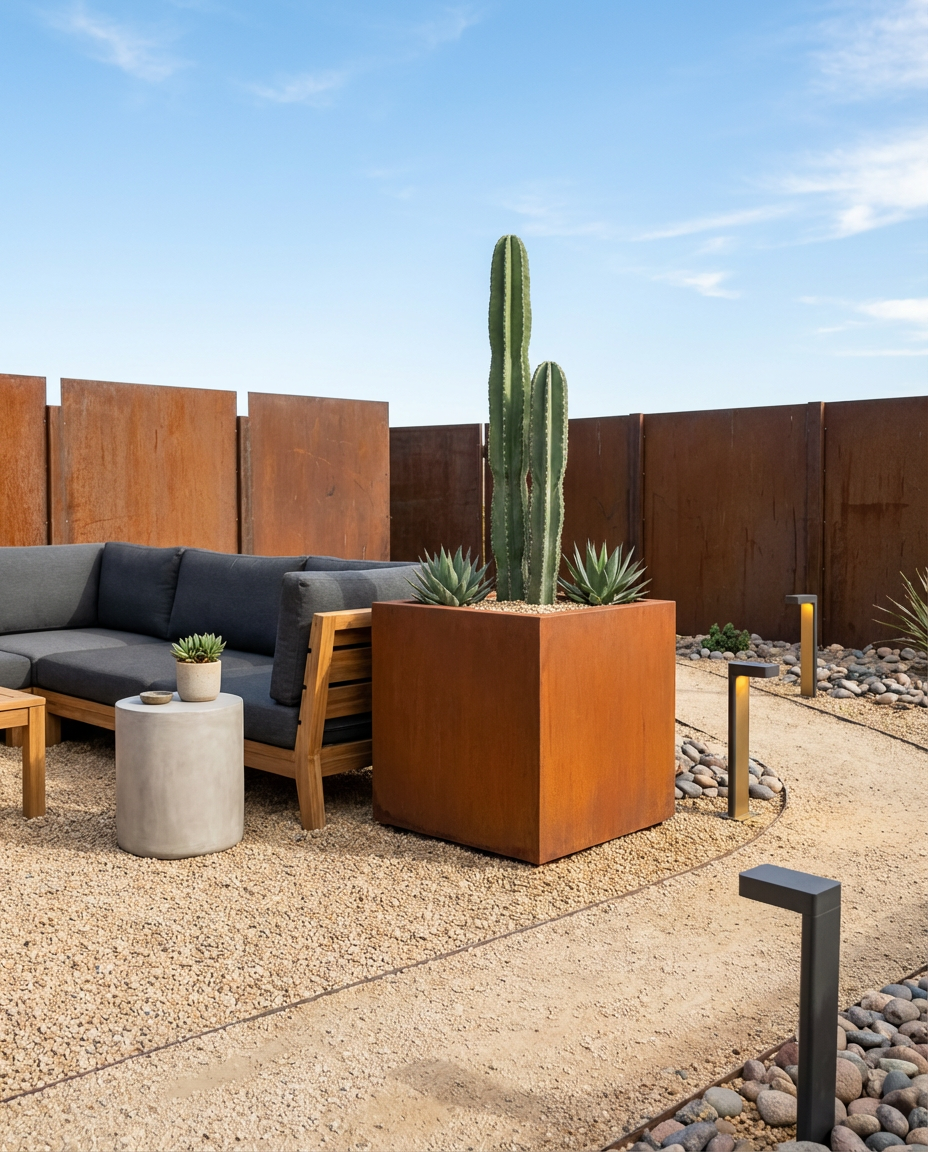
For challenging climates or simply for those who prefer beauty with minimal effort, a modern desert oasis featuring xeriscape landscaping is a brilliant solution. This look embraces succulents, cacti, and various types of gravel, often accented with corten steel. It’s dramatically beautiful, extremely low maintenance, and perfect for conserving water. Clean lines and architectural plants create a striking, contemporary environment that feels both sophisticated and utterly unique, proving that a desert landscape doesn’t have to be barren.
Maintenance Reality: Not Zero, But Close!
While xeriscape is undeniably low maintenance compared to a traditional lawn, it’s not *no* maintenance. The main task will be occasional weeding, especially during establishment. You’ll also need to manage leaf litter, which can be more visible on gravel beds. Succulents and cacti are drought-tolerant but do still need some watering during extended dry spells, particularly when newly planted. Annual pruning for shape and health is also recommended. The good news? No mowing, minimal fertilizing, and significantly reduced water bills. It’s an excellent choice for a busy lifestyle, but still requires a little love. Compare this with Modern Farmhouse Patio, which requires more upkeep for lush plantings.
What Makes It Work: Form, Texture, and Resilience
This modern desert oasis succeeds through a deliberate focus on form, texture, and resilience. Architectural plant forms (like saguaro cacti or agaves) create striking sculptural elements that define the space. The use of varied gravels (different sizes and colors) alongside raw materials like corten steel adds rich textural contrast that’s visually compelling. Crucially, the aesthetic actively celebrates drought-tolerant, resilient plants, making it a sustainable and practical solution for drier climates. It’s a design that’s both visually impactful and environmentally conscious.
3 things interior designers always notice in a xeriscape:
- The quality and blend of gravels
- The health and sculptural quality of succulents
- Intentional use of hardscaping (e.g., corten steel edging)
- Thoughtful placement of accent boulders
- Lack of opportunistic weeds
|
|
|
|
As an affiliate, we earn from qualifying purchases.
16. Cozy Screened Porch Oasis with Daybed Swing
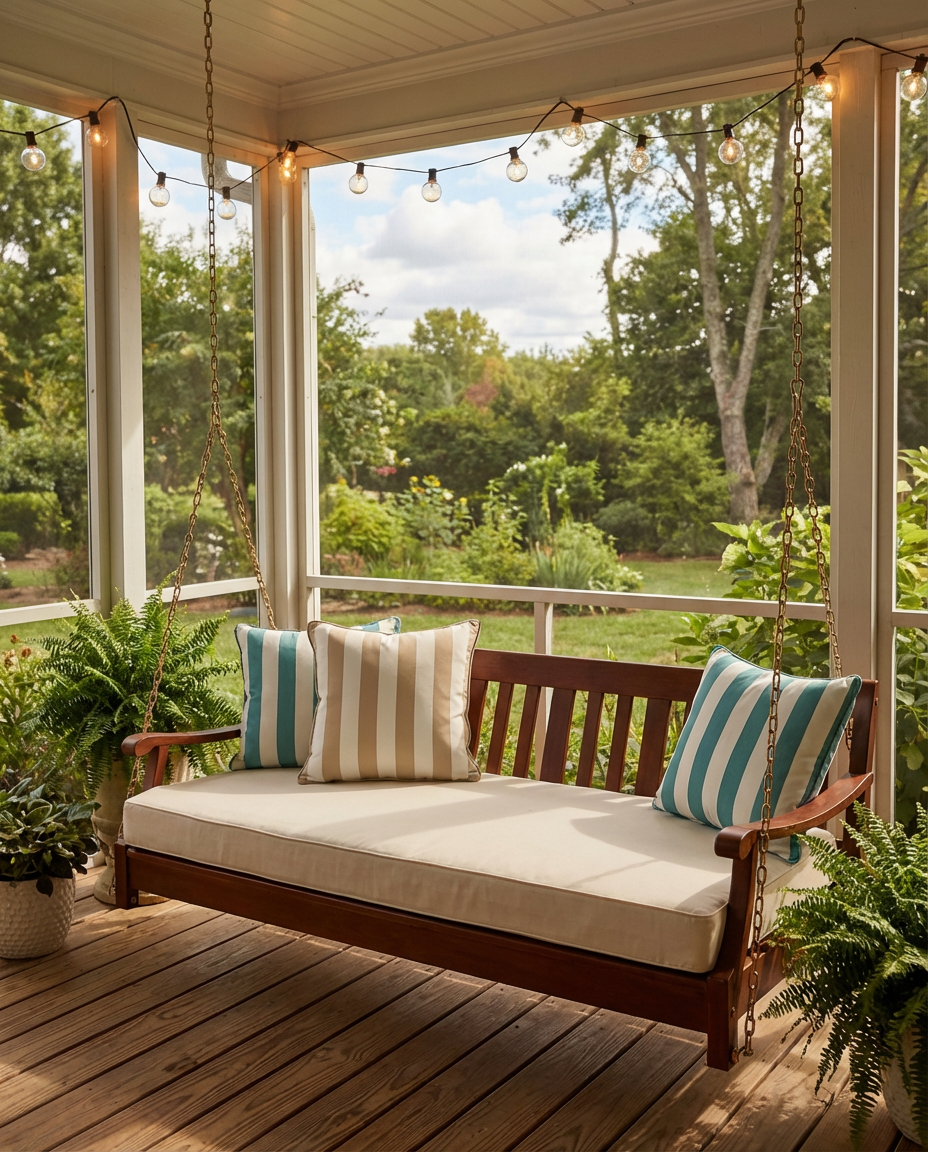
Imagine curling up with a book, rain pattering gently outside, but you’re warm, dry, and blissfully bug-free. That’s the magic of a cozy screened porch with a daybed swing. It’s the ultimate indoor-outdoor hybrid, offering the best of both worlds. The rustic wood paneling, soft string lights, and inviting daybed create a sanctuary perfect for lazy afternoons or quiet evenings. This setup extends your living space significantly, allowing you to enjoy your backyard longer and more comfortably throughout the year.
The One Thing: The Daybed Swing
The undisputed hero of the cozy screened porch is the daybed swing. It’s more than just a piece of furniture; it’s a statement of ultimate relaxation and comfort. Its ability to gently sway adds a unique, almost nostalgic, element of tranquility that a static sofa simply can’t replicate. It transforms the porch into a genuine retreat, inviting you to lounge for hours, read, or even nap. Without the daybed swing, the porch loses its whimsical charm and primary function as a dedicated, luxurious lounging spot, becoming a much more generic enclosed space. If you’re building this, make this your focal point.
Scale Guide: Perfect for Medium to Large Porches
This cozy screened porch concept truly shines in medium to large-sized porches, ideally those 100 square feet and up, to comfortably accommodate a daybed swing without feeling cramped. You’ll need enough depth for the swing to move freely (typically 8-10 feet depending on swing size) and ample width for any additional seating or side tables. If your porch is smaller, say 80 square feet, consider a single oversized chair or a small bistro set with a more compact porch swing, like Idea #10’s bistro set with fairy lights. The key is to ensure comfortable circulation and avoid overcrowding, allowing the natural light and fresh air to still flow freely.
|
|
|
|

As an affiliate, we earn from qualifying purchases.
17. Eclectic Global-Inspired Patio with Mixed Seating
An eclectic, global-inspired patio is for the free spirits and world travelers among us. It’s a wonderfully vibrant and personalized space, rich with mixed textures, global patterns, and a diverse array of seating, from ottomans to comfy chairs. String lights tie it all together, adding that magical nighttime glow. This isn’t a cookie-cutter design; it’s a confident expression of individuality, inviting guests to explore and relax in a truly unique atmosphere. It celebrates collected treasures and a relaxed, bohemian vibe.
Trending Context: The ‘Collected’ Aesthetic in 2026
In 2026, the global-inspired eclectic patio taps into a strong design current: the ‘collected’ aesthetic. People are moving away from matchy-matchy sets, favoring spaces that tell a story and reflect personal travels or tastes. Pinterest boards are filled with images featuring layered rugs, artisanal lanterns, and unique seating arrangements from different cultures. Brands are responding by offering more standalone accent pieces that can be mixed and matched. This trend has significant staying power because it’s so personal and anti-fast-fashion, allowing for continuous evolution and discovery without ever feeling ‘done.’ It’s about building a unique narrative.
Get This Look For Less: Thrifty Global Flair
Creating a global-inspired patio on a budget is where your inner treasure hunter shines! Instead of expensive imported textiles, look for patterned outdoor rugs and throw pillows at Target, Walmart, or TJ Maxx. Check out Facebook Marketplace or thrift stores for unique lanterns (like the Kirkland’s Home Metal Ring Hurricane Lantern at $29.99) and weathered side tables to spray paint. Ottomans can be found affordably at stores like Walmart (Better Homes & Gardens Outdoor Pouf Ottoman for $49.97). Mix and match less expensive chairs to create that eclectic feel, rather than buying a matching set. You can easily achieve this vibrant, collected look for under $500 by being creative with your sourcing and embracing the hunt!
|
|
|
|
As an affiliate, we earn from qualifying purchases.
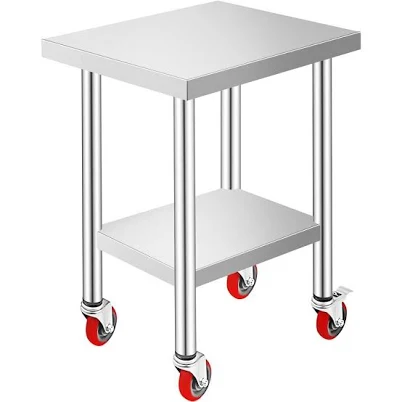
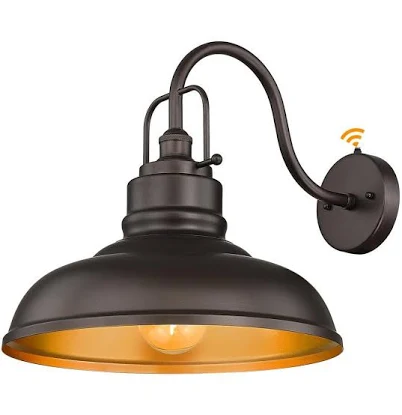
18. Sleek Concrete Patio with Integrated Planters and Lighting
A sleek concrete patio with integrated planters and lighting is the epitome of modern minimalism. It’s about creating a seamless, architectural outdoor space where form and function merge beautifully. The clean lines, modern furniture, and subtle LED strip lighting create a sophisticated backdrop for entertaining or simply unwinding. It’s a high-impact design that feels incredibly refined, offering a durable and visually striking foundation for any modern backyard oasis.
Designer Tip: The Power of Monochromatic Planting
When working with integrated concrete planters for a sleek, modern look, resist the urge to fill them with a riot of colorful flowers. Instead, opt for monochromatic planting, focusing on varied textures and shades of green. Think architectural succulents, grasses with interesting seed heads, or dark-leaved tropicals. This creates a refined, sophisticated aesthetic that enhances the clean lines of the concrete structure rather than detracting from it. It’s a subtle choice that makes a disproportionately large impact on the overall modern feel, allowing the hardscaping to truly shine. For a beautiful planter from Home Depot, check out the KANTE 23.2″L Concrete Long Rectangular Planter with Drainage Plug for Garden that costs $98.43.
Real Talk: Managing Heat Retention of Concrete
Here’s something few people consider with sleek concrete patios: they can get incredibly hot, especially in direct sun. Concrete absorbs and radiates a lot of heat, which can make your patio uncomfortable to walk on barefoot and raise the ambient temperature of your outdoor space. If you live in a hot climate, think about incorporating shade structures from day one, whether that’s a pergola, an umbrella, or even strategically placed trees. Consider lighter-colored concrete or adding a cooling mister system if you’re concerned about heat. Don’t let a beautiful design decision make your patio unusable during the peak summer months!
|
|
|
|
As an affiliate, we earn from qualifying purchases.
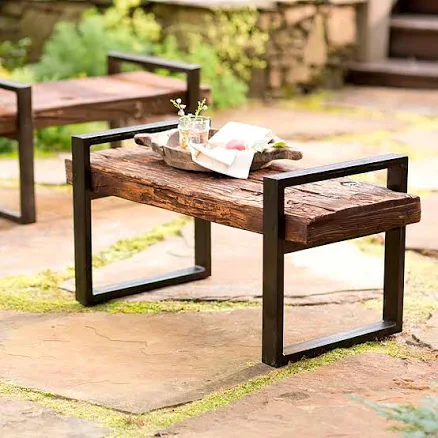
19. DIY Pallet Furniture Lounge Area with Outdoor Rug
✨ Luxury Version
If you love a good DIY project and want a lounge area that’s both stylish and incredibly budget-friendly, pallet furniture is your answer. This look embraces an upcycled, rustic charm, creating a comfortable and unique seating zone without breaking the bank. Paired with a soft outdoor rug and string lights, a pallet lounge area can transform any backyard into a cozy, inviting retreat. It’s perfect for those who value creativity and sustainability.
How-To Brief: Building Basic Pallet Seating
💸 Budget Version
Ready to get your hands dirty? Here’s how to craft simple pallet seating for your lounge area:
- Source Pallets (1-2 hours, $0-$50): Look for free, heat-treated (HT stamped) pallets at local businesses. Avoid chemically treated (MB stamped) pallets. You’ll need 6-8 pallets for a basic sectional.
- Clean & Sand (2-4 hours, $10 for sandpaper): Thoroughly clean pallets with soap and water, then sand down rough spots to prevent splinters.
- Assemble Base (1 hour, $20 for screws): Arrange 2-3 pallets side-by-side for the base, stacking another 2-3 on top for height. Secure with wood screws.
- Add Backrest (1 hour, $10 for screws): Attach a single pallet upright to the back of your base at an angle, securing with screws and L-brackets if needed.
- Add Cushions (1 hour, $100-$300): This is key for comfort. Look for outdoor cushions designed for pallets, or repurpose old crib mattresses covered in outdoor fabric.
- Decorate (Variable, $0-$100): Add an outdoor rug, string lights, and throw pillows to complete the look.
The One Thing: The Pallet Furniture Itself
When it comes to a DIY pallet furniture lounge, the one undeniable thing that makes this idea is the pallet furniture itself. It’s not just a budget-friendly choice; it’s a statement of resourcefulness, upcycling, and laid-back, rustic style. The raw wood, often with its imperfections, brings an authentic, unpretentious charm. Without the pallets, you lose the core DIY aesthetic and the unique structural foundation that defines this look. It signals a creative, hands-on approach to outdoor living that mass-produced furniture simply cannot replicate.
|
|
|
|
As an affiliate, we earn from qualifying purchases.
20. Small Pool with Waterfall Feature and Compact Seating
Even smaller backyards can enjoy the luxury of a pool, especially when thoughtfully designed with a waterfall feature and compact seating. This idea proves that size doesn’t mean sacrificing style or enjoyment. A tiled surround and a cleverly integrated privacy fence ensure that even a modest pool feels like a luxurious retreat. It’s perfect for a quick refreshing dip on a hot day, and the sound of the waterfall adds an extra layer of tranquility.
Budget Breakdown: The Compact Luxury Pool
- Small Pool Installation (Plunge Pool, Fiberglass Shell): $15,000 – $35,000
- Waterfall Feature: $1,000 – $4,000
- Tiled Surround/Decking (Compact Area): $2,000 – $6,000
- Compact Seating (Loveseat, Side Table): $300 – $1,500
- Privacy Fence/Screen: $500 – $2,000
- Lighting (Deck Lights, Underwater): $200 – $800
- TOTAL: $19,000 – $49,300
- Budget alternative: A DIY stock tank pool with a pre-made waterfall feature (like a spillway) and simple wooden decking will achieve a similar refreshing vibe for $1,000 – $3,000.
Scale Guide: Tailored for Smaller Footprints
This small pool idea is specifically designed for backyards ranging from 200 to 600 square feet. The key is in choosing a plunge pool or a compact fiberglass shell (typically 8×12 feet to 10×20 feet) rather than a full-size swimming pool. By integrating the seating and waterfall directly into the pool surround, you maximize the functional space. This approach allows a refreshing water feature to be the focal point without overwhelming a modest yard, making it a far superior choice than trying to awkwardly fit a larger pool into limited outdoor space. It’s similar in spirit to Tropical Oasis with Plunge Pool, just with an even more focused footprint.
Quick comparison: Small Pool vs. Stock Tank Pool
- Small Pool: Higher upfront cost, professional installation, custom finishes, built-in features, longer lifespan, higher resale value.
- Stock Tank Pool: Lower upfront cost, DIY-friendly, rustic aesthetic, portable, shorter lifespan, minimal resale value.
|
|
|
|
As an affiliate, we earn from qualifying purchases.
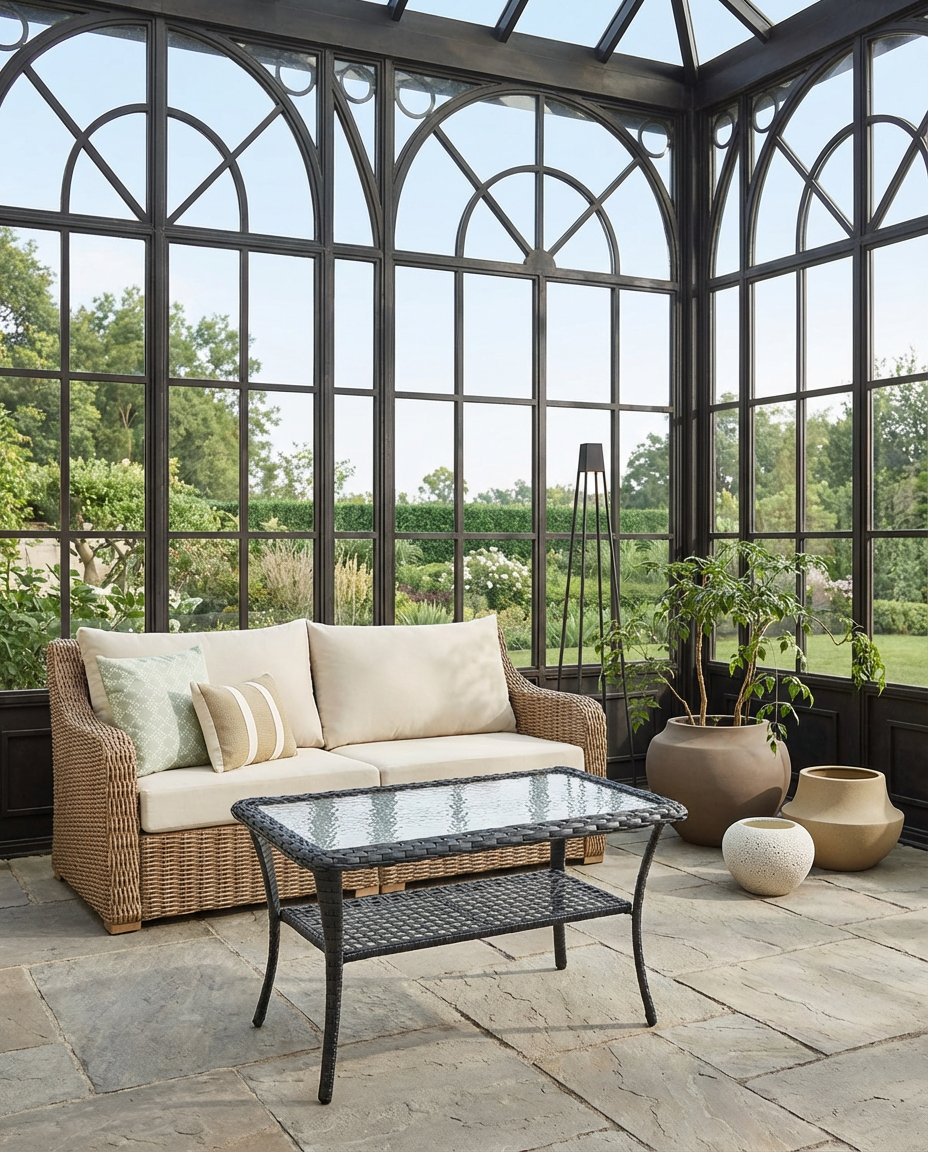
21. Garden Room Oasis with Conservatory-Style Windows
For plant lovers and those seeking seamless indoor-outdoor living, a garden room oasis with conservatory-style windows is pure magic. It’s a space where lush plants thrive year-round, bathed in natural light, while comfy rattan furniture invites you to linger. This isn’t just a sunroom; it’s a dedicated botanical haven that blurs the lines between your home and your garden, creating a serene and invigorating escape no matter the season. It’s a dream for anyone who loves being surrounded by greenery and light.
Designer Tip: Create a Microclimate
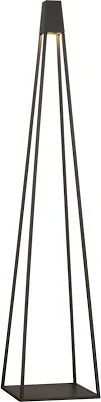
To truly make a garden room oasis thrive, focus on optimizing its microclimate for your plants. If possible, incorporate ventilation (ceiling fans or strategically placed operable windows) to manage temperature and humidity. Consider underfloor heating for colder climates to protect tropical plants, or invest in grow lights for darker corners during winter. The goal is to mimic a greenhouse environment, which will allow your plants to flourish luxuriantly. This thoughtful approach to environmental control is what separates a pretty sunroom from a vibrant, living garden room that feels truly integrated with nature. Make sure to consider the Visual Comfort Modern Apex LED Outdoor Floor Lamp to supplement your plant’s light needs for $1,499.00.
The One Thing: Conservatory-Style Windows
The defining feature of this garden room oasis is unequivocally the conservatory-style windows. They are more than just glass; they are the architectural element that floods the space with maximum natural light, essentially creating a transparent shell that connects the interior directly to the surrounding garden. This abundance of light is crucial for the lush plant life and creates the very essence of an ‘indoor-outdoor’ experience. Without these expansive windows, the space would merely be an enclosed patio or a standard sunroom, losing its unique botanical charm and the feeling of being immersed in nature.
|
|
|
|
As an affiliate, we earn from qualifying purchases.
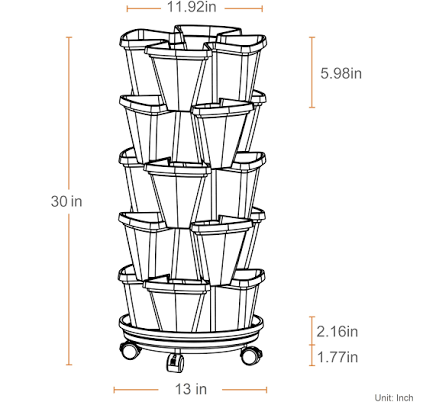
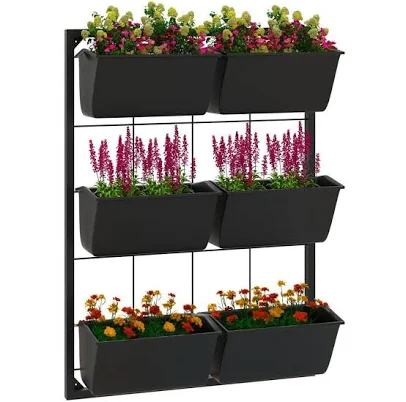
22. Vertical Herb Garden Wall for Small Outdoor Kitchens
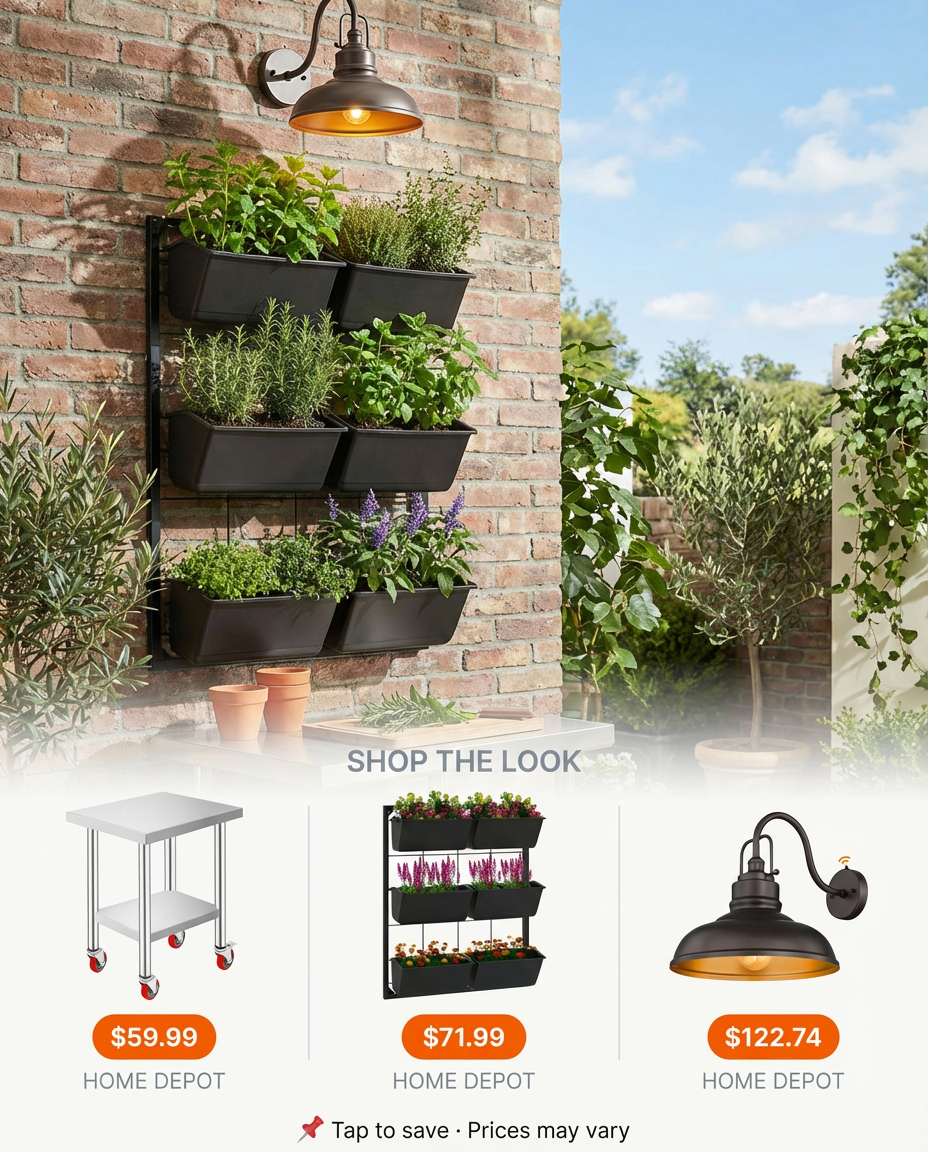
Even the tiniest outdoor kitchen can benefit from a vertical herb garden wall. This ingenious idea is all about maximizing space and ensuring you always have fresh ingredients at your fingertips. It’s a minimalist, space-saving solution that’s incredibly functional, adding a touch of living green to your culinary zone. Imagine snipping fresh basil or chives right from your wall as you grill – it’s a simple luxury that makes a huge difference in your outdoor cooking experience.
Maintenance Reality: Vertical Watering Needs
While a vertical herb garden is space-saving, it does come with a specific watering challenge: gravity! Vertical planters tend to dry out much faster than traditional garden beds, especially the top tiers. You’ll need to water more frequently, often daily in hot weather. Consider installing a drip irrigation system or choosing a self-watering planter system (like the Flora Bunda Self-Watering Dandelion Ceramic Dandelion Planter from Home Depot for $14.97) after establishment to cut down on manual effort. Also, watch out for nutrient runoff, as lower plants can get over-fertilized if you’re not careful. It’s not high-maintenance, but it’s a different kind of consistent care than a traditional row garden.
Style Math: Functional Greenery
This small outdoor kitchen’s visual formula is about combining utility with lively accents: 60% essential kitchen function (prep/grill area) + 30% vertical herb garden + 10% curated lighting/accessories. The vast majority is dedicated to the practical elements needed for outdoor cooking. The vertical garden then adds a crucial layer of fresh ingredients and vibrant green texture without impeding circulation. The lighting and minimal accessories provide the finishing touches, enhancing both visibility and ambiance. This balance ensures the space remains highly functional while delivering on its promise of fresh, accessible herbs. The Outsunny 3-Tier Wall Planter from Home Depot at $71.99 is perfect for small spaces.
|
|
|
|
As an affiliate, we earn from qualifying purchases.
23. Backyard Campfire Nook with Log Seating and String Lights

There’s something deeply primal and comforting about a backyard campfire nook. With simple log seating, a crackling fire pit, and the ethereal glow of string lights, it transforms your yard into a gathering spot straight out of a storybook. The gravel base keeps things tidy and safe, making it perfect for marshmallow roasting or sharing tales under the stars. It’s a natural, unpretentious retreat that encourages connection and pure, unadulterated outdoor fun.
Get This Look For Less: Rustic Campfire Vibes
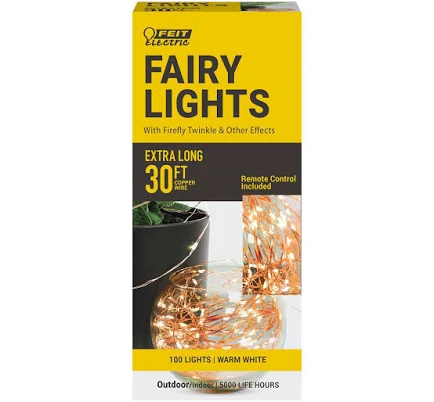
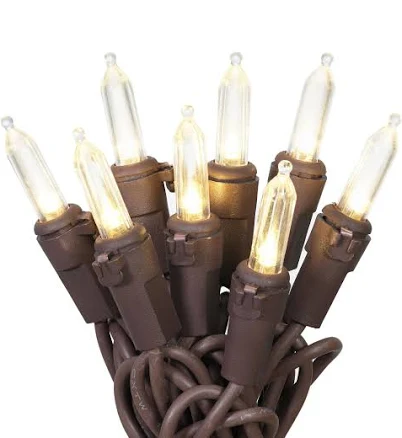
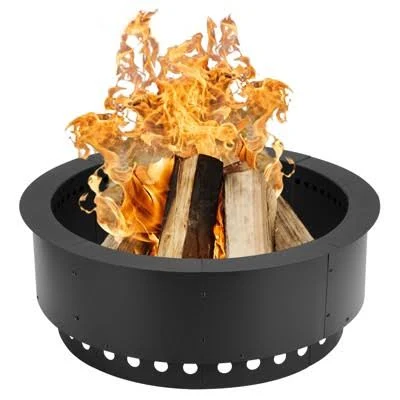
Creating this inviting campfire nook on a budget is refreshingly easy. Start with the fire pit itself; a simple metal fire ring or even a budget-friendly option like the Aoodor Round Smokeless Fire Pit Ring from Target ($79.99) is perfect. For seating, fallen logs from local tree removals (ask permission!) or store-bought log benches from Walmart for $84.99 are incredibly affordable. Forget fancy patio furniture here. Gravel can be sourced cheaply by the yard from landscape suppliers. String lights are a must and can be found for under $20 (Mainstays 100-Count Warm White LED Outdoor String Lights with Brown Wire from Walmart is $9.97). You can absolutely create this entire cozy setup for well under $400, especially if you’re resourceful.
What Makes It Work: Primal Pull and Intimacy
This backyard campfire nook works so well because it appeals to a deep, primal human desire for warmth, light, and gathering around a fire. The focal point of the flame instantly draws people in and creates a sense of enchantment. The circular arrangement of log seating naturally fosters intimacy and conversation, encouraging shared moments unlike more formal seating arrangements. Combined with subtle string lights, it creates a magical, almost nostalgic atmosphere that feels both simple and profoundly special, reminding us of simpler times and the joy of connection. It’s an age-old formula for good times.
|
|
|
|
As an affiliate, we earn from qualifying purchases.
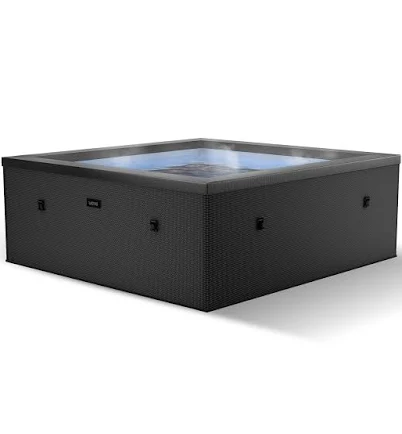
24. Luxurious Outdoor Spa Area with Hot Tub and Privacy Wall
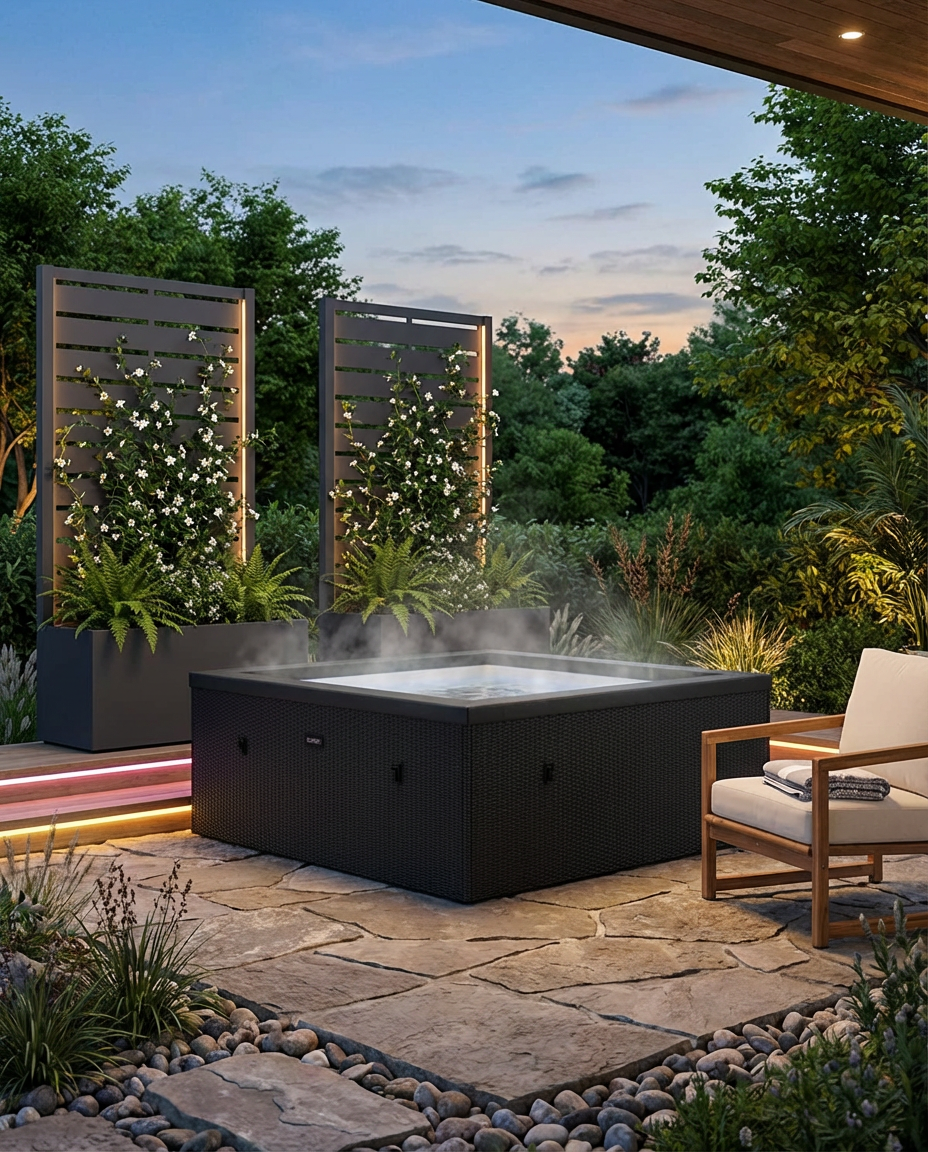
For an ultimate indulgence, a luxurious outdoor spa area with a hot tub and integrated privacy wall is the dream. It’s about creating a dedicated zone for relaxation and rejuvenation, where mood lighting sets the tone and stylish decking elevates the entire look. Imagine unwinding under the stars, completely secluded, in your own personal hydrotherapy haven. This is about self-care meets sophisticated outdoor living, making your backyard a true sanctuary from the everyday hustle.
Trending Context: Wellness Outdoors
The luxurious outdoor spa area is absolutely trending in 2026, fueled by a massive cultural shift towards wellness and self-care at home. People are investing in mental and physical well-being, and creating dedicated spaces for relaxation is a key part of that. Pinterest is seeing a surge in searches for ‘outdoor wellness rooms’ and ‘backyard hydrotherapy setups,’ moving beyond just pools. The emphasis is on privacy, mood lighting, and sleek, integrated design. This isn’t a fleeting trend; it’s a reflection of a deeper societal value placed on at-home sanctuary and health, making it a sound investment. We’re seeing this desire for personal retreat in other areas too, like the Tropical Oasis with Plunge Pool.
Real Talk: Hot Tub Costs & Maintenance
Okay, real talk about hot tubs: they are not a set-it-and-forget-it purchase. Beyond the initial cost of the tub itself (which can range from $2,000 to well over $15,000), you’ll have ongoing expenses. Think about the electrical work required for installation, increased energy bills, and the constant maintenance of water chemistry, filters, and repairs. If you forgo a chlorine system, you’ll need regular water testing and chemical adjustments. And expect to replace filters and potentially parts every few years. It’s a significant commitment in both time and money, so go into it with eyes wide open about the long-term upkeep, not just the upfront luxury.
|
|
|
|
As an affiliate, we earn from qualifying purchases.
25. Backyard Greenhouse Retreat for Plant Enthusiasts
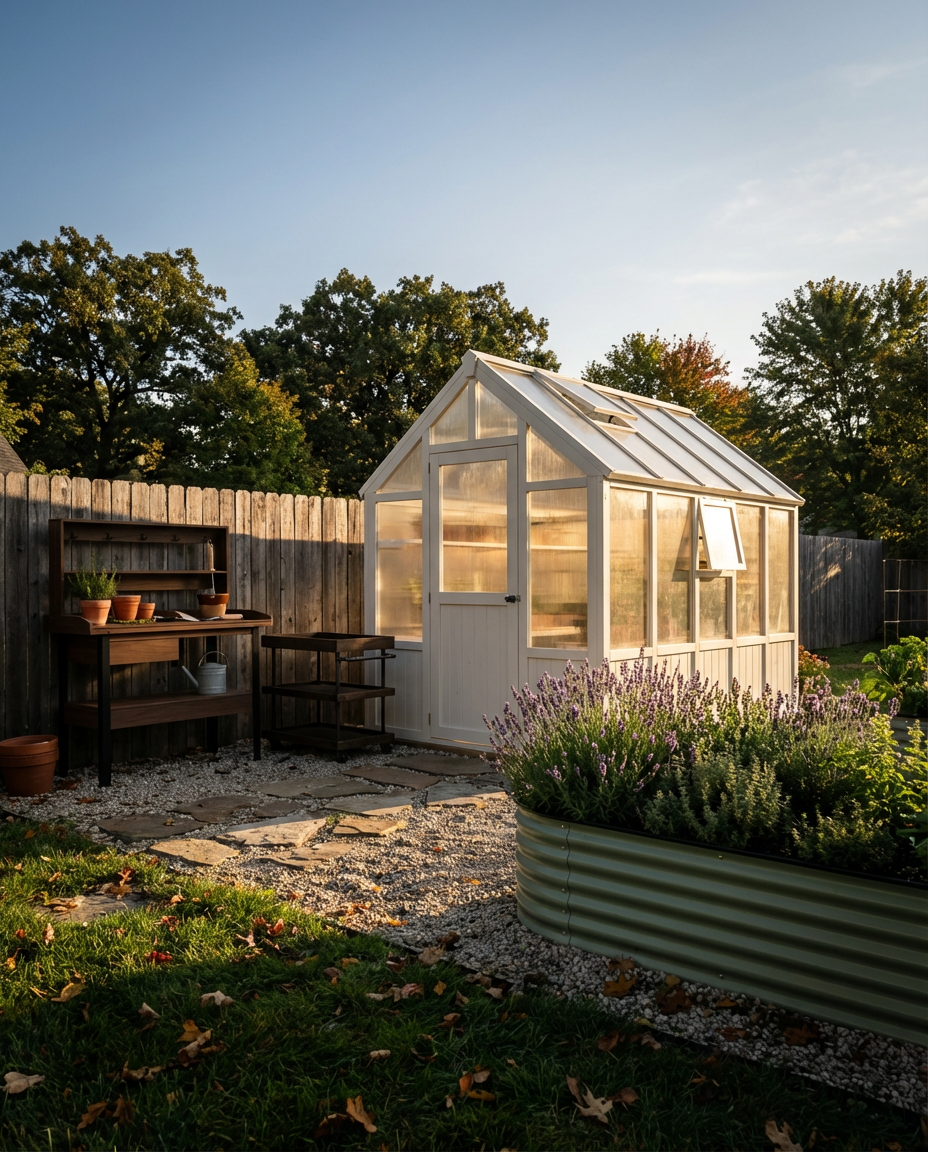
For anyone with a green thumb, a backyard greenhouse retreat is the ultimate dream. It’s not just a place to grow plants; it’s a charming, rustic haven where you can indulge your passion for gardening year-round. With a dedicated potting bench and raised beds, it becomes a functional and beautiful space for nurturing seedlings, overwintering delicate plants, or simply enjoying the quiet joy of cultivation. It blends rustic charm with practical function, creating a truly personal oasis for plant enthusiasts.
Designer Tip: Create Distinct Zones
To make your greenhouse retreat truly functional and beautiful, think about creating distinct zones even within a small structure. Designate a ‘potting zone’ with your potting bench, soil, and tools readily accessible. Then, have a ‘growing zone’ for your seedlings and main plants, ensuring optimal light and ventilation. Finally, consider a small ‘relaxation zone’ – even if it’s just a simple chair or stool – where you can sit and enjoy the fruits of your labor (literally!). This intentional zoning prevents clutter and makes the space feel organized and more inviting, transforming it from a mere shed into a true retreat. For instance, the Vita Cedar Potting Bench from Home Depot for $134.62 is great as the center piece for a potting zone.
The One Thing: The Greenhouse Structure
The single most important element that defines this backyard oasis is, naturally, the greenhouse structure itself. It’s not merely a shed or a covered area; its transparent walls and roof create a specialized microclimate, allowing for year-round plant cultivation and bathing the space in precious natural light. Without the greenhouse, this concept simply doesn’t exist – you’d have a potting bench in your yard, but none of the magical, temperate, and dedicated growing environment that sets this idea apart. It’s the literal enclosure that makes all the plant care dreams possible.
|
|
|
|
As an affiliate, we earn from qualifying purchases.
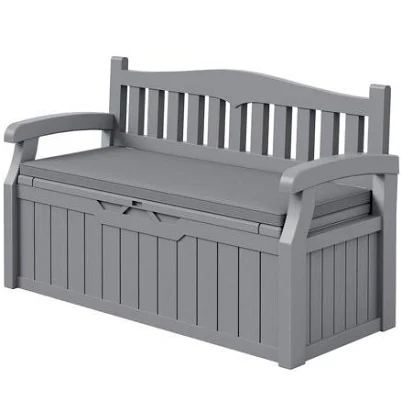
26. Kids’ Backyard Oasis with Playhouse and Sandpit
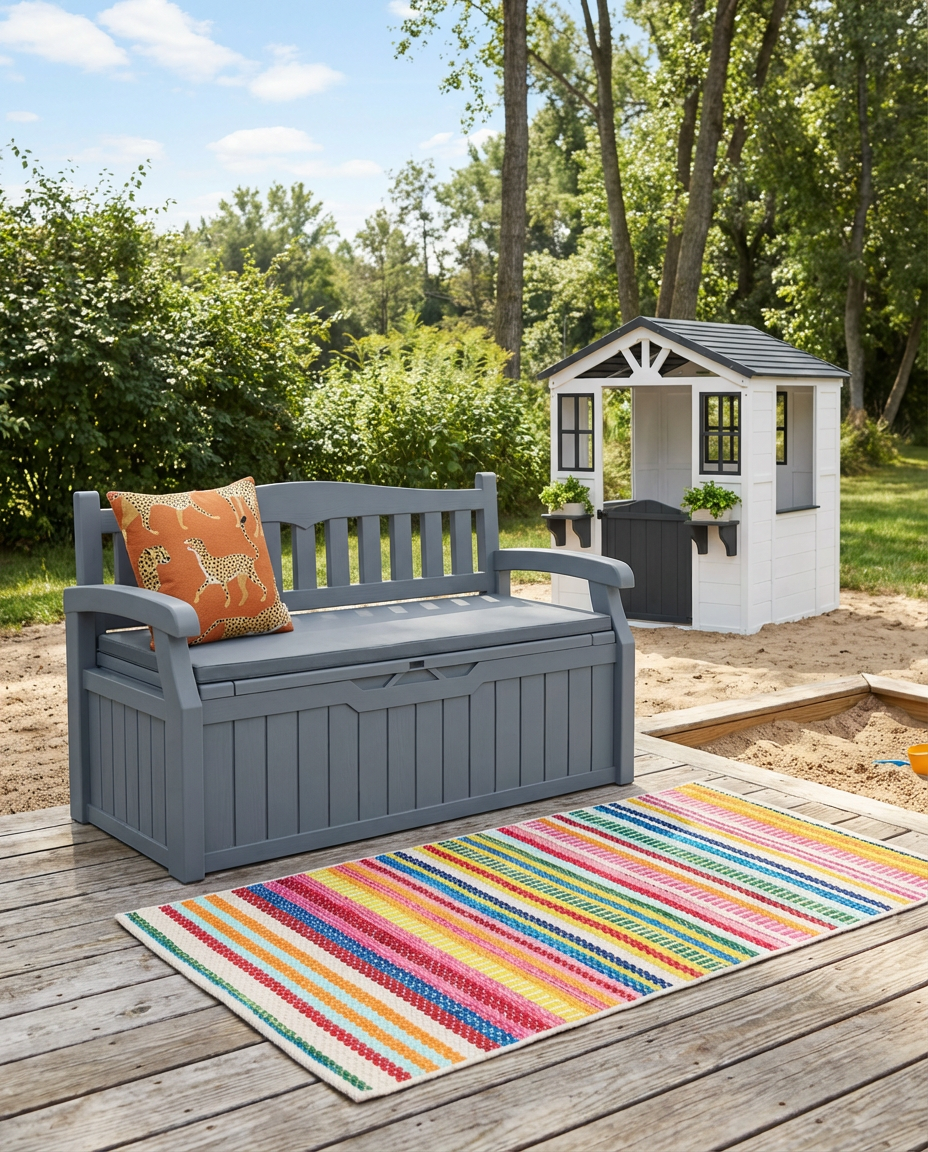
Creating a backyard oasis for kids isn’t about sacrificing style; it’s about thoughtful design that’s fun, safe, and encourages imaginative play. A charming playhouse and a dedicated sandpit become the anchors of this colorful, family-friendly space, surrounded by outdoor toys and perhaps a comfy bench for parents. It’s an eclectic, vibrant zone designed to spark joy and curiosity, proving that an adult-friendly backyard can absolutely cater to the little ones without turning into a chaotic playground. The goal is a harmonious blend of play and peace.
Budget Breakdown: The Kid-Centric Paradise
- Playhouse: $300 – $1,500
- Sandpit (with sand): $100 – $300
- Outdoor Toys/Activity Supplies: $50 – $200
- Seating for Adults (Bench, Cushions): $150 – $500
- Outdoor Rug/Soft Grounding: $50 – $200
- TOTAL: $650 – $2,700
- Budget alternative: DIY a playhouse from repurposed materials (like pallets) or look for used ones on Facebook Marketplace. Use a large plastic tub instead of a dedicated sandpit, and source outdoor toys from thrift stores. A simple storage bench like the Devoko 82 Gallon Storage Patio Bench for $164.99 works great. You could get a fun kid’s oasis for $200 – $600.
What Makes It Work: Designated Zones & Imagination
This kid-friendly oasis works by smartly combining designated play zones with elements that spark imagination. The playhouse and sandpit immediately define areas for specific types of play, minimizing chaos and allowing for parallel activities. Crucially, these elements aren’t overly prescriptive; they act as a canvas for a child’s imagination, encouraging storytelling and creative exploration rather than just passive entertainment. The overall eclectic and colorful aesthetic contributes to a sense of fun, making the space an inviting world for young adventurers, all without a full, jarring playground visual.
|
|
|
|

As an affiliate, we earn from qualifying purchases.
27. Budget-Friendly Gabion Wall Seating with Succulents
For an industrial-chic look that’s also incredibly budget-friendly, gabion wall seating filled with succulents is a fantastic DIY solution. It takes recycled materials (rocks, wire cages) and elevates them into a modern-rustic design statement. The gabion walls offer sturdy, architectural seating, while the succulents add a touch of living green and textural contrast. It’s an affordable, durable, and unique approach to outdoor seating, perfect for those who appreciate raw materials and a bit of practical creativity.
How-To Brief: Constructing Gabion Wall Seating
Building your own gabion wall seating isn’t too tricky, but requires some muscle:
- Plan & Measure (1 hour, $0): Determine the size and shape of your bench. Calculate the number of gabion baskets needed.
- Order Gabion Baskets (30 mins, $30-$100 per basket): Purchase flat-pack galvanized steel gabion baskets online or from a landscape supplier.
- Level the Ground (1-2 hours, $0-$50): Ensure the area where your gabion basket will sit is perfectly level to prevent leaning.
- Assemble Baskets (1-2 hours per basket, $0): Follow manufacturer instructions to assemble the wire mesh baskets. Secure all sides firmly.
- Fill with Rocks (4-6 hours, $100-$300 for rocks): This is the heaviest part! Fill the baskets with dense, angular rocks (river rock works too, but angular rocks interlock better). Arrange larger rocks on the visible surfaces for a neater look.
- Add Topping (1 hour, $50-$100): For actual seating, place a sturdy piece of treated wood, stone slab, or a cushion on top of the filled gabion.
Real Talk: The Weight and Physicality
Okay, let’s be blunt: gabion walls are heavy, and filling them is a workout! While the concept is budget-friendly, the labor involved in moving and arranging rocks can be significant. This is not a quick solo project unless you’re a seasoned DIYer with access to equipment or a few strong friends. Also, consider the type of rock you’re using. If you go with rounded river rock, it won’t interlock as well as angular crushed stone, potentially leading to bulging or shifting over time. Be prepared for some serious manual labor and consider renting a wheelbarrow or hand truck.
|
|
|
|

As an affiliate, we earn from qualifying purchases.
28. Covered Patio with Outdoor TV and Lounge Seating
A covered patio with an outdoor TV and comfortable lounge seating is about bringing the comforts of your living room right into your backyard. This transitional space is perfect for year-round entertainment, whether it’s catching the game, enjoying a movie night under the stars, or simply relaxing with a cool drink. A ceiling fan ensures comfort on warmer days, making it a truly versatile and functional extension of your home. It’s the ultimate splurge for outdoor entertainment enthusiasts.
Budget Breakdown: The Ultimate Outdoor Entertainment Zone
- Covered Patio Structure (Existing or New Build): $3,000 – $15,000+ (Varies wildly)
- Outdoor TV (Weather-resistant): $1,000 – $5,000
- Lounge Seating (Sectional, Coffee Table): $1,500 – $5,000
- Ceiling Fan: $100 – $400
- Outdoor Rug/Decor: $100 – $500
- Electrical Installation (Outlets, TV mount): $300 – $1,000
- TOTAL: $6,000 – $26,900+
- Budget alternative: Use an existing covered porch or pavilion. Opt for a regular TV in a weatherproof enclosure (or bring it in when not in use). Choose a more affordable modular sectional and a portable fan. You could get a comfortable outdoor viewing area for $1,500 – $4,000.
The One Thing: The Outdoor TV
While the covered patio and lounge seating are essential for comfort, the absolute ‘one thing’ that transforms this space into an *ultimate entertainment zone* is the outdoor TV. It’s what signals a dedicated commitment to recreation and leisure in the backyard. Without the TV, you simply have a nice covered lounge. With it, you open up a world of movie nights, game day festivities, and casual viewing that genuinely extends your indoor media experience to the outdoors. It’s the central hub around which all passive entertainment revolves, making it the defining feature of this luxurious setup.
|
|
|
|

As an affiliate, we earn from qualifying purchases.
🚫 Common Mistakes to Avoid
Now that you’ve seen what works — here’s what to watch out for. These mistakes are surprisingly common and can undermine even the best design intentions.
❌ Mistake #1: Ignoring Your Climate (Especially for Plants)
Choose plants suited to your local climate for a thriving, beautiful garden.
This is probably the biggest oversight I see. People fall in love with a lush tropical look on Pinterest but live in a desert, or vice versa. Trying to force plants that aren’t suited to your local climate into your backyard is a recipe for constant frustration, high water bills, and a perpetually struggling garden. It’s like trying to wear flip-flops in a snowstorm – it just doesn’t work.
The Fix: Research native plants and xeriscape options for your zone. Embrace the beauty of what naturally thrives in your environment. You can still achieve stunning aesthetics (like Modern Desert Oasis) without fighting nature.
❌ Mistake #2: Overlooking Lighting Layers

Layer ambient, task, and accent lighting for a dynamic outdoor space.
Many backyards end up with just one type of lighting: either harsh floodlights or dim string lights. This creates a flat, unwelcoming atmosphere that doesn’t feel right for evening entertaining or relaxation. Good indoor design uses multiple layers of light, and your outdoor oasis deserves the same thoughtful approach. Just like a room needs a mix of ambient, task, and accent lighting, your backyard needs depth and dimension.
The Fix: Plan for at least three layers: ambient (soft path or general overhead light), task (grill area, dining table), and accent (uplighting on trees, integrated deck lights). This creates warmth and highlights focal points.
❌ Mistake #3: Skipping Scale and Proportion

Match furniture scale to your patio size for a balanced and inviting look.
Ever see a tiny patio with a massive sectional sofa that feels like it’s eating the entire space? Or a huge backyard with furniture too small, making it look sparse and uninviting? That’s a scale issue. It’s about how the size of your elements relates to each other and to the size of your outdoor area. Getting it wrong makes even the most expensive furniture look out of place and uncomfortable.
The Fix: Measure your space rigorously. For smaller areas, opt for compact, vertical solutions (like Small Backyard Oasis with Vertical Garden) and multi-functional furniture. For larger yards, create distinct zones with appropriately scaled pieces to fill the space meaningfully.
Final Thoughts
See? Creating your dream backyard oasis in 2026 doesn’t have to be overwhelming or require an unlimited budget. It’s all about smart planning, understanding your personal style, and sometimes, a little DIY magic. From serene Zen gardens to luxurious spa zones, we hope these 30 ideas have sparked your inspiration and shown you the incredible potential right outside your door.
Now go forth, get inspired, and make your backyard the envy of the neighborhood. Happy dreaming (and building)! Don’t forget to share your favorite finds on Pinterest!